Mk6 JWRC fiesta cosworth

 24-03-2013, 02:53 PM
#2802
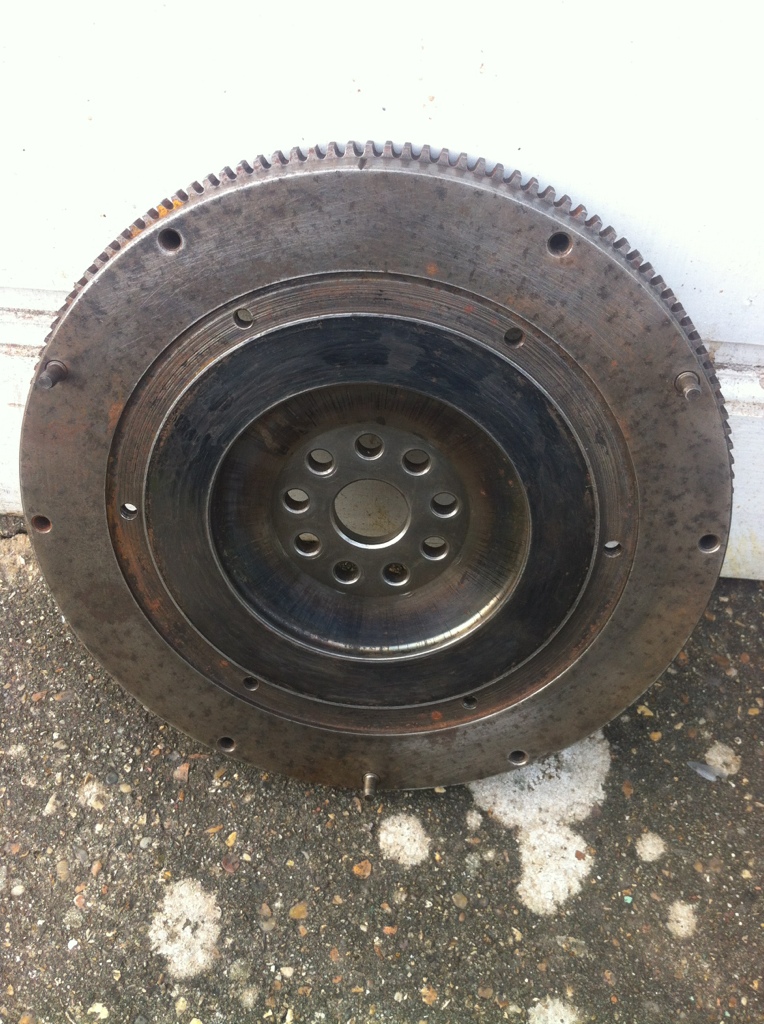
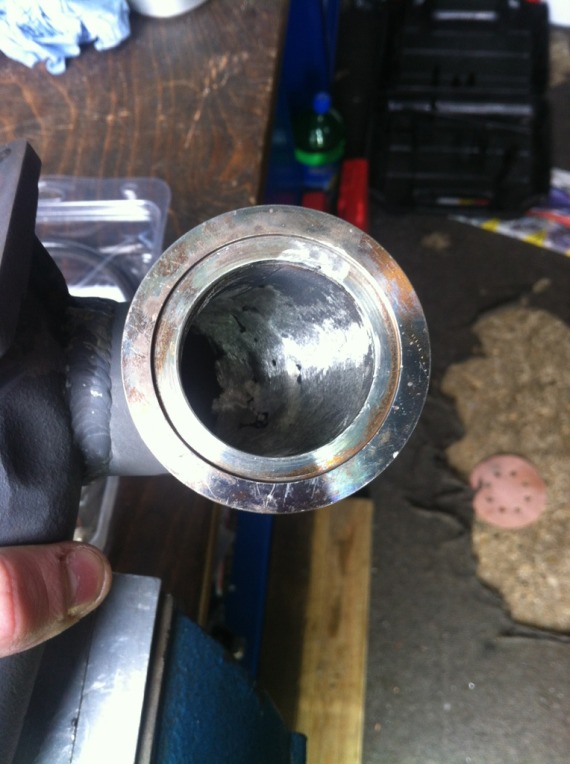
Got my flywheel back, had it machined down to remove the old surface area as it was not needed and saves a tiny amount of weight, then the friction face re ground
Weighed it and it is 7.9kg's
Before
After
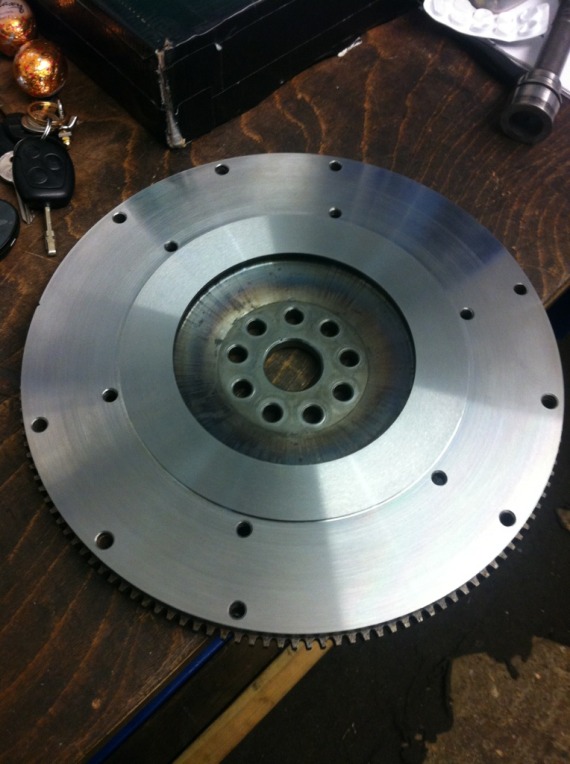
So i can test fit the clutch then work out the size of the spacer needed for the hydraulic concentric clutch set up
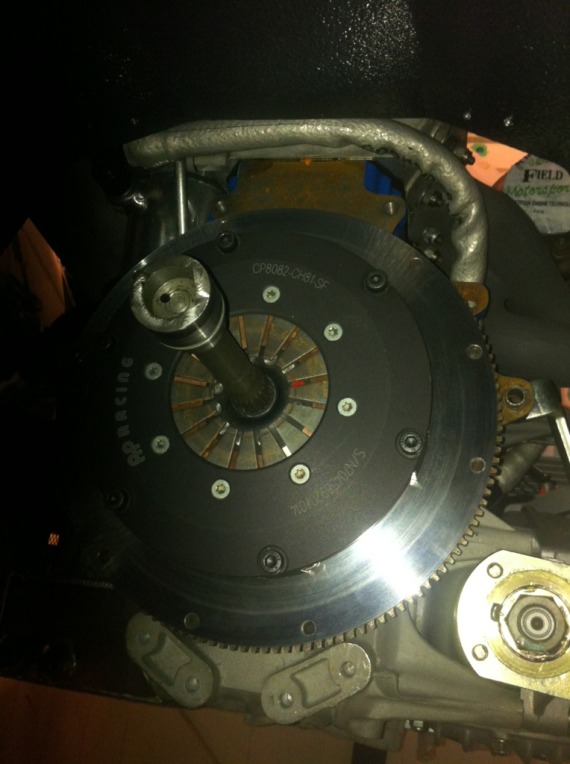
Also ordered all the Thermo-tec adhesive heat proof barrier for me so i can cover the transmission tunnel, bulkhead and wing area's where needed, so when the weather is better and i get a full day on the car i will remove the engine again, check the front diff is all good and add the extra brackets i didn't fit before, fit the flywheel and clutch properly and fit the concentric set up and the gearbox fully and get the whole lot bolted back in again
Weighed it and it is 7.9kg's
Before
After
So i can test fit the clutch then work out the size of the spacer needed for the hydraulic concentric clutch set up
Also ordered all the Thermo-tec adhesive heat proof barrier for me so i can cover the transmission tunnel, bulkhead and wing area's where needed, so when the weather is better and i get a full day on the car i will remove the engine again, check the front diff is all good and add the extra brackets i didn't fit before, fit the flywheel and clutch properly and fit the concentric set up and the gearbox fully and get the whole lot bolted back in again
27-03-2013, 09:10 PM
#2804
Thanks mate
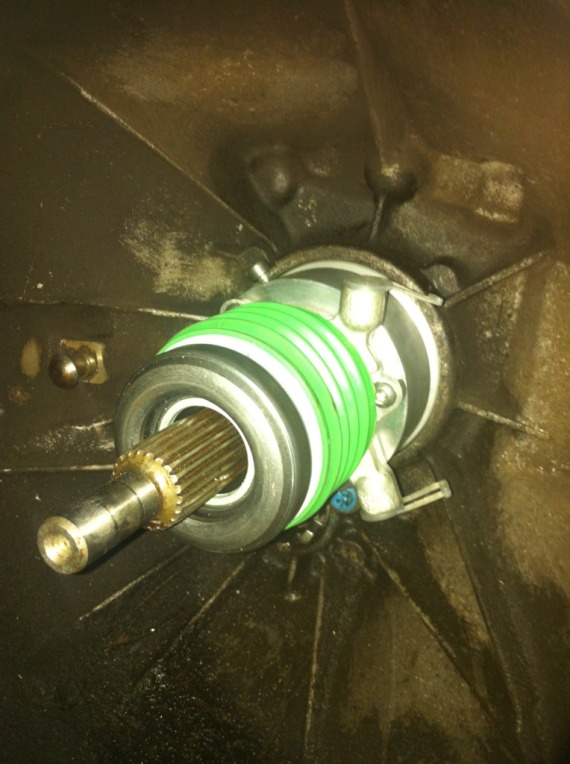
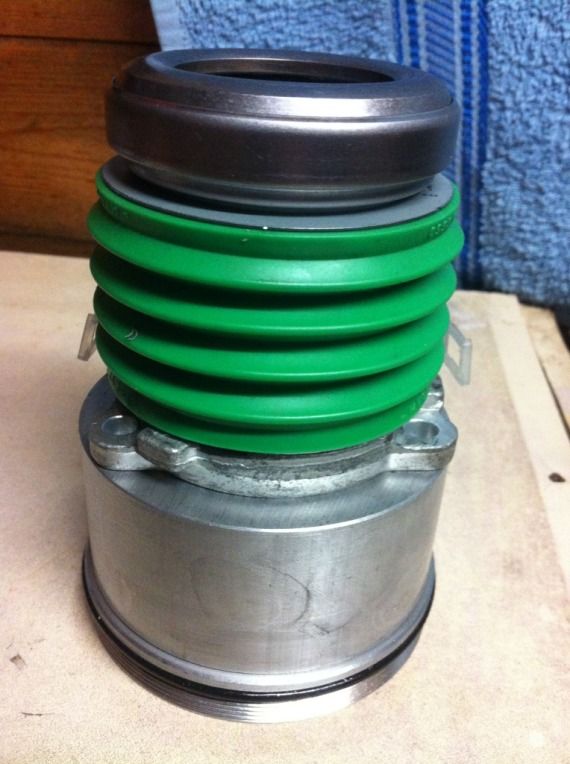
Got my concentric hydraulic clutch set up finished, worked out the size the spacer needed to be, drilled and tapped the 3 mounting holes, added a bolt on the side for securing as a grub screw,
Test fitted to my spare box
Got my concentric hydraulic clutch set up finished, worked out the size the spacer needed to be, drilled and tapped the 3 mounting holes, added a bolt on the side for securing as a grub screw,
Test fitted to my spare box
30-03-2013, 09:46 AM
#2805
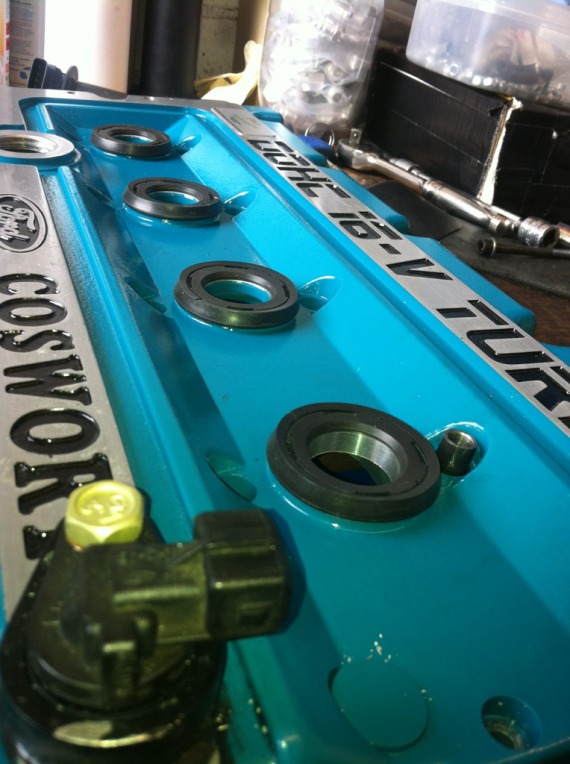
Found an issue yesterday, using the cop's means i have realised that it is totally impossible to remove plug number 4 
Not ideal!!!
So i have to sort a way of milling out the cam cover to make a section around number 4 removable so the cop can be pulled out, not sure how i will achieve this yet but the only other option is to remove the entire middle section of the cover and fit a removable piece as others have done before, going to go have have a head scratch later today,
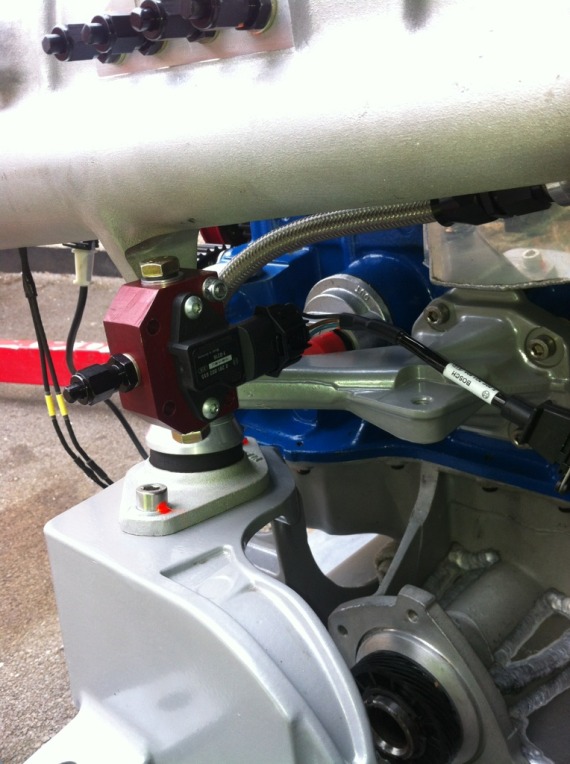
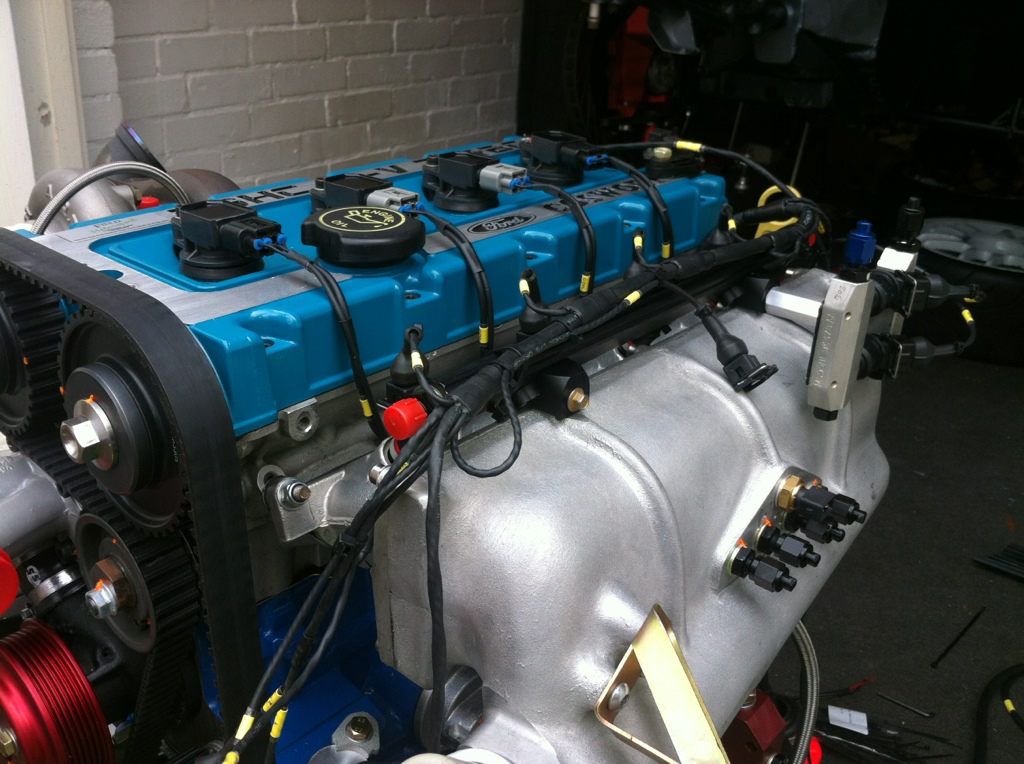
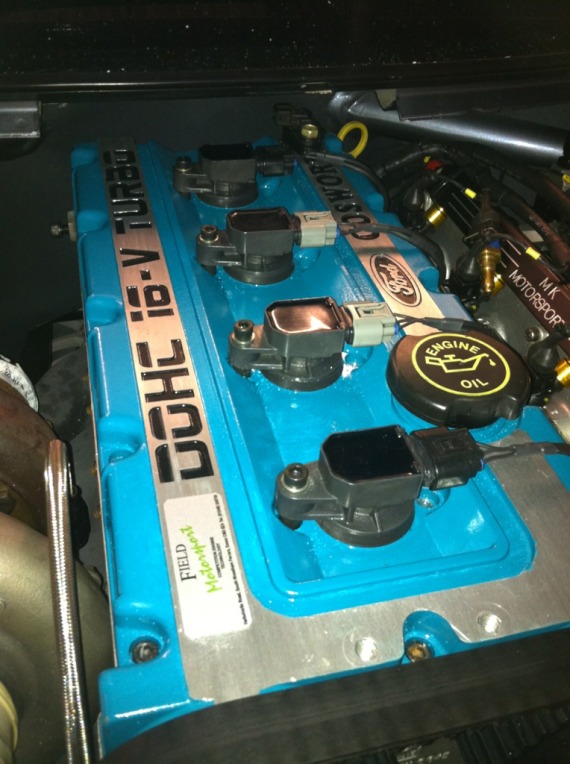
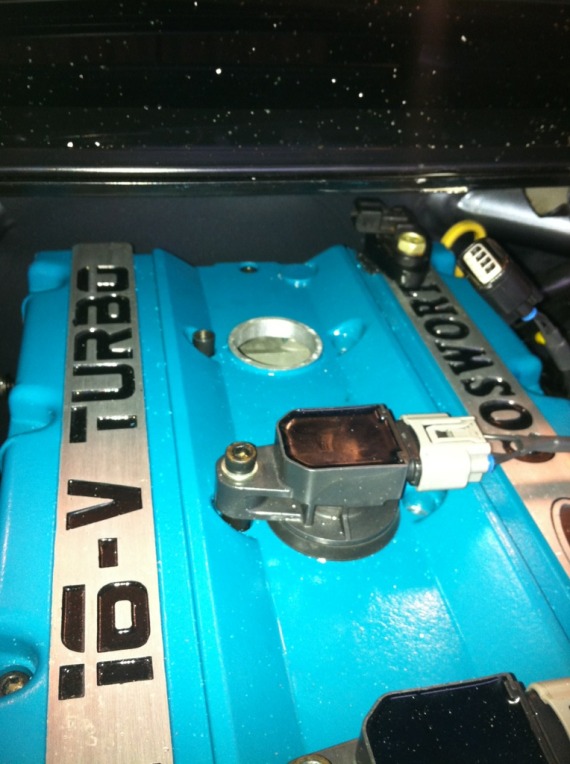
Engine is now back out and i am waiting for the heat proof barrier to turn up so in the meantime i looked at mounting the map sensor, fuel reg and air injectors again, wasnt happy with them on the front by the pulleys
Fuel reg is going to be mounted on the passenger inner wing area so i made some stand offs to space it out a bit so it allows easy access to the adjustment screw on the top, will get it mounted today at some point

Wanted somewhere to mount the map sensor on the engine, if it ever comes apart again i would weld a boss for it straight to the inlet manifold but for now i have mounted it here, i can still fit the damping bracket for the manifold too when i make it
Then i also wanted to find somewhere for the air injectors so used the previous stand off i made and mounted them off the fuel rail mount, when they are all plumbed in with the aeroquip i think it will look spot on
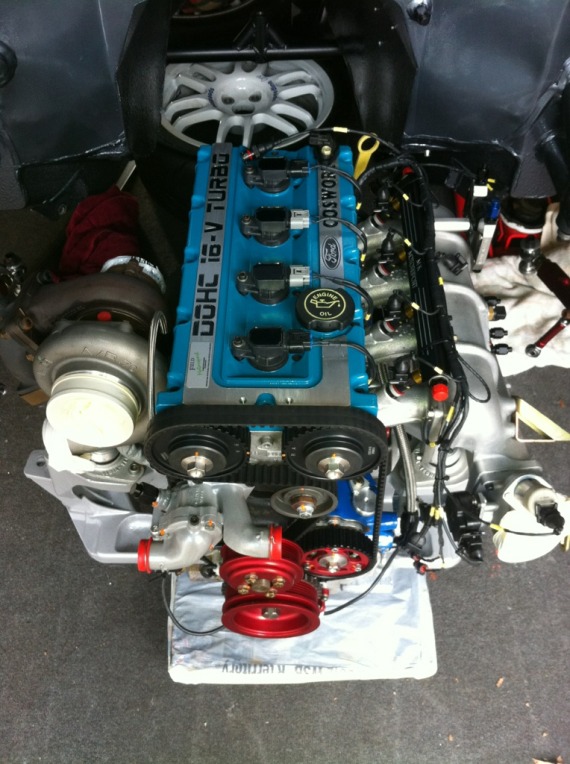
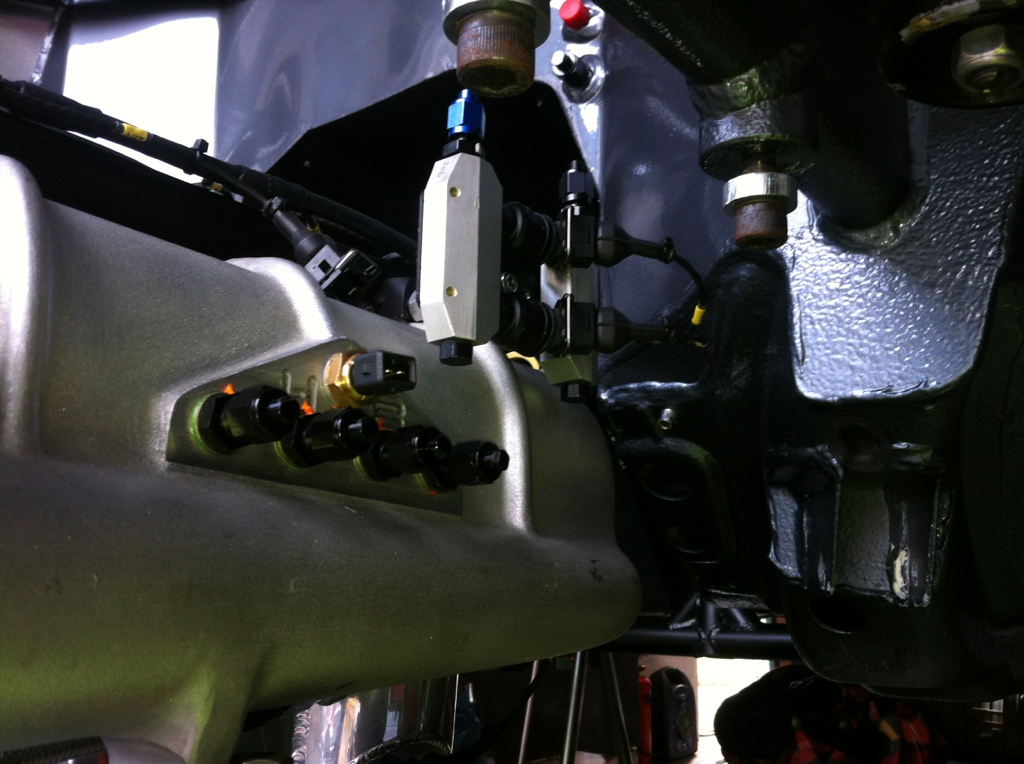
Also done a bit of routing for the loom to get it tidy and where i want it roughly,
More tinkering today i think
Not ideal!!!
So i have to sort a way of milling out the cam cover to make a section around number 4 removable so the cop can be pulled out, not sure how i will achieve this yet but the only other option is to remove the entire middle section of the cover and fit a removable piece as others have done before, going to go have have a head scratch later today,
Engine is now back out and i am waiting for the heat proof barrier to turn up so in the meantime i looked at mounting the map sensor, fuel reg and air injectors again, wasnt happy with them on the front by the pulleys
Fuel reg is going to be mounted on the passenger inner wing area so i made some stand offs to space it out a bit so it allows easy access to the adjustment screw on the top, will get it mounted today at some point
Wanted somewhere to mount the map sensor on the engine, if it ever comes apart again i would weld a boss for it straight to the inlet manifold but for now i have mounted it here, i can still fit the damping bracket for the manifold too when i make it
Then i also wanted to find somewhere for the air injectors so used the previous stand off i made and mounted them off the fuel rail mount, when they are all plumbed in with the aeroquip i think it will look spot on
Also done a bit of routing for the loom to get it tidy and where i want it roughly,
More tinkering today i think
 31-03-2013, 04:25 PM
#2807
Solved the issue of not being able to remove number 4 cop,
Started off by removing the cam cover and milling out the hole to 43mm, again I had to do this with my pillar drill which is far from easy due to no drawbar on a pillar drill and the risk of the mt2 drill chuck vibrating loose,
But with time and care it came out quite well
Then milled 1.5mm off the top
Turned and center bored a top hat to suit the cam cover hole and cop
Perfect fit
Accepts the cop seal perfectly as well still
You wouldn't even know it had been modified
But the top hat allows a much greater angle to remove the cop once it has been unbolted and lifted slightly as shown here
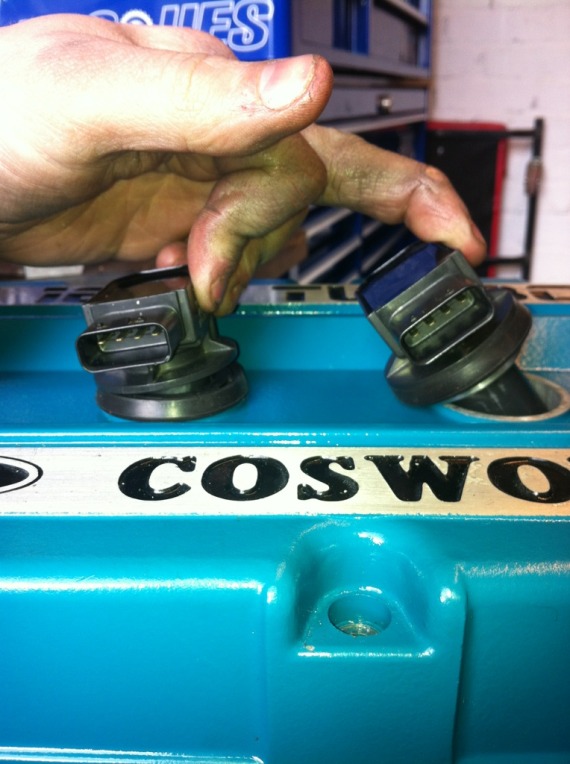
And the end result is being able to remove the cop with engine etc in situ still which is obviously important or checkin the plugs would of been a 2 hour job
Best bit is it cost me �0
Started off by removing the cam cover and milling out the hole to 43mm, again I had to do this with my pillar drill which is far from easy due to no drawbar on a pillar drill and the risk of the mt2 drill chuck vibrating loose,
But with time and care it came out quite well
Then milled 1.5mm off the top
Turned and center bored a top hat to suit the cam cover hole and cop
Perfect fit
Accepts the cop seal perfectly as well still
You wouldn't even know it had been modified
But the top hat allows a much greater angle to remove the cop once it has been unbolted and lifted slightly as shown here
And the end result is being able to remove the cop with engine etc in situ still which is obviously important or checkin the plugs would of been a 2 hour job
Best bit is it cost me �0
Last edited by M K; 31-03-2013 at 04:27 PM.


 31-03-2013, 08:16 PM
#2815
Spanner monkey
Smart Arse.
Great work, looks spot on.
What fuel reg do you have? Looks the same as my Aeromotive one. Just wondered as i think i need washers to seat my -6 fittings into it?
Gary
Great work, looks spot on.
What fuel reg do you have? Looks the same as my Aeromotive one. Just wondered as i think i need washers to seat my -6 fittings into it?
Gary
31-03-2013, 09:54 PM
#2816
Cops are from a Toyota Yaris, and as for the car being finished I'm afraid it's gonna be a while yet as funds are low
Yes you need washers mate as the female threads in the reg are not a flare fitting, just a 9/16-18 thread
Mine is an Aeromotive
Thanks for all the positive comments people, not majorly exciting updates but I like to share what's been happening
Thanks
Marc
10-04-2013, 05:04 PM
#2821
Sorted a few more little bits while funds are a bit low
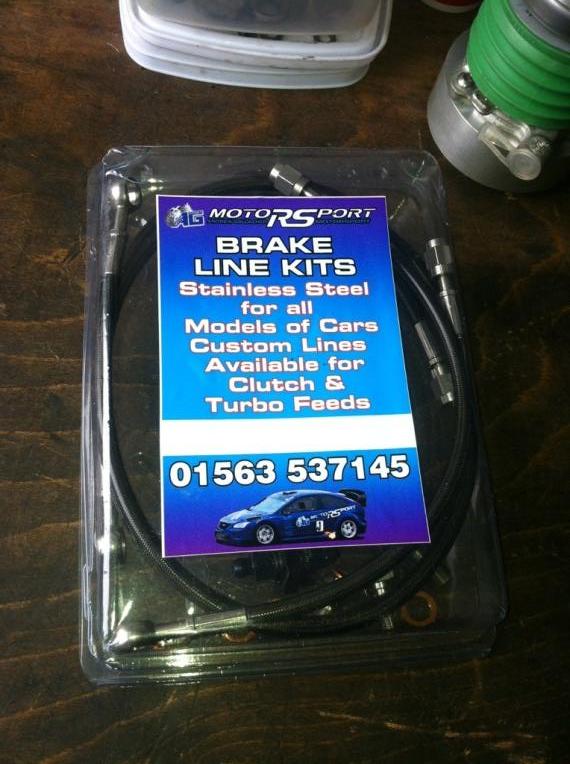
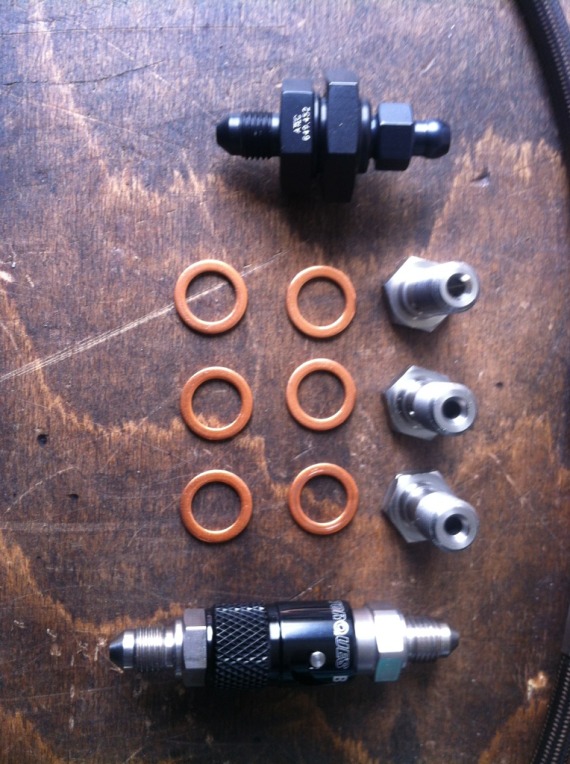
BIG thanks to Andrew Gallacher for making and supplying the new clutch lines, -3 carbon look same as the rest of the cars brake system, give him a shout if you want some lines for your car as he can make up anything, custom or standard
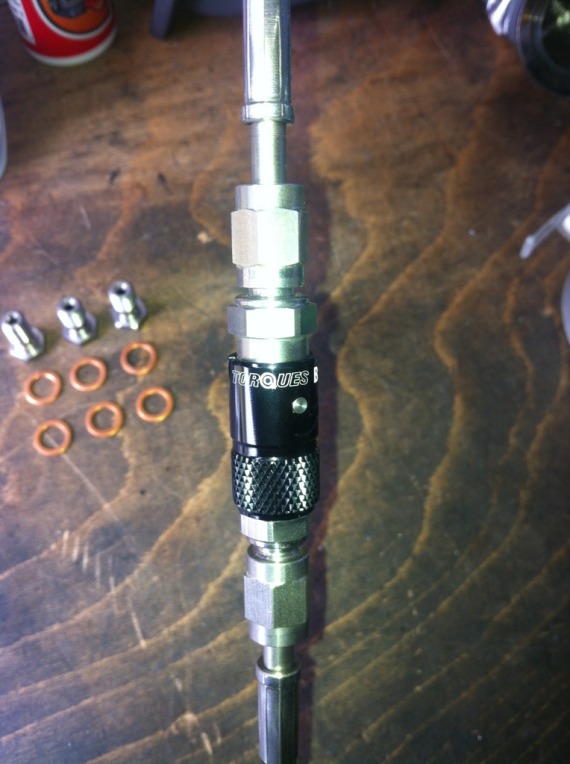
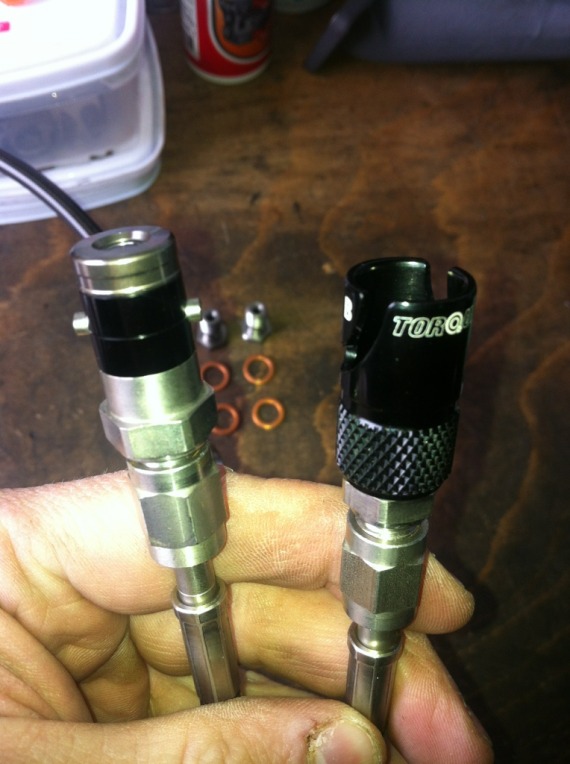
Also as i don't want the hassle of disconnecting the clutch line every time i remove the gearbox (which will probably be every other week) i bought a -3 dry break connector from TORQUE'S, it has zero leak or air inclusion on connection or disconnection so you don't have to bleed the system again after removing and re fitting the box
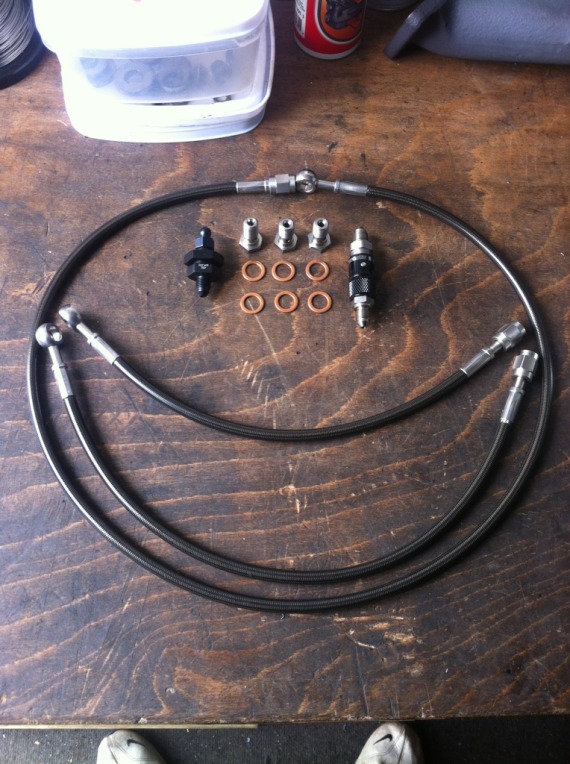
Also got the remote bleed fitting for the concentric cylinder, this will be bolted to the gearbox on an L shape bracket

That's everything i need now to get the gearbox fitted up to the engine, and hopefully all my Thermo-tec adhesive heat barrier will turn up this week so i can do the entire tunnel and bulkhead area before the engine and box goes in,
Lastly i had to alter my external wastegate again as it was too close the cross bar for my liking but the only way to do it was to cut it open and bend it into place which was easy
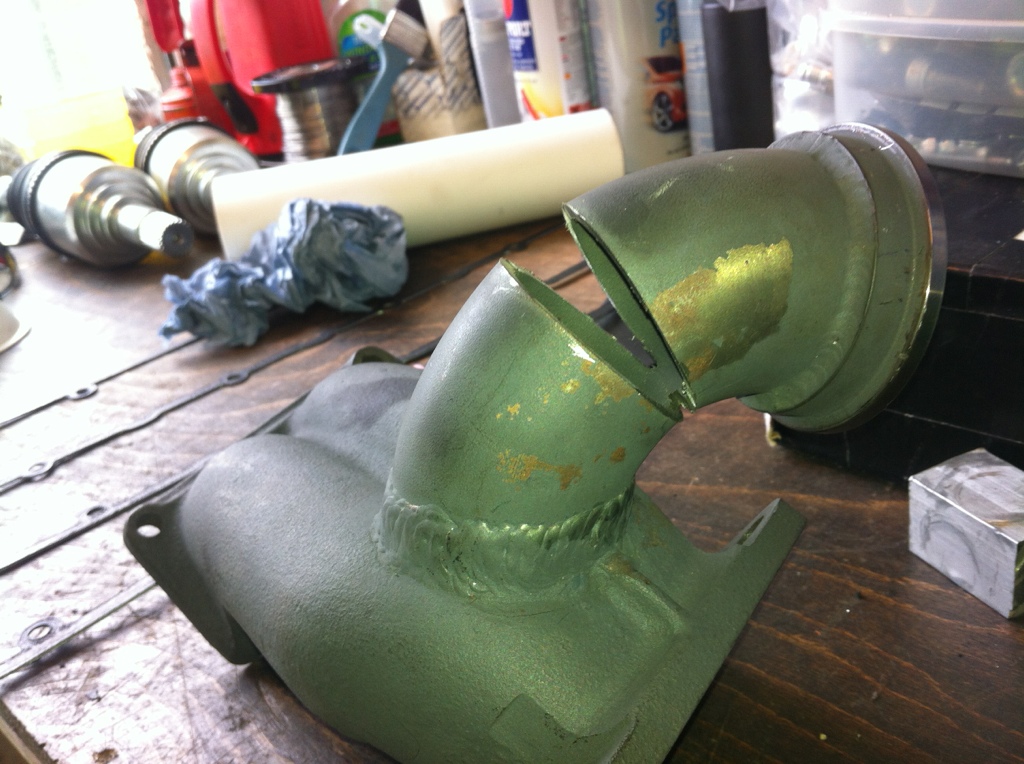
A friend of mine welded it up again for me this week and it was down to me to try and clean it up the best i could inside as we filled the gap with weld rather than use a filler piece to fit the gap,
I am not sure if i am happy with it though, i am not bothered about the outside as i am wrapping it so it will not be seen at all
I need to do a bit more smoothing on the inside but i leak tested it and all is good there, but i have ummed and arrred about cutting it off and starting again
What do you think?
There is no chunks of weld or anything to fall of and get eaten by the turbo but being fussy im just not sure whether to do a bit more smoothing and then wrap it and job done?
Thanks
Marc
BIG thanks to Andrew Gallacher for making and supplying the new clutch lines, -3 carbon look same as the rest of the cars brake system, give him a shout if you want some lines for your car as he can make up anything, custom or standard
Also as i don't want the hassle of disconnecting the clutch line every time i remove the gearbox (which will probably be every other week) i bought a -3 dry break connector from TORQUE'S, it has zero leak or air inclusion on connection or disconnection so you don't have to bleed the system again after removing and re fitting the box
Also got the remote bleed fitting for the concentric cylinder, this will be bolted to the gearbox on an L shape bracket
That's everything i need now to get the gearbox fitted up to the engine, and hopefully all my Thermo-tec adhesive heat barrier will turn up this week so i can do the entire tunnel and bulkhead area before the engine and box goes in,
Lastly i had to alter my external wastegate again as it was too close the cross bar for my liking but the only way to do it was to cut it open and bend it into place which was easy
A friend of mine welded it up again for me this week and it was down to me to try and clean it up the best i could inside as we filled the gap with weld rather than use a filler piece to fit the gap,
I am not sure if i am happy with it though, i am not bothered about the outside as i am wrapping it so it will not be seen at all
I need to do a bit more smoothing on the inside but i leak tested it and all is good there, but i have ummed and arrred about cutting it off and starting again
What do you think?
There is no chunks of weld or anything to fall of and get eaten by the turbo but being fussy im just not sure whether to do a bit more smoothing and then wrap it and job done?
Thanks
Marc
10-04-2013, 05:06 PM
#2822
Here's the wrap i got for the exhaust manifold

2 rolls of 1" x 15ft to do the trouser piece first and see how i get on, i will use lockwire to secure it and then i have the silicone spray sealer that you spray it with afterwards so it does not dry out and go brittle
2 rolls of 1" x 15ft to do the trouser piece first and see how i get on, i will use lockwire to secure it and then i have the silicone spray sealer that you spray it with afterwards so it does not dry out and go brittle
 11-04-2013, 12:22 PM
#2825
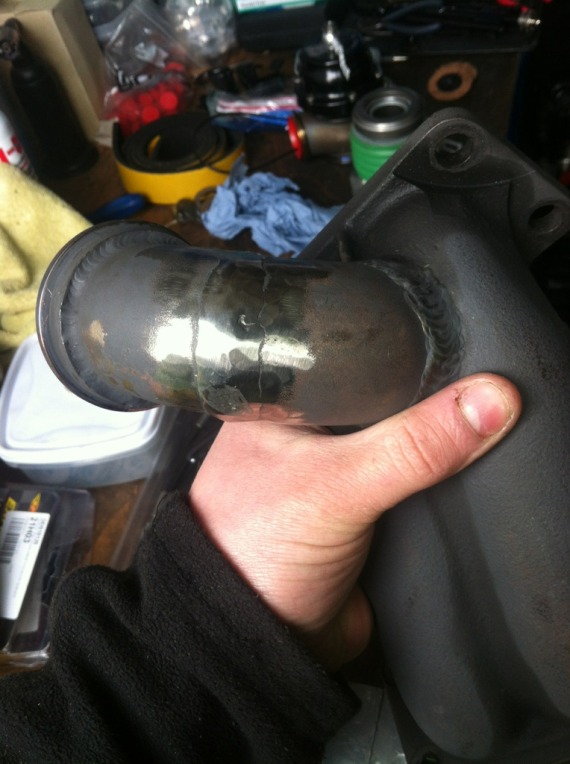
Inside is not very rough at all, gonna have a bit more of a go at it see if I can get it a bit better
Rookie error was cutting it in the middle to start with, should of cut and re angled right at the flange
Rookie error was cutting it in the middle to start with, should of cut and re angled right at the flange
Last edited by M K; 11-04-2013 at 12:24 PM.
11-04-2013, 01:23 PM
#2826
I've found that life I needed.. It's HERE!!

 13-04-2013, 03:50 PM
#2829
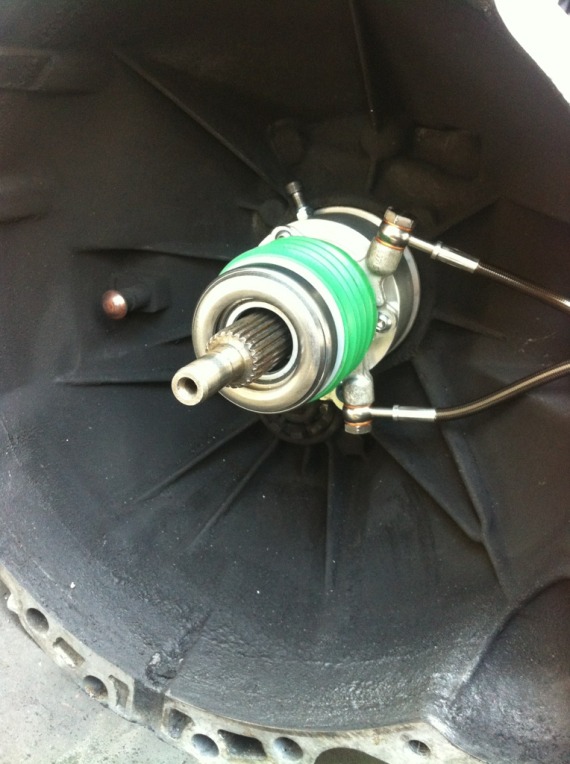
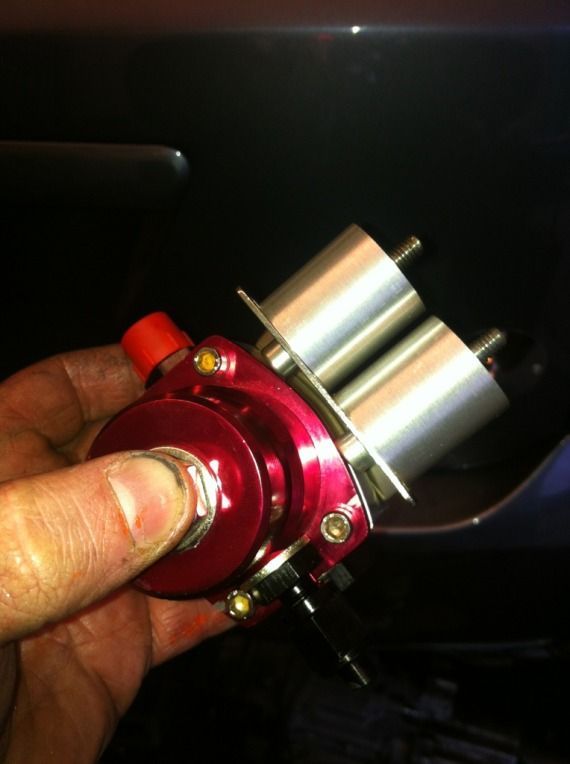
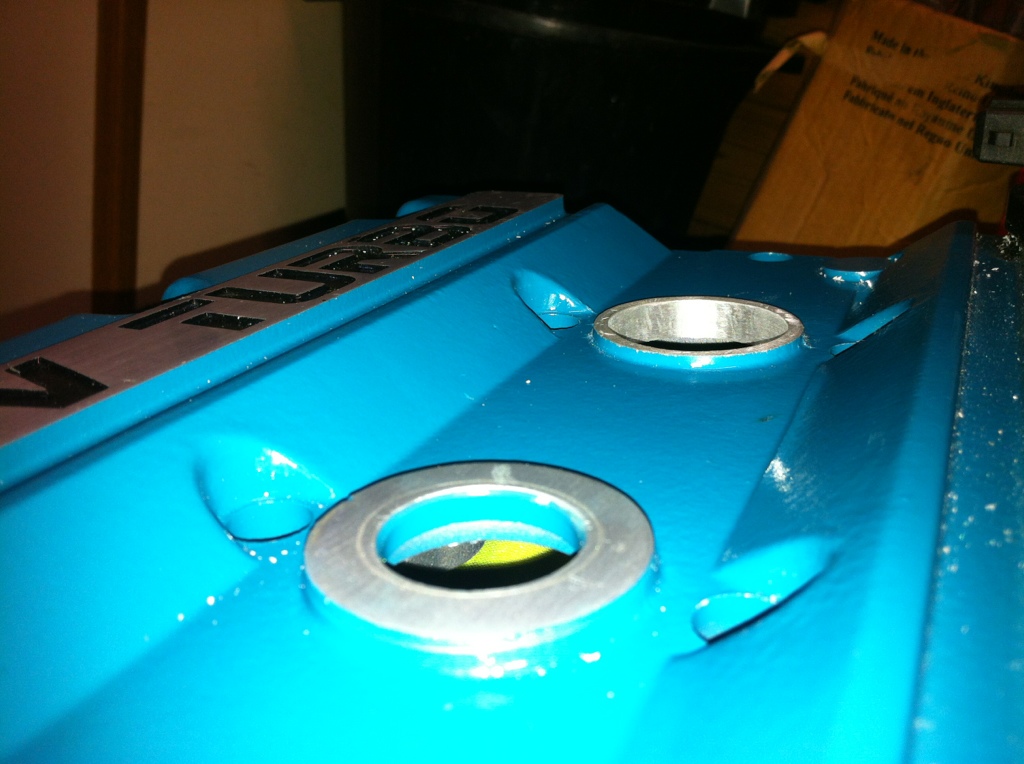
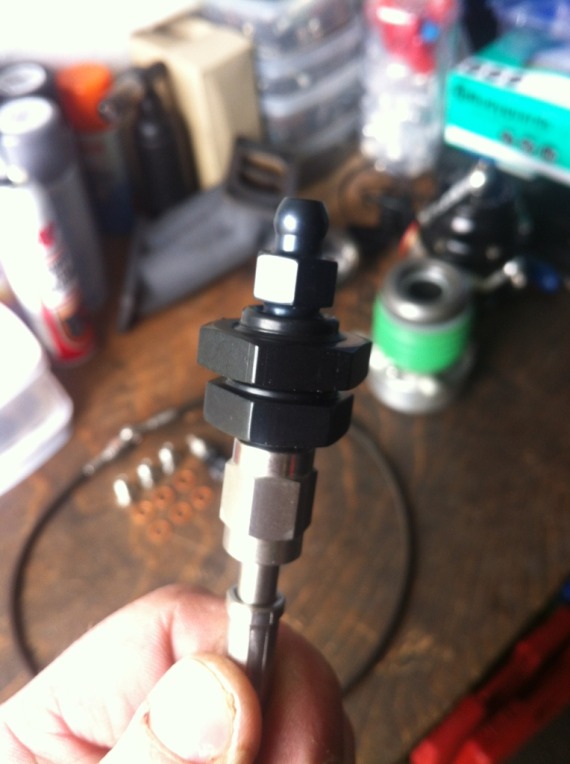
Started to make my own concentric hydraulic clutch set up,
Spent a long time looking for the correct bearing and slave cylinder as there's lots of photos if different supplied kits on the net but no part numbers etc
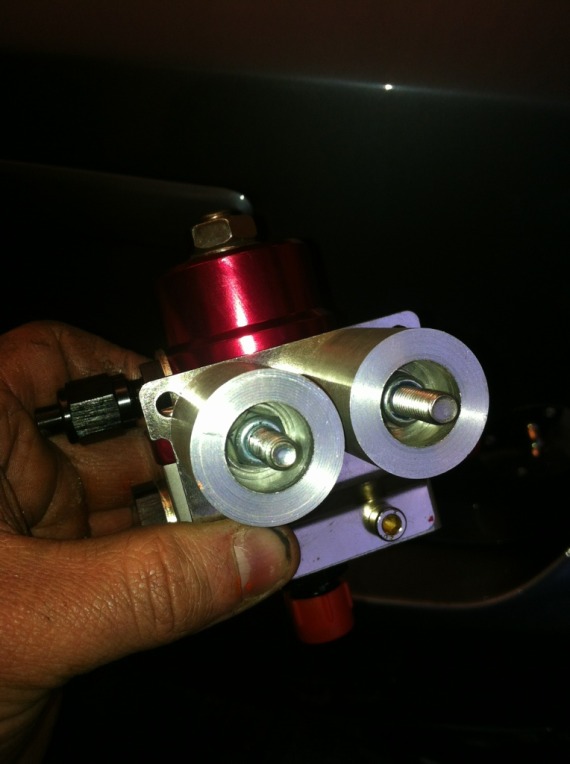
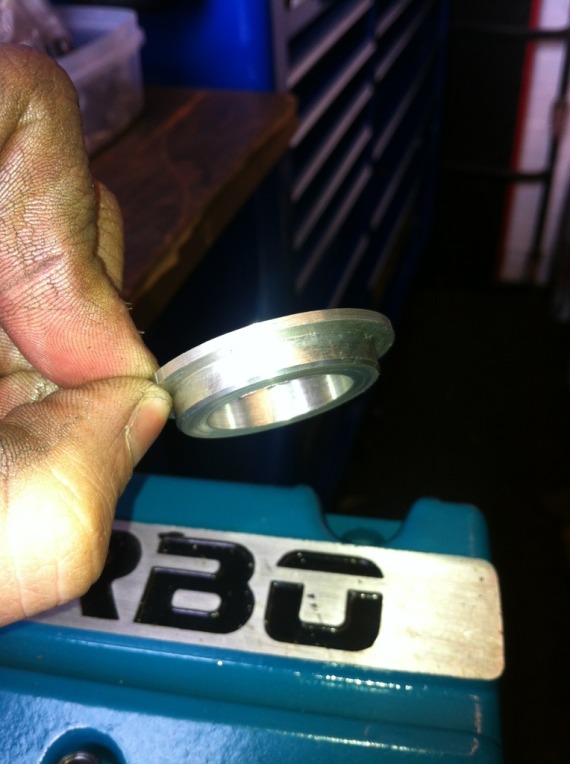
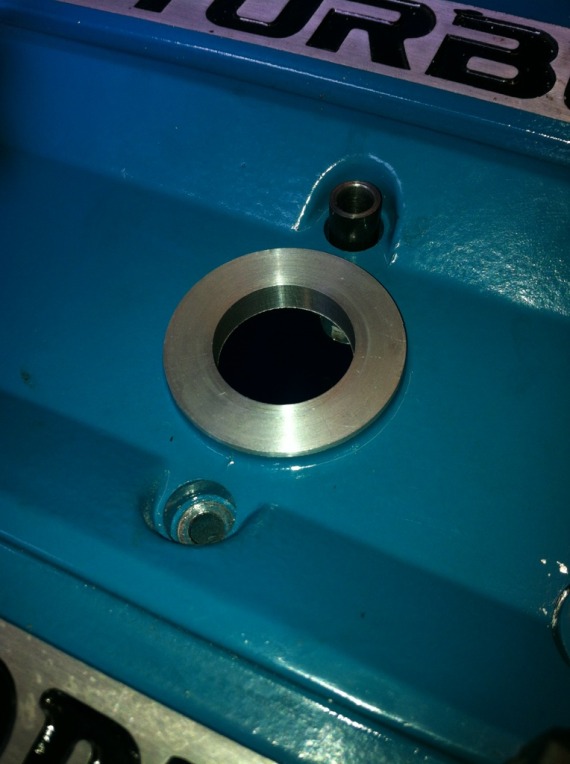
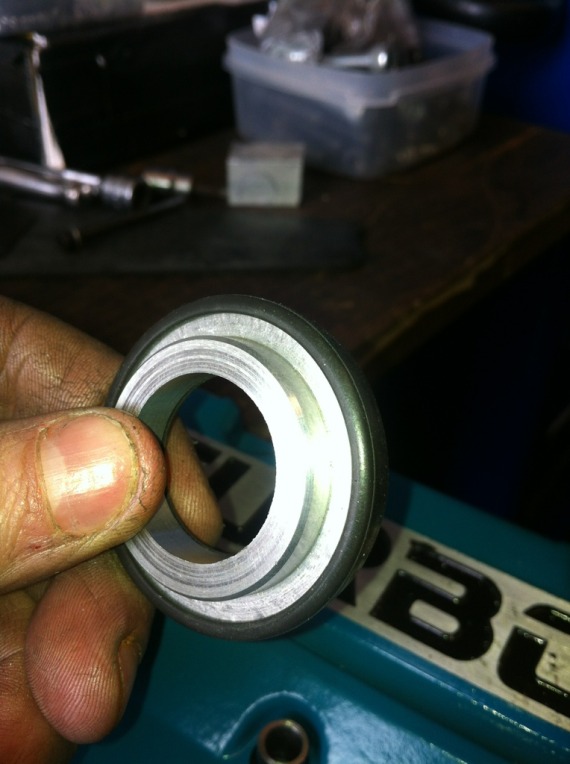
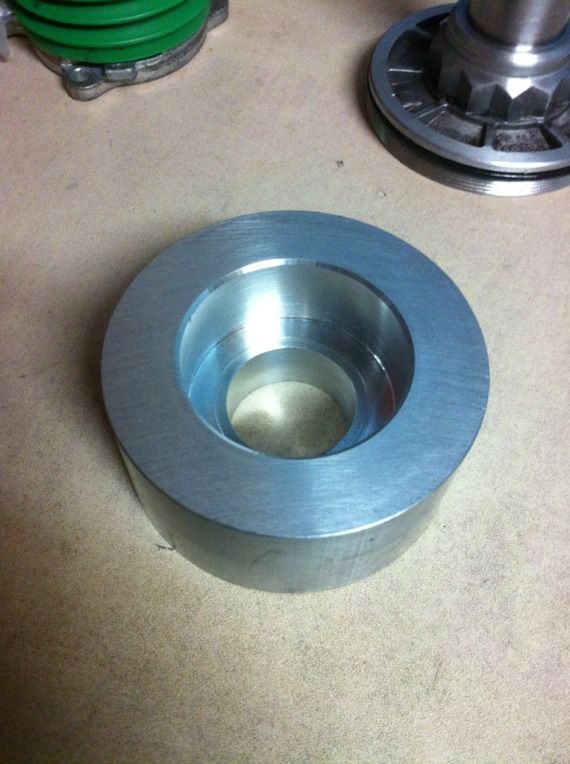
Sorted the cylinder, sorted a proper bearing for twin plate clutches, bought some billet to make the spacer,
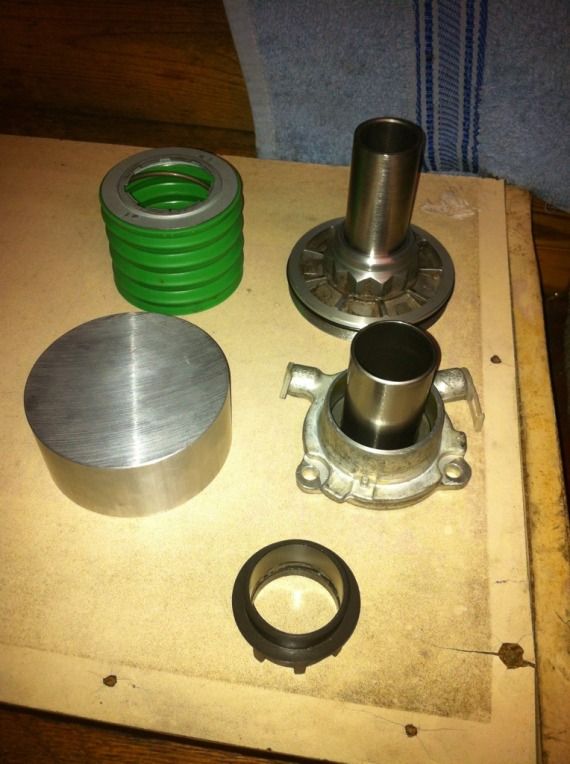
Bored out the spacer so its a snug fit over the gearbox nose piece
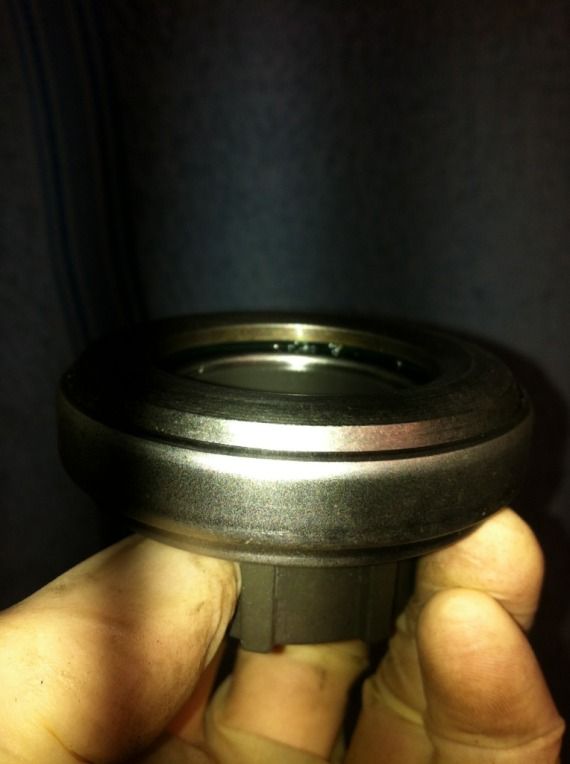
Bearing press fitted on retainer
Spacer test fit
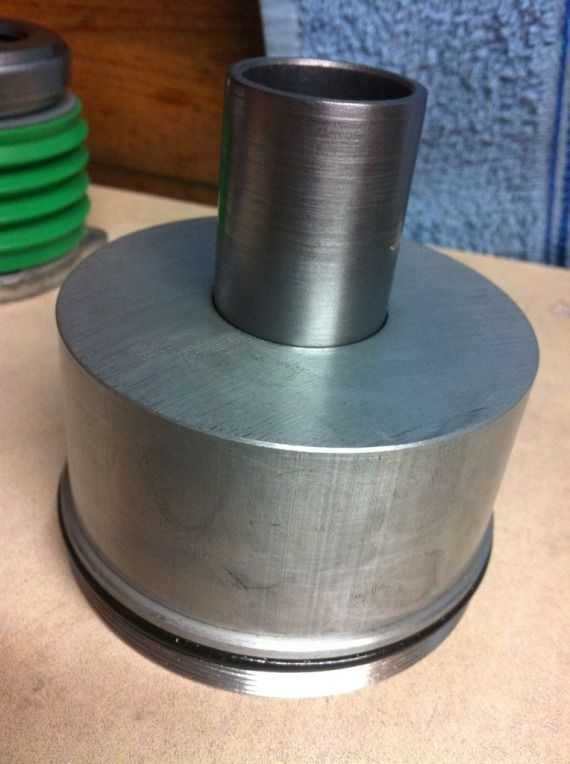
Just need to get my flywheel back so I can bolt up the clutch pack and test fit to work out spacer height, then the spacer can be turned down, drilled and threaded for the bolt holes and an anti rotation fixing
Spent a long time looking for the correct bearing and slave cylinder as there's lots of photos if different supplied kits on the net but no part numbers etc
Sorted the cylinder, sorted a proper bearing for twin plate clutches, bought some billet to make the spacer,
Bored out the spacer so its a snug fit over the gearbox nose piece
Bearing press fitted on retainer
Spacer test fit
Just need to get my flywheel back so I can bolt up the clutch pack and test fit to work out spacer height, then the spacer can be turned down, drilled and threaded for the bolt holes and an anti rotation fixing
I have one of these ford cylinders, had i for years but dont know what its off, did your round release bearing just press onto the std ford bearing carrier? what cylinder is yours off?
Do you recognise this?