Mk6 JWRC fiesta cosworth


 20-11-2011, 07:31 AM
#1962
Neil - I am tempted to do that but the problem is the car is too far away from completion still i think to be bartering for a deal if i test the box as they would have to wait ages to find out lol so will see how things progress over the next couple of months but i have been offered another box again now at a good price but it will eat up every penny i have and halt the rest of the build for a fair while,
Wellens7 - I may turn them down and then get them chemically blackened after with some other bits i need doing so will see, Thanks for the reply about the k-nuts too
Wellens7 - I may turn them down and then get them chemically blackened after with some other bits i need doing so will see, Thanks for the reply about the k-nuts too
20-11-2011, 08:08 AM
#1963
Had a few things coming together slowly,
First off as i am having the diffs rebuilt/uprated i have been trying to source all new parts but could not for love nor money find the small washer locking tabs that hold the bearing retainers in place so i gave up and had a load laser cut
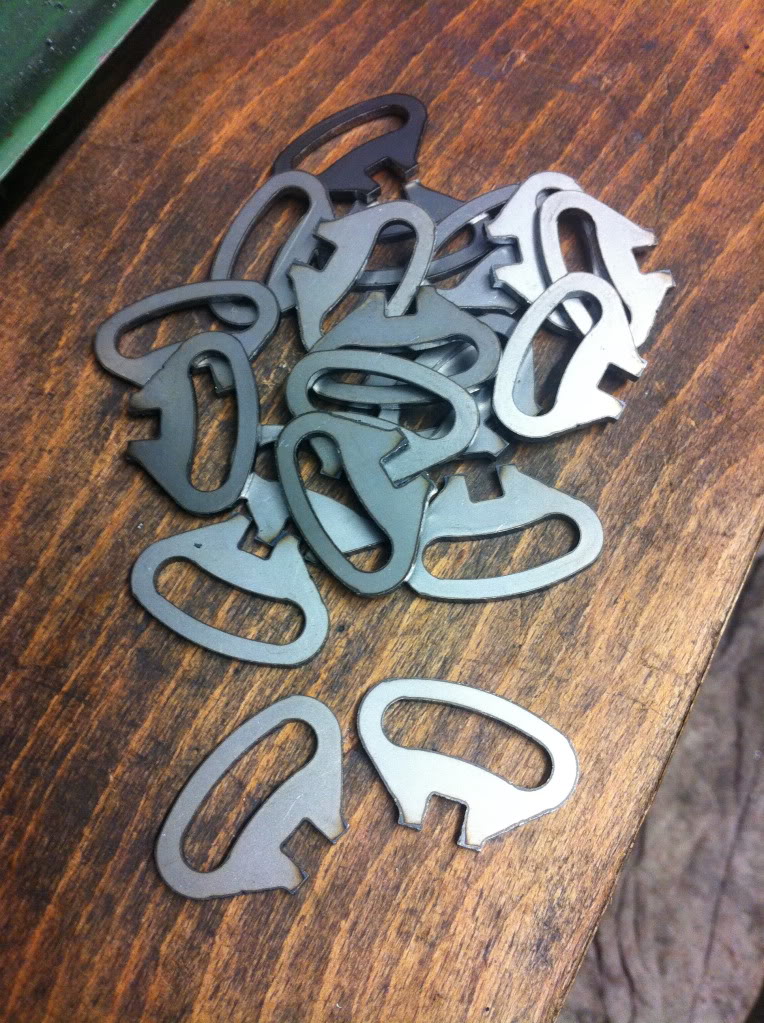
Gonna keep what i need for my diffs and sell the other 9 pairs on
The company i got to do the laser cutting also made me up all the new components to re make my rear steering arms, but in slightly lighter 2.5mm steel rather than 3mm, they also bent the main channel for me using a 100 ton brake press rather than a normal sheet metal folder so it has a tighter radius on the bends,
The other pieces of the steering arms jigsaw were also laser cut and it has all been dropped off to my mate Karl who will be tig welding them together and tacking the captive k-nuts in place, so although they will still look industrial as some people say, they will look a lot smarter being perfect mirror images and fully tig welded, no pics of the parts as i forgot to take some before dropping the stuff off to be done.
The same firm is making me a load of camber washers as well as i have started to fit the camber washer set up to the front shocks as well to try and lose some of the negative camber that way,
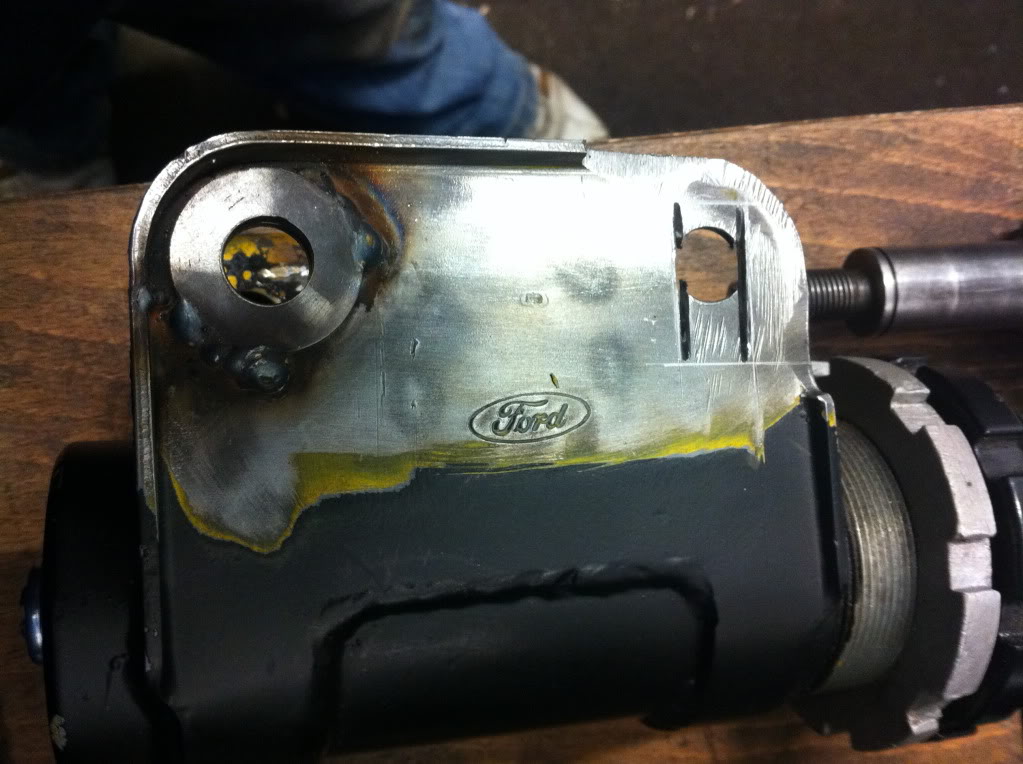
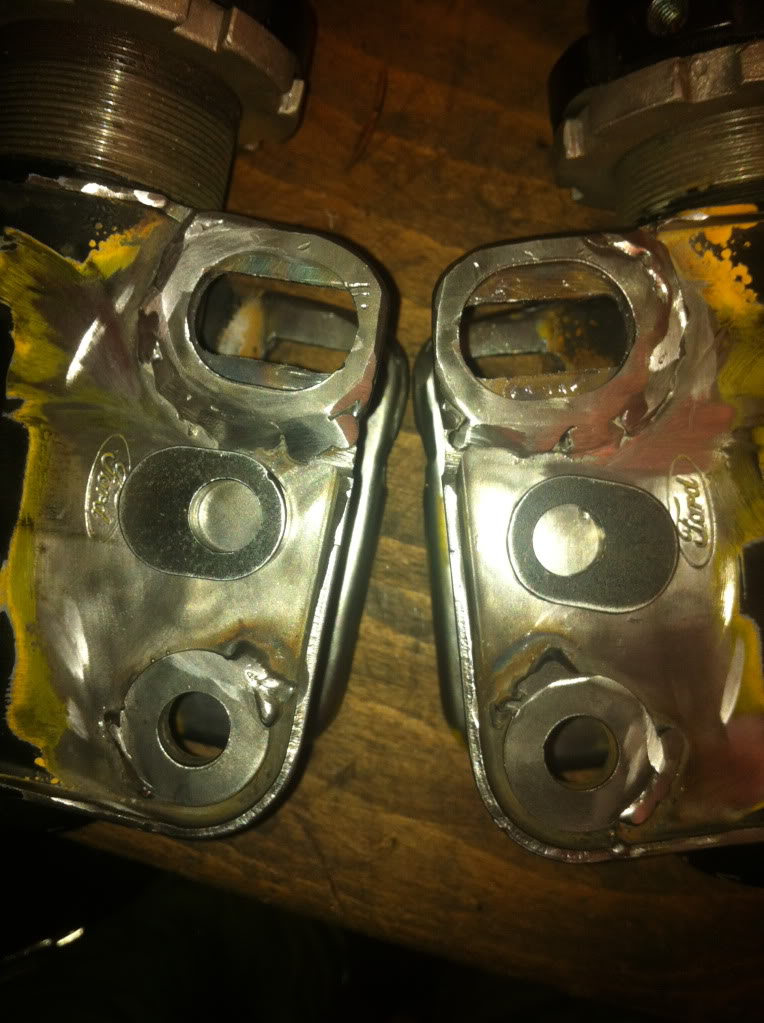
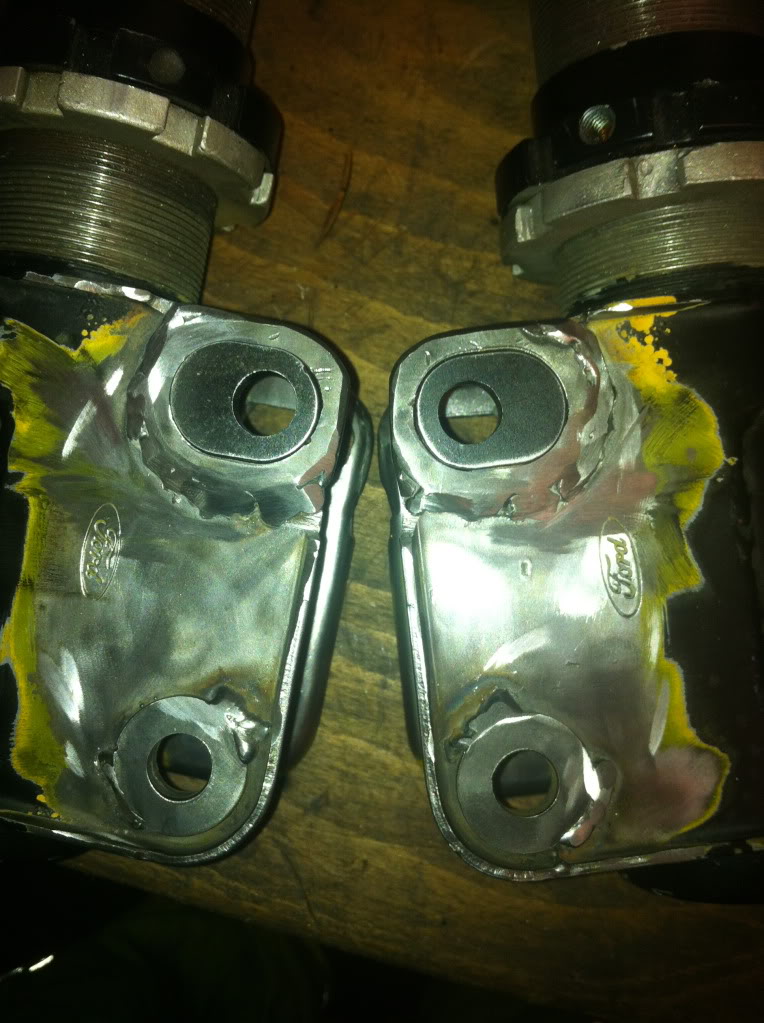
Welded on the lower reinforcing hole that just goes in the standard position, and the top is ground back ready the the washer surround to be welded in place, i just have to finish cutting out the slots that will allow the bolts to be moved forward and back with the different camber washers but my poor little dremmel was getting a bit hot so had to leave it there for now lol
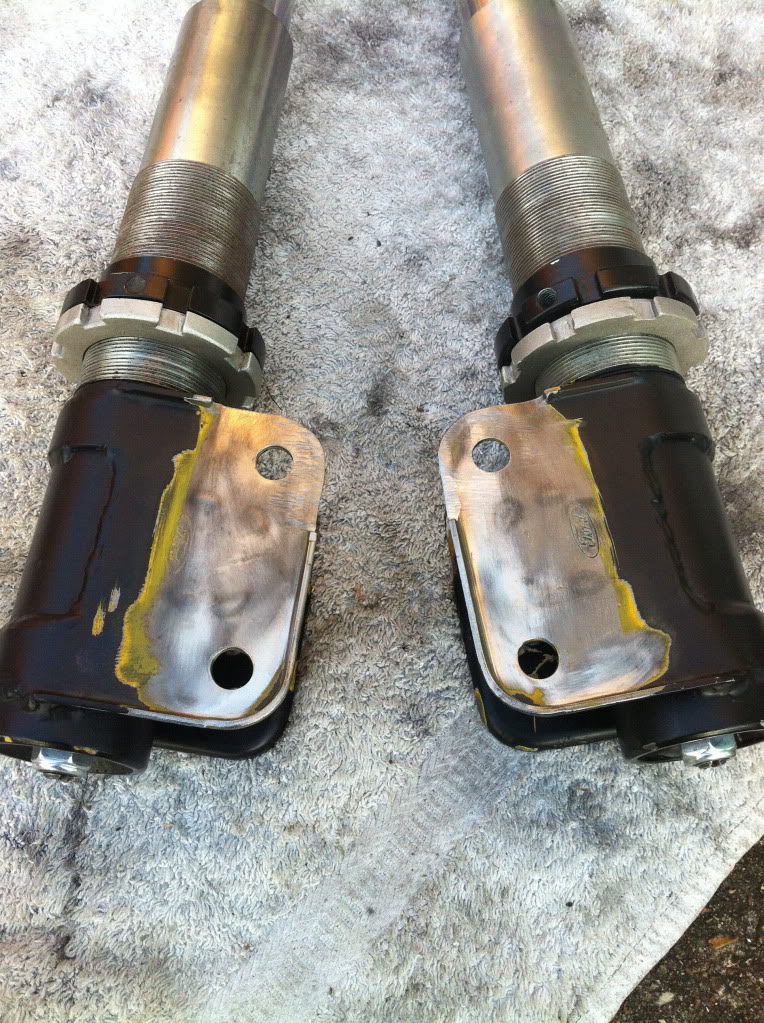
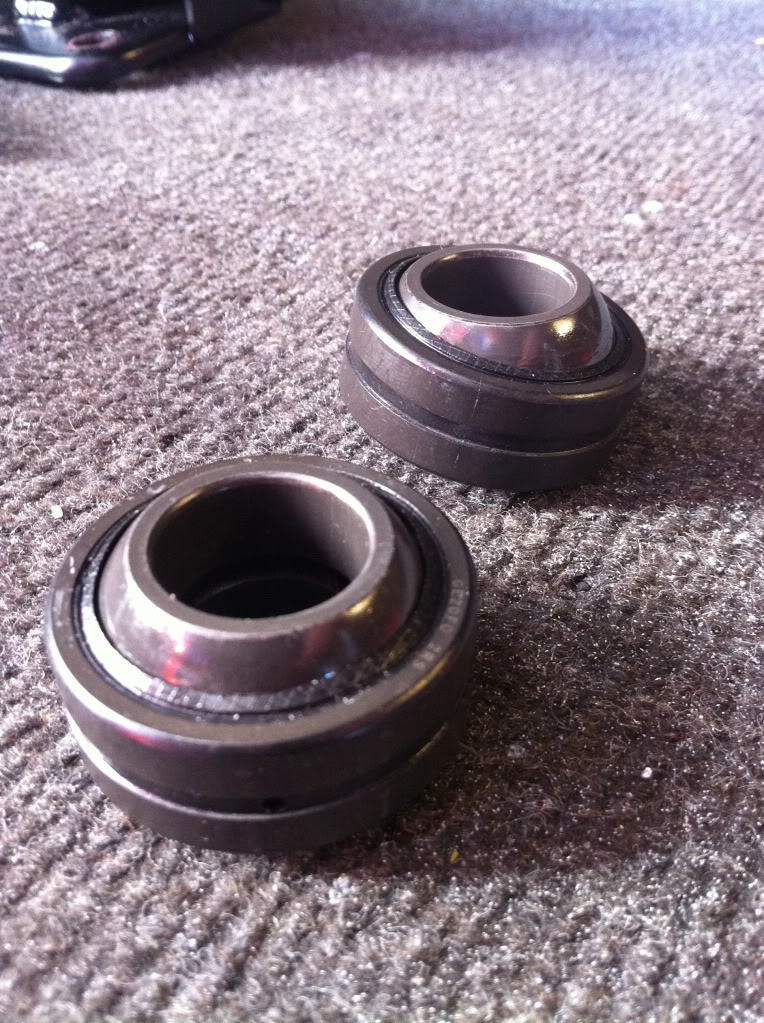
Next up was a problem i noticed with the Compbrake top mounts, once my shocks etc were all bolted up i noticed that there was play and a knocking when you moved the shock up and down, this would not happen when the car was on its wheels unless you jumped the car and the suspension was at full droop in which case you would be about to have bigger problems to worry about lol, but i didn't like the play so had a measure up with the verniers and had some tiny shims laser cut to fit between the bearing and the top mounts bearing recess to take up the slack and now there is no play at all so i m happy
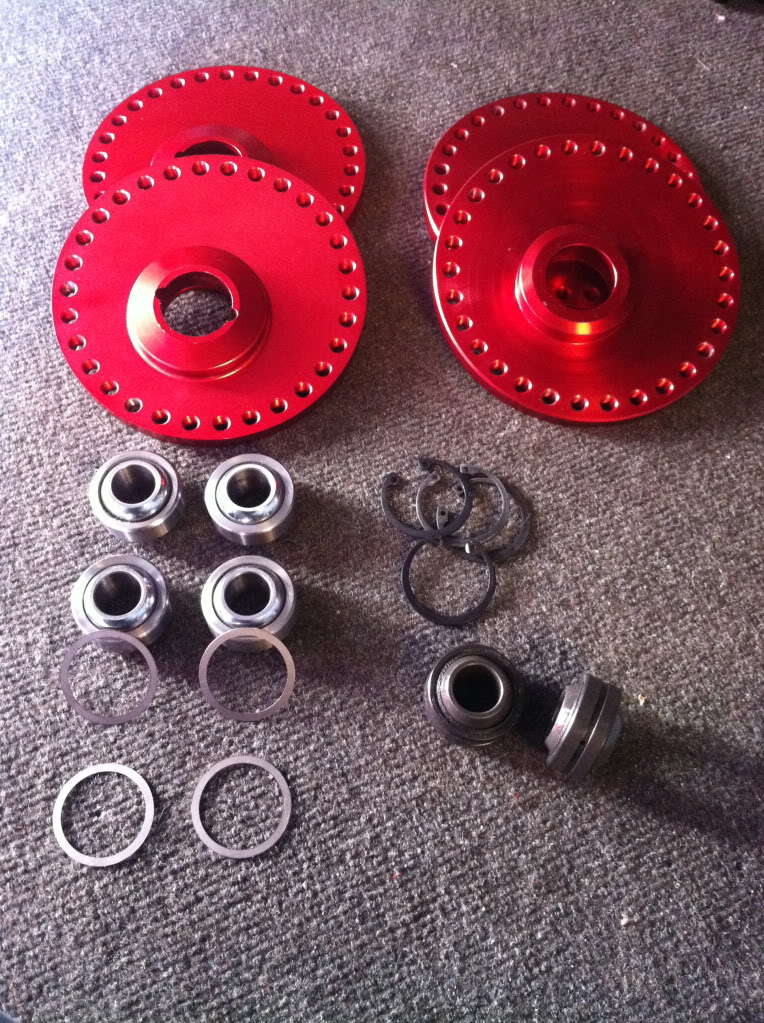
Bearings and shims can be seen here, i also bought 2 new bearings as for some reason 2 of mine had the cheaper bearing fitted which was no good in my eyes so these have been replaced
Old bearings that have no been replaced
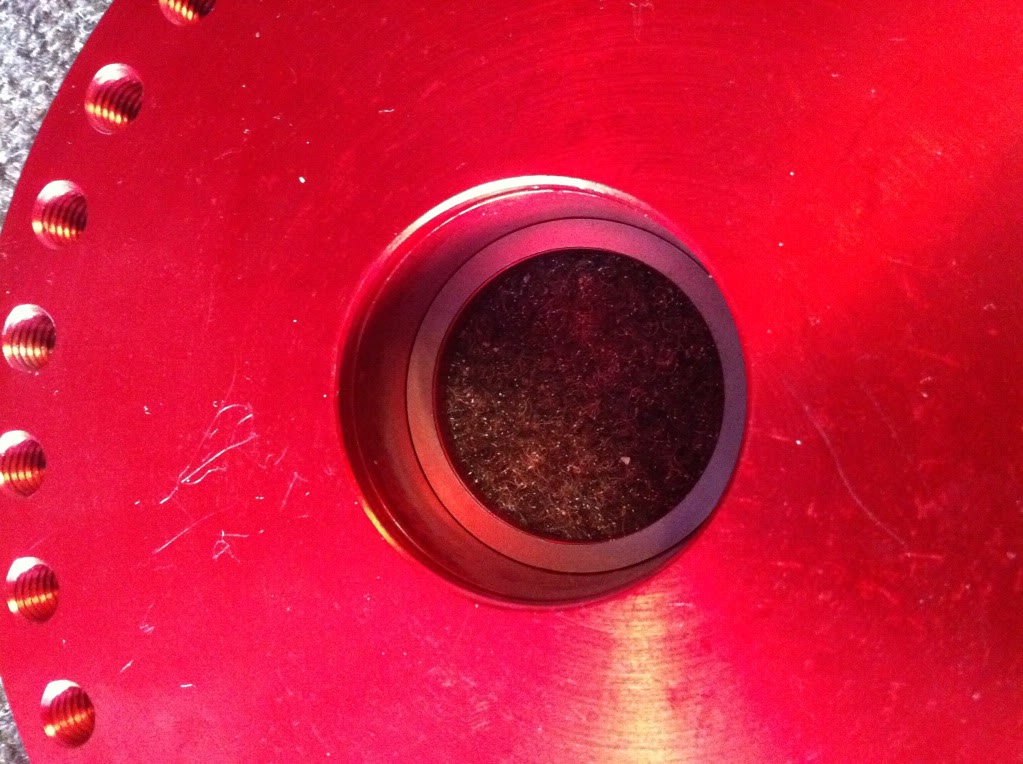
The shim sitting inside the top mount ready to fit the bearing
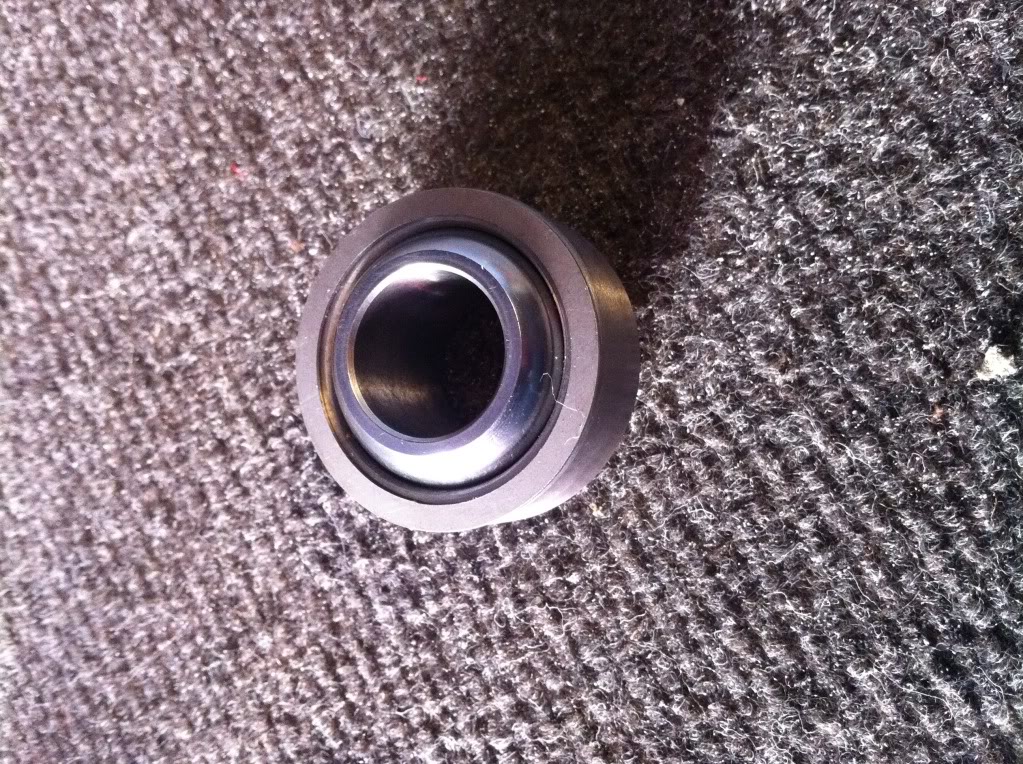
Showing the shim sitting on the bearing
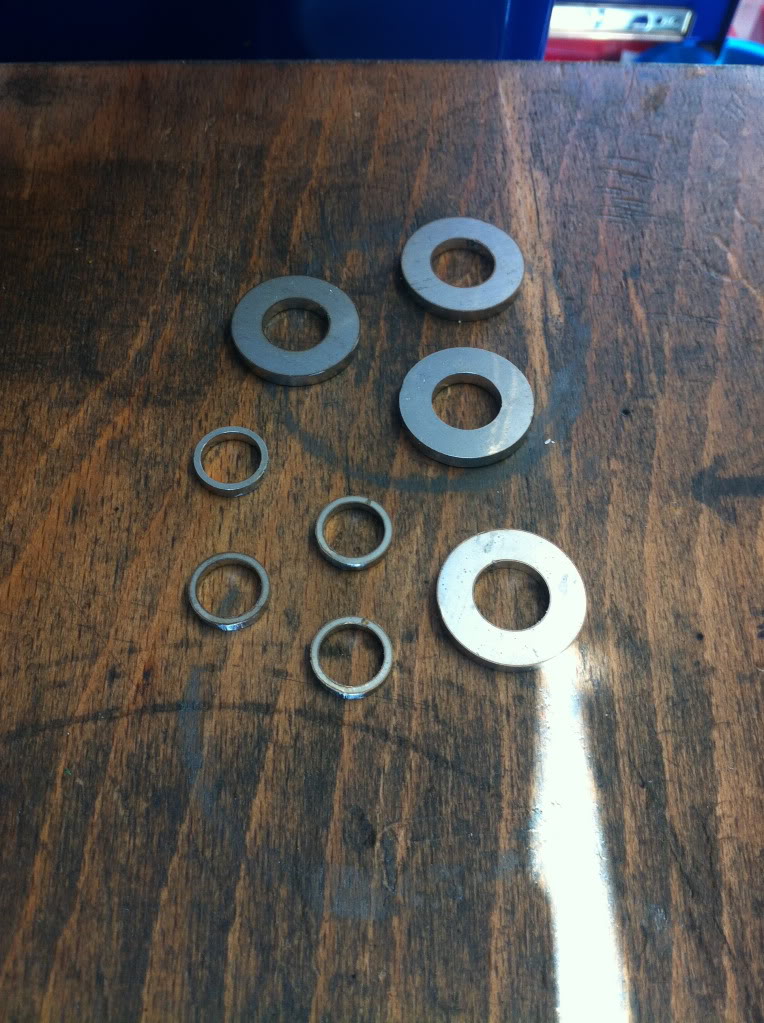
A couple more laser cut specials to suit the rear droplinks and bilstein suspension tops
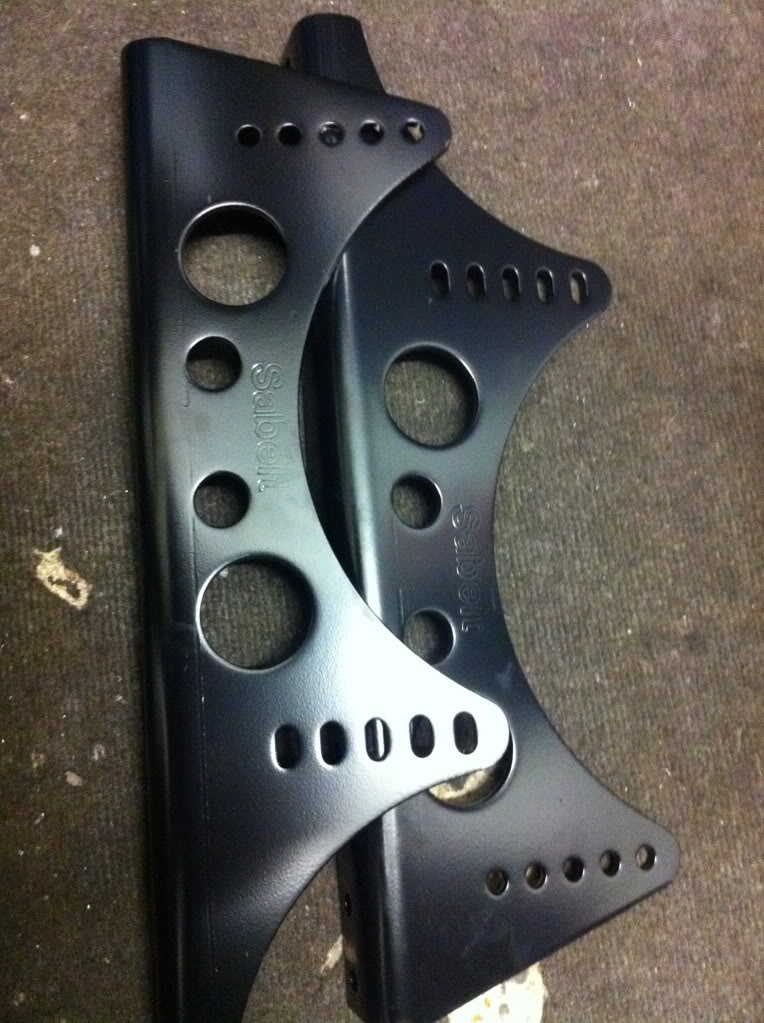
Ordered and received my other pair of sabelt seat mounts as i only had 1 pair that Andrew supplied me
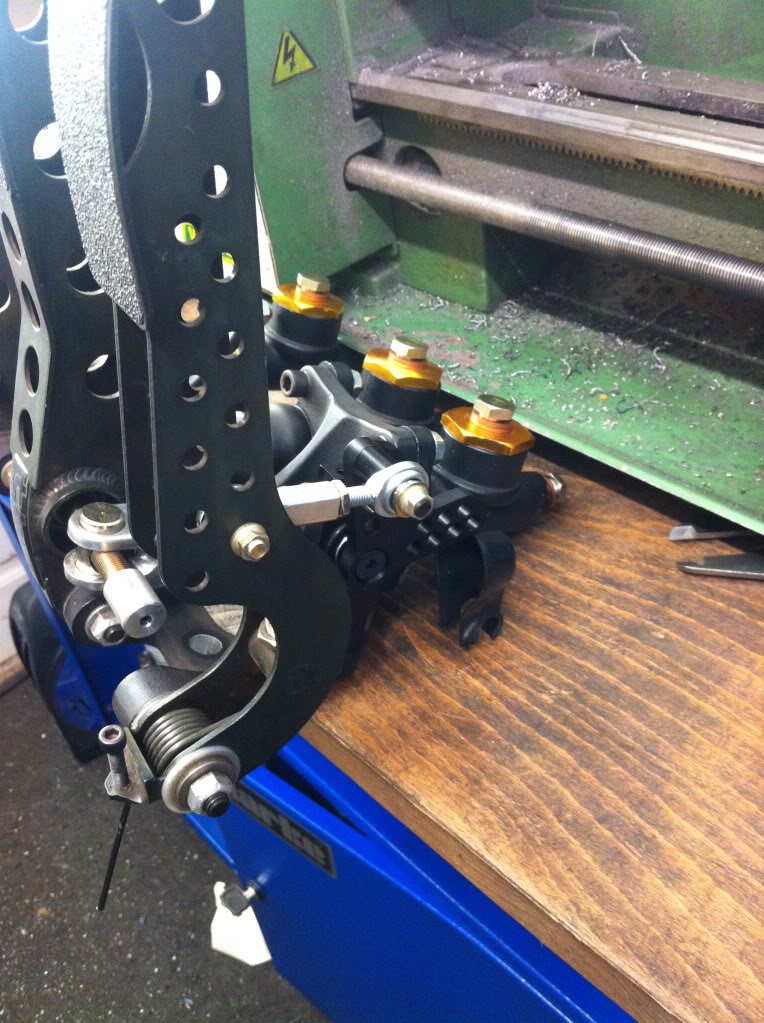
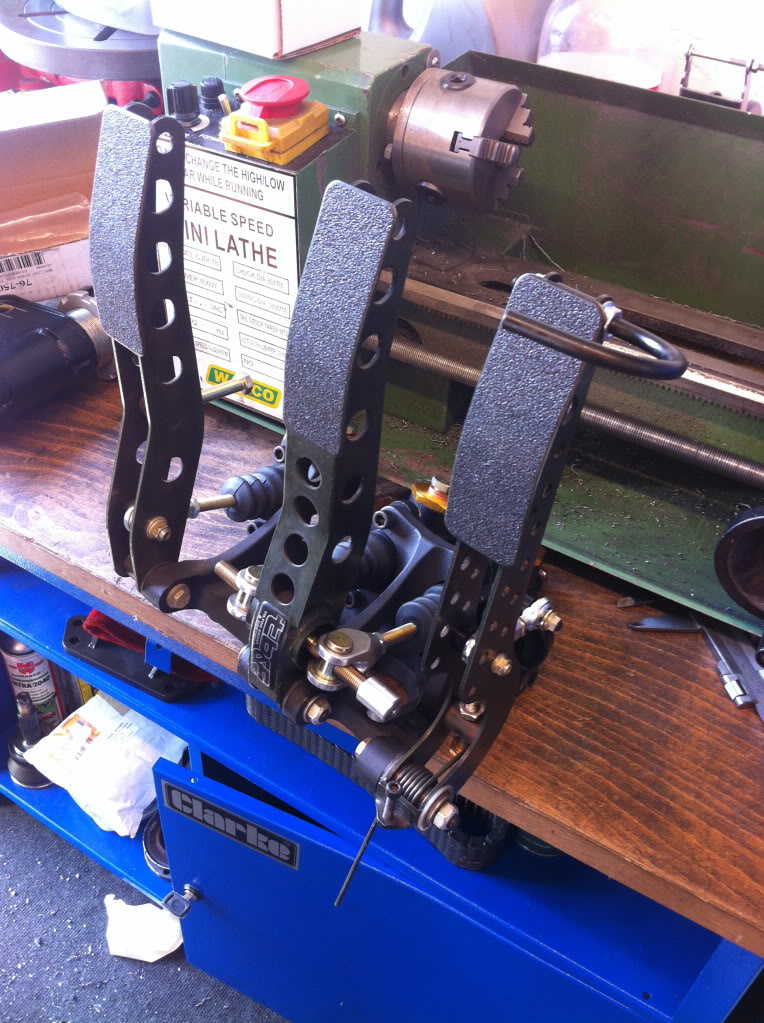
Also got through my throttle linkage system for the tilton pedal box and the tilton remote bias adjuster

With the linkage and accelerator pull back bar fitted
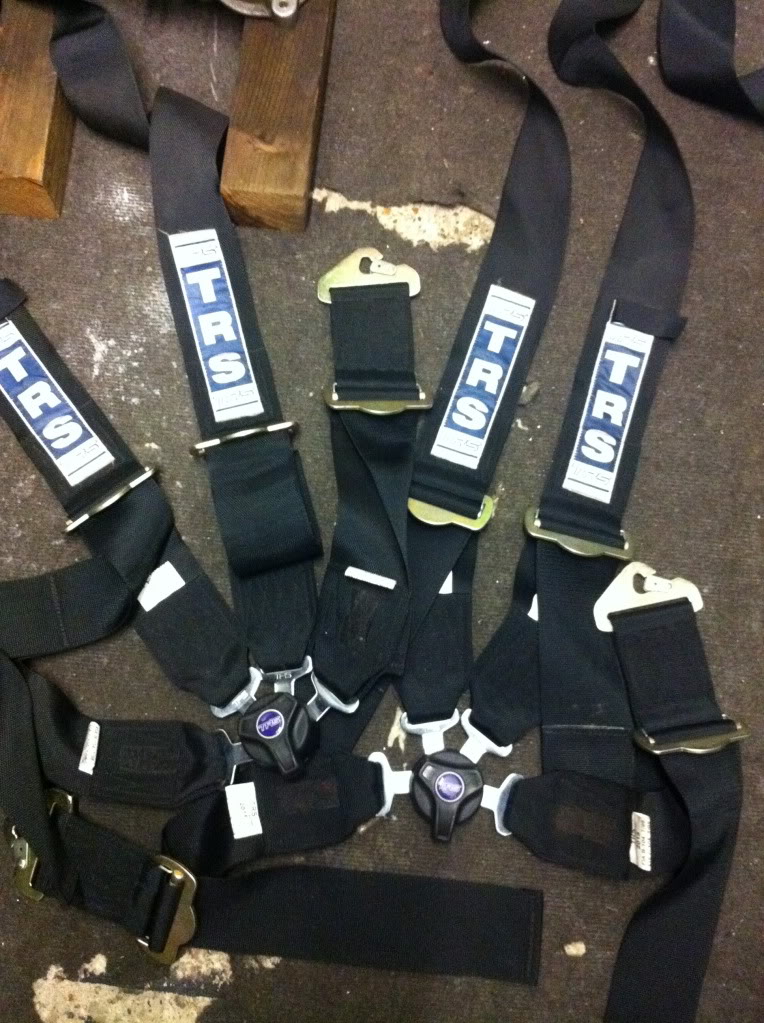
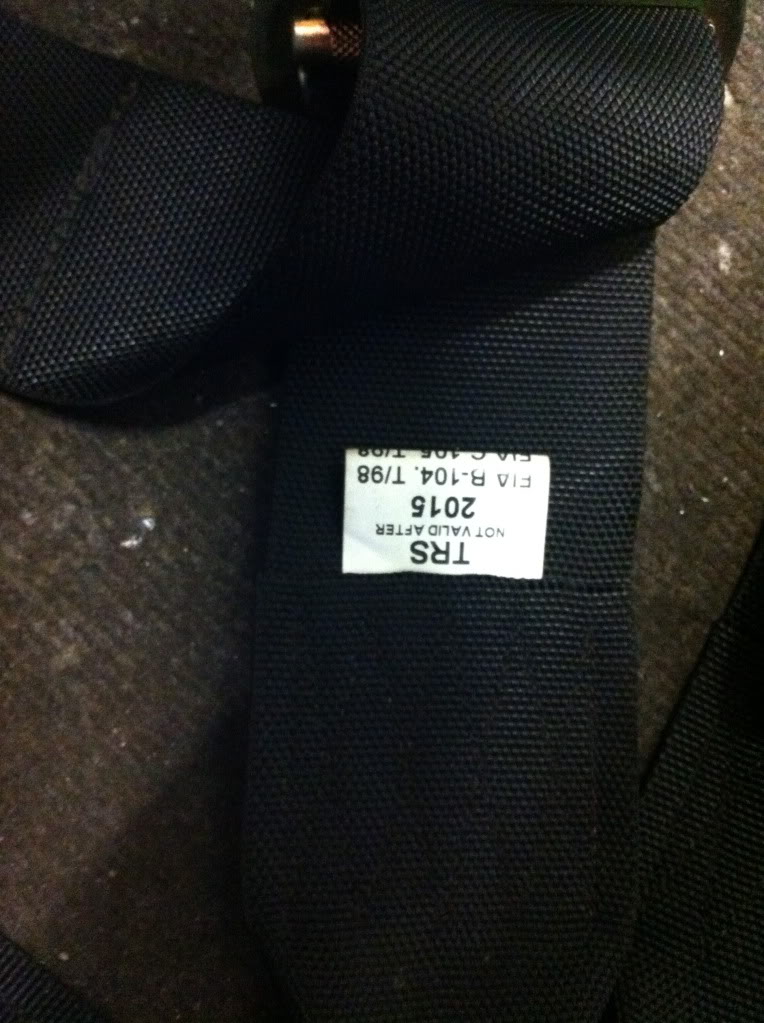
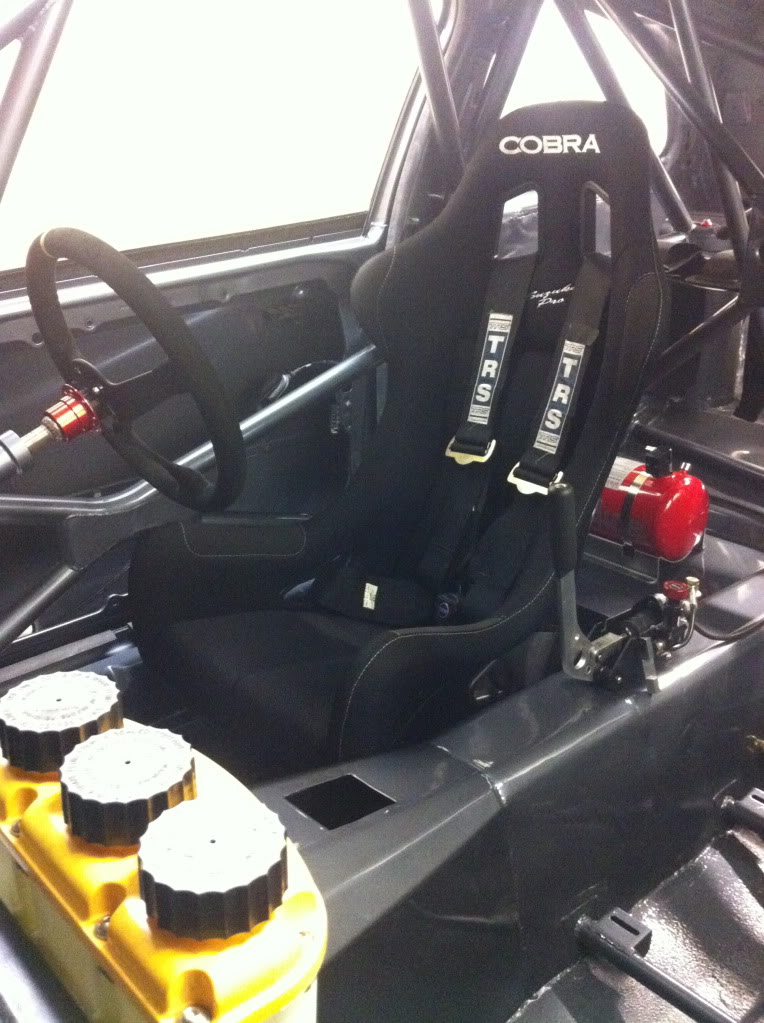
Next up was my ebay bargain for the month, a pair of as new condition TRS magnum 4 point harnesses that are in date until 2015, so hopefully i should get the car on the road by then
They have 3" shoulder and lap straps and have a hole to accomodate the 5th point crutch strap but i will buy them later, They were a bargain at �150 the pair delivered
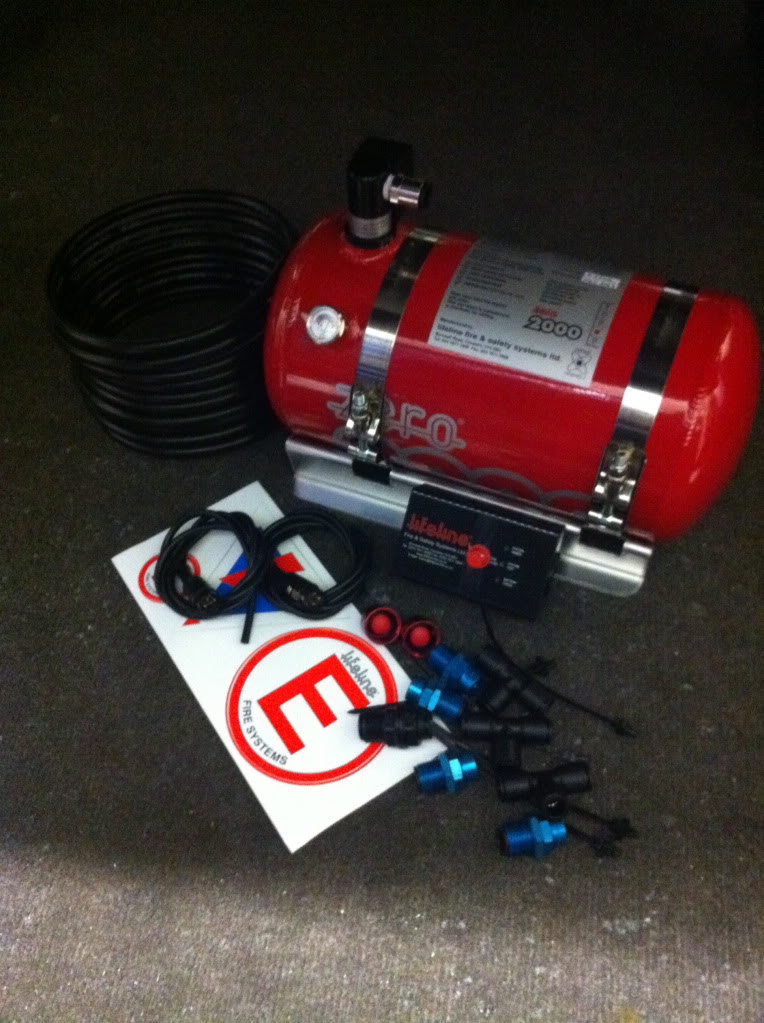
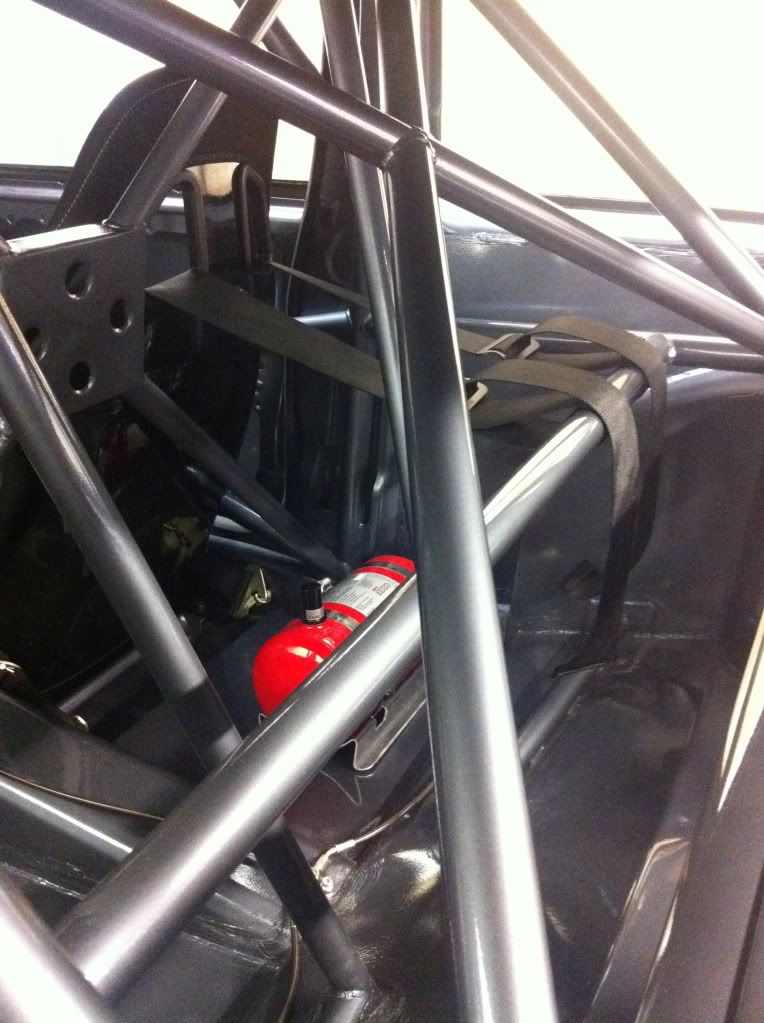
And lastly for this little update, i got this through
Roughly in its position behind the drivers seat, just need to drill the holes in the mounts and shell to secure it in place
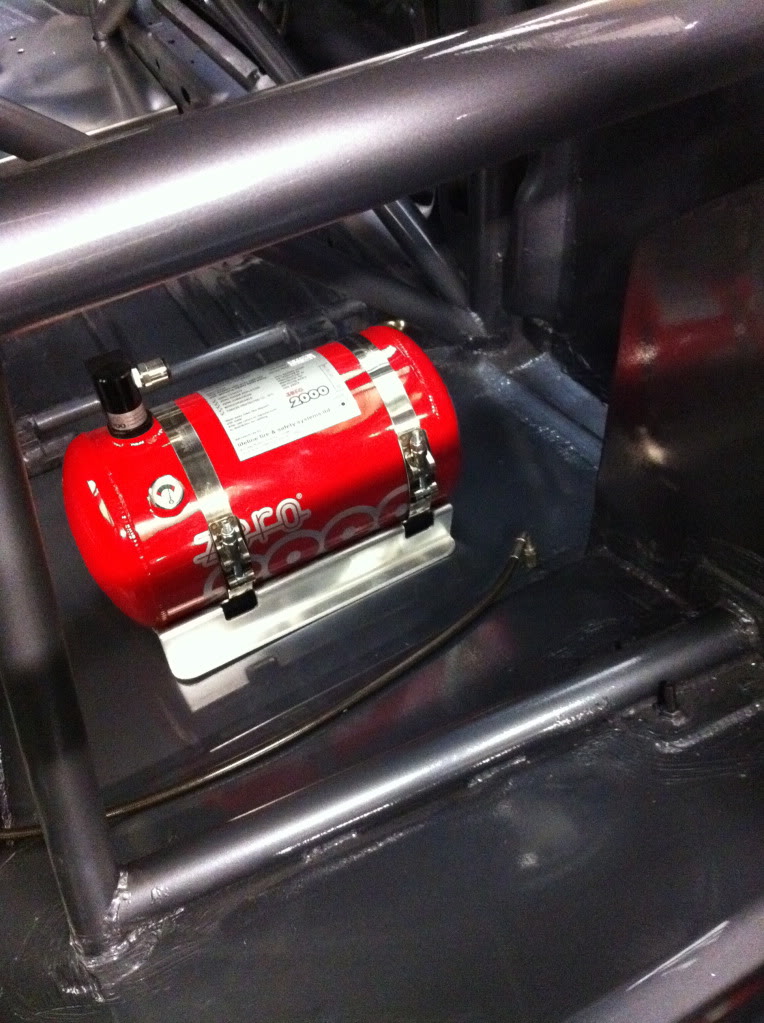
I know that things like the seat belts and the extinguisher are not really needed yet but my plan is to build the car so it is complete almost minus wiring and engine, yes i could put all this money towards the engine and have it built and dyno'd but whats the point when it will be sitting there for the next 8 months or longer probably doing nothing, and most likely want taking apart to check after all that time as it hasnt even been turned over etc.
I think building the car this way round makes more sense, the only downside is it takes life off things like belts/seats and fire system service date, but that is only really a problem if i was to race it first time out which i doubt i will
That's all for now
Thanks
Marc
First off as i am having the diffs rebuilt/uprated i have been trying to source all new parts but could not for love nor money find the small washer locking tabs that hold the bearing retainers in place so i gave up and had a load laser cut
Gonna keep what i need for my diffs and sell the other 9 pairs on
The company i got to do the laser cutting also made me up all the new components to re make my rear steering arms, but in slightly lighter 2.5mm steel rather than 3mm, they also bent the main channel for me using a 100 ton brake press rather than a normal sheet metal folder so it has a tighter radius on the bends,
The other pieces of the steering arms jigsaw were also laser cut and it has all been dropped off to my mate Karl who will be tig welding them together and tacking the captive k-nuts in place, so although they will still look industrial as some people say, they will look a lot smarter being perfect mirror images and fully tig welded, no pics of the parts as i forgot to take some before dropping the stuff off to be done.
The same firm is making me a load of camber washers as well as i have started to fit the camber washer set up to the front shocks as well to try and lose some of the negative camber that way,
Welded on the lower reinforcing hole that just goes in the standard position, and the top is ground back ready the the washer surround to be welded in place, i just have to finish cutting out the slots that will allow the bolts to be moved forward and back with the different camber washers but my poor little dremmel was getting a bit hot so had to leave it there for now lol
Next up was a problem i noticed with the Compbrake top mounts, once my shocks etc were all bolted up i noticed that there was play and a knocking when you moved the shock up and down, this would not happen when the car was on its wheels unless you jumped the car and the suspension was at full droop in which case you would be about to have bigger problems to worry about lol, but i didn't like the play so had a measure up with the verniers and had some tiny shims laser cut to fit between the bearing and the top mounts bearing recess to take up the slack and now there is no play at all so i m happy
Bearings and shims can be seen here, i also bought 2 new bearings as for some reason 2 of mine had the cheaper bearing fitted which was no good in my eyes so these have been replaced
Old bearings that have no been replaced
The shim sitting inside the top mount ready to fit the bearing
Showing the shim sitting on the bearing
A couple more laser cut specials to suit the rear droplinks and bilstein suspension tops
Ordered and received my other pair of sabelt seat mounts as i only had 1 pair that Andrew supplied me
Also got through my throttle linkage system for the tilton pedal box and the tilton remote bias adjuster
With the linkage and accelerator pull back bar fitted
Next up was my ebay bargain for the month, a pair of as new condition TRS magnum 4 point harnesses that are in date until 2015, so hopefully i should get the car on the road by then
They have 3" shoulder and lap straps and have a hole to accomodate the 5th point crutch strap but i will buy them later, They were a bargain at �150 the pair delivered
And lastly for this little update, i got this through
Roughly in its position behind the drivers seat, just need to drill the holes in the mounts and shell to secure it in place
I know that things like the seat belts and the extinguisher are not really needed yet but my plan is to build the car so it is complete almost minus wiring and engine, yes i could put all this money towards the engine and have it built and dyno'd but whats the point when it will be sitting there for the next 8 months or longer probably doing nothing, and most likely want taking apart to check after all that time as it hasnt even been turned over etc.
I think building the car this way round makes more sense, the only downside is it takes life off things like belts/seats and fire system service date, but that is only really a problem if i was to race it first time out which i doubt i will
That's all for now
Thanks
Marc
20-11-2011, 10:27 PM
#1968
I did think that myself lol but the standard one will do for now, will get it anodized probably if it's alloy (will check if it is as i didn't really look before) just to add a bit of color
It sure is mate, the parts to buy list is getting smaller just like my bank account
 28-11-2011, 09:35 PM
#1972
Managed a bit of time over the weekend to finish modding the front shocks for the camber washers,
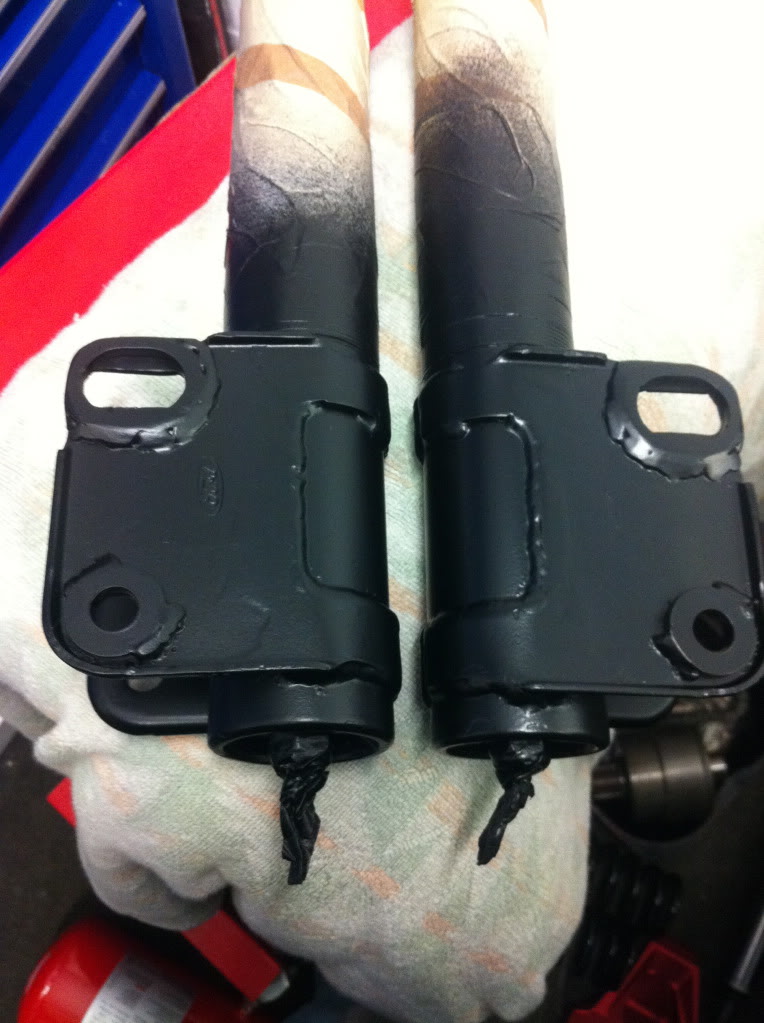
I know my welding isn't great but with a lick of paint it's not that bad imo, and it will be more than up to the job which is what matters
Camber washer holders welded on
With the shocks re painted
And with camber washers fitted

Double checked them on the uprights and they bolt on still so that is good and although they look a bit wonky they are in the same position on each shock so will adjust camber by same amount both sides.
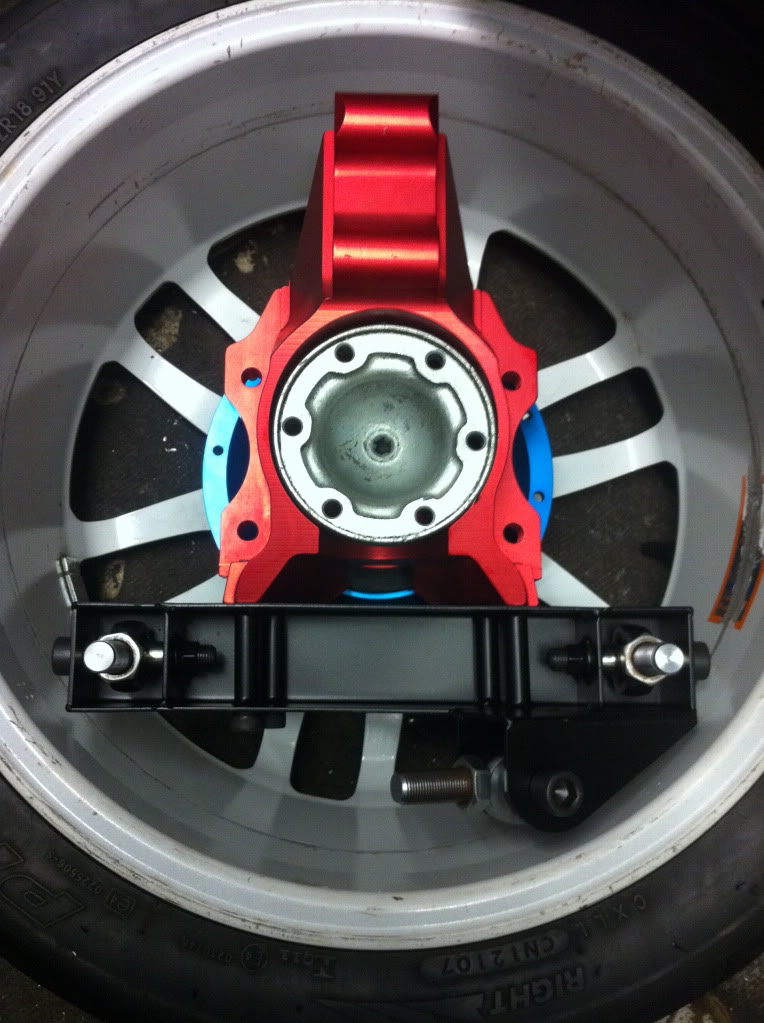
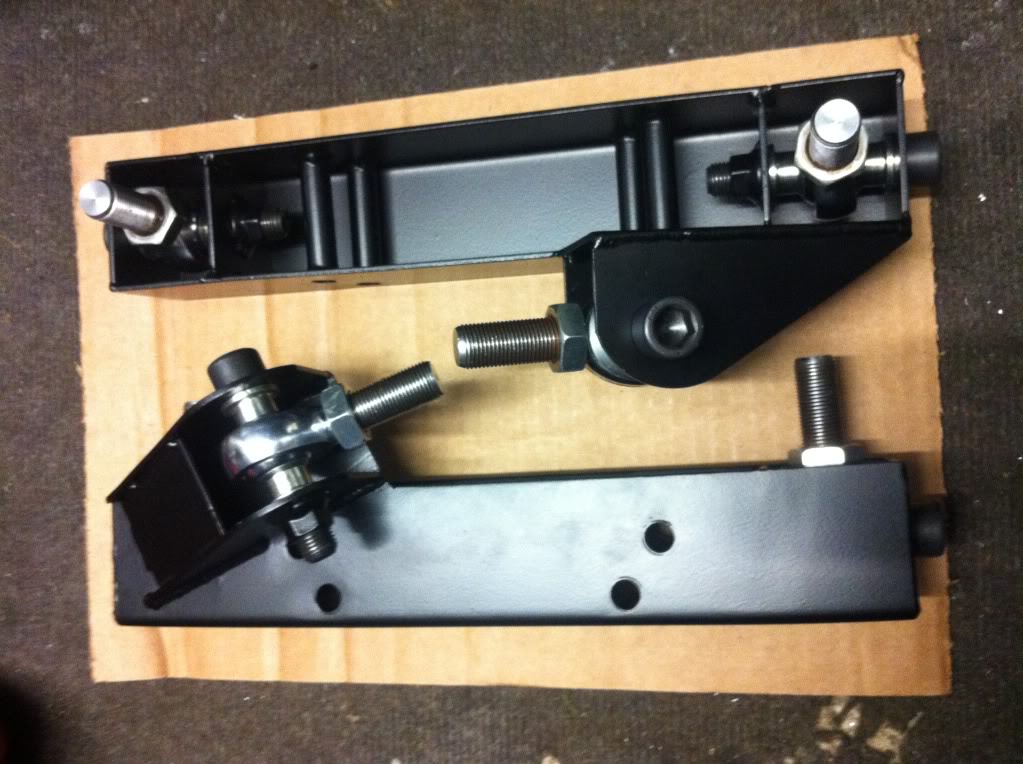
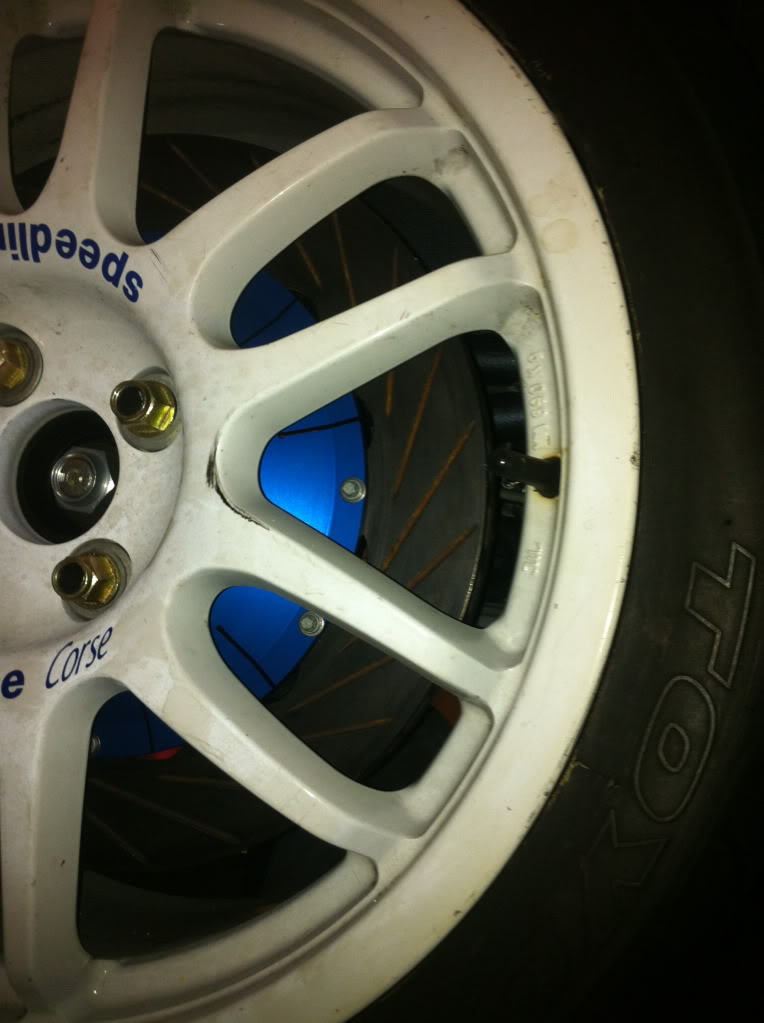
Also had another set of the AG style wide steering arms made up but this time had all the parts laser cut and tig welded up to make them a lot neater, happy with how they have turned out and these ones use the Motorsport f1 type k- nuts as captive nuts so no risk of bolts vibrating/working loose
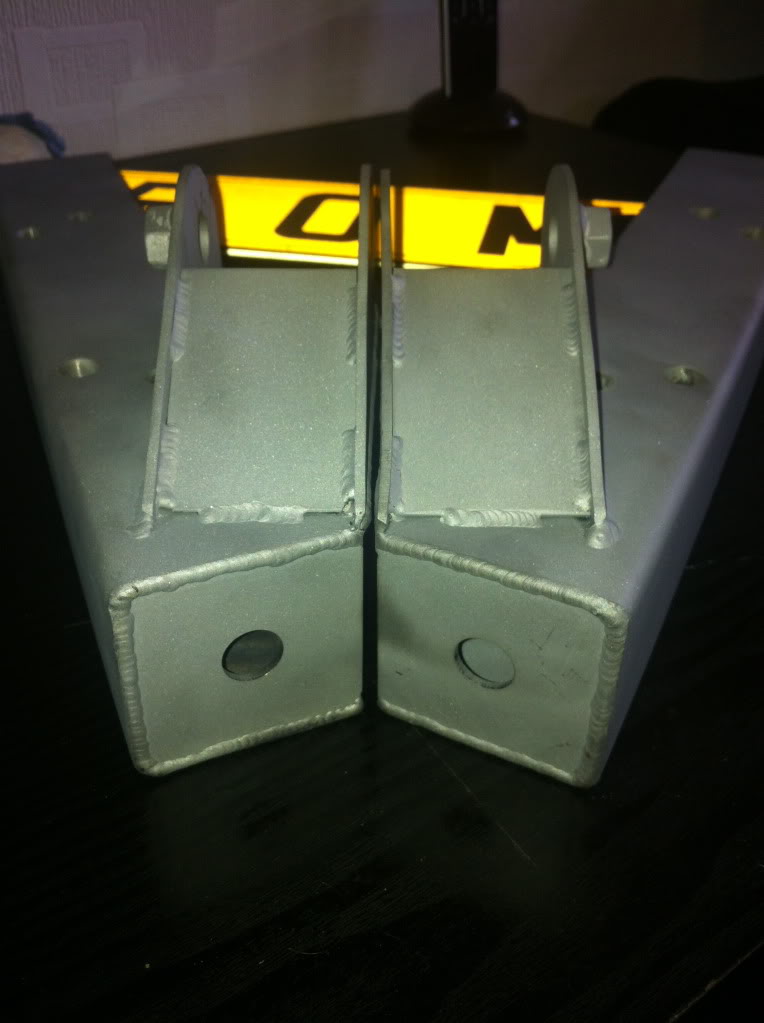
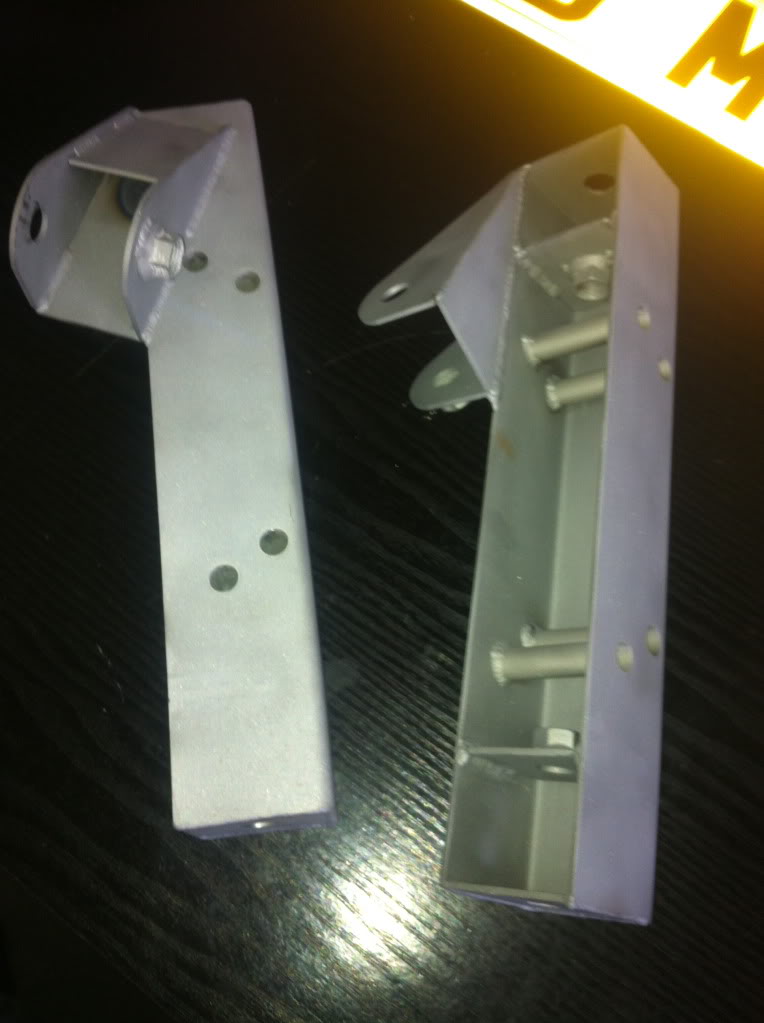
With a lick of paint and then dummy fitted to the wheel
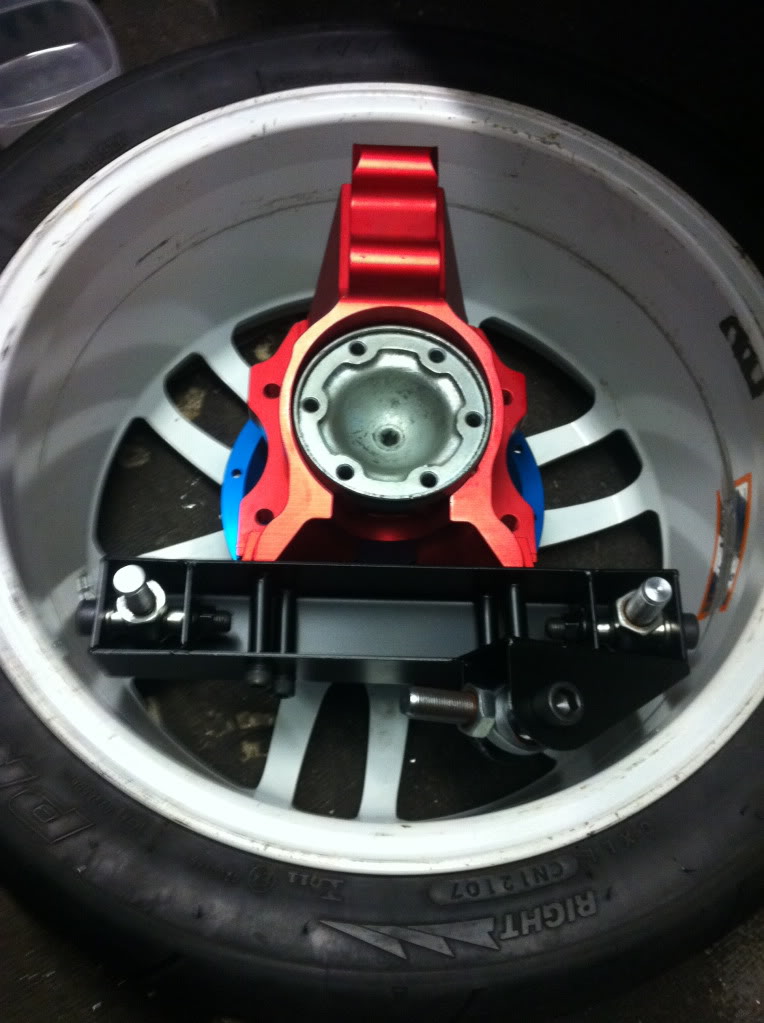
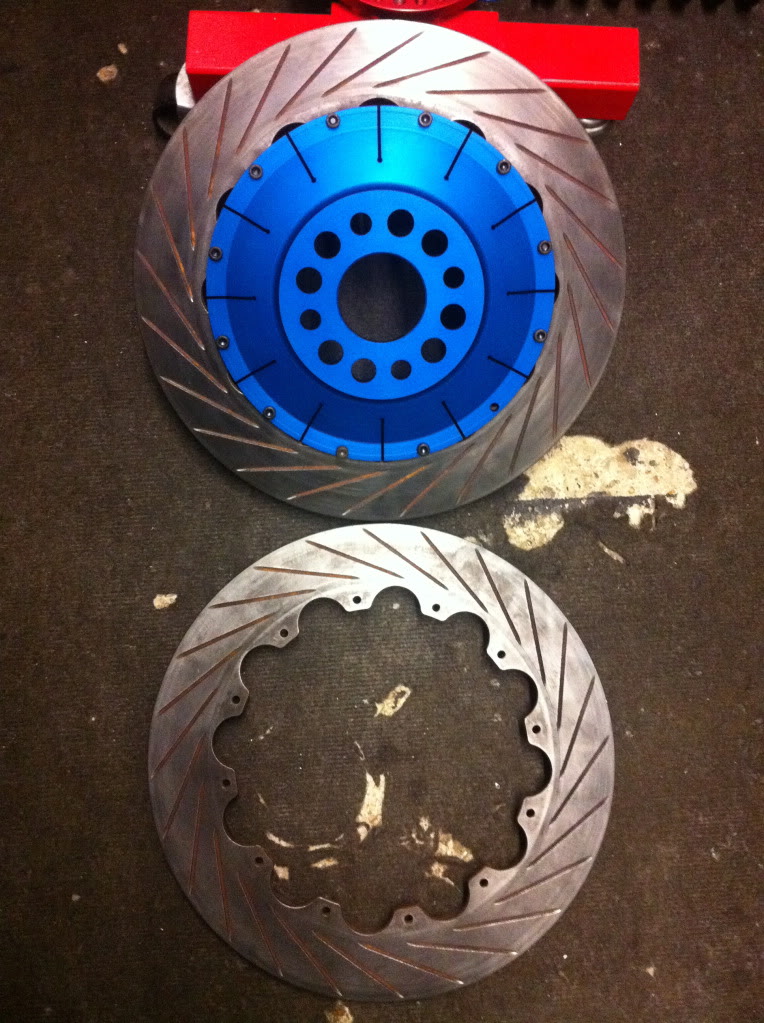
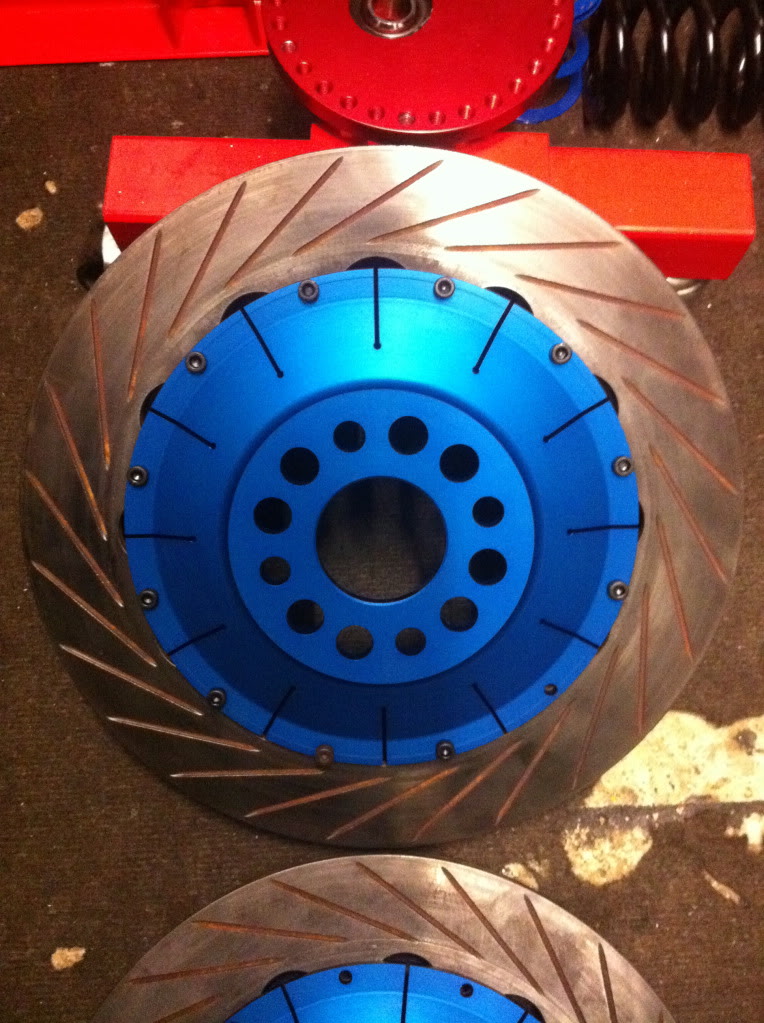
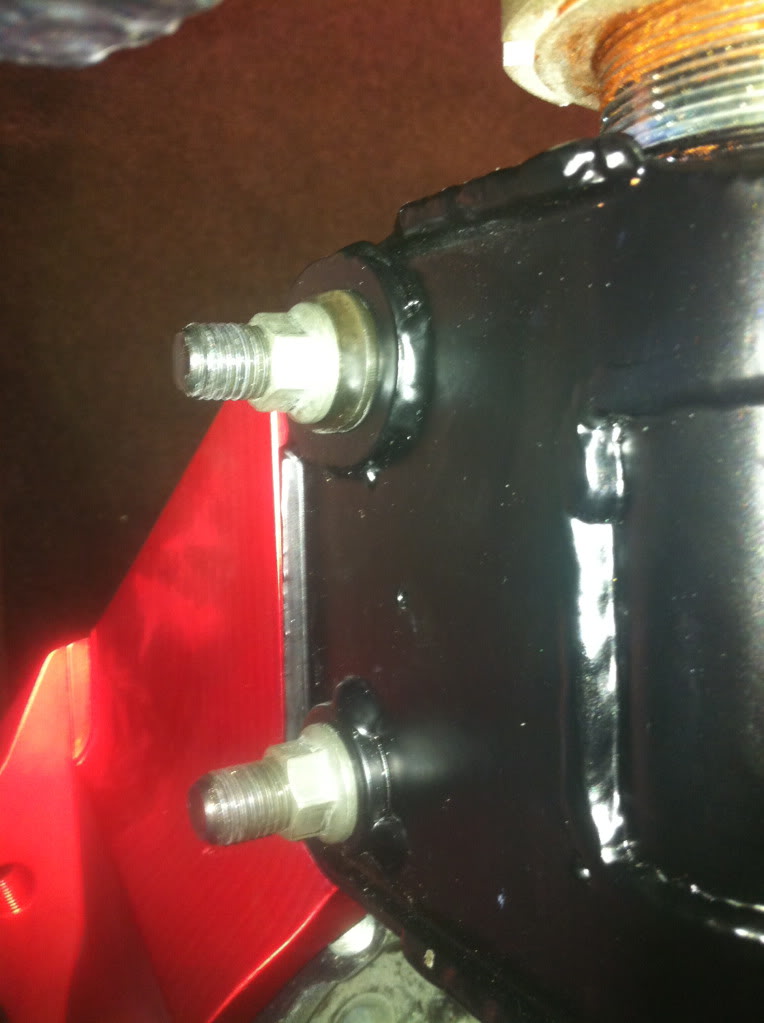
Got my front discs through from Harvey as well, they are 367mm and were the spares off his old wrc car
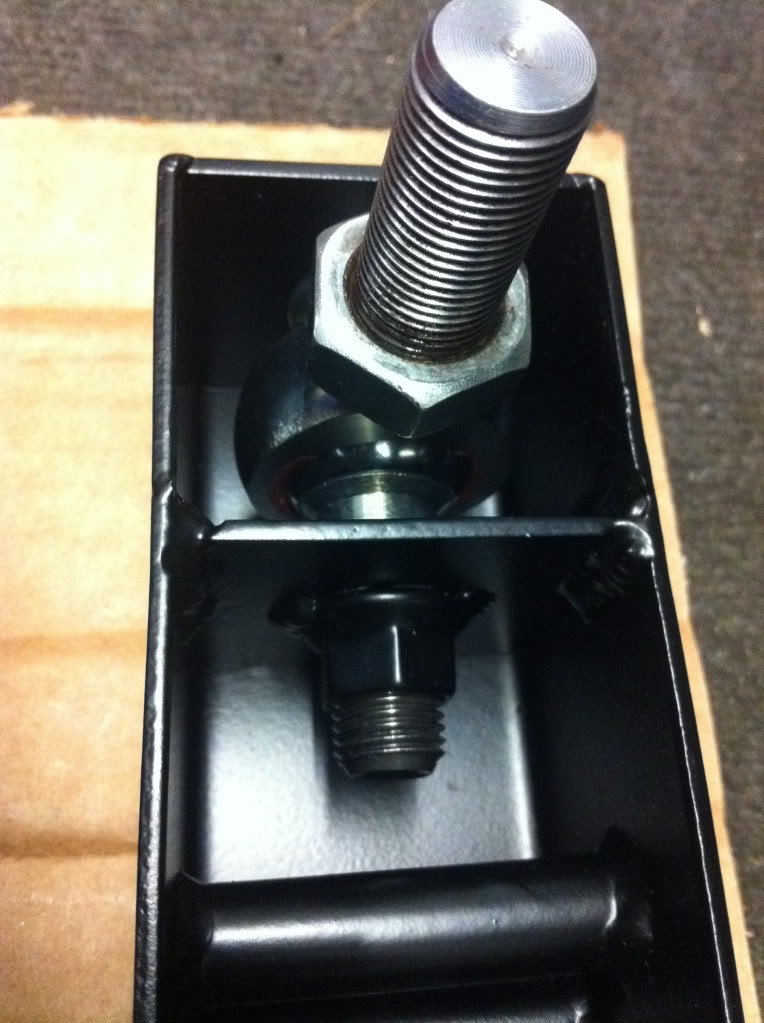
The bolts in the pic above are not the ones I am using! They were just to check the lengths of the proper 6 lobe bolts that I have now ordered.
Also I re fitted the seat and pedal box to work out positions, the pedal box may need moving back but this can not be worked out properly until there is fluid in the lines and I know pedal travel etc but here's a quick pic,
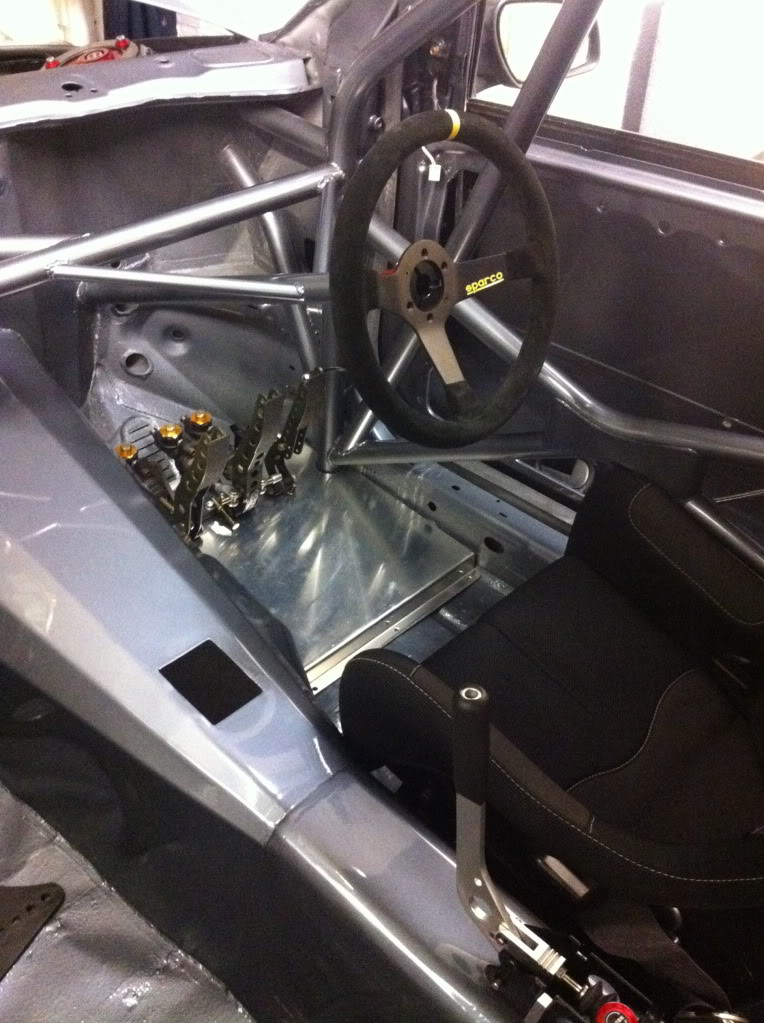
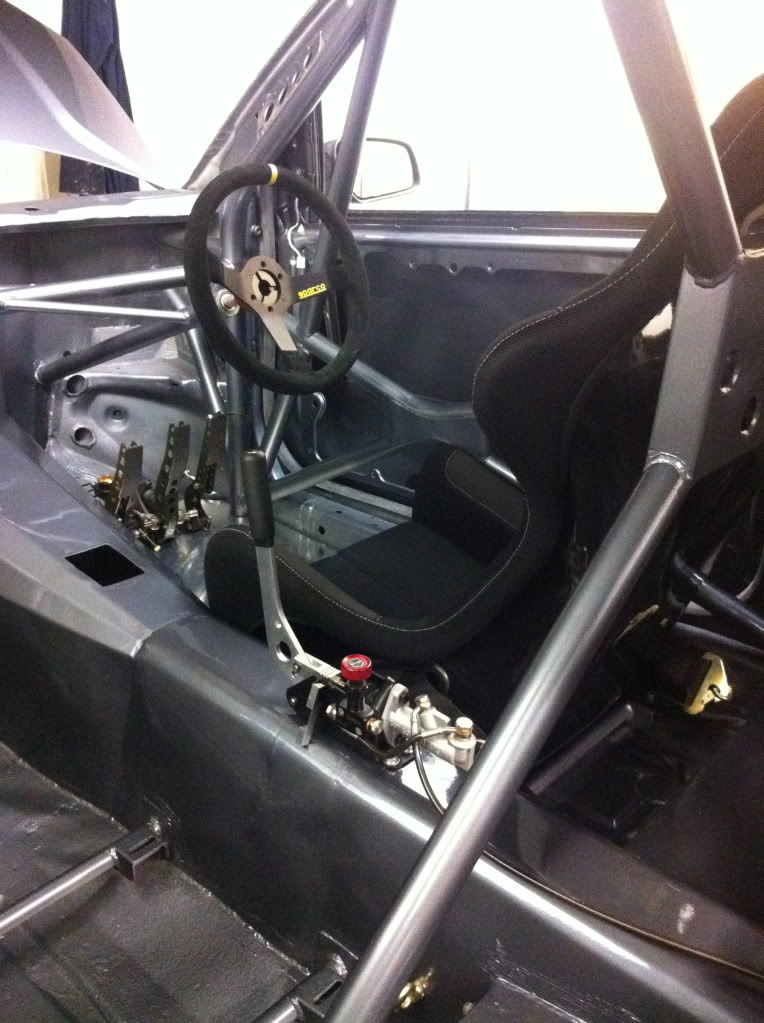
Going to put adhesive grip tape on the false floor panel for extra grip.
And while there I though it would be rude not to trial fit the harness as well for a few pics
Handbrake needs to be repositioned to horizontal as with it vertical it is too far back to use.
More updates soon as waiting for a few things to come back from zinc plating before things can be bolted back to the car
Thanks
Marc
I know my welding isn't great but with a lick of paint it's not that bad imo, and it will be more than up to the job which is what matters
Camber washer holders welded on
With the shocks re painted
And with camber washers fitted
Double checked them on the uprights and they bolt on still so that is good and although they look a bit wonky they are in the same position on each shock so will adjust camber by same amount both sides.
Also had another set of the AG style wide steering arms made up but this time had all the parts laser cut and tig welded up to make them a lot neater, happy with how they have turned out and these ones use the Motorsport f1 type k- nuts as captive nuts so no risk of bolts vibrating/working loose
With a lick of paint and then dummy fitted to the wheel
Got my front discs through from Harvey as well, they are 367mm and were the spares off his old wrc car
The bolts in the pic above are not the ones I am using! They were just to check the lengths of the proper 6 lobe bolts that I have now ordered.
Also I re fitted the seat and pedal box to work out positions, the pedal box may need moving back but this can not be worked out properly until there is fluid in the lines and I know pedal travel etc but here's a quick pic,
Going to put adhesive grip tape on the false floor panel for extra grip.
And while there I though it would be rude not to trial fit the harness as well for a few pics
Handbrake needs to be repositioned to horizontal as with it vertical it is too far back to use.
More updates soon as waiting for a few things to come back from zinc plating before things can be bolted back to the car
Thanks
Marc
30-11-2011, 04:27 PM
#1976
Zee Germans are coming
looking good mate
but 1 thing you need to do it make the faulse floor in front of the peddle box as your legs and ankles are gonna suffer big time
the faulse floor needs to bring the resting point for your feet higher so you can touch the peddles easier
if that makes sence lol
but 1 thing you need to do it make the faulse floor in front of the peddle box as your legs and ankles are gonna suffer big time
the faulse floor needs to bring the resting point for your feet higher so you can touch the peddles easier
if that makes sence lol
02-12-2011, 06:42 PM
#1977
Yeah i will raise the false floor but to be honest it is not a bad as it looks height wise but id prefer a bit more so will sort it last thing as said i want the systems to have fluid in etc so i can get proper pedal feel and travel before making adjustments
02-12-2011, 06:46 PM
#1978
Got some bits back from being zinc plated
Mainly parts for my diff rebuild and spacers/washers for my shocks, and the Ap 6 lobe bolts for the discs along with a 6 lobe socket,
I also had some stainless washers made up for my tca's rose joints as i needed slightly more clearance than the normal rose joints spacers allow
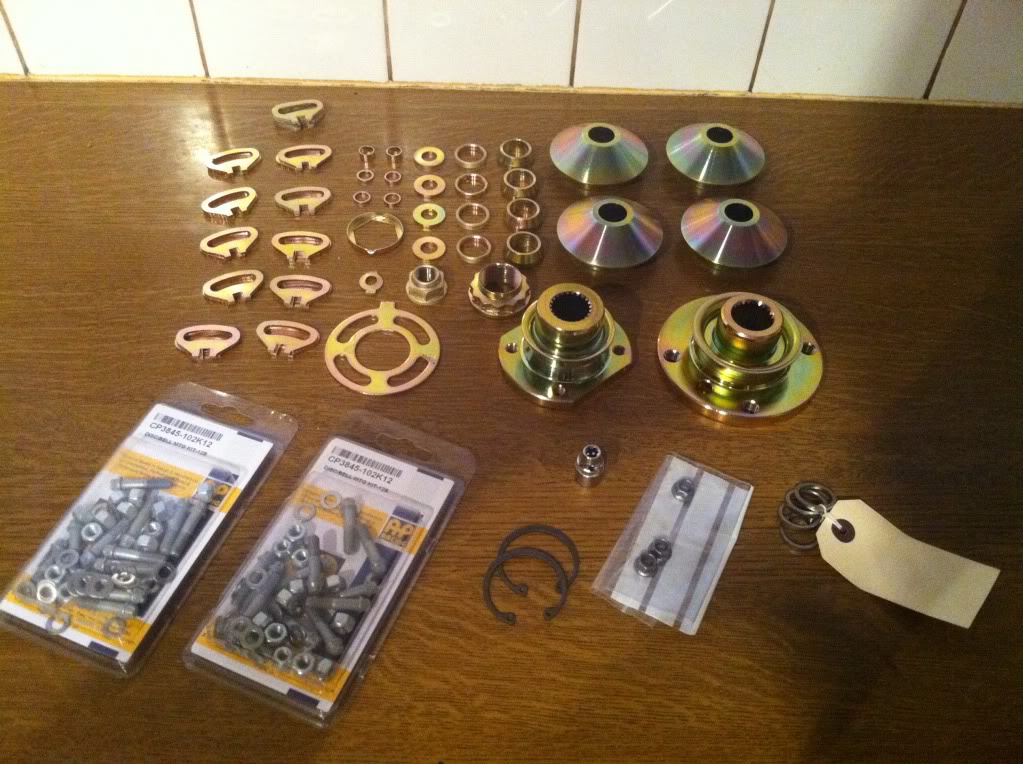
I also got a load of different measurement camber washers made up for the shock casings, so i have quite a few different options now to adjust camber from here

Thanks
Marc
Mainly parts for my diff rebuild and spacers/washers for my shocks, and the Ap 6 lobe bolts for the discs along with a 6 lobe socket,
I also had some stainless washers made up for my tca's rose joints as i needed slightly more clearance than the normal rose joints spacers allow
I also got a load of different measurement camber washers made up for the shock casings, so i have quite a few different options now to adjust camber from here
Thanks
Marc


 02-12-2011, 07:25 PM
#1981
A company down the road from me called Action Electro Plating
Bear in mind nearly all the stuff in the photo is new so it did come out exceptionally well, but even the smaller front diff flange which was old and crappy came out great
Bear in mind nearly all the stuff in the photo is new so it did come out exceptionally well, but even the smaller front diff flange which was old and crappy came out great

 03-12-2011, 04:53 PM
#1985
Sorry mate i missed that 1
Yeah it is definitely 2 different pairs, Andrew supplied these and they were both new pairs but maybe he already had a new set laying around from another build supplied by someone else or something, i am not too fussed as they are mounted front and rear so as long as they are matching pairs im happy, can't warrant another �80 just to have exact ones lol
Yeah it is definitely 2 different pairs, Andrew supplied these and they were both new pairs but maybe he already had a new set laying around from another build supplied by someone else or something, i am not too fussed as they are mounted front and rear so as long as they are matching pairs im happy, can't warrant another �80 just to have exact ones lol
03-12-2011, 06:16 PM
#1986

Im looking to do the same camber adjust modification to my dampers as you have done.
Why did you reinforce the lower bolt hole?
Also you probably need to modify the hub a bit also to obtain more negative camber right?
Did you weld the holders to the damperbody with the dampers in? could it be a problem with the heat generated?
04-12-2011, 12:57 PM
#1987
Hi Mate
The bottom hole reinforcing was only done as this is what Andrew Gallacher did on my rear struts probably because the metal around the bolt holes isn't substantial and if you look at a lot of old used grpA strut cases the holes are ruined and oval shaped where they have worn themselves out of shape so the reinforcing washer will stop this.
The upright/hub does not need modifying at all as the arc the bolt moves through when adjusting the top camber washer is very small but makes a big difference to the camber.
As for the welding, I welded mine with the inserts still fitted, I just welded in short bursts to generate minimal heat and when feeling the bit the insert is in with my hand it only got moderately warm to the touch so nothing to worry about, but if you want to be cautious then it only takes a minute to remove the inserts
Thanks
Marc
04-12-2011, 05:06 PM
#1989
Lucifer II - 666
Amazing as usual.
Same hand brake as mine, I was looking at mine the other week wondering if I can turn the handle round, as yours in now and you've answered that question for me lol
Same hand brake as mine, I was looking at mine the other week wondering if I can turn the handle round, as yours in now and you've answered that question for me lol
04-12-2011, 05:55 PM
#1990
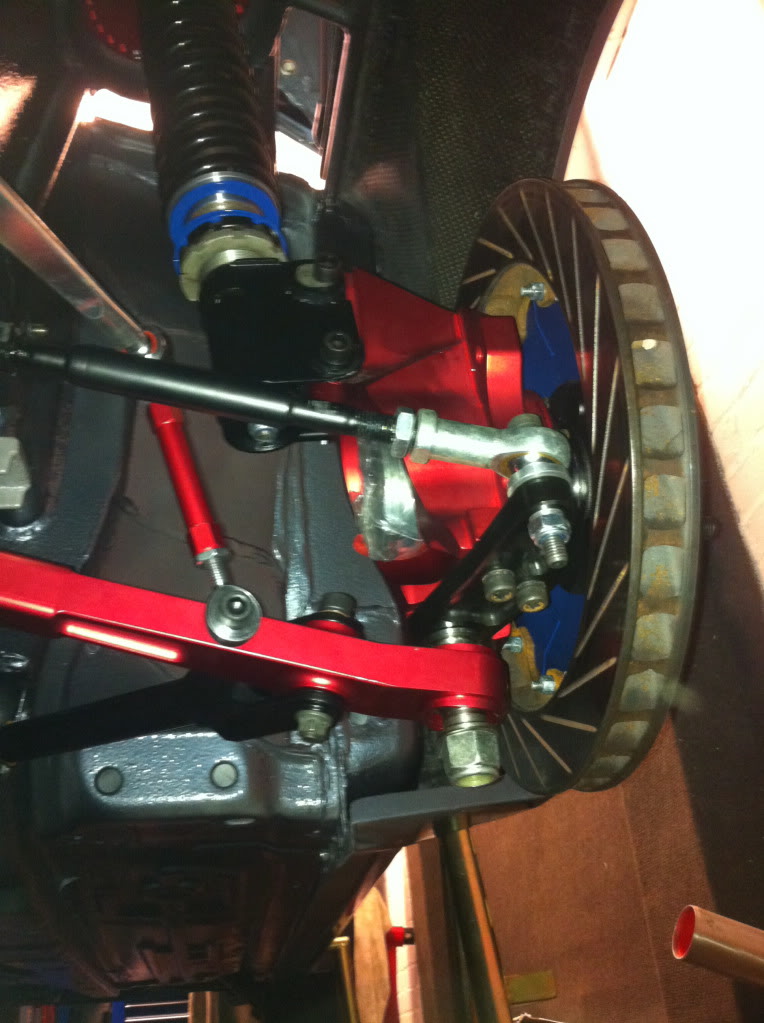
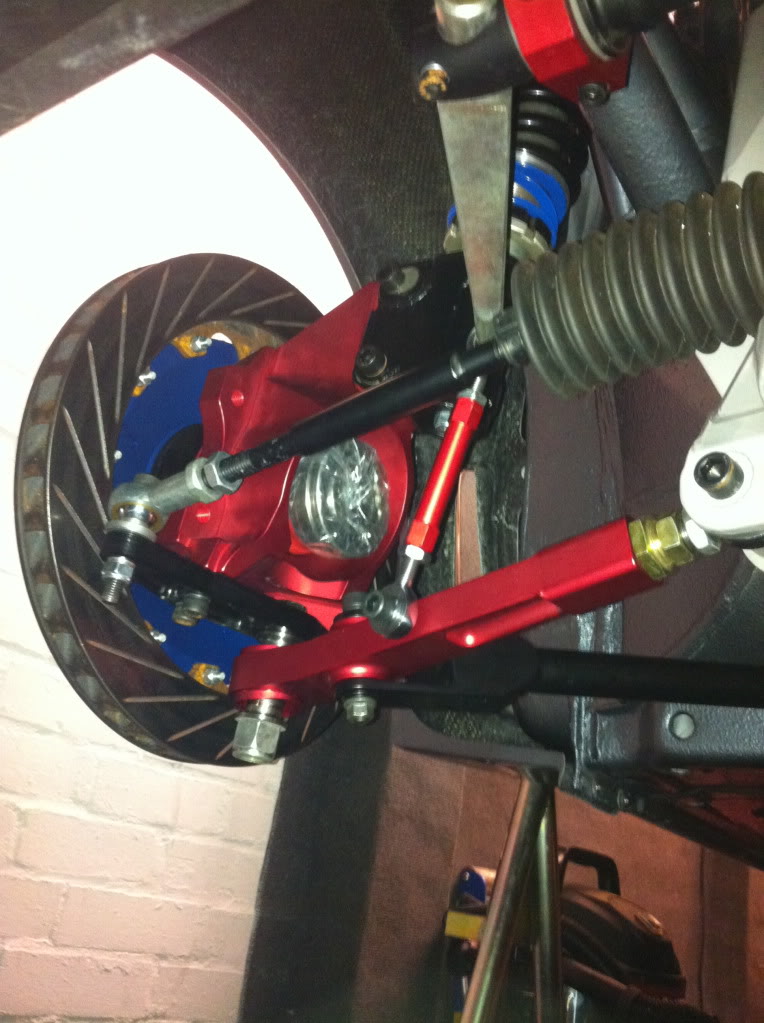
Got the front disc to bell bolts through and fitted
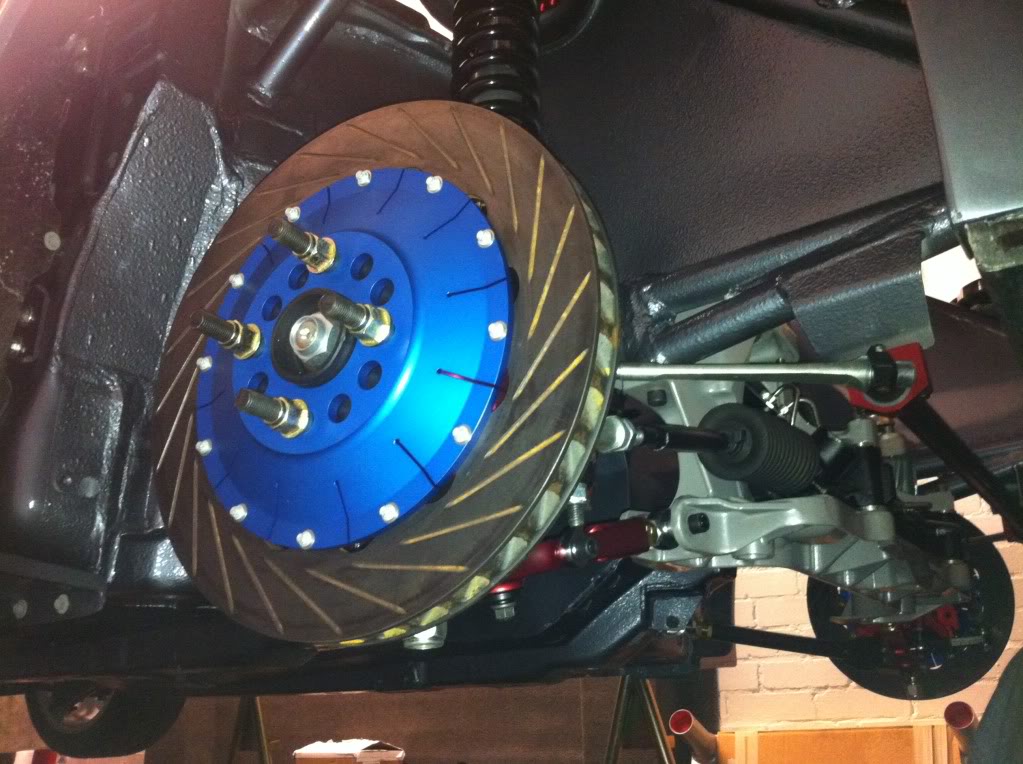
Once i had all the small zinc plated washers etc back i could build the shocks up again and re fit to the car once and for all,
Having the camber washer set up now on the front has bought it all back into line alot more than it was so happy with that
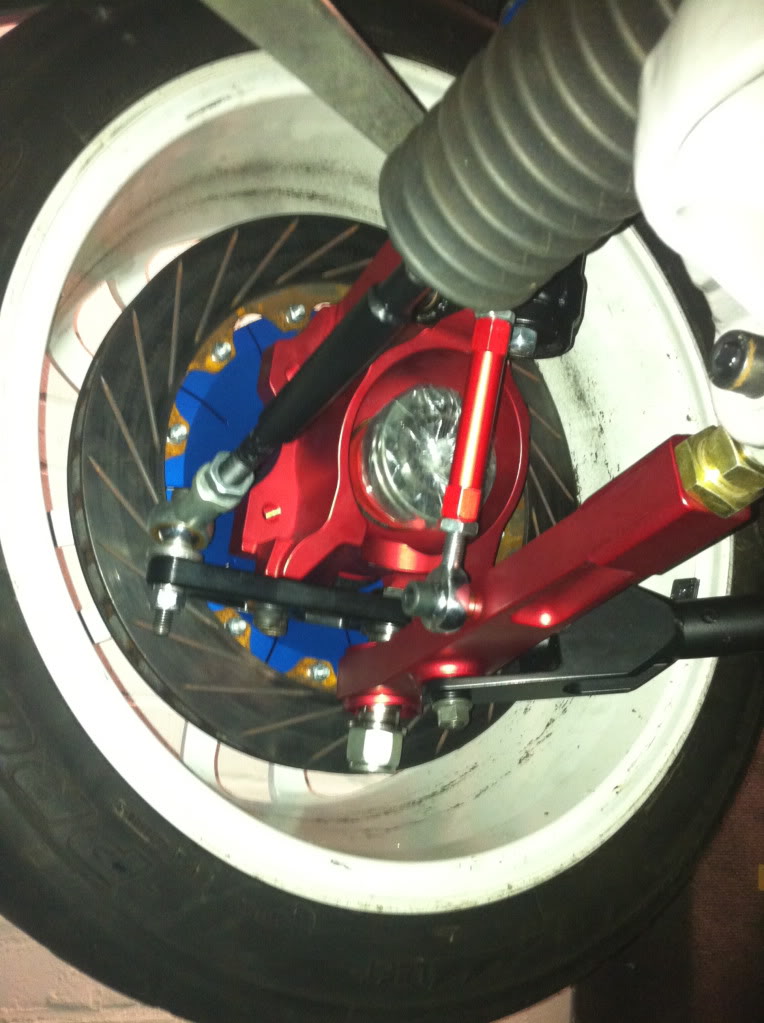
New tig welded steering arms back on and rear link bars
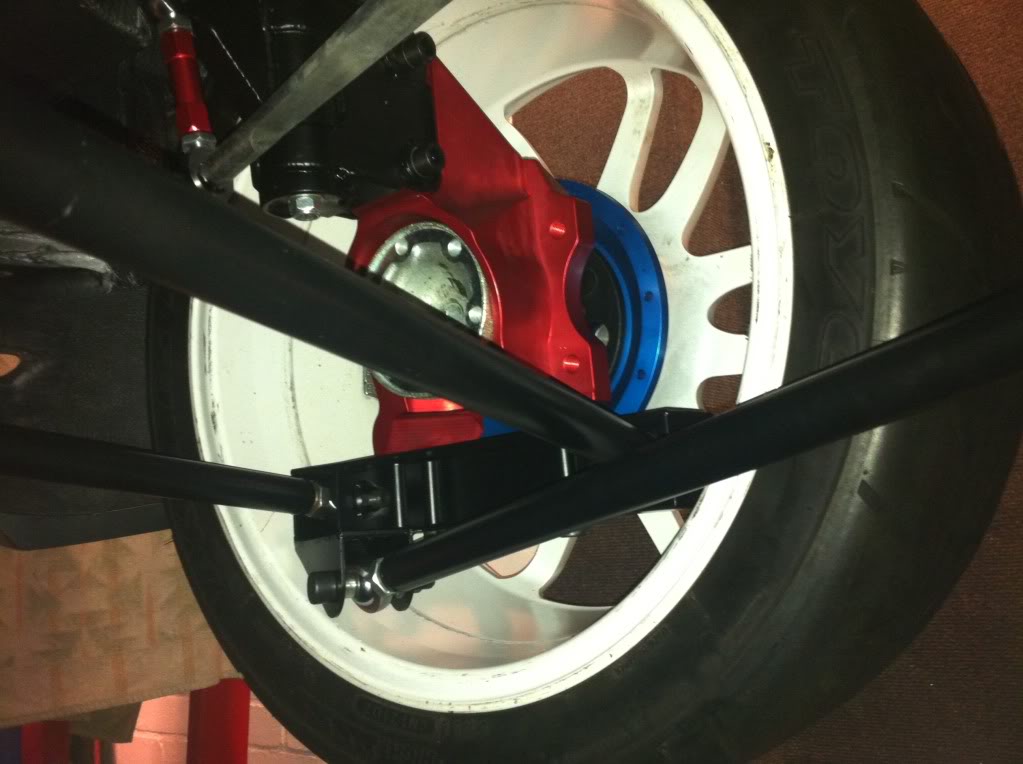
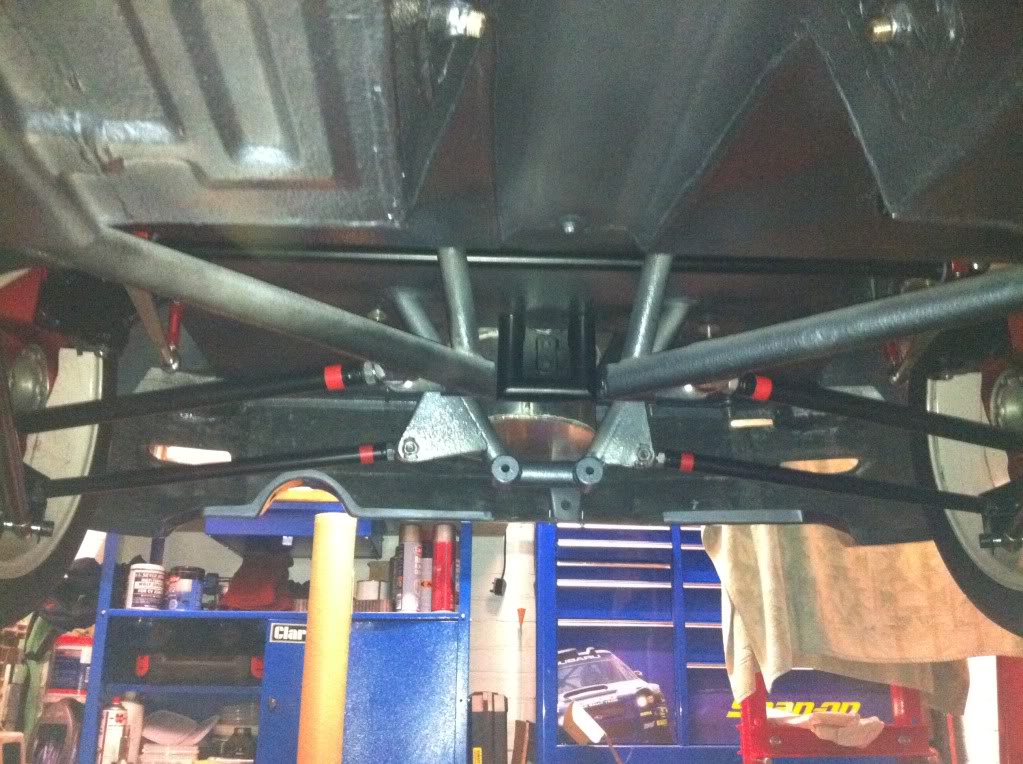

Front end all back together
Thanks
Marc
Once i had all the small zinc plated washers etc back i could build the shocks up again and re fit to the car once and for all,
Having the camber washer set up now on the front has bought it all back into line alot more than it was so happy with that
New tig welded steering arms back on and rear link bars
Front end all back together
Thanks
Marc
04-12-2011, 08:31 PM
#1997
15000

Join Date: Mar 2009
Location: isle of man
Posts: 41
Likes: 0
Received 0 Likes
on
0 Posts
mk the car looks the dogs dangly bits mate im gonna build another one end of next year do you want a job lol. also top tip for you the focus steering arms are quite abit longer than cosworth ones and screw straight into the cosworth rack saves you having to cut and extend standard cosworth ones just to let you no for future refrence
04-12-2011, 09:36 PM
#1998
PassionFord Post Whore!!
iTrader: (2)

Cracking work Mark
Car's looking great
dont know if it's me but are the disc's on back to front?
i thought that the inner fins were supposed to aim backwards?
might be wrong but im sure i read it on here on someones thread
Car's looking great
dont know if it's me but are the disc's on back to front?
i thought that the inner fins were supposed to aim backwards?
might be wrong but im sure i read it on here on someones thread
04-12-2011, 09:55 PM
#1999
Thanks Simon, the focus is looking great as well mate
It is nice to have bits finished and i can see an end in sight .....sort of
The torque for the ap bolts is 14nm, well that' what ap recommend so that is what i went with, as for calipers i am gonna use 4 pots on the rear and 6 pots on the front
Doing it the way i have was purely because i wanted the bells first so i could work out the correct stud lengths i needed etc, then the front discs come up cheap so they had to be bought, when it is nearer to being finished or if a deal comes up earlier and i have the cash i will sort the calipers
Yeah they was a steal i thought Jim, your dad advertised them as 380mm disc's but they have been machined down slightly to 362mm i think it was so they could be fitted to a smaller rim and calipers Rainbird said, either way for �50 the pair i can not complain as if i spend roughly �600 on calipers and pads then the whole front set up only cost me �800 so il be happy with that.
Thanks fella
Cheers Beefy, hows yours coming along?
Thanks mate, yeah il always be happy to help mate, id love to build cars like this for a living. That is handy to know about the steering arms, Andrew made up these longer ones for me and even after changing to wrc uprights it seems they will be ok but good to know for future reference, cheers.
I sat in the garage earlier and ummed & arred about what way they face and sods law your right mate lol, they should be on the opposite sides
Thanks for the kind comments guys
There is light at the end of the tunnel
It is nice to have bits finished and i can see an end in sight .....sort of
Doing it the way i have was purely because i wanted the bells first so i could work out the correct stud lengths i needed etc, then the front discs come up cheap so they had to be bought, when it is nearer to being finished or if a deal comes up earlier and i have the cash i will sort the calipers
Yeah they was a steal i thought Jim, your dad advertised them as 380mm disc's but they have been machined down slightly to 362mm i think it was so they could be fitted to a smaller rim and calipers Rainbird said, either way for �50 the pair i can not complain as if i spend roughly �600 on calipers and pads then the whole front set up only cost me �800 so il be happy with that.
Thanks fella
Cheers Beefy, hows yours coming along?
mk the car looks the dogs dangly bits mate im gonna build another one end of next year do you want a job lol. also top tip for you the focus steering arms are quite abit longer than cosworth ones and screw straight into the cosworth rack saves you having to cut and extend standard cosworth ones just to let you no for future refrence
I sat in the garage earlier and ummed & arred about what way they face and sods law your right mate lol, they should be on the opposite sides
Thanks for the kind comments guys
There is light at the end of the tunnel