trusty xr reborn
 23-07-2008, 12:34 AM
#1
Part of the Furniture
Thread Starter

Join Date: Jun 2008
Location: sidcup kent
Posts: 167
Likes: 0
Received 0 Likes
on
0 Posts
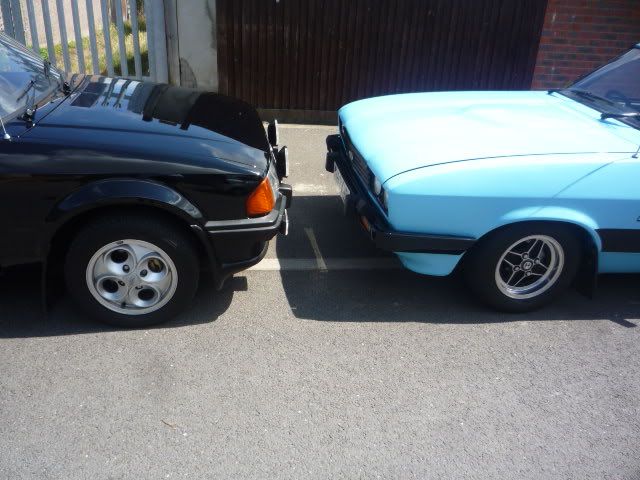
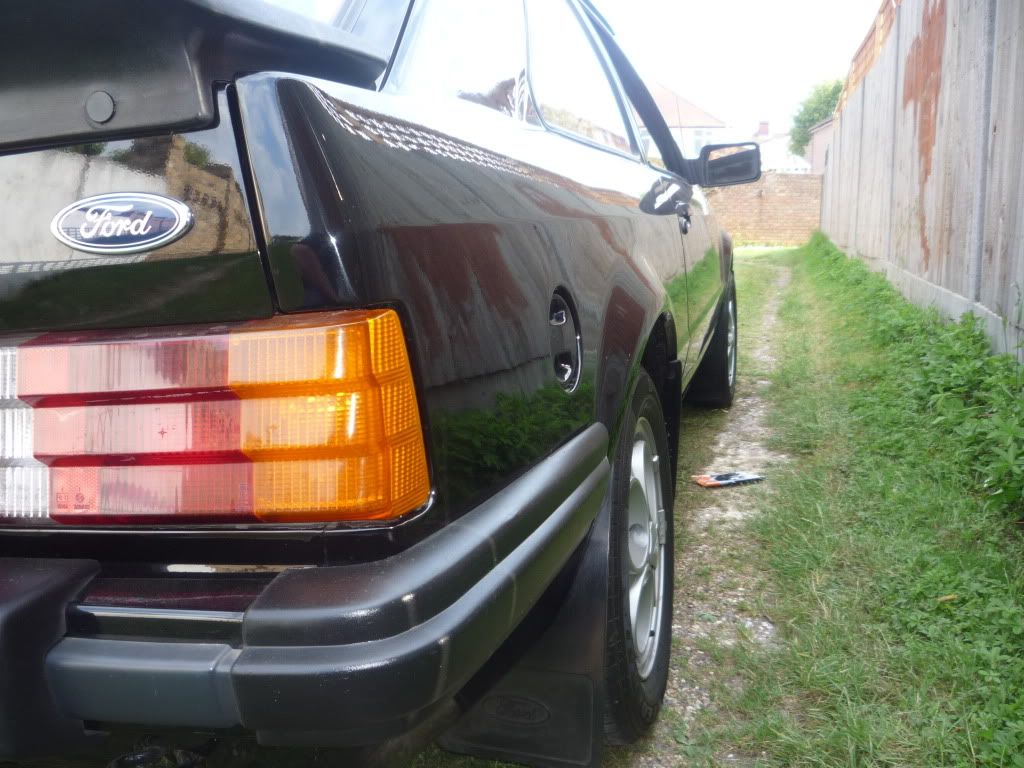
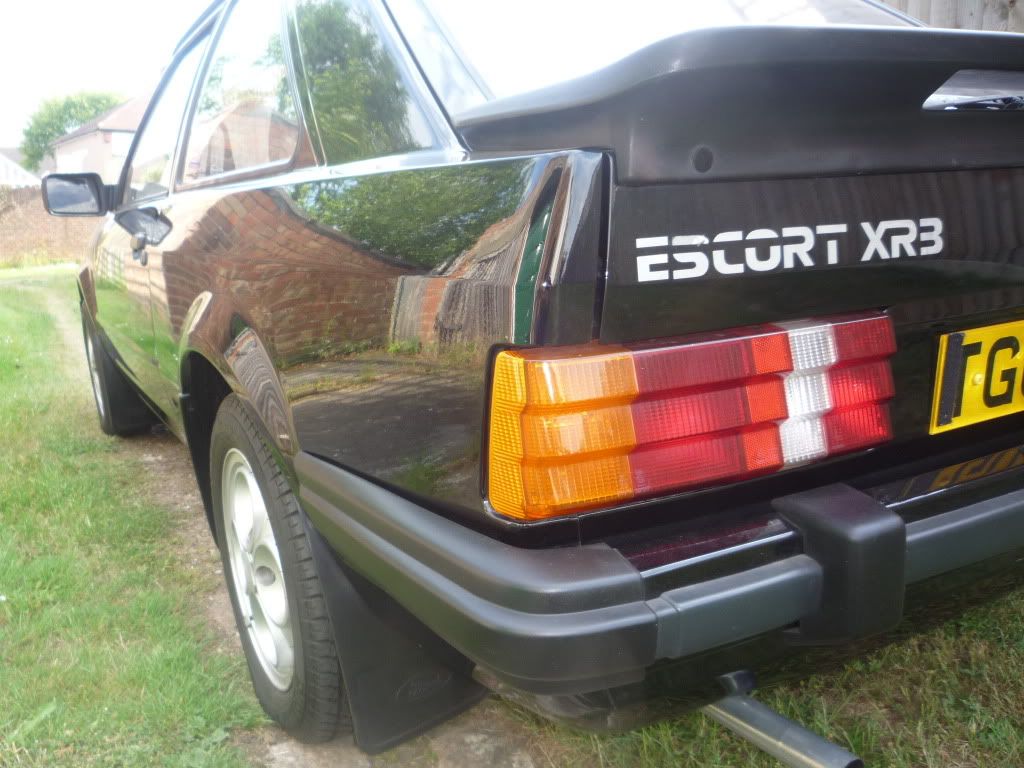
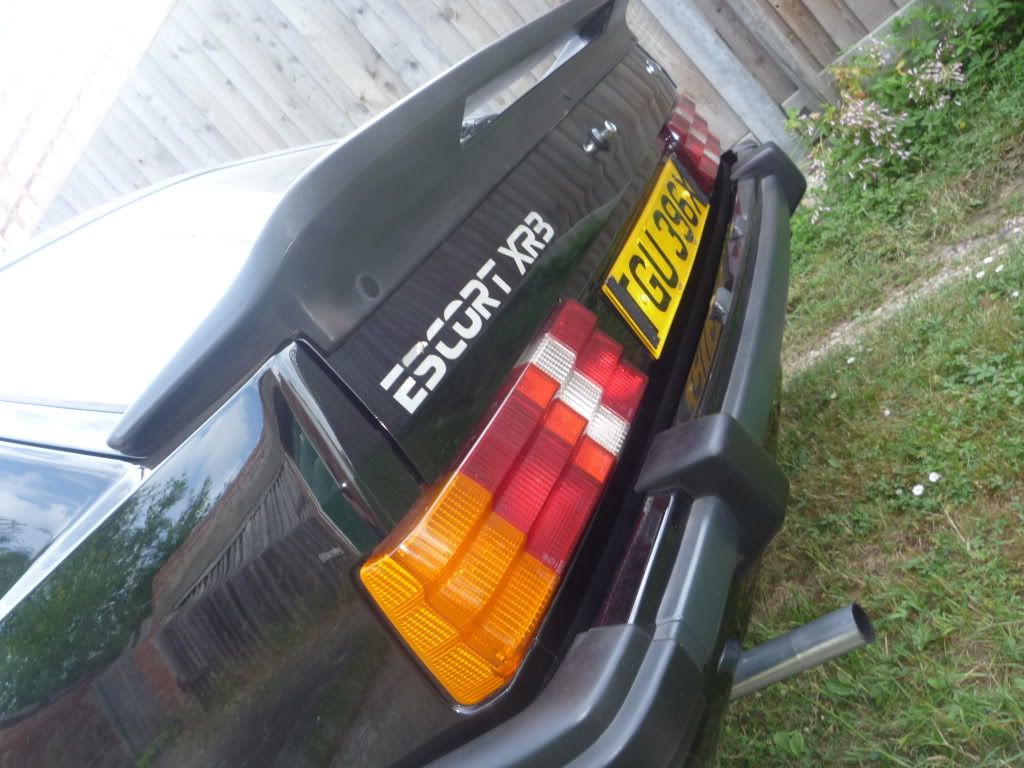
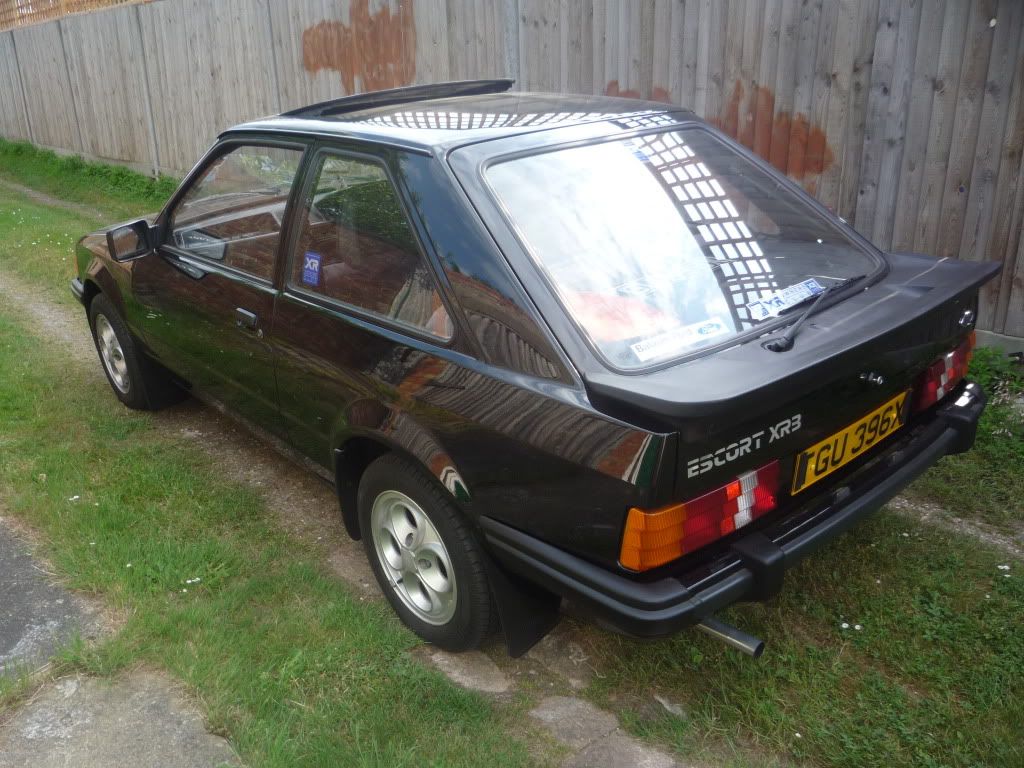
Hi there this is my mate robs (trusty xr) 81 xr3

This is how she looks now but a couple of years ago it was a different story.
she came to me looking quite sorry for herself after having a major vandalism issue.
there were windows smashed deep body scratches all over dents stab marks in she spoiler headlining and interior mutilated not at all pretty
so i set about straightening her out.
It was while i was sorting the cosmetic stufff that i found the history.
Lets start with the doors
The passenger door was so badly damaged that rescue was not an option so a second hand one was sourced which was an appalling fit so i found another.
This came courtesy of a dead mk4 and the paint finish was rubbish the laquer had crazed so although it was solid it still needed four hours of prep to sort that out.

Drivers door was rough.
At some point in its life the corner had rotted out of it (as they usually do) and someone had rivitted a plate behind the rot and just filled over it.
There was no effort put into the frame. It was a floating skin secured by a long bolt,two washers and a grommet for support.
heres how not to do it...

Heres how i did it.
Budget was a big concern so after trying to get a skin which to be honest probably wouldn't have made the door any better it would still have a rotten frame. I decided to make a repair section like this.
first i drew a template of how the door was to be shaped by marking out the lines with masking tape and following them round with a clear pen line.

Note I made marks on another piece of tape to line my "template" to later.
Then I removed the template and cut out the poor repair whilst still leaving the other pieces of tape on the door.


I roughly shaped a piece of plate to fiit the hole and tried to maintain the contour of the door so as to minimise filler and tacked it into place.

Laid my template back on again and cut round it.


Then I turned my attention to the frame. Now a better man than me would have shaped the lower part of the plate with a lp to fold over like a skin, I tried that a couple of times but found that route to create serious ripples to the botton of the door which would be evident against the sill so i went for cosmetic surgery and cut a "lip" out of a piece of plate and tacked it into place then seam welded the edge and shaped with a grinder care was taken not to get the metal too hot as distortion would definitely occur.


Try it on

A couple of spreads to even everything up.

Et voila a properly repaired door.

This is how she looks now but a couple of years ago it was a different story.
she came to me looking quite sorry for herself after having a major vandalism issue.
there were windows smashed deep body scratches all over dents stab marks in she spoiler headlining and interior mutilated not at all pretty
so i set about straightening her out.
It was while i was sorting the cosmetic stufff that i found the history.
Lets start with the doors
The passenger door was so badly damaged that rescue was not an option so a second hand one was sourced which was an appalling fit so i found another.
This came courtesy of a dead mk4 and the paint finish was rubbish the laquer had crazed so although it was solid it still needed four hours of prep to sort that out.
Drivers door was rough.
At some point in its life the corner had rotted out of it (as they usually do) and someone had rivitted a plate behind the rot and just filled over it.
There was no effort put into the frame. It was a floating skin secured by a long bolt,two washers and a grommet for support.
heres how not to do it...
Heres how i did it.
Budget was a big concern so after trying to get a skin which to be honest probably wouldn't have made the door any better it would still have a rotten frame. I decided to make a repair section like this.
first i drew a template of how the door was to be shaped by marking out the lines with masking tape and following them round with a clear pen line.
Note I made marks on another piece of tape to line my "template" to later.
Then I removed the template and cut out the poor repair whilst still leaving the other pieces of tape on the door.
I roughly shaped a piece of plate to fiit the hole and tried to maintain the contour of the door so as to minimise filler and tacked it into place.
Laid my template back on again and cut round it.
Then I turned my attention to the frame. Now a better man than me would have shaped the lower part of the plate with a lp to fold over like a skin, I tried that a couple of times but found that route to create serious ripples to the botton of the door which would be evident against the sill so i went for cosmetic surgery and cut a "lip" out of a piece of plate and tacked it into place then seam welded the edge and shaped with a grinder care was taken not to get the metal too hot as distortion would definitely occur.
Try it on
A couple of spreads to even everything up.
Et voila a properly repaired door.

 23-07-2008, 09:37 PM
#4
Part of the Furniture
Thread Starter
Join Date: Jun 2008
Location: sidcup kent
Posts: 167
Likes: 0
Received 0 Likes
on
0 Posts
Scuttle next.
Again nasty hole plated with ali rivetted on and skimmed over.

I cut out the corroded metal, treated the exposed part of the bulkhead with an inhibitor (kurust i think) and made a plate to fit the majority of the hole. It got a bit complicated around the screen aperture so I tacled that seperately.


I was careful to maintain the original shut line to the back edge of the bonnet.
Then, I made a repair section to the screen apperture.

And welded that in too.

The trickiest bit of that was trying to stretch the metal between the swage lines like a fan to allow the correct contour of the screen apperture to be acheived.
Tidied up and ready for a skim.

Skimmed.

A couple of rubs (about an hour later actually)

And etched. phew another bit done.

Again nasty hole plated with ali rivetted on and skimmed over.
I cut out the corroded metal, treated the exposed part of the bulkhead with an inhibitor (kurust i think) and made a plate to fit the majority of the hole. It got a bit complicated around the screen aperture so I tacled that seperately.
I was careful to maintain the original shut line to the back edge of the bonnet.
Then, I made a repair section to the screen apperture.
And welded that in too.
The trickiest bit of that was trying to stretch the metal between the swage lines like a fan to allow the correct contour of the screen apperture to be acheived.
Tidied up and ready for a skim.
Skimmed.
A couple of rubs (about an hour later actually)
And etched. phew another bit done.
 23-07-2008, 11:14 PM
#6
Part of the Furniture
Thread Starter
Join Date: Jun 2008
Location: sidcup kent
Posts: 167
Likes: 0
Received 0 Likes
on
0 Posts
There were various other bits around the car I repaired like that just the usual really.
Passenger door shut.


Drivers side sill (Front section)


Once apon a time, there was a key operated pony alarm system which had a barrel mounted in the o/s quarter panel.

And then it didn't any more.

Onto the osr wheelarch and inner wheelarch at the end of the sill (you know the bit i'm talking about)

This Bit
I,m afraid I've got no earlier pictures of this as this is where I started and besides which there was nothing to take a picture of.
This too was harder than it looks. Primarily there is two plates. one which makes up the inner sill return and one that becomes inner arch.
I Should have made him buy an inner arch
The lip that has the wheelarch welded to it is rolled two different directions. It twists downward and curves inward the only way I could replicate this shape was to put multiple cuts in a length of L shape metal then do the same again on the other edge.
Once I was happy with the contour of the arch i had to weld up each cut which I think was about 50 welds. This took an age...

Then of course the outer arch had to be fitted.

And the open bit of sill closed up...

More filler

More etch

As you can see dents were plentiful all over this car. Both quarters, roof, bonnet, tailgate, rear panel and wings all recieved a couple of hammer blows and I don't think it was a little hammer.


Bonnet was not nice.

Thats about it for damage except for the remaining key scratches which though extensive were easy enough to sort out before primer.
thats enough for tonight I'm going to bed...
Passenger door shut.
Drivers side sill (Front section)
Once apon a time, there was a key operated pony alarm system which had a barrel mounted in the o/s quarter panel.
And then it didn't any more.
Onto the osr wheelarch and inner wheelarch at the end of the sill (you know the bit i'm talking about)
This Bit
I,m afraid I've got no earlier pictures of this as this is where I started and besides which there was nothing to take a picture of.
This too was harder than it looks. Primarily there is two plates. one which makes up the inner sill return and one that becomes inner arch.
I Should have made him buy an inner arch
The lip that has the wheelarch welded to it is rolled two different directions. It twists downward and curves inward the only way I could replicate this shape was to put multiple cuts in a length of L shape metal then do the same again on the other edge.
Once I was happy with the contour of the arch i had to weld up each cut which I think was about 50 welds. This took an age...
Then of course the outer arch had to be fitted.
And the open bit of sill closed up...
More filler
More etch
As you can see dents were plentiful all over this car. Both quarters, roof, bonnet, tailgate, rear panel and wings all recieved a couple of hammer blows and I don't think it was a little hammer.
Bonnet was not nice.
Thats about it for damage except for the remaining key scratches which though extensive were easy enough to sort out before primer.
thats enough for tonight I'm going to bed...
25-07-2008, 05:49 PM
#7
I'm Finding My Feet Here Now

Join Date: Aug 2007
Location: welling in kent
Posts: 119
Likes: 0
Received 0 Likes
on
0 Posts
thanks phil thats my car alright, you done a cracking job and could not of done it with out ya . at all the shows now and will be on xroc stand at ford fair next week!!!
cheers buddy
cheers buddy
Trending Topics
25-07-2008, 06:44 PM
#8
Part of the Furniture
Thread Starter
Join Date: Jun 2008
Location: sidcup kent
Posts: 167
Likes: 0
Received 0 Likes
on
0 Posts
With repairs finally complete and i was happy with the shapes i took the car to the paintshop for a couple of coats of hi-build primer.
While i was at it it made sense to paint the shuts so final paint layers could be applied to the whole car in one go.


And back from the paintshop for more elbow grease flatting, flatting and more flatting.


While i was at it it made sense to paint the shuts so final paint layers could be applied to the whole car in one go.
And back from the paintshop for more elbow grease flatting, flatting and more flatting.

 25-07-2008, 07:36 PM
#11
Part of the Furniture
Thread Starter
Join Date: Jun 2008
Location: sidcup kent
Posts: 167
Likes: 0
Received 0 Likes
on
0 Posts
And back to the paintshop.


Time was of the essence when it came to topcoat it was an all weekend job but had to be back by monday painted and polished.
There were three guys on this and I couldn't have done it without them.
Big thanks to shaun, carl and jimmy.


All masked ready to go.

It was a toss up what process we were going to use for topcoat.
We opted for clear over base as defects could be polished out easier than a solid colour and we thought a laquer finish would polish to a higher standard.
Here she is in the first coat of base.


And here shaun laying down the final coat of lacquer.


mmmmmmm shiny...

Followed by several hours flatting, flatting and more flatting.

And polishing, polishing and more polishing.

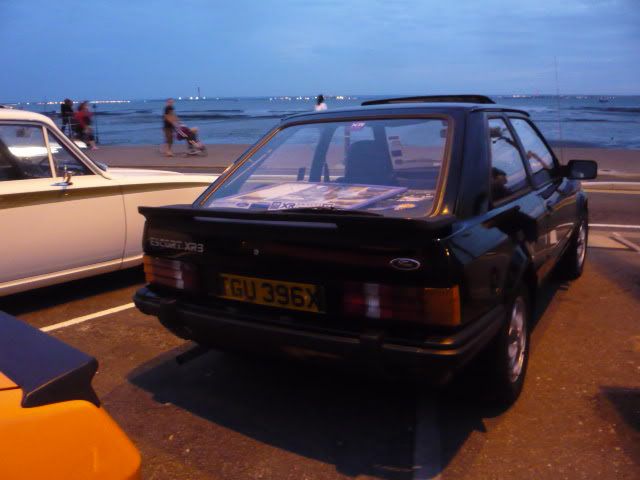
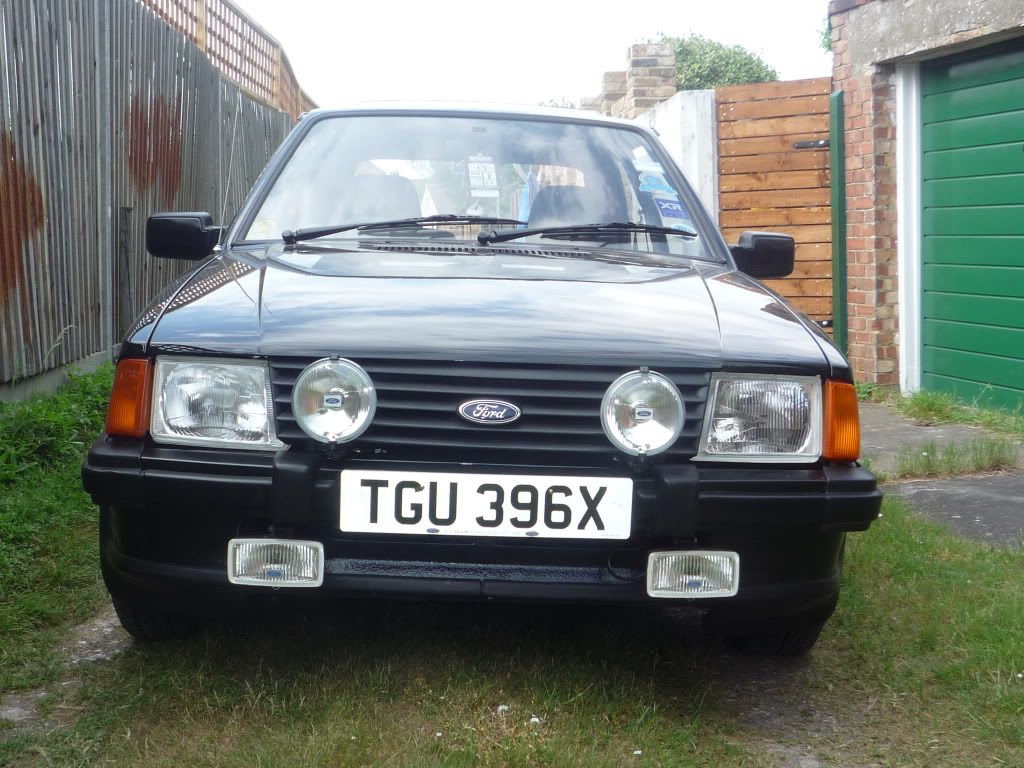
And this is where i left it and rob took over with final fit and clean up.
Check it out in the flesh at ford fair.
Thanks for looking
check out my current project
series one rebuild https://passionford.com/forum/restorations-rebuilds-and-projects/247462-series-one-rebuild.html
And watch this space for a future mk1 track car build
and the resurrection of a ren5 gtt
Feedback appreciated
Time was of the essence when it came to topcoat it was an all weekend job but had to be back by monday painted and polished.
There were three guys on this and I couldn't have done it without them.
Big thanks to shaun, carl and jimmy.
All masked ready to go.
It was a toss up what process we were going to use for topcoat.
We opted for clear over base as defects could be polished out easier than a solid colour and we thought a laquer finish would polish to a higher standard.
Here she is in the first coat of base.
And here shaun laying down the final coat of lacquer.
mmmmmmm shiny...
Followed by several hours flatting, flatting and more flatting.
And polishing, polishing and more polishing.
And this is where i left it and rob took over with final fit and clean up.
Check it out in the flesh at ford fair.
Thanks for looking
check out my current project
series one rebuild https://passionford.com/forum/restorations-rebuilds-and-projects/247462-series-one-rebuild.html
And watch this space for a future mk1 track car build
and the resurrection of a ren5 gtt
Feedback appreciated
Last edited by reborns1; 25-07-2008 at 07:43 PM. Reason: wanted to insert link


 30-07-2008, 12:58 AM
#17
Part of the Furniture
Thread Starter
Join Date: Jun 2008
Location: sidcup kent
Posts: 167
Likes: 0
Received 0 Likes
on
0 Posts
I,m glad you did cos its the only one i've got of it on clovers there are more on here of it on rs7s.
but definitely clovers for the shows. i think
but definitely clovers for the shows. i think
 31-07-2008, 04:48 AM
#21
Monte 087

 01-08-2008, 11:33 AM
#22
I'm Finding My Feet Here Now
Join Date: Aug 2007
Location: welling in kent
Posts: 119
Likes: 0
Received 0 Likes
on
0 Posts
guys theres some great comments on my xr3 & i must say i apreciate them !!
i could not of done this w/out phils help i owe alot to him!!! he really is the man!!
the car is at all the shows on the xr oc stand & will be over at ford fair on sunday so come over & say hello !!
i could not of done this w/out phils help i owe alot to him!!! he really is the man!!
the car is at all the shows on the xr oc stand & will be over at ford fair on sunday so come over & say hello !!
01-08-2008, 11:36 AM
#23
I'm Finding My Feet Here Now
Join Date: Aug 2007
Location: welling in kent
Posts: 119
Likes: 0
Received 0 Likes
on
0 Posts
by the way it was smashed up coz i was a clown & the mrs found out !!!
she took a slege hammer to it in the garage !!!!!
i was sorry , she was sorry & now im a good boy & she stays out the garage!!!
see full pictures of resto at ford fair 2008 on xroc stand!!
see ya there
she took a slege hammer to it in the garage !!!!!
i was sorry , she was sorry & now im a good boy & she stays out the garage!!!
see full pictures of resto at ford fair 2008 on xroc stand!!
see ya there
18-08-2008, 09:17 PM
#25
Part of the Furniture
Thread Starter
Join Date: Jun 2008
Location: sidcup kent
Posts: 167
Likes: 0
Received 0 Likes
on
0 Posts
I have spoken to rob today
and the reborn xr has suffered a little engine fire.
I stress the word little. no major damage not even scorches to the wings Apparantly.
But I get the feeling that an overdue engine bay revamp awaits me (or someone).
Apparantly it was due to oil leaking onto exhaust manifold from a breather.
It seems more posts may be In our future...
20-08-2008, 03:30 PM
#26
I'm Finding My Feet Here Now
Join Date: Aug 2007
Location: welling in kent
Posts: 119
Likes: 0
Received 0 Likes
on
0 Posts
yes phil small bieng the word . no paint damage or dmaamge thank god just eerything in the engine is covered in a soot colour but wipes up easily tho!!
got to it just in time tho mate
but a top end rebuild on the way & a engine bay paint for ya !!!
coming your way soon phil
got to it just in time tho mate
but a top end rebuild on the way & a engine bay paint for ya !!!
coming your way soon phil
05-01-2009, 06:57 PM
#27
Capri For The Win!
Love the clover rims, gettin some on my fiesta off my dads escort xr3i that got robbed n then crashed into a bus shelter. Got it back in a right state, been scrapped since but still got the rims.
31-01-2011, 10:16 PM
#29
I'm Finding My Feet Here Now
Join Date: Aug 2007
Location: welling in kent
Posts: 119
Likes: 0
Received 0 Likes
on
0 Posts
hi guys
car still looks just as good as the day it was done currently. now due to be in ford titled magazine with a large heritage spread on it.
& still only done 2k since the resto lol
top work philipe !!!!!!
car still looks just as good as the day it was done currently. now due to be in ford titled magazine with a large heritage spread on it.
& still only done 2k since the resto lol
top work philipe !!!!!!

 02-02-2011, 10:59 PM
#32
Part of the Furniture
Thread Starter
Join Date: Jun 2008
Location: sidcup kent
Posts: 167
Likes: 0
Received 0 Likes
on
0 Posts
Well, well good to see her all bulit up again.. thankfully no return visits eh Rob lol
I reckon we shd be on for the fordfair convoy this yr matey. good to hear from ya..
I reckon we shd be on for the fordfair convoy this yr matey. good to hear from ya..
02-02-2011, 11:11 PM
#34
Part of the Furniture
Thread Starter
Join Date: Jun 2008
Location: sidcup kent
Posts: 167
Likes: 0
Received 0 Likes
on
0 Posts

Thread
Thread Starter
Forum
Replies
Last Post
kitchy
General Car Related Discussion.
5
26-09-2007 05:51 PM
fatty
Restorations, Rebuilds & Projects.
24
20-03-2007 03:23 PM

