New garage build
 29-03-2017, 11:41 PM
#81
Advanced PassionFord User
Thread Starter
Update
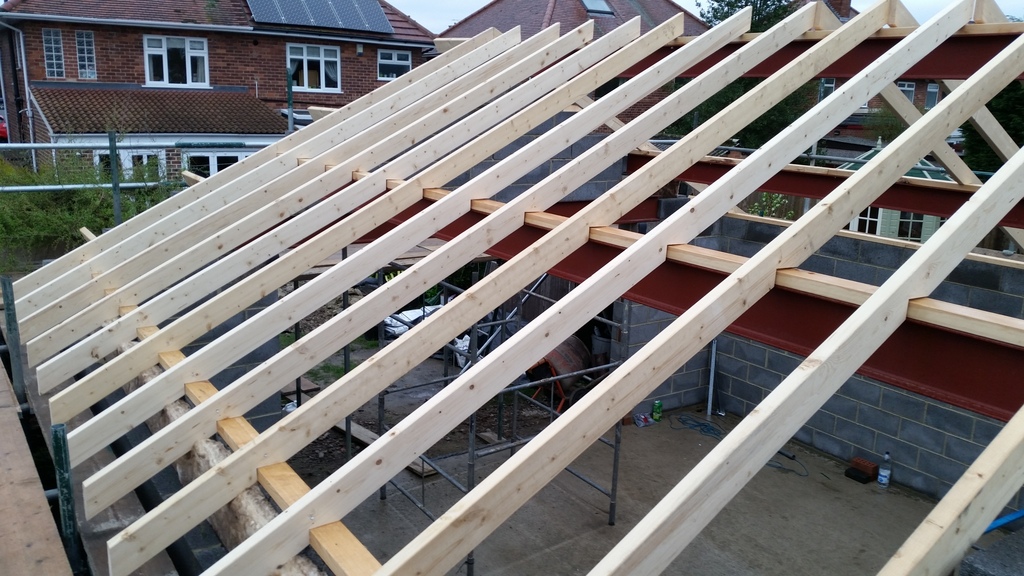
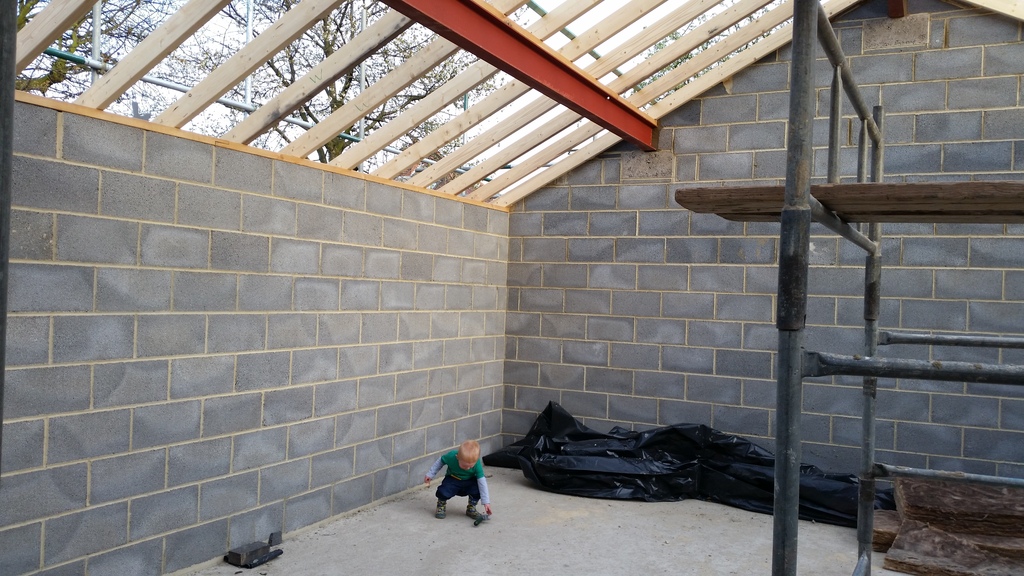
Roof timbers came but 8 short as they said 28 looked like 20 that was 2 days ago and they've still not been delivered . Ordered another 60 blocks to finish off the eaves etc so hopefully be here tomoz.
Jeff cut all the birdmouths so most of the timber are ready.
Then they started to go up only nailed on at the bottom and he started the ladders on the front and rear as iam having a 10 inch overhang front , rear , and sides.
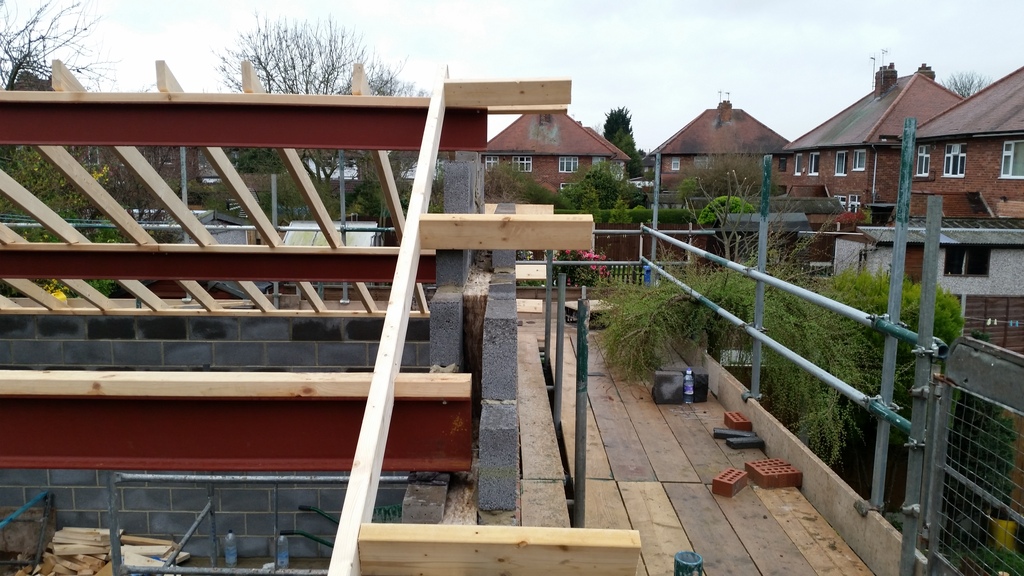
Weathers looking shit again so I will update if anything gets done.
Cheers Paul
Roof timbers came but 8 short as they said 28 looked like 20 that was 2 days ago and they've still not been delivered . Ordered another 60 blocks to finish off the eaves etc so hopefully be here tomoz.
Jeff cut all the birdmouths so most of the timber are ready.
Then they started to go up only nailed on at the bottom and he started the ladders on the front and rear as iam having a 10 inch overhang front , rear , and sides.


Weathers looking shit again so I will update if anything gets done.
Cheers Paul
 30-03-2017, 05:48 PM
#83
Advanced PassionFord User
Thread Starter
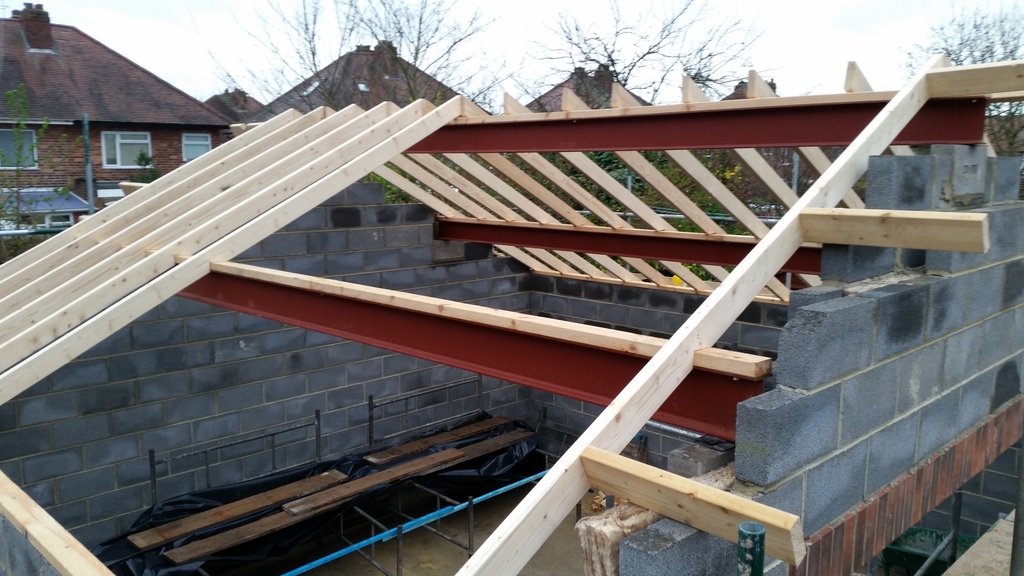
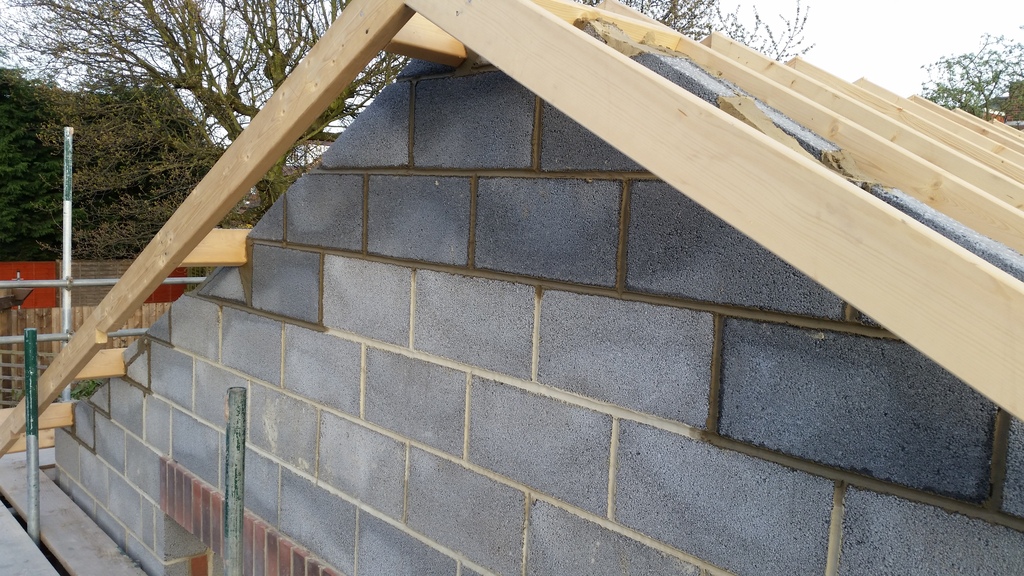
It used to be the case but now you can full fill the cavity , we was using 100mm as that's what cavity we had and it was so big we couldn't get it in the wall so changed it for 75mm and as you can see it easily fills a 100 mm void.
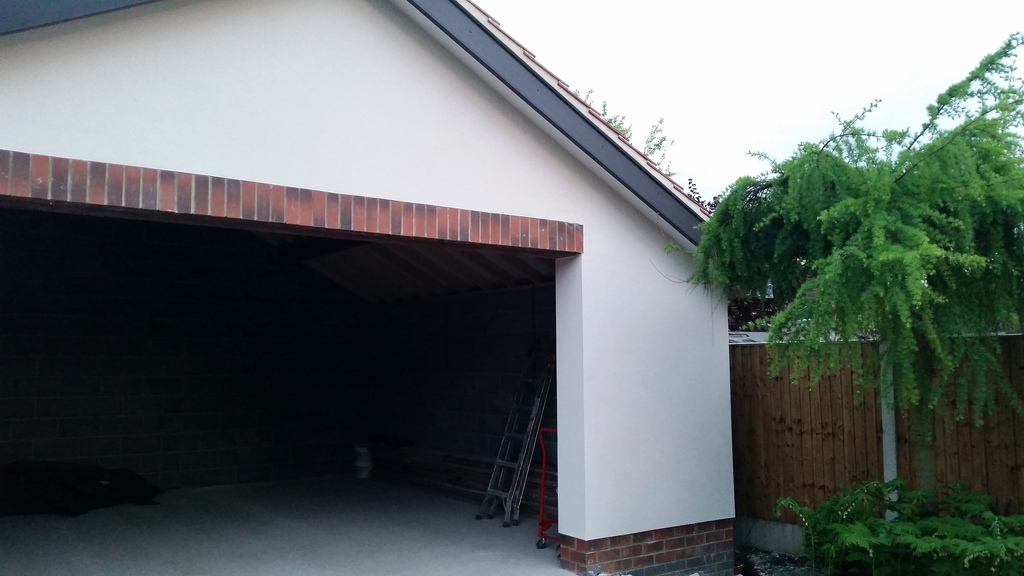
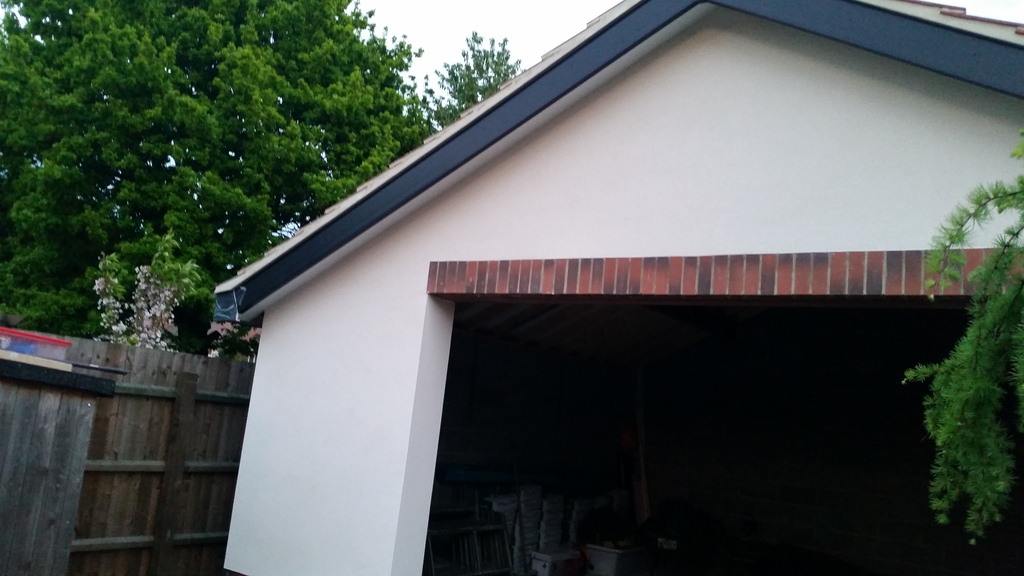
Timbers and roof tiles finally arrived today so Jeff can crack on . I've been told that I need to choose the fascia board but can't make my mind up wether to go white or black or anthercite on fascias and door.
Cheers paul
Timbers and roof tiles finally arrived today so Jeff can crack on . I've been told that I need to choose the fascia board but can't make my mind up wether to go white or black or anthercite on fascias and door.
Cheers paul
Last edited by zetaboostboy522bhp; 31-03-2017 at 05:41 PM.
30-03-2017, 06:21 PM
#84
Advanced PassionFord User
That's gonna be a really nice garage mate and the construction of it is very good 
 05-04-2017, 08:30 PM
#86
Advanced PassionFord User
Thread Starter
Update .
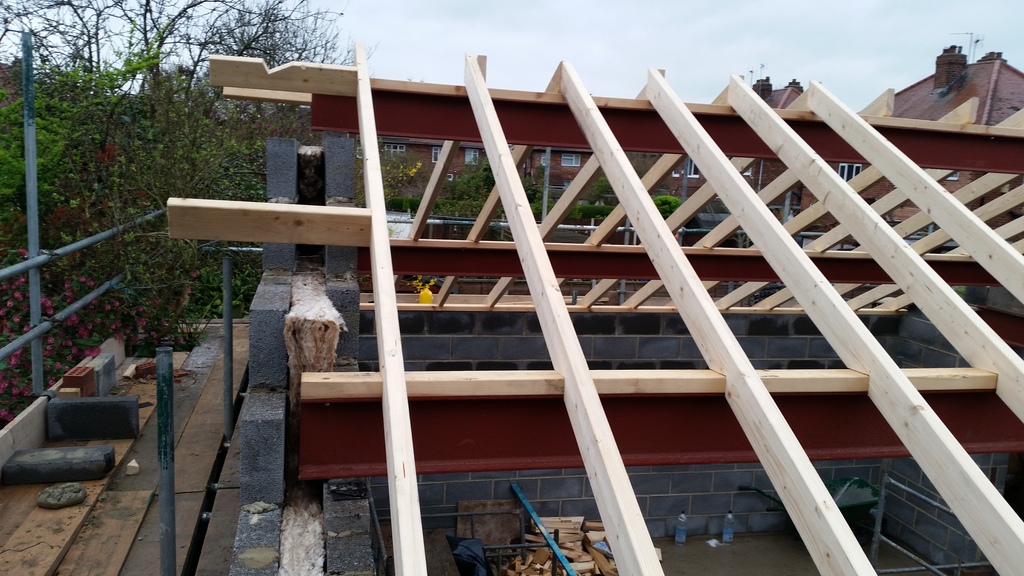
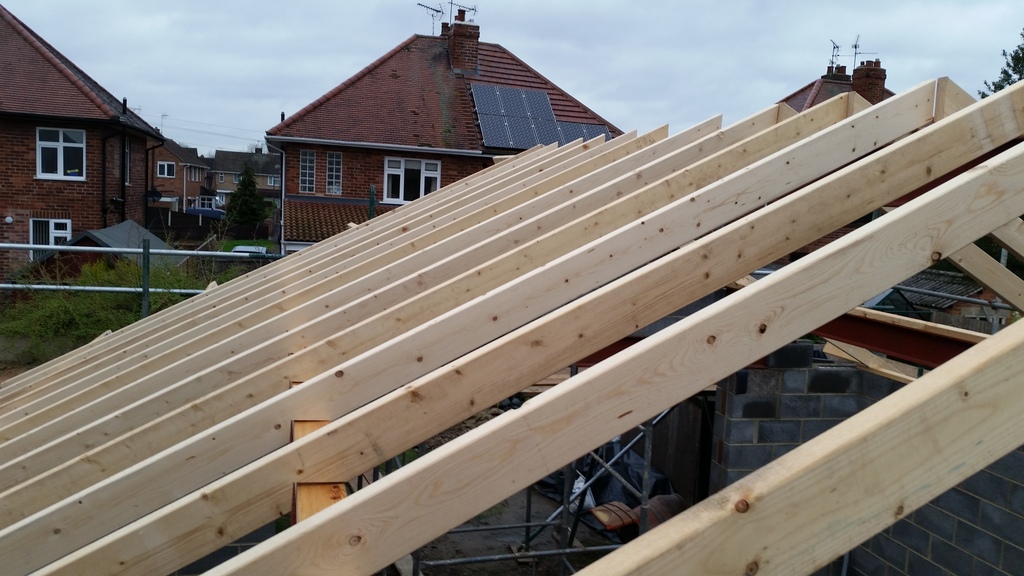
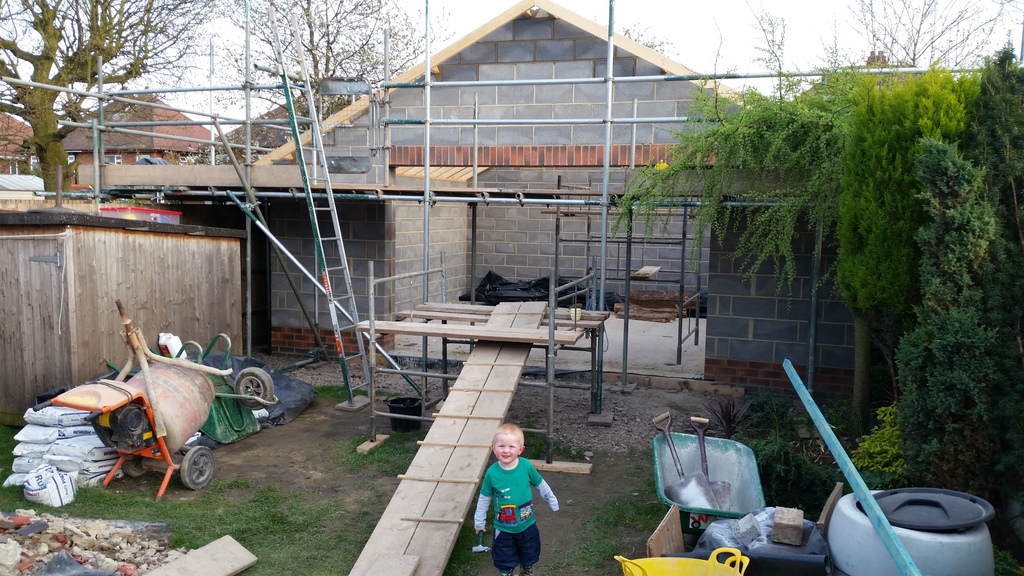
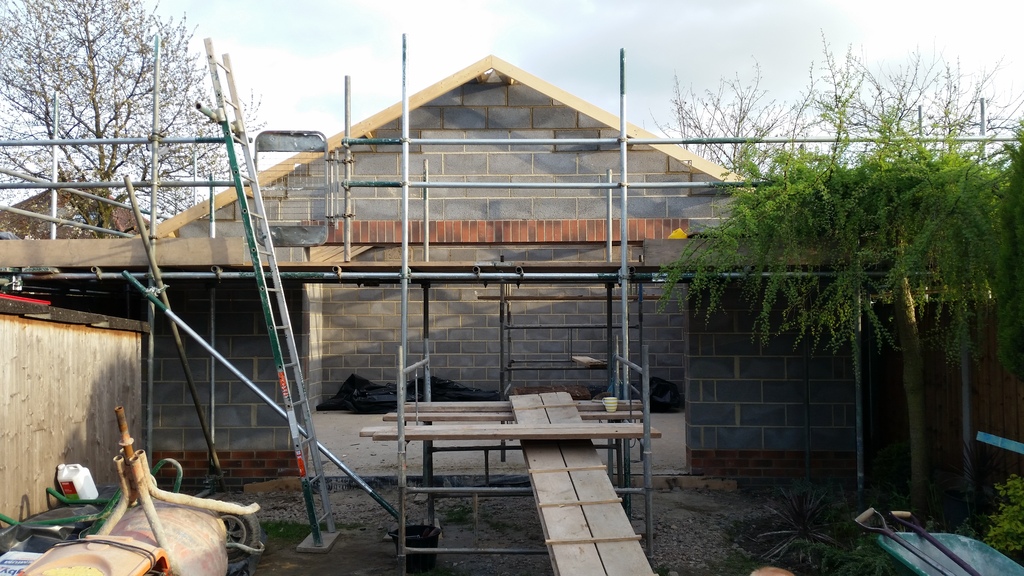
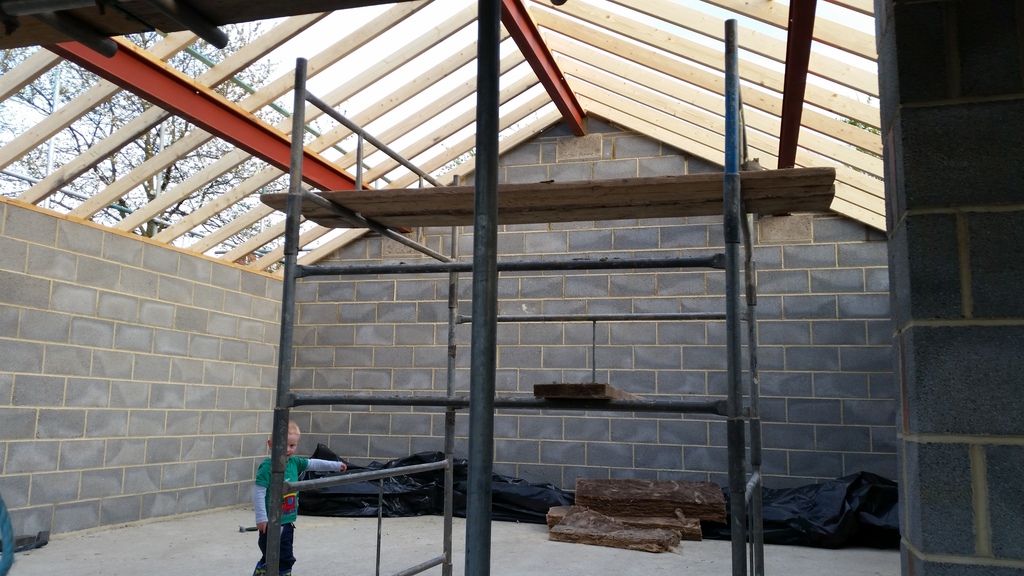
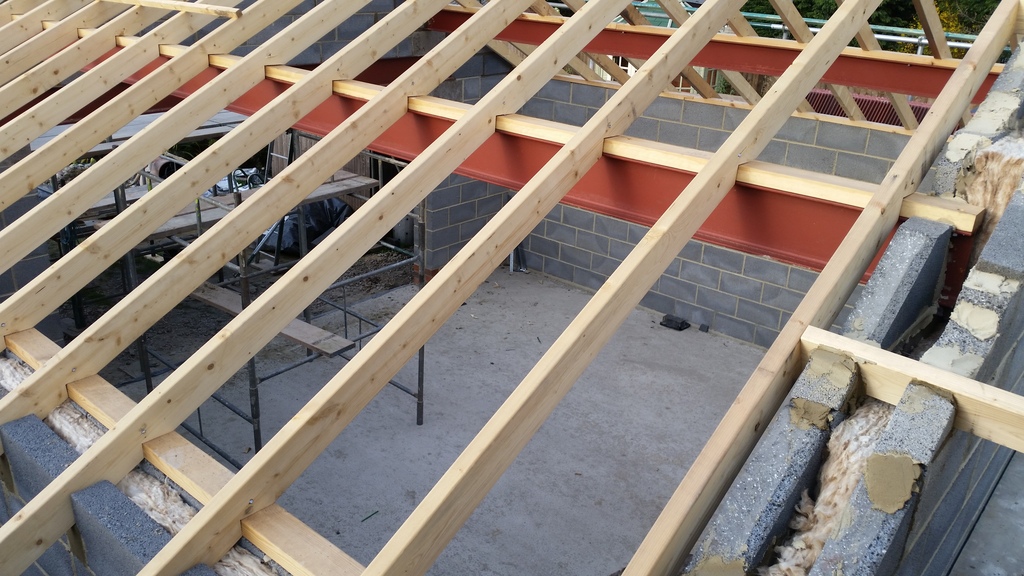
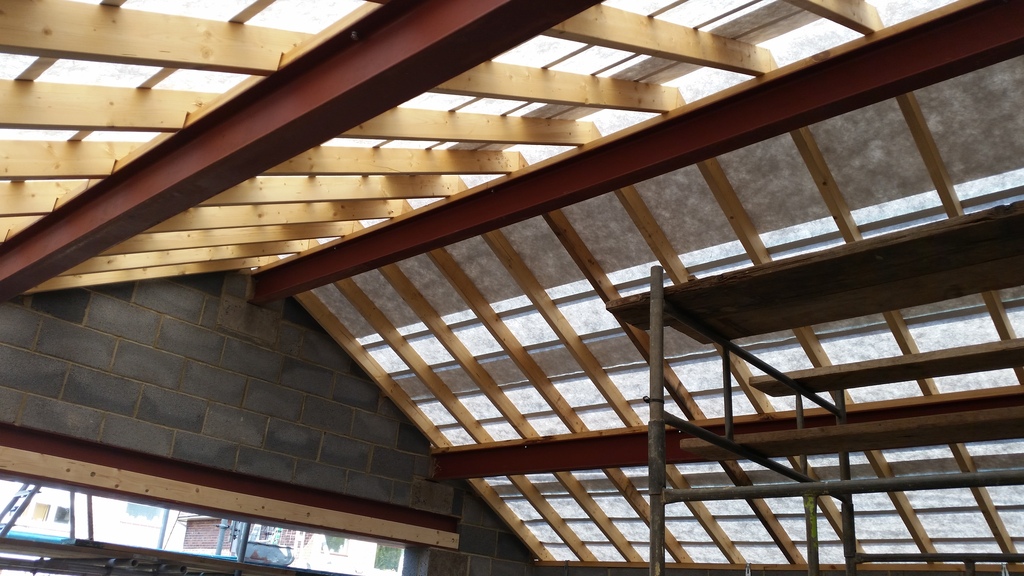
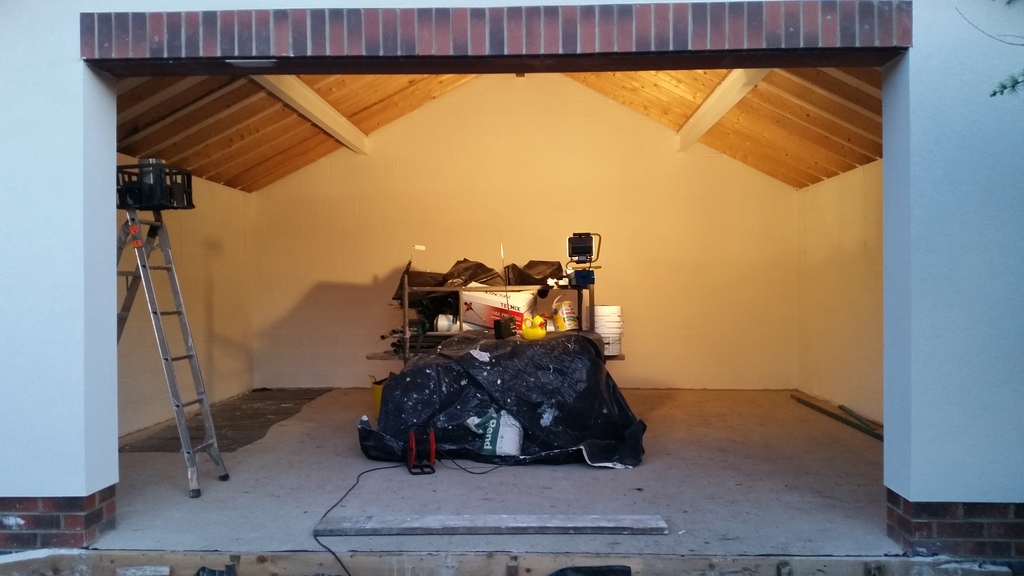
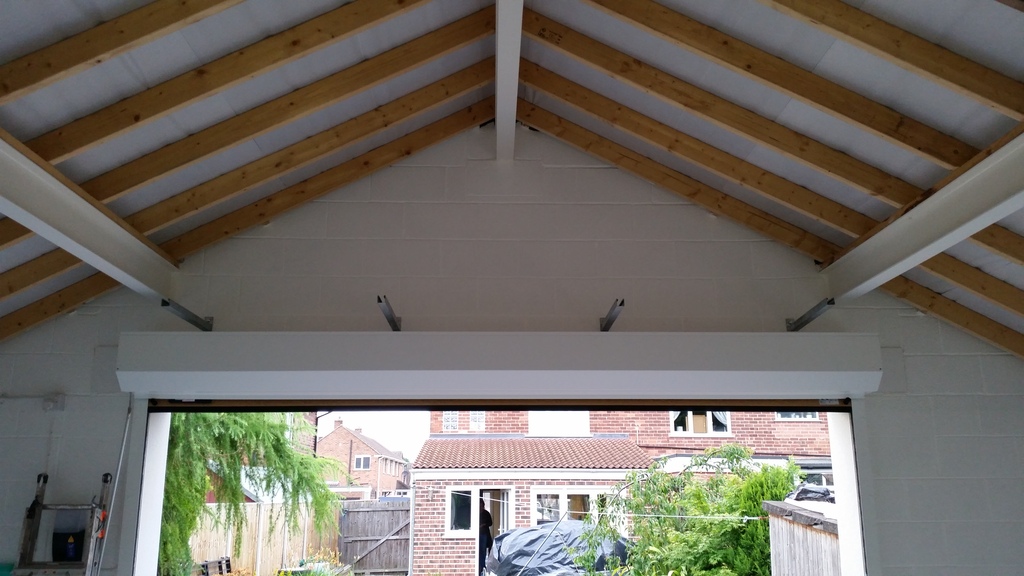
Jeffs been finishing of the block work on the gable ends and pointing up. All the timbers are on and just need nailing at the top then it's roof time .
I've ordered black fascia board which cost me around �340 and I've still got to get the Sofit board . With white render and black fascia I think I've changed my mind in terms of what colour door I will be going for . I wanted black or white door but I think iam going for light oak.i had a local door company come and measure up and have a quick look at the build in terms of if they can fit there door to the rsj etc and if they had any issues.
The only thing he said was to bolt a 5x2 timber to the back of the rsj as when the slats are closed the will sit against the timber to make a solid seal , that will be getting done on Saturday.
The door company quoted �1896 inc vat fitted in ether black , white or light oak . It's for a securoglide door which are very good so I will be snapping his hands off next week and ordering it. 3 weeks to make so your looking at around a month to get it fitted.
Finishing the gables at the top
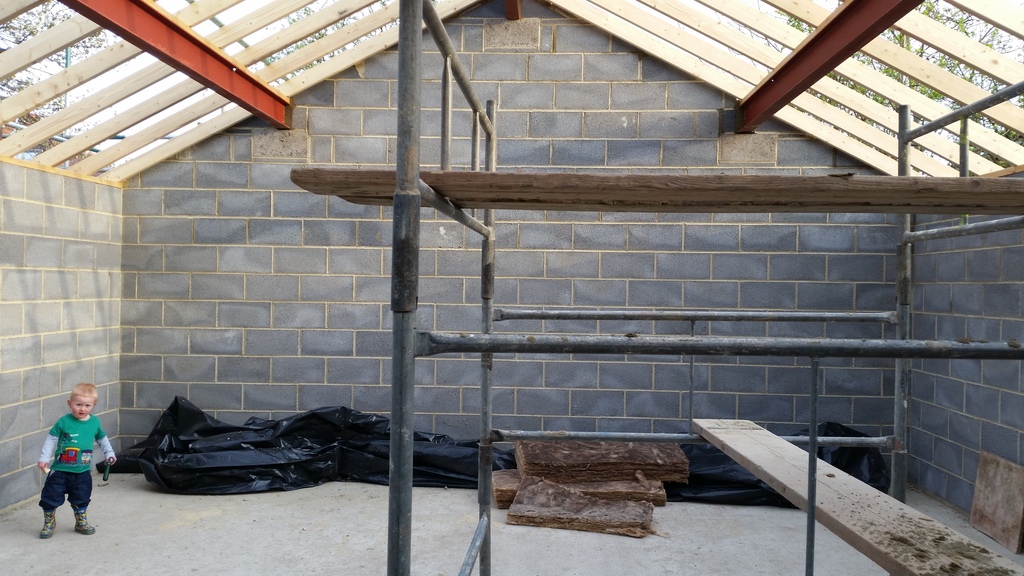
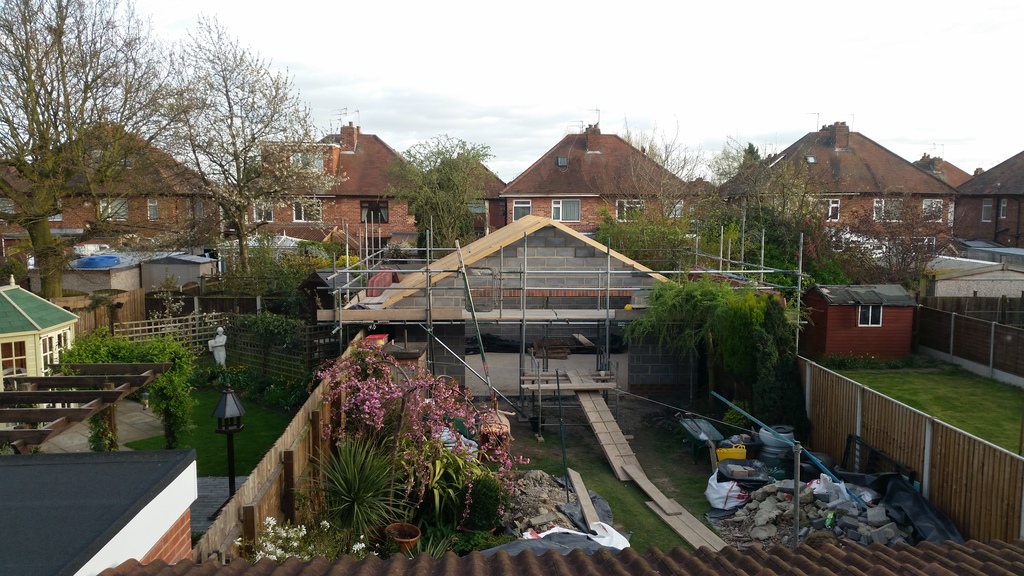
Now you can see the size better , if I had a larger garden I would of gone bigger lol
The monsters in the garden lol
Nice height for hanging shit off the walls


Final bits of block work
Something landed in the garden lol
Cheers paul
Jeffs been finishing of the block work on the gable ends and pointing up. All the timbers are on and just need nailing at the top then it's roof time .
I've ordered black fascia board which cost me around �340 and I've still got to get the Sofit board . With white render and black fascia I think I've changed my mind in terms of what colour door I will be going for . I wanted black or white door but I think iam going for light oak.i had a local door company come and measure up and have a quick look at the build in terms of if they can fit there door to the rsj etc and if they had any issues.
The only thing he said was to bolt a 5x2 timber to the back of the rsj as when the slats are closed the will sit against the timber to make a solid seal , that will be getting done on Saturday.
The door company quoted �1896 inc vat fitted in ether black , white or light oak . It's for a securoglide door which are very good so I will be snapping his hands off next week and ordering it. 3 weeks to make so your looking at around a month to get it fitted.
Finishing the gables at the top

Now you can see the size better , if I had a larger garden I would of gone bigger lol

The monsters in the garden lol
Nice height for hanging shit off the walls


Final bits of block work


Something landed in the garden lol

Cheers paul
Last edited by zetaboostboy522bhp; 05-04-2017 at 08:44 PM.
 05-04-2017, 09:52 PM
#89
Advanced PassionFord User
Thread Starter
Yep insulated door , and I know what you mean that's the price is with a full box as well . He said ideally it would of been a box section as when it's fully shut the last slat leans forwards so he said if I bolt a timber to the steel it will sit on that instead of leaning even further forwards in the void of the steel if you know what I mean plus it will give another fixing point as we are right on the edge of the pad stone.
Cheers paul
Cheers paul
 16-04-2017, 02:55 PM
#92
Advanced PassionFord User
Thread Starter
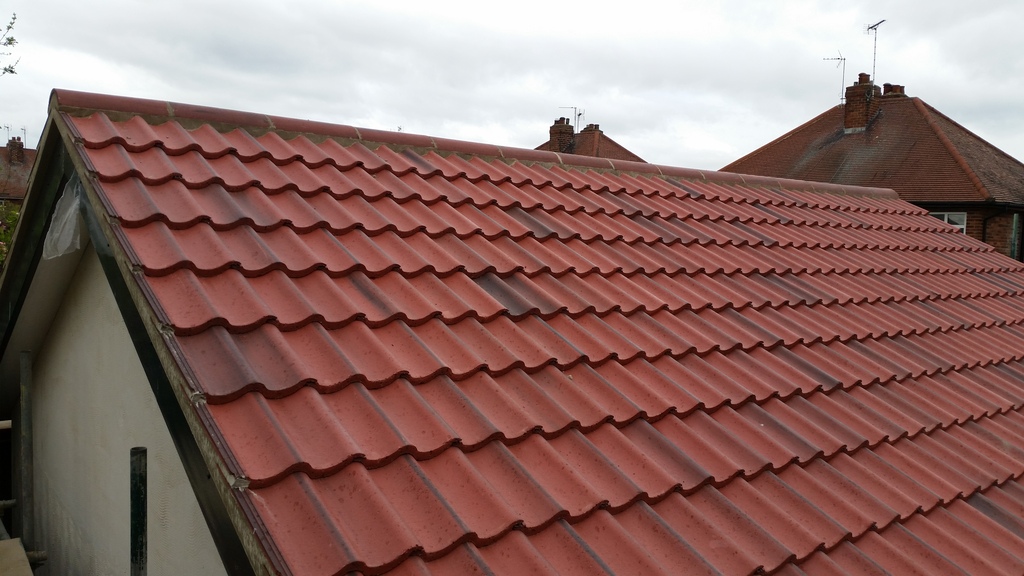
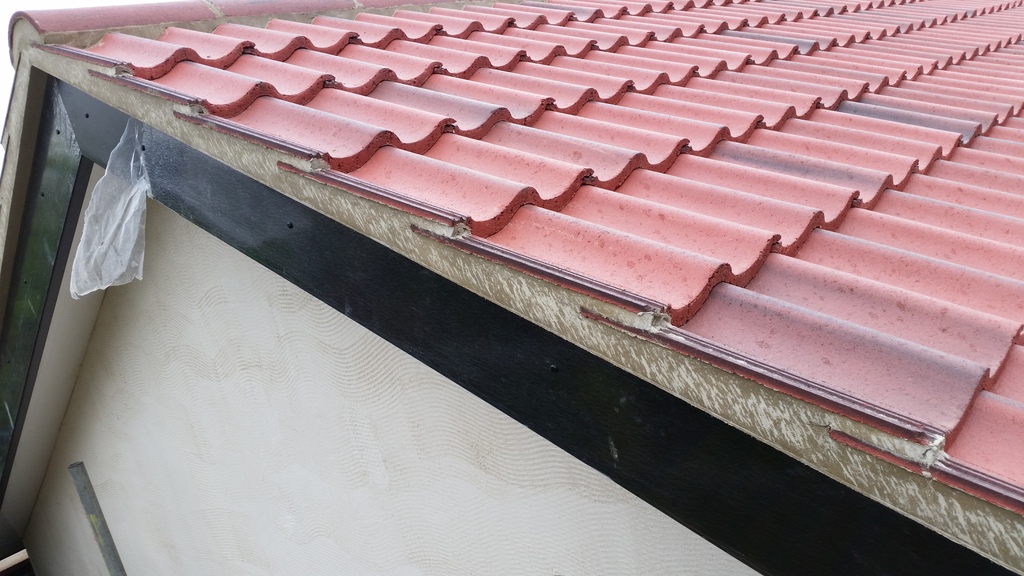
Update
Lots done but been really busy sorting the next stage of the build out as I will be doing the rest.
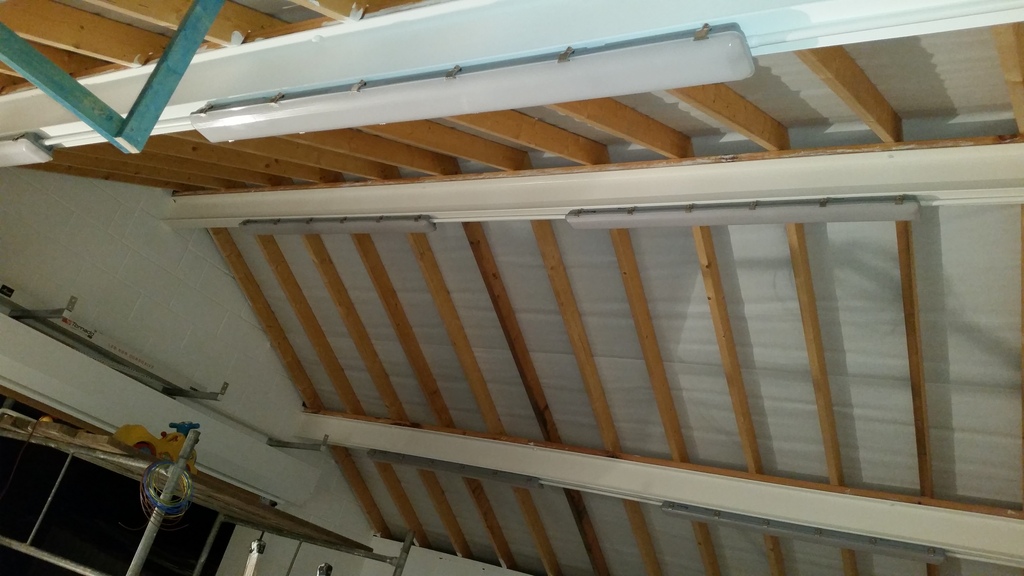
Right roof felt on which is a good quality breather membrane
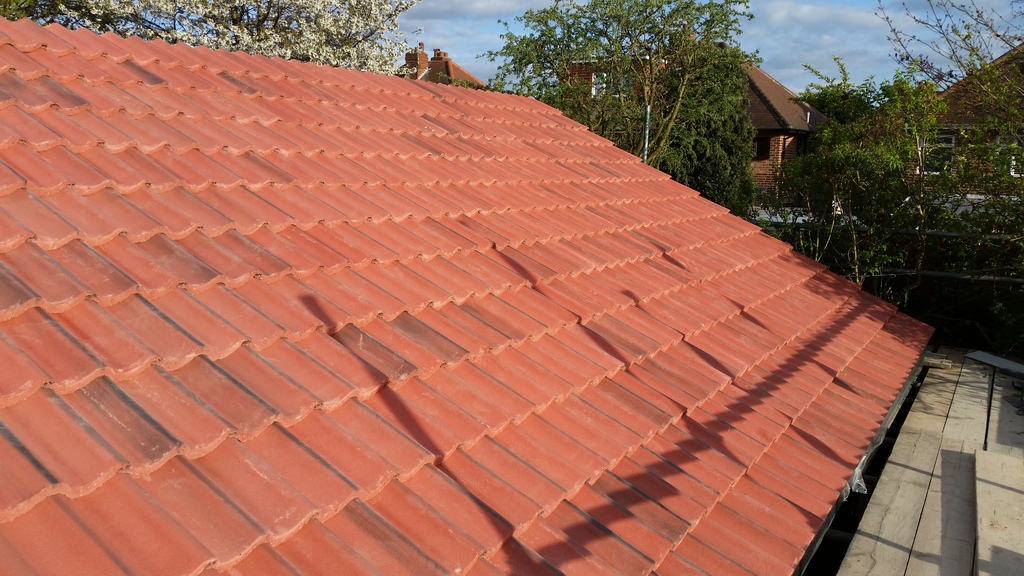
Next job was putting 750 roof tiles on
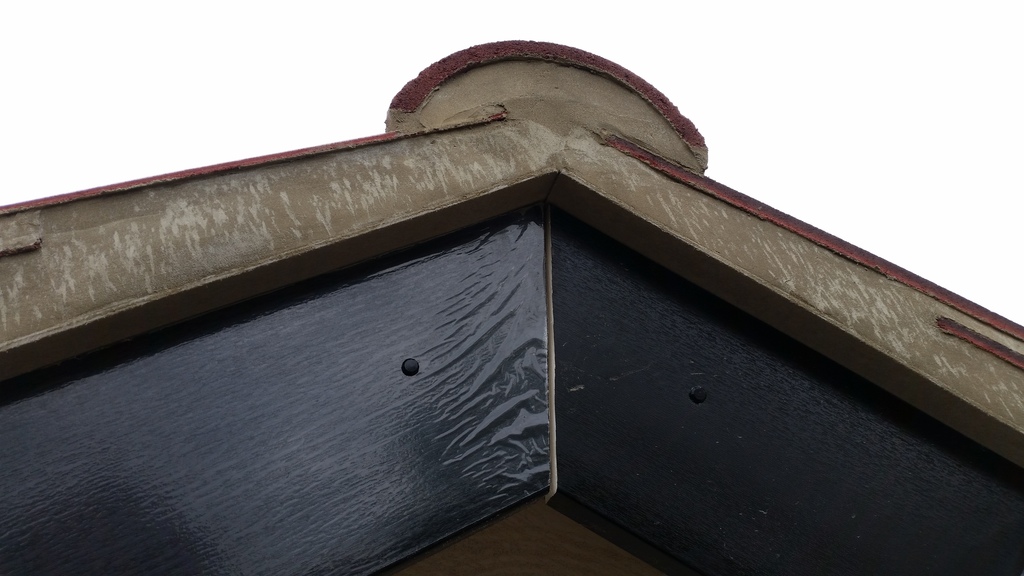
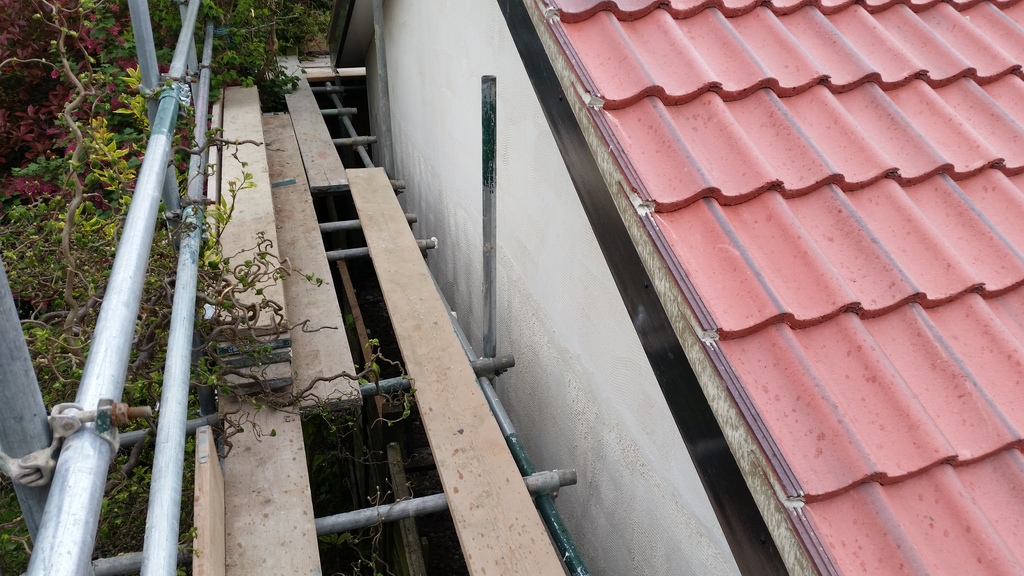
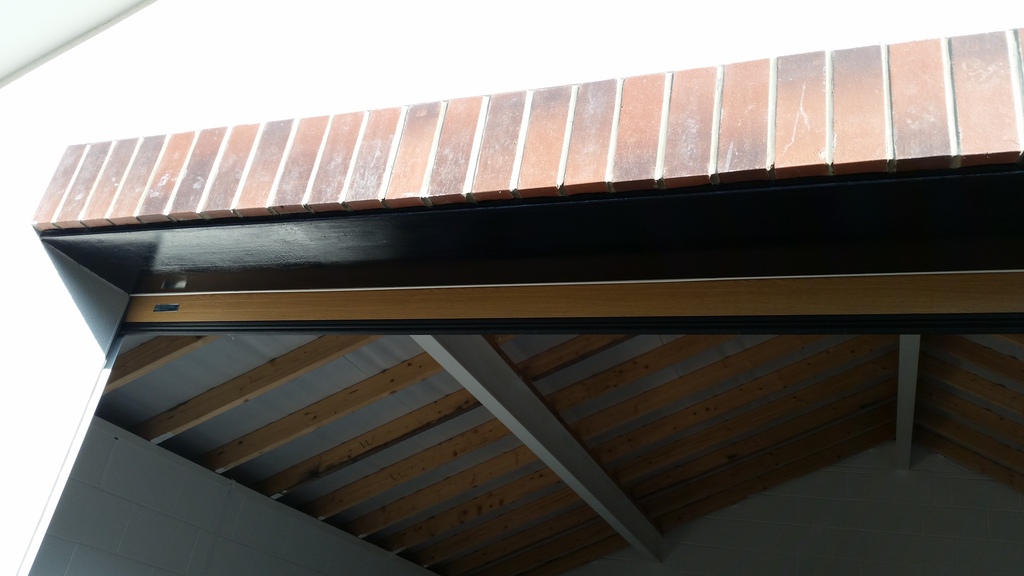
Cement boards on and black fascias on
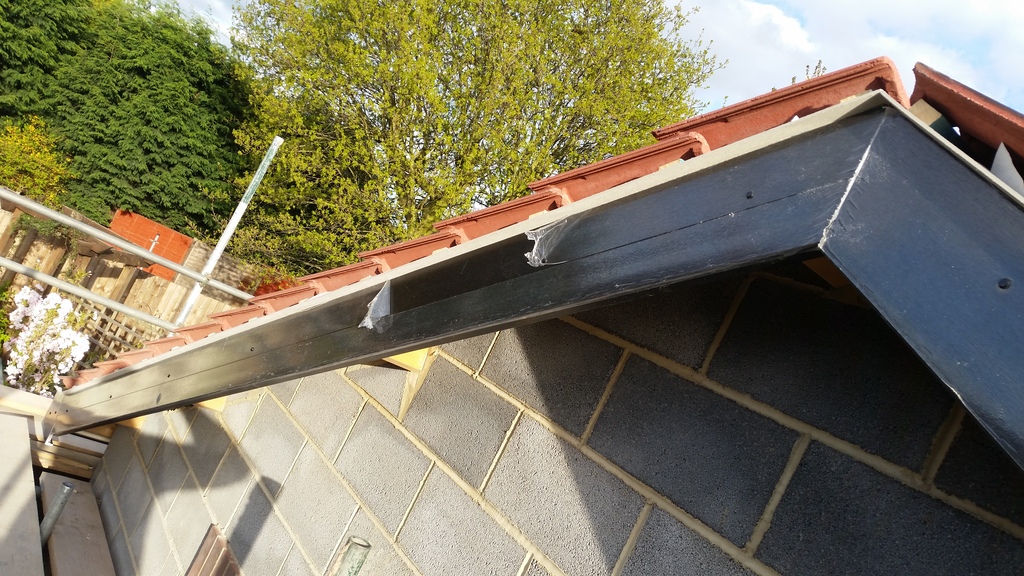
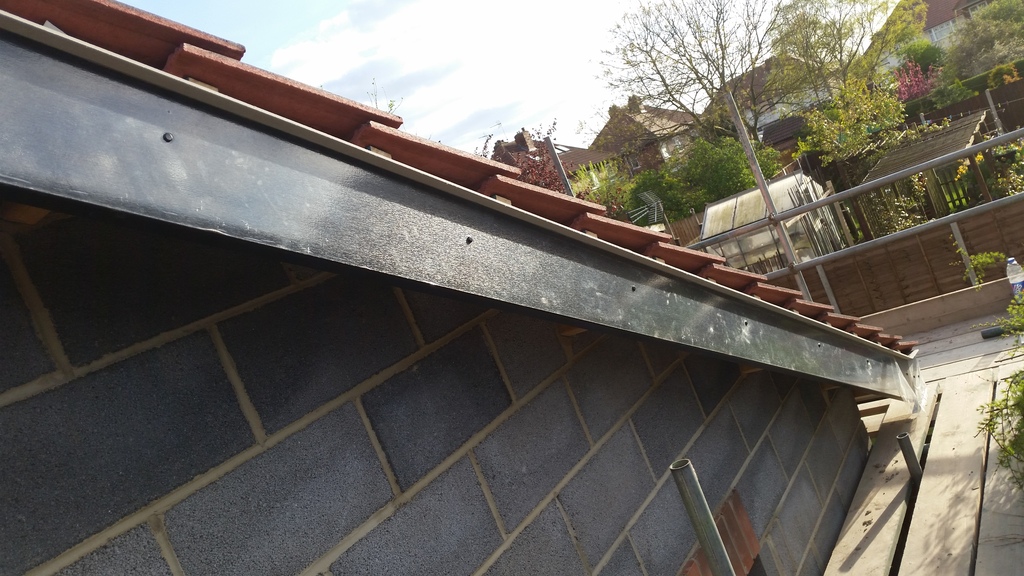
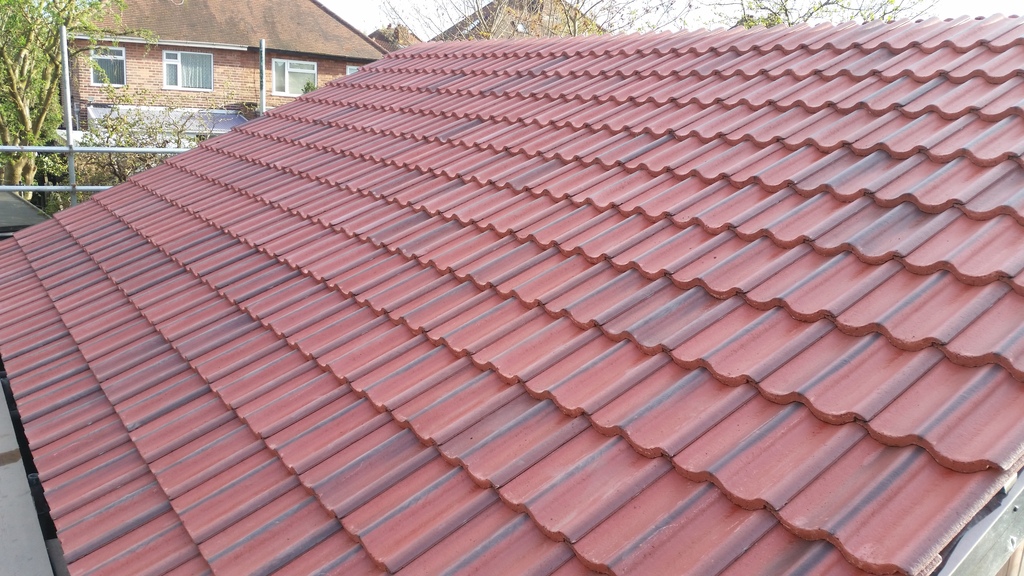
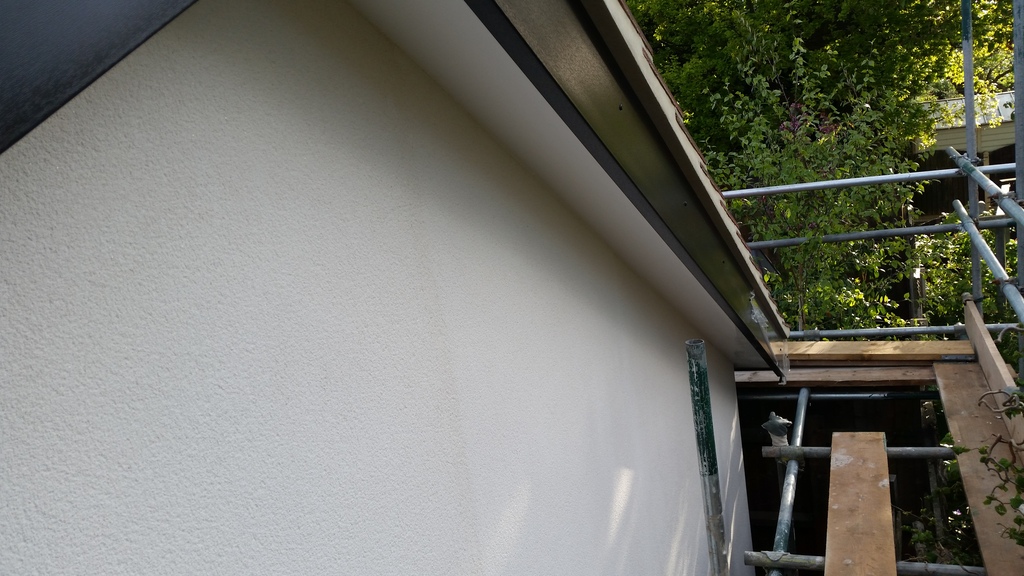
Ridge tiles bedded on and the eaves cemented up , really pleased how it's turned out.
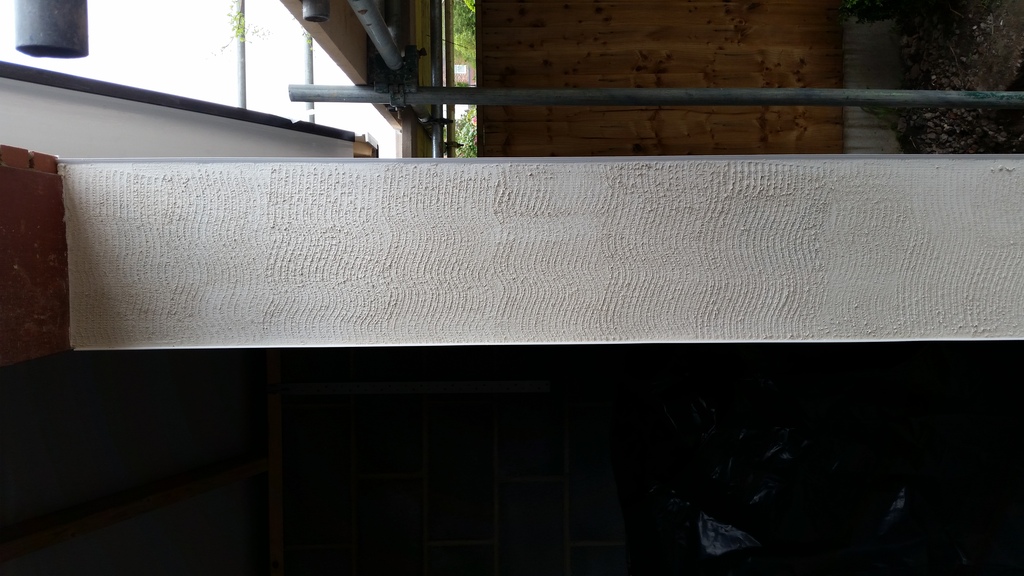
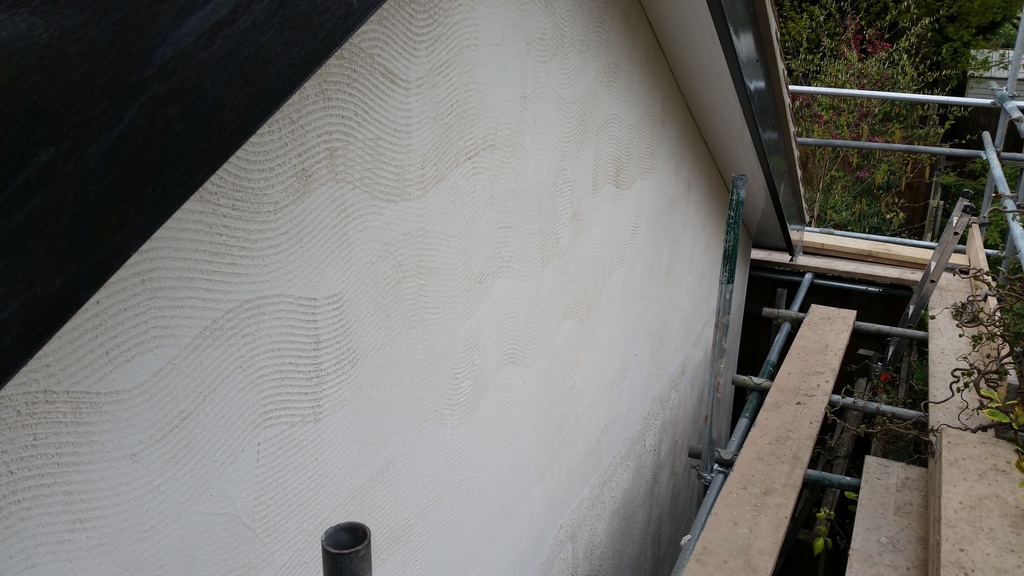
Yesterday I started the start task of rendering the building in k rend . I've had to use the hpx base coat as it's specially designed for fibrolite blocks and has a mesh which you float in after you've applied it to the wall . Well iam pretty good at plastering so I've decided to save a few quid by doing it myself but it's Defo a learning curve lol. My arm nearly fell off yesterday doing the back wall as when you don't do it day in day out you certainly notice it.
Managed to do the basecoat on the rear wall and the x2 sides of the front door . Keyed up like traditional render for use with there silicon ft render.
Side walls

And the rear wall
More to follow soon
Cheers paul
Lots done but been really busy sorting the next stage of the build out as I will be doing the rest.
Right roof felt on which is a good quality breather membrane

Next job was putting 750 roof tiles on


Cement boards on and black fascias on


Ridge tiles bedded on and the eaves cemented up , really pleased how it's turned out.


Yesterday I started the start task of rendering the building in k rend . I've had to use the hpx base coat as it's specially designed for fibrolite blocks and has a mesh which you float in after you've applied it to the wall . Well iam pretty good at plastering so I've decided to save a few quid by doing it myself but it's Defo a learning curve lol. My arm nearly fell off yesterday doing the back wall as when you don't do it day in day out you certainly notice it.
Managed to do the basecoat on the rear wall and the x2 sides of the front door . Keyed up like traditional render for use with there silicon ft render.
Side walls


And the rear wall


More to follow soon
Cheers paul
Last edited by zetaboostboy522bhp; 16-04-2017 at 03:21 PM.
16-04-2017, 07:11 PM
#93
THE REAL DEAL

hiya, looking good, what type of tile is that [name]. when the roofers did my roof they recommended screw down vented ridge tiles as to cemented on,did you look into this option?
17-04-2017, 09:49 PM
#94
Advanced PassionFord User
Thread Starter
No I did not look at the vented option
Cheers paul
03-05-2017, 12:48 AM
#95
Advanced PassionFord User
Thread Starter
Update time
Started rendering the building and space was so tight only have around 450mm to work in around the back of the building and being a big lad don't help much like lol.
Decided to use use krend silicon ft white with the hpx base coat and mesh.
Well as the back of the build is also the largest part of the building I decided to hit that first then the scaffold could be taken down as I could do the front off the mobile scaffold.
It took a few days to get it on and scratch it back but it went better than I thought.
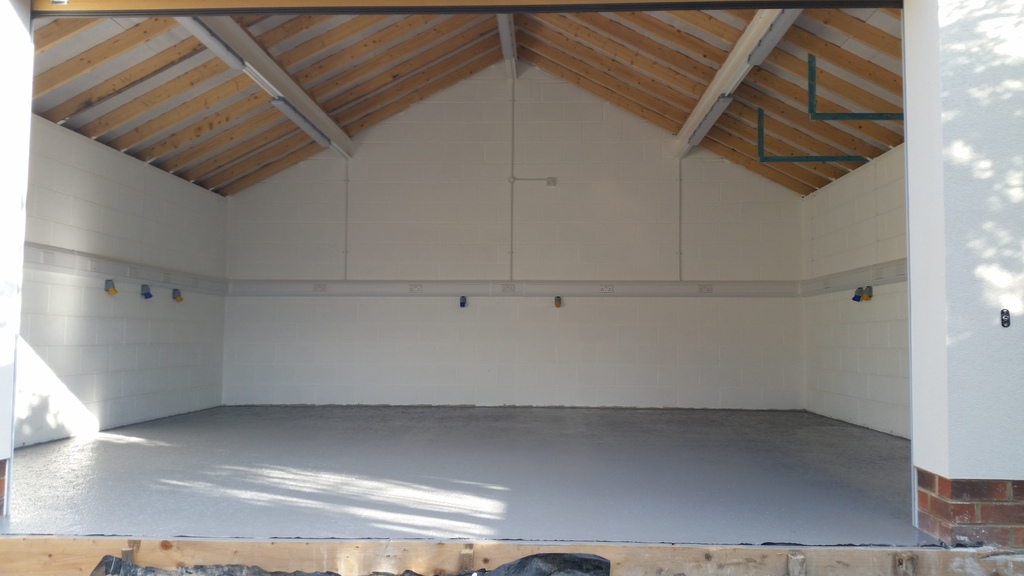
Then the scaffold came down first time I could see the actual size of the garage and how it sits in he garden
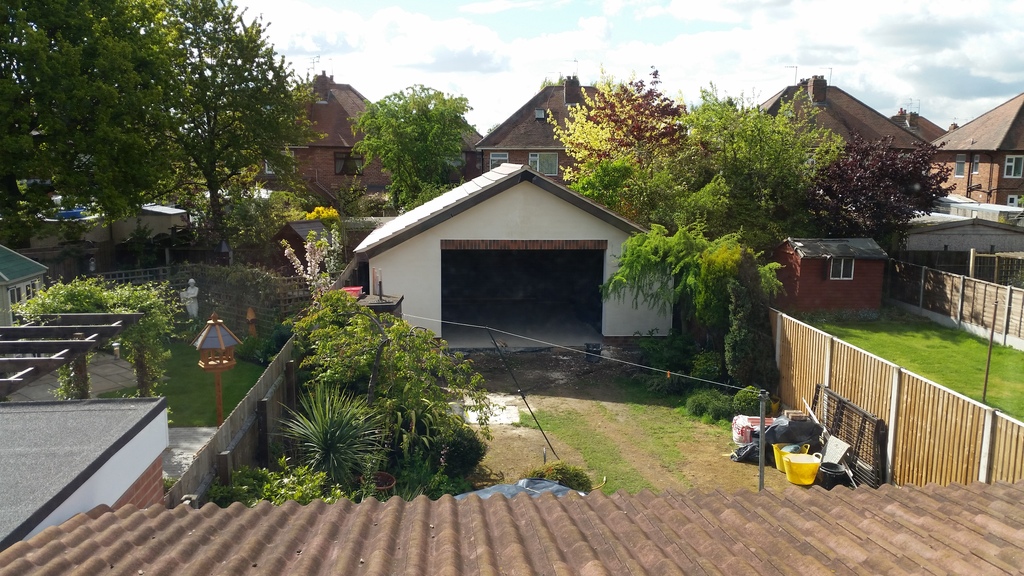
Looks alright with just the basecoat on lol
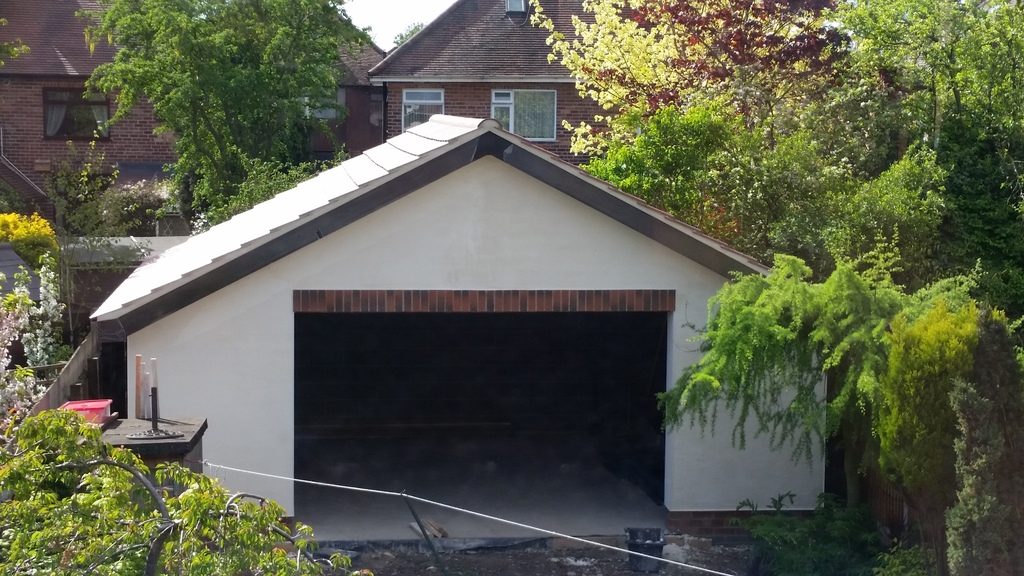
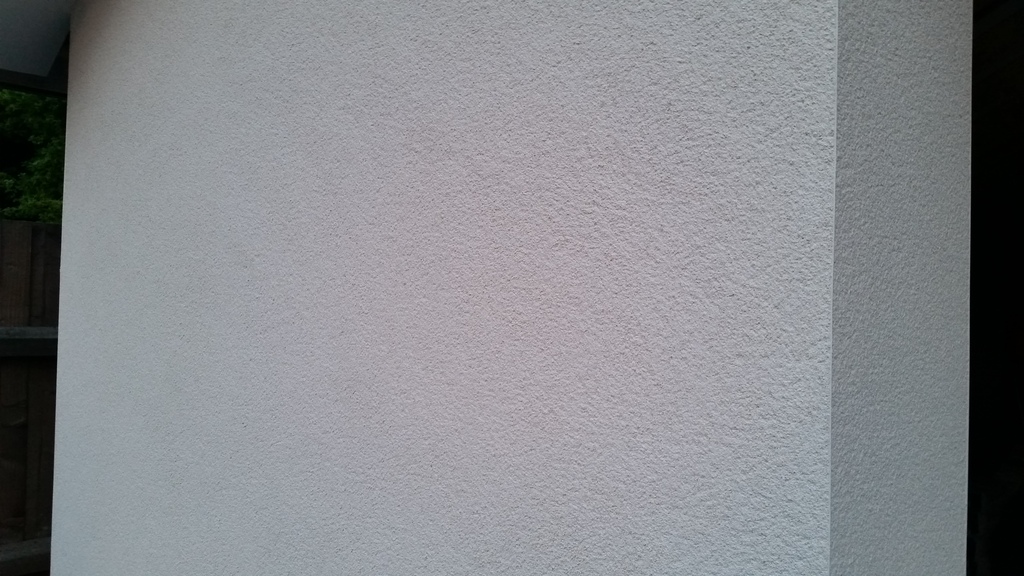
Then had to hit the front of he building in one go as the finish coat can dry different shades of white due to different scratching time.
It was a long day and had to hit it in a double pass so took all day and then checked it a 10 at night and it was nearly dry as they say 4 to 36 hours drying time wtf lol. Waiting till 12 at night and the bastard was ready to scratch so out I went and did the whole lot and didn't finish until 2 in the morning lol I bet the neighbours loved me but was very happy with how it looks . The next day I cleaned the fascia and took the plastic off so the front was finished.

The finished texture
Roller door ordered which will be light oak and will hopefully be fitted in the next week or so
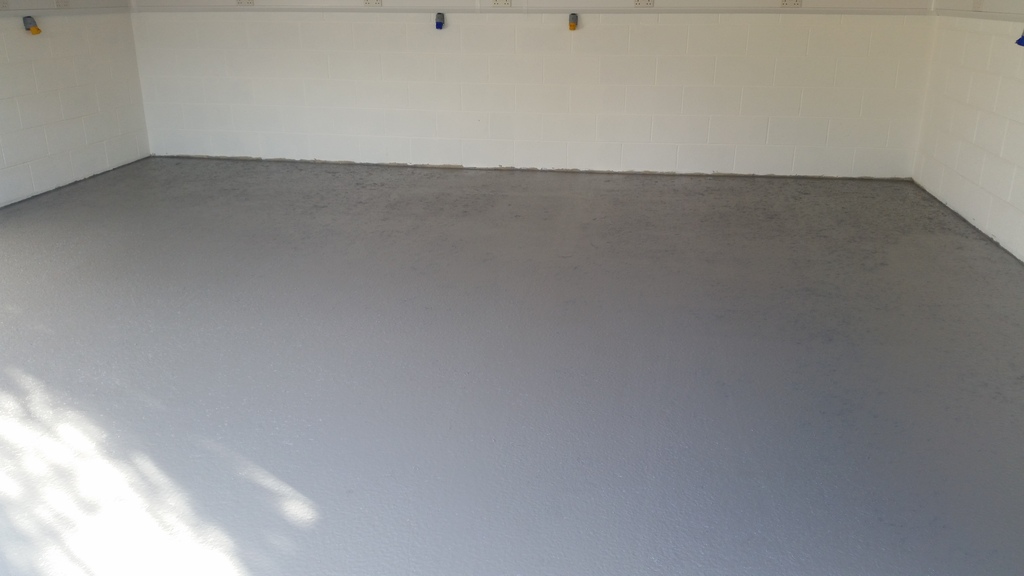
Scraped the floor clean so it's ready for sealing and got some white sandtex paint for the inside walls so hopefully be painted by the weekend
I will update as soon as I can
Thanks for looking
Cheers paul
Started rendering the building and space was so tight only have around 450mm to work in around the back of the building and being a big lad don't help much like lol.
Decided to use use krend silicon ft white with the hpx base coat and mesh.
Well as the back of the build is also the largest part of the building I decided to hit that first then the scaffold could be taken down as I could do the front off the mobile scaffold.
It took a few days to get it on and scratch it back but it went better than I thought.

Then the scaffold came down first time I could see the actual size of the garage and how it sits in he garden


Looks alright with just the basecoat on lol
Then had to hit the front of he building in one go as the finish coat can dry different shades of white due to different scratching time.
It was a long day and had to hit it in a double pass so took all day and then checked it a 10 at night and it was nearly dry as they say 4 to 36 hours drying time wtf lol. Waiting till 12 at night and the bastard was ready to scratch so out I went and did the whole lot and didn't finish until 2 in the morning lol I bet the neighbours loved me but was very happy with how it looks . The next day I cleaned the fascia and took the plastic off so the front was finished.


The finished texture


Roller door ordered which will be light oak and will hopefully be fitted in the next week or so
Scraped the floor clean so it's ready for sealing and got some white sandtex paint for the inside walls so hopefully be painted by the weekend
I will update as soon as I can
Thanks for looking
Cheers paul
Last edited by zetaboostboy522bhp; 03-05-2017 at 12:51 AM.
03-05-2017, 05:22 AM
#96
THE REAL DEAL
hi paul, looking great now, a couple of questions please, i notice you have no batt straps on the wall plate? also how do you access the garage as in your photos there seems to be a roof in front of it. thanks for the posst and keep up the good work. mark
03-05-2017, 05:57 PM
#97
Advanced PassionFord User
Thread Starter
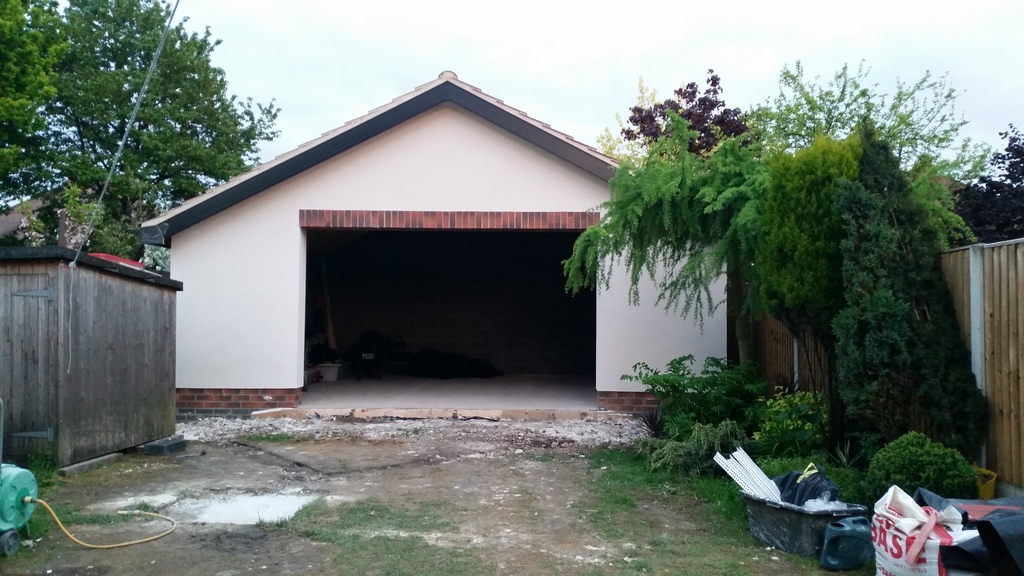
That's the house extension which is the full width of he house and it's got a drive down the side that will be continued all the way to the garage when I can afford it.
Cheers paul
Last edited by zetaboostboy522bhp; 03-05-2017 at 06:00 PM.
03-05-2017, 06:15 PM
#98
THE REAL DEAL
Update .
Jeffs been finishing of the block work on the gable ends and pointing up. All the timbers are on and just need nailing at the top then it's roof time .
I've ordered black fascia board which cost me around �340 and I've still got to get the Sofit board . With white render and black fascia I think I've changed my mind in terms of what colour door I will be going for . I wanted black or white door but I think iam going for light oak.i had a local door company come and measure up and have a quick look at the build in terms of if they can fit there door to the rsj etc and if they had any issues.
The only thing he said was to bolt a 5x2 timber to the back of the rsj as when the slats are closed the will sit against the timber to make a solid seal , that will be getting done on Saturday.
The door company quoted �1896 inc vat fitted in ether black , white or light oak . It's for a securoglide door which are very good so I will be snapping his hands off next week and ordering it. 3 weeks to make so your looking at around a month to get it fitted.
Finishing the gables at the top

Now you can see the size better , if I had a larger garden I would of gone bigger lol

The monsters in the garden lol
Nice height for hanging shit off the walls


Final bits of block work


Something landed in the garden lol

Cheers paul
Jeffs been finishing of the block work on the gable ends and pointing up. All the timbers are on and just need nailing at the top then it's roof time .
I've ordered black fascia board which cost me around �340 and I've still got to get the Sofit board . With white render and black fascia I think I've changed my mind in terms of what colour door I will be going for . I wanted black or white door but I think iam going for light oak.i had a local door company come and measure up and have a quick look at the build in terms of if they can fit there door to the rsj etc and if they had any issues.
The only thing he said was to bolt a 5x2 timber to the back of the rsj as when the slats are closed the will sit against the timber to make a solid seal , that will be getting done on Saturday.
The door company quoted �1896 inc vat fitted in ether black , white or light oak . It's for a securoglide door which are very good so I will be snapping his hands off next week and ordering it. 3 weeks to make so your looking at around a month to get it fitted.
Finishing the gables at the top
Now you can see the size better , if I had a larger garden I would of gone bigger lol
The monsters in the garden lol
Nice height for hanging shit off the walls
Final bits of block work
Something landed in the garden lol
Cheers paul
03-05-2017, 10:49 PM
#99
Advanced PassionFord User
Thread Starter
Cheers paul
14-05-2017, 04:26 PM
#100
Cracking garage this, looks big inside
My house and garage build has just started with all the footings poured few days ago, my garage needed a portal frame internal for building regs, its 6500 wide and 7500 long internal sizes, I think the frame is needed for the height as its 3.125 to ceiling and from ceiling 2.4 to peak, I wanted enough height for a ramp and storage area in upper level
My house and garage build has just started with all the footings poured few days ago, my garage needed a portal frame internal for building regs, its 6500 wide and 7500 long internal sizes, I think the frame is needed for the height as its 3.125 to ceiling and from ceiling 2.4 to peak, I wanted enough height for a ramp and storage area in upper level
05-06-2017, 09:50 PM
#101
Advanced PassionFord User
Thread Starter
Update time
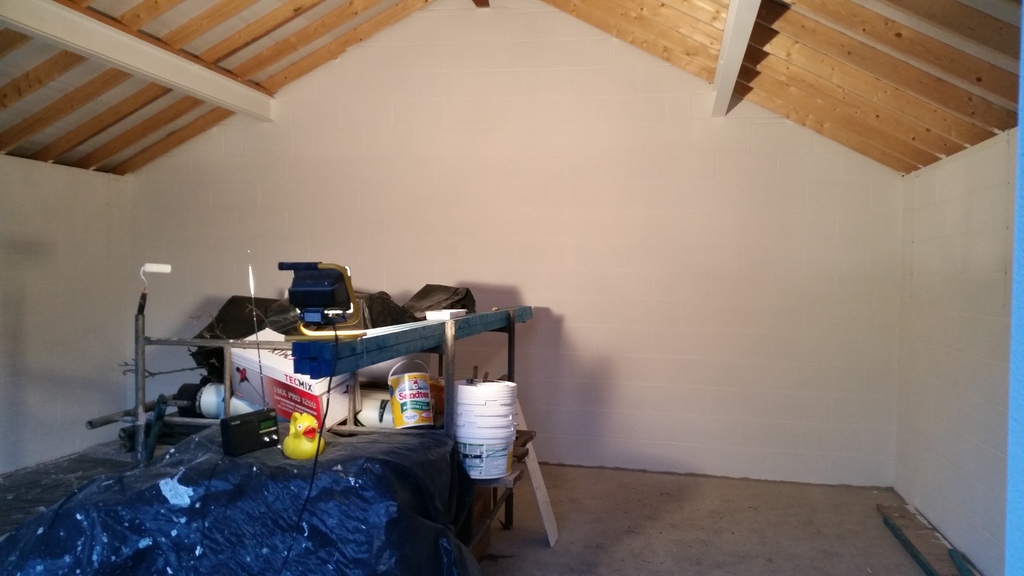
Started to paint the inside of the building . I decided to use sandtex smooth mansonary paint as it's thick and can be wiped down as it drys with a rubber like coating.
I purchased 20 litres thinking that would be enough but when it dried out I knew it would be a bit patchy and would need another coat, well 70 litres later and 3 weeks off and on I finally finished lol.
Next was painting the beams , I decided to use hammerite direct to rust and it went on very well , the next day checked it over and there was rust spot everywhere wtf , so decided to touch up the rust spots and ran out of paint , got a 1litre tin painted and the next morning it was a cream colour which really fooked me off , so got a new 5 litre tin and repainted every beam again.
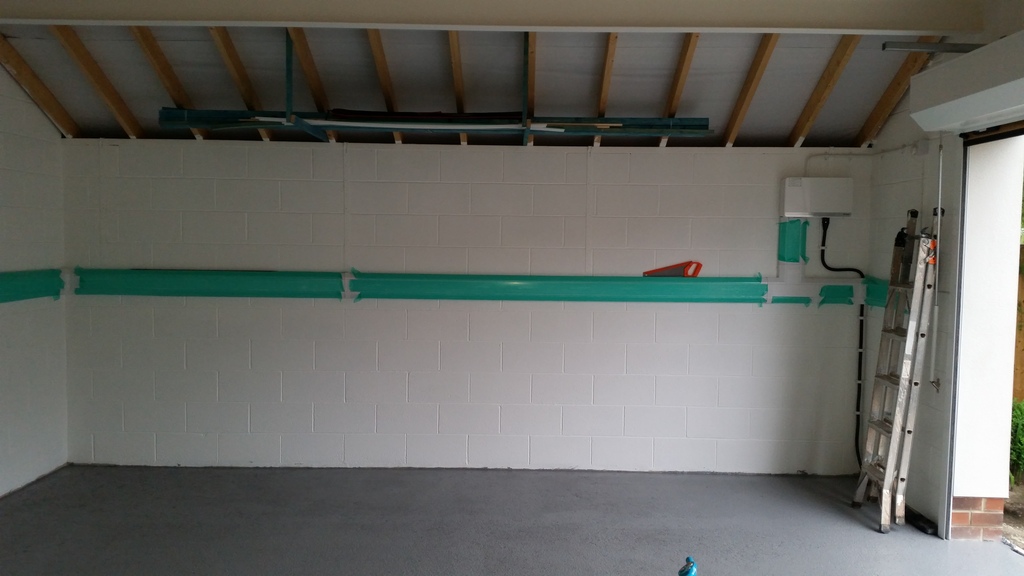
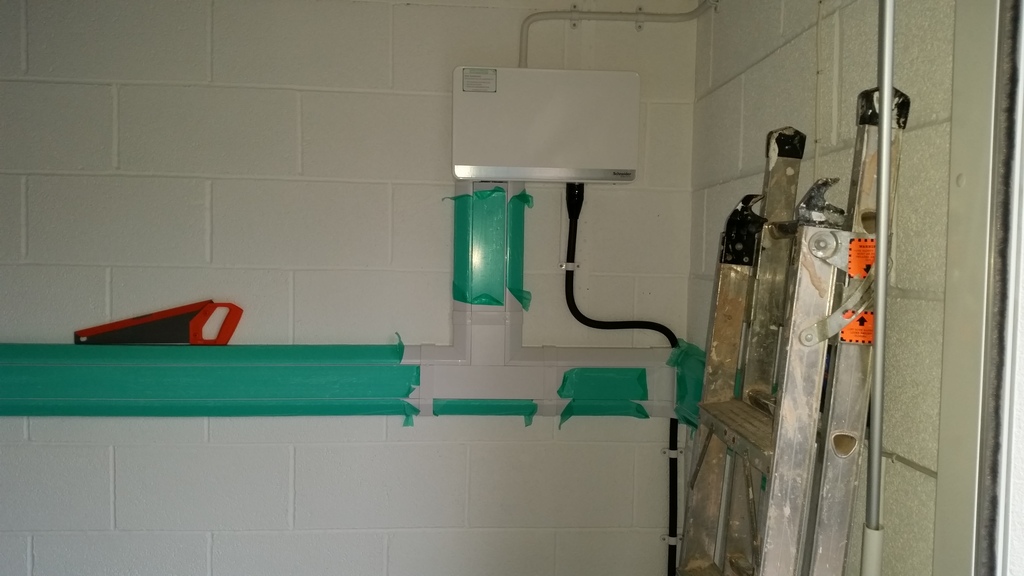
Armoured cable from the log cabin was pulled back and feed into the building
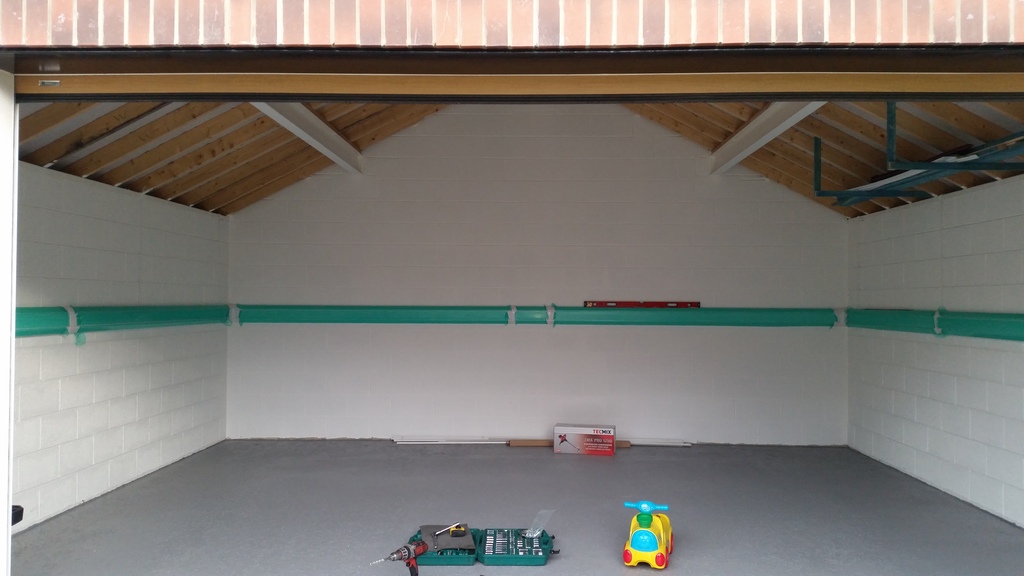
Getting there

Then last Friday the roller garage door was fitted
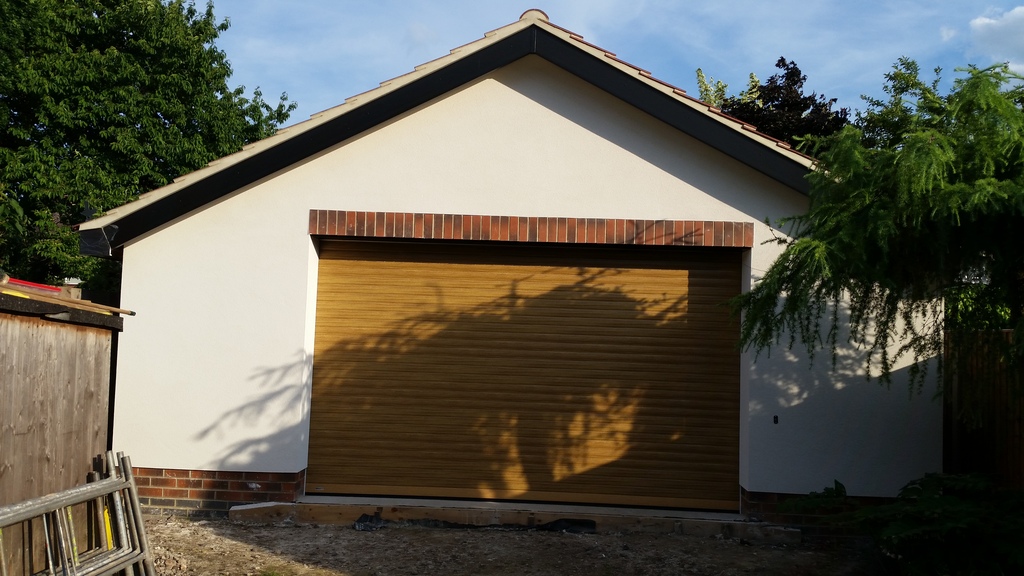
Couldn't fault Attenborough doors the lads were quality and the doors the dogs bollocks. It's a secureoglide door and iam very pleased with it for �1890 fitted.
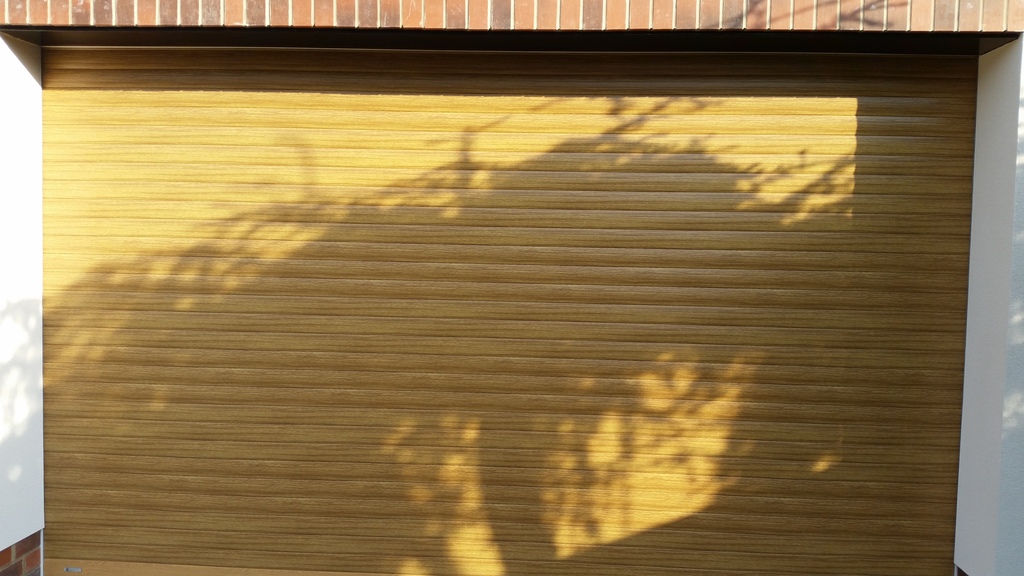
Full box included in the above price
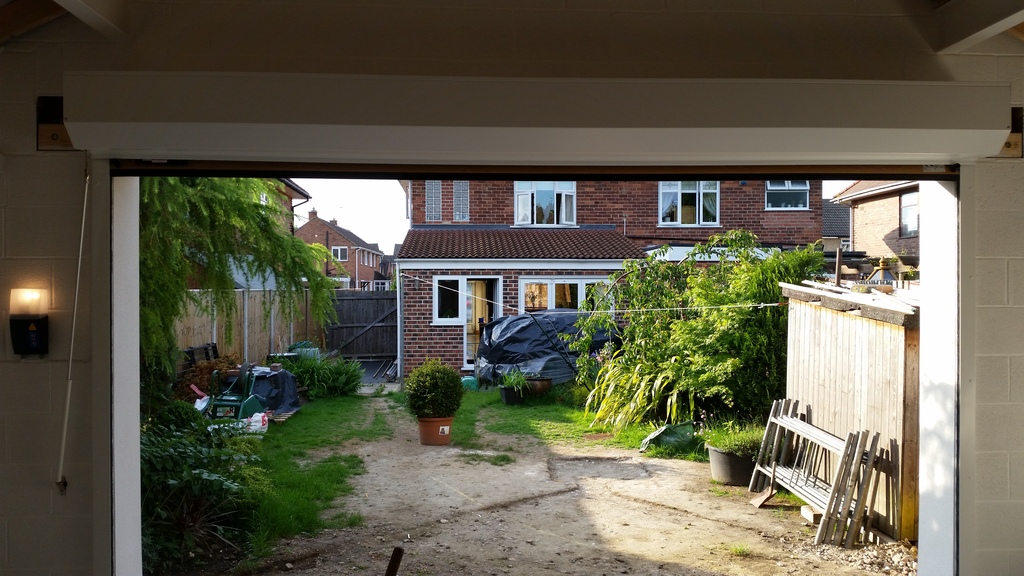
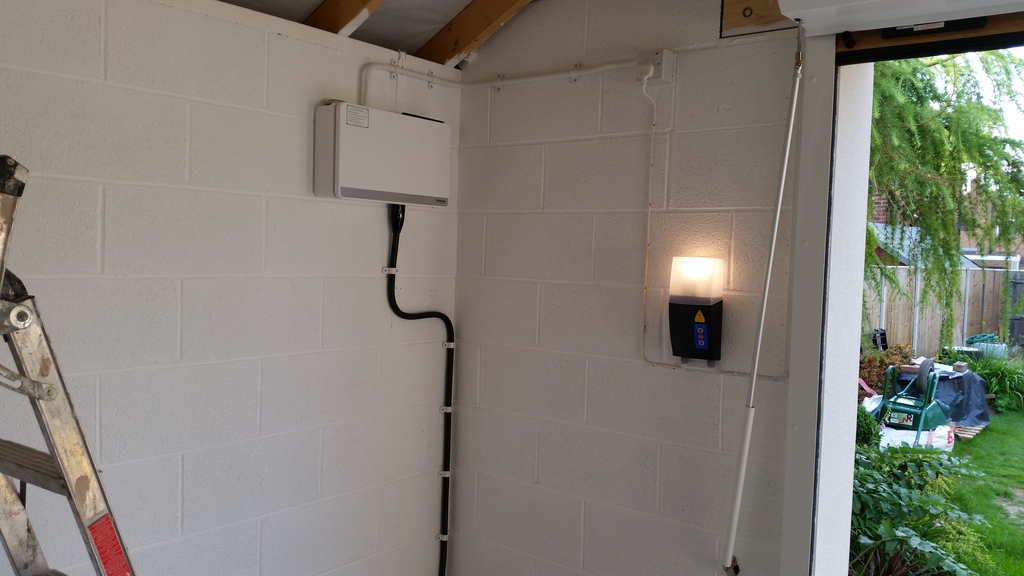
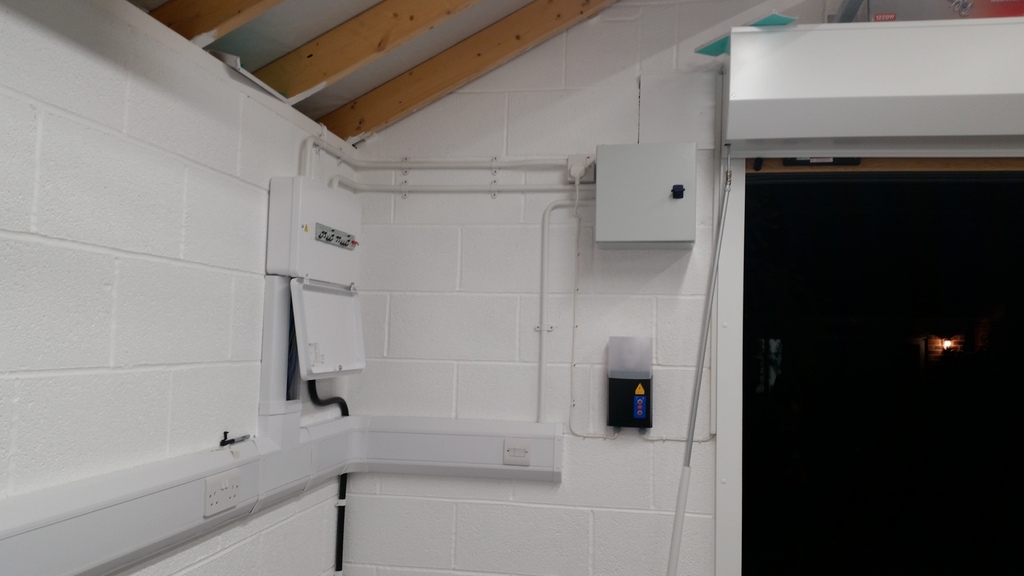
Door controller with built in light , Schneider disboard it's a bit on the large size but if I start to add lathes etc I will have plenty of spare breakers. Powered up and the first bit of conduit for the supply for the door.
Also painted the rsj underside black to match the fascias
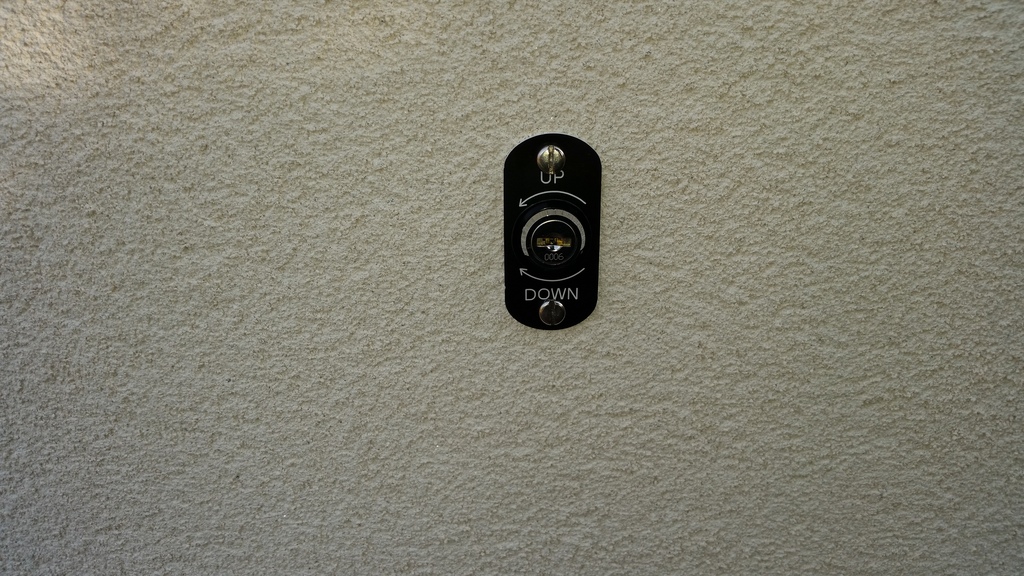
Manual override plate with lockable cover
I've painted the floor with the first coat thinned down , now waiting for more paint for the top coat and also got to wait for 24 hrs before it's fully dry. Once the top coat goes on I won't be able to use for 7 days as he said that's the best way to let it cure properly.
I will do more update as and when
Next jobs are insulate the eaves
Board the ceiling and paint
The lighting , electrics etc
Buy and fit cupboards
Fetch my stuff from storage and move in
Cheers paul
Started to paint the inside of the building . I decided to use sandtex smooth mansonary paint as it's thick and can be wiped down as it drys with a rubber like coating.
I purchased 20 litres thinking that would be enough but when it dried out I knew it would be a bit patchy and would need another coat, well 70 litres later and 3 weeks off and on I finally finished lol.


Next was painting the beams , I decided to use hammerite direct to rust and it went on very well , the next day checked it over and there was rust spot everywhere wtf , so decided to touch up the rust spots and ran out of paint , got a 1litre tin painted and the next morning it was a cream colour which really fooked me off , so got a new 5 litre tin and repainted every beam again.


Armoured cable from the log cabin was pulled back and feed into the building


Getting there

Then last Friday the roller garage door was fitted

Couldn't fault Attenborough doors the lads were quality and the doors the dogs bollocks. It's a secureoglide door and iam very pleased with it for �1890 fitted.

Full box included in the above price

Door controller with built in light , Schneider disboard it's a bit on the large size but if I start to add lathes etc I will have plenty of spare breakers. Powered up and the first bit of conduit for the supply for the door.

Also painted the rsj underside black to match the fascias

Manual override plate with lockable cover

I've painted the floor with the first coat thinned down , now waiting for more paint for the top coat and also got to wait for 24 hrs before it's fully dry. Once the top coat goes on I won't be able to use for 7 days as he said that's the best way to let it cure properly.
I will do more update as and when
Next jobs are insulate the eaves
Board the ceiling and paint
The lighting , electrics etc
Buy and fit cupboards
Fetch my stuff from storage and move in
Cheers paul
 06-06-2017, 07:01 PM
#104
Advanced PassionFord User
Thread Starter
29-06-2017, 06:51 PM
#107
Advanced PassionFord User
Thread Starter
Update time.
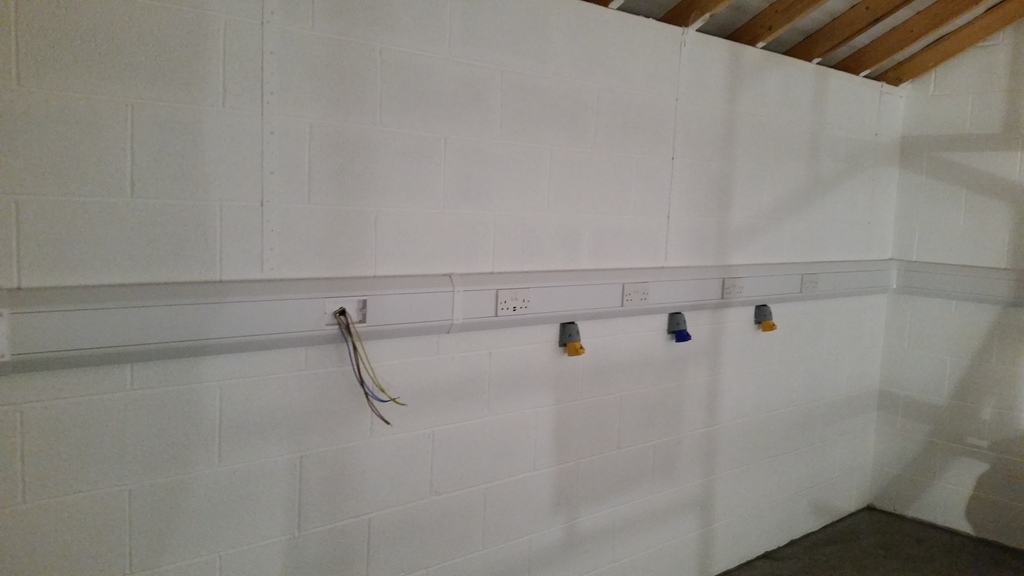
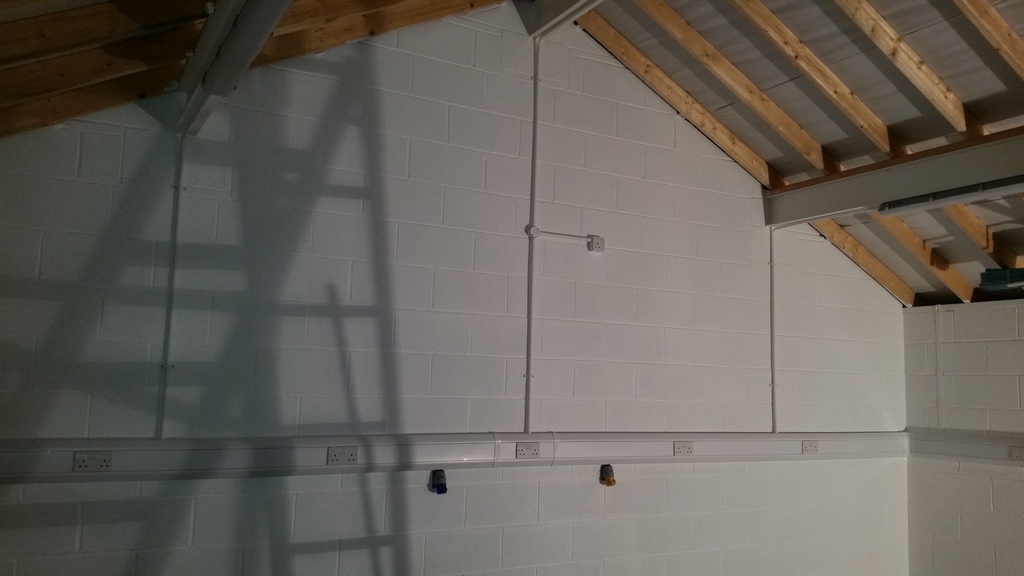
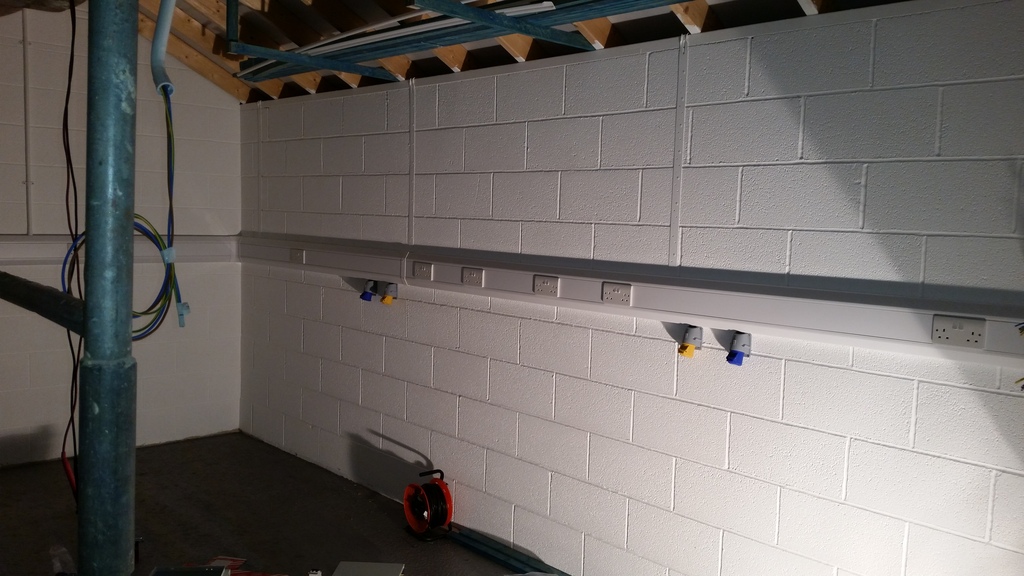
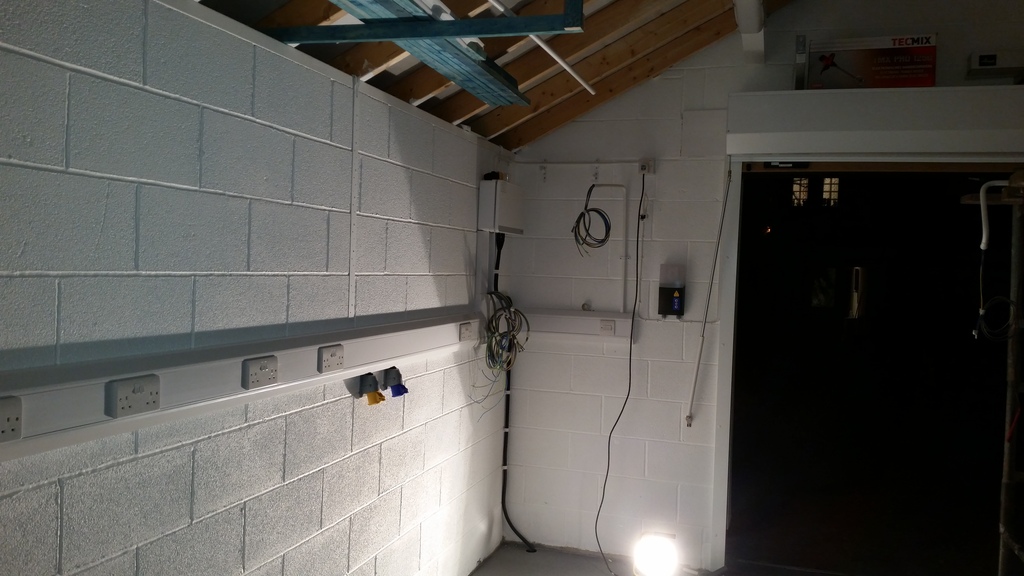
Next stage was sorting the electrics which isn't a problem as I wire complex control panels for a living so sorting out a few lights and sockets shouldnt be a issue.
Decided to use dado trunking as it's what I used in my shed before and it's pretty hard wearing did a bit of wheeling and dealing at the wholesalers and got 78% knocked off everything lol.
Total wasaround �290 for the dado , bends , couplers etc and lids.
Started to fit workshop out and planning where things are going etc
Fit some brackets for storage of pipes etc
Started wiring 240v sockets , 240v 16amp sockets for welder and 110v 16 amp sockets.
Missus said whats the single socket for , I said tv or light up ford sign lol
Ordered a ansell 2x30 led tornado light fittings x7 �100 a piece until I told them to stick it up there arses final price �32.50 each inc vat.
Fitted x6 to beams x2 per beam all on separate switches the extra one was for my welding bench but its that bright in there I couldn't see when I walked back into a dark house , very weird how led effects your eyes.
All lights on
110v centre tapped transformer mounted in control enclosure borrowed from work oh and the transformer lol, �400 worth of gear can't complain . The transformers are �220 for a 2 k va but these transformers are designed to be run constantly and not like the transformers found in the mobile plant.
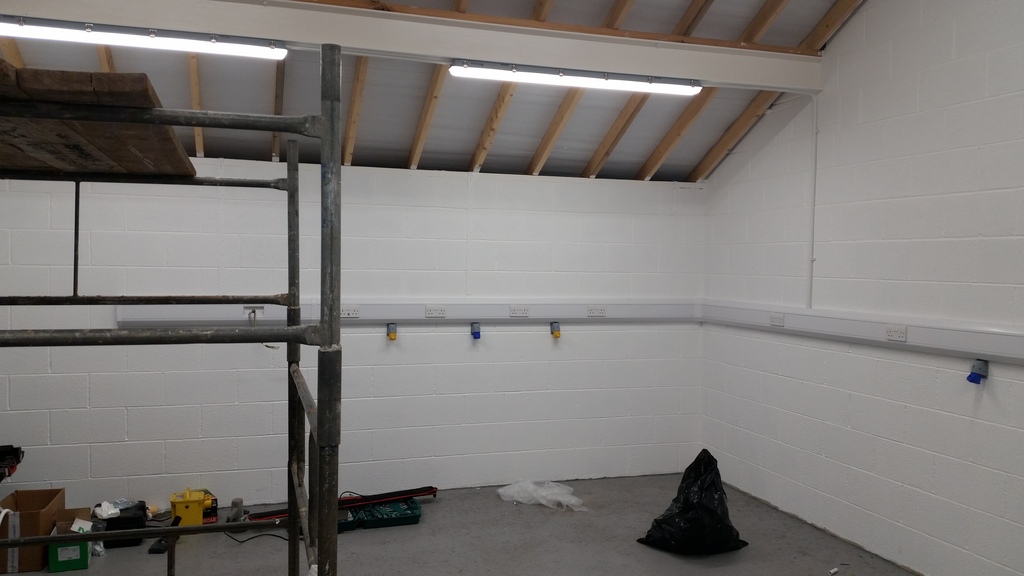
Next big job was hoovering , steam cleaning the floor ready for the top coat of 2 pack epoxy floor paint.
I fucked up with the floor as I put fibres in the concrete and they were sticking up out of the floor and should of burnt them off with a blow torch instead like a knobhead I painted it and now it like having needles in you legs so when it wears down and needs new paint either they would of worn down or they will be burnt off.
All finished ready for the cupboards to come and fit for storage etc
Fetched some cabinets from b and q cost around �360 so far
Will take some more pics soon
Cheers paul
Next stage was sorting the electrics which isn't a problem as I wire complex control panels for a living so sorting out a few lights and sockets shouldnt be a issue.
Decided to use dado trunking as it's what I used in my shed before and it's pretty hard wearing did a bit of wheeling and dealing at the wholesalers and got 78% knocked off everything lol.
Total wasaround �290 for the dado , bends , couplers etc and lids.
Started to fit workshop out and planning where things are going etc


Fit some brackets for storage of pipes etc

Started wiring 240v sockets , 240v 16amp sockets for welder and 110v 16 amp sockets.

Missus said whats the single socket for , I said tv or light up ford sign lol


Ordered a ansell 2x30 led tornado light fittings x7 �100 a piece until I told them to stick it up there arses final price �32.50 each inc vat.
Fitted x6 to beams x2 per beam all on separate switches the extra one was for my welding bench but its that bright in there I couldn't see when I walked back into a dark house , very weird how led effects your eyes.

All lights on


110v centre tapped transformer mounted in control enclosure borrowed from work oh and the transformer lol, �400 worth of gear can't complain . The transformers are �220 for a 2 k va but these transformers are designed to be run constantly and not like the transformers found in the mobile plant.

Next big job was hoovering , steam cleaning the floor ready for the top coat of 2 pack epoxy floor paint.
I fucked up with the floor as I put fibres in the concrete and they were sticking up out of the floor and should of burnt them off with a blow torch instead like a knobhead I painted it and now it like having needles in you legs so when it wears down and needs new paint either they would of worn down or they will be burnt off.

All finished ready for the cupboards to come and fit for storage etc

Fetched some cabinets from b and q cost around �360 so far
Will take some more pics soon
Cheers paul
Last edited by zetaboostboy522bhp; 29-06-2017 at 11:40 PM.
29-06-2017, 11:42 PM
#110
Advanced PassionFord User
Thread Starter
Cheers lads , how's it going rob ? Not seen you around for a while what you been up to and what motor you got now
Cheers paul
Cheers paul


 12-07-2017, 11:02 AM
#113
Advanced PassionFord User

Fair play Paul that looks brilliant inside. I missed the pics of the outside an you post some please?

The following users liked this post:
H3lsing (18-07-2017)
15-02-2018, 01:38 AM
#115
Advanced PassionFord User
Thread Starter
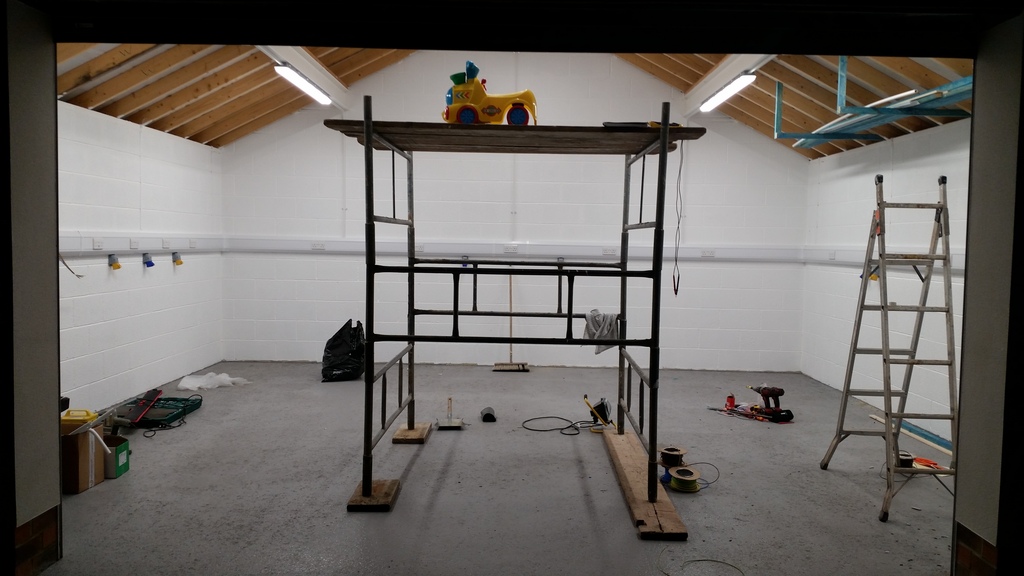
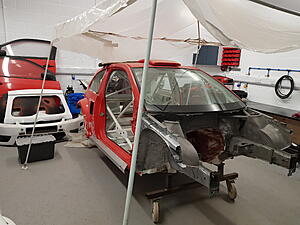
A little update in and everything working fine , as normal I could do with more room lol as all the shit has found its way into my man cave.
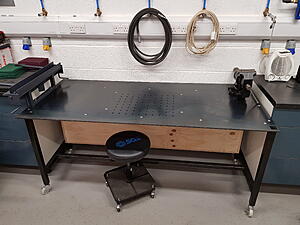
Built my welding table frame before Christmas and cost around �70 in metal as I had it all cut to size as I worked it all out and it just needed welding and some wheels adding.
Ordered table top from scc laser in Derby they do a lot of rolls Royce stuff so was expecting them to be very expensive but �150 later delivered I was well happy , spent Saturday drilling and countersinking the bolts for the table top and made a bracket so my metal bender could be mounted out of the way on the side of the table. Notice the square hole that's for the removable vice to be dropped down the frame leg and bolted when in use just need to make a plate for it .
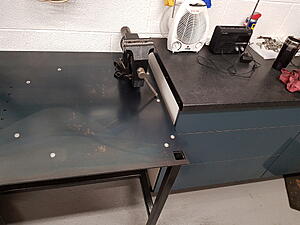
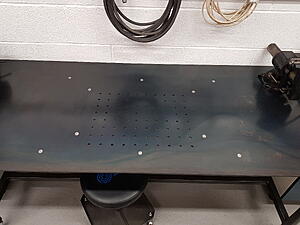
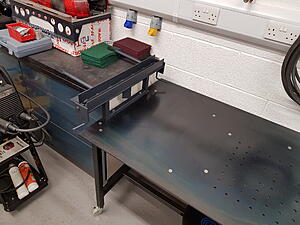
As you can see the garage is now in use
Need to sort the garden out next or I will be in the dog house as it was mint before the garage lol
Thanks for looking
Cheers Paul
Built my welding table frame before Christmas and cost around �70 in metal as I had it all cut to size as I worked it all out and it just needed welding and some wheels adding.
Ordered table top from scc laser in Derby they do a lot of rolls Royce stuff so was expecting them to be very expensive but �150 later delivered I was well happy , spent Saturday drilling and countersinking the bolts for the table top and made a bracket so my metal bender could be mounted out of the way on the side of the table. Notice the square hole that's for the removable vice to be dropped down the frame leg and bolted when in use just need to make a plate for it .


As you can see the garage is now in use

Need to sort the garden out next or I will be in the dog house as it was mint before the garage lol
Thanks for looking
Cheers Paul
Last edited by zetaboostboy522bhp; 15-02-2018 at 01:55 AM.
15-02-2018, 09:51 AM
#116
10K+ Poster!!


Wow, car looks great in there and I like what you have done with the cupboards and the electrics etc. I have been thinking of doing something similar in my garage and workshop.
16-02-2018, 05:48 PM
#118
10K+ Poster!!