My RS2000 Rally Car (Well, one of them)
 30-05-2016, 04:55 PM
#41
More small updates. I had planned to fit the gearbox over the weekend but I've decided to replace the clutch just to be safe, so the box should hopefully go in next weekend. Dropped the front hubs with my friend earlier to have new bearings fitted too, just because.
Did a little work on the inside. Firstly, made an alloy bracket to hold the heater:
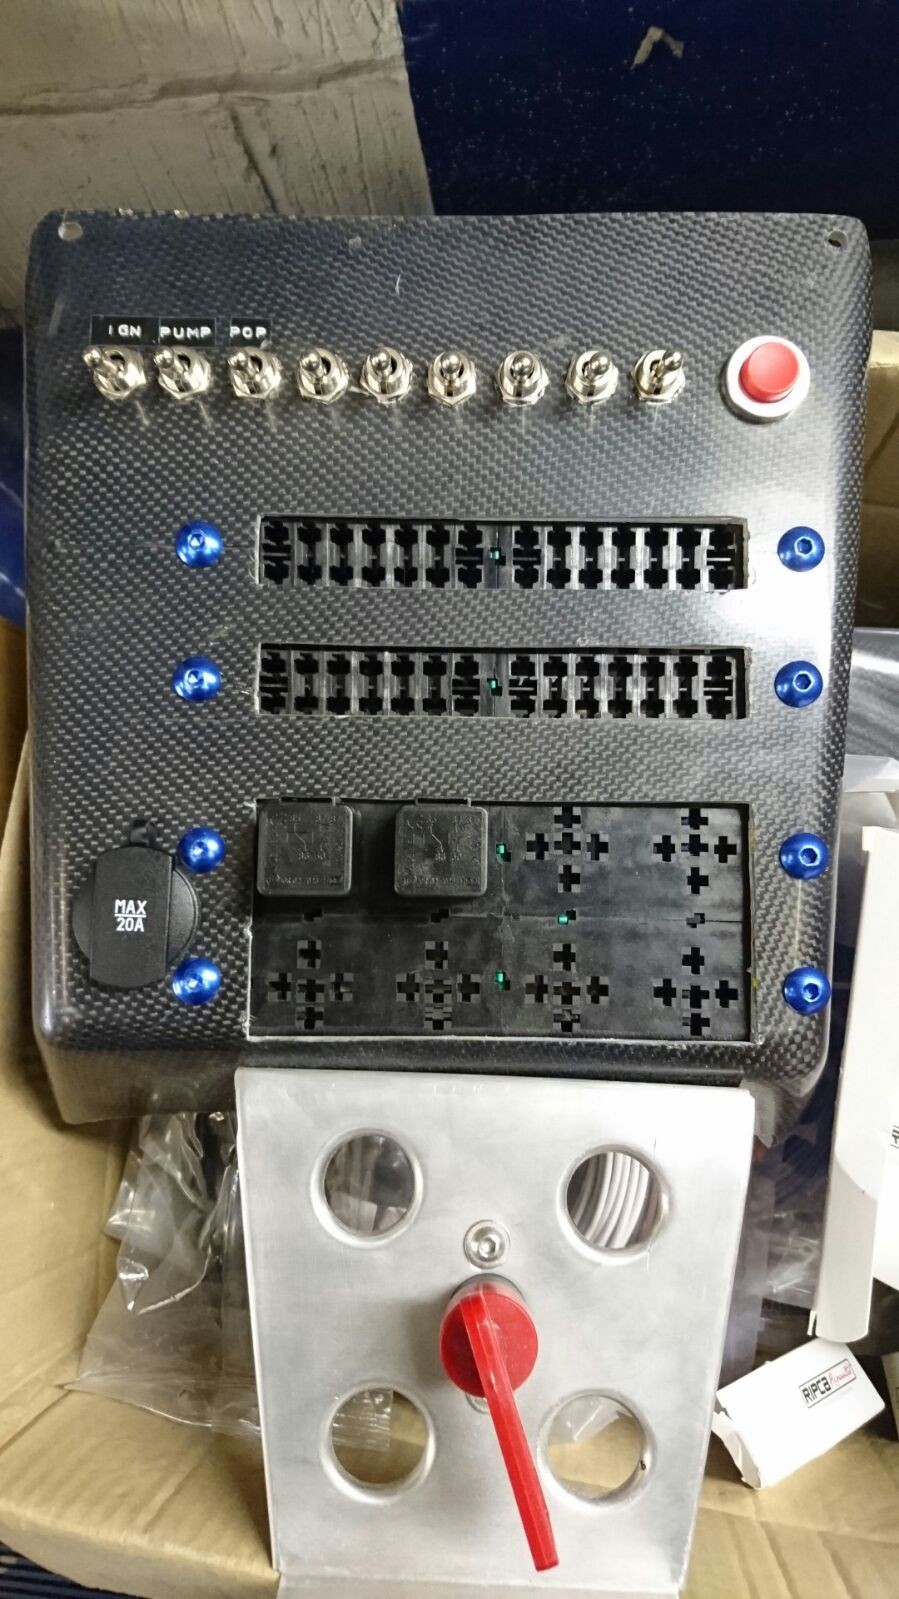
Also fitted the carbon centre console and cut-off switch bracket. Obviously this will be furnished with fuses and relays in due course, and the kill switch bracket cleaned up:
Dash is coming together a bit more. I ditched the LHS dash panel and replaced it with a loosely formed version made out of 1mm plastic sheet. Not the prettiest but an awful lot lighter than the standard piece. Also made a blank for the clock:
I've made a start on the main dash panel so will try and finish that off this week and also fit the gearbox/uprights/driveshafts hopefully. You can see the column lowering bracket in the picture too, though that column is just a placeholder as I have a lighter version to go in.
Until next time.
Did a little work on the inside. Firstly, made an alloy bracket to hold the heater:


Also fitted the carbon centre console and cut-off switch bracket. Obviously this will be furnished with fuses and relays in due course, and the kill switch bracket cleaned up:

Dash is coming together a bit more. I ditched the LHS dash panel and replaced it with a loosely formed version made out of 1mm plastic sheet. Not the prettiest but an awful lot lighter than the standard piece. Also made a blank for the clock:

I've made a start on the main dash panel so will try and finish that off this week and also fit the gearbox/uprights/driveshafts hopefully. You can see the column lowering bracket in the picture too, though that column is just a placeholder as I have a lighter version to go in.
Until next time.
 06-06-2016, 12:52 PM
#42
Thanks to a couple of friends popping round yesterday, the gearbox is now fitted. This is probably the single biggest performance modification I've made, reducing the gearing significantly. Fitted a new Sachs clutch and slave cylinder while I was about it, as the old clutch was pretty worn. With the new mounts, the engine is pretty much solid, so that should make the thing vibrate a bit. Not sure how long the silver paint will last, but it was nice of the gearbox builder to put some effort in I suppose.
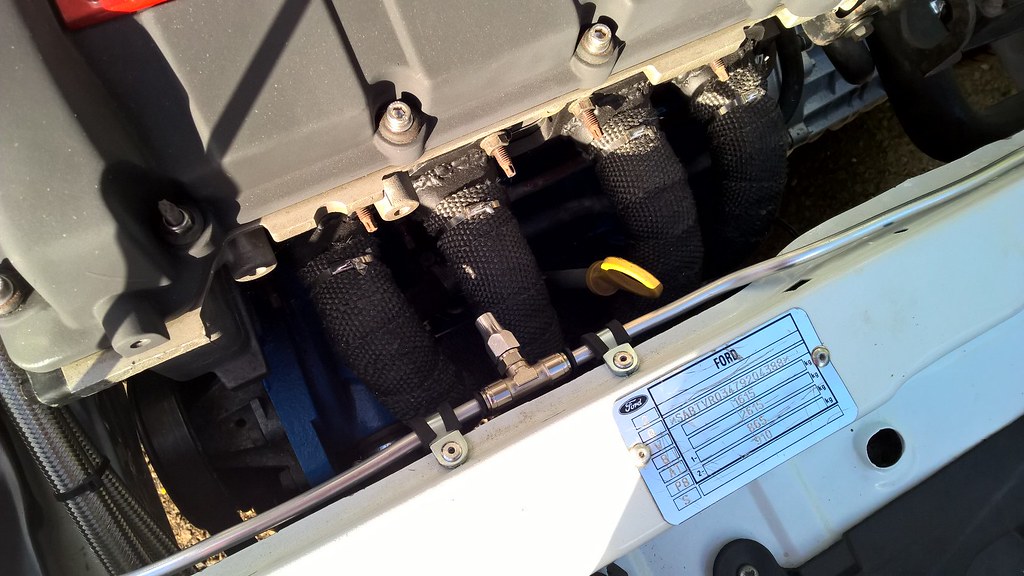
Heat-wrapped manifold fitted:
Also fitted the starter motor, alternator and PAS pump back on. Shame about the rusty engine mount bolts. Will probably just put some paint on them. Not taking it apart again.

Was going to put the new aux belt on but it didn't fit so I need to buy another one. I've got a spare cam cover to paint so will make a start on that. Waiting to get the front upright back with new bearings in them so, providing the drive shafts still fit, it should be rolling again by the weekend I hope.
Until next time.

Heat-wrapped manifold fitted:

Also fitted the starter motor, alternator and PAS pump back on. Shame about the rusty engine mount bolts. Will probably just put some paint on them. Not taking it apart again.

Was going to put the new aux belt on but it didn't fit so I need to buy another one. I've got a spare cam cover to paint so will make a start on that. Waiting to get the front upright back with new bearings in them so, providing the drive shafts still fit, it should be rolling again by the weekend I hope.
Until next time.
06-06-2016, 01:21 PM
#43
10K+ Poster!!

Nice work!
 28-07-2016, 03:00 PM
#45
Been rather lazy and not updated this lately! Few bits been happening so let's get to it!
Firstly, I've been trying to work out drive shafts. Thanks to the use of a Focus gearbox, the offside Escort shaft no longer fits. I've just bought a two piece shaft from a 2.0 Focus so I will give that a try and see how it works out length-wise. I will need to make a bracket for the intermediate bearing but that isn't too difficult. The length is the big issue (ooh err) so will have to see how that goes.
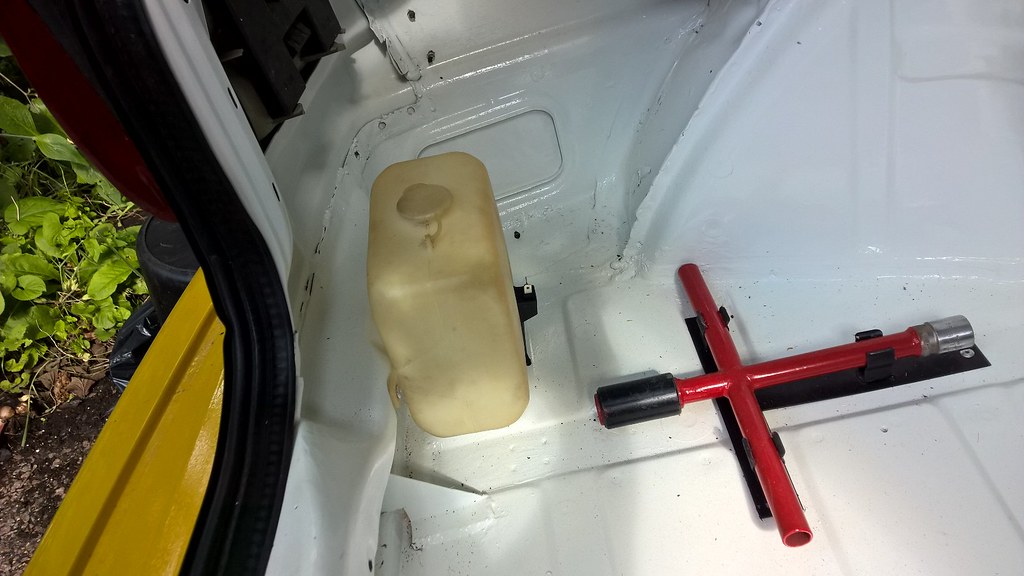
One massive job, I fitted a MK2 Escort washer bottle in the boot:
 WP_20160626_16_11_46_Pro by Jon Scoltock, on Flickr
Since taking that picture I've plumbed the pump into the washer jets, but no pictures of that.
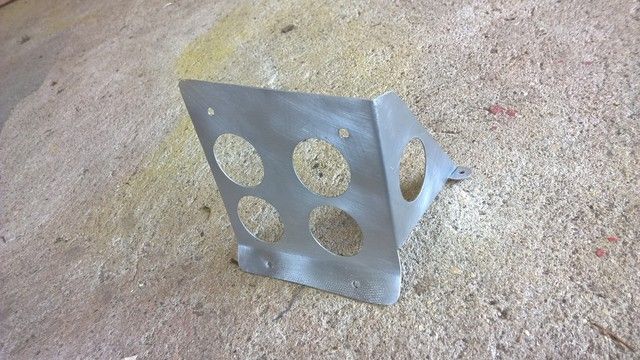
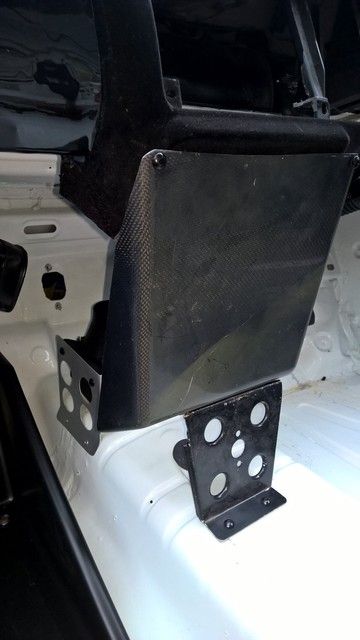
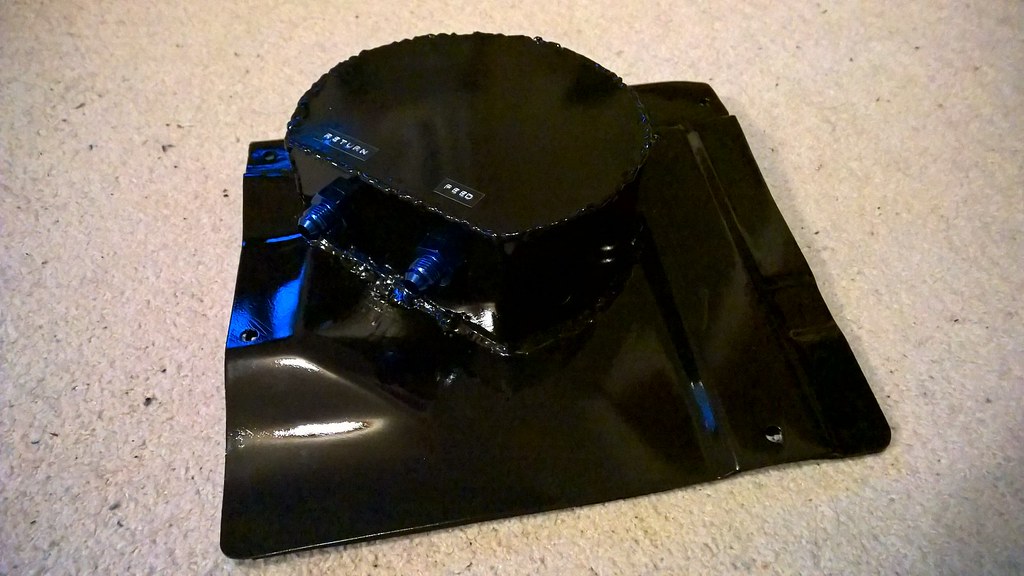
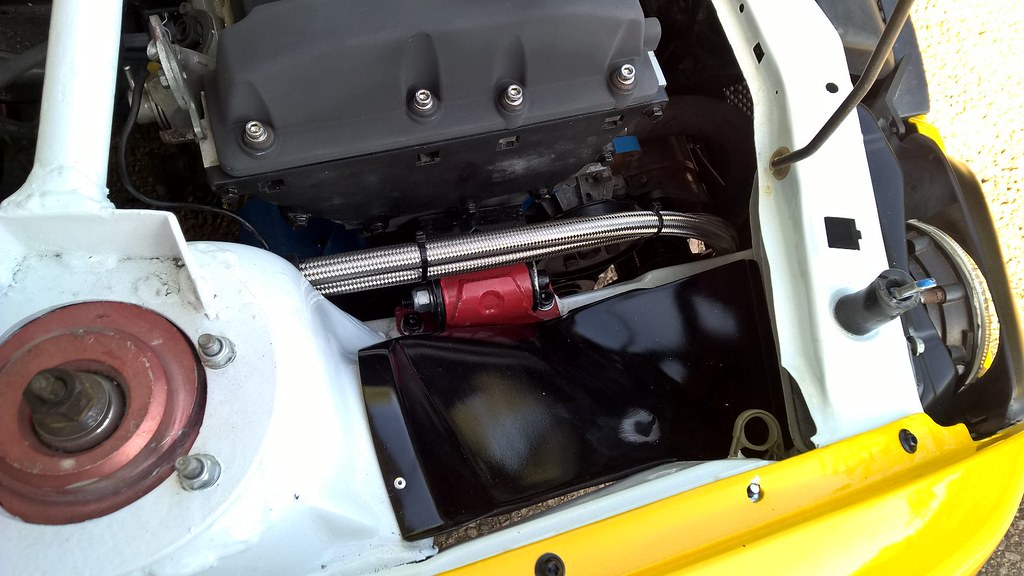
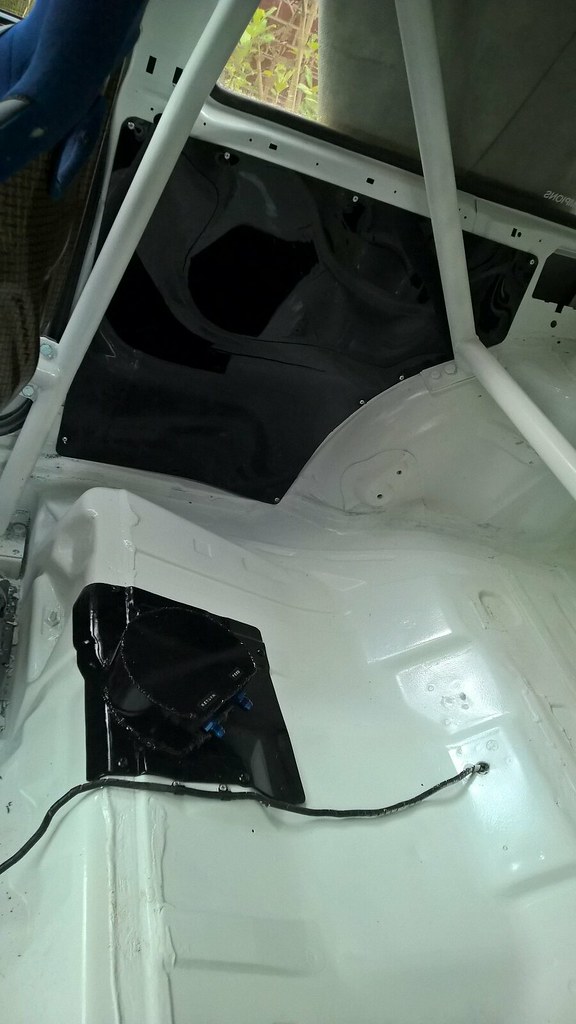
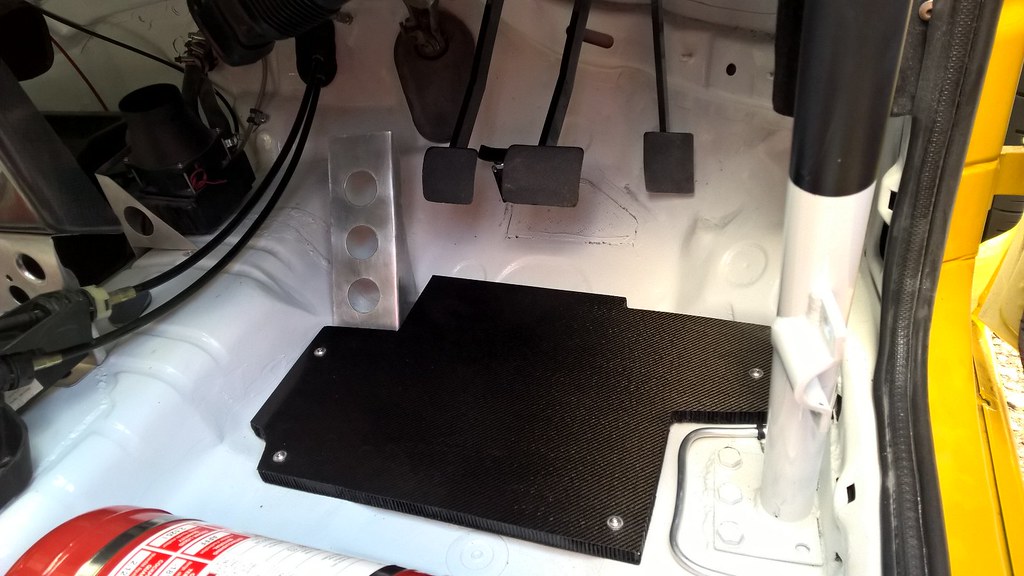
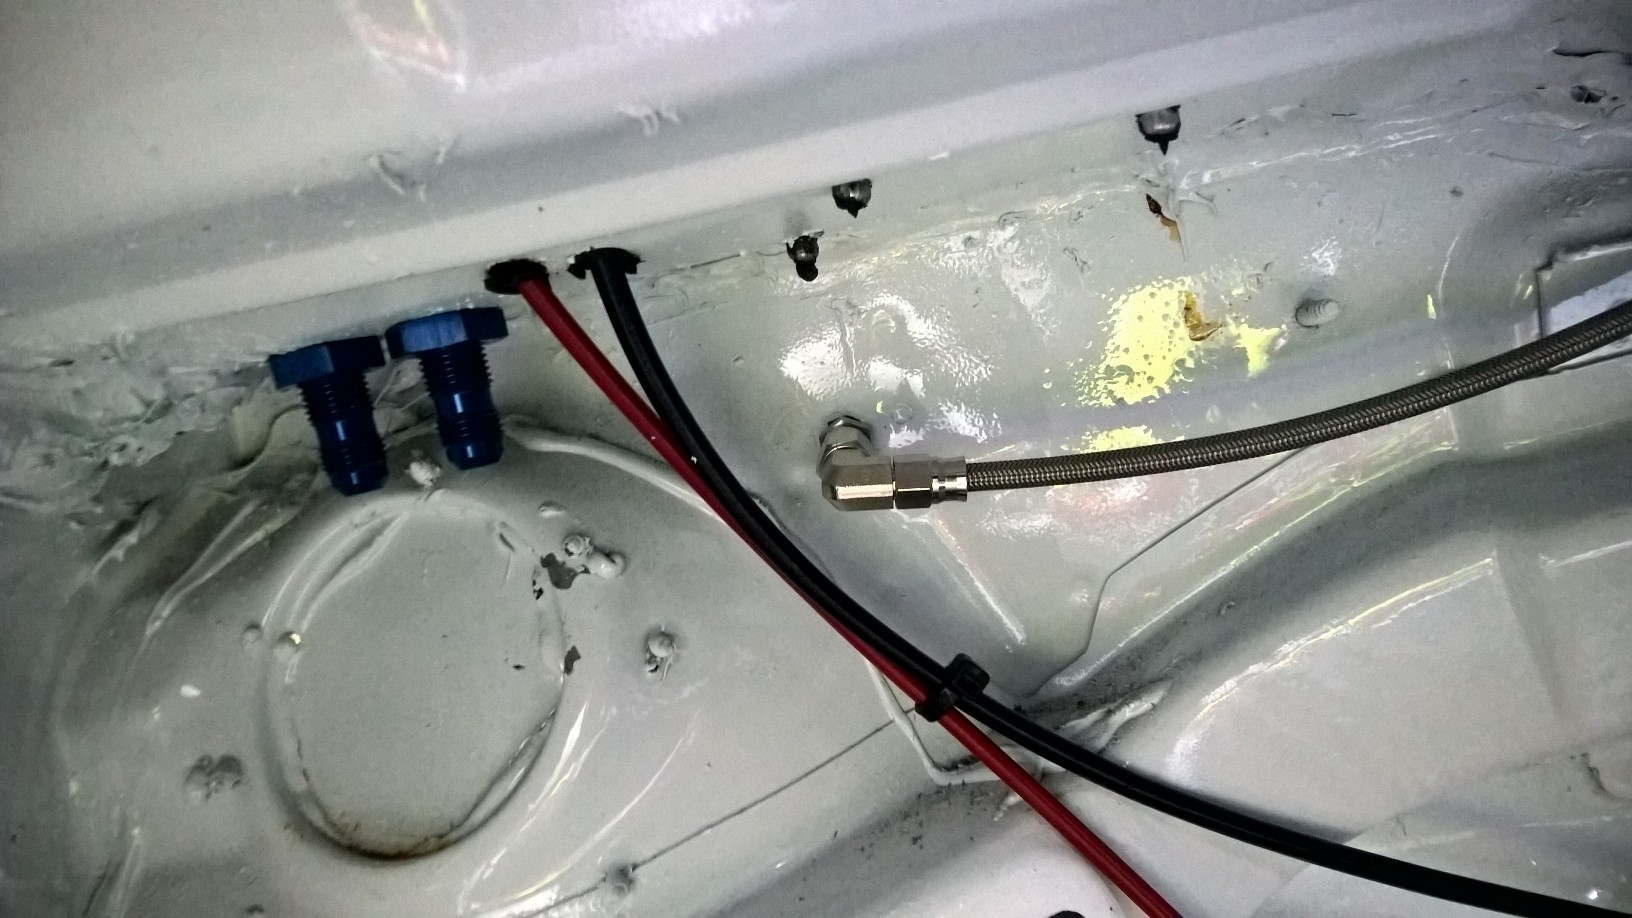
Inside the car, I've been making a cover for the fuel pump. I wanted to be able to remove the pump so wanted a bolt down cover, and wanted a bit of space for the fuel lines etc, so knocked this up using a spare piece of floor pan and some sheet steel:
 WP_20160711_14_03_45_Pro__highres by Jon Scoltock, on Flickr
Painted and with fittings in:
 WP_20160723_21_12_02_Pro by Jon Scoltock, on Flickr
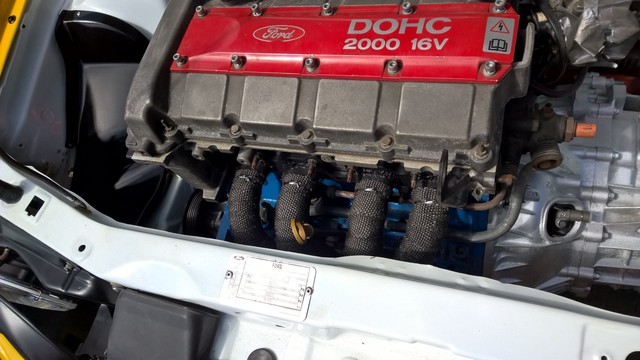
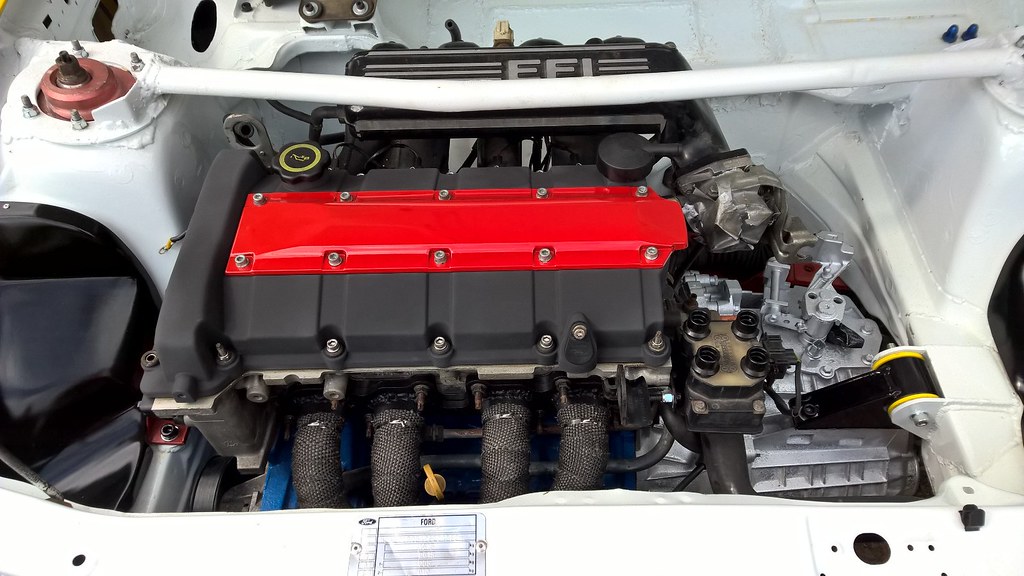
Getting back to the engine bay, I fitted a black cam cover, just to tidy things up a bit. Also fitted another plug cover, but need to fit new stickers to it:
 WP_20160626_15_55_11_Pro by Jon Scoltock, on Flickr
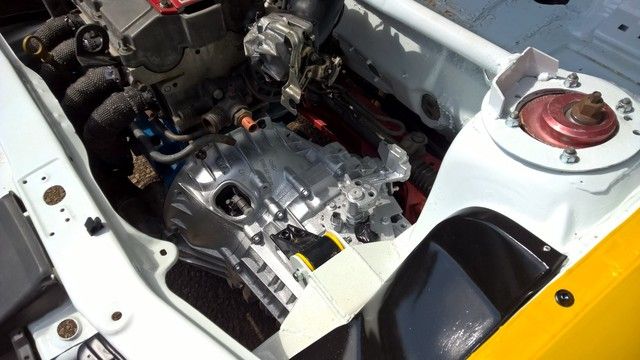
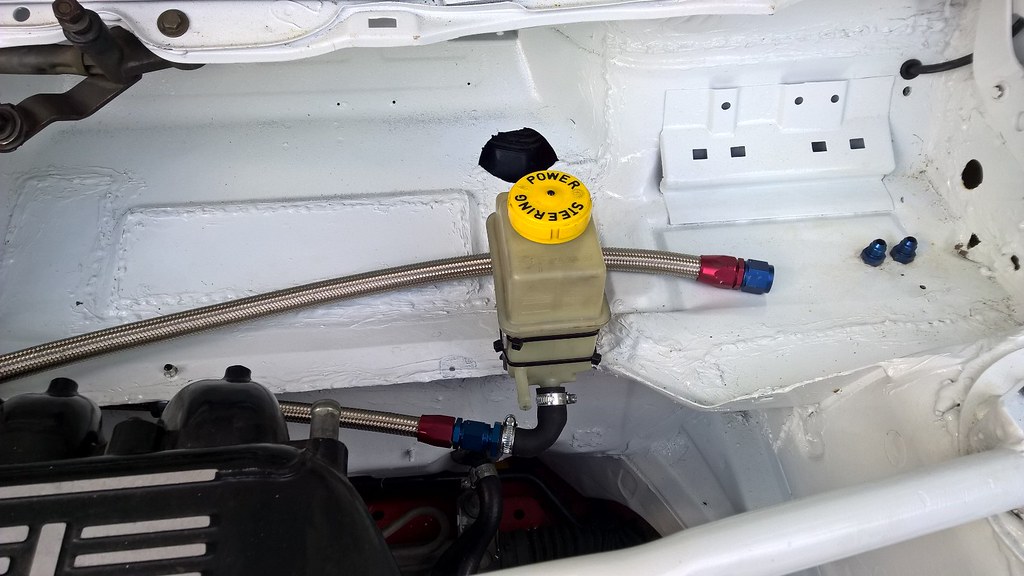
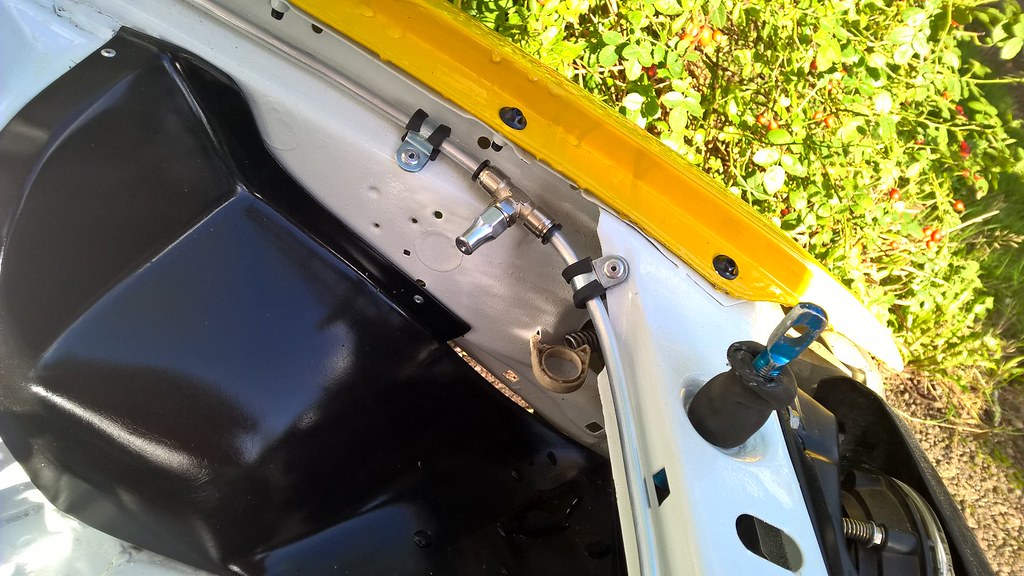
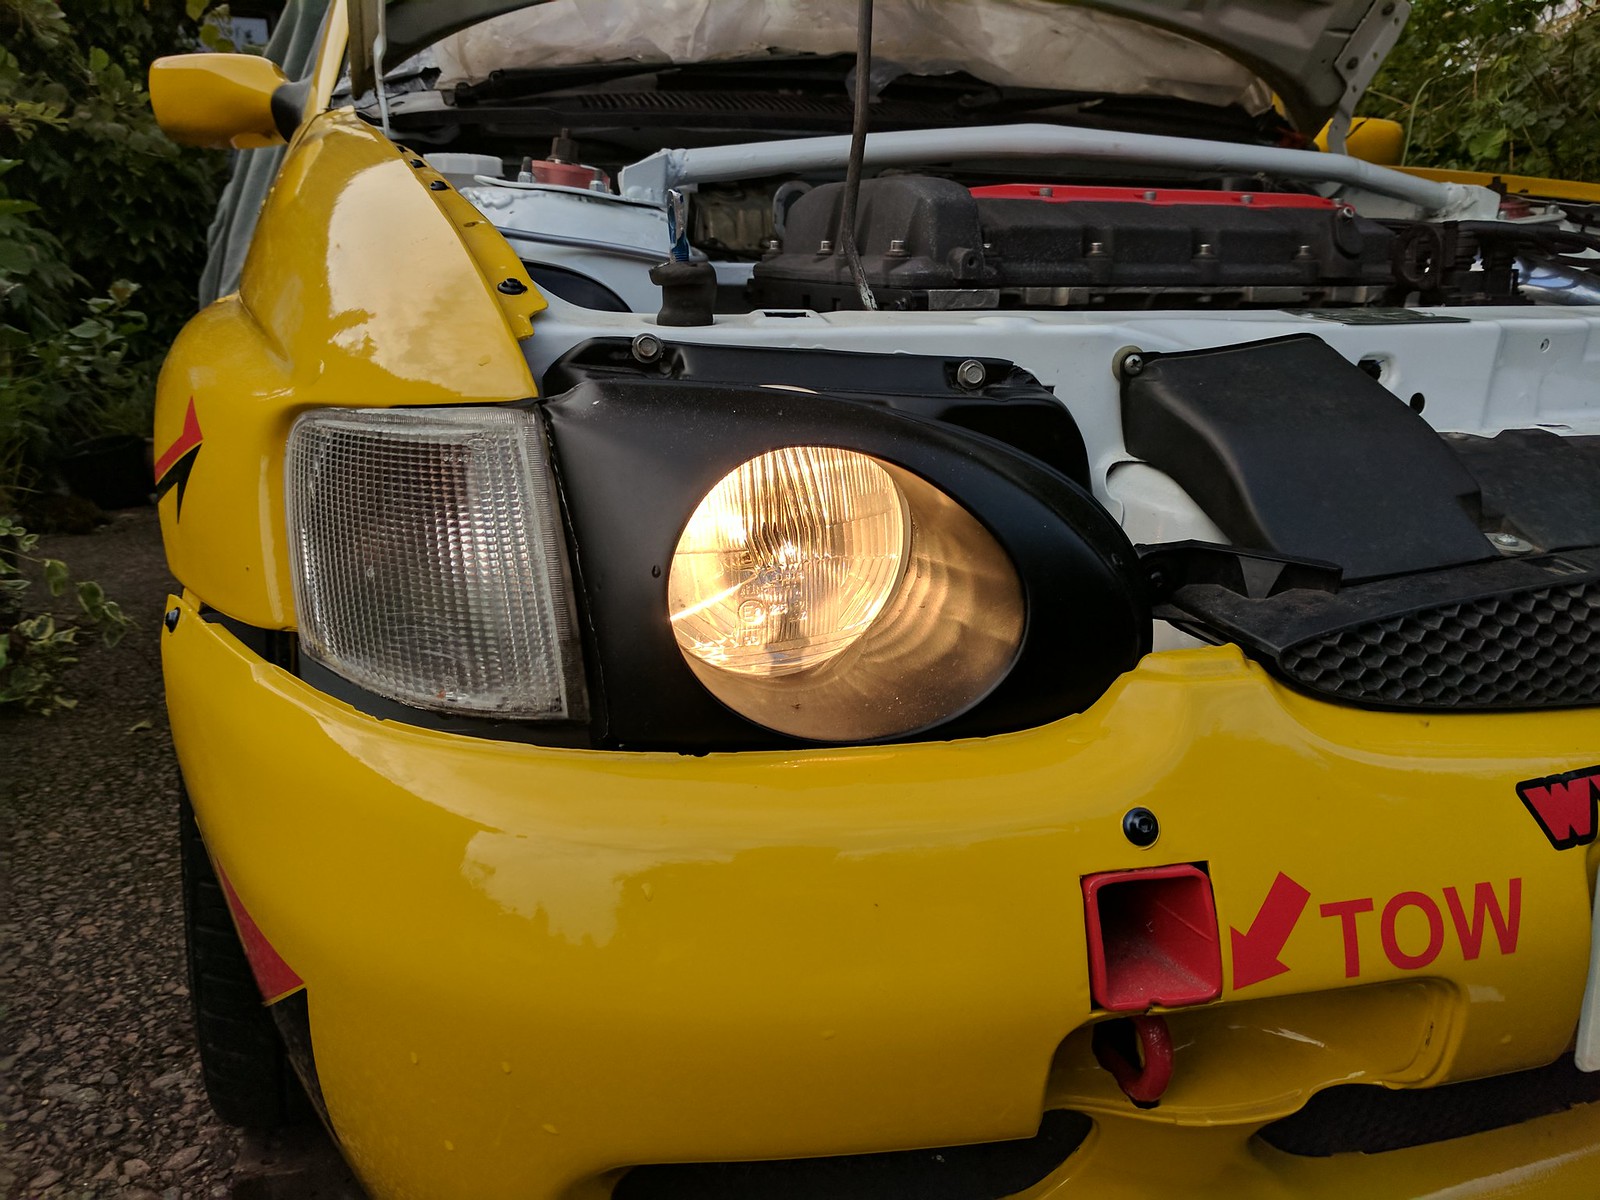
Thanks to the Group A inner arch guards, the standard header/PAS tanks weren't really ideal. I had ordered a nice aftermarket one with AN fittings but it was going to take 3-4 months to turn up, so I picked up a Sierra PAS reservoir and mounted it on top of the bulkhead:
 WP_20160702_17_18_08_Pro by Jon Scoltock, on Flickr
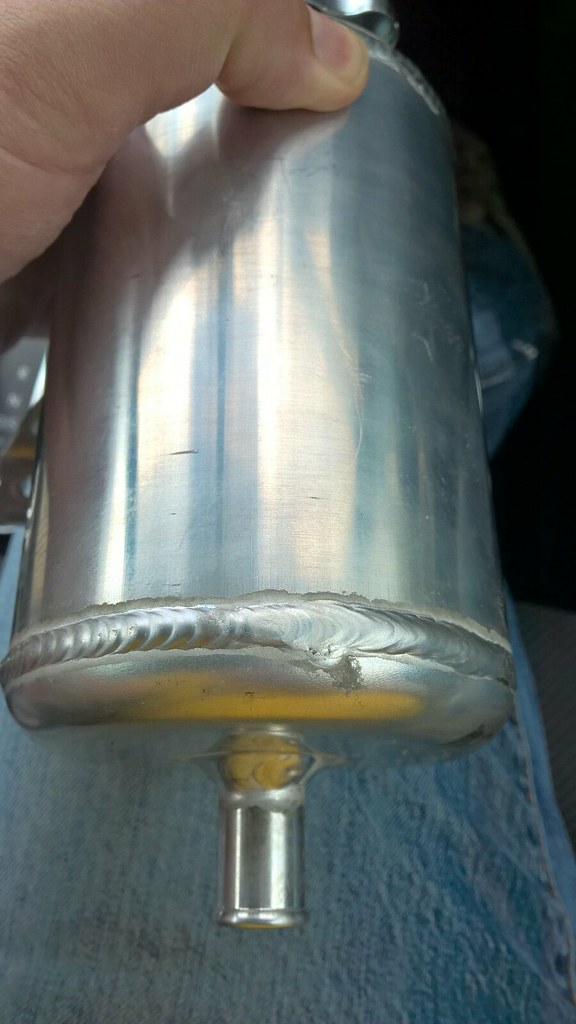
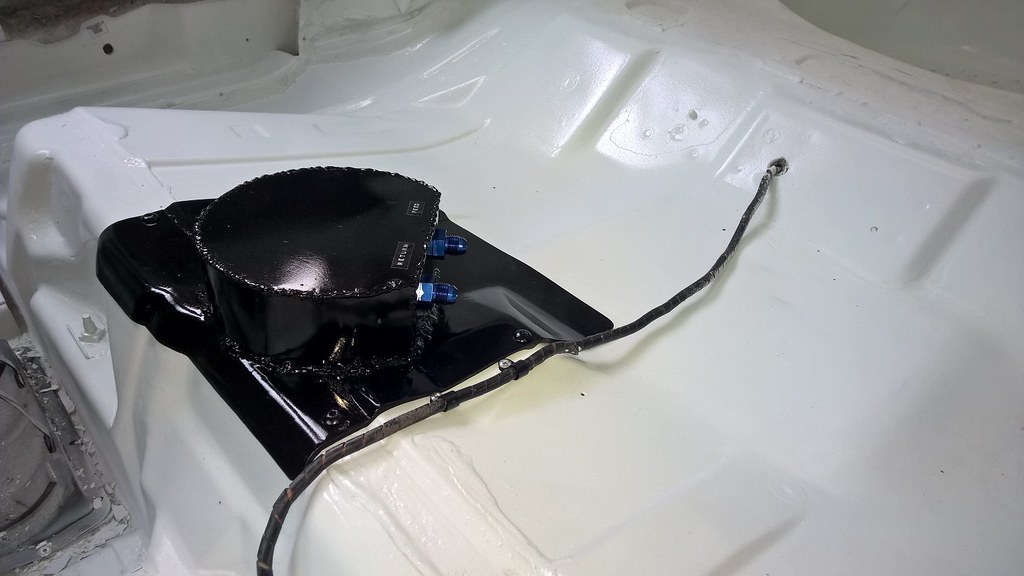
I then bought an alloy header tank which was a sensible size but unfortunately it had the outlet on the bottom, which wasn't a lot of use:
 WP_20160708_13_49_40_Pro by Jon Scoltock, on Flickr
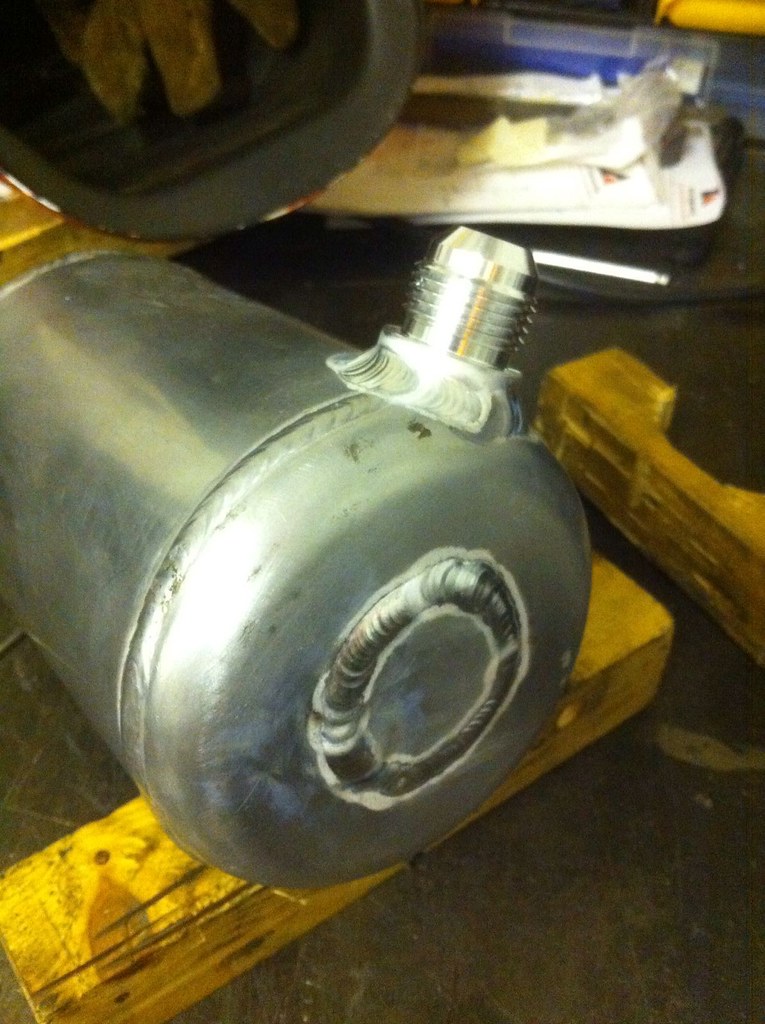
So a friend of mine welded up the original outlet and welded in a new one on the side for me:
 IMG-20160716-WA0004 by Jon Scoltock, on Flickr
The header tank could then be fitted in place:
 WP_20160723_17_15_19_Pro by Jon Scoltock, on Flickr
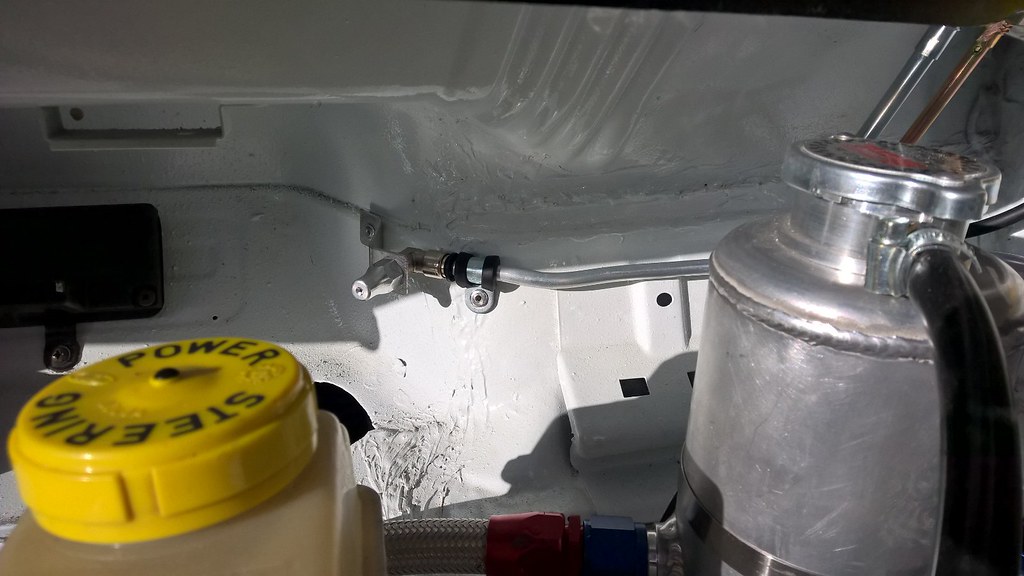
Coolant and PAS feeds running down to their respective pumps:
 WP_20160723_17_15_35_Pro by Jon Scoltock, on Flickr
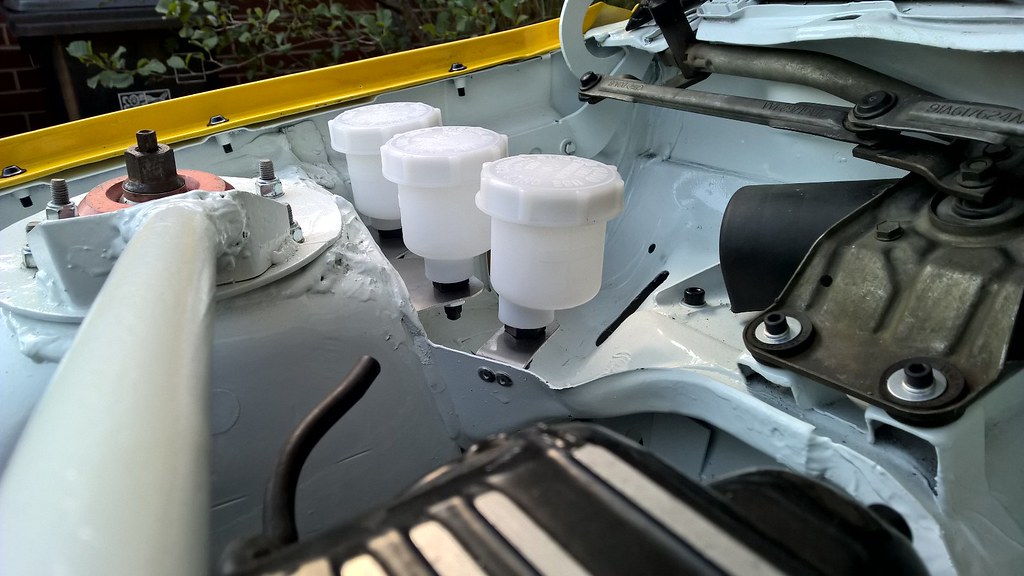
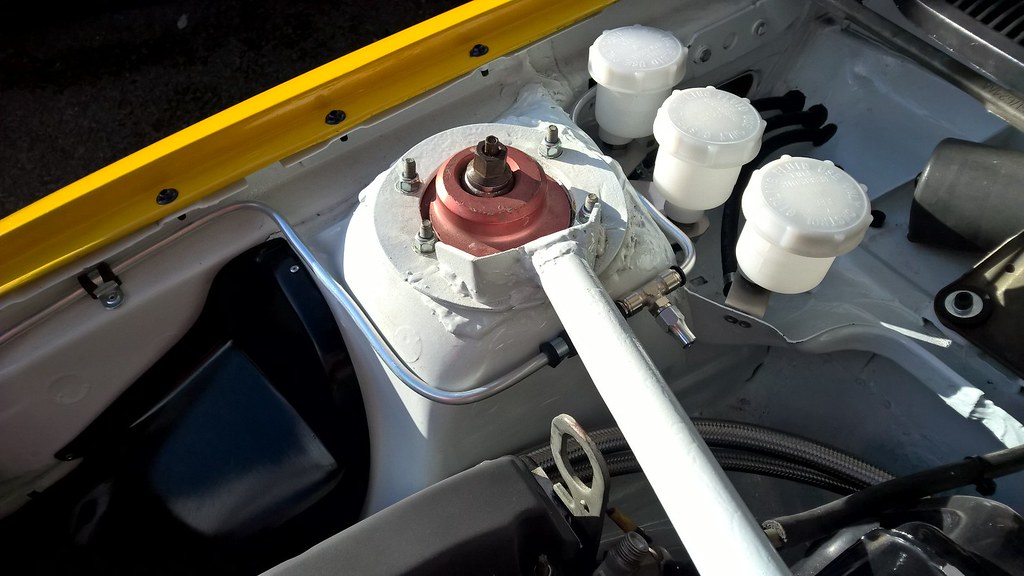
Also fitted the brake/clutch reservoirs:
 WP_20160723_17_15_54_Pro by Jon Scoltock, on Flickr
To leave an engine bay that is looking a bit more complete:
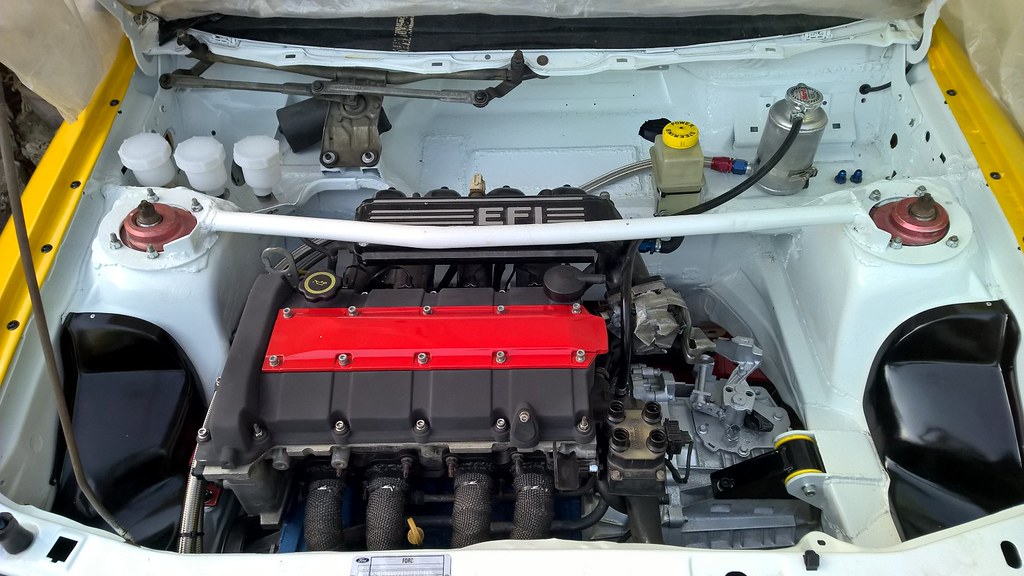 WP_20160723_17_15_27_Pro by Jon Scoltock, on Flickr
The cooling system is now fully plumbed in, as well as the PAS system. The next job is to buy the bits to make up the brake lines, as I've been putting that off while I try and work out how best to route everything. Having the reservoirs in position helps with that a bit though, so I can start measuring up and then order the necessary bits to do the brakes.
Once the drive shafts are finally sorted I will be able to move it around again which will be useful.
Until next time.
Firstly, I've been trying to work out drive shafts. Thanks to the use of a Focus gearbox, the offside Escort shaft no longer fits. I've just bought a two piece shaft from a 2.0 Focus so I will give that a try and see how it works out length-wise. I will need to make a bracket for the intermediate bearing but that isn't too difficult. The length is the big issue (ooh err) so will have to see how that goes.
One massive job, I fitted a MK2 Escort washer bottle in the boot:
WP_20160626_16_11_46_Pro by Jon Scoltock, on FlickrSince taking that picture I've plumbed the pump into the washer jets, but no pictures of that.
Inside the car, I've been making a cover for the fuel pump. I wanted to be able to remove the pump so wanted a bolt down cover, and wanted a bit of space for the fuel lines etc, so knocked this up using a spare piece of floor pan and some sheet steel:
WP_20160711_14_03_45_Pro__highres by Jon Scoltock, on FlickrPainted and with fittings in:
WP_20160723_21_12_02_Pro by Jon Scoltock, on FlickrGetting back to the engine bay, I fitted a black cam cover, just to tidy things up a bit. Also fitted another plug cover, but need to fit new stickers to it:
WP_20160626_15_55_11_Pro by Jon Scoltock, on FlickrThanks to the Group A inner arch guards, the standard header/PAS tanks weren't really ideal. I had ordered a nice aftermarket one with AN fittings but it was going to take 3-4 months to turn up, so I picked up a Sierra PAS reservoir and mounted it on top of the bulkhead:
WP_20160702_17_18_08_Pro by Jon Scoltock, on FlickrI then bought an alloy header tank which was a sensible size but unfortunately it had the outlet on the bottom, which wasn't a lot of use:
WP_20160708_13_49_40_Pro by Jon Scoltock, on FlickrSo a friend of mine welded up the original outlet and welded in a new one on the side for me:
IMG-20160716-WA0004 by Jon Scoltock, on FlickrThe header tank could then be fitted in place:
WP_20160723_17_15_19_Pro by Jon Scoltock, on FlickrCoolant and PAS feeds running down to their respective pumps:
WP_20160723_17_15_35_Pro by Jon Scoltock, on FlickrAlso fitted the brake/clutch reservoirs:
WP_20160723_17_15_54_Pro by Jon Scoltock, on FlickrTo leave an engine bay that is looking a bit more complete:
WP_20160723_17_15_27_Pro by Jon Scoltock, on FlickrThe cooling system is now fully plumbed in, as well as the PAS system. The next job is to buy the bits to make up the brake lines, as I've been putting that off while I try and work out how best to route everything. Having the reservoirs in position helps with that a bit though, so I can start measuring up and then order the necessary bits to do the brakes.
Once the drive shafts are finally sorted I will be able to move it around again which will be useful.
Until next time.
07-08-2016, 04:18 PM
#46
Some small updates. I fitted the fuel pump cover with the soft hoses inside it from the pump. This allows the cover to be removed and the pump accessed/removed easily. Also clipped the rear brake pipe back into place:
 WP_20160730_16_24_02_Pro by Jon Scoltock, on Flickr
One job I've been putting off for ages is making the rear quarter trim panels. I don't know why, but I just kept putting it off! Anyway, I made some up from some 1mm thick plastic sheet. They might rattle a bit but are nice and light and cover the unsightly quarter panel area:
 WP_20160731_17_33_37_Pro by Jon Scoltock, on Flickr
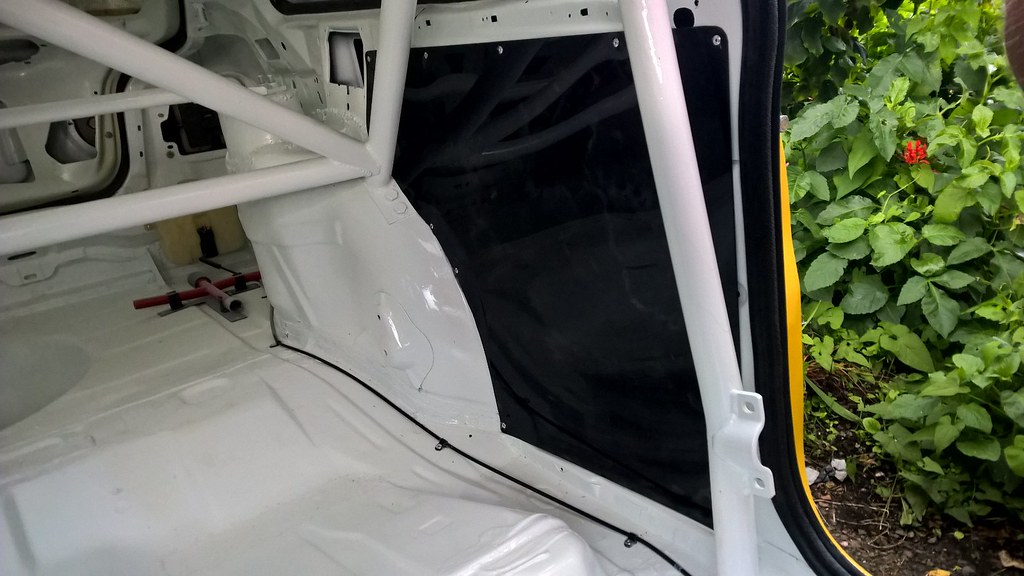 WP_20160731_17_33_50_Pro by Jon Scoltock, on Flickr
Finally, another job that I had been putting off was making the main dash panel. This one is made out of 3mm plastic sheet so still nice and light but a bit stronger to mount gauges. As you can see, I have made three holes in the middle for oil press/water temp/fuel press. I will be fitting an SPA tacho/speedo too, but I haven't ordered that yet. I also need to fit the various dash warning lights which I do have. Fitted a button for the horn too. It looks a bit crappy as it still has the plastic protective film on it, but you get the idea:
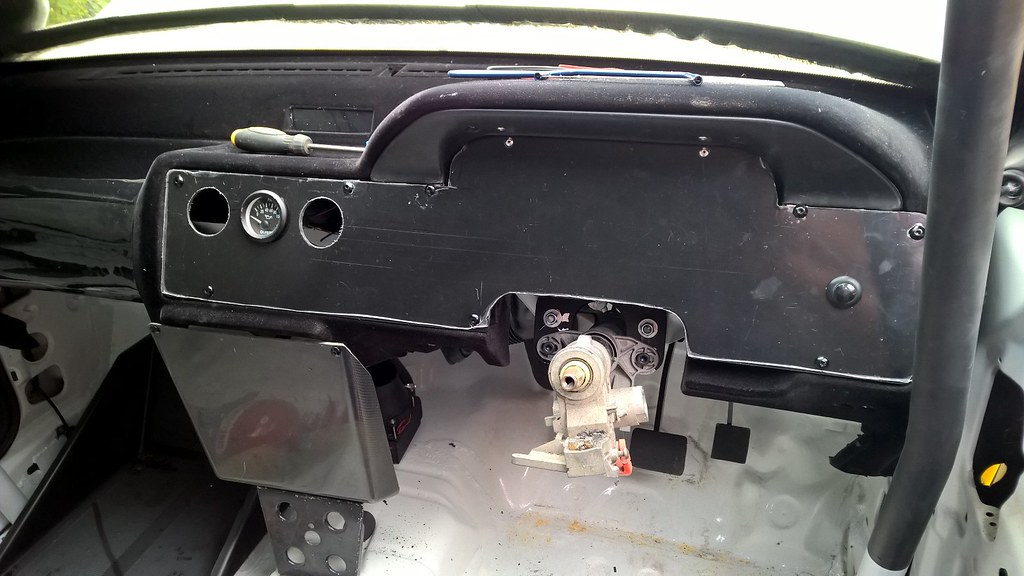 WP_20160731_15_11_11_Pro by Jon Scoltock, on Flickr
Until next time...
WP_20160730_16_24_02_Pro by Jon Scoltock, on FlickrOne job I've been putting off for ages is making the rear quarter trim panels. I don't know why, but I just kept putting it off! Anyway, I made some up from some 1mm thick plastic sheet. They might rattle a bit but are nice and light and cover the unsightly quarter panel area:
WP_20160731_17_33_37_Pro by Jon Scoltock, on FlickrWP_20160731_17_33_50_Pro by Jon Scoltock, on FlickrFinally, another job that I had been putting off was making the main dash panel. This one is made out of 3mm plastic sheet so still nice and light but a bit stronger to mount gauges. As you can see, I have made three holes in the middle for oil press/water temp/fuel press. I will be fitting an SPA tacho/speedo too, but I haven't ordered that yet. I also need to fit the various dash warning lights which I do have. Fitted a button for the horn too. It looks a bit crappy as it still has the plastic protective film on it, but you get the idea:
WP_20160731_15_11_11_Pro by Jon Scoltock, on FlickrUntil next time...
The following users liked this post:
massivewangers (09-08-2016)
23-08-2016, 01:26 PM
#48
I haven't updated this for a couple of weeks but things are still progressing. I don't have any pictures currently but I've been messing around with the seat positions as I'm not happy with them. The old seats were too narrow for my fat arse and the mounts didn't allow for wider seats to be used. Having taken some measurements from a friend's seats, I've made up some new seat mounts but need to put them in the car. I did redo the driver's side one but wasn't happy with it, so am going to cut it out and do it again. Sadly, the Group A pedal box means the driver's seat needs to be further back, which also means the fire extinguisher needs to move. I think it will just go in front of the seat instead, shouldn't be in the way there.
I've been playing with drive shafts too. I ordered a RH shaft from a 2.0 Focus as the original Escort one no longer fitted. While the Focus one does fit into the gearbox and hub, I'm not entirely convinced that it's long enough. The tripod joint seems a little close to the end of its housing on full droop. I need to take the spring out and try it on full bump and see how it looks, as that will probably be the worst condition, especially with some steering lock on. I think it would be ok but part of me is thinking it might be sensible to have a slightly longer shaft made. That's an annoying expense though. I'm seeking advice from a pro anyway. In the mean time I have made a start on making up a mounting bracket for the drive shaft intermediate bearing. This is good as the Escort shaft was one piece. The two piece Focus design should help with torque steer a bit.
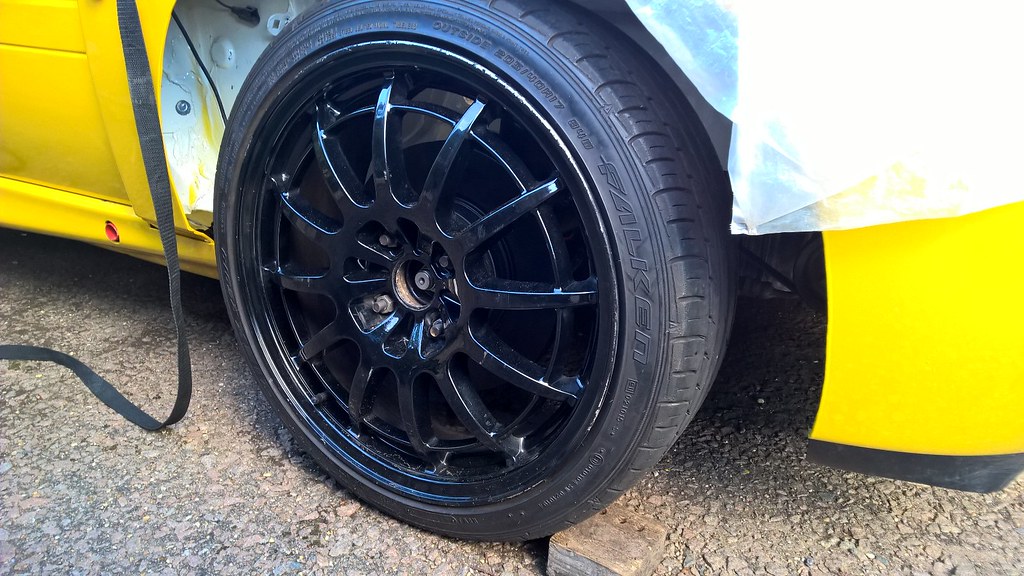
The only thing I do have pictures of is when I bolted a 15x7" Sparco Cromodora wheel onto the car to try and work out what offset I need. This one is an ET32 Group A fitment one from a Cosworth and looks just about perfect so it's likely that I'll go with that. It's a shame I don't have a full set because they are really nice wheels - light too as they're mag alloy. I know 17s would look better but the tyres are more expensive and it just adds weight/rolling resistance. I also need to adjust the ride height as a lot of weight has come out from the front of the car and the body work has changed significantly. That will be the last job on the list though.
 WP_20160812_16_08_20_Pro by Jon Scoltock, on Flickr
 WP_20160812_16_08_49_Pro by Jon Scoltock, on Flickr
In other news, I ordered all the stuff to make my brake lines but it turns out that the banjos/bolts I ordered for the cylinders are the wrong ones so I had to send them back. Interestingly when they went from opposed mounting lugs to offset, they decided to go from UNF fittings to metric too. Go figure. I've fitted the bias valve and plumbed that back to the handbrake cylinder, but I'll do the rest when I get the new banjo bits. The fuel filter has turned up so I am working out what hose/fittings I need to finish the fuel system and I've ordered an oil breather tank.
I've also made a start on some vinyl work for the outside of the car thanks to a guy local to me. It's getting ahead of the game a bit but doesn't hurt to tick it off the list around doing other jobs. Some of the vinyl has been applied, but I'm keeping that under wraps (ha!) for now. It will be unveiled once it's finished and the car is on its wheels properly again.
Apologies for the lack of pictures. I'll try harder next time.
I've been playing with drive shafts too. I ordered a RH shaft from a 2.0 Focus as the original Escort one no longer fitted. While the Focus one does fit into the gearbox and hub, I'm not entirely convinced that it's long enough. The tripod joint seems a little close to the end of its housing on full droop. I need to take the spring out and try it on full bump and see how it looks, as that will probably be the worst condition, especially with some steering lock on. I think it would be ok but part of me is thinking it might be sensible to have a slightly longer shaft made. That's an annoying expense though. I'm seeking advice from a pro anyway. In the mean time I have made a start on making up a mounting bracket for the drive shaft intermediate bearing. This is good as the Escort shaft was one piece. The two piece Focus design should help with torque steer a bit.
The only thing I do have pictures of is when I bolted a 15x7" Sparco Cromodora wheel onto the car to try and work out what offset I need. This one is an ET32 Group A fitment one from a Cosworth and looks just about perfect so it's likely that I'll go with that. It's a shame I don't have a full set because they are really nice wheels - light too as they're mag alloy. I know 17s would look better but the tyres are more expensive and it just adds weight/rolling resistance. I also need to adjust the ride height as a lot of weight has come out from the front of the car and the body work has changed significantly. That will be the last job on the list though.
WP_20160812_16_08_20_Pro by Jon Scoltock, on FlickrWP_20160812_16_08_49_Pro by Jon Scoltock, on FlickrIn other news, I ordered all the stuff to make my brake lines but it turns out that the banjos/bolts I ordered for the cylinders are the wrong ones so I had to send them back. Interestingly when they went from opposed mounting lugs to offset, they decided to go from UNF fittings to metric too. Go figure. I've fitted the bias valve and plumbed that back to the handbrake cylinder, but I'll do the rest when I get the new banjo bits. The fuel filter has turned up so I am working out what hose/fittings I need to finish the fuel system and I've ordered an oil breather tank.
I've also made a start on some vinyl work for the outside of the car thanks to a guy local to me. It's getting ahead of the game a bit but doesn't hurt to tick it off the list around doing other jobs. Some of the vinyl has been applied, but I'm keeping that under wraps (ha!) for now. It will be unveiled once it's finished and the car is on its wheels properly again.
Apologies for the lack of pictures. I'll try harder next time.
13-09-2016, 07:53 PM
#49
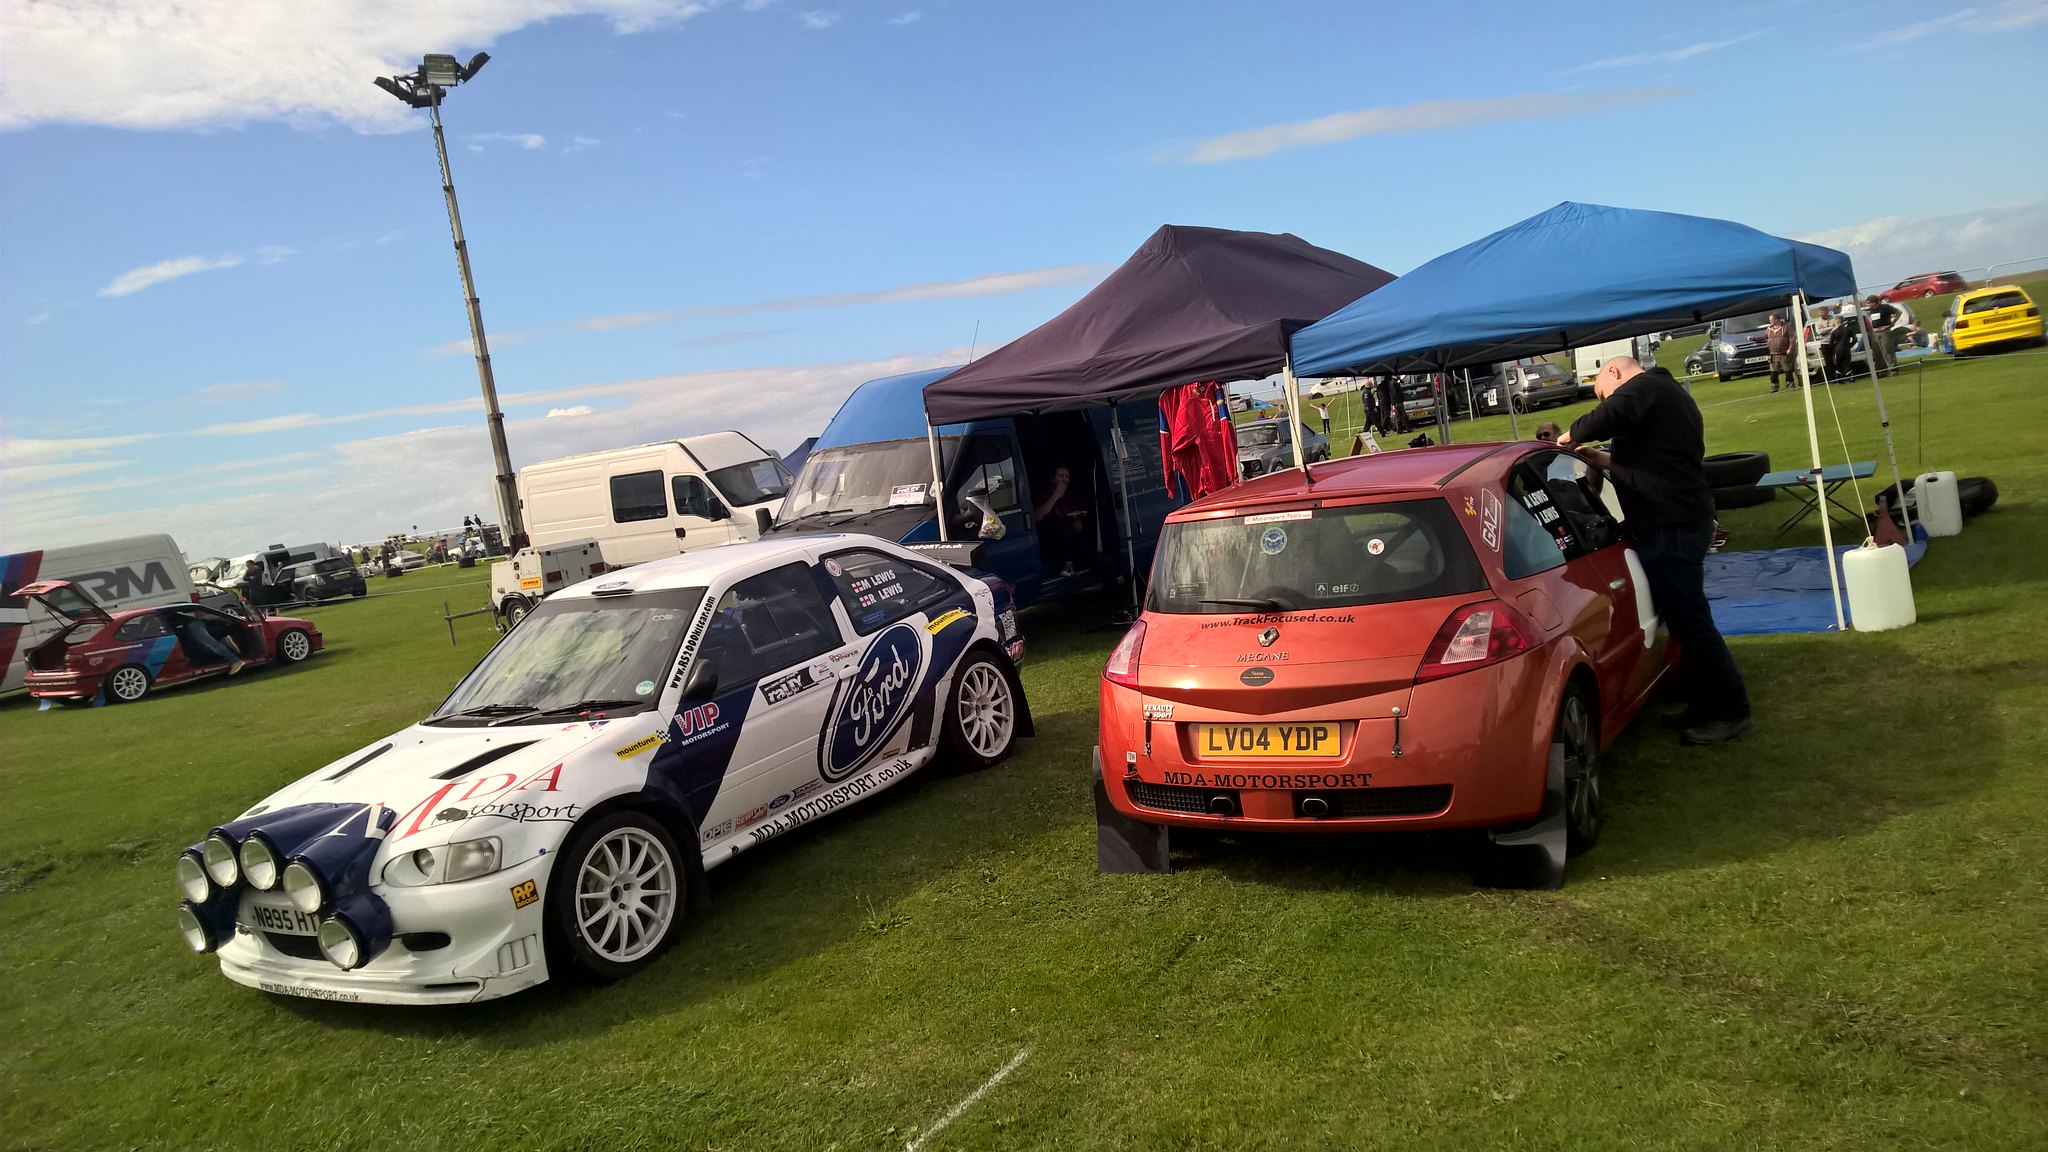
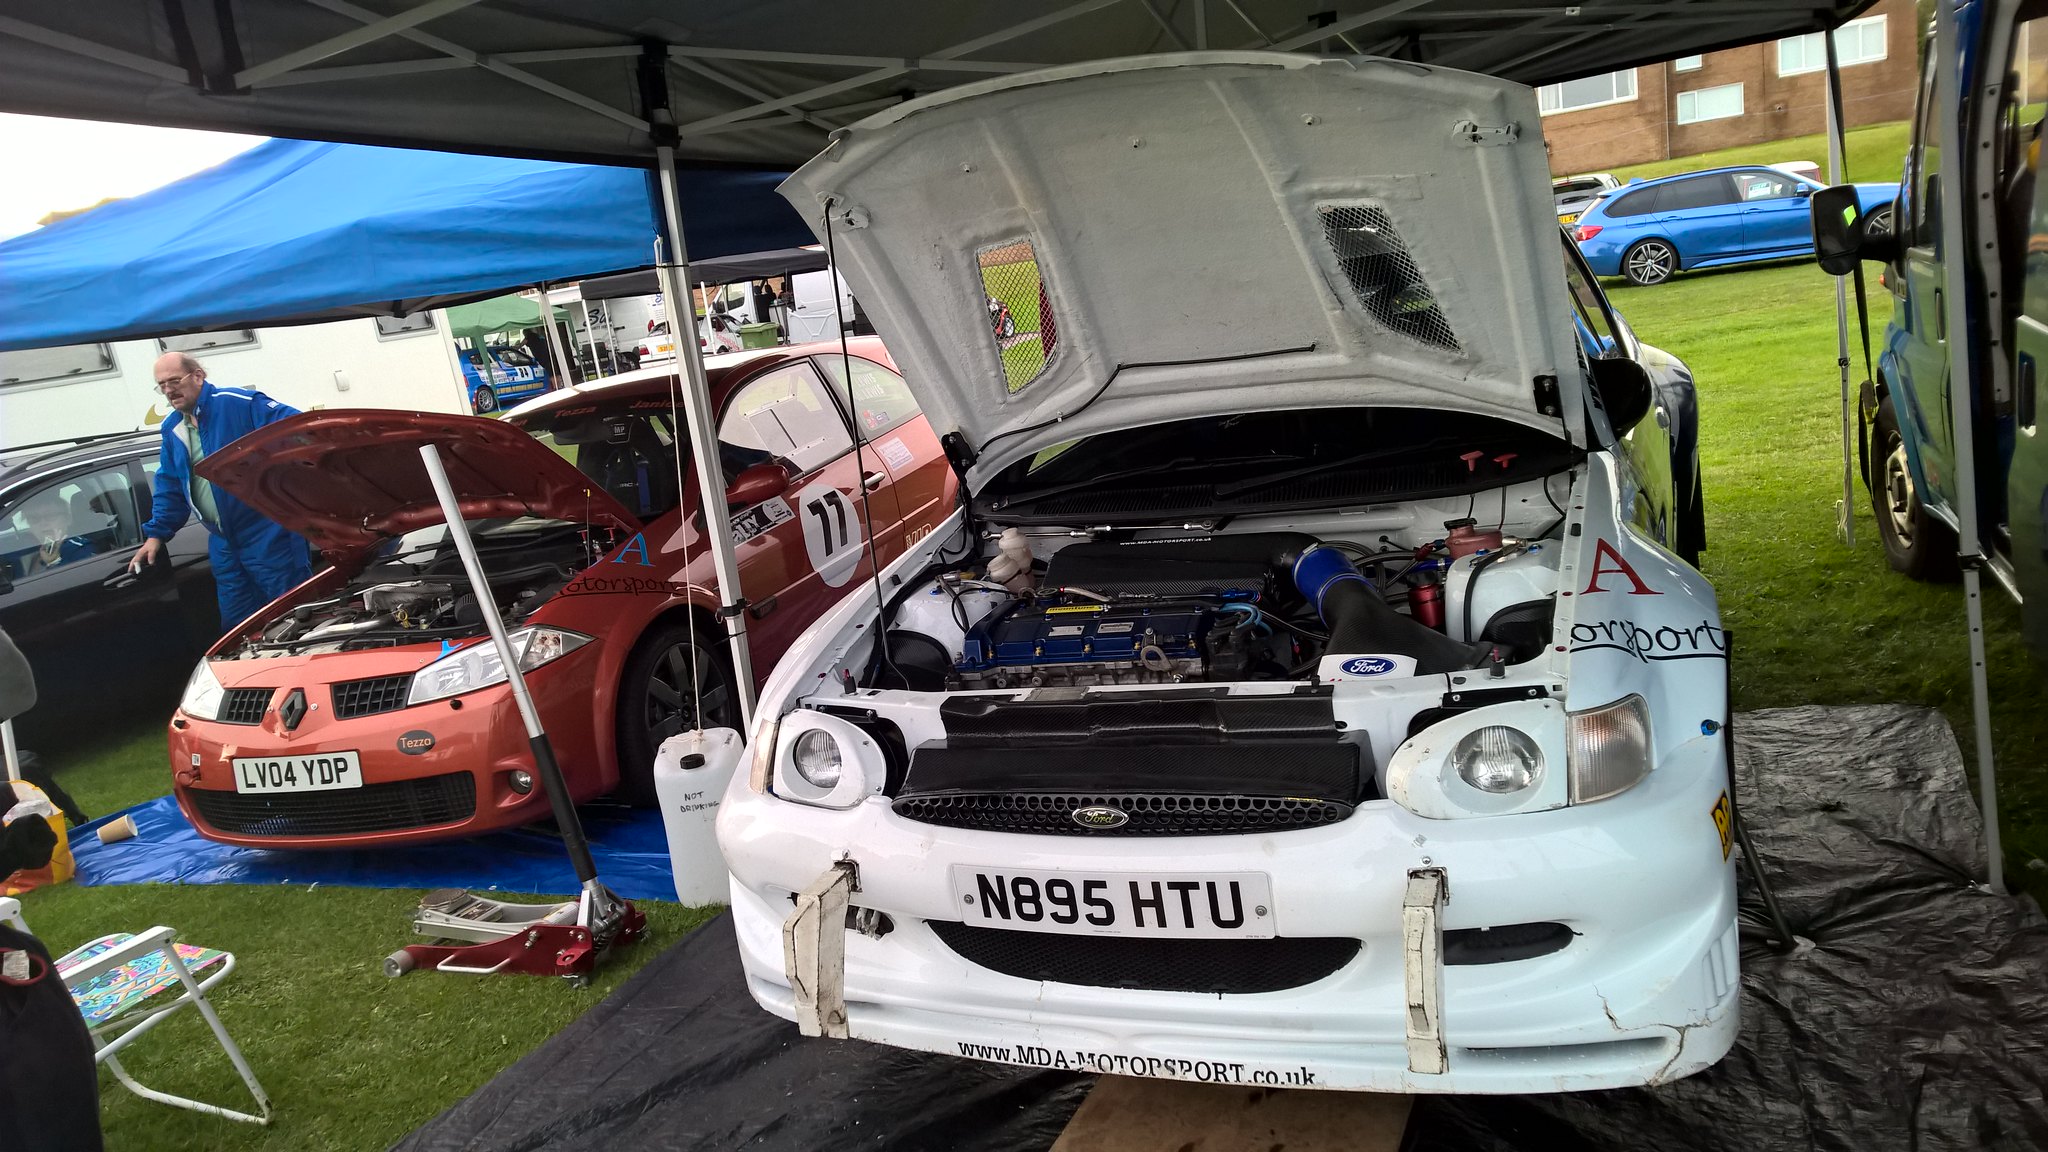
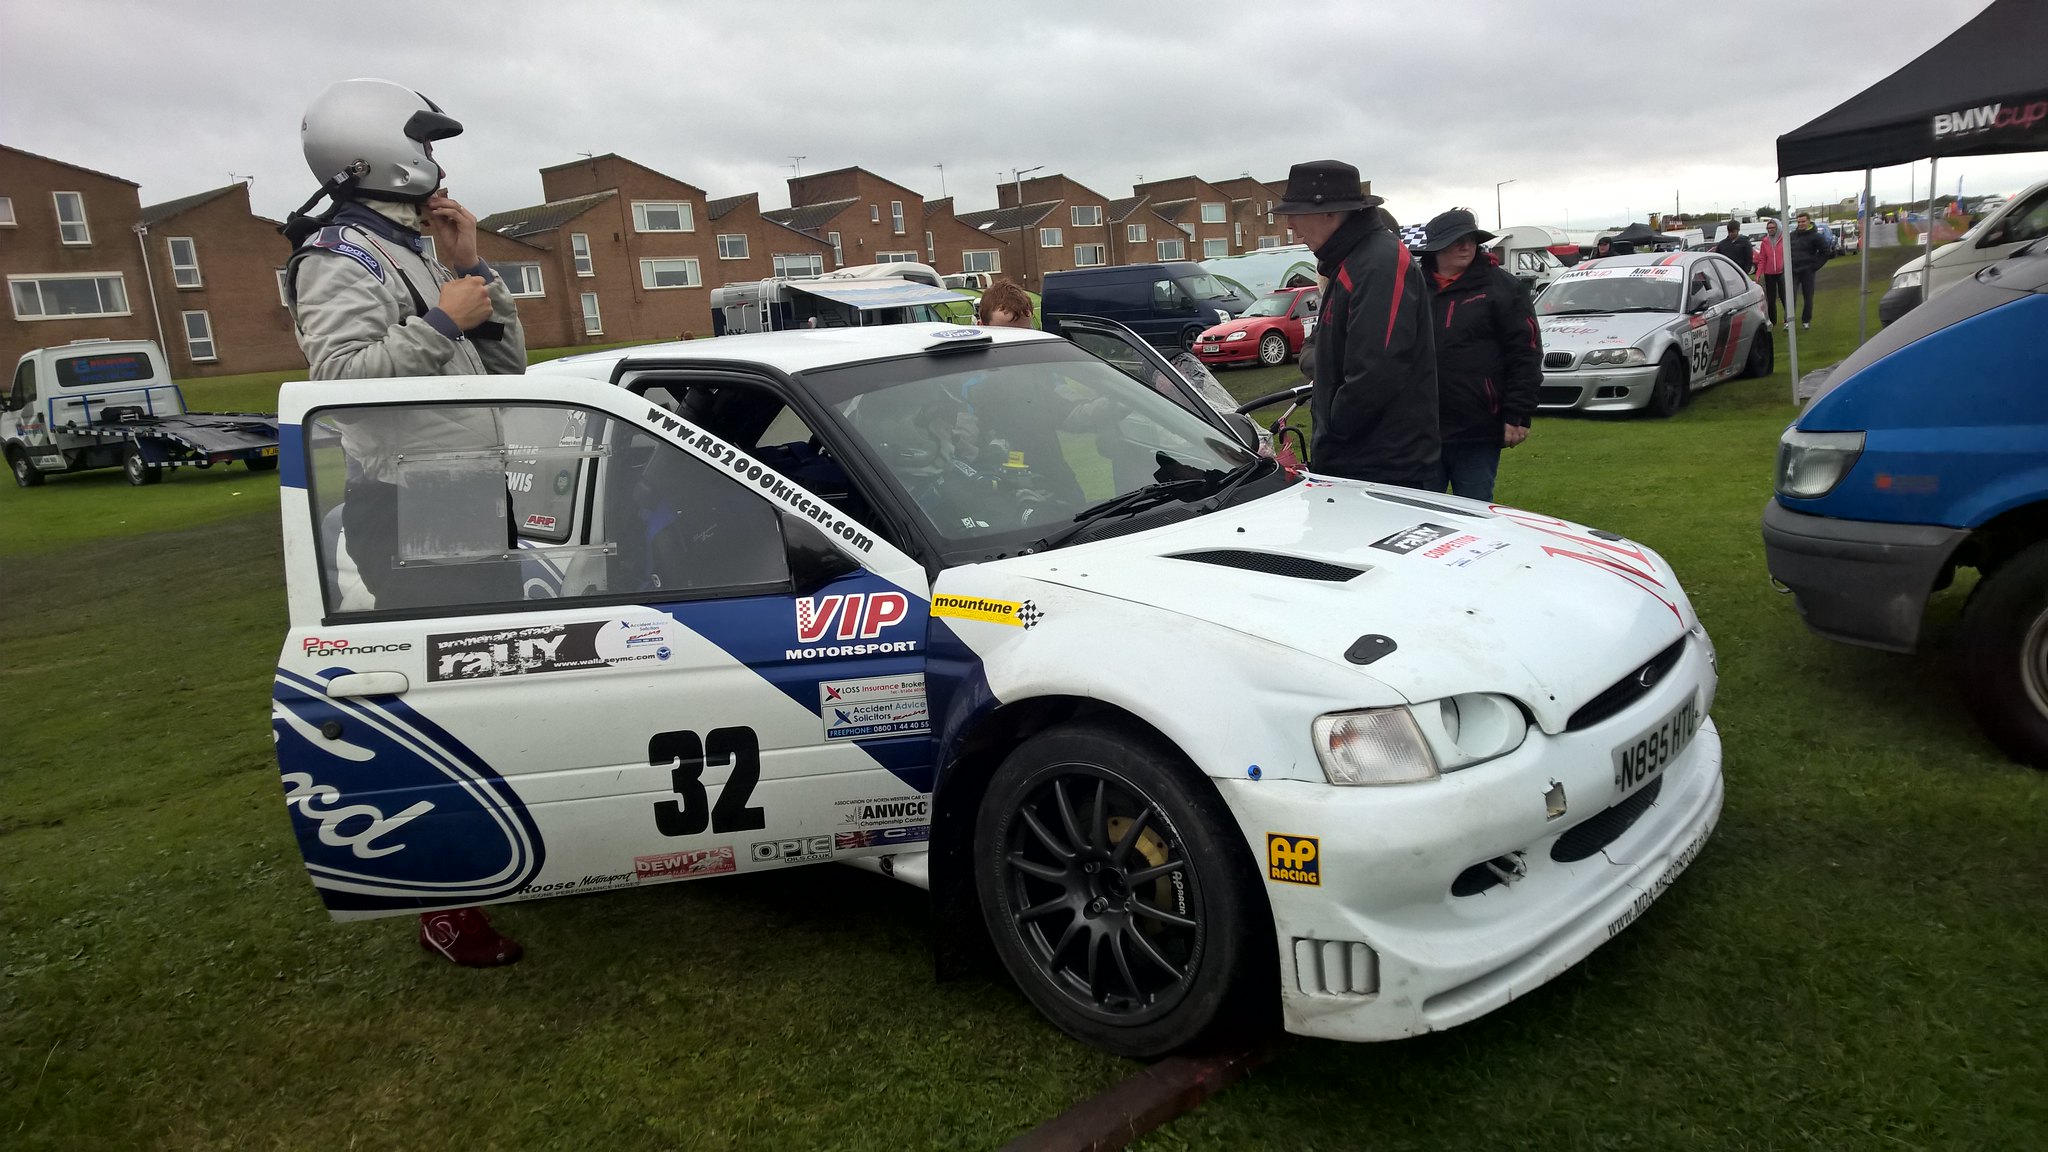
A few days off work meant a bit of time on the car. First off though, I journeyed to the North West to help out Matman with his Escort Maxi on the New Brighton promenade rally. It wasn't a great event with a few oil problems, but we managed to keep the car going to the end. We lost over three minutes thanks to the problems so only managed ninth in class which was a shame, as we had been up among podium runners time-wise. Also, it rained a lot, which made servicing a slightly soggy experience!
Anyway, couple of snaps/videos of the Escort, and his dad's 225 rally car:
 WP_20160902_14_59_10_Pro__highres by Jon Scoltock, on Flickr
 WP_20160902_19_58_31_Pro by Jon Scoltock, on Flickr
 WP_20160902_20_51_28_Pro by Jon Scoltock, on Flickr
 WP_20160903_07_24_26_Pro__highres by Jon Scoltock, on Flickr
 WP_20160903_09_10_13_Pro by Jon Scoltock, on Flickr
 WP_20160903_10_23_31_Pro by Jon Scoltock, on Flickr
 WP_20160903_11_08_29_Pro by Jon Scoltock, on Flickr
 WP_20160903_16_48_00_Pro__highres by Jon Scoltock, on Flickr
After that was done and dusted, it was home to try and get a few jobs done on my own car. I actually put quite a few hours into the car but you can't really see much difference! It was just doing lots of little jobs that I wanted to get out of the way. The first one was replacing the seat mounts. I didn't take any pictures of this as it wasn't very interesting but I essentially wanted to allow a wider seat to be fitted and to have more options for moving the seat back. It did mean repainting part of the floor which is a bit uncool but it's done now.
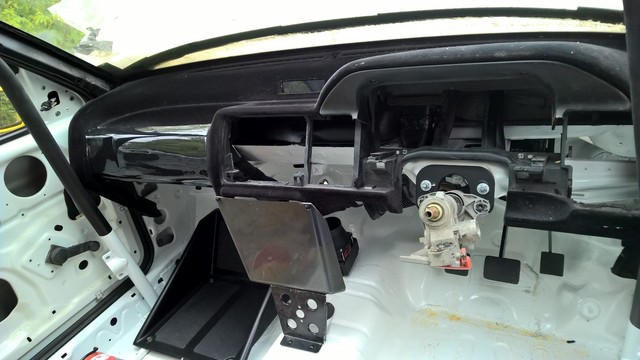
Next up was to start plumbing in the brakes which I also didn't seem to take pictures of, but I've plumbed in the reservoirs and the brake and clutch up to the front bulkhead. This allowed me to get on with another pressing job - the steering column. Thanks to the Group A pedal box, the lower column mount was no longer any good, as it was too close to the cylinders. On a Group A RS2000, they used a bespoke column which moved the lower mount further back, away from the cylinders. Sadly I don't have one of those, so I had to come up with a different solution. This involved making a removable lower mount so, if I need to get a cylinder out, you can pop the bracket out of the way. Simples!
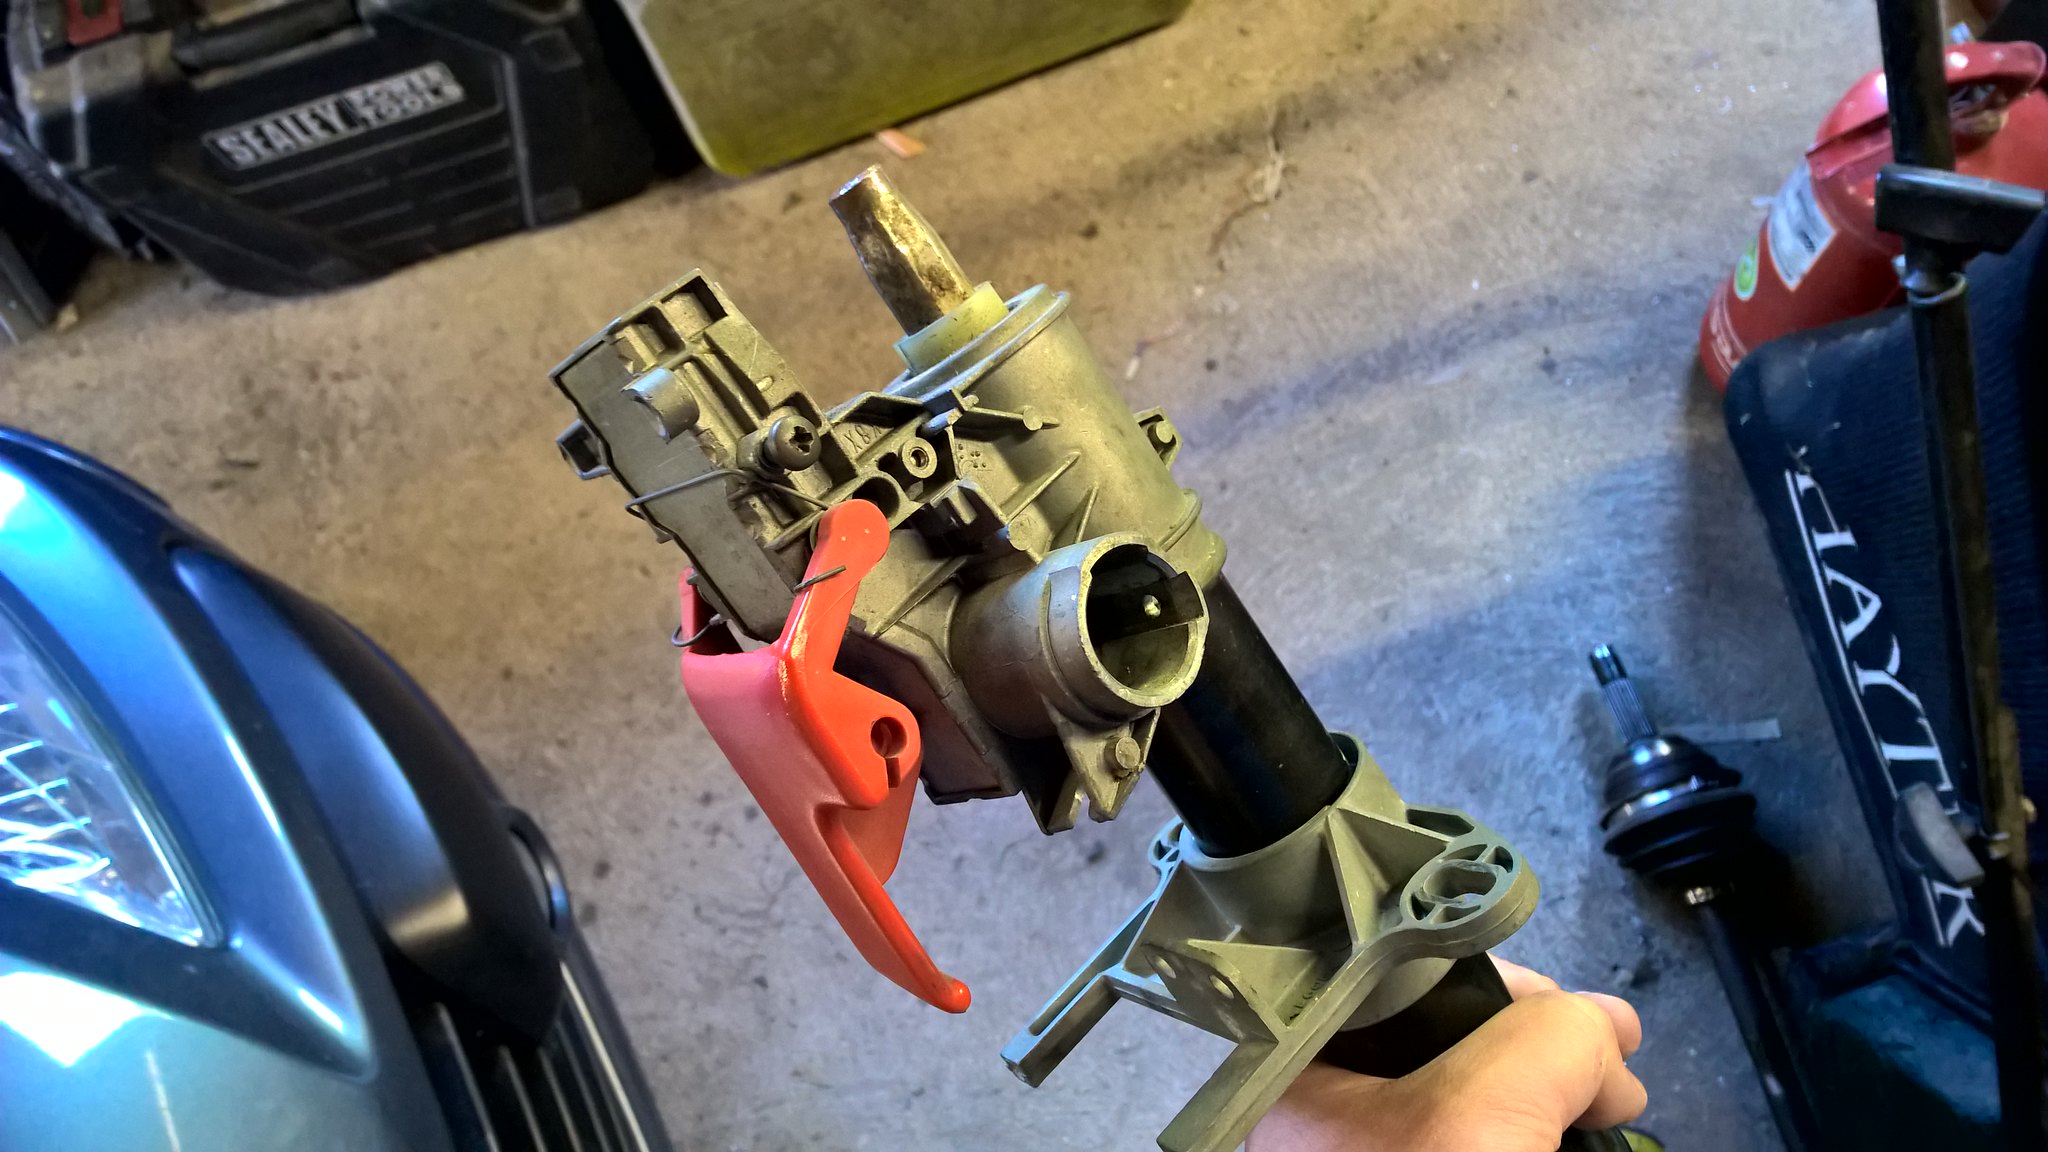
Realising that I've been somewhat hopeless with pictures, I also finally fitted the steering column. Up to now, I had been using a standard column but a few months ago I modified a spare one to save a bit of weight. So, below you can see the standard column. The casting incorporates the bonnet release, lock barrel and various features which the column cowls screw on to.
 WP_20160912_14_42_37_Pro__highres by Jon Scoltock, on Flickr
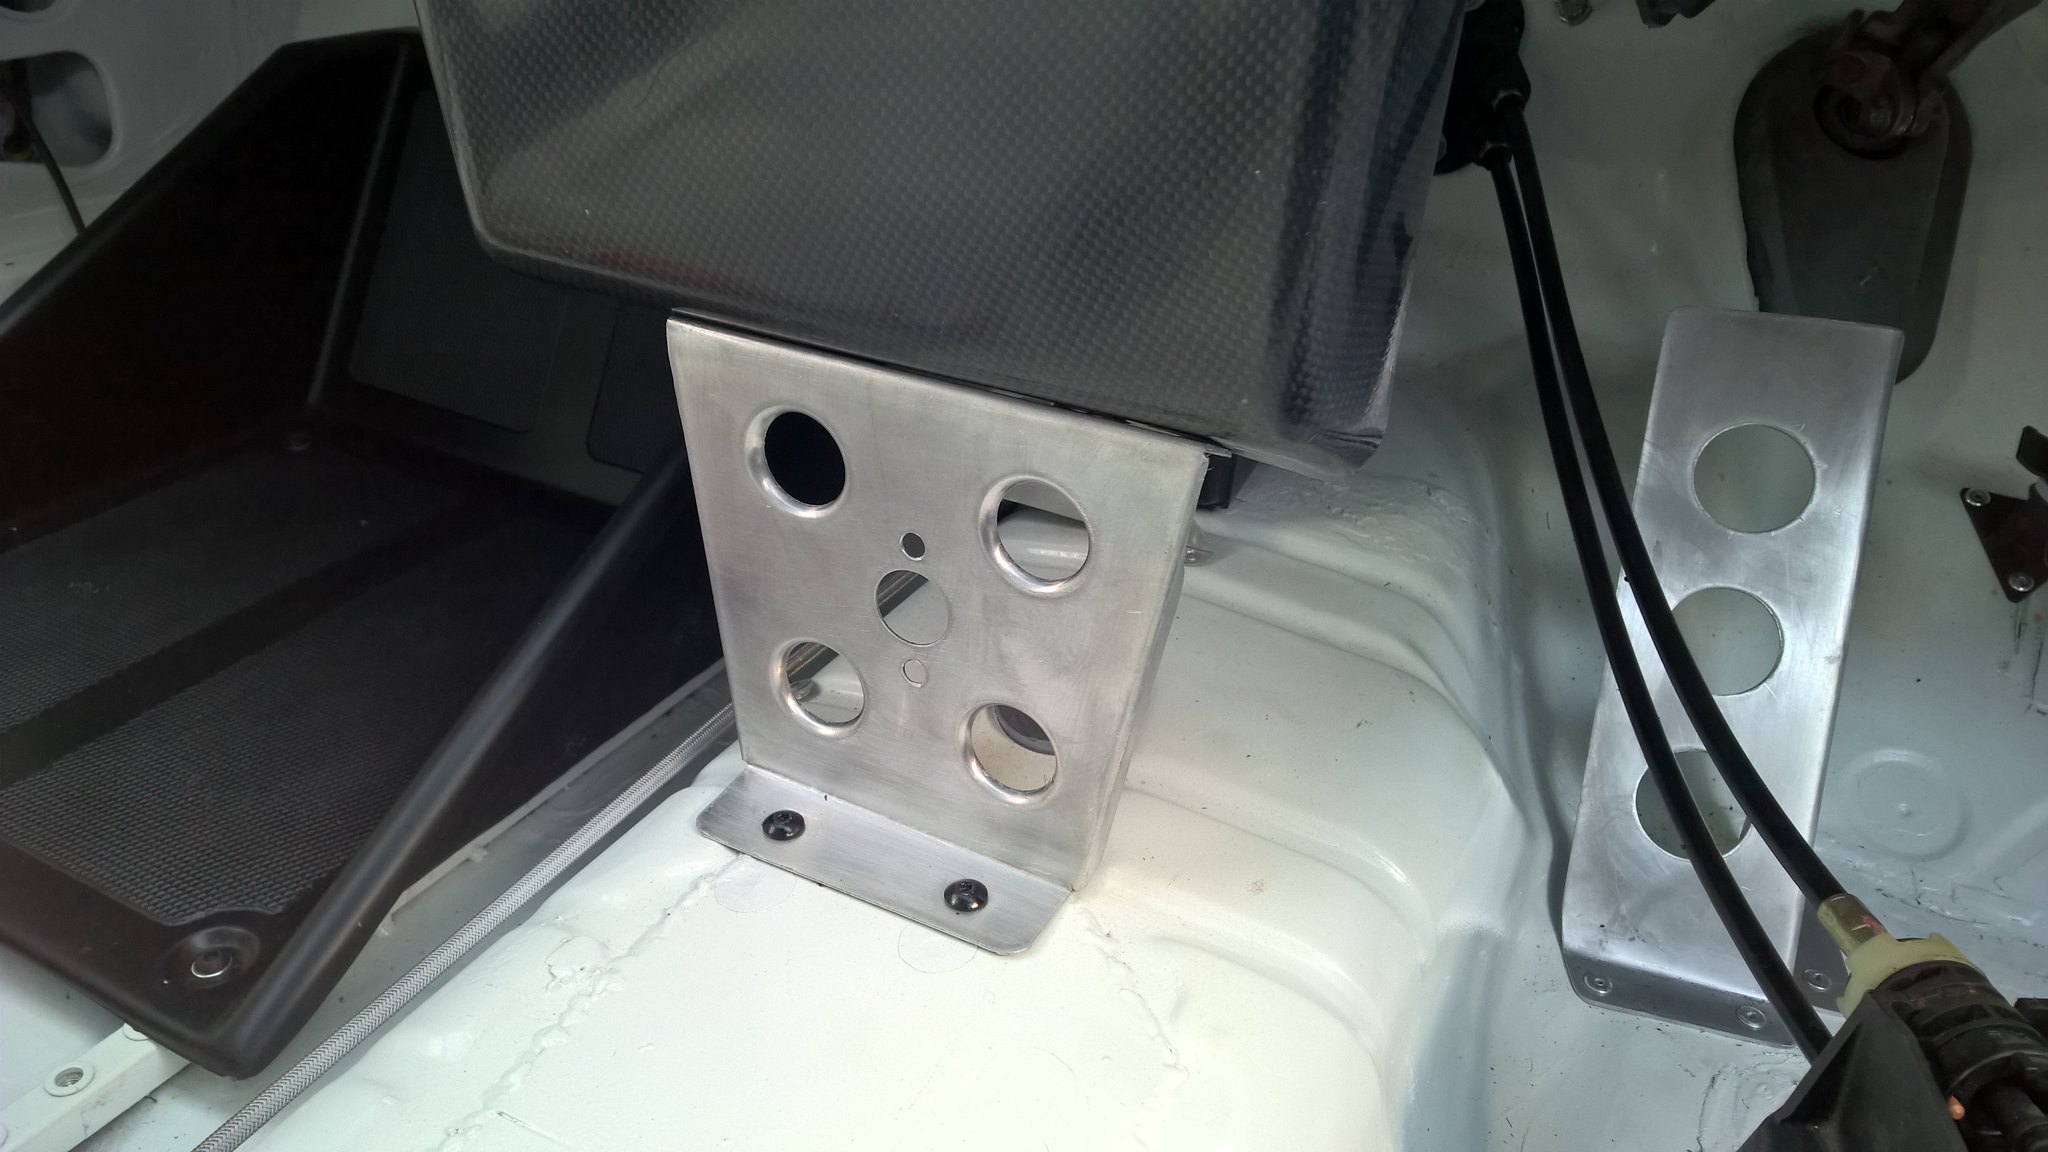
The new column has had all of this removed so, viewed from underneath, you can see that it is much simpler, with no big bonnet release handle etc. This has obviously saved a small amount of weight but it's also made things a bit neater. In this pictures you can also see the ally bracket that has dropped the column to suit the revised seating position:
 WP_20160912_16_52_18_Pro__highres by Jon Scoltock, on Flickr
The fun didn't stop there, so I made up a footrest for the driver:
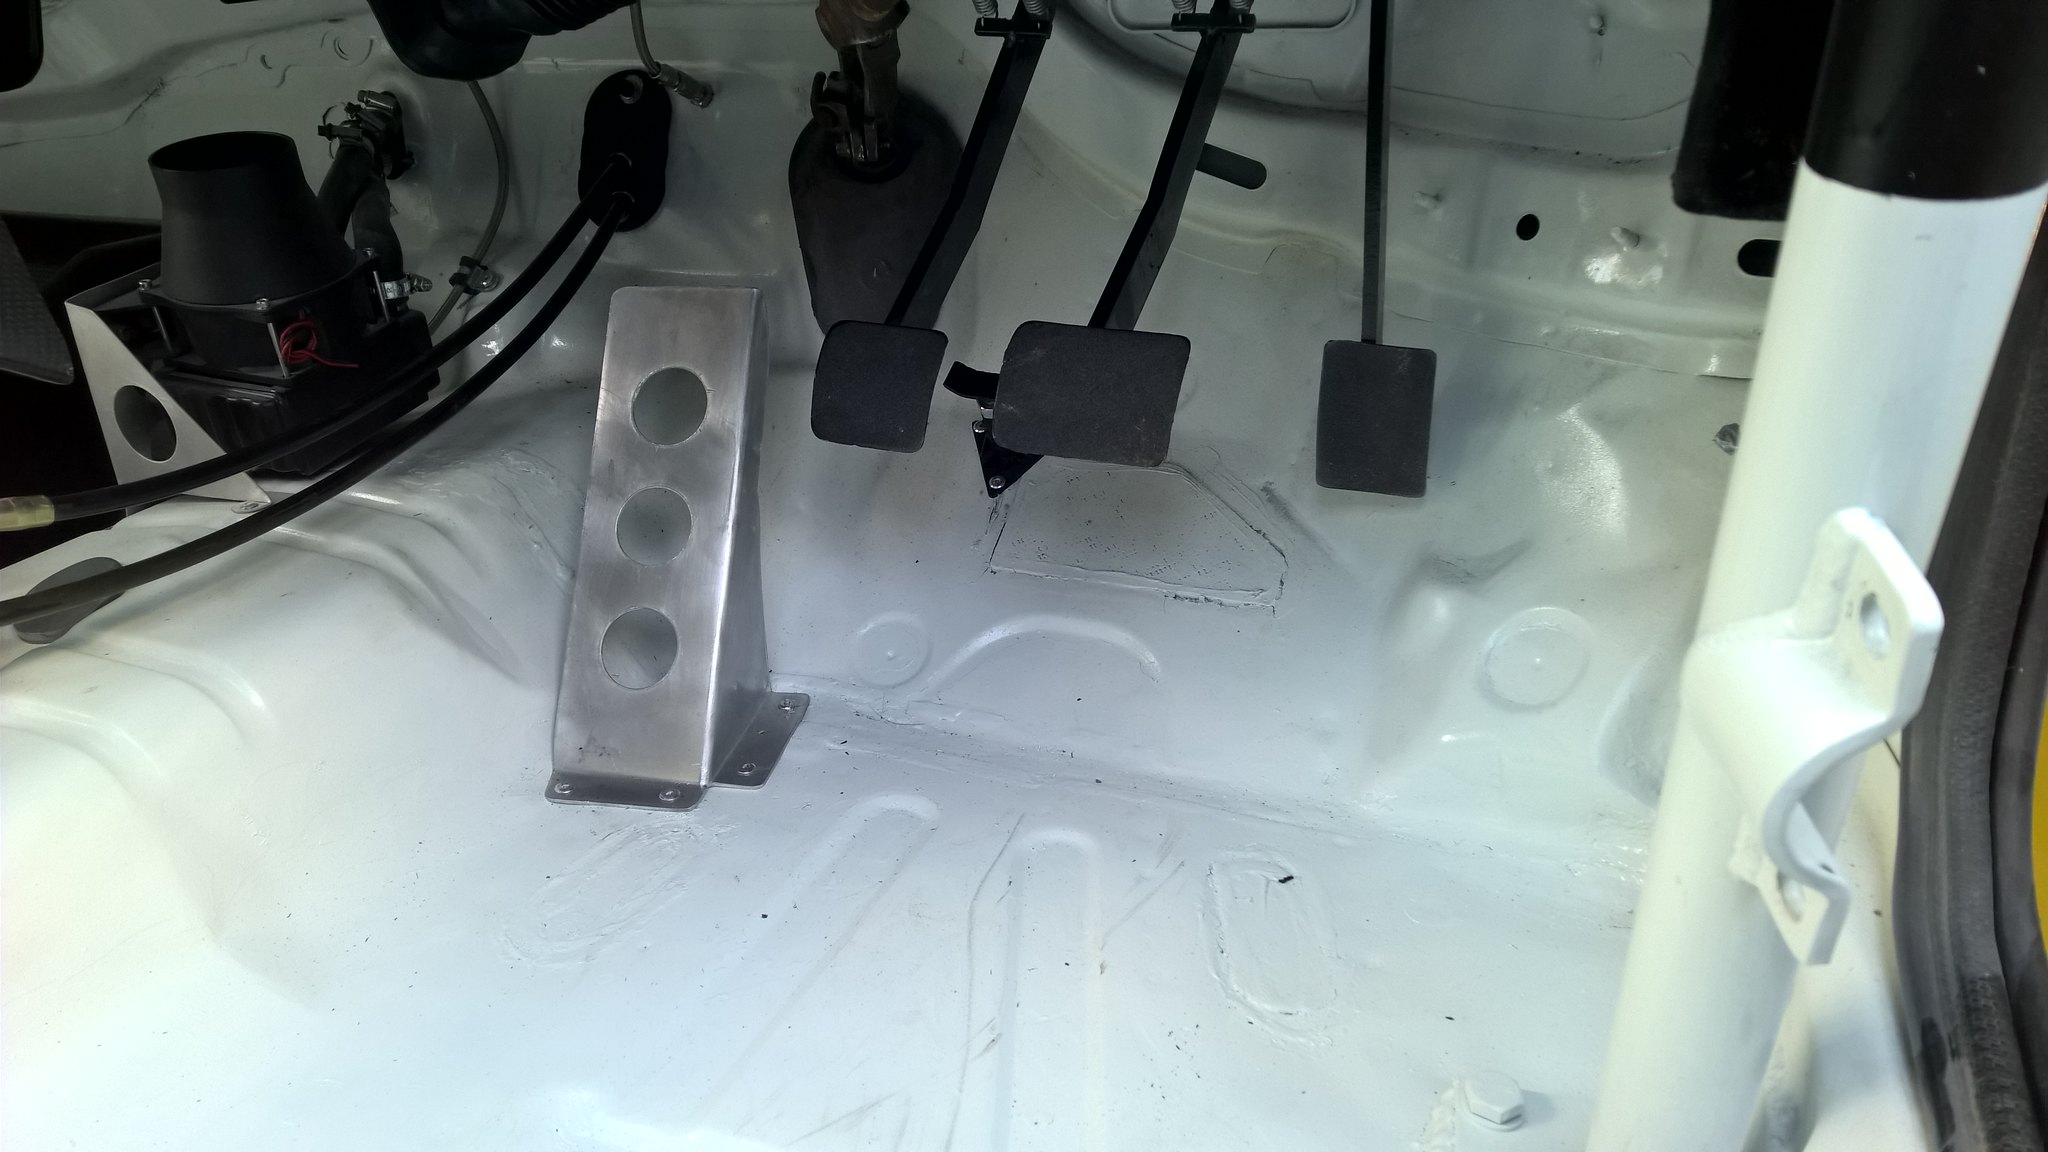 WP_20160912_16_51_37_Pro__highres by Jon Scoltock, on Flickr
I also cleaned up the cut-off switch mounting bracket. This had been painted black at some point and was looking pretty flakey, so I removed the paint and cleaned it up a bit:
 WP_20160912_16_51_47_Pro__highres by Jon Scoltock, on Flickr
I've started to fit the gear lever too, feeding the cables through and connecting them to the gearbox. I need to work out where the lever needs to go and make a mount for it, but that will be simple enough. Unfortunately, when I fitted the cables, I noticed that the bracket that holds them in place on the gearbox (and allows them to push and pull) is missing, so I'm trying to find one of those:
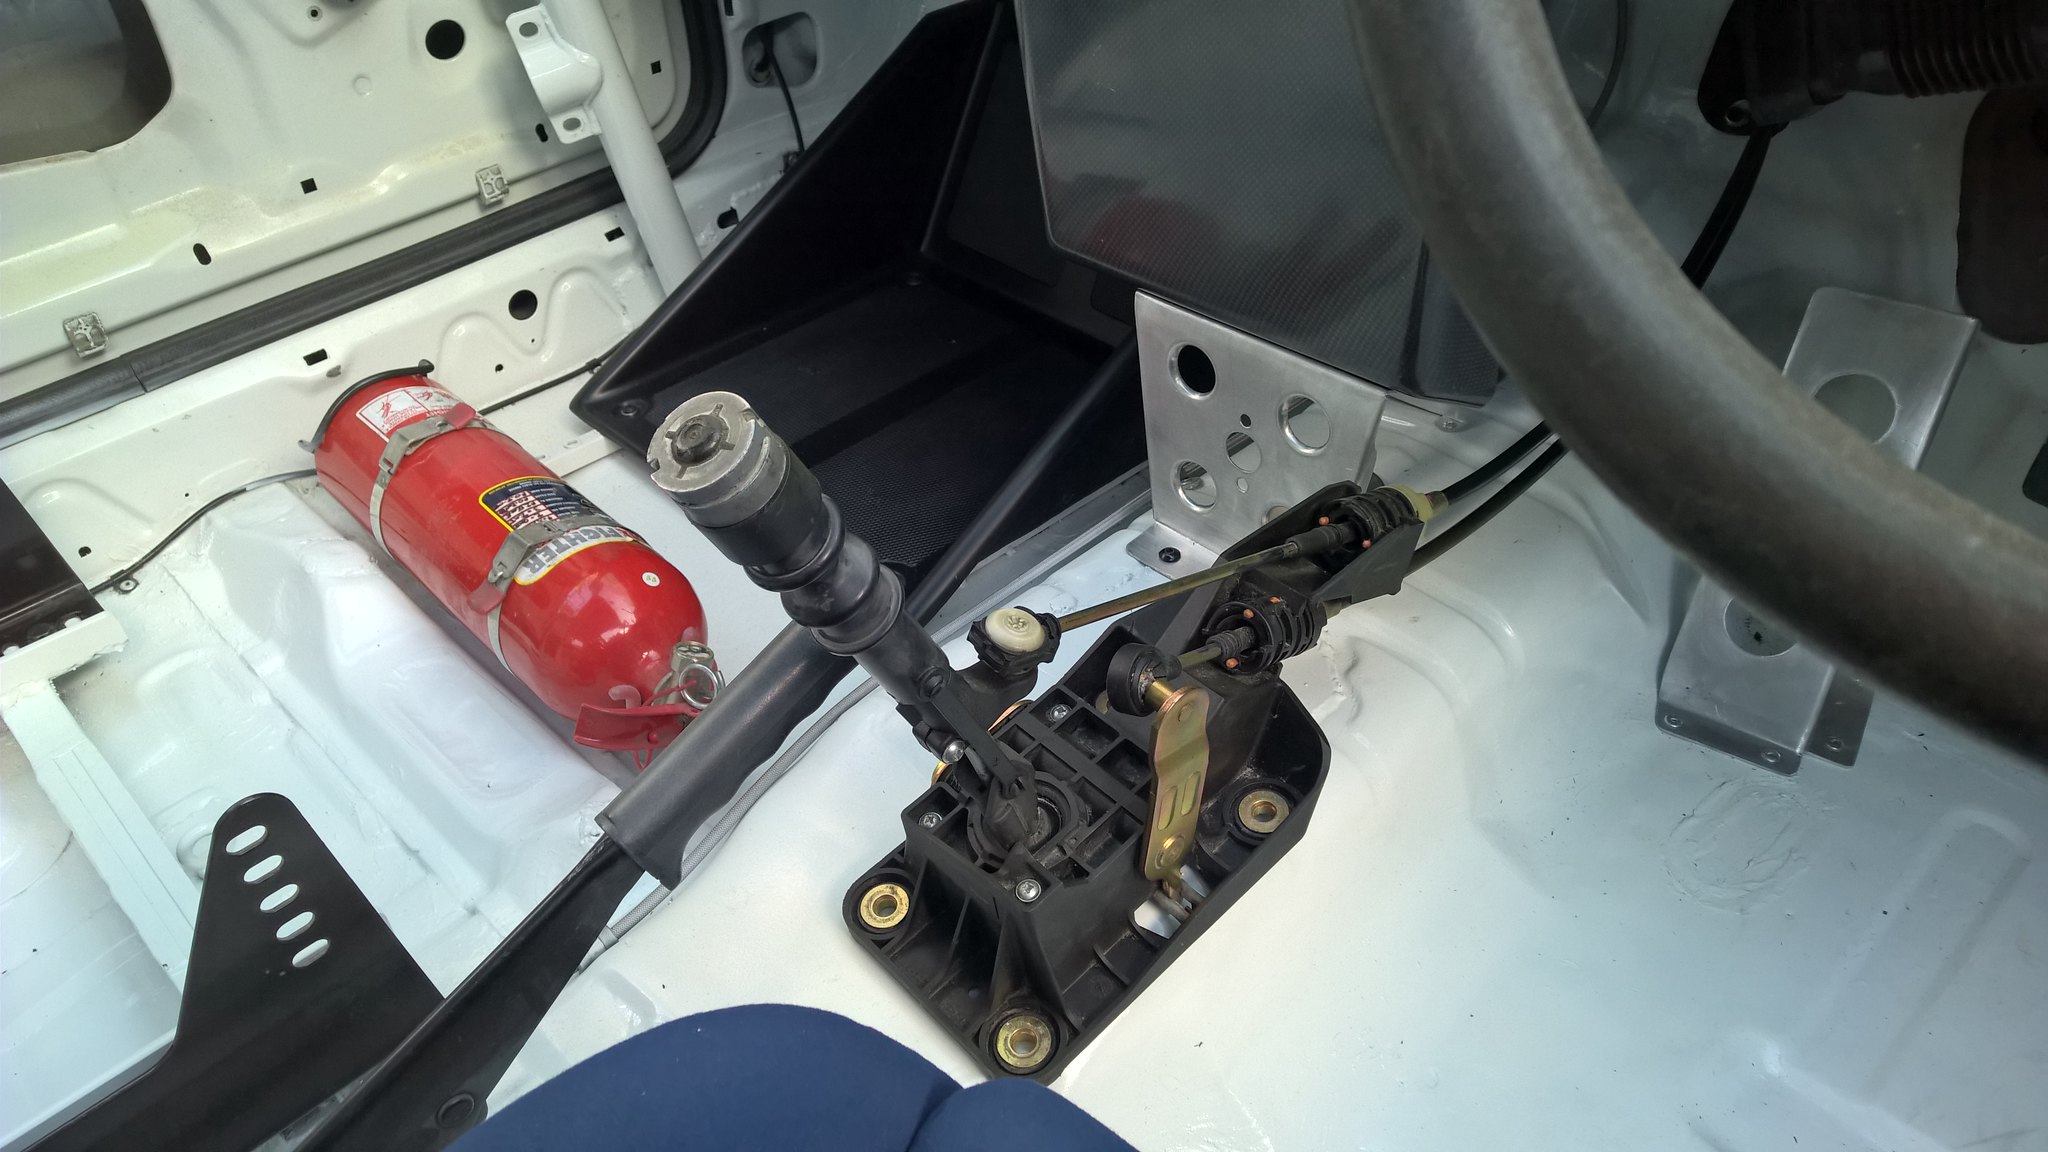 WP_20160912_16_51_55_Pro__highres by Jon Scoltock, on Flickr
I've fitted the warning lights to the dash panel and also thrown an old steering wheel onto it to help work out the gear lever position and help making moving the car about easier. I need to buy the tacho and other gauges, then the dash is finished apart from wiring:
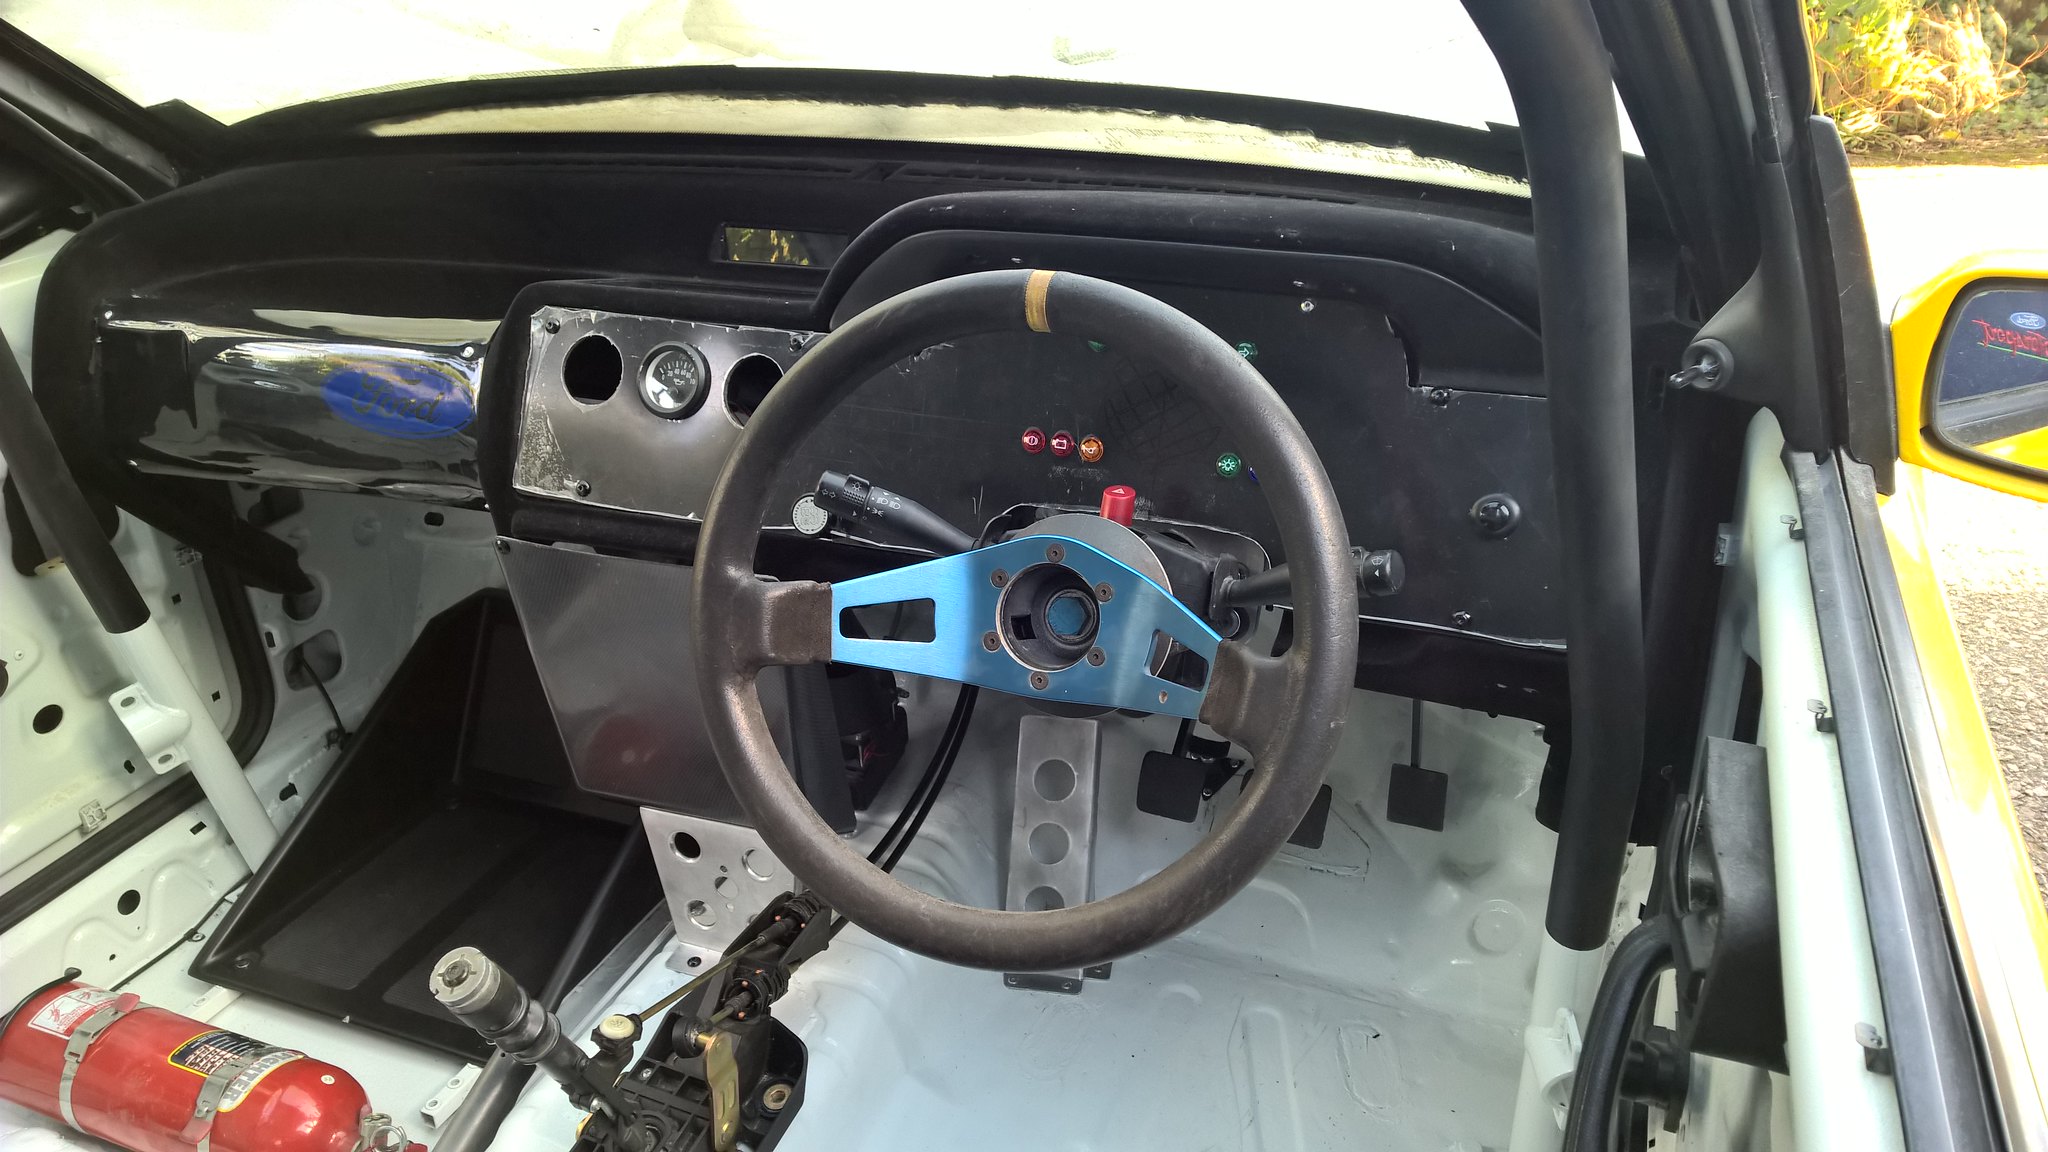 WP_20160912_16_51_24_Pro__highres by Jon Scoltock, on Flickr
Finally, my rather optimistic idea of attaching the passenger side dash panel on with a glue gun failed when I head-butted it and it fell off, so I had to rivet it in. I also put a sticker on it, just because:
 WP_20160912_16_52_52_Pro__highres by Jon Scoltock, on Flickr
On the subject of stickers, the work on the vinyl on the outside is underway. Just a sneak little look for now though, as it's not finished:
 WP_20160912_16_54_44_Pro__highres by Jon Scoltock, on Flickr
Next up is to make the false floor for the driver's side, find this silly bracket for the gear cables and making up some heater ducting.
Until next time.
Anyway, couple of snaps/videos of the Escort, and his dad's 225 rally car:
WP_20160902_14_59_10_Pro__highres by Jon Scoltock, on FlickrWP_20160902_19_58_31_Pro by Jon Scoltock, on FlickrWP_20160902_20_51_28_Pro by Jon Scoltock, on FlickrWP_20160903_07_24_26_Pro__highres by Jon Scoltock, on FlickrWP_20160903_09_10_13_Pro by Jon Scoltock, on FlickrWP_20160903_10_23_31_Pro by Jon Scoltock, on FlickrWP_20160903_11_08_29_Pro by Jon Scoltock, on FlickrWP_20160903_16_48_00_Pro__highres by Jon Scoltock, on FlickrAfter that was done and dusted, it was home to try and get a few jobs done on my own car. I actually put quite a few hours into the car but you can't really see much difference! It was just doing lots of little jobs that I wanted to get out of the way. The first one was replacing the seat mounts. I didn't take any pictures of this as it wasn't very interesting but I essentially wanted to allow a wider seat to be fitted and to have more options for moving the seat back. It did mean repainting part of the floor which is a bit uncool but it's done now.
Next up was to start plumbing in the brakes which I also didn't seem to take pictures of, but I've plumbed in the reservoirs and the brake and clutch up to the front bulkhead. This allowed me to get on with another pressing job - the steering column. Thanks to the Group A pedal box, the lower column mount was no longer any good, as it was too close to the cylinders. On a Group A RS2000, they used a bespoke column which moved the lower mount further back, away from the cylinders. Sadly I don't have one of those, so I had to come up with a different solution. This involved making a removable lower mount so, if I need to get a cylinder out, you can pop the bracket out of the way. Simples!
Realising that I've been somewhat hopeless with pictures, I also finally fitted the steering column. Up to now, I had been using a standard column but a few months ago I modified a spare one to save a bit of weight. So, below you can see the standard column. The casting incorporates the bonnet release, lock barrel and various features which the column cowls screw on to.
WP_20160912_14_42_37_Pro__highres by Jon Scoltock, on FlickrThe new column has had all of this removed so, viewed from underneath, you can see that it is much simpler, with no big bonnet release handle etc. This has obviously saved a small amount of weight but it's also made things a bit neater. In this pictures you can also see the ally bracket that has dropped the column to suit the revised seating position:
WP_20160912_16_52_18_Pro__highres by Jon Scoltock, on FlickrThe fun didn't stop there, so I made up a footrest for the driver:
WP_20160912_16_51_37_Pro__highres by Jon Scoltock, on FlickrI also cleaned up the cut-off switch mounting bracket. This had been painted black at some point and was looking pretty flakey, so I removed the paint and cleaned it up a bit:
WP_20160912_16_51_47_Pro__highres by Jon Scoltock, on FlickrI've started to fit the gear lever too, feeding the cables through and connecting them to the gearbox. I need to work out where the lever needs to go and make a mount for it, but that will be simple enough. Unfortunately, when I fitted the cables, I noticed that the bracket that holds them in place on the gearbox (and allows them to push and pull) is missing, so I'm trying to find one of those:
WP_20160912_16_51_55_Pro__highres by Jon Scoltock, on FlickrI've fitted the warning lights to the dash panel and also thrown an old steering wheel onto it to help work out the gear lever position and help making moving the car about easier. I need to buy the tacho and other gauges, then the dash is finished apart from wiring:
WP_20160912_16_51_24_Pro__highres by Jon Scoltock, on FlickrFinally, my rather optimistic idea of attaching the passenger side dash panel on with a glue gun failed when I head-butted it and it fell off, so I had to rivet it in. I also put a sticker on it, just because:
WP_20160912_16_52_52_Pro__highres by Jon Scoltock, on FlickrOn the subject of stickers, the work on the vinyl on the outside is underway. Just a sneak little look for now though, as it's not finished:
WP_20160912_16_54_44_Pro__highres by Jon Scoltock, on FlickrNext up is to make the false floor for the driver's side, find this silly bracket for the gear cables and making up some heater ducting.
Until next time.
The following users liked this post:
mrbox (14-09-2016)
21-09-2016, 01:31 PM
#51
10K+ Poster!!
Making good progress, really neat build with you, had a couple of friends out on the prom stages, won the 1400 class in a nova, think they managed 18th overall.
 It's better than it was though, a bit more tidy and simple which is the main thing.
21-09-2016, 10:28 PM
It's better than it was though, a bit more tidy and simple which is the main thing.
21-09-2016, 10:28 PM
#53
10K+ Poster!!
Well battle scars and a little rough edge is fine on a rally car!
And ye some of the 1400s are mad, think the nova he was using has around the 180bhp mark.
And ye some of the 1400s are mad, think the nova he was using has around the 180bhp mark.
03-10-2016, 01:22 PM
#54
A few more little updates. Things are plodding along, just wrapping up jobs.
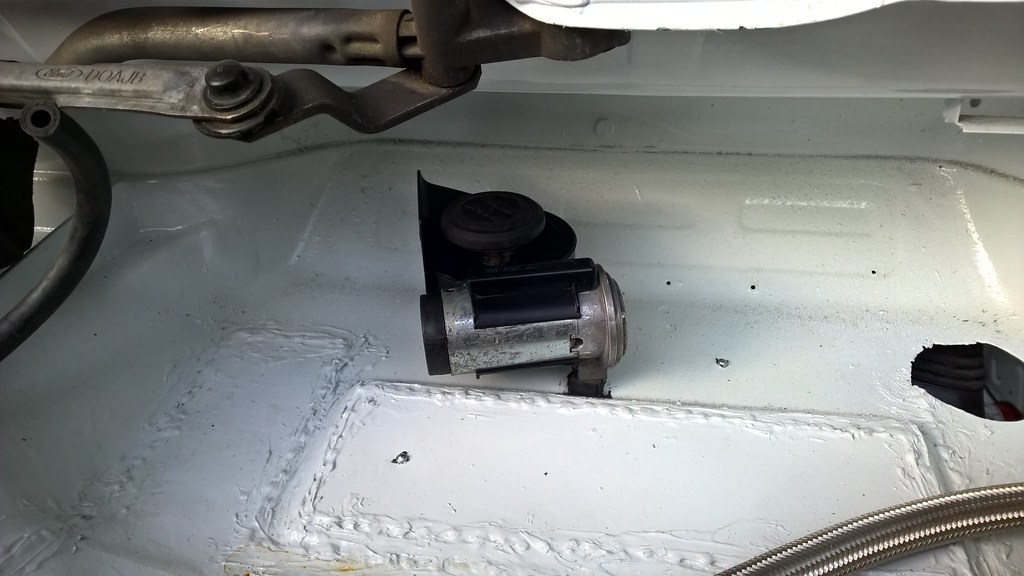
The first vital update is that I fitted the horn. It was mounted in the standard position before, so behind the front bumper, but I've moved it to the top of the bulkhead, out of harms way:
 WP_20160912_17_48_33_Pro__highres by Jon Scoltock, on Flickr
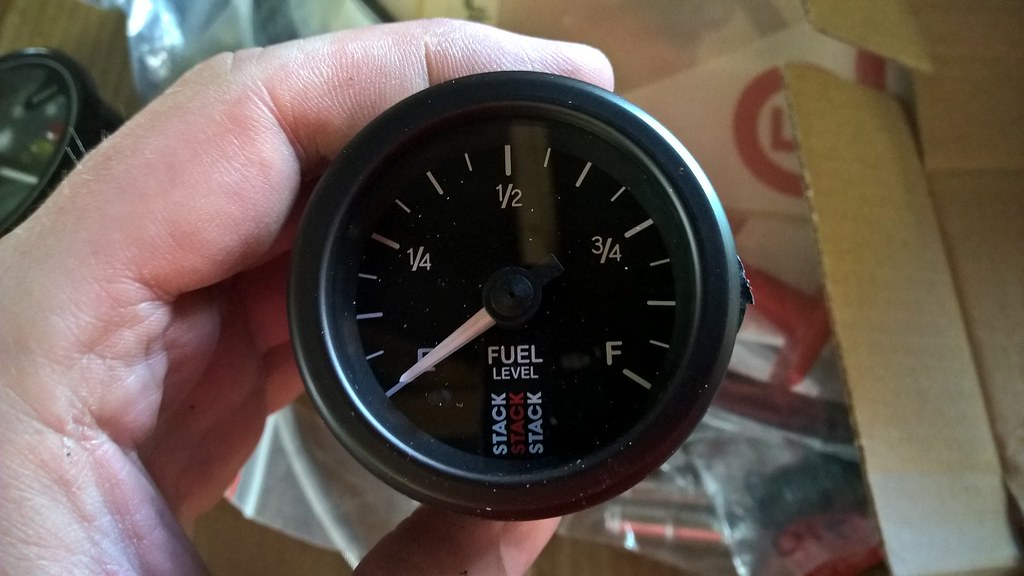
I've also been trying to get things sorted out for the electrical systems, as the new wiring loom is going to be made soon. I've ordered all of the gauges but so far I only have the fuel gauge, which is a nice Stack unit that can be programmed to work with the standard in-tank sender. This will be mounted in the back of the car out of the way. I have made a bracket for it, but will save the pictures for when it is fitted:
 WP_20161002_14_20_22_Pro by Jon Scoltock, on Flickr
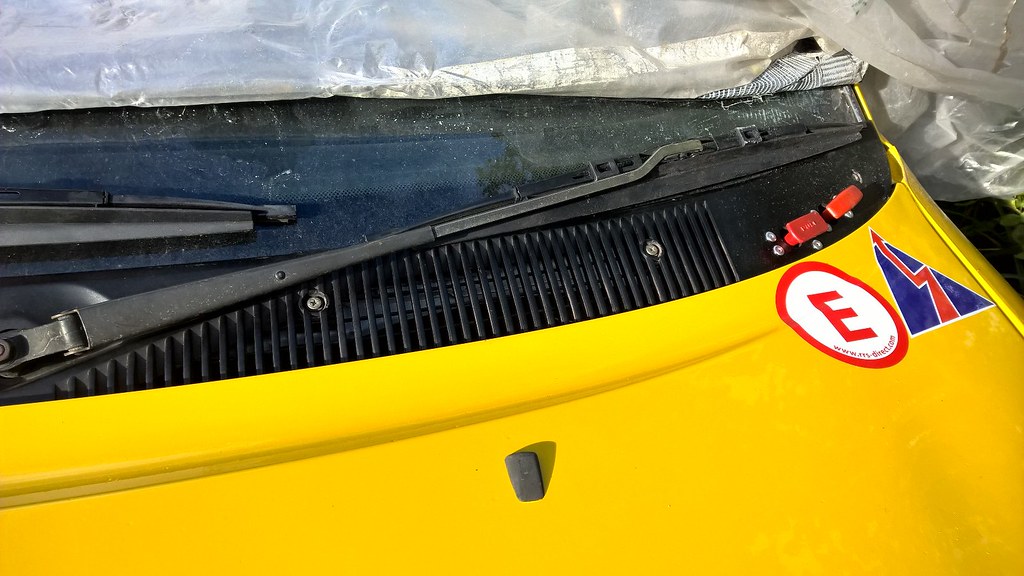
My friend Peter has been a bit of a lifesaver with parts recently, as I seem to have lost no end of stuff. I've also replaced a few bits that were tired. A new scuttle panel was one of those, and this has also been fitted with pull cables for the fire extinguisher/cut-off switch. I put the wipers back on too, but need to pick up some new wiper blades at some point:
 WP_20161002_15_58_50_Pro by Jon Scoltock, on Flickr
 WP_20161002_15_59_44_Pro by Jon Scoltock, on Flickr
I also bought a new fire extinguisher kit as I wanted to replace all of the pipes etc. The bottle has been fitted, though it currently only has one activation cable fitted. Will try and do the other at the weekend:
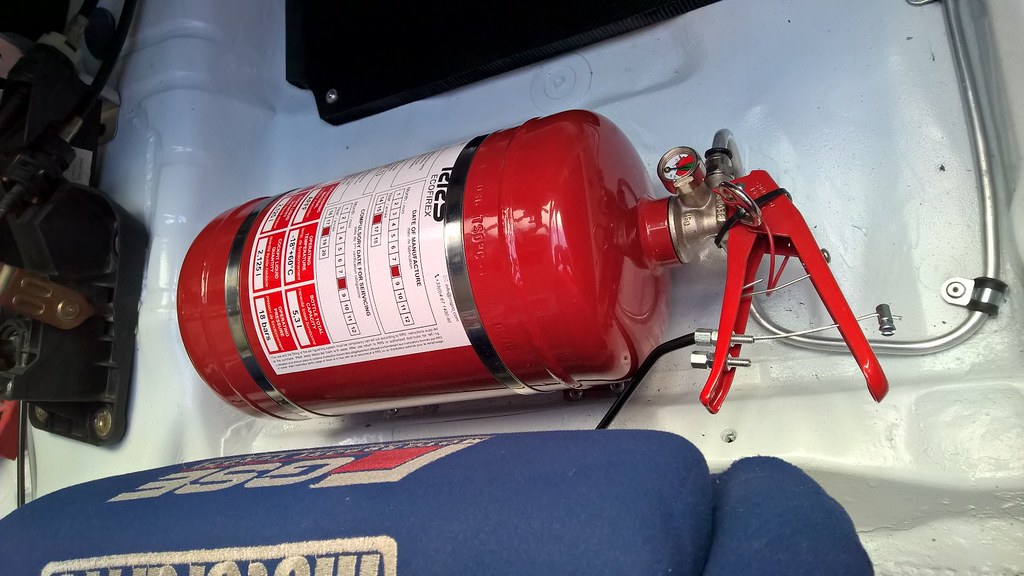 WP_20161002_16_00_51_Pro by Jon Scoltock, on Flickr
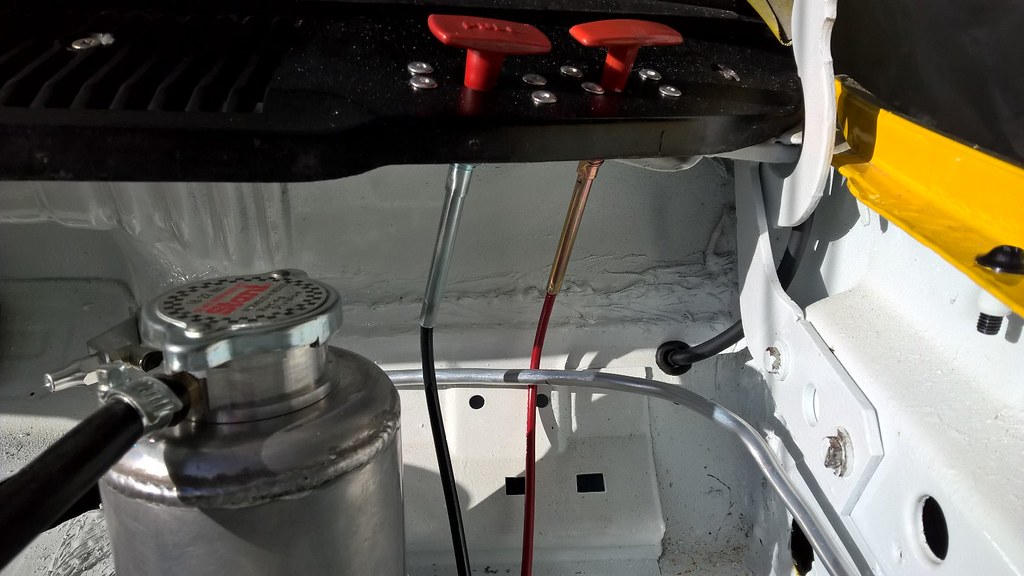
There are two nozzles inside the car, plus four in the engine bay, like so:
 WP_20161002_15_59_22_Pro by Jon Scoltock, on Flickr
 WP_20161002_15_59_27_Pro by Jon Scoltock, on Flickr
 WP_20161002_15_59_31_Pro by Jon Scoltock, on Flickr
 WP_20161002_15_59_35_Pro by Jon Scoltock, on Flickr
I wanted to raise the floor a little bit under the driver's feet as, without the carpet in there, your feet always end up a bit low. When I bought the car it had a heavy piece of chequer plate in there, but I didn't like that. I got a piece of carbon fibre/honeycomb from a friend and thought that would do the trick, so it was cut around the horrendous floor shape and is held in place with a couple of stainless button head bolts. Hopefully it will be up to the job, just need to be a little careful when jumping in and out of the car. I'm waiting for some grip tape to turn up to stick on to it:
 WP_20161002_16_01_02_Pro by Jon Scoltock, on Flickr
Peter came to the rescue again with some door cards. I toyed with the idea of fitting plastic sheet like I have in the pack, but this works ok and means I can use all the standard handles etc. There's a glass hammer/belt cutter on each one and I've fitted a little net pocket for the navigator to store his sick bags:
 WP_20161002_16_01_17_Pro by Jon Scoltock, on Flickr
Lastly, the Rondells that the car had been rolling around on have been removed. They were never intended to stay on the car and the 225 tyres were causing clearance issues, so I picked up another set of cheap wheels. These will only be used on the road so didn't need to be anything special. The offset isn't quite what I wanted but I can always stick some spacers on if it bothers me that much, and I might upgrade to 215 tyres at some stage, but they'll do for the road. I've always quite liked this design of wheels with the extra spoke supports:
 WP_20161002_17_00_56_Pro by Jon Scoltock, on Flickr
Note how I haven't included a picture of the whole car with these fitted. This is deliberate as it's currently in the final stages of having the vinyl work applied, so I'm saving that until it's all finished. Other than that, I'm waiting for a few things to turn up and just measuring and working things out for the wiring, the exhaust, the drive shafts and various other bits and bobs.
Until next time.
The first vital update is that I fitted the horn. It was mounted in the standard position before, so behind the front bumper, but I've moved it to the top of the bulkhead, out of harms way:
WP_20160912_17_48_33_Pro__highres by Jon Scoltock, on FlickrI've also been trying to get things sorted out for the electrical systems, as the new wiring loom is going to be made soon. I've ordered all of the gauges but so far I only have the fuel gauge, which is a nice Stack unit that can be programmed to work with the standard in-tank sender. This will be mounted in the back of the car out of the way. I have made a bracket for it, but will save the pictures for when it is fitted:
WP_20161002_14_20_22_Pro by Jon Scoltock, on FlickrMy friend Peter has been a bit of a lifesaver with parts recently, as I seem to have lost no end of stuff. I've also replaced a few bits that were tired. A new scuttle panel was one of those, and this has also been fitted with pull cables for the fire extinguisher/cut-off switch. I put the wipers back on too, but need to pick up some new wiper blades at some point:
WP_20161002_15_58_50_Pro by Jon Scoltock, on FlickrWP_20161002_15_59_44_Pro by Jon Scoltock, on FlickrI also bought a new fire extinguisher kit as I wanted to replace all of the pipes etc. The bottle has been fitted, though it currently only has one activation cable fitted. Will try and do the other at the weekend:
WP_20161002_16_00_51_Pro by Jon Scoltock, on FlickrThere are two nozzles inside the car, plus four in the engine bay, like so:
WP_20161002_15_59_22_Pro by Jon Scoltock, on FlickrWP_20161002_15_59_27_Pro by Jon Scoltock, on FlickrWP_20161002_15_59_31_Pro by Jon Scoltock, on FlickrWP_20161002_15_59_35_Pro by Jon Scoltock, on FlickrI wanted to raise the floor a little bit under the driver's feet as, without the carpet in there, your feet always end up a bit low. When I bought the car it had a heavy piece of chequer plate in there, but I didn't like that. I got a piece of carbon fibre/honeycomb from a friend and thought that would do the trick, so it was cut around the horrendous floor shape and is held in place with a couple of stainless button head bolts. Hopefully it will be up to the job, just need to be a little careful when jumping in and out of the car. I'm waiting for some grip tape to turn up to stick on to it:
WP_20161002_16_01_02_Pro by Jon Scoltock, on FlickrPeter came to the rescue again with some door cards. I toyed with the idea of fitting plastic sheet like I have in the pack, but this works ok and means I can use all the standard handles etc. There's a glass hammer/belt cutter on each one and I've fitted a little net pocket for the navigator to store his sick bags:
WP_20161002_16_01_17_Pro by Jon Scoltock, on FlickrLastly, the Rondells that the car had been rolling around on have been removed. They were never intended to stay on the car and the 225 tyres were causing clearance issues, so I picked up another set of cheap wheels. These will only be used on the road so didn't need to be anything special. The offset isn't quite what I wanted but I can always stick some spacers on if it bothers me that much, and I might upgrade to 215 tyres at some stage, but they'll do for the road. I've always quite liked this design of wheels with the extra spoke supports:
WP_20161002_17_00_56_Pro by Jon Scoltock, on FlickrNote how I haven't included a picture of the whole car with these fitted. This is deliberate as it's currently in the final stages of having the vinyl work applied, so I'm saving that until it's all finished. Other than that, I'm waiting for a few things to turn up and just measuring and working things out for the wiring, the exhaust, the drive shafts and various other bits and bobs.
Until next time.
04-10-2016, 10:20 PM
#55
10K+ Poster!!
Coming on well with you!
07-10-2016, 09:56 AM
#57
PassionFord Regular

like it 
10-10-2016, 10:07 AM
#59
Not too much done this weekend as the weather was a bit hit and miss, but I did get a couple of odd jobs done.
I'd had a few problems with the fuel filter, which I had bought a while ago. None of the fitting threads seemed to match, but it's finally sorted, so I made up a little bracket and fitted it. The fuel system is done now with the exception of the lines themselves, I just need to order the hose and fittings. Excuse the gaffer tape, just helps keep the dust out:
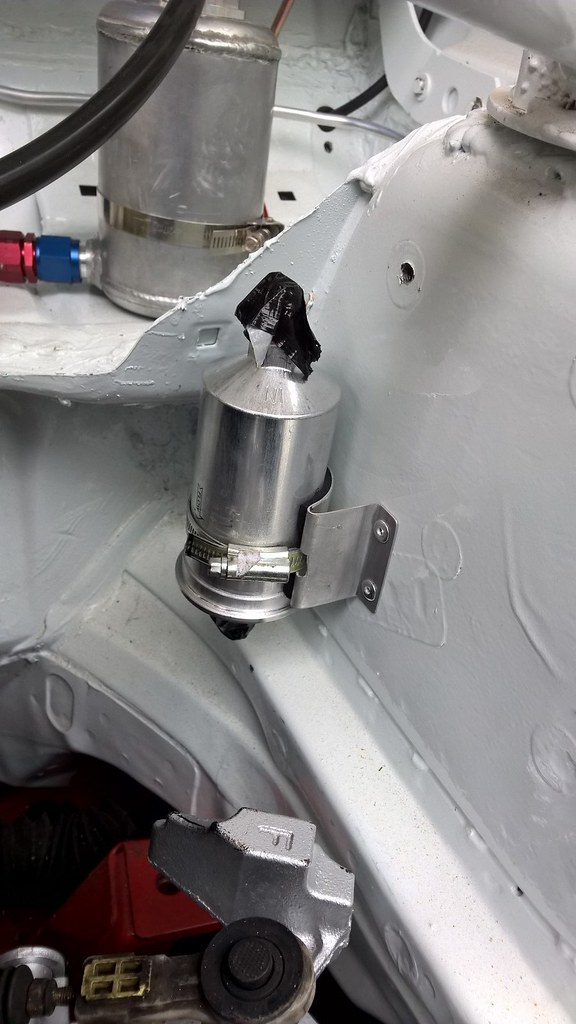 WP_20161007_15_20_34_Pro by Jon Scoltock, on Flickr
I then fitted the bargain basement oil catch tank I got off eBay for a whole �13:
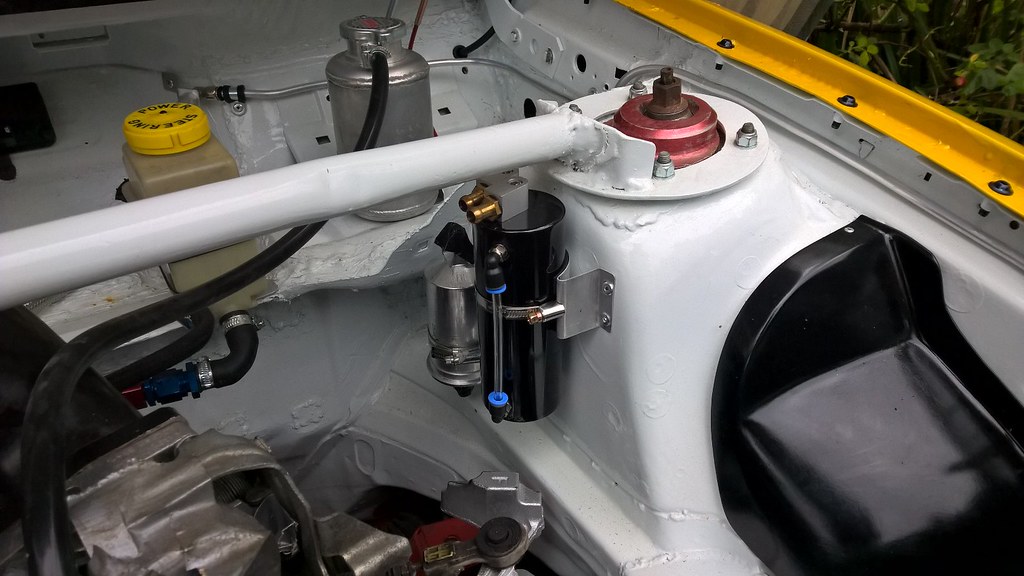 WP_20161007_16_30_24_Pro by Jon Scoltock, on Flickr
And a hose to the cam breather. The other will go to the intake somewhere so it's closed loop like standard:
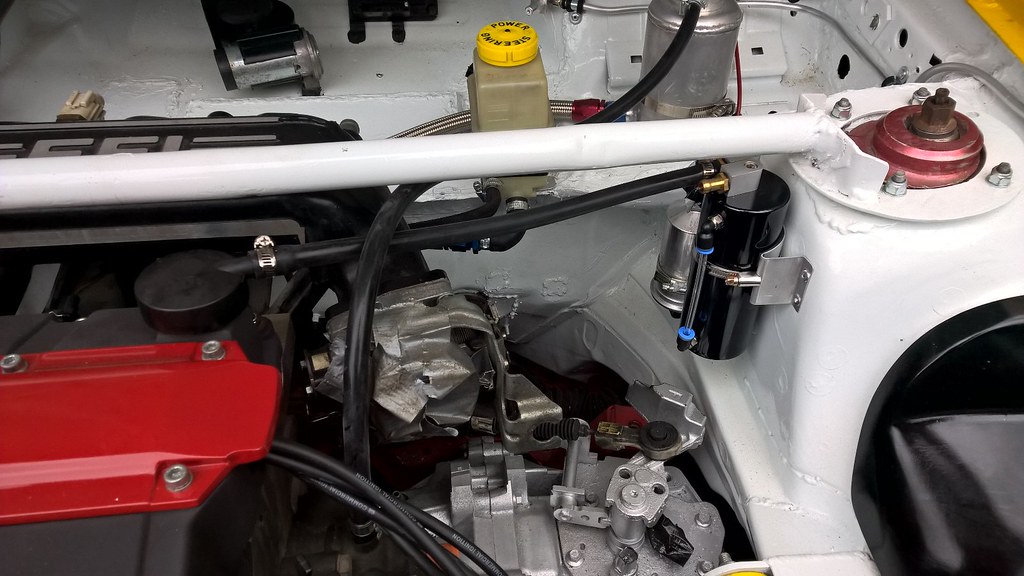 WP_20161007_16_48_40_Pro by Jon Scoltock, on Flickr
The tacho/speedo has arrived, as below, along with the other gauges. The wiring loom is paid for, so should be underway shortly, I just need to give all the bits to the MDA Motorsport who are doing the loom.
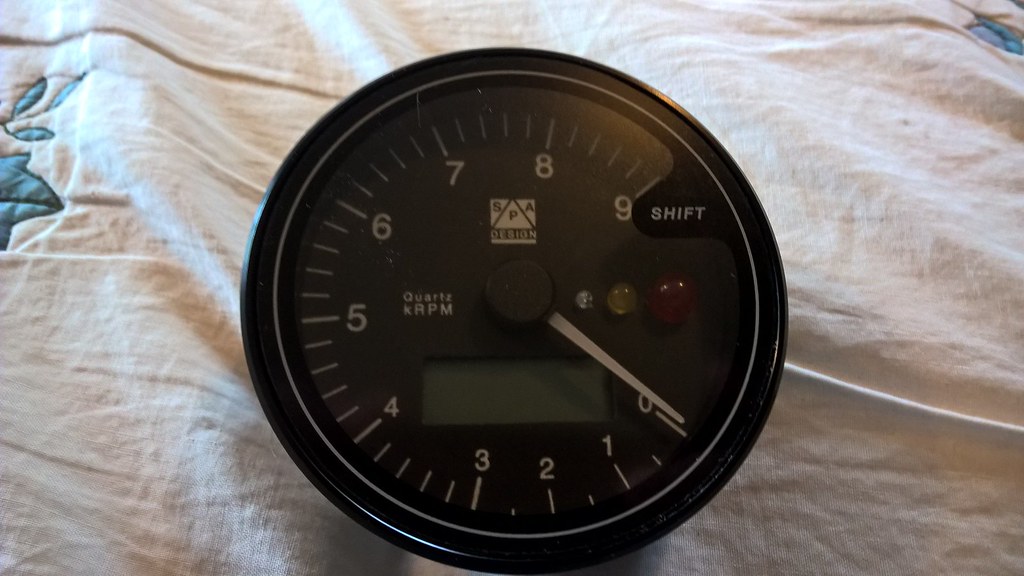 WP_20161008_10_16_12_Pro by Jon Scoltock, on Flickr
I also spent some time measuring driveshaft plunge which was a bit of a faff, moving the suspension about so I can order some new shafts, as I can't find an off-the-shelf solution that will fit. It's an expense that I was hoping to avoid but there we are.
Until next time.
I'd had a few problems with the fuel filter, which I had bought a while ago. None of the fitting threads seemed to match, but it's finally sorted, so I made up a little bracket and fitted it. The fuel system is done now with the exception of the lines themselves, I just need to order the hose and fittings. Excuse the gaffer tape, just helps keep the dust out:
WP_20161007_15_20_34_Pro by Jon Scoltock, on FlickrI then fitted the bargain basement oil catch tank I got off eBay for a whole �13:
WP_20161007_16_30_24_Pro by Jon Scoltock, on FlickrAnd a hose to the cam breather. The other will go to the intake somewhere so it's closed loop like standard:
WP_20161007_16_48_40_Pro by Jon Scoltock, on FlickrThe tacho/speedo has arrived, as below, along with the other gauges. The wiring loom is paid for, so should be underway shortly, I just need to give all the bits to the MDA Motorsport who are doing the loom.
WP_20161008_10_16_12_Pro by Jon Scoltock, on FlickrI also spent some time measuring driveshaft plunge which was a bit of a faff, moving the suspension about so I can order some new shafts, as I can't find an off-the-shelf solution that will fit. It's an expense that I was hoping to avoid but there we are.
Until next time.
17-10-2016, 10:45 AM
#62
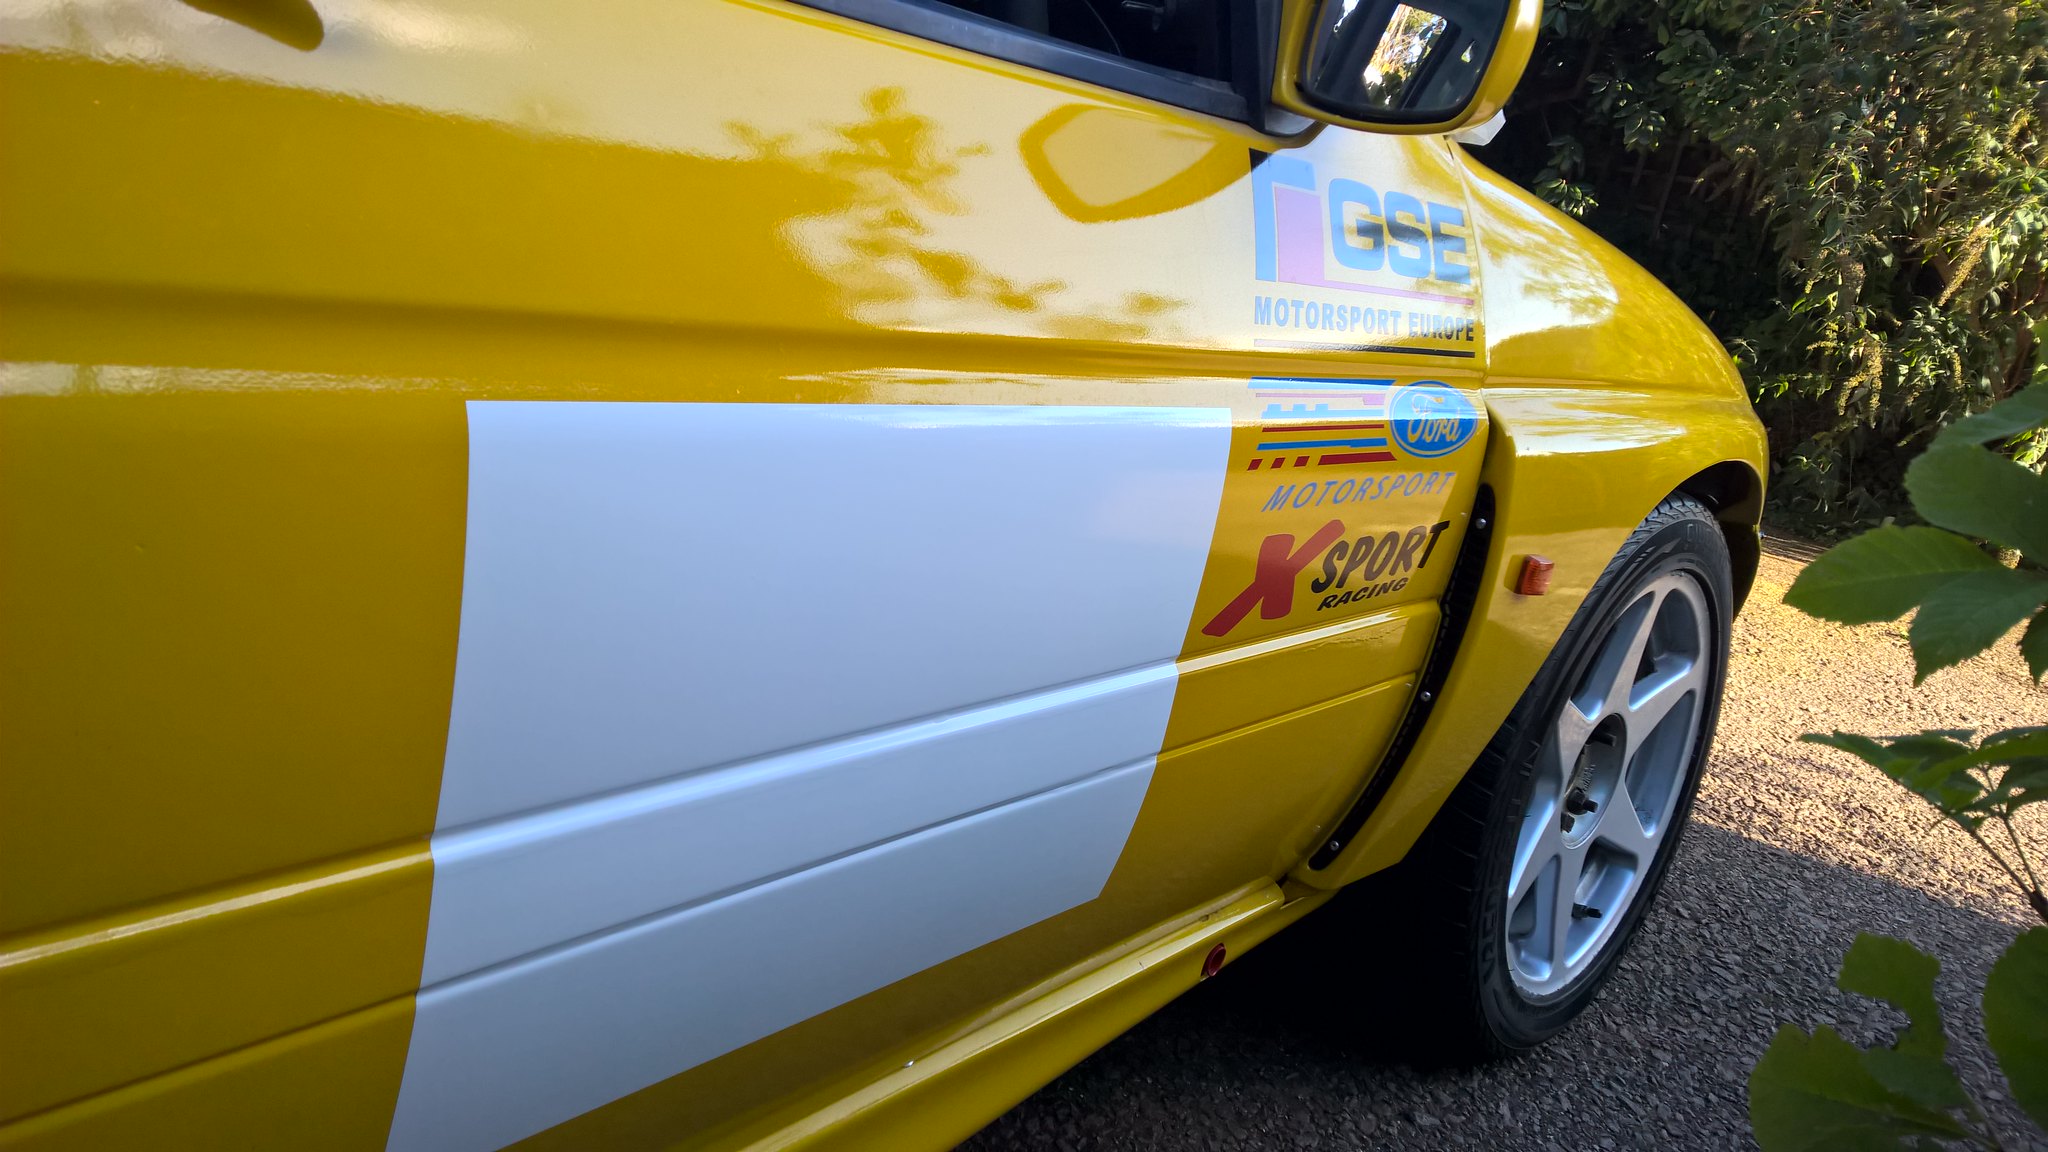
Not much to update over the weekend as I didn't have much of a chance to work on the car unfortunately. I fitted a gear knob to the gear lever, but forgot to take a picture. The one thing that did happen was the guy who has been doing my vinyl popped over on Friday and finished up. There will be a few extra bits to go on at some point, but it's done for the moment. So, the outside now looks like this:
 WP_20161014_15_20_47_Pro by Jon Scoltock, on Flickr
 WP_20161014_15_21_00_Pro by Jon Scoltock, on Flickr
 WP_20161014_15_24_46_Pro by Jon Scoltock, on Flickr
 WP_20161014_15_43_58_Pro by Jon Scoltock, on Flickr
Until next time.
WP_20161014_15_20_47_Pro by Jon Scoltock, on FlickrWP_20161014_15_21_00_Pro by Jon Scoltock, on FlickrWP_20161014_15_24_46_Pro by Jon Scoltock, on FlickrWP_20161014_15_43_58_Pro by Jon Scoltock, on FlickrUntil next time.
17-10-2016, 02:26 PM
#63
10K+ Poster!!
Looks the part! Very nice indeed.
 06-12-2016, 07:54 PM
#68
10K+ Poster!!
Nice!!
30-01-2017, 12:23 PM
#69
Lordy, it's been a while since I updated this! Holidays, work, Christmas and various other things can all be used as excuses, along with the fact the weather has been poo. I've got some high quality man flu going on right now, but I did spend a little bit of time on this on Saturday before other things got in the way.
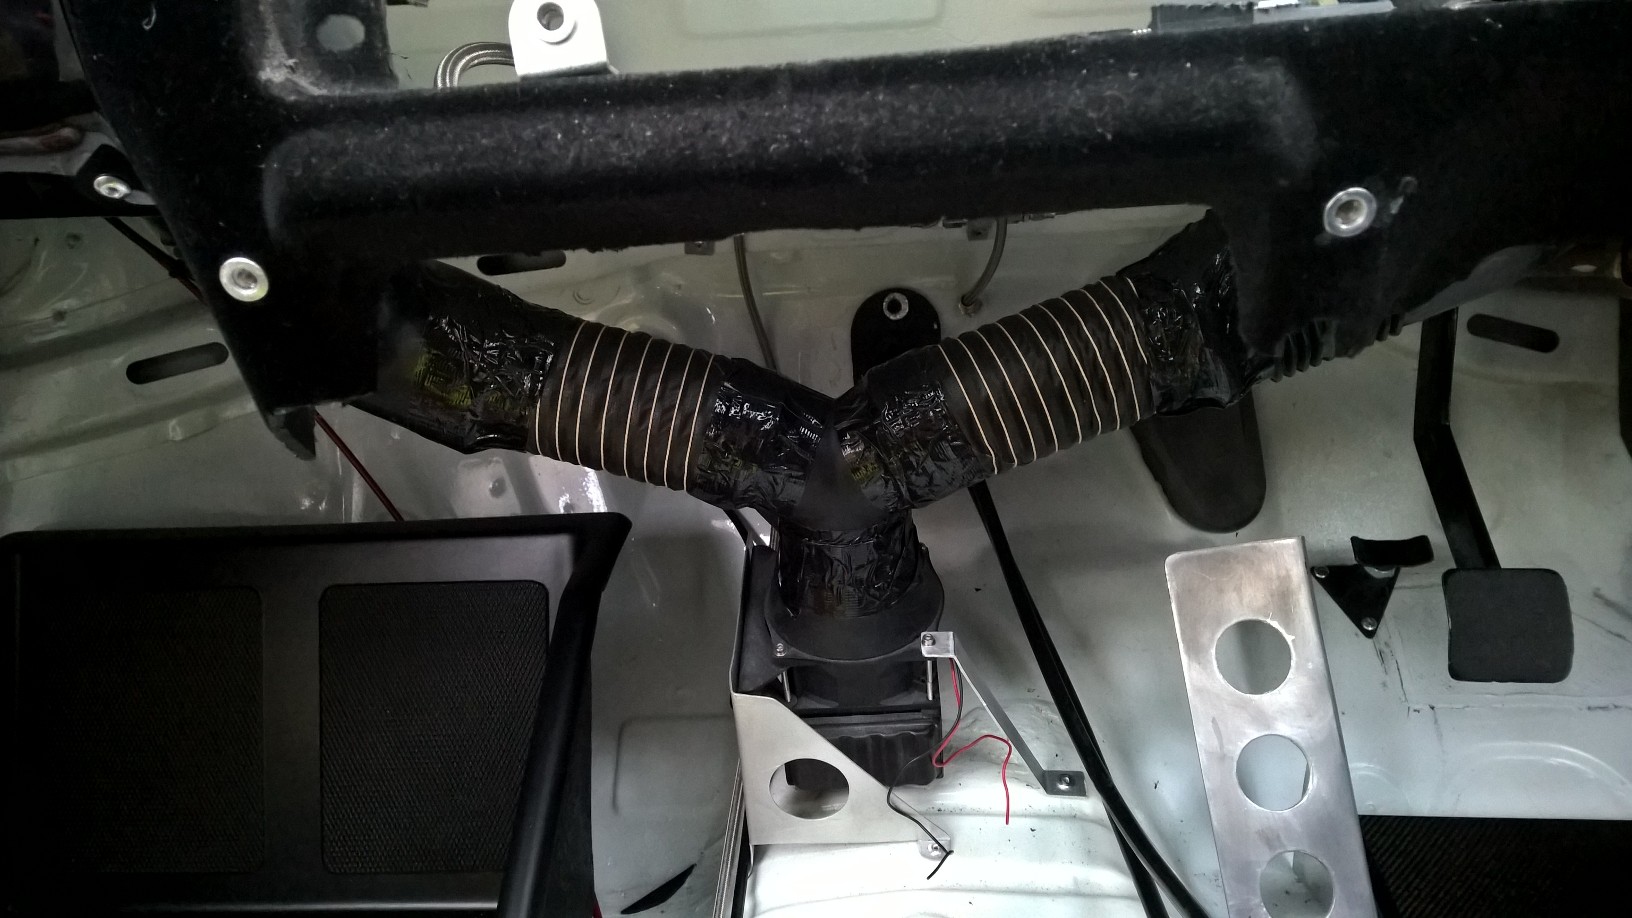
Firstly, I finally botched together some heater ducting from the fan blower. The Y-piece came from a caravan parts supplier, then I used some flexible ducting to join into the original heater ducts. It's a simple system, so the flick of a switch will just mean that air blows up the windscreen. Don't need anything more than that. I appreciate that the gaffer tape isn't pretty but it's purpose is to just help seal things a bit better.
 WP_20170128_15_54_47_Pro by Jon Scoltock, on Flickr
I also made up some brake lines to the front inner arch bulkhead, so the only brake lines I now need to make are to the calipers themselves:
 WP_20170128_15_54_55_Pro by Jon Scoltock, on Flickr
Finally, Mat from MDA sent me this, which means my wiring loom is progressing nicely!
 IMG-20170129-WA0001 by Jon Scoltock, on Flickr
In other news, while I was on holiday, the custom drive shafts finally turned up after 2.5 months of waiting. I just need to buy some new inner joints, which seem impossible to find. One of the front Bilsteins has been away to have a new shaft fitted and is now back, while a big package with lots of exhaust bits turned up, so I can make up a side exit system.
The to-do list is shrinking now so, once the above stuff is all wrapped up, it will just need some seats, belts and rebuild of the rear brakes and it should be ready to turn the key (or push the button at least).
Firstly, I finally botched together some heater ducting from the fan blower. The Y-piece came from a caravan parts supplier, then I used some flexible ducting to join into the original heater ducts. It's a simple system, so the flick of a switch will just mean that air blows up the windscreen. Don't need anything more than that. I appreciate that the gaffer tape isn't pretty but it's purpose is to just help seal things a bit better.
WP_20170128_15_54_47_Pro by Jon Scoltock, on FlickrI also made up some brake lines to the front inner arch bulkhead, so the only brake lines I now need to make are to the calipers themselves:
WP_20170128_15_54_55_Pro by Jon Scoltock, on FlickrFinally, Mat from MDA sent me this, which means my wiring loom is progressing nicely!
IMG-20170129-WA0001 by Jon Scoltock, on FlickrIn other news, while I was on holiday, the custom drive shafts finally turned up after 2.5 months of waiting. I just need to buy some new inner joints, which seem impossible to find. One of the front Bilsteins has been away to have a new shaft fitted and is now back, while a big package with lots of exhaust bits turned up, so I can make up a side exit system.
The to-do list is shrinking now so, once the above stuff is all wrapped up, it will just need some seats, belts and rebuild of the rear brakes and it should be ready to turn the key (or push the button at least).
25-04-2017, 10:39 AM
#70
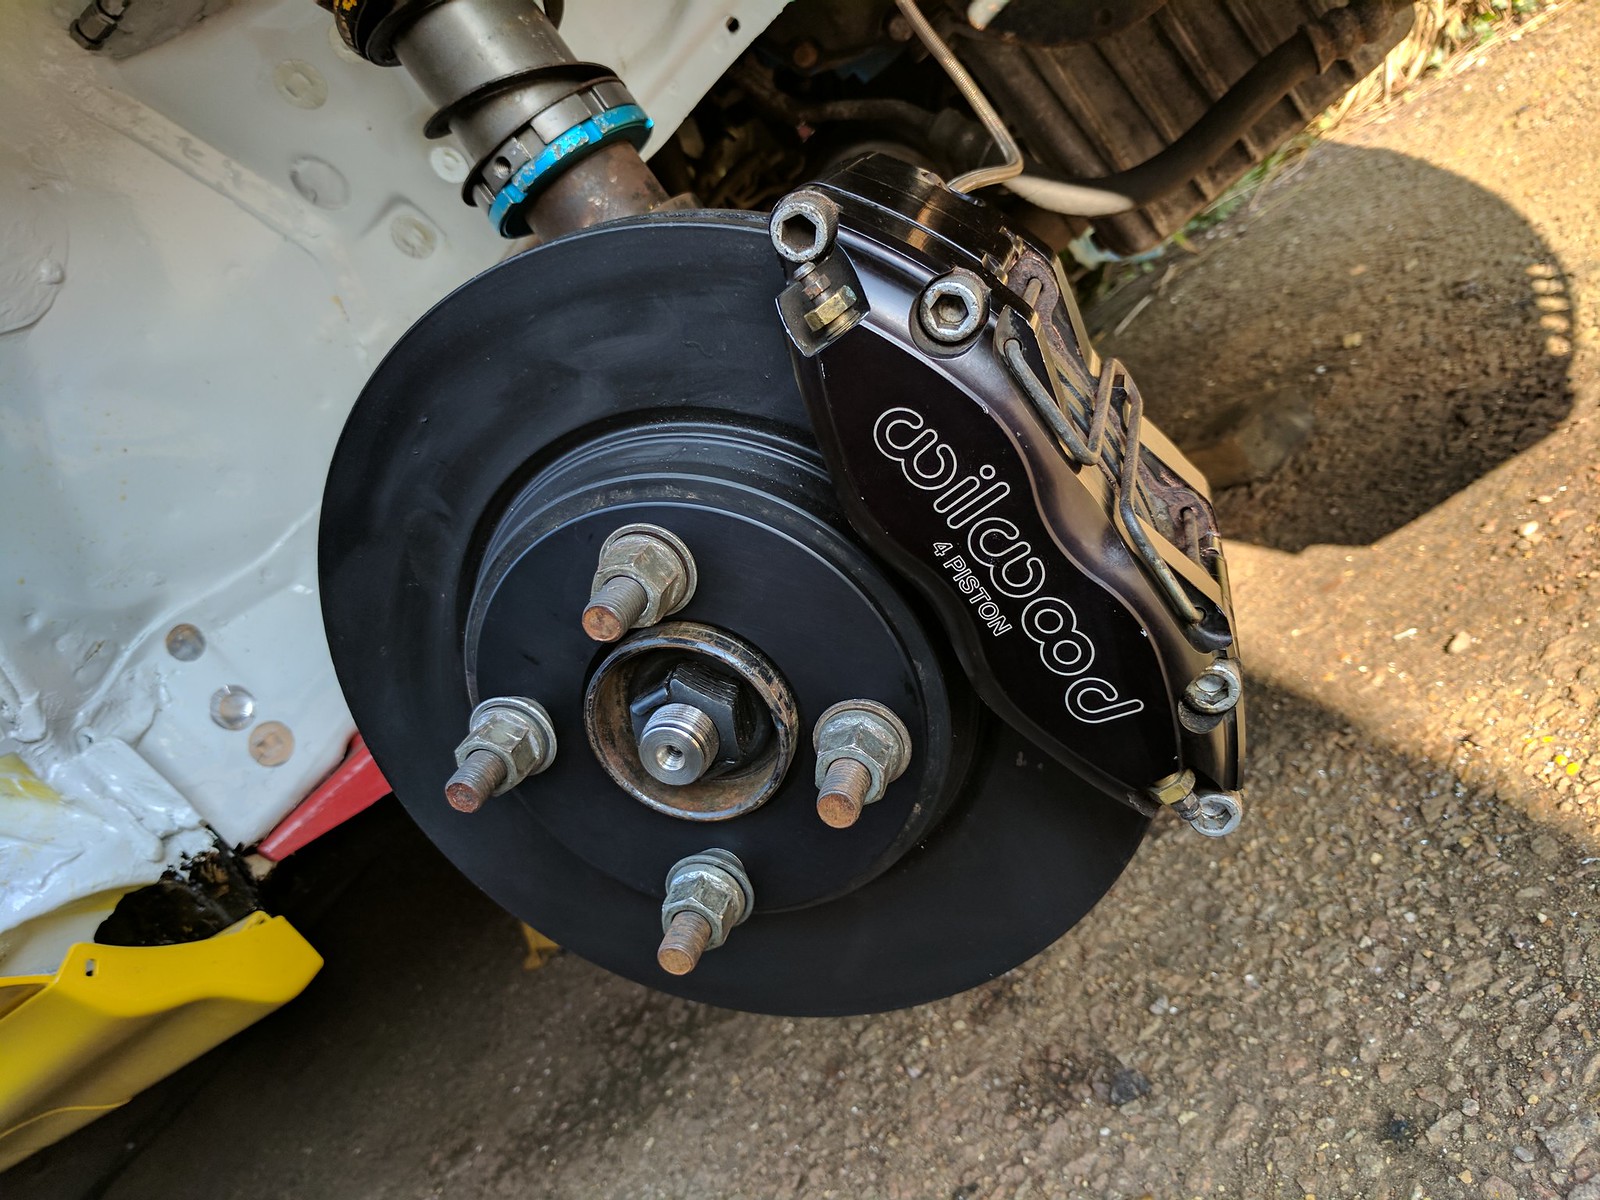
Things have been a bit quiet with this of late, but there is some progress. The wiring loom is almost done so should be with me soon and I have fitted the custom front drive shafts and brakes:
by https://www.flickr.com/photos/143473428@N02/, on Flickr
 26-06-2017, 12:35 PM
#71
My updates for this have been terrible, but they are happening. I've rebuilt the rear brakes with new bearings/discs/pads. Also removed one of the rear hub spacer blocks to suit the new arches. The rear dampers are being sent away this week for refurbishment. The rear spring platforms are totally seized and I don't appear to have any rebound left, so they're well overdue. No pics of any of this sadly, but I promise you it's happened.
In other news, I've made up all the fuel lines and fitted them. I also test fitted the air filter assembly so I can make a template up for the heat shield. I'm going to try and enclose the corner of the engine bay where the filter is as much as possible to try and minimise heat soak. Engine bay pic as it stands:
[ame=https://flic.kr/p/USF8FG]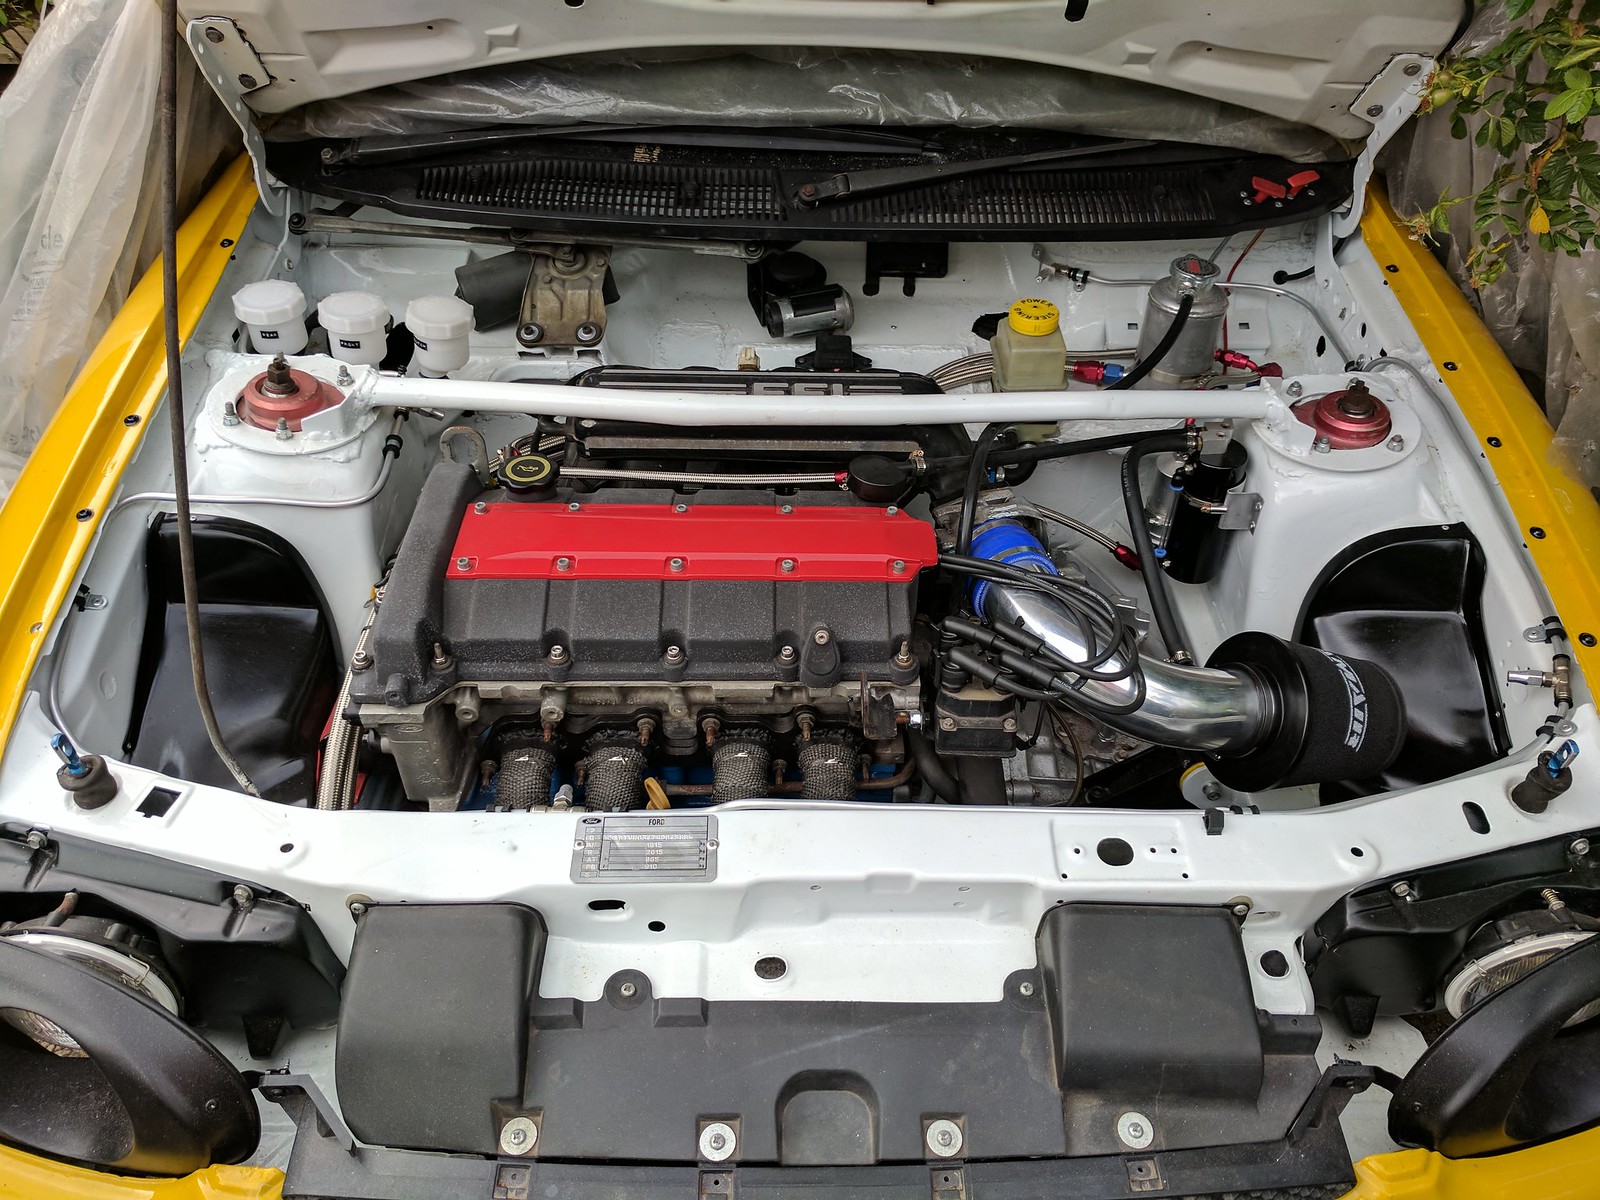 by https://www.flickr.com/photos/143473428@N02/, on Flickr
A few weeks ago I made up the exhaust system. When I bought the car, it had an Ashley group N exhaust system. This was getting a bit ratty as it was only mild steel and it was a bit on the loud side as the baffles had broken down in the back box. It was a bit close to noise limits on some events, so a replacement was needed. Rather than forking out a fortune for a new exhaust, I decided to get Blue Peter. I bought a universal silencer and a couple of bits of pipe and, by using parts of the old exhaust, I was able to make up a new system. The side exit was chosen for a couple of reasons. Firstly, it's lighter because there is less of it. Secondly, because it looks bad-ass. It was mostly the second one. I've gone for a much larger silencer than it had before so hopefully it will still be quieter, despite not being as long. I followed the standard routing for the most part, running down the centre of the car, then in front of the fuel tank. Then I dropped it down so it exits under the skirt in roughly the same place as it would on a Group A RS2000. I crushed the pipe a bit so it wasn't quite as low. It's not a fully even shape, but they often weren't in-period anyway. I suspect it won't be to everyone's taste but I think it's cool. Sadly you can't see much of it.
by https://www.flickr.com/photos/143473428@N02/, on Flickr
[ame=https://flic.kr/p/USGE9d]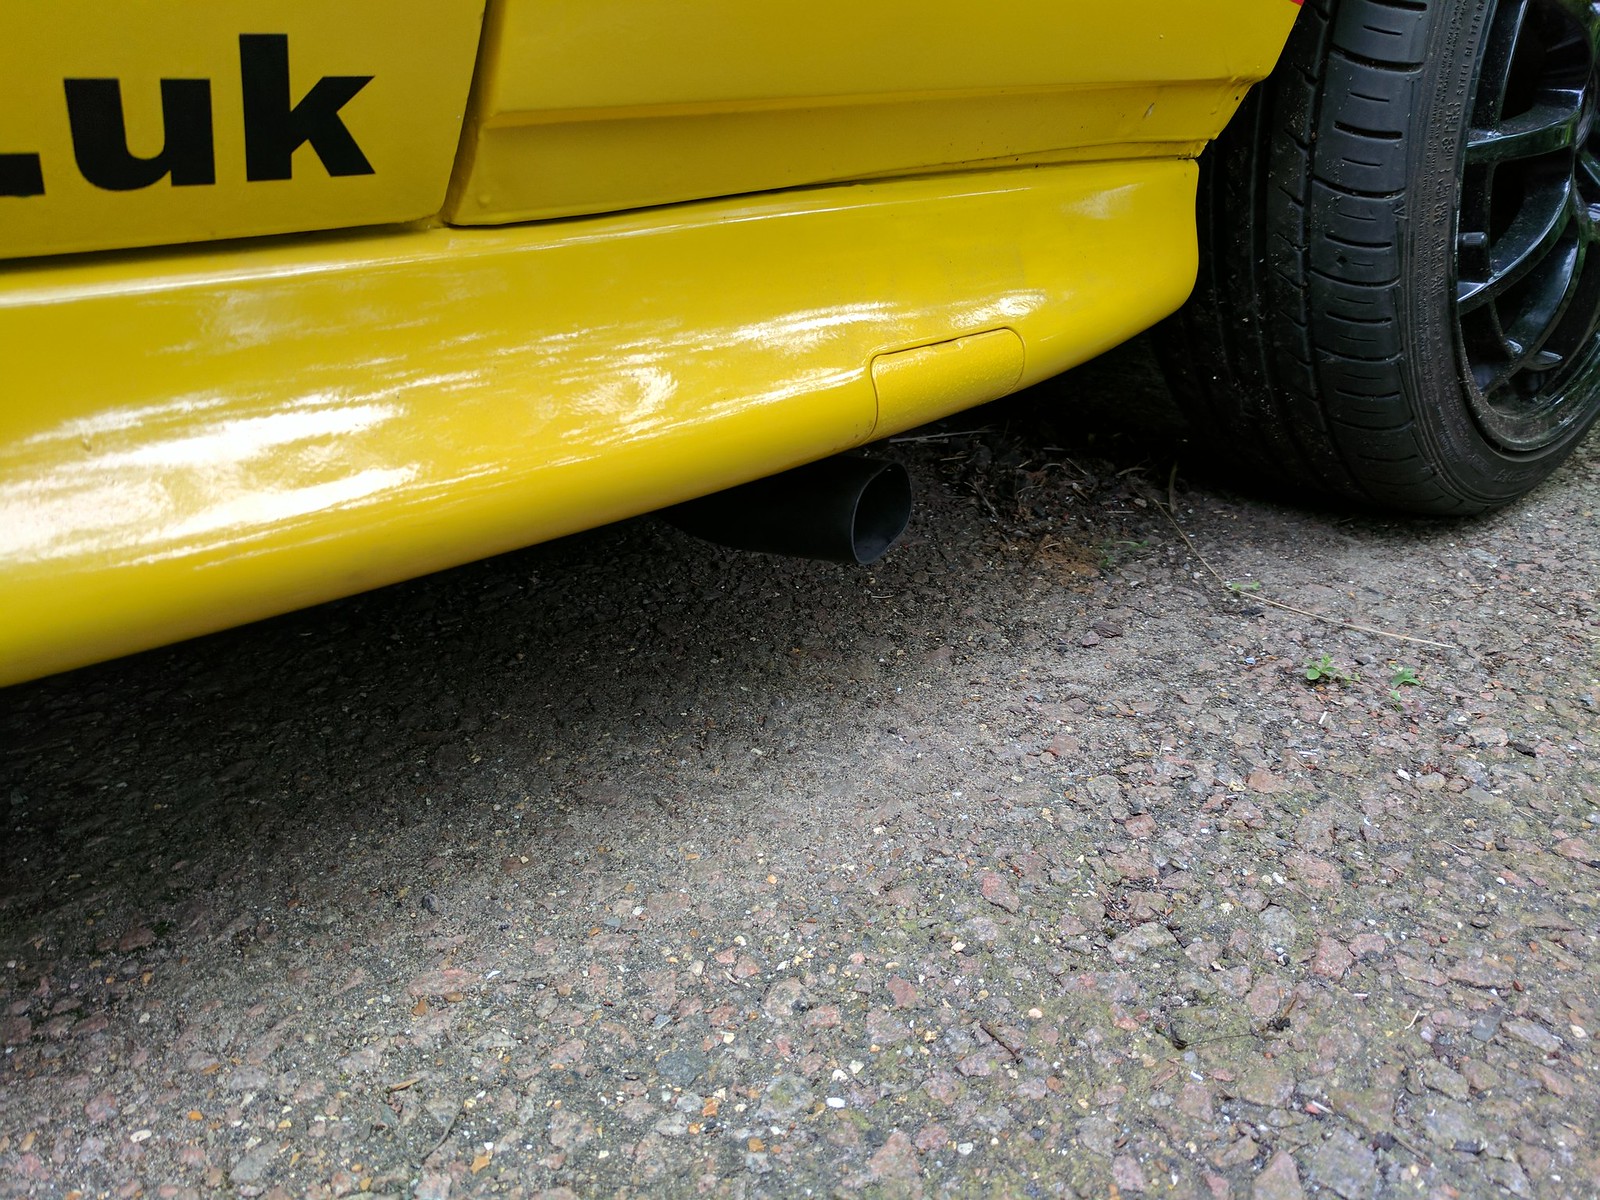 by https://www.flickr.com/photos/143473428@N02/, on Flickr
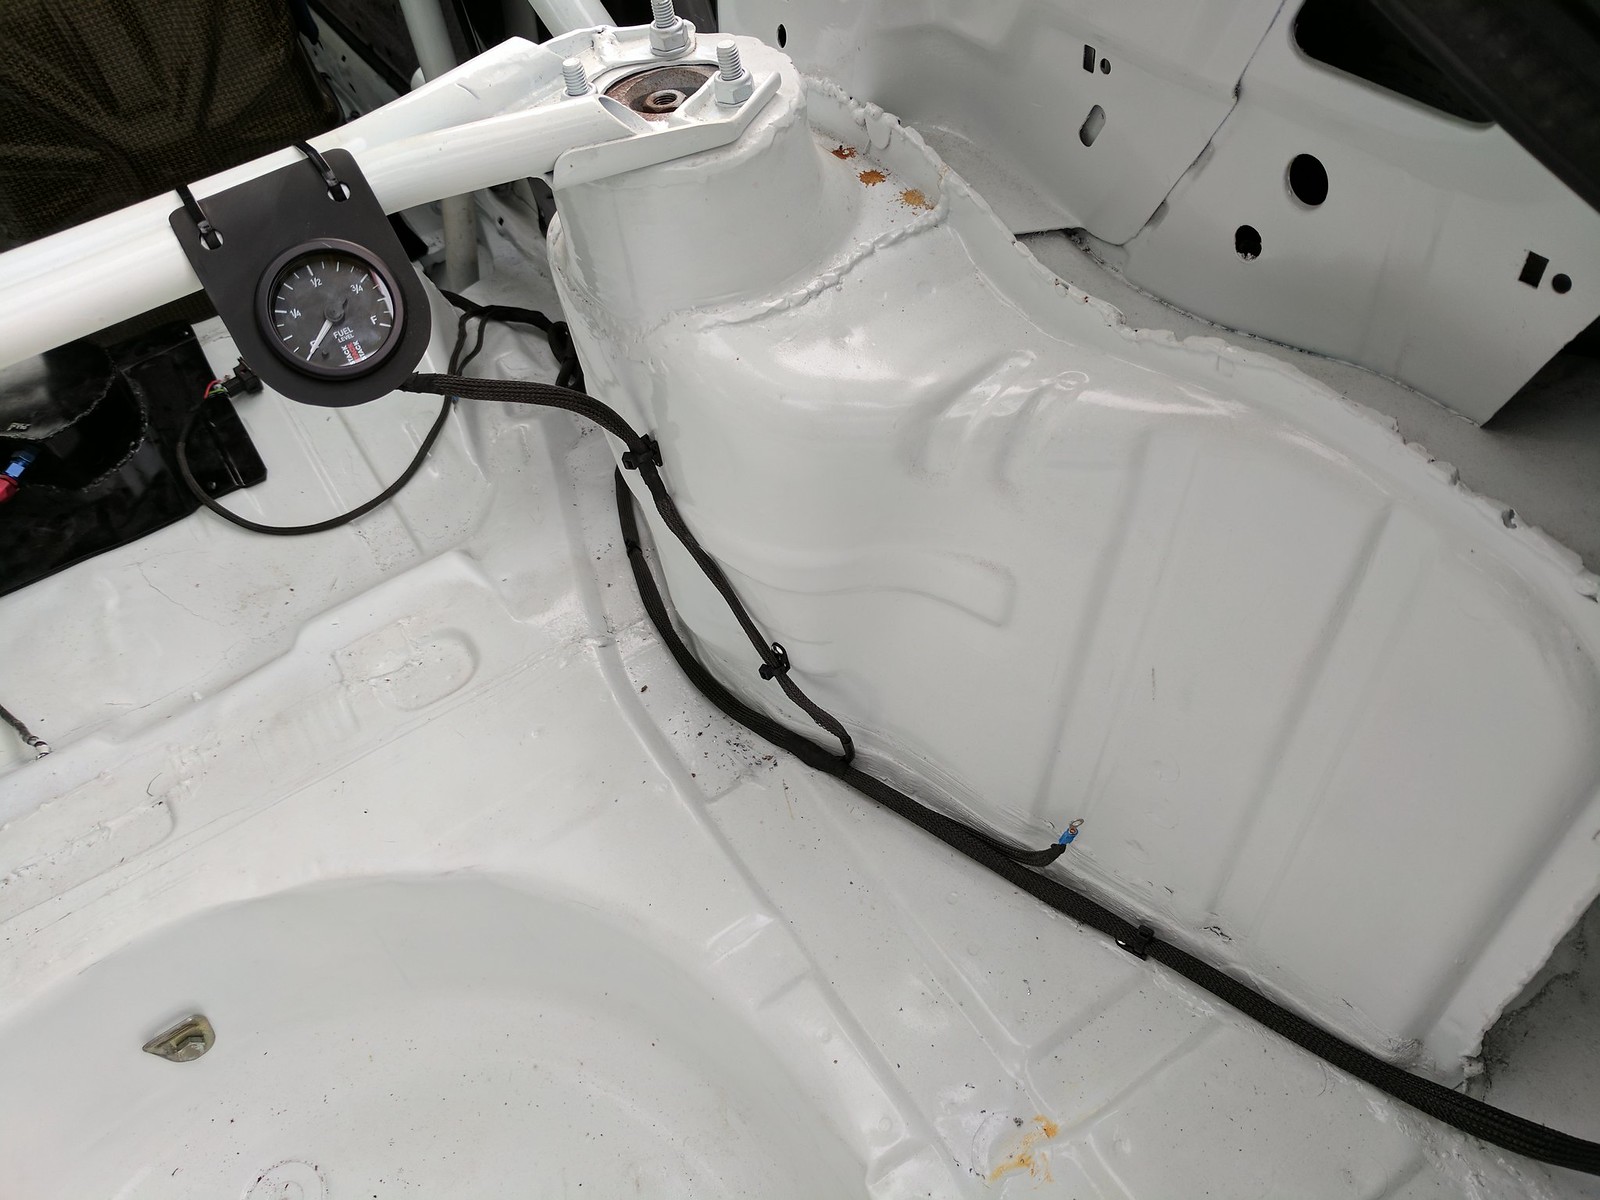
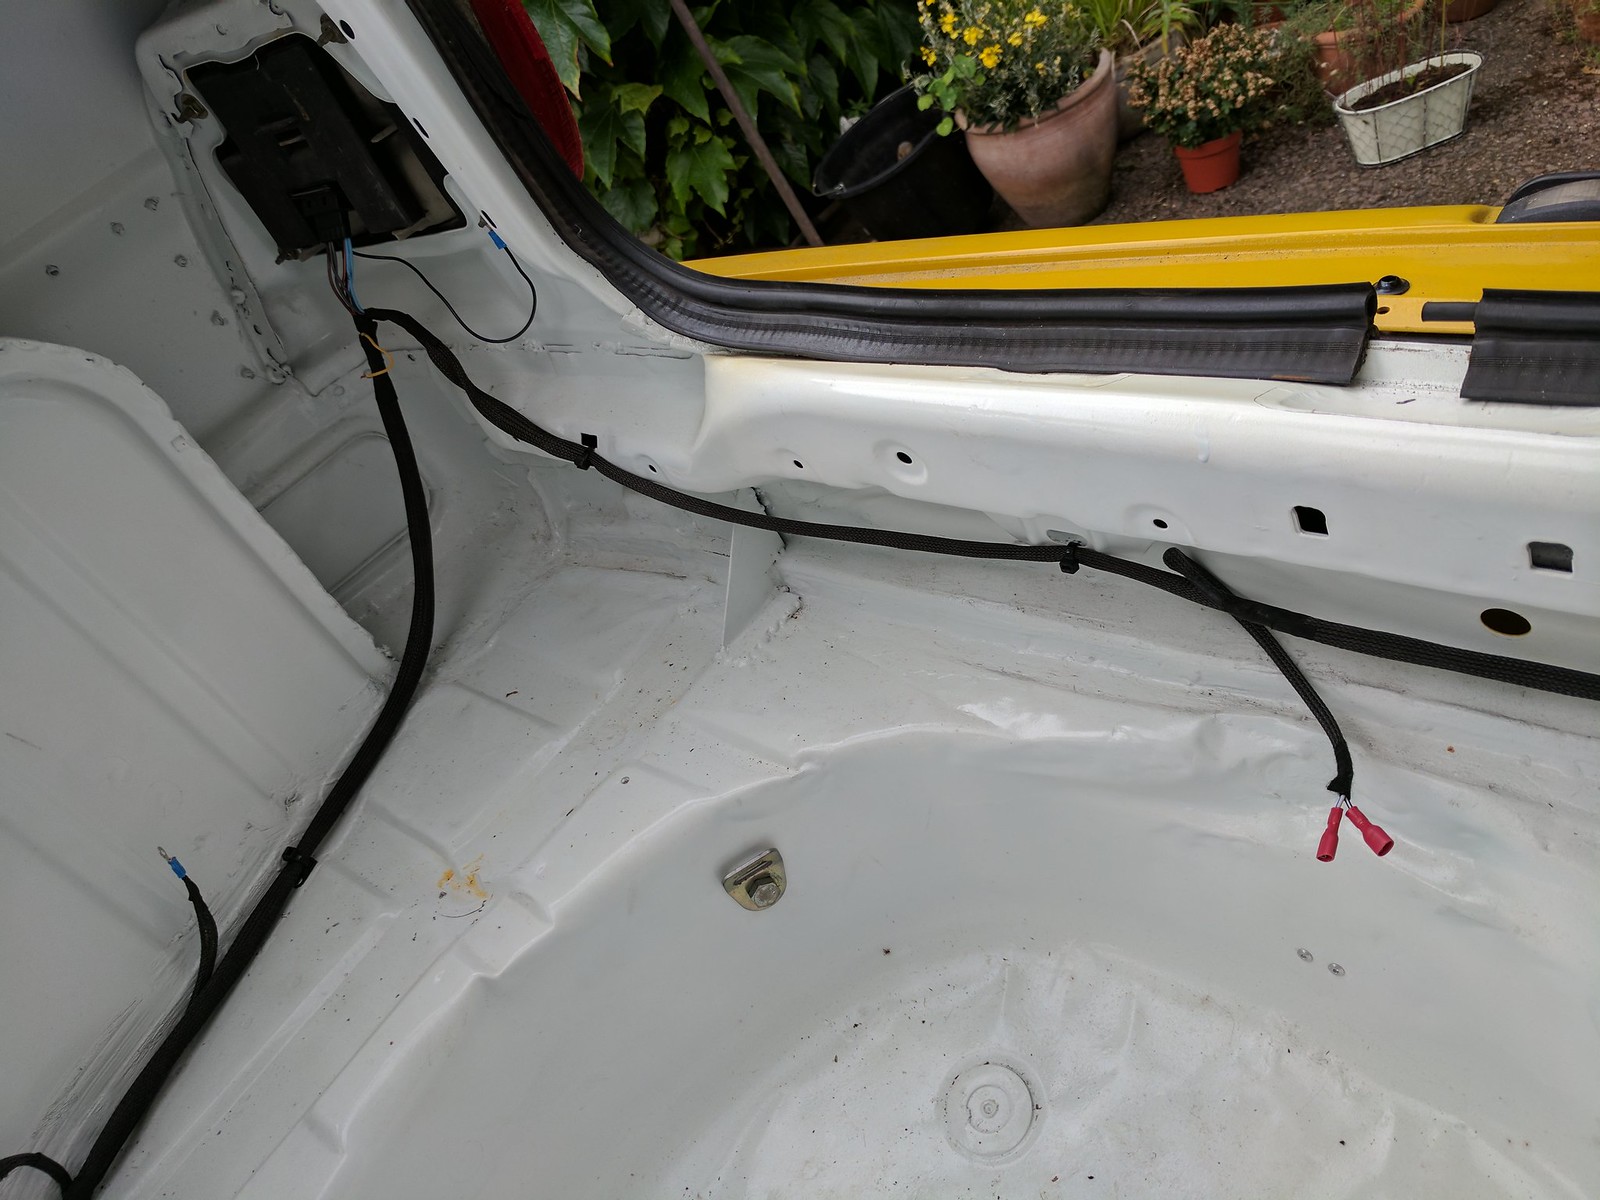
The biggest development has been the arrival of the wiring loom. This was custom made by a friend of mine up at MDA Motorsport. I've started to fit it into the car but haven't finished yet. I am leaving it mostly loose fitting until it's been tested, but I couldn't resist clipping the rear into place. Note the Stack fuel gauge mounted in the rear so you can monitor the fuel level while you fill up. Saves some cable routing too.
by https://www.flickr.com/photos/143473428@N02/, on Flickr
by https://www.flickr.com/photos/143473428@N02/, on Flickr
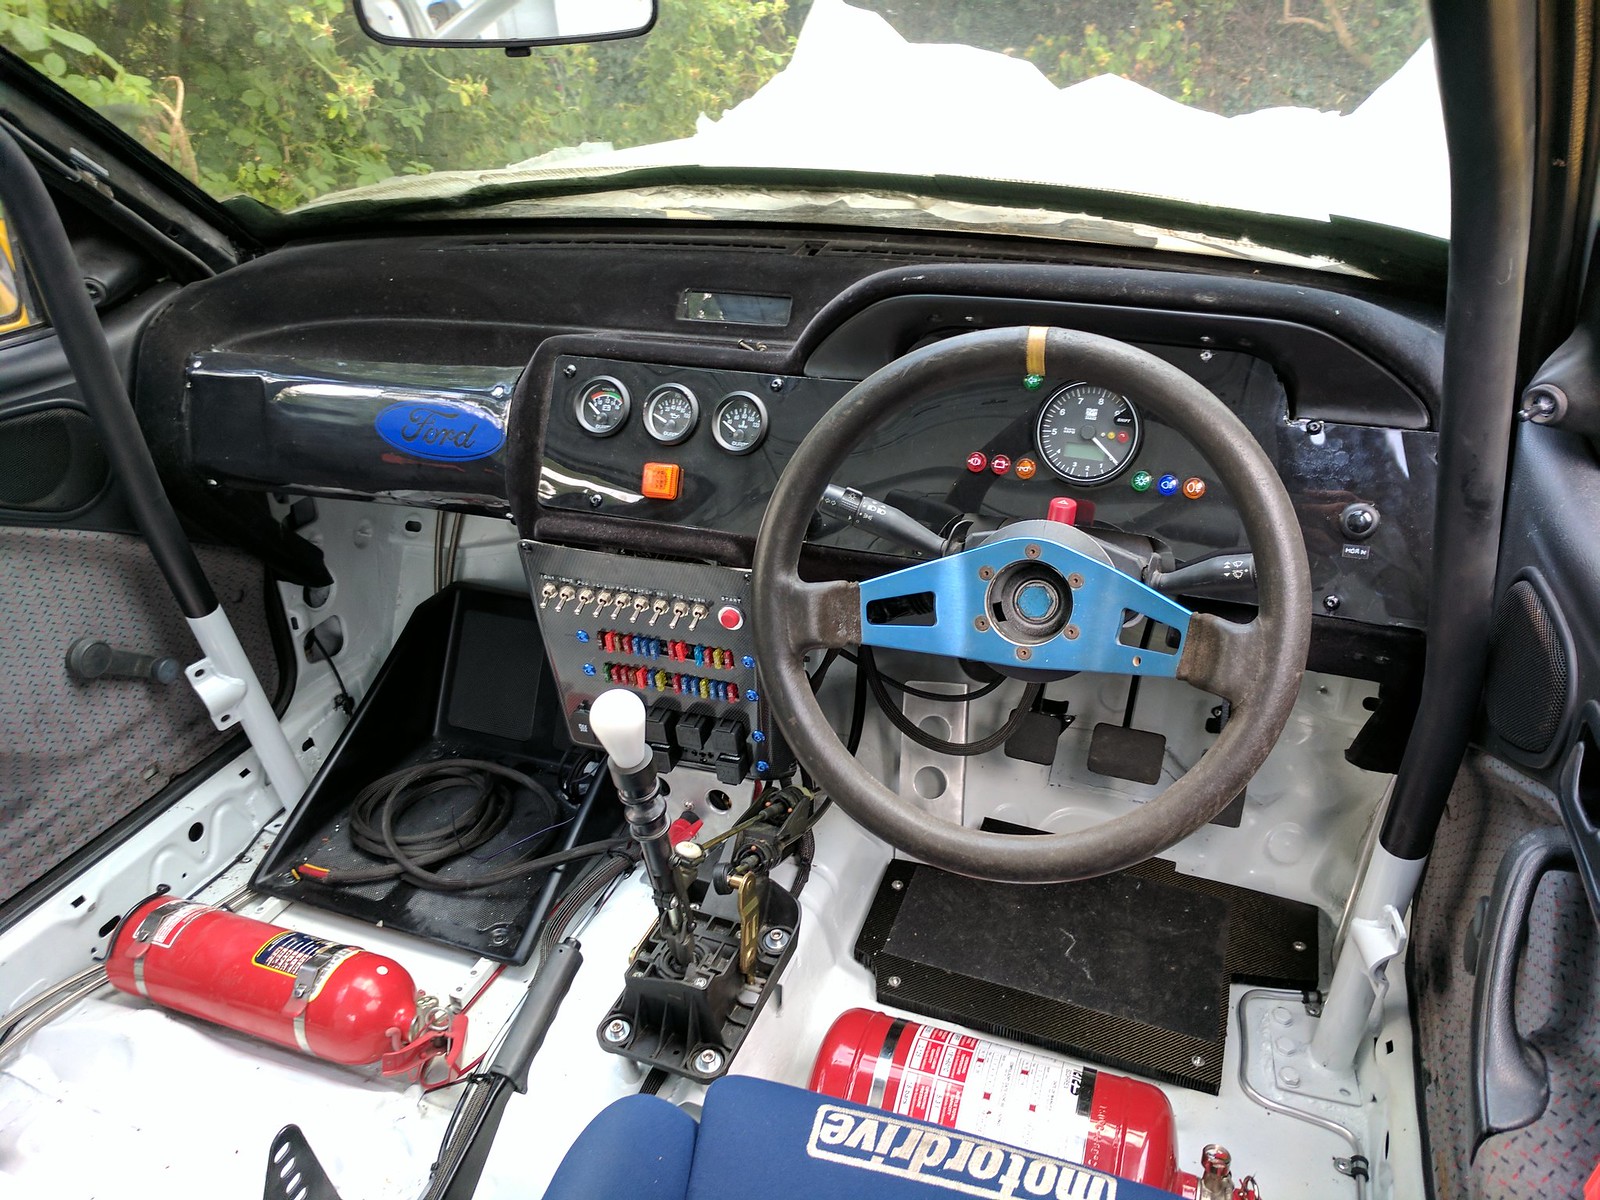
I've put the centre console/fuse board into place, along with the dash panel, as well as feeding the headlight/wiper/horn loom loosely into position. The dash is nice and simple, so all the standard vents etc are gone, it's just a sheet of plastic with the dials in it. I might remake the dash panel at some stage, but it will do for the moment.
by https://www.flickr.com/photos/143473428@N02/, on Flickr
Since taking that, I have done a bit more to the wiring; connected up all of the earths, started to route the starter loom into the engine bay, fitted the tacho reset button and a couple of other bits. I need to sort things out under the bonnet and connect everything up, so I can test the loom. I've got the engine/ECU harness too, but that will go in once the car loom is finalised a bit more.
Work this weekend means it will be a couple of weeks before I get back on it, but I've ordered the lightweight battery, a couple of switches and other bits I need and some other odds and sods. Need to buy some fluids so I can think about trying to run it!
In other news, I've made up all the fuel lines and fitted them. I also test fitted the air filter assembly so I can make a template up for the heat shield. I'm going to try and enclose the corner of the engine bay where the filter is as much as possible to try and minimise heat soak. Engine bay pic as it stands:
[ame=https://flic.kr/p/USF8FG]
by https://www.flickr.com/photos/143473428@N02/, on FlickrA few weeks ago I made up the exhaust system. When I bought the car, it had an Ashley group N exhaust system. This was getting a bit ratty as it was only mild steel and it was a bit on the loud side as the baffles had broken down in the back box. It was a bit close to noise limits on some events, so a replacement was needed. Rather than forking out a fortune for a new exhaust, I decided to get Blue Peter. I bought a universal silencer and a couple of bits of pipe and, by using parts of the old exhaust, I was able to make up a new system. The side exit was chosen for a couple of reasons. Firstly, it's lighter because there is less of it. Secondly, because it looks bad-ass. It was mostly the second one. I've gone for a much larger silencer than it had before so hopefully it will still be quieter, despite not being as long. I followed the standard routing for the most part, running down the centre of the car, then in front of the fuel tank. Then I dropped it down so it exits under the skirt in roughly the same place as it would on a Group A RS2000. I crushed the pipe a bit so it wasn't quite as low. It's not a fully even shape, but they often weren't in-period anyway. I suspect it won't be to everyone's taste but I think it's cool. Sadly you can't see much of it.

[ame=https://flic.kr/p/USGE9d]
by https://www.flickr.com/photos/143473428@N02/, on FlickrThe biggest development has been the arrival of the wiring loom. This was custom made by a friend of mine up at MDA Motorsport. I've started to fit it into the car but haven't finished yet. I am leaving it mostly loose fitting until it's been tested, but I couldn't resist clipping the rear into place. Note the Stack fuel gauge mounted in the rear so you can monitor the fuel level while you fill up. Saves some cable routing too.
I've put the centre console/fuse board into place, along with the dash panel, as well as feeding the headlight/wiper/horn loom loosely into position. The dash is nice and simple, so all the standard vents etc are gone, it's just a sheet of plastic with the dials in it. I might remake the dash panel at some stage, but it will do for the moment.
Since taking that, I have done a bit more to the wiring; connected up all of the earths, started to route the starter loom into the engine bay, fitted the tacho reset button and a couple of other bits. I need to sort things out under the bonnet and connect everything up, so I can test the loom. I've got the engine/ECU harness too, but that will go in once the car loom is finalised a bit more.
Work this weekend means it will be a couple of weeks before I get back on it, but I've ordered the lightweight battery, a couple of switches and other bits I need and some other odds and sods. Need to buy some fluids so I can think about trying to run it!
Last edited by massivewangers; 26-06-2017 at 12:39 PM.
17-07-2017, 10:51 AM
#73
Not many pictures taken over the weekend, but I've made a bracket for the ECU and another one for the ISCV.
Also mostly installed the ECU harness and finished up most of the car loom. Which means I could do this:
by https://www.flickr.com/photos/143473428@N02/, on Flickr
More to come this weekend. Might even get to try and start it in the next week or two!
Also mostly installed the ECU harness and finished up most of the car loom. Which means I could do this:
More to come this weekend. Might even get to try and start it in the next week or two!
12-09-2017, 03:14 PM
#74
Minor update. The car won't start lol. Got it to the point where it would turn over, but it was very lazy, like the battery was flat, except it wasn't. Beefed up the earths which helped a bit but have since upgraded the size of the battery cable. Since doing that, it won't turn over. Ho hum. Not sure what is causing that. Hoping to make some progress this weekend.
In the meantime, I have done a few small jobs. I needed some bulkhead grommets for the wiring loom. I ordered some but they were, frankly, rubbish. They were blank as I wanted to make my own holes, but they were so flimsy that the material just tore as soon as you did anything to it. I decided to get creative, so used some smaller grommets, bonded into the bigger ones. It actually took six grommets to make the two that I needed. They're glued together and then silicone sealed to help prevent water ingress. They're not pretty but they will do a job:
by https://www.flickr.com/photos/143473428@N02/, on Flickr
I also made some very basic arch liners to try and keep some of the crap out from behind the wings. The mudflaps will partially deal with this, but these are just something extra. As it's only being used on tarmac, it won't get too bad, and will be cleaned regularly anyway. These are just made from some 2mm rubber/plastic sheet. I want to make one to protect the aux belt too, but need to fit the sump guard to do that and I'm a bit lazy!
by https://www.flickr.com/photos/143473428@N02/, on Flickr
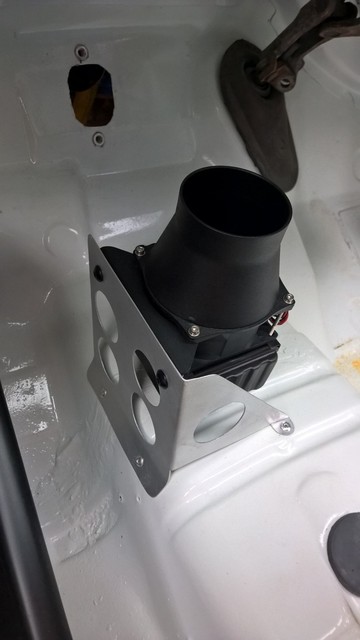
Another minor irritation was the air filter. I bought a RamAir one a few months ago, much the same as I have on my Clio 172. Unfortunately, the rubber neck split, which is a bit shoddy. I tried to repair it, but it just split in a different place. Rather than waste money on that, I just bought a cheap, crap eBay one. I might paint the end of it black to get rid of the chrome at some stage. I also knocked up an alloy heat shield to try and protect the filter a bit. I may add a cold air feed, but I may not. There's plenty of holes in the front of the car with the Group A headlights etc:
by https://www.flickr.com/photos/143473428@N02/, on Flickr
Engine bay is now pretty much complete:
by https://www.flickr.com/photos/143473428@N02/, on Flickr
Plan is to try and get it started this weekend, fill up the cooling system to see if it leaks and go from there. I'm waiting for new rear dampers to turn up as the Bilsteins were goosed and I need to bleed the brakes more as the pedal is non-existent.
Once that's done, I can fit the door bars (left out for now for access), fit roll cage padding, tidy up wiring and then it's ready for an MOT.
Until next time...
In the meantime, I have done a few small jobs. I needed some bulkhead grommets for the wiring loom. I ordered some but they were, frankly, rubbish. They were blank as I wanted to make my own holes, but they were so flimsy that the material just tore as soon as you did anything to it. I decided to get creative, so used some smaller grommets, bonded into the bigger ones. It actually took six grommets to make the two that I needed. They're glued together and then silicone sealed to help prevent water ingress. They're not pretty but they will do a job:
I also made some very basic arch liners to try and keep some of the crap out from behind the wings. The mudflaps will partially deal with this, but these are just something extra. As it's only being used on tarmac, it won't get too bad, and will be cleaned regularly anyway. These are just made from some 2mm rubber/plastic sheet. I want to make one to protect the aux belt too, but need to fit the sump guard to do that and I'm a bit lazy!
Another minor irritation was the air filter. I bought a RamAir one a few months ago, much the same as I have on my Clio 172. Unfortunately, the rubber neck split, which is a bit shoddy. I tried to repair it, but it just split in a different place. Rather than waste money on that, I just bought a cheap, crap eBay one. I might paint the end of it black to get rid of the chrome at some stage. I also knocked up an alloy heat shield to try and protect the filter a bit. I may add a cold air feed, but I may not. There's plenty of holes in the front of the car with the Group A headlights etc:
Engine bay is now pretty much complete:
Plan is to try and get it started this weekend, fill up the cooling system to see if it leaks and go from there. I'm waiting for new rear dampers to turn up as the Bilsteins were goosed and I need to bleed the brakes more as the pedal is non-existent.
Once that's done, I can fit the door bars (left out for now for access), fit roll cage padding, tidy up wiring and then it's ready for an MOT.
Until next time...
Last edited by massivewangers; 12-09-2017 at 03:18 PM.
05-10-2017, 02:40 PM
#75
Another update. Still not got it started. Been too busy to look at it to be honest. This weekend with any luck. Anyway, I did do a few odd jobs here and there.
Used a spare bit of mud flap material to make a simple cover to protect the aux belt:
[ame=https://flic.kr/p/YQfaNj]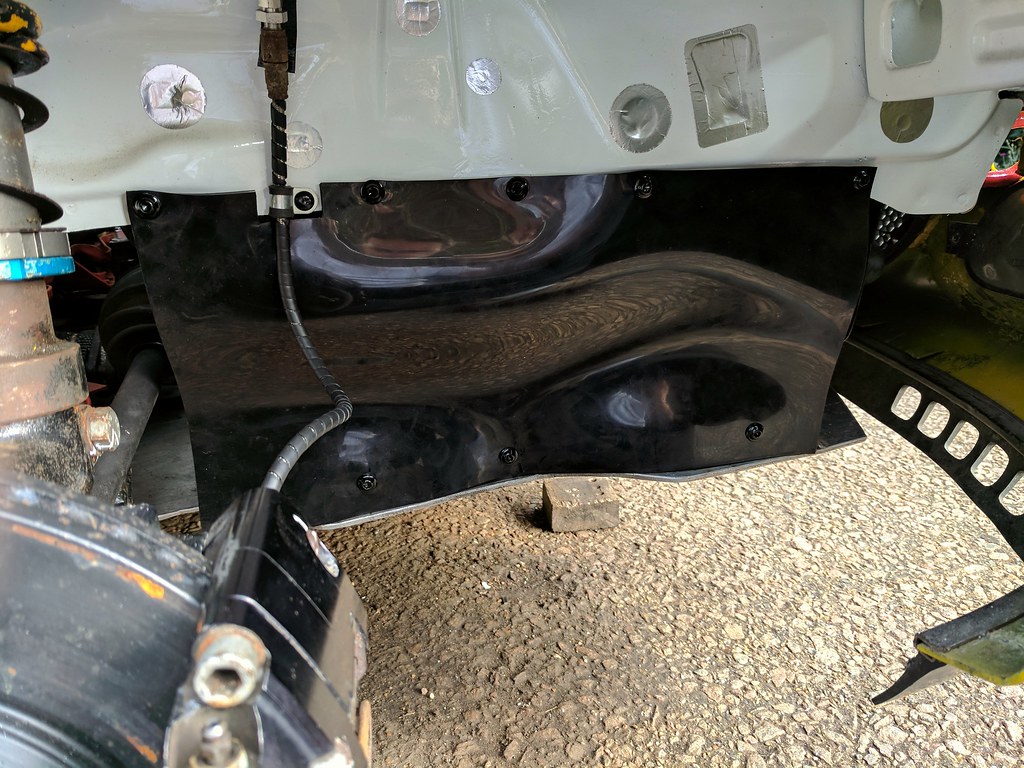 by https://www.flickr.com/photos/143473428@N02/, on Flickr
Chucked in a spare wheel, spill kit, first aid kit and warning triangle. I might come up with a neater solution for storing the first aid and spill kit, as well as the warning triangle, but not sure where yet. Also put the helmet net in. What you can't see here is that I removed the fuel pump and put some foam in the tank to try and prevent fuel starvation. Trust me though, I did it.
[ame=https://flic.kr/p/YL7jG5]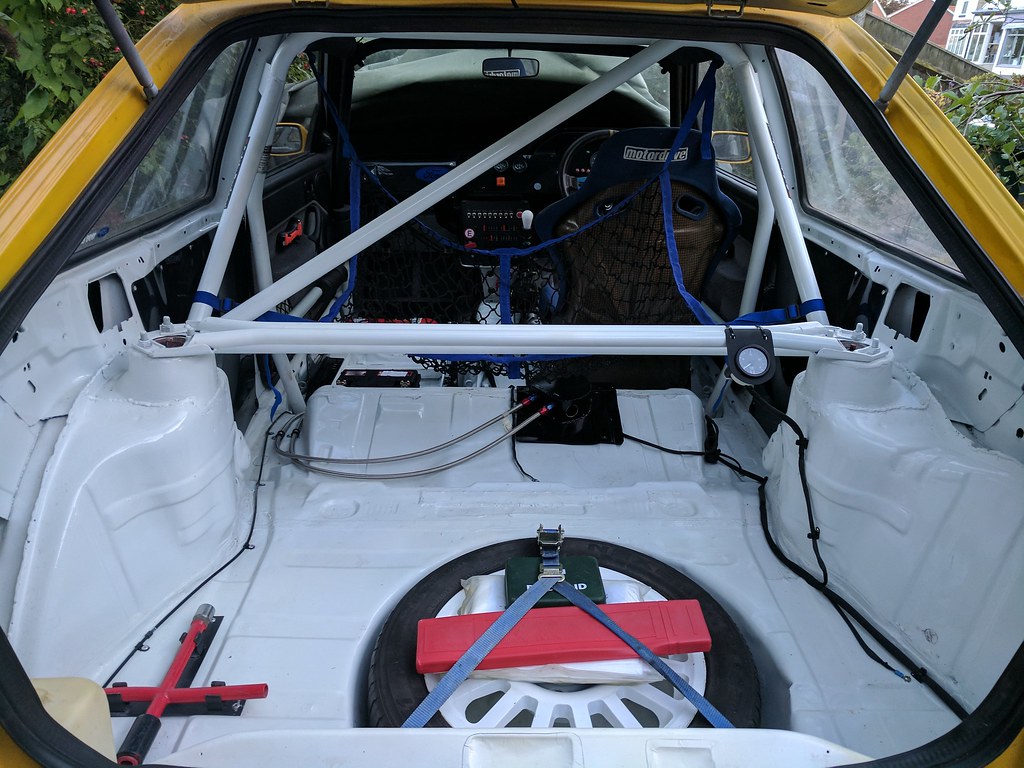 by https://www.flickr.com/photos/143473428@N02/, on Flickr
The door bars have finally been painted and fitted, along with some foam to prevent leg and head knocks:
[ame=https://flic.kr/p/C3RBXw]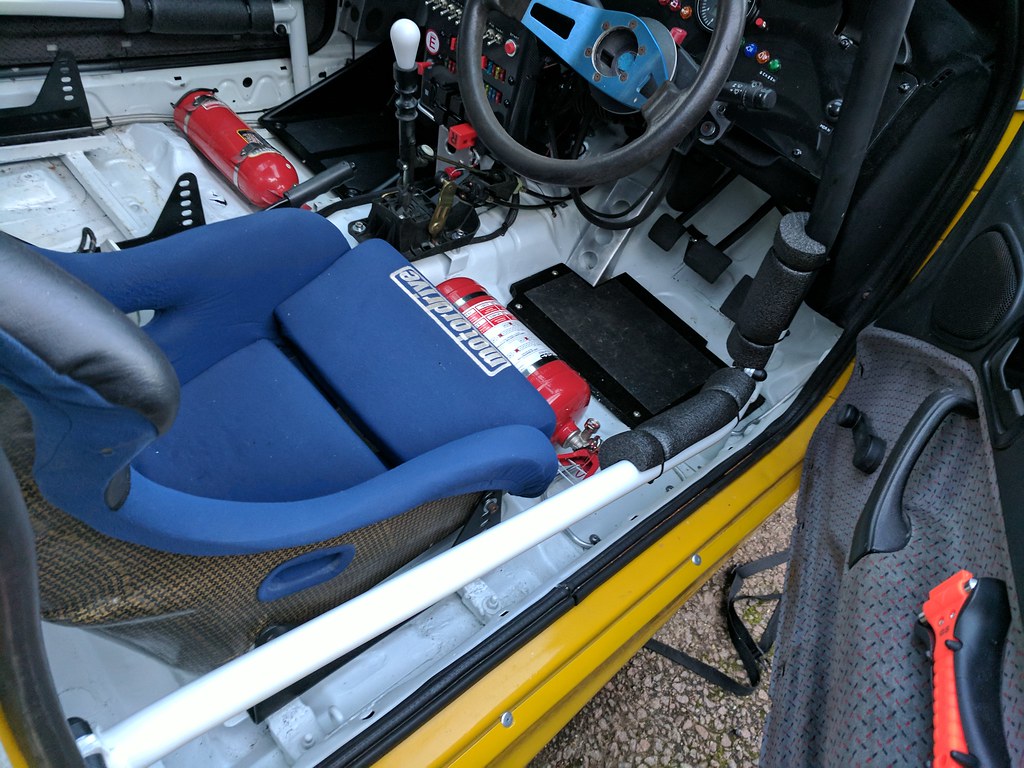 by https://www.flickr.com/photos/143473428@N02/, on Flickr
[ame=https://flic.kr/p/Y8NiGz]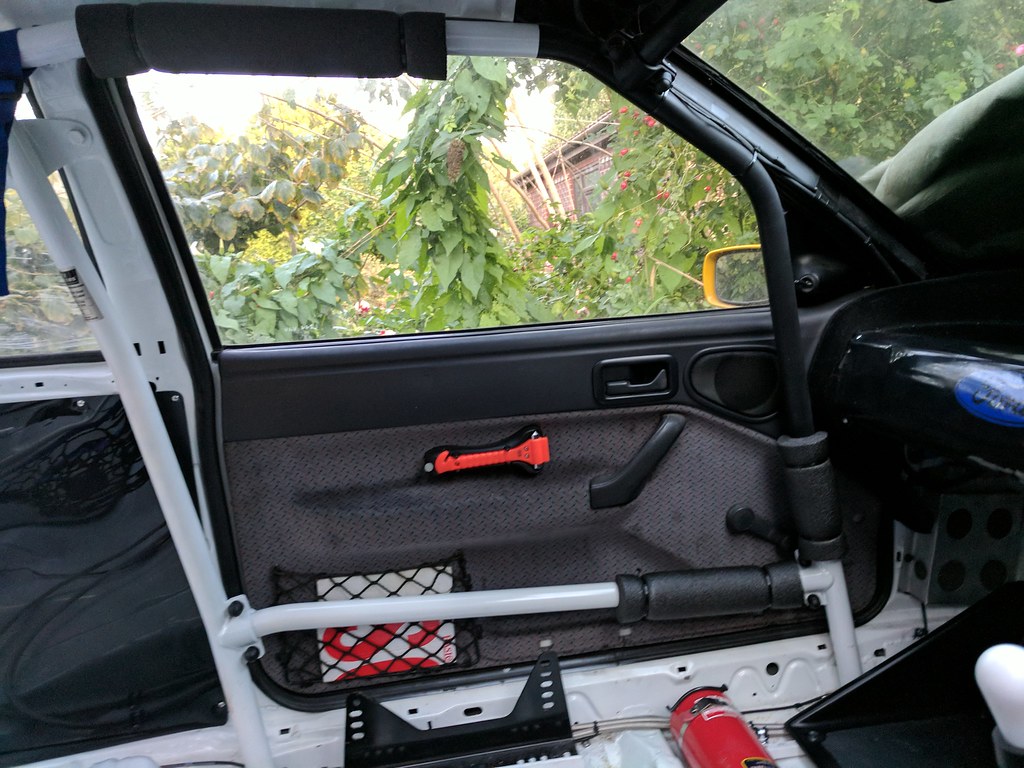 by https://www.flickr.com/photos/143473428@N02/, on Flickr
I mounted the ECU properly and cable tied the wiring out of the way:
[ame=https://flic.kr/p/C3RBdL]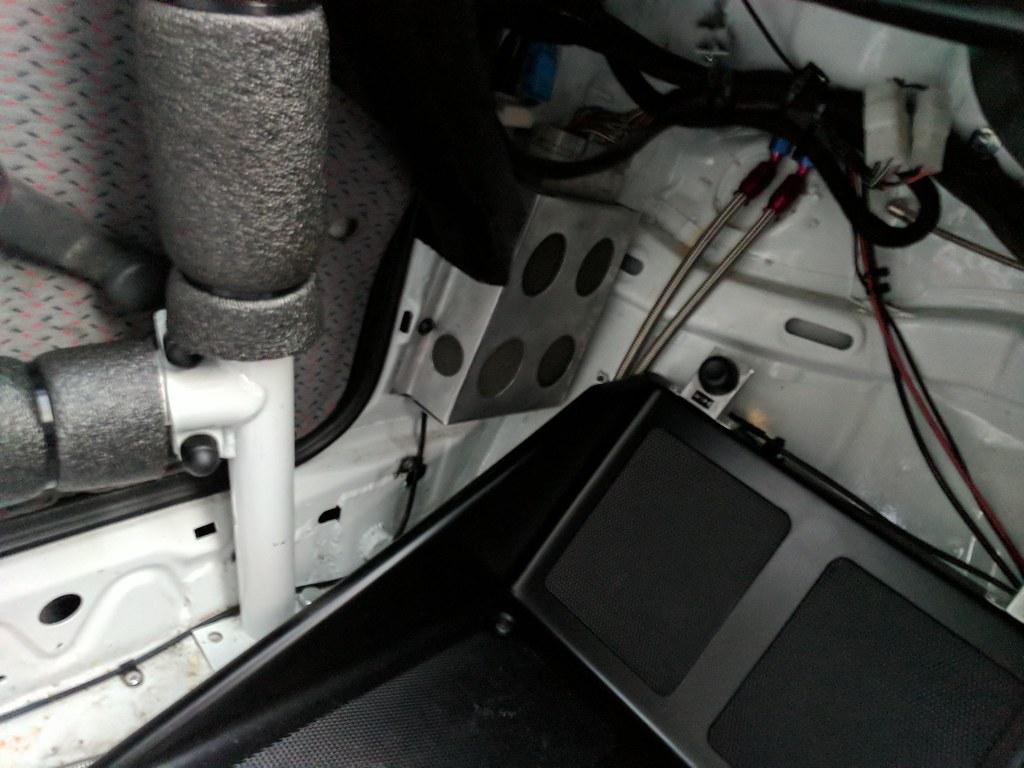 by https://www.flickr.com/photos/143473428@N02/, on Flickr
Also had a general tidy up inside and bolted everything into place. The dash panel will have to come out again to tidy up the wiring behind it, but it looks pretty for now. You can also see that I mounted the pull cable for the fire extinguisher. Still need to label the kill switch though:
[ame=https://flic.kr/p/YL7jrA] by https://www.flickr.com/photos/143473428@N02/, on Flickr
Since these pictures, I've made a bracket to mount the sensor for the speedo and bonded the magnet onto the driveshaft. I just need to run the wiring into the cabin.
Until next time...
Used a spare bit of mud flap material to make a simple cover to protect the aux belt:
[ame=https://flic.kr/p/YQfaNj]
by https://www.flickr.com/photos/143473428@N02/, on FlickrChucked in a spare wheel, spill kit, first aid kit and warning triangle. I might come up with a neater solution for storing the first aid and spill kit, as well as the warning triangle, but not sure where yet. Also put the helmet net in. What you can't see here is that I removed the fuel pump and put some foam in the tank to try and prevent fuel starvation. Trust me though, I did it.
[ame=https://flic.kr/p/YL7jG5]
by https://www.flickr.com/photos/143473428@N02/, on FlickrThe door bars have finally been painted and fitted, along with some foam to prevent leg and head knocks:
[ame=https://flic.kr/p/C3RBXw]
by https://www.flickr.com/photos/143473428@N02/, on Flickr[ame=https://flic.kr/p/Y8NiGz]
by https://www.flickr.com/photos/143473428@N02/, on FlickrI mounted the ECU properly and cable tied the wiring out of the way:
[ame=https://flic.kr/p/C3RBdL]
by https://www.flickr.com/photos/143473428@N02/, on FlickrAlso had a general tidy up inside and bolted everything into place. The dash panel will have to come out again to tidy up the wiring behind it, but it looks pretty for now. You can also see that I mounted the pull cable for the fire extinguisher. Still need to label the kill switch though:
[ame=https://flic.kr/p/YL7jrA]
by https://www.flickr.com/photos/143473428@N02/, on FlickrSince these pictures, I've made a bracket to mount the sensor for the speedo and bonded the magnet onto the driveshaft. I just need to run the wiring into the cabin.
Until next time...
Last edited by massivewangers; 05-10-2017 at 02:42 PM.
10-10-2017, 09:57 AM
#78
Thanks Glenn. Yeah, his car is a monster - much better than mine!
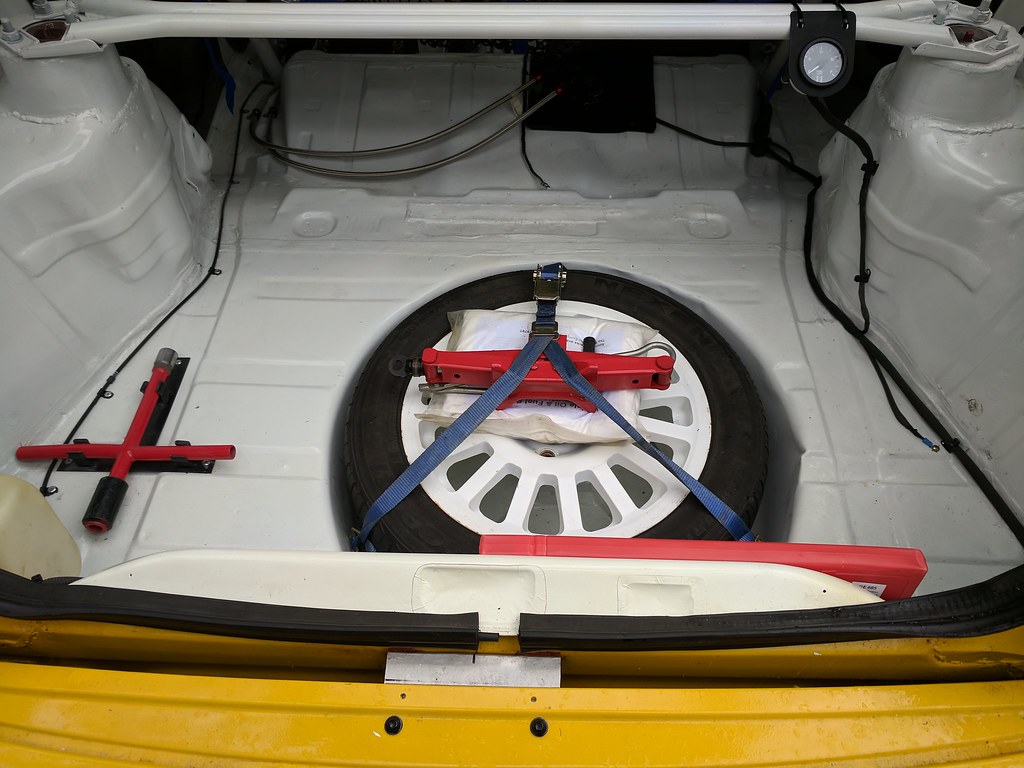
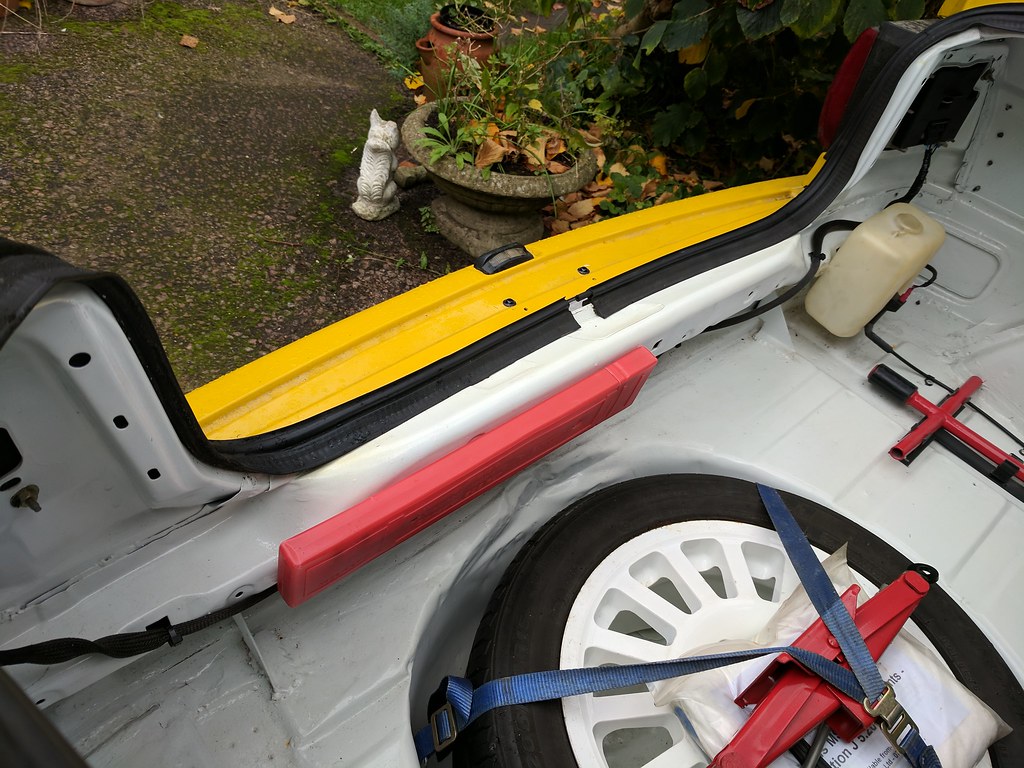
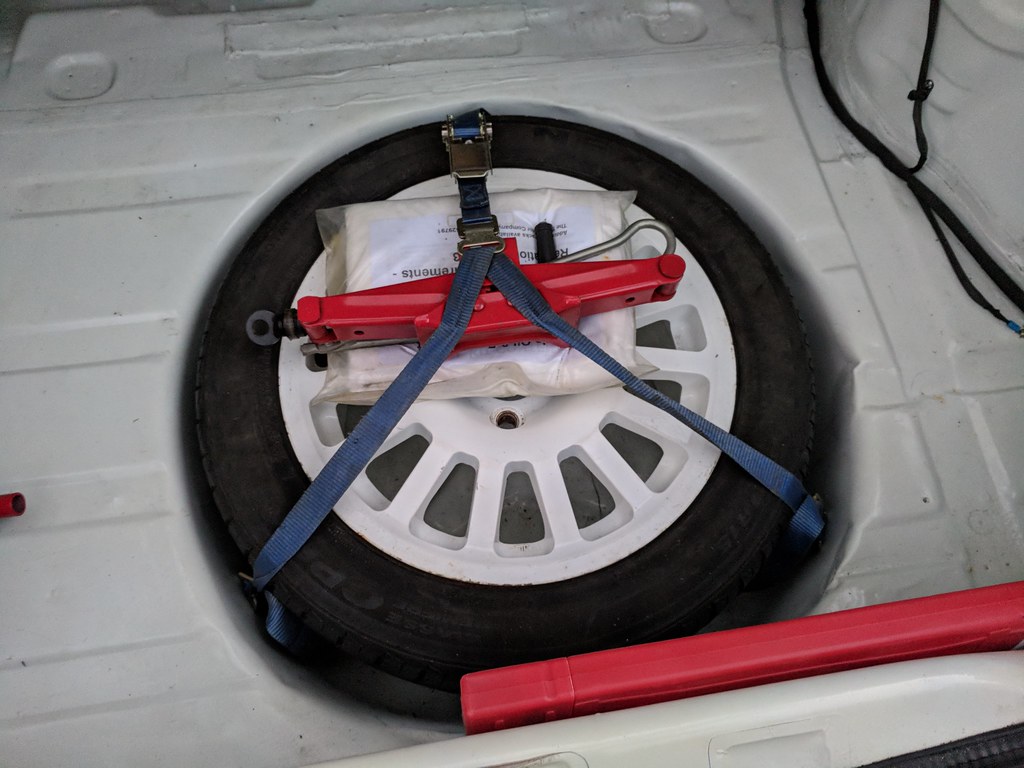
I didn't have a mega one on the car last weekend as I was doing a few other things, but I did have a bit of a re-organise in the boot. I wanted to strap the jack down with the spare wheel for convenience, so that happened. The spill kit makes a handy barrier to stop the jack rattling or scratching the spare too much:
by https://www.flickr.com/photos/143473428@N02/, on Flickr
This meant the warning triangle needed a new home, so I riveted it to the rear panel. It's offset to one side so you can get it out of the holder easily. My OCD doesn't like that much, but it makes things easier:
by https://www.flickr.com/photos/143473428@N02/, on Flickr
I still need to find somewhere to put the first aid kit. There is a pocket on the passenger door but the FA kit is a bit too big and fouls the cage, so that's a no go. I will probably just find a way to strap it into the boot somewhere.
On Sunday, Mat, who made the wiring loom came down to investigate the starting issues and, after a couple of hours, this happened:
This isn't the first start, so don't get too upset by the revving. He was messing with the rev counter, which needs some adjustment. The starter motor had died, which had been causing some more recent issues but, once we had swapped that, some messing found that the real root of the problem was the wiring to the coil pack. The two feed wires were backwards, which meant it was sparking at the wrong time. With those swapped, it fired instantly and appears to run really well. Starts on the button every time now. This is great news, as I was getting a bit pissed off with it to be honest. I would never have found the fault myself, so I'm glad Mat sussed it. He was a bit frustrated that the wiring was incorrect, but it's easily done. It runs, that's what matters.
Sadly though, while under the car, he noticed fluid at the base of the engine/gearbox join. This appears to be clutch fluid, which sucks. A bit of further investigation is required, but I suspect the gearbox is going to have to come out. I fitted a new slave cylinder before putting the gearbox in so, if this is leaking, I am going to be really pissed off. I replaced the clutch and cylinder to try and avoid running into problems like this, but have run into them anyway. Annoying.
This weekend I will try and get my head around that fault but, once that is done, I need to test the cooling system, bleed the brakes, fit the mud flaps, order new seats and belts, set-up the speedo/tacho/fuel gauge and it's ready for MOT.
Until next time...
I didn't have a mega one on the car last weekend as I was doing a few other things, but I did have a bit of a re-organise in the boot. I wanted to strap the jack down with the spare wheel for convenience, so that happened. The spill kit makes a handy barrier to stop the jack rattling or scratching the spare too much:
This meant the warning triangle needed a new home, so I riveted it to the rear panel. It's offset to one side so you can get it out of the holder easily. My OCD doesn't like that much, but it makes things easier:
I still need to find somewhere to put the first aid kit. There is a pocket on the passenger door but the FA kit is a bit too big and fouls the cage, so that's a no go. I will probably just find a way to strap it into the boot somewhere.
On Sunday, Mat, who made the wiring loom came down to investigate the starting issues and, after a couple of hours, this happened:
This isn't the first start, so don't get too upset by the revving. He was messing with the rev counter, which needs some adjustment. The starter motor had died, which had been causing some more recent issues but, once we had swapped that, some messing found that the real root of the problem was the wiring to the coil pack. The two feed wires were backwards, which meant it was sparking at the wrong time. With those swapped, it fired instantly and appears to run really well. Starts on the button every time now. This is great news, as I was getting a bit pissed off with it to be honest. I would never have found the fault myself, so I'm glad Mat sussed it. He was a bit frustrated that the wiring was incorrect, but it's easily done. It runs, that's what matters.
Sadly though, while under the car, he noticed fluid at the base of the engine/gearbox join. This appears to be clutch fluid, which sucks. A bit of further investigation is required, but I suspect the gearbox is going to have to come out. I fitted a new slave cylinder before putting the gearbox in so, if this is leaking, I am going to be really pissed off. I replaced the clutch and cylinder to try and avoid running into problems like this, but have run into them anyway. Annoying.
This weekend I will try and get my head around that fault but, once that is done, I need to test the cooling system, bleed the brakes, fit the mud flaps, order new seats and belts, set-up the speedo/tacho/fuel gauge and it's ready for MOT.
Until next time...
04-12-2017, 02:33 PM
#79
The updates continue, although I'm not very good at posting about them. I've managed to bleed the brakes (which feel decent) and clutch, which is good, but I'm still not totally happy with the clutch. It feels like you have to max out the master cylinder travel, but it can still be difficult to select gears with the engine running. A bit more investigation is required, but my friend made a bad video of the car moving a foot under it's own steam, so that's progress:
Part of the process of trying to improve gear selection was to get rid of the rubber mounts in the gear lever and to improve the supports under it. I could have fabricated a raised mount for the gear lever, but I wanted to keep some level of height adjustability in case I don't like it, so I went with alloy spacers. I used welded brackets on one side, as I knew I would never want it mounted directly to the tunnel, but I can drop it up to 25mm if I feel the need, though I do like the position currently. Anyway, when I first installed it, I only used narrow OD bushes as I had some, but they didn't feel all that solid, so I had some larger ones made up. I also had some top hat bushes made to replace the rubber inserts. So, this is what it did look like (you might have to look close):
[ame=https://flic.kr/p/YL7jrA] by https://www.flickr.com/photos/143473428@N02/, on Flickr
New bits:
[ame=https://flic.kr/p/227H7ru]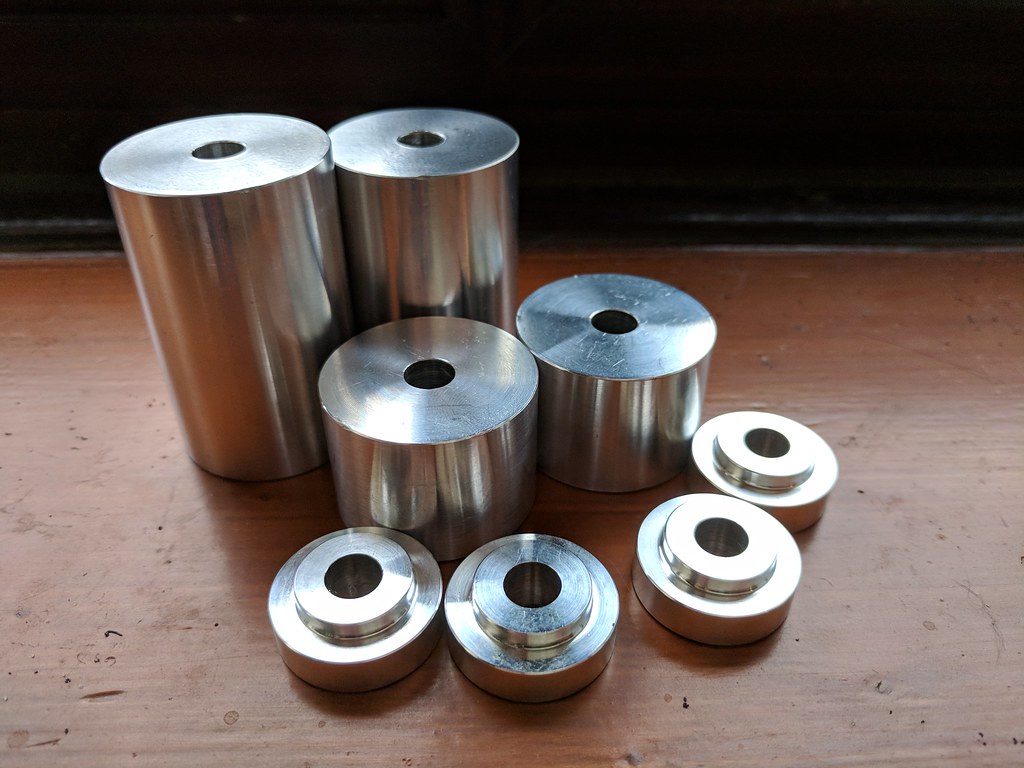 by https://www.flickr.com/photos/143473428@N02/, on Flickr
Fitted:
[ame=https://flic.kr/p/HdN6vM]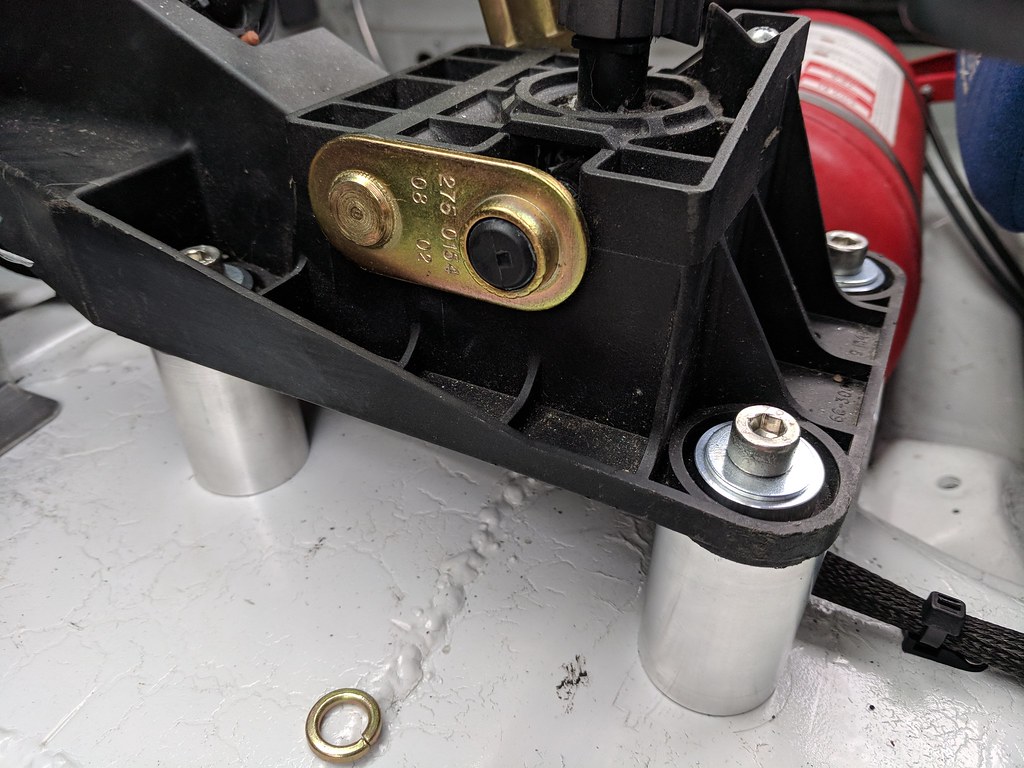 by https://www.flickr.com/photos/143473428@N02/, on Flickr
[ame=https://flic.kr/p/22are6V] by https://www.flickr.com/photos/143473428@N02/, on Flickr
The selection feels a bit better and it's now mounted very solidly, but I haven't yet had a chance to fire up the car and test it.
I've done a few other little jobs, as I didn't get loads of time over the last few days. First was to replace the shite silicone hoses to the ISCV which were collapsing. Hopefully these reinforced rubber ones will be better:
[ame=https://flic.kr/p/HdN7uR]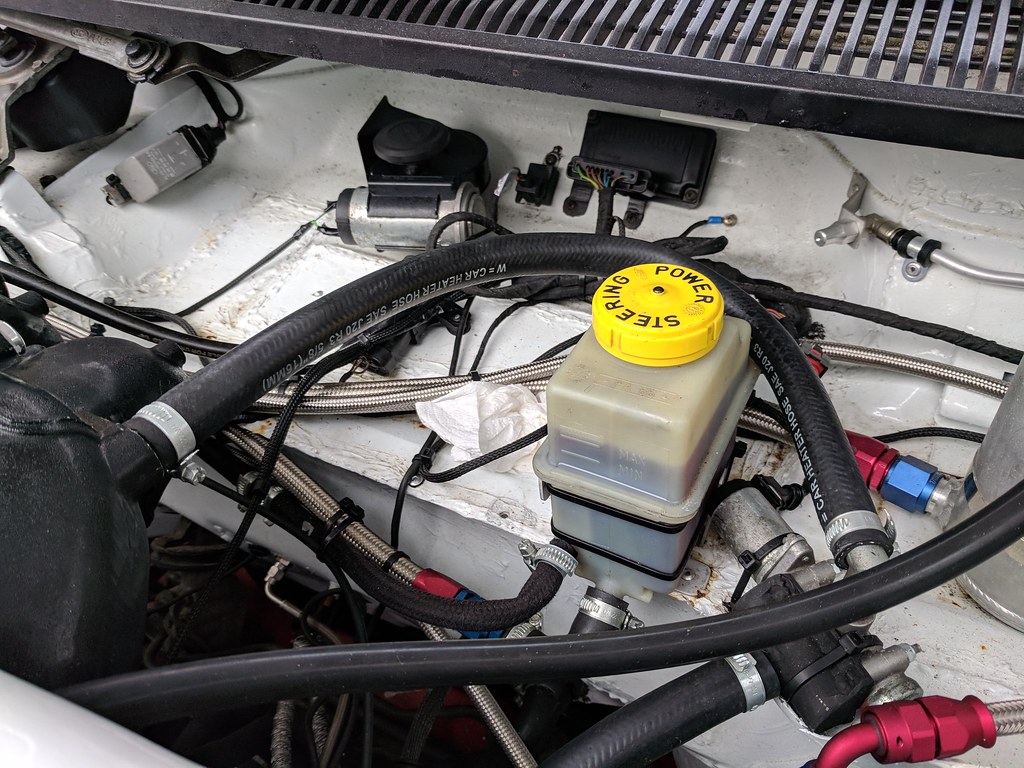 by https://www.flickr.com/photos/143473428@N02/, on Flickr
I also bonded a bung into the hole where the brake vacuum hose went into the inlet:
by https://www.flickr.com/photos/143473428@N02/, on Flickr
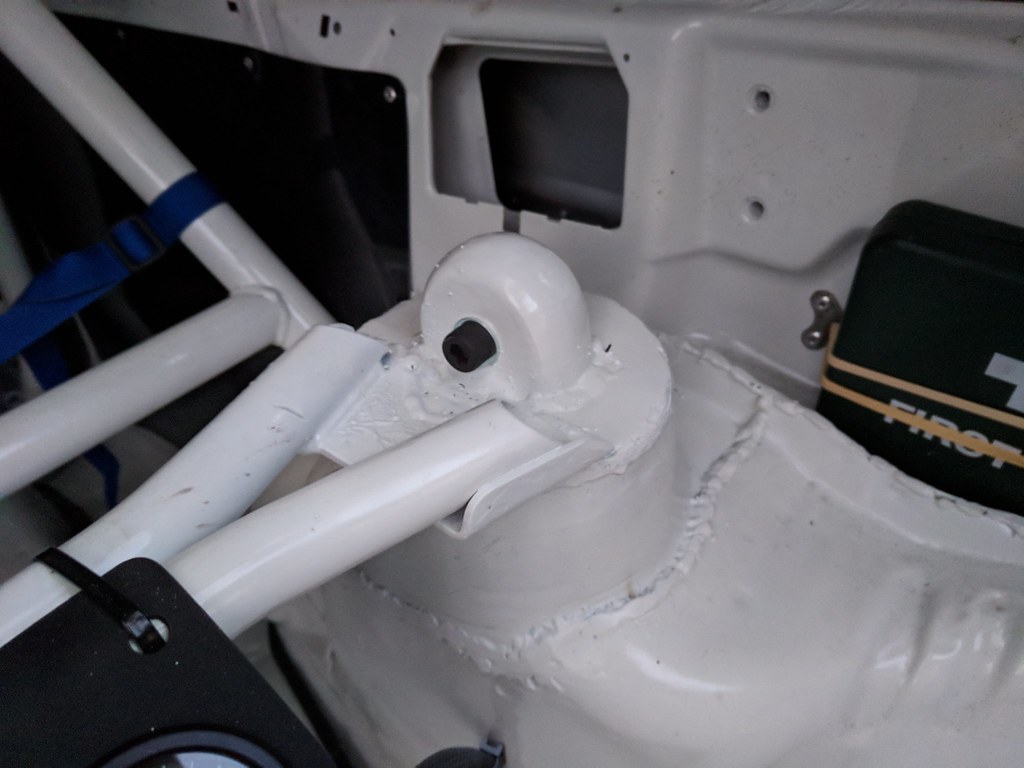
Back inside the car, when I fitted new rear dampers, I had to change the top mounts, as the new ones didn't work. I wasn't sure how to approach this at first, as the rear suspension turrets had been heavily modified. Then I remember that Group N/A Escort Cosworths used a very similar top mount as the Escort Road car and they were welded in, so I welded some in to my car. The rear strut brace also used to be bolted, but I just welded it in. It's not the prettiest thing ever but it works:
by https://www.flickr.com/photos/143473428@N02/, on Flickr
I had a re-organise of the spare wheel, so it's strapped in with the jack and spill kit:
by https://www.flickr.com/photos/143473428@N02/, on Flickr
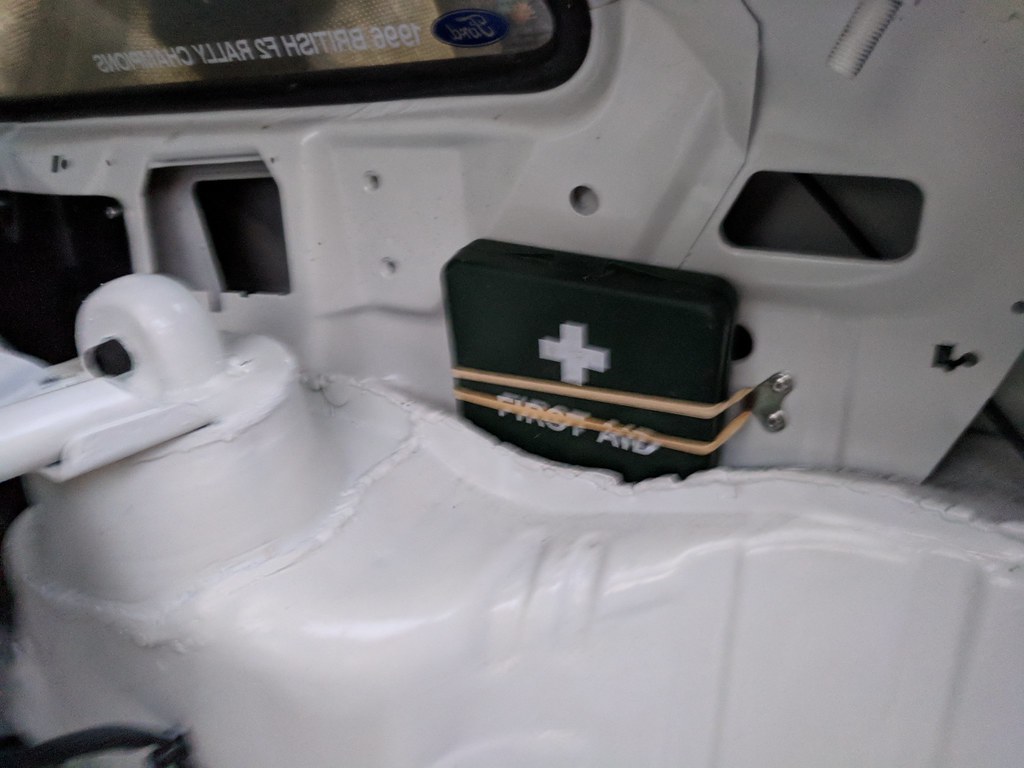
The first aid kit needed a home, so I put it above the wheel arch with some motorsport spec rubber bands (and an extremely blurry picture):
by https://www.flickr.com/photos/143473428@N02/, on Flickr
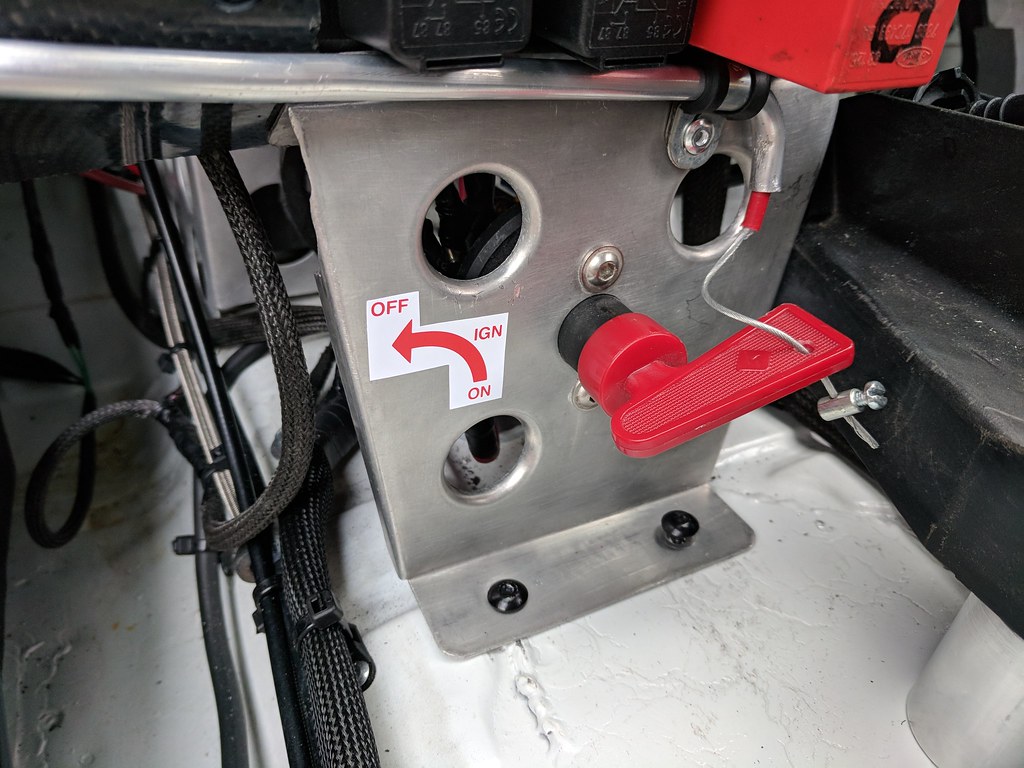
Big job this one; I fitted a sticker for the cut-off switch:
by https://www.flickr.com/photos/143473428@N02/, on Flickr
I fitted a new steering wheel boss as the old one was a bit ratty:
by https://www.flickr.com/photos/143473428@N02/, on Flickr
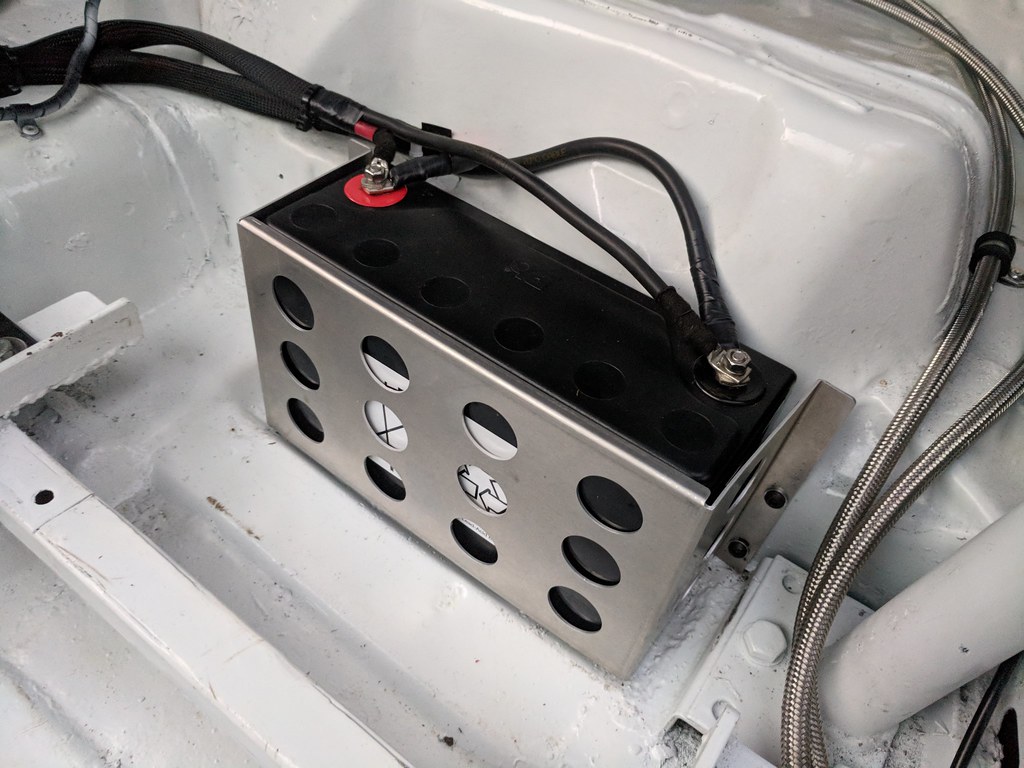
Having been using a big chunky battery to test the car, I thought I would fit the proper one:
by https://www.flickr.com/photos/143473428@N02/, on Flickr
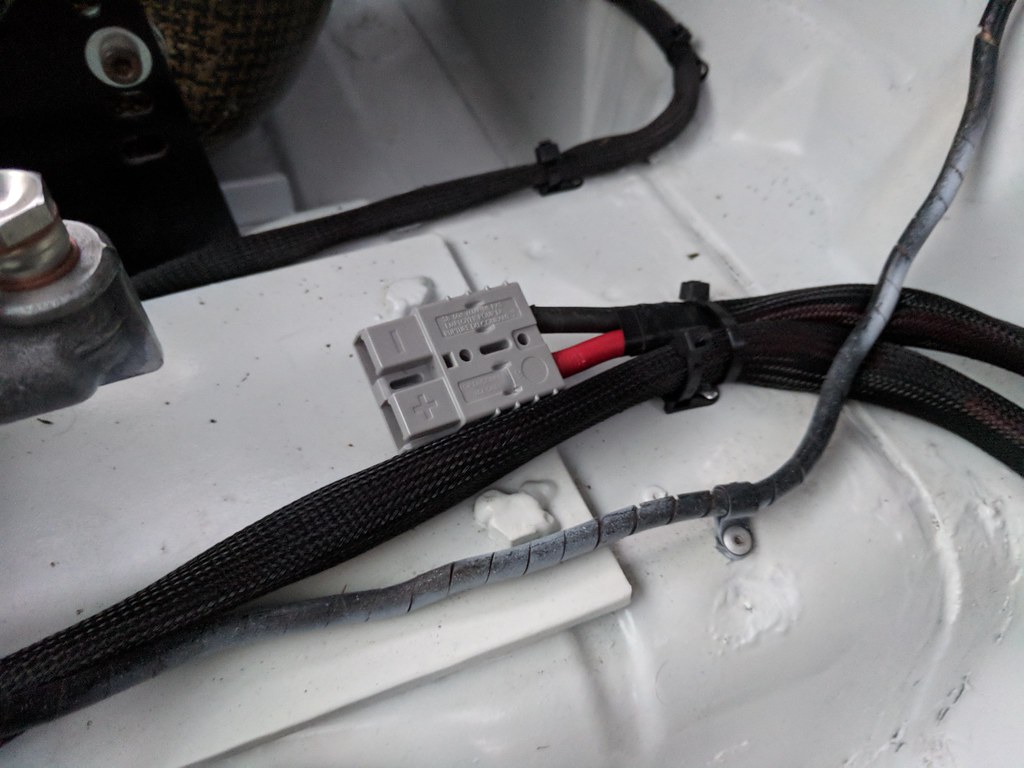
Finally, I wanted to fit an Anderson plug so that I can just plug the car in to charge it. The battery is behind the co-driver's seat so not all that easy to access. Rather than having to get behind it to put the car on charge, I put an Anderson plug on top of the tunnel. I need to buy a new trickle charger at some point, so will make up a little pack that I can easily plug into the car or use to jump it if need be:
by https://www.flickr.com/photos/143473428@N02/, on Flickr
The list is shrinking now. Need to finish off the clutch, put some coolant in it, fit some mud flaps, adjust the ride height and do a couple of other silly little jobs and then it can go for MOT. Hopefully over Christmas or early in January.
Until next time...
Part of the process of trying to improve gear selection was to get rid of the rubber mounts in the gear lever and to improve the supports under it. I could have fabricated a raised mount for the gear lever, but I wanted to keep some level of height adjustability in case I don't like it, so I went with alloy spacers. I used welded brackets on one side, as I knew I would never want it mounted directly to the tunnel, but I can drop it up to 25mm if I feel the need, though I do like the position currently. Anyway, when I first installed it, I only used narrow OD bushes as I had some, but they didn't feel all that solid, so I had some larger ones made up. I also had some top hat bushes made to replace the rubber inserts. So, this is what it did look like (you might have to look close):
[ame=https://flic.kr/p/YL7jrA]
by https://www.flickr.com/photos/143473428@N02/, on FlickrNew bits:
[ame=https://flic.kr/p/227H7ru]
by https://www.flickr.com/photos/143473428@N02/, on FlickrFitted:
[ame=https://flic.kr/p/HdN6vM]
by https://www.flickr.com/photos/143473428@N02/, on Flickr[ame=https://flic.kr/p/22are6V]
by https://www.flickr.com/photos/143473428@N02/, on FlickrThe selection feels a bit better and it's now mounted very solidly, but I haven't yet had a chance to fire up the car and test it.
I've done a few other little jobs, as I didn't get loads of time over the last few days. First was to replace the shite silicone hoses to the ISCV which were collapsing. Hopefully these reinforced rubber ones will be better:
[ame=https://flic.kr/p/HdN7uR]
by https://www.flickr.com/photos/143473428@N02/, on FlickrI also bonded a bung into the hole where the brake vacuum hose went into the inlet:

Back inside the car, when I fitted new rear dampers, I had to change the top mounts, as the new ones didn't work. I wasn't sure how to approach this at first, as the rear suspension turrets had been heavily modified. Then I remember that Group N/A Escort Cosworths used a very similar top mount as the Escort Road car and they were welded in, so I welded some in to my car. The rear strut brace also used to be bolted, but I just welded it in. It's not the prettiest thing ever but it works:
I had a re-organise of the spare wheel, so it's strapped in with the jack and spill kit:
The first aid kit needed a home, so I put it above the wheel arch with some motorsport spec rubber bands (and an extremely blurry picture):
Big job this one; I fitted a sticker for the cut-off switch:
I fitted a new steering wheel boss as the old one was a bit ratty:

Having been using a big chunky battery to test the car, I thought I would fit the proper one:
Finally, I wanted to fit an Anderson plug so that I can just plug the car in to charge it. The battery is behind the co-driver's seat so not all that easy to access. Rather than having to get behind it to put the car on charge, I put an Anderson plug on top of the tunnel. I need to buy a new trickle charger at some point, so will make up a little pack that I can easily plug into the car or use to jump it if need be:
The list is shrinking now. Need to finish off the clutch, put some coolant in it, fit some mud flaps, adjust the ride height and do a couple of other silly little jobs and then it can go for MOT. Hopefully over Christmas or early in January.
Until next time...
Last edited by massivewangers; 04-12-2017 at 02:35 PM.
02-01-2018, 10:37 AM
#80
Little update for the new year. As is always the way with the holidays, you have a lot planned, but family and other commitments get in the way! Progress is being made though.
I've done a few silly little things - bled the PAS, filled the washer bottle, fitted new wipers, made an earth for the water temp sender etc, but didn't take any pictures of that. I topped up the cooling system and ran the engine for a while to check for leaks. There was a minor one from the water pump outlet but I have tightened up the clip so hopefully that will be ok. The only real problem is that the header tank overflows when you rev the engine lol. This appears to be a result of the location of the return from the thermostat housing. As you can see in the rather terrible picture below, it's in the neck of the tank. I thought I would get away with this (I'm told that this port is usually an overflow), but it seems not. The pressure in the neck overwhelms the cap and I end up with coolant everywhere. Not helpful.
by https://www.flickr.com/photos/143473428@N02/, on Flickr
I've ordered a weld-in barb for the return so will have to remove the header tank and have that fitted. I may well try and block the existing outlet too, as it will be redundant and I don't think it really needs the overflow, as the road car wouldn't have it. Otherwise, all seems well with the cooling system so far, which is quite impressive given that none of it is standard and it was made up from little more than guesswork.
Over the holidays I did get distracted thinking about wheels. To keep tyre costs down, I am going to be using 15s and I had been keeping an eye out for used 15" motorsport type alloys. Sadly, the ET32 Cosworth gravel wheels are getting stupidly expensive (there is a guy asking �800 for a set of used Compomotives on eBay), so I thought about other options. In my experience of rallying, wheels are pretty easily bent and therefore a bit disposable, so a low cost solution seemed sensible. I did some browsing and found that the Peugeot Partner/Citroen Berlingo uses a 15" wheel with a vaguely useful offset (a lot of Peugeot wheels are stupidly wide). This means that, rather than paying �200-odd for one set of second hand wheels, I could probably get three sets of these. With this in mind, I ordered one to test, which you can see below:
by https://www.flickr.com/photos/143473428@N02/, on Flickr
by https://www.flickr.com/photos/143473428@N02/, on Flickr
While it isn't the prettiest solution, it's cheap, and that's kind of the idea. I have a set of alloys for when I want the car to look smarter, so these can be purely functional. Of course, leaving them in rusty silver would be a step too far, so I got busy with an angle grinder and, after getting pelted with bits of the wire wheel attachment, ended up with this:
by https://www.flickr.com/photos/143473428@N02/, on Flickr
Some Kurust was then applied in the vain hope that it might help to keep it in better condition:
by https://www.flickr.com/photos/143473428@N02/, on Flickr
Then, with the help of some Halfords wheel paint, it ended up like this:
by https://www.flickr.com/photos/143473428@N02/, on Flickr
It doesn't look too bad and has a hint of Peugeot Rallye flavour I think. I don't know how long the paint will last, but powder coat is an option. I've ordered another three wheels for now, but will keep an eye out for more cheap ones. As I say, not the prettiest, but function over form in this case.
Moving on from wheels but staying under the arches, since fitting new springs, the ride height was all over the place, so I spent a bit of time making it a bit more sensible. It isn't low, but that would be silly on this type of car and, once it is on 15s, it will lose another 20mm of ground clearance, so I had to keep that in mind. Further tweaking may be required, but it's a starting point. While I was about it, I also fitted the idiotic MSA-regulation mudflaps. Whoever decided on these should be sacked in my view. Having to have them on non-driven wheels is pointless and, even on the driven axle, they are total overkill, especially on a tarmac car. Motorsport suppliers aren't afraid to charge for them either. Anyway, here they are:
by https://www.flickr.com/photos/143473428@N02/, on Flickr
by https://www.flickr.com/photos/143473428@N02/, on Flickr
And a couple of overall pictures to show the semi-finalised ride height and that it looks like an almost-finished car:
by https://www.flickr.com/photos/143473428@N02/, on Flickr
by https://www.flickr.com/photos/143473428@N02/, on Flickr
Top priority now is to get the header tank altered so I can do a final test of the cooling system, finish fiddling with the clutch a bit, fit some seats, belts and an intercom, set-up the instruments and then take it for an MOT.
Until next time.
I've done a few silly little things - bled the PAS, filled the washer bottle, fitted new wipers, made an earth for the water temp sender etc, but didn't take any pictures of that. I topped up the cooling system and ran the engine for a while to check for leaks. There was a minor one from the water pump outlet but I have tightened up the clip so hopefully that will be ok. The only real problem is that the header tank overflows when you rev the engine lol. This appears to be a result of the location of the return from the thermostat housing. As you can see in the rather terrible picture below, it's in the neck of the tank. I thought I would get away with this (I'm told that this port is usually an overflow), but it seems not. The pressure in the neck overwhelms the cap and I end up with coolant everywhere. Not helpful.

I've ordered a weld-in barb for the return so will have to remove the header tank and have that fitted. I may well try and block the existing outlet too, as it will be redundant and I don't think it really needs the overflow, as the road car wouldn't have it. Otherwise, all seems well with the cooling system so far, which is quite impressive given that none of it is standard and it was made up from little more than guesswork.
Over the holidays I did get distracted thinking about wheels. To keep tyre costs down, I am going to be using 15s and I had been keeping an eye out for used 15" motorsport type alloys. Sadly, the ET32 Cosworth gravel wheels are getting stupidly expensive (there is a guy asking �800 for a set of used Compomotives on eBay), so I thought about other options. In my experience of rallying, wheels are pretty easily bent and therefore a bit disposable, so a low cost solution seemed sensible. I did some browsing and found that the Peugeot Partner/Citroen Berlingo uses a 15" wheel with a vaguely useful offset (a lot of Peugeot wheels are stupidly wide). This means that, rather than paying �200-odd for one set of second hand wheels, I could probably get three sets of these. With this in mind, I ordered one to test, which you can see below:
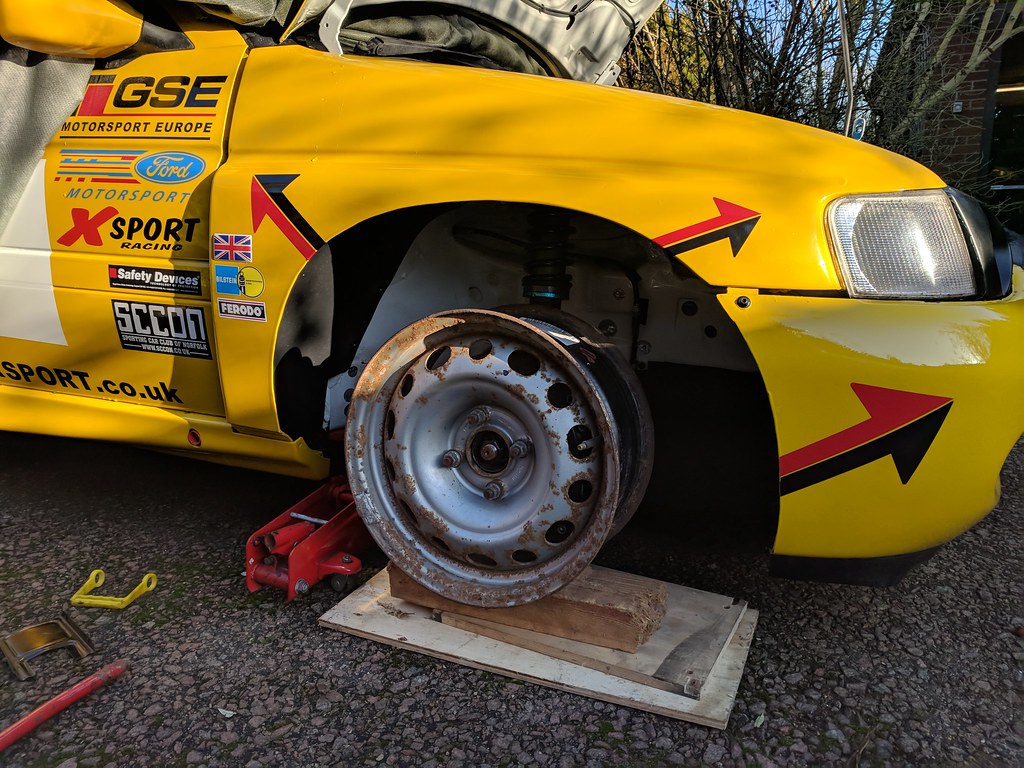

While it isn't the prettiest solution, it's cheap, and that's kind of the idea. I have a set of alloys for when I want the car to look smarter, so these can be purely functional. Of course, leaving them in rusty silver would be a step too far, so I got busy with an angle grinder and, after getting pelted with bits of the wire wheel attachment, ended up with this:
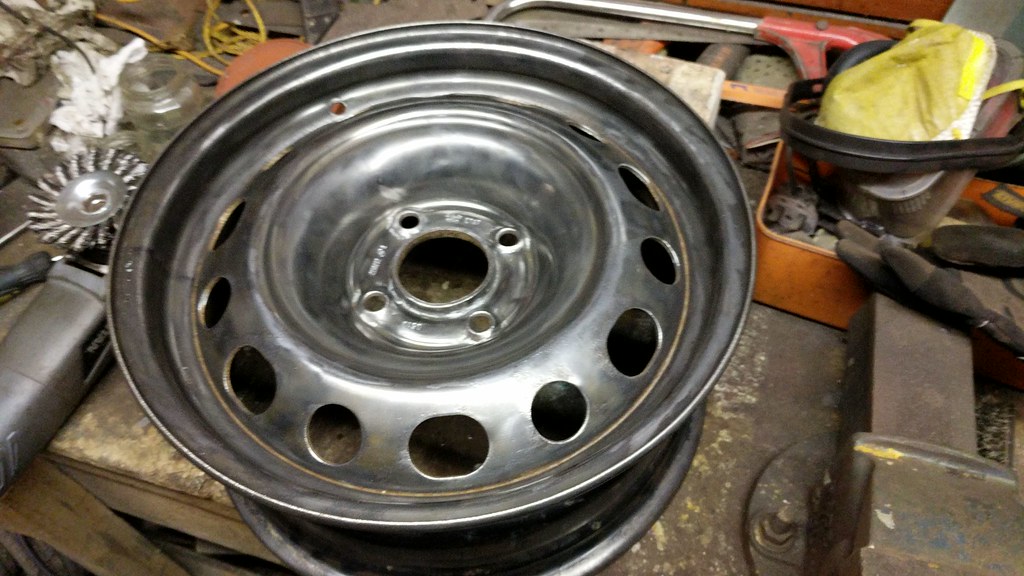
Some Kurust was then applied in the vain hope that it might help to keep it in better condition:
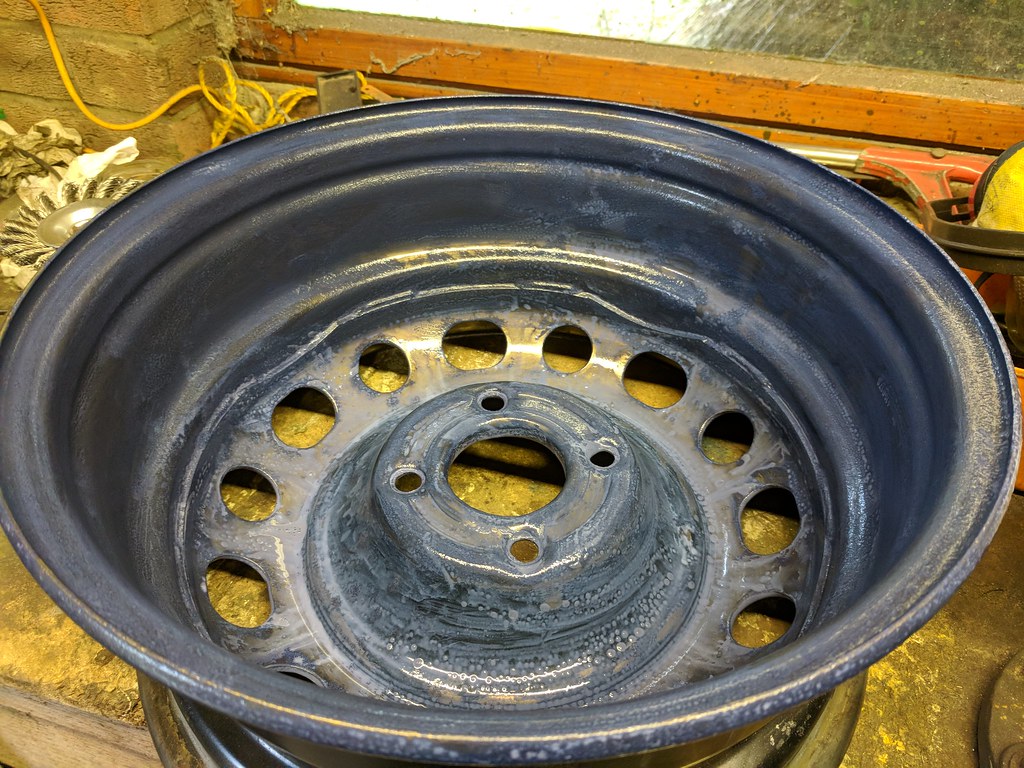
Then, with the help of some Halfords wheel paint, it ended up like this:
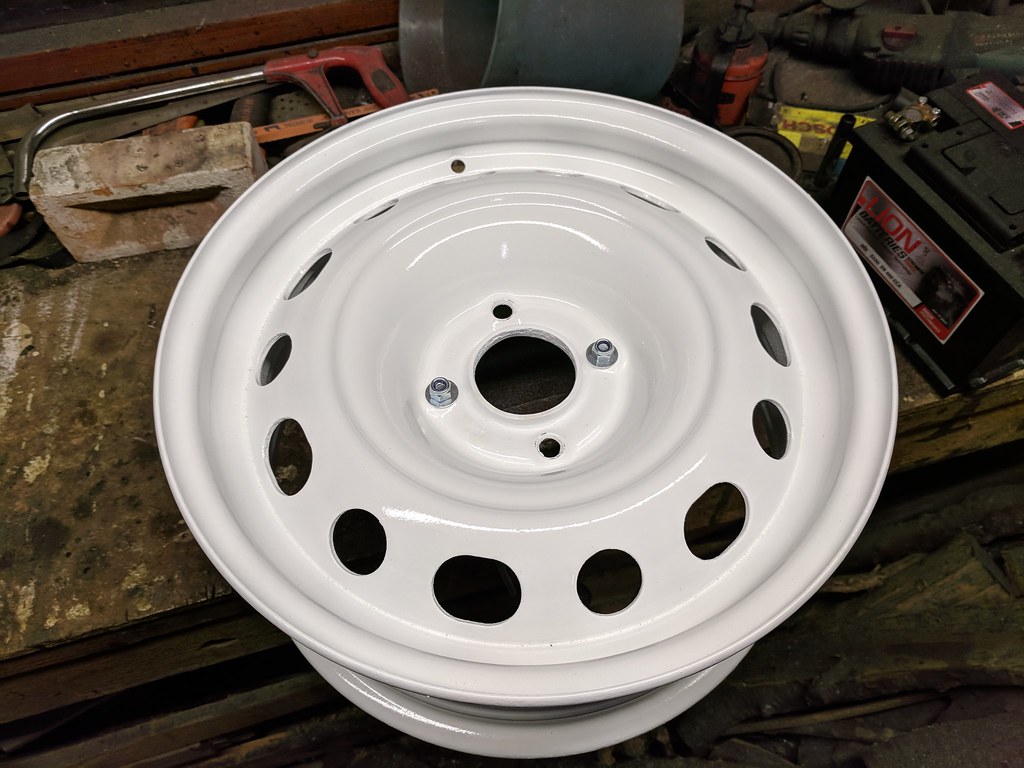
It doesn't look too bad and has a hint of Peugeot Rallye flavour I think. I don't know how long the paint will last, but powder coat is an option. I've ordered another three wheels for now, but will keep an eye out for more cheap ones. As I say, not the prettiest, but function over form in this case.
Moving on from wheels but staying under the arches, since fitting new springs, the ride height was all over the place, so I spent a bit of time making it a bit more sensible. It isn't low, but that would be silly on this type of car and, once it is on 15s, it will lose another 20mm of ground clearance, so I had to keep that in mind. Further tweaking may be required, but it's a starting point. While I was about it, I also fitted the idiotic MSA-regulation mudflaps. Whoever decided on these should be sacked in my view. Having to have them on non-driven wheels is pointless and, even on the driven axle, they are total overkill, especially on a tarmac car. Motorsport suppliers aren't afraid to charge for them either. Anyway, here they are:

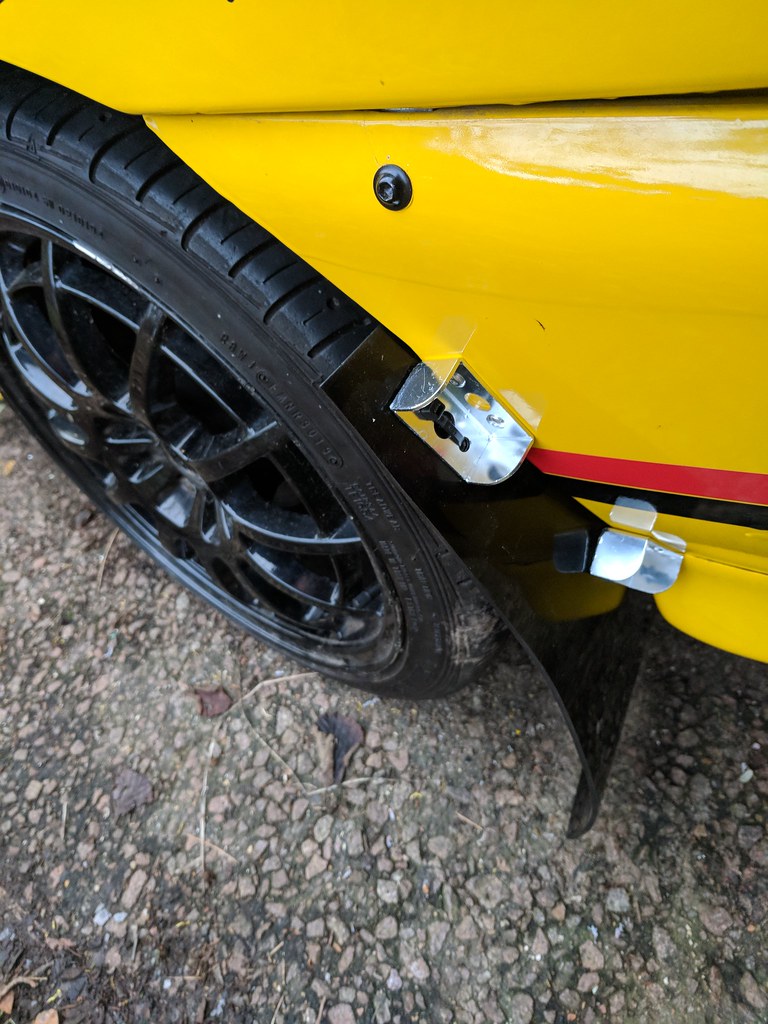
And a couple of overall pictures to show the semi-finalised ride height and that it looks like an almost-finished car:
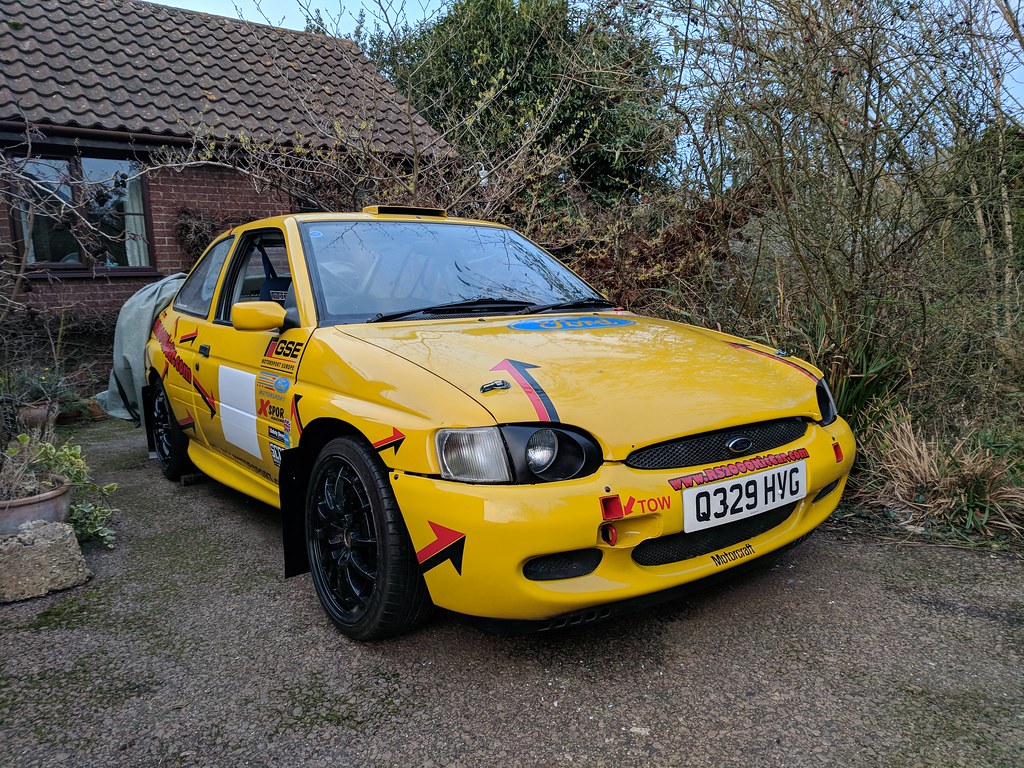

Top priority now is to get the header tank altered so I can do a final test of the cooling system, finish fiddling with the clutch a bit, fit some seats, belts and an intercom, set-up the instruments and then take it for an MOT.
Until next time.
Last edited by massivewangers; 02-01-2018 at 10:38 AM.