Puma 4x4 Cosworth
 25-10-2015, 06:15 PM
#1
PassionFord Regular
Thread Starter

I thought I would make a thread about my progress with my latest project. Some of you will probably already know the car well and hopefully I won't disappoint too much with my efforts.
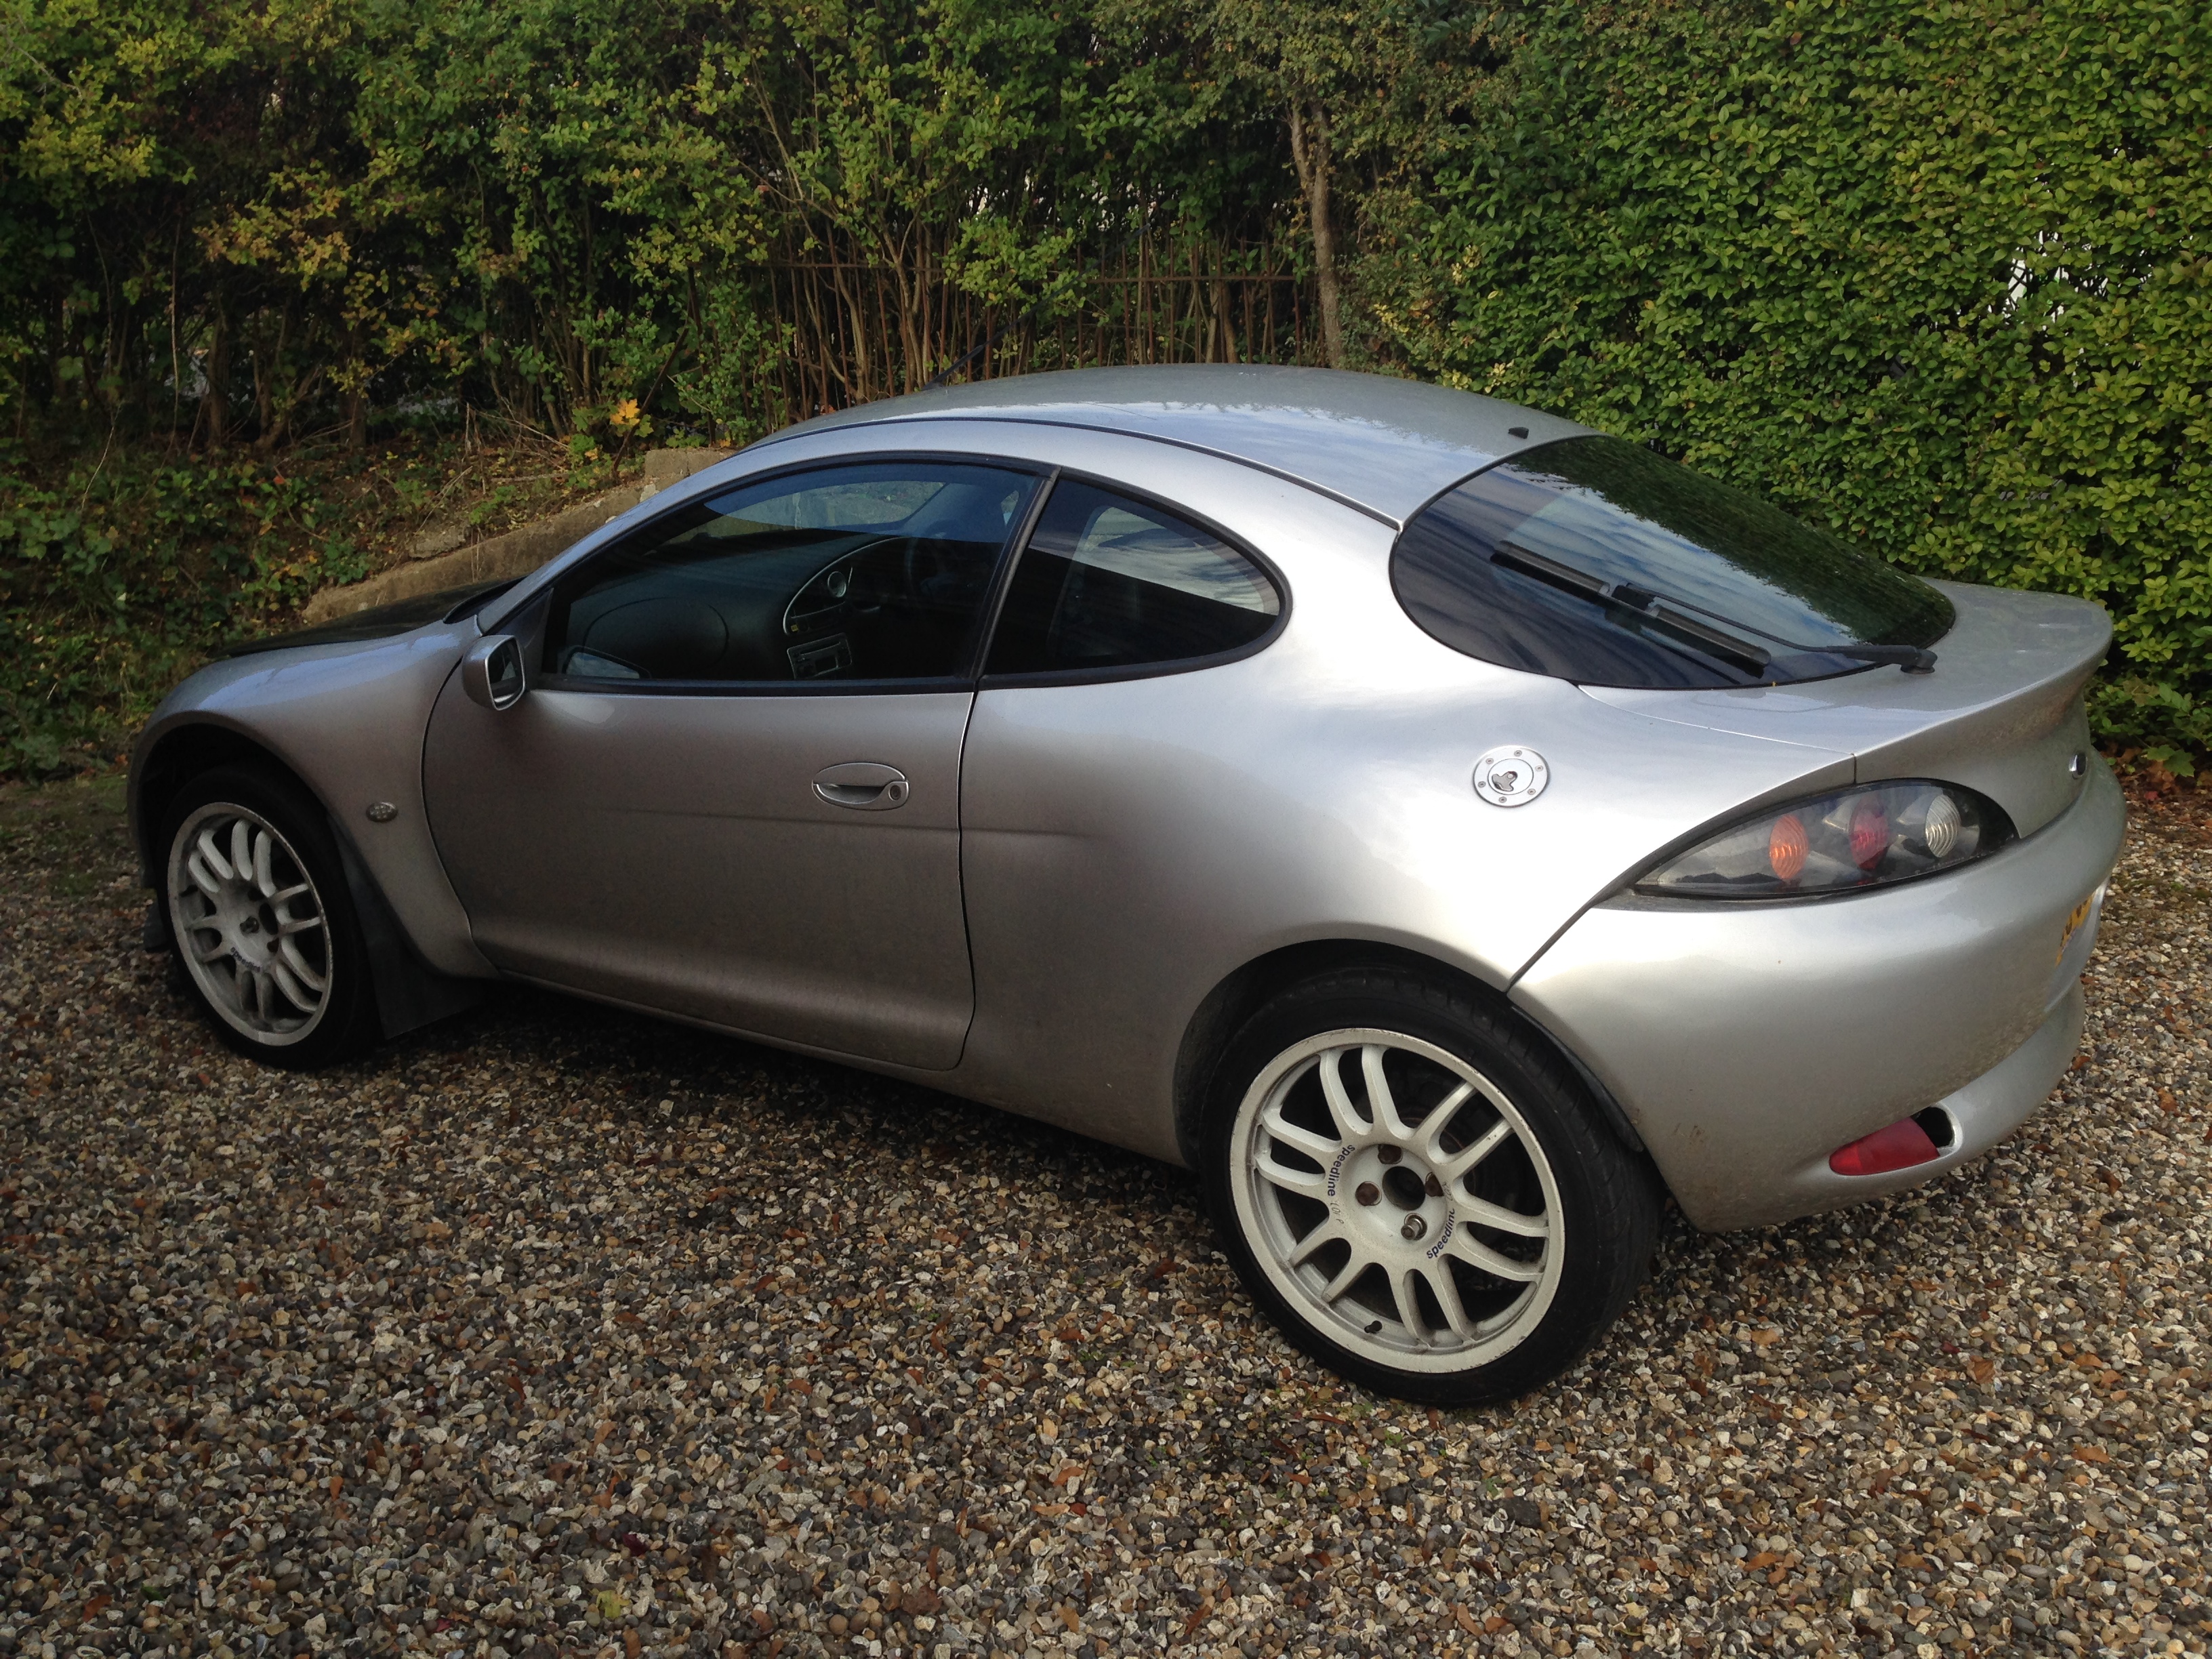
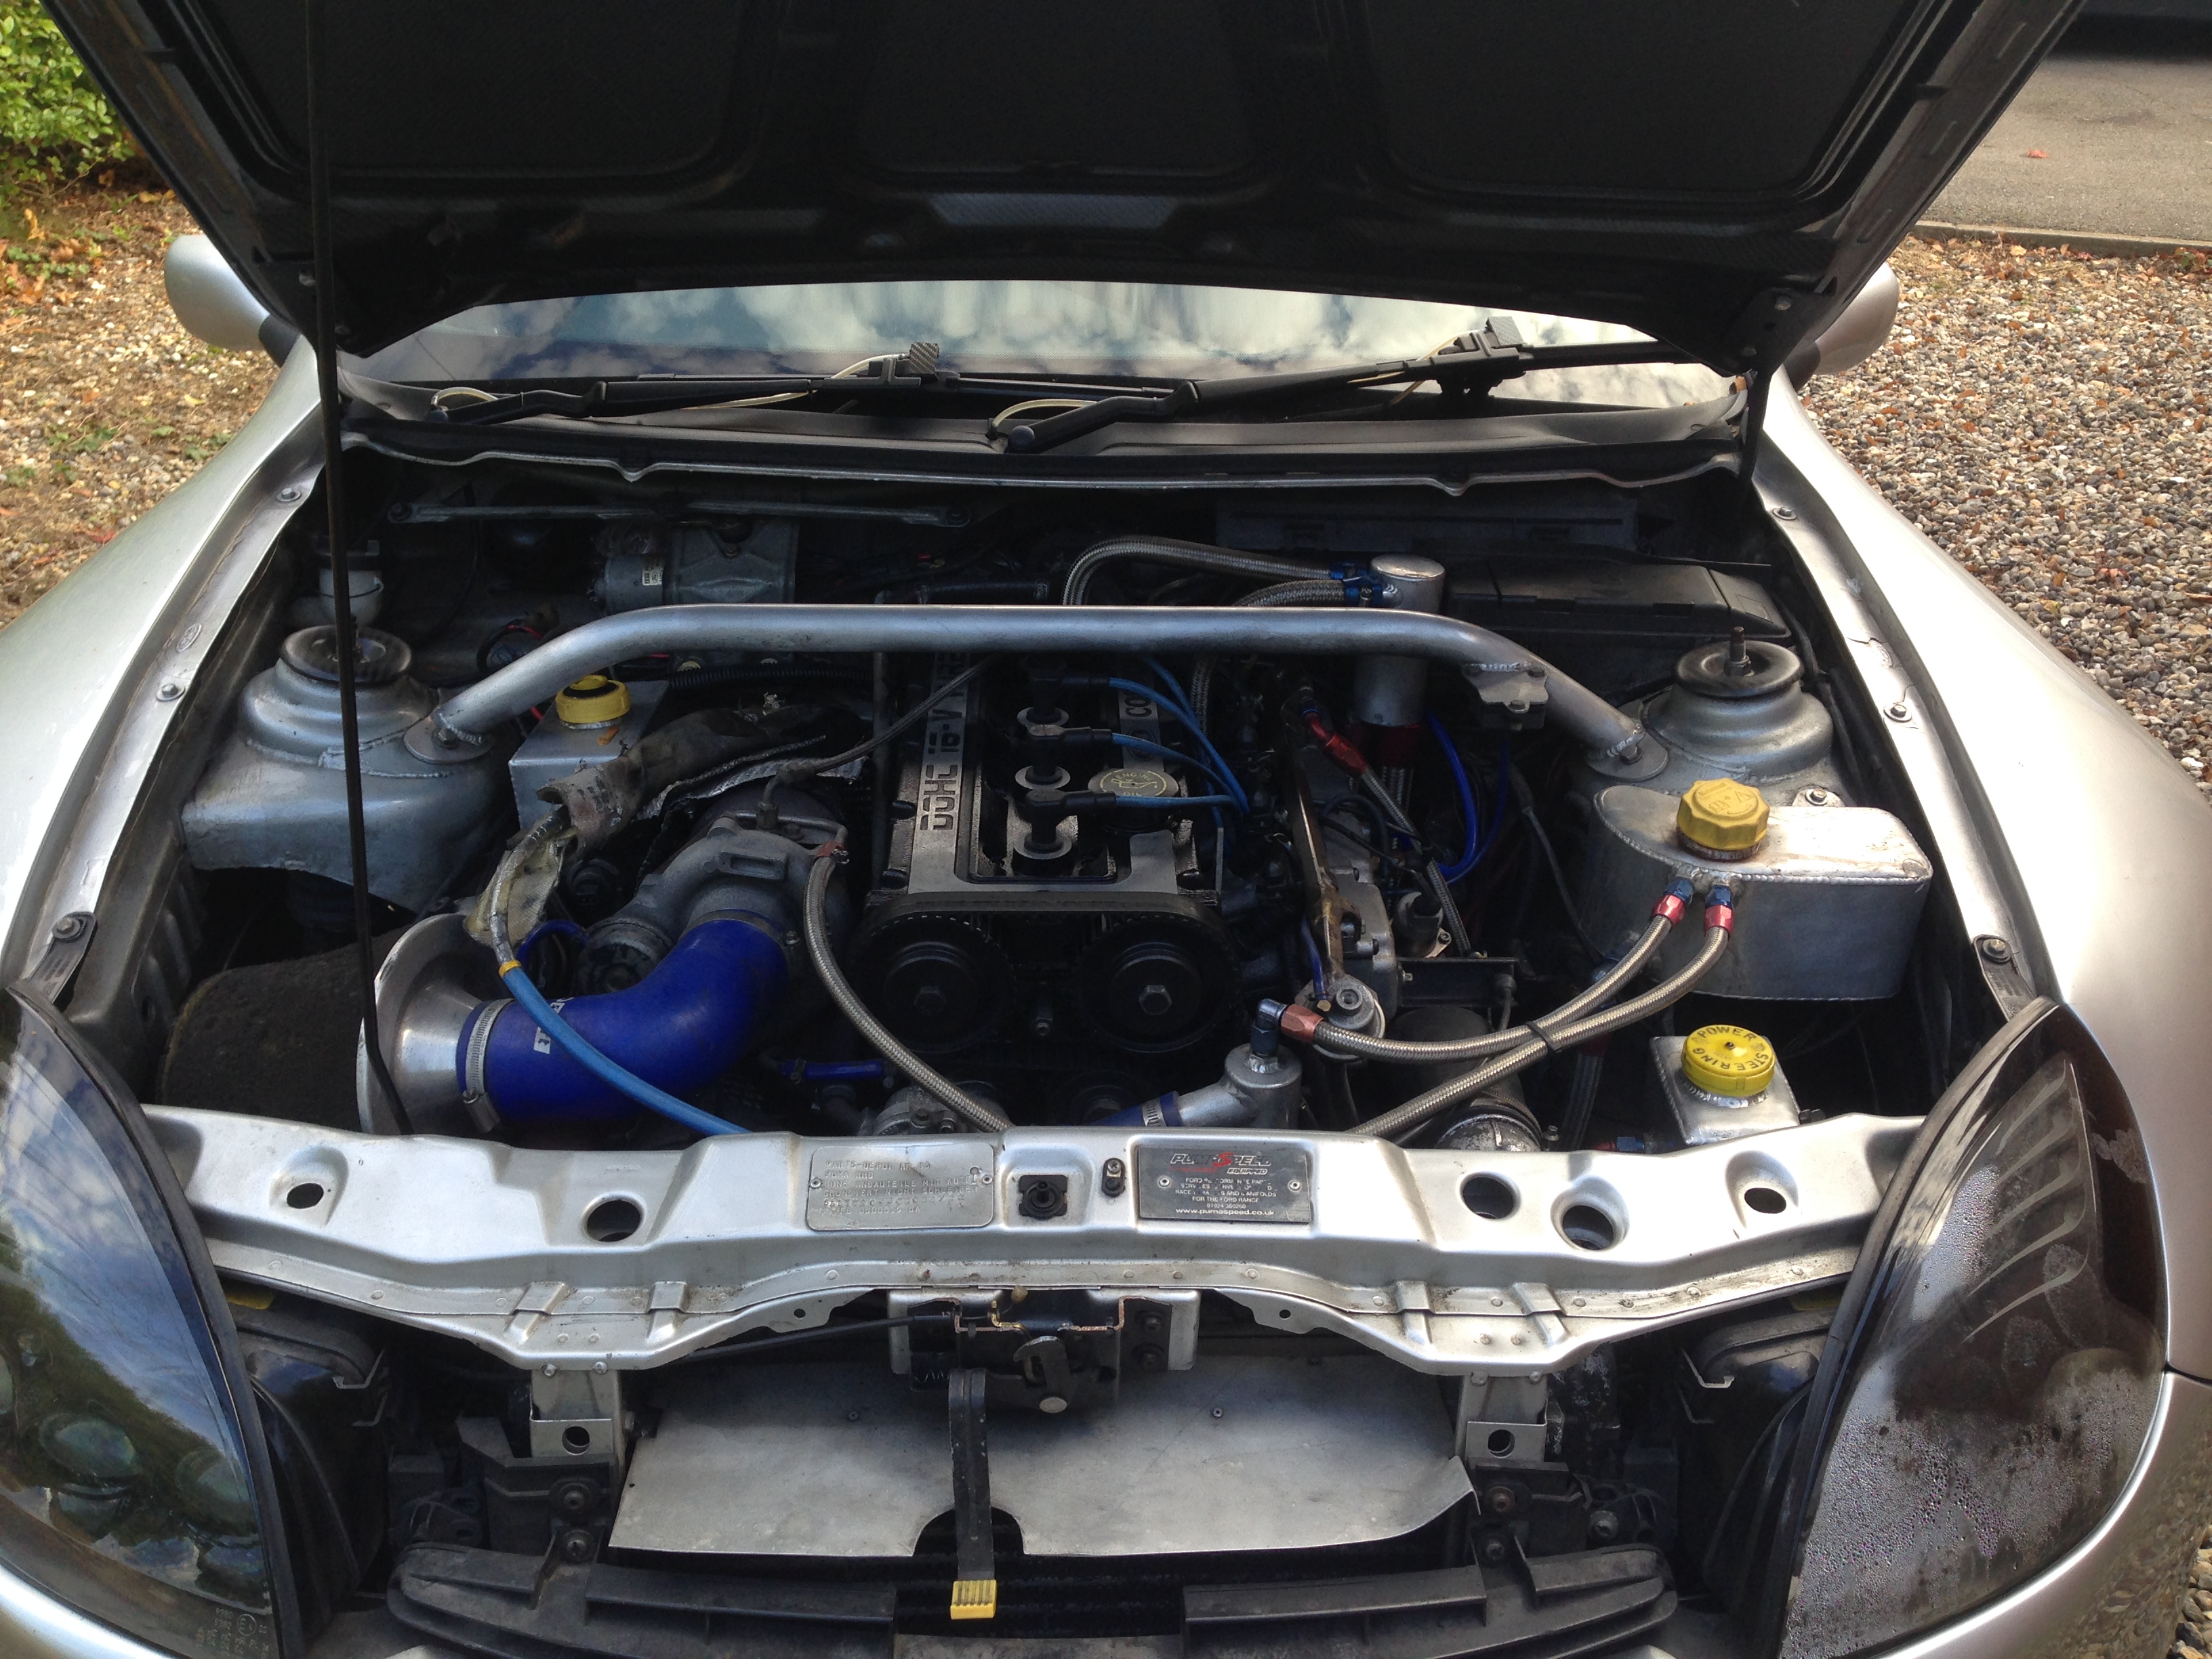
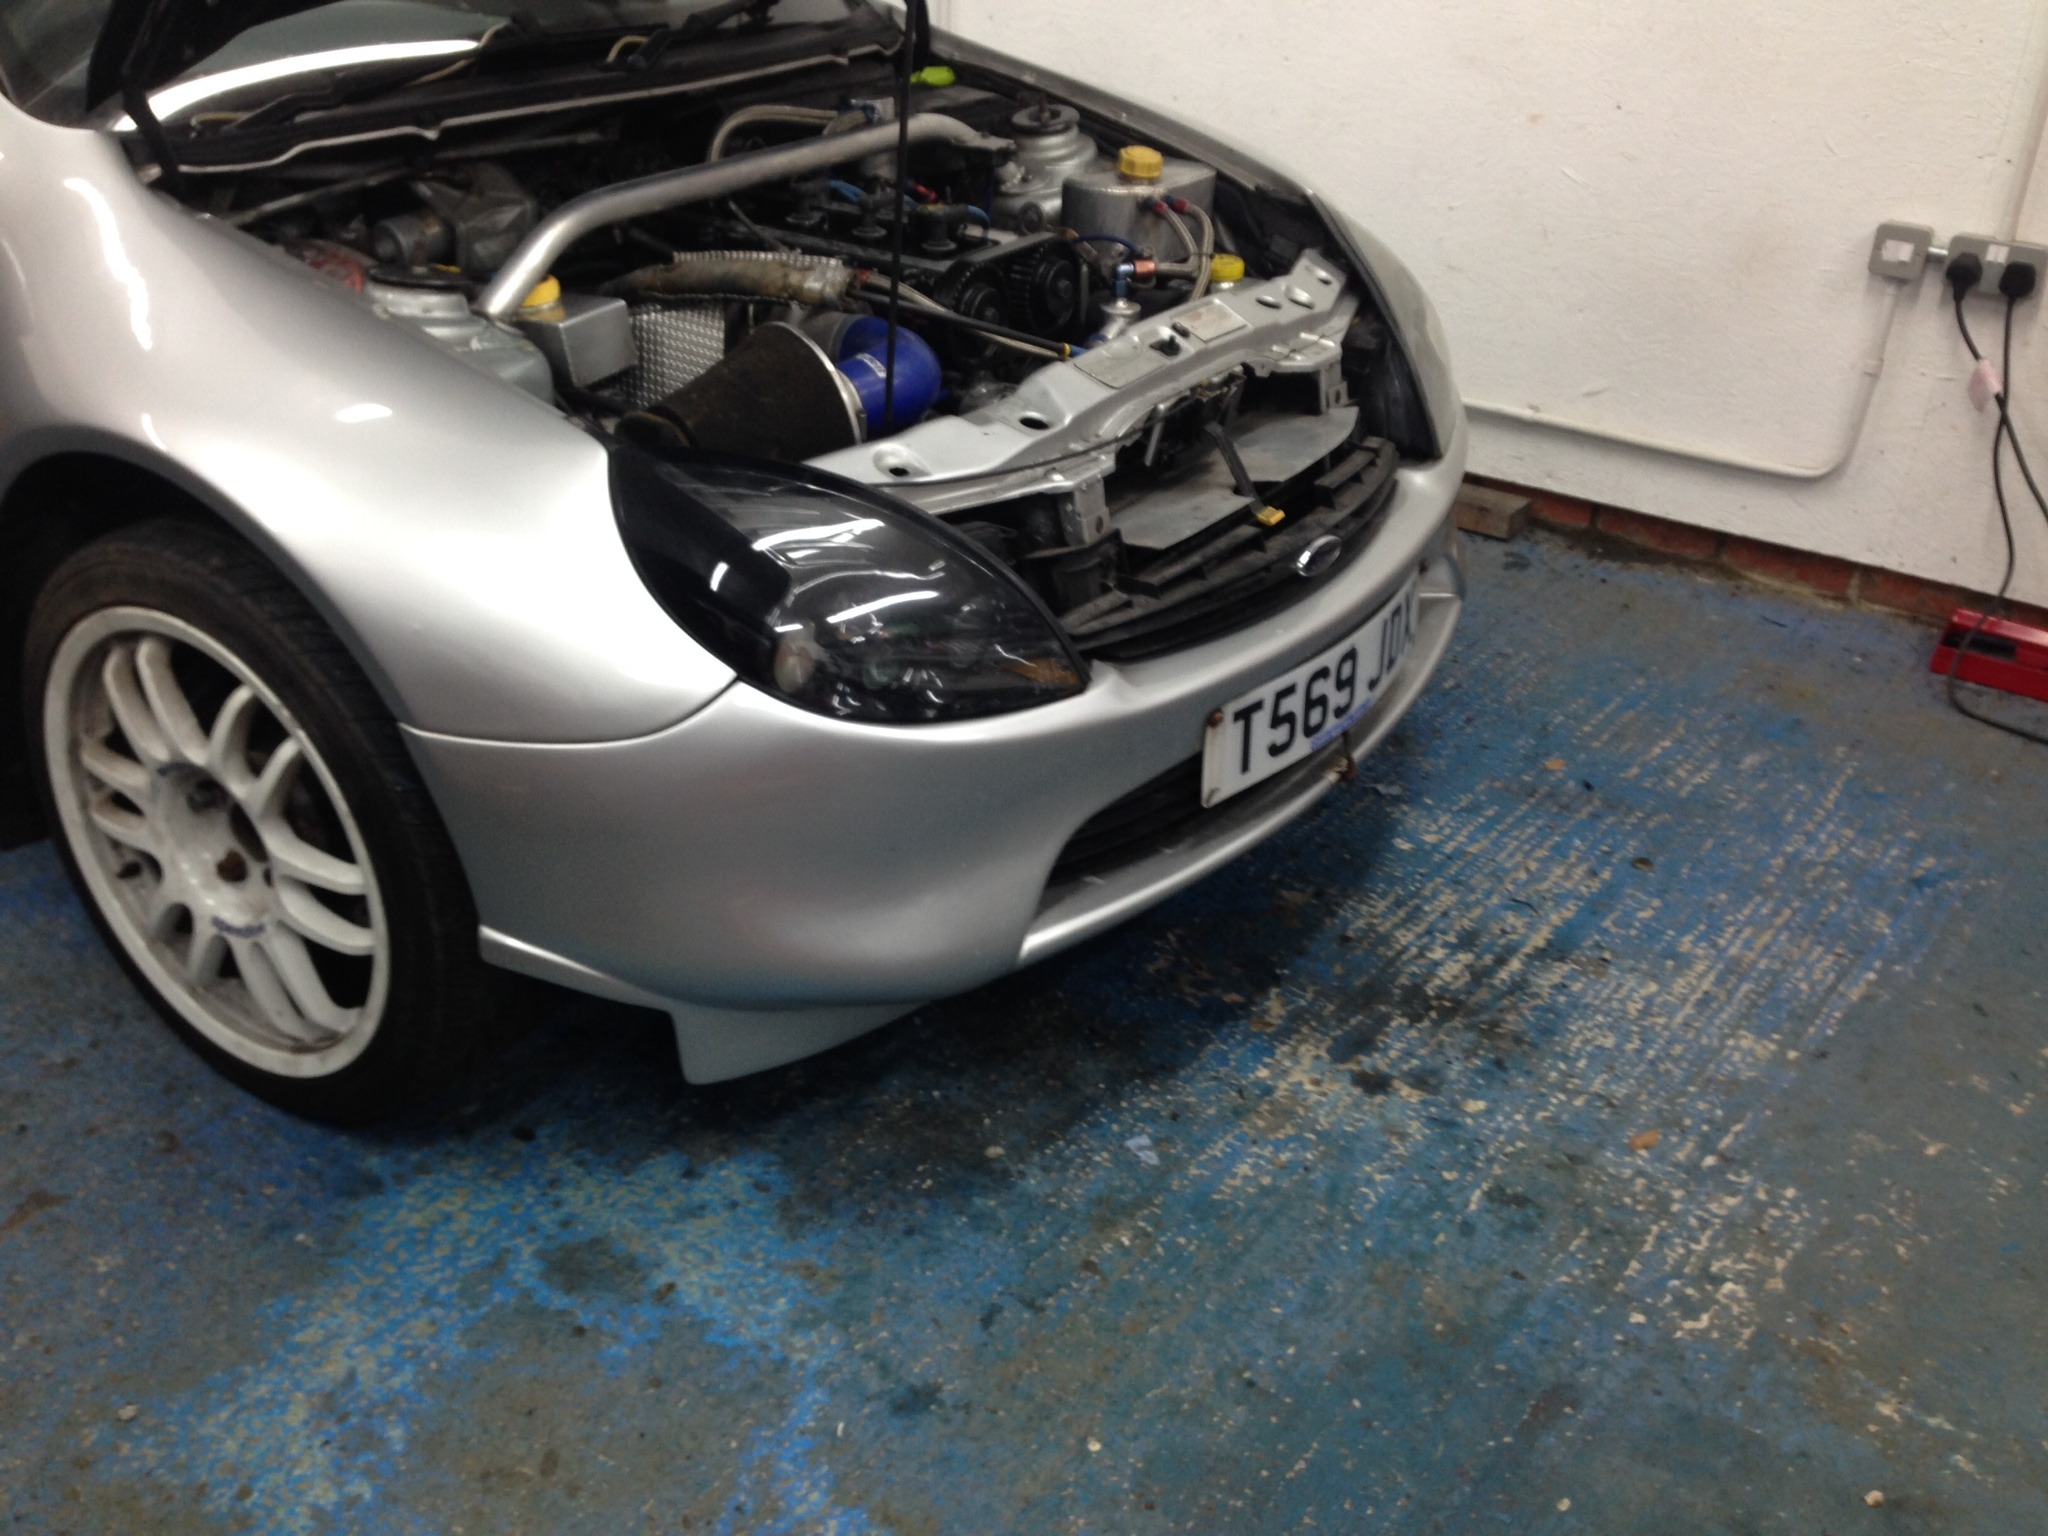
For those that don't know it too well, it is a puma with the S1600 kit and converted to run the 4x4 Escort Cosworth engine and running gear. The shell I am lead to believe was converted by a company called DJM and the rest of it was built by Pumaspeed.
It had covered nearly 20,000 miles by the time I bought a little over a year ago now.
So on to the photos, to date I have over 400 photos of work I have done to the car and aspects of it that I'm trying to photo so I have something to go back over. I will share all the interesting ones as some are quite repetitive!
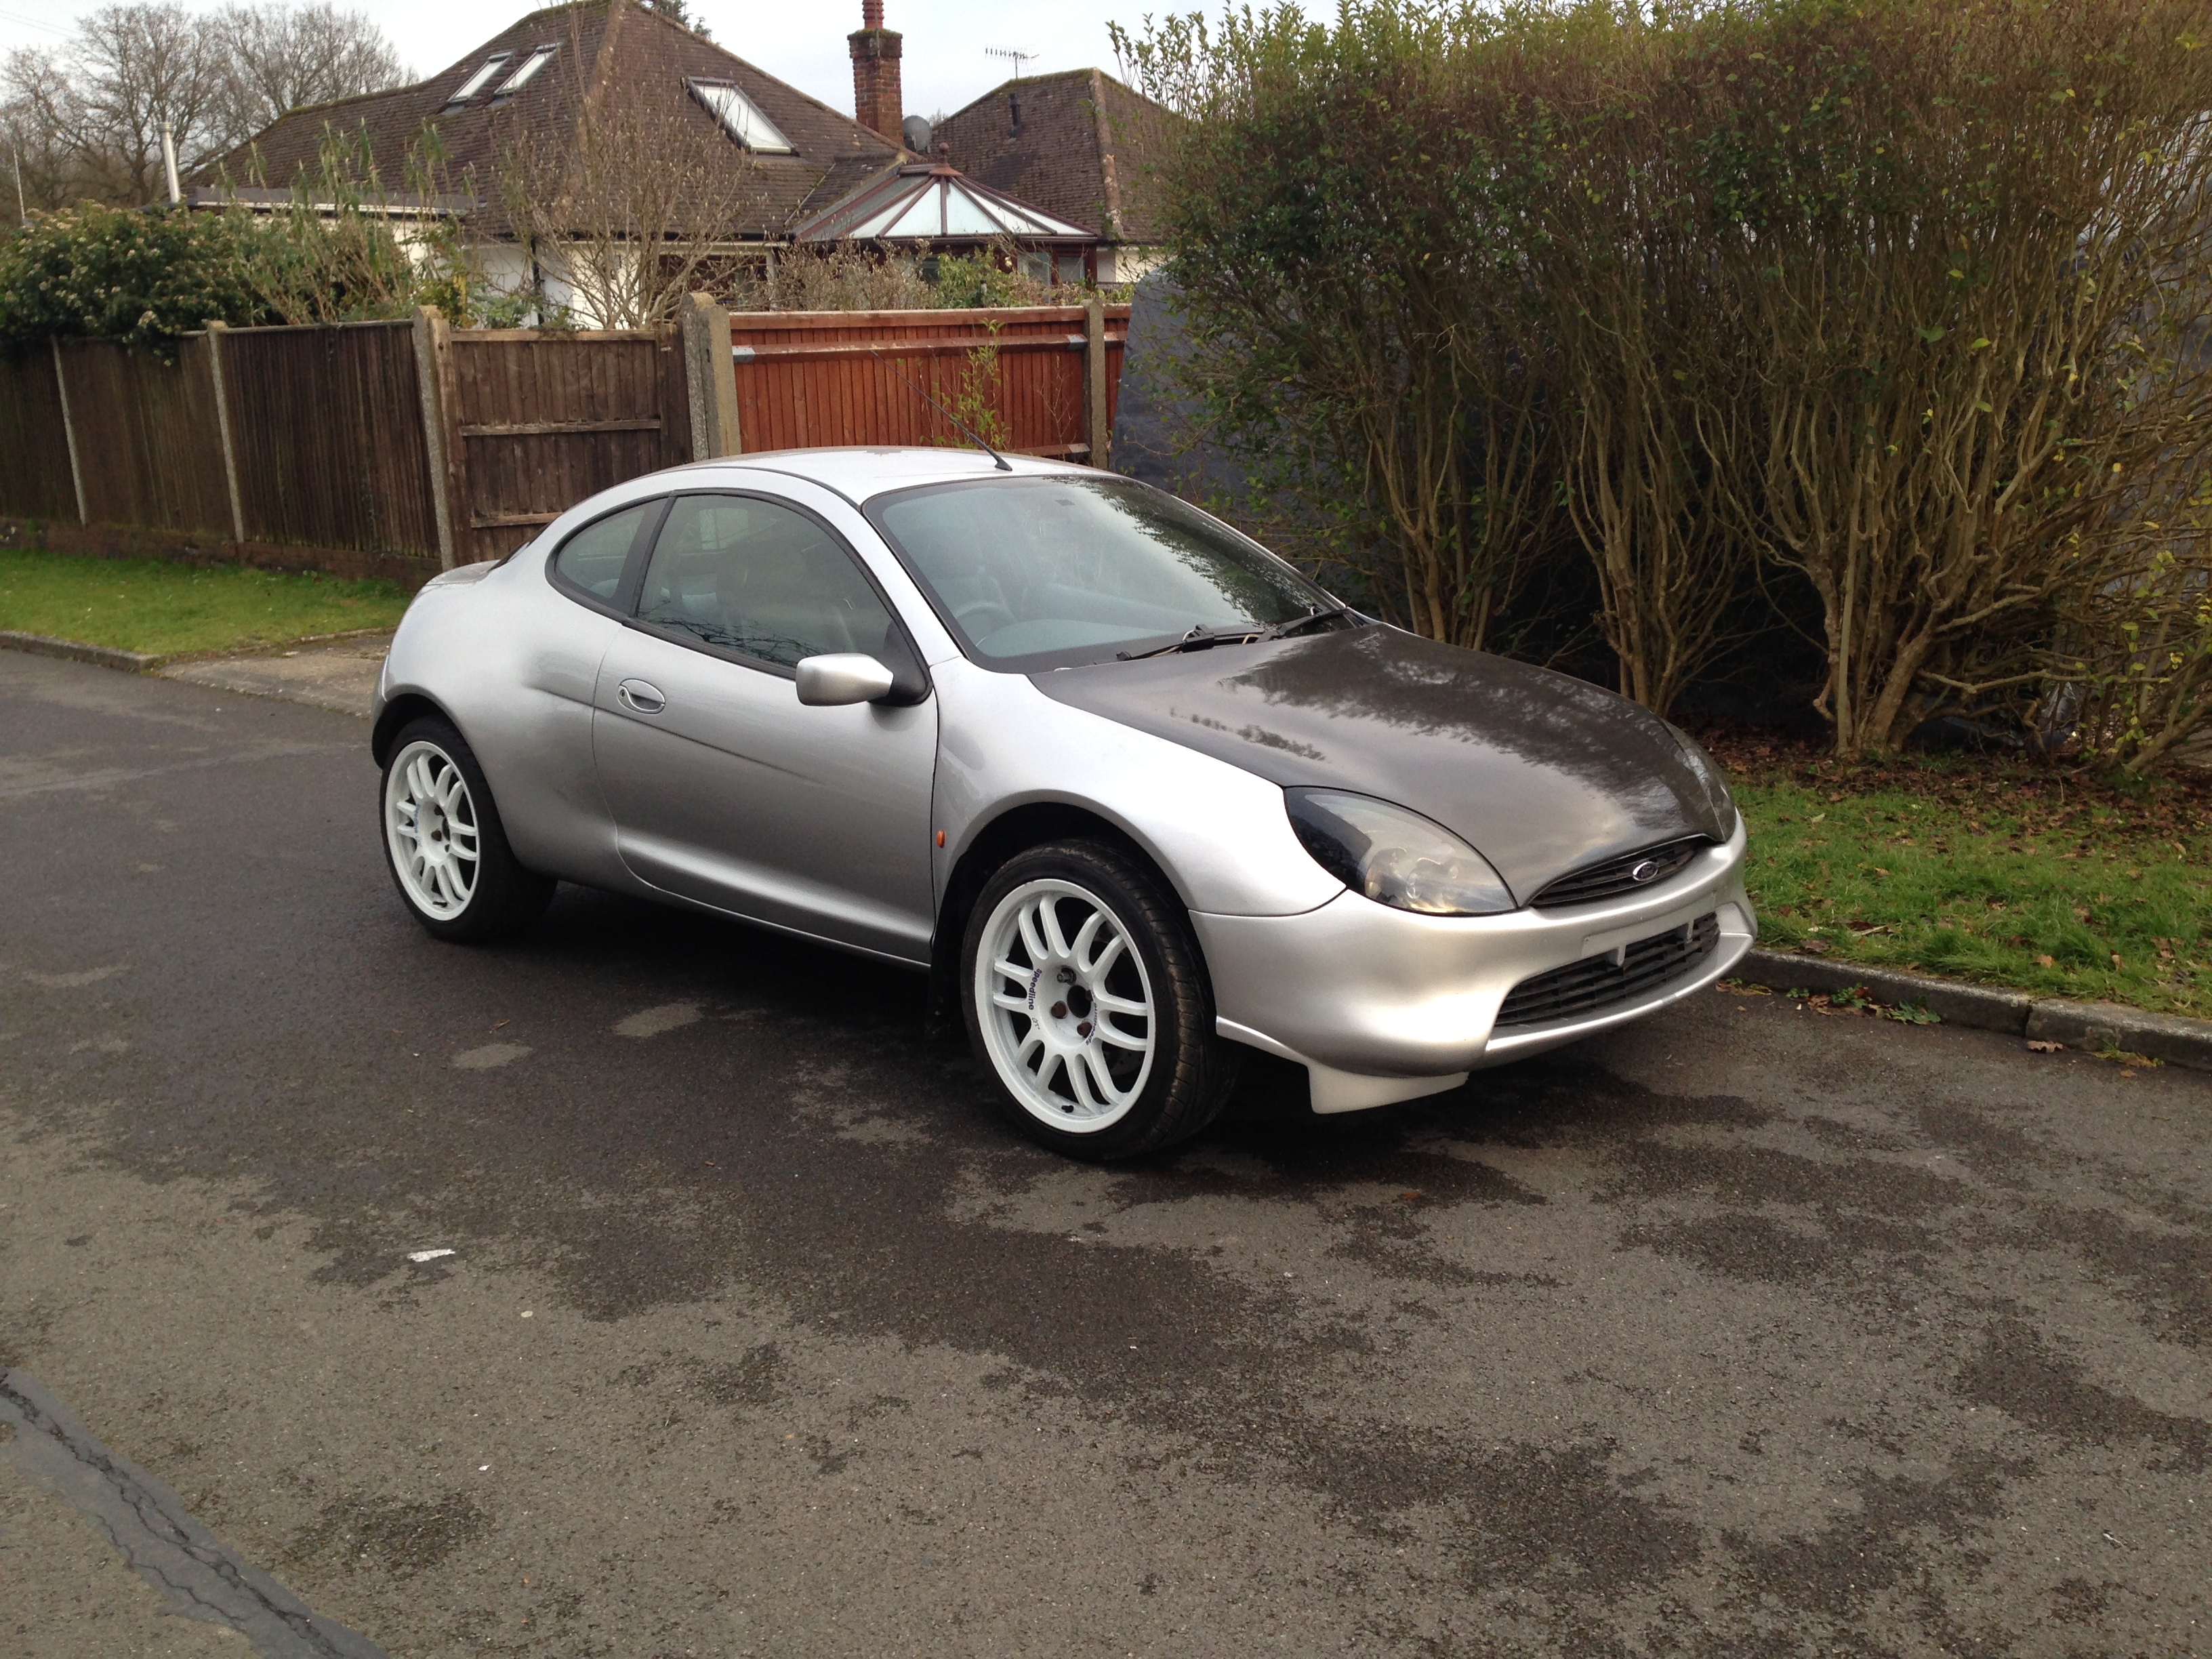
So this is how the car arrived at home, it was dry when it turned up and then quickly rained an hour or so later which showed the cars first gremlins..
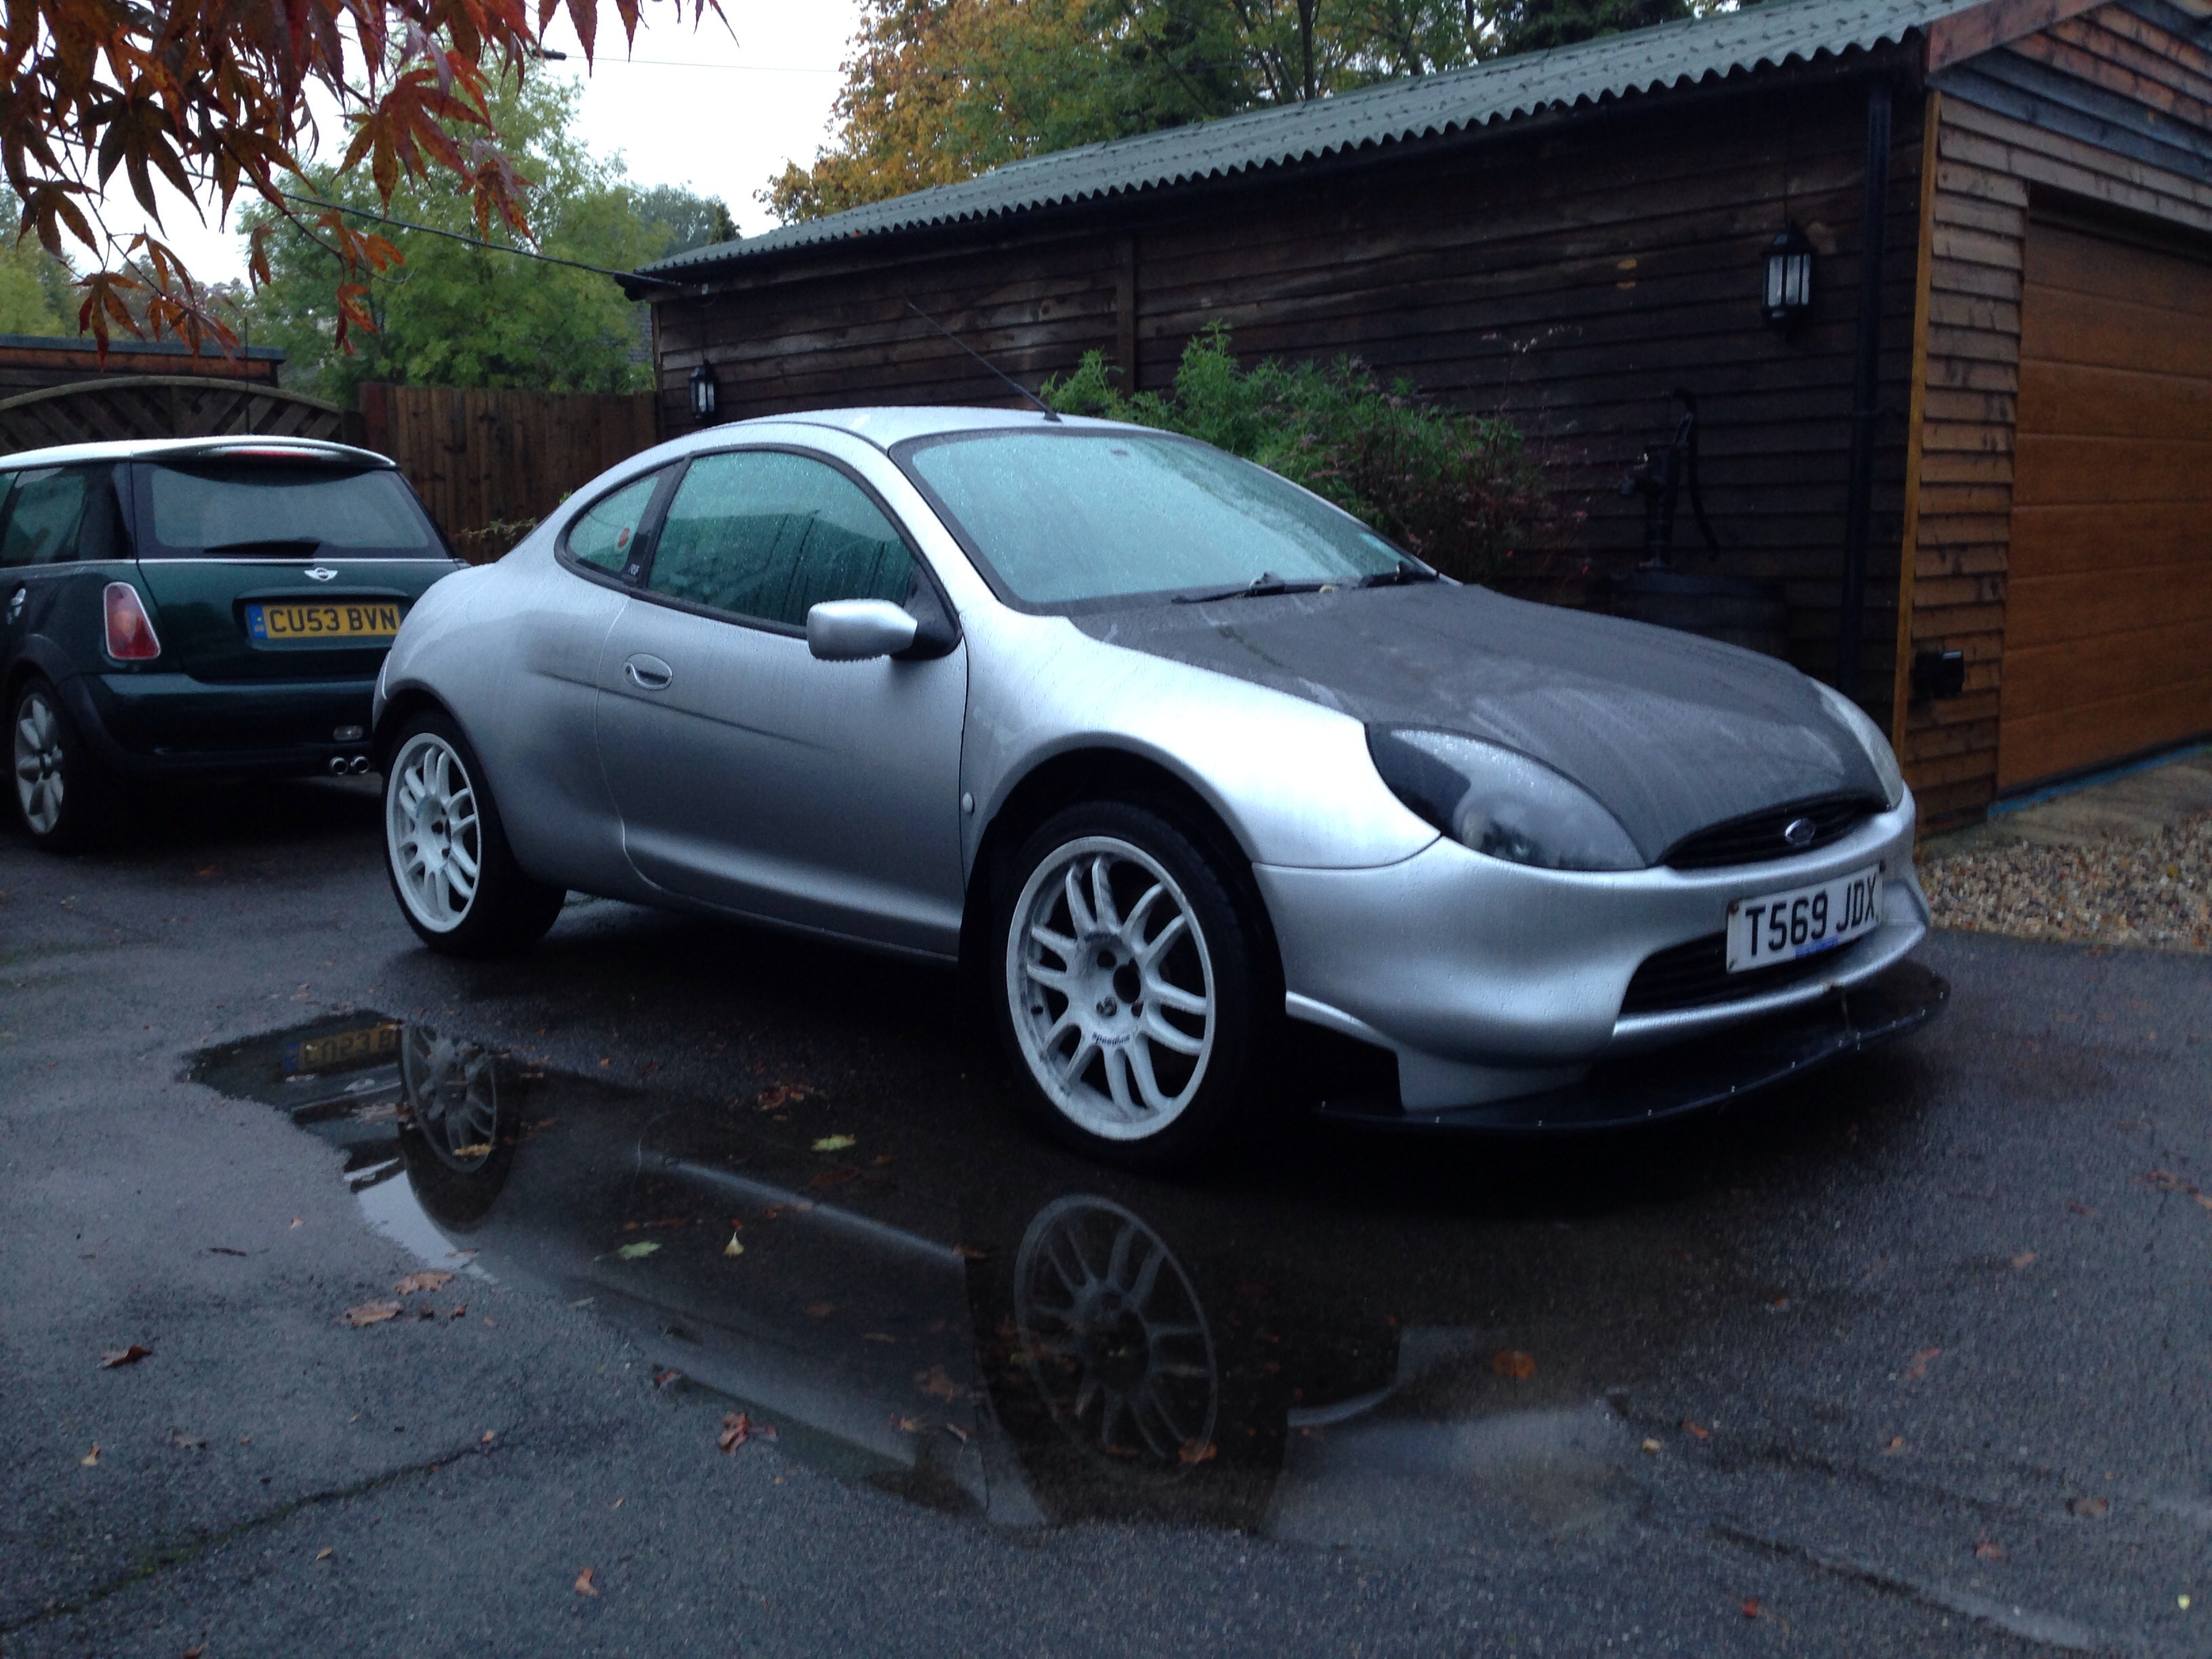
I noticed after it had rained for an hour or so that there was a rather large oil slick appearing running down the driveway.. I knew the car was a bit oily but wasn't quite expecting this amount! In total by the time the rain had stopped the patch was half the size of the car out to one side so I knew then I needed to do something about it.
I took it for my first drive a few days later and over a couple of days covered around 20-30 miles in it. Bit clunky and very noisy but as I was expecting to be honest.. I was told about the release bearing whining but after my first few journeys it was something I knew I had to get fixed.. The clutch pedal was awful and even for a cable clutch it was bad so had a look into this..
Found these..
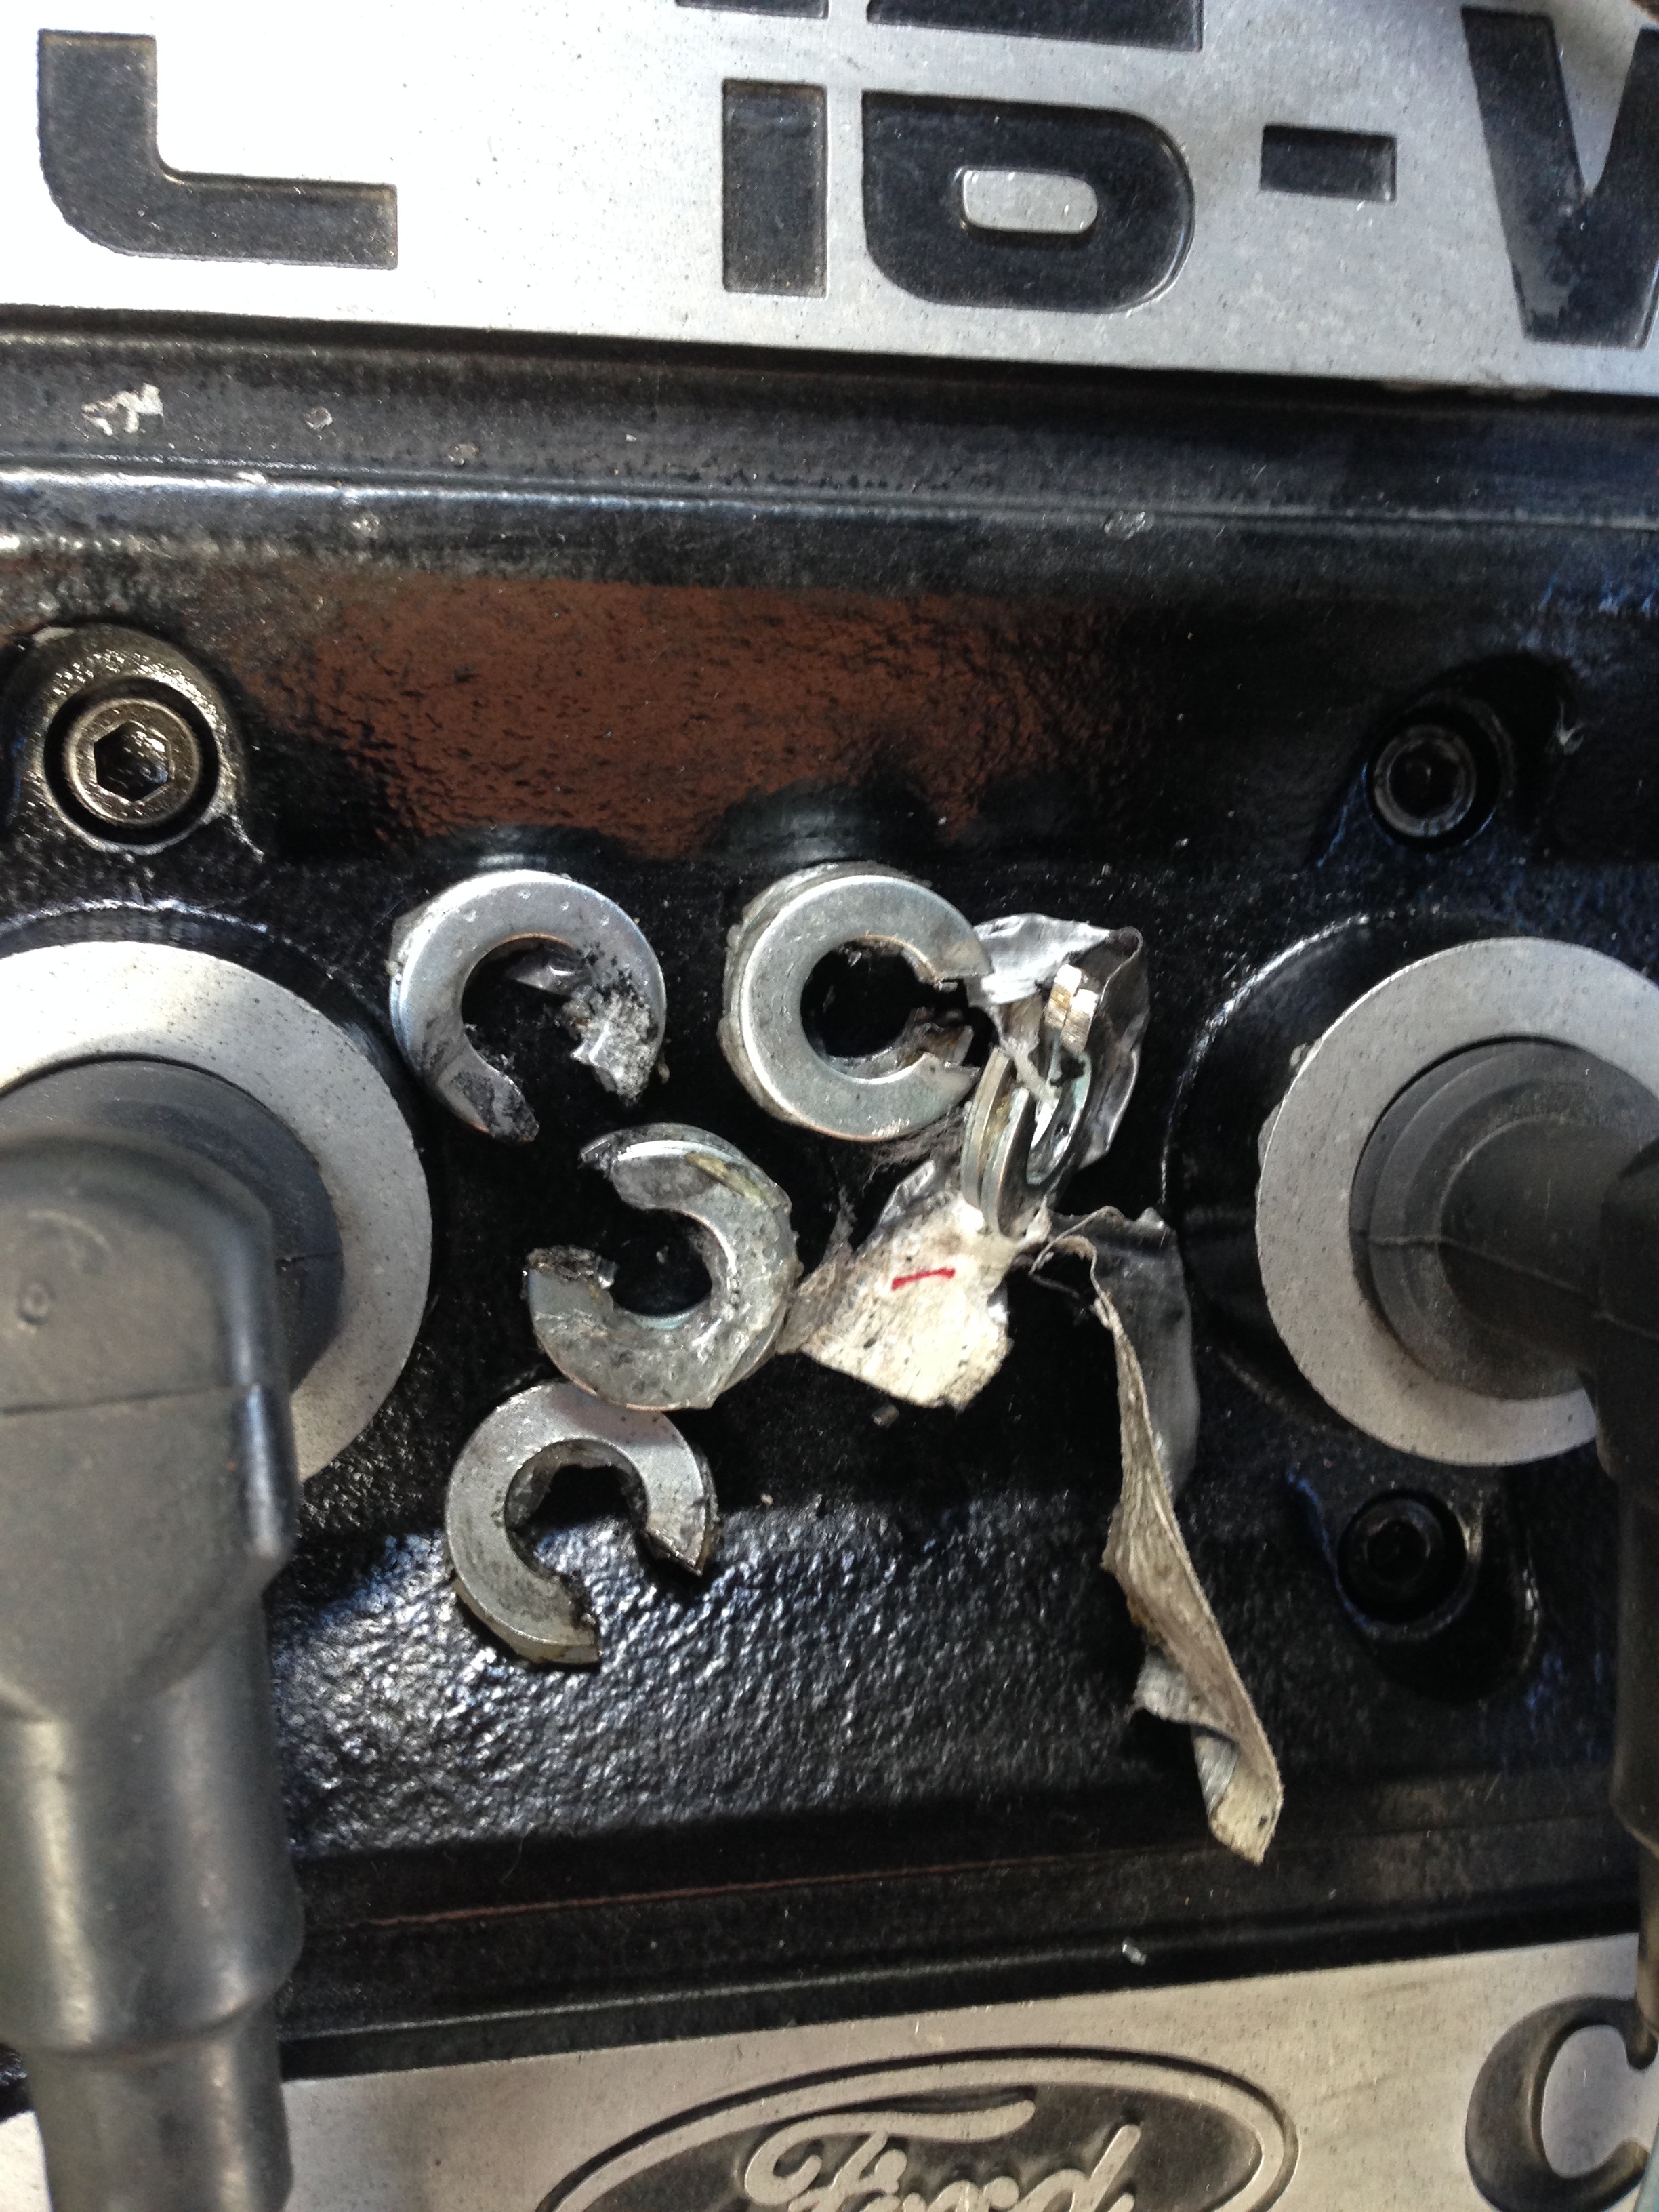
These were wedged in between the rubber stop and plastic housing case on the bulkhead around the cable.. The idea being I guess to take up some slack on the cable but in doing so made it stiff and feel horrible.. With them removed and the self adjust quadrant on the clutch pedal allowed to adjust the cable feels better, although the pedal still flaps a bit before it starts operating the cable. Eventually I will move it onto a hydraulic clutch and put the standard puma pedal box back in.
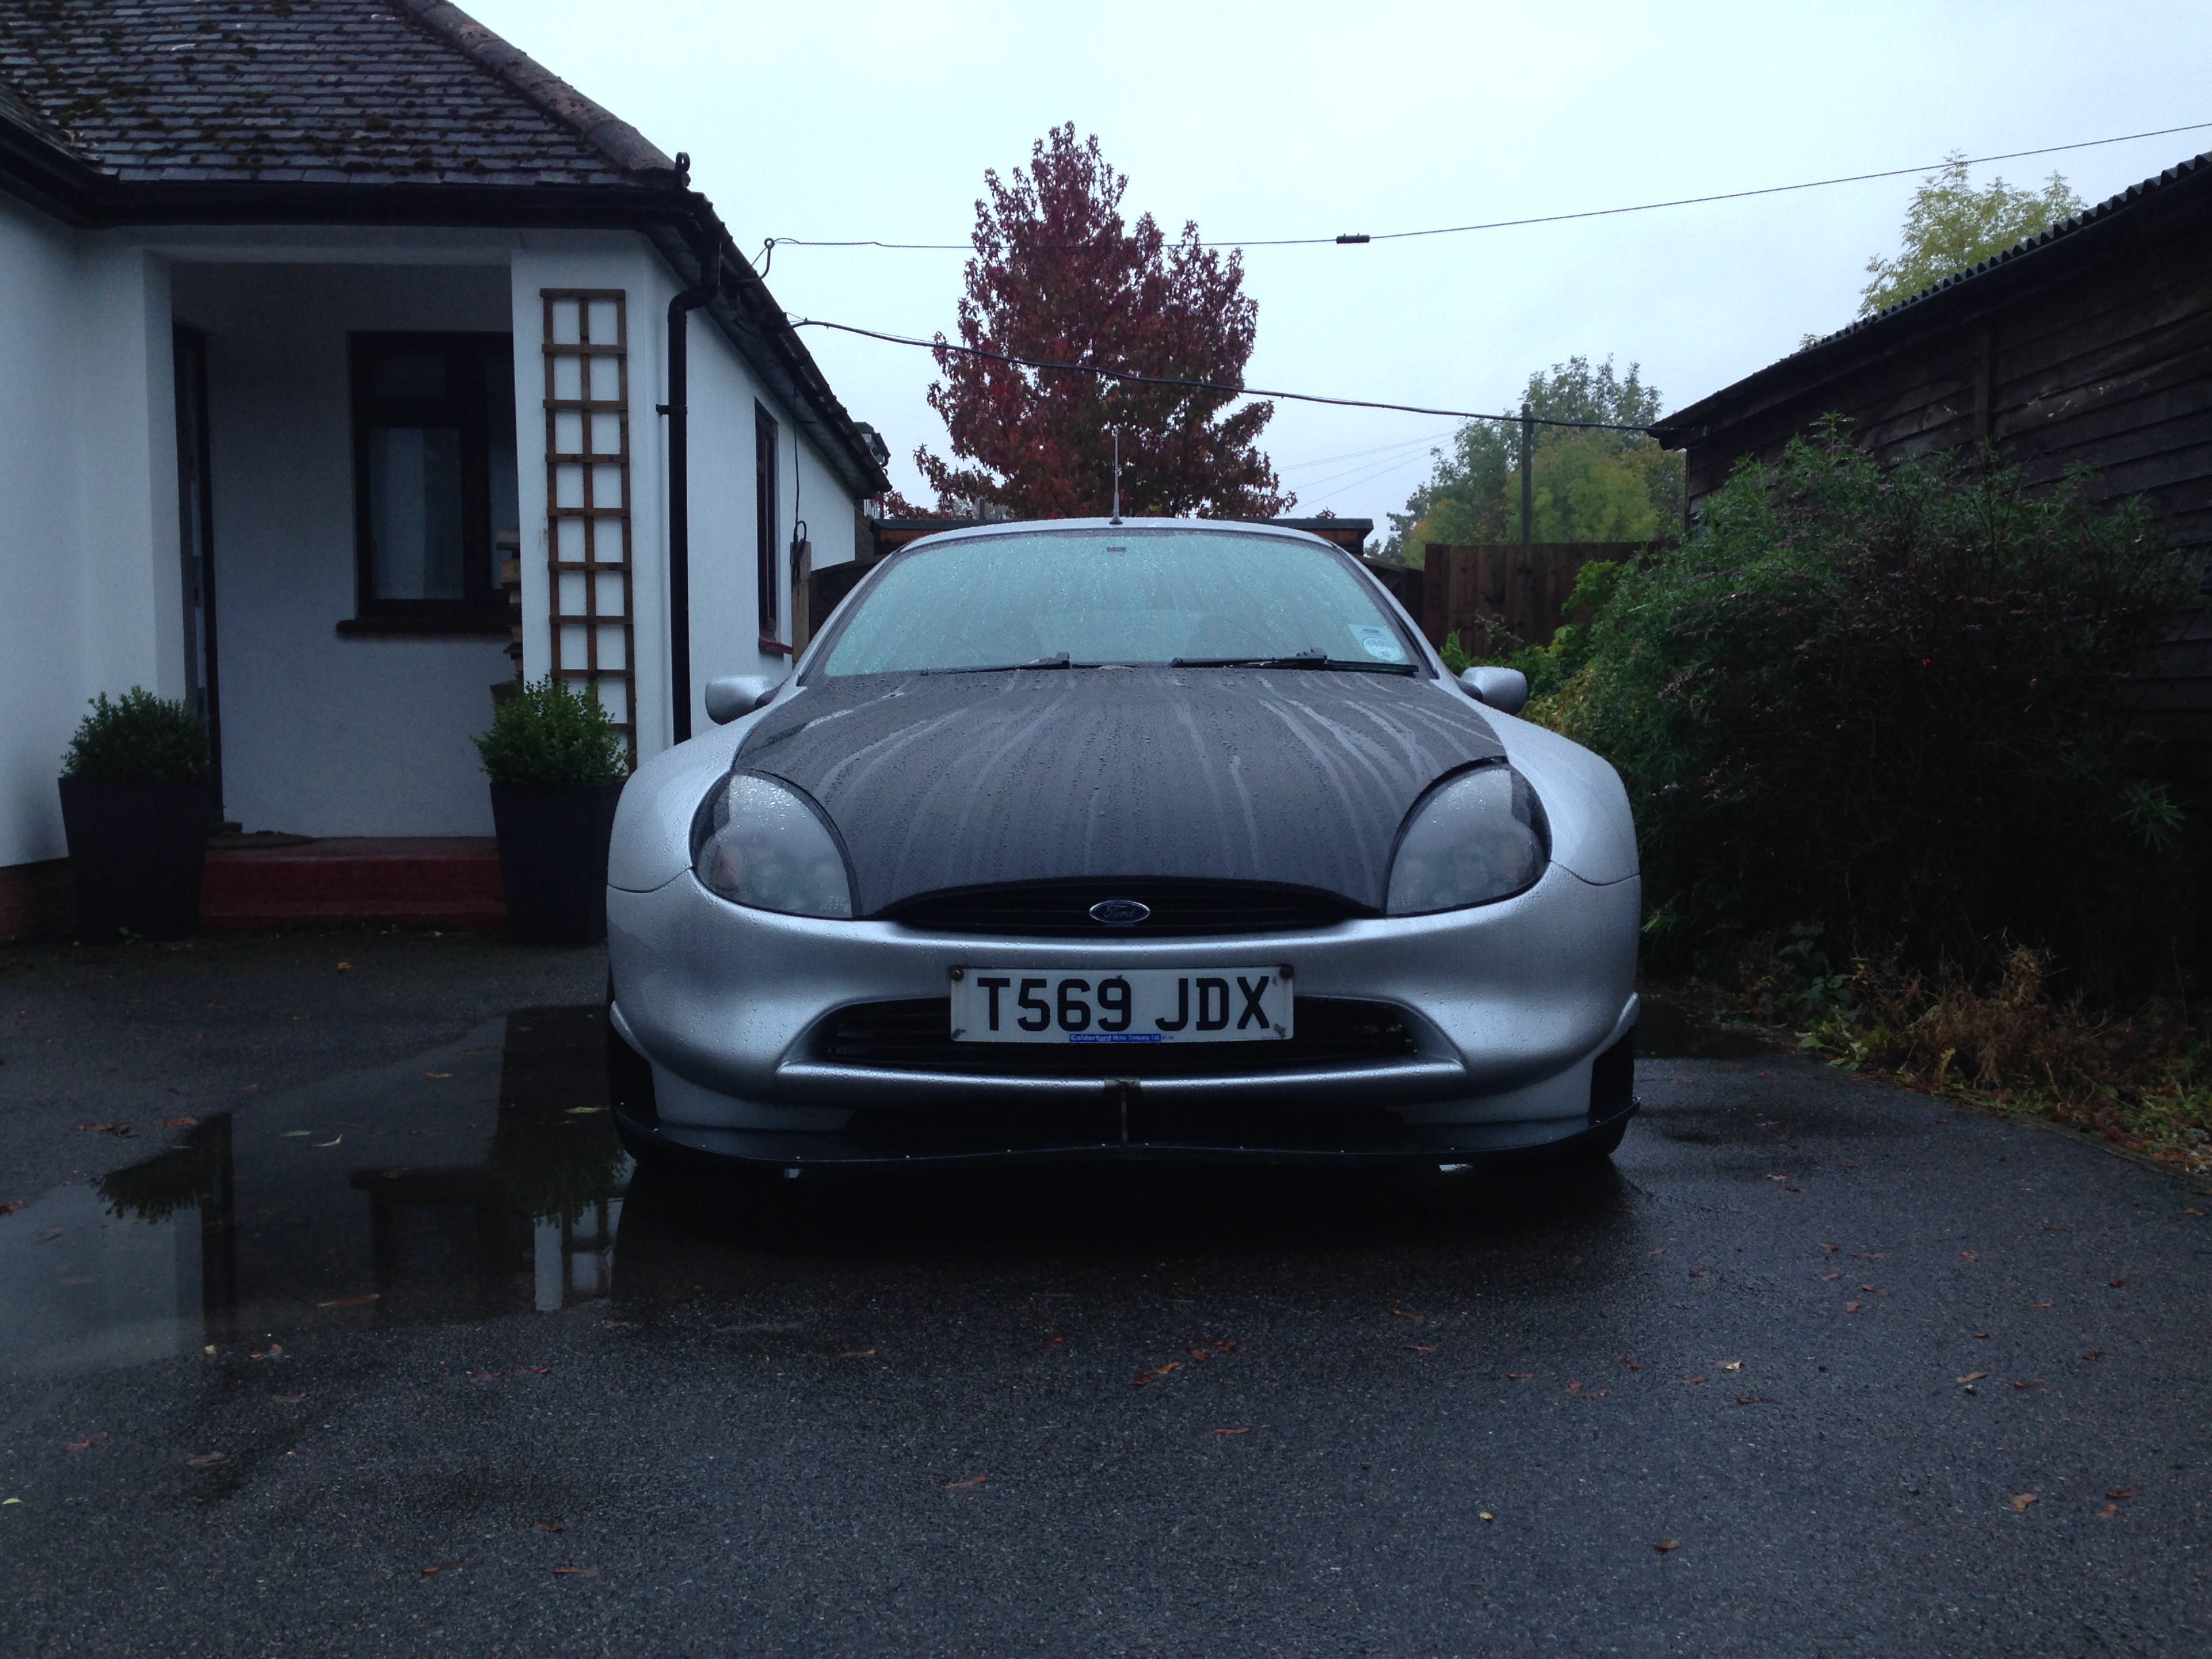
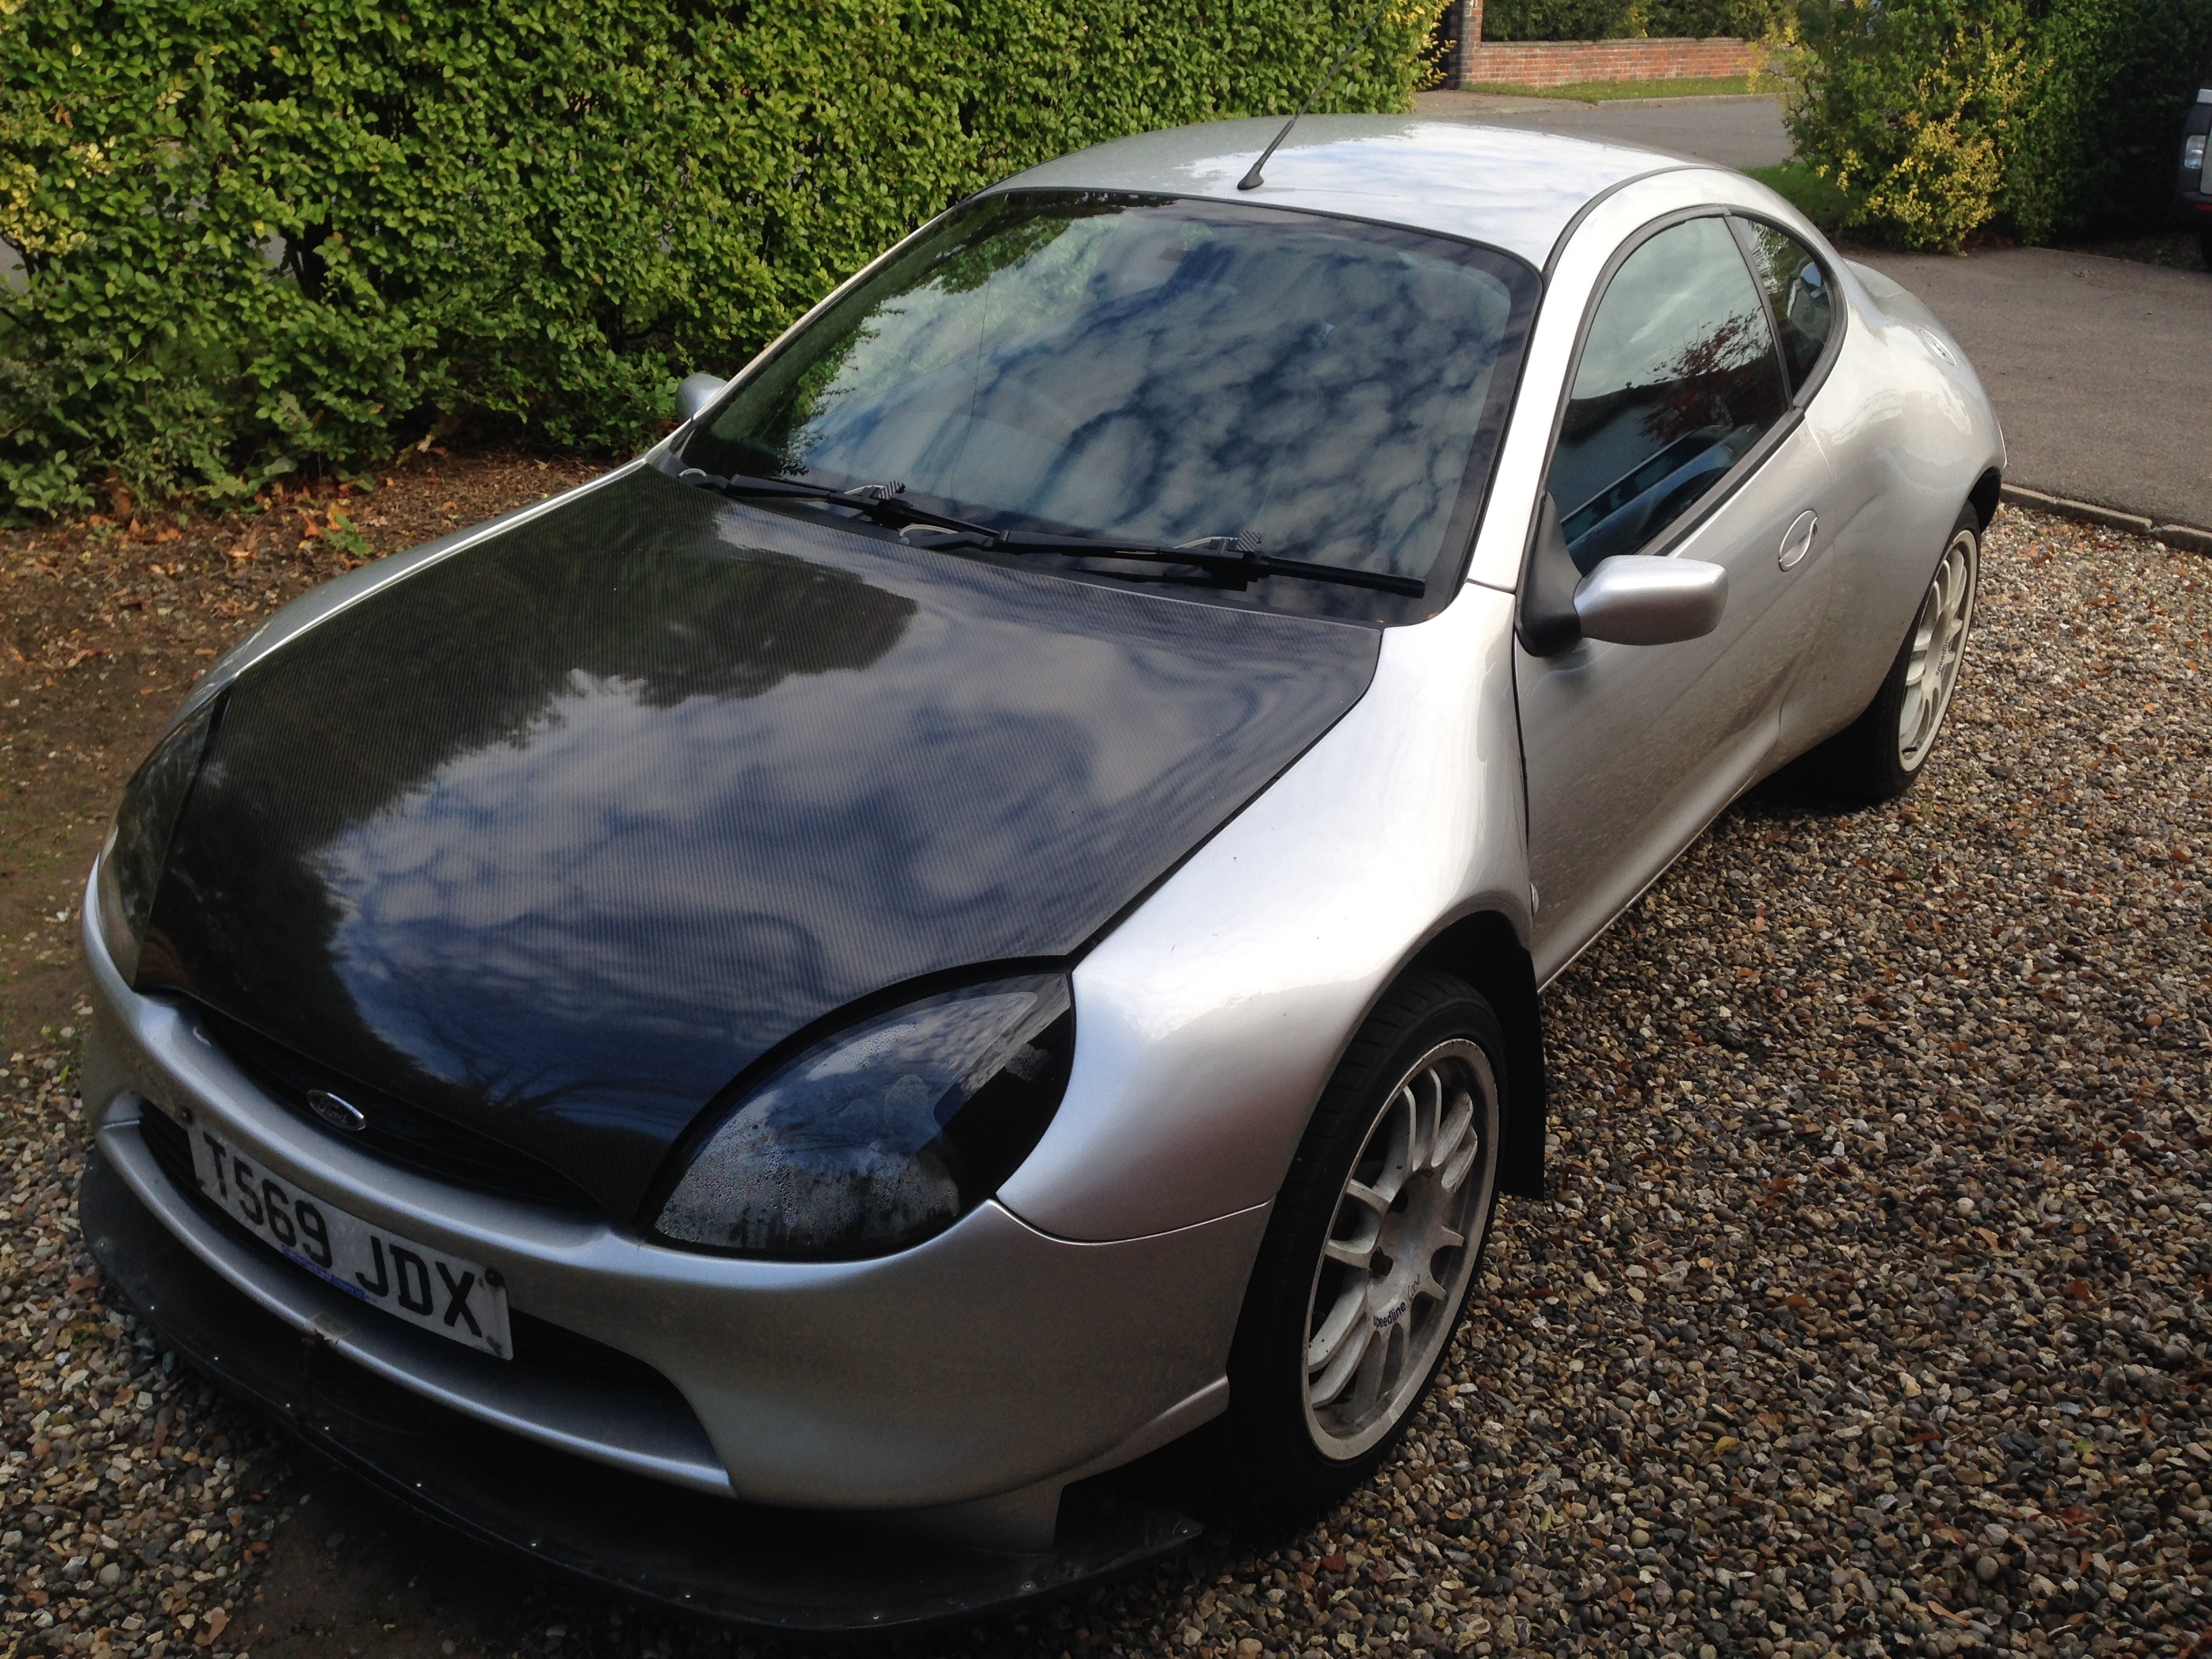
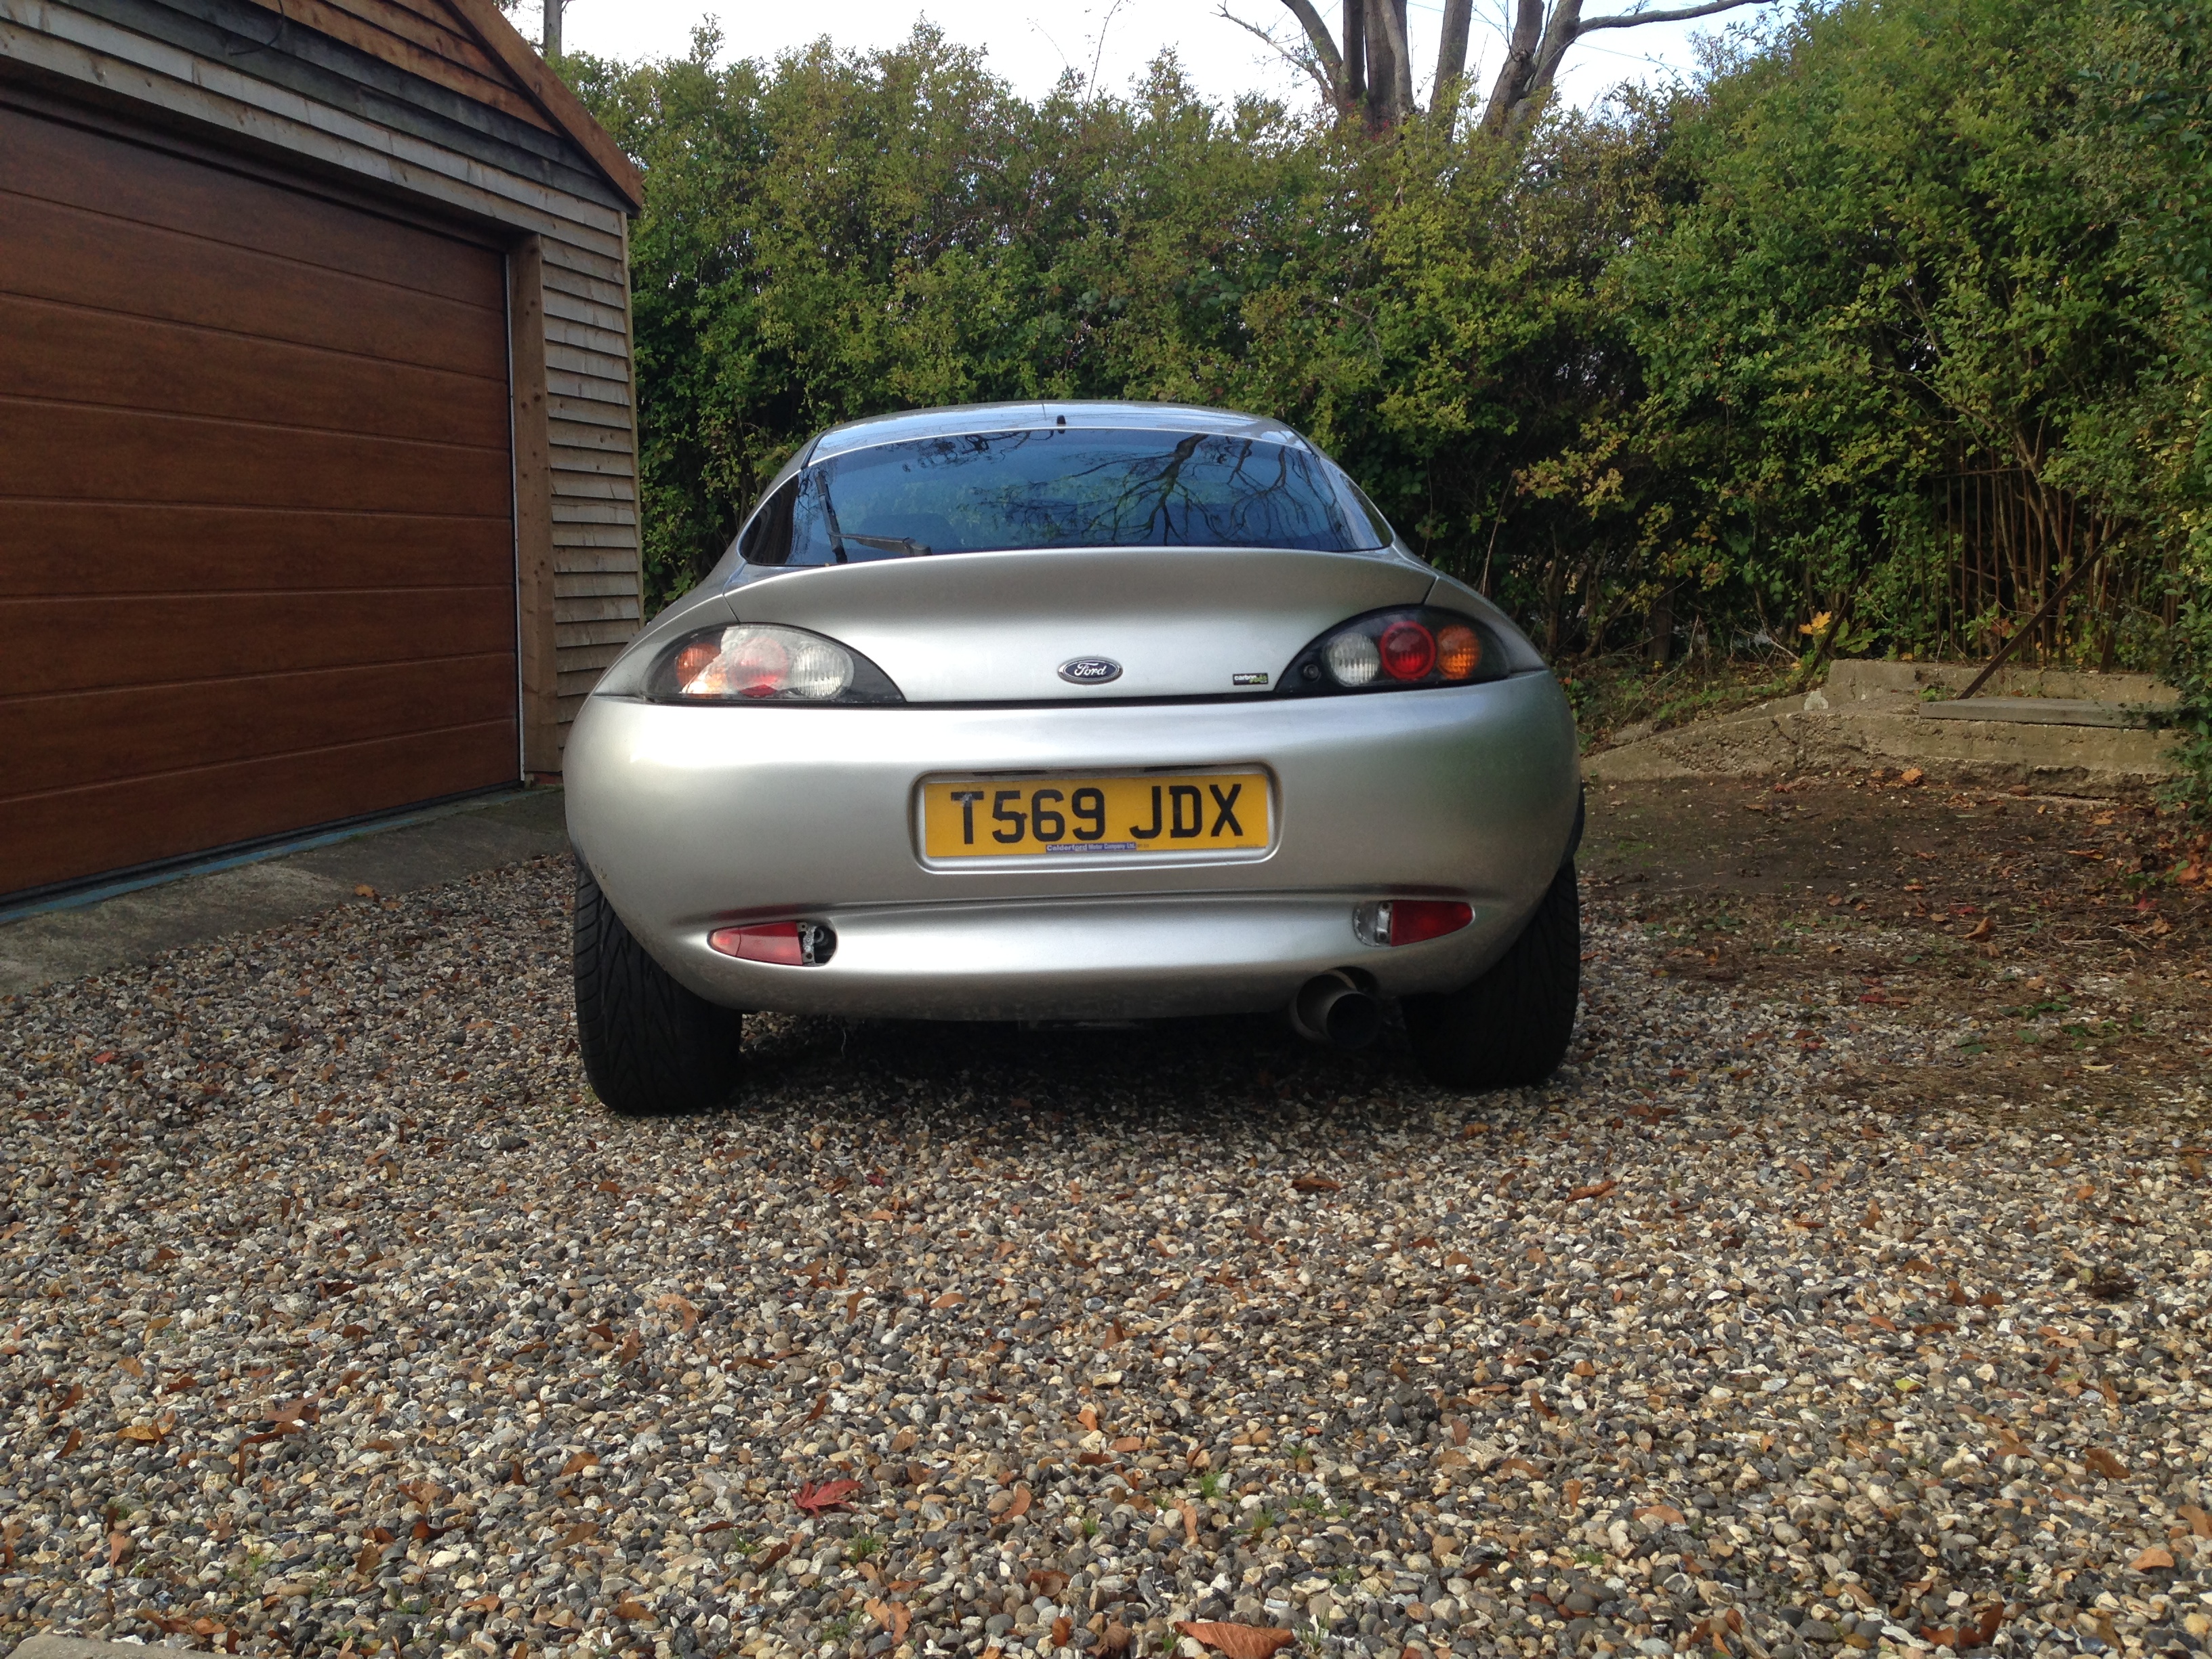
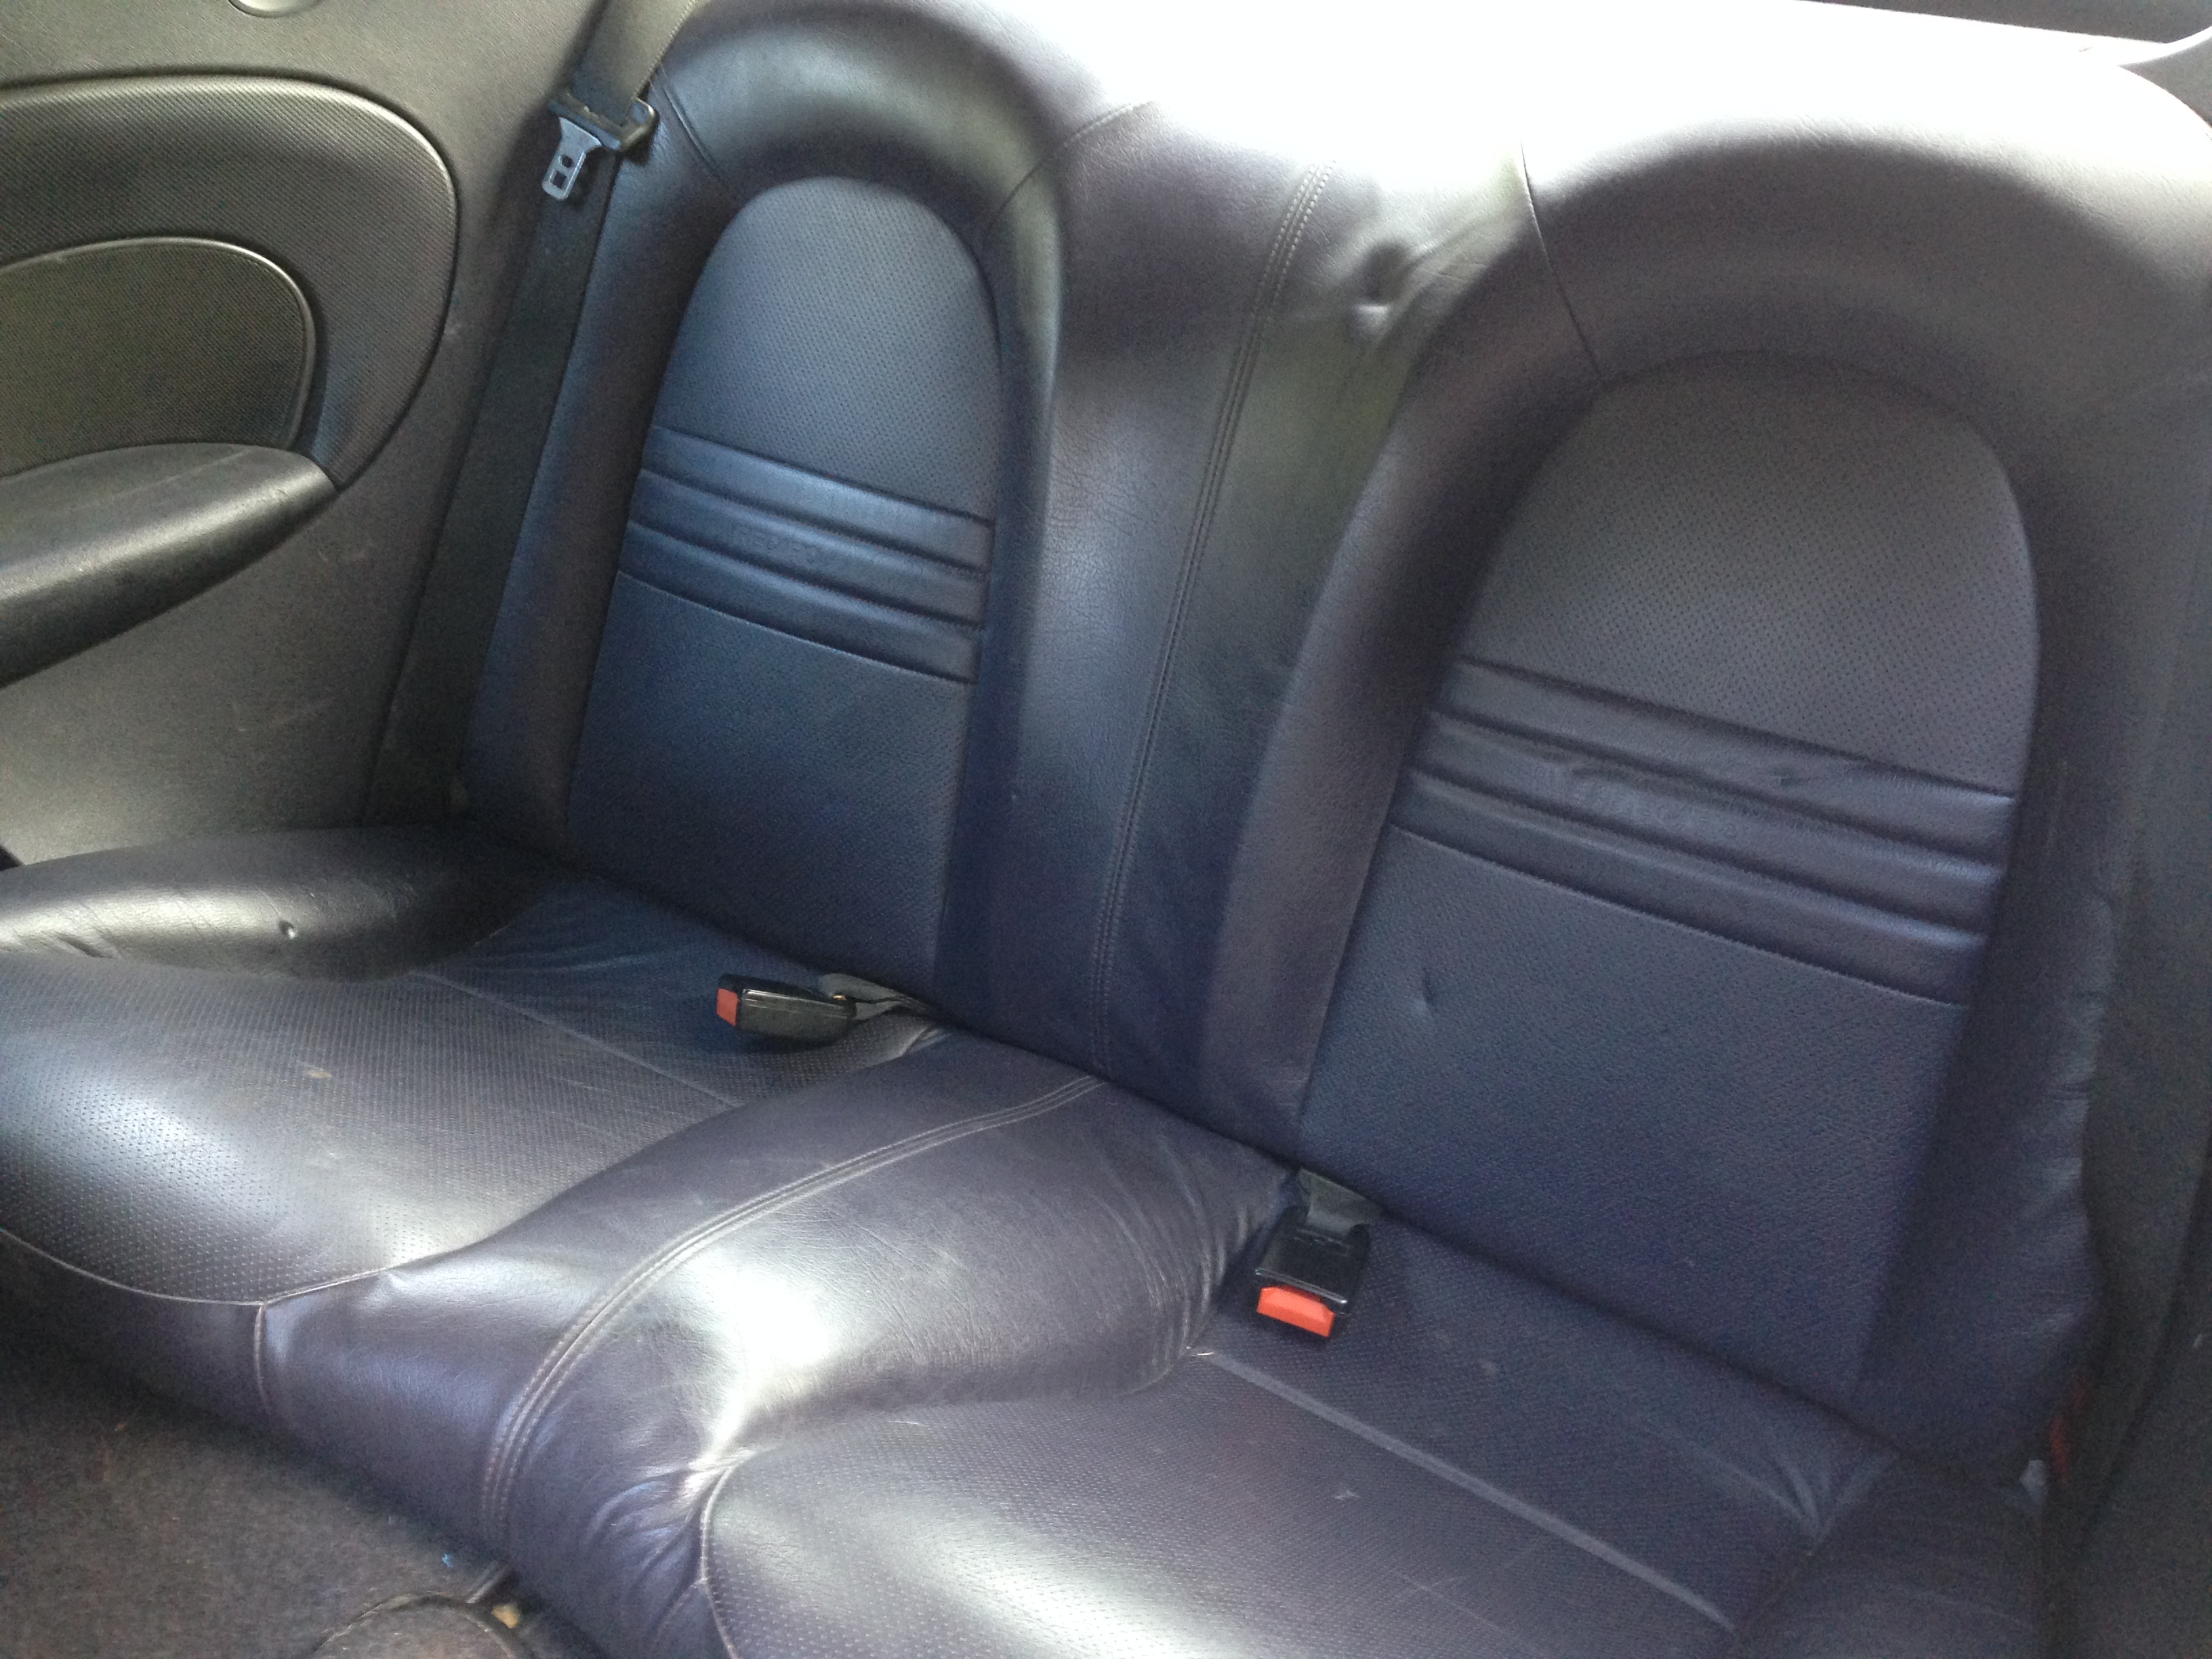
At this point with one little task investigated I had an opportunity to take some better pics of the car

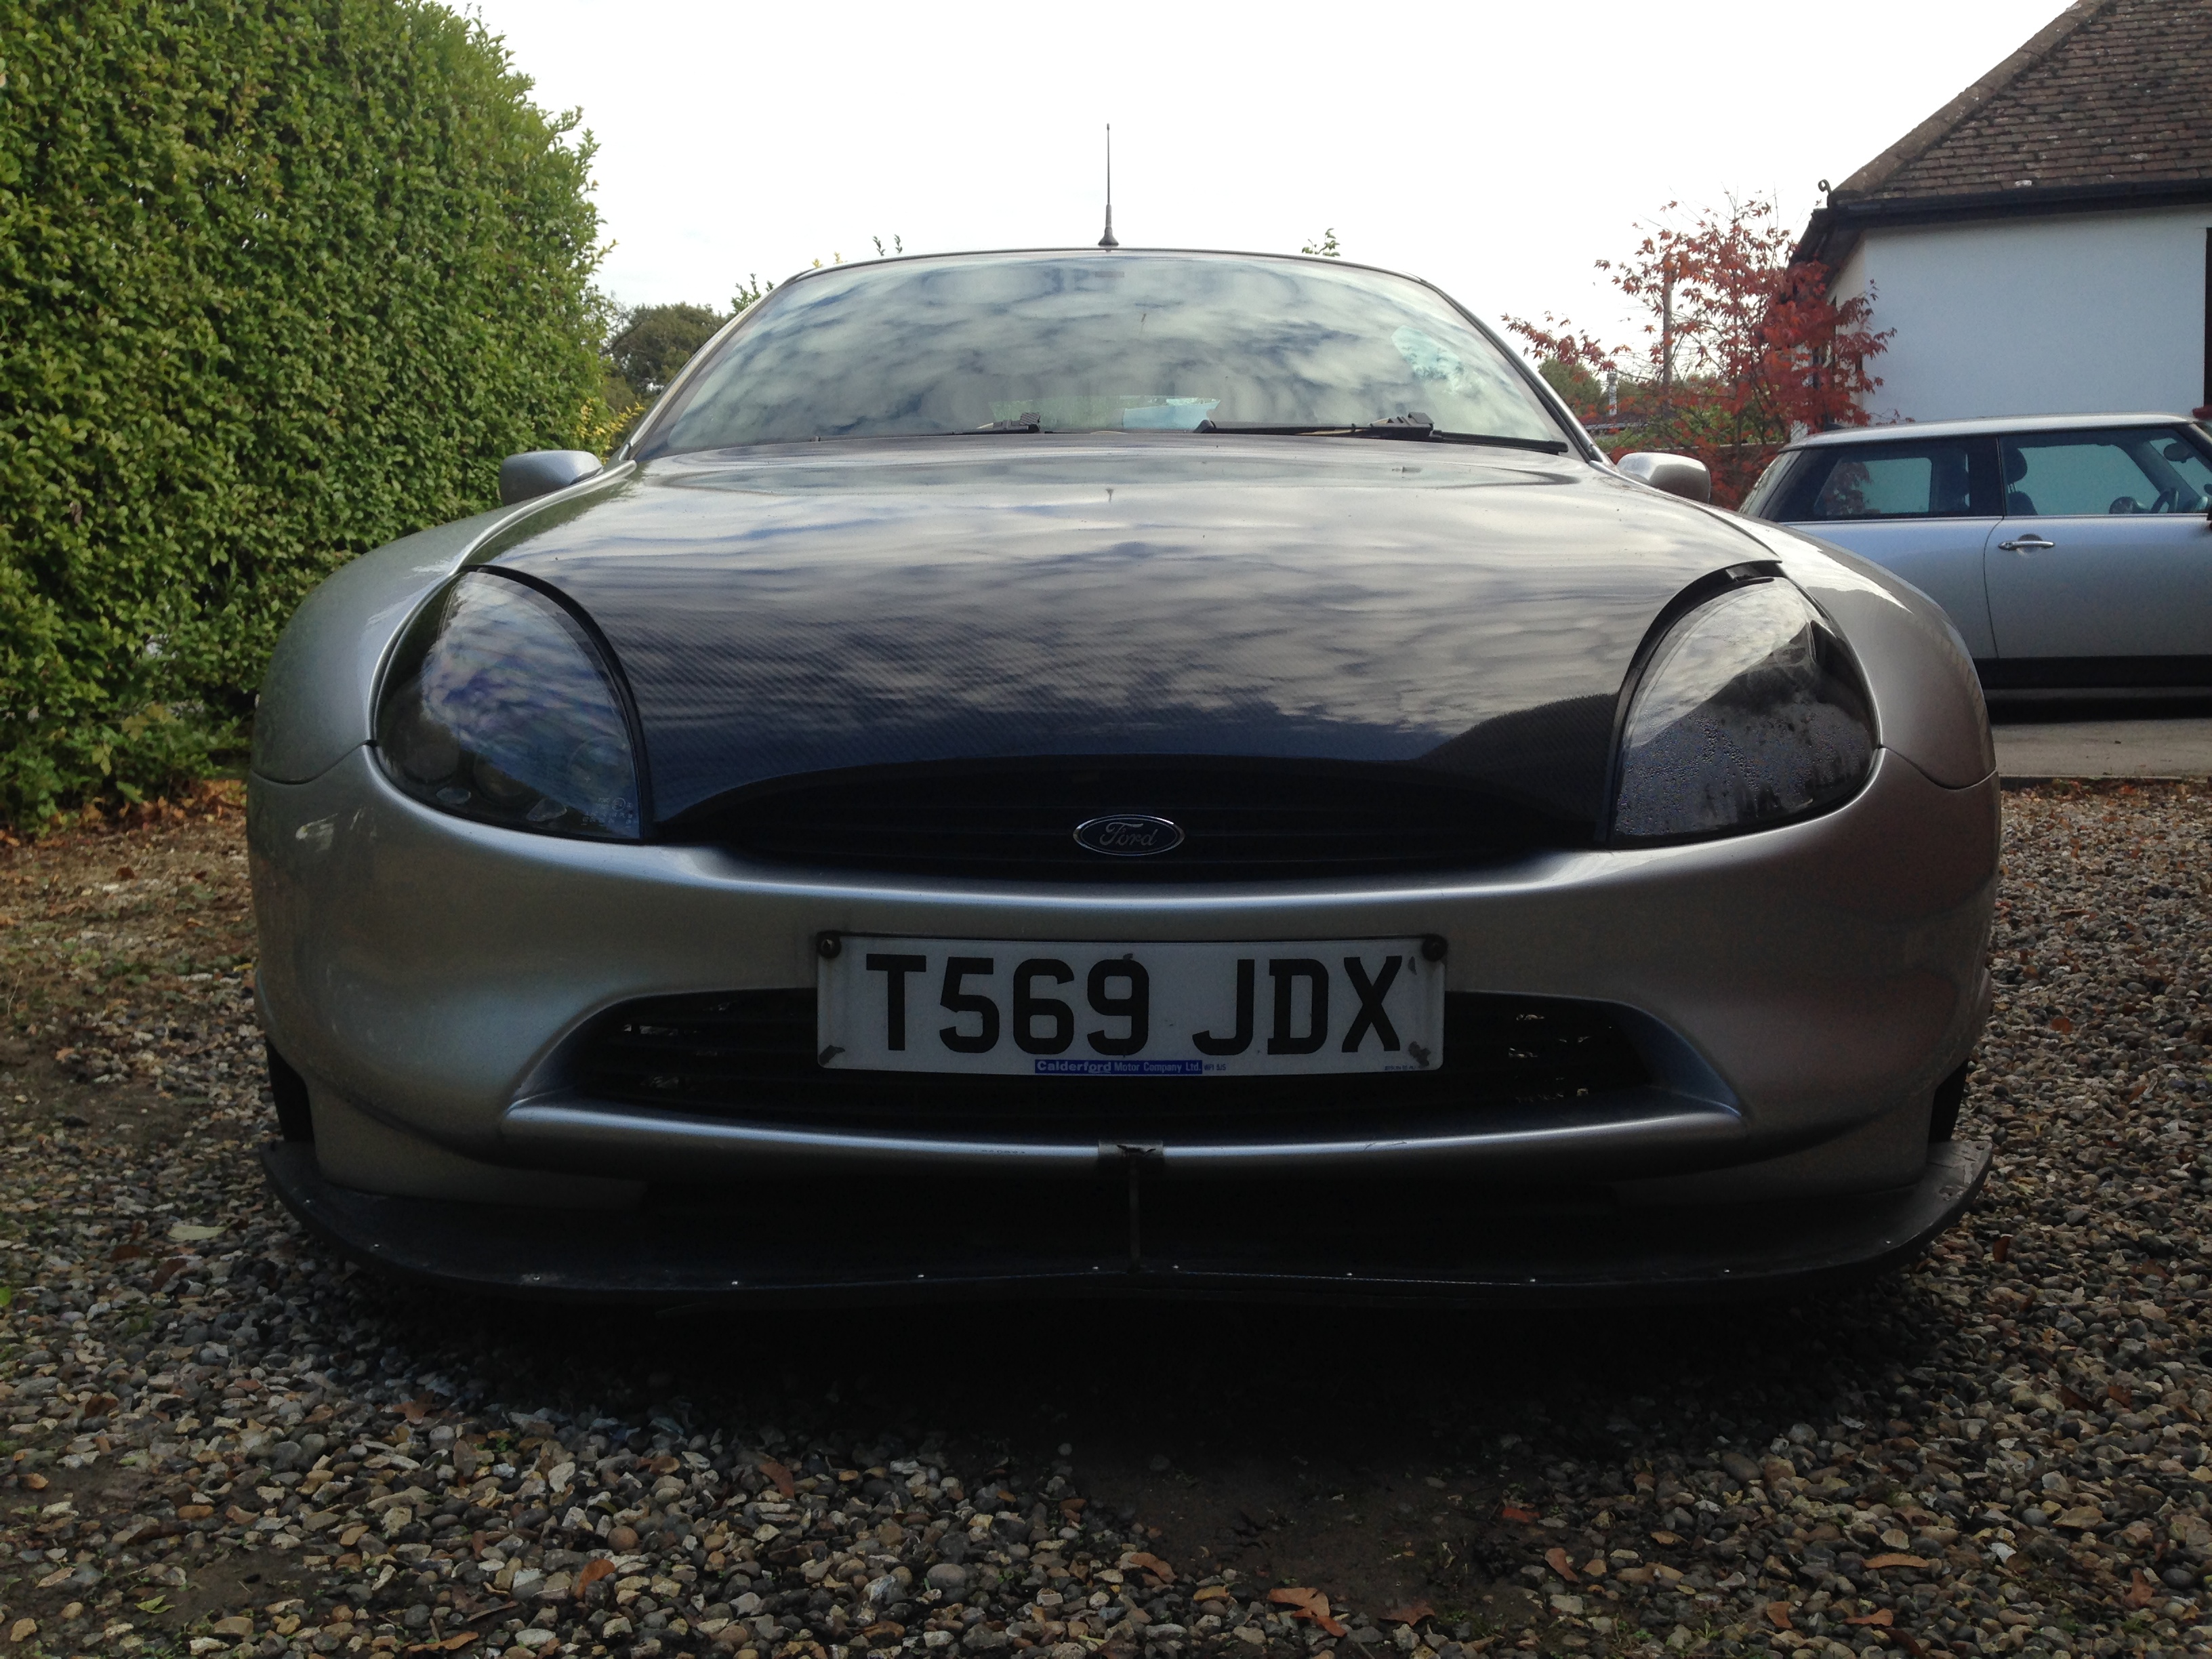
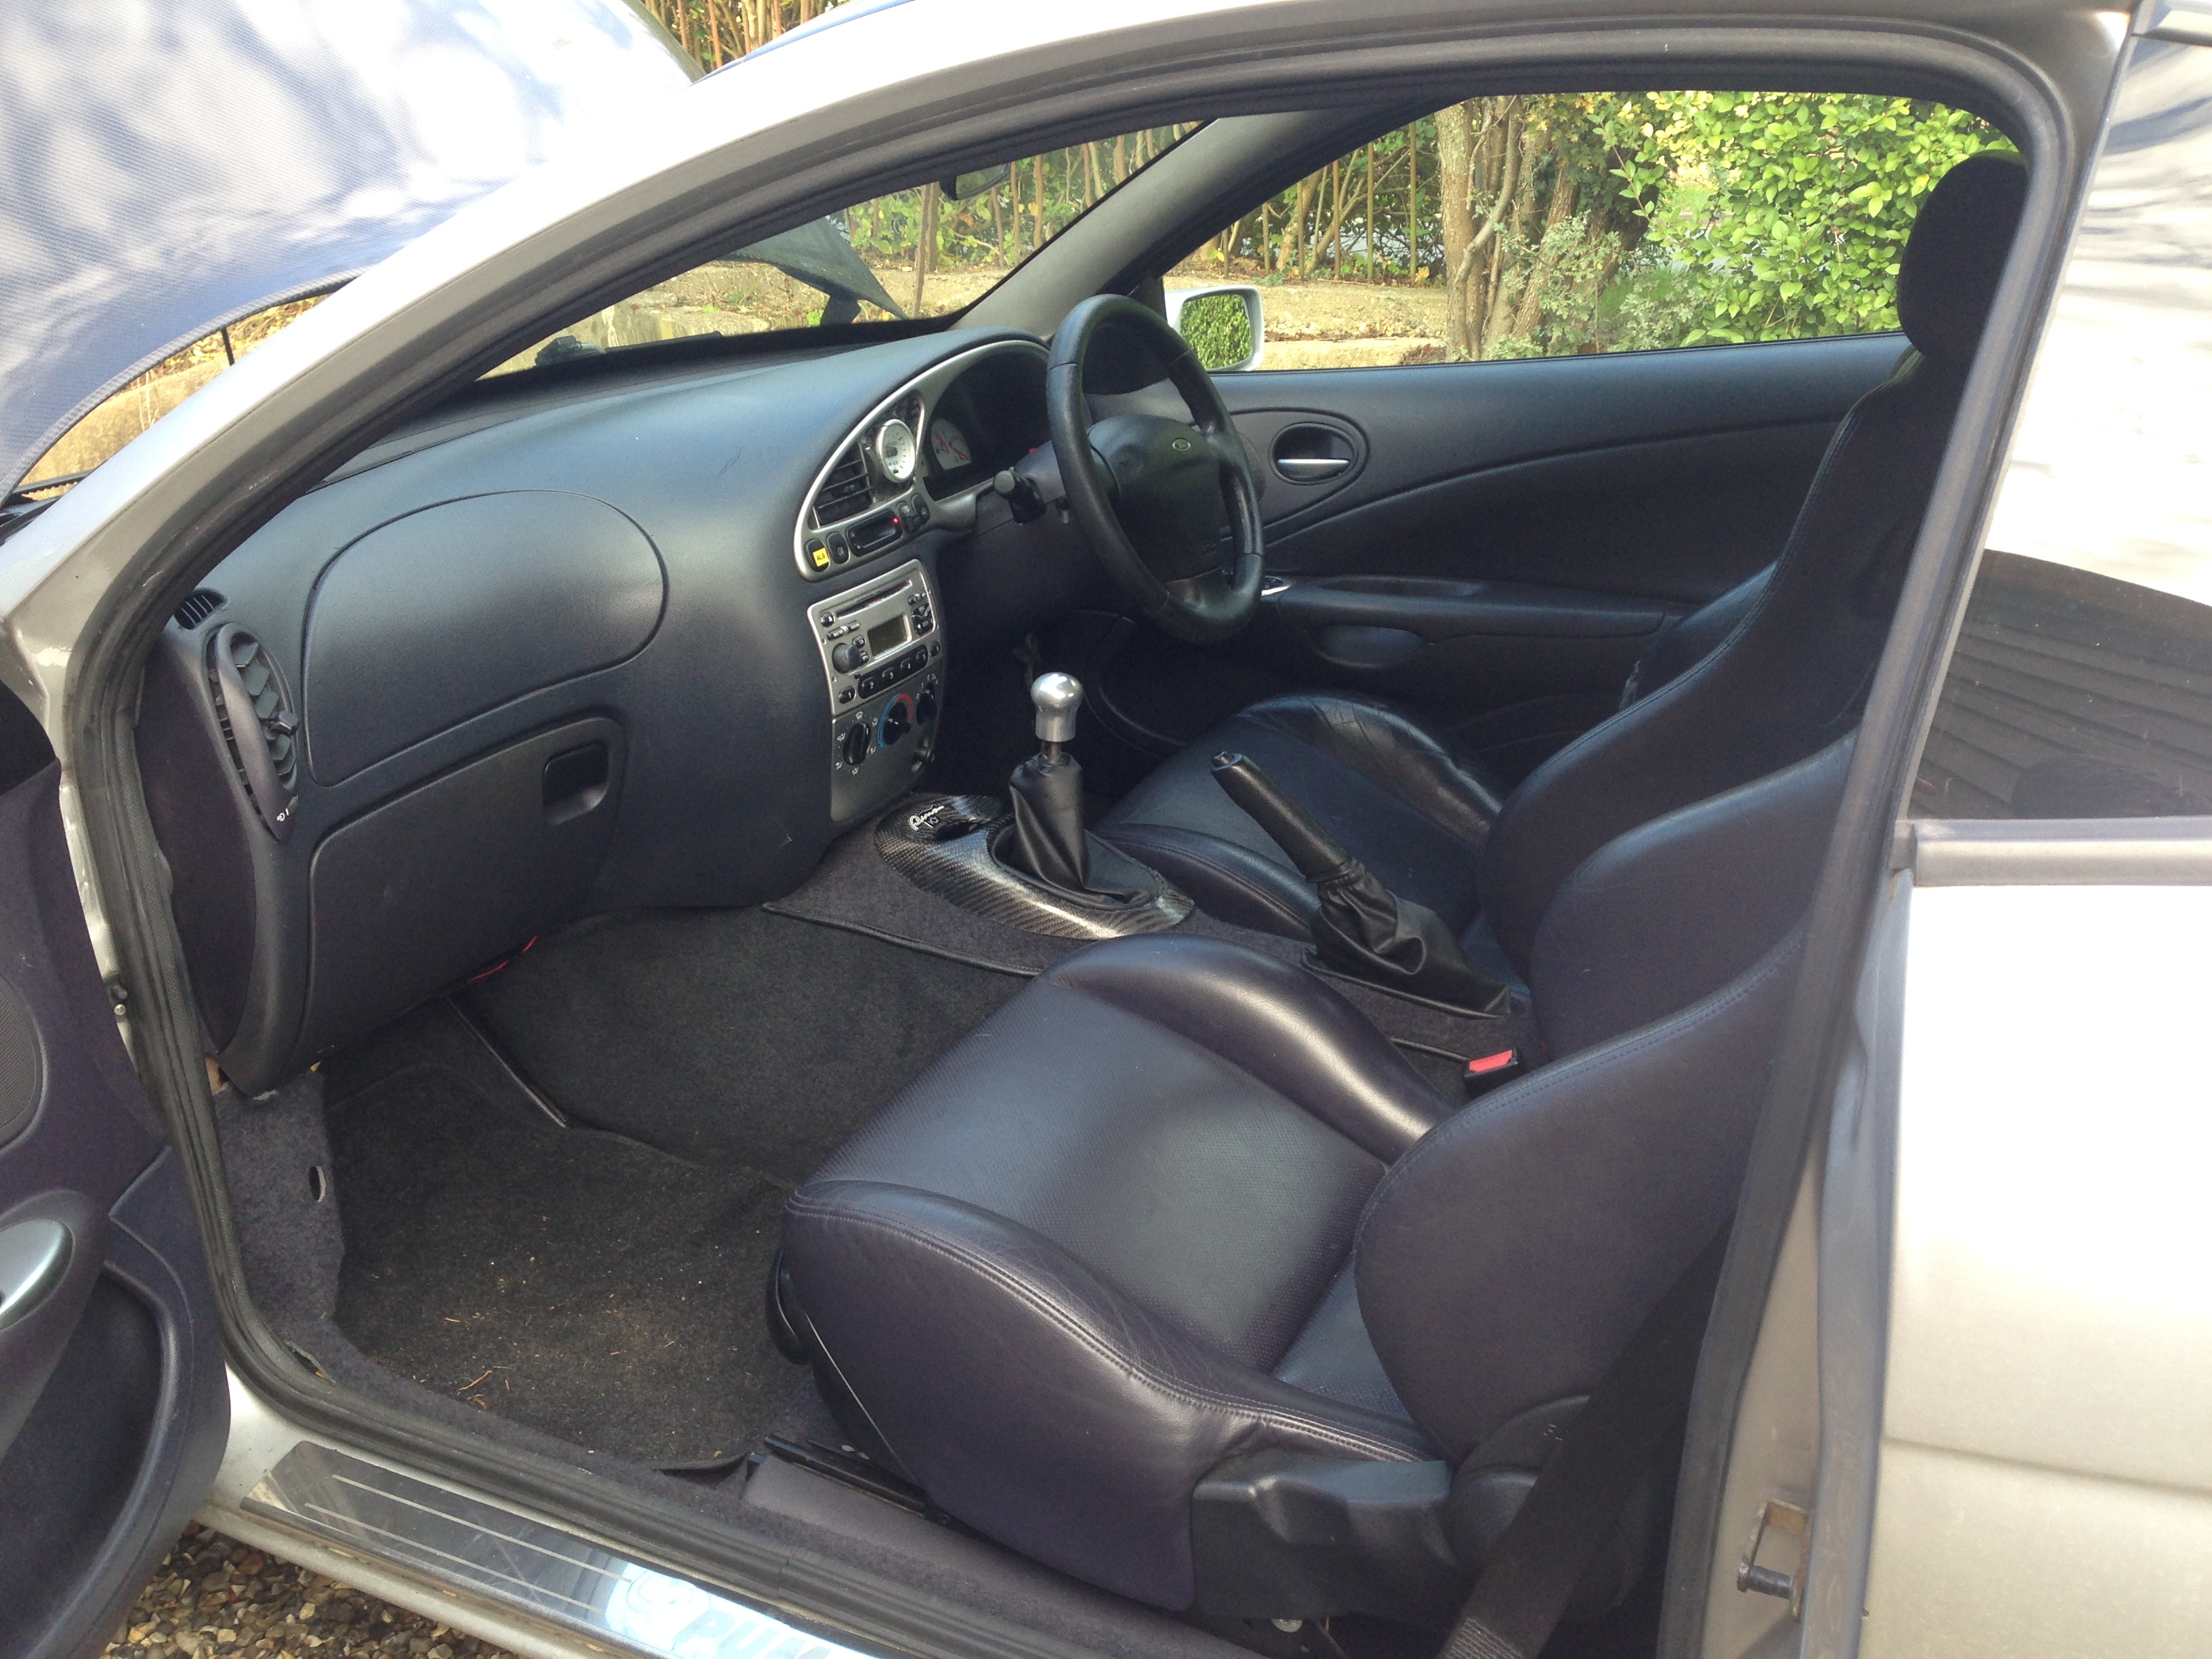
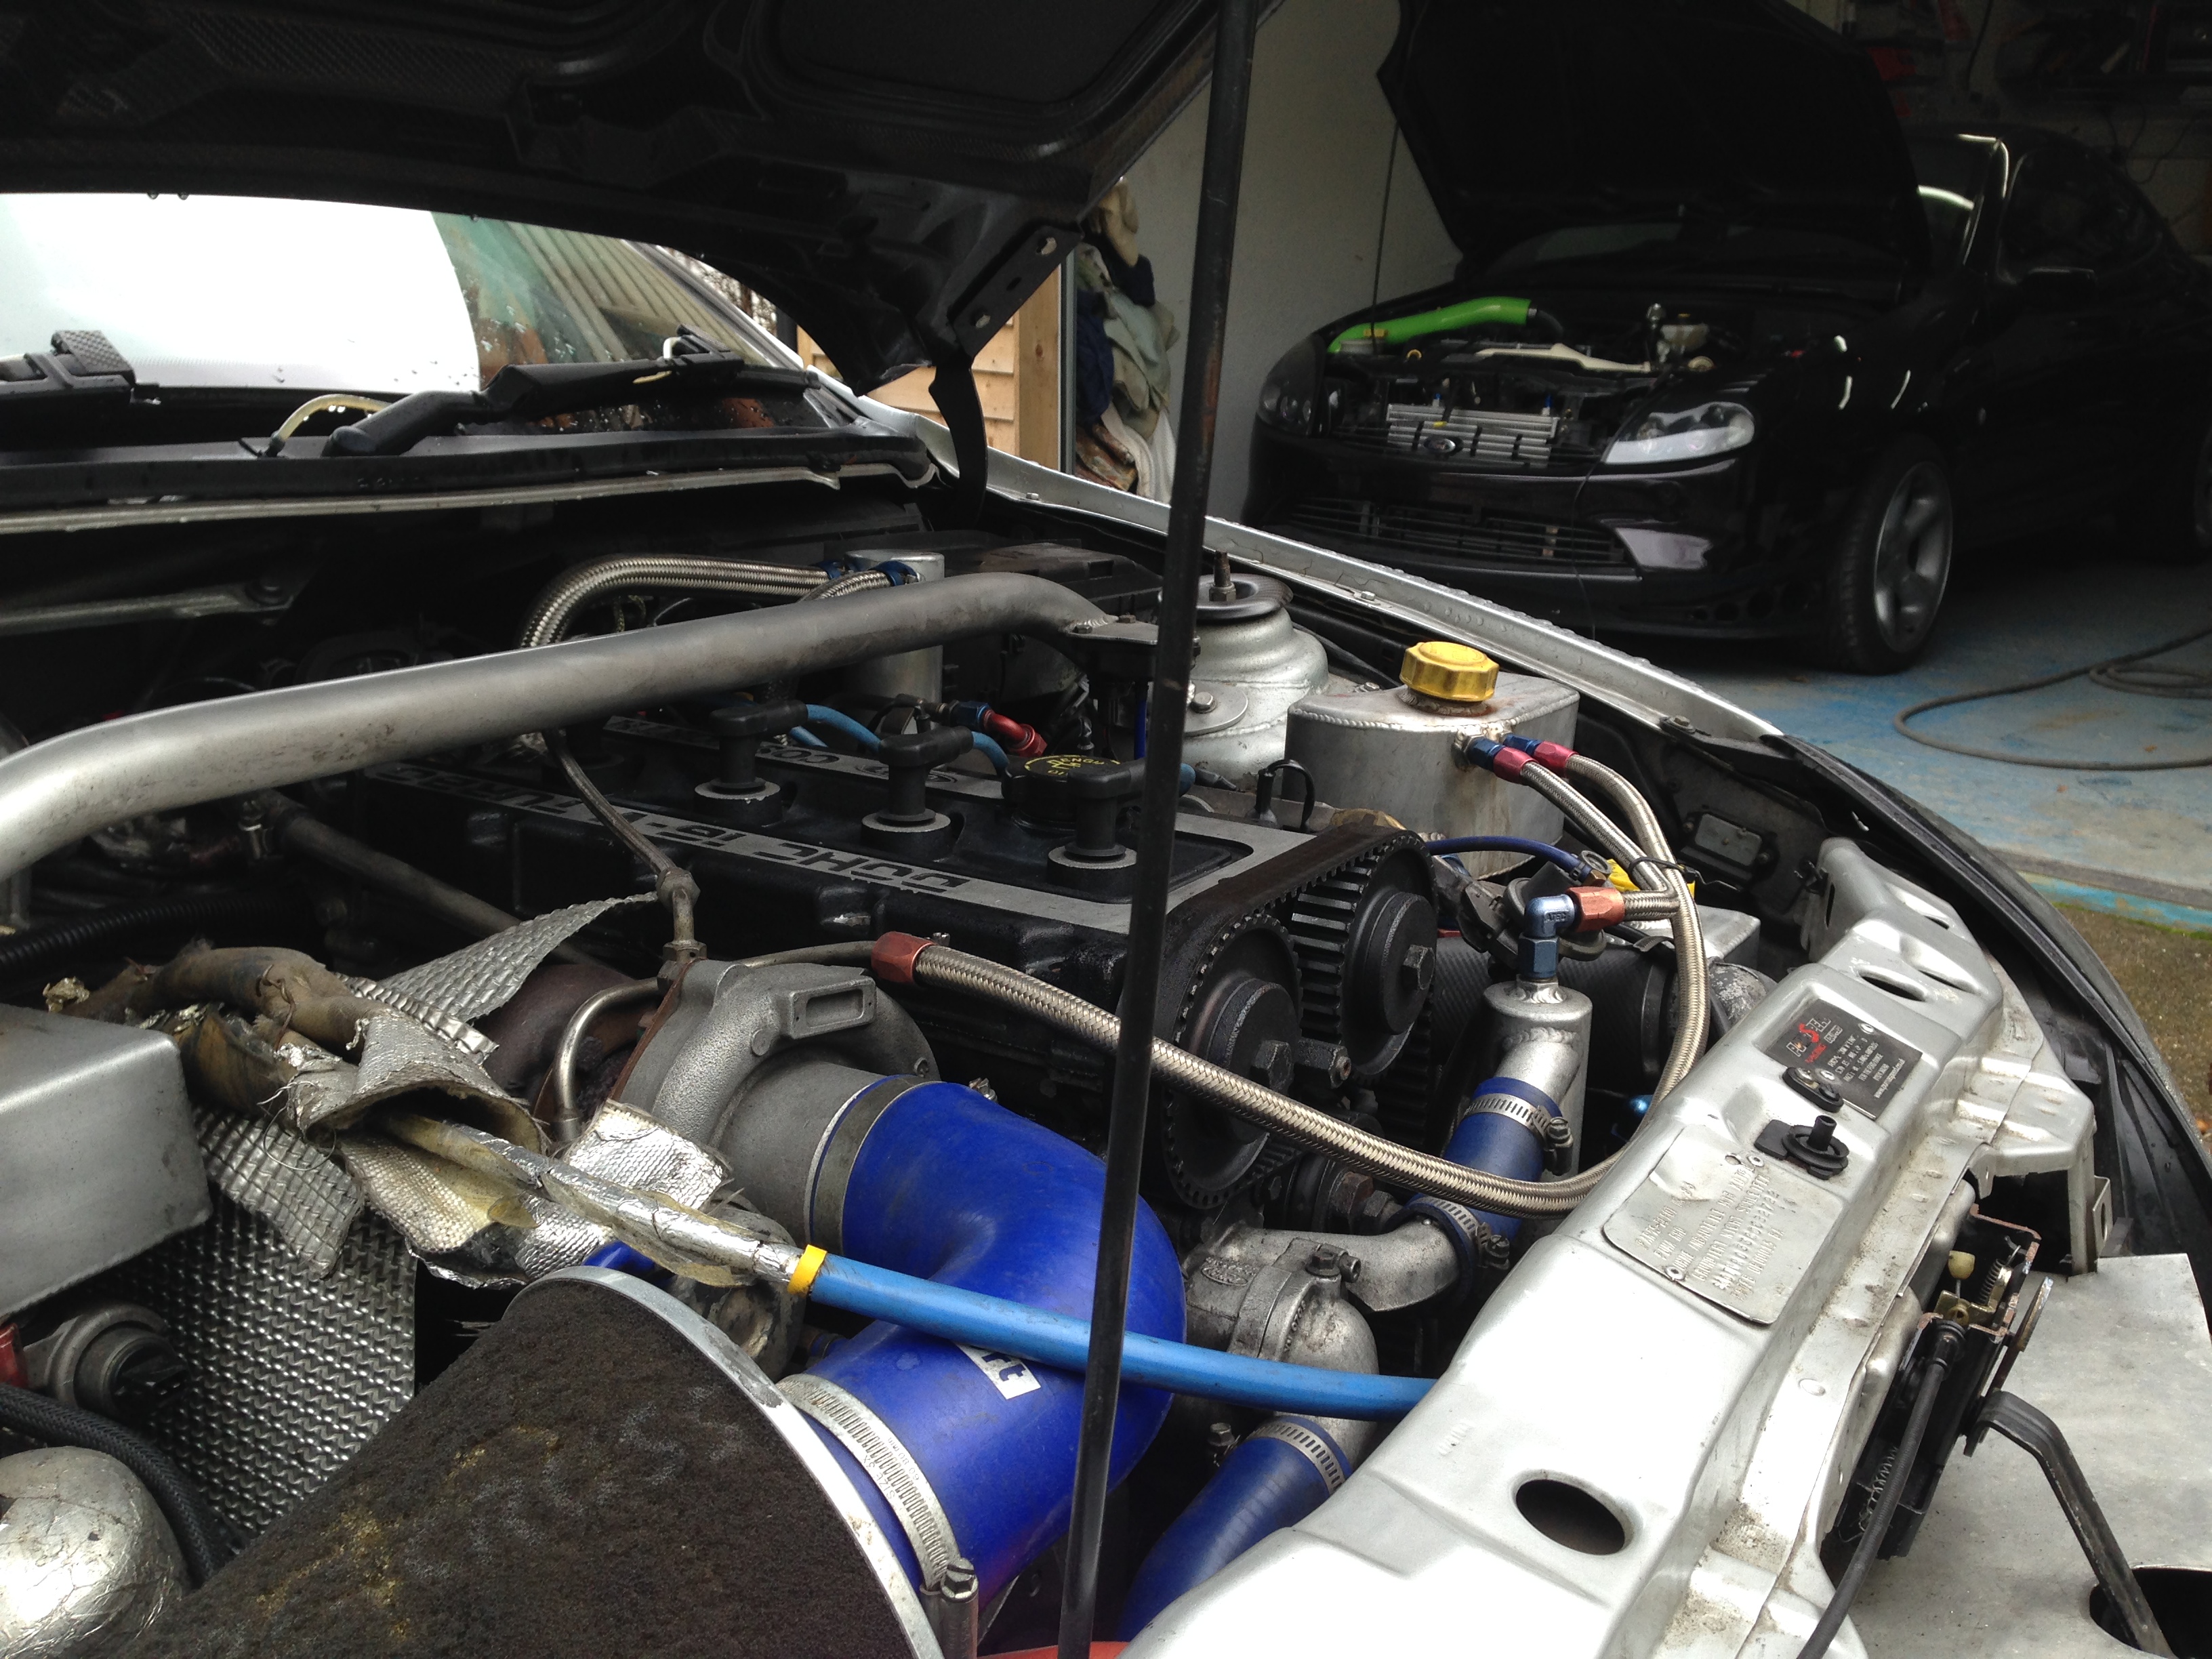
Lastly a photo with brother Ben's Puma in the background
Left the car for a few days and noticed that it was full of condensation.. It had been raining so I knew I had a leak somewhere which turned out to be a pretty bad one..
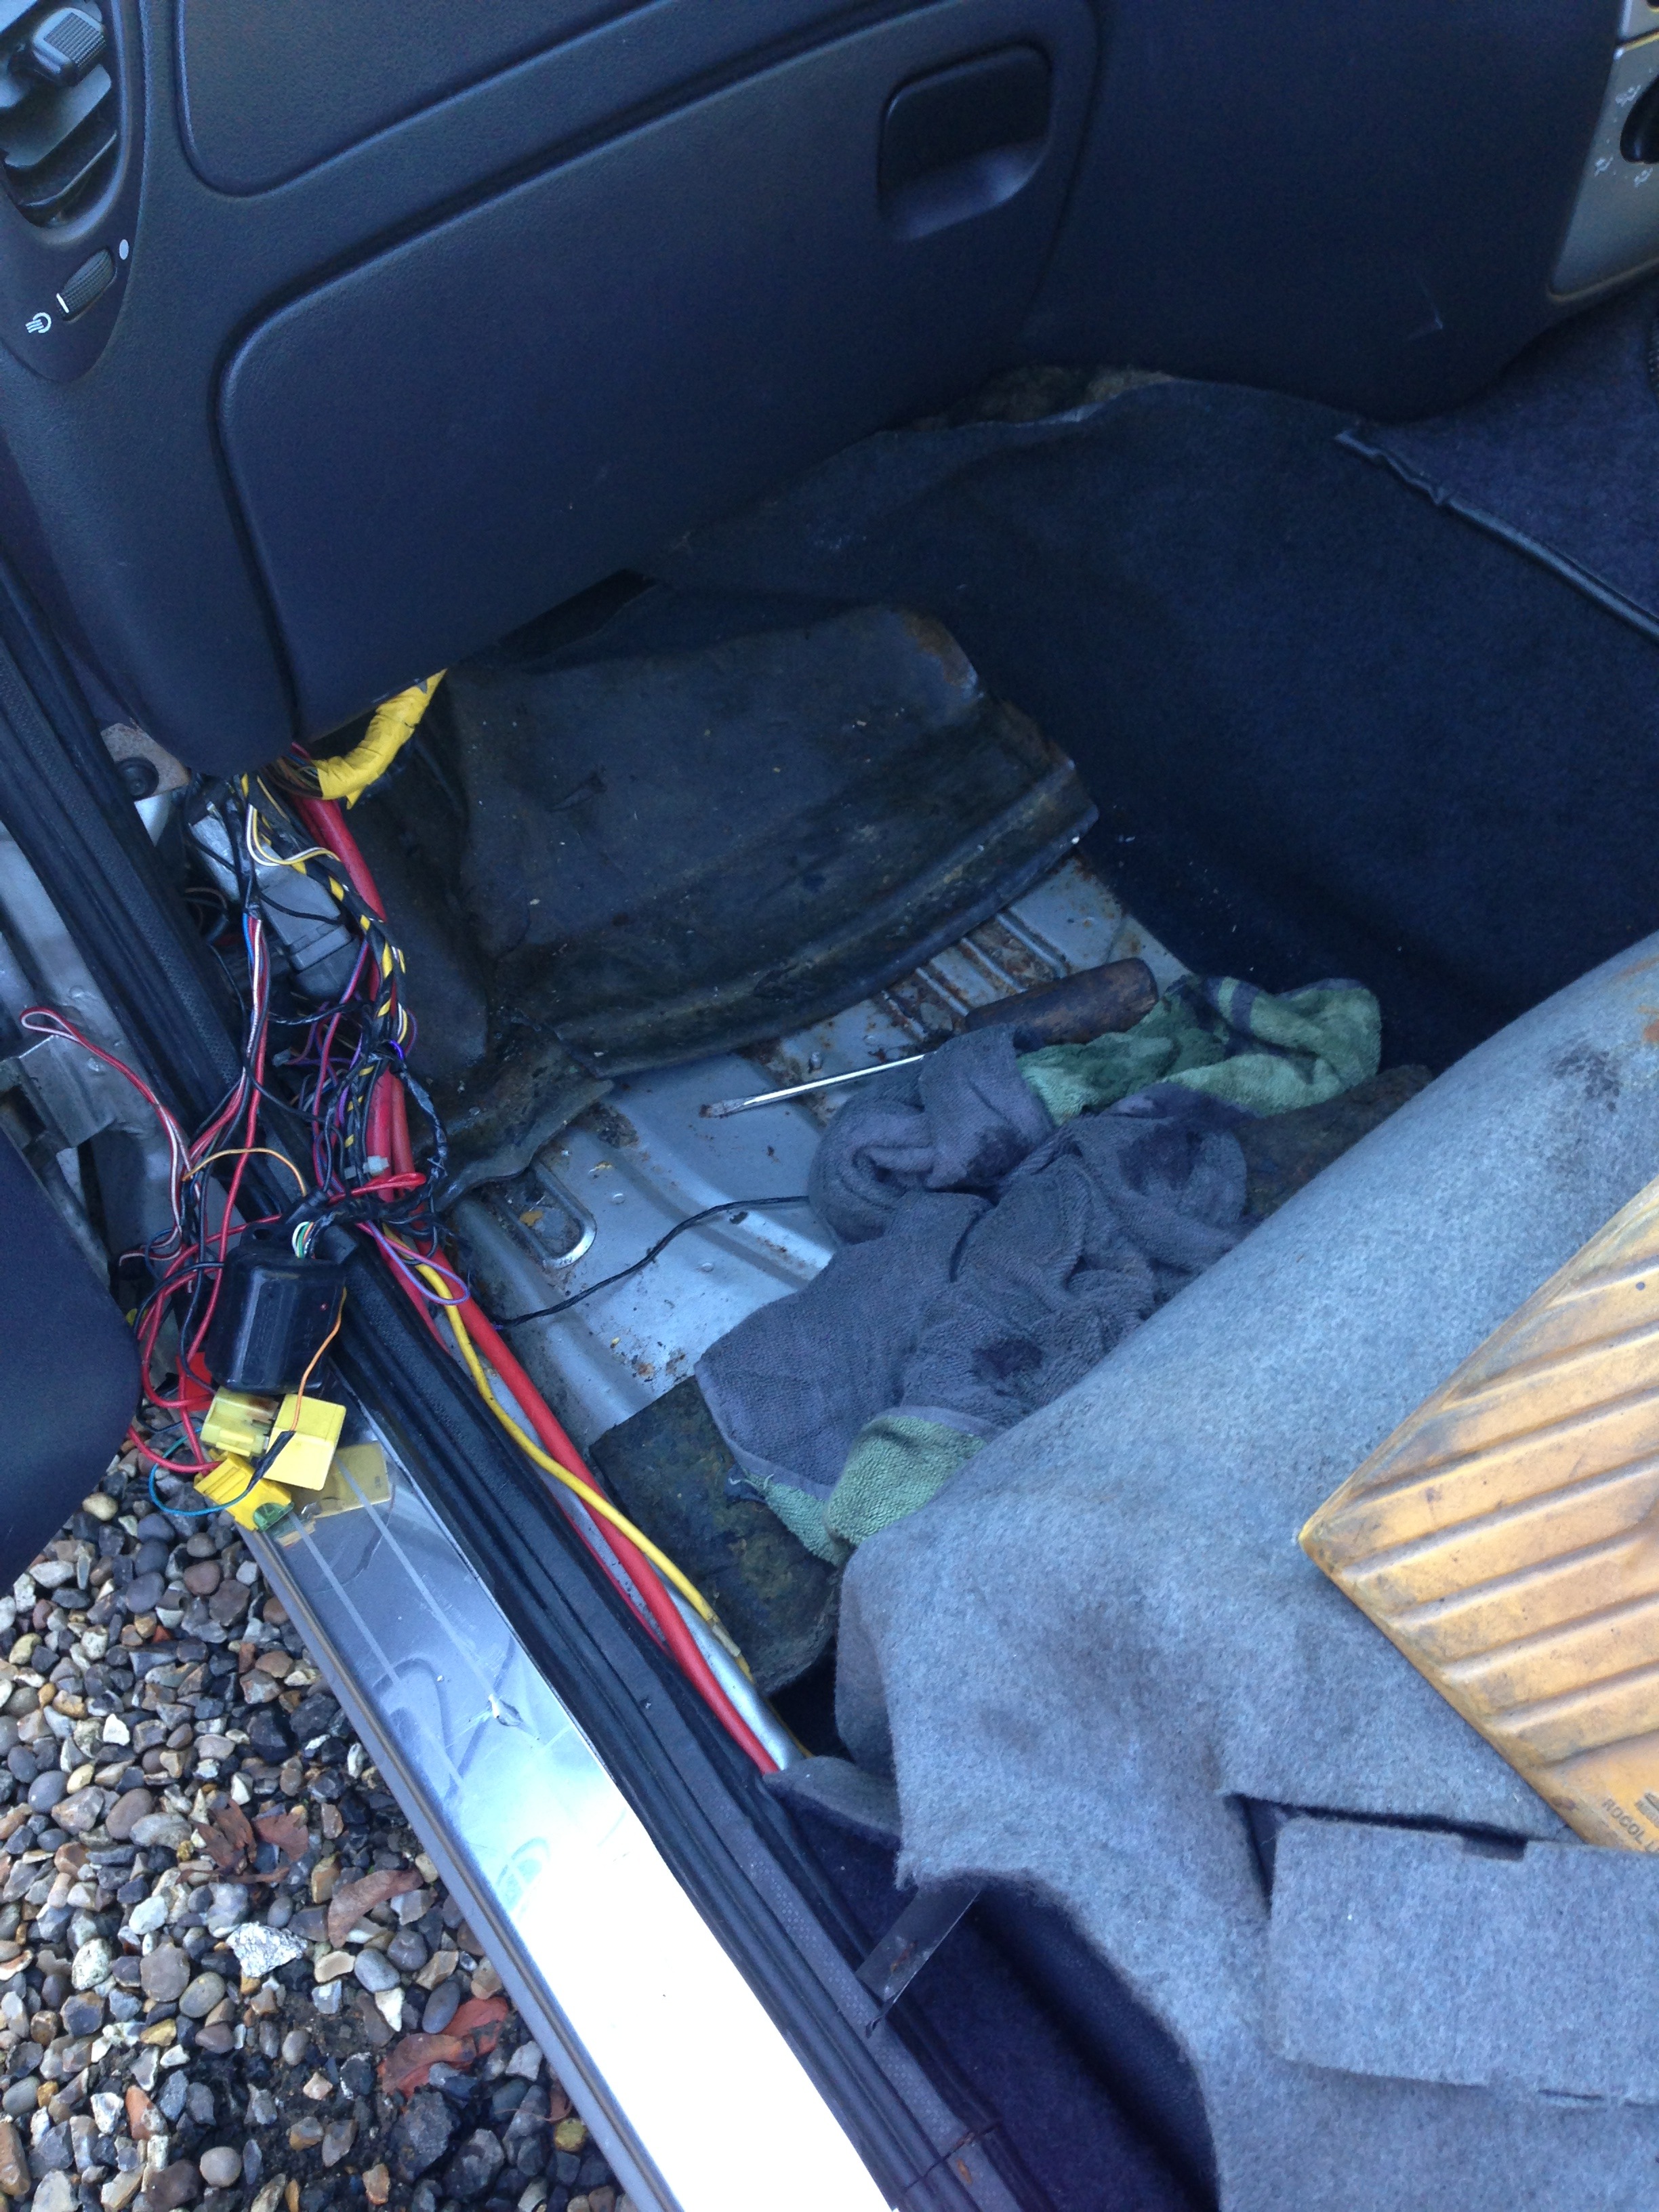
Someone had butchered the bulkhead grommet that allows the ECU wiring to run into the engine bay, so badly that my footwell was full of water.. I knew this was going to need to be replaced but the only way to do it using the standard grommet was to get another from the scrap yard and feed a new loom through it.. At this stage this was put on hold and the release bearing was the next aspect to tackle..
For those that don't know it too well, it is a puma with the S1600 kit and converted to run the 4x4 Escort Cosworth engine and running gear. The shell I am lead to believe was converted by a company called DJM and the rest of it was built by Pumaspeed.
It had covered nearly 20,000 miles by the time I bought a little over a year ago now.
So on to the photos, to date I have over 400 photos of work I have done to the car and aspects of it that I'm trying to photo so I have something to go back over. I will share all the interesting ones as some are quite repetitive!
So this is how the car arrived at home, it was dry when it turned up and then quickly rained an hour or so later which showed the cars first gremlins..


I noticed after it had rained for an hour or so that there was a rather large oil slick appearing running down the driveway.. I knew the car was a bit oily but wasn't quite expecting this amount! In total by the time the rain had stopped the patch was half the size of the car out to one side so I knew then I needed to do something about it.
I took it for my first drive a few days later and over a couple of days covered around 20-30 miles in it. Bit clunky and very noisy but as I was expecting to be honest.. I was told about the release bearing whining but after my first few journeys it was something I knew I had to get fixed.. The clutch pedal was awful and even for a cable clutch it was bad so had a look into this..
Found these..

These were wedged in between the rubber stop and plastic housing case on the bulkhead around the cable.. The idea being I guess to take up some slack on the cable but in doing so made it stiff and feel horrible.. With them removed and the self adjust quadrant on the clutch pedal allowed to adjust the cable feels better, although the pedal still flaps a bit before it starts operating the cable. Eventually I will move it onto a hydraulic clutch and put the standard puma pedal box back in.
At this point with one little task investigated I had an opportunity to take some better pics of the car


Lastly a photo with brother Ben's Puma in the background

Left the car for a few days and noticed that it was full of condensation.. It had been raining so I knew I had a leak somewhere which turned out to be a pretty bad one..

Someone had butchered the bulkhead grommet that allows the ECU wiring to run into the engine bay, so badly that my footwell was full of water.. I knew this was going to need to be replaced but the only way to do it using the standard grommet was to get another from the scrap yard and feed a new loom through it.. At this stage this was put on hold and the release bearing was the next aspect to tackle..
 25-10-2015, 06:22 PM
#2
PassionFord Regular
Thread Starter
As I started working on this car it was quite a steep learning curve for me, for the past 12 years or so all I had messed about with was front wheel drive cars and so my knowledge was limited when it came to rear wheel drive and 4x4. I knew all the basics in terms of how they worked and what everything did, but the mechanical detail I was lacking and so perhaps missed some bits earlier on that I really should have picked up on!
Needless to say it was all experiences that has given me a much better understanding of how this particular car has been built and what will improve it.
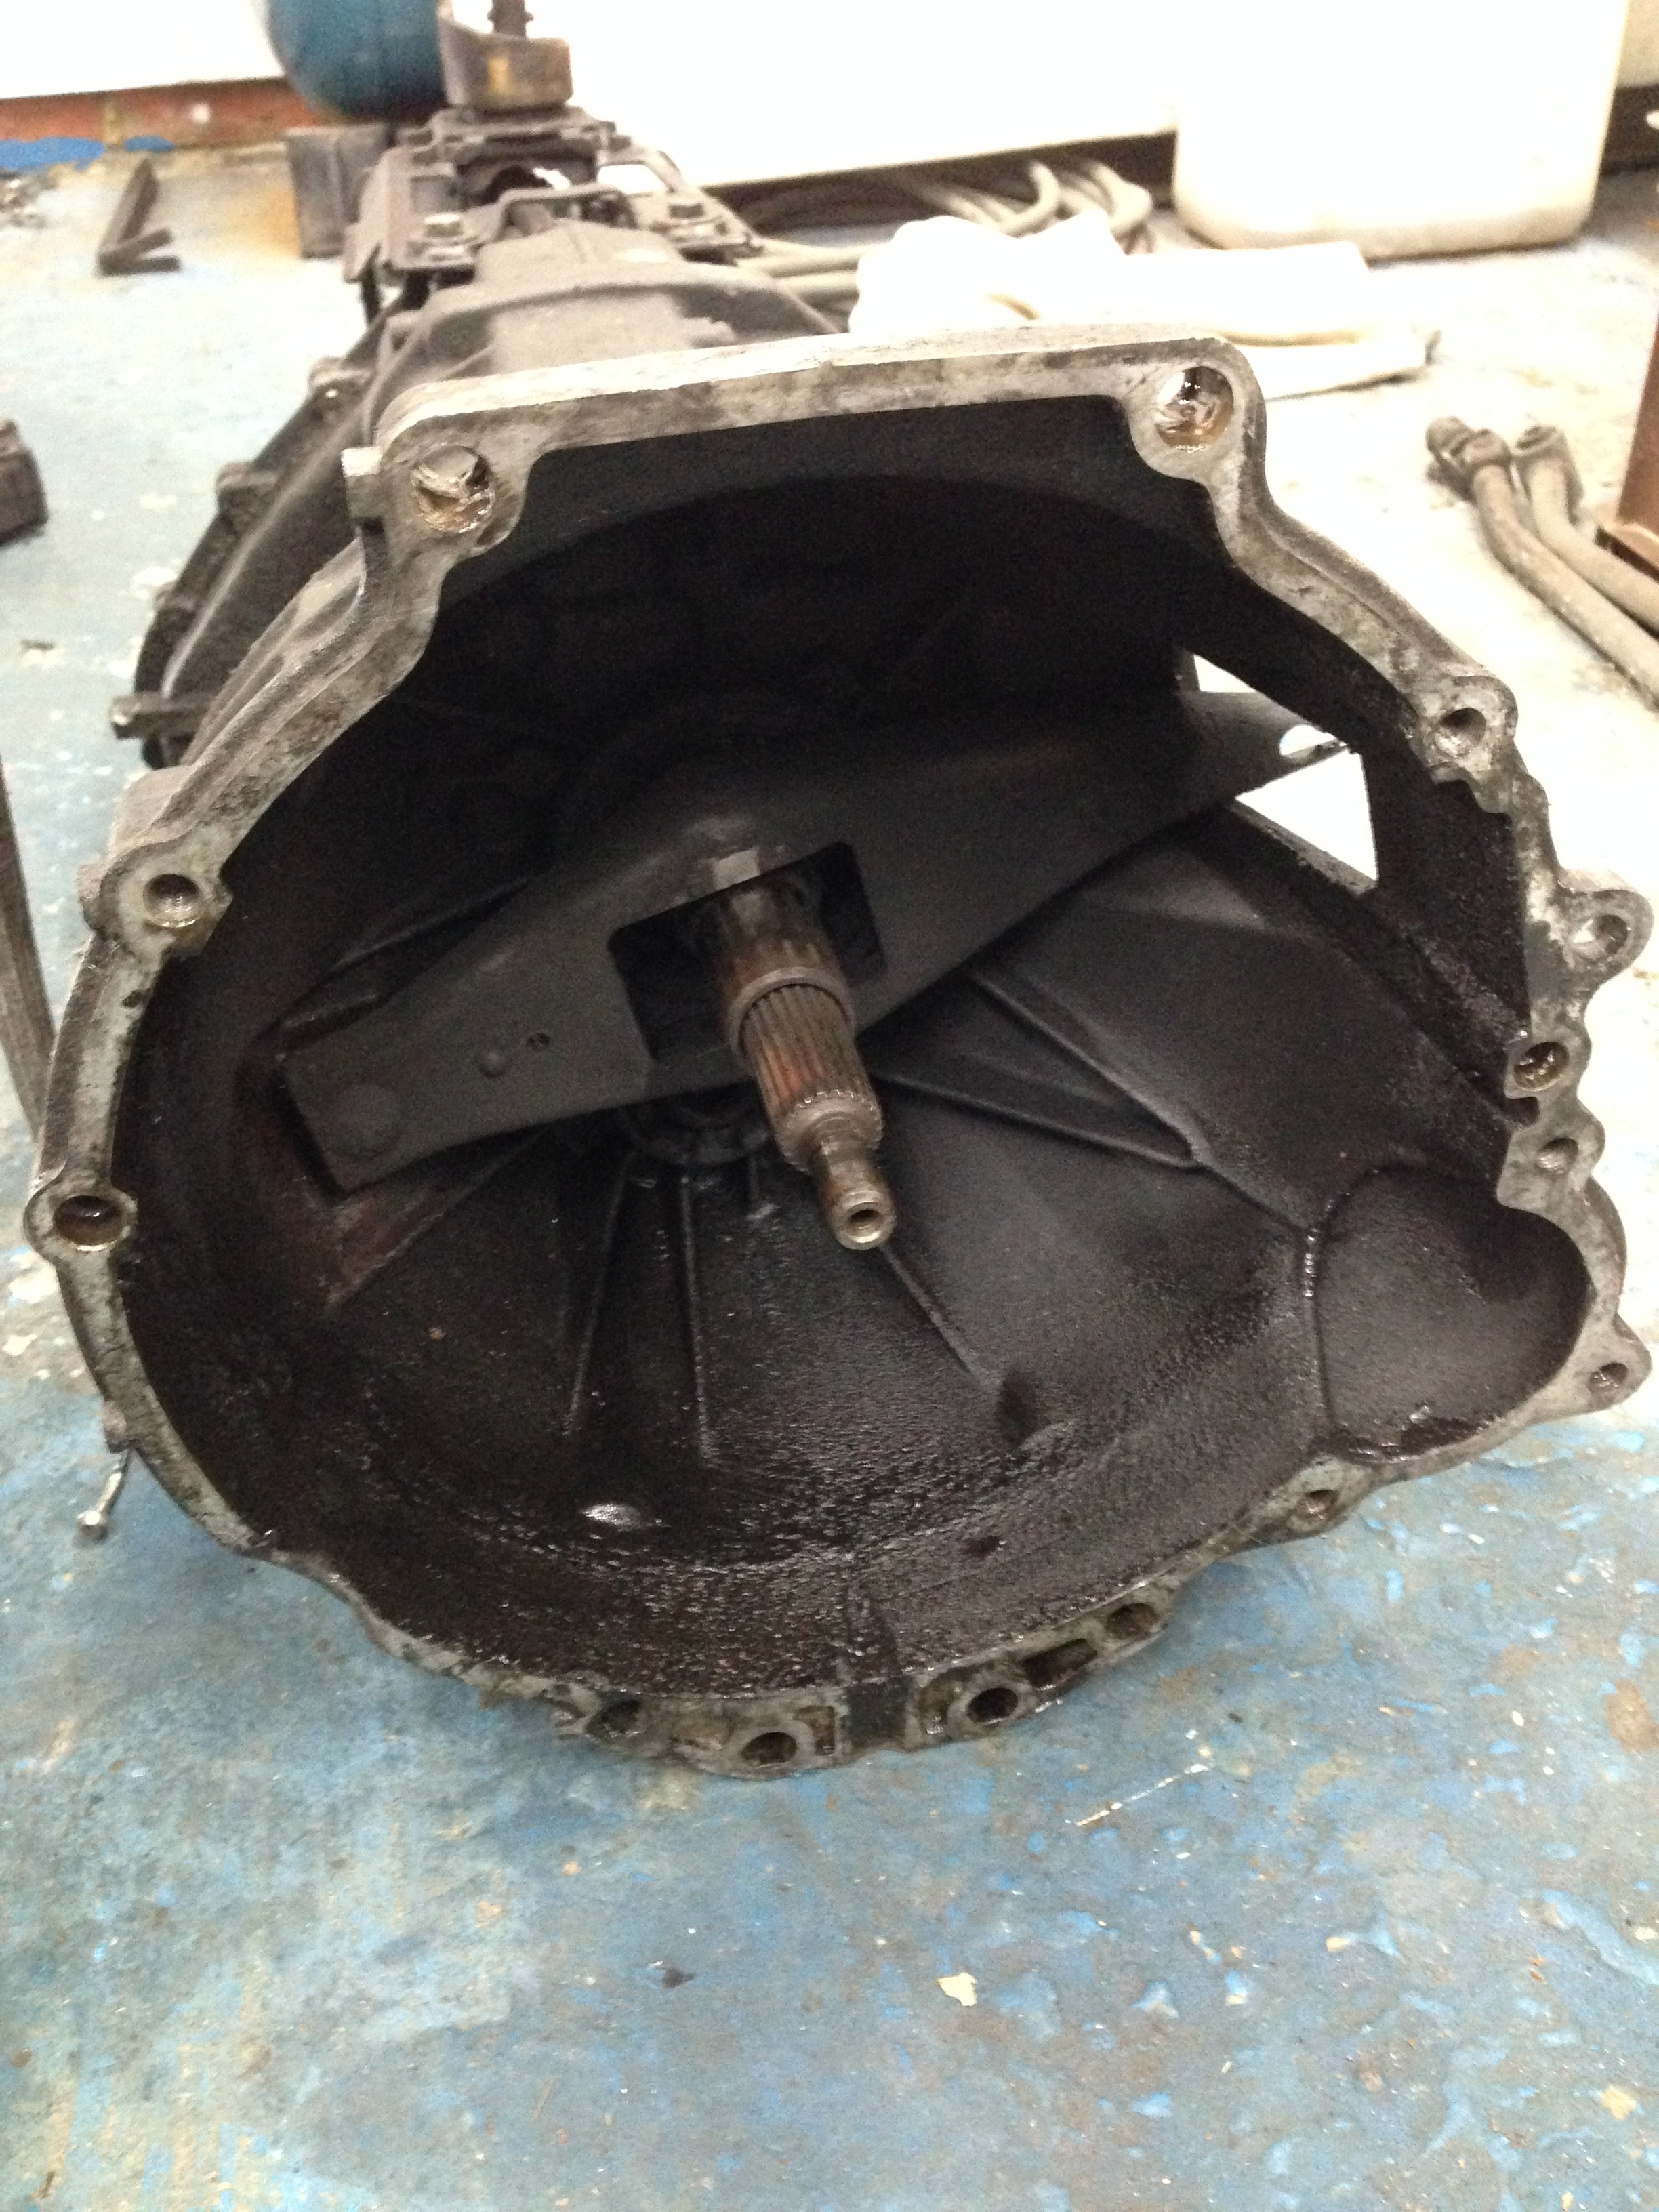
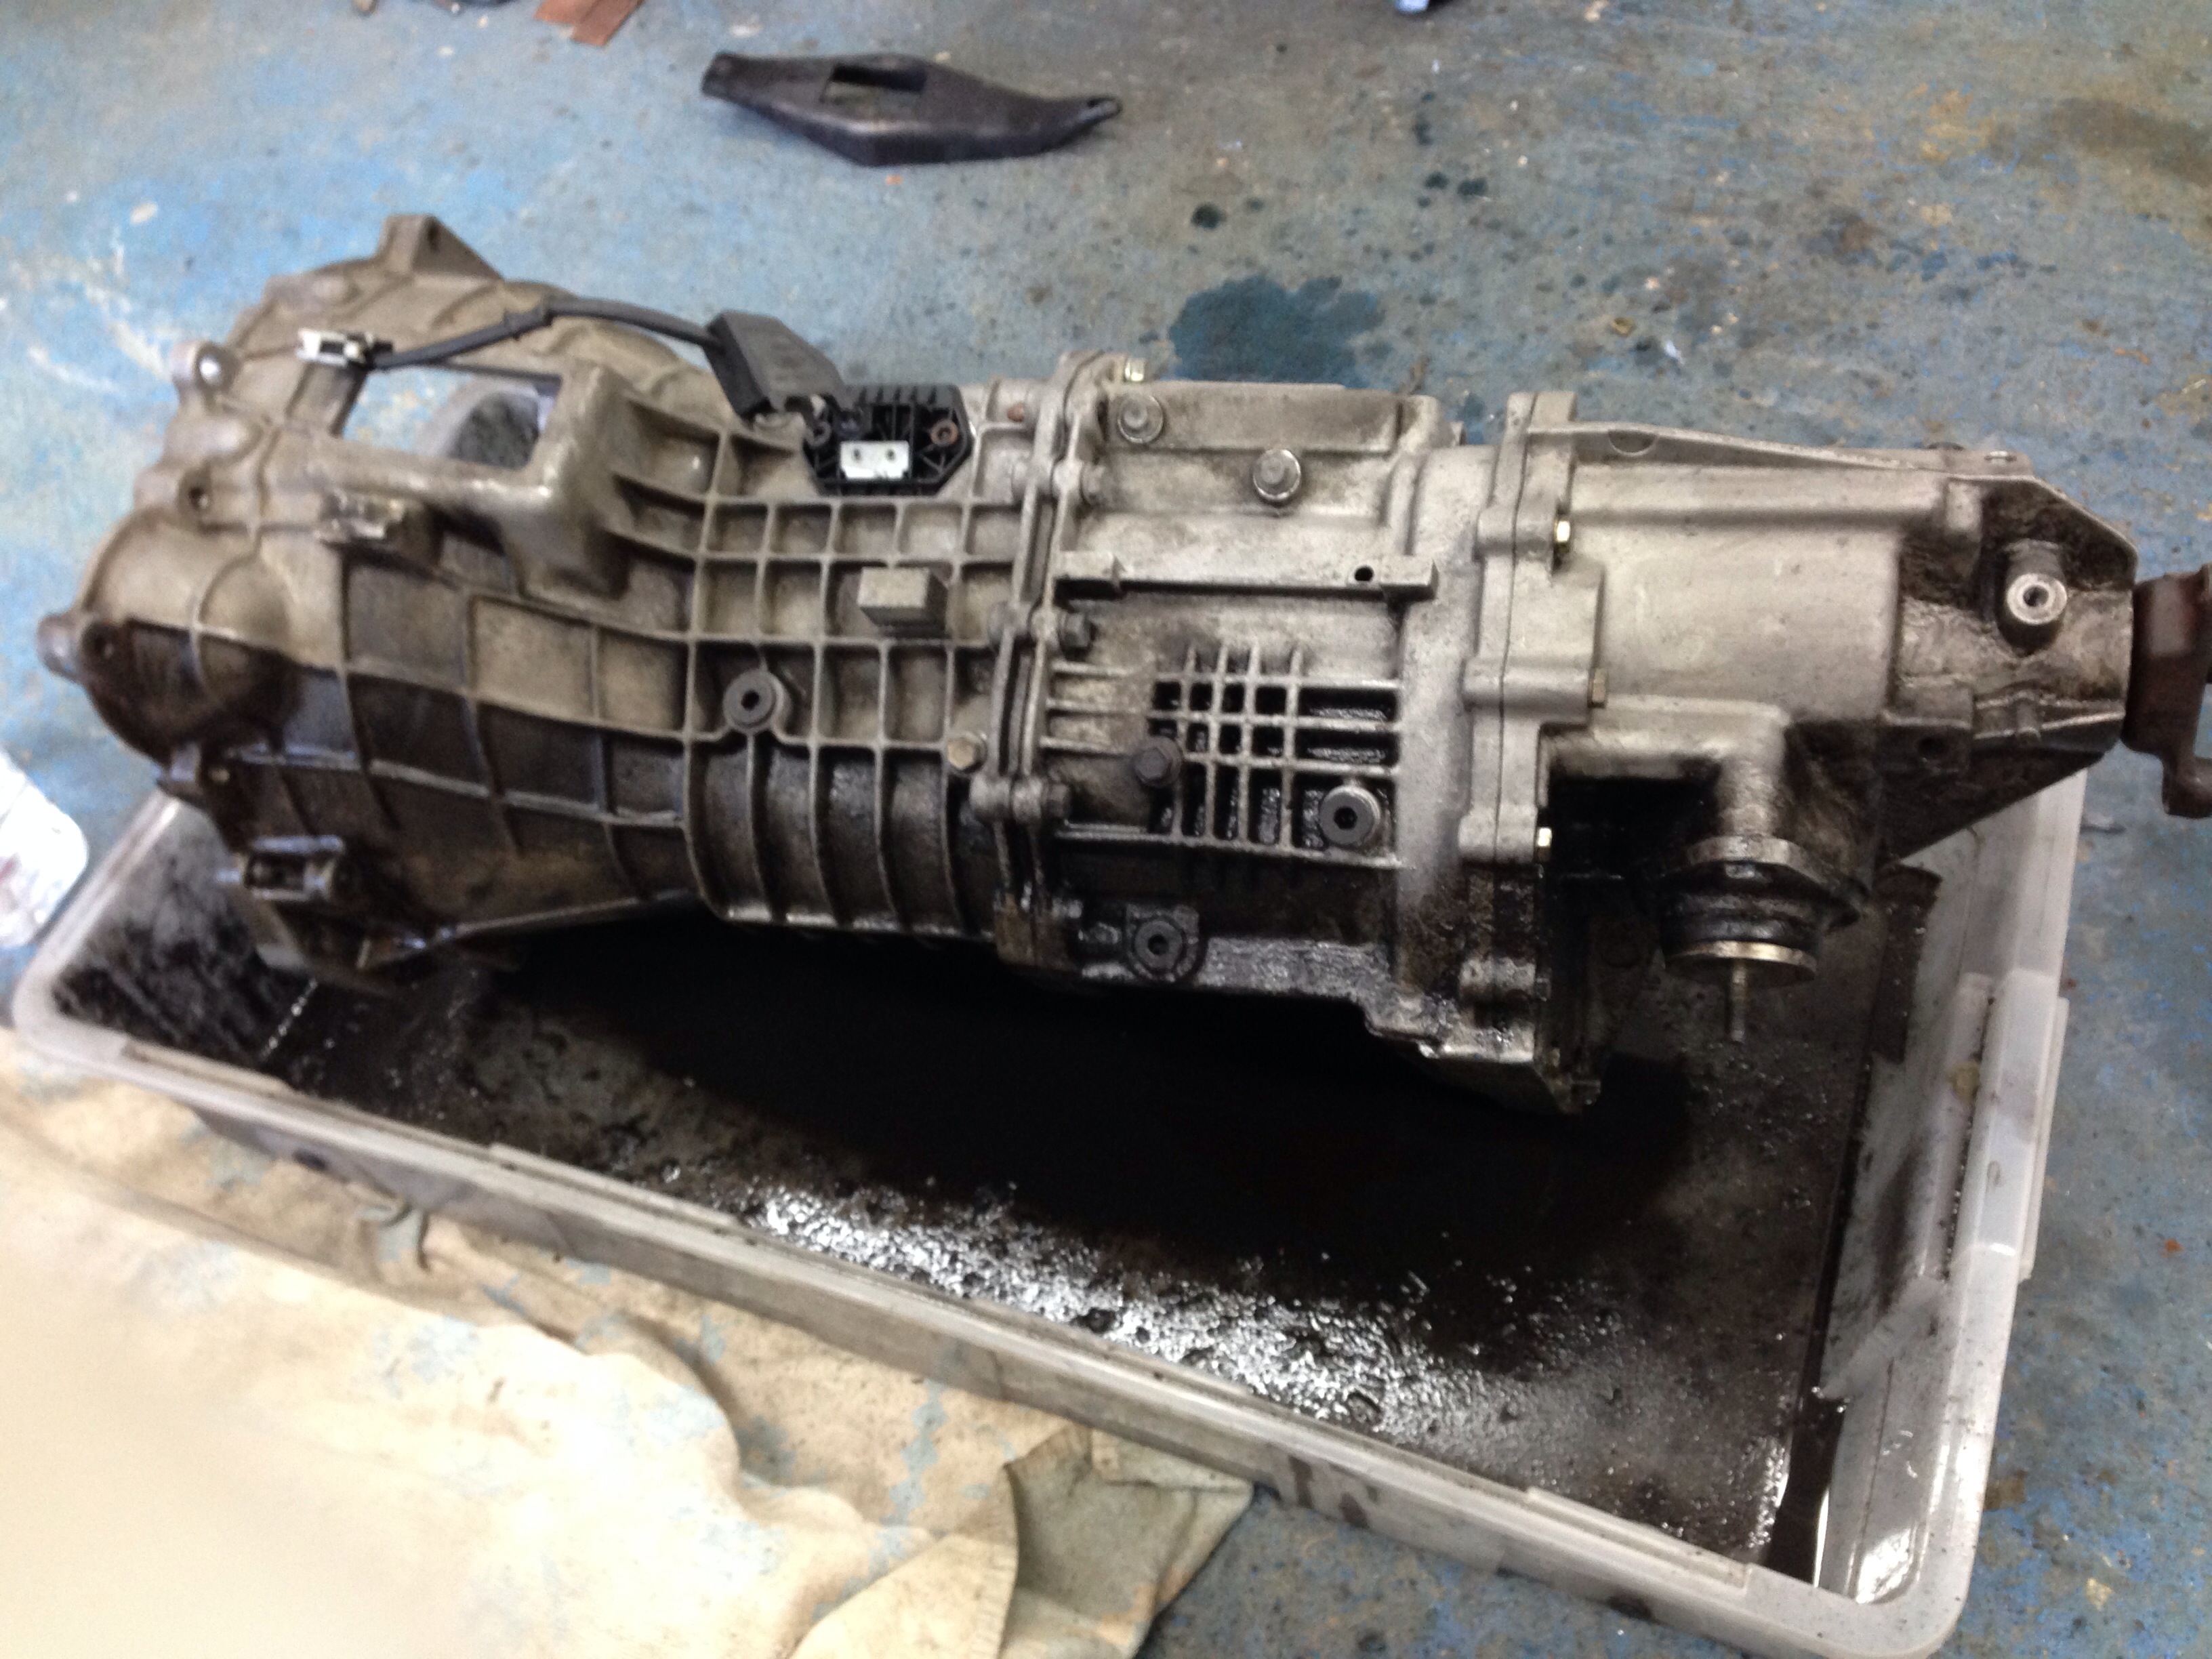
On to the photos.. So first up was to get the gearbox out to replace the release bearing which was making an awful noise! Gearbox out
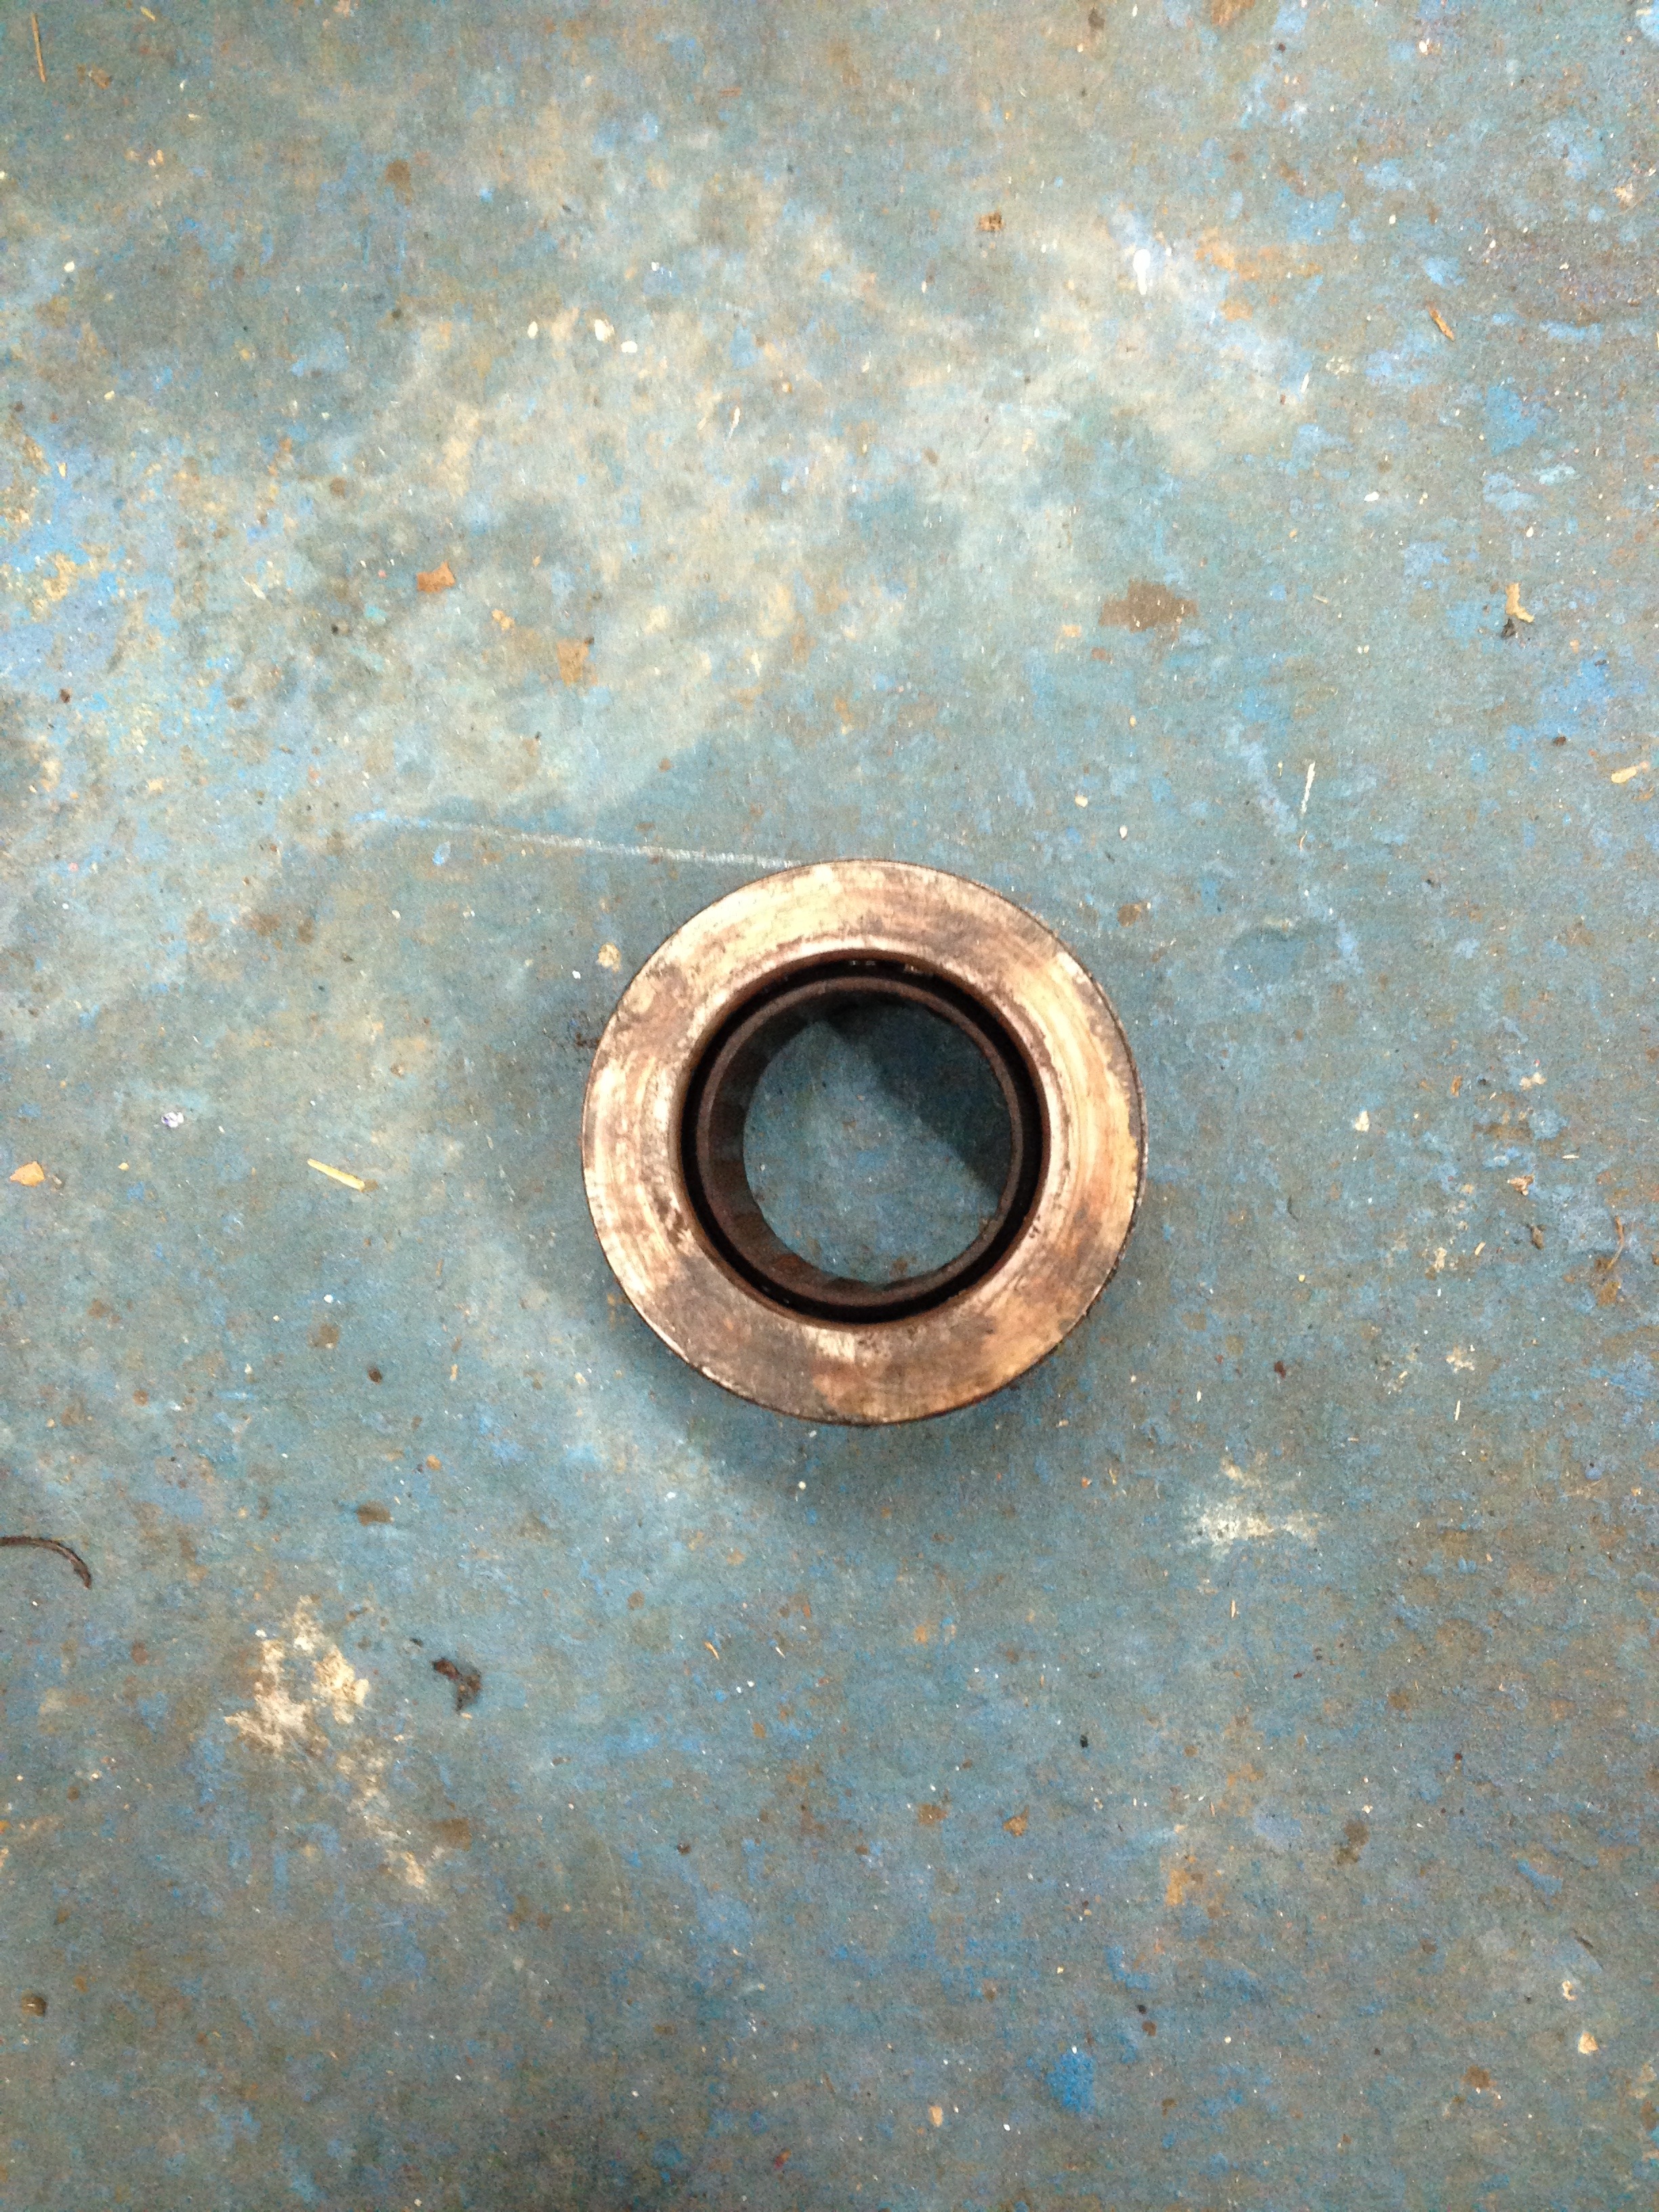
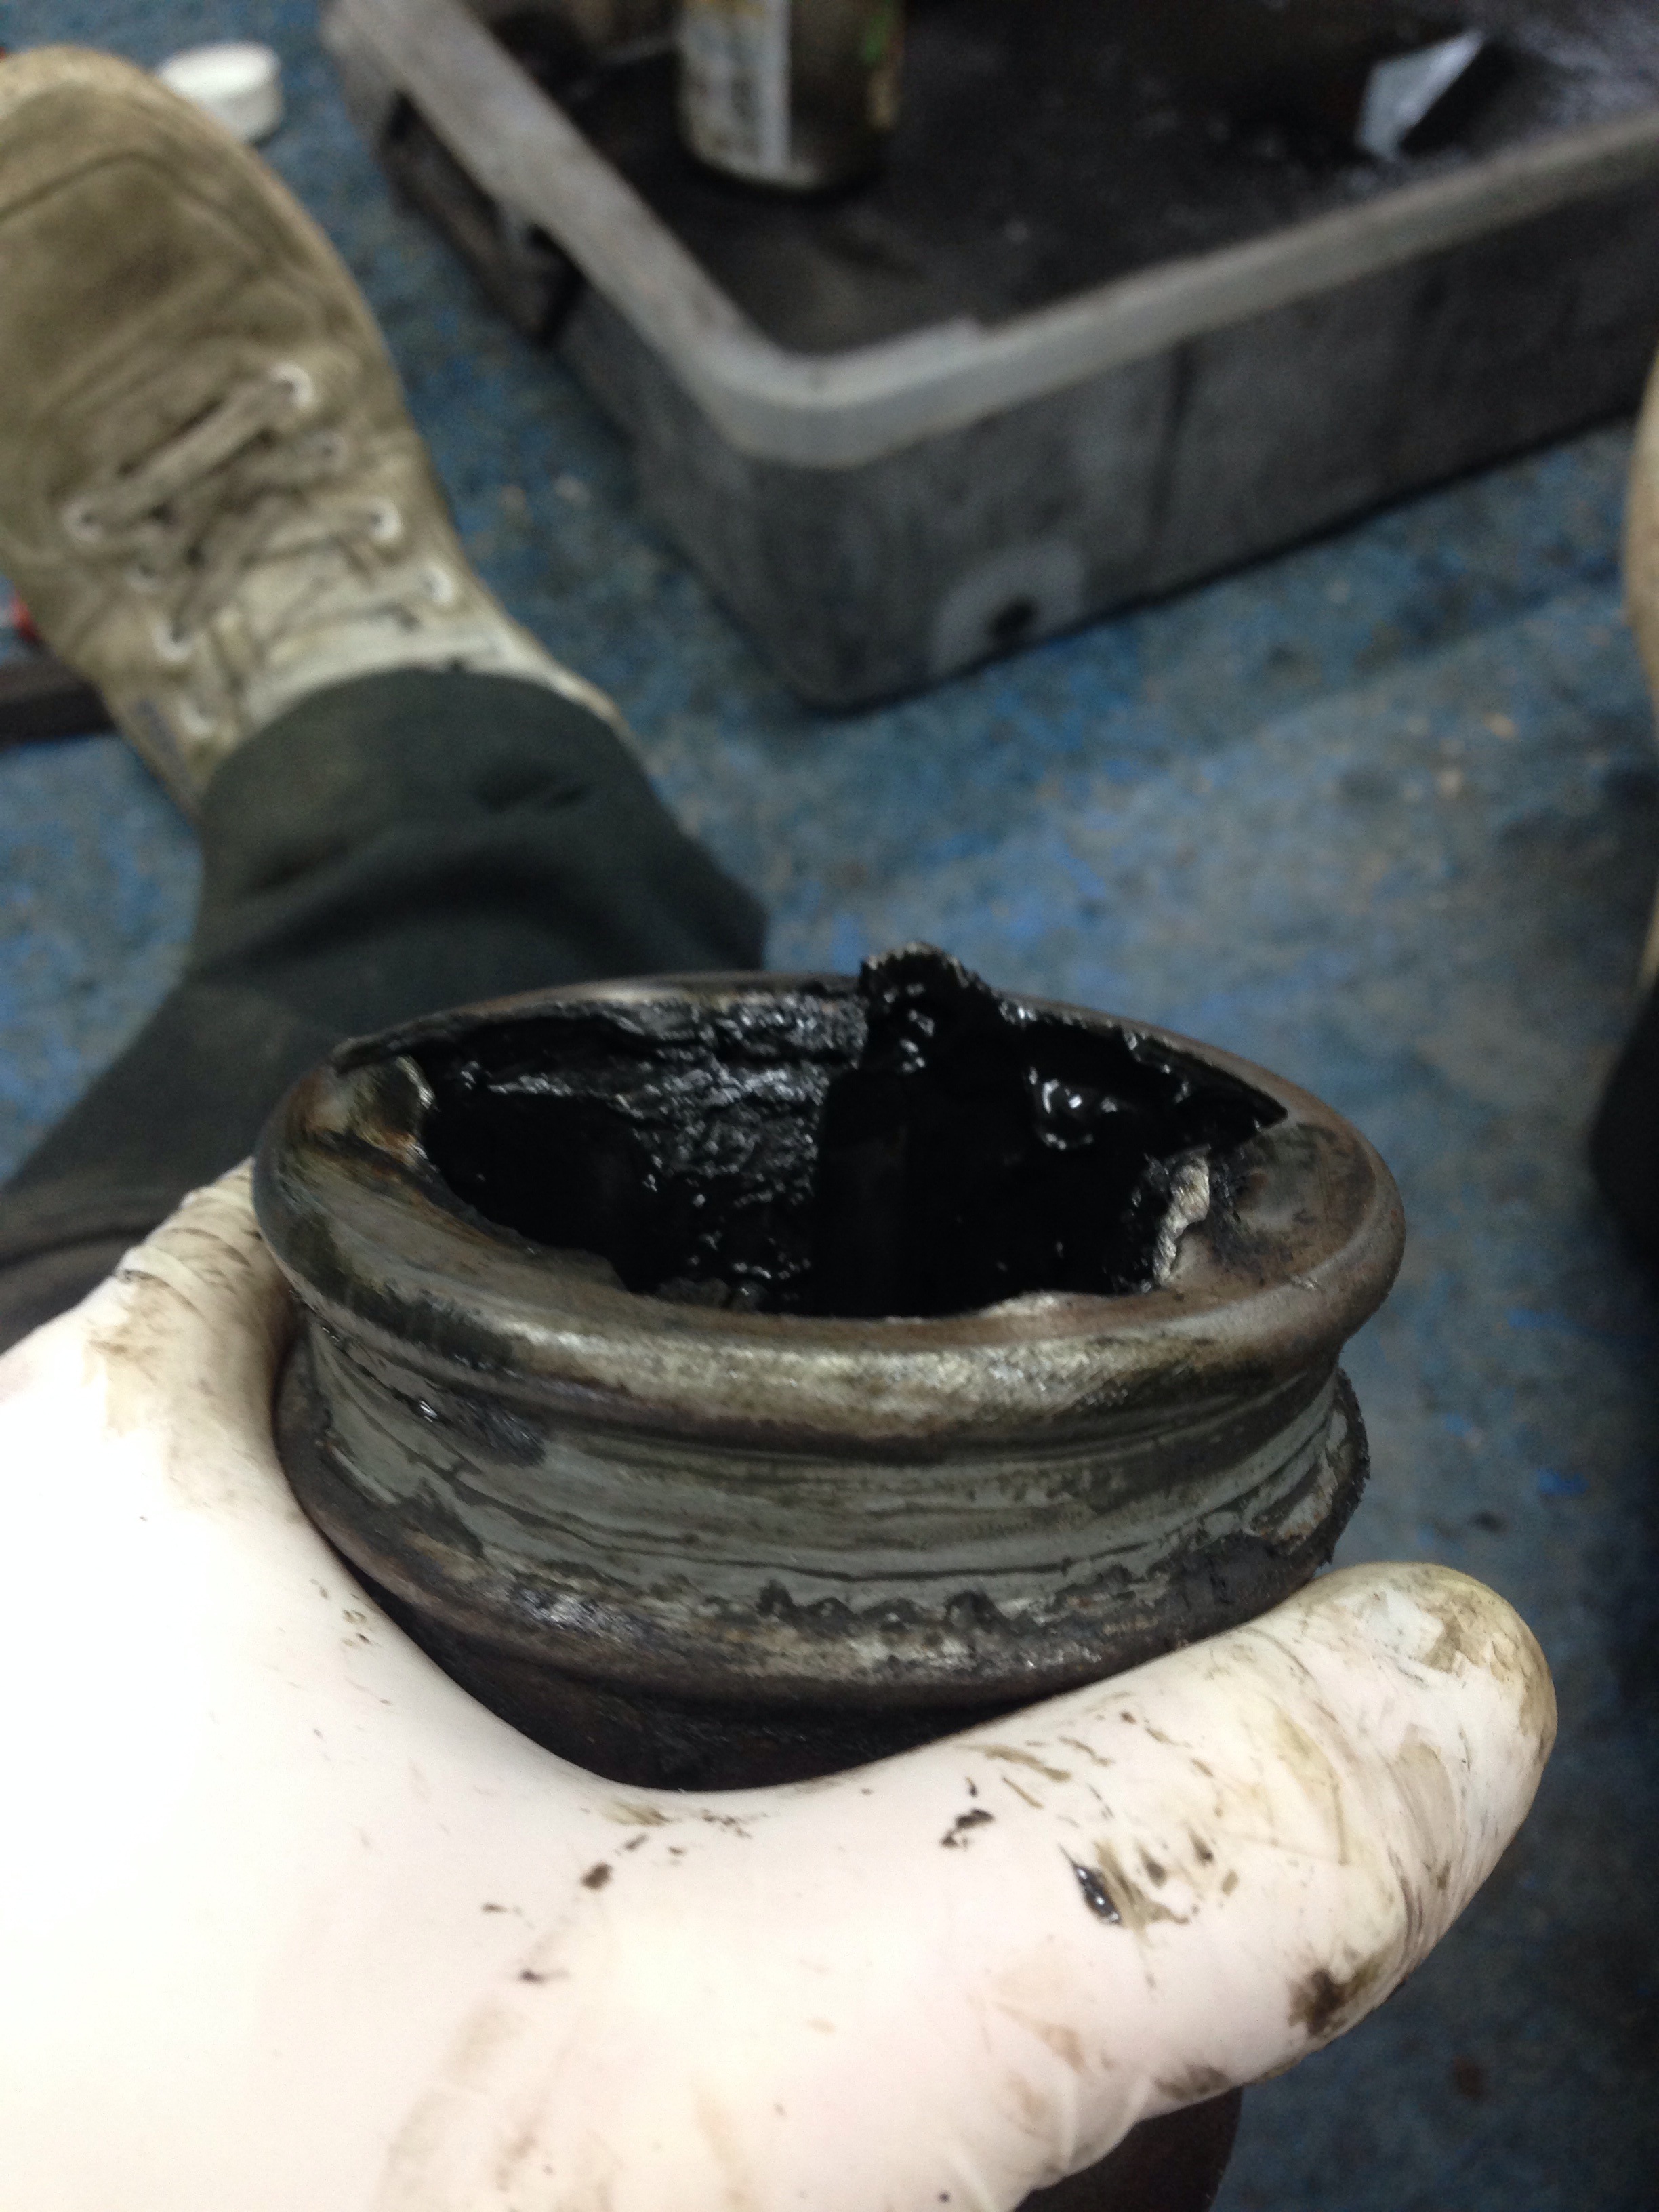
And the noisy bearing - knackered!
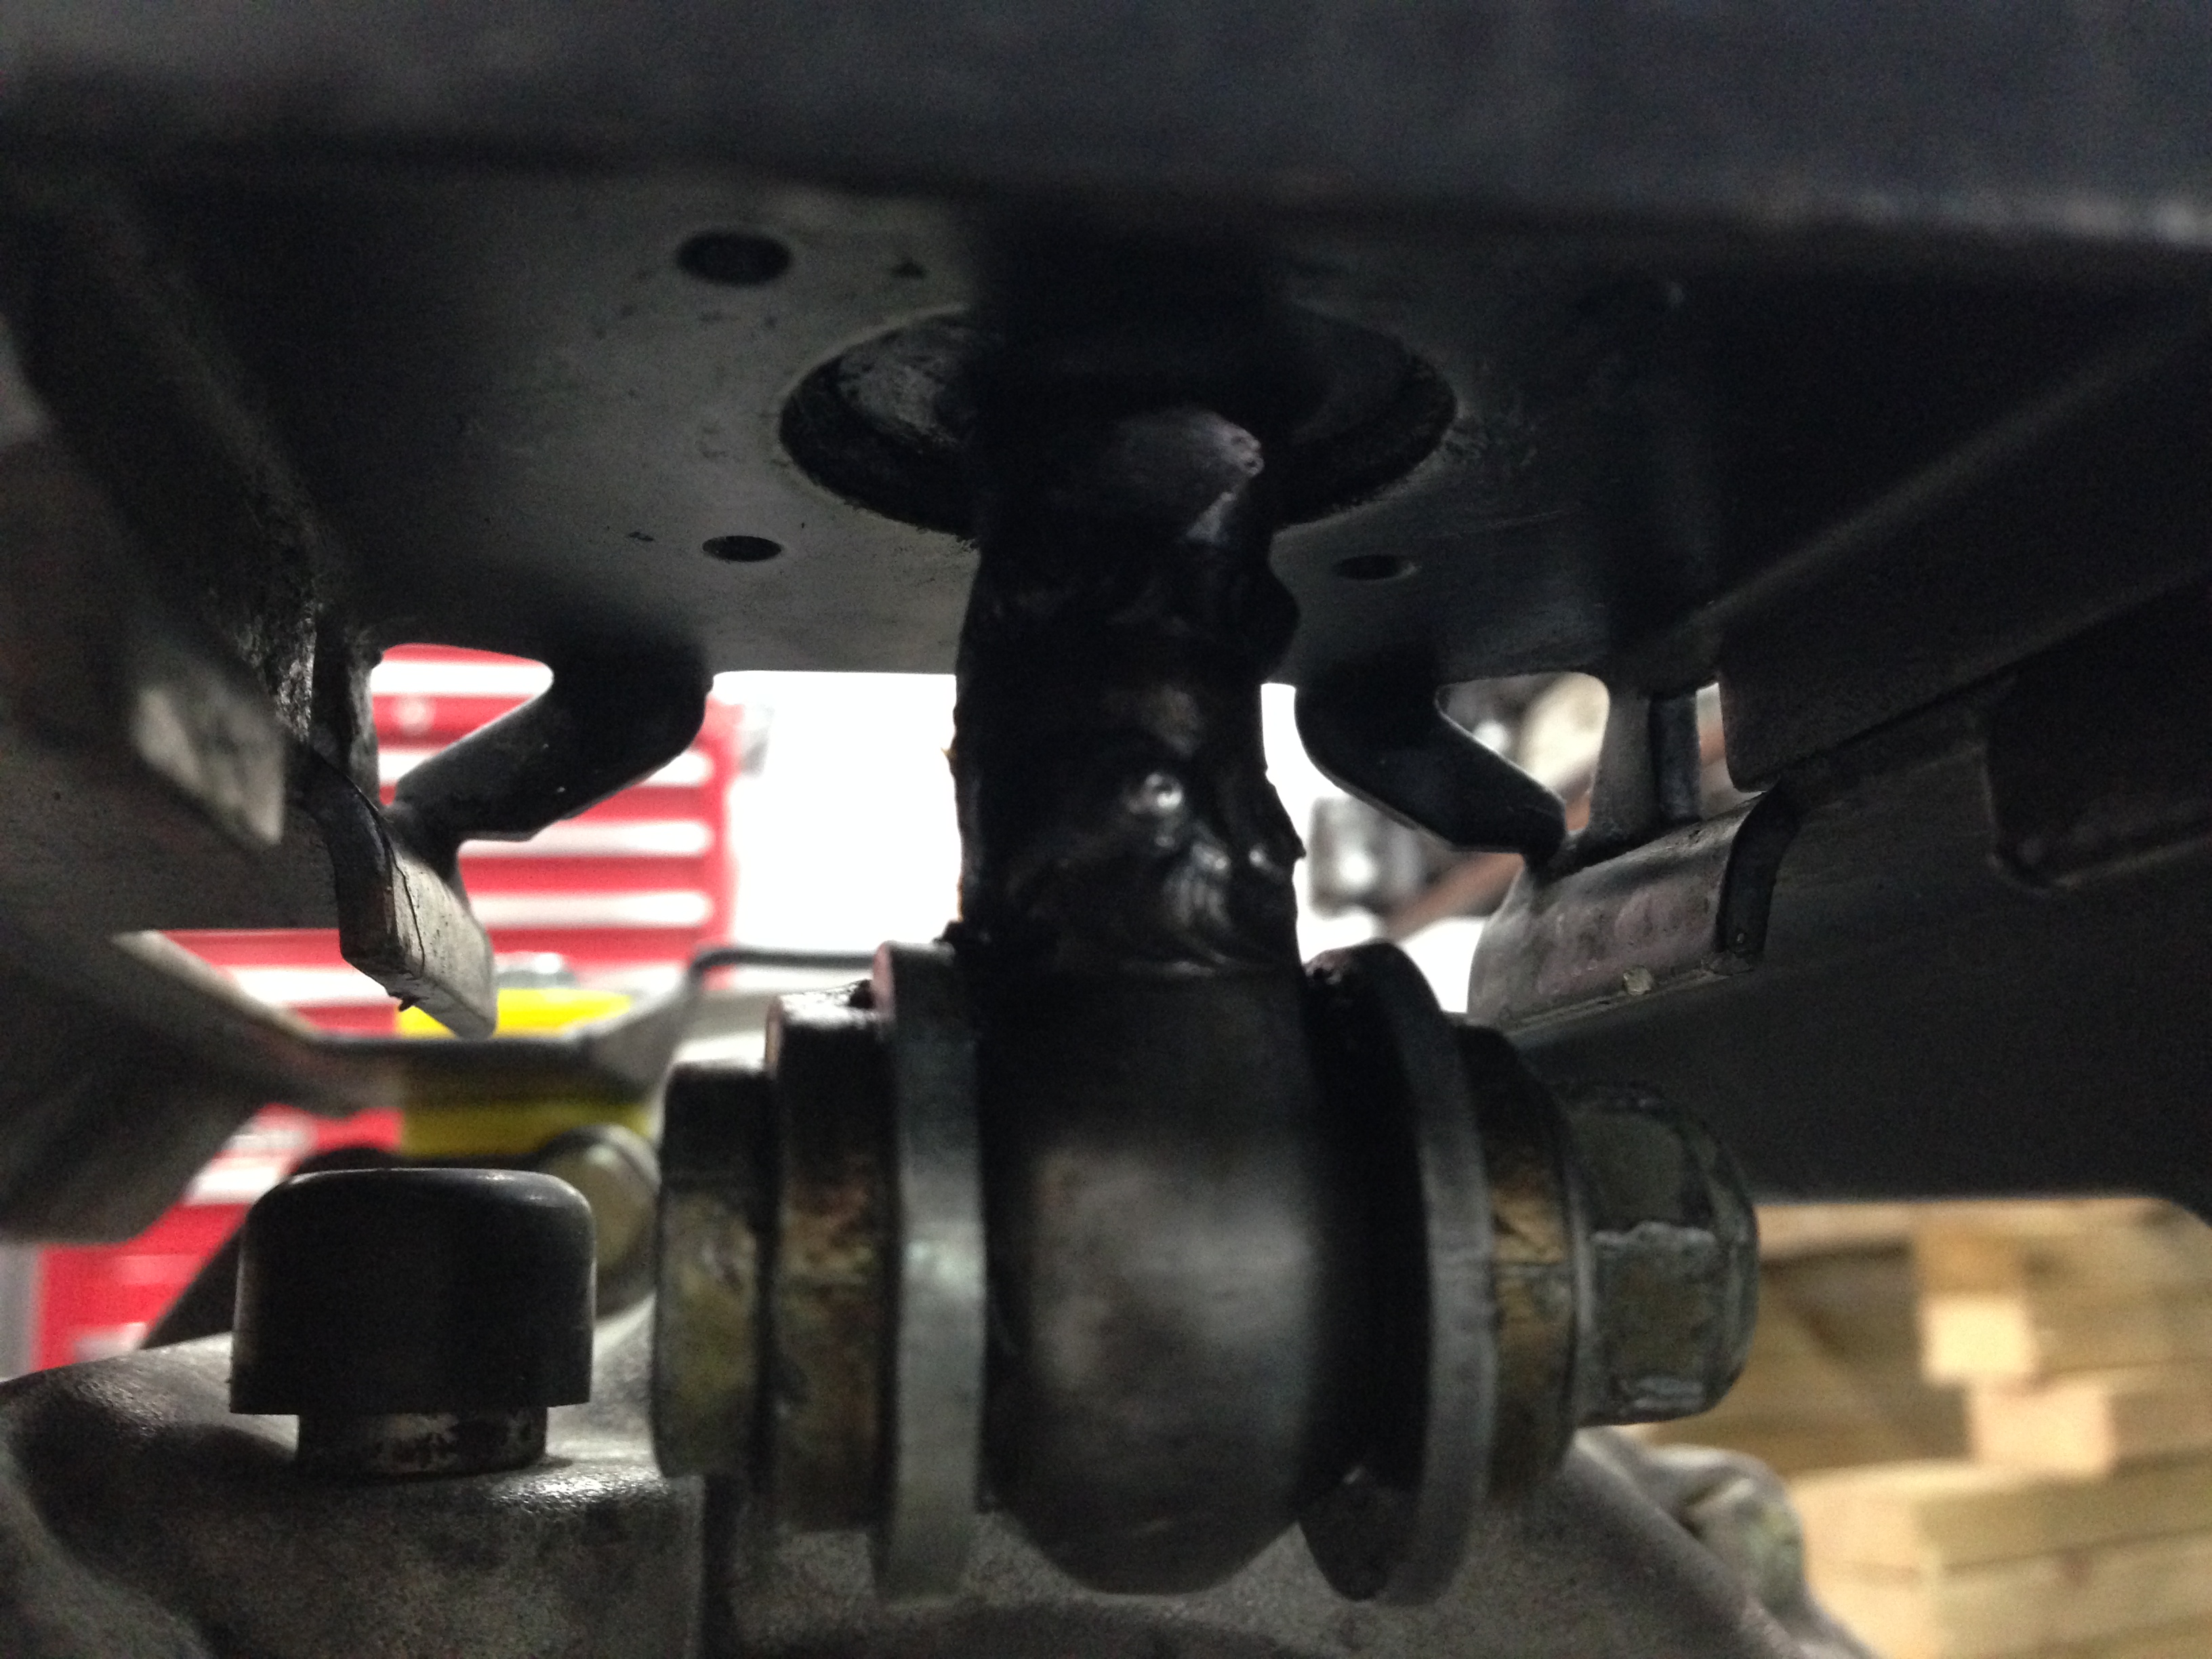
Though on getting the box off I came across a host of other problems, first up I noticed that the rubber doughnut used as a coupling between the gearbox output shaft and prop shaft was knackered
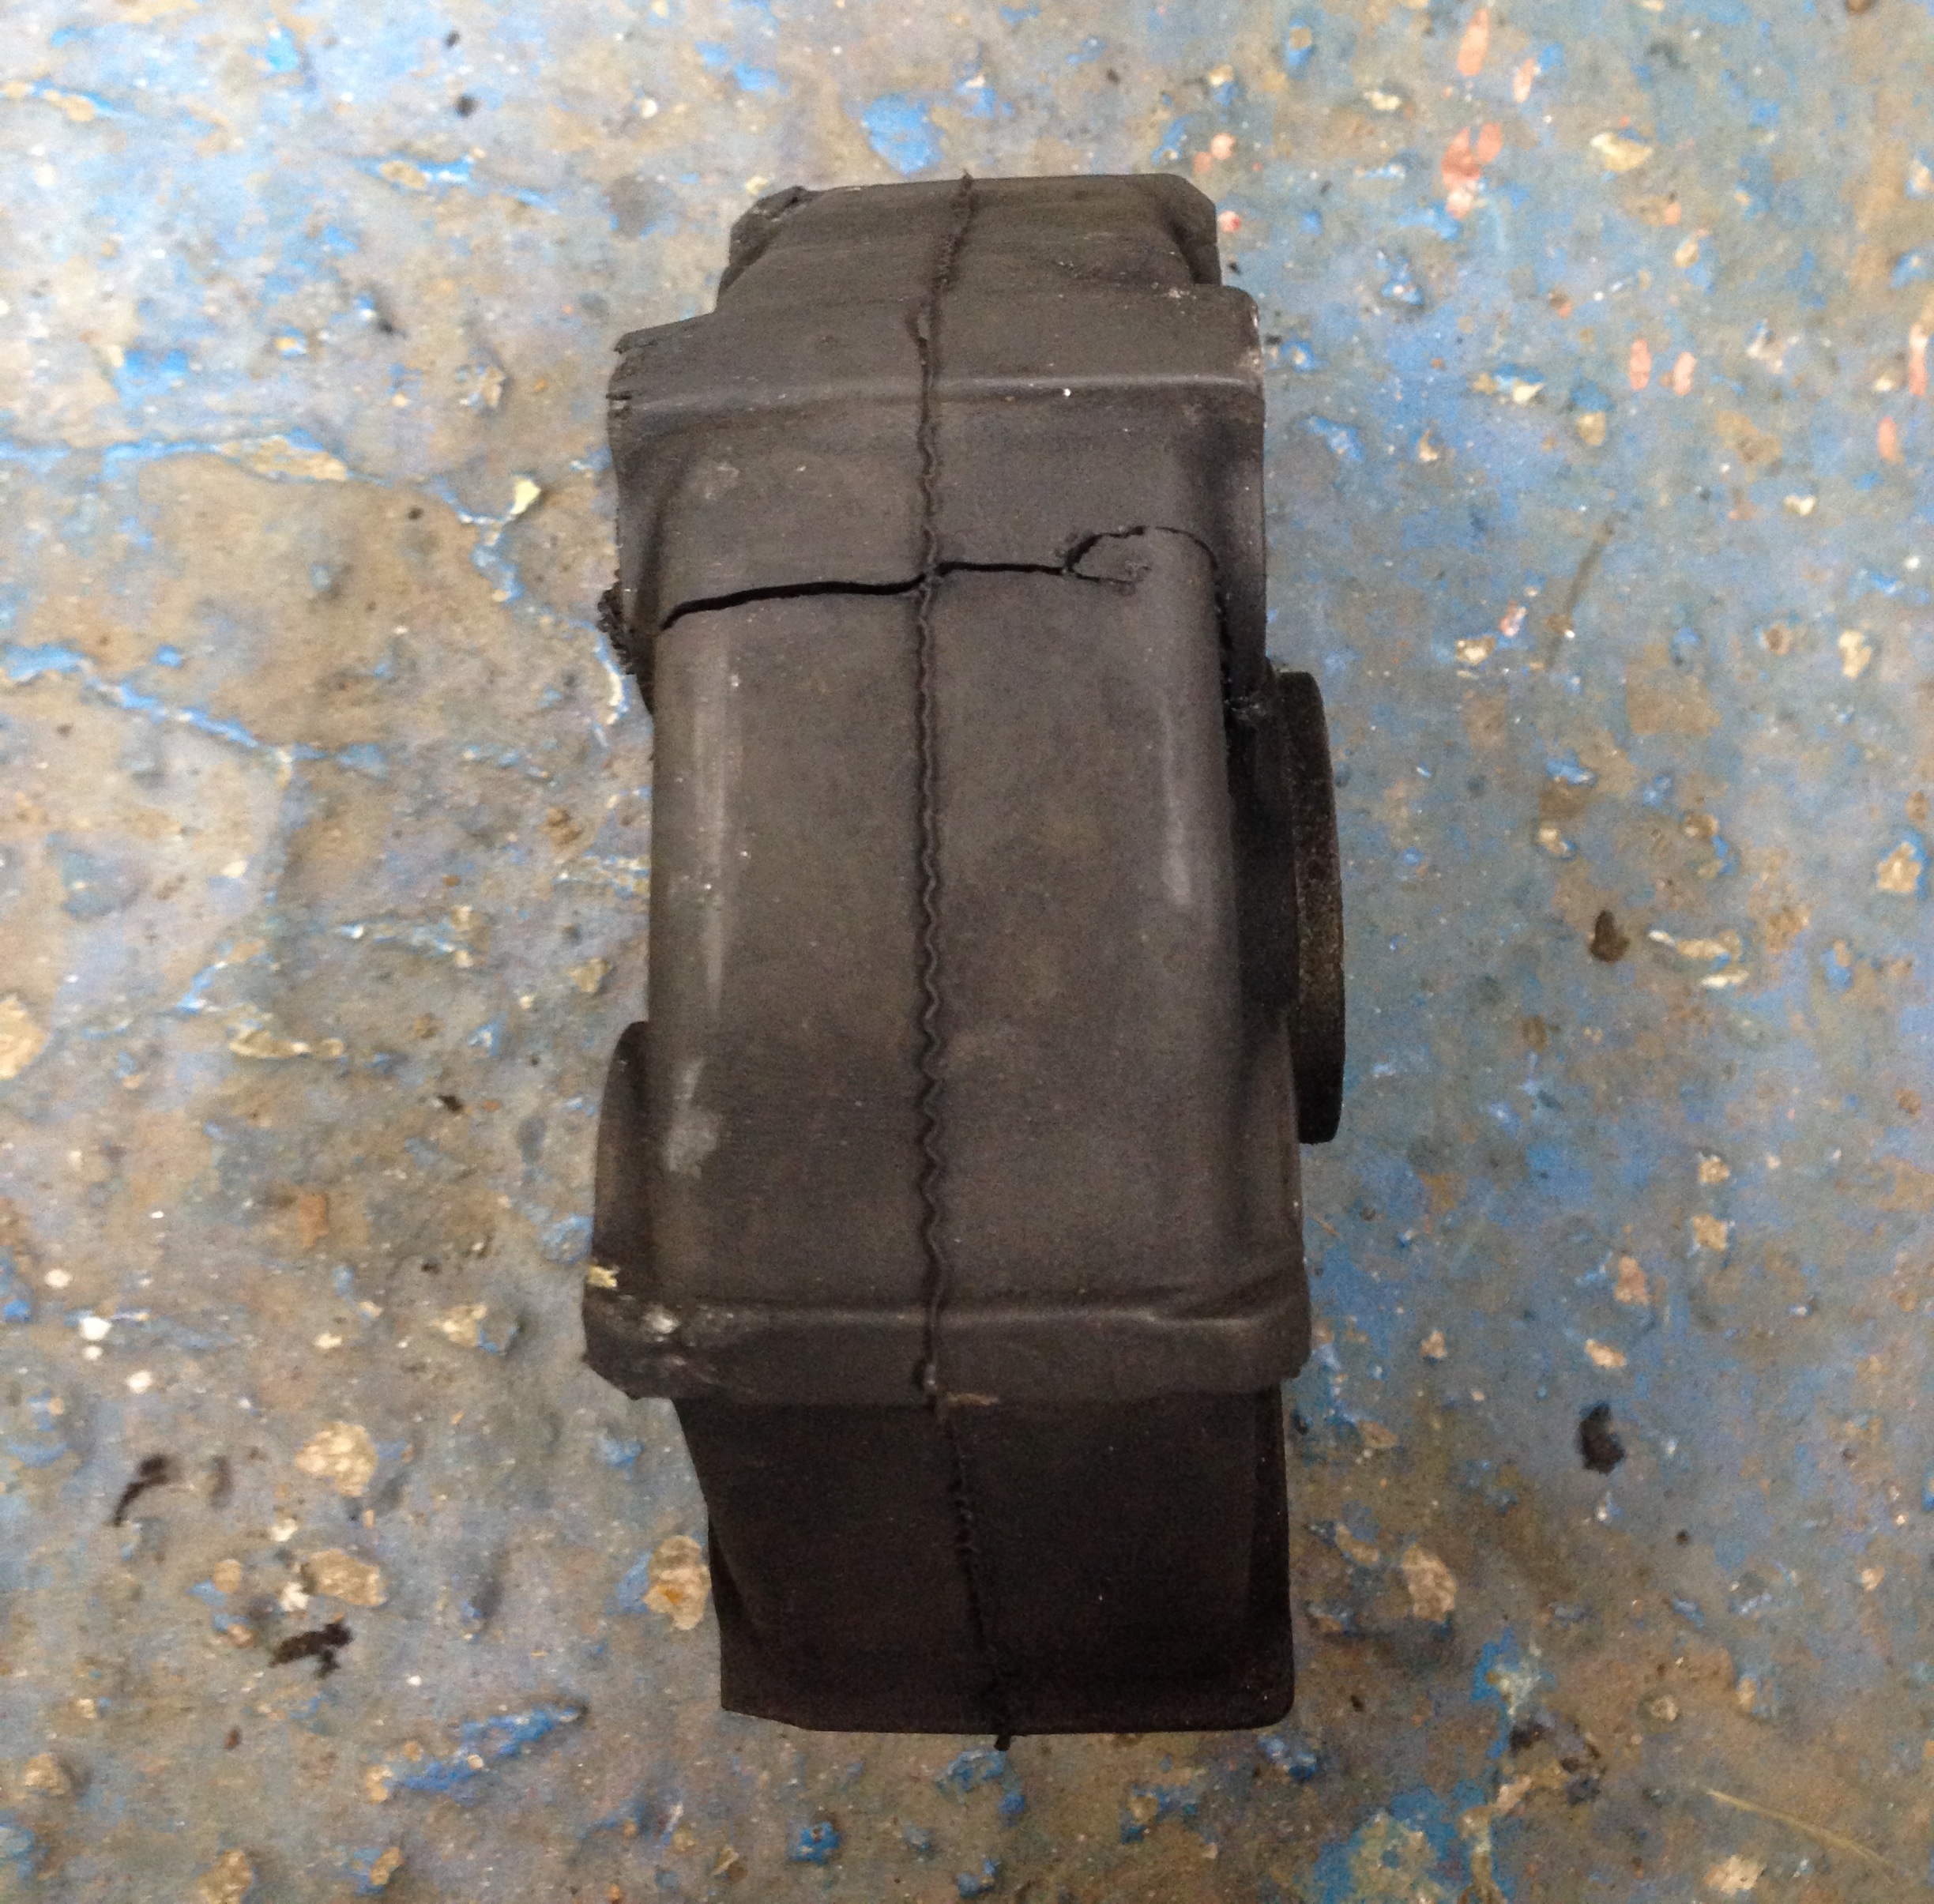

So I knew this would need to be replaced.. Easy enough or so I thought. This is the older hexagonal type, the type fitted to the early Sapphire 4x4s.. So what it was doing on this car I don't know. It turns out that the propshaft was also the early Sapphire 4x4 item. The problem being you can not get this part for love nor money. They are simply not available anymore. Ford changed it for a different design in the later sapphires and for the escort cosworth. So I had to order the later one.. Problem solved.. For now.
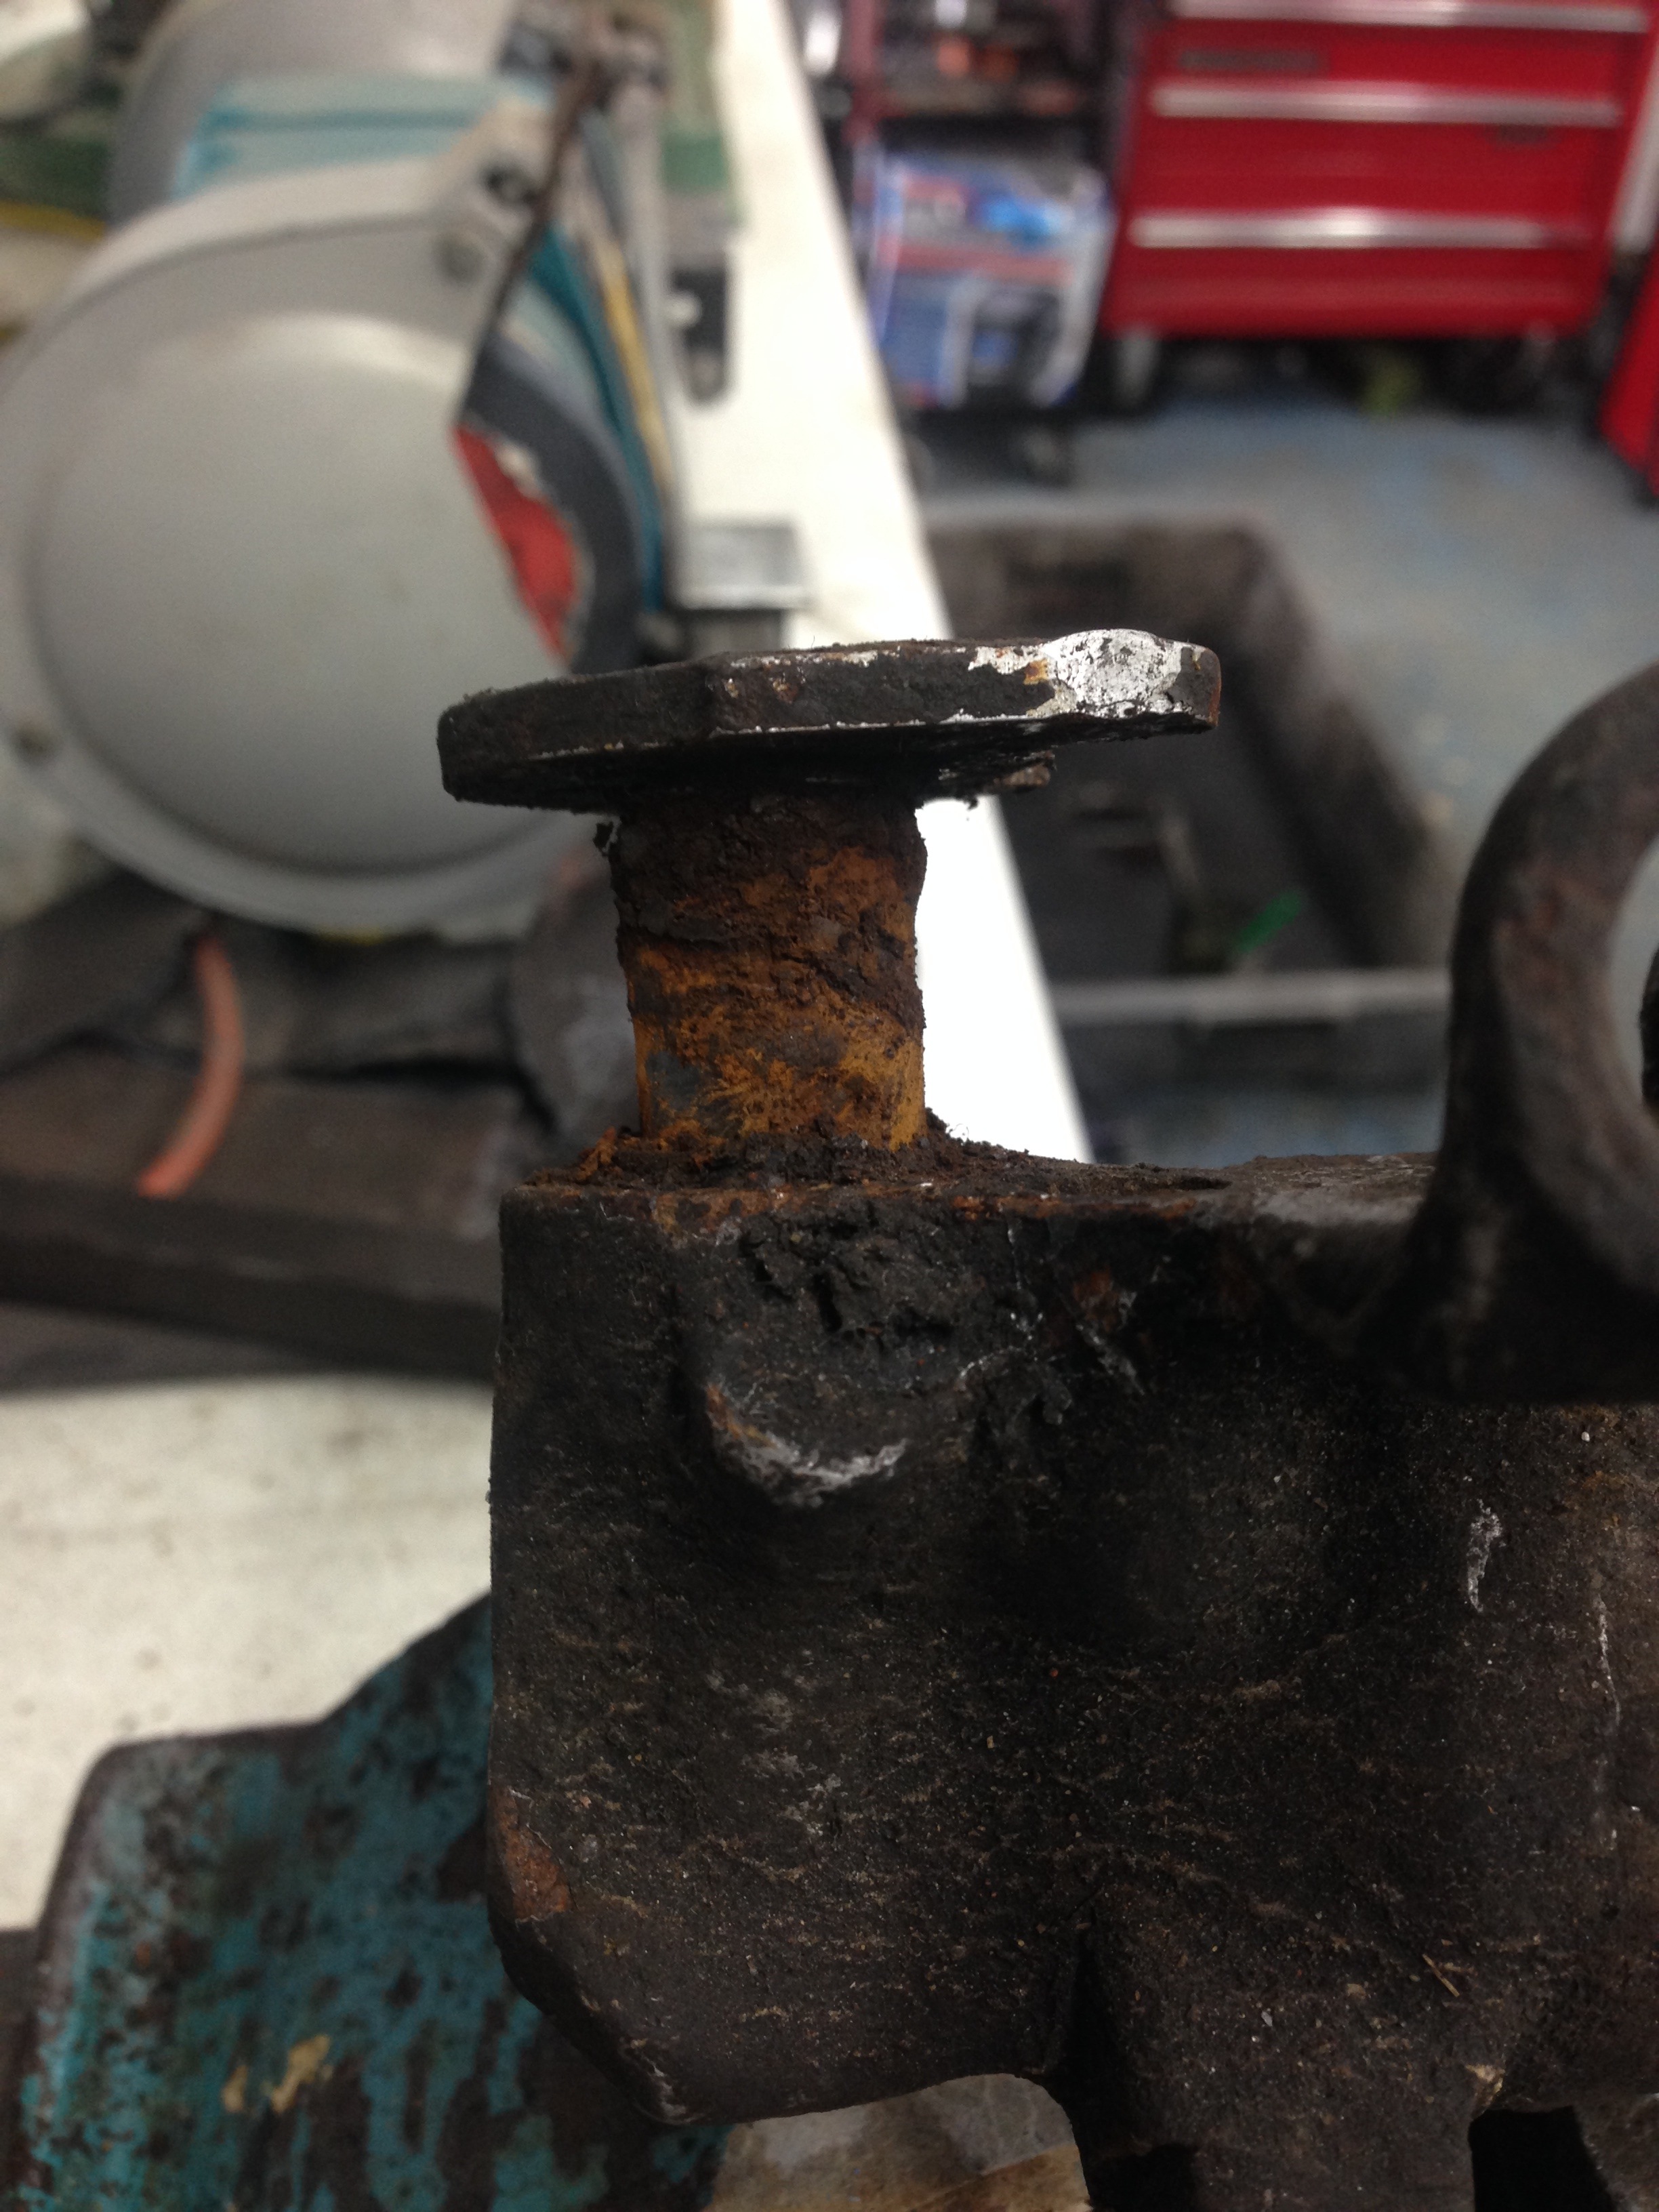
I also noticed this but thought nothing of it at the time being told that it shouldn't cause an issue
This is the output shaft of the gearbox cut off to allow the early doughnut to fit, later this was going to cause me no end of issues!
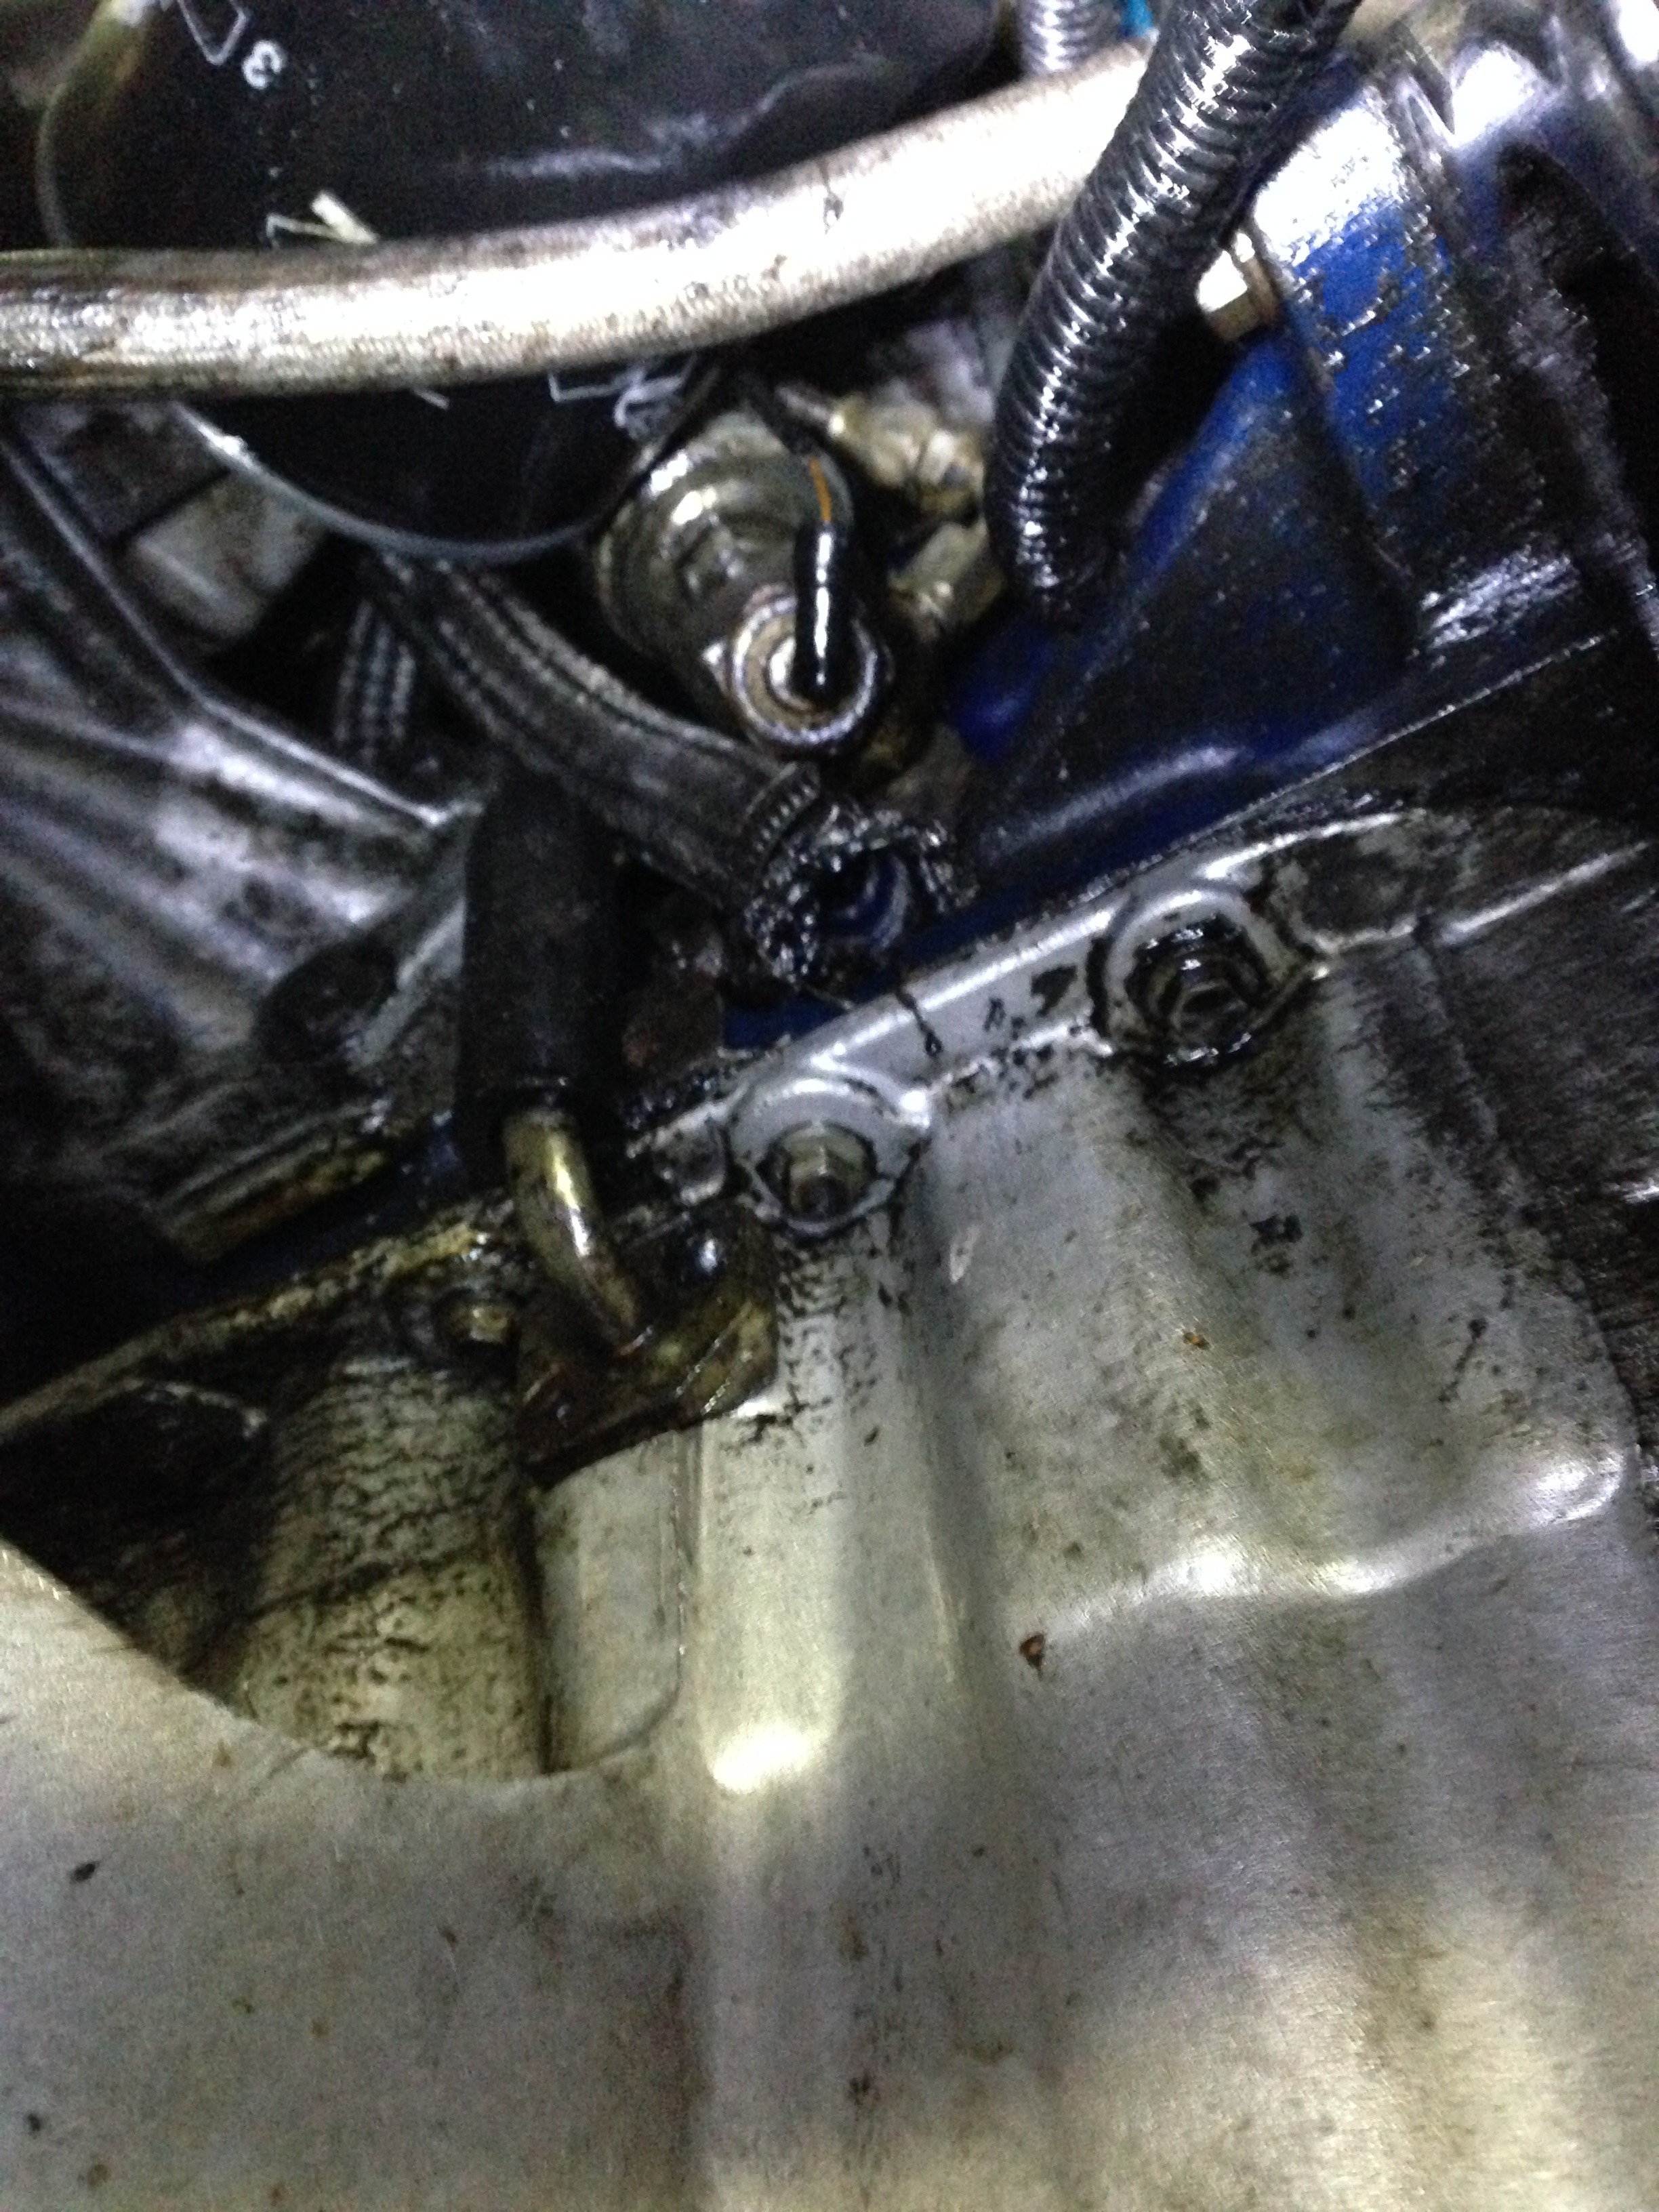
Whilst the box was out and the starter had been removed I also noticed the breather drain pipe to the sump simply was not connected and therefore draining oil all over the side of the engine.. Another aspect to address.
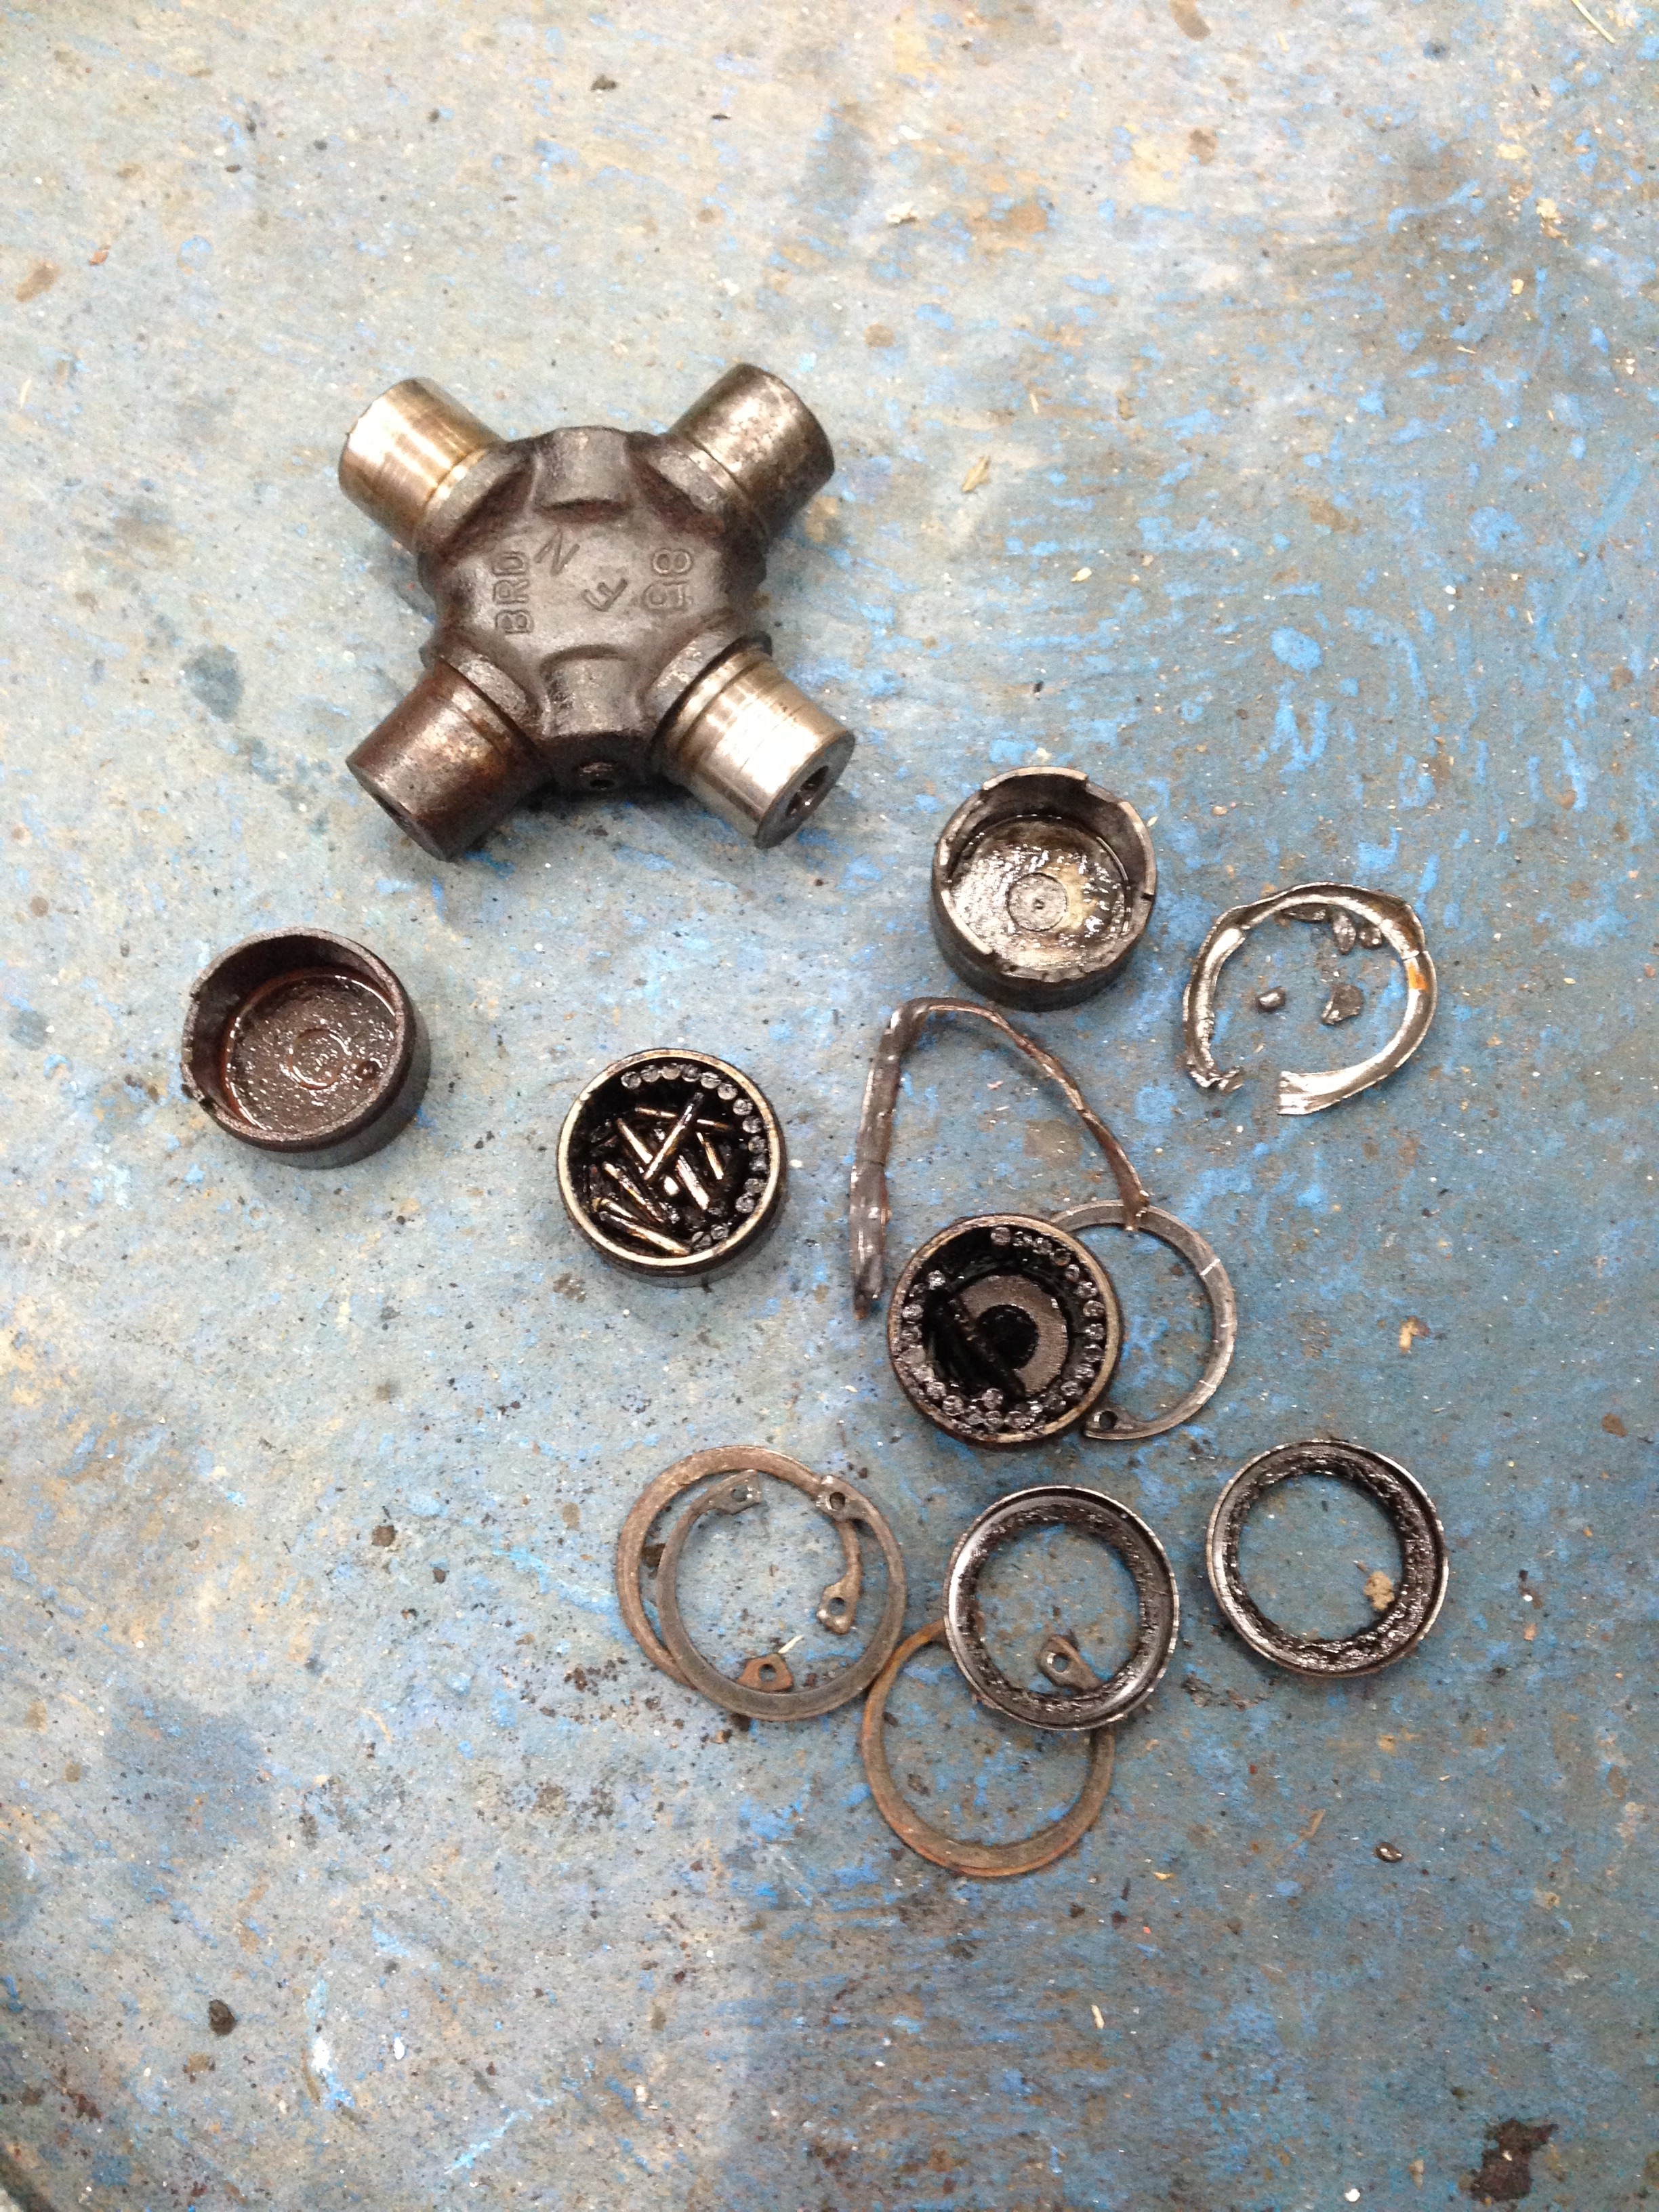
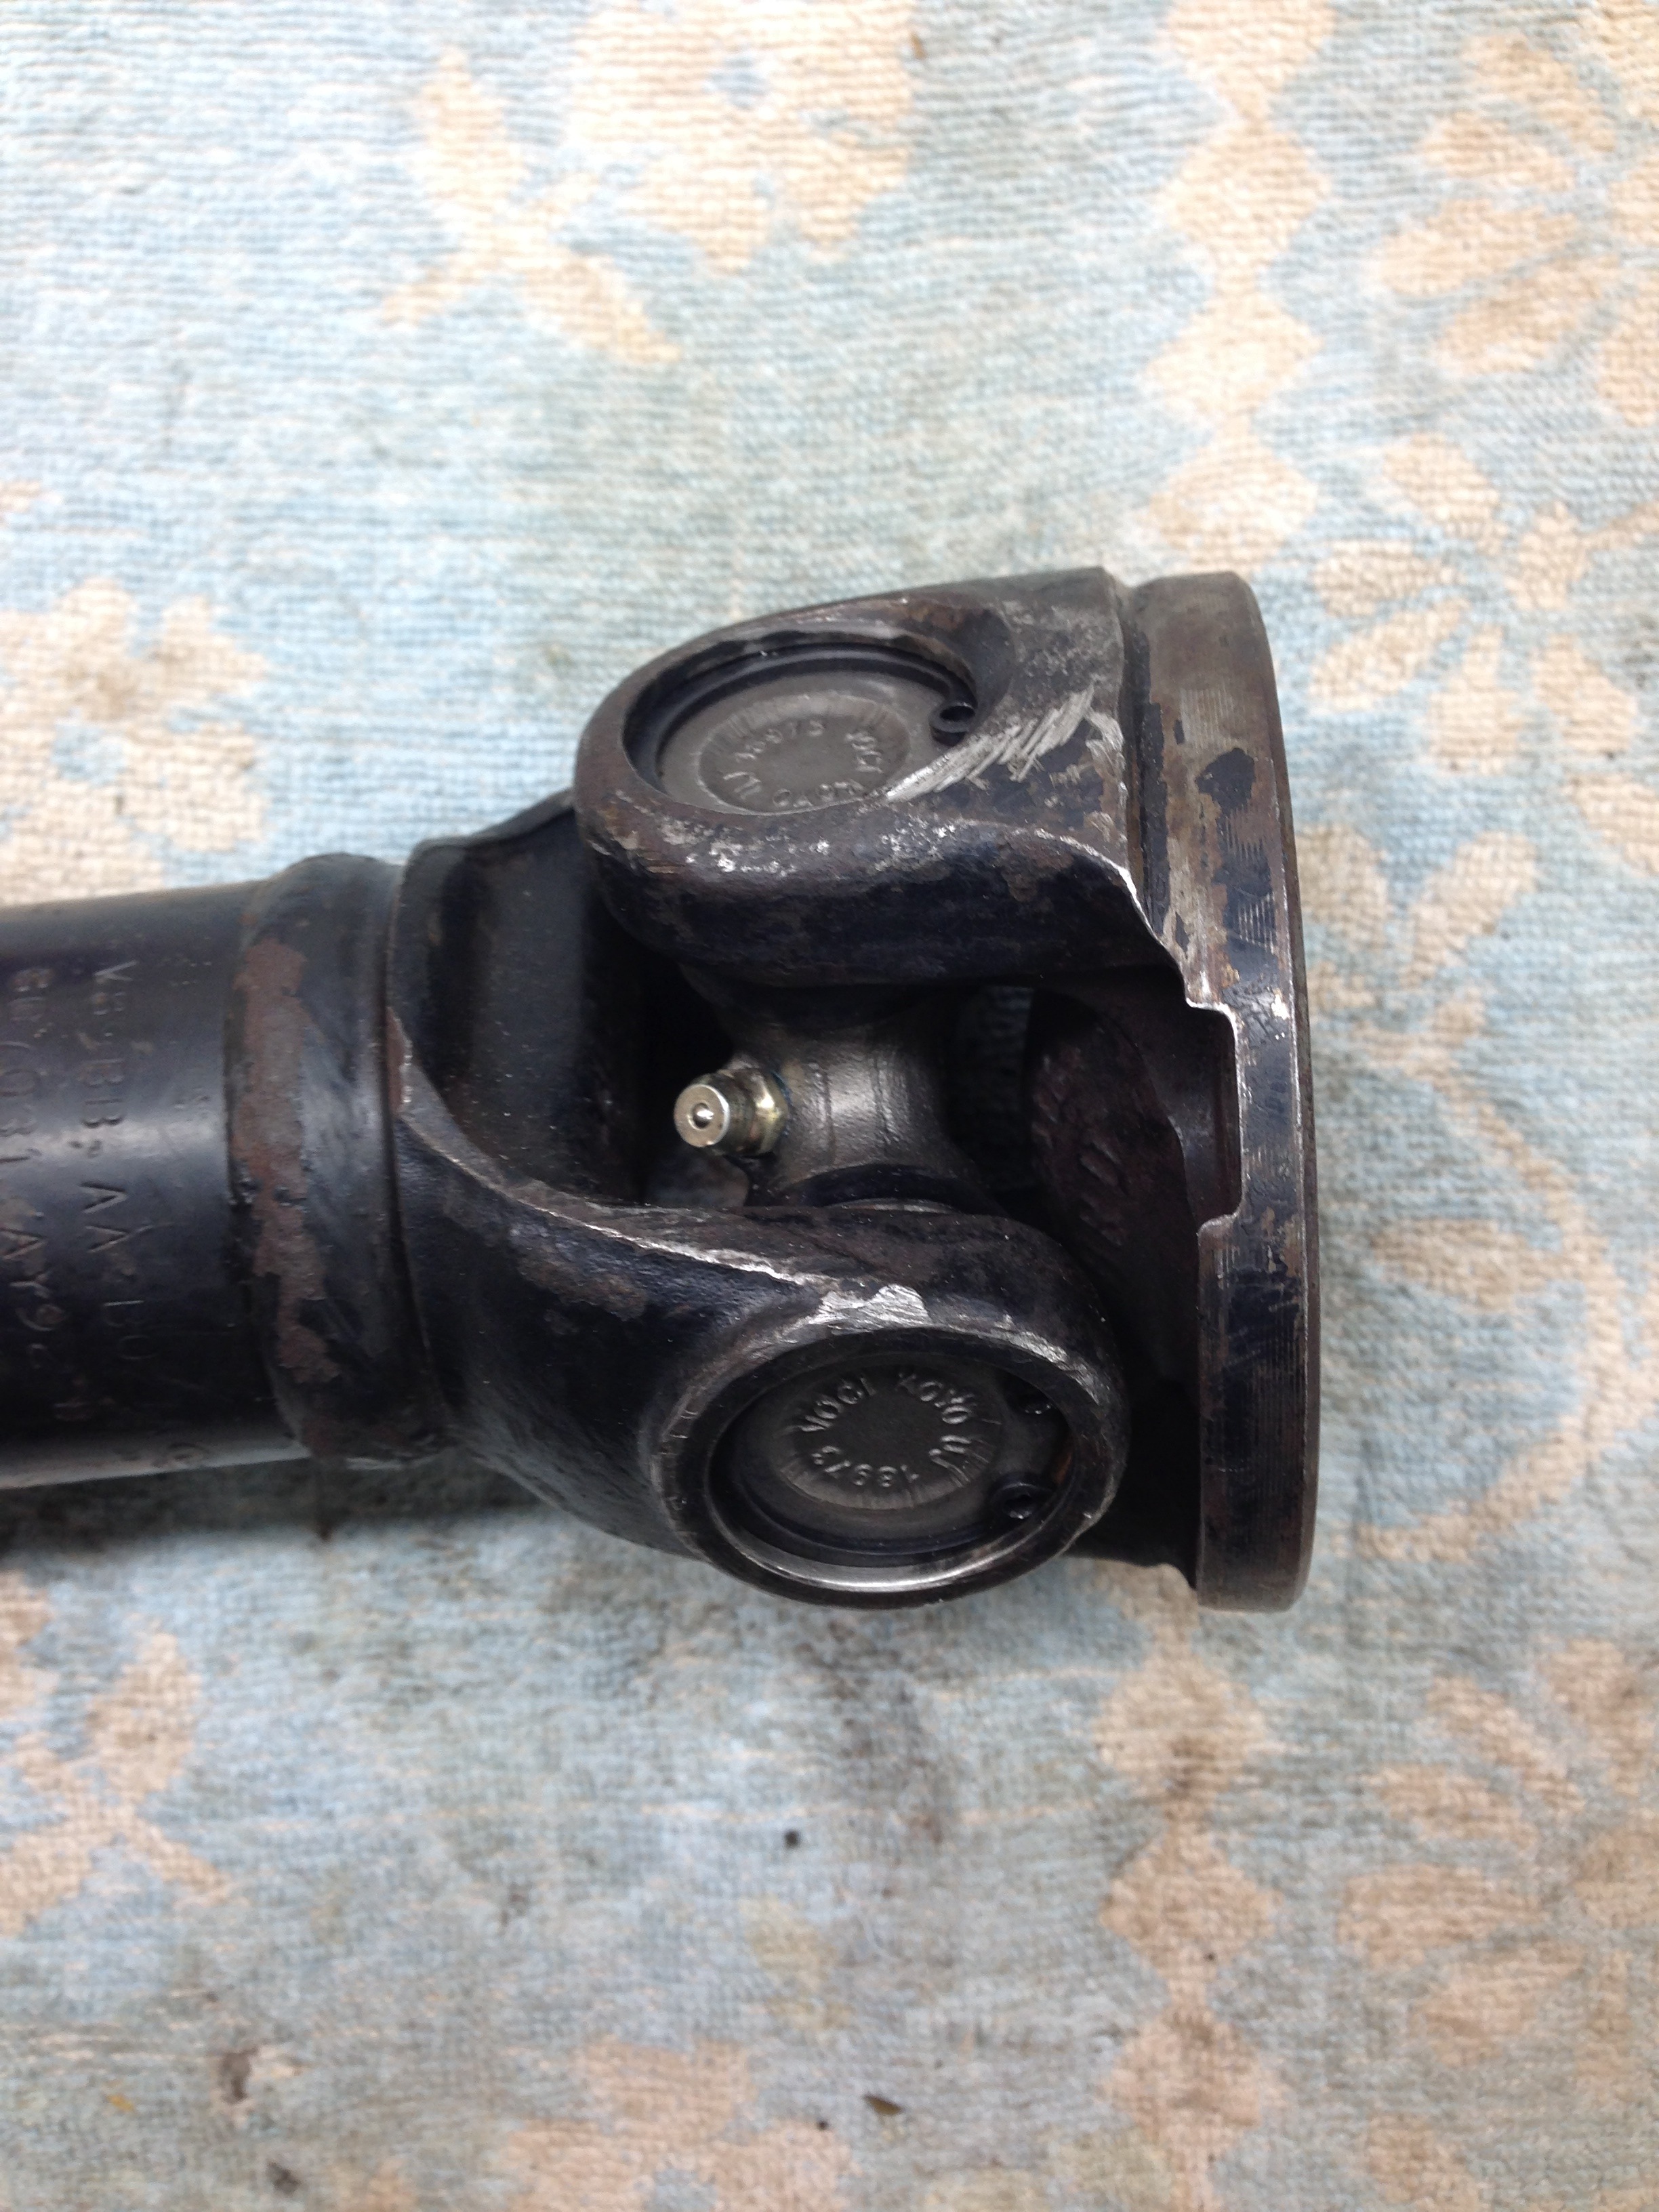
The front UJ on the front propshaft was also knackered and had loads of play in it.. I've heard that this can fail whilst driving and take the diff, sump and a mass of other bits out so lucky I caught it whilst still attached
Old one out
New one ready to go in
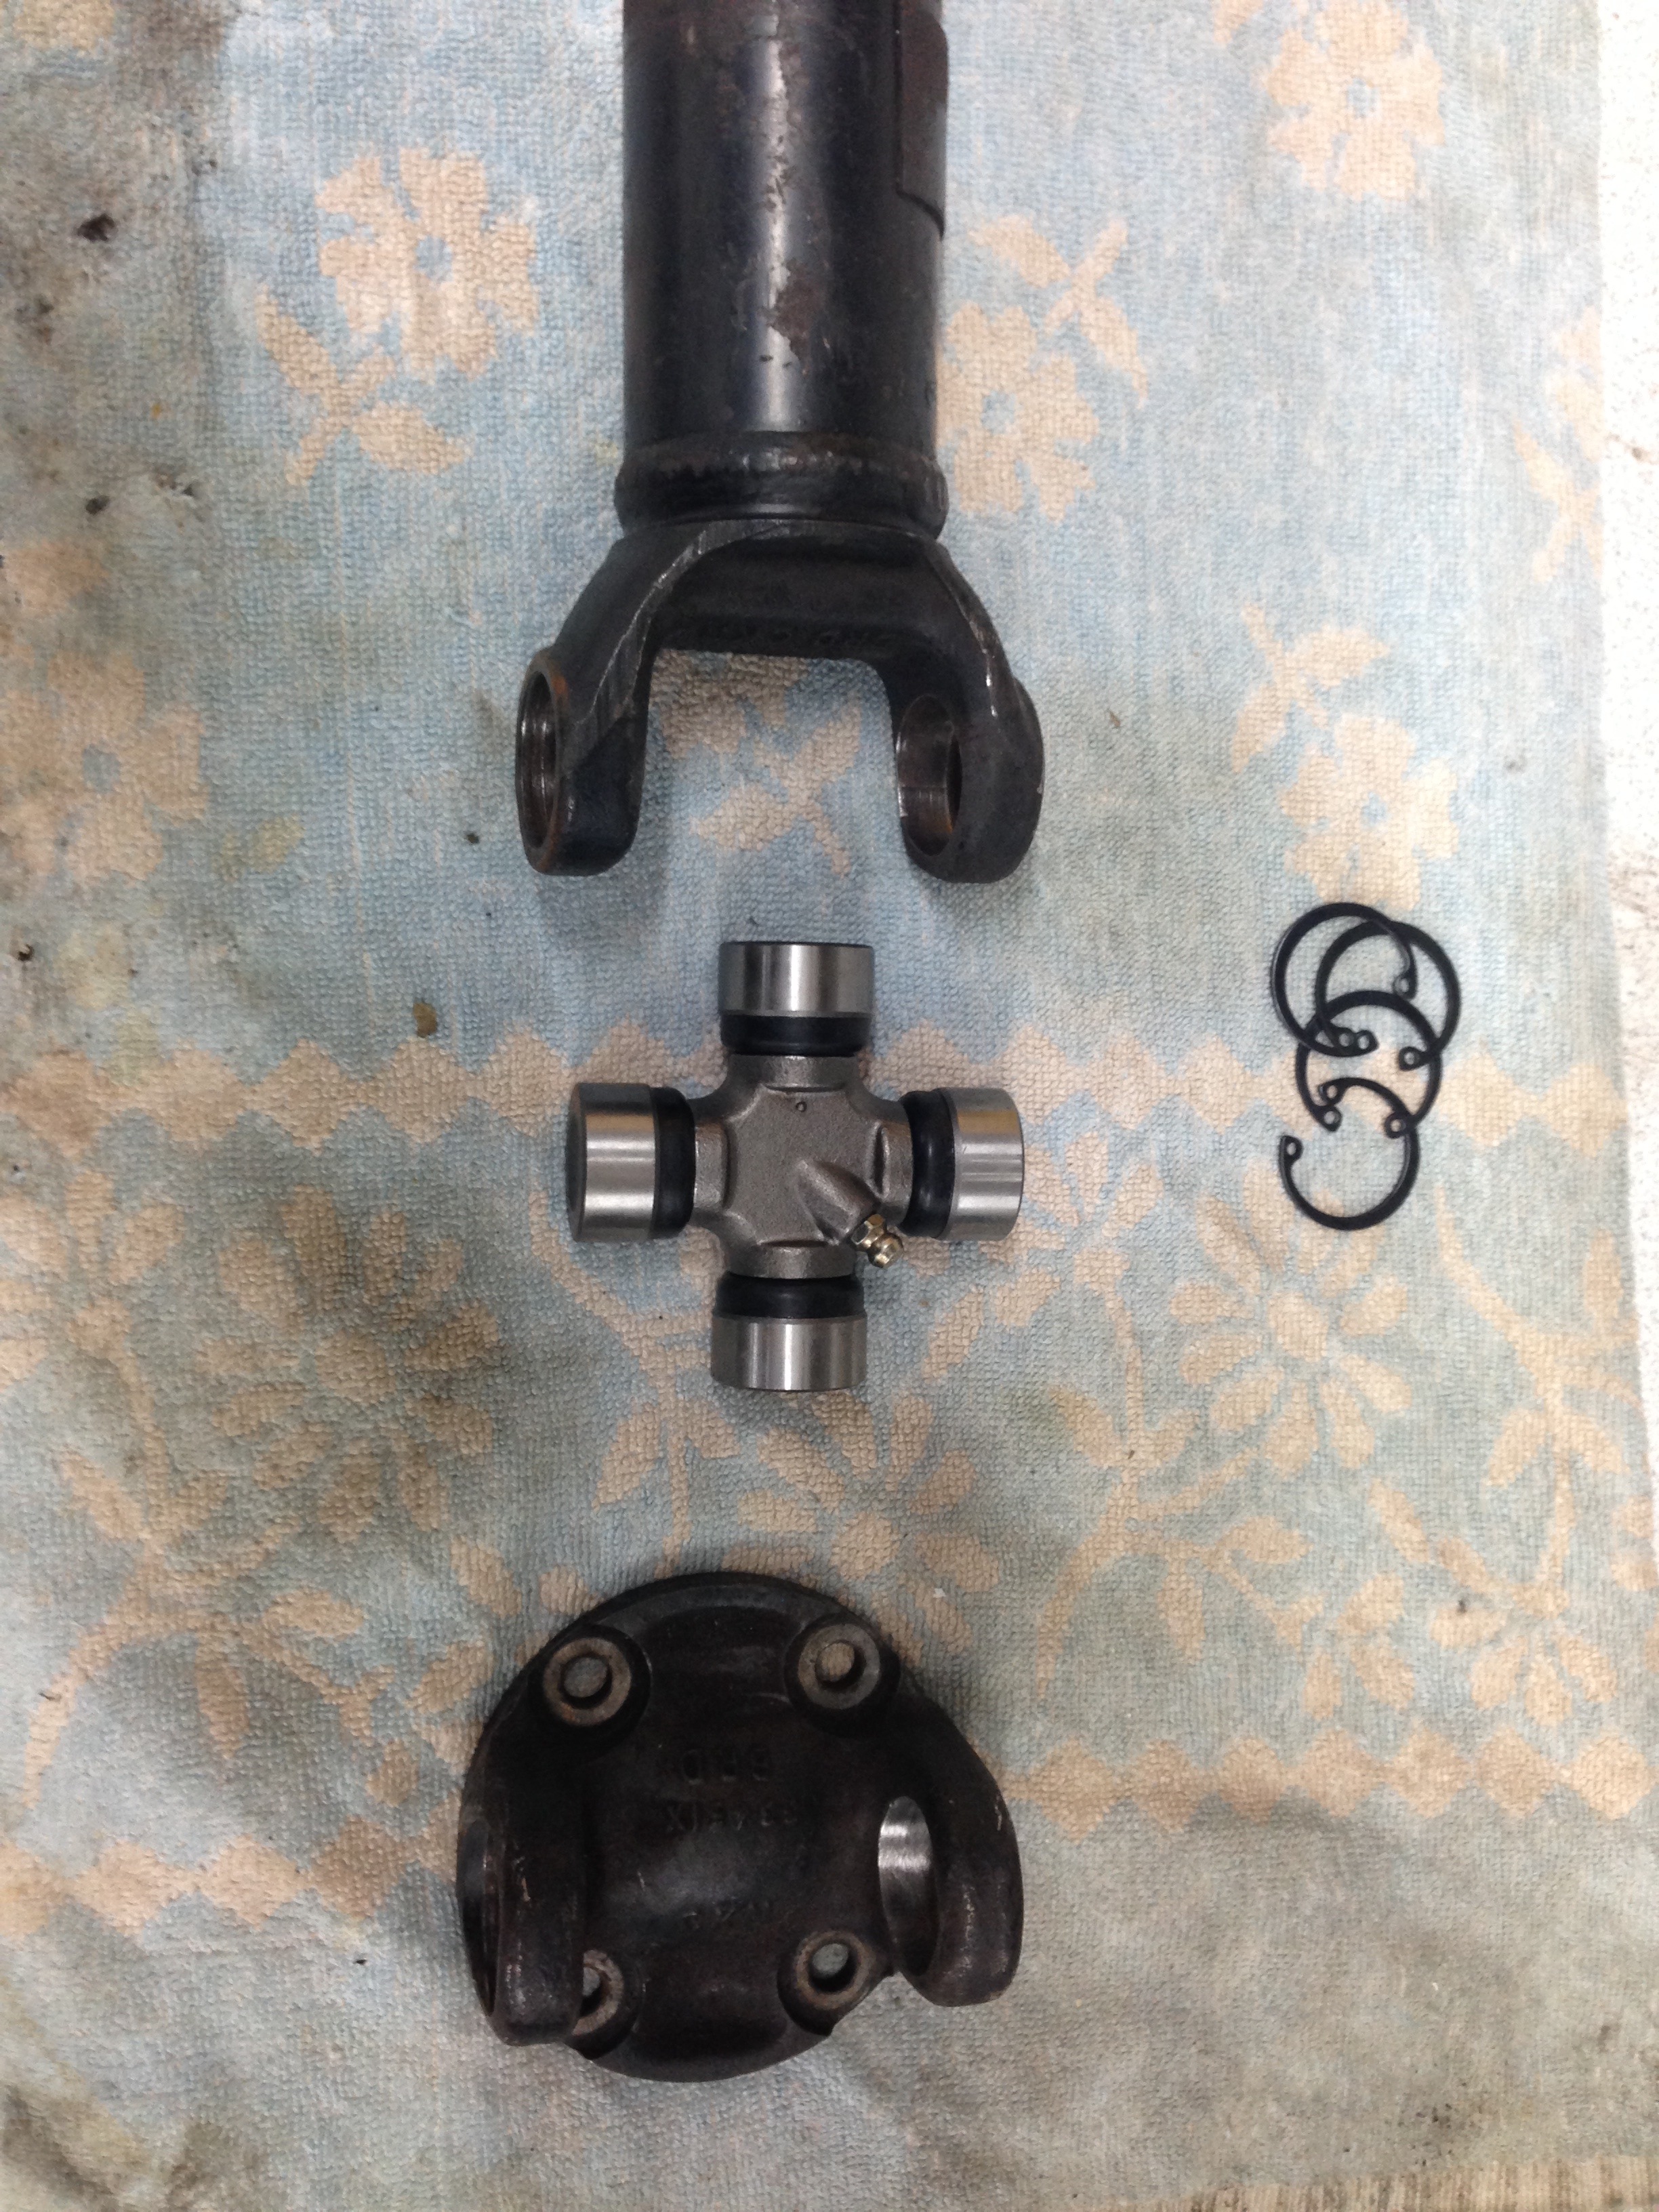
Fitted
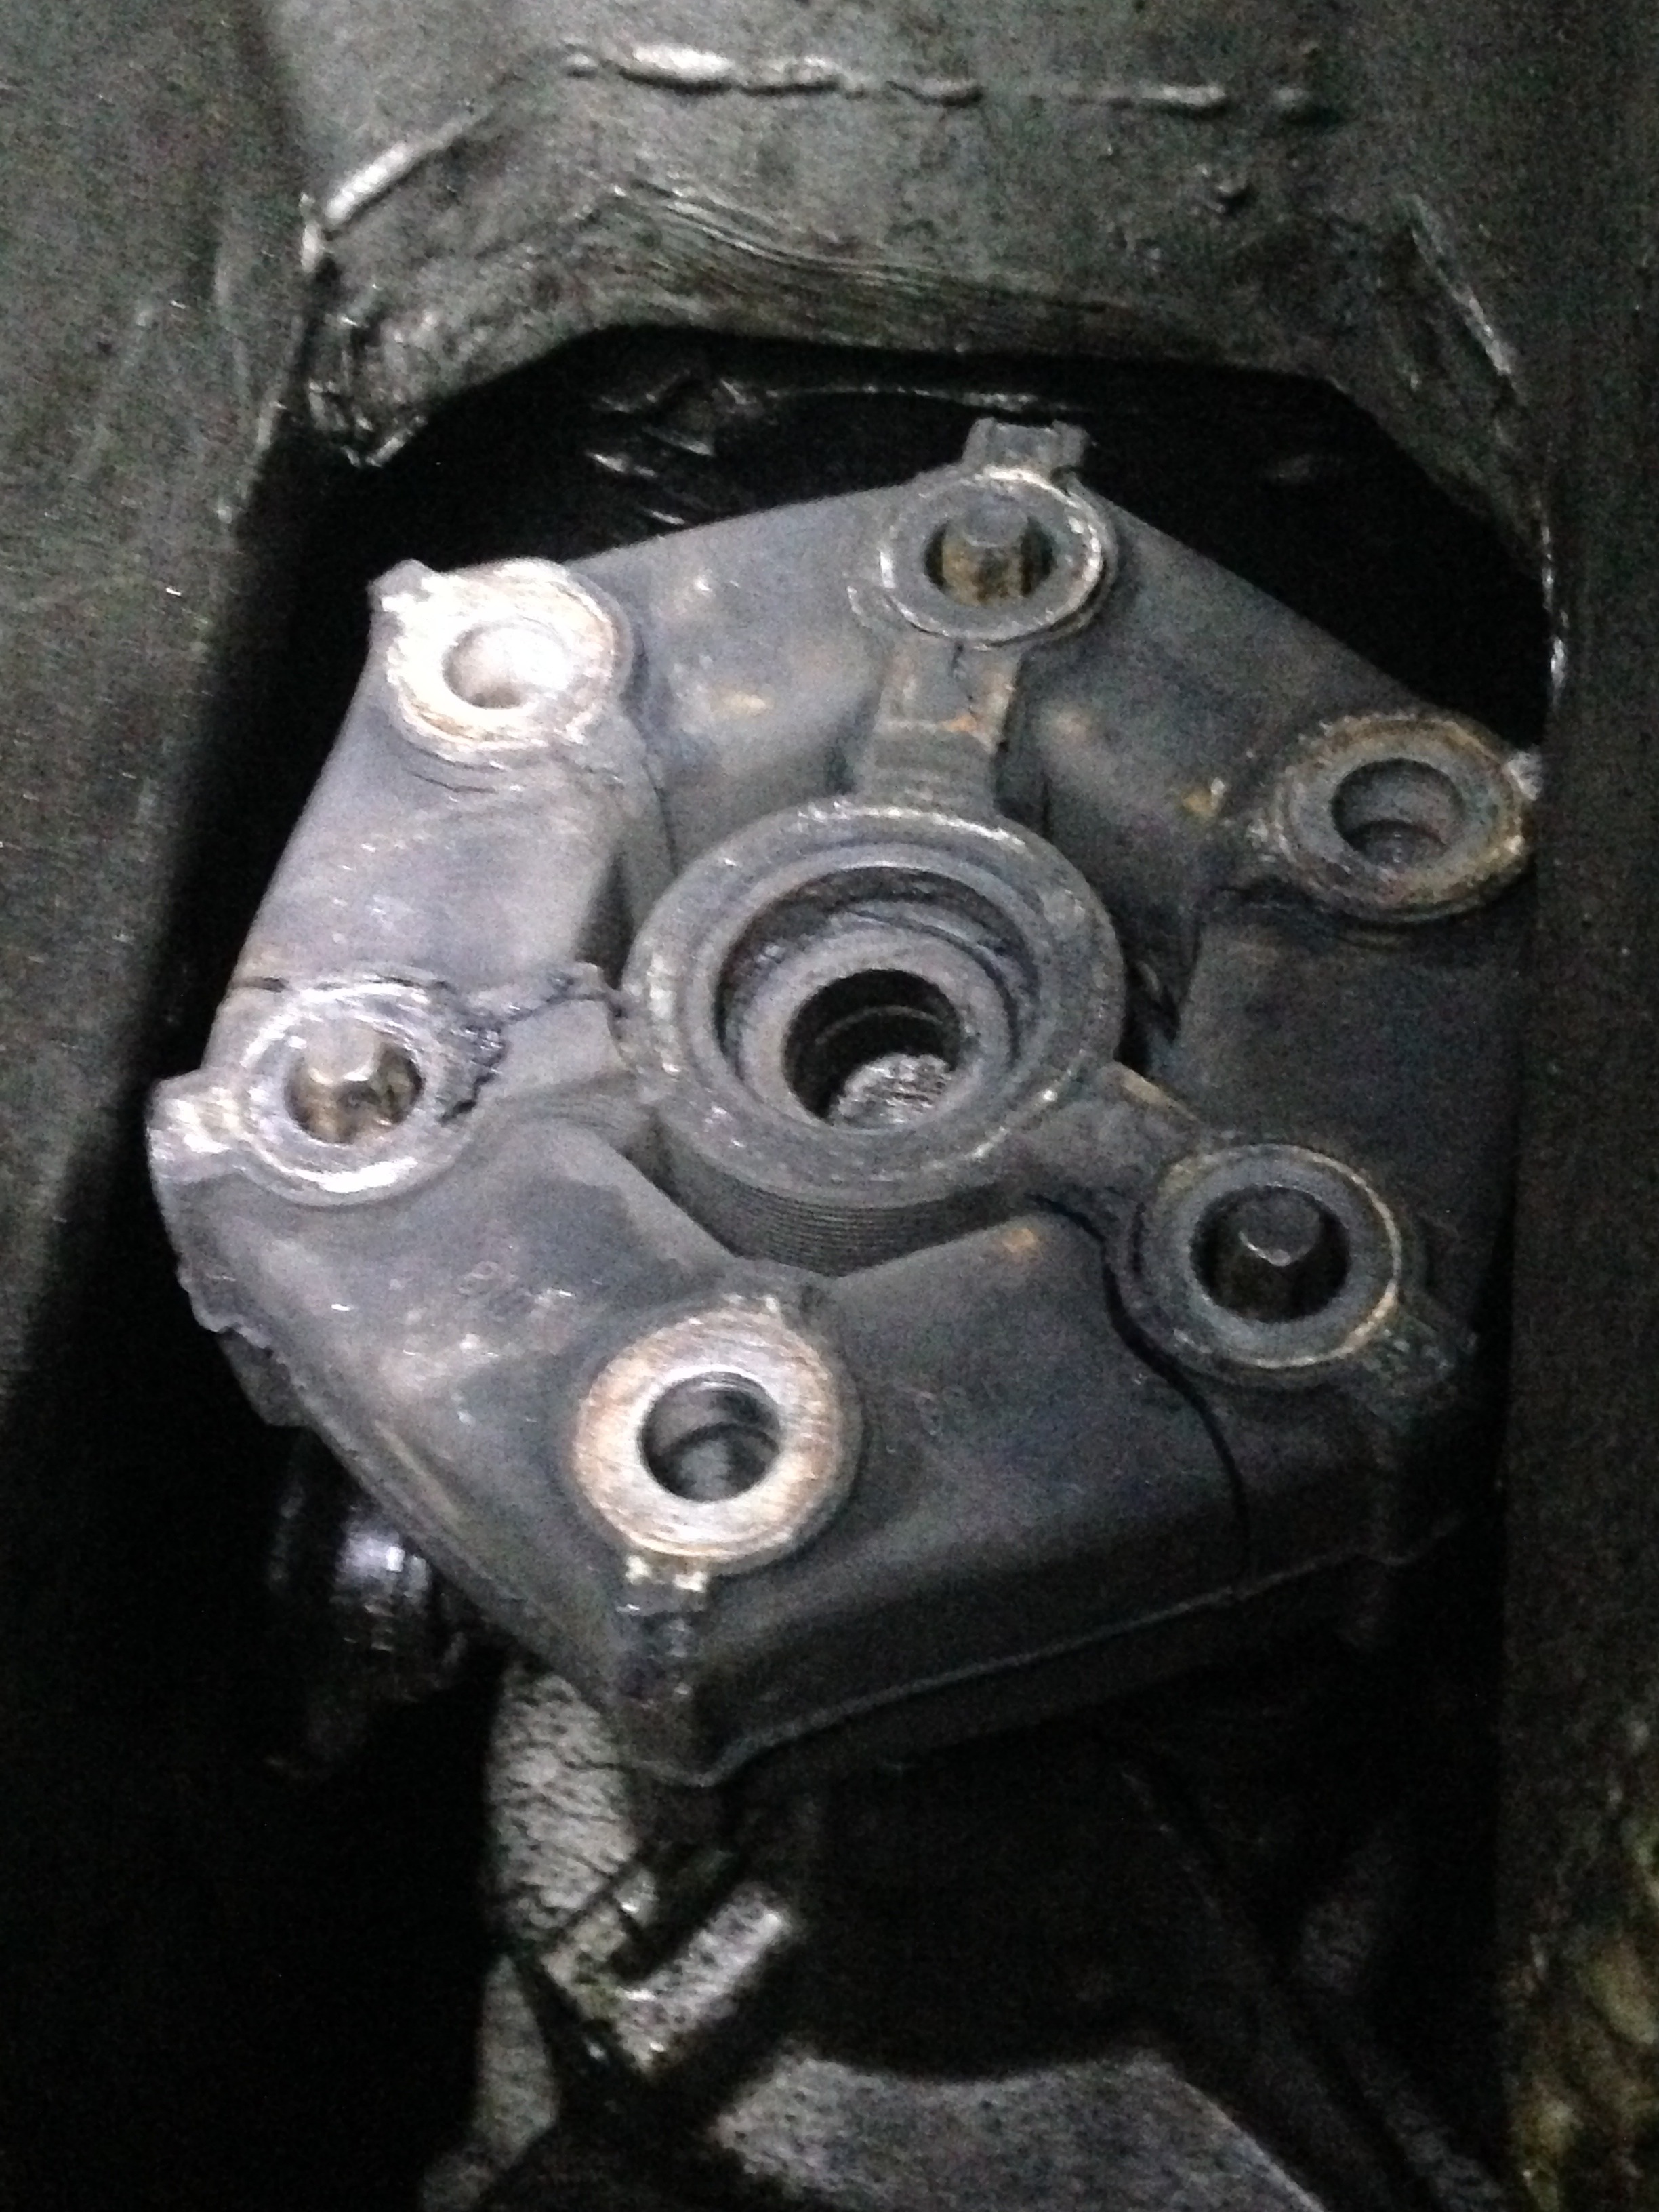
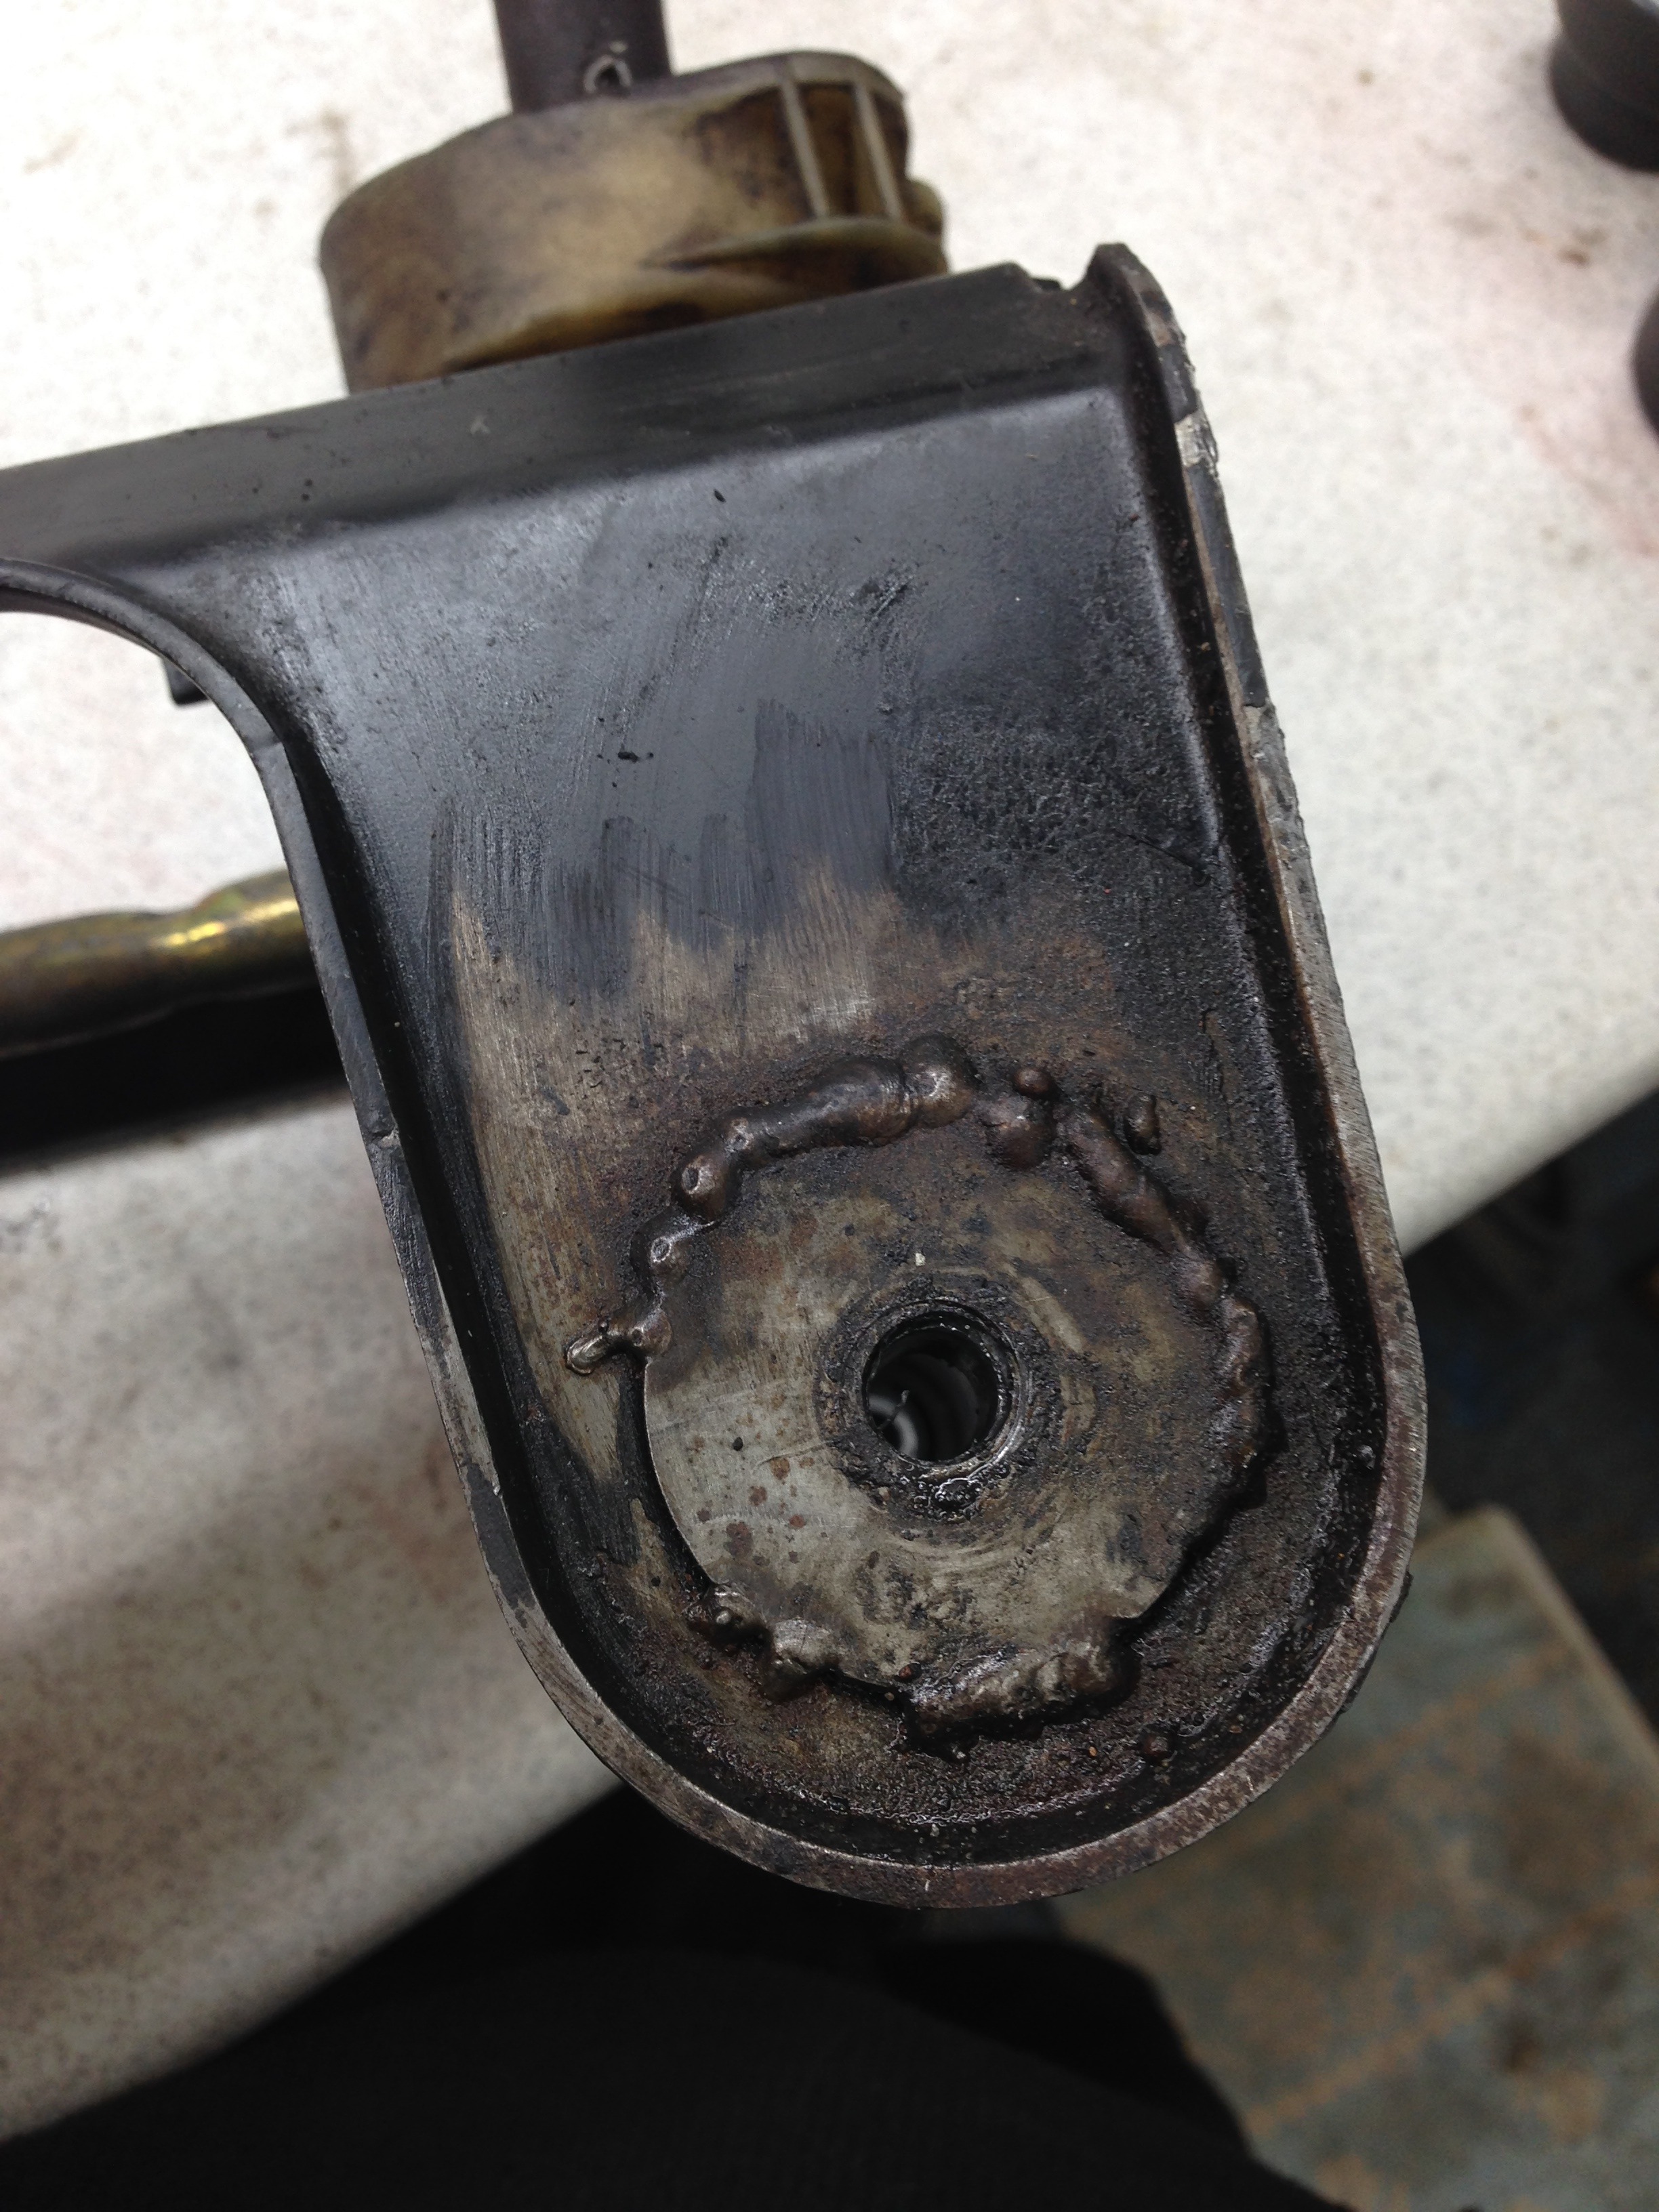
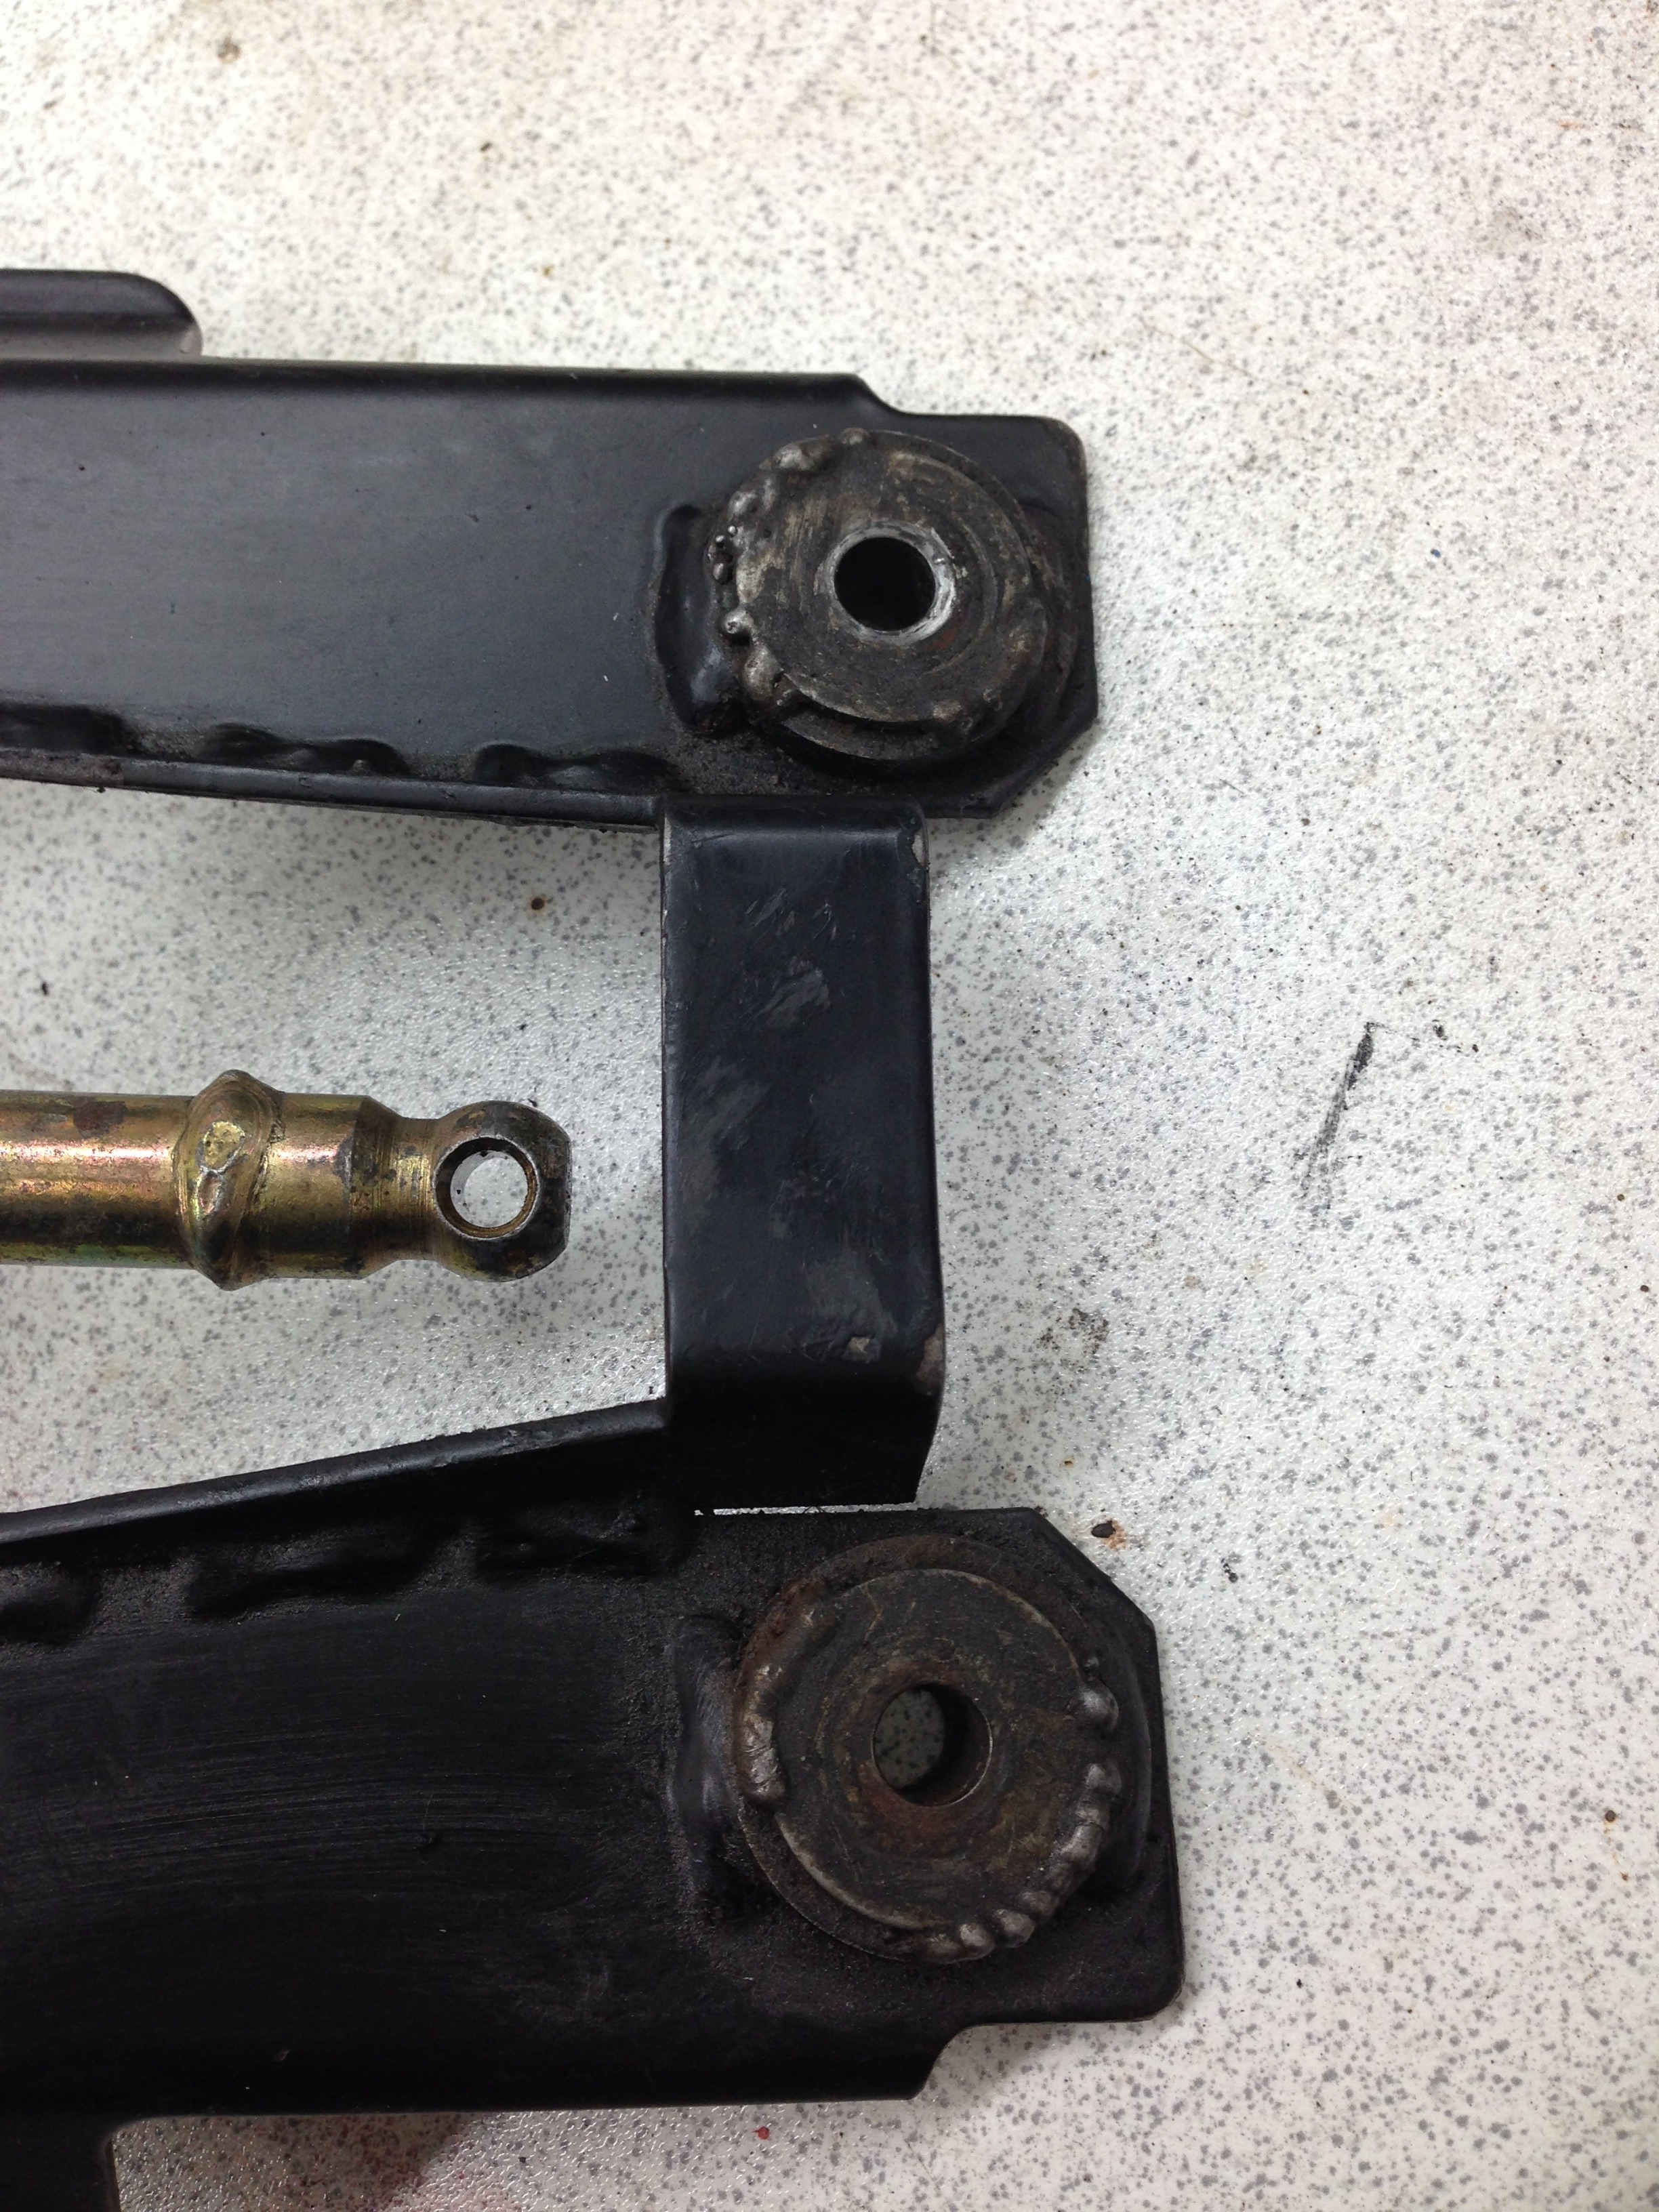
The gear lever frame also had some strange modifications.. I know what the aim was but to me this is not the way to stiffen the mounts onto the gearbox.. Welded washers over the original ford mounts..
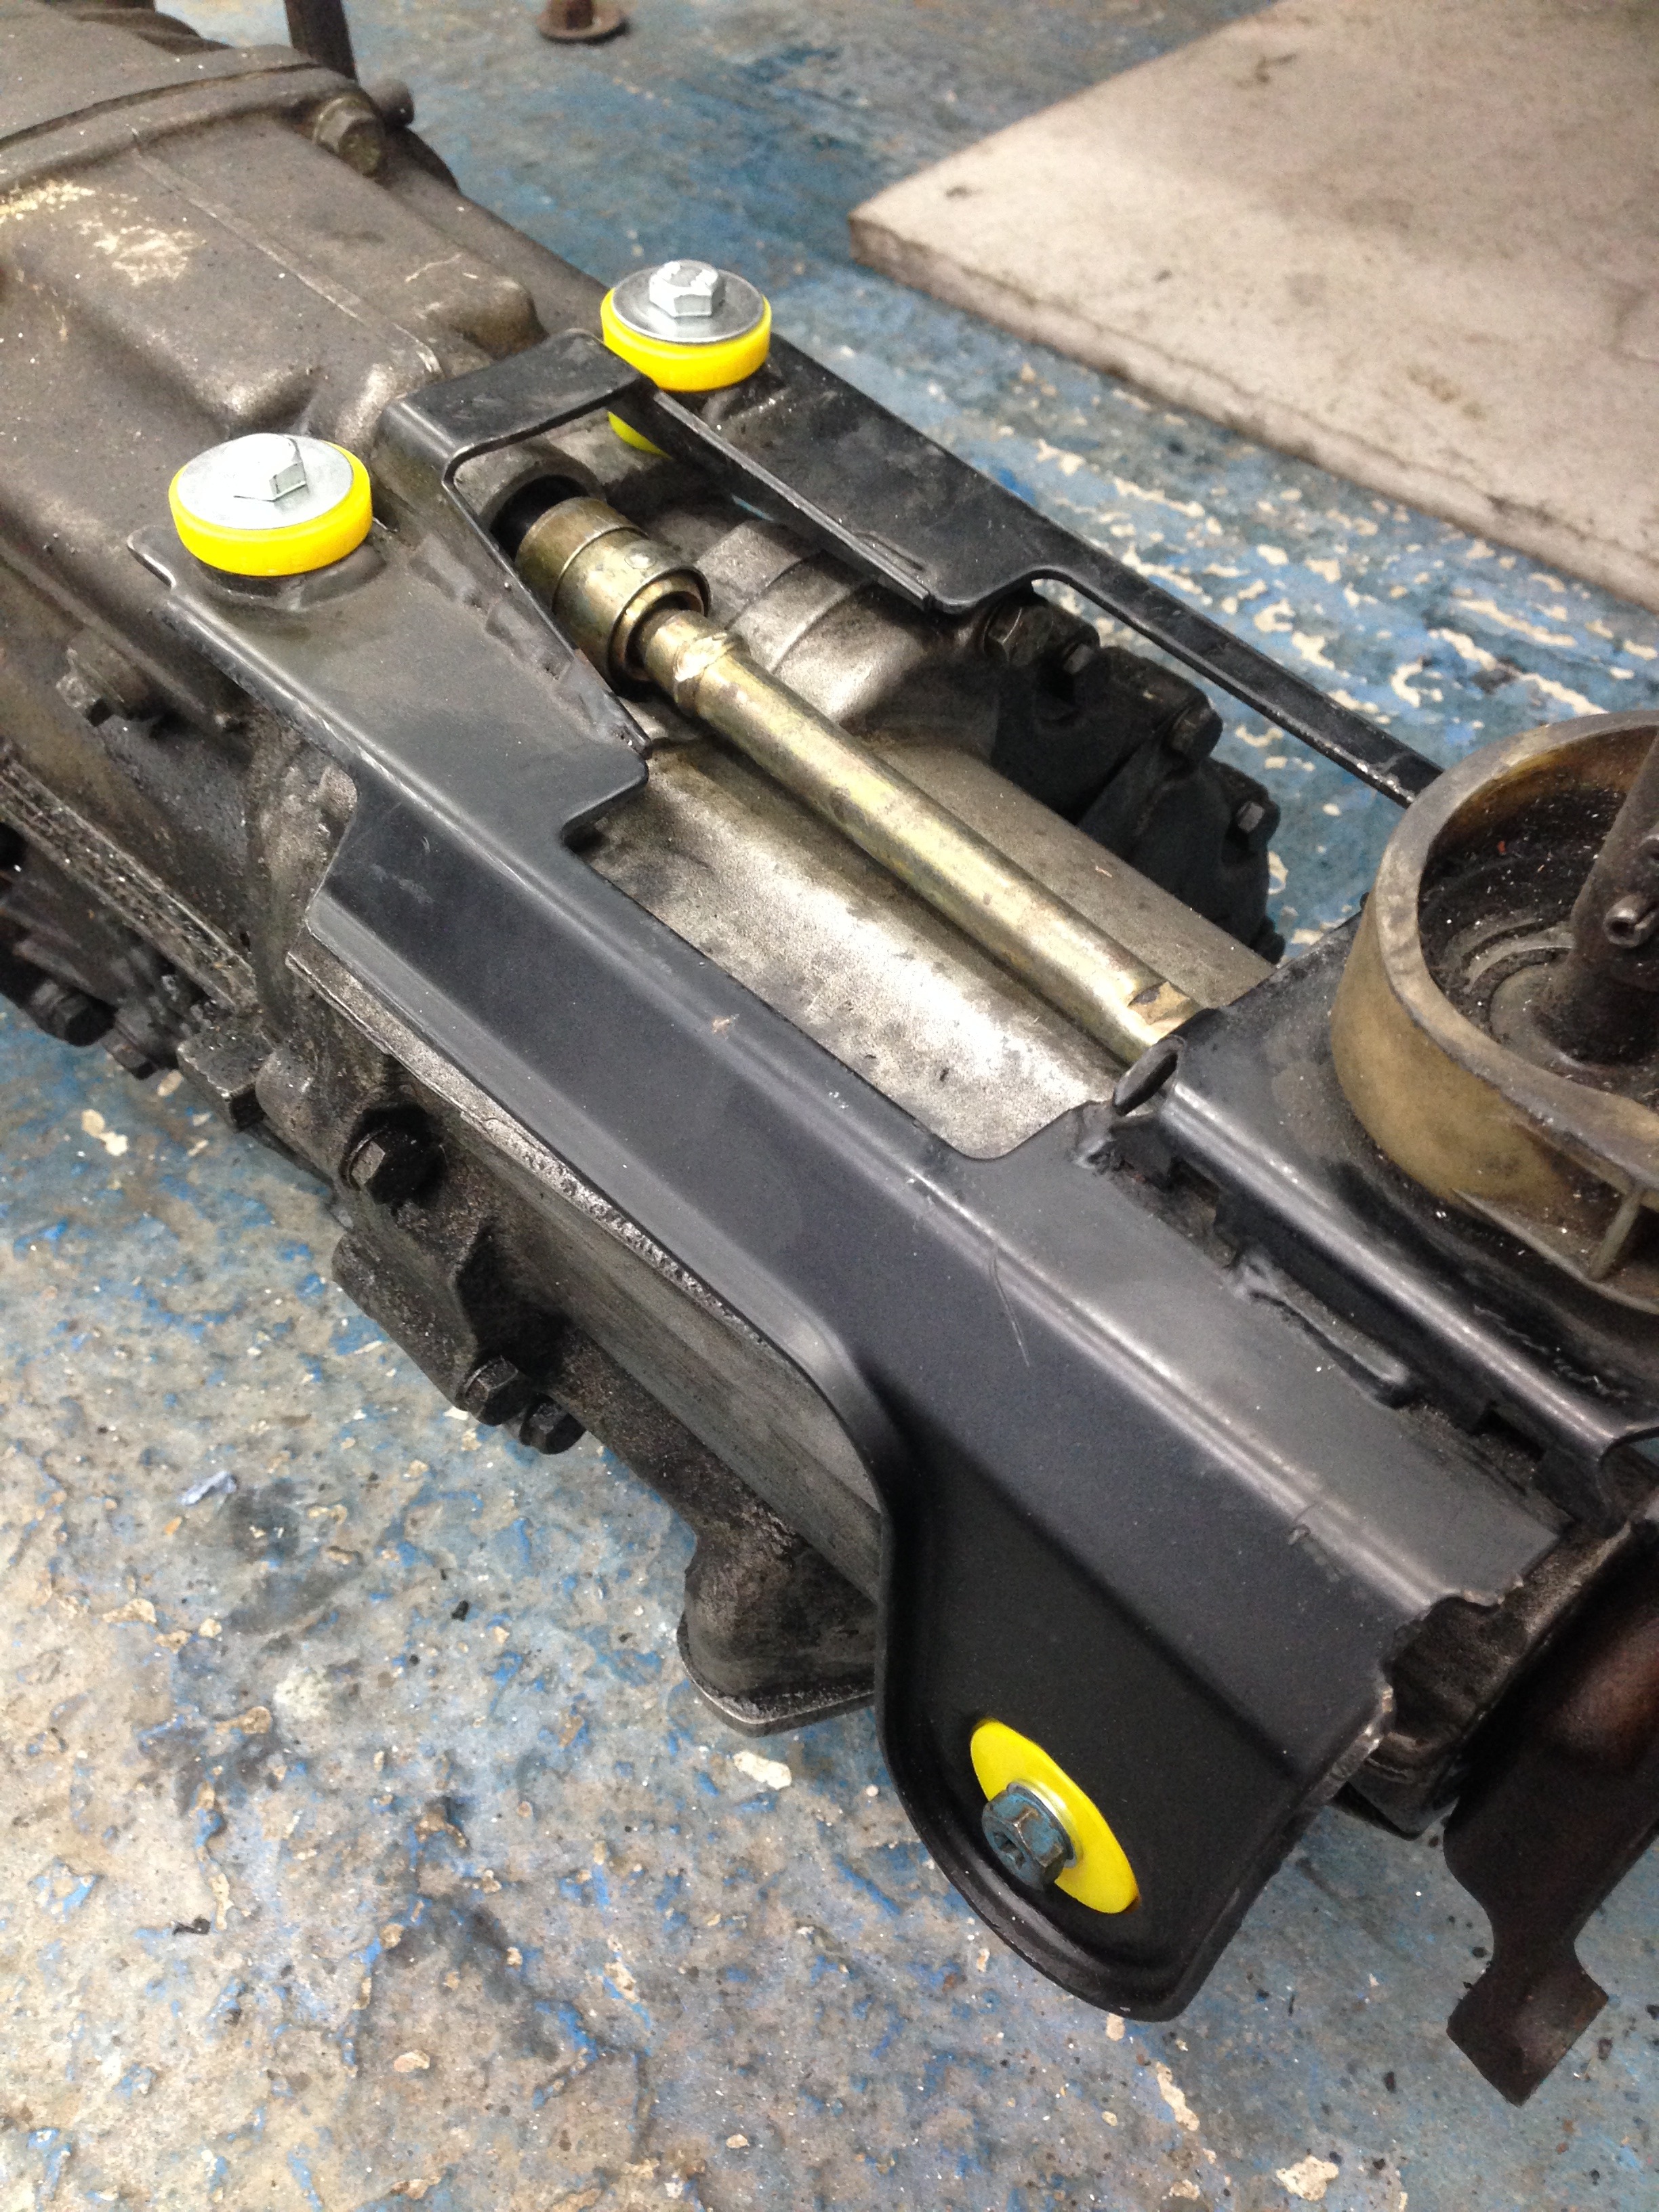
So a set of poly bushes later (wanted some vibrations taken out as you can get solid aluminium mounts) and a quick test fit on to the gearbox
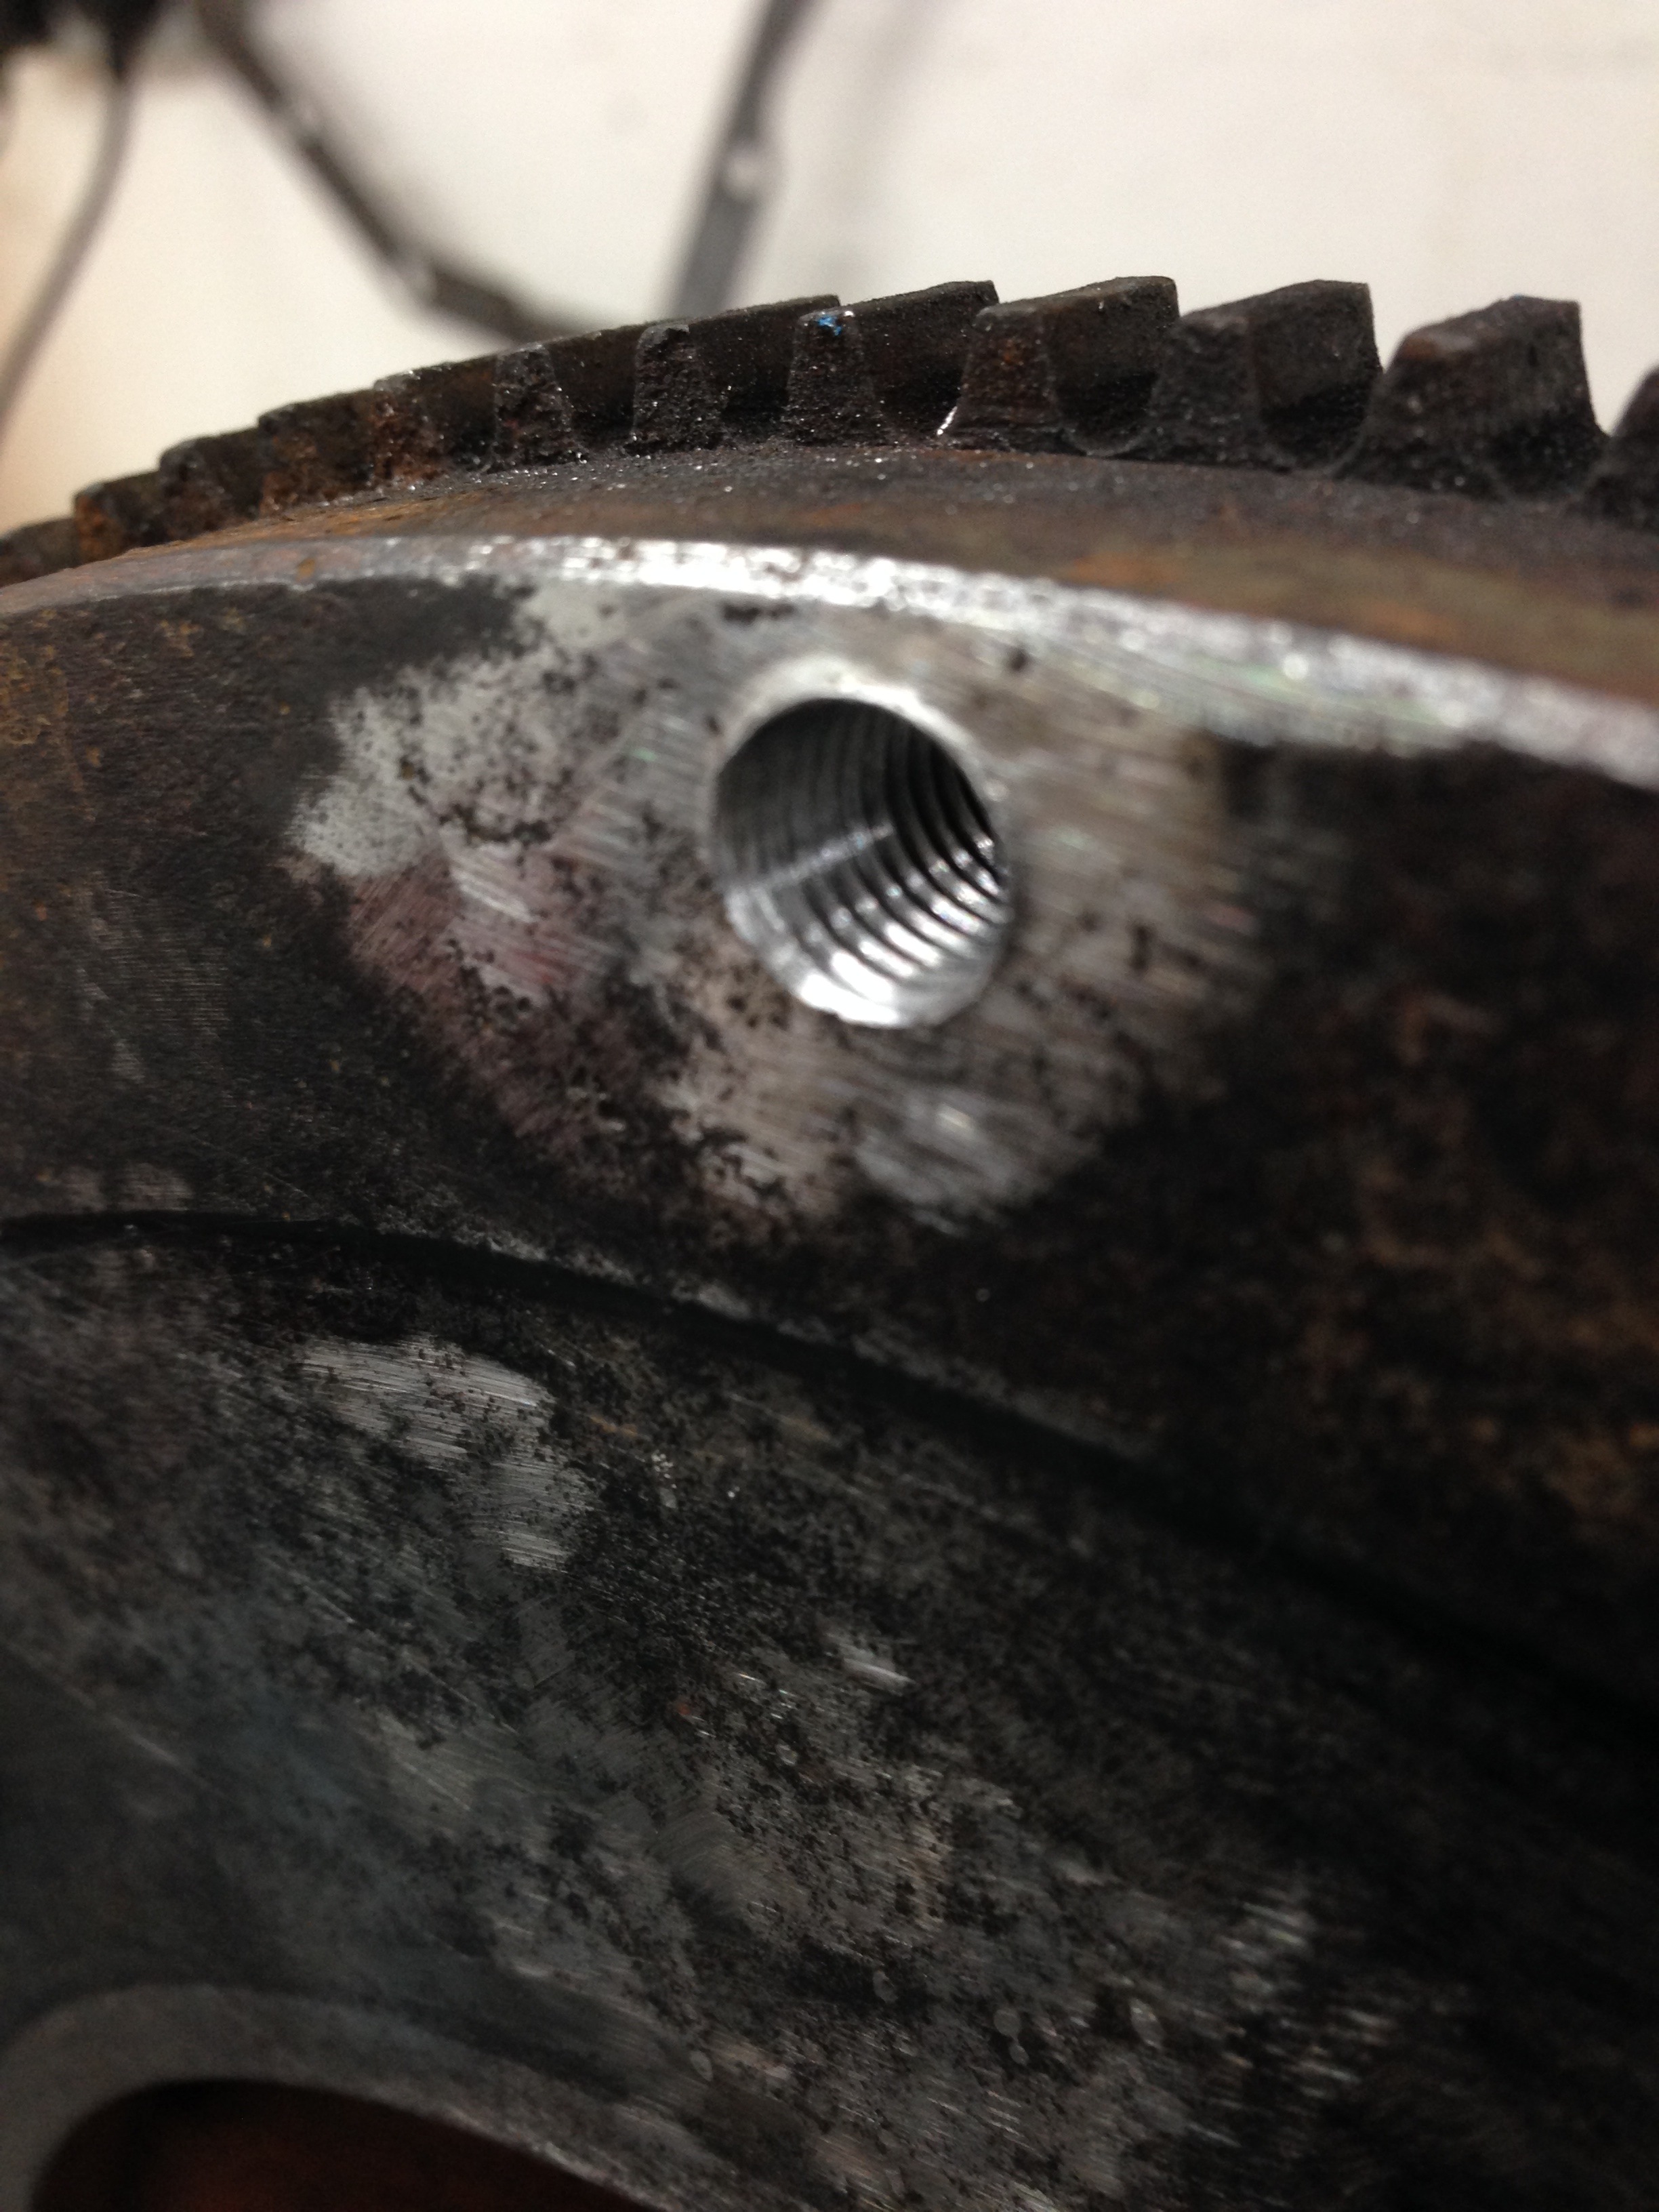
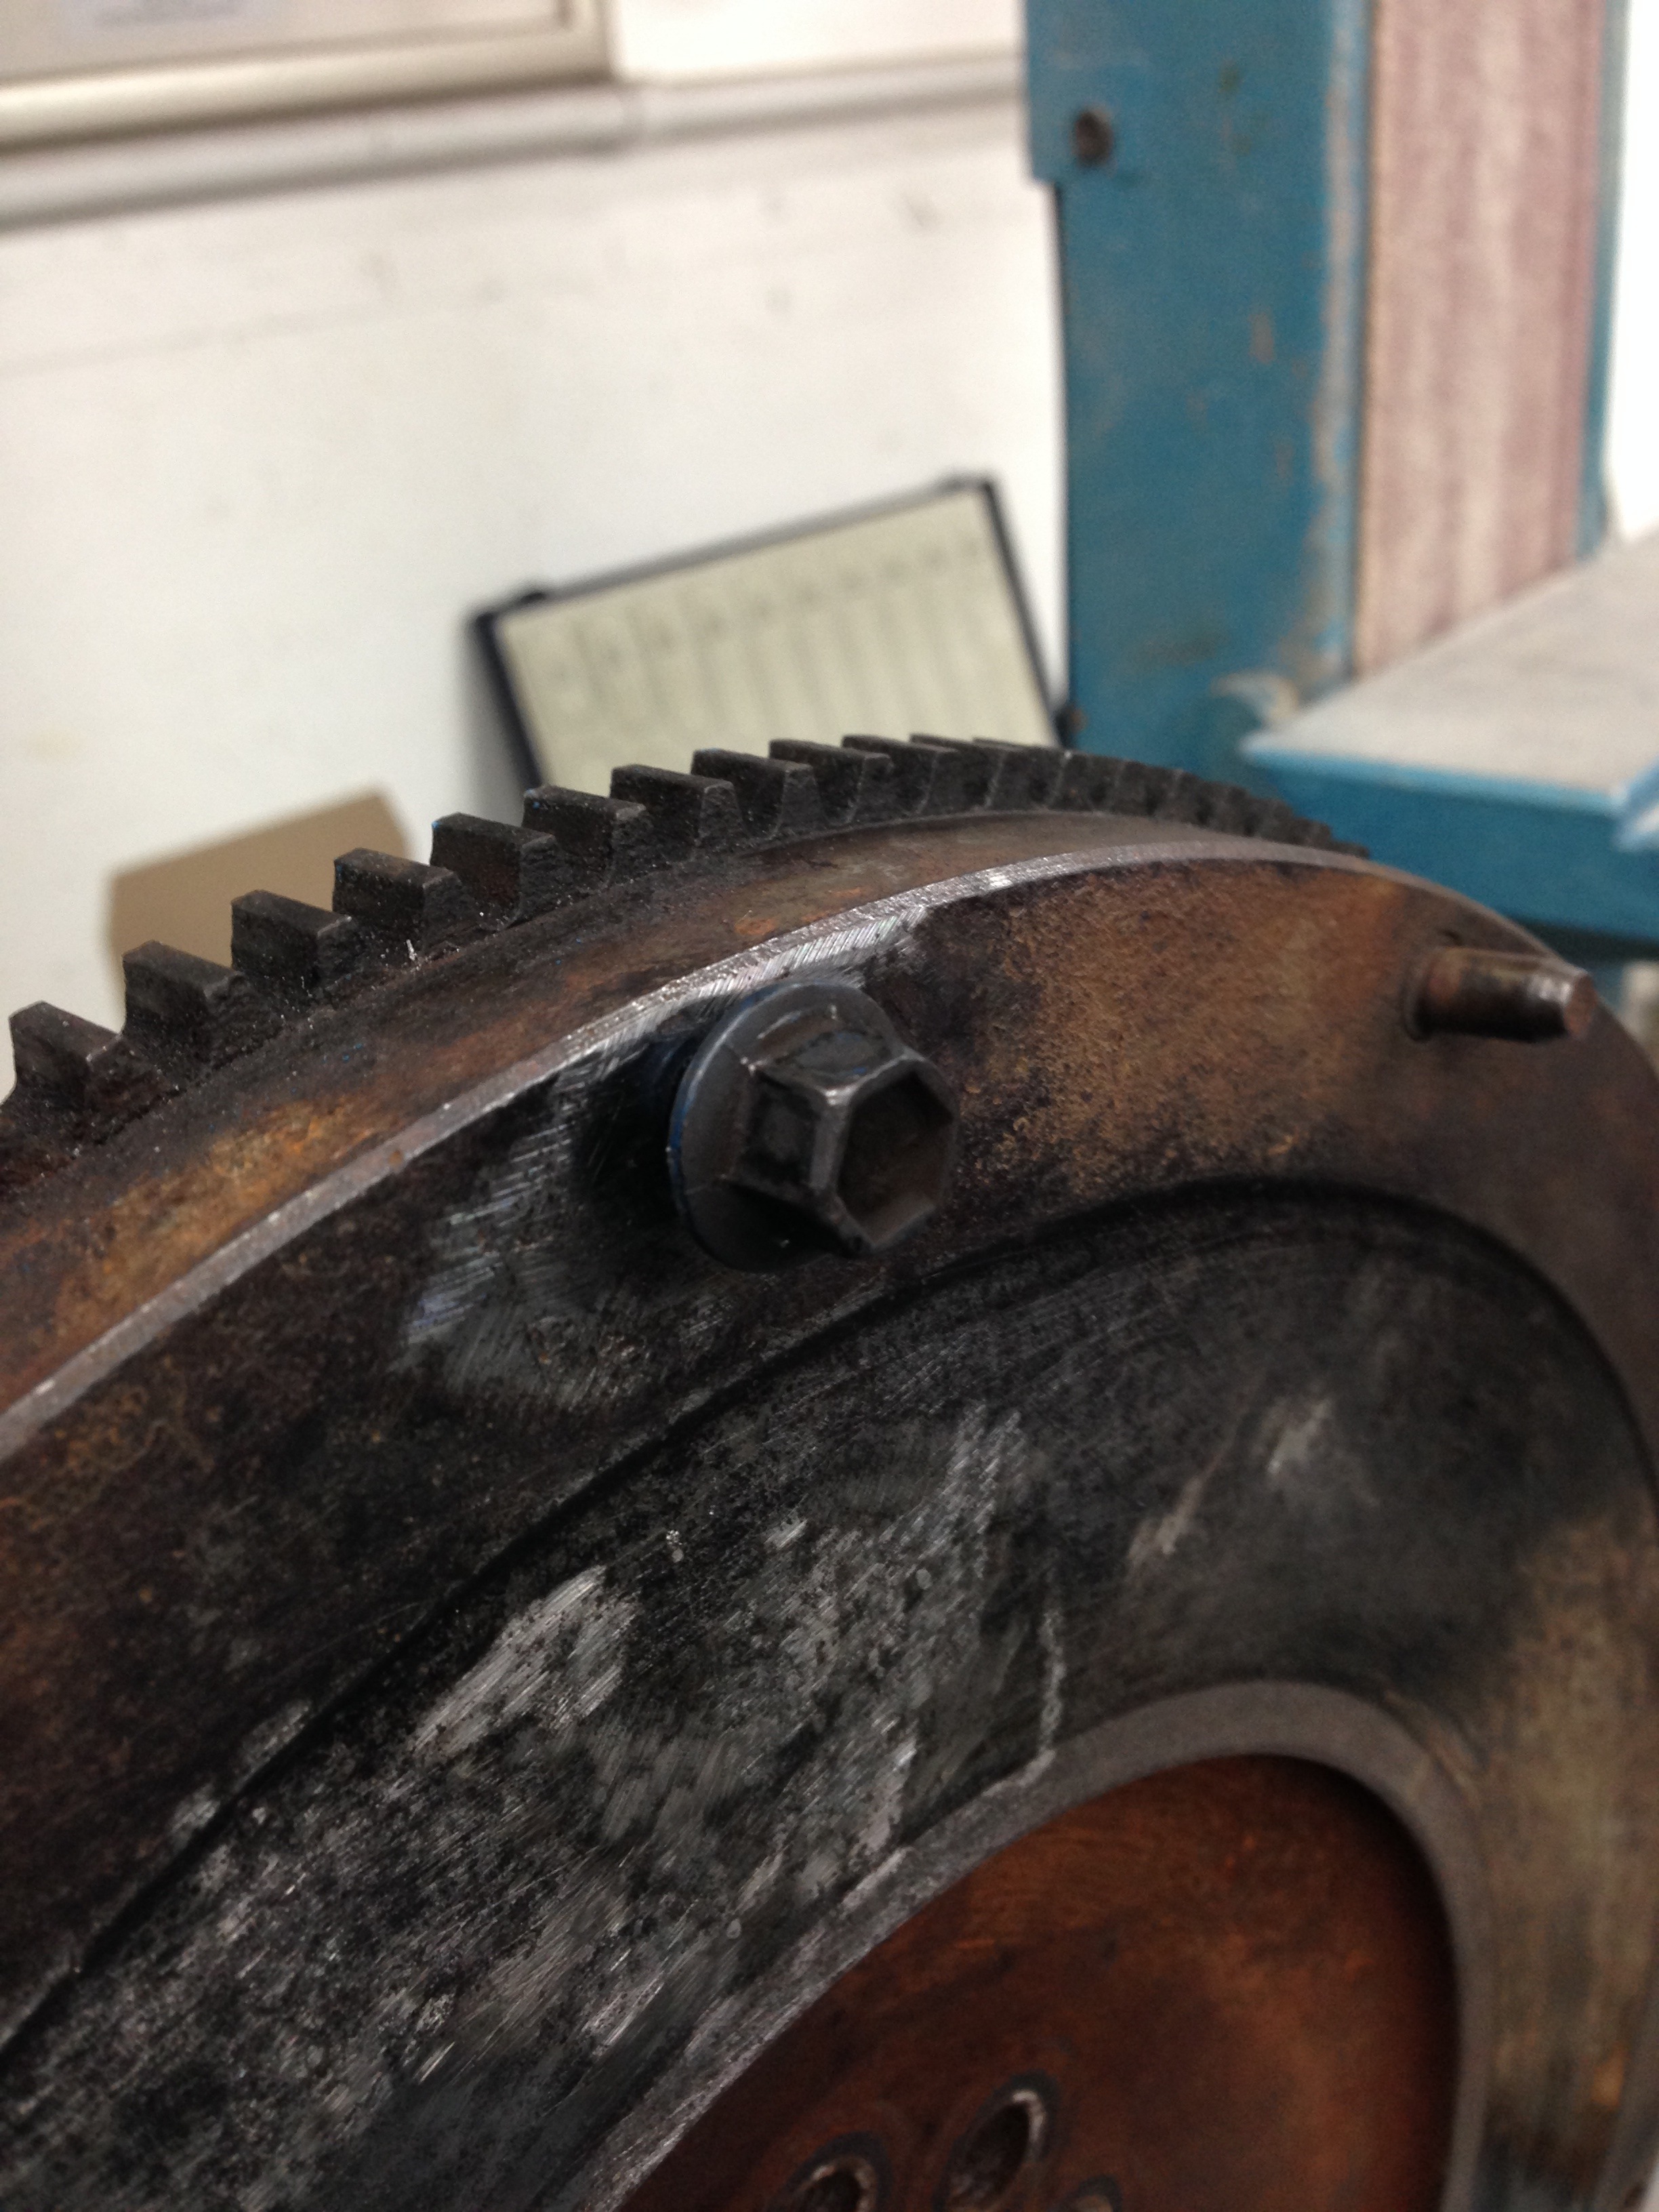
Whilst the box was out I decided to check the clutch, and I was dubious as to whether the rear crank seal was leaking so now was the time to change.. Good job I did. Had a snapped clutch bolt left in the flywheel so the clutch was only on with 5 bolts.. Great!
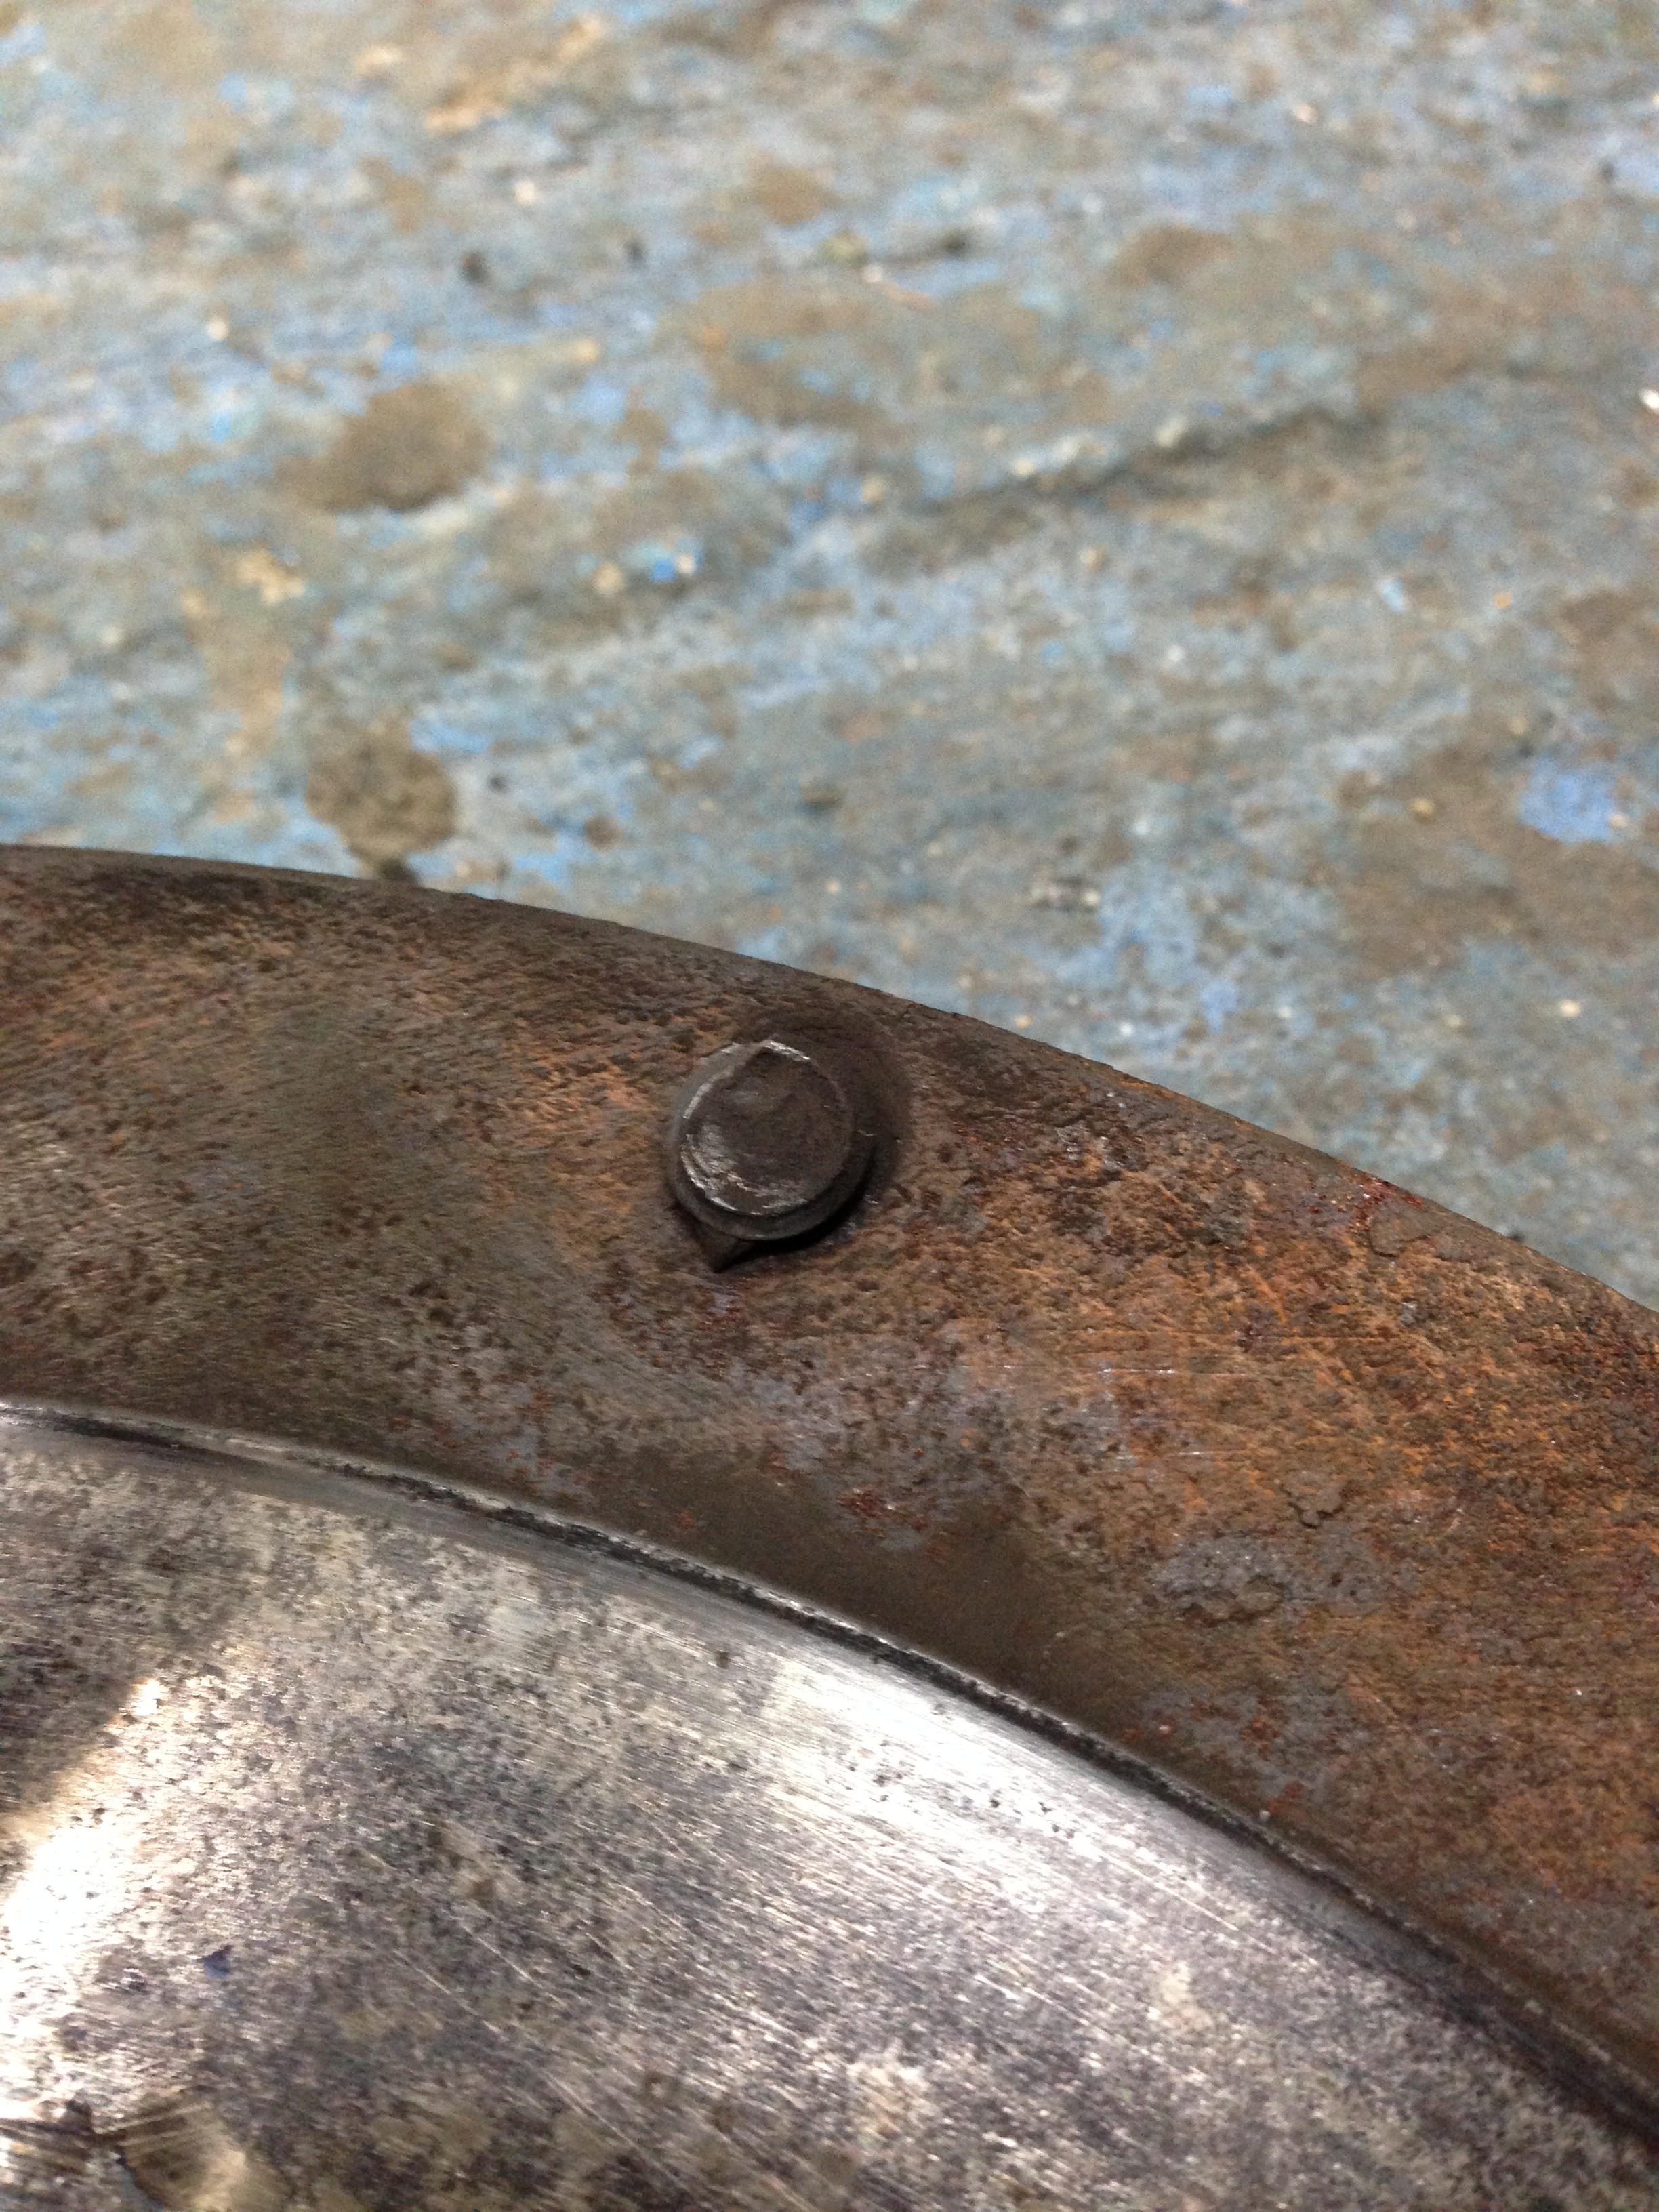
Someone knew this has happened when the clutch was fitted so why it was left is anyone's guess. So drilled it out.. Taped a new thread and fitted a helicoil. Nice new thread for the 6th bolt.
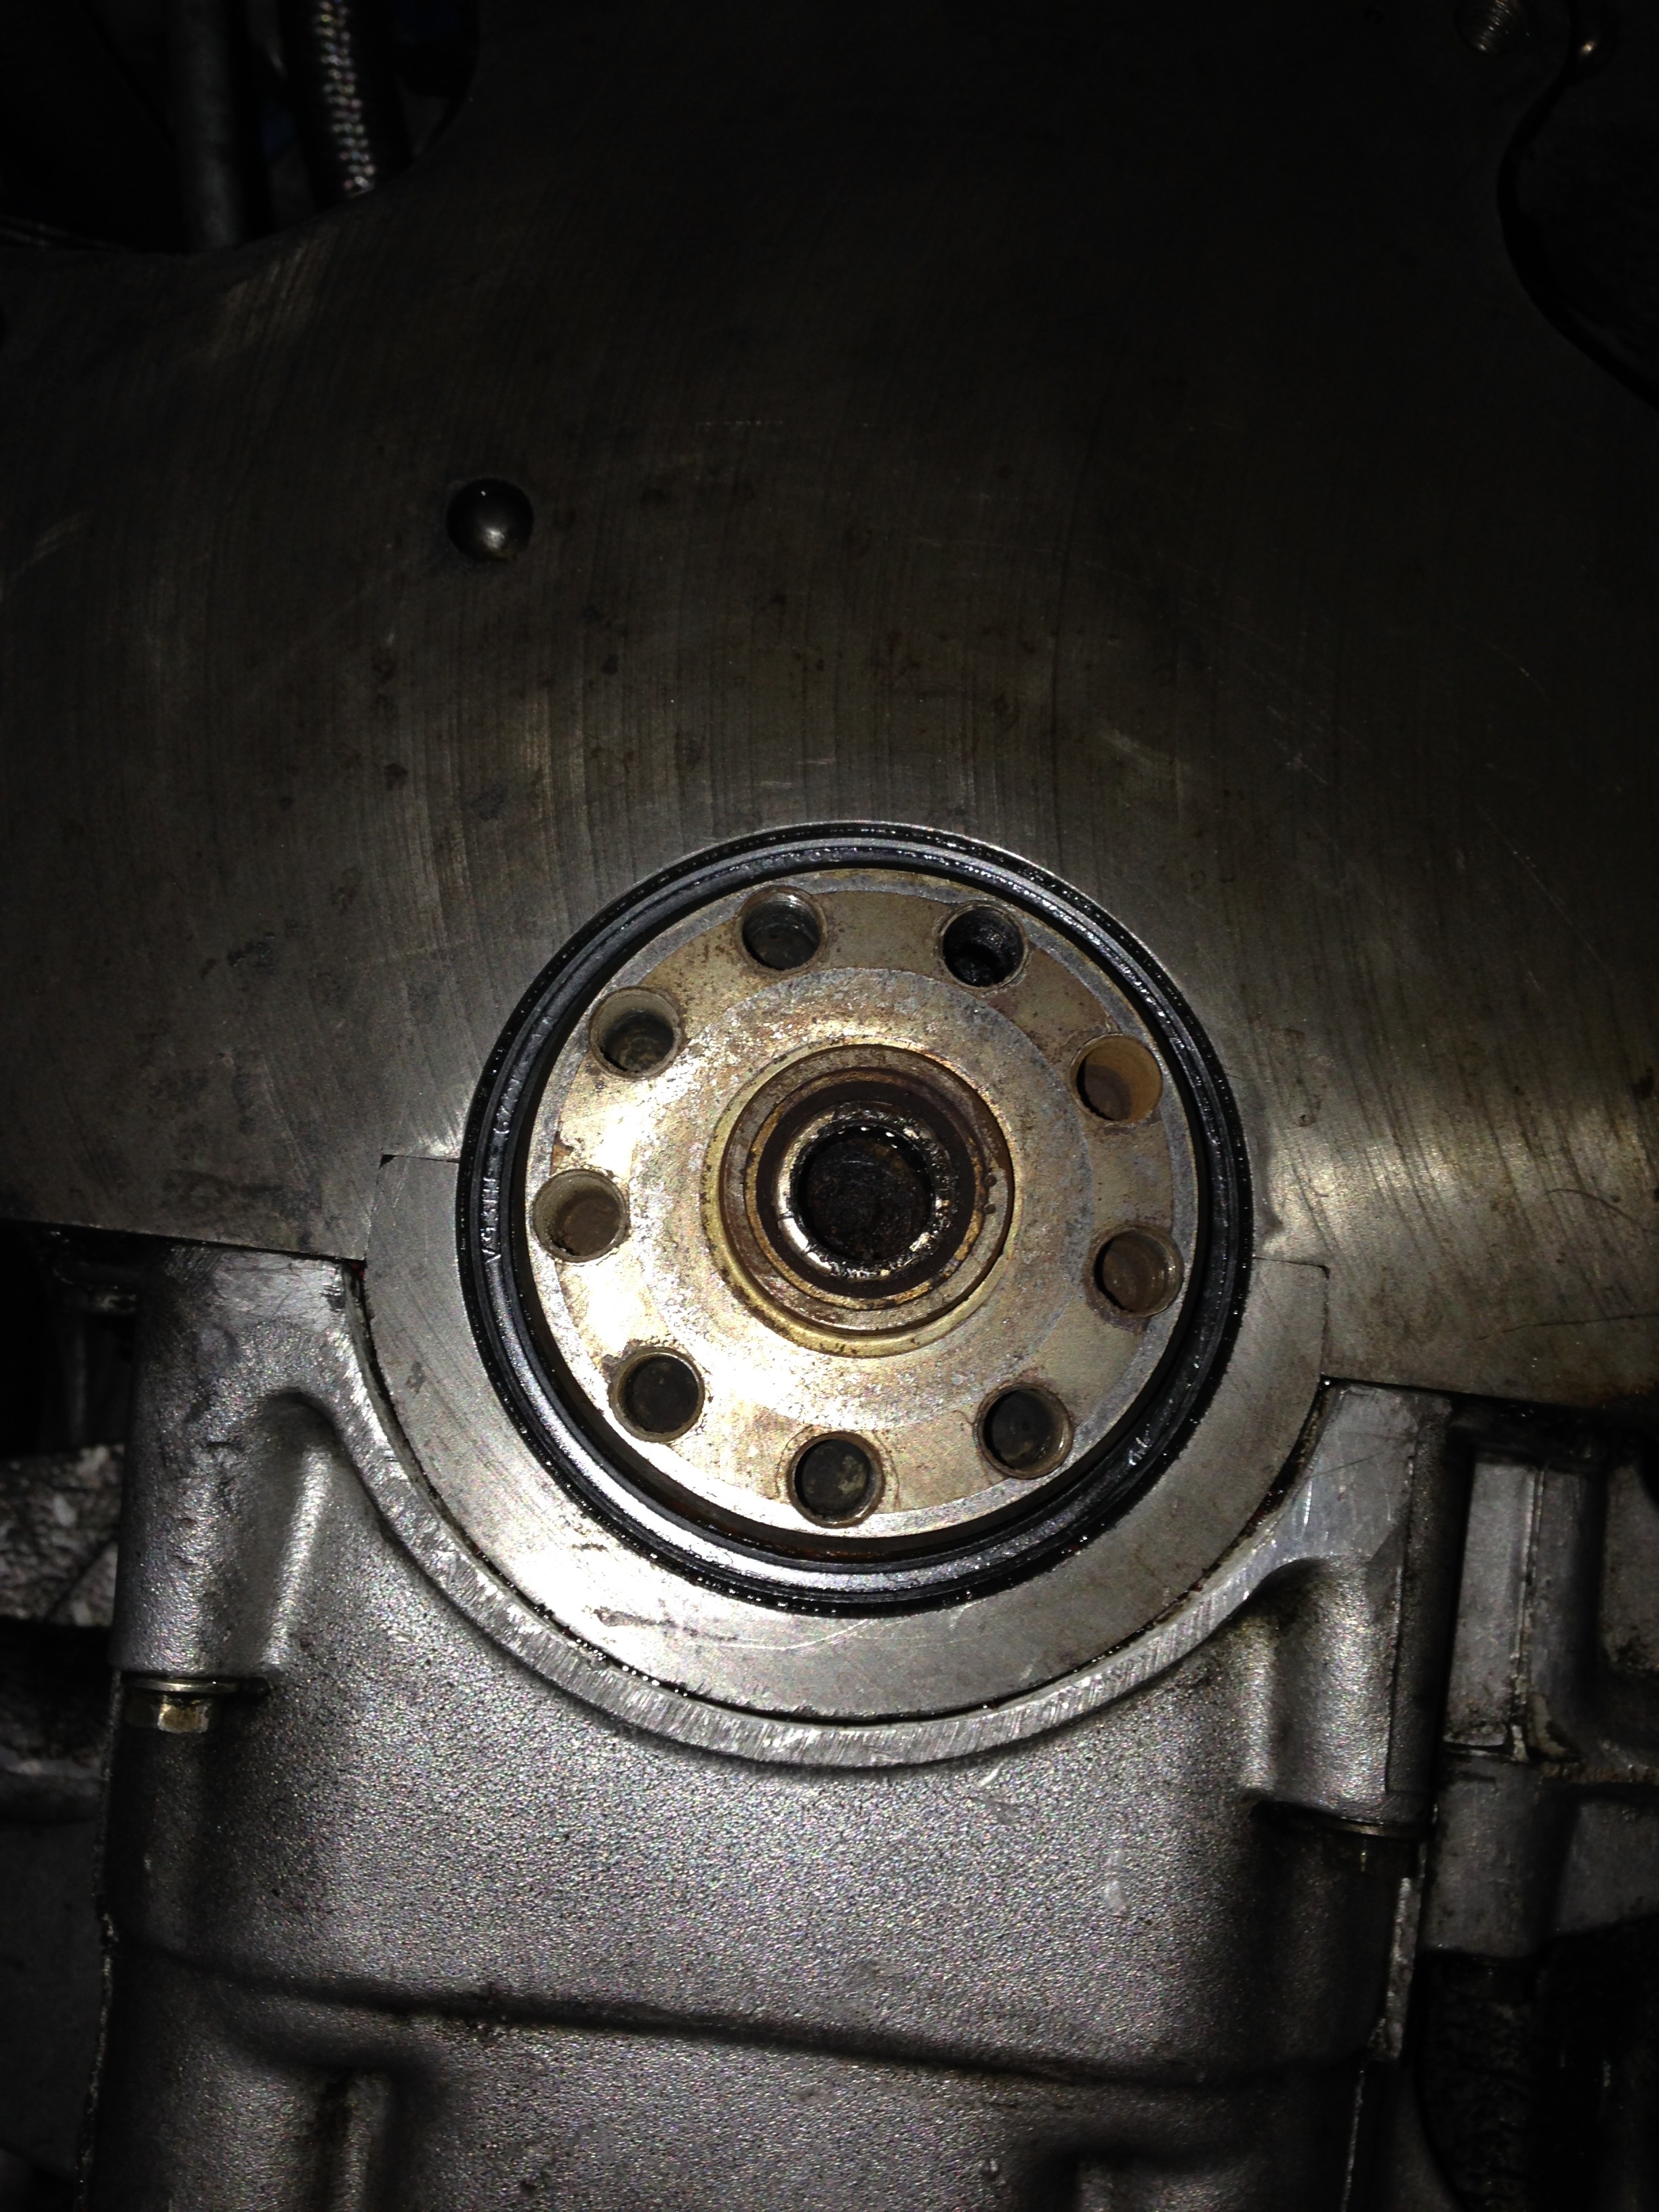
This was the suspect rear crank seal so out it came ready for a new one to be fitted
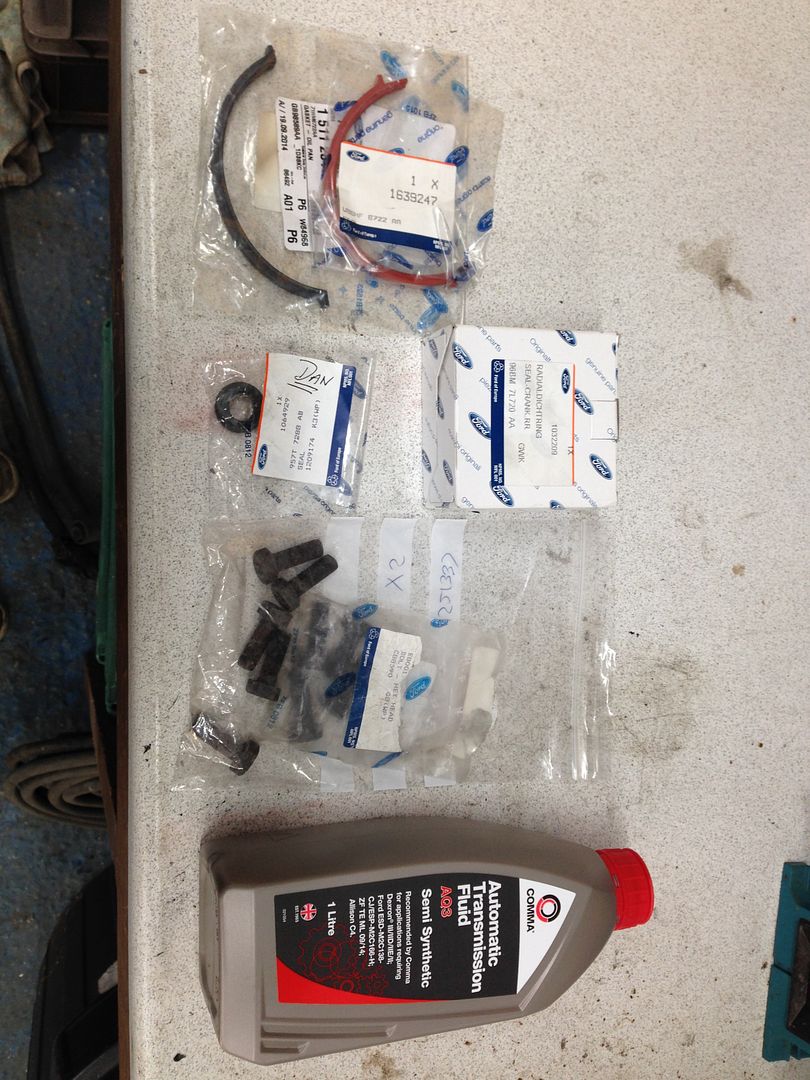
So new parts ordered.. By this stage I had noticed a leak in the gear selector shaft on the gearbox so got a new seal for that.. I had also realised that the sump was leaking.. So as I had the box out I thought now would be the time to replace.. Easy said than done!!!
Needless to say it was all experiences that has given me a much better understanding of how this particular car has been built and what will improve it.
On to the photos.. So first up was to get the gearbox out to replace the release bearing which was making an awful noise! Gearbox out

And the noisy bearing - knackered!

Though on getting the box off I came across a host of other problems, first up I noticed that the rubber doughnut used as a coupling between the gearbox output shaft and prop shaft was knackered


So I knew this would need to be replaced.. Easy enough or so I thought. This is the older hexagonal type, the type fitted to the early Sapphire 4x4s.. So what it was doing on this car I don't know. It turns out that the propshaft was also the early Sapphire 4x4 item. The problem being you can not get this part for love nor money. They are simply not available anymore. Ford changed it for a different design in the later sapphires and for the escort cosworth. So I had to order the later one.. Problem solved.. For now.
I also noticed this but thought nothing of it at the time being told that it shouldn't cause an issue

This is the output shaft of the gearbox cut off to allow the early doughnut to fit, later this was going to cause me no end of issues!
Whilst the box was out and the starter had been removed I also noticed the breather drain pipe to the sump simply was not connected and therefore draining oil all over the side of the engine.. Another aspect to address.

The front UJ on the front propshaft was also knackered and had loads of play in it.. I've heard that this can fail whilst driving and take the diff, sump and a mass of other bits out so lucky I caught it whilst still attached
Old one out

New one ready to go in

Fitted

The gear lever frame also had some strange modifications.. I know what the aim was but to me this is not the way to stiffen the mounts onto the gearbox.. Welded washers over the original ford mounts..


So a set of poly bushes later (wanted some vibrations taken out as you can get solid aluminium mounts) and a quick test fit on to the gearbox

Whilst the box was out I decided to check the clutch, and I was dubious as to whether the rear crank seal was leaking so now was the time to change.. Good job I did. Had a snapped clutch bolt left in the flywheel so the clutch was only on with 5 bolts.. Great!

Someone knew this has happened when the clutch was fitted so why it was left is anyone's guess. So drilled it out.. Taped a new thread and fitted a helicoil. Nice new thread for the 6th bolt.


This was the suspect rear crank seal so out it came ready for a new one to be fitted

So new parts ordered.. By this stage I had noticed a leak in the gear selector shaft on the gearbox so got a new seal for that.. I had also realised that the sump was leaking.. So as I had the box out I thought now would be the time to replace.. Easy said than done!!!
 25-10-2015, 06:25 PM
#3
PassionFord Regular
Thread Starter
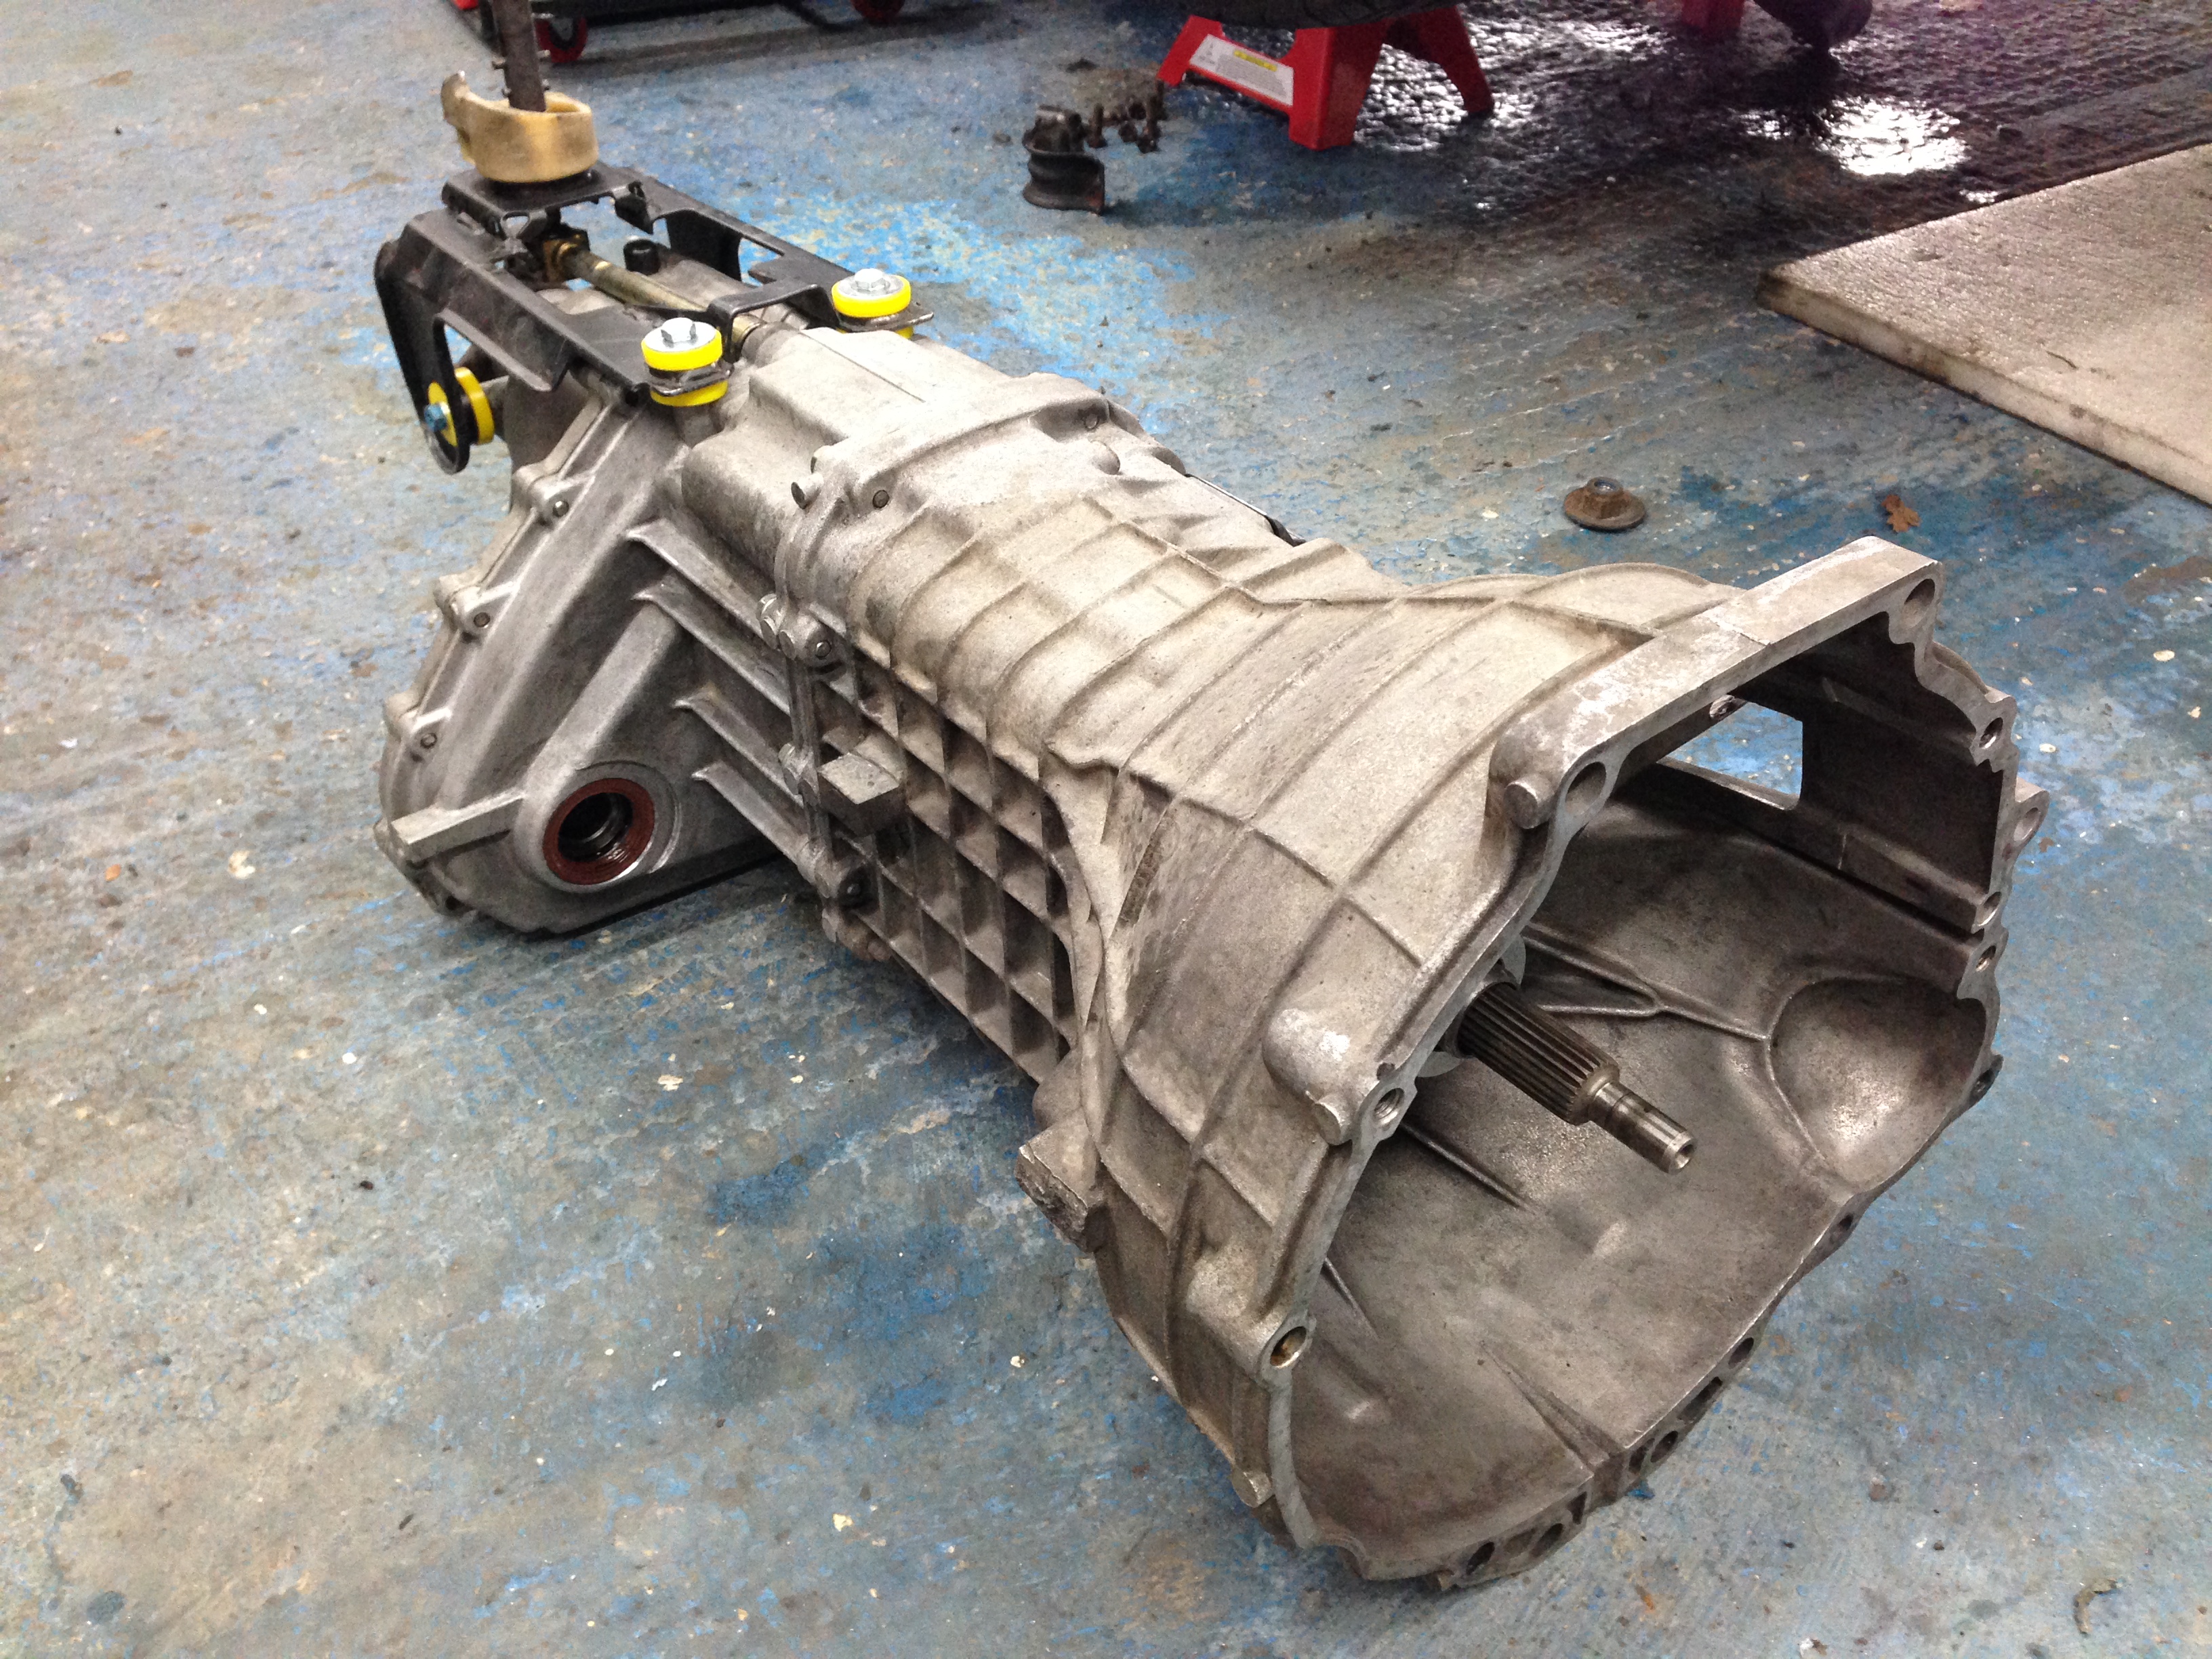
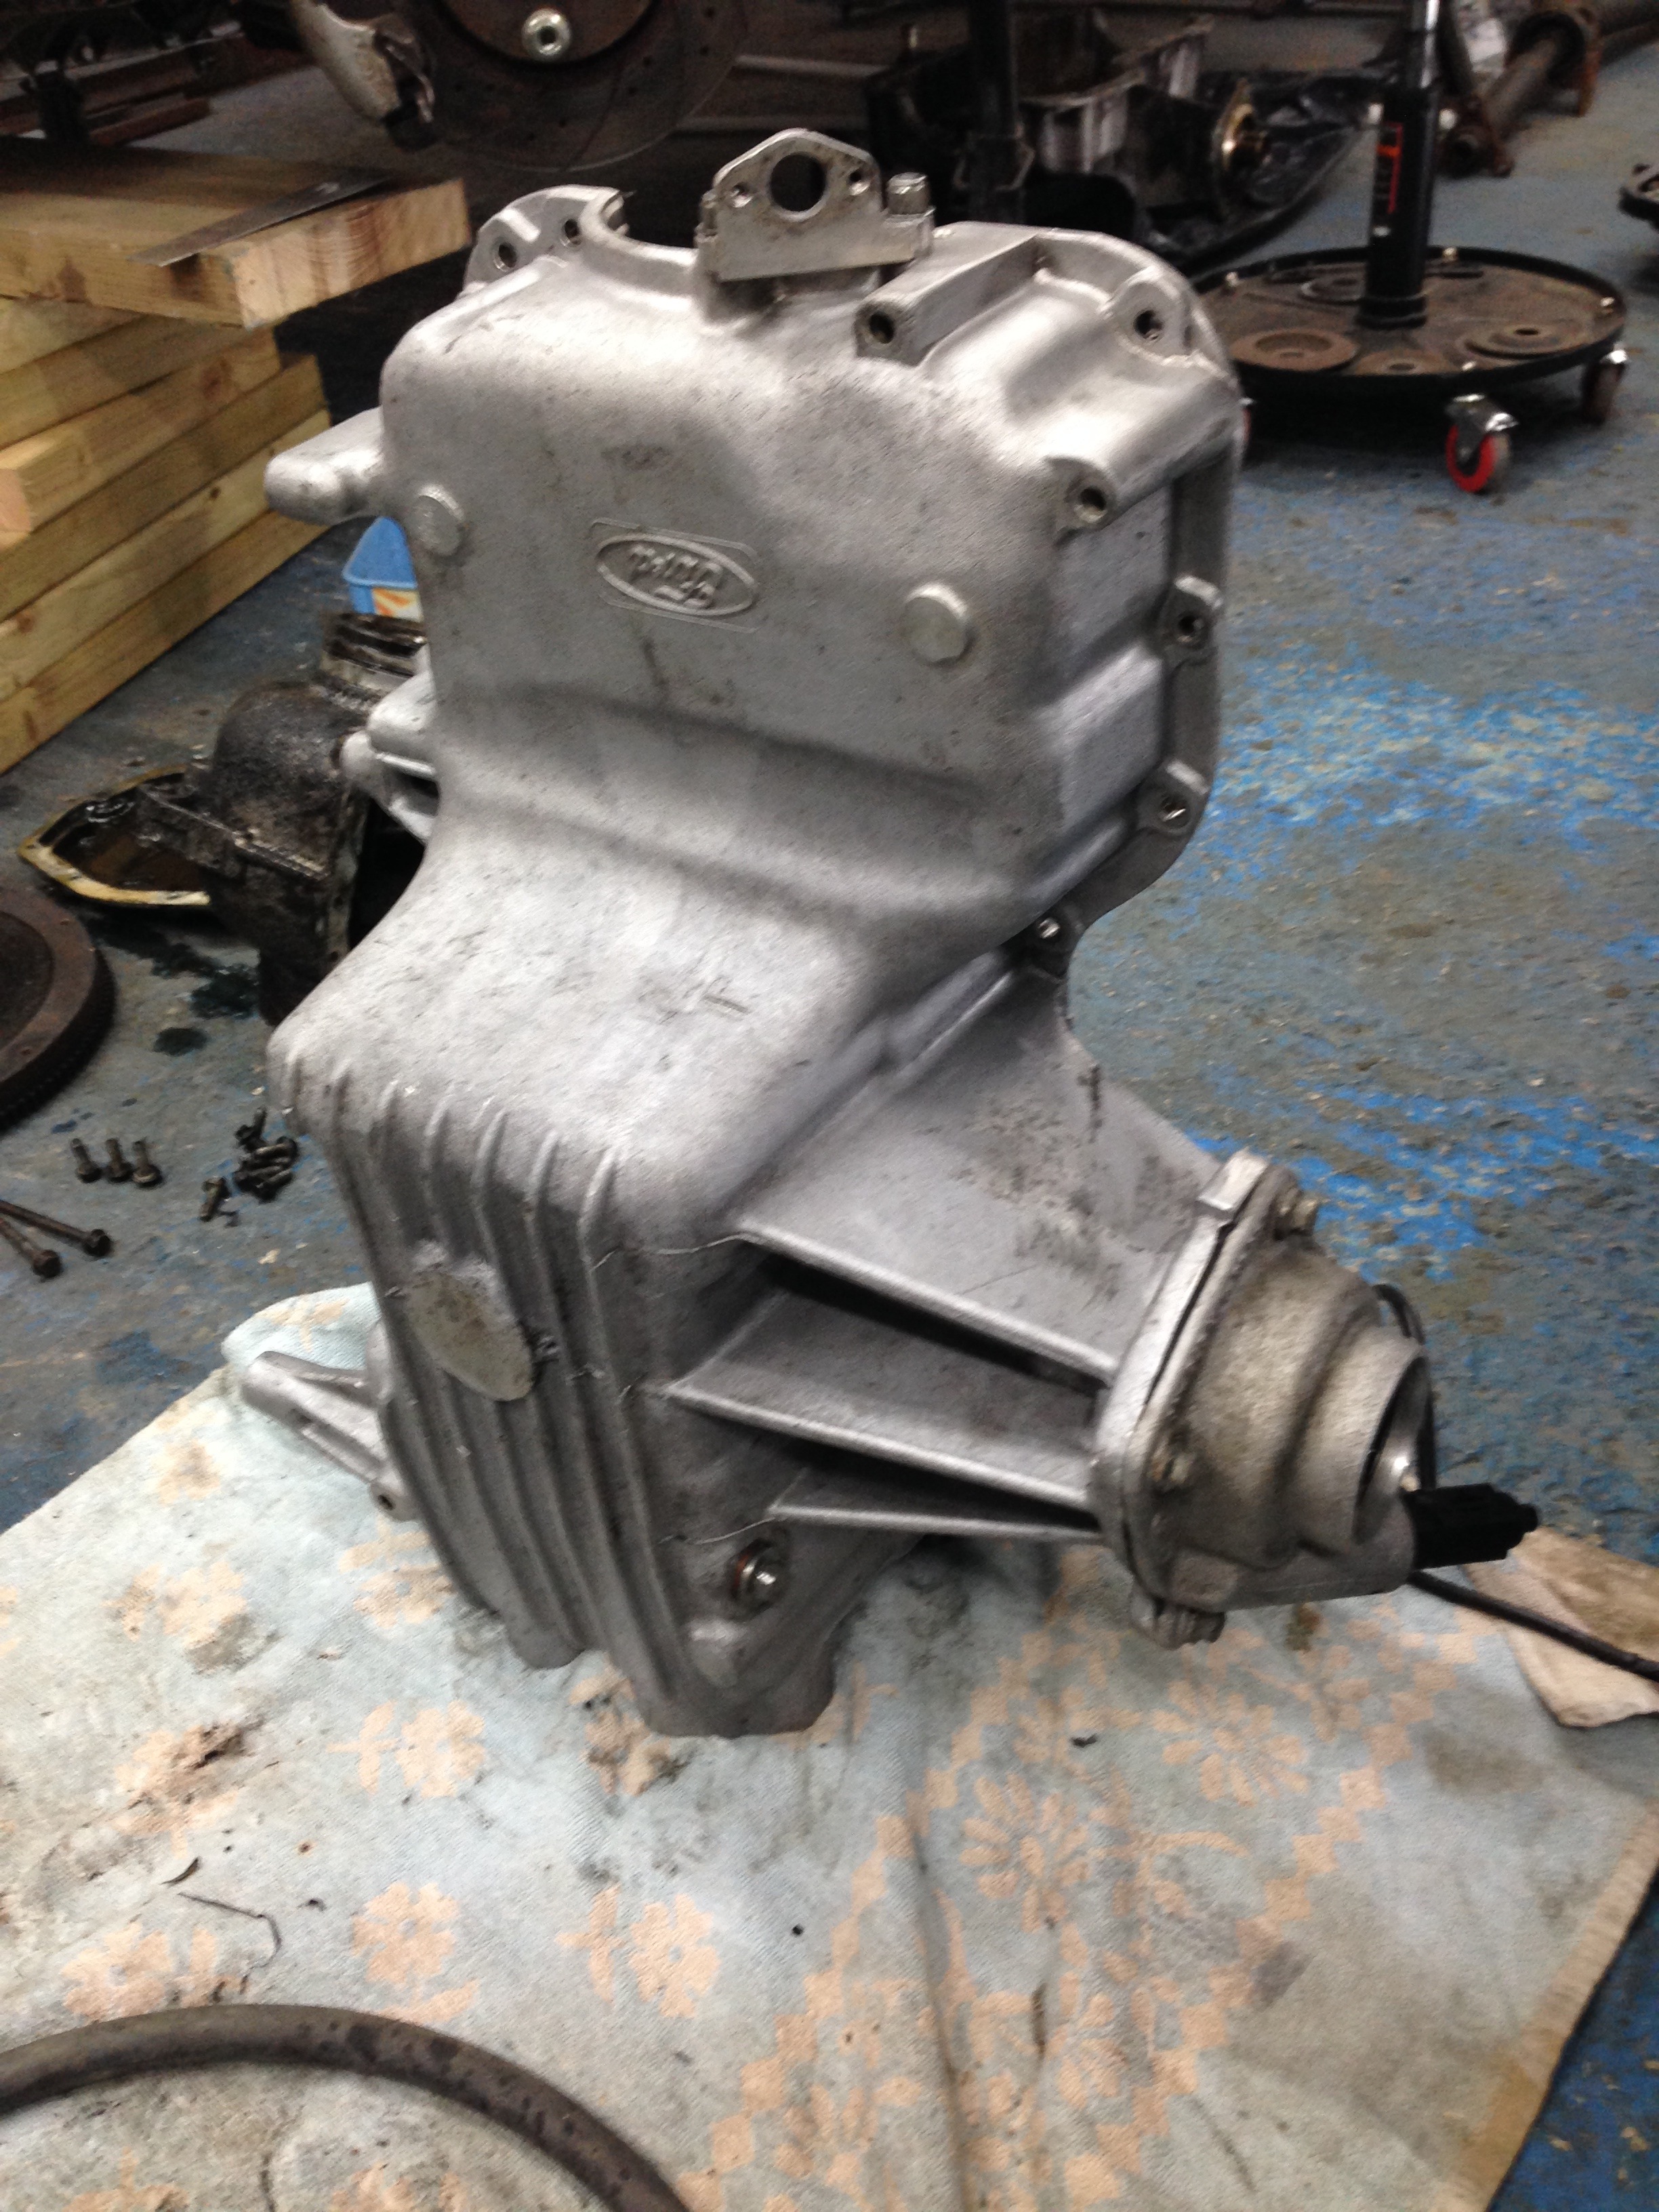
So whilst I had a lot of the transmission out I decided to give it a good clean as over the years it had become quite 'sludged' up
Gearbox cleaned
Whilst the gear-lever cradle was off I noticed that a modification has been made to the gear level itself.. This basically makes it a shorter throw between gears, don't know by how much as I didn't have a standard item to compare to but for now left on as I quite liked the feel it did give.
I was suspicious that the sump was leaking so with the transmission already removed I figured now was the time to do it, it also meant that everything could get a good clean.
Sub frame and sump out..
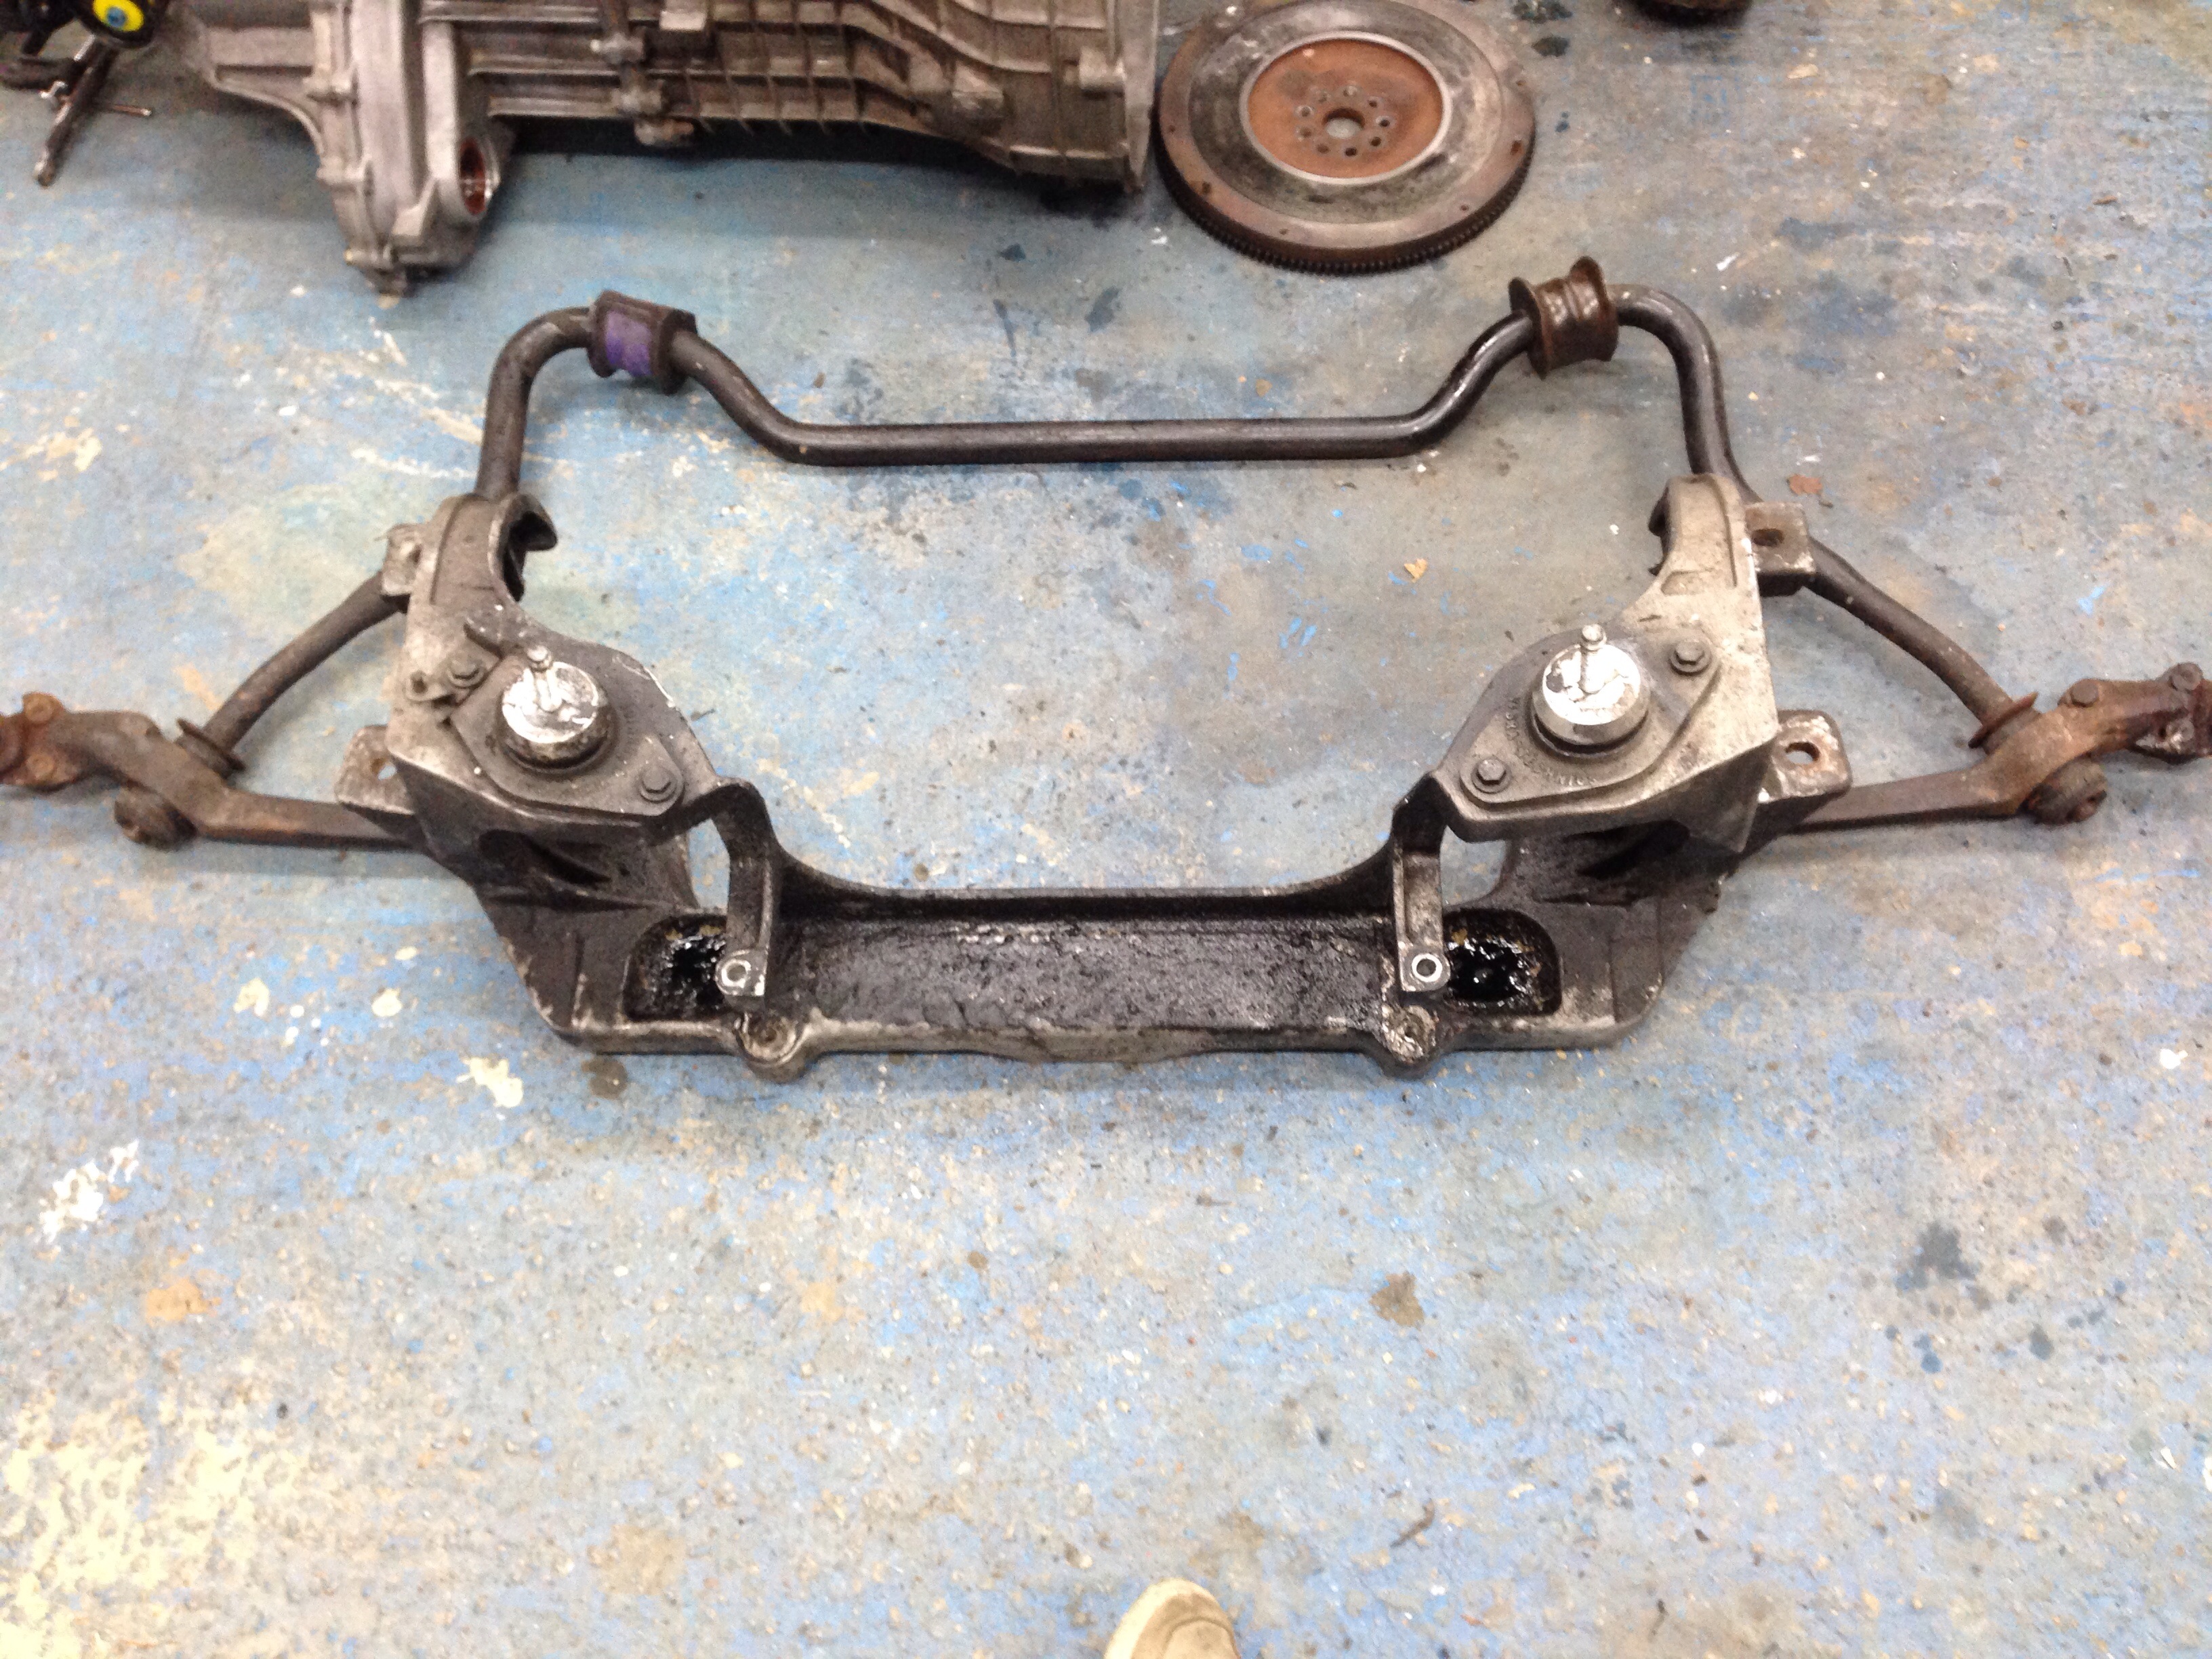
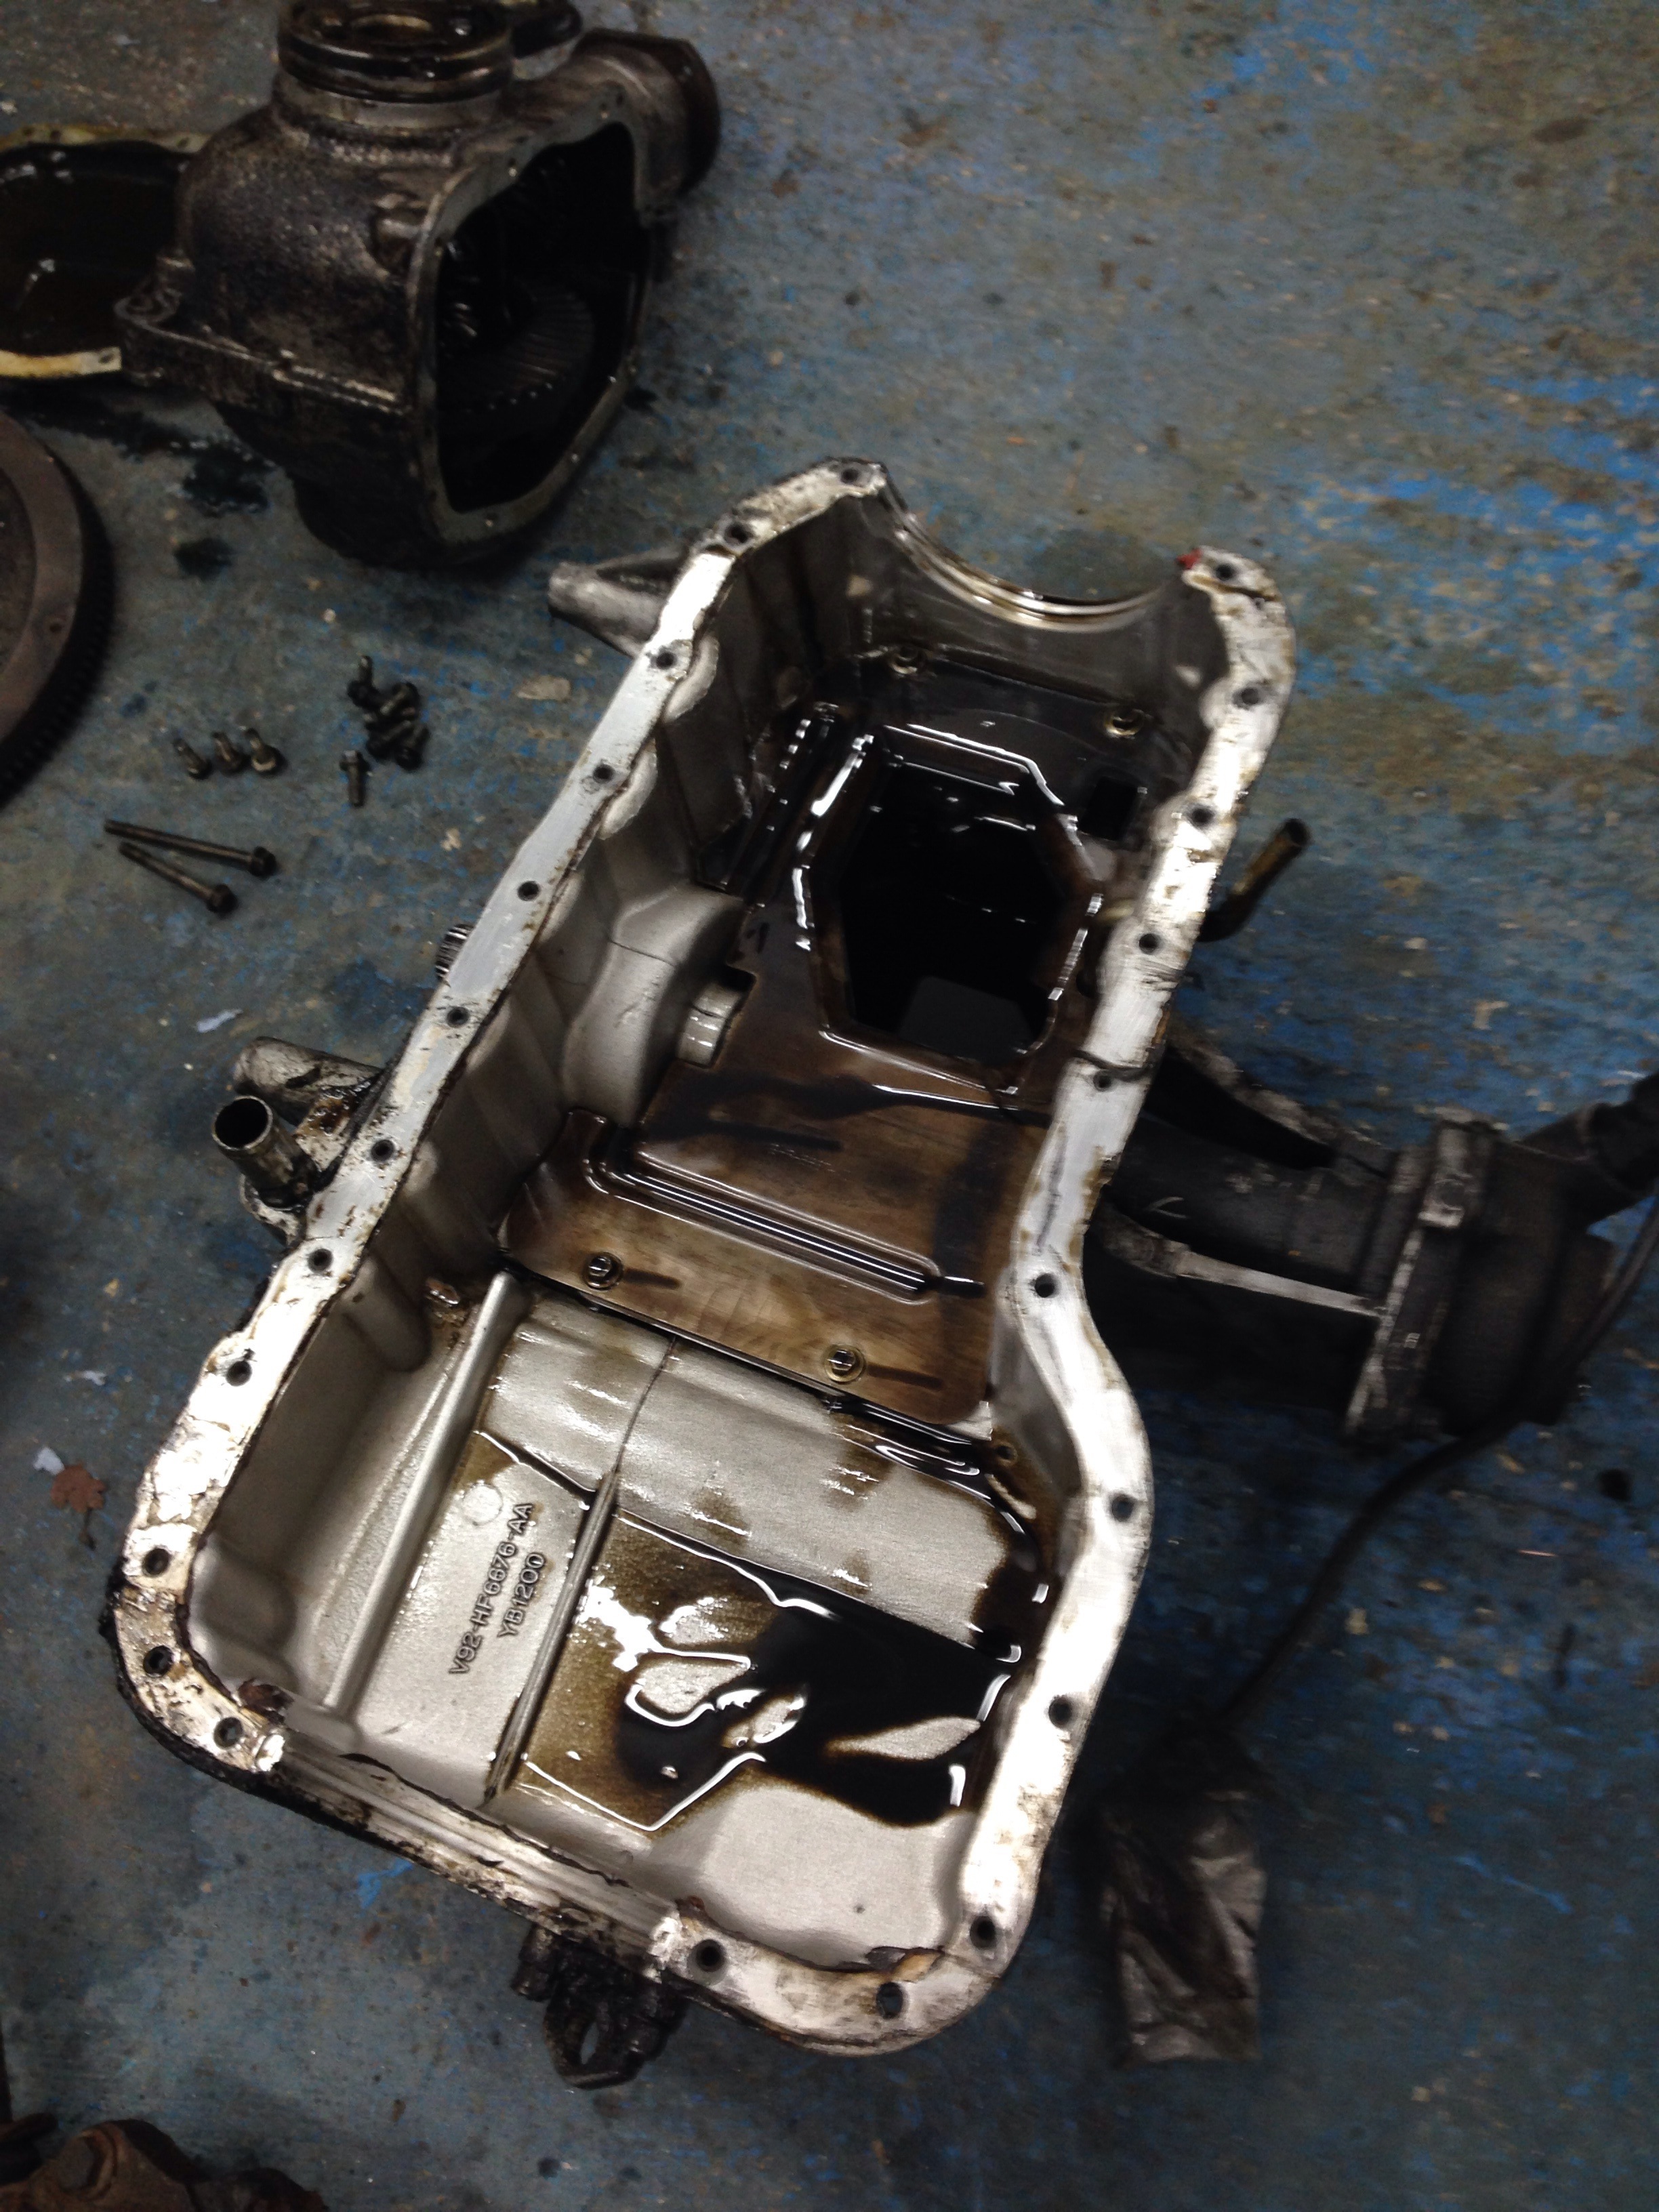
As you can see they were quite dirty so set about getting it all clean..
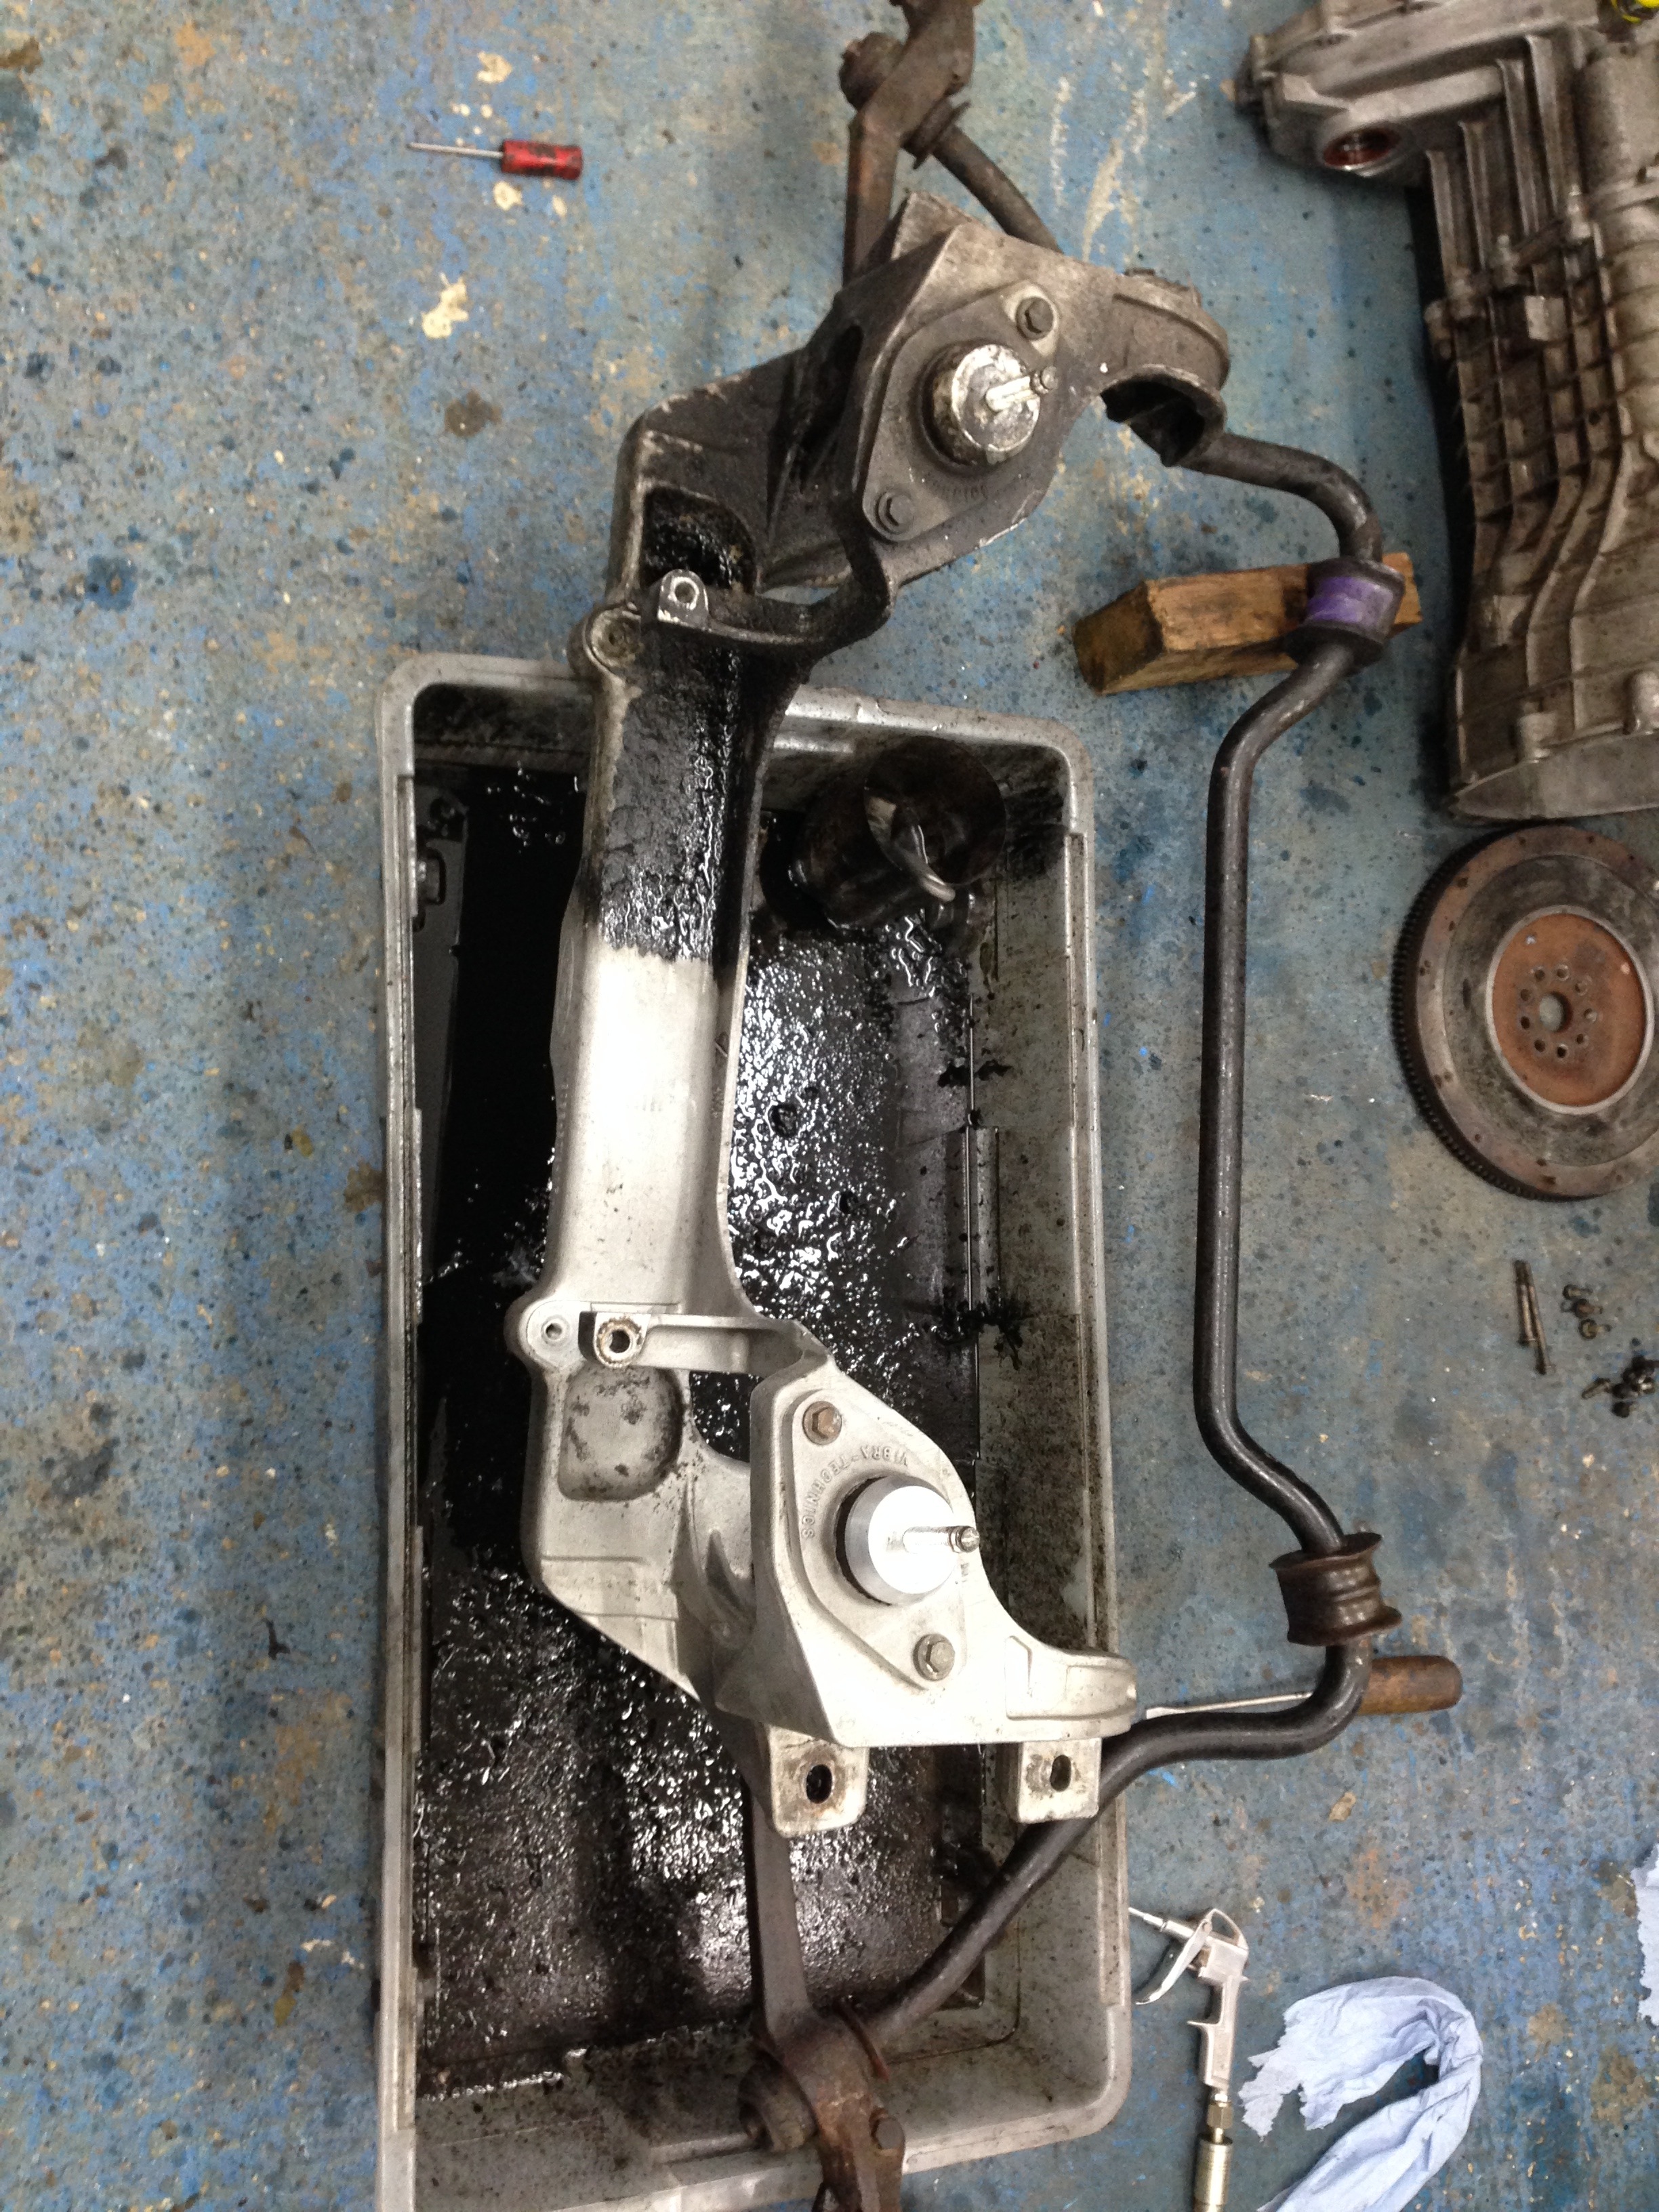
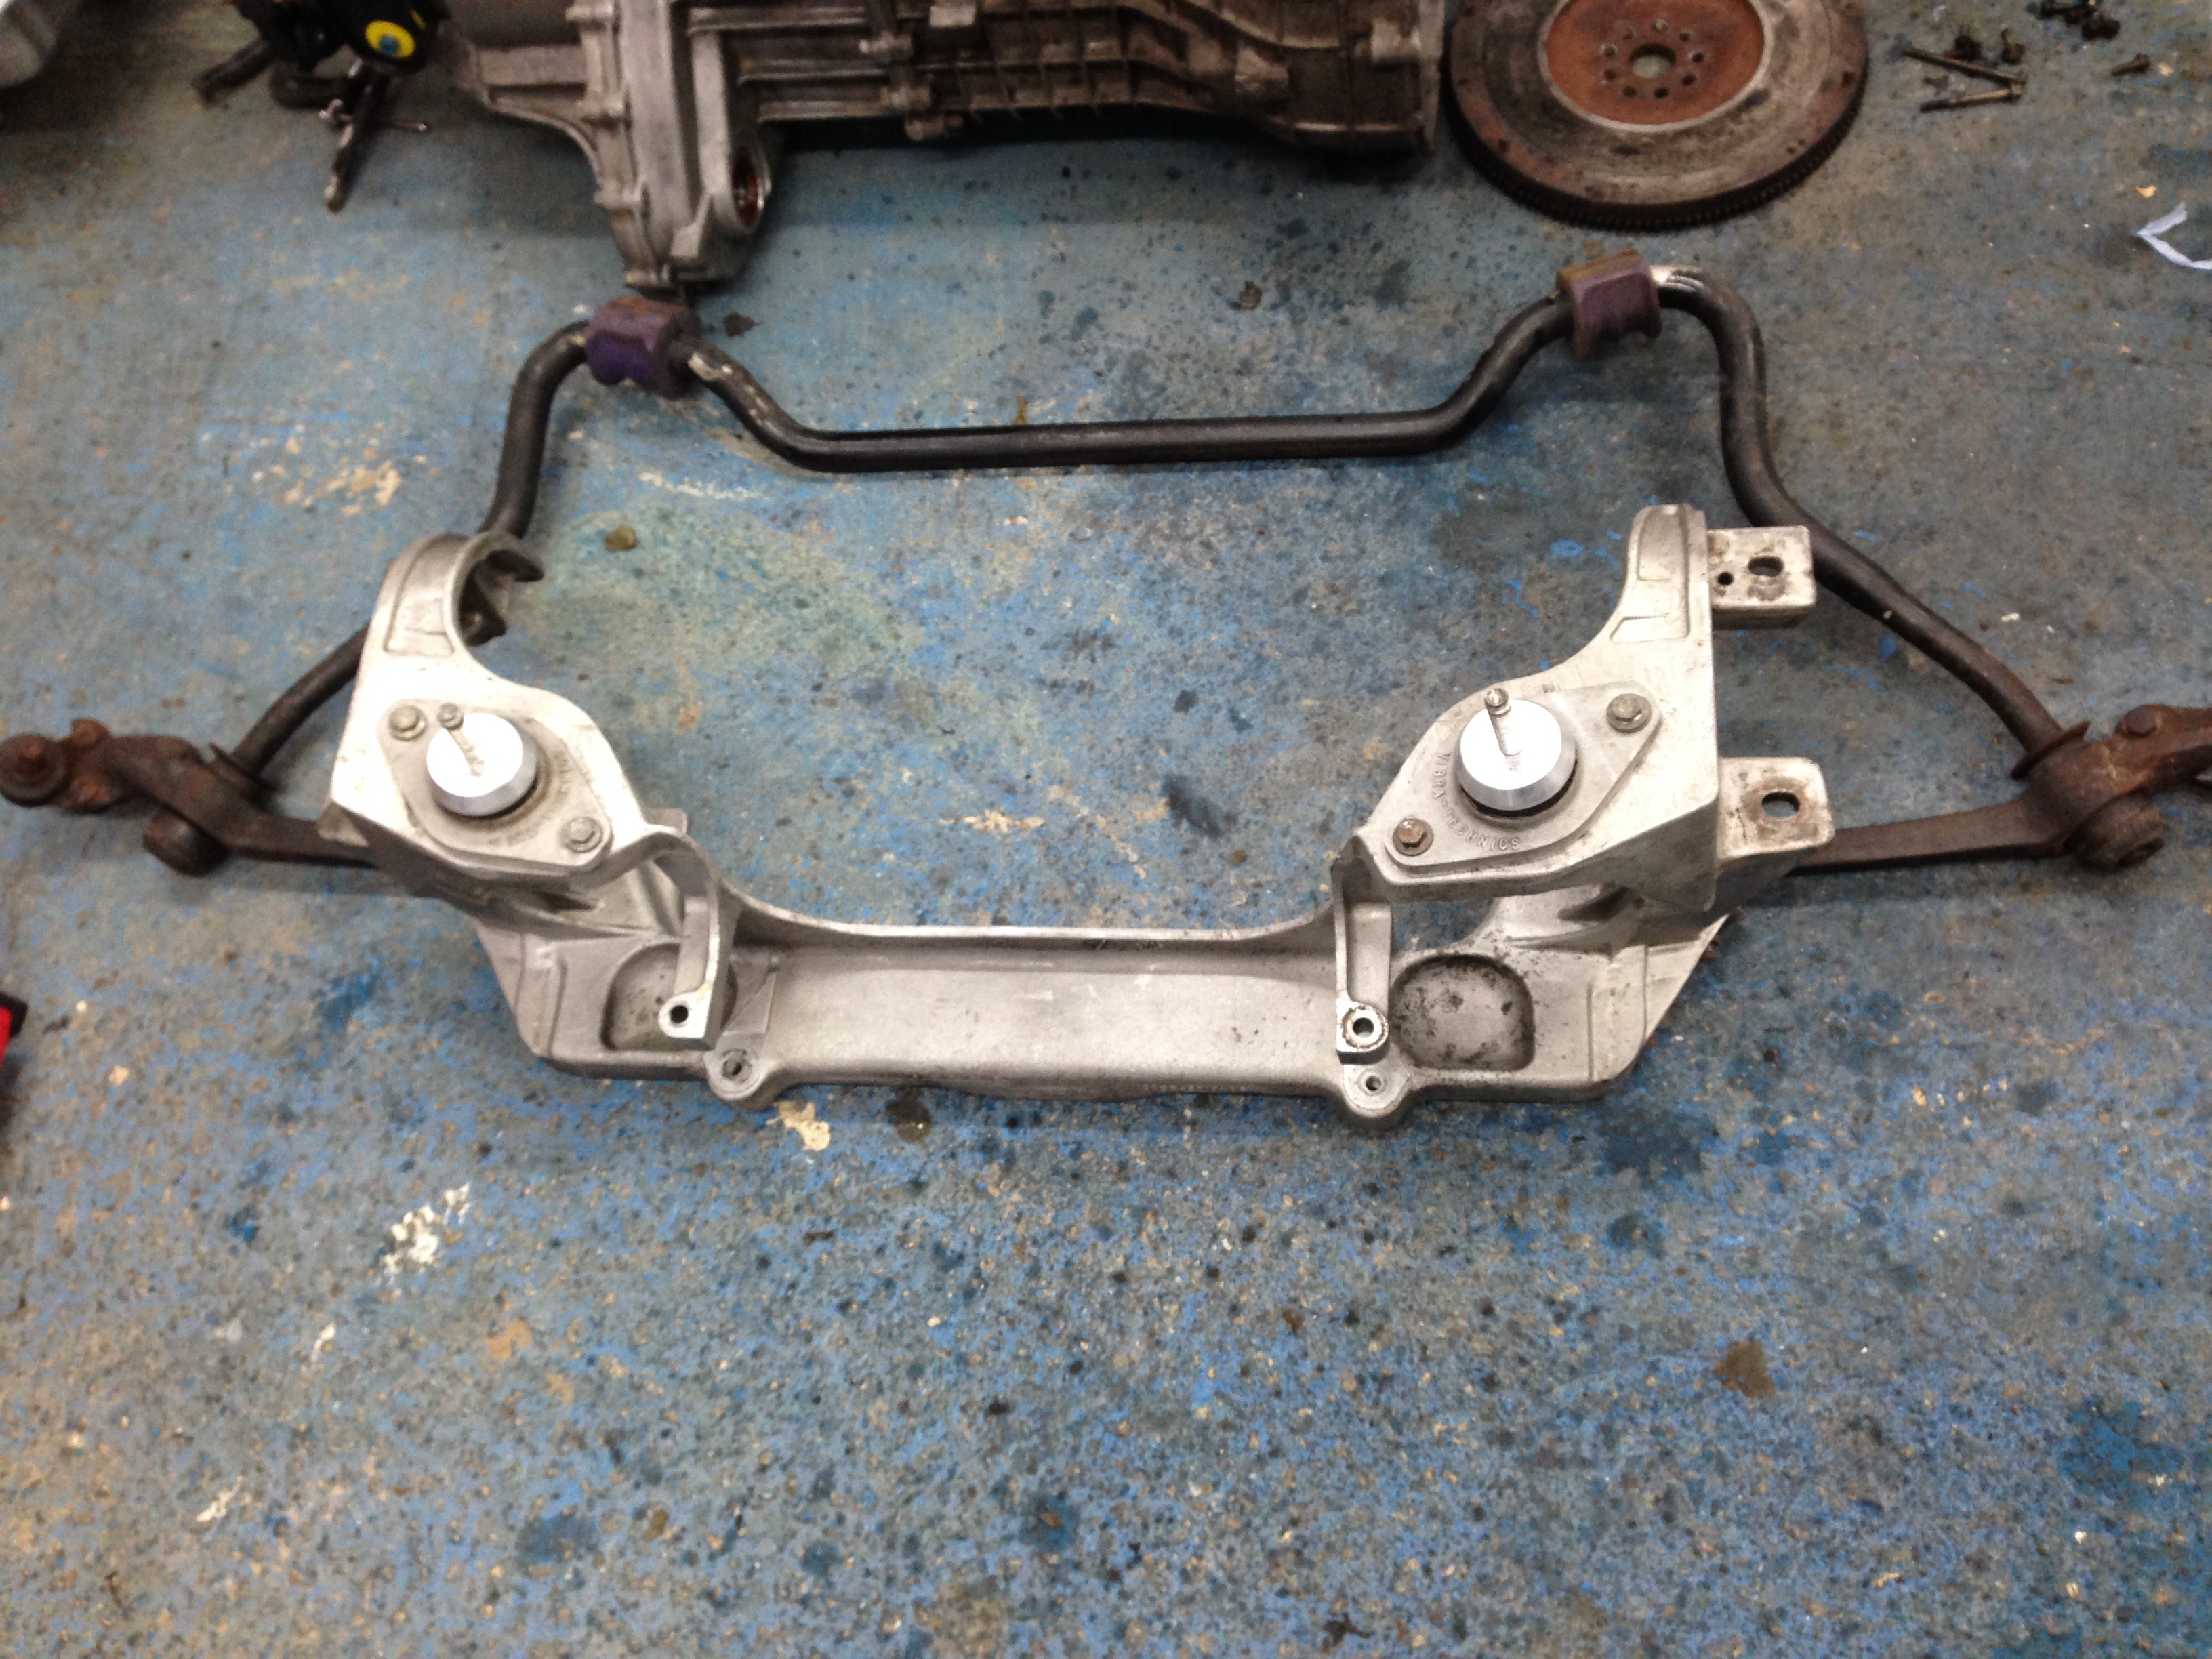
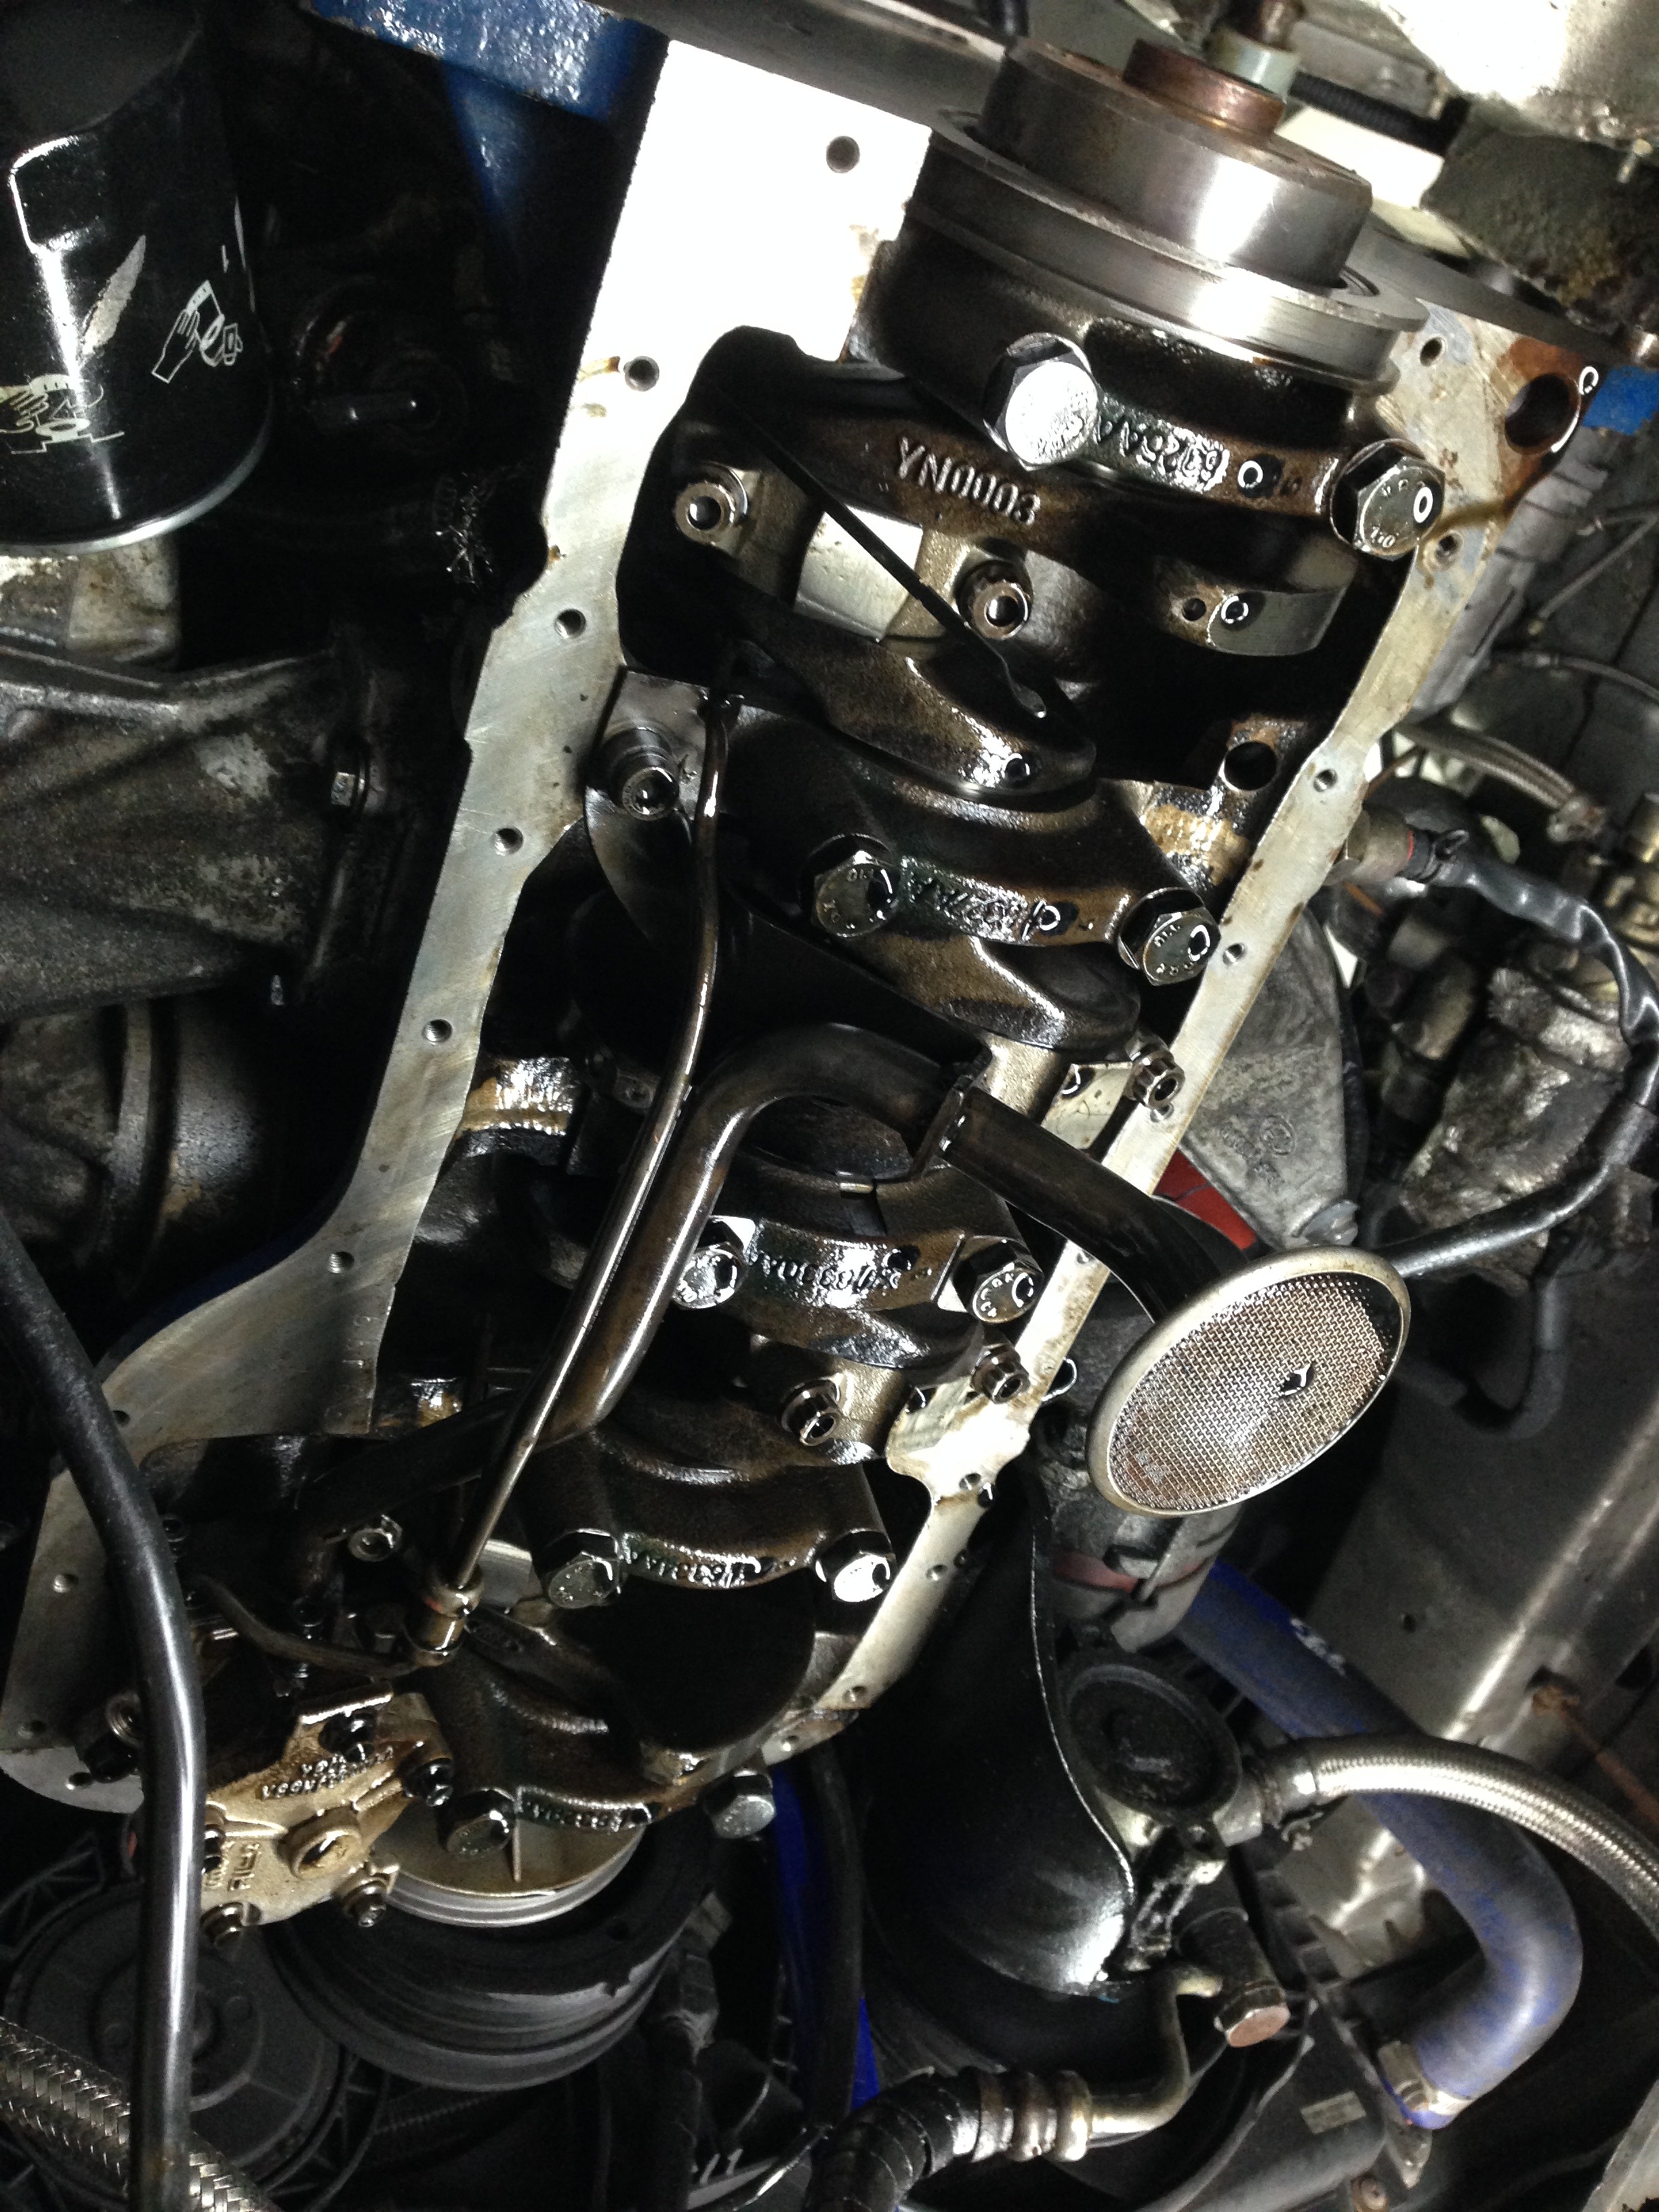
Quick shot of the underside of the business end of the engine
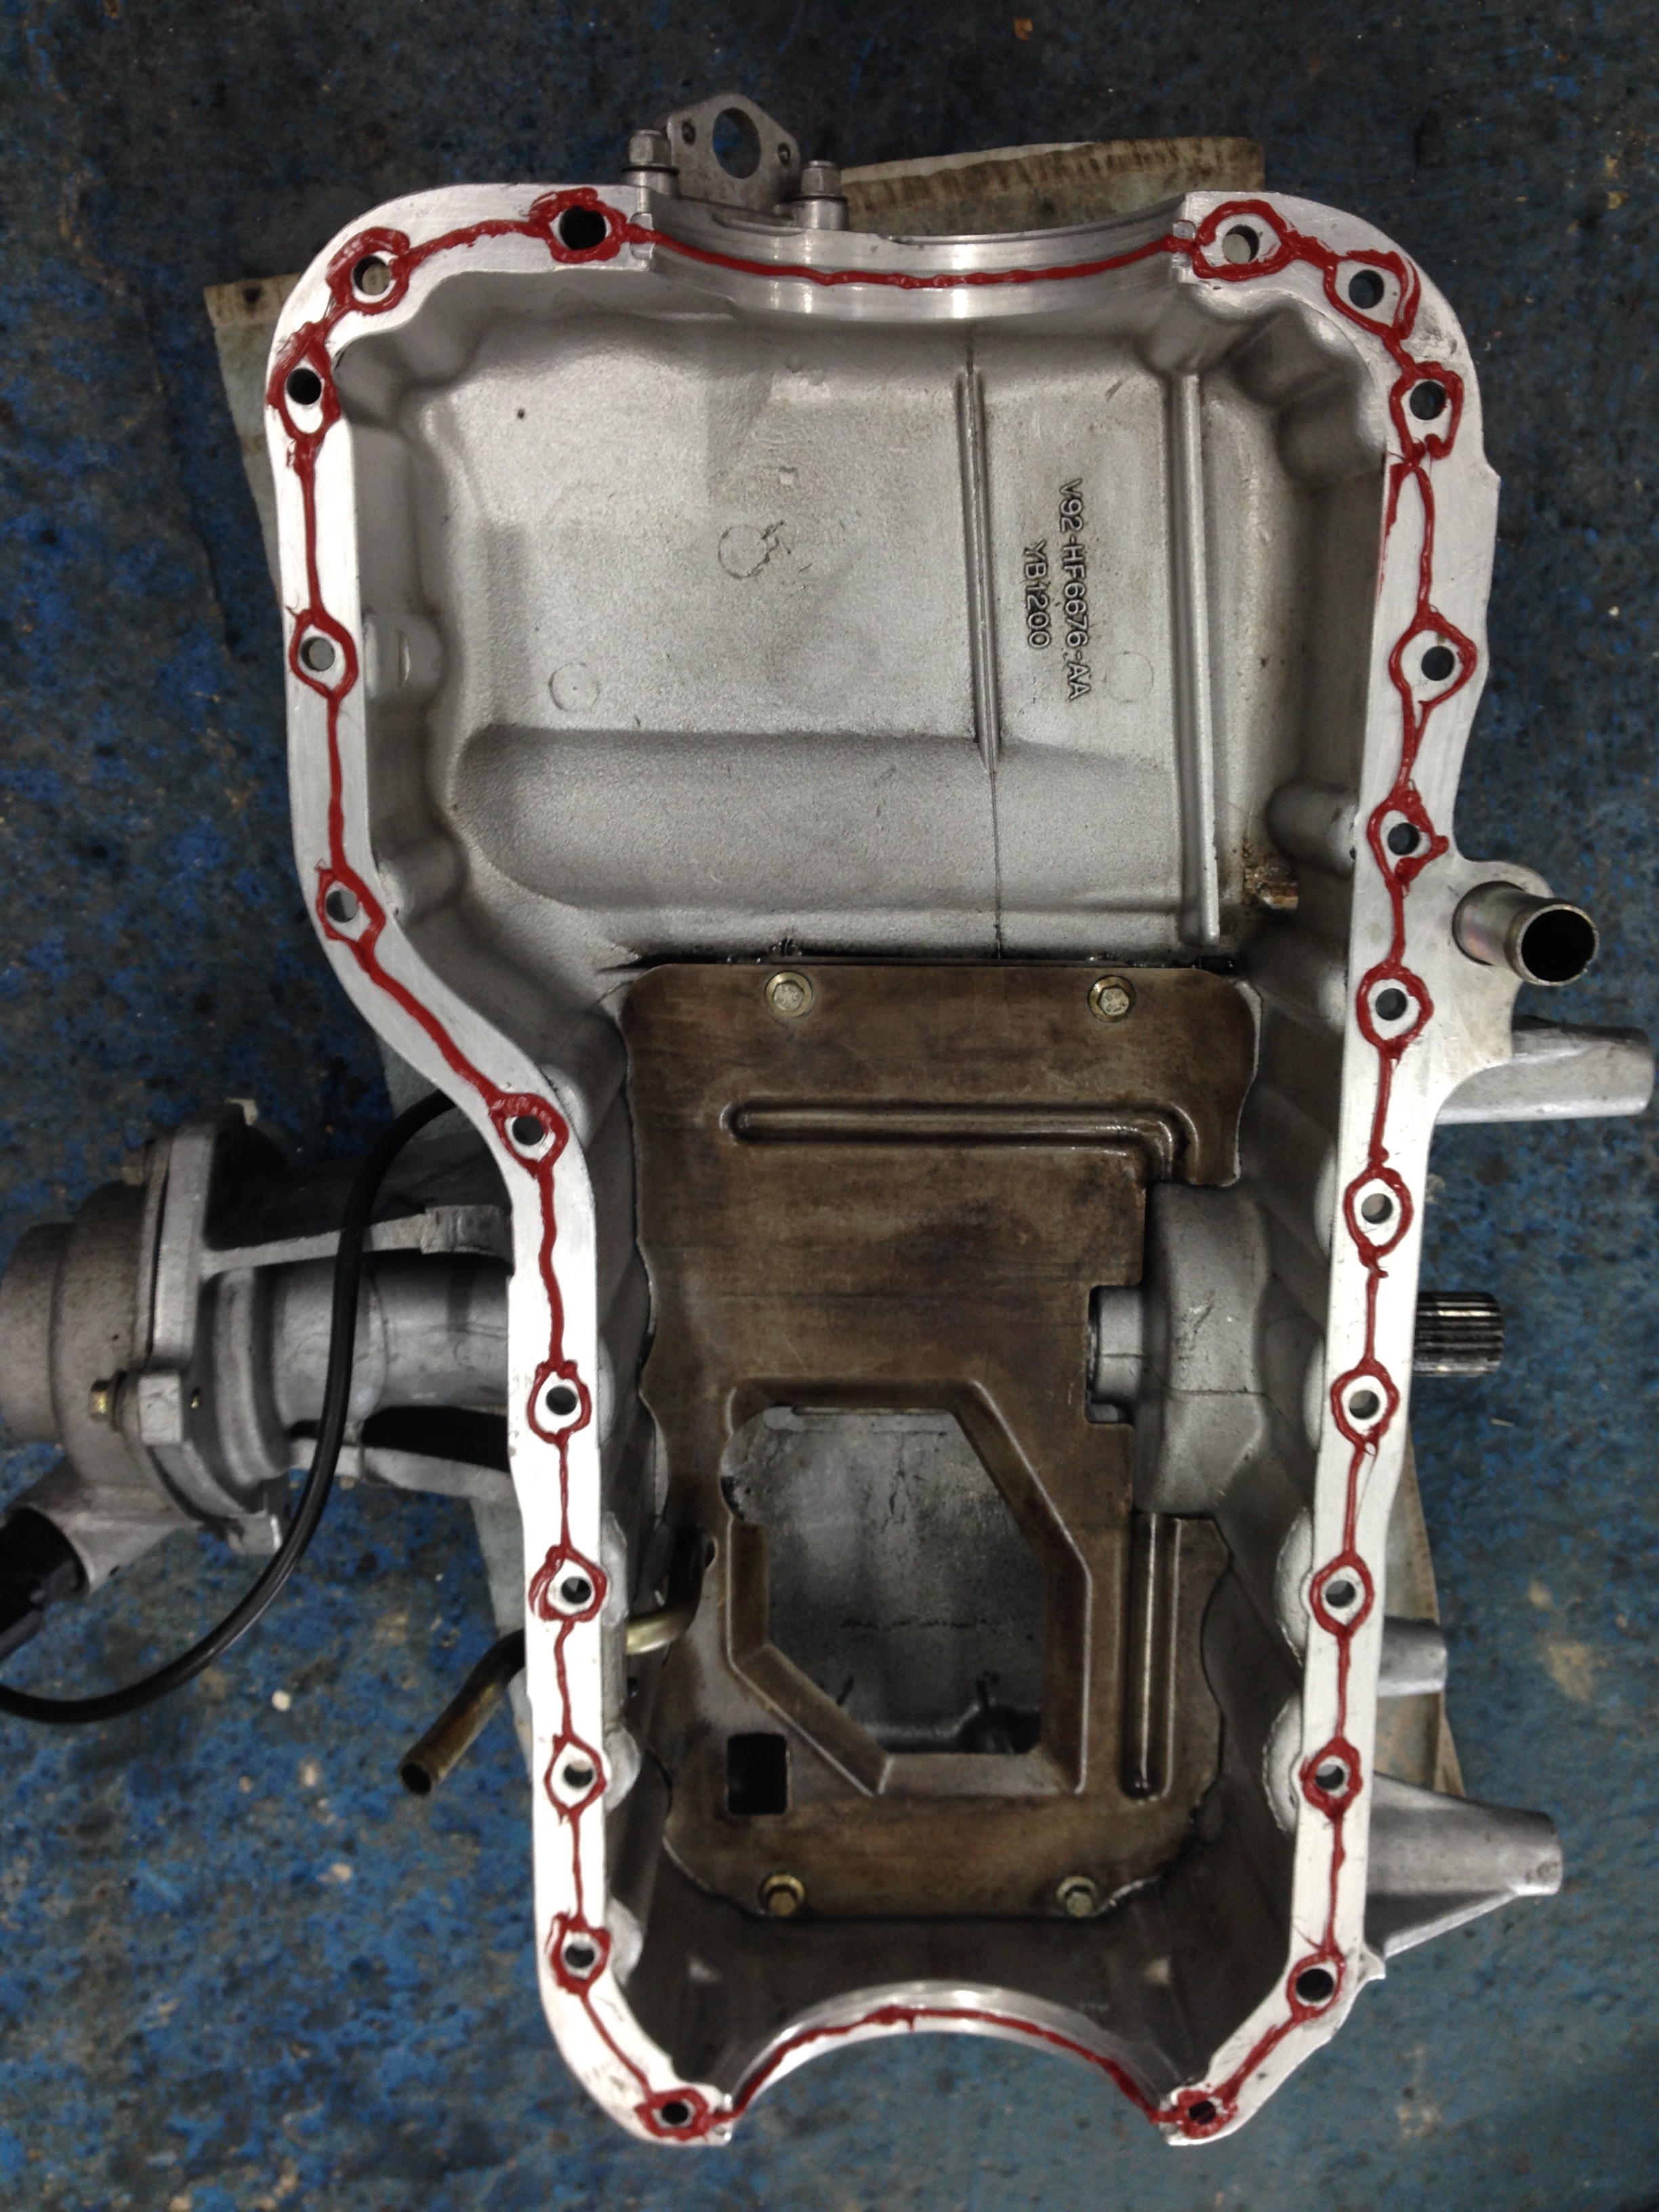
With that all cleaned I set about getting the sump back on.. Sealer applied
After many hours managed to get the engine all bolted back in properly, a bit cleaner underneath!

I noticed whilst the front shafts were out that the inner cvs were knackered.. At this point I needed to get the car moving again... So put them back together as they were holding ok knowing that these would need addressing quite quickly
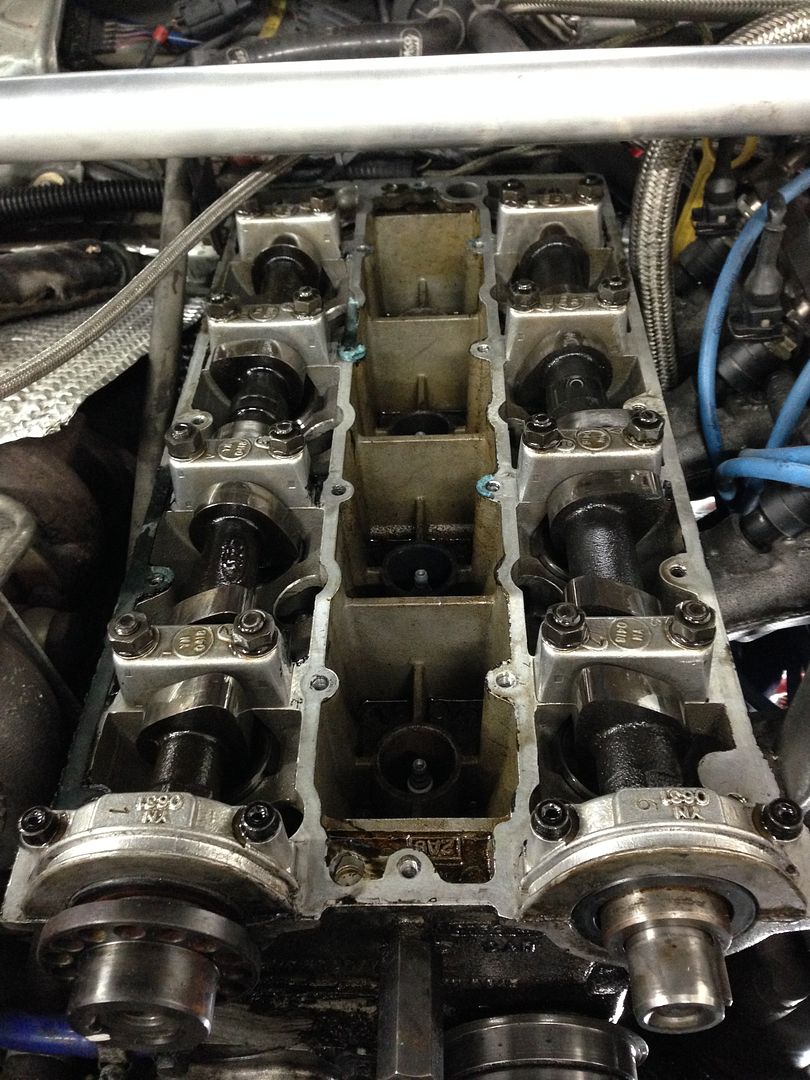
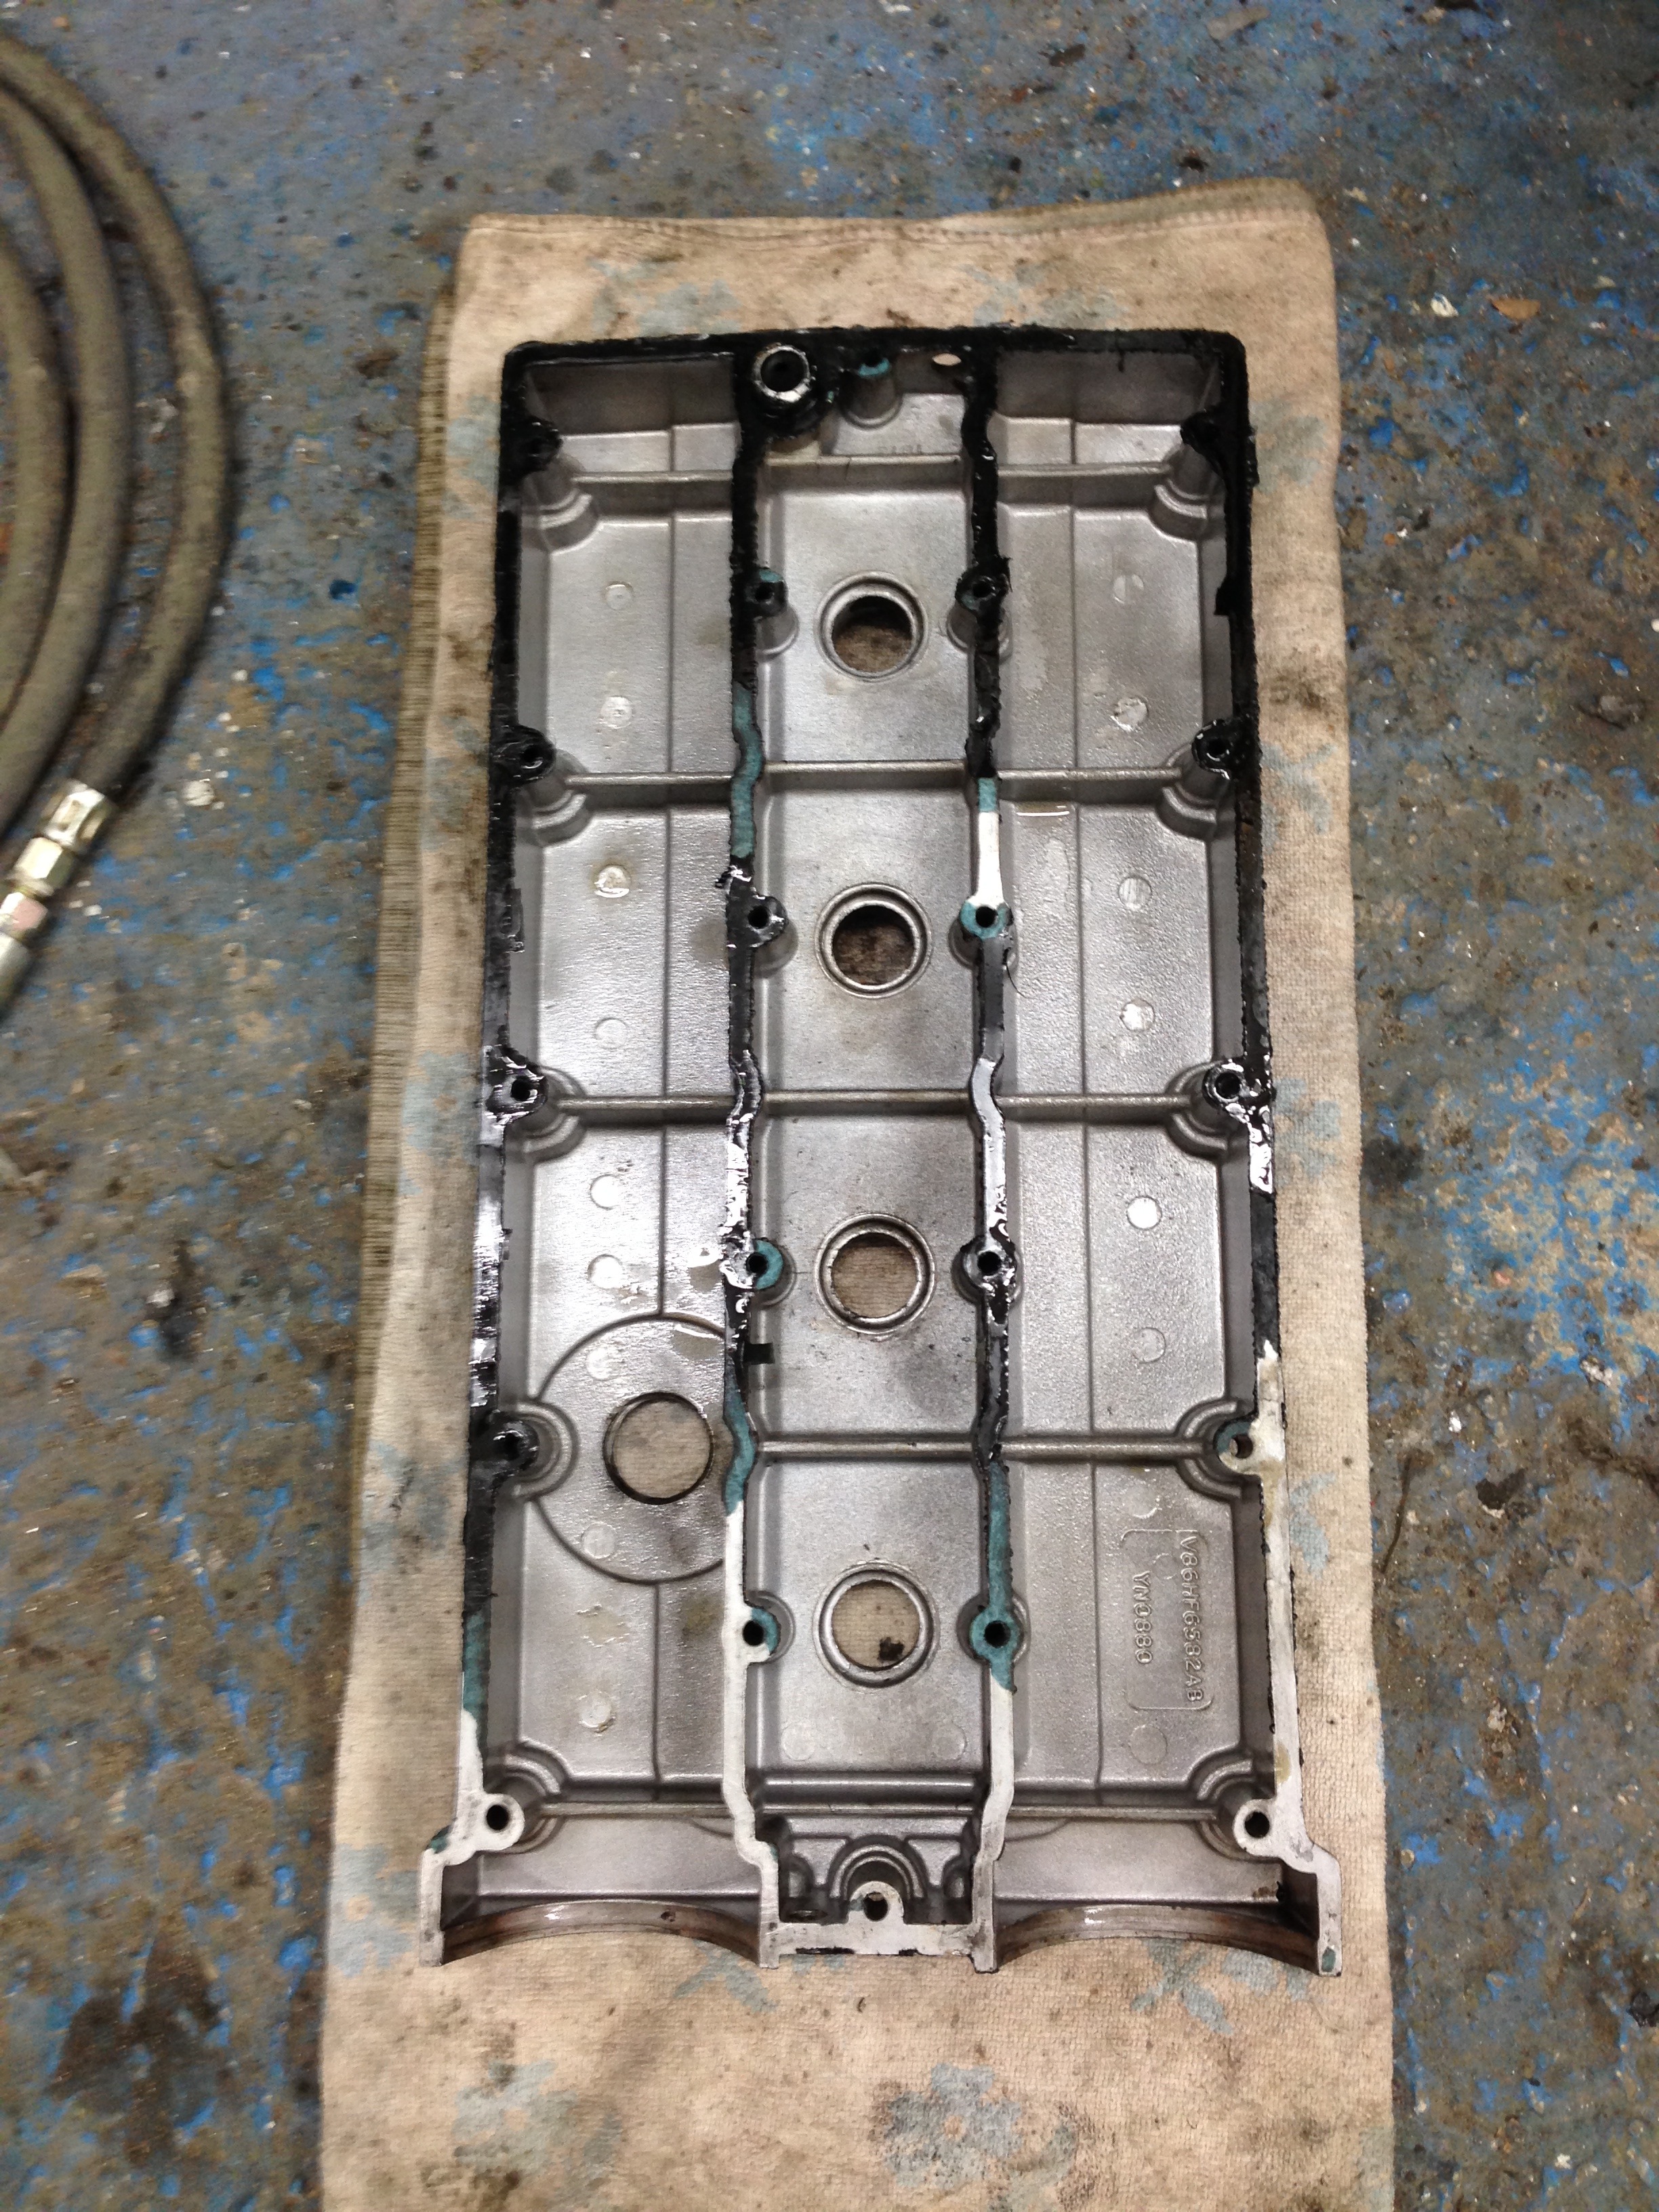
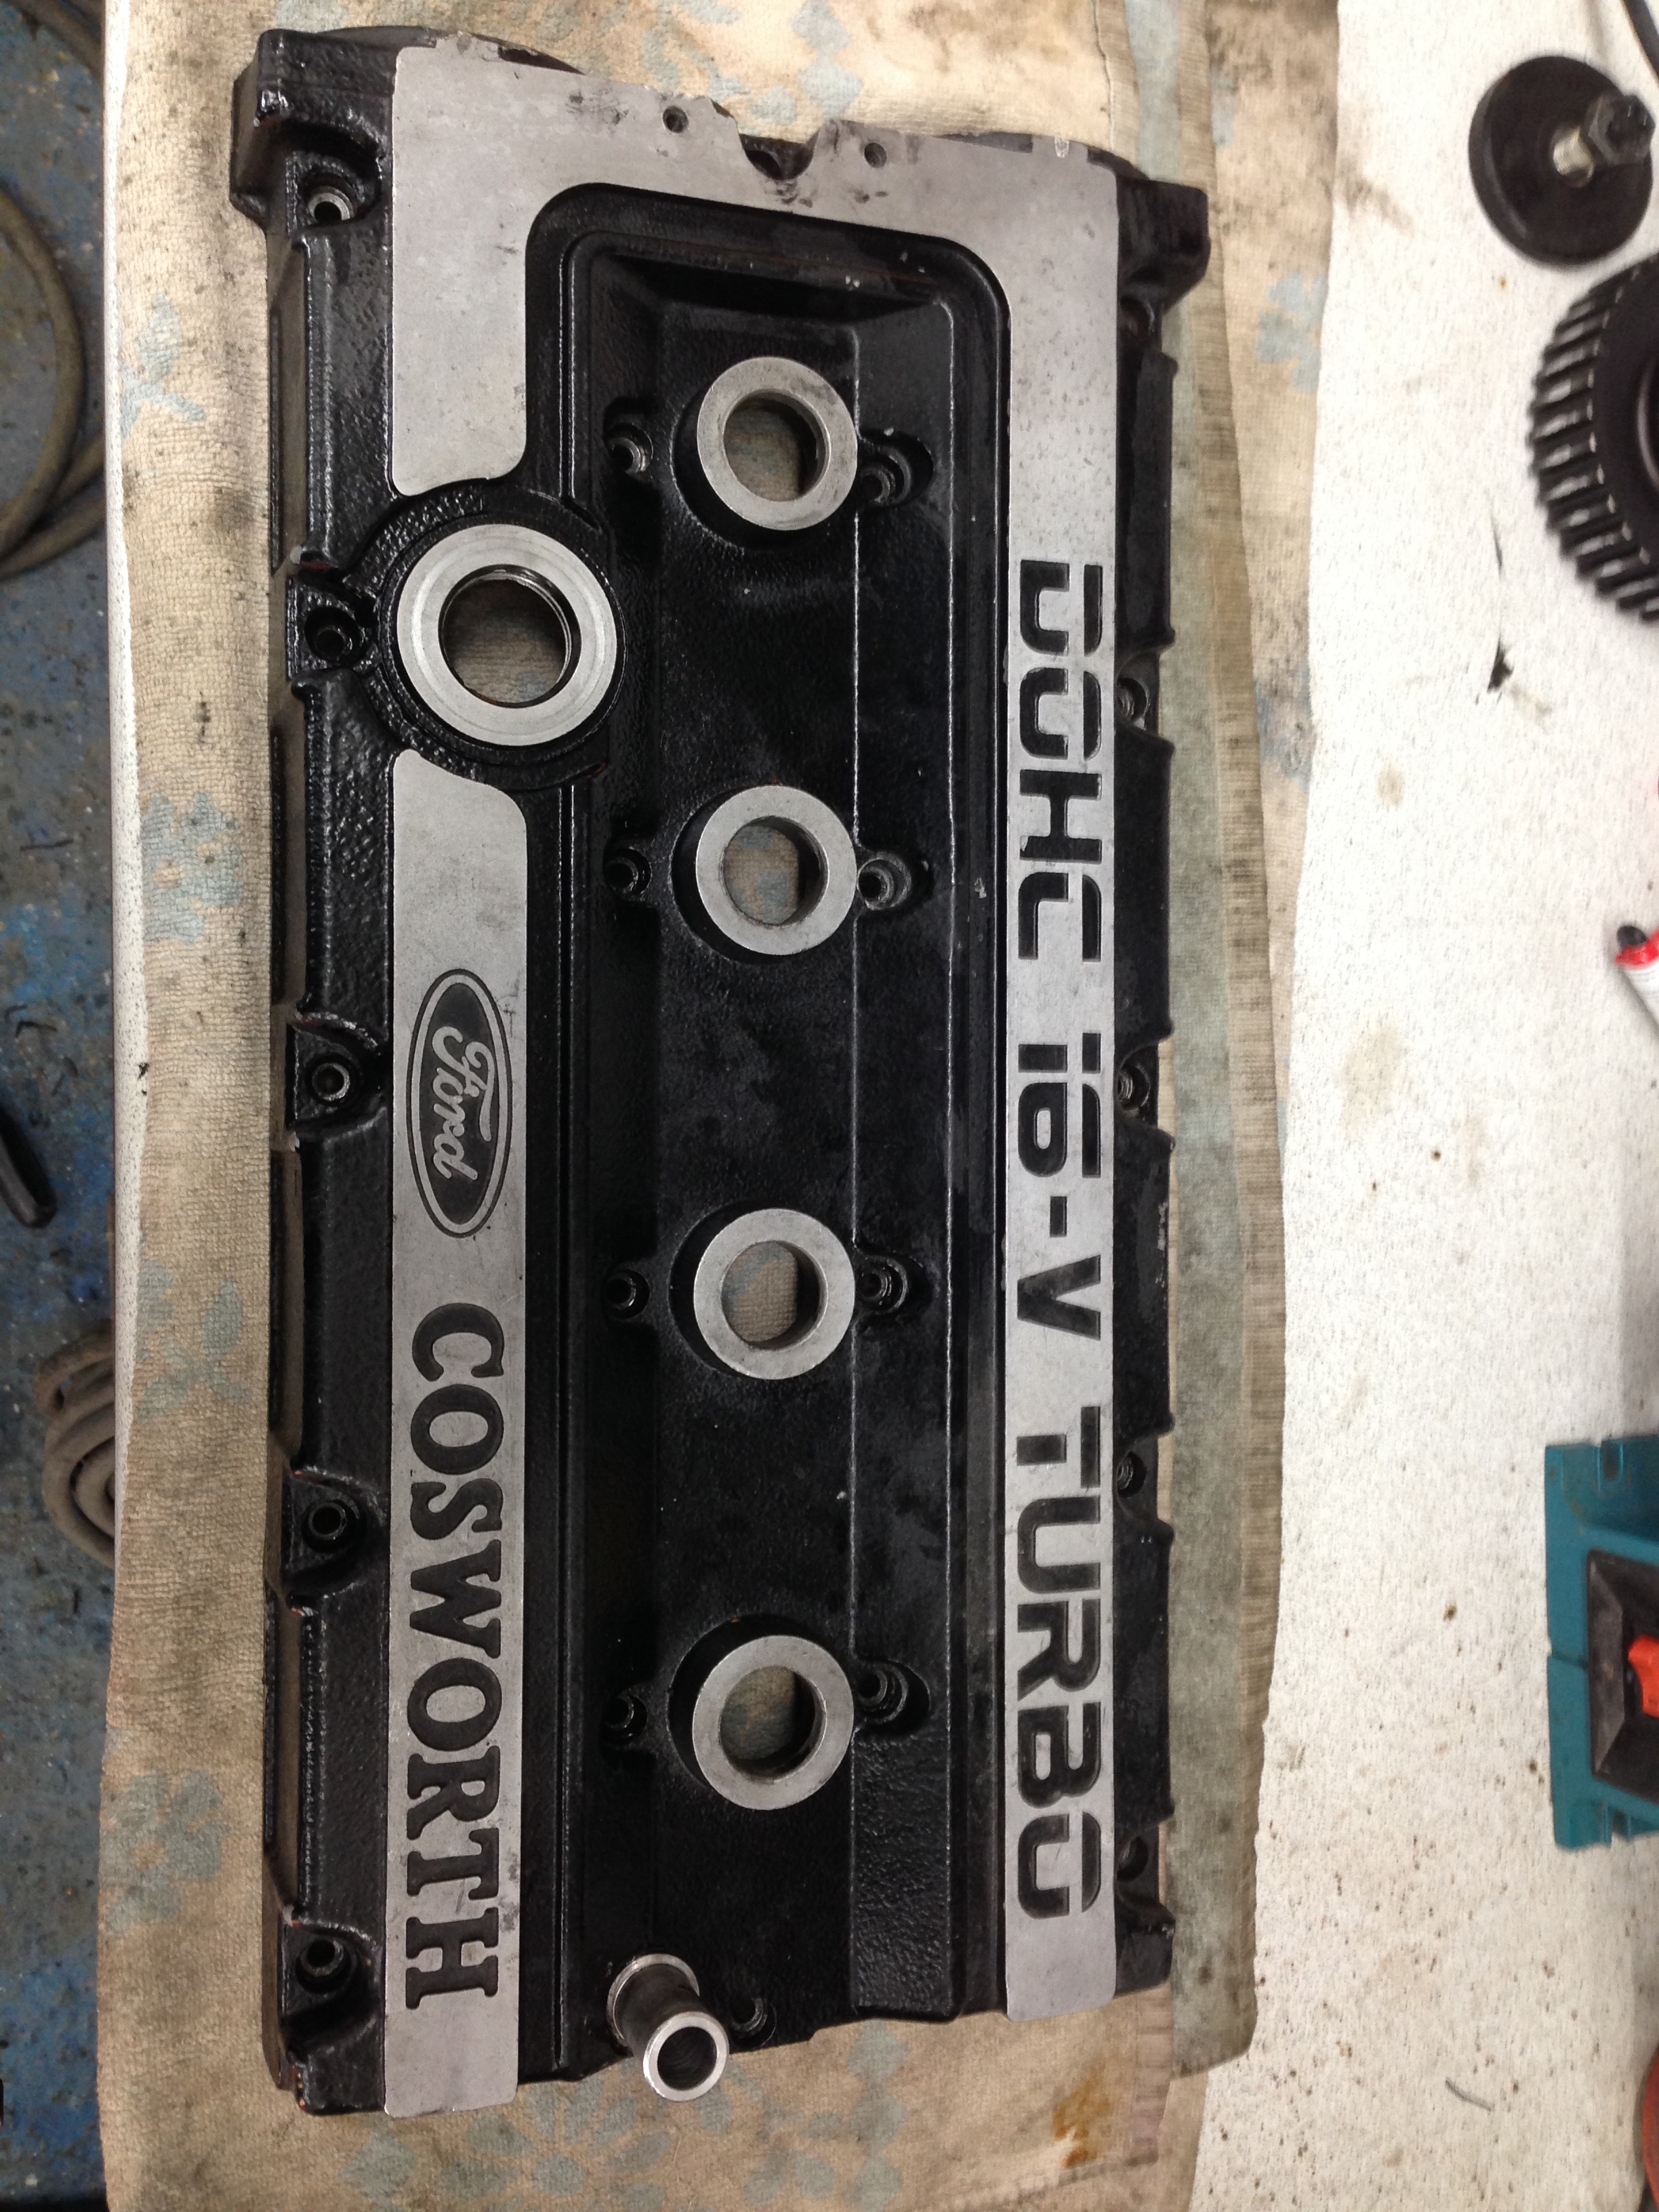
With the underside finished for now, I turned my attentions to the leaking cam cover. New cam shaft seals on the front and the cam cover sealed down with an instant gasket ( which I later regretted!)

With the car back down I removed the front splitter.. At some point this will be remade and fitted back again but the current one was badly damaged and needed to be taken off before it fell off! I had to remove the front bumper to remove the splitter support in the middle.. This was not easy, the bolts holding the wings to the bumper were rusted and would not budge easily!
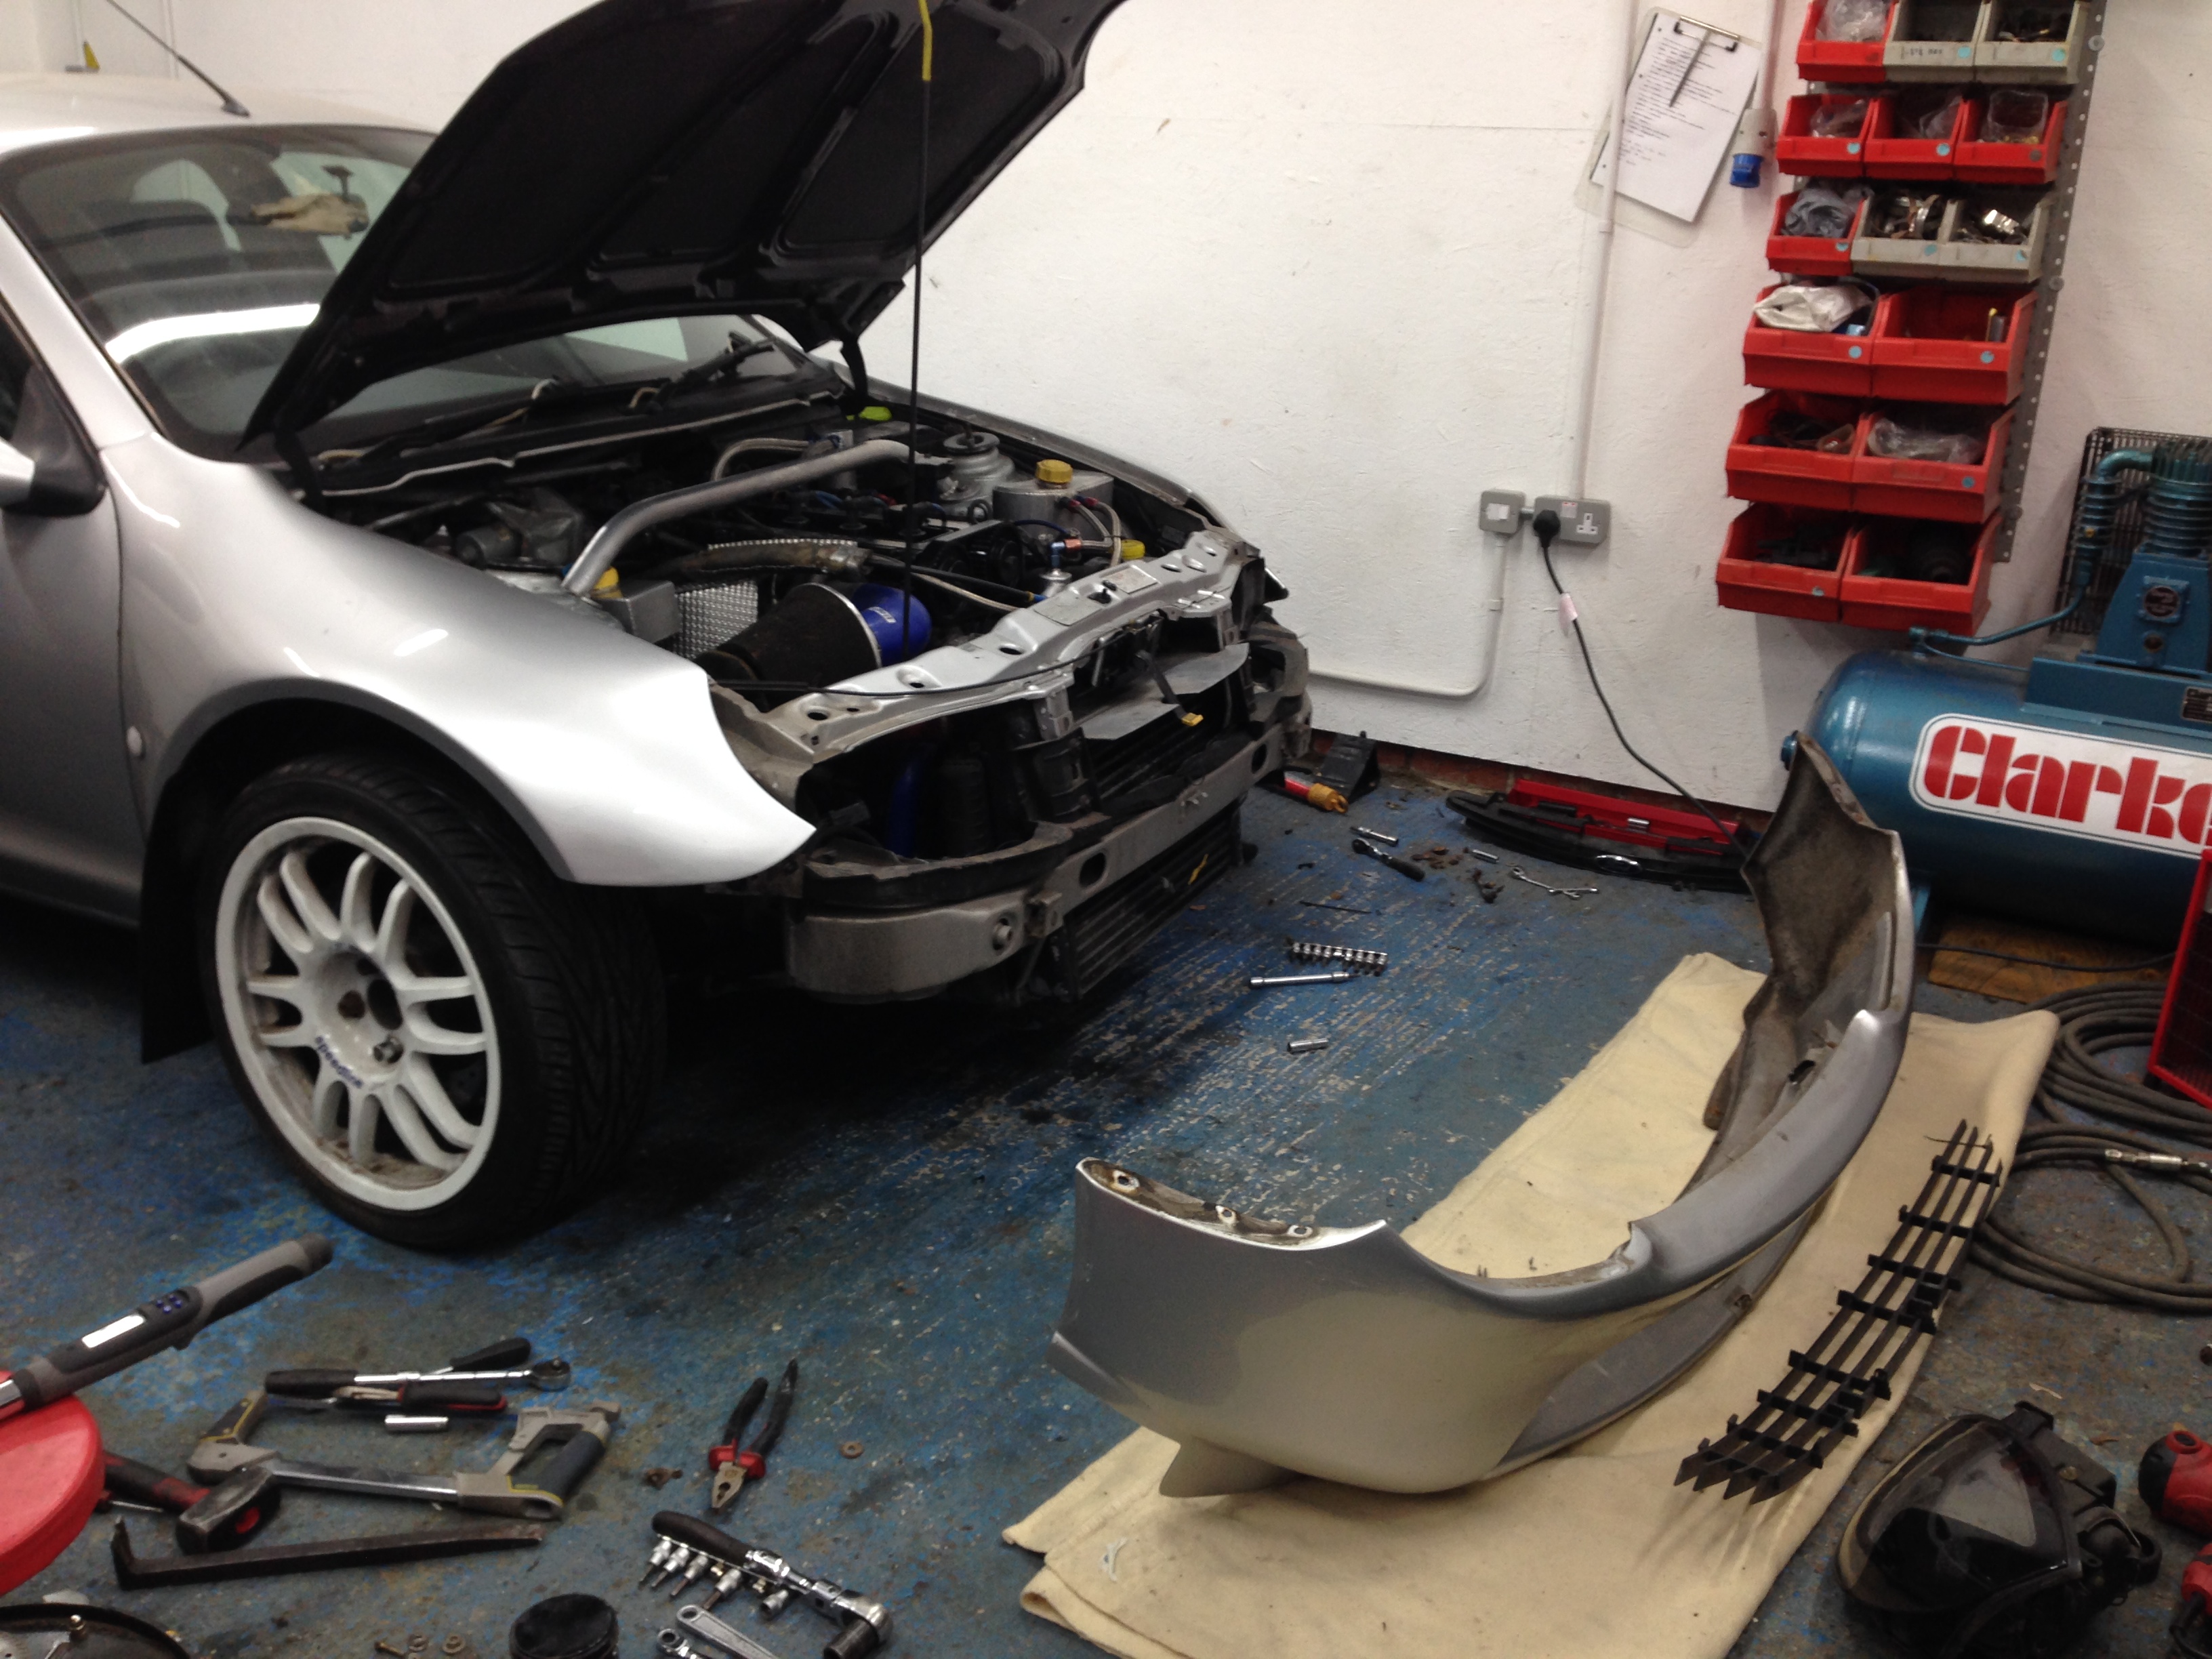

With that done I fitted the bumper back, except this time didn't fit back the bolts in the front of the wings. I knew I needed to take this bumper off again a number of times and where the bolts are located are difficult to get to and not very well installed. So dare I say it for now they have cable ties through the holes to hold the join tight. It works surprisingly well and better than the bolts as the old ones weren't really doing much. When I concentrate on the shell at a later date then this area will be improved and stainless steel bolts installed, maybe even studs into the fibreglass so it's only a nut on one side.
That's all for now, I'll get some more photos up soon of the progress to date.
Thanks for looking
Dan
Gearbox cleaned


Whilst the gear-lever cradle was off I noticed that a modification has been made to the gear level itself.. This basically makes it a shorter throw between gears, don't know by how much as I didn't have a standard item to compare to but for now left on as I quite liked the feel it did give.

I was suspicious that the sump was leaking so with the transmission already removed I figured now was the time to do it, it also meant that everything could get a good clean.
Sub frame and sump out..


As you can see they were quite dirty so set about getting it all clean..


Quick shot of the underside of the business end of the engine

With that all cleaned I set about getting the sump back on.. Sealer applied

After many hours managed to get the engine all bolted back in properly, a bit cleaner underneath!

I noticed whilst the front shafts were out that the inner cvs were knackered.. At this point I needed to get the car moving again... So put them back together as they were holding ok knowing that these would need addressing quite quickly

With the underside finished for now, I turned my attentions to the leaking cam cover. New cam shaft seals on the front and the cam cover sealed down with an instant gasket ( which I later regretted!)


With the car back down I removed the front splitter.. At some point this will be remade and fitted back again but the current one was badly damaged and needed to be taken off before it fell off! I had to remove the front bumper to remove the splitter support in the middle.. This was not easy, the bolts holding the wings to the bumper were rusted and would not budge easily!


With that done I fitted the bumper back, except this time didn't fit back the bolts in the front of the wings. I knew I needed to take this bumper off again a number of times and where the bolts are located are difficult to get to and not very well installed. So dare I say it for now they have cable ties through the holes to hold the join tight. It works surprisingly well and better than the bolts as the old ones weren't really doing much. When I concentrate on the shell at a later date then this area will be improved and stainless steel bolts installed, maybe even studs into the fibreglass so it's only a nut on one side.
That's all for now, I'll get some more photos up soon of the progress to date.
Thanks for looking
Dan
25-10-2015, 06:38 PM
#5
PassionFord Regular
Thread Starter
25-10-2015, 07:39 PM
#7
PassionFord Regular
Thread Starter
Trending Topics
25-10-2015, 07:43 PM
#8
PassionFord Post Troll

Nice project mate going about it the right way too 
The following users liked this post:
McCloud 85 (25-10-2015)


 26-10-2015, 08:00 AM
#12
26-10-2015, 08:37 AM
#13
10K+ Poster!!


Great project car, I am on Surrey / Hants border near GRAYSHOTT. DJM built my Cossie Pug too.
26-10-2015, 08:31 PM
#15
PassionFord Regular
Thread Starter
Thanks very much
26-10-2015, 09:41 PM
#16
G66UES+D89XVX+R18FMCPilot
This is the output shaft of the gearbox cut off to allow the early doughnut to fit, later this was going to cause me no end of issues!
why did this cause an issue later ?
why did this cause an issue later ?
27-10-2015, 10:16 AM
#17
I've found that life I needed.. It's HERE!!
Looks like youve uncovered a few bodges, great to see you putting it all right though. Should be a cracking car when you're done.
27-10-2015, 09:23 PM
#18
PassionFord Regular
Thread Starter
In replacing the propshaft doughnut I changed it to the later type, this type doesn't have the bearing in the middle to centre the shaft and therefore needs the spigot on the back of the output shaft to locate into the propshaft to centre it. Back ally mean that the propshaft moved about all over the place and made one hell of a noise in the process.
I'll get the update showing this soon.
Thanks very much 👍
28-10-2015, 09:16 PM
#20
PassionFord Regular
Thread Starter
Update on progress so far..
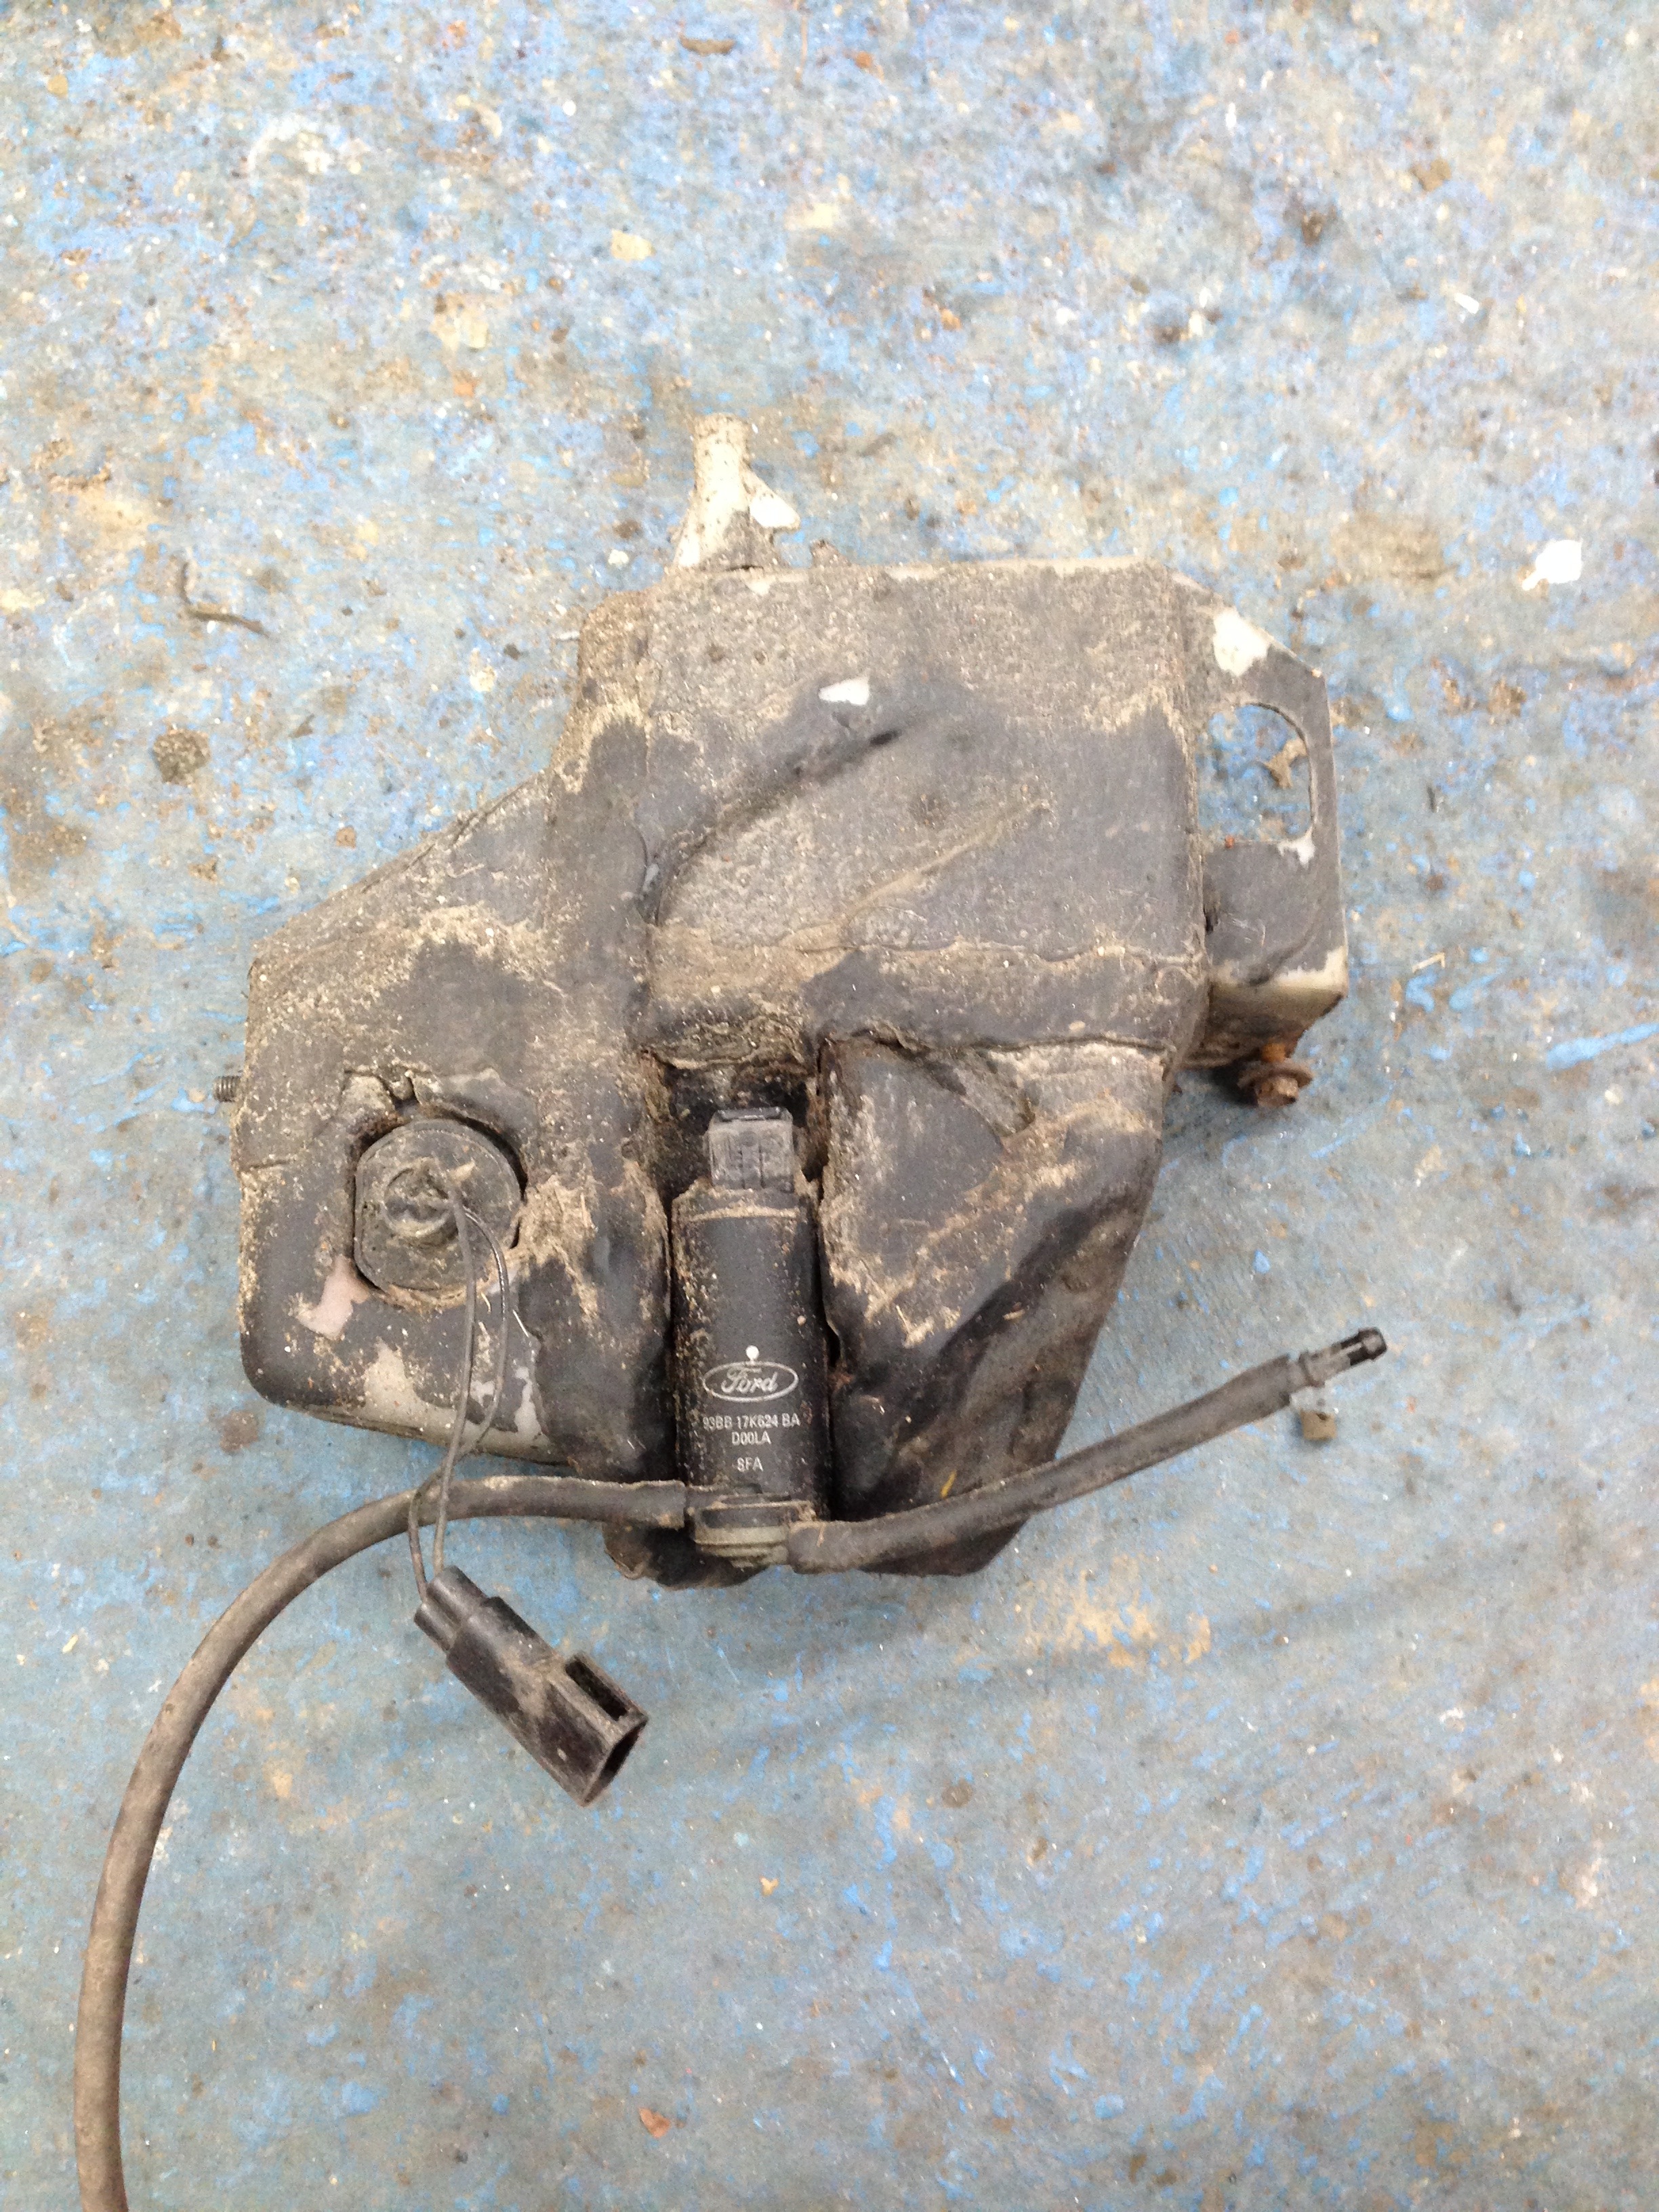
This is the washer bottle that doesn't hold fluid.. So not much use. It is a mess of cut up bottles and bits and needs addressing at some point soon!
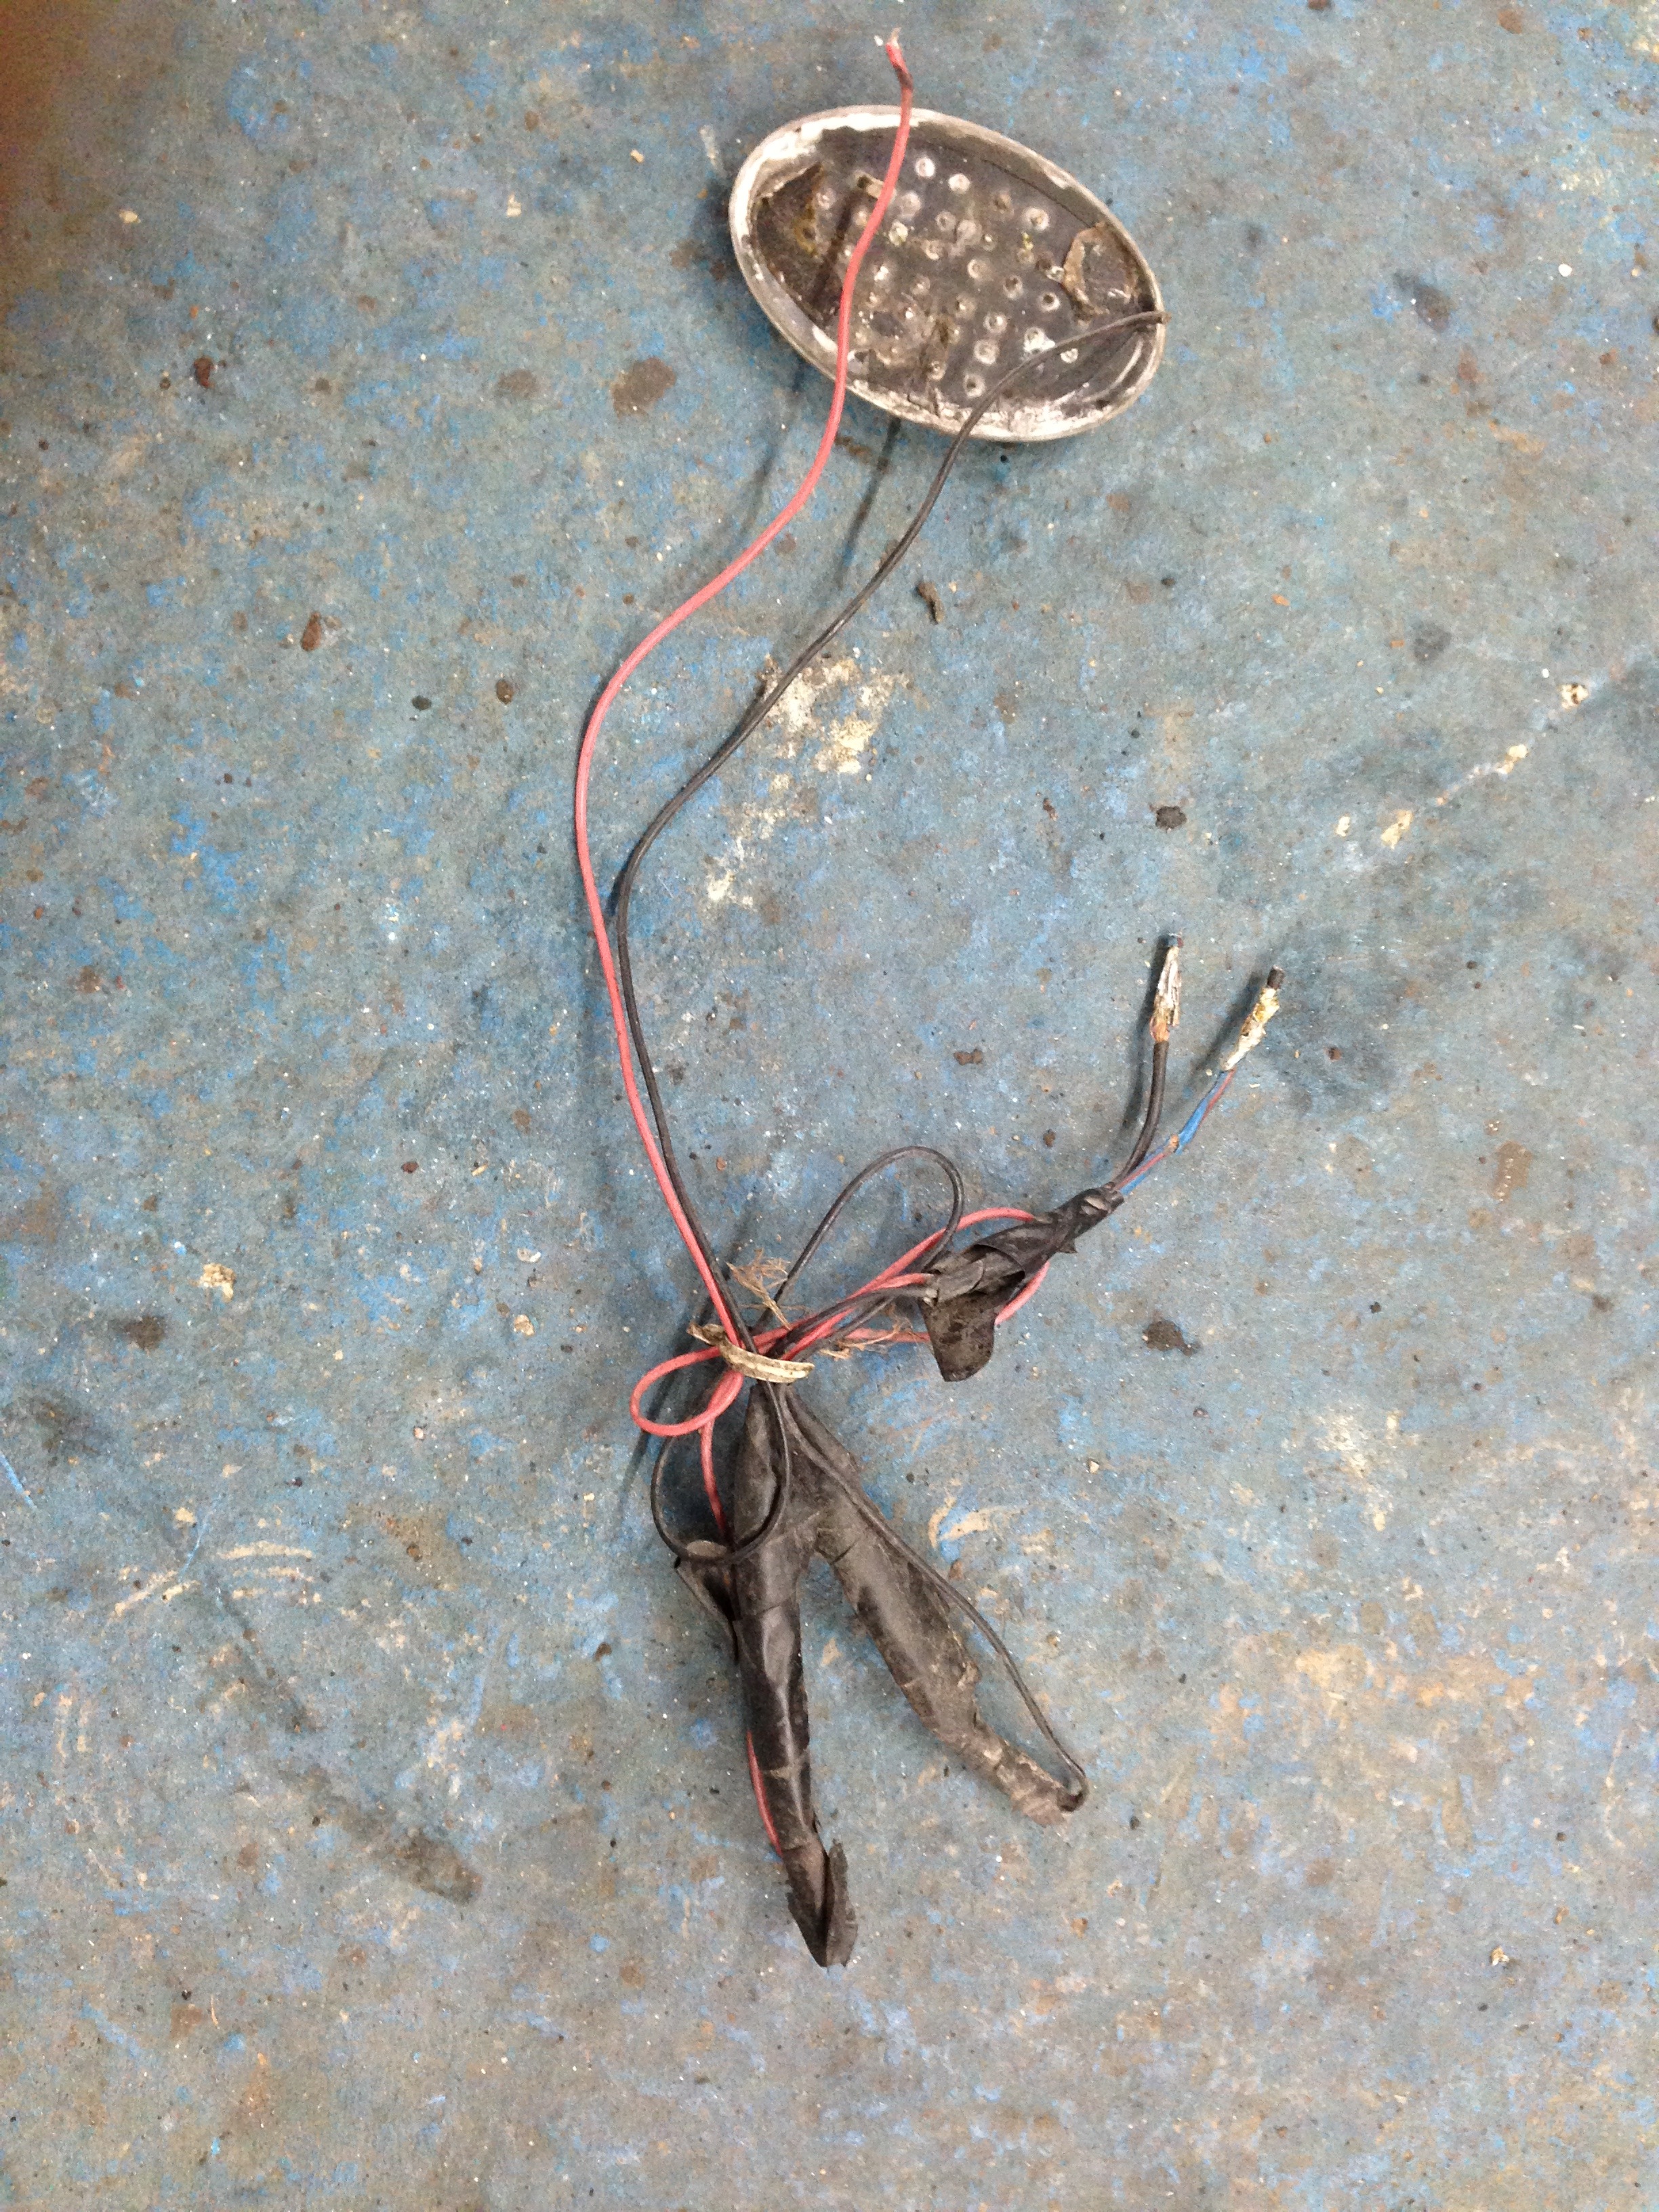
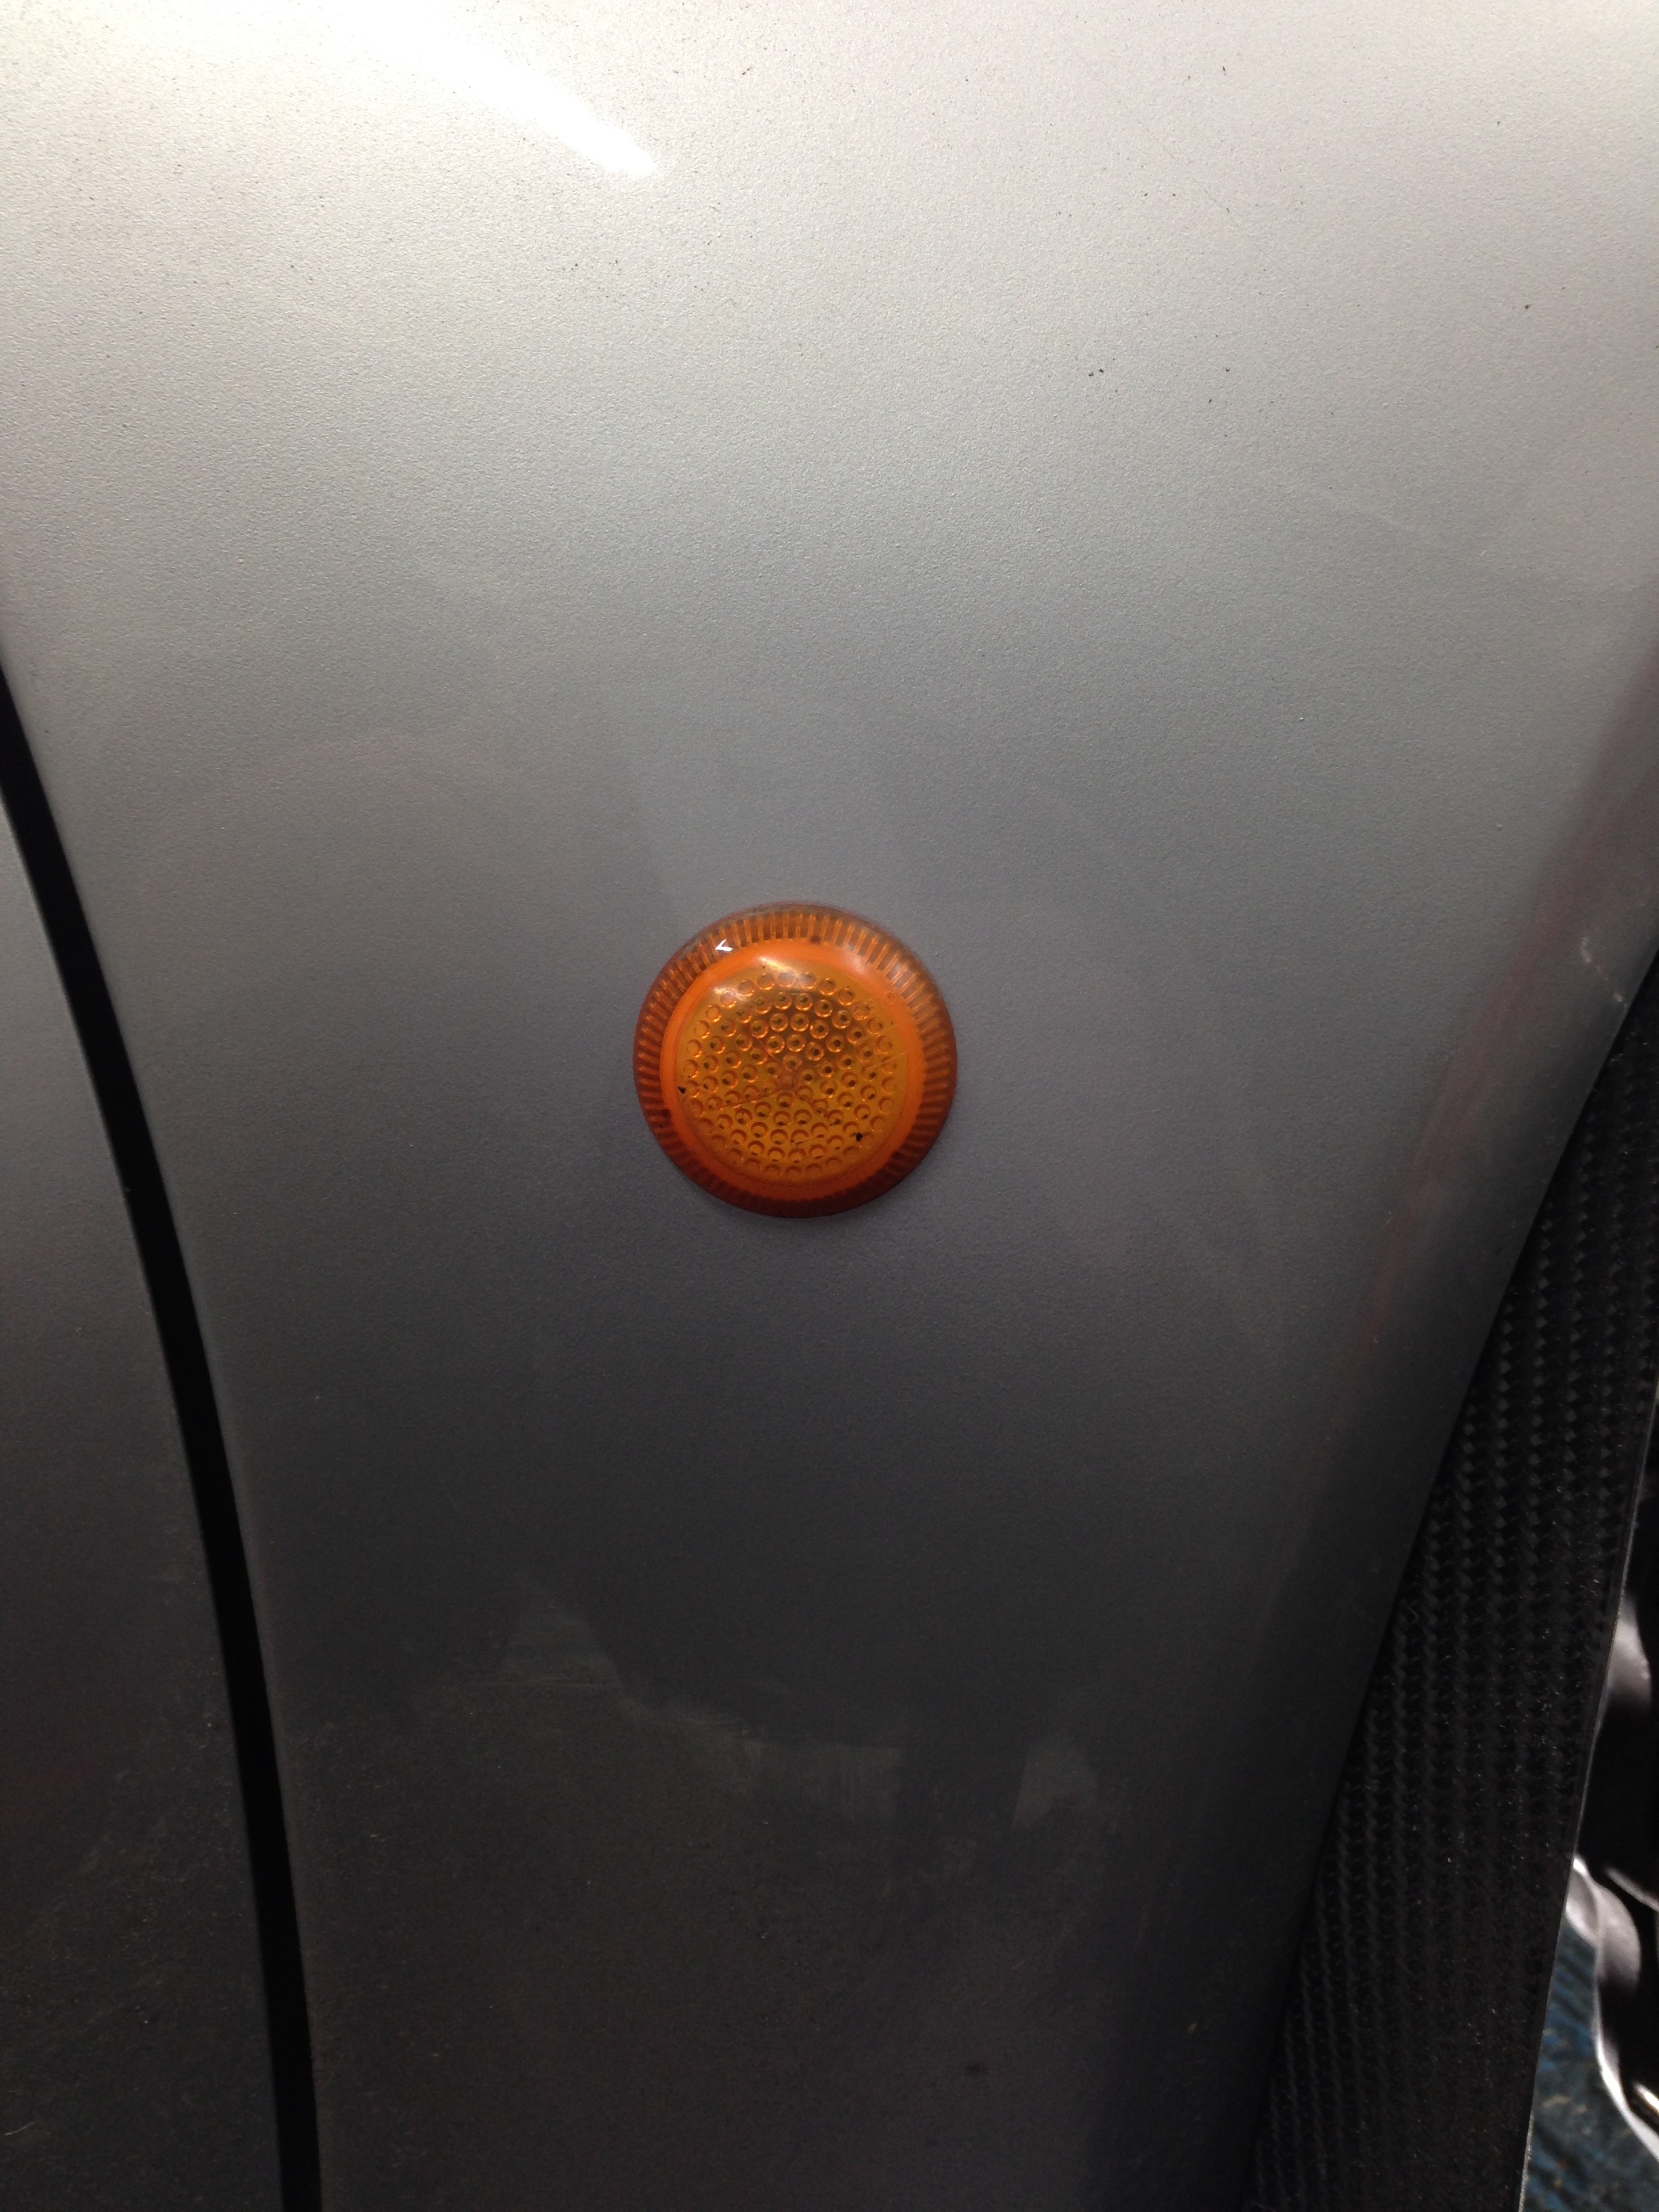
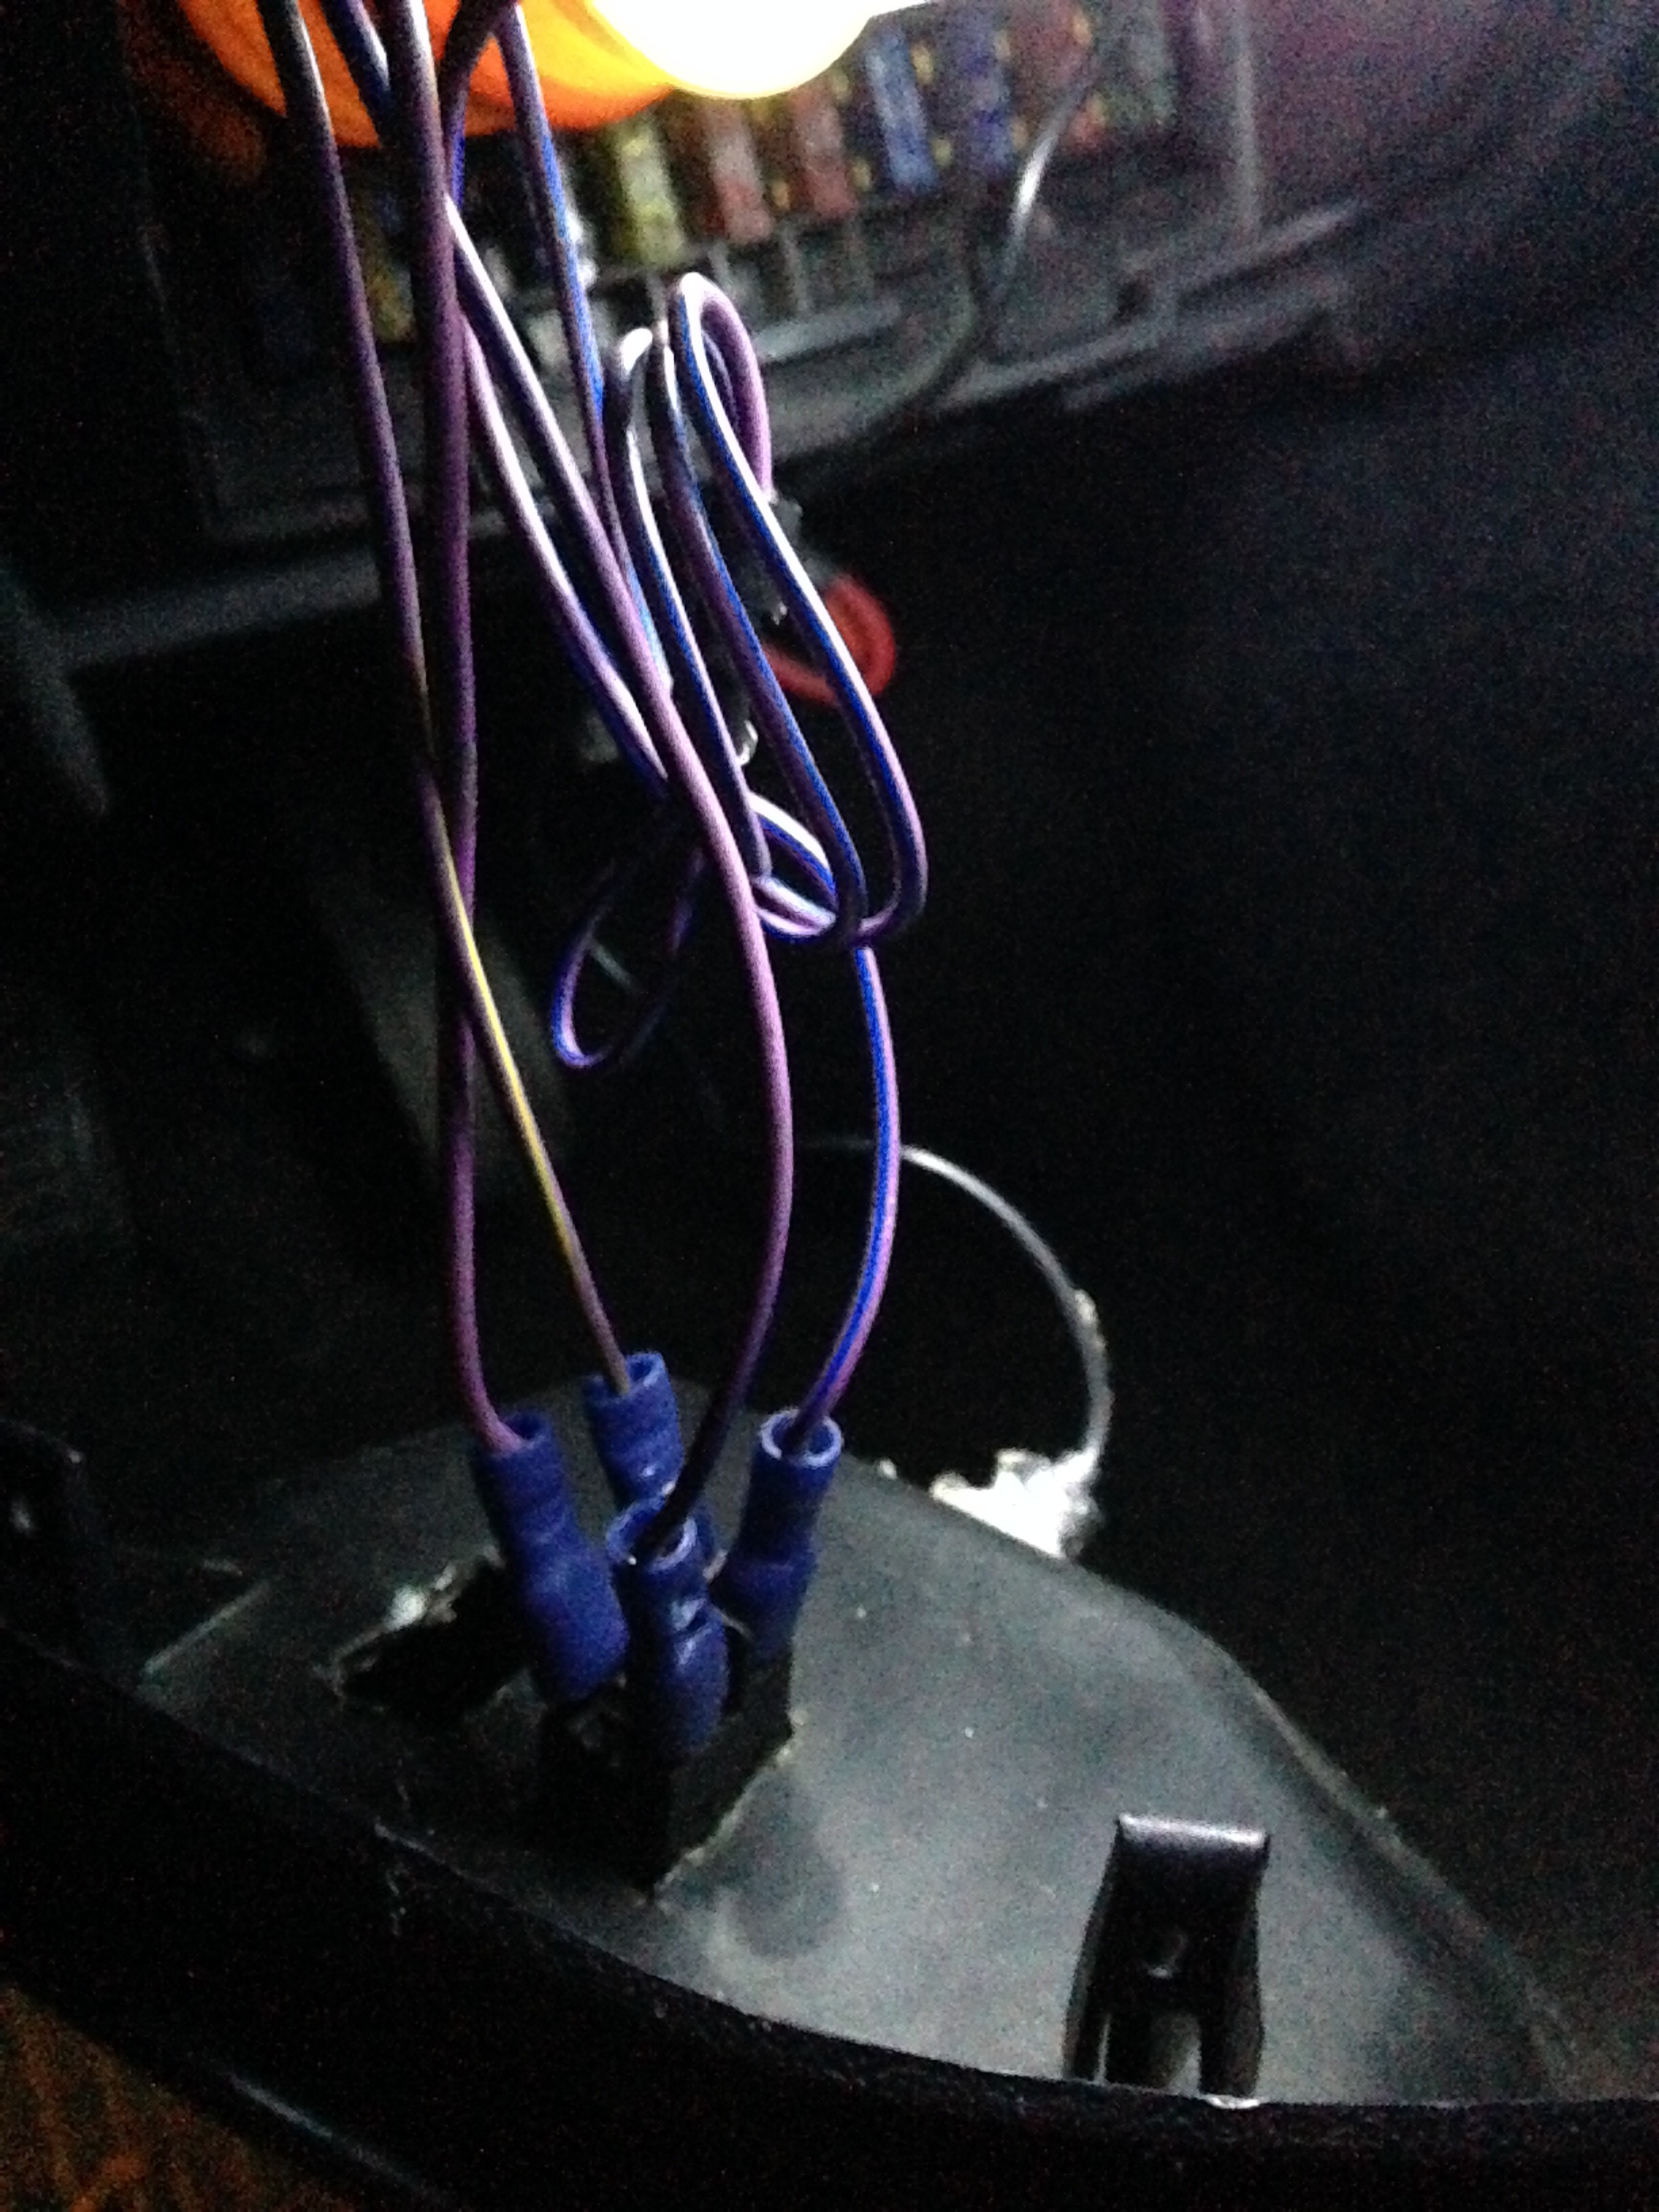
Decided to change the side repeaters, the ones fitted had loads of excess cable left bundled up and wanted a more factory look so set about fitting the standard items.
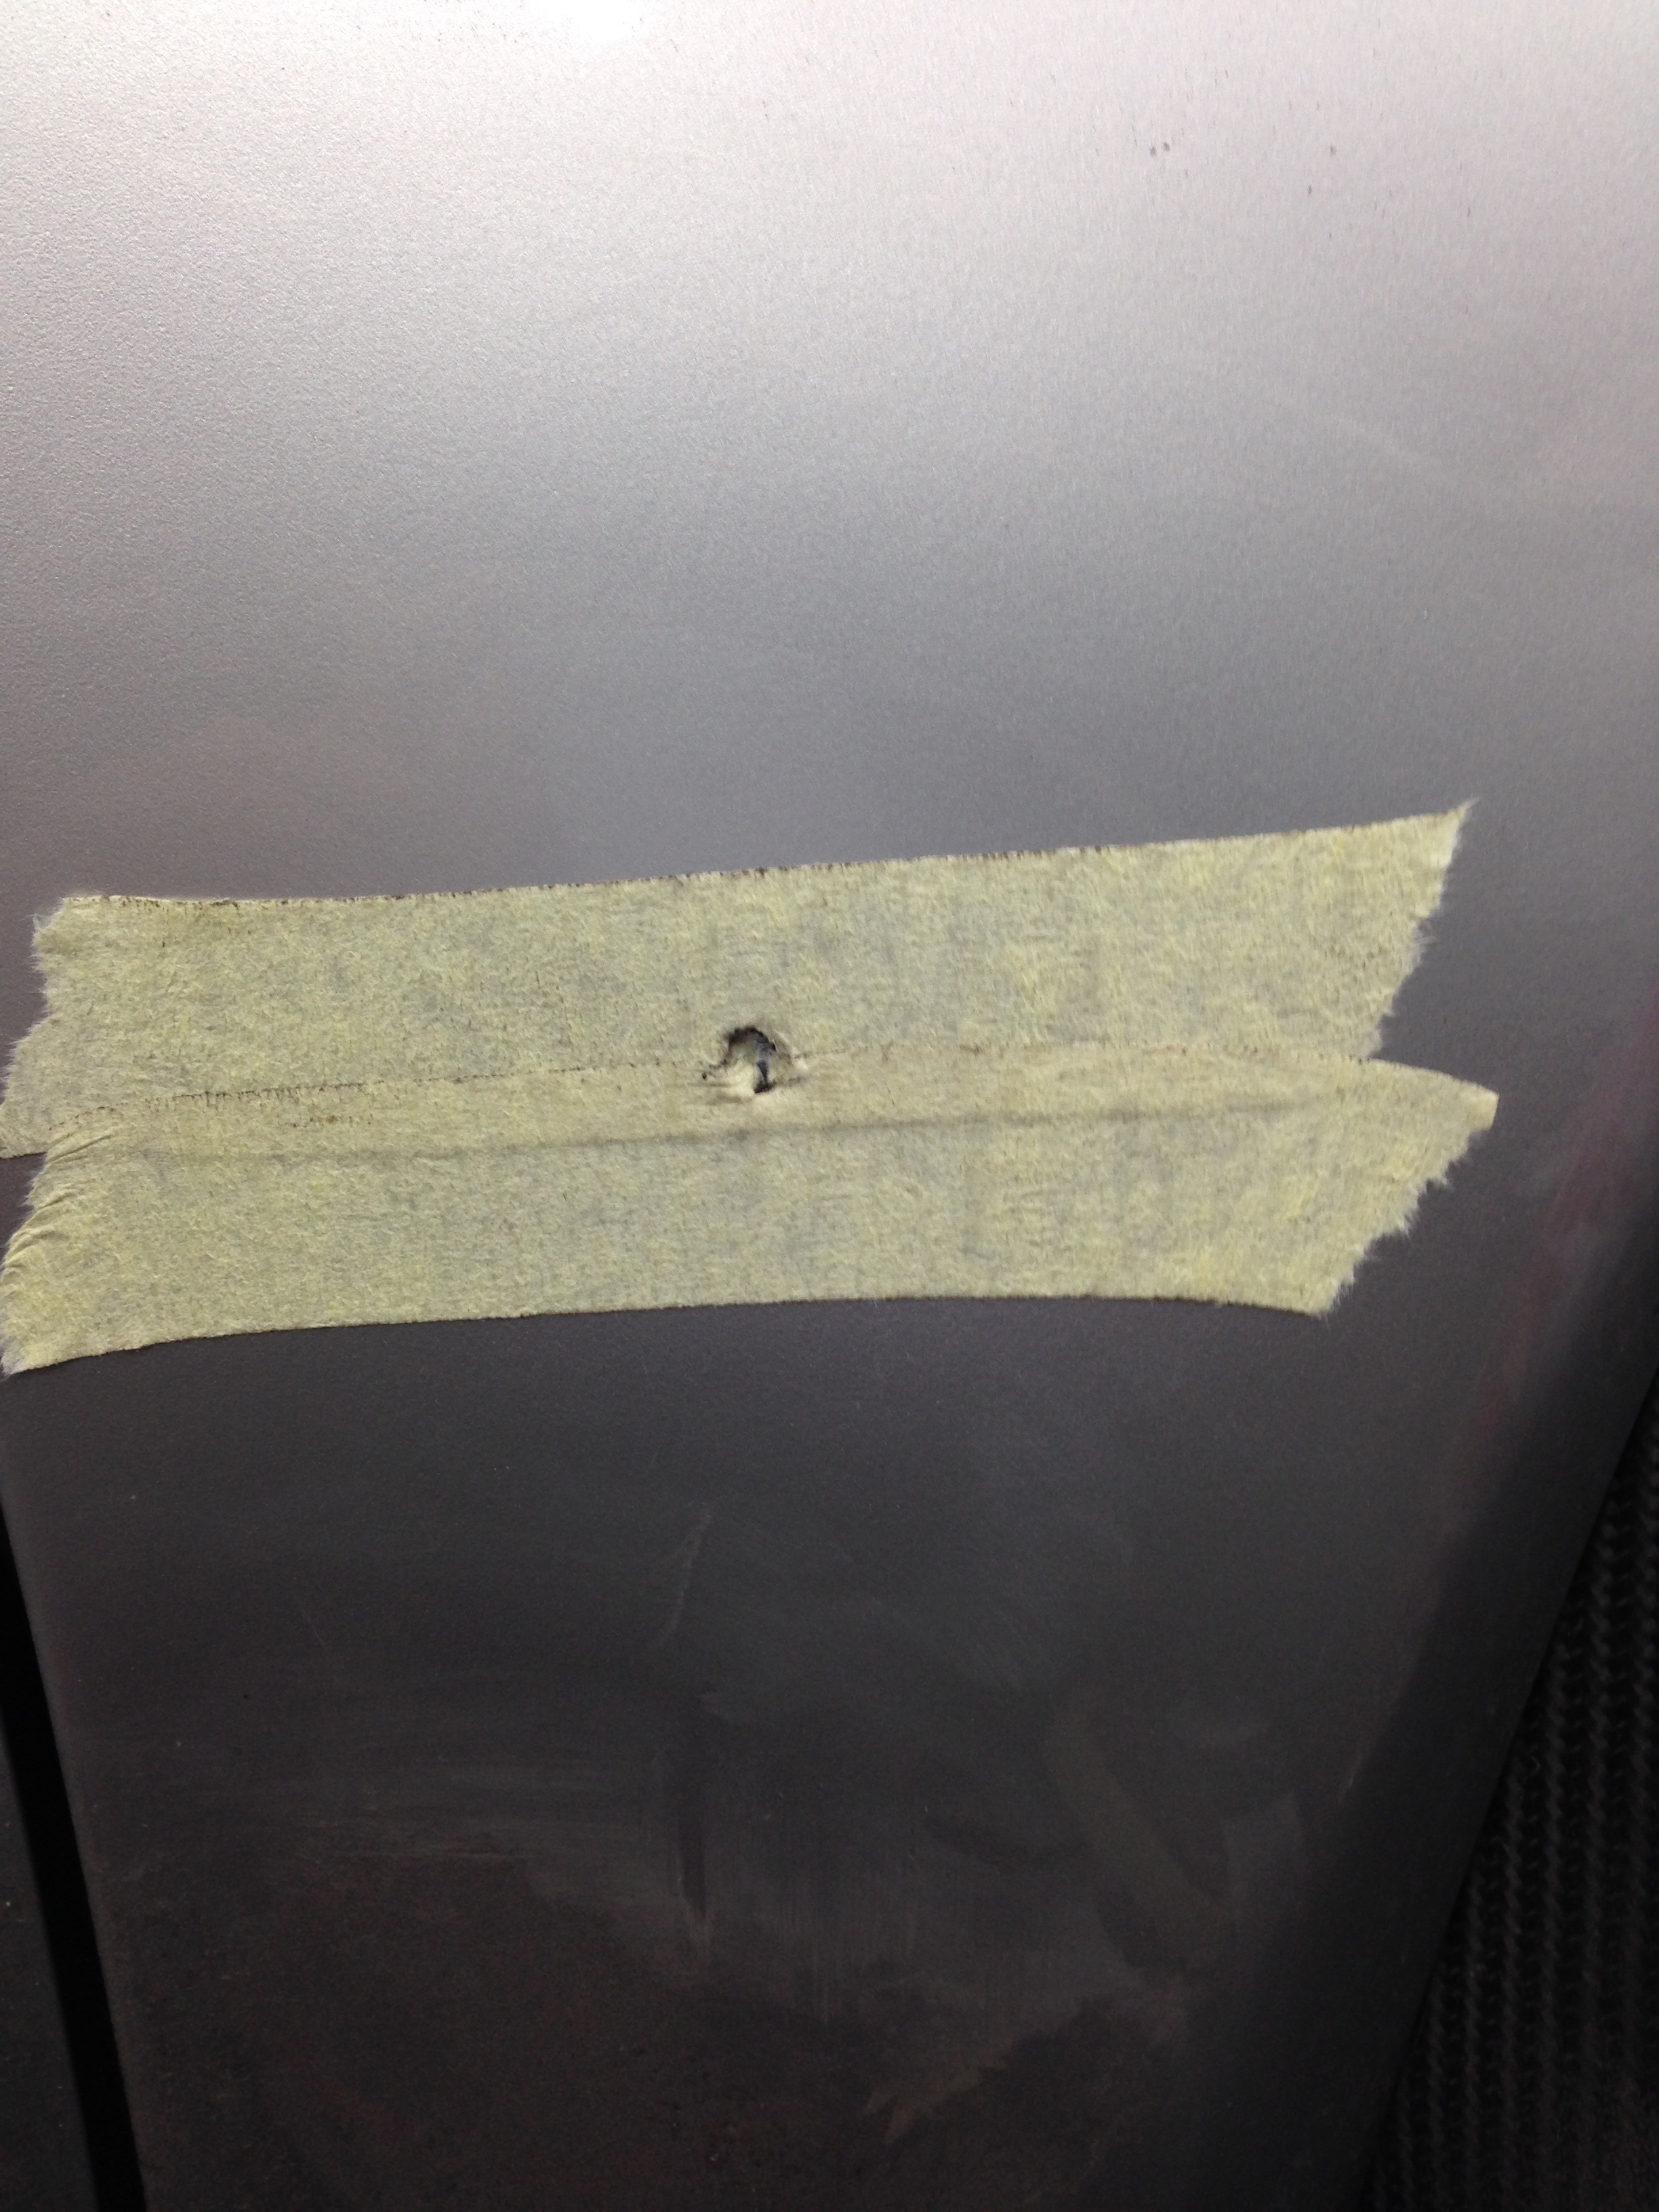
Holes ready to be cored
New lights fitted with the correct wiring loom and plugs
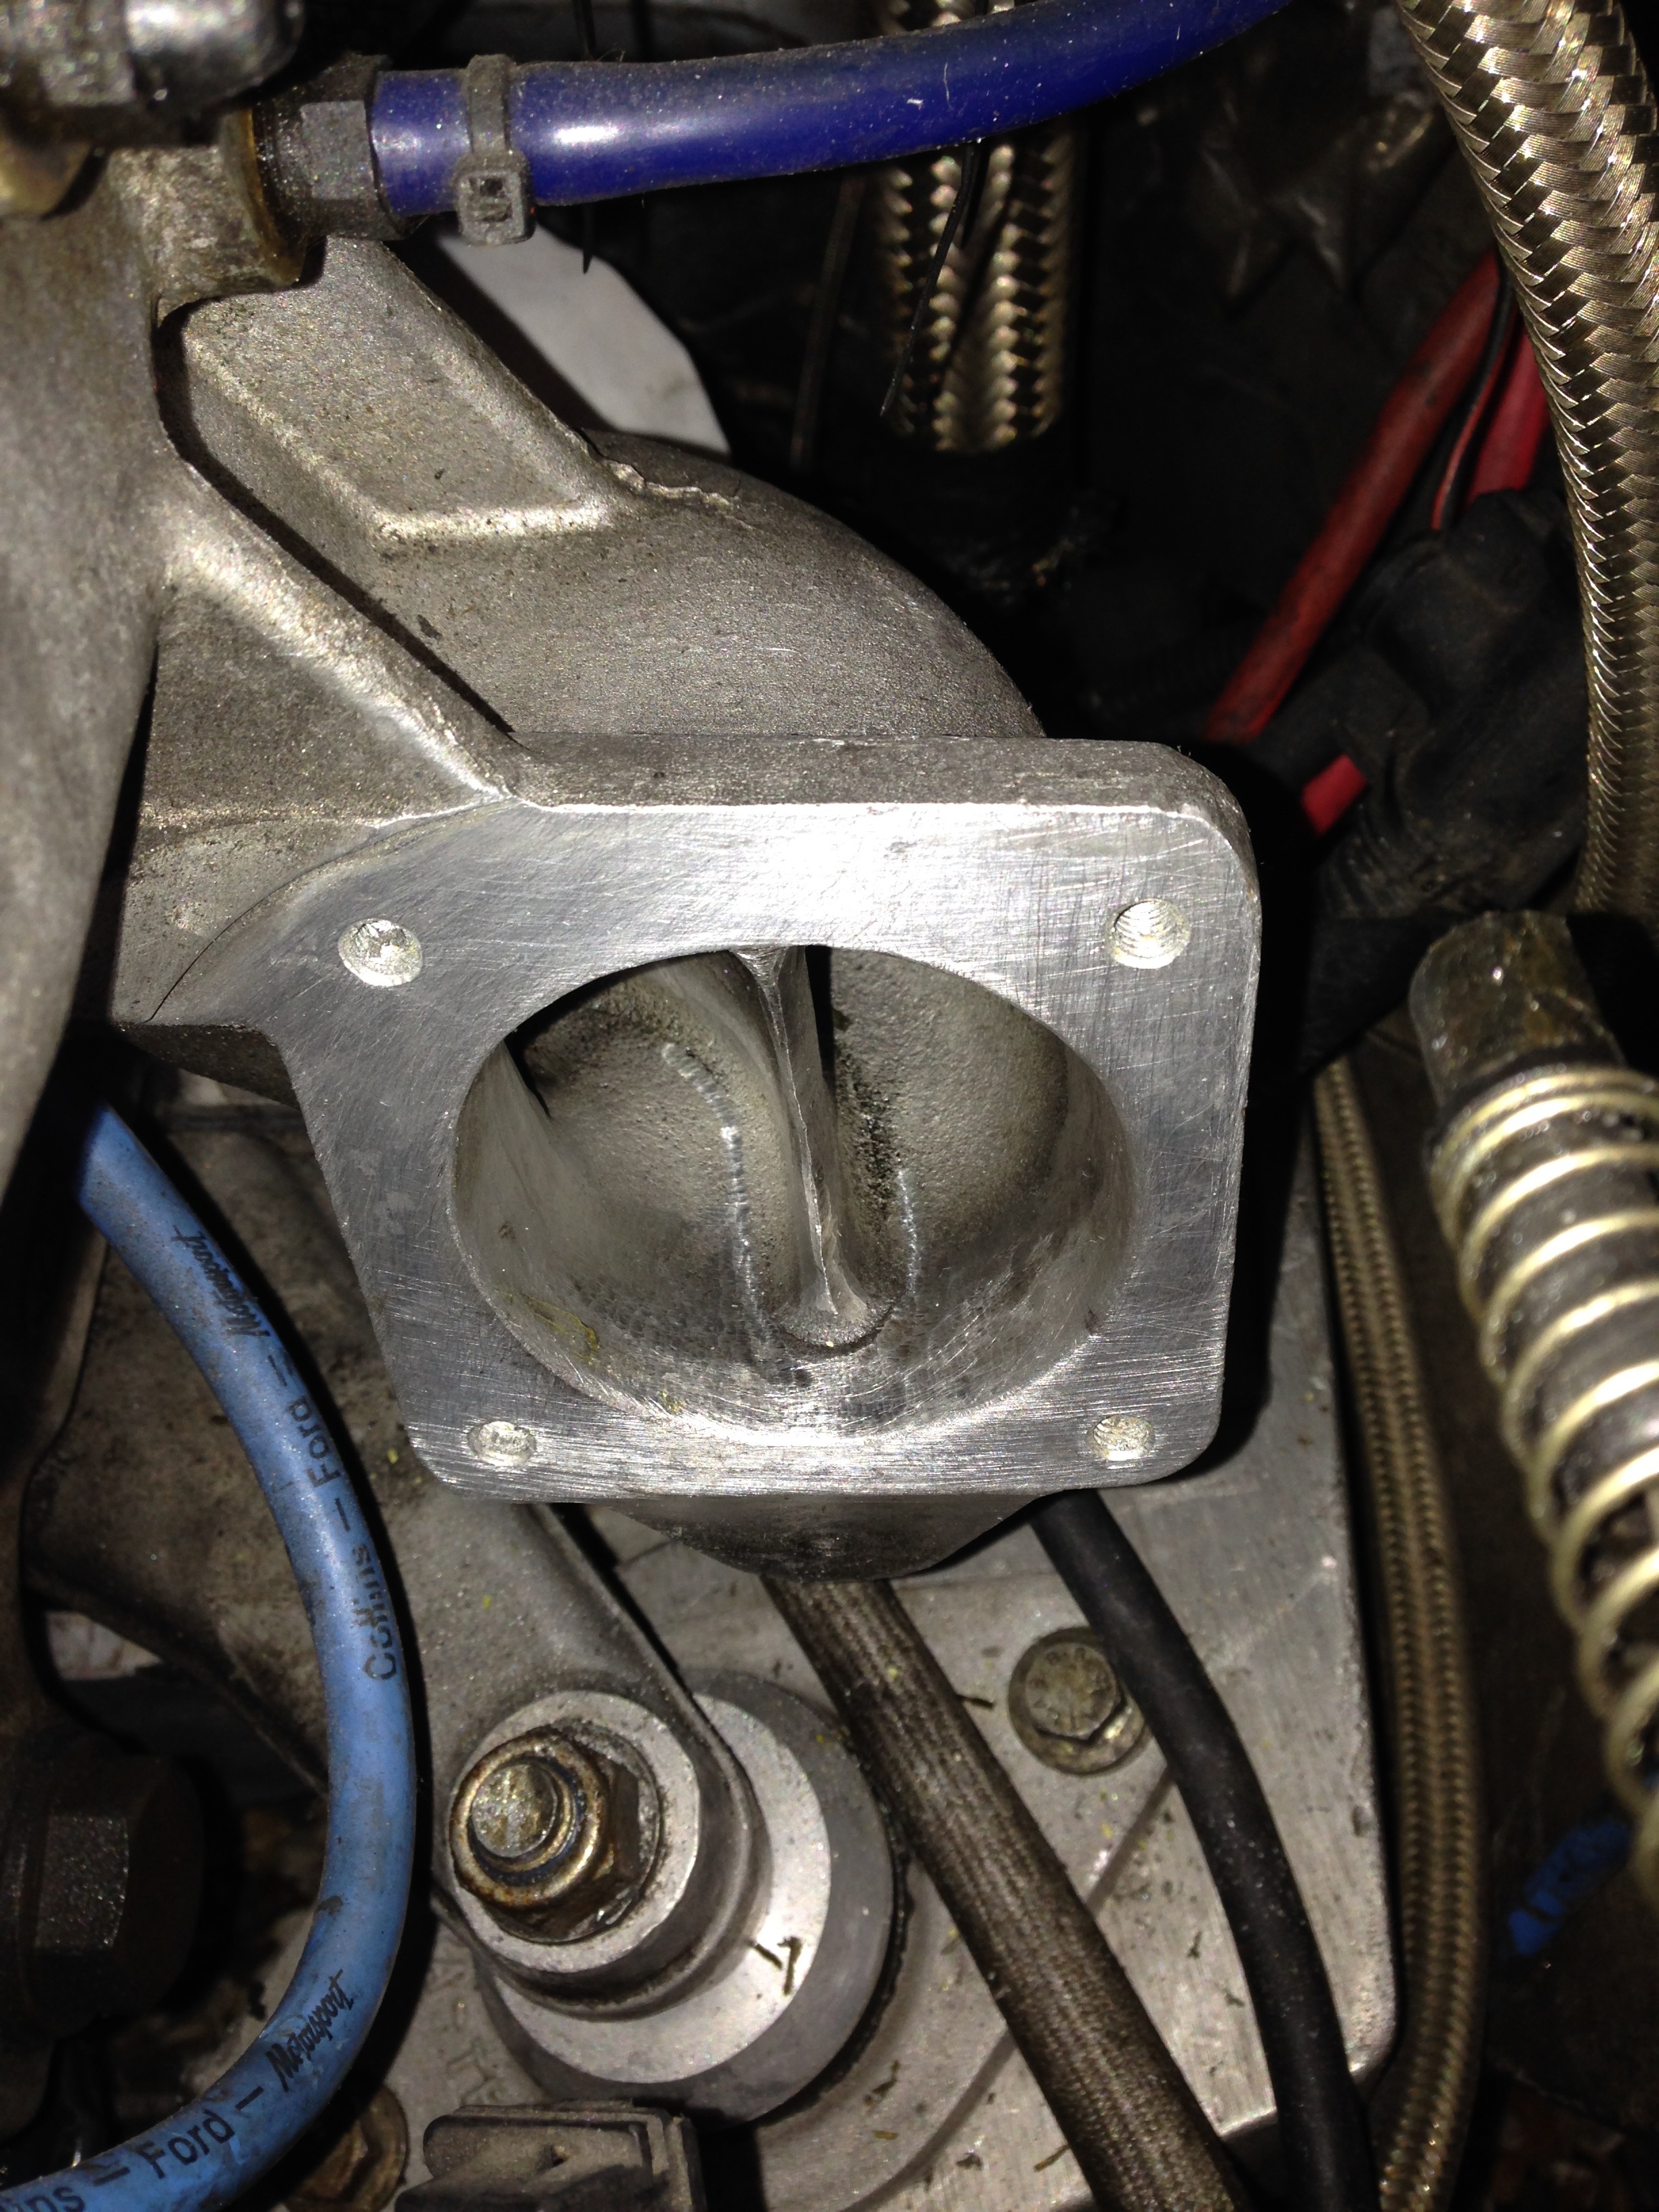
Looked into the anti-lag wiring and it seemed very messy, although fun to use for now I decided to remove the wiring. The anti lag also meant the idle valve didn't work properly and the cold idle was awful, so I also looked into the idle valve..
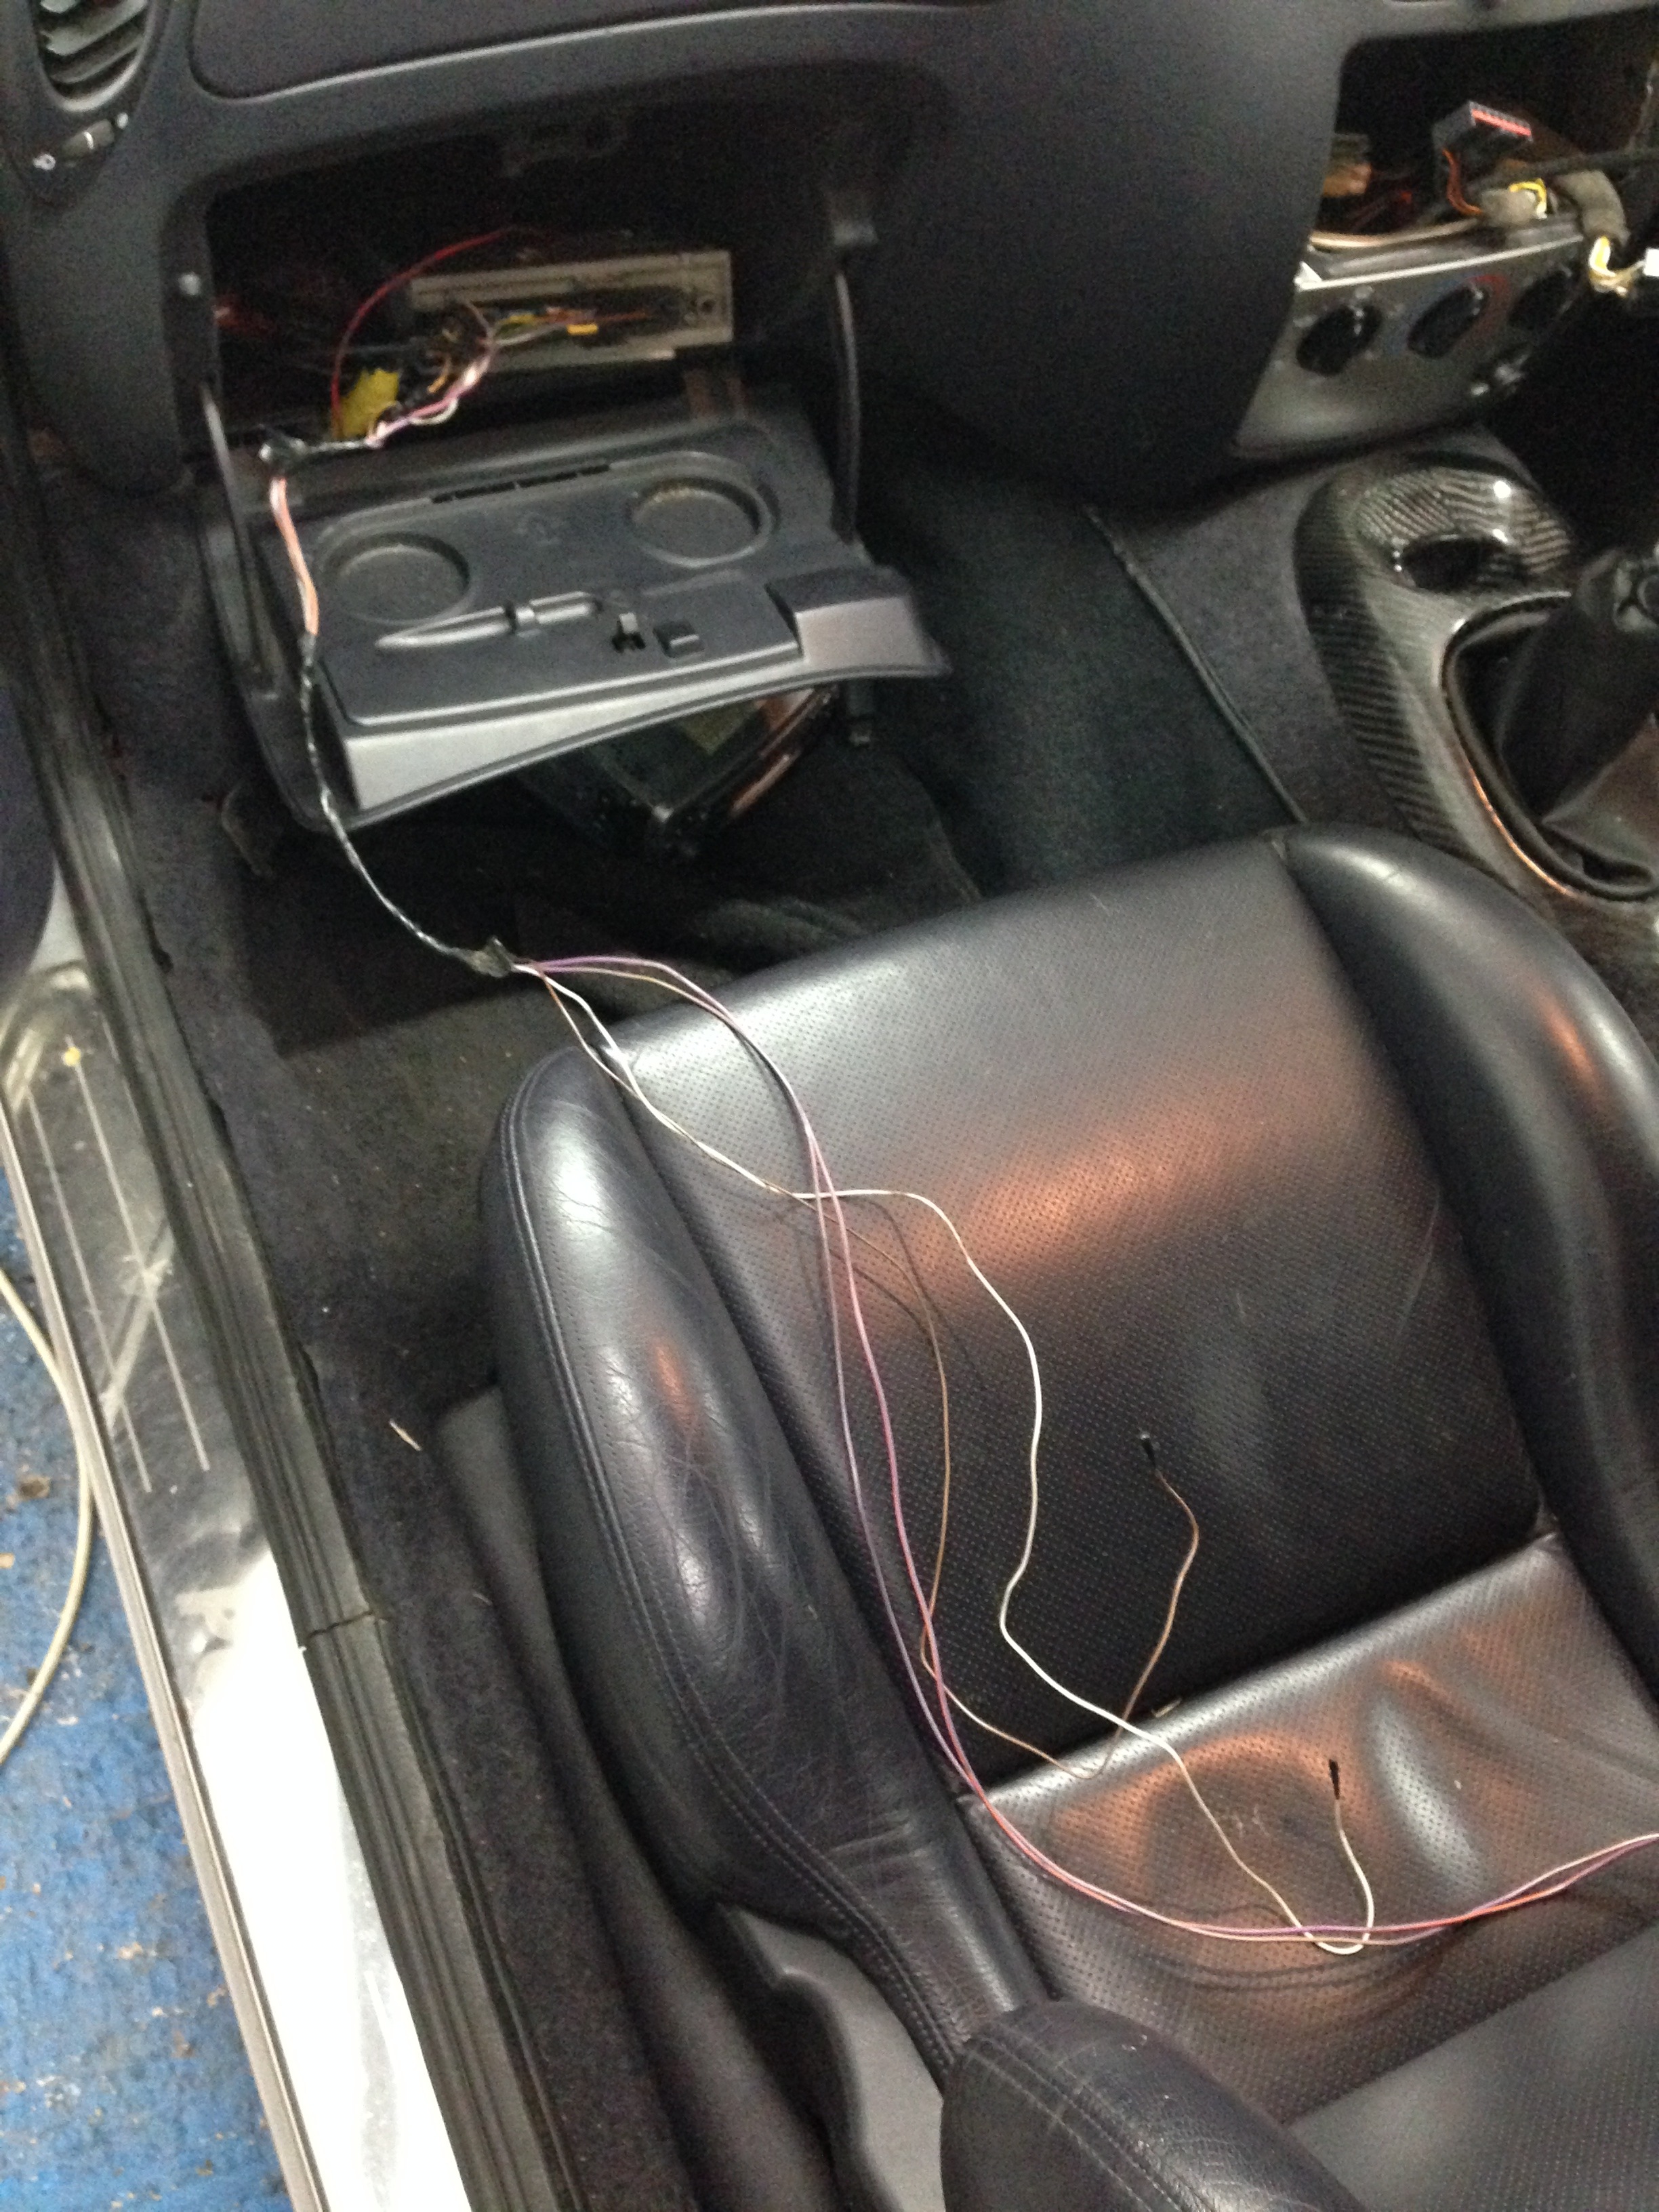
Found the valve to be butchered so set about replacing it
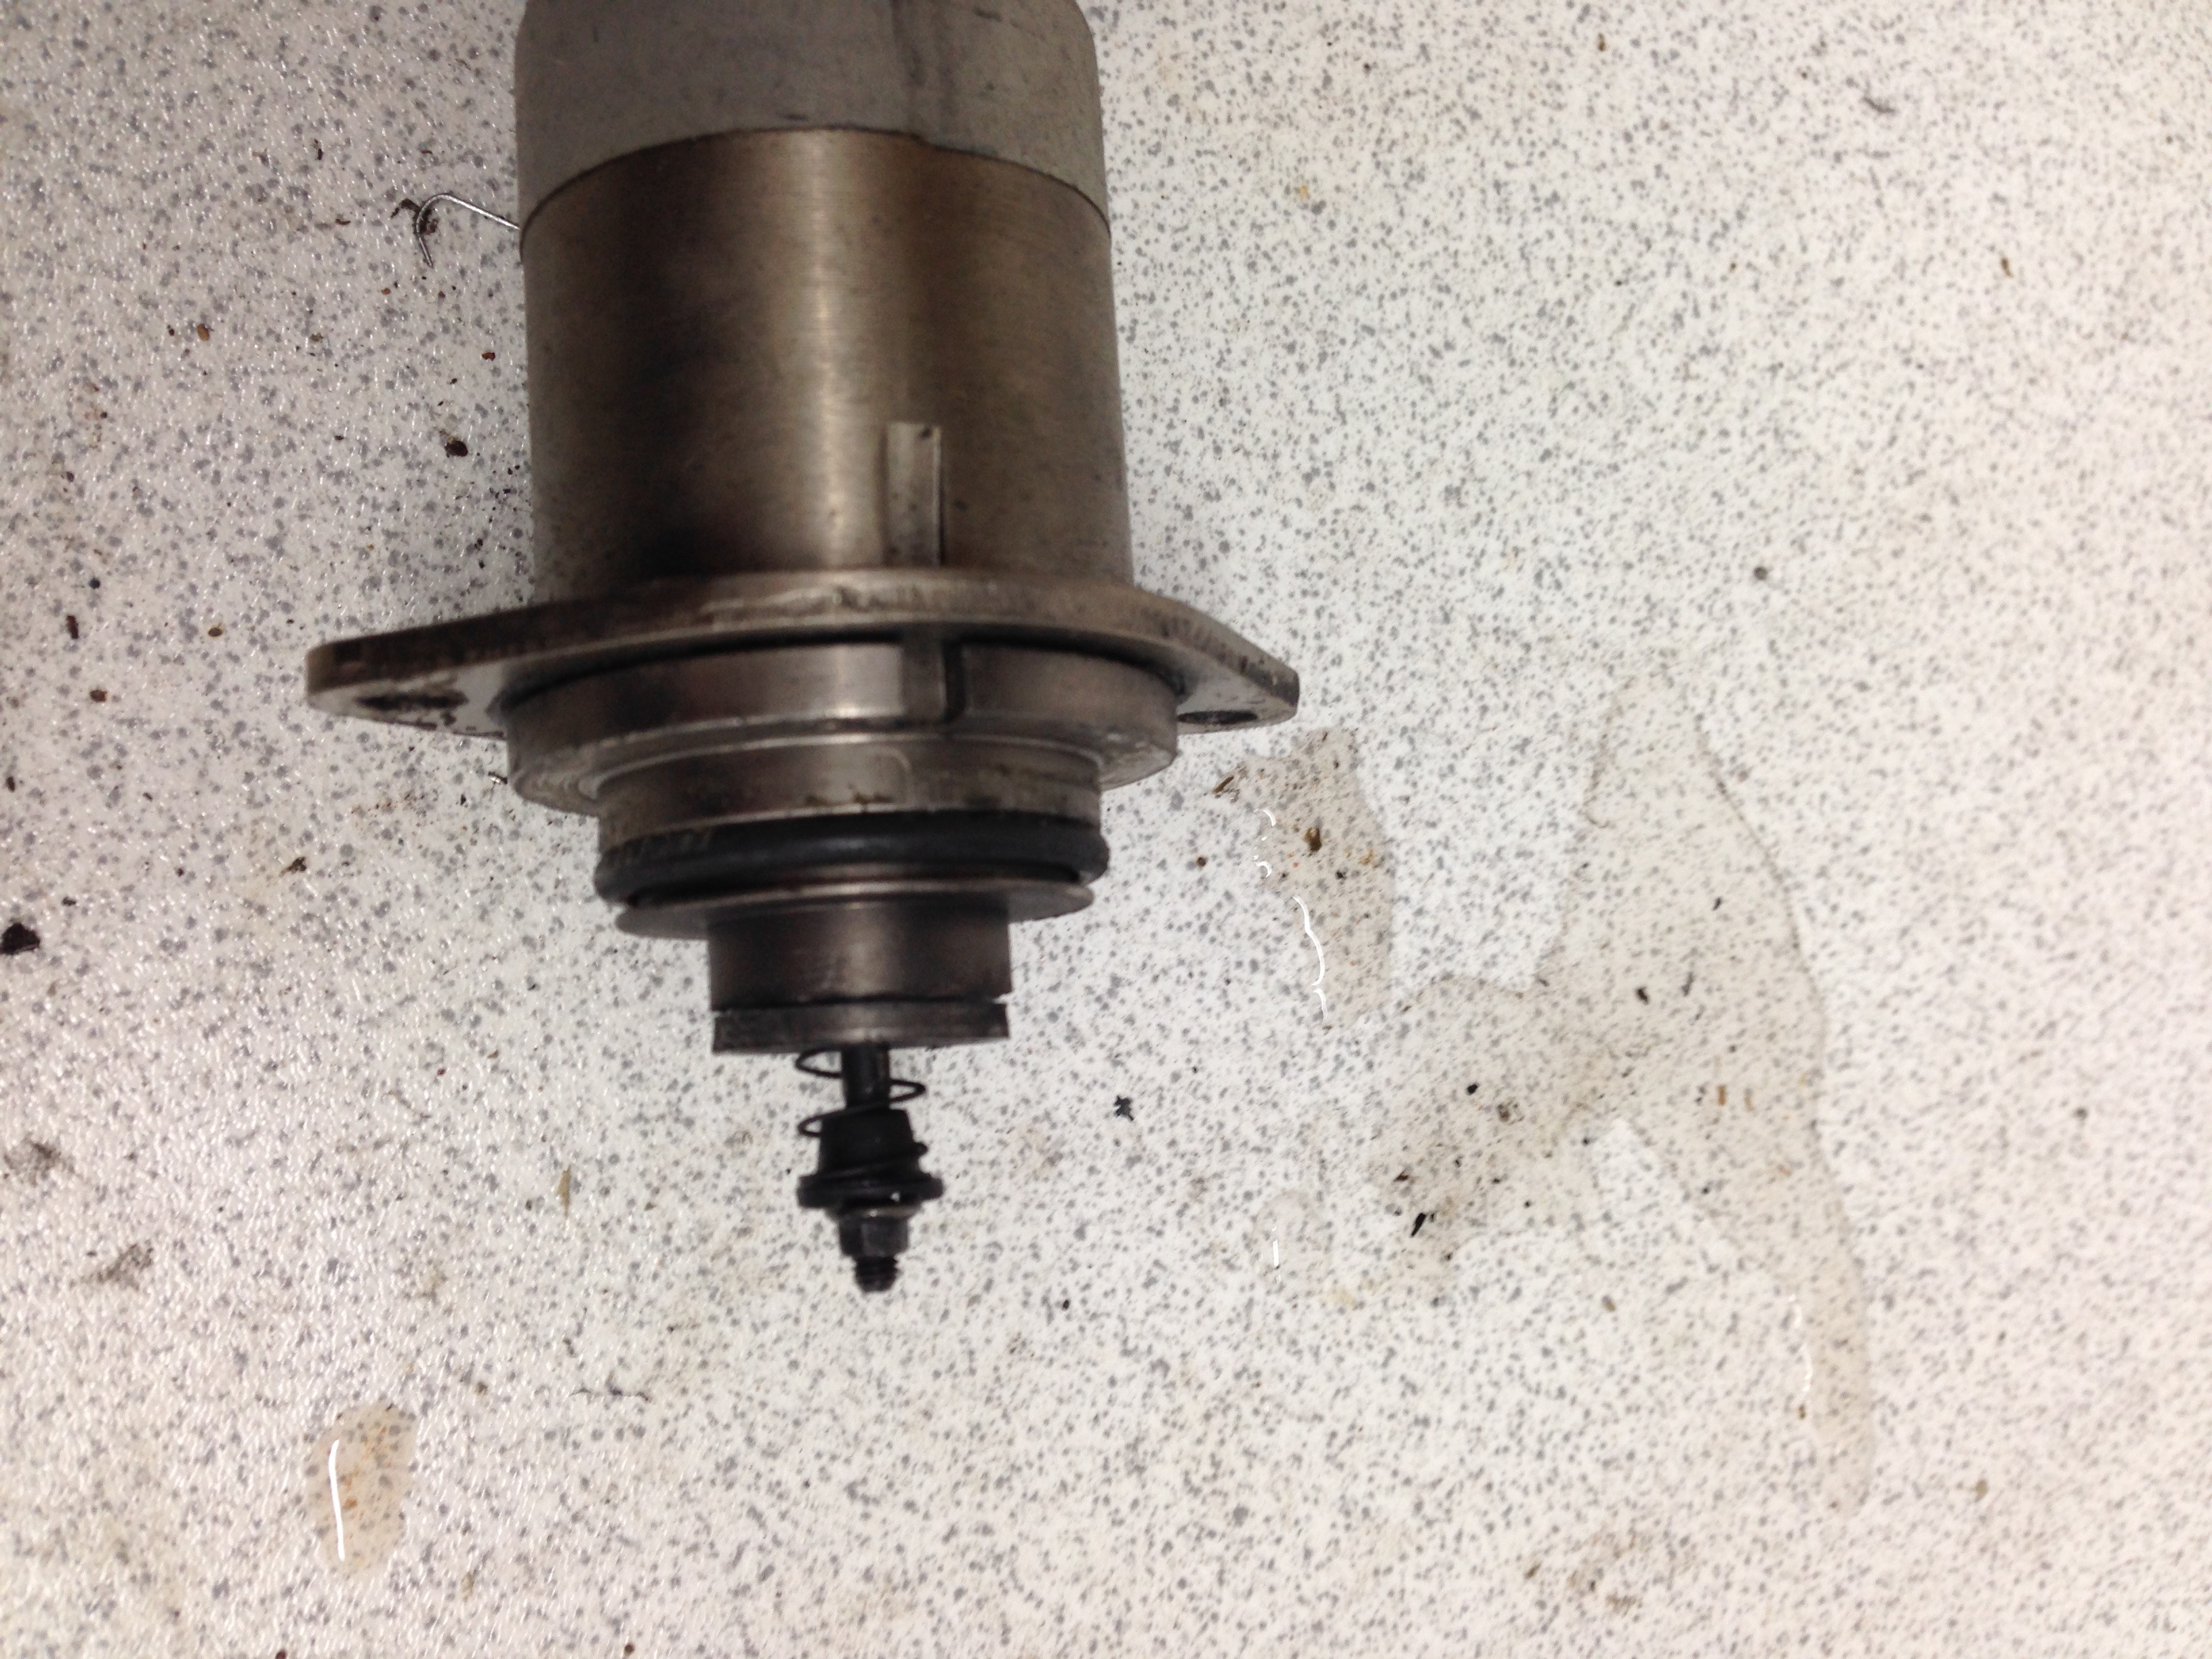
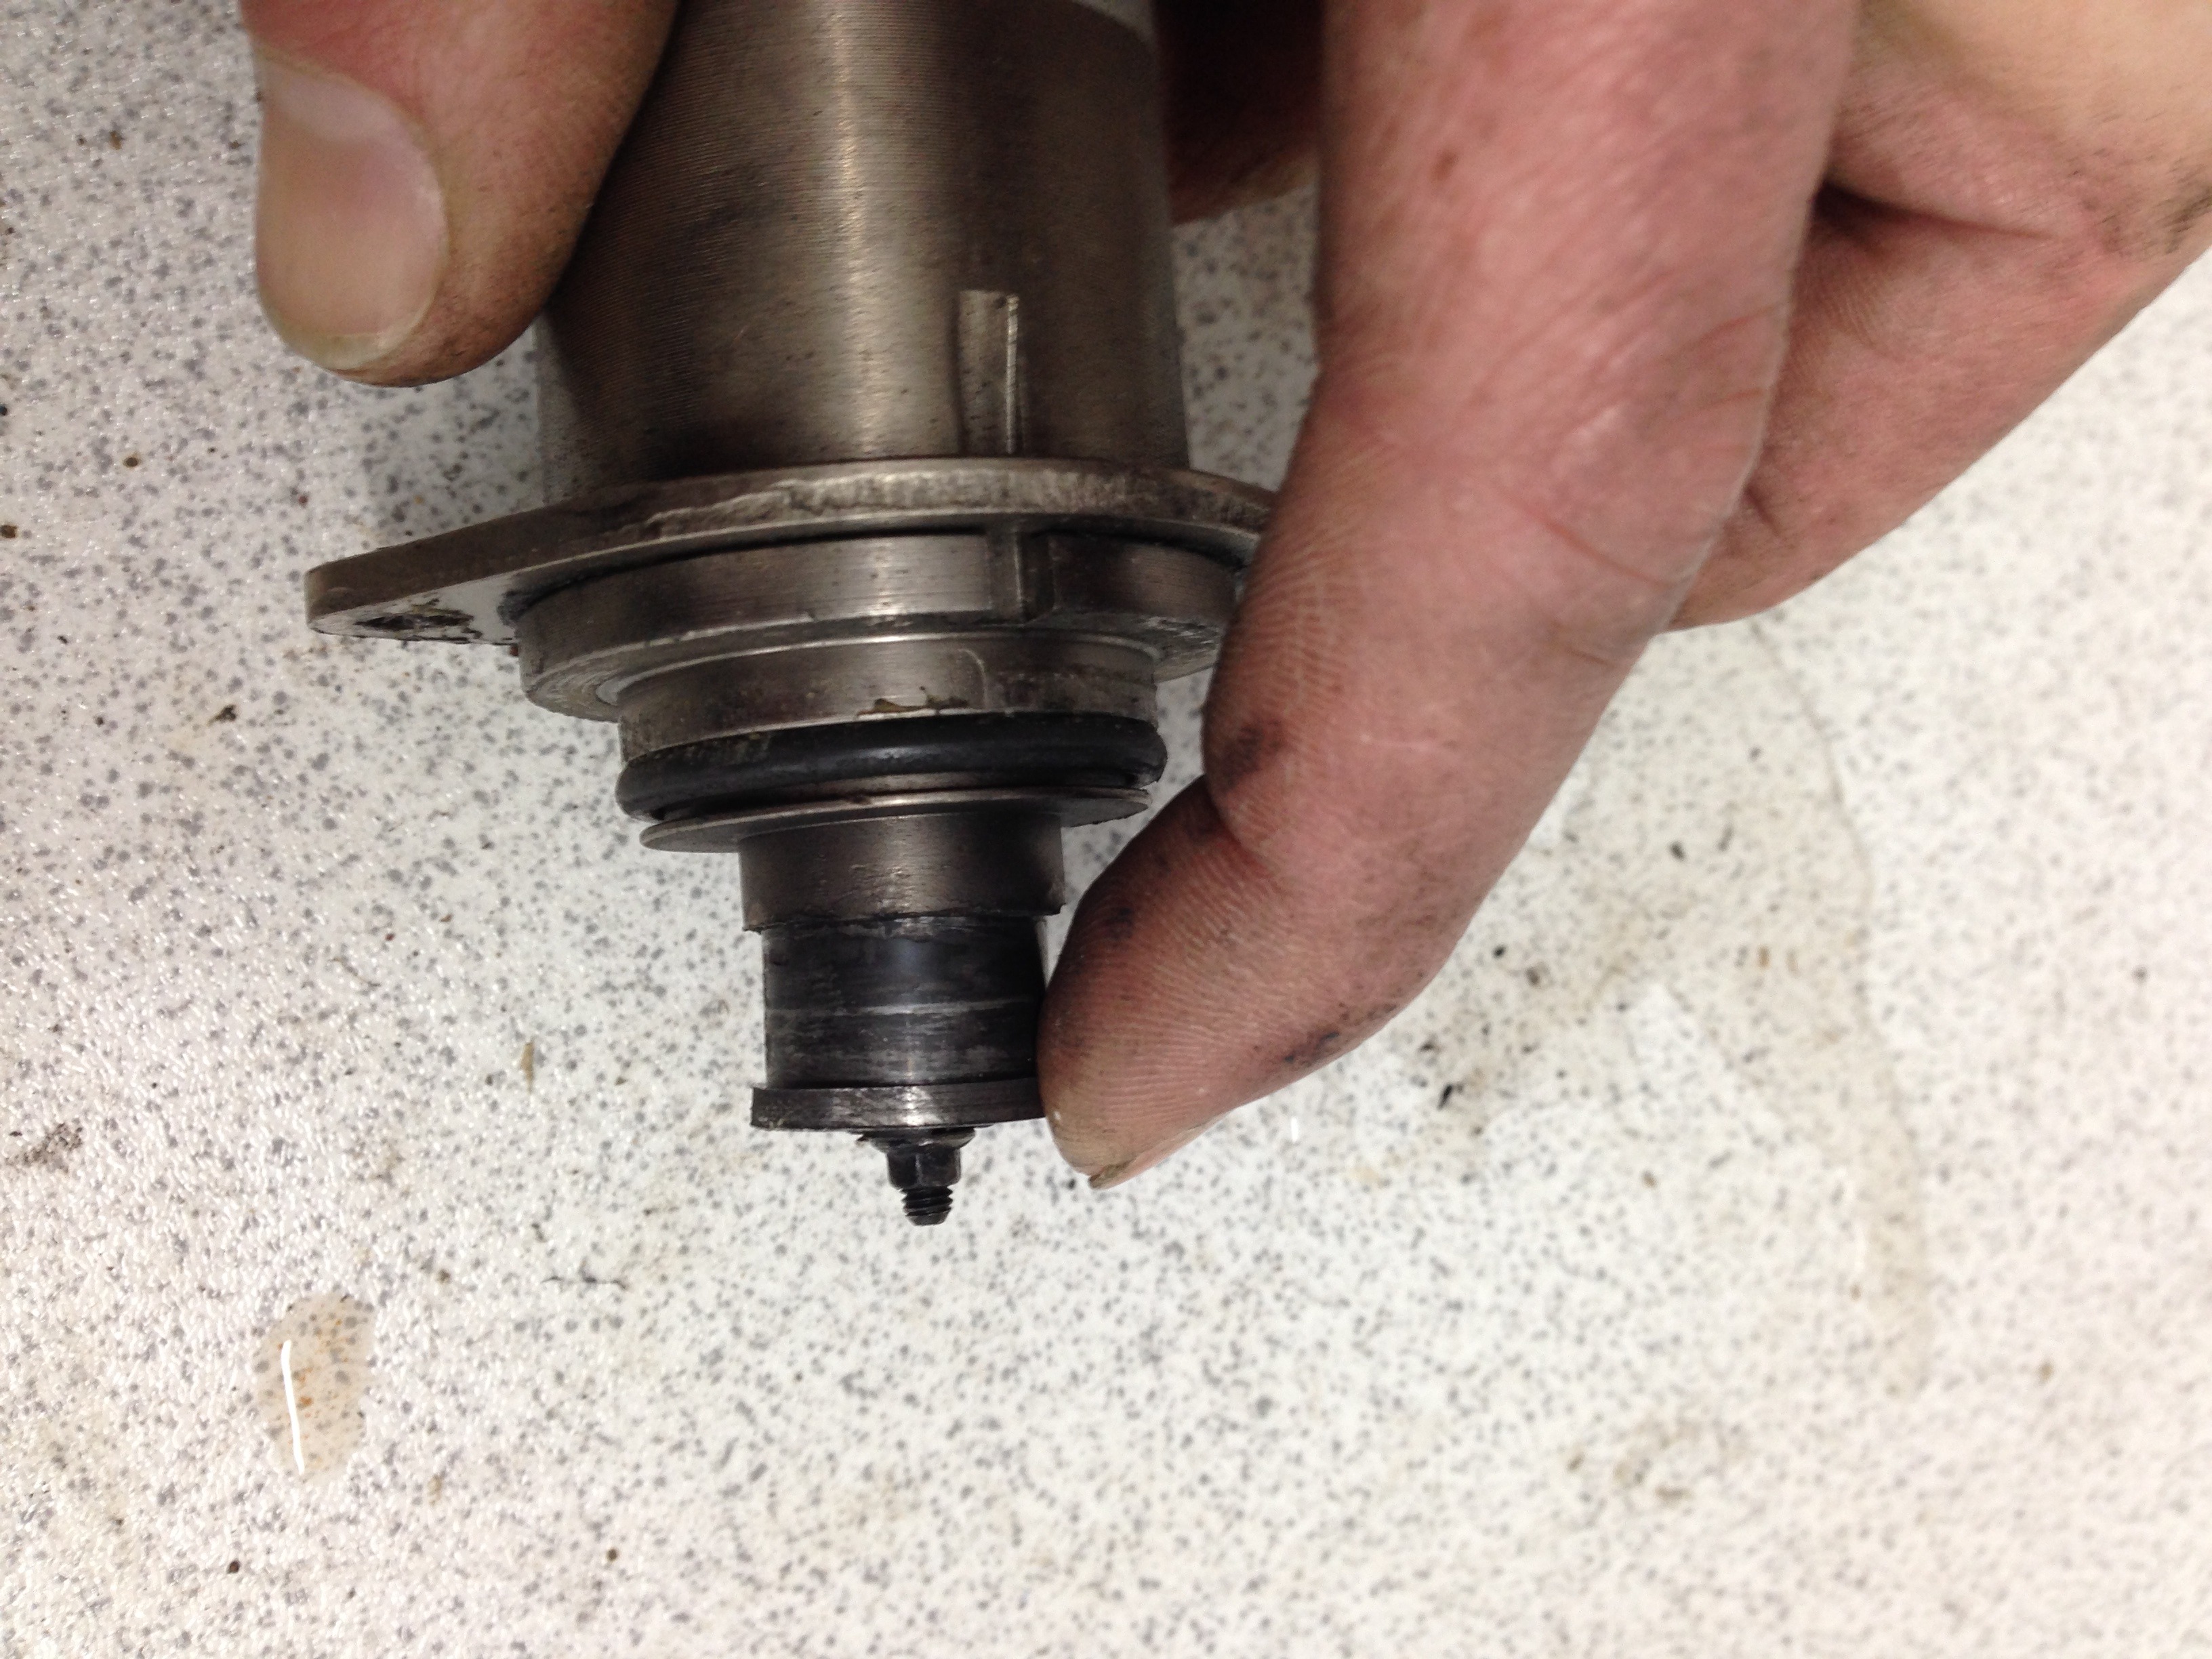
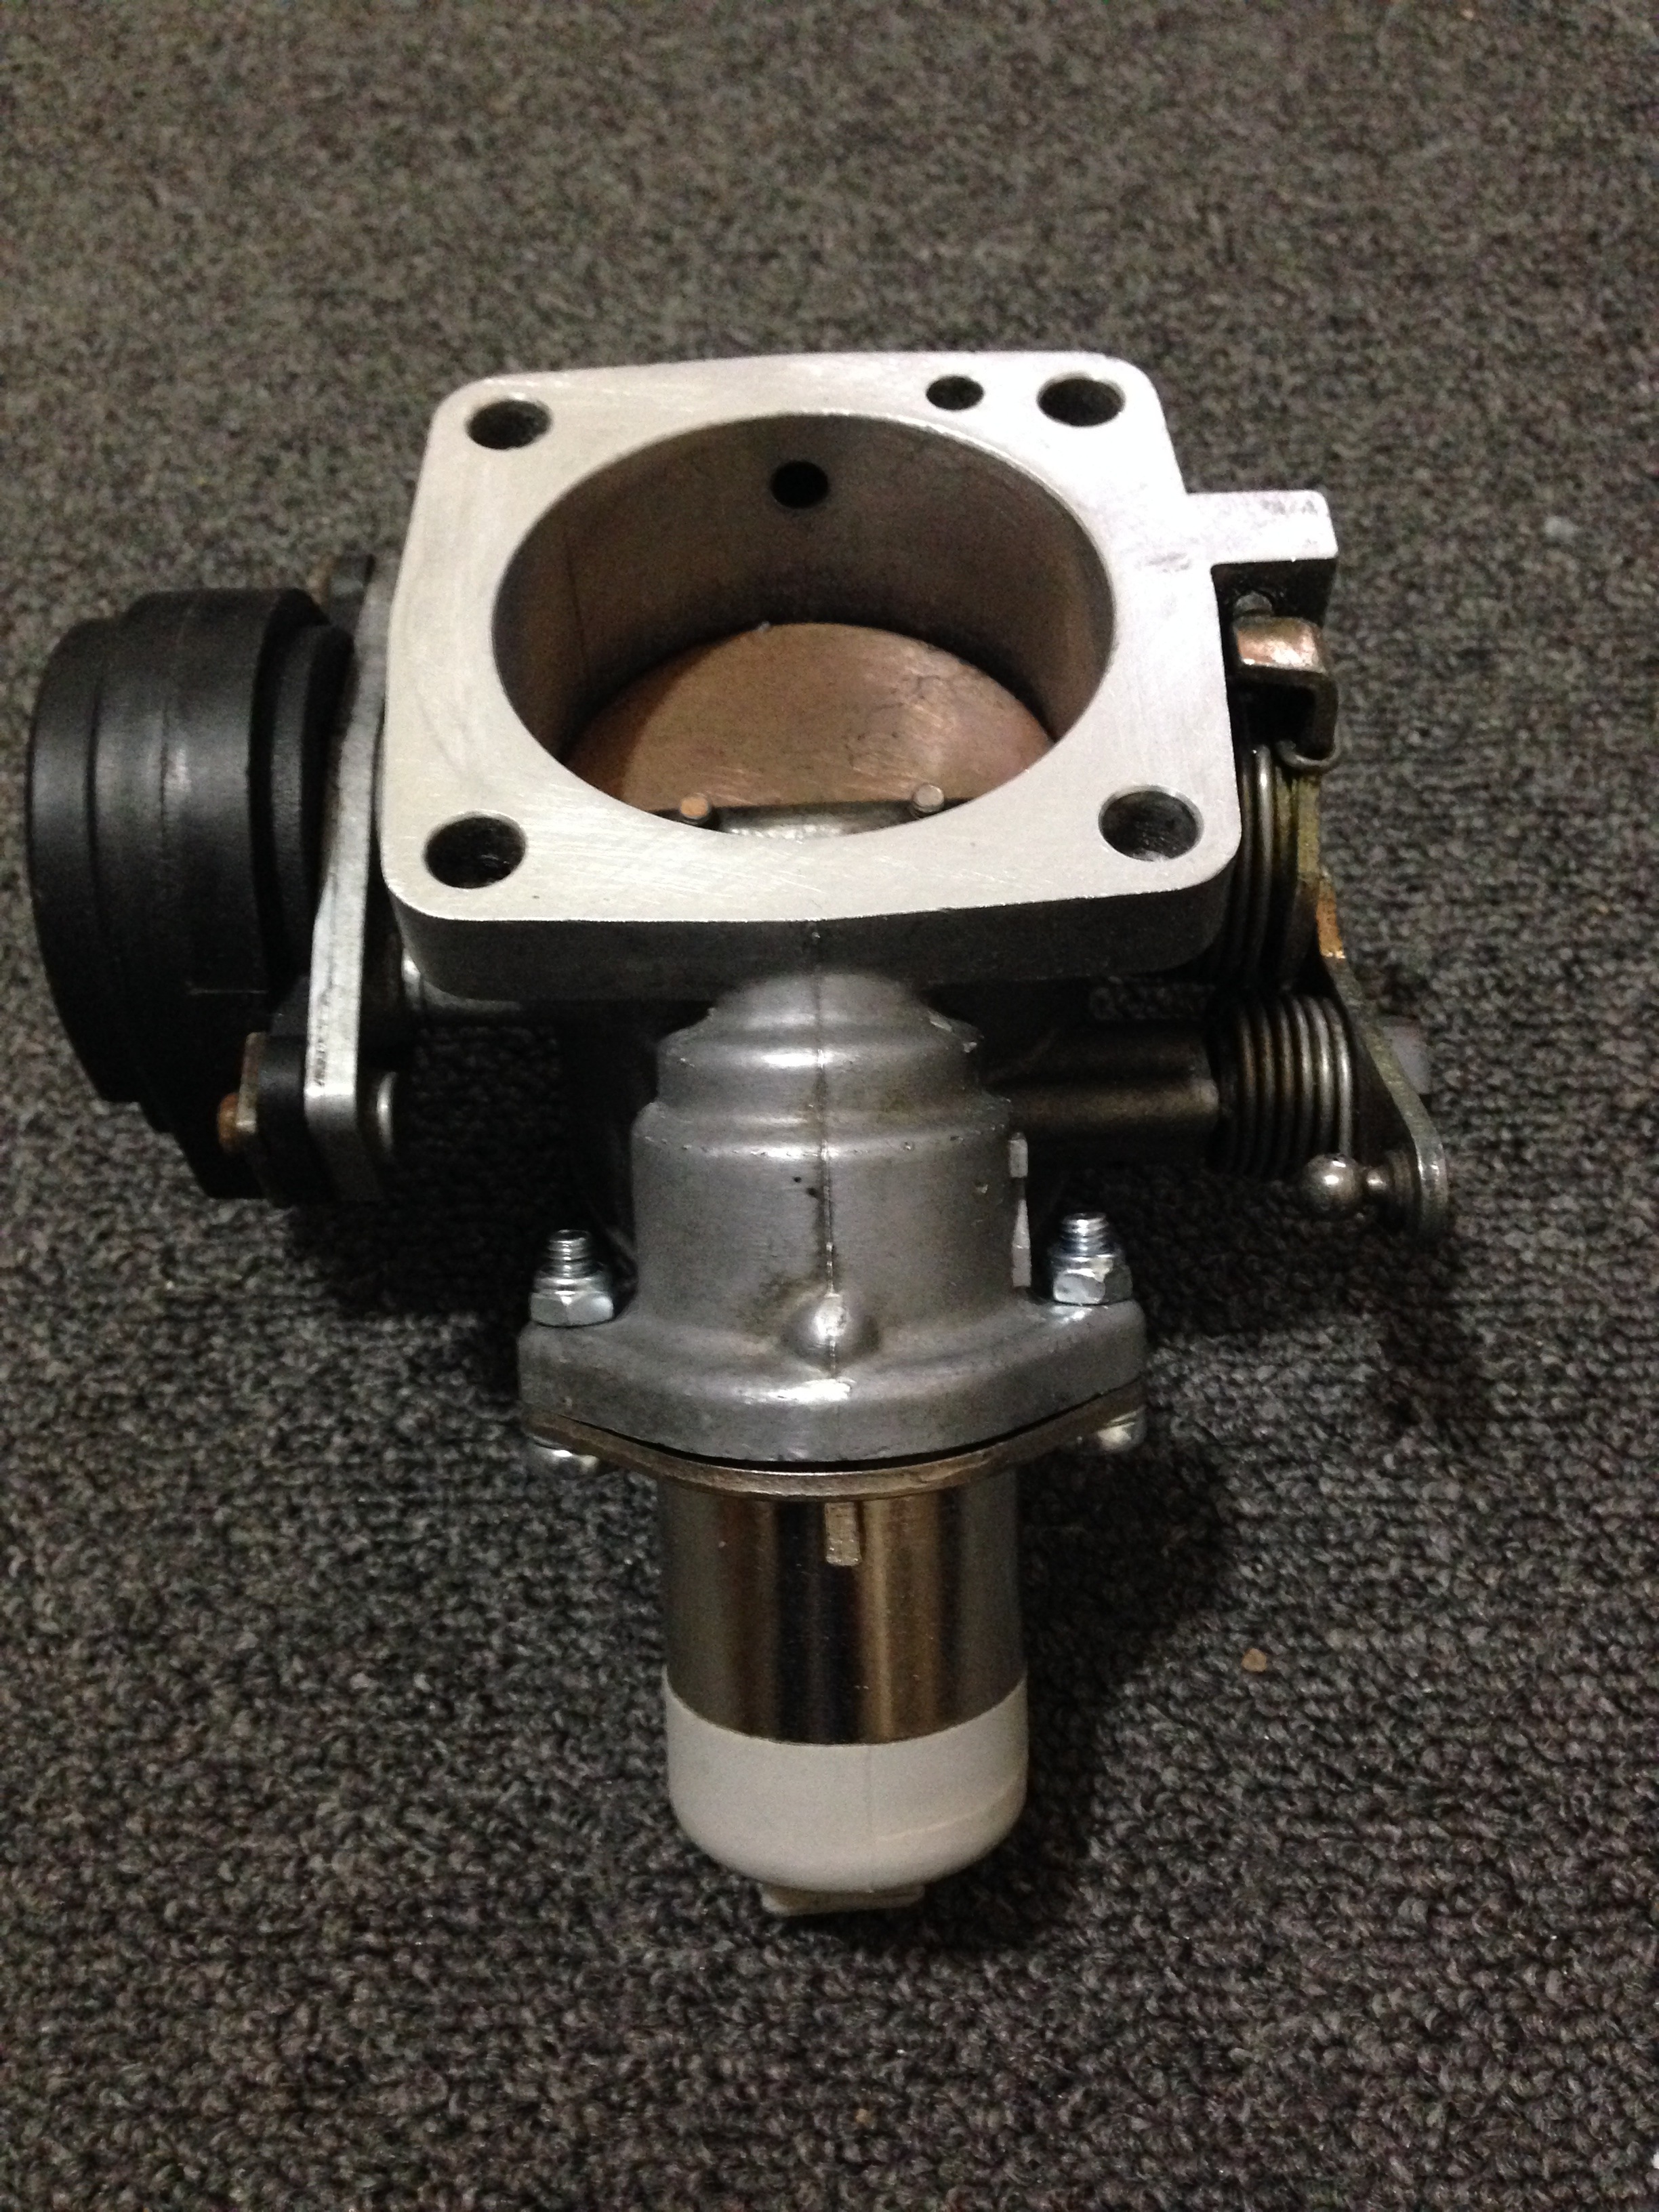
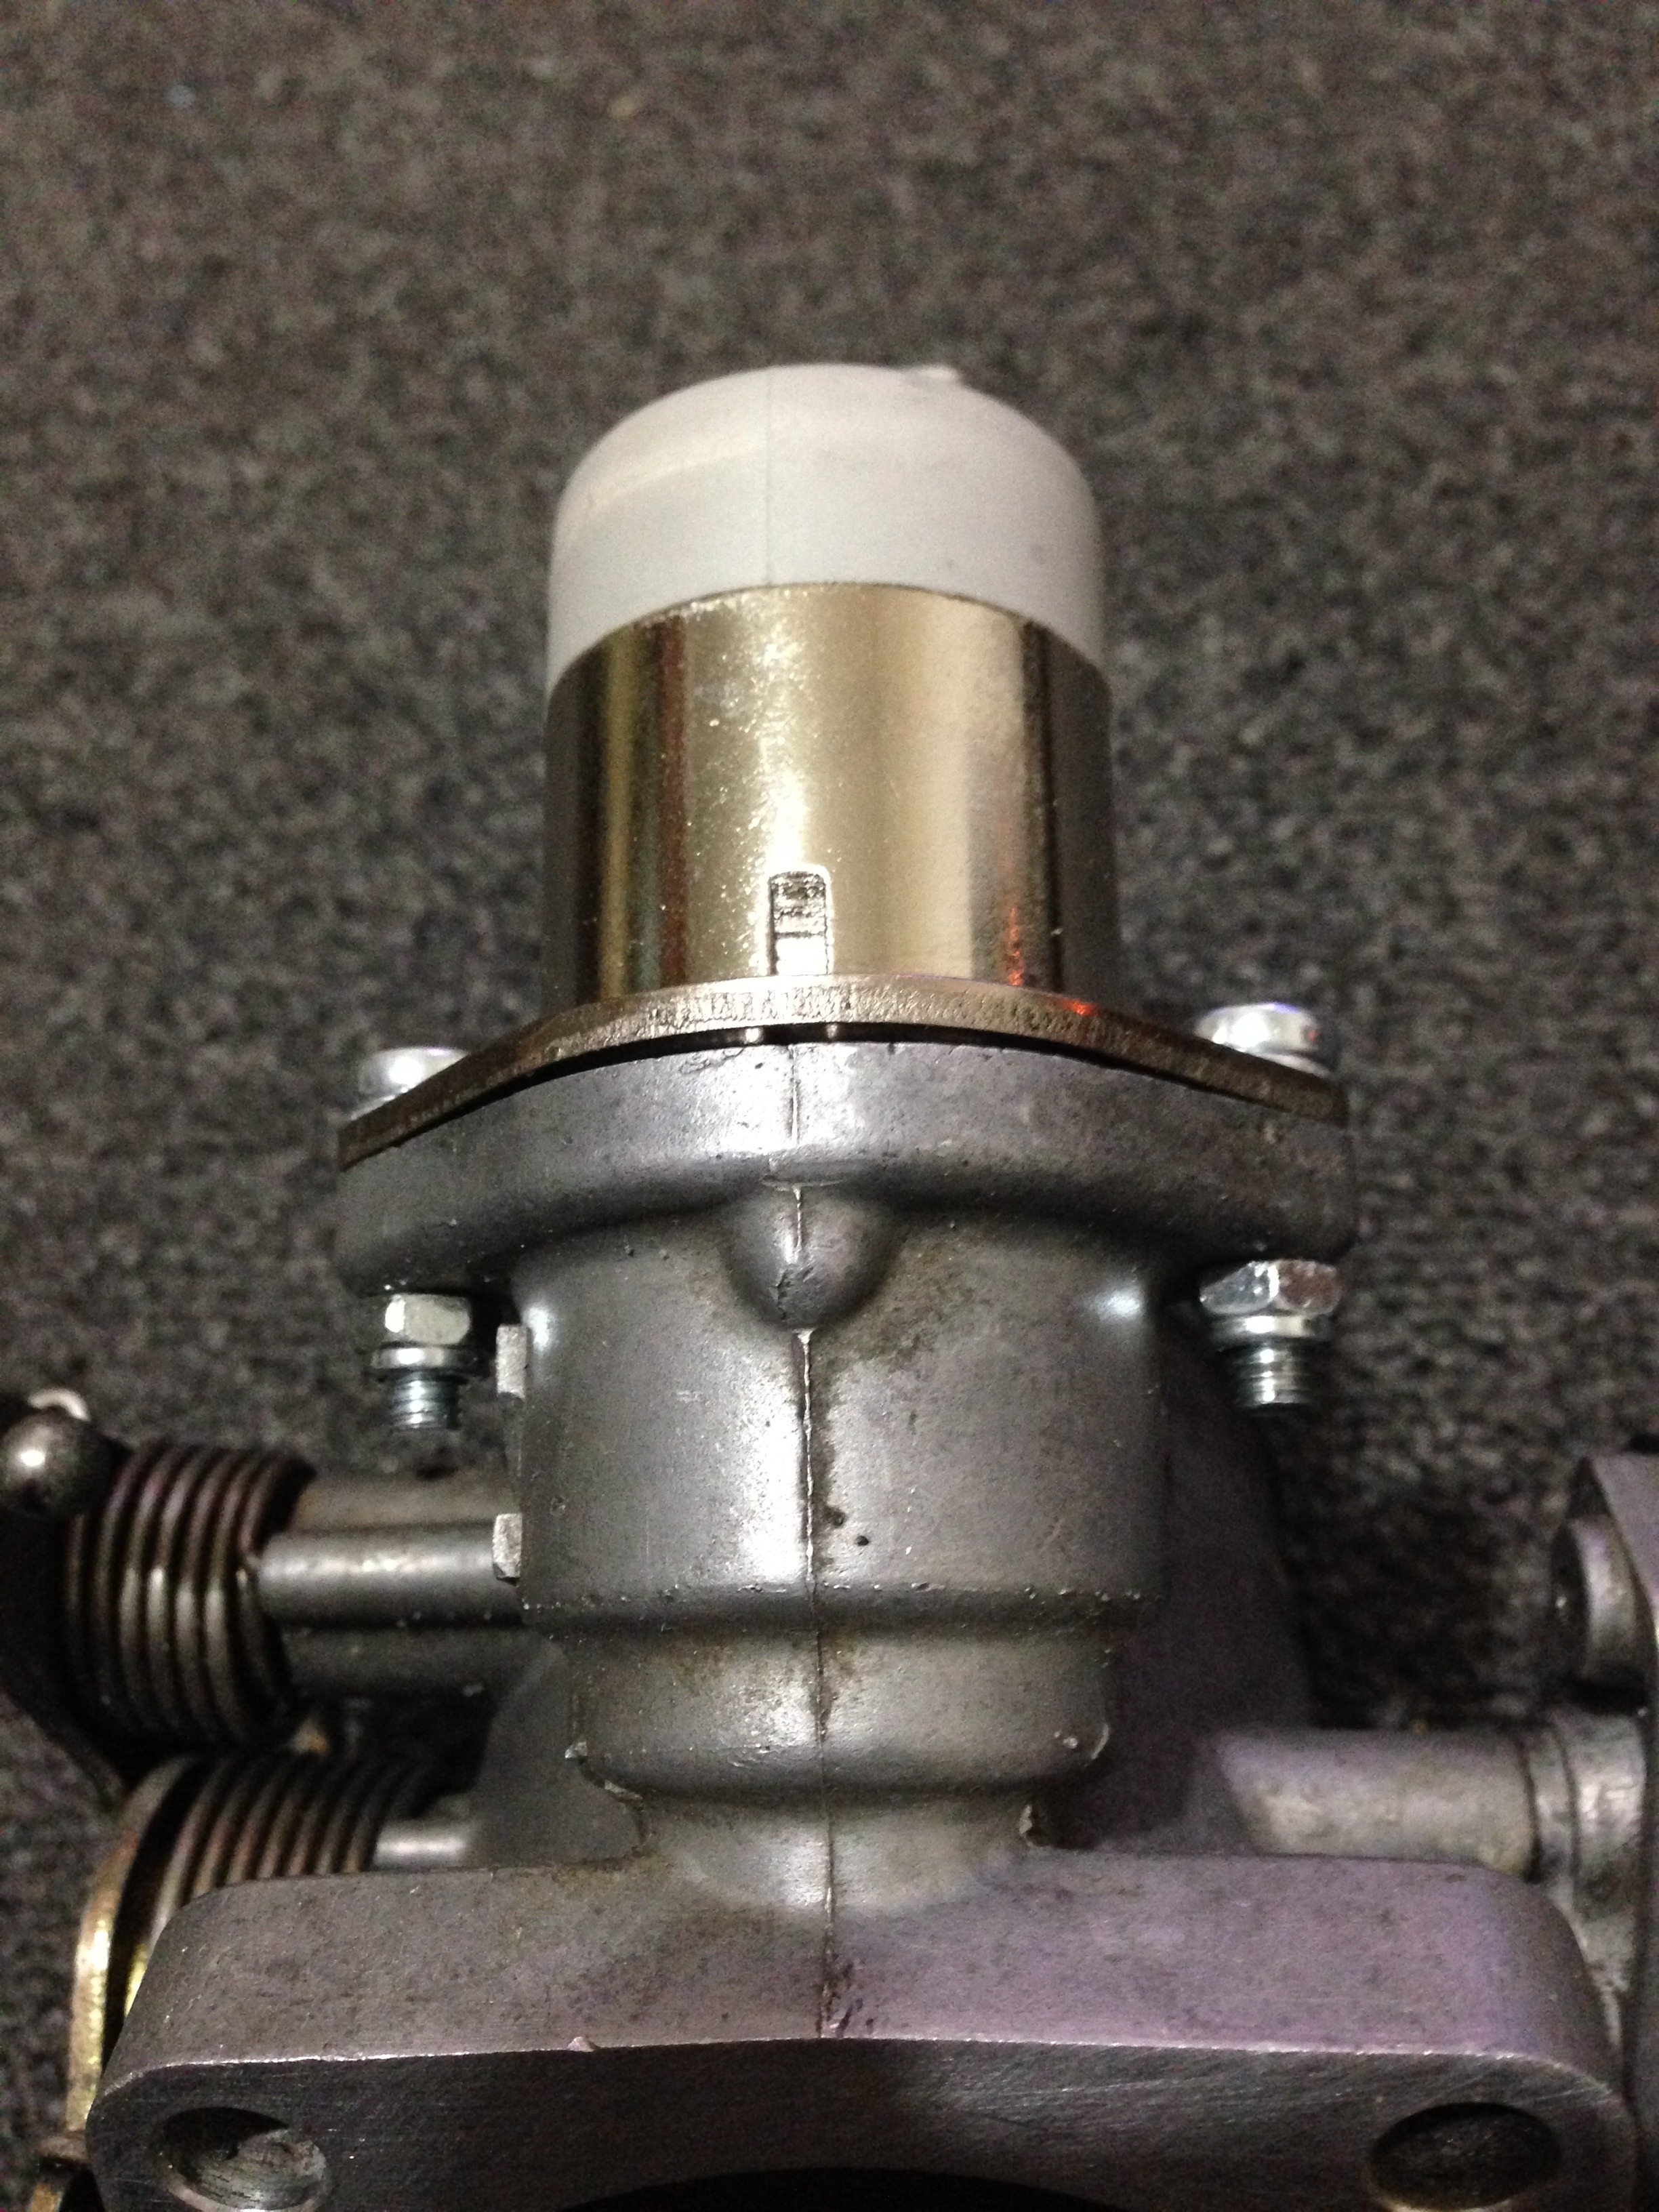
New valve fitted.. Turned out it was easier to remove the throttle body housing as one of the threads on the housing had been stripped.. So decide to nut and bolt through. Later realised this wasn't the best idea as it's impossible really to remove the valve on the car so repaired the thirds with helicoils.
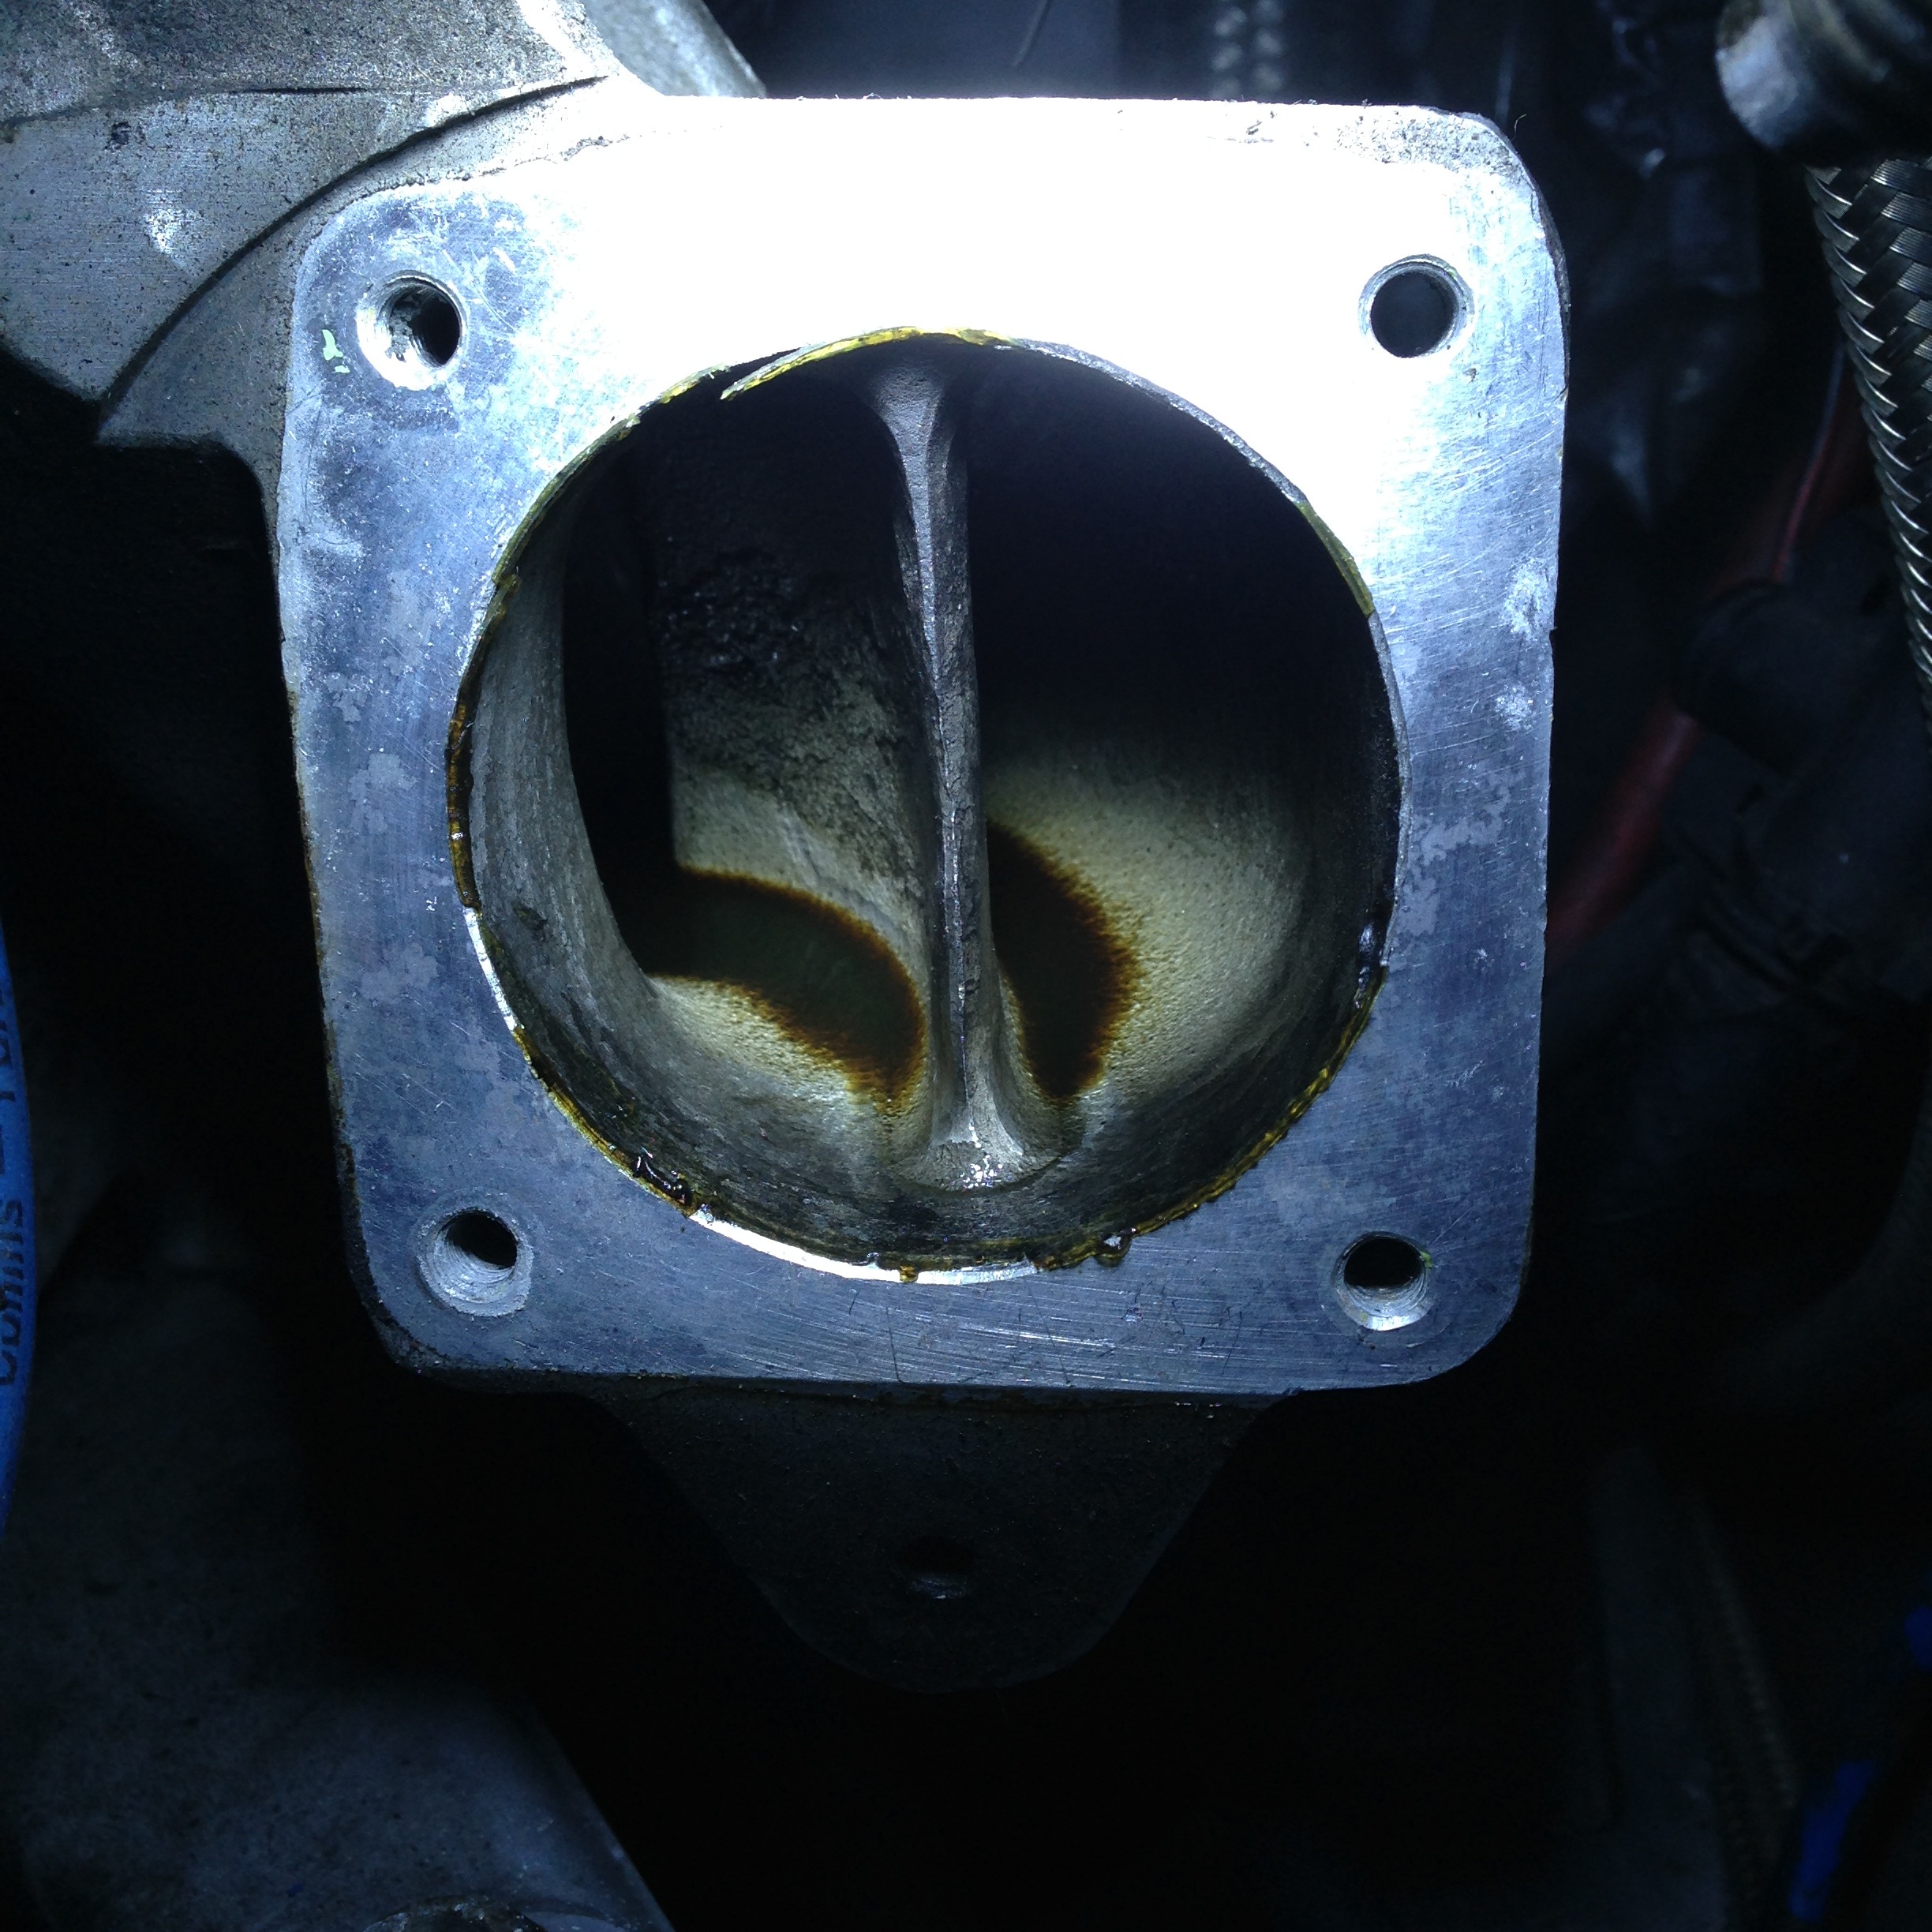
Whilst it was off I noticed fuel lying in the intake elbow.. Shows how badly the car is over fuelling.. So soon looked to getting the management changed.
And cleaned
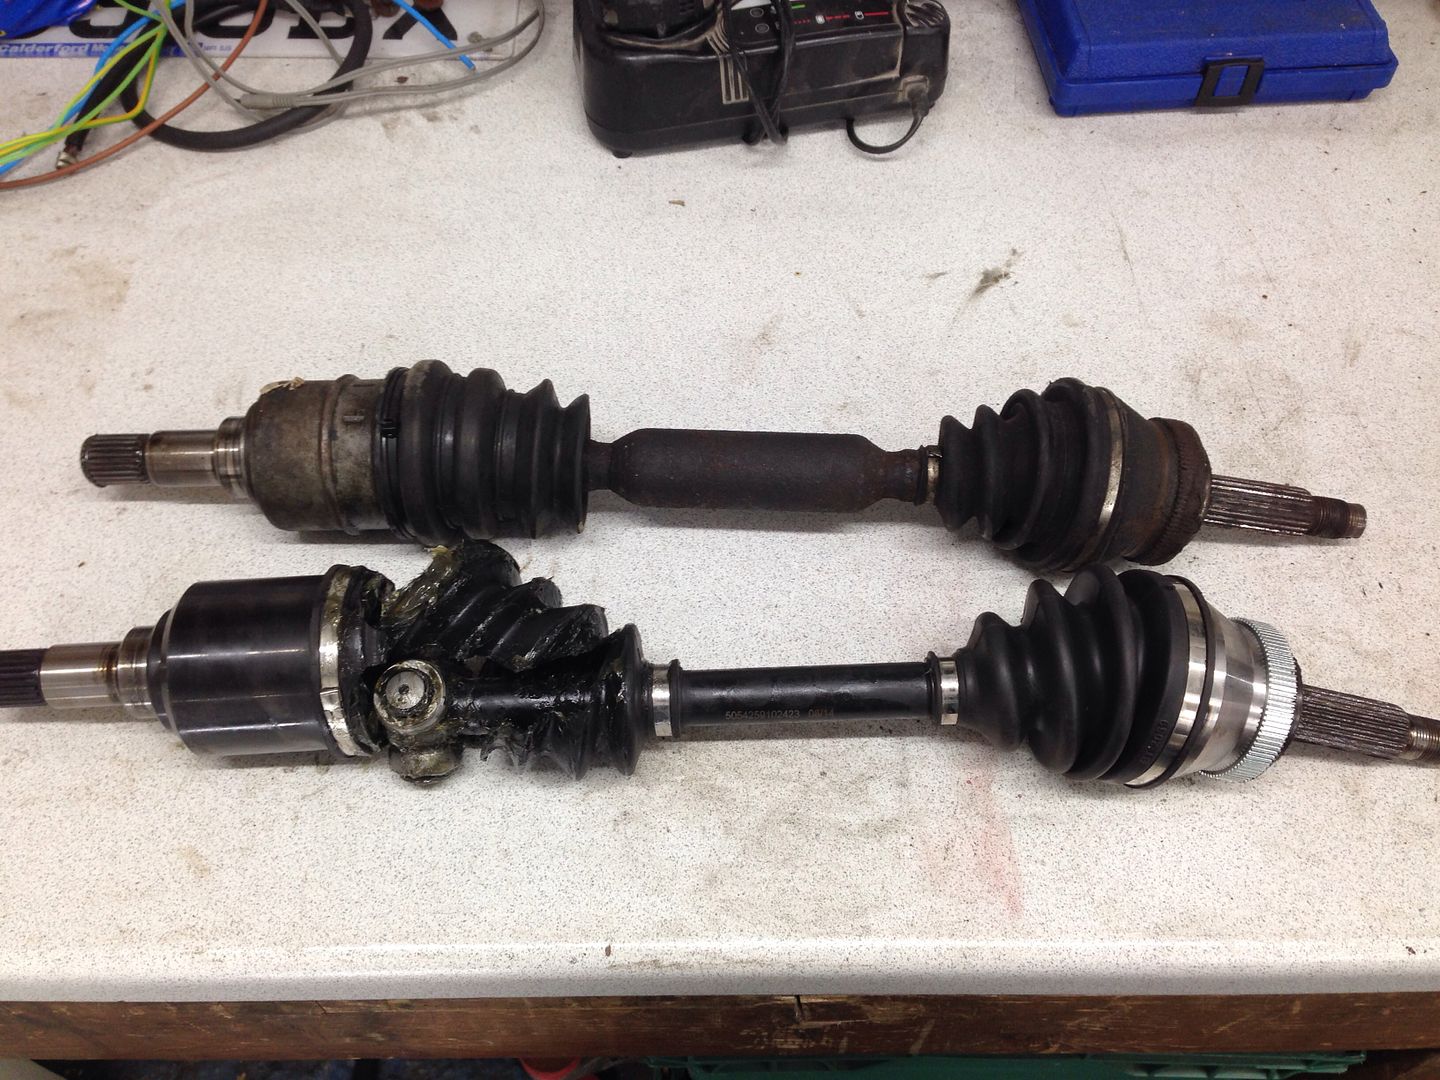
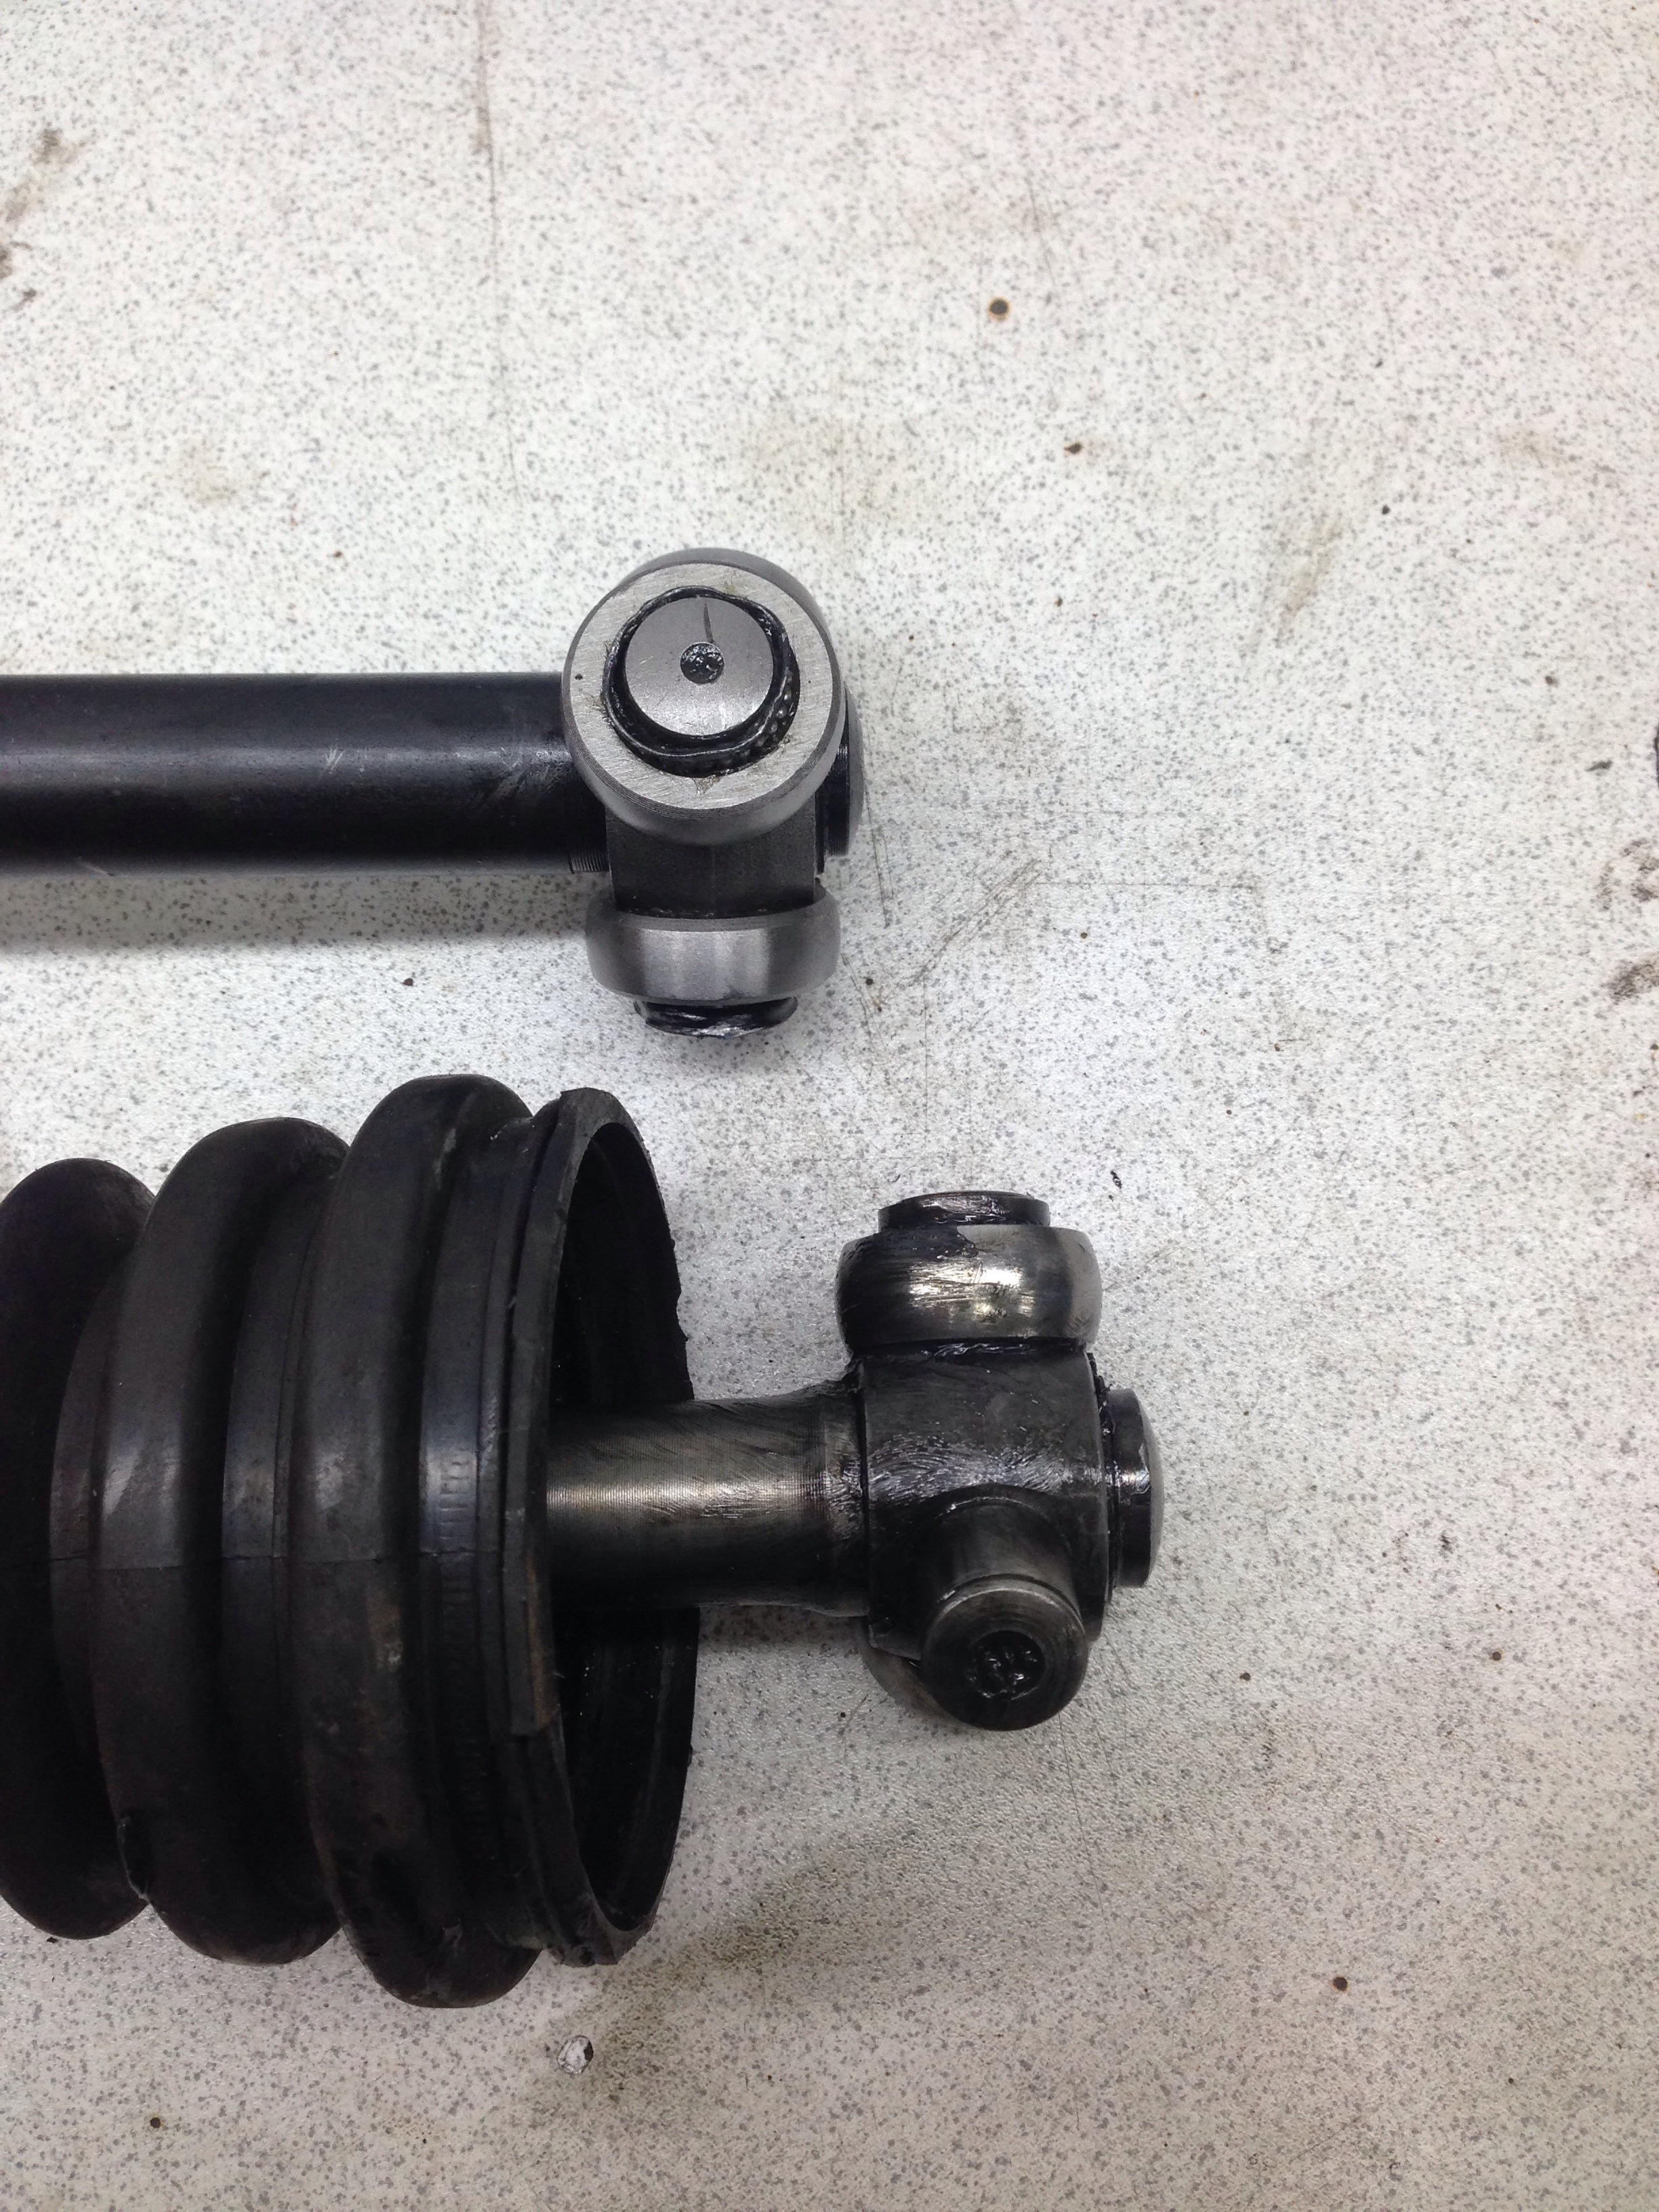
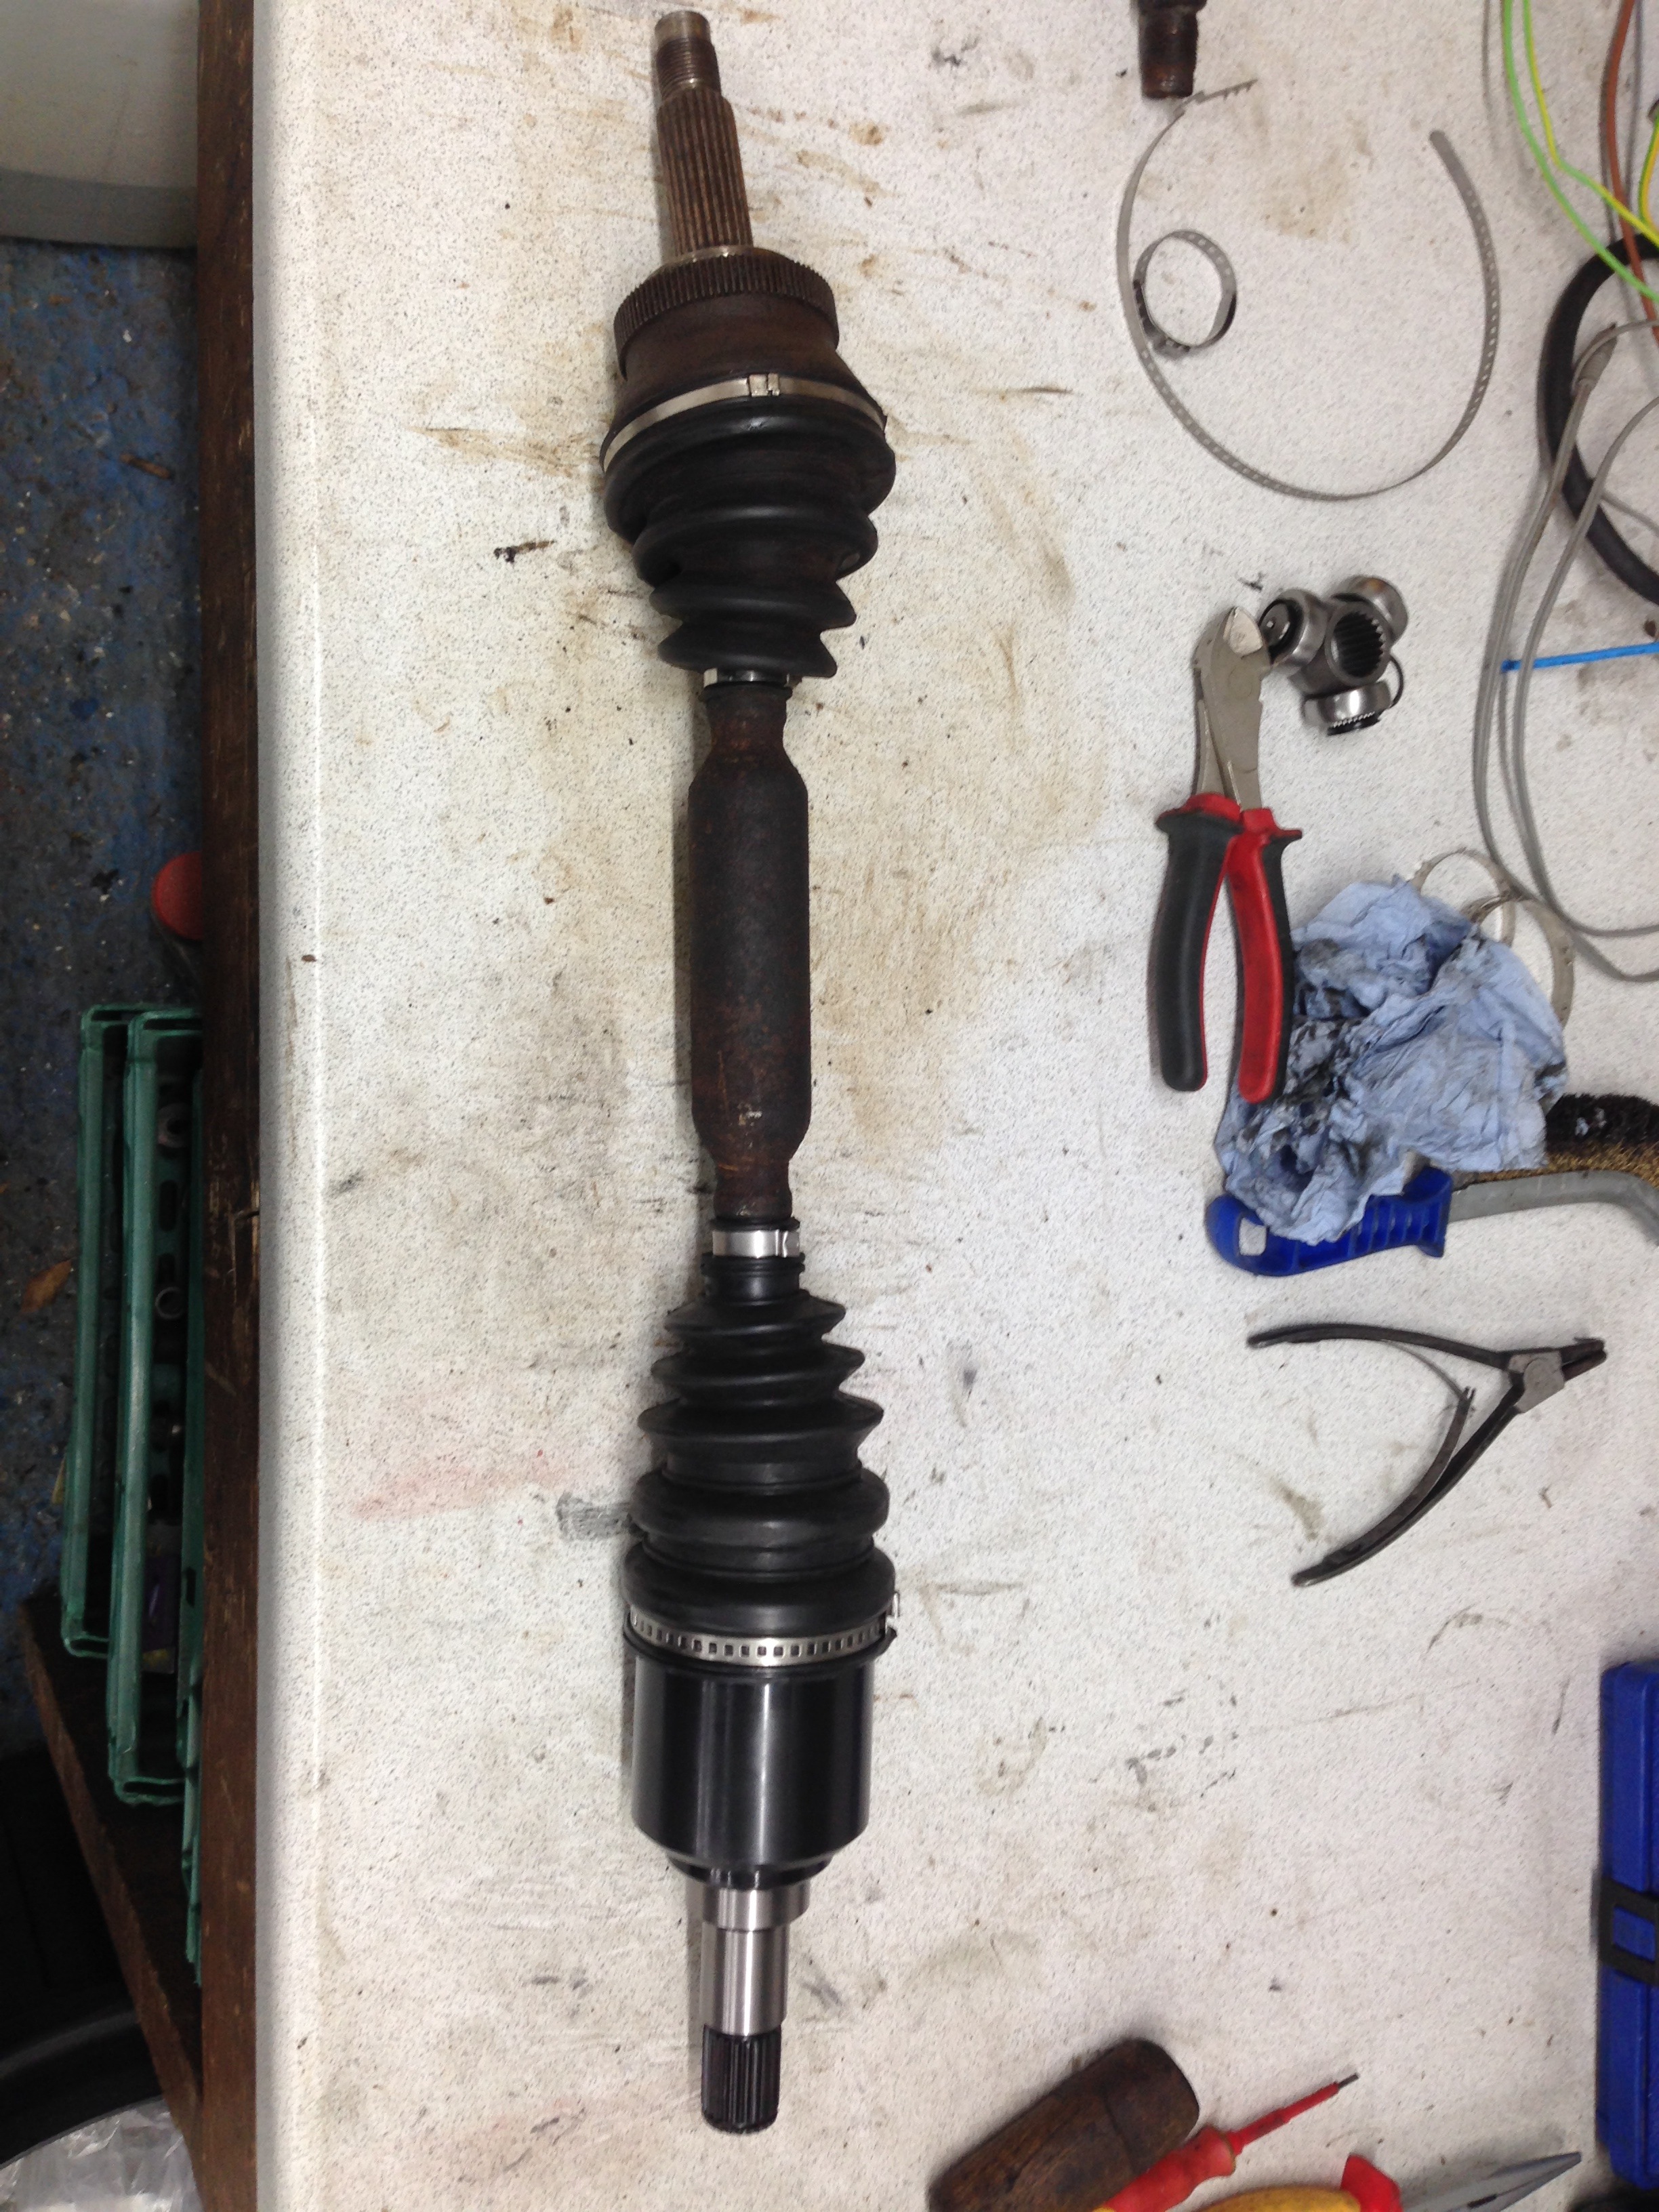
Then turned my attentions back to the front driveshafts and bought these
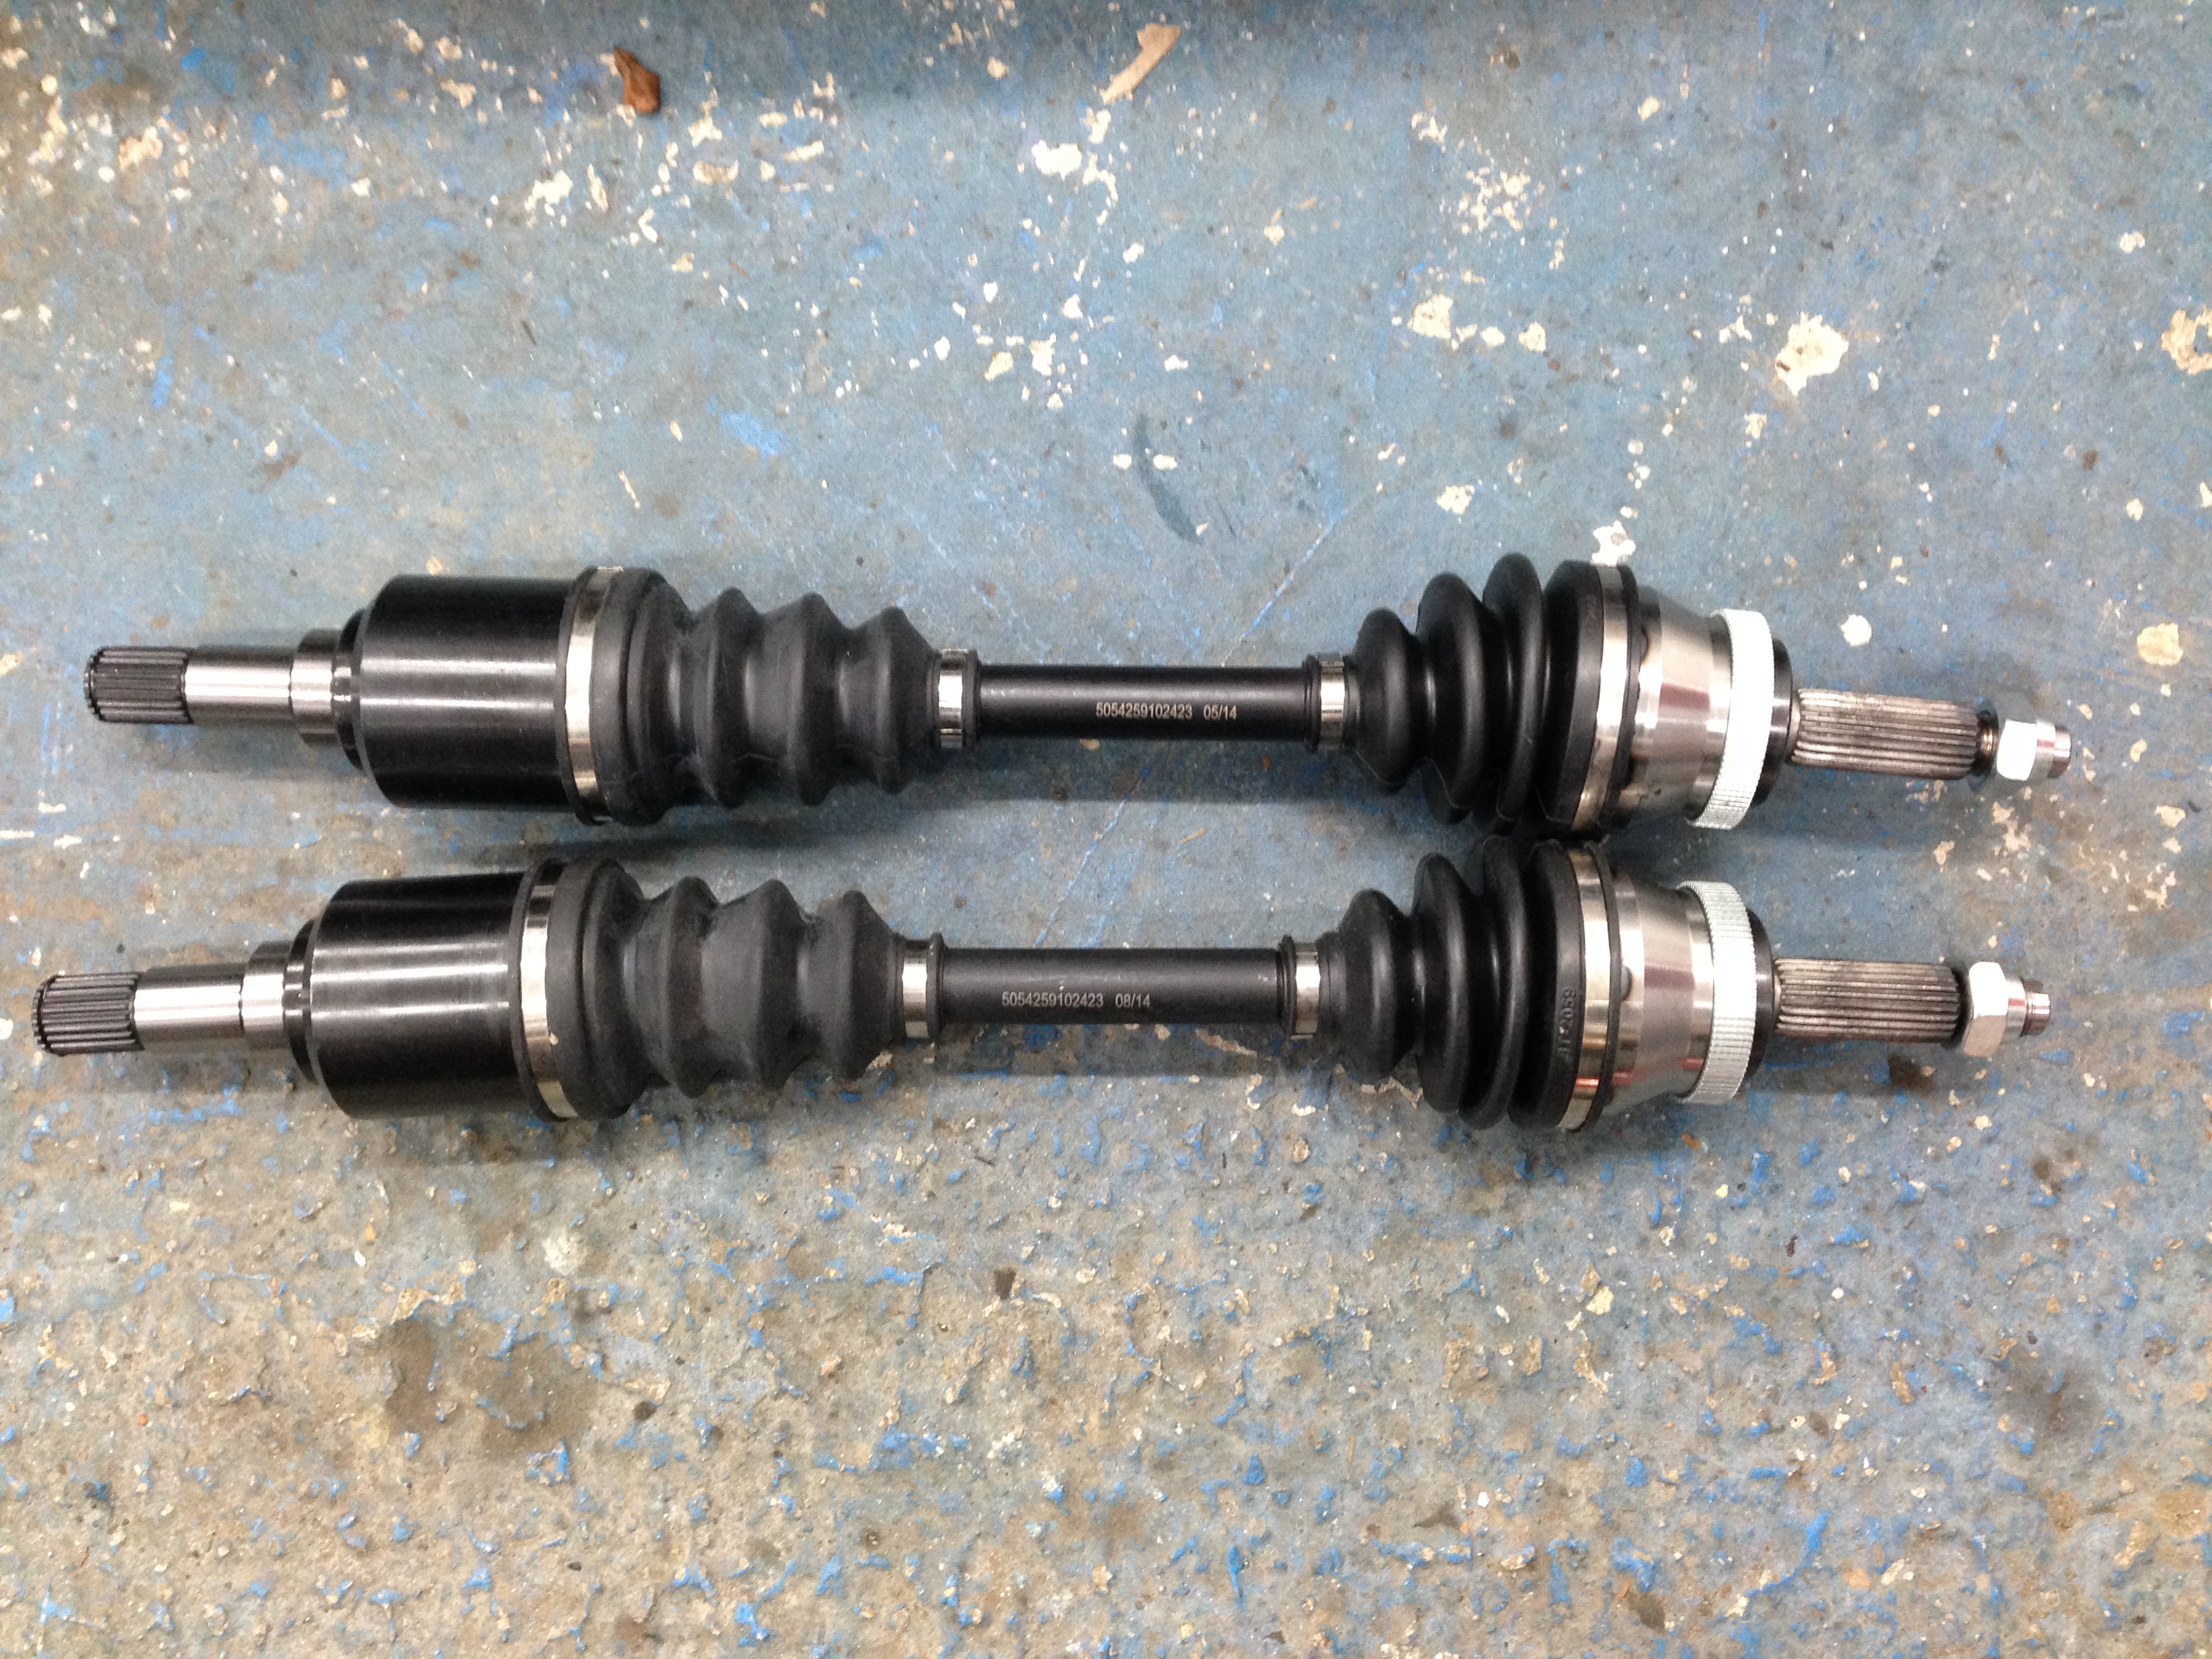
These are the extended GGR shafts and are designed to stop the front shafts pulling out when the car is lowered so they should be a good replacement for the current worn items
Fitting
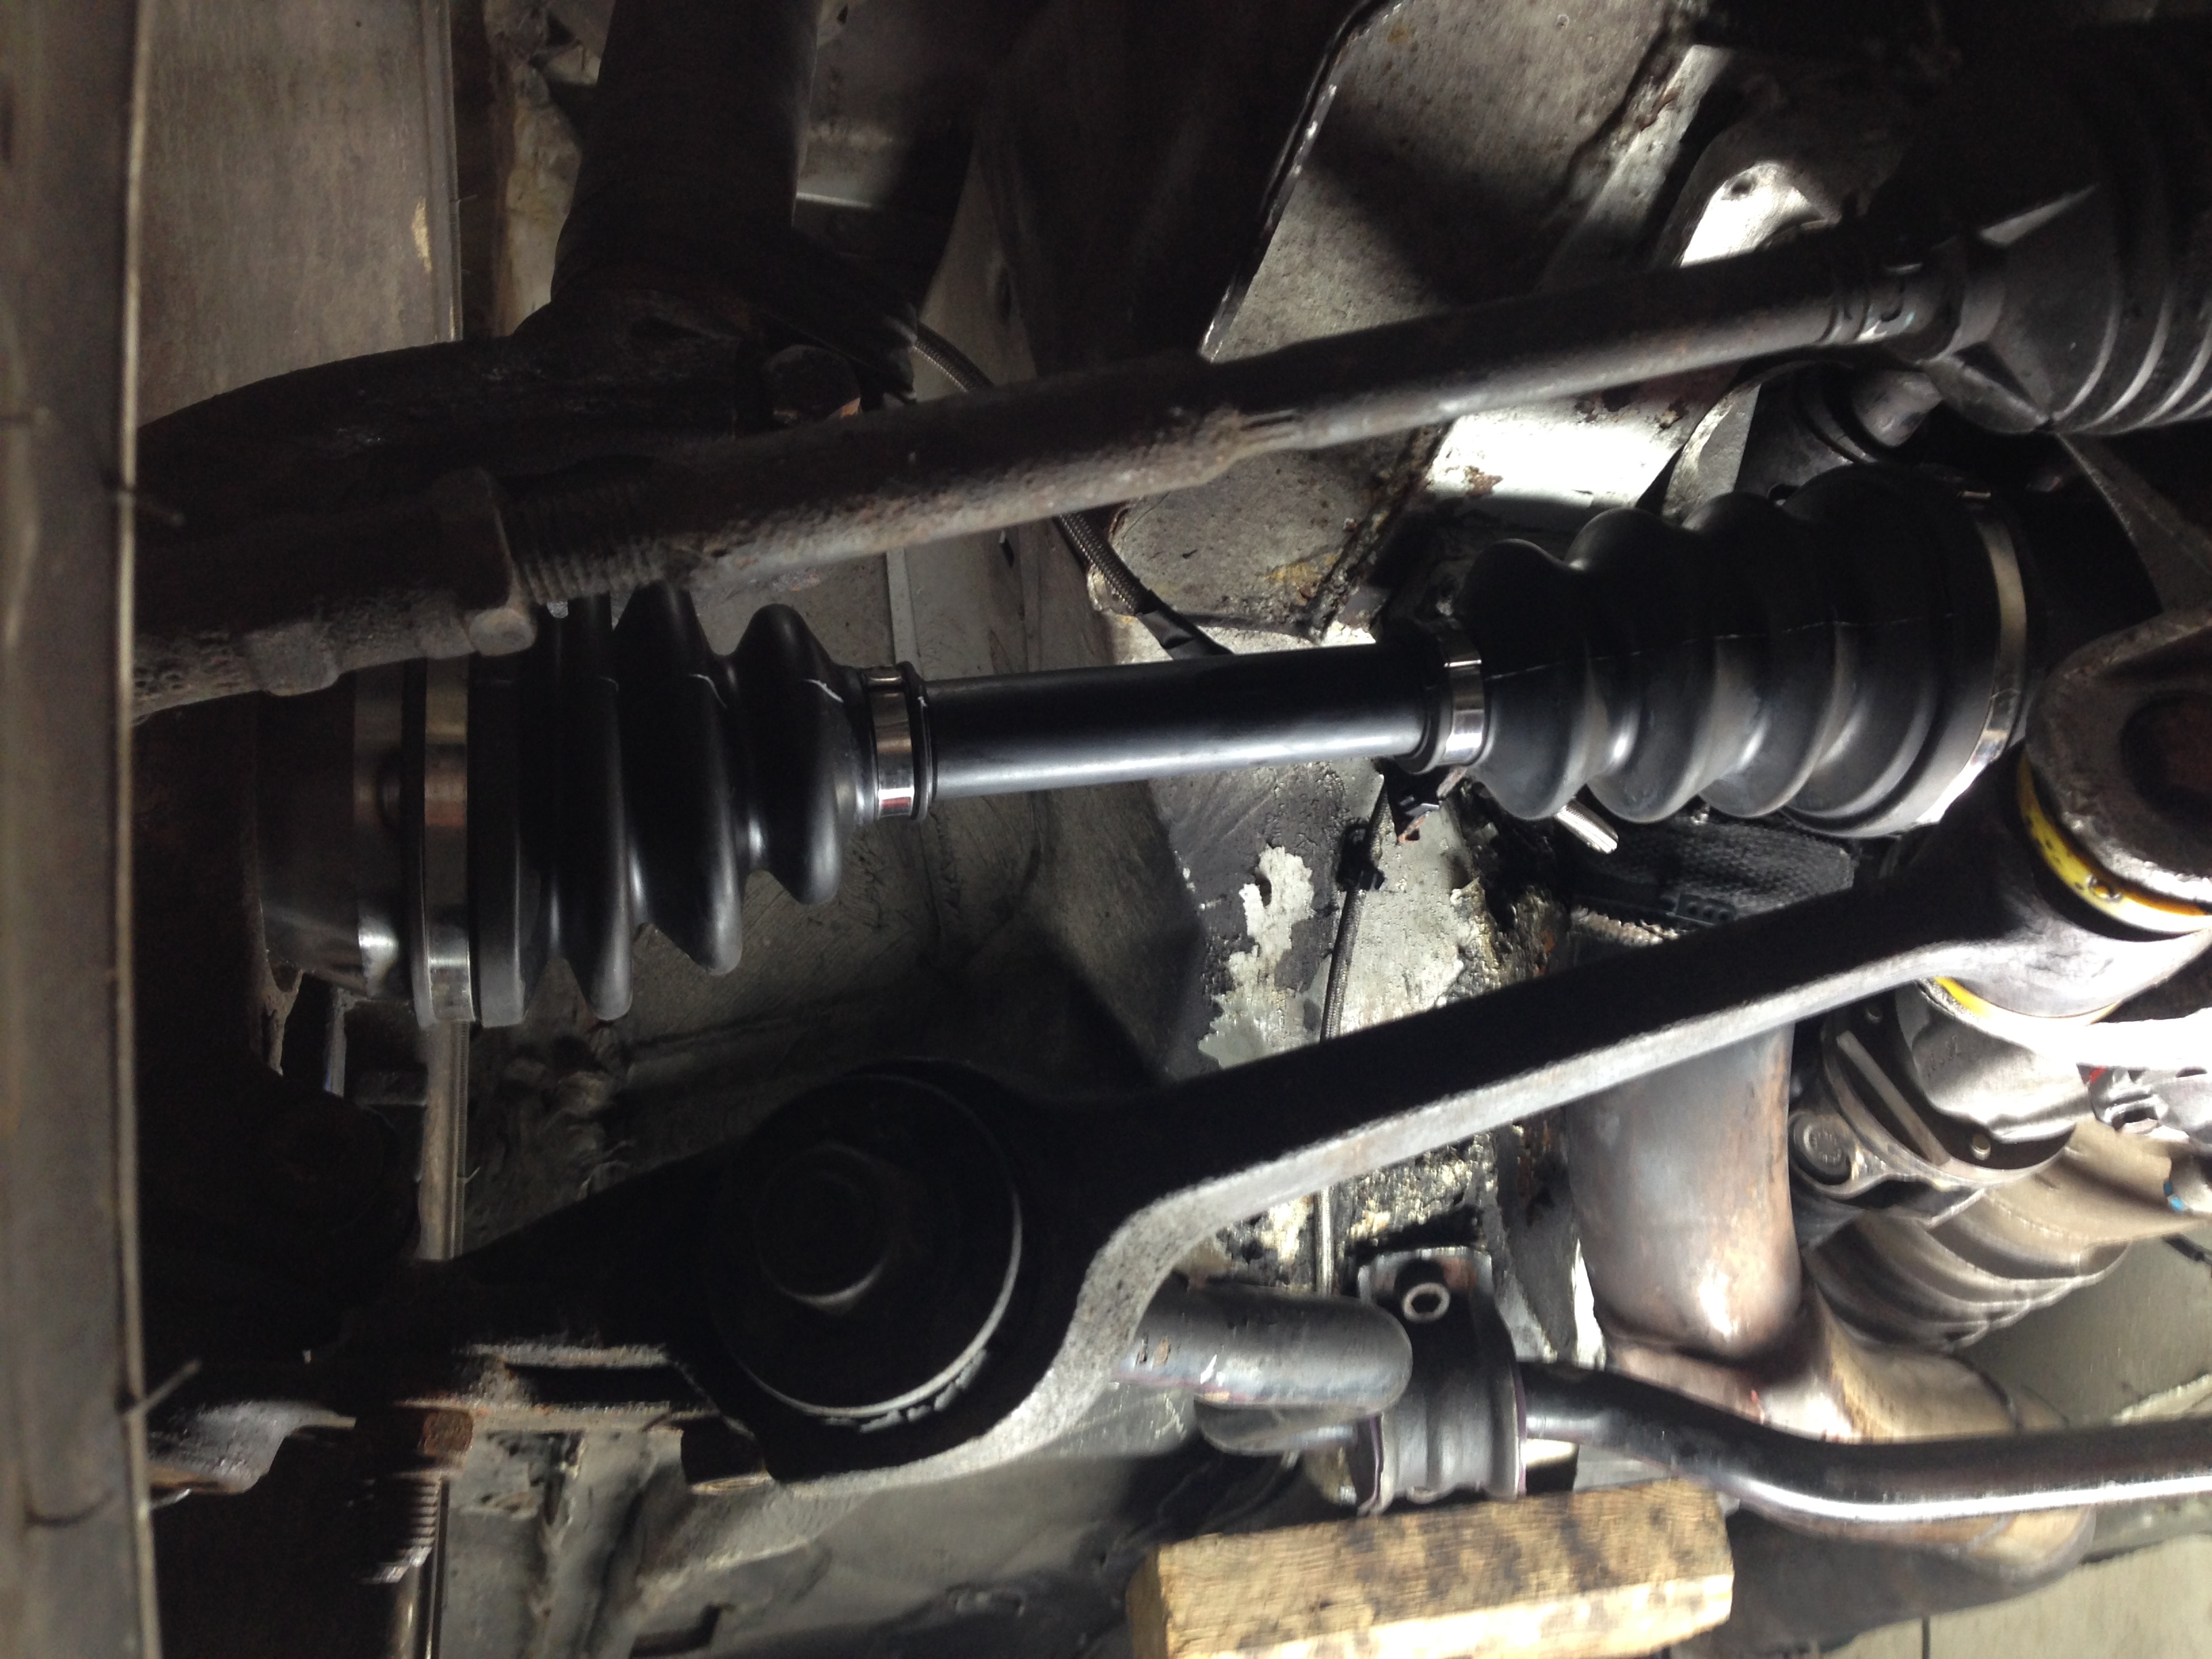
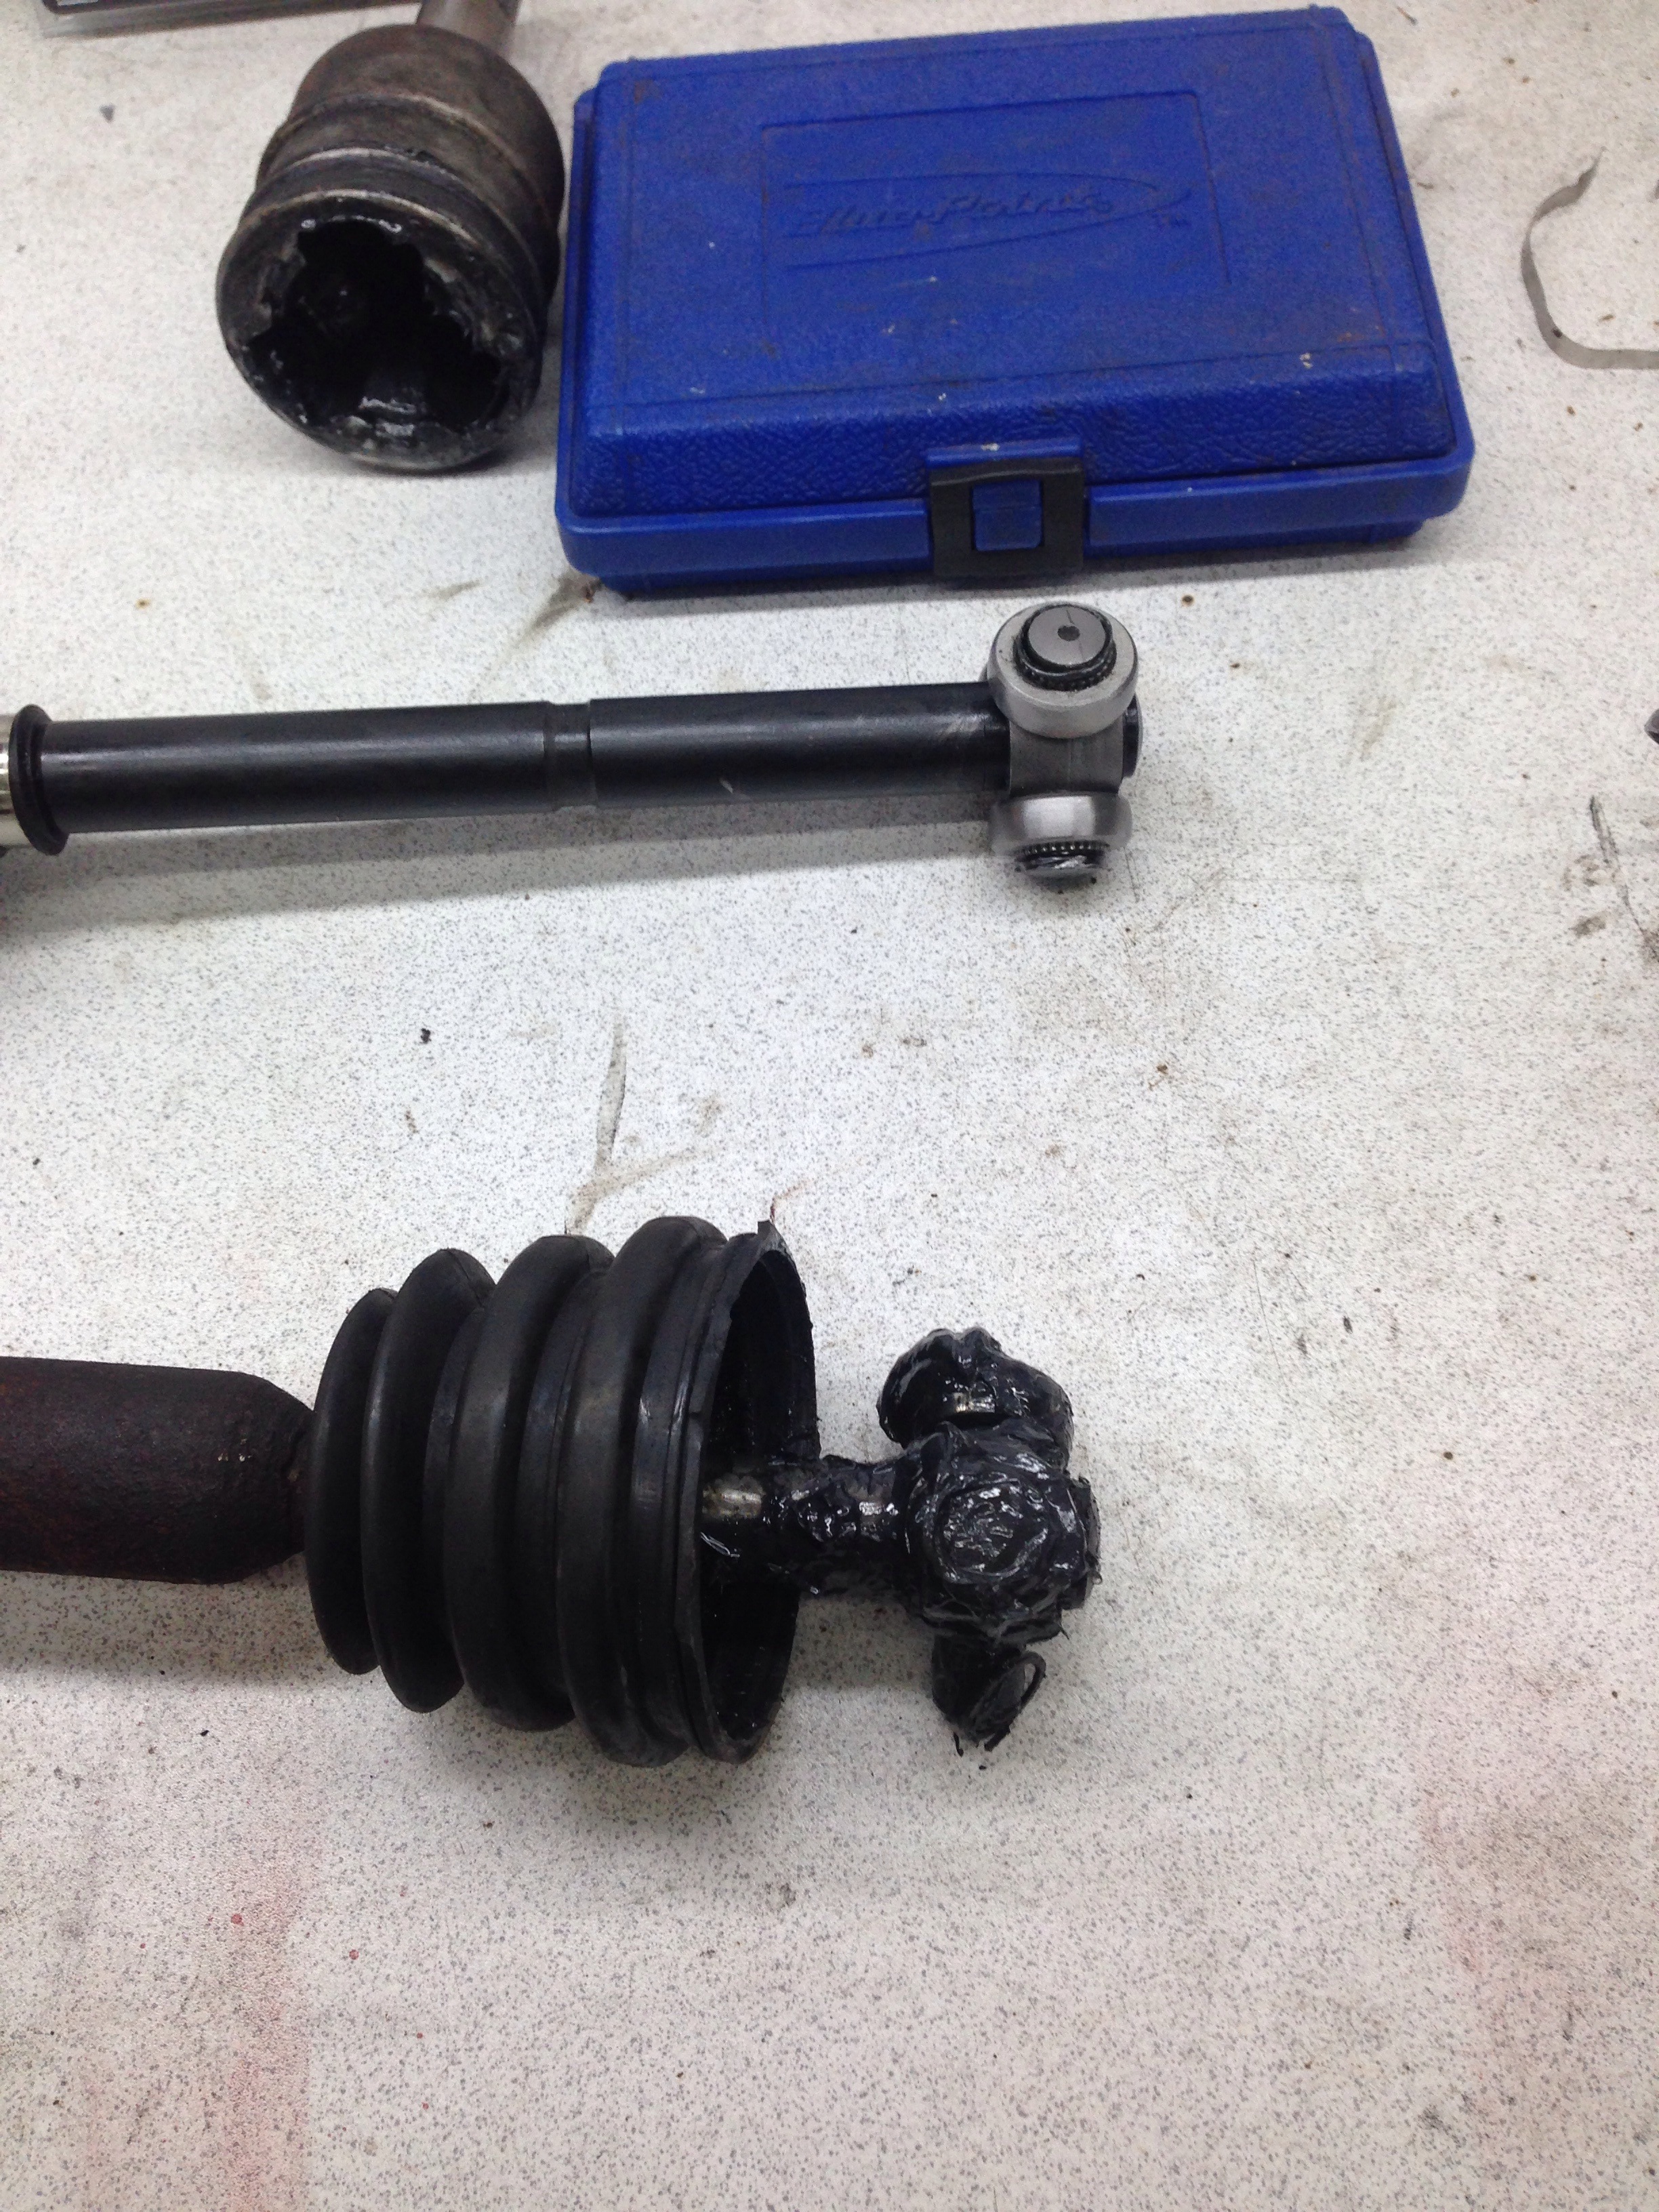
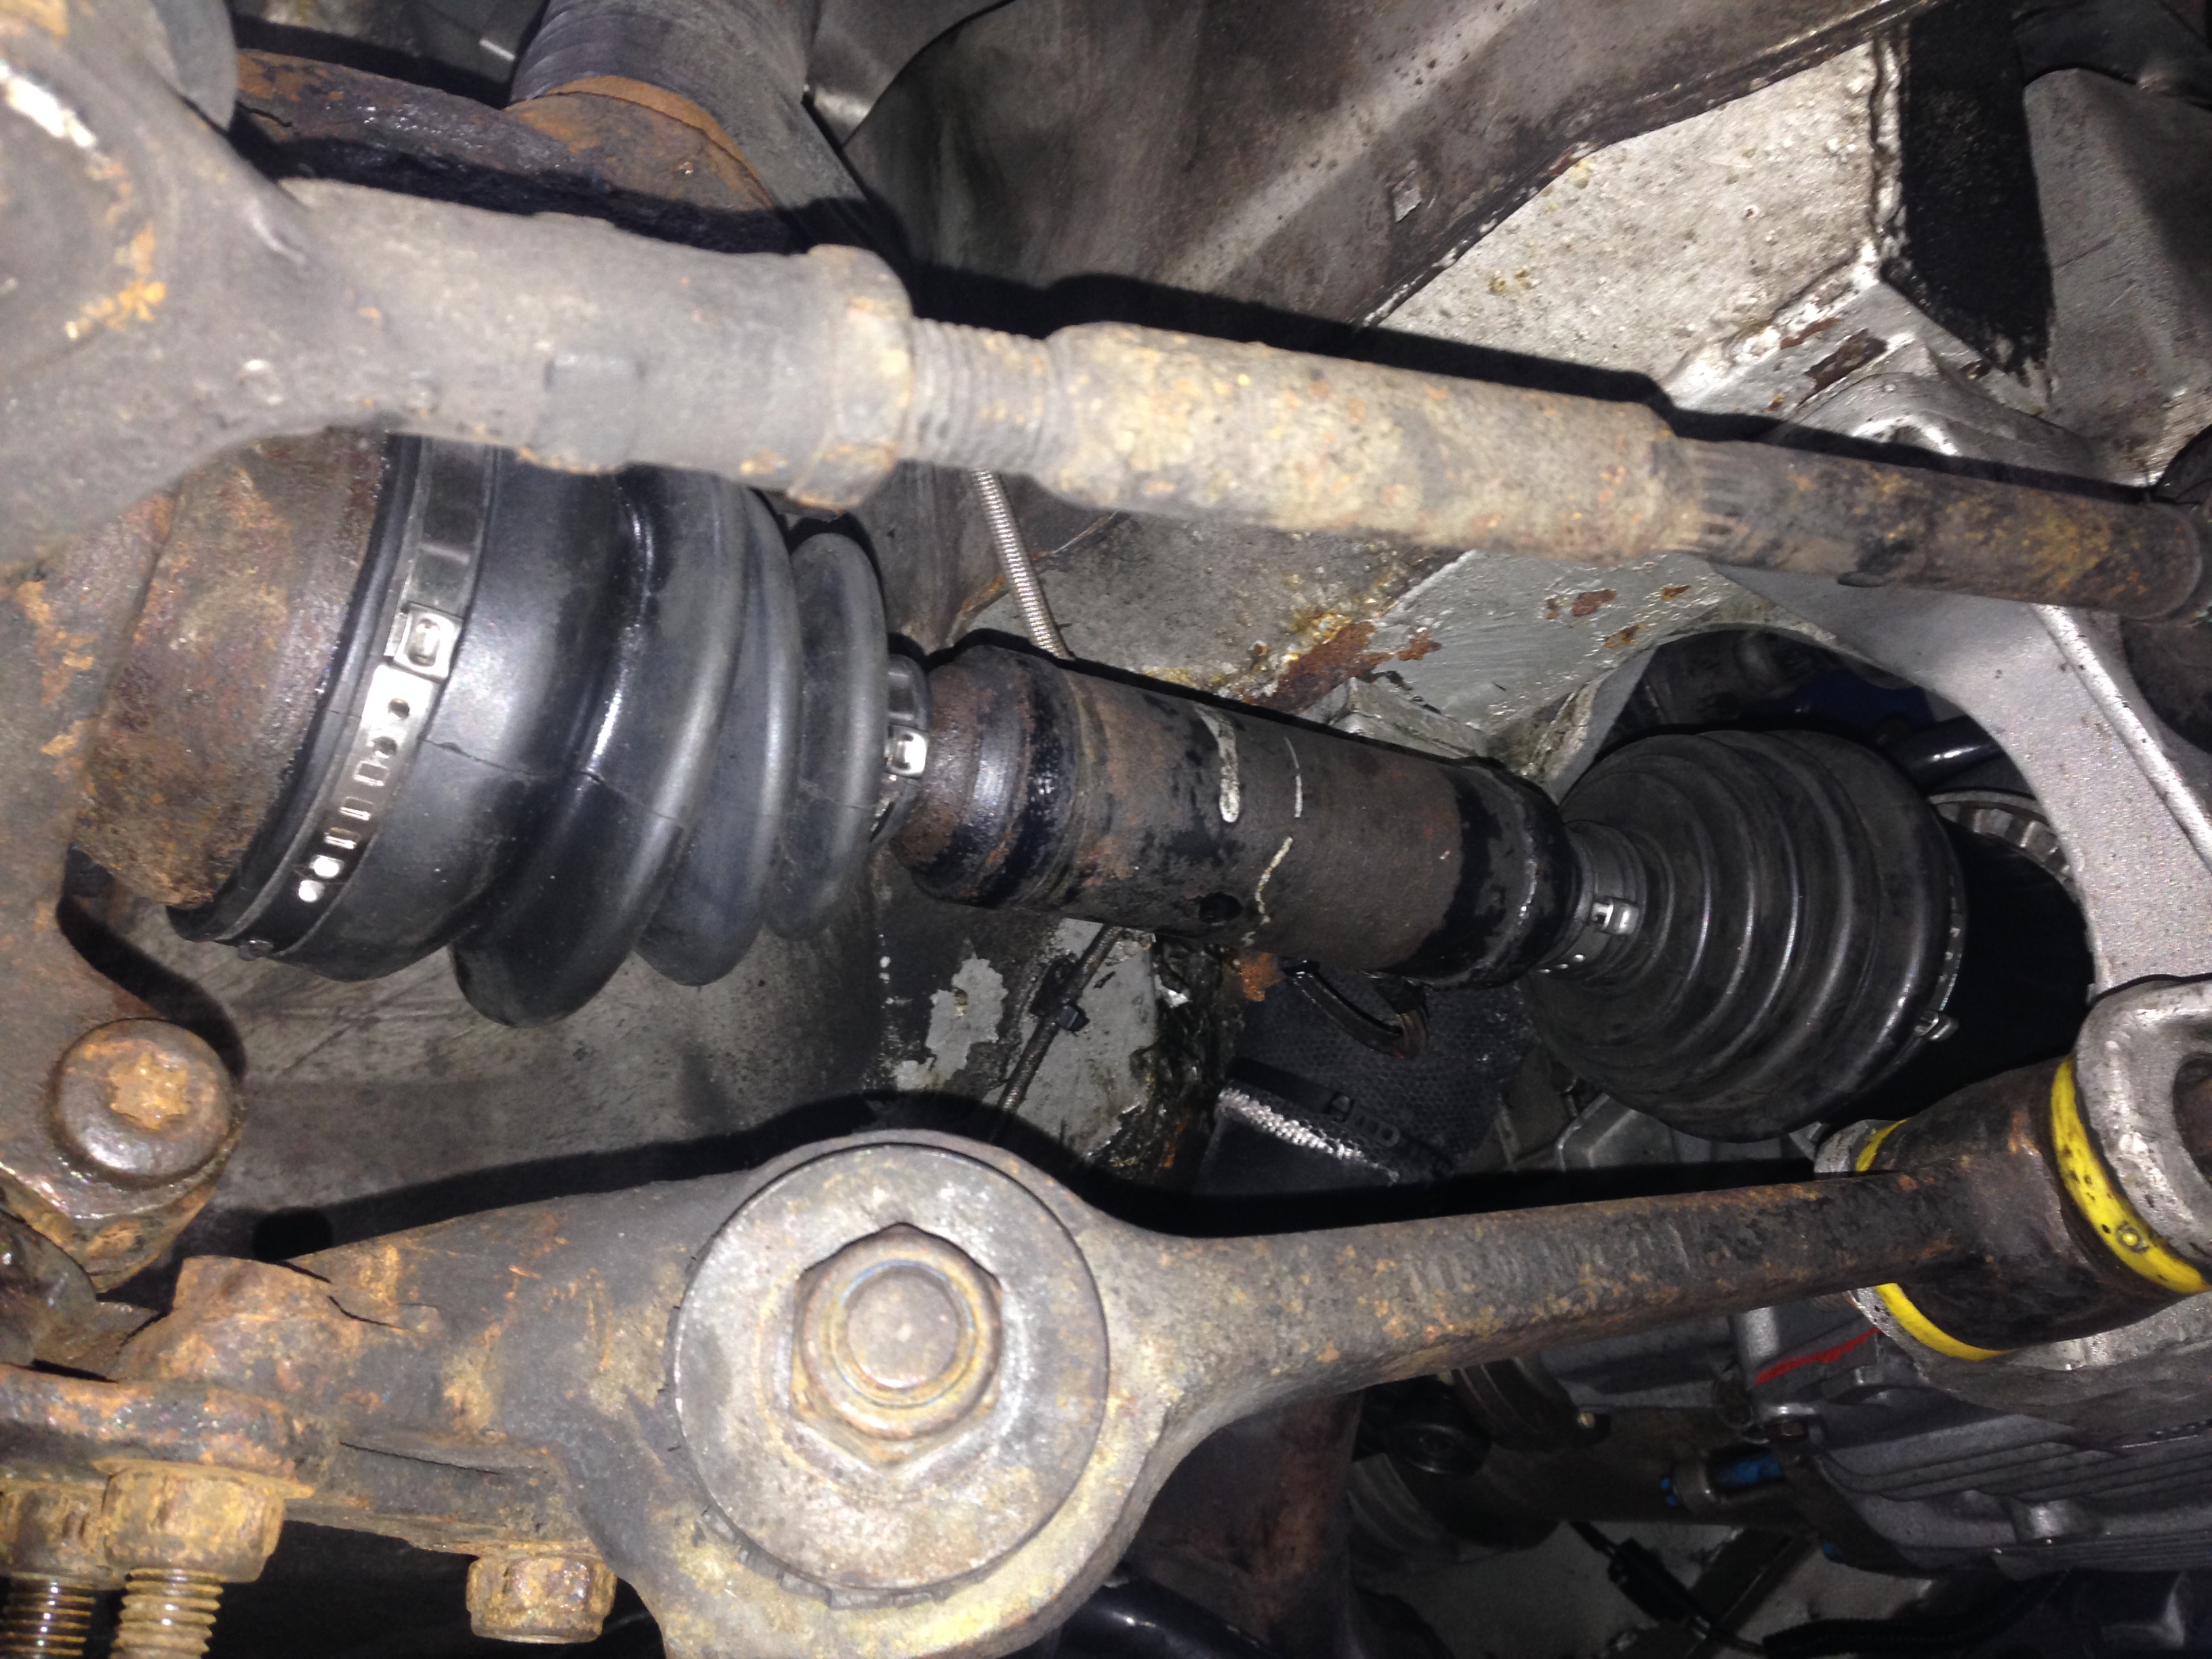
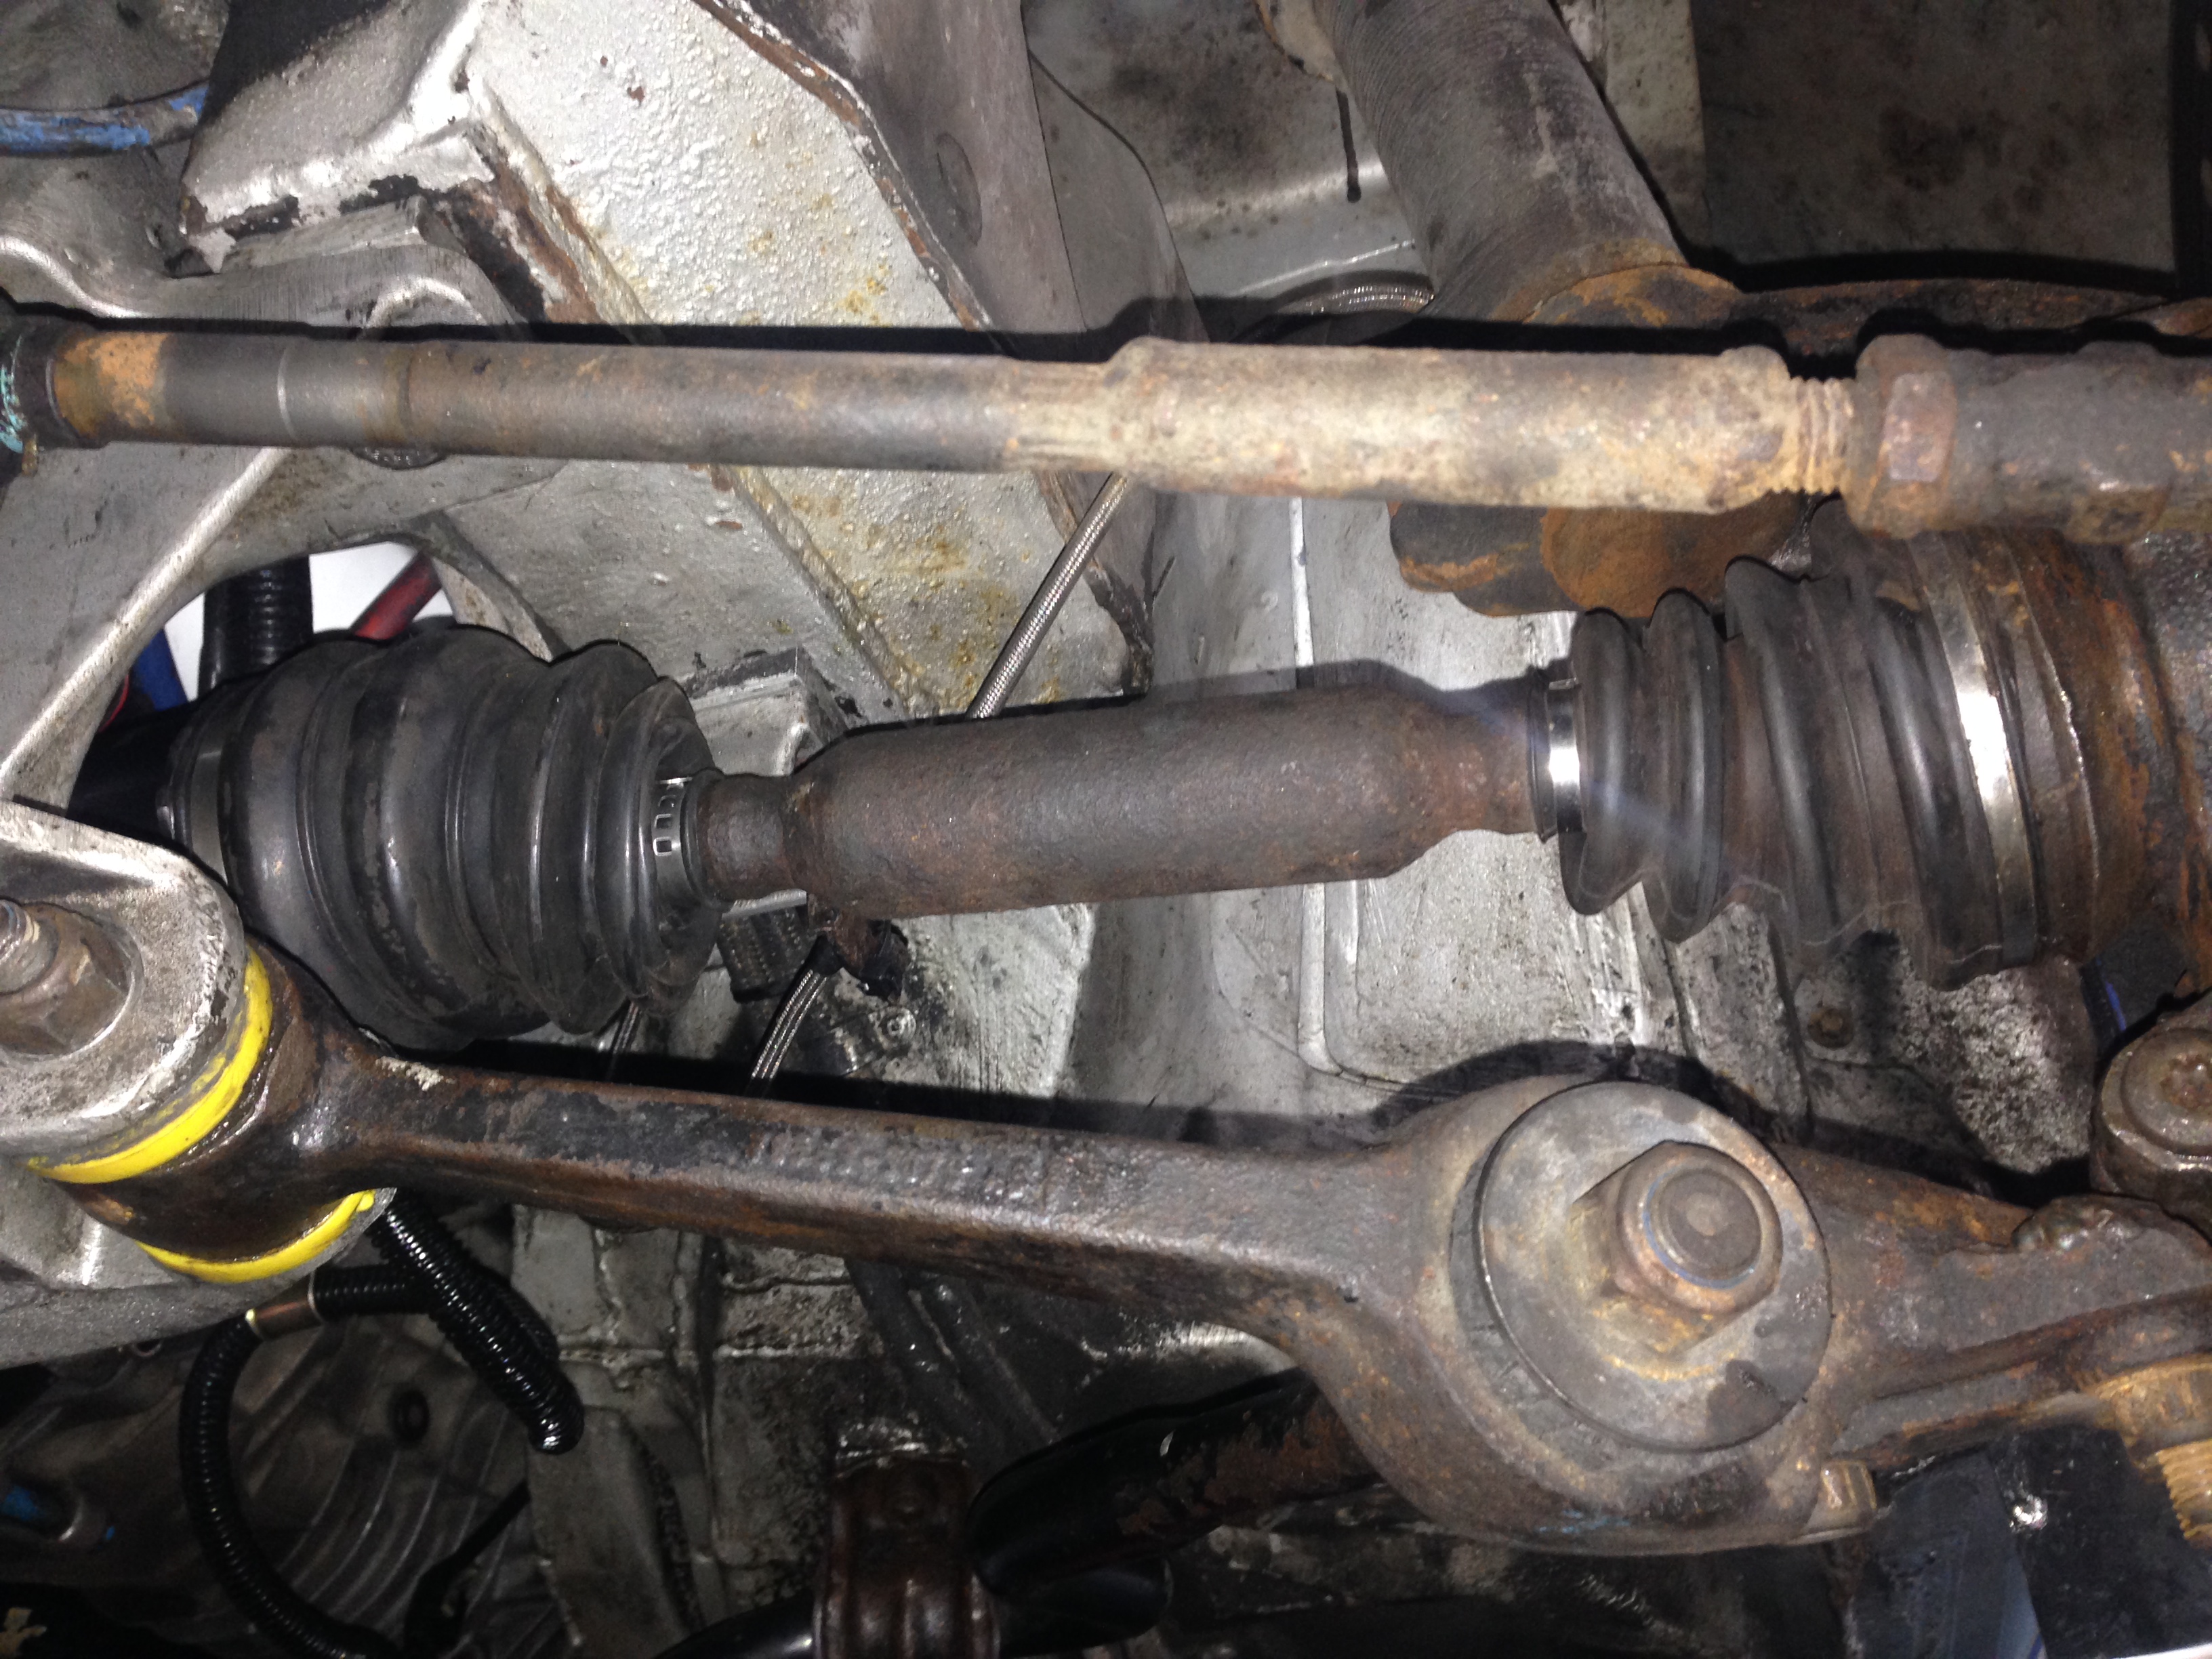
With these fitted thought it was time for a drive again.. Lots had been apart and it was more of a test drive to make sure everything was working as it should.. Except this happened
Inner CV joint popped out on the passenger side.. Great. So something wasn't right. FIVE HOURS later I finally got picked up by the RAC!!!
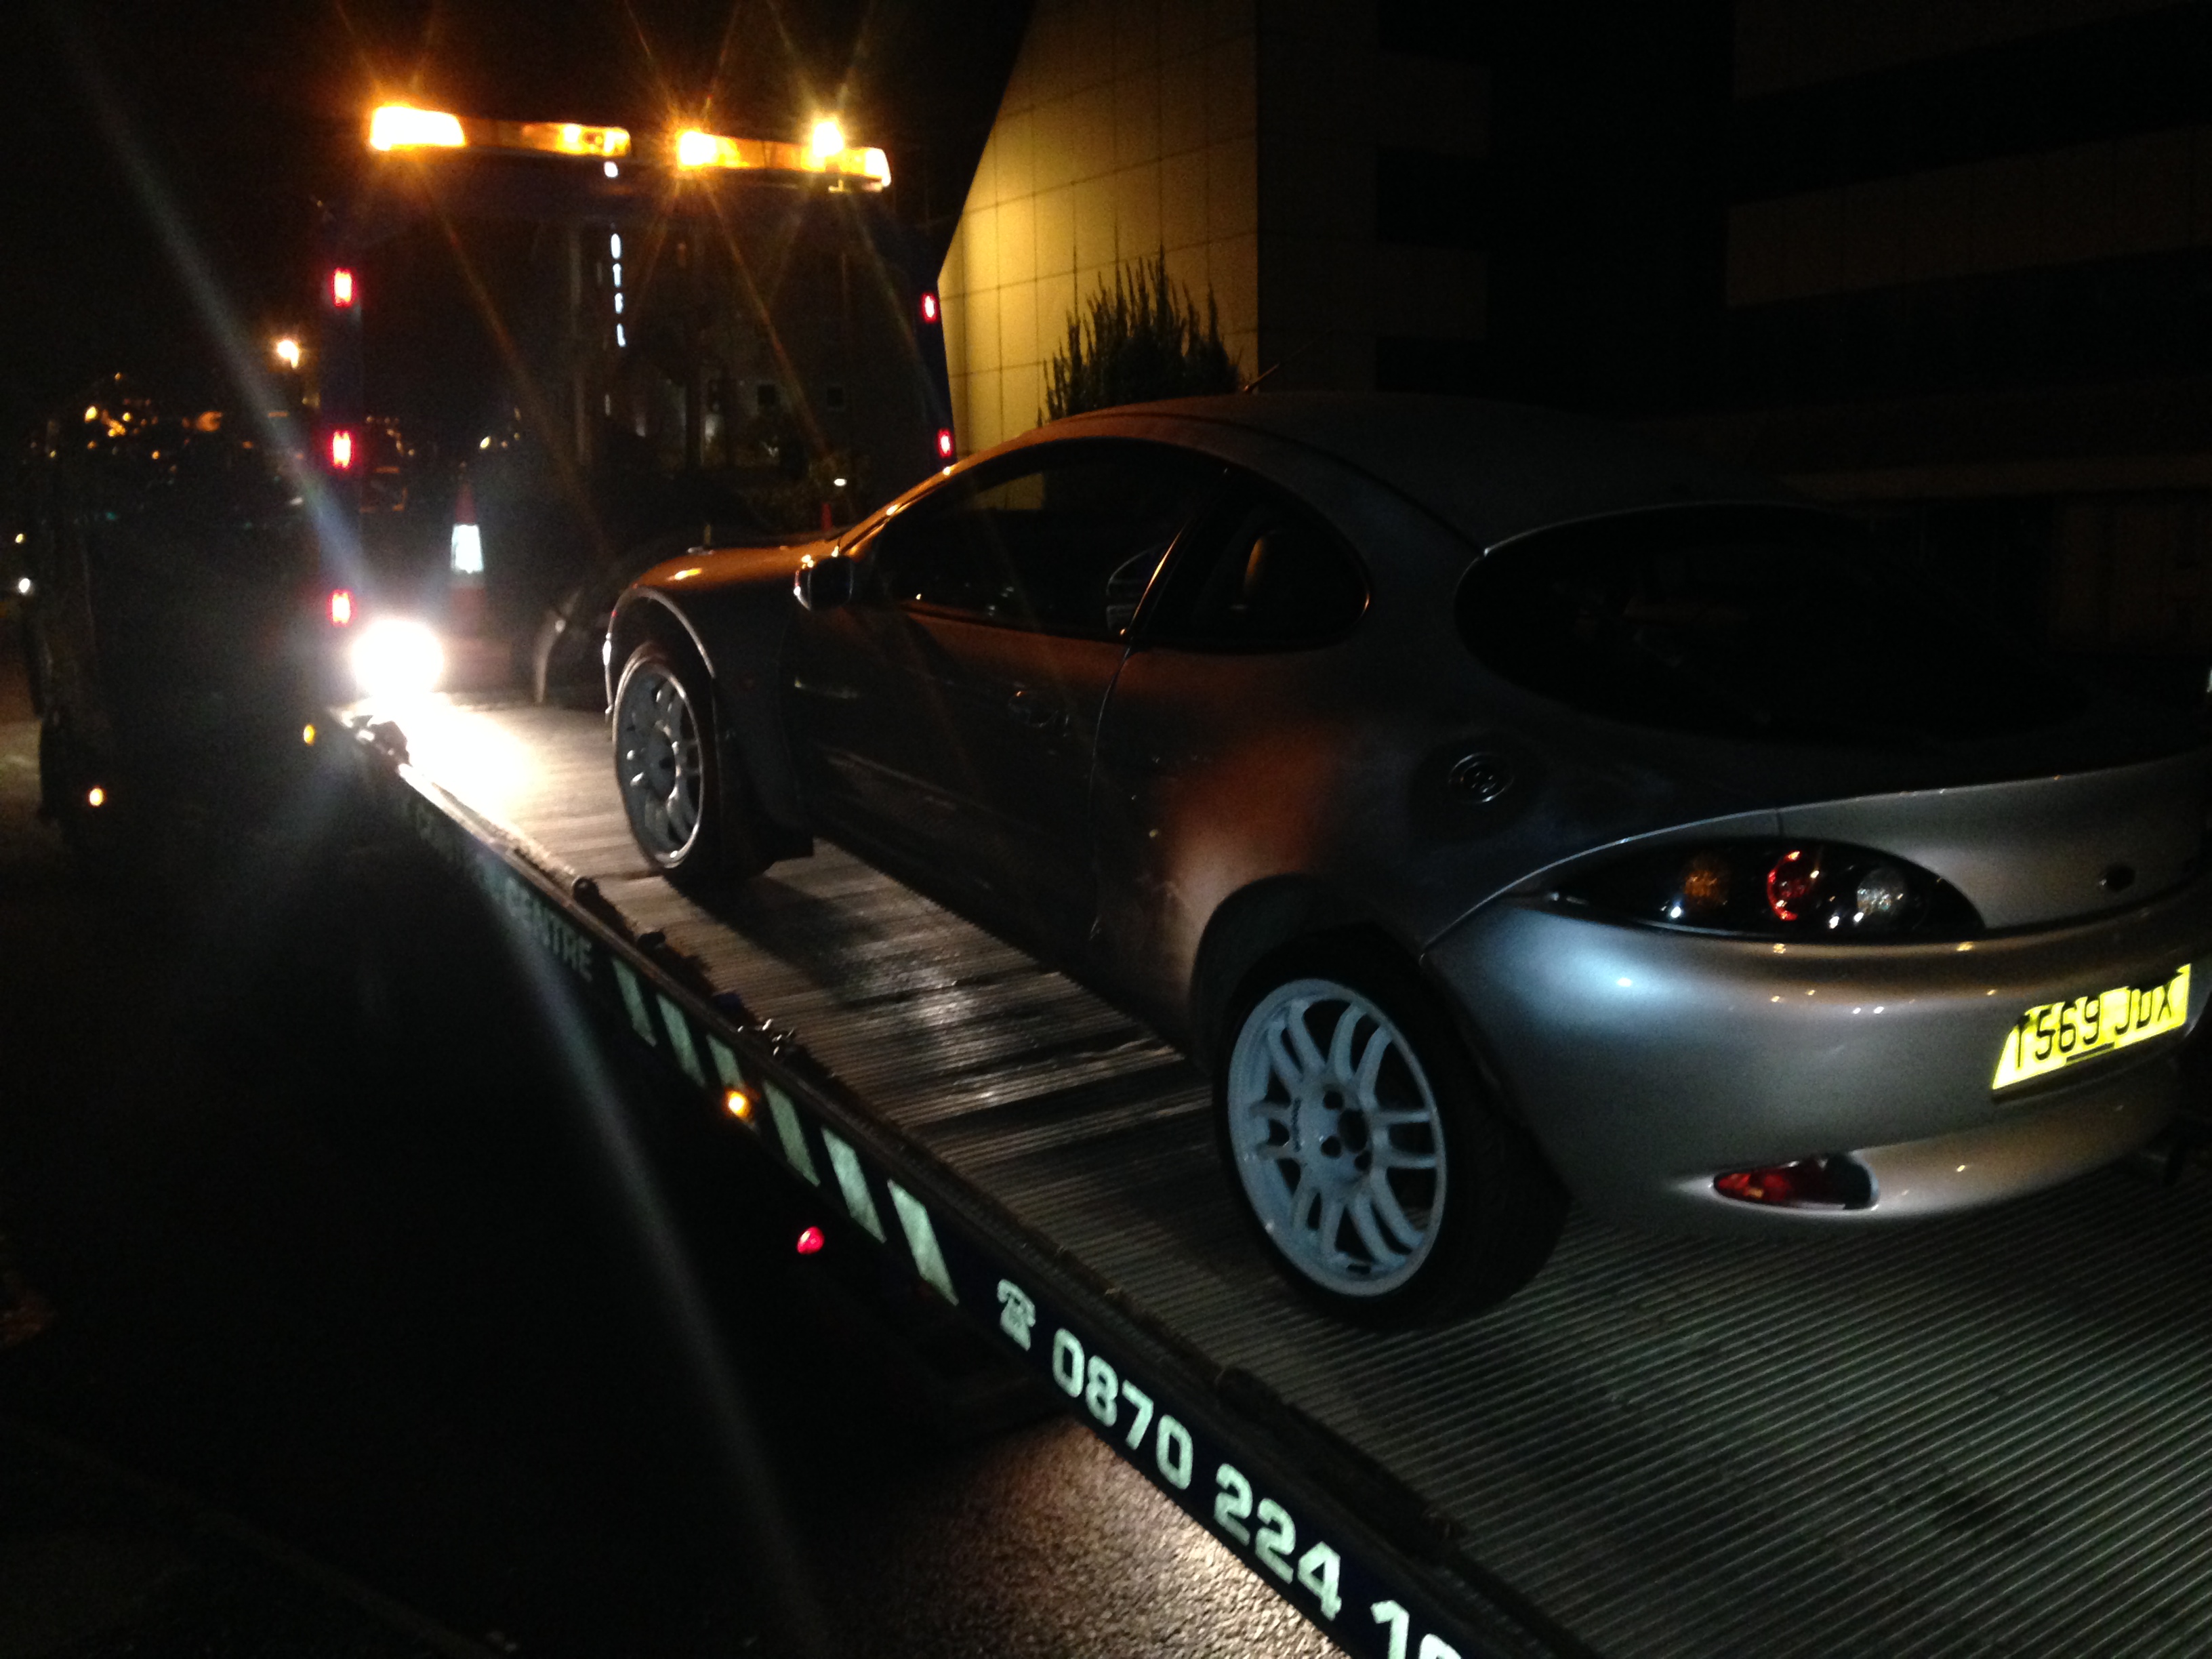
So back to the garage and wait for another day to find out why this had happened.
This is the washer bottle that doesn't hold fluid.. So not much use. It is a mess of cut up bottles and bits and needs addressing at some point soon!

Decided to change the side repeaters, the ones fitted had loads of excess cable left bundled up and wanted a more factory look so set about fitting the standard items.

Holes ready to be cored

New lights fitted with the correct wiring loom and plugs

Looked into the anti-lag wiring and it seemed very messy, although fun to use for now I decided to remove the wiring. The anti lag also meant the idle valve didn't work properly and the cold idle was awful, so I also looked into the idle valve..


Found the valve to be butchered so set about replacing it


New valve fitted.. Turned out it was easier to remove the throttle body housing as one of the threads on the housing had been stripped.. So decide to nut and bolt through. Later realised this wasn't the best idea as it's impossible really to remove the valve on the car so repaired the thirds with helicoils.
Whilst it was off I noticed fuel lying in the intake elbow.. Shows how badly the car is over fuelling.. So soon looked to getting the management changed.

And cleaned

Then turned my attentions back to the front driveshafts and bought these

These are the extended GGR shafts and are designed to stop the front shafts pulling out when the car is lowered so they should be a good replacement for the current worn items
Fitting


With these fitted thought it was time for a drive again.. Lots had been apart and it was more of a test drive to make sure everything was working as it should.. Except this happened

Inner CV joint popped out on the passenger side.. Great. So something wasn't right. FIVE HOURS later I finally got picked up by the RAC!!!

So back to the garage and wait for another day to find out why this had happened.
Last edited by McCloud 85; 28-10-2015 at 09:20 PM.
28-10-2015, 09:19 PM
#21
PassionFord Regular
Thread Starter
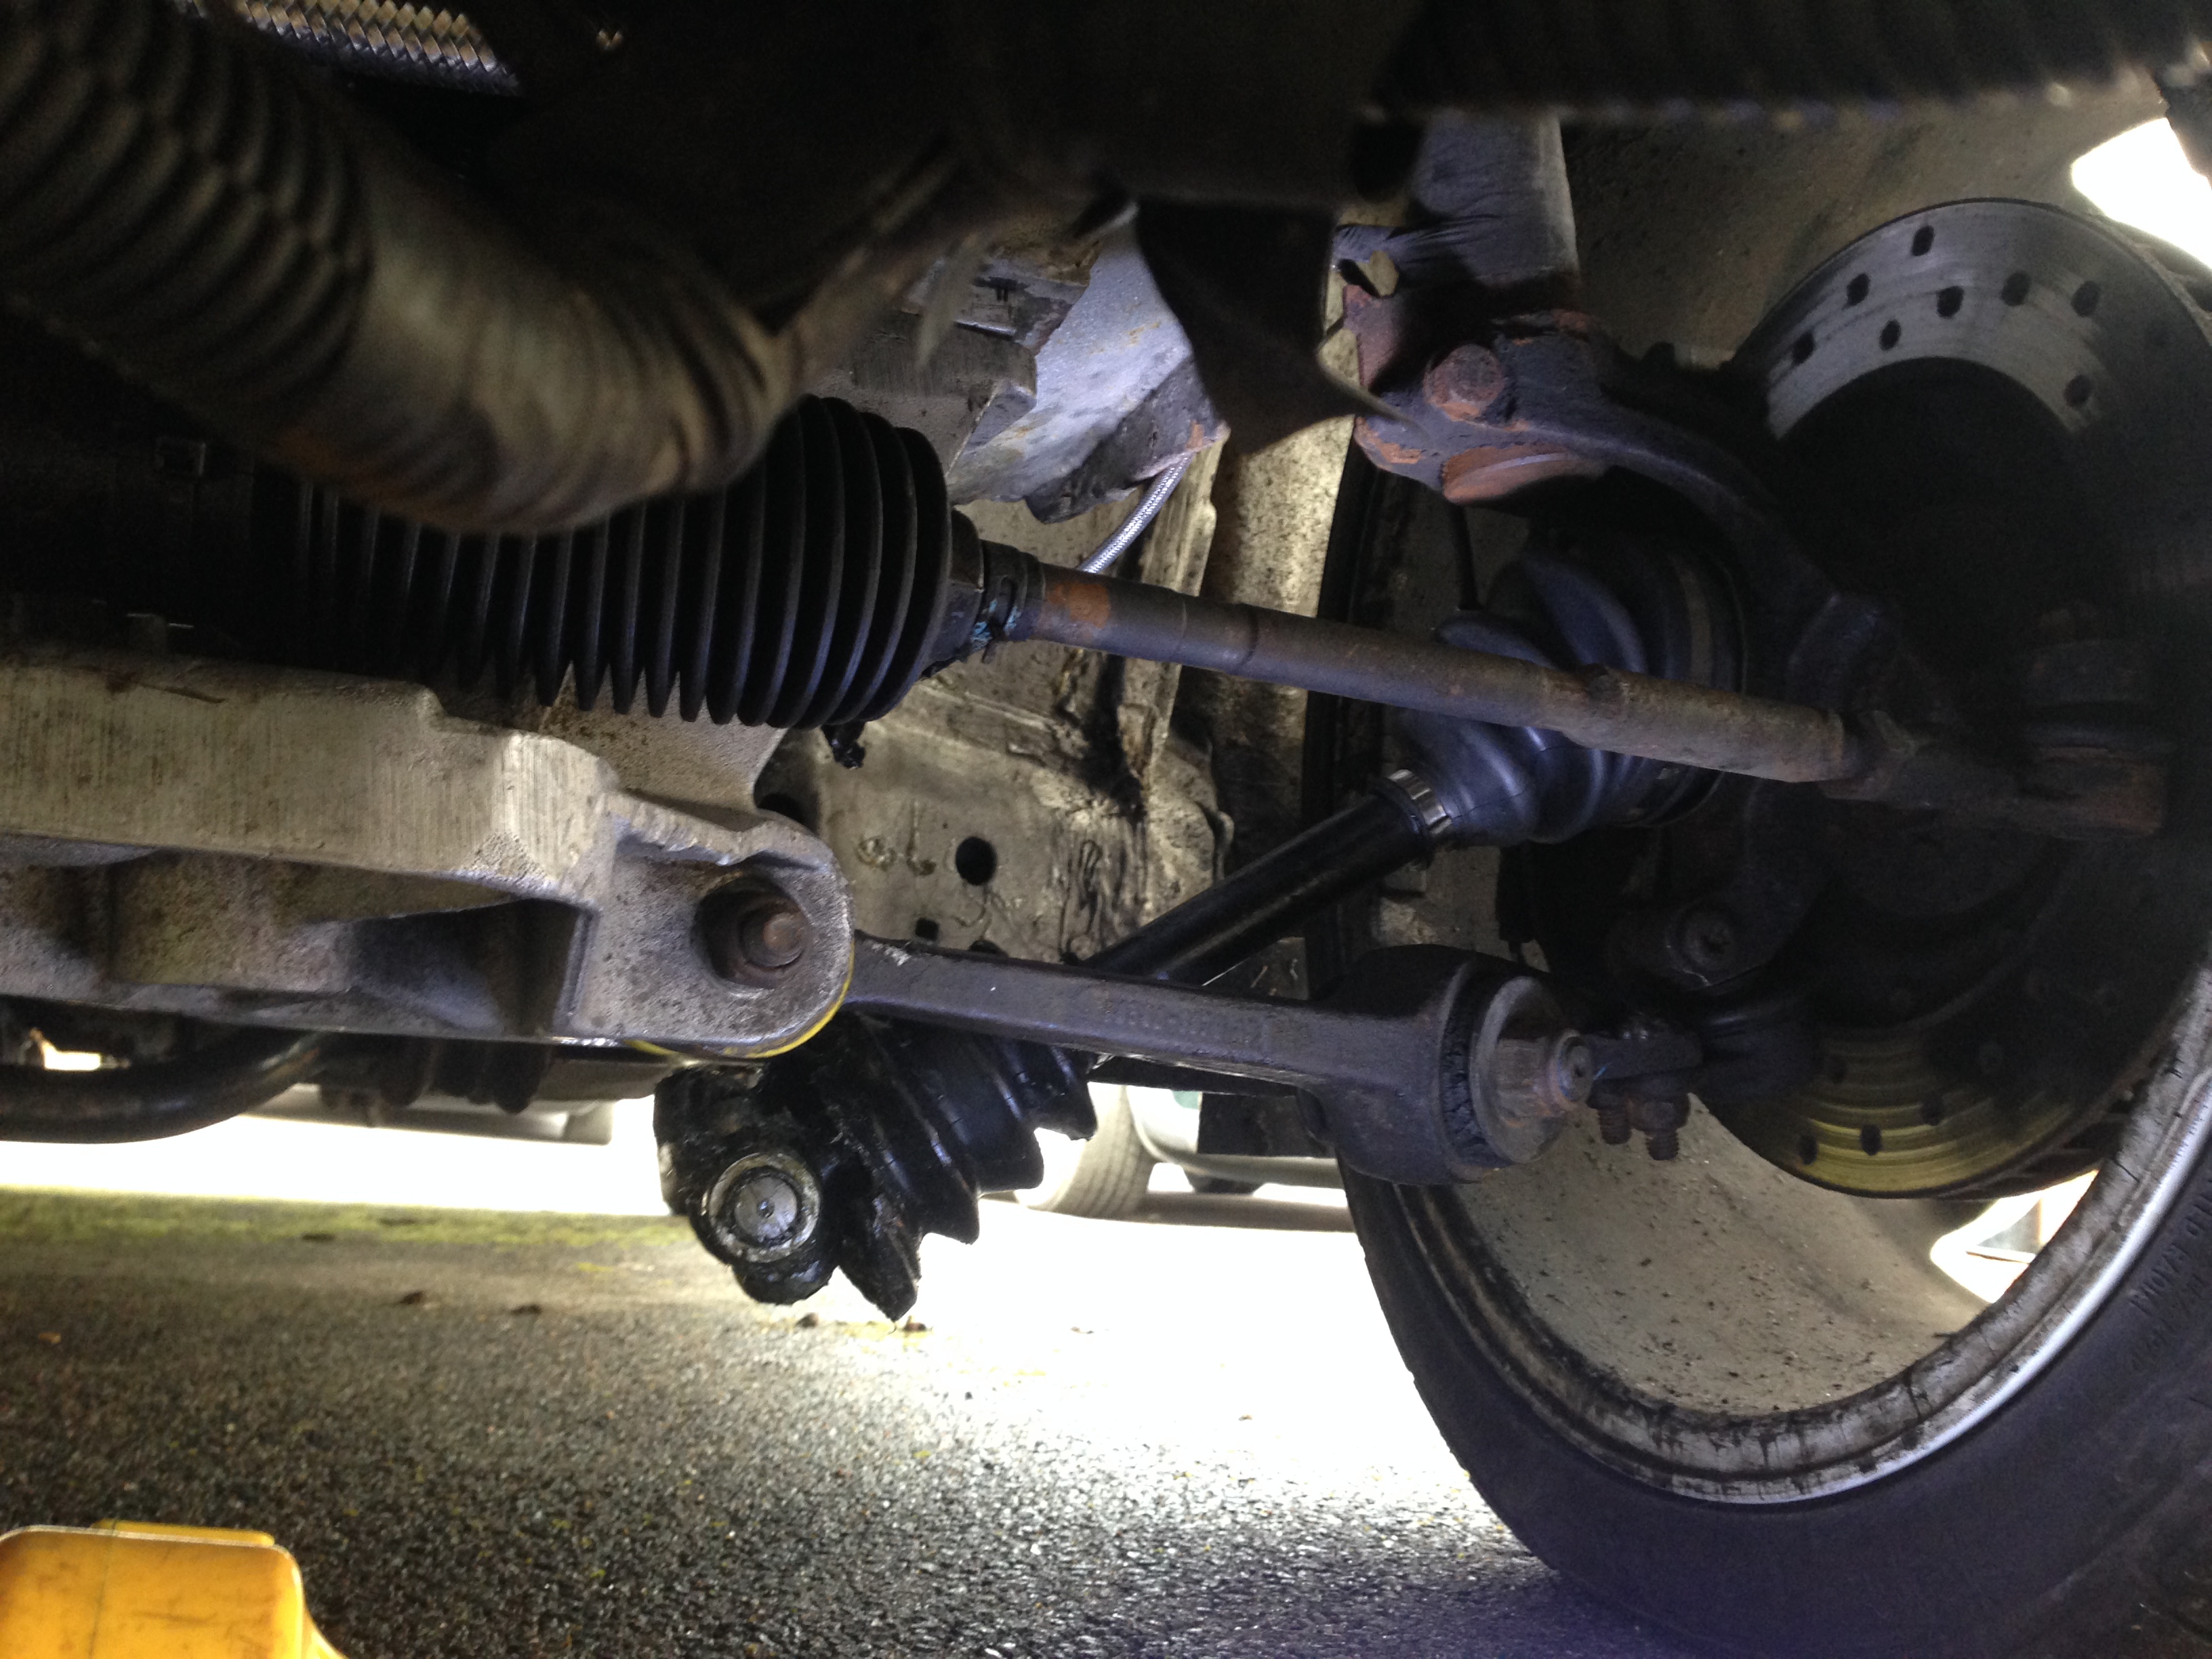
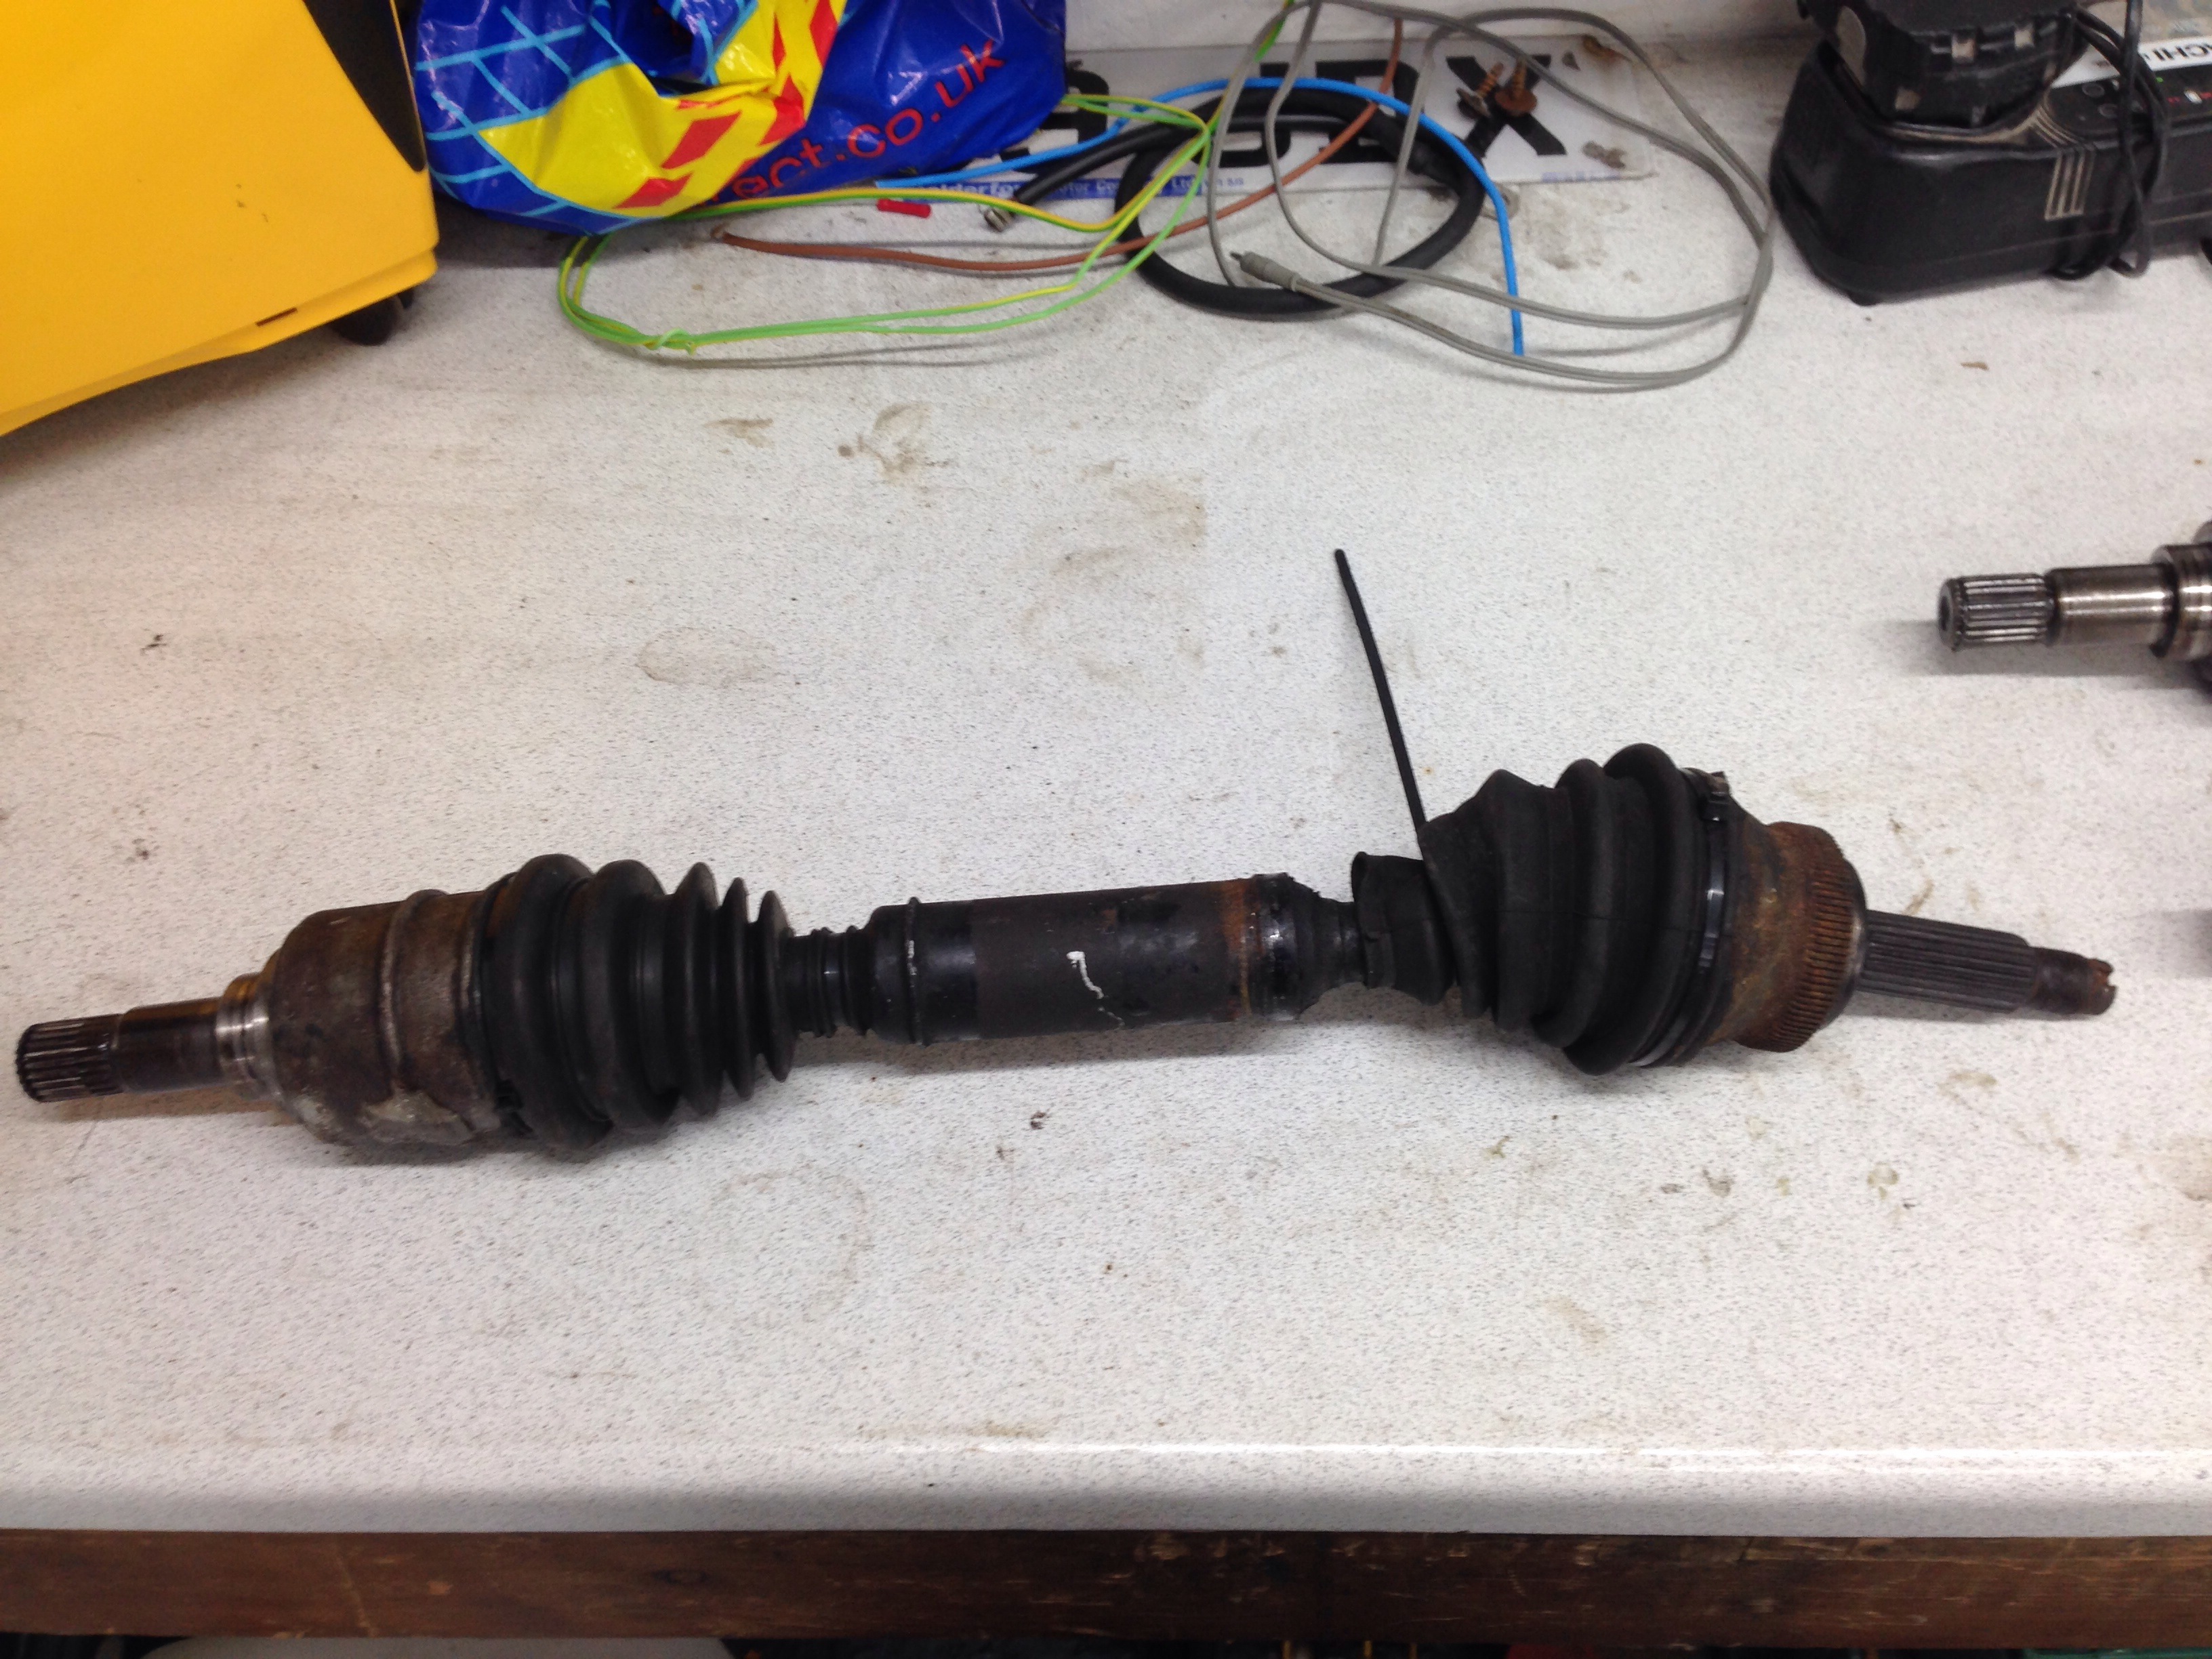
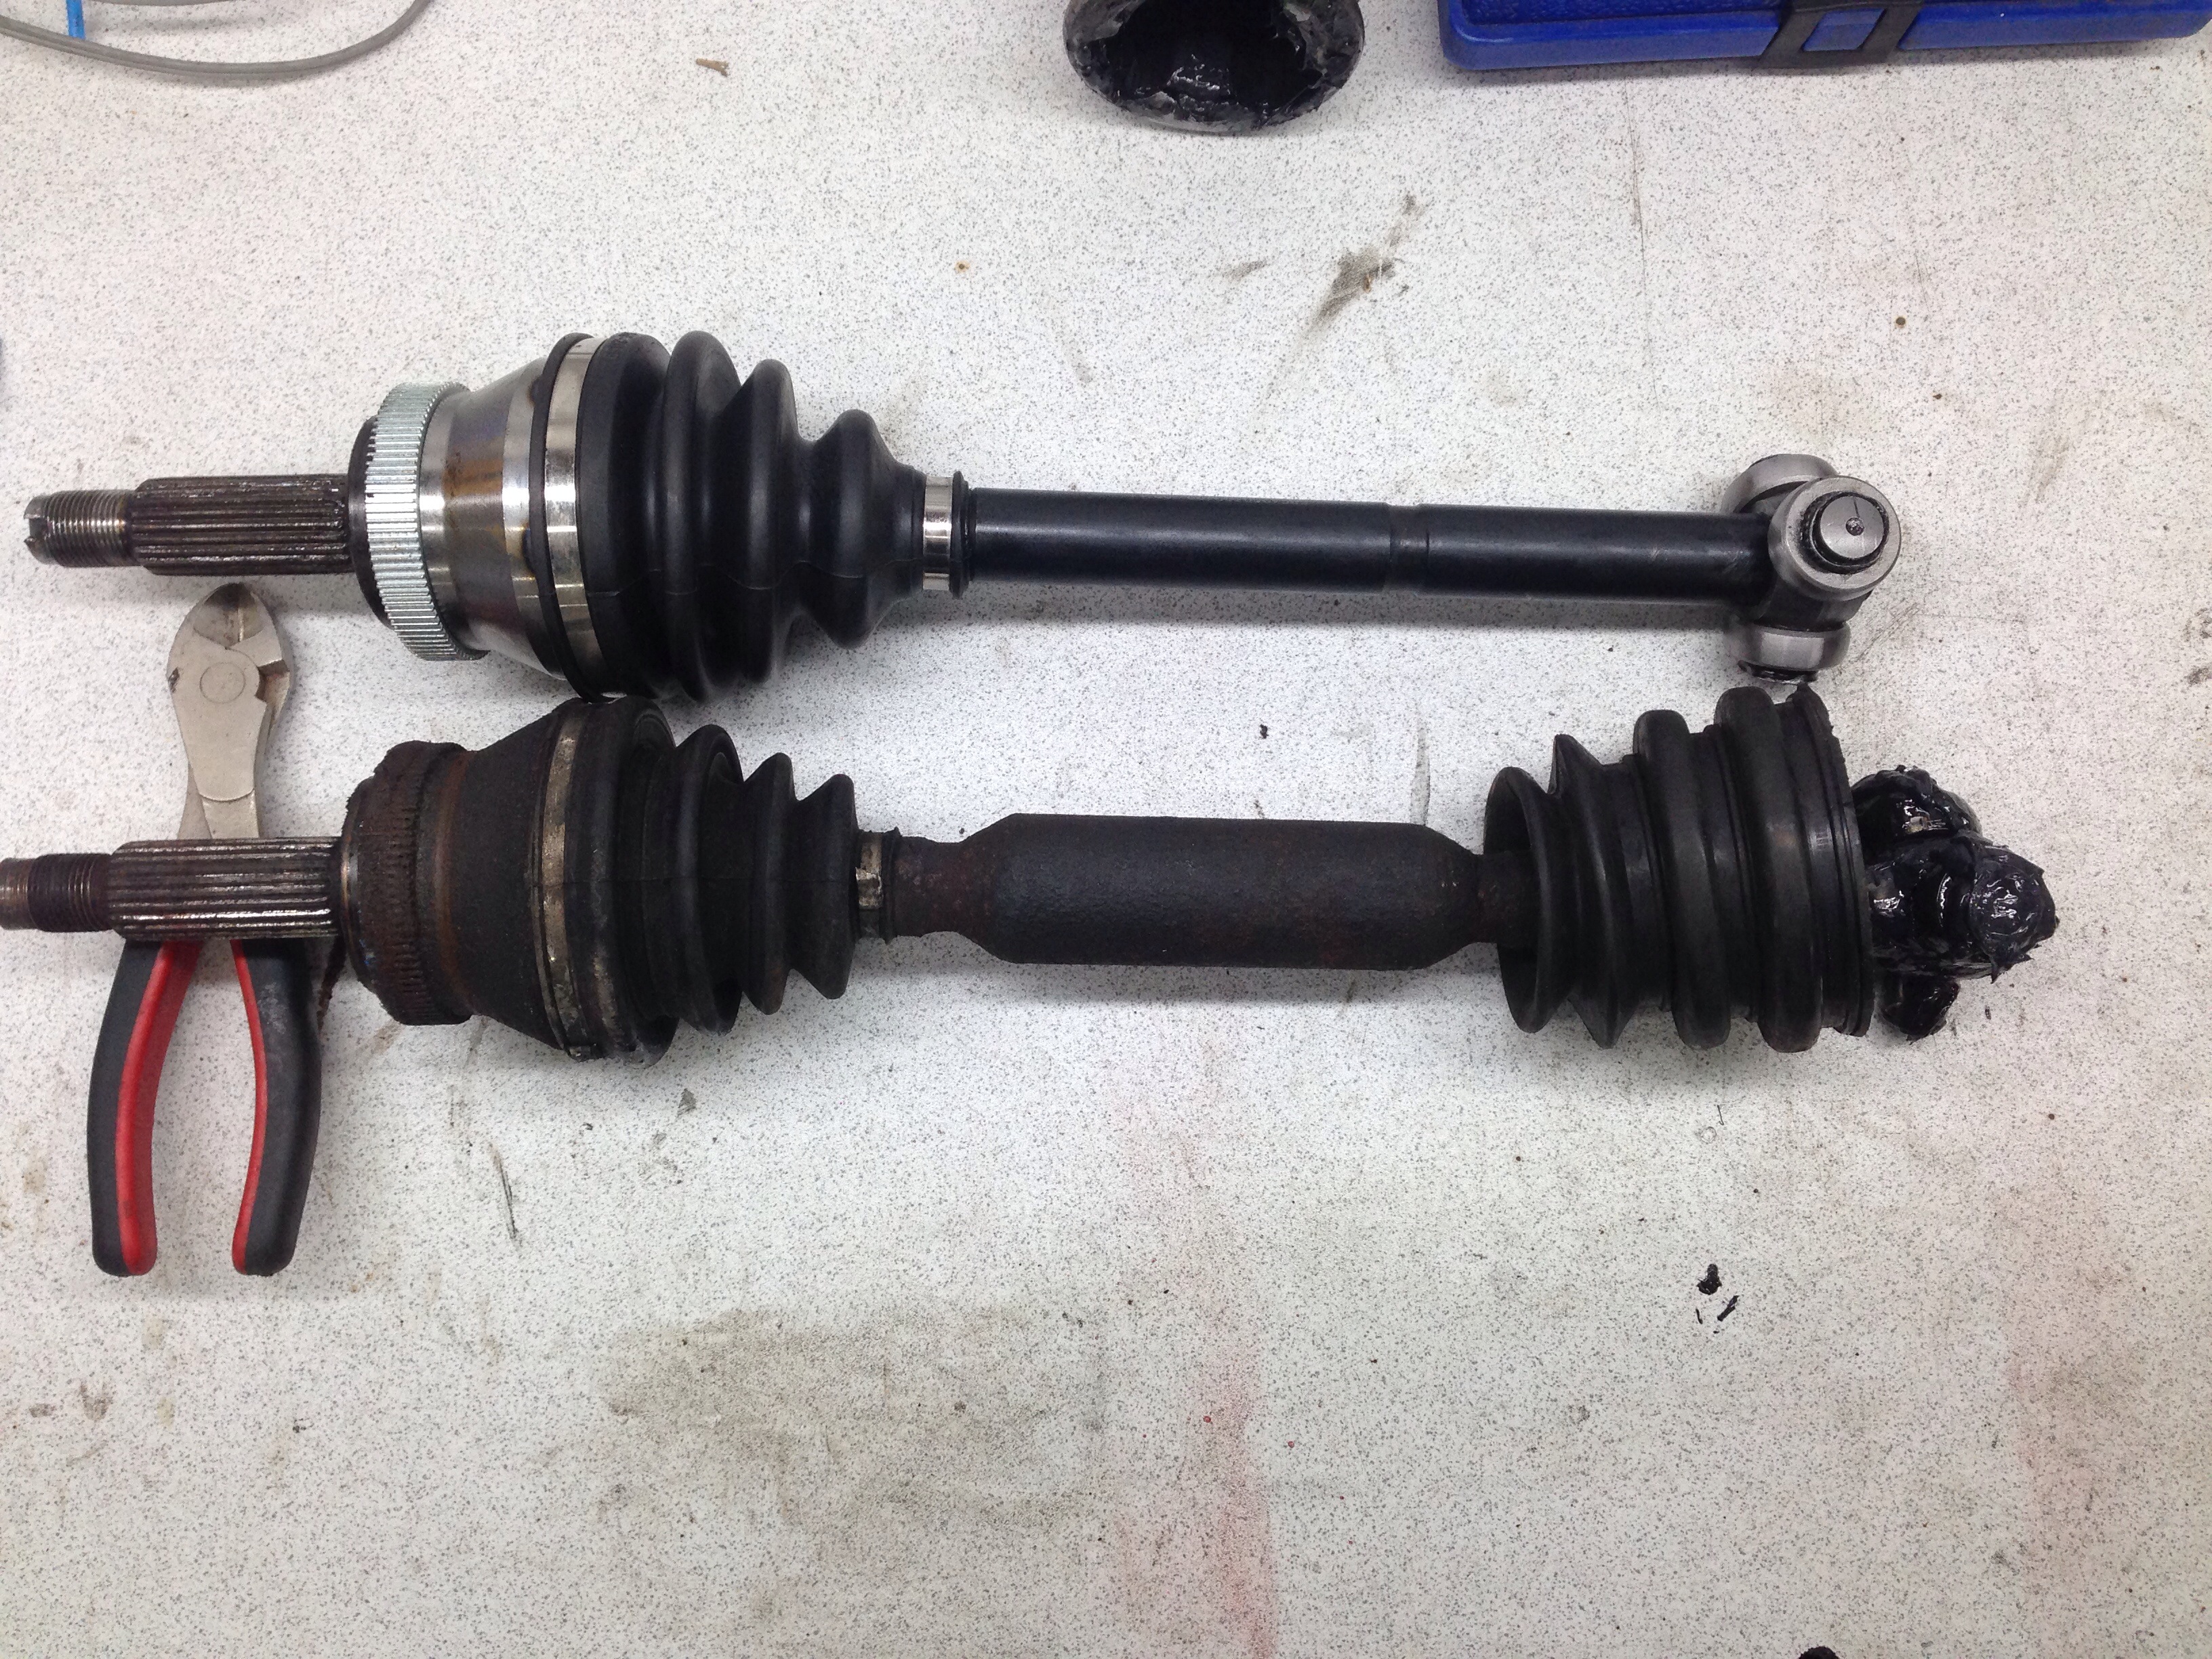
After the new shaft popped out I went back and had a better look at the setup on the front. Noticed that it has been widened after the initial fabrication work and also wider than a standard cosworth
So a better look into the old shafts revealed they were much longer to fit he cars alterations and needed to be fitted back for the time being. So new CV's were bought and fitted to the old shafts and once repaired fitted back to the car
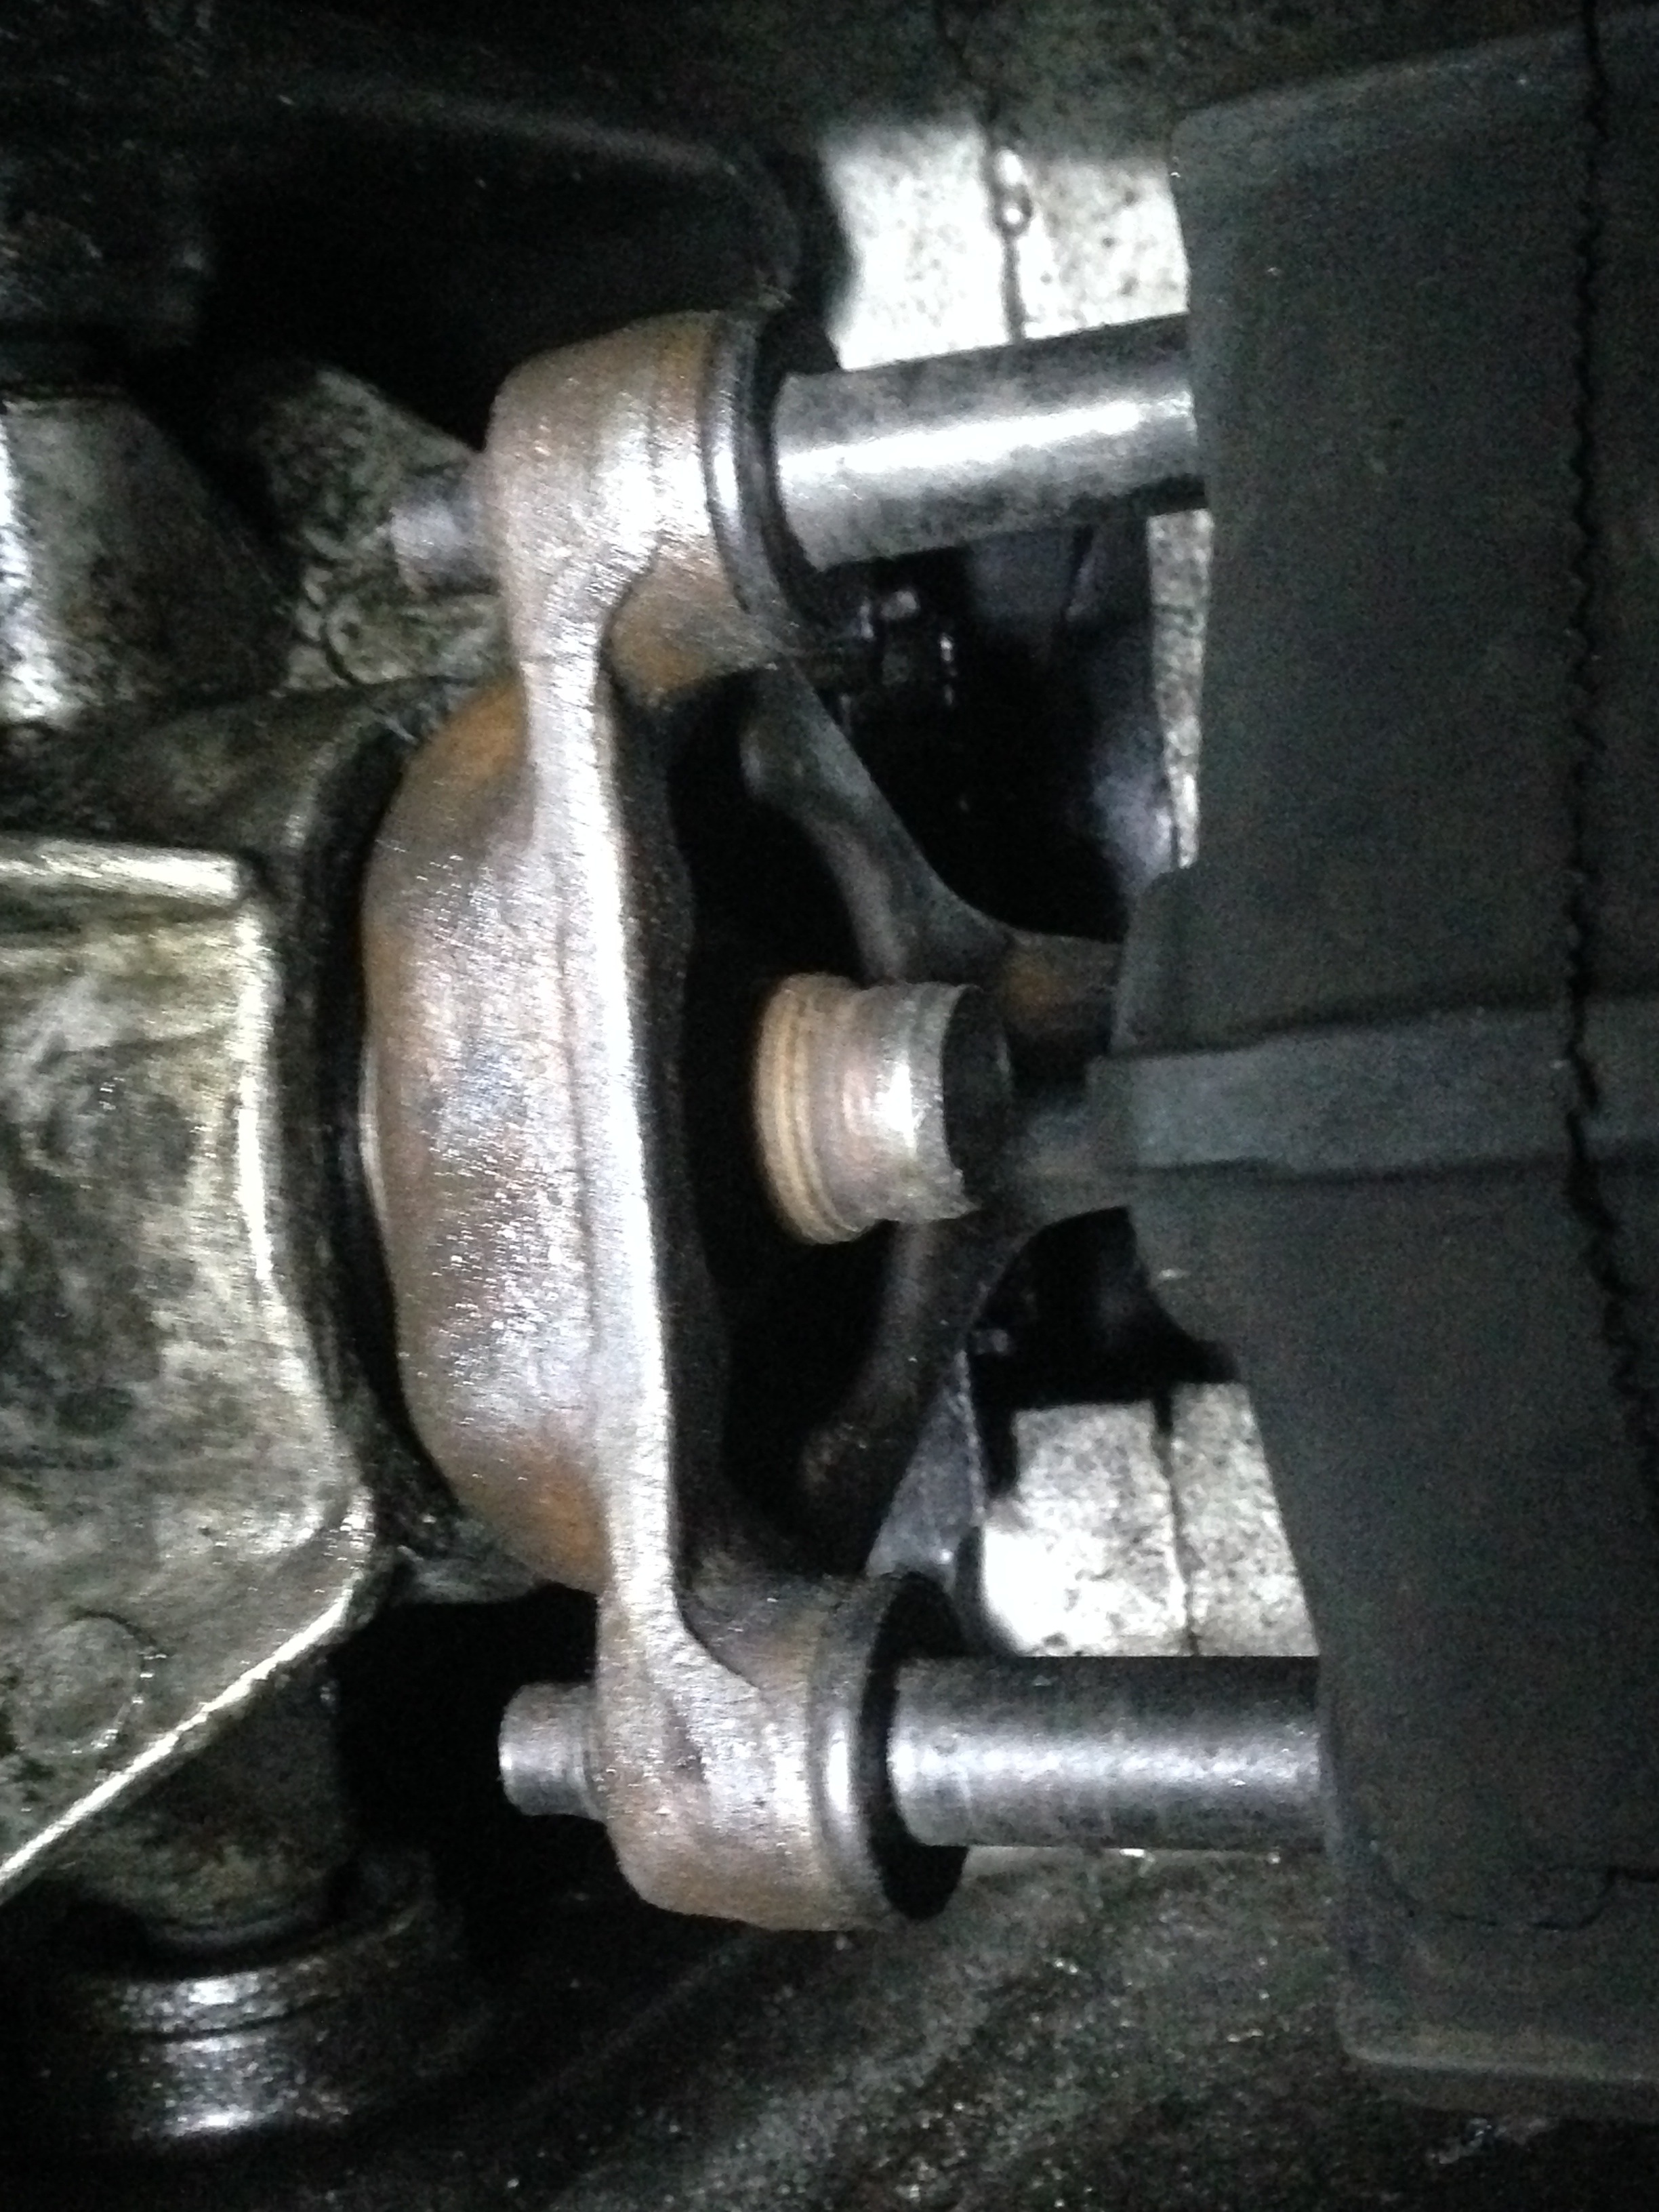
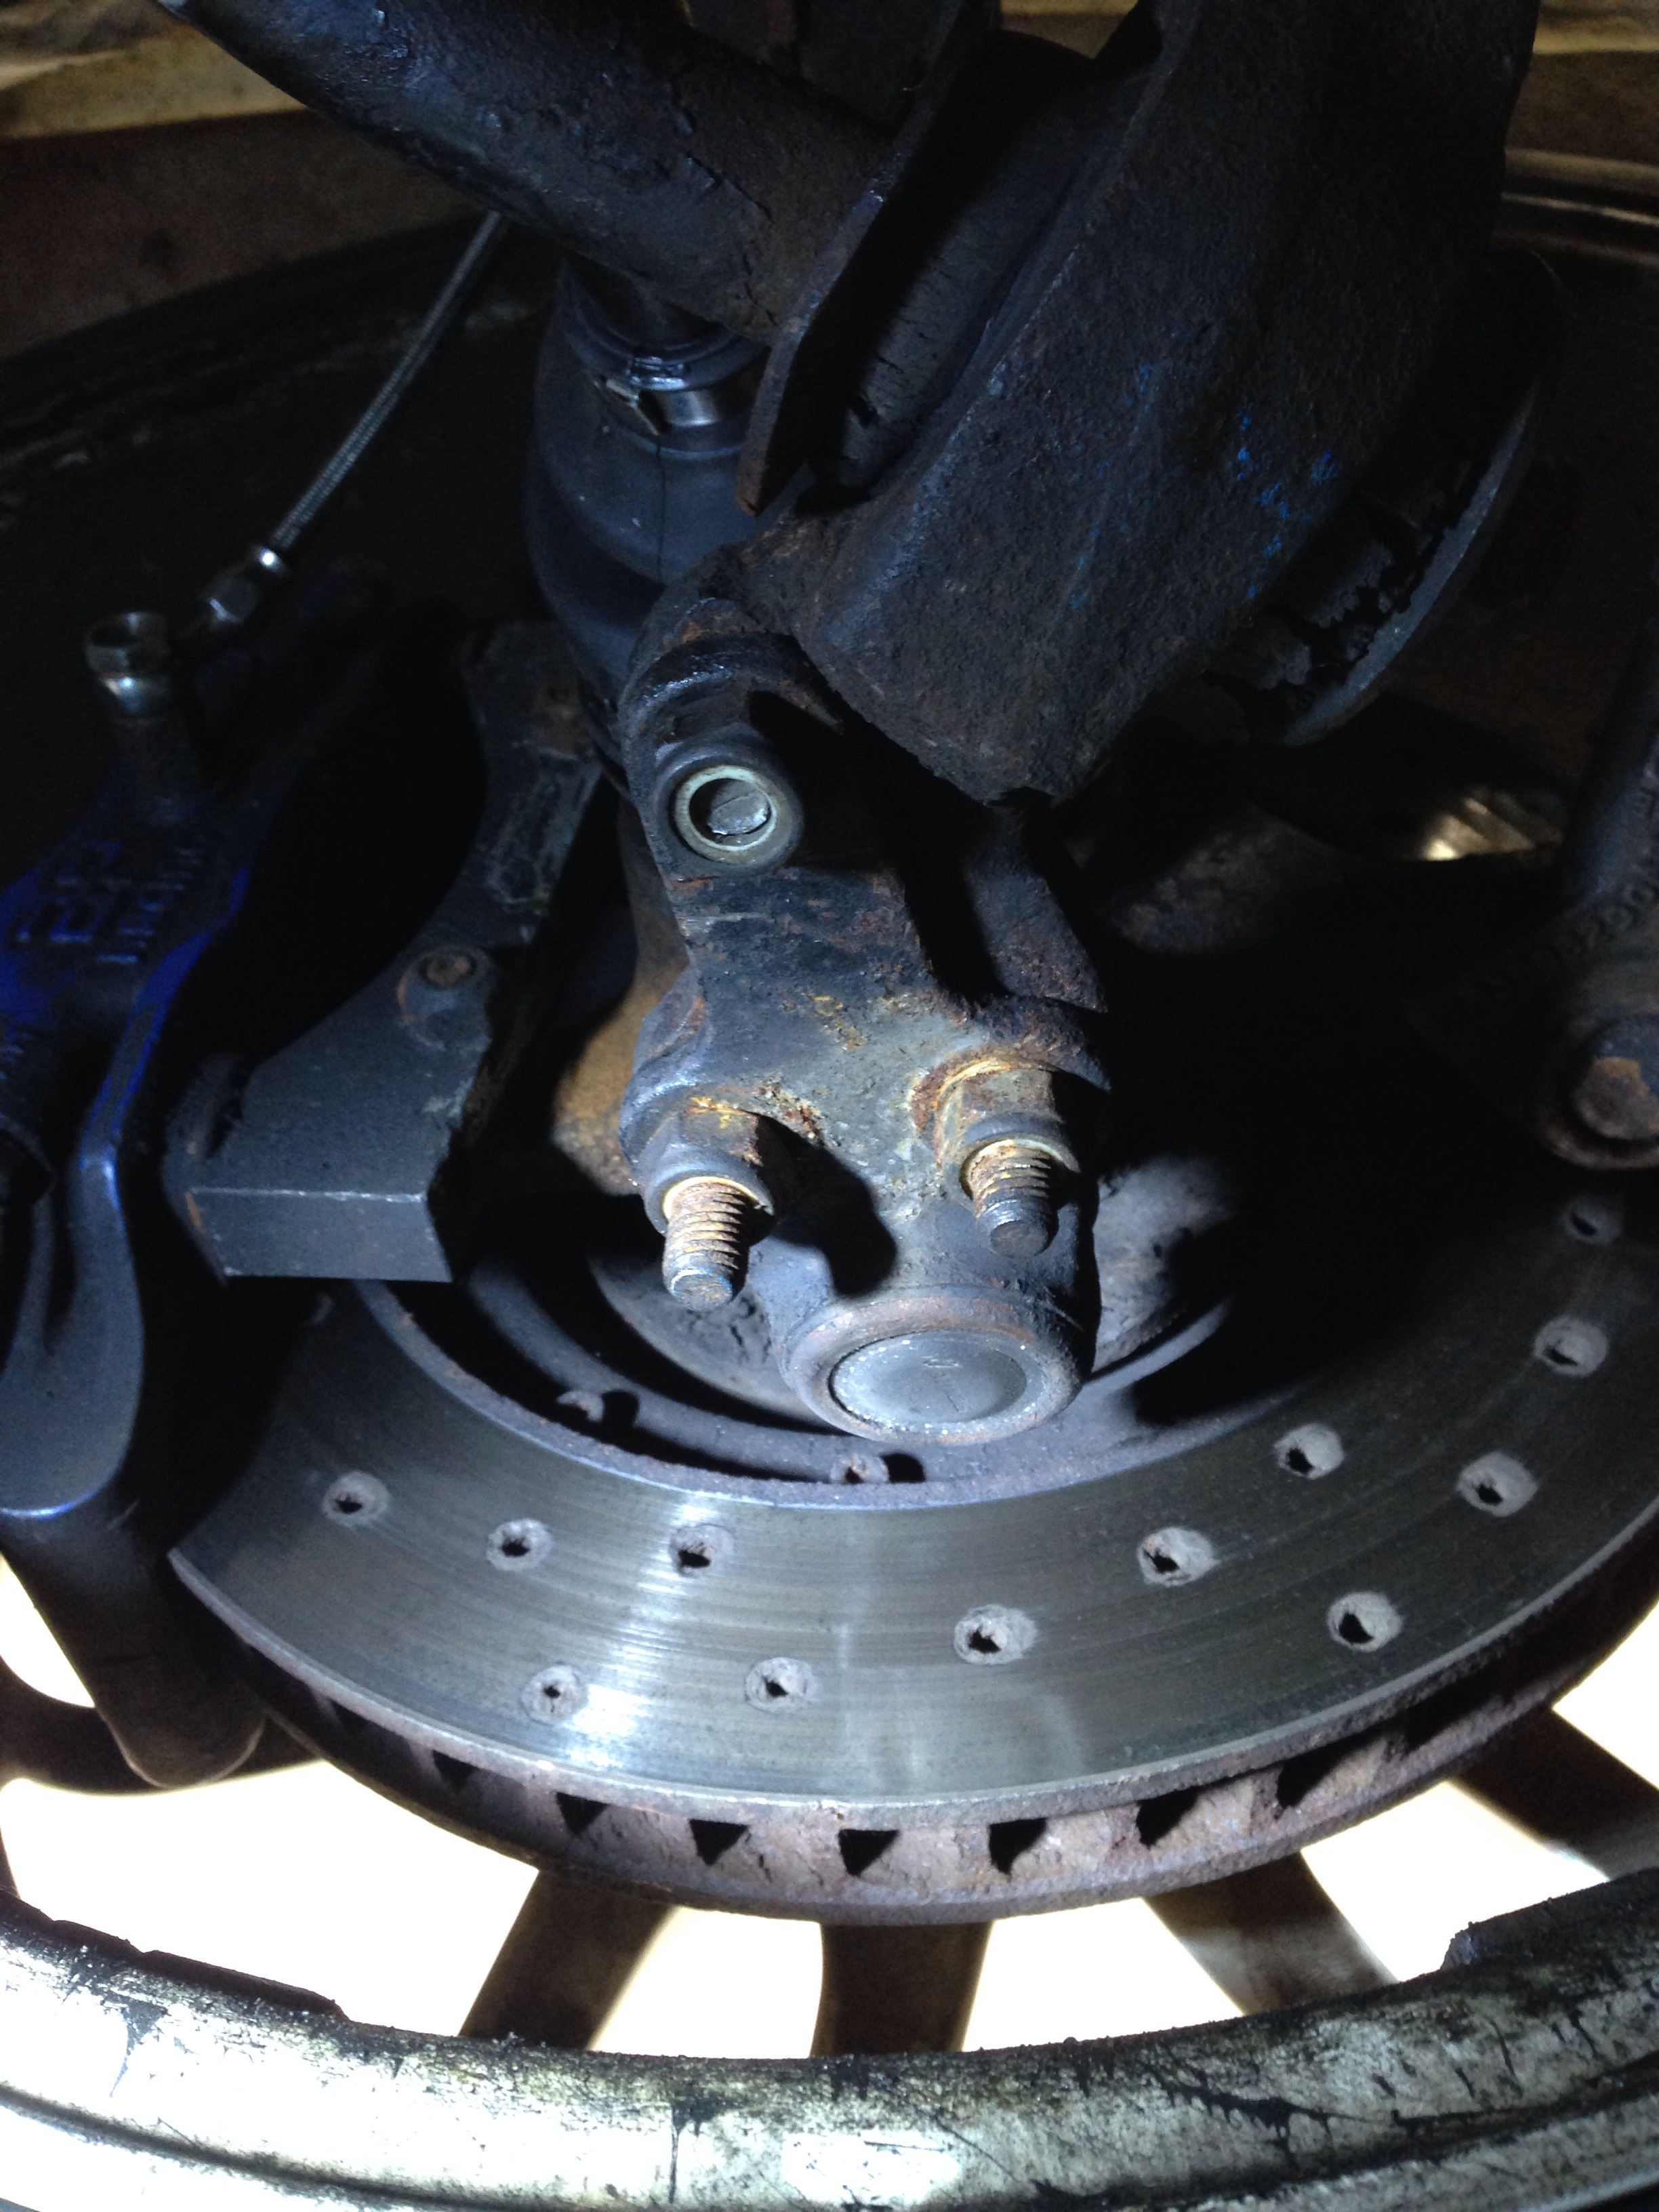
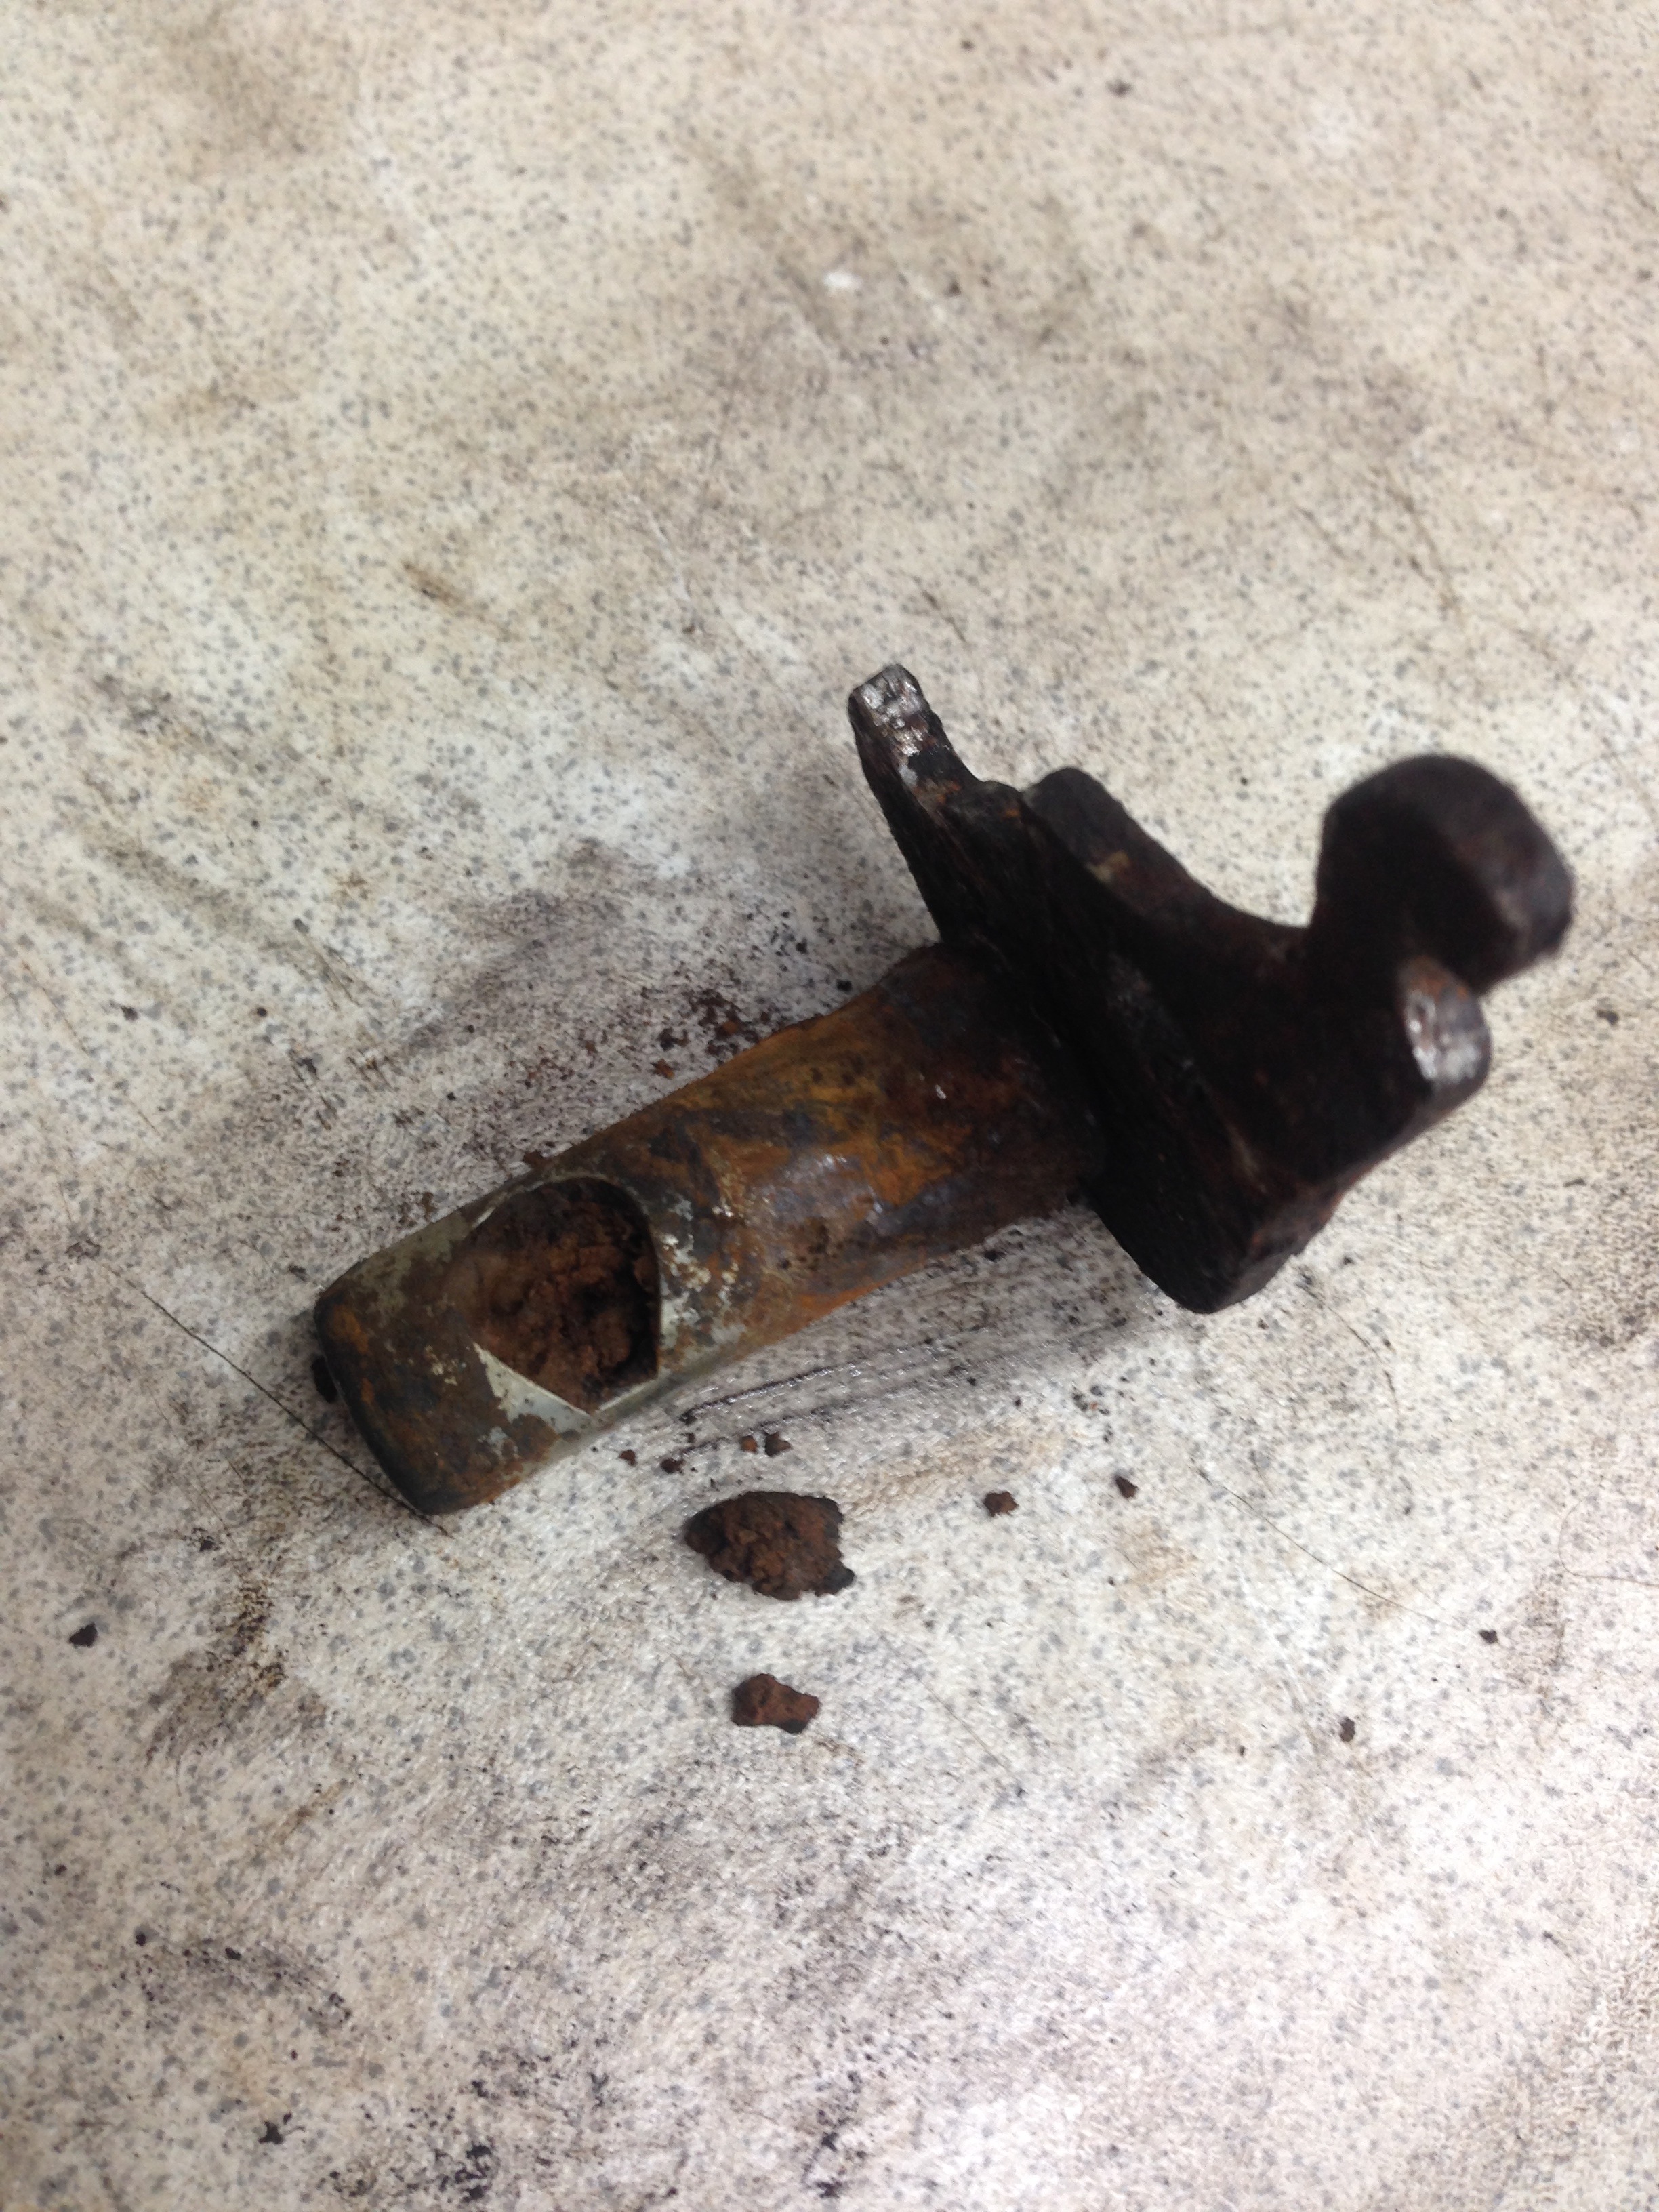
Once the driveshafts were sorted I turned my attentions to the rear brake callipers, the handbrake simply did not work. You applied it on flat ground and you could easily push the car by leaning on it!! So I set about taking the rear callipers apart to find out what was wrong
The strip down
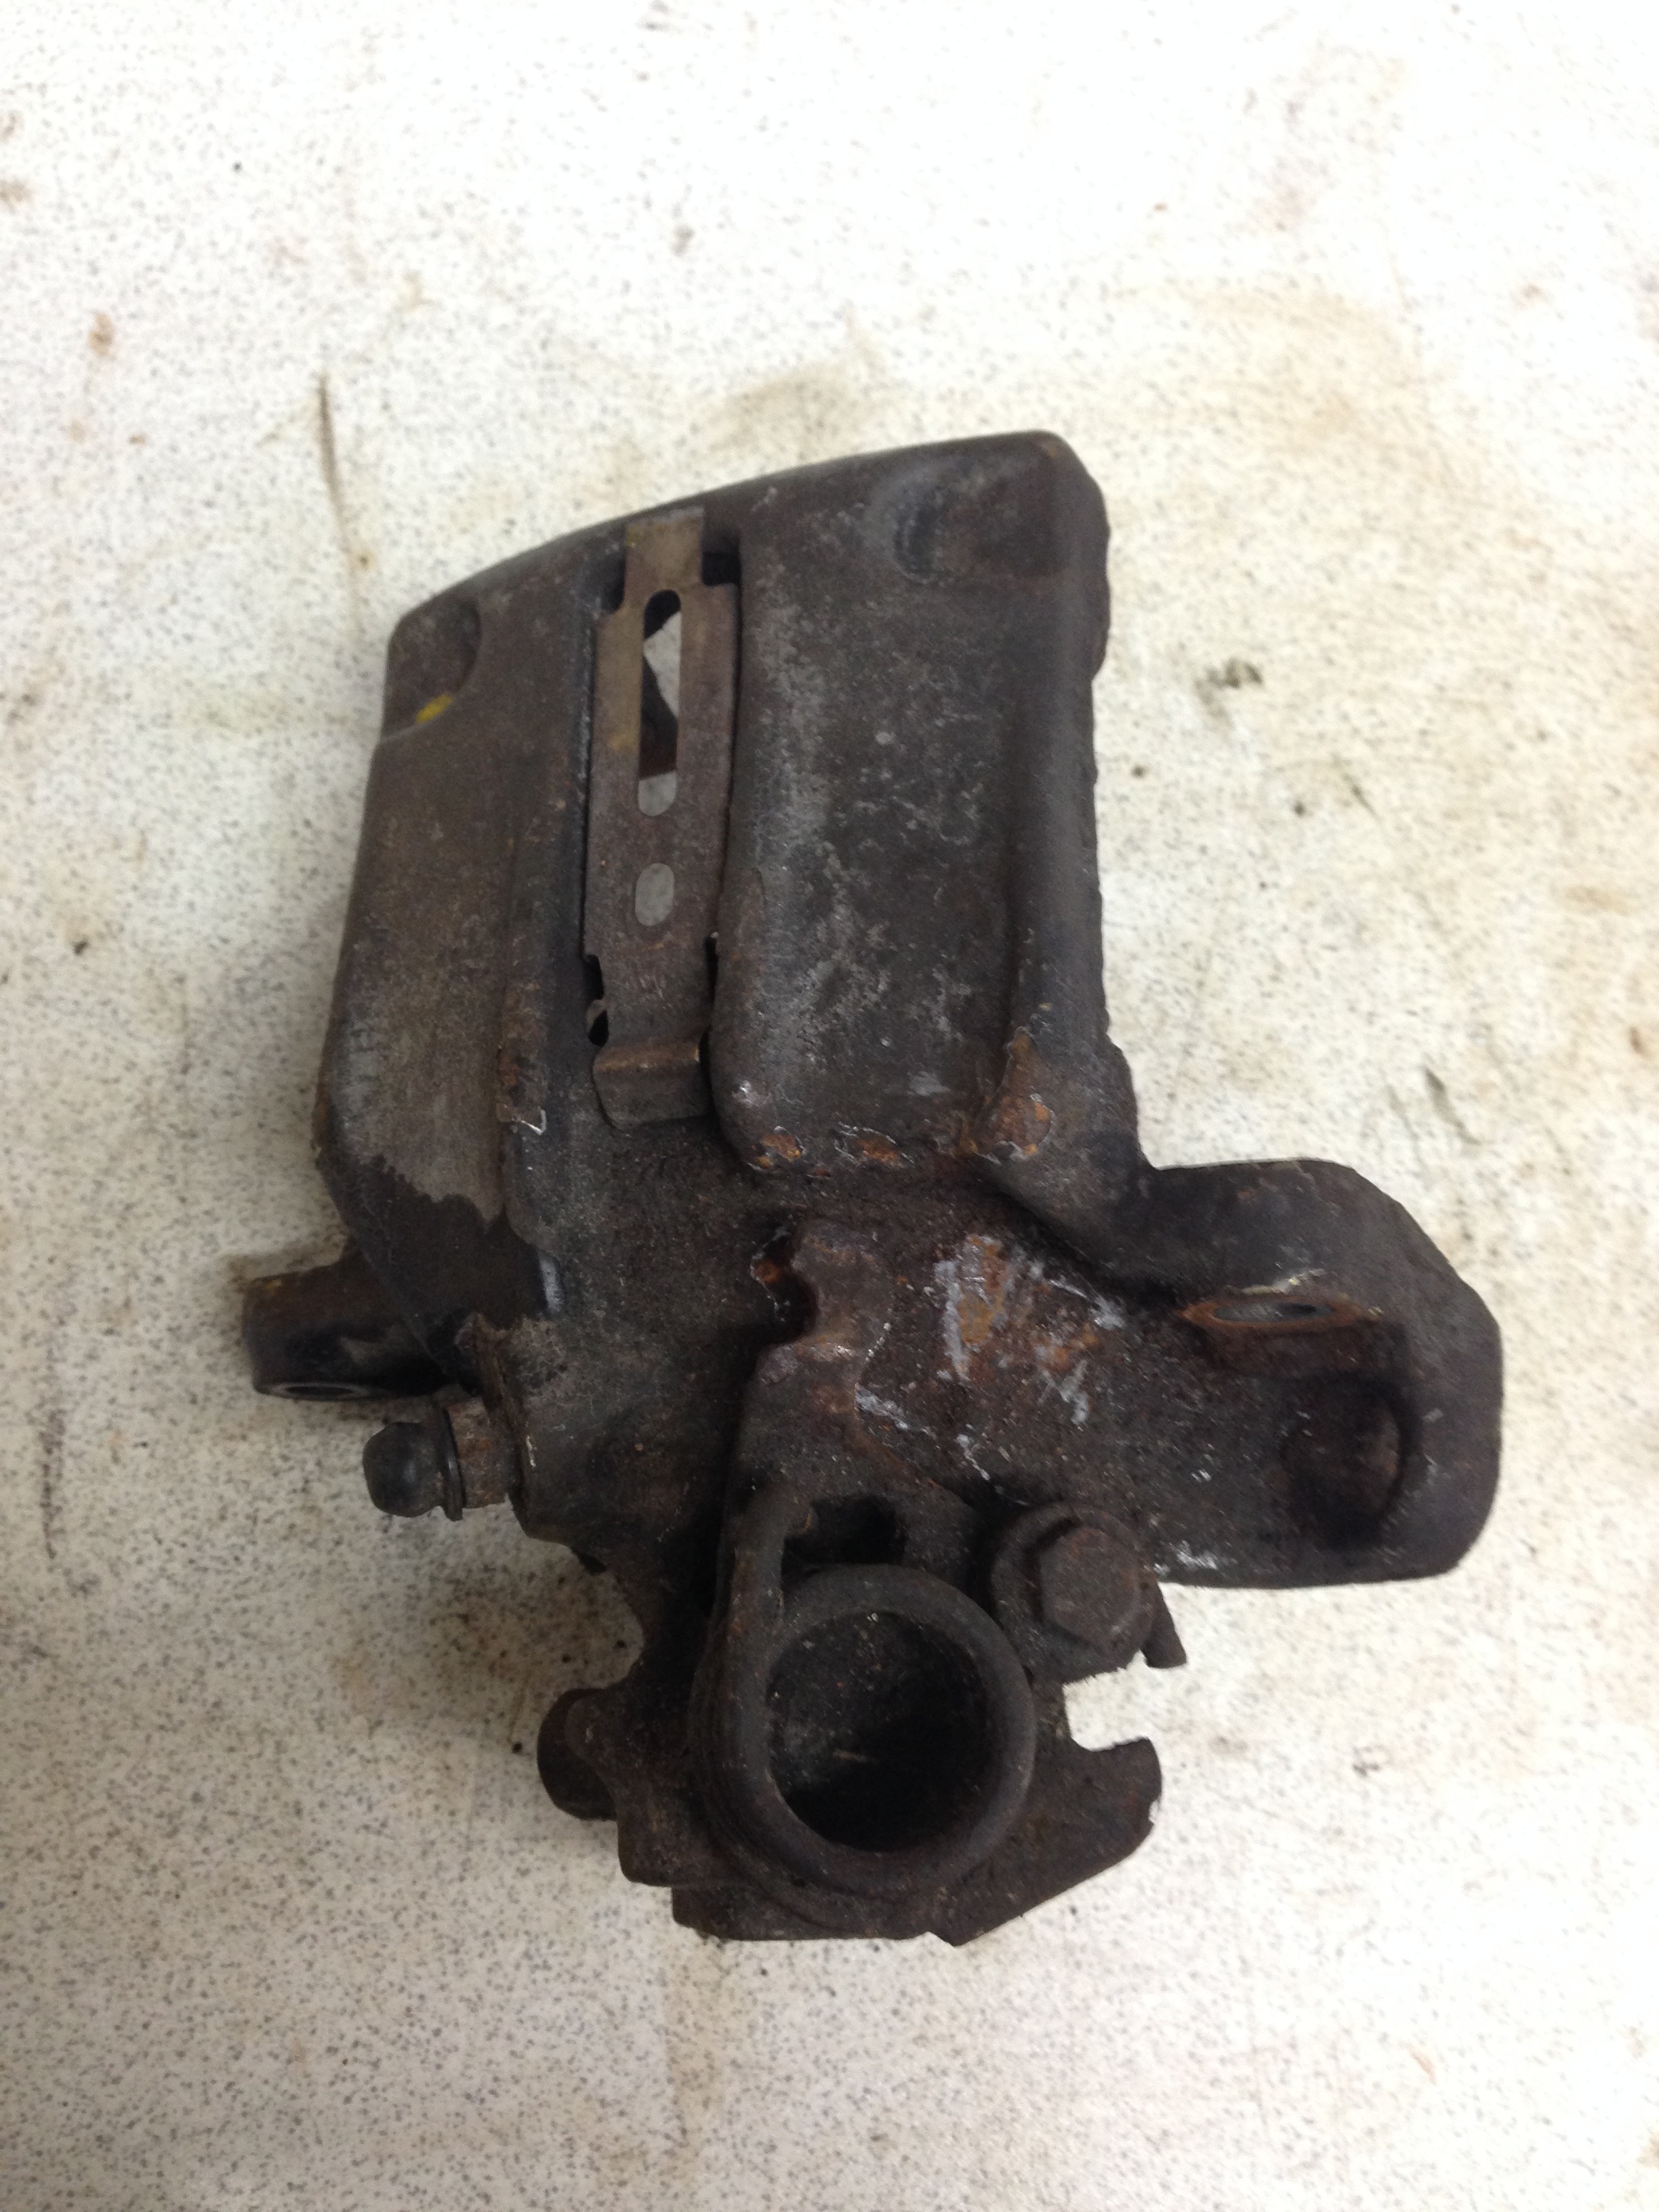
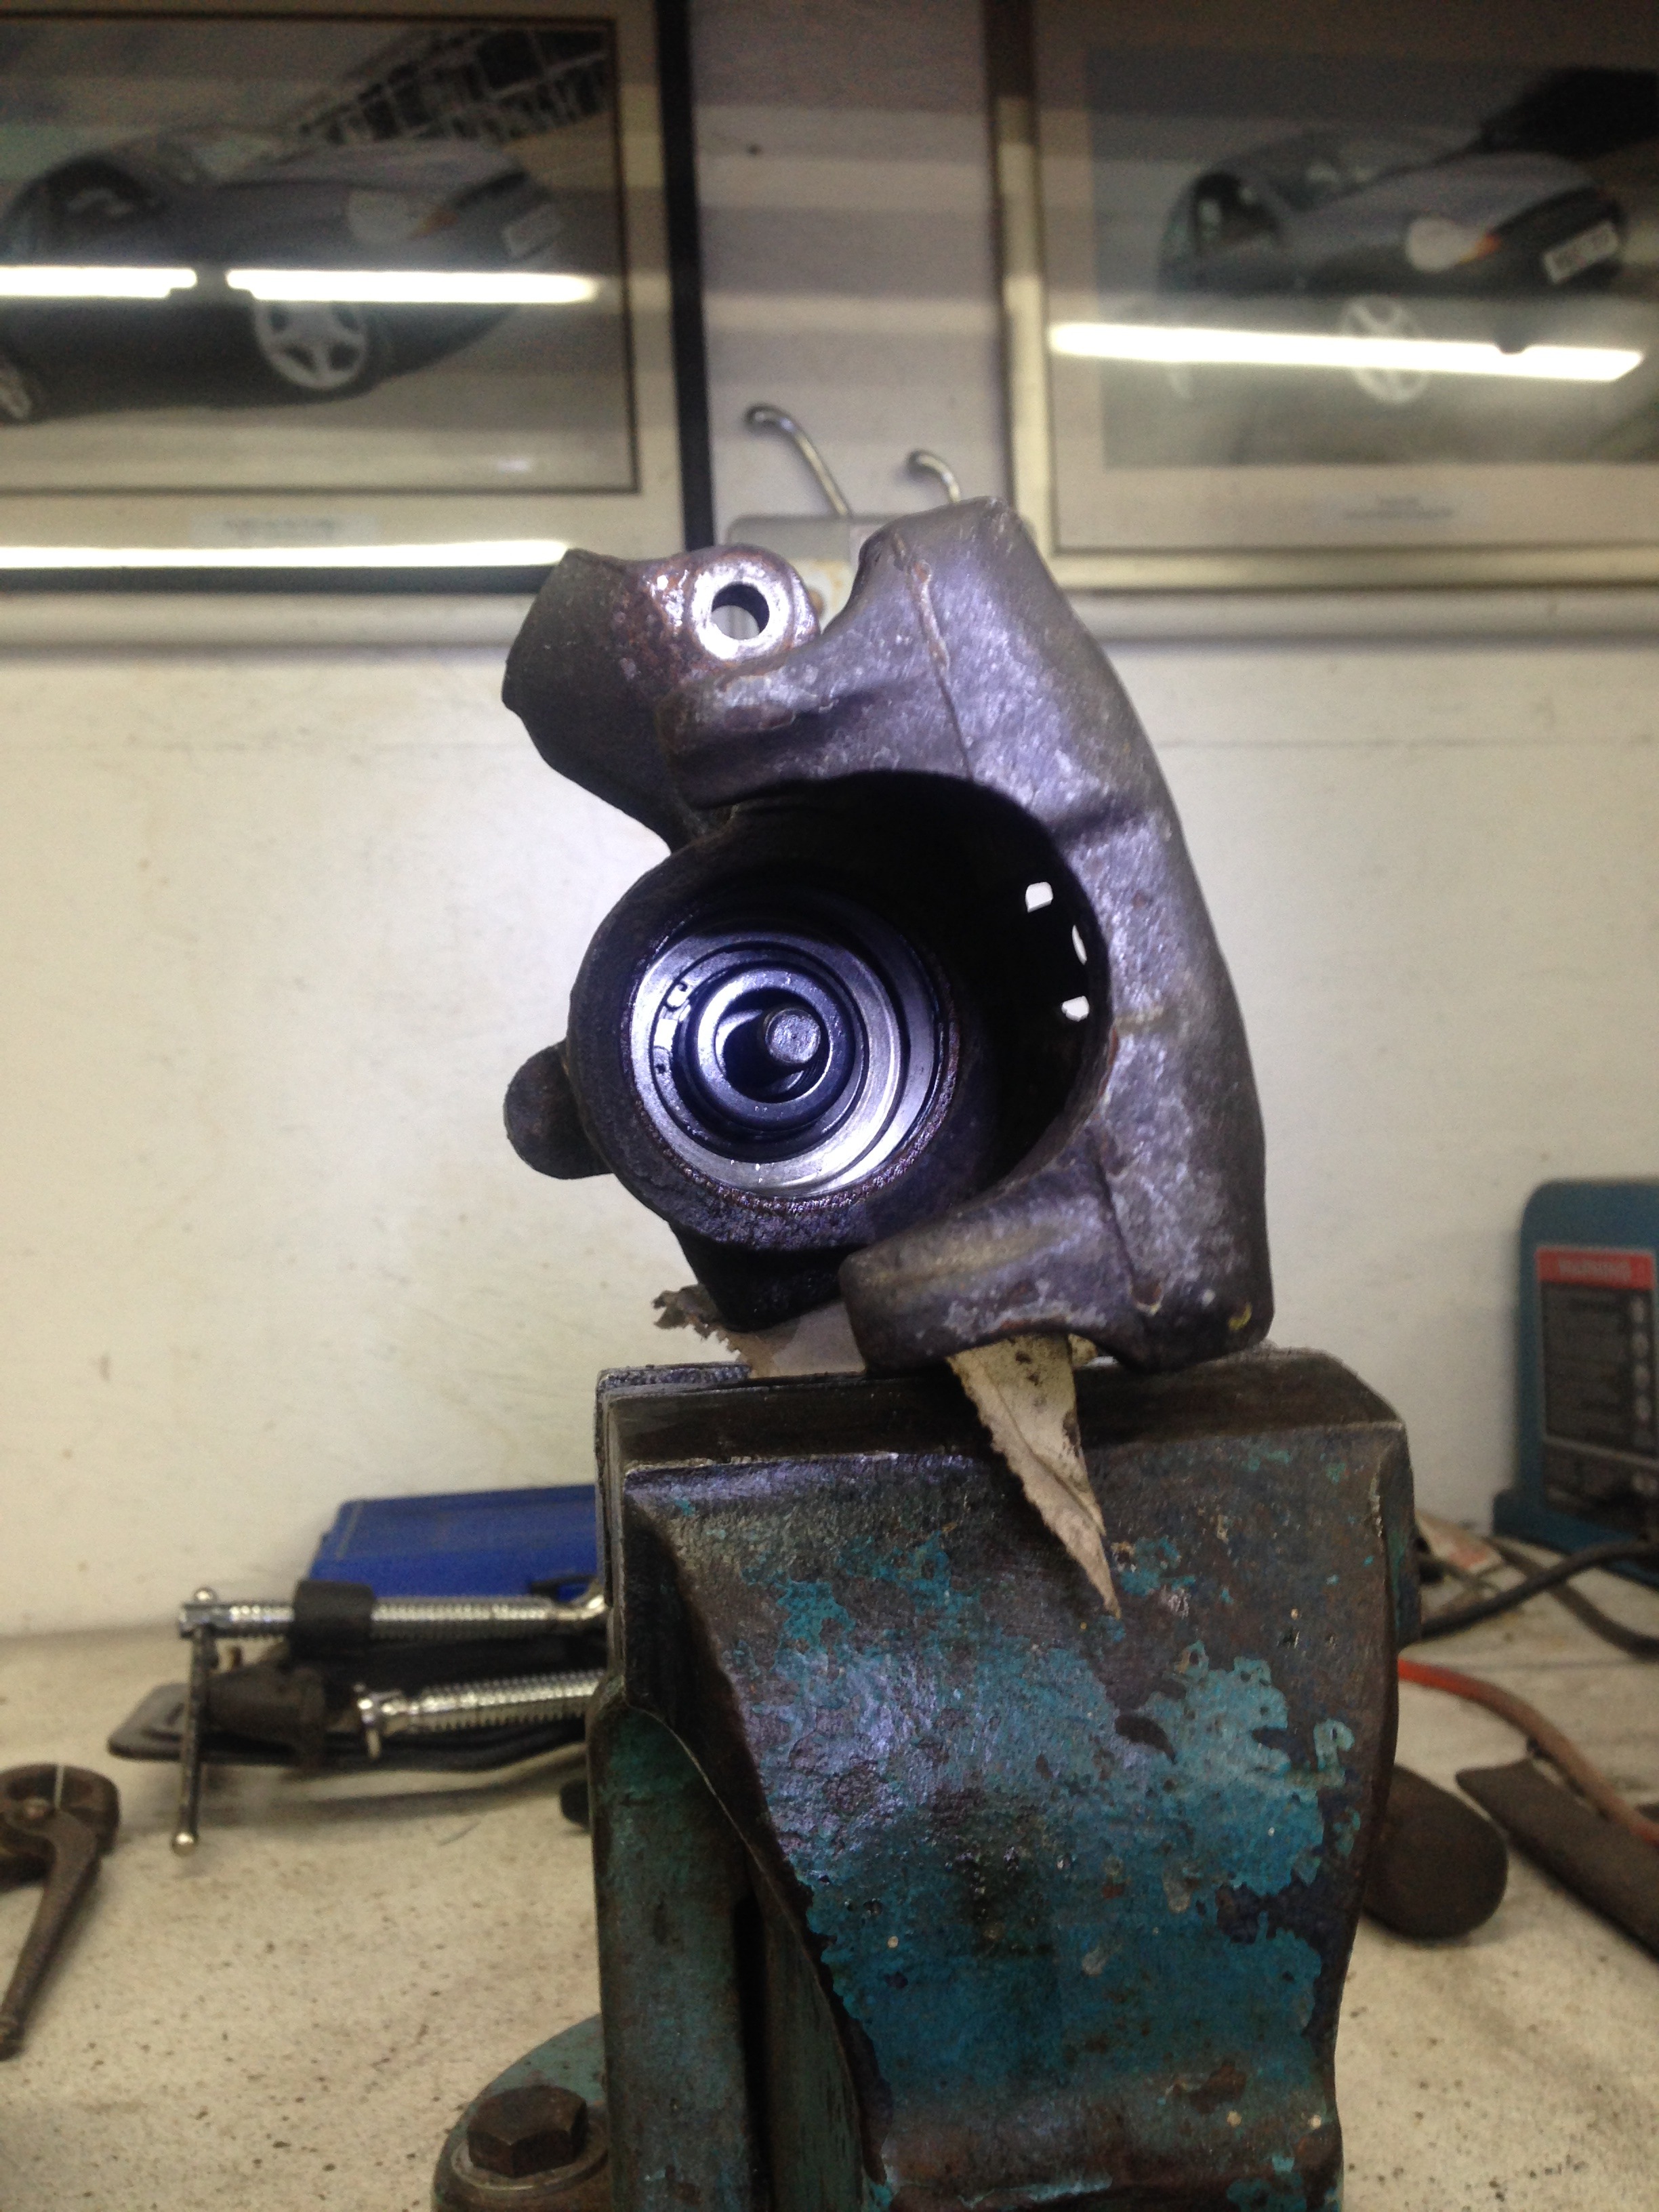
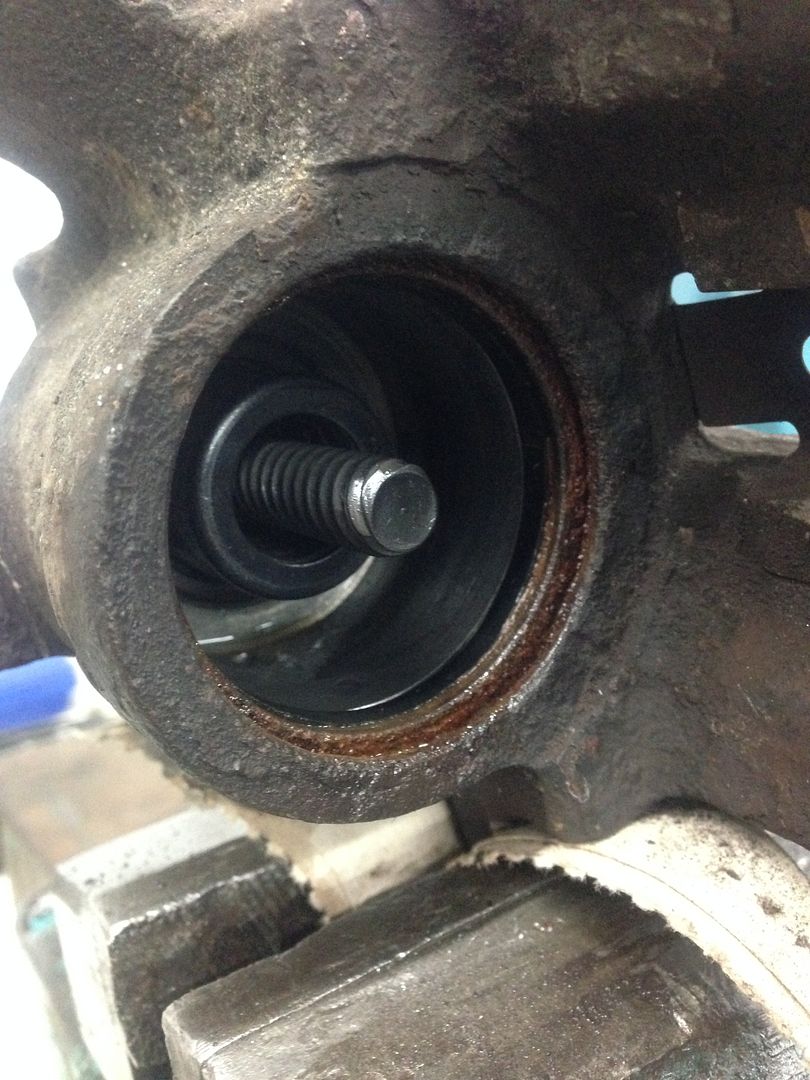
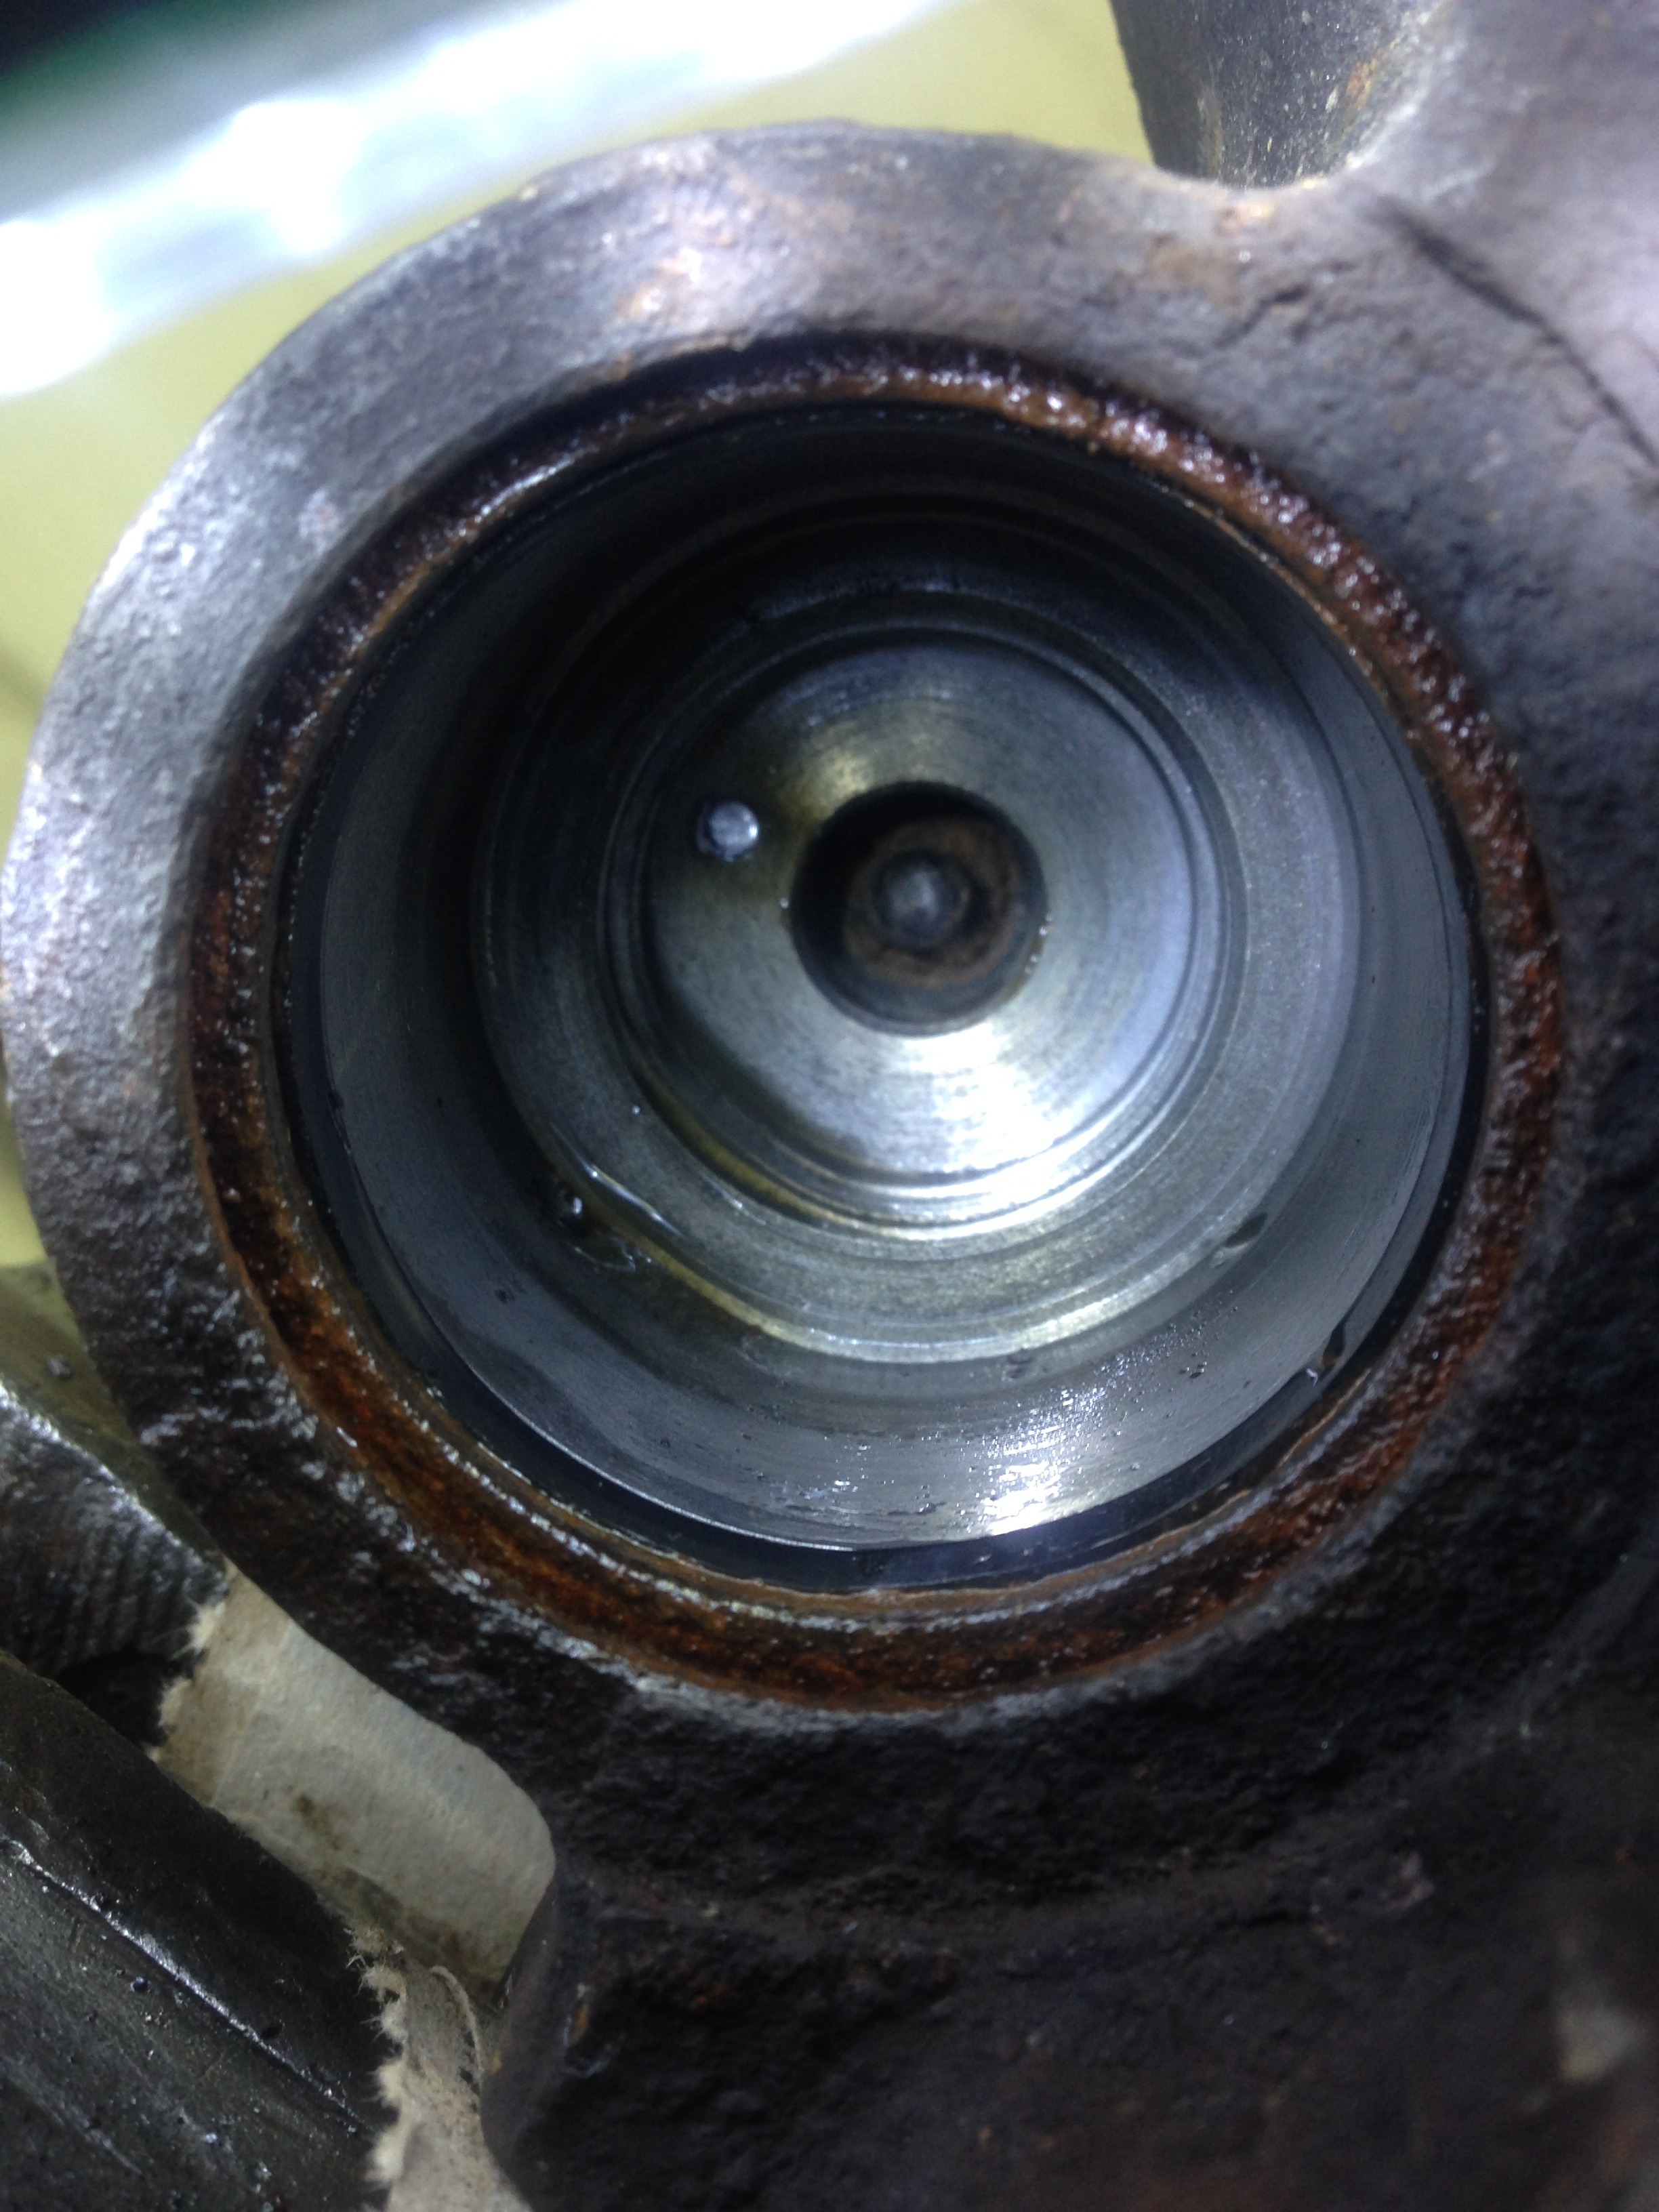
The problem part, this is the spindle that turns to push the piston out when the handbrake is applied, completely seized so no wonder it wasn't working. It was like this on both sides!
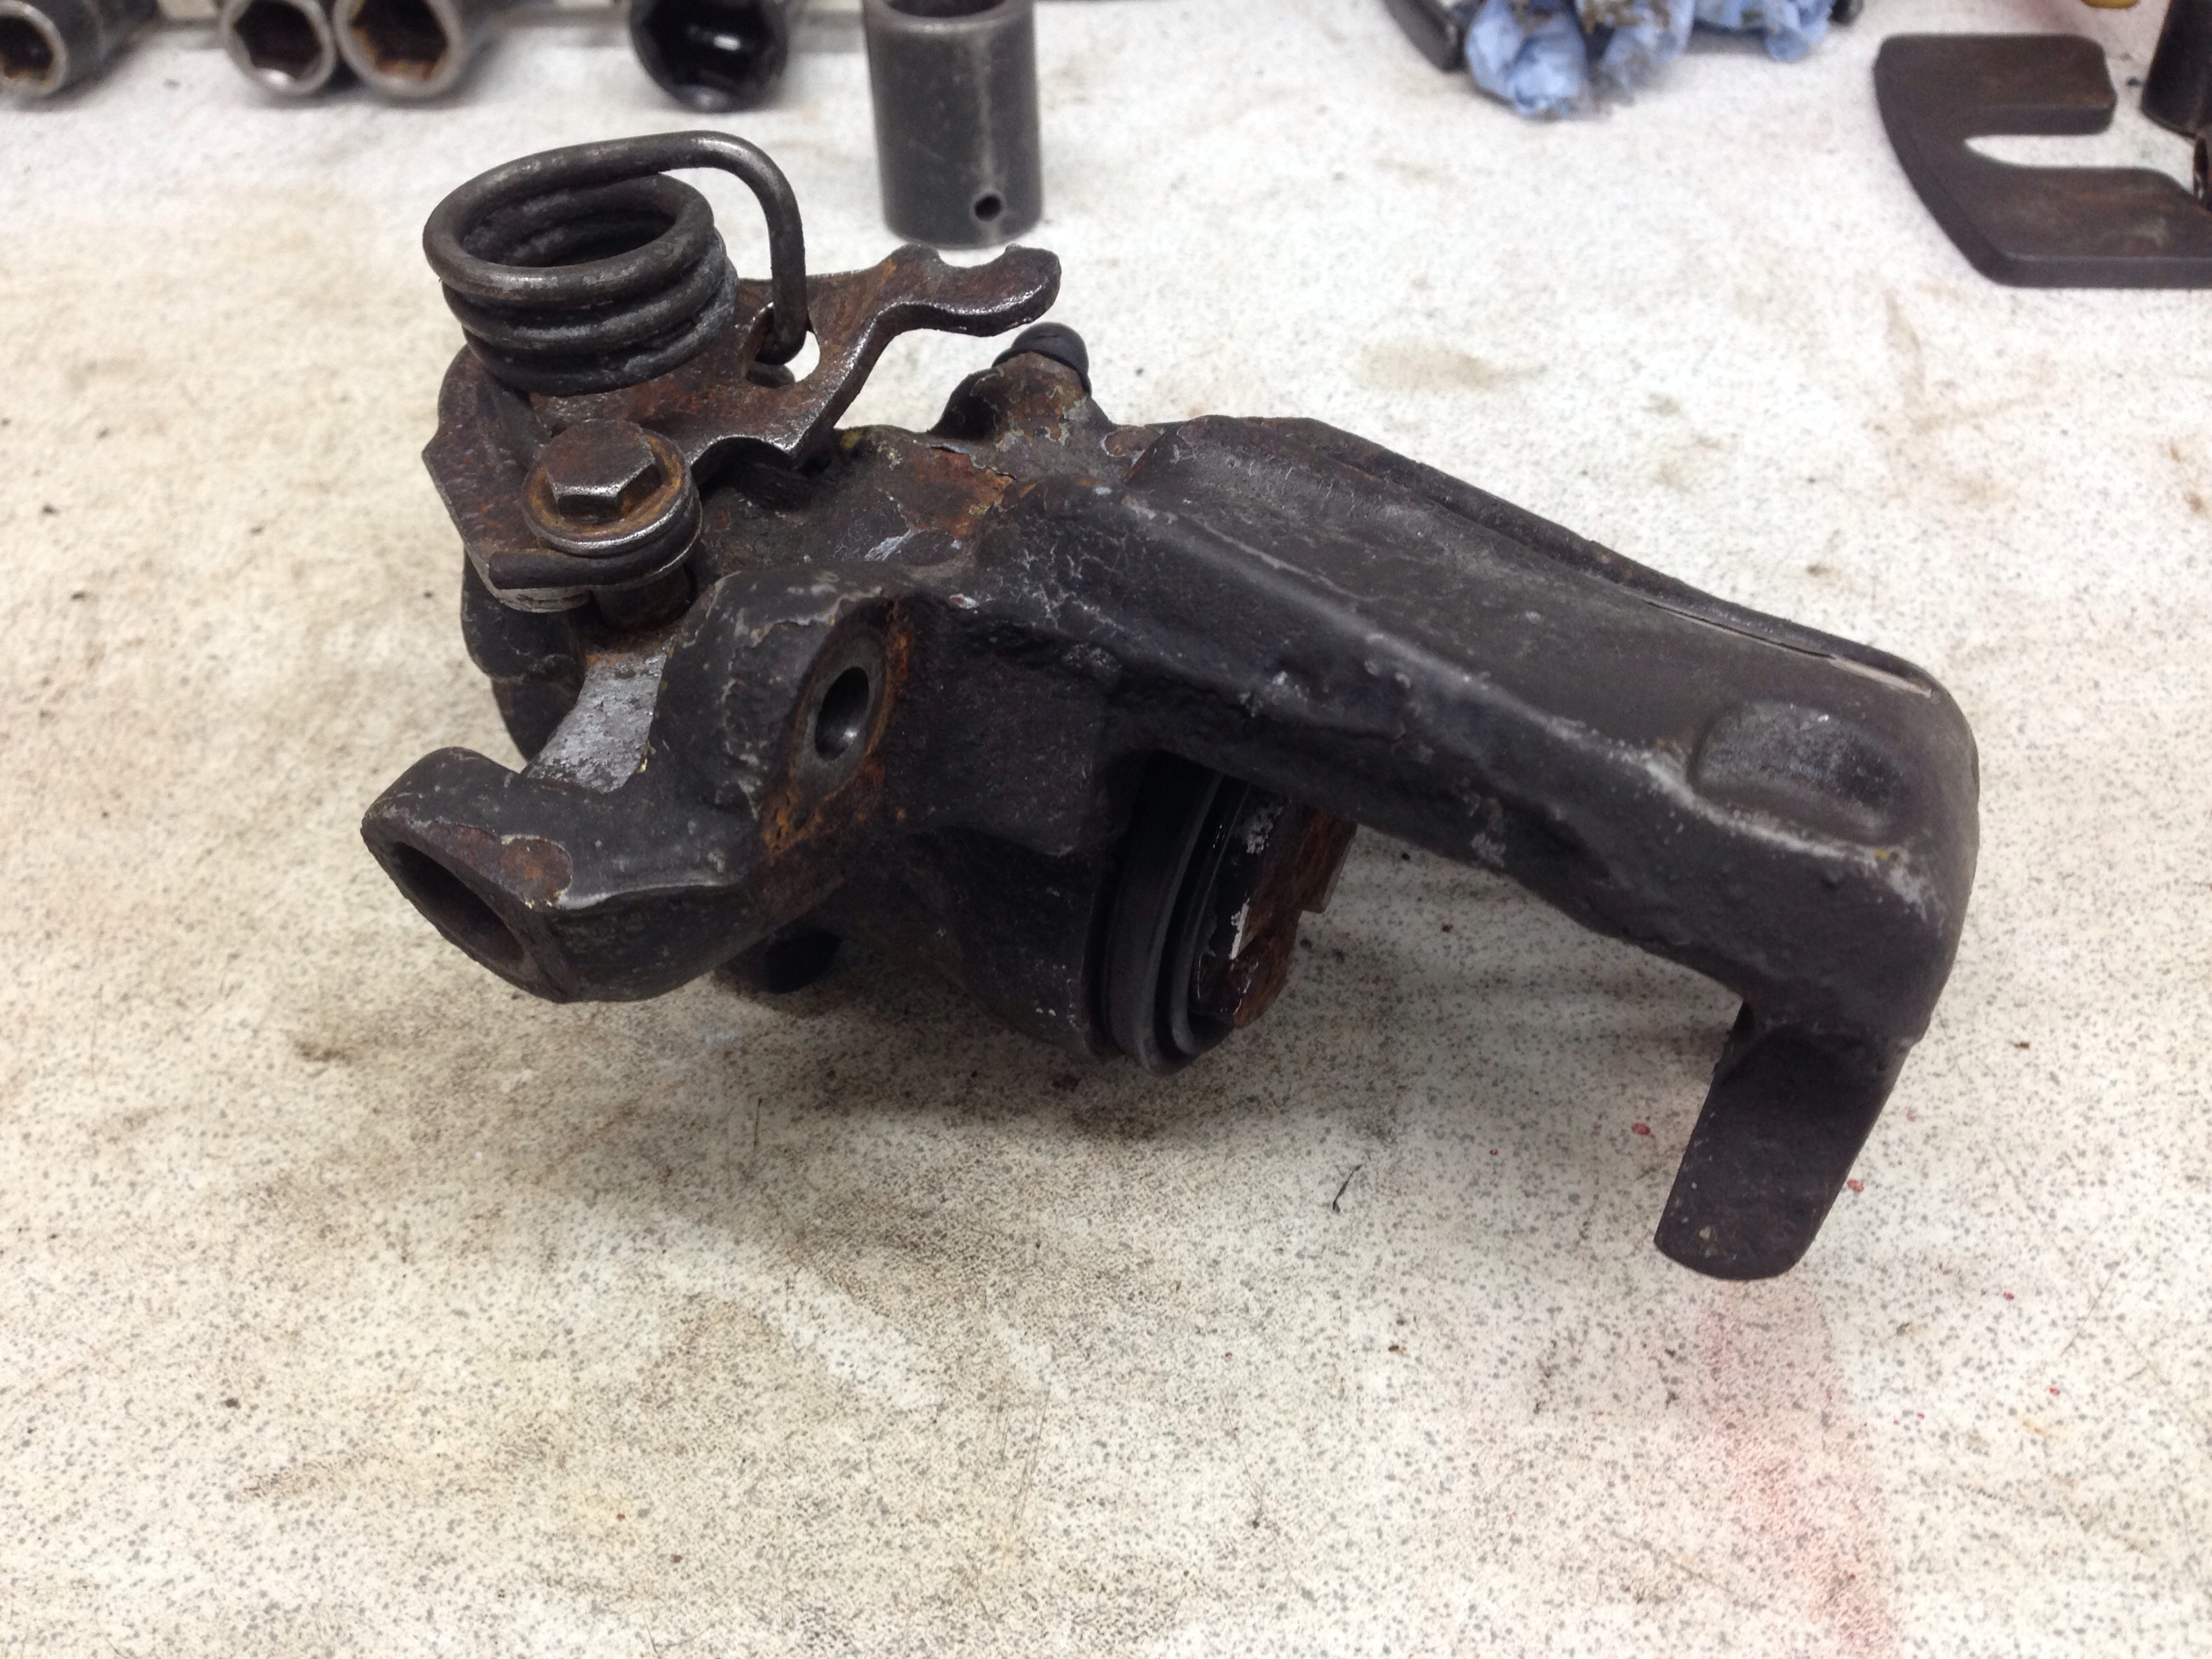
The calliper in bits

One of the callipers built back up, this time we'll greased so hopefully it won't seize again anytime soon.
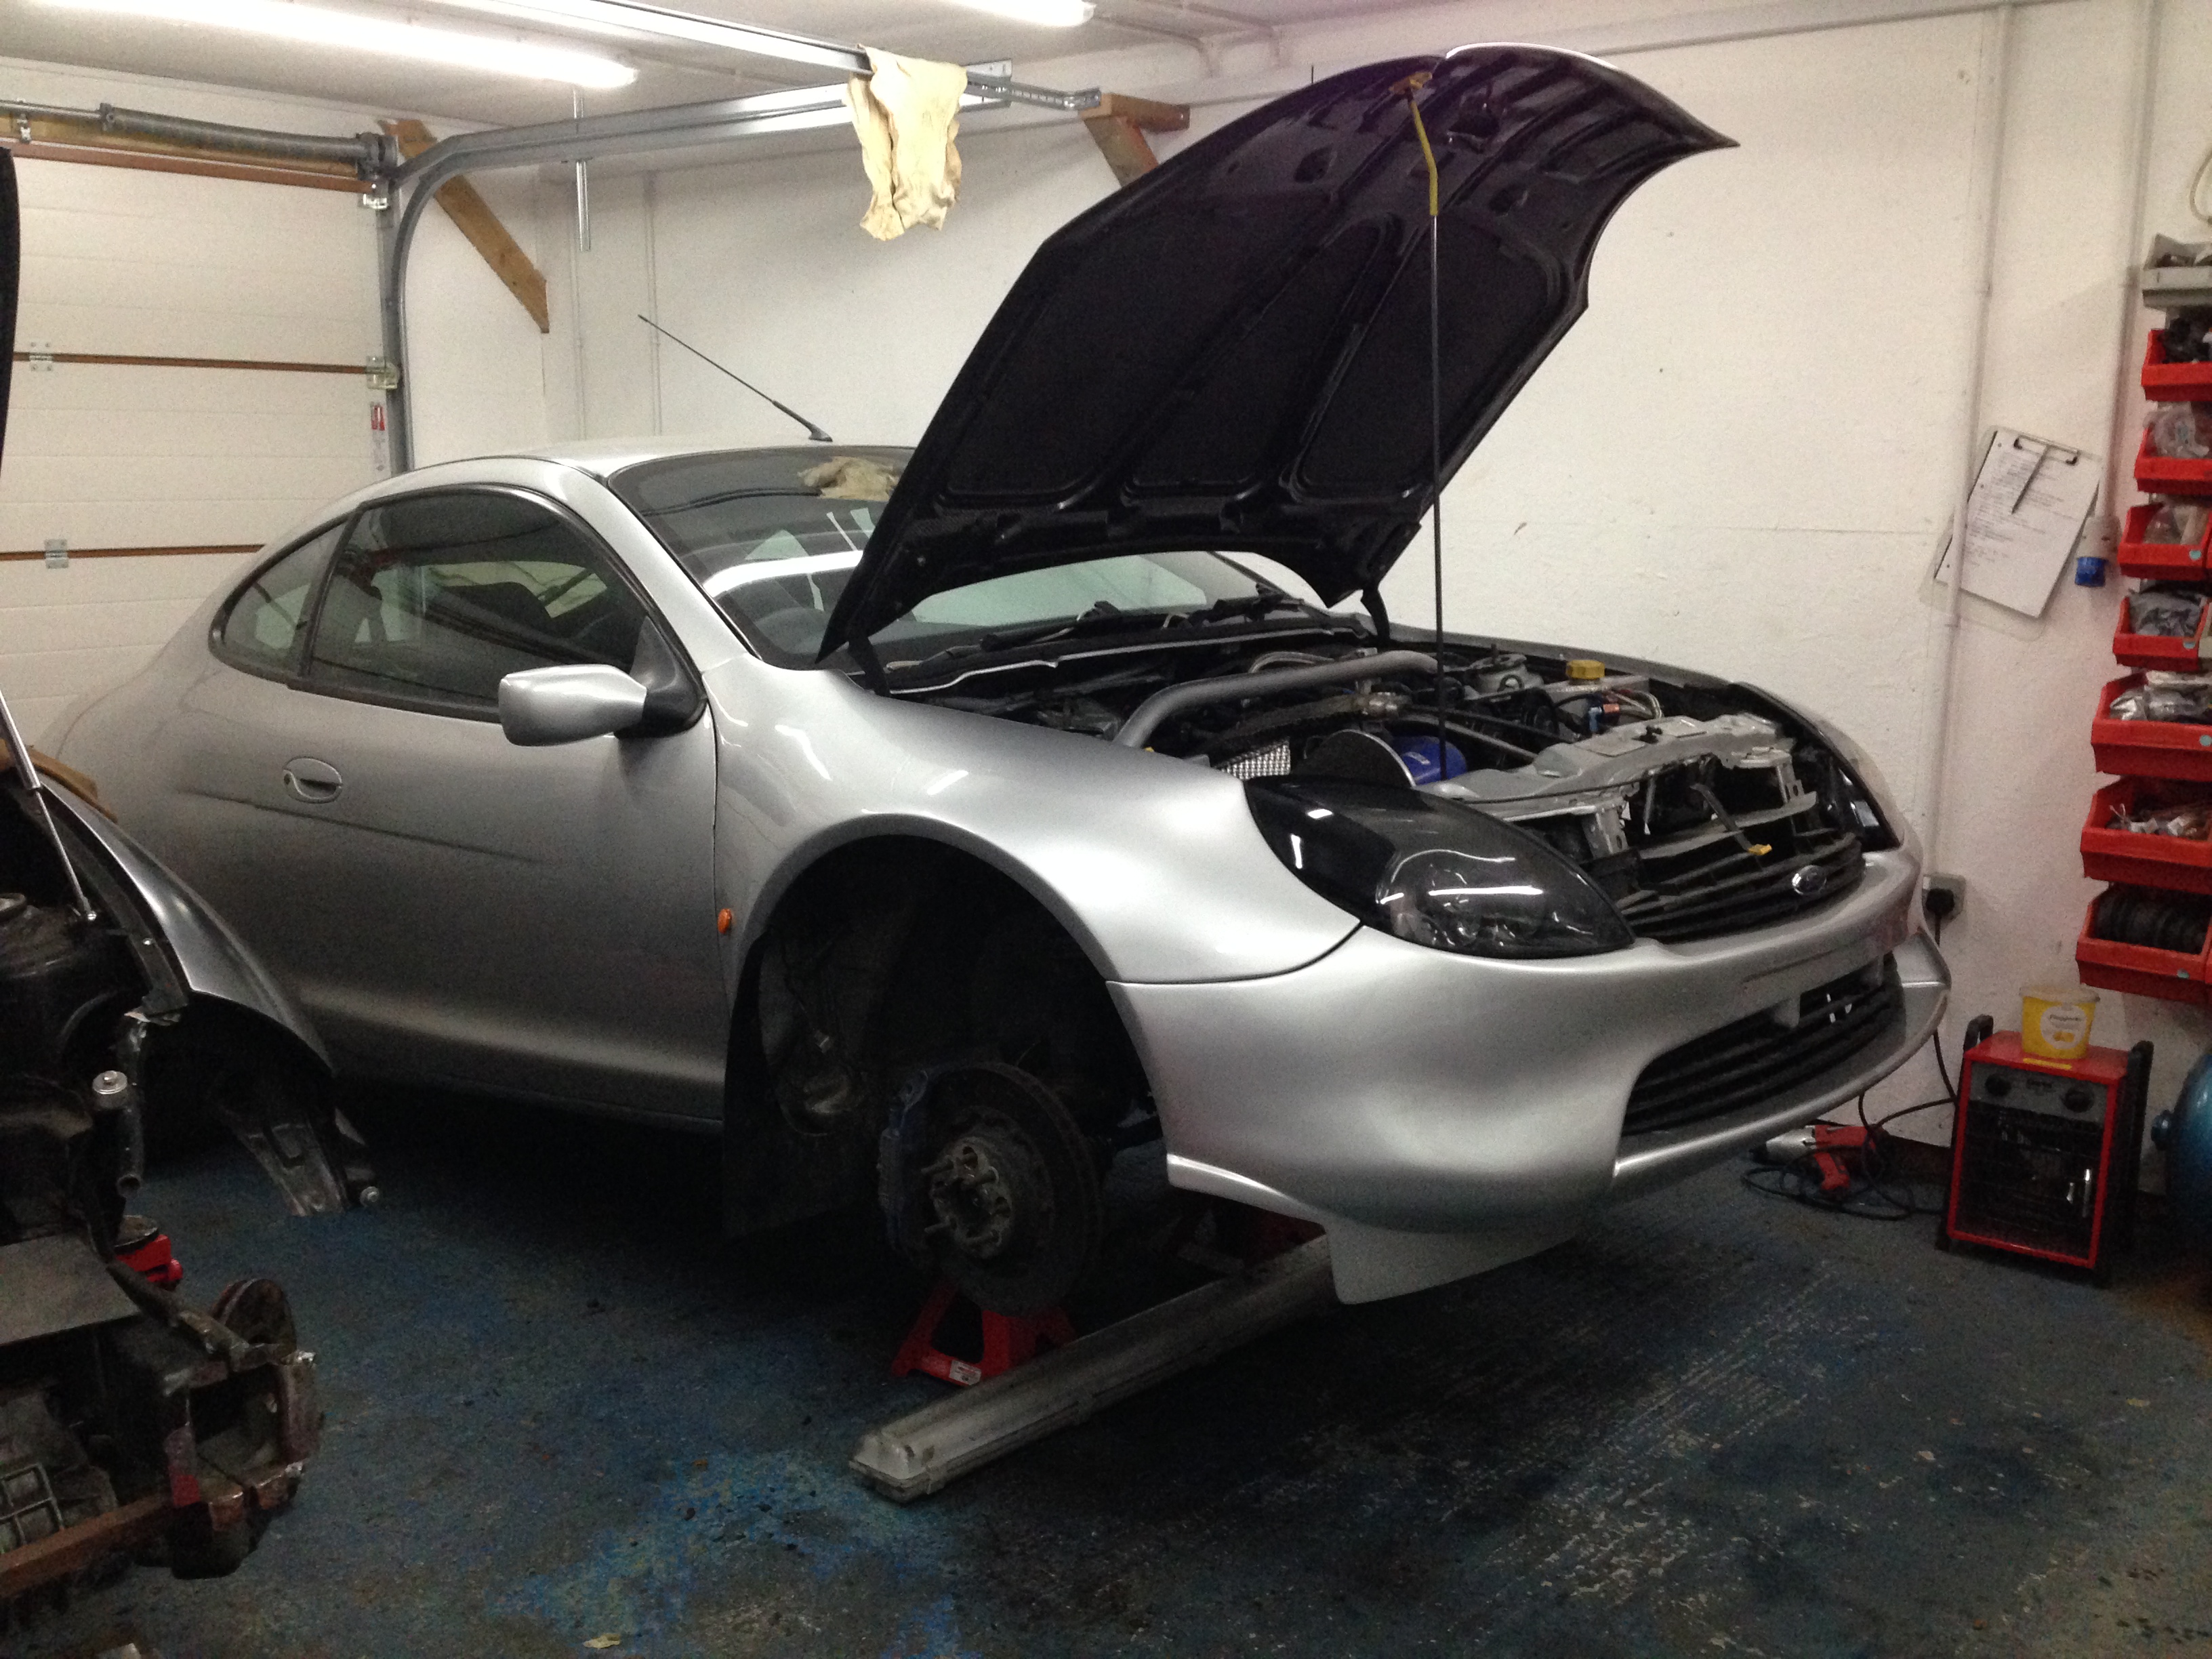
The car was then back in one bit and brought out of the garage
That's all for now, thanks for looking will get more photos up soon.


So a better look into the old shafts revealed they were much longer to fit he cars alterations and needed to be fitted back for the time being. So new CV's were bought and fitted to the old shafts and once repaired fitted back to the car


Once the driveshafts were sorted I turned my attentions to the rear brake callipers, the handbrake simply did not work. You applied it on flat ground and you could easily push the car by leaning on it!! So I set about taking the rear callipers apart to find out what was wrong
The strip down


The problem part, this is the spindle that turns to push the piston out when the handbrake is applied, completely seized so no wonder it wasn't working. It was like this on both sides!


The calliper in bits

One of the callipers built back up, this time we'll greased so hopefully it won't seize again anytime soon.

The car was then back in one bit and brought out of the garage

That's all for now, thanks for looking will get more photos up soon.
29-10-2015, 12:34 AM
#23
Wow,what a bodge fest.you expect some little jobs when buying somebody else's modified car but thats been worked on by someone or people who shouldn't be touching spanners.
Good on you for working through it and improving it as you go.
I had the same with an rs1600i I bought,every time I took something apart to fix it I found more man made bodges.
Good luck with it,you're on the right road.
Good on you for working through it and improving it as you go.
I had the same with an rs1600i I bought,every time I took something apart to fix it I found more man made bodges.
Good luck with it,you're on the right road.
 29-10-2015, 10:06 PM
#25
PassionFord Regular
Thread Starter
Thanks for the comments guys, it has been tiring to constantly fix a problem but find 3 more! Getting there slowly with where I am with the car now. Will get some of the progress up shortly.
Thanks
Thanks
31-10-2015, 02:29 PM
#27
PassionFord Regular
Thread Starter
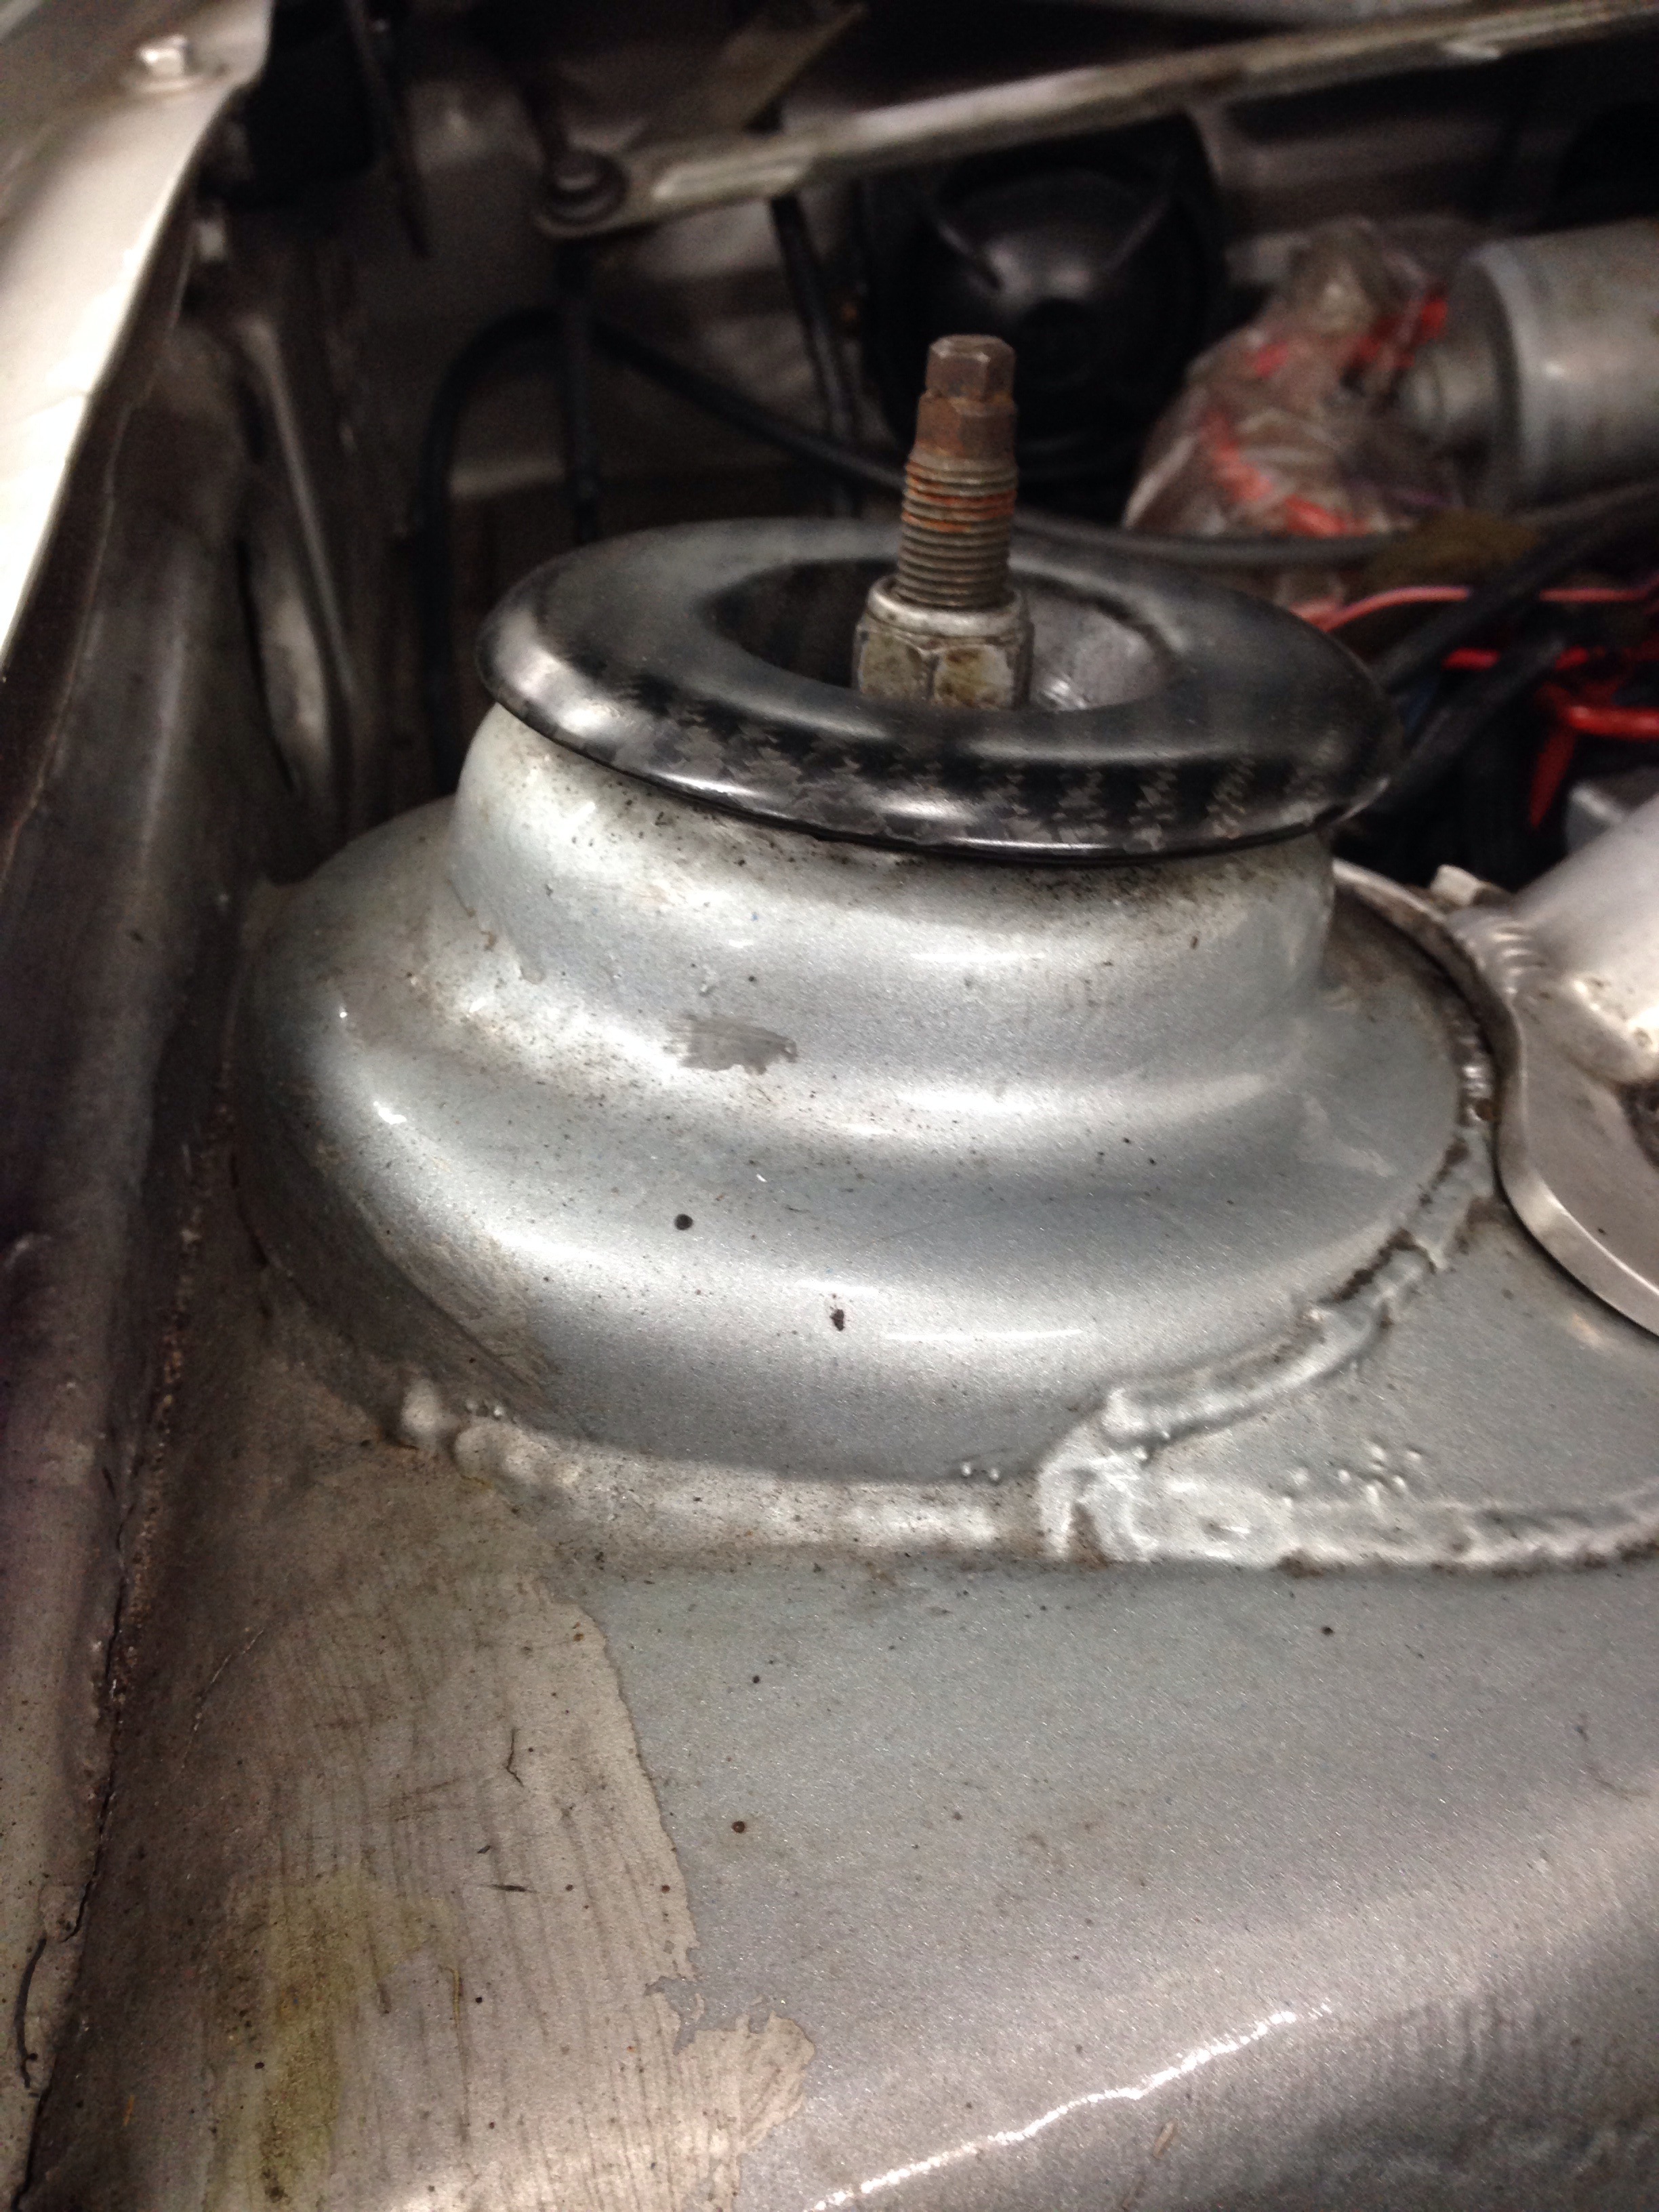
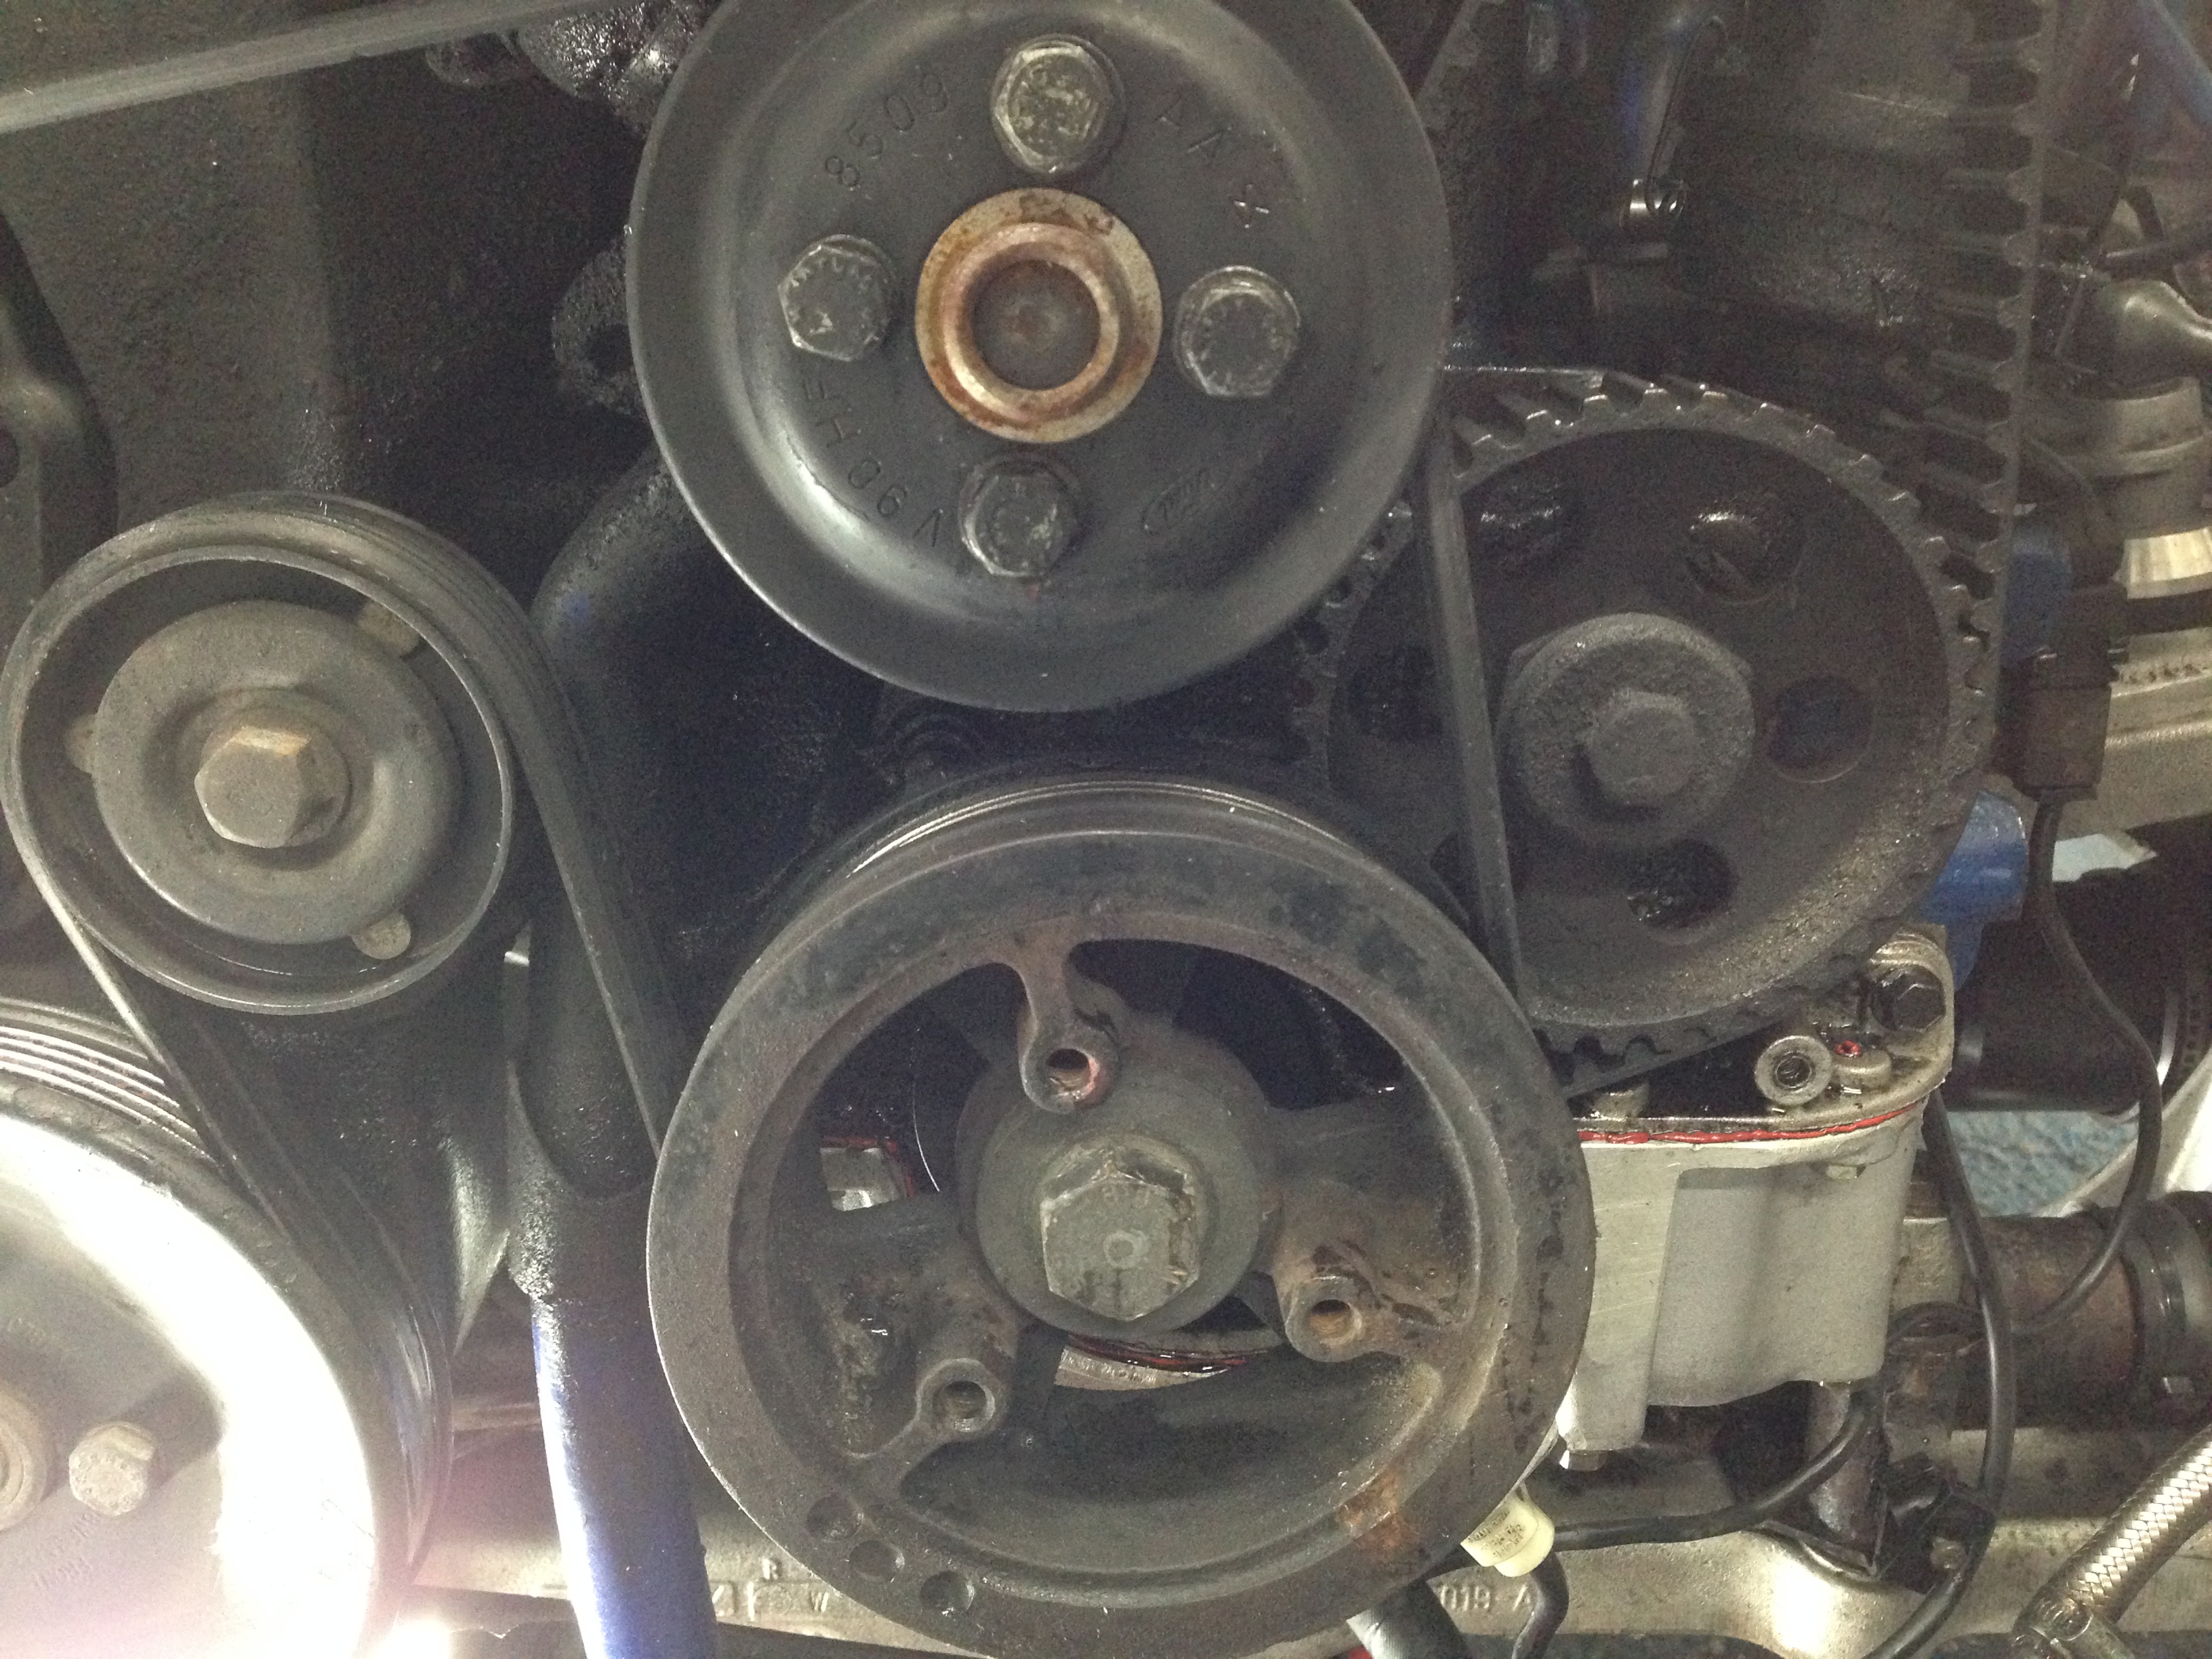
So on to another update.. I didn't drive the car between the last stage and this one as I was starting to get fed up with the fact it was still leaking oil everywhere. So made the decision to get the front of the engine stripped down and change some of the suspect engine seals
Back in the workshop
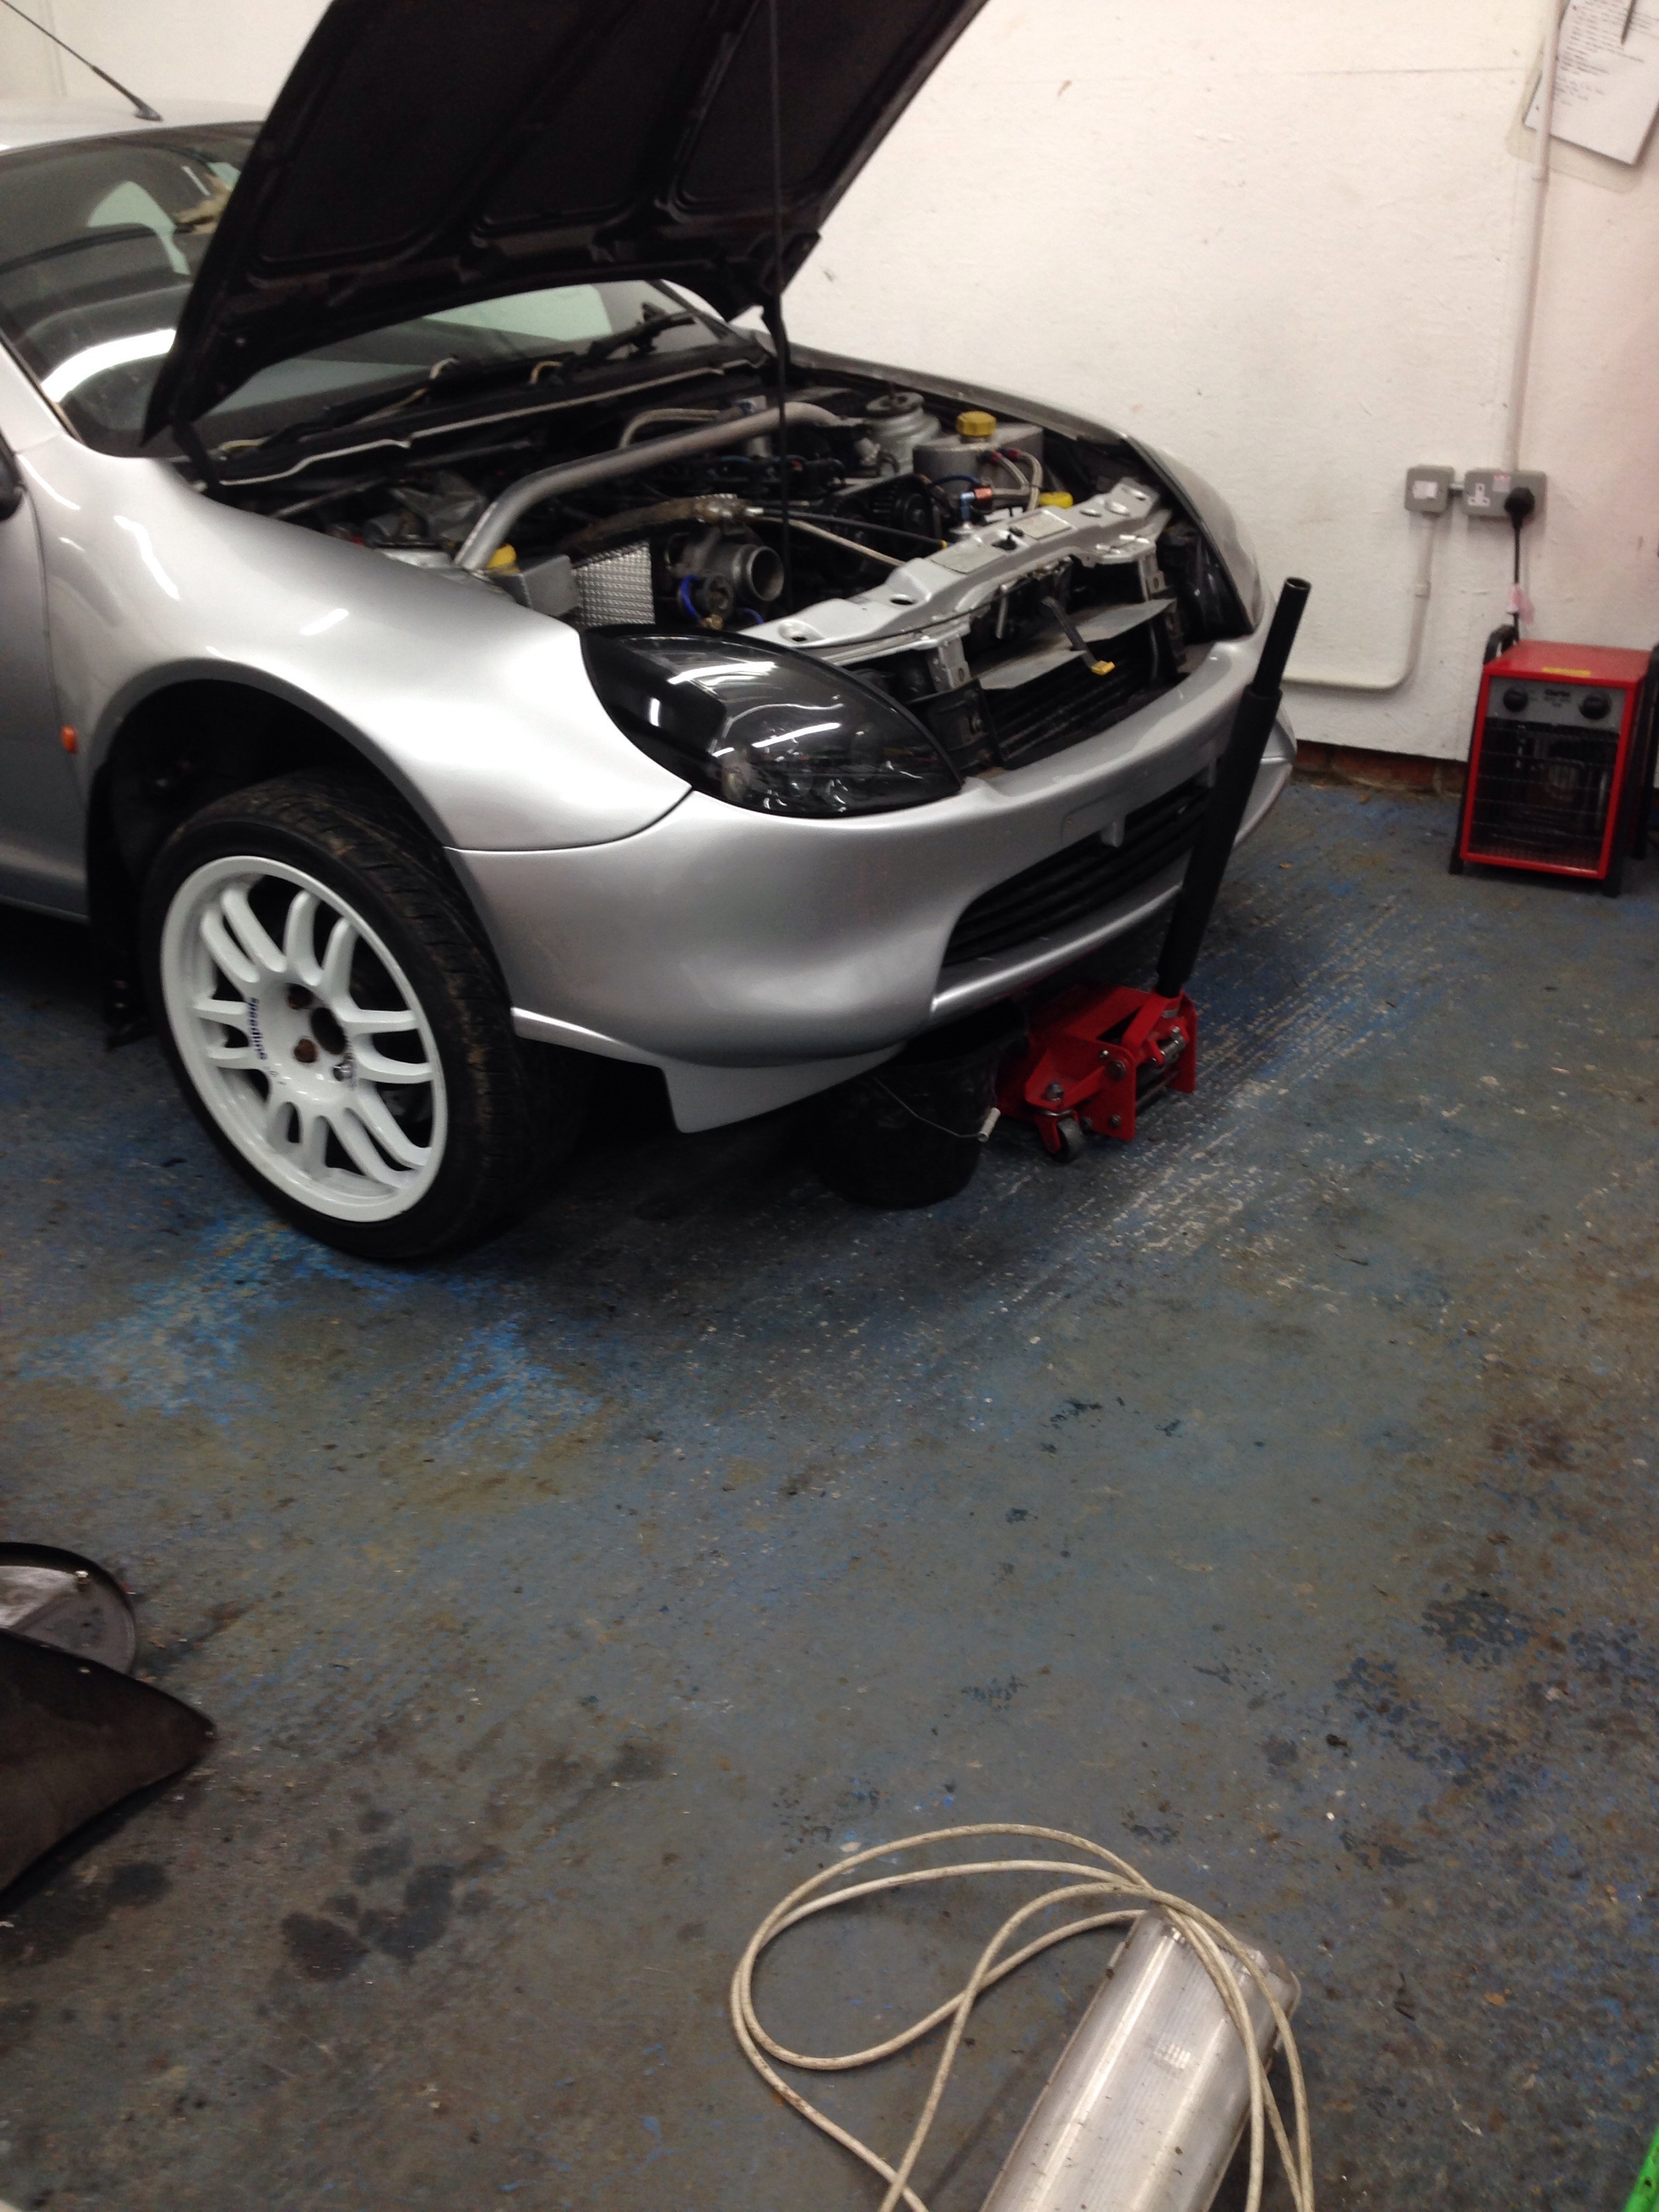
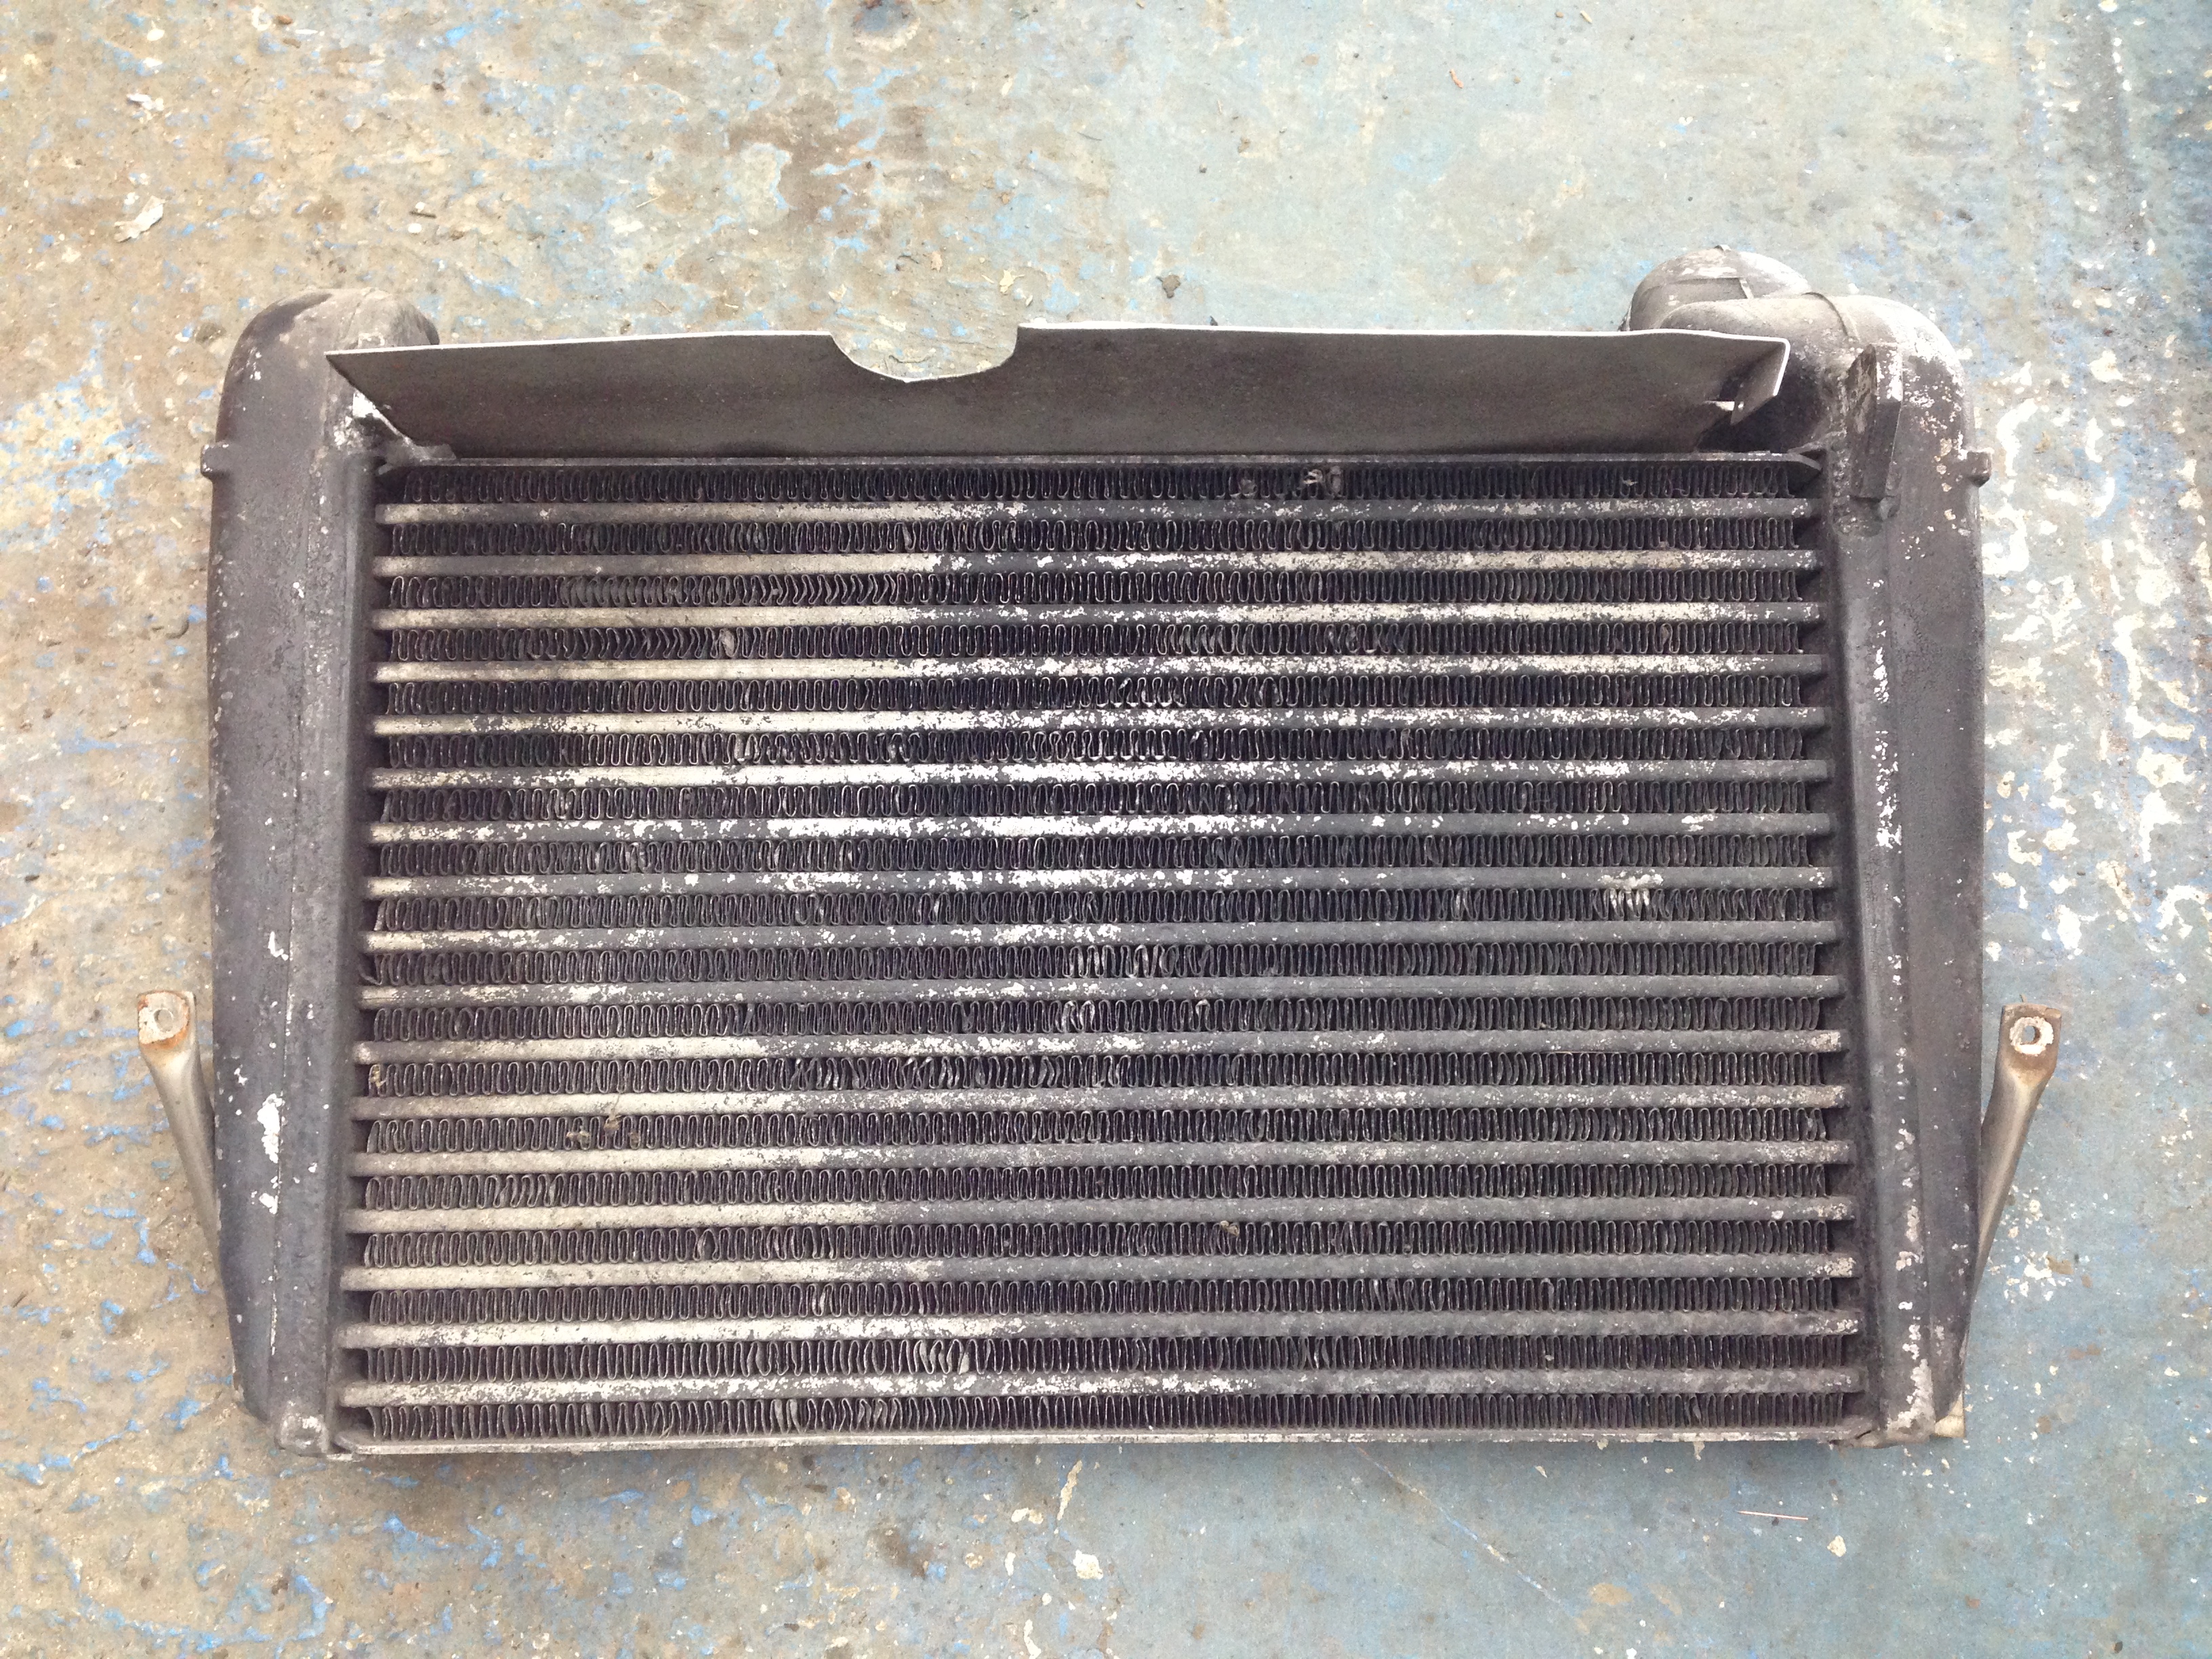
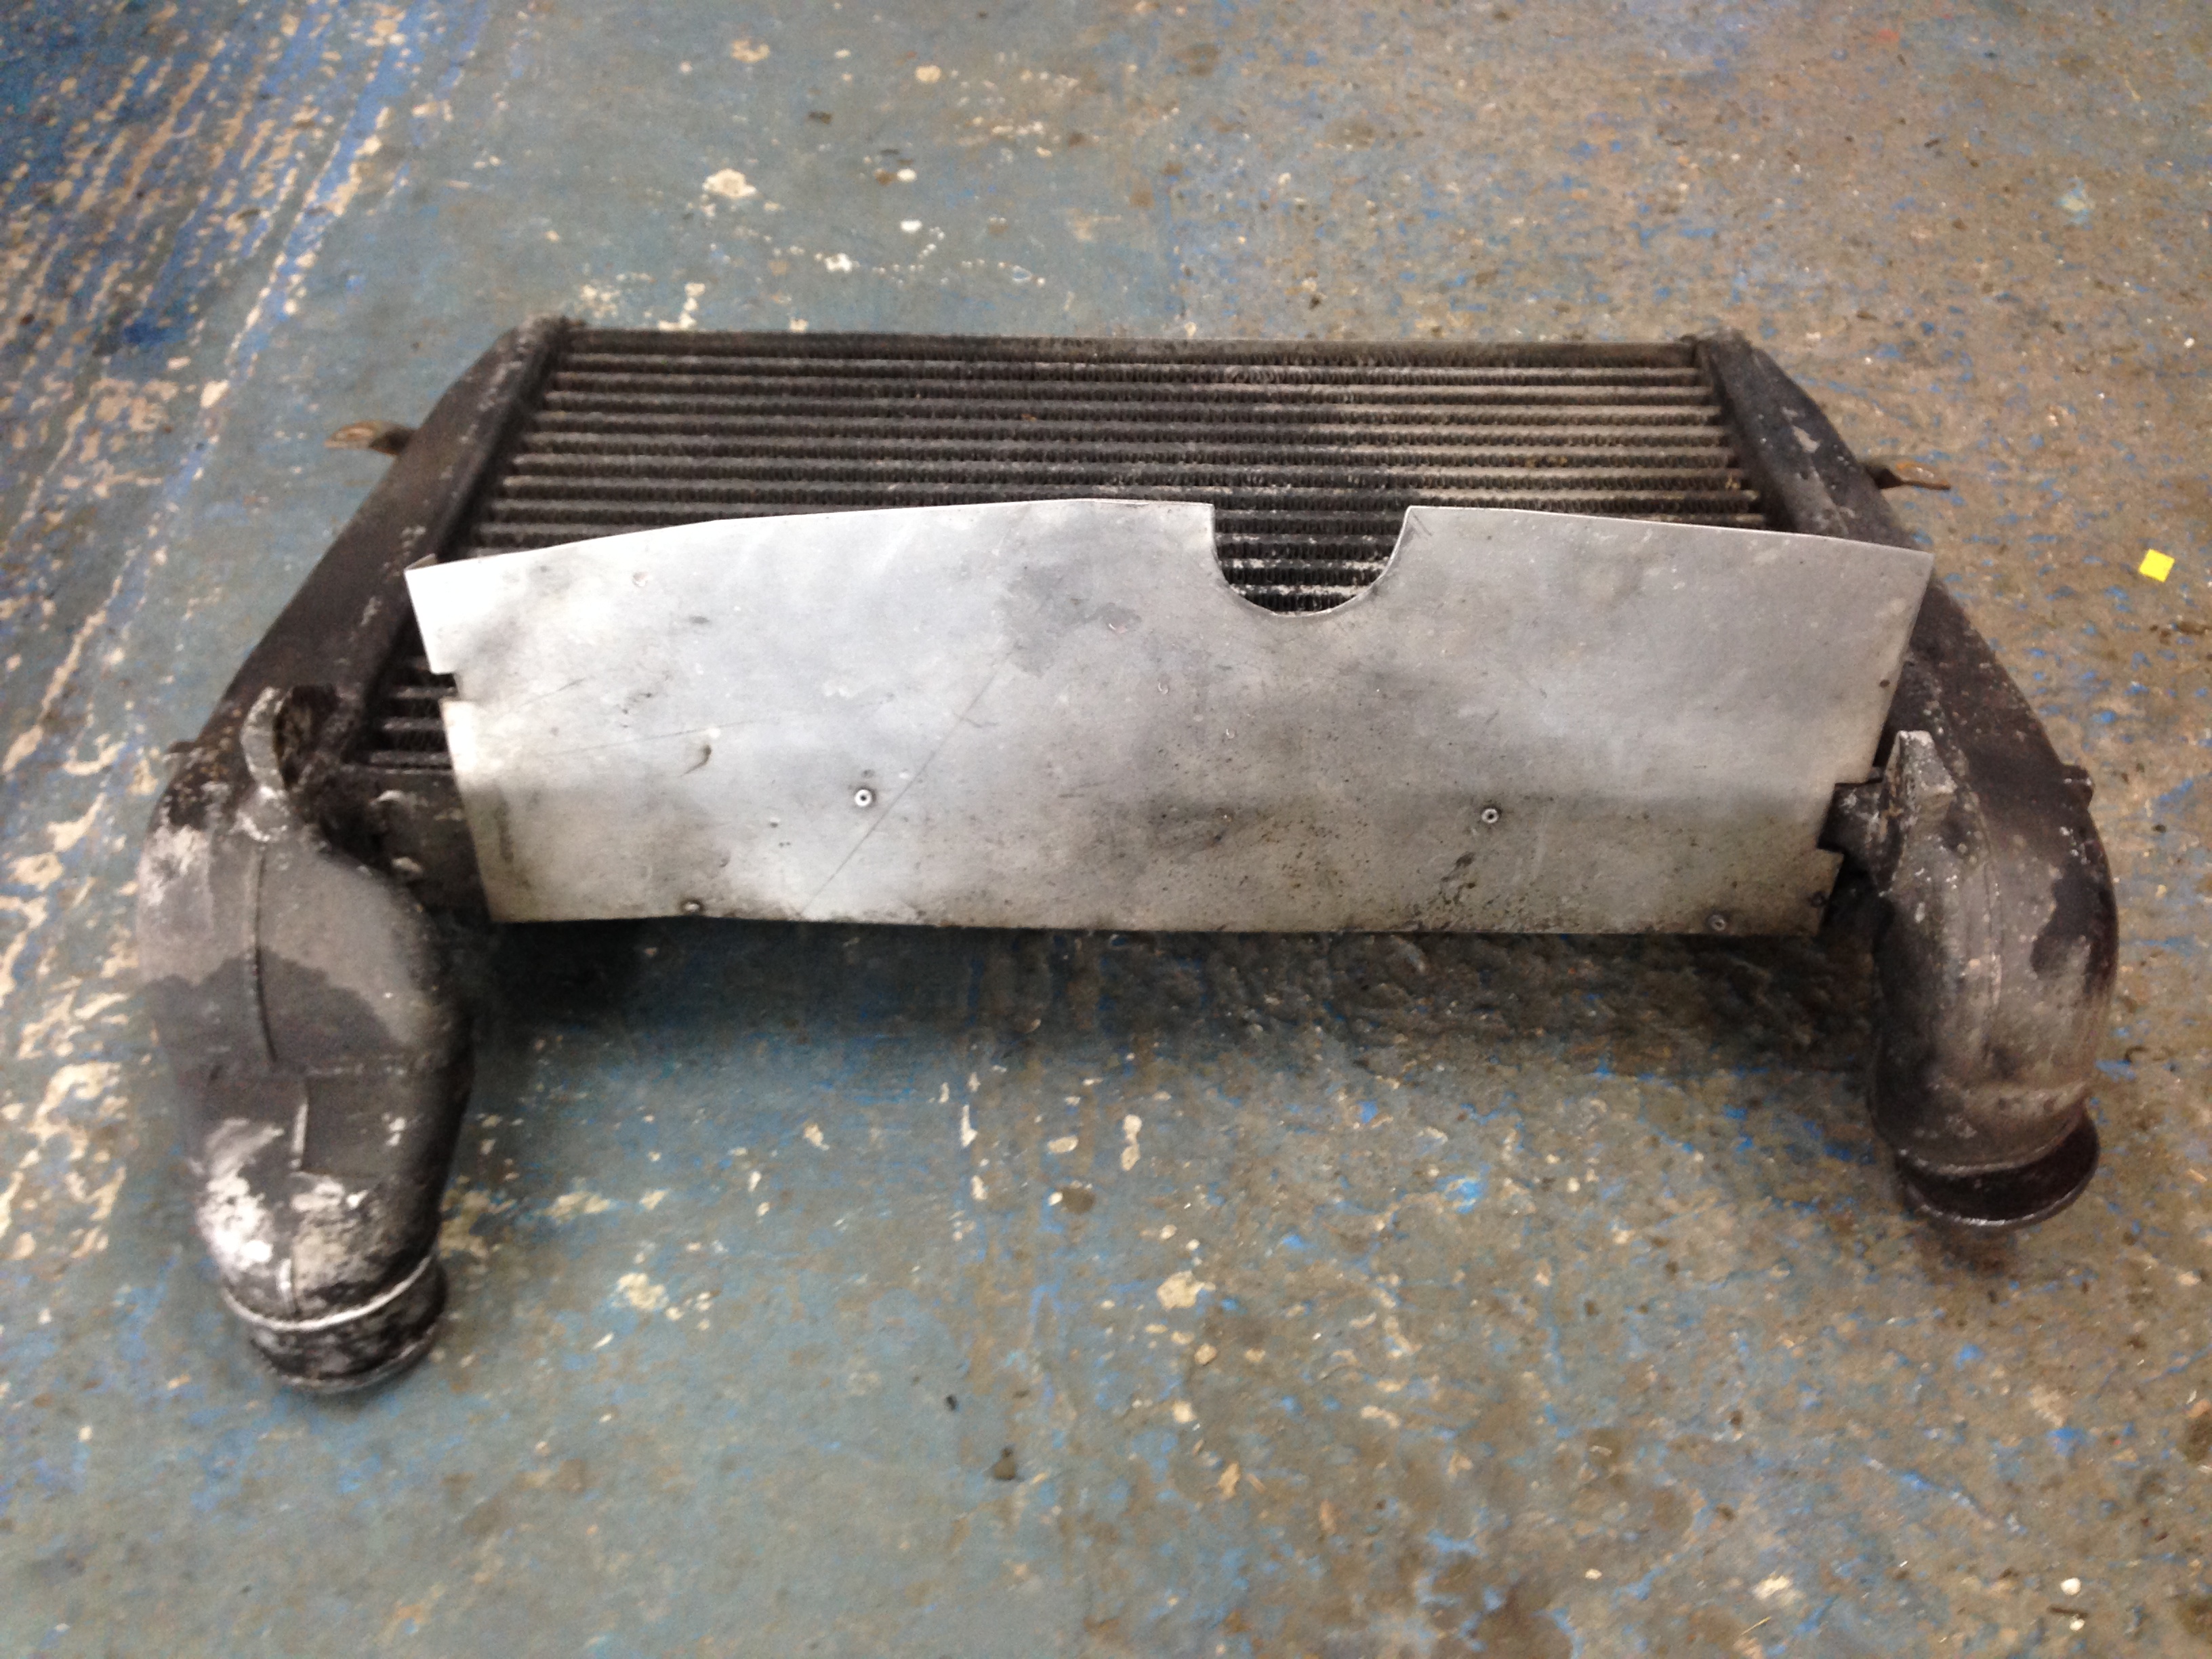
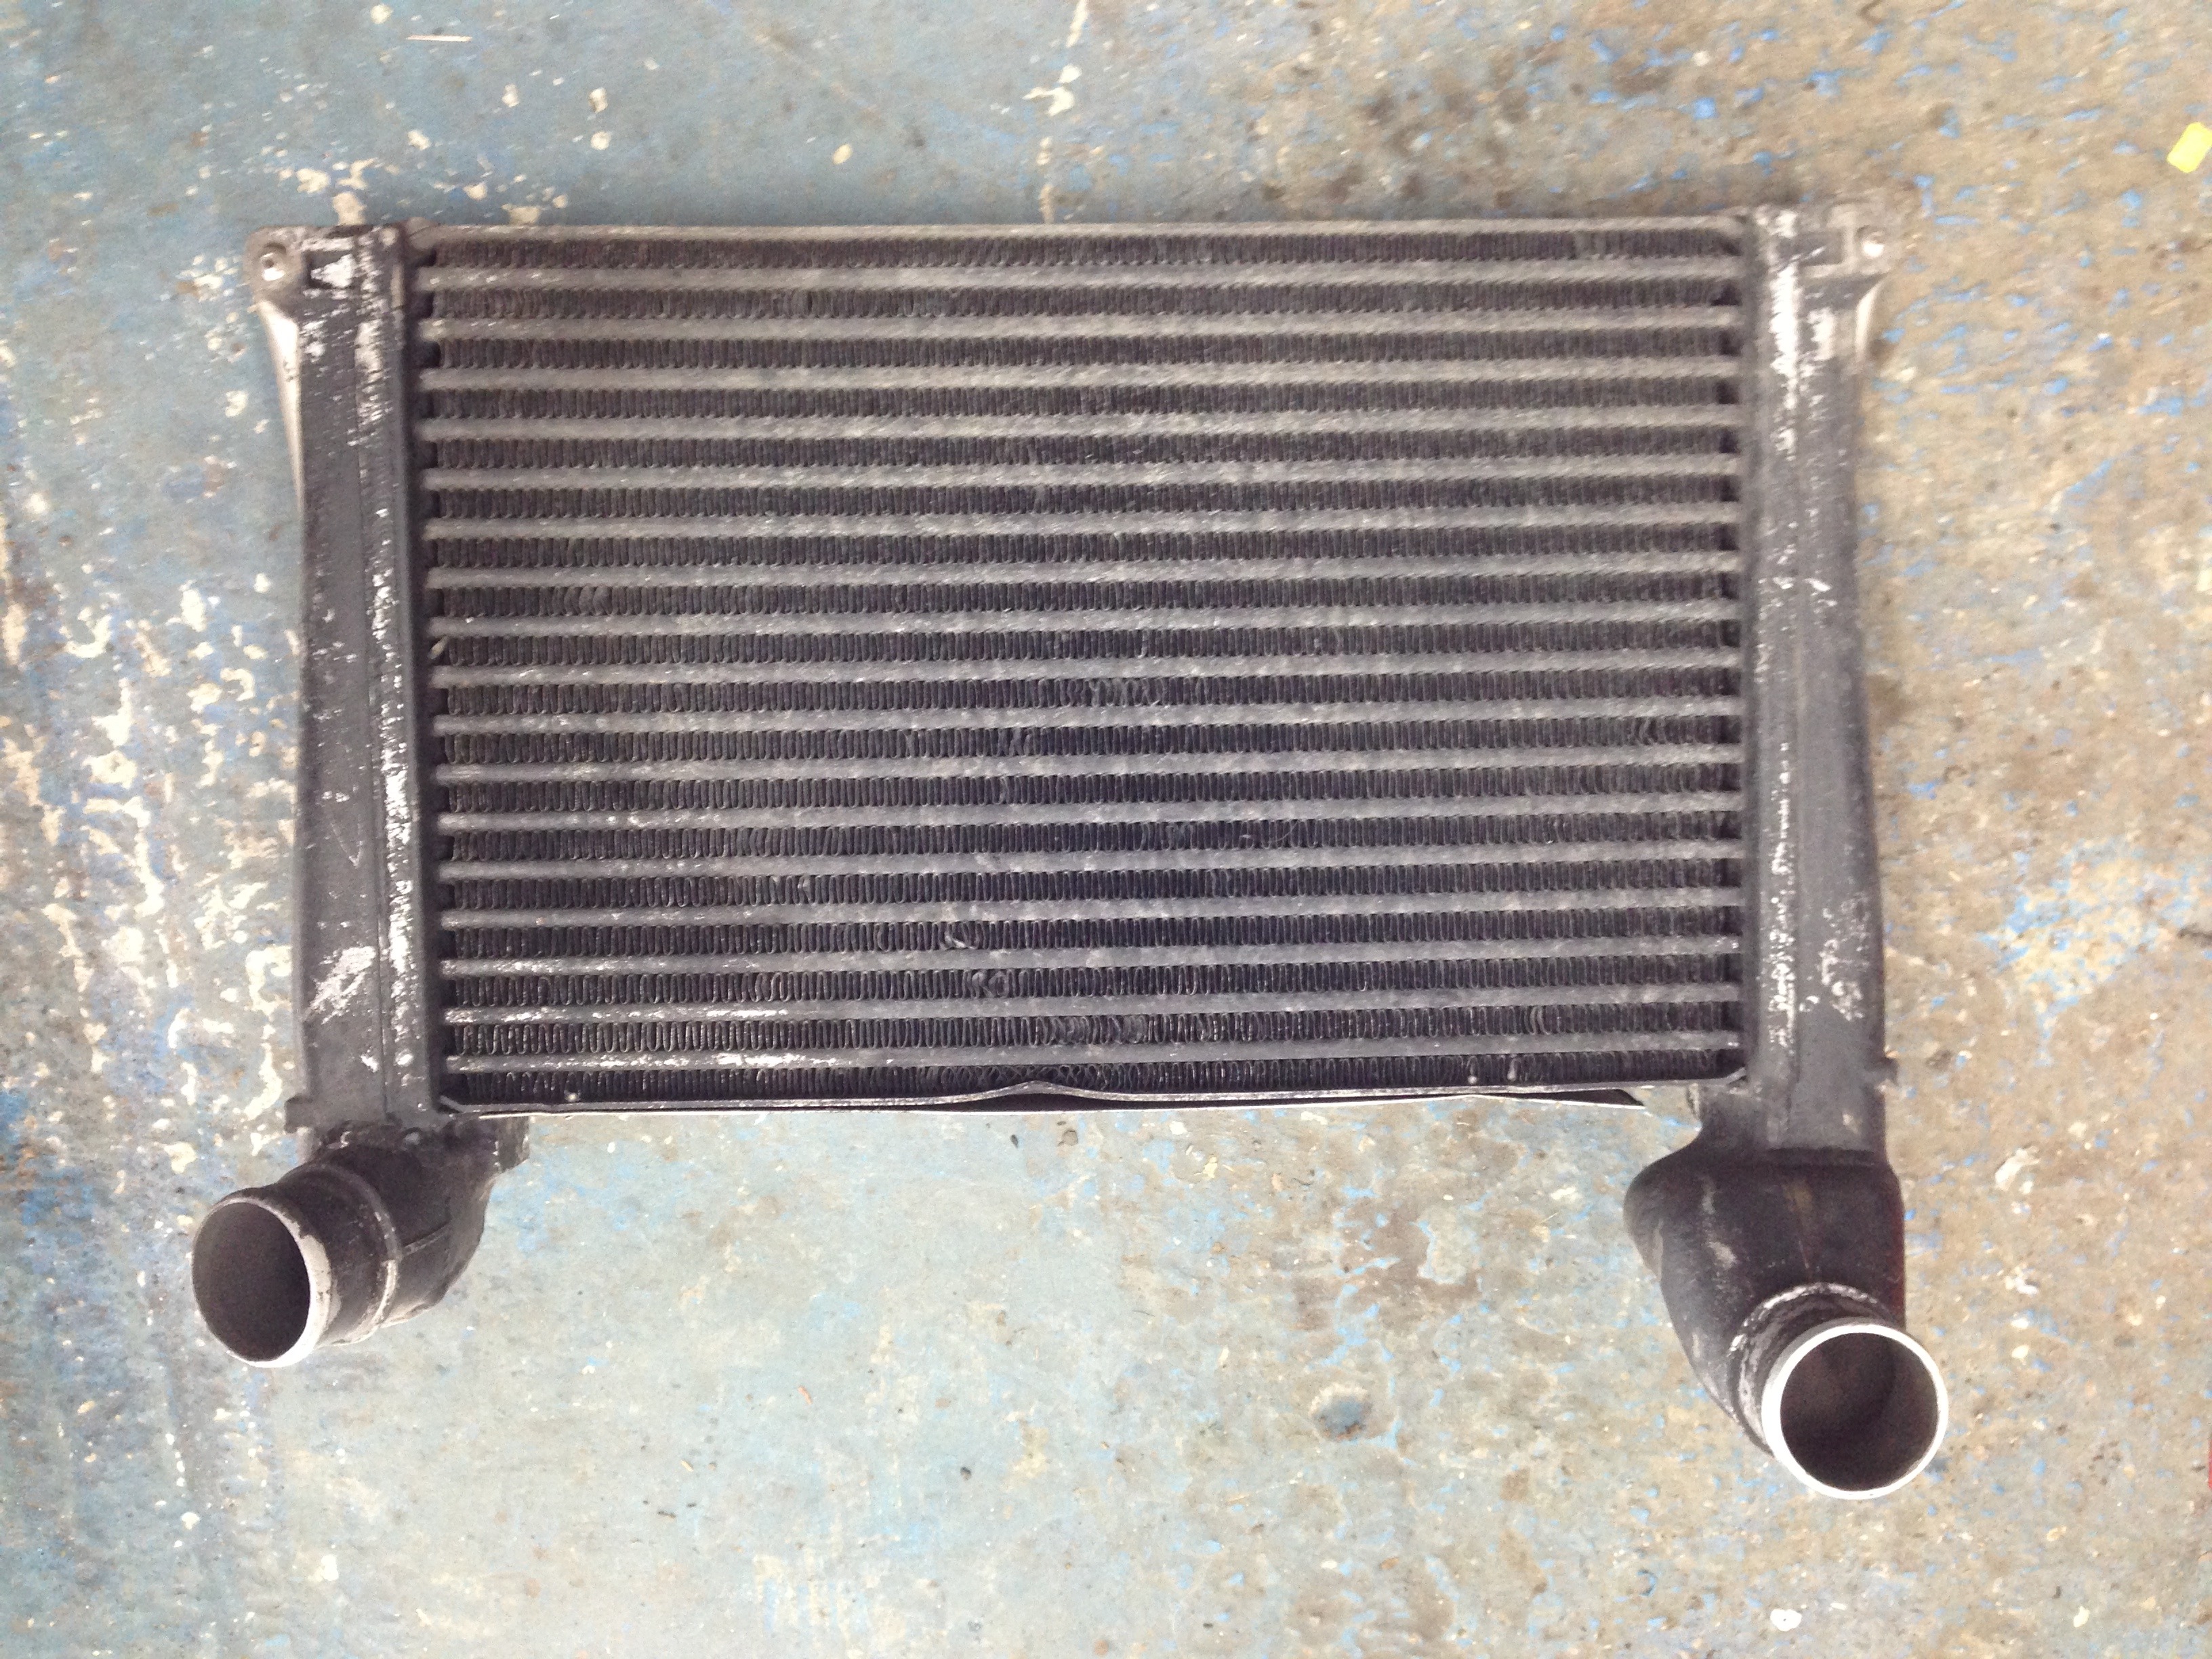
Strip down - intercooler out and rad although I don't have any photos of that
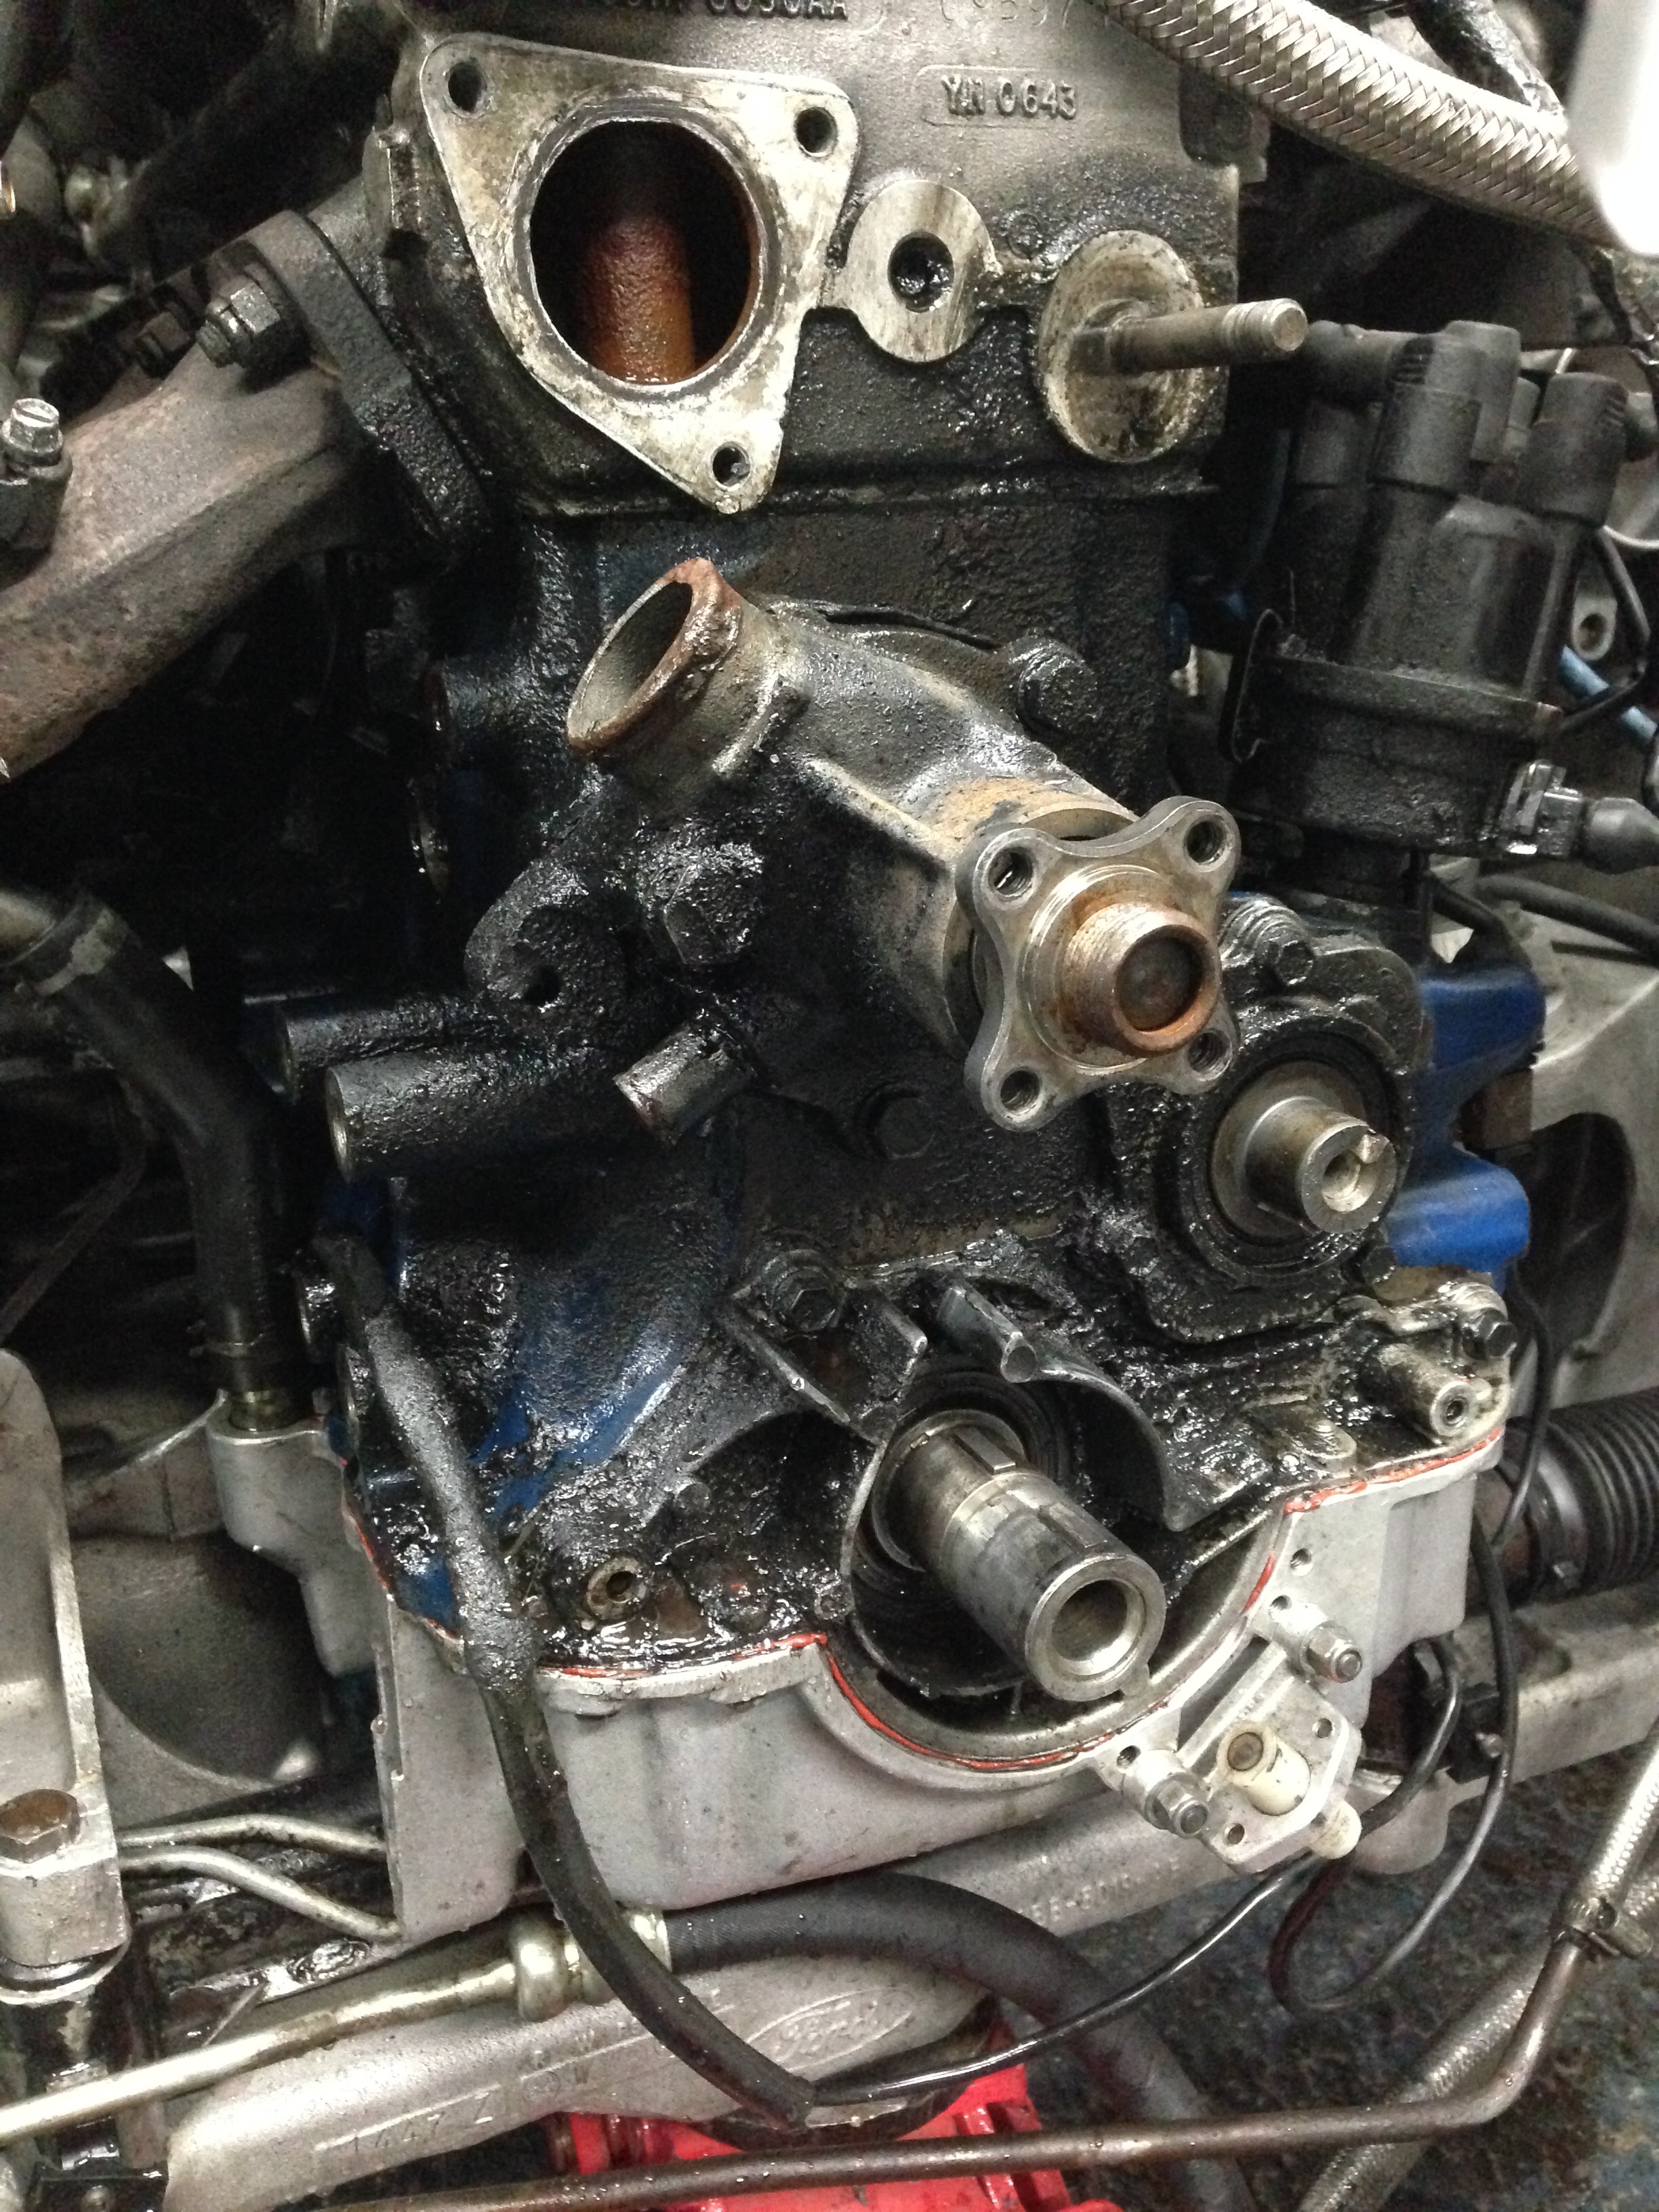
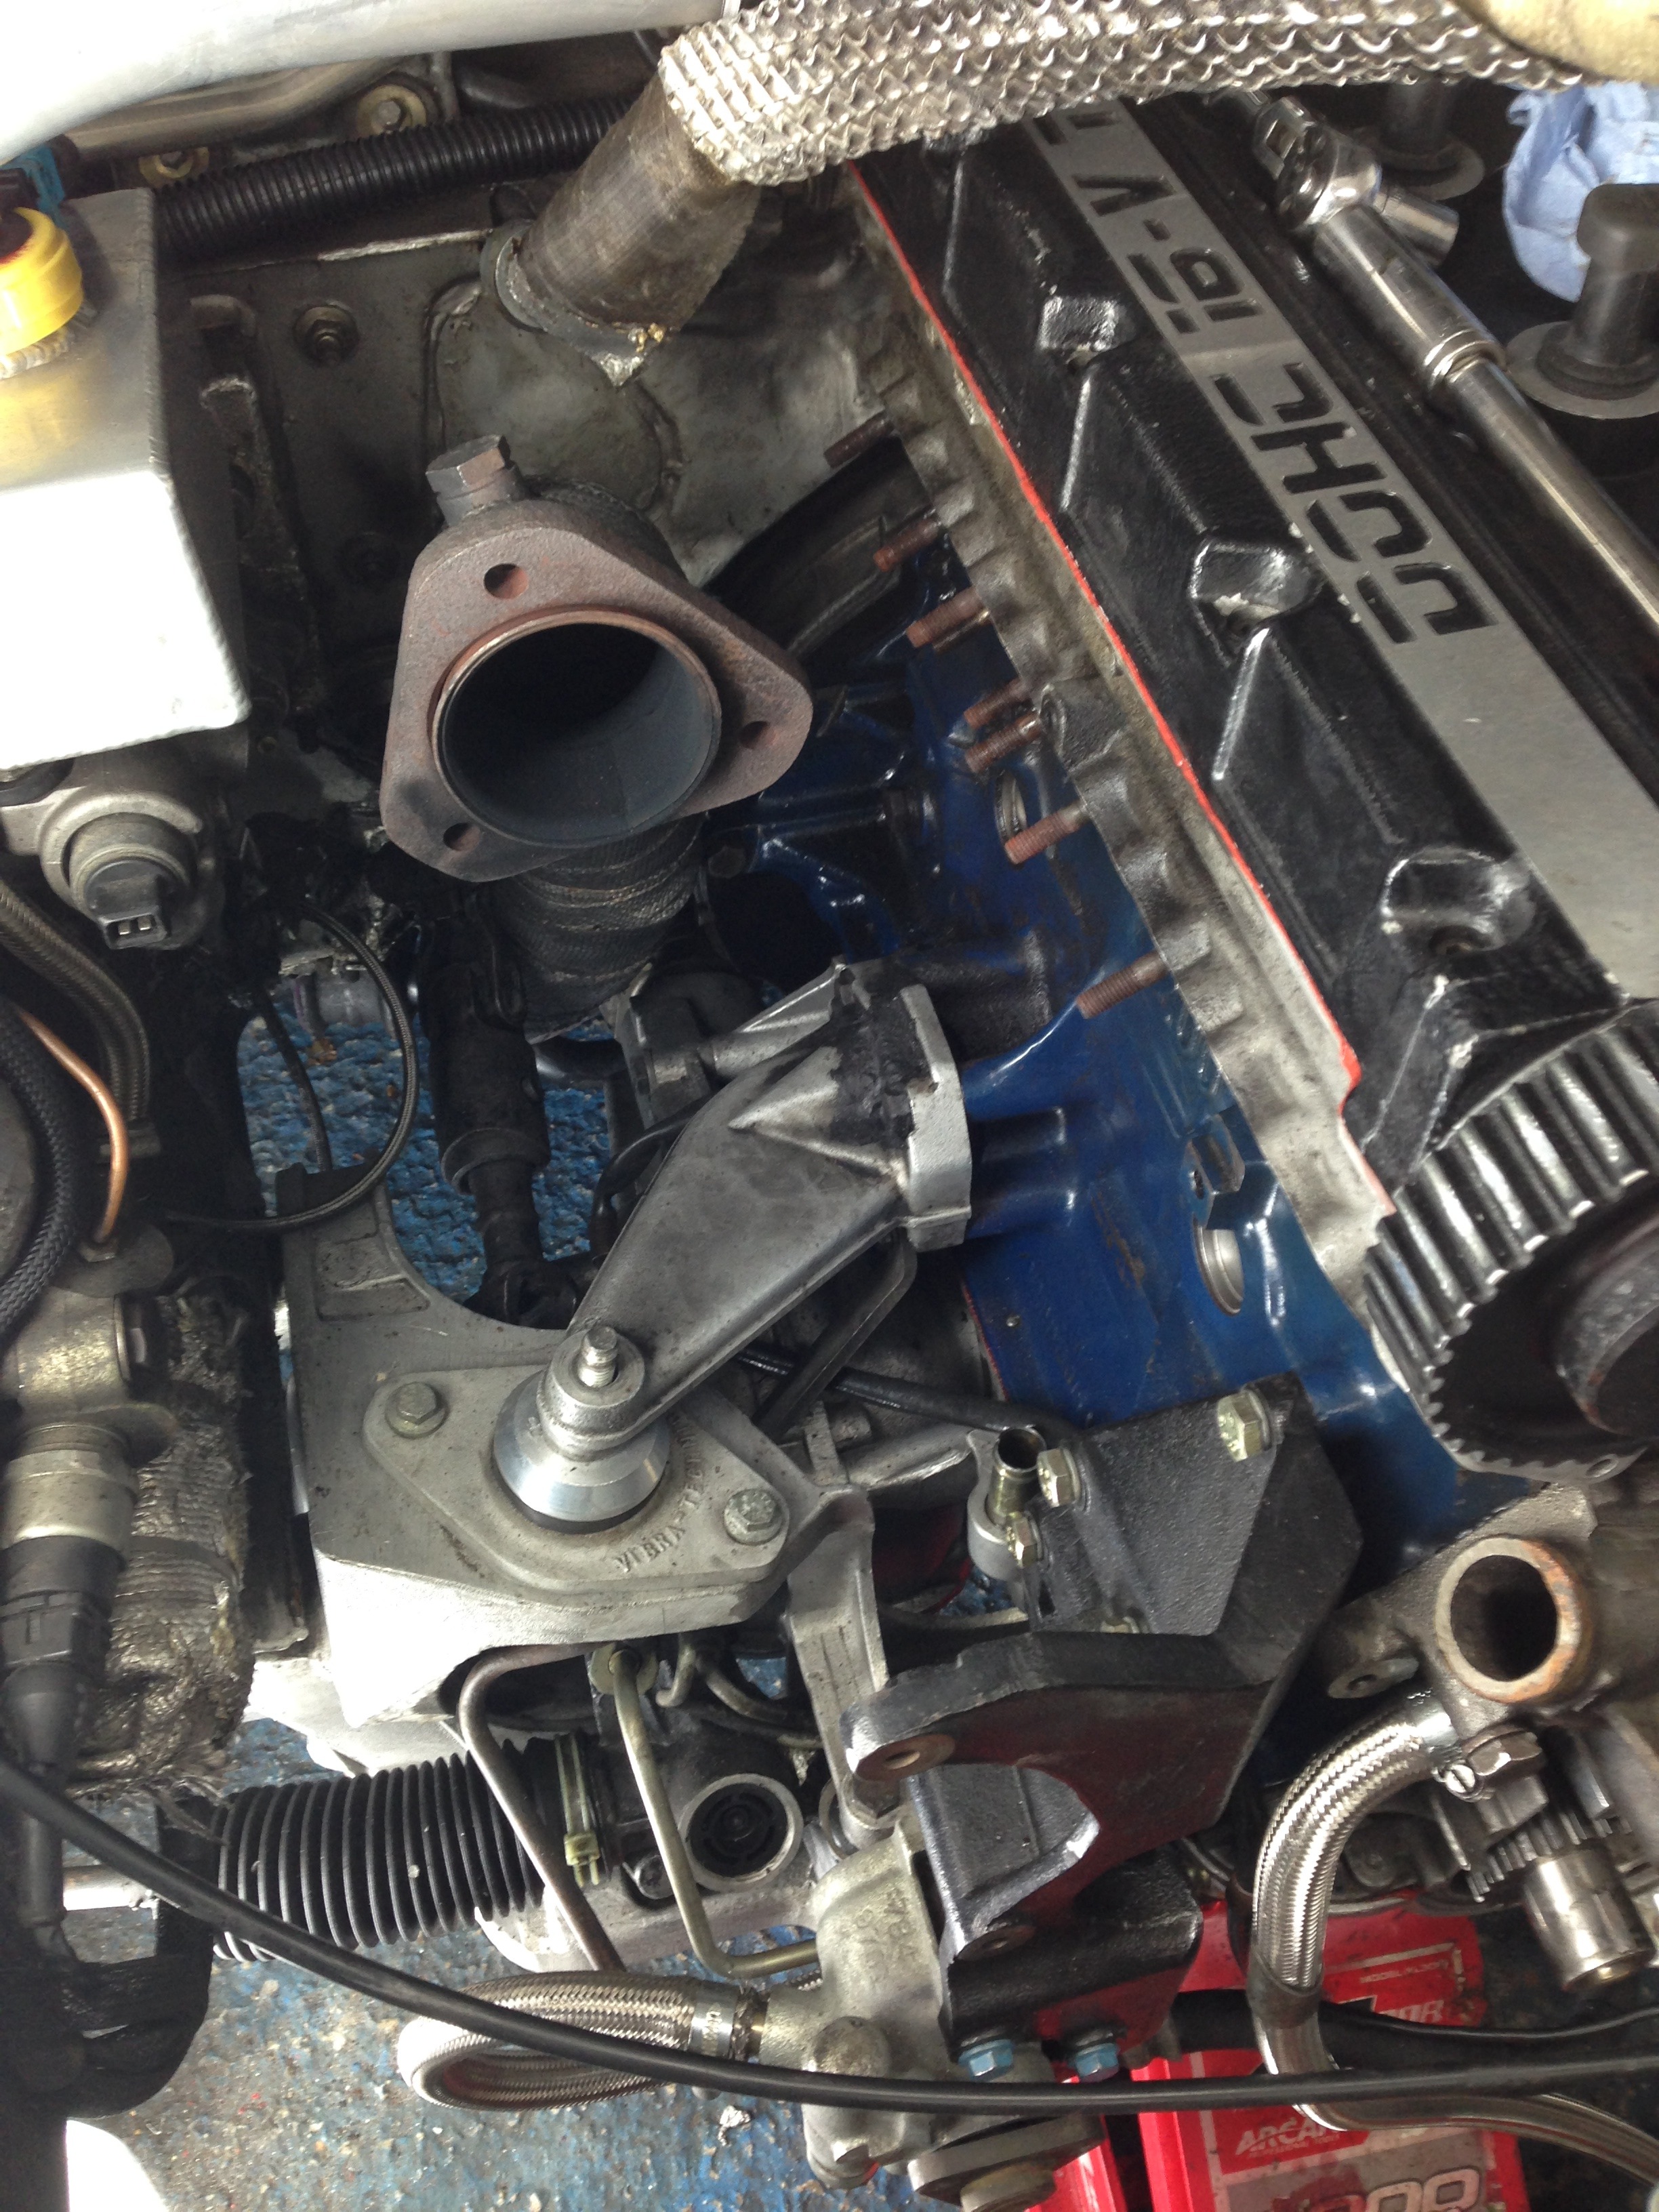
And so onto the engine strip down and you can see just how bad the leaks have been and for how long.. This has been like this for years
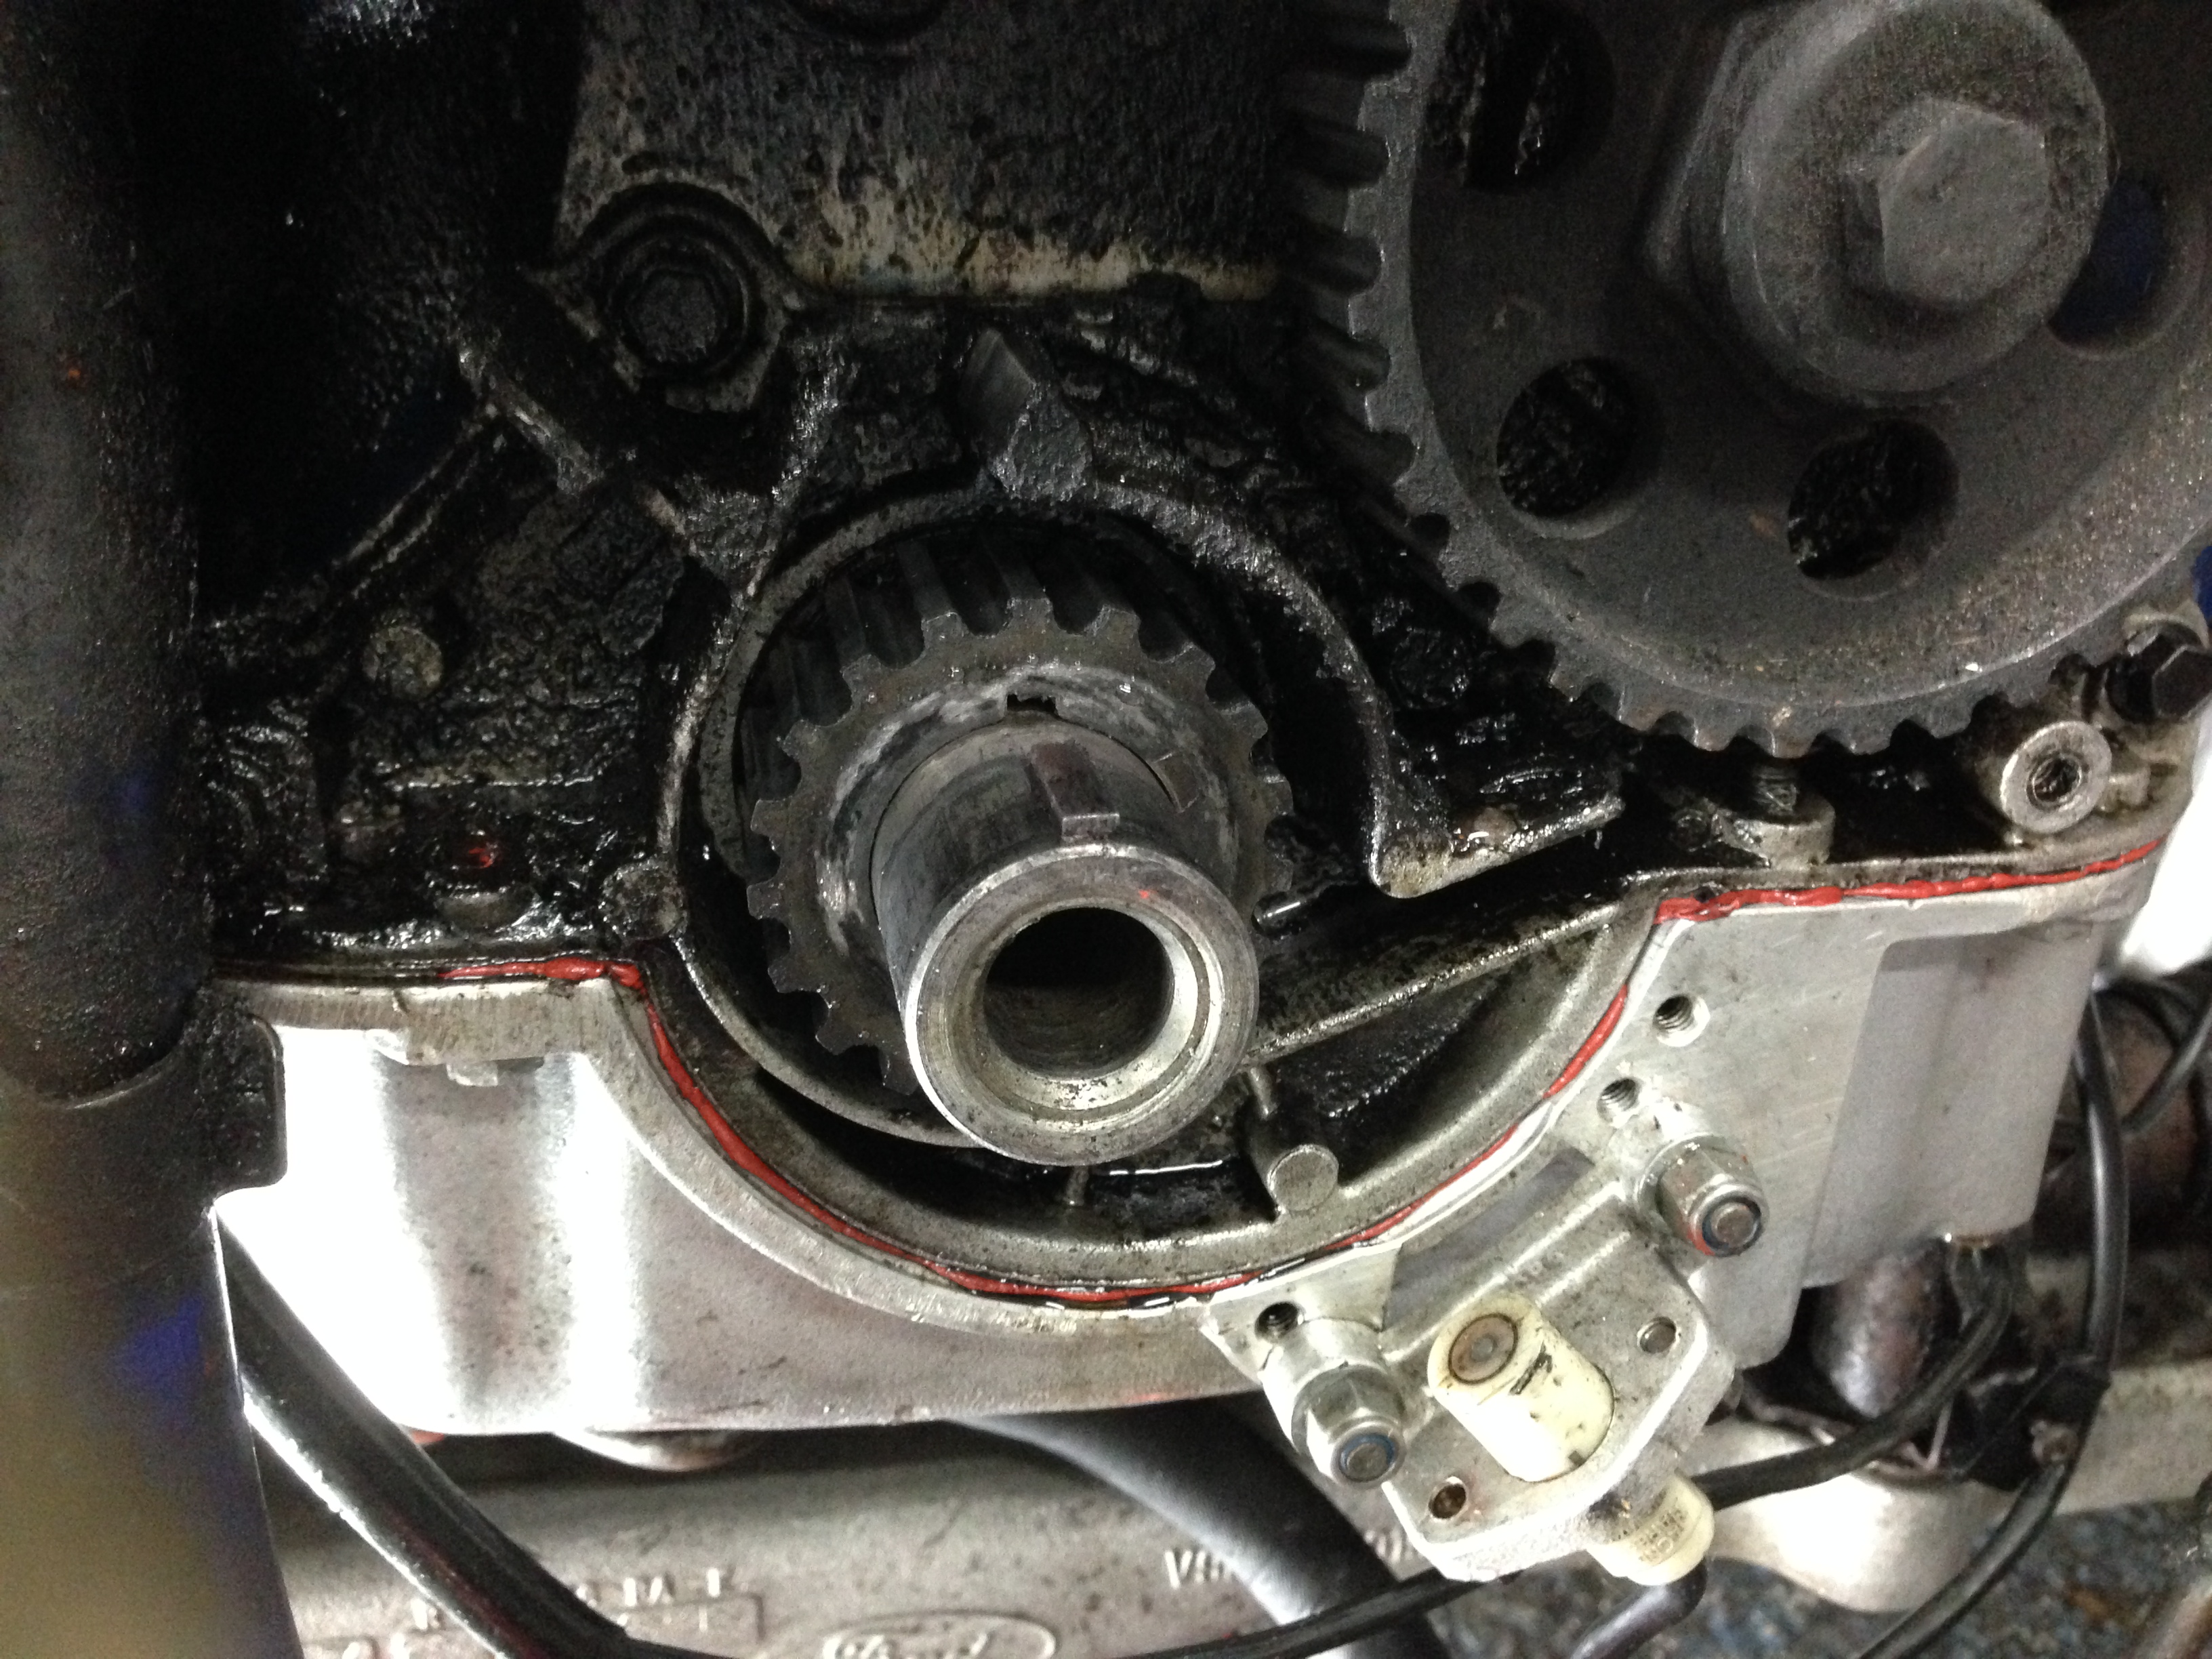
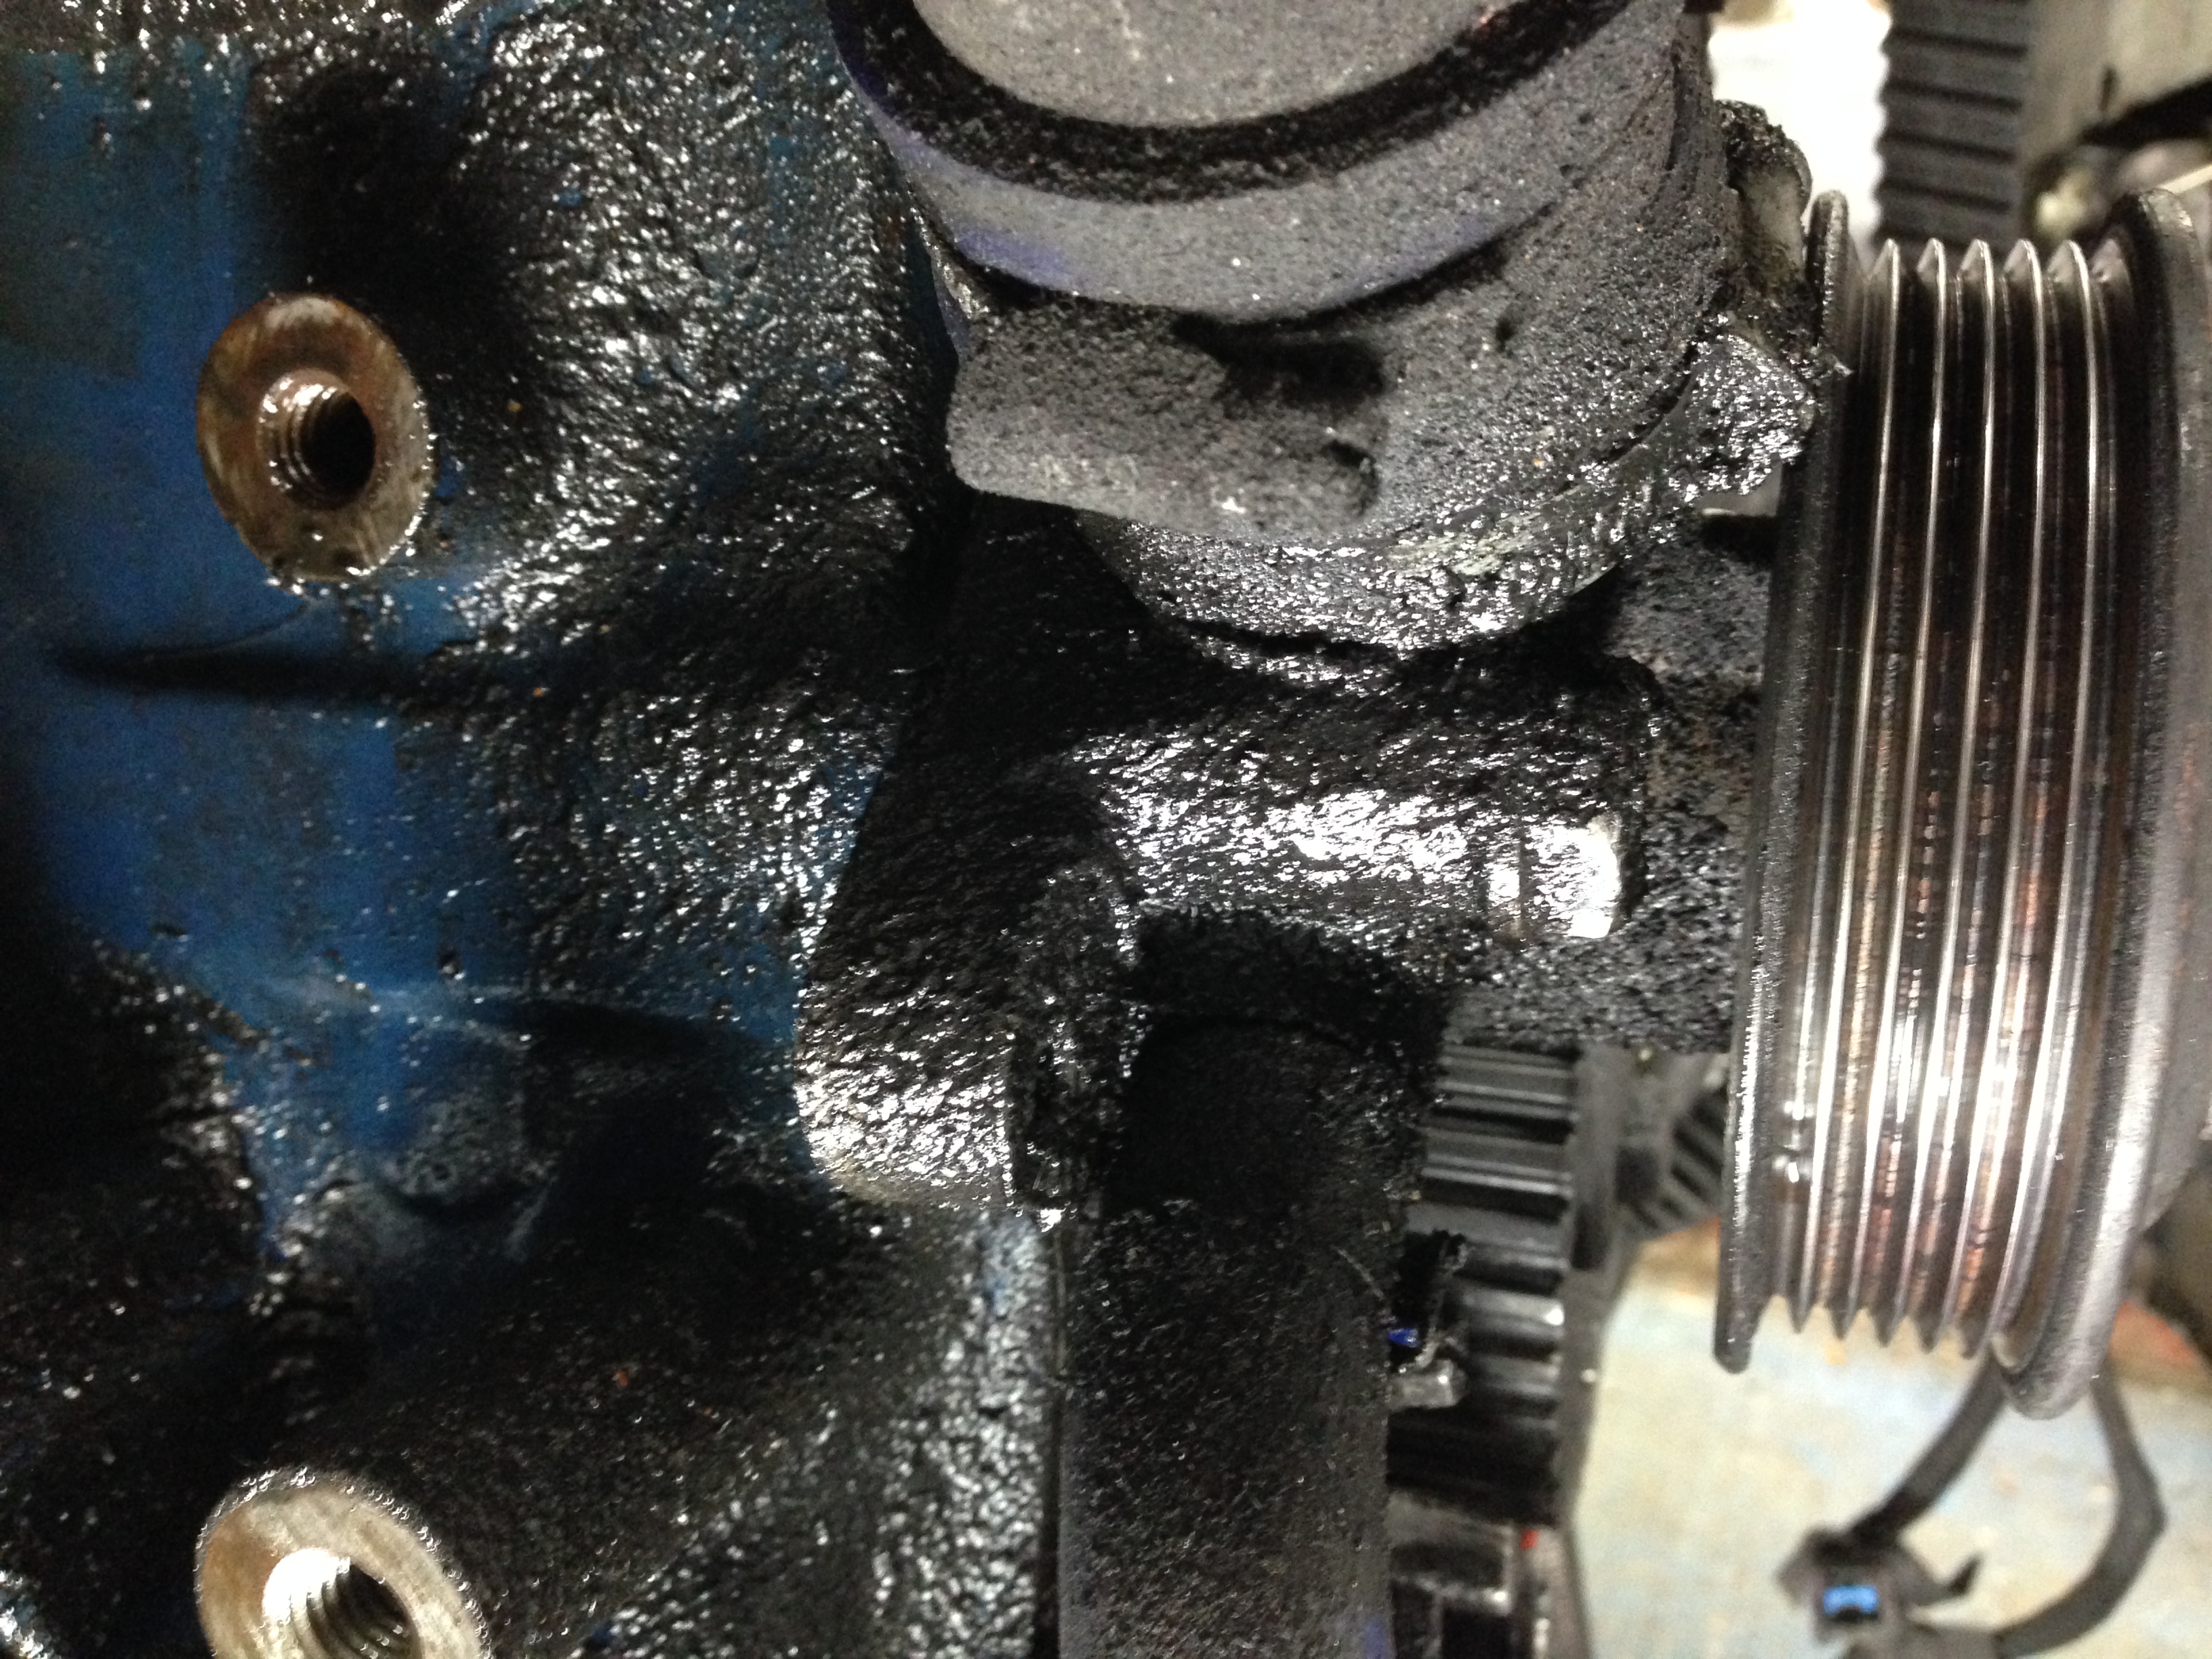
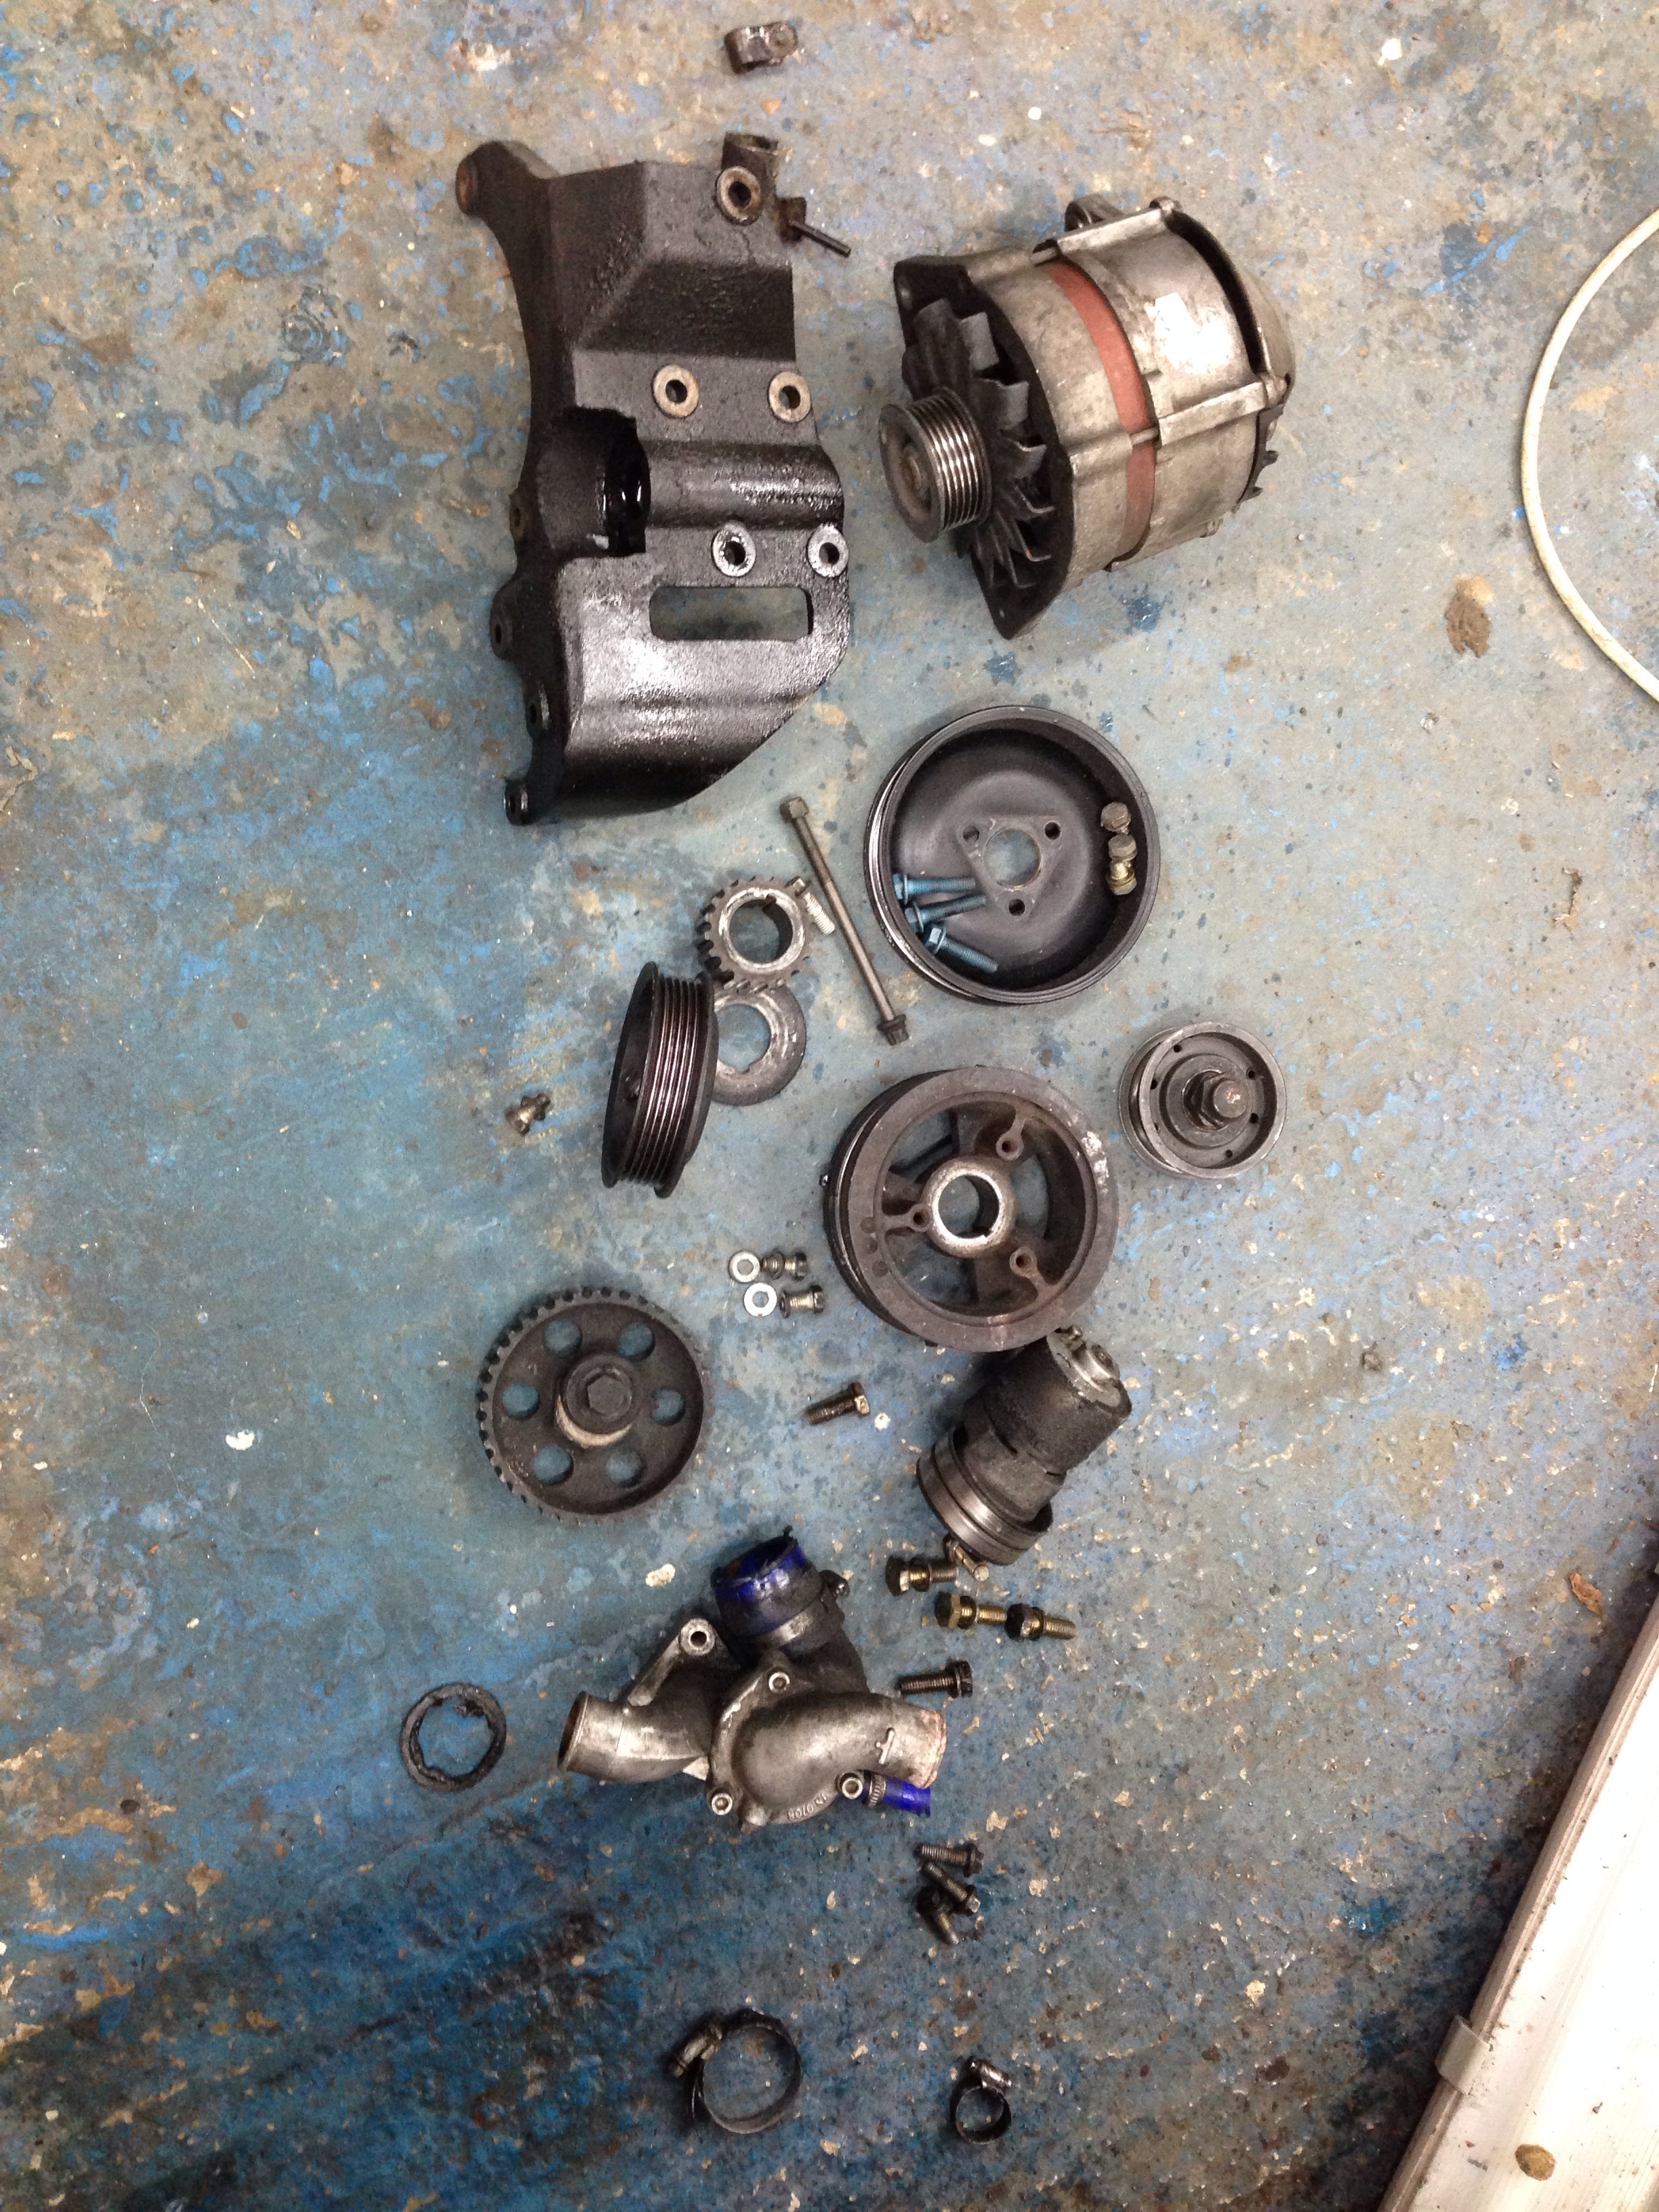
All the parts off the front to get cleaned - simply using white spirit and a toothbrush and then an airline to get the gunk out of all the little crevices!
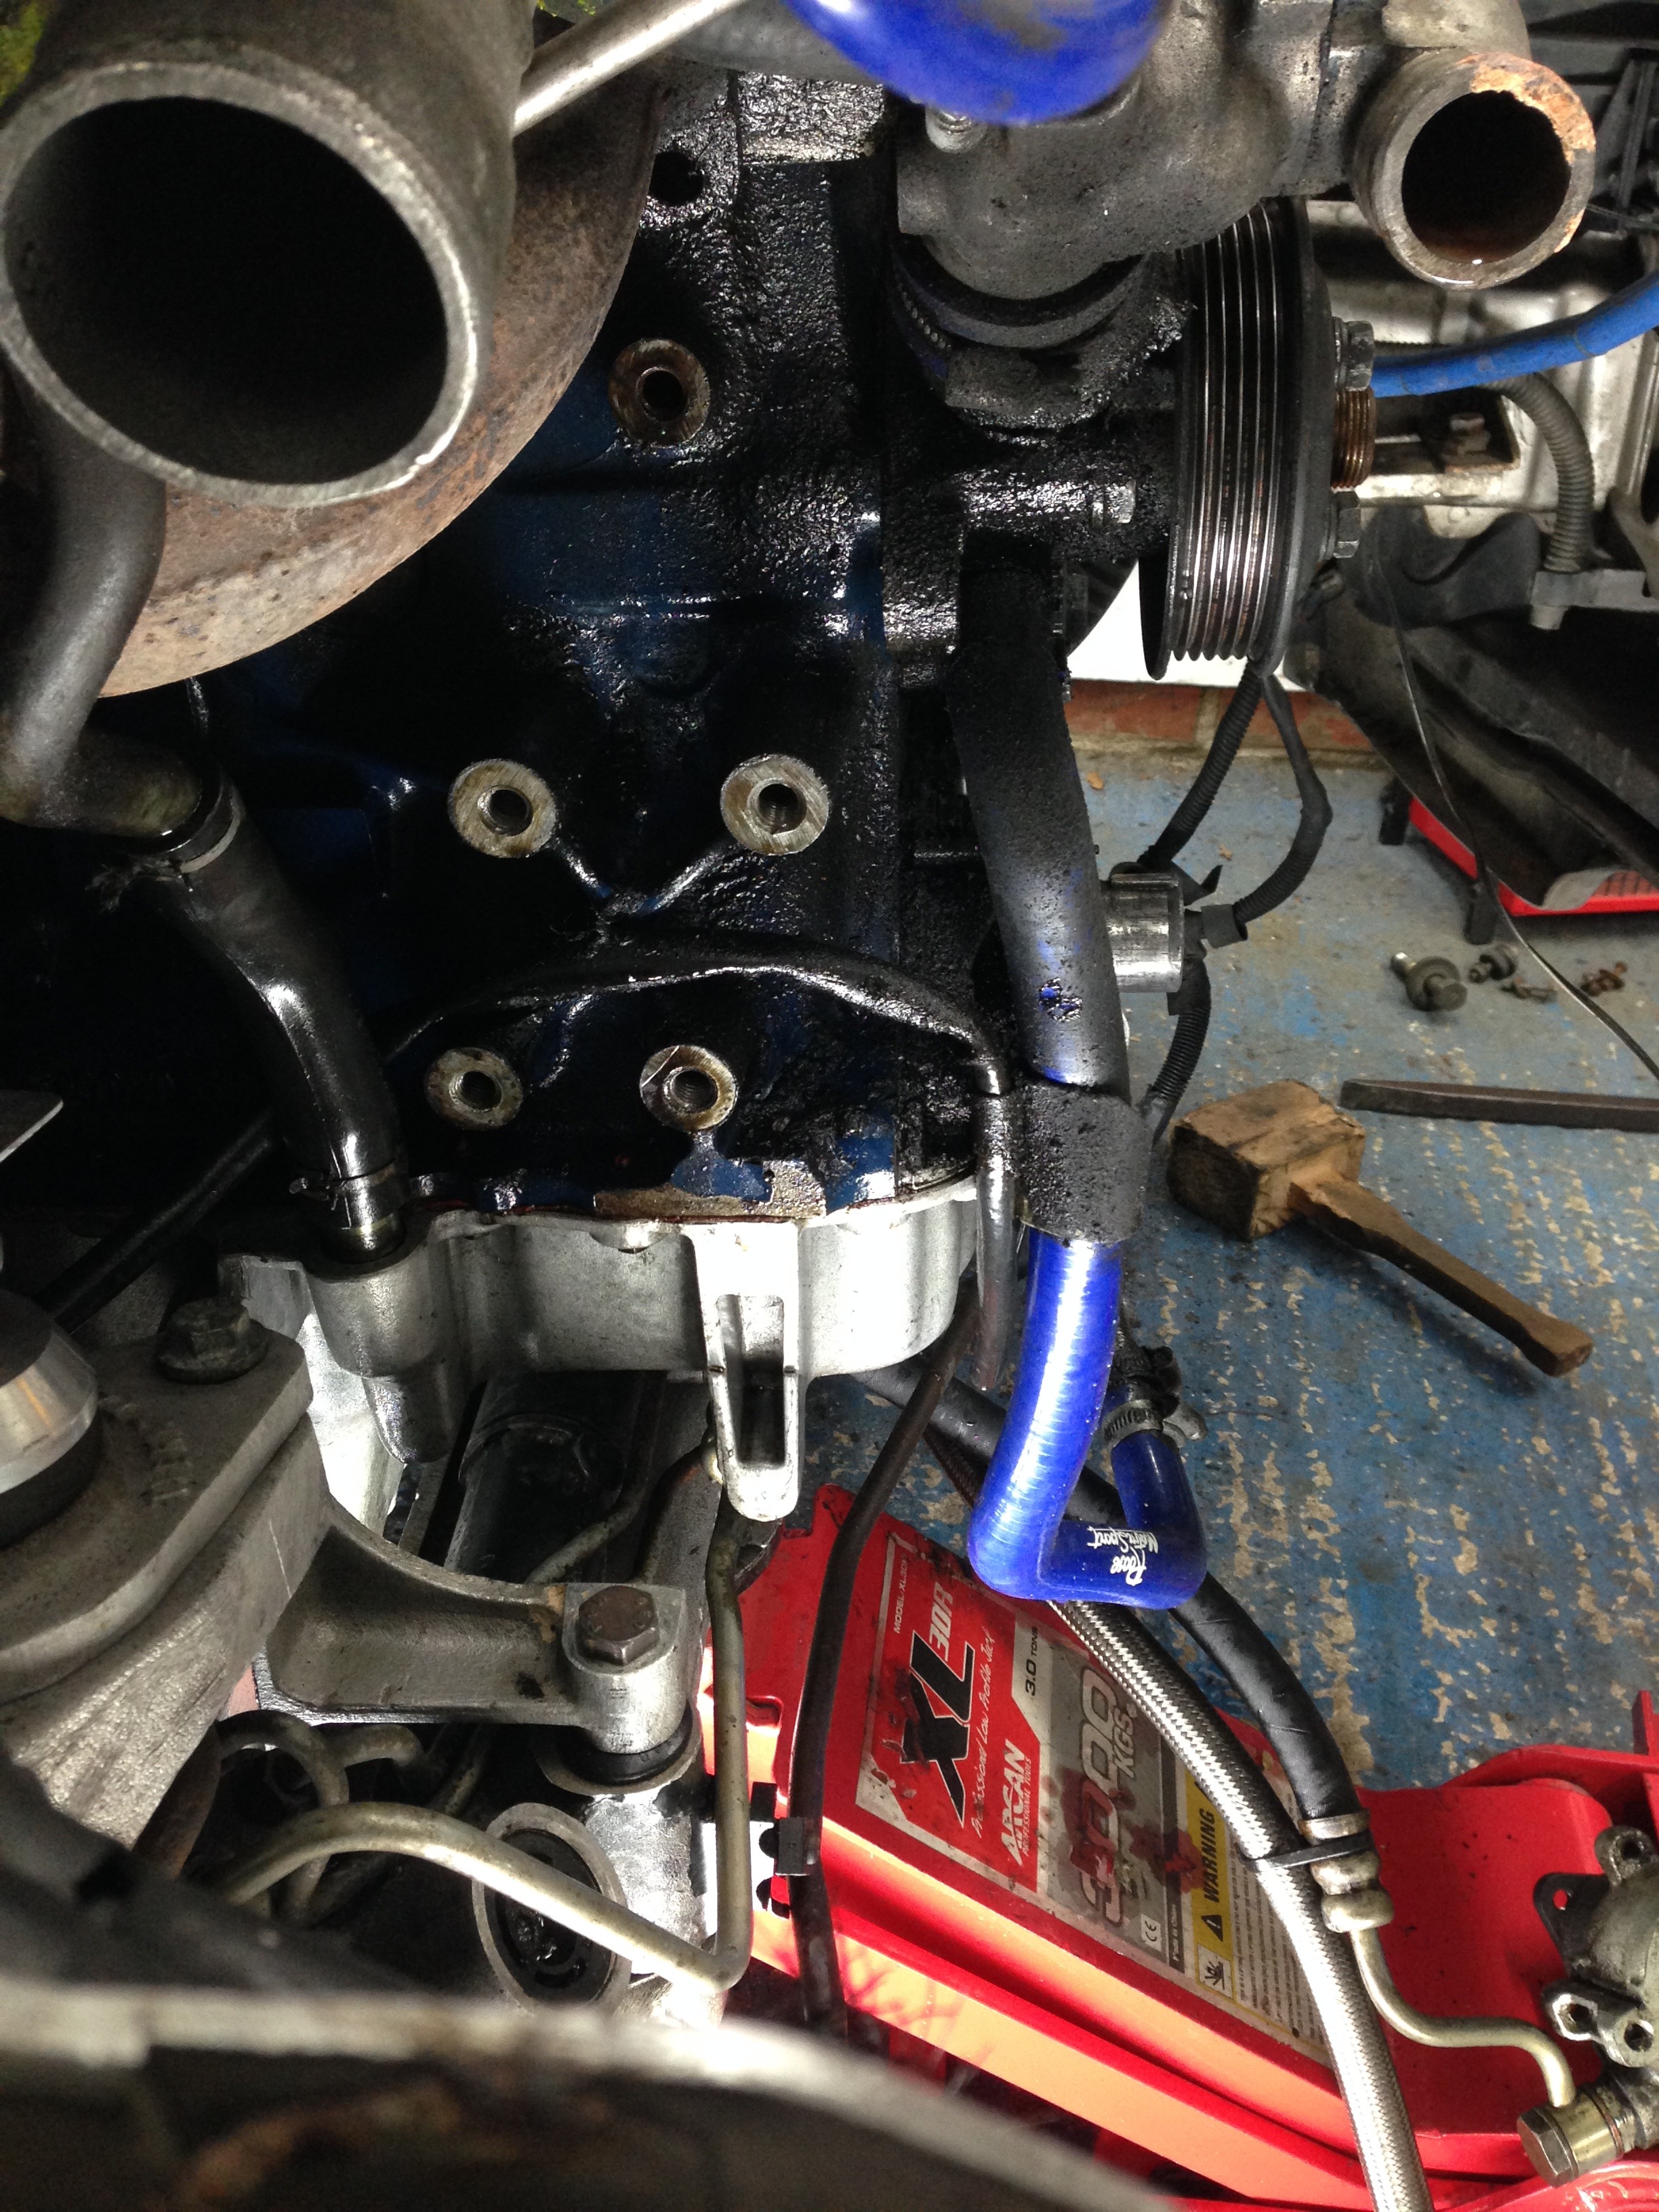
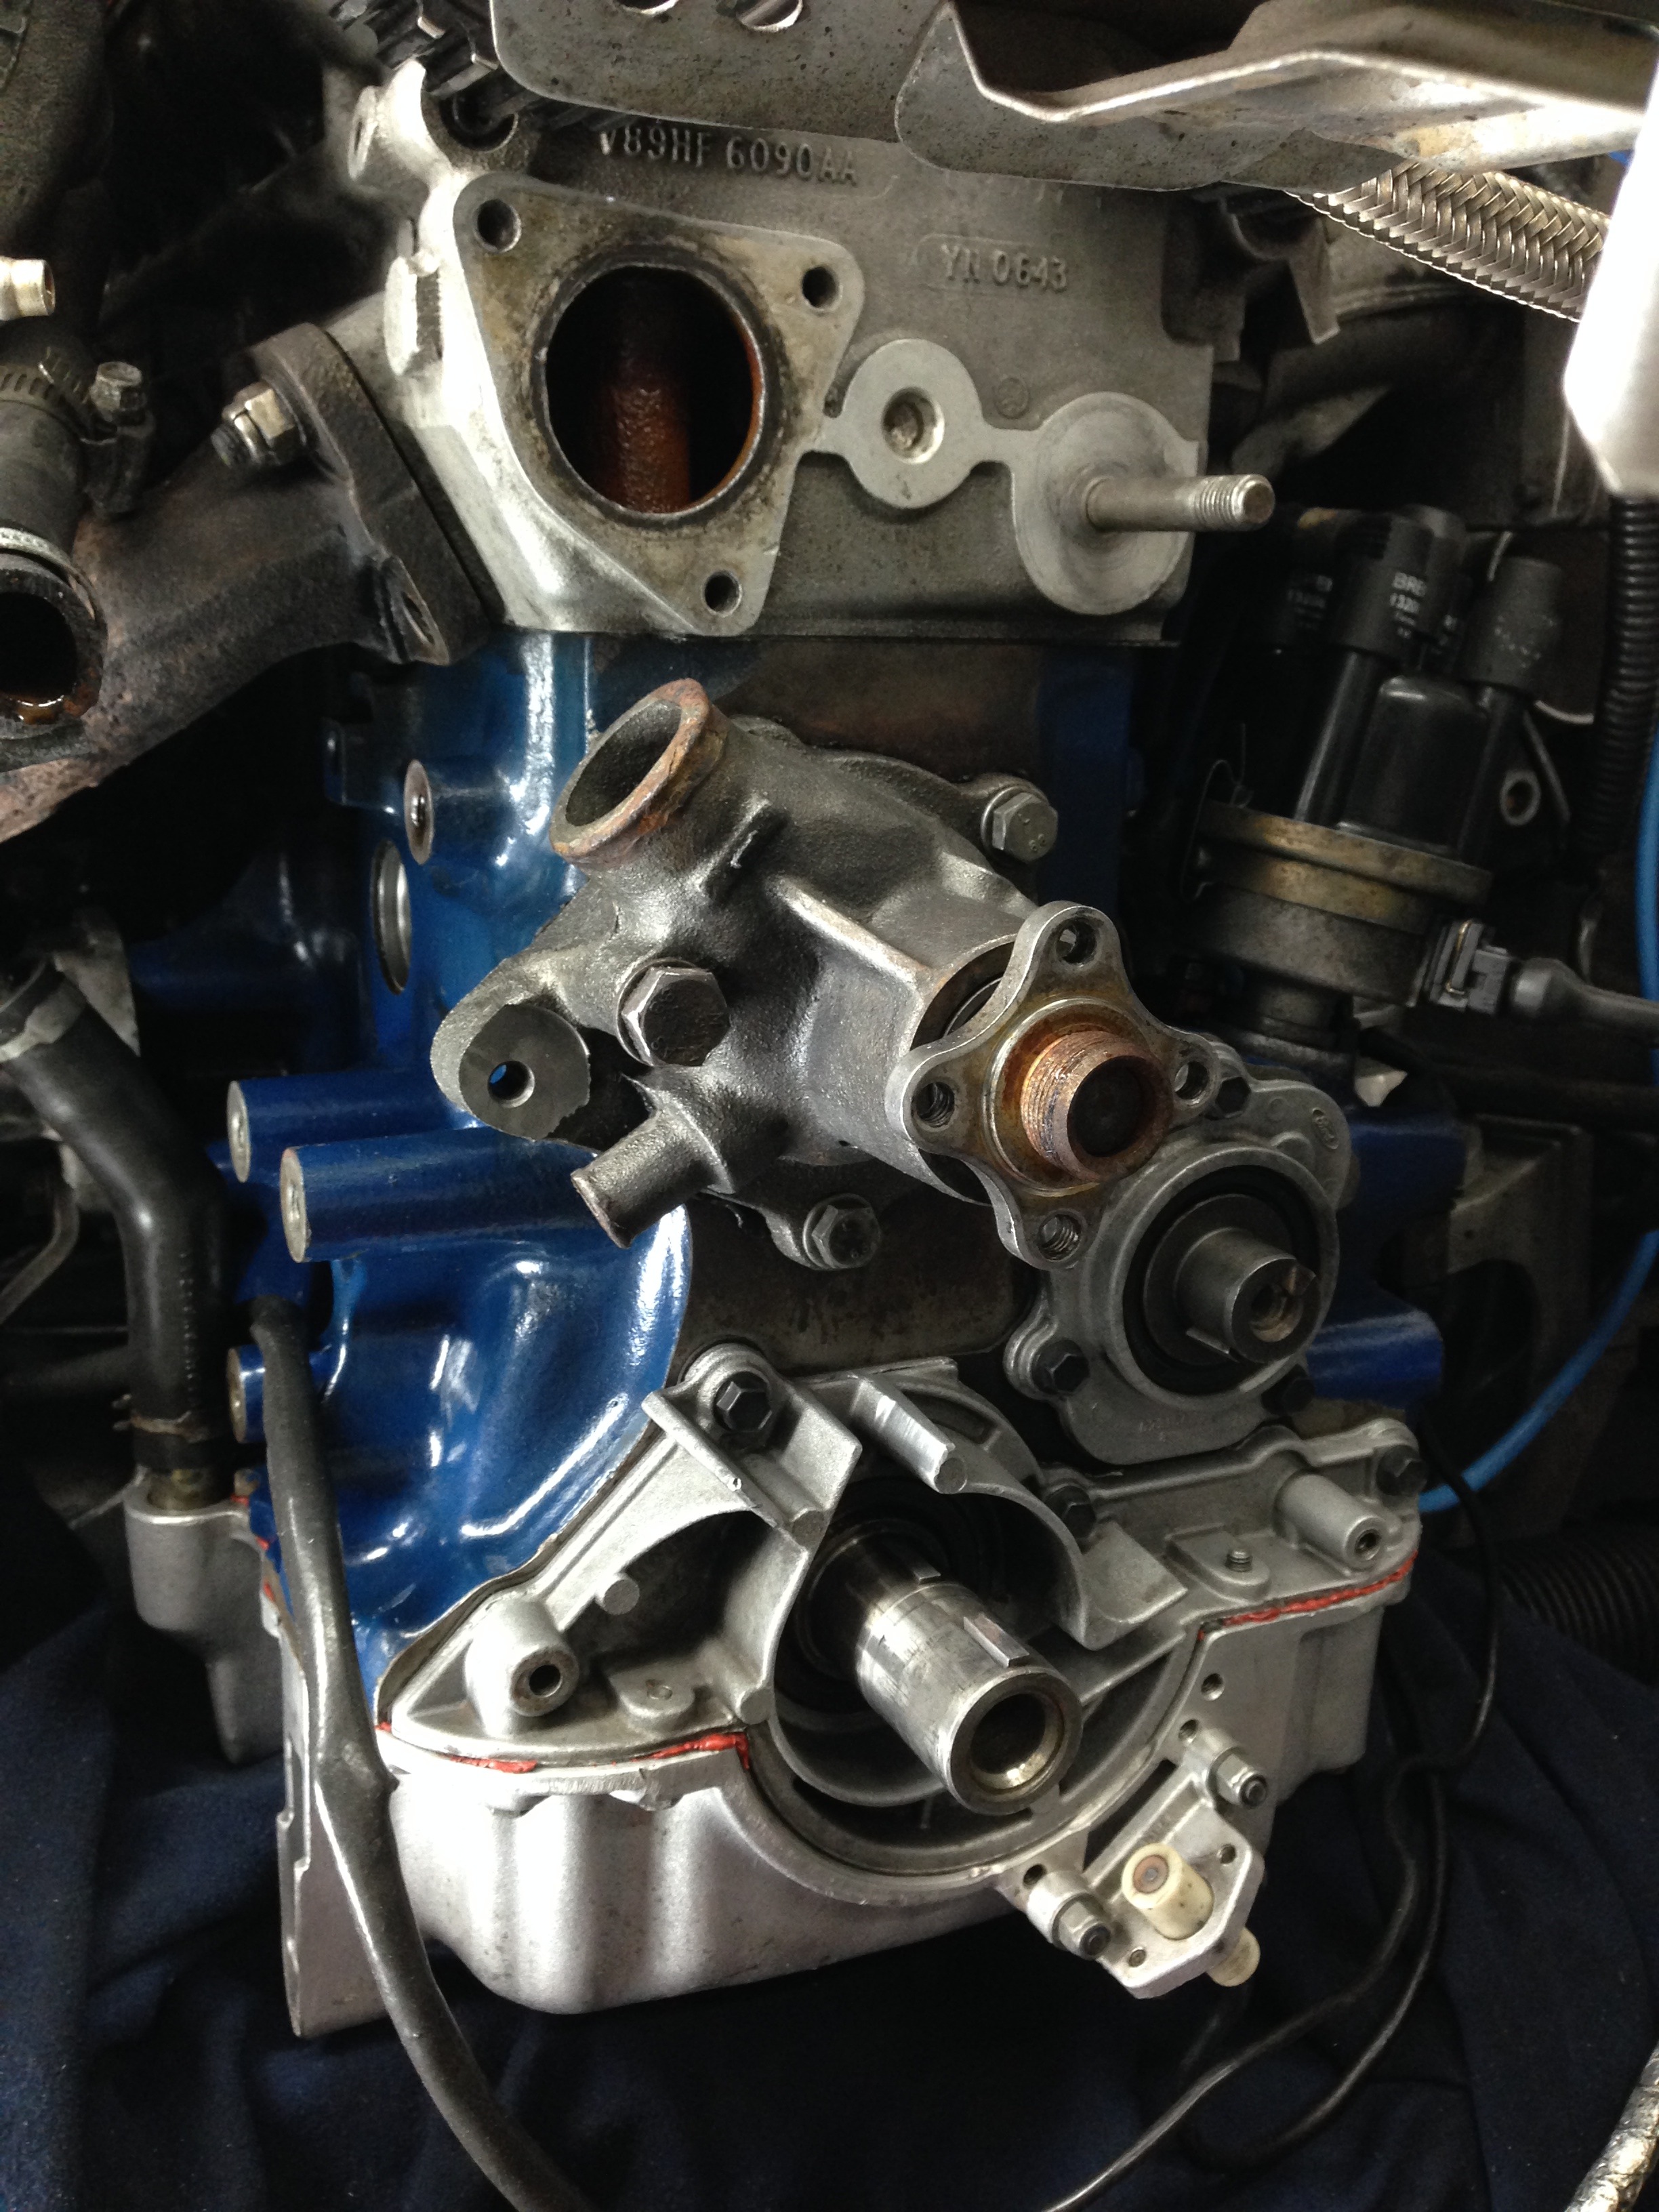
All cleaned and going back together - hopefully you can see the difference!!
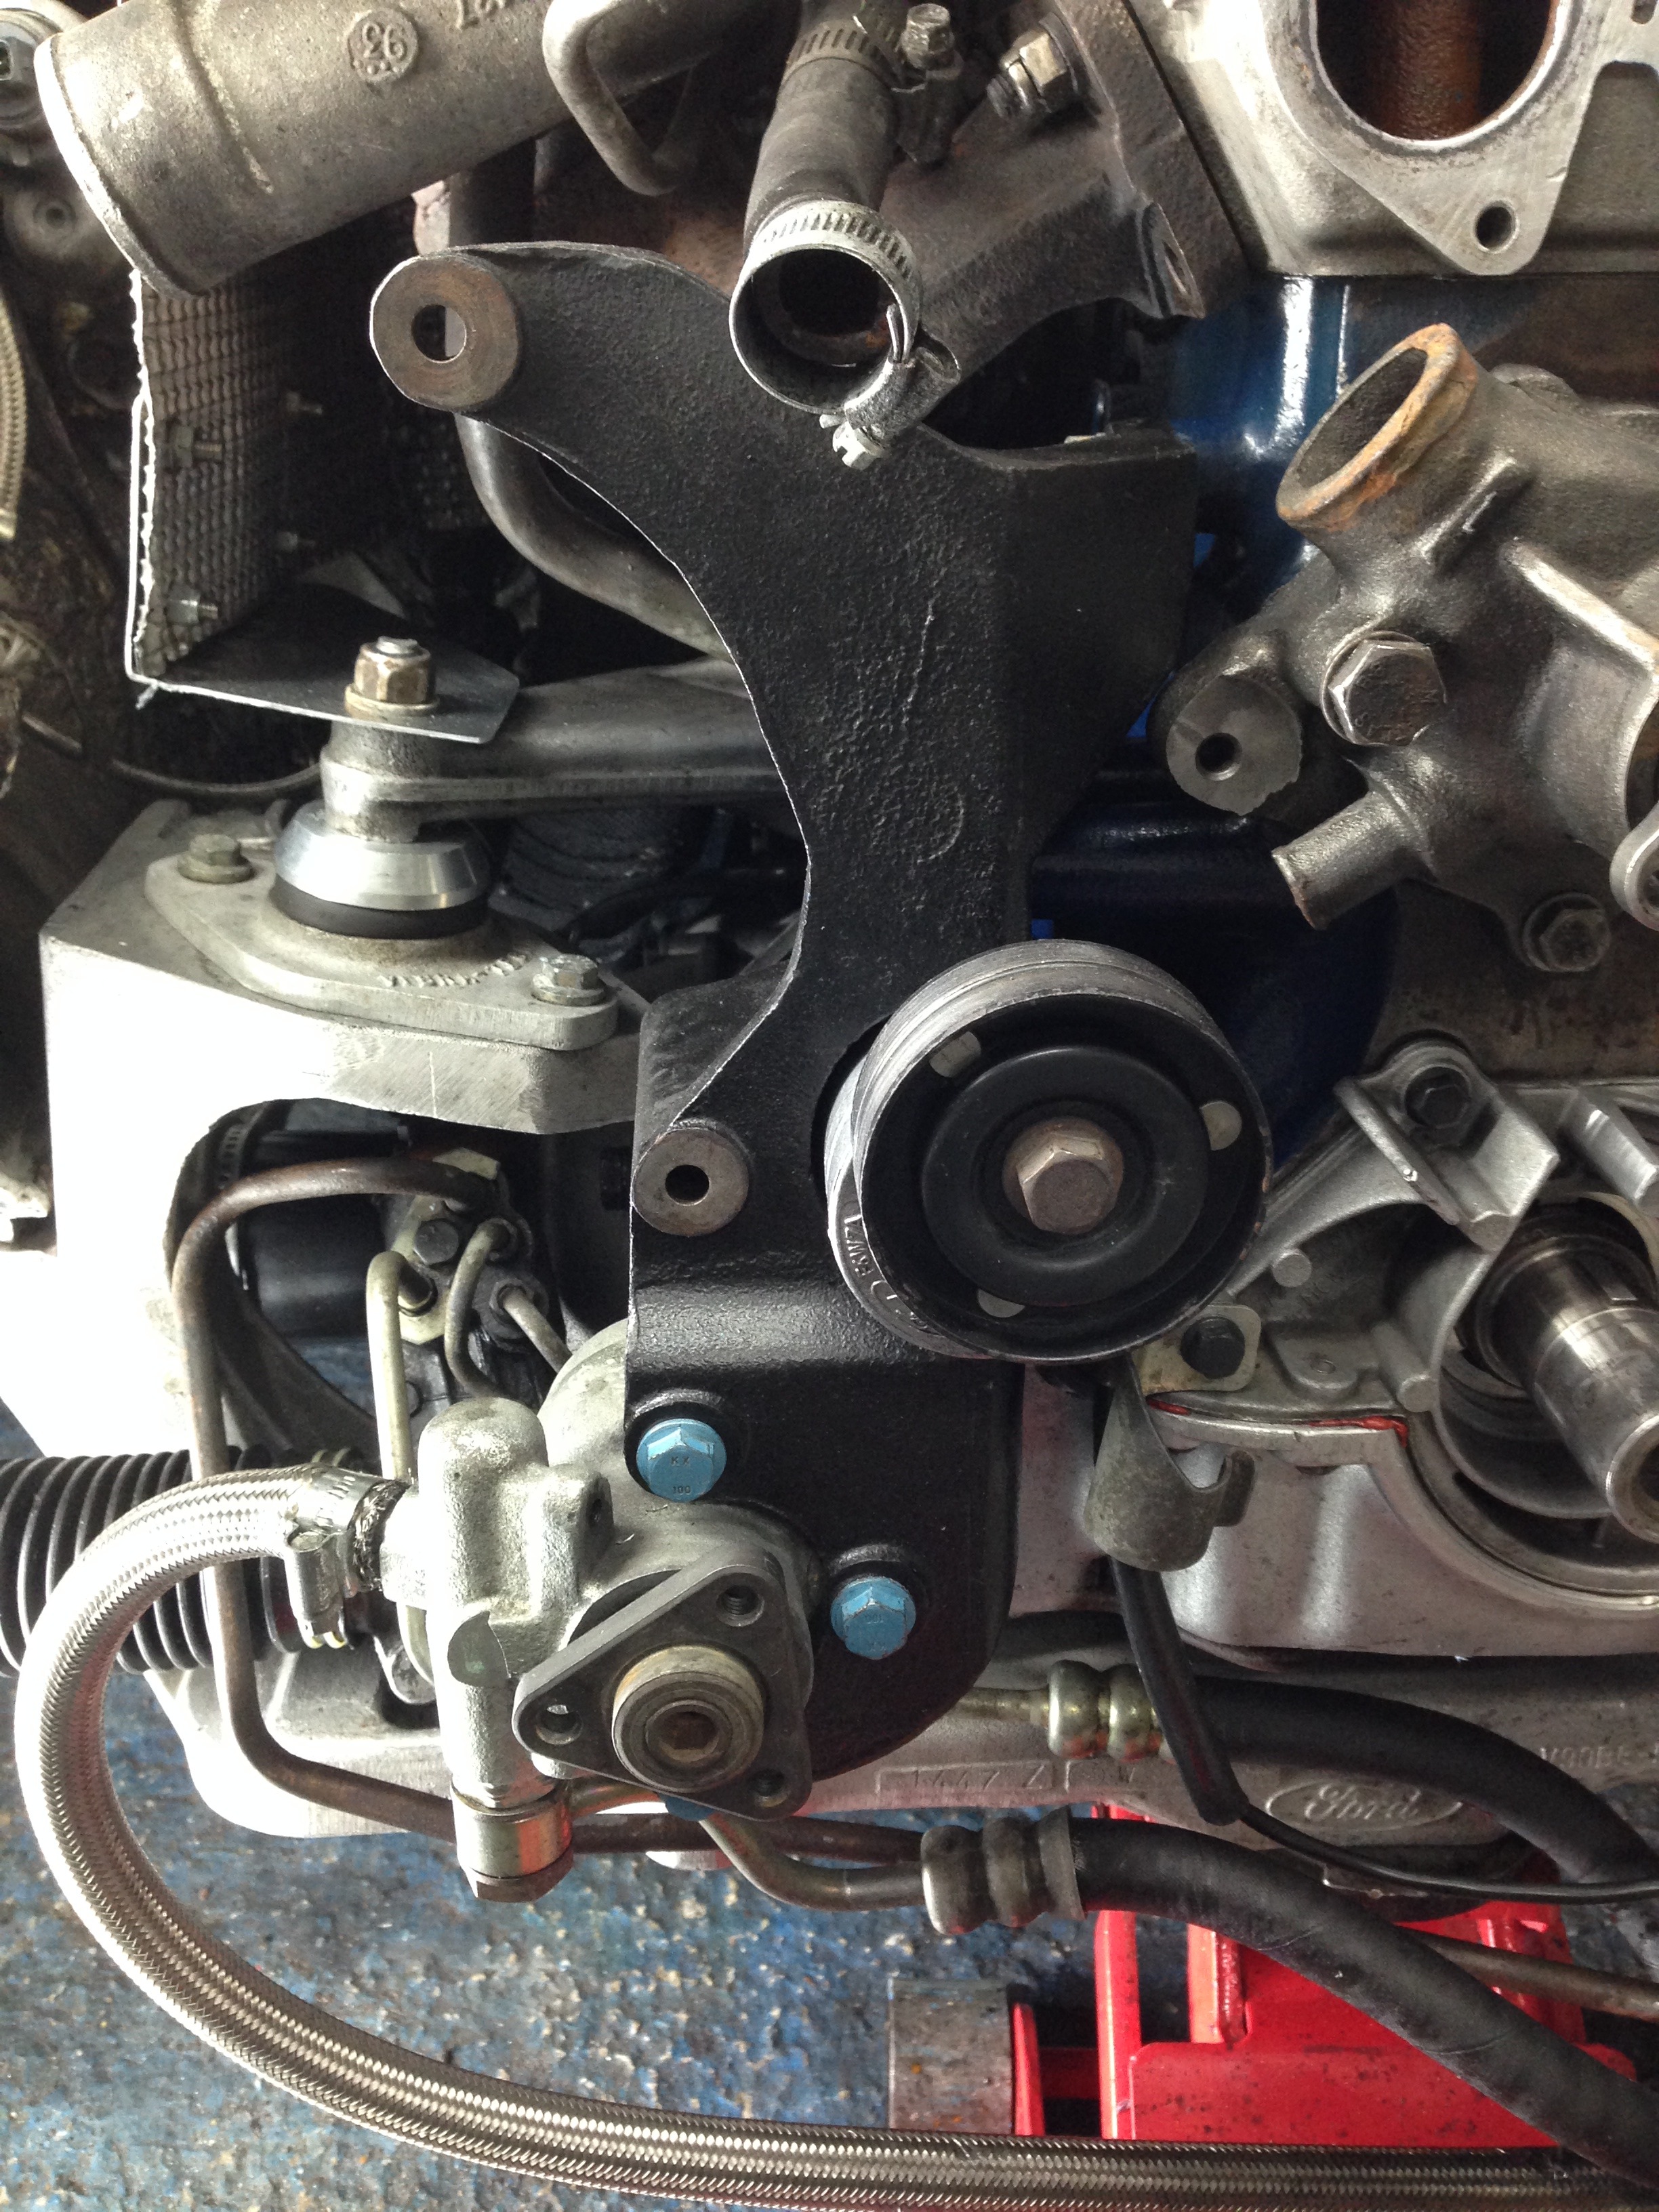
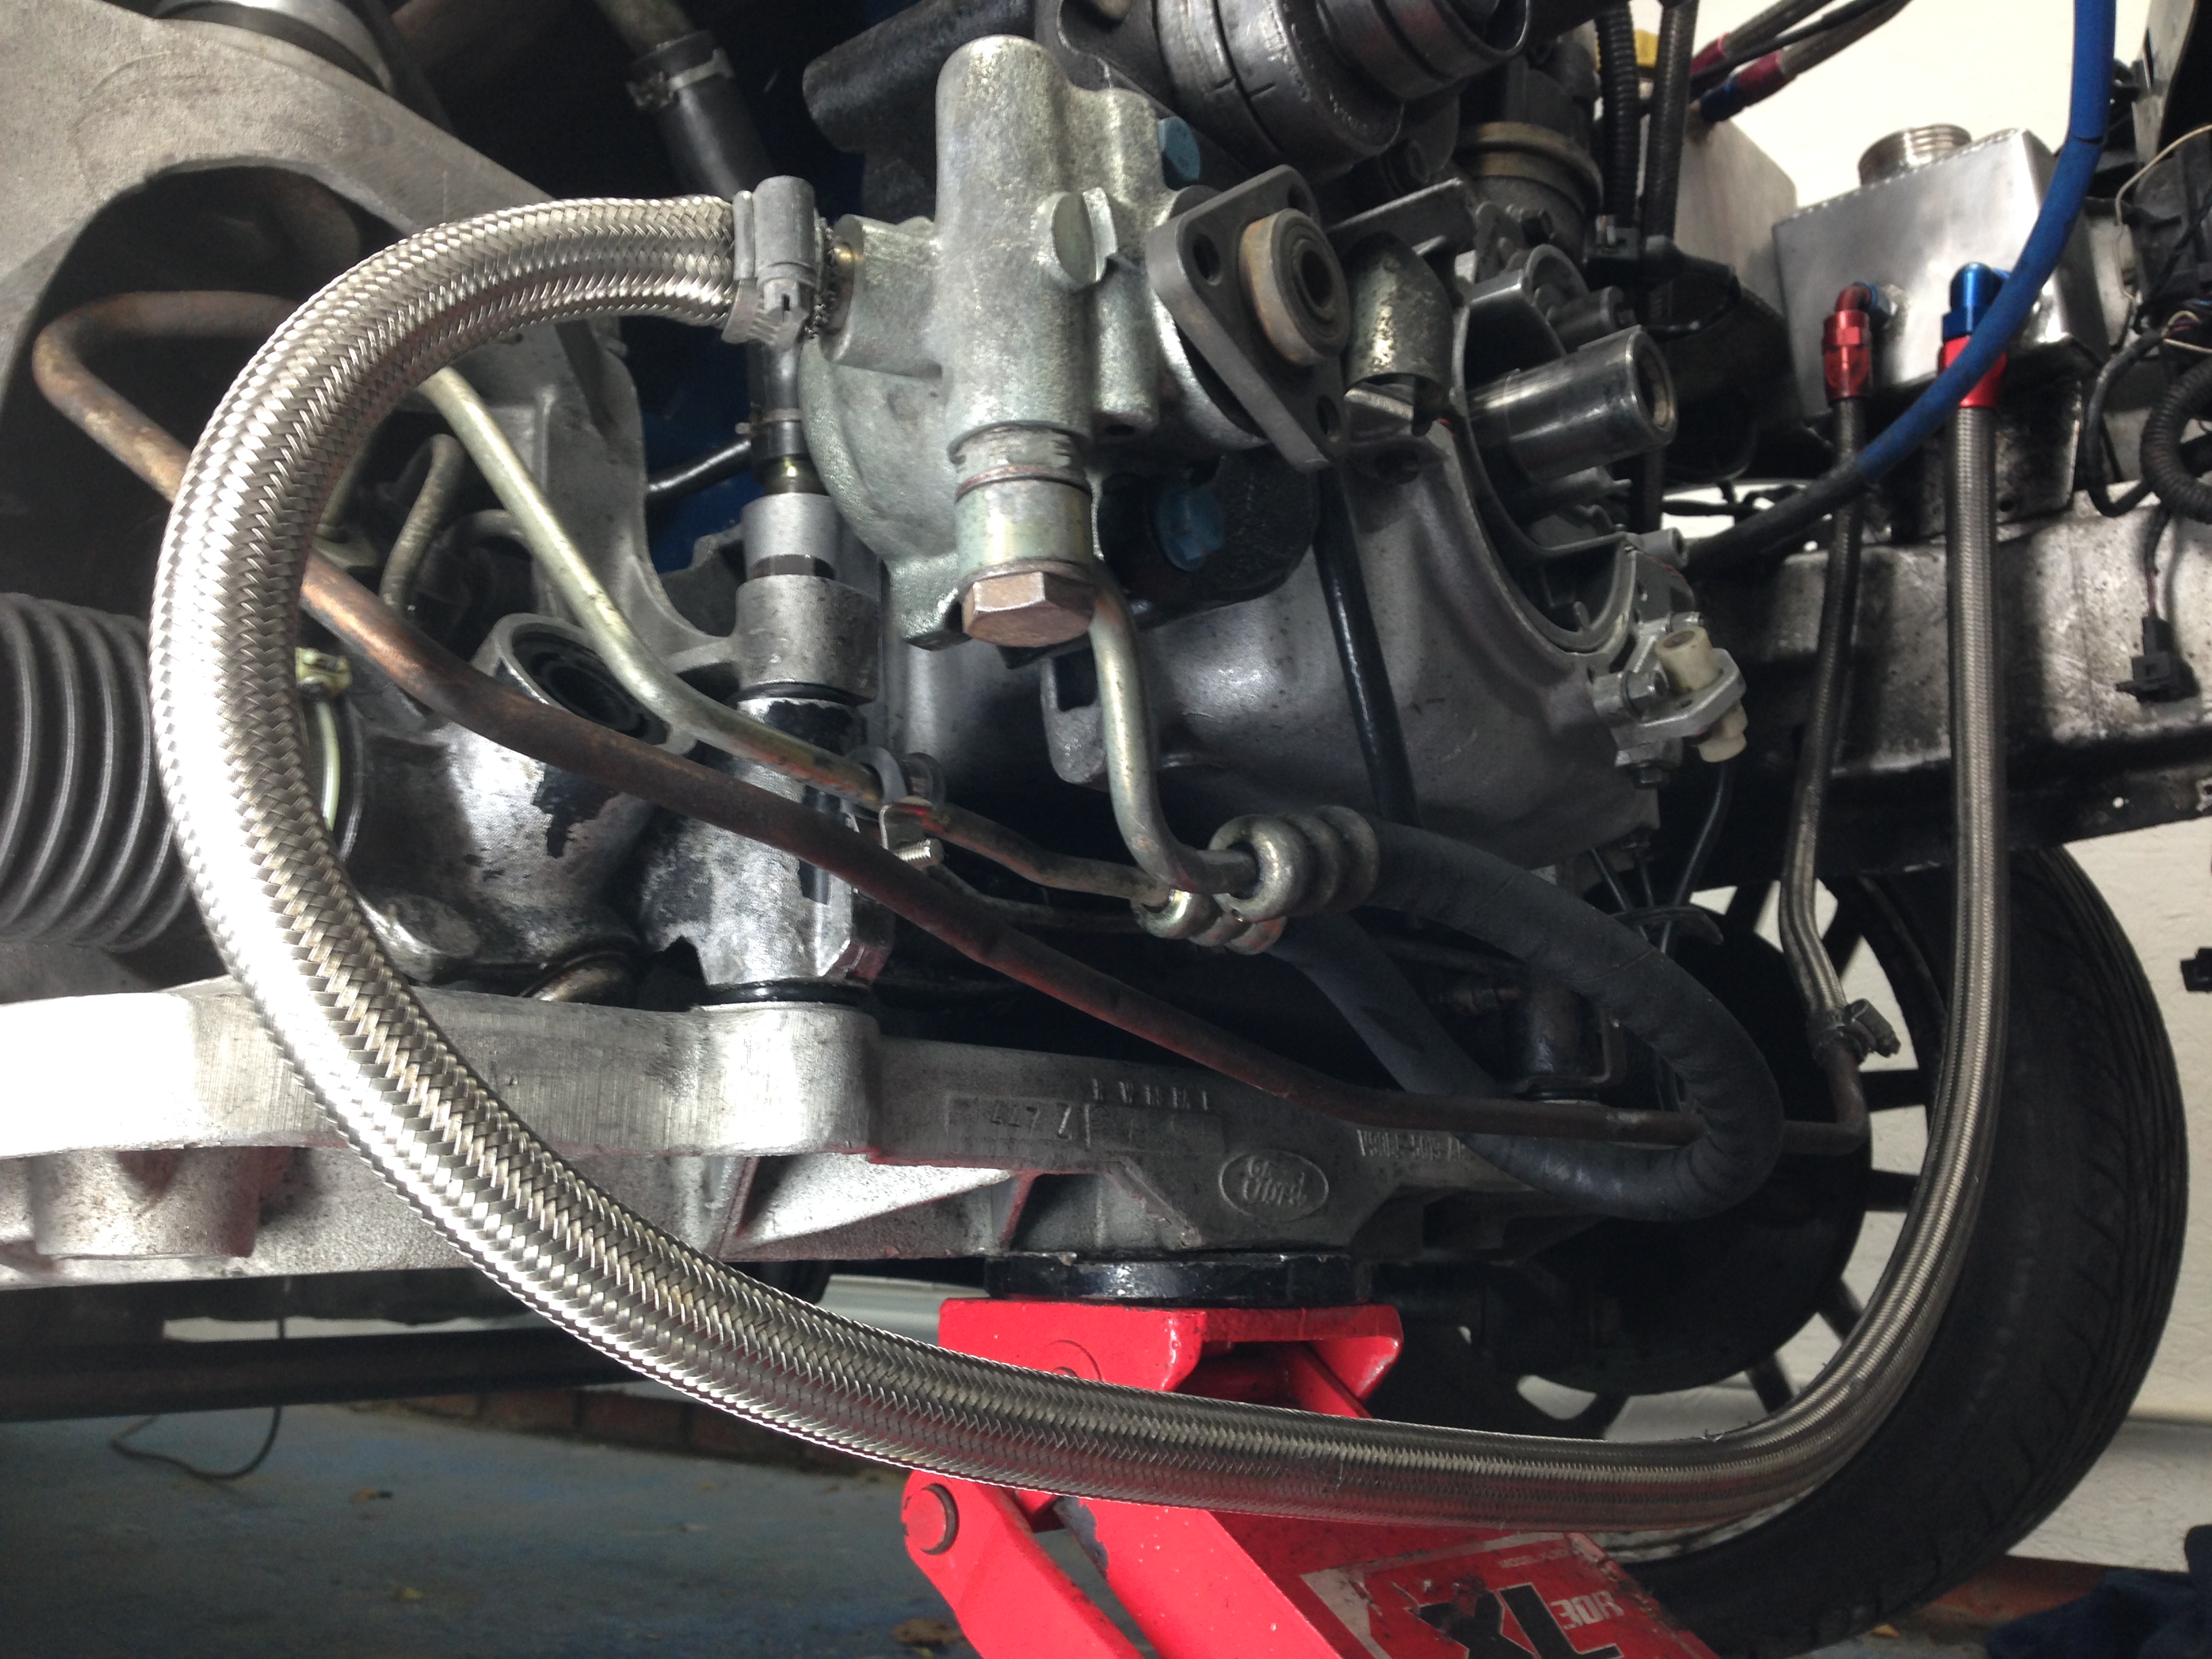
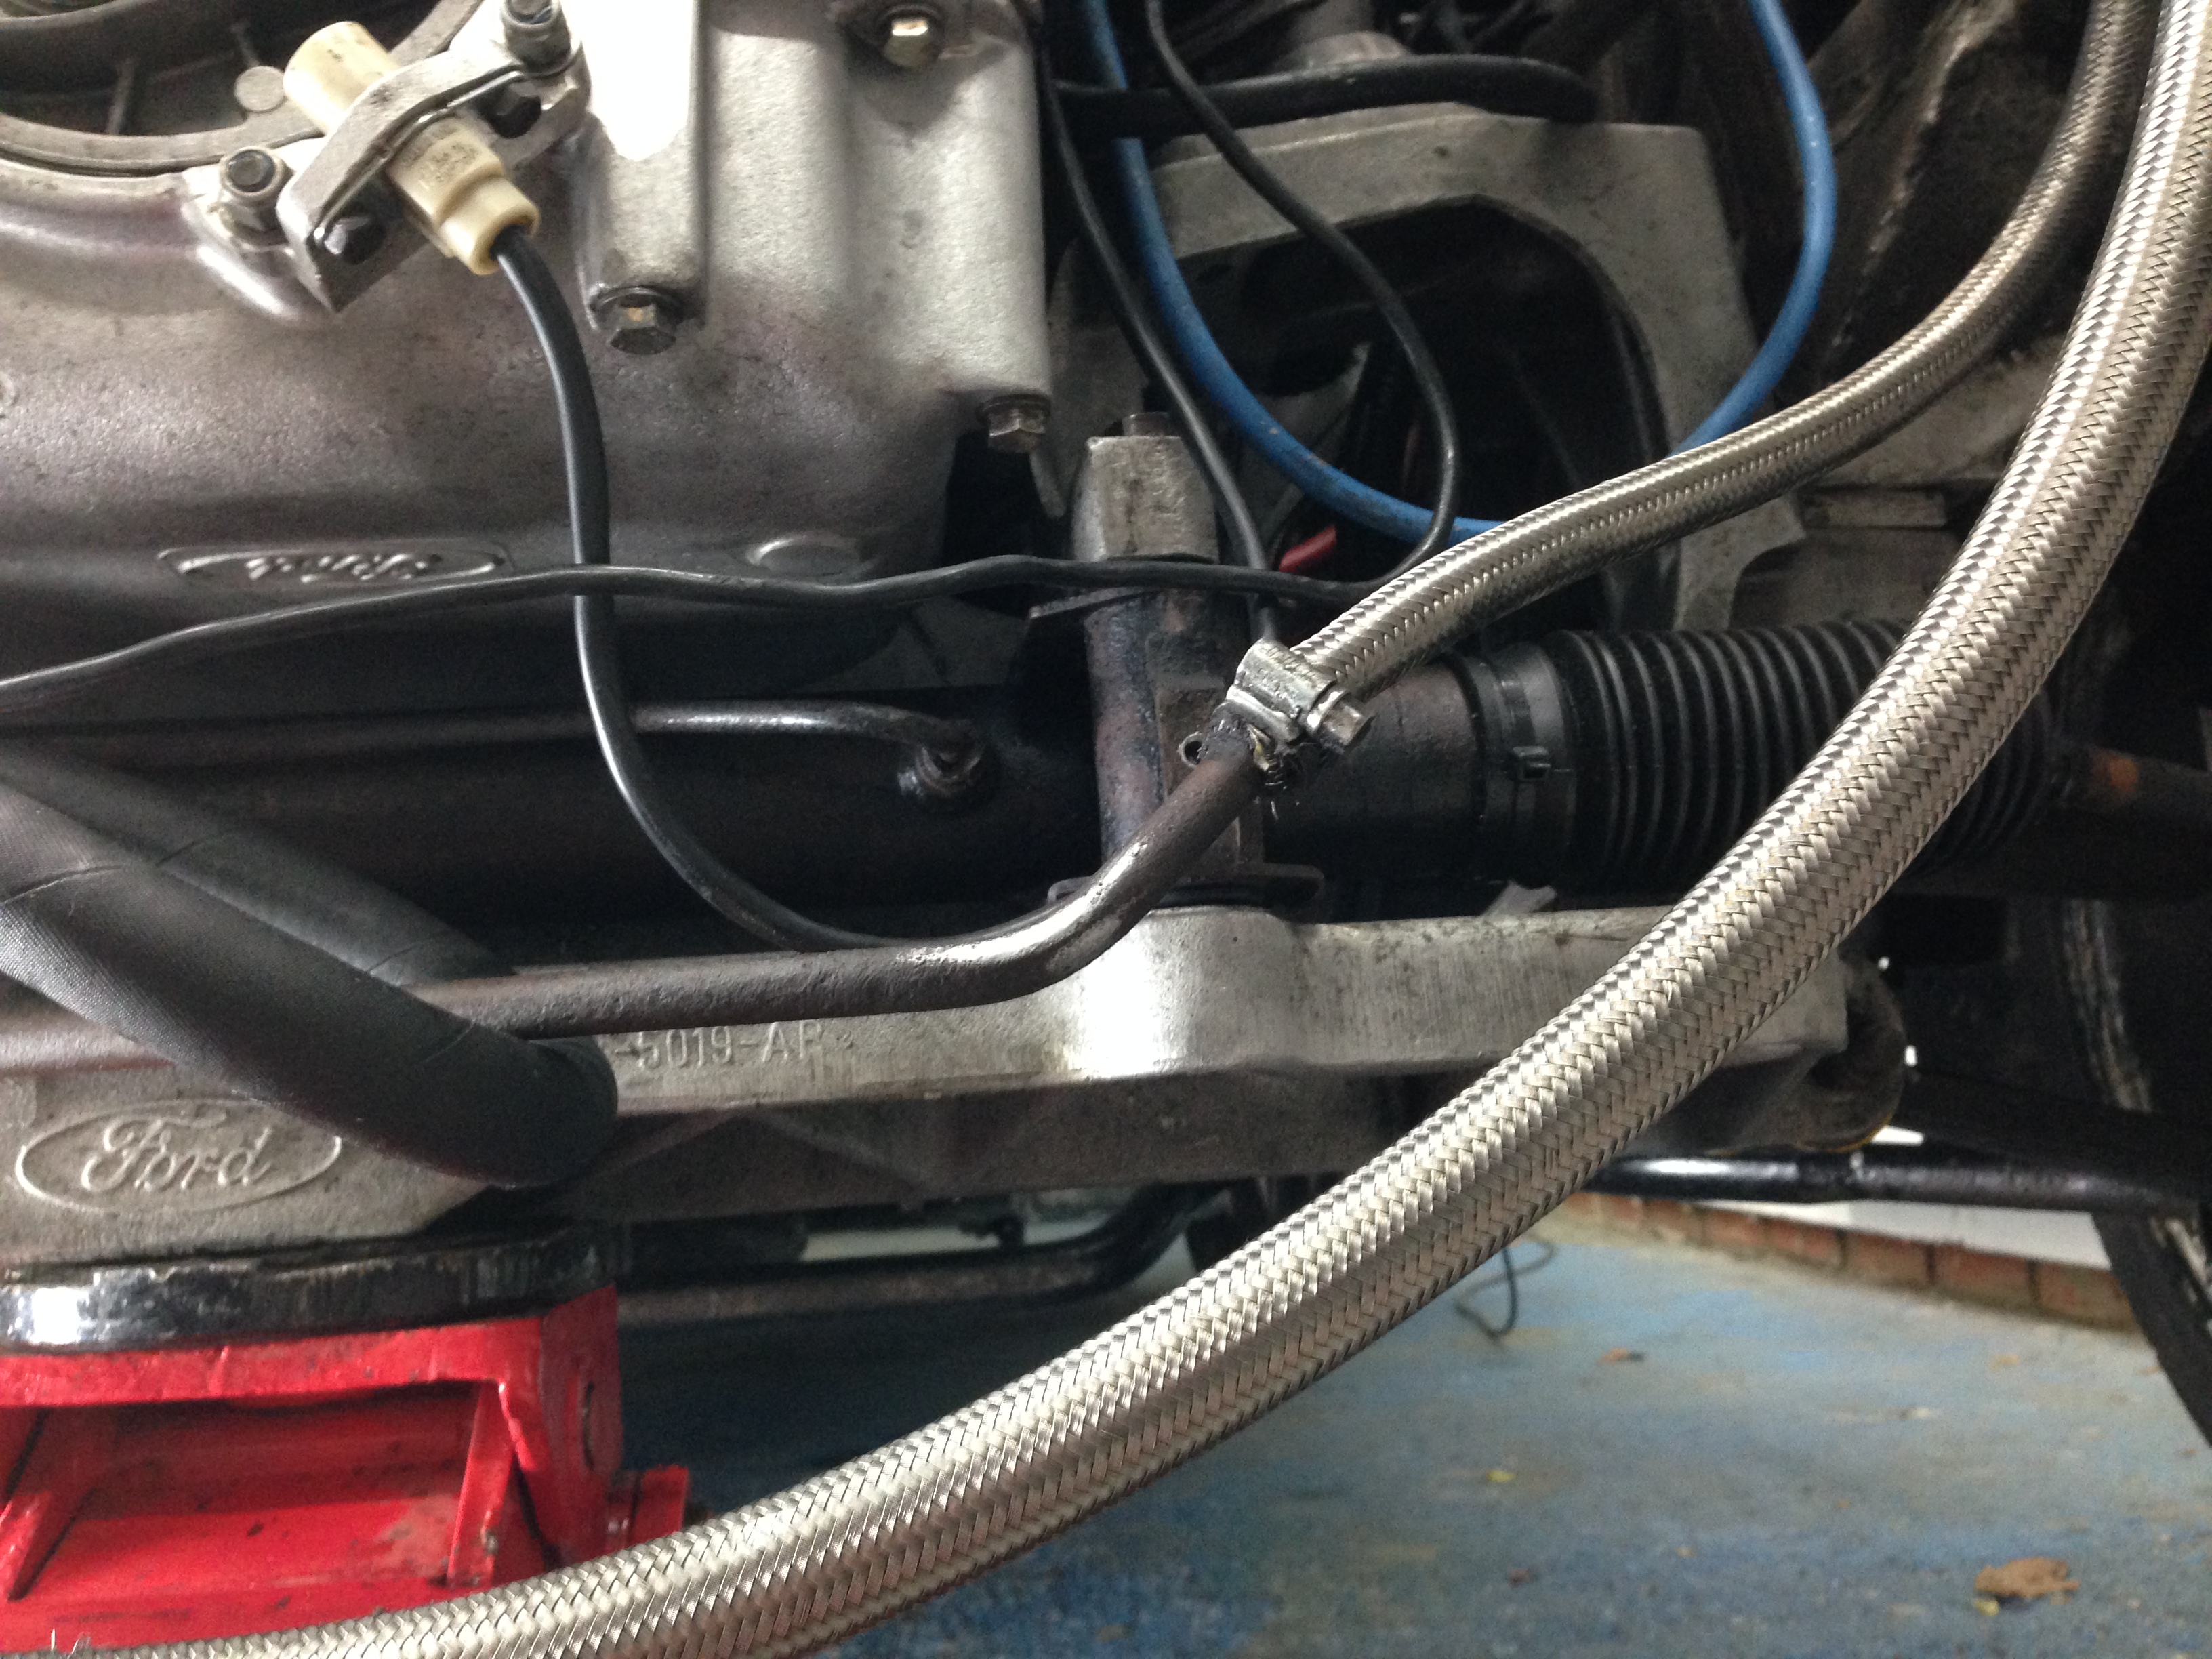
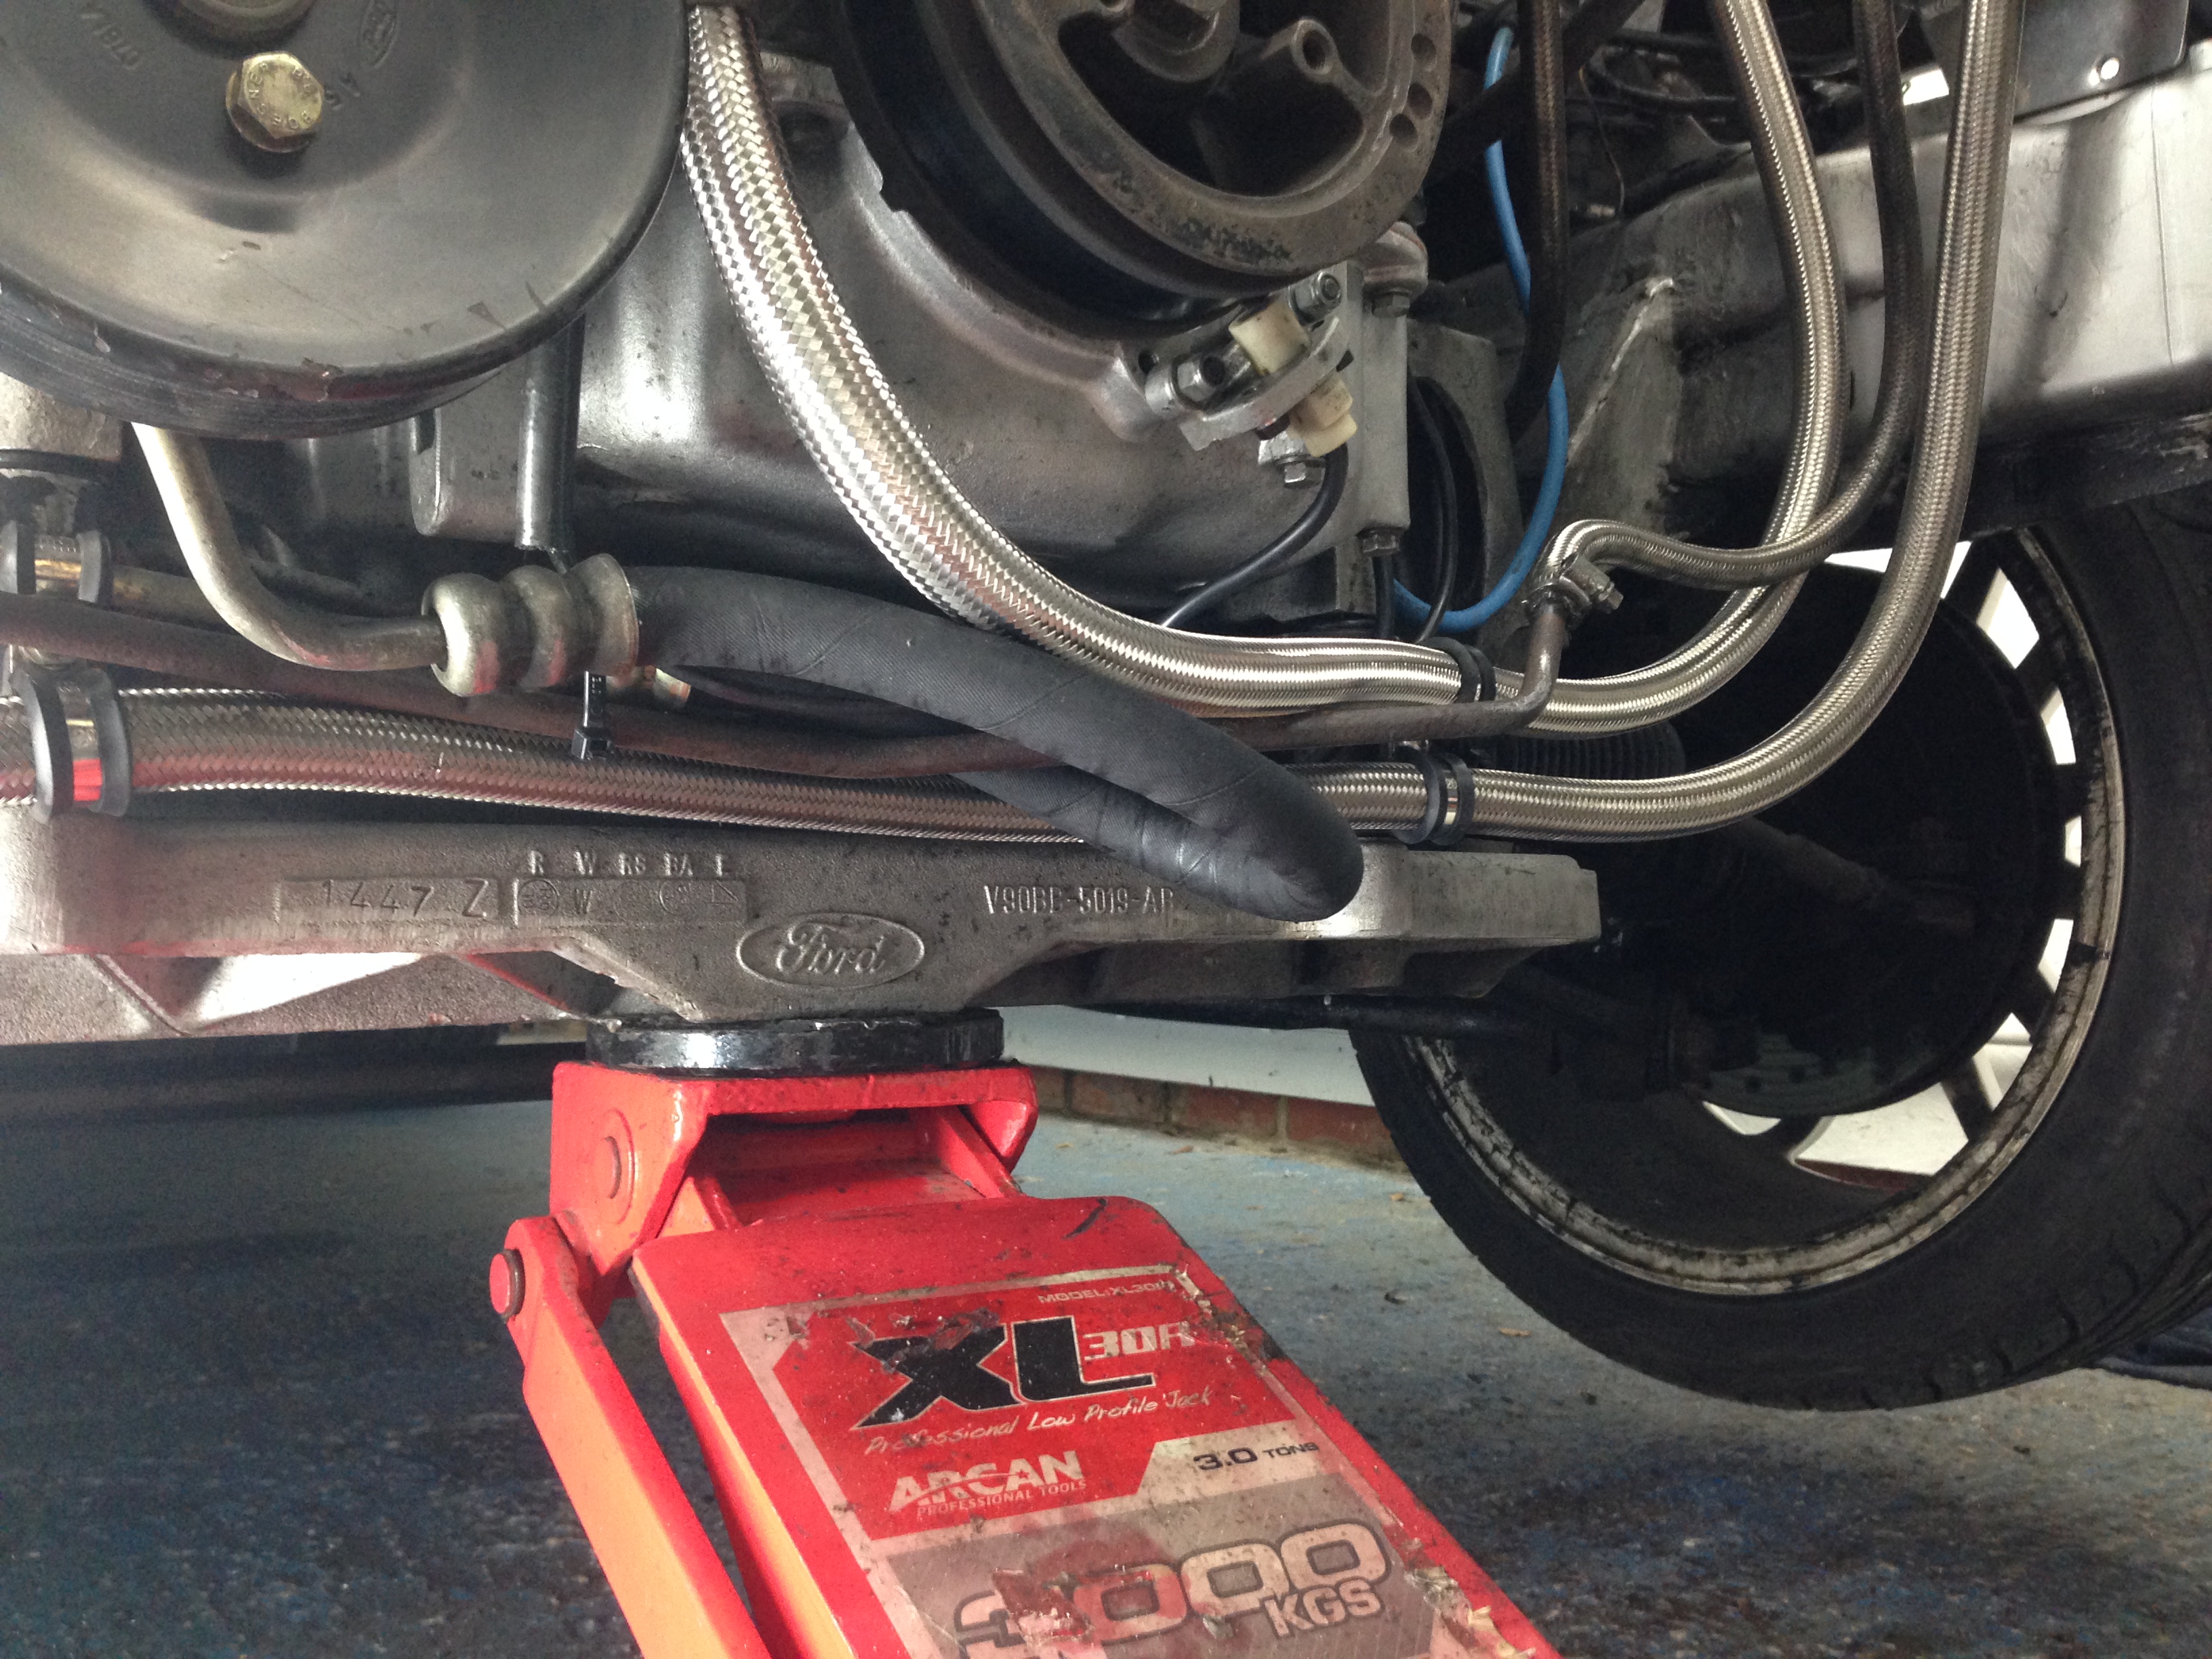
You can see the power steering return hose here, the stainless piping just jubilee clipped onto the old solid pipe - eventually I want to change the whole system to aeroquip

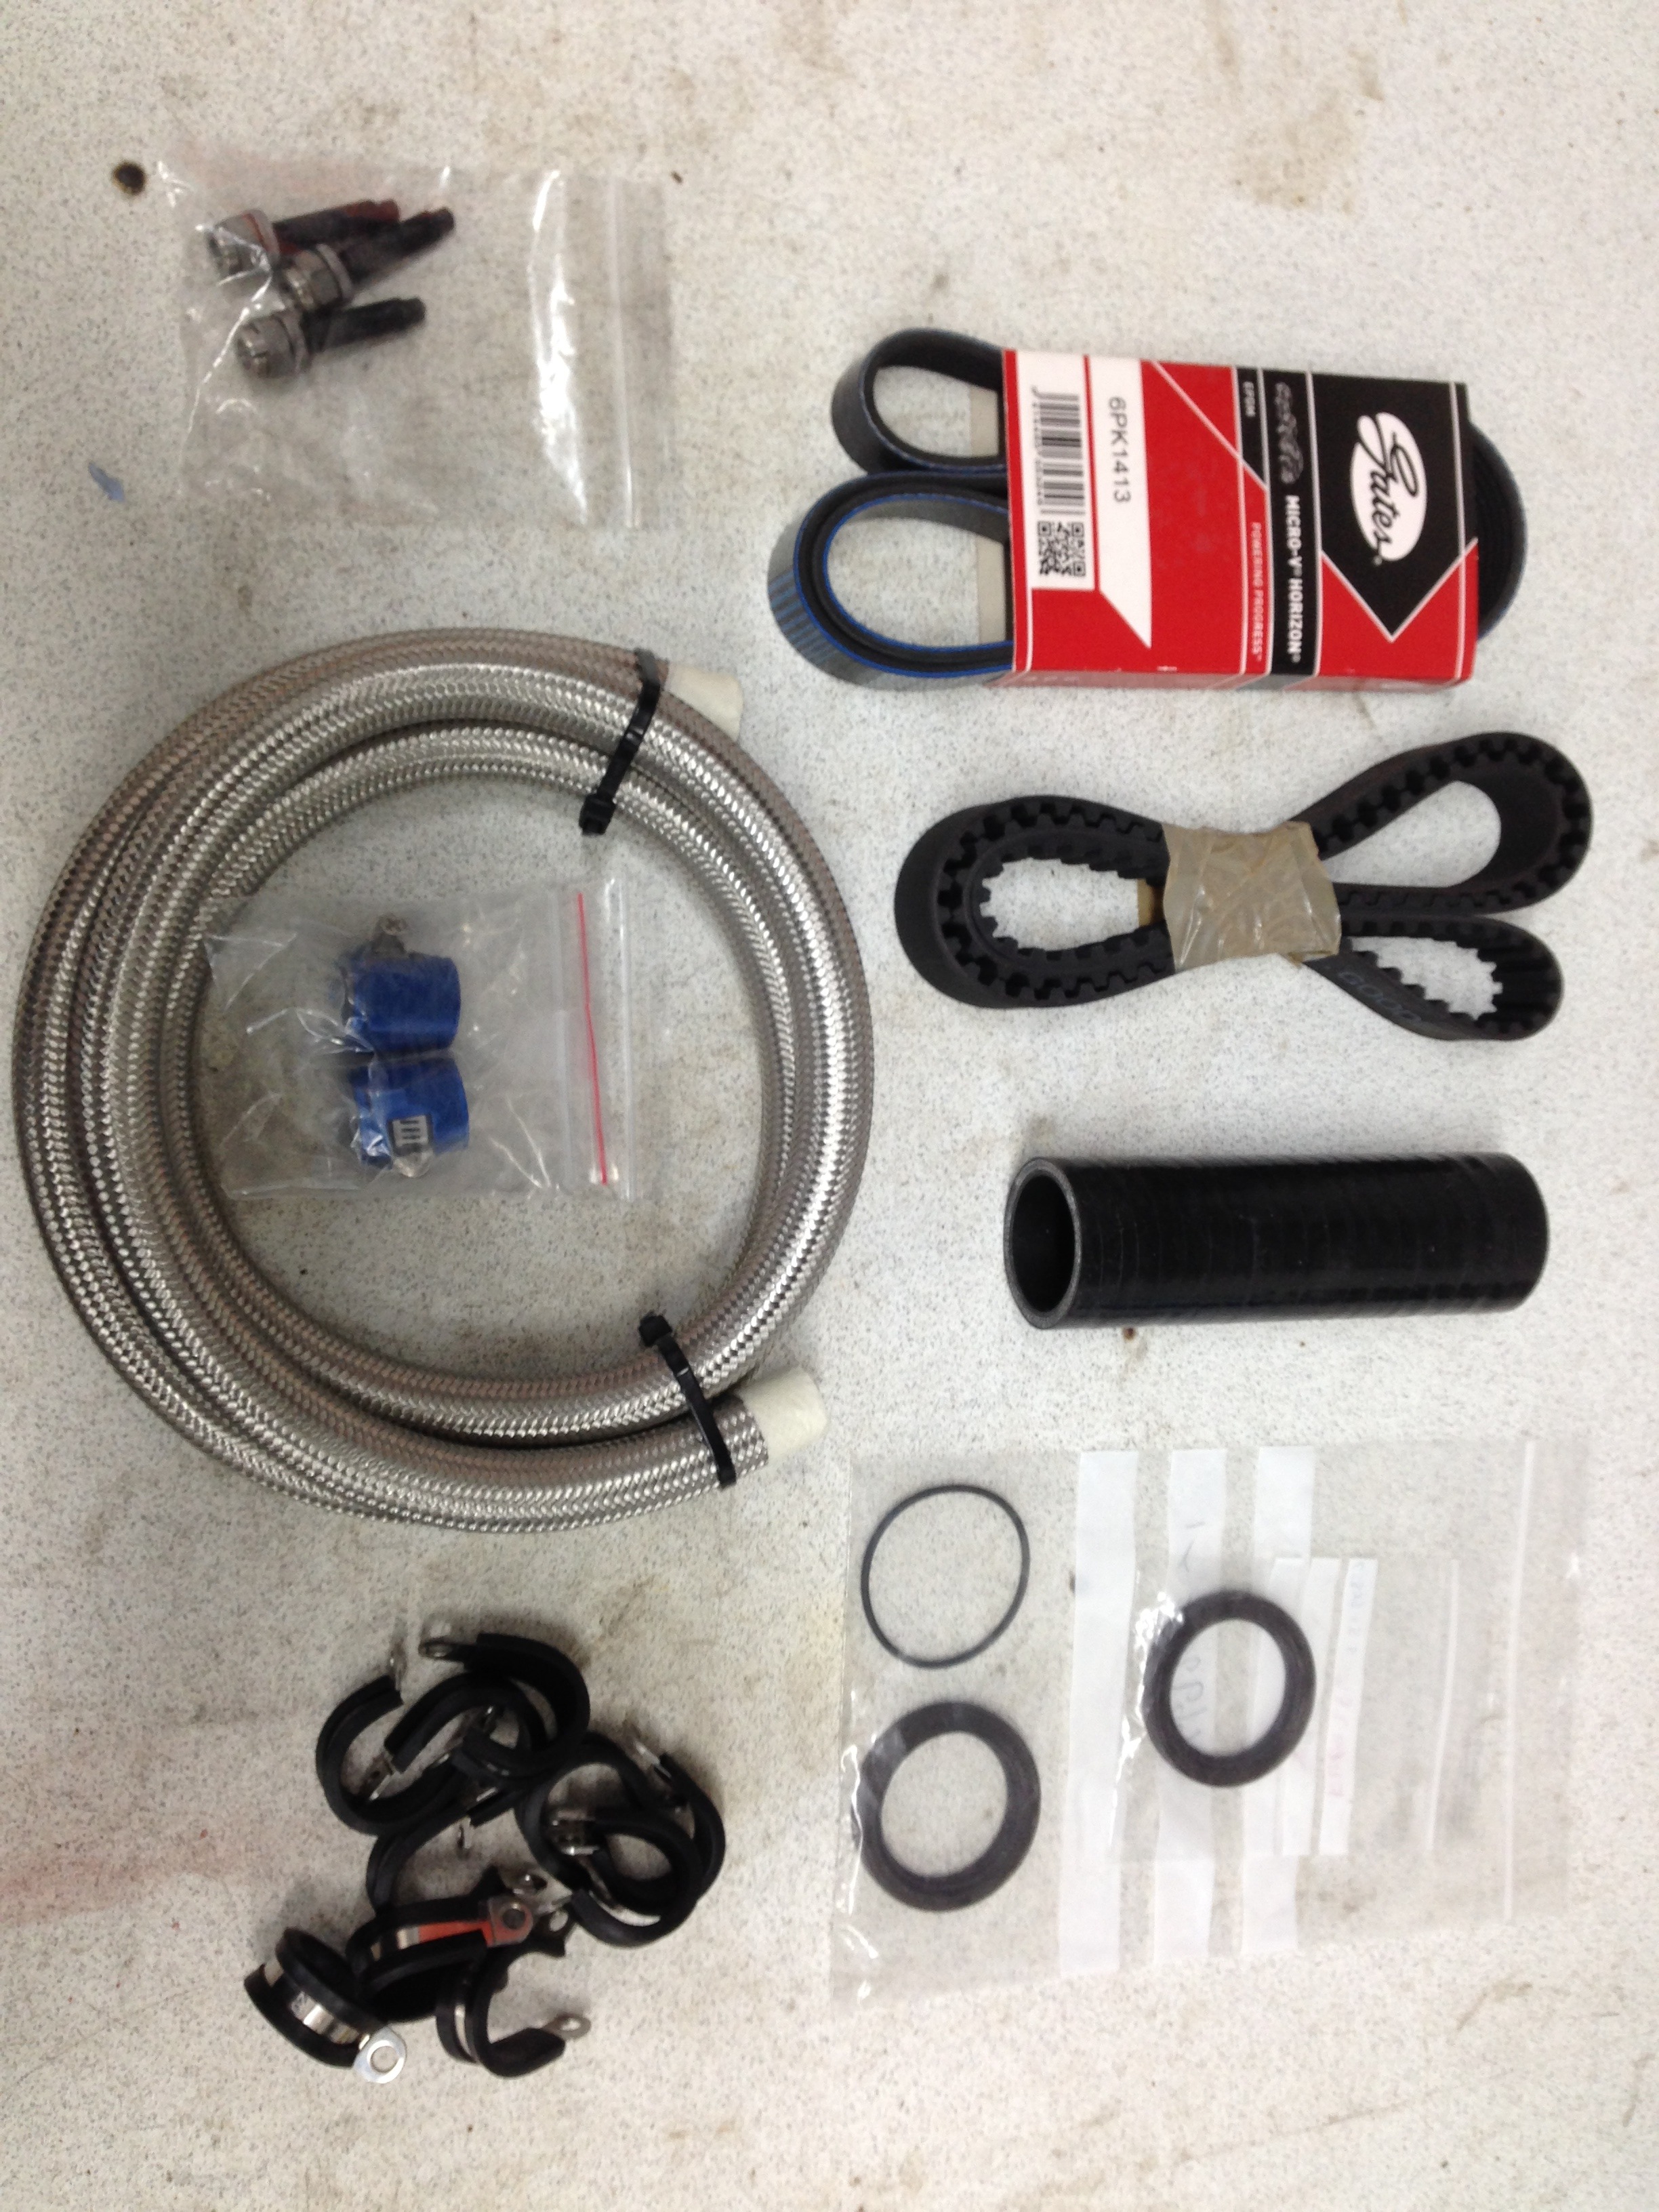
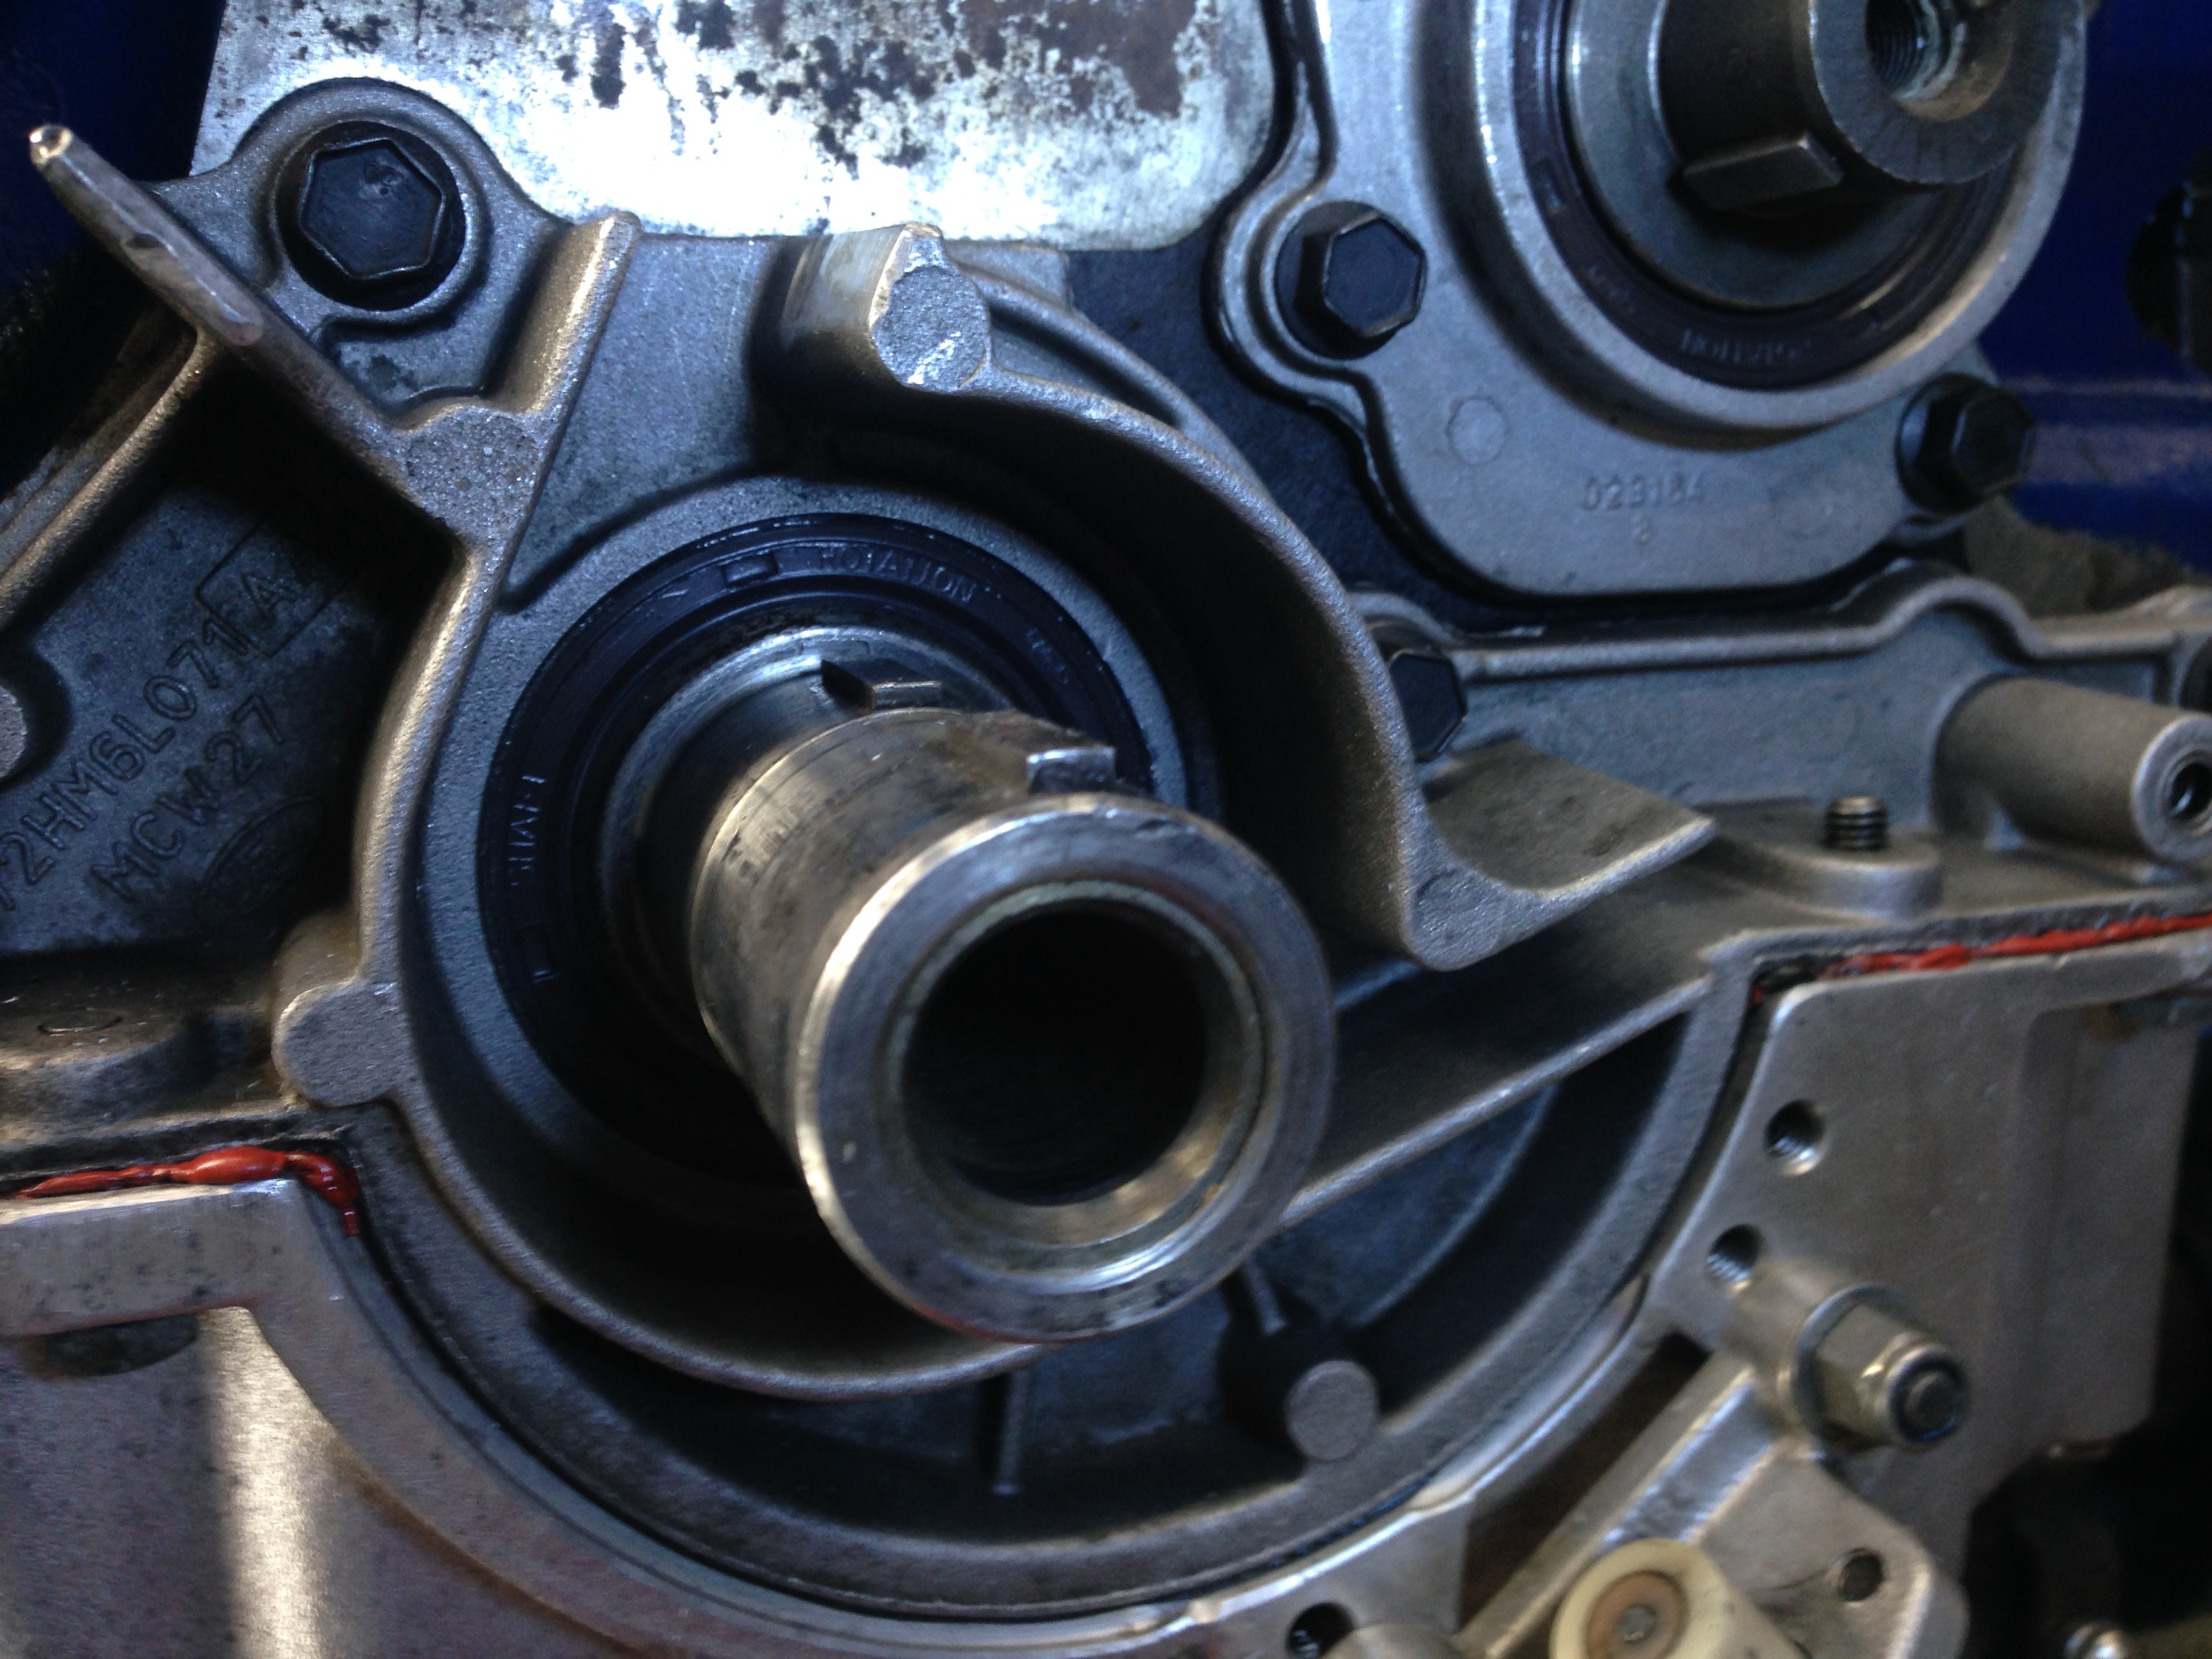
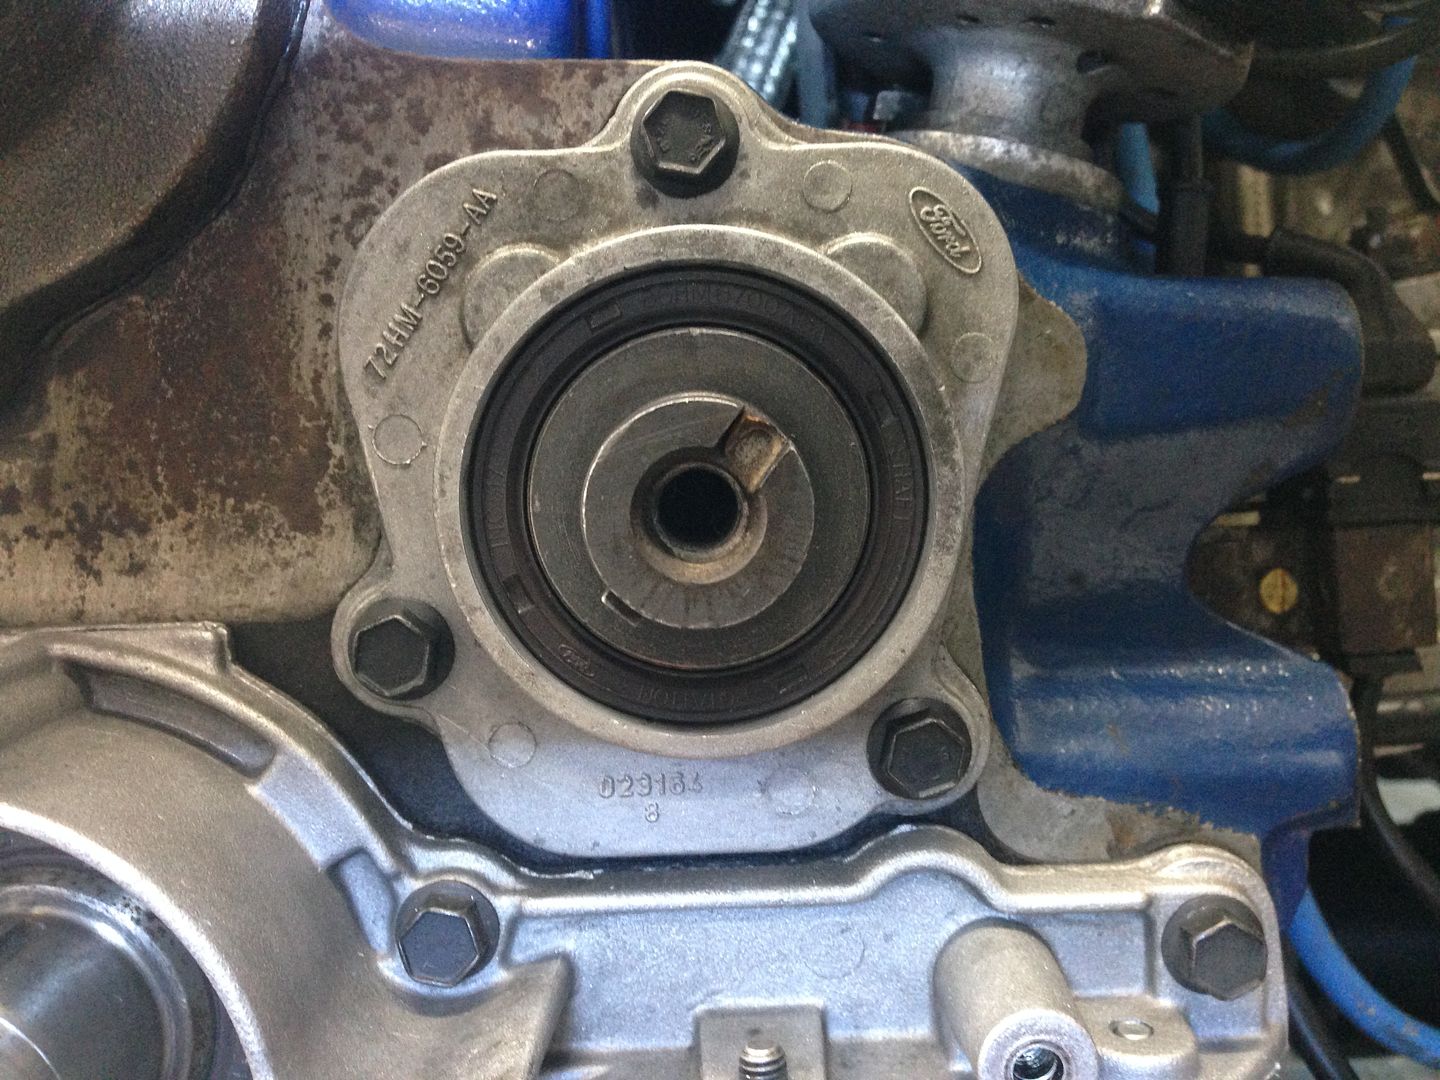
New parts to be fitted
New seals fitted
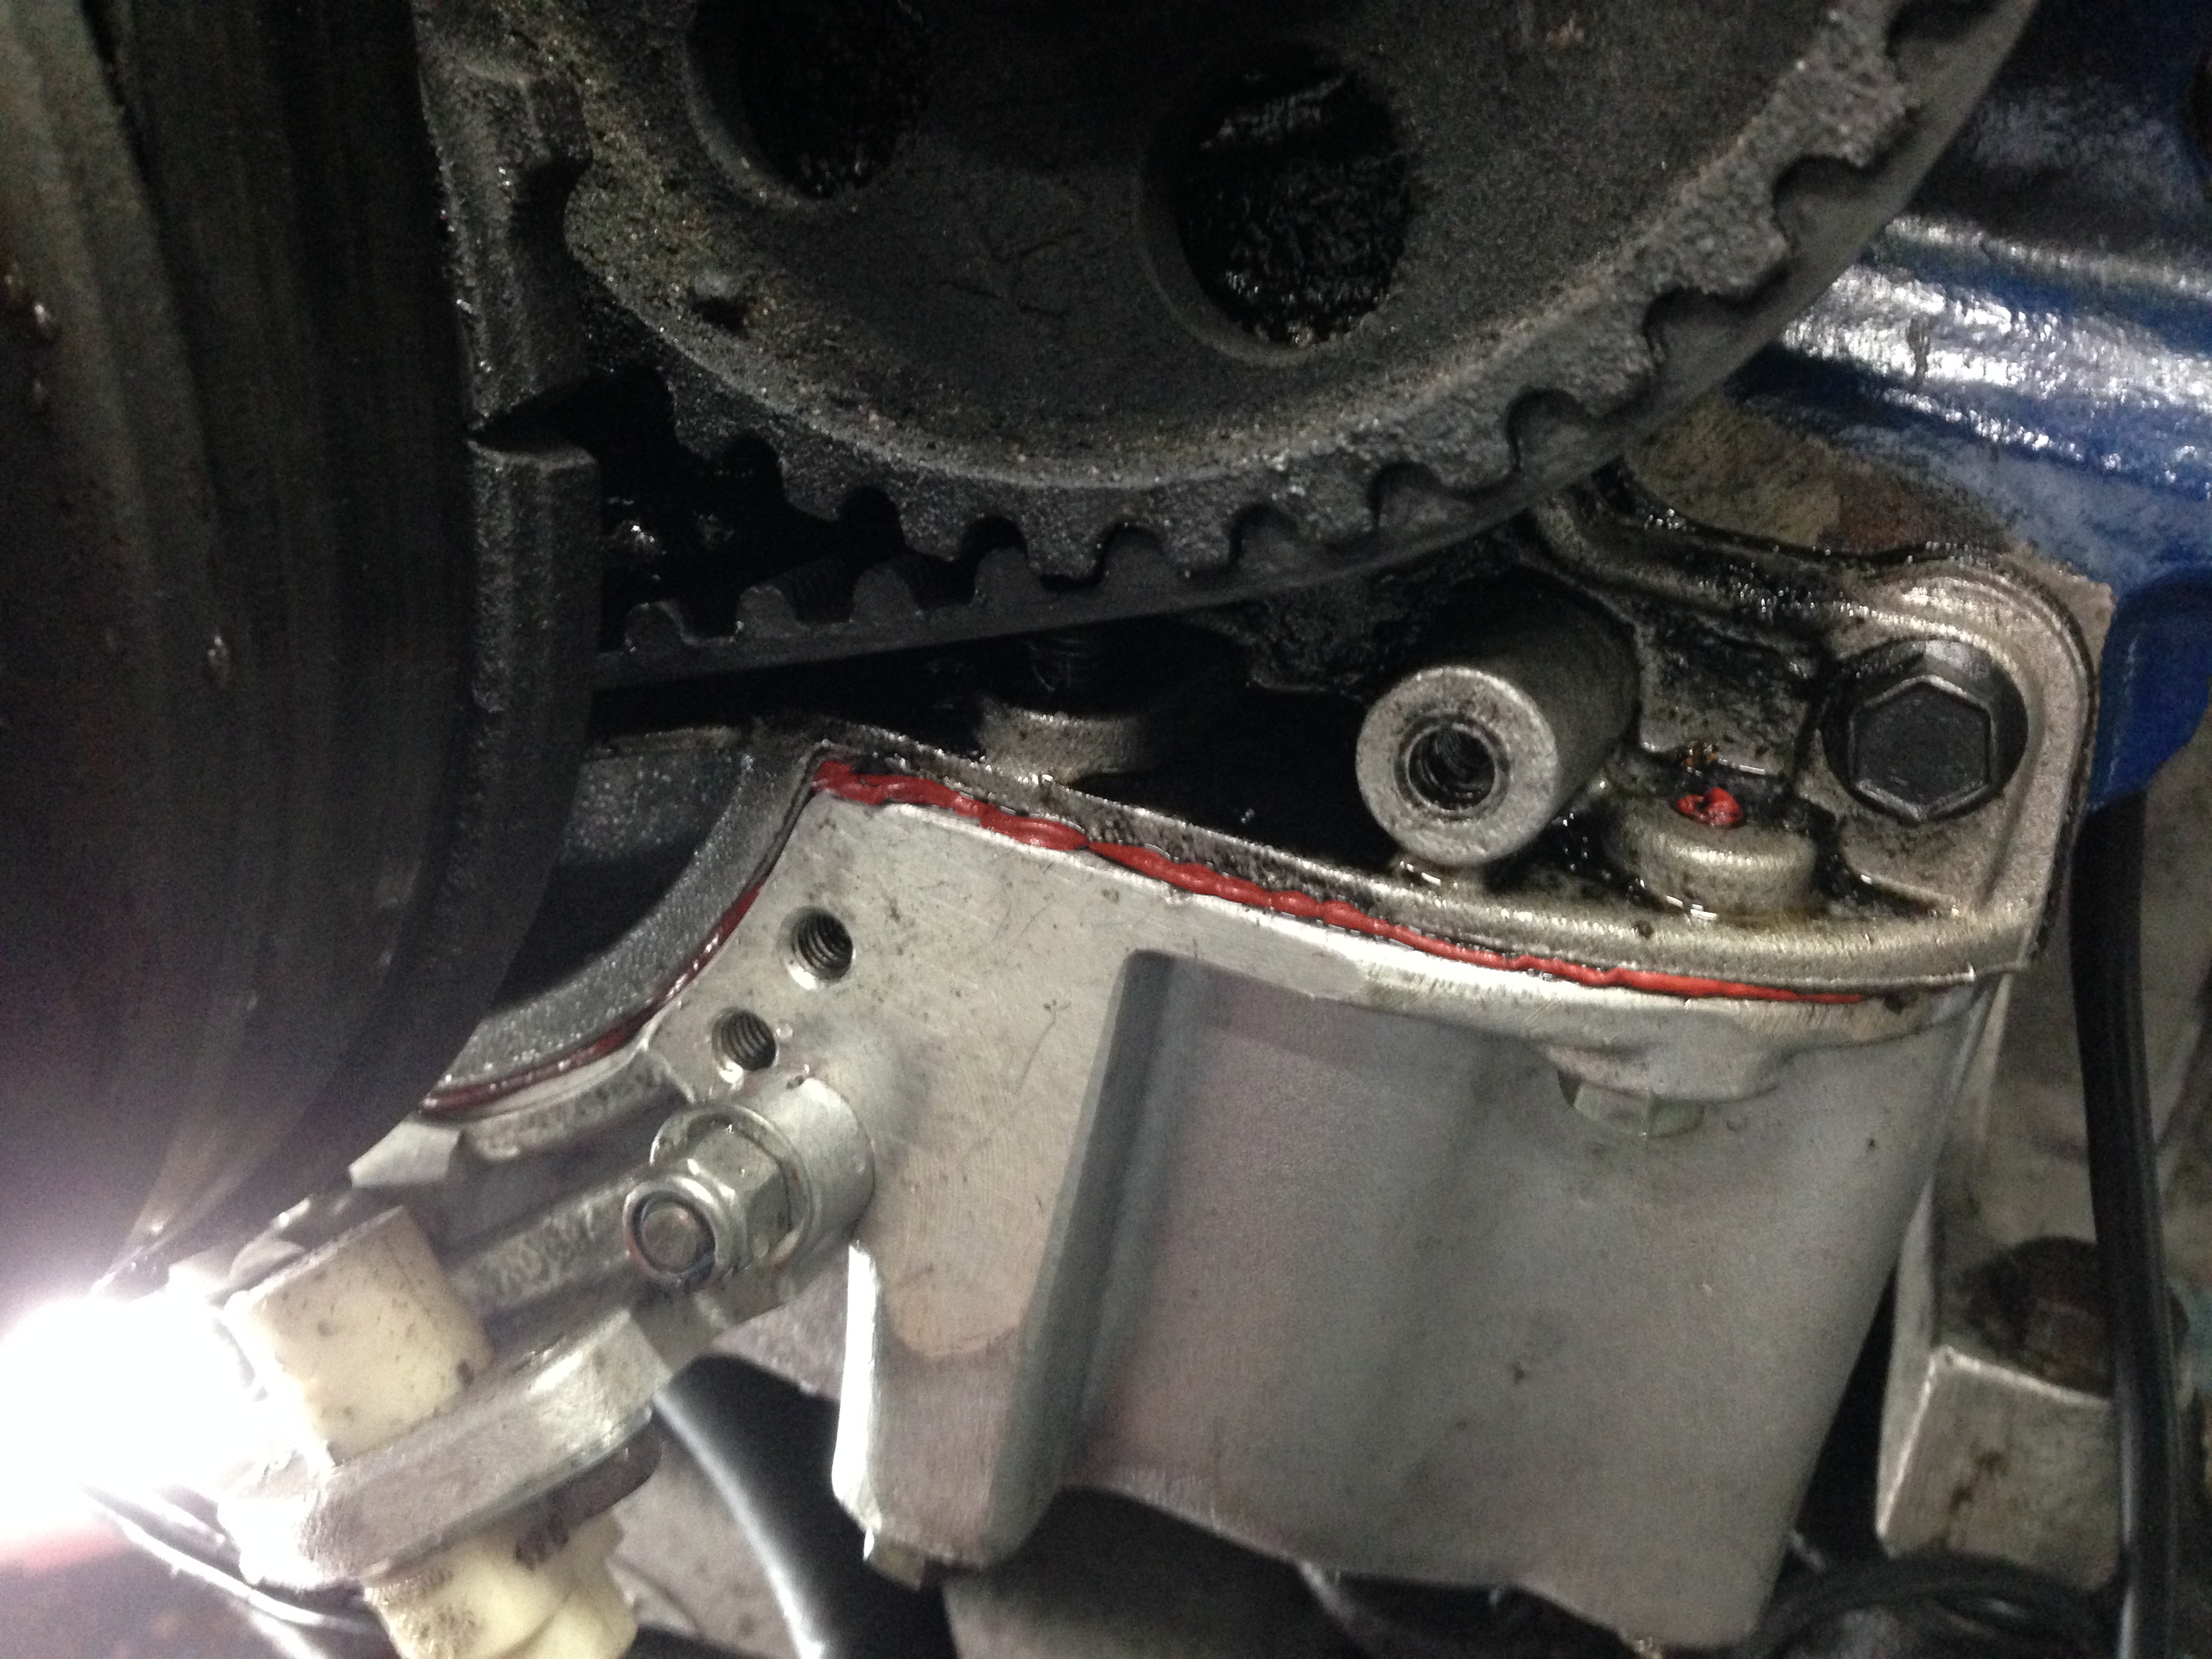
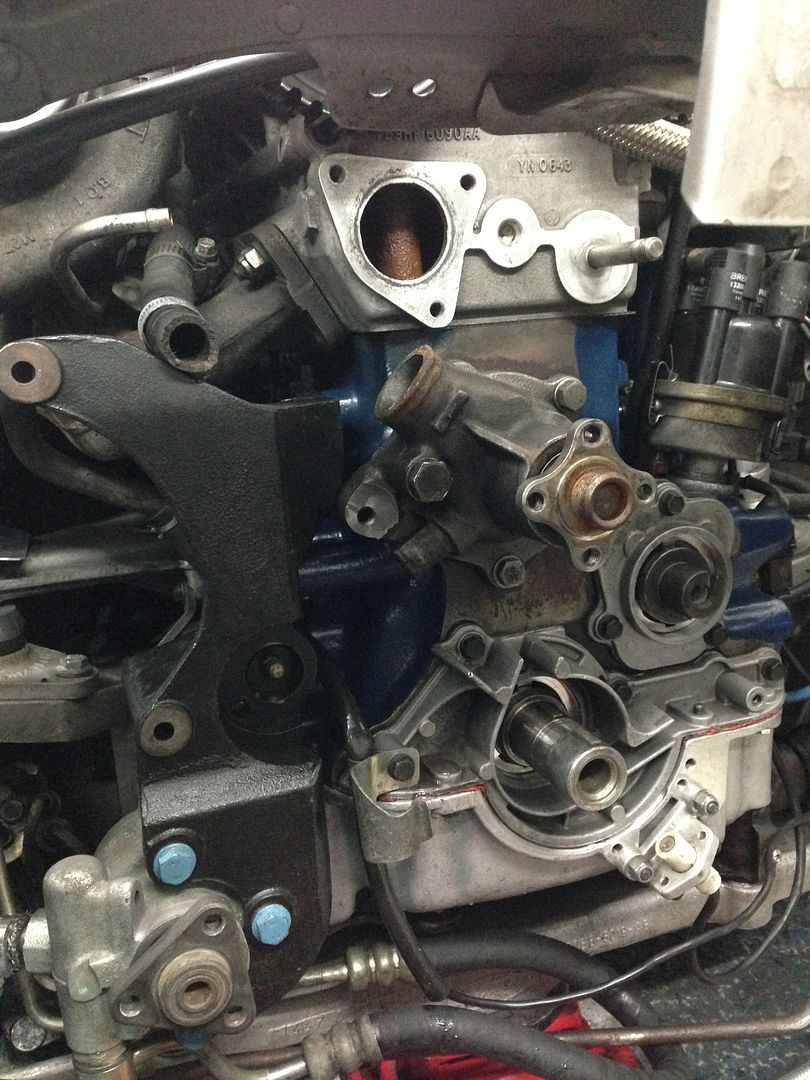
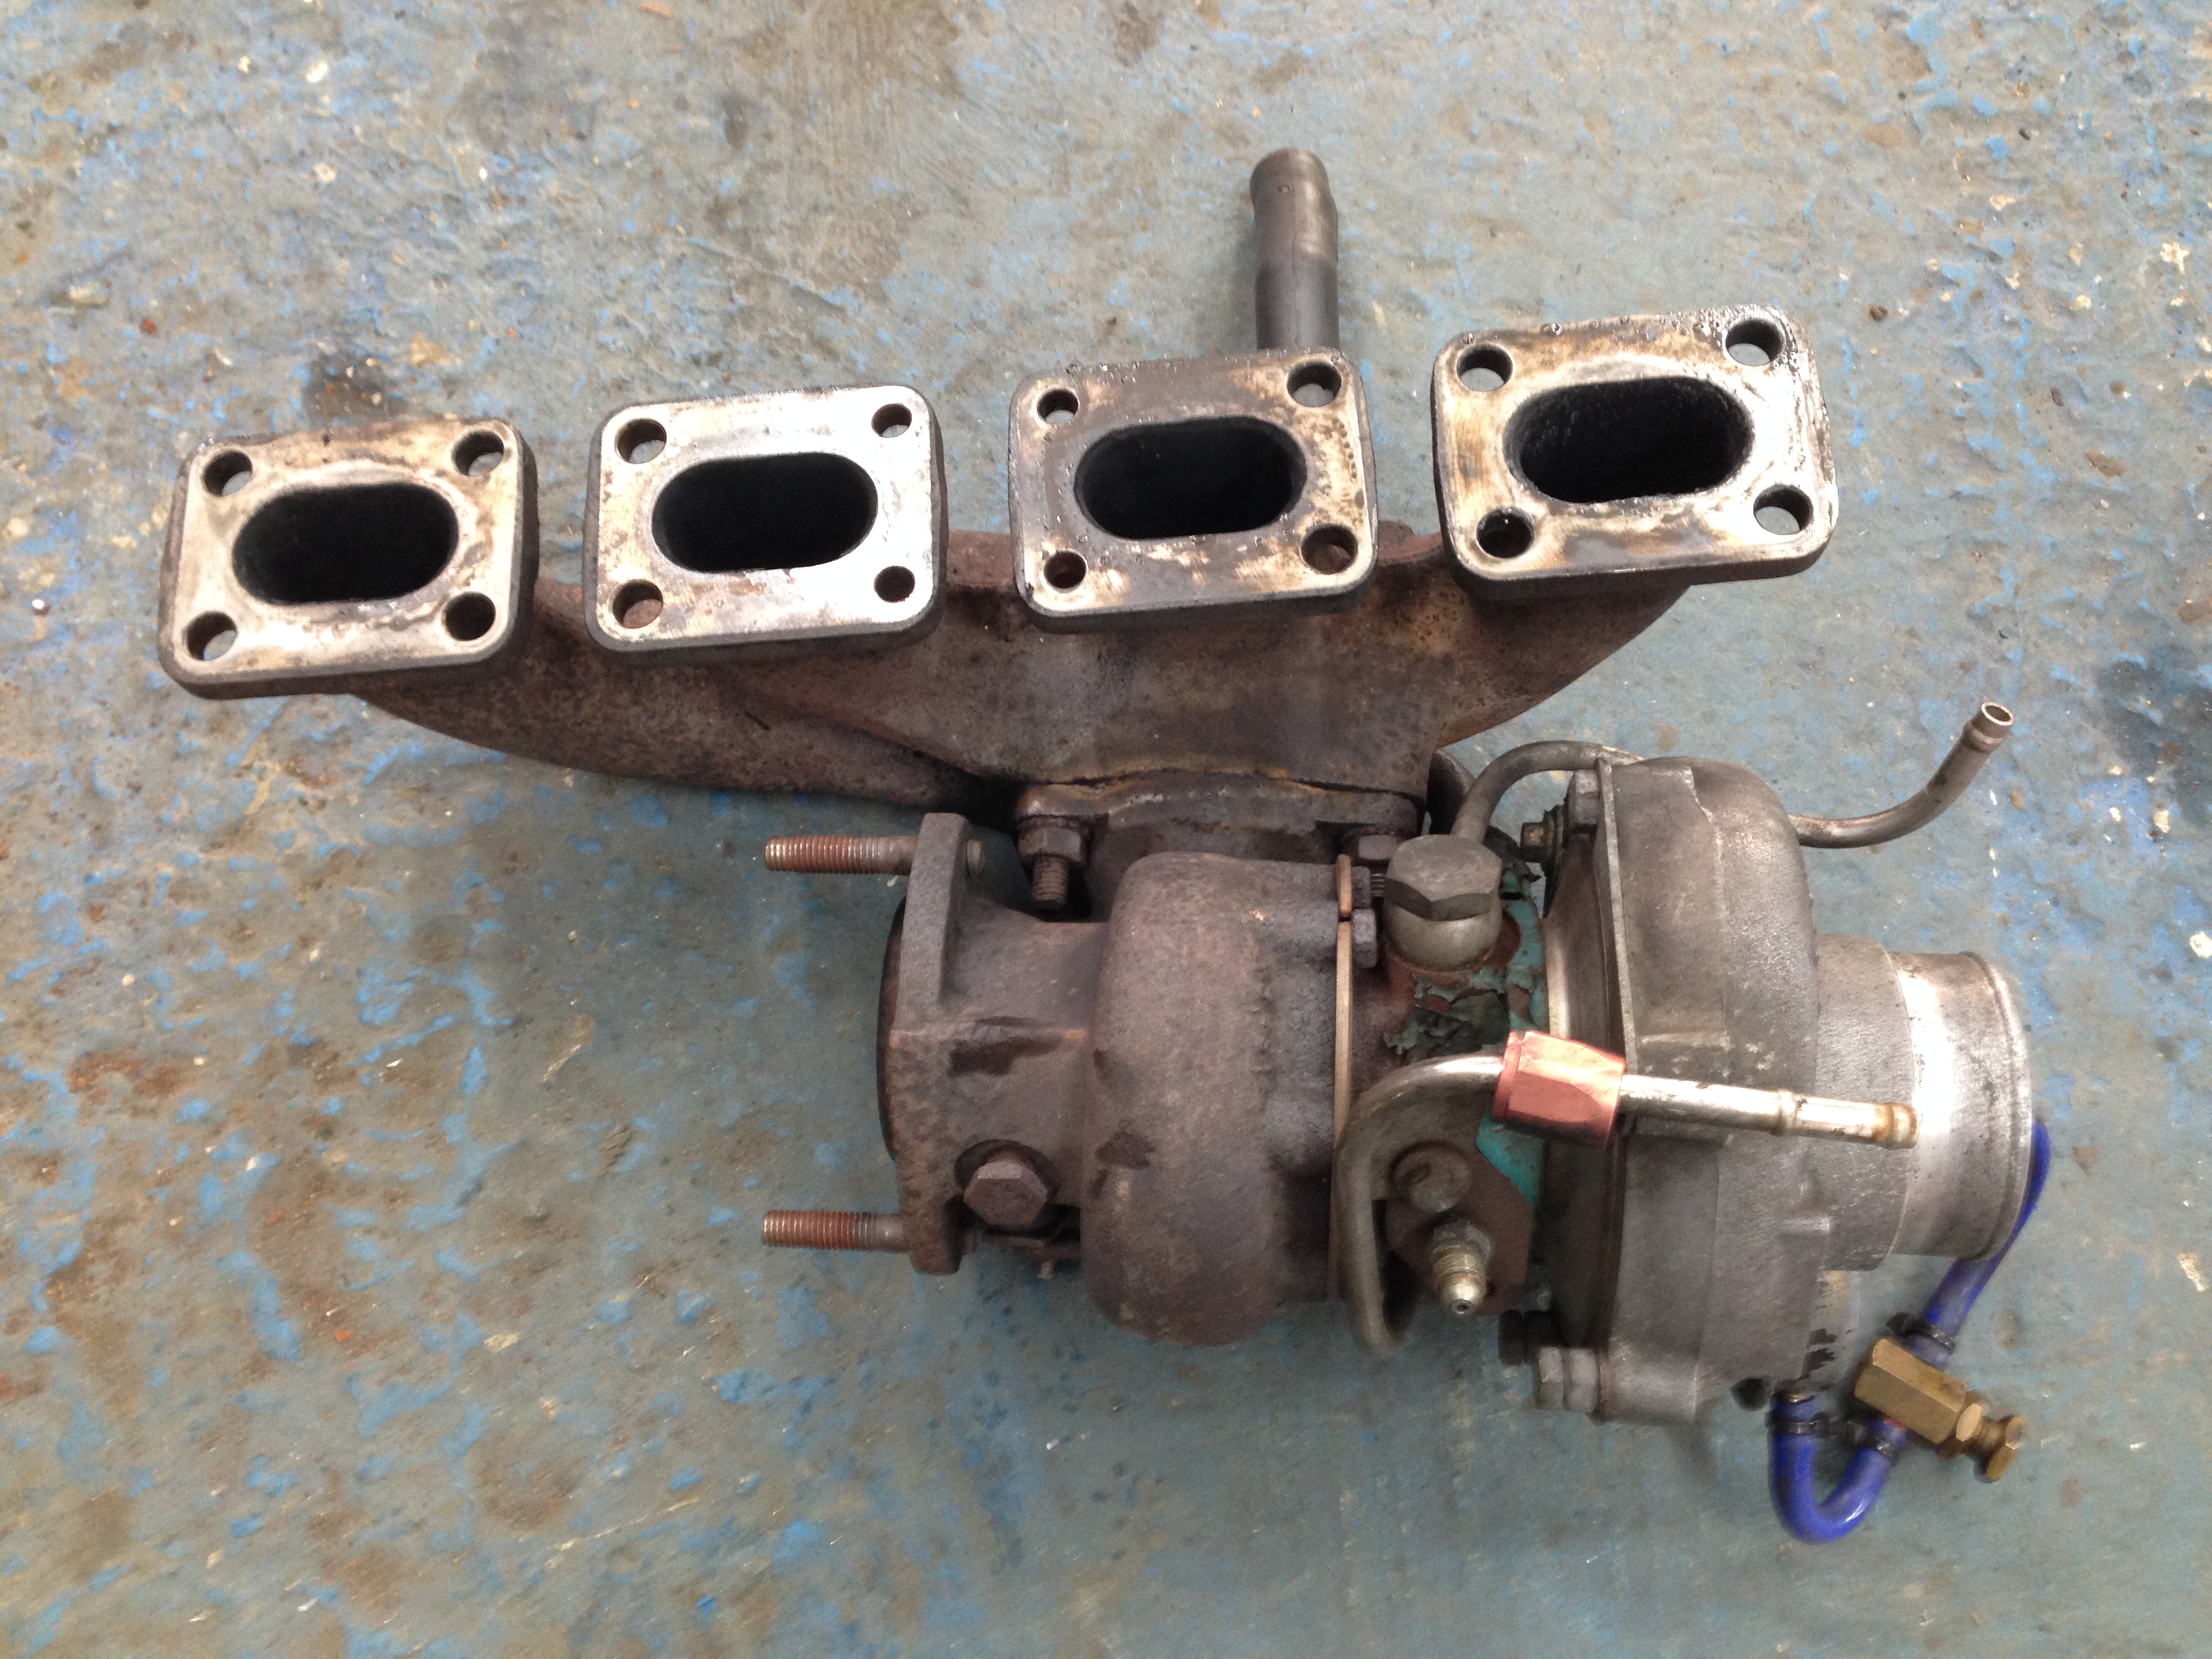
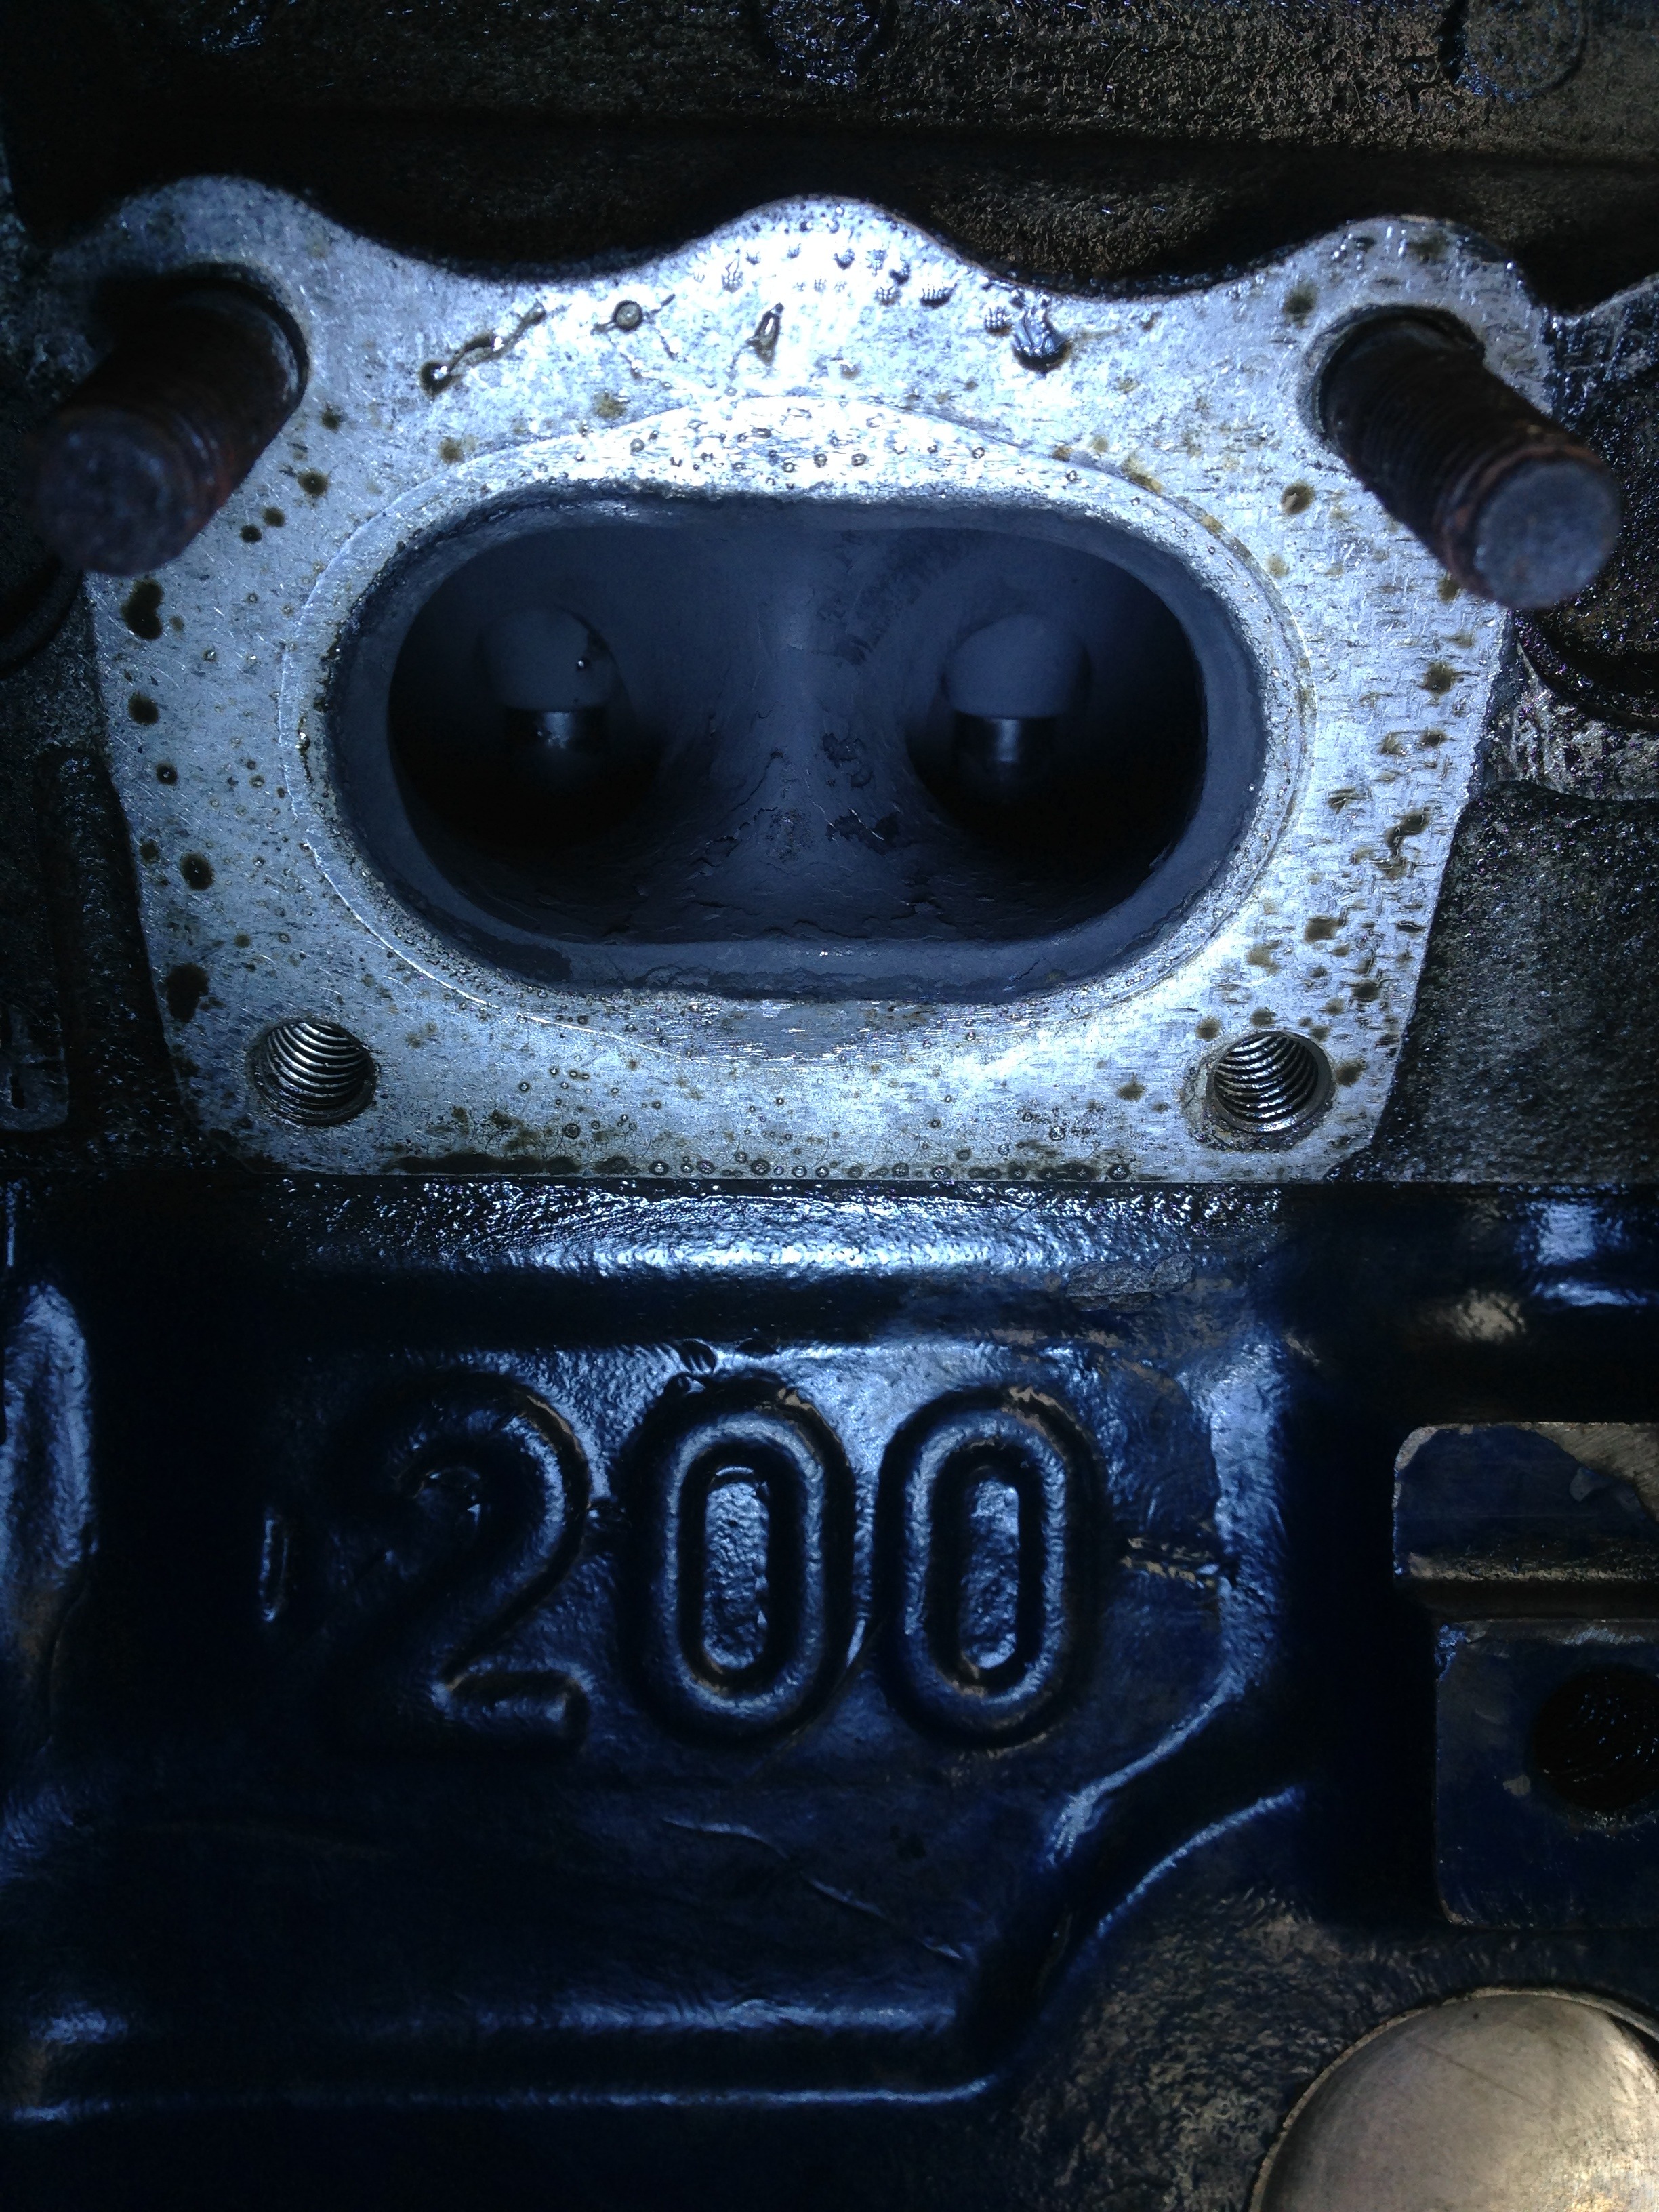
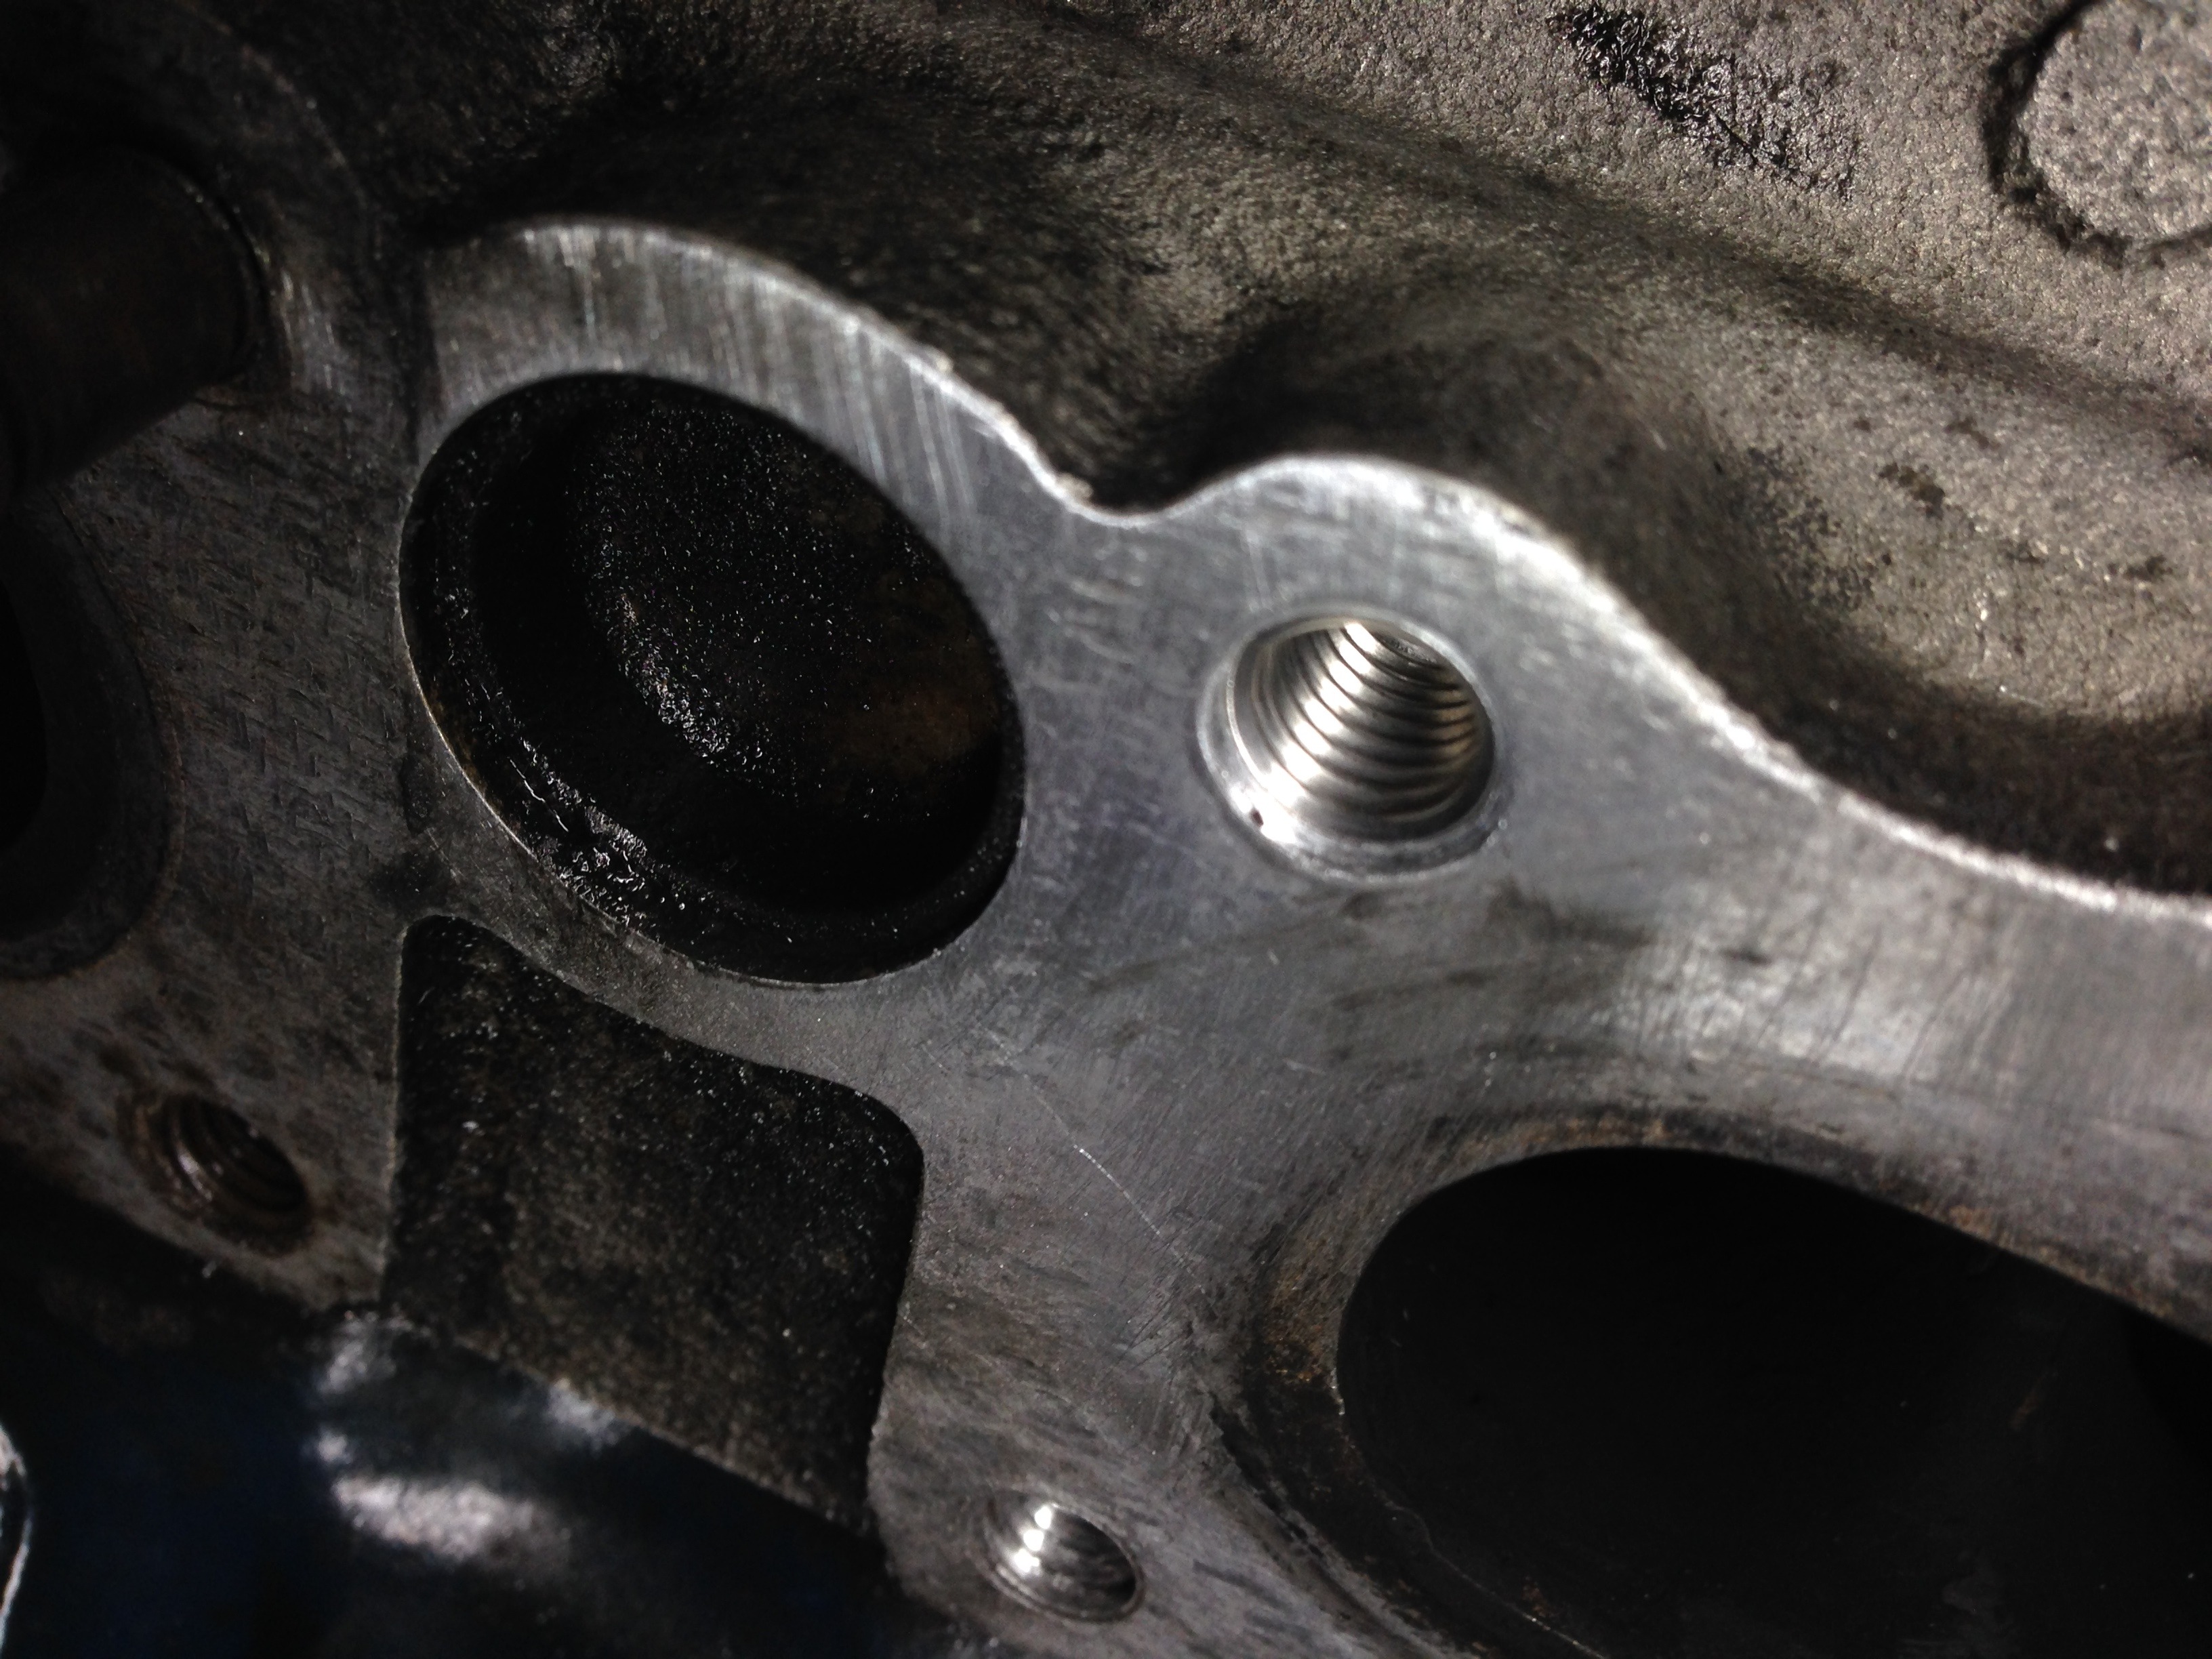
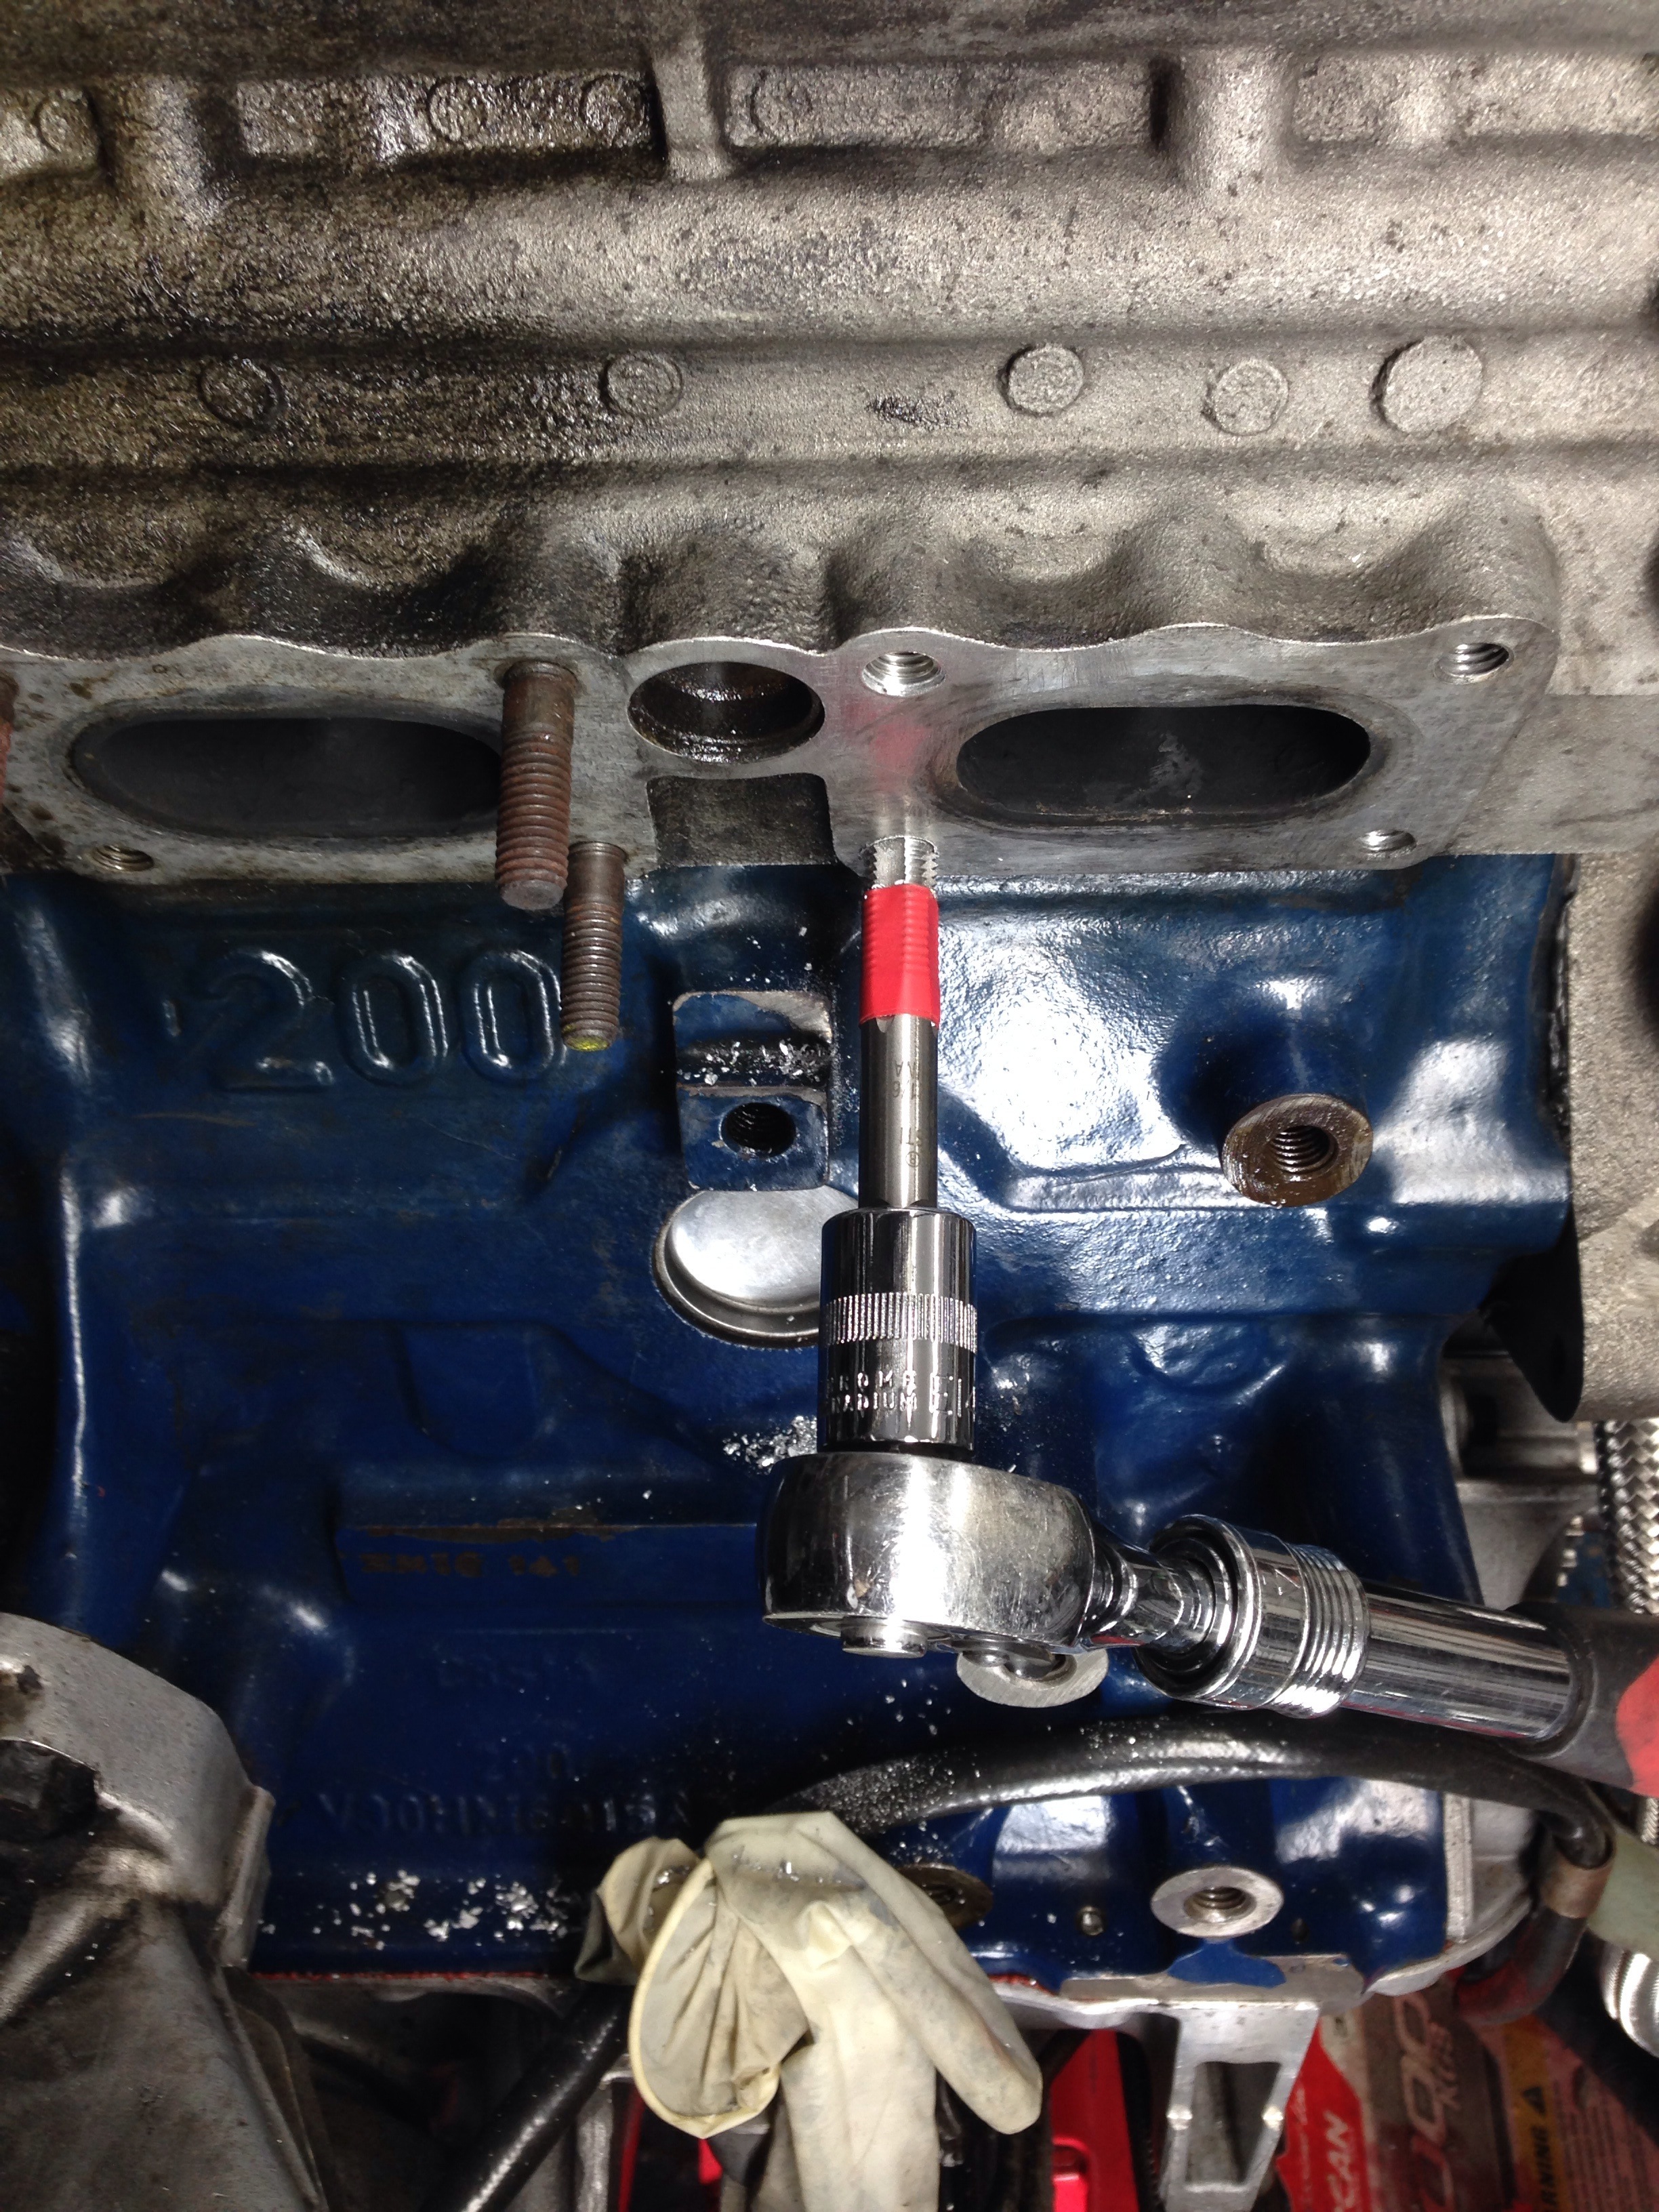
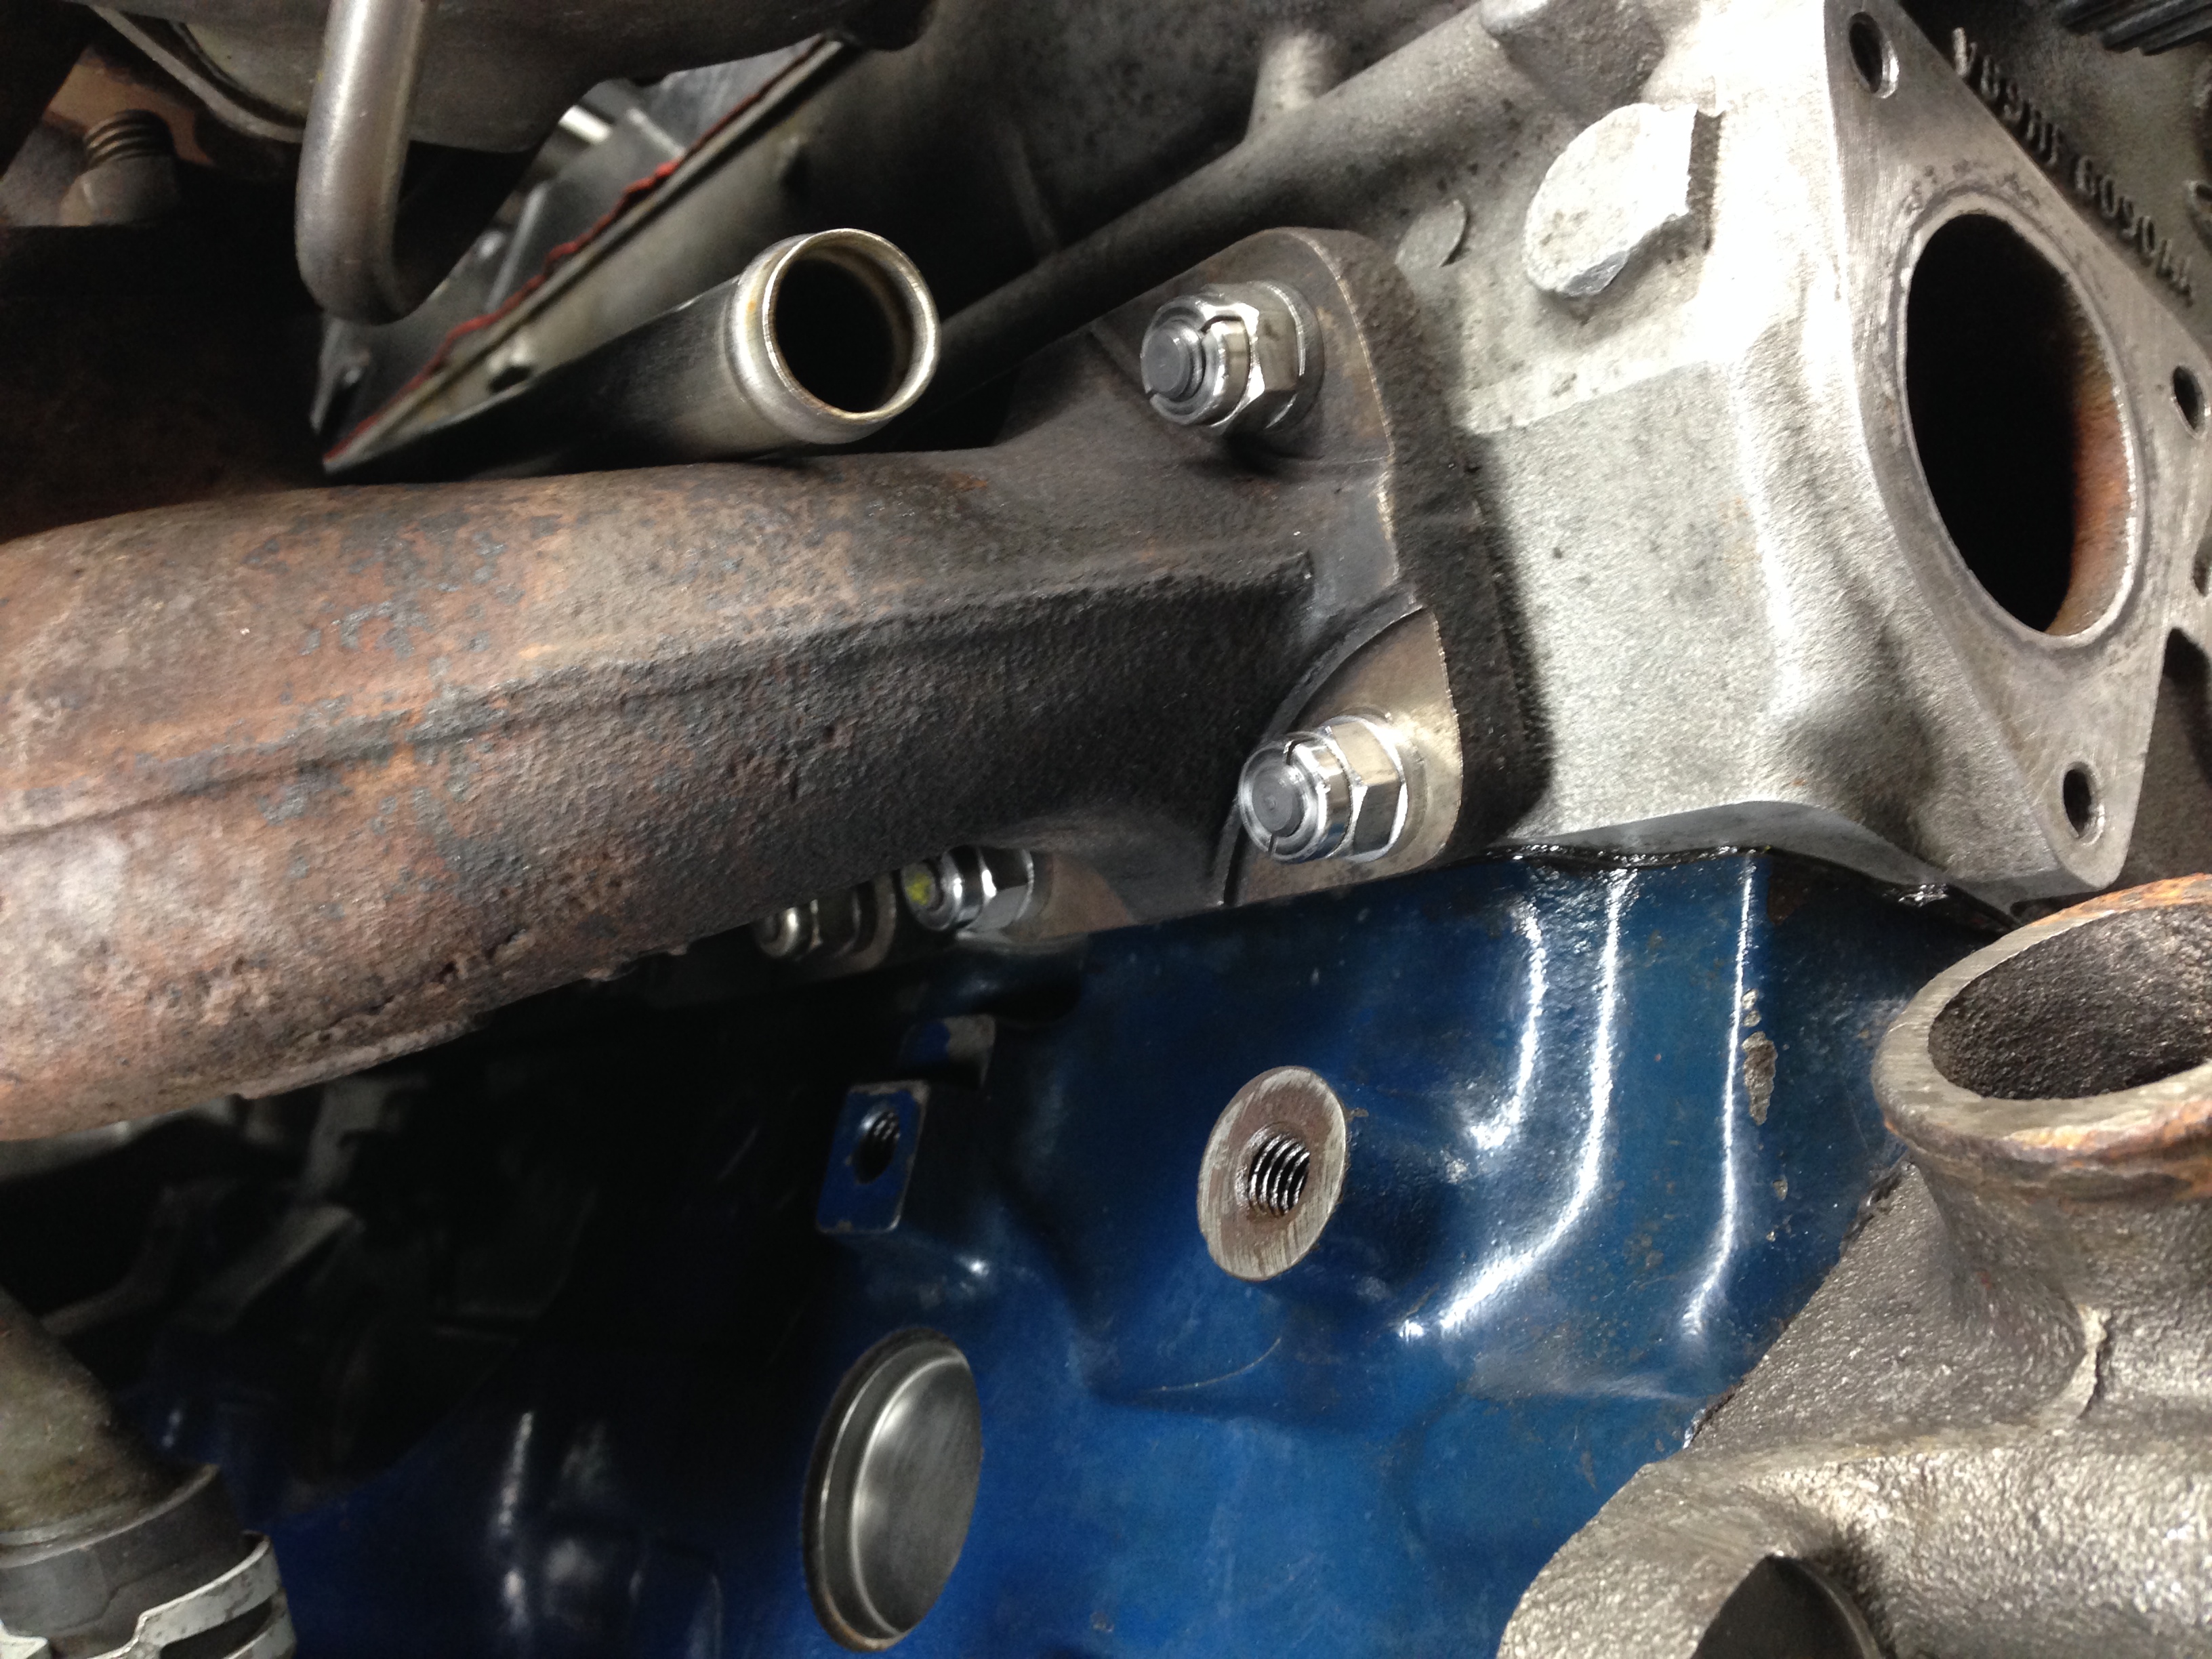
Noticed while everything was out that there were two exhaust manifold studs missing so set about finding out why which came down to the threads were stripped and once removed a third was also barely there - so set about getting the threads repaired and new studs fitted
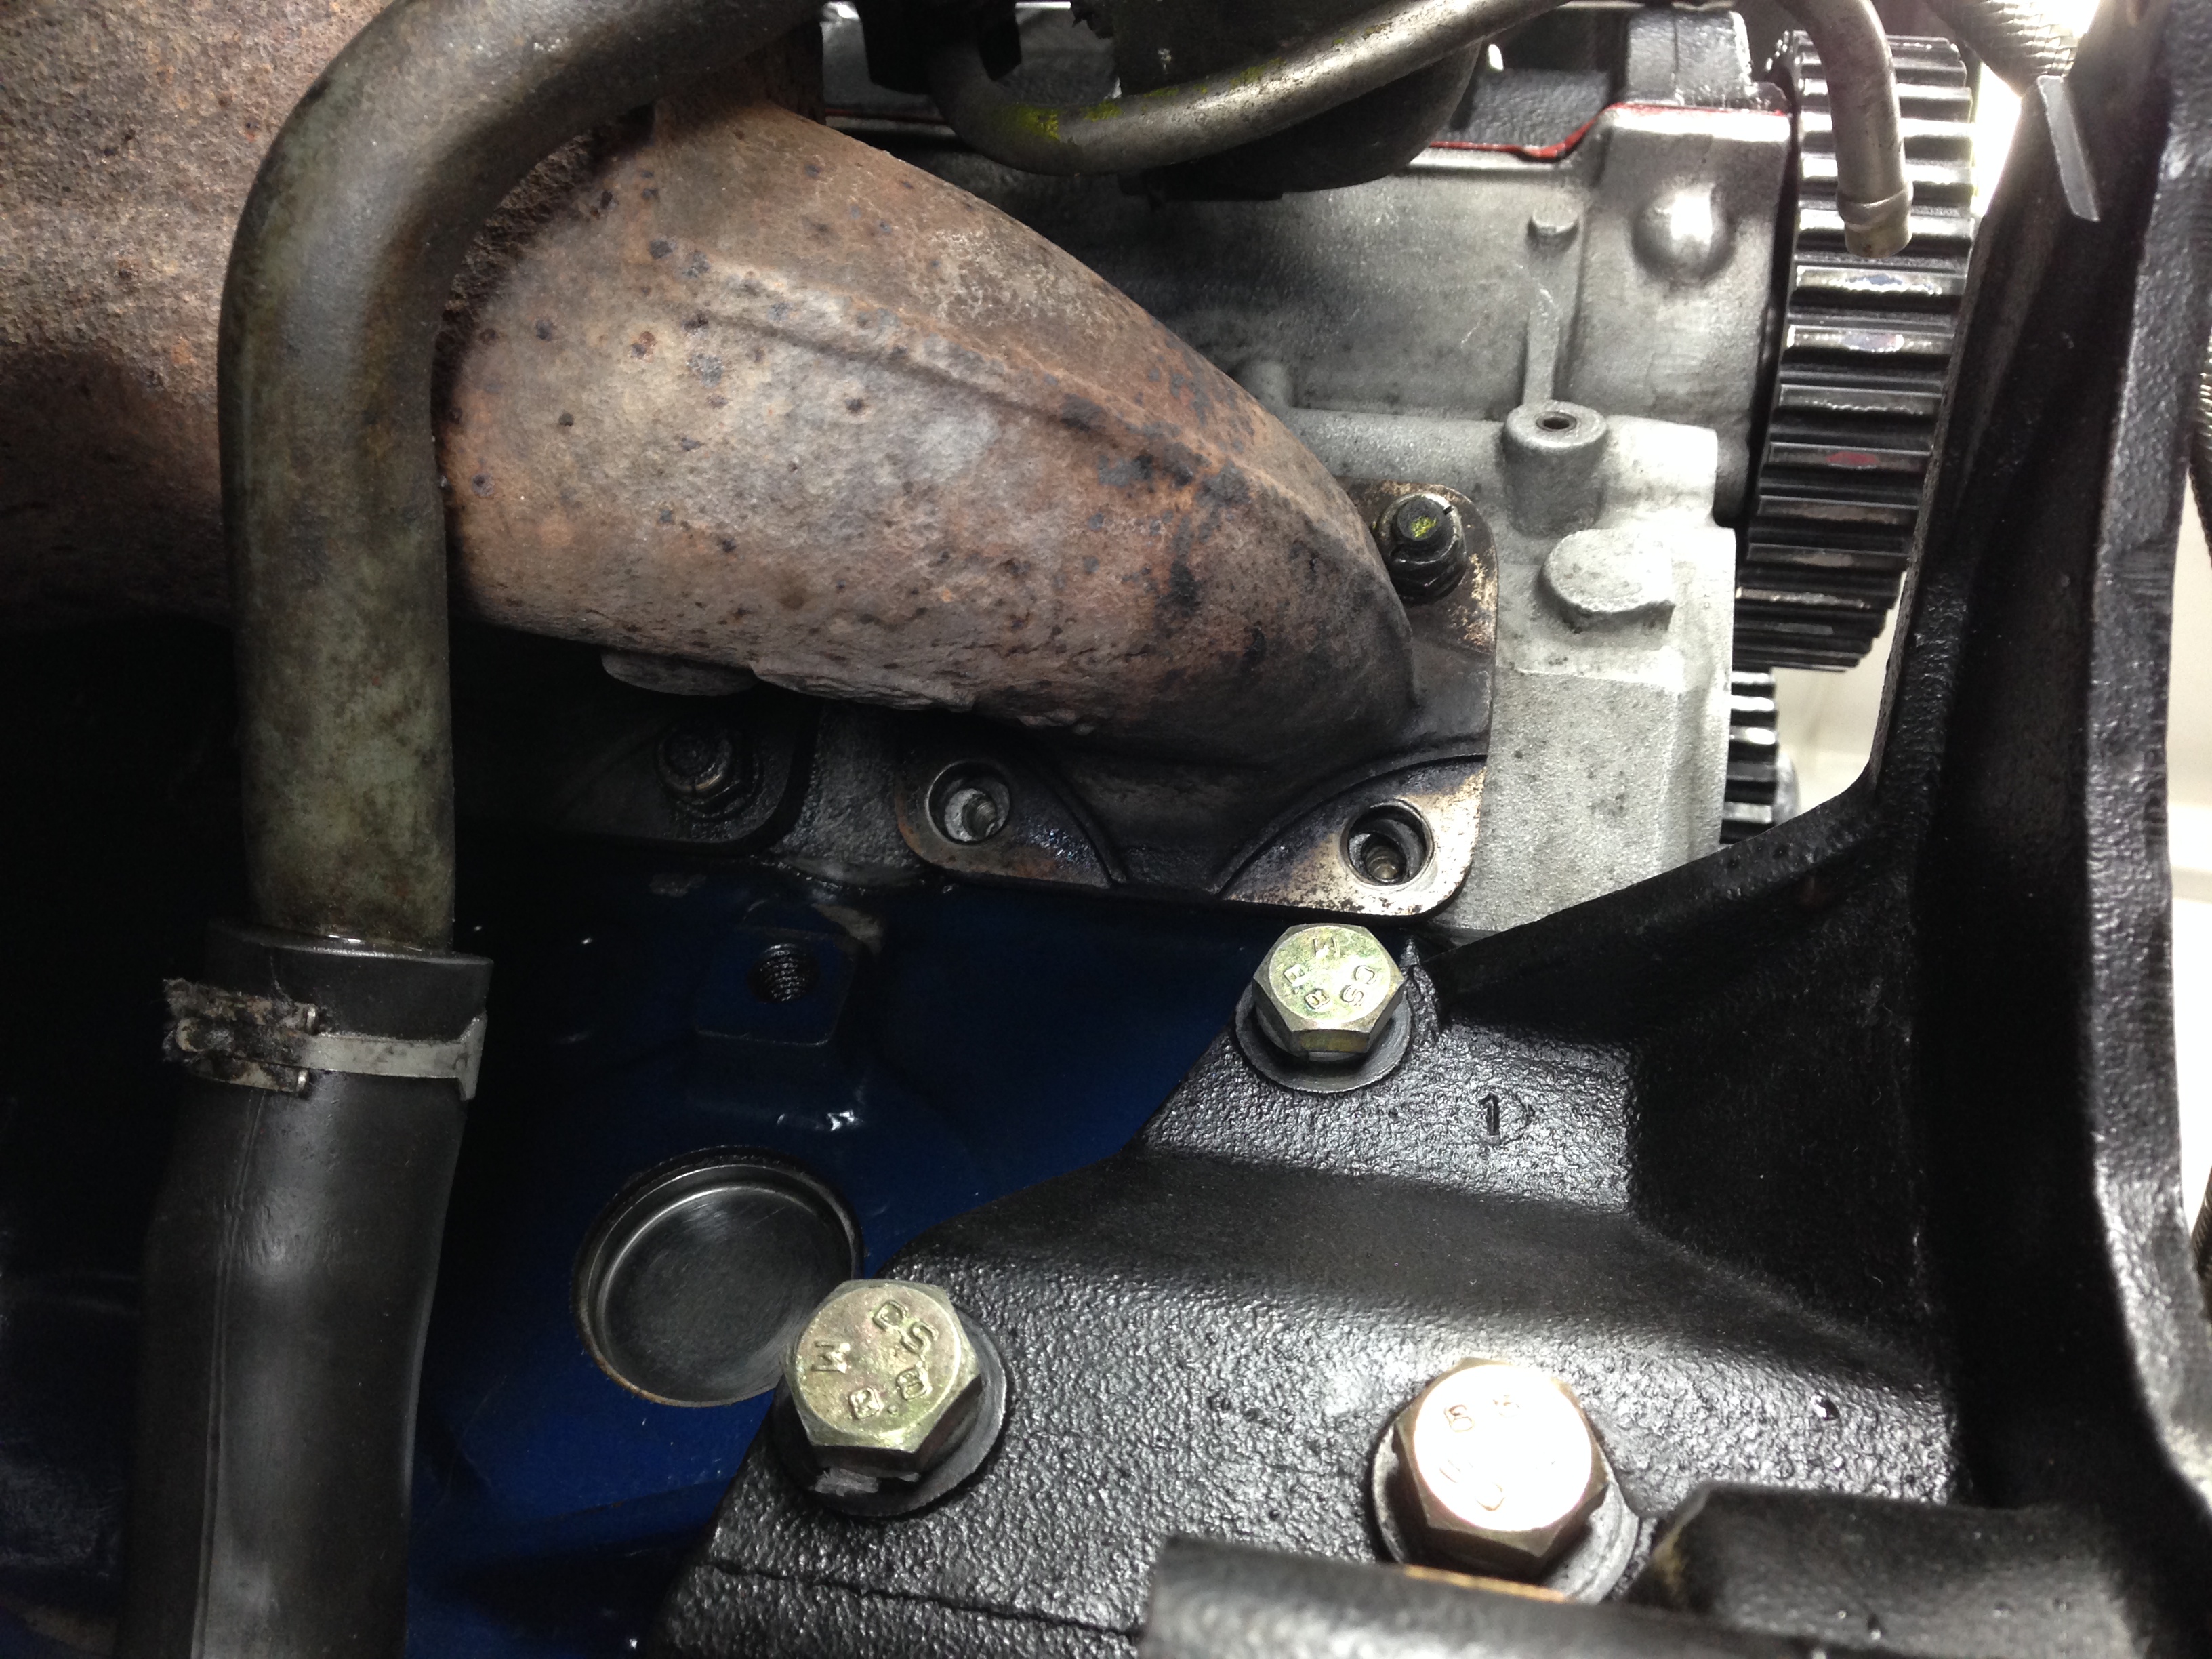
Whilst off I cleaned the side of the head and block
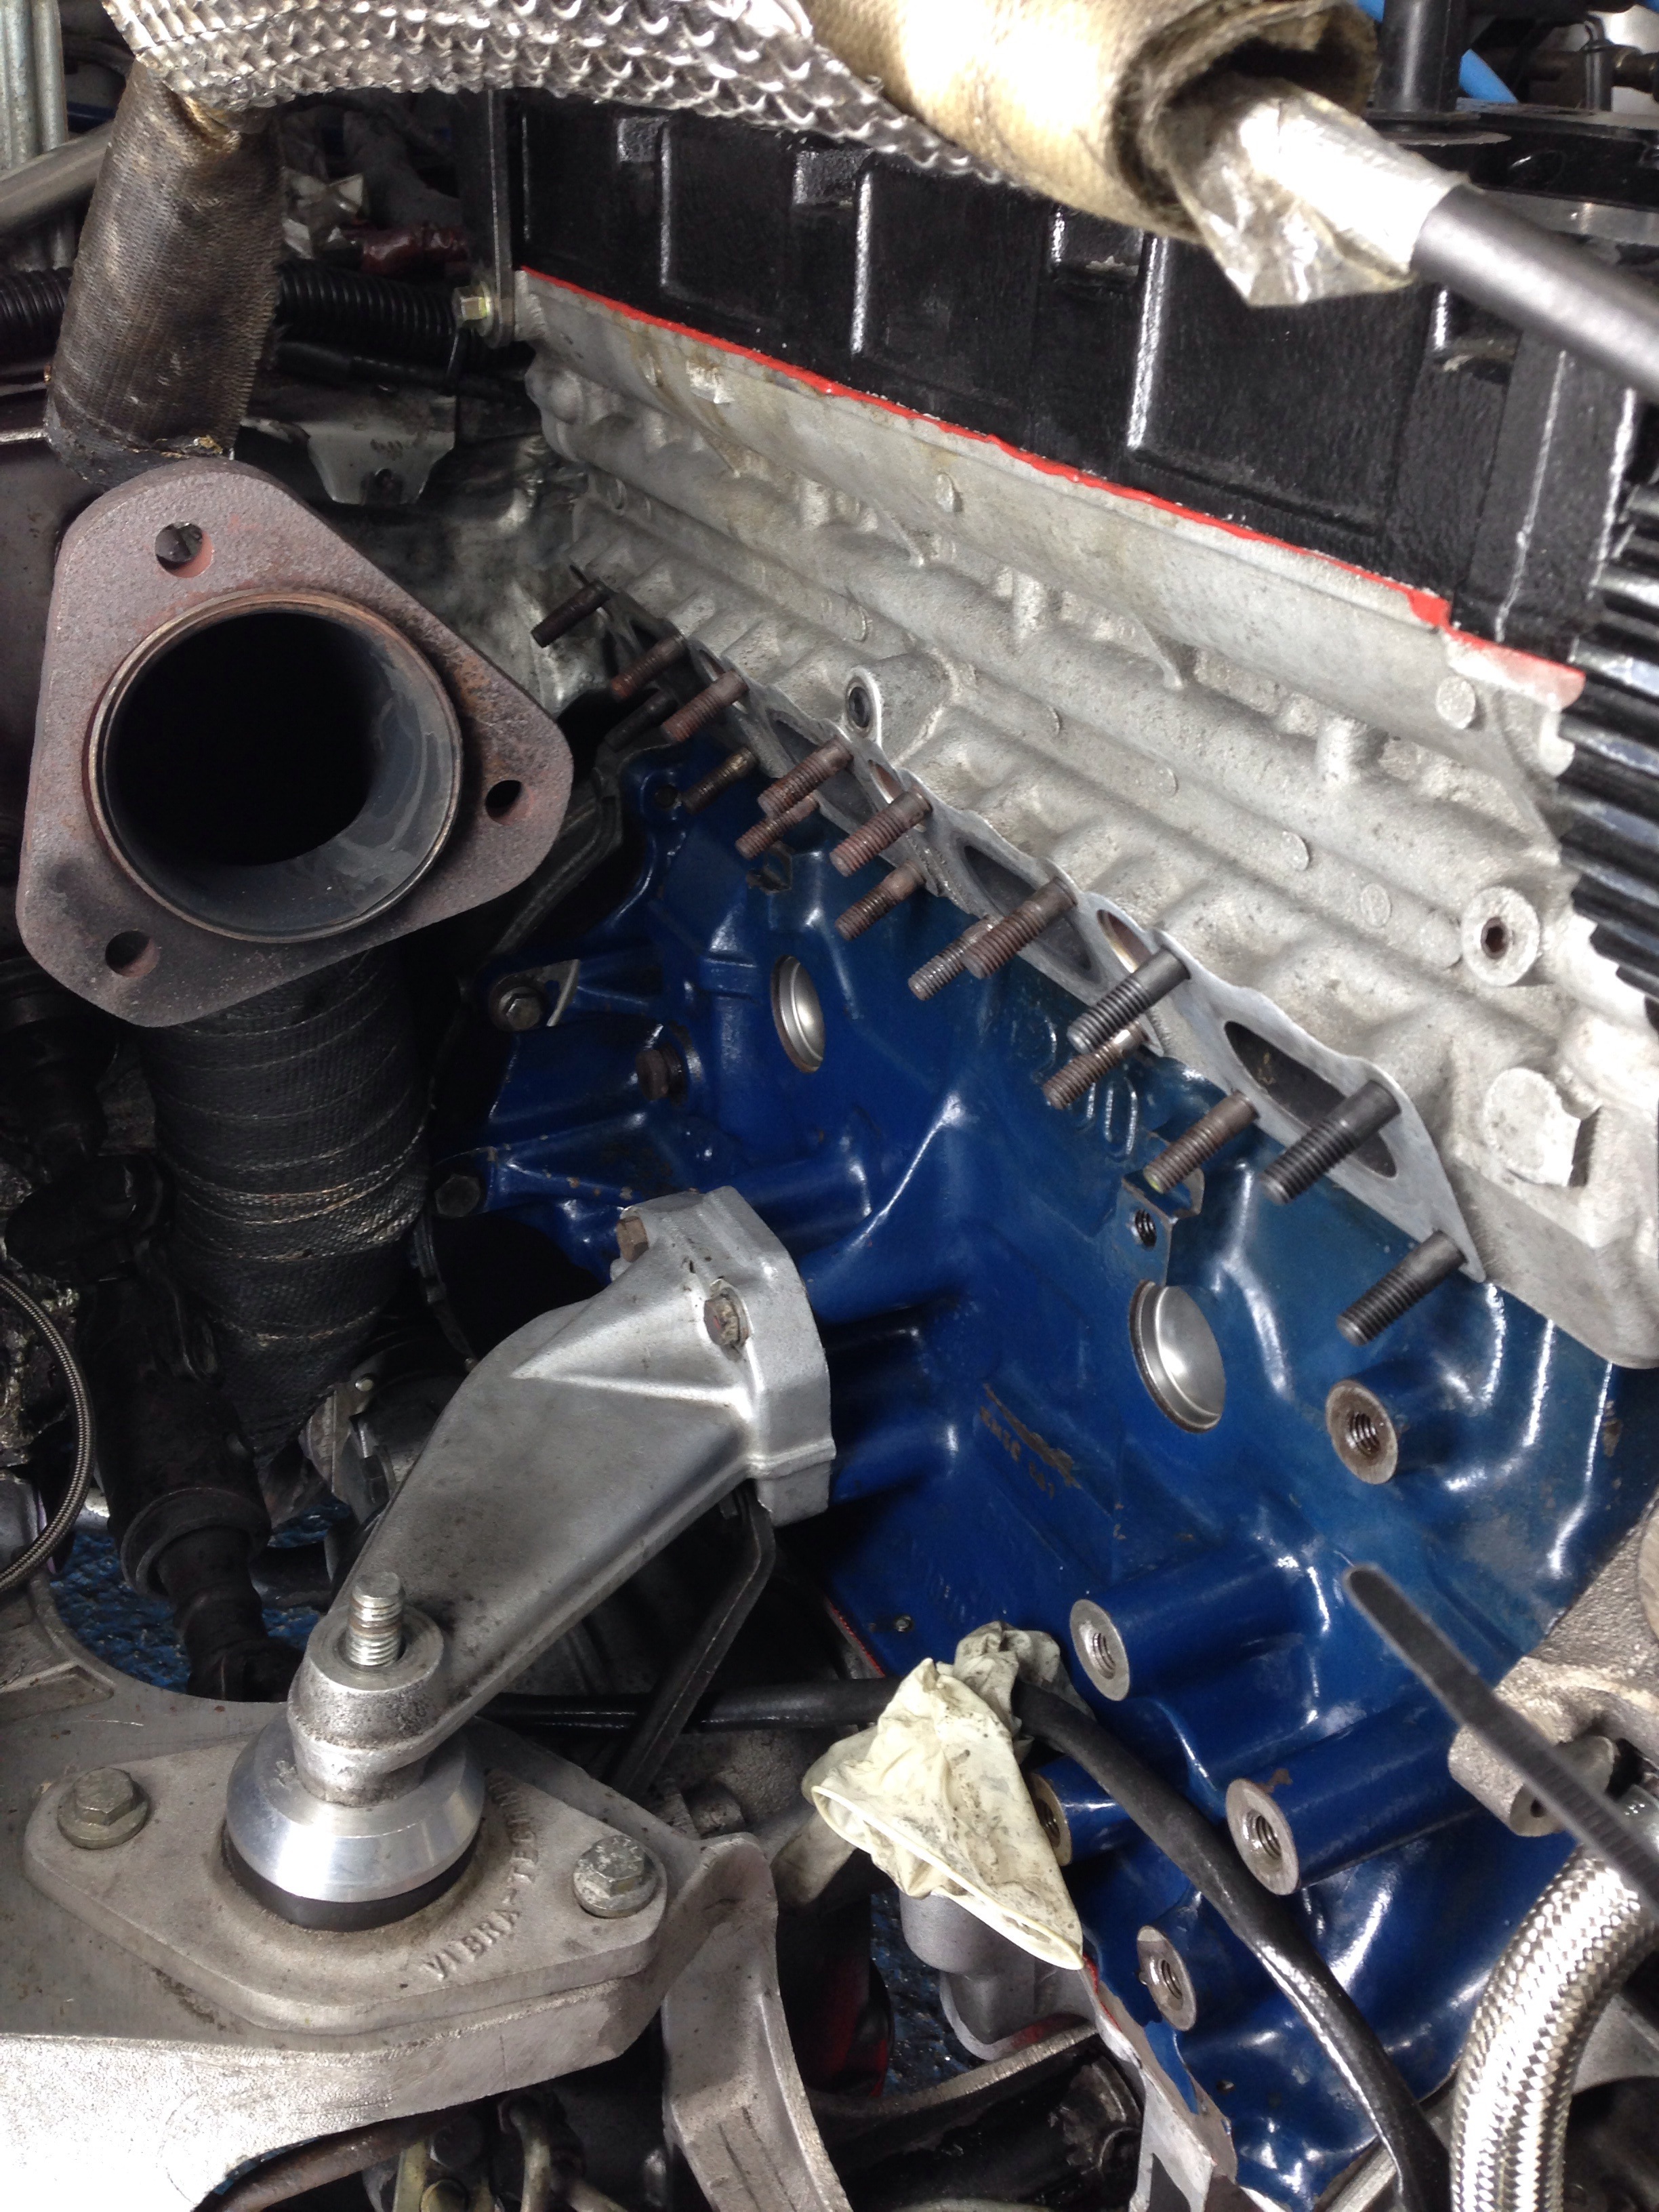
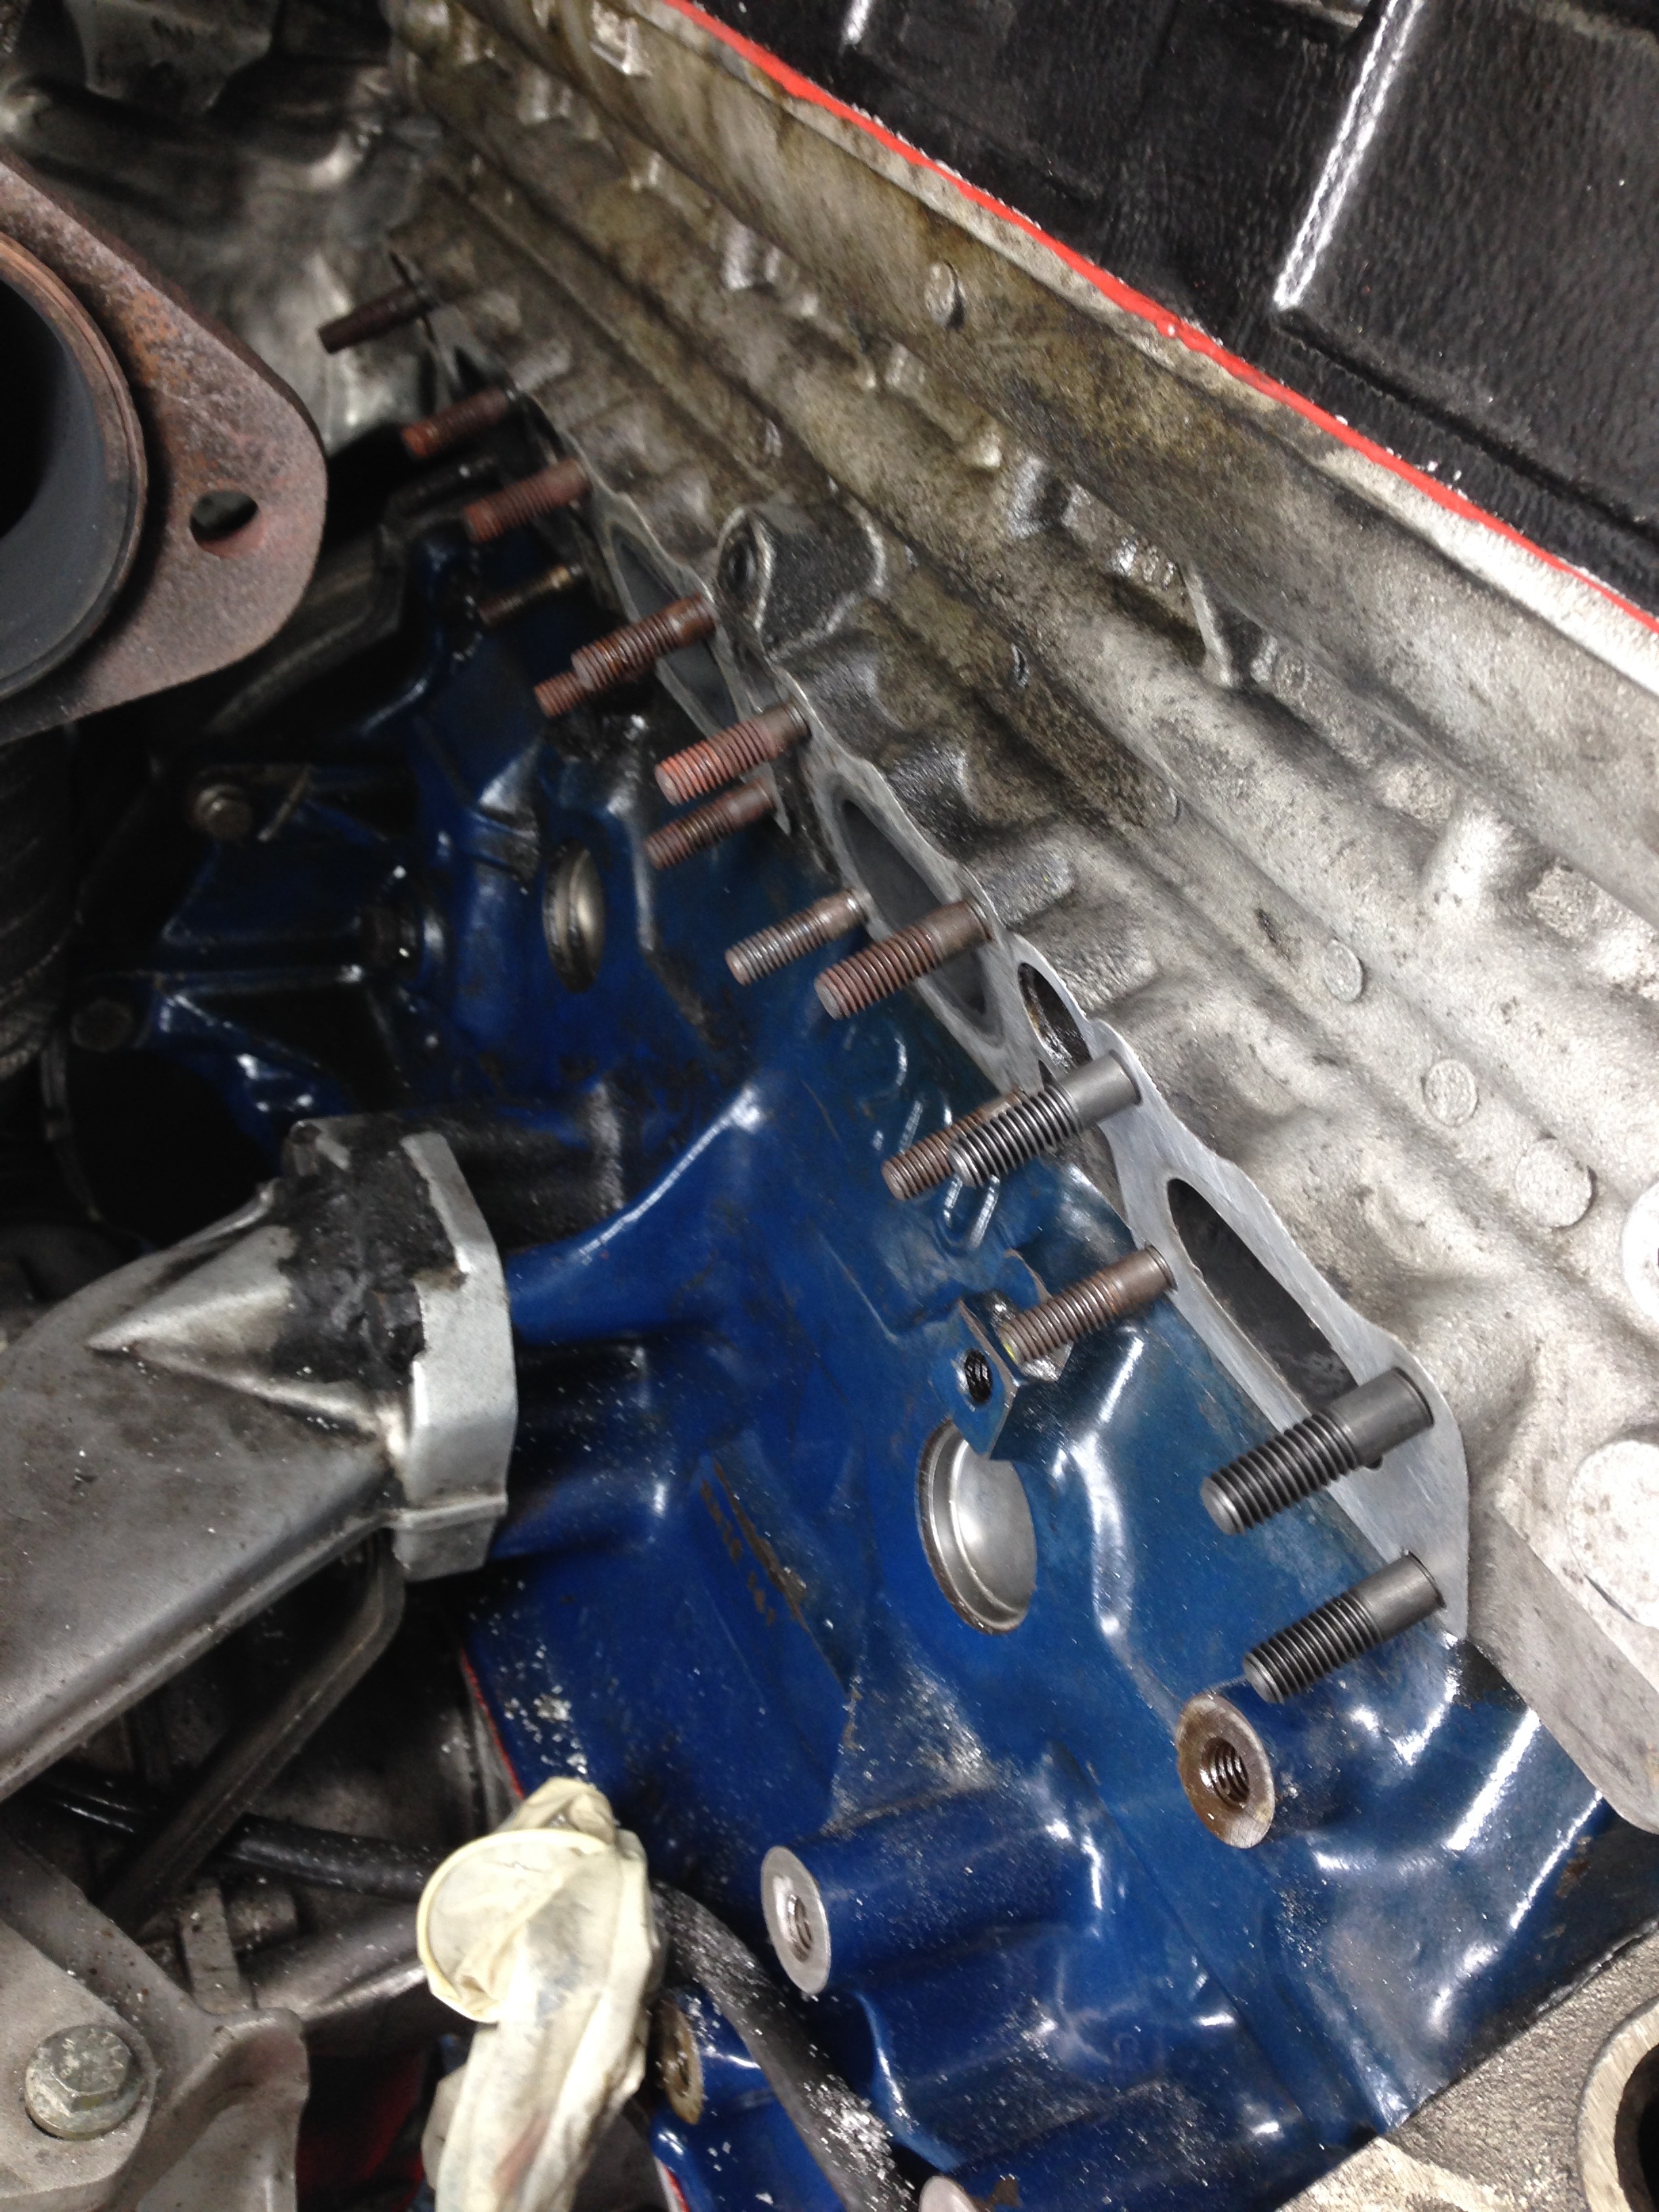
Manifold bolted back up with all its studs and nuts this time
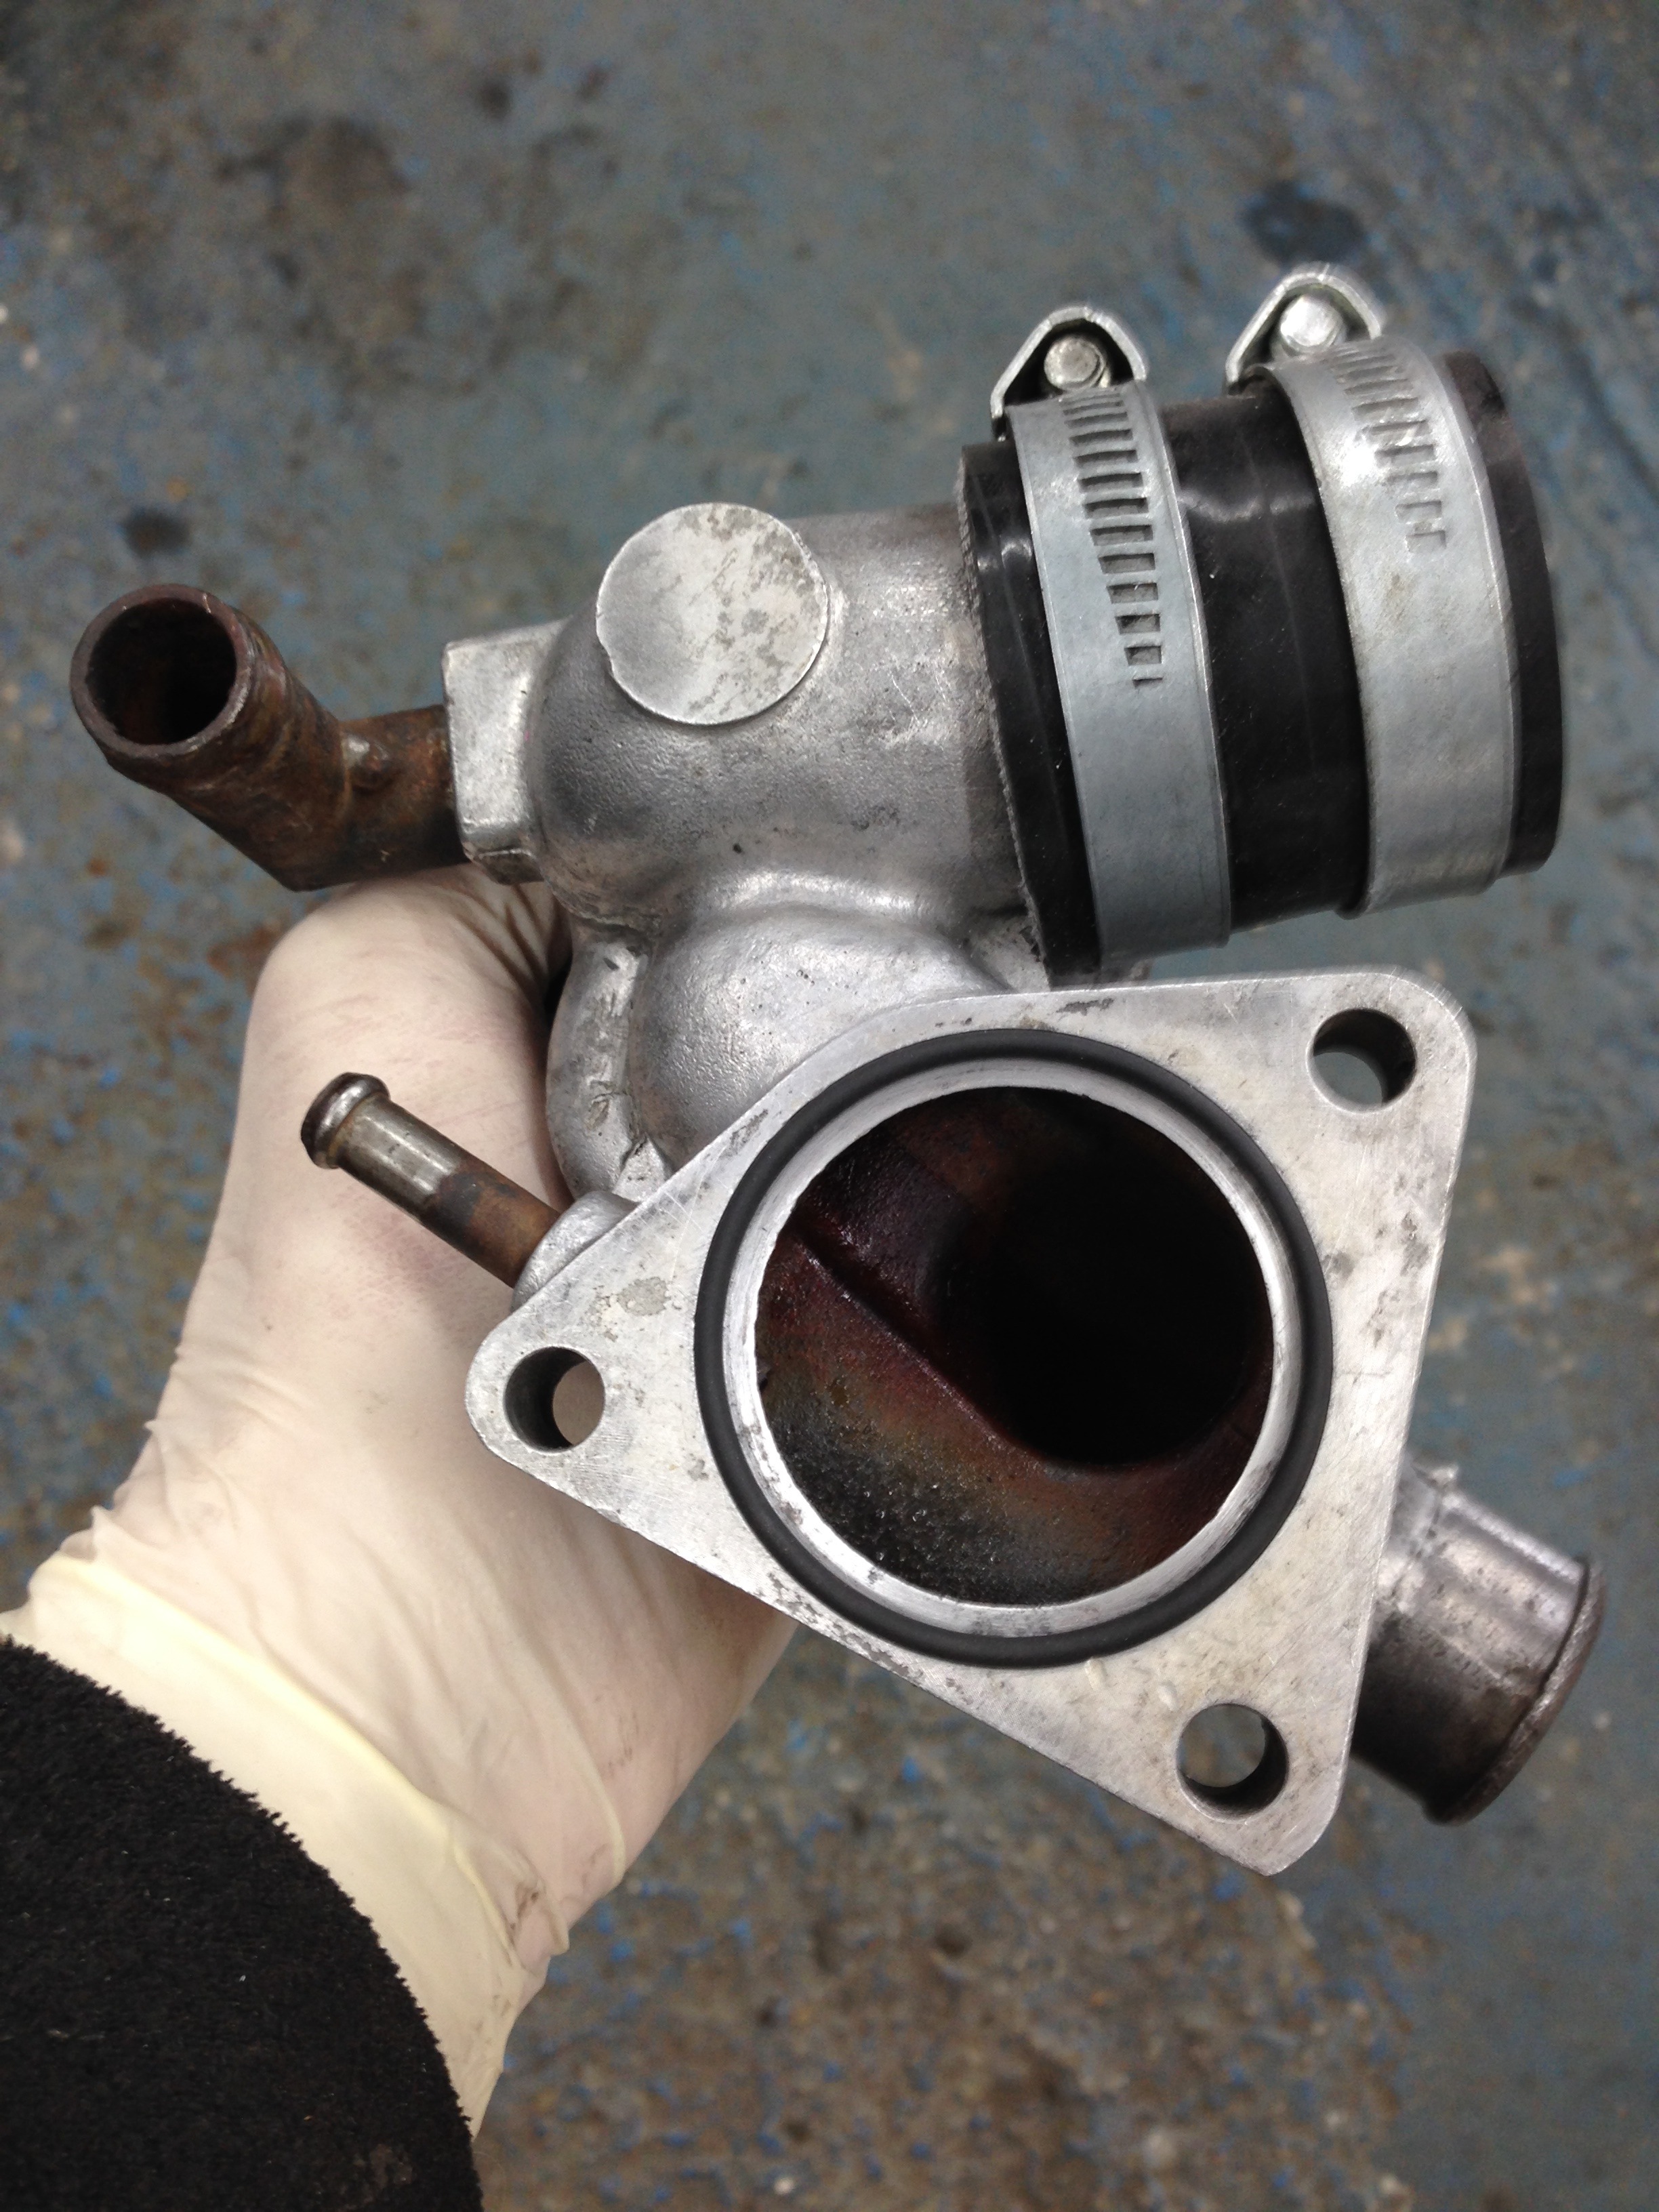
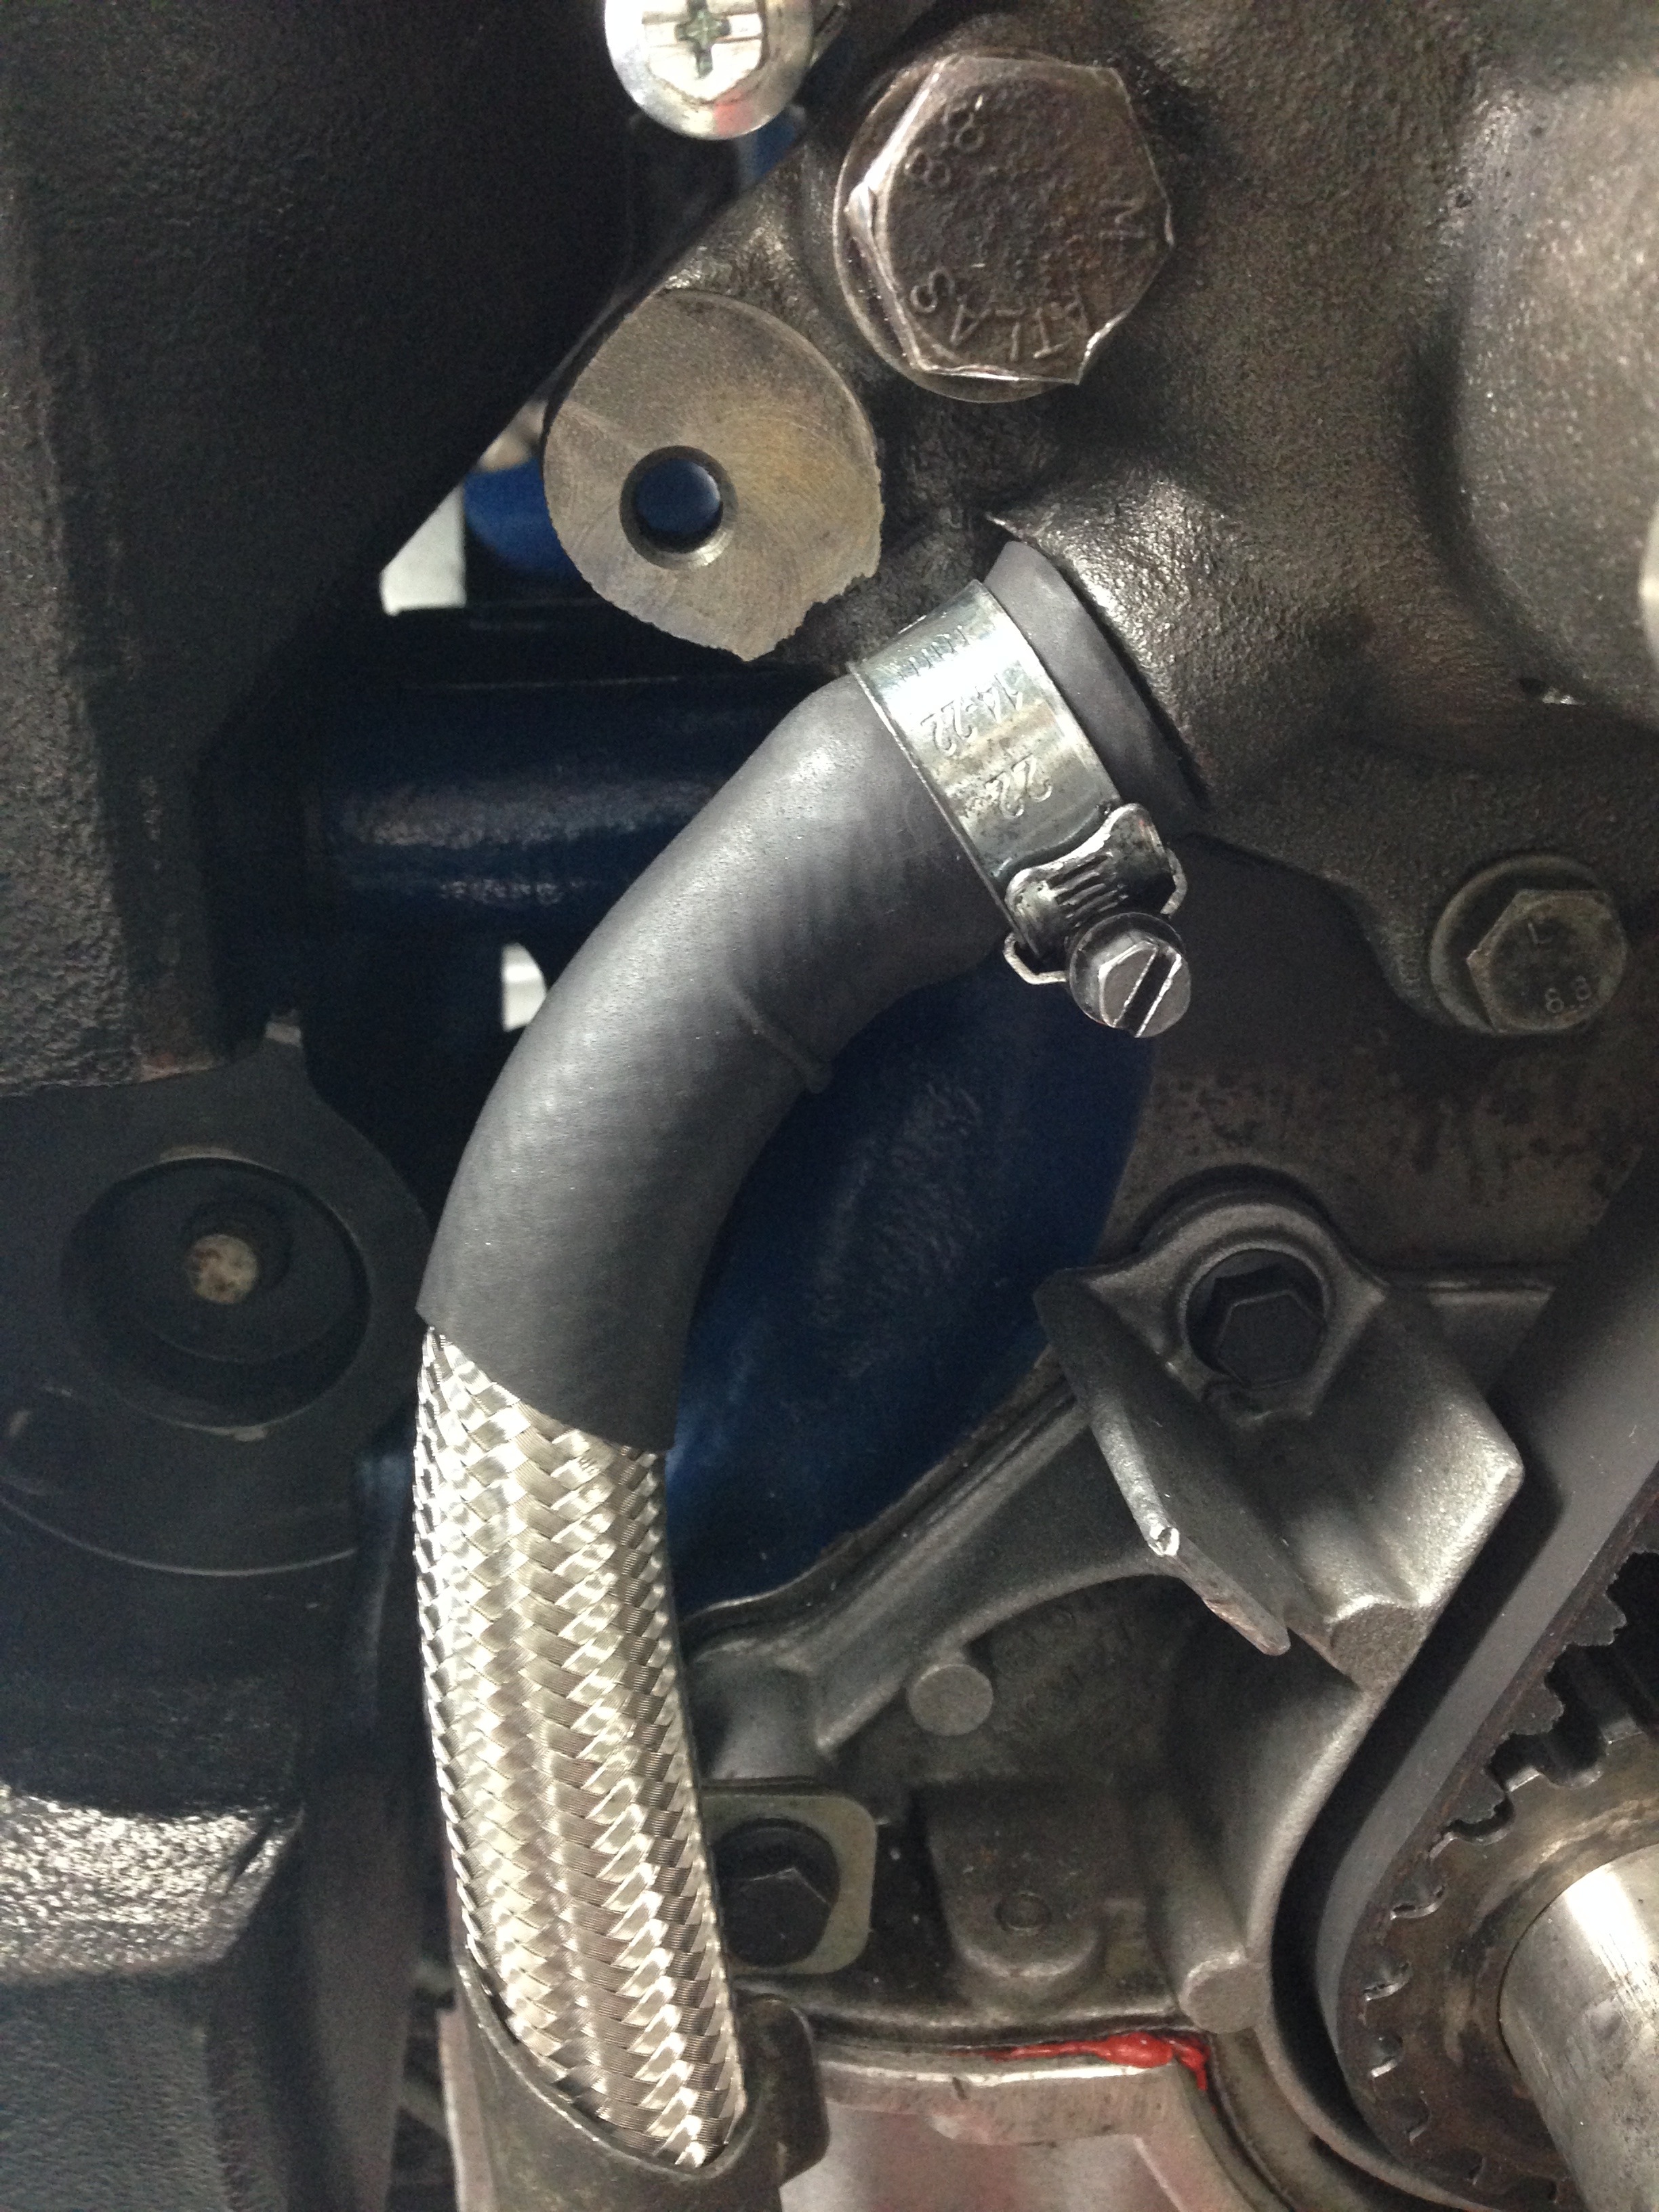
Fitted a new water pump feed hose - couldn't use a hose finisher as it was too close to the pump housing so used some heat shrink to neatly finish the hose
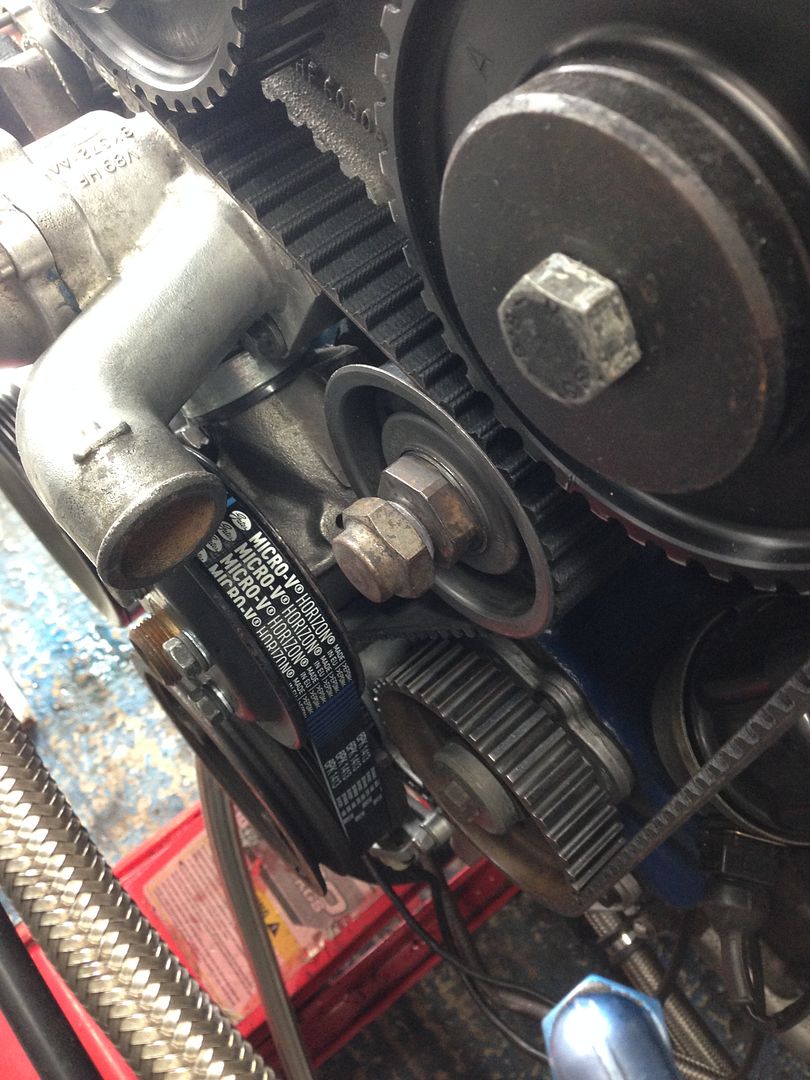
New belts fitted and things coming back together
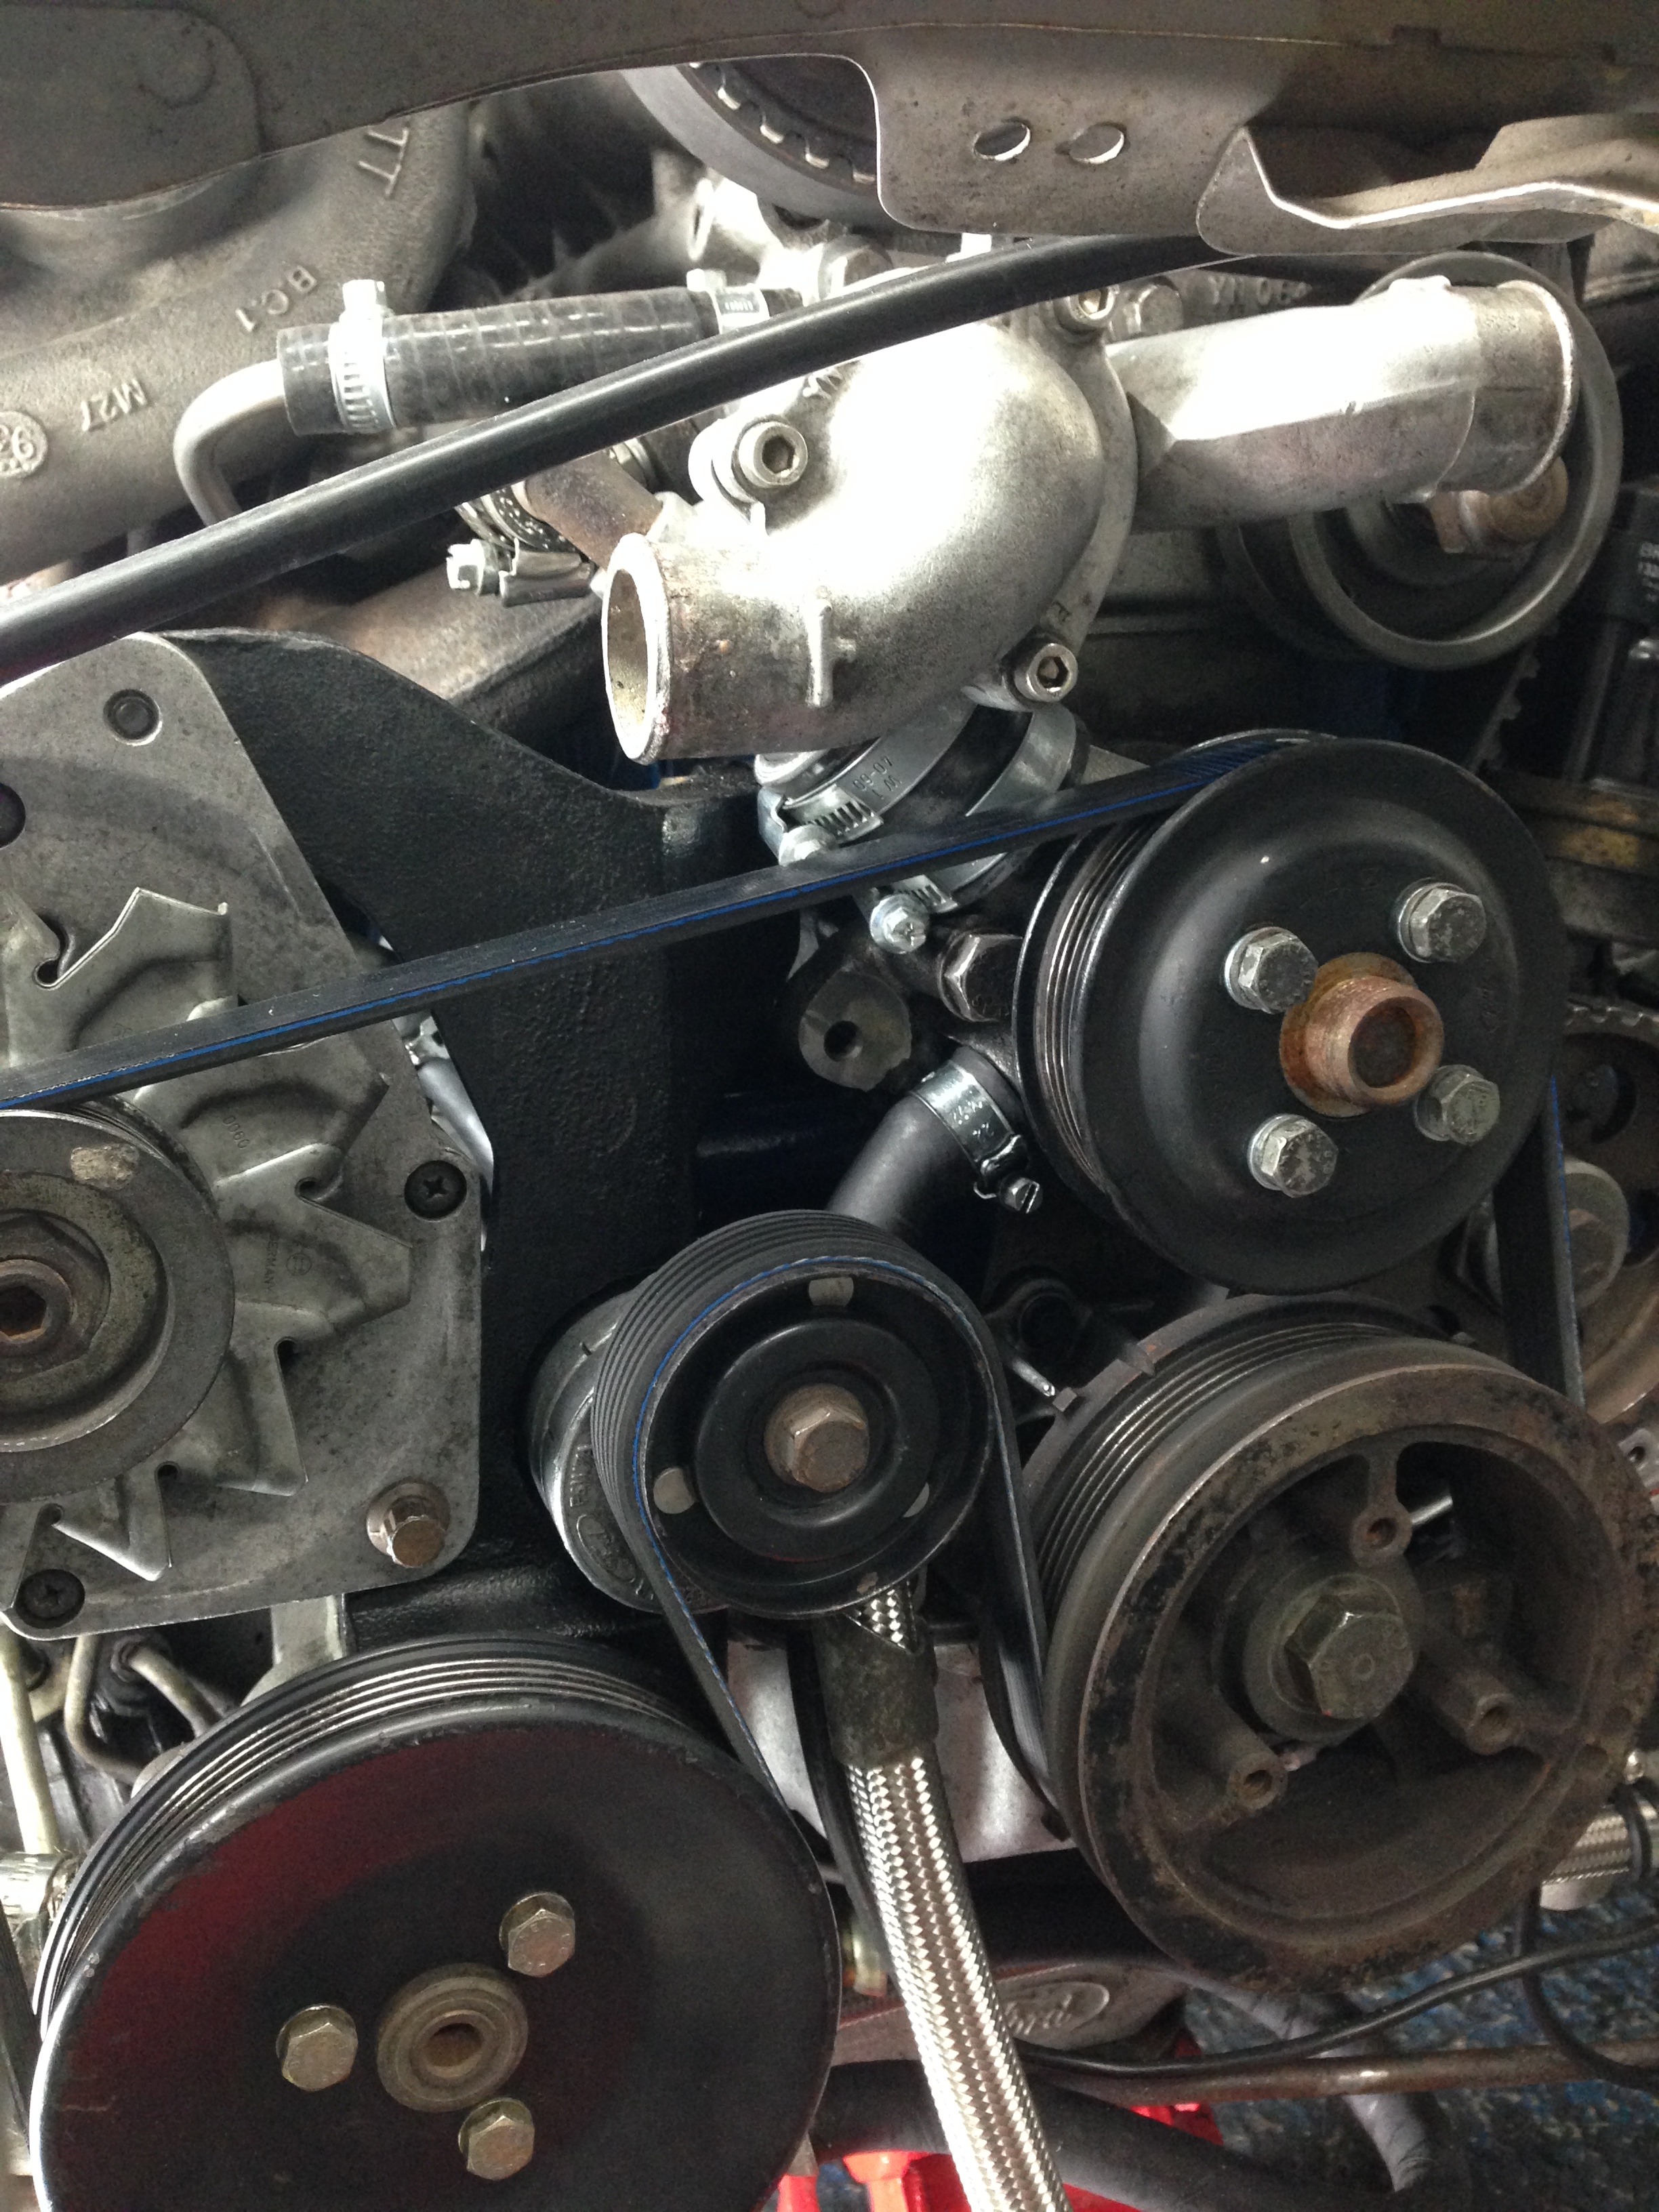
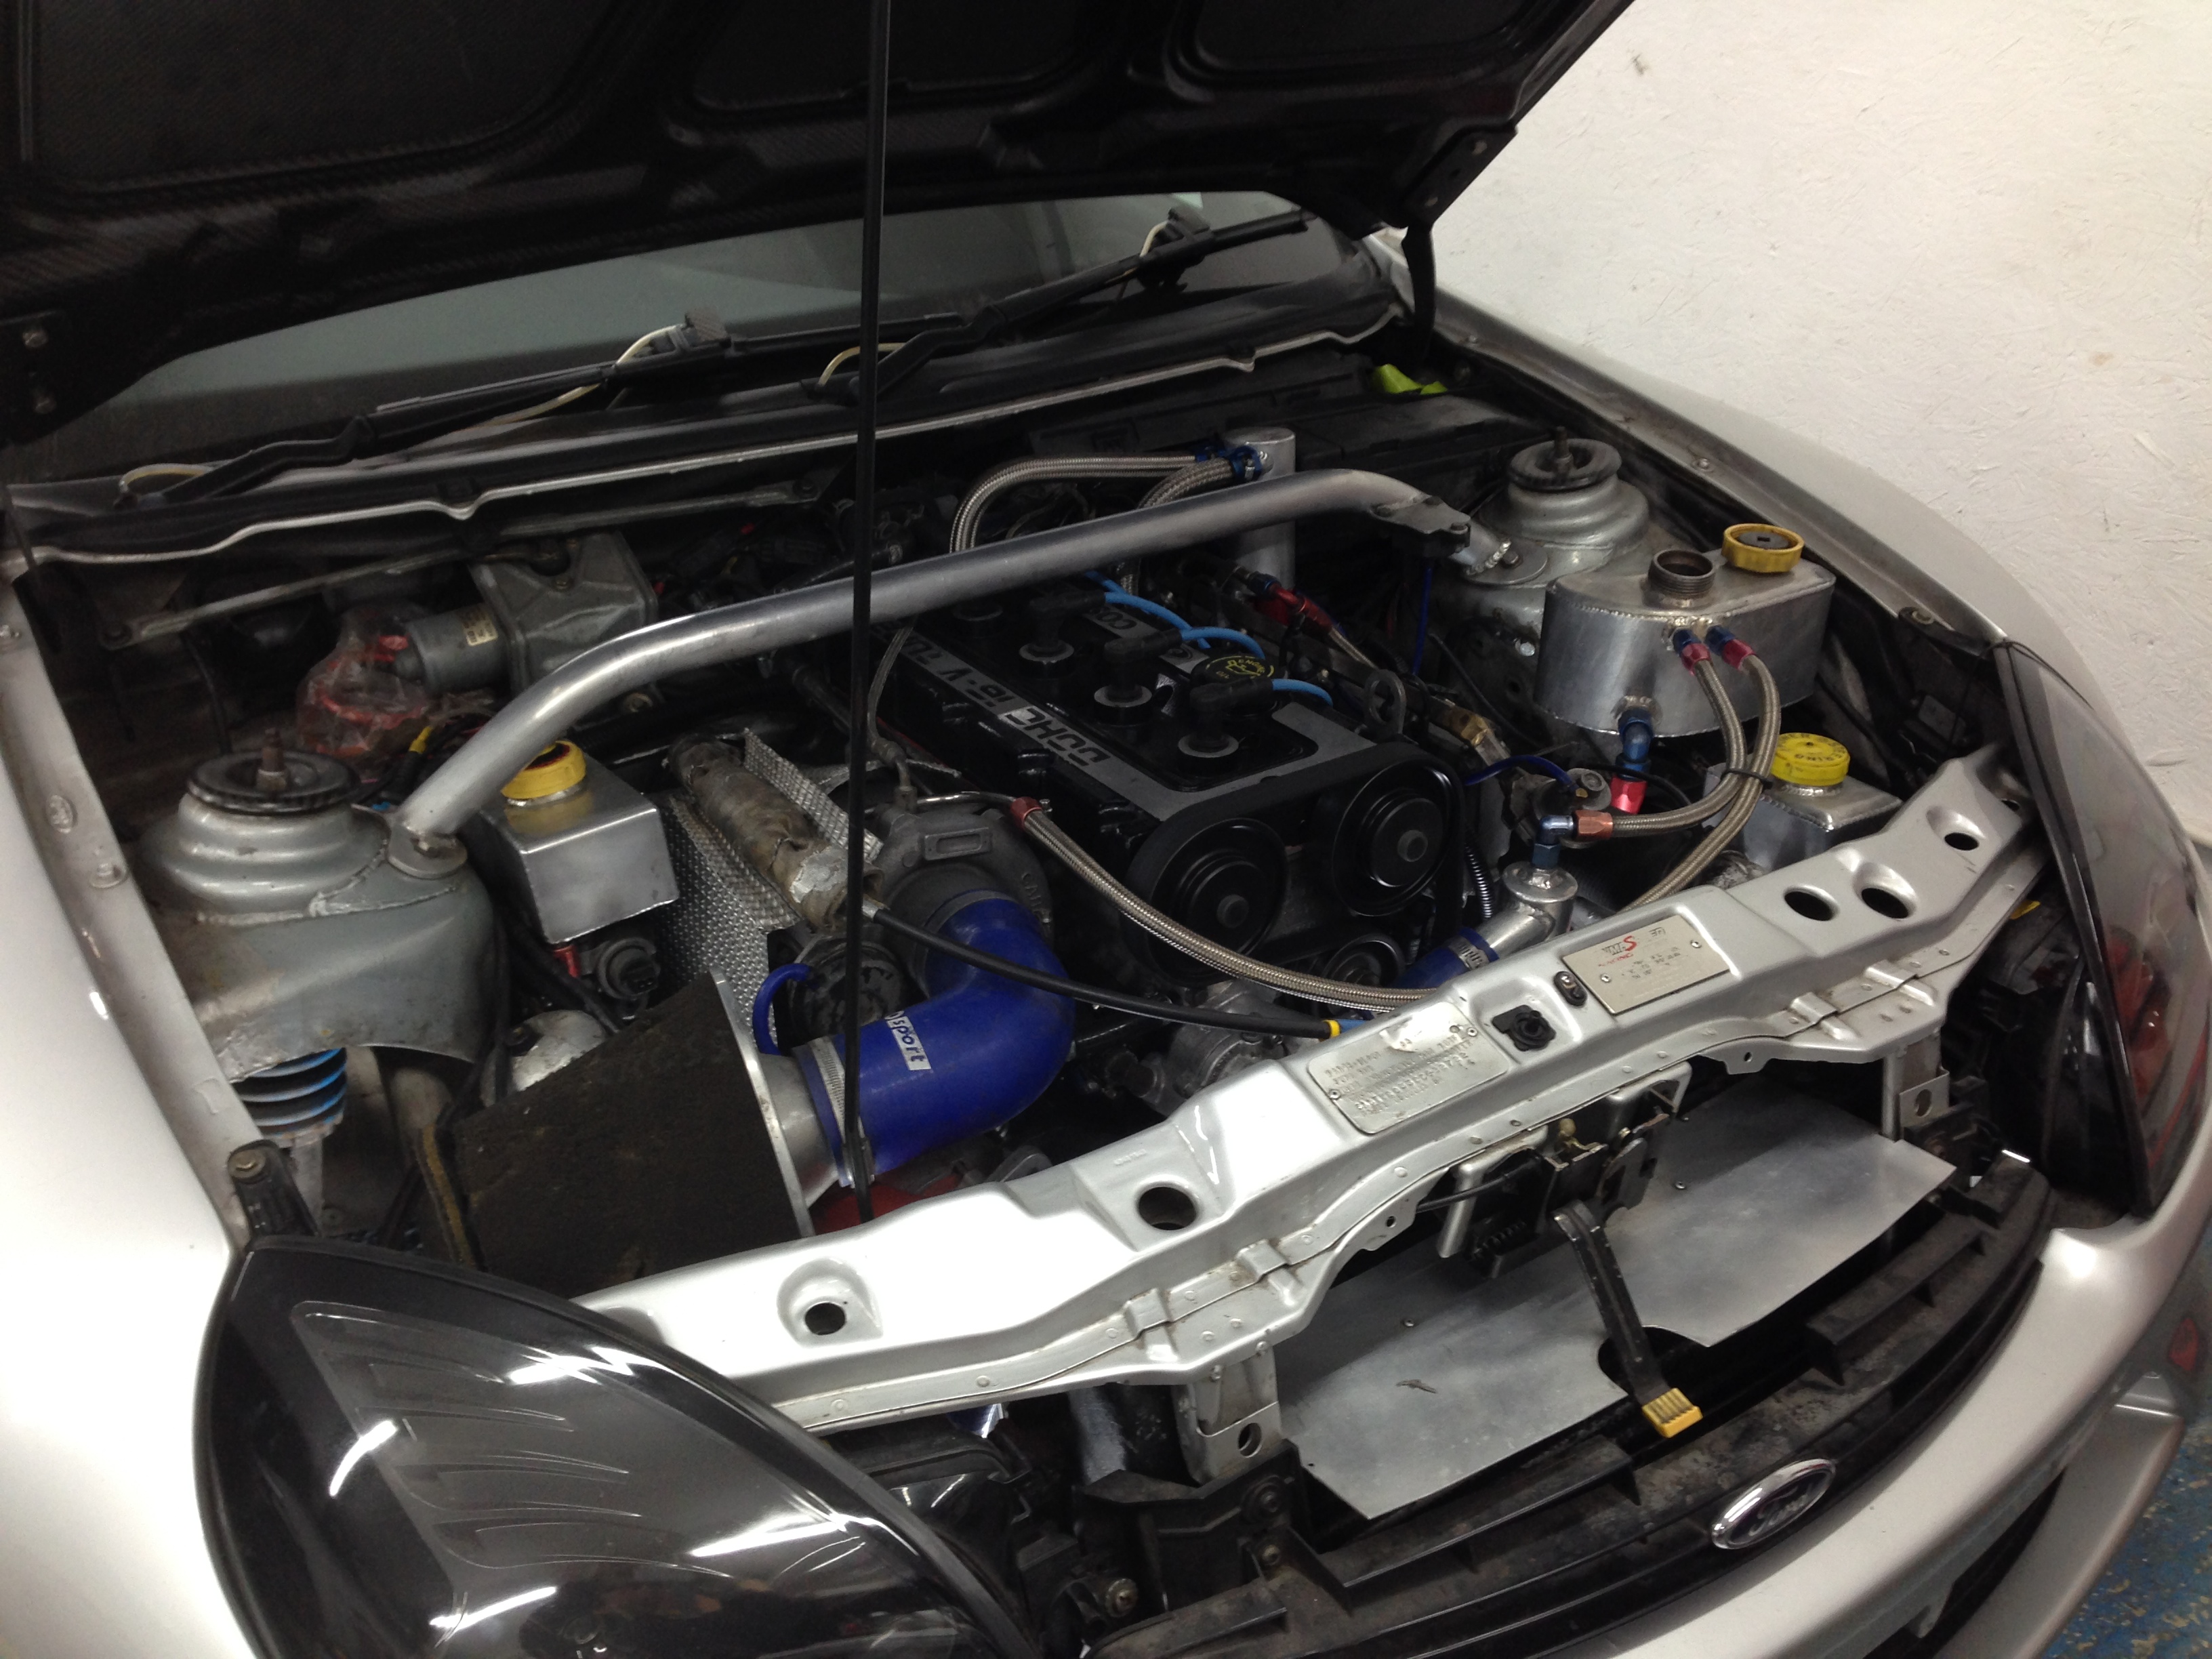
While I had the chance I secured all the loose pipes properly at the front. Much neater now, although the power steering pipes still need some attention at a later date
All back together for now and went off on a test drive..
More to come soon - thanks for looking
Back in the workshop

Strip down - intercooler out and rad although I don't have any photos of that


And so onto the engine strip down and you can see just how bad the leaks have been and for how long.. This has been like this for years


All the parts off the front to get cleaned - simply using white spirit and a toothbrush and then an airline to get the gunk out of all the little crevices!

All cleaned and going back together - hopefully you can see the difference!!


You can see the power steering return hose here, the stainless piping just jubilee clipped onto the old solid pipe - eventually I want to change the whole system to aeroquip


New parts to be fitted

New seals fitted


Noticed while everything was out that there were two exhaust manifold studs missing so set about finding out why which came down to the threads were stripped and once removed a third was also barely there - so set about getting the threads repaired and new studs fitted


Whilst off I cleaned the side of the head and block

Manifold bolted back up with all its studs and nuts this time

Fitted a new water pump feed hose - couldn't use a hose finisher as it was too close to the pump housing so used some heat shrink to neatly finish the hose

New belts fitted and things coming back together


While I had the chance I secured all the loose pipes properly at the front. Much neater now, although the power steering pipes still need some attention at a later date

All back together for now and went off on a test drive..

More to come soon - thanks for looking

 31-10-2015, 10:32 PM
#35
Wahay!! I've lost my Virginity!!

Join Date: Feb 2011
Location: Czech Republic
Posts: 57
Likes: 0
Received 0 Likes
on
0 Posts
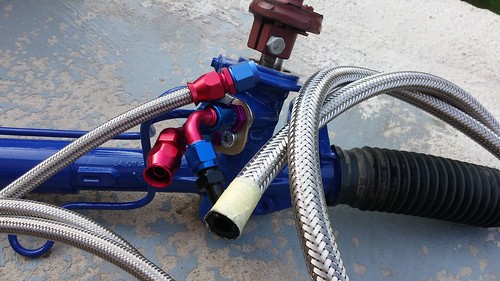
You are very courageous to use hose clamps onto power steering pressure tube... Its not good idea. That will pop off and that fluid is flammable... I have used AN fittings from steering rack to PS pump. Everything works perfect 
Last edited by Malfis; 31-10-2015 at 10:33 PM.
01-11-2015, 12:16 AM
#37
PassionFord Regular
Thread Starter
Thanks very much for all the comments guys, it's good to know people think I'm heading in the right direction with it.
It's amazing to think I'm still coming across areas that need attention. Although the car I guess is getting to an age where parts will need replacing anyway. I didn't intend to get my hands dirty this often, but hopefully it's becoming less now
The jubilee clip is on the return line so isn't as bad as the high pressure line. I do want to get this changed soon though.
Am I right in thinking you sell them on eBay? Or have I just made this up?
Am I right in thinking you sell them on eBay? Or have I just made this up?
01-11-2015, 08:30 AM
#40
Glennvestite
iTrader: (1)
Join Date: Jul 2006
Location: Darlington county durham
Posts: 62,755
Received 1,042 Likes
on
996 Posts
Top work matey.
The rear brake calipers, can you take the handbrake lever part out without stripping the rest of the caliper down?
Im suprised that the puma is wider than a cossie.
The rear brake calipers, can you take the handbrake lever part out without stripping the rest of the caliper down?
Im suprised that the puma is wider than a cossie.