Puma 4x4 Cosworth
 15-05-2016, 08:22 PM
#161
10K+ Poster!!


Cable tie special going on there with the fuel pump
 15-05-2016, 08:57 PM
#162
PassionFord Regular
Thread Starter

Thanks Martin. I didn't think it was as bad as it was, otherwise I think I would have taken it off a lot sooner. Yeap new one is made and on the car and I've been running it through its paces the last couple of weeks making sure it behaves itself. I'll get an update up with the build pics.
 15-05-2016, 08:59 PM
#163
PassionFord Regular
Thread Starter
18-05-2016, 09:25 PM
#167
PassionFord Regular
Thread Starter
Thanks for the comments guys. It's definitely a good thing that this is off the car. Scary to think it's done the best part of 20,000 miles as far as I know.
28-05-2016, 07:26 PM
#168
PassionFord Regular
Thread Starter
On with a quick update..
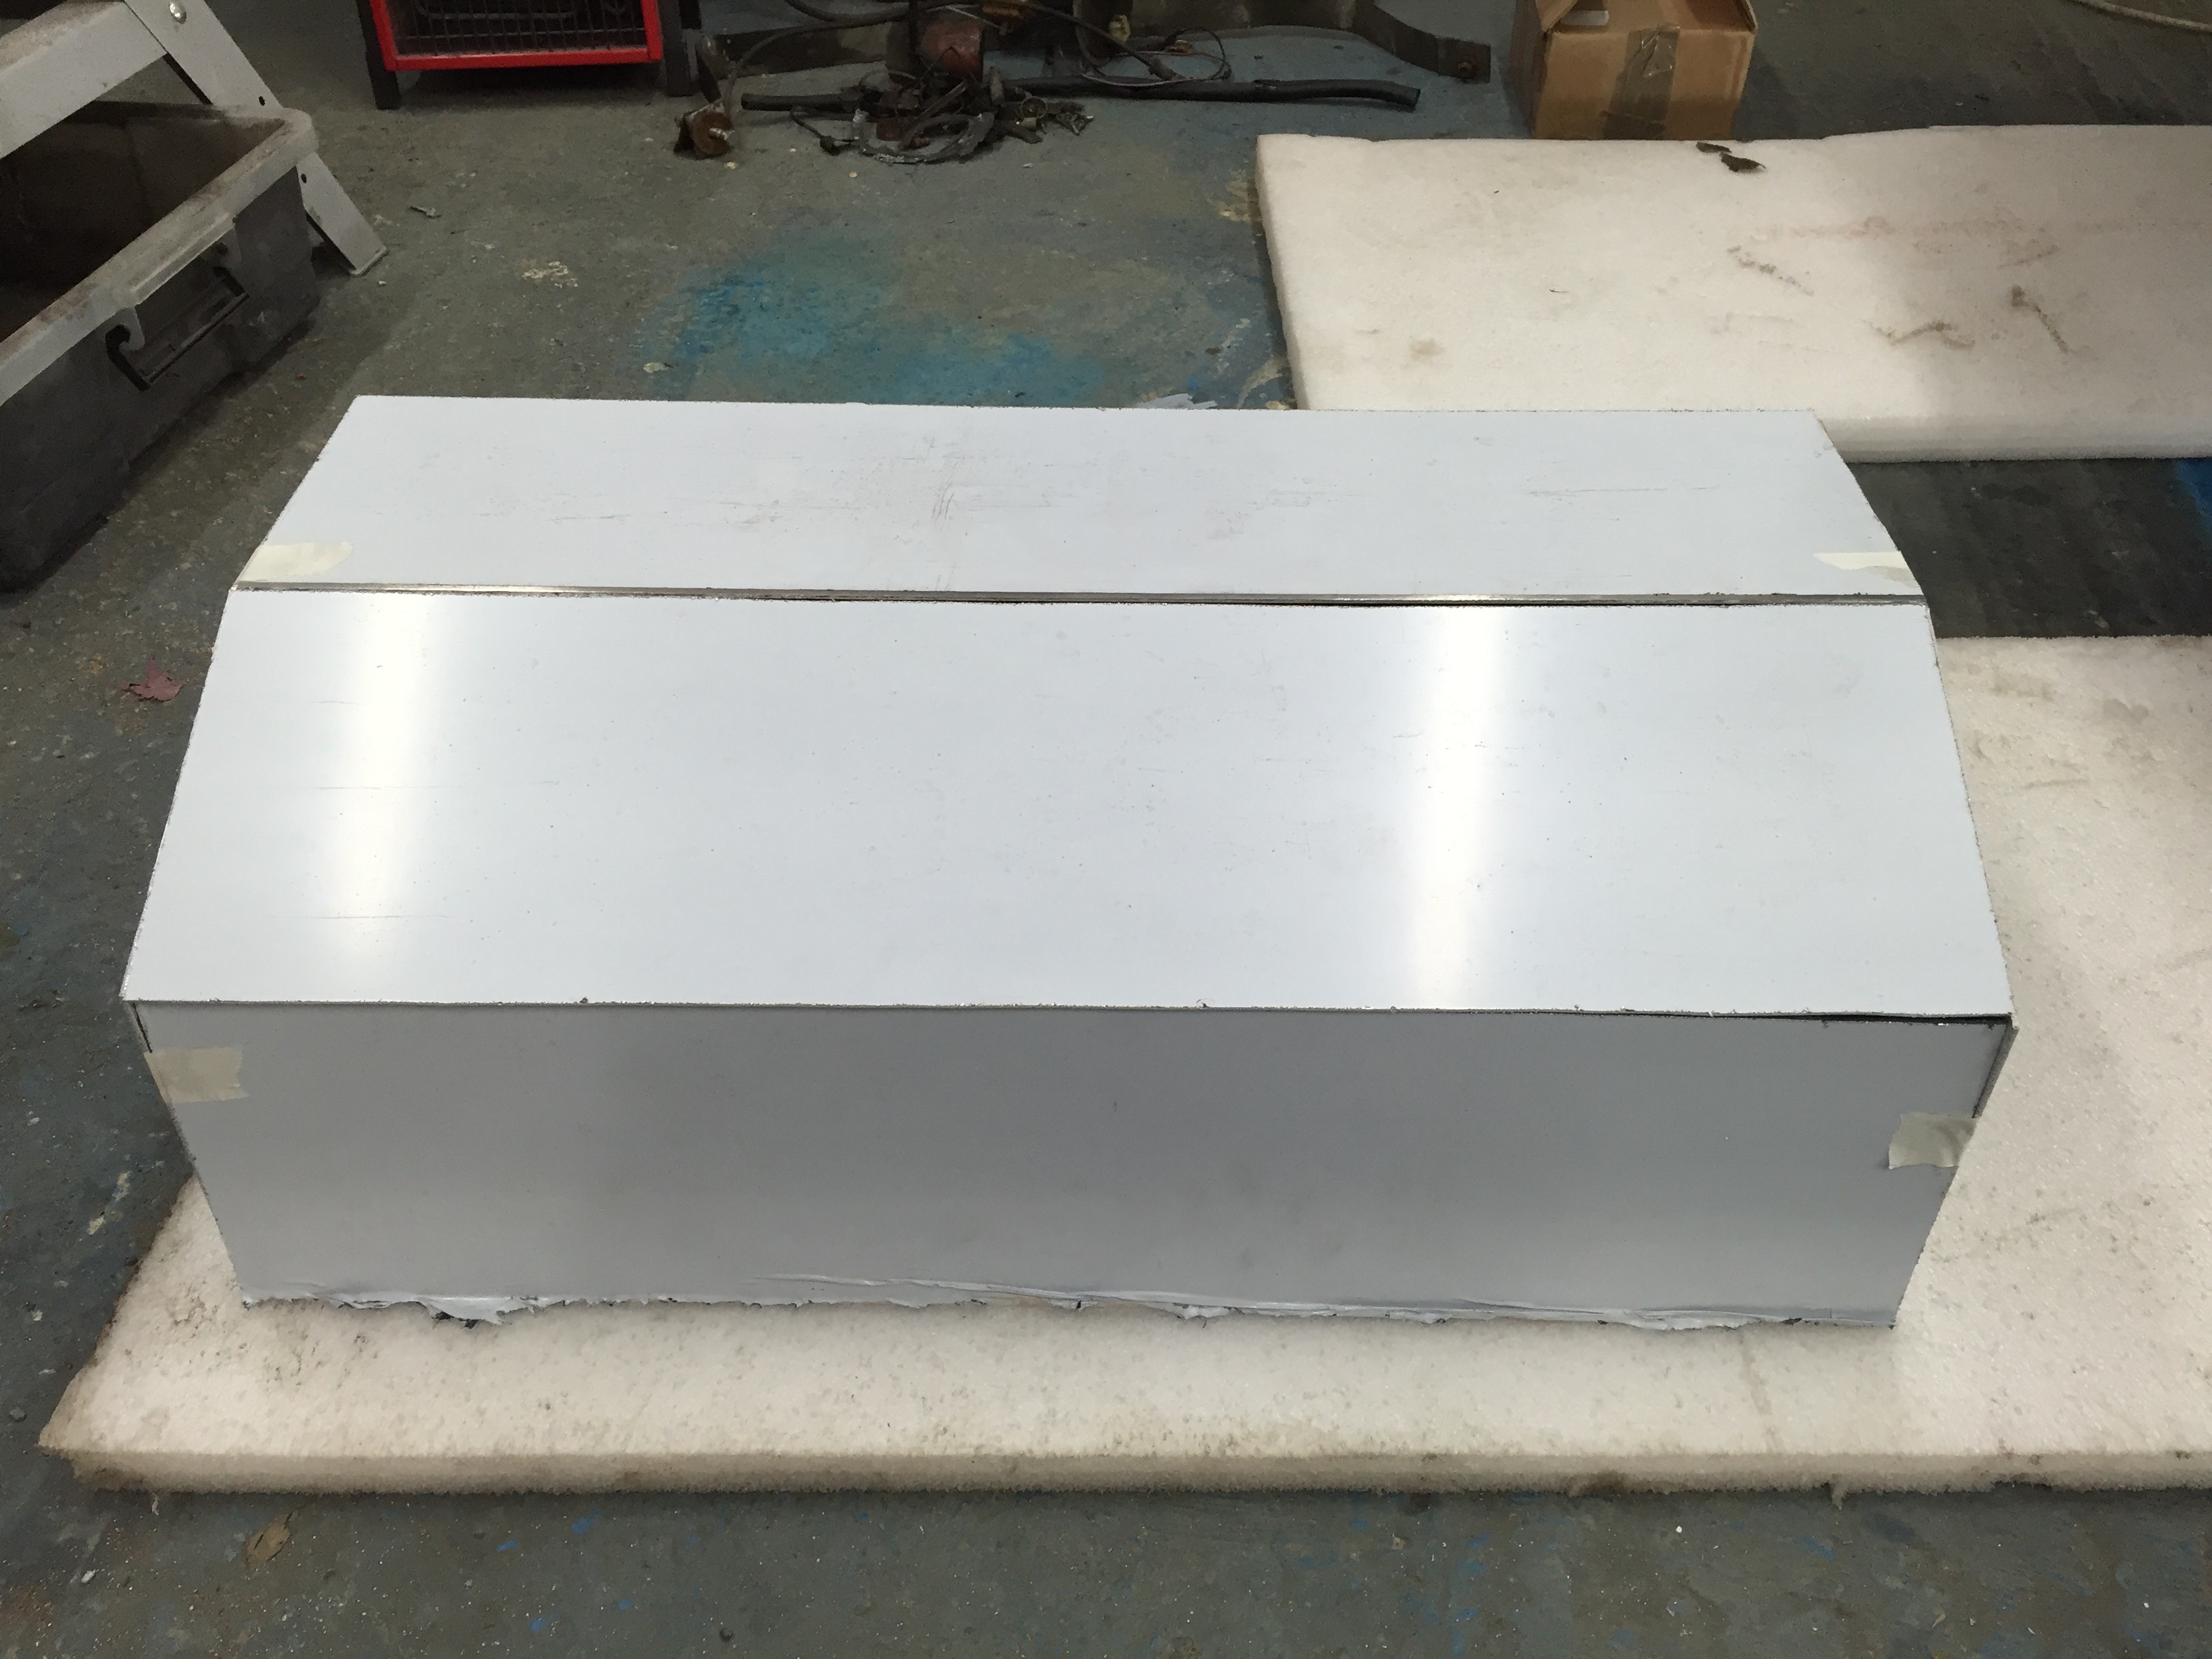
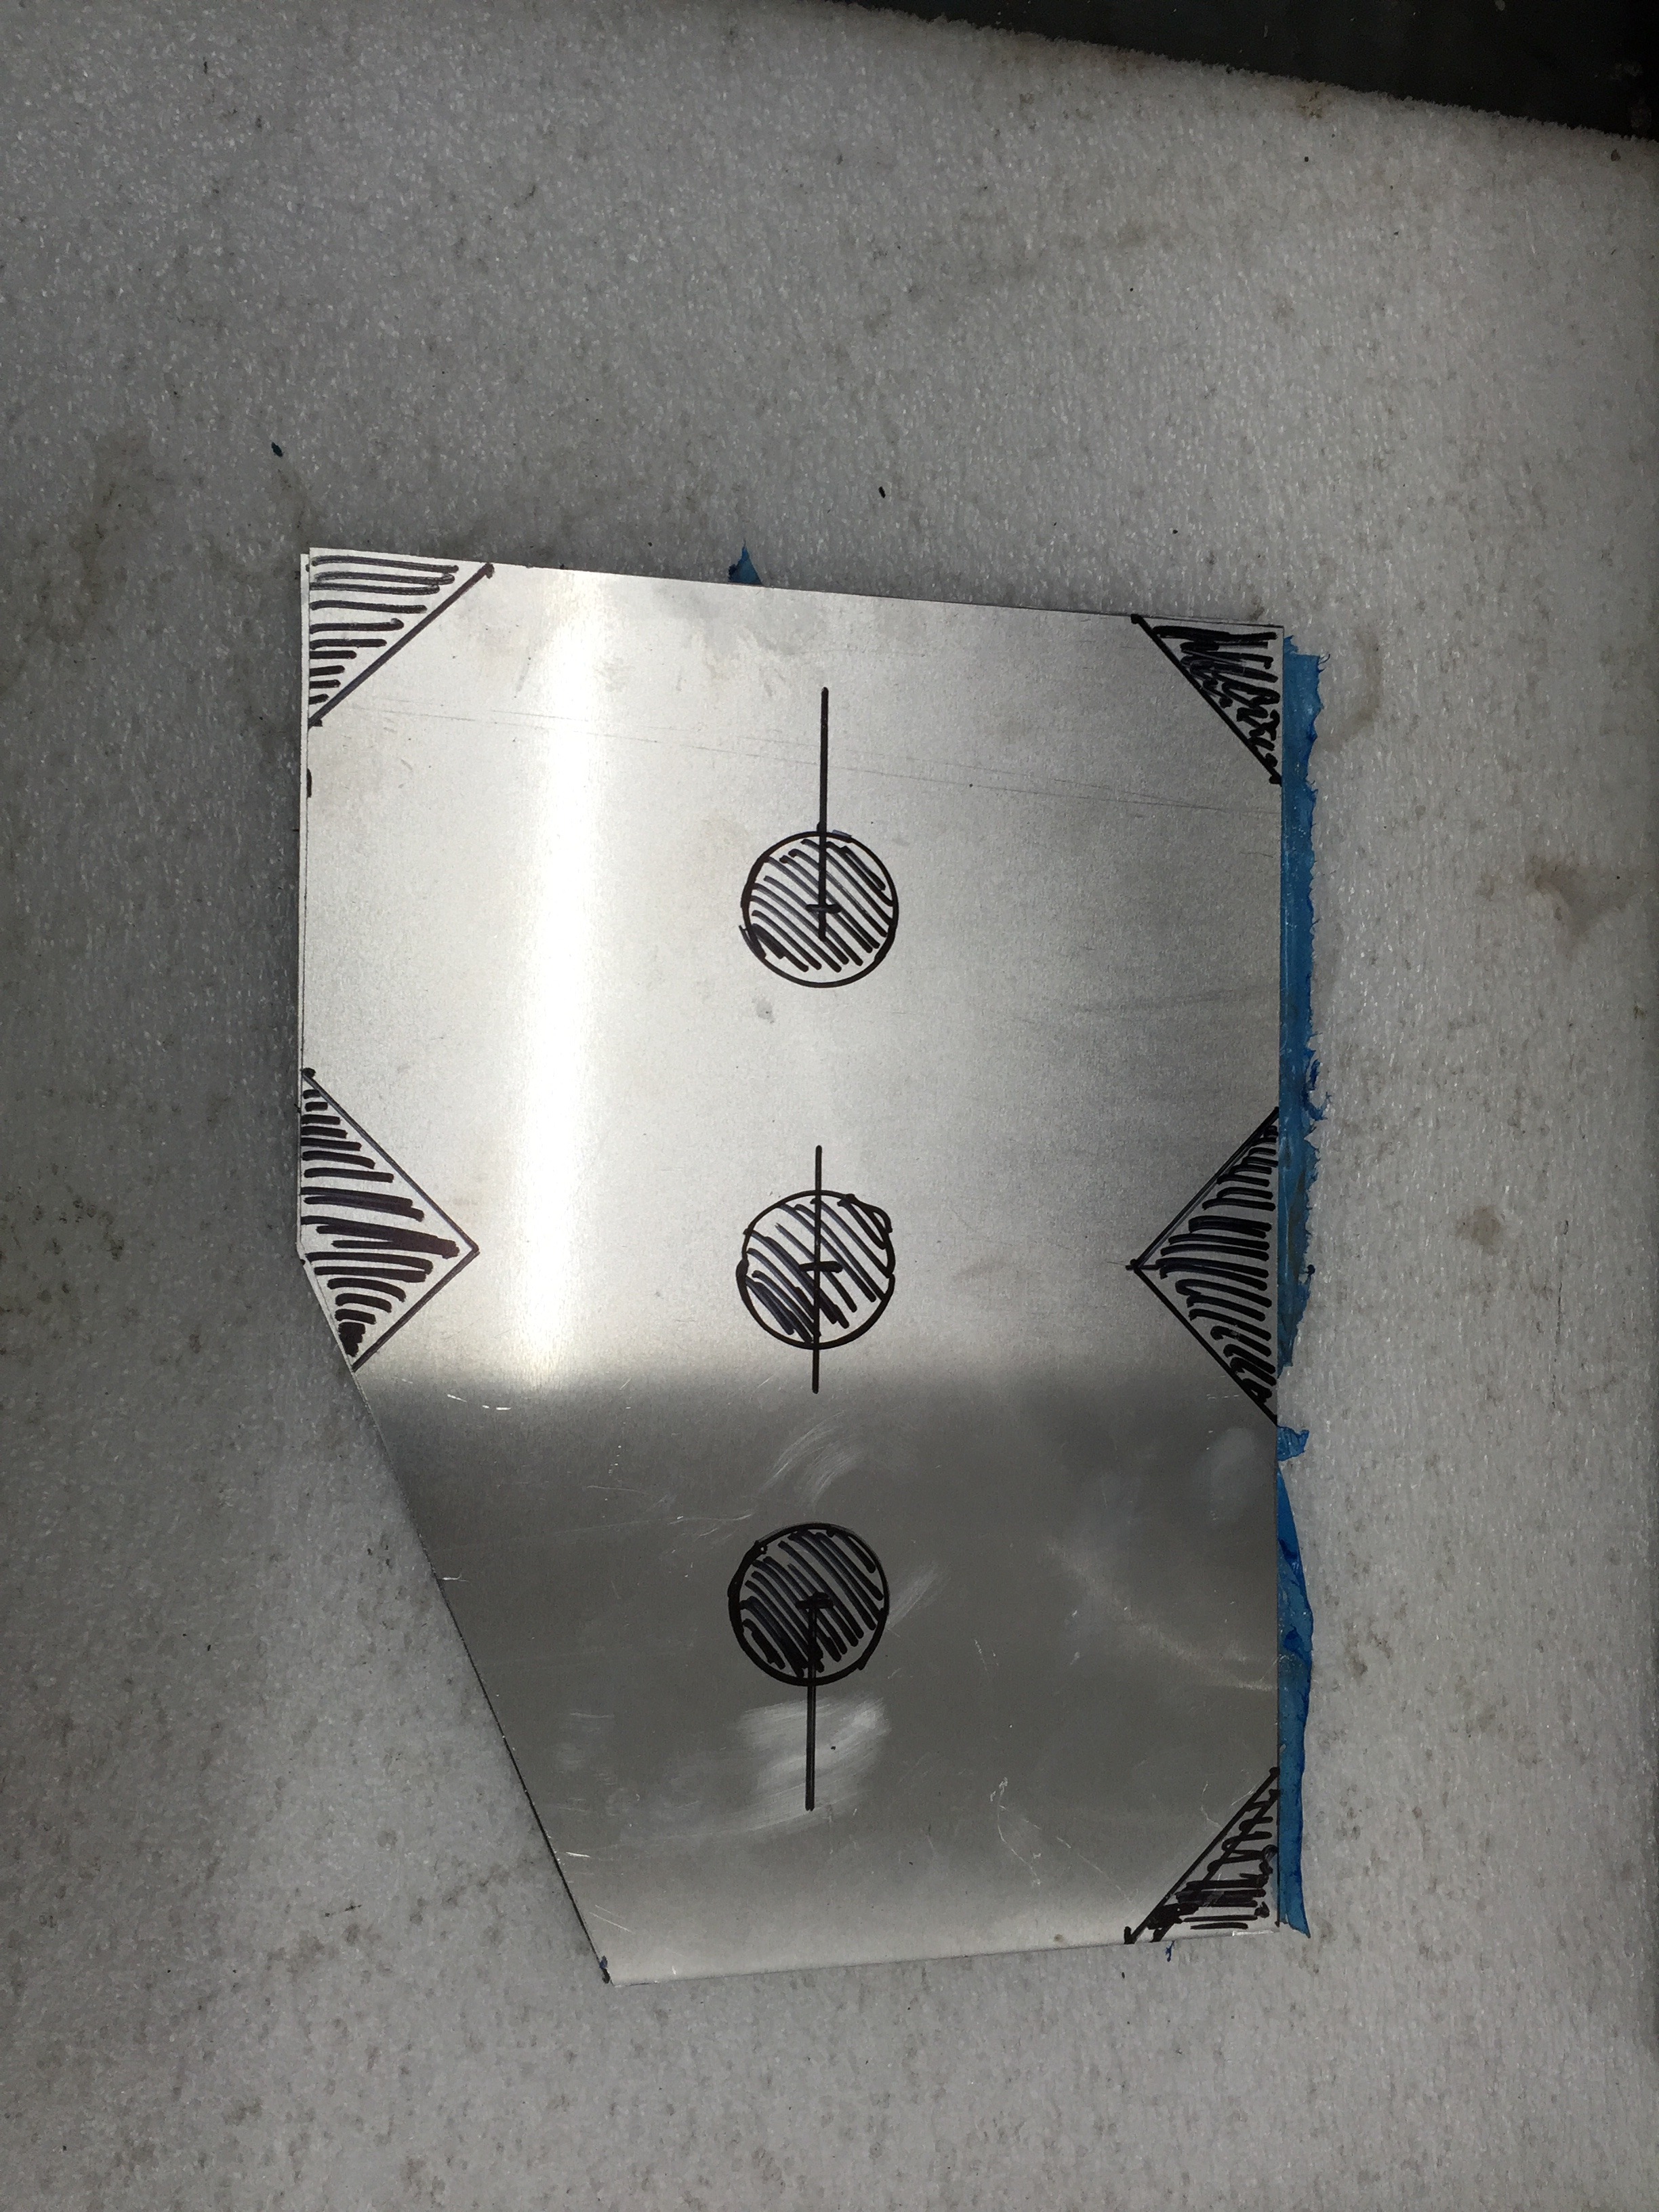
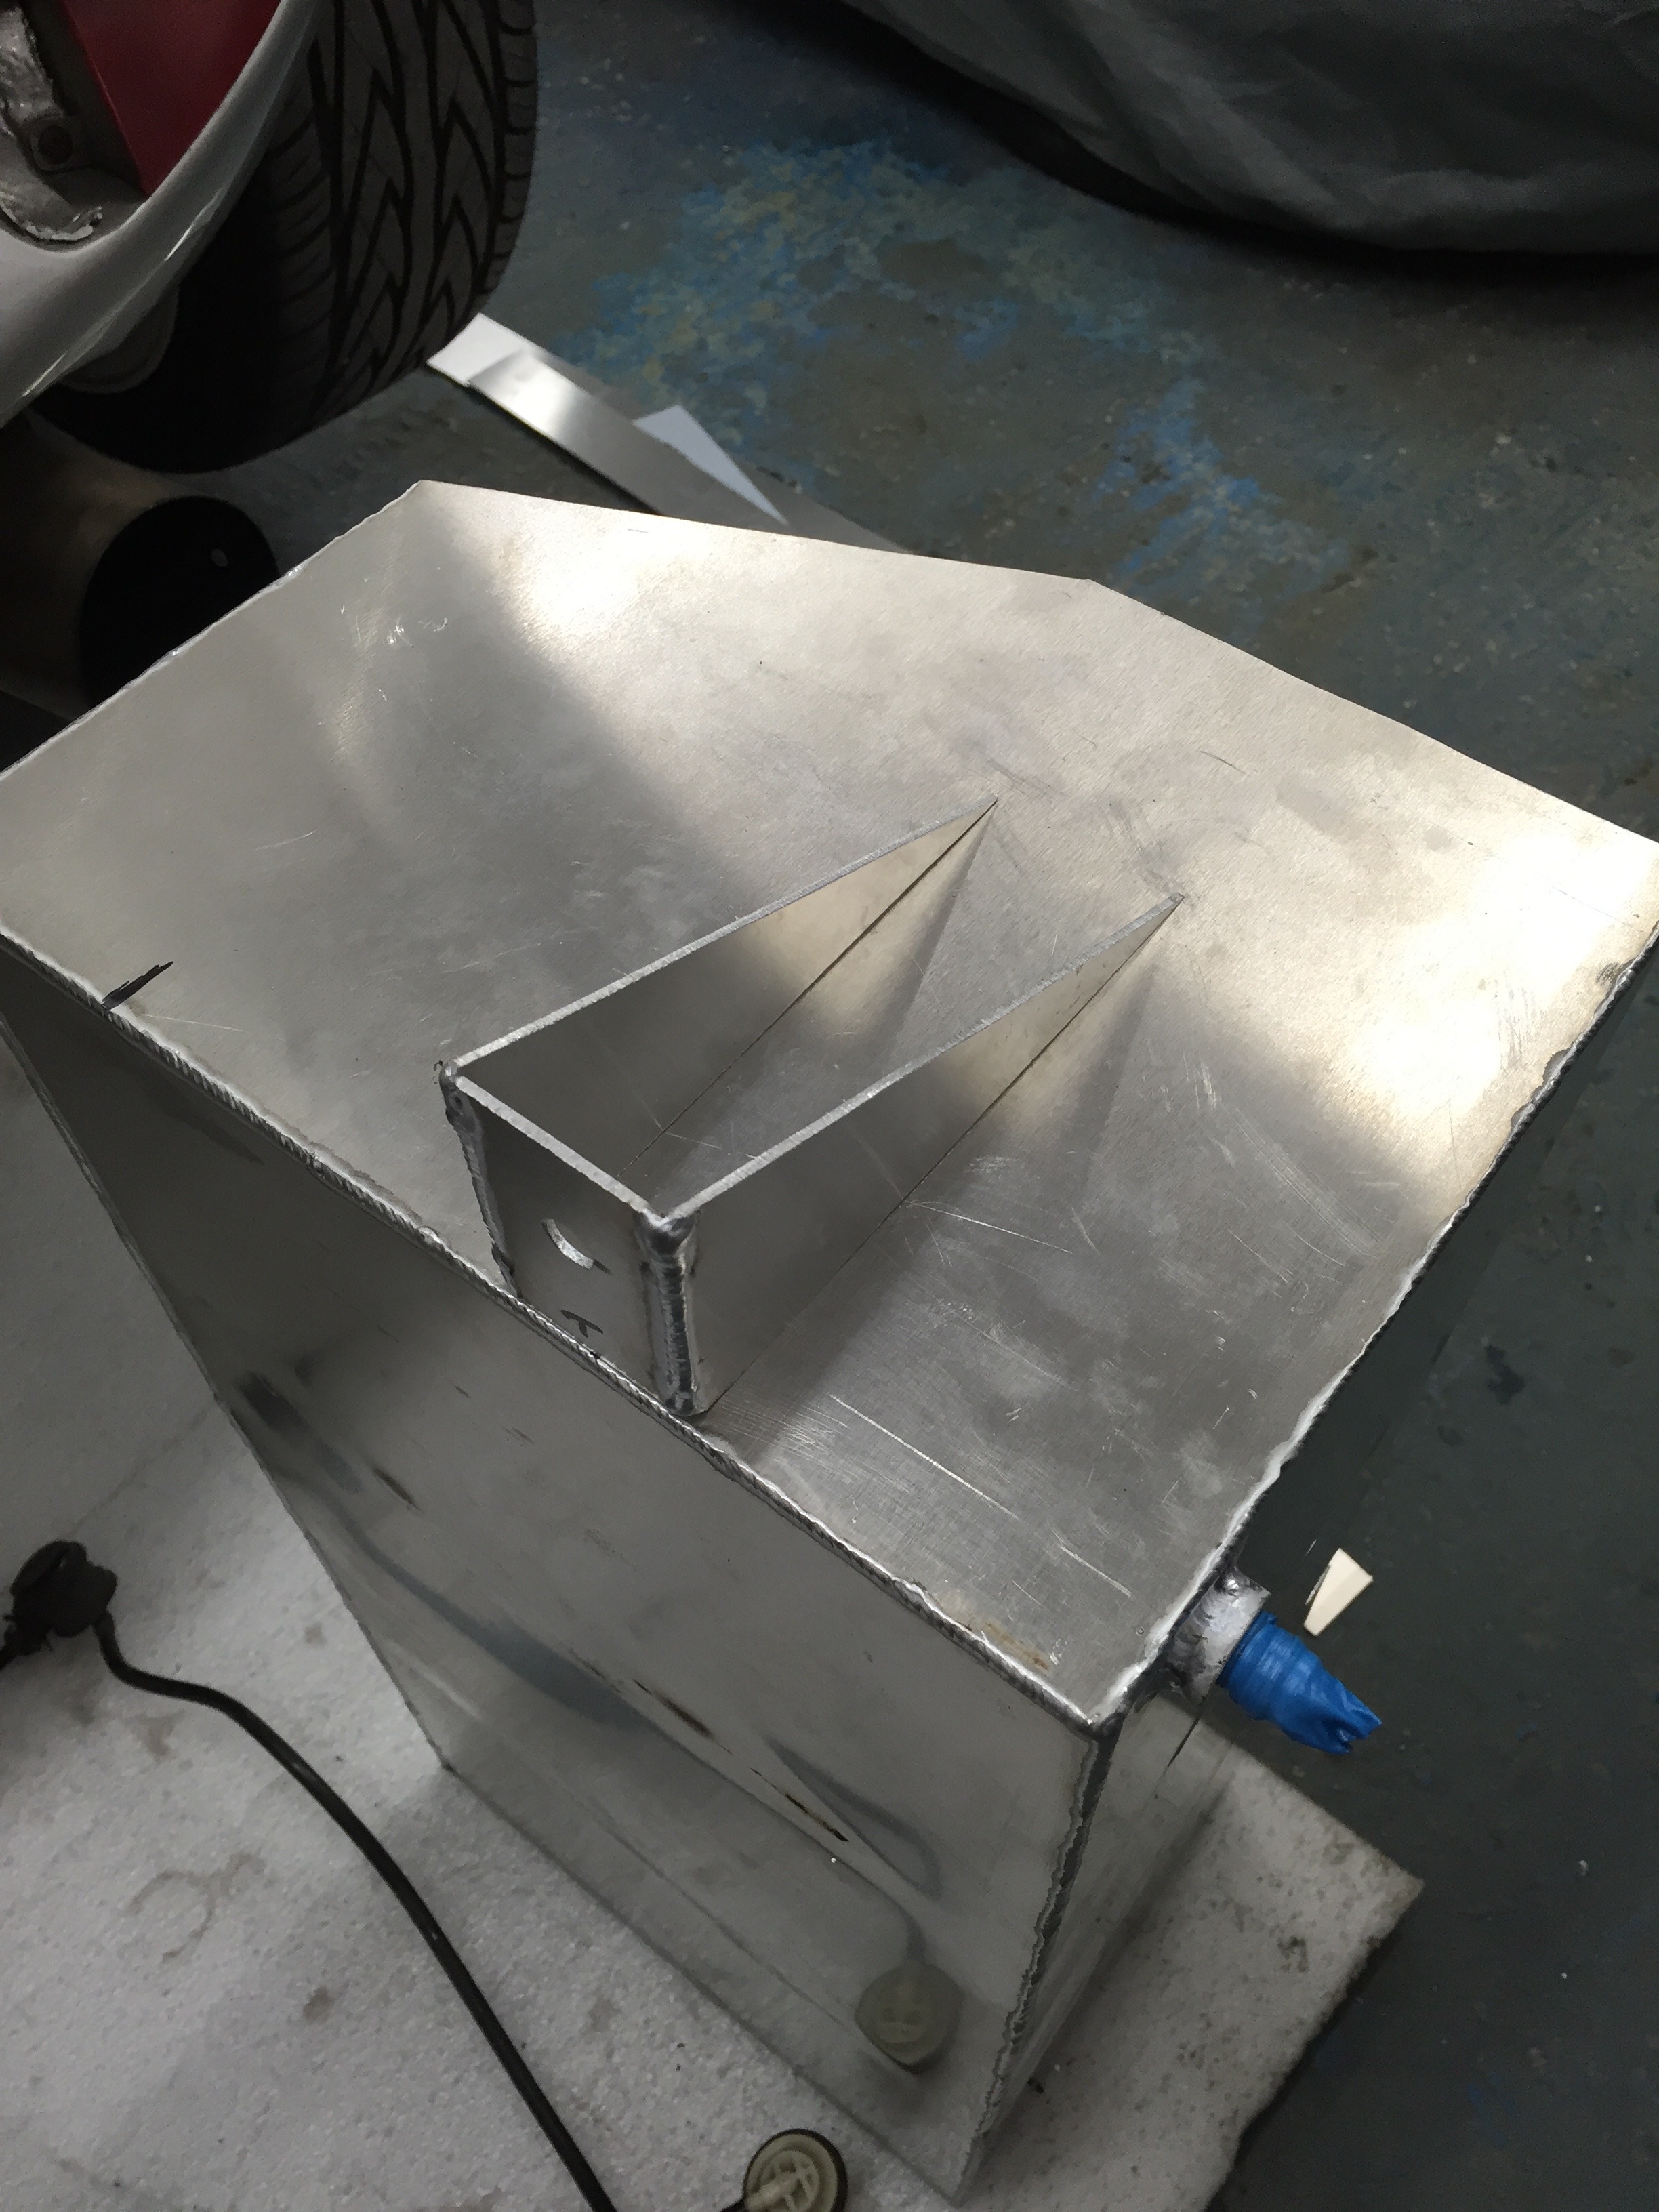
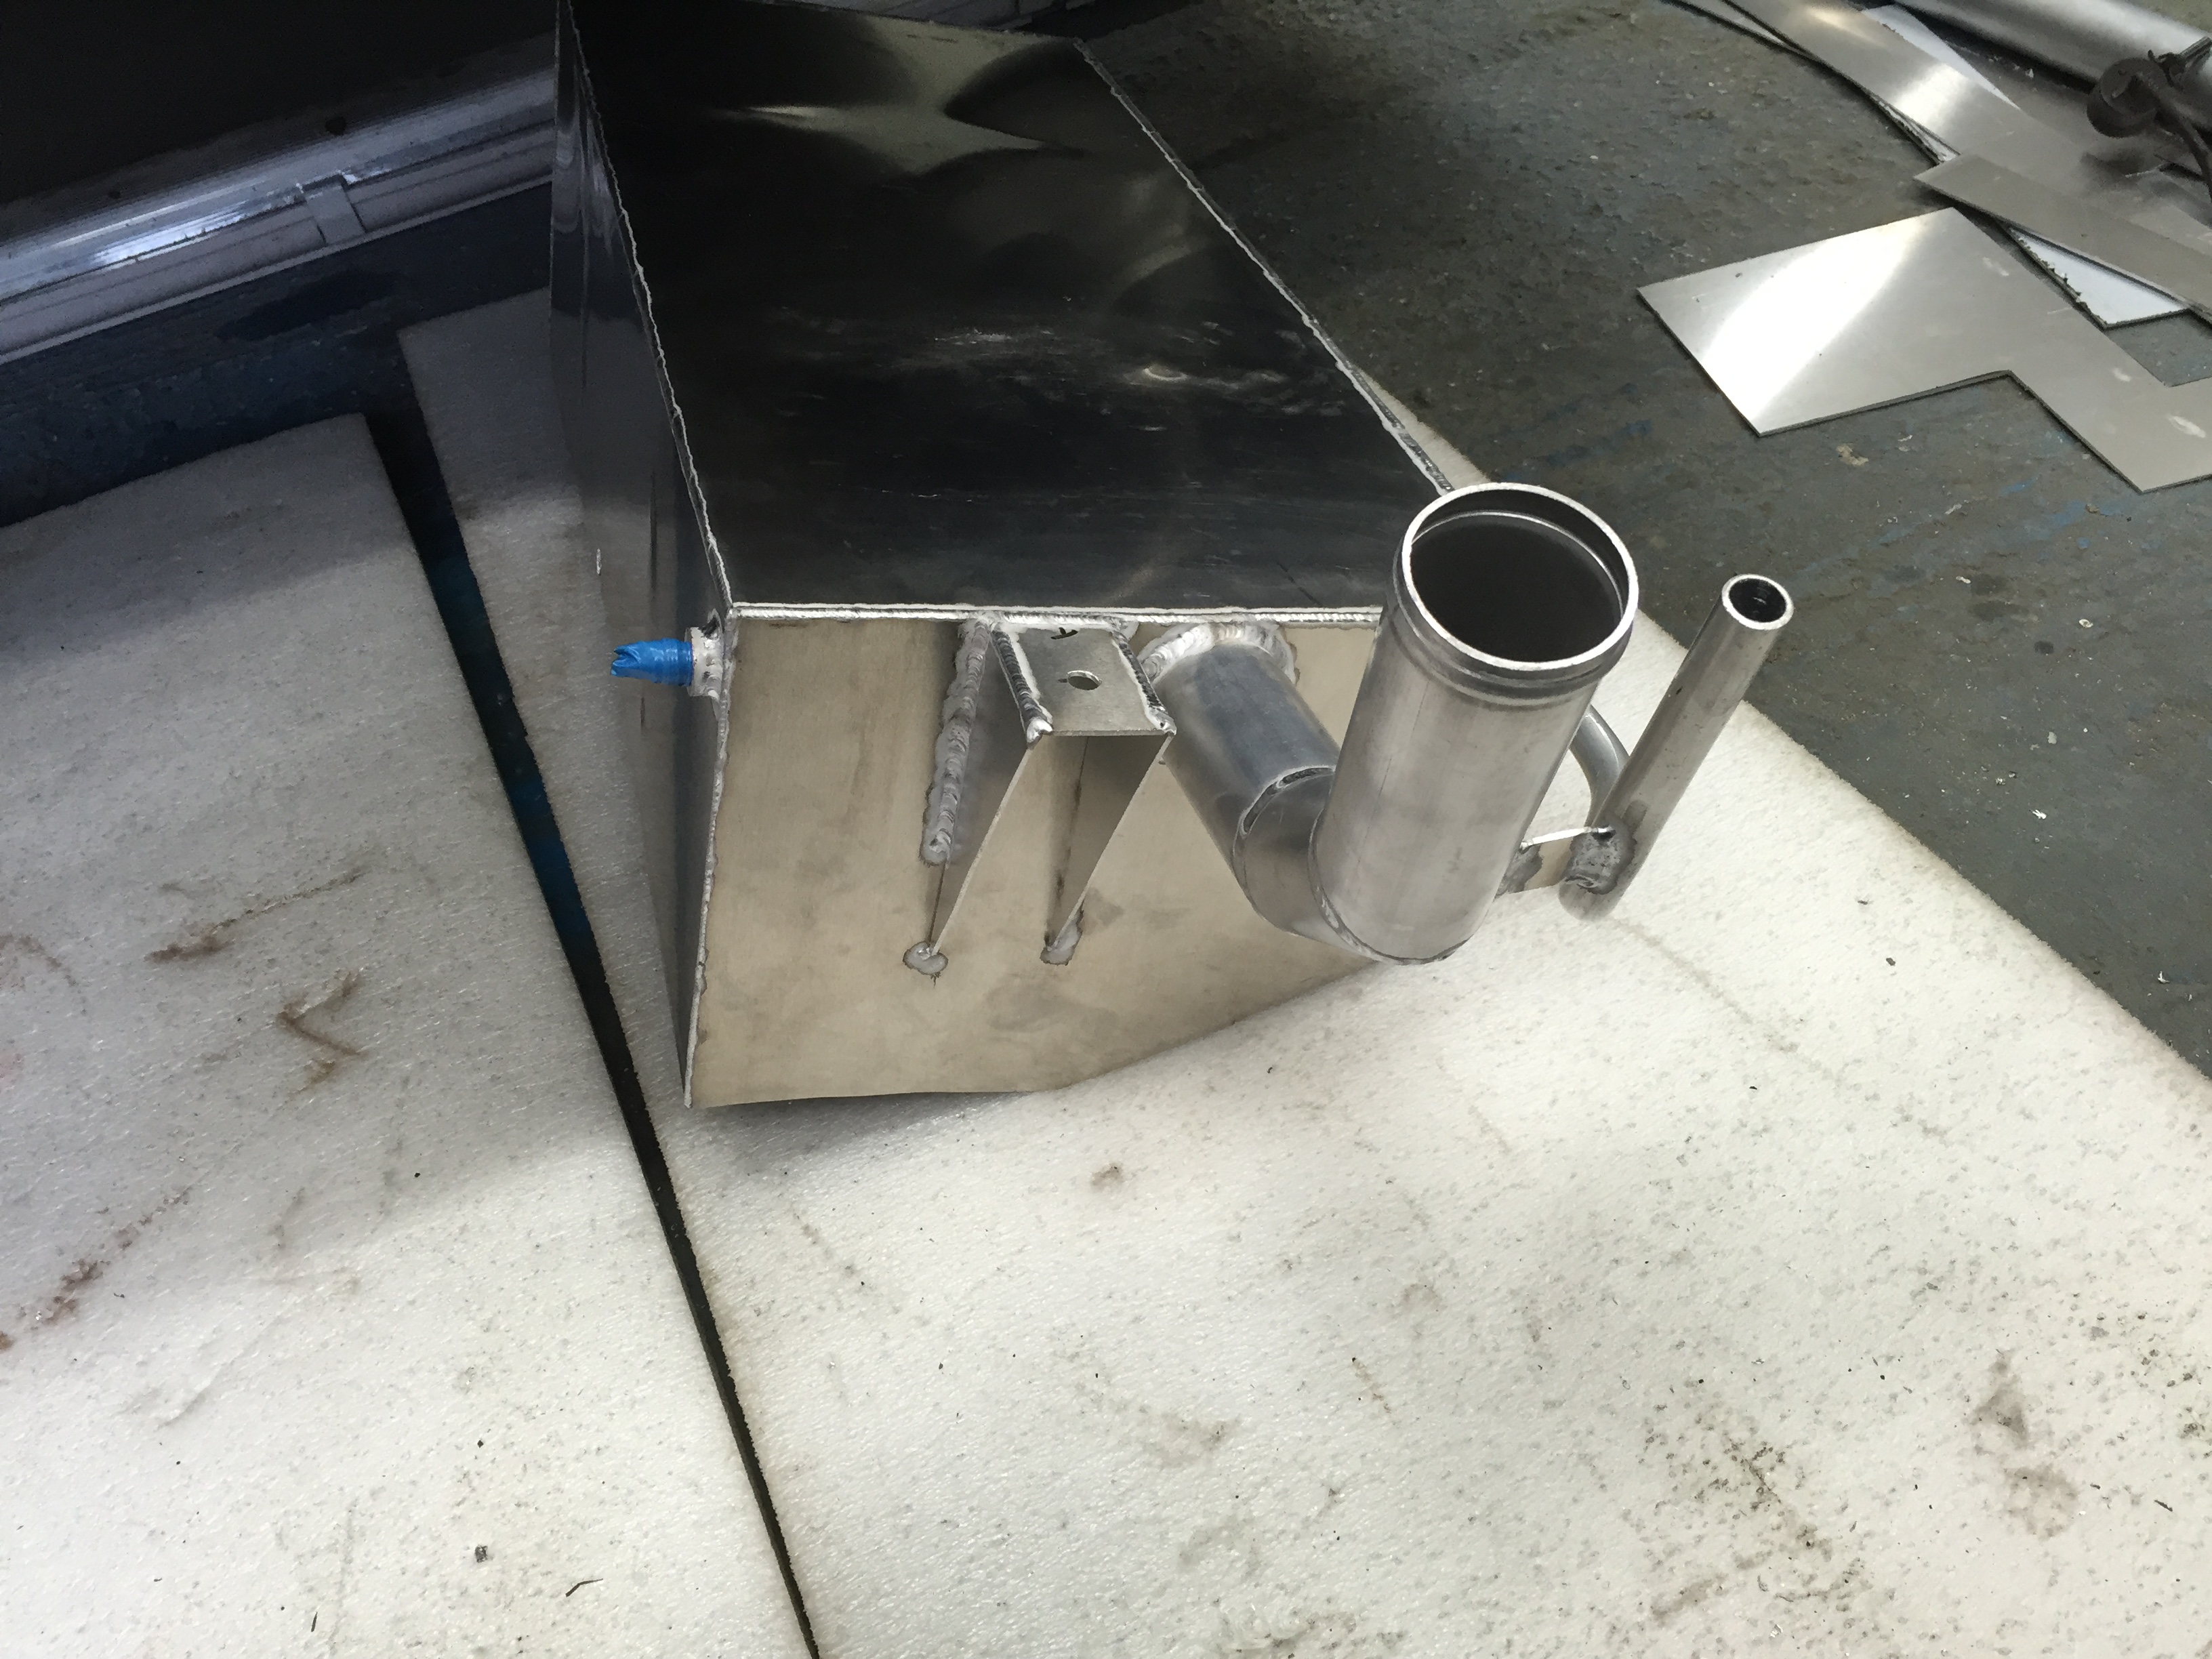
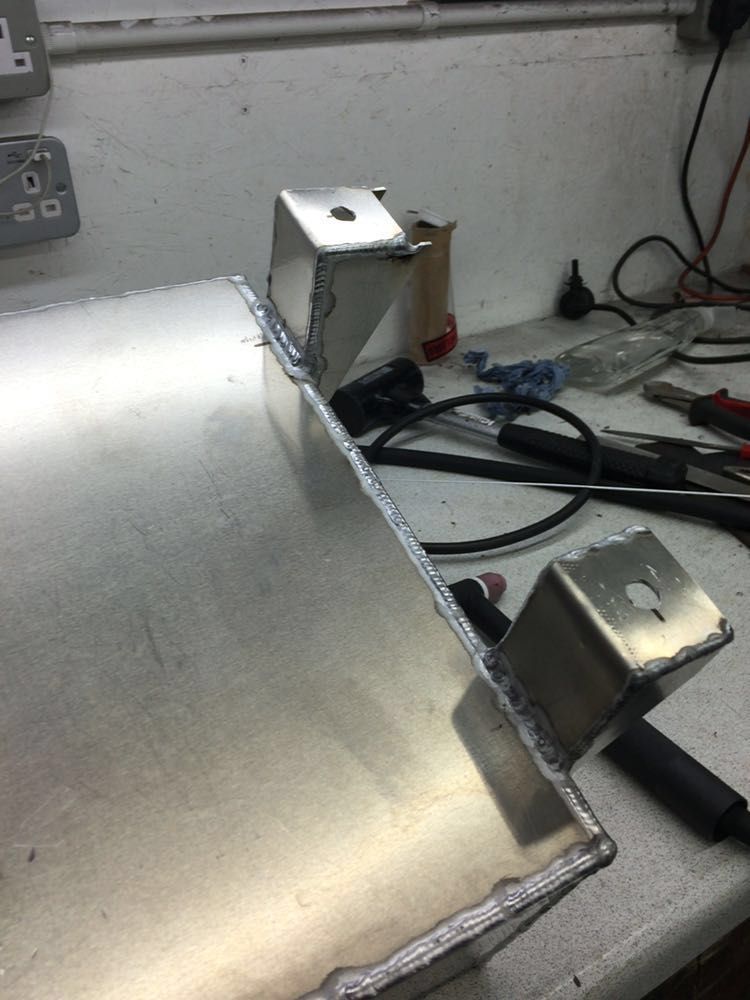
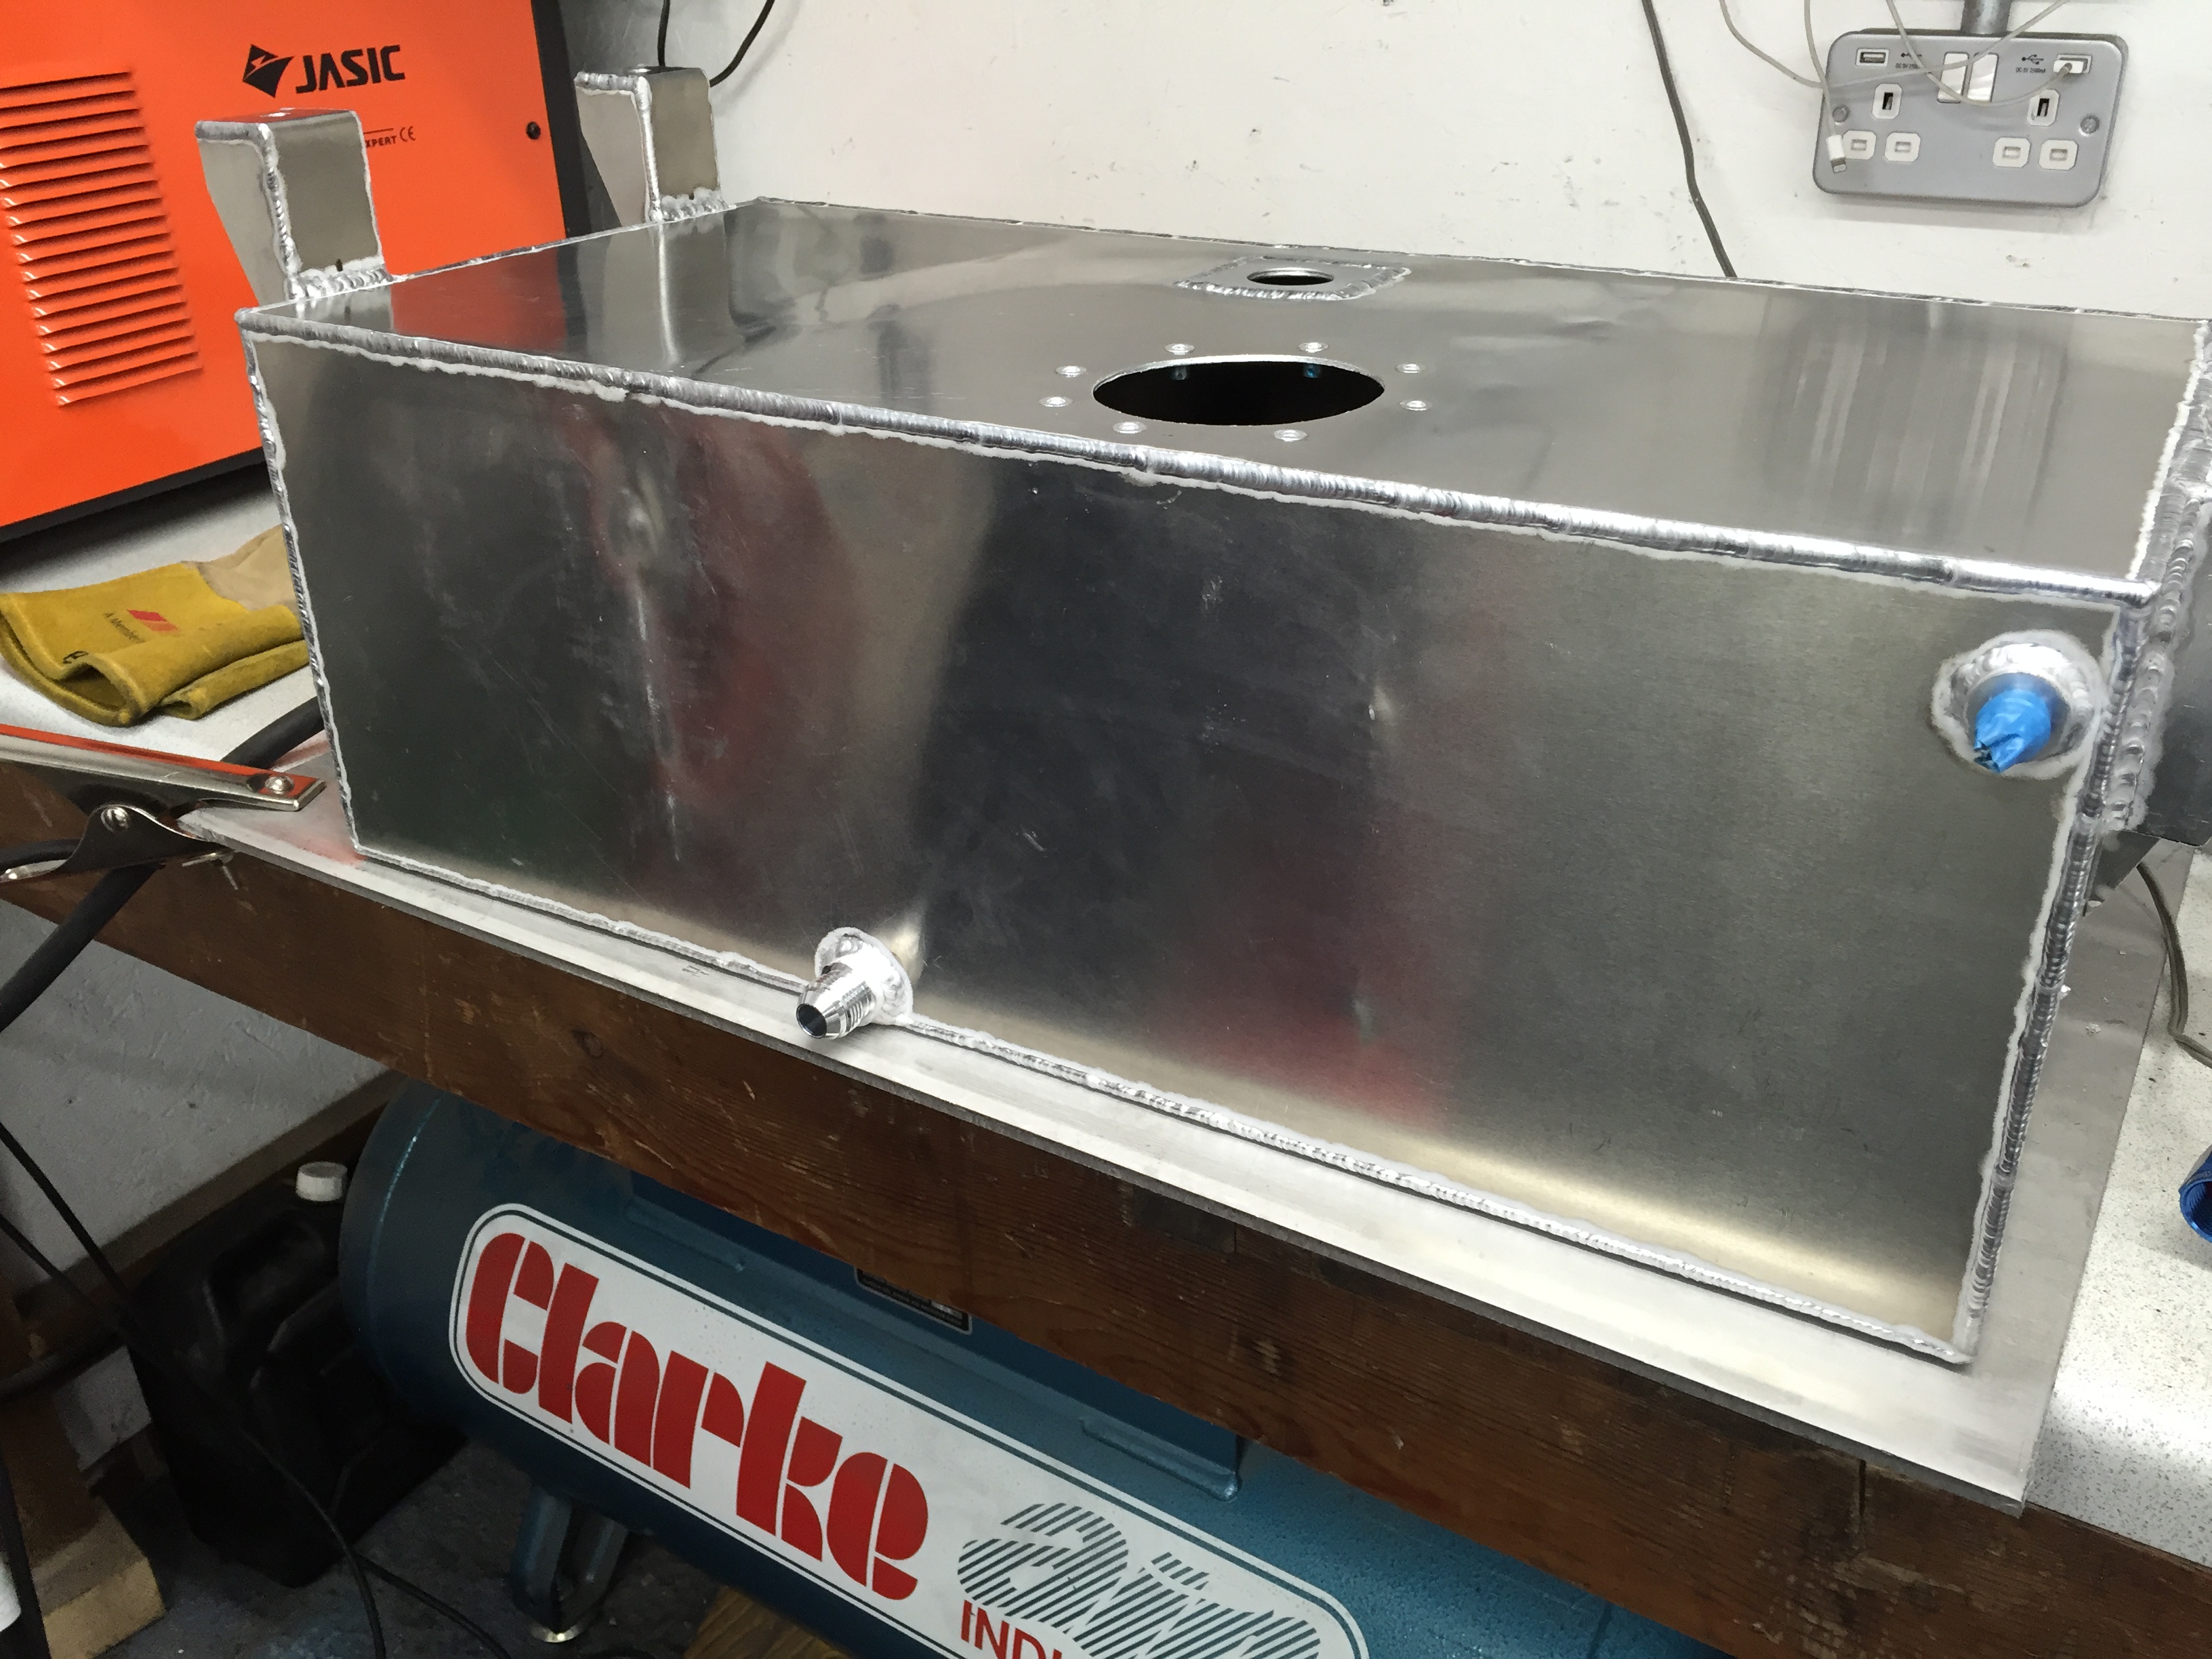
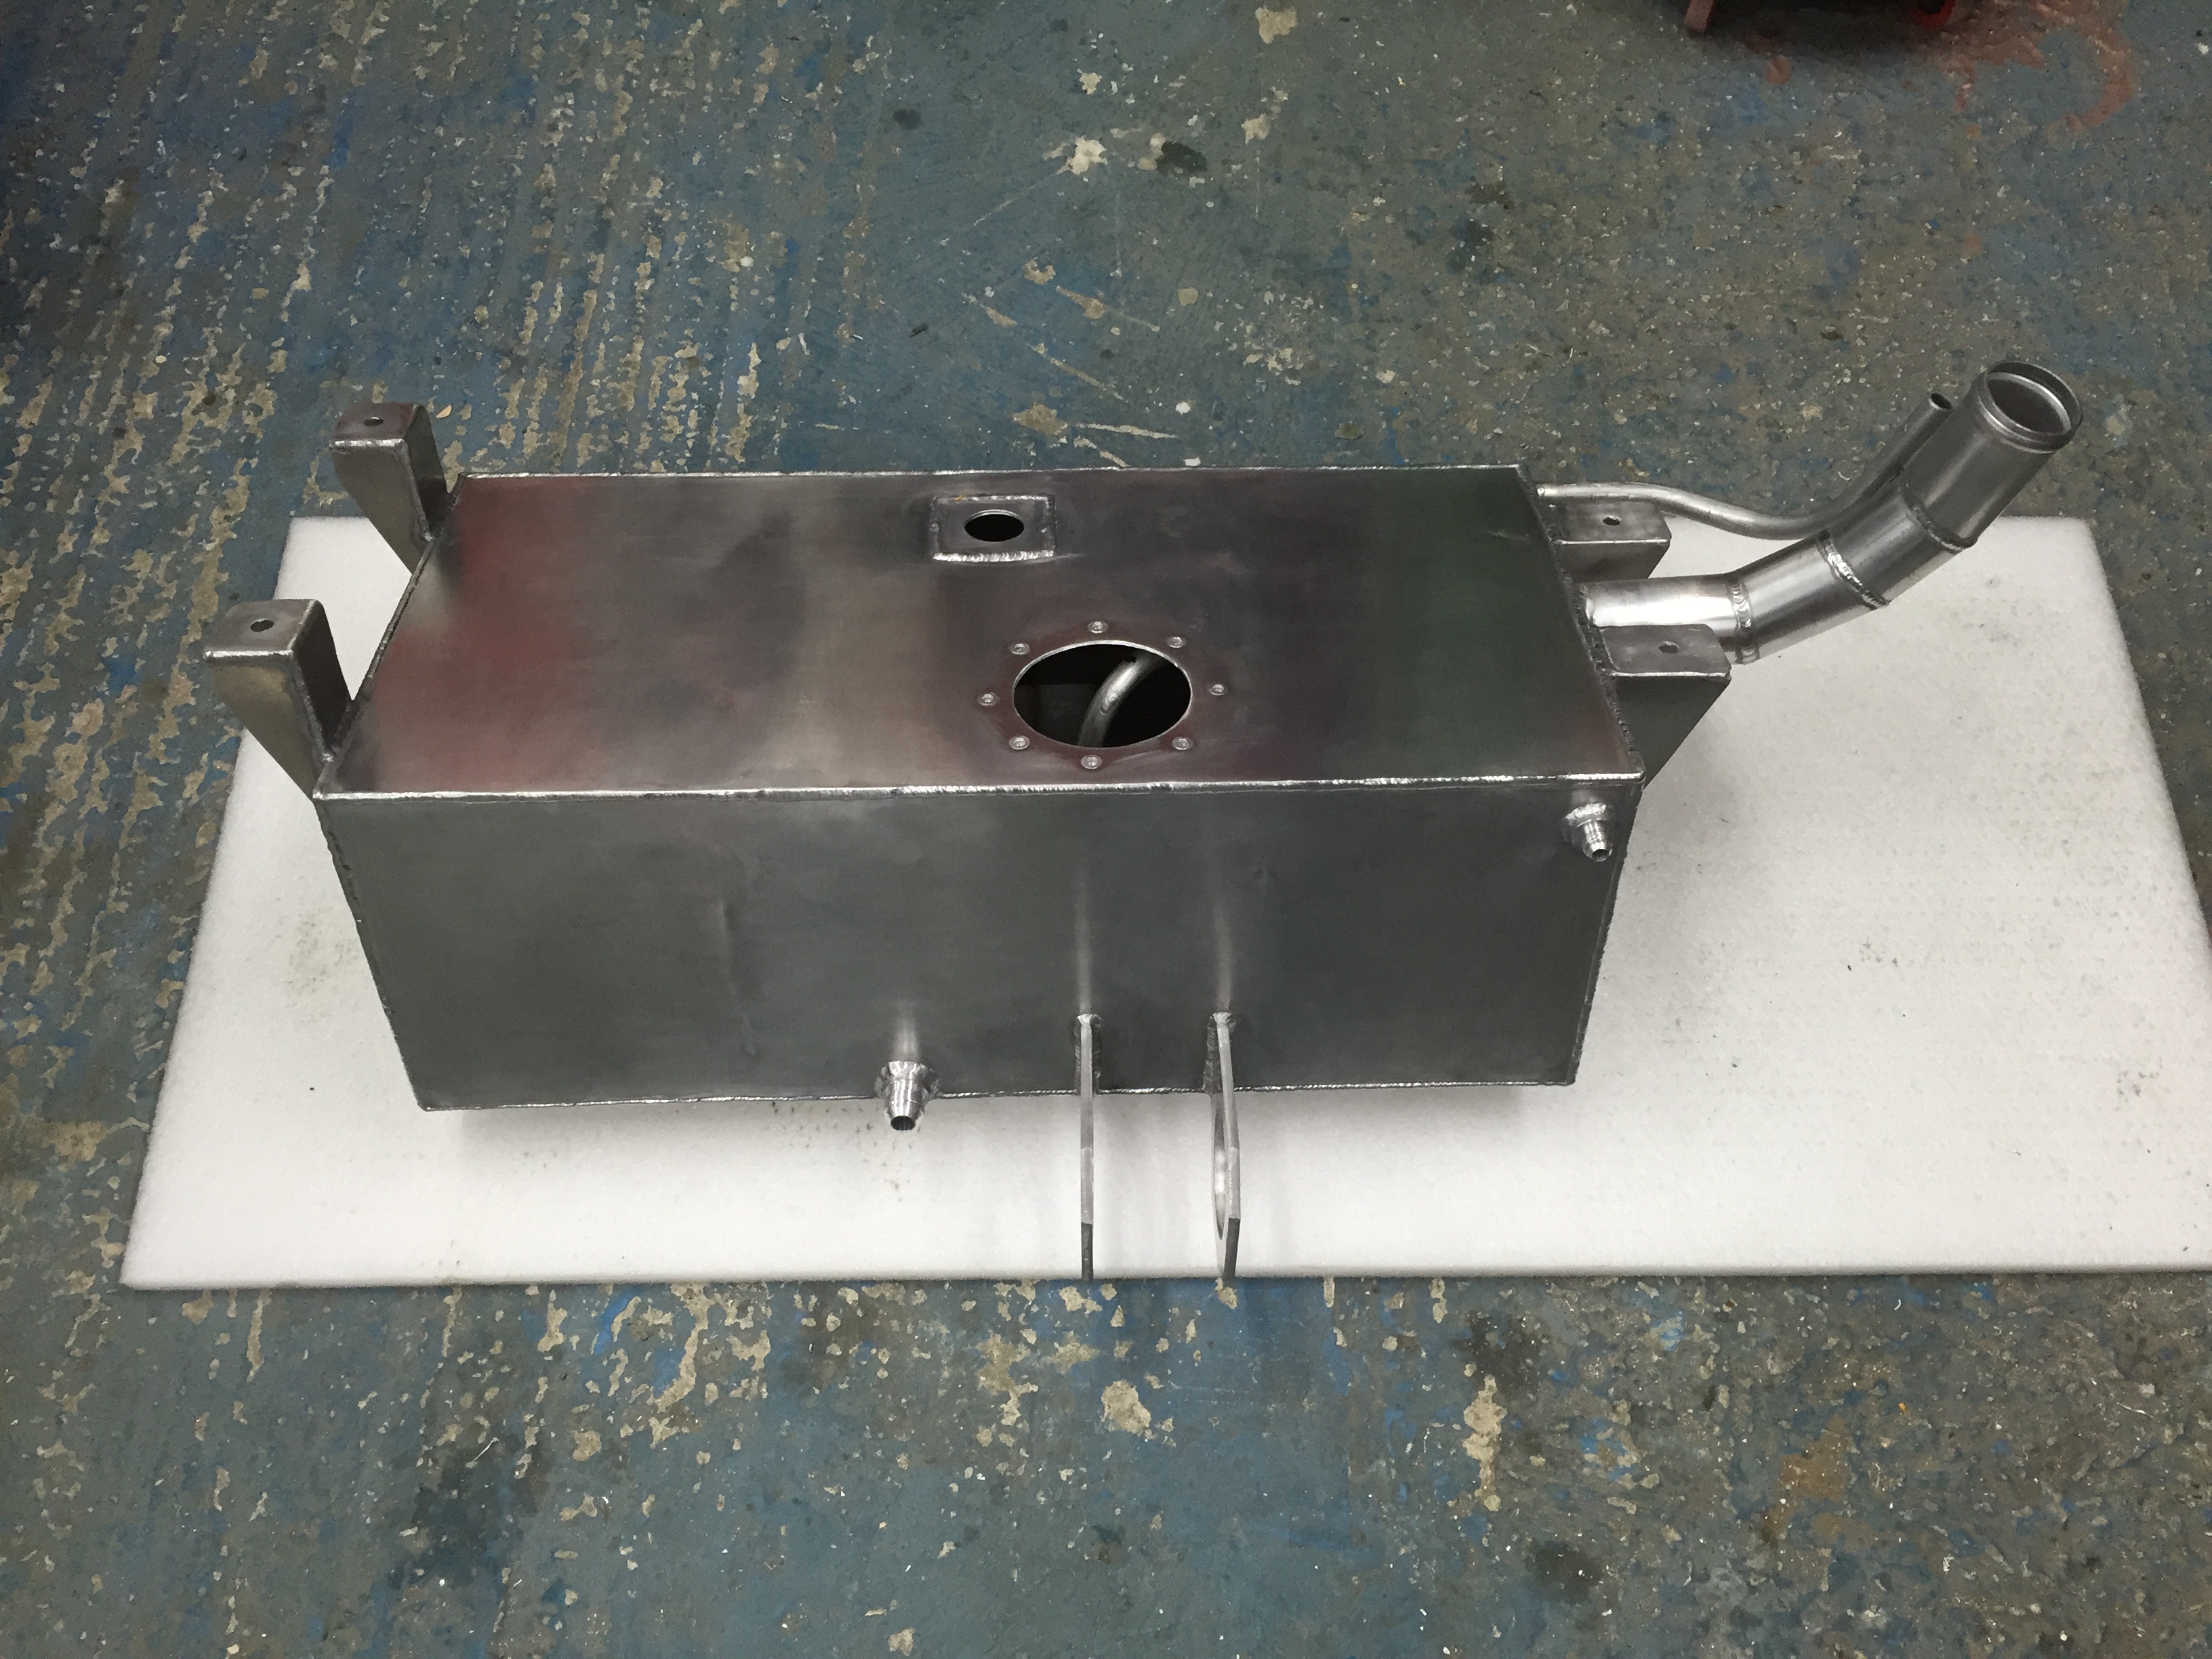
Sheet aluminium bought and started cutting and welding the new tank..
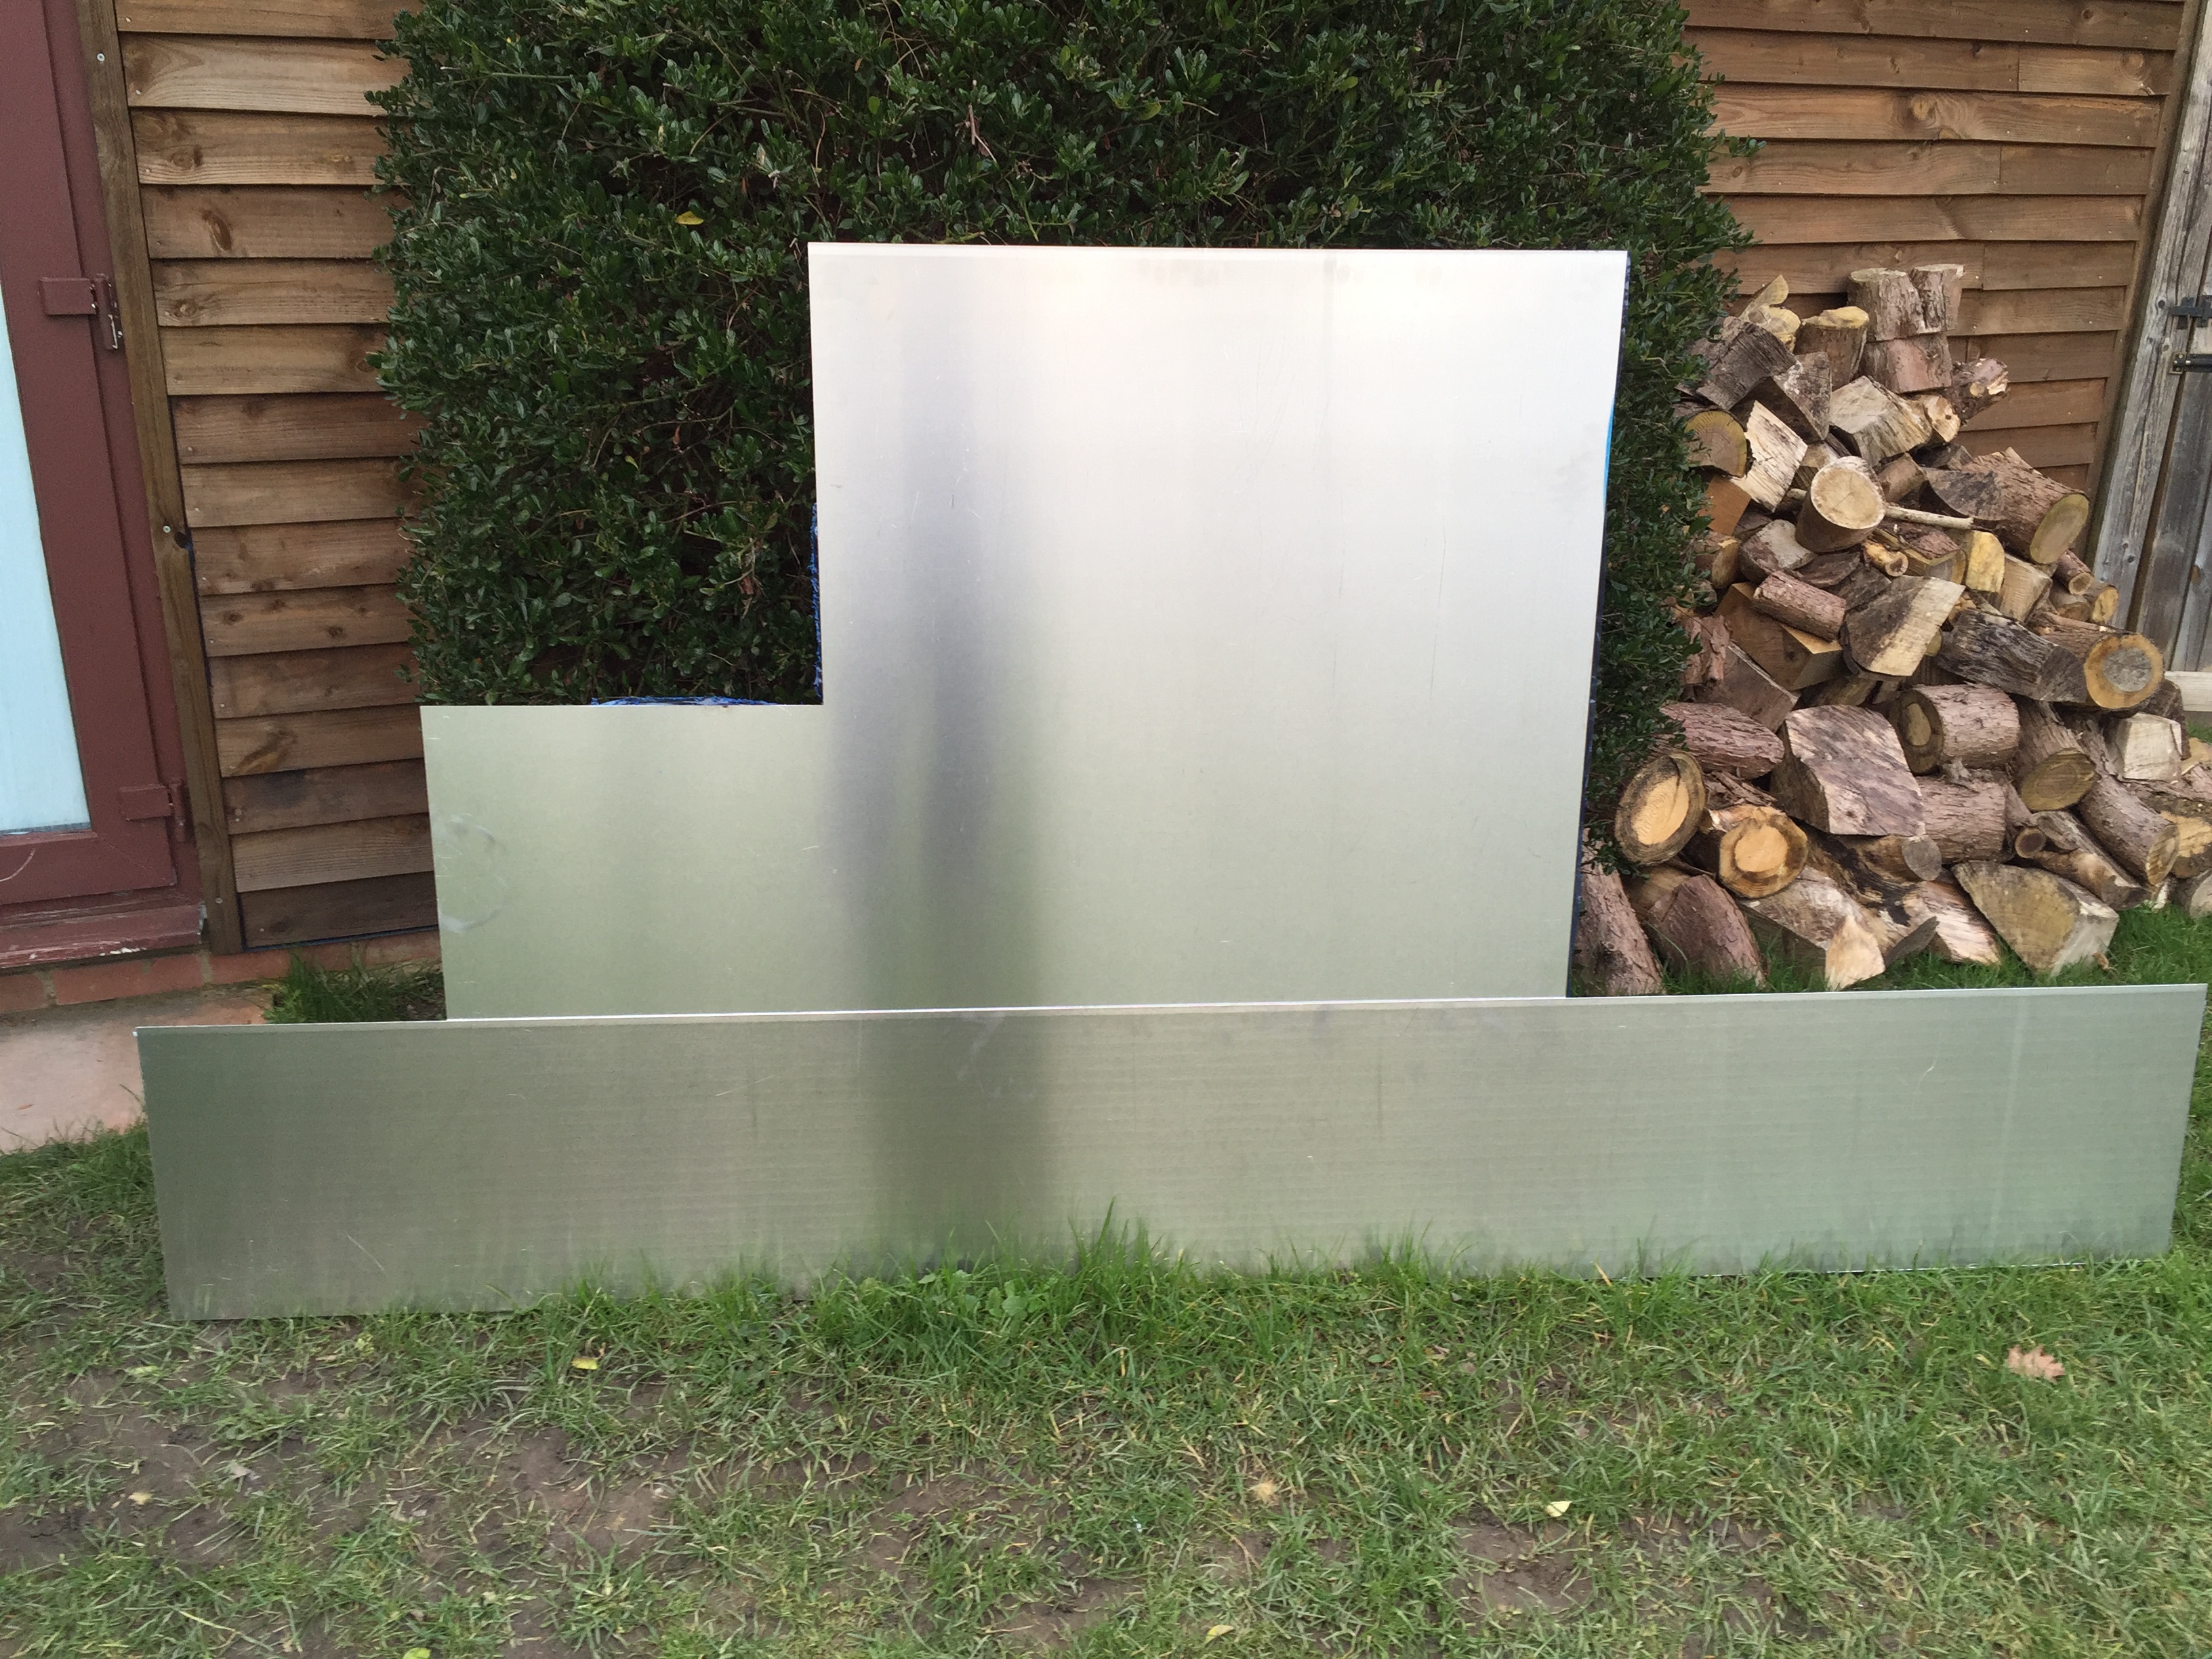
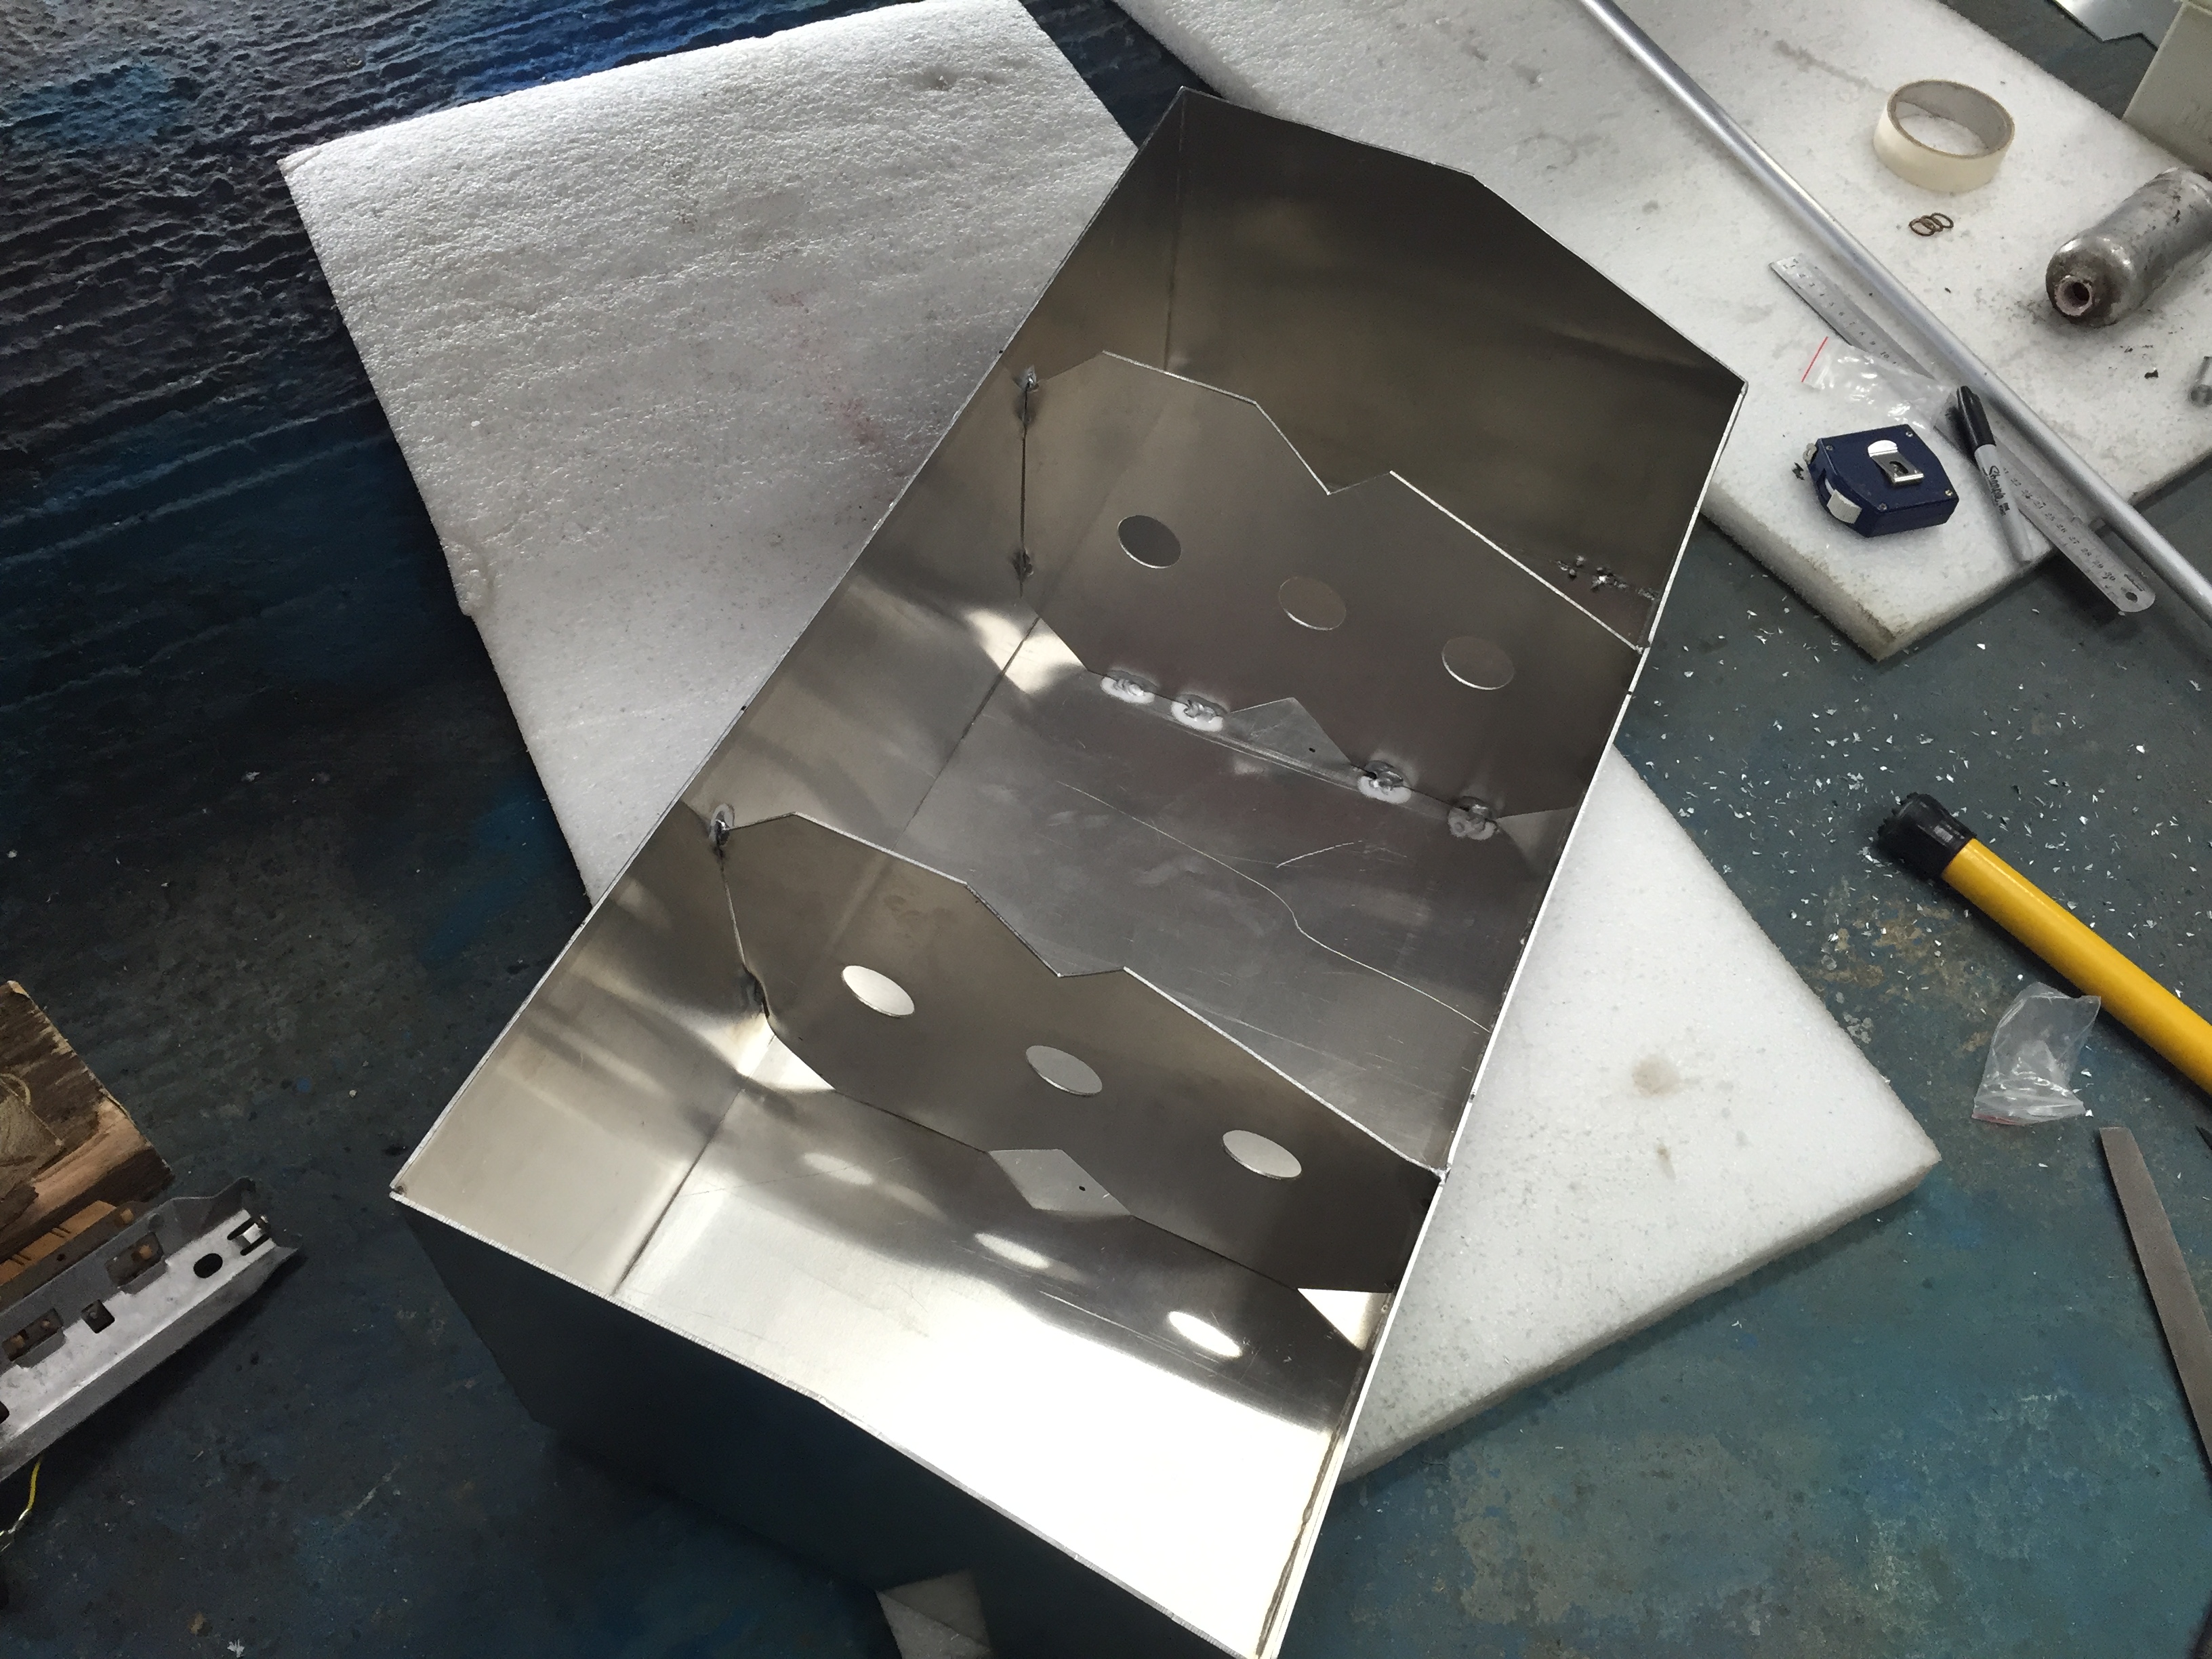
Baffles getting made
Tacked in
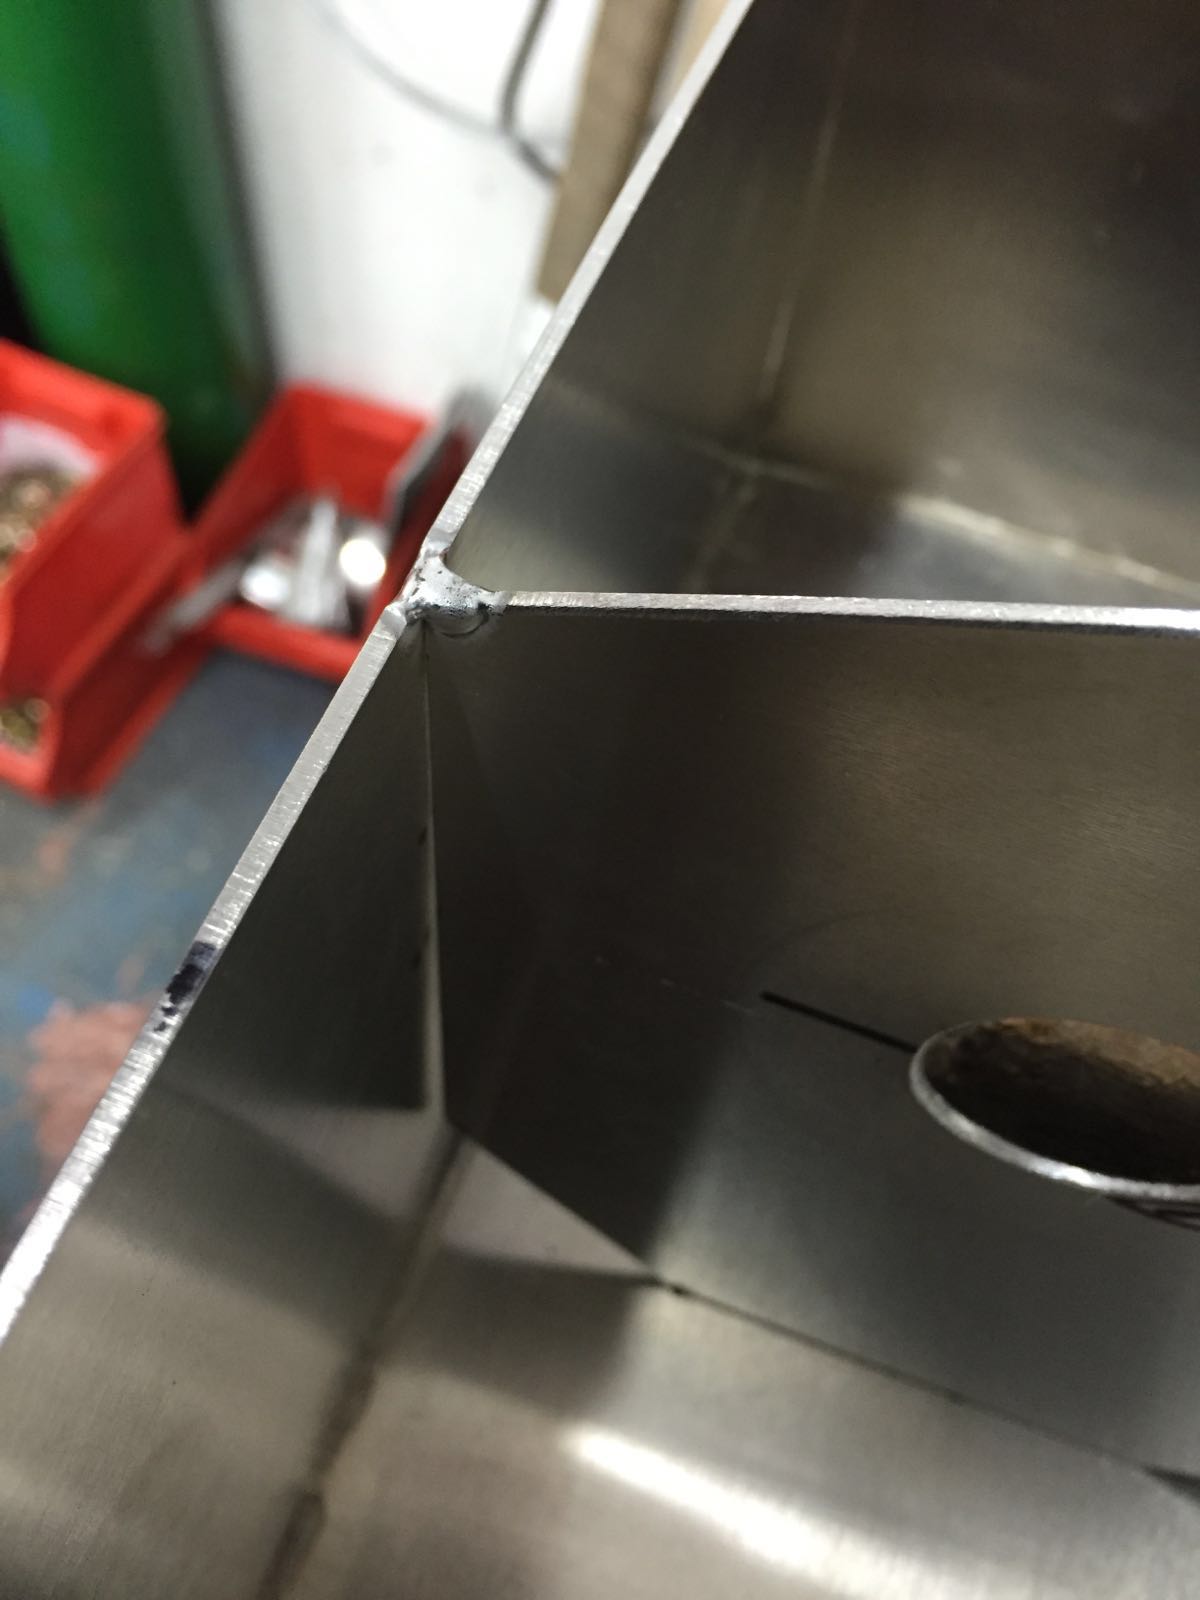
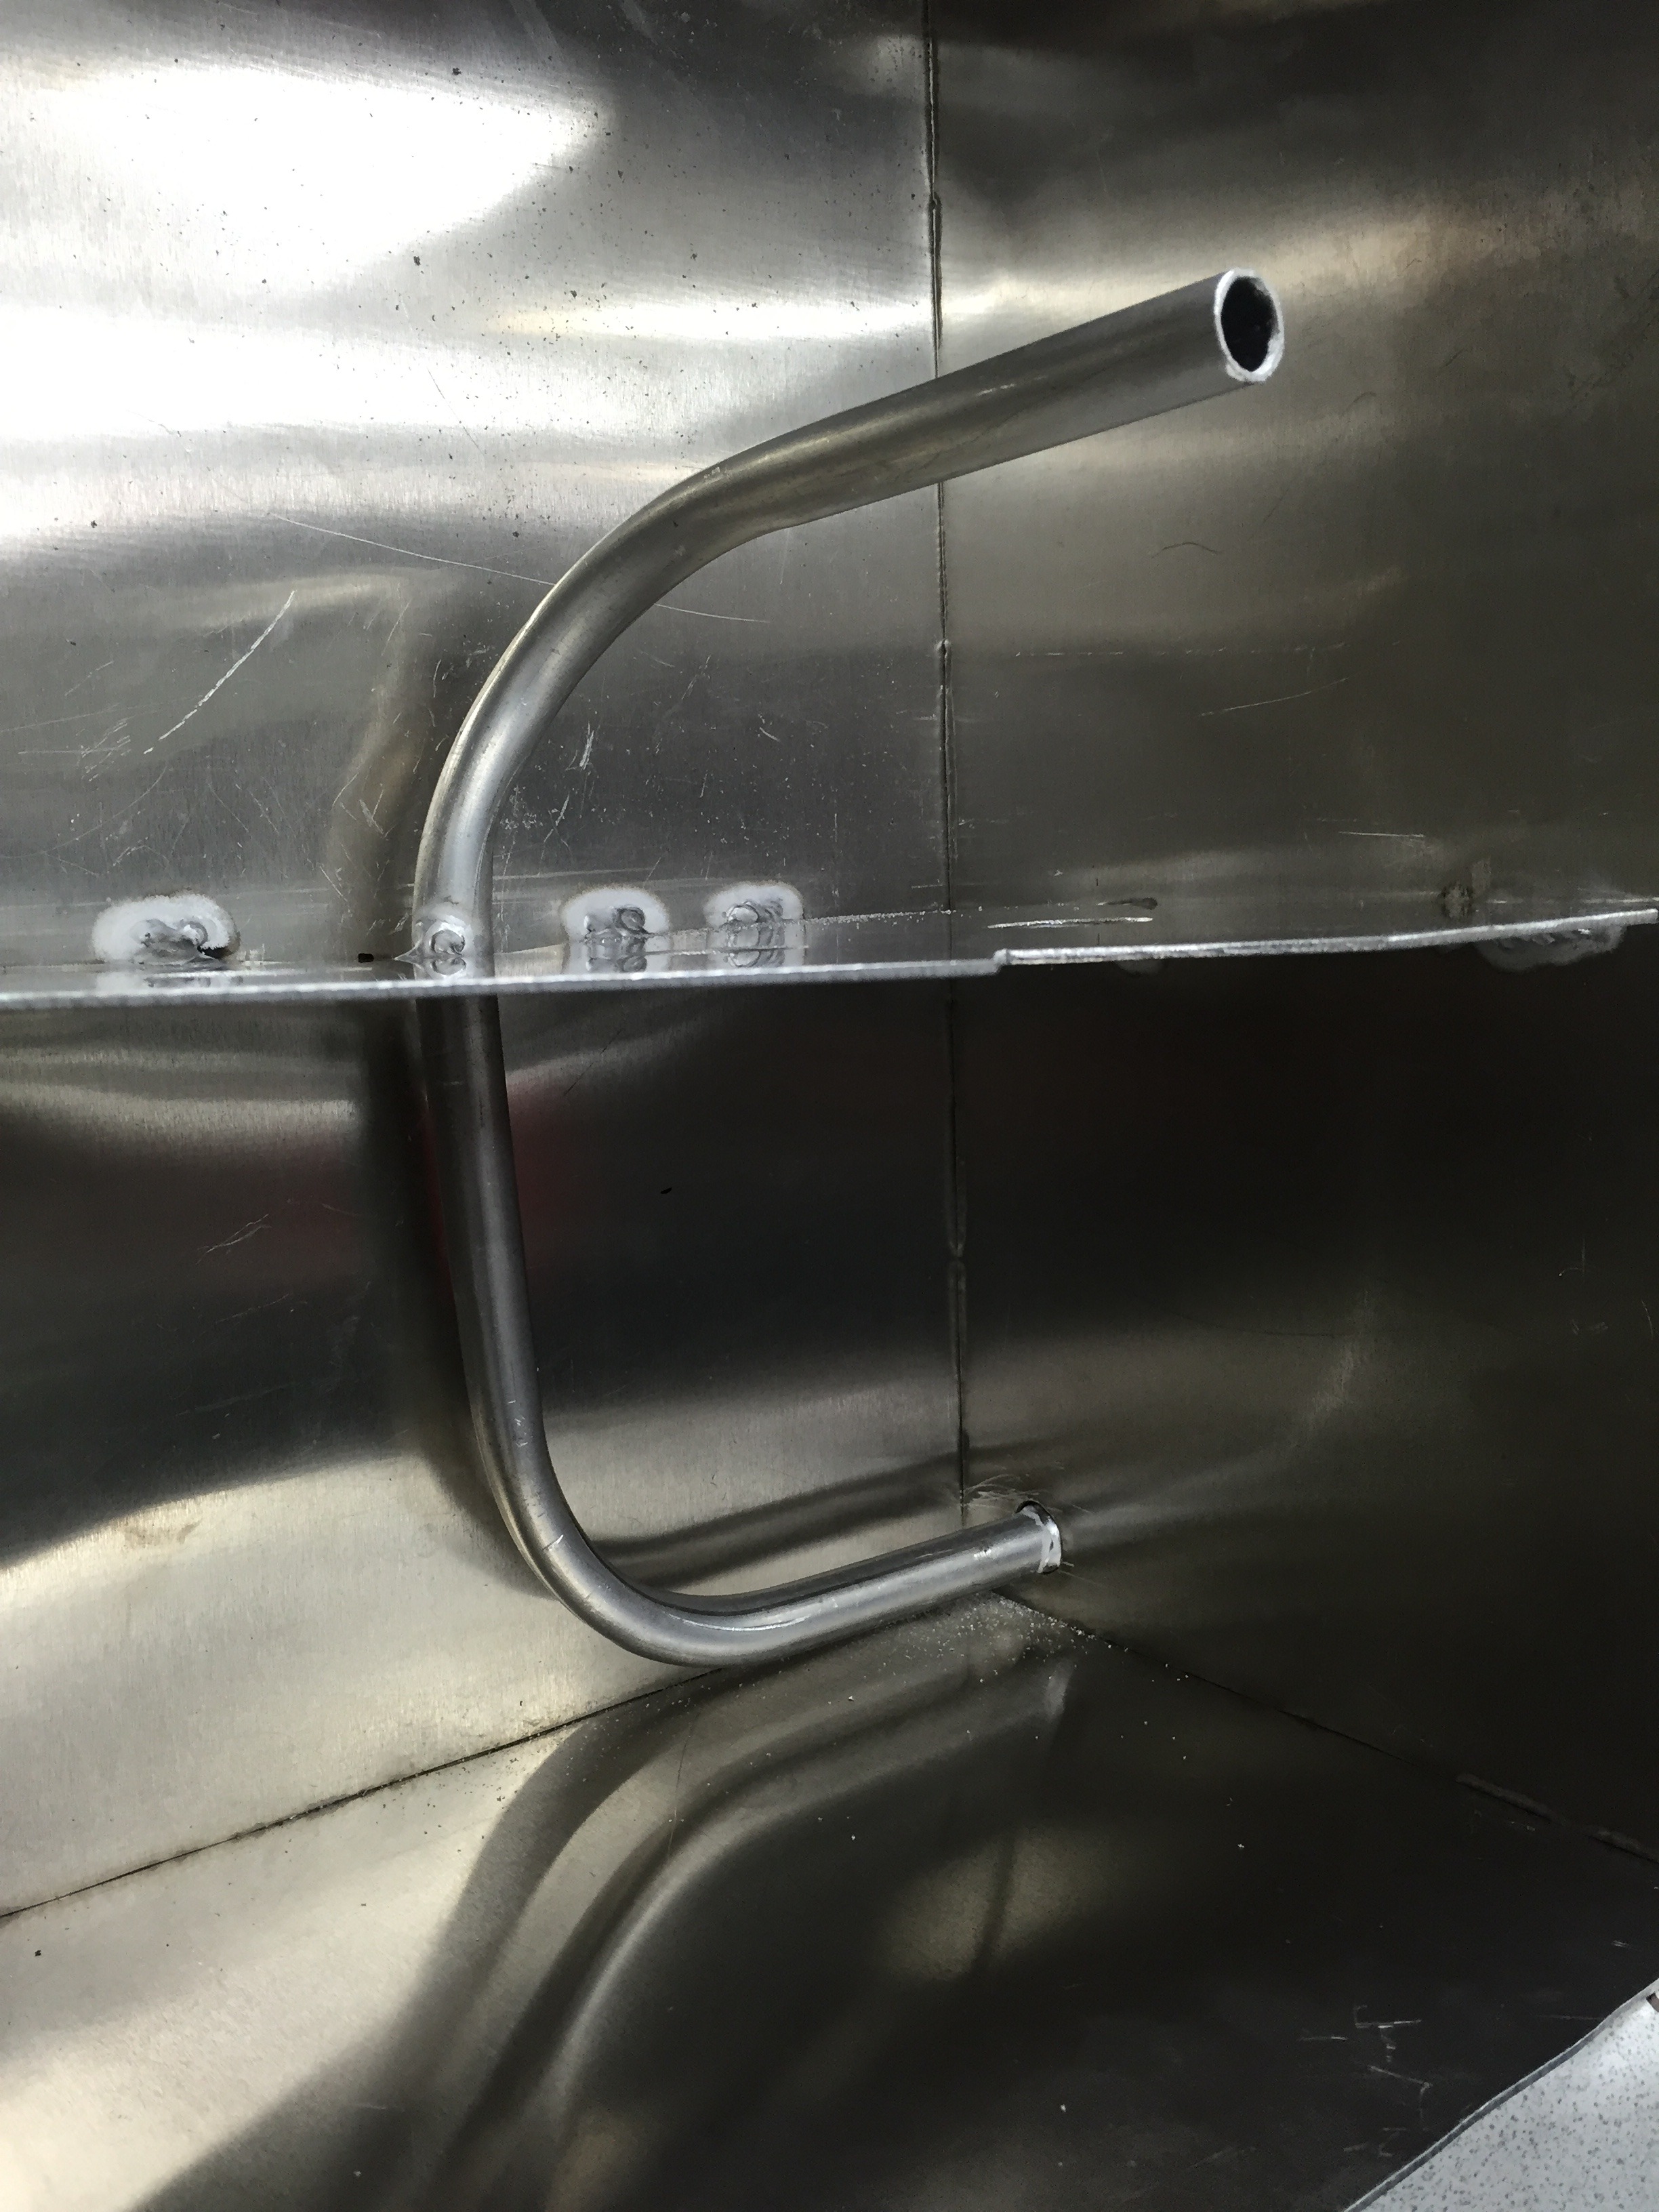
Collector pot made
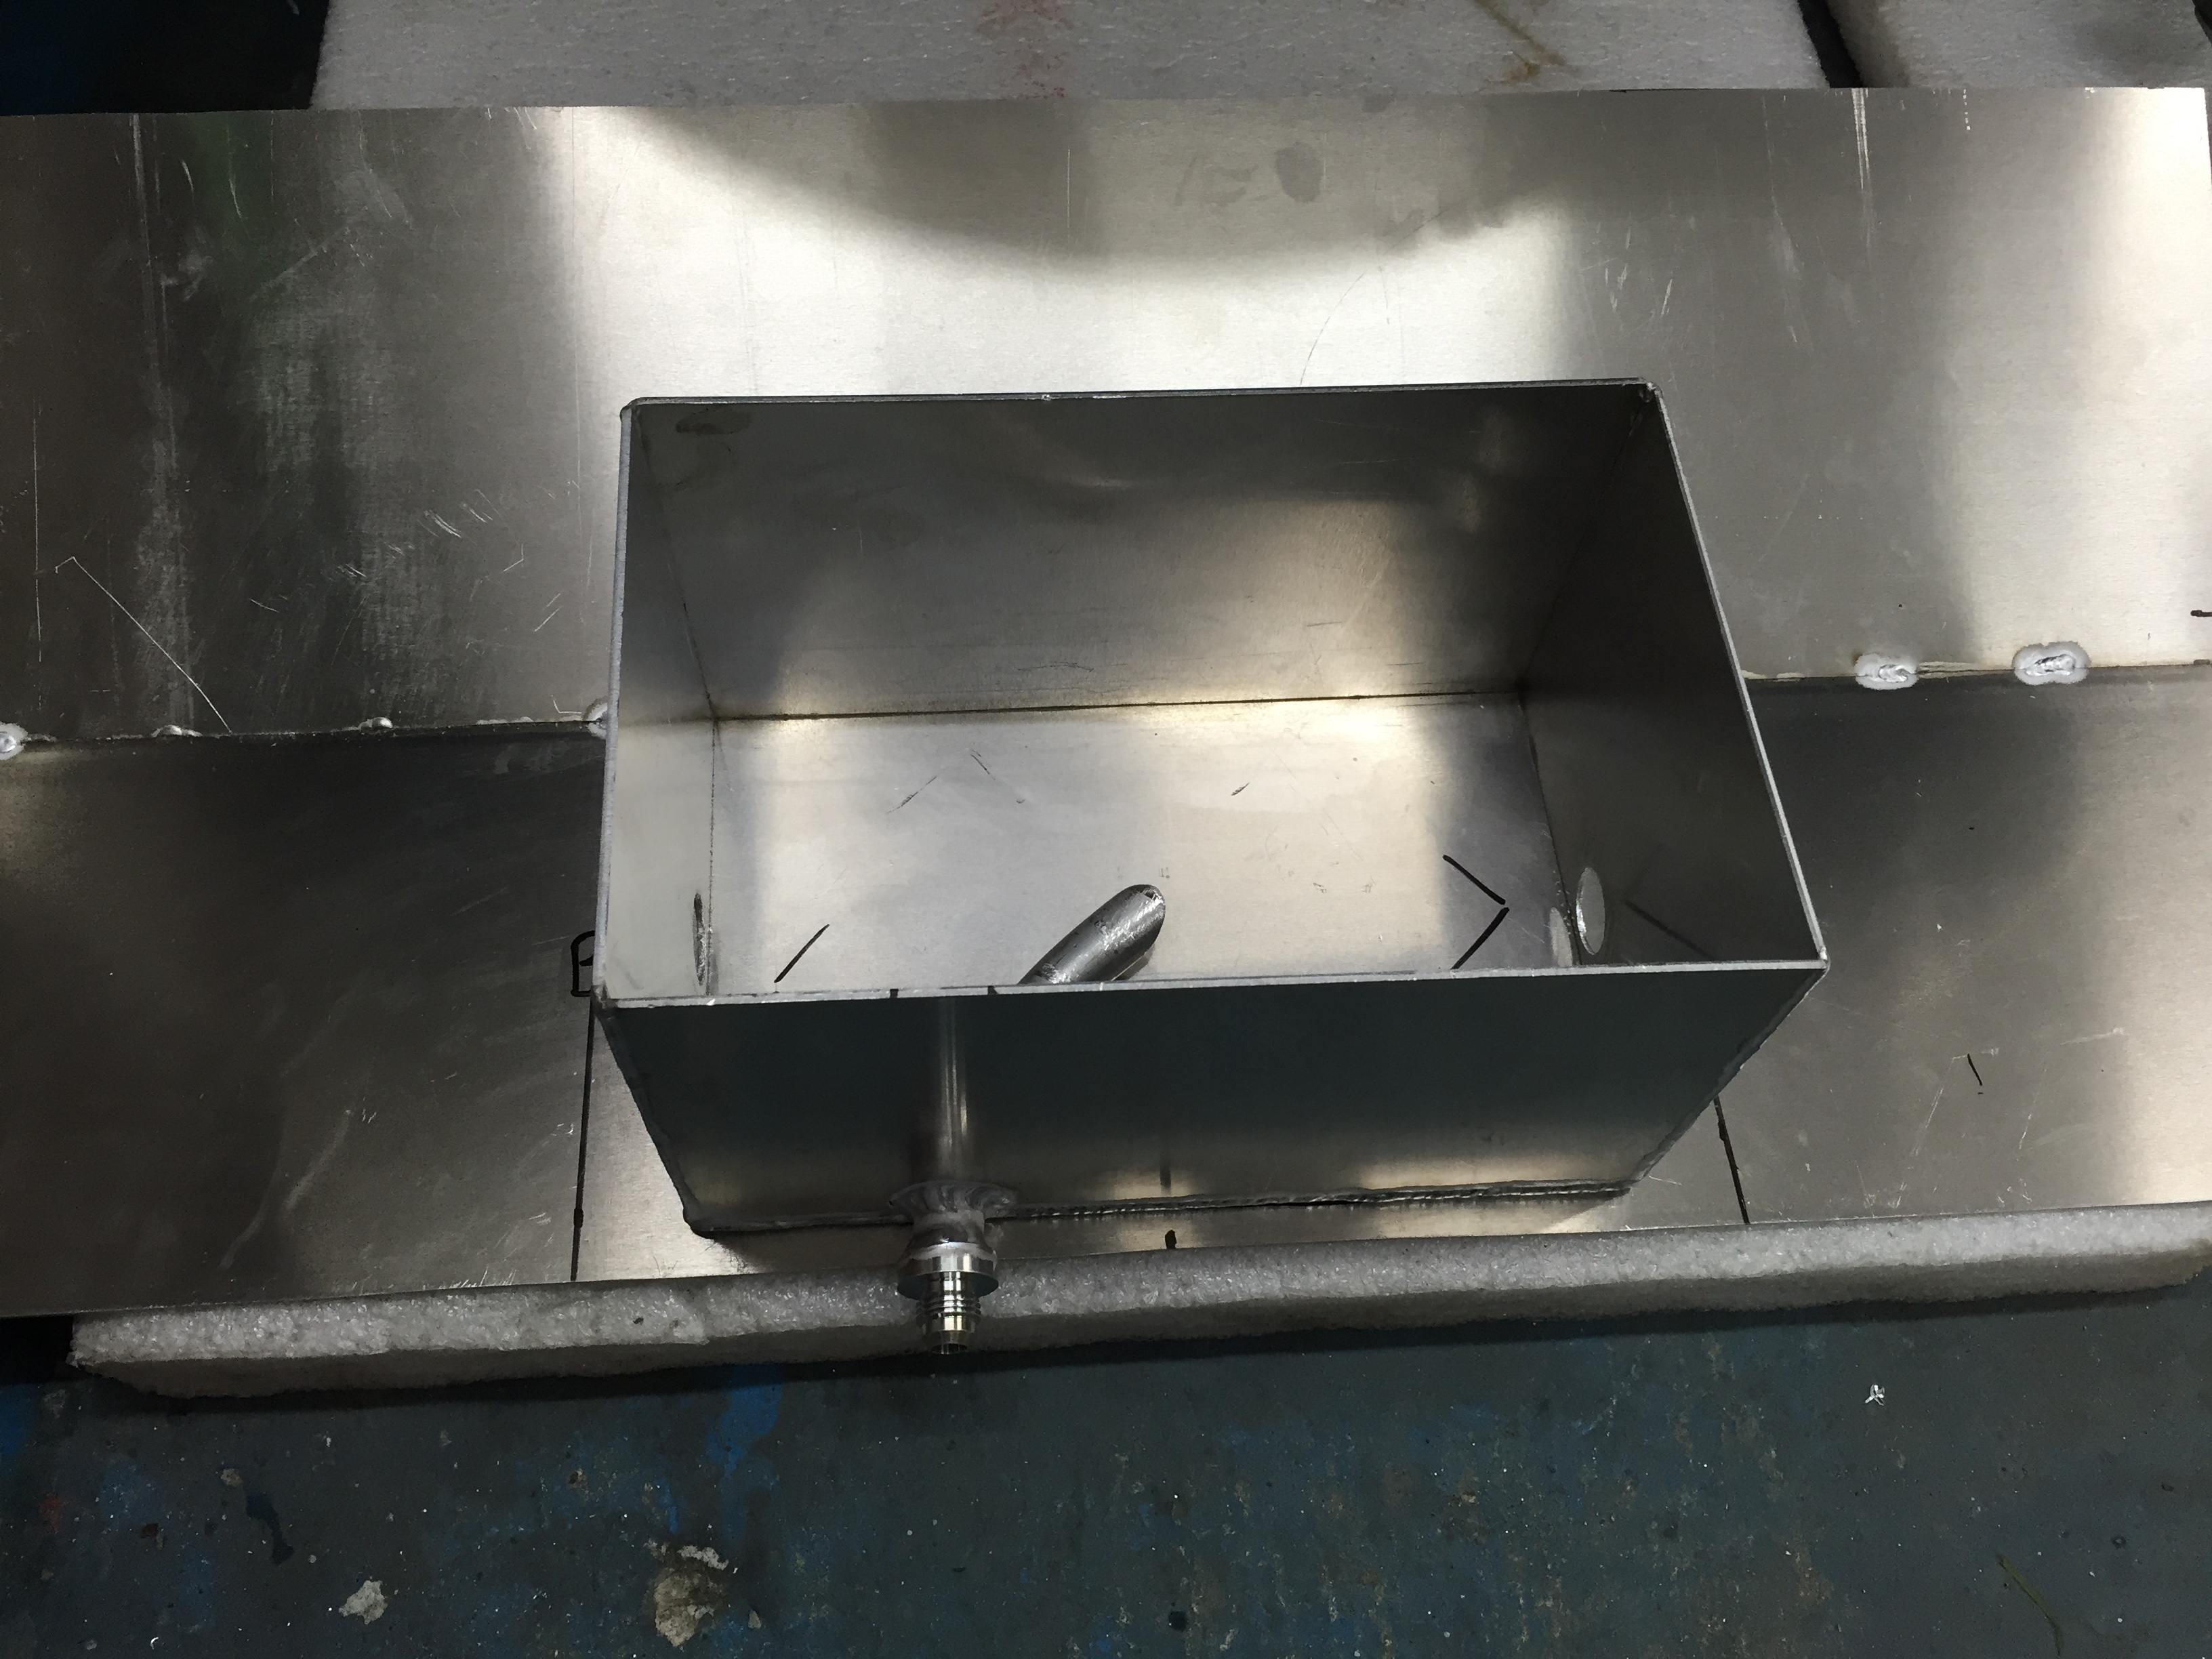
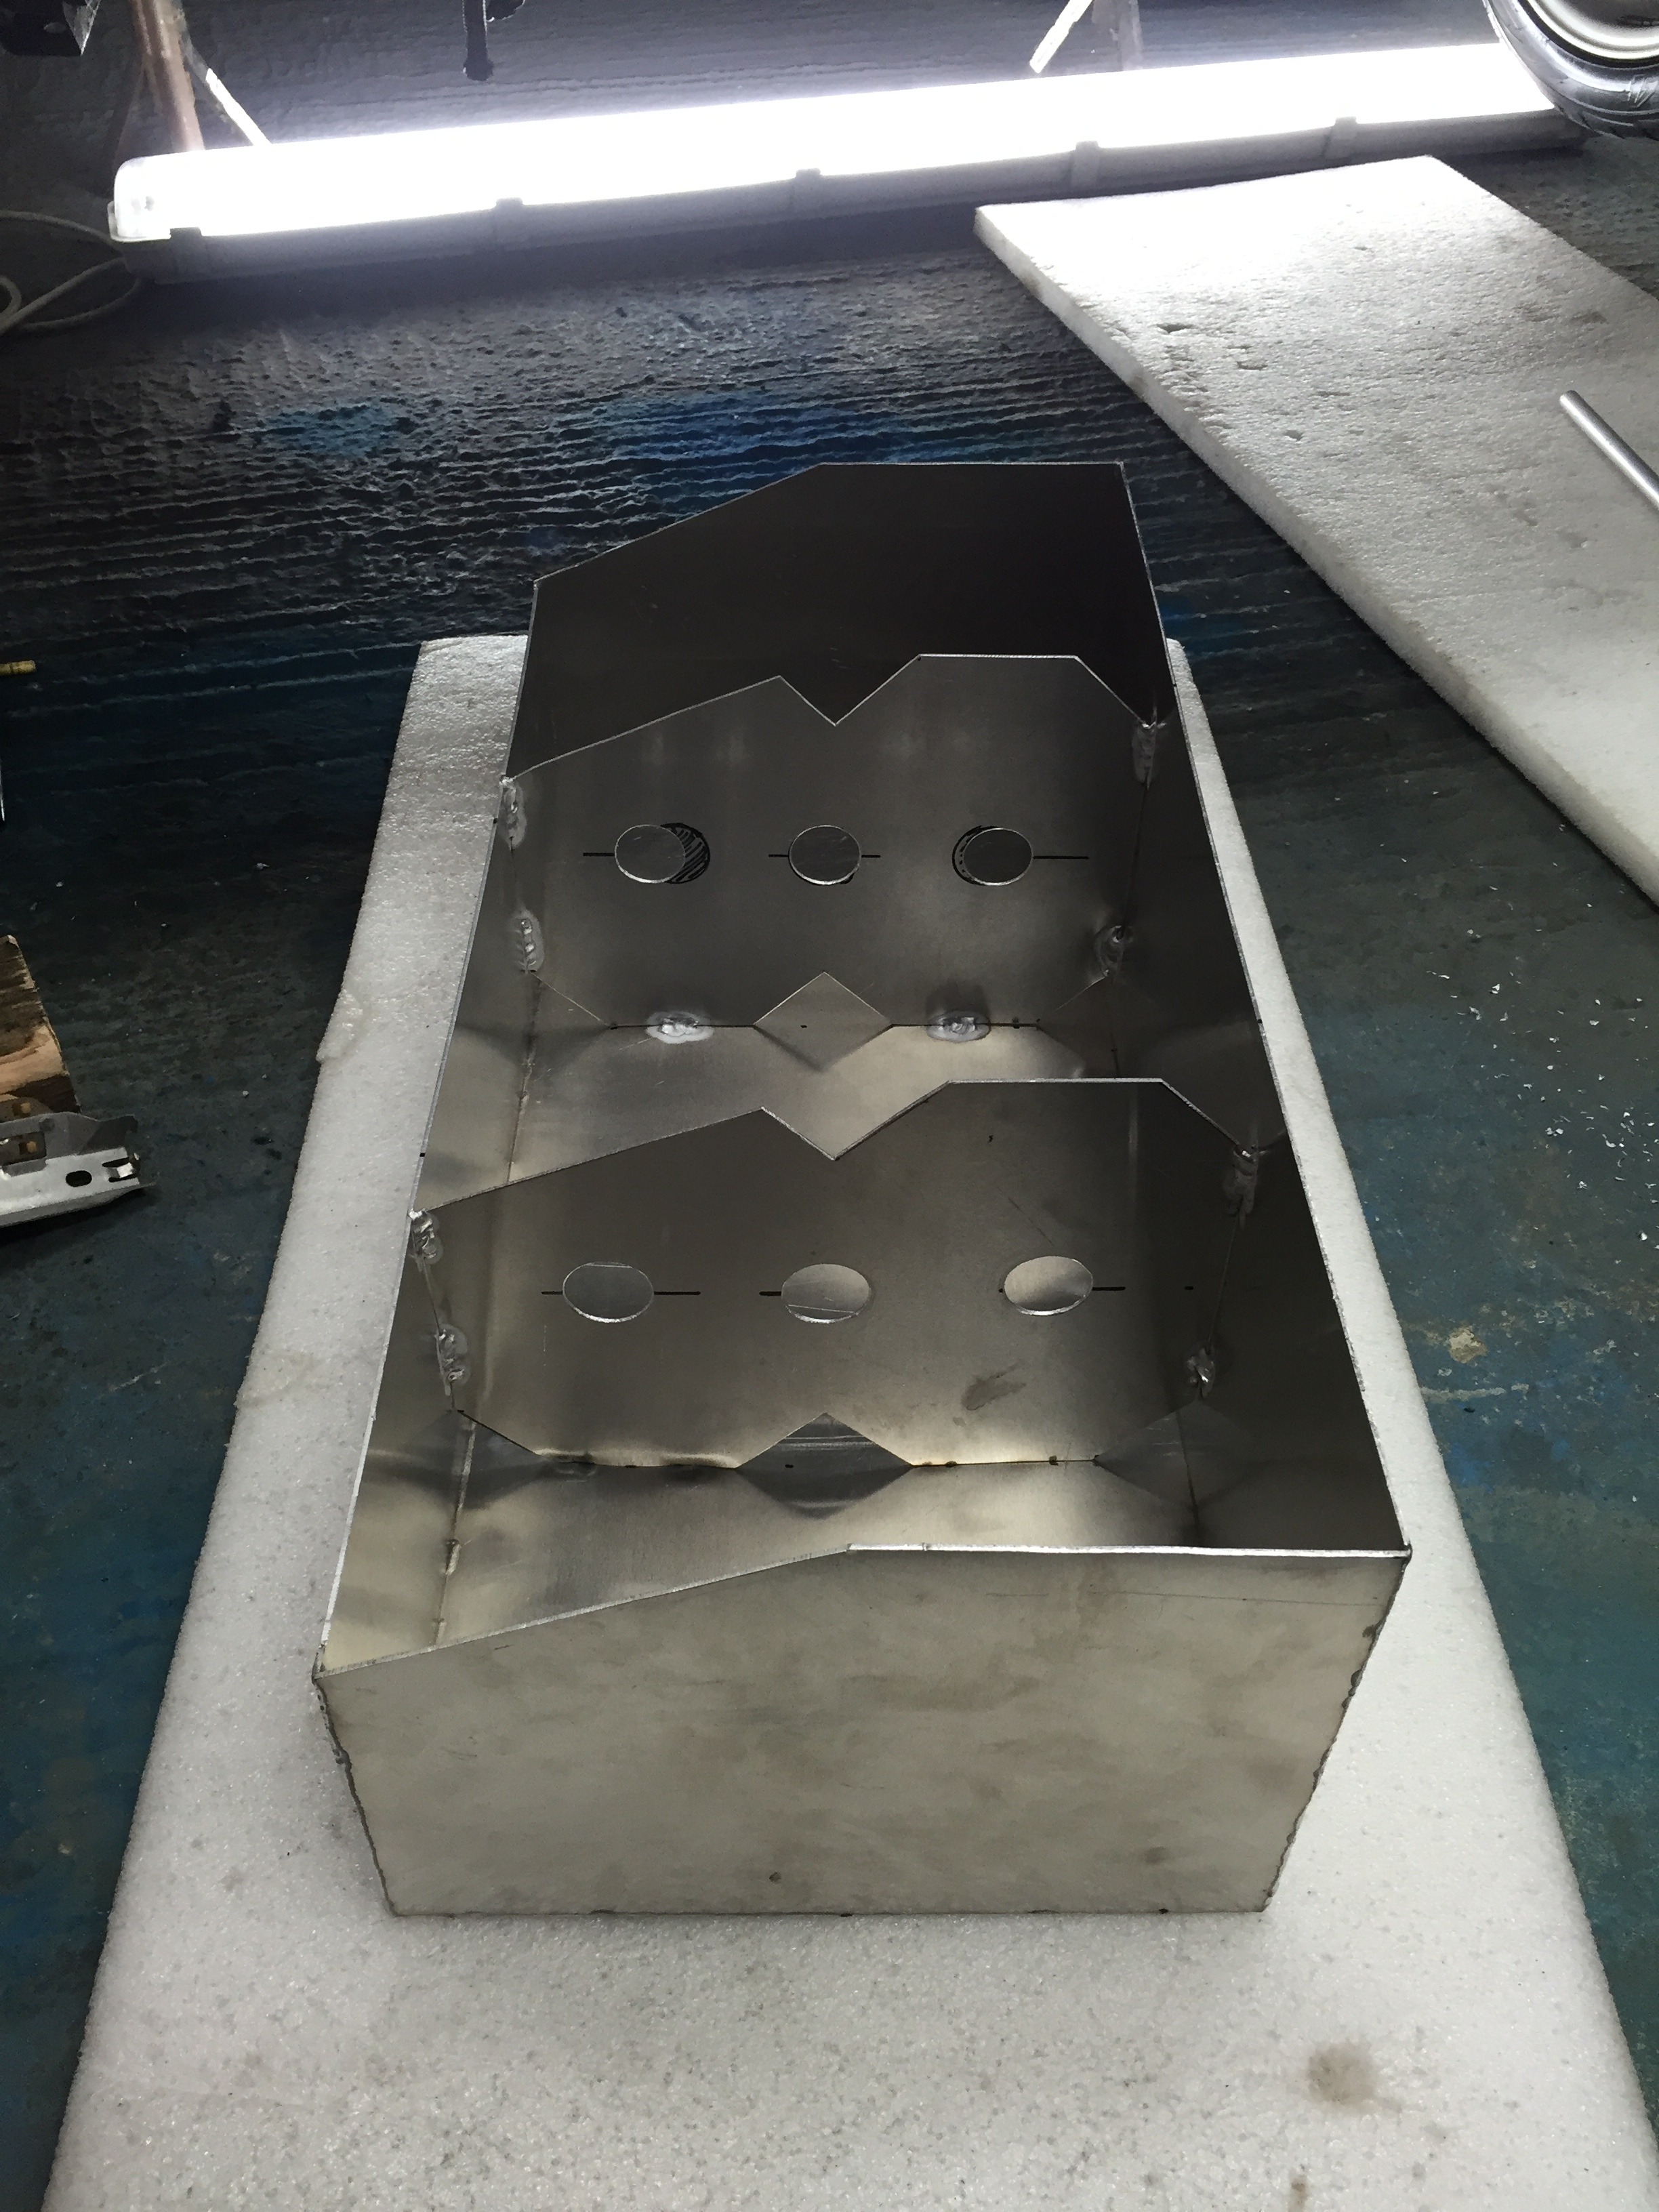
Return pipe made so return fuel back into the collector pot
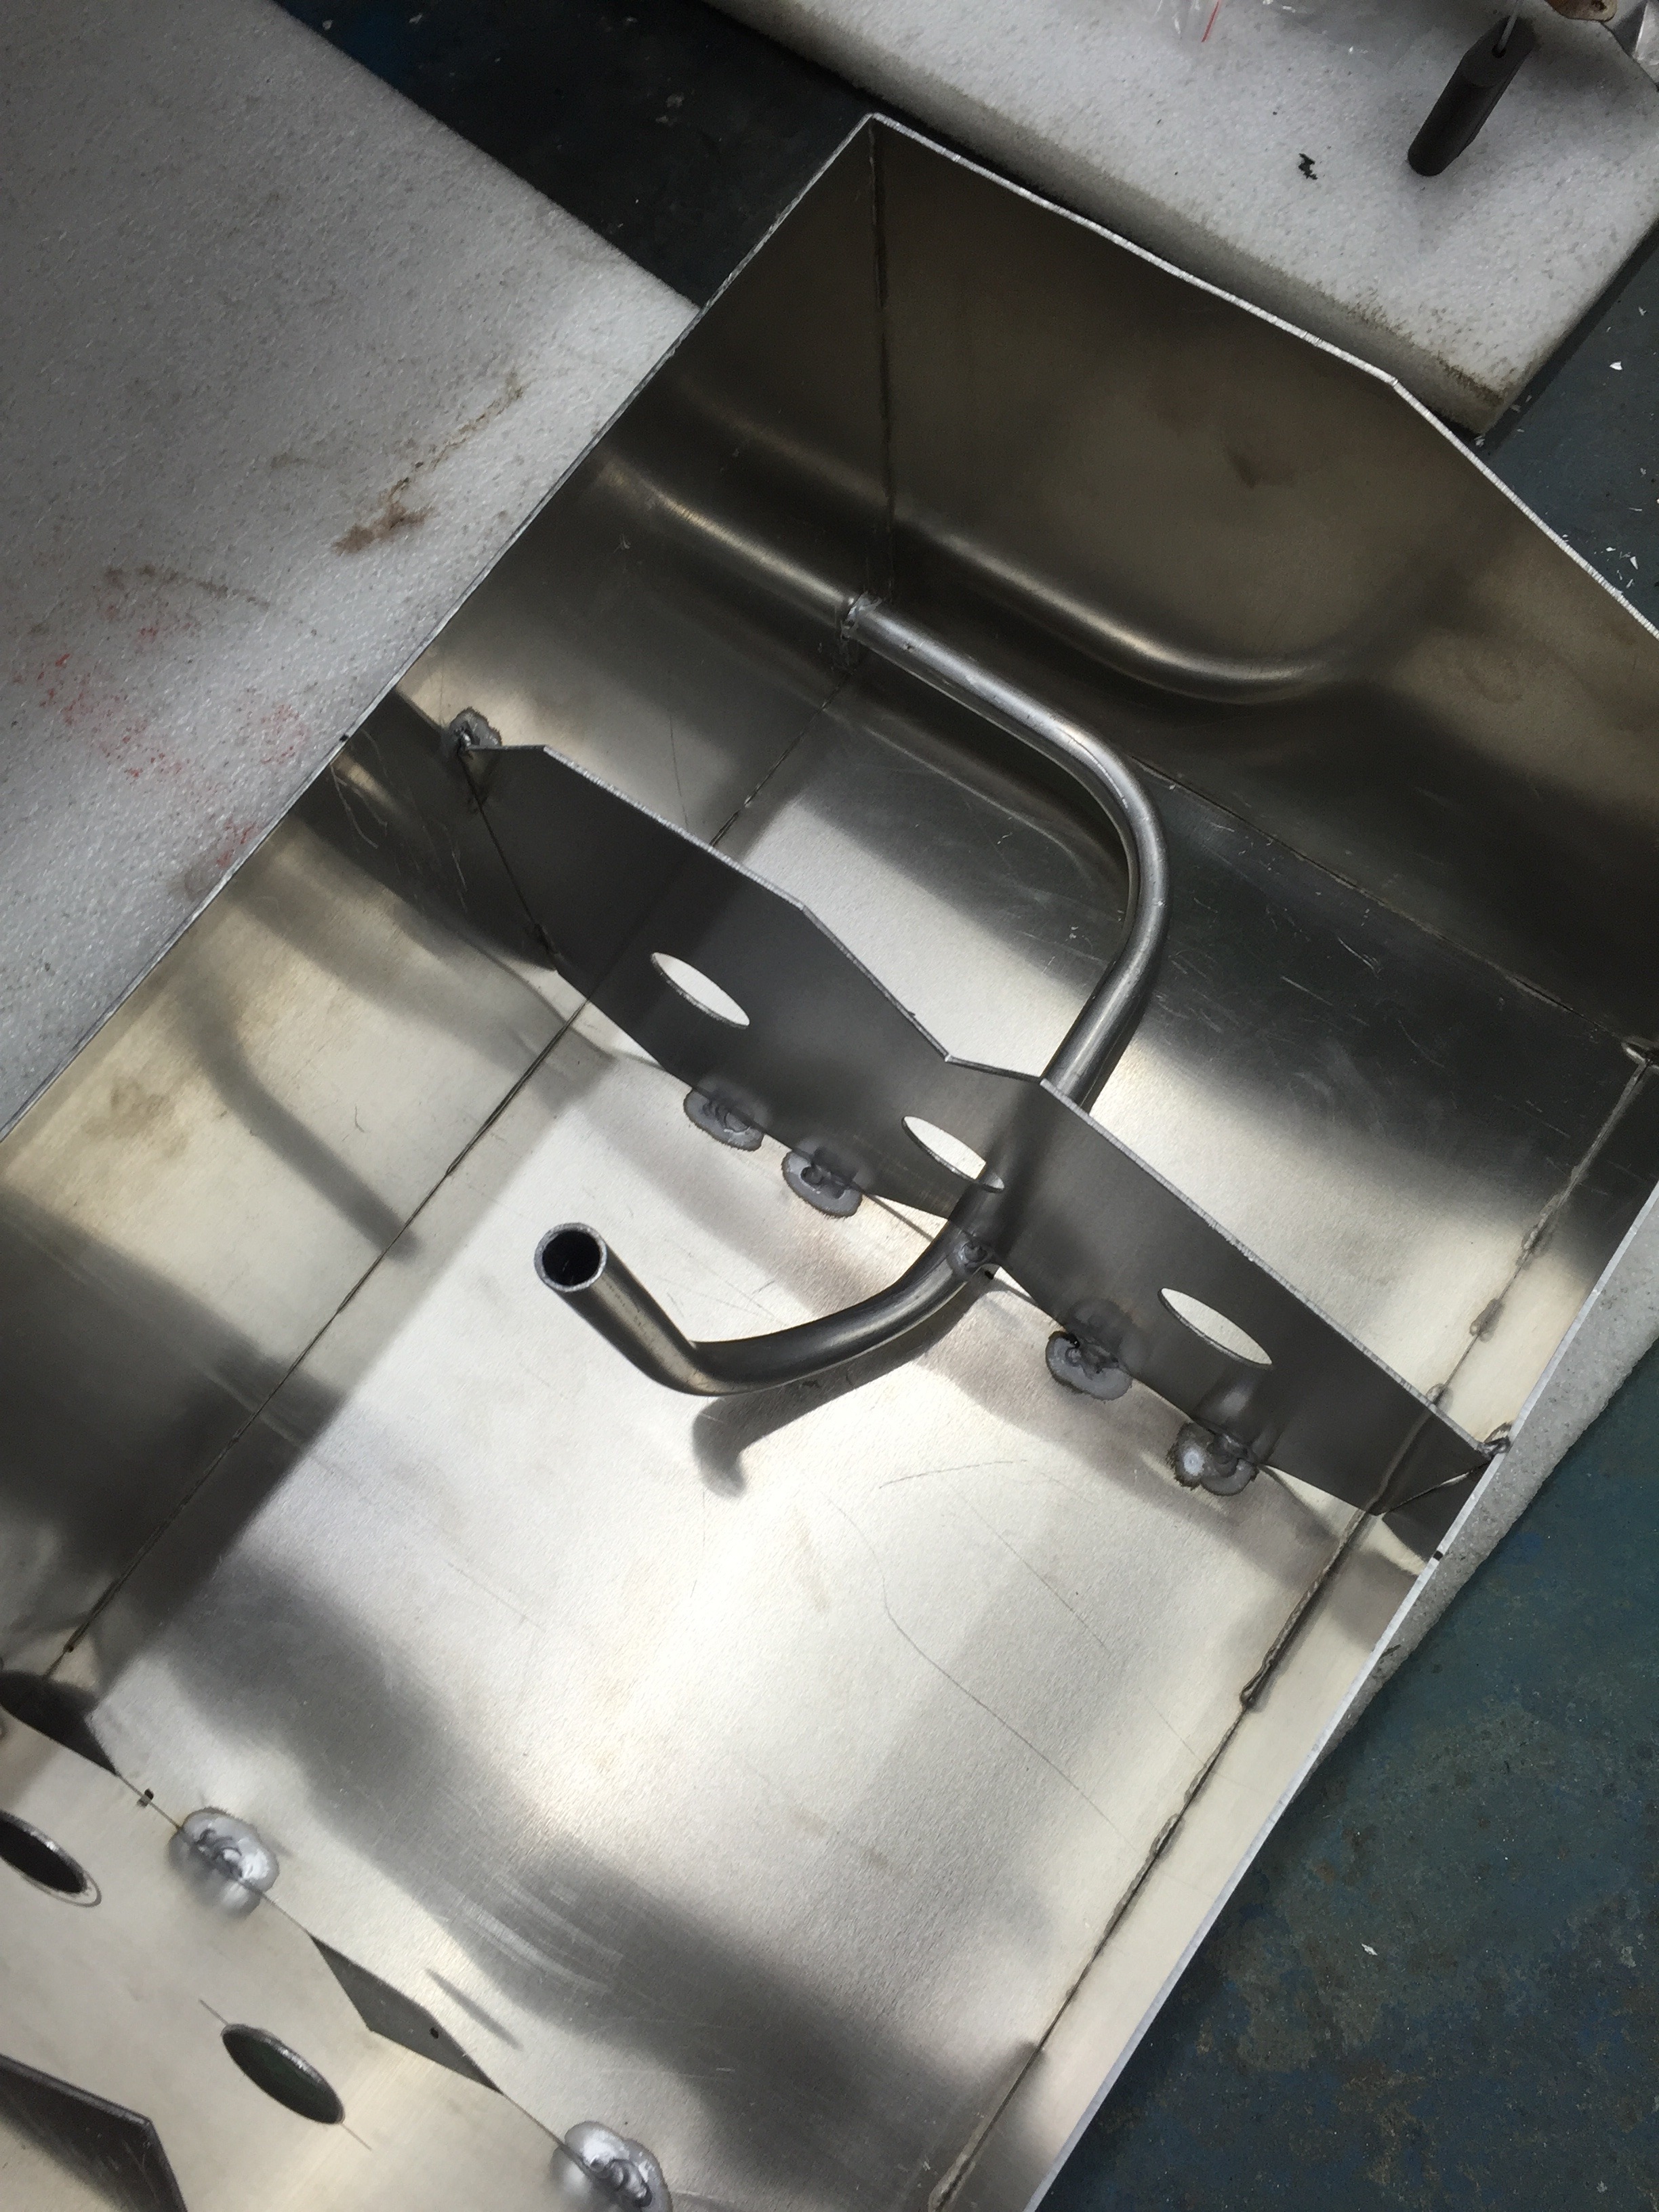
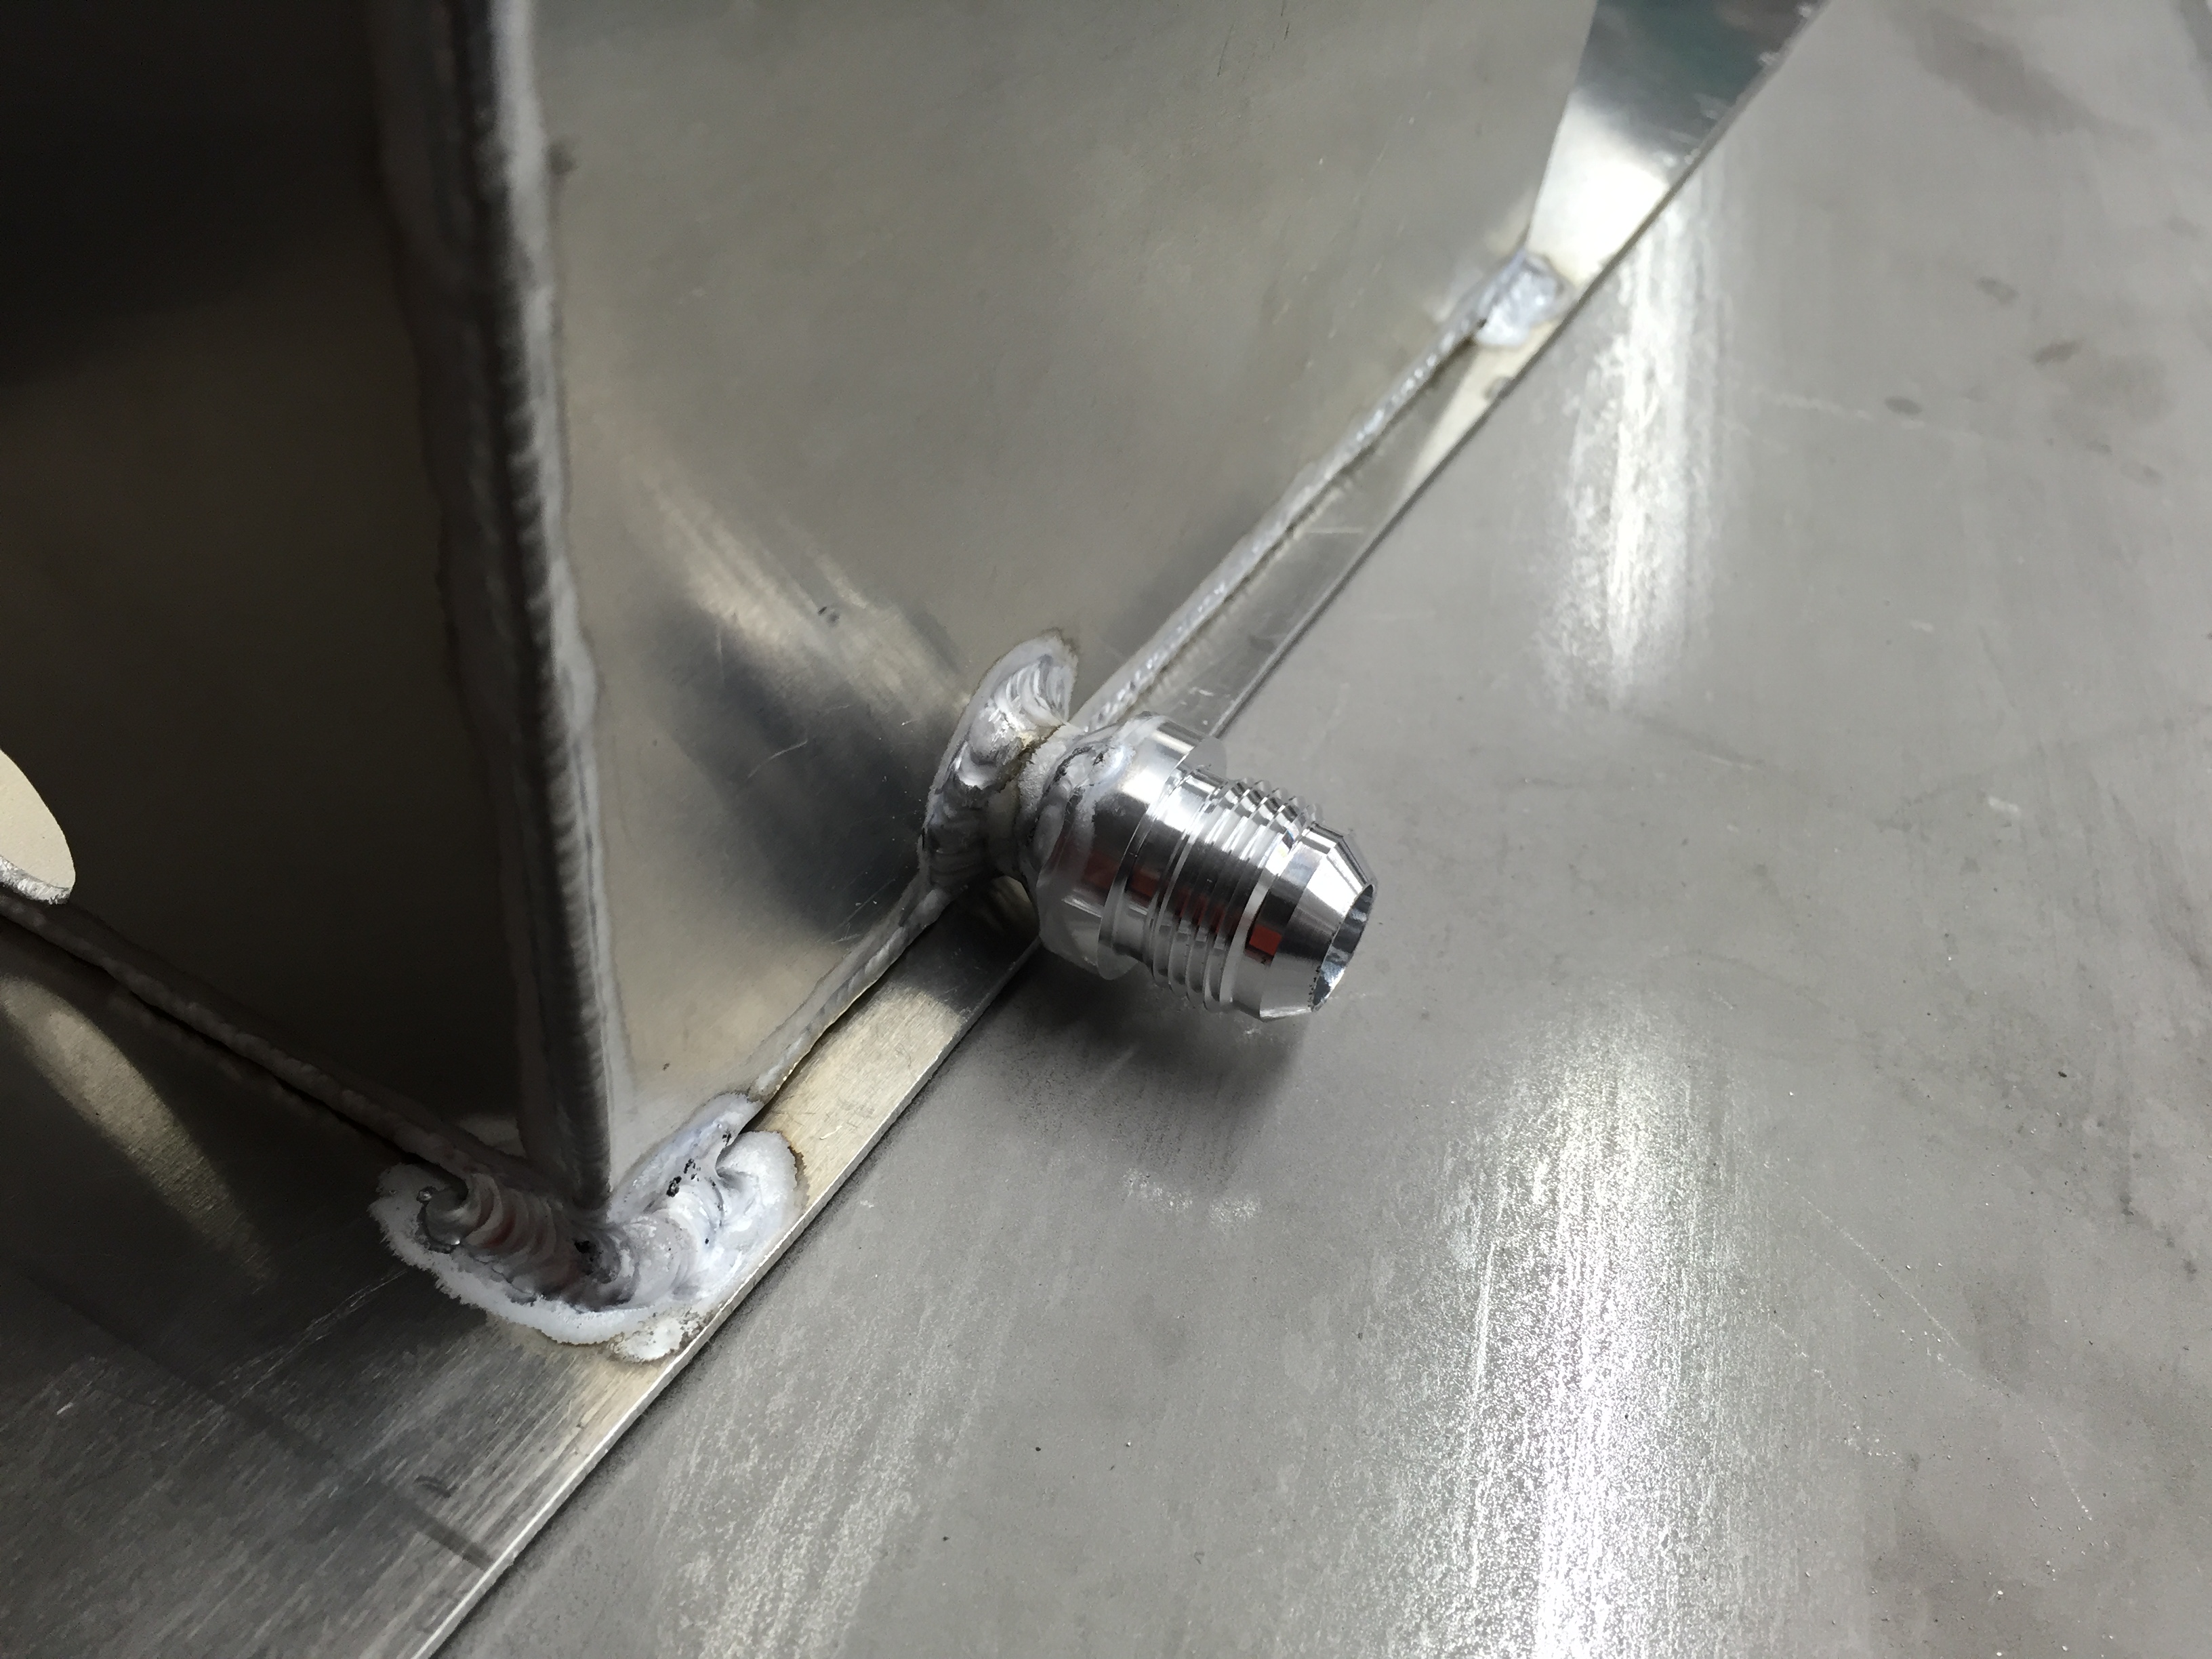
All tank fittings are AN fittings
Filler neck & breather pipe made - tank brackets also started - not going to bother with a strap this time, want to make sure it's not going to move about!
Will get more up soon
Thanks
Sheet aluminium bought and started cutting and welding the new tank..


Baffles getting made

Tacked in

Collector pot made


Return pipe made so return fuel back into the collector pot


All tank fittings are AN fittings

Filler neck & breather pipe made - tank brackets also started - not going to bother with a strap this time, want to make sure it's not going to move about!


Will get more up soon
Thanks
Last edited by McCloud 85; 28-05-2016 at 07:28 PM.
 12-06-2016, 09:48 PM
#172
PassionFord Regular
Thread Starter
More work done on the fuel tank
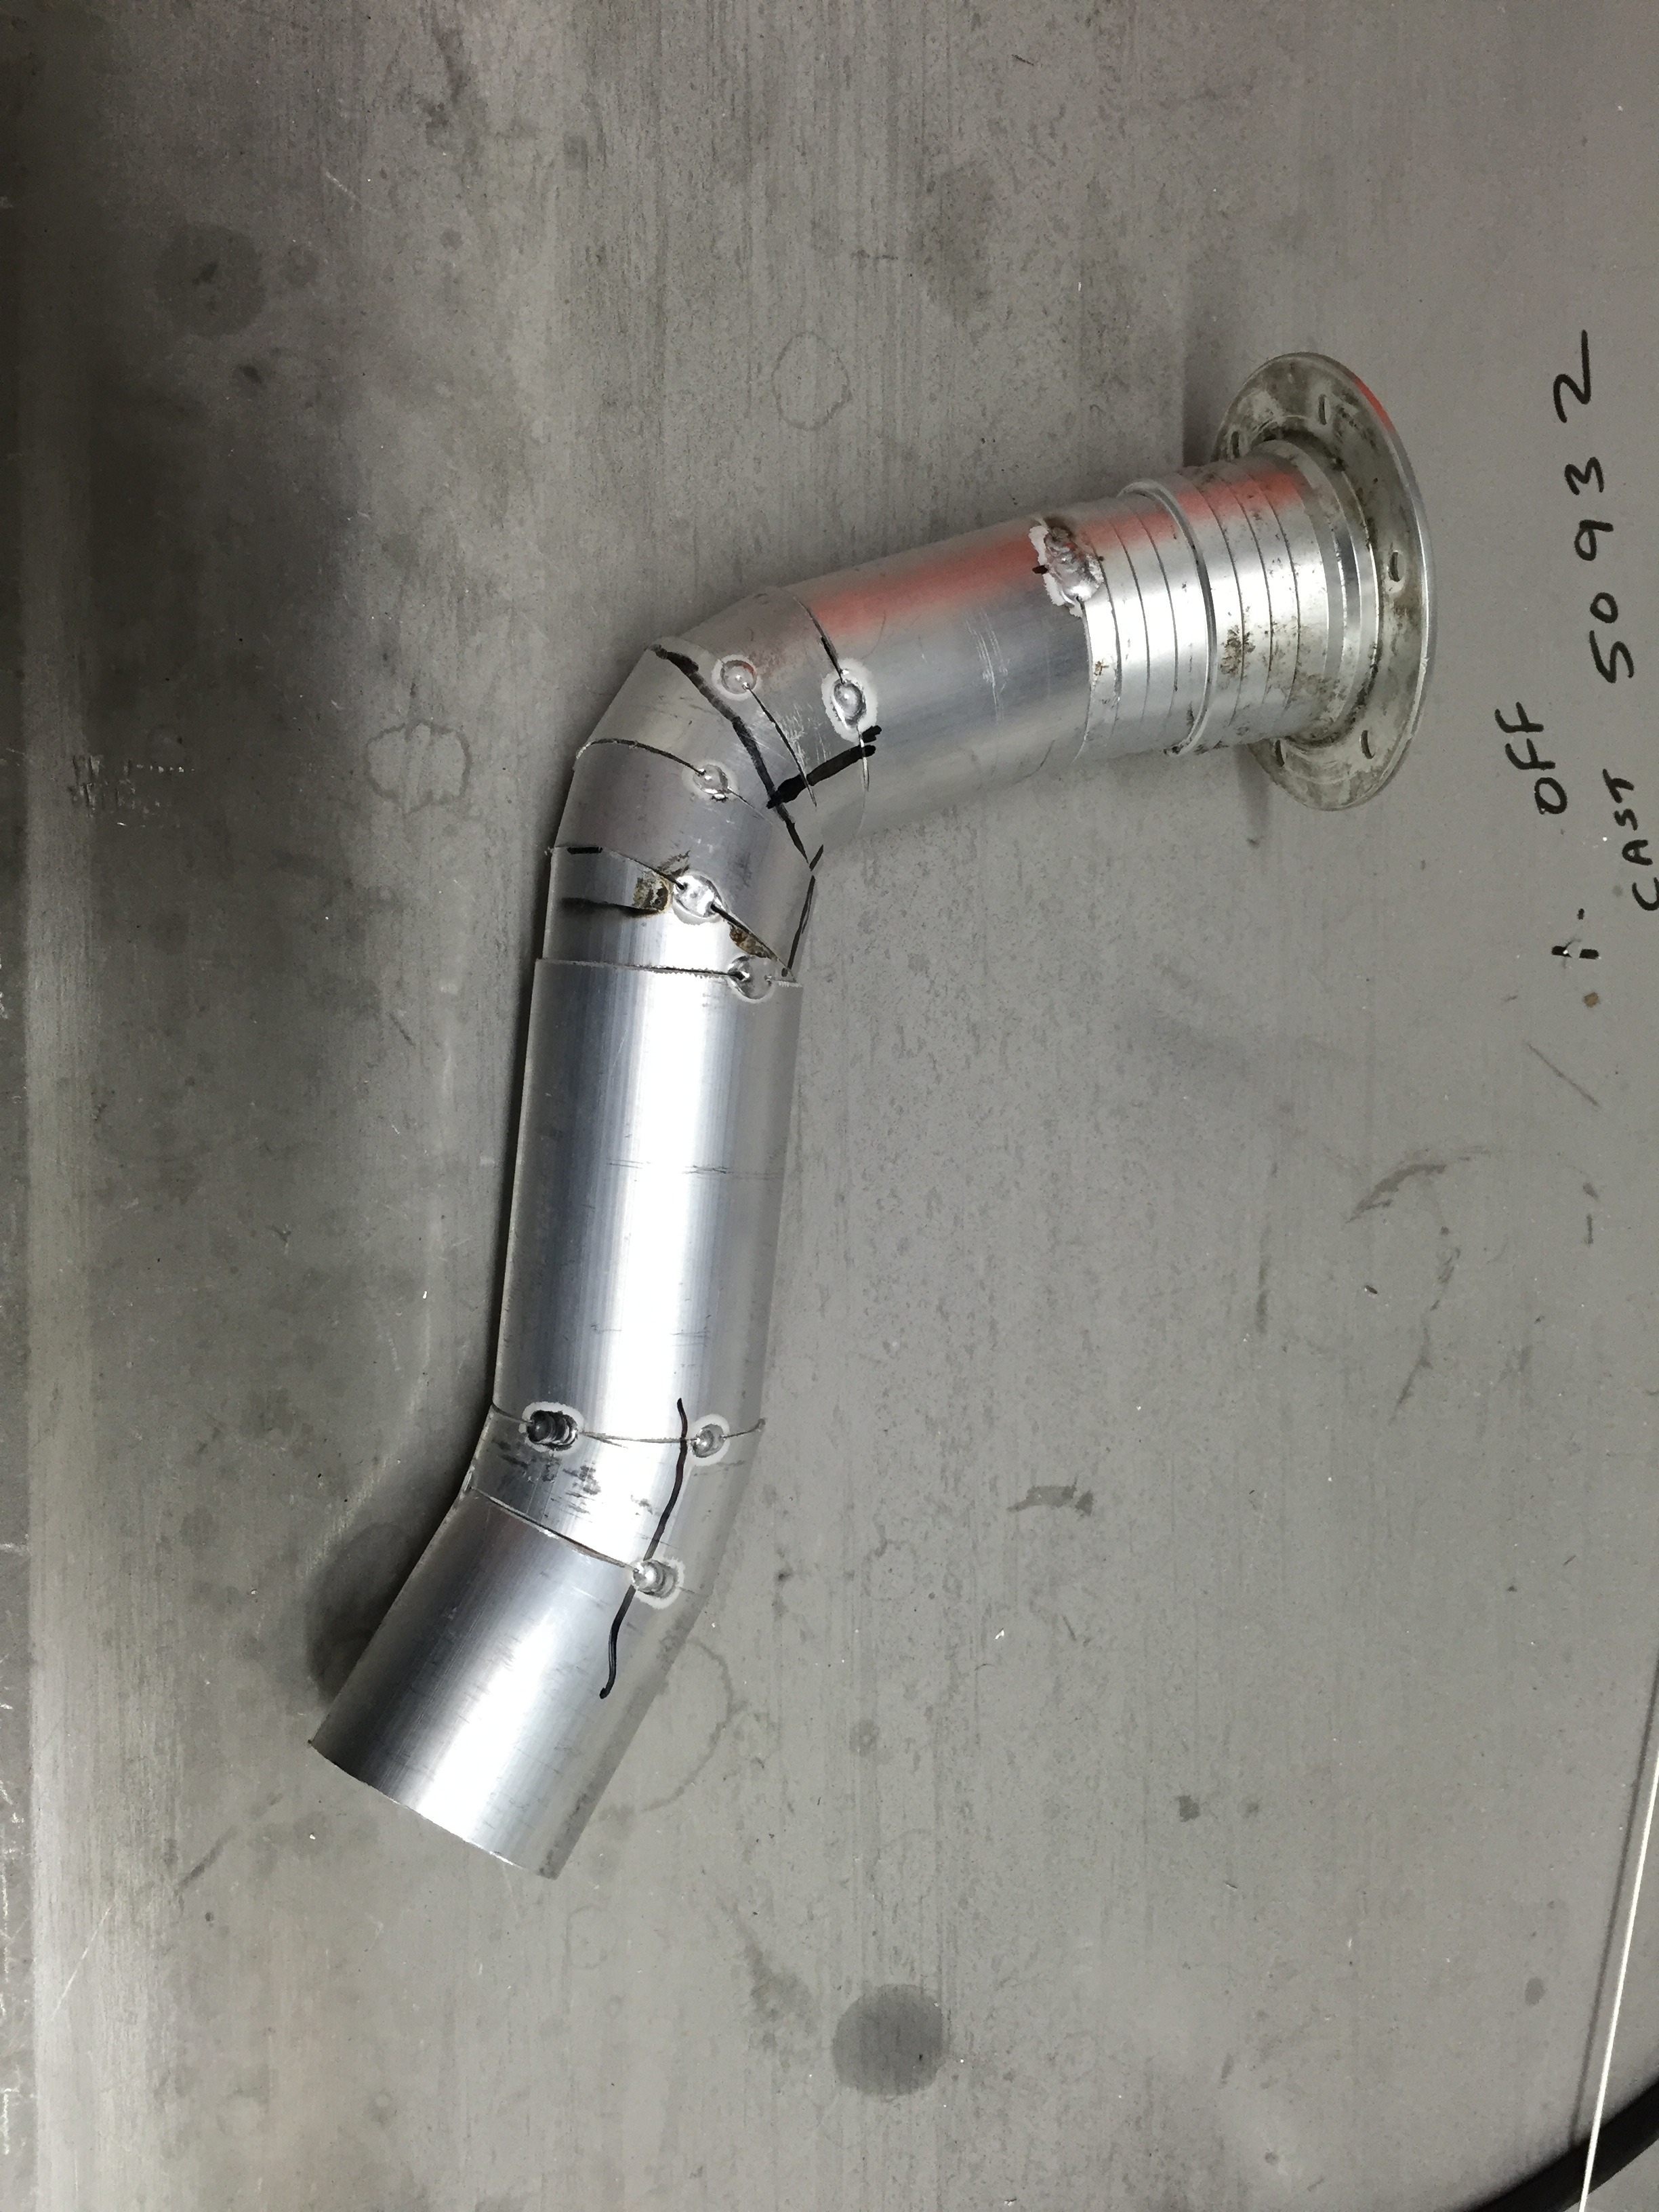
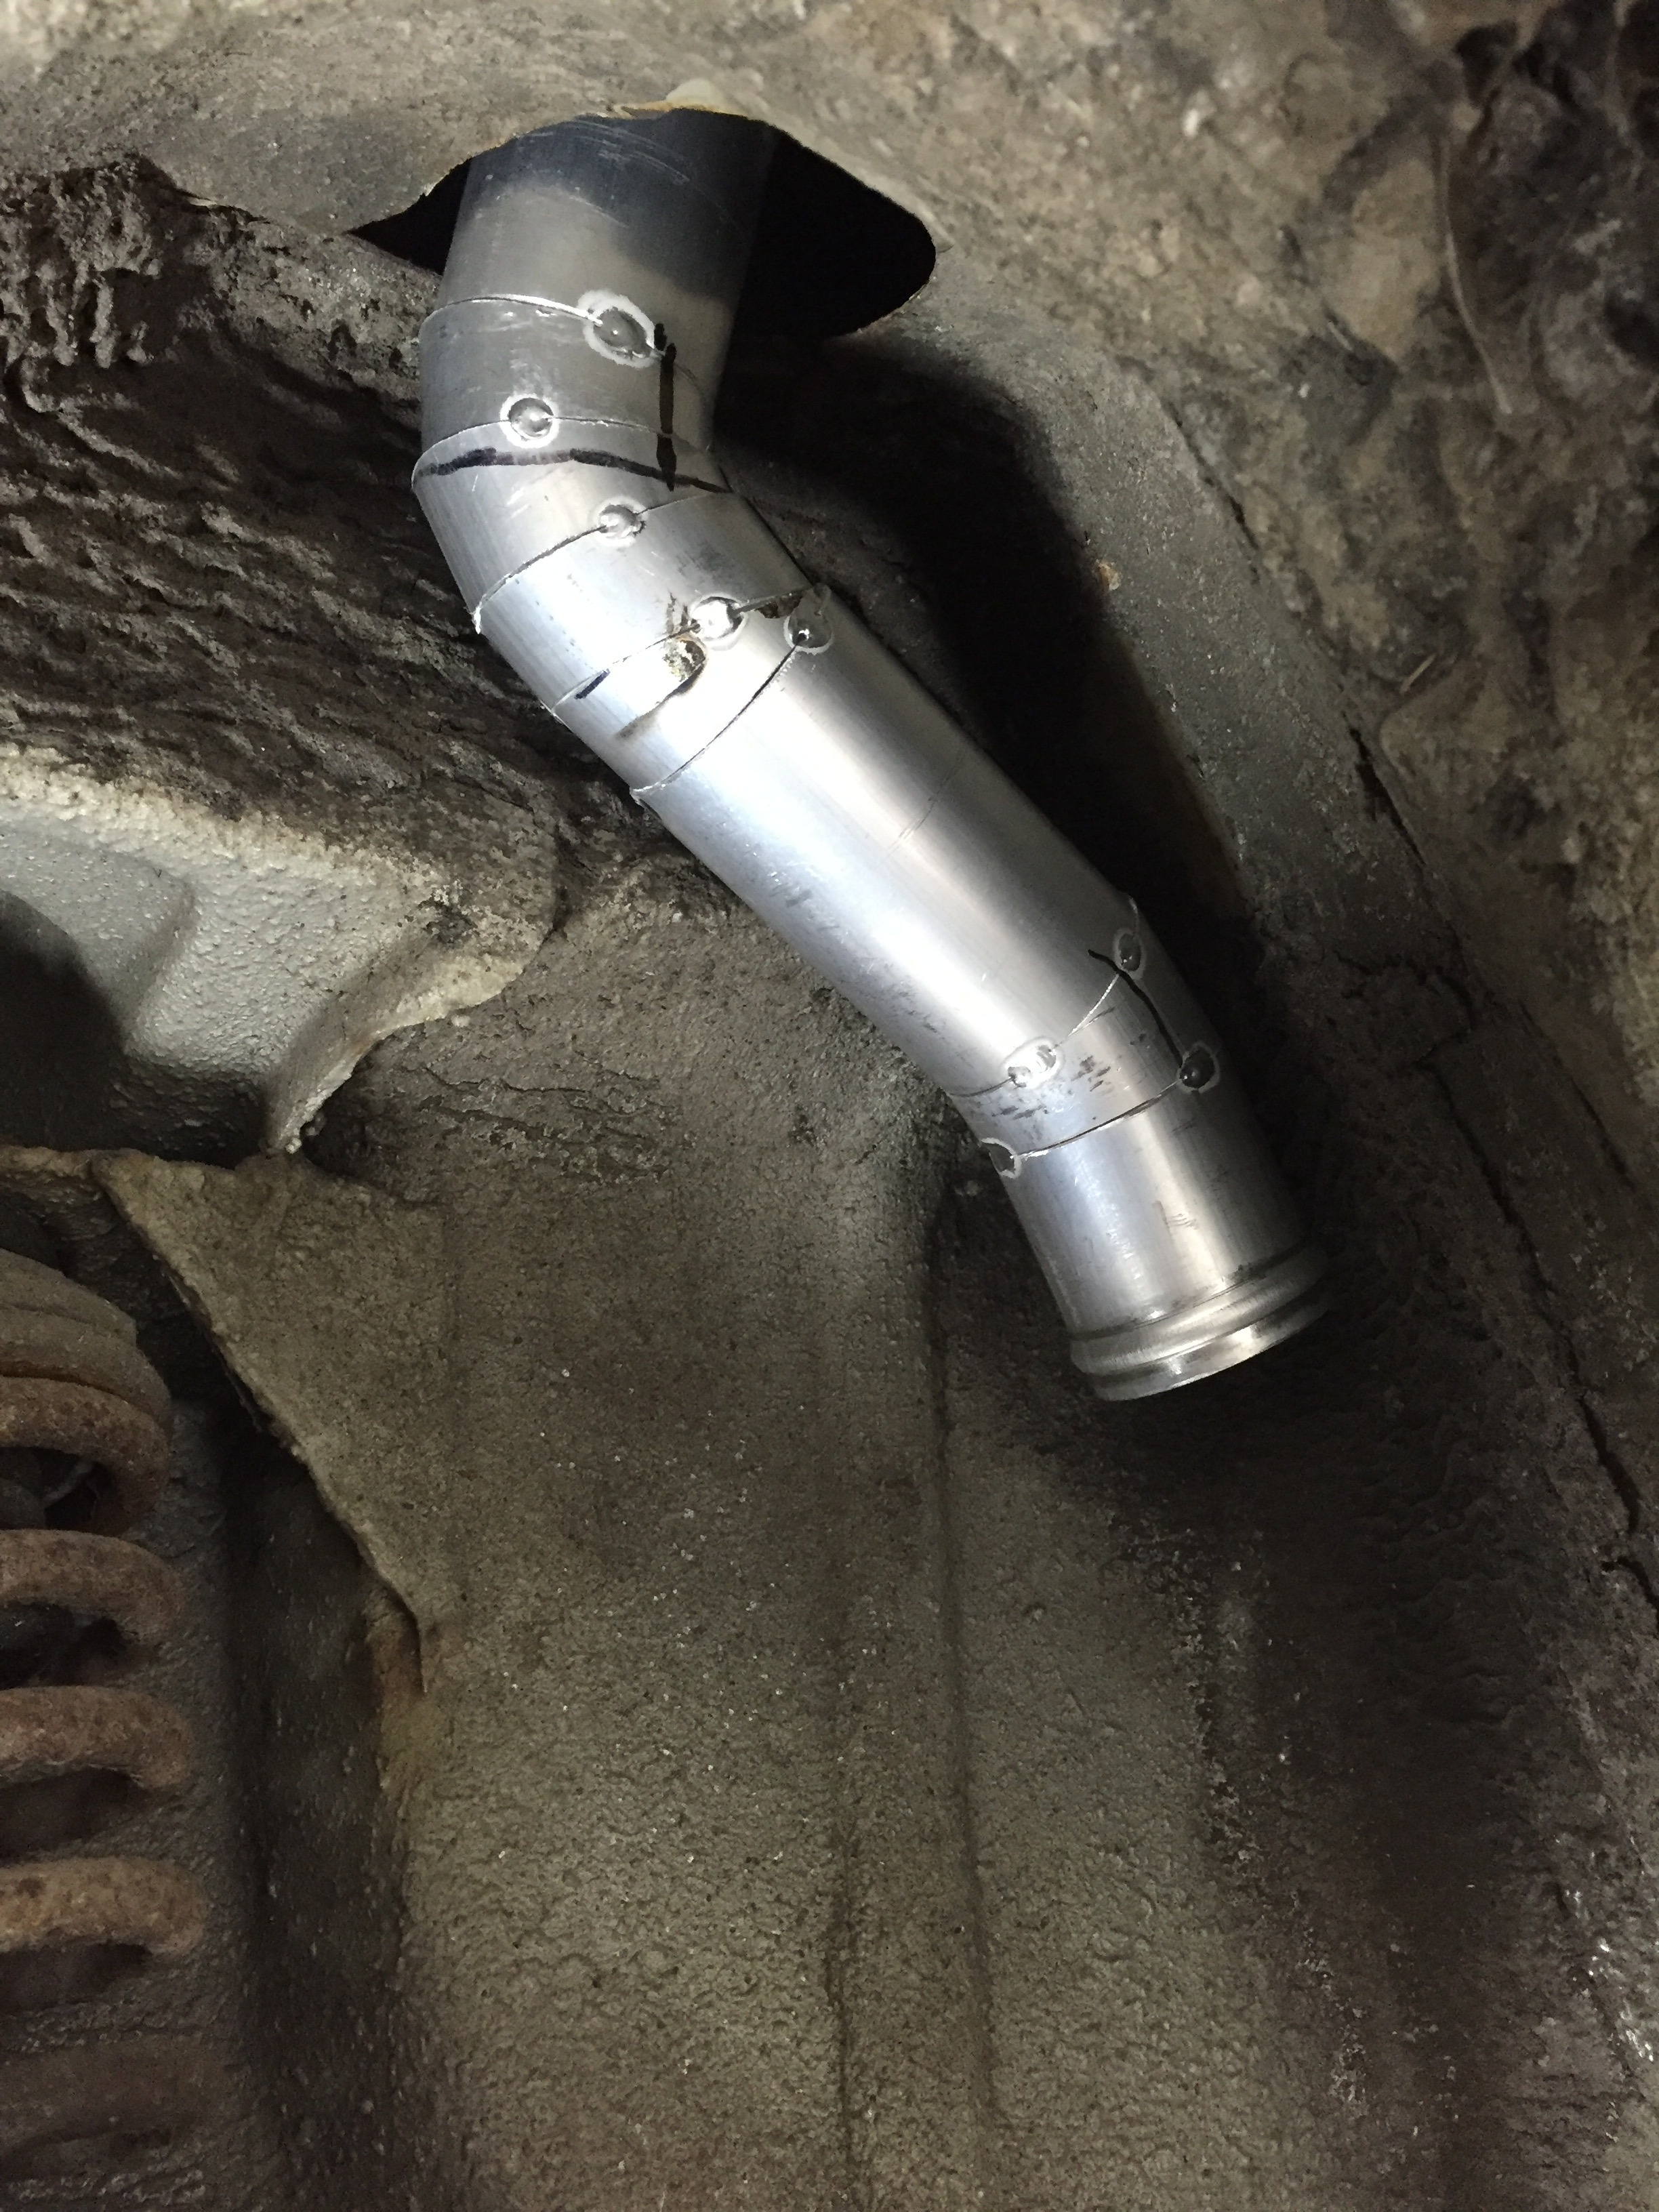
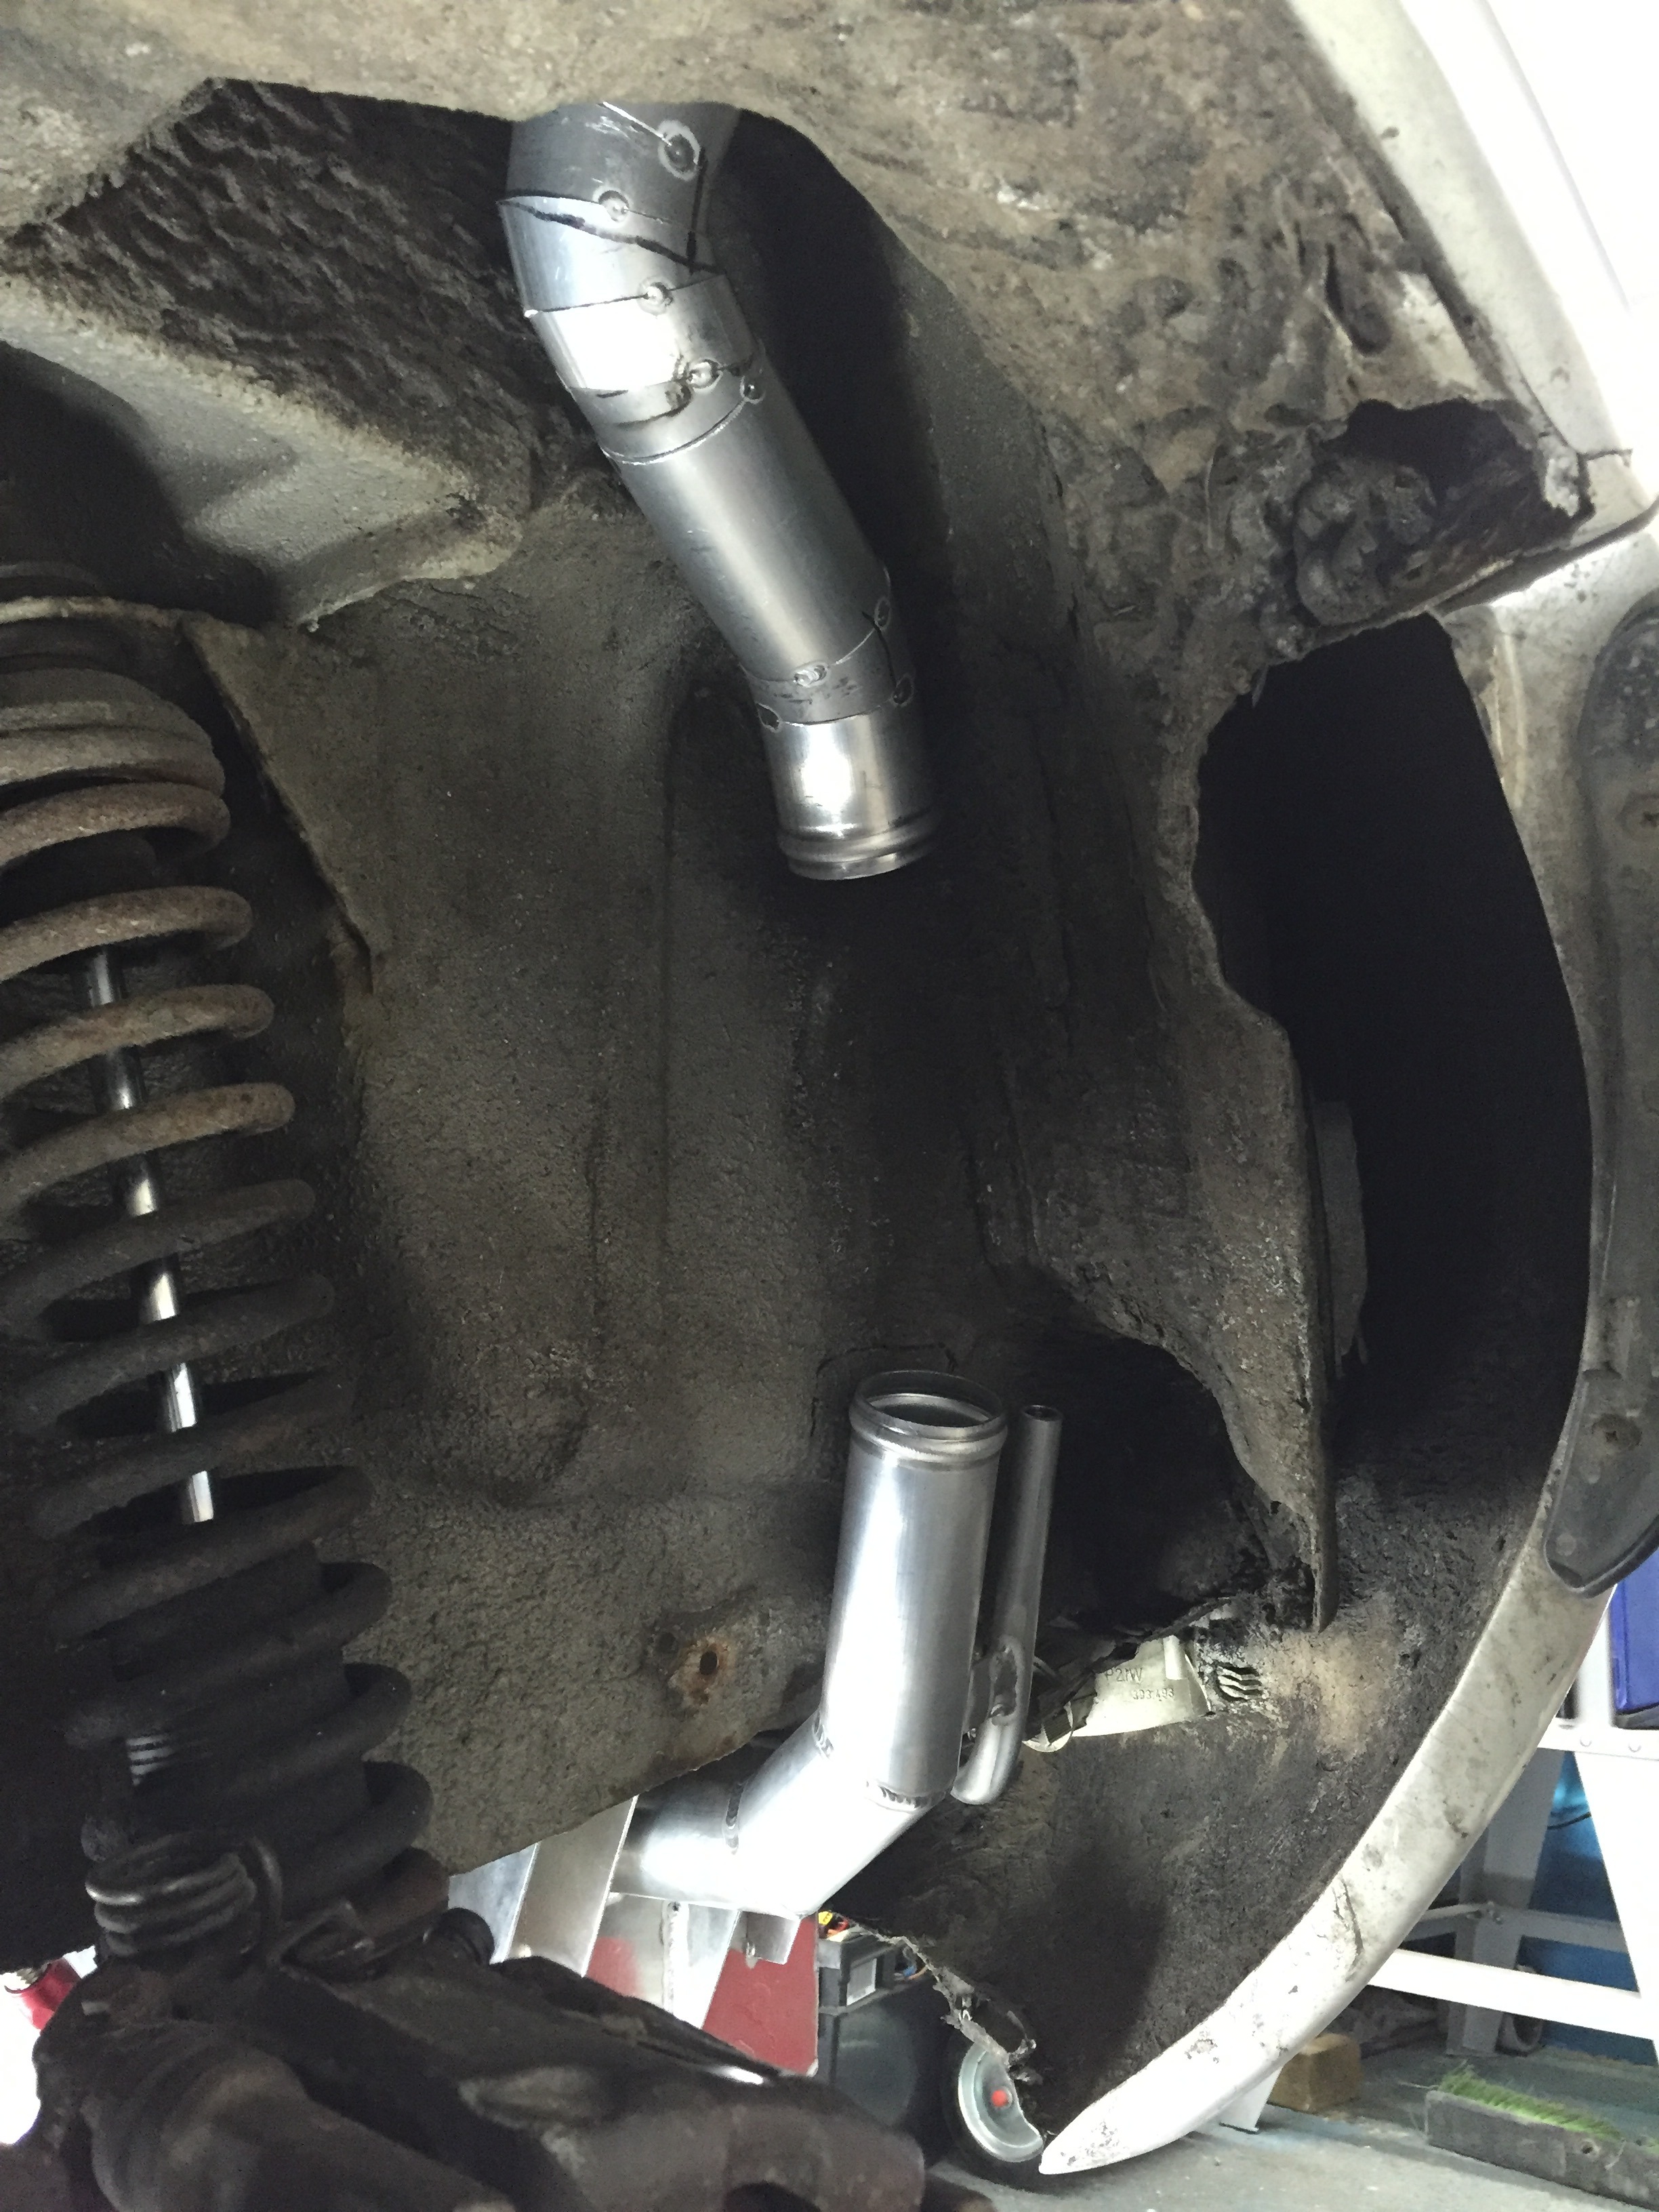
Old filler neck removed.. This was awful. You put the pump nozzle in, pulled the trigger and all the fuel would splash back at you. So you had to stand there on half pull on the nozzle to allow the fuel into the pipework. Just awful.
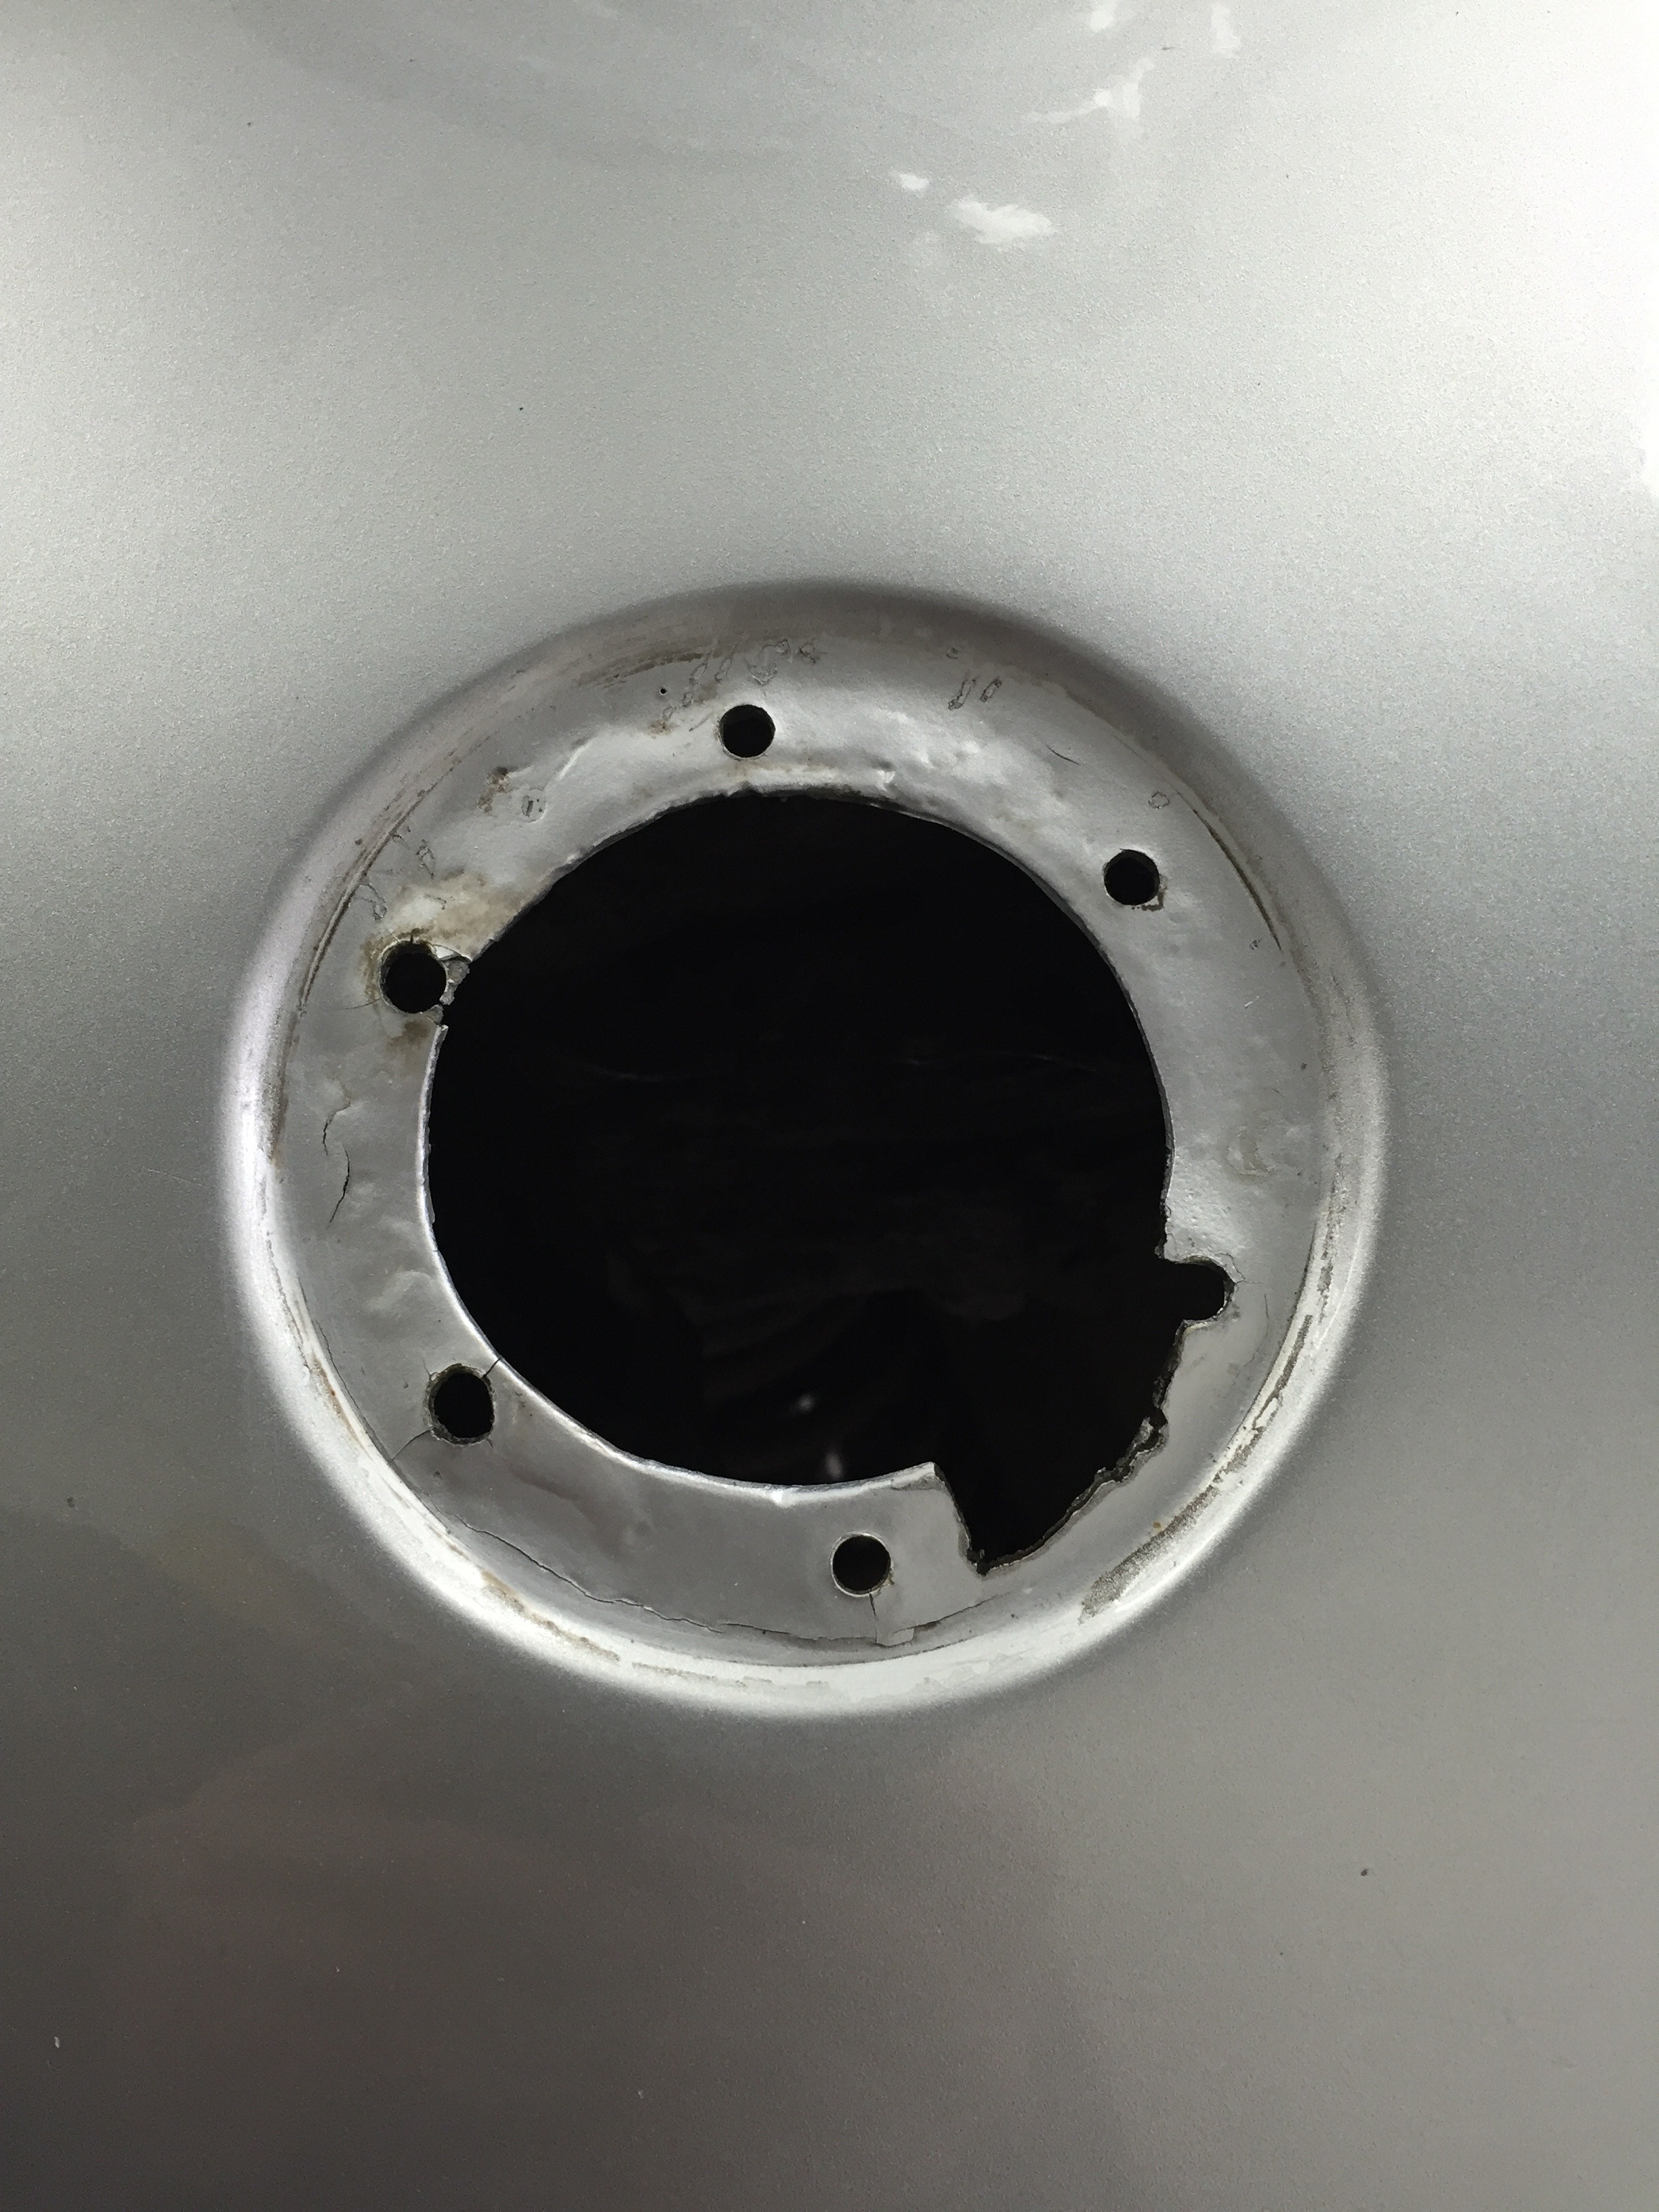
This is the quarter panel where the filler cap is.. It needs addressing to make it how I want but will require the side of the car to be resprayed so this will have to wait for another time.
More fab work on the tank

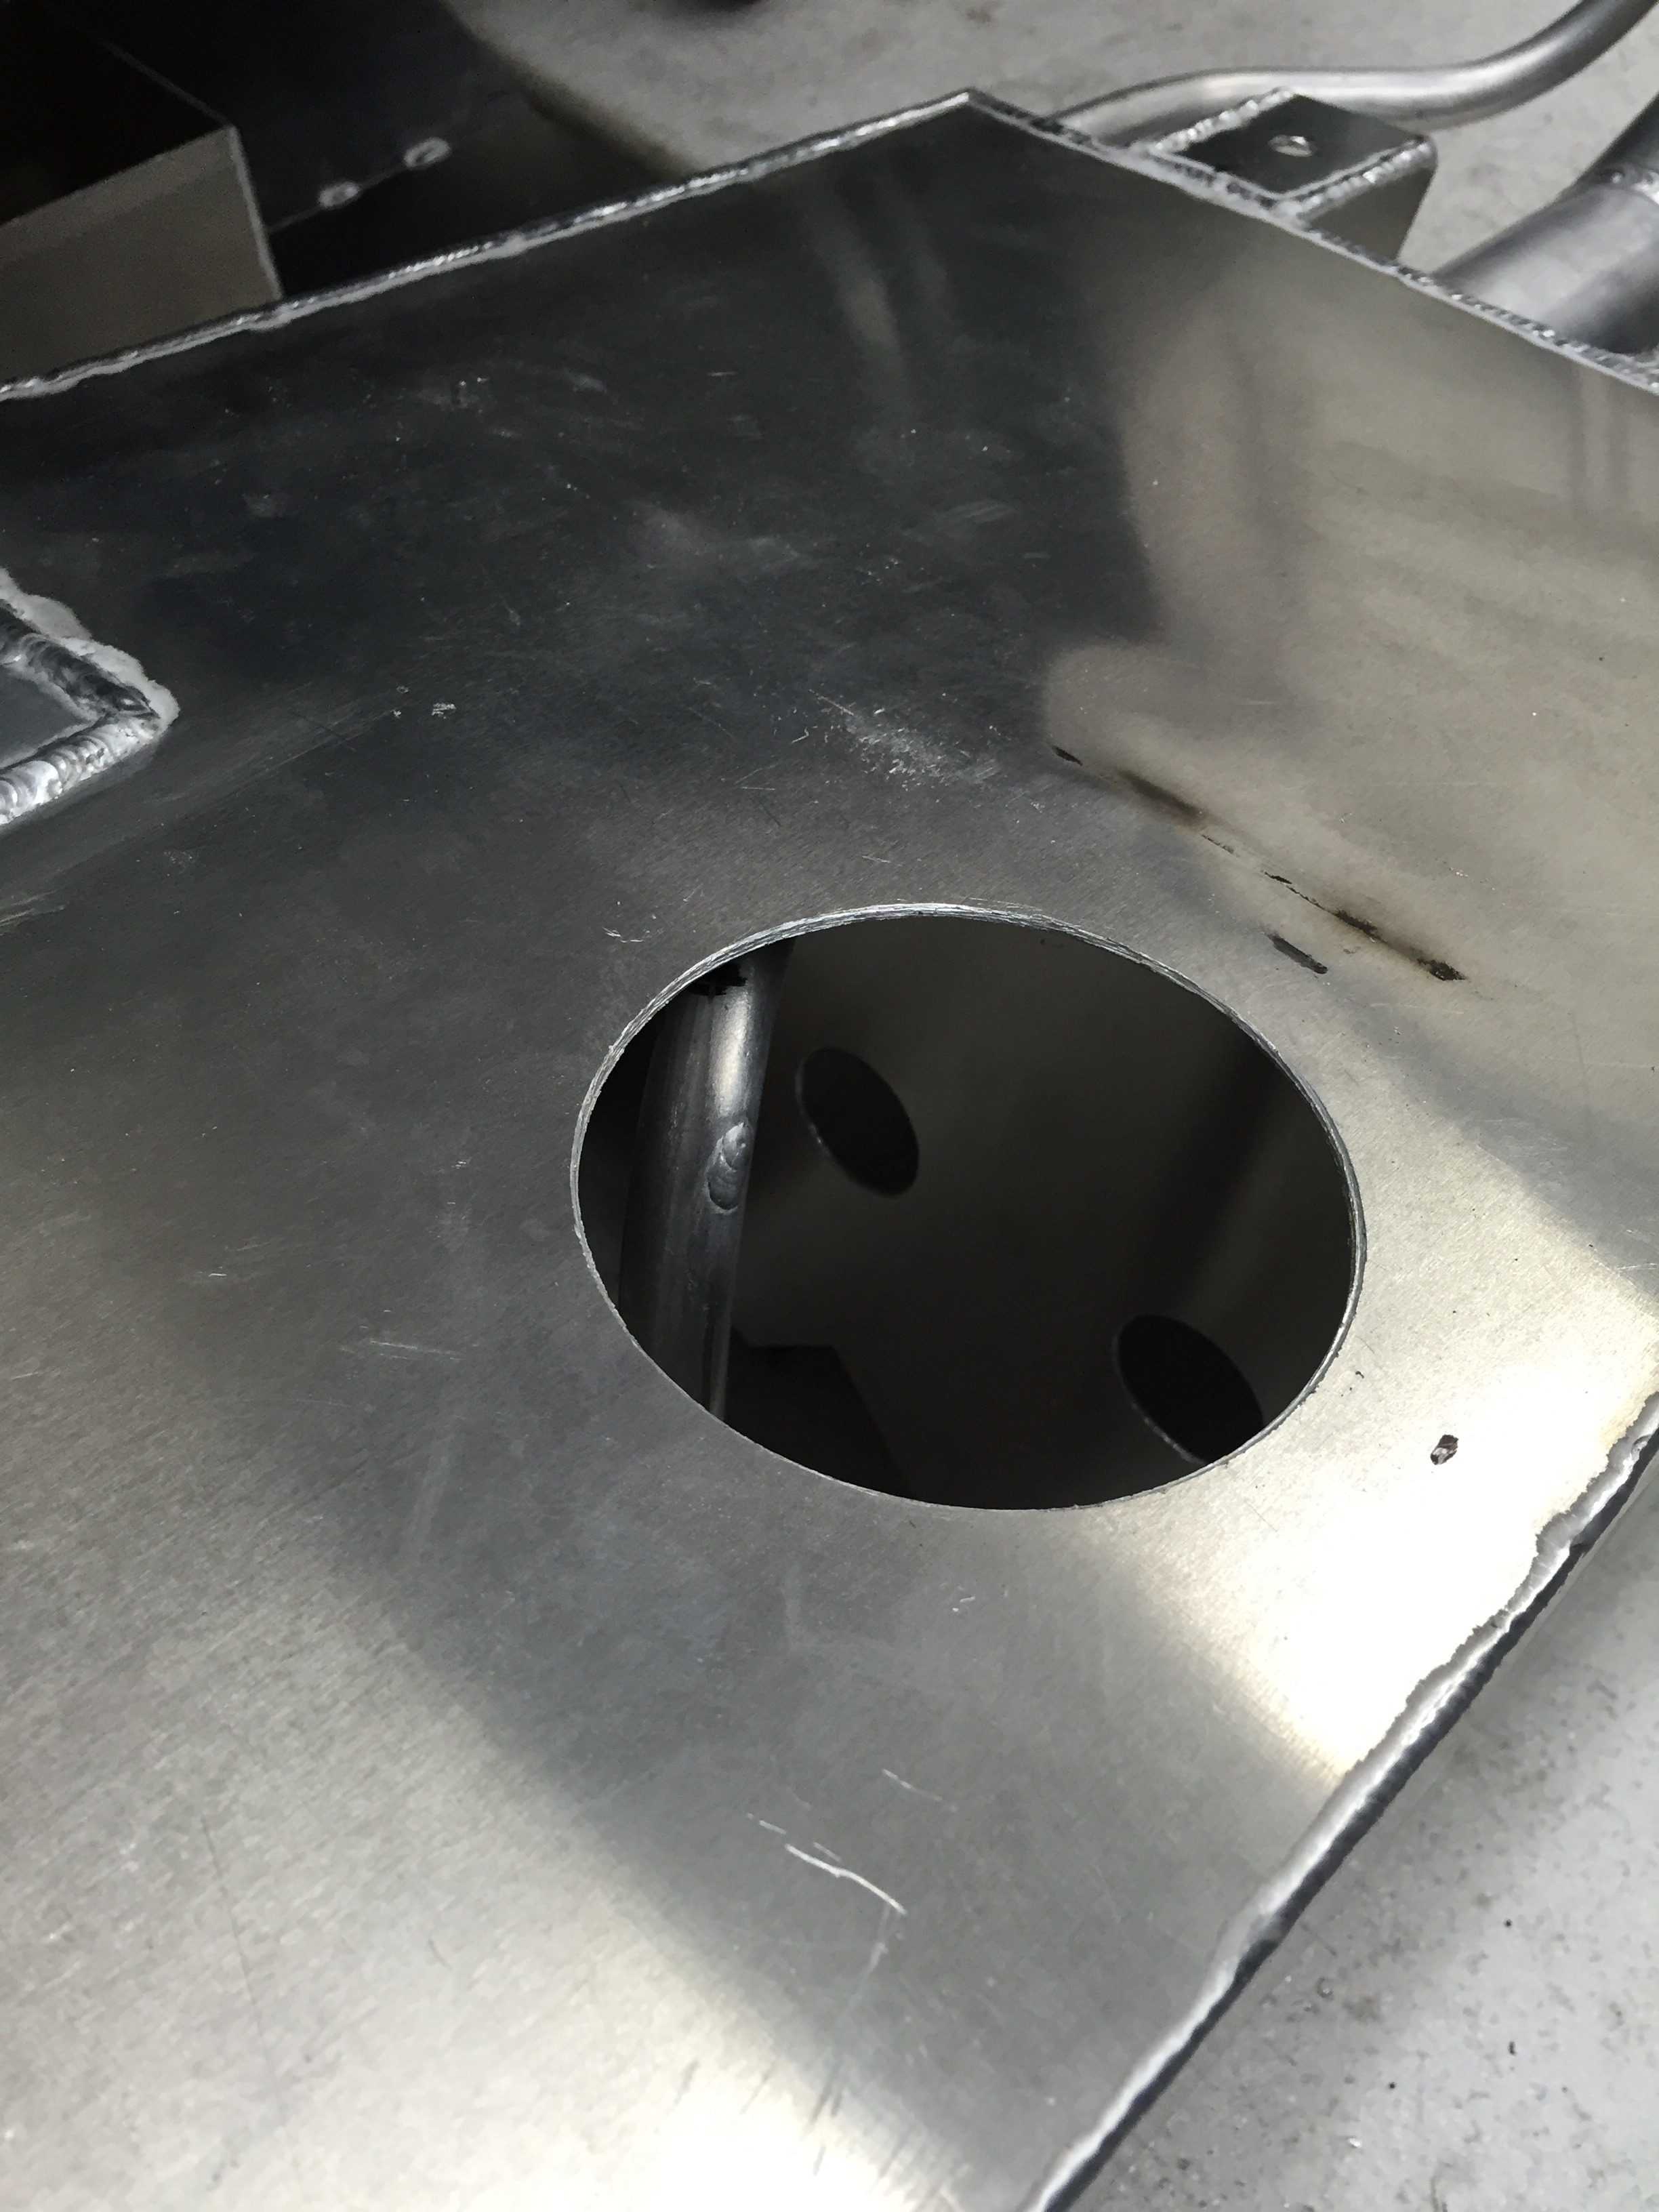
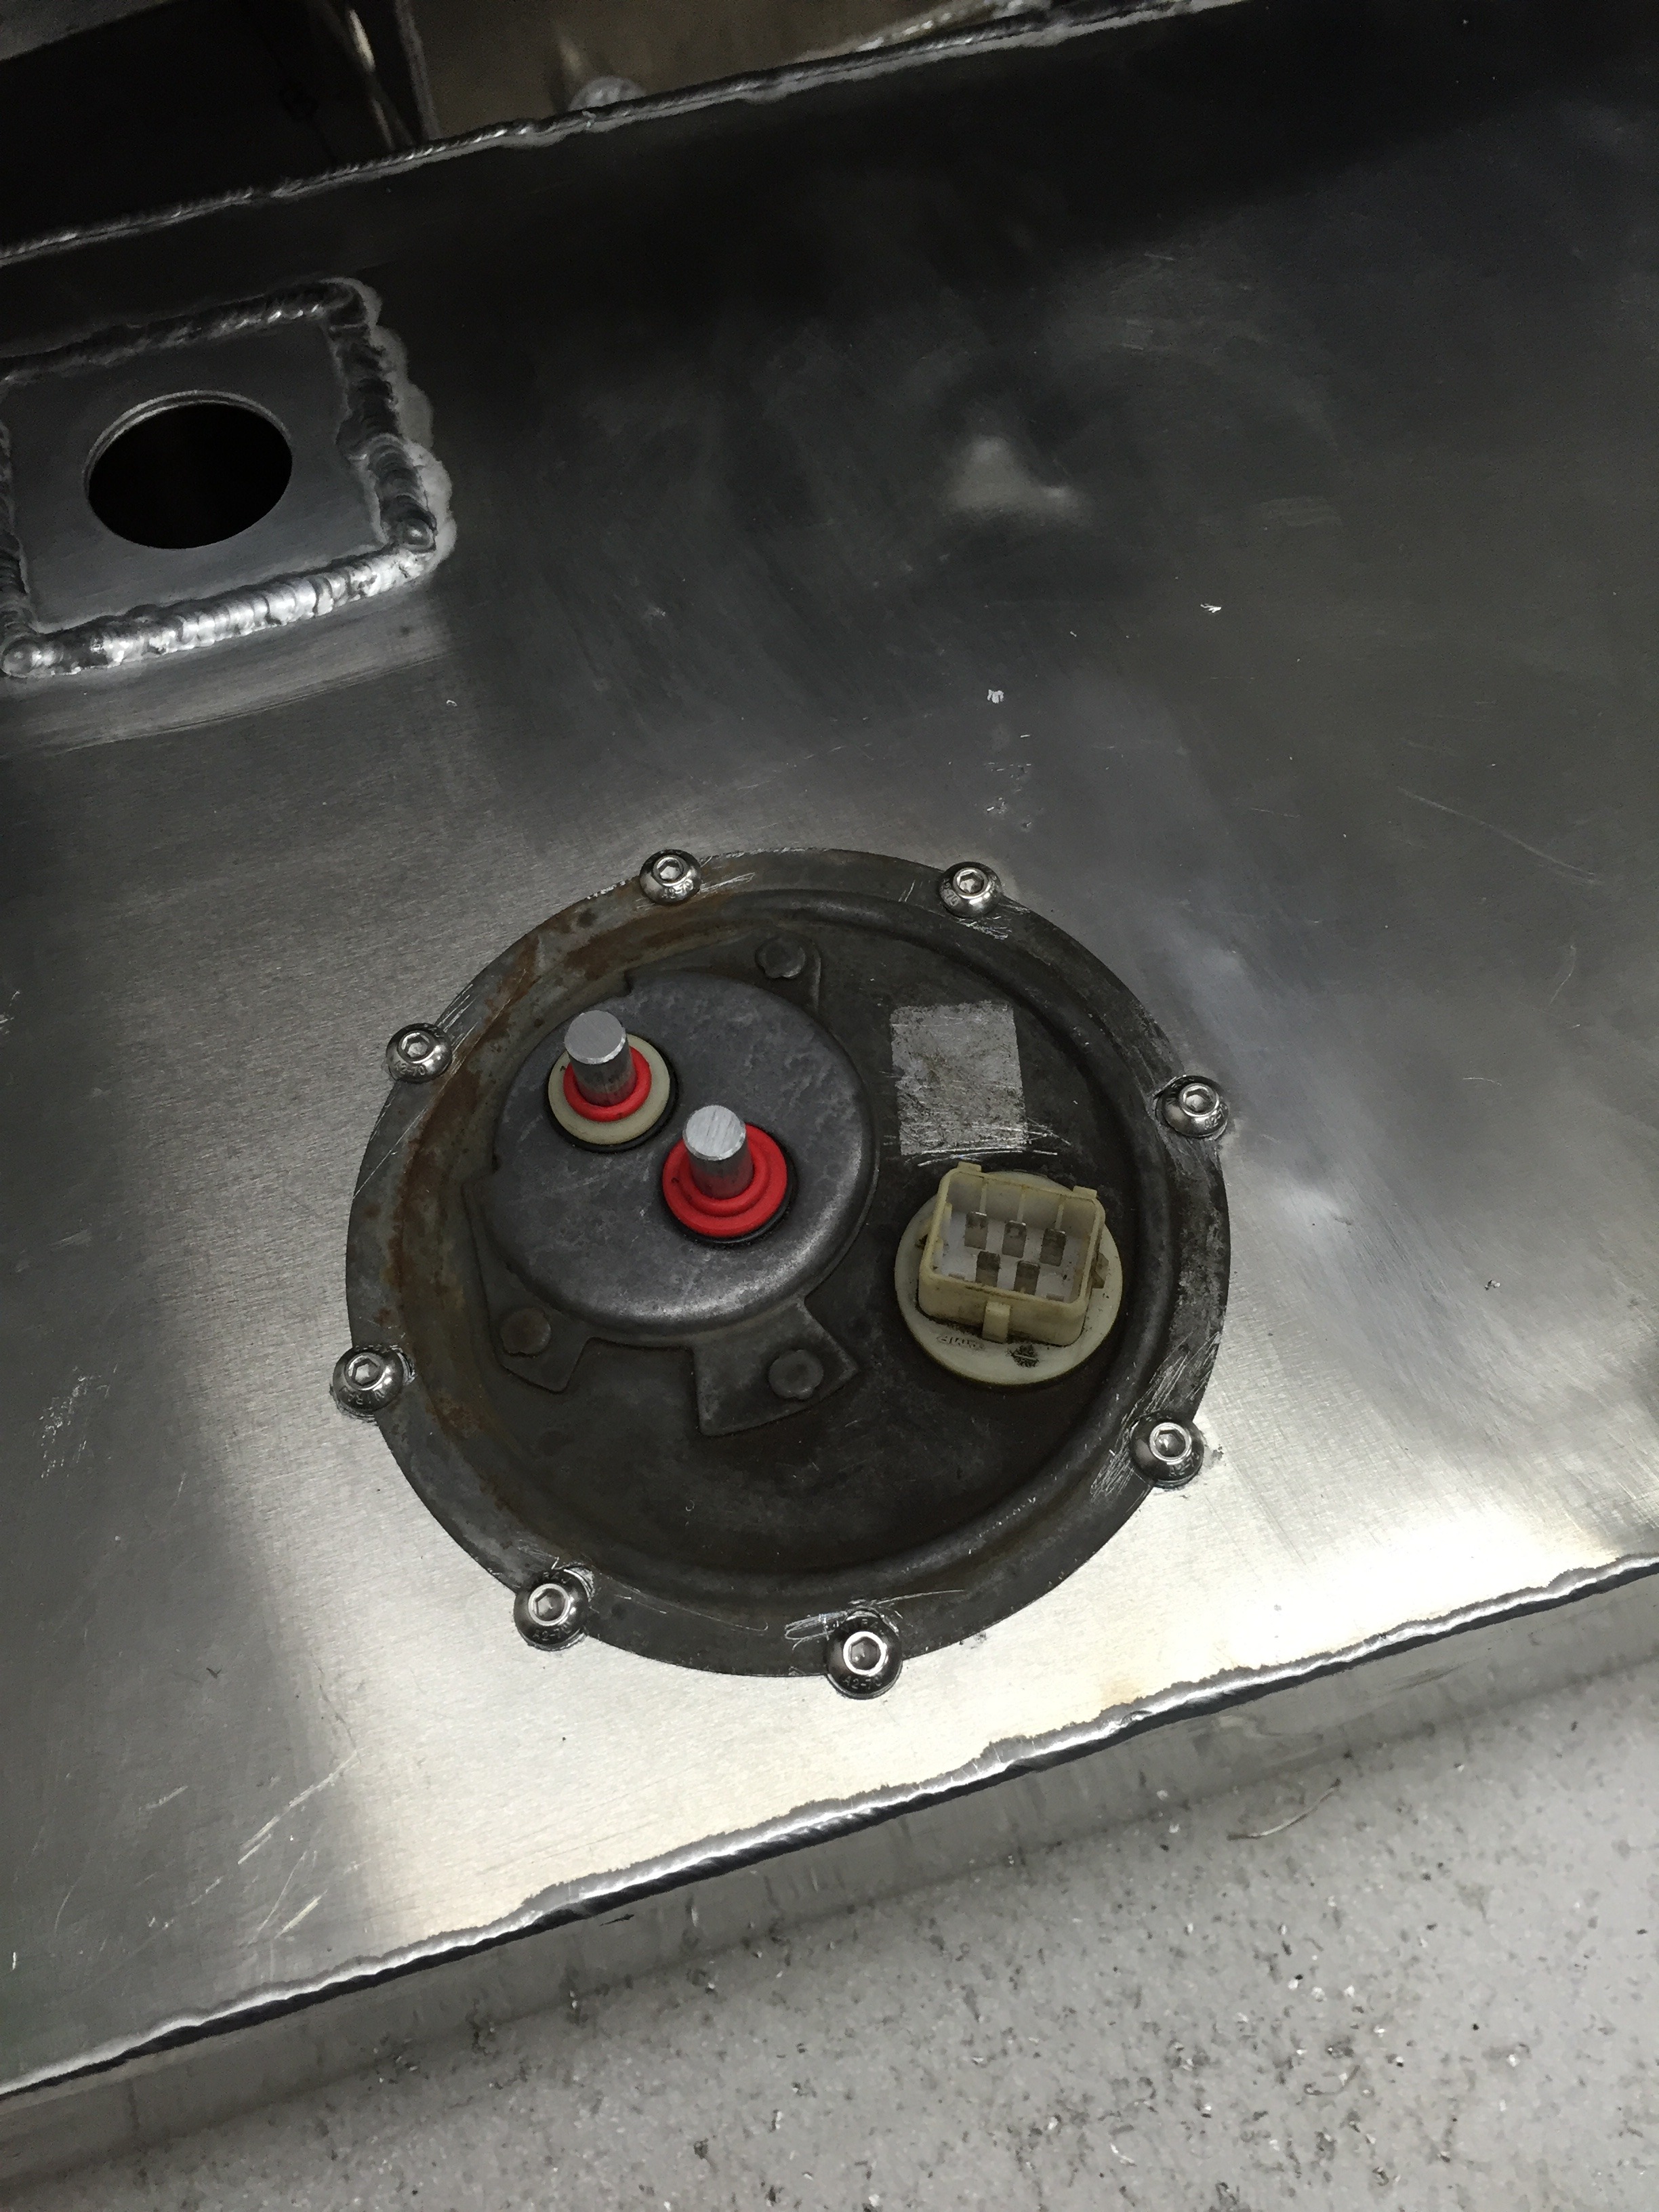
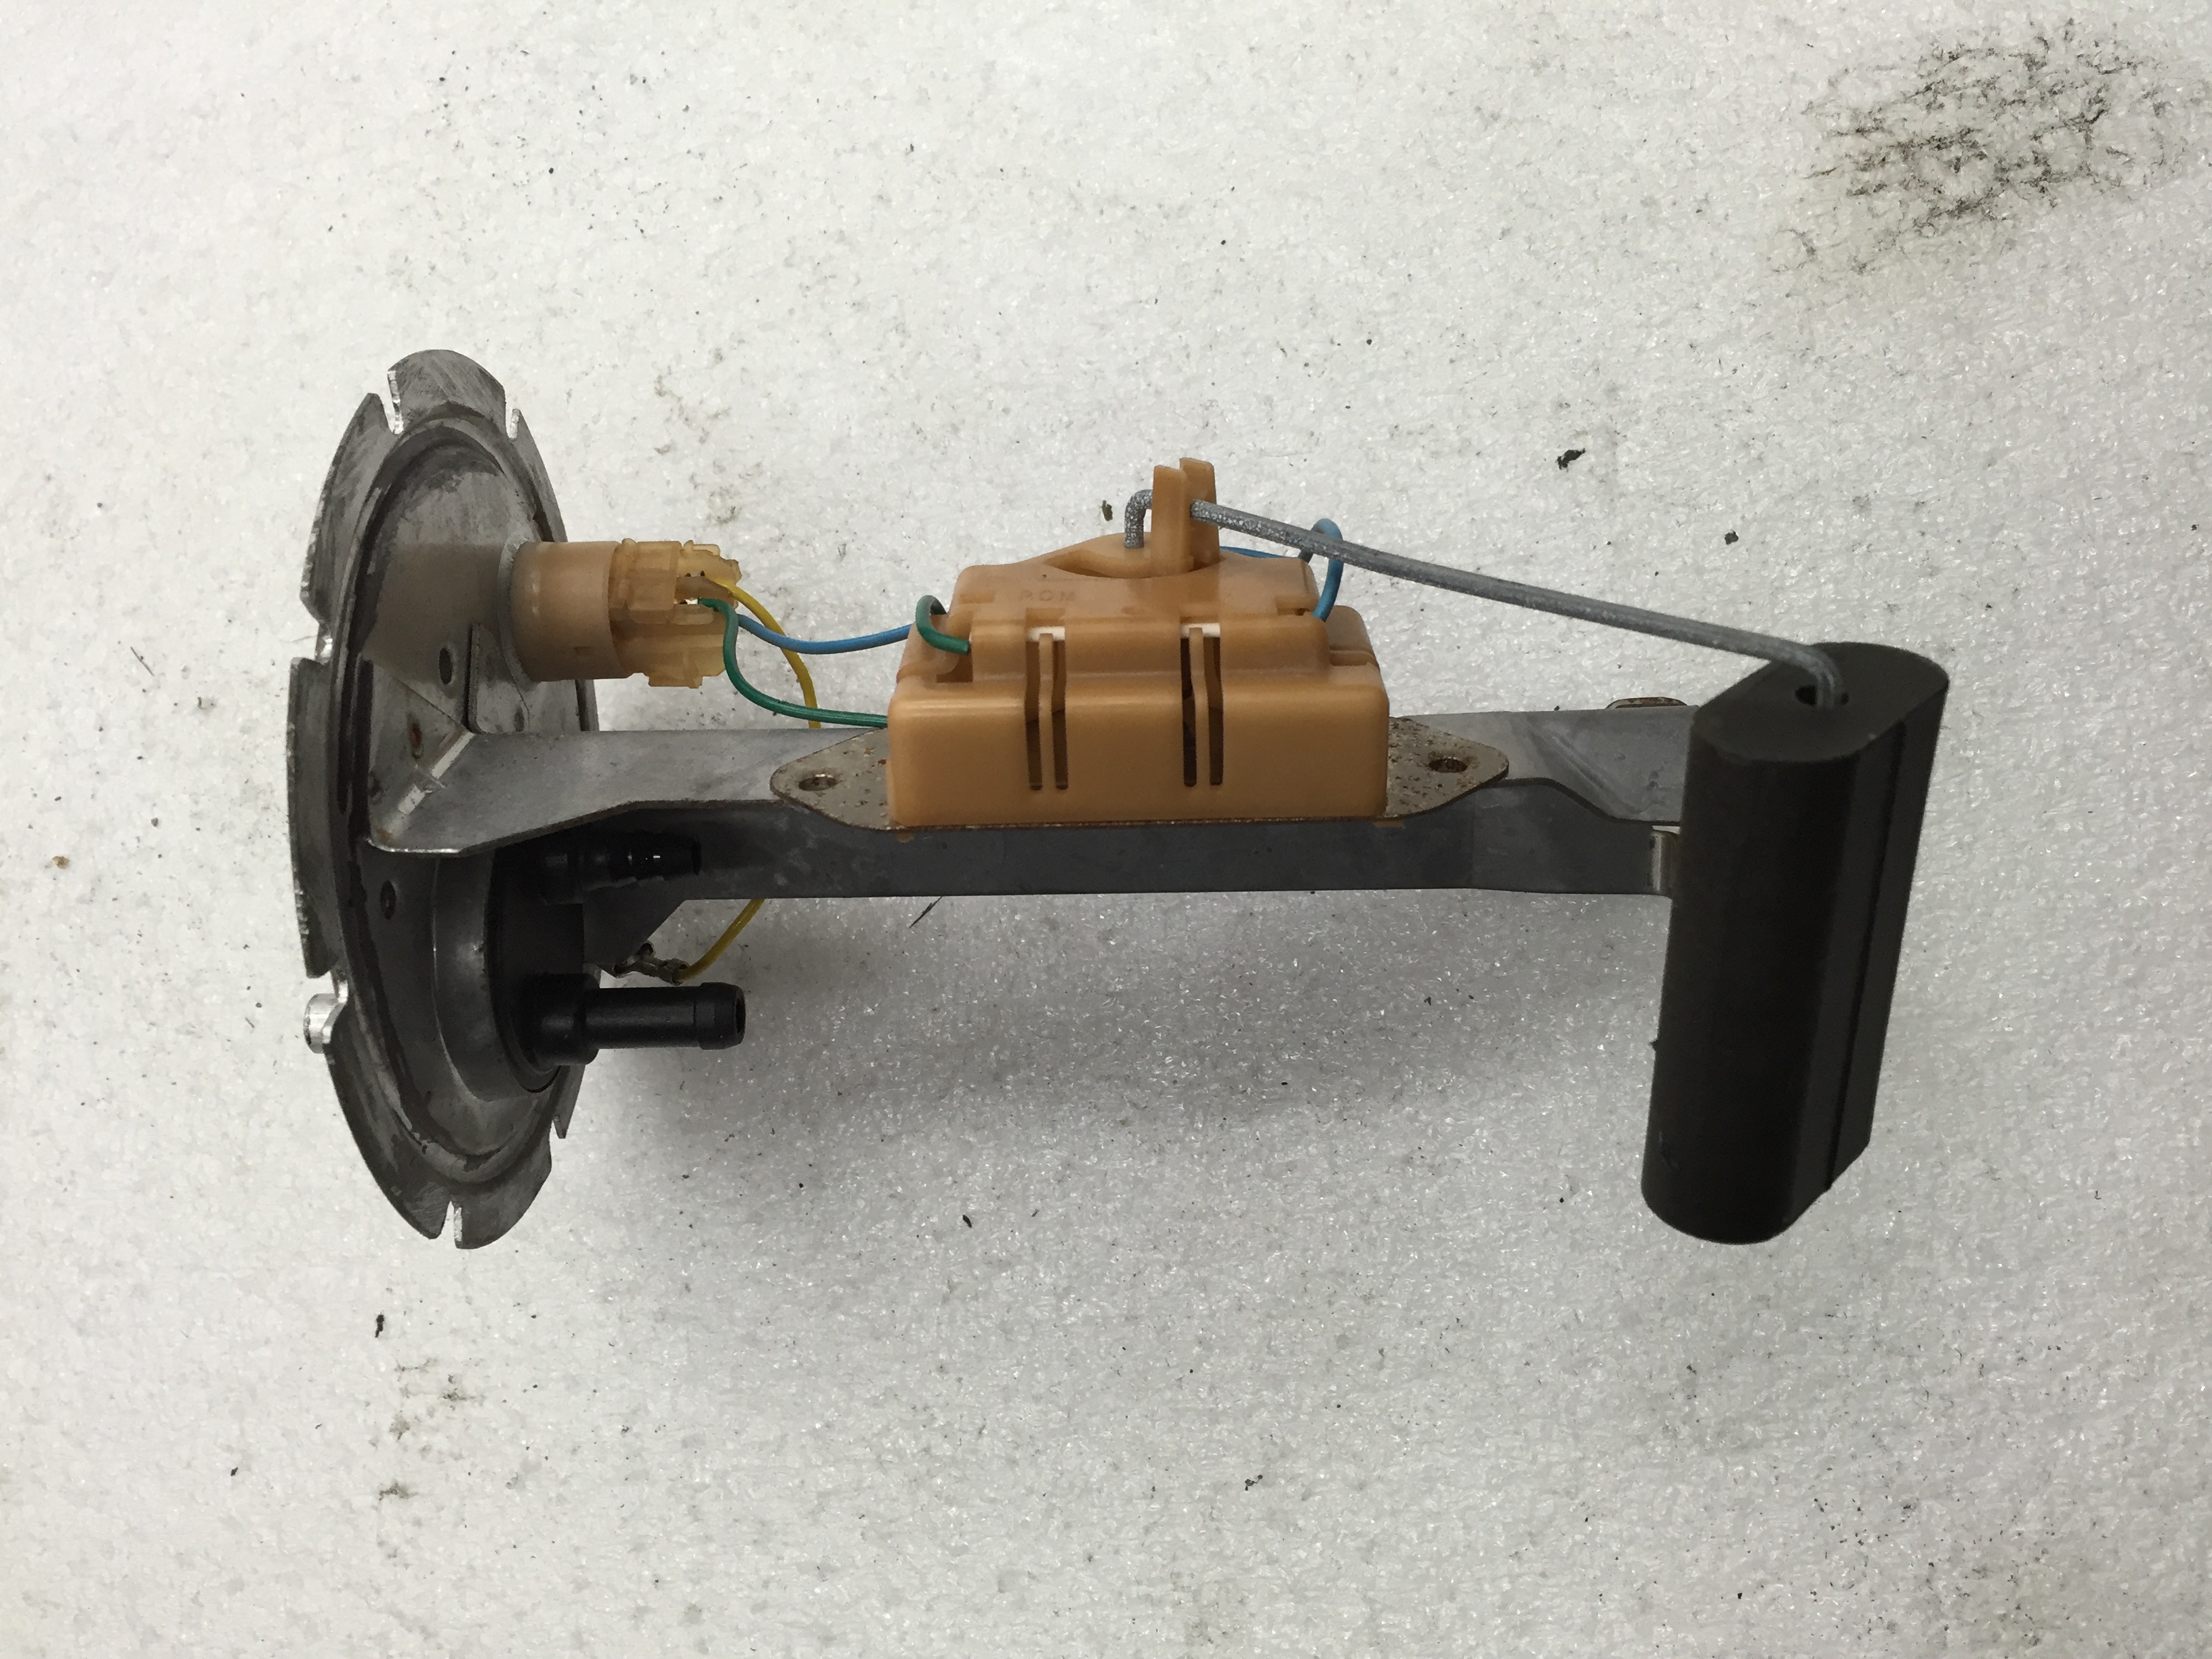
Using the standard sender unit and needed to block the original inlet/outlet - so used a short section of solid 8mm aluminium rod in both
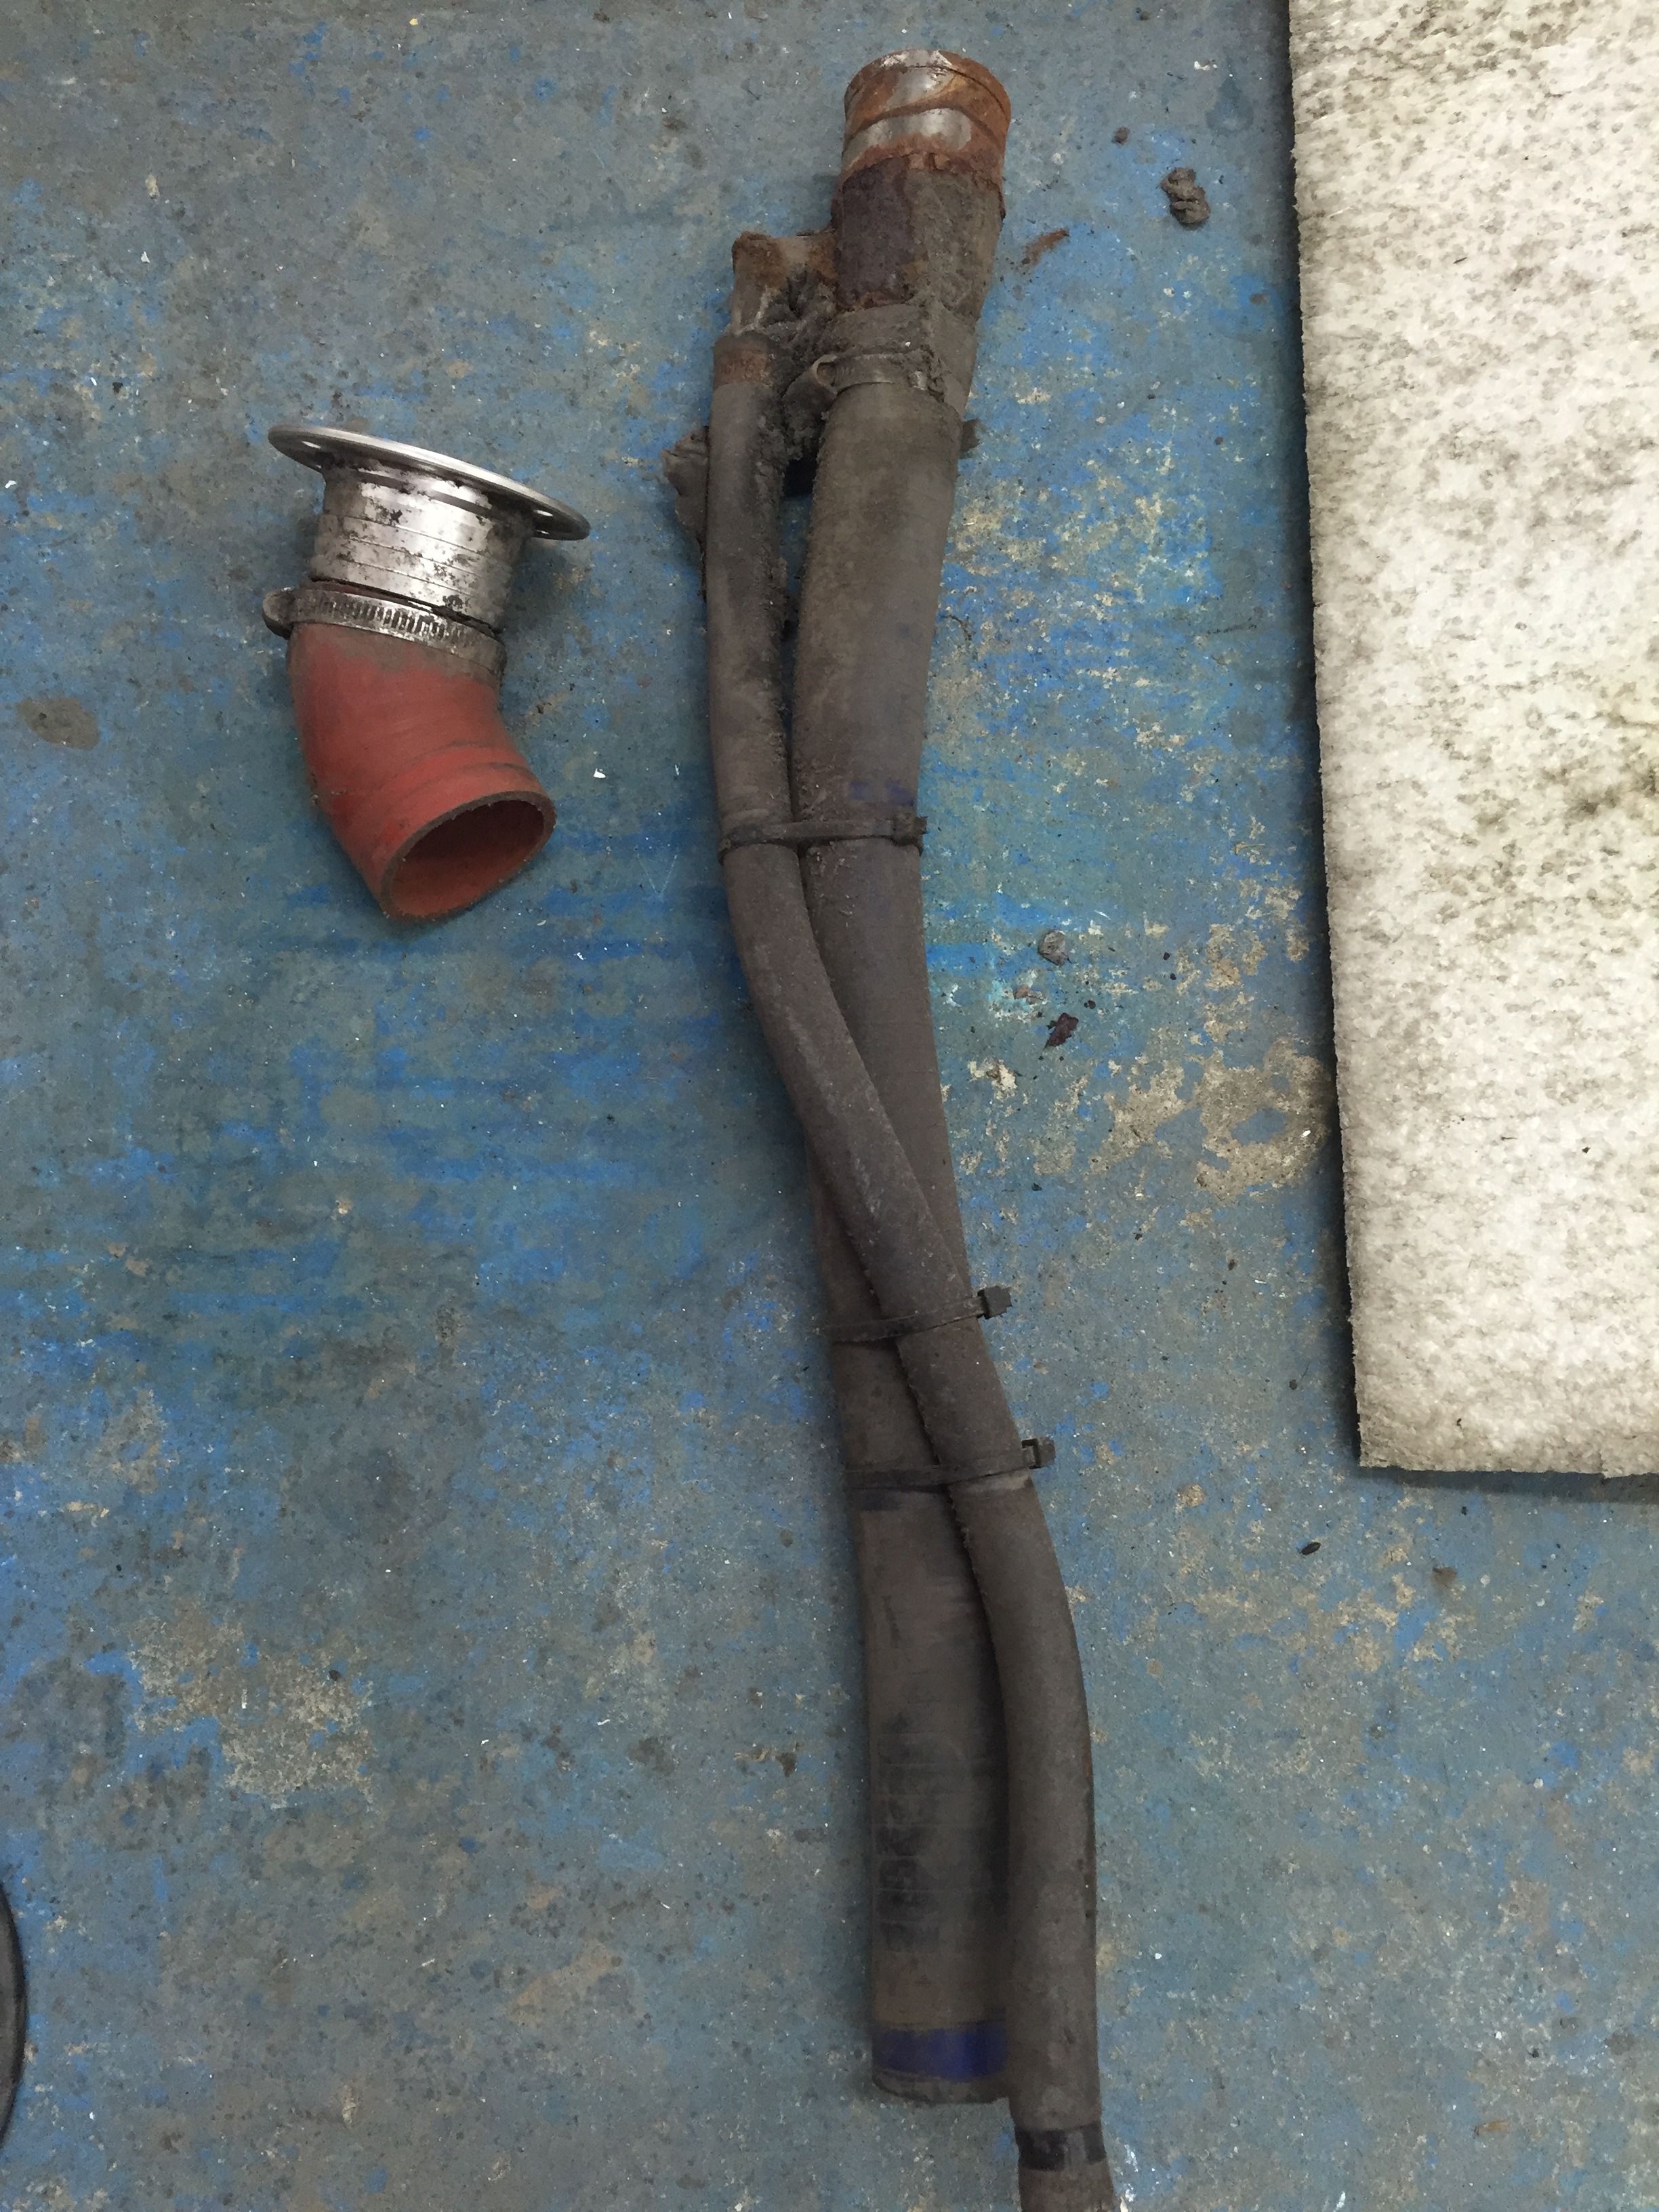
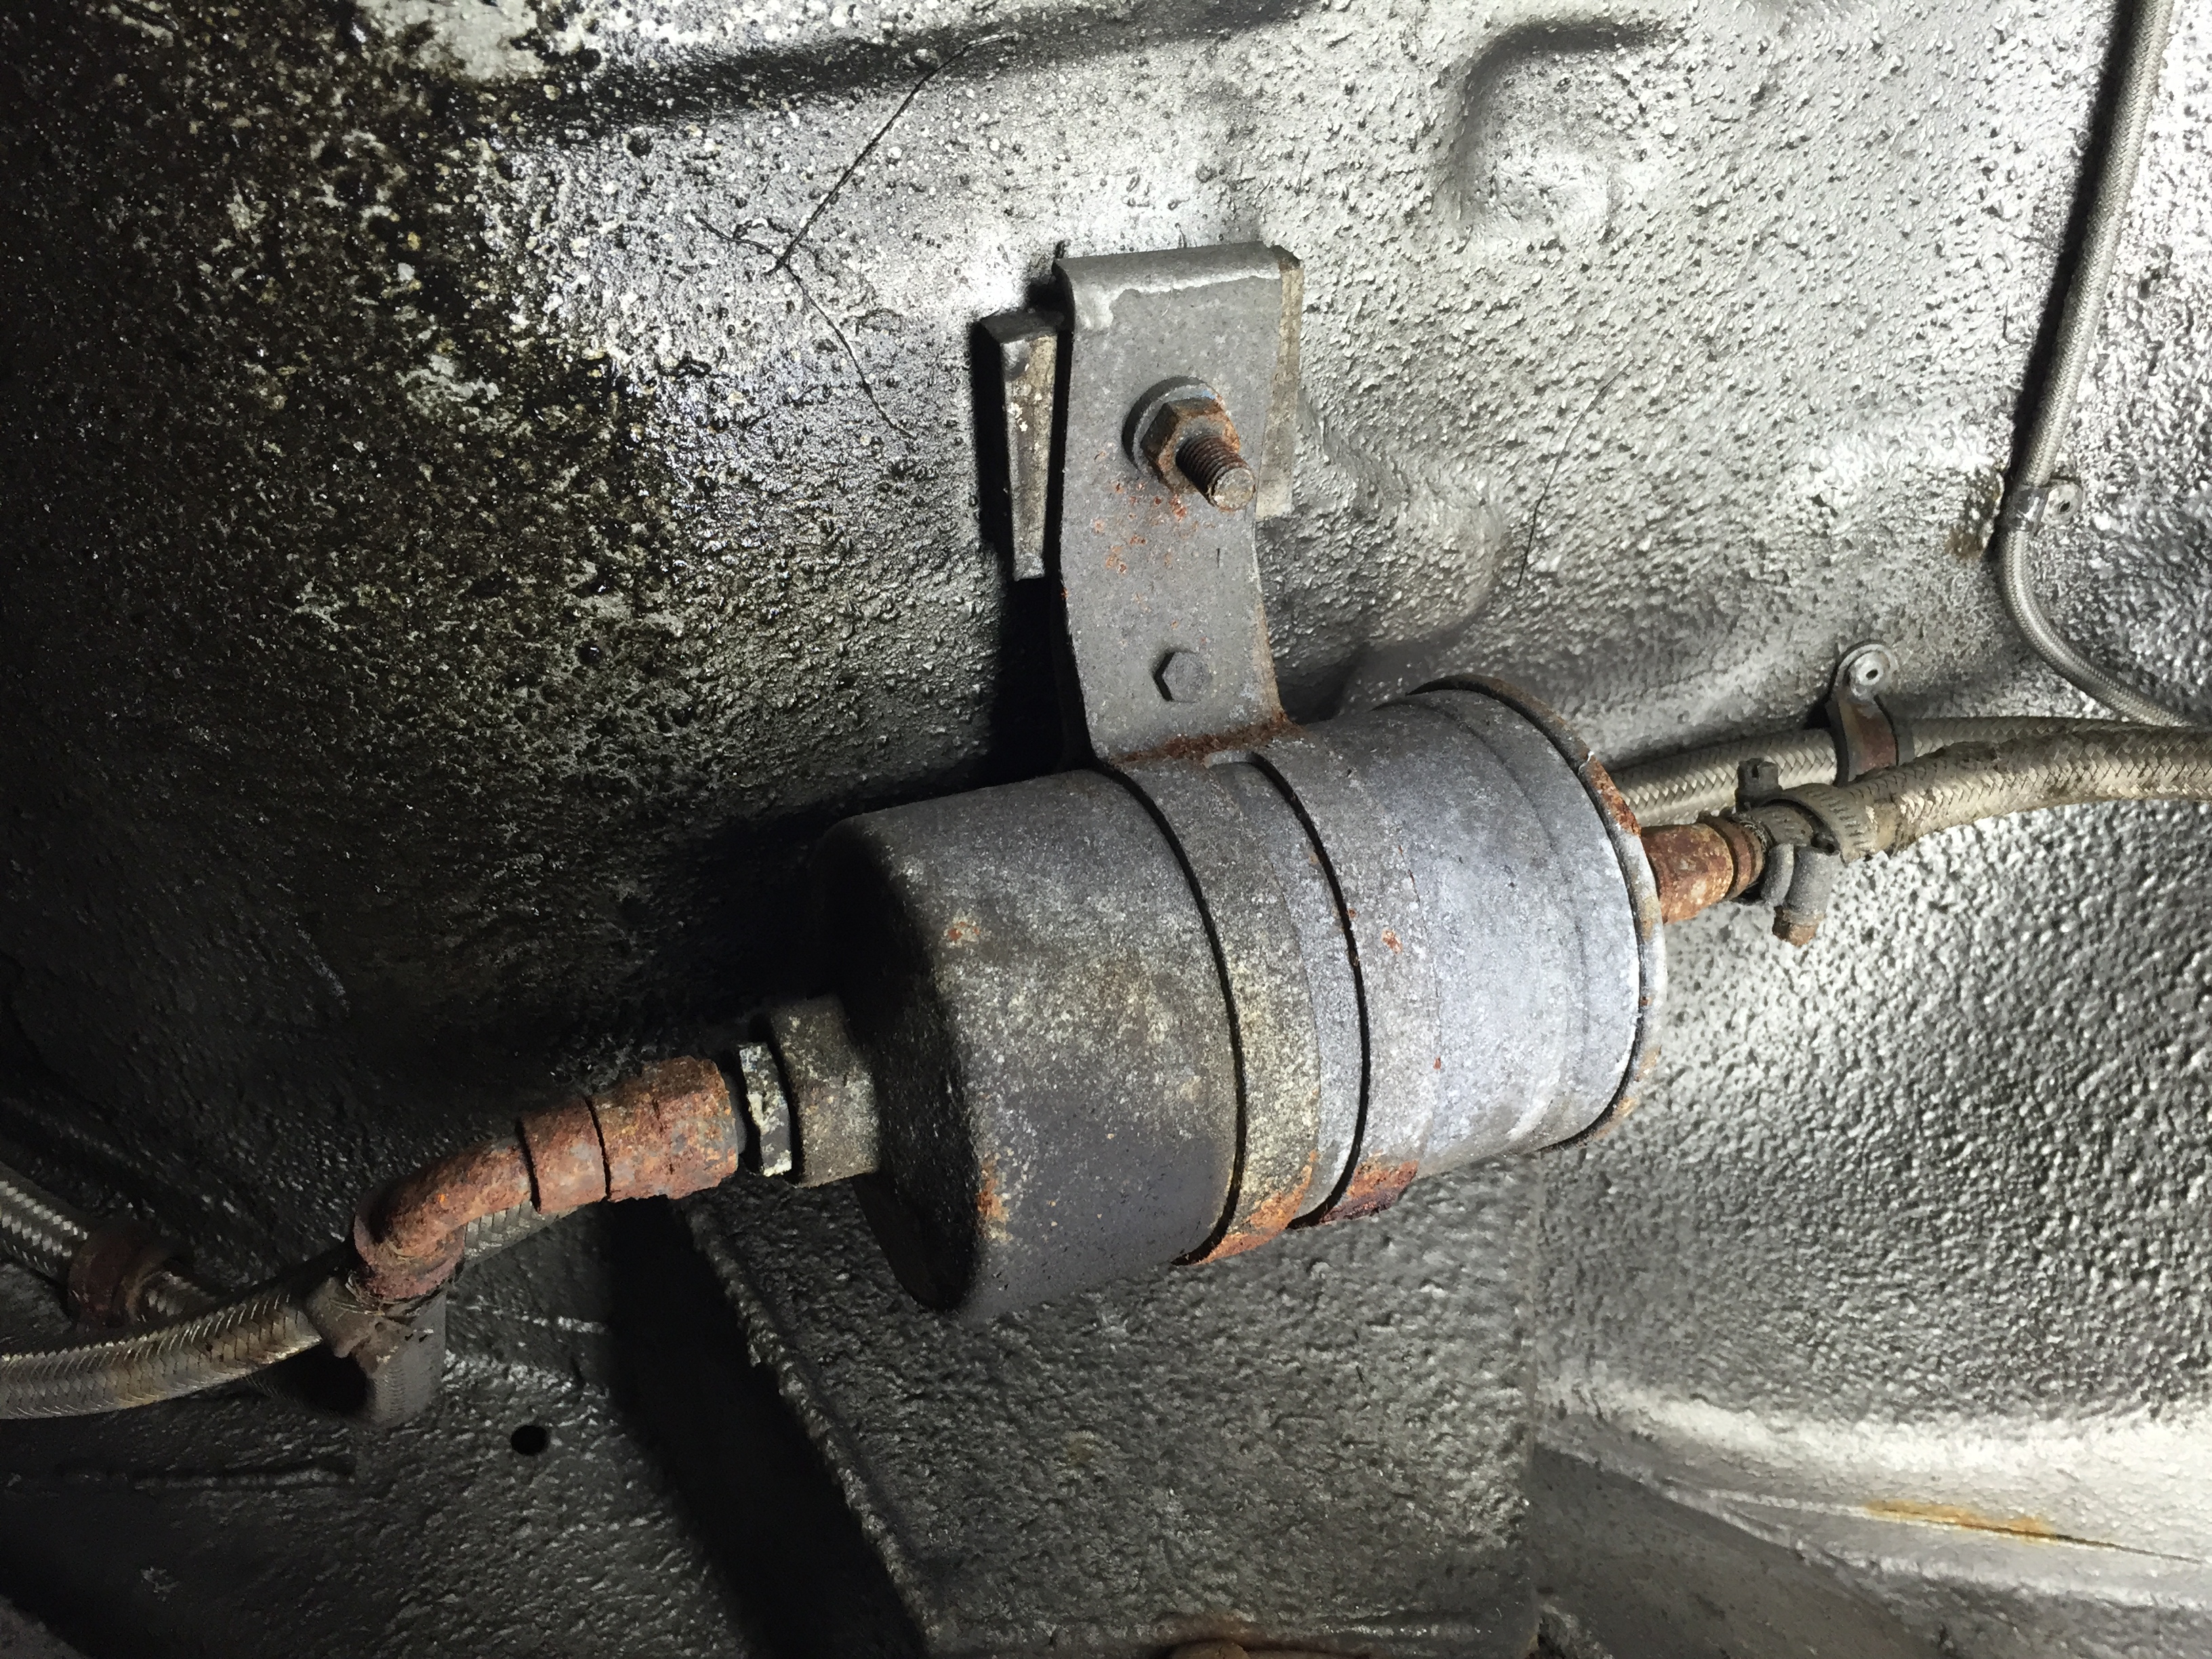
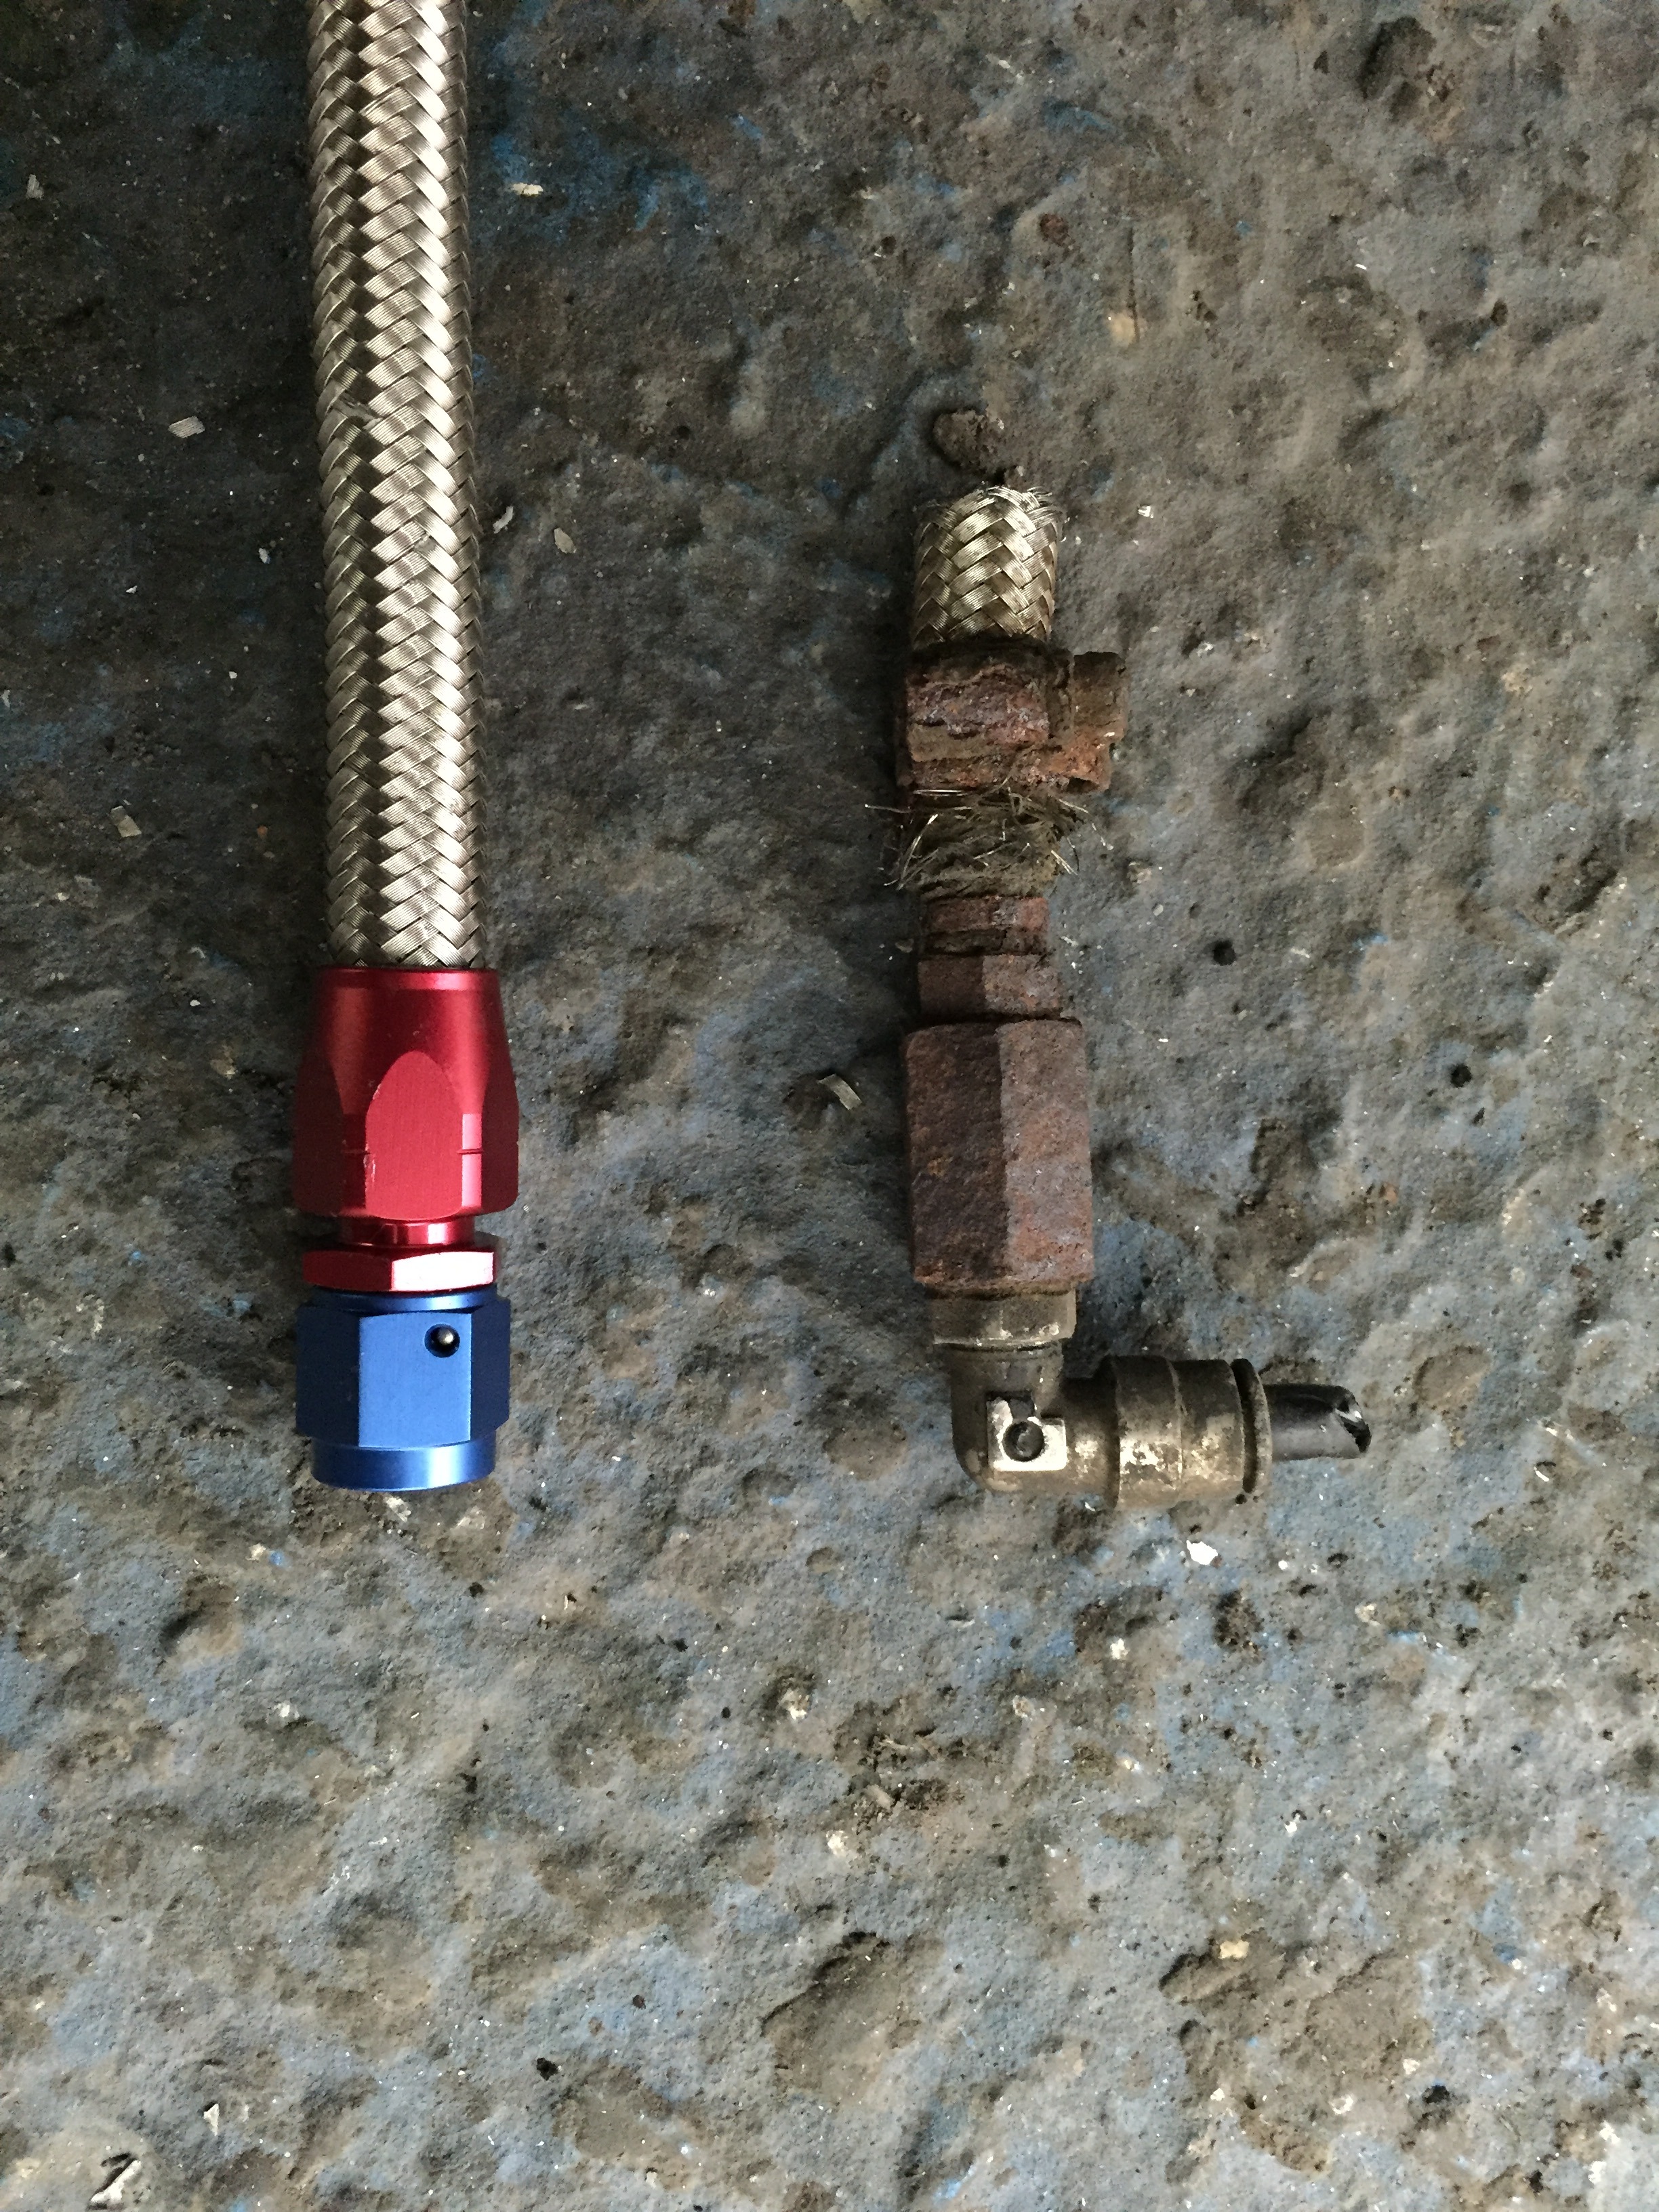
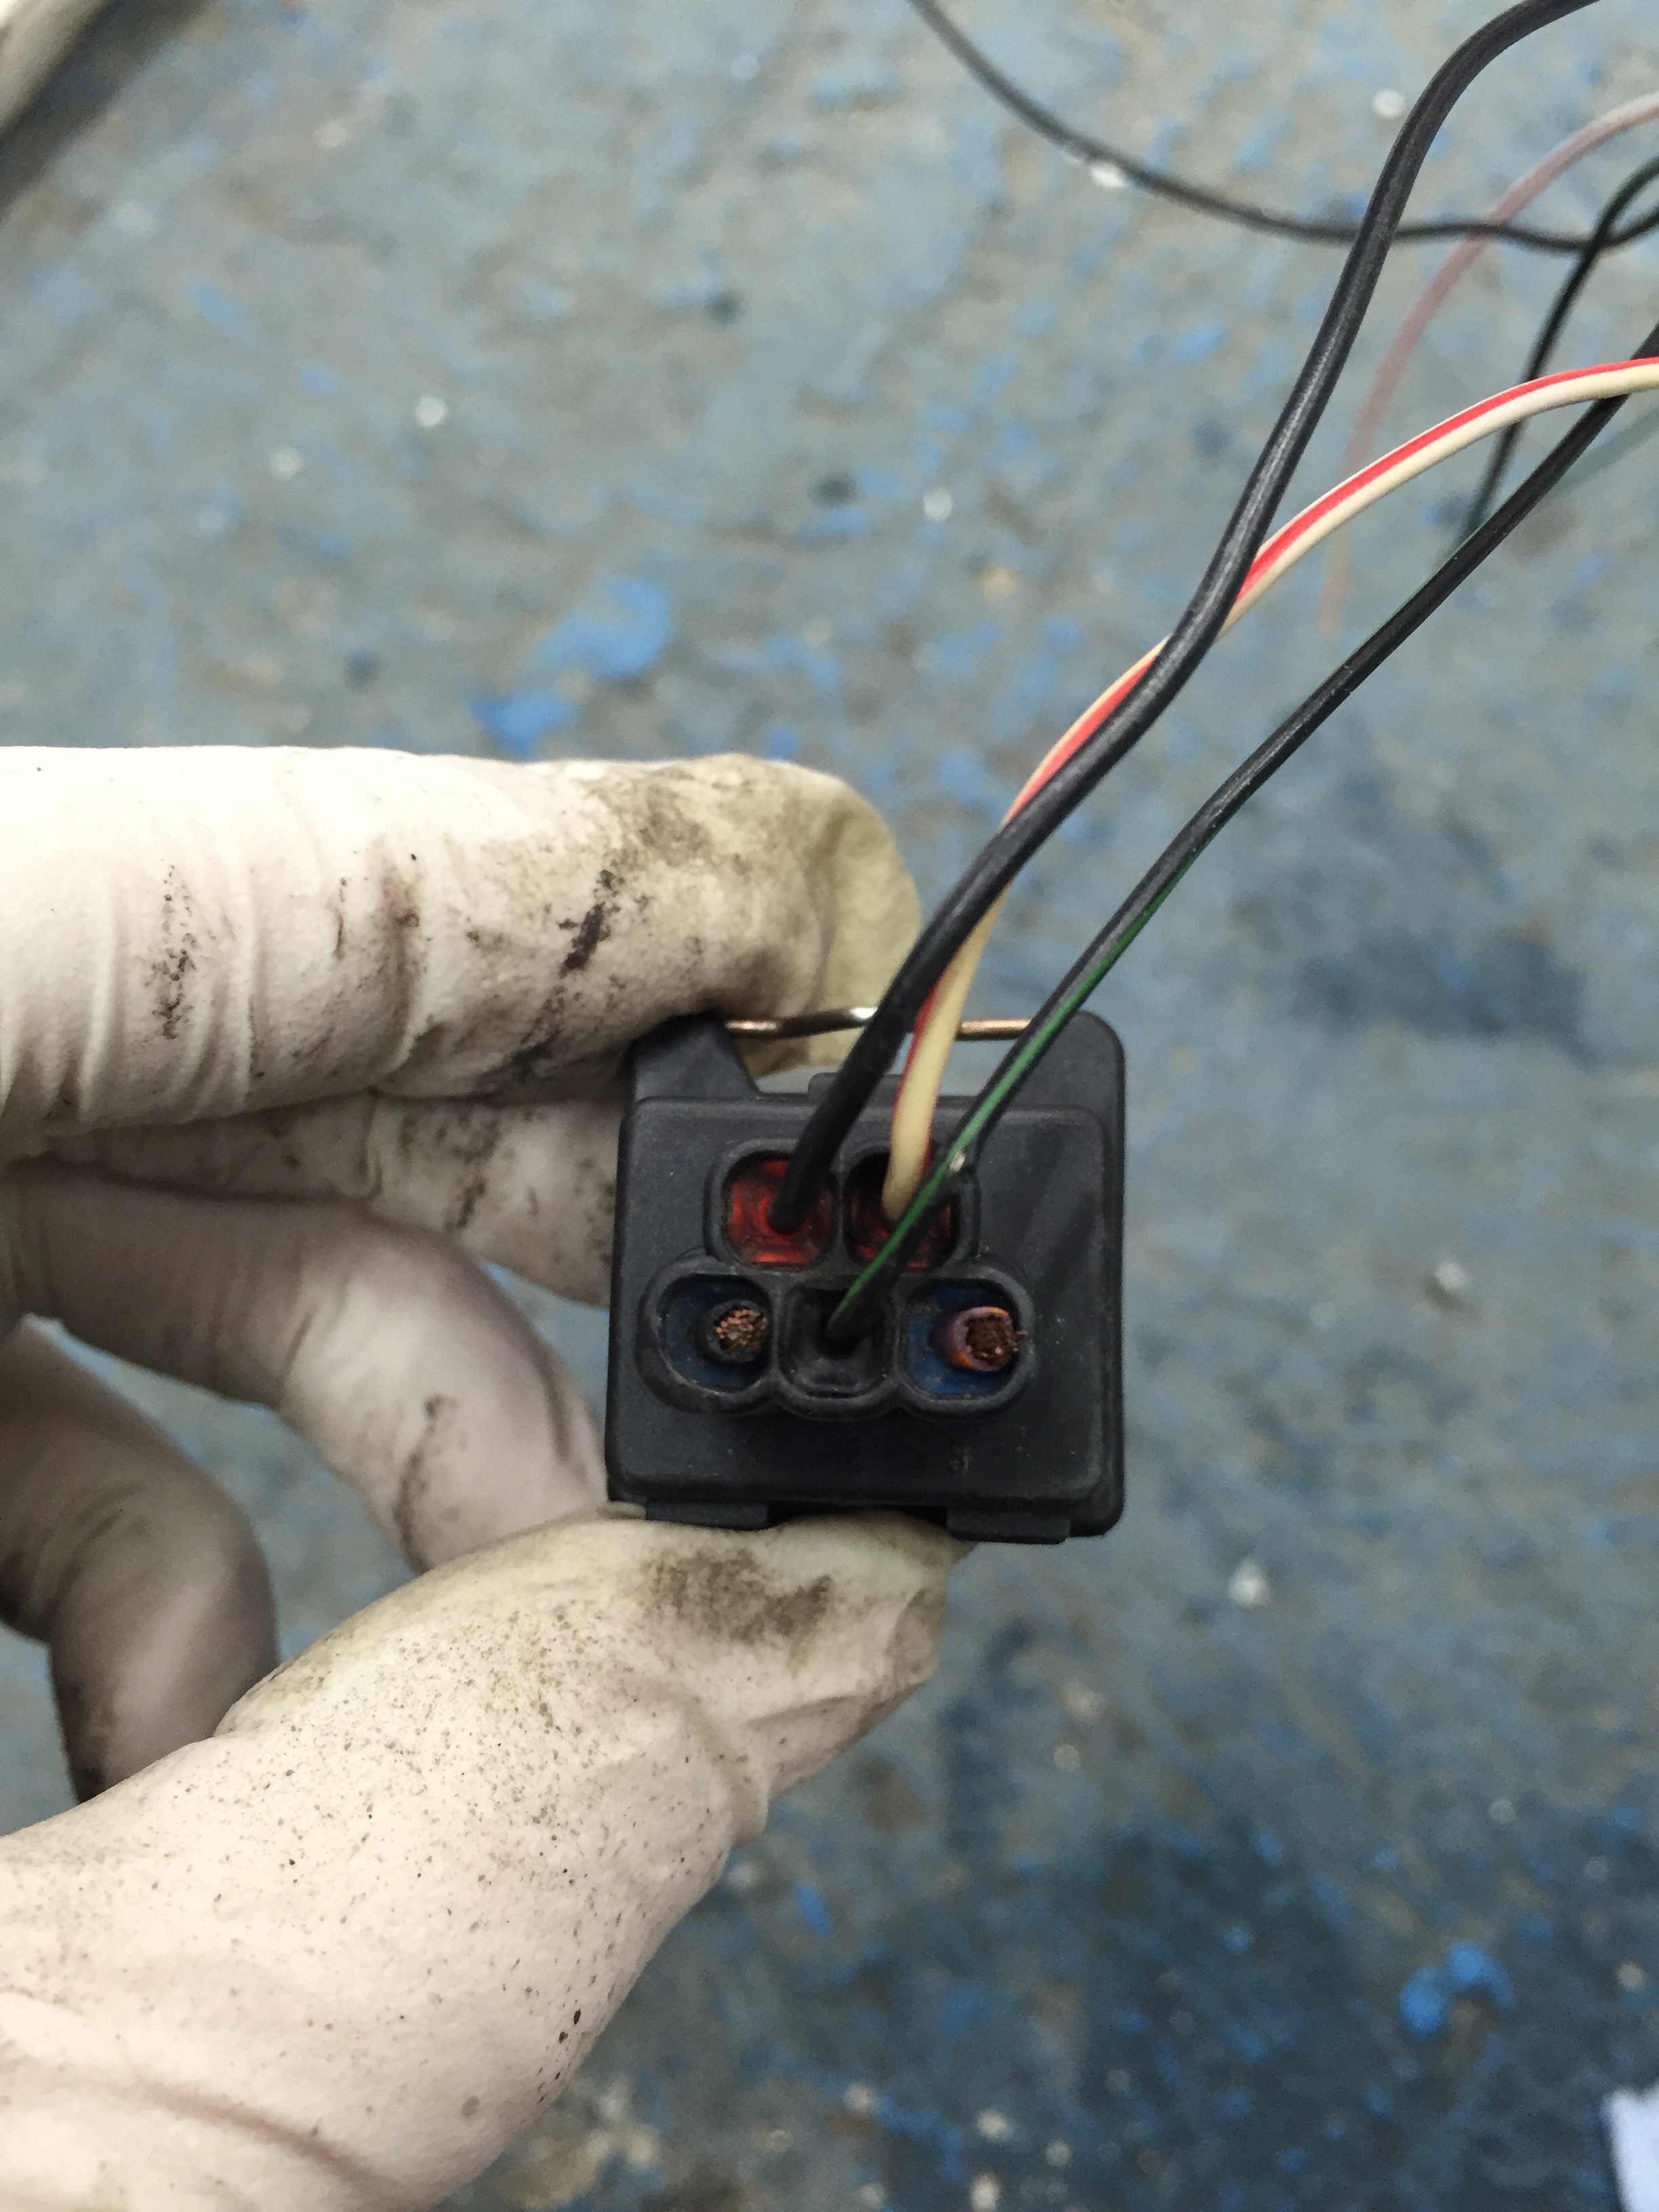
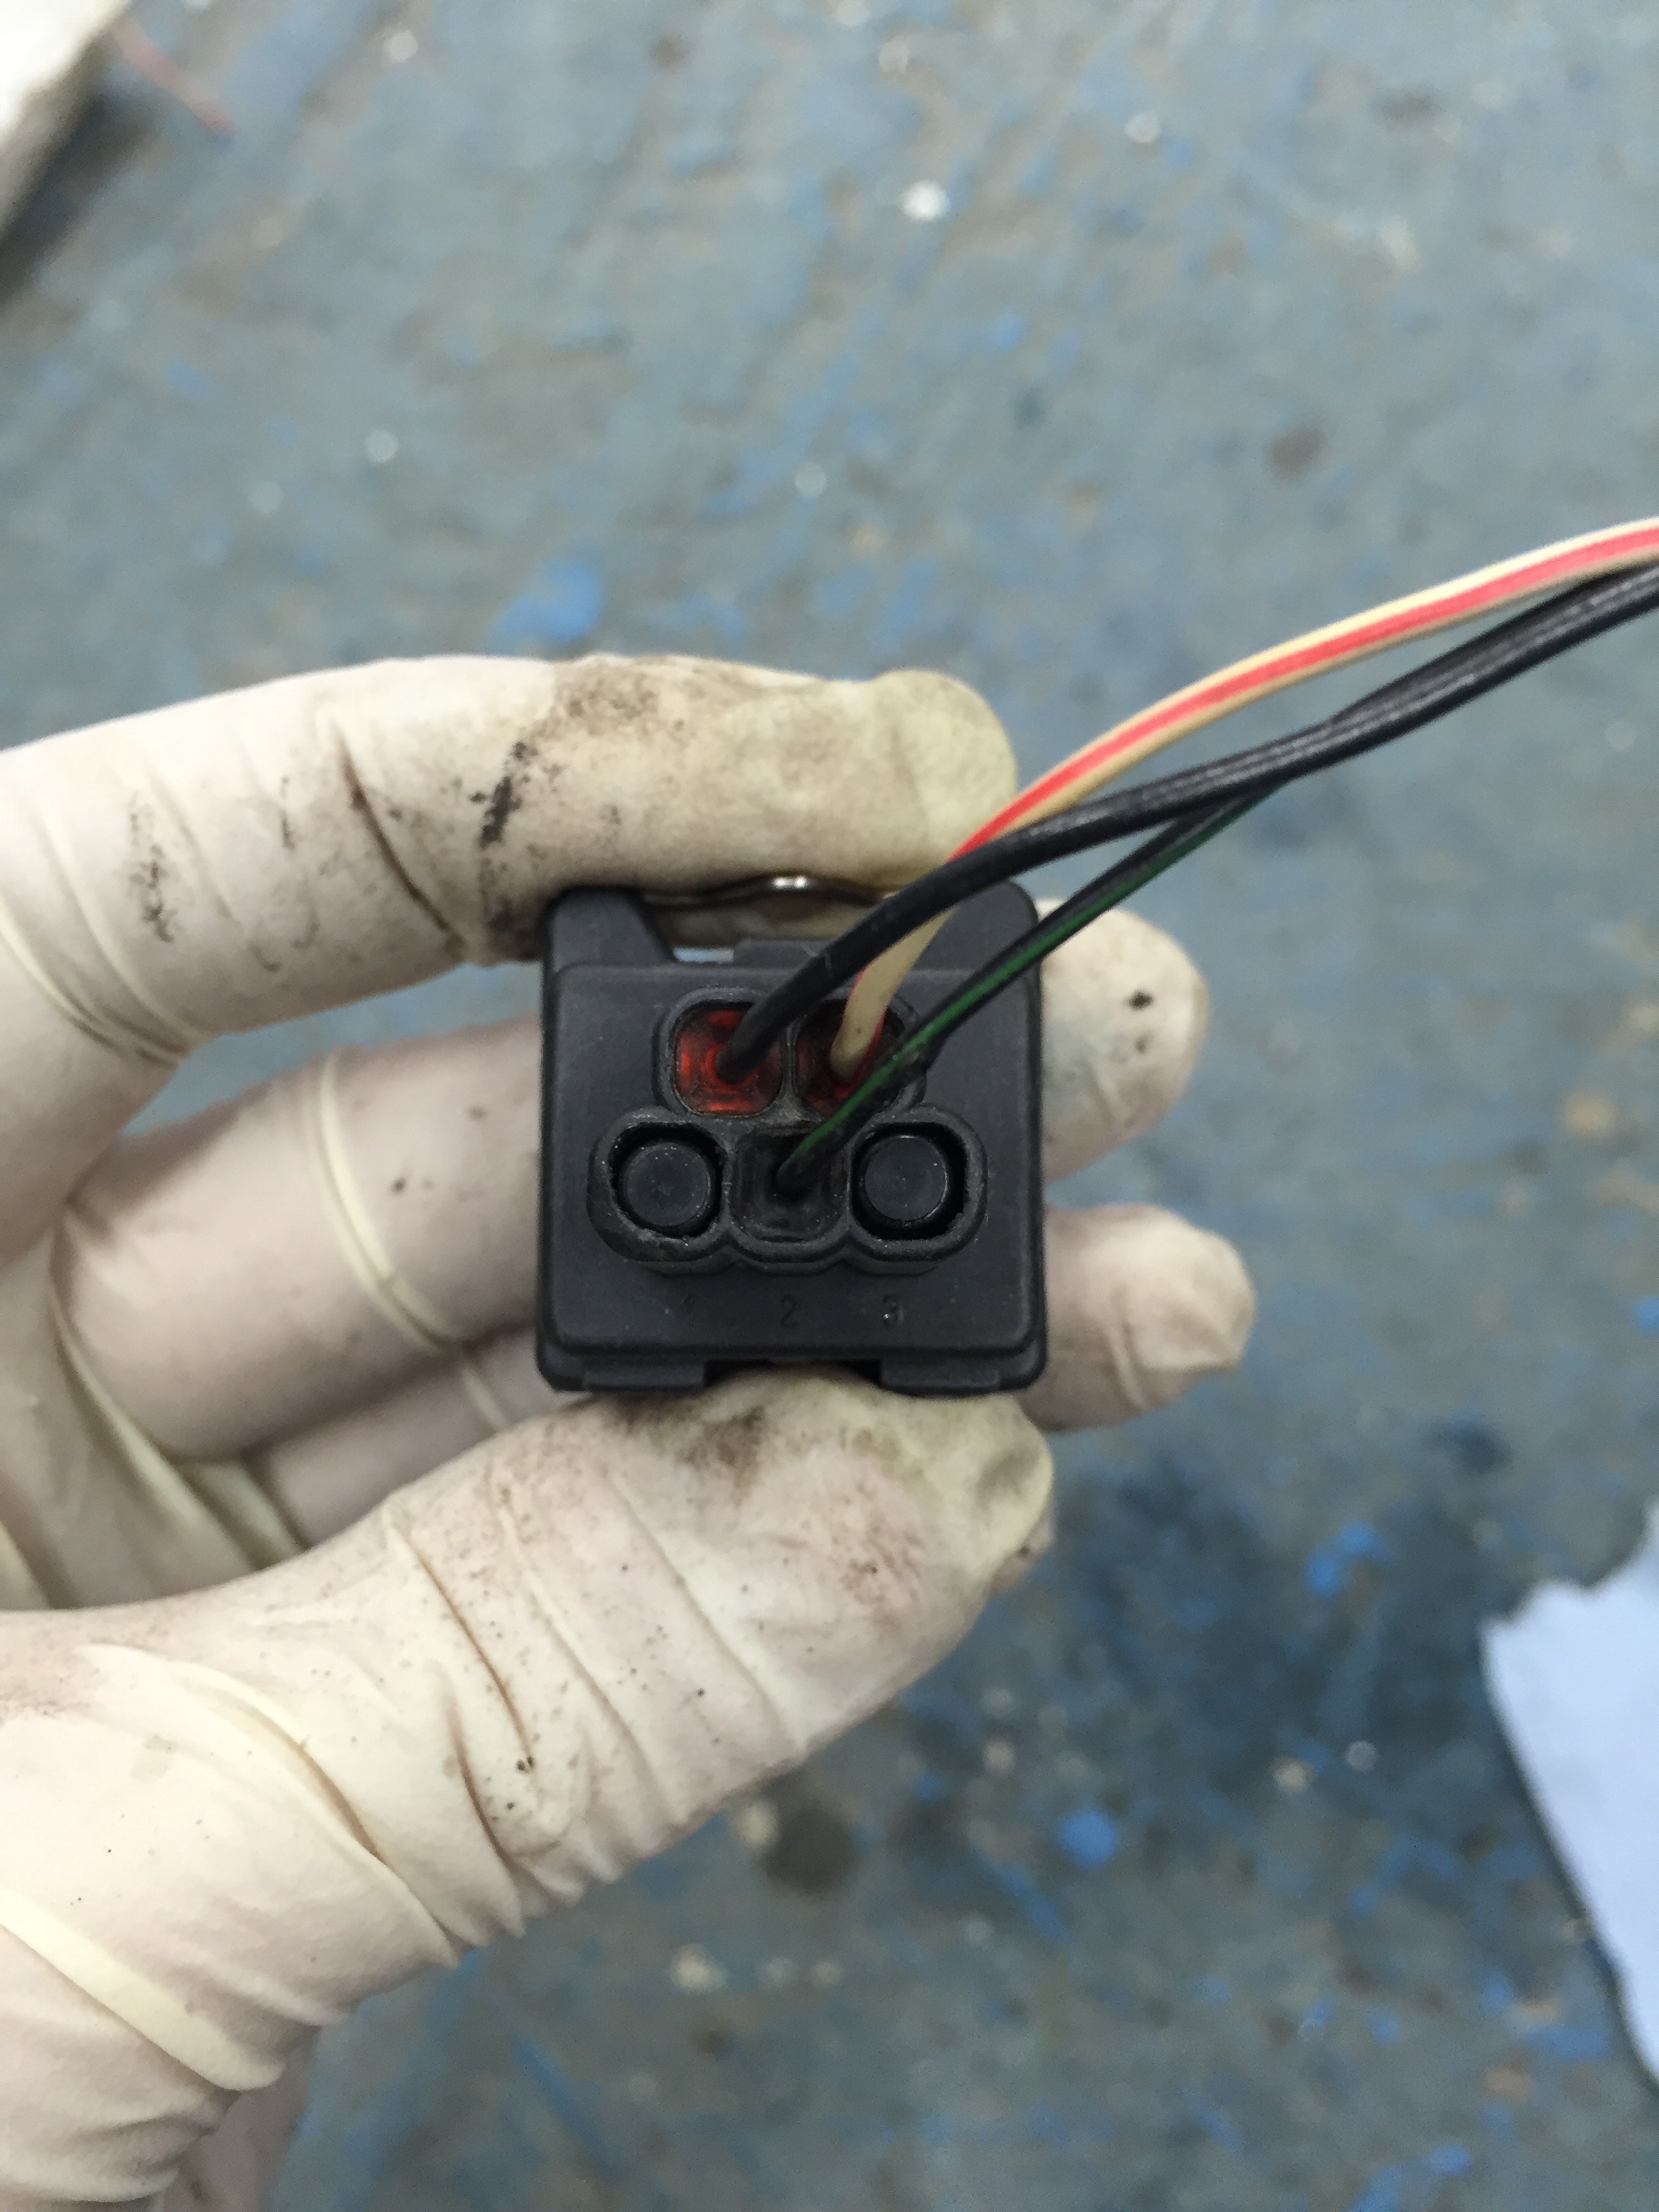
This needed changing have no idea how long this filter has been on but it's seen better days
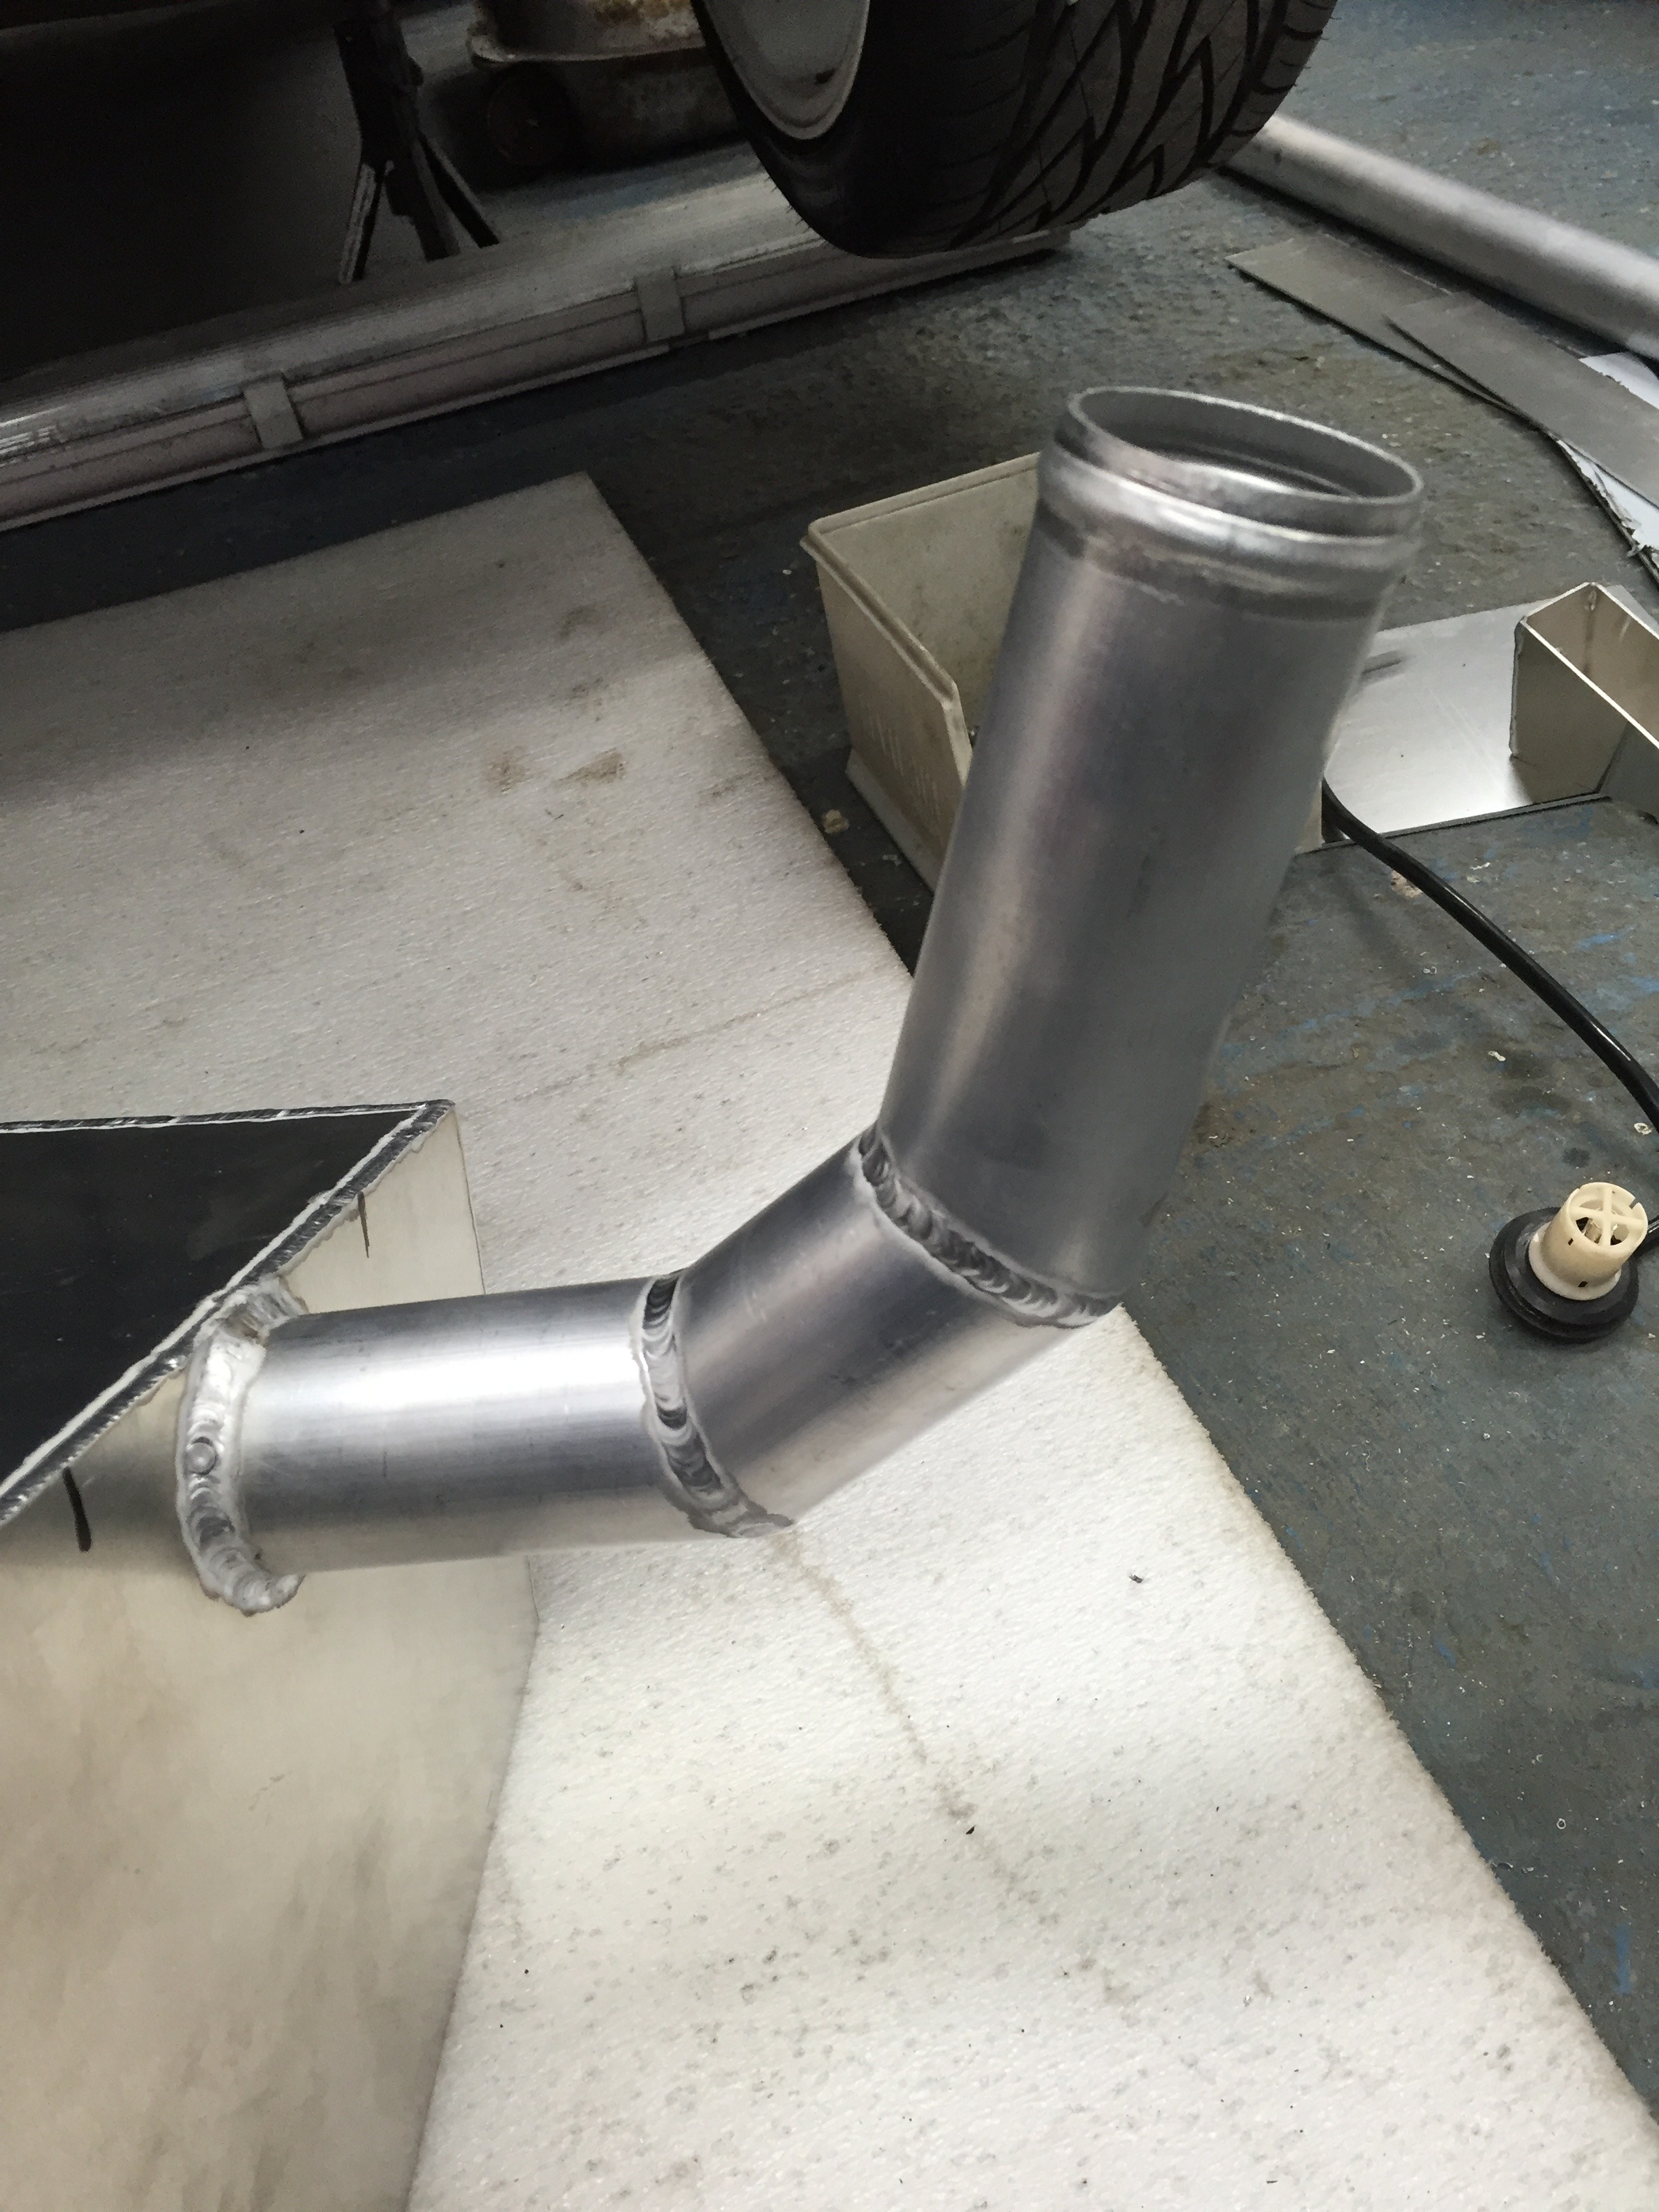
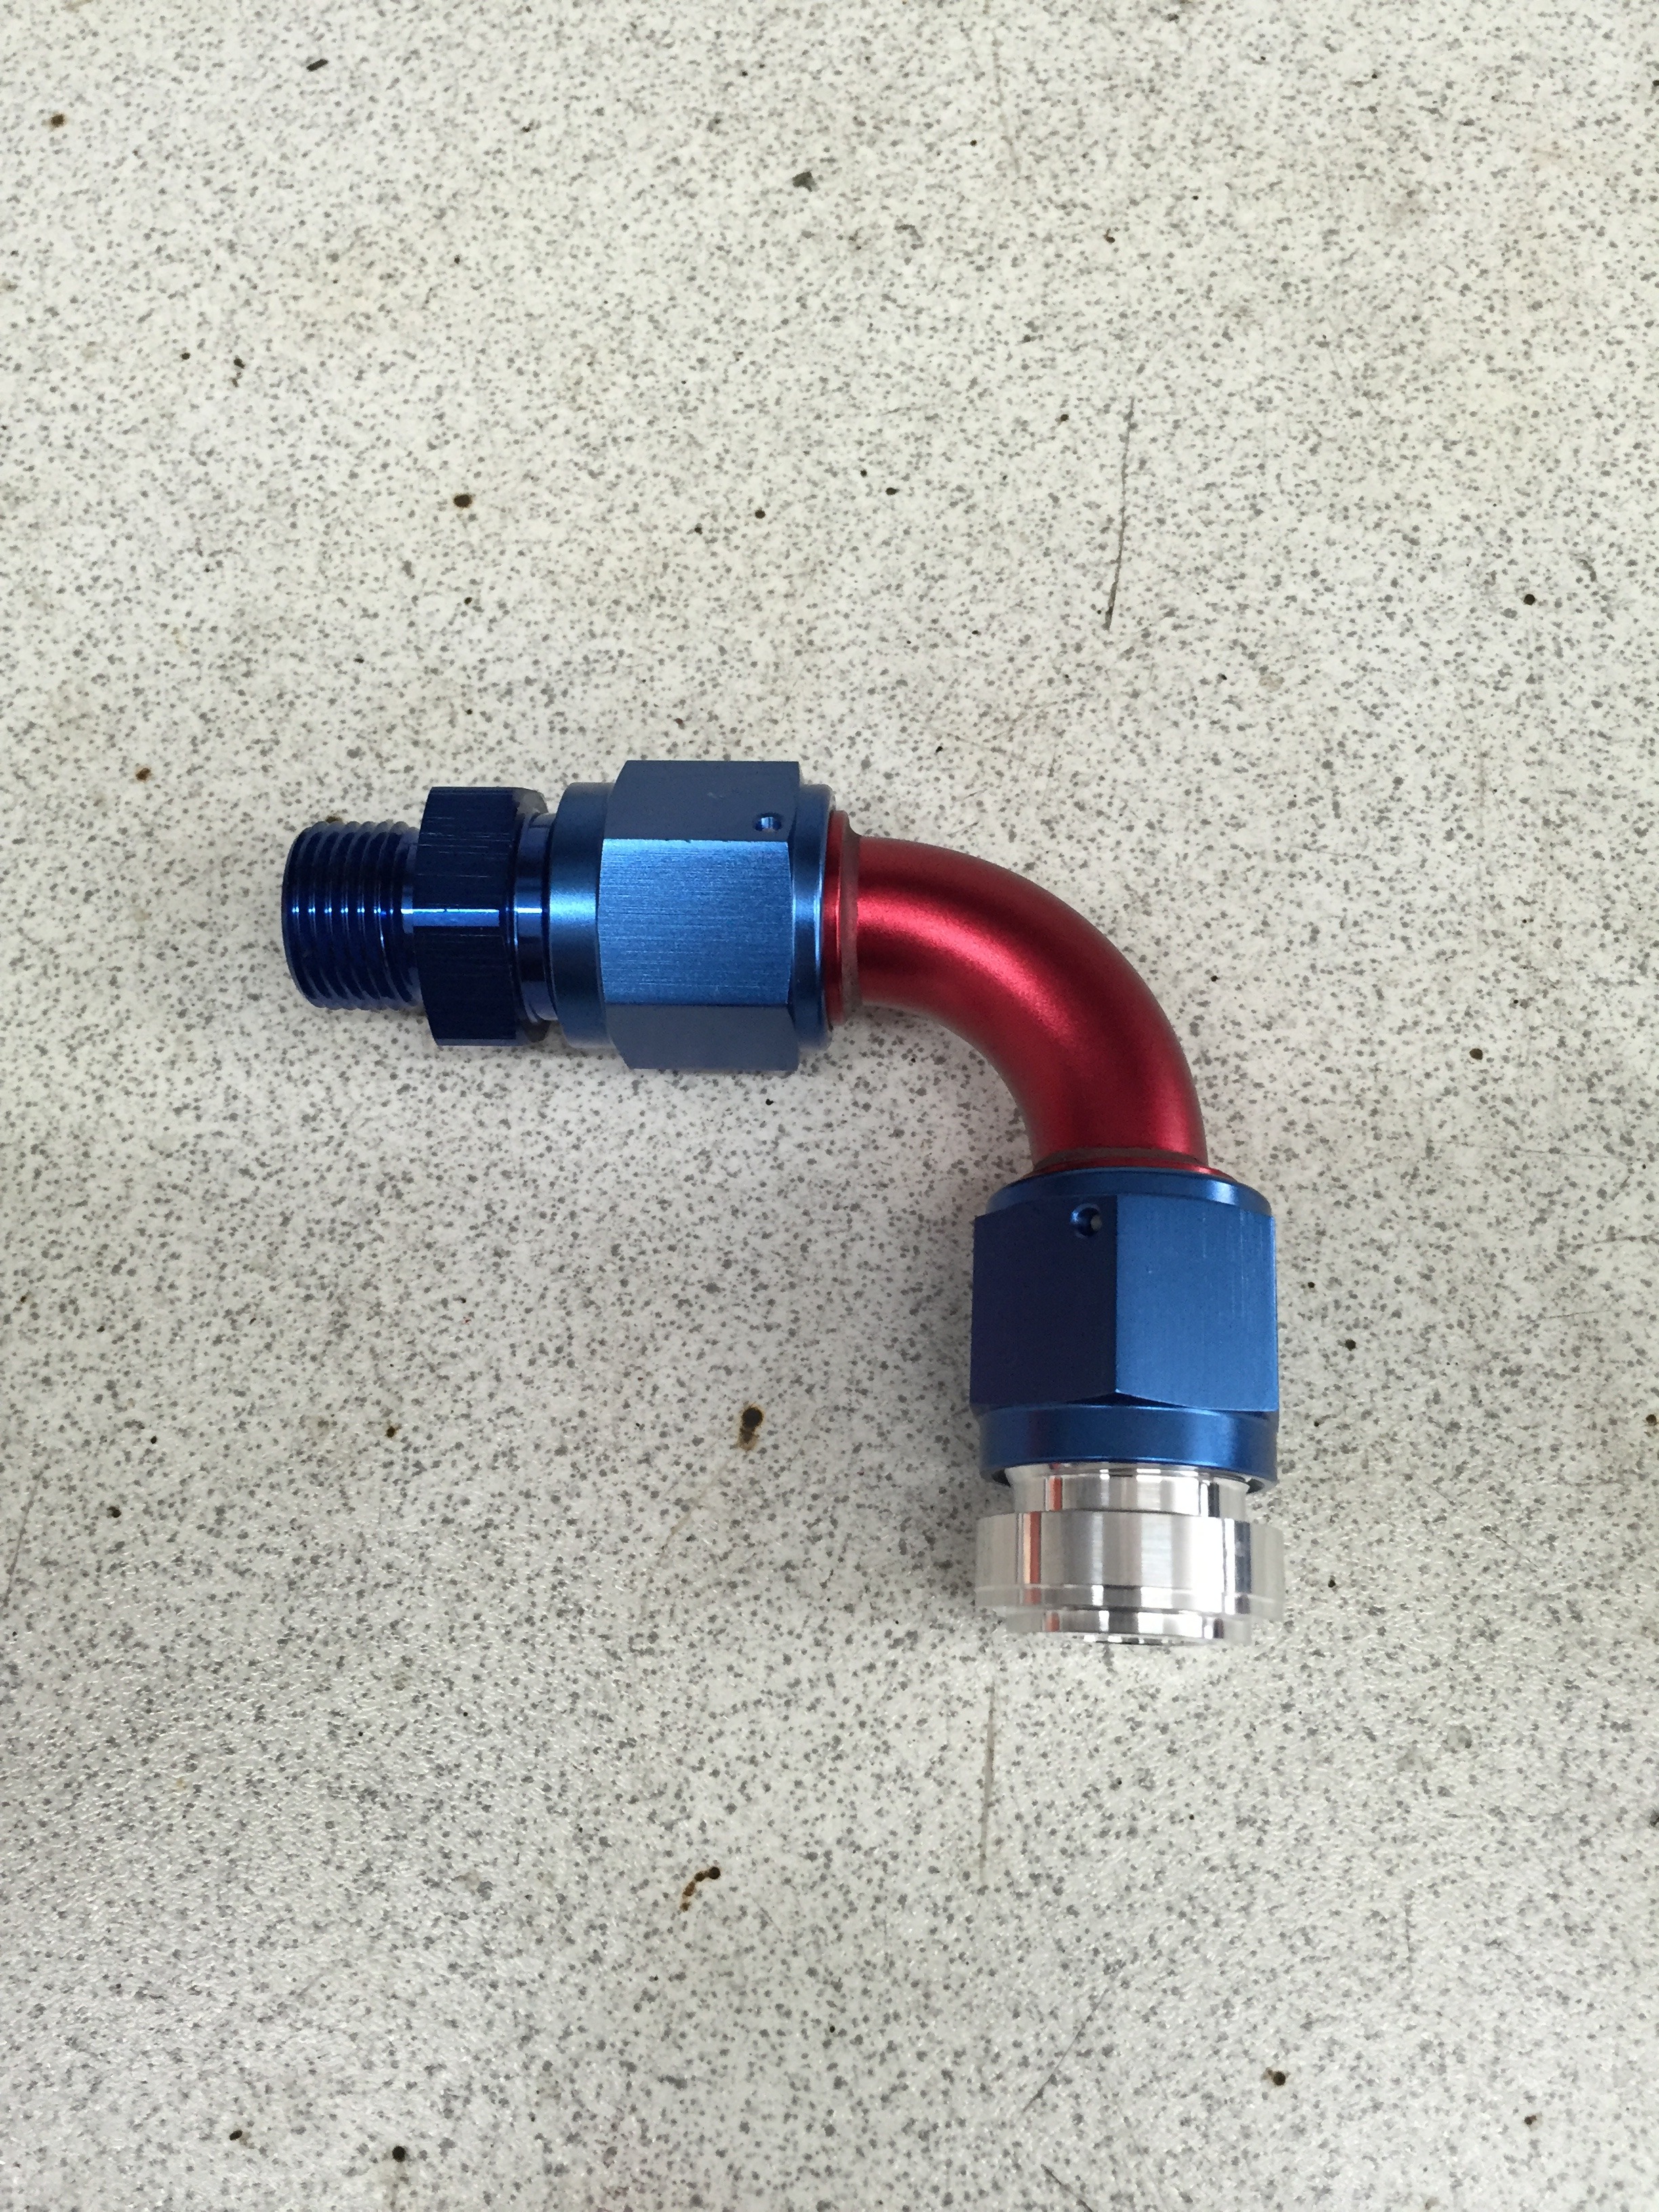
New lines made
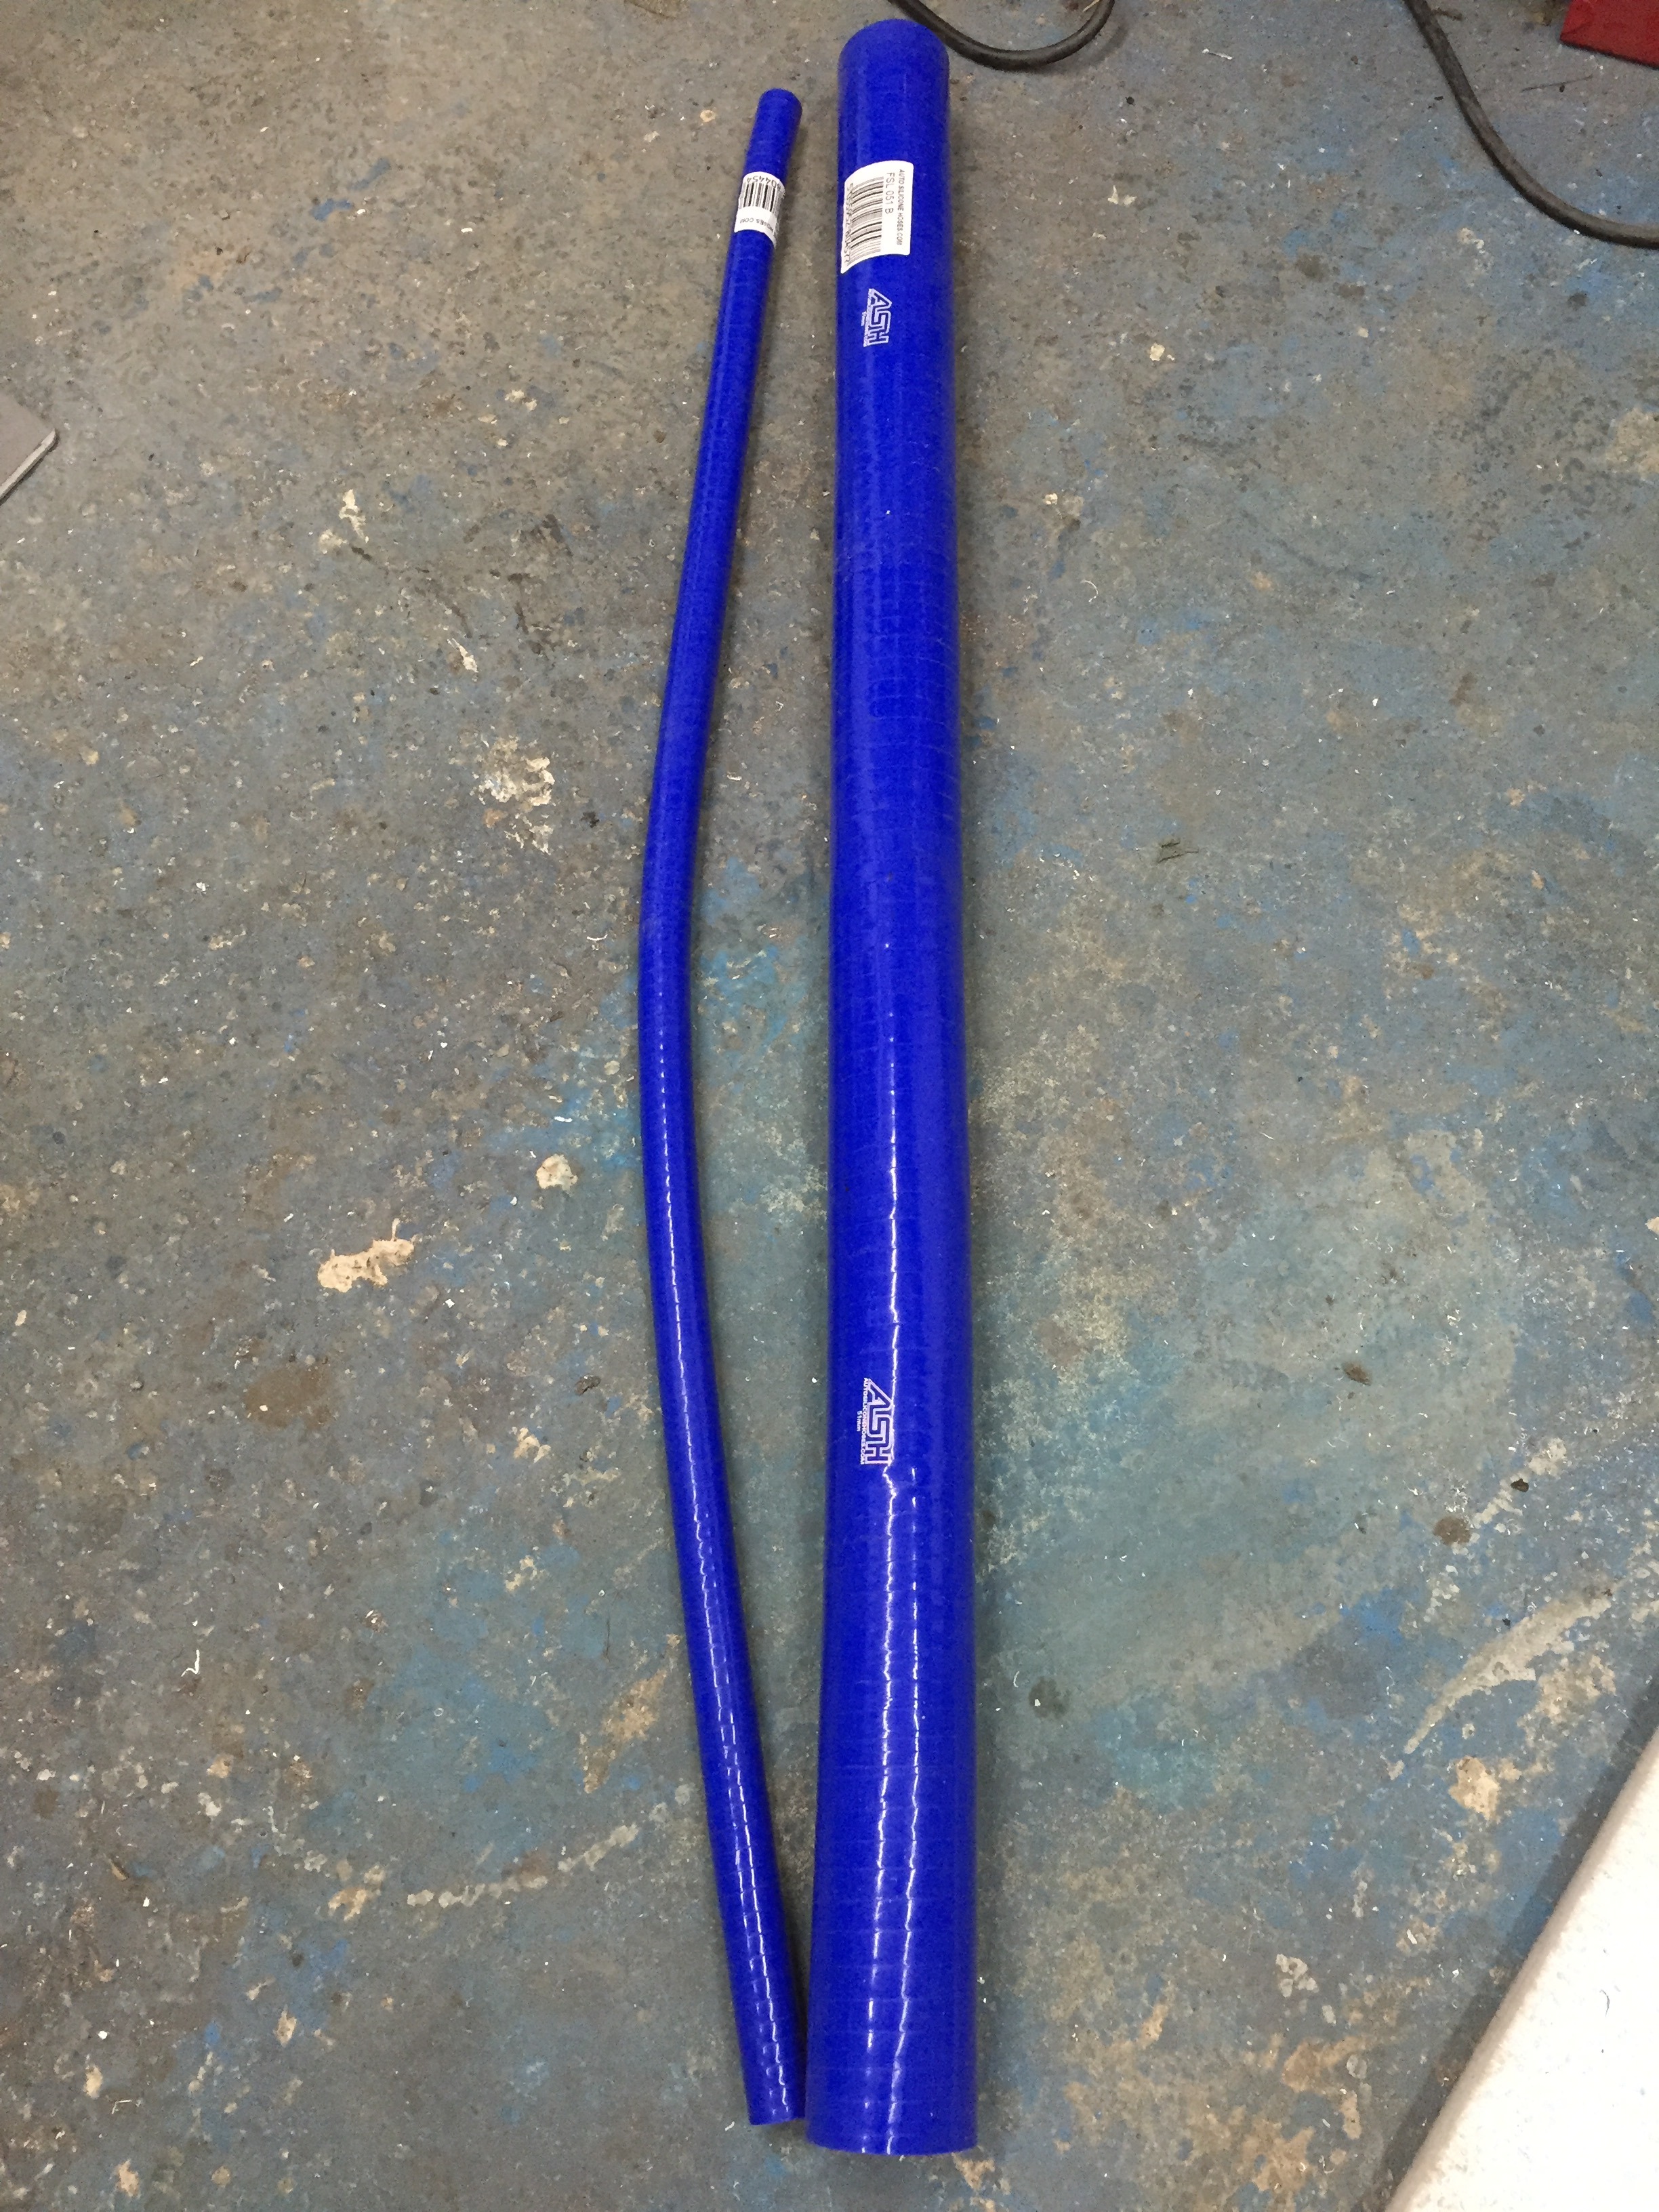
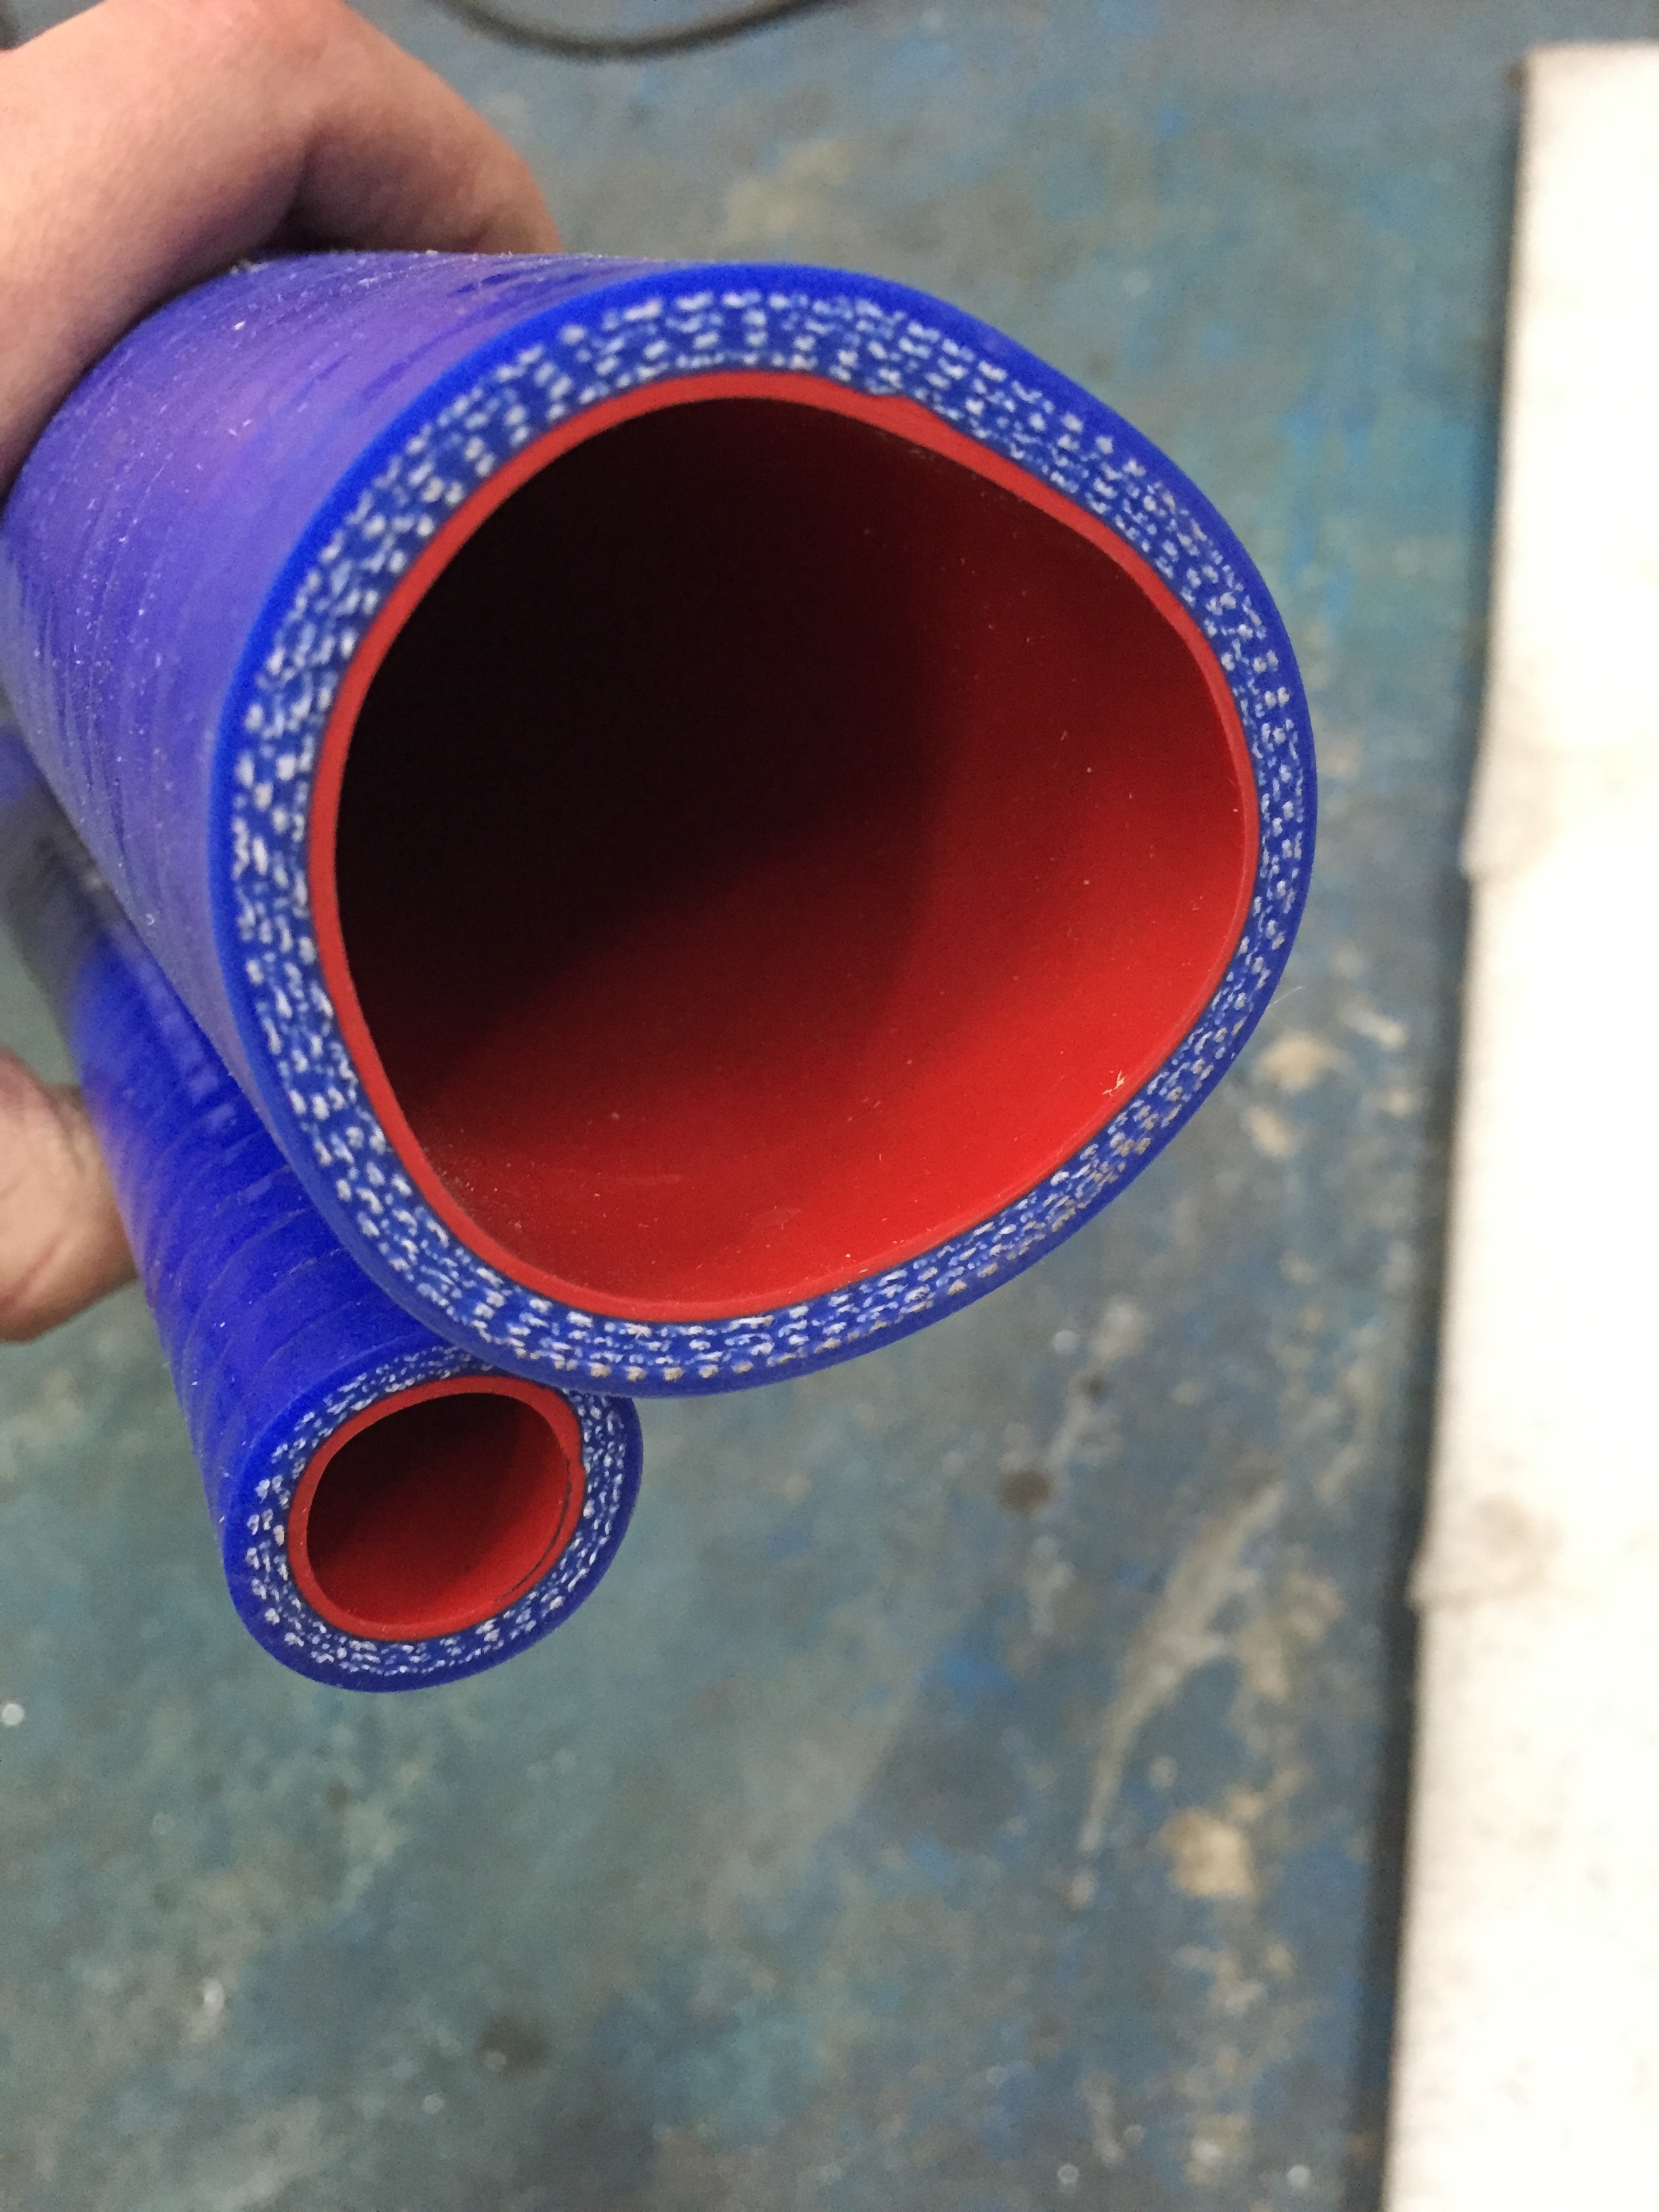
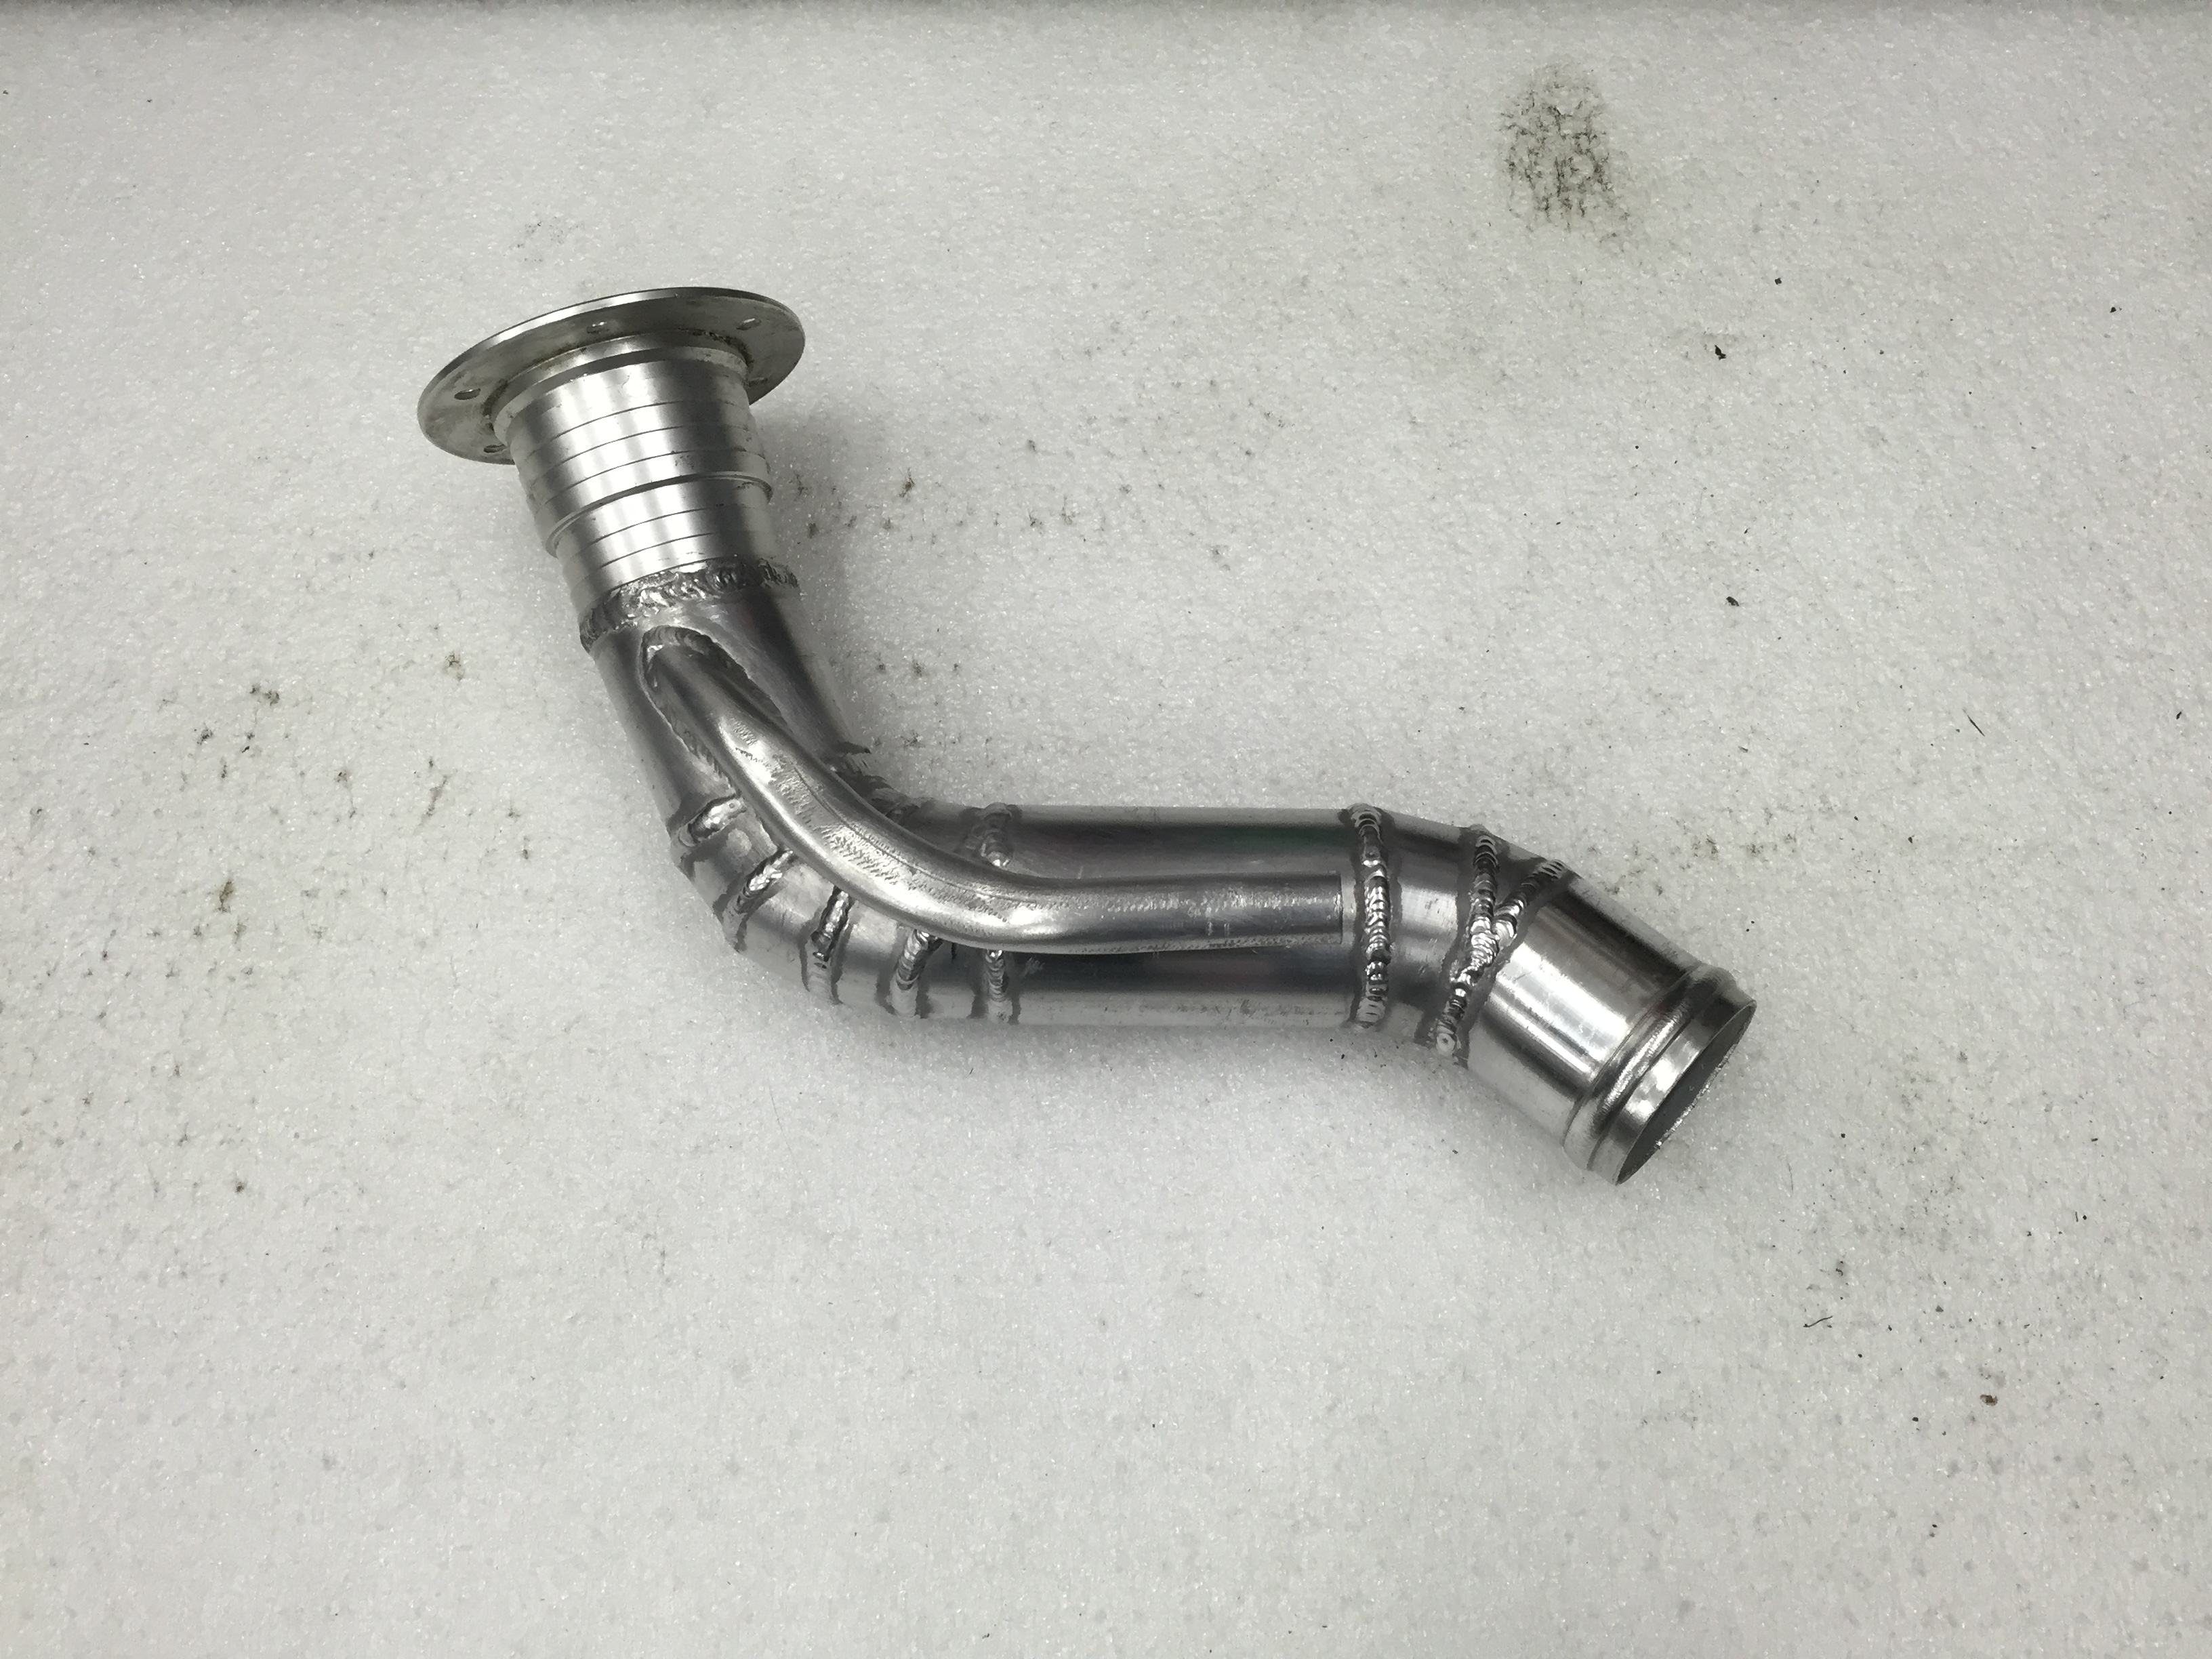
New filler and breather pipes arrived
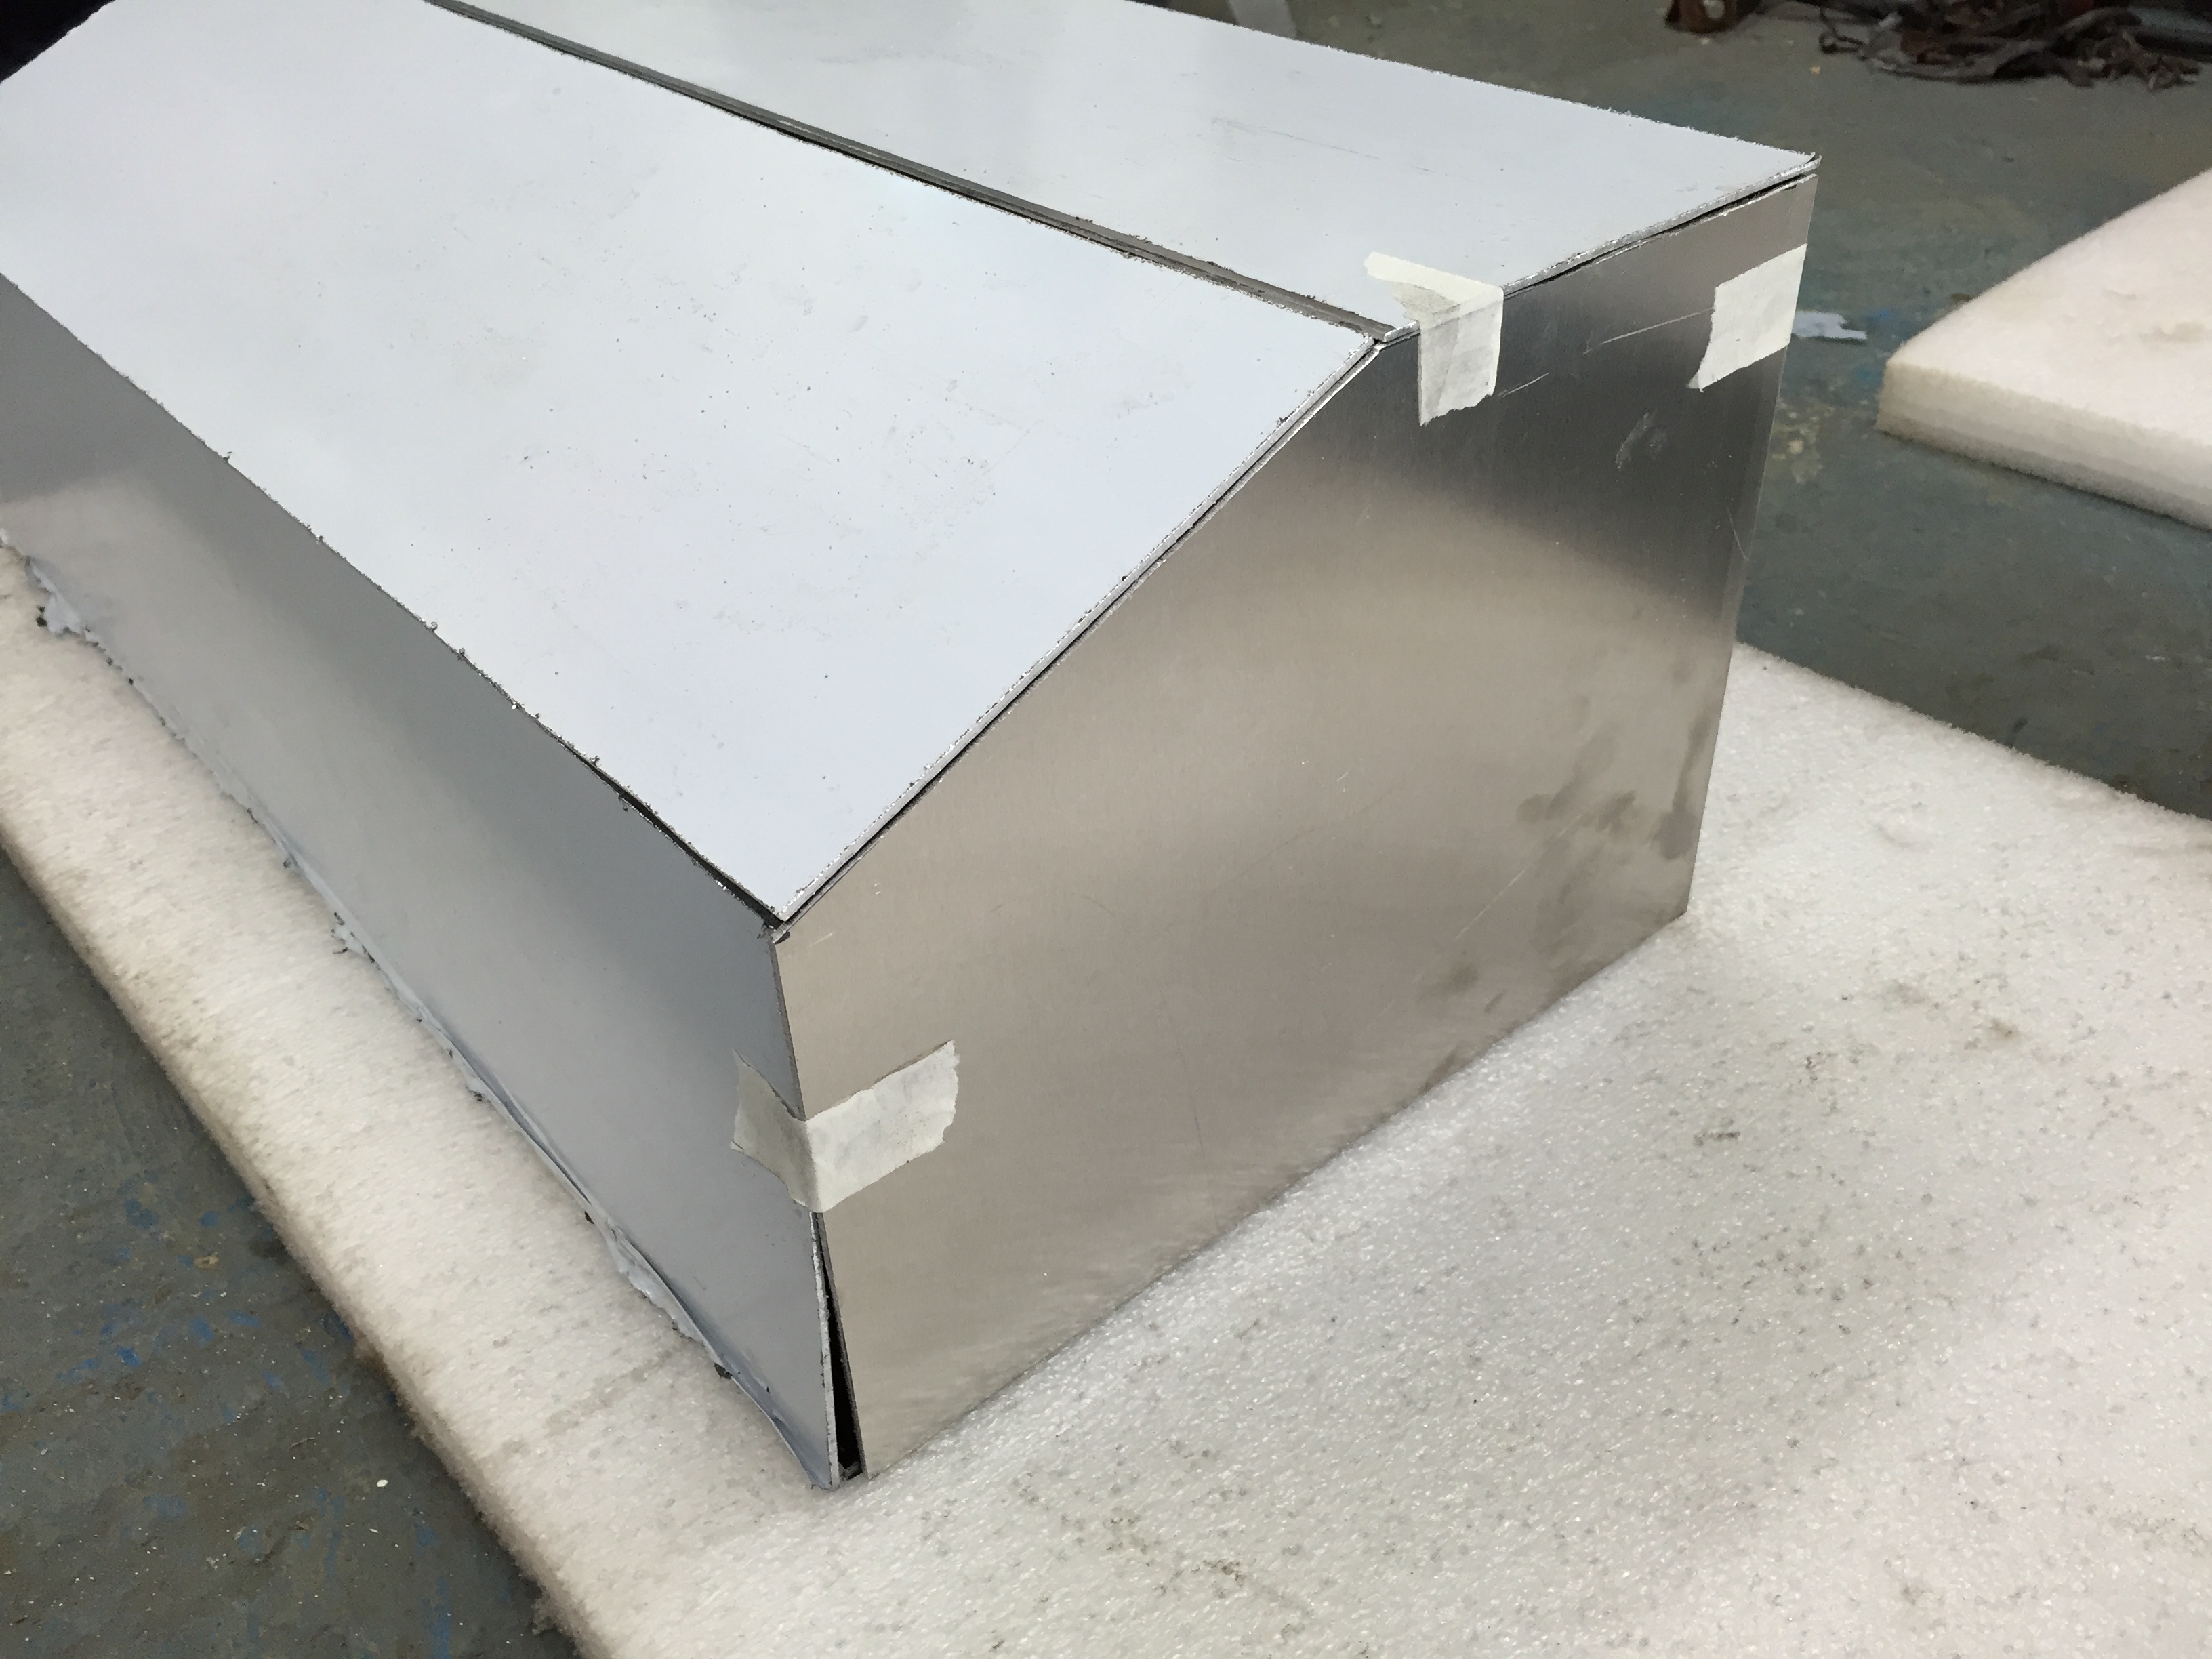
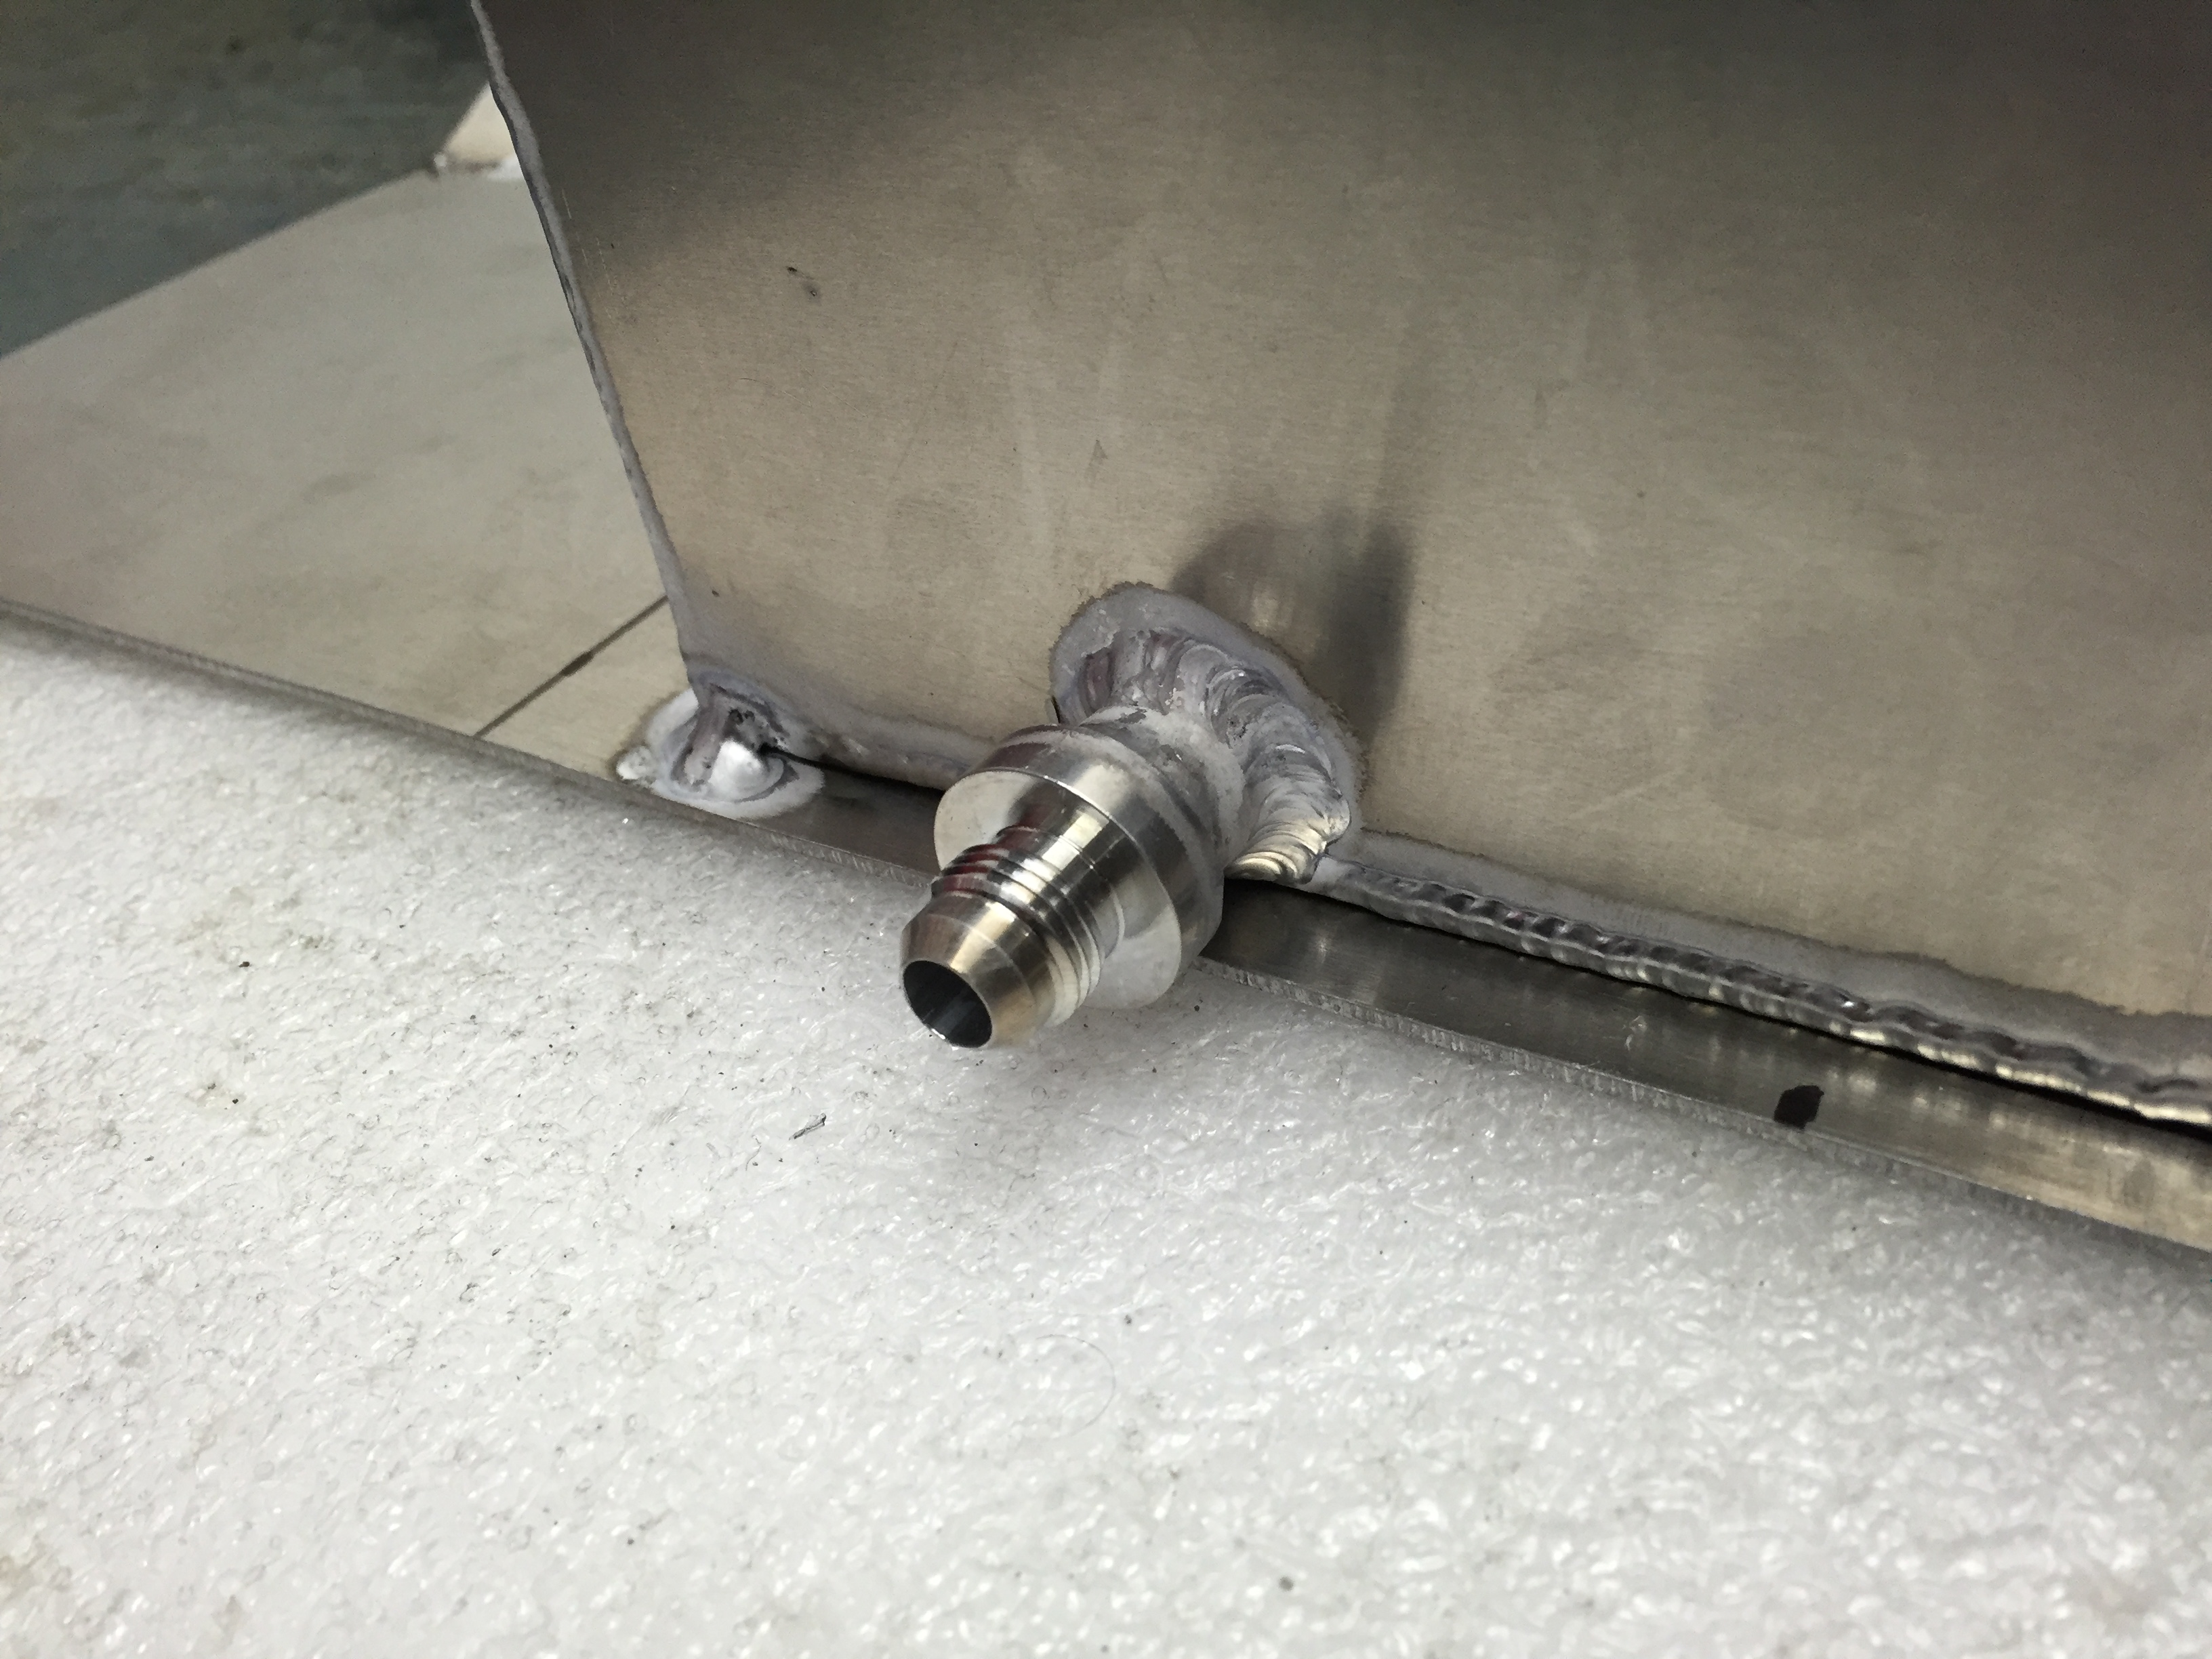
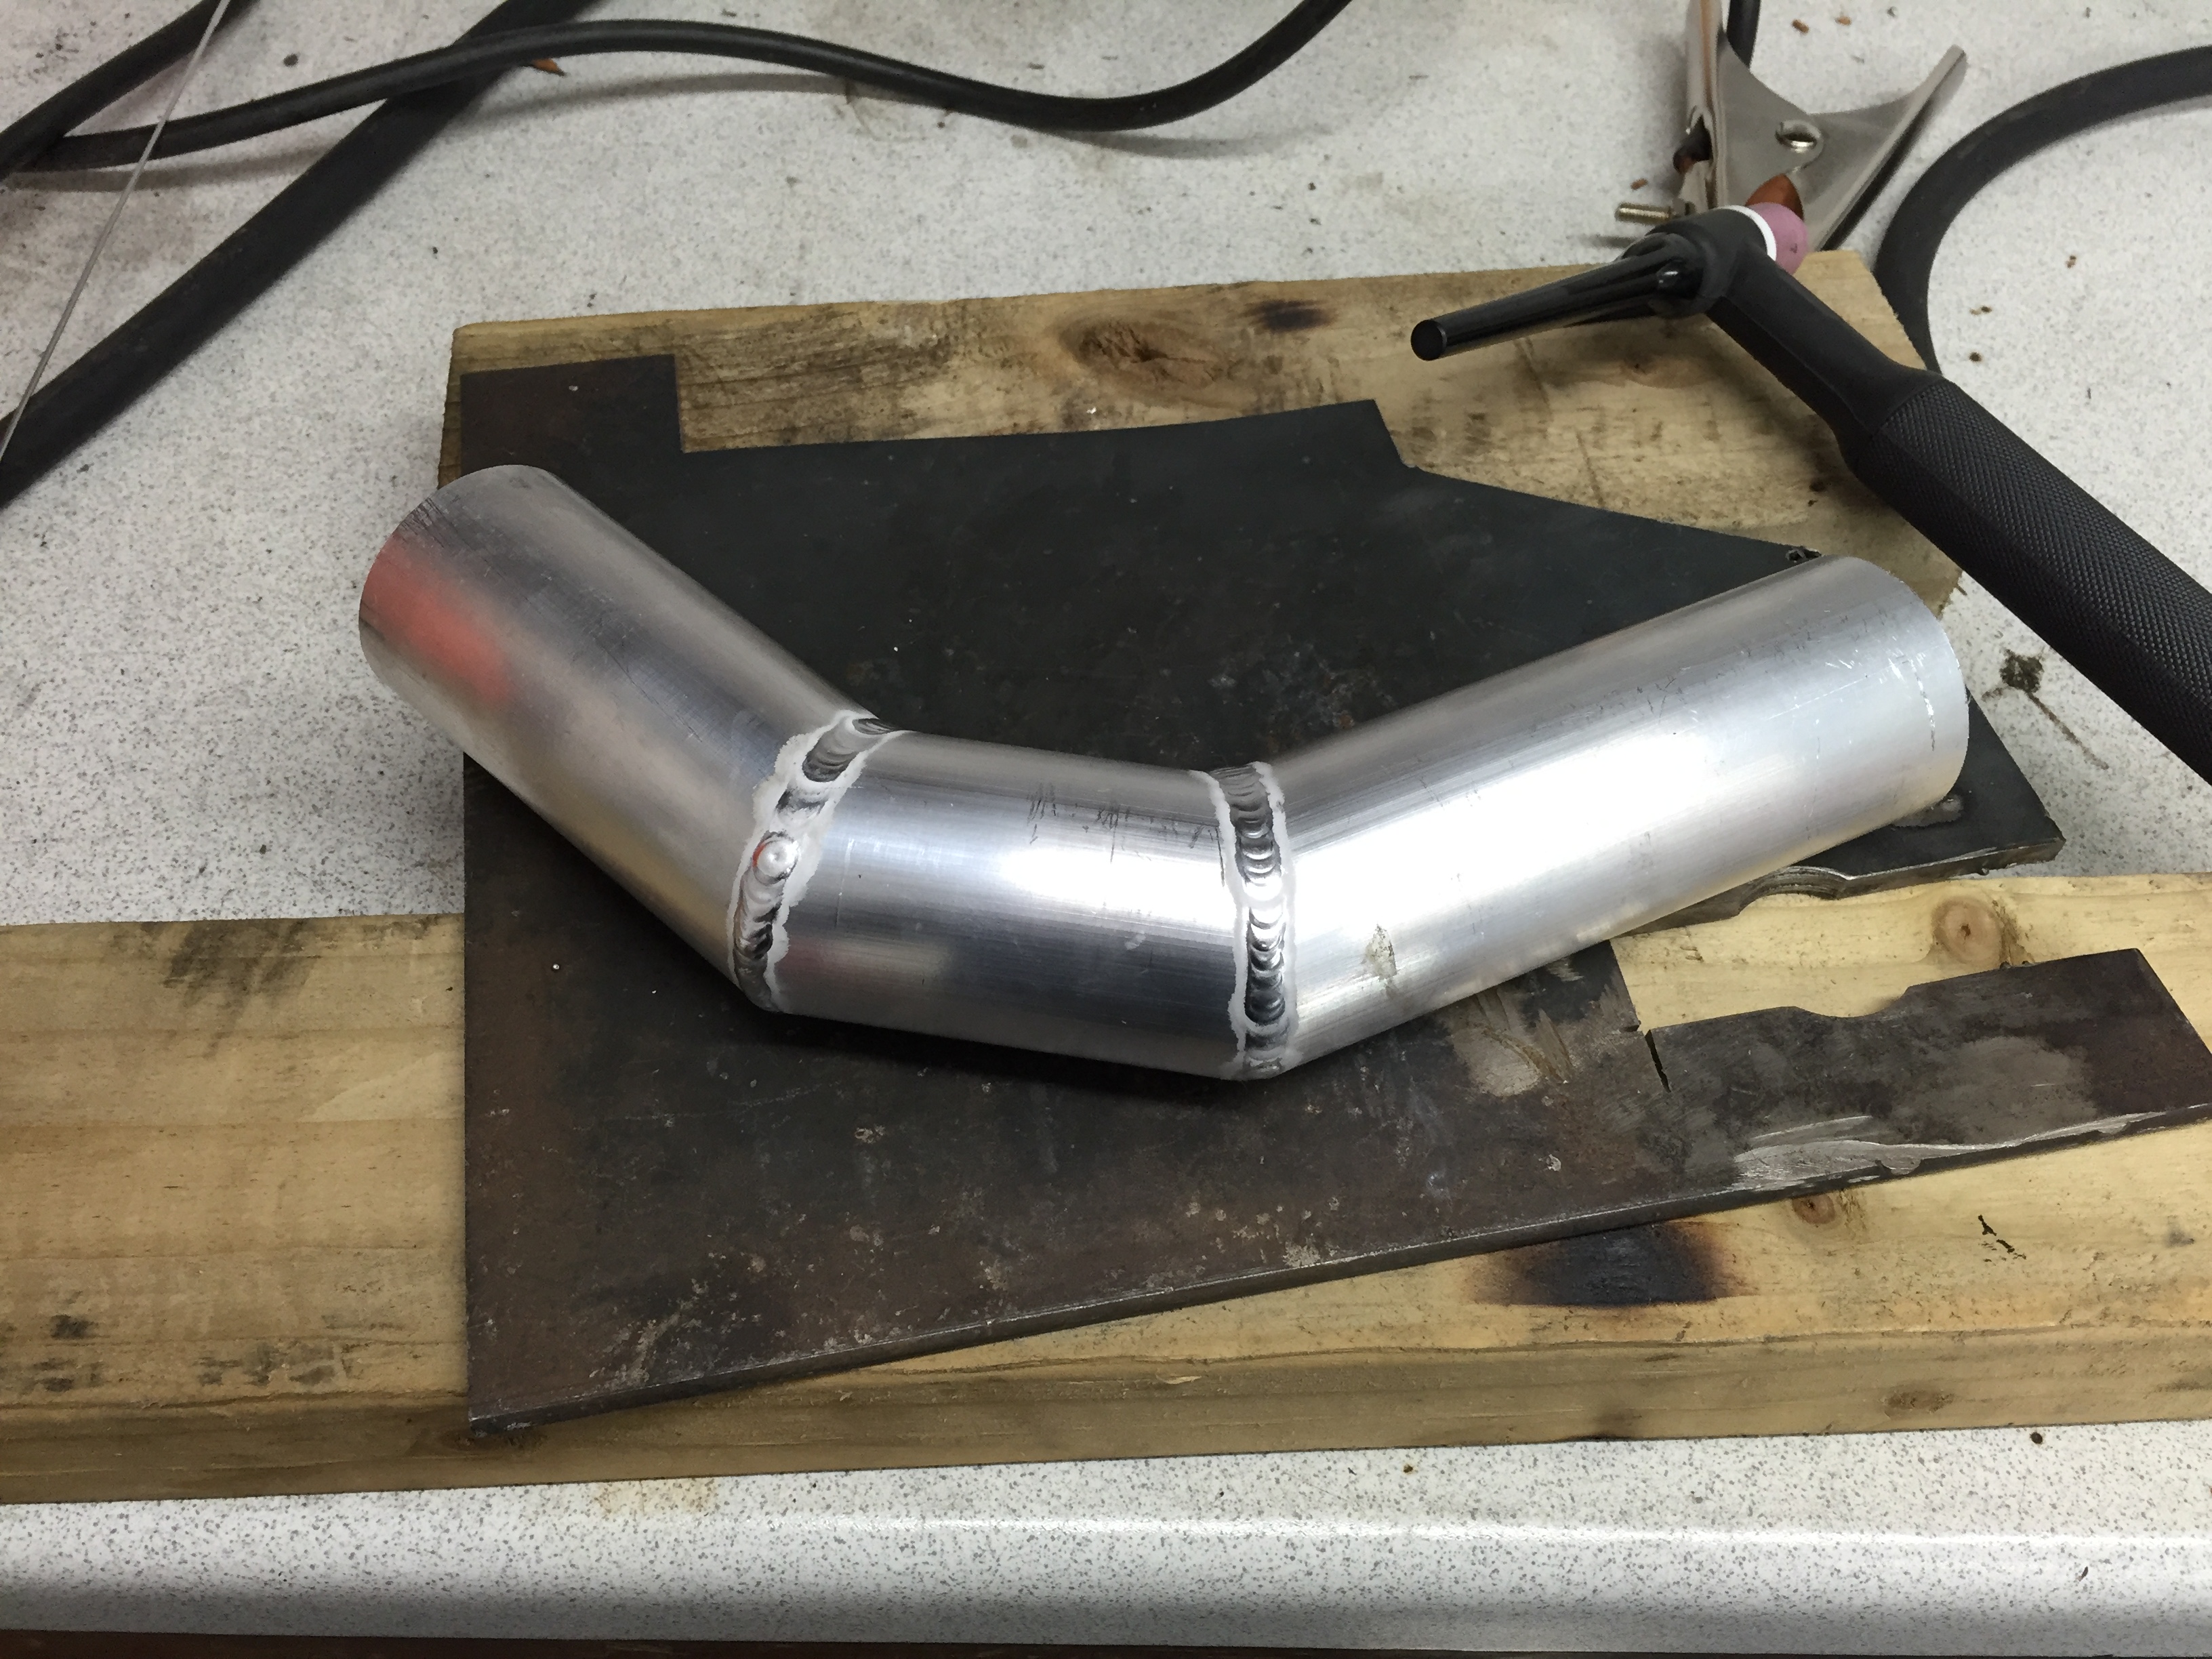
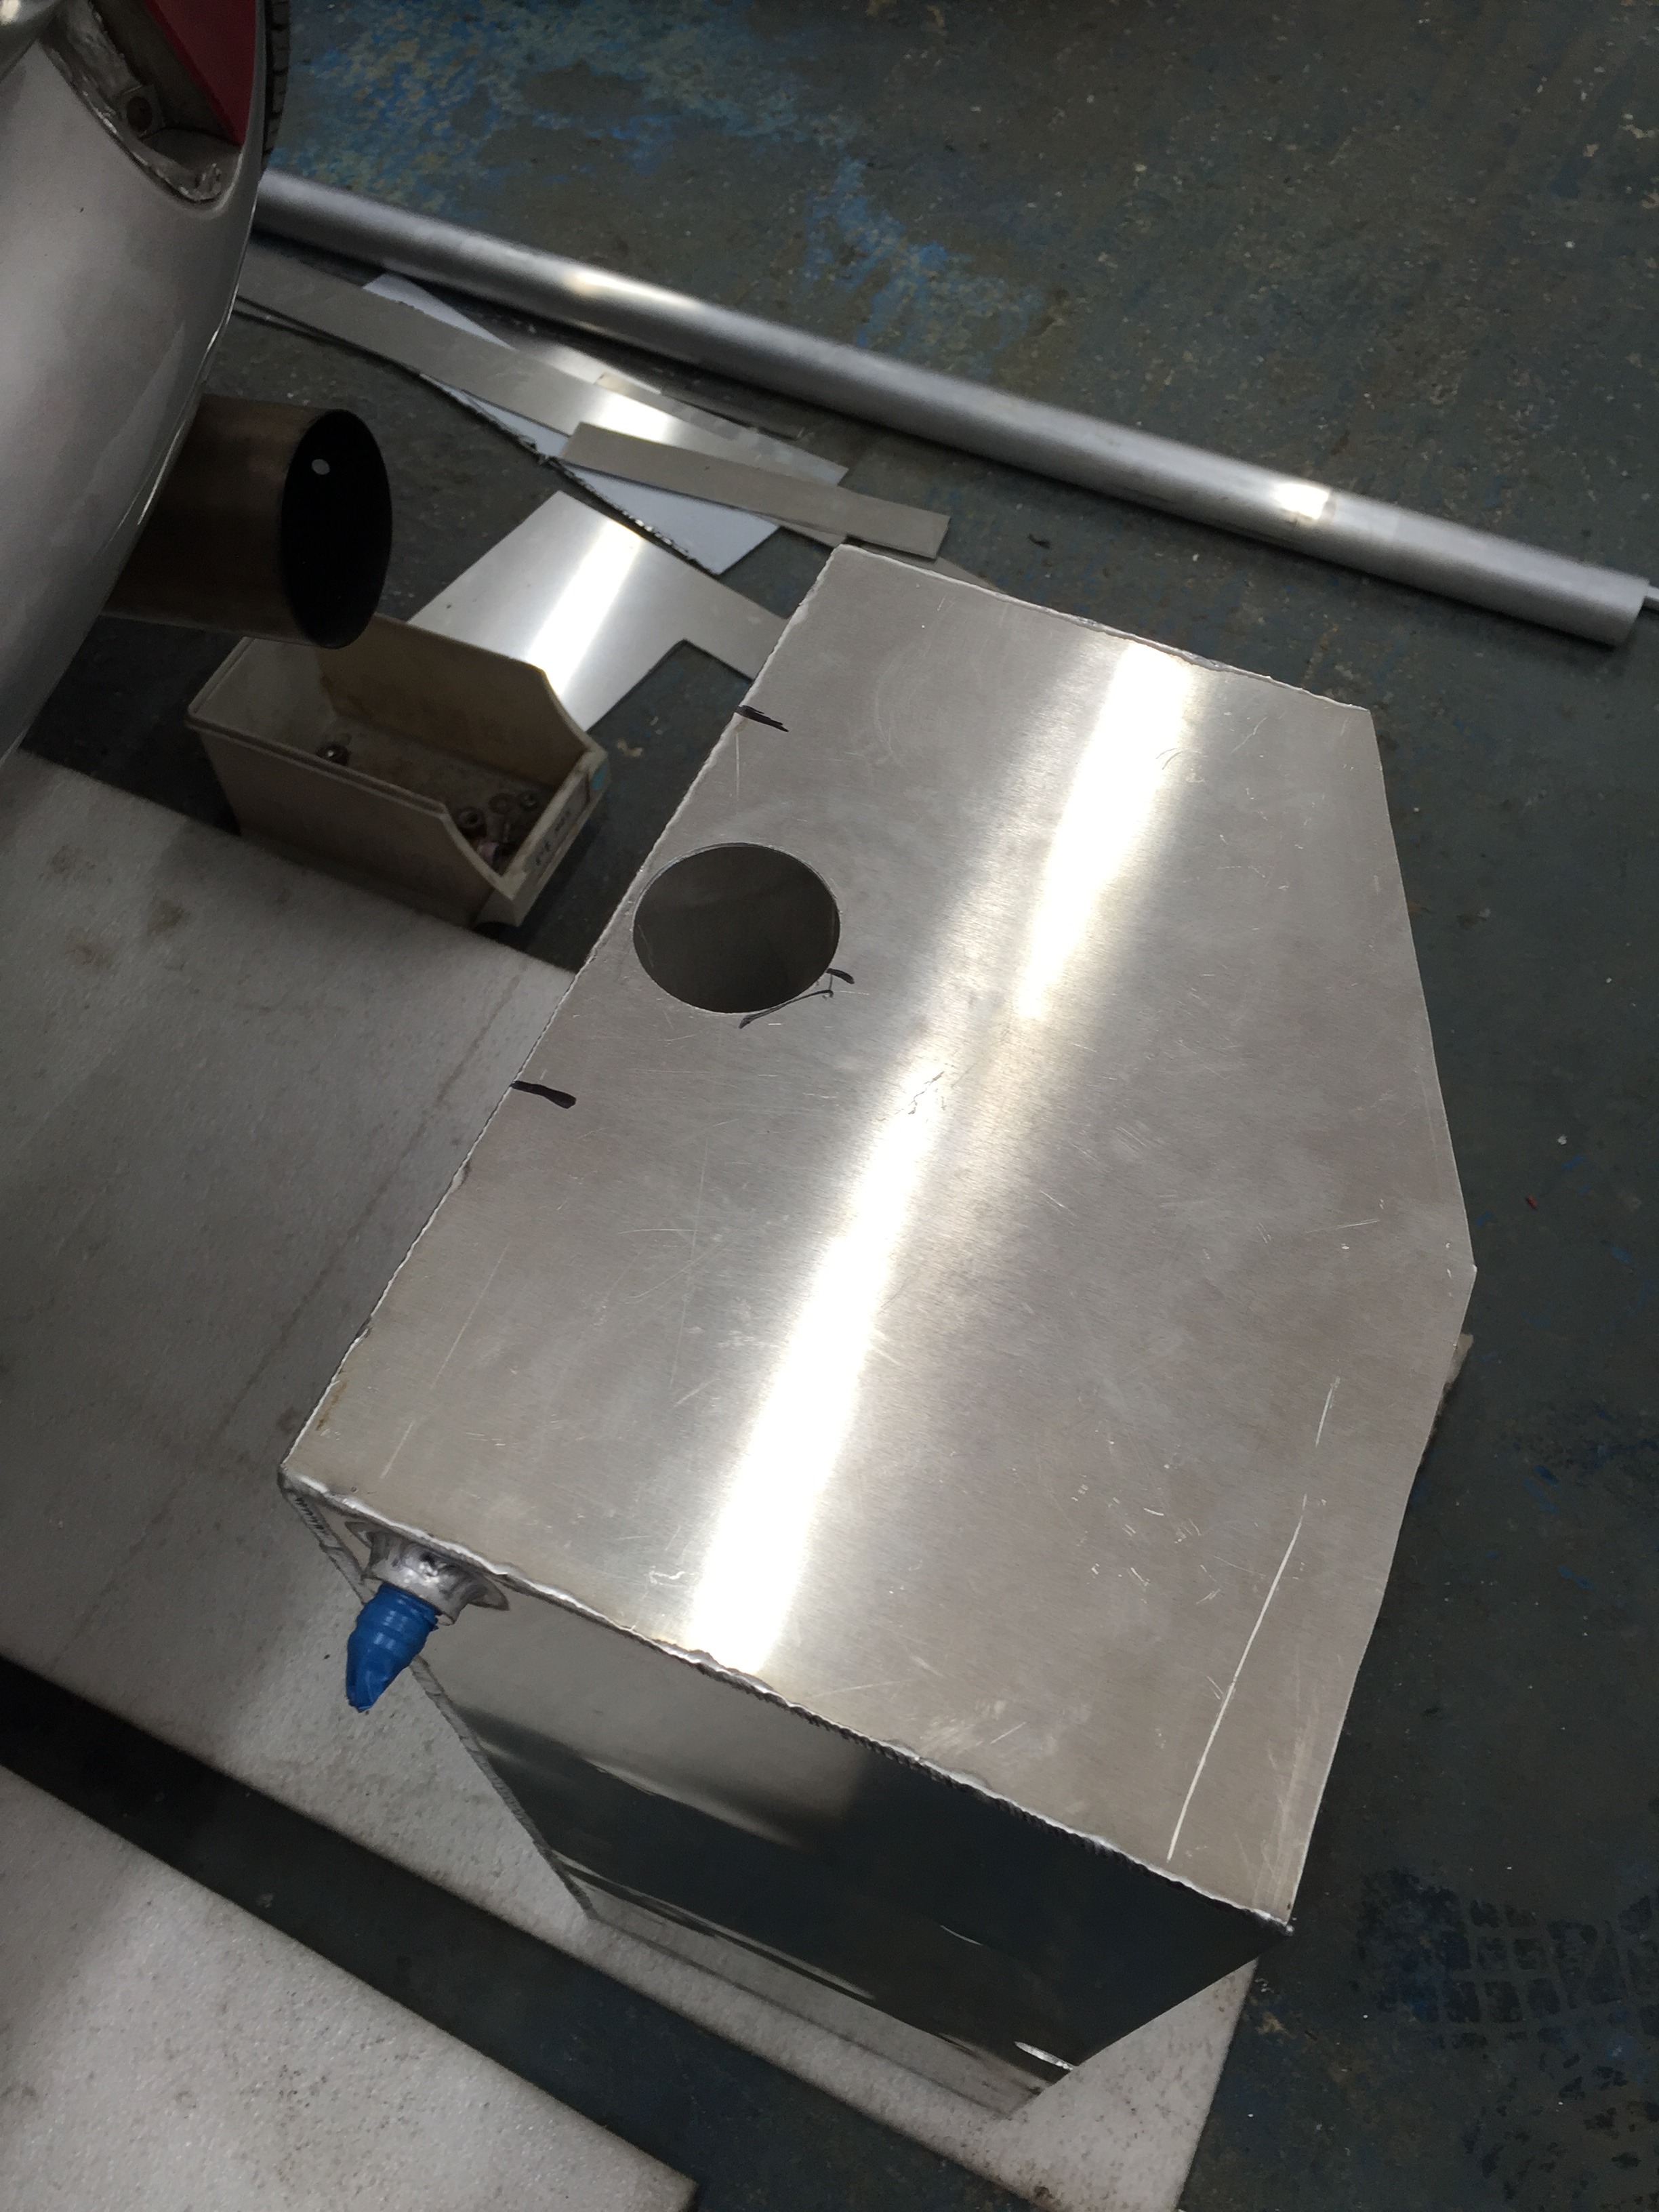
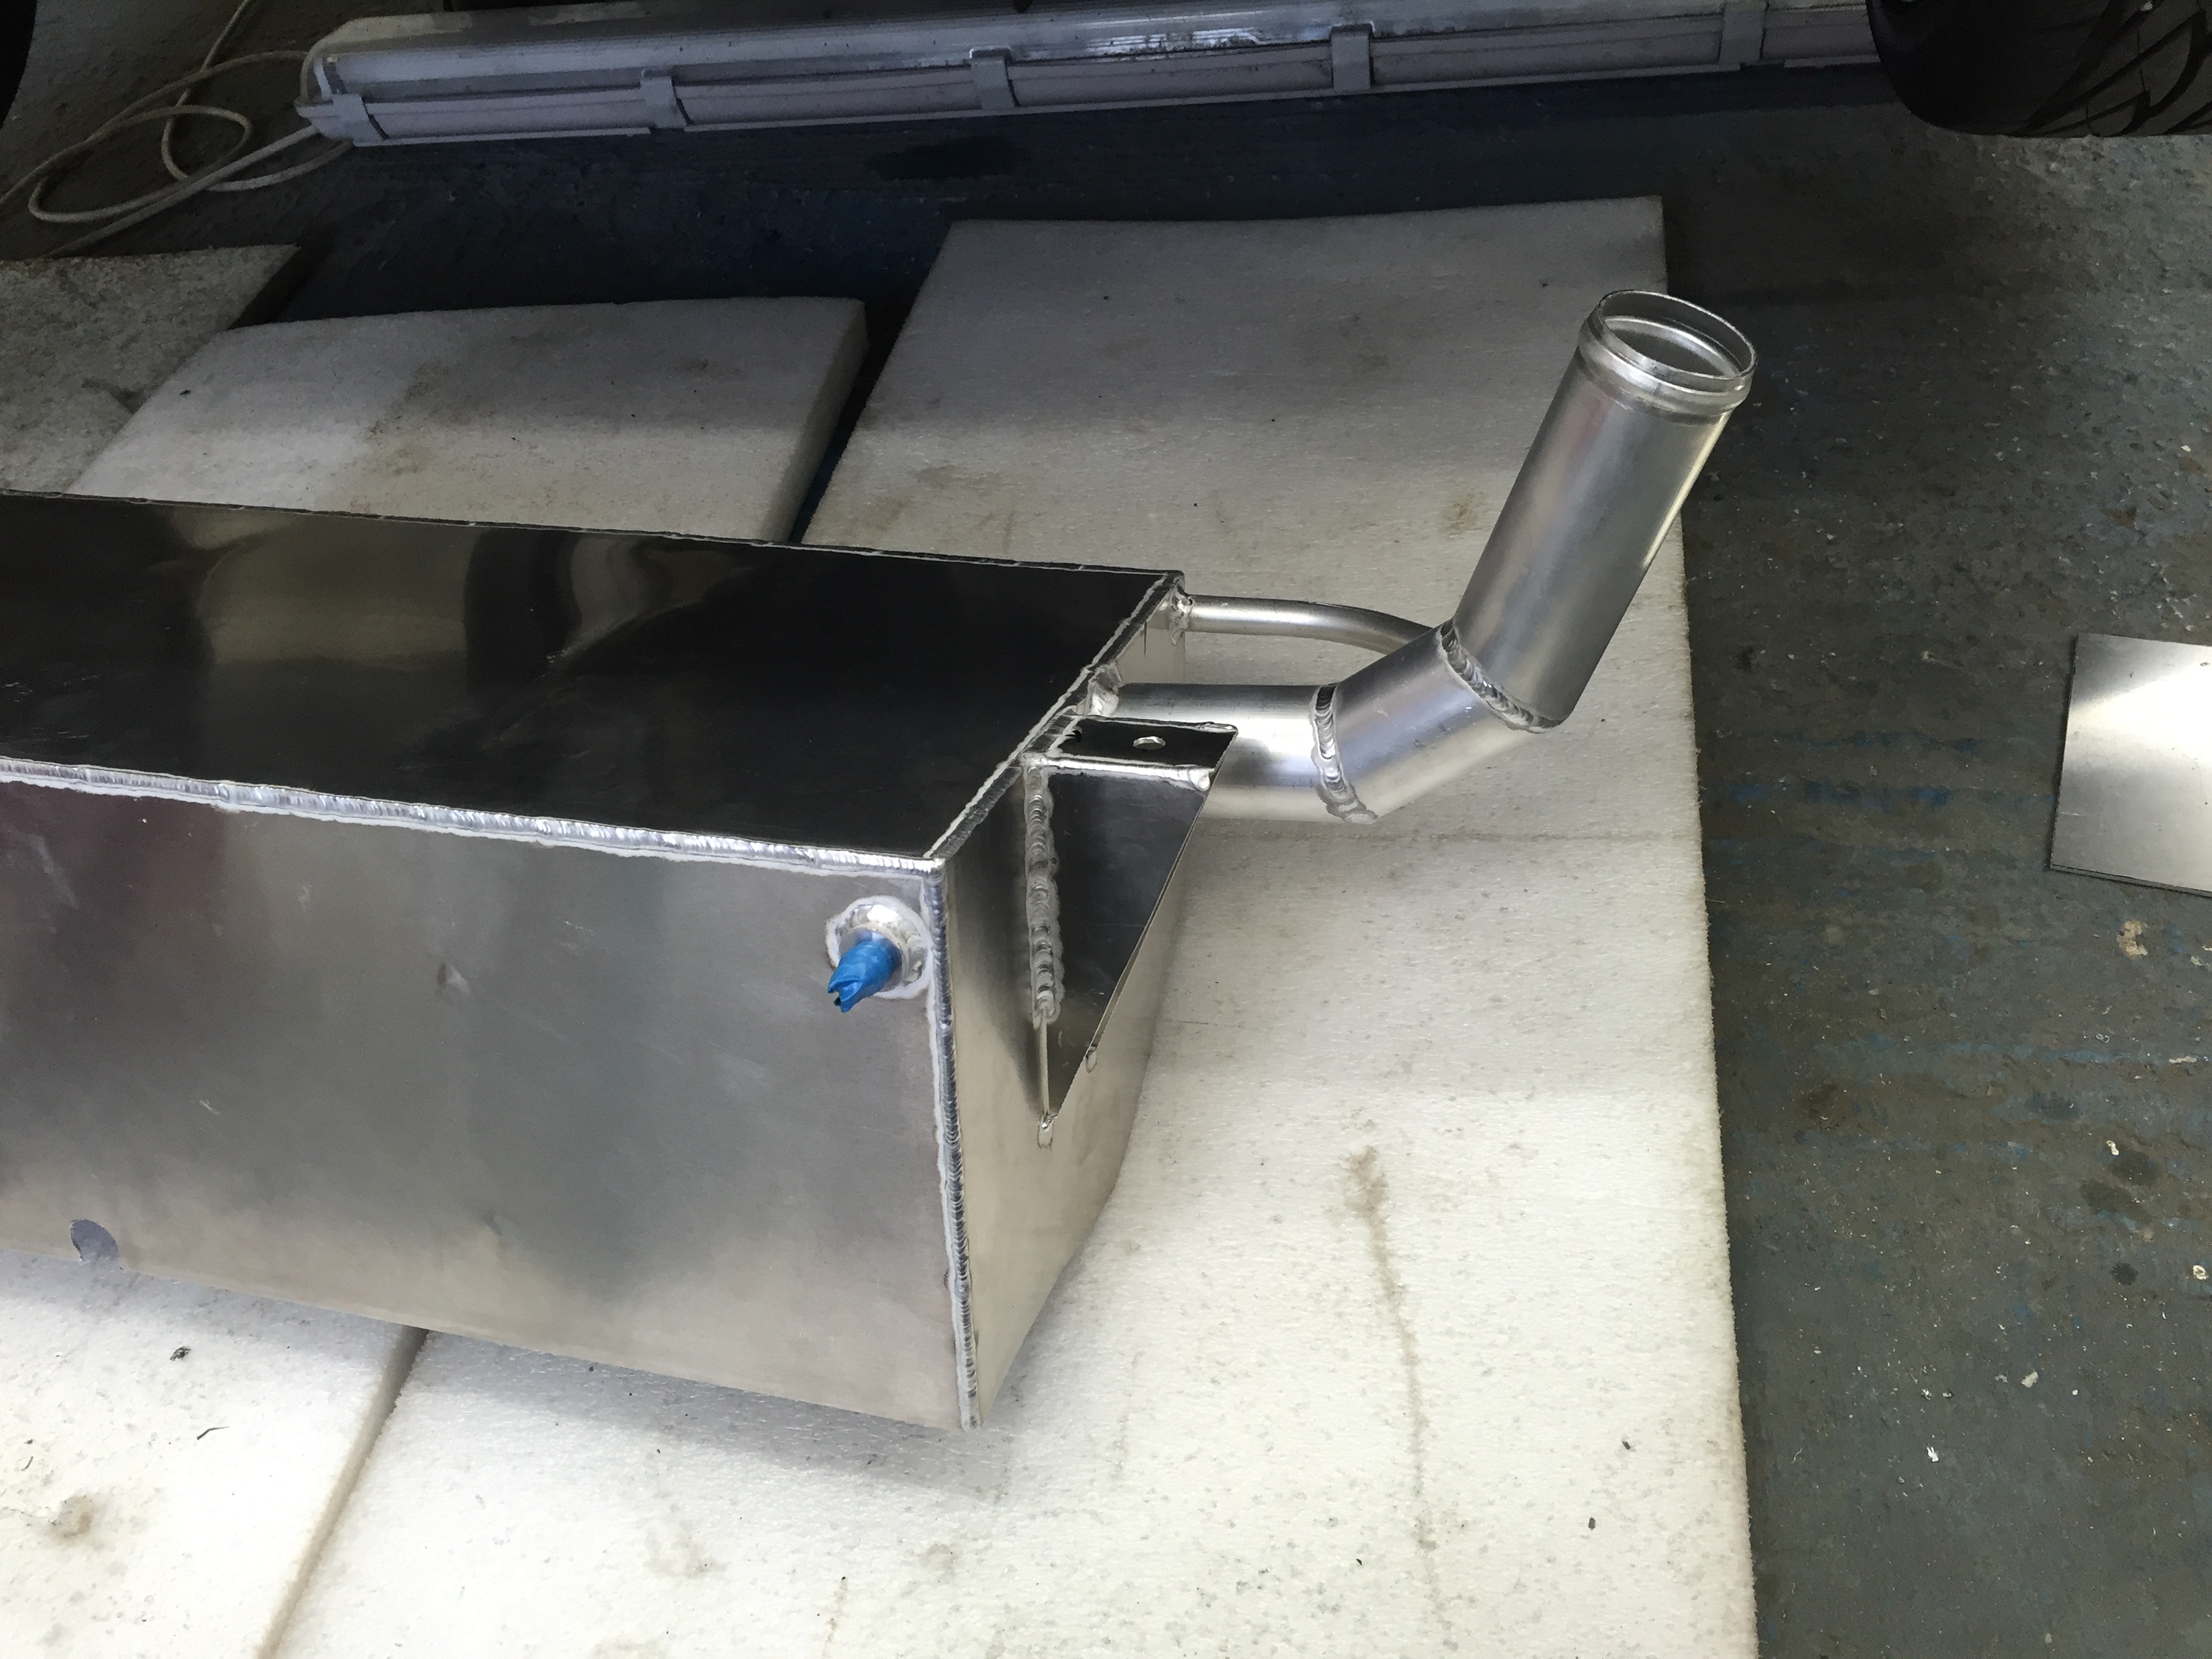
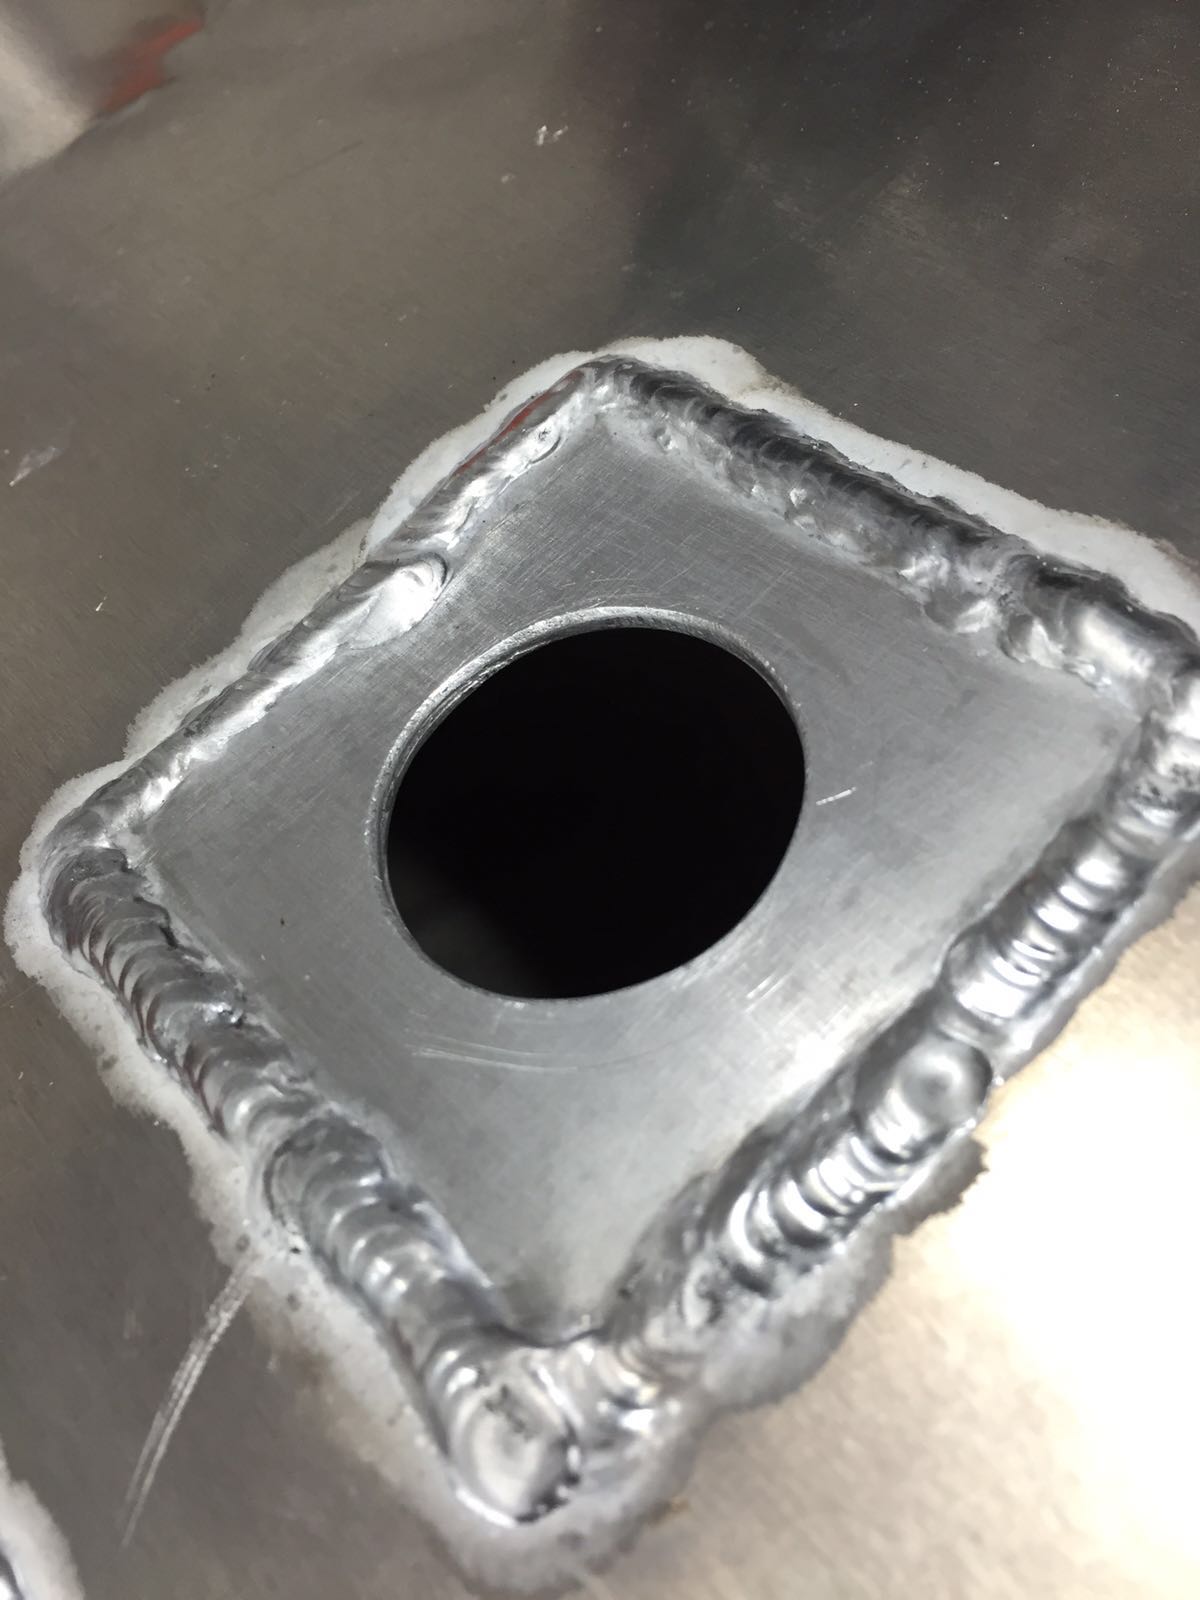
More done on the tank
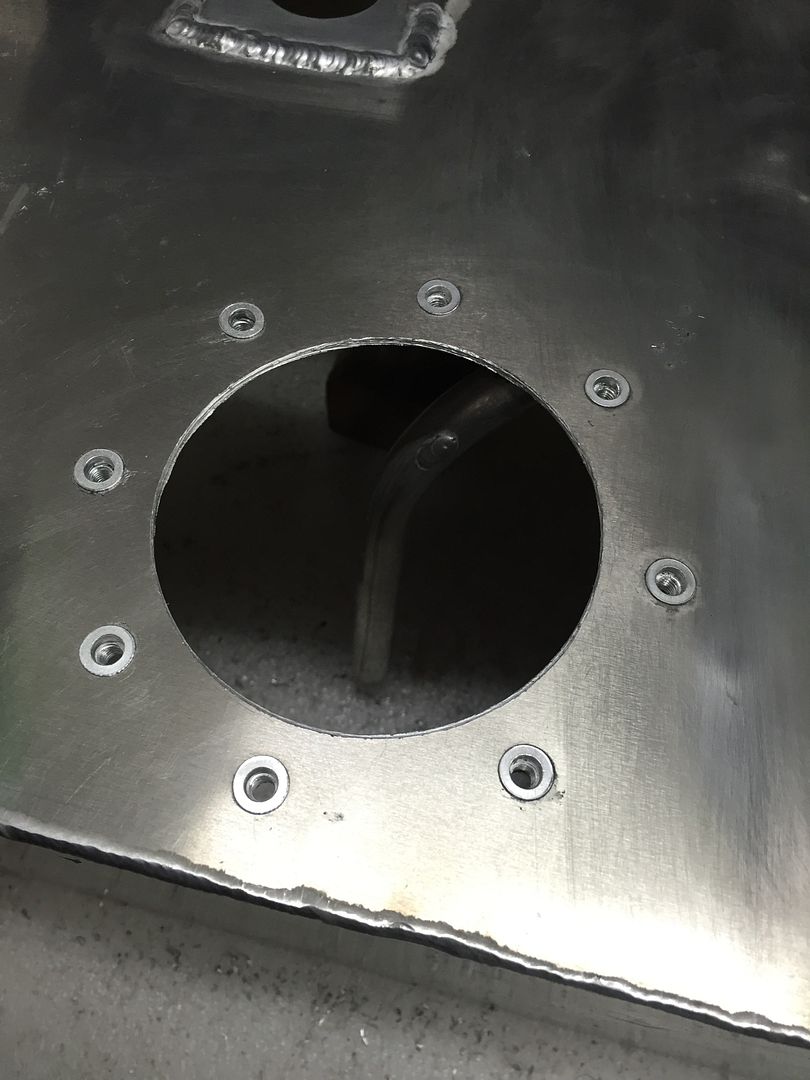
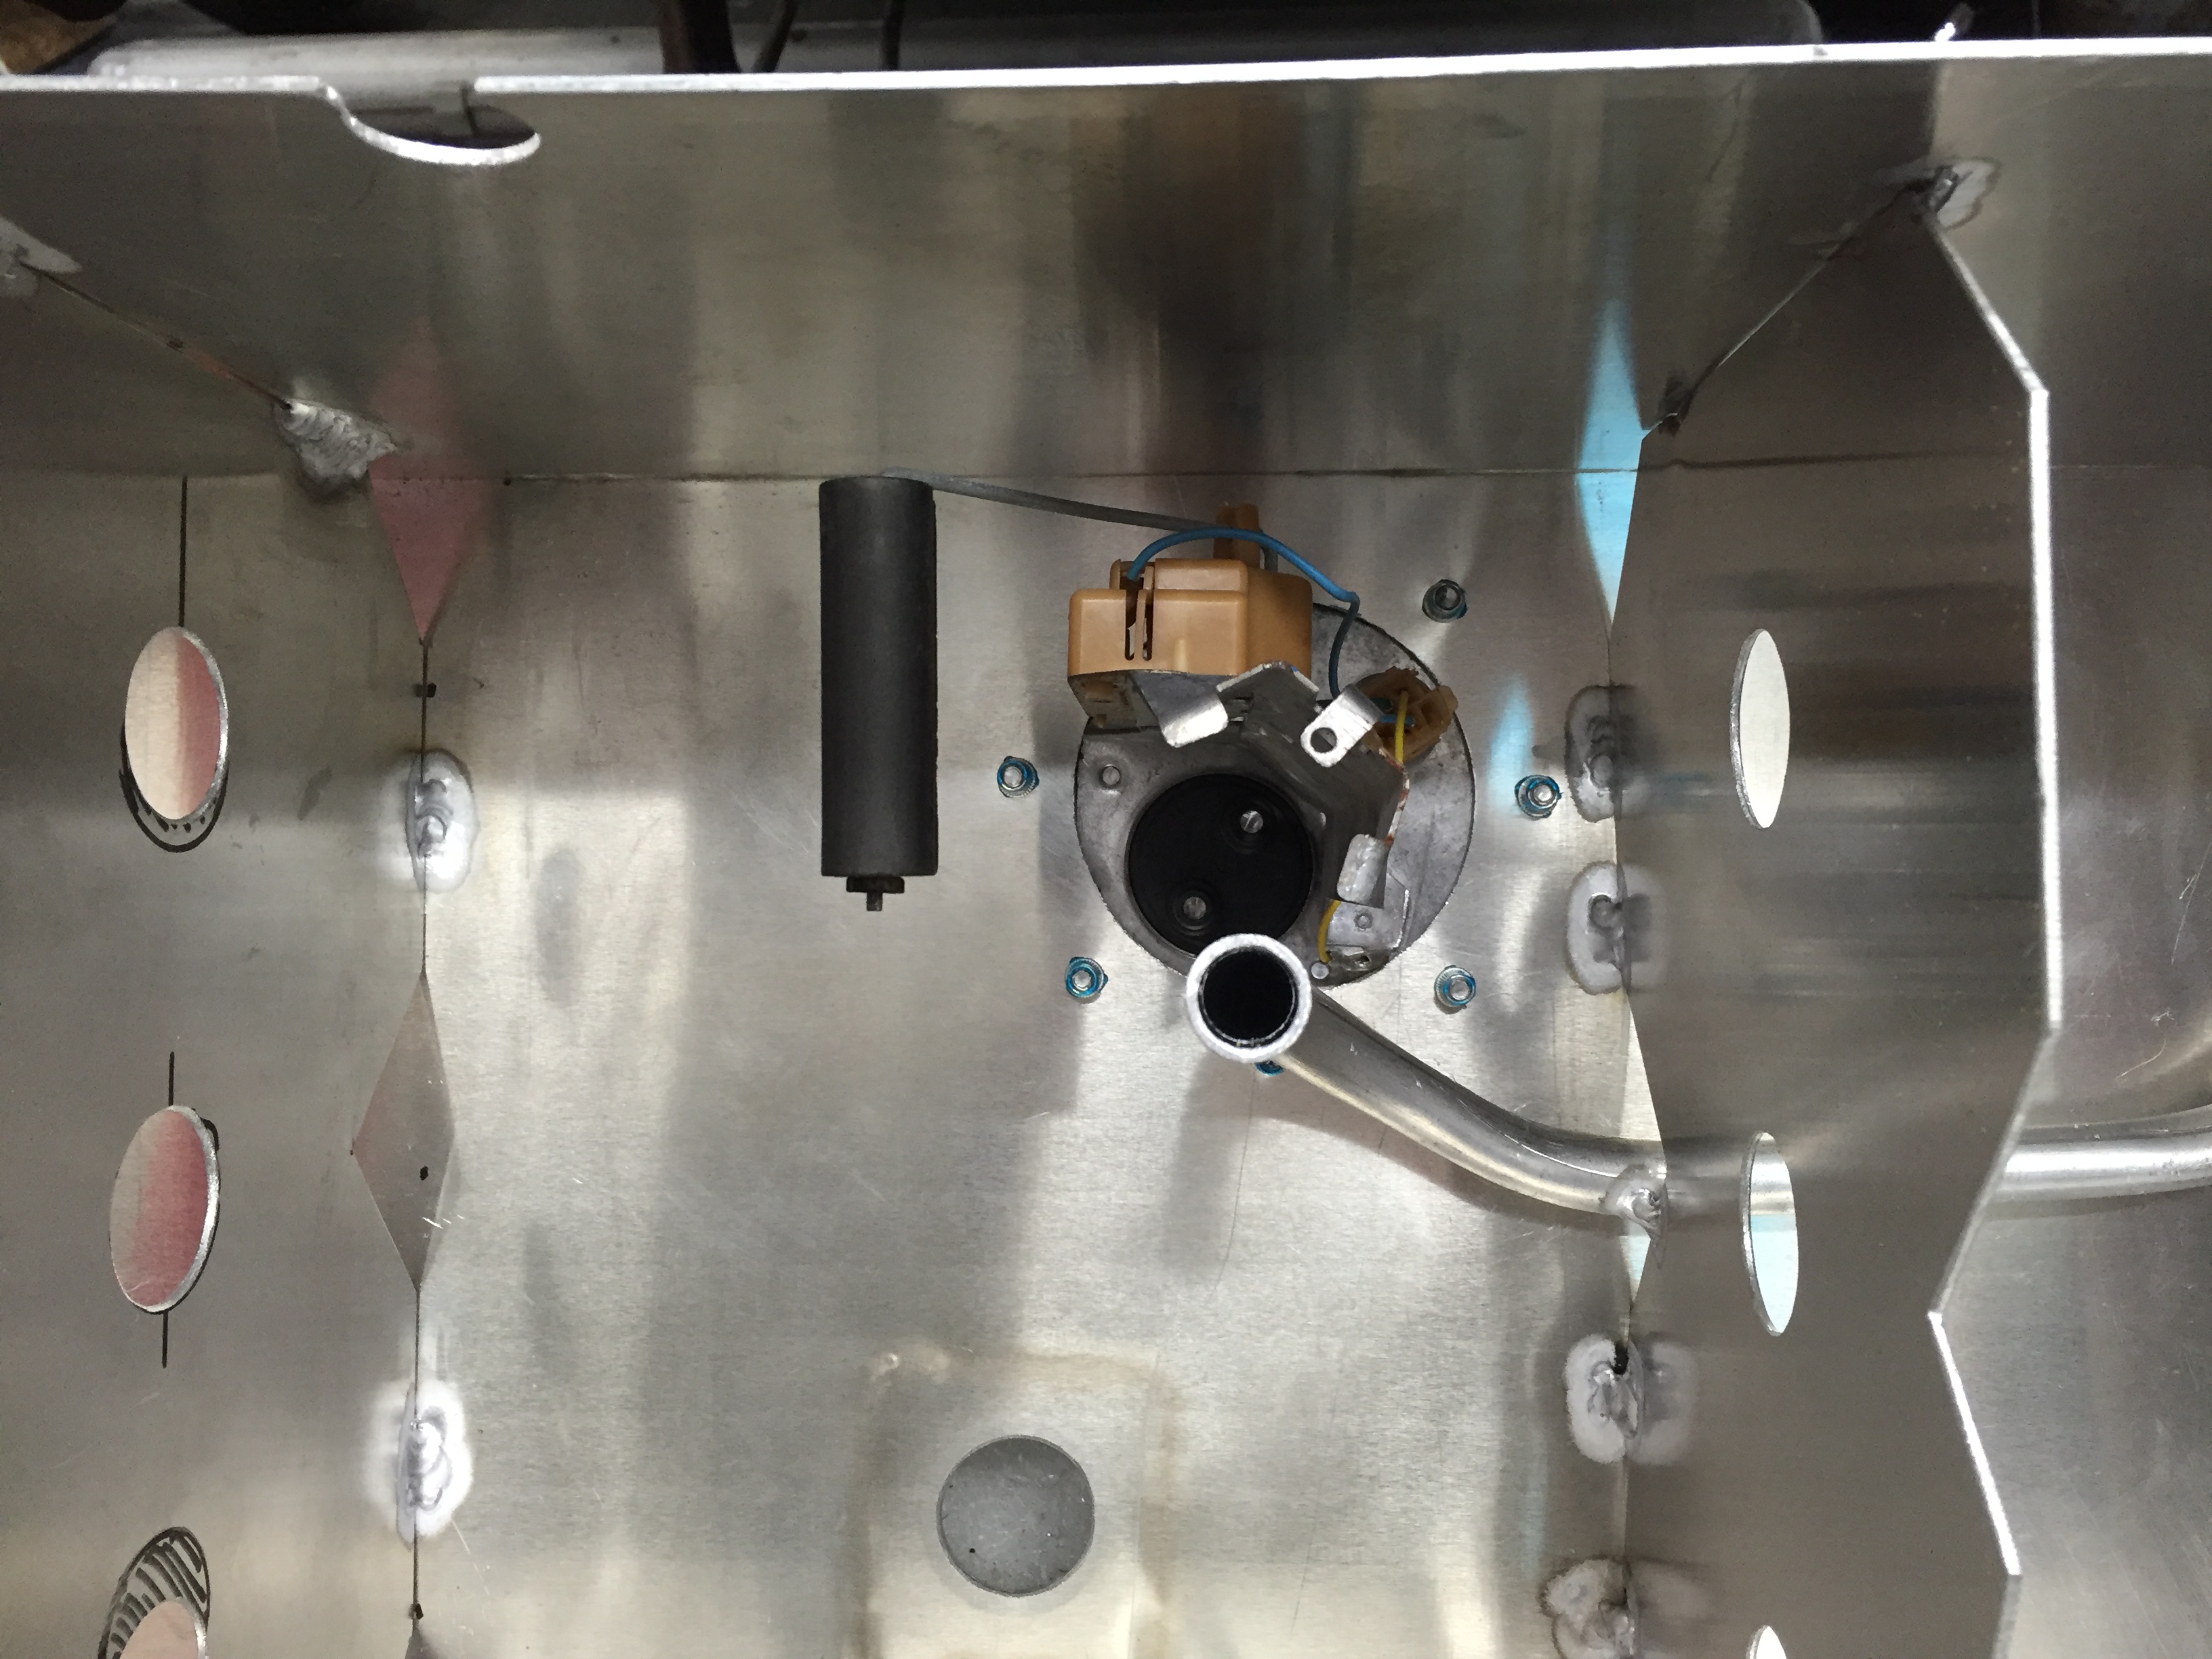
This is where I'd realised I'd made a slight over sight. I'd only fitted an AN6 outlet to feed the pump, which I wasn't confident that it was enough. So before it was all welded together I changed it for an AN10 outlet and elbow.
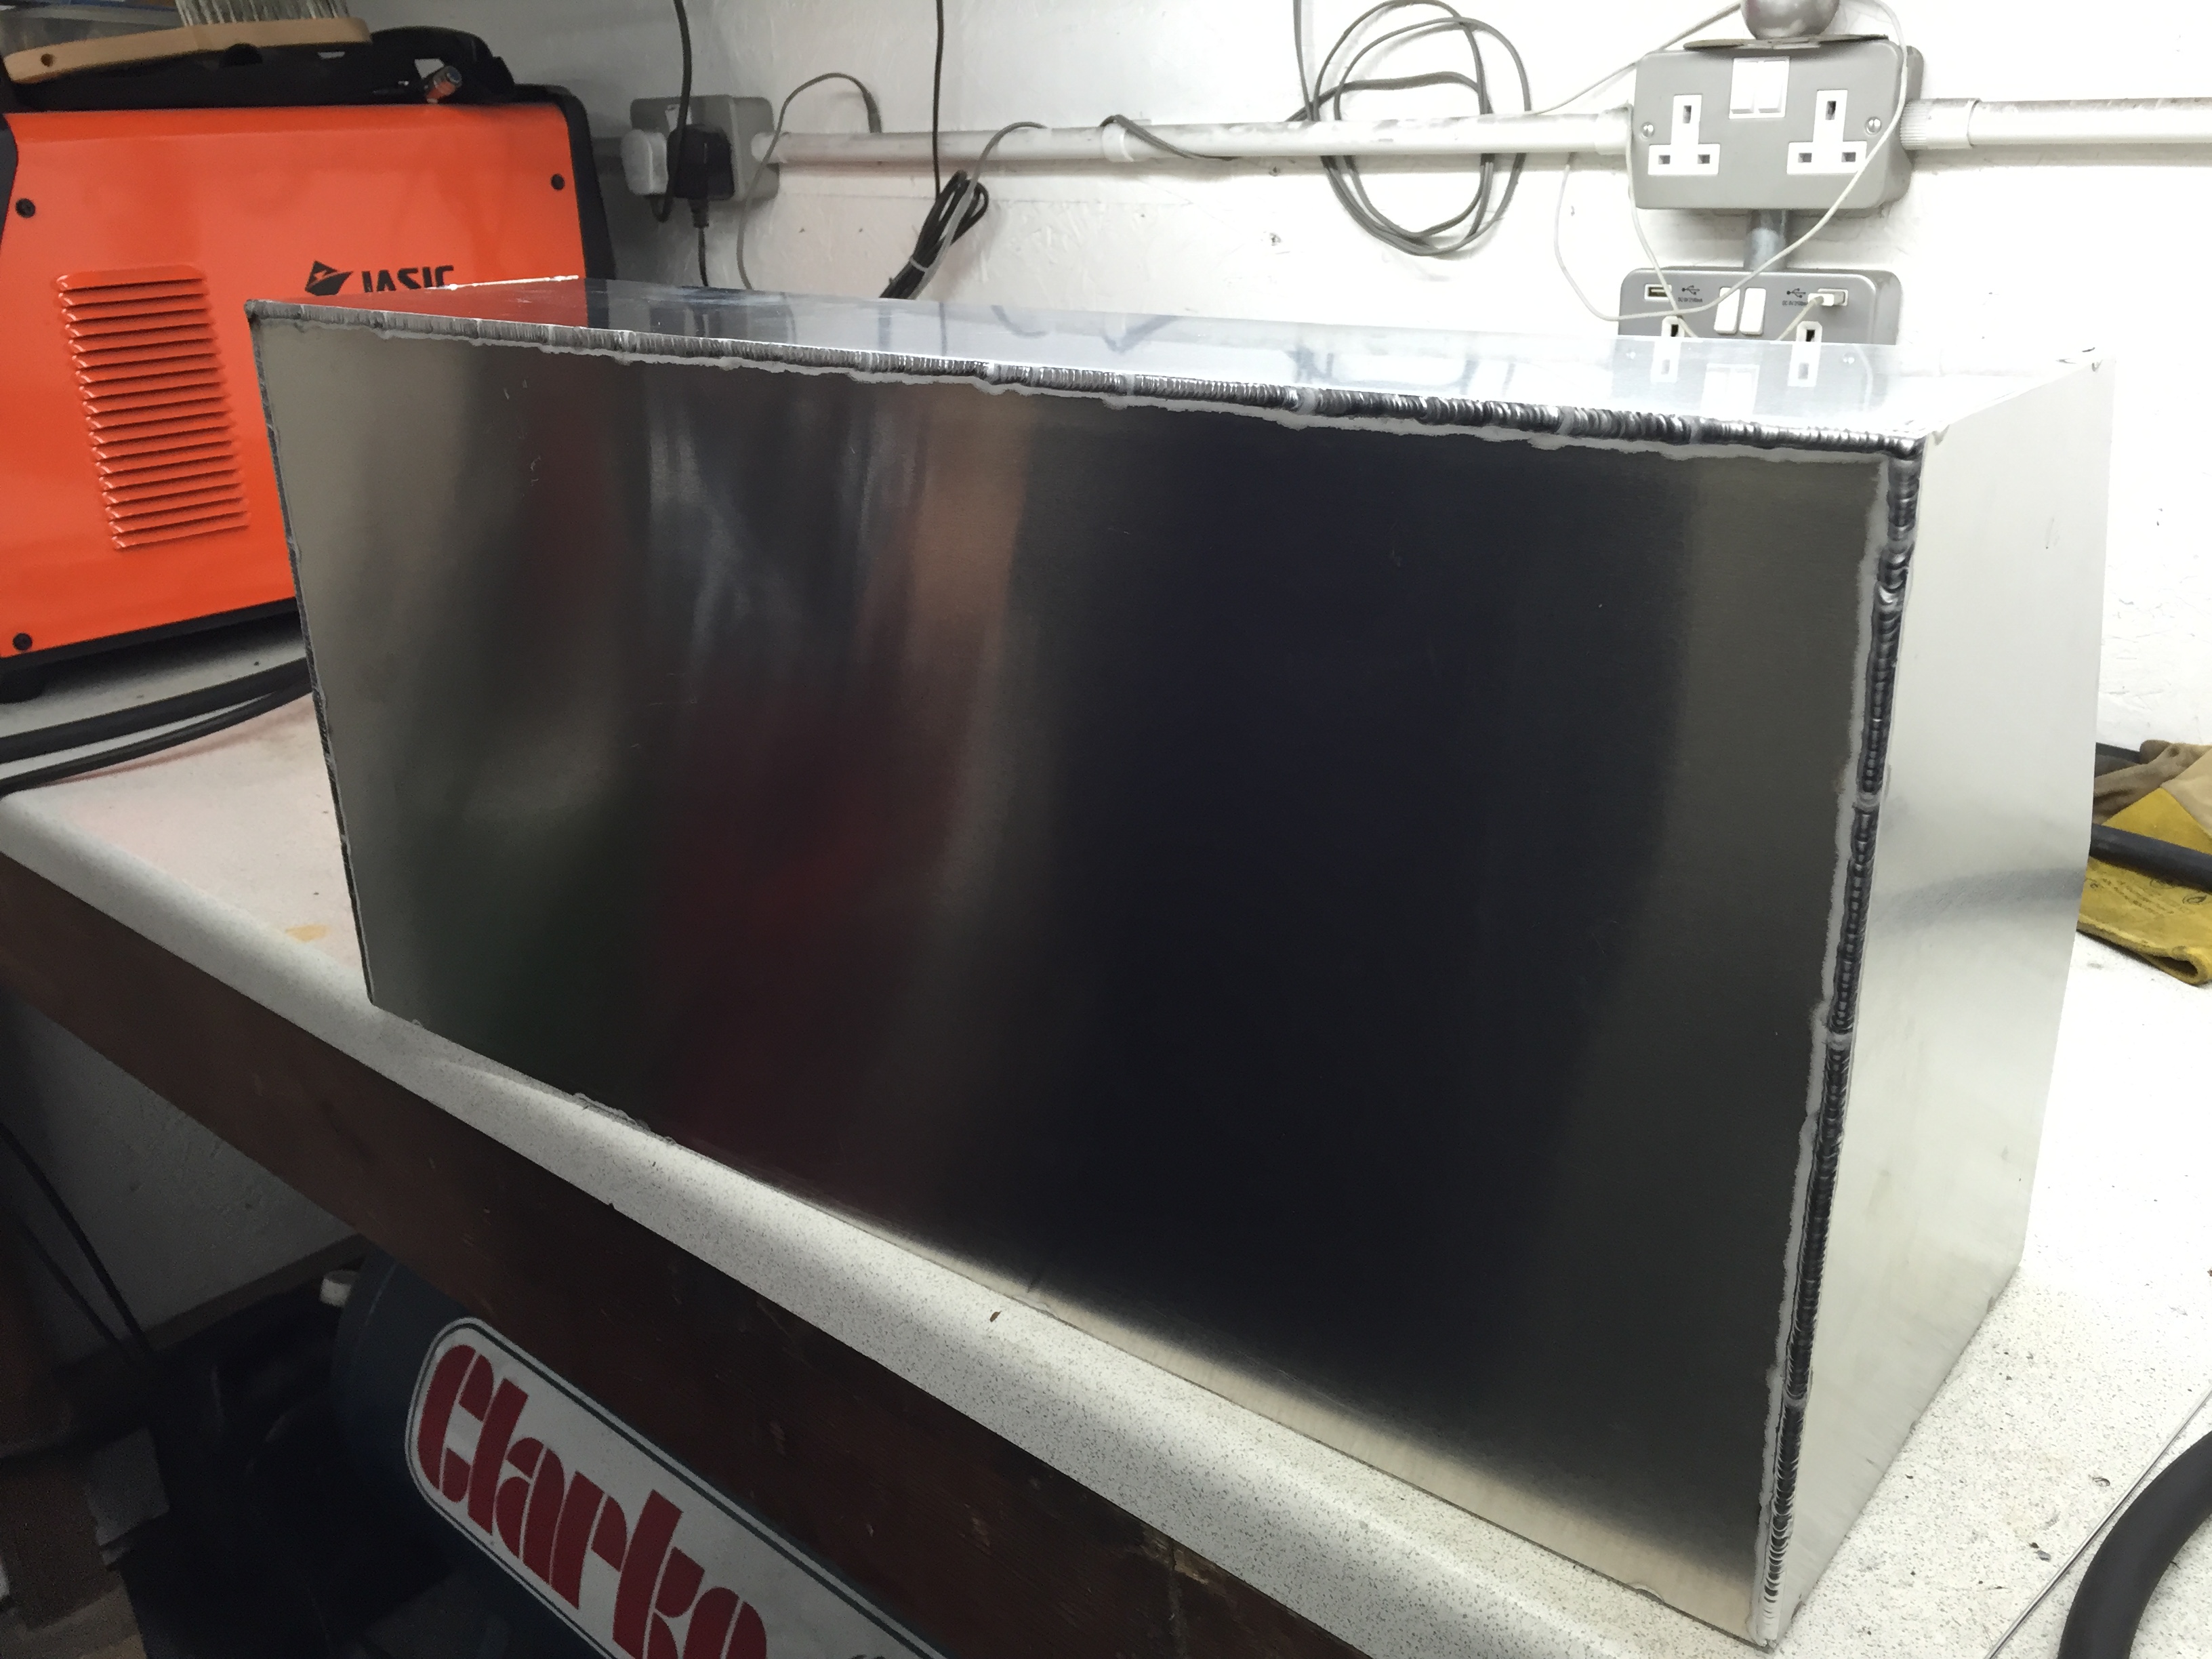
Bottom of the tank welded to the top and finally sealed
Thanks for looking, more to follow.
Old filler neck removed.. This was awful. You put the pump nozzle in, pulled the trigger and all the fuel would splash back at you. So you had to stand there on half pull on the nozzle to allow the fuel into the pipework. Just awful.

This is the quarter panel where the filler cap is.. It needs addressing to make it how I want but will require the side of the car to be resprayed so this will have to wait for another time.

More fab work on the tank


Using the standard sender unit and needed to block the original inlet/outlet - so used a short section of solid 8mm aluminium rod in both


This needed changing have no idea how long this filter has been on but it's seen better days

New lines made

New filler and breather pipes arrived


More done on the tank


This is where I'd realised I'd made a slight over sight. I'd only fitted an AN6 outlet to feed the pump, which I wasn't confident that it was enough. So before it was all welded together I changed it for an AN10 outlet and elbow.


Bottom of the tank welded to the top and finally sealed

Thanks for looking, more to follow.
12-06-2016, 09:57 PM
#173
PassionFord Regular
top job man  !
!
keep us posted...
!keep us posted...
13-06-2016, 08:13 AM
#175
Advanced PassionFord User

be a new car by the time you've finished. Really enjoying this thread and I think it is your brothers thread (moondustka?) with the rs engined (now) puma. Both are good threads, his took me a few days to read start to finish.
I'm surprised over the years this car hasn't gone up in some very expensive smoke going by the bodges its had done in the past.
I'm surprised over the years this car hasn't gone up in some very expensive smoke going by the bodges its had done in the past.
13-06-2016, 09:47 PM
#176

That's me, yea. You must have gone over to projectpuma to read it?!
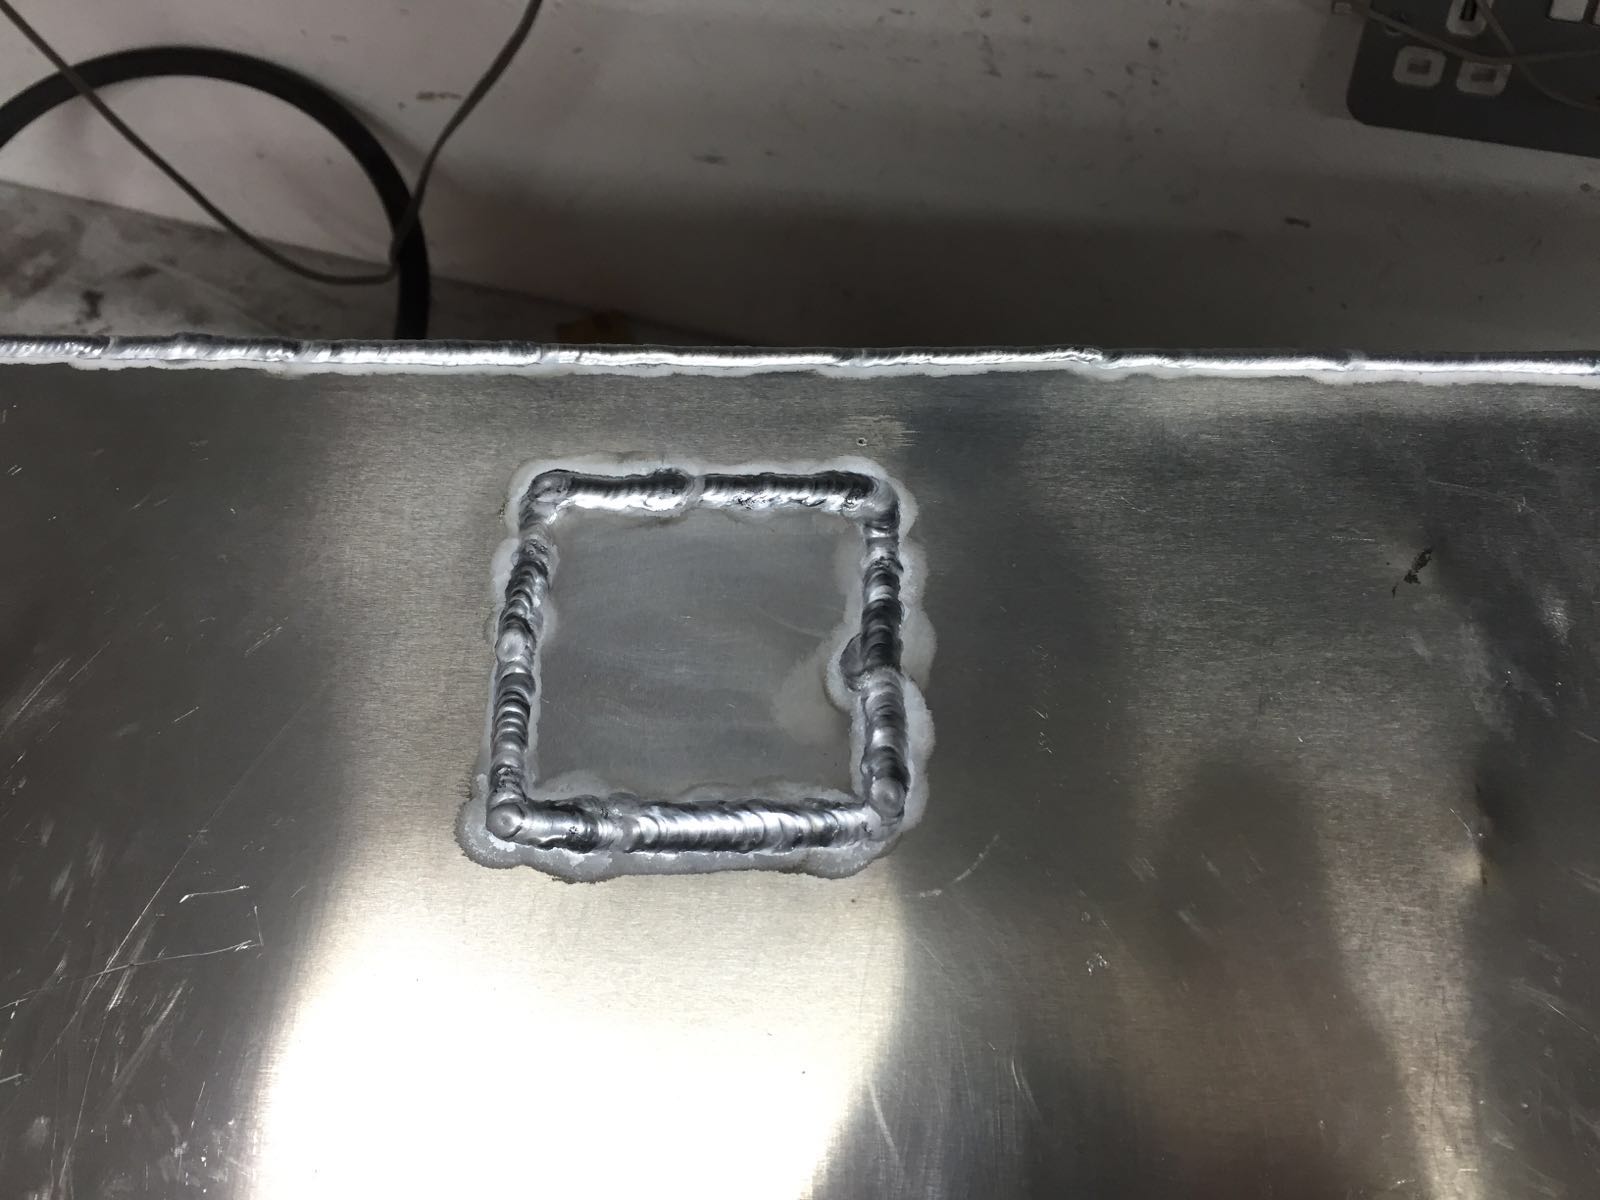
I'm responsible for all that tigging! Can't believe Dan put a pic of that patch welded on for the vent. It's not the best, I found it hard to weld.
I'm responsible for all that tigging! Can't believe Dan put a pic of that patch welded on for the vent. It's not the best, I found it hard to weld.
13-06-2016, 10:56 PM
#177
PassionFord Regular
Thread Starter
be a new car by the time you've finished. Really enjoying this thread and I think it is your brothers thread (moondustka?) with the rs engined (now) puma. Both are good threads, his took me a few days to read start to finish.
I'm surprised over the years this car hasn't gone up in some very expensive smoke going by the bodges its had done in the past.
I'm surprised over the years this car hasn't gone up in some very expensive smoke going by the bodges its had done in the past.
Yes that is my brother Ben, he is the one that has done all of the welding on this tank. His car is a pretty nice bit of kit! Both should be at ford fair this year for the first time together.
14-06-2016, 10:16 PM
#180
PassionFord Regular
Thread Starter
Thanks Glenn. Yeah the filter wasn't the best. Never wanted to change it over the few miles I did knowing that if I did it would fall apart and be in a mess trying to get a new one back in. So waited until I was doing this job.
16-06-2016, 07:29 PM
#182

What on earth were these morons up to! Good work sorting it though.
Do you think it was a challenge to build a puma 4x4 Cosworth in a weekend lol.
"Have we got the parts in for the puma build?"
"Yep, club hammer ready, the mastic came in earlier, still got cable ties left over from the last build and if we can't complete it with those we've got the mop bucket and next door's scrap pile"
18-06-2016, 06:31 PM
#184
PassionFord Regular
Thread Starter
What on earth were these morons up to! Good work sorting it though.
Do you think it was a challenge to build a puma 4x4 Cosworth in a weekend lol.
"Have we got the parts in for the puma build?"
"Yep, club hammer ready, the mastic came in earlier, still got cable ties left over from the last build and if we can't complete it with those we've got the mop bucket and next door's scrap pile"
Do you think it was a challenge to build a puma 4x4 Cosworth in a weekend lol.
"Have we got the parts in for the puma build?"
"Yep, club hammer ready, the mastic came in earlier, still got cable ties left over from the last build and if we can't complete it with those we've got the mop bucket and next door's scrap pile"
19-06-2016, 07:38 PM
#185
PassionFord Regular
Thread Starter
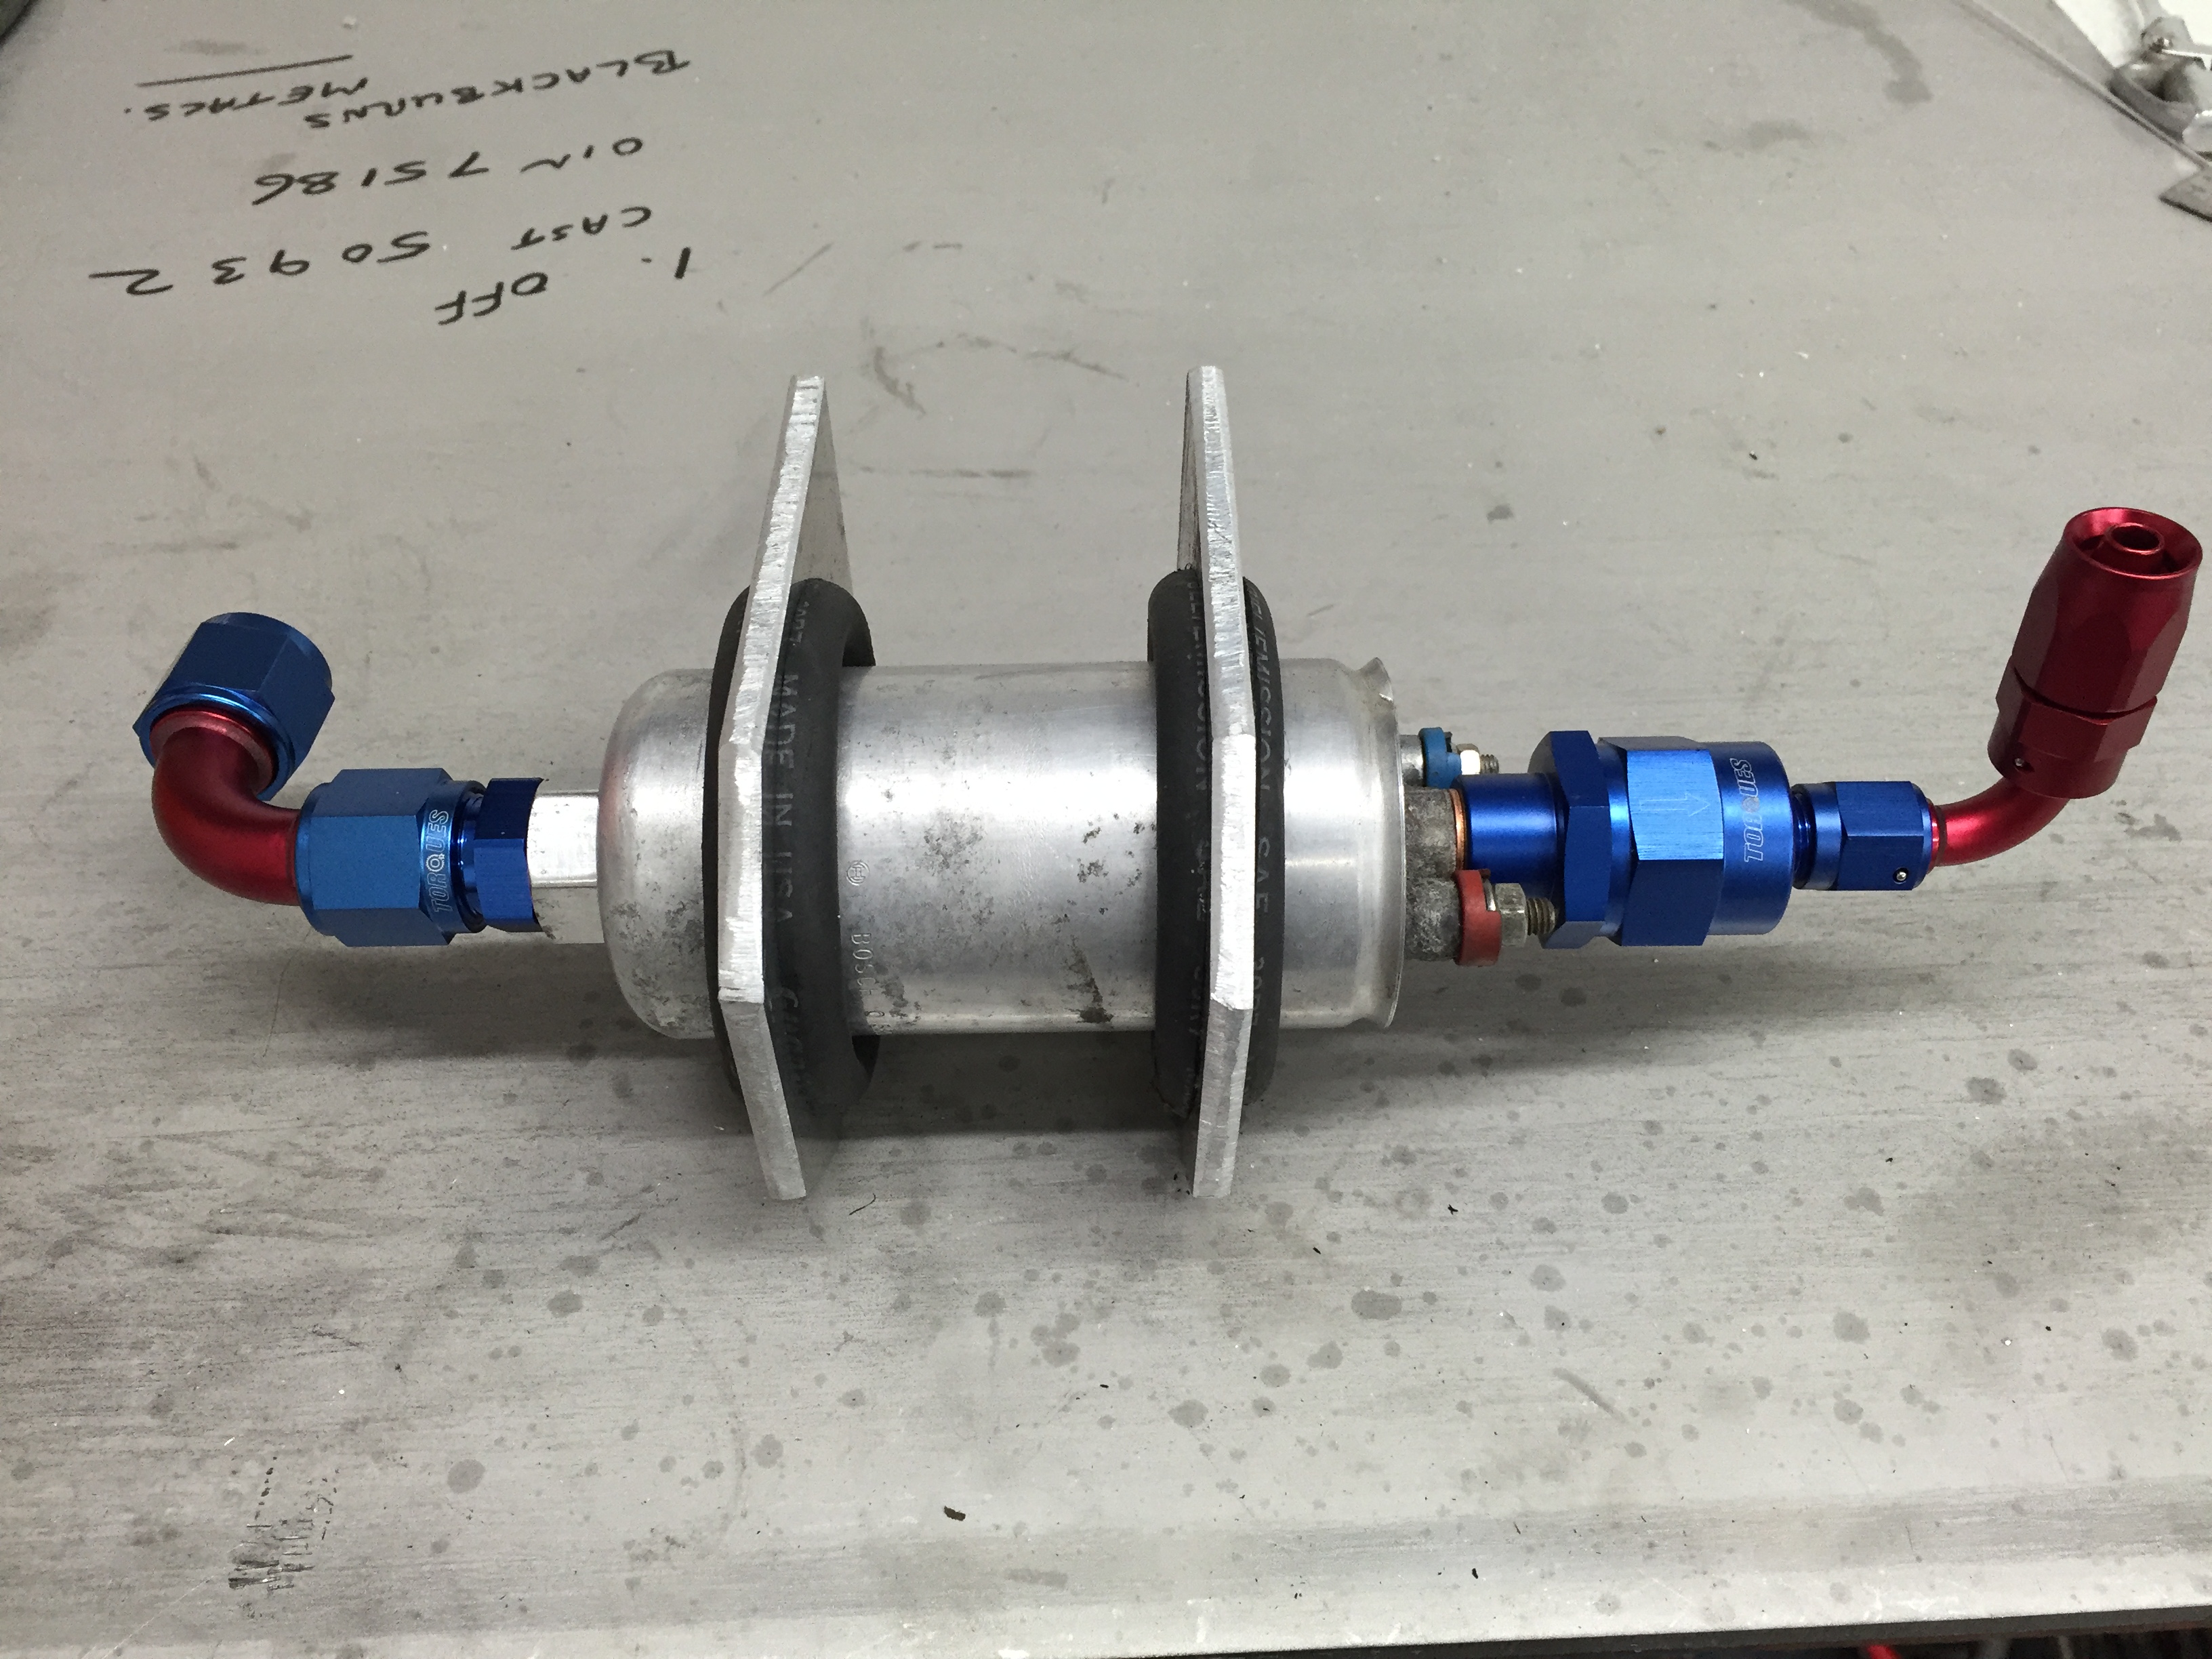
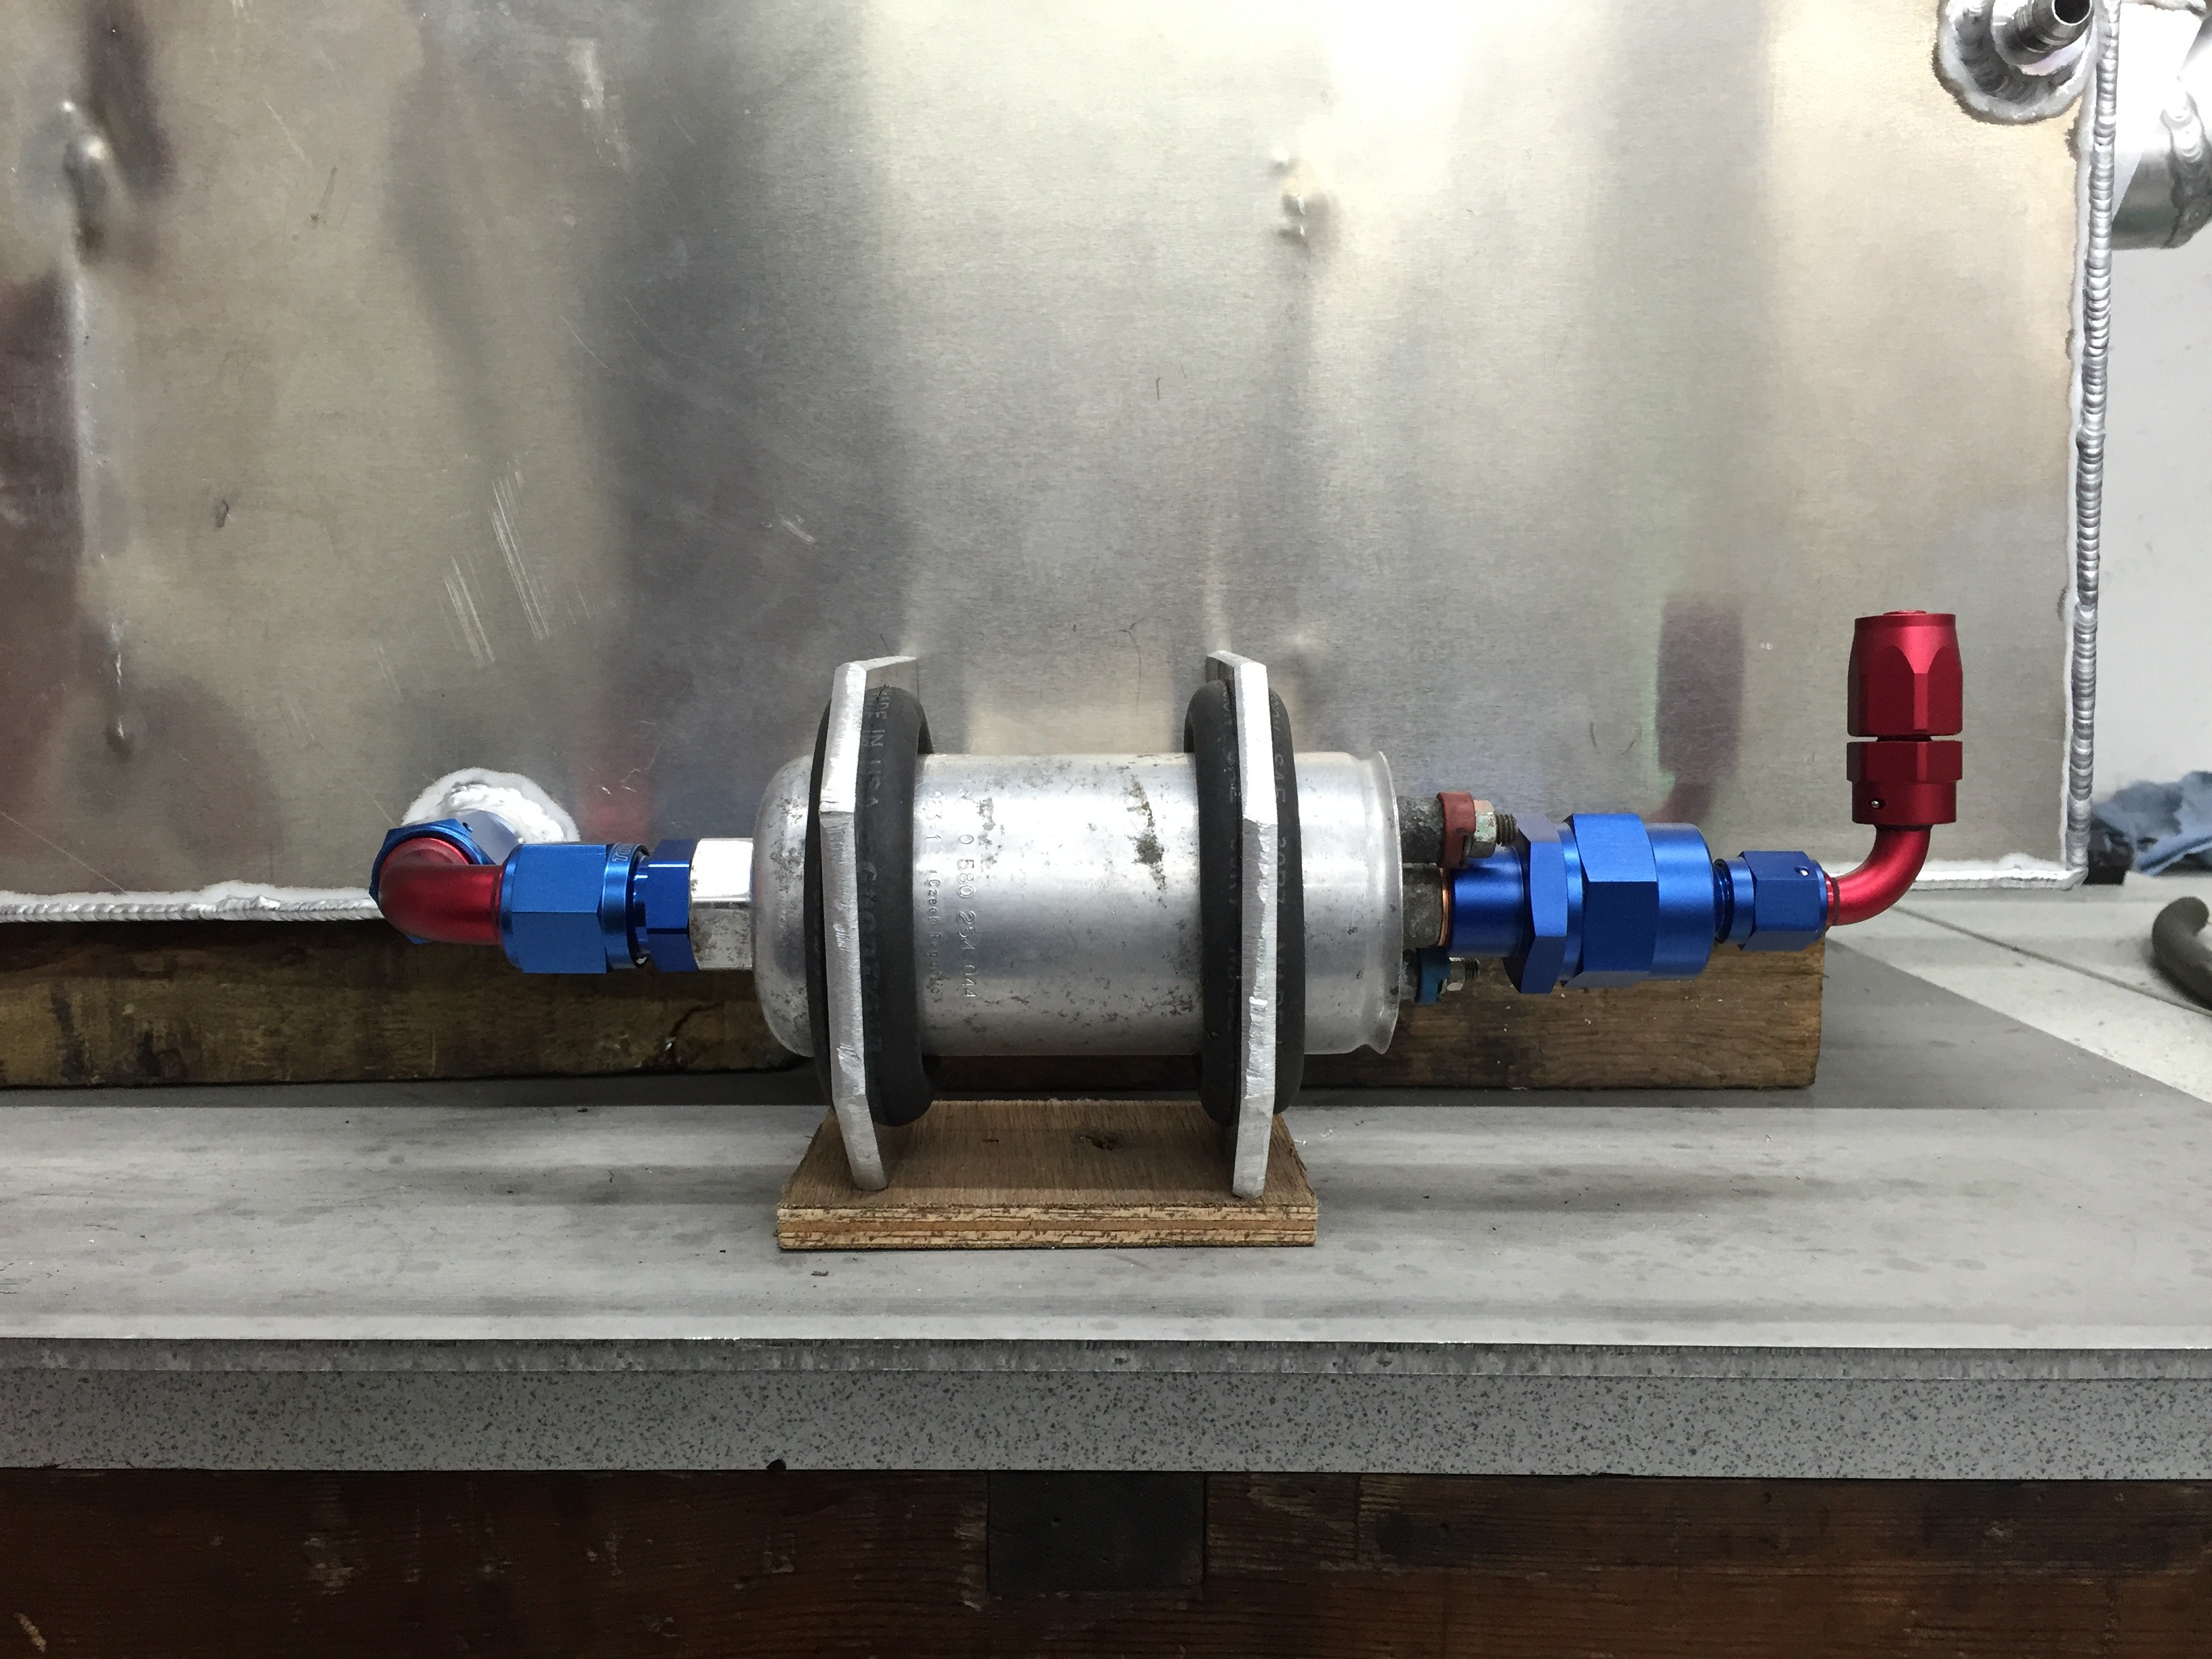
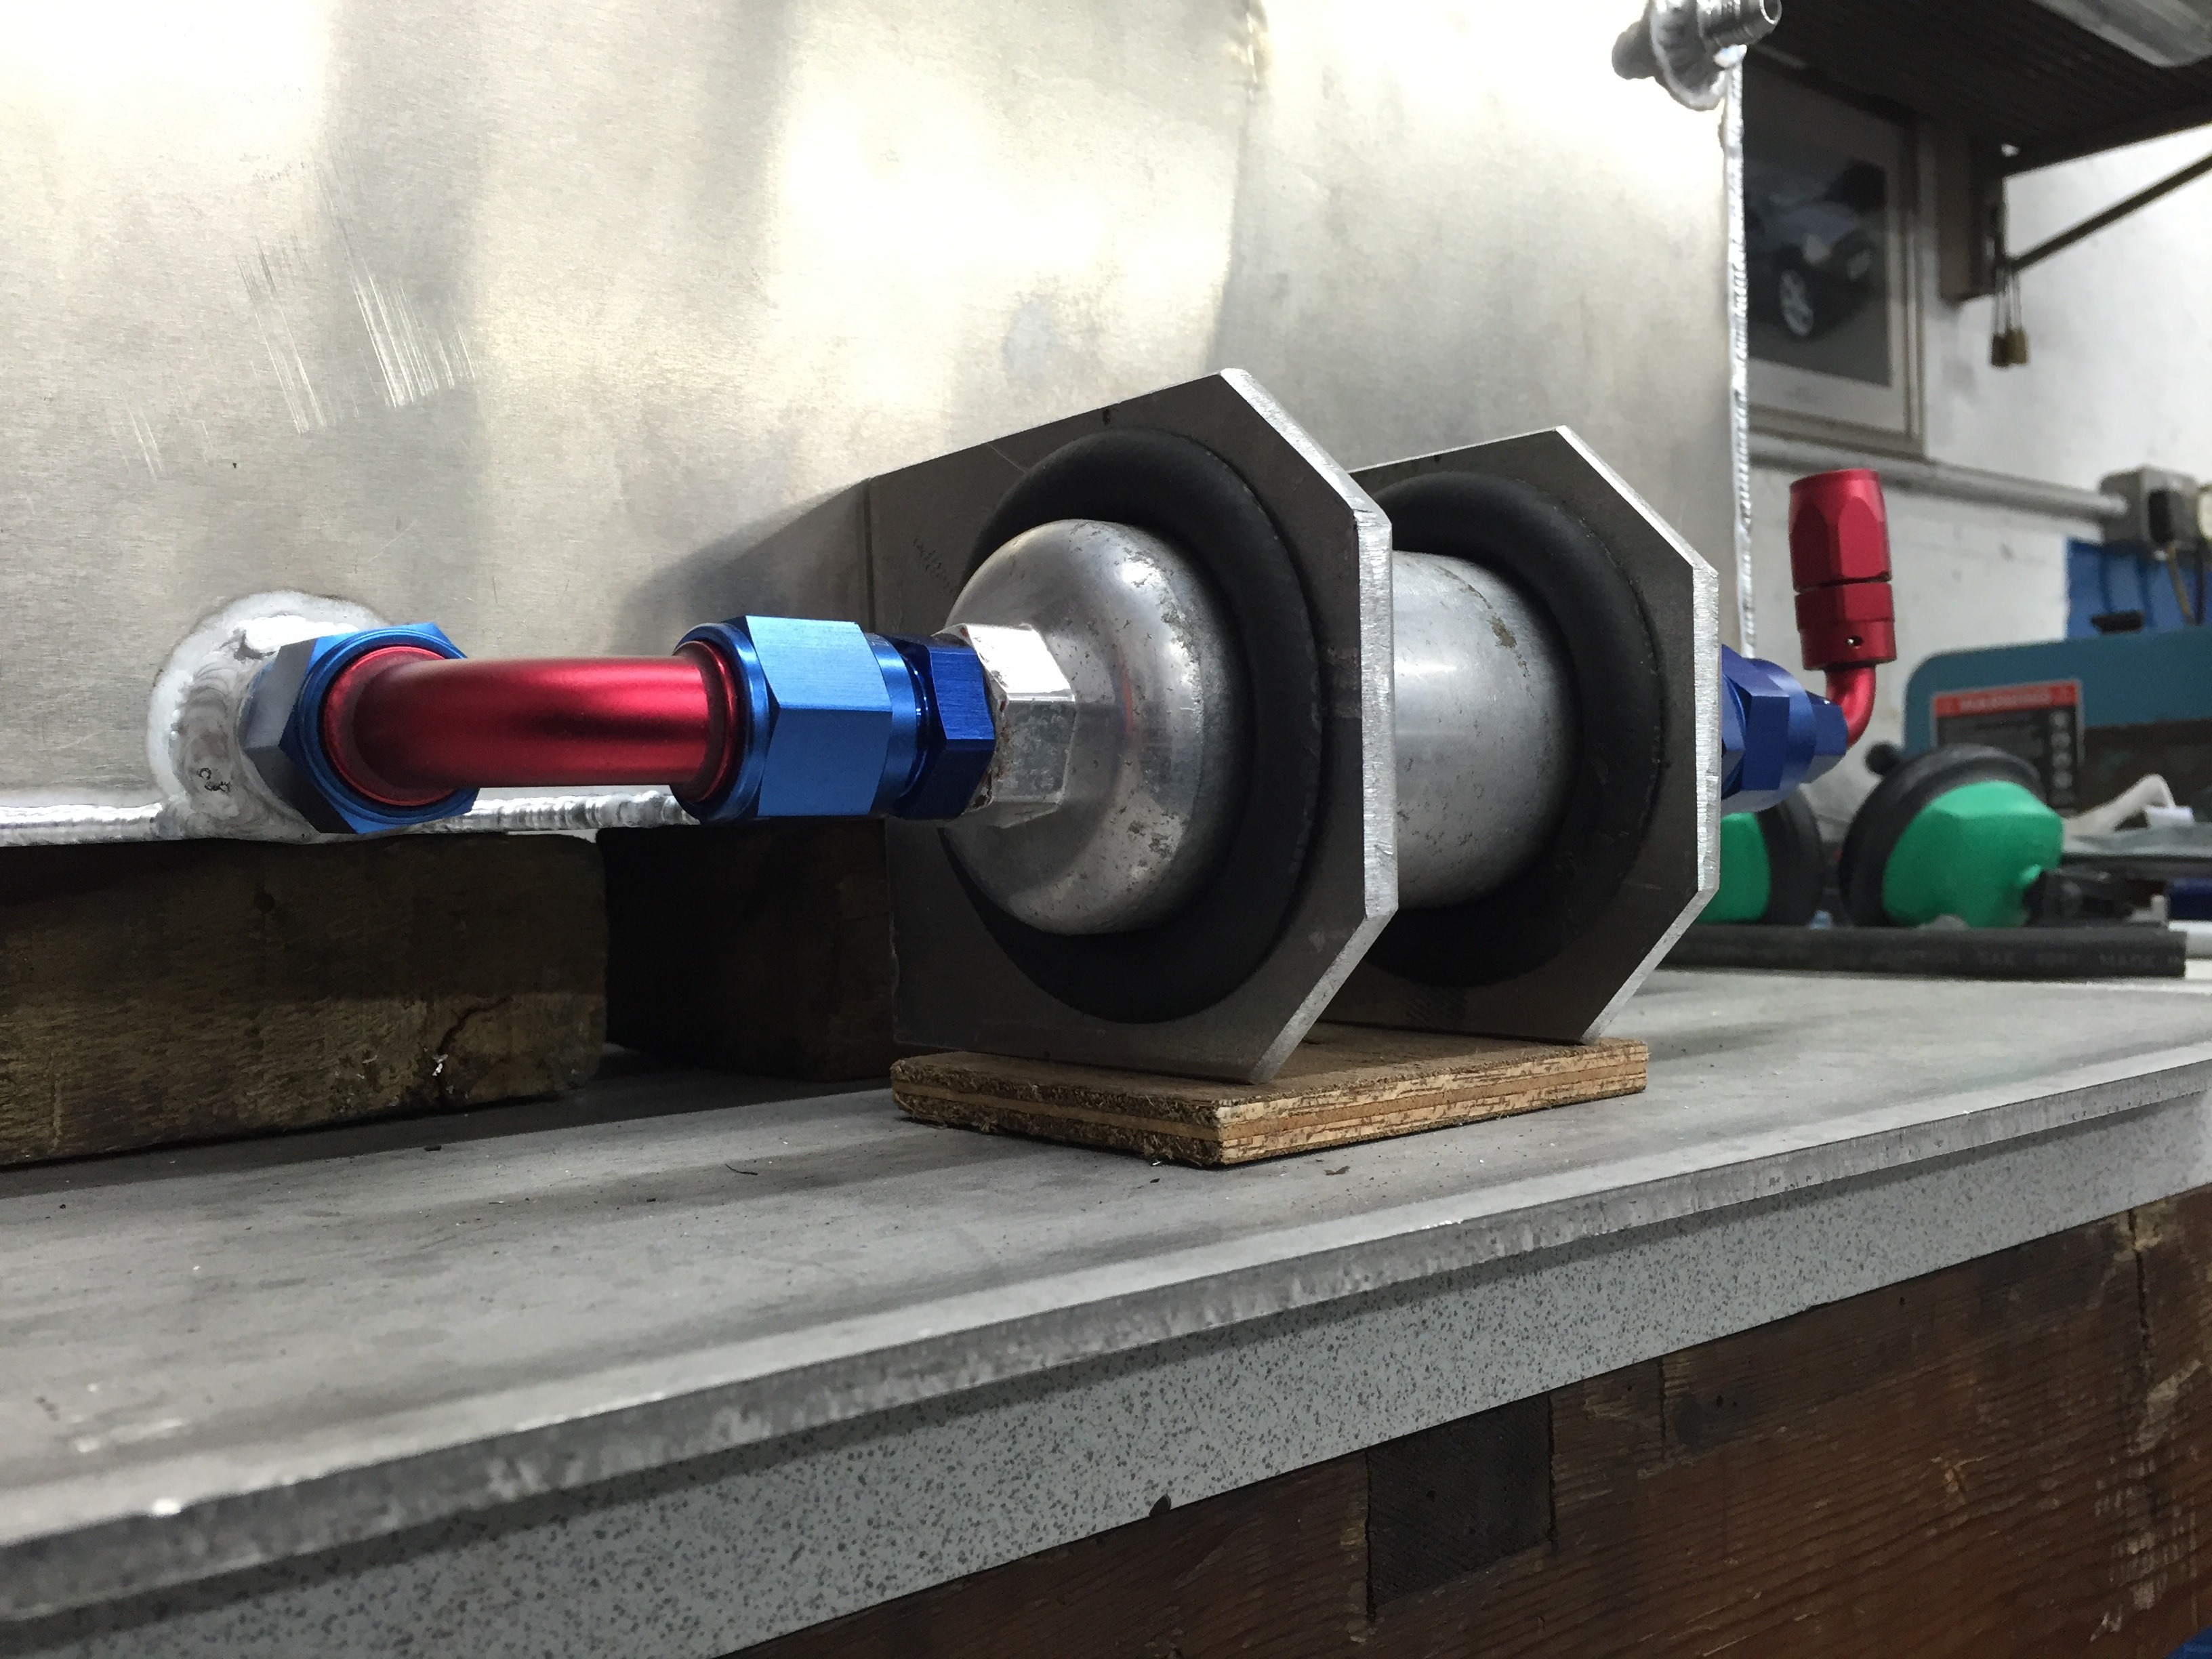
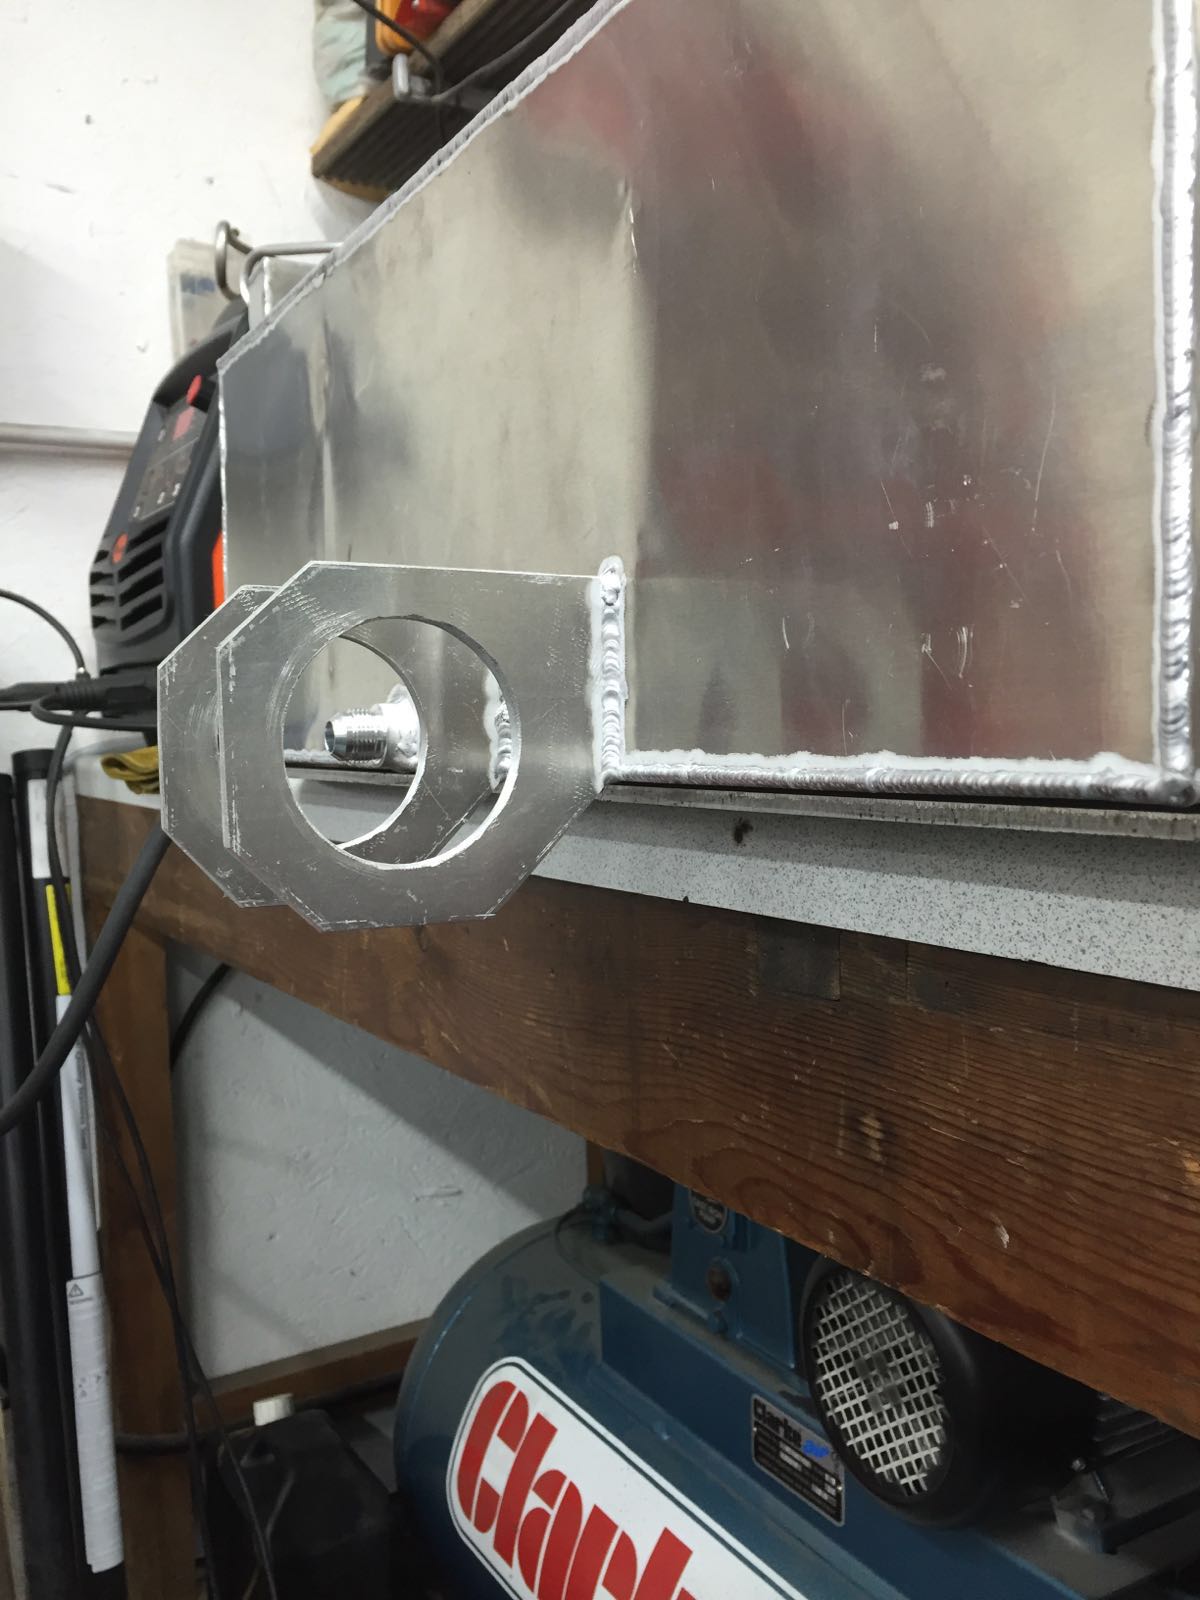
More work done on the tank...
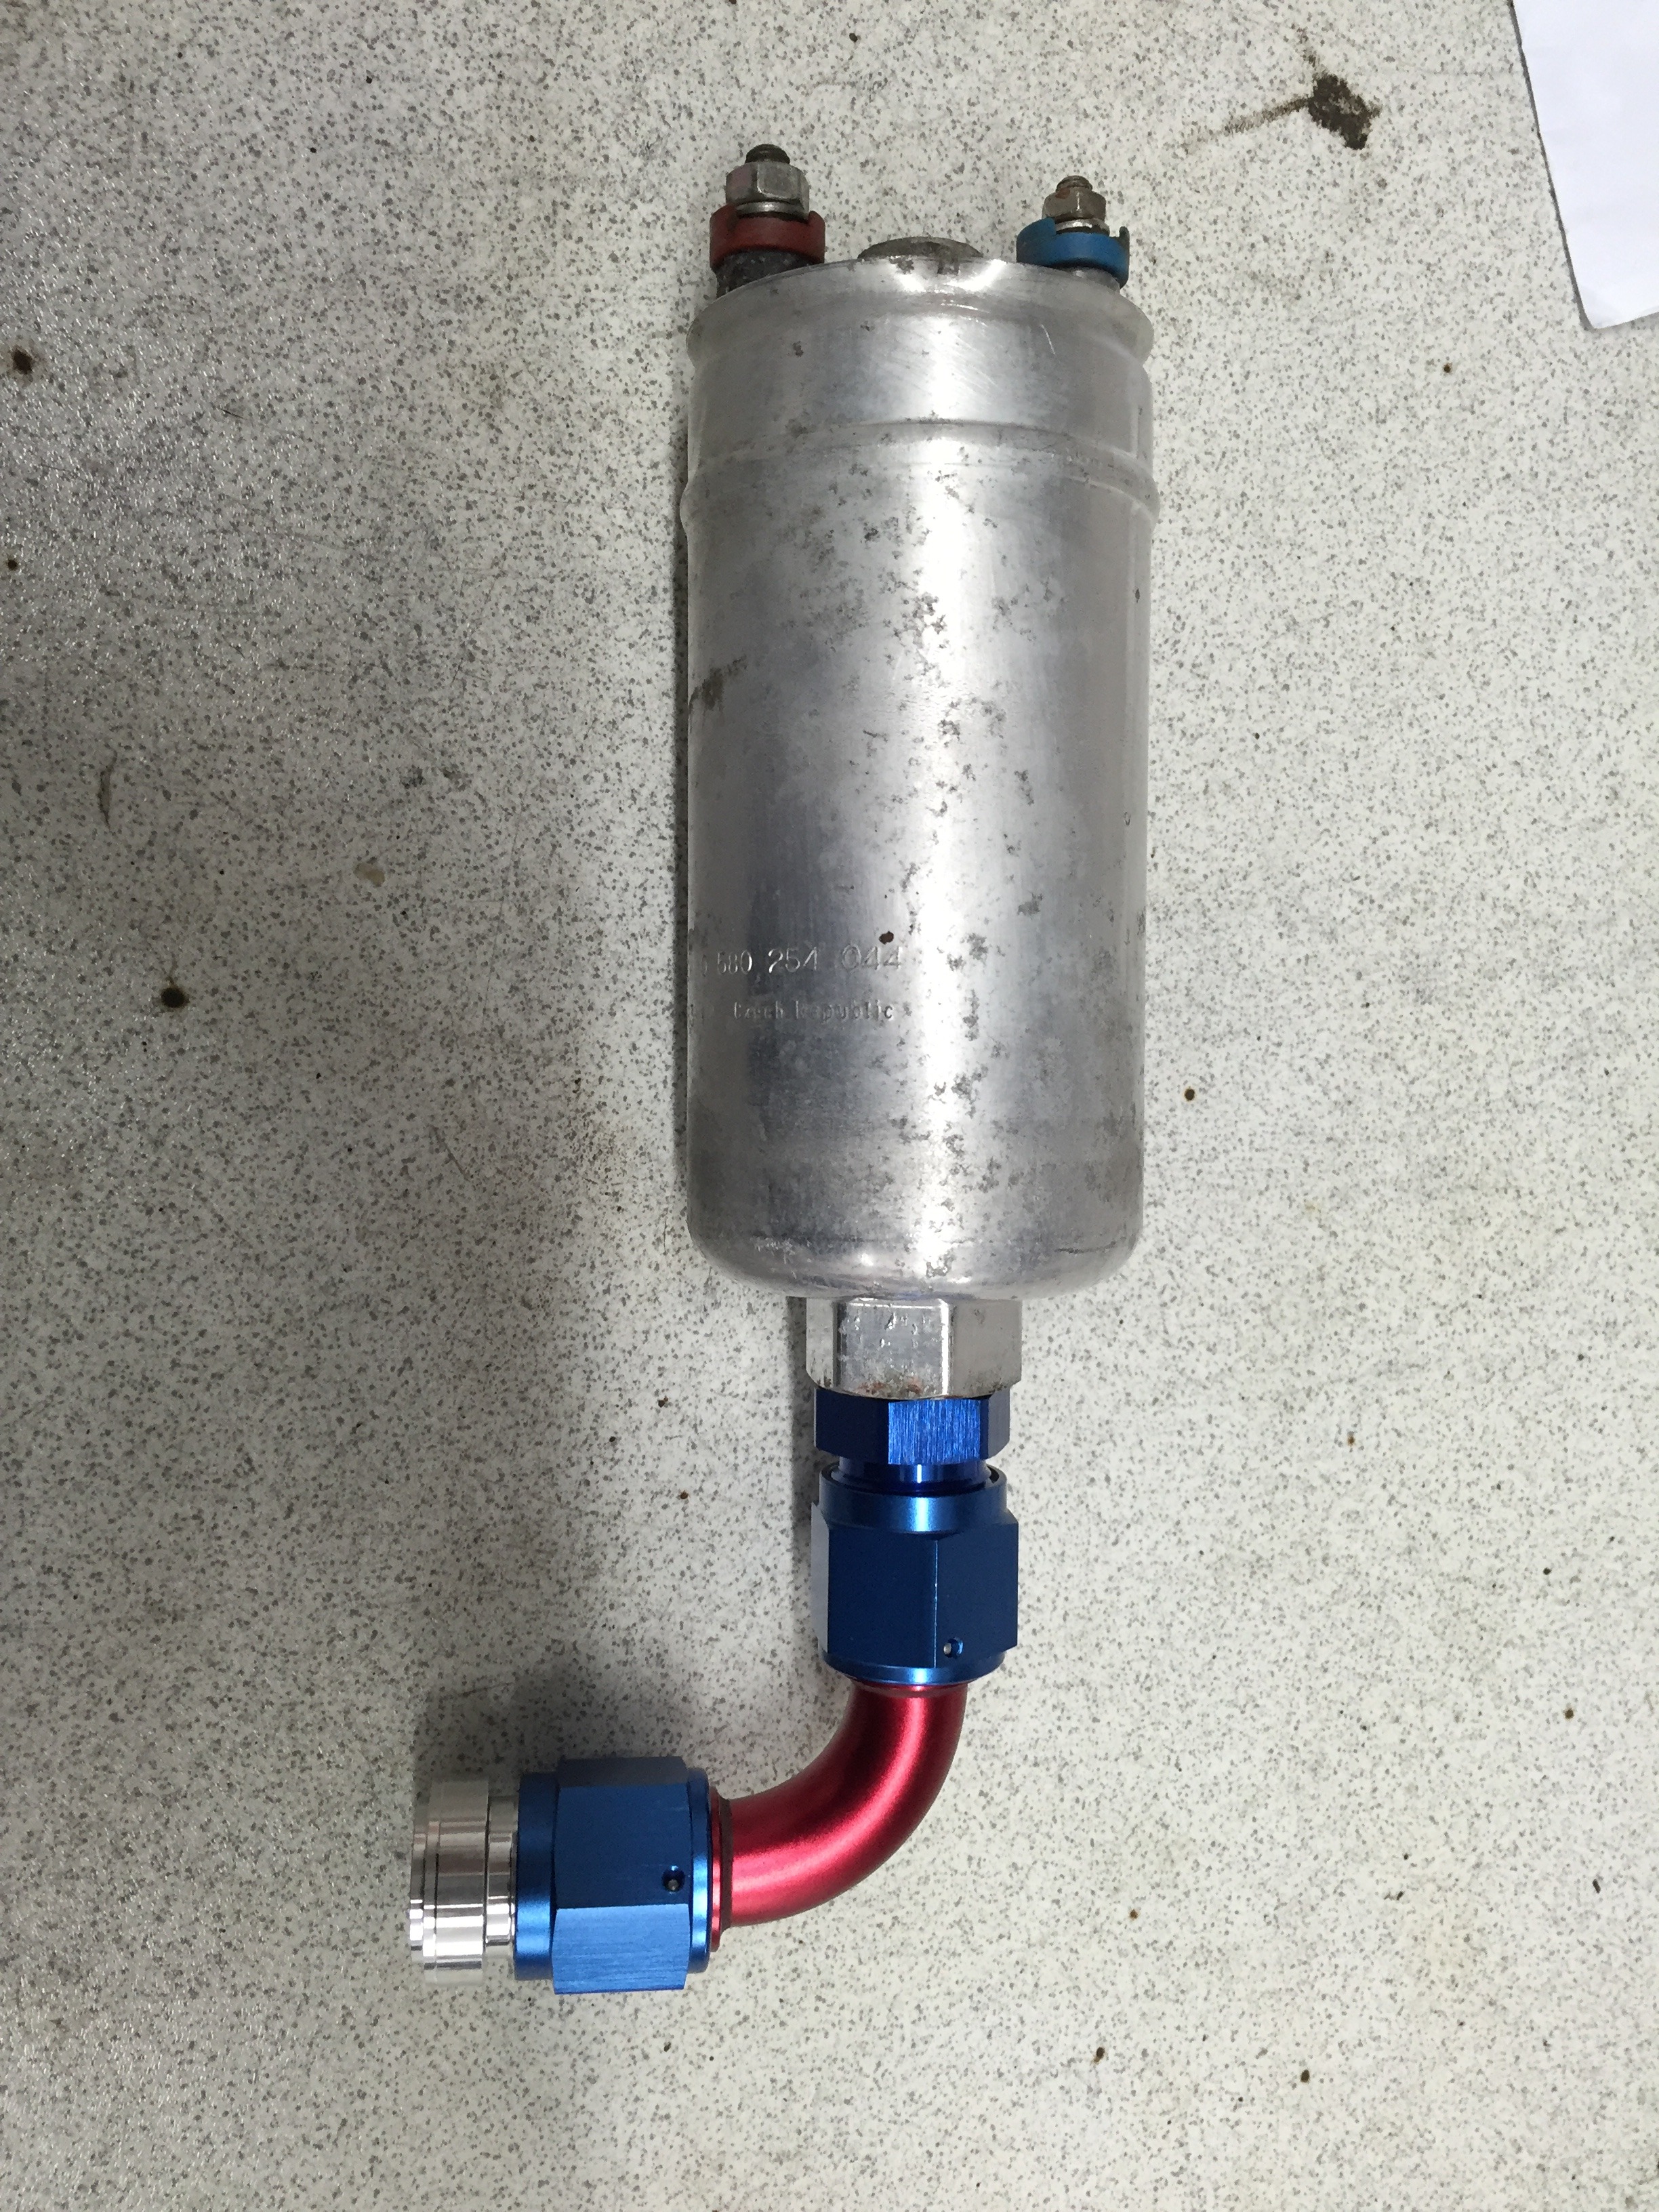
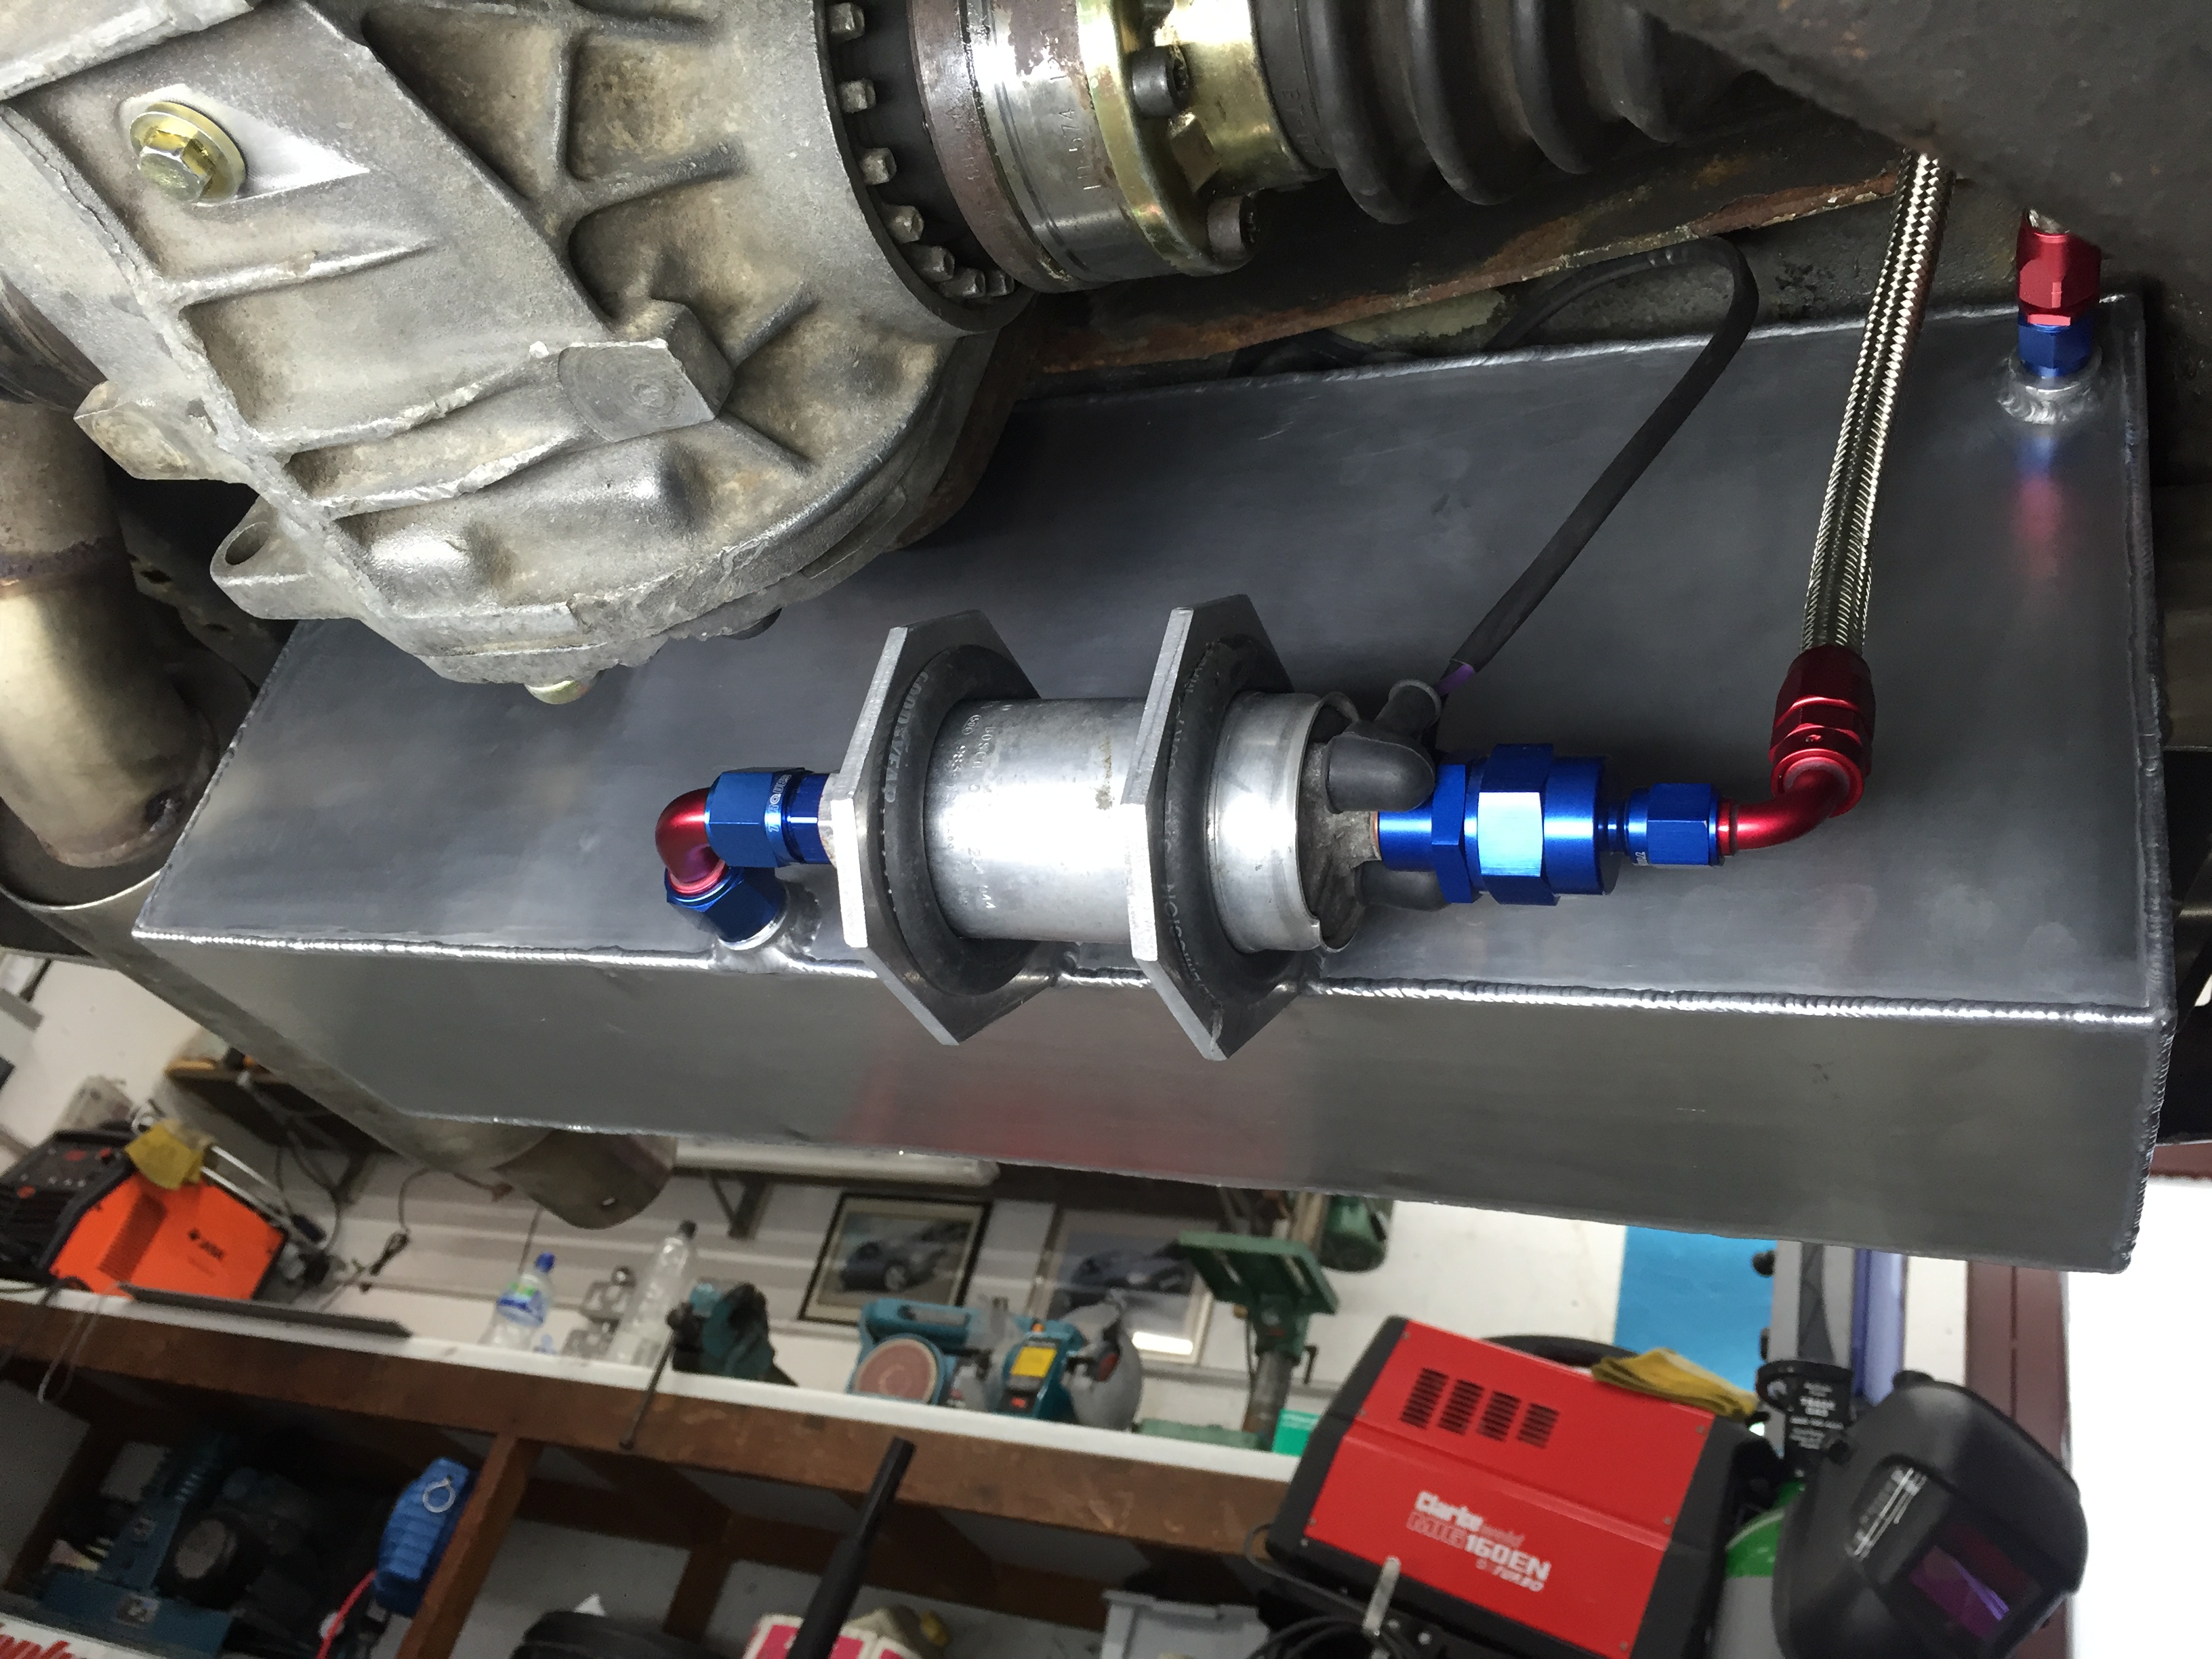
Fuel pump fitting and brackets made
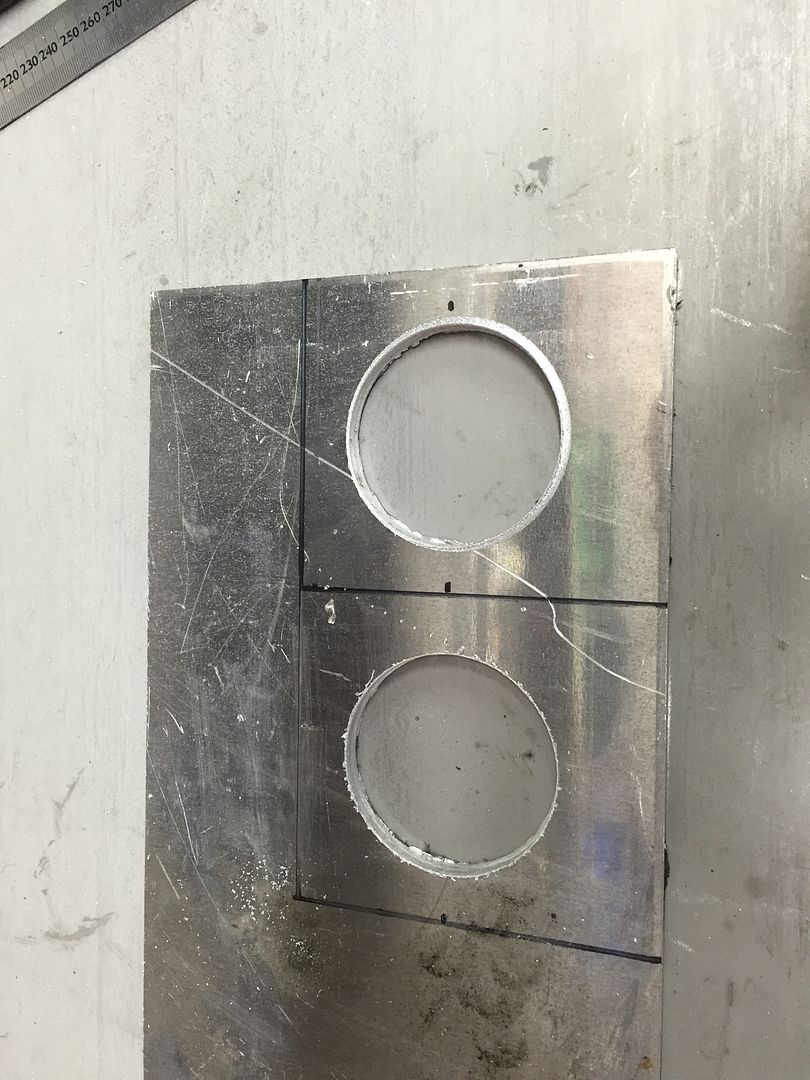
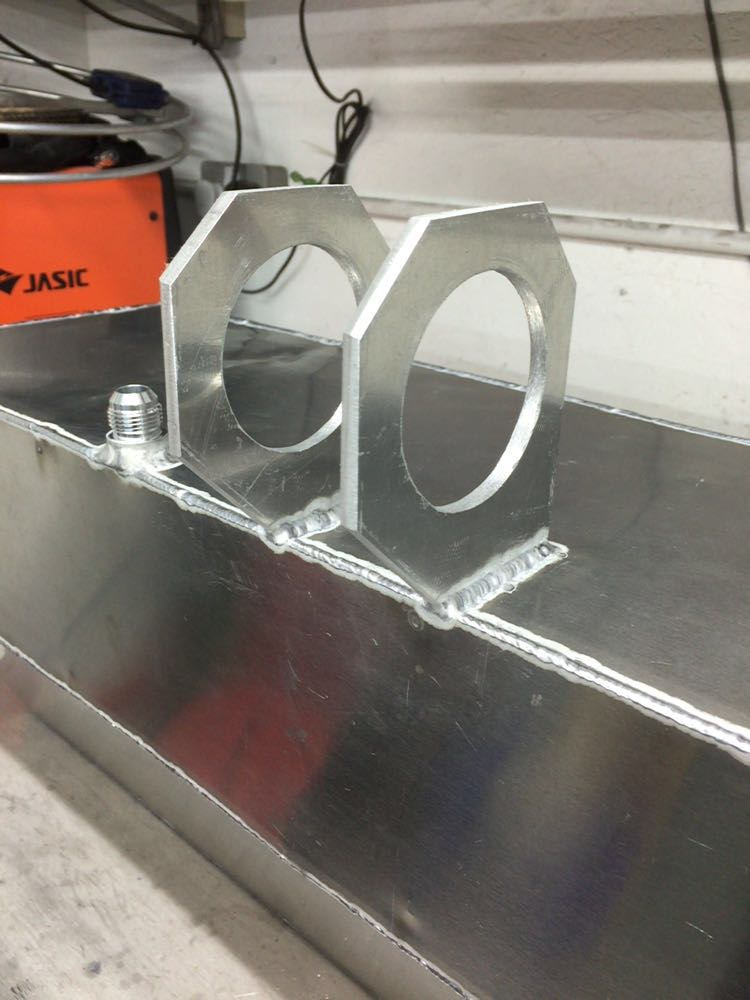
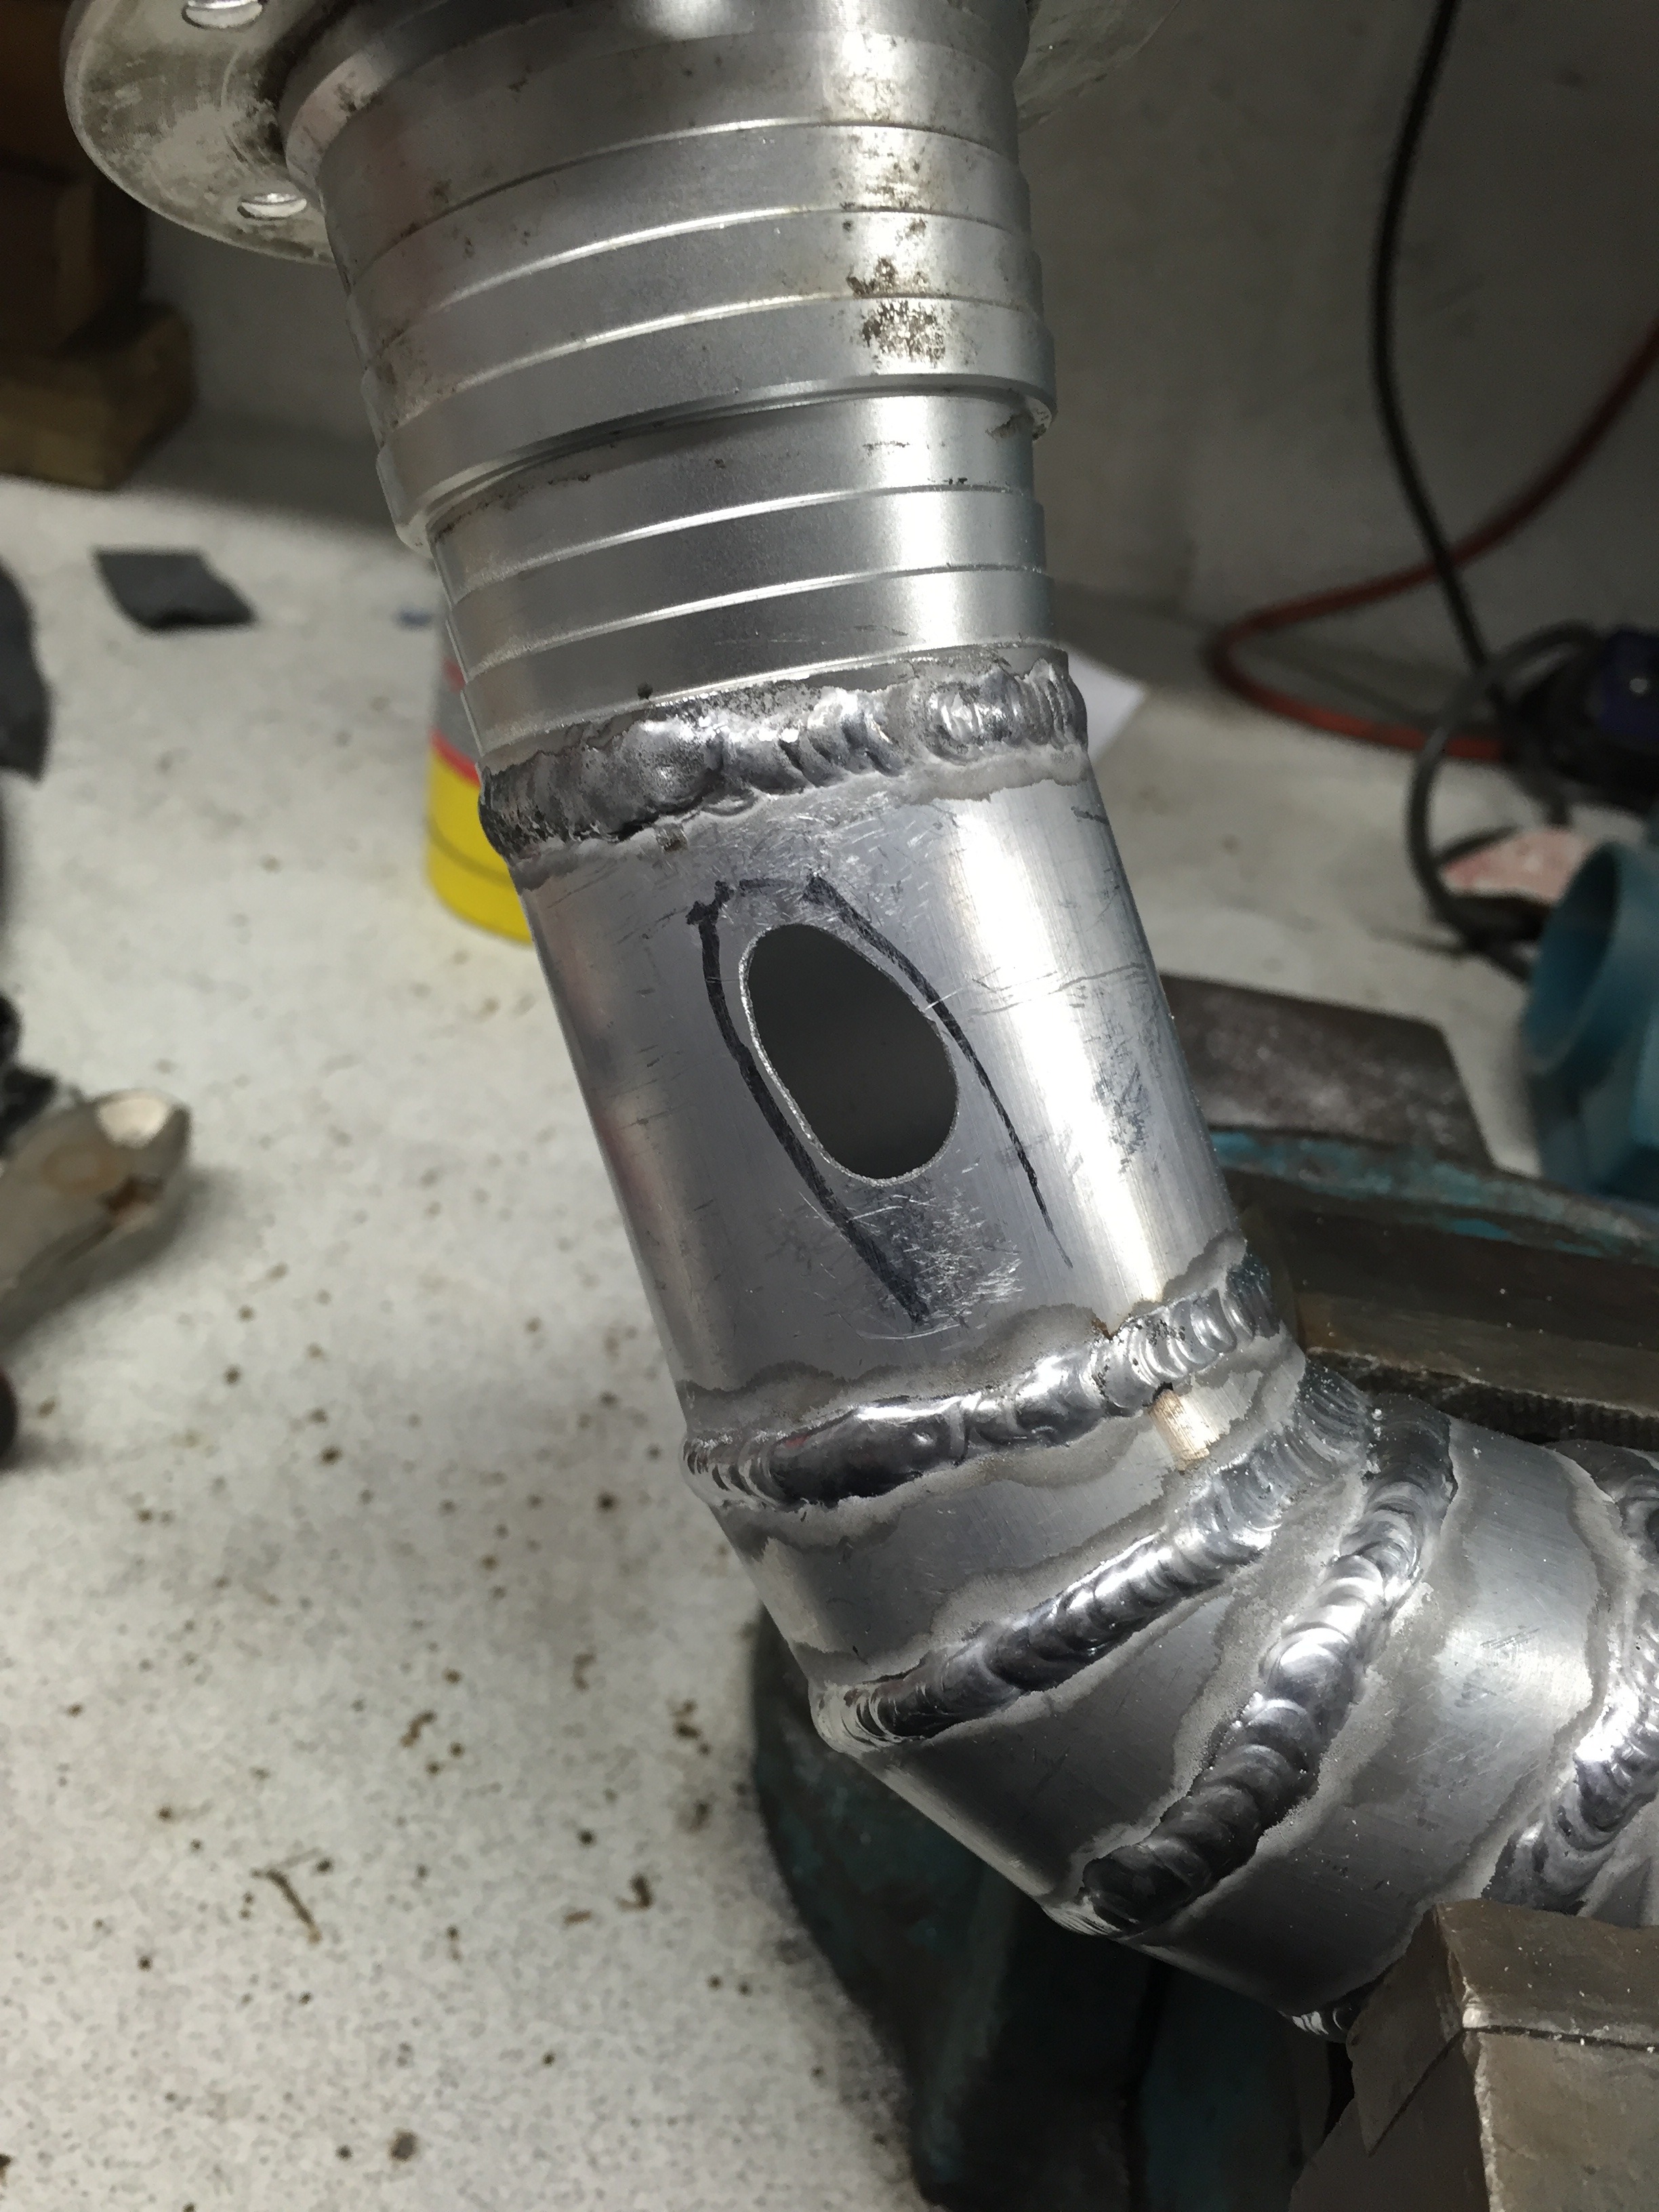
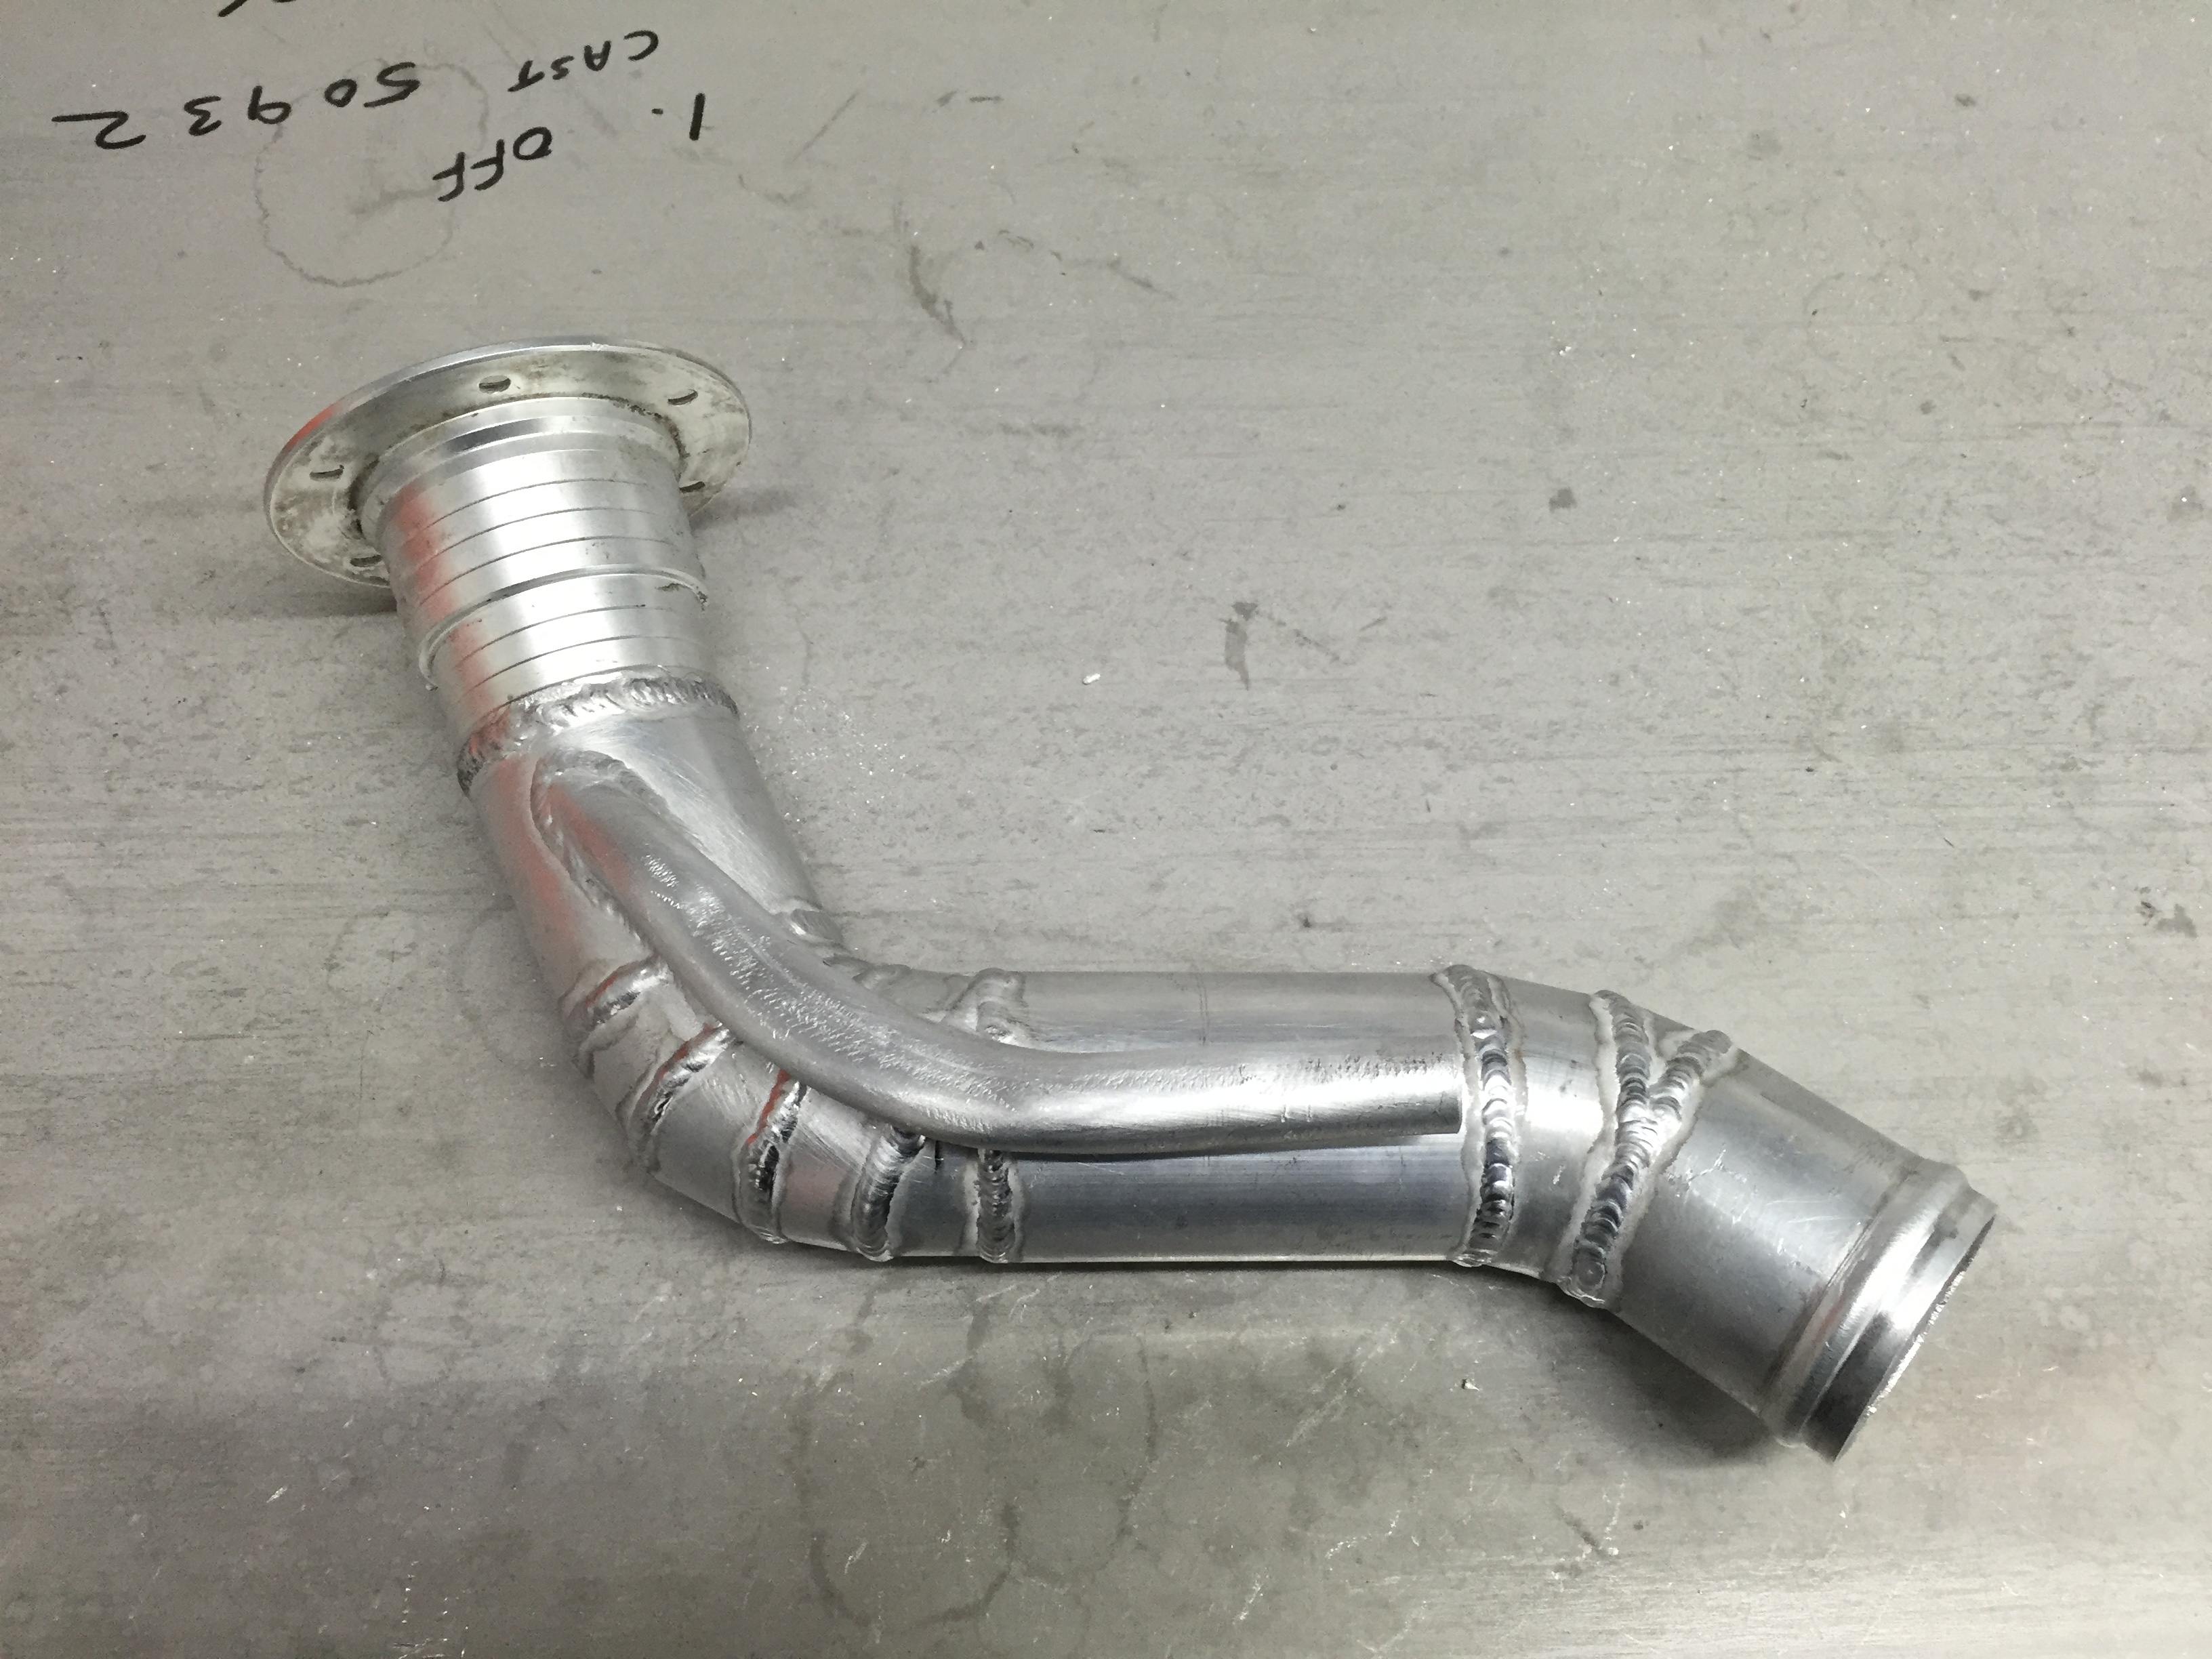
With that done I turned my attentions to the fuel filler pipe and cap - decided that the filler neck needed to be extended to allow a better/easier connection of the filler hose

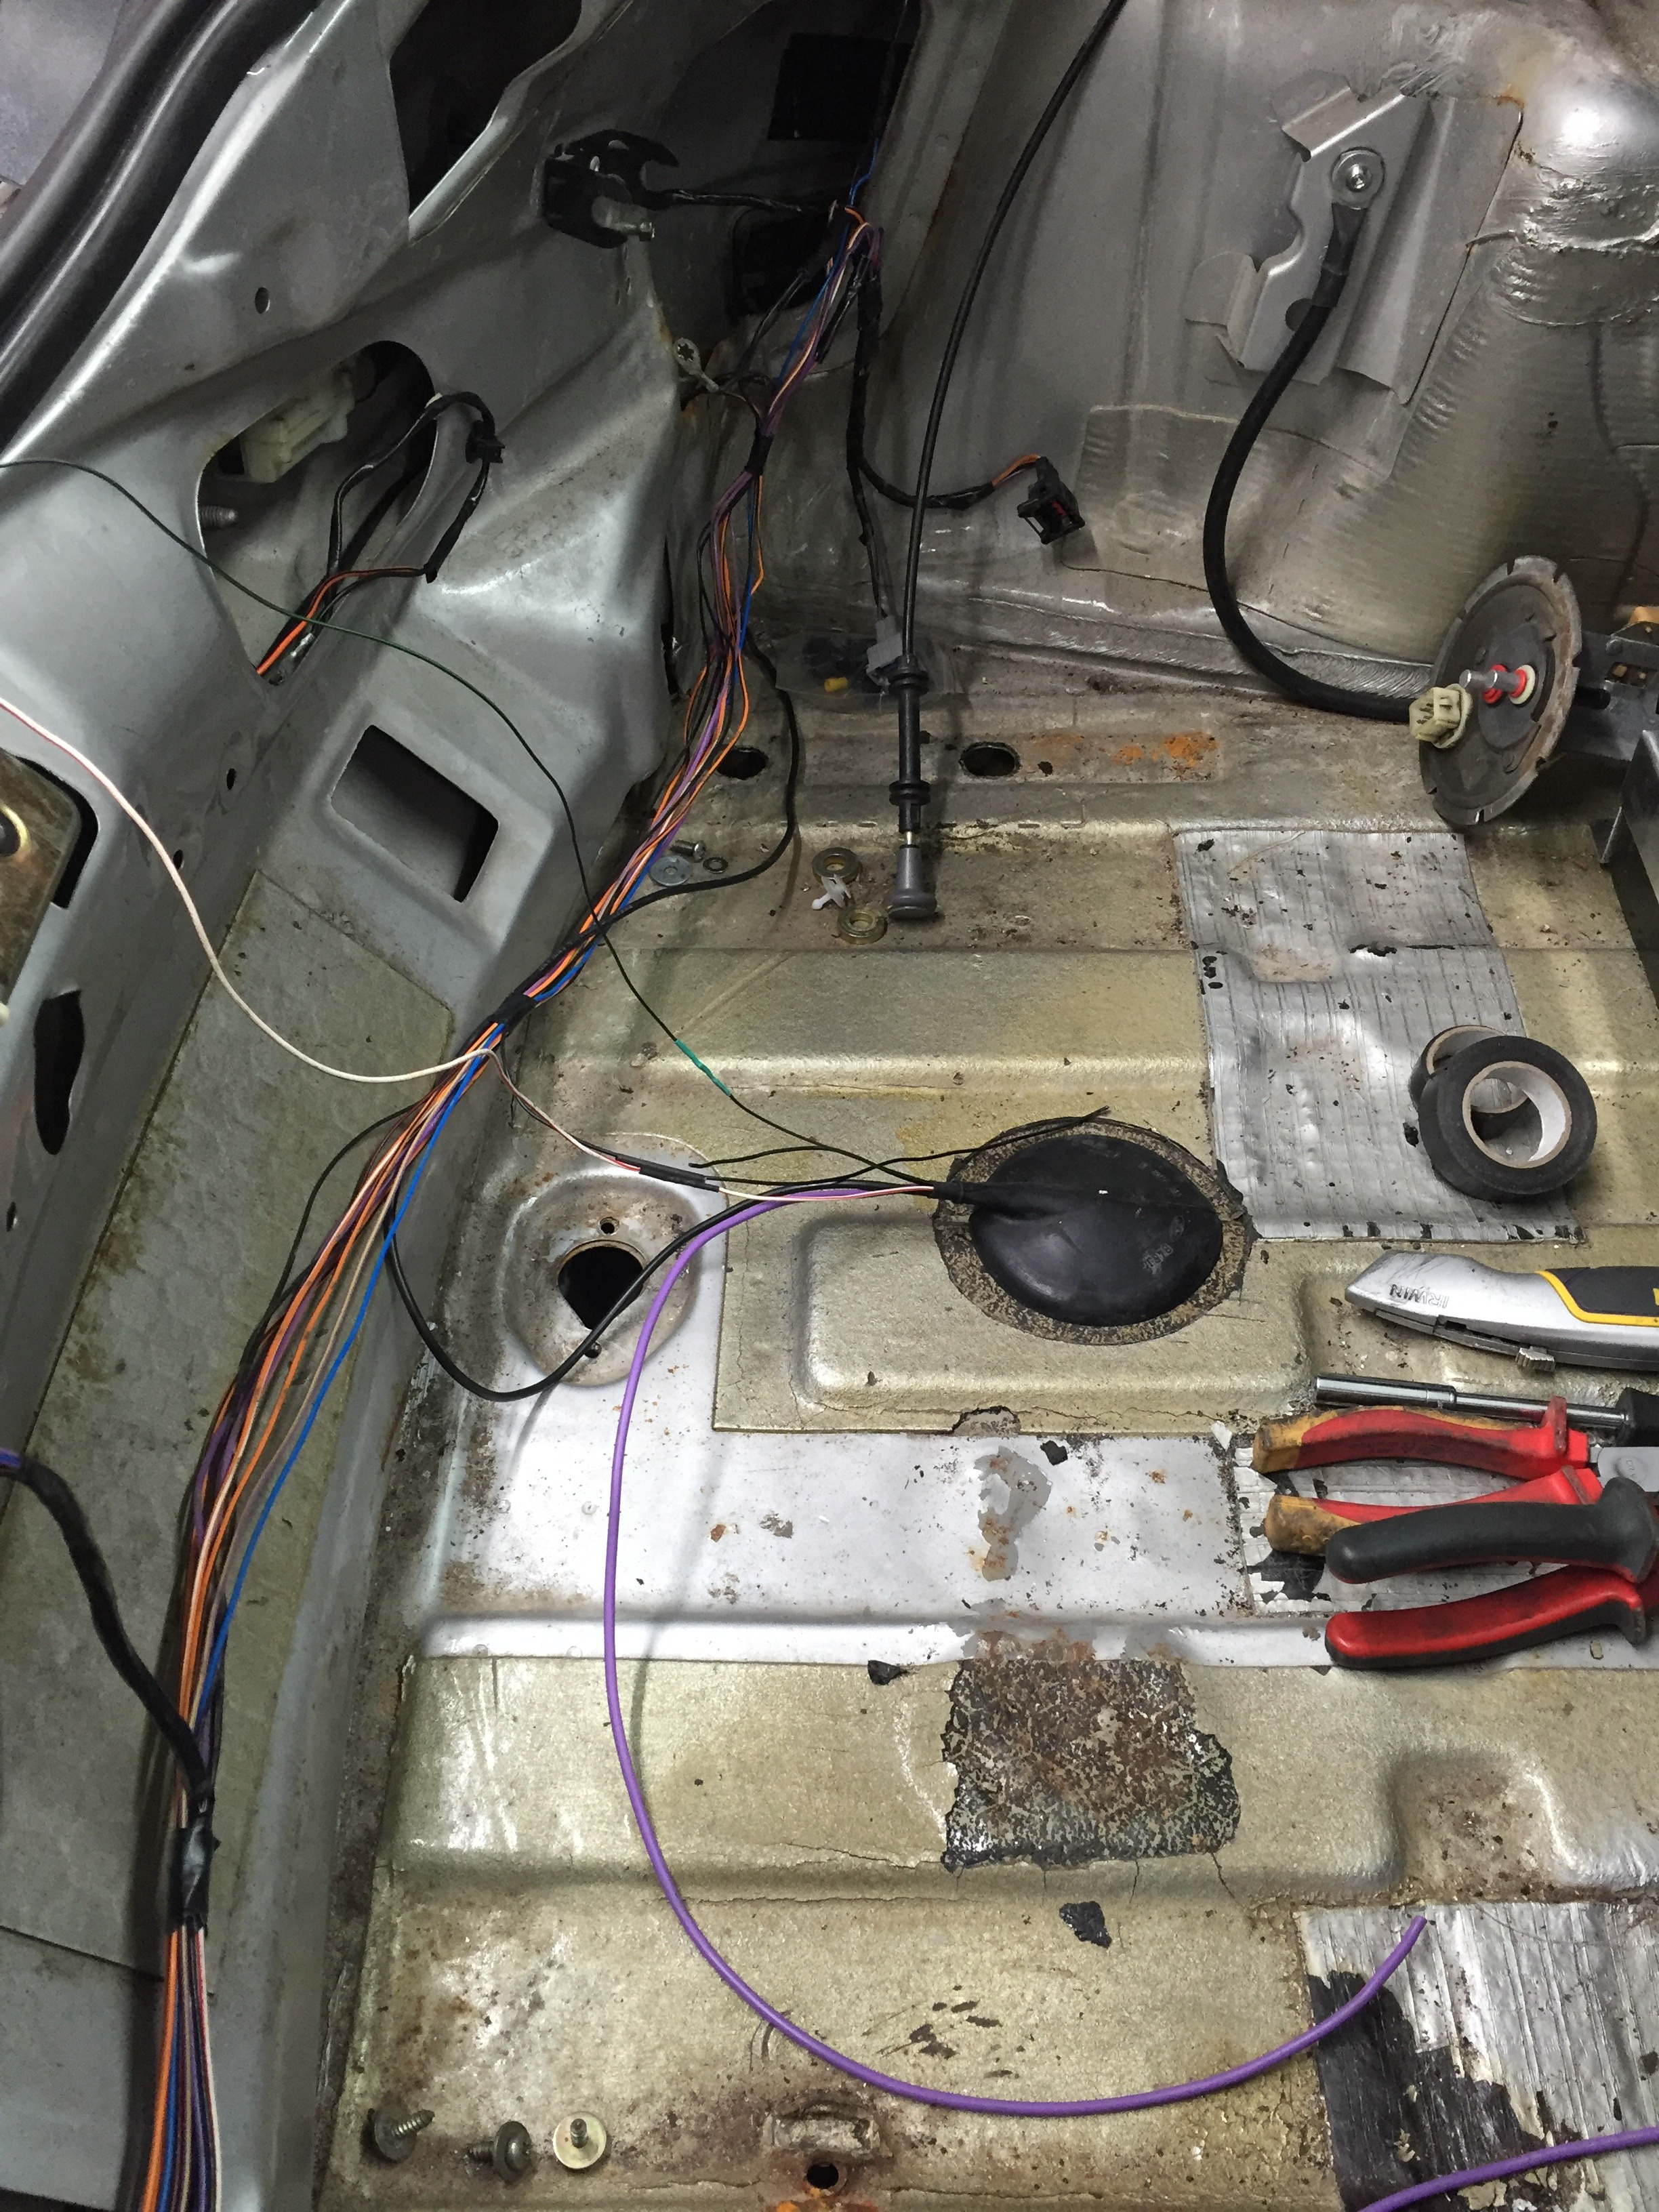
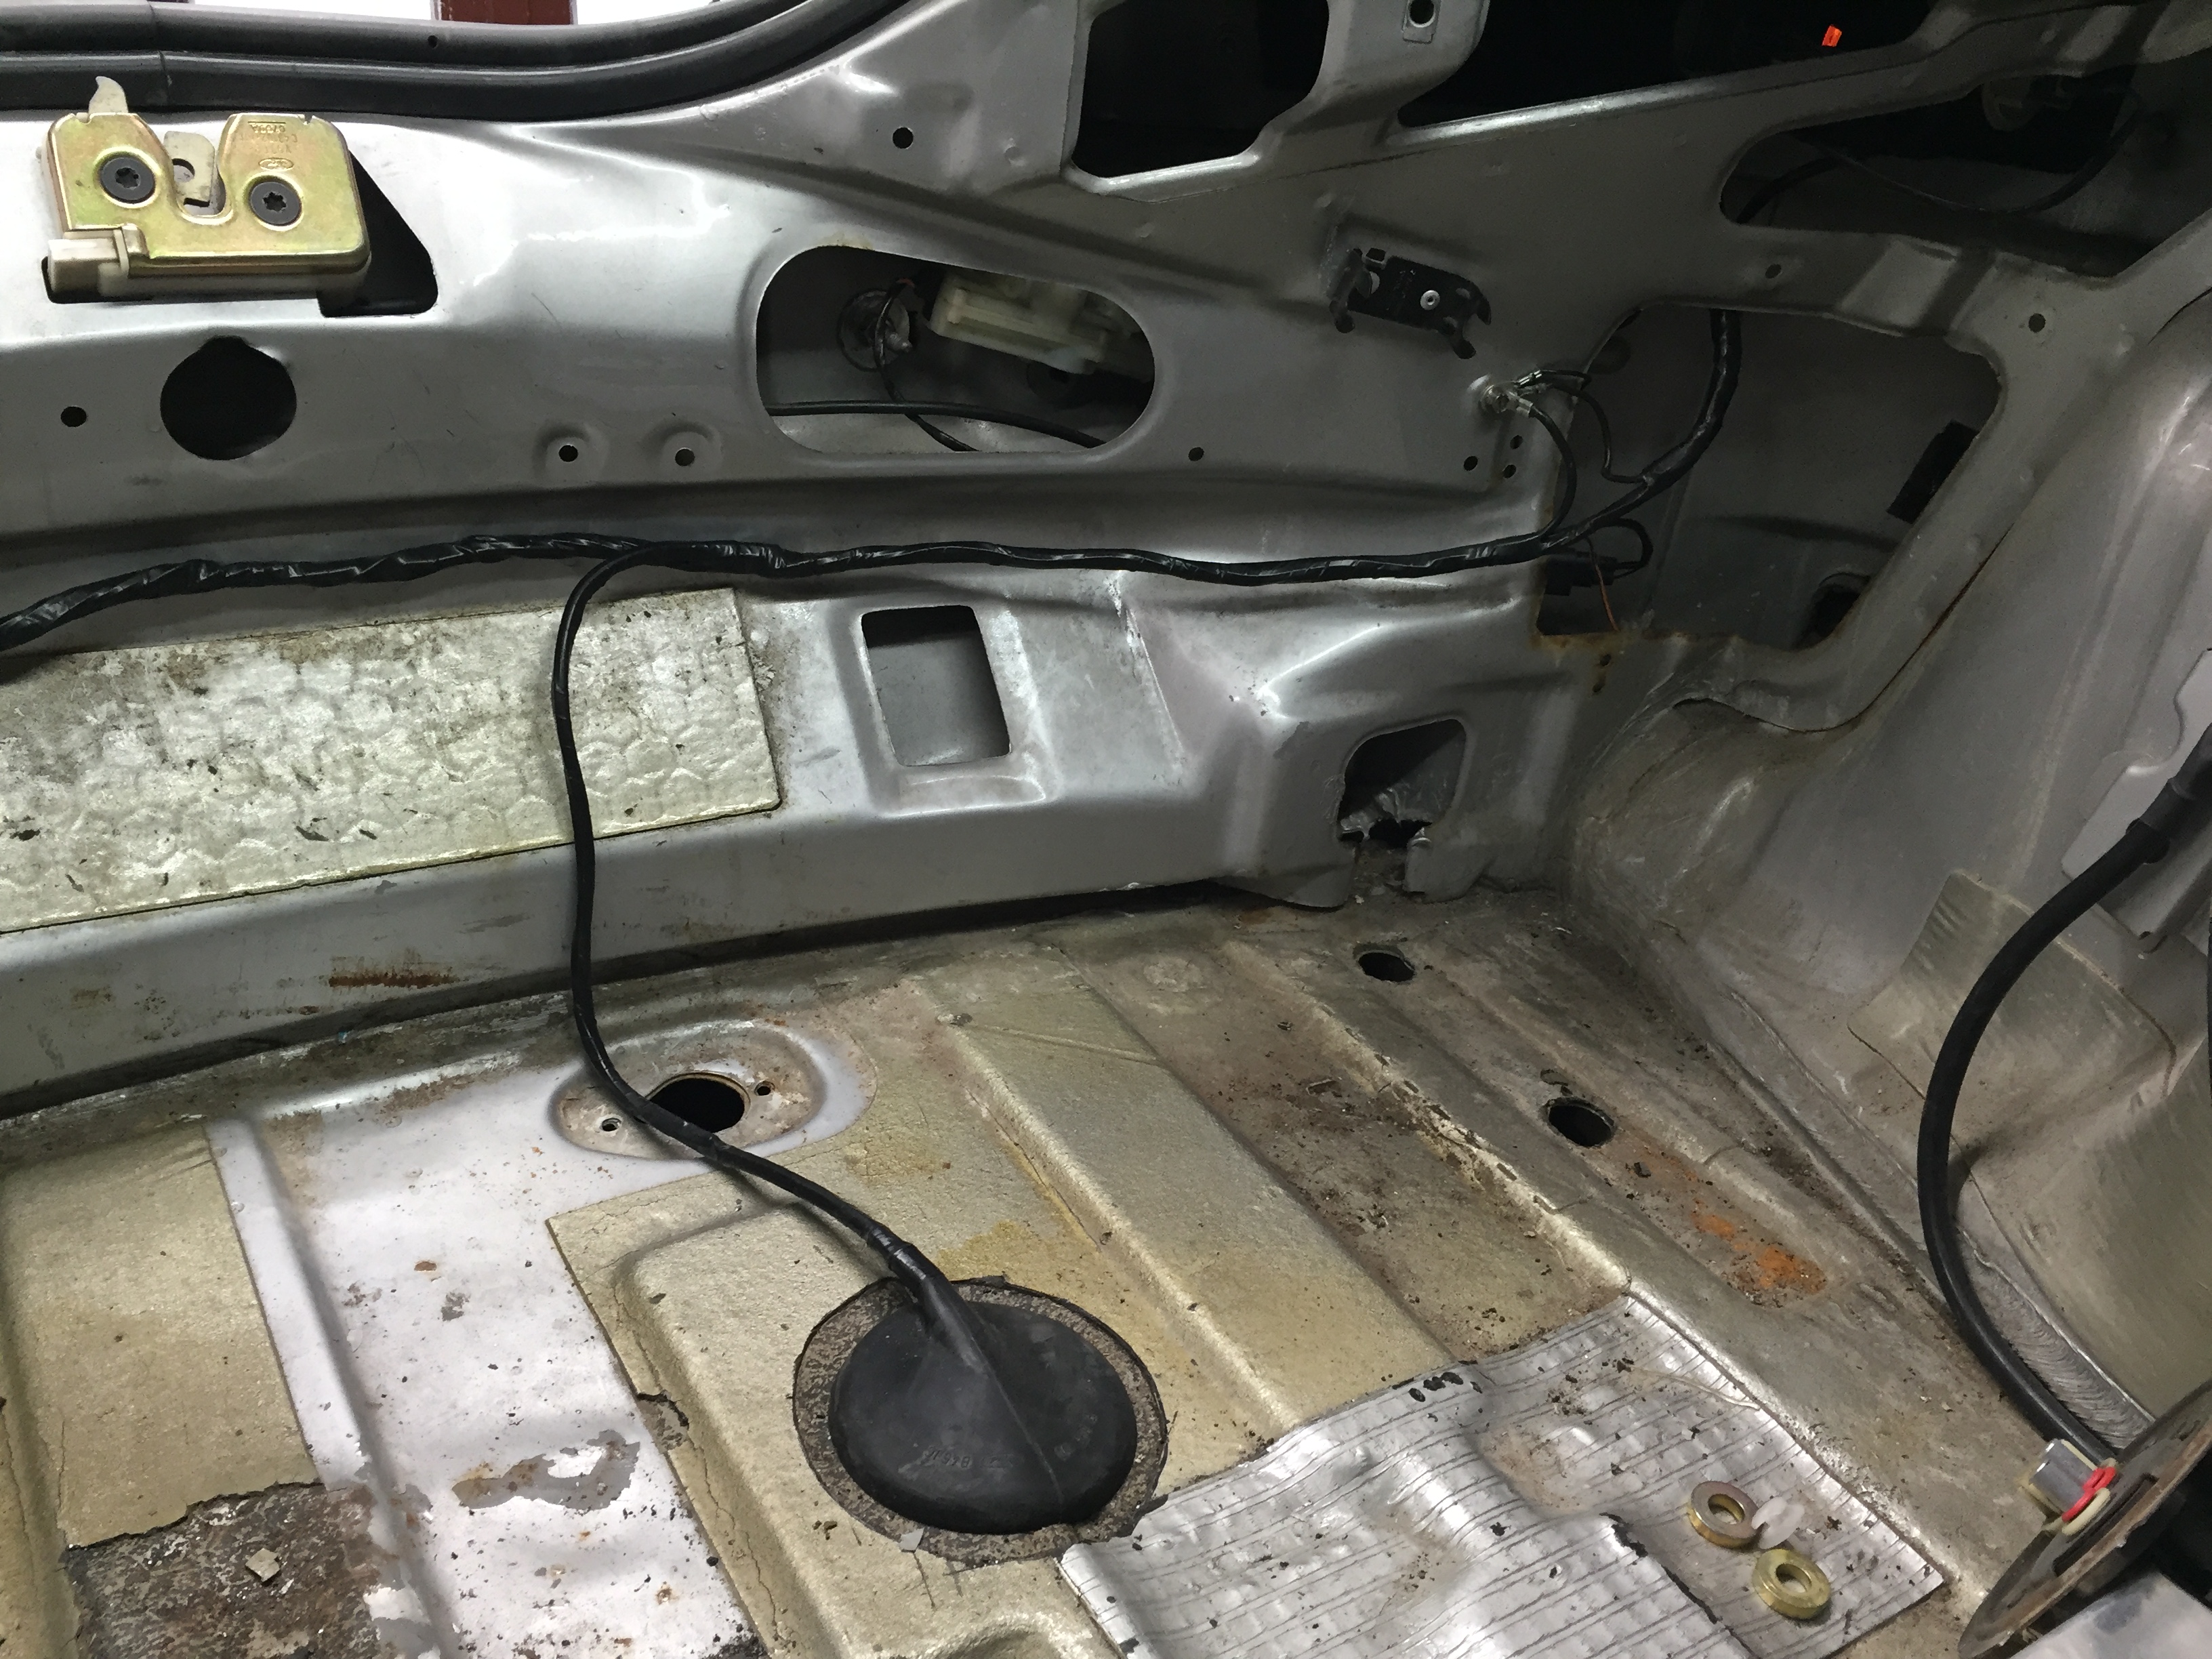
The wiring in the boot was left last time around, now with the tank being done I could finally get this last bit tidied up properly. Also decided to relocate the loom outlet for the tank into the boot floor using a ford grommit I had.

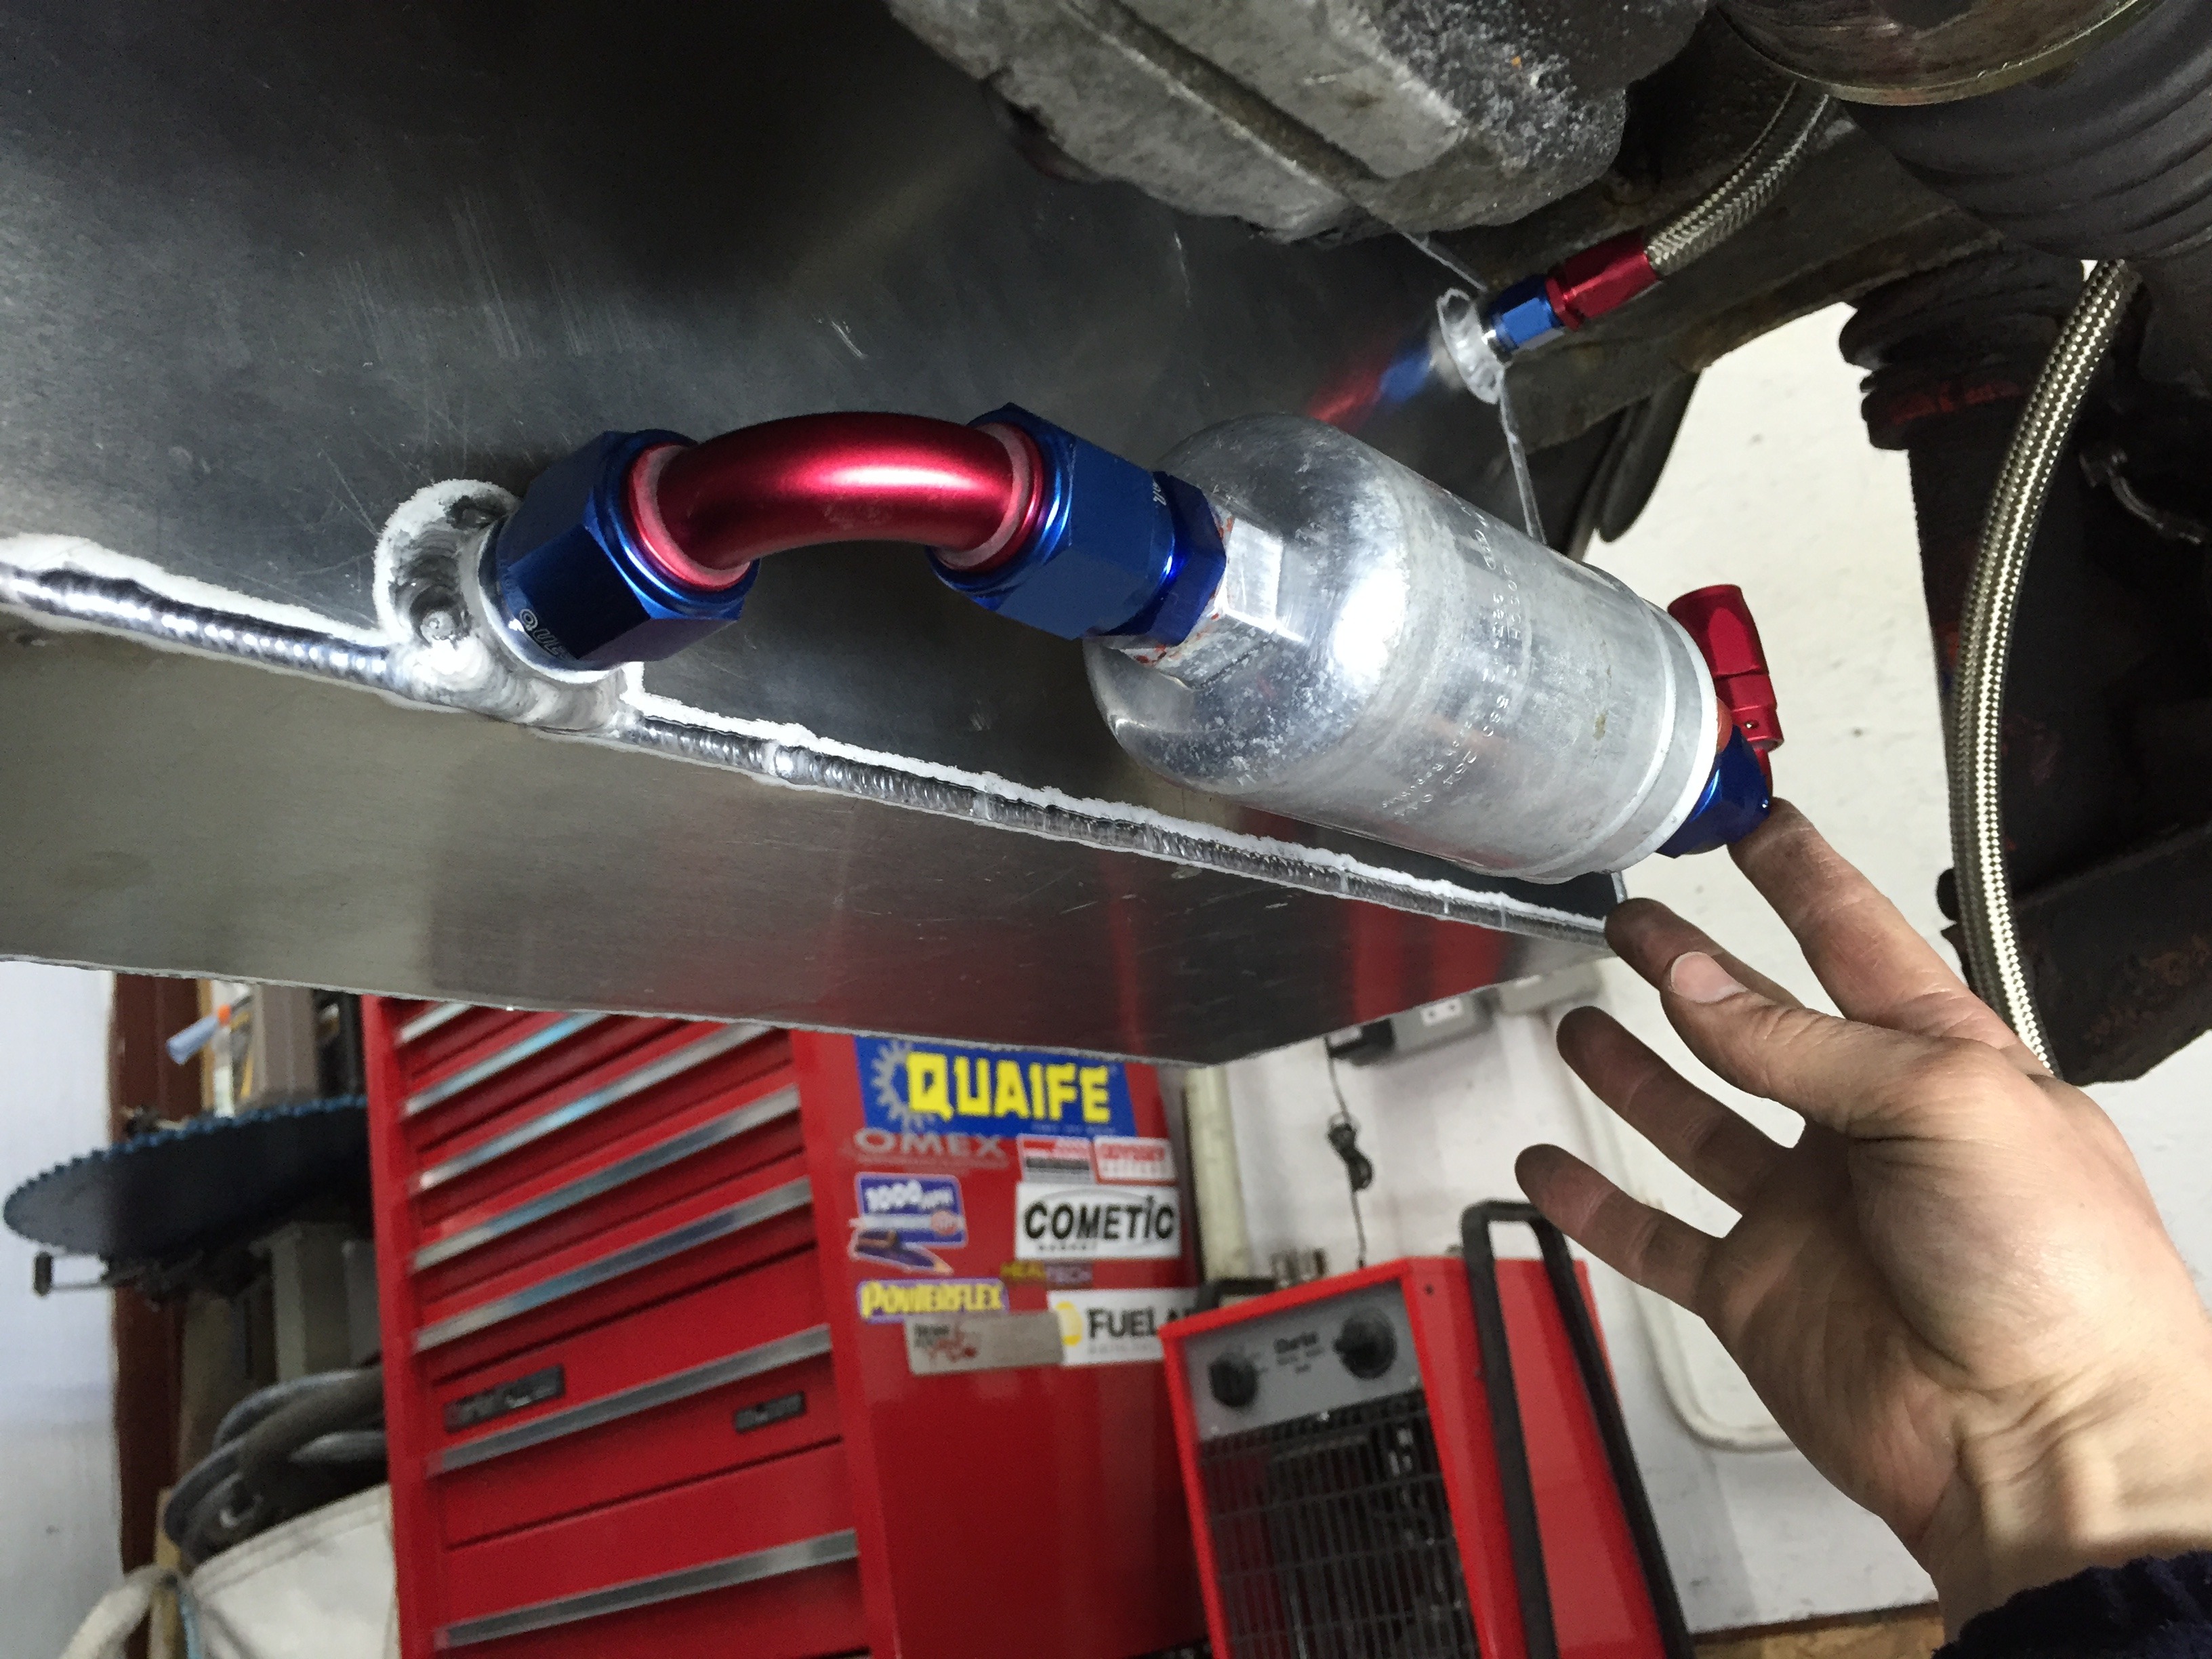
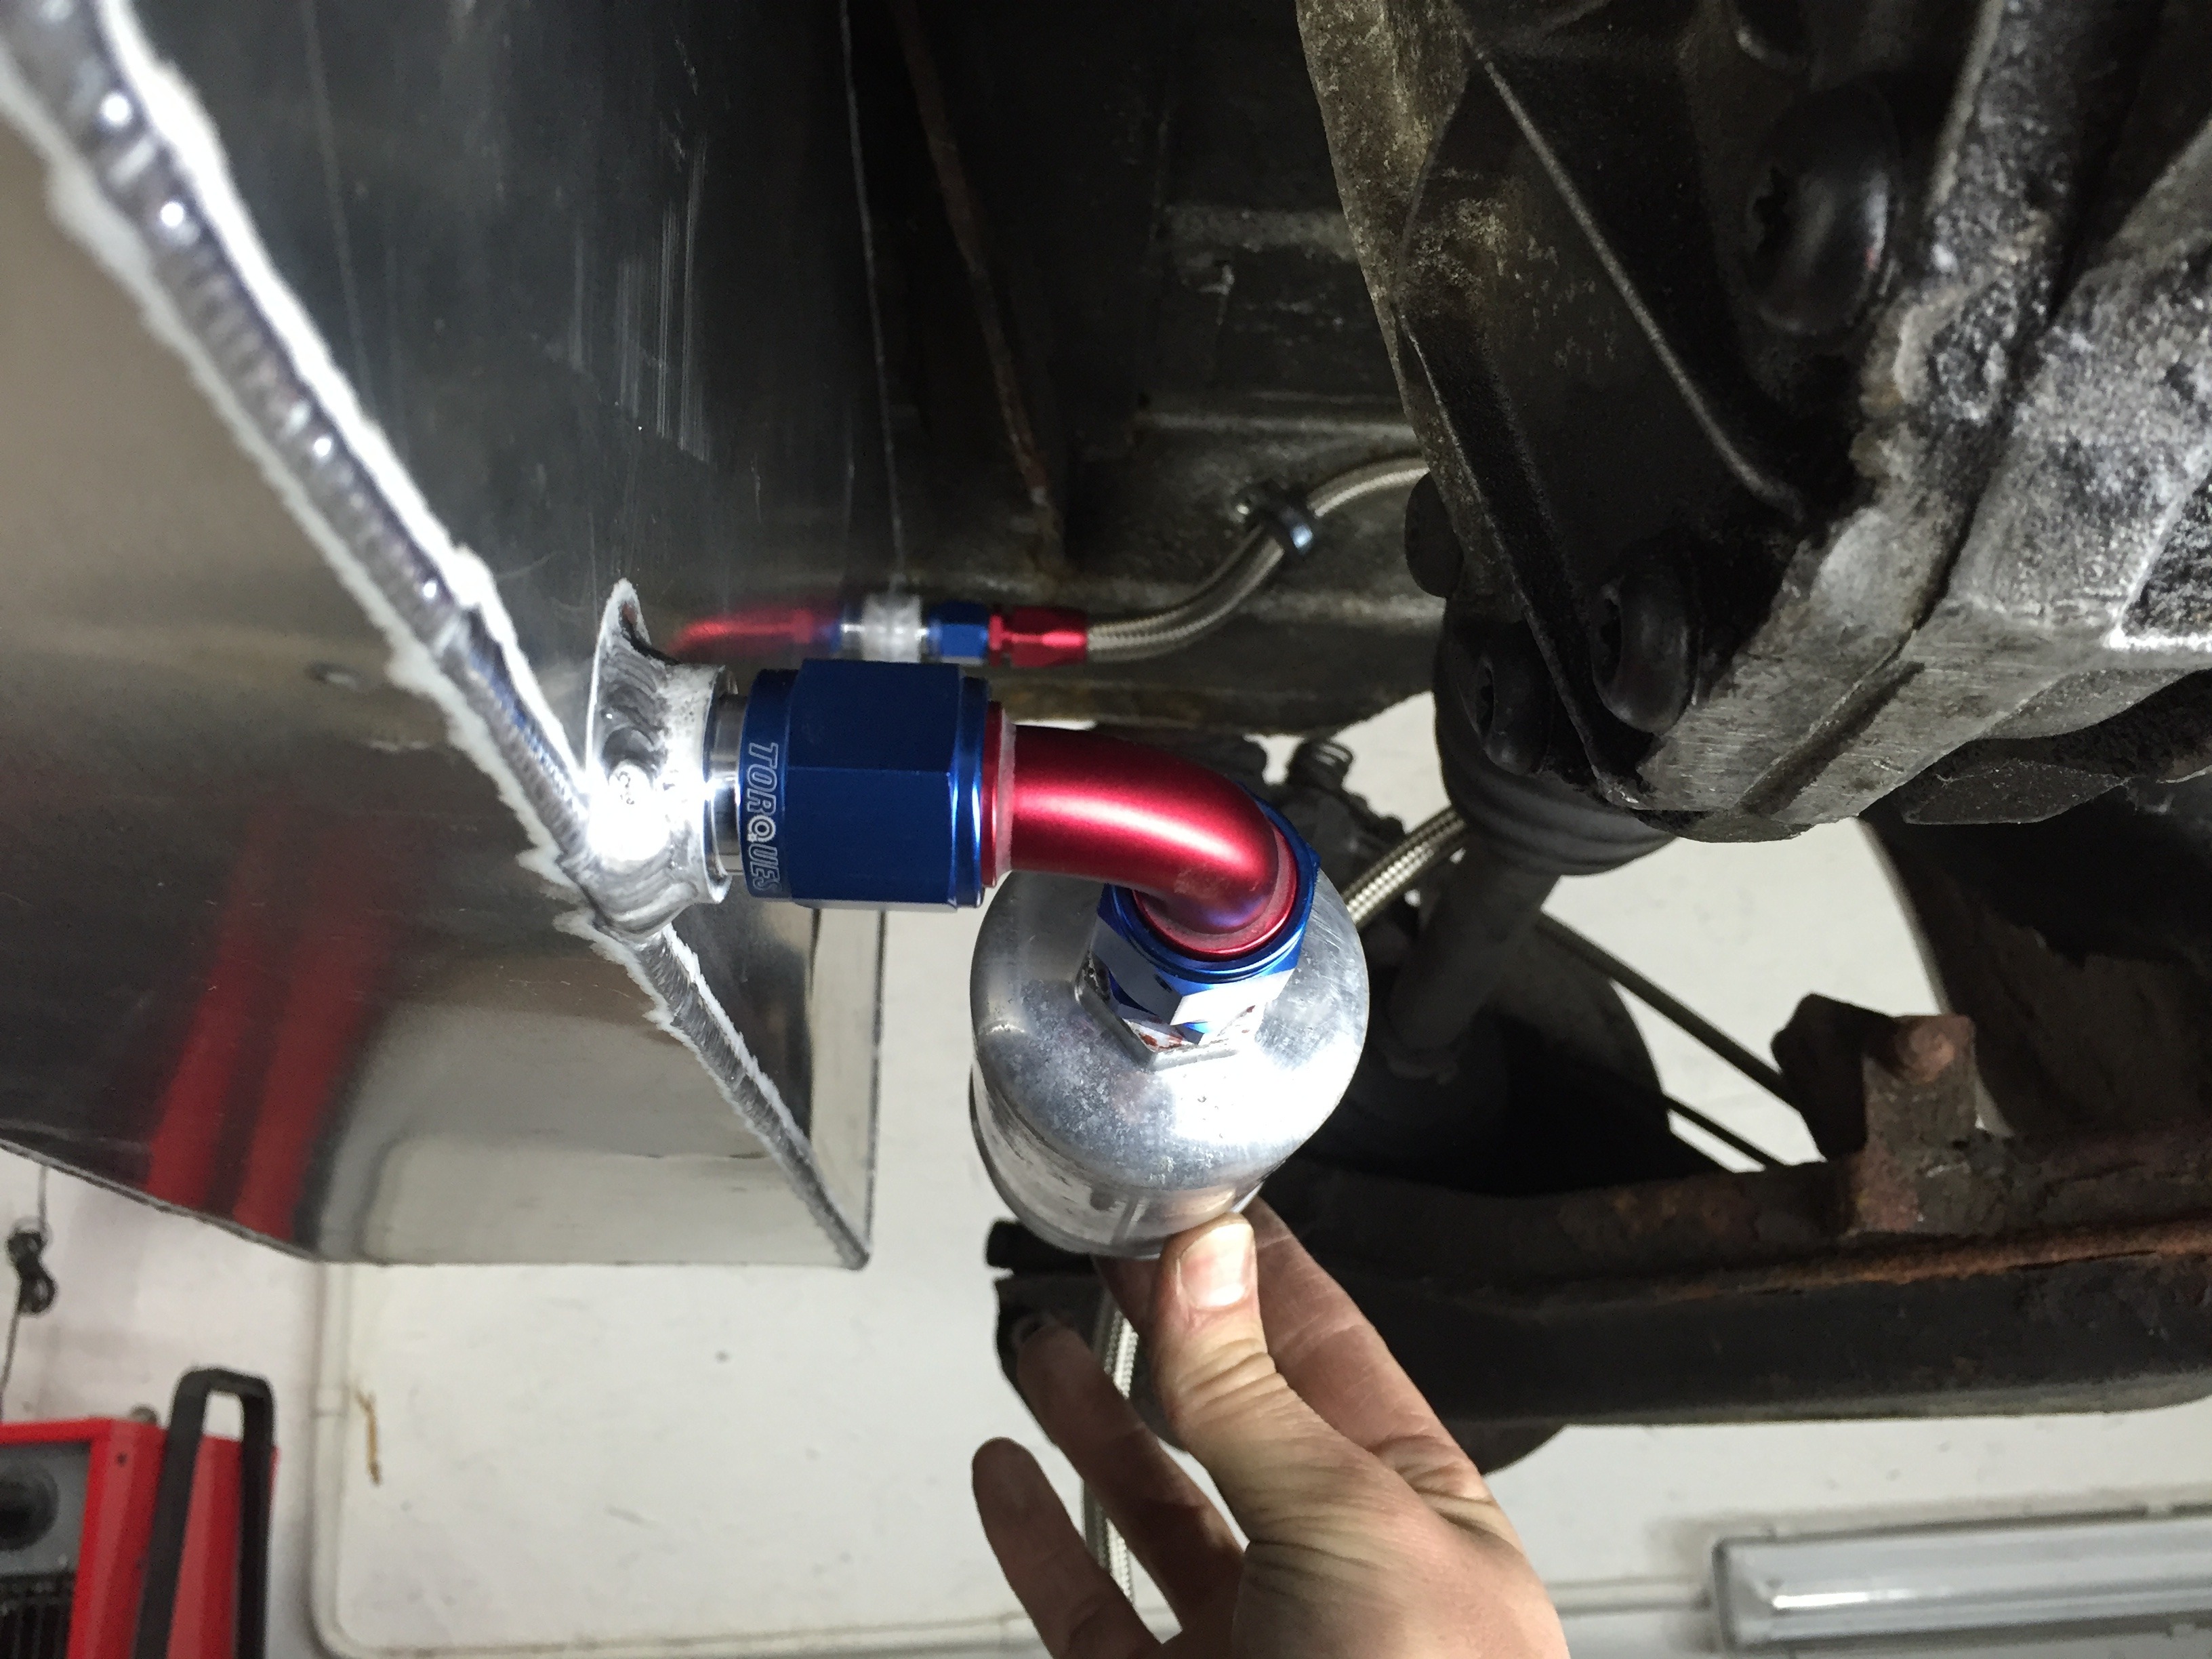
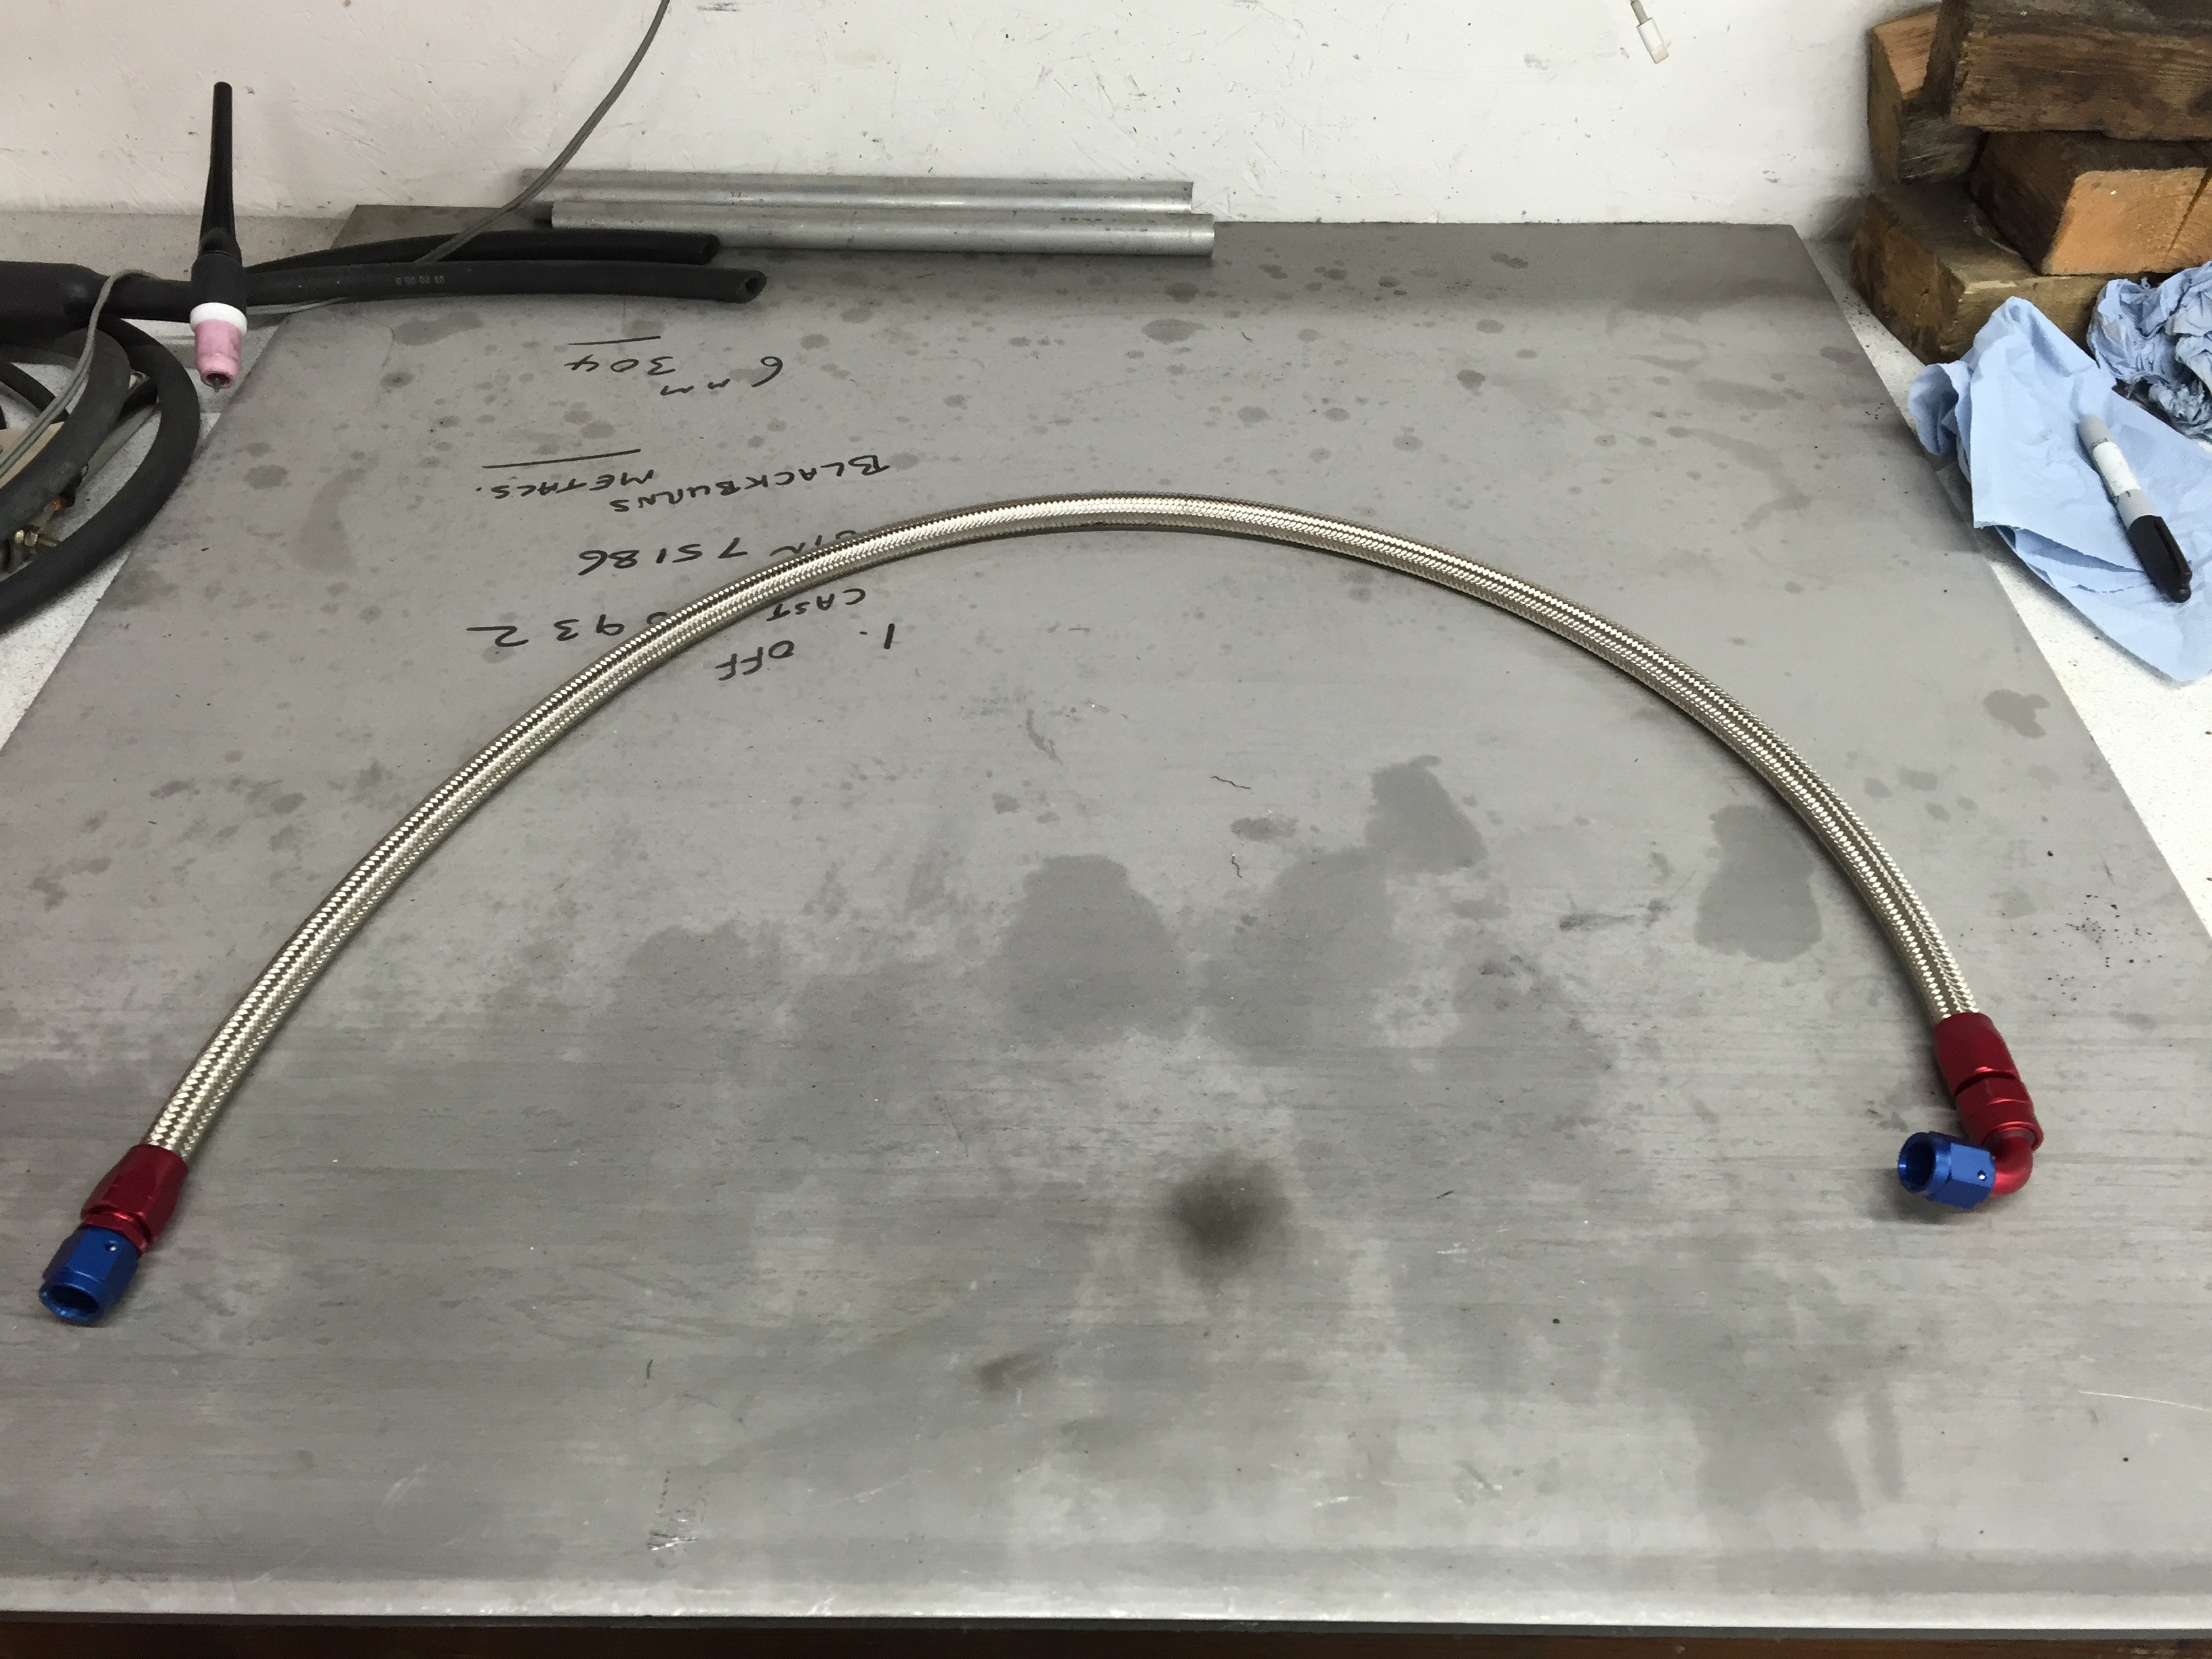
Also made up the feed line from the pump to the fuel filter which is located underneath the rear passenger seat (where the standard tank would be)
That's all for now, more to follow.
Thanks for looking.
Fuel pump fitting and brackets made


With that done I turned my attentions to the fuel filler pipe and cap - decided that the filler neck needed to be extended to allow a better/easier connection of the filler hose


The wiring in the boot was left last time around, now with the tank being done I could finally get this last bit tidied up properly. Also decided to relocate the loom outlet for the tank into the boot floor using a ford grommit I had.


Also made up the feed line from the pump to the fuel filter which is located underneath the rear passenger seat (where the standard tank would be)

That's all for now, more to follow.
Thanks for looking.
20-06-2016, 06:45 AM
#186
PassionFord Regular
very good welder you are mate !
!
 20-06-2016, 05:33 PM
#190
PassionFord Regular
Thread Starter
I'm going to have to own up here as its not me that has done the welding but my brother Ben. We bought the TIG welder around a year ago now and he's self taught completely. This tank is to date the largest item ever made. I did all the cutting and moulding, he does all the welding!
Think it's just the one offered on the polevolt website. If I remember right it was around �25. Not the best tool in the world, but it does crimp the connections well enough.
Think it's just the one offered on the polevolt website. If I remember right it was around �25. Not the best tool in the world, but it does crimp the connections well enough.
20-06-2016, 07:50 PM
#192
I've found that life I needed.. It's HERE!!
What on earth were these morons up to! Good work sorting it though.
Do you think it was a challenge to build a puma 4x4 Cosworth in a weekend lol.
"Have we got the parts in for the puma build?"
"Yep, club hammer ready, the mastic came in earlier, still got cable ties left over from the last build and if we can't complete it with those we've got the mop bucket and next door's scrap pile"
Do you think it was a challenge to build a puma 4x4 Cosworth in a weekend lol.
"Have we got the parts in for the puma build?"
"Yep, club hammer ready, the mastic came in earlier, still got cable ties left over from the last build and if we can't complete it with those we've got the mop bucket and next door's scrap pile"
But you are coping really well. It will be one well sorted car when you're finished but I wouldn't like to predict when that will be as the bodge experts have been thorough 😳
Keep in there.
21-06-2016, 05:27 PM
#193
PassionFord Regular
Thread Starter
This way of working reminds me of a maintenance team I was forced to work with 16 years ago. The guys weren't complete mongs but every job was like a speed trial and you were only allowed to use materials with a 30m radius. I couldn't cope.
But you are coping really well. It will be one well sorted car when you're finished but I wouldn't like to predict when that will be as the bodge experts have been thorough 😳
Keep in there.
But you are coping really well. It will be one well sorted car when you're finished but I wouldn't like to predict when that will be as the bodge experts have been thorough 😳
Keep in there.
Onwards and upwards!
23-06-2016, 08:39 PM
#194
PassionFord Regular
I'm going to have to own up here as its not me that has done the welding but my brother Ben. We bought the TIG welder around a year ago now and he's self taught completely. This tank is to date the largest item ever made. I did all the cutting and moulding, he does all the welding! ....
...however, both of of you are doing great, man
 !
!love this one, keep us posted...
26-06-2016, 07:00 PM
#195
Yea, just onwards and upwards as you say. Engine is rebuilt now after about 6-7 weeks and hopefully this should see some better results!
The following users liked this post:
visa_broke (26-06-2016)
26-06-2016, 07:04 PM
#196
06-07-2016, 04:07 PM
#197
PassionFord Regular
Thread Starter
Update time, will try and get this to where I am now over the next few days.
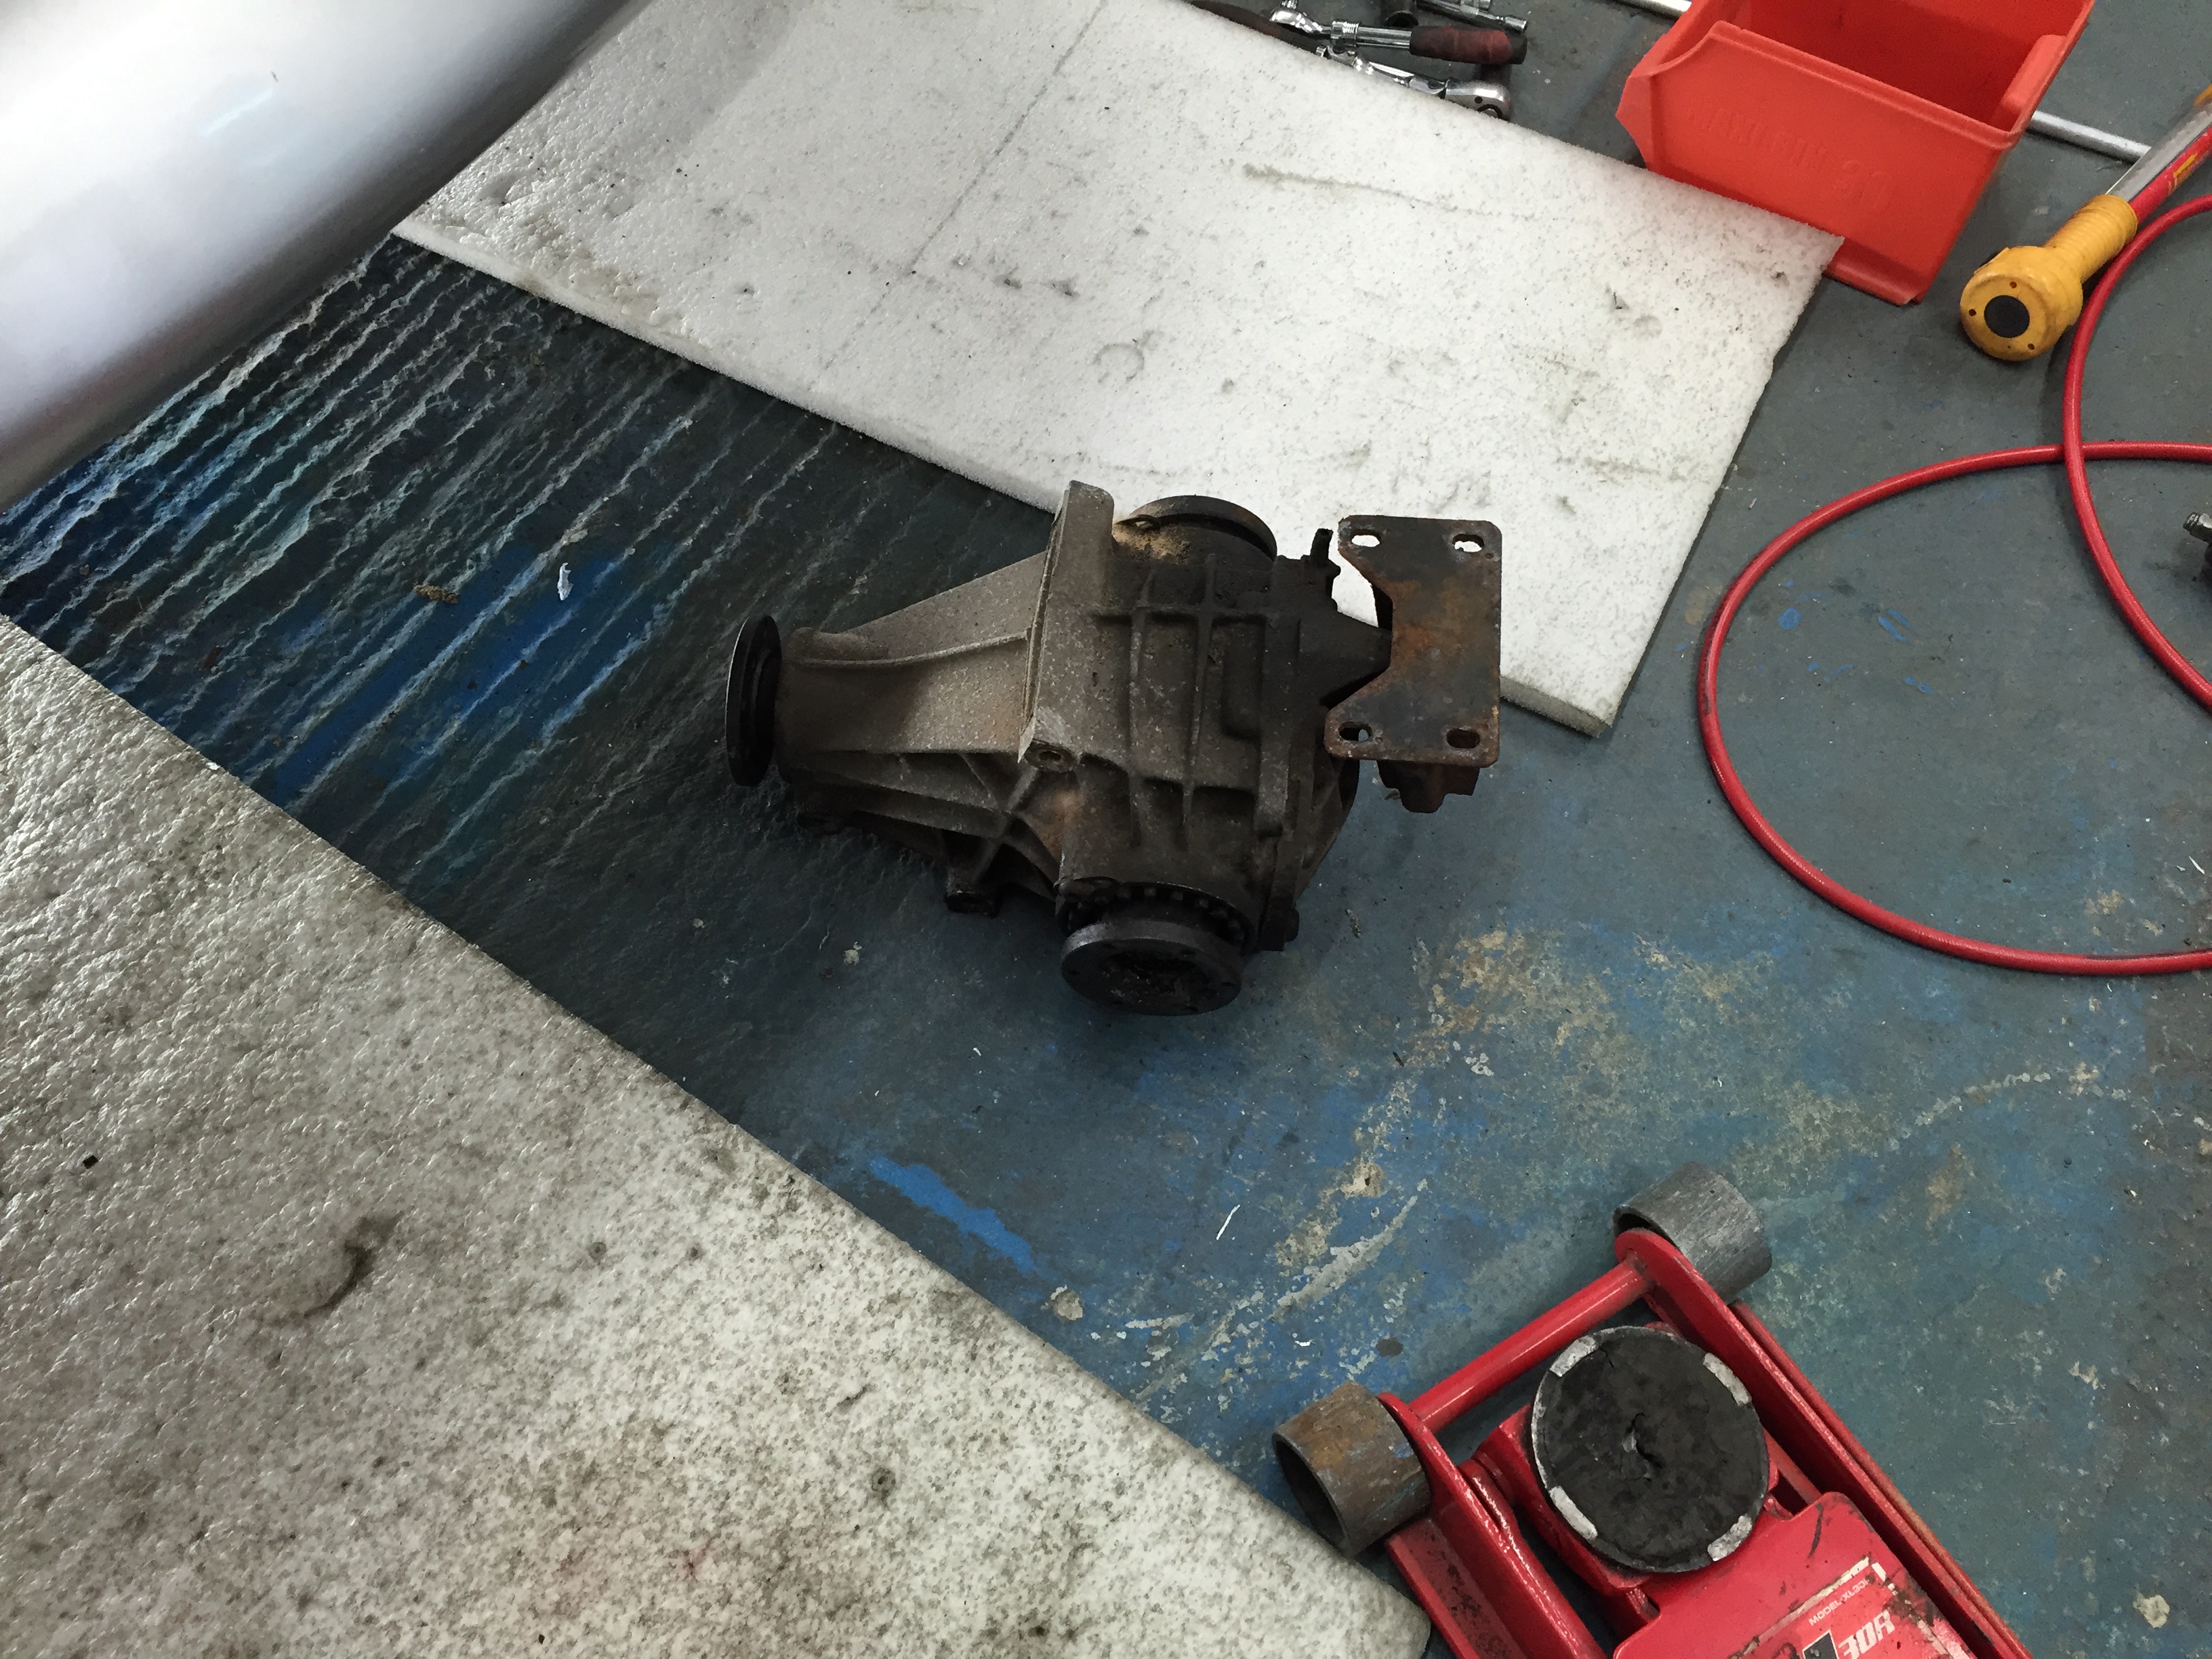
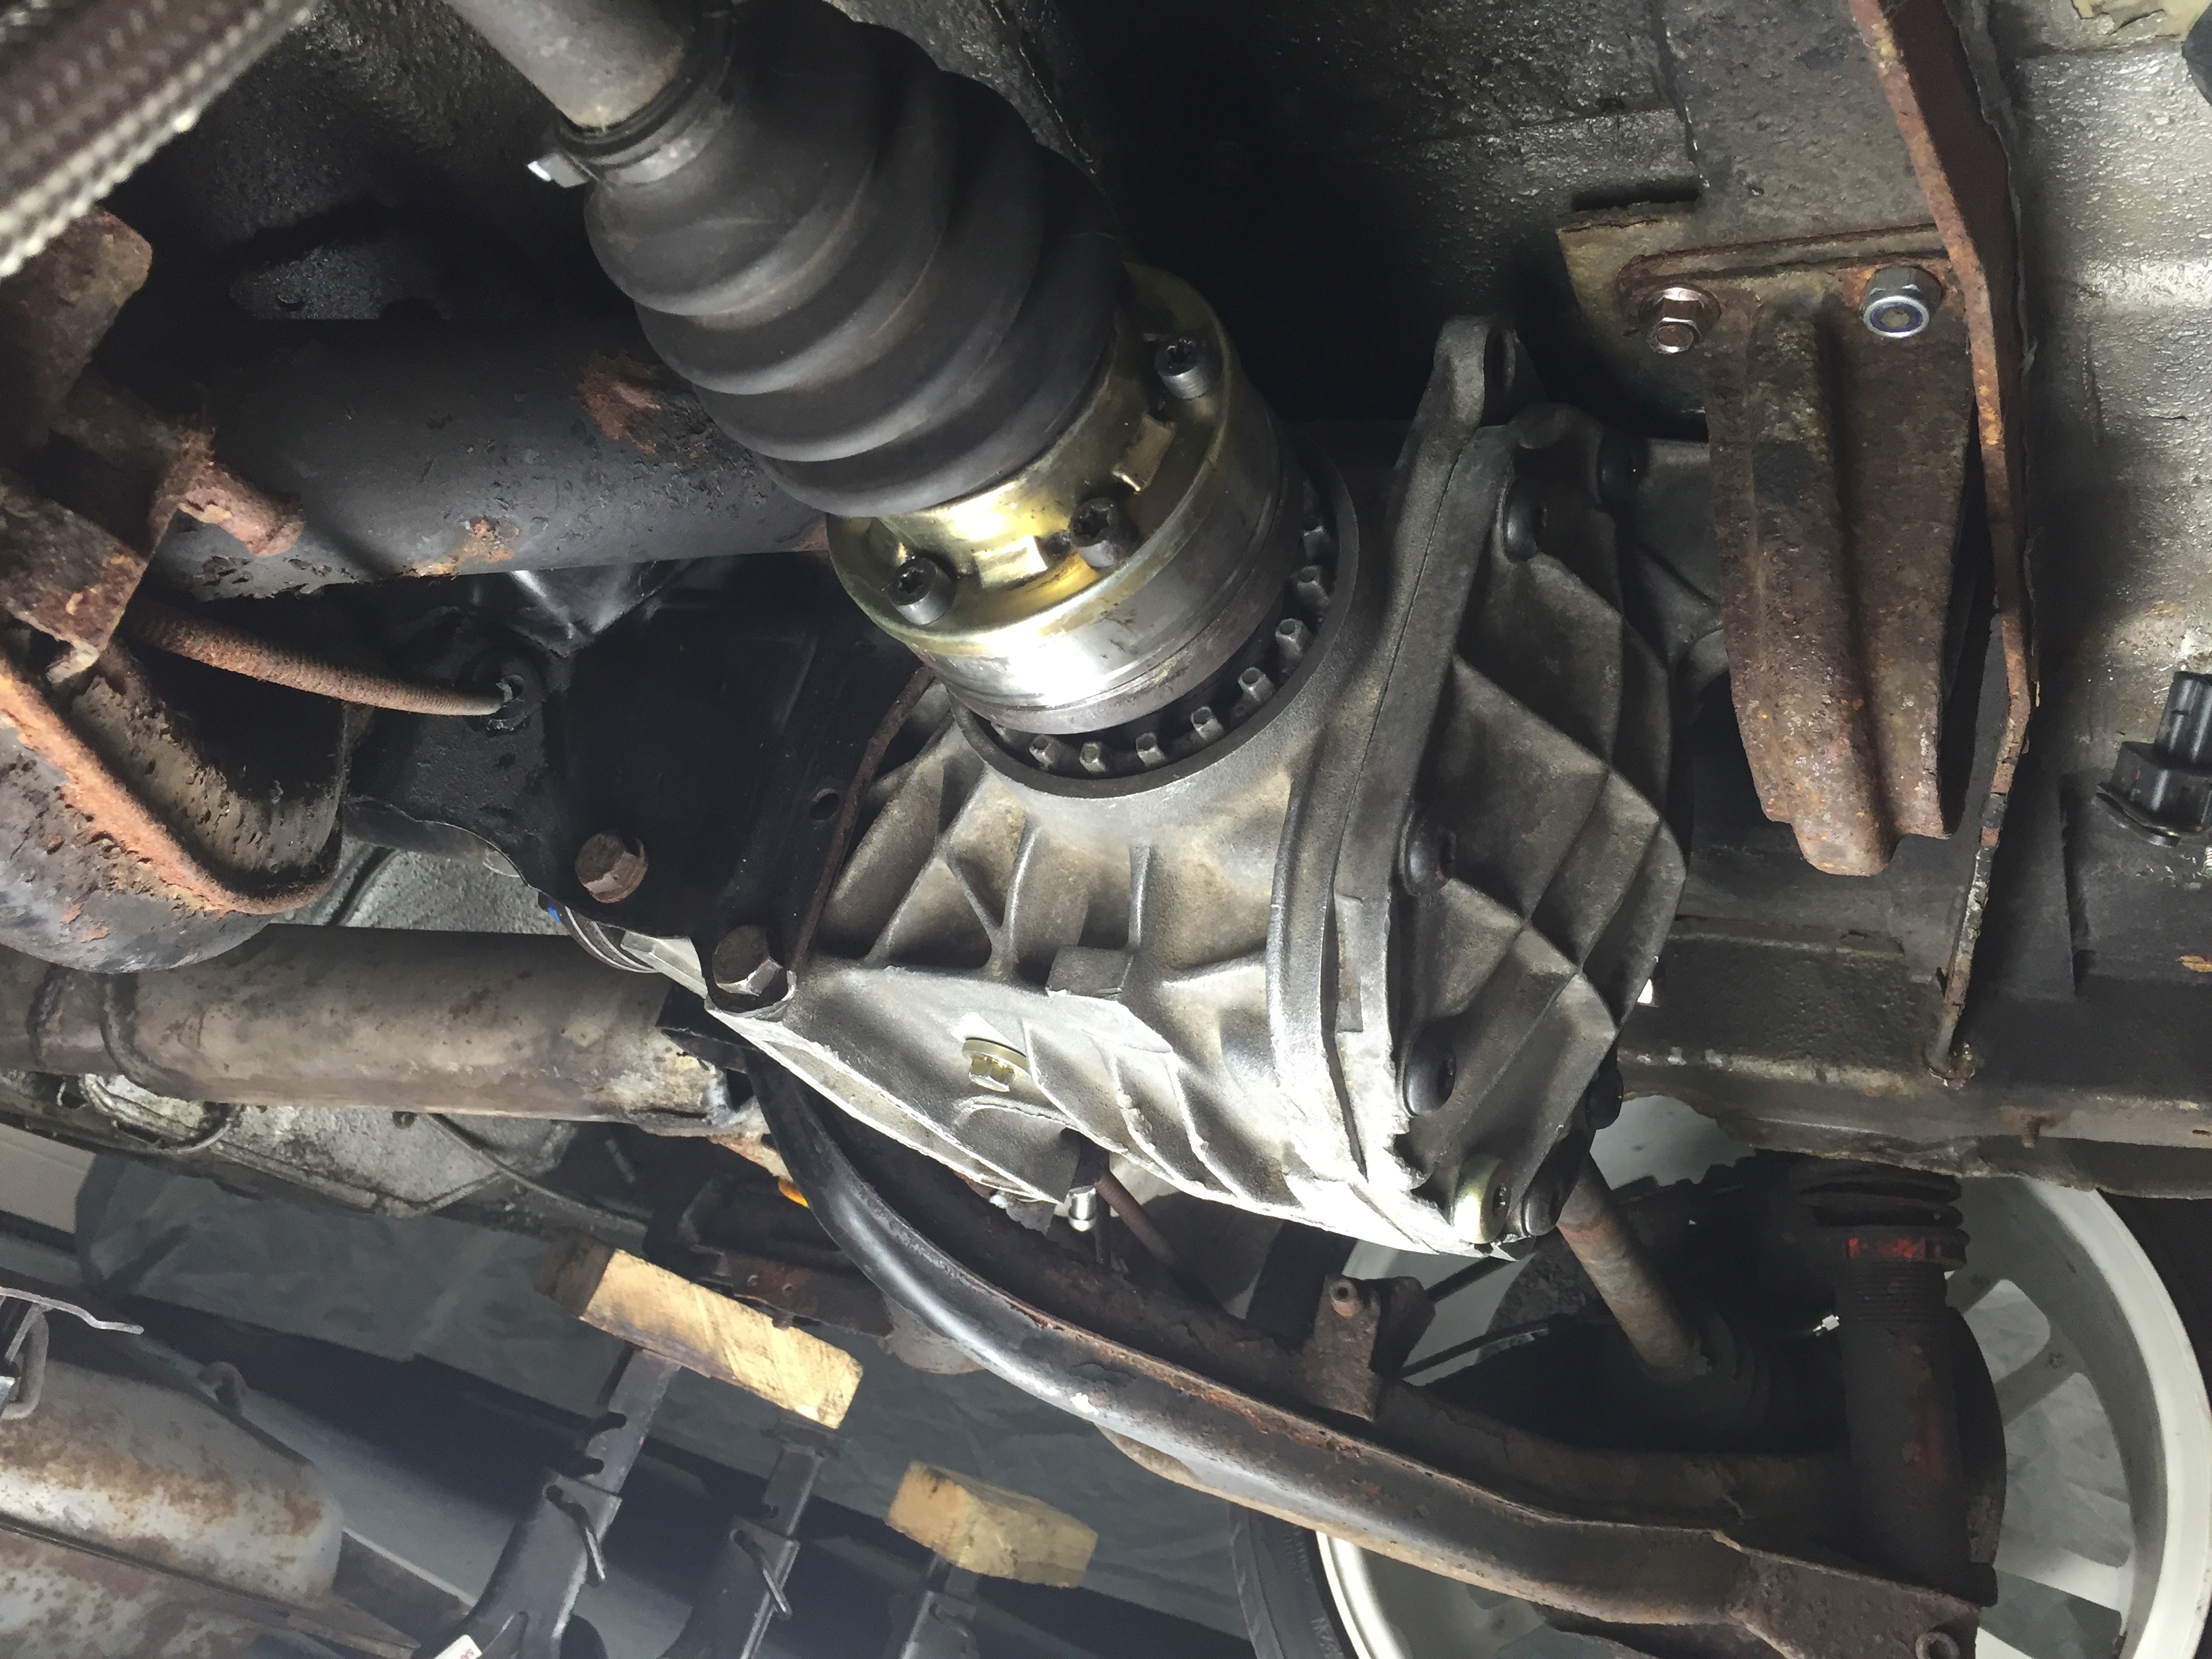
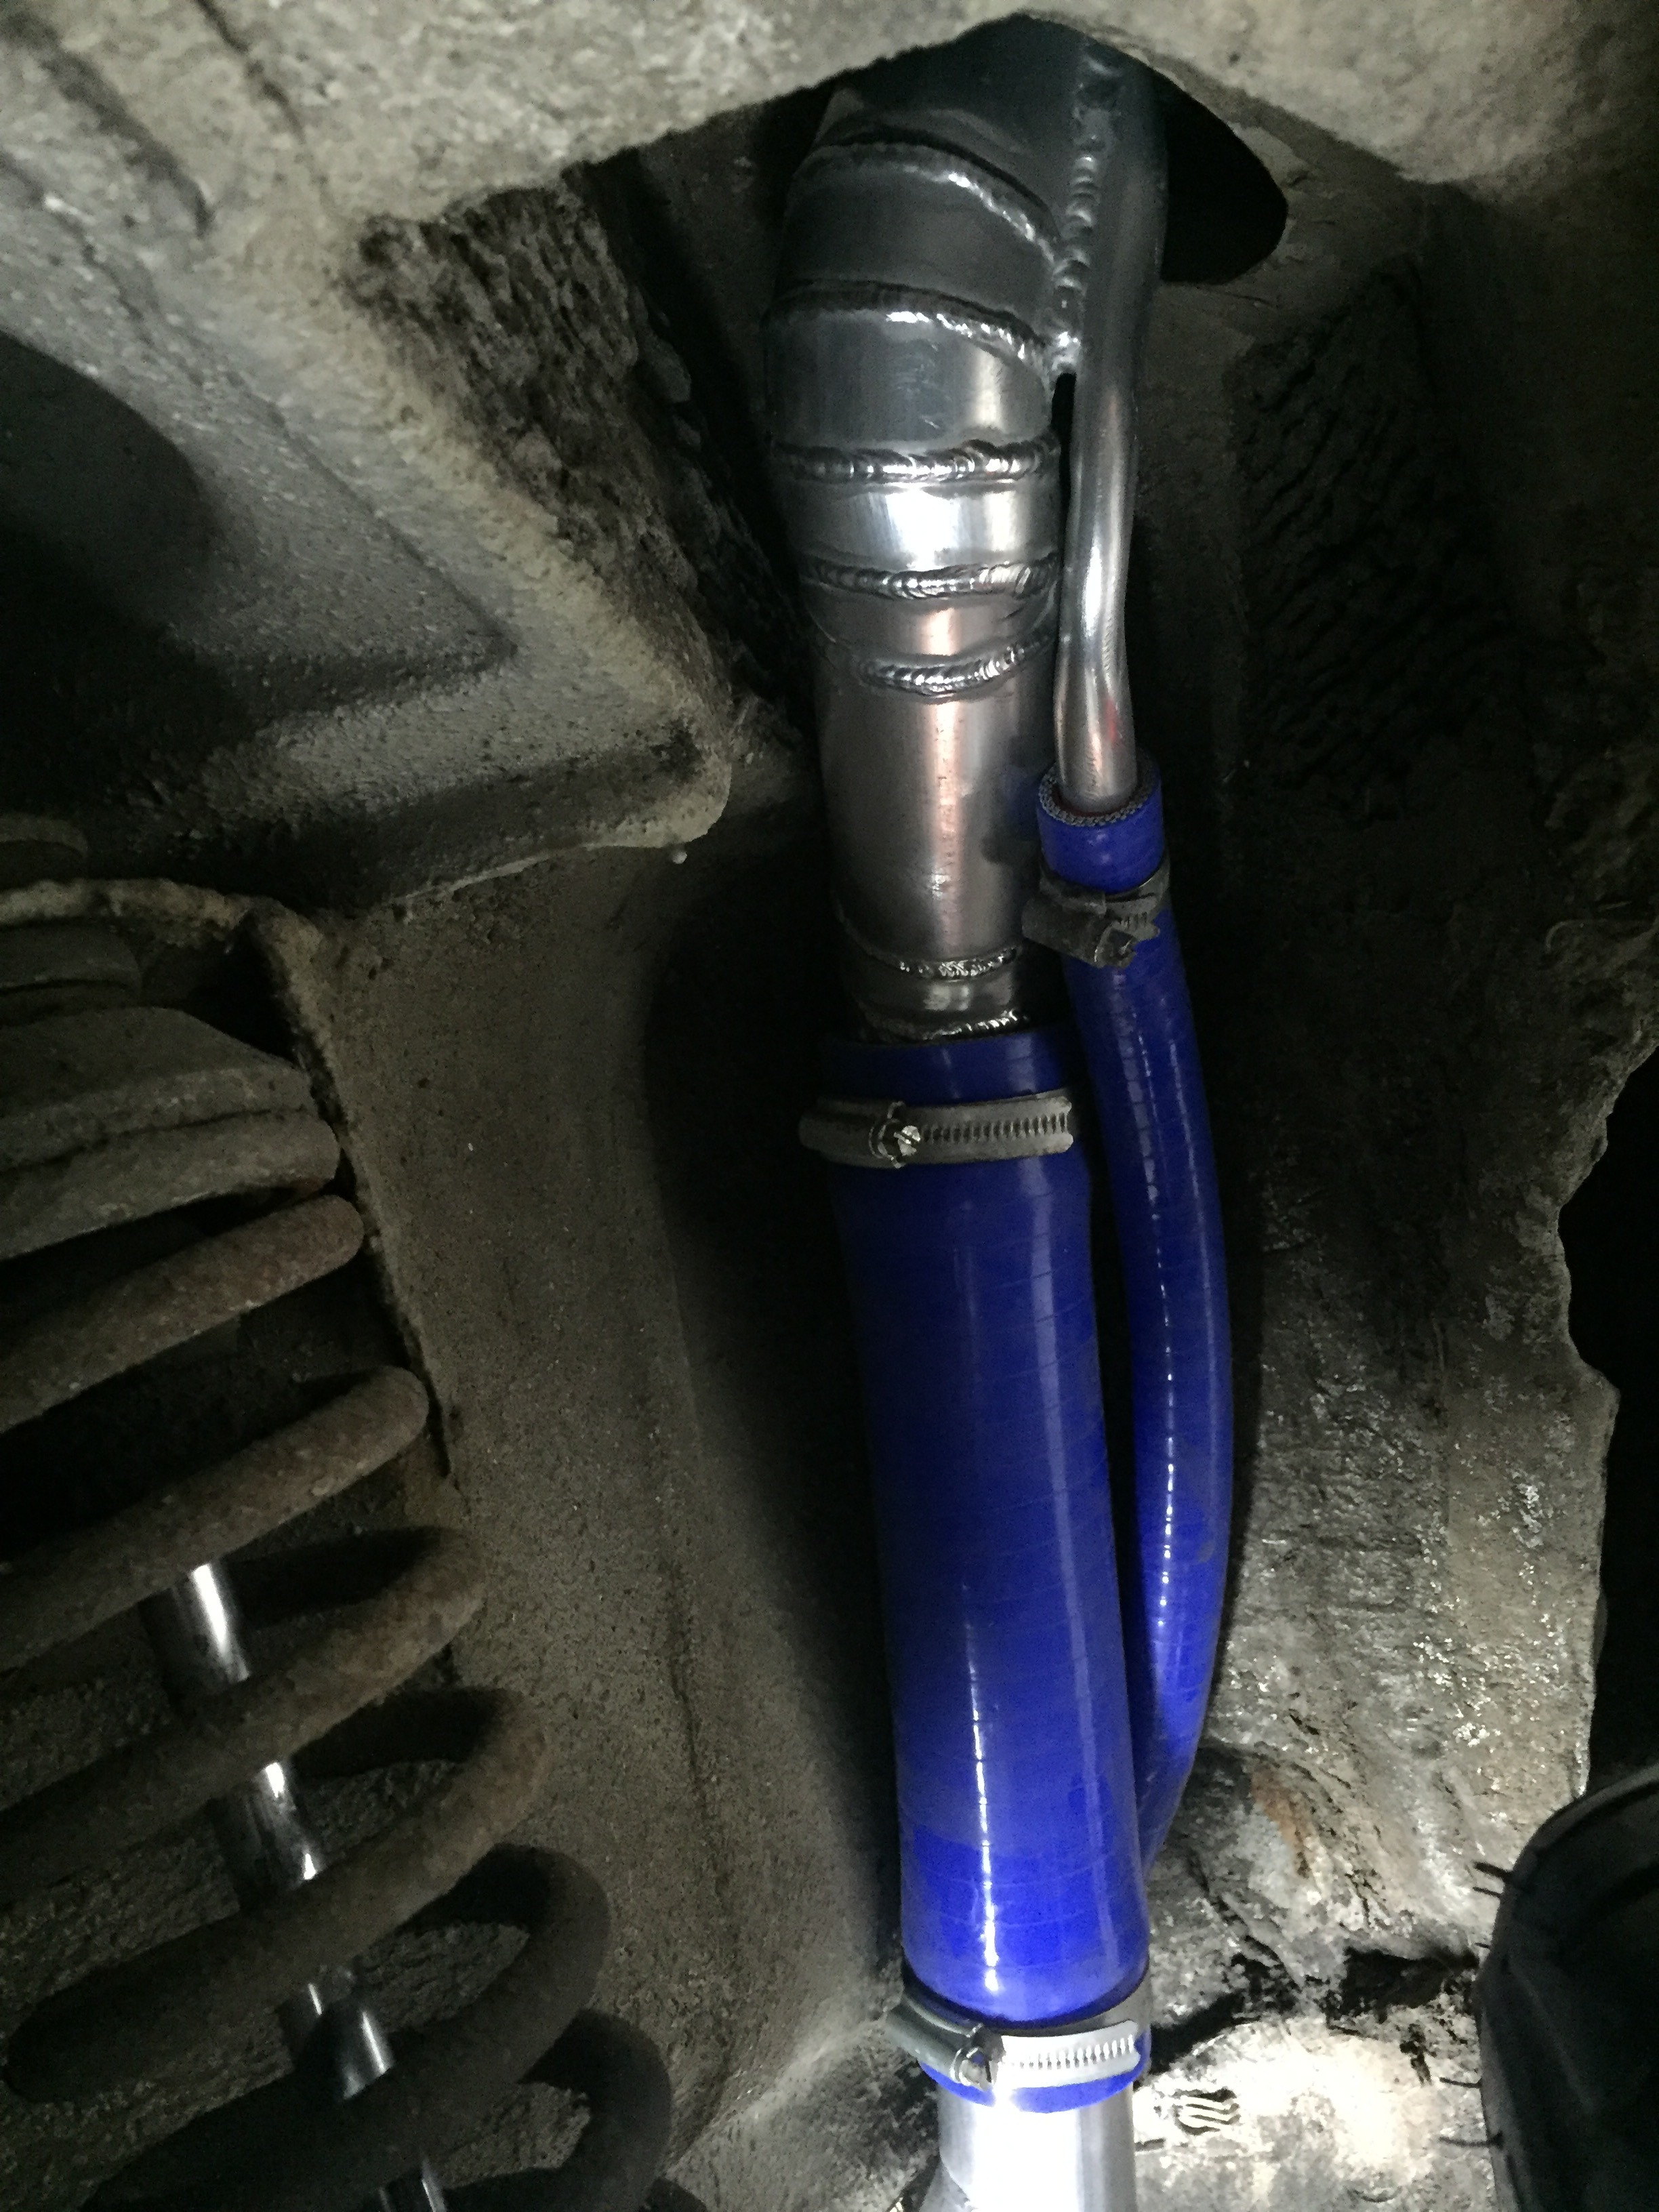
With the tank out and before I put it back in I turned my attentions to the rear diff. This needed its oil changing as I had no clue when it was last changed and had a feeling it was topped up with anything lying around as it seemed to have a leak on the pinion shaft... Which appeared to be a red fluid. I'm guessing transmission fluid.
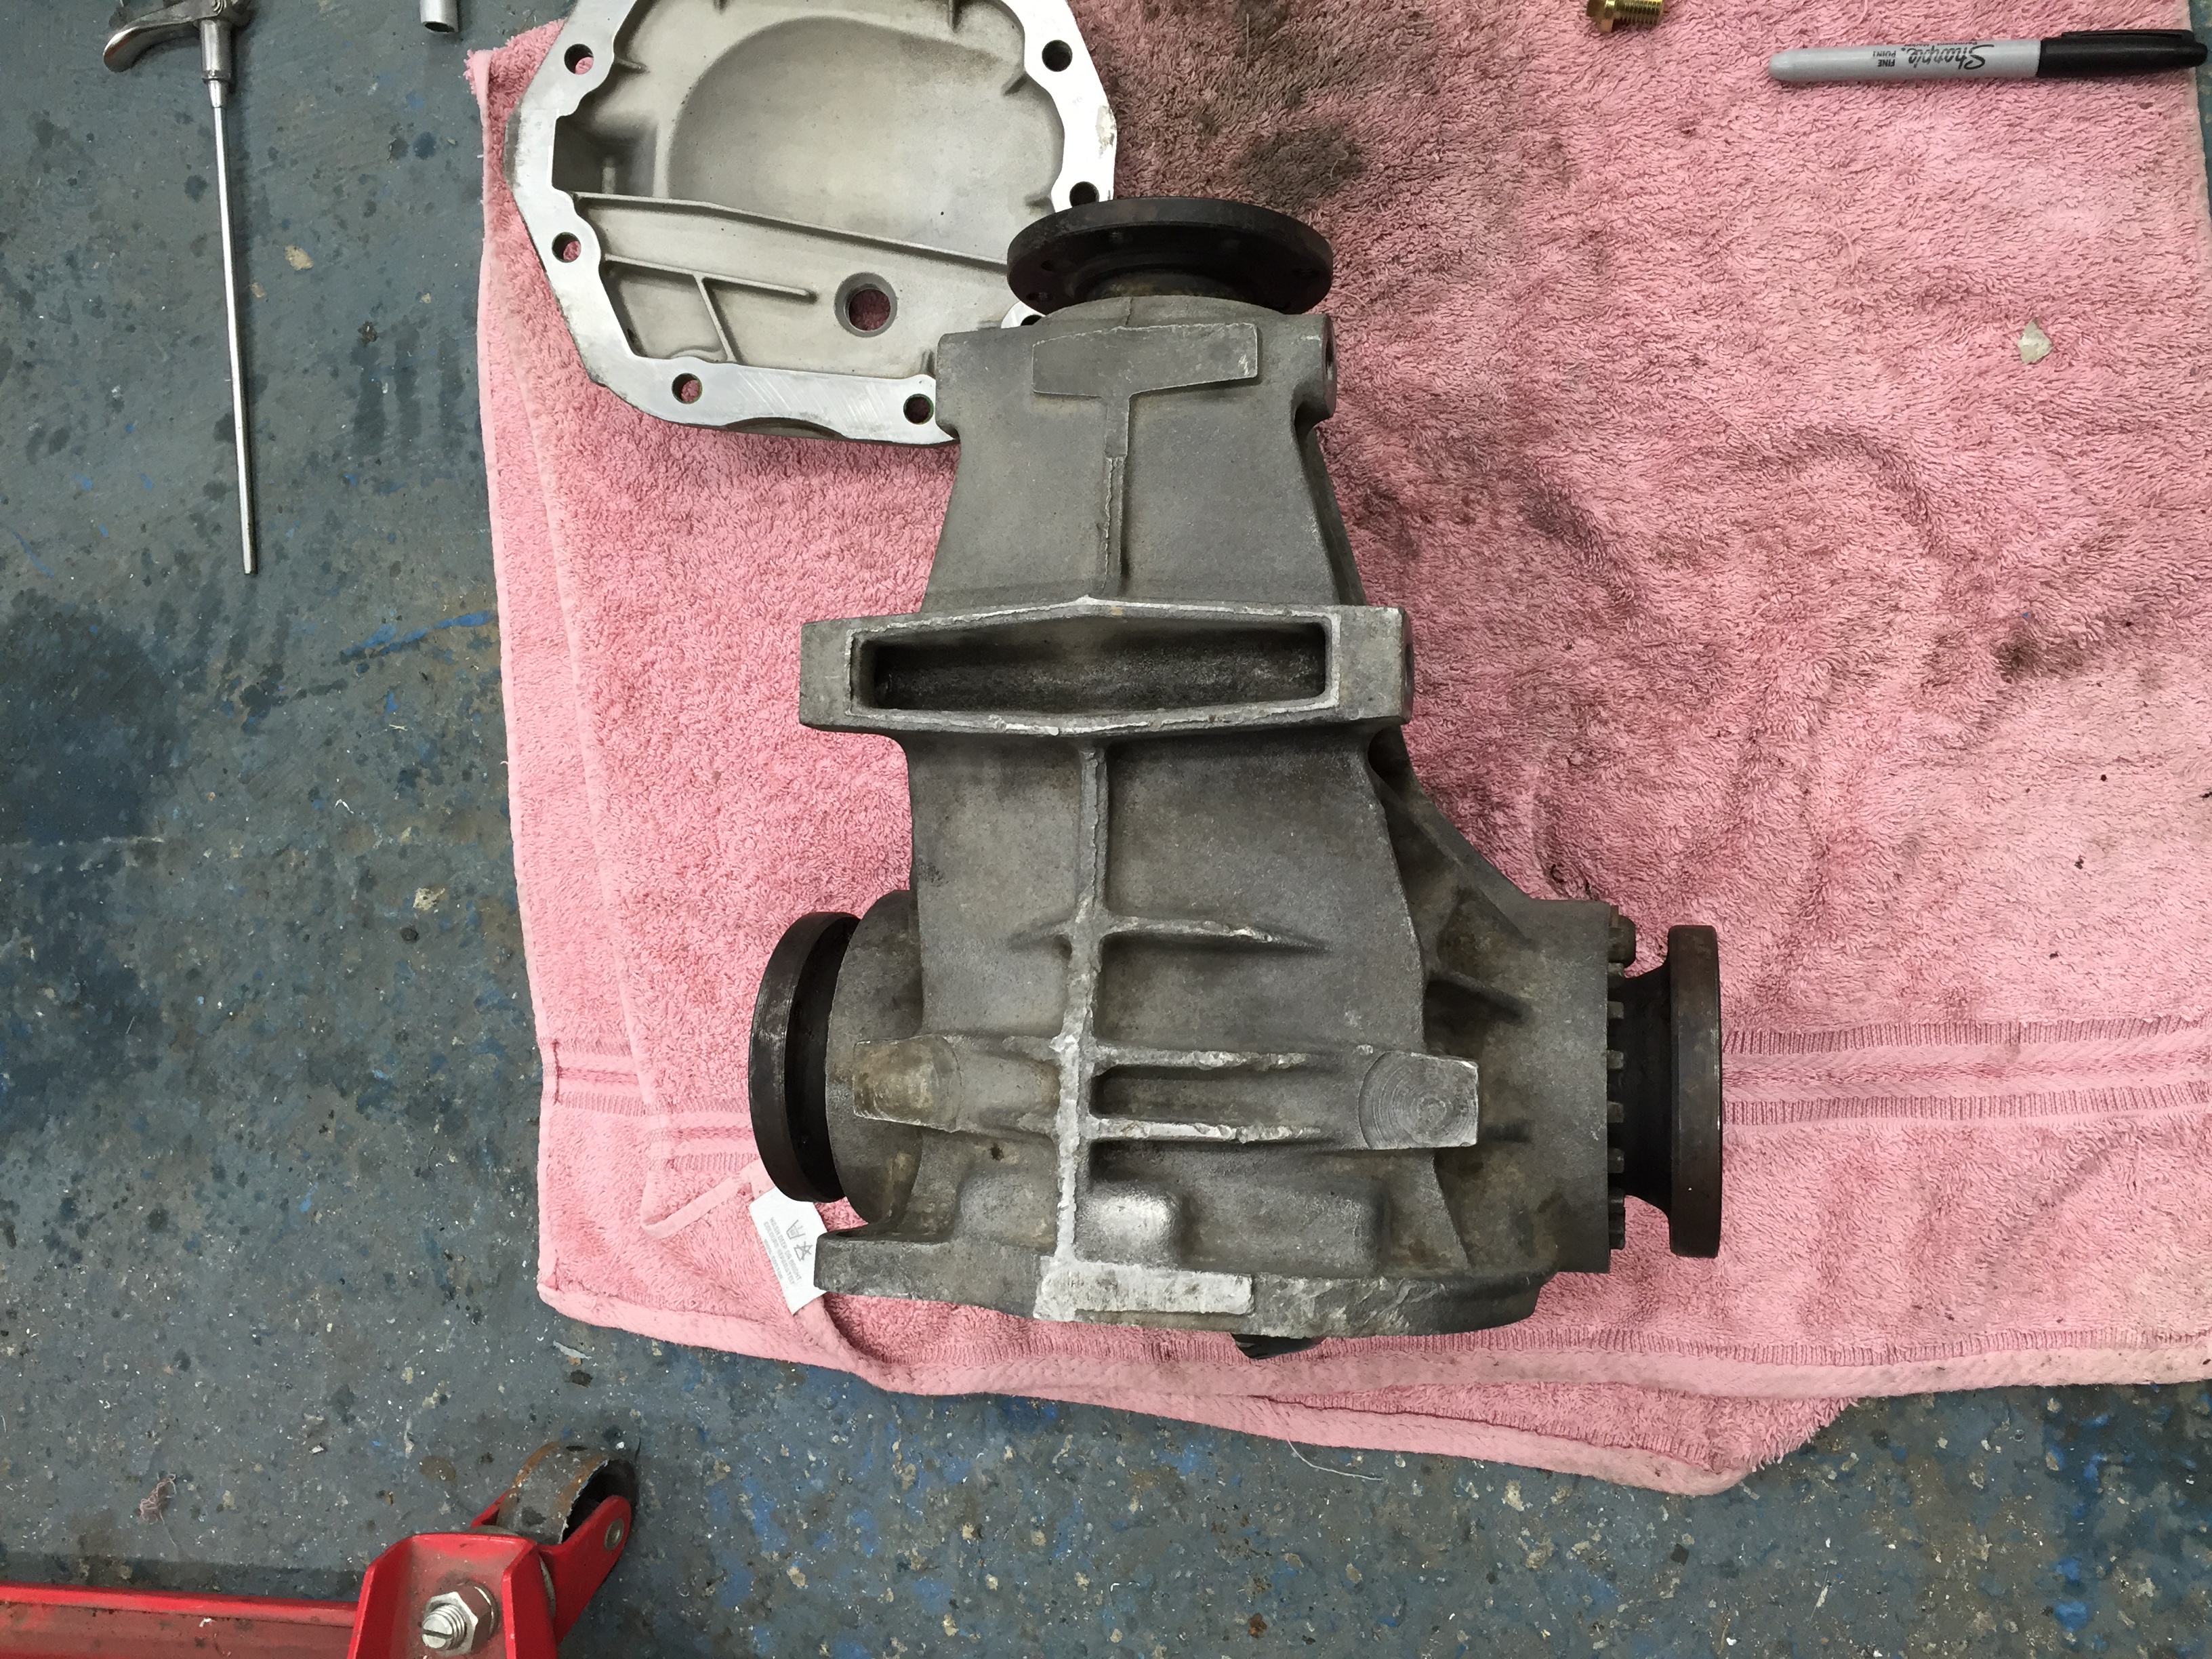
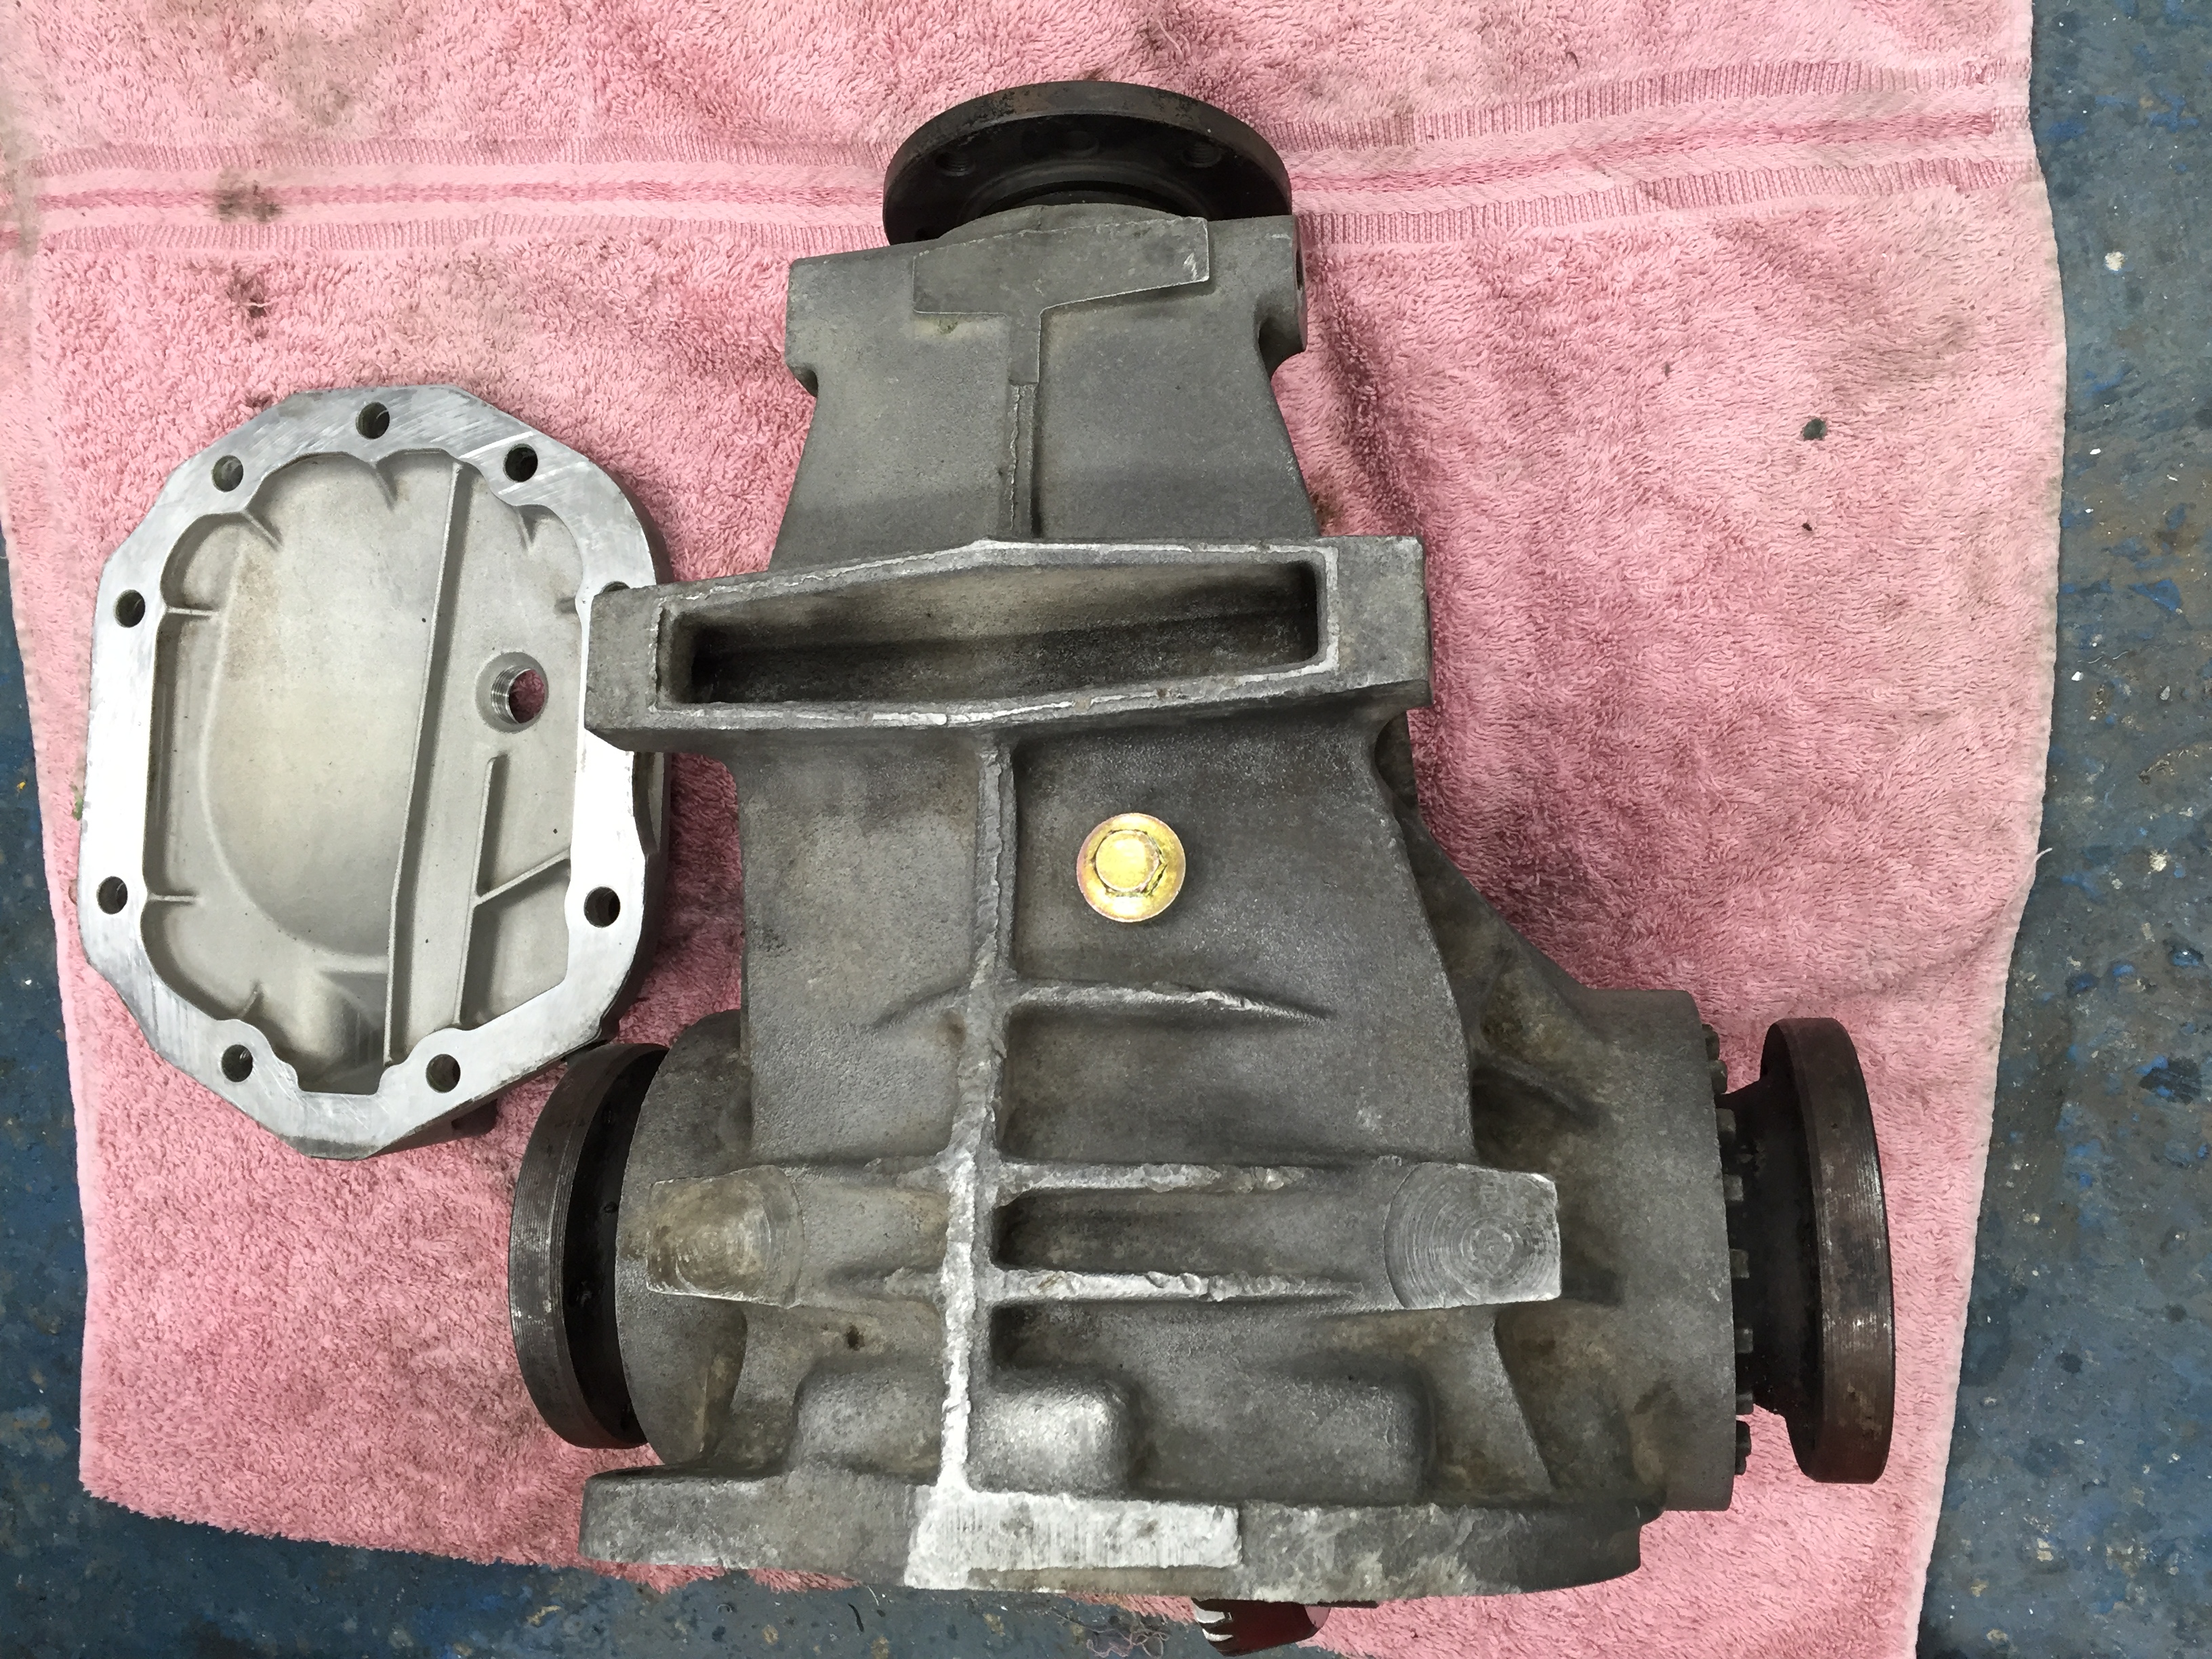
Because of the way the car has been built I can't get the rear cover off the diff without removing the whole thing from the car.. So spanners out again and got the diff out.
Diff out I could now remove the rear cover, also realised that the fill plug was rounded and so out with the welder to weld a nut onto it so I could turn it out
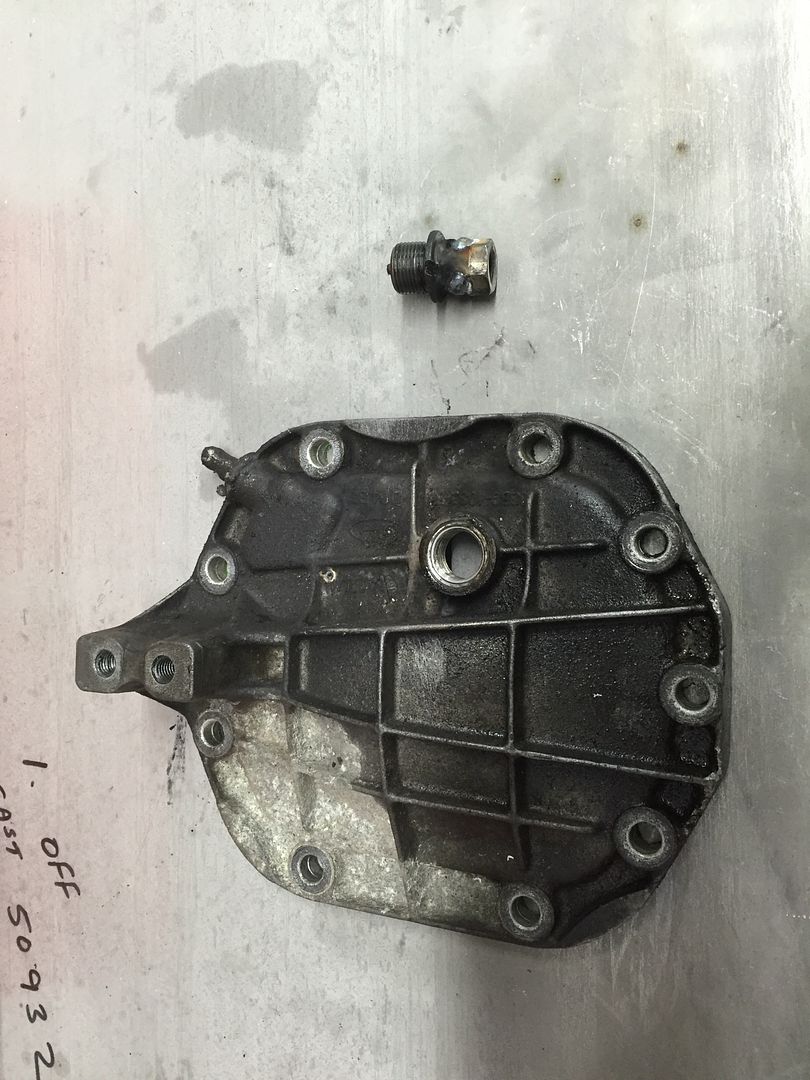
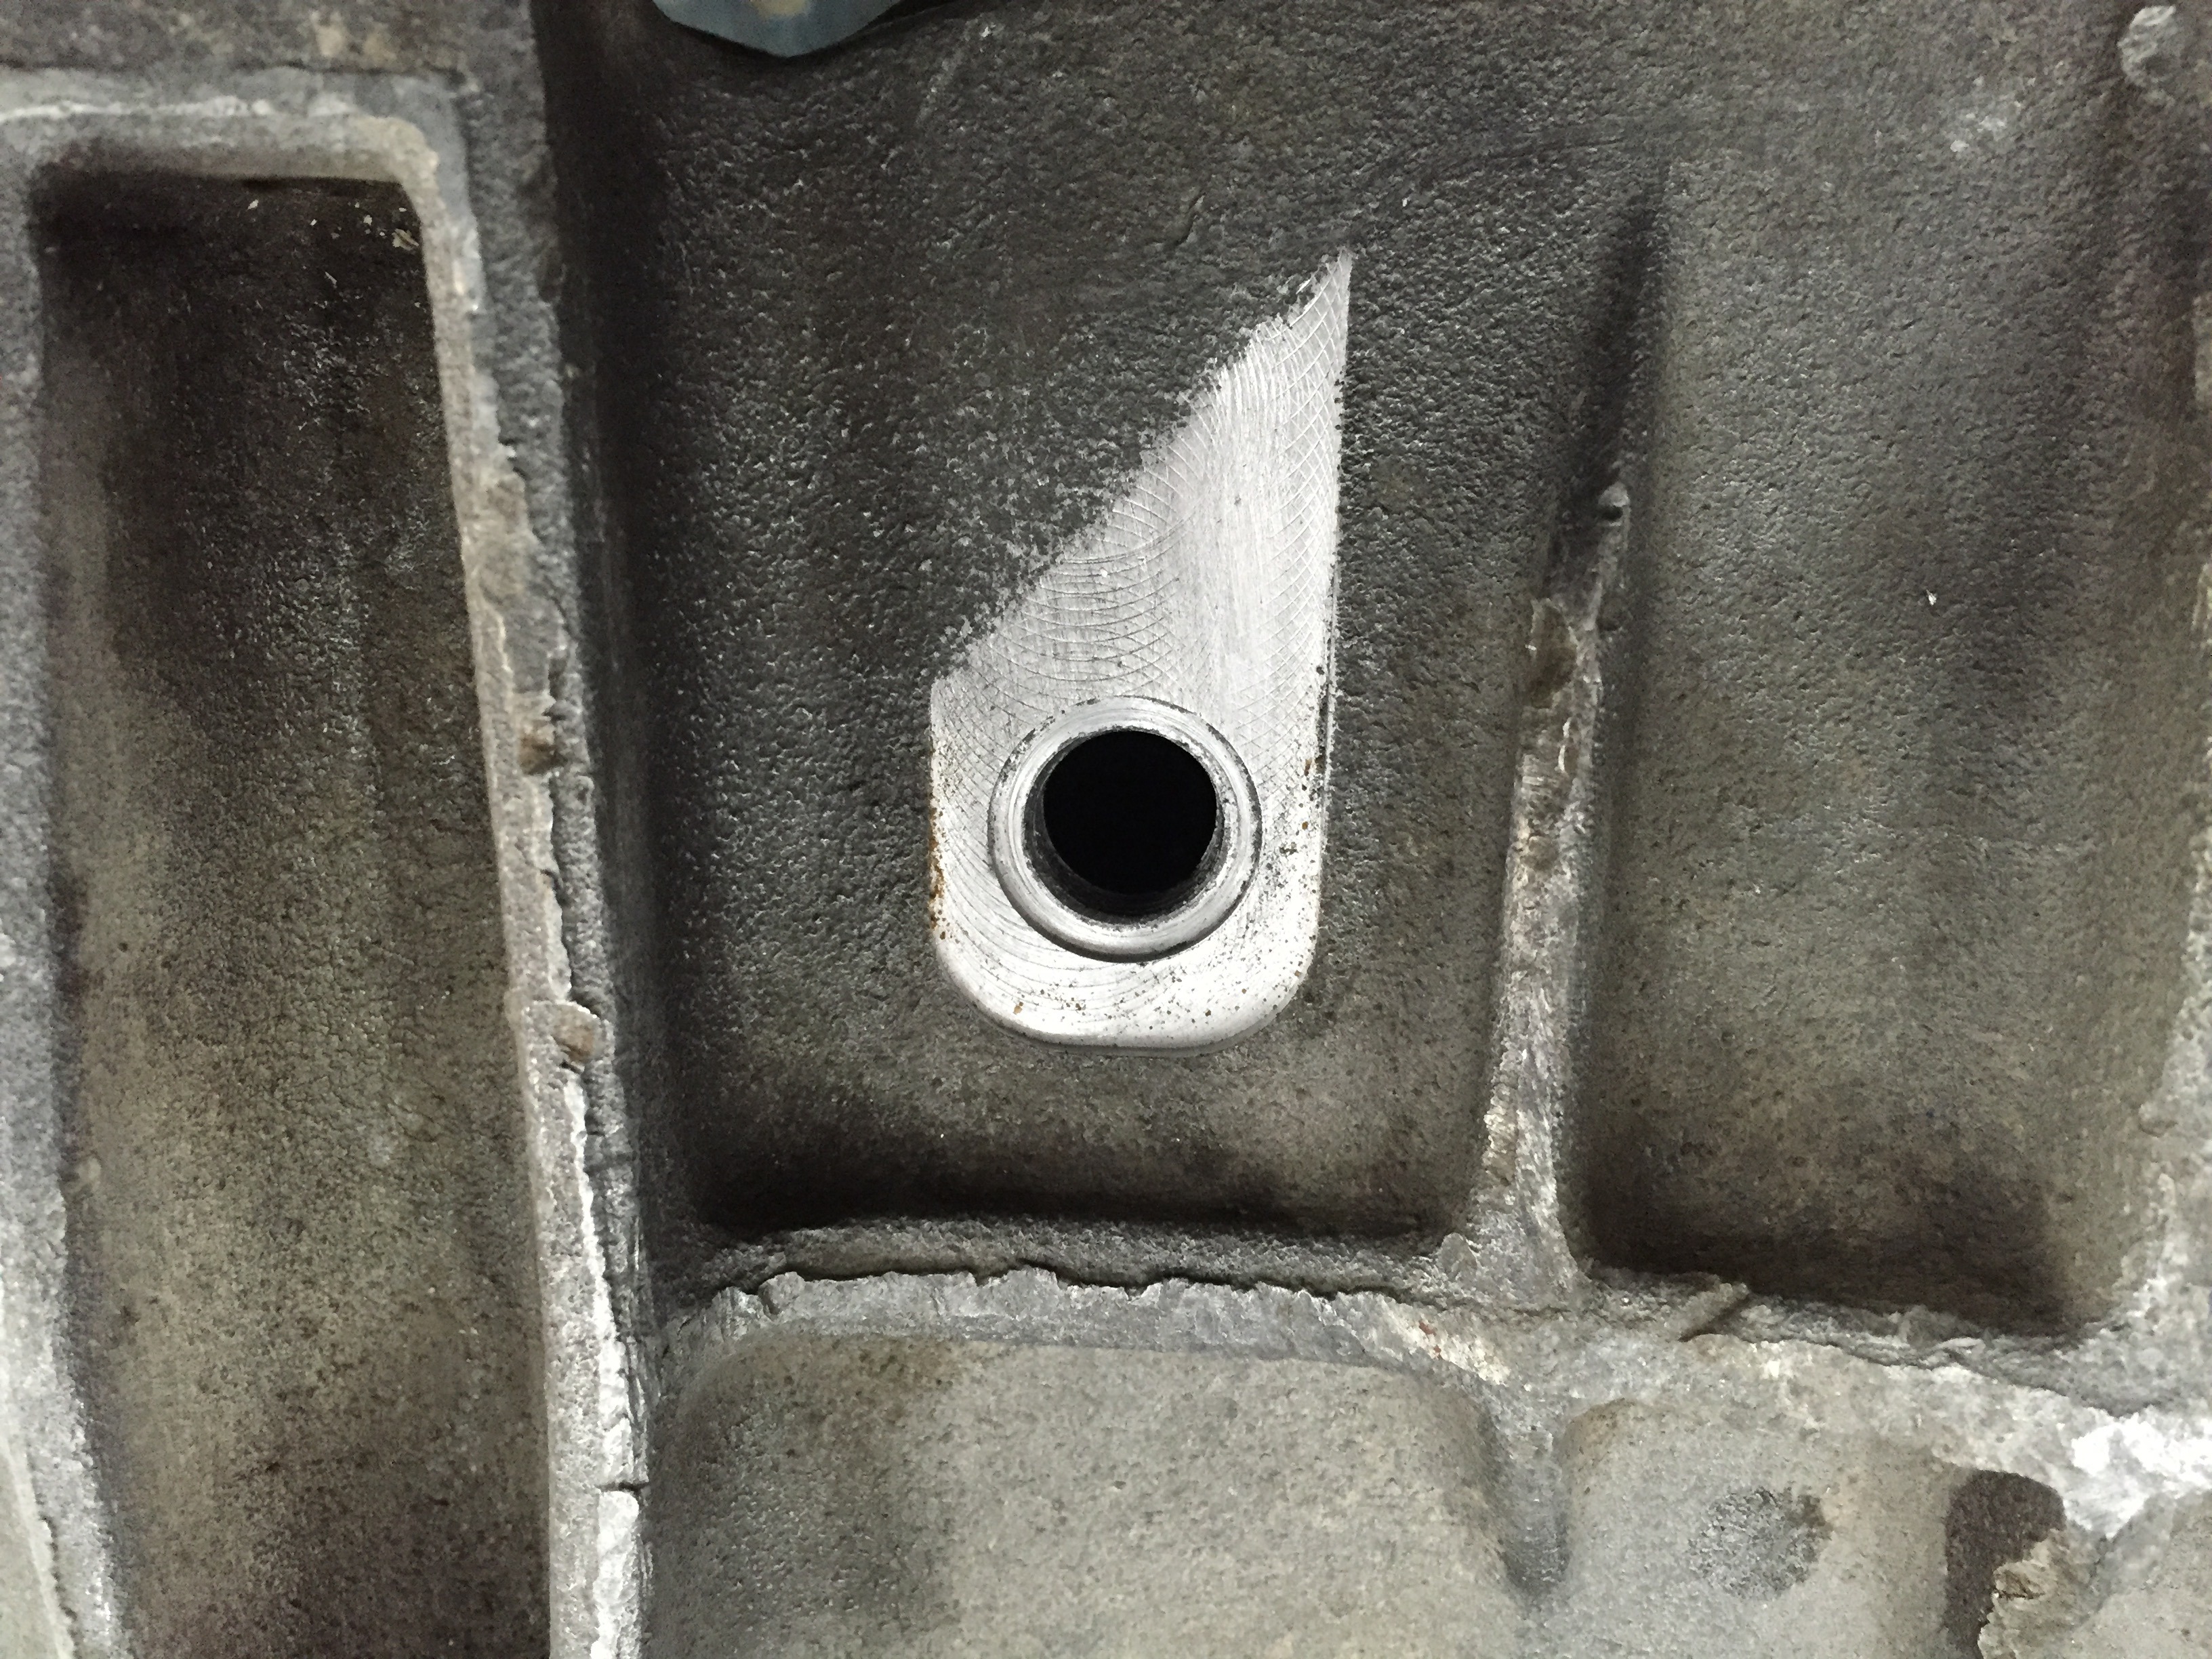
Knowing this won't be the last time I'll need to change the oil I set about fitting a drain plug
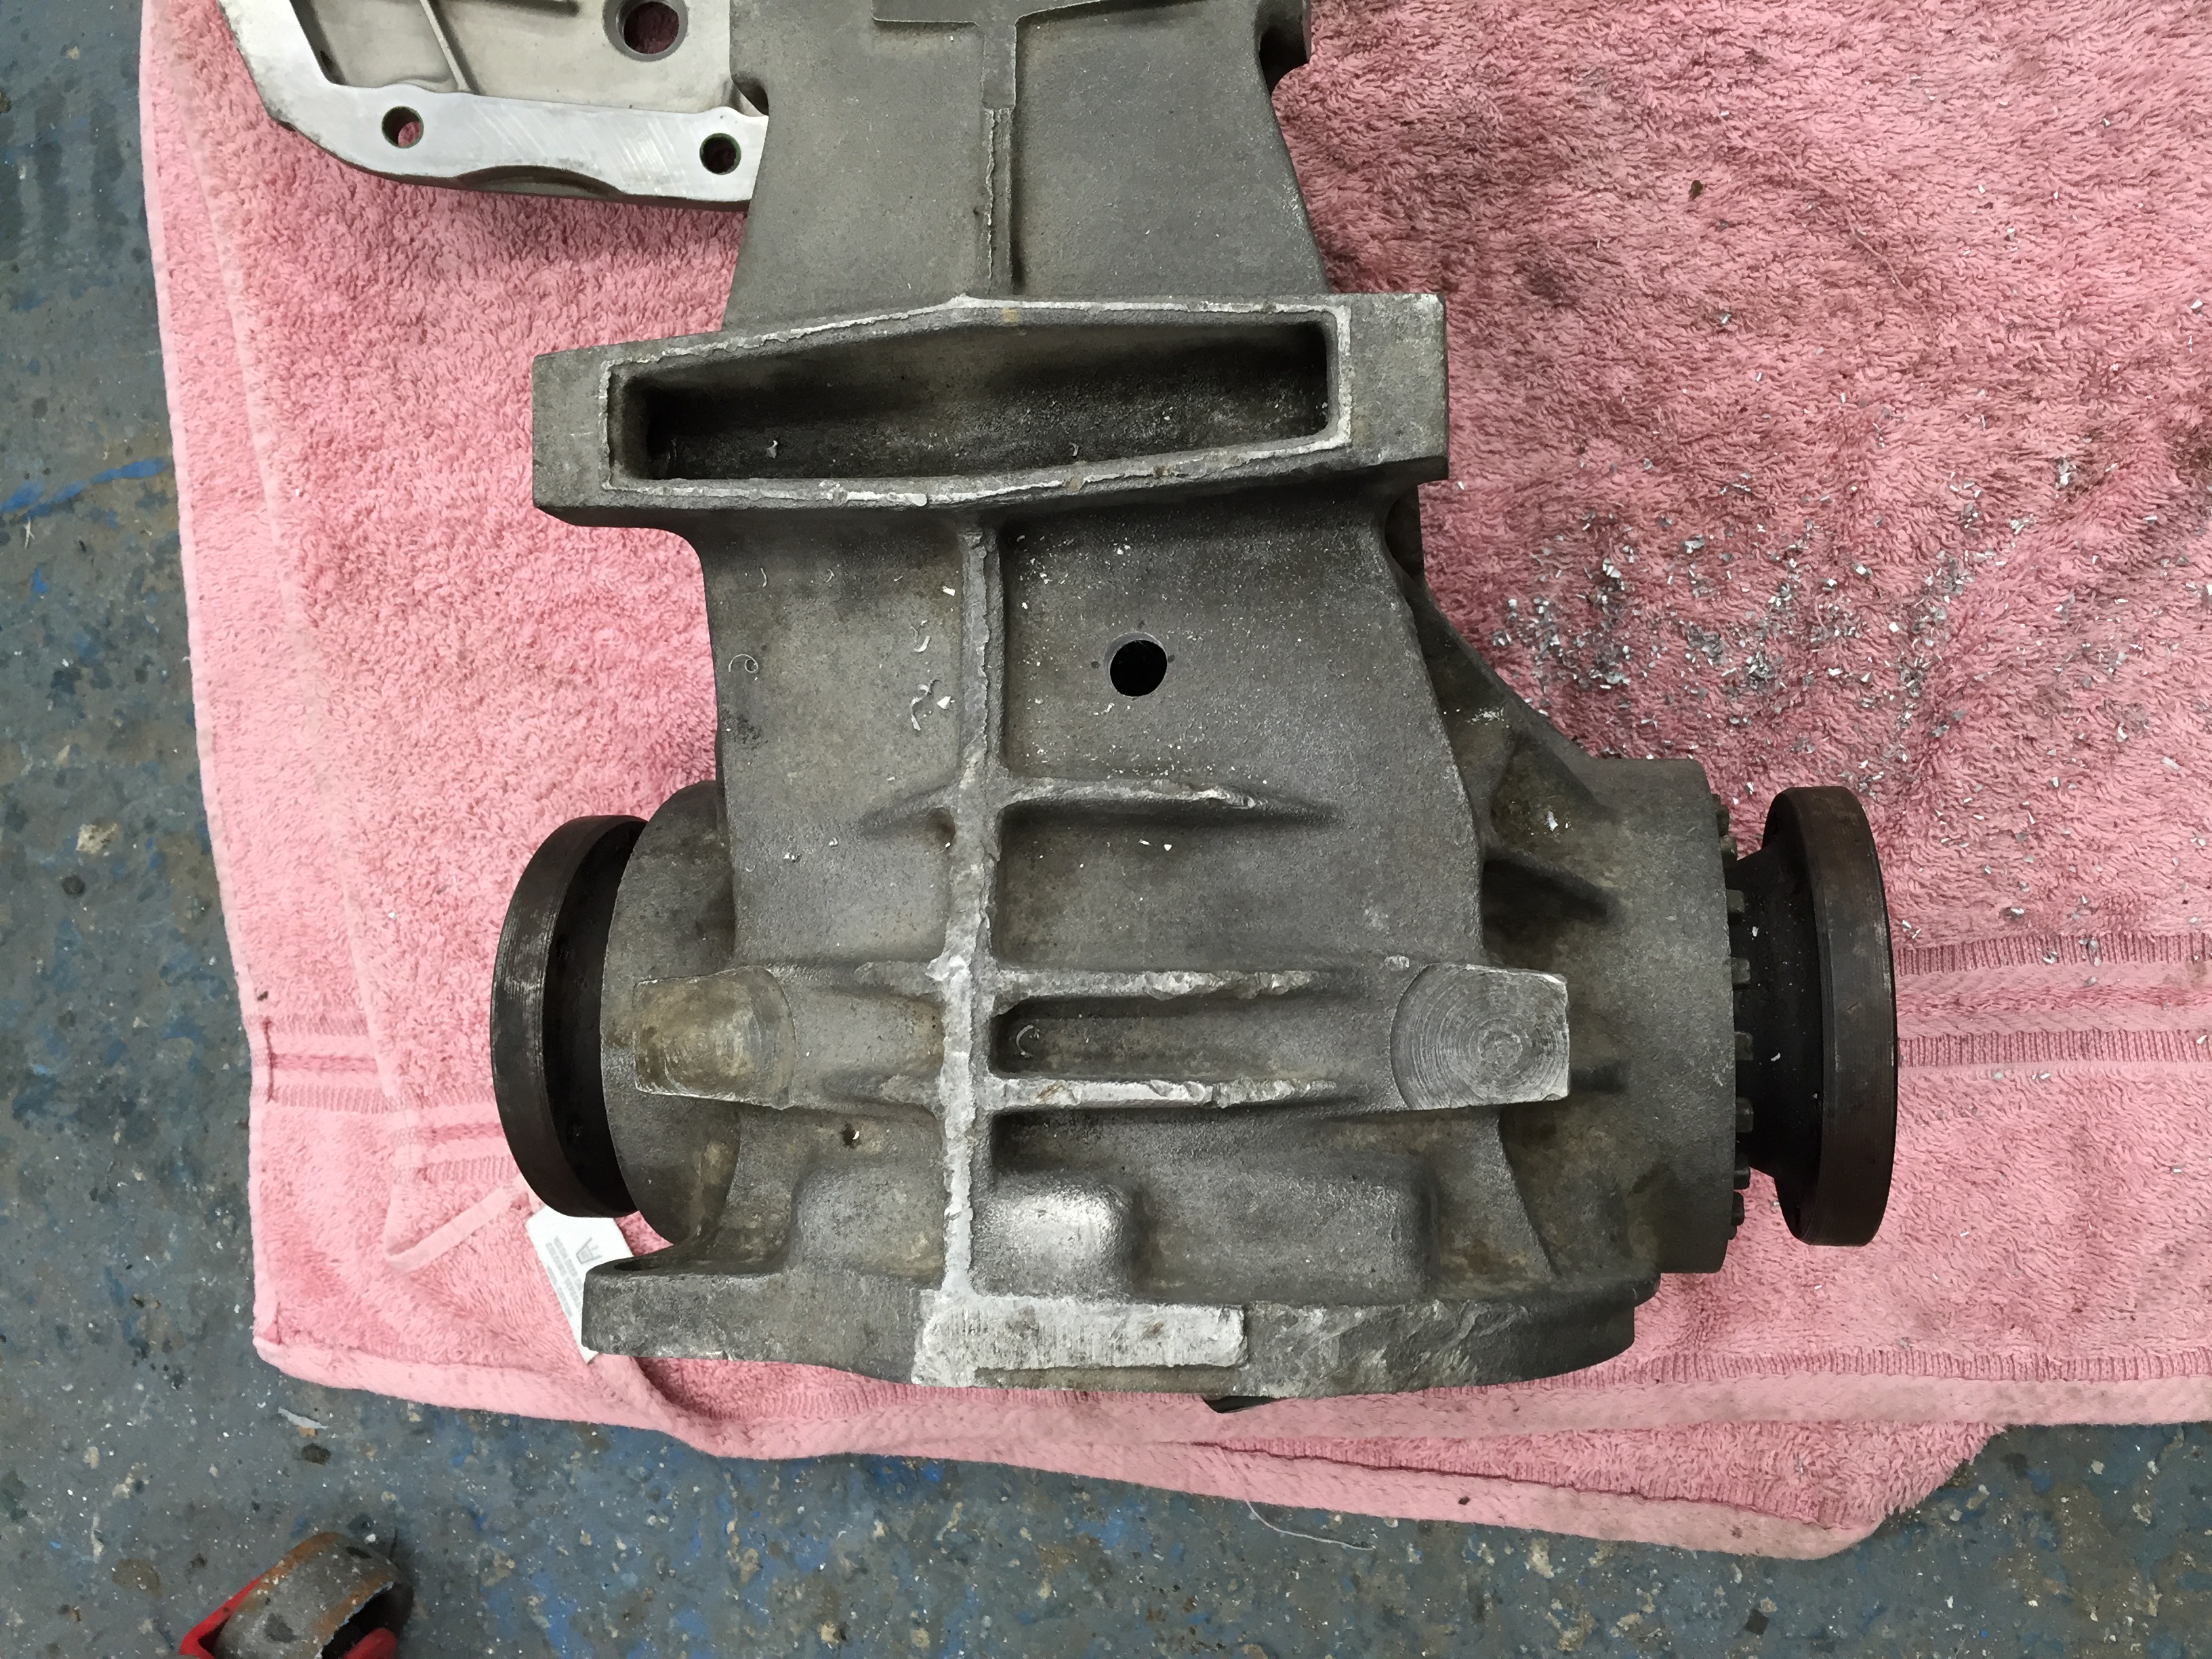
Wasn't happy with just letting the rubber 'o' ring squash against the casing as it wasn't totally flat at the point. So of to my machining friend who managed to mill a flat area and even a small recess for the rubber 'o' ring to make sure it wasn't going to leak.
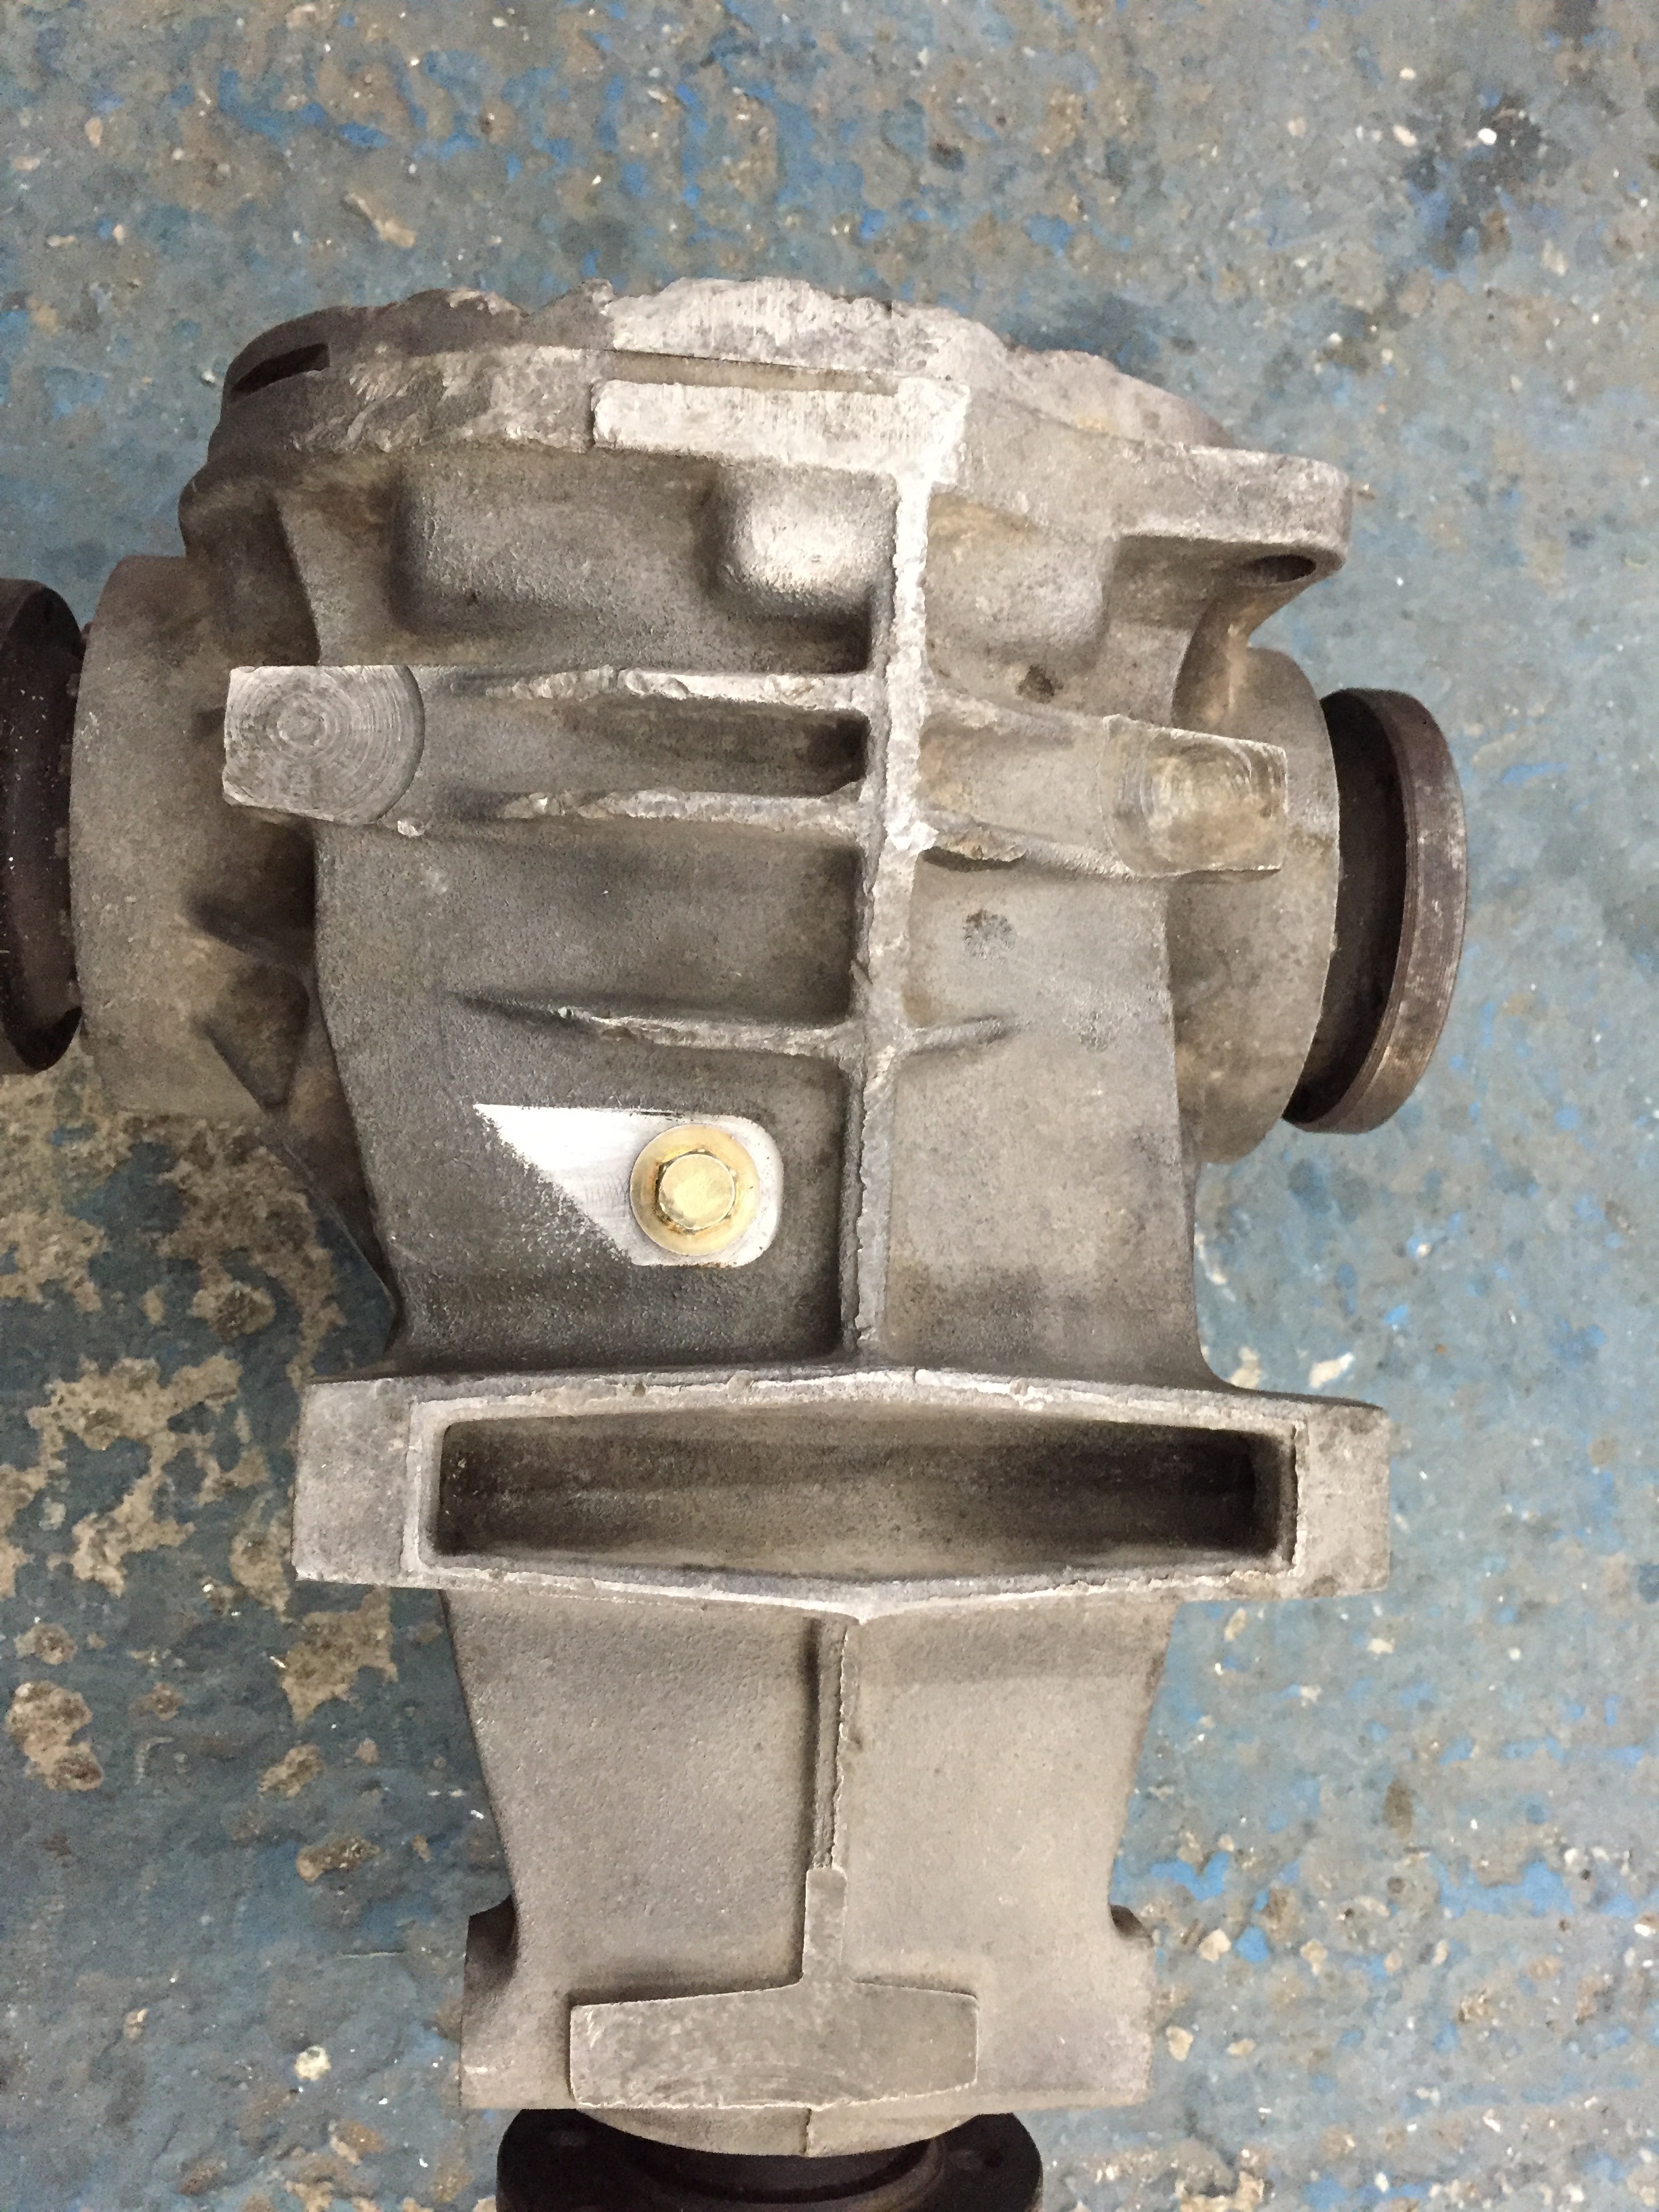
Gave it all a clean and bolted back up again - some of you may notice the odd nuts on the diff mount and the old standard diff mount, the rear beam and everything is due to come out again at some point to be overhauled so new nuts, mount, bushes and everything else will be done then.
At this point I was keeping my fingers crossed that the pinion seal was leaking due to the transmission fluid and that with the correct oil I would get lucky and it would be OK. Only time would tell.
With that done time to get the tank all bolted up and fitted. Gave it a very very quick polish just to make it look like one block colour.
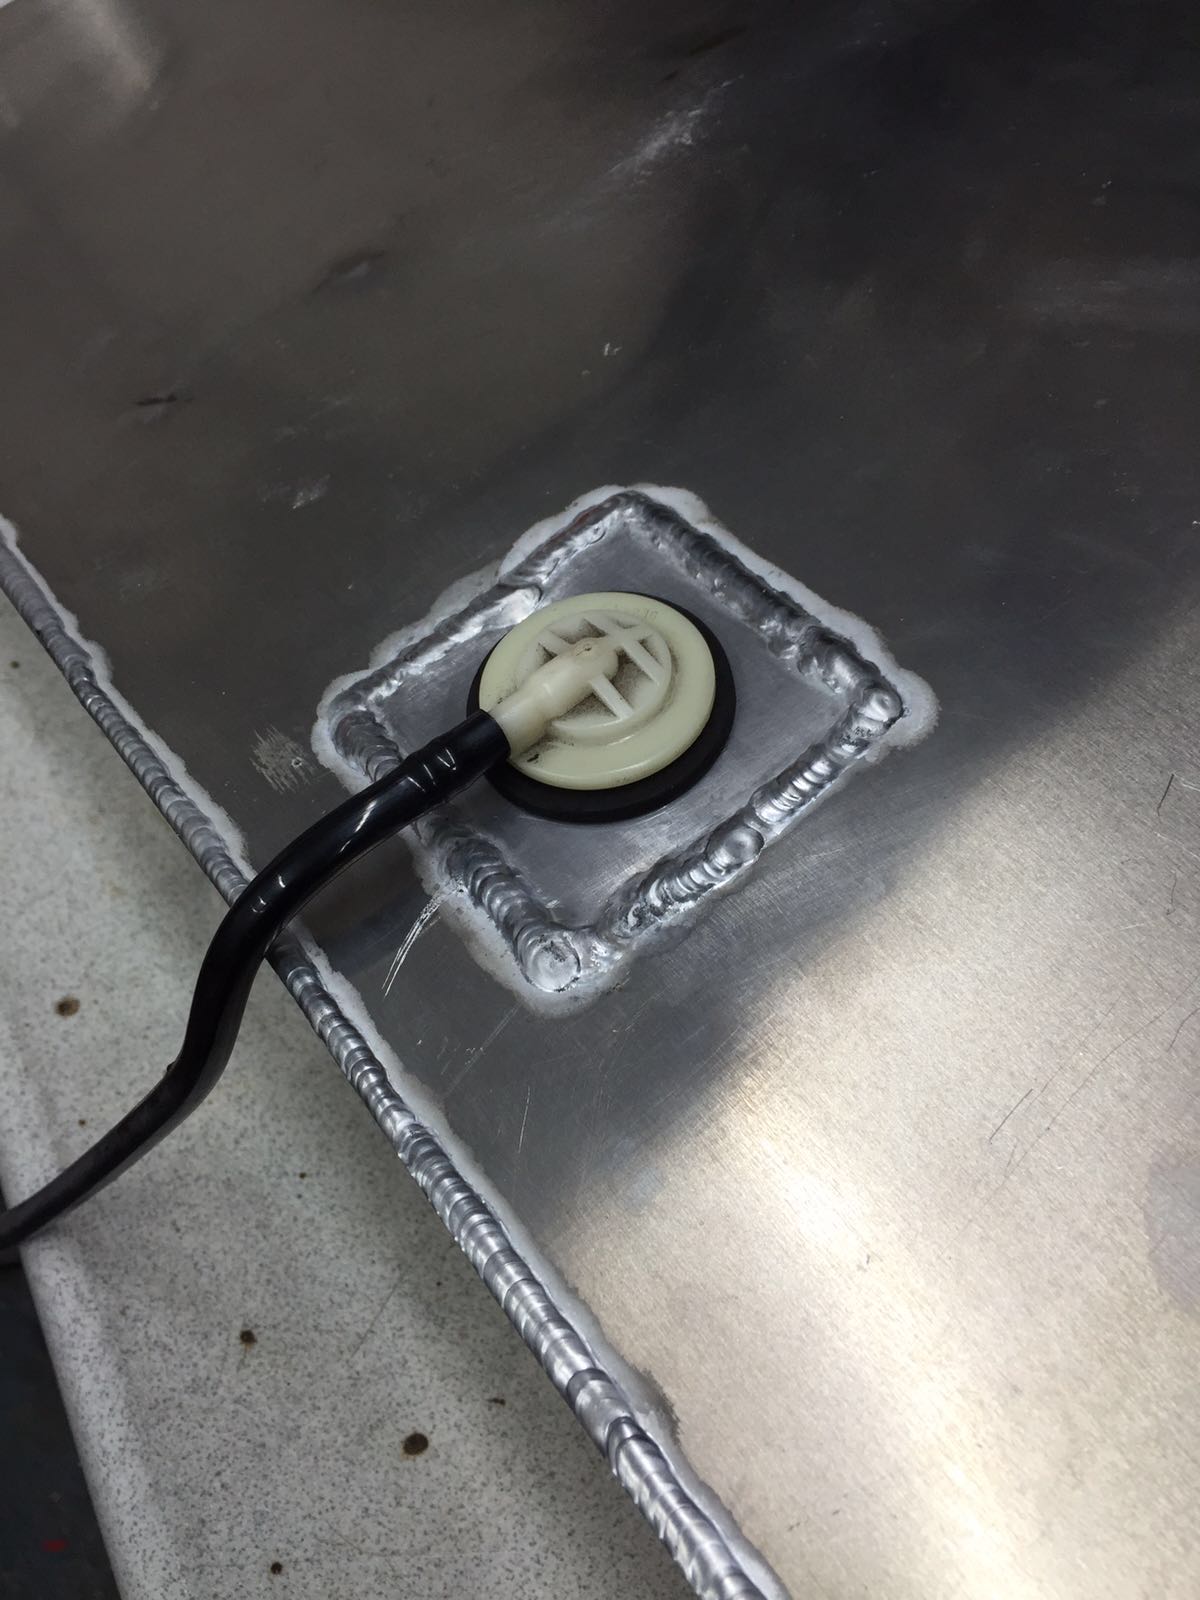
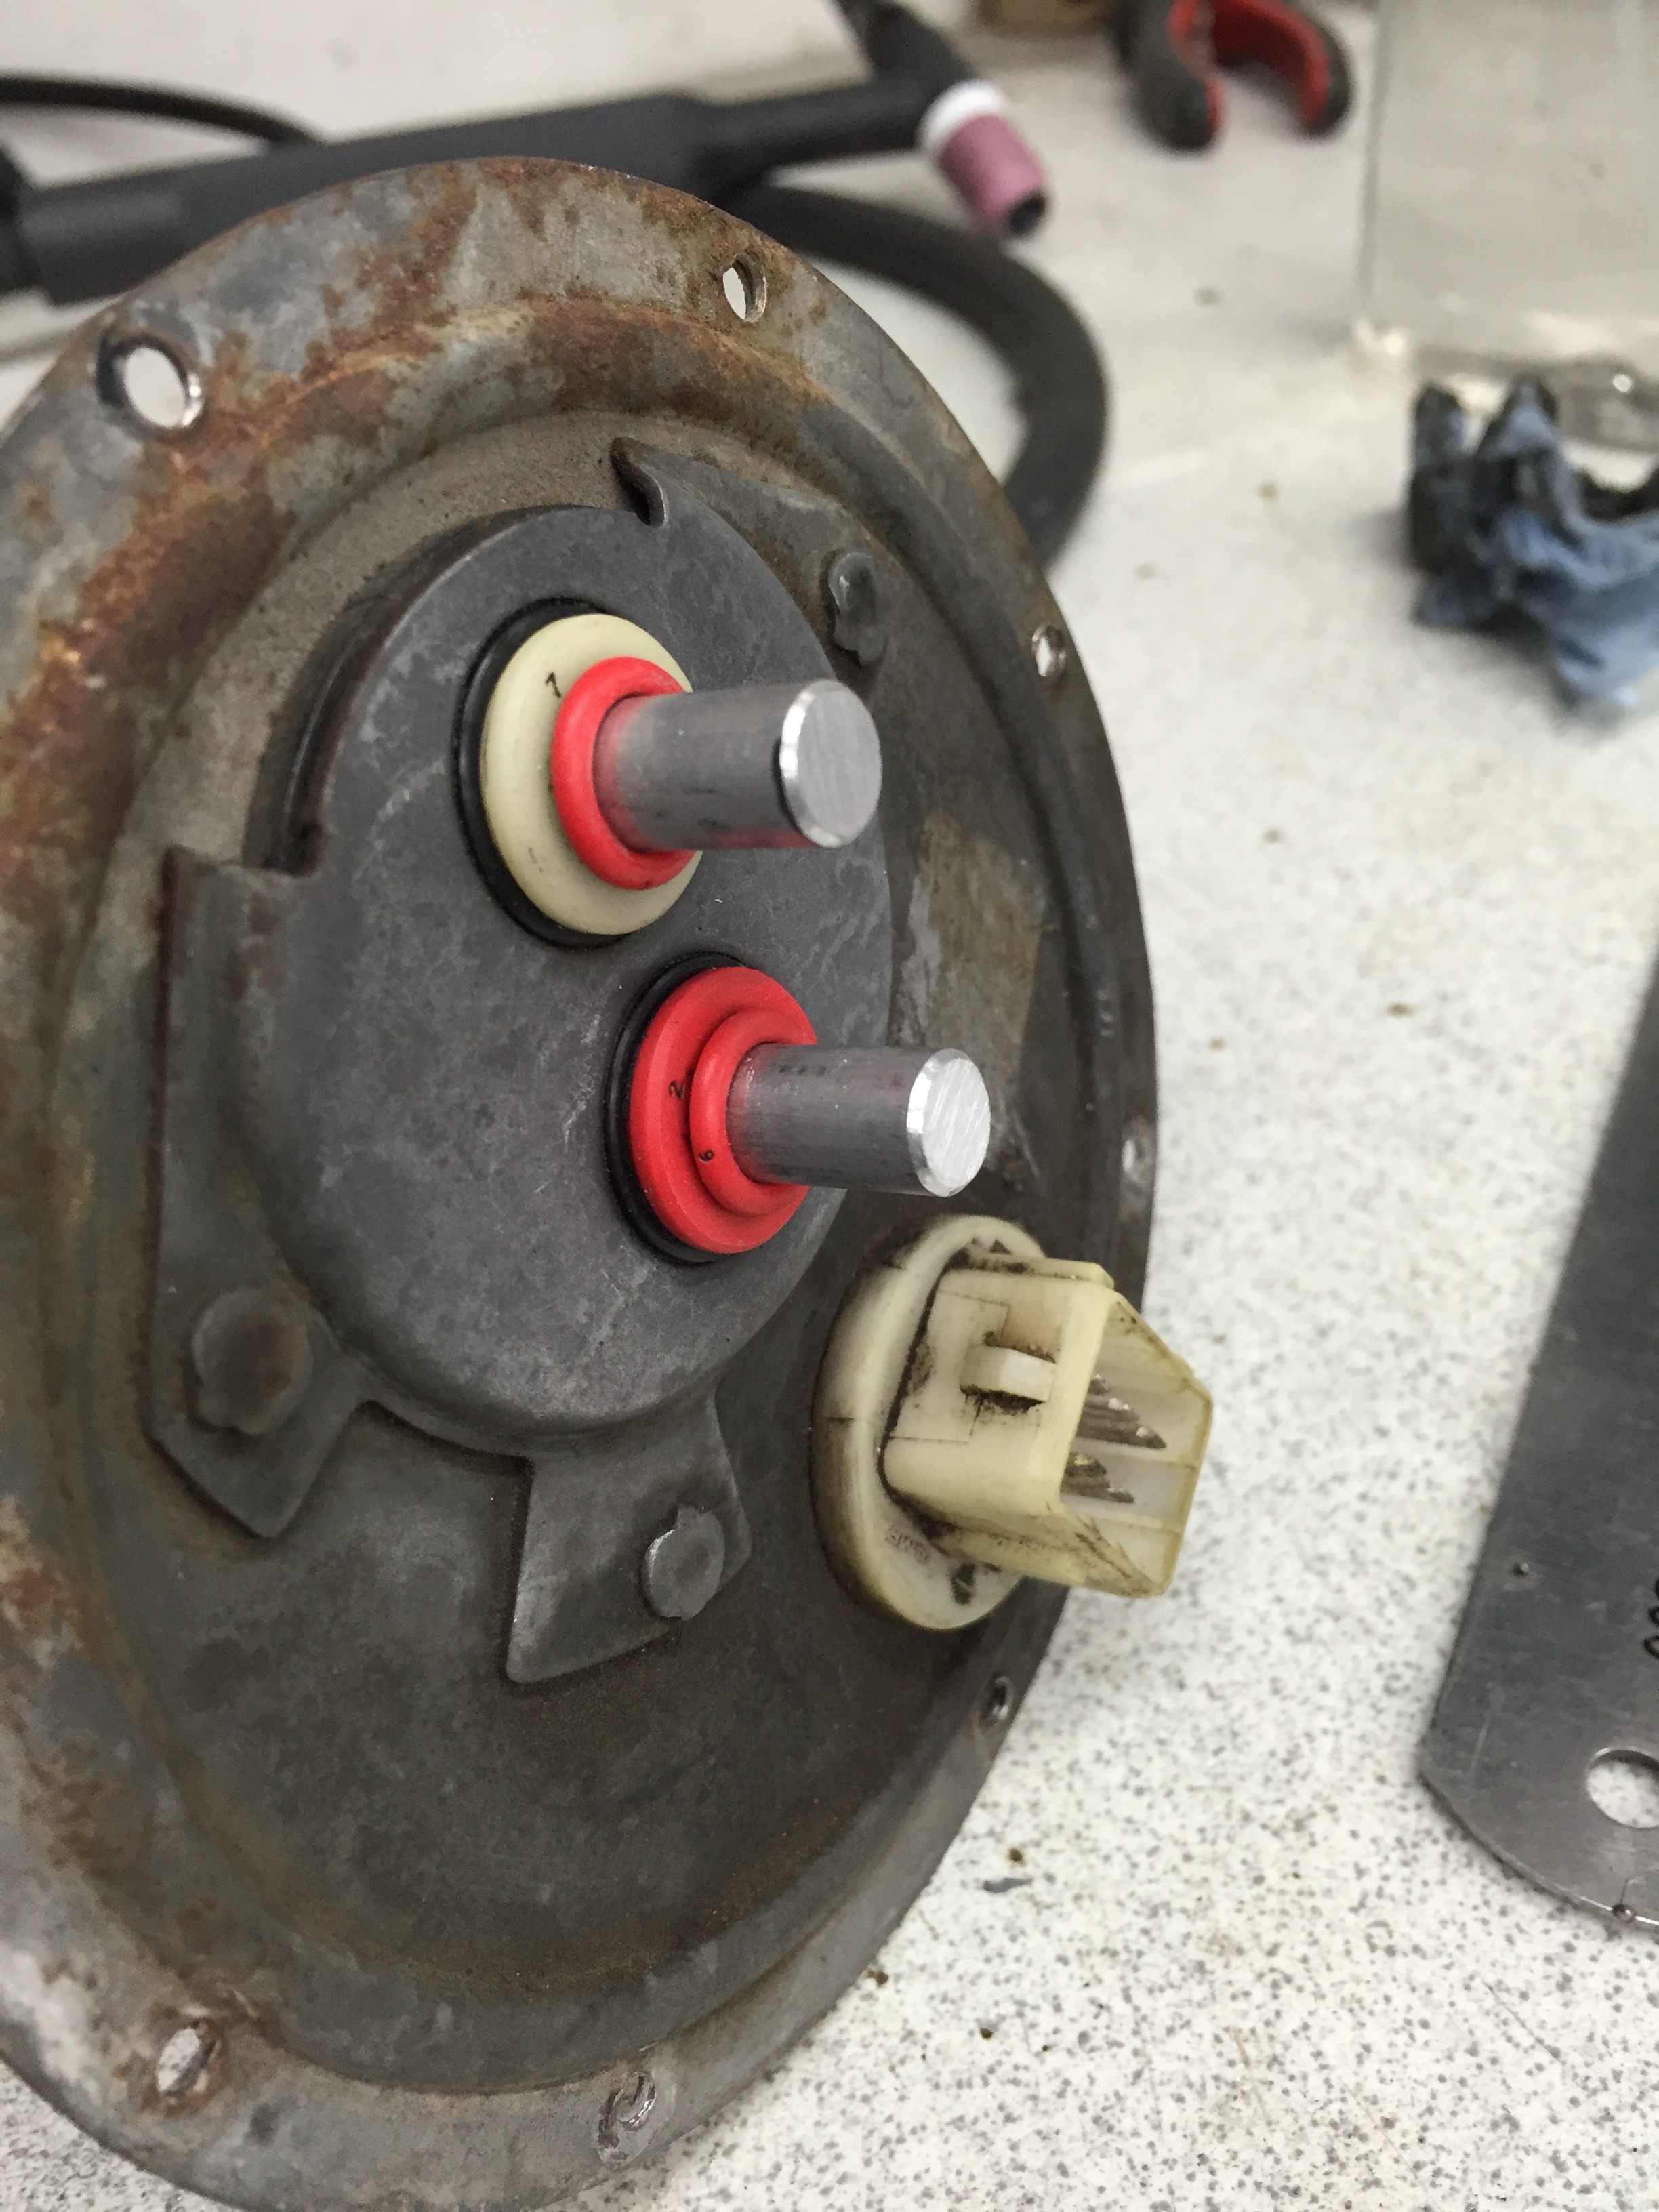
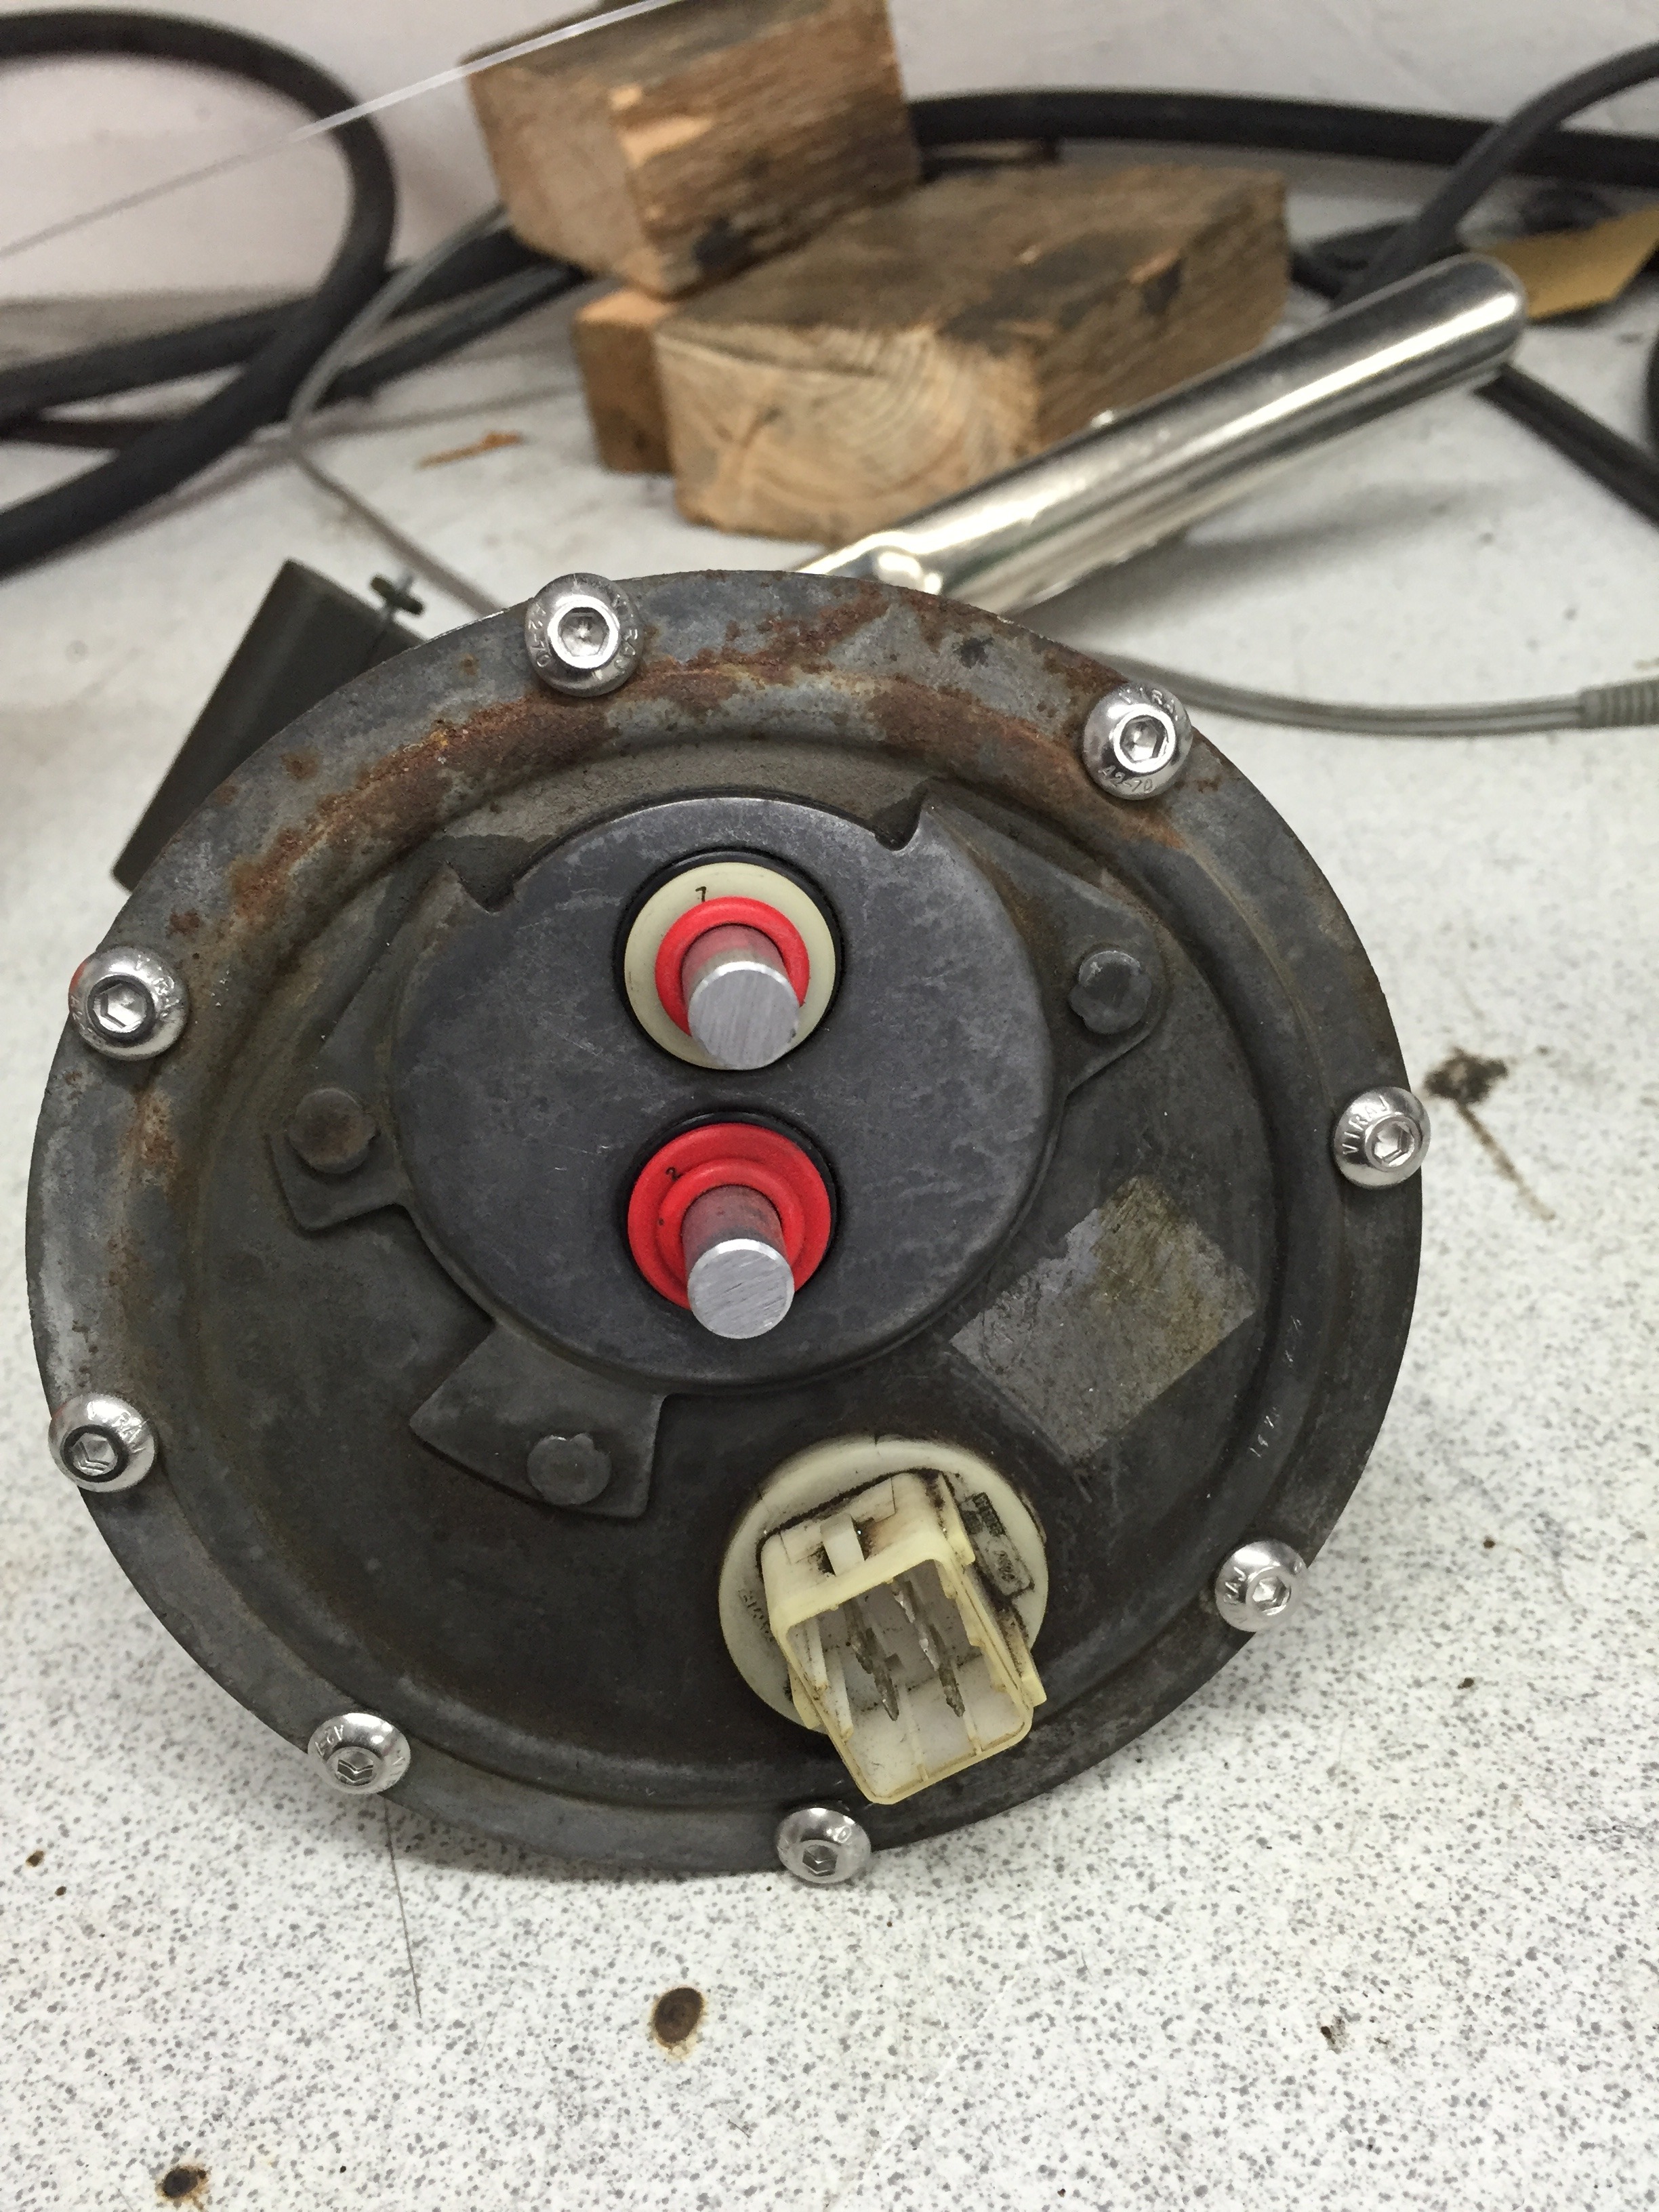
Tidied the original sender unit as best I could before fitting
Fitted the breather and sender unit and then one last shot of new vs old!
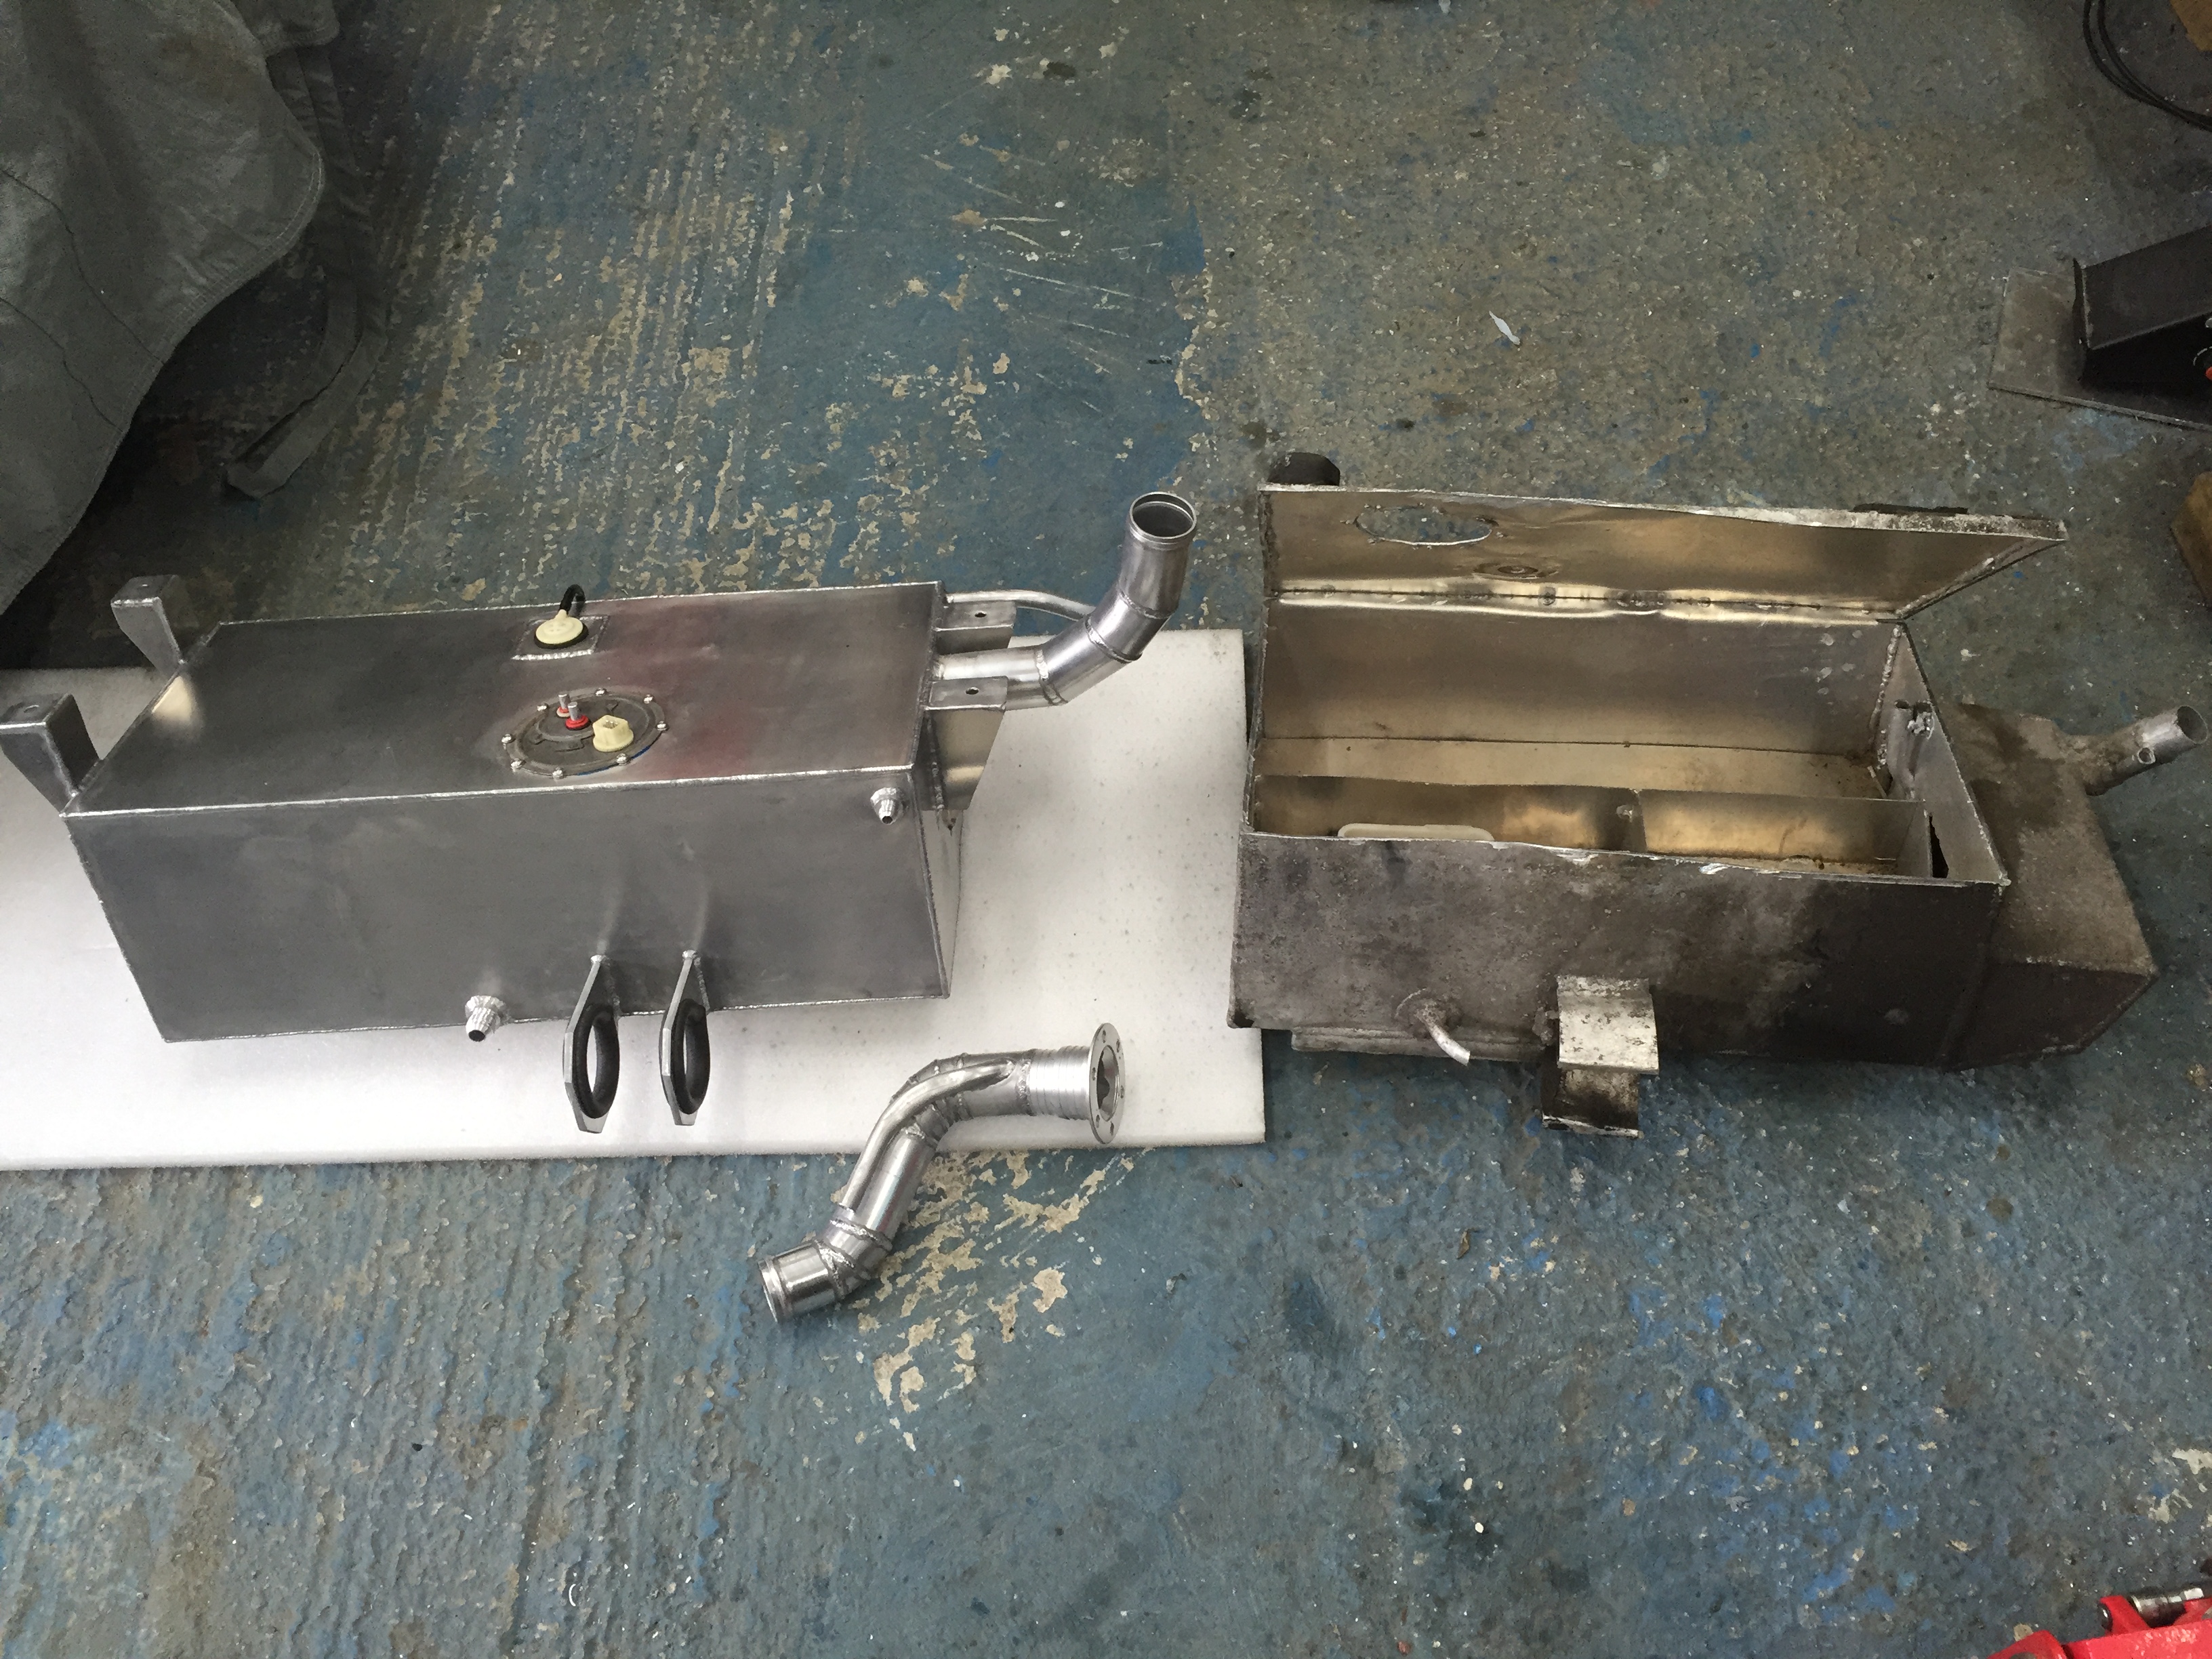
Tank fully fitted
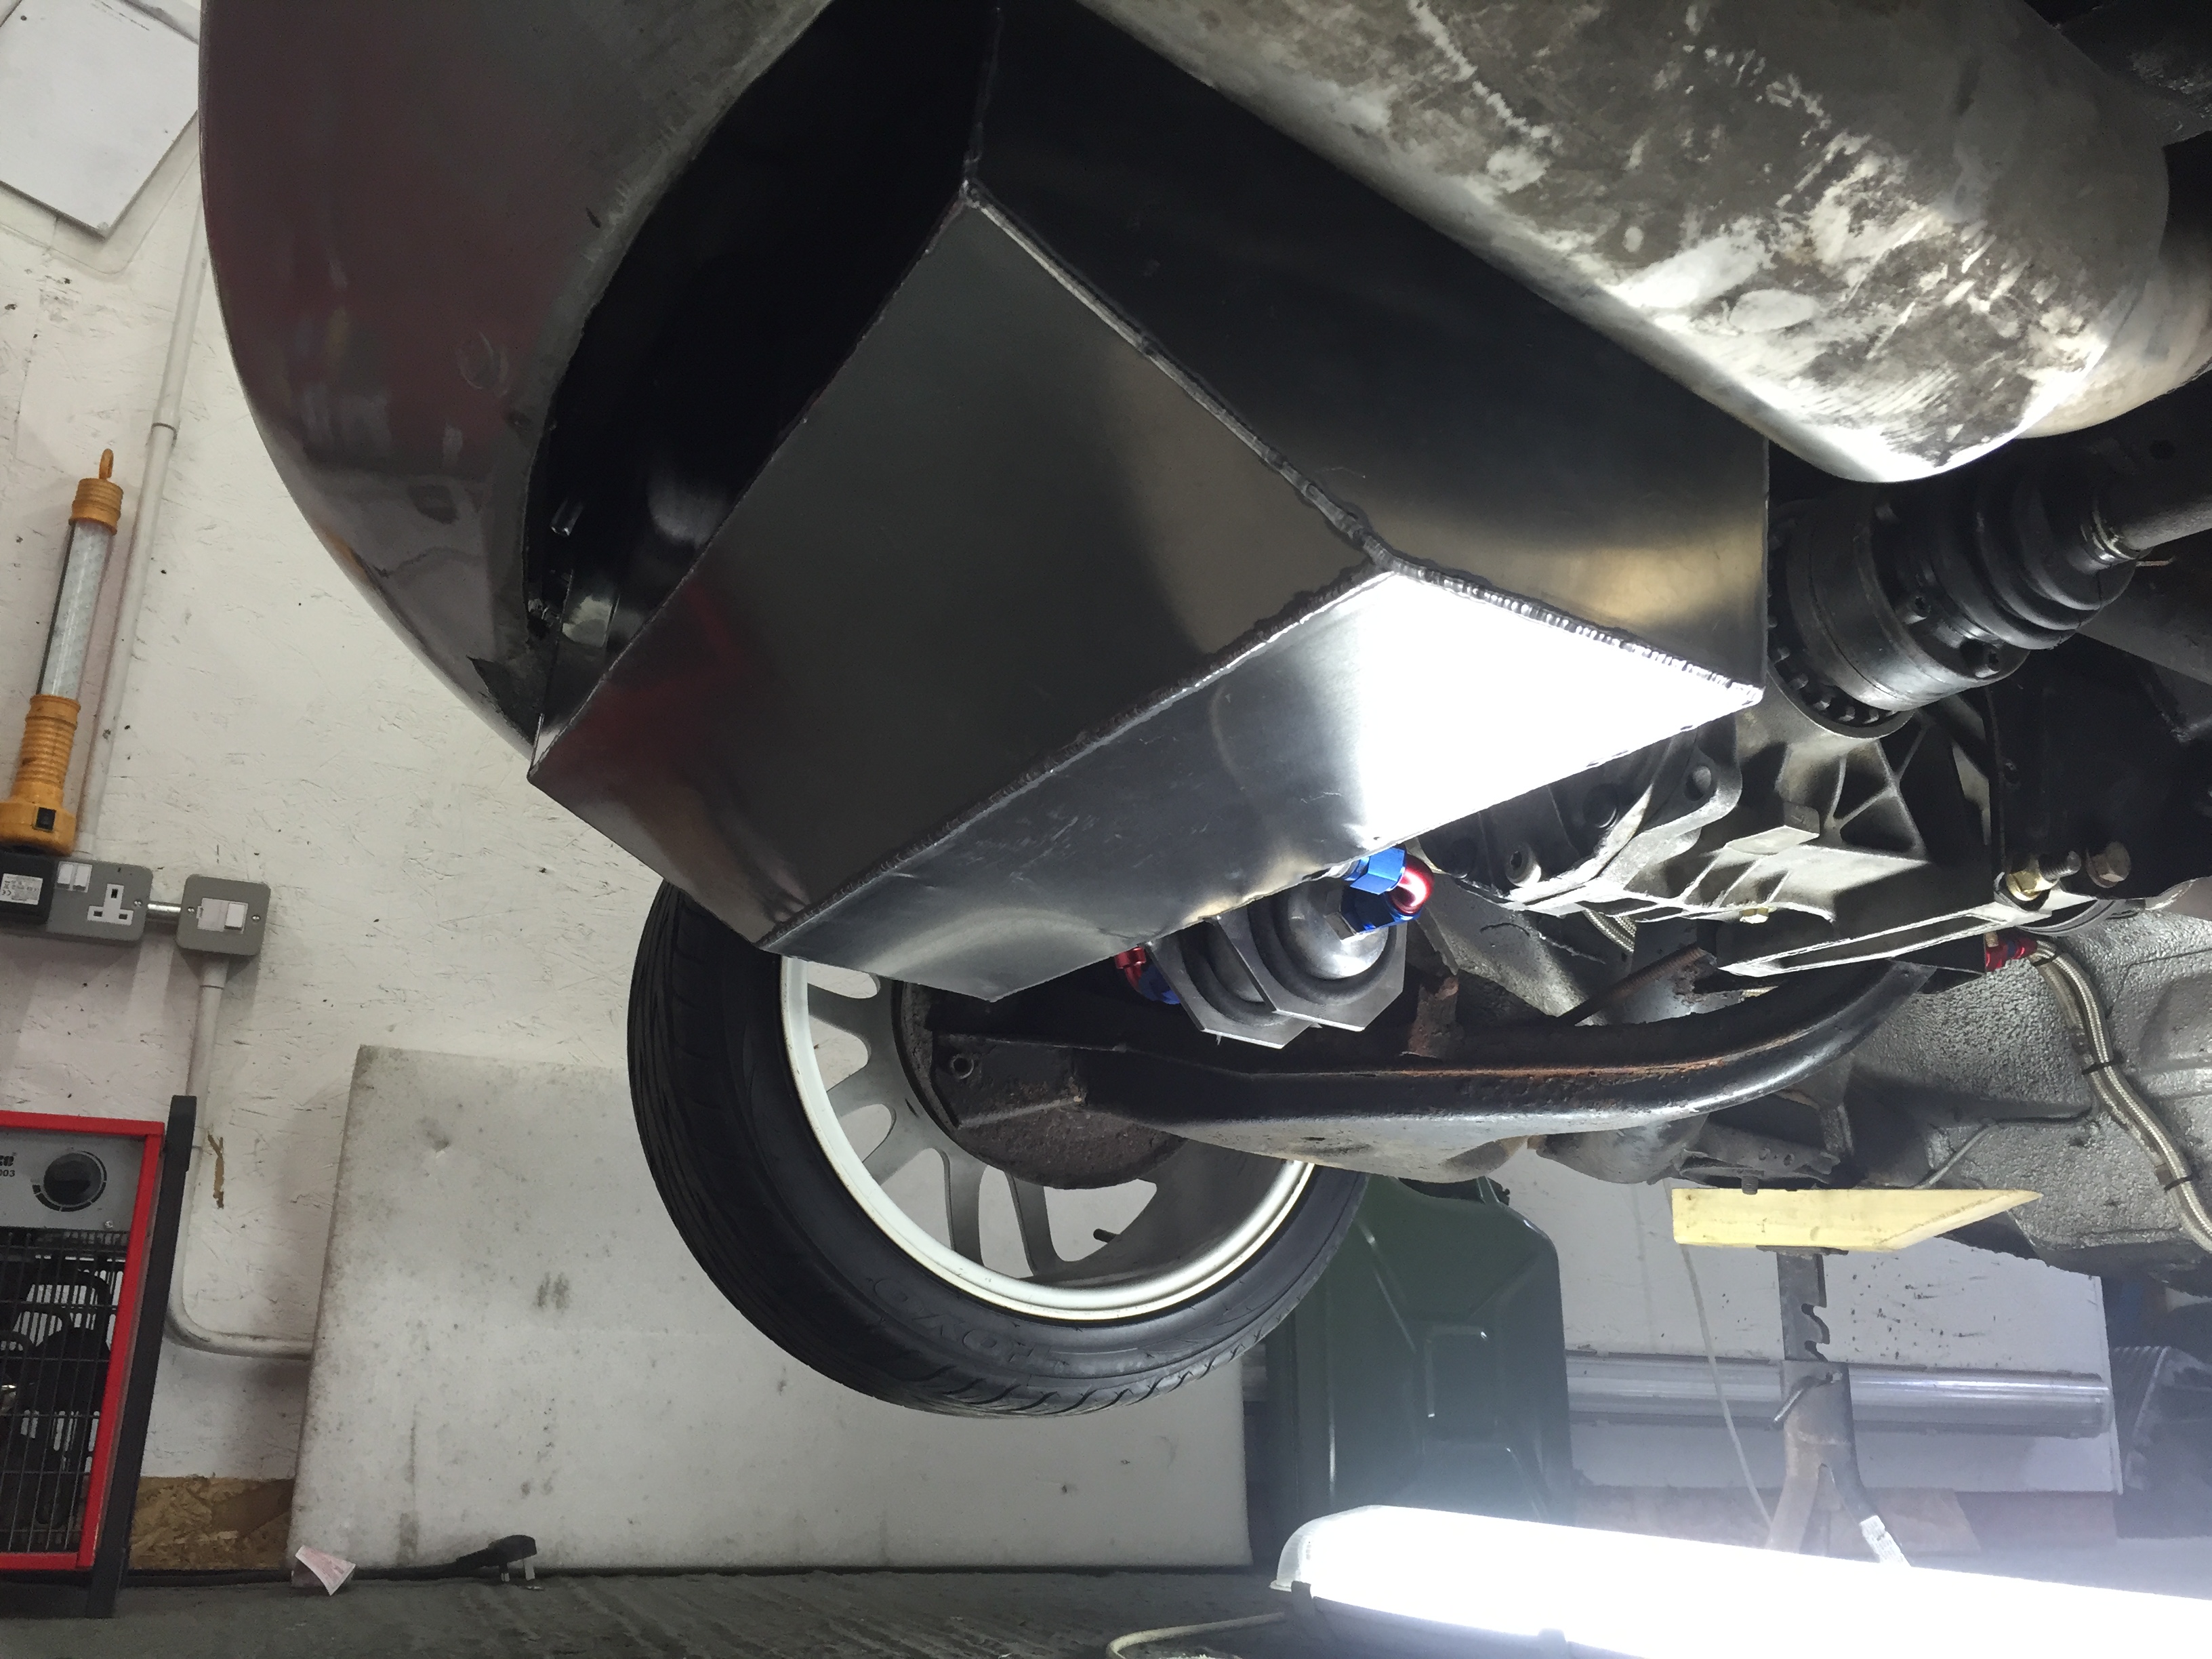
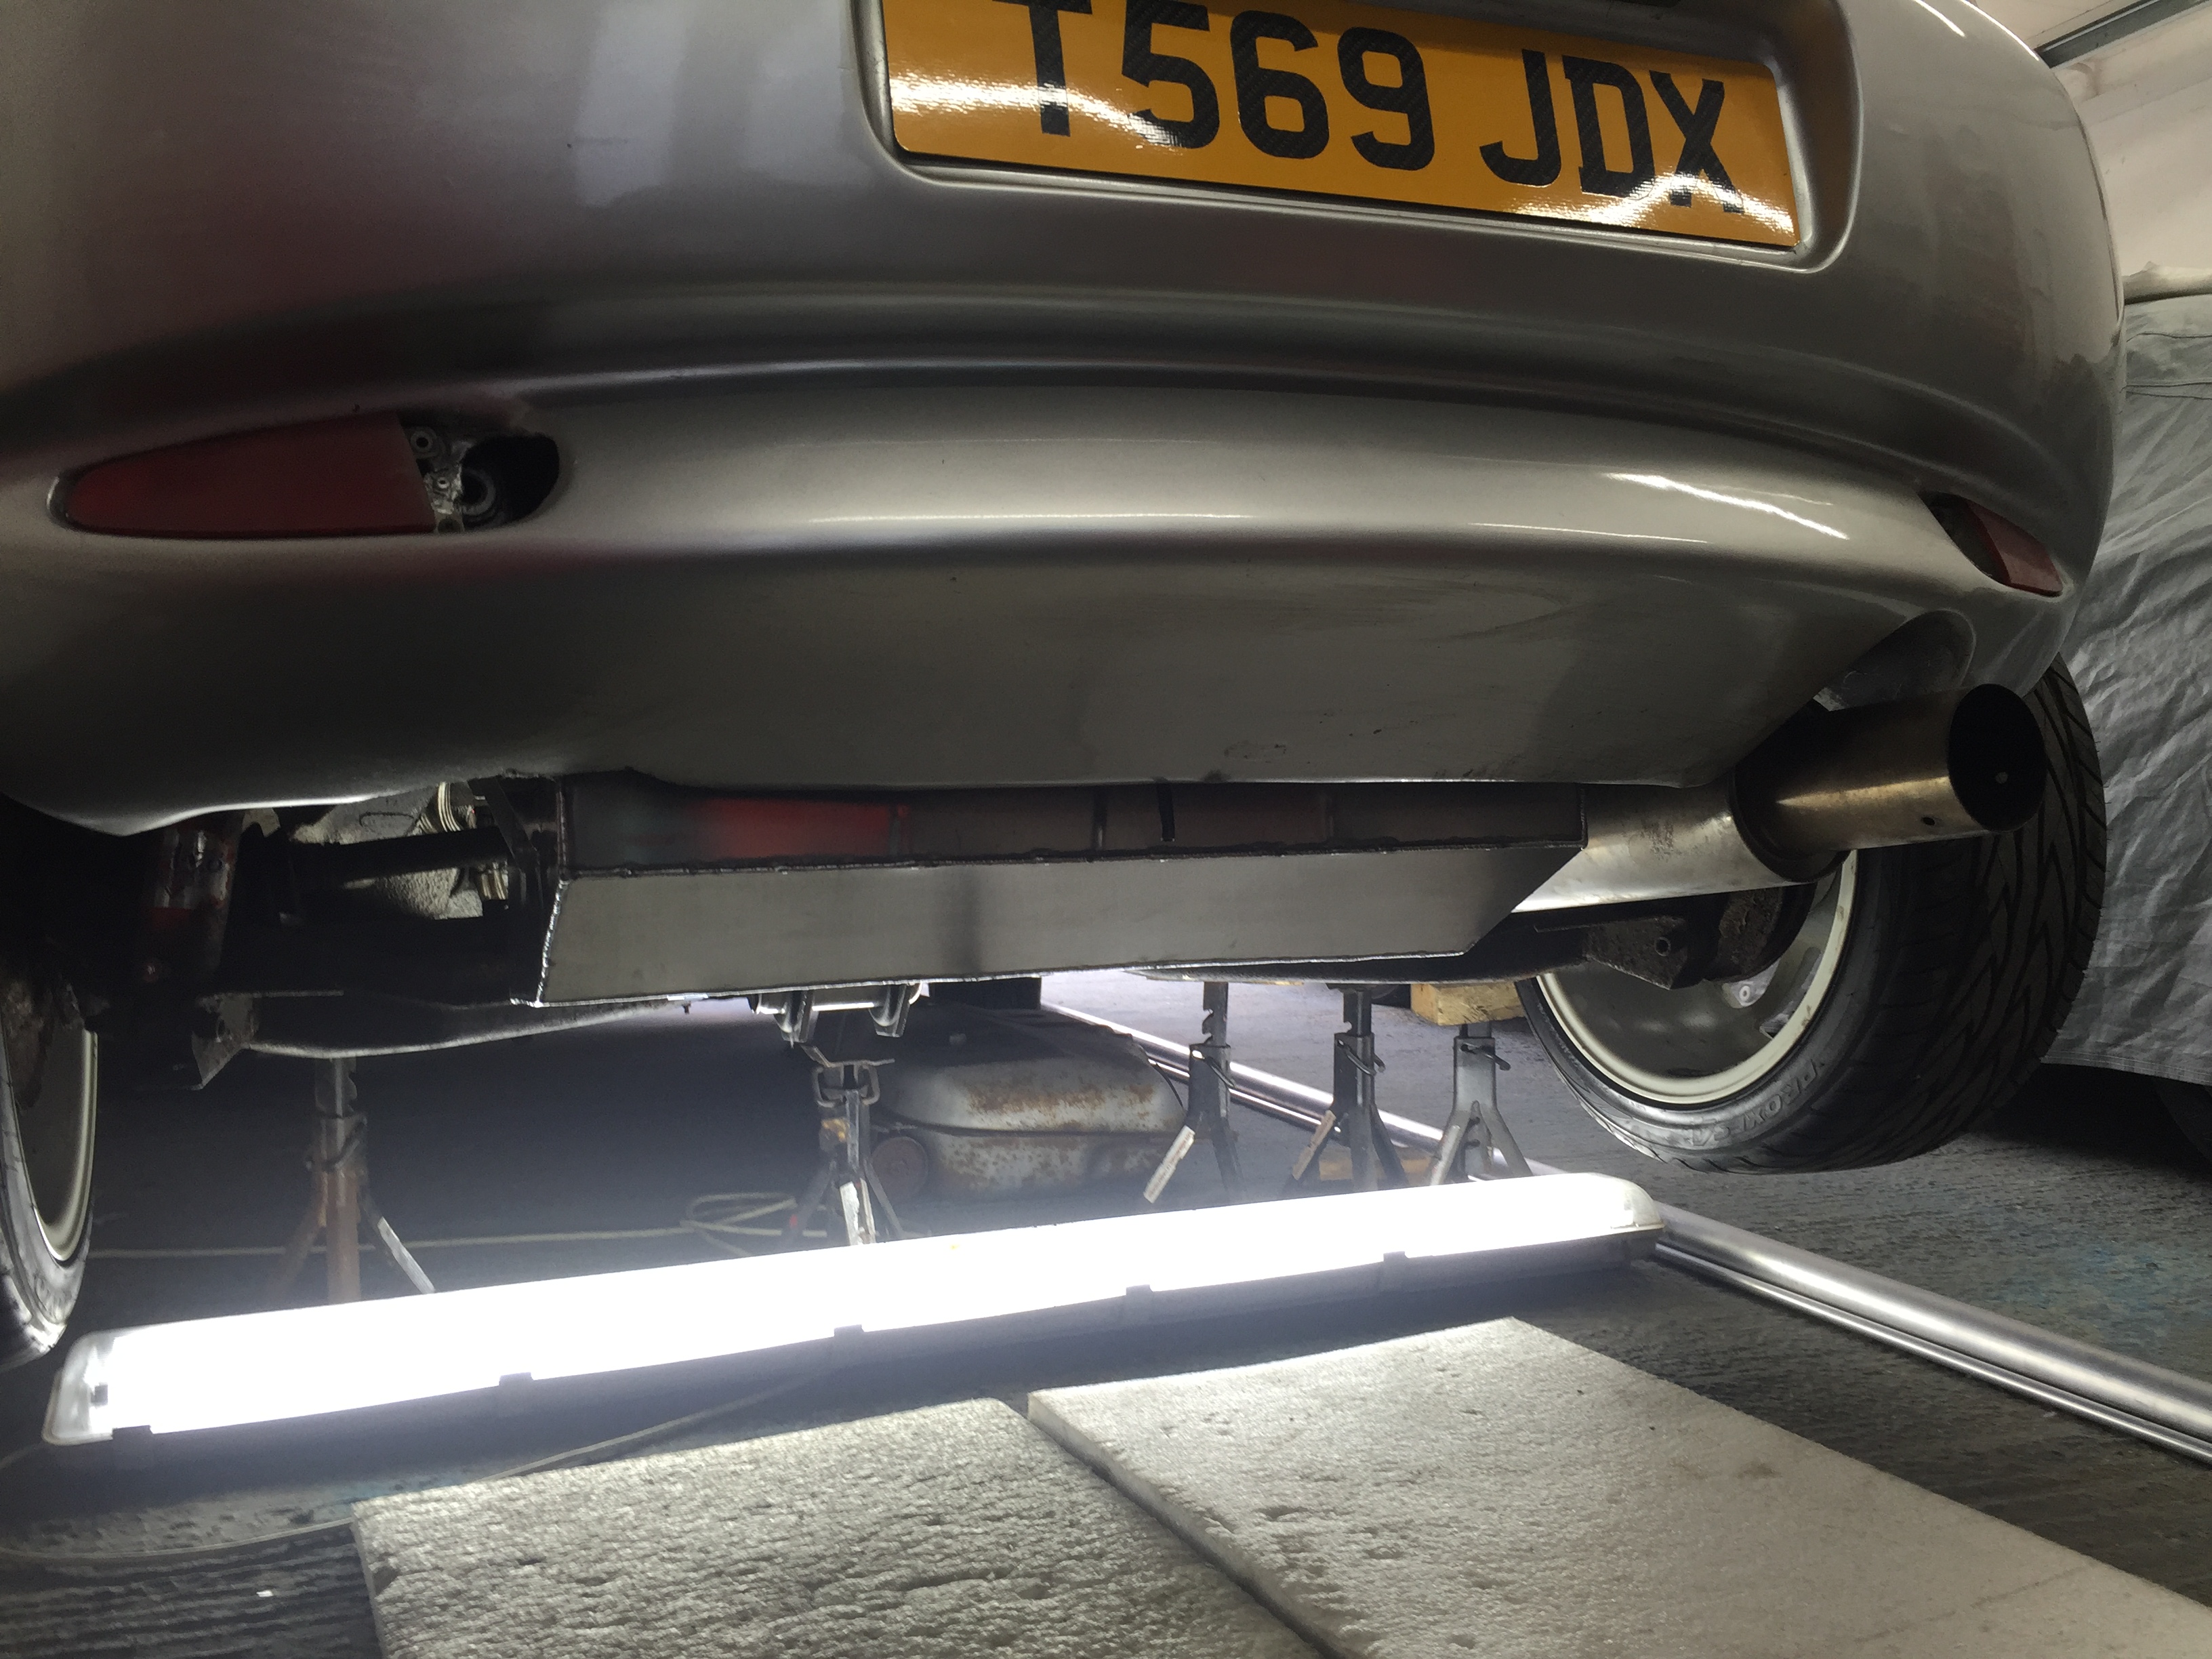
With that done it was filled up with some fuel and of on a test drive.
More to follow soon.
With the tank out and before I put it back in I turned my attentions to the rear diff. This needed its oil changing as I had no clue when it was last changed and had a feeling it was topped up with anything lying around as it seemed to have a leak on the pinion shaft... Which appeared to be a red fluid. I'm guessing transmission fluid.
Because of the way the car has been built I can't get the rear cover off the diff without removing the whole thing from the car.. So spanners out again and got the diff out.

Diff out I could now remove the rear cover, also realised that the fill plug was rounded and so out with the welder to weld a nut onto it so I could turn it out

Knowing this won't be the last time I'll need to change the oil I set about fitting a drain plug


Wasn't happy with just letting the rubber 'o' ring squash against the casing as it wasn't totally flat at the point. So of to my machining friend who managed to mill a flat area and even a small recess for the rubber 'o' ring to make sure it wasn't going to leak.


Gave it all a clean and bolted back up again - some of you may notice the odd nuts on the diff mount and the old standard diff mount, the rear beam and everything is due to come out again at some point to be overhauled so new nuts, mount, bushes and everything else will be done then.
At this point I was keeping my fingers crossed that the pinion seal was leaking due to the transmission fluid and that with the correct oil I would get lucky and it would be OK. Only time would tell.

With that done time to get the tank all bolted up and fitted. Gave it a very very quick polish just to make it look like one block colour.


Tidied the original sender unit as best I could before fitting

Fitted the breather and sender unit and then one last shot of new vs old!

Tank fully fitted


With that done it was filled up with some fuel and of on a test drive.
More to follow soon.
06-07-2016, 04:28 PM
#198
Advanced PassionFord User
That looks really impressive  well done