Puma 4x4 Cosworth
 01-11-2015, 09:57 AM
#41
PassionFord Regular
Thread Starter

 01-11-2015, 10:02 AM
#42
PassionFord Regular
Thread Starter
There's a jubilee clamp on the pump feed from the tank, and one on the return line back to the tank, the high pressure hose is the standard item - the rubber hose with the banjo fittings is the high pressure hose.
Though I will double check !!
Though I will double check !!
01-11-2015, 10:11 AM
#43
PassionFord Regular
Thread Starter
Pretty sure you have to remove the piston to allow you to remove the little pin that pushes against the back of the piston as the handbrake lever is pulled. It's not a bad a job as your thing. Just need a decent pair of long reach circlip pliers.
The car has the S1600 kit fitted which i'm told is about an inch wider on both sides than the racing puma. It's border line whether the wing mirrors are the widest part of the car!
01-11-2015, 12:37 PM
#44
10K+ Poster!!


Looks fantastic, I always liked this car when Waren had it. Looks like a great restoration.
I just bought brand new ford power steering pipes for mine.
I just bought brand new ford power steering pipes for mine.
01-11-2015, 03:52 PM
#45
Wahay!! I've lost my Virginity!!

Join Date: Feb 2011
Location: Czech Republic
Posts: 57
Likes: 0
Received 0 Likes
on
0 Posts
01-11-2015, 10:14 PM
#46
Glennvestite
iTrader: (1)
Join Date: Jul 2006
Location: Darlington county durham
Posts: 62,755
Received 1,042 Likes
on
996 Posts
Thanks Glenn.
Pretty sure you have to remove the piston to allow you to remove the little pin that pushes against the back of the piston as the handbrake lever is pulled. It's not a bad a job as your thing. Just need a decent pair of long reach circlip pliers.
The car has the S1600 kit fitted which i'm told is about an inch wider on both sides than the racing puma. It's border line whether the wing mirrors are the widest part of the car!
03-11-2015, 05:31 PM
#47
PassionFord Regular
Thread Starter
The test drive was not that successful... Thinking oil leaks and running issues were a thing of the past I took the car on a drive to a mates house, when pulling onto the motorway decided to give the car some throttle to be confronted with what can only be described as a noise like a neumatic hammer they use for digging up the roads except on the floor pan of the car. It seemed speed related so keeping below 60mph stopped the banging but the car was shacking quiet horribly..
I then started to realise what was probably causing the issue.. The propshaft
Back home and back in the workshop time to find out what had happened..
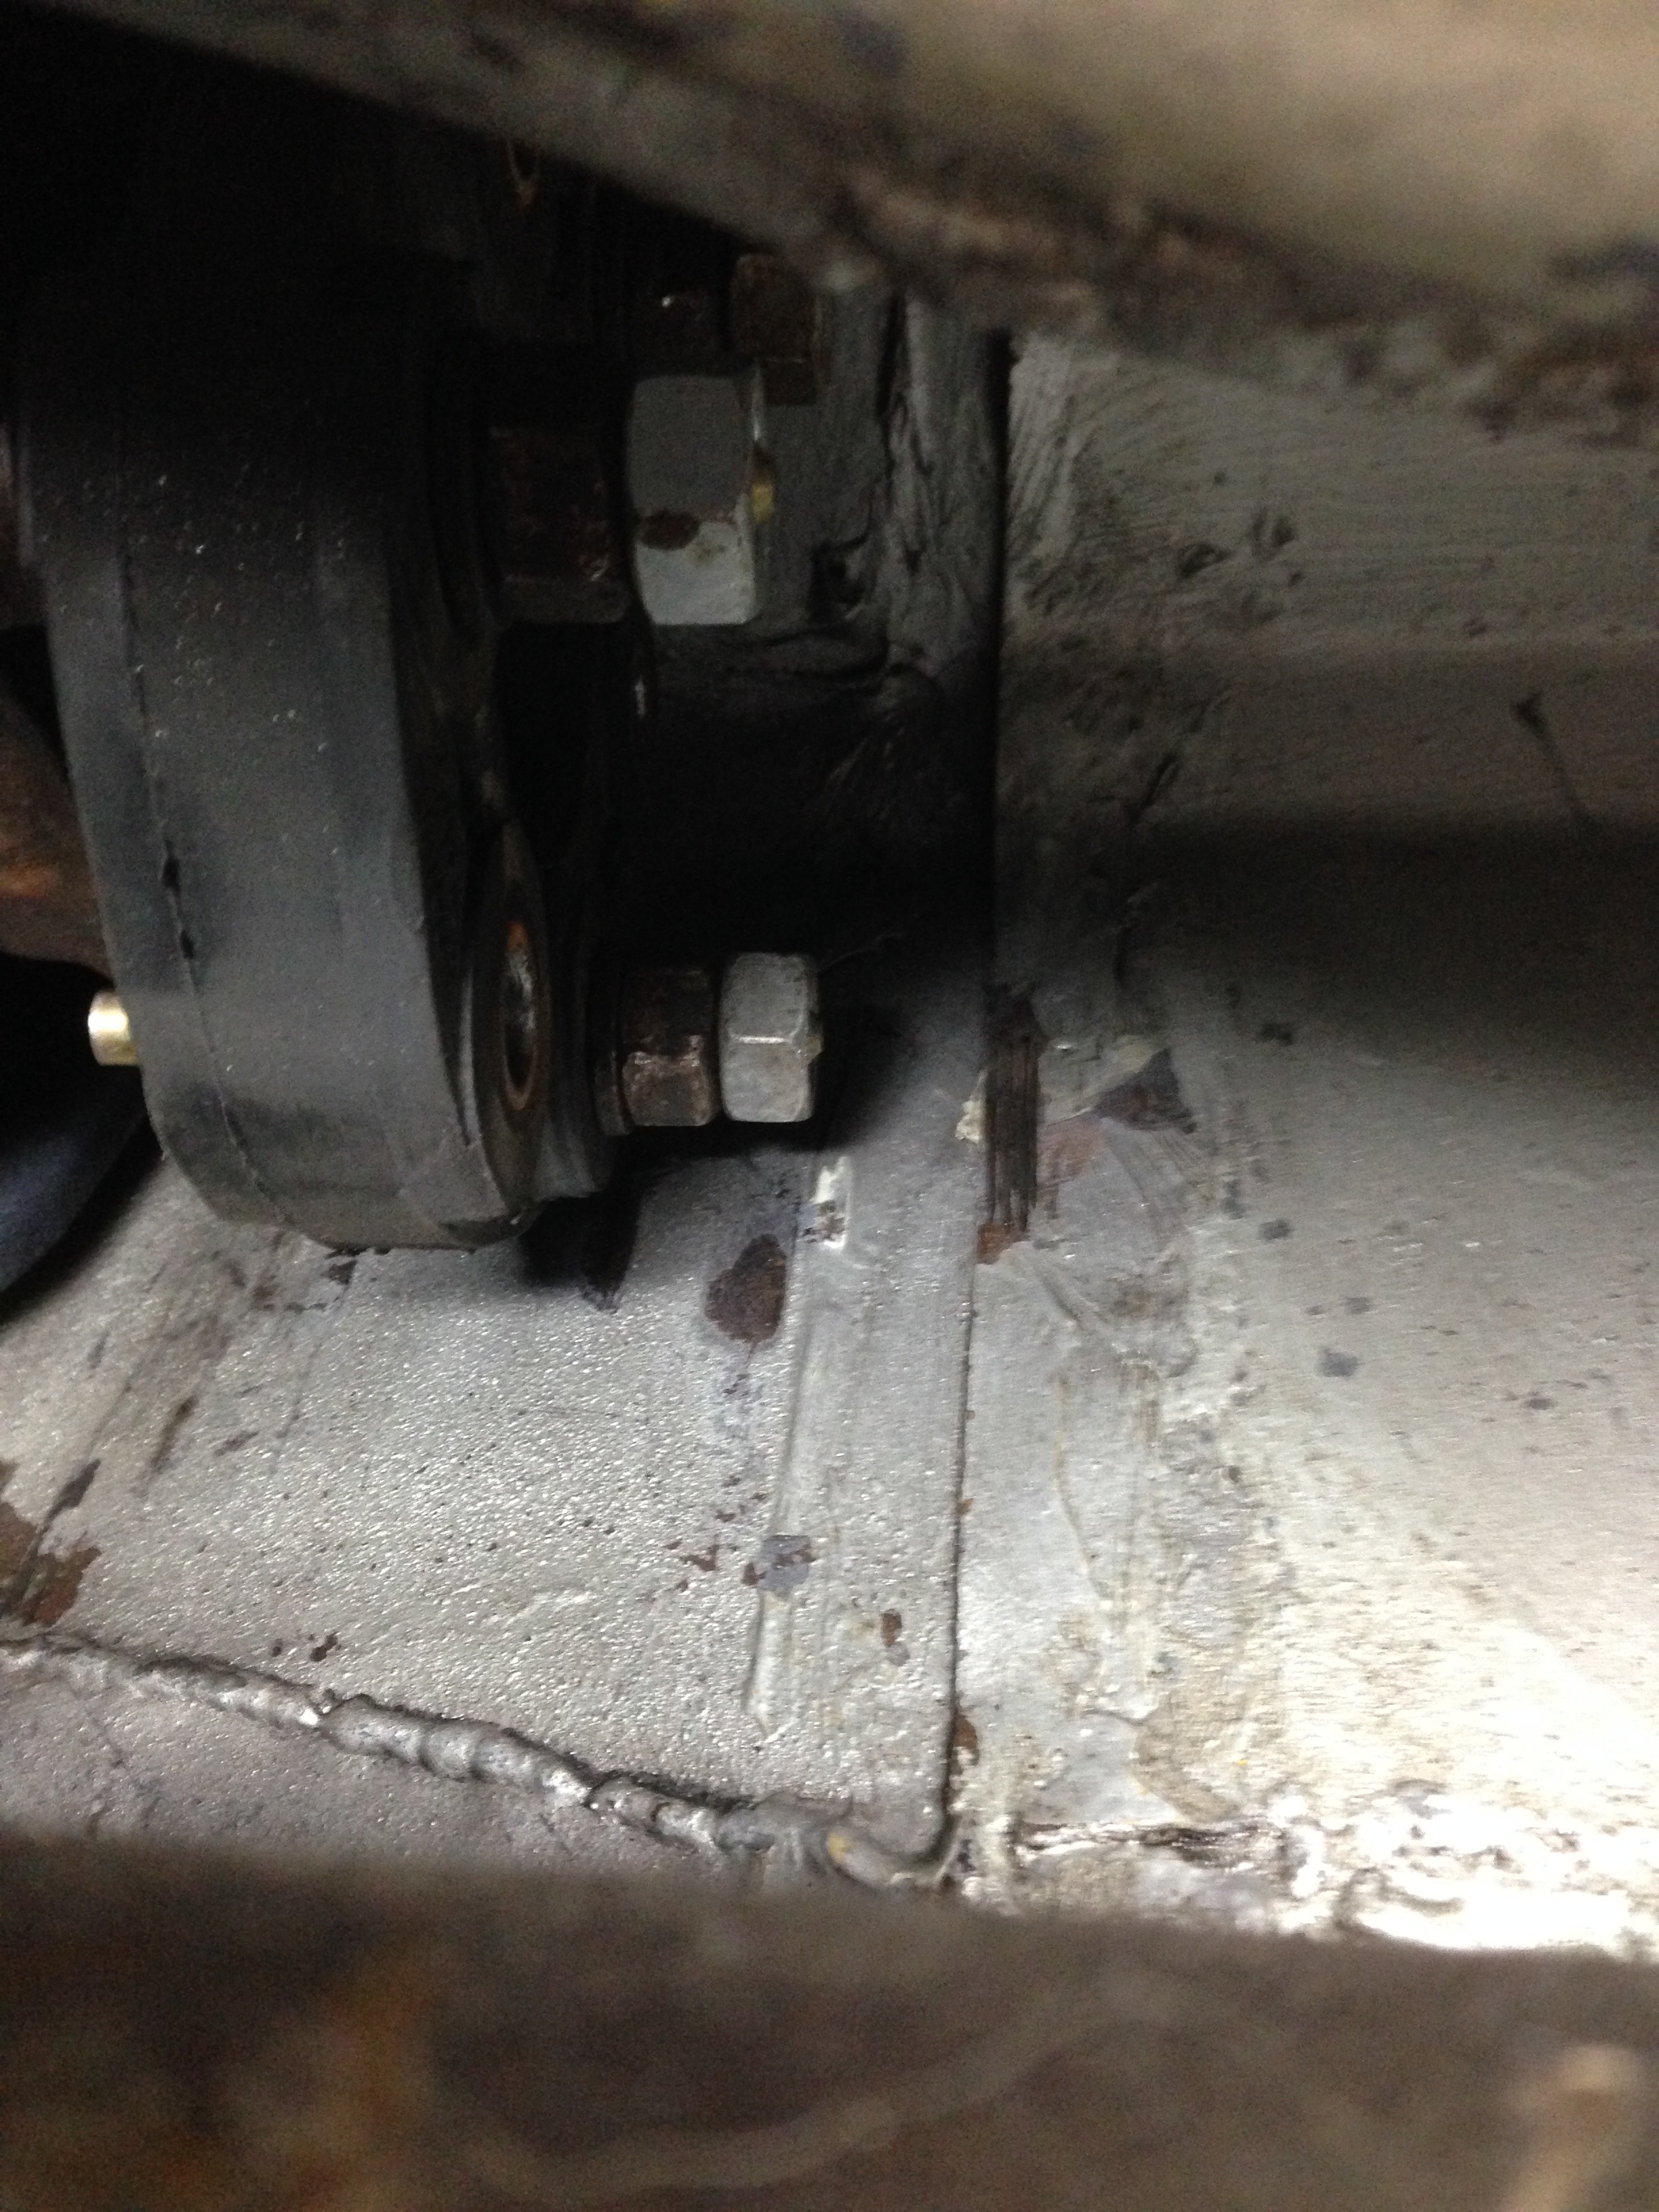
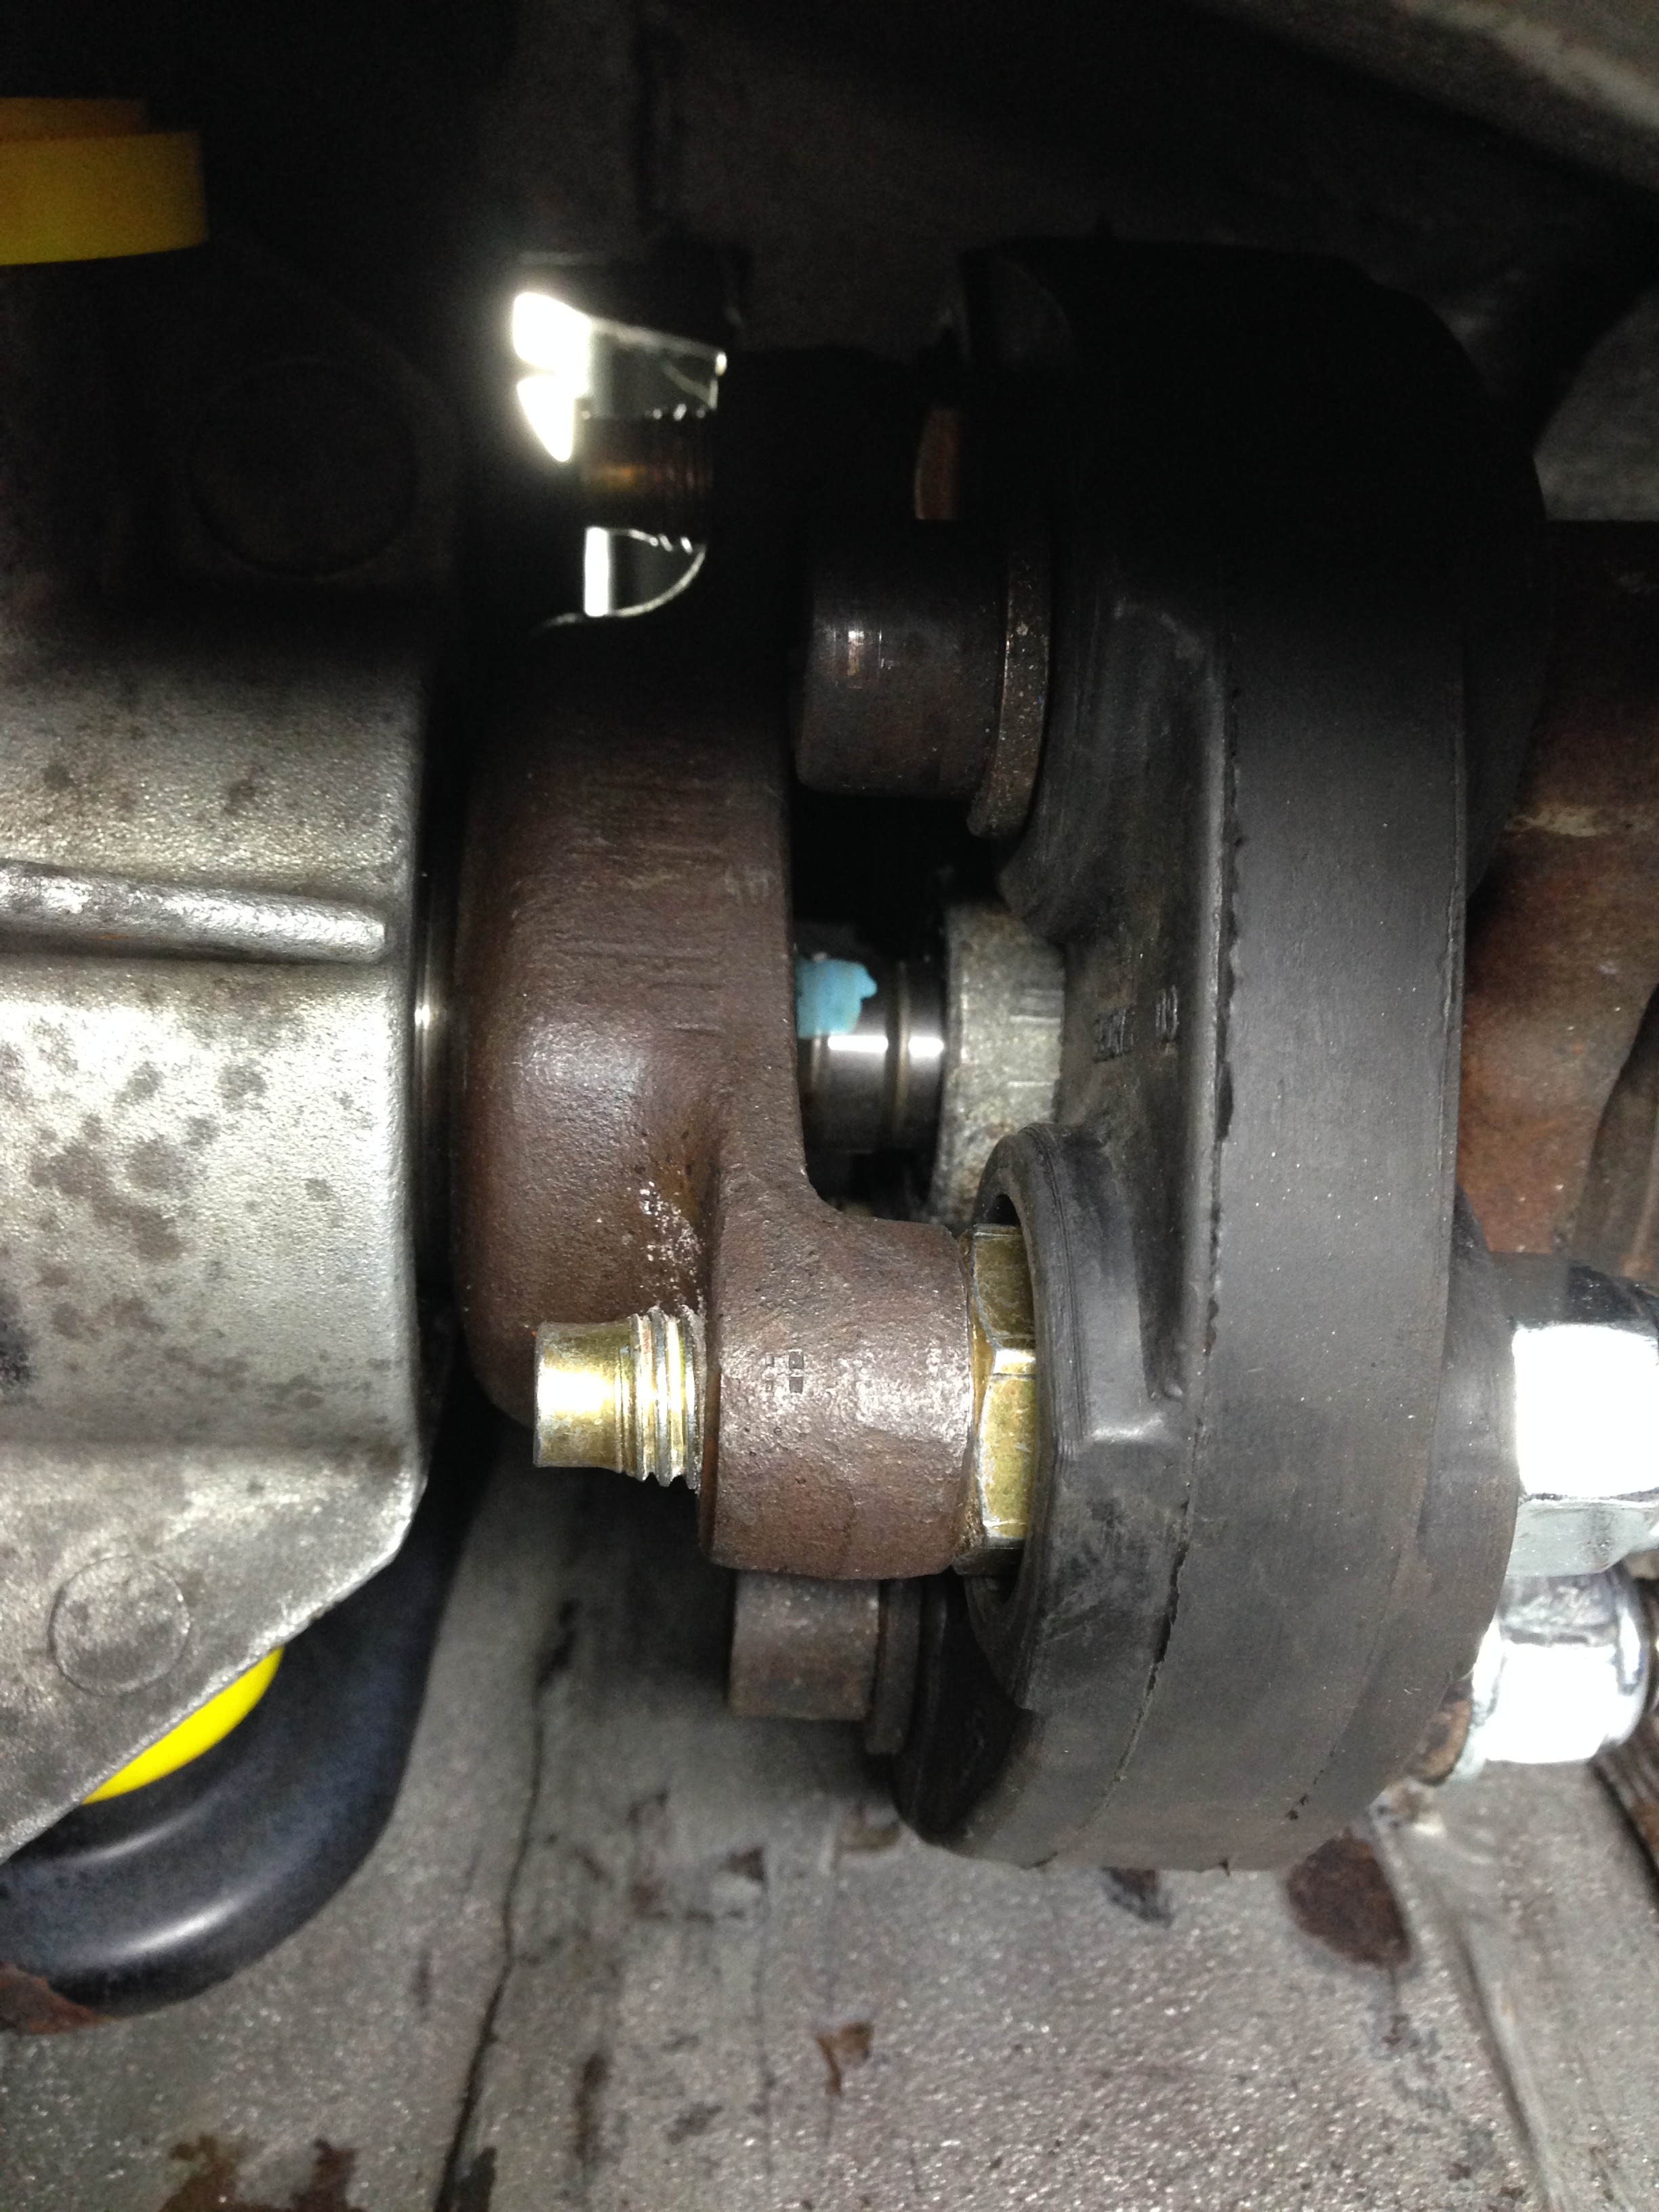
This shows where the propshaft has smacked the side of the tunnel.. Which explains the noise, at this stage I was thinking unbalanced prop - as I had matched the rear section with a new front section on an early stage of work when I changed the propshaft doughnut - this is where my in-experience with the running gear showed.. After speaking to the company who balanced the prop shaft it was suggested that the reason why it was oscillating was because it was not centered properly.
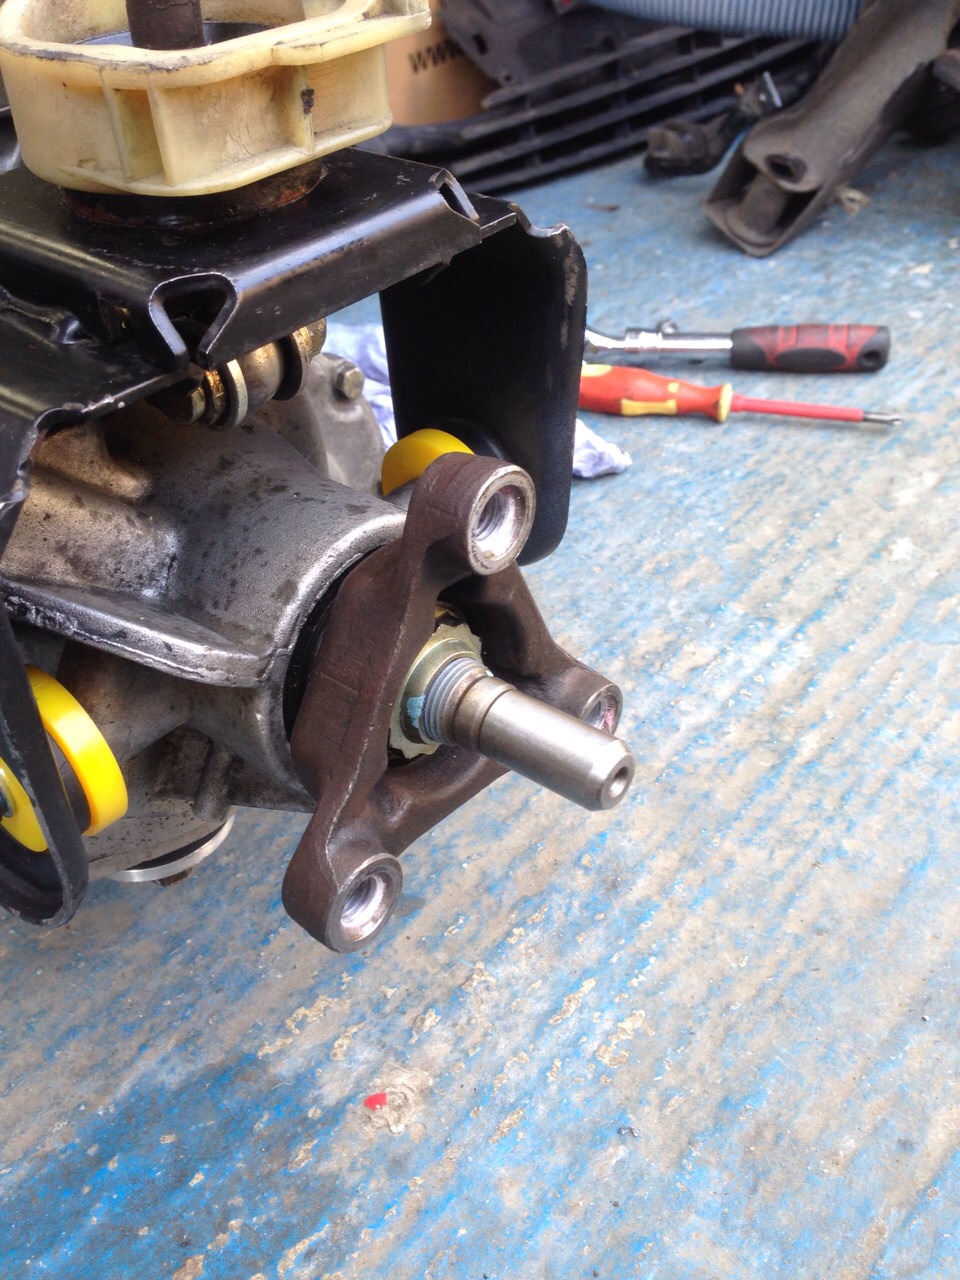
Back to the workshop and it was starring me in the face and I really should have noticed before
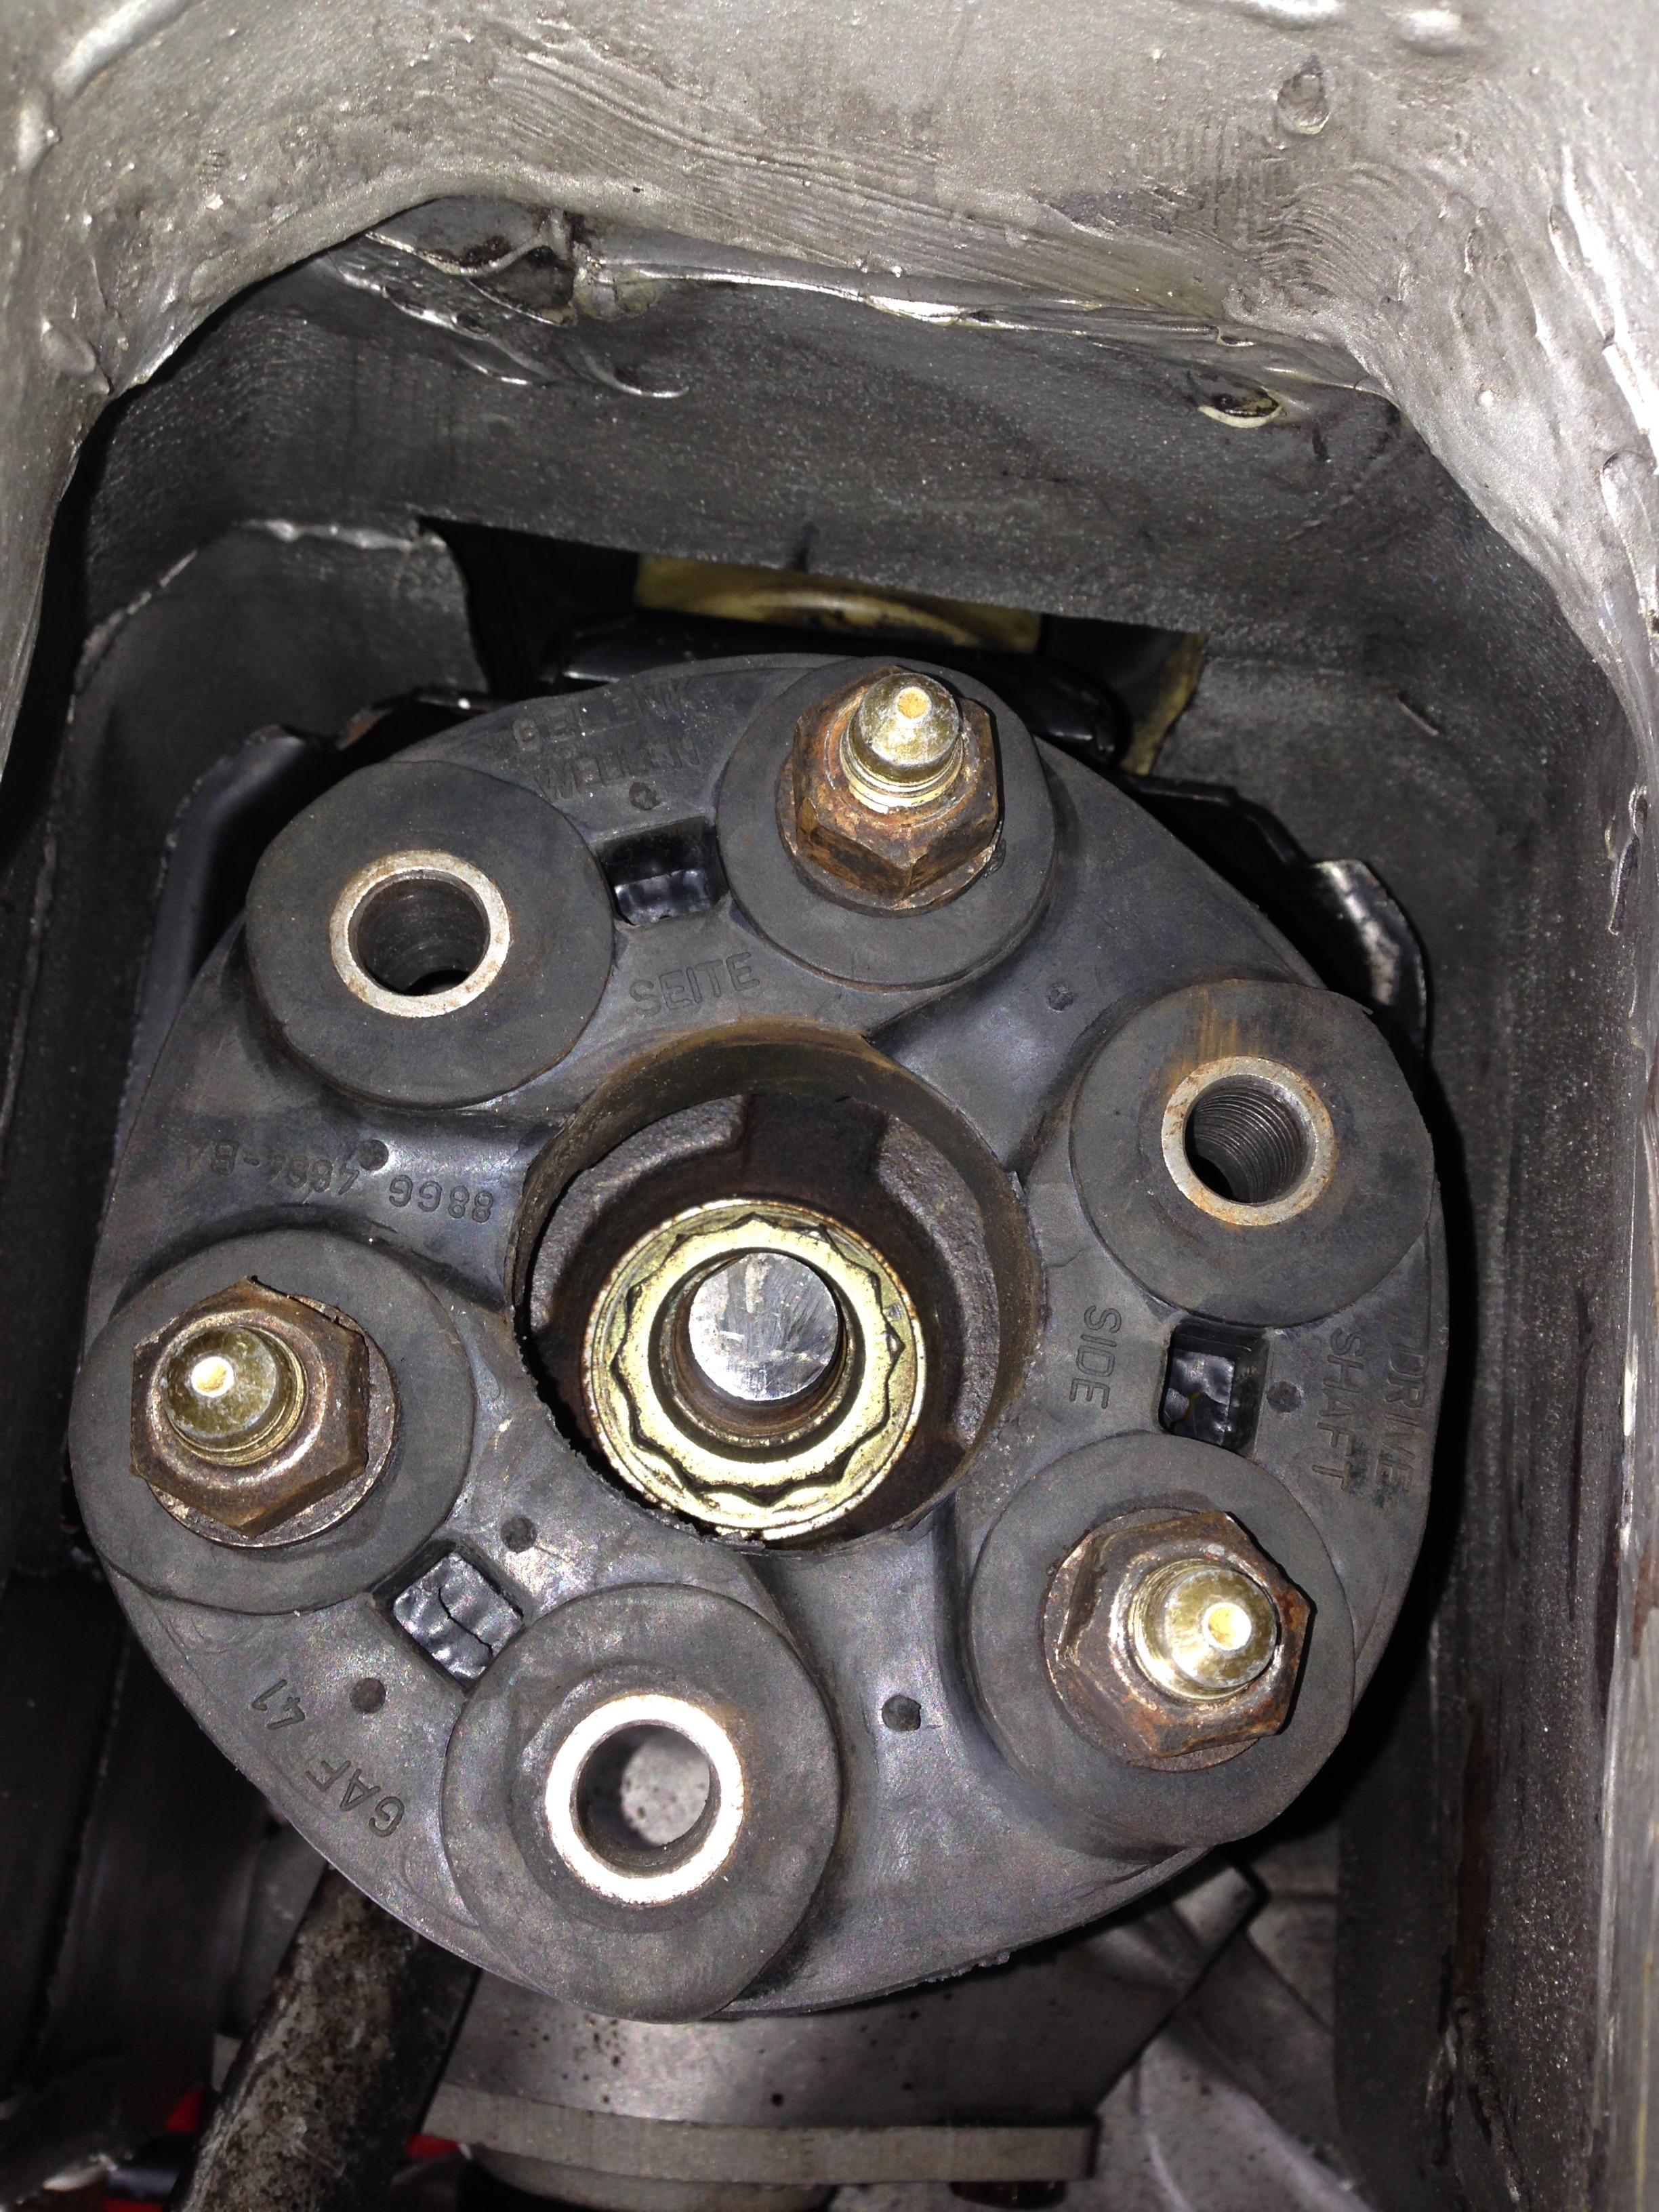
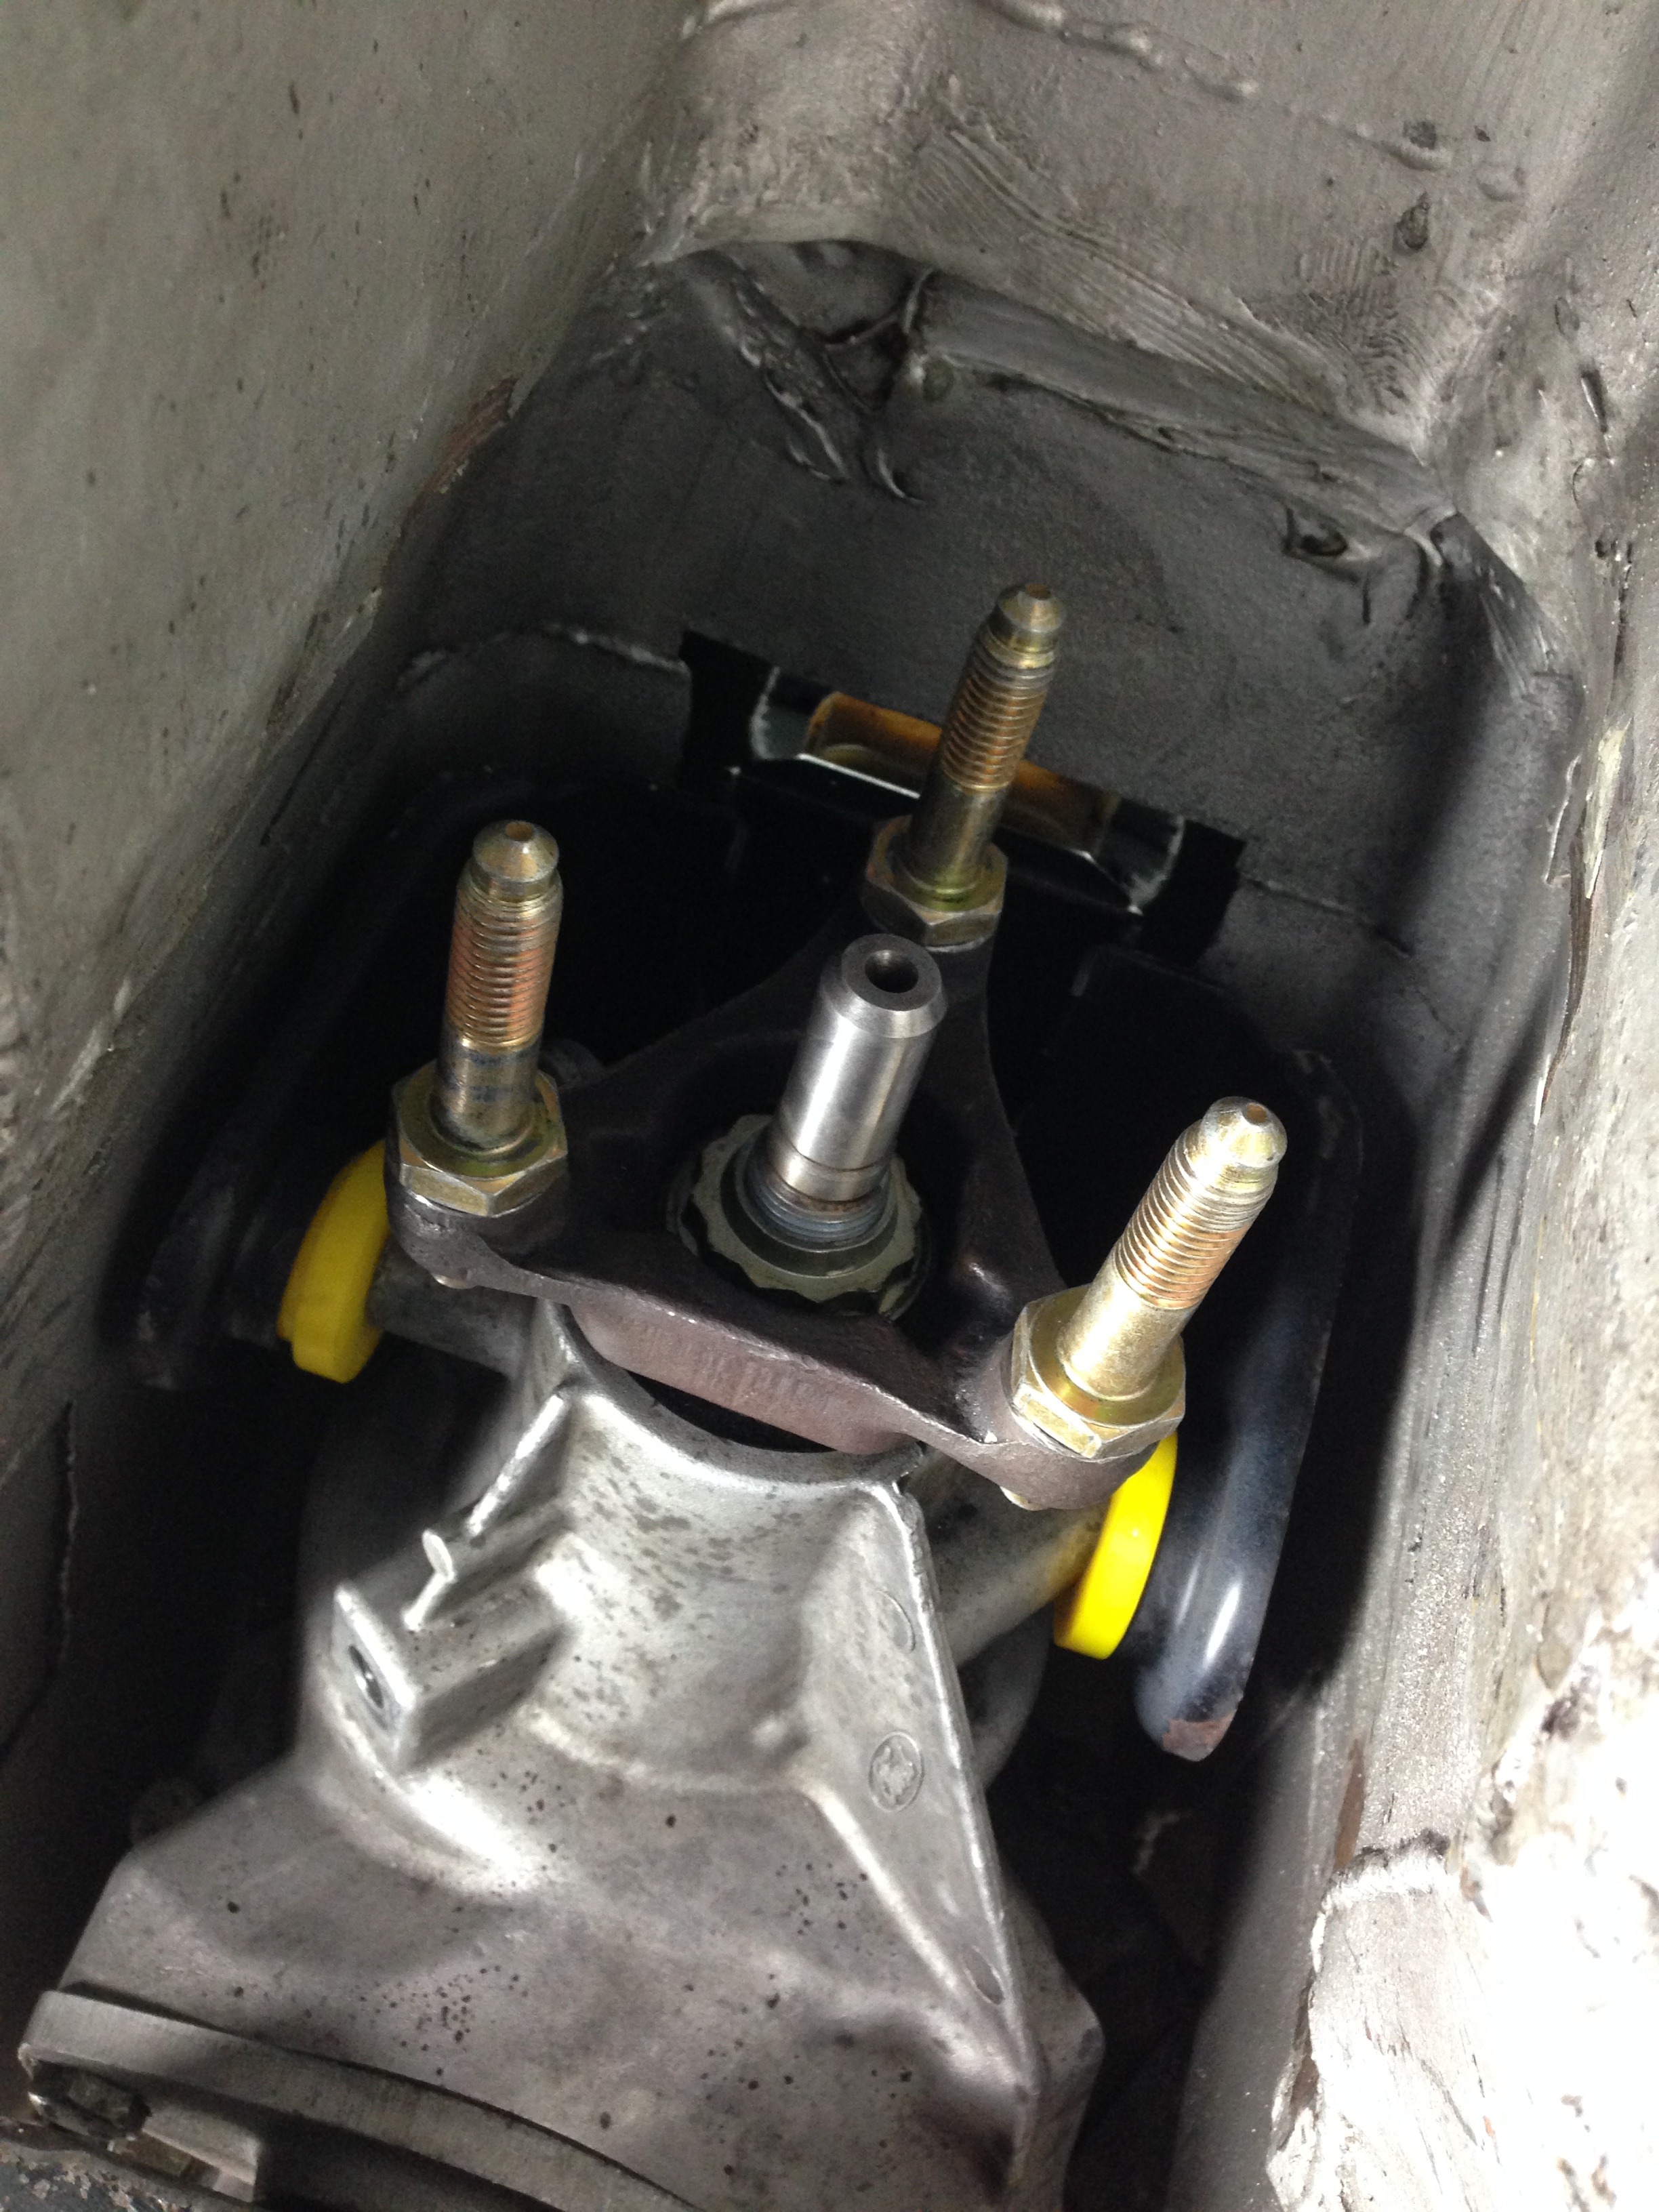
The output shaft on the gearbox has been cut down to fit the earlier propshaft doughnut, the earlier doughnut has the centering bearing in the doughnut.. The later doughnut (the one I replaced with as you can't buy the earlier type anymore) doesn't, the front section of the prop has this bearing in which centres on the output shaft.. Which is missing.
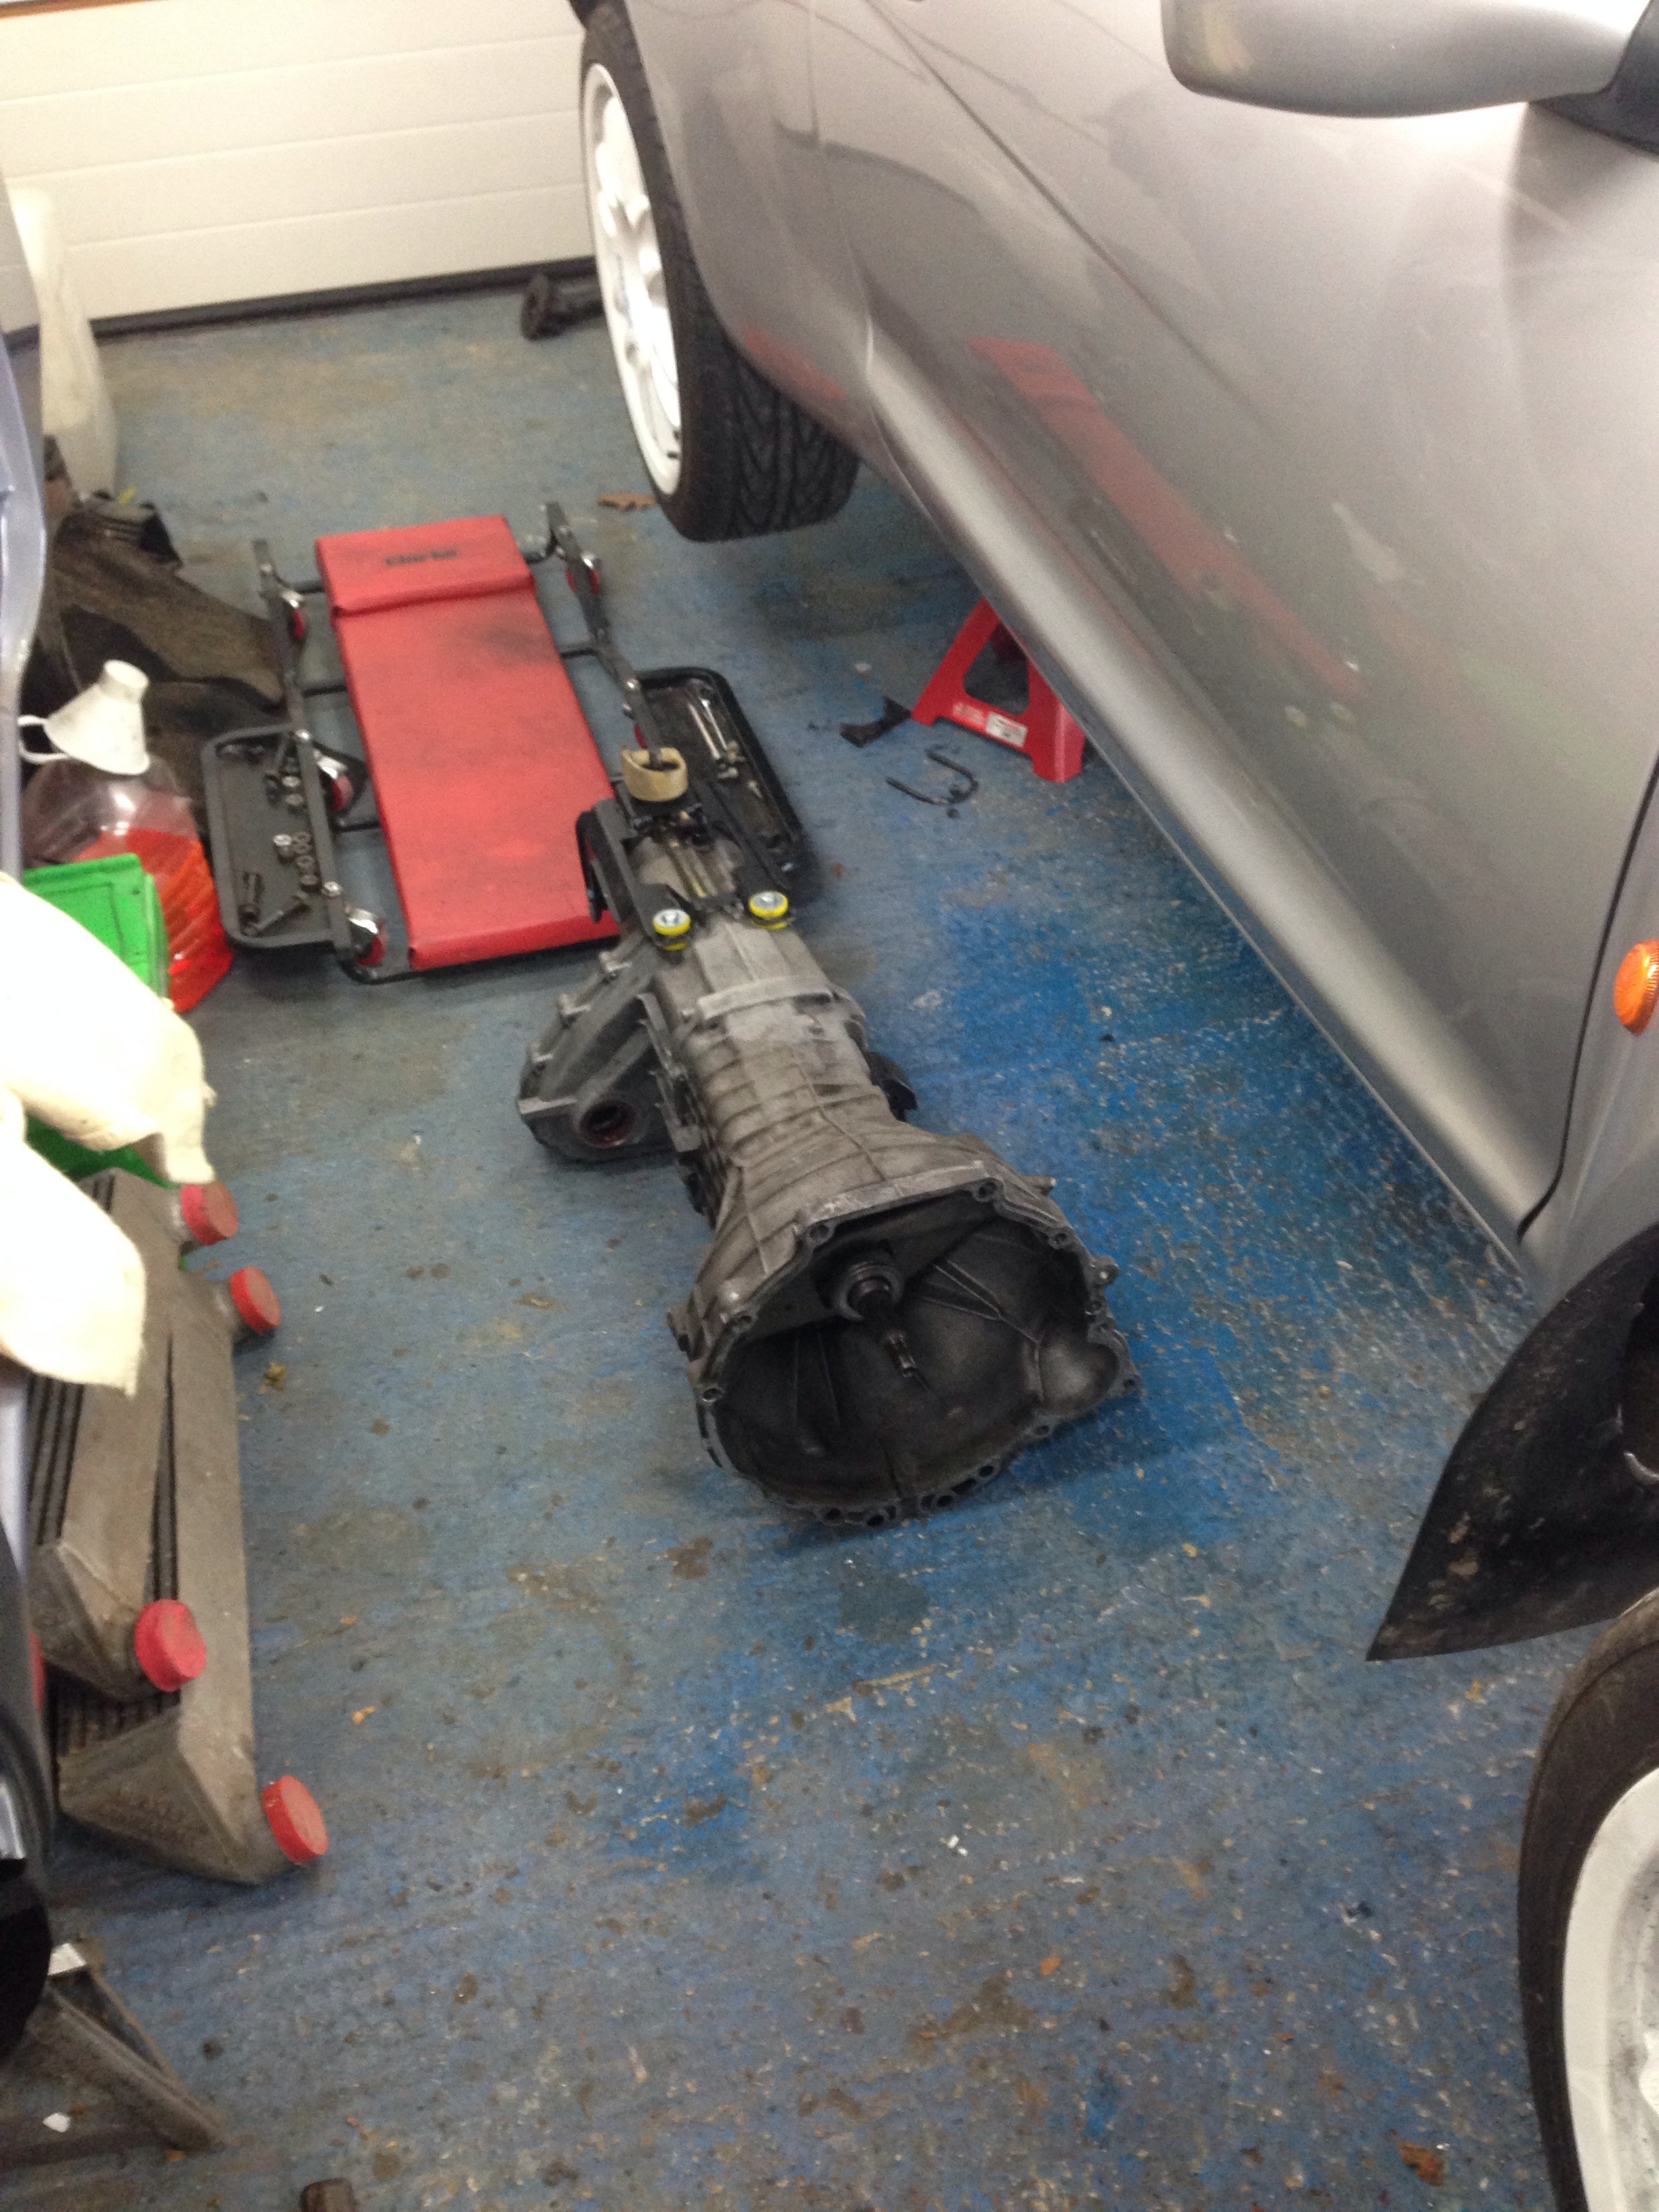
So with that settled and with only one way of repairing the box properly the gearbox was out again
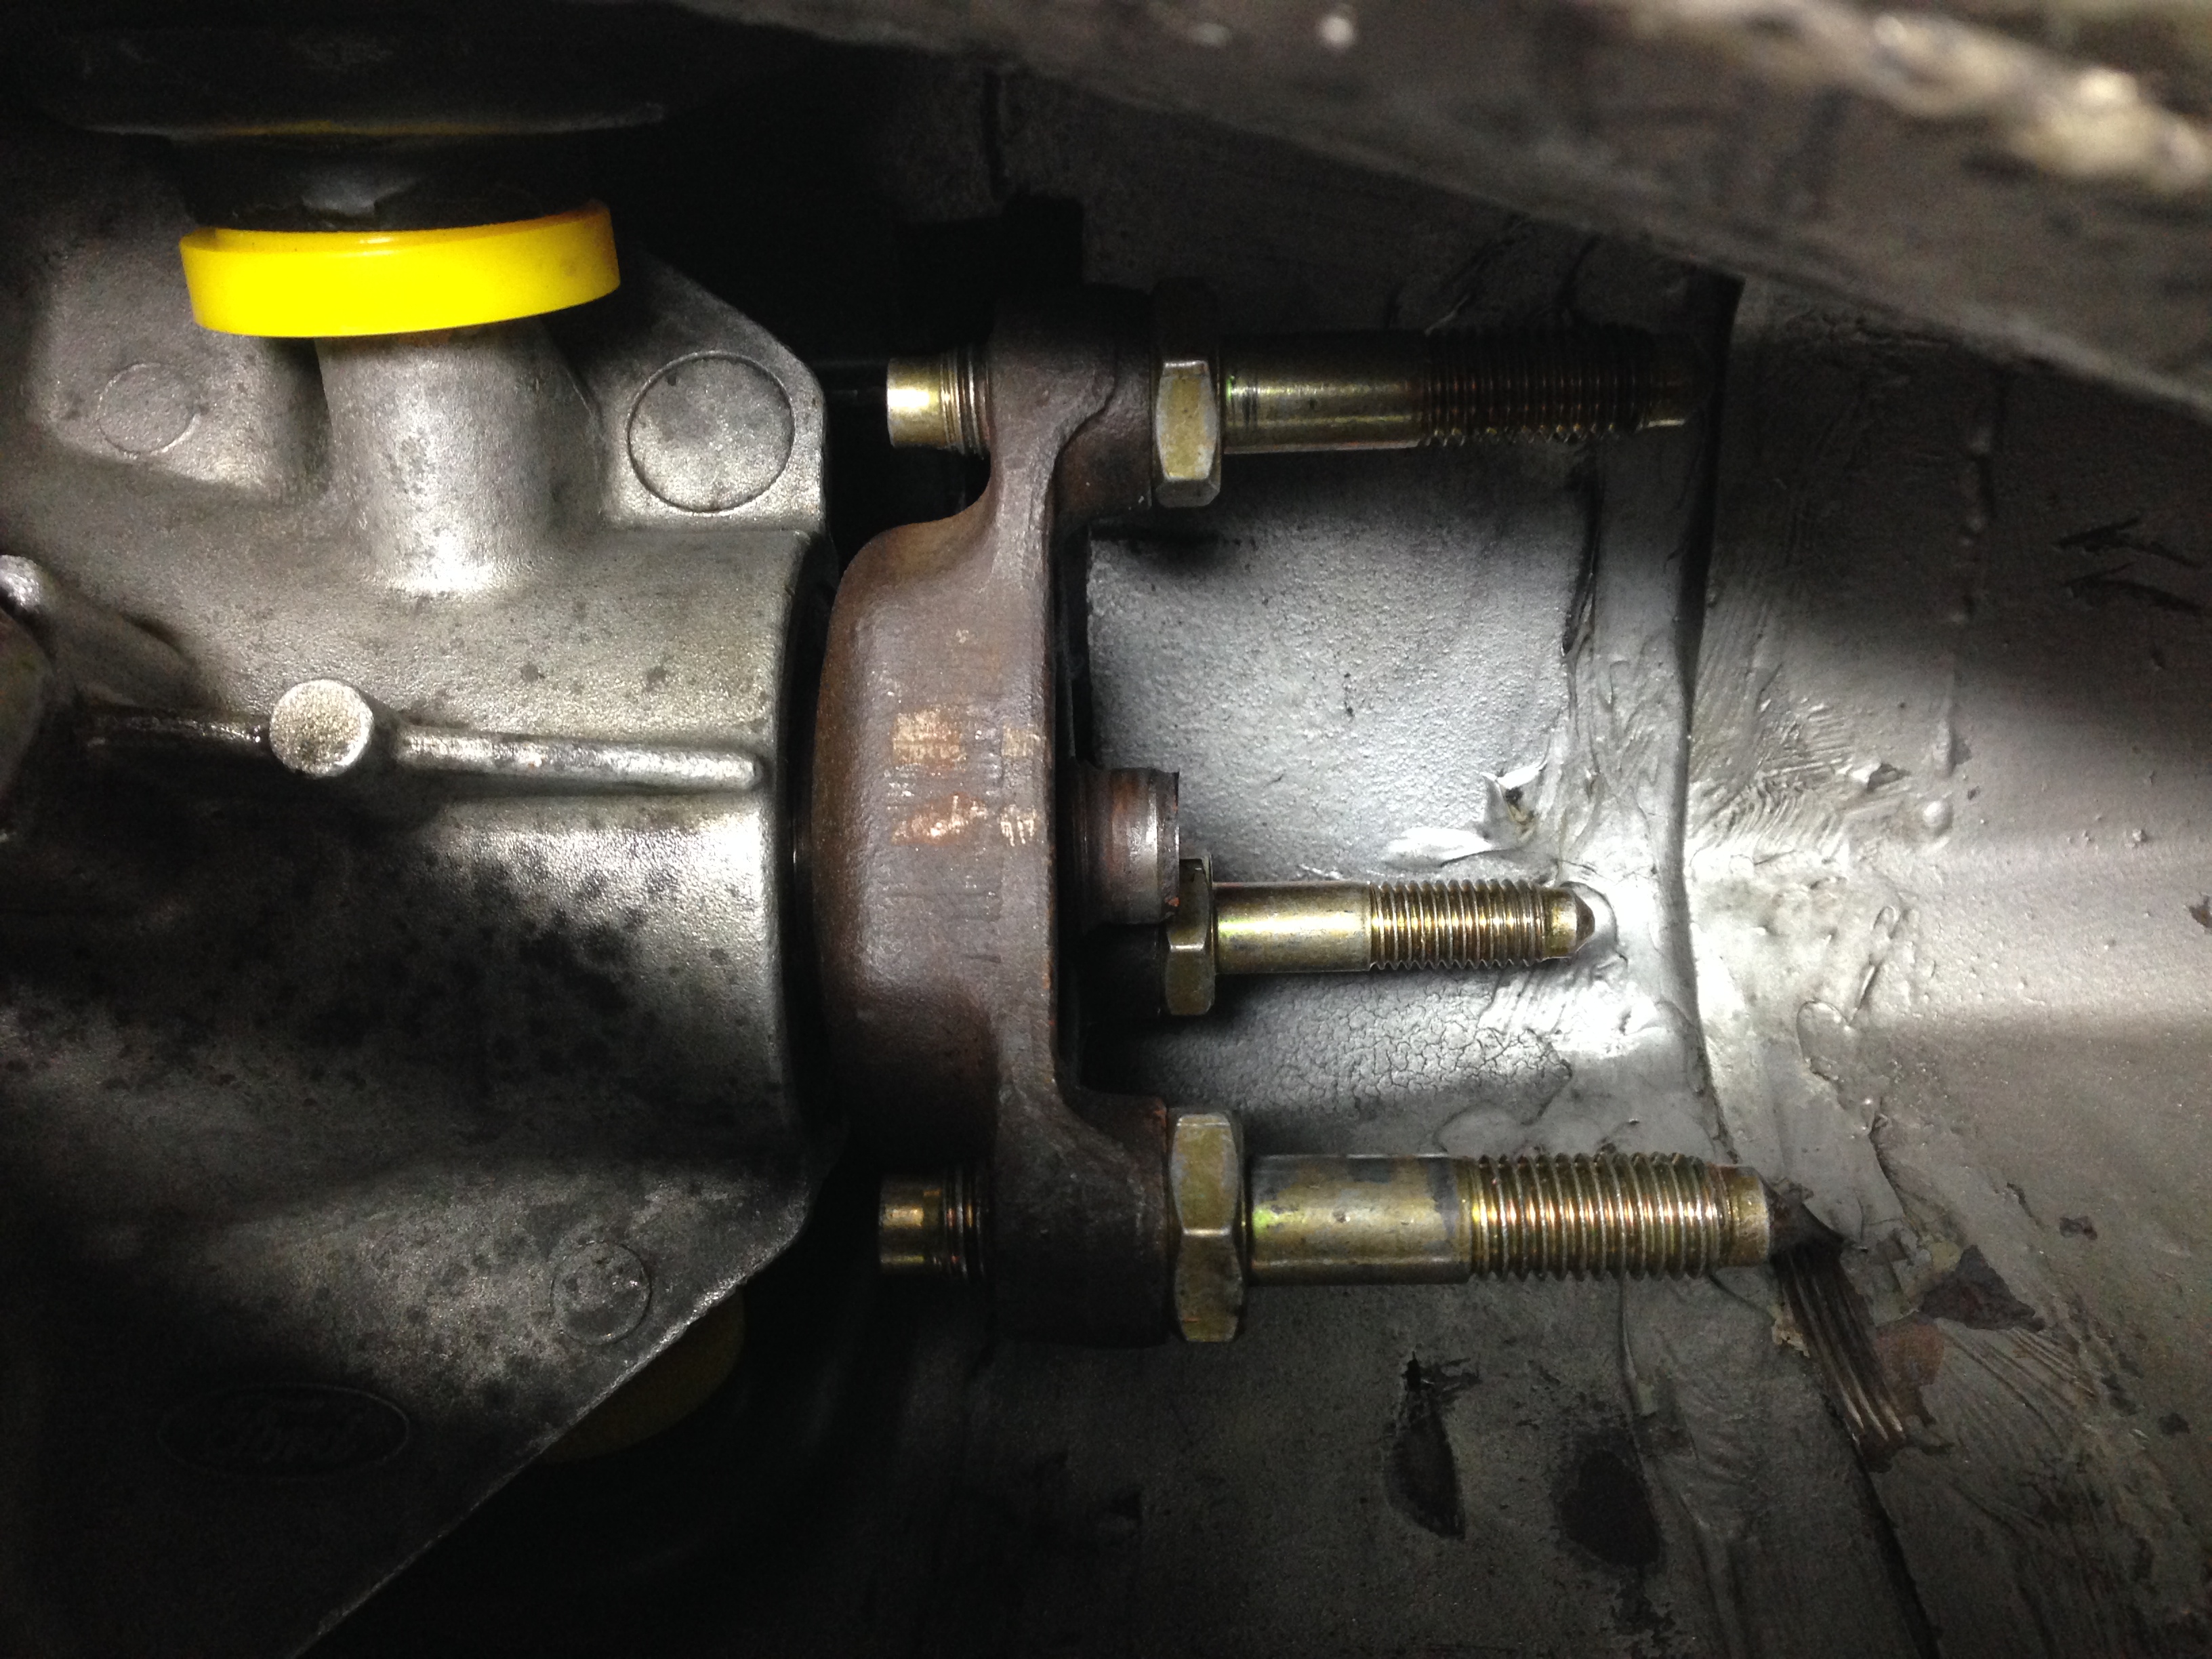
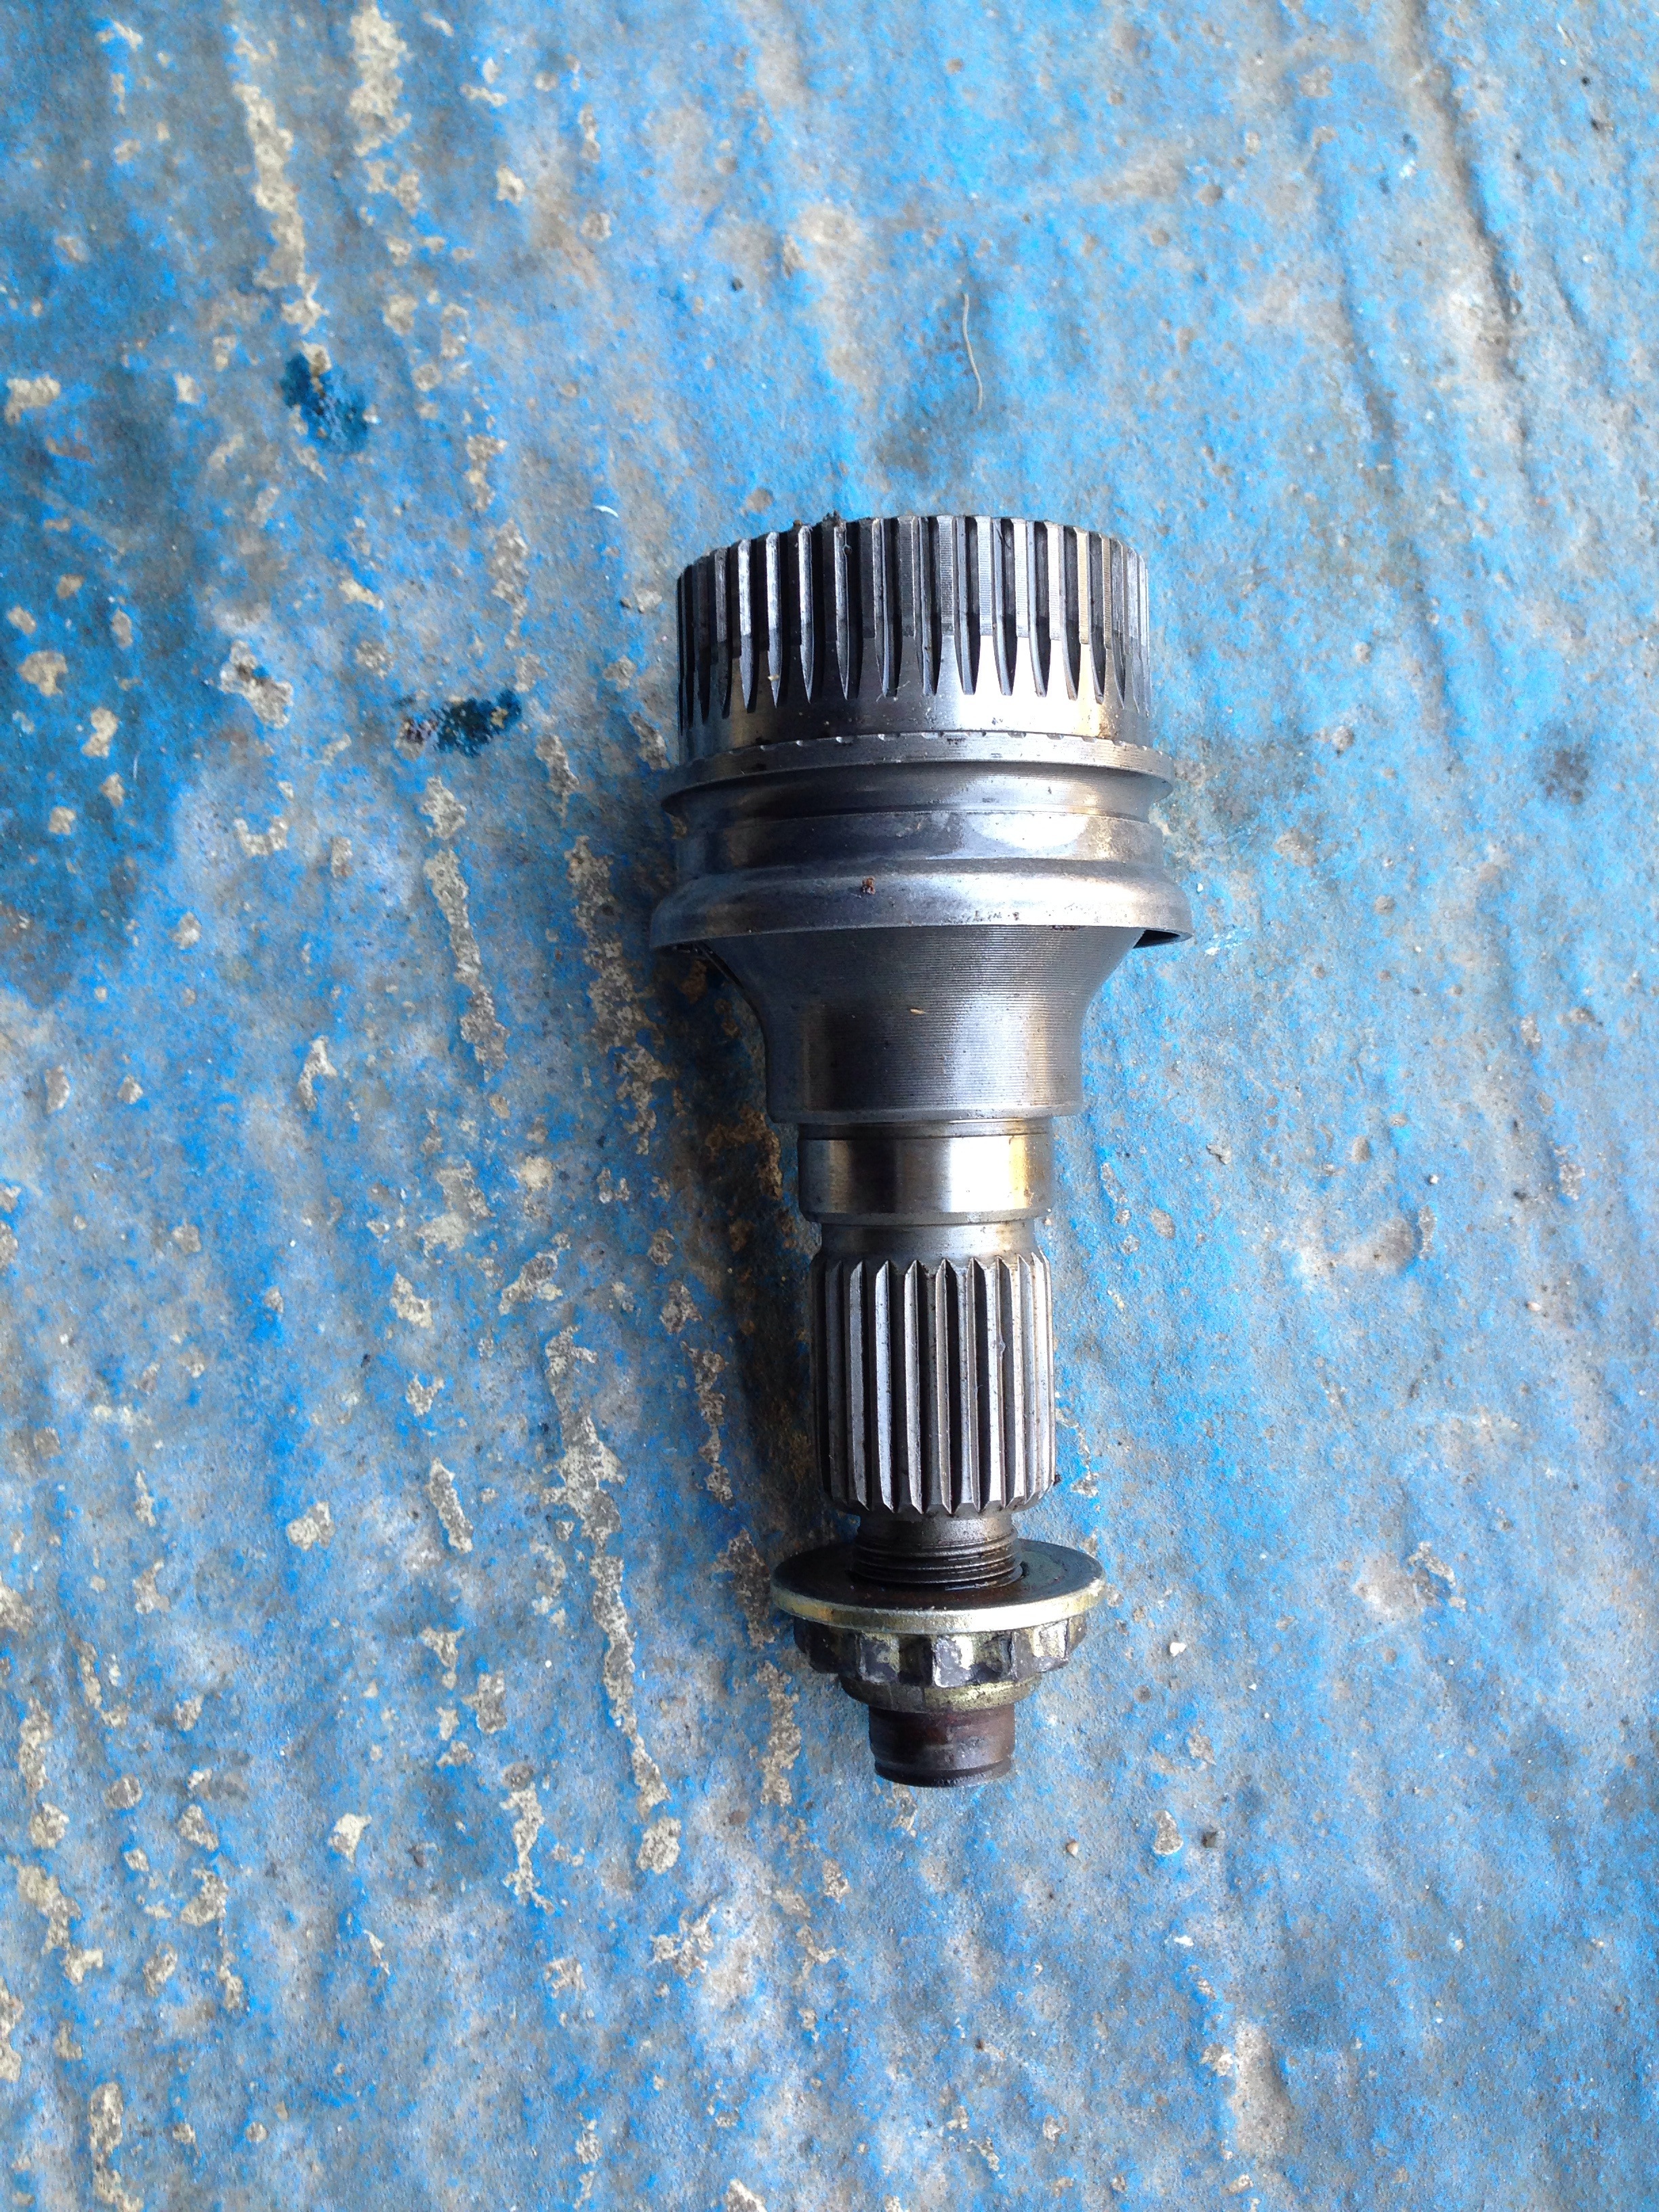
After a week of searching and phoning around gearbox specialists I found a company that had in its stores, randomly an output shaft from the ford MT75 gearbox - luck at last!
Once back from picking up the box you can see just how much was cut off!
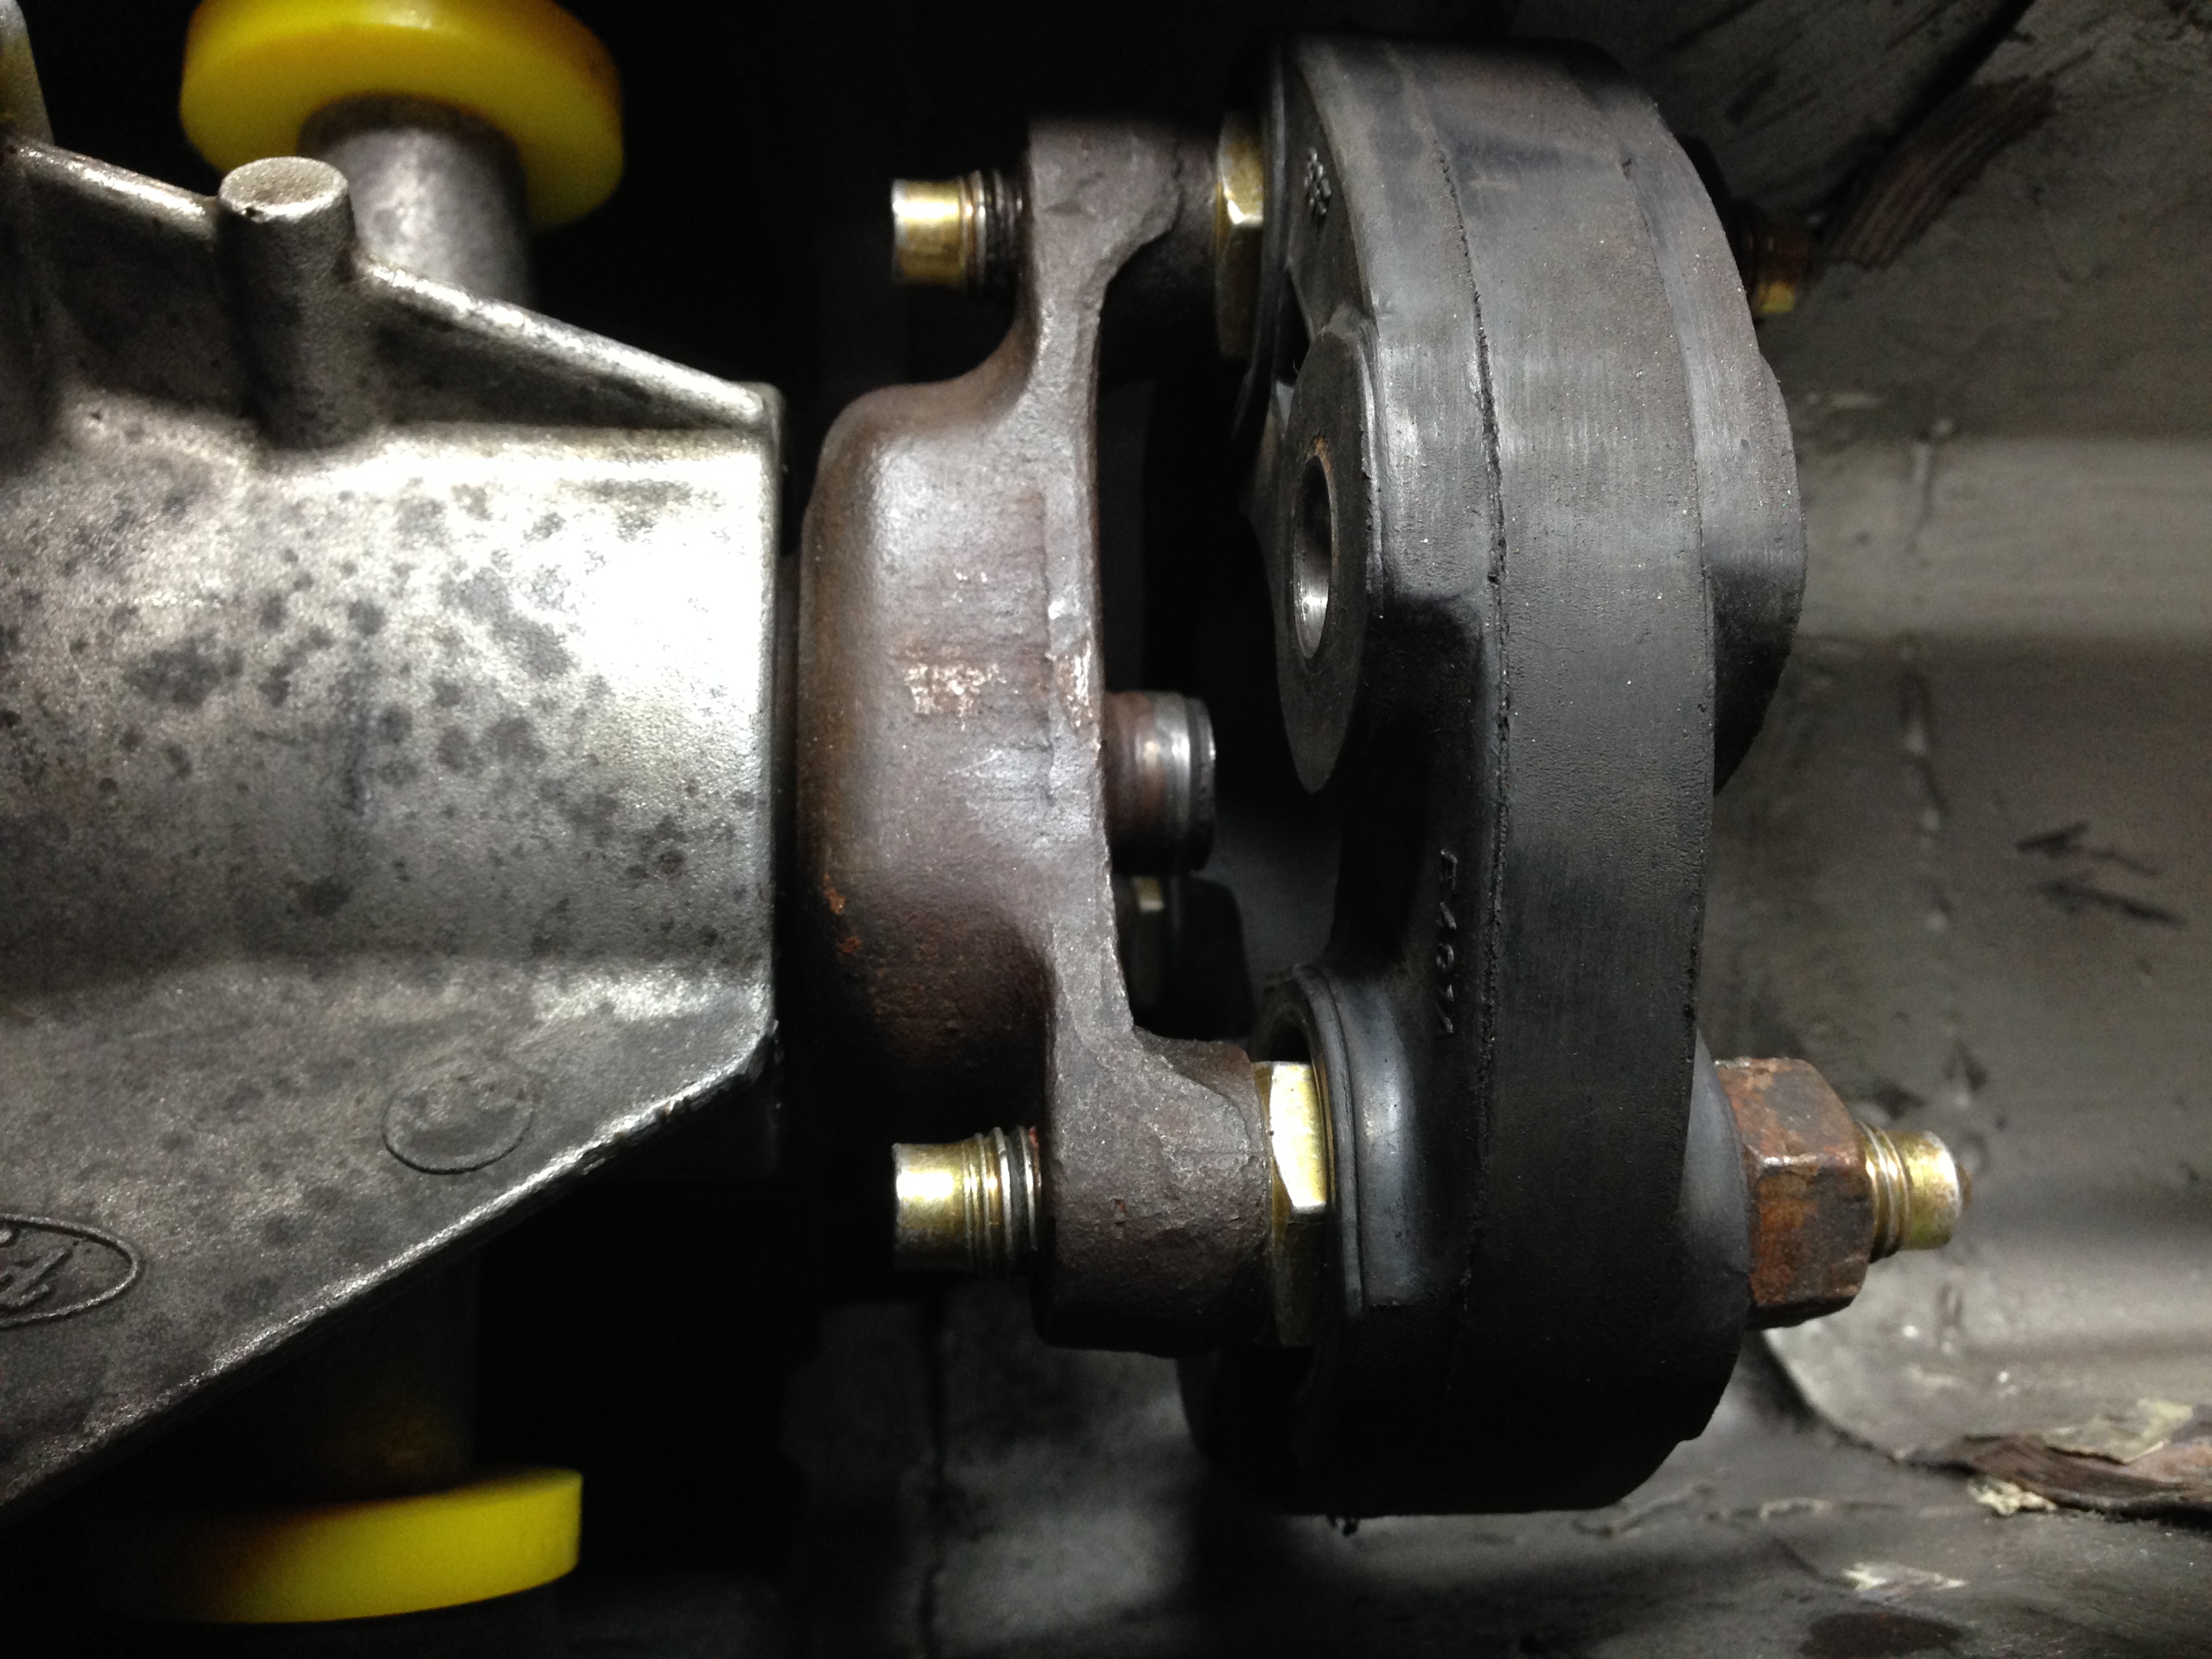
Once again with help from Ben we got the box back in the car and with the new balanced prop all bolted back up and centered as it should be!
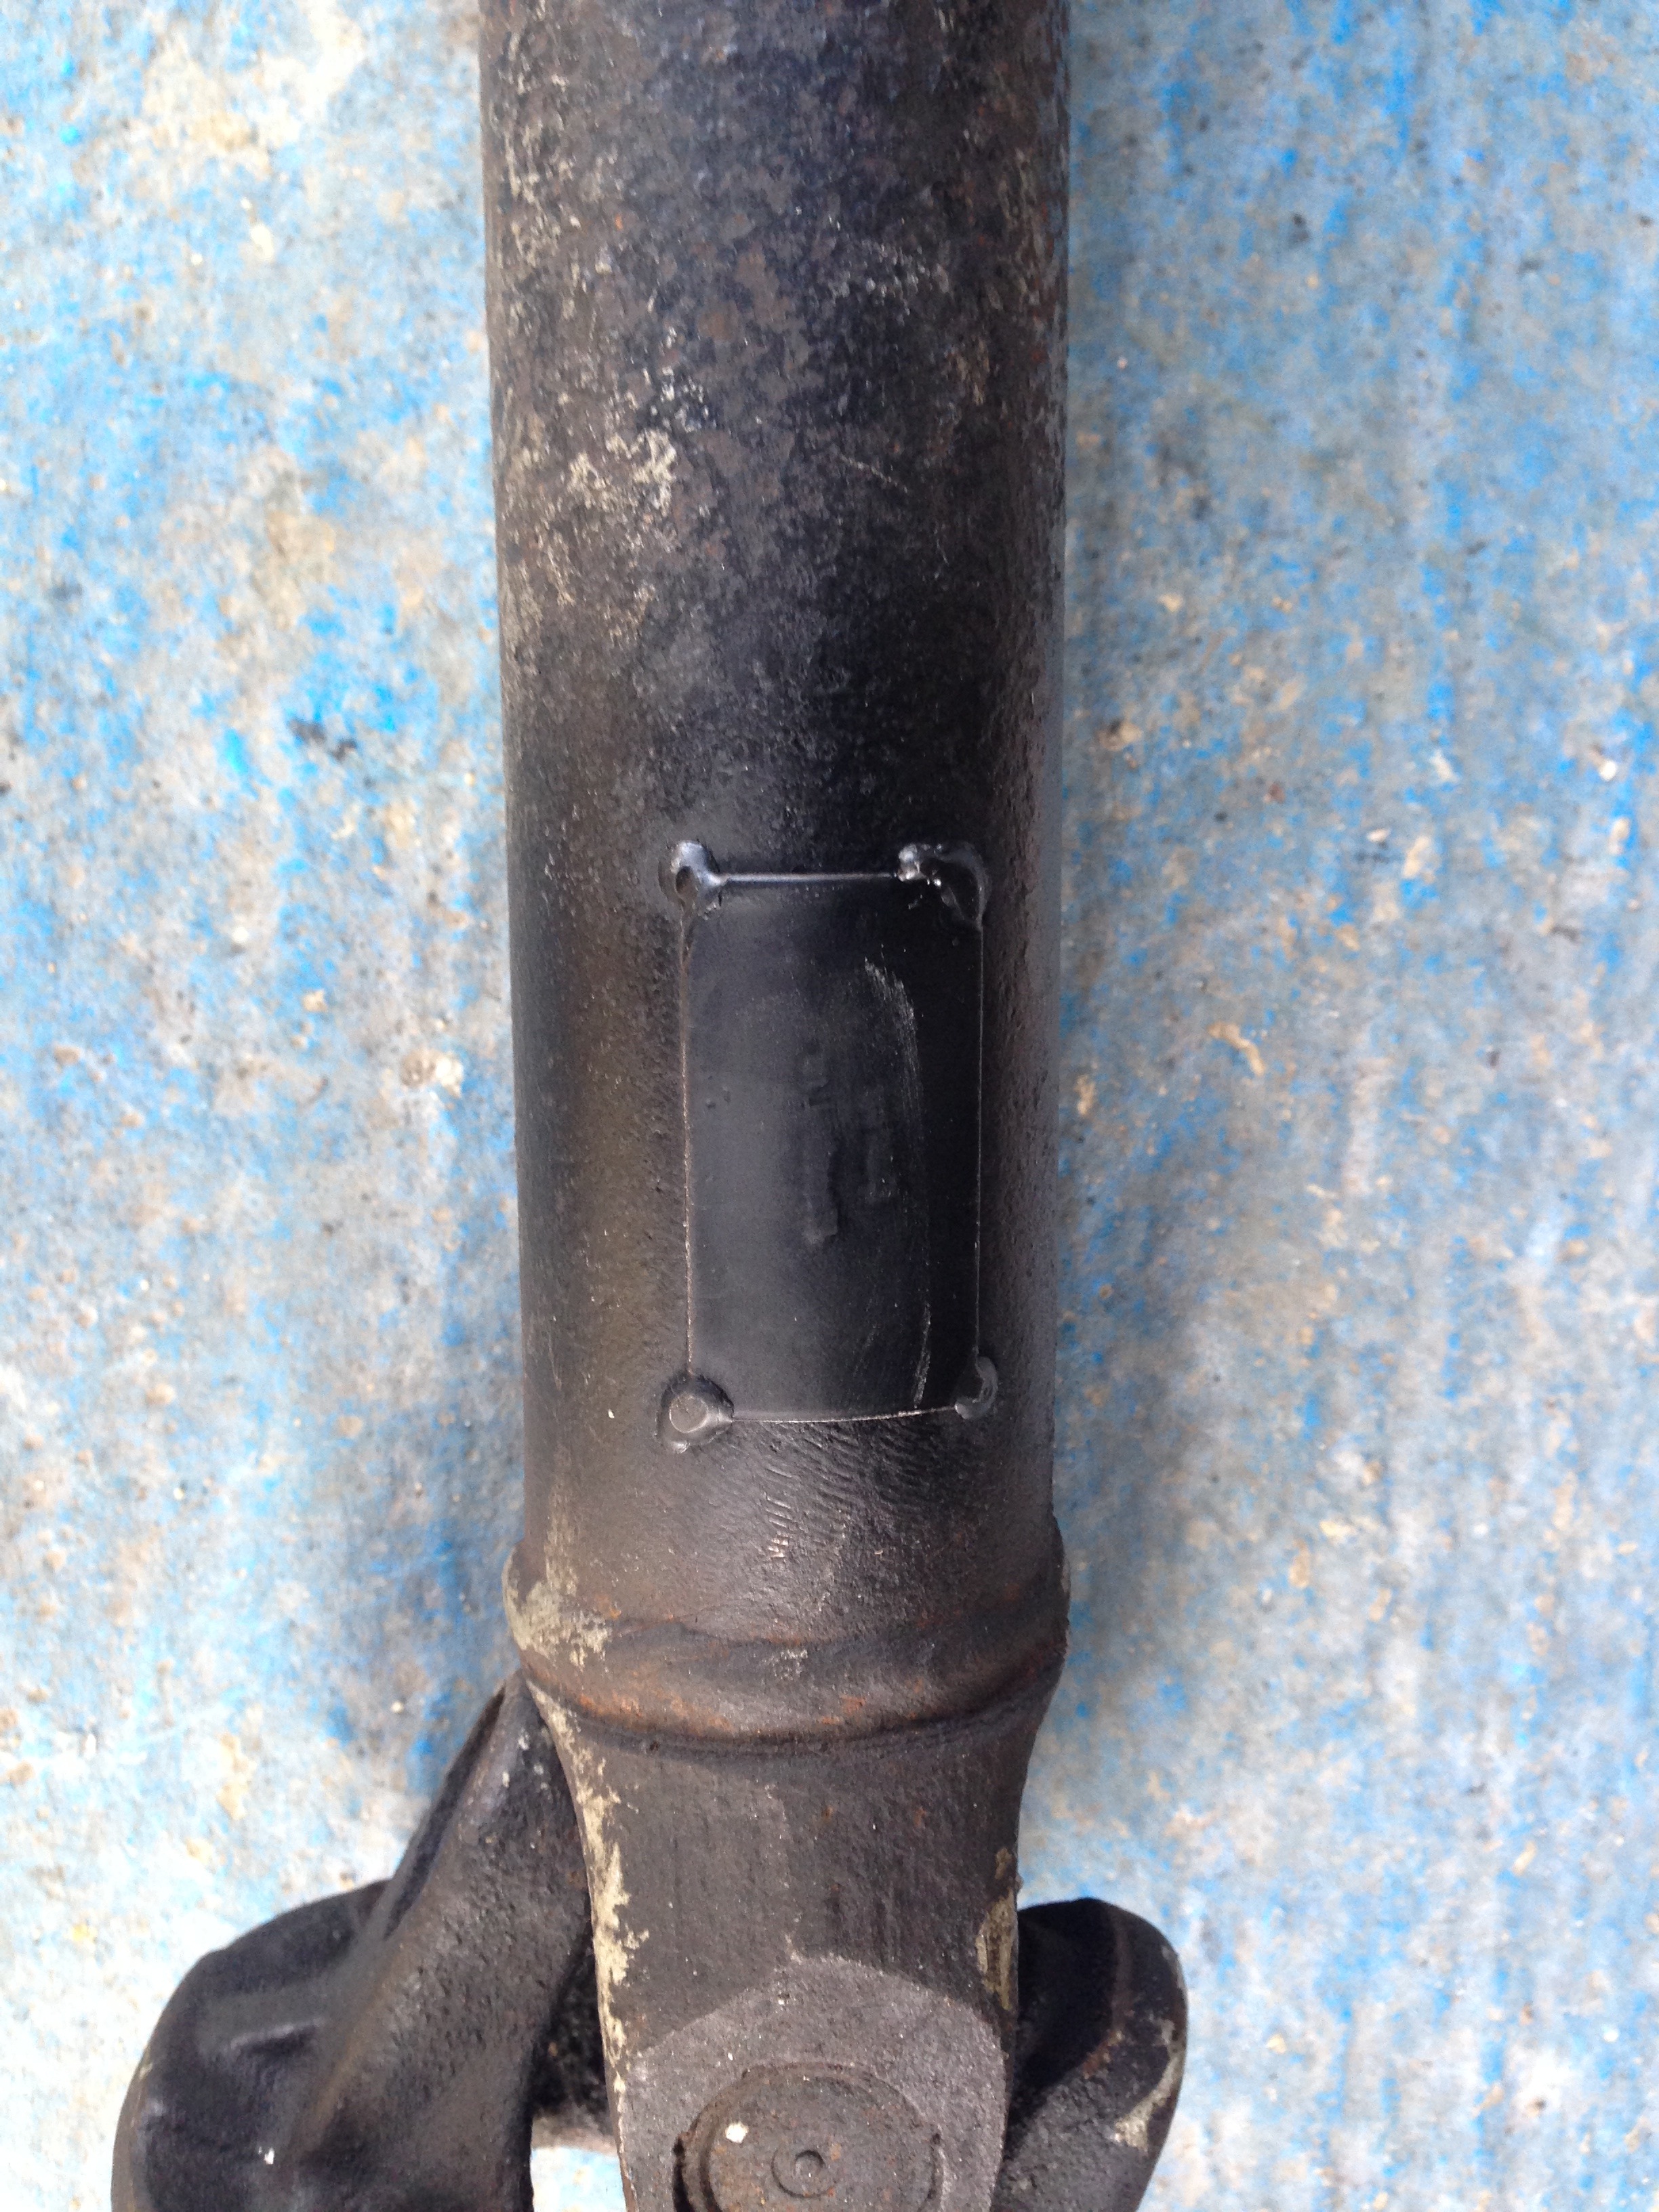
Small plate on the prop added to balance it all
Centered properly!
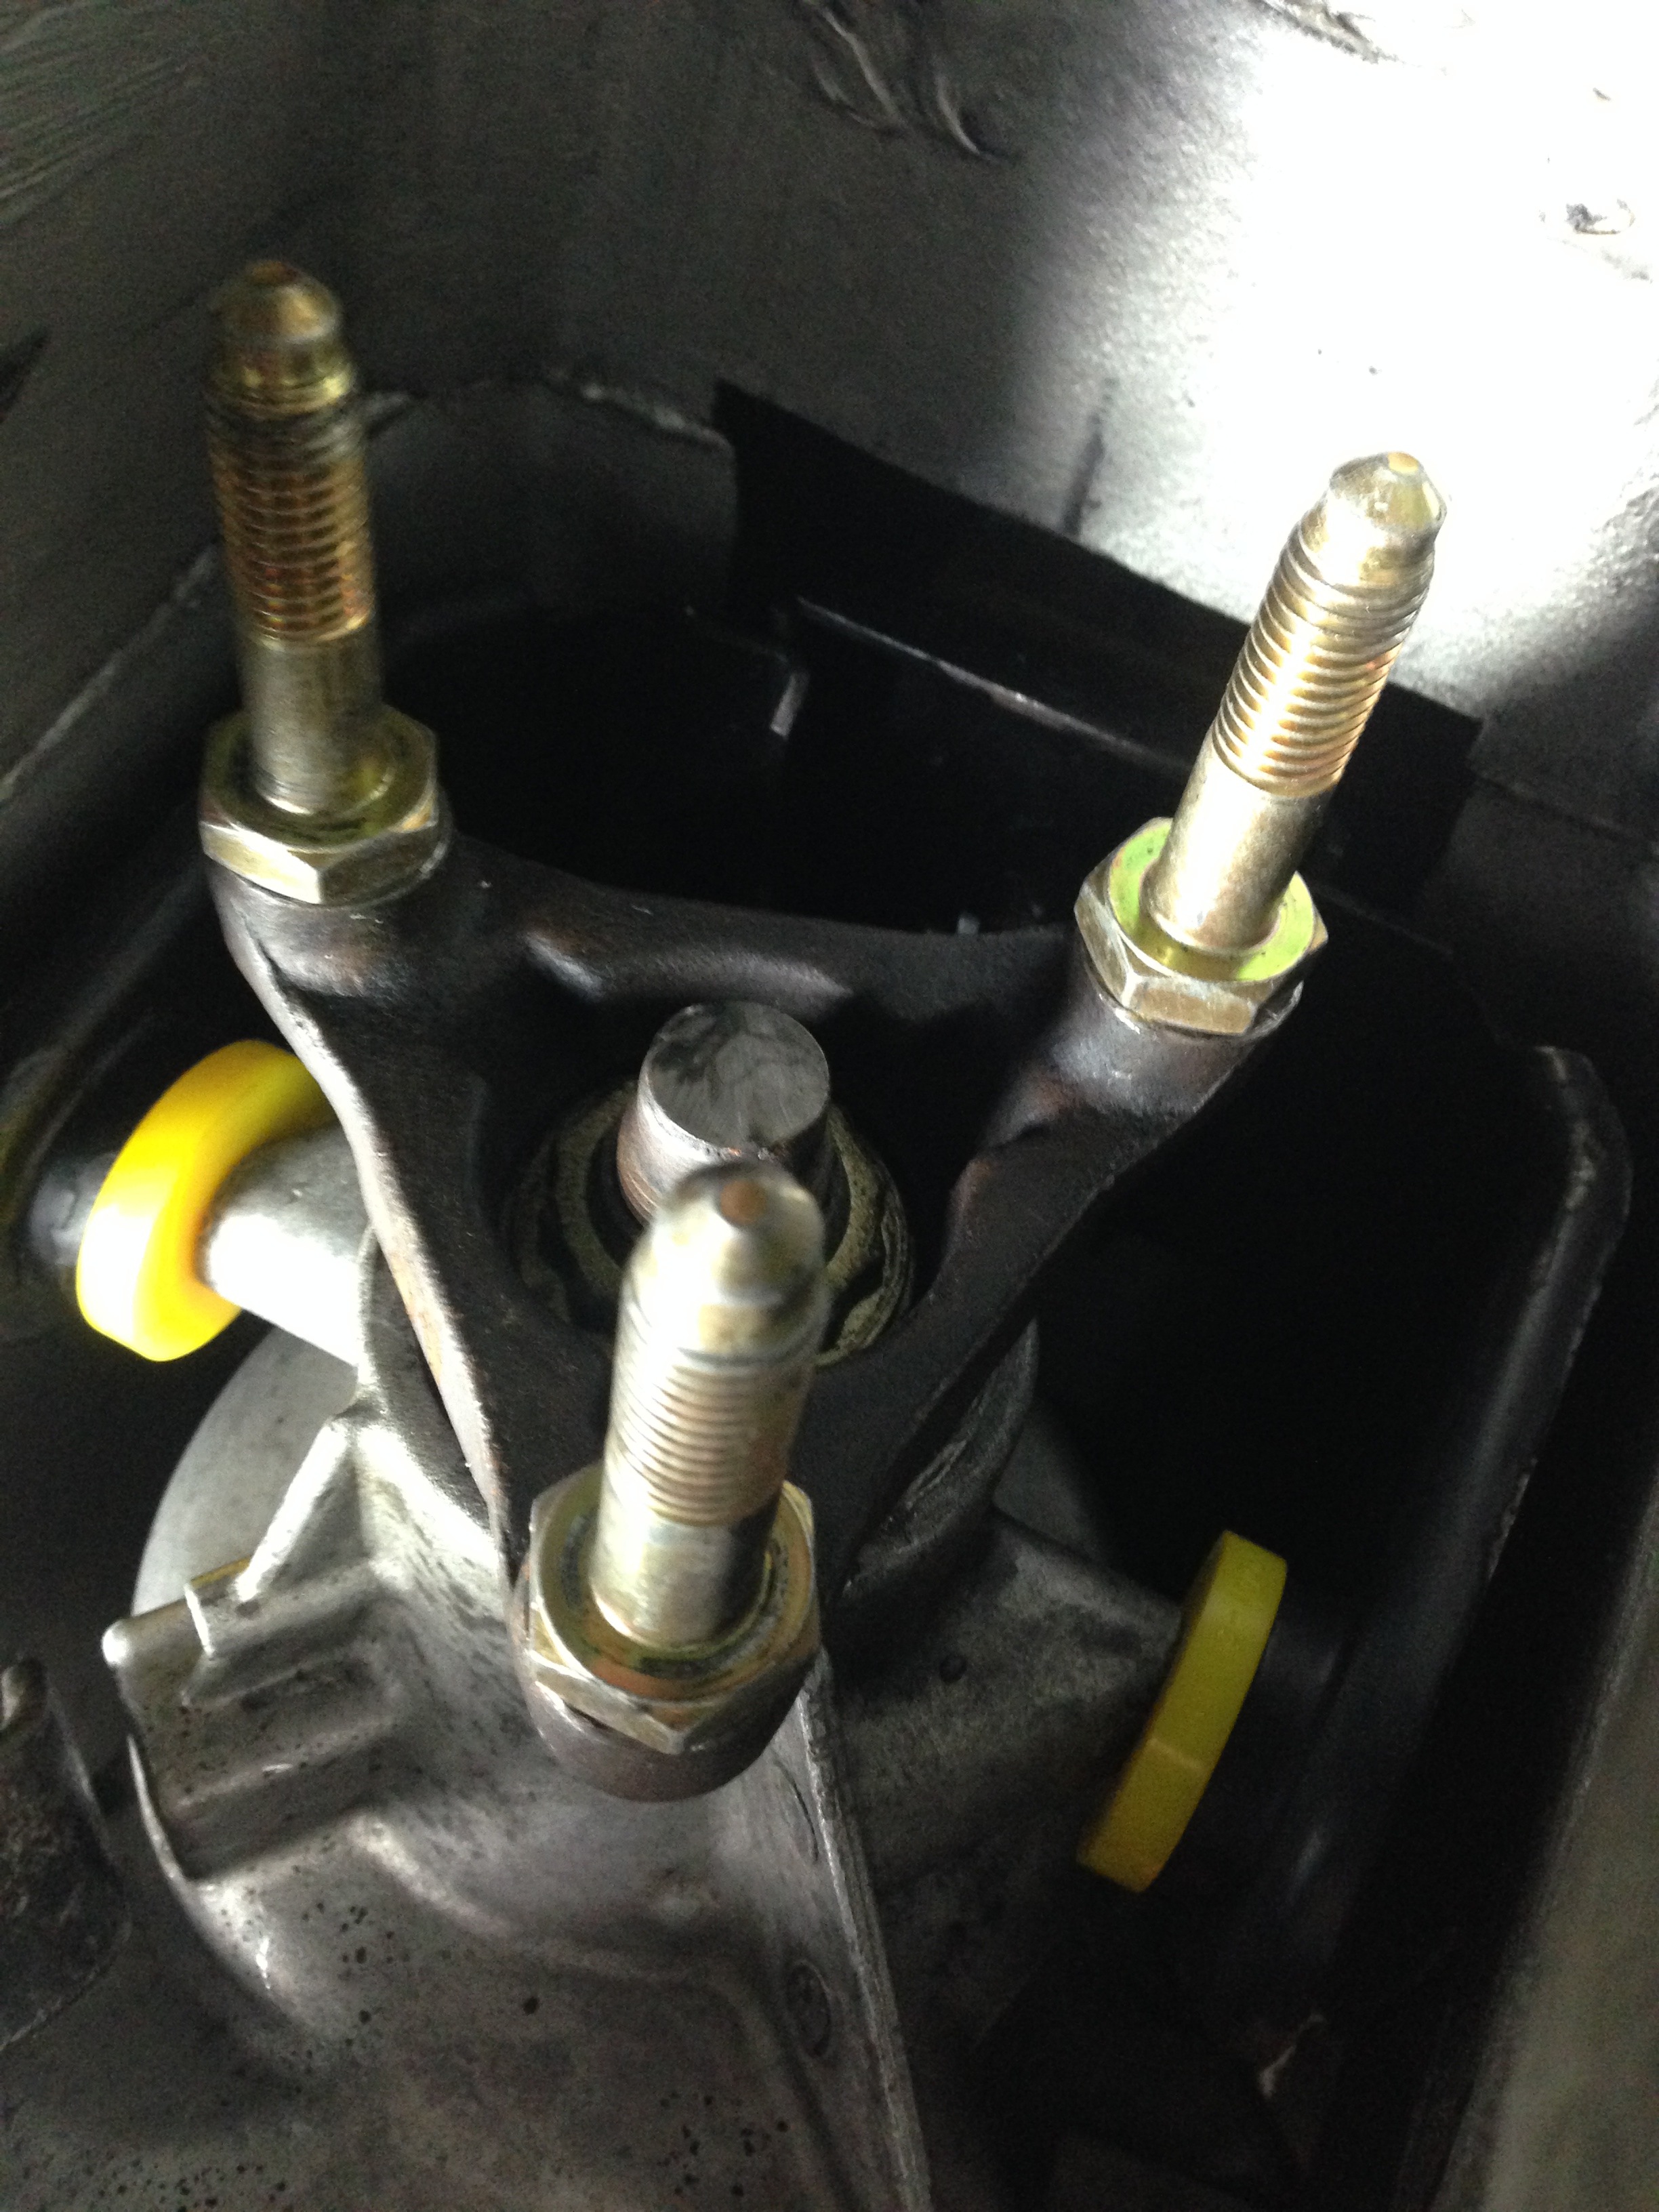
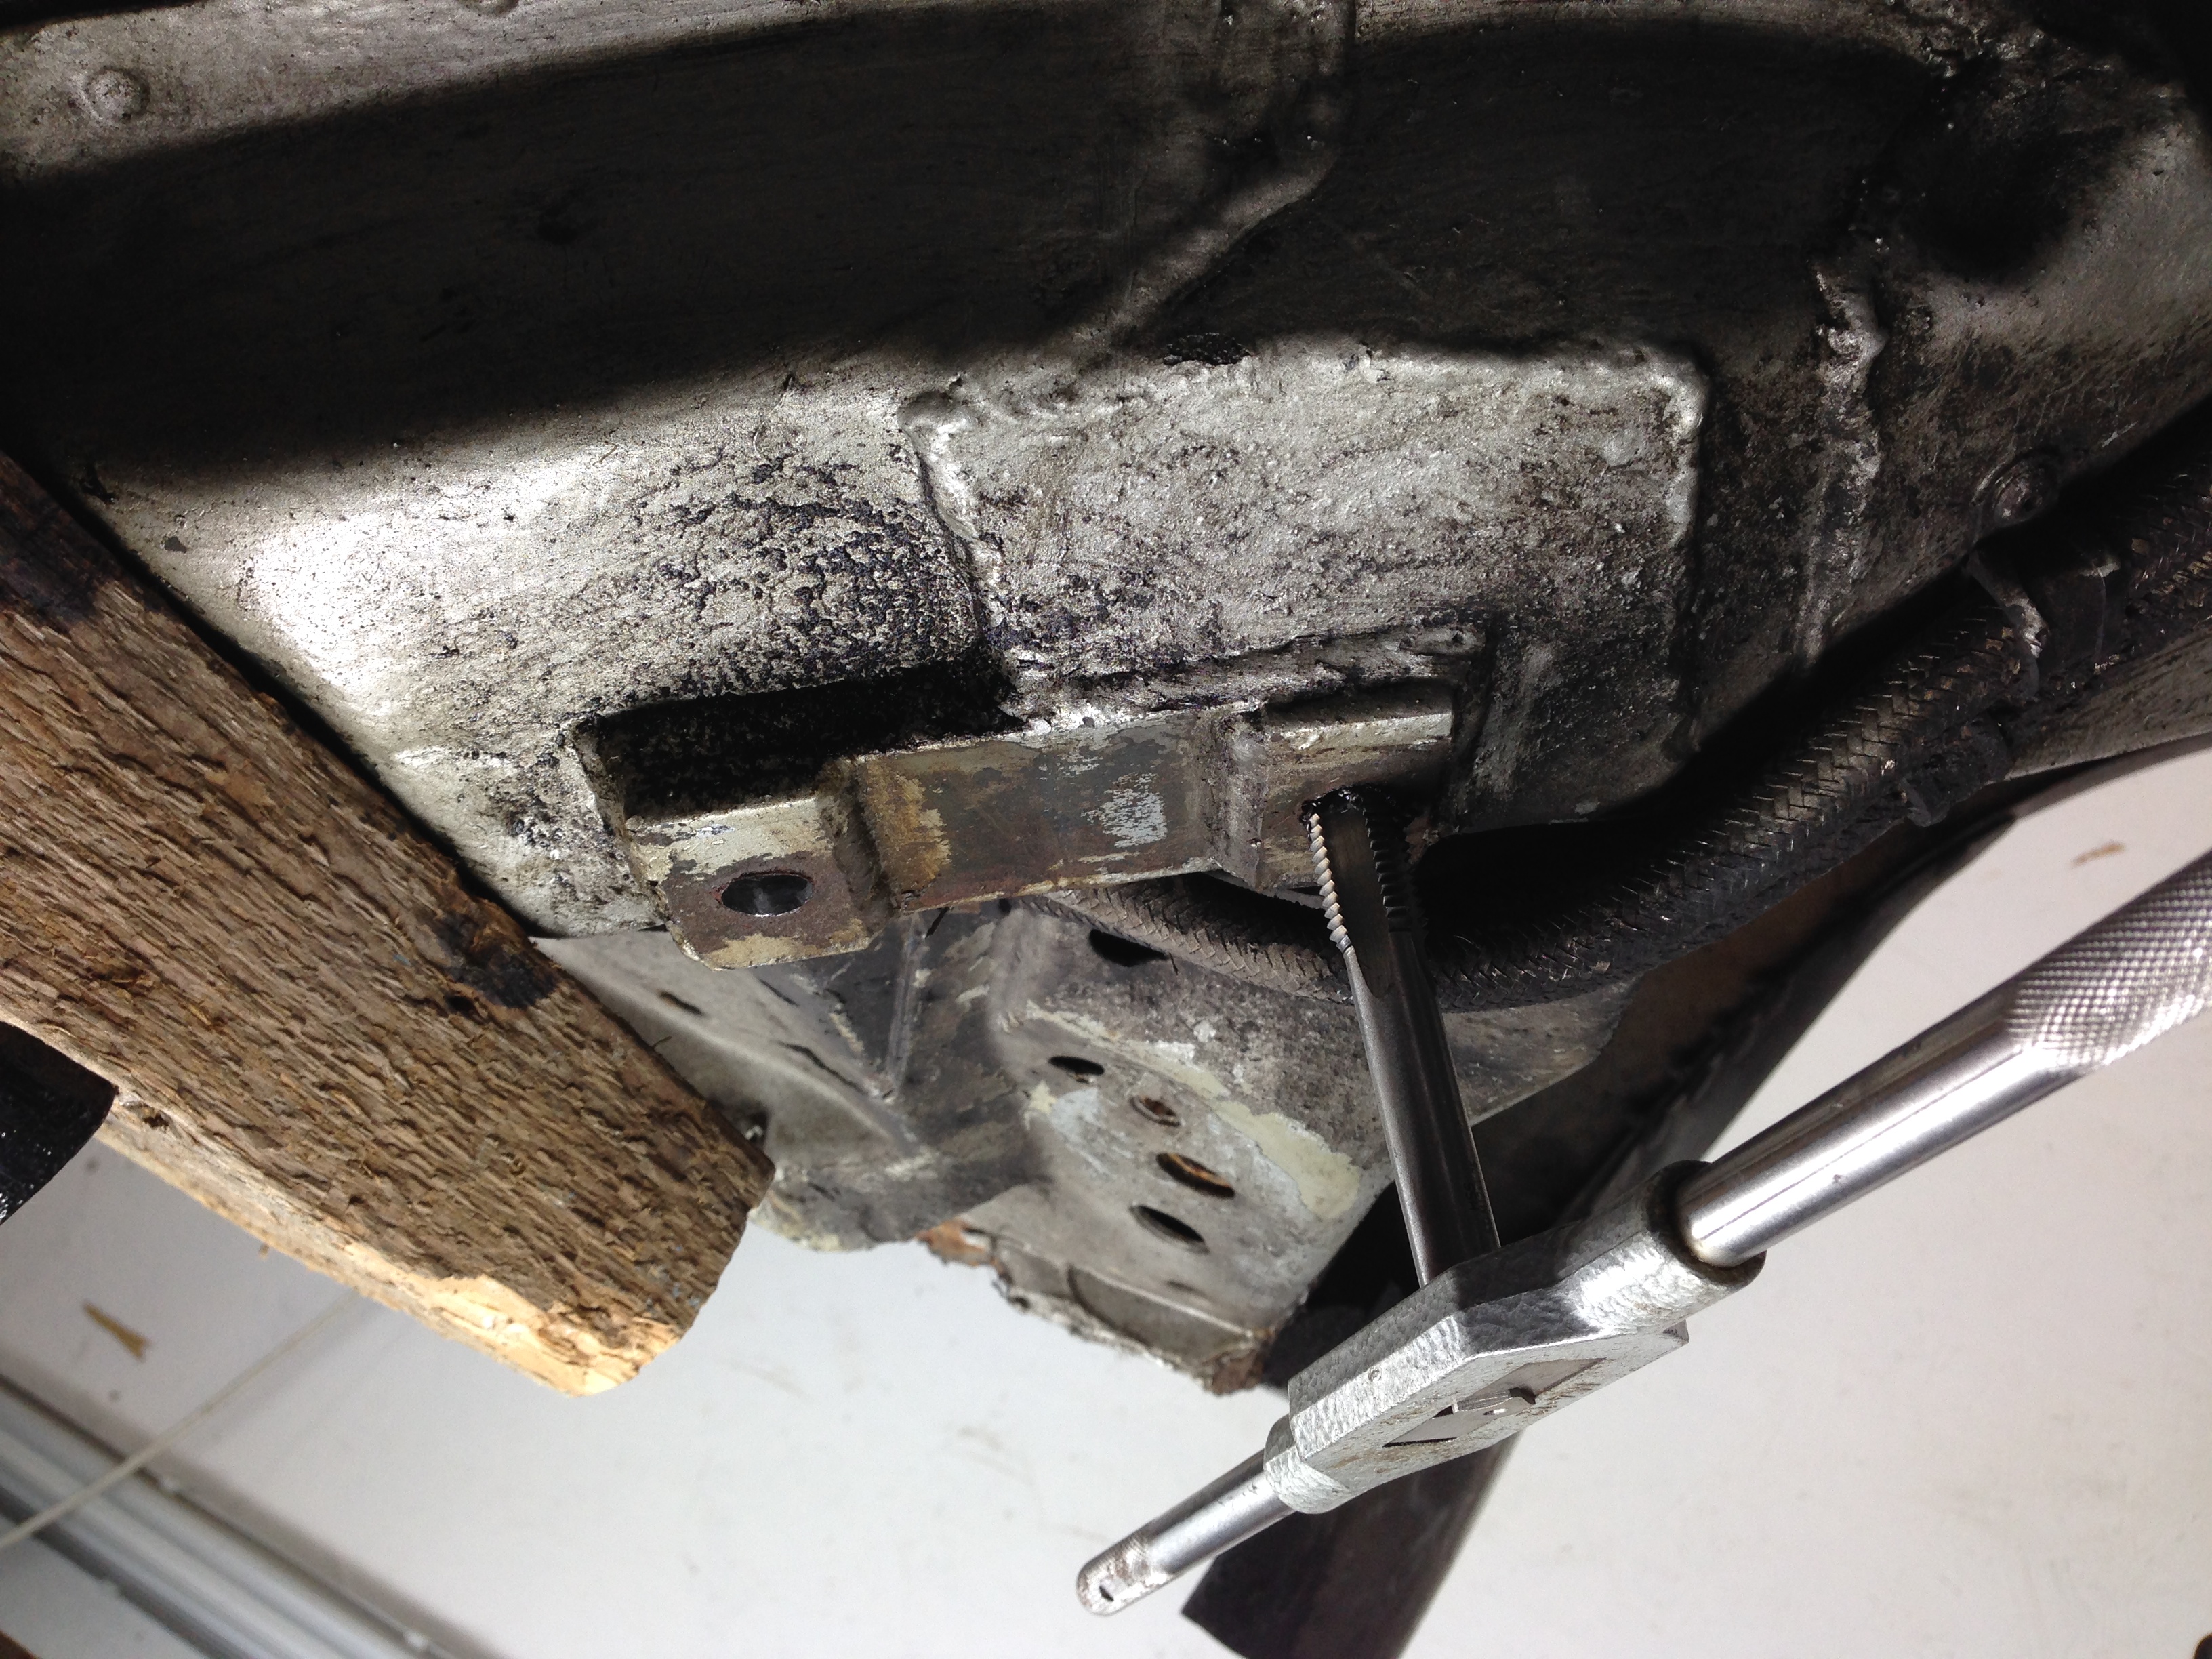
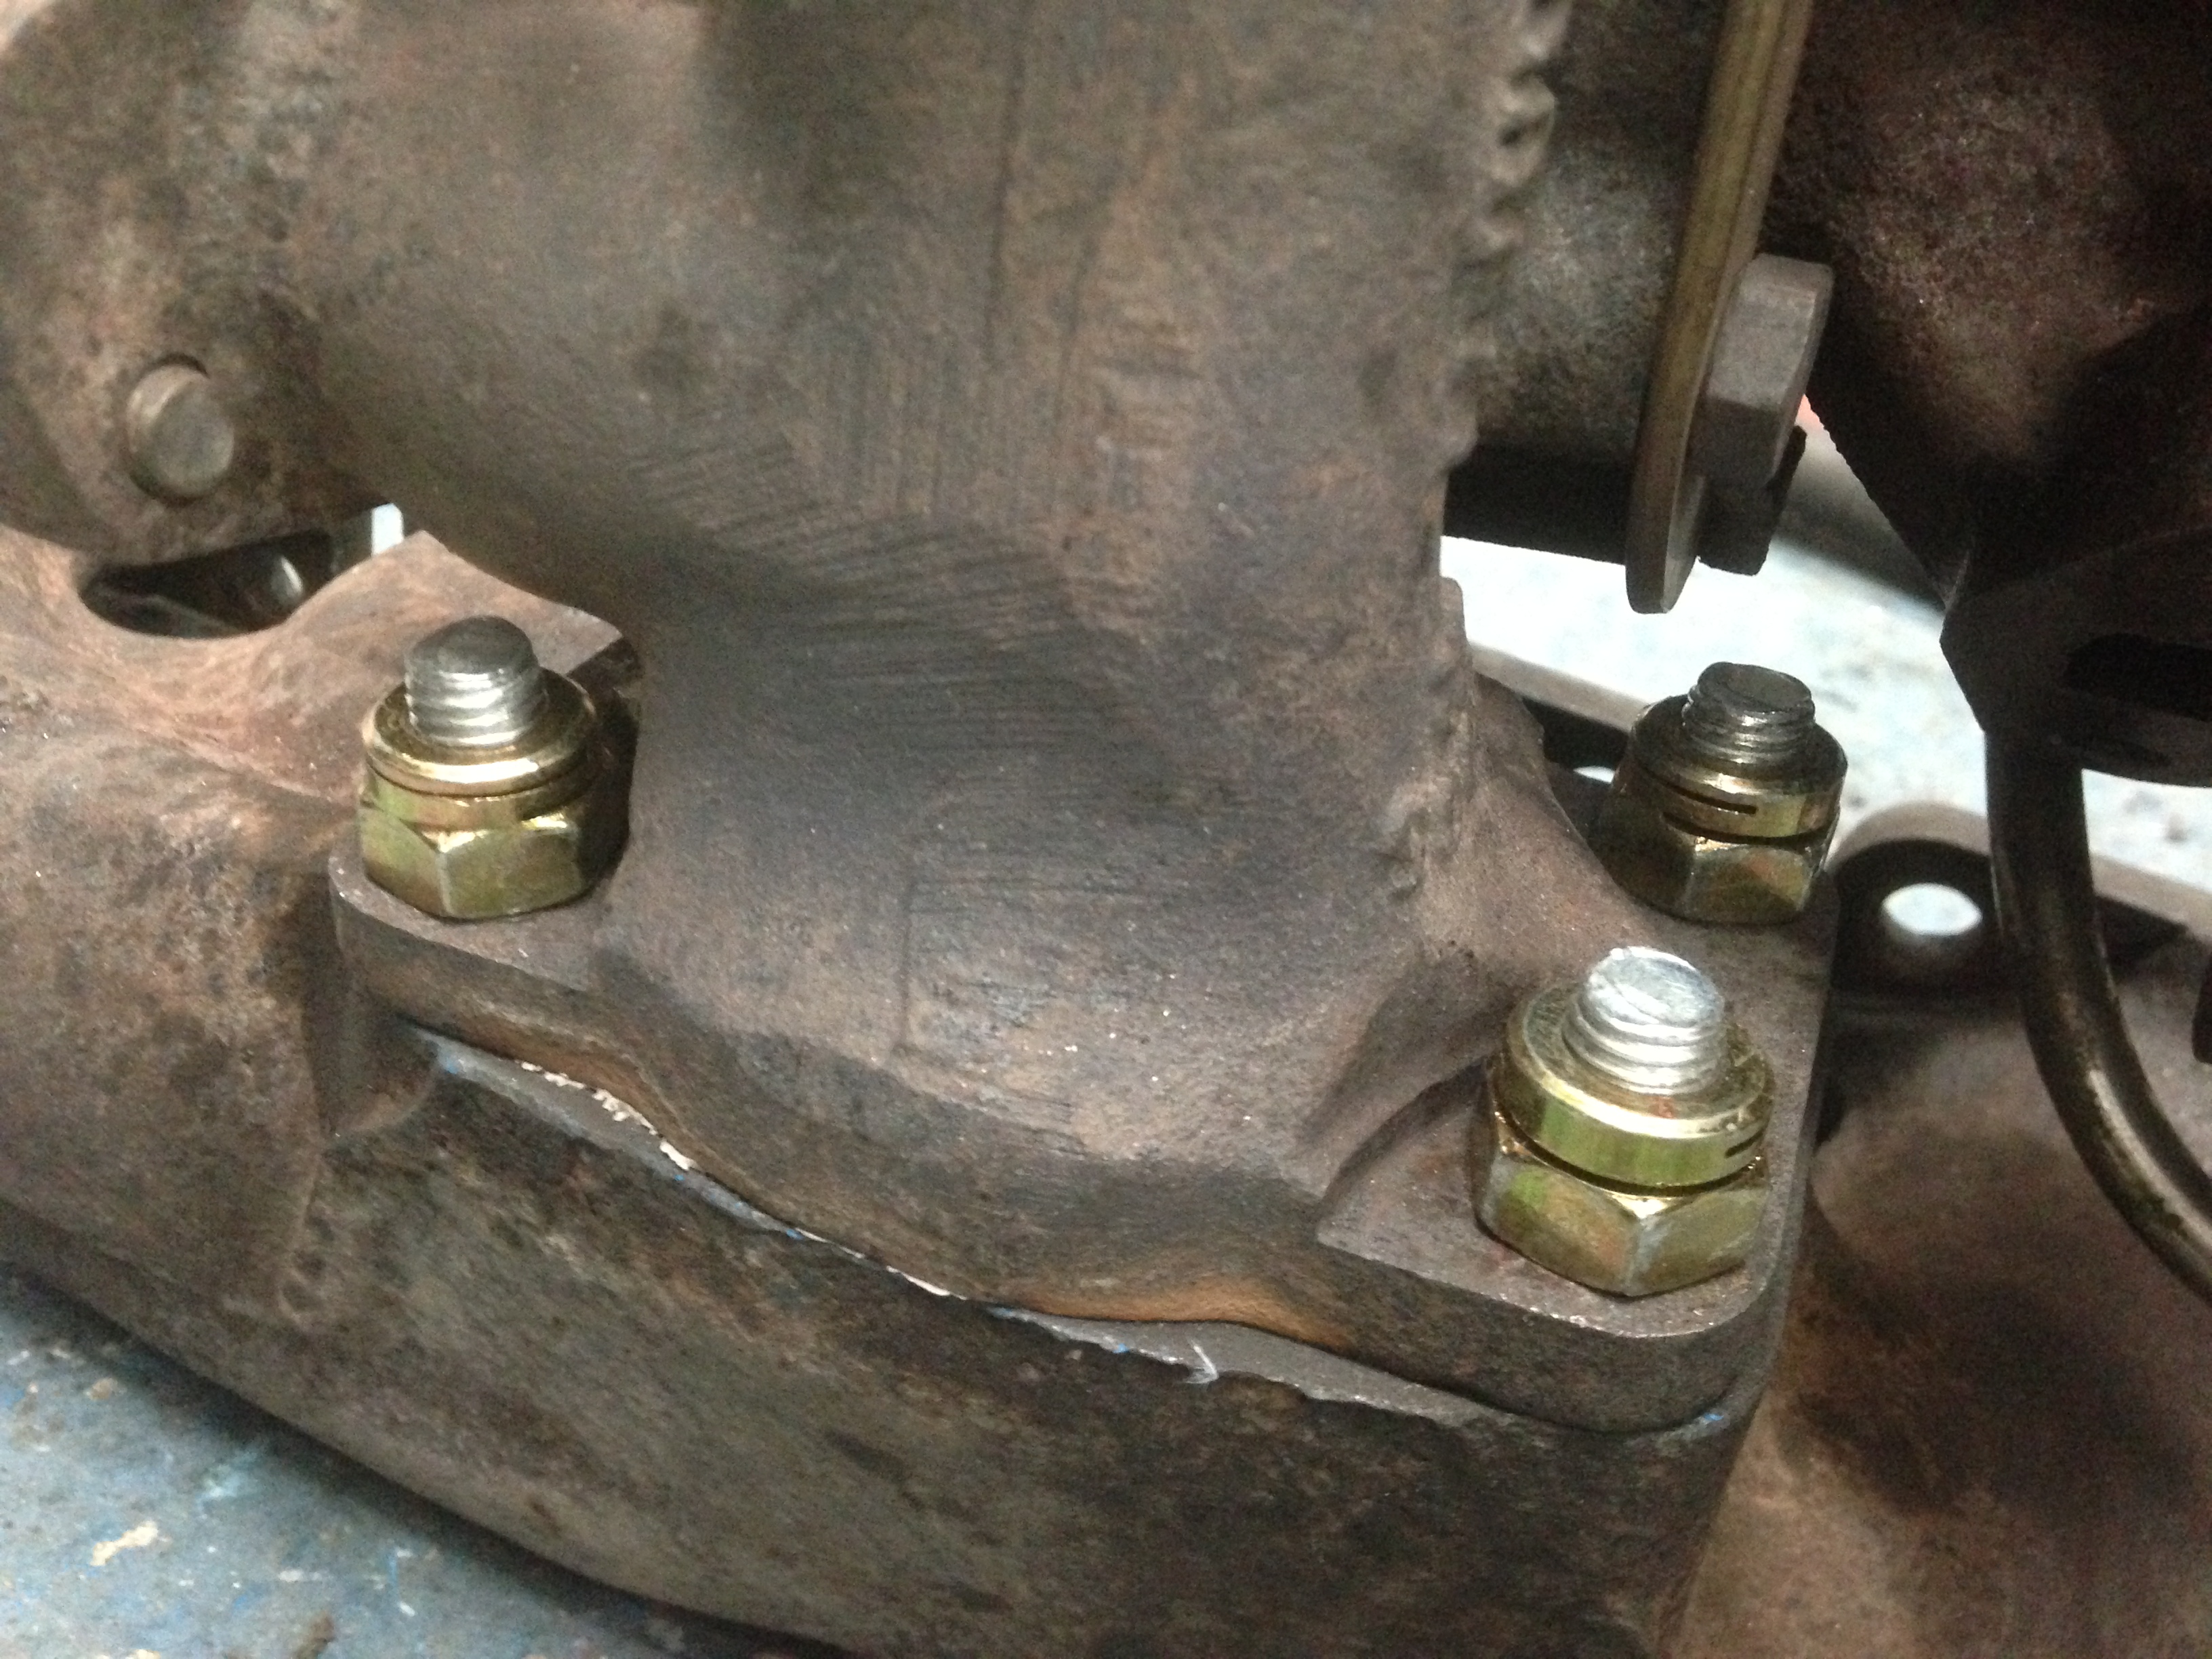
Whilst the ARB was off I decided to re-thread the stripped thread on one of the mounts. It before had a nut used on the other side of the box section and accessed through the passenger footwell. Didn't like that repair so decided to get it helicoiled and repaired properly.
With that done it was back out for another drive finally.. Weeks later!
This time the car drives really smoothly, transmission is nice and quiet. It's a massive step foward and the car is starting to feel like it's meant to. However as this car is proving time and time again whilst one area may be fixed another is not. The oil leaks are still as bad as ever and having cleaned the engine it's a bit de-motivating, the only positive is that because it's all clean now I can finally see where it's coming from and its an enormous leak!
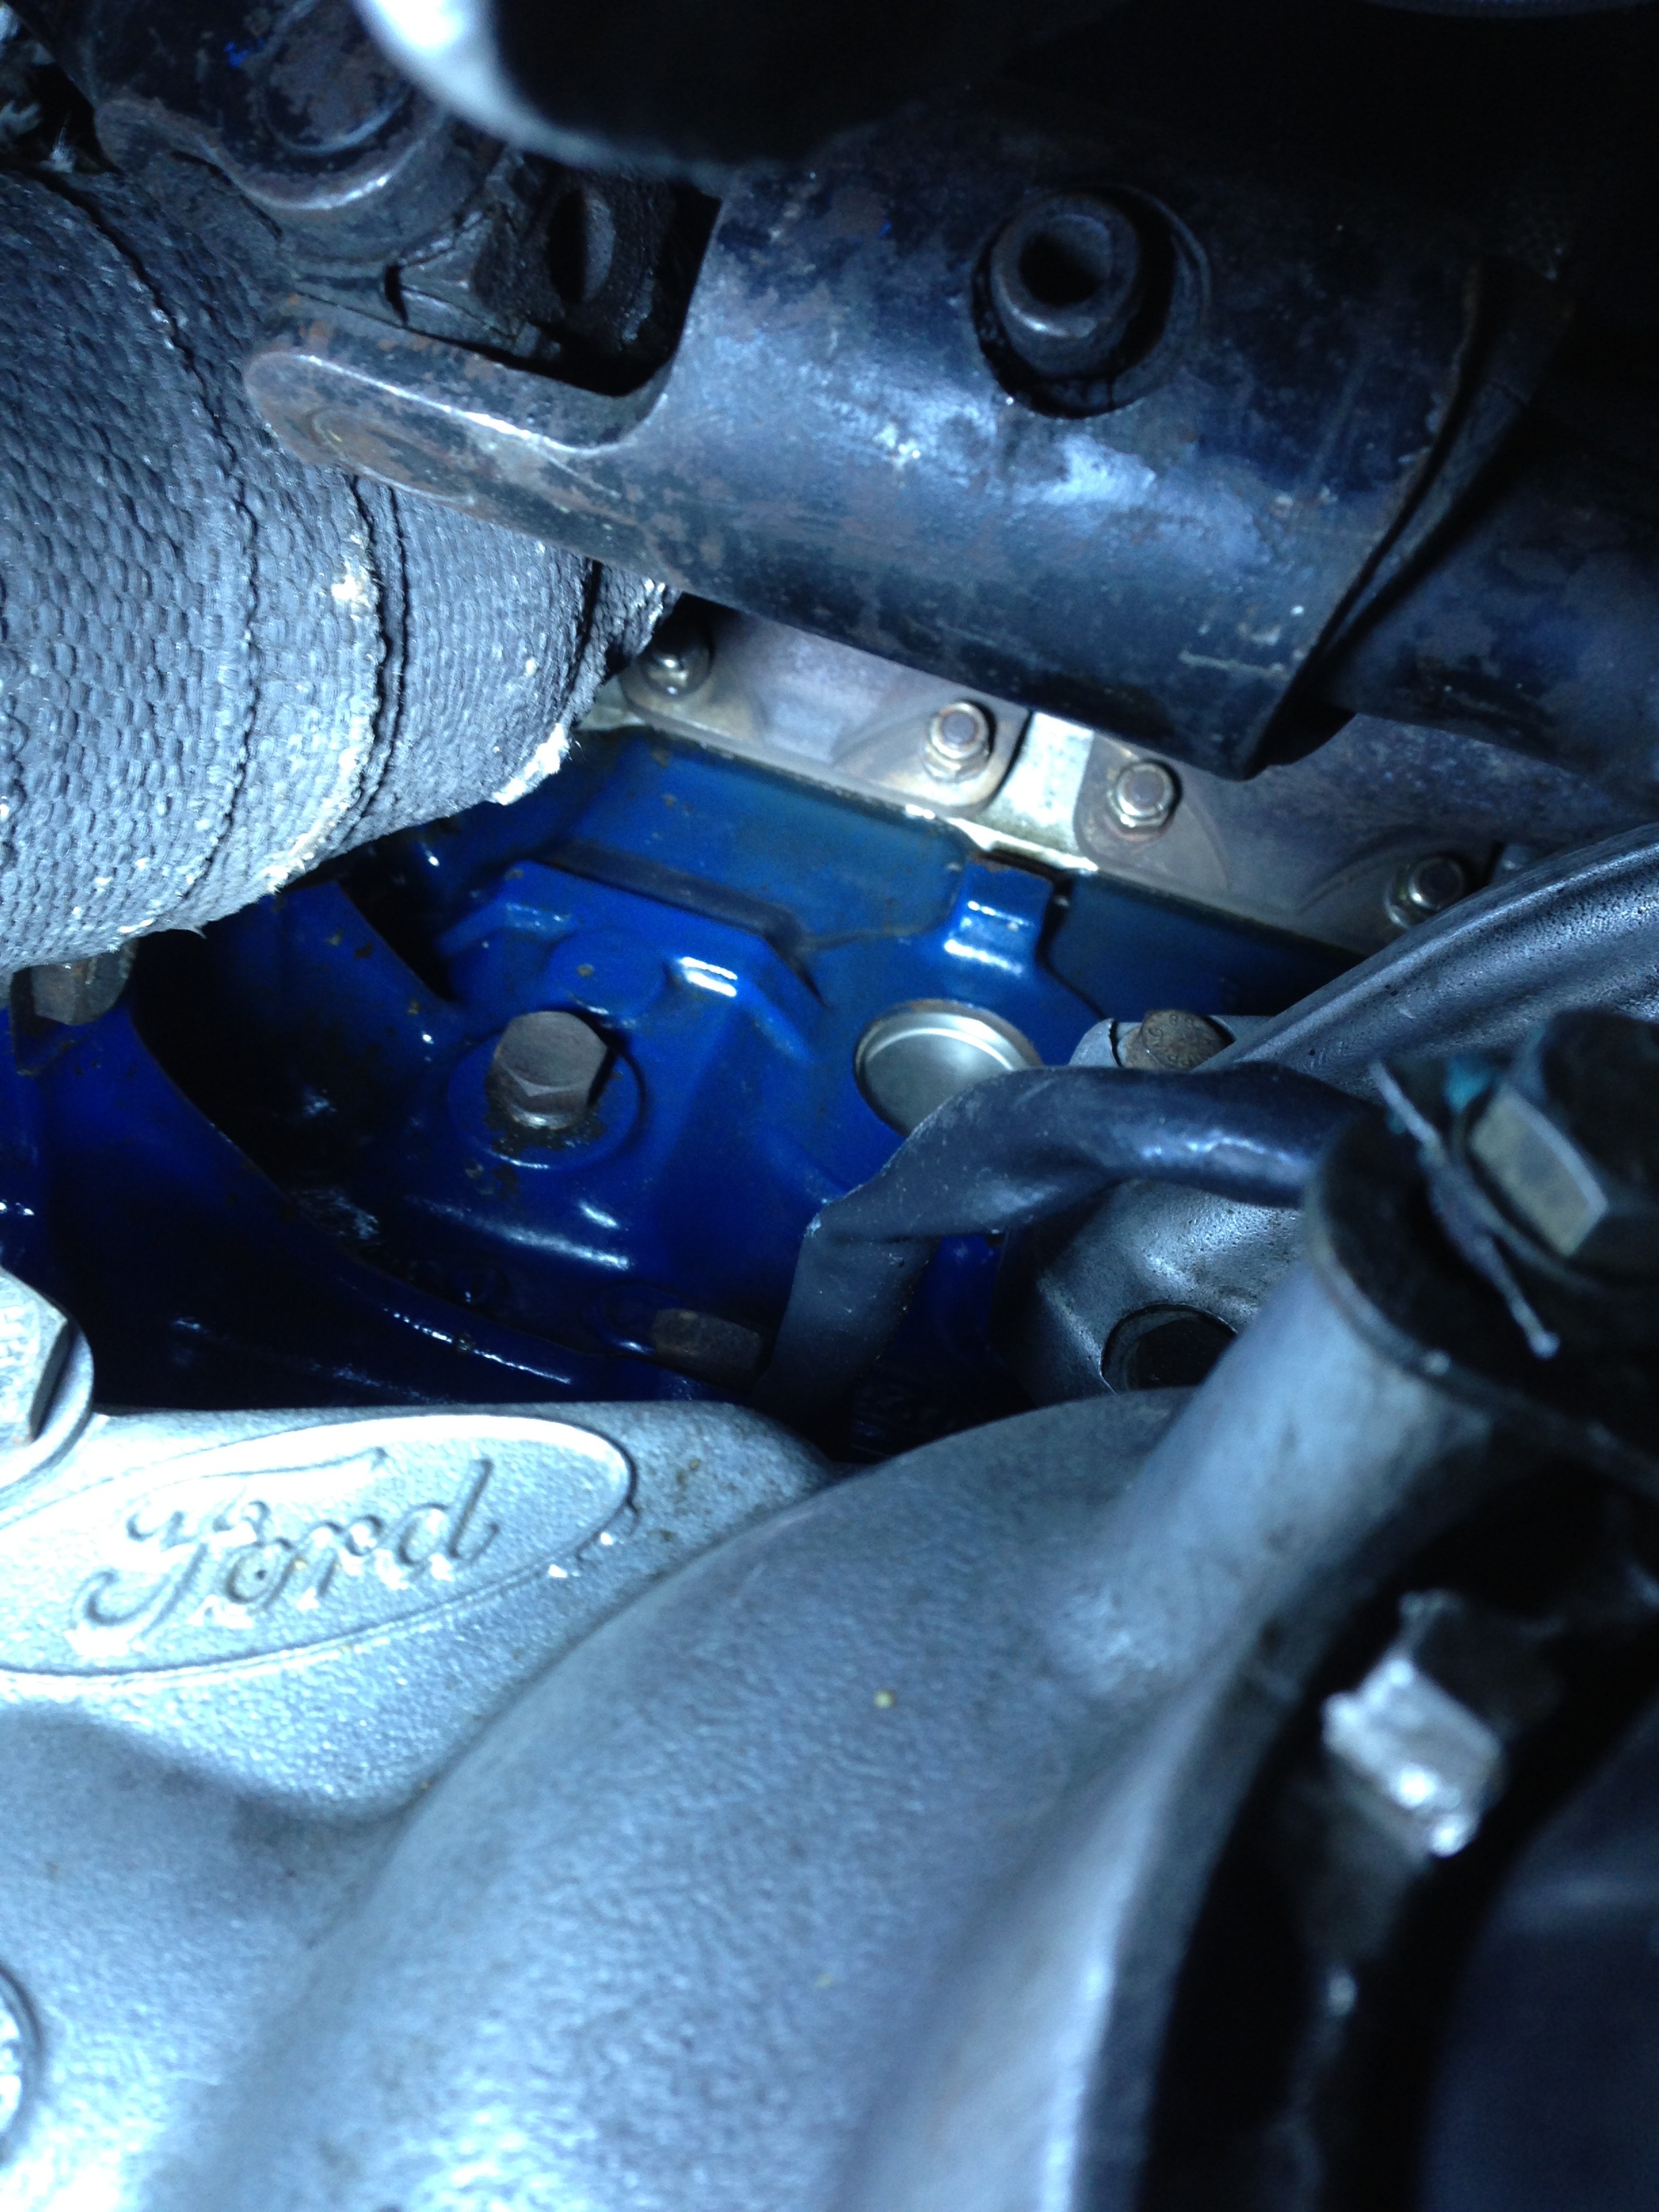
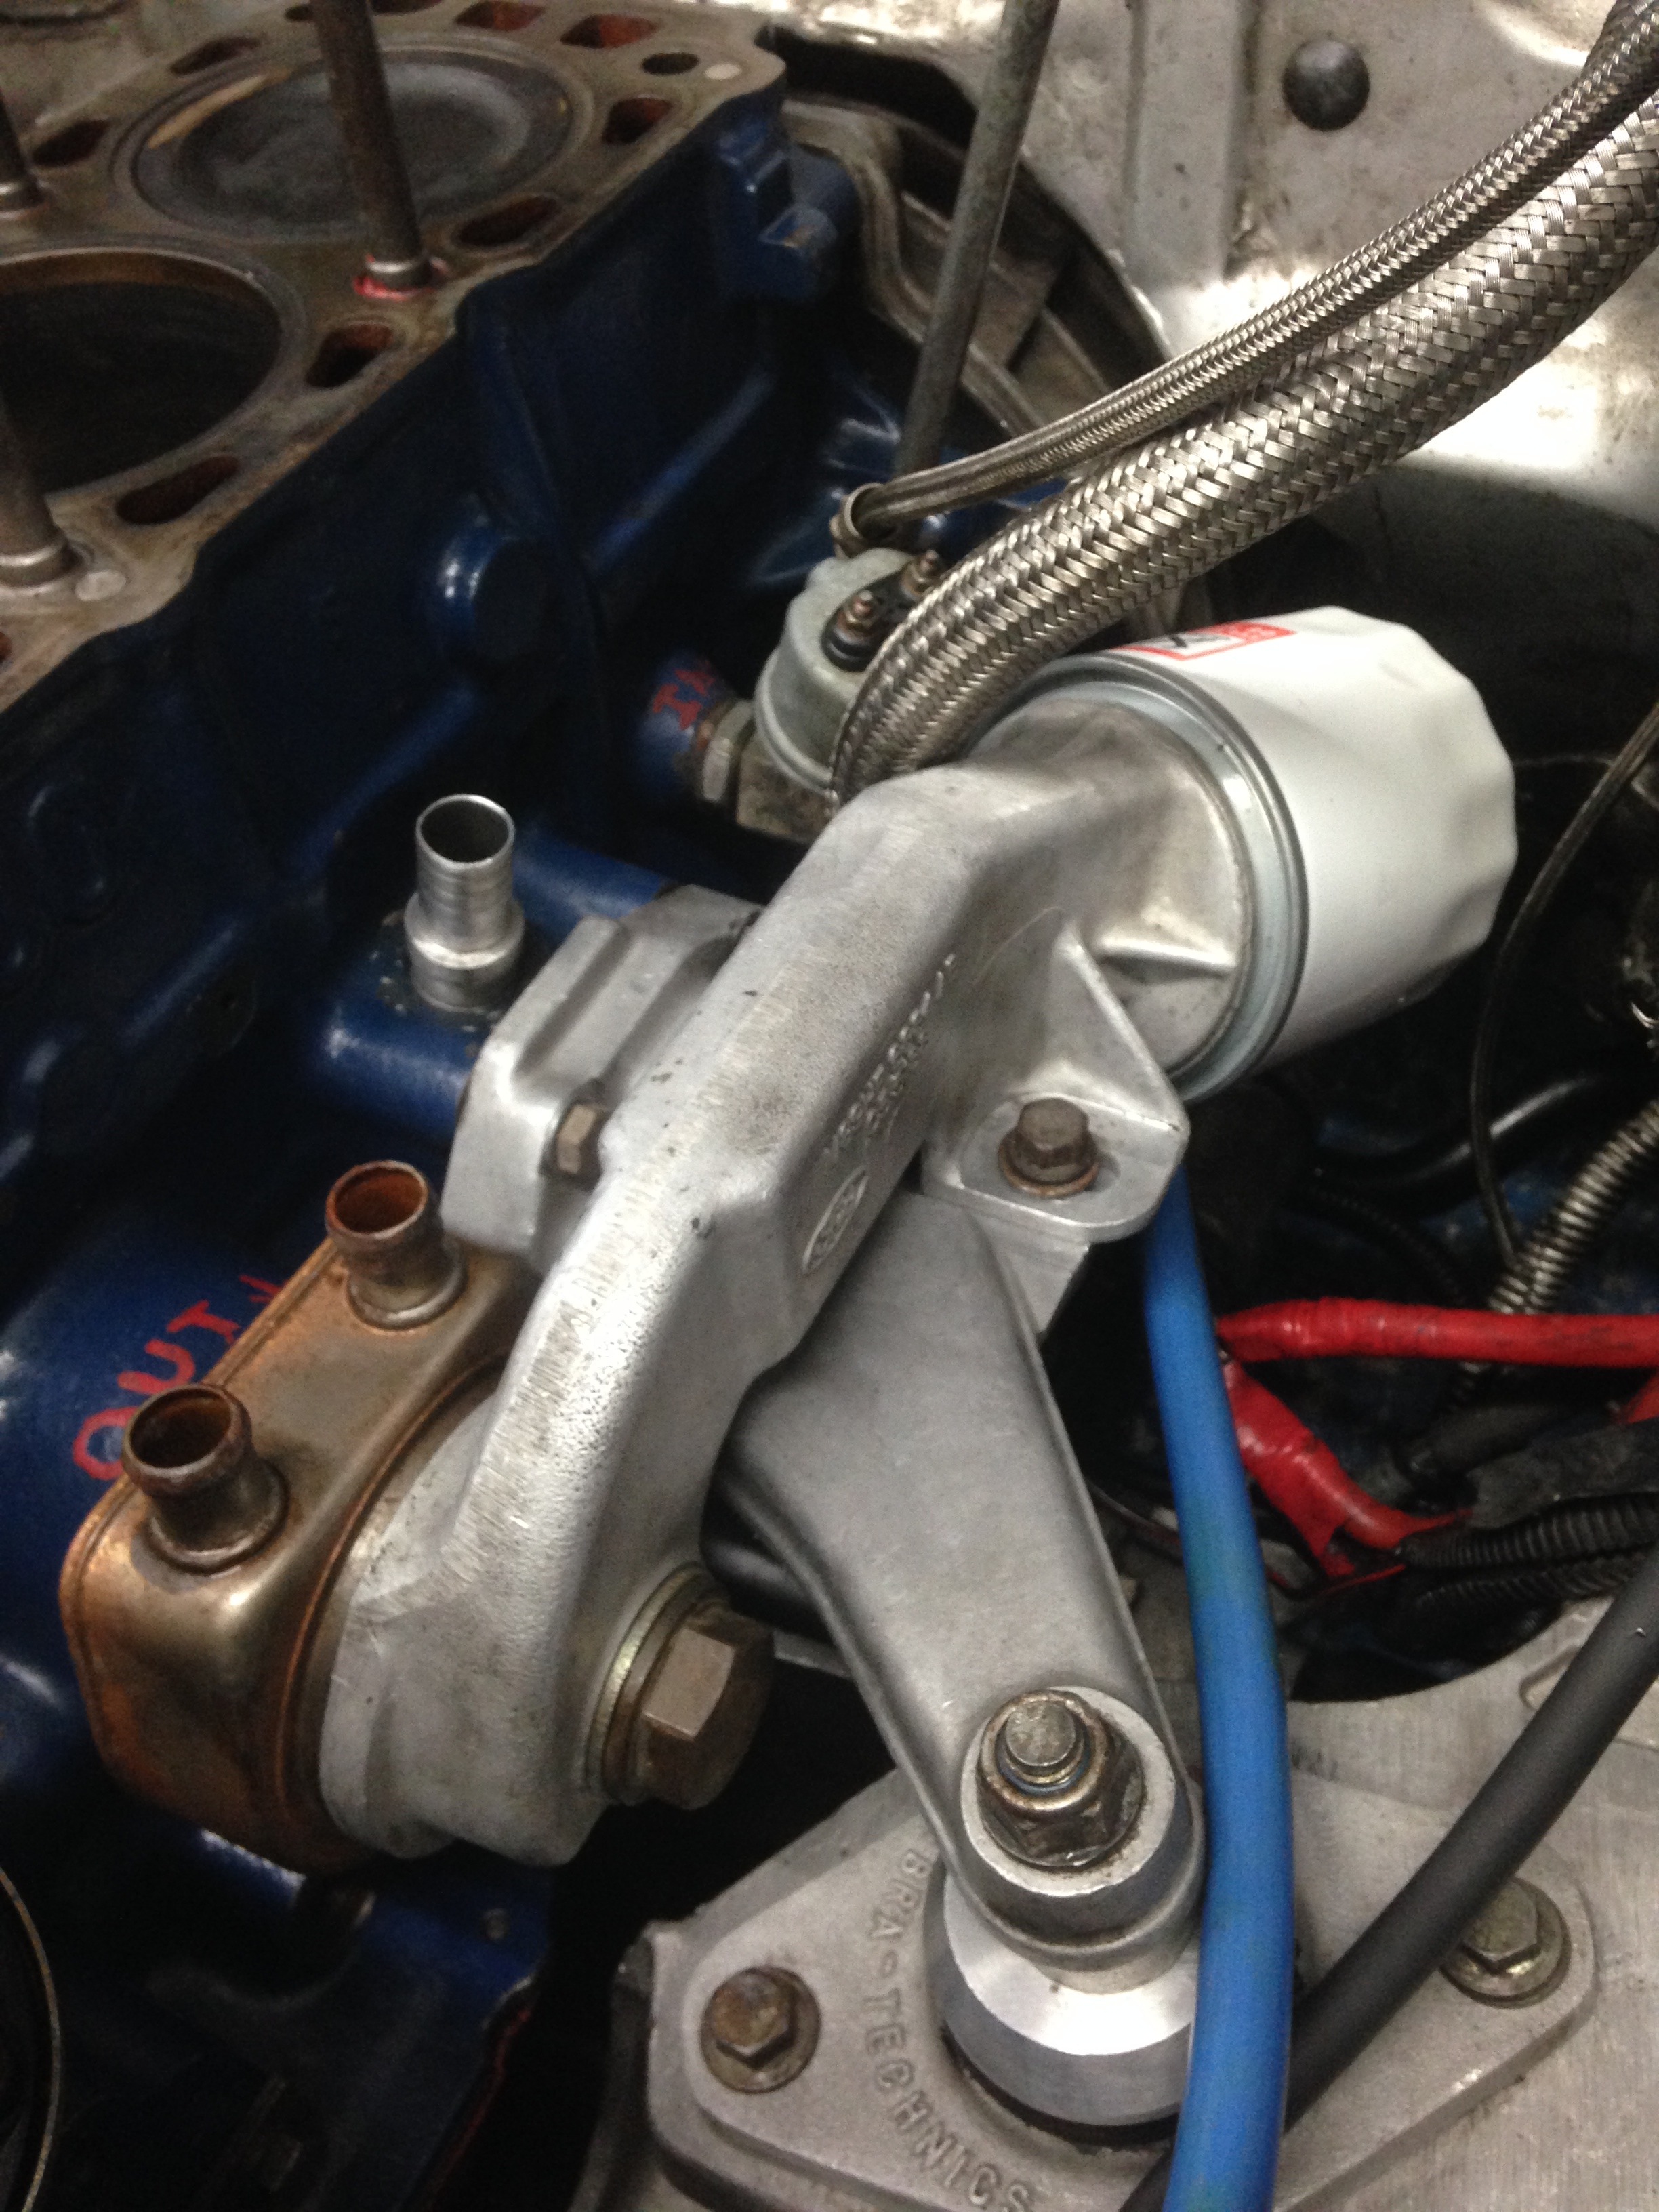
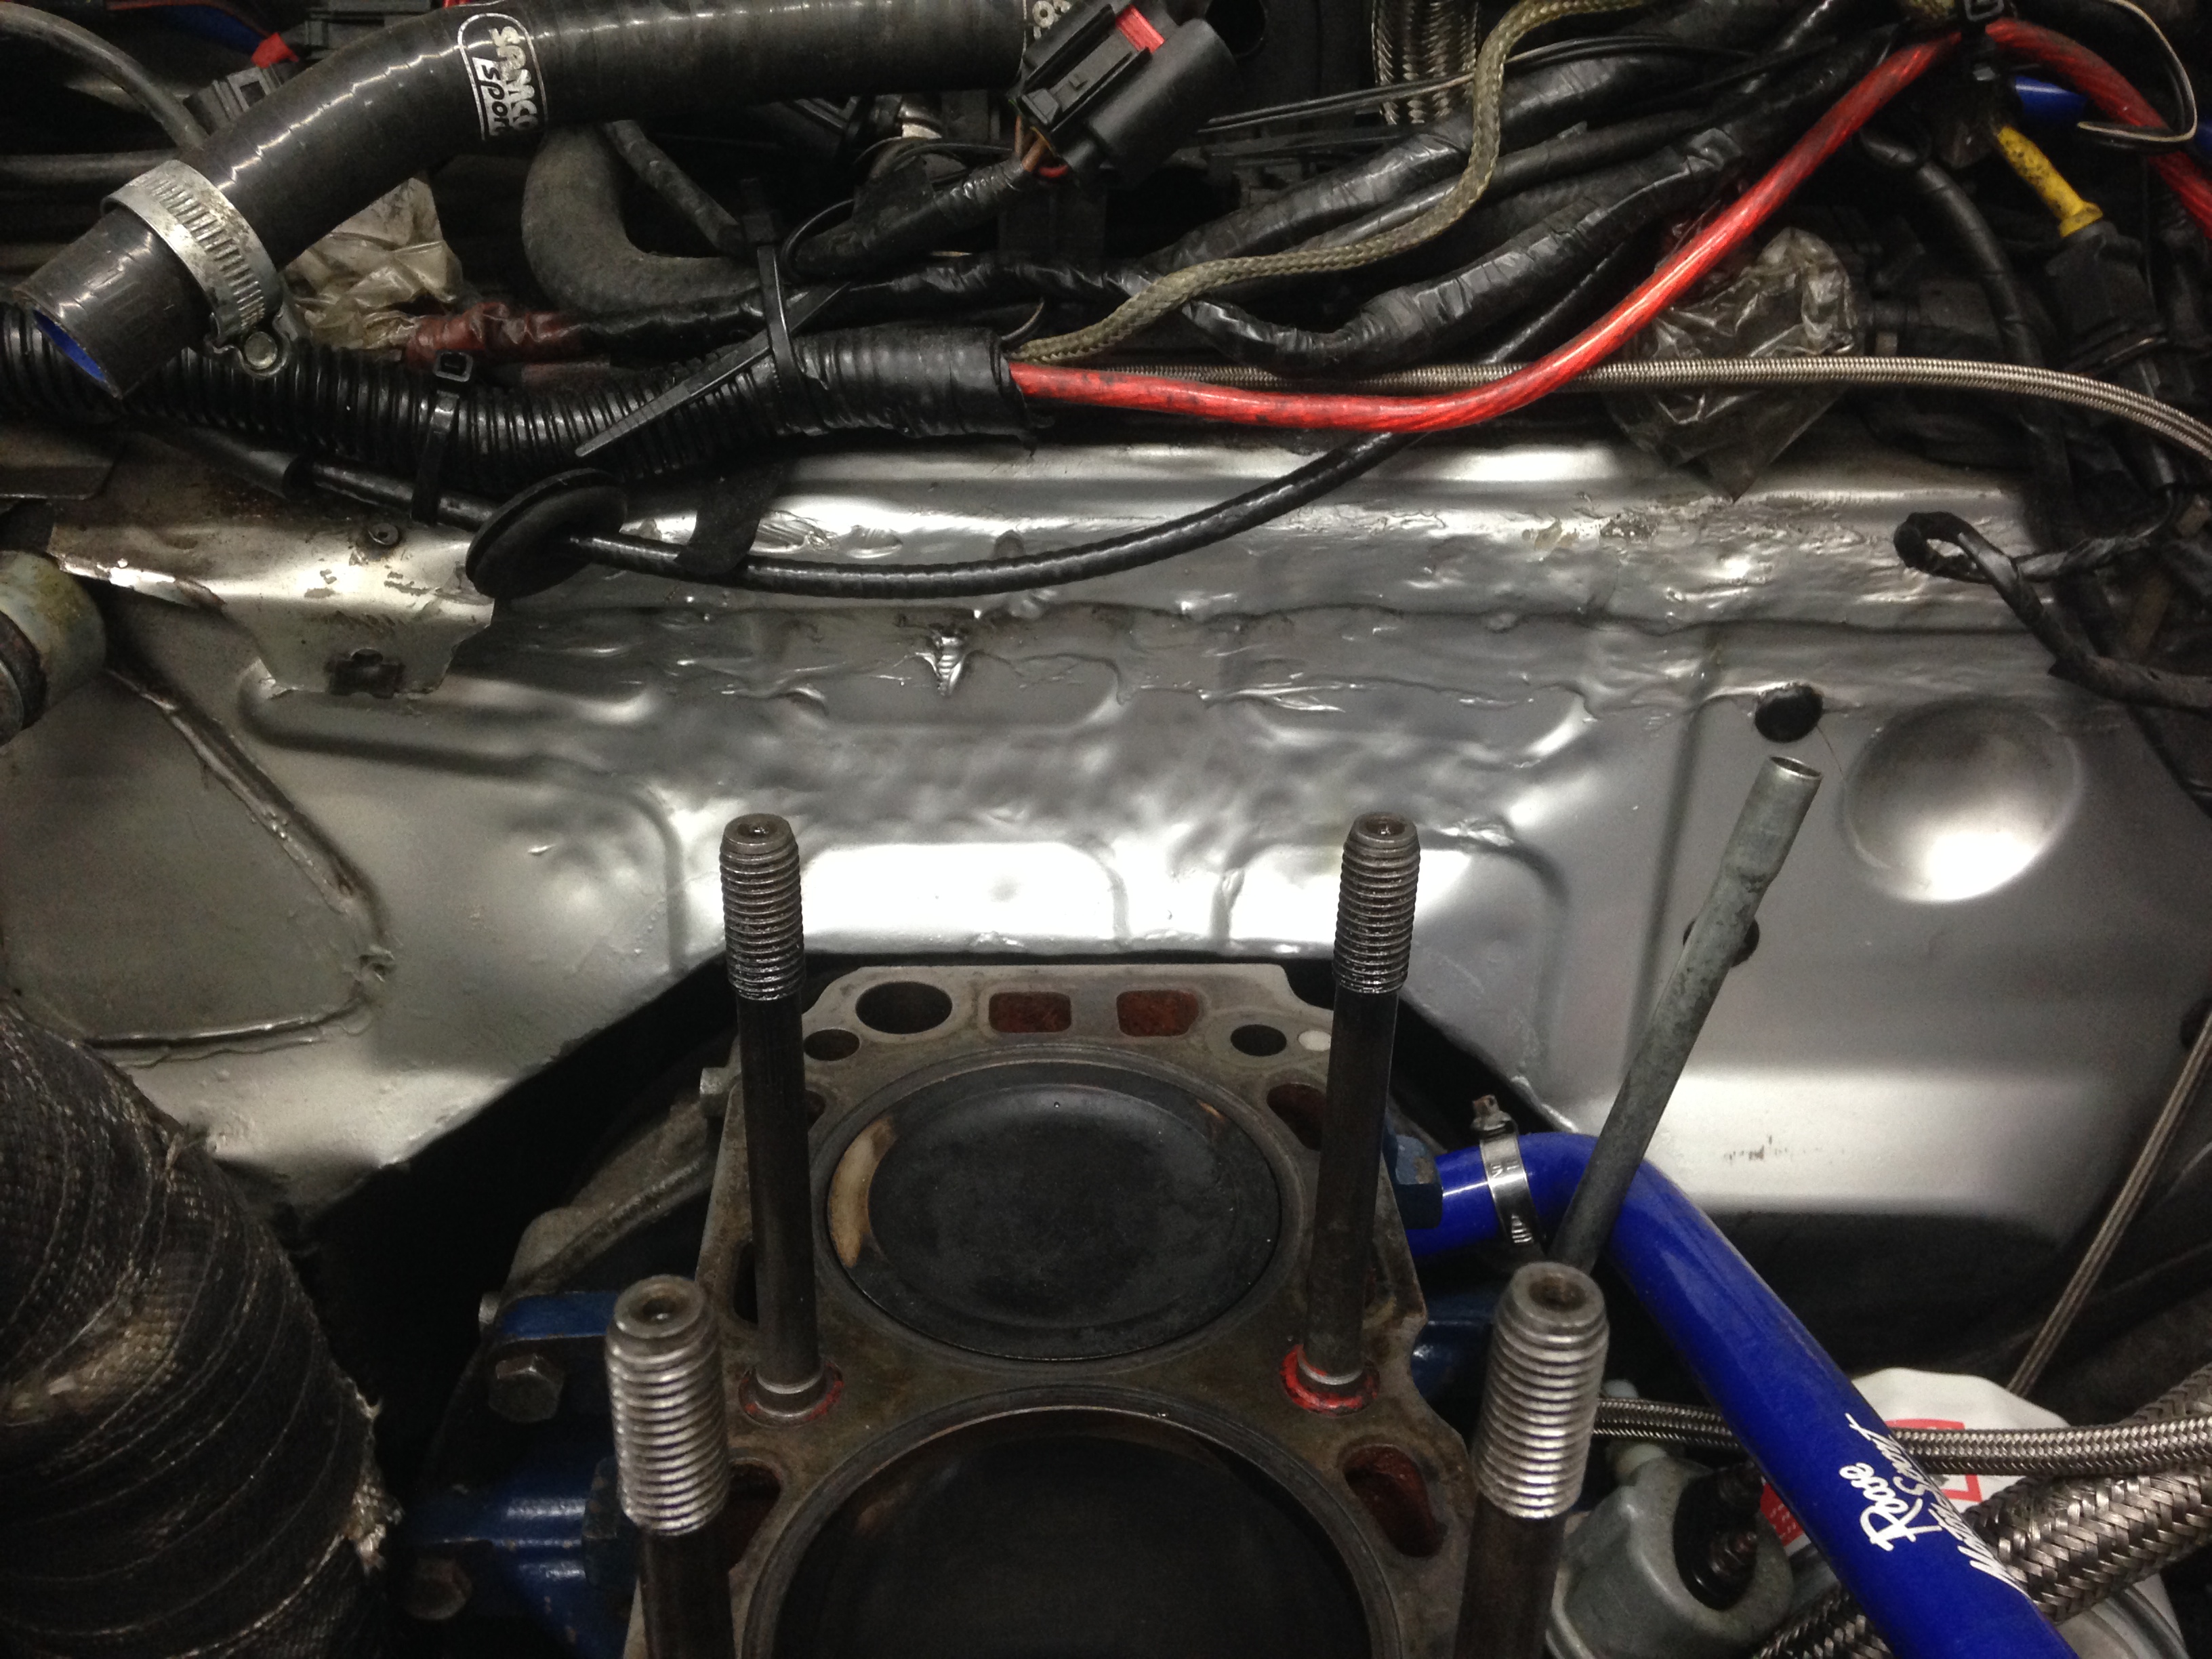
That is the back of the block on the exhaust side looking up from underneath. It shows where the head meets the block.. And if you look closely the fact it's all shiney is fresh oil. Bit of research and my thoughts were confirmed.. That is head gasket failure on the pressurised oil feed to the head. It is literally pumping oil out the side of the engine as it runs.
So back in the workshop and the strip down begins... Getting a little bored of this now!!
More to follow soon!
Thanks for looking
I then started to realise what was probably causing the issue.. The propshaft
Back home and back in the workshop time to find out what had happened..

This shows where the propshaft has smacked the side of the tunnel.. Which explains the noise, at this stage I was thinking unbalanced prop - as I had matched the rear section with a new front section on an early stage of work when I changed the propshaft doughnut - this is where my in-experience with the running gear showed.. After speaking to the company who balanced the prop shaft it was suggested that the reason why it was oscillating was because it was not centered properly.
Back to the workshop and it was starring me in the face and I really should have noticed before


The output shaft on the gearbox has been cut down to fit the earlier propshaft doughnut, the earlier doughnut has the centering bearing in the doughnut.. The later doughnut (the one I replaced with as you can't buy the earlier type anymore) doesn't, the front section of the prop has this bearing in which centres on the output shaft.. Which is missing.


So with that settled and with only one way of repairing the box properly the gearbox was out again

After a week of searching and phoning around gearbox specialists I found a company that had in its stores, randomly an output shaft from the ford MT75 gearbox - luck at last!
Once back from picking up the box you can see just how much was cut off!


Once again with help from Ben we got the box back in the car and with the new balanced prop all bolted back up and centered as it should be!

Small plate on the prop added to balance it all

Centered properly!

Whilst the ARB was off I decided to re-thread the stripped thread on one of the mounts. It before had a nut used on the other side of the box section and accessed through the passenger footwell. Didn't like that repair so decided to get it helicoiled and repaired properly.

With that done it was back out for another drive finally.. Weeks later!

This time the car drives really smoothly, transmission is nice and quiet. It's a massive step foward and the car is starting to feel like it's meant to. However as this car is proving time and time again whilst one area may be fixed another is not. The oil leaks are still as bad as ever and having cleaned the engine it's a bit de-motivating, the only positive is that because it's all clean now I can finally see where it's coming from and its an enormous leak!

That is the back of the block on the exhaust side looking up from underneath. It shows where the head meets the block.. And if you look closely the fact it's all shiney is fresh oil. Bit of research and my thoughts were confirmed.. That is head gasket failure on the pressurised oil feed to the head. It is literally pumping oil out the side of the engine as it runs.
So back in the workshop and the strip down begins... Getting a little bored of this now!!
More to follow soon!
Thanks for looking
03-11-2015, 08:02 PM
#48
10K+ Poster!!
Keep your chin up, it will be worth it in the end, you are doing an excellent job!
Worth getting a good gasket on there. Is it worth looking at long studding?
Worth getting a good gasket on there. Is it worth looking at long studding?
03-11-2015, 09:27 PM
#49
PassionFord Regular
Thread Starter
Thanks very much, it was meant to be a car I could get out and enjoy more. My last project fell foul of too much to do and not enough time. I knew this had some issues but more than I had contemplated at this early stage of ownership. Still I'm getting a very good understanding of it on a fast learning curve!
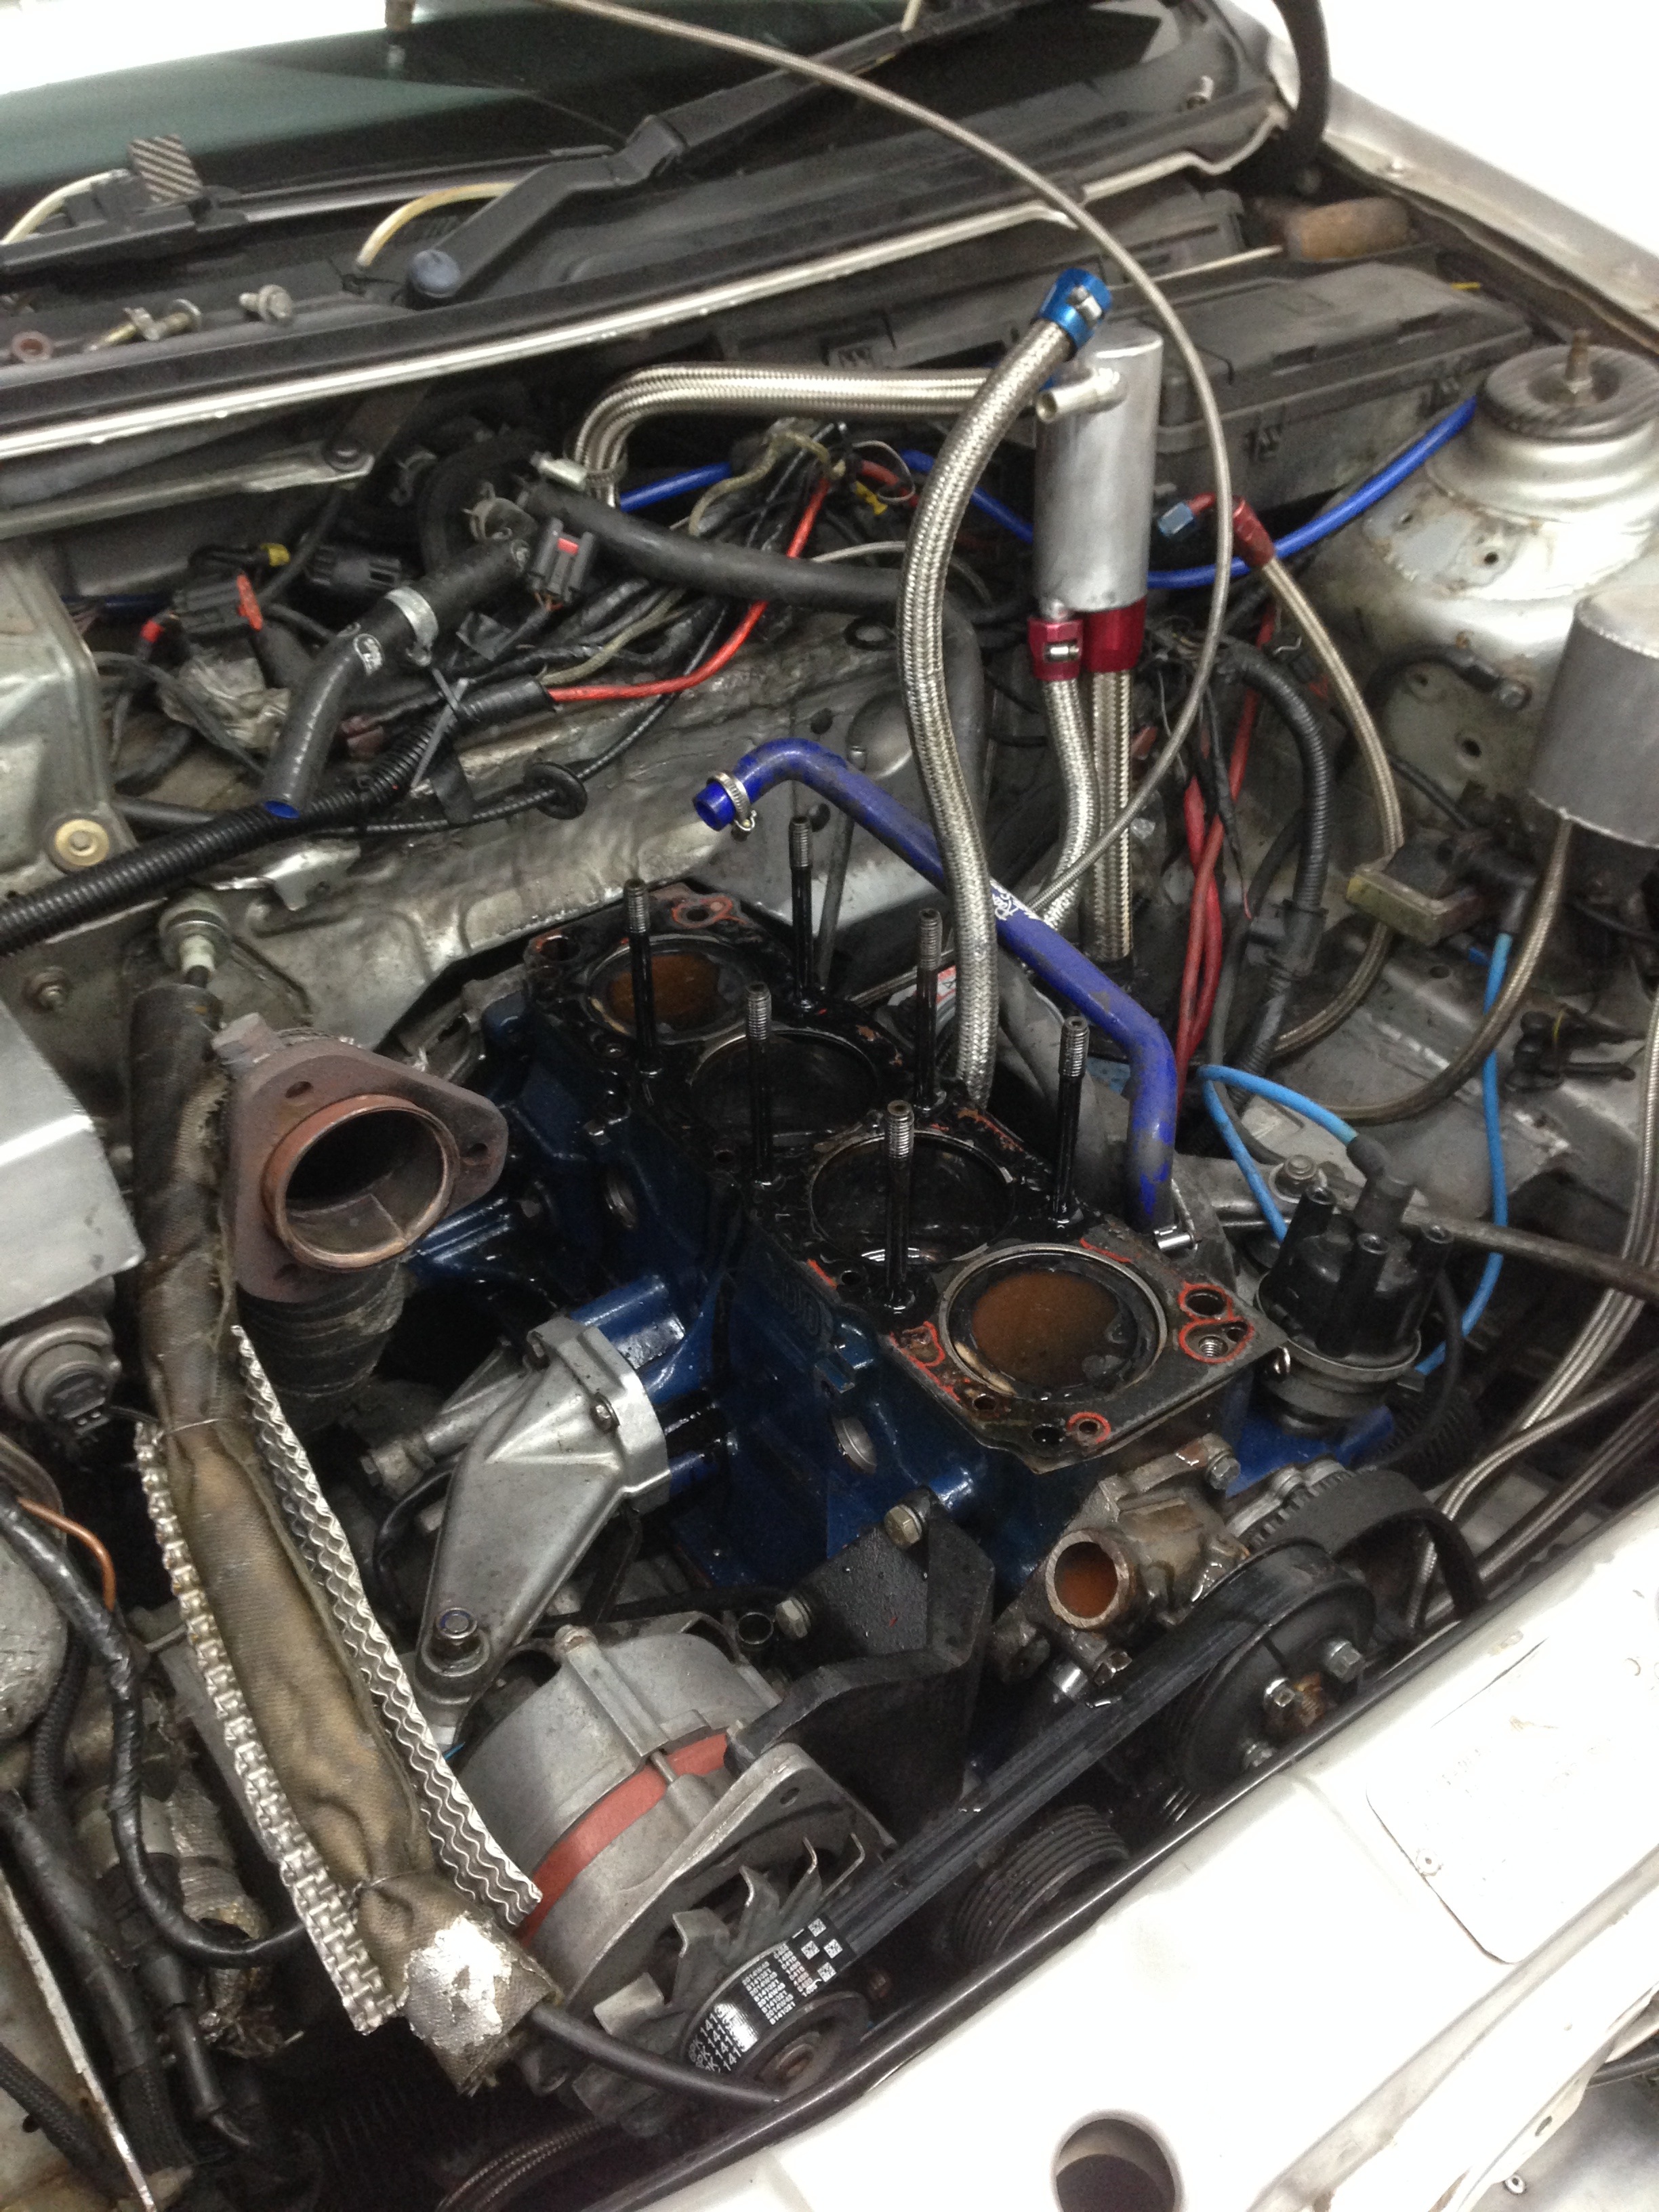
The engine already has been long studded on the inner 6, I'll get the next step up soon. That shows all the engine in bits again!
The engine already has been long studded on the inner 6, I'll get the next step up soon. That shows all the engine in bits again!
03-11-2015, 11:34 PM
#50
cossie fan (unluckerly)
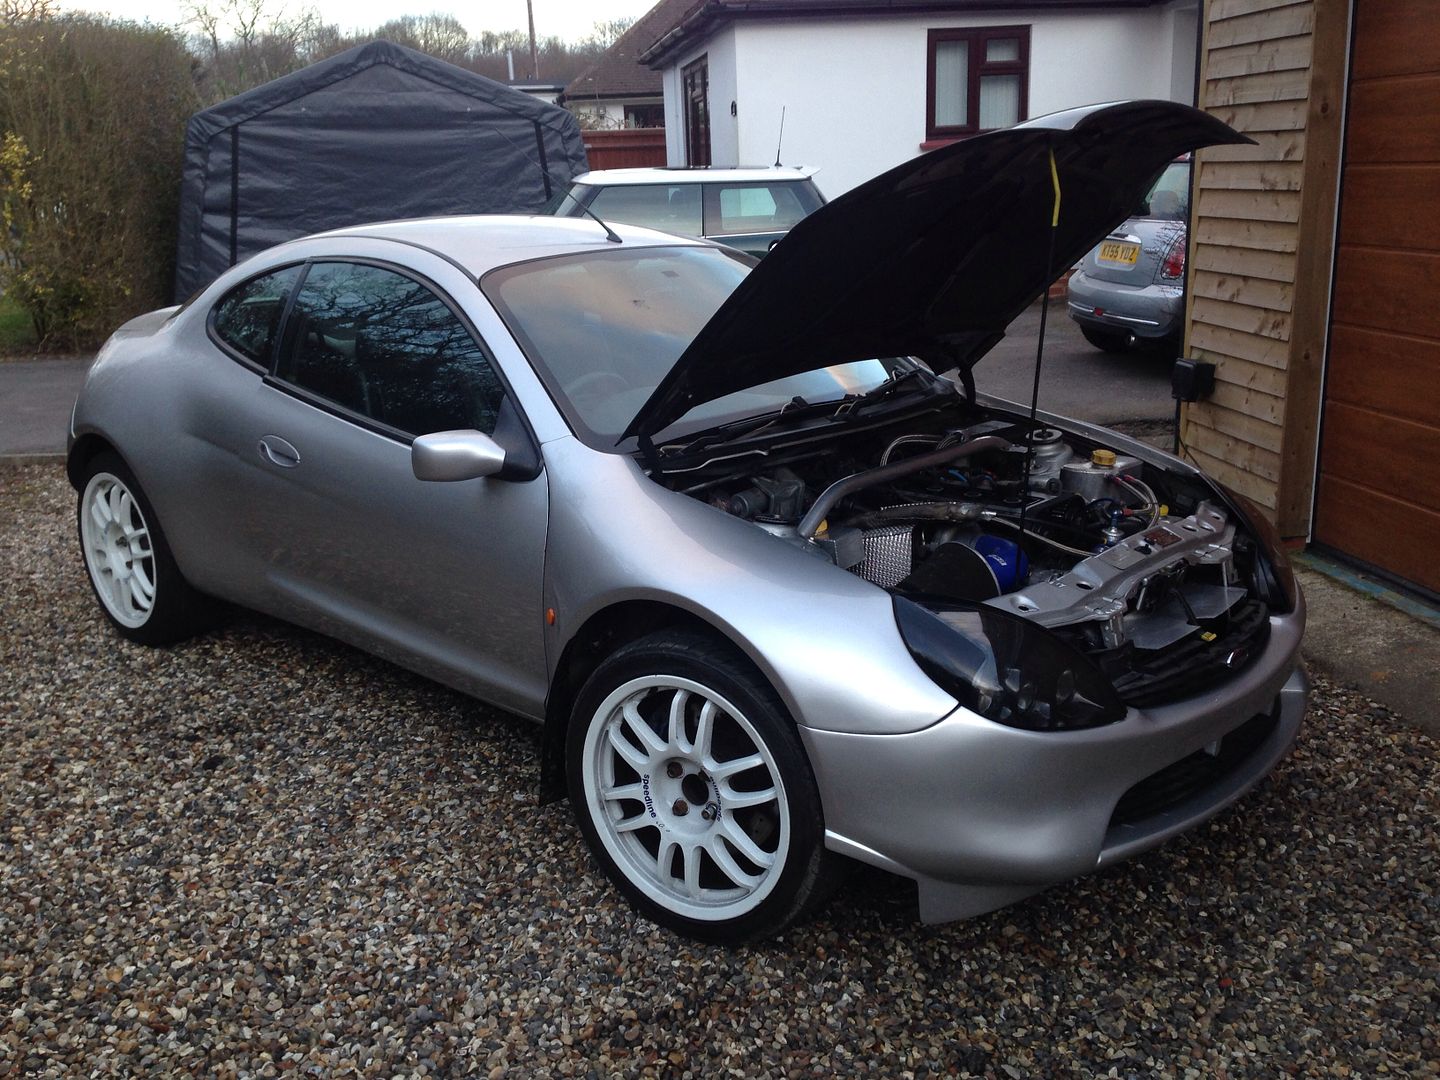
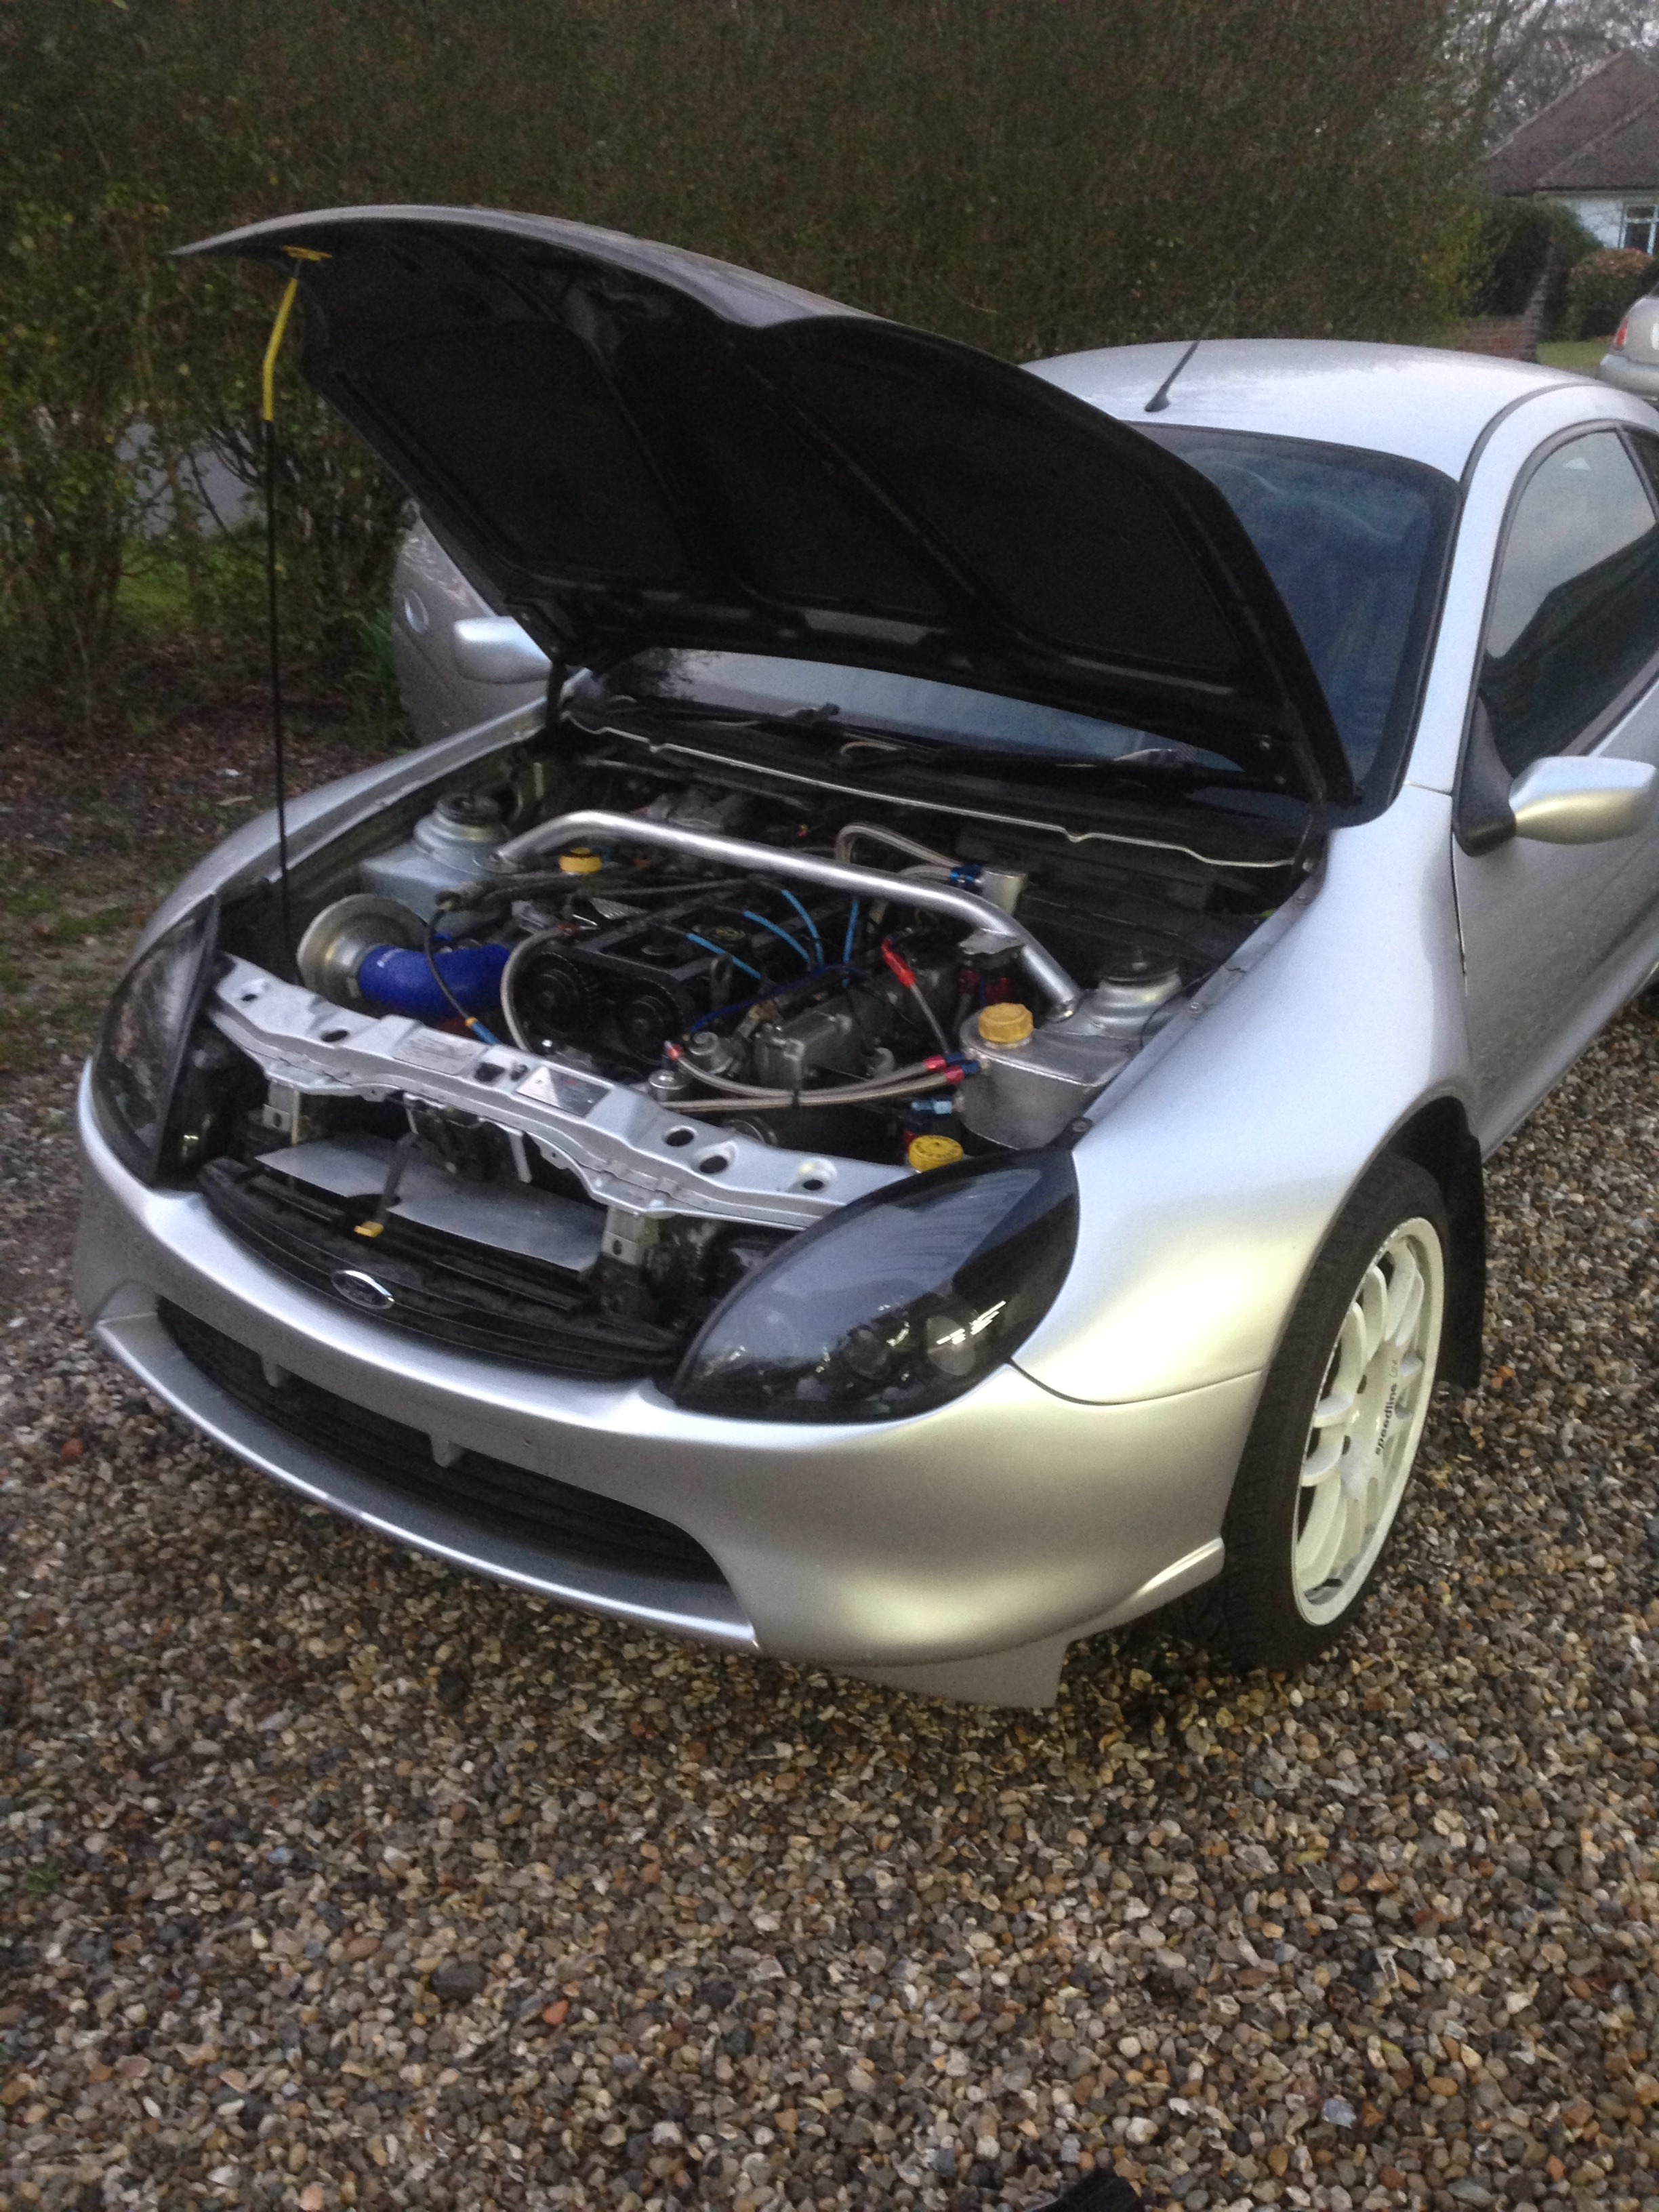
Still at least your getting through it all bit by bit. It's a pain but at least the head gasket is not too bad a job. Once it's all done your know the car is right. It's worth doing as the car sits in that last pic it looks a nice car in silver with the white wheels
Last edited by ajamesc; 03-11-2015 at 11:35 PM.
04-11-2015, 04:48 AM
#51
Boost addict
wow what a project mate, keep at it as there is not much more satisfying than finding and fixing problems on your motor, as said a few times above it will all be worth it in the end when the car is leak and bodge free and driving better than its ever done 
04-11-2015, 10:16 PM
#53
PassionFord Regular
Thread Starter
Thanks guys for the comments. I am getting there with the car, but during these stages of work it really does make you think twice! Problem is you get back in it and when it does work you can't think of anything better.
05-11-2015, 08:20 PM
#55
PassionFord Regular
Thread Starter
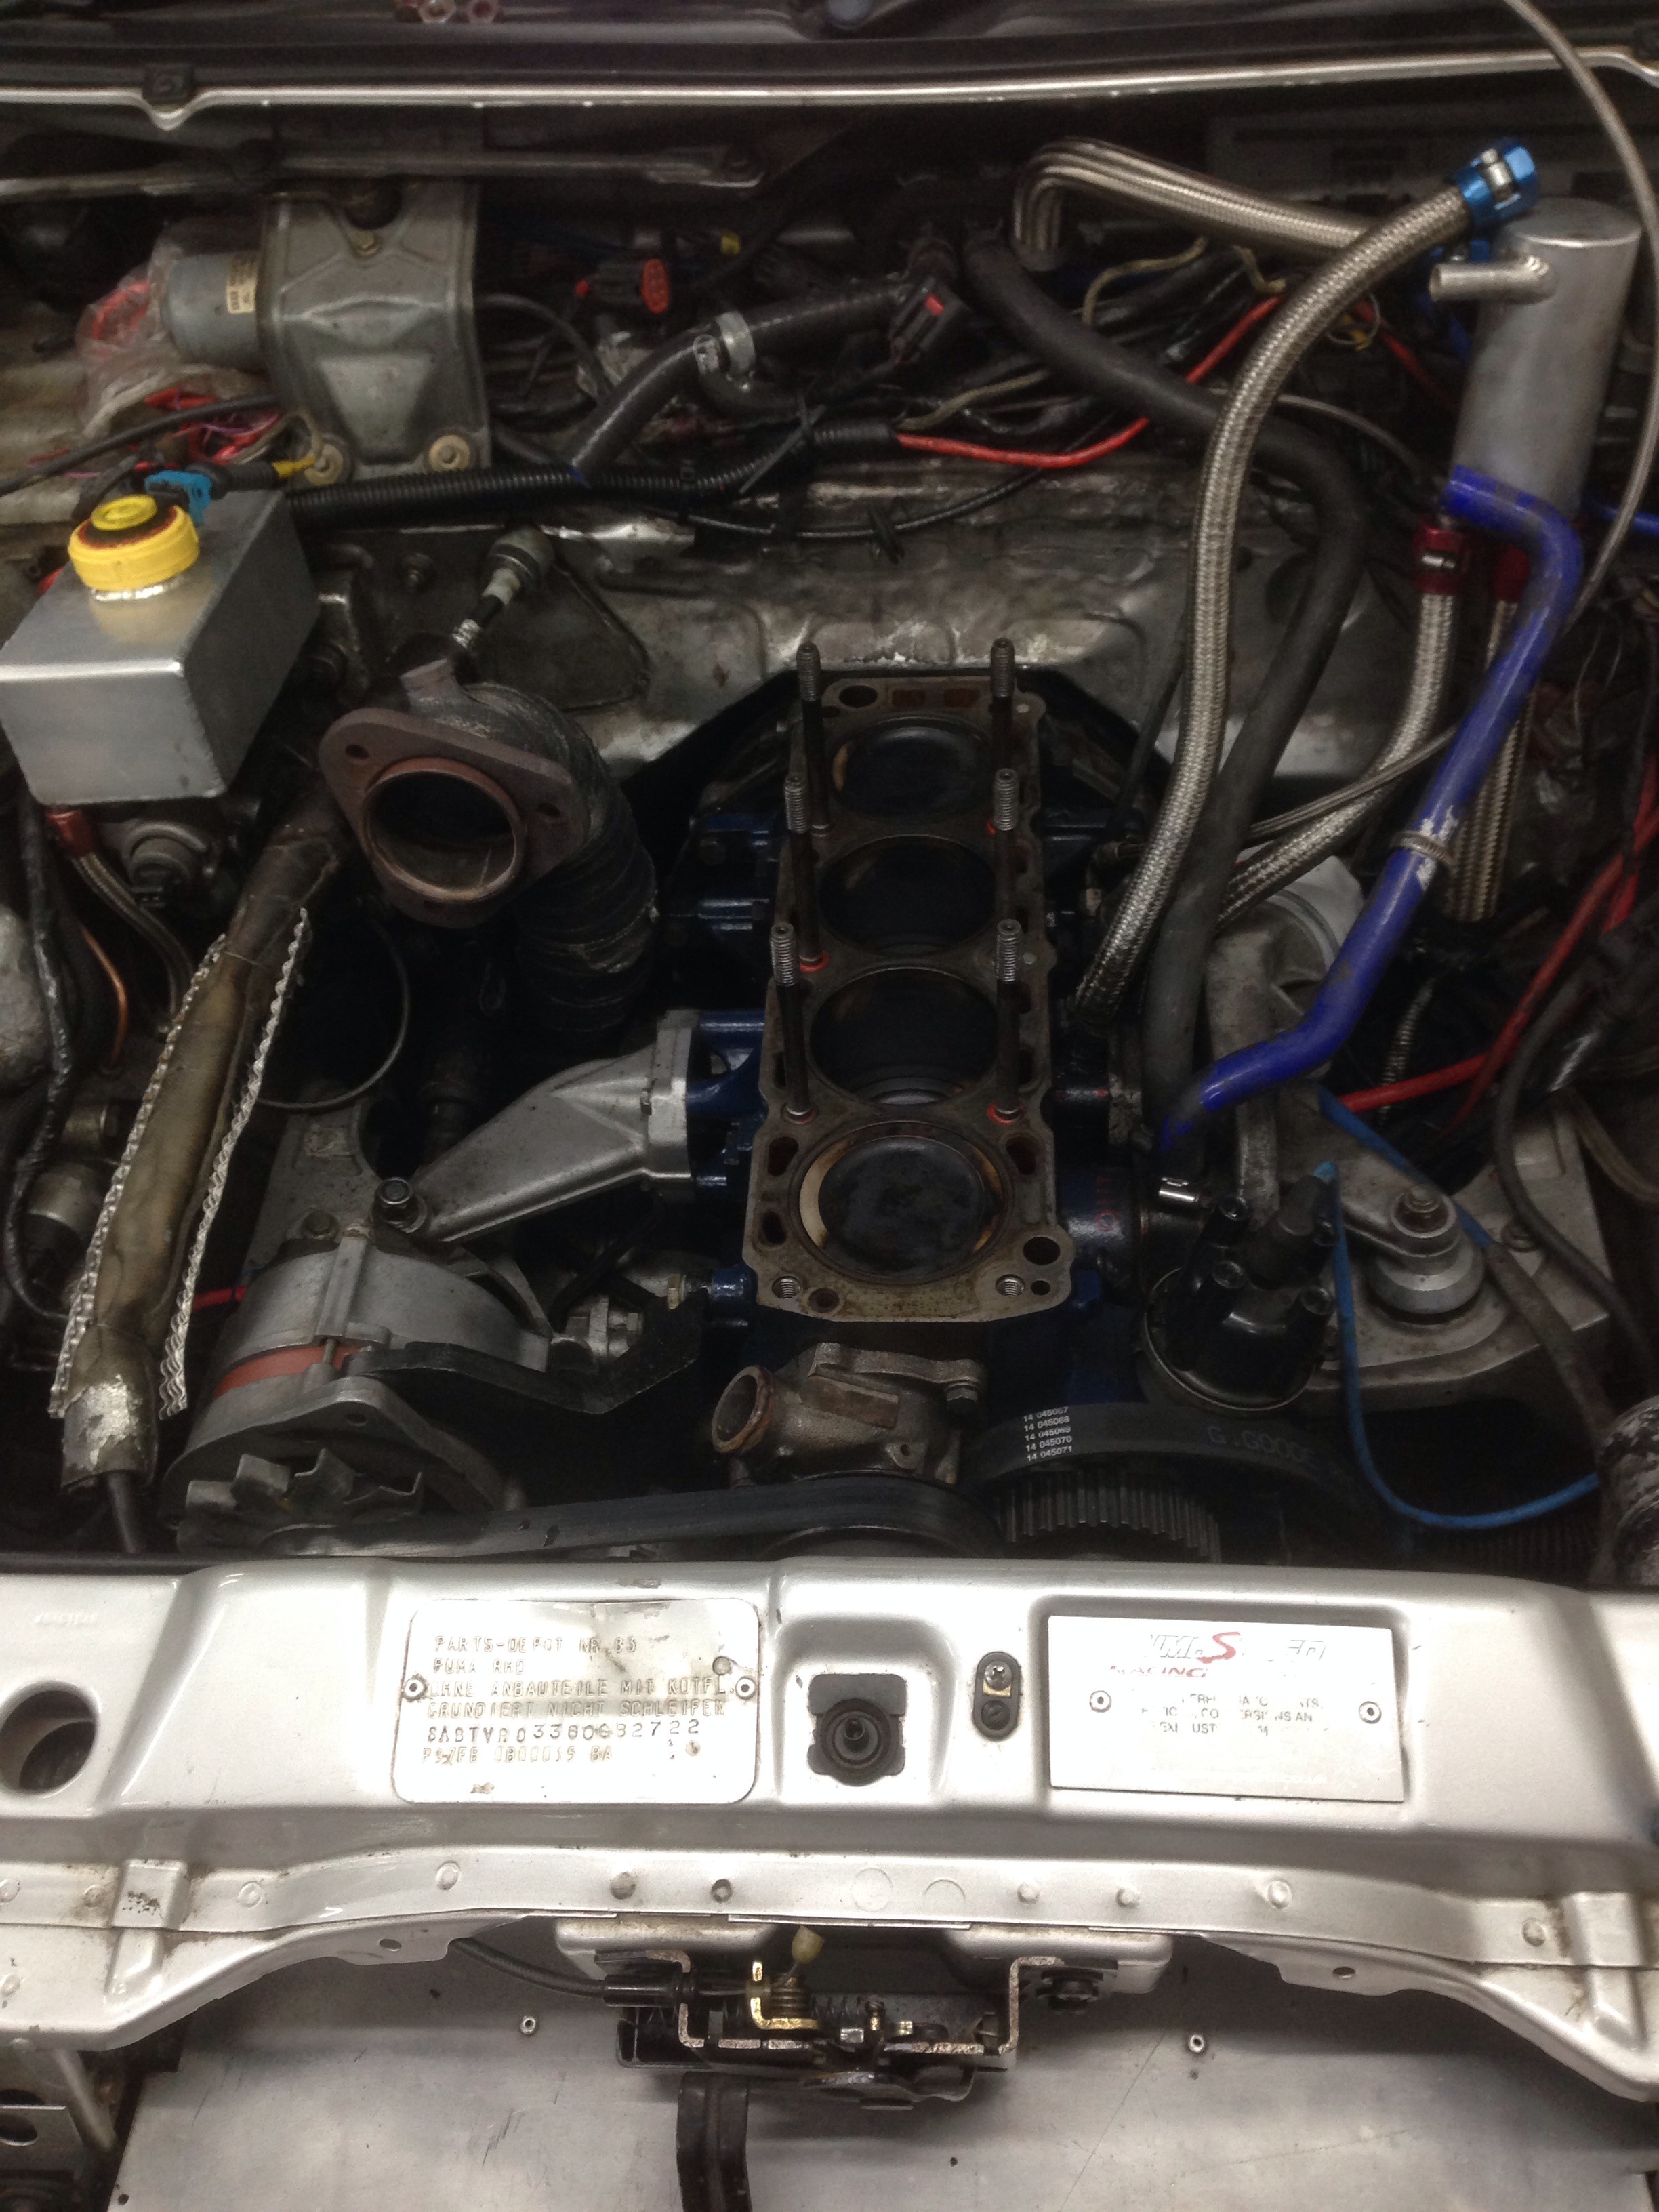
So another update of progress over the last year..
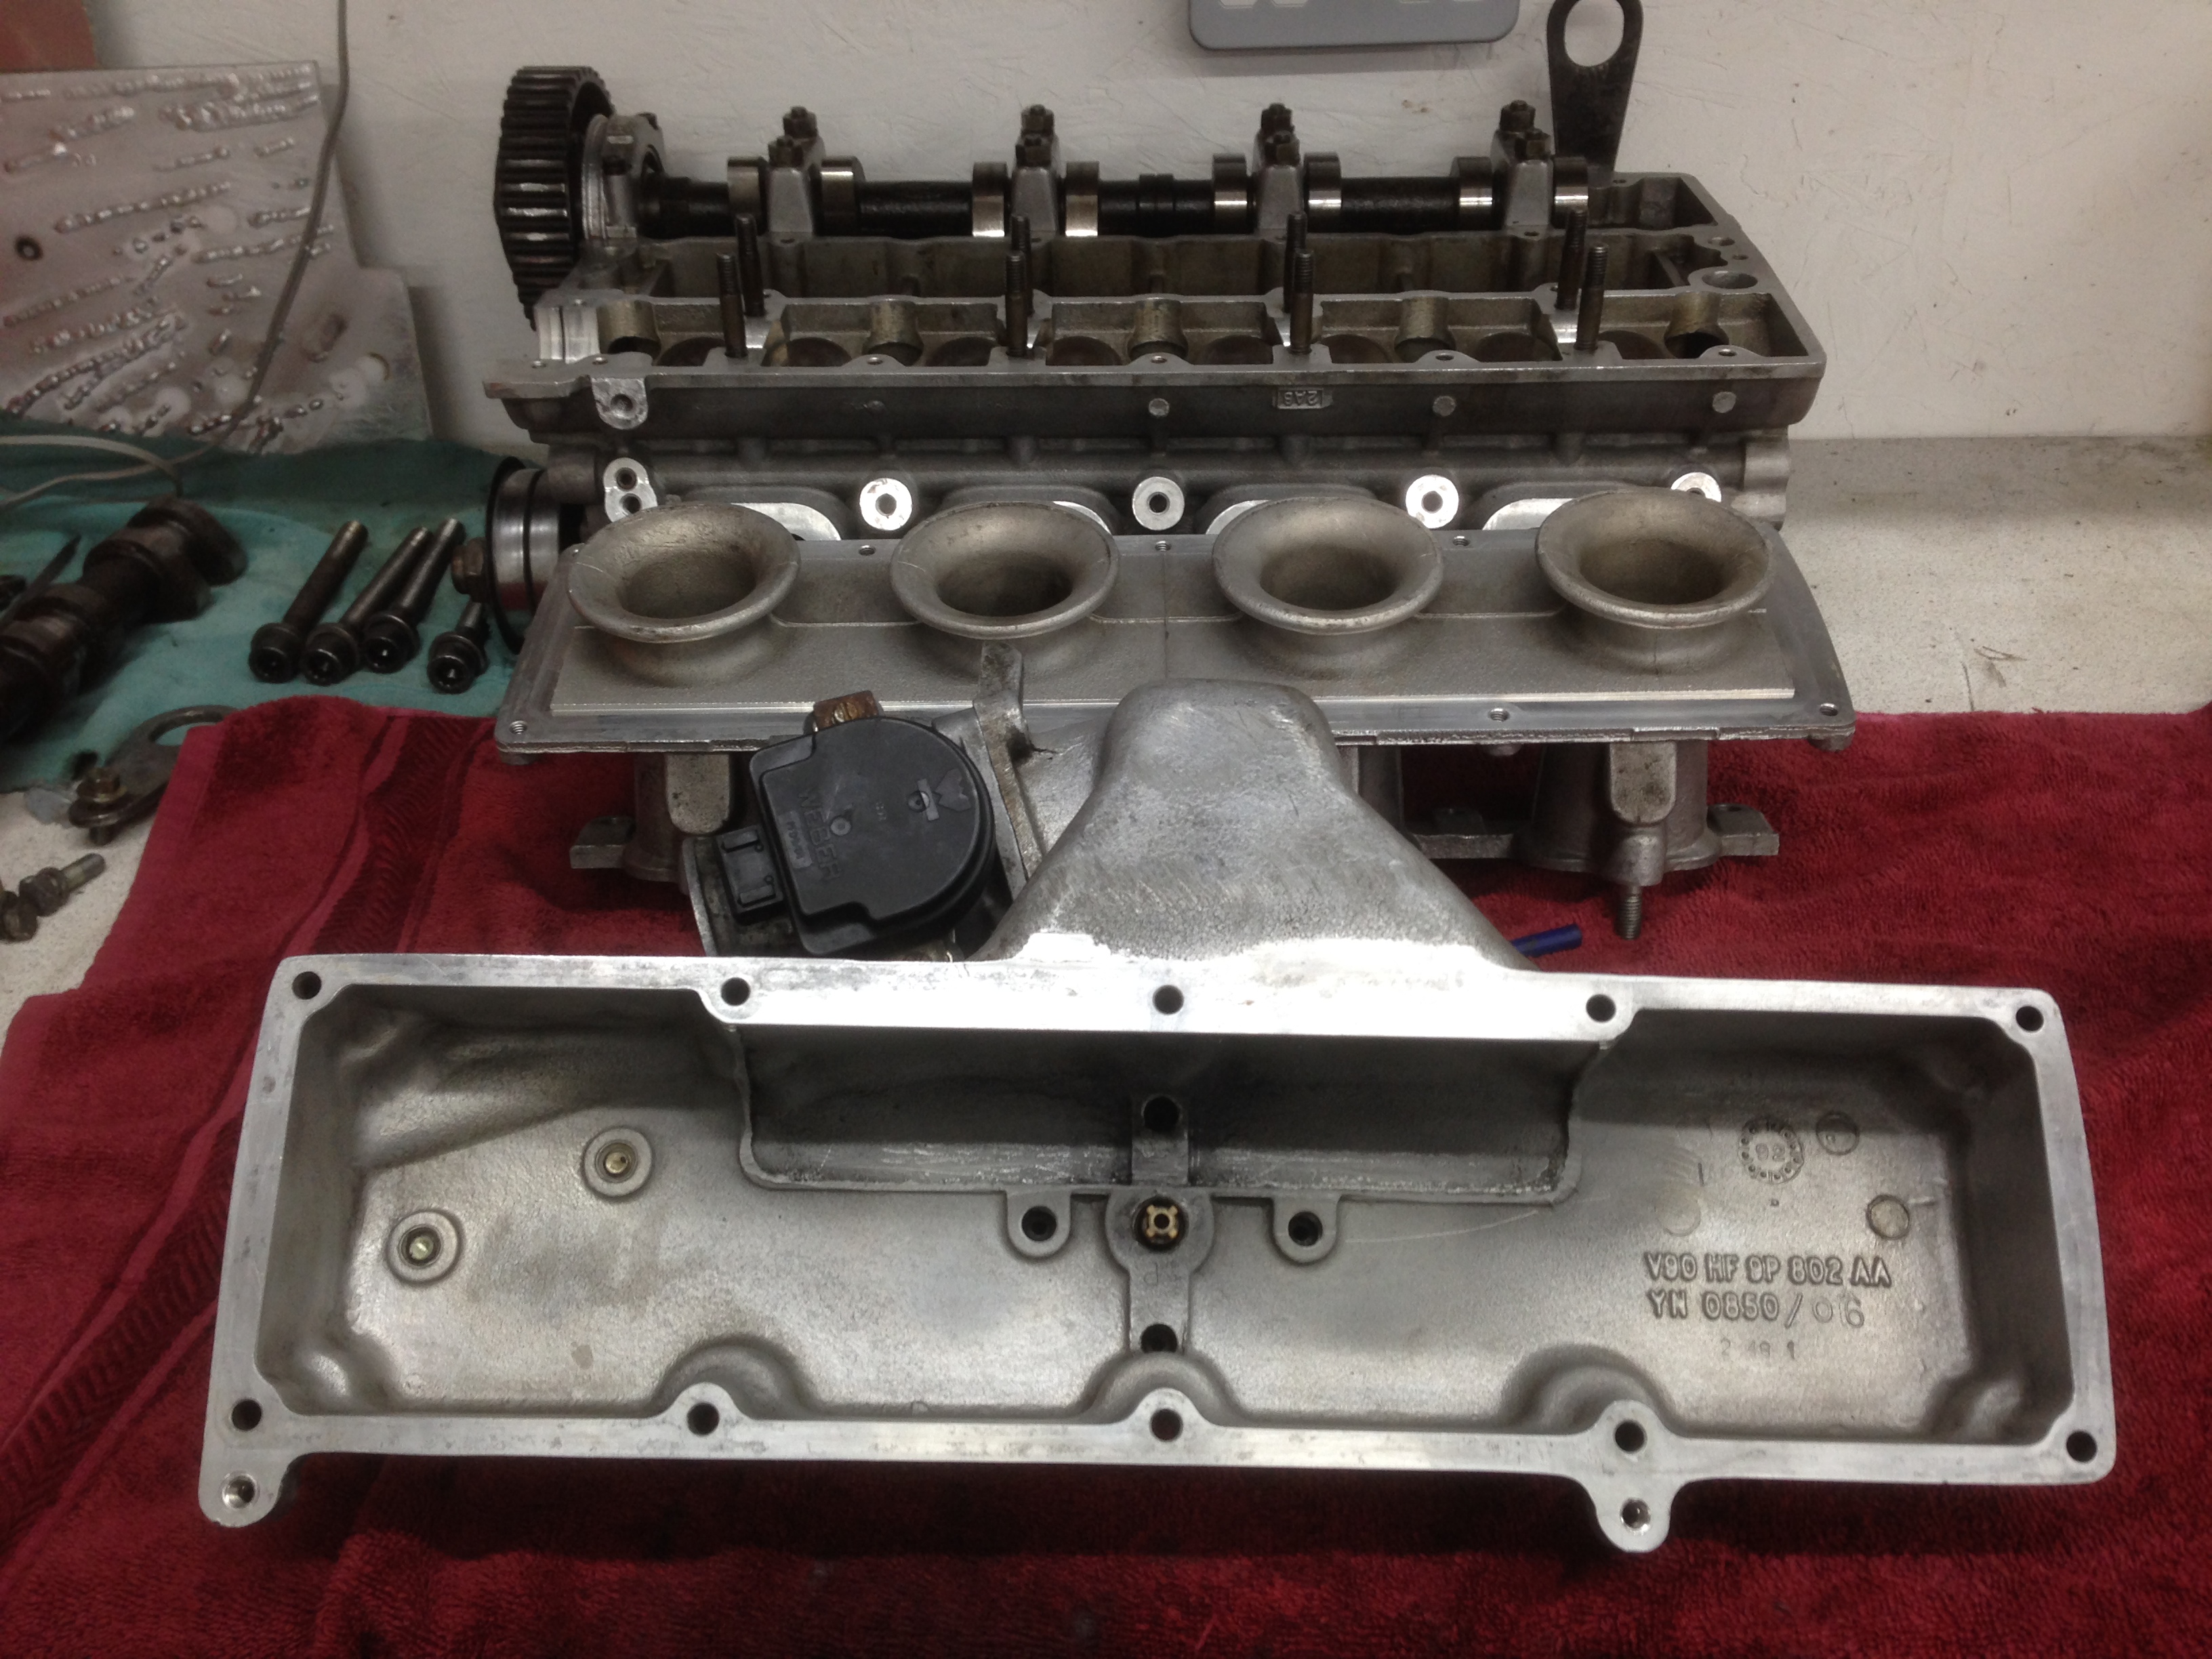
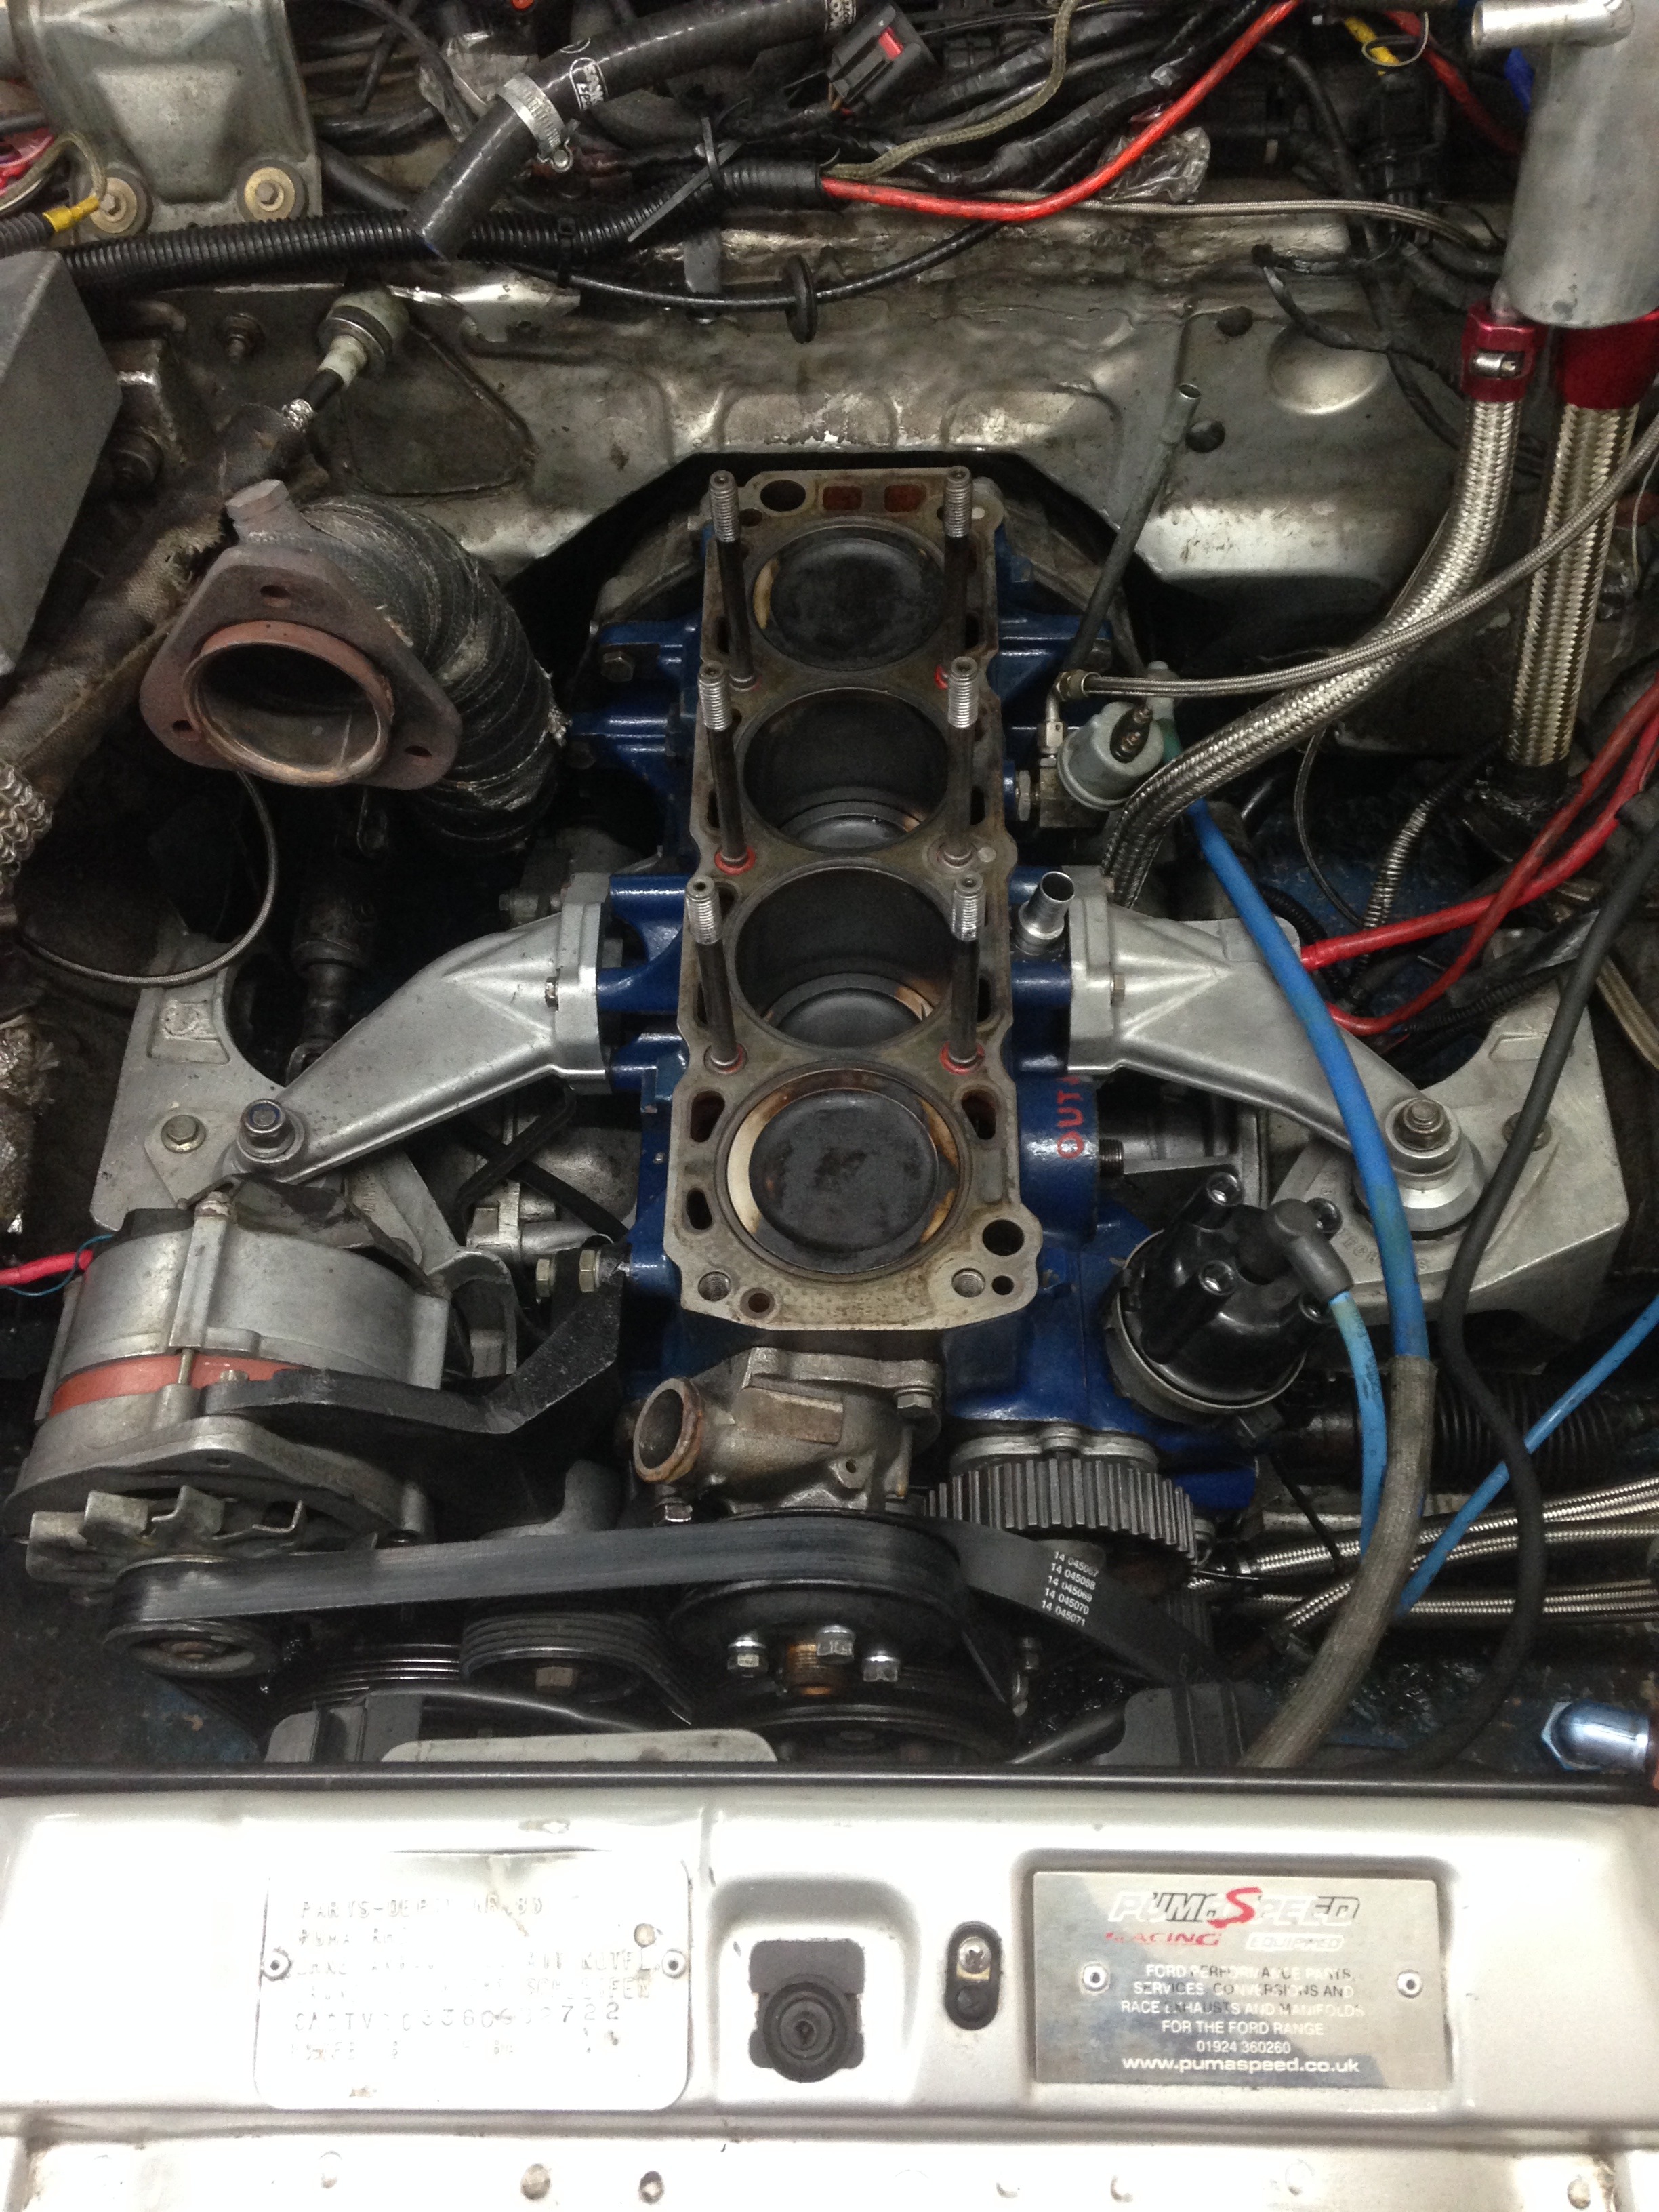
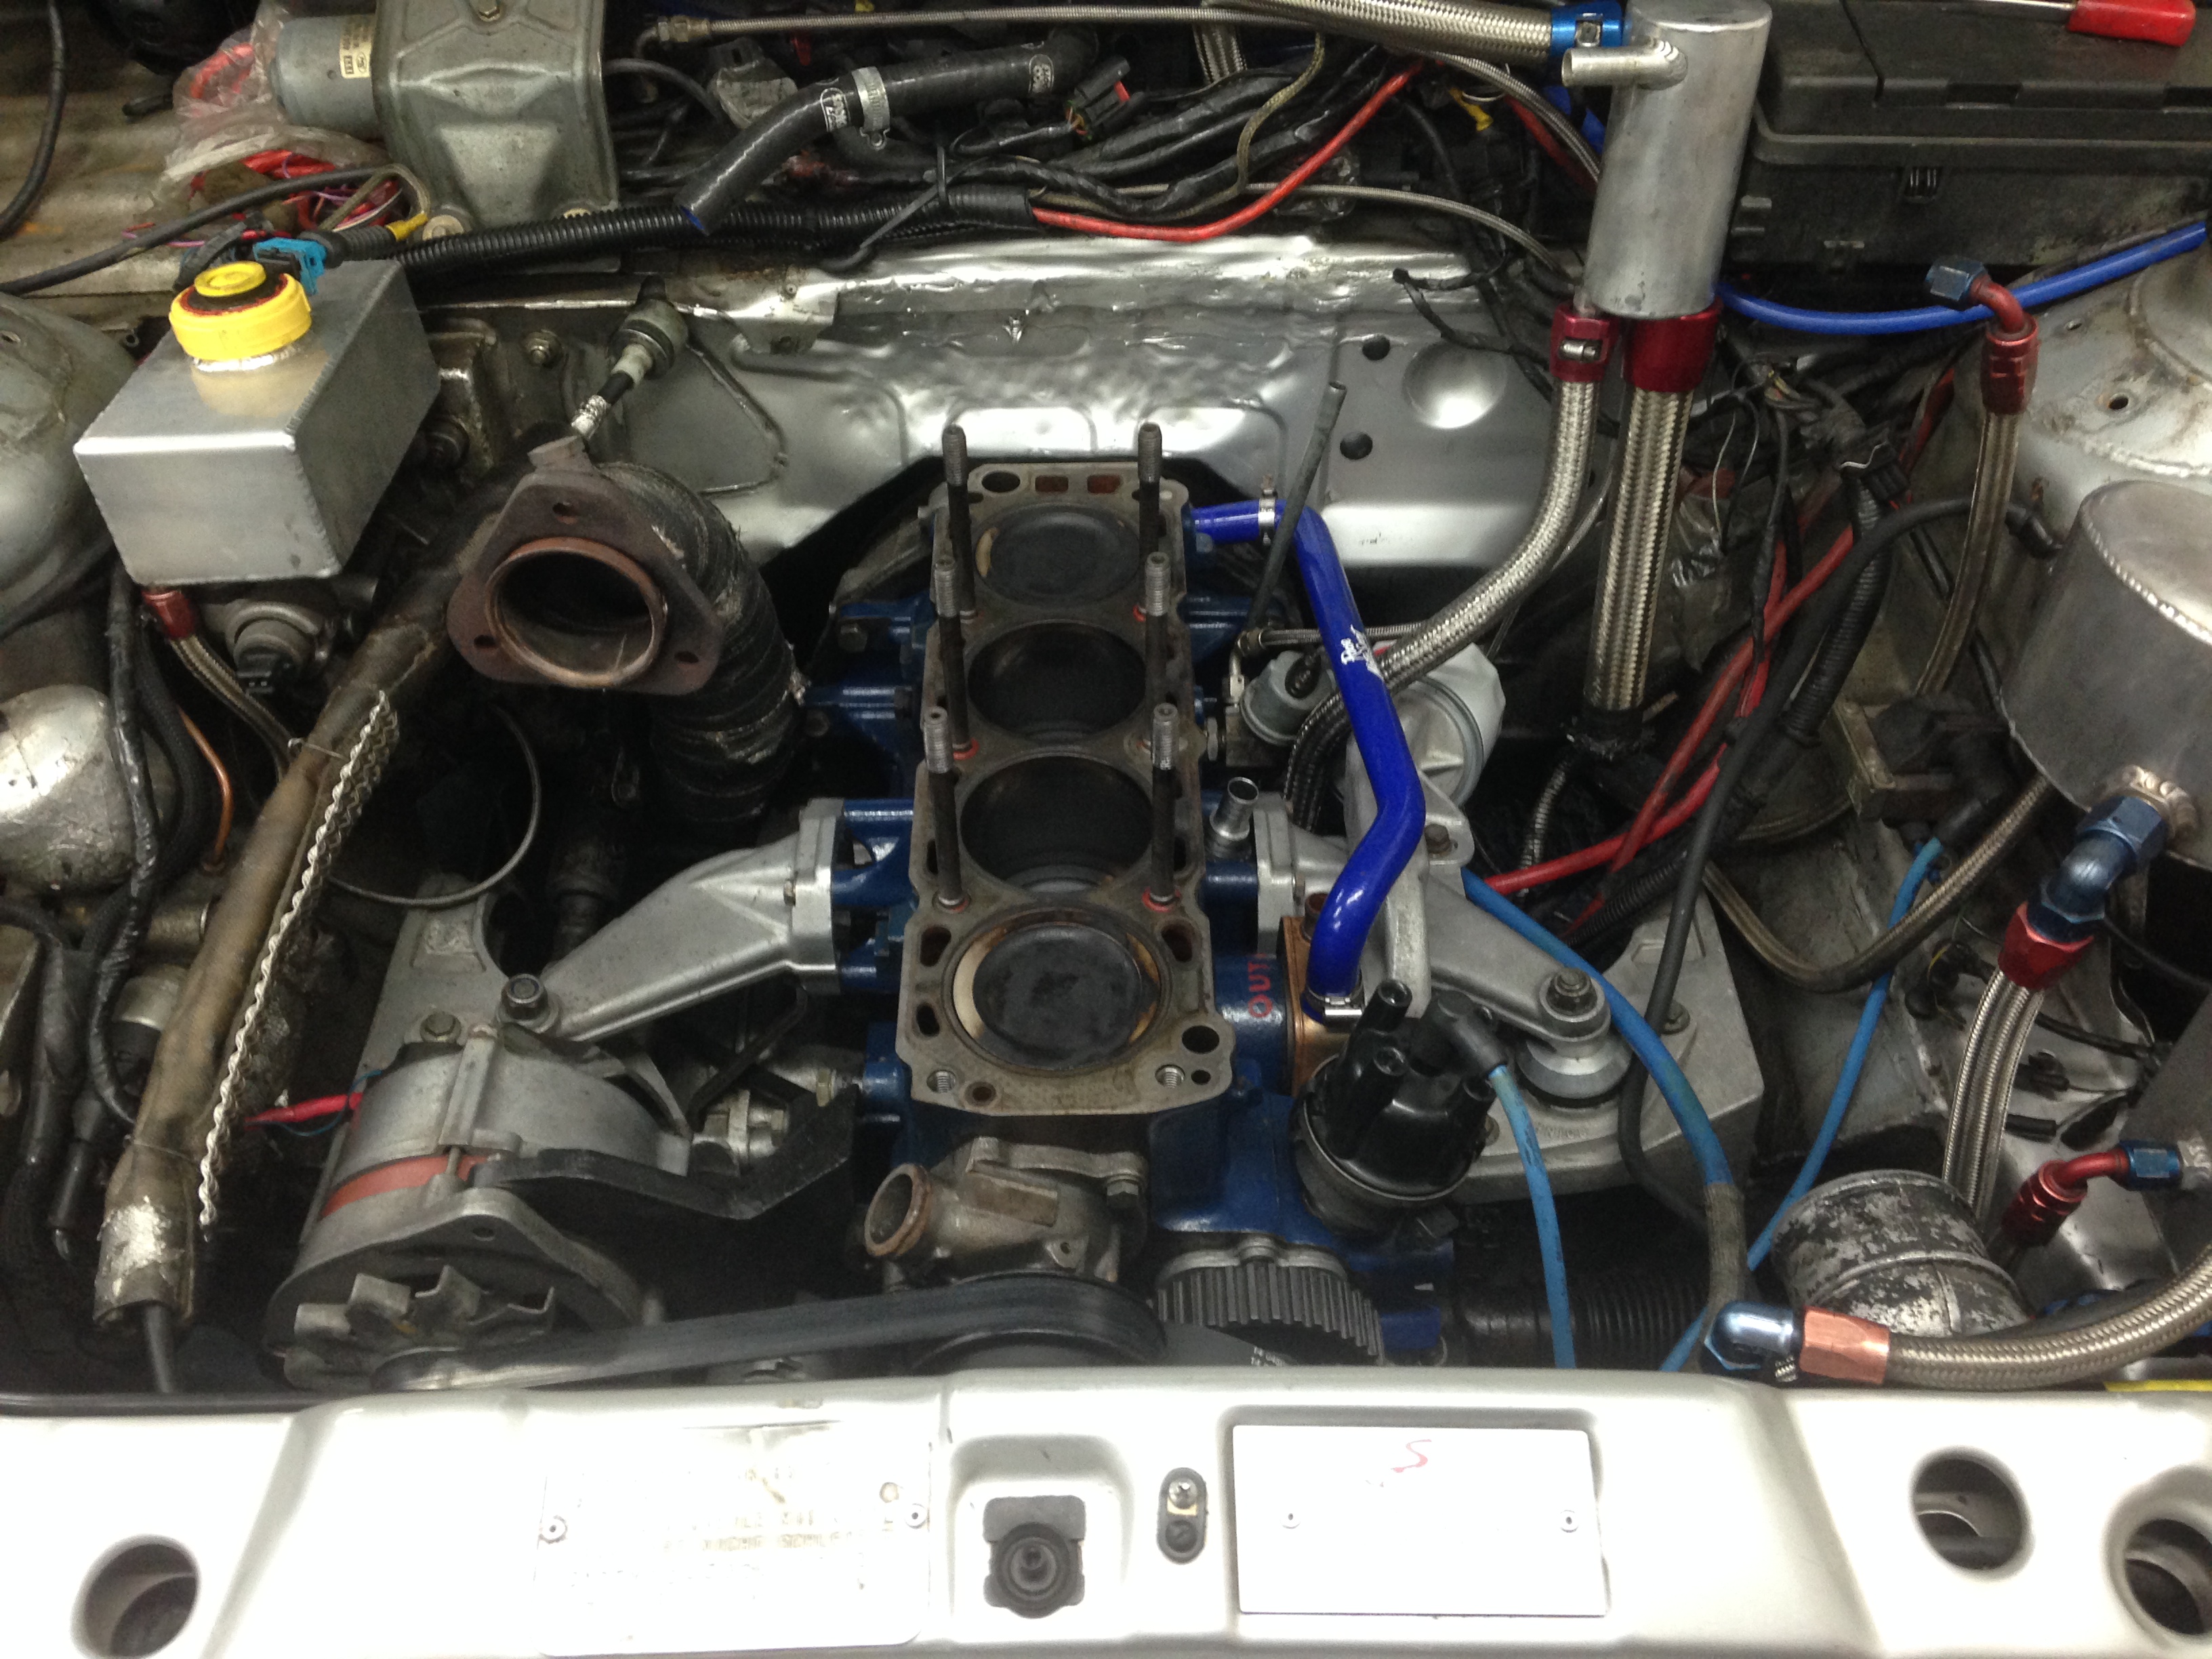
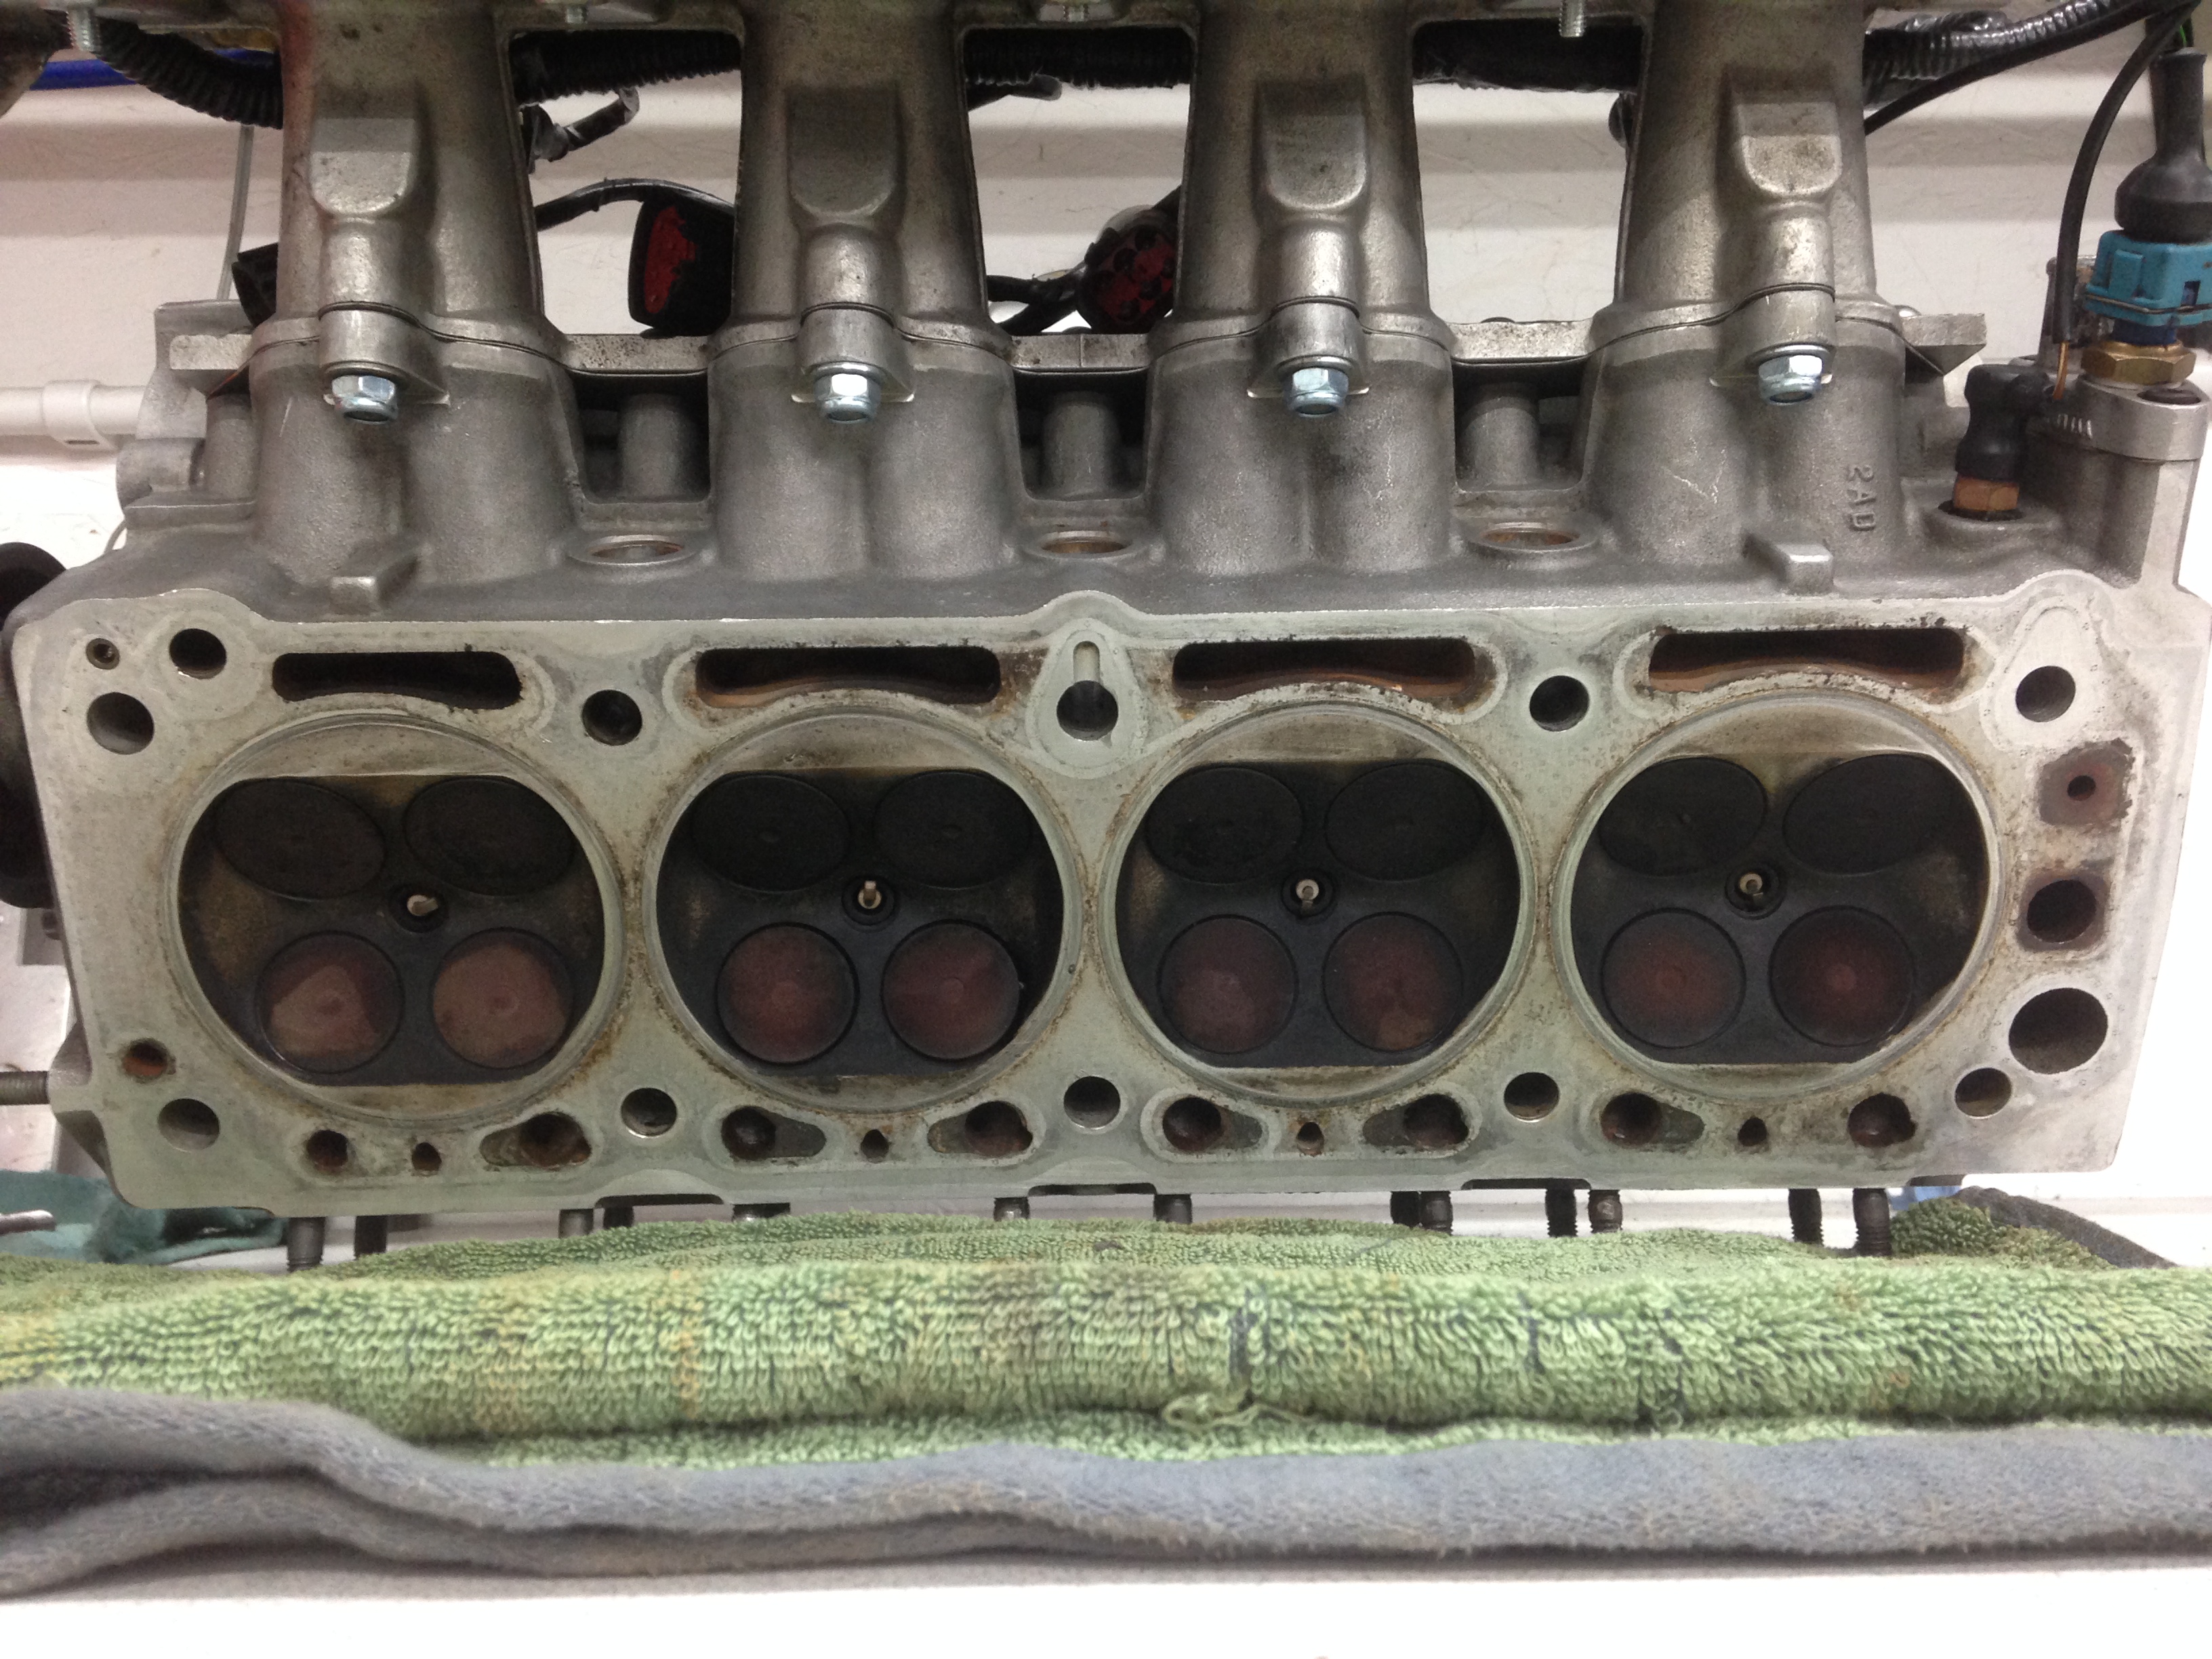
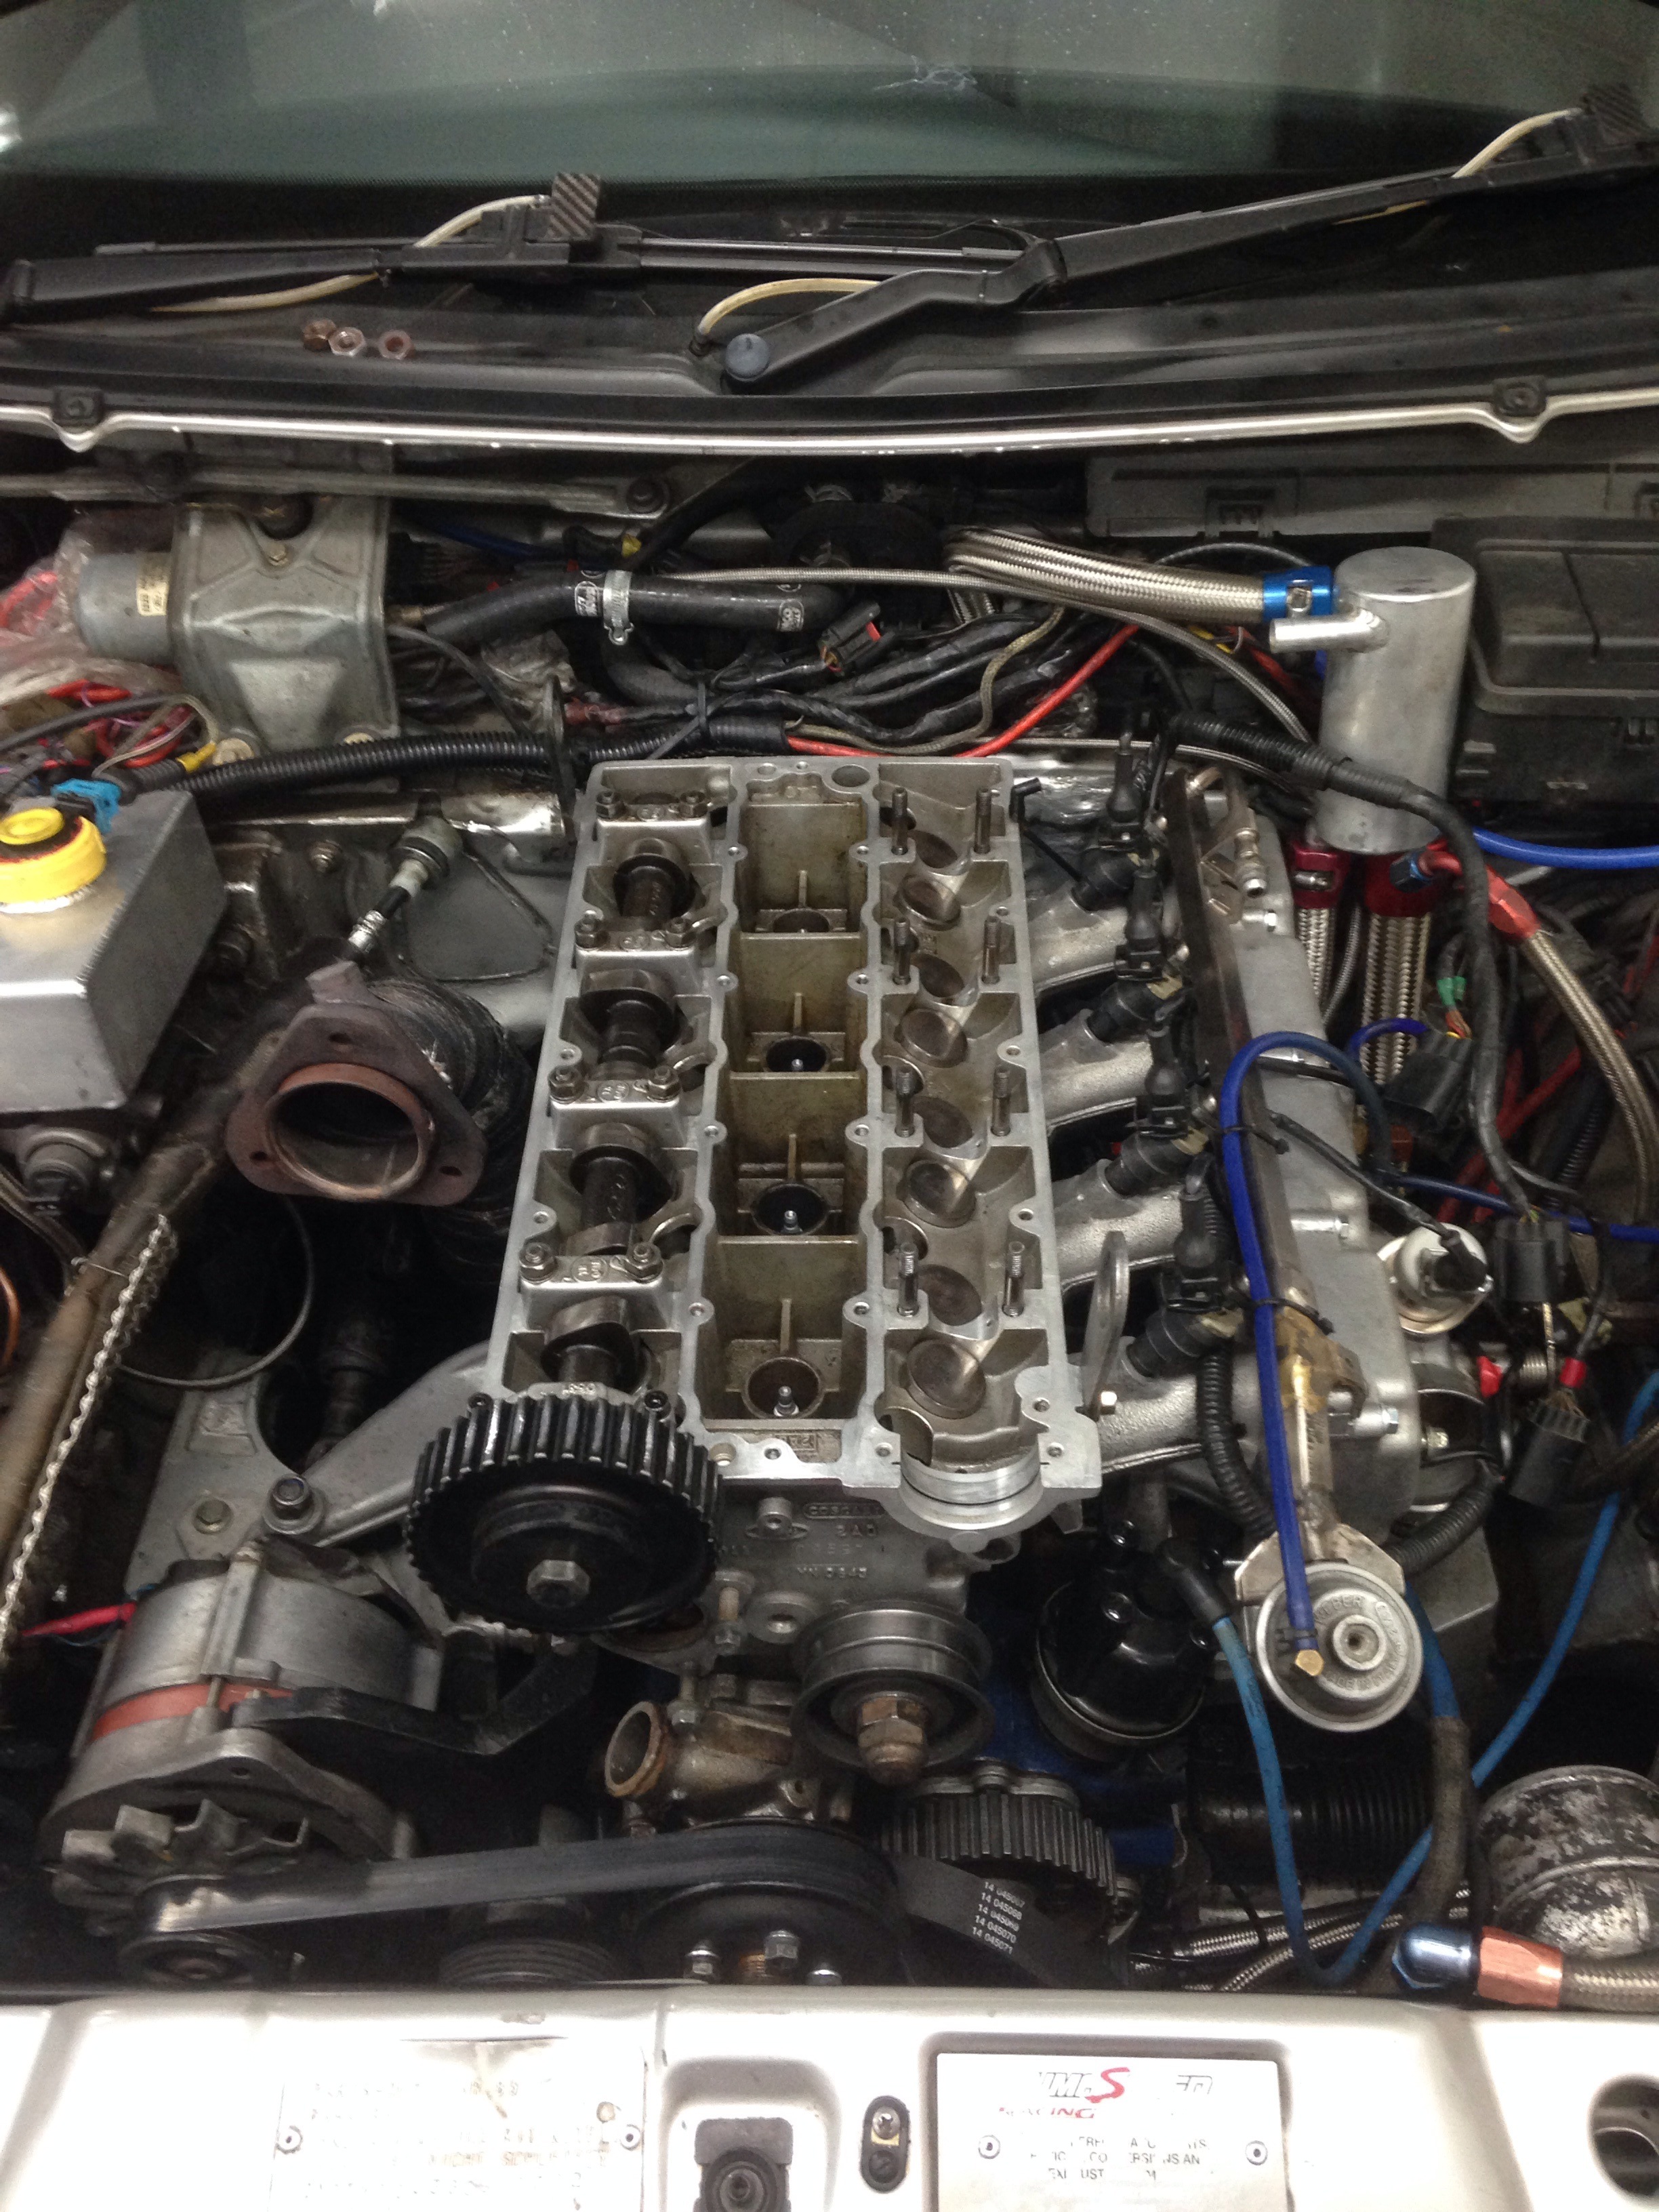
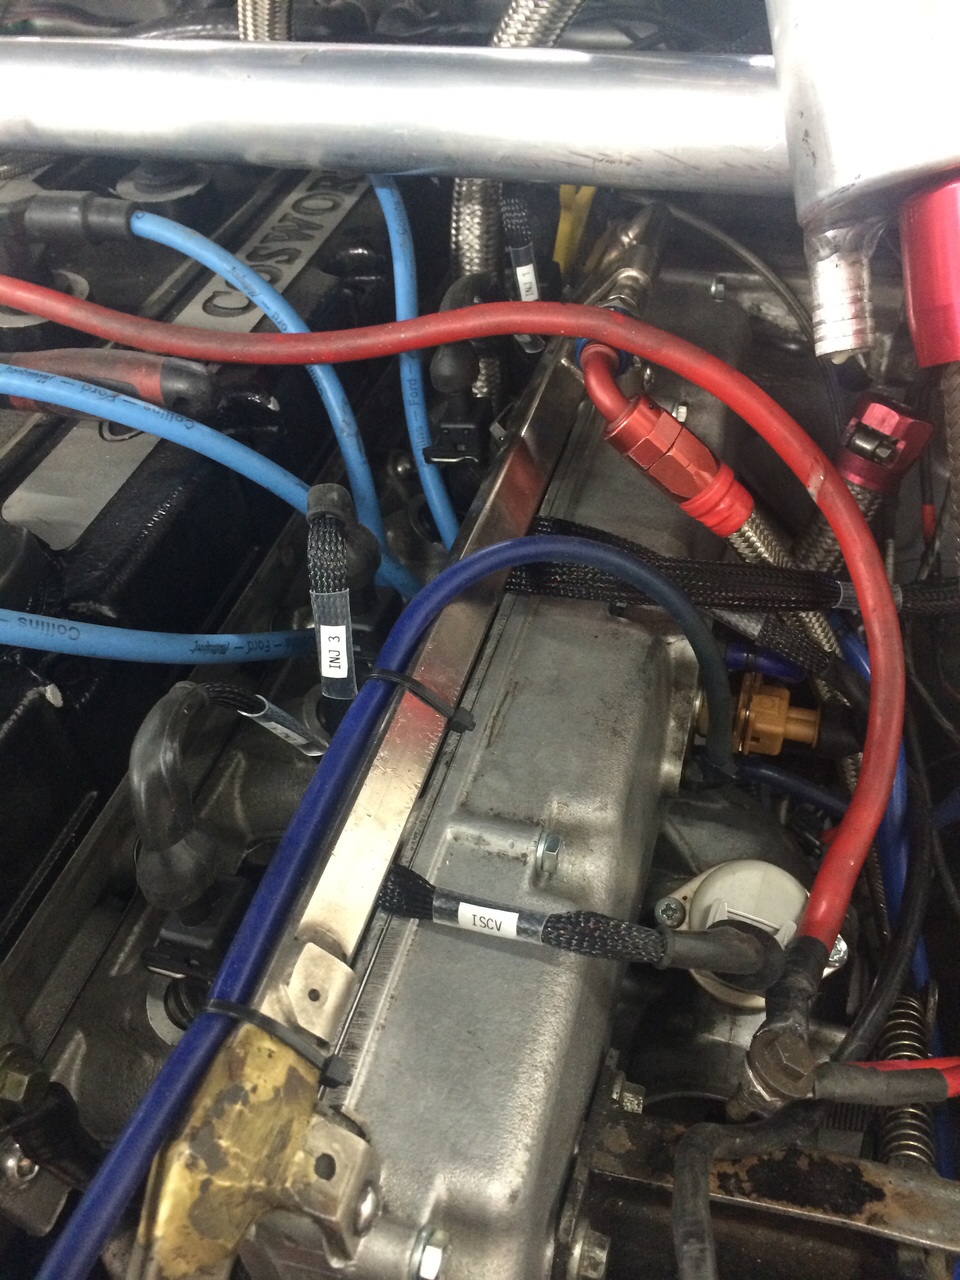
Head off.. You can also see the mess in the engine bay, pipes and wiring loom everywhere! I have got around to sorting this now so will show that later on.
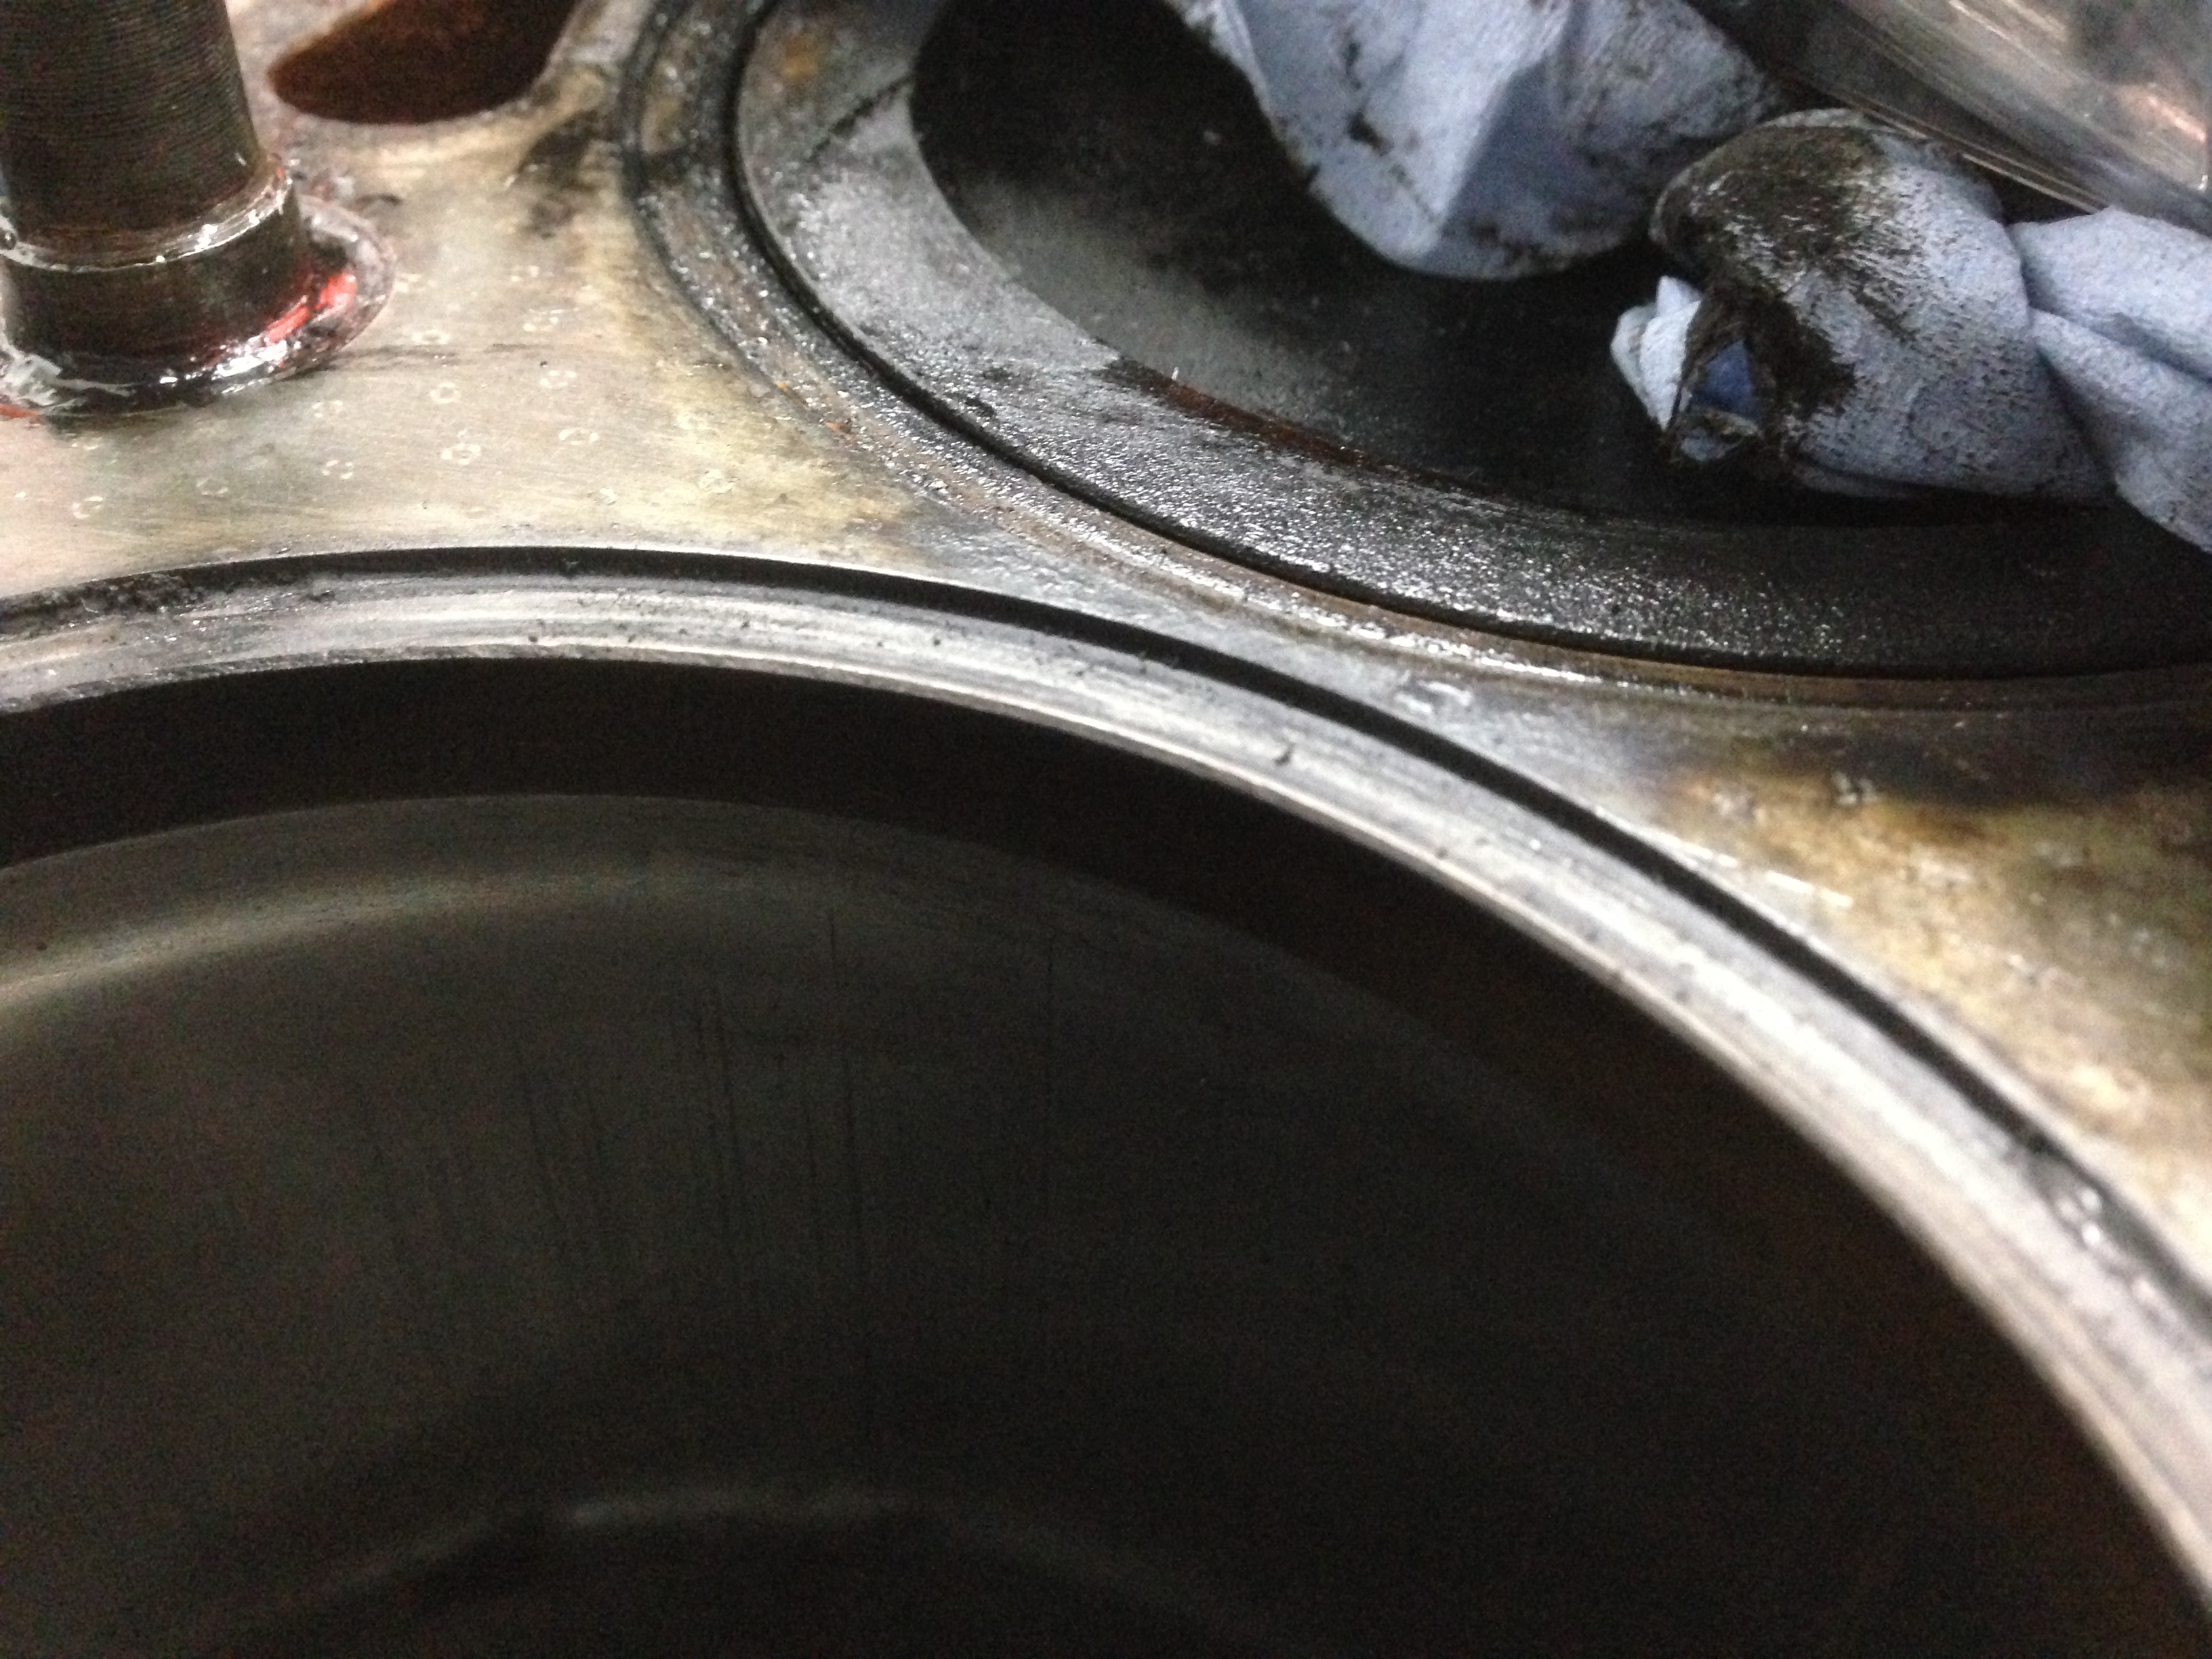
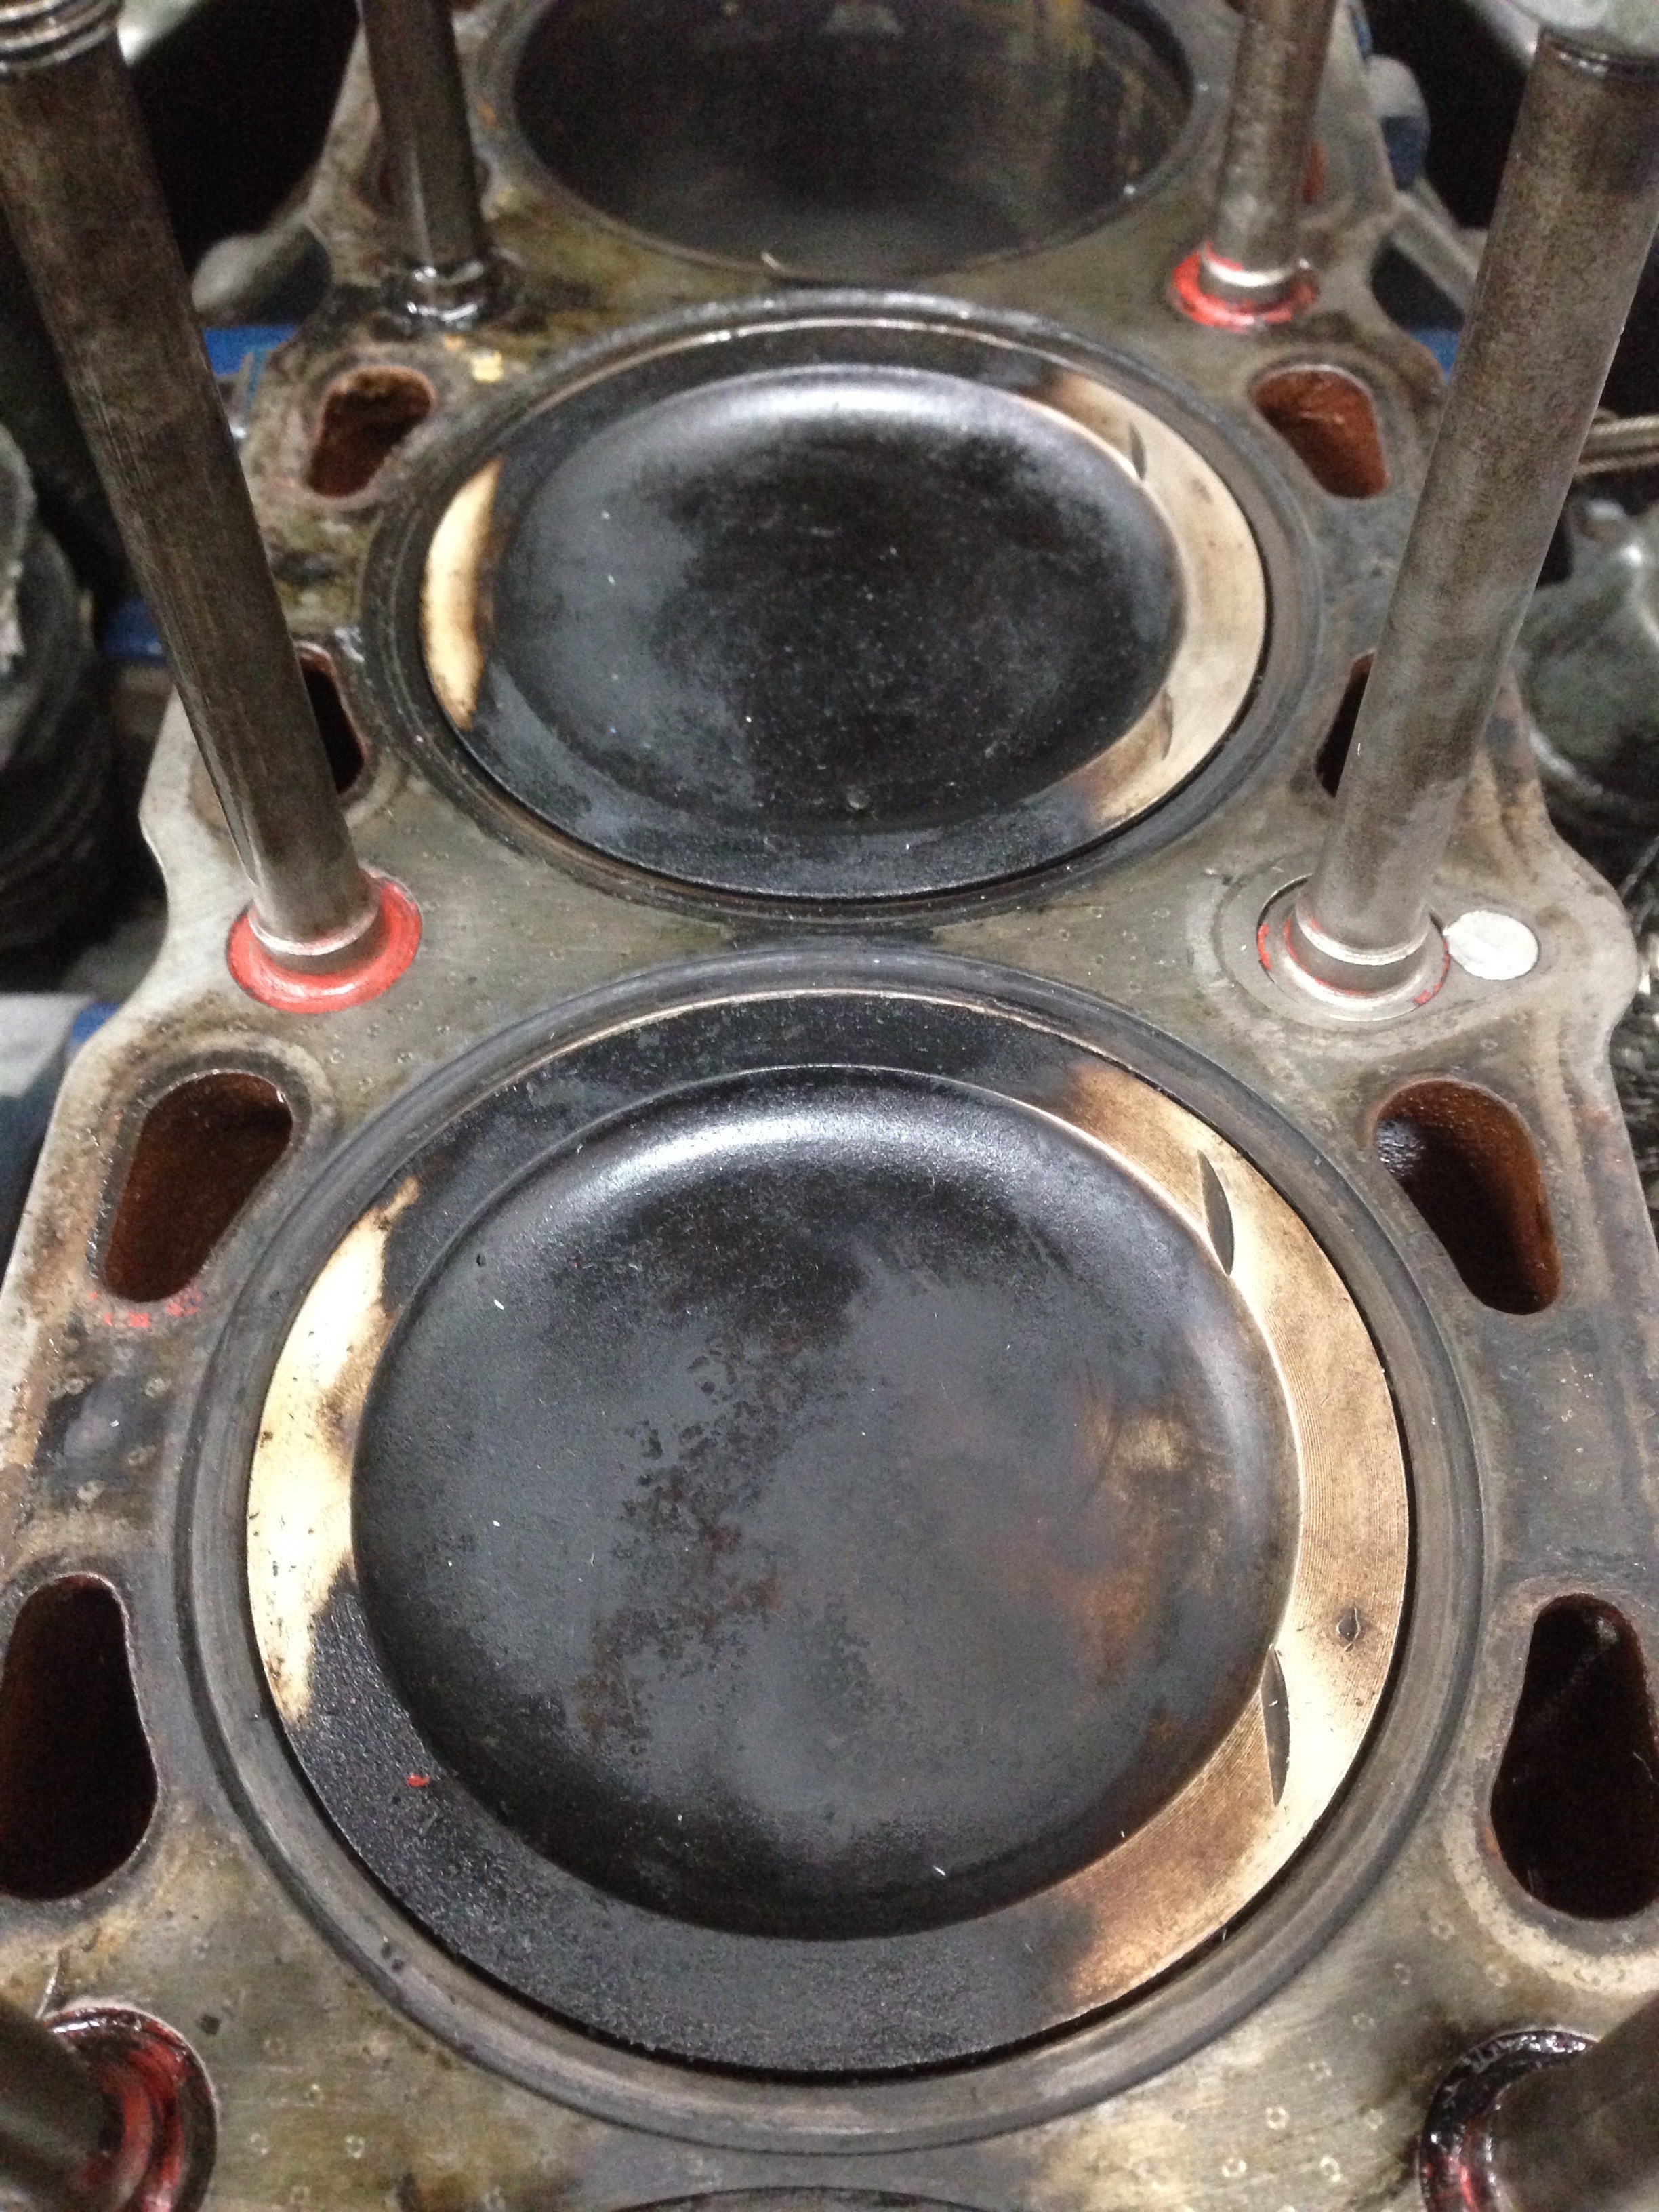
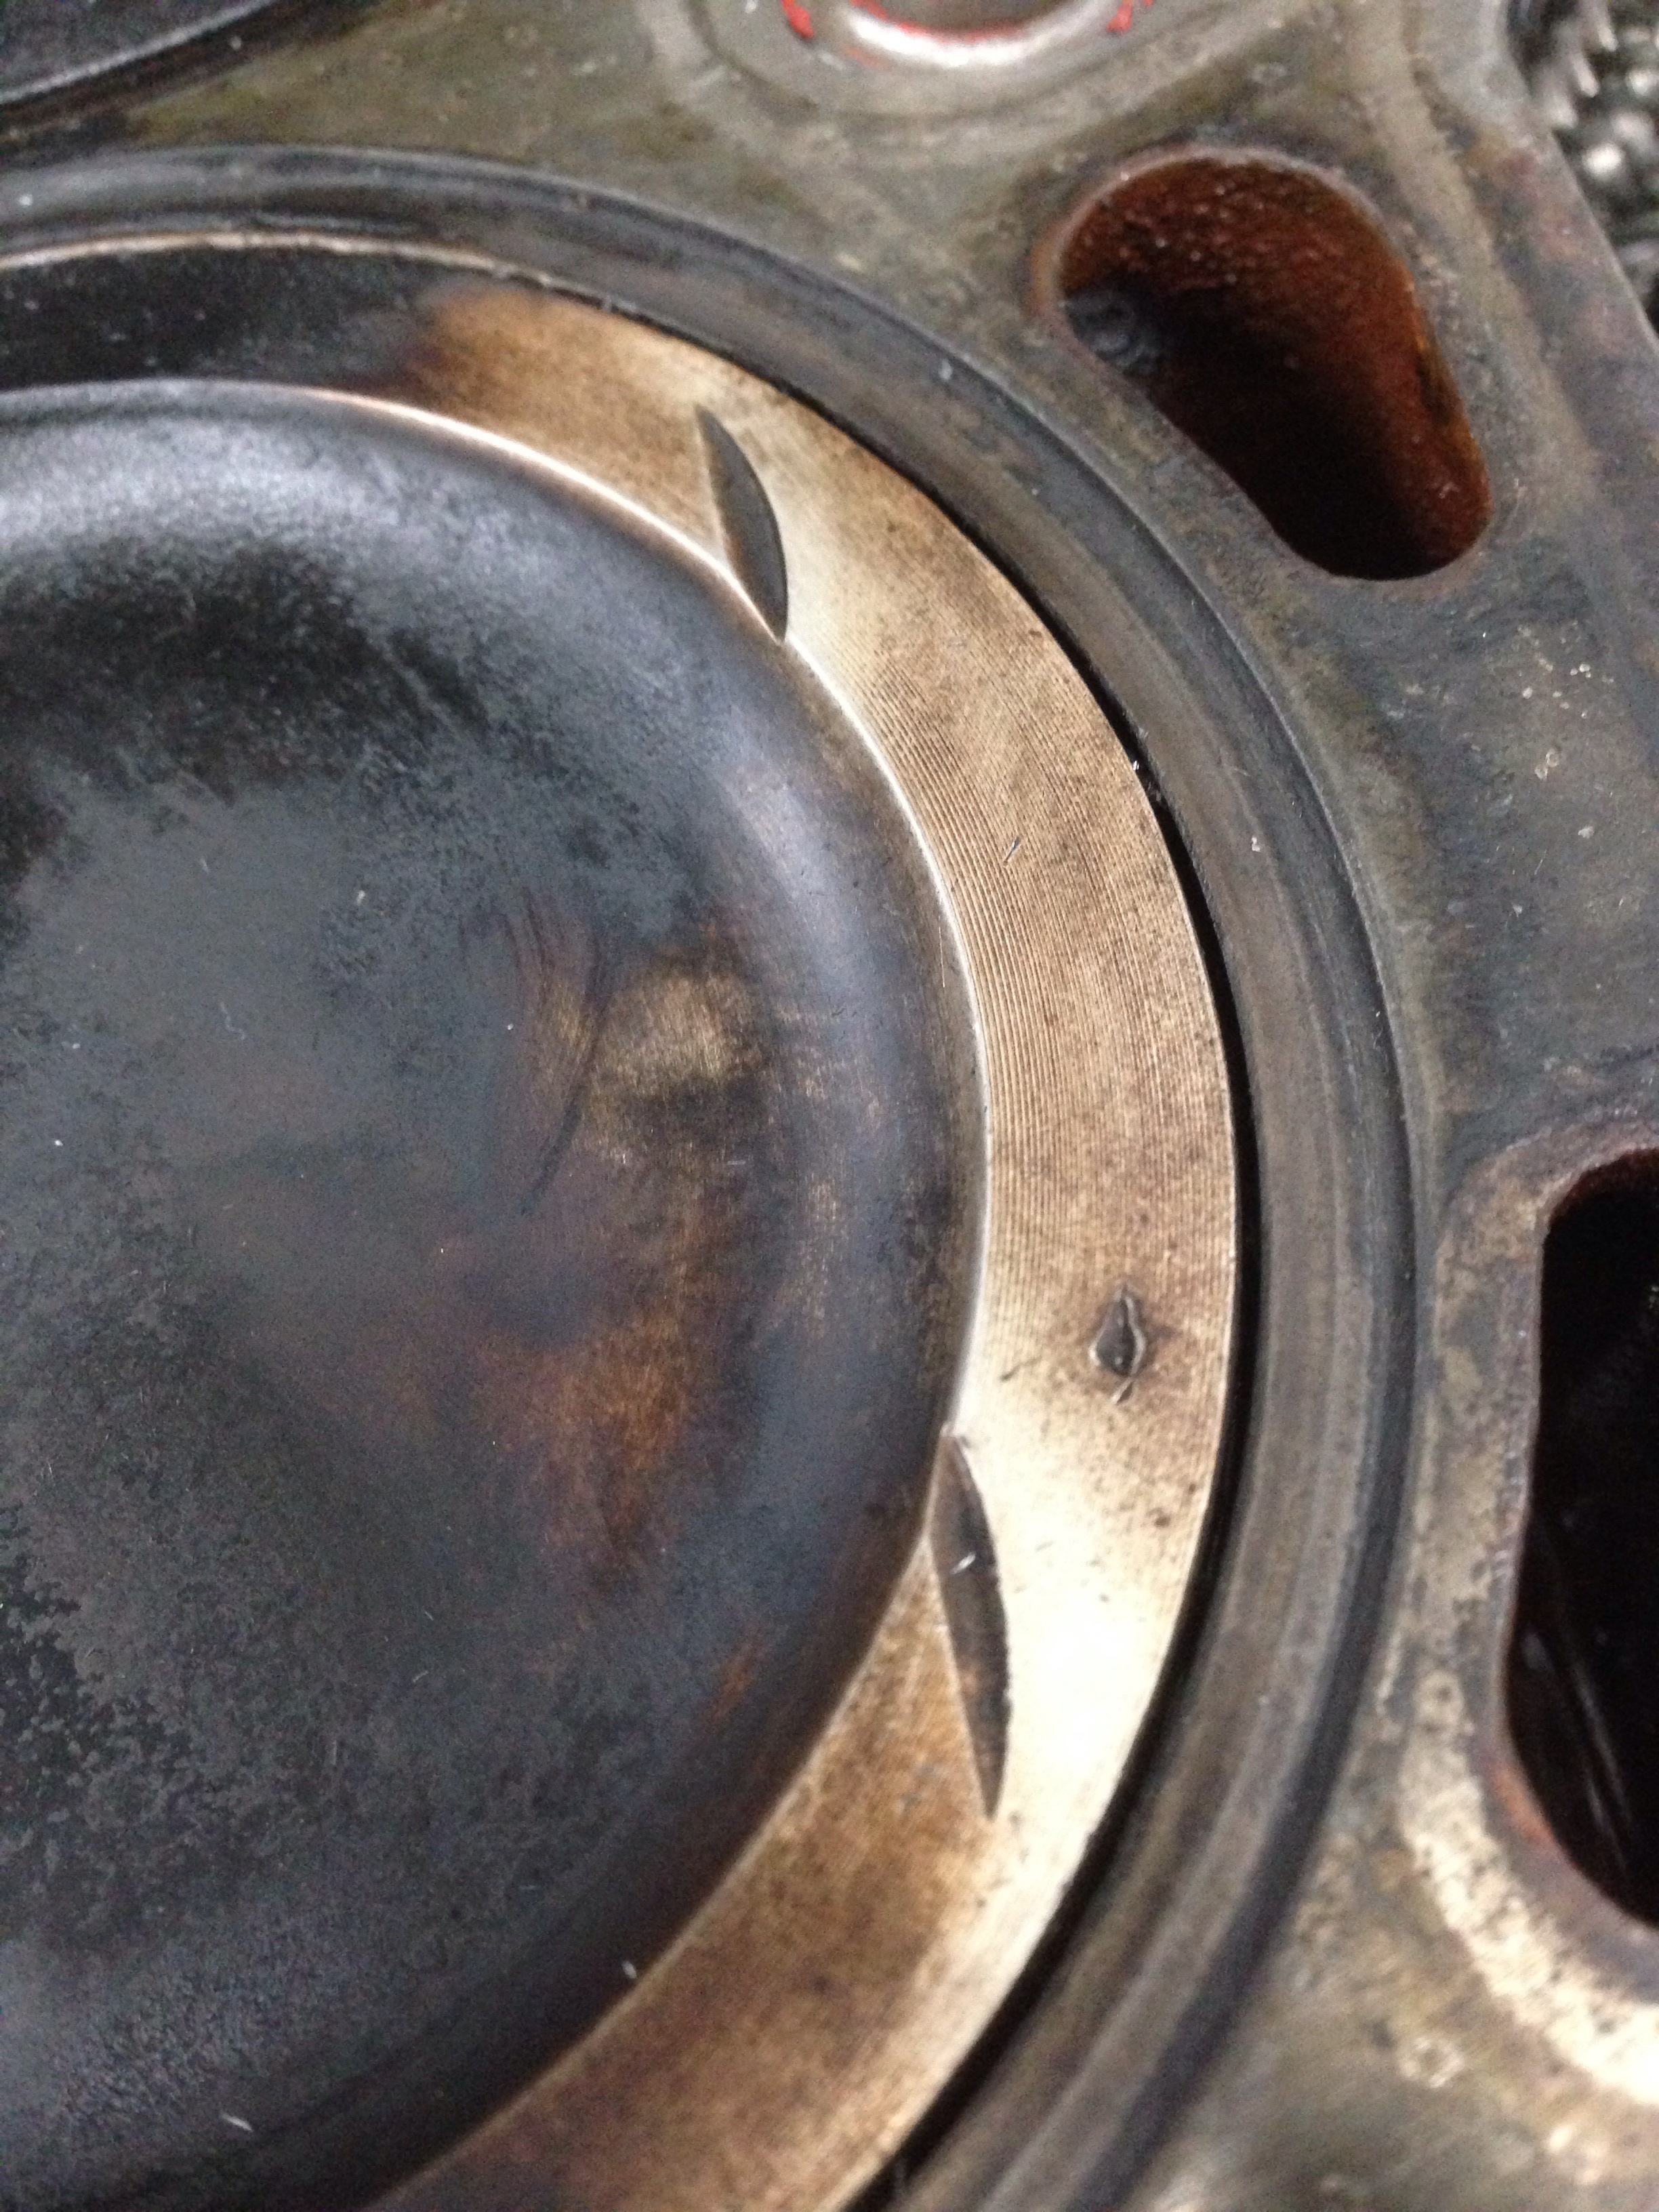
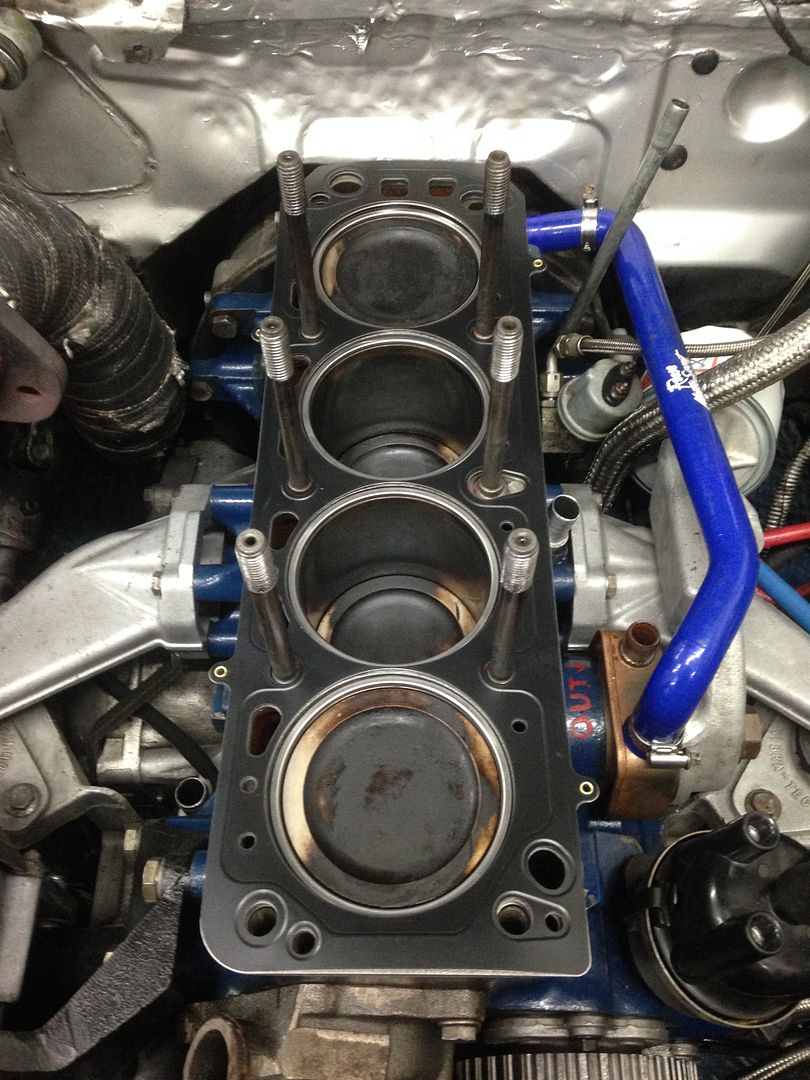
This shows the 'coopers rings' grooves around each cylinder - a good head gasket just dam expensive to replace

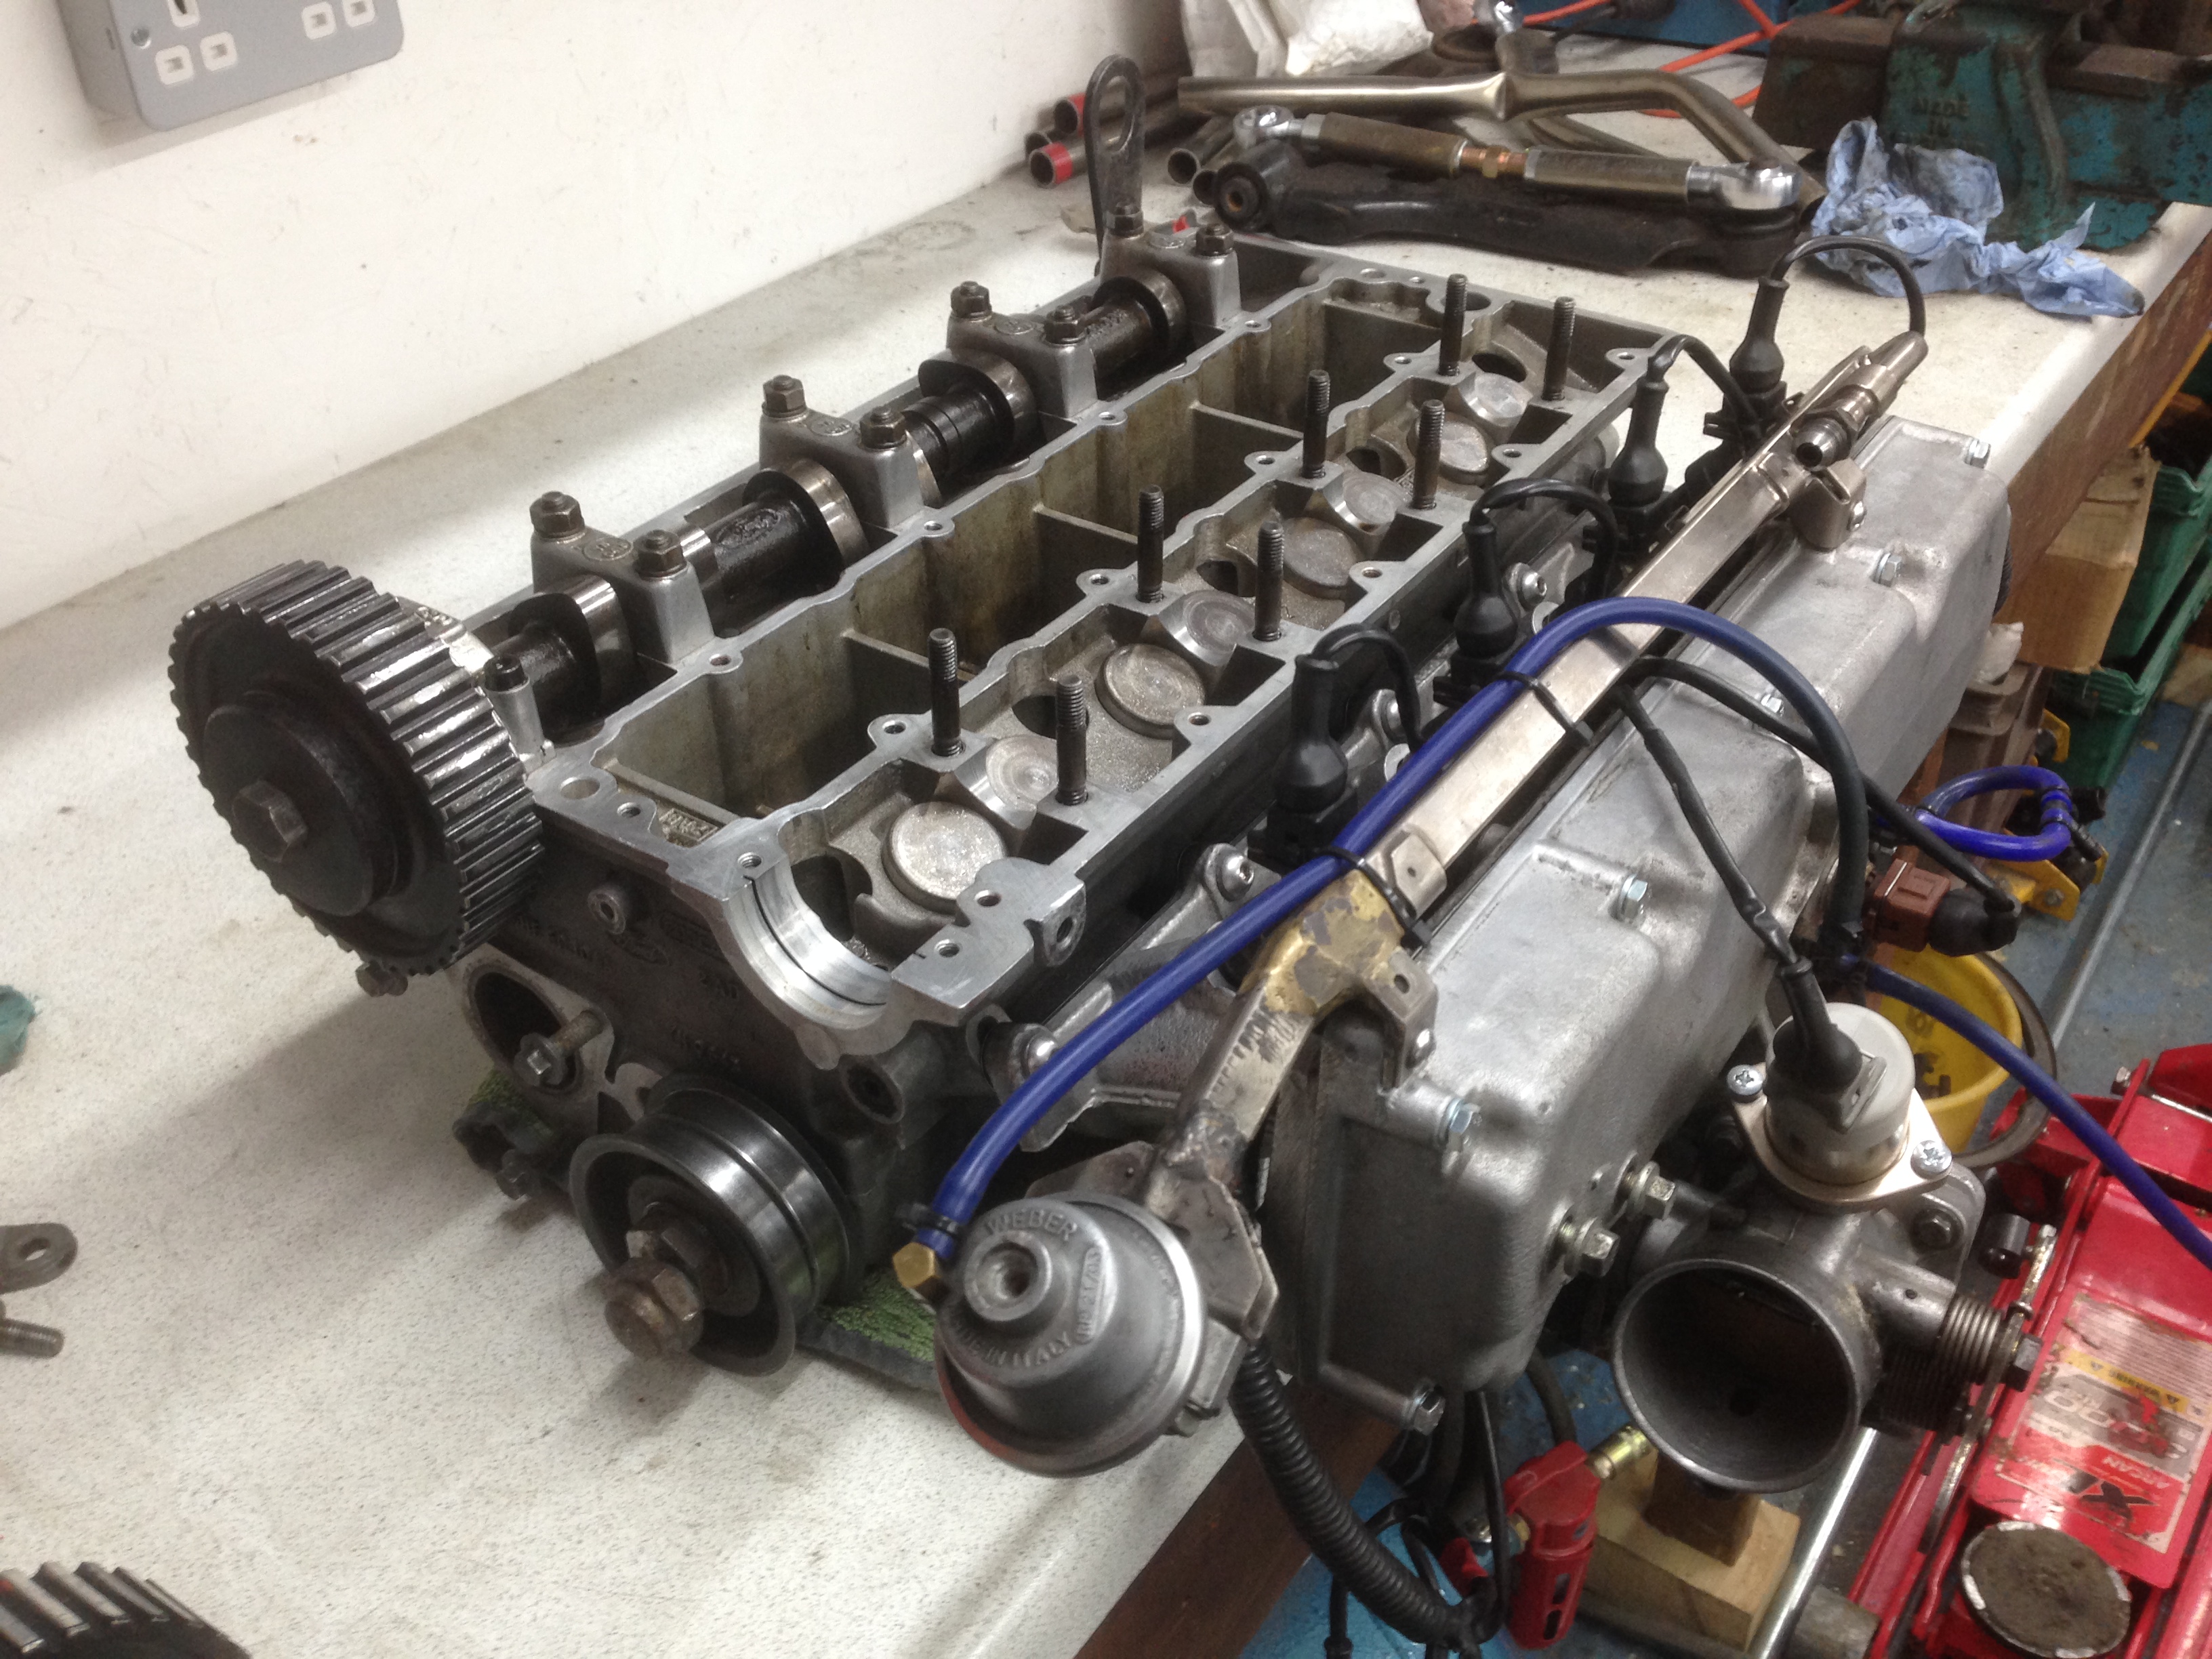
Long studs
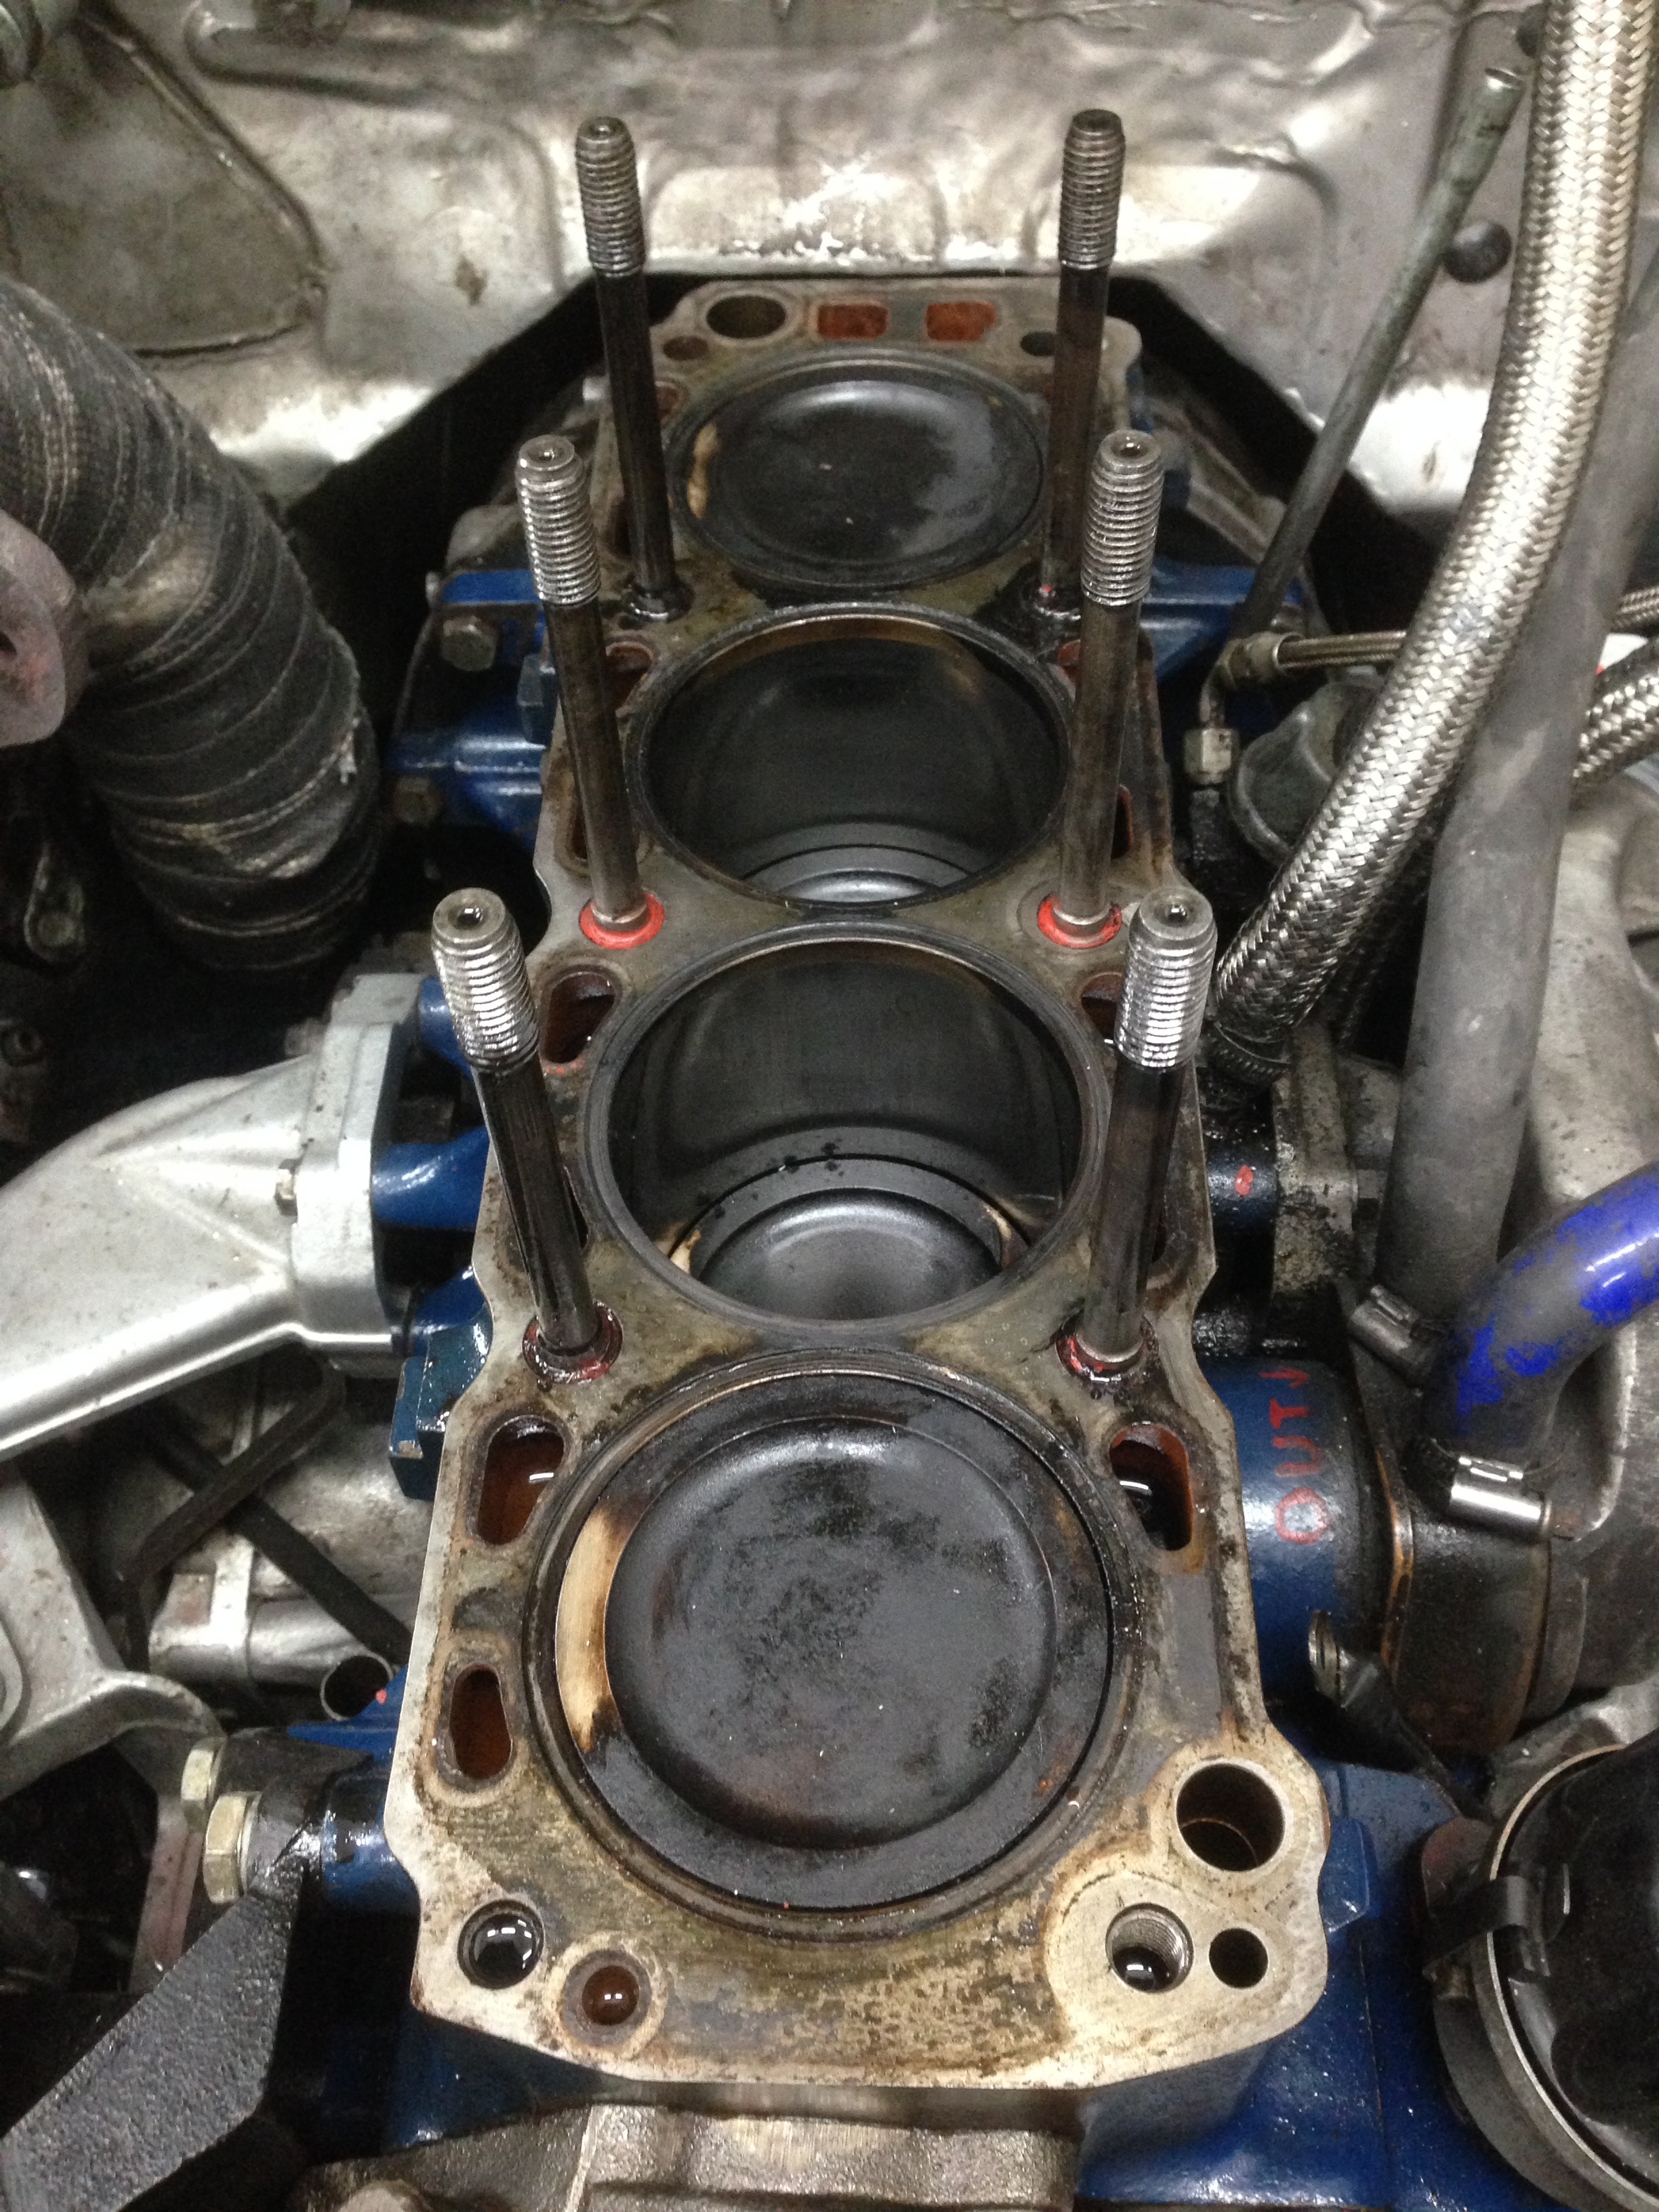
Low comp Pistons
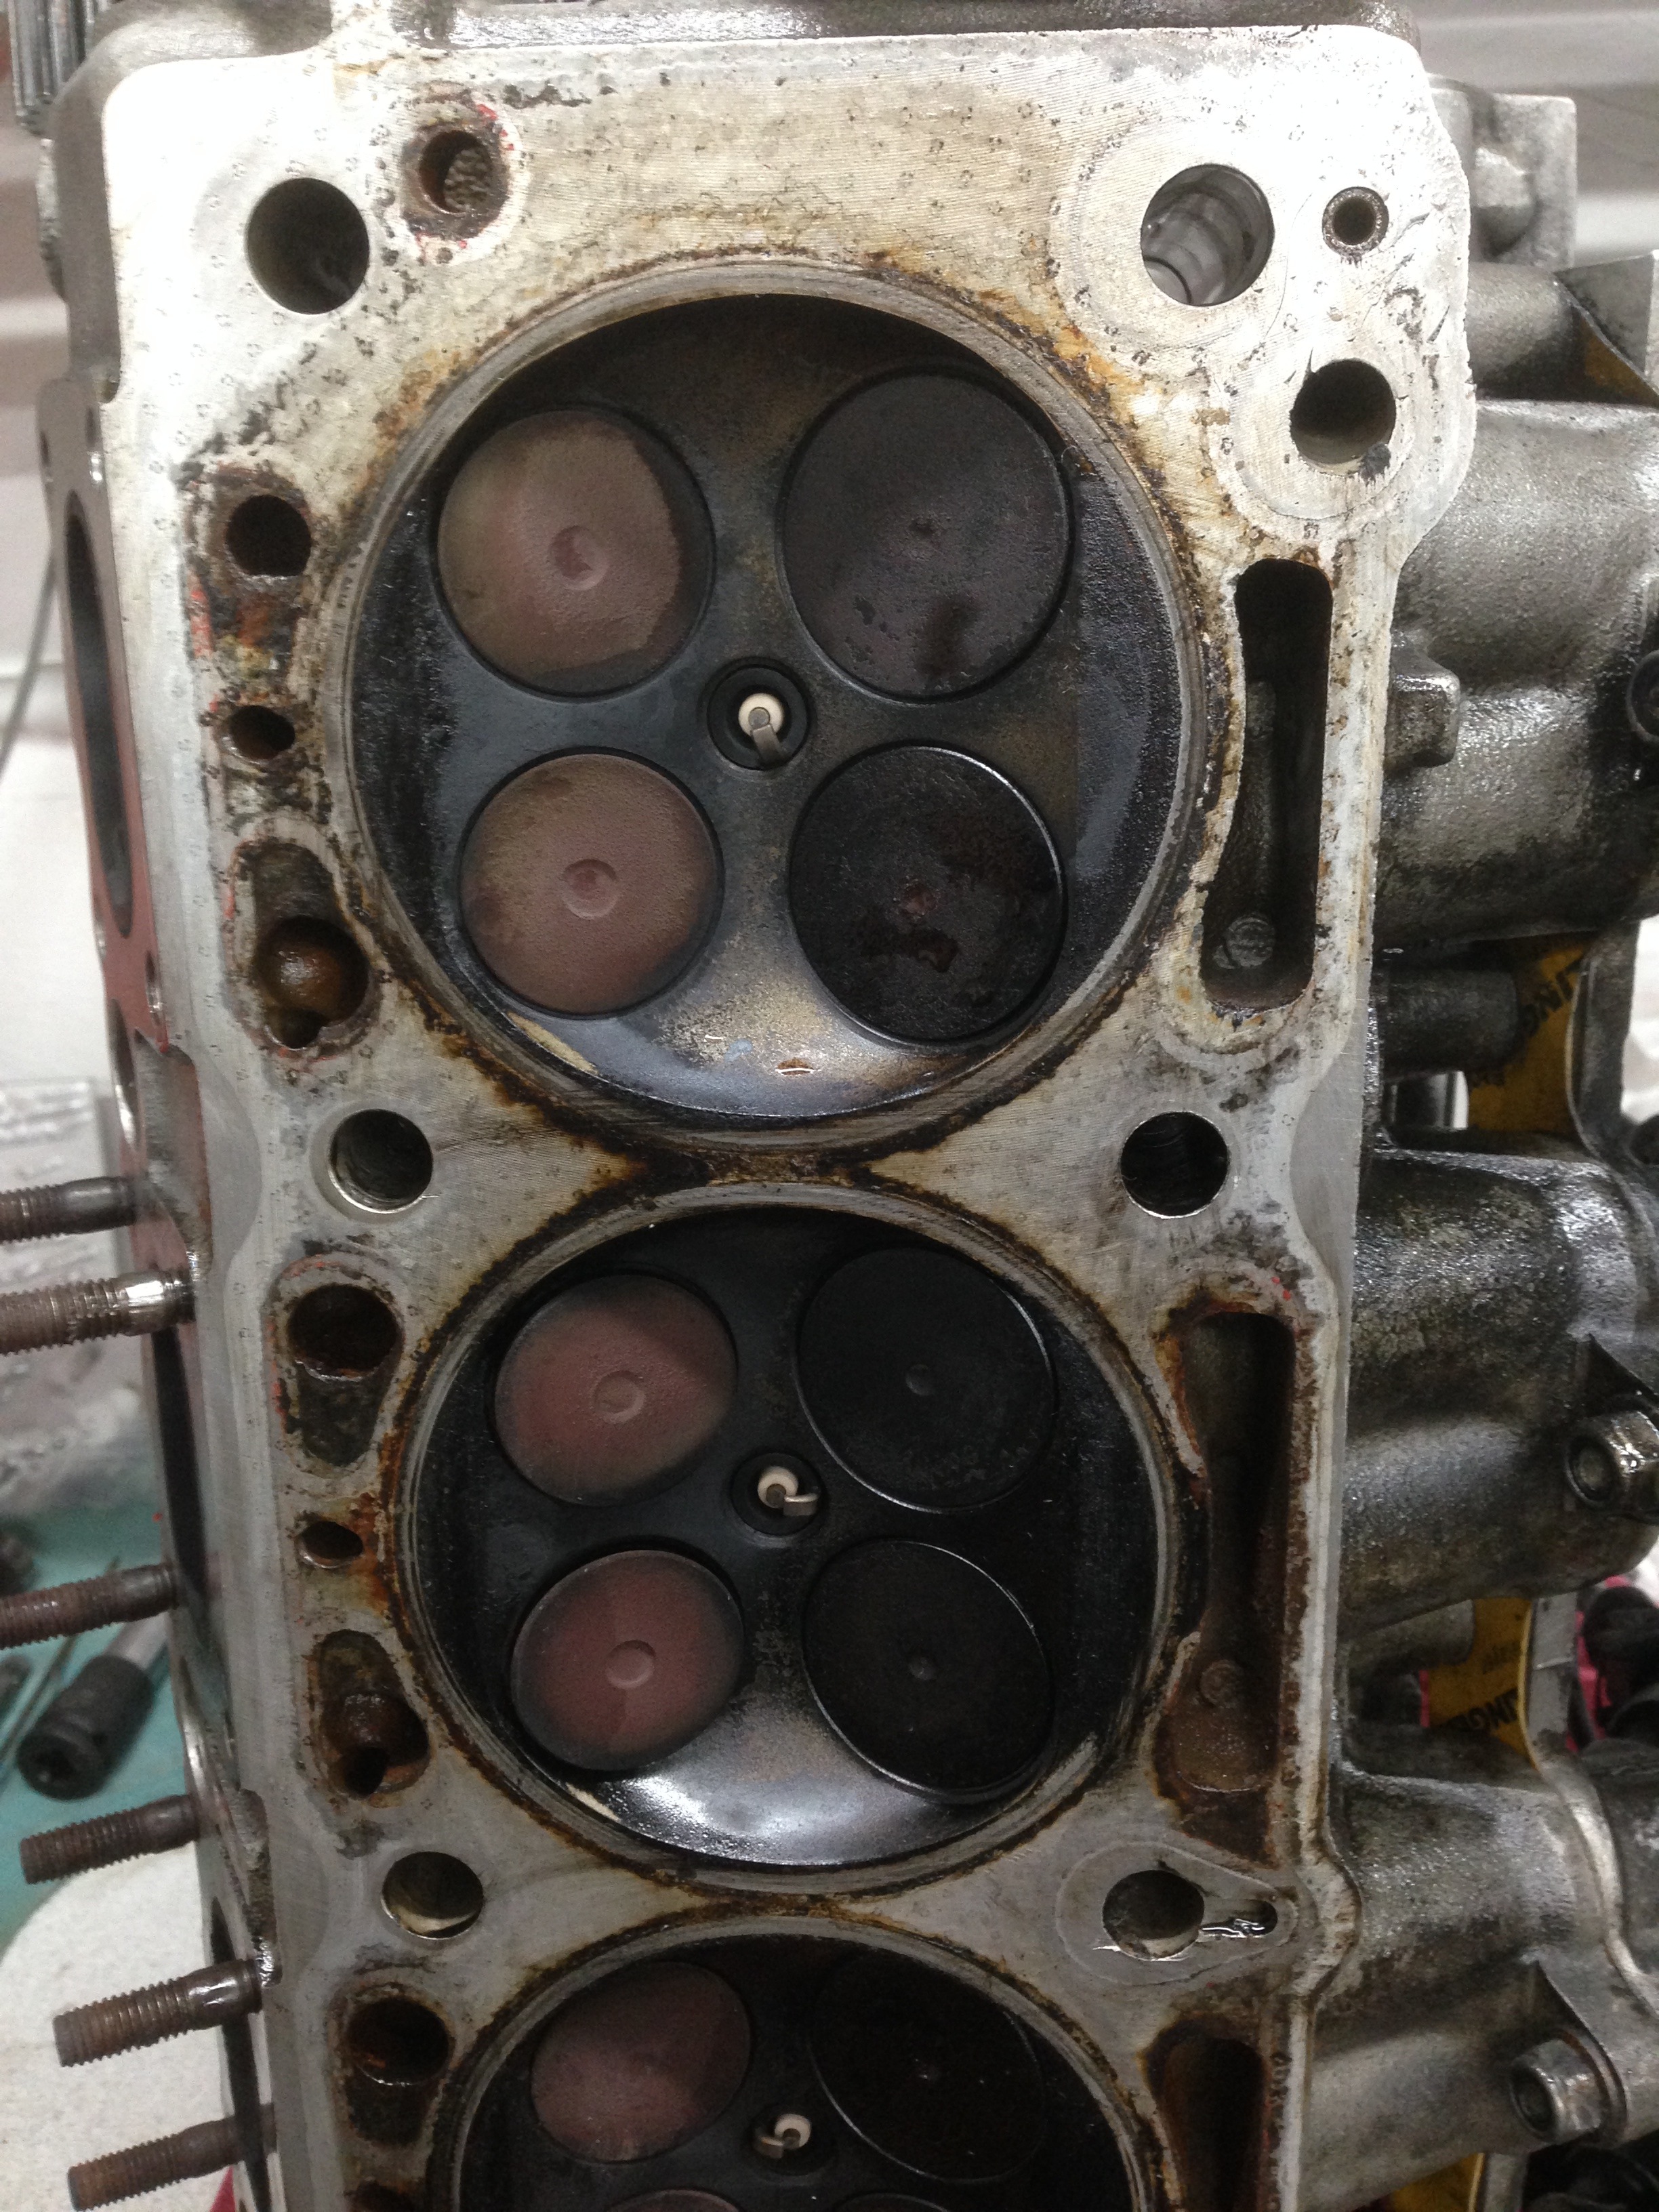
Underside of the head - not in bad condition so with a clean it will be good to go back on
Everything apart on the bench for a check over and clean mainly!

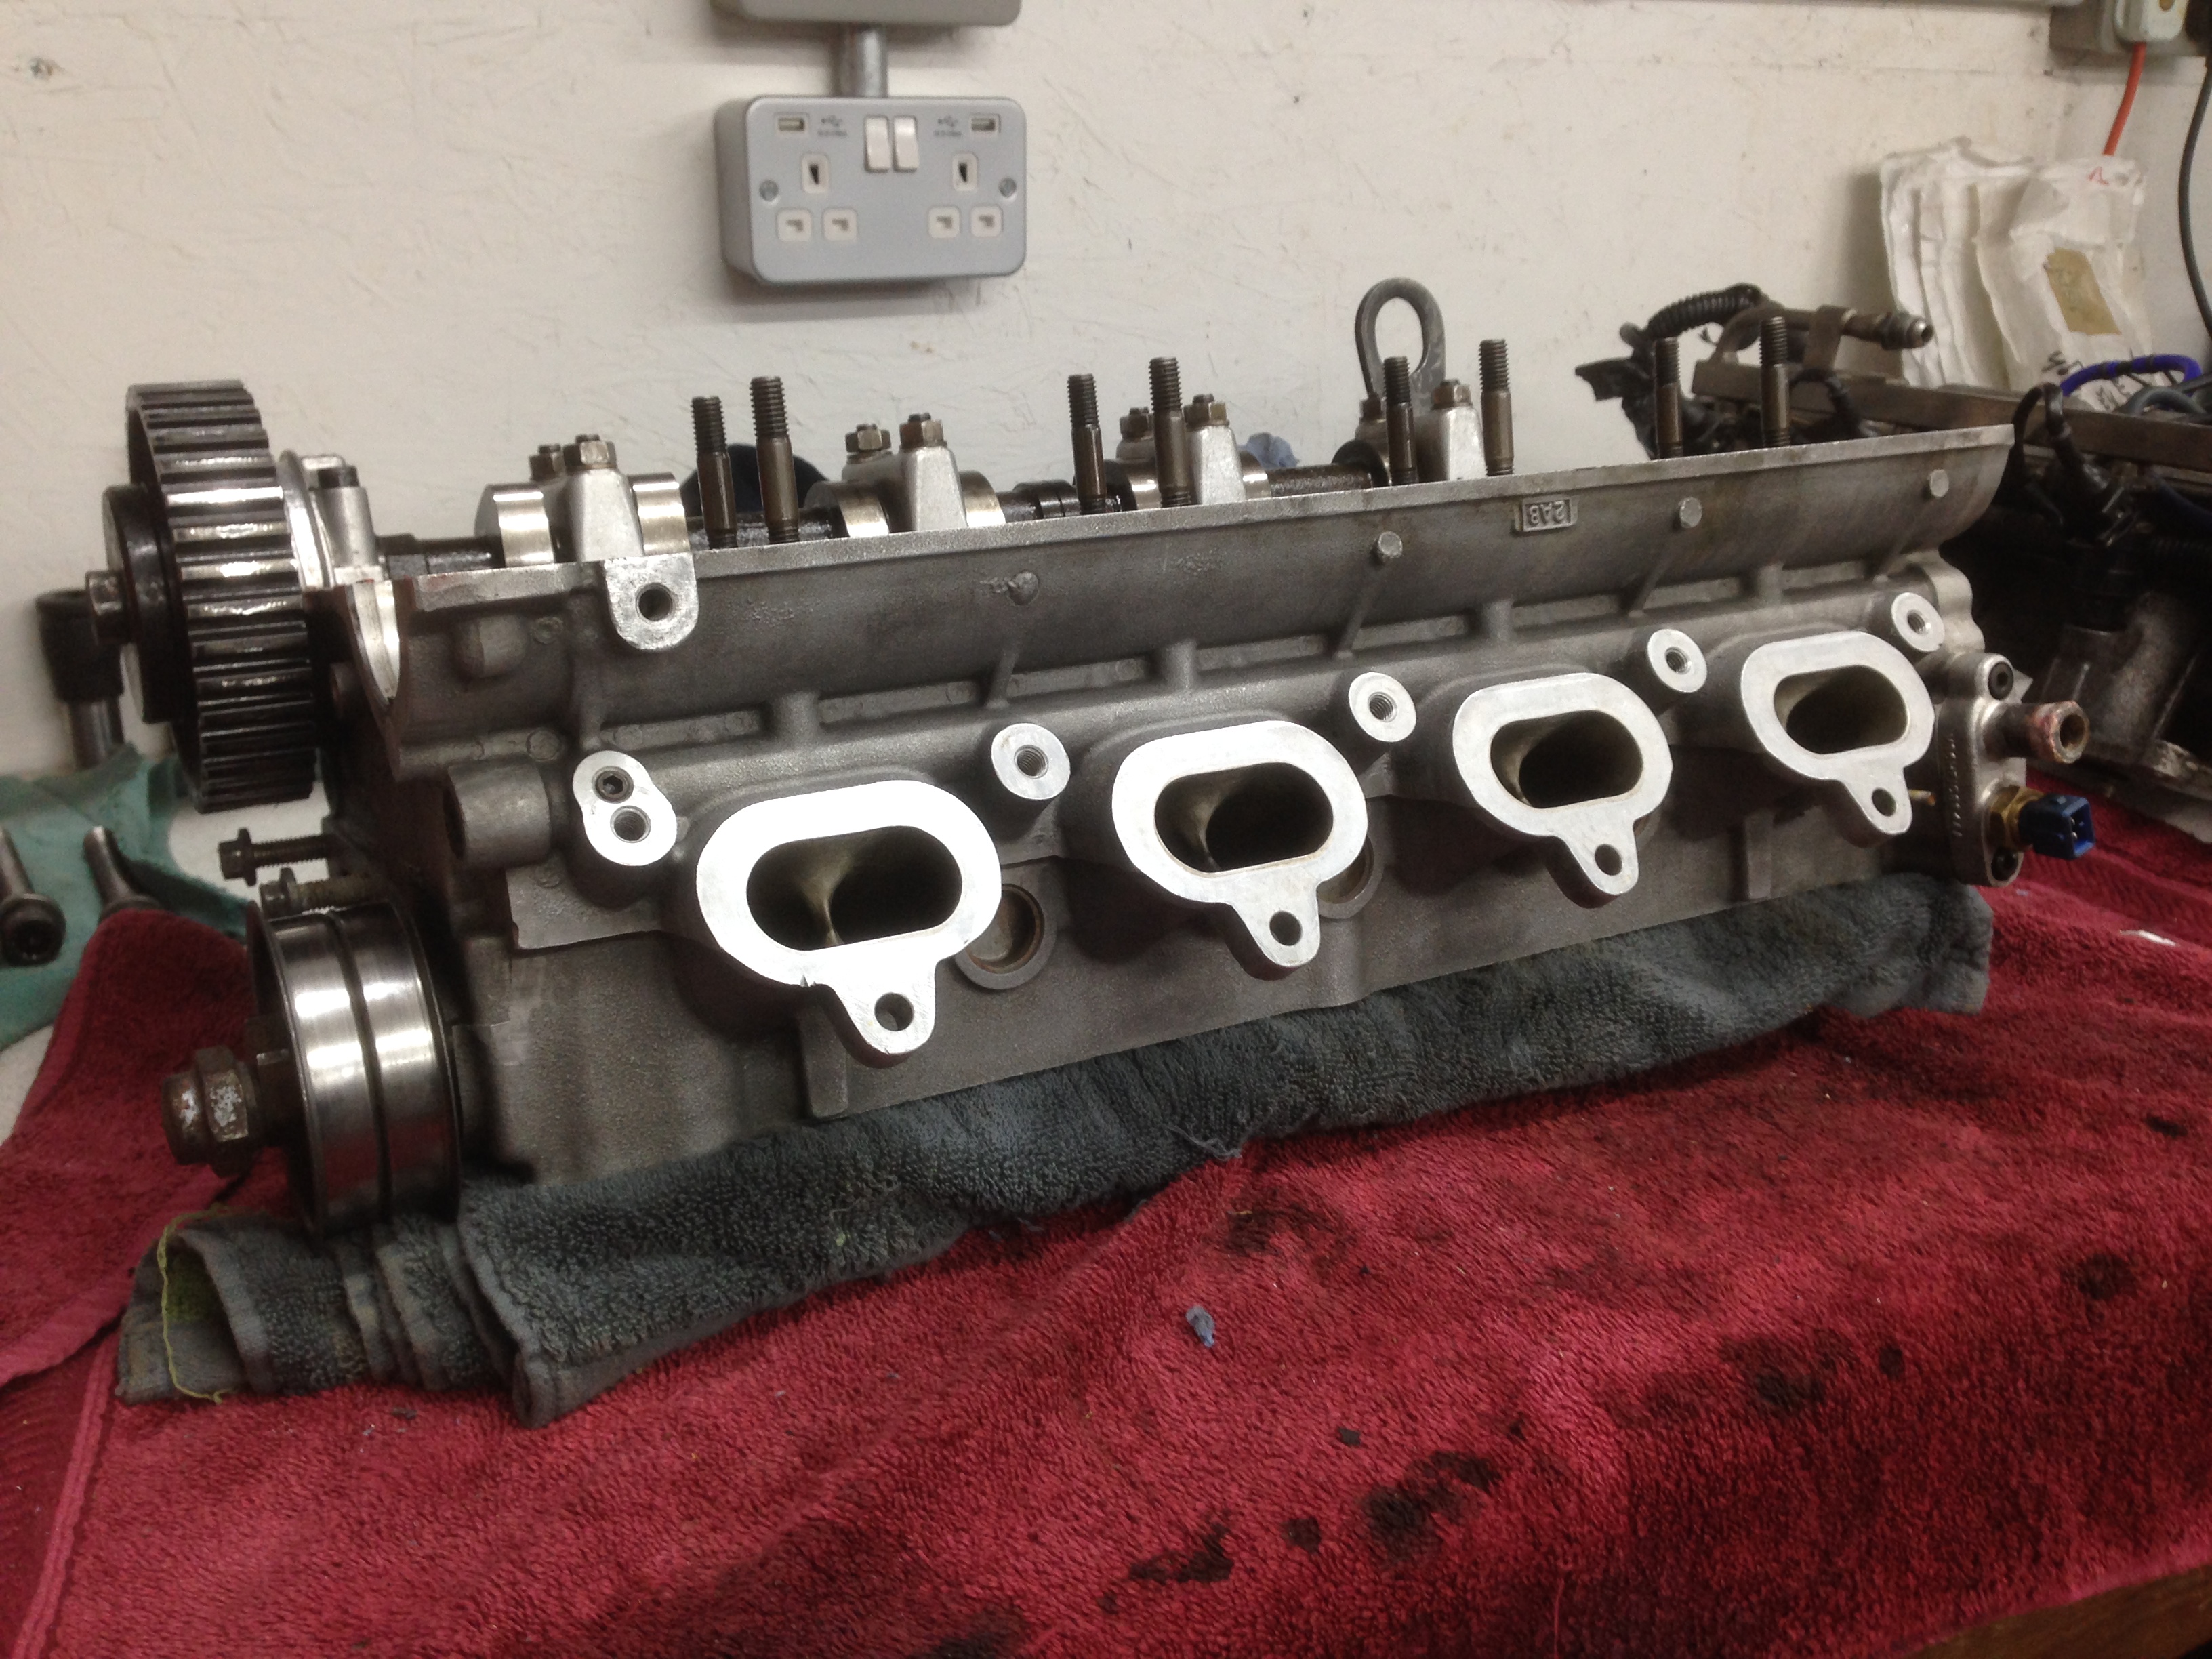
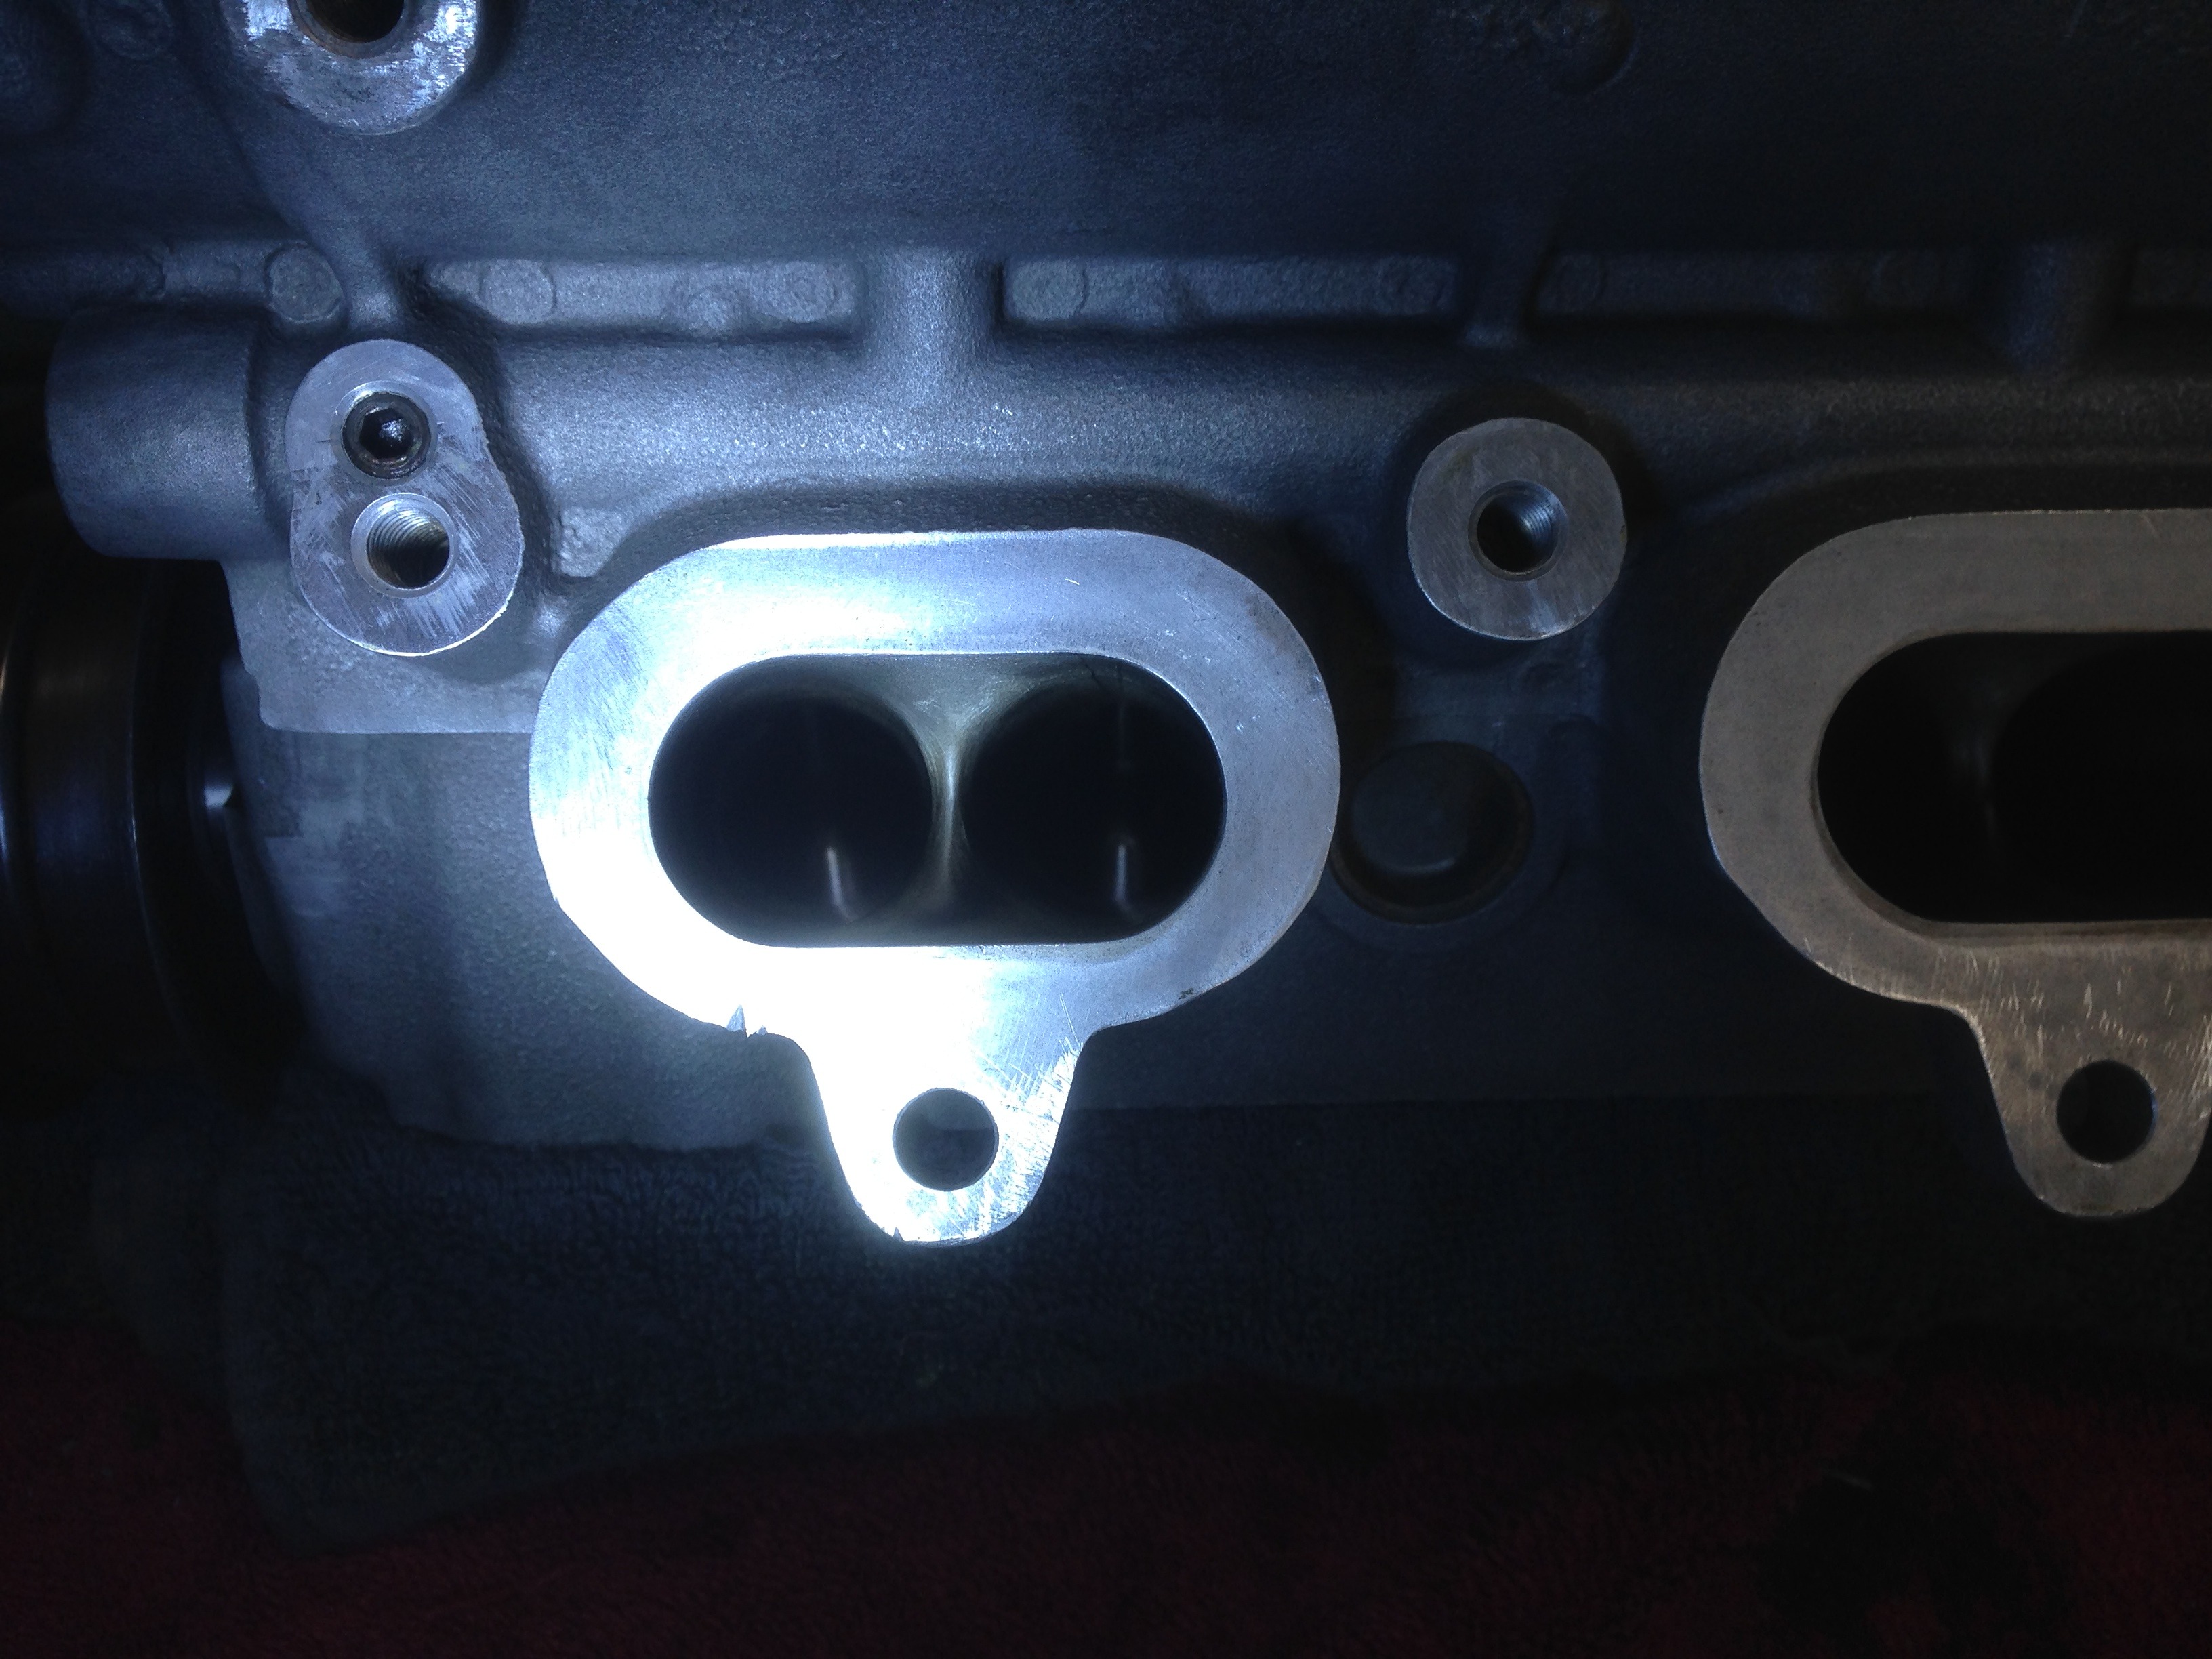
Here you can see the porting work on the head - not sure why the photo is dark!
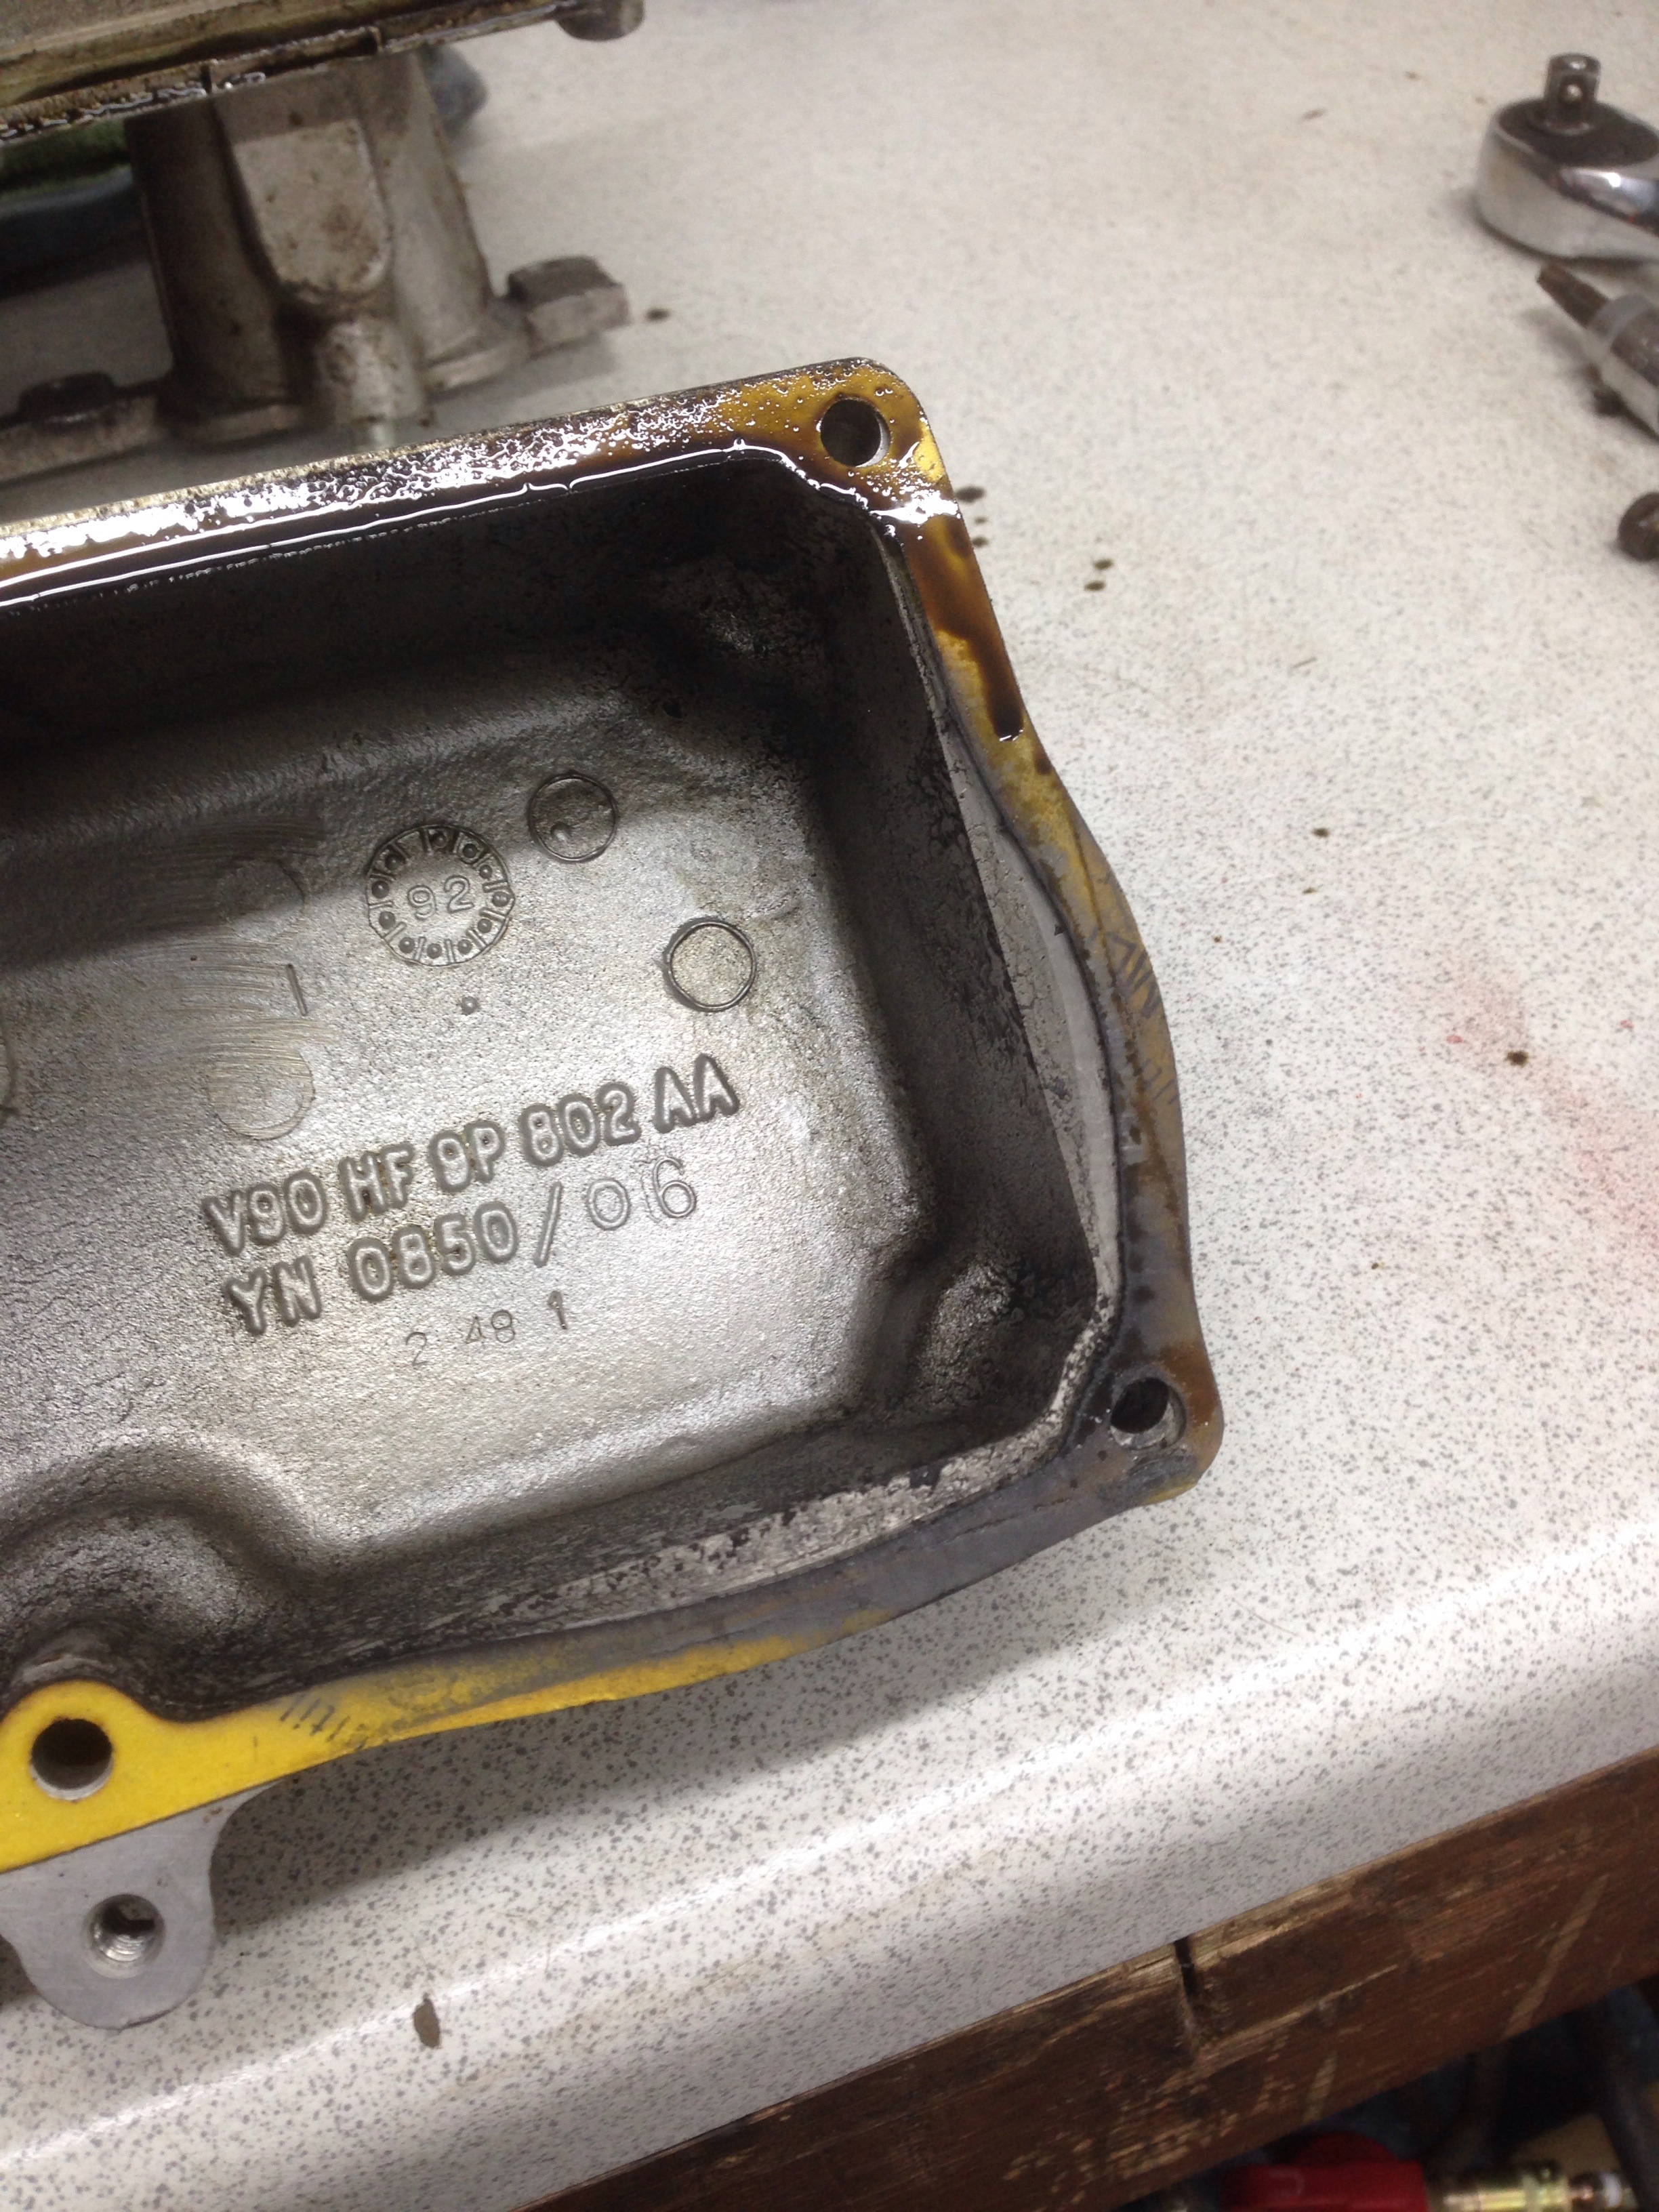
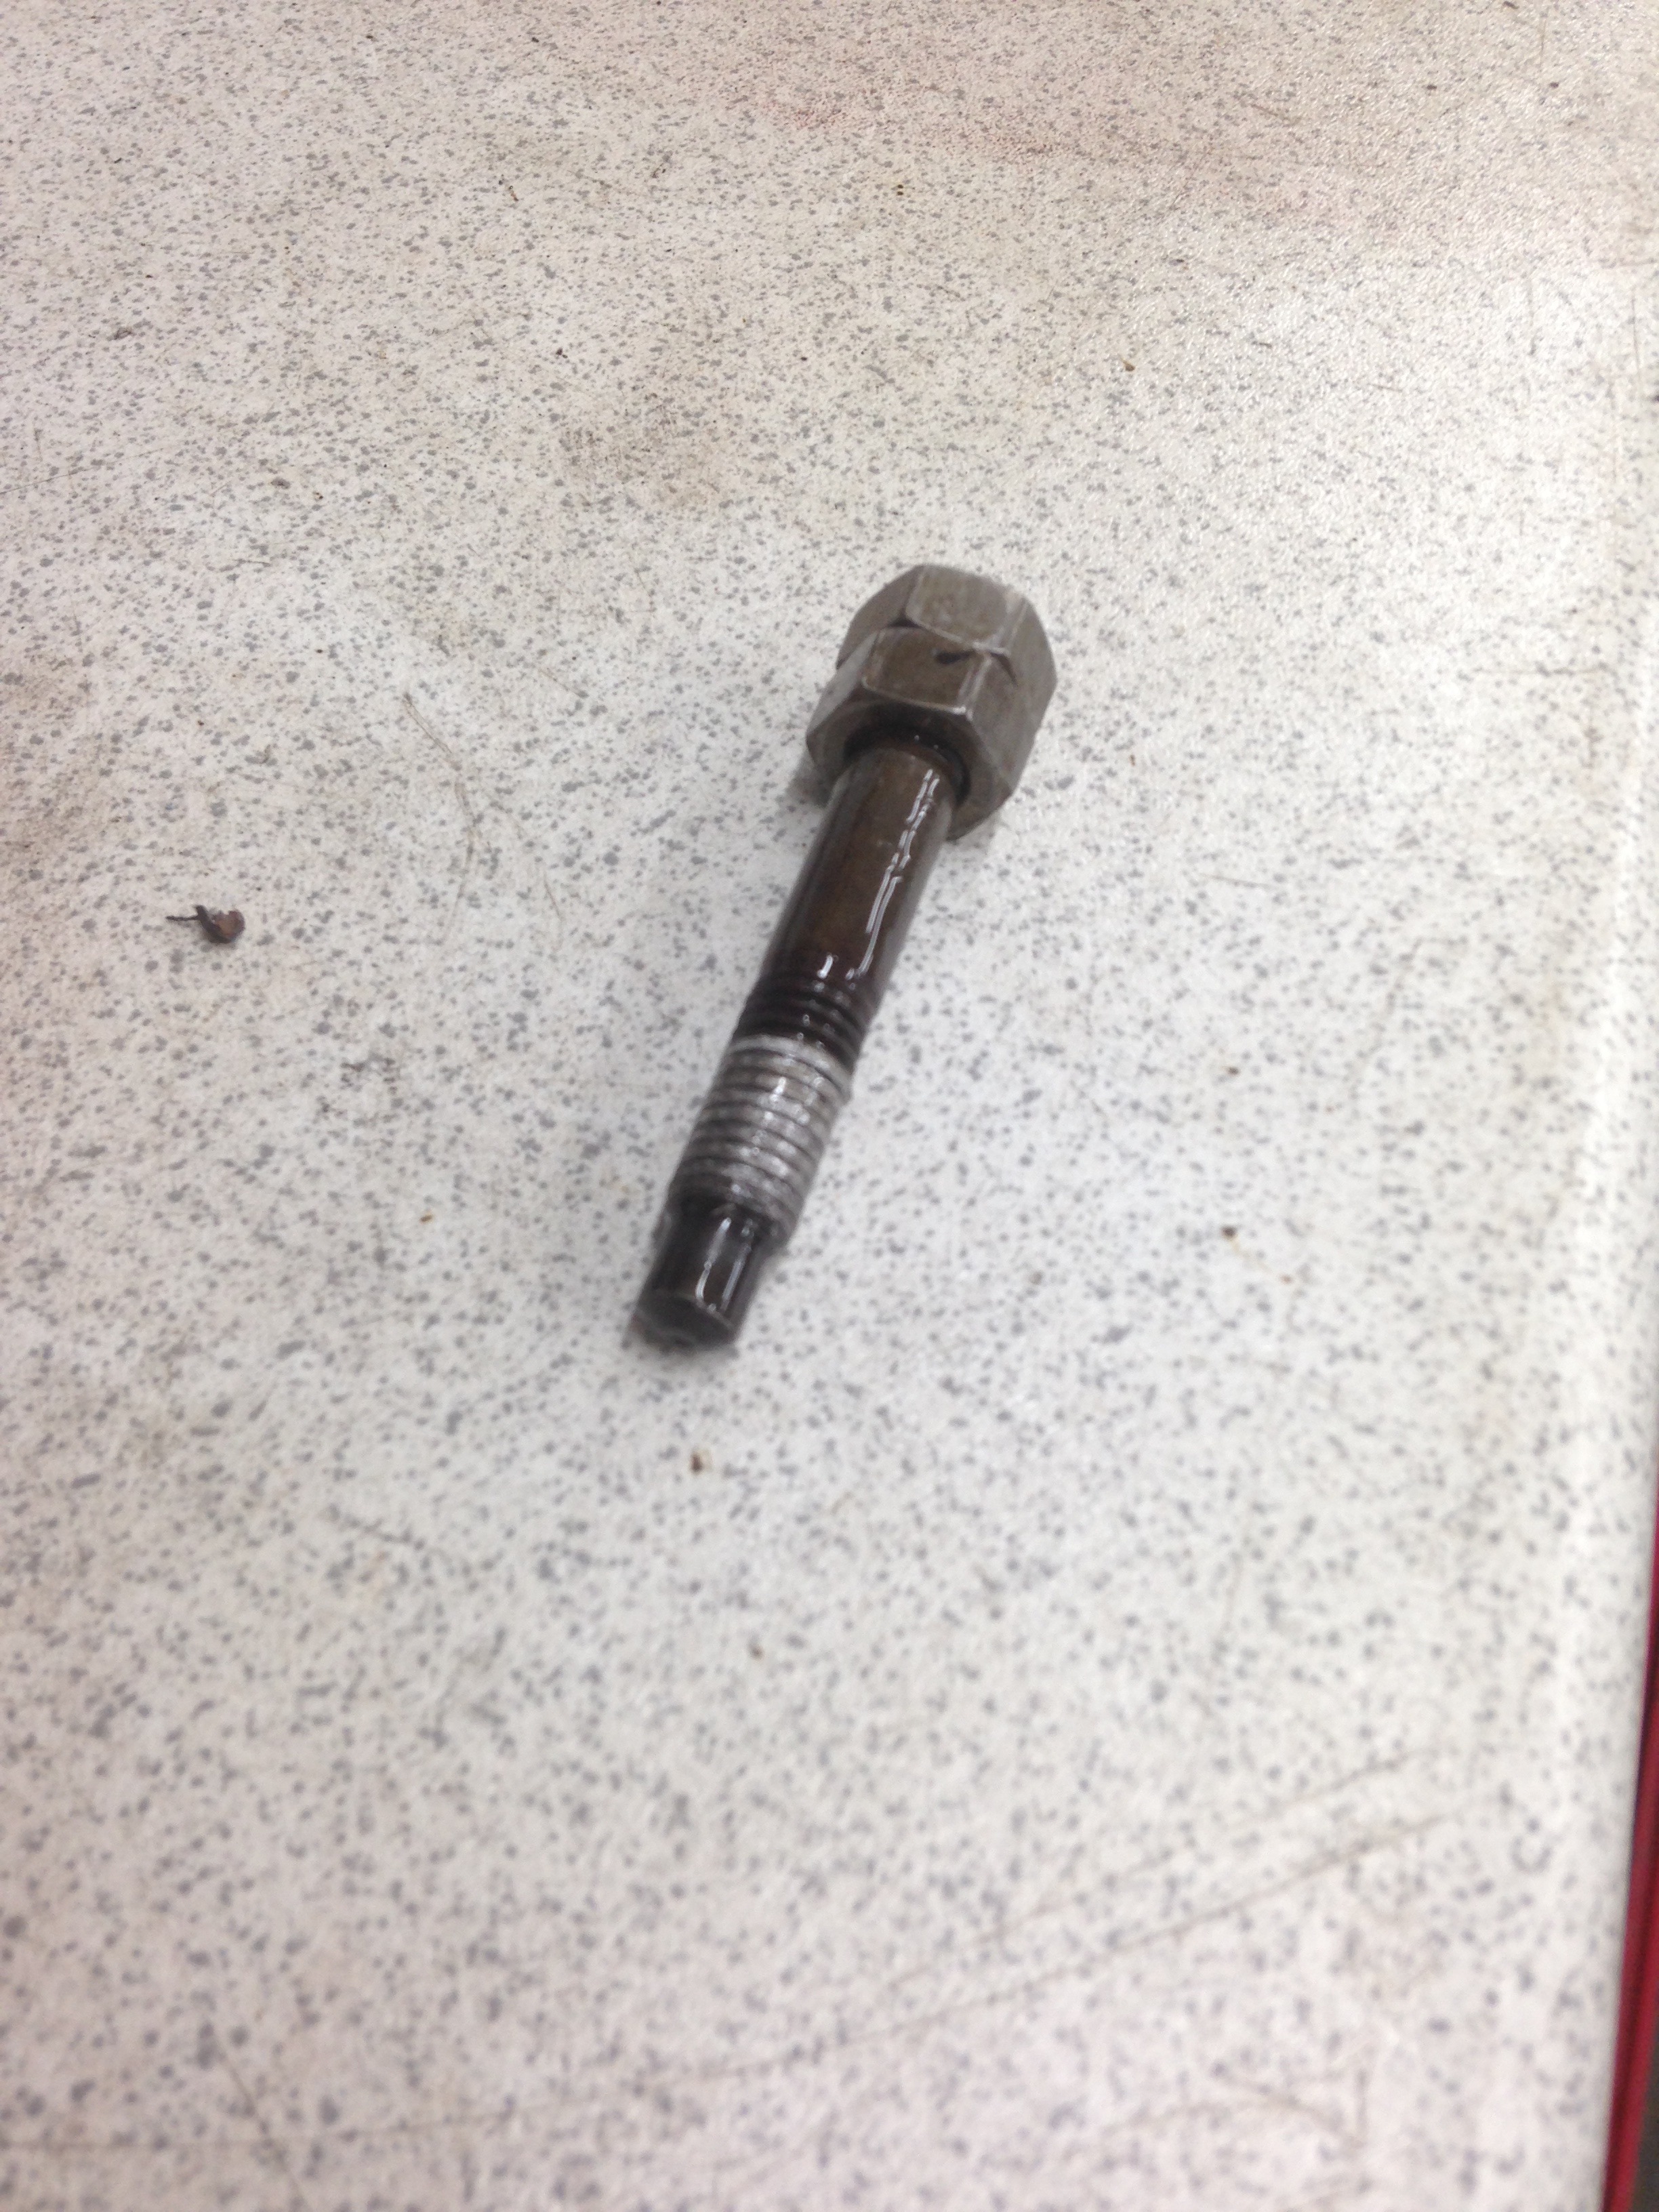
One stripped thread to repair and a weird bodge on one of the plenum bolts
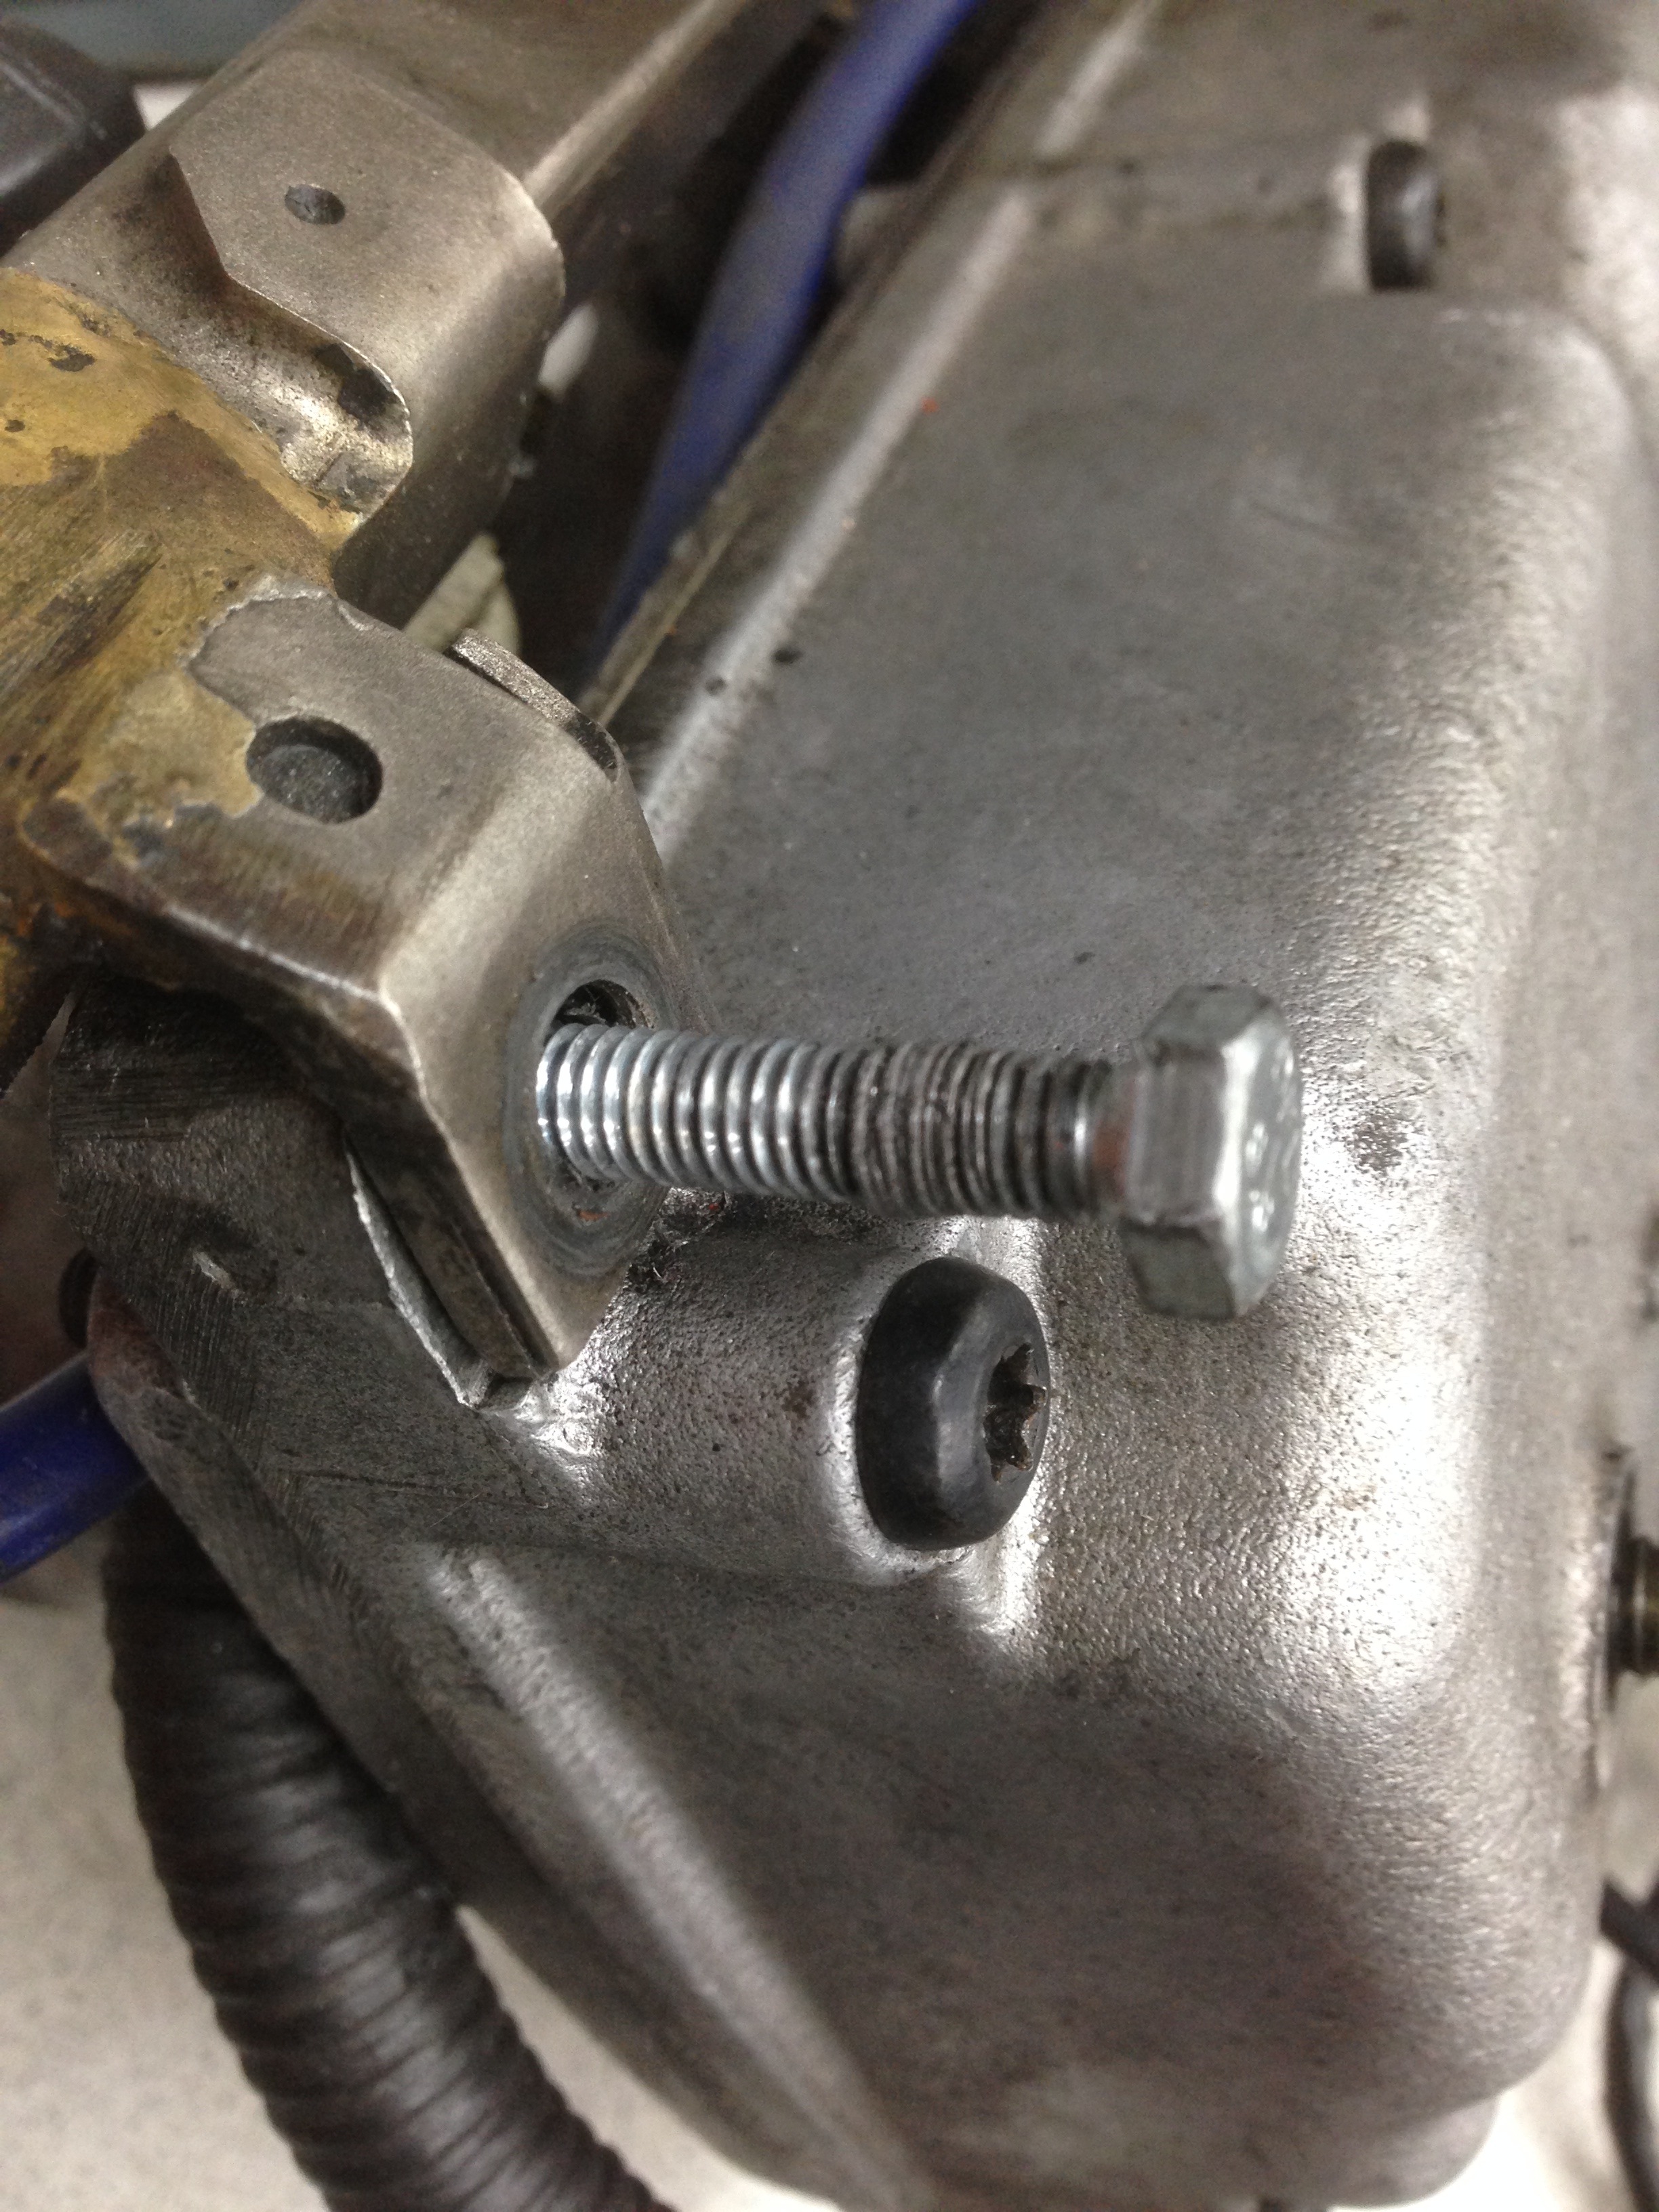
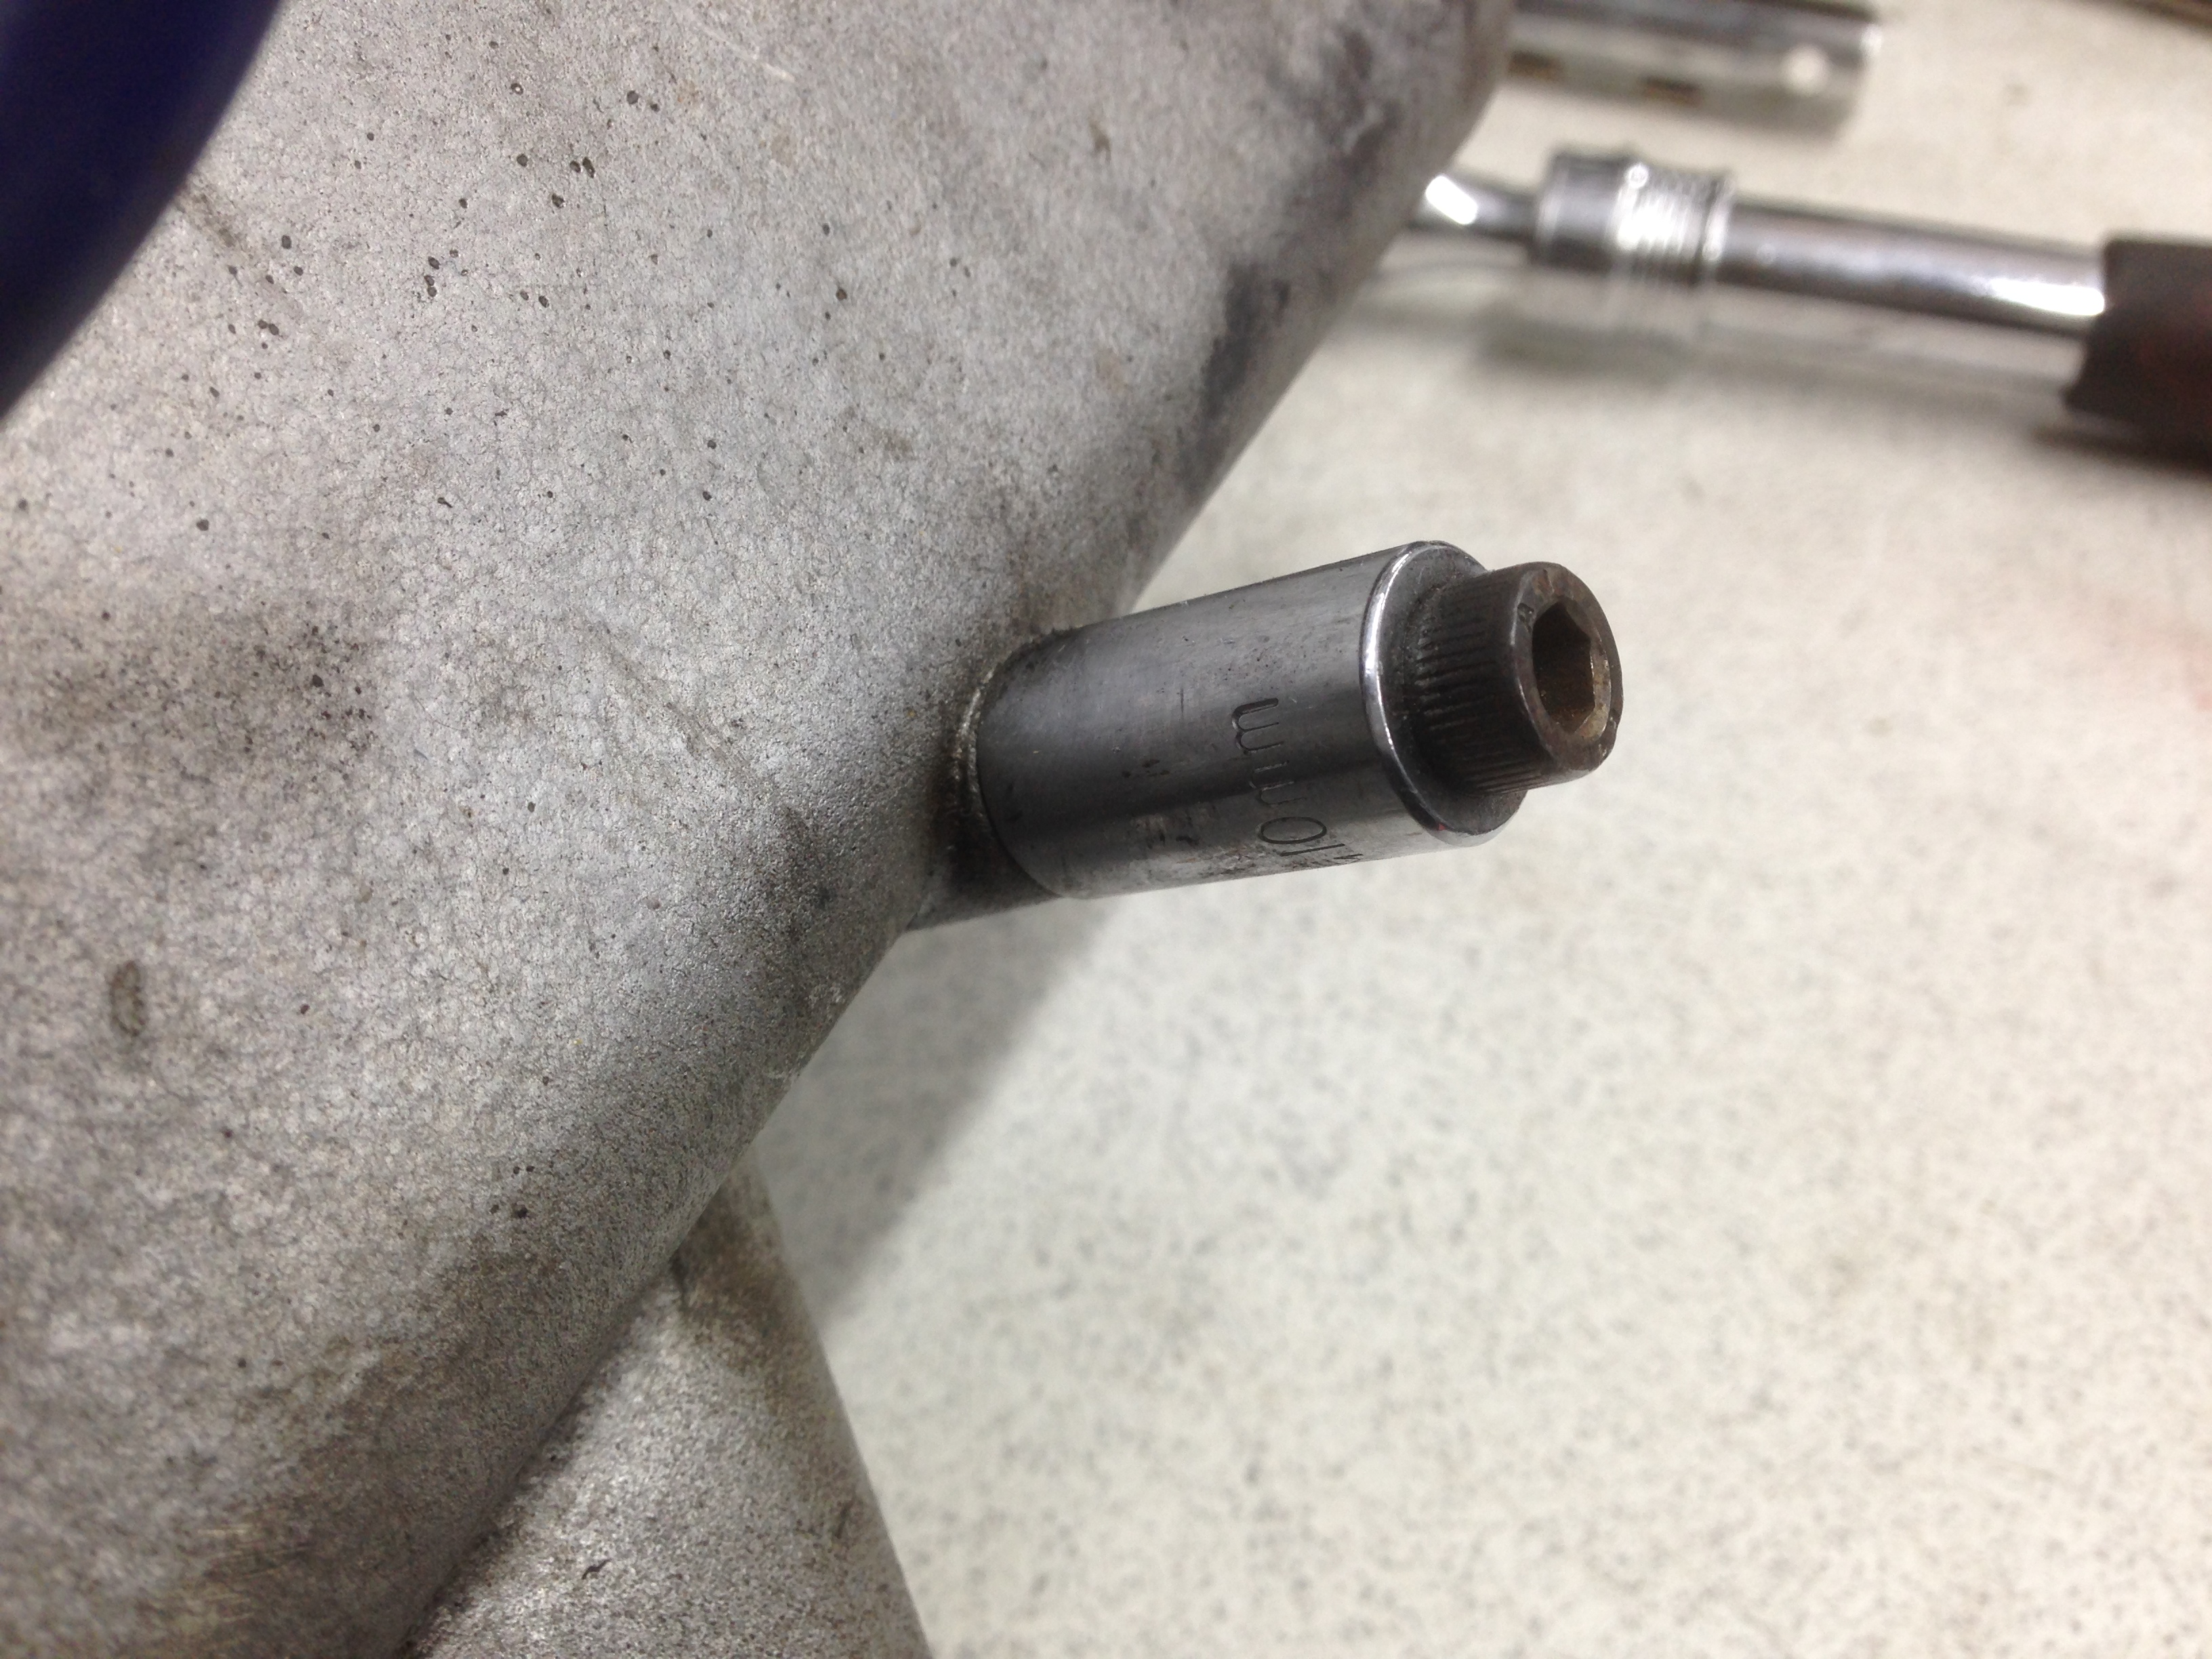
Yes that's a 10mm socket used as a spacer!
This might be the cause of some of the idling issues!
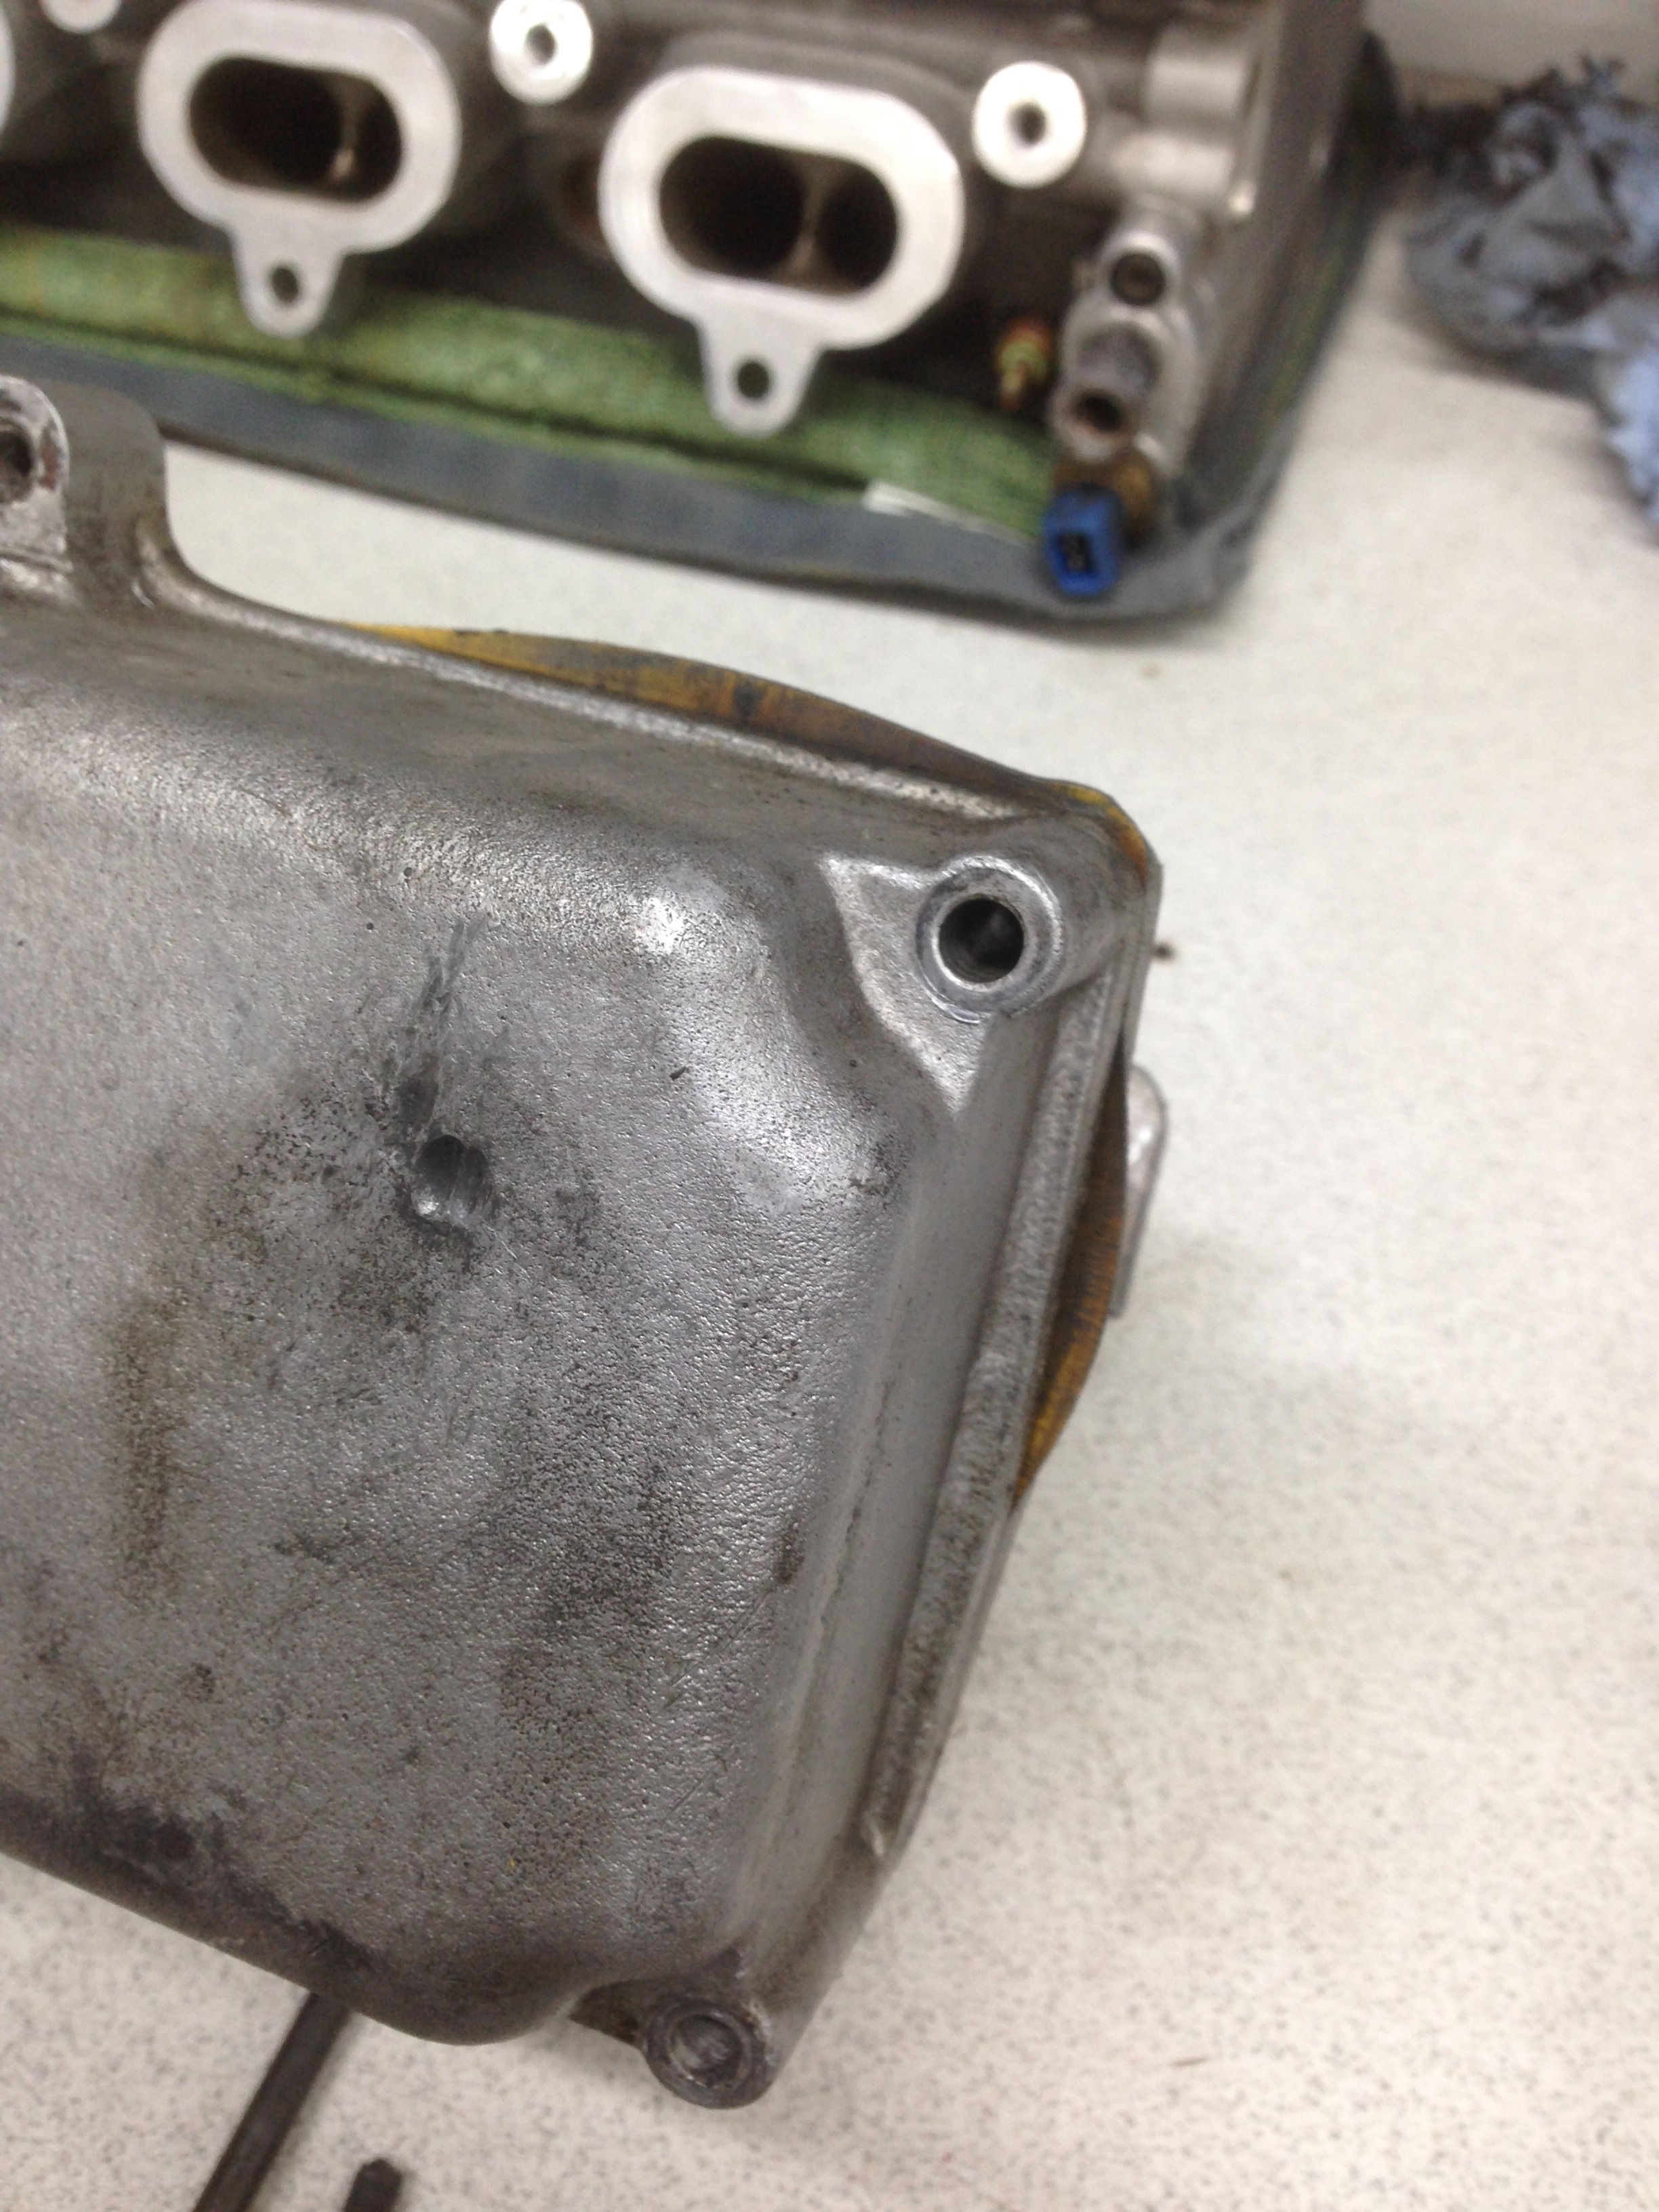
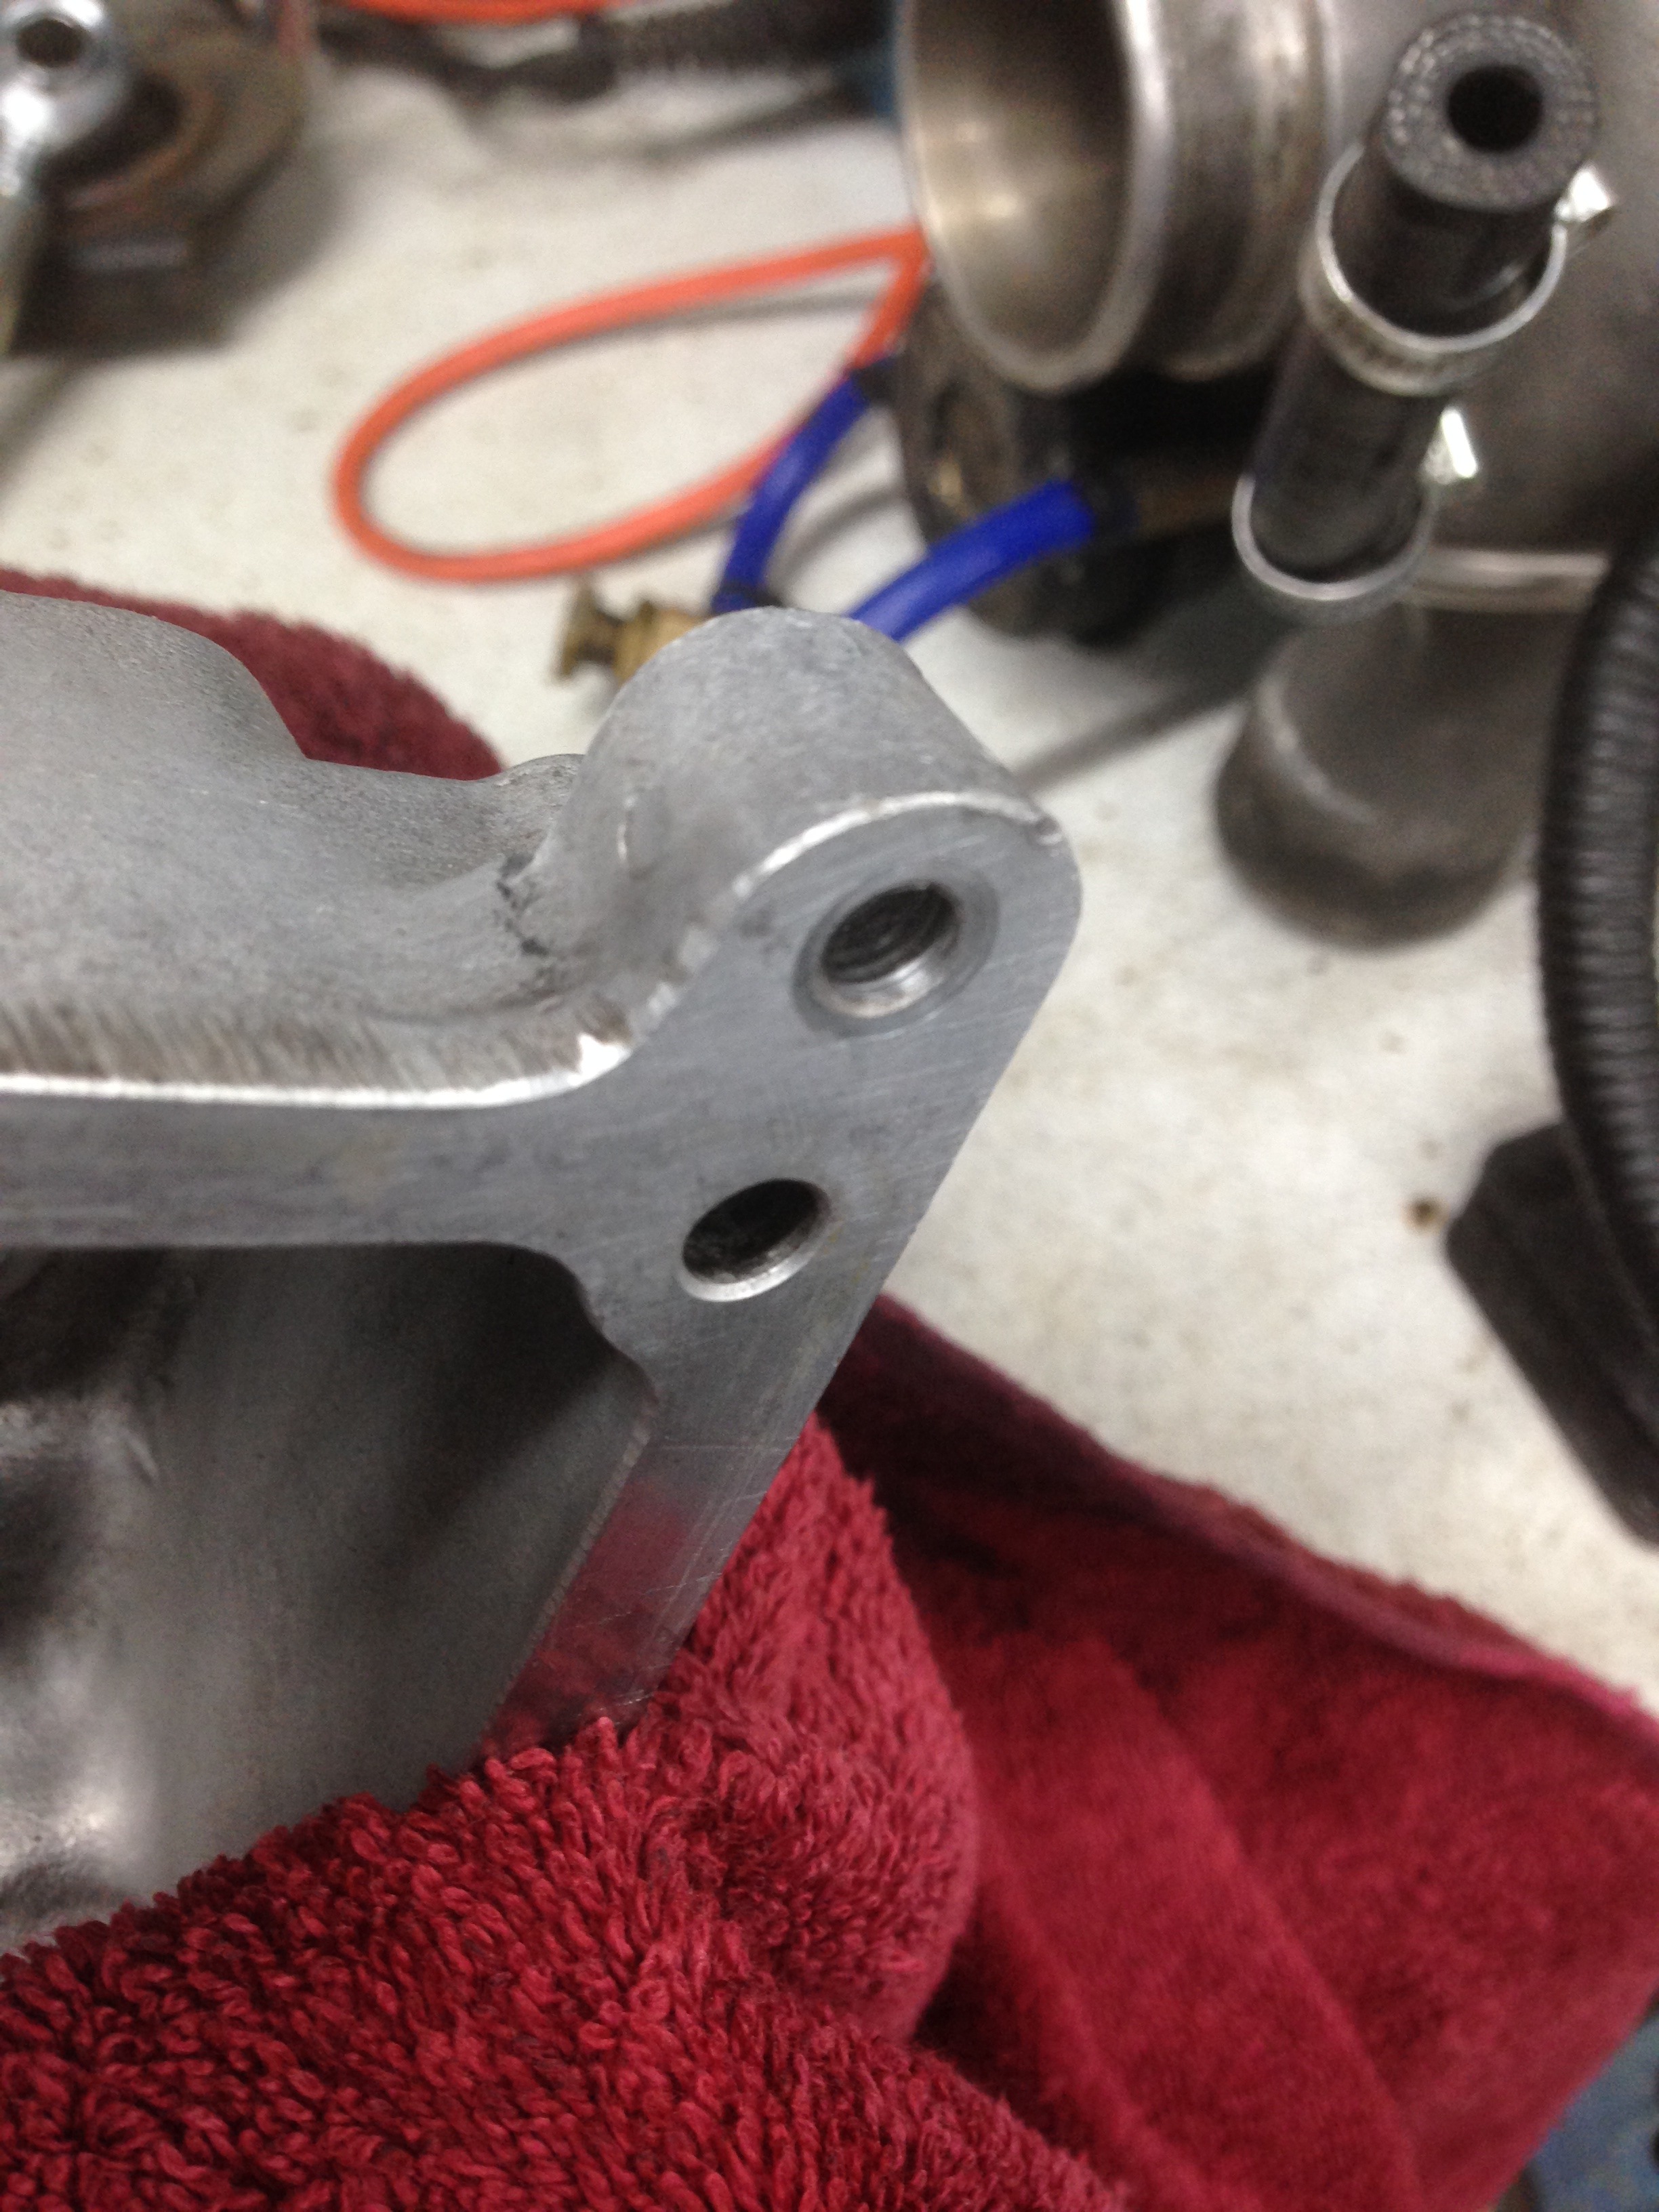
Thread repaired
Another shot of the engine bay
Head and inlet cleaned
Started cleaning up the block and various parts
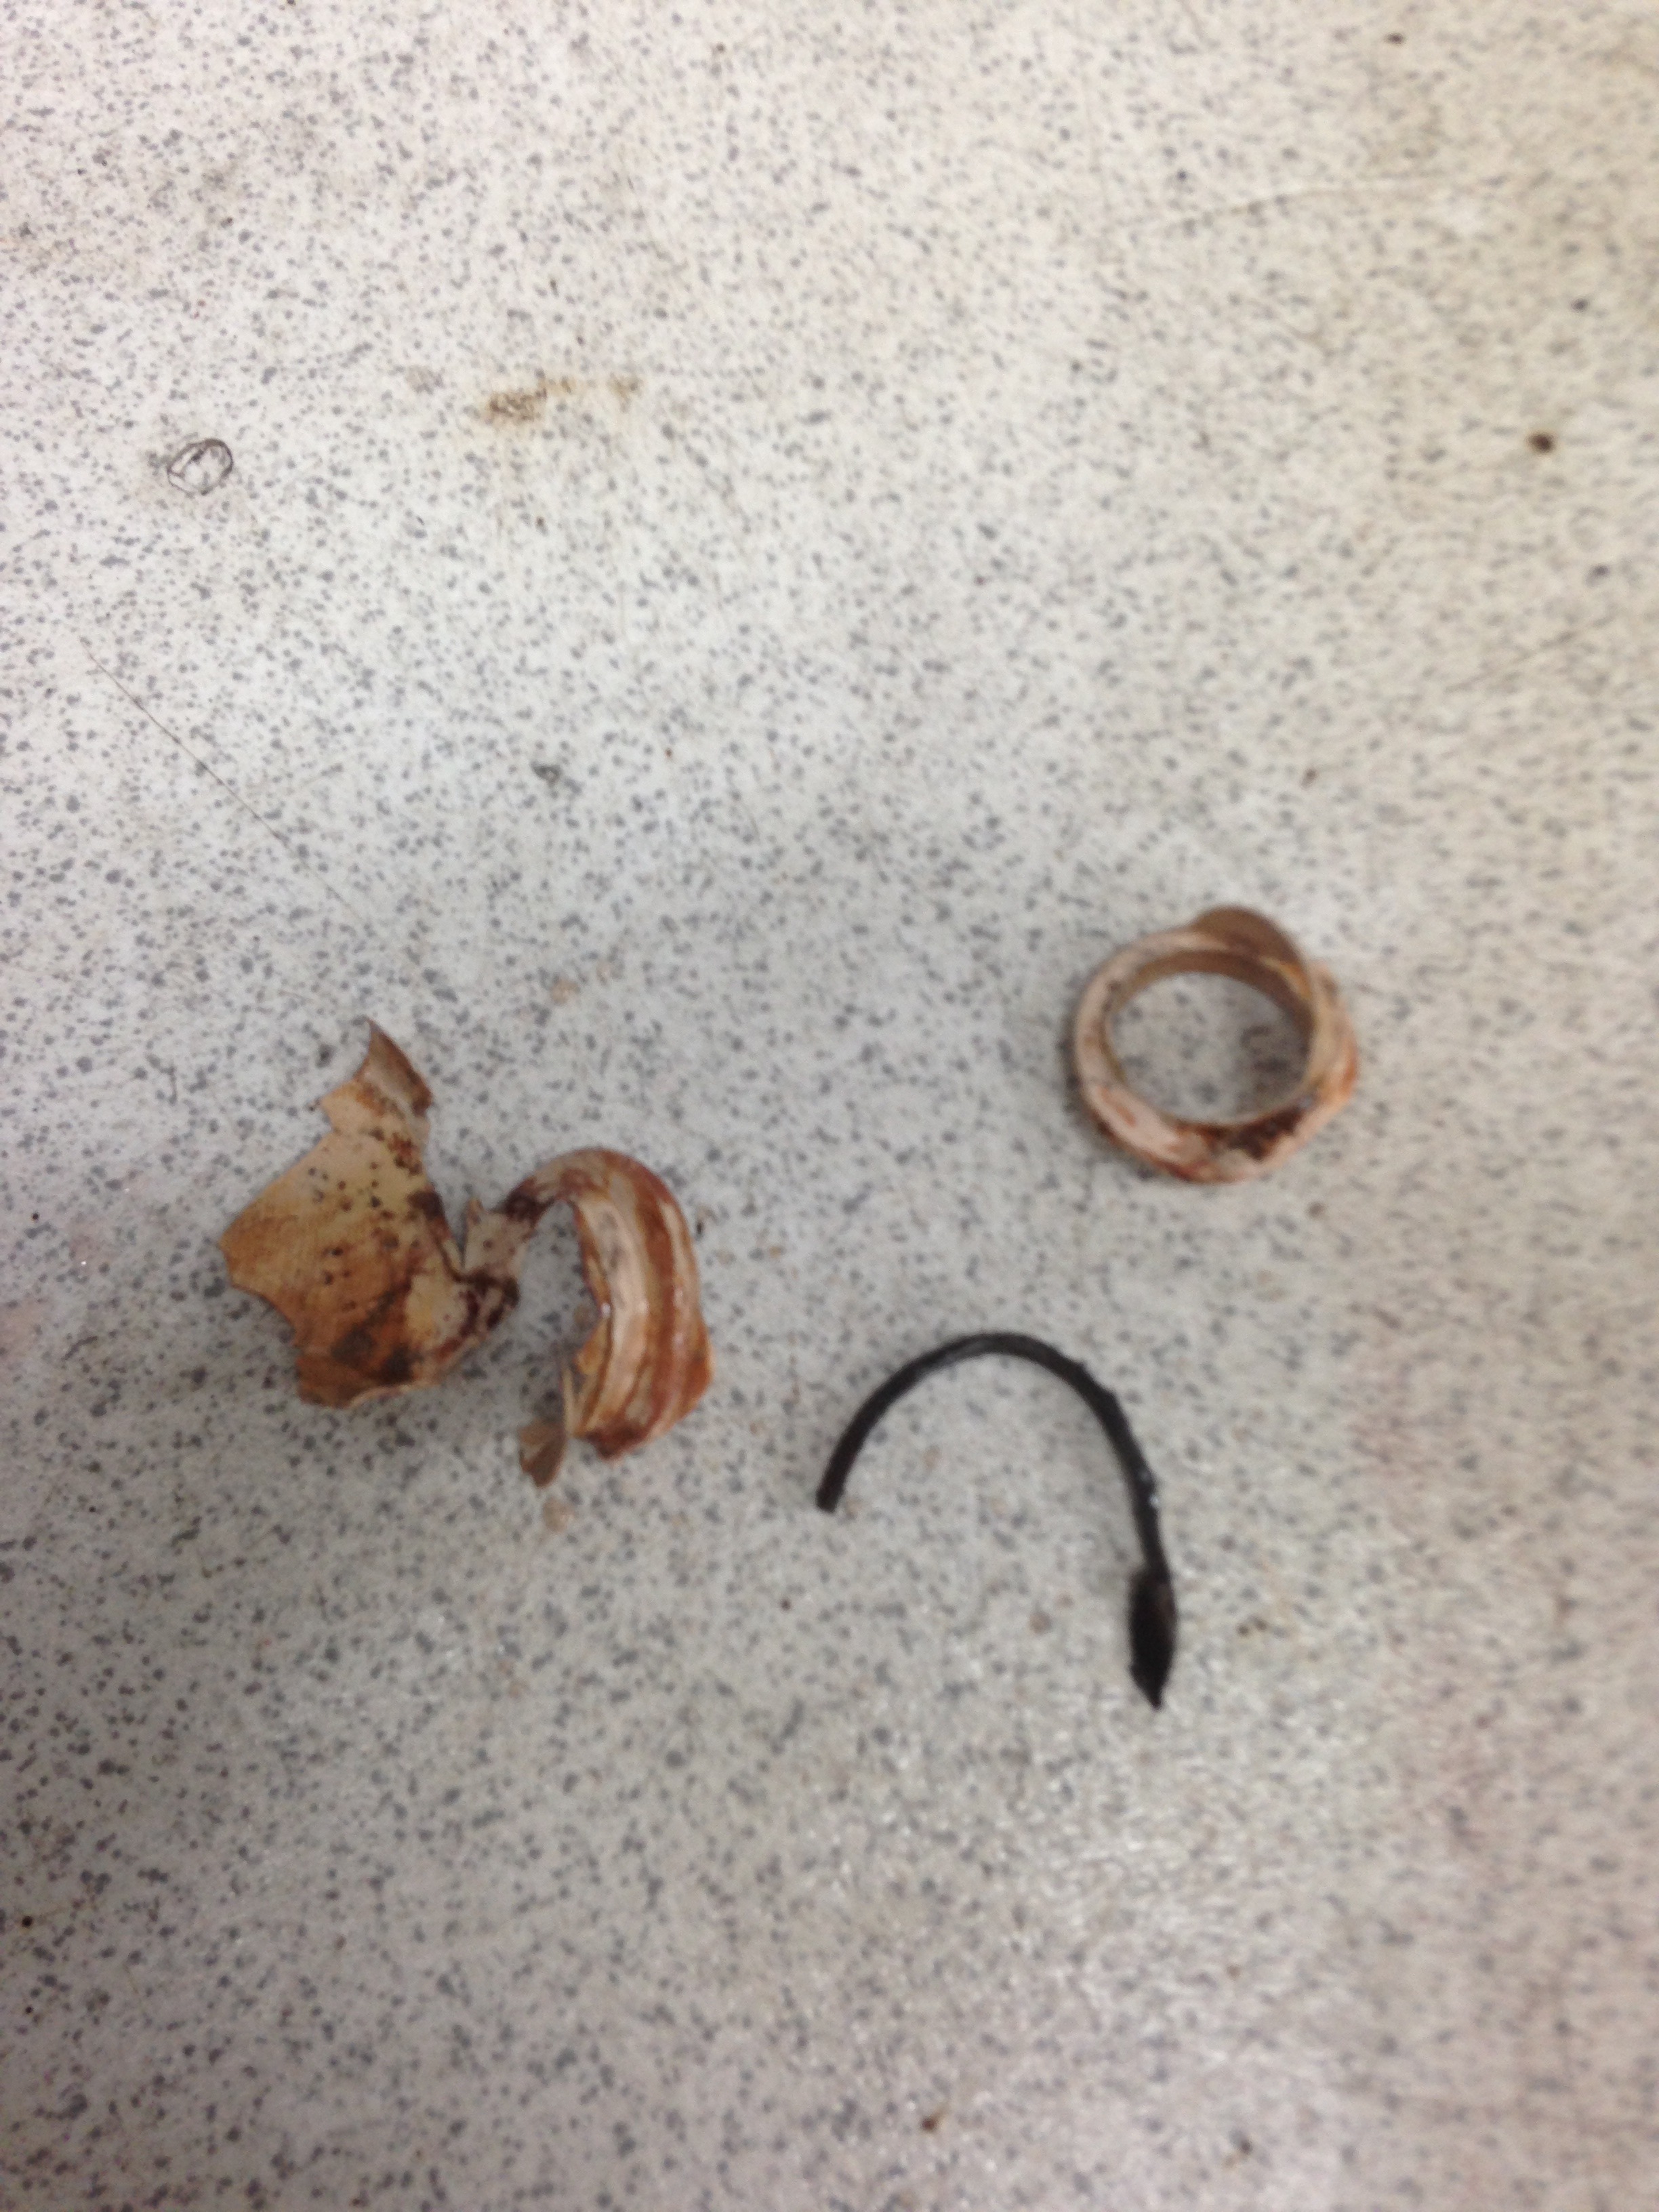
Found this in the oil cooler.. Not the best but it's all out now
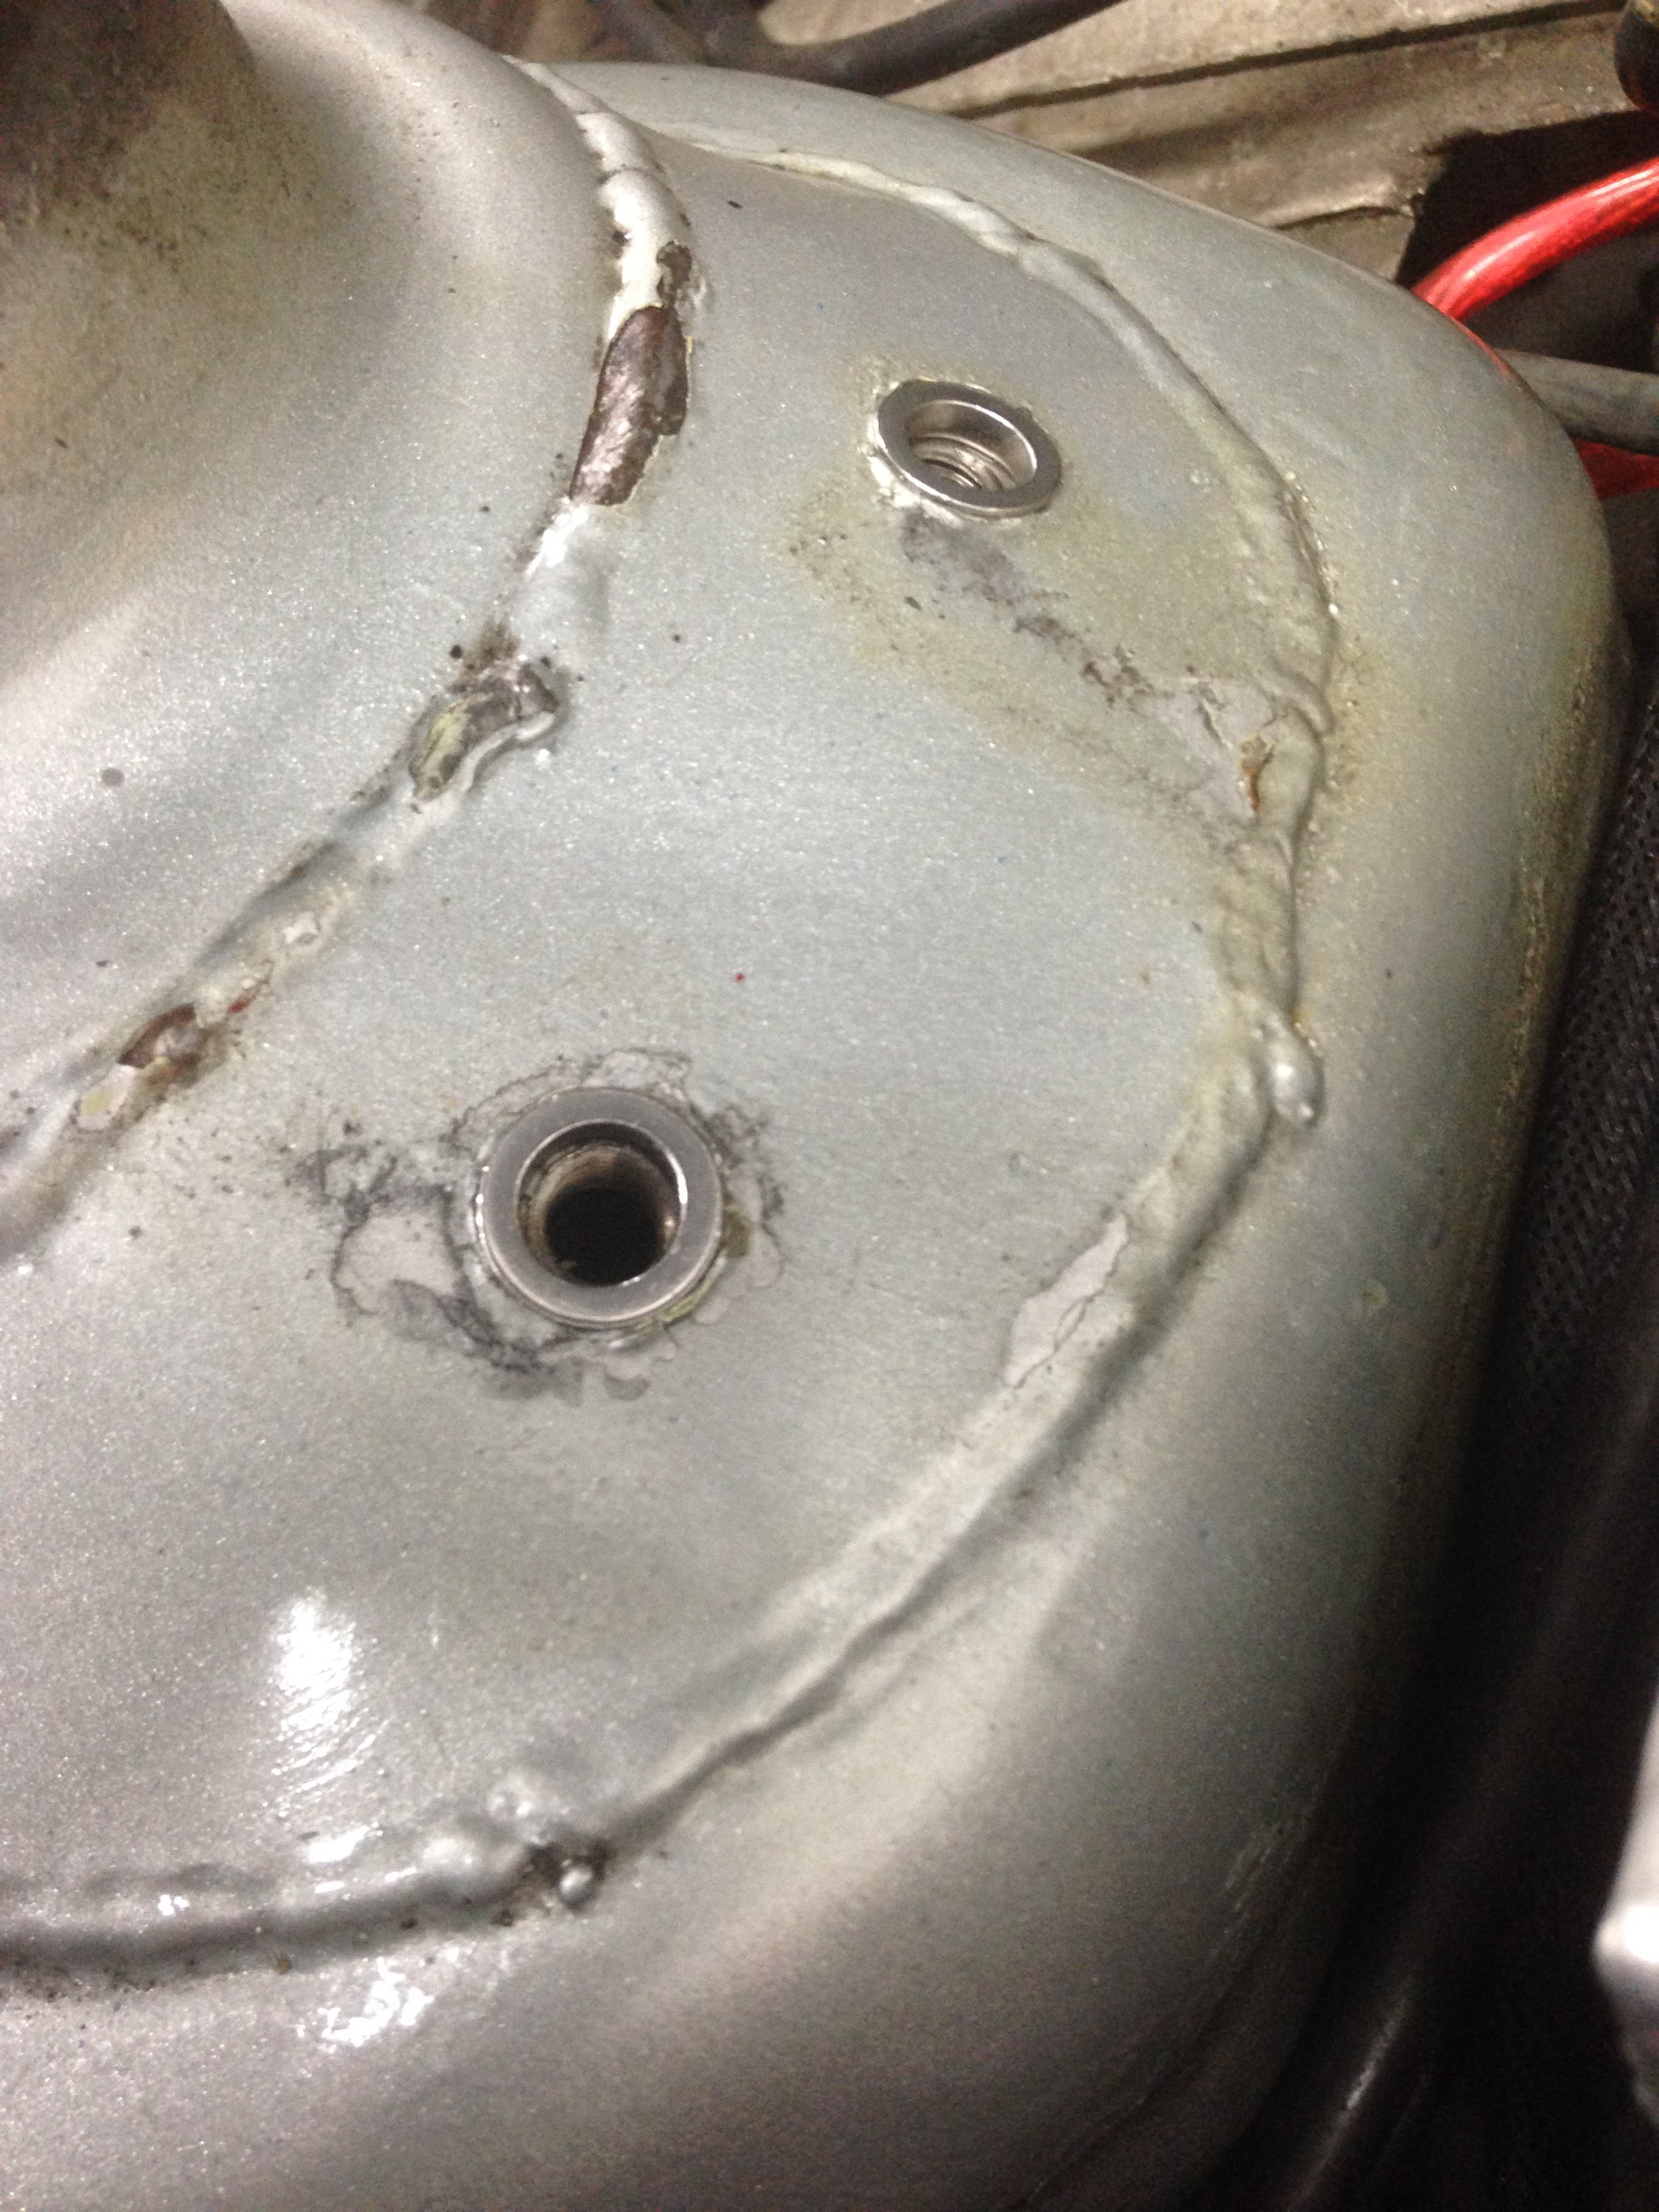
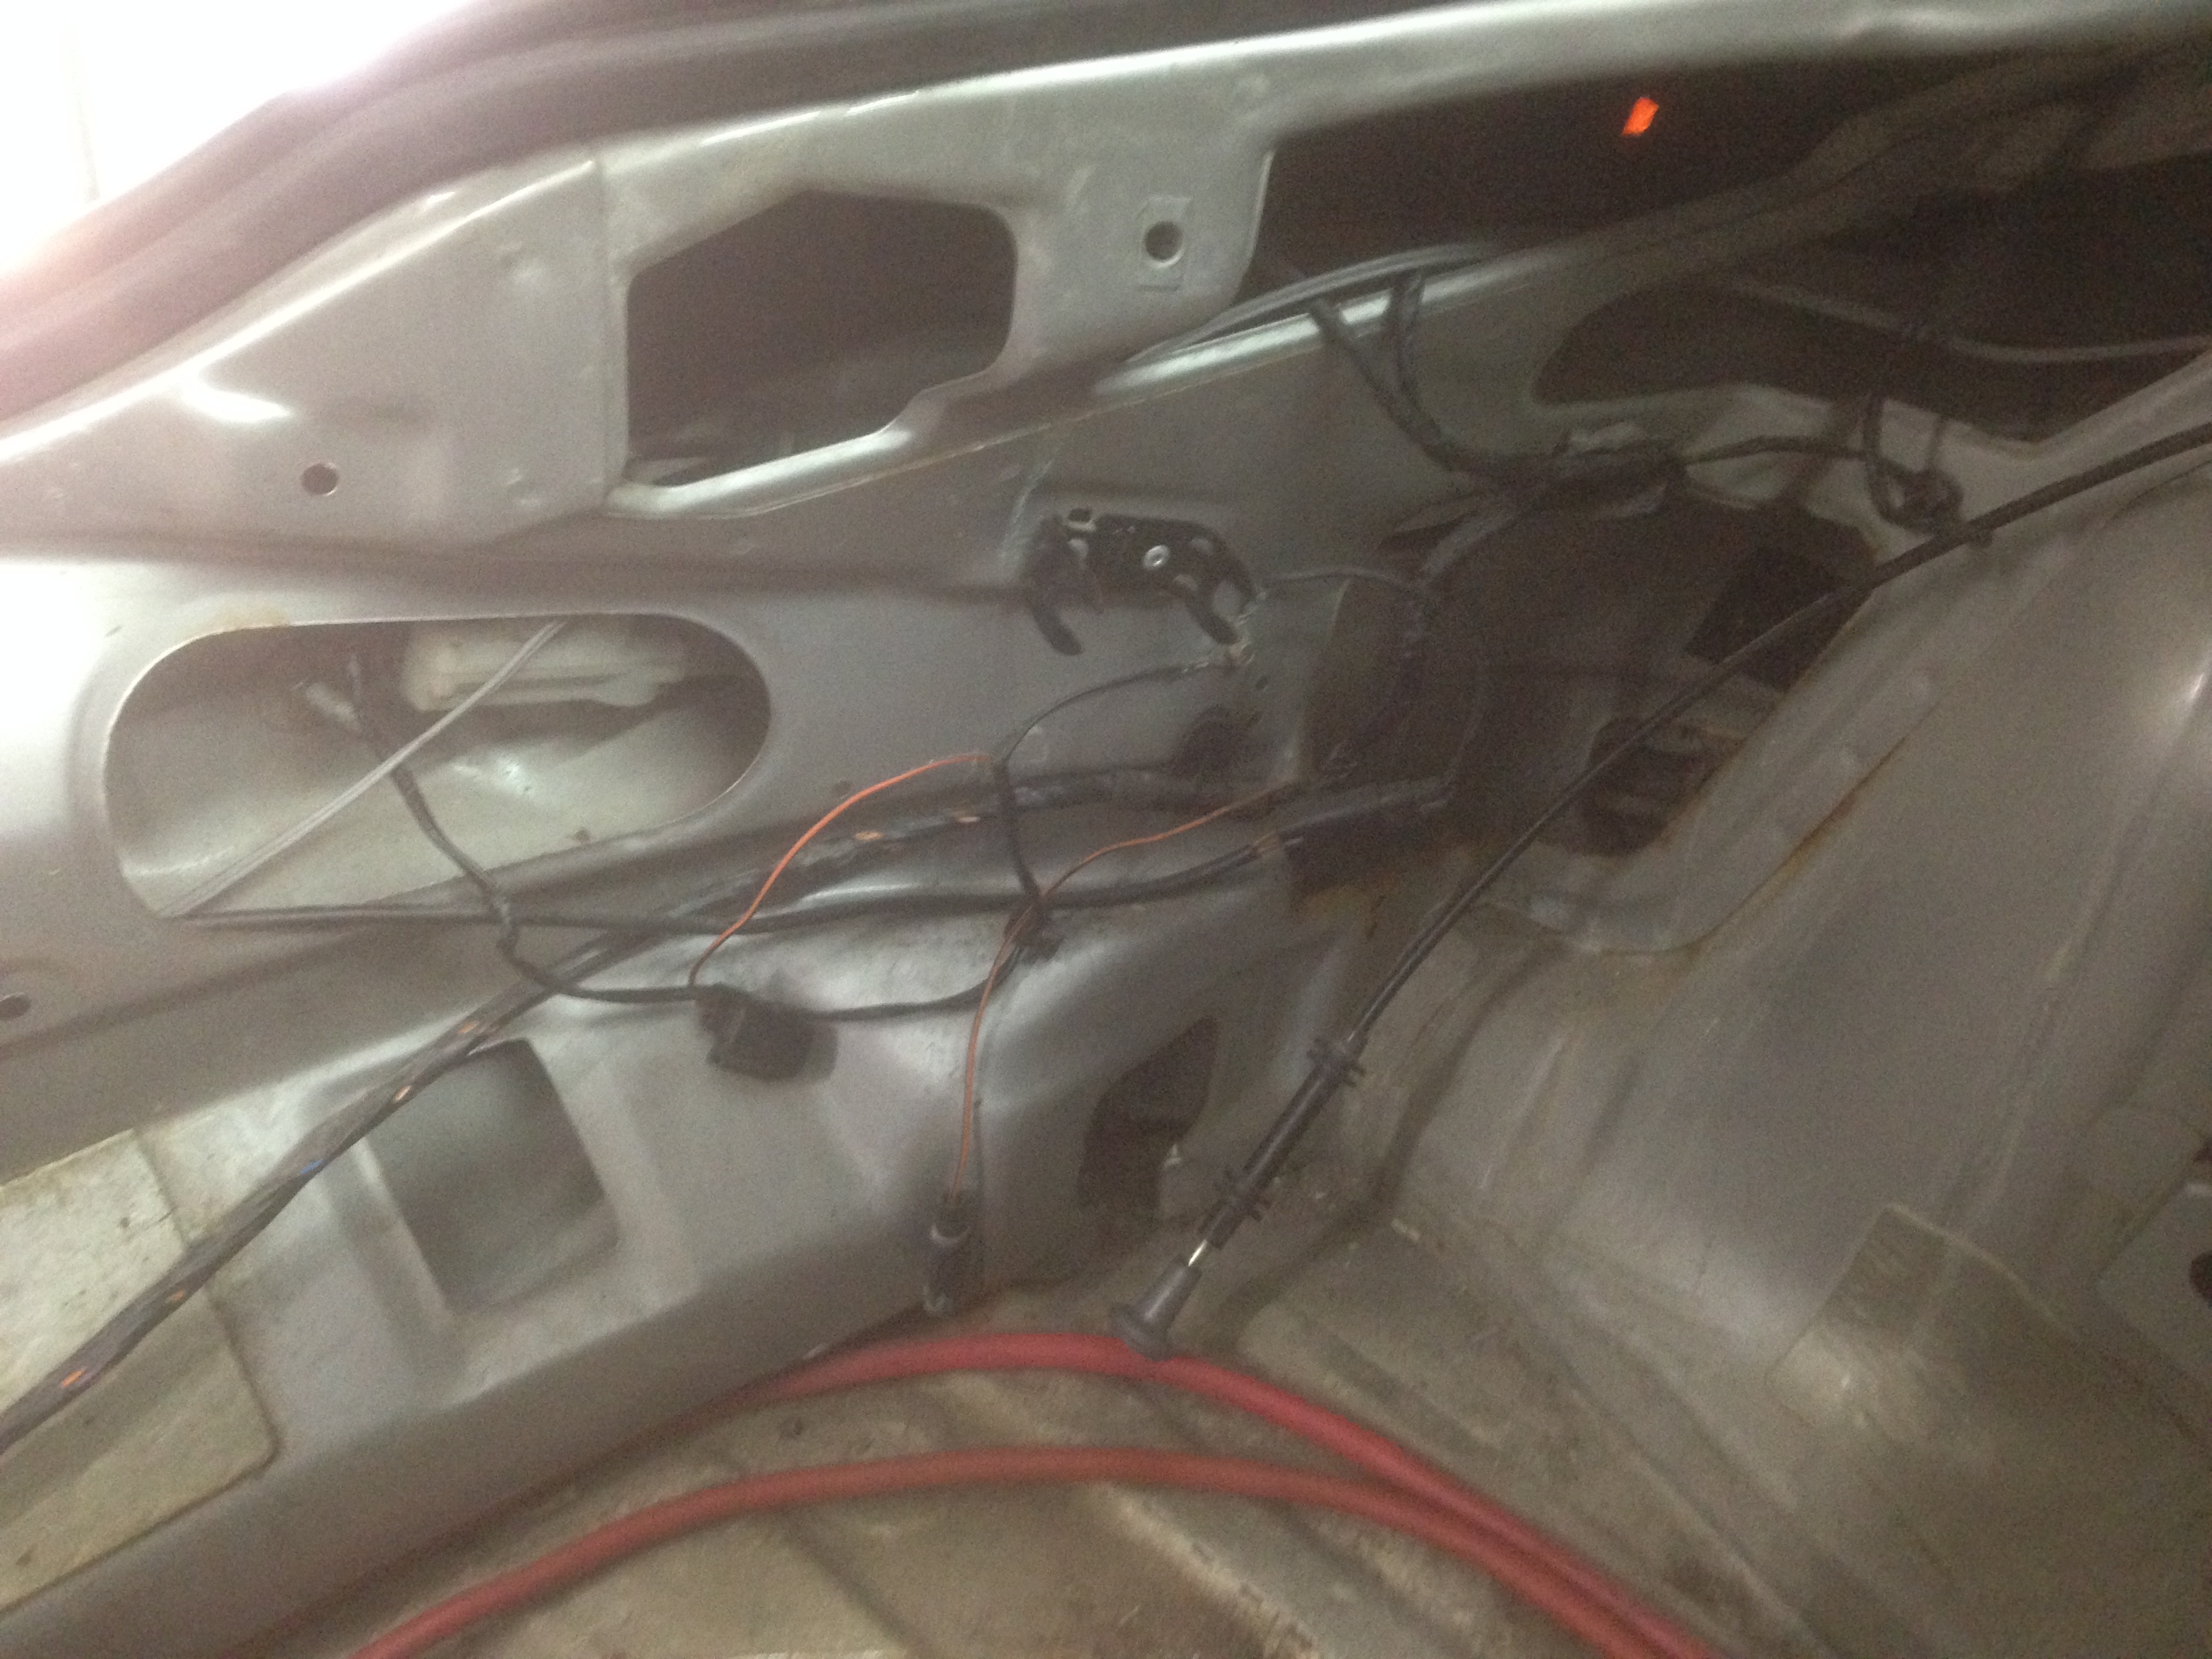
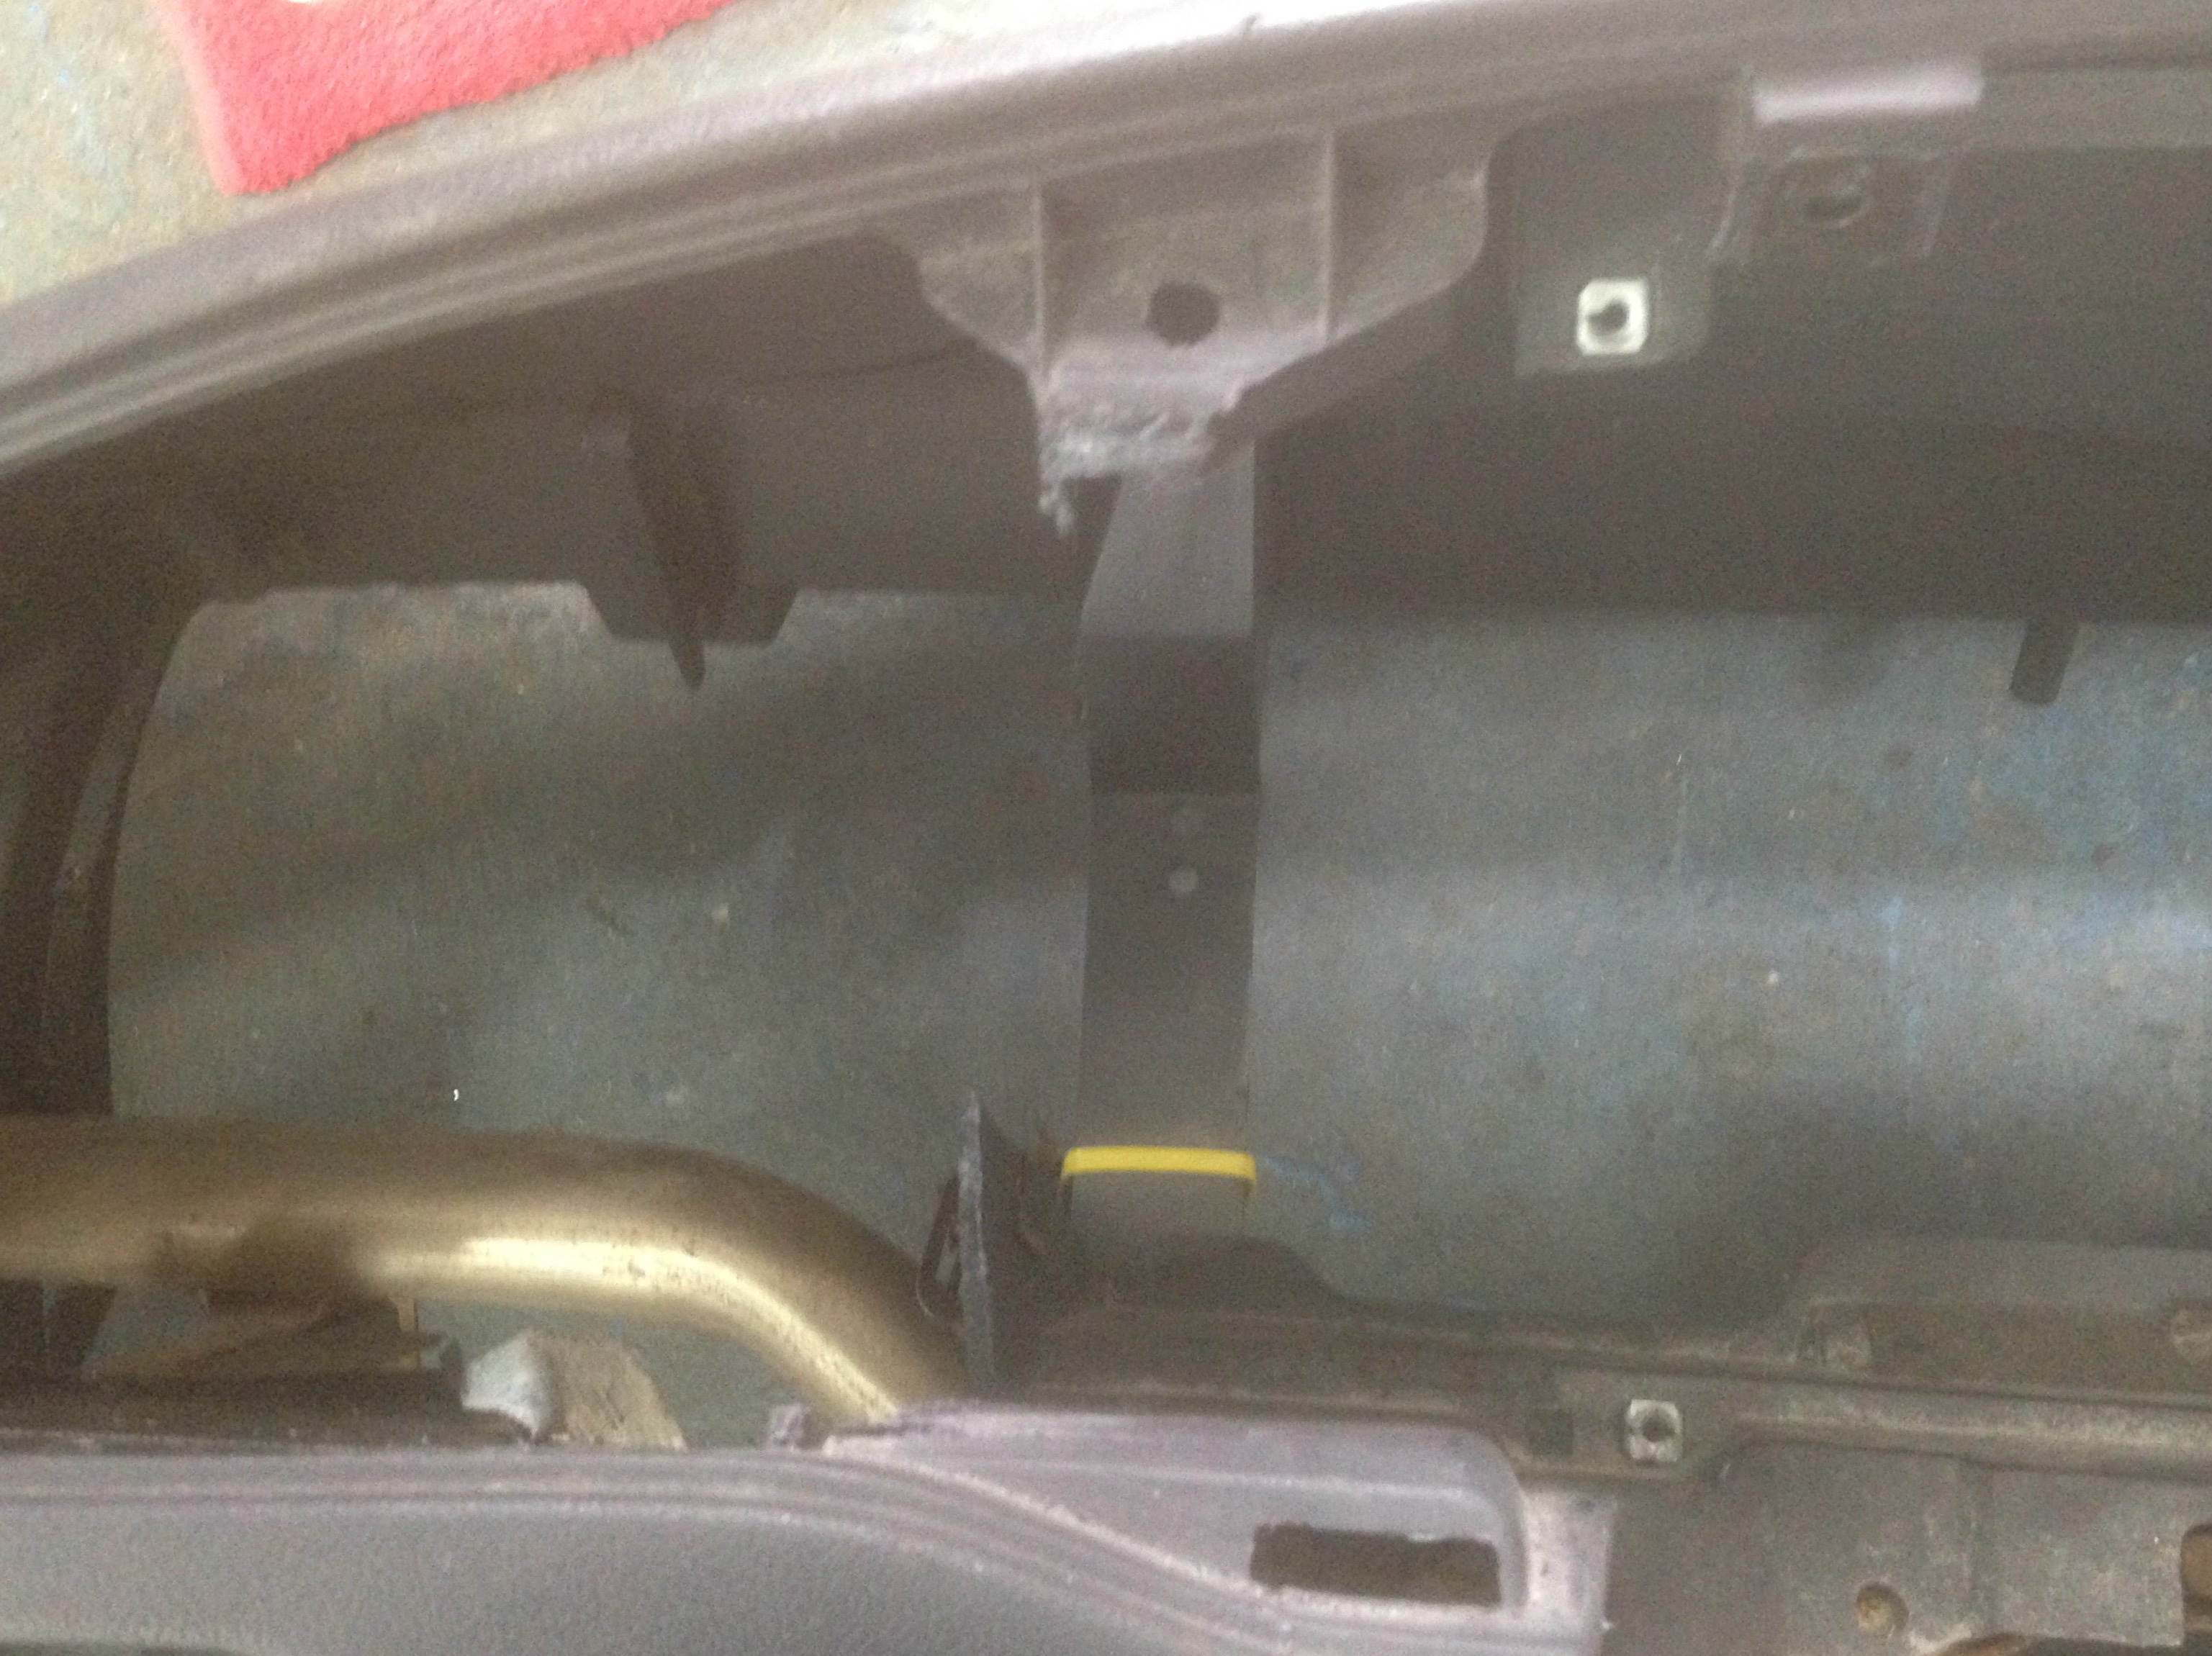
If someone can explain this to me that would be a great help.. Why was there a need a some point to attack the bulkhead with a hammer.. It looks like this was done prior to painting too.. Bizarre ! Will deal with this at another stage.
Engine bay looking a little better
New cometic head gasket
Head given a clean
And back on..

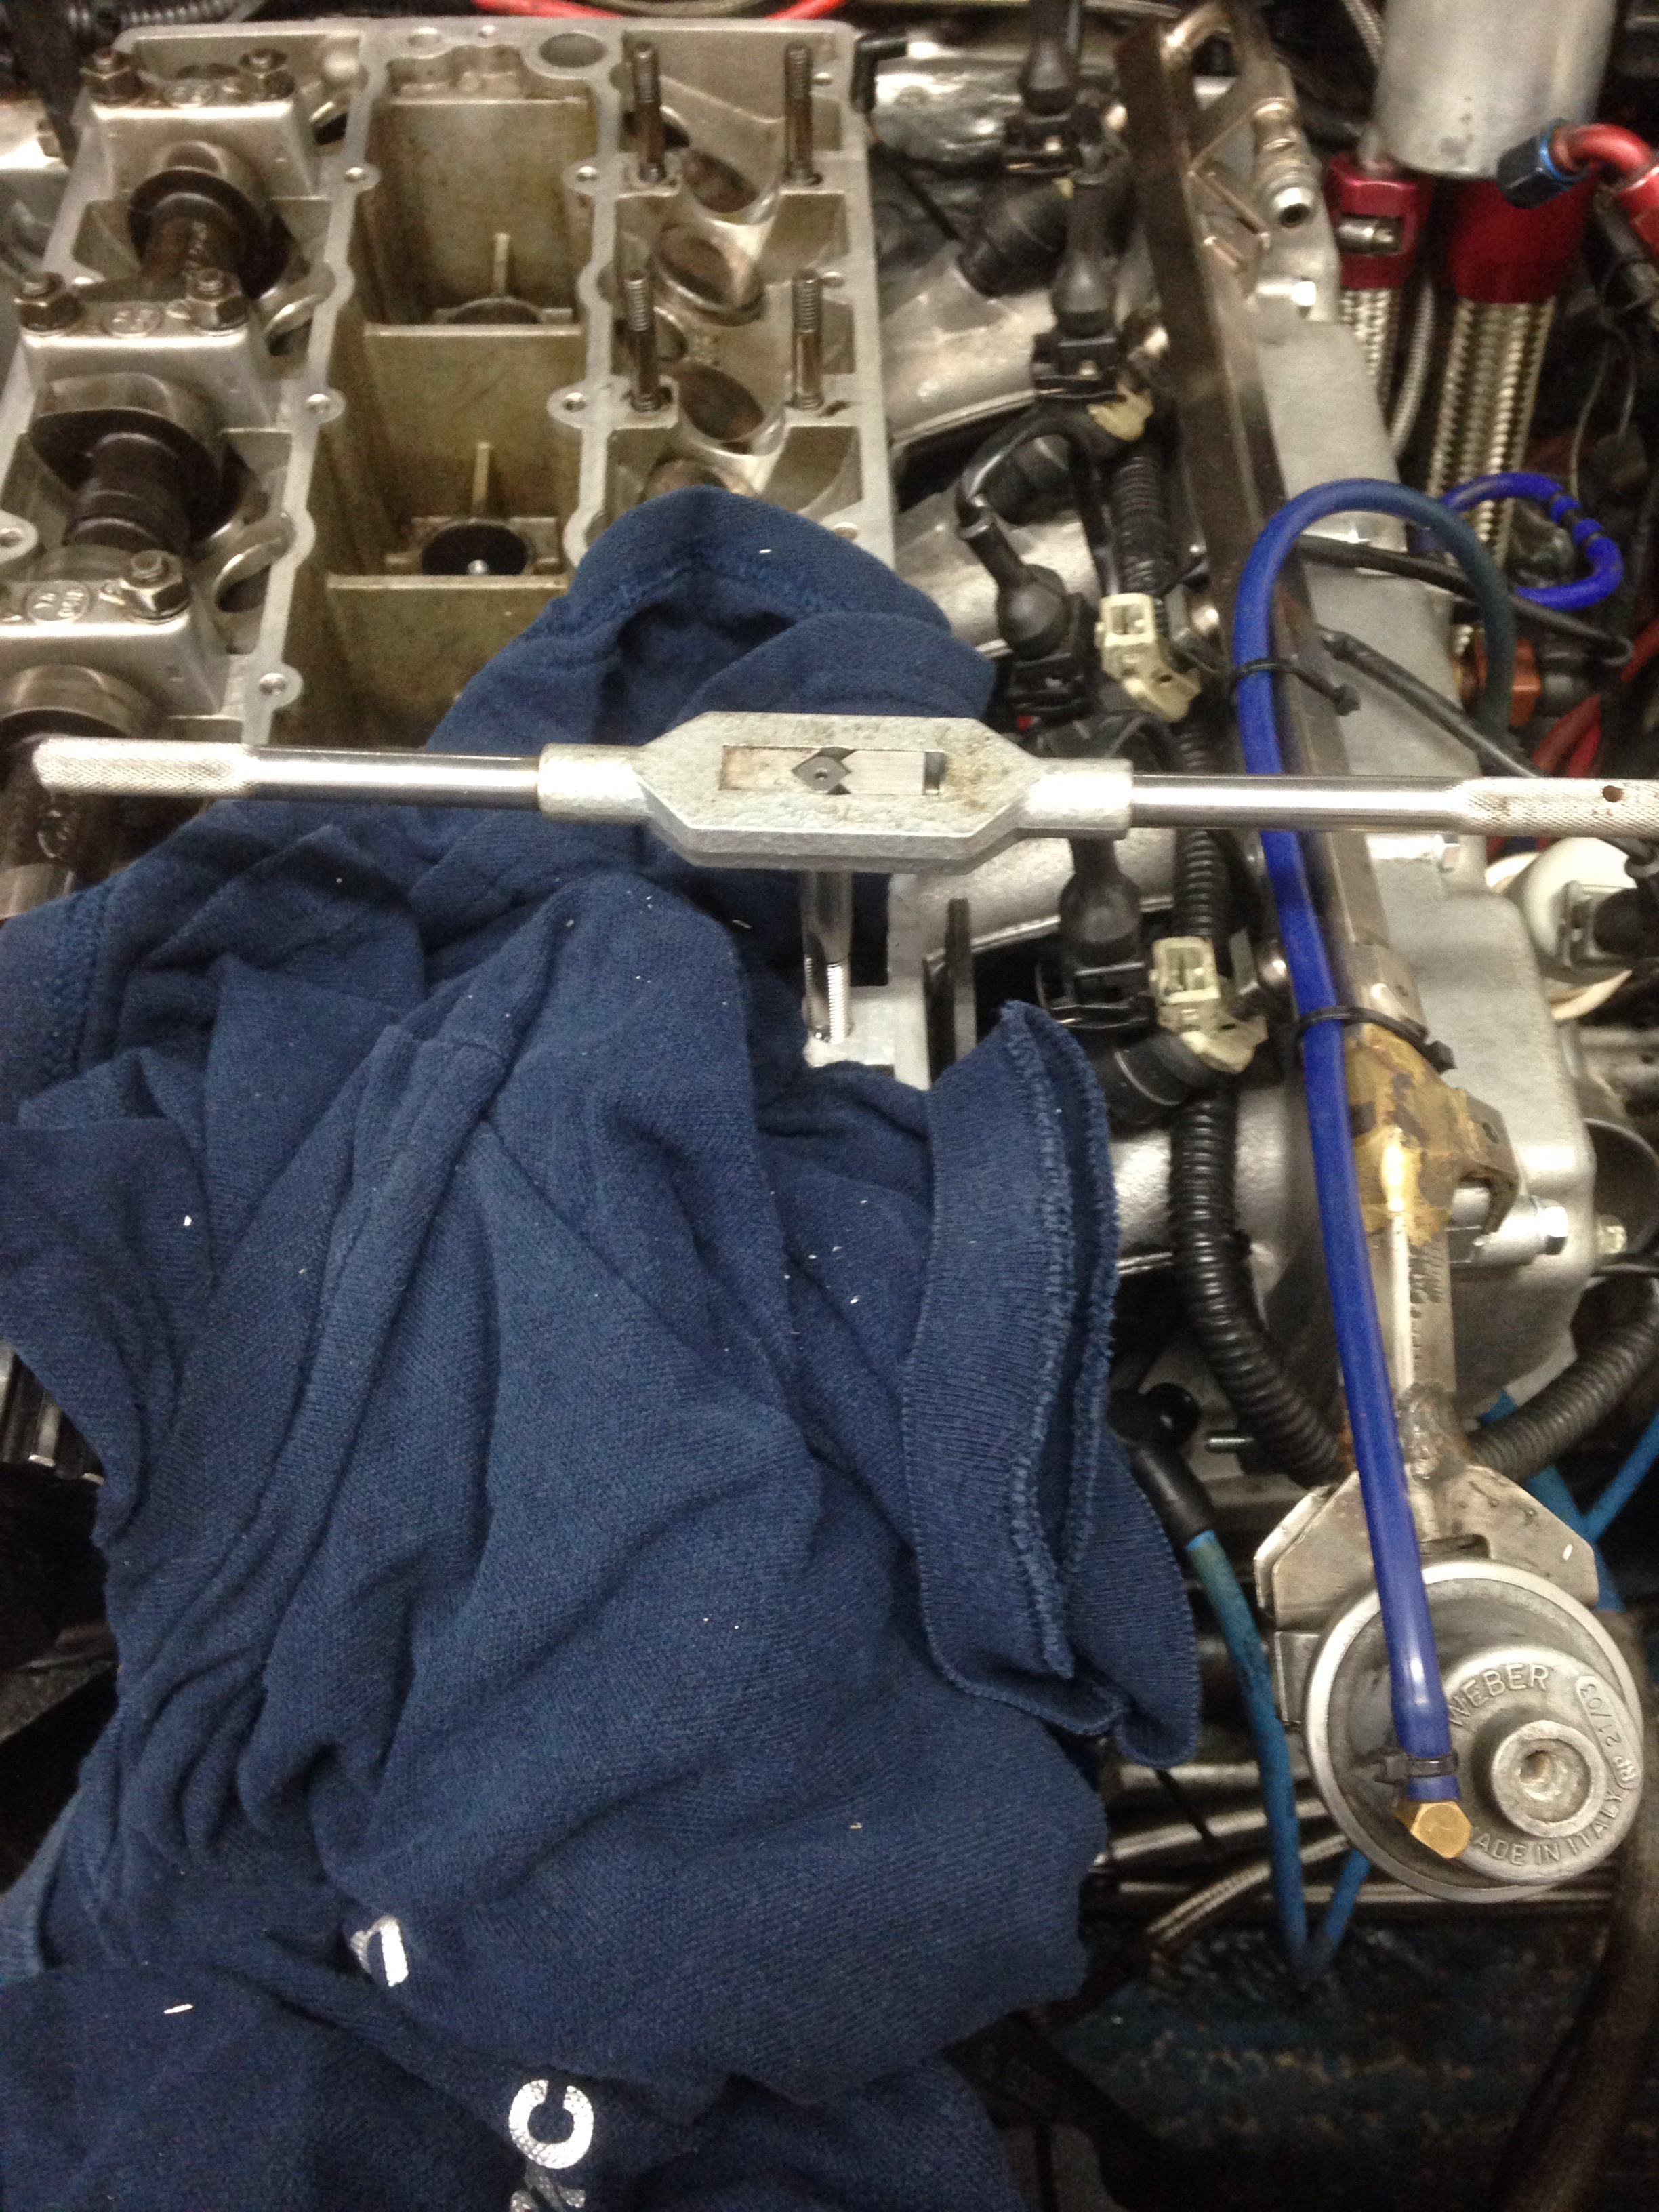
To take the head off I had to remove the inlet cam as the socket wouldn't go down past the body of the camshaft.. In doing so I noticed that one of the cam cap studs had stripped it's thread, so repaired the thread and checked all of them... Turned out a few needed doing so glad I found this now!

Did a few other jobs while it was apart, split the turbo and manifold to for new studs and nuts, also out riv nuts in for the strut brace.. Probably not the strongest thing to use but for now it will do.. I may have plans to change this arrangement anyway, so will come back to it at a later day. For now it makes getting the strut brace off a lot easier!
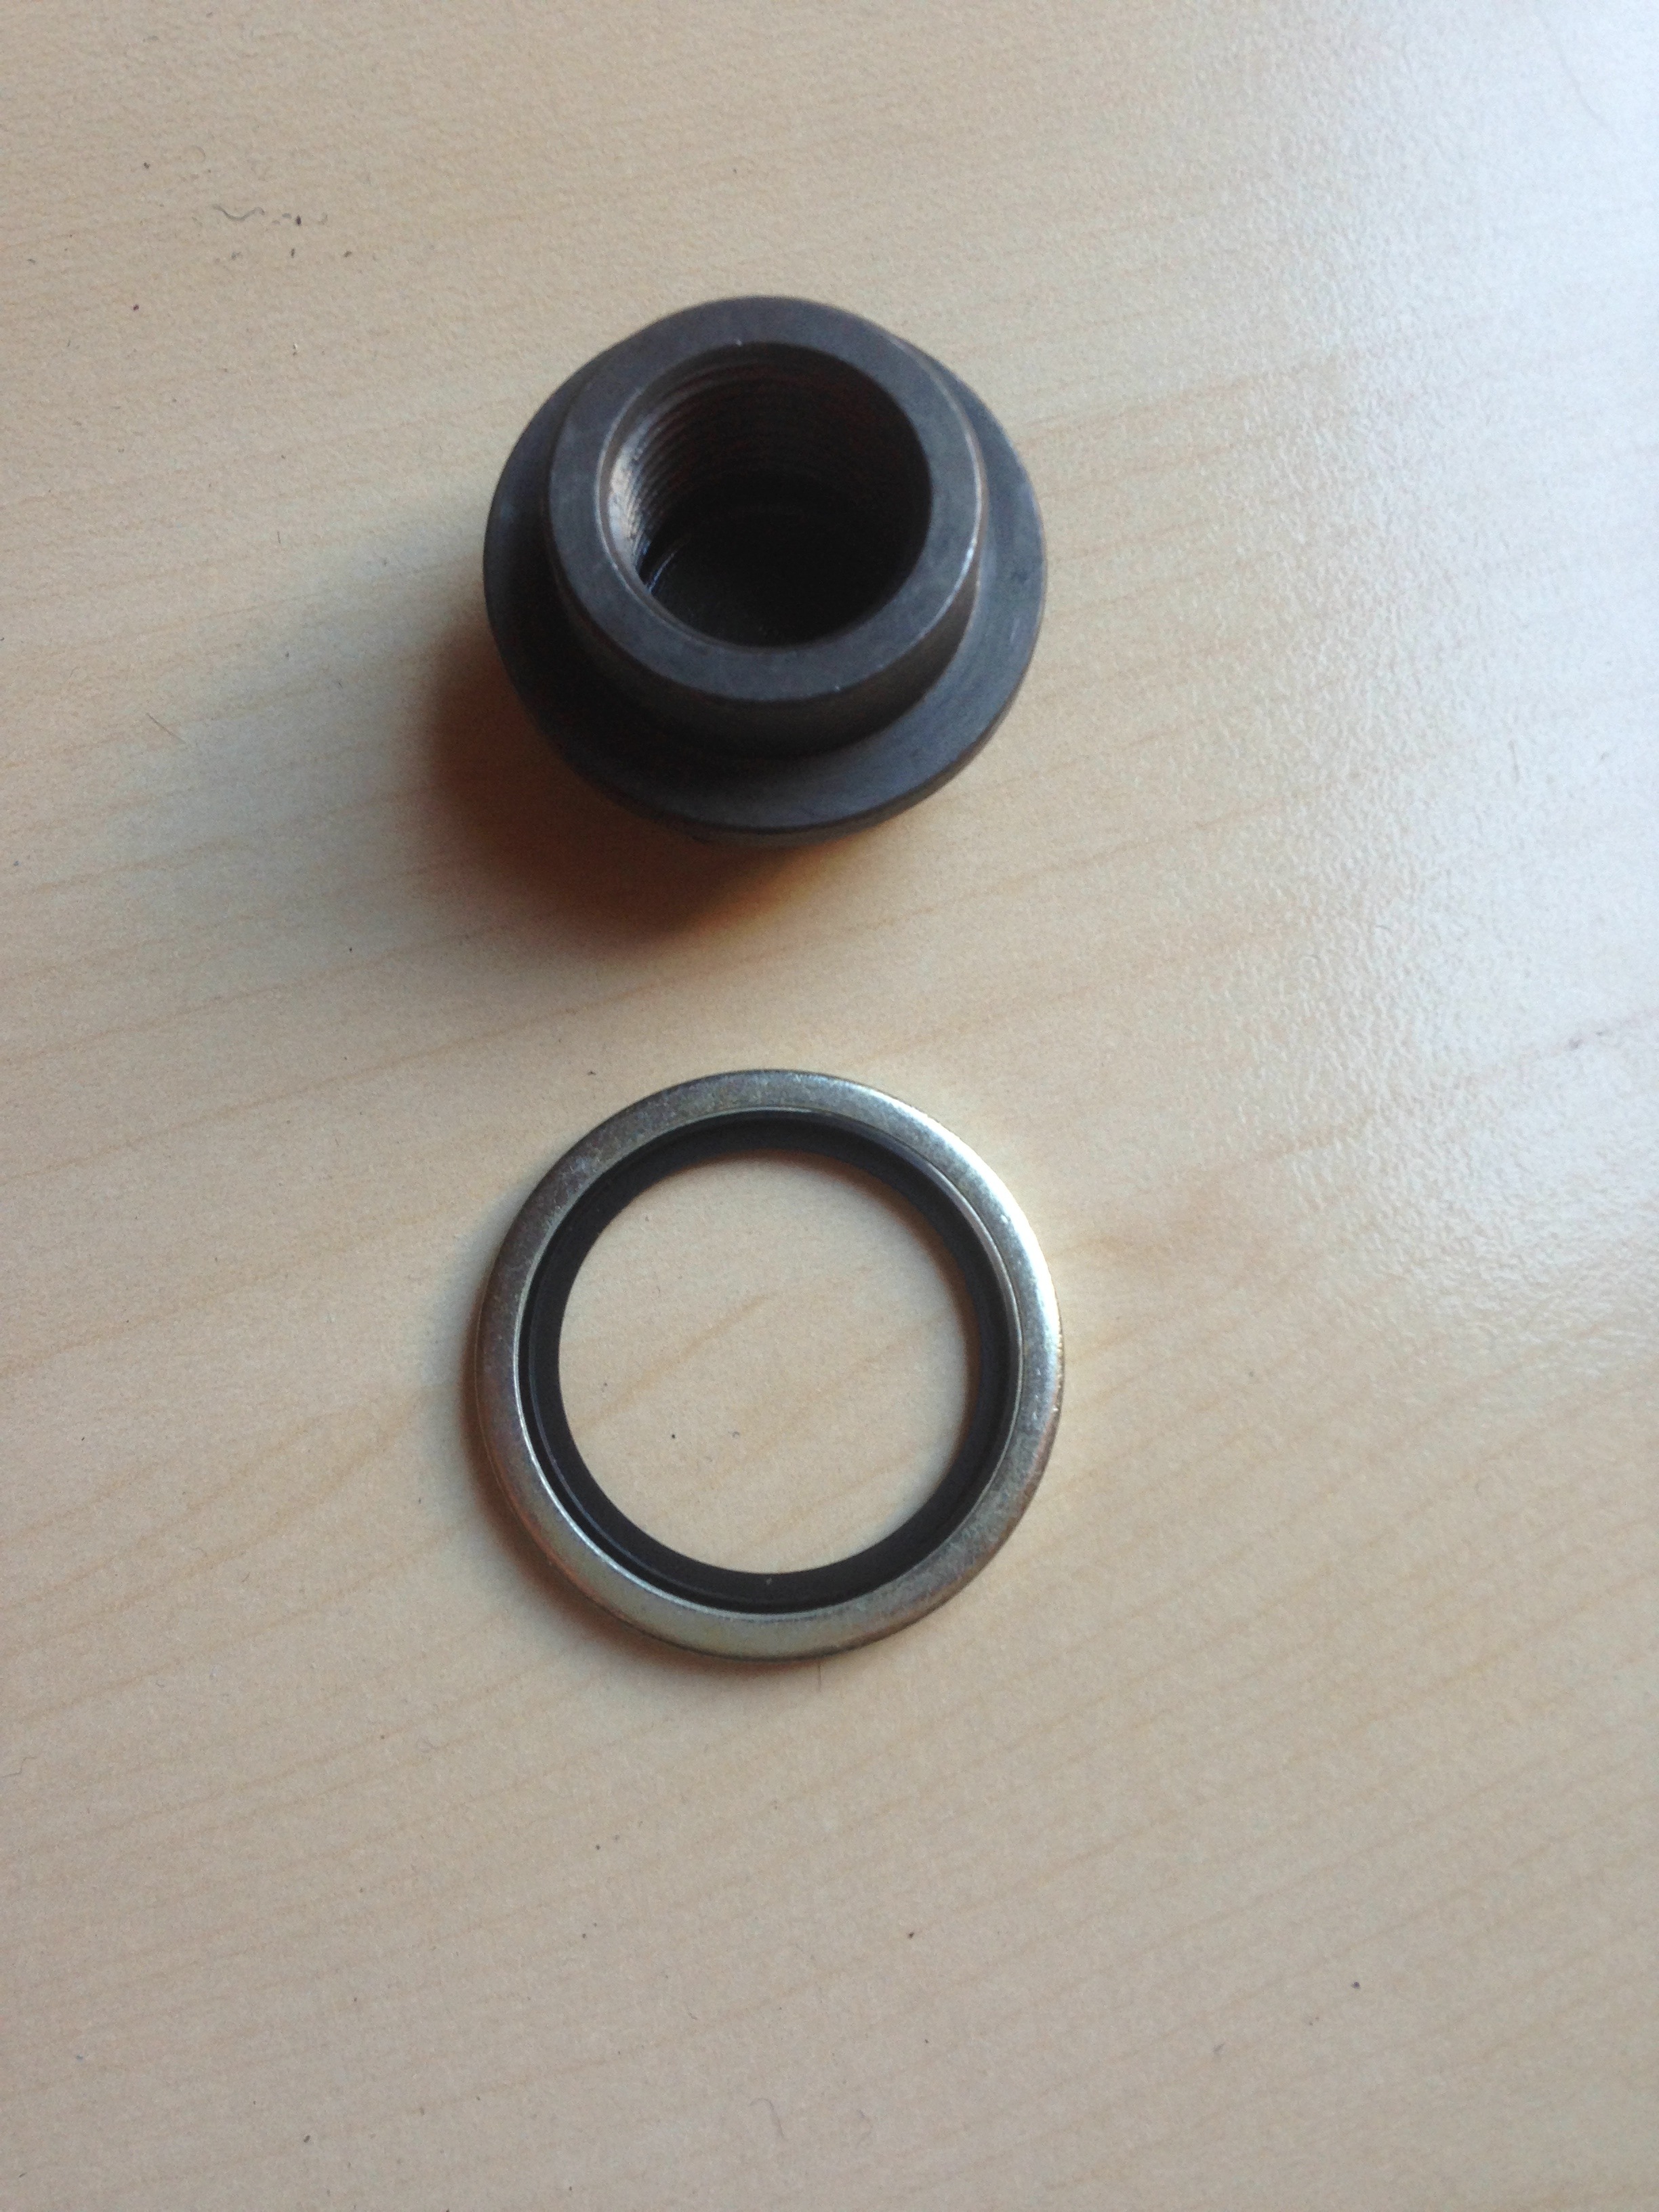
So with all this back in place and the engine bolted together again I have it a quick test run.. Which ended very quickly after I noticed it started pumping oil onto the workshop floor.. After a quick investigation found this seal had gone on the remote oil filter housing

A quick trip to a hydraulics place and a new one was sourced
Back together again and outside the workshop
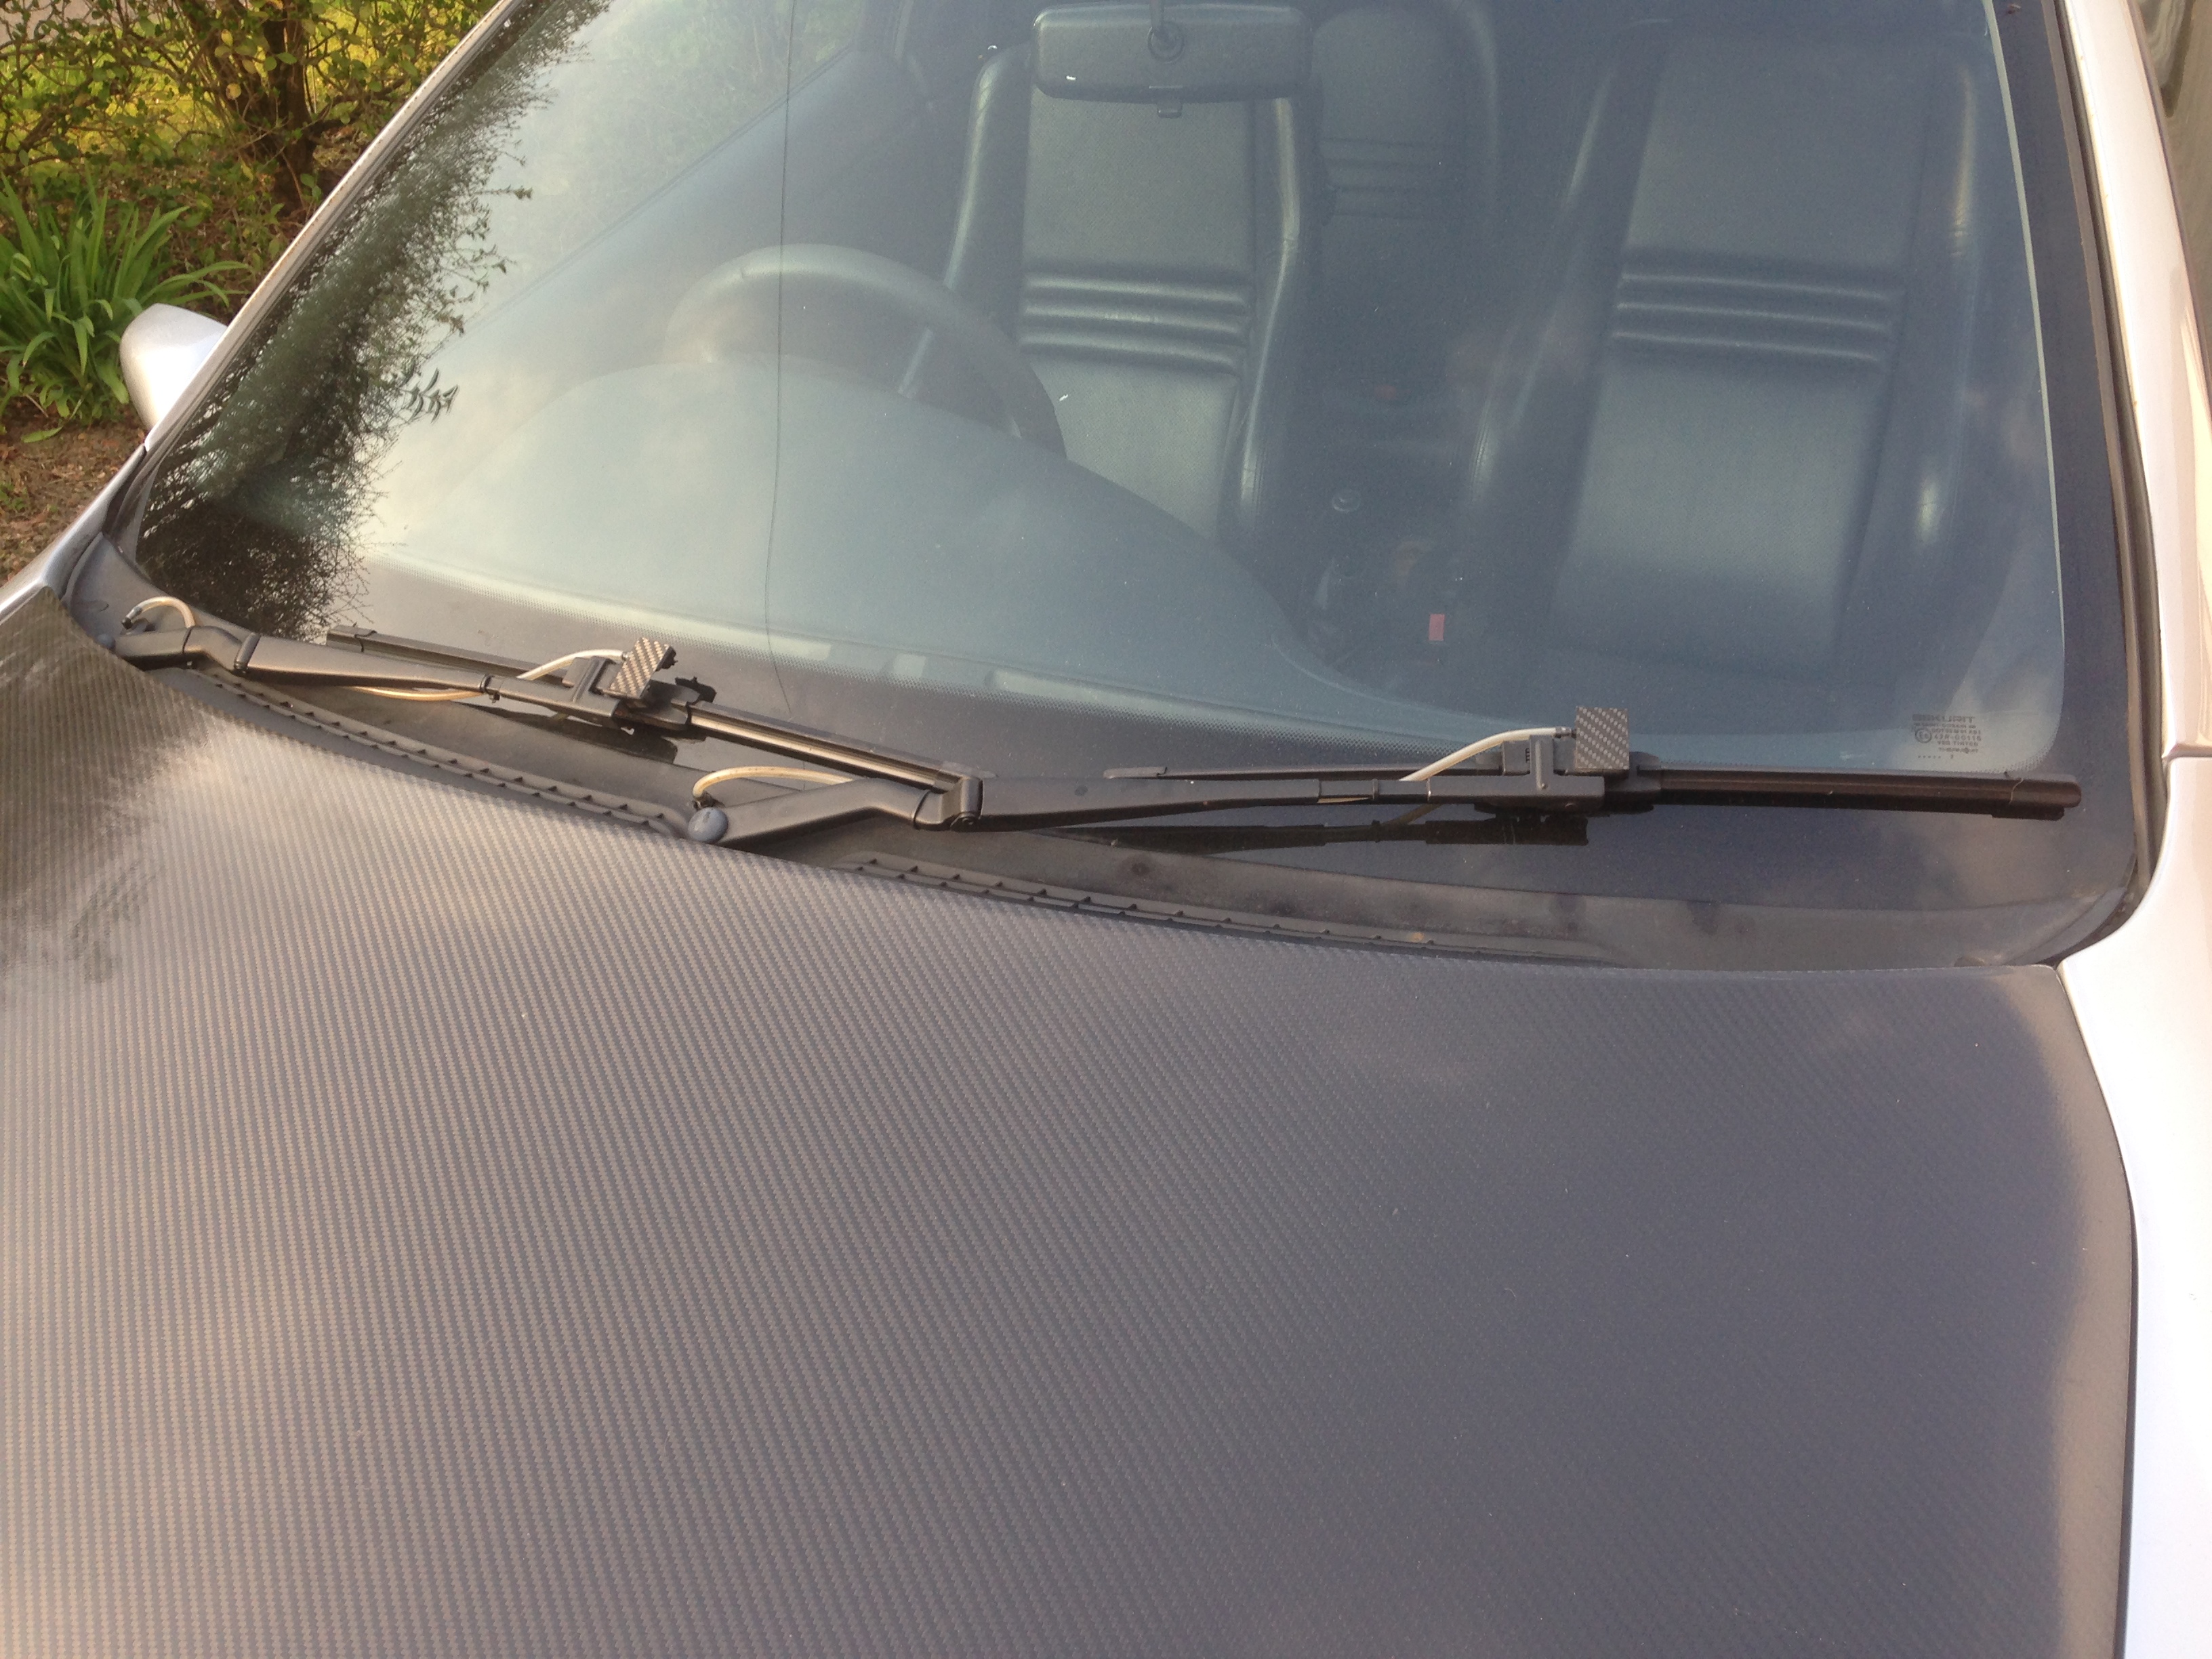
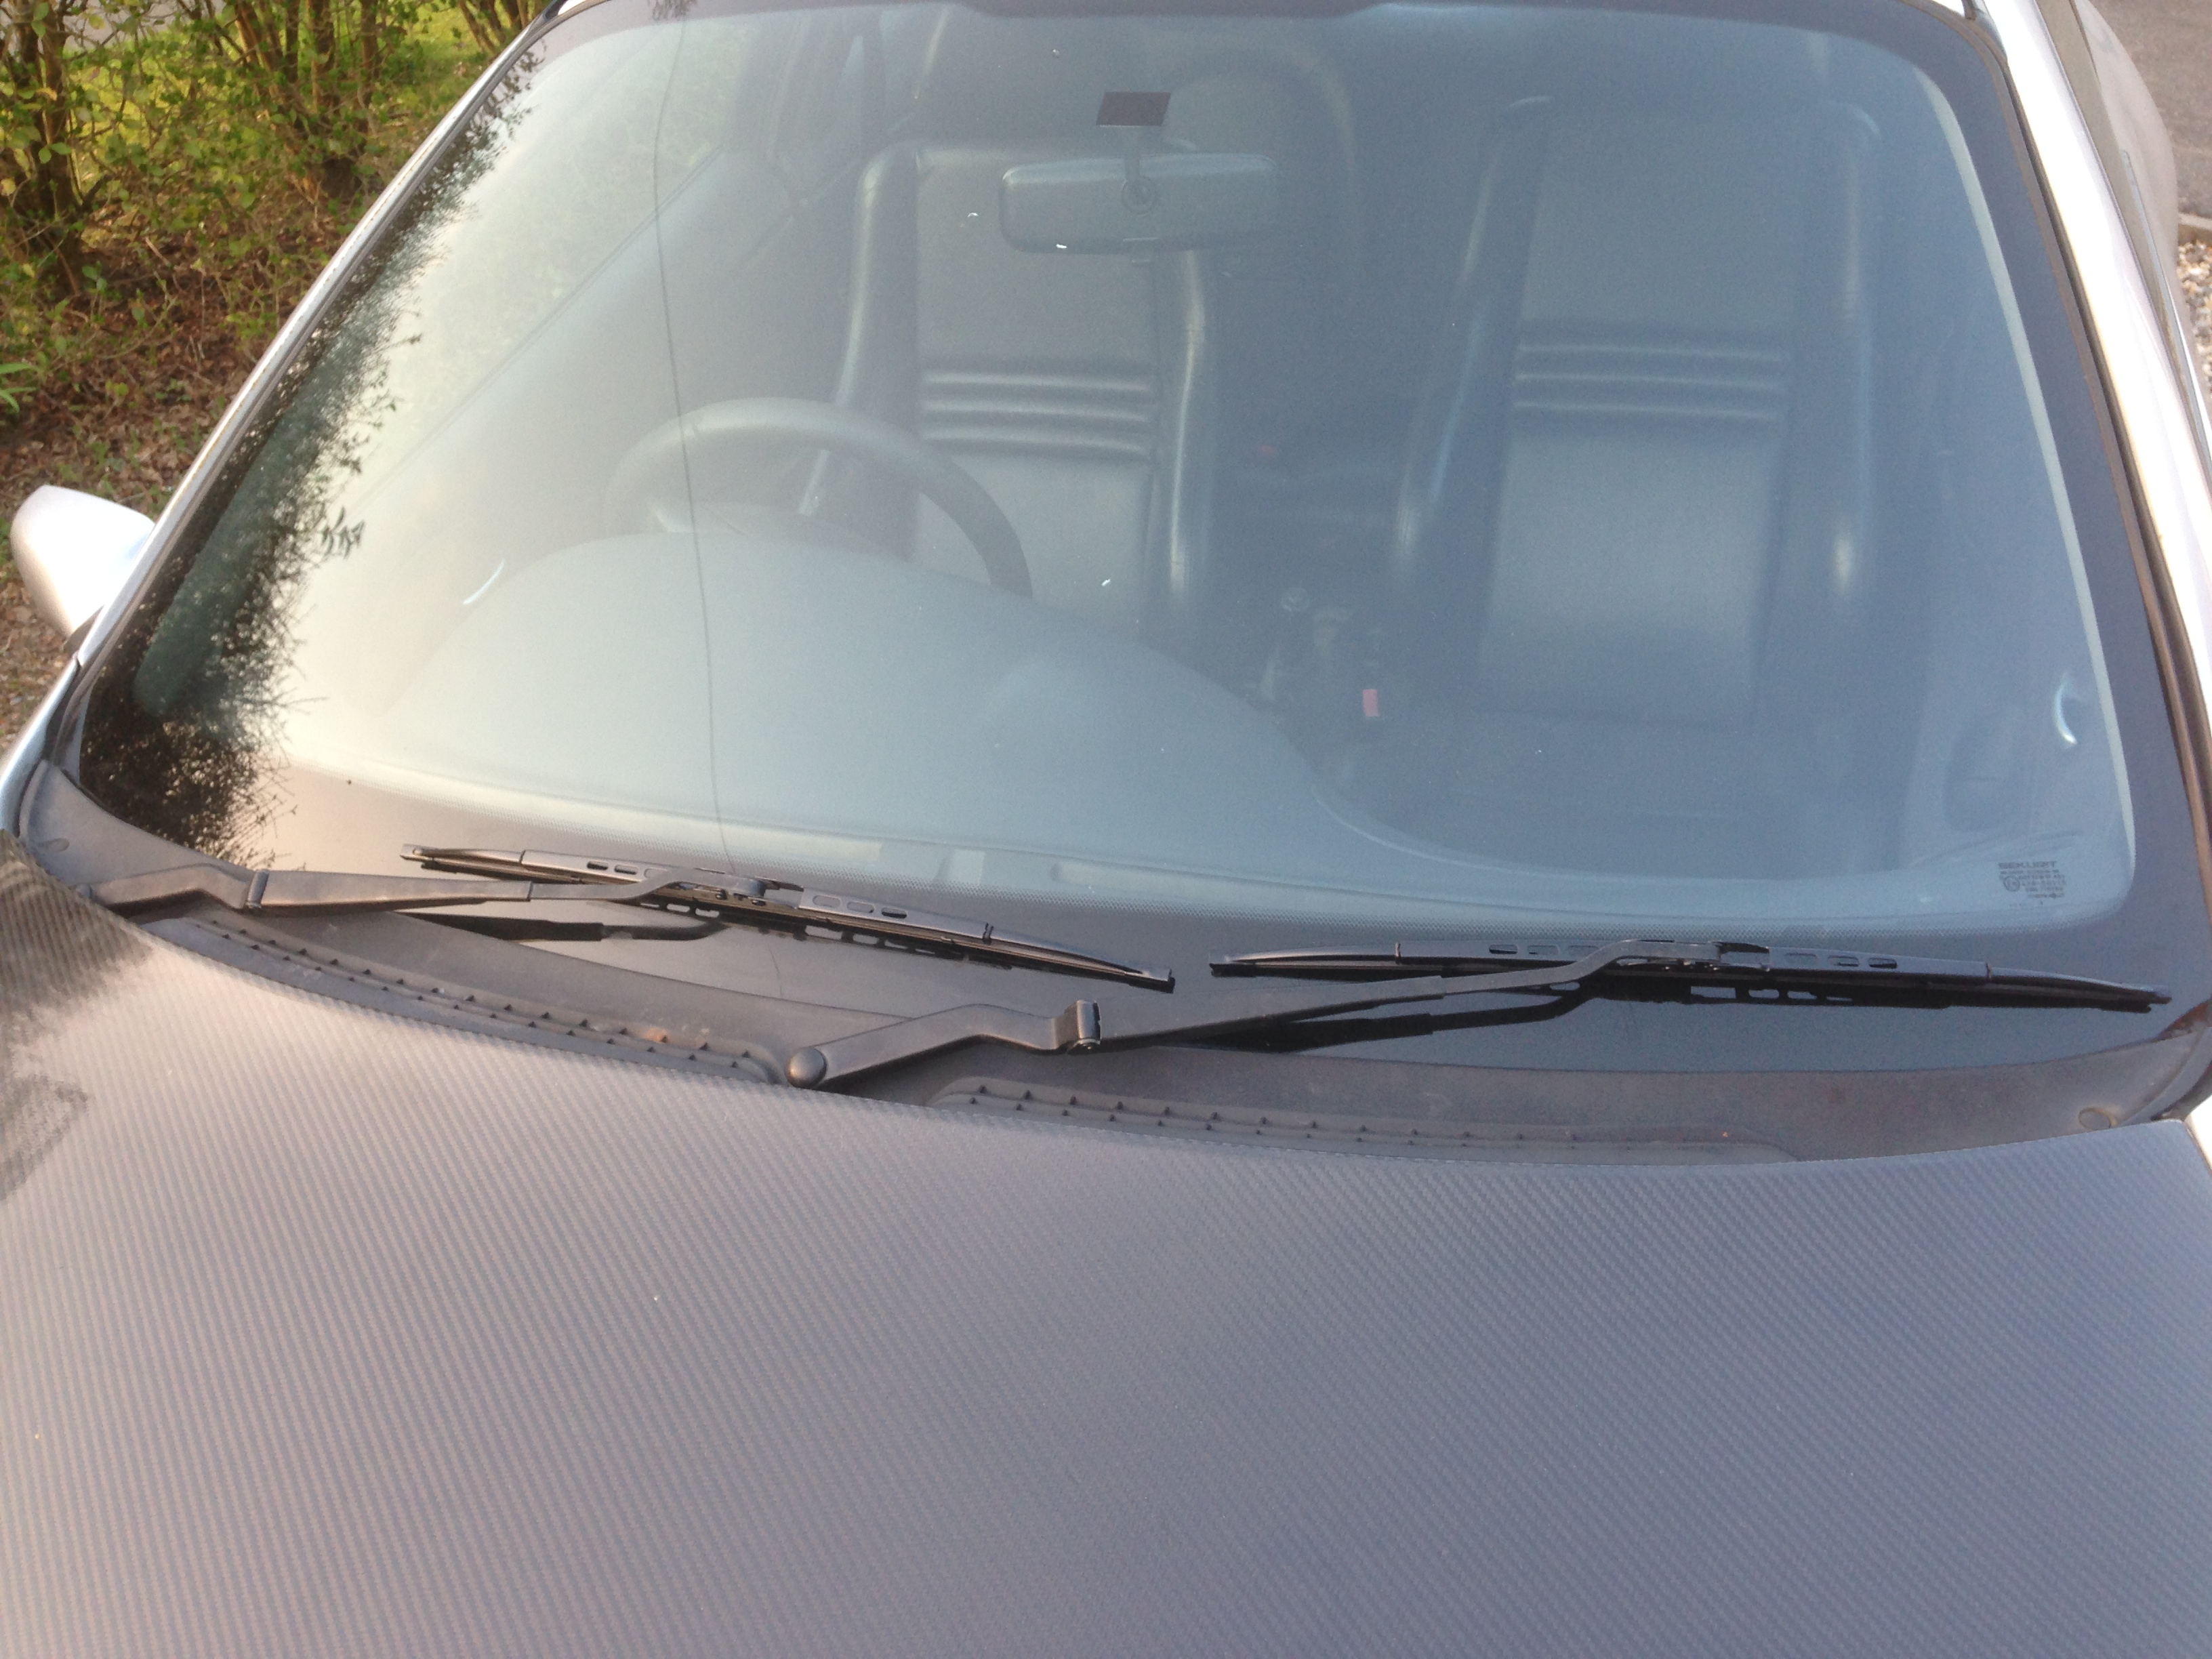
Also made a quick modification back to standard wipers again, after a bit of thought decided I wanted a cleaner look so changed them over
So with that set, back out on a drive.. This time a very successful one, the engine came back as clean as I left and the car driving smoothly... All be it a little rough running due to the management.
More to come still to bring it up to date so will get this up soon.
Thanks for looking.
Head off.. You can also see the mess in the engine bay, pipes and wiring loom everywhere! I have got around to sorting this now so will show that later on.

This shows the 'coopers rings' grooves around each cylinder - a good head gasket just dam expensive to replace


Long studs

Low comp Pistons


Underside of the head - not in bad condition so with a clean it will be good to go back on

Everything apart on the bench for a check over and clean mainly!


Here you can see the porting work on the head - not sure why the photo is dark!

One stripped thread to repair and a weird bodge on one of the plenum bolts


Yes that's a 10mm socket used as a spacer!
This might be the cause of some of the idling issues!


Thread repaired

Another shot of the engine bay

Head and inlet cleaned


Started cleaning up the block and various parts


Found this in the oil cooler.. Not the best but it's all out now

If someone can explain this to me that would be a great help.. Why was there a need a some point to attack the bulkhead with a hammer.. It looks like this was done prior to painting too.. Bizarre ! Will deal with this at another stage.

Engine bay looking a little better

New cometic head gasket

Head given a clean

And back on..


To take the head off I had to remove the inlet cam as the socket wouldn't go down past the body of the camshaft.. In doing so I noticed that one of the cam cap studs had stripped it's thread, so repaired the thread and checked all of them... Turned out a few needed doing so glad I found this now!


Did a few other jobs while it was apart, split the turbo and manifold to for new studs and nuts, also out riv nuts in for the strut brace.. Probably not the strongest thing to use but for now it will do.. I may have plans to change this arrangement anyway, so will come back to it at a later day. For now it makes getting the strut brace off a lot easier!


So with all this back in place and the engine bolted together again I have it a quick test run.. Which ended very quickly after I noticed it started pumping oil onto the workshop floor.. After a quick investigation found this seal had gone on the remote oil filter housing

A quick trip to a hydraulics place and a new one was sourced

Back together again and outside the workshop

Also made a quick modification back to standard wipers again, after a bit of thought decided I wanted a cleaner look so changed them over


So with that set, back out on a drive.. This time a very successful one, the engine came back as clean as I left and the car driving smoothly... All be it a little rough running due to the management.
More to come still to bring it up to date so will get this up soon.
Thanks for looking.
06-11-2015, 08:48 AM
#58
Too many posts.. I need a life!!

damn, you are handy with a helicoil kit!
lol
good work so far, its so demoralising when you do something that has taken ages and then you have put it all together and something else pops up thats wrong........
lol
good work so far, its so demoralising when you do something that has taken ages and then you have put it all together and something else pops up thats wrong........
06-11-2015, 10:48 AM
#59
10K+ Poster!!
Doing a great job and really cracking on with it.
I wonder why the head gasket failed when it was a good one AND you have the 6 long studs? It isn't running mega boost is it?
I wonder why the head gasket failed when it was a good one AND you have the 6 long studs? It isn't running mega boost is it?
 07-11-2015, 08:50 AM
#61
10K+ Poster!!
 07-11-2015, 03:35 PM
#62
Advanced PassionFord User

 at least he got another spare 10mm socket this time.....
Glad to see your still making progress on it. That bulkhead is a strange one, only thing I can think of is they thought they might have needed access down the back of the head at some point or the engine might have needed clearance? Either way it wasn't the nicest of looking solutions especially considering what the conversion probably cost in the first place.
07-11-2015, 07:31 PM
#64
PassionFord Regular
Thread Starter
Thanks for all the comments guys - it's certainly been an interesting ride so far!
I've actually had it all mapped on the new management now, I use TDI in lakeside, Essex. Have done for a few years now on a few cars and always been spot on.
I've had to be good with the odd helicoil! So much so I ended up buying a large kit knowing full well there will be plenty more to do on this car!
The compression side hadn't failed, nor had any of the water ways. It was only the oil seal around the pressurised gallery at the back and in doing so pumped oil out between the head and block. The coopers rings and lon studs were doing their job in that sense. So hopefully with the new cometic gasket this shouldn't be a problem again! No not anymore, may have done in the past but it's around 2 bar now.
at least he got another spare 10mm socket this time.....
Glad to see your still making progress on it. That bulkhead is a strange one, only thing I can think of is they thought they might have needed access down the back of the head at some point or the engine might have needed clearance? Either way it wasn't the nicest of looking solutions especially considering what the conversion probably cost in the first place. That 10mm socket made me and a few mates laugh.. It's certainly a new trick! As for the bulkhead... It's strange, it seems to have been done before paint, there's plenty of space there for the engine, and I don't think it's needed to get to the top two gearbox bolts.
Eventually I would like to strip the car down and these bits of 'character' I will correct and panel beat back out in a shell restoration.
Thanks for looking guys, appreciate all the comments. I'll get another update up shortly.
Thanks
Dan
at least he got another spare 10mm socket this time.....Glad to see your still making progress on it. That bulkhead is a strange one, only thing I can think of is they thought they might have needed access down the back of the head at some point or the engine might have needed clearance? Either way it wasn't the nicest of looking solutions especially considering what the conversion probably cost in the first place.
Eventually I would like to strip the car down and these bits of 'character' I will correct and panel beat back out in a shell restoration.
Thanks for looking guys, appreciate all the comments. I'll get another update up shortly.
Thanks
Dan
07-11-2015, 10:28 PM
#65
PassionFord Regular
Thread Starter
So another update..
After getting the car running and all things being well it was left on the driveway. Few days later I was out for the evening and it rained, came home to find the car battery flat as the alarm had been going off. I knew the car had some leaking issues shall we say but this was a little silly.
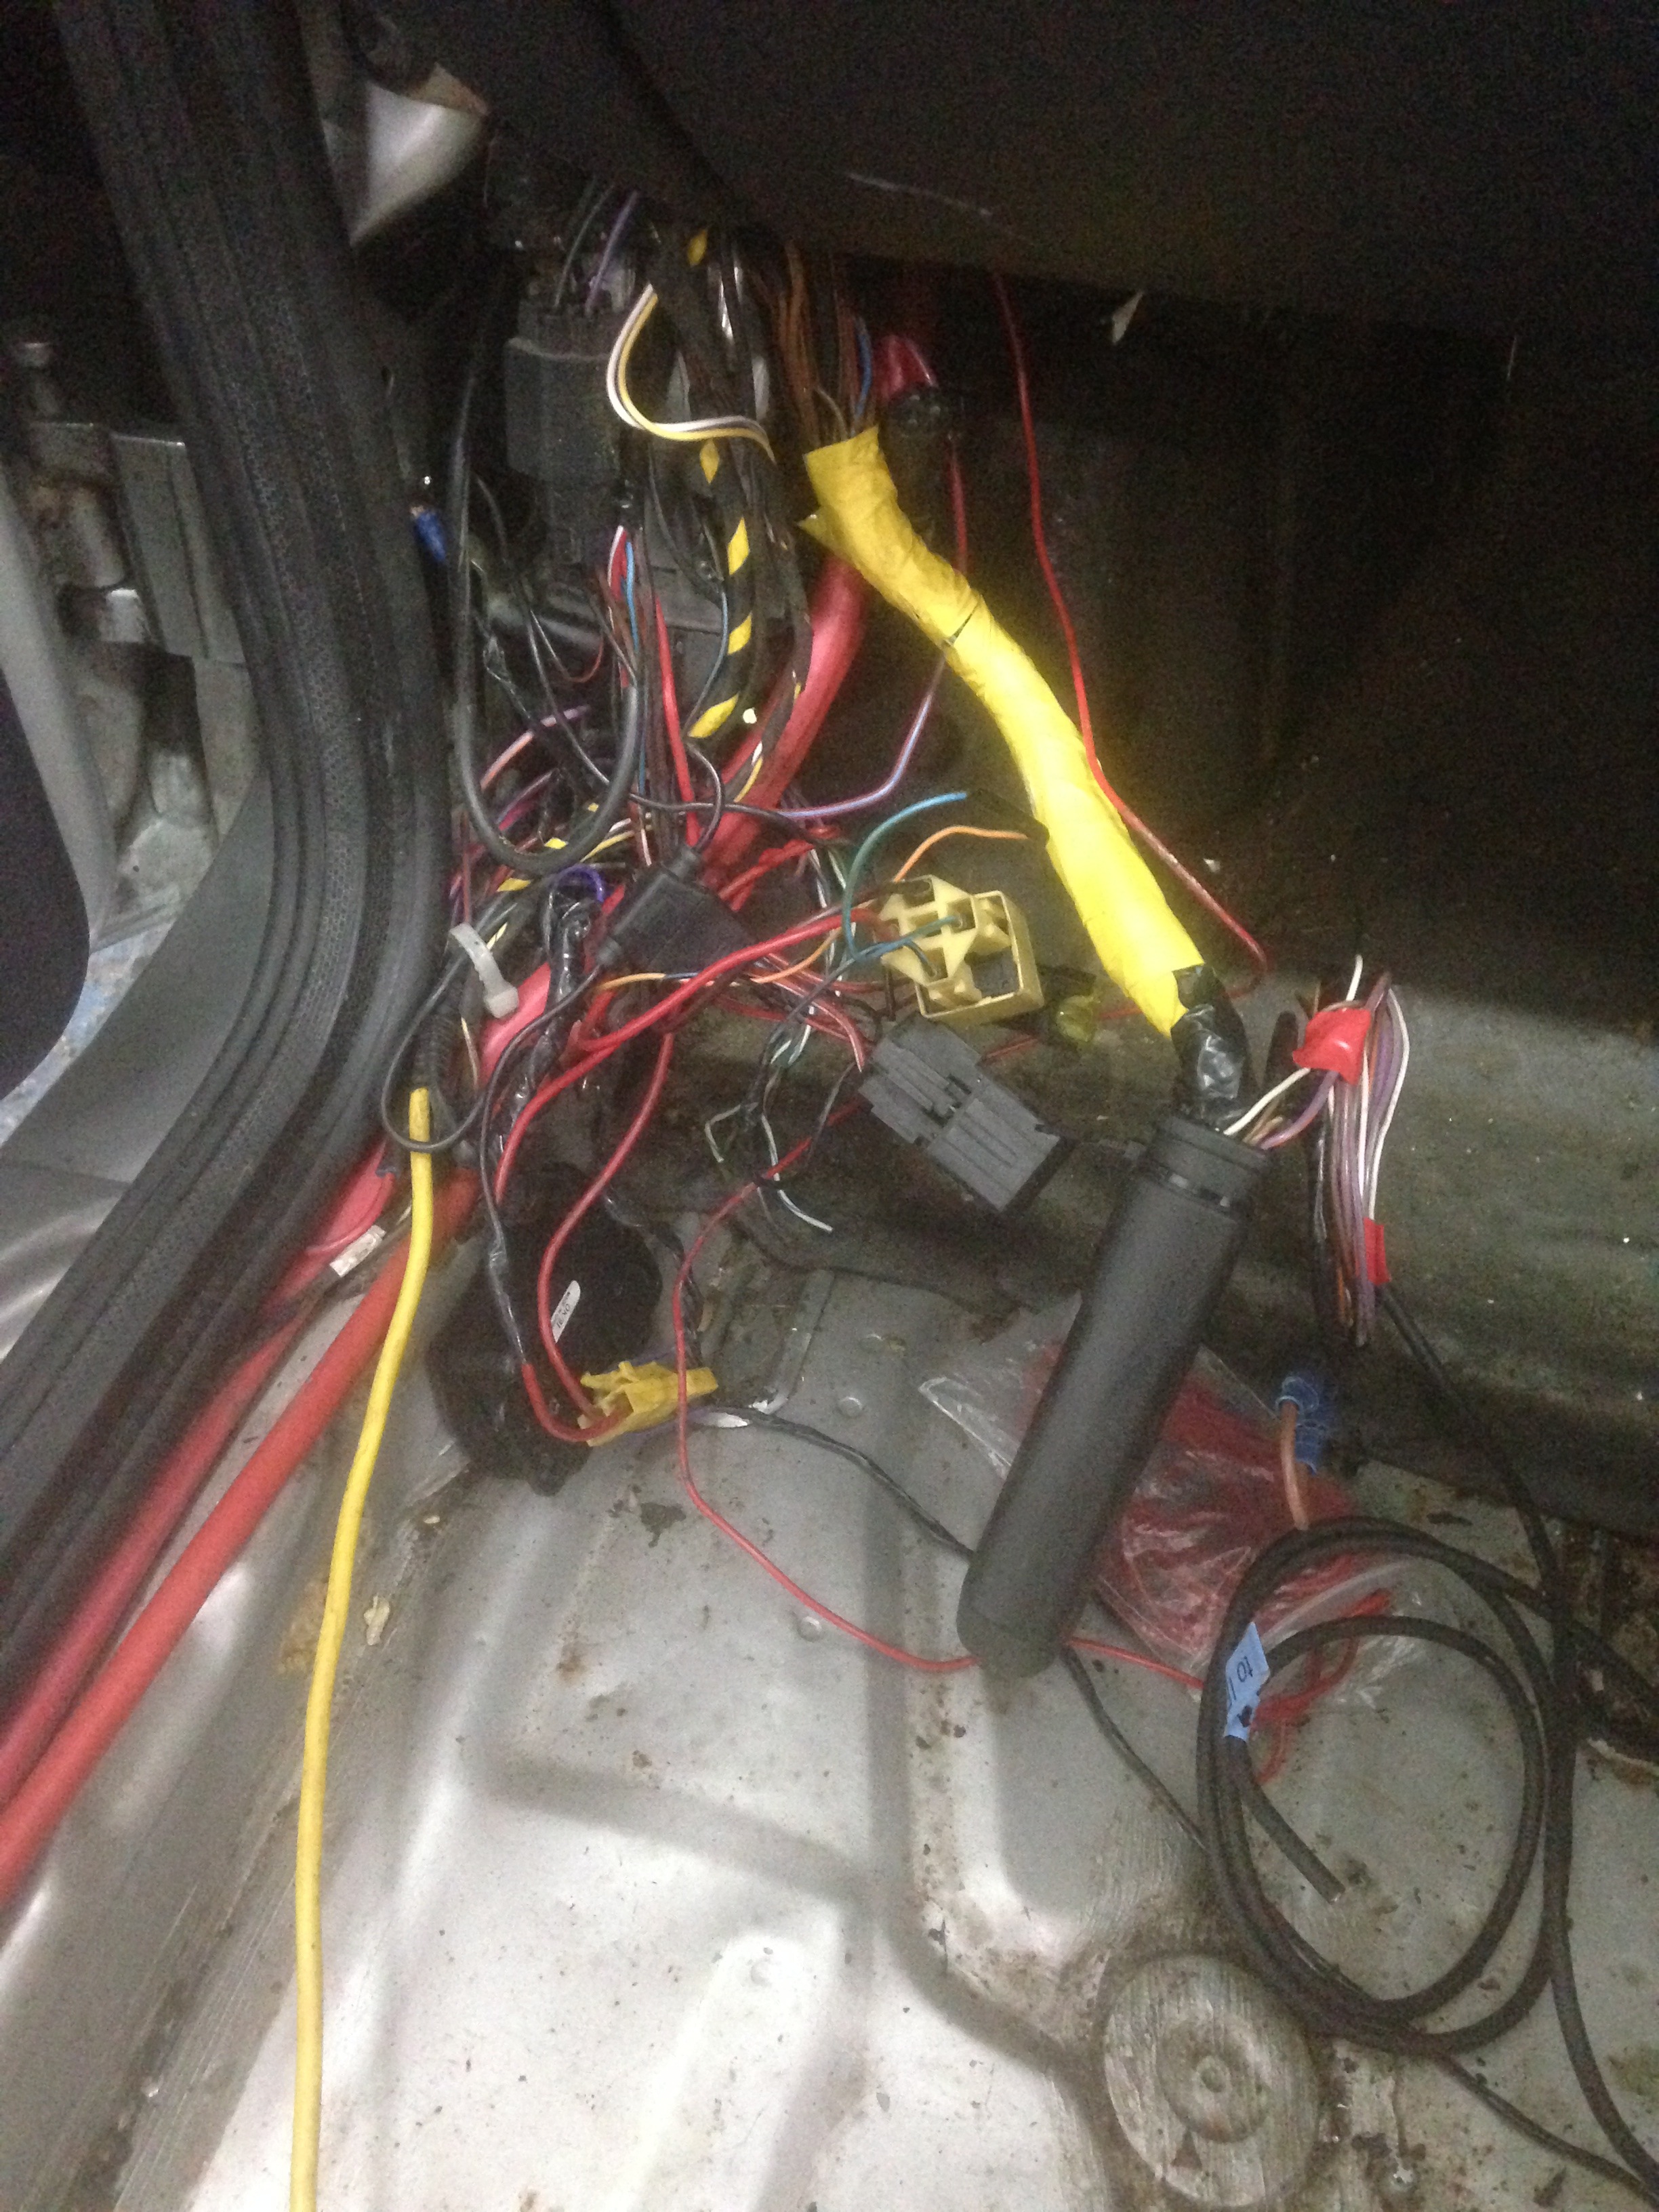
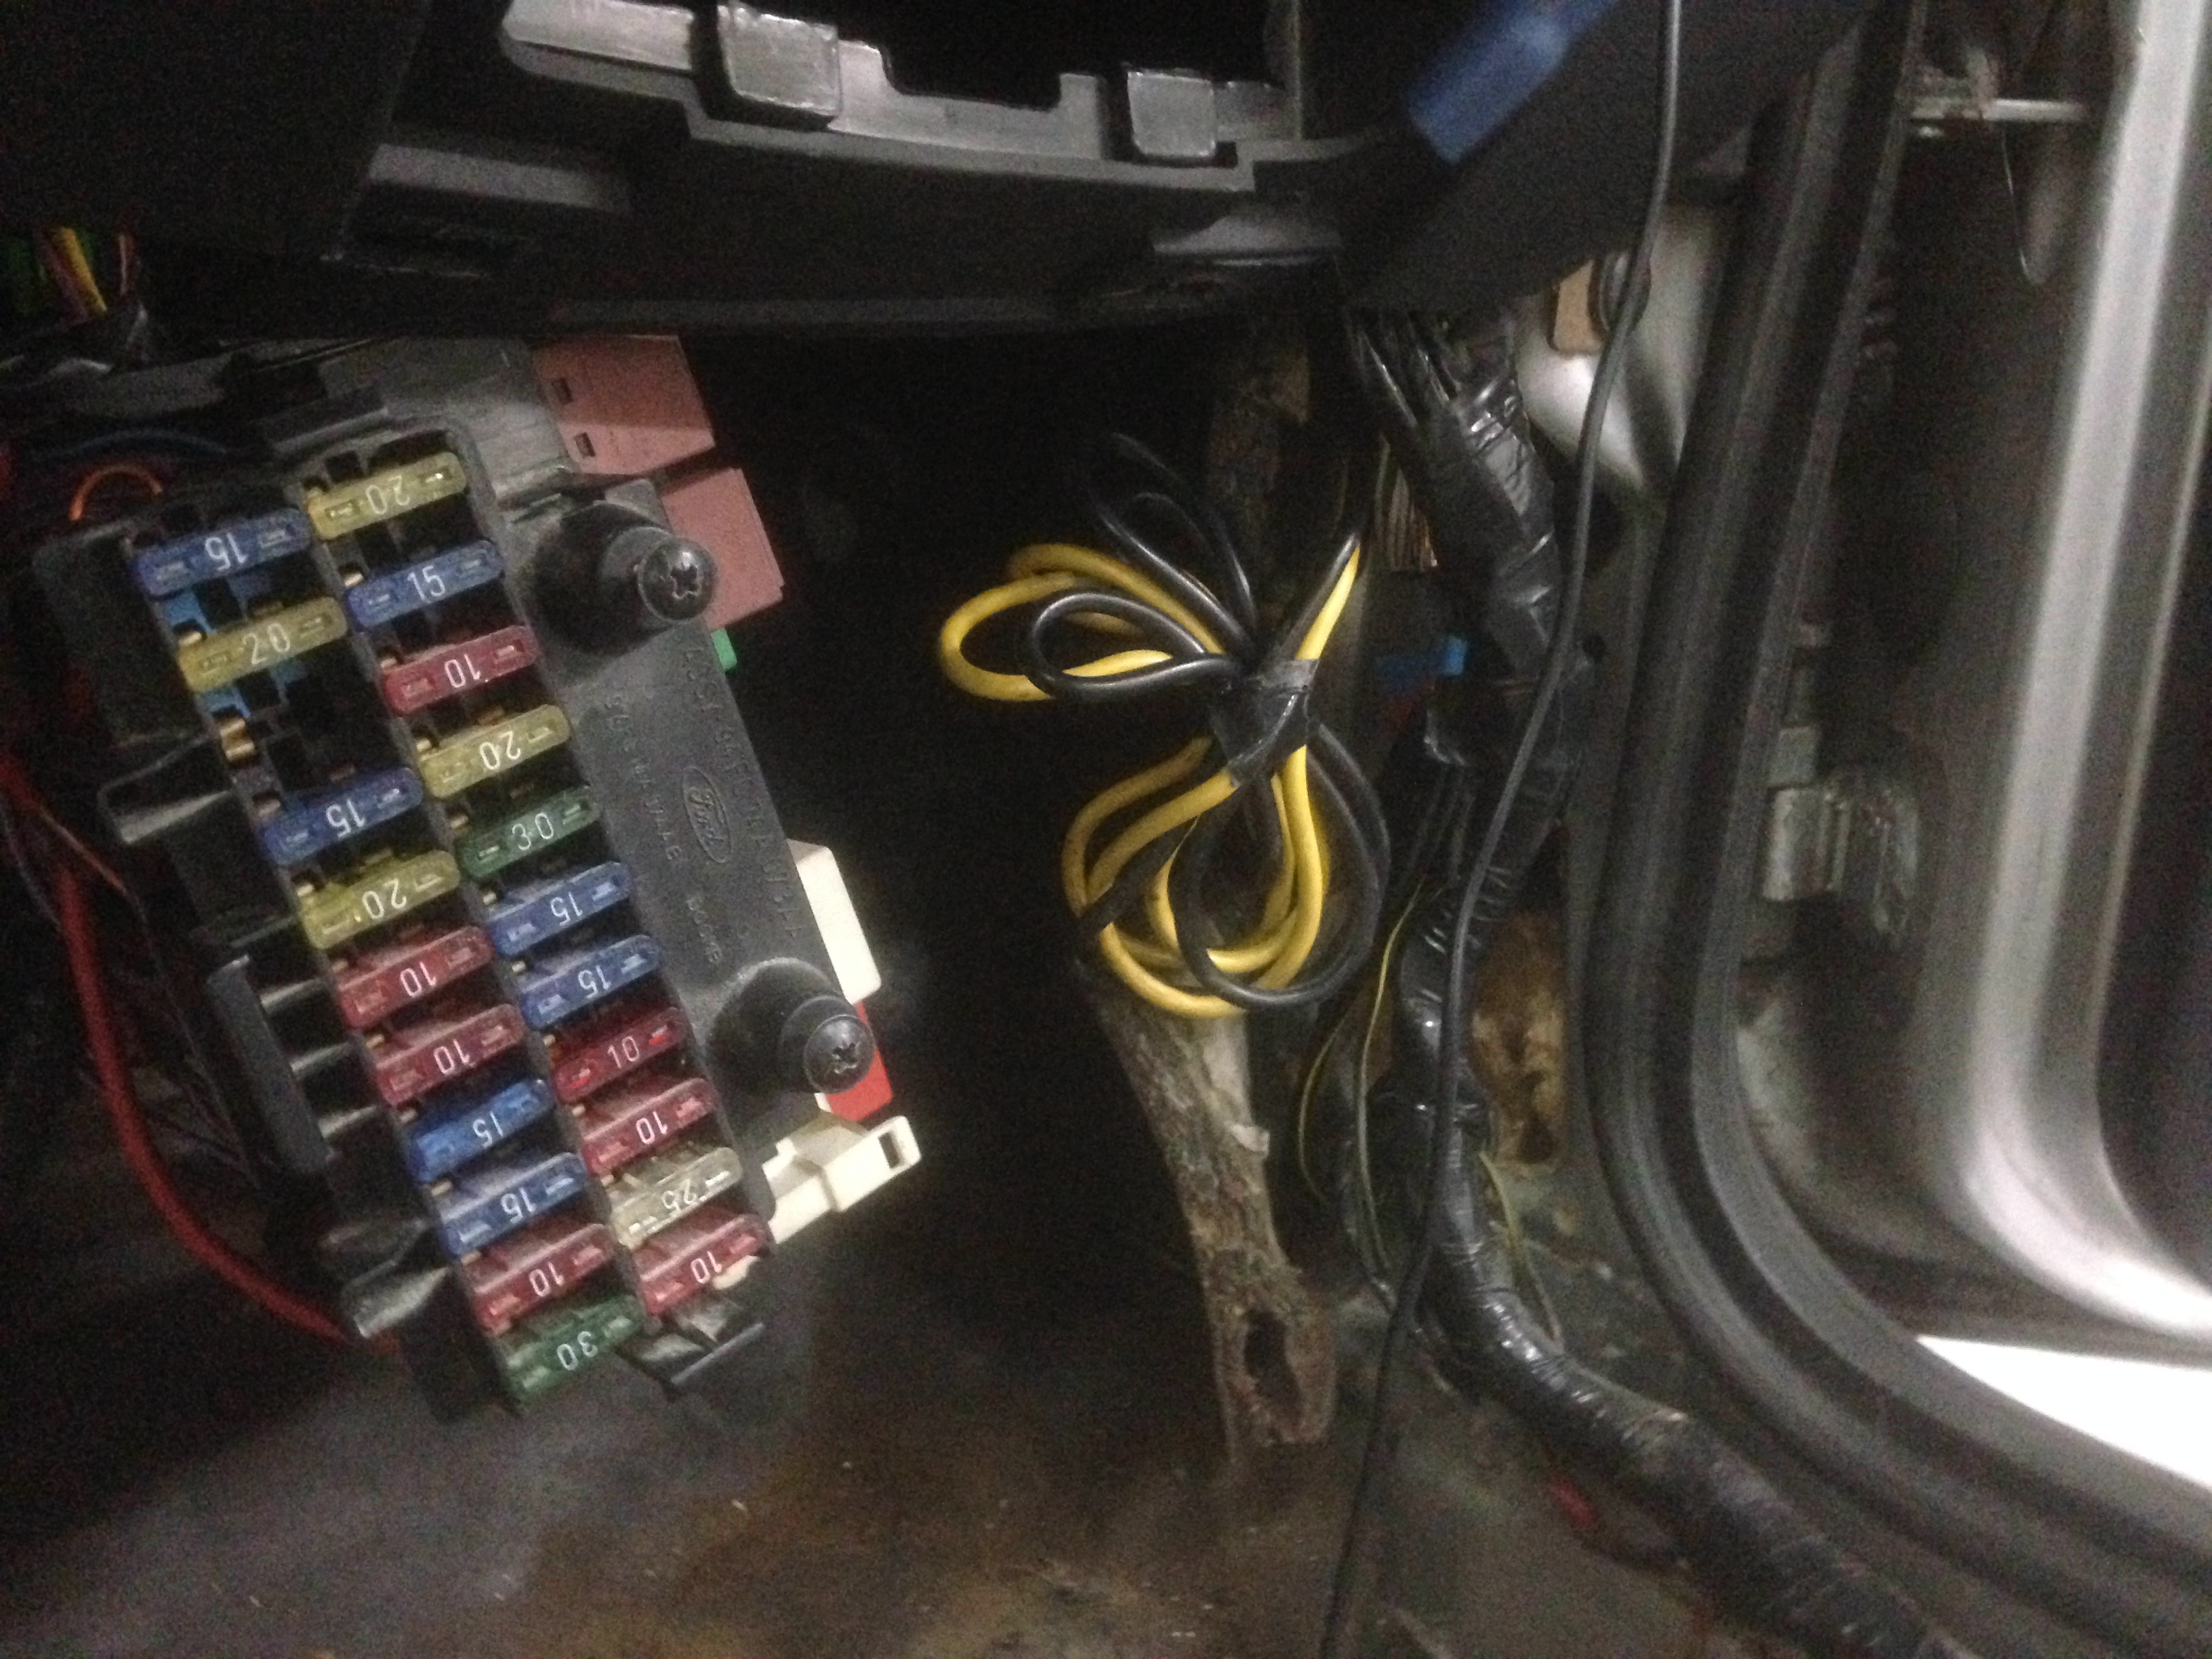
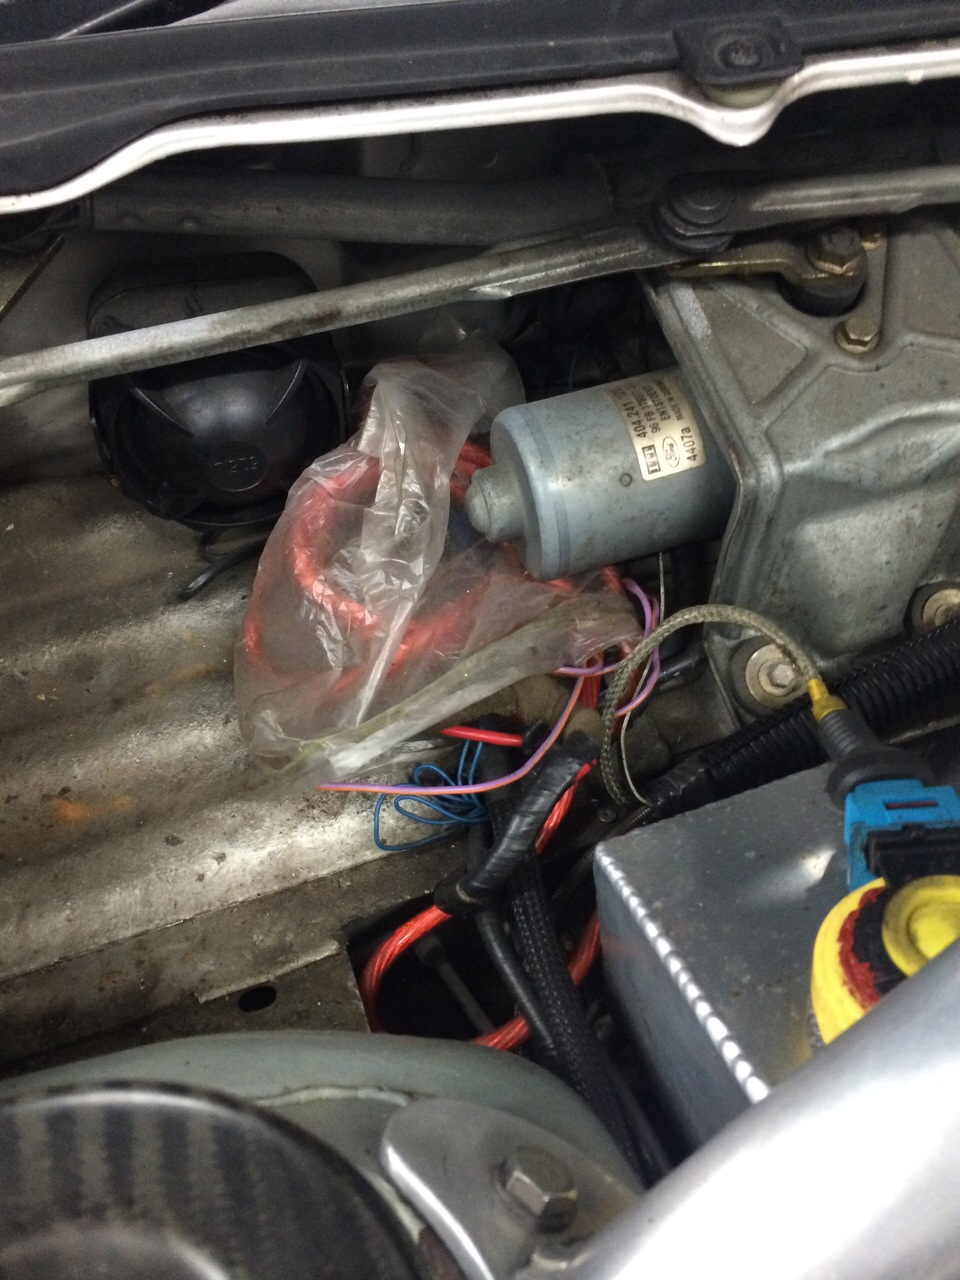
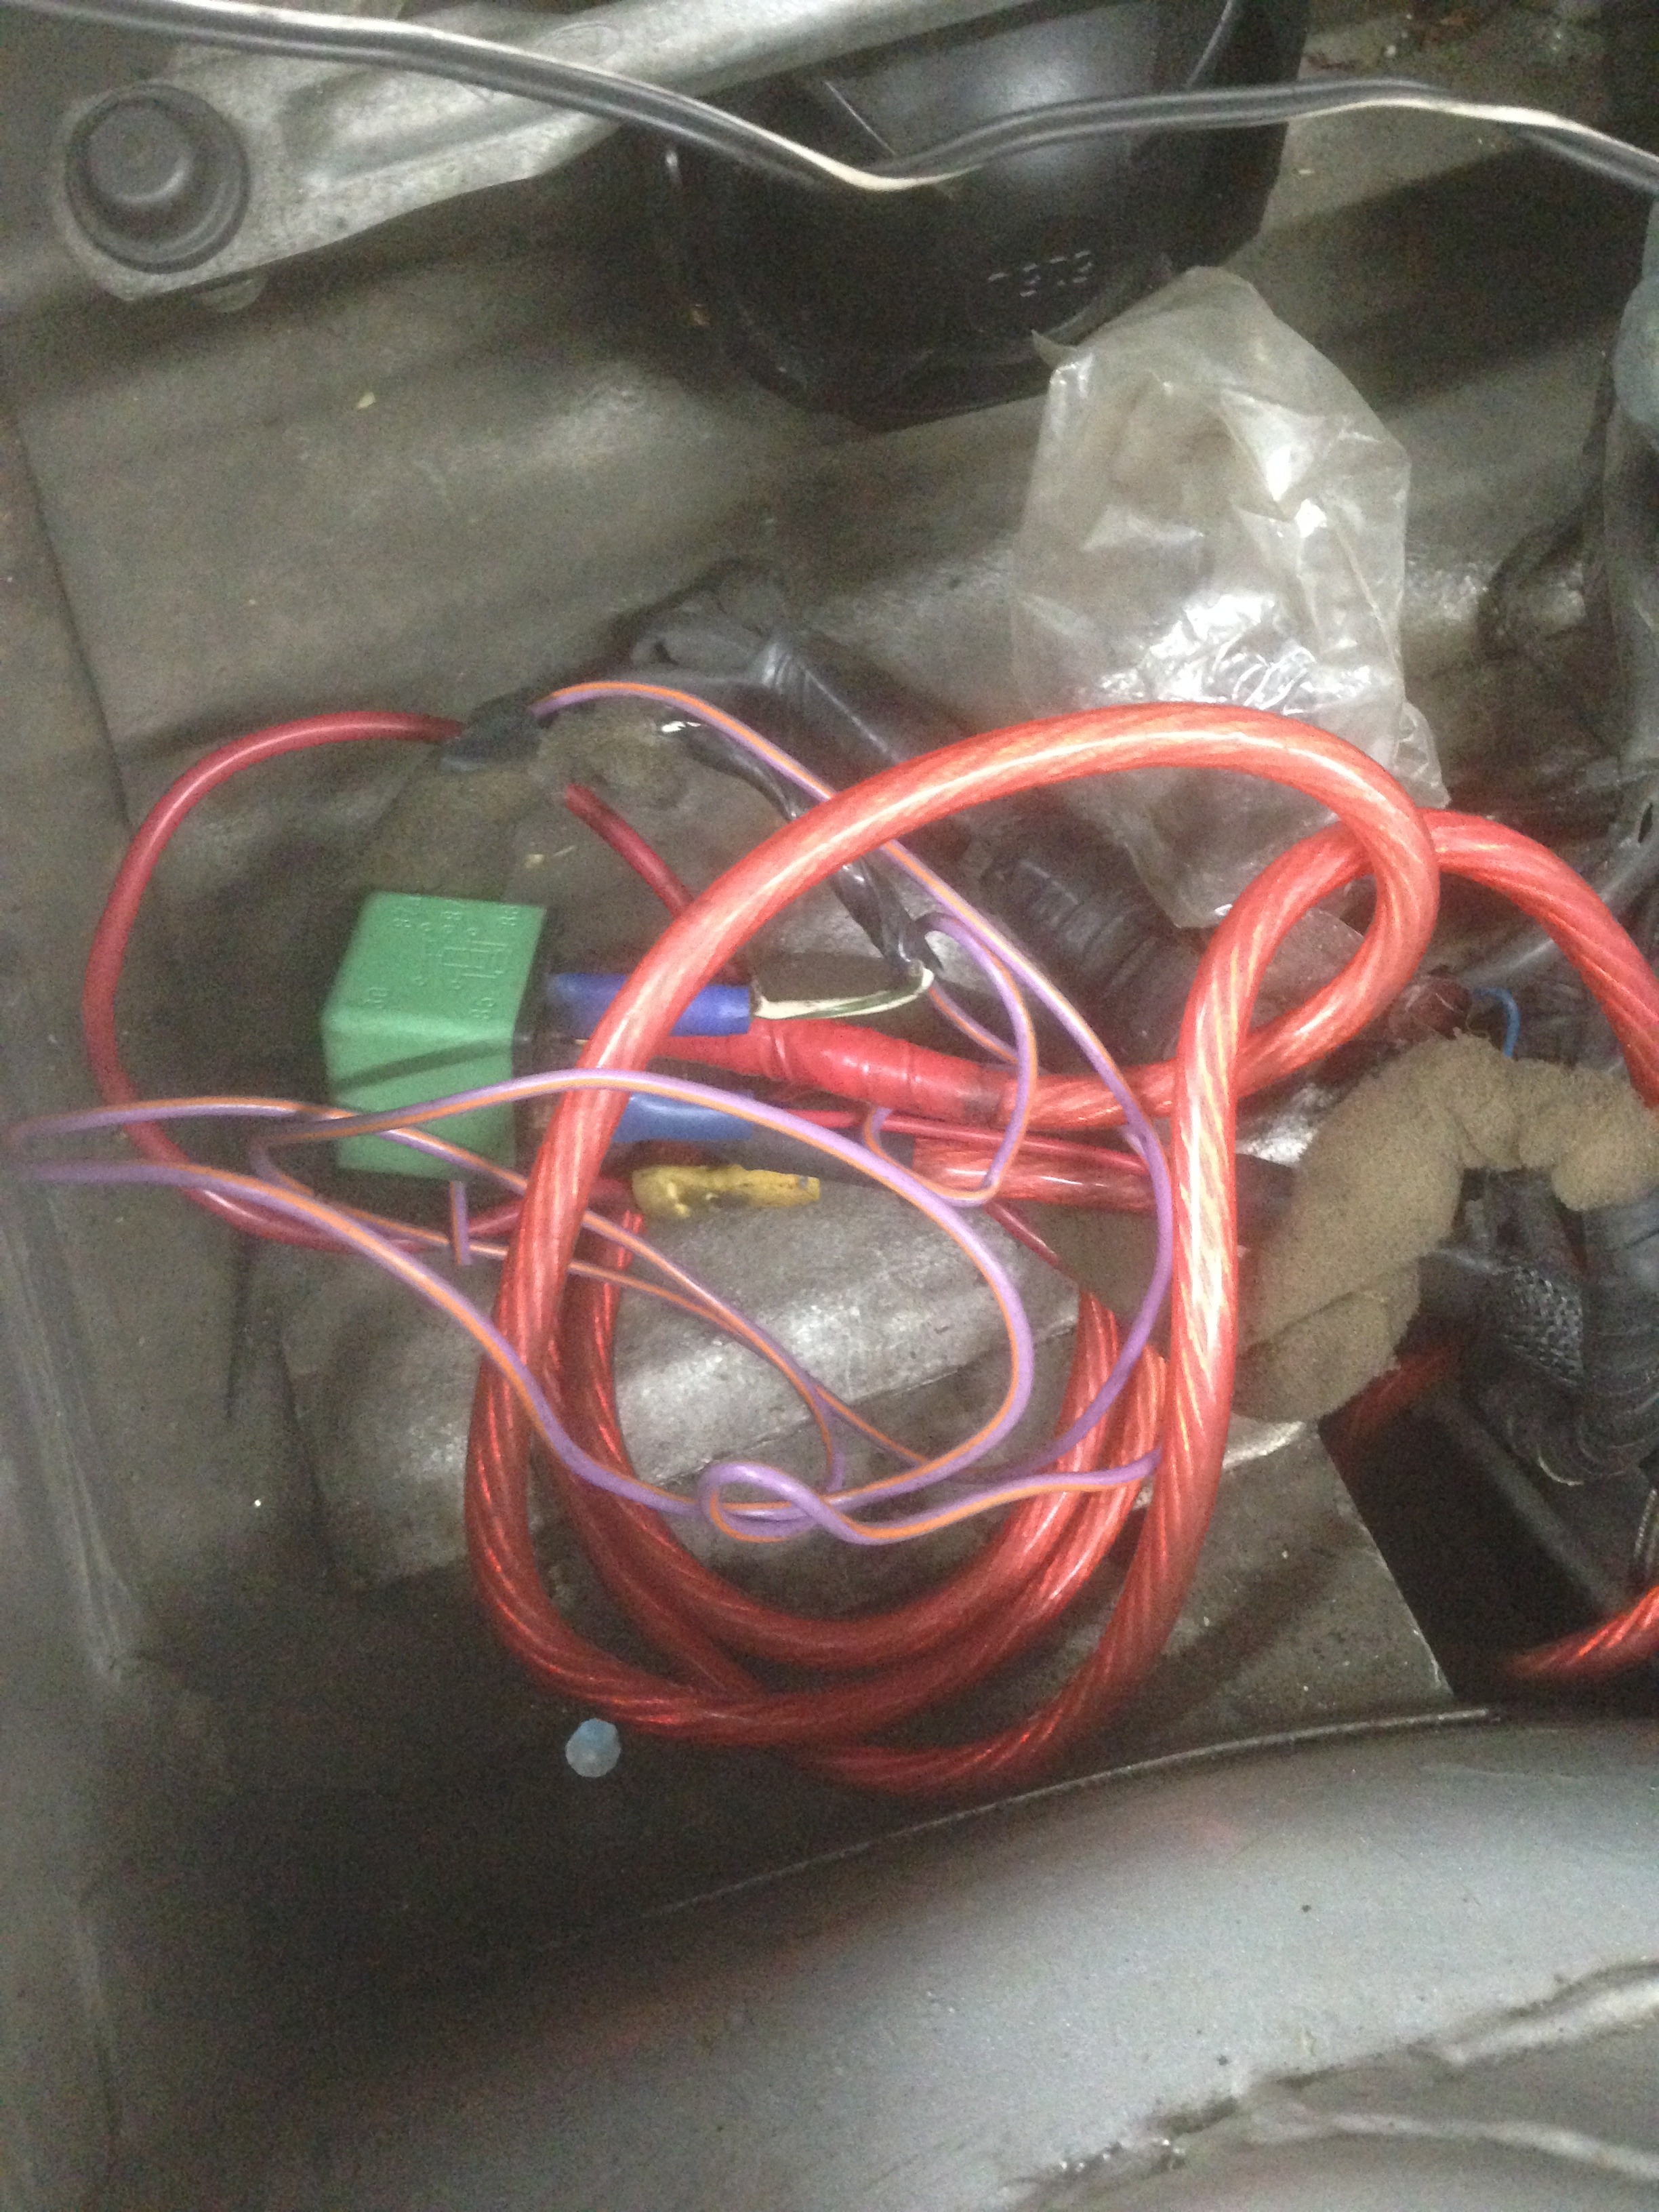
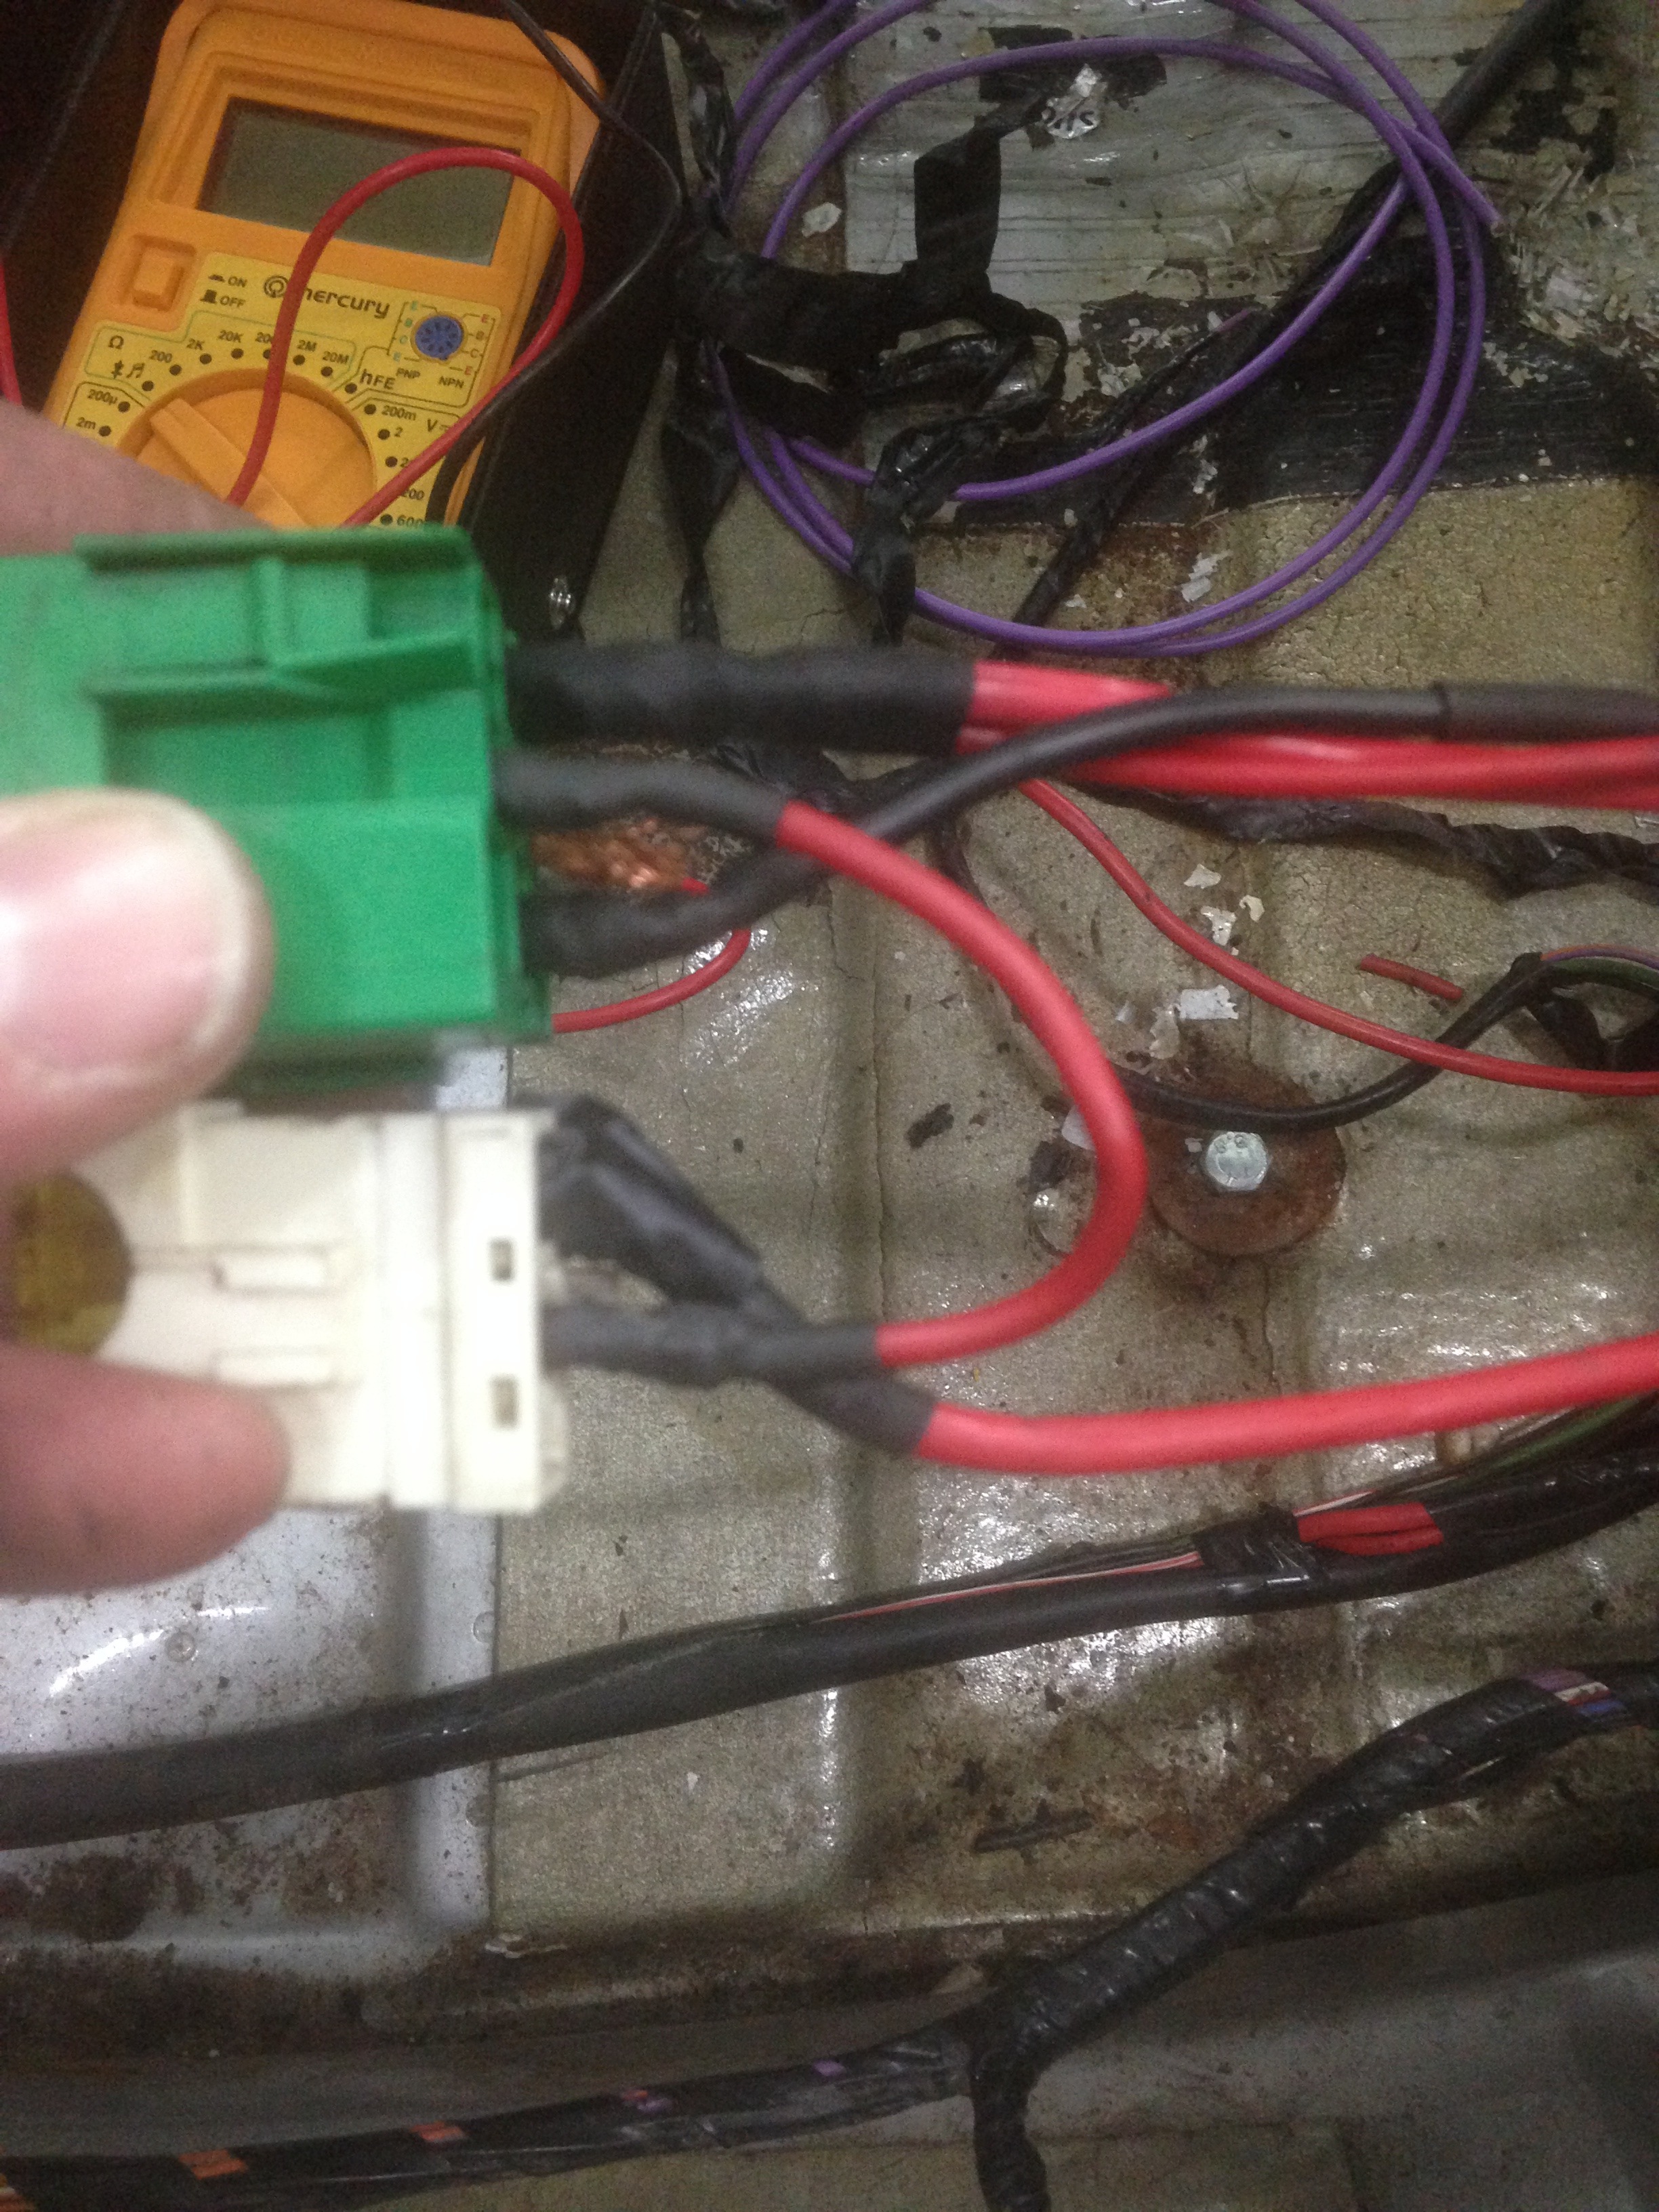
So put the car battery on charge and went inside for a while. Half hour later came back it to find the fuel pump running and the auxiliary fusebox relays clicking like crazy. Water had tracked down the wiring loom on the passenger side due to a massive hole through one of the bulkhead grommets, it had then run into the engine loom relays that were just hanging there and caused them to fail and get stuck on.
So with that and always knowing that the wiring on this car was interesting to say the least, it was time to strip it apart and find out what's going on.
Some of the photos are a little 'misty' as my phone was playing up so apologies for that, but hopefully you'll get the idea.
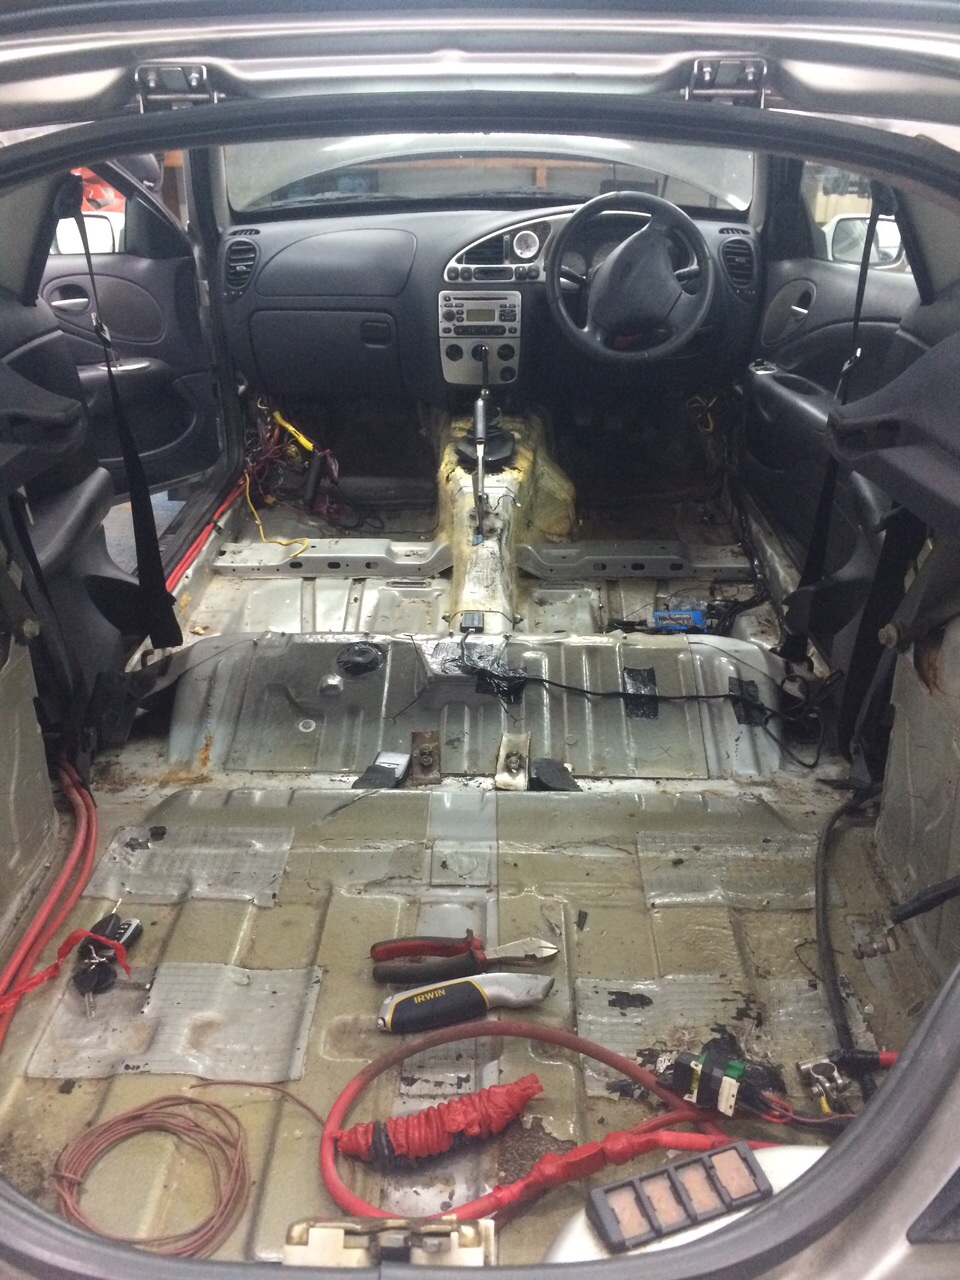
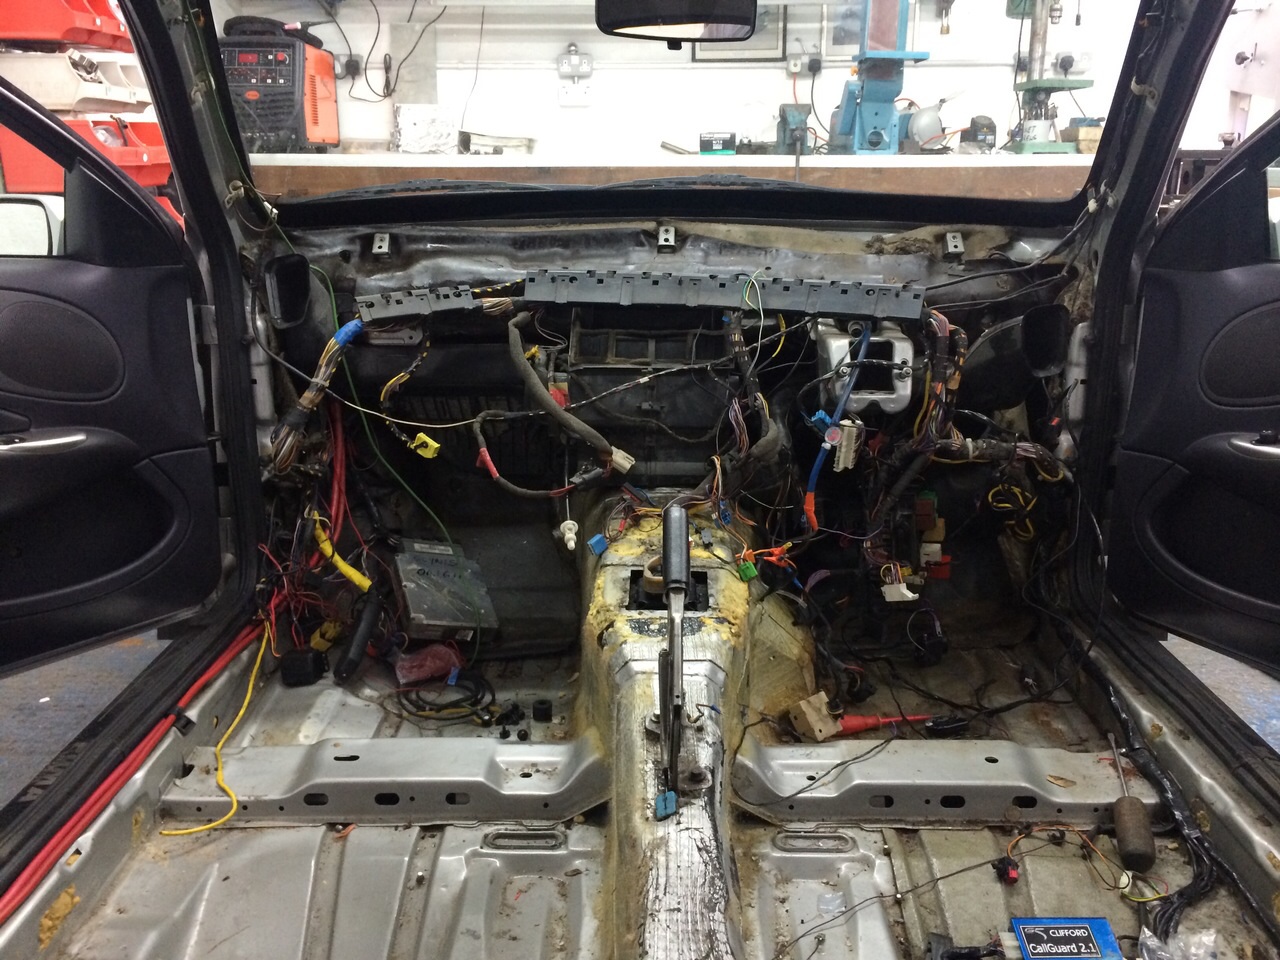
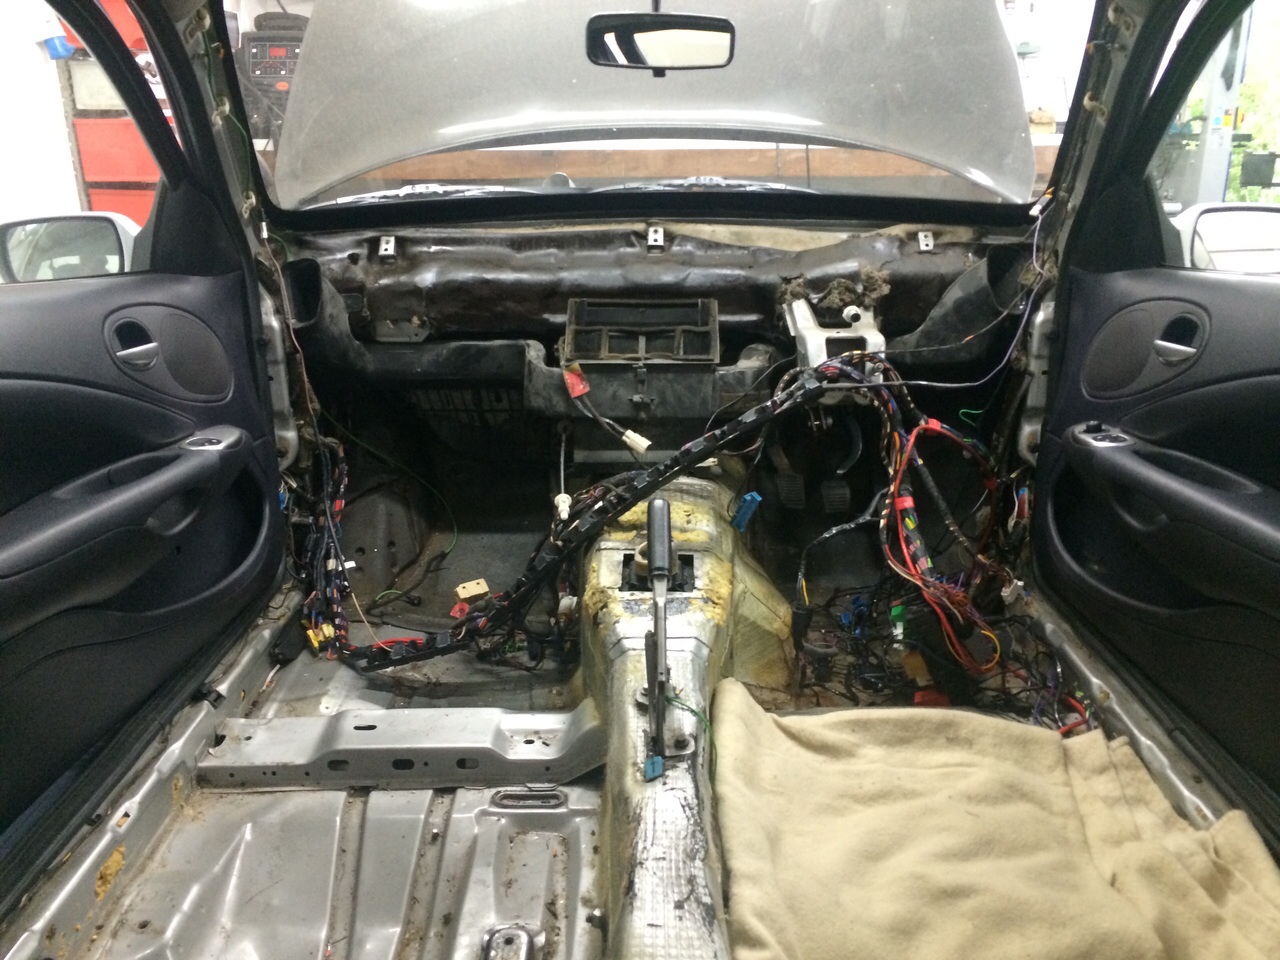
Interior out ready for dash to come out, and some of the messes I will need to sort.
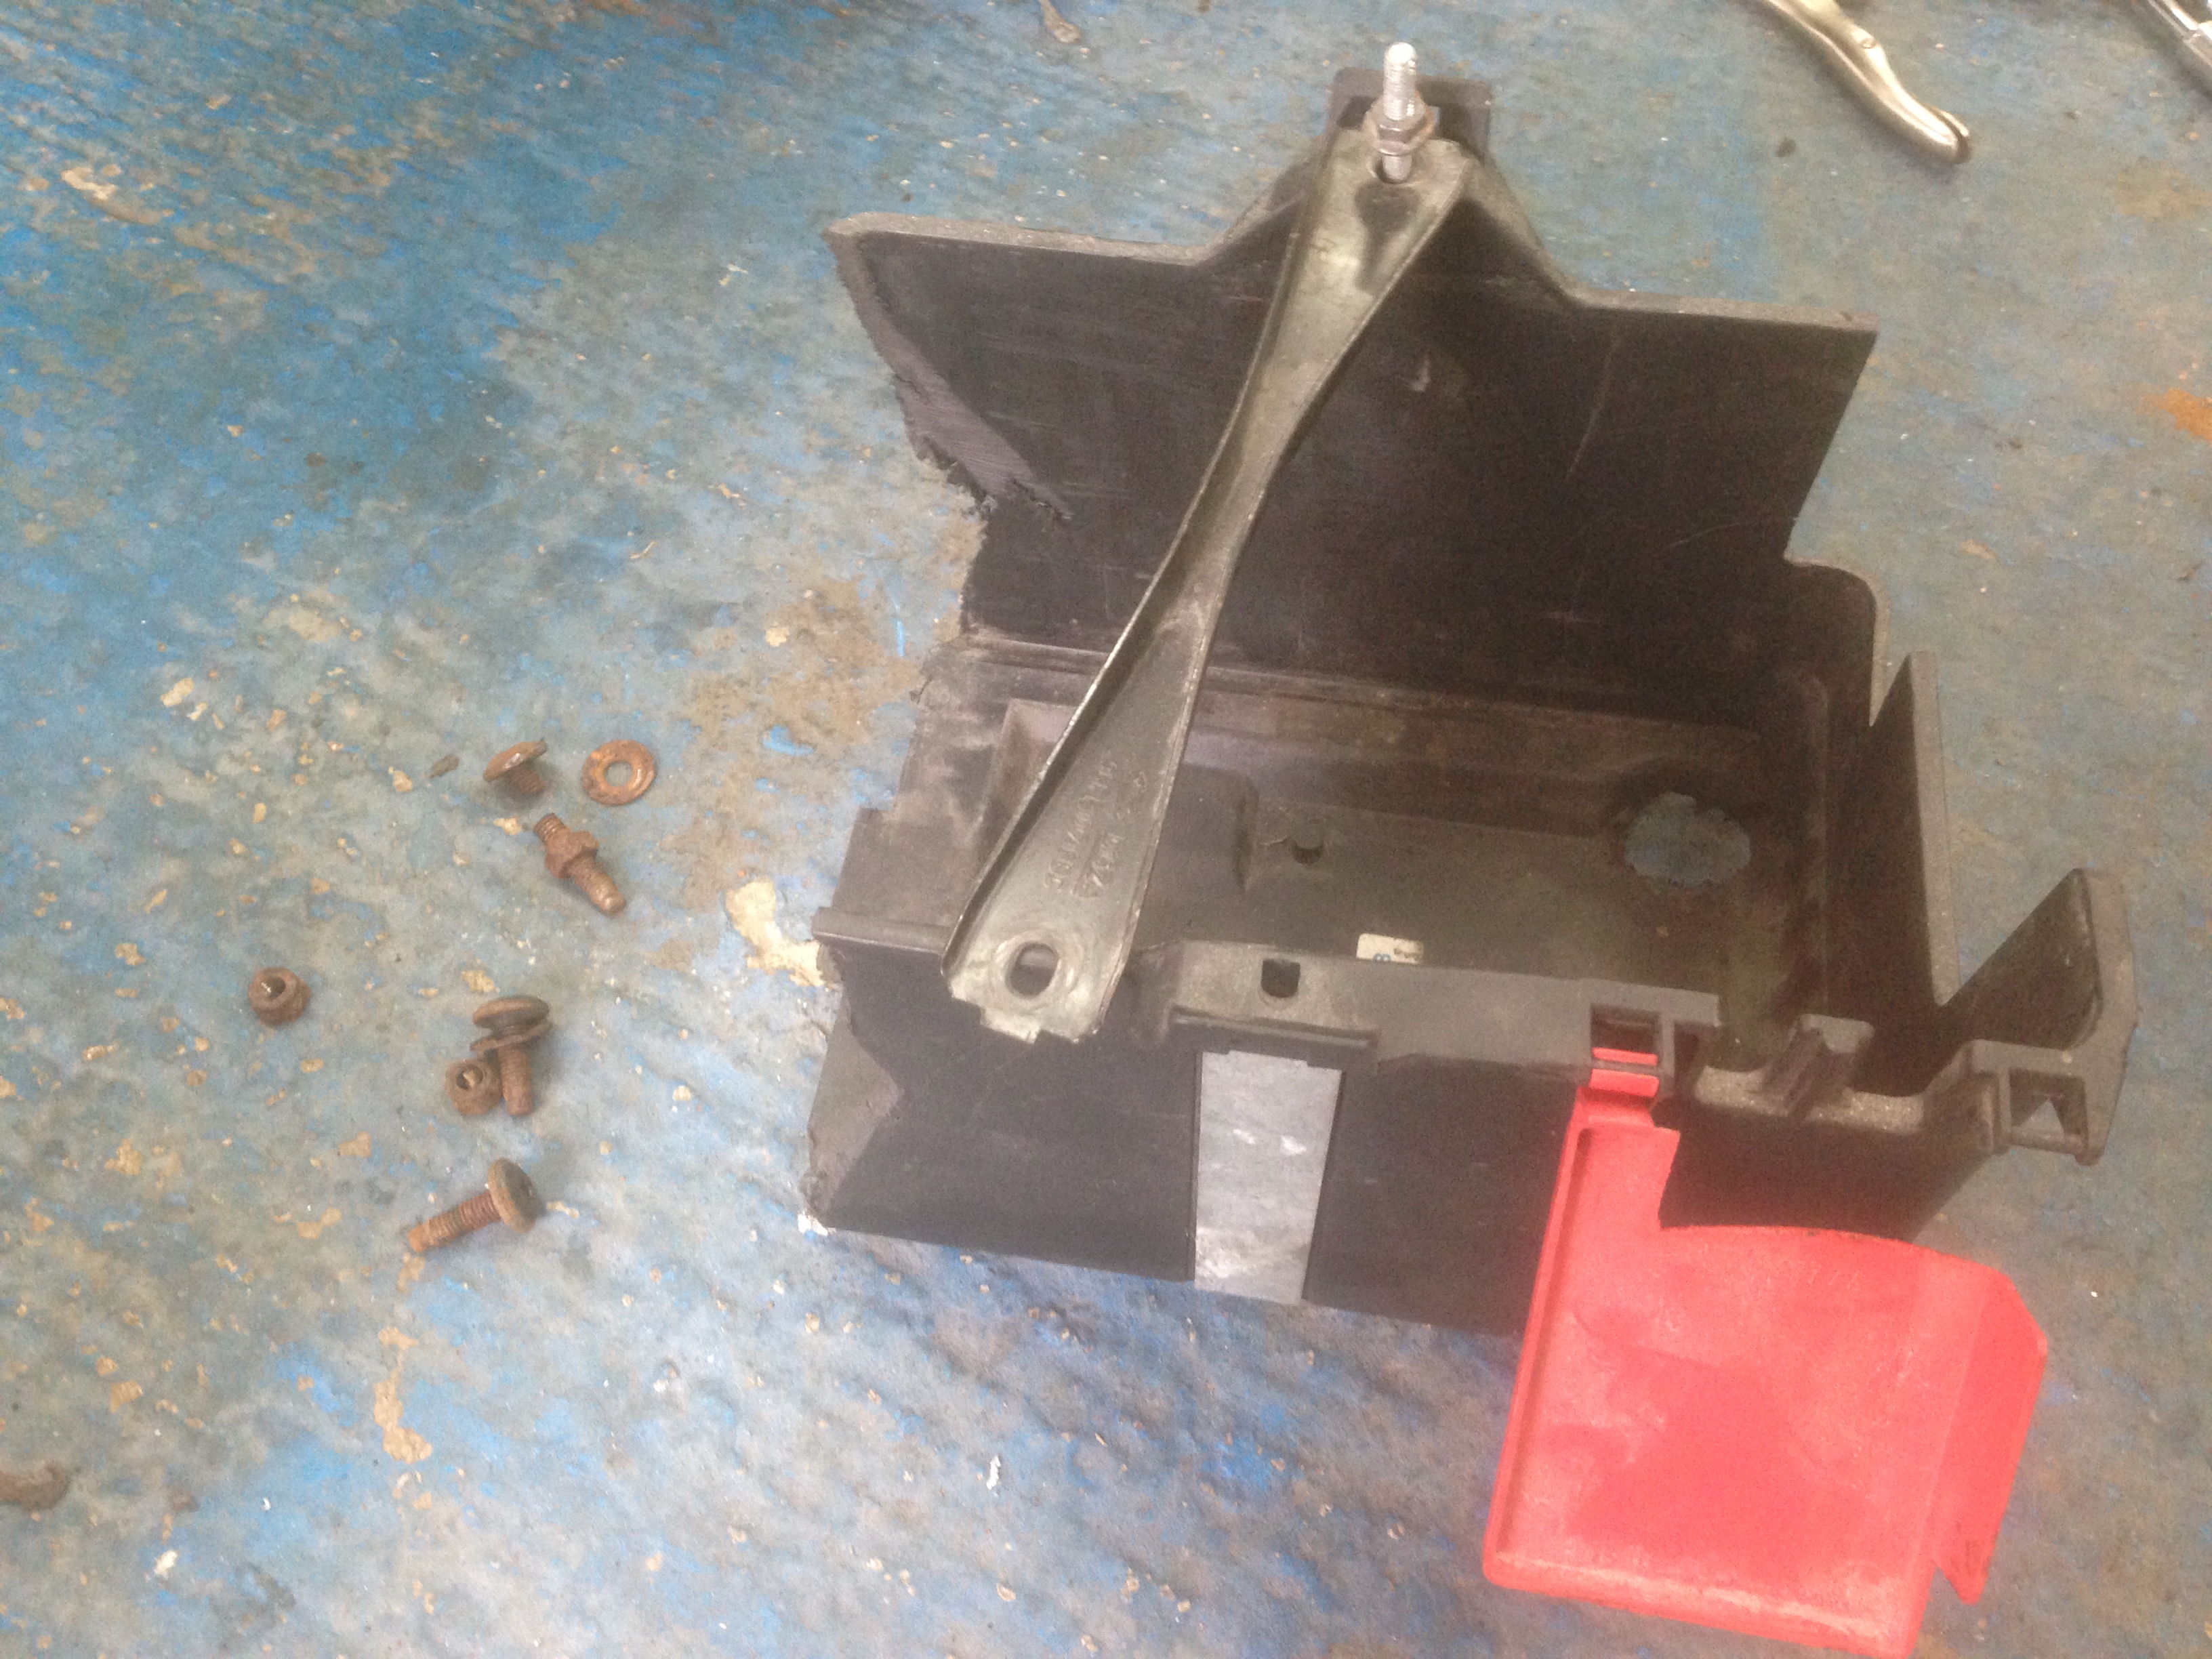
Battery box was a mess to fit a larger battery than it was made for
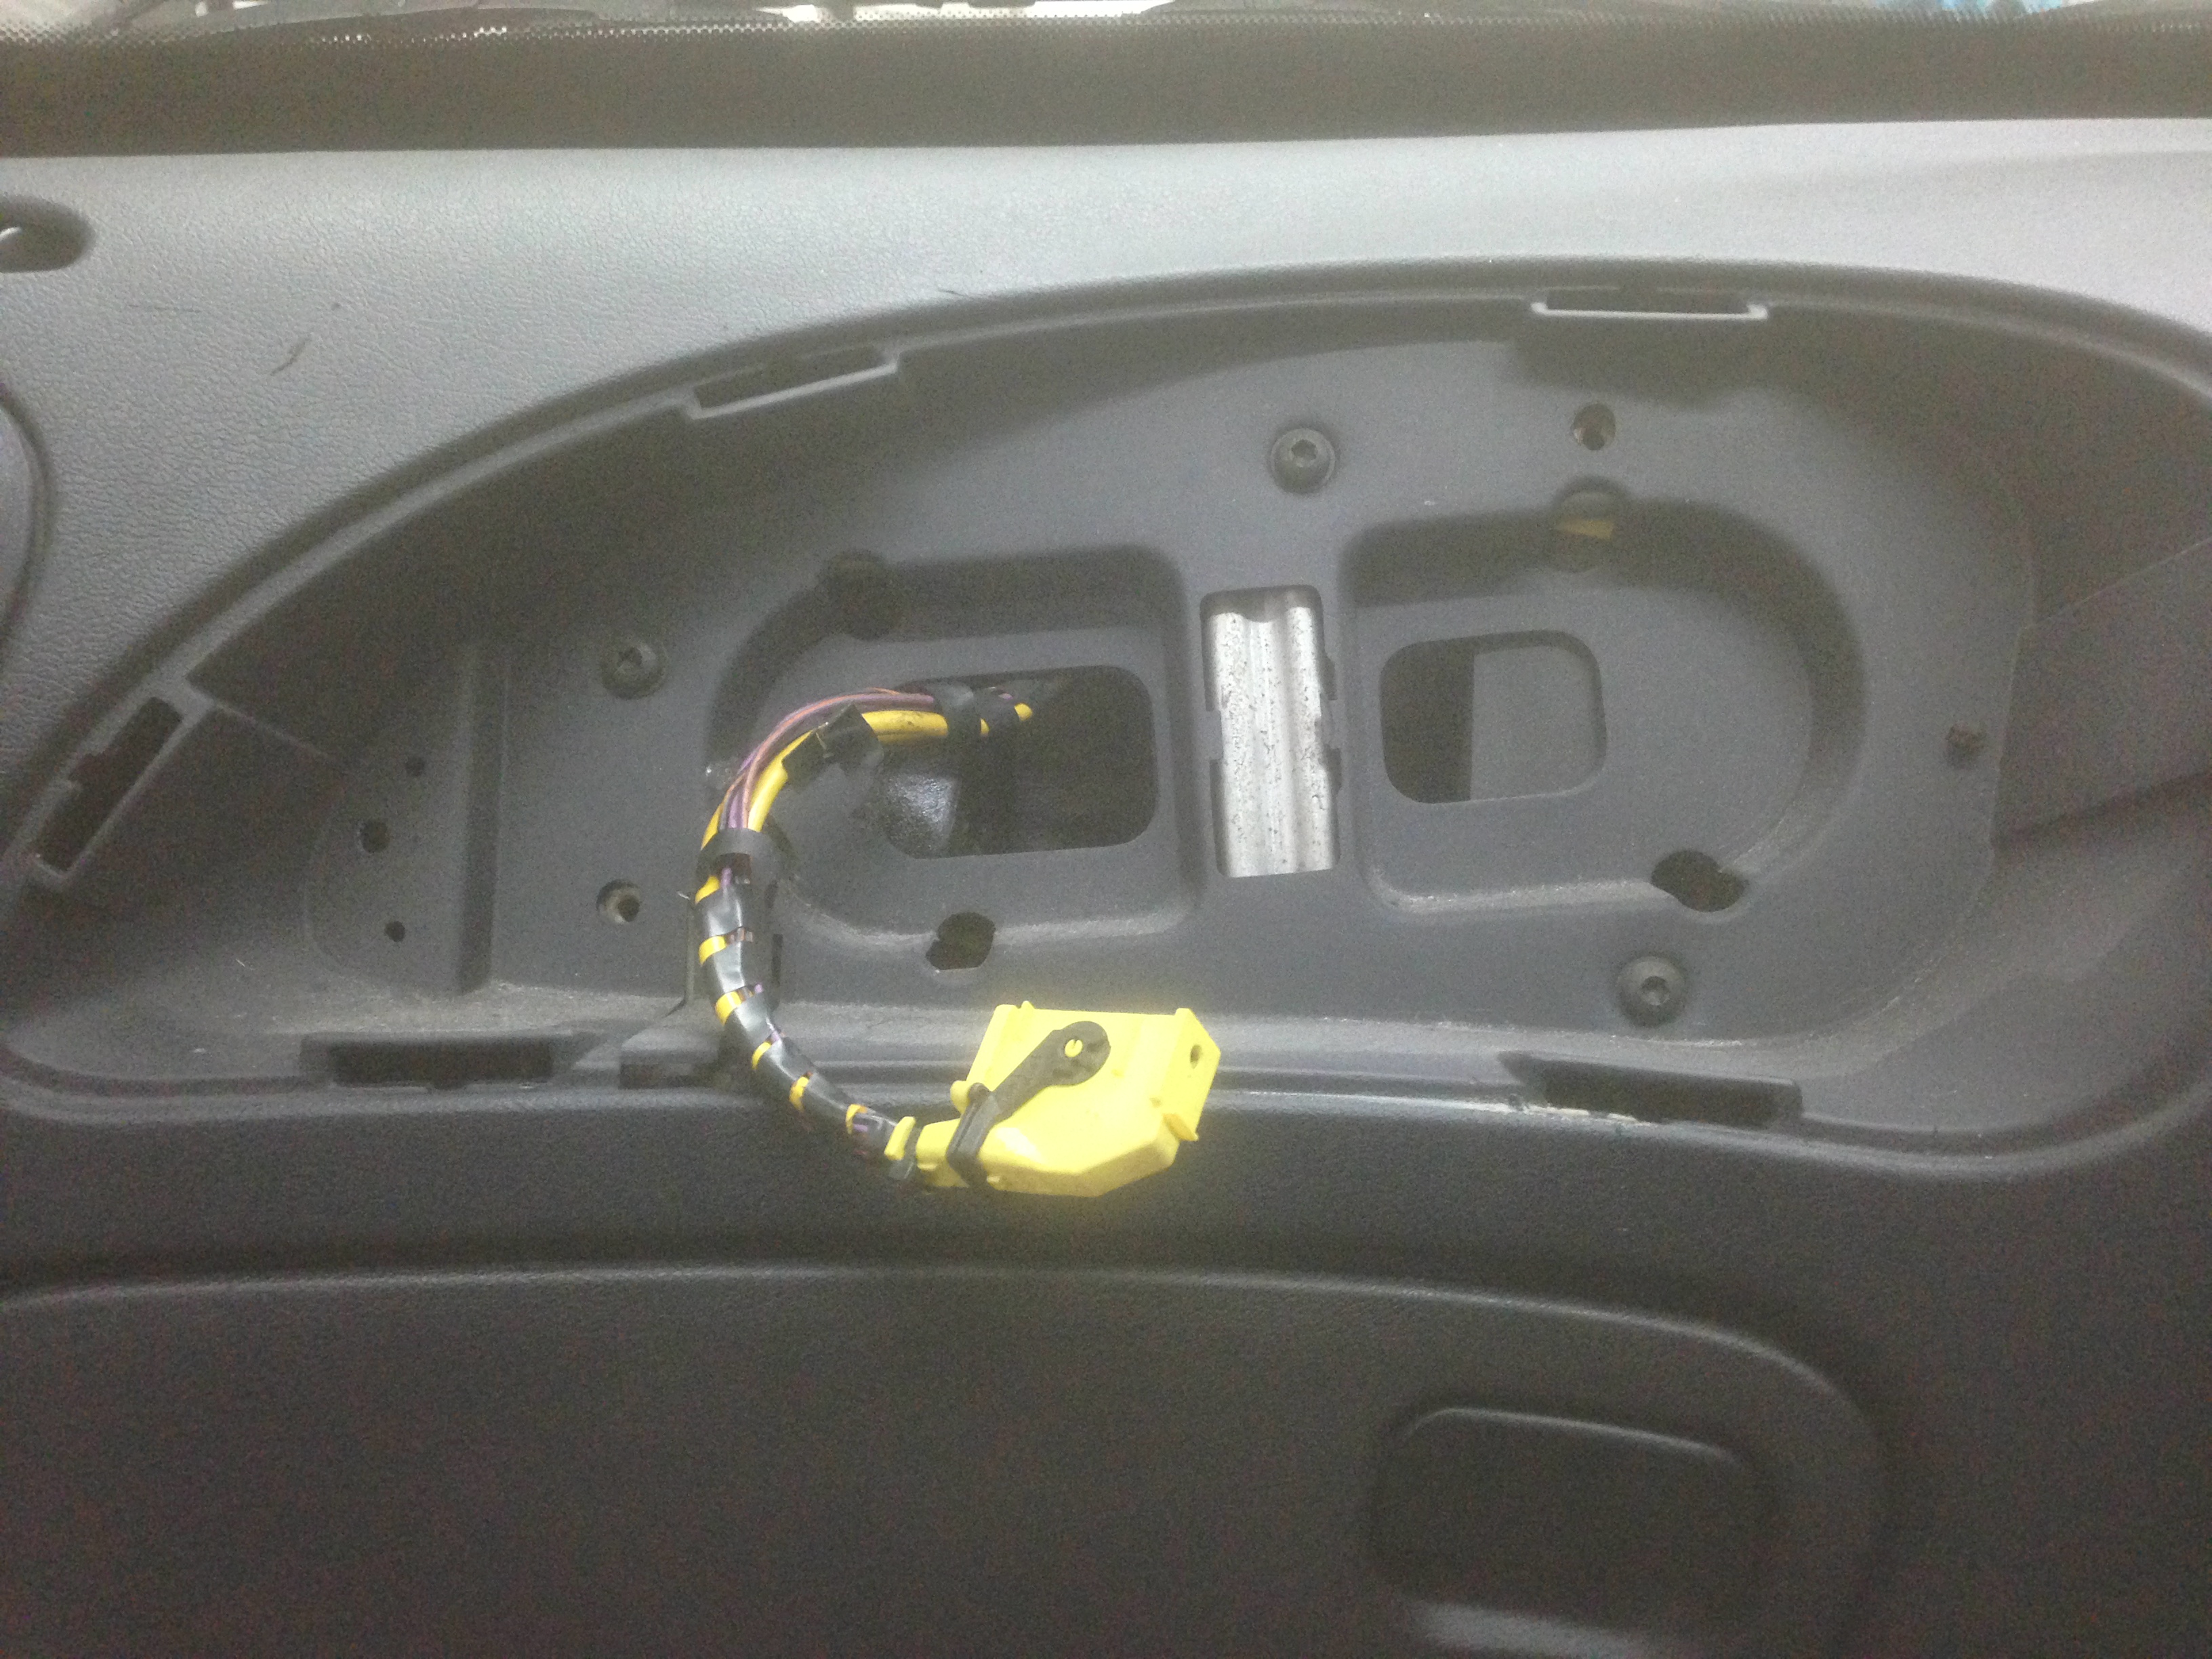
Lack of airbag module means the drivers airbag is useless, seat restraints had also been cut out so I made the decision to remove it all and at some point change the steering wheel for something more desirable!
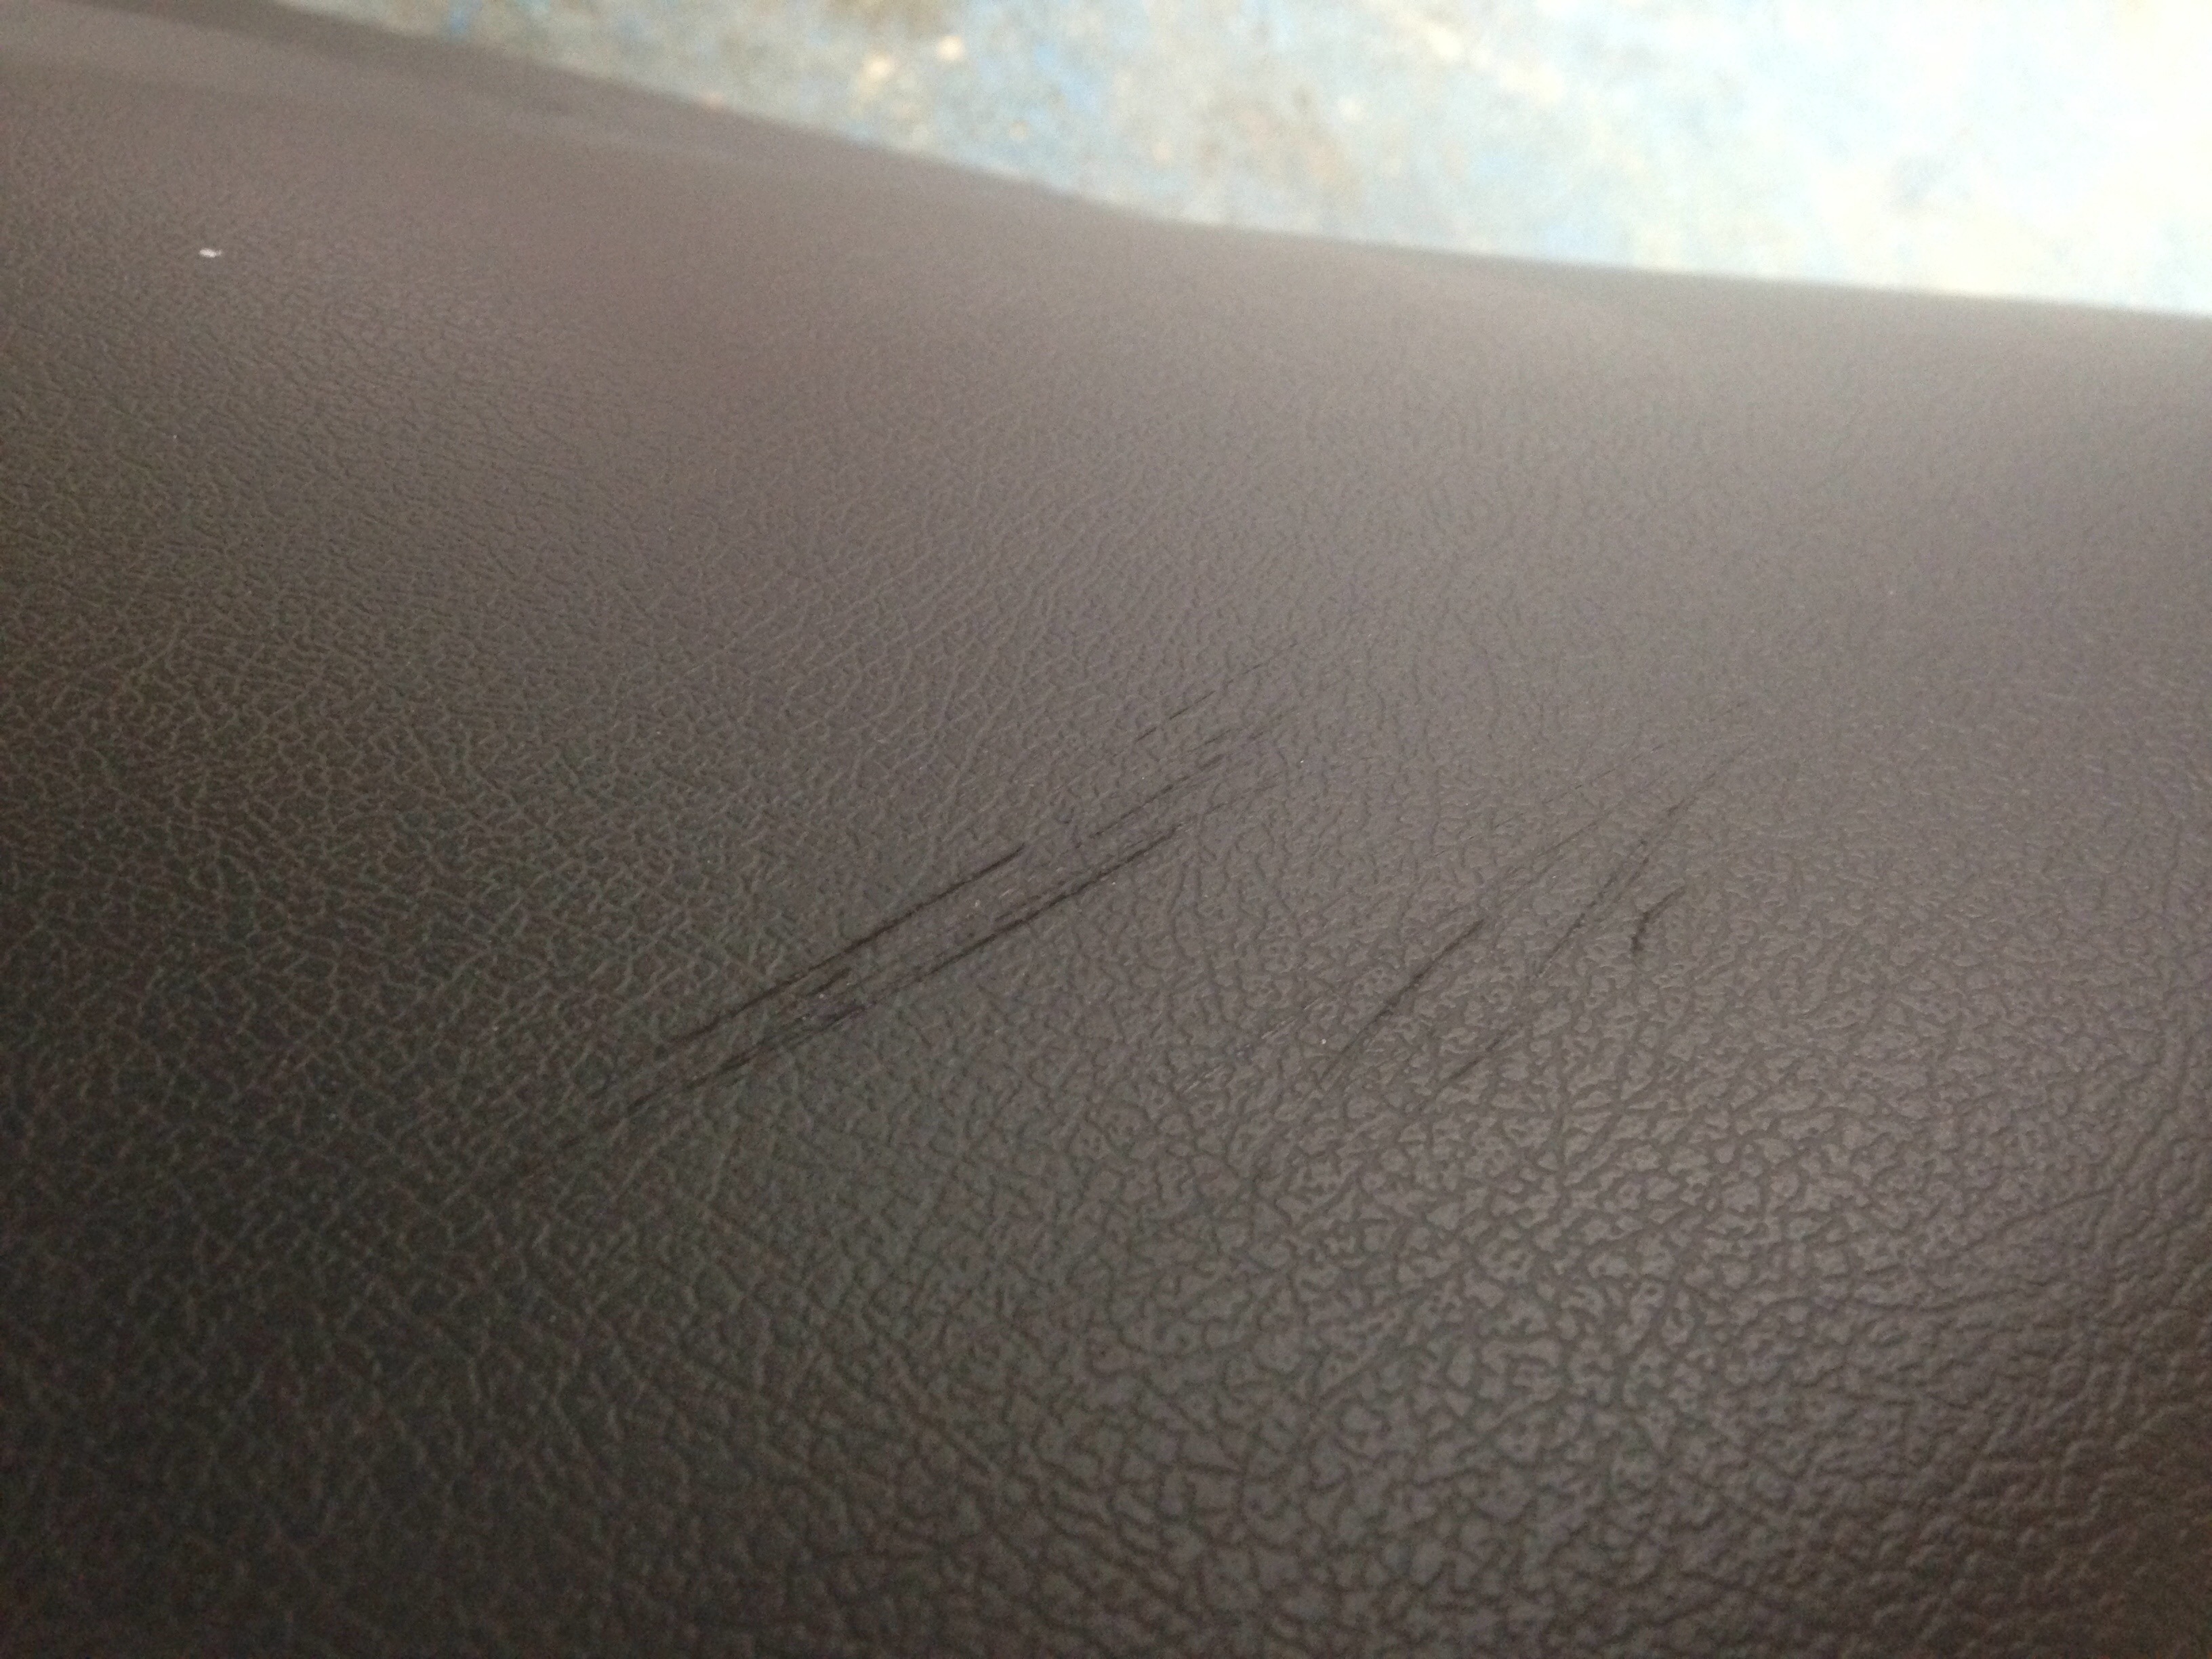
Once I got the dash out I realised it had seen better days, it had been hacked about all over the place. So a new one was sourced to be refitted


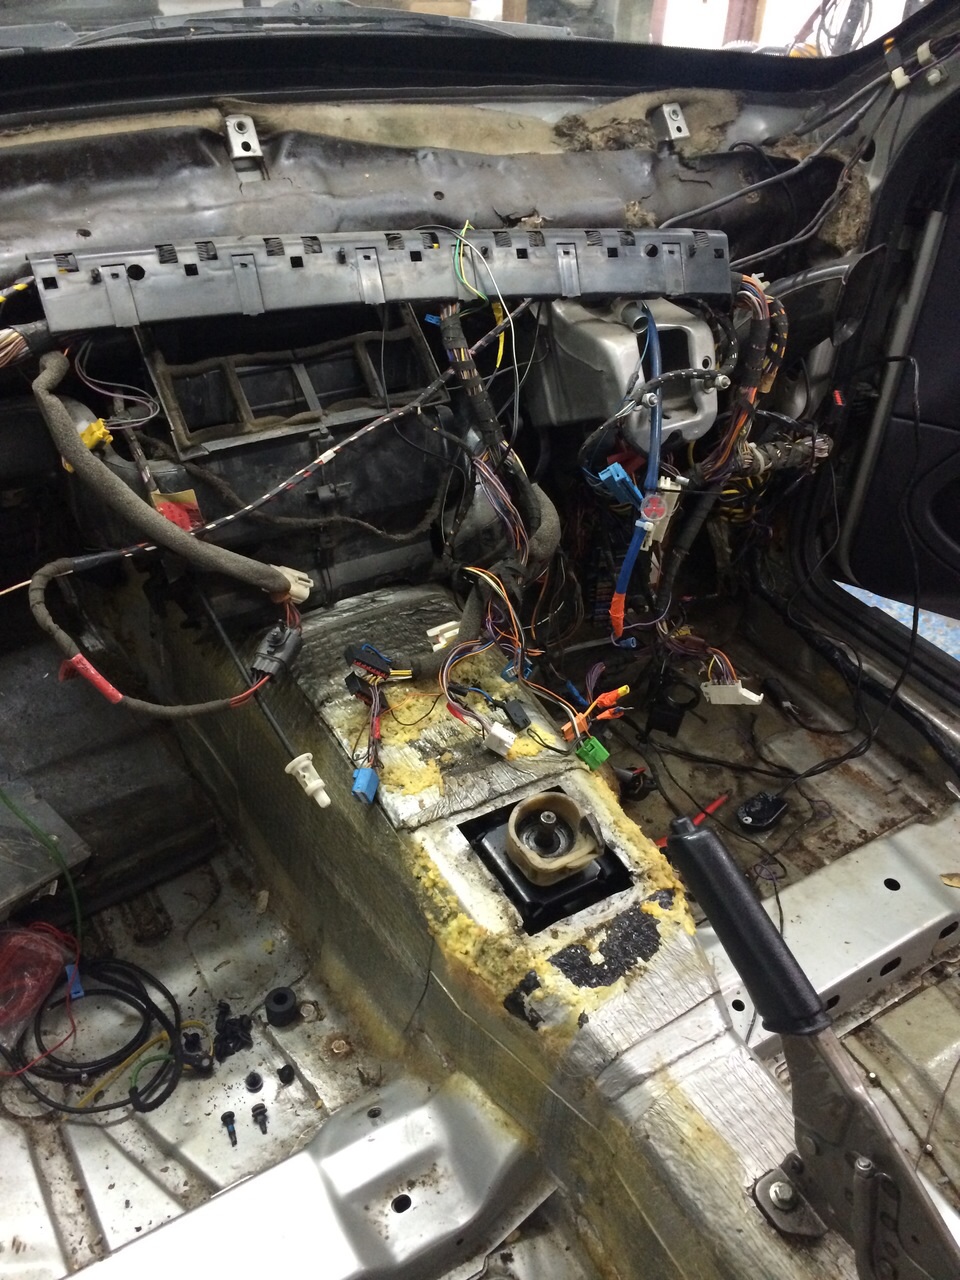
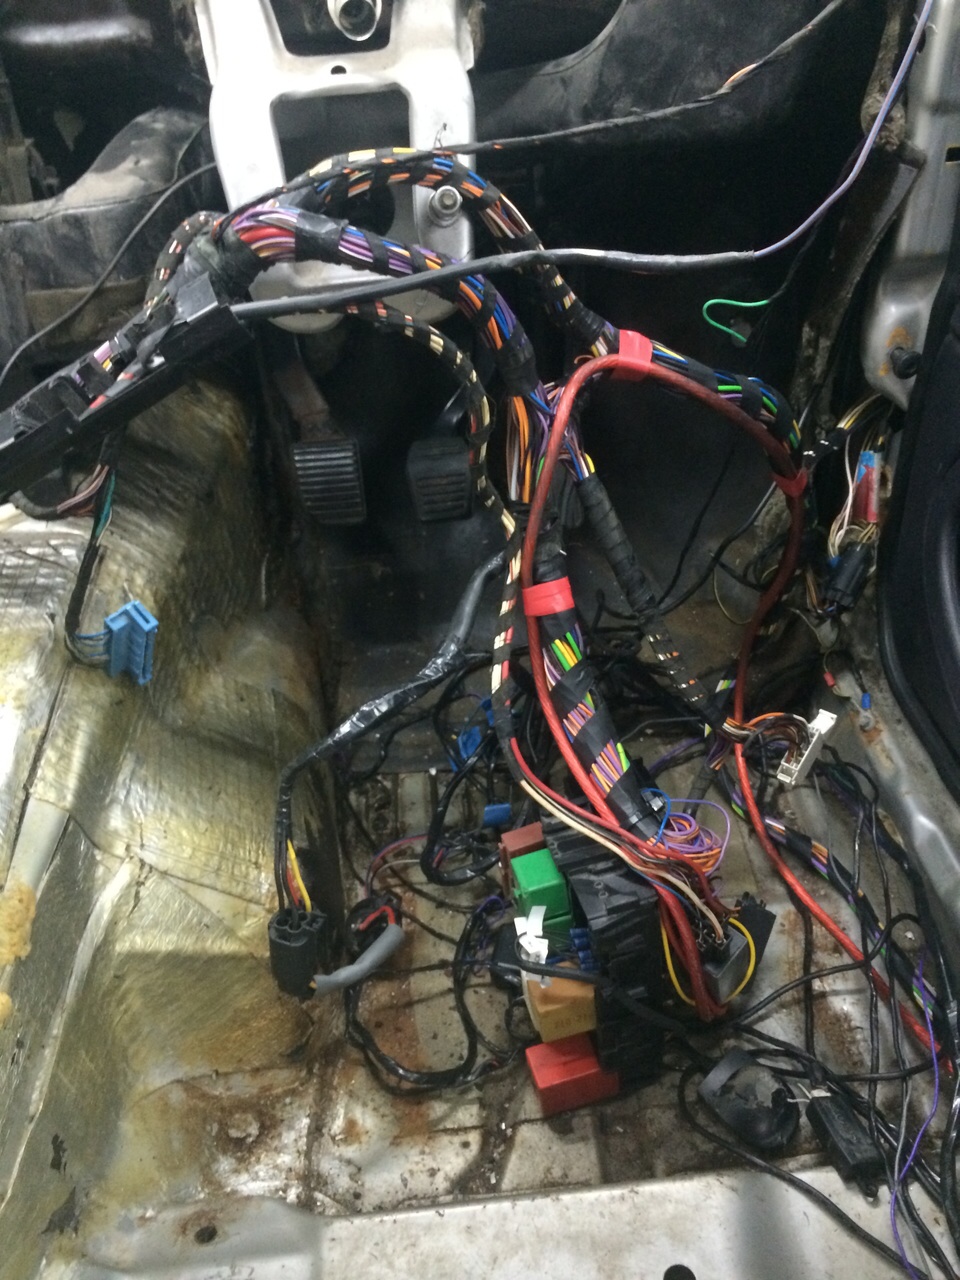
So with the dash out and all the wiring exposed I can now begin to repair and remove as required, the plan is to remove the old 1.7 ECU and all associated wiring, remove airbag wiring, repair any bodged connections and re-jig wiring for the conversion... Properly this time!
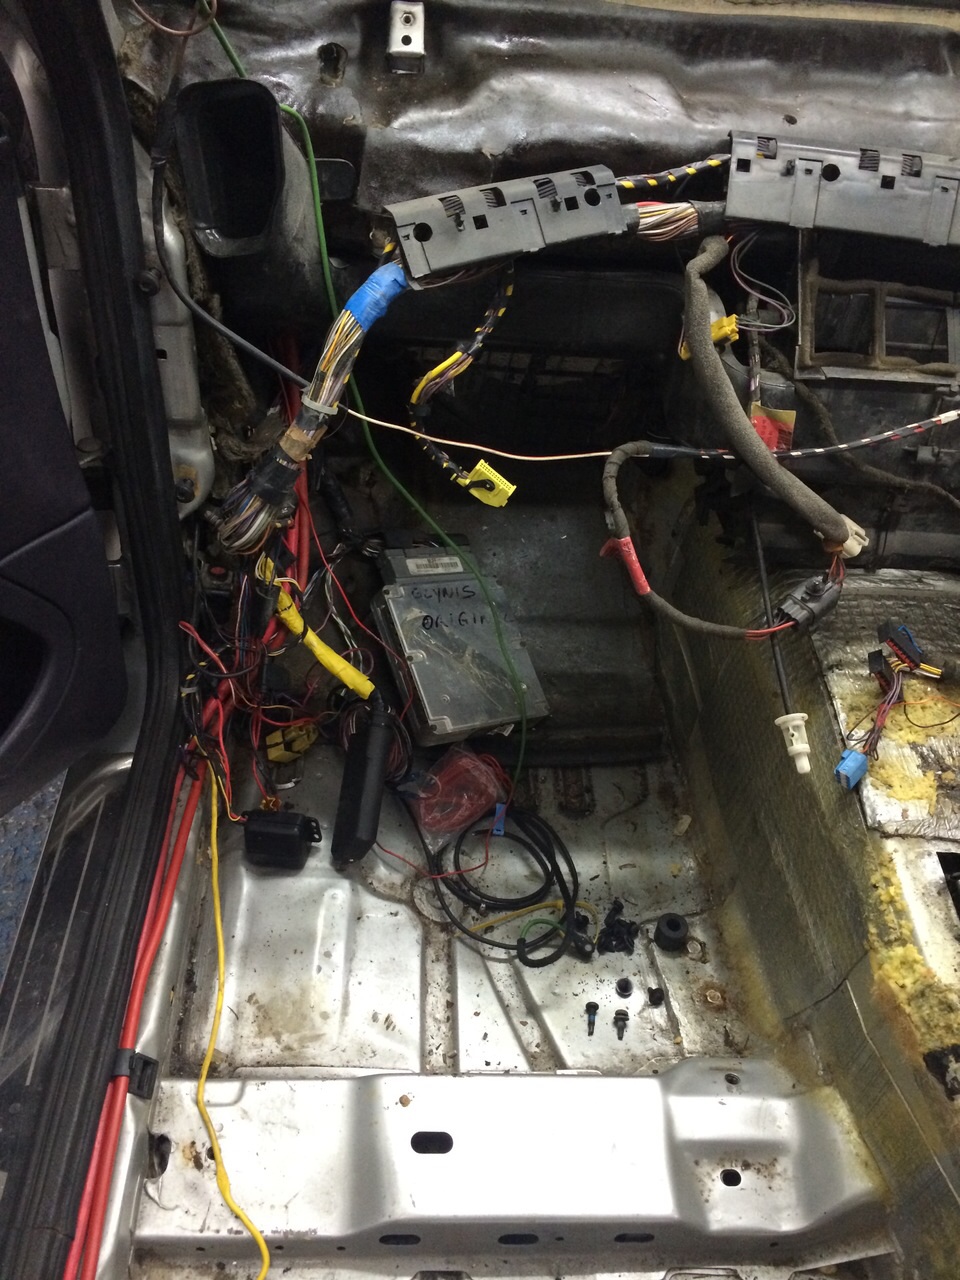
I'm also going to address the engine bay wiring as that is a little less than desired!
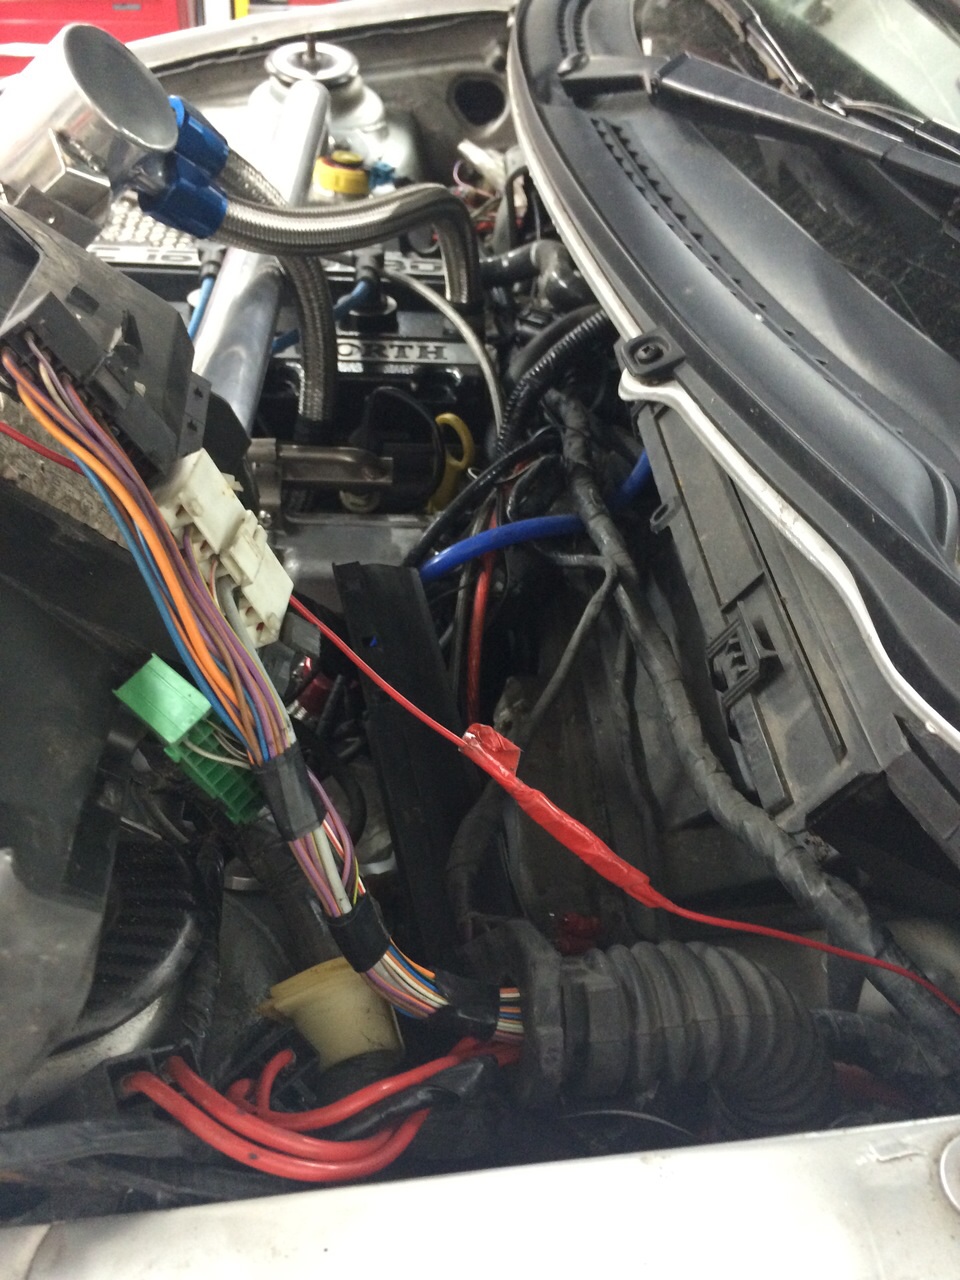
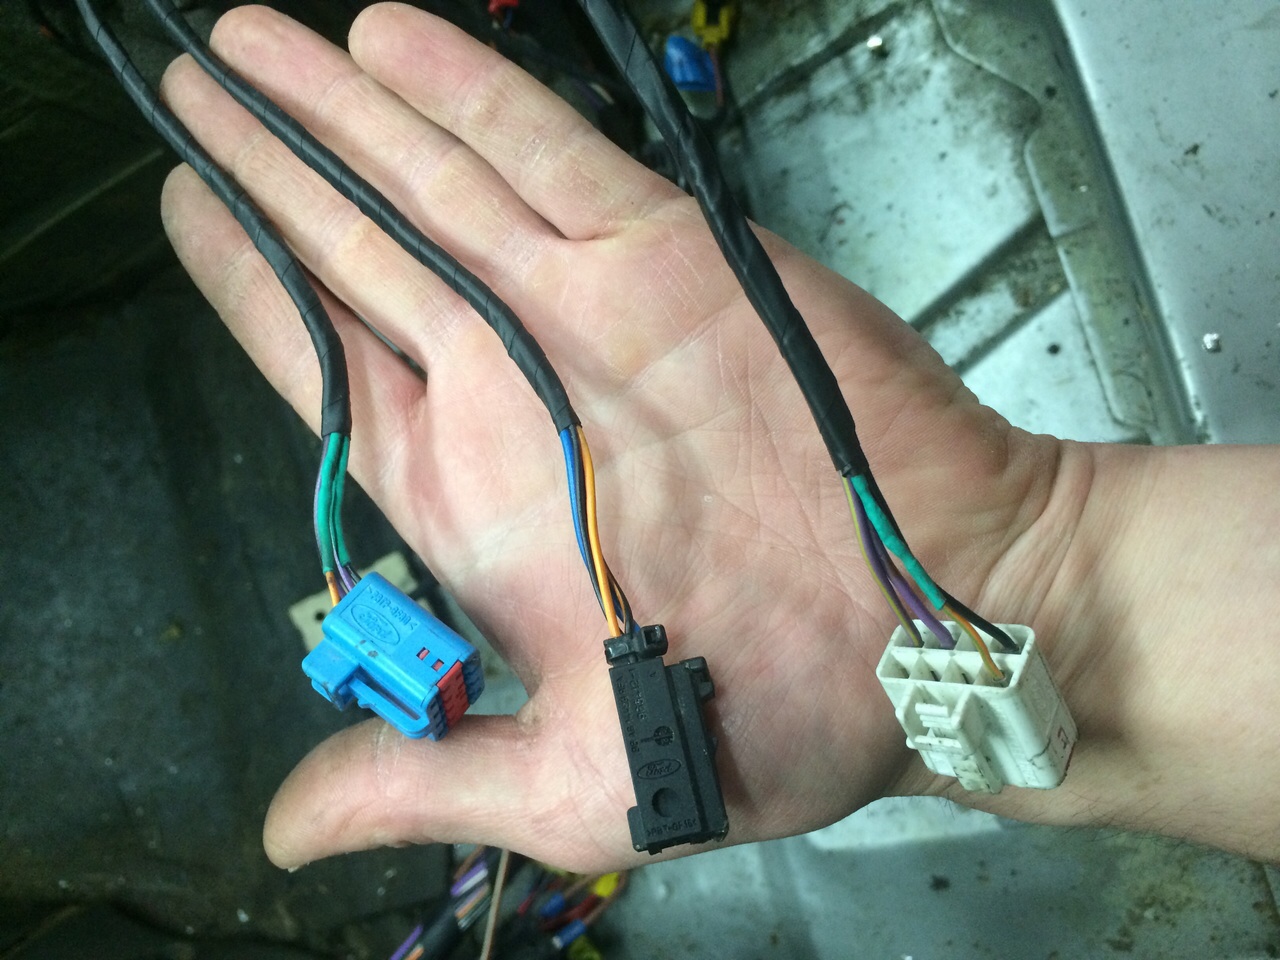
So I got to work and this is what I managed to get rid of

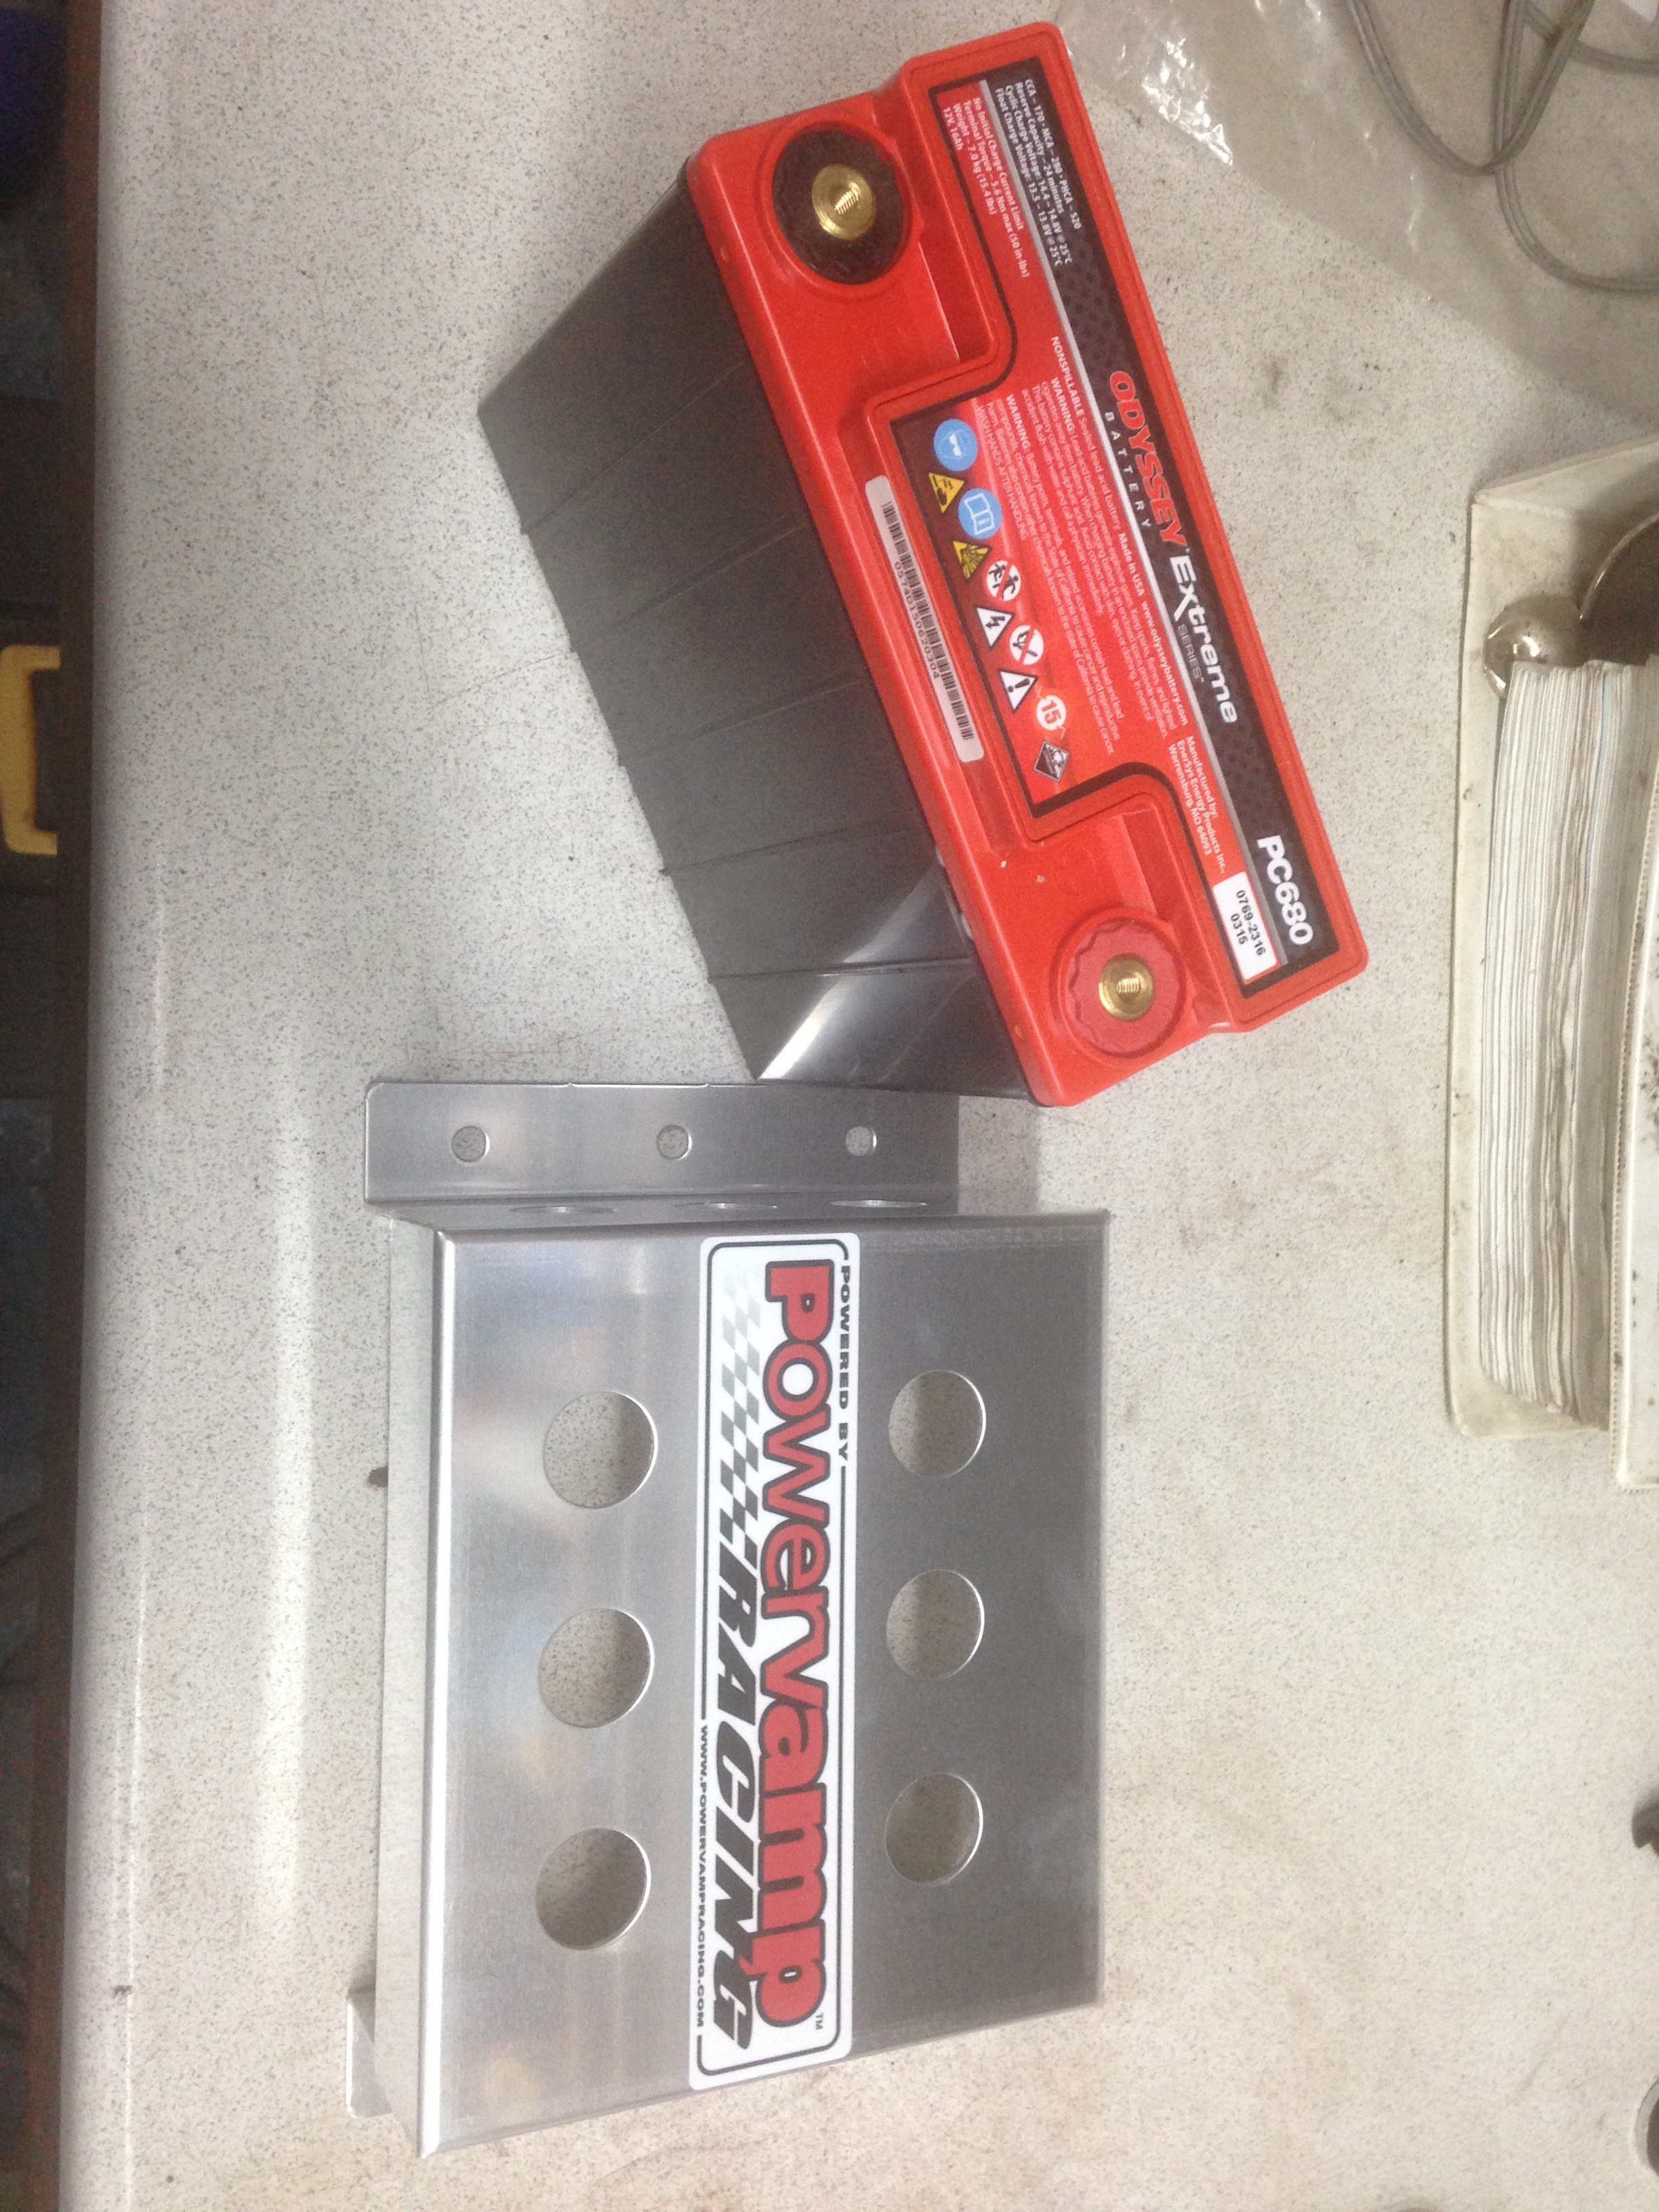
Decided to upgrade to a new battery, something a little smaller for the boot
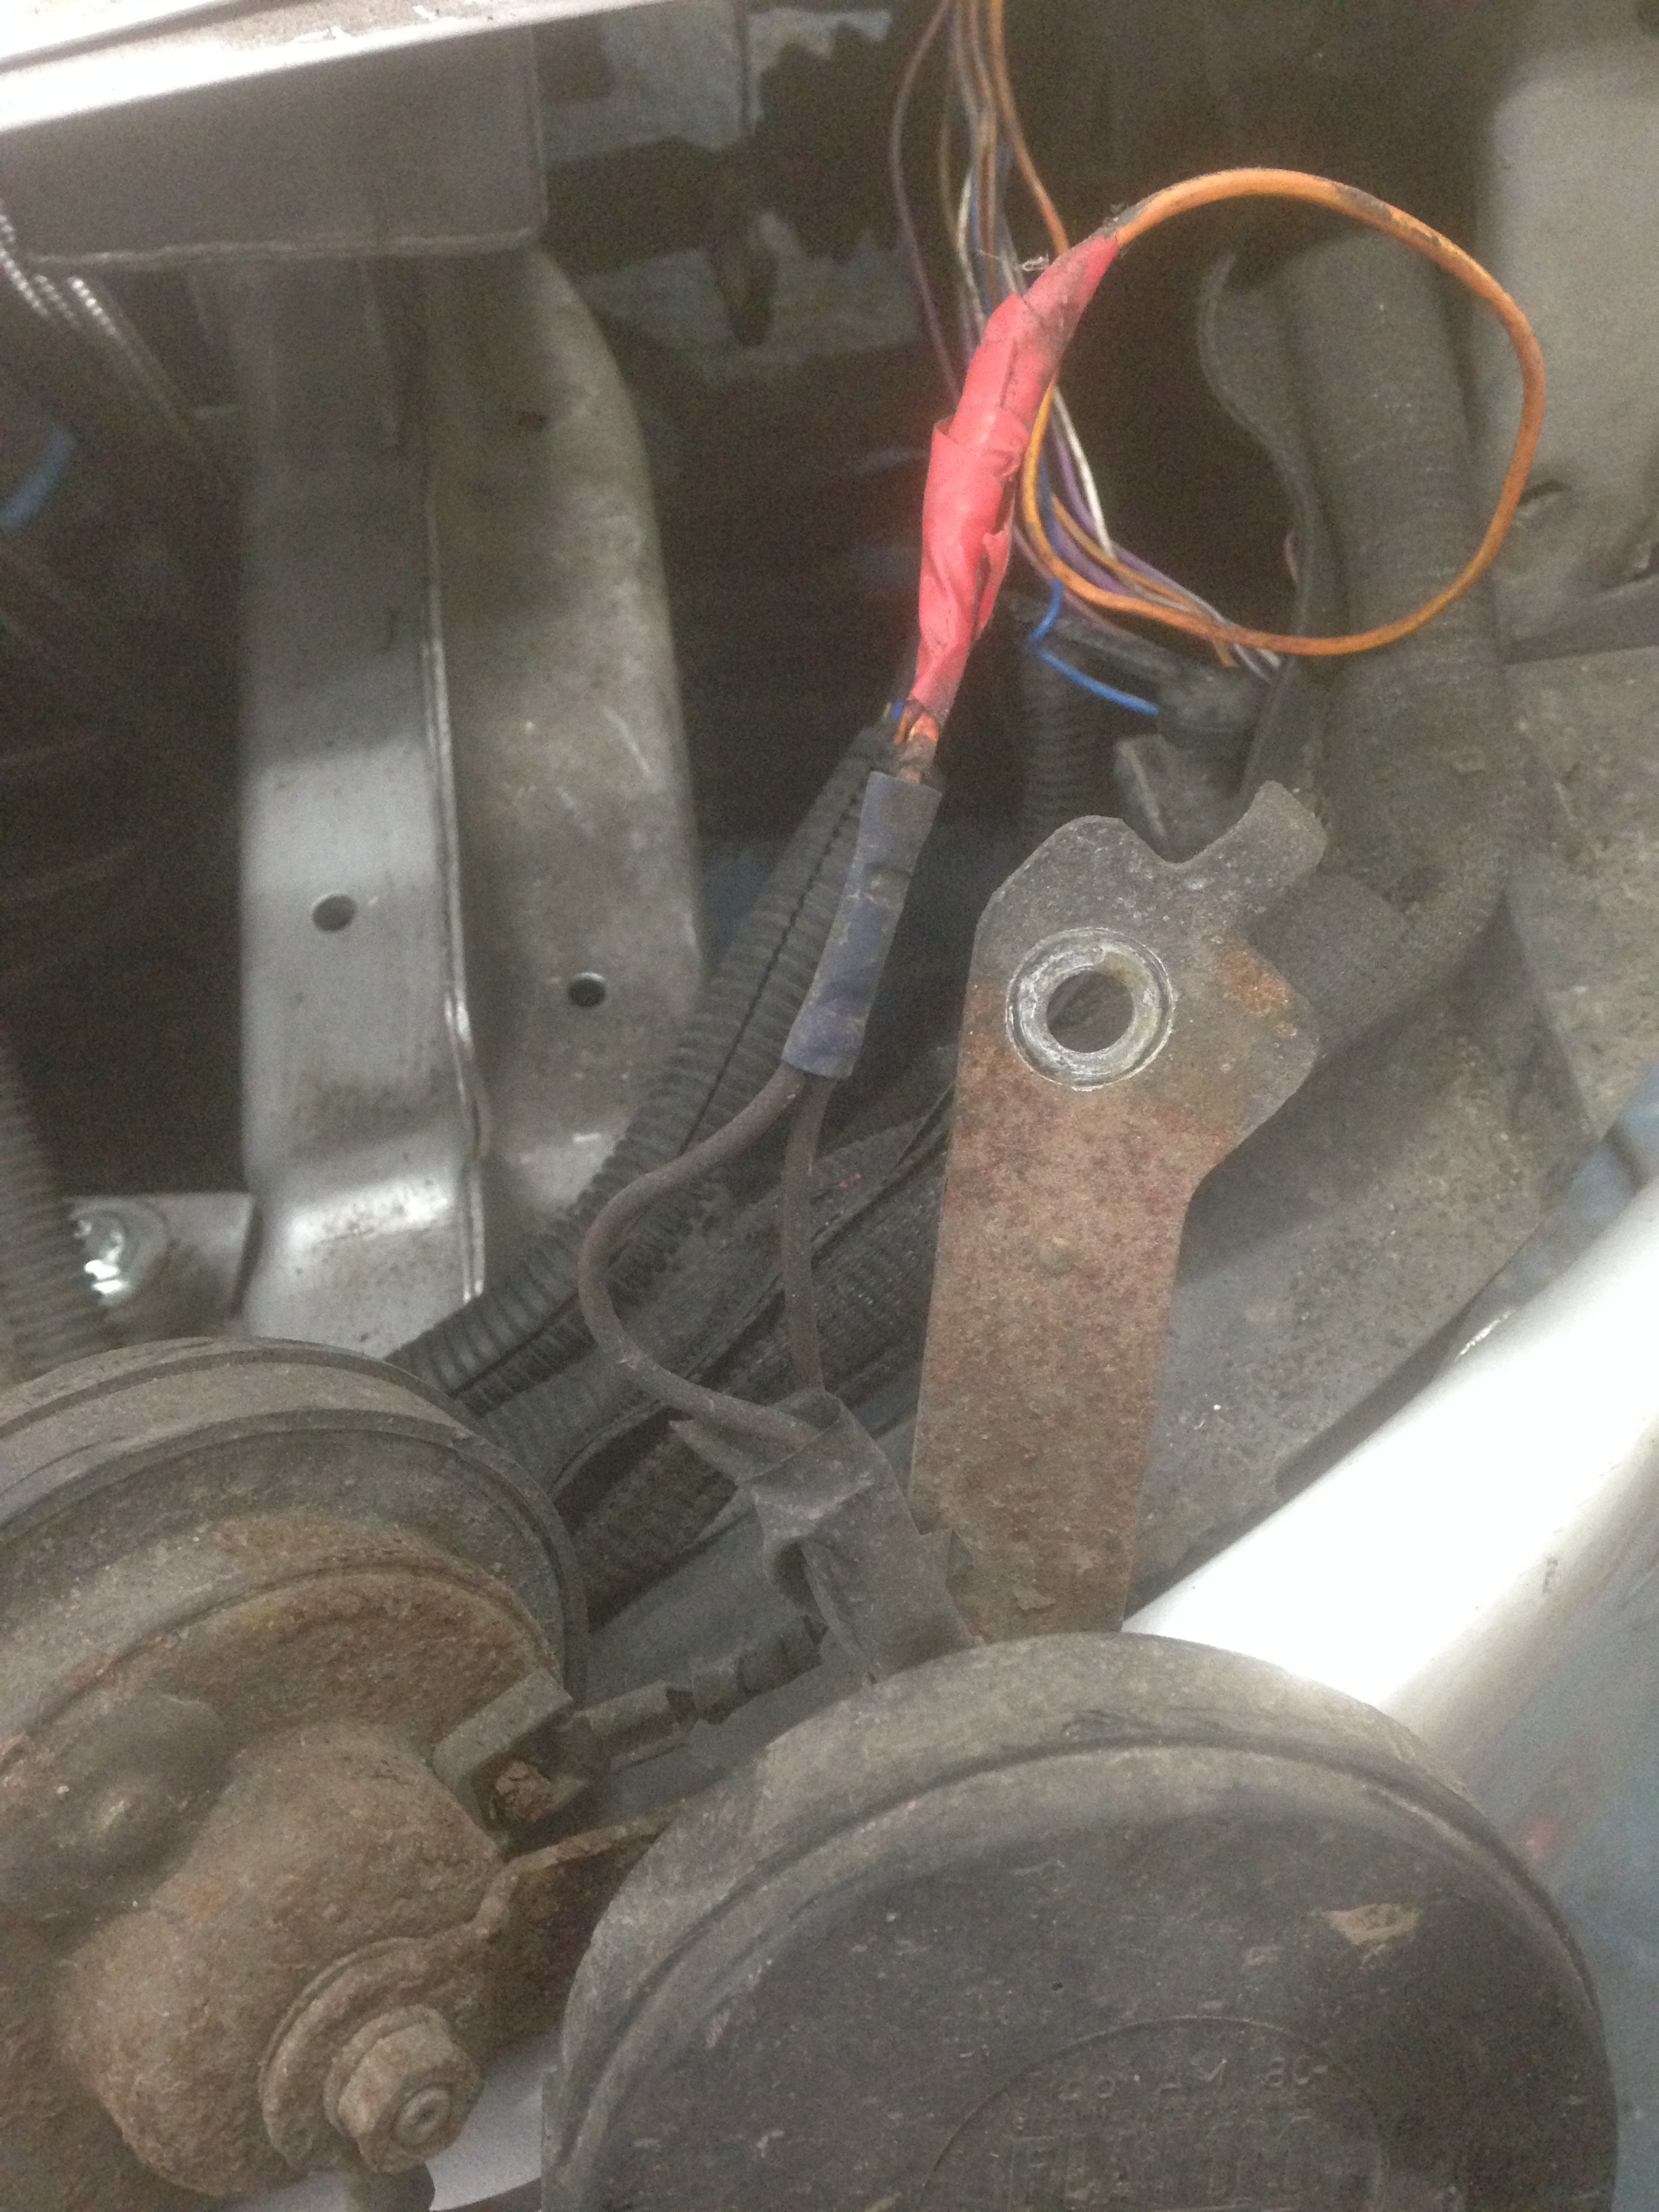
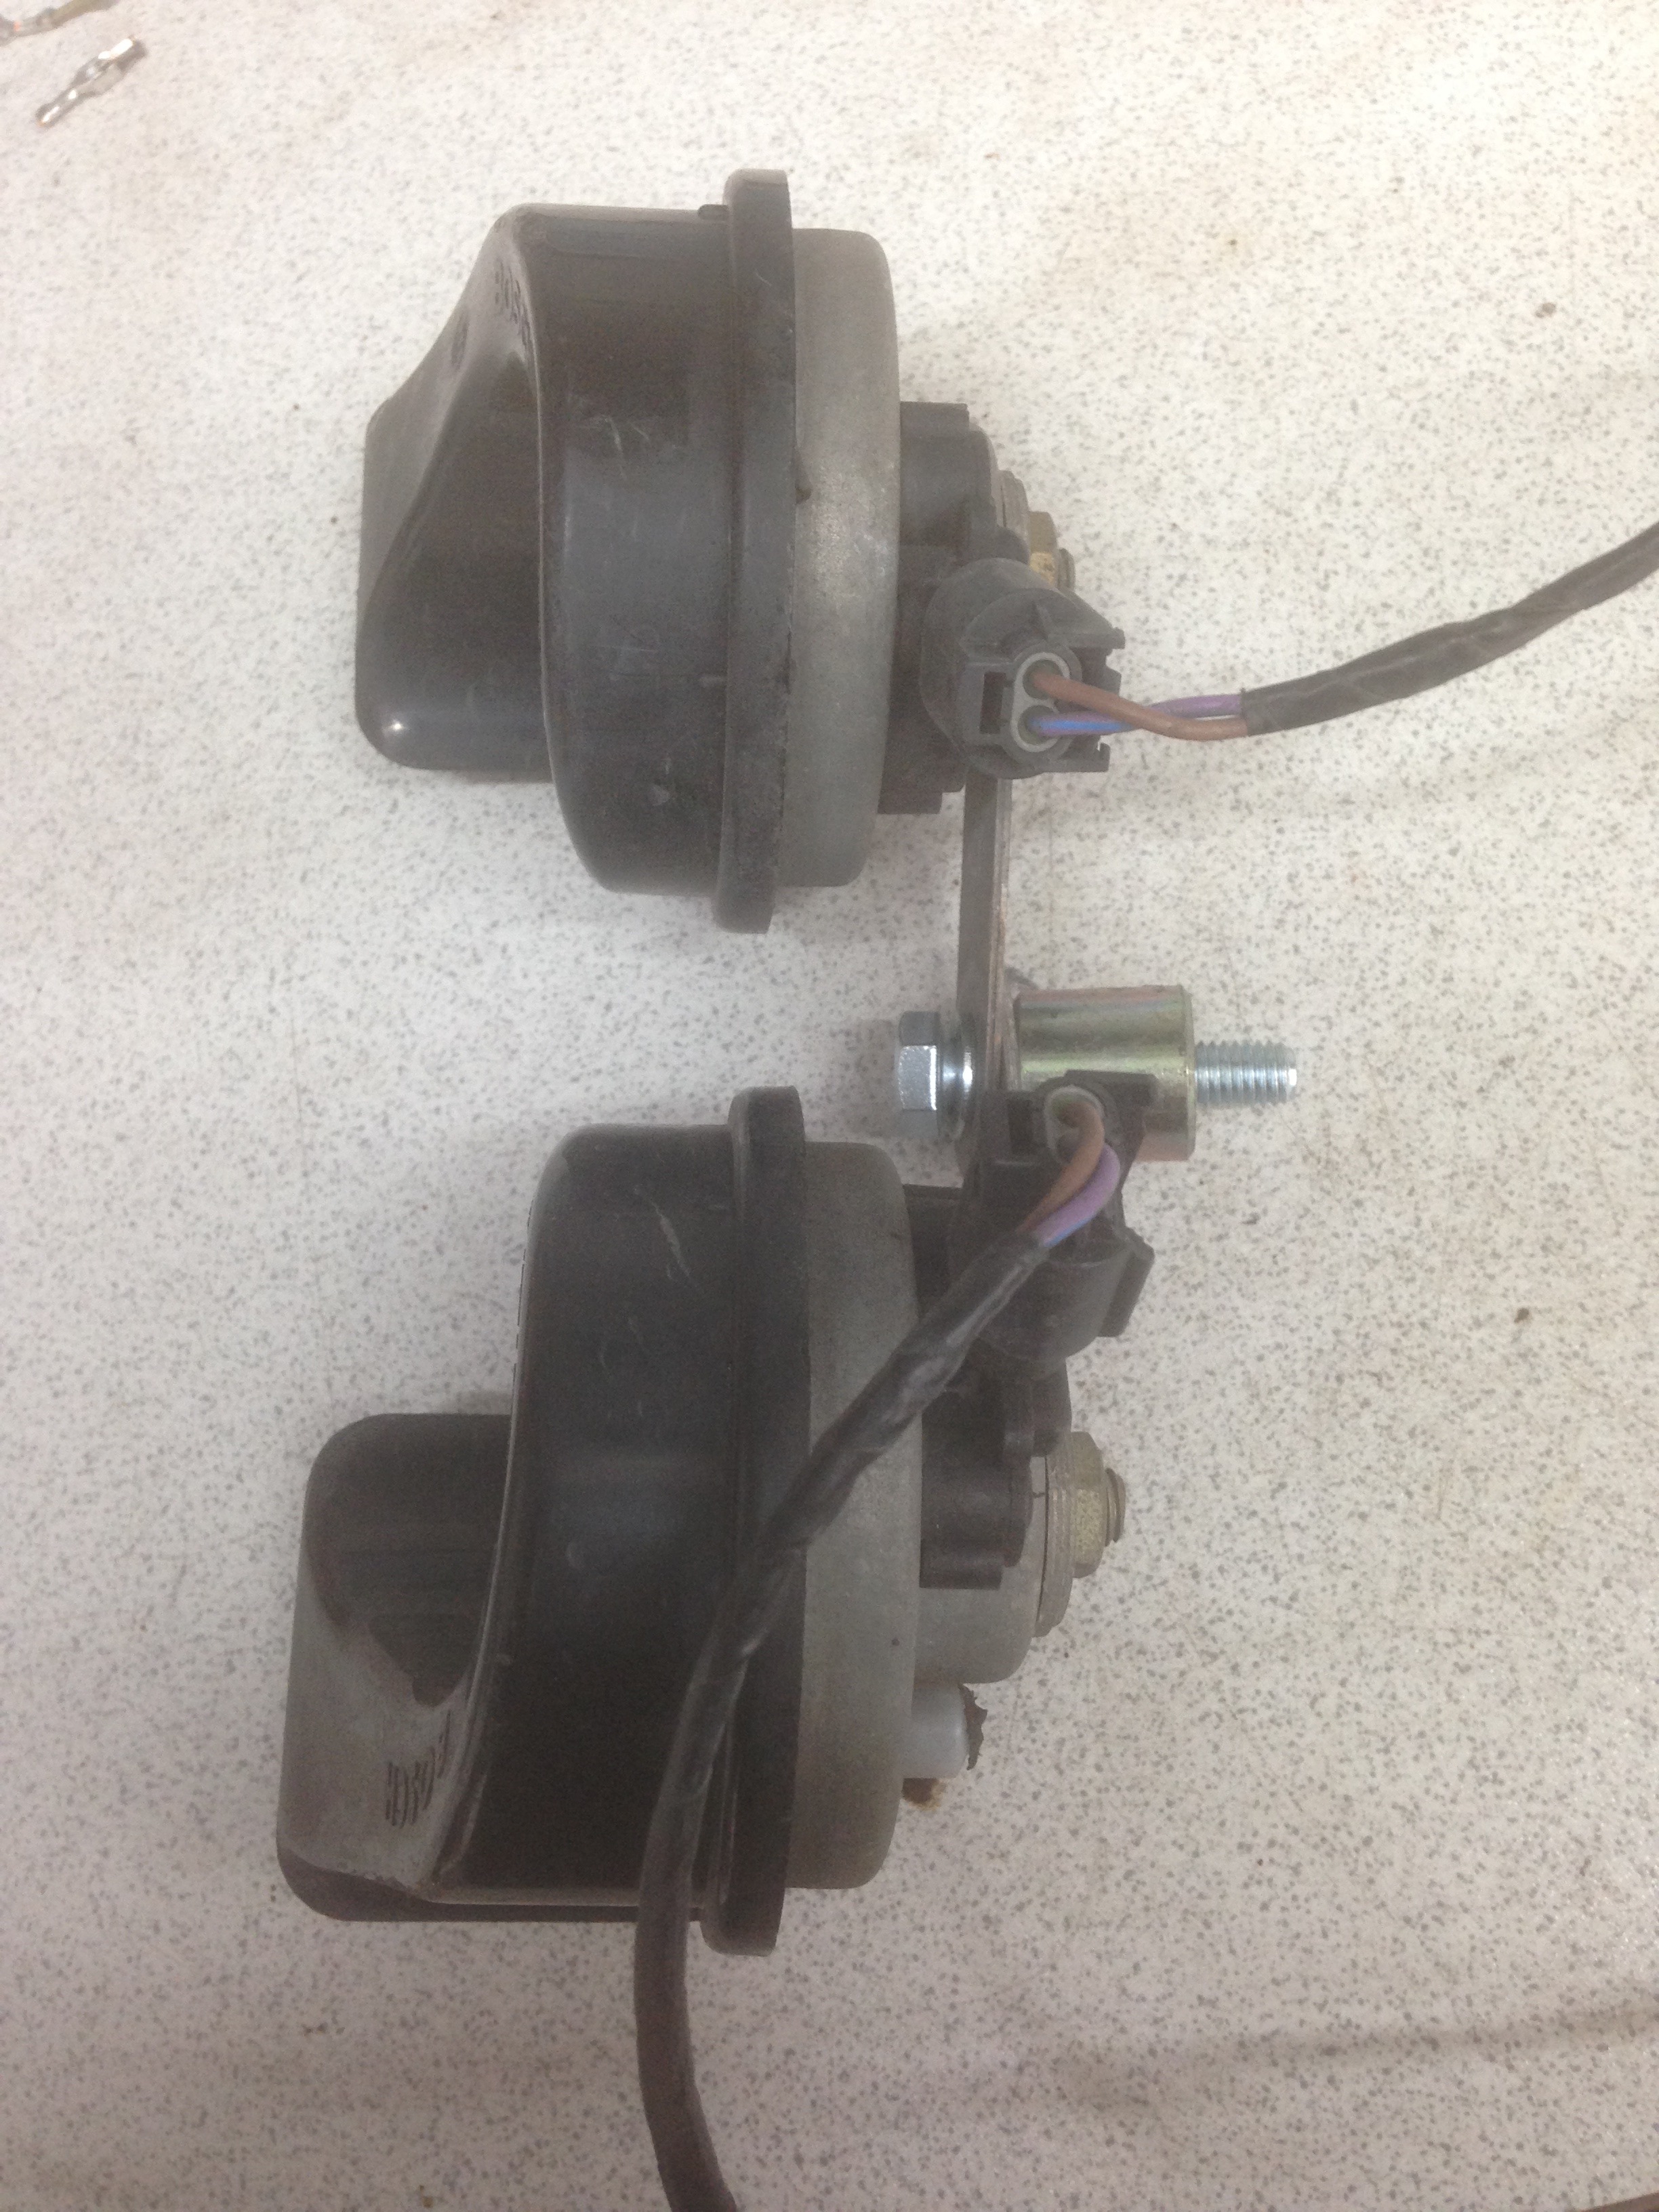
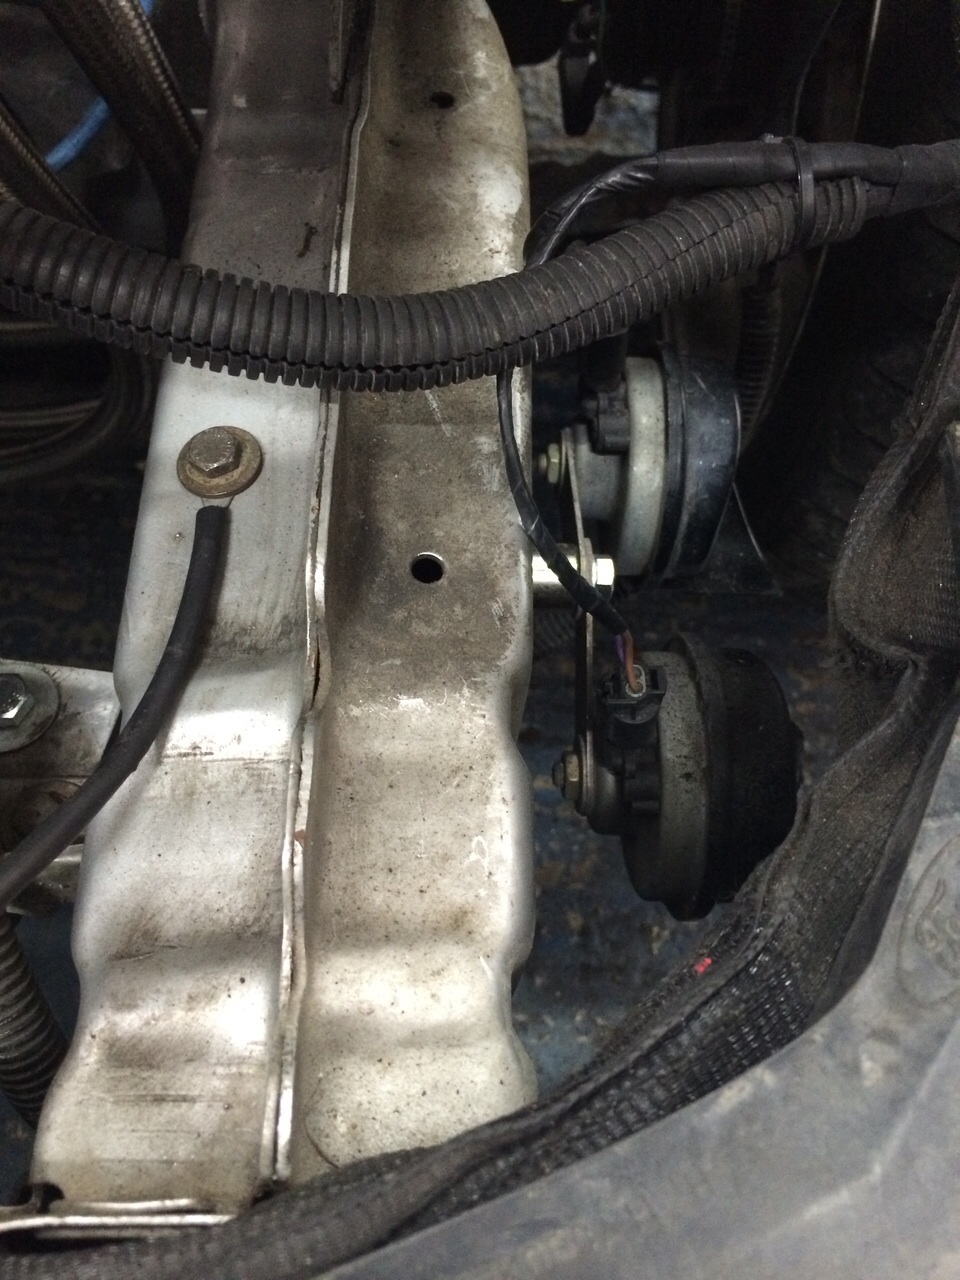
Wiring to the horn was a bit suspect and the horn itself, so replaced with a newer dual tone item
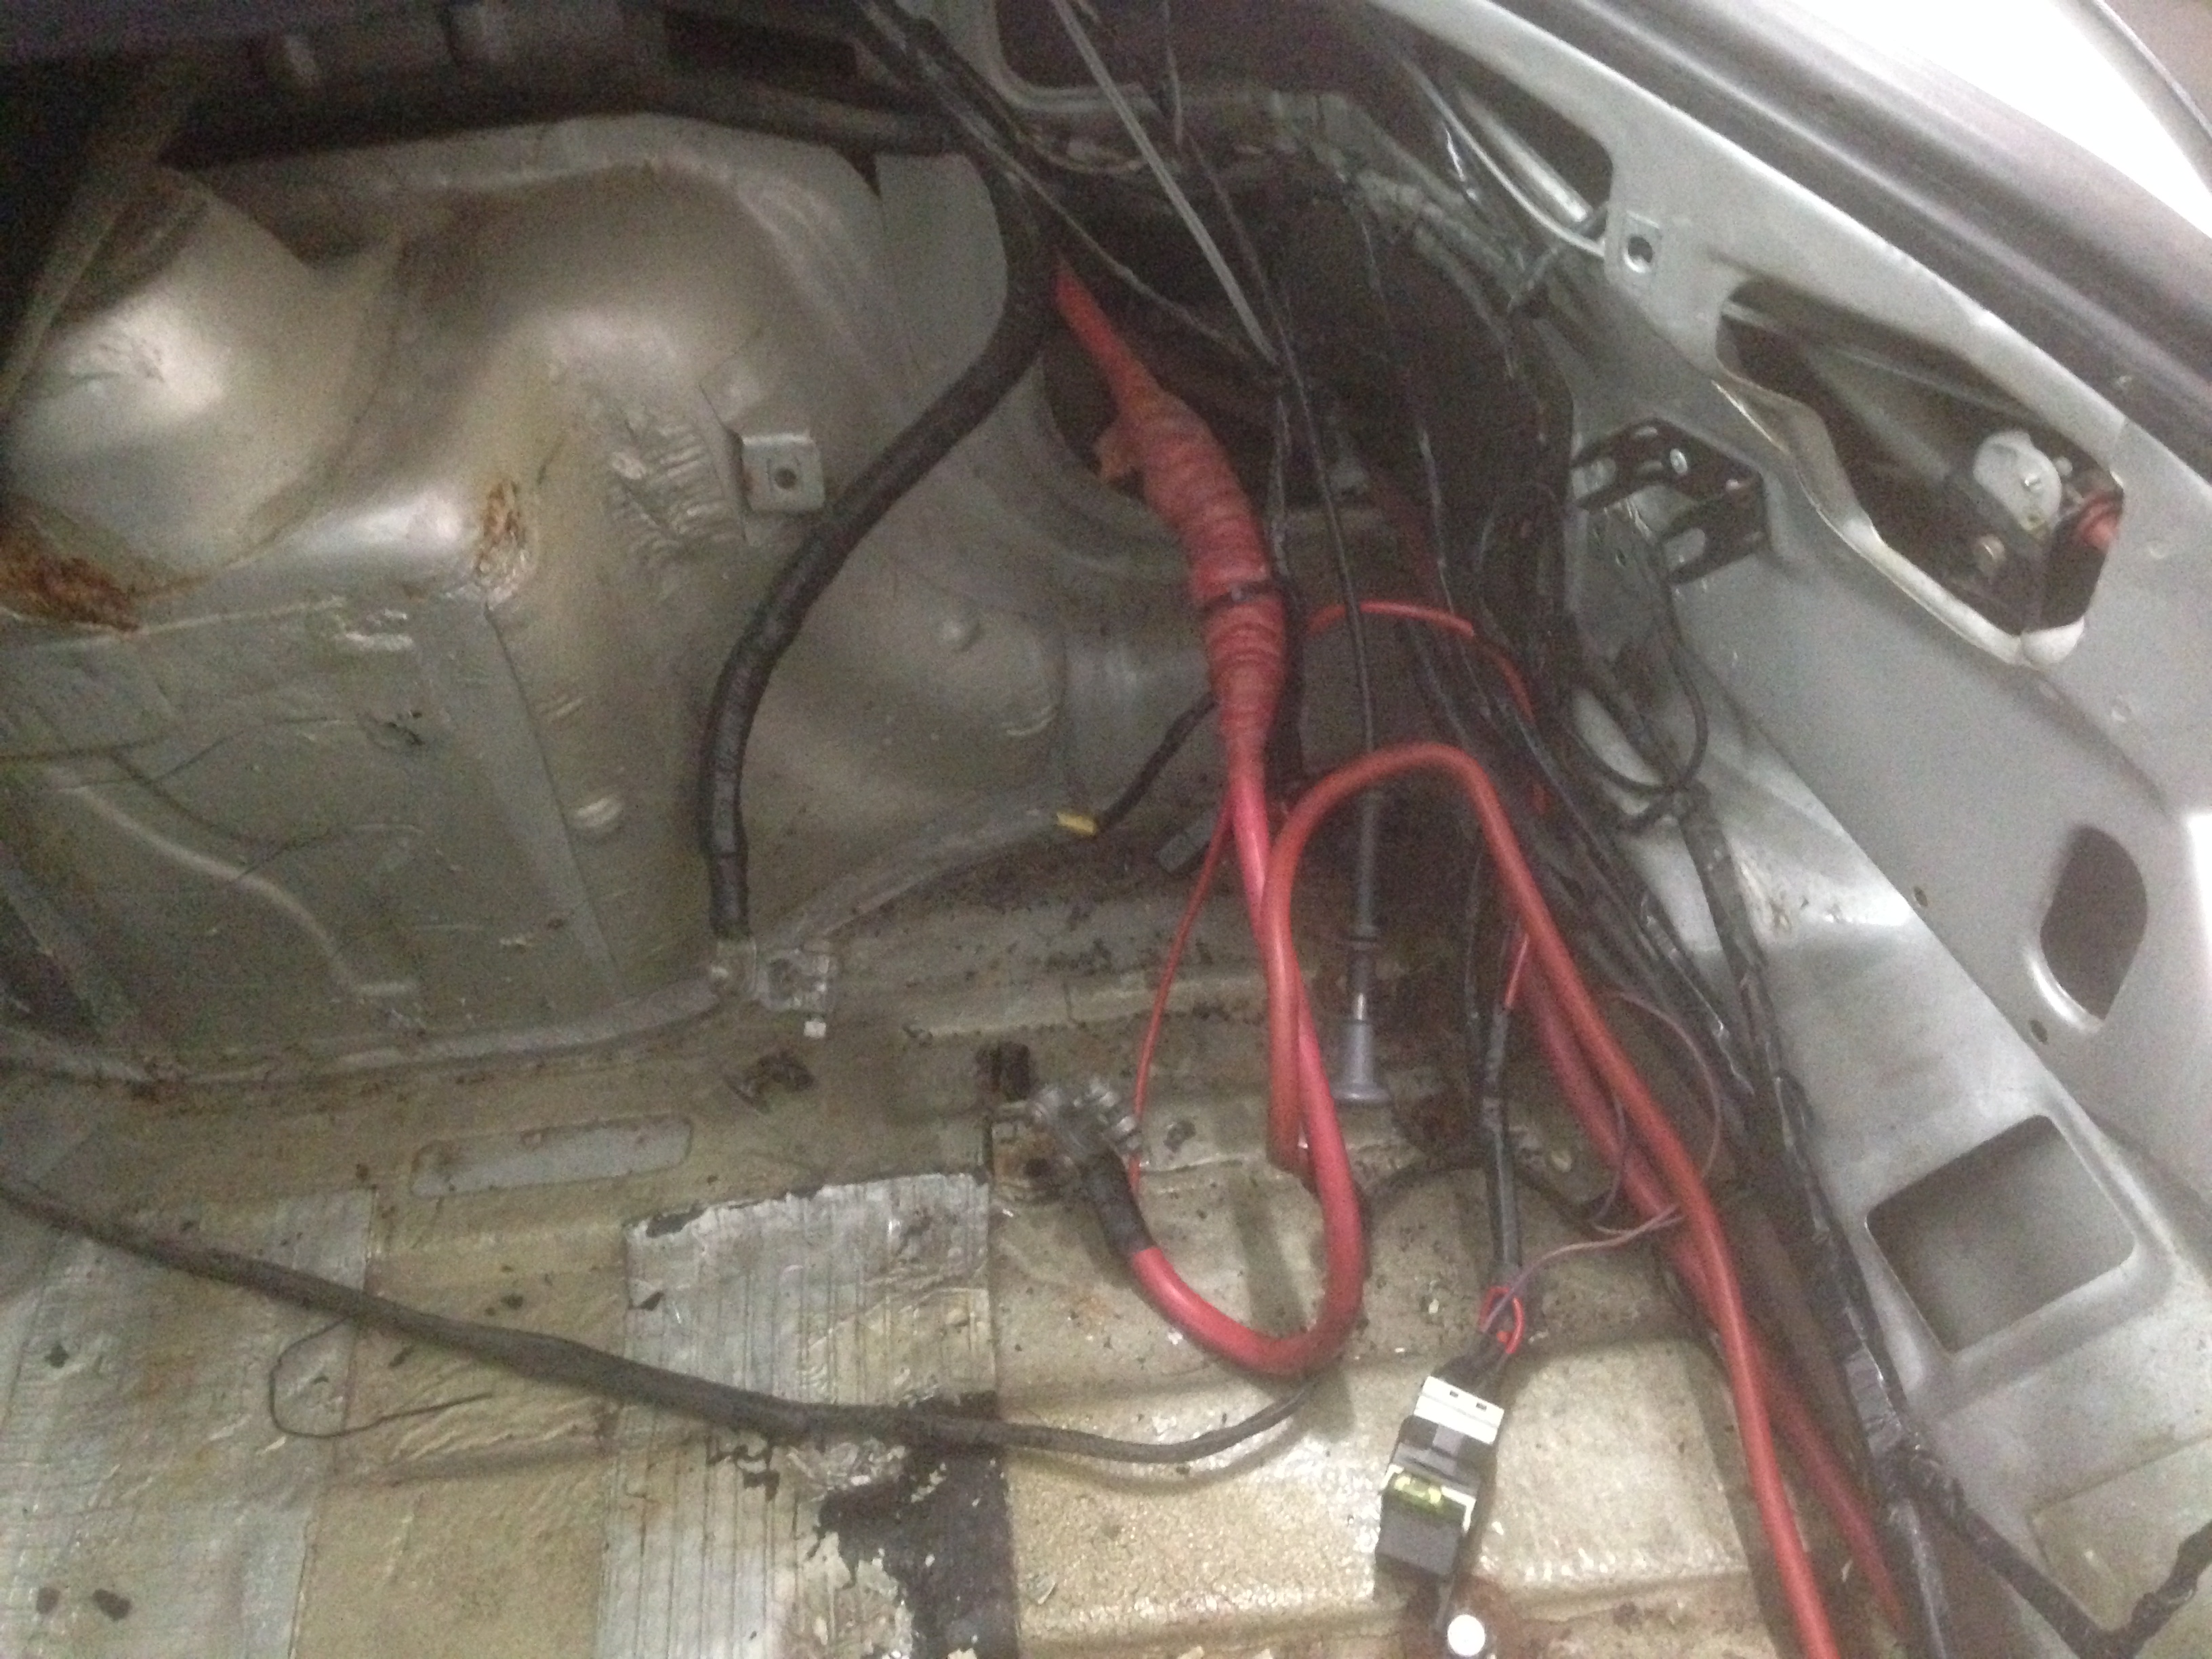
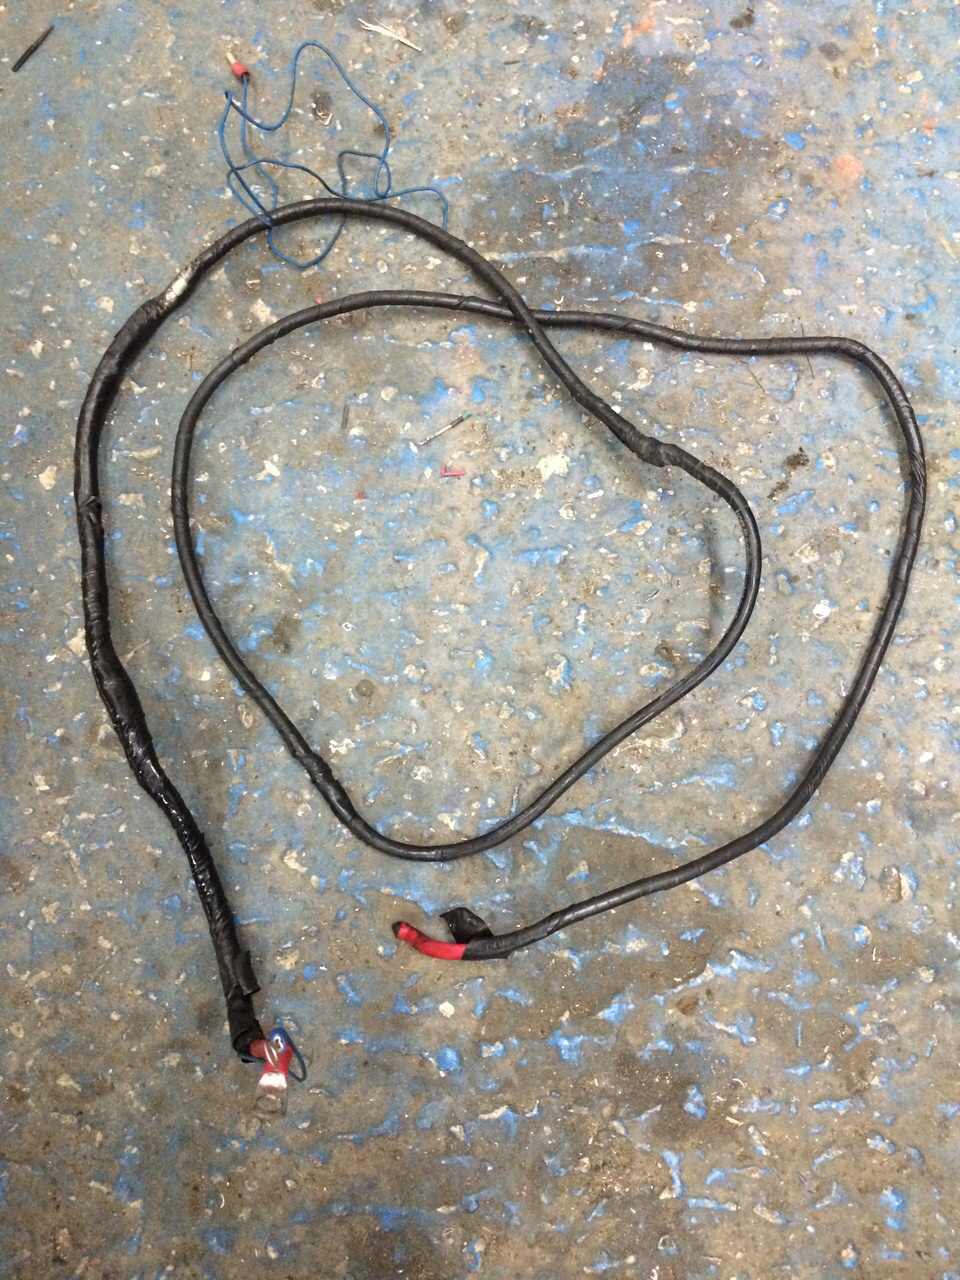
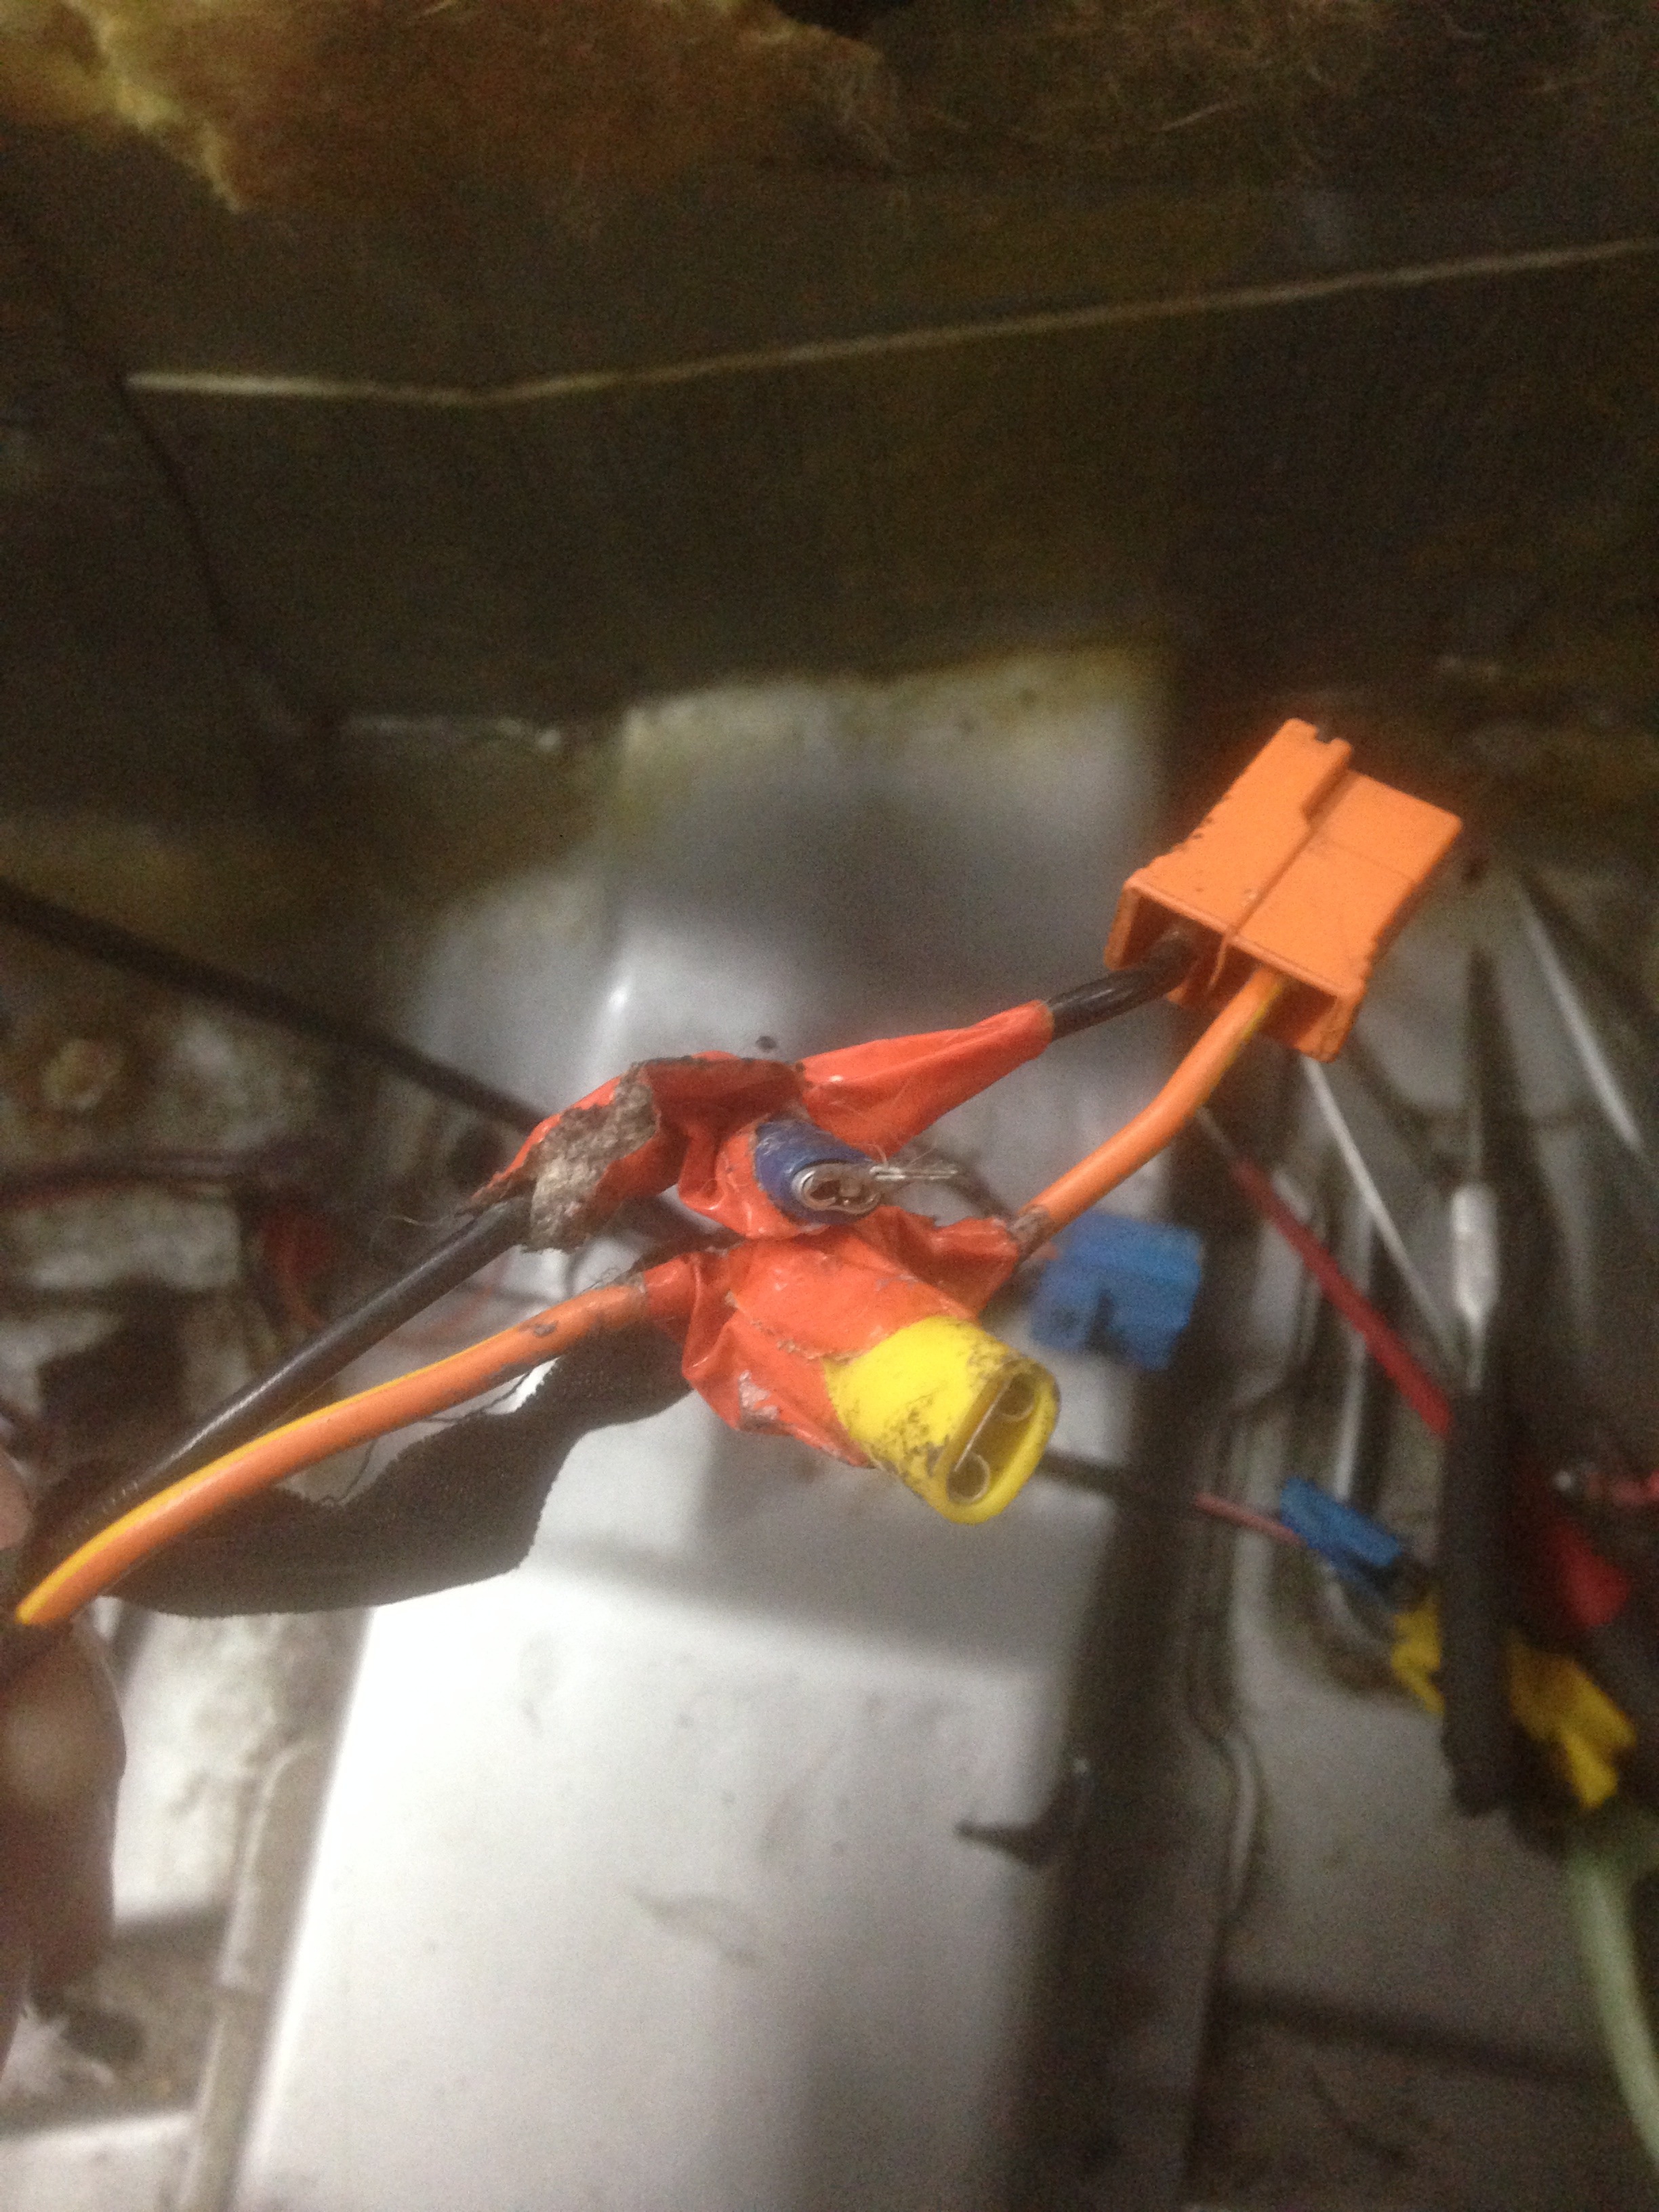
This was the cable between the alternator and starter.. It had 4 joins in it!
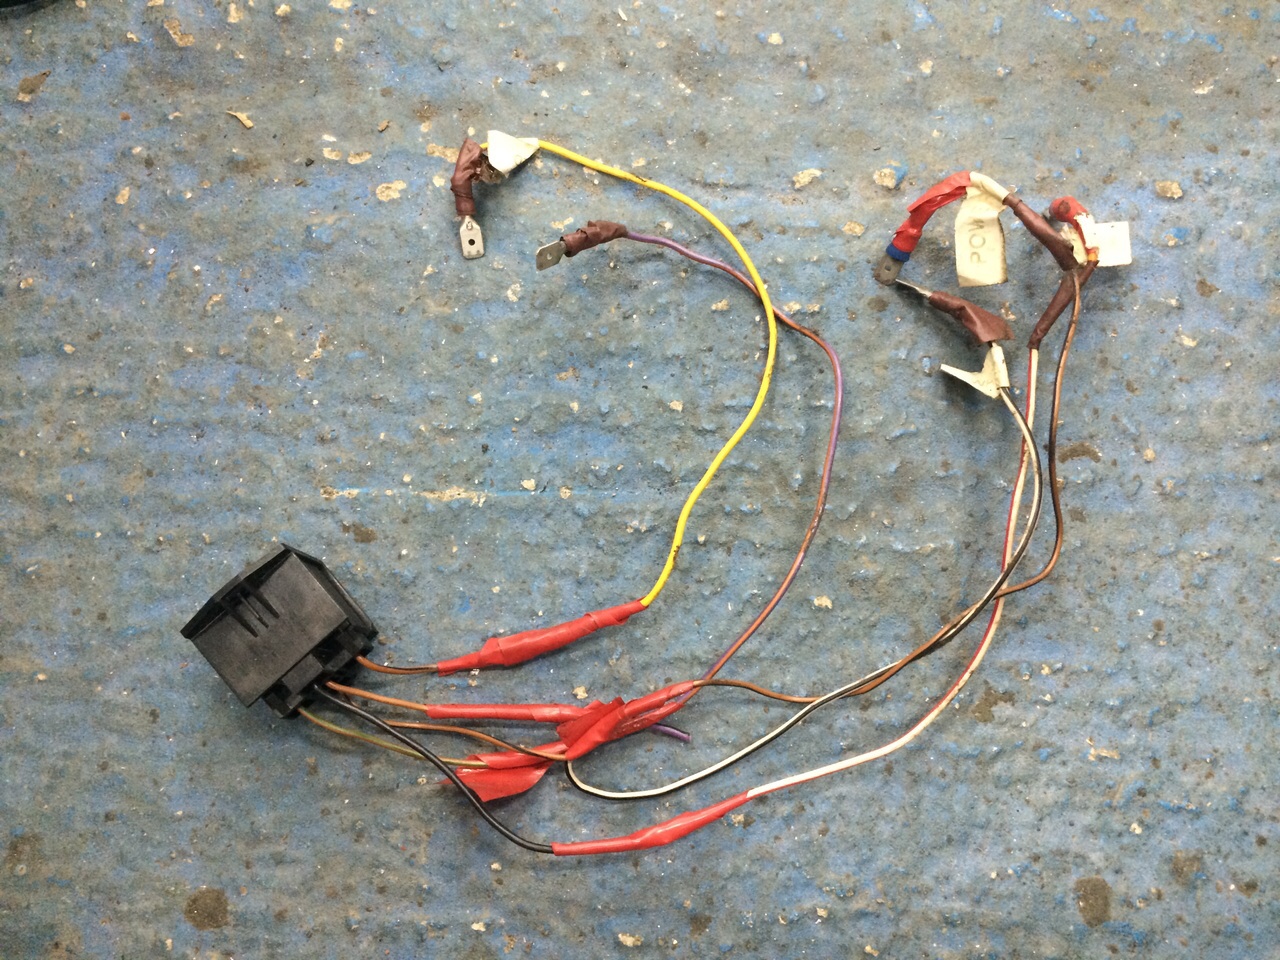
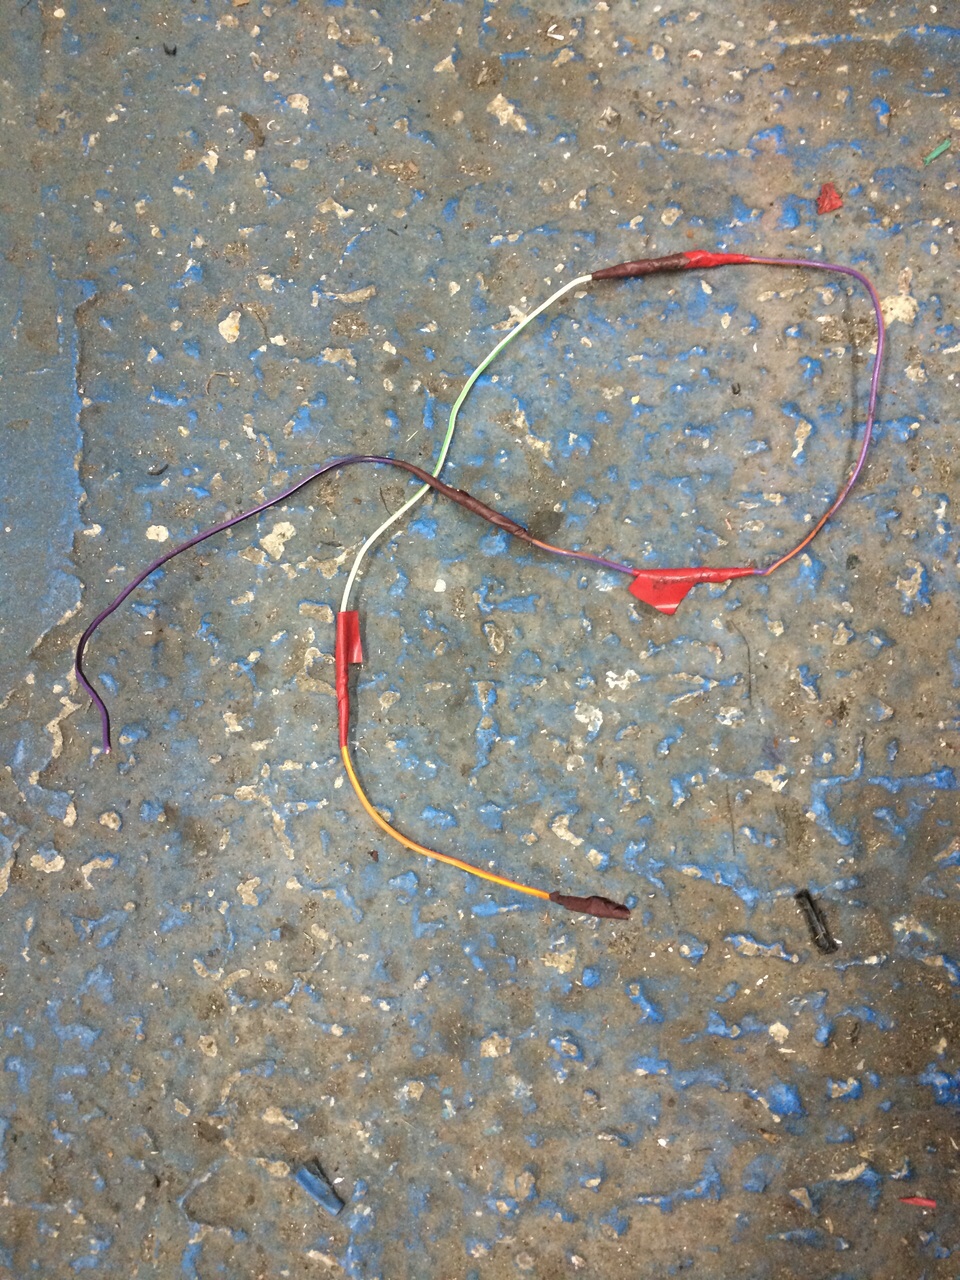
More of the mess
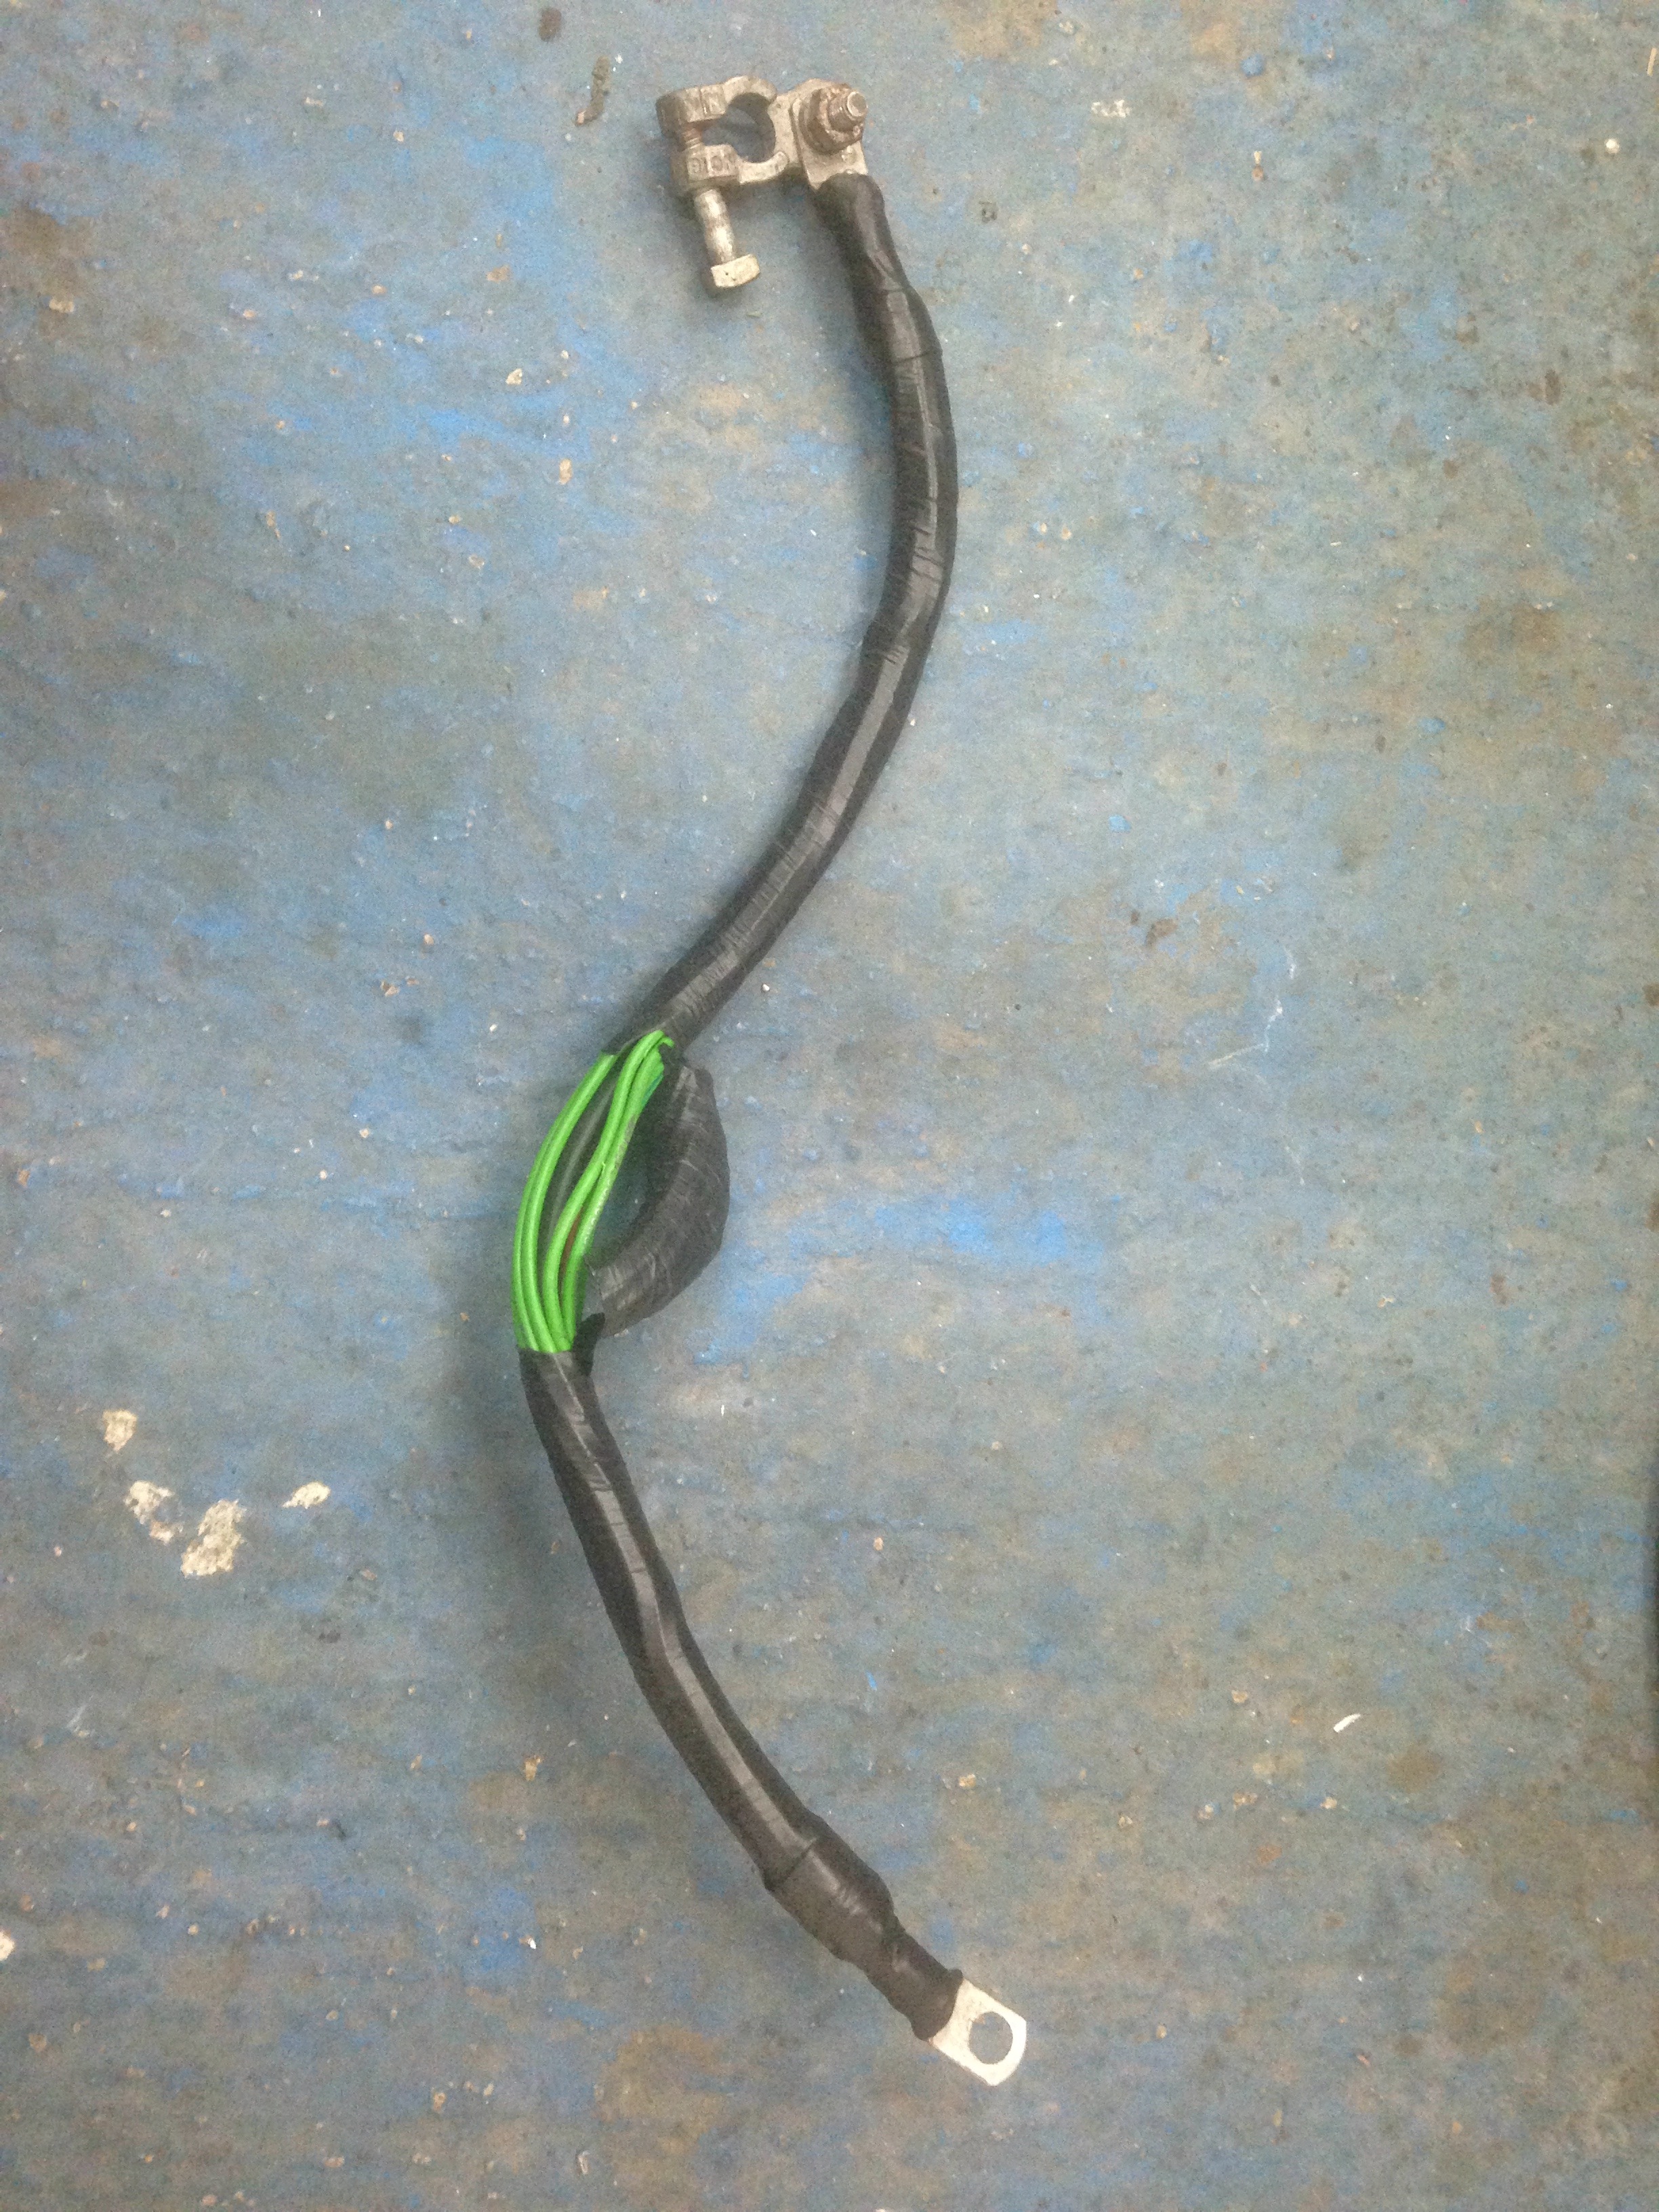
Strange battery earth cable
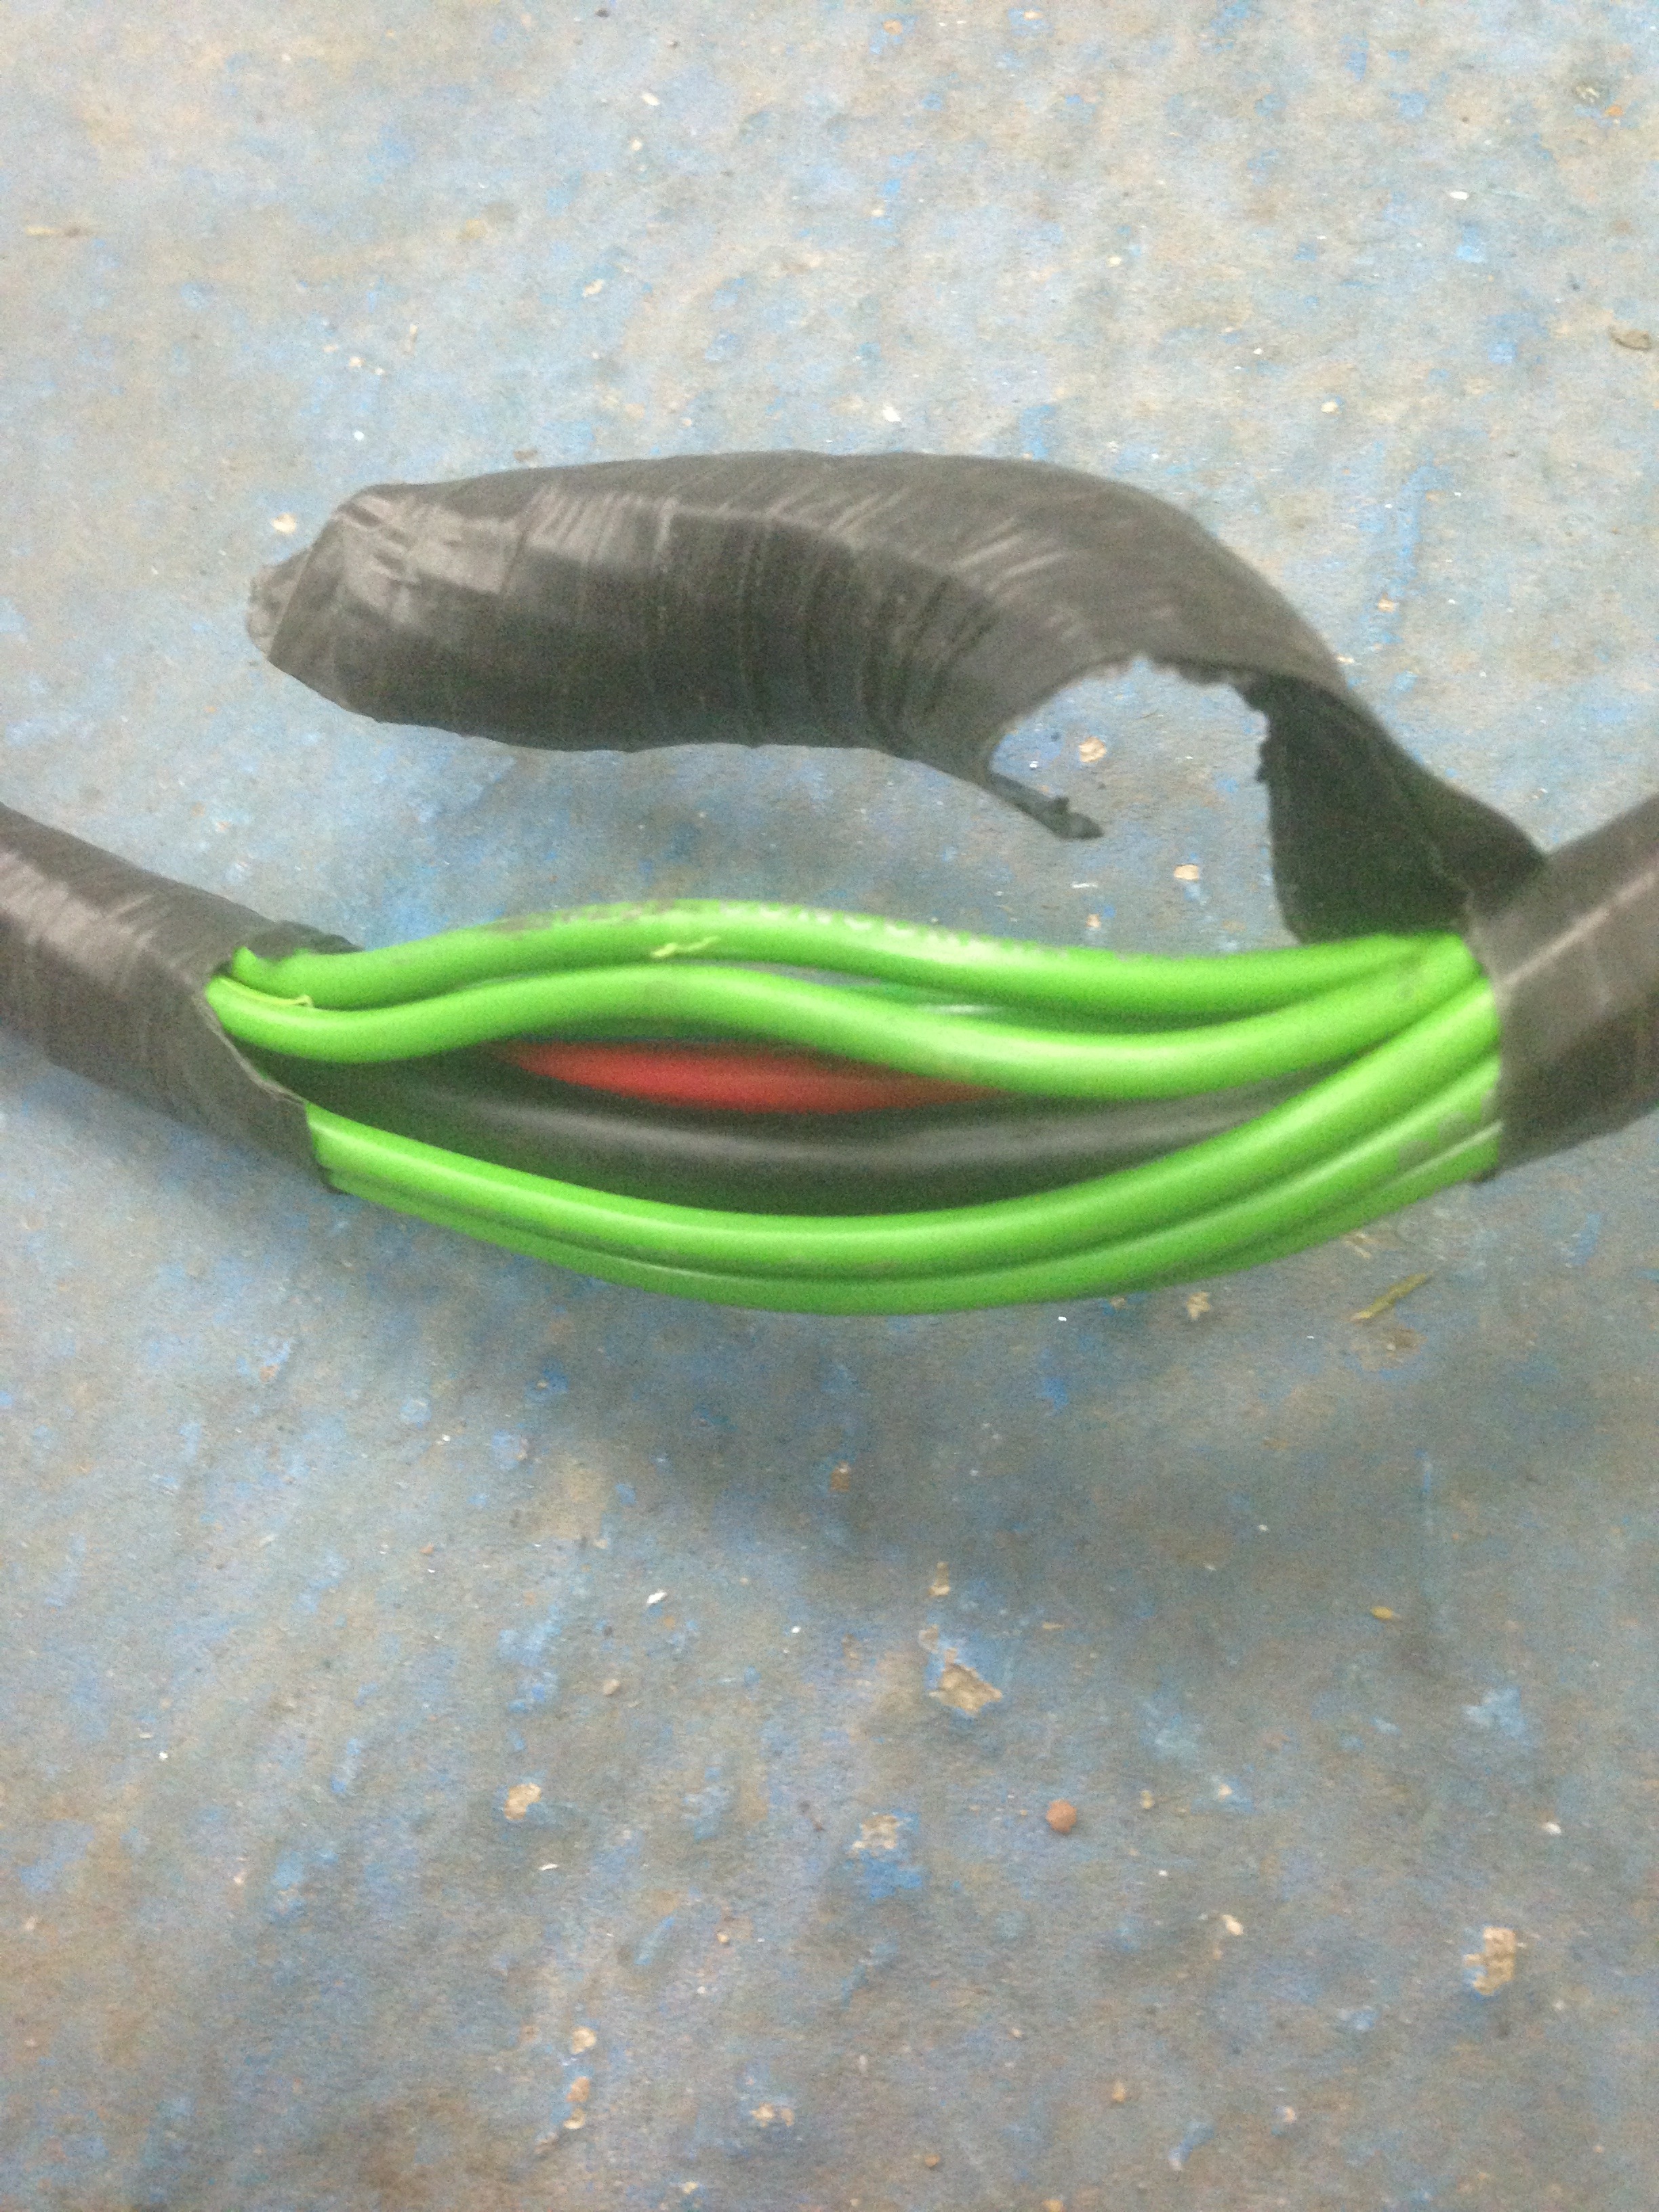
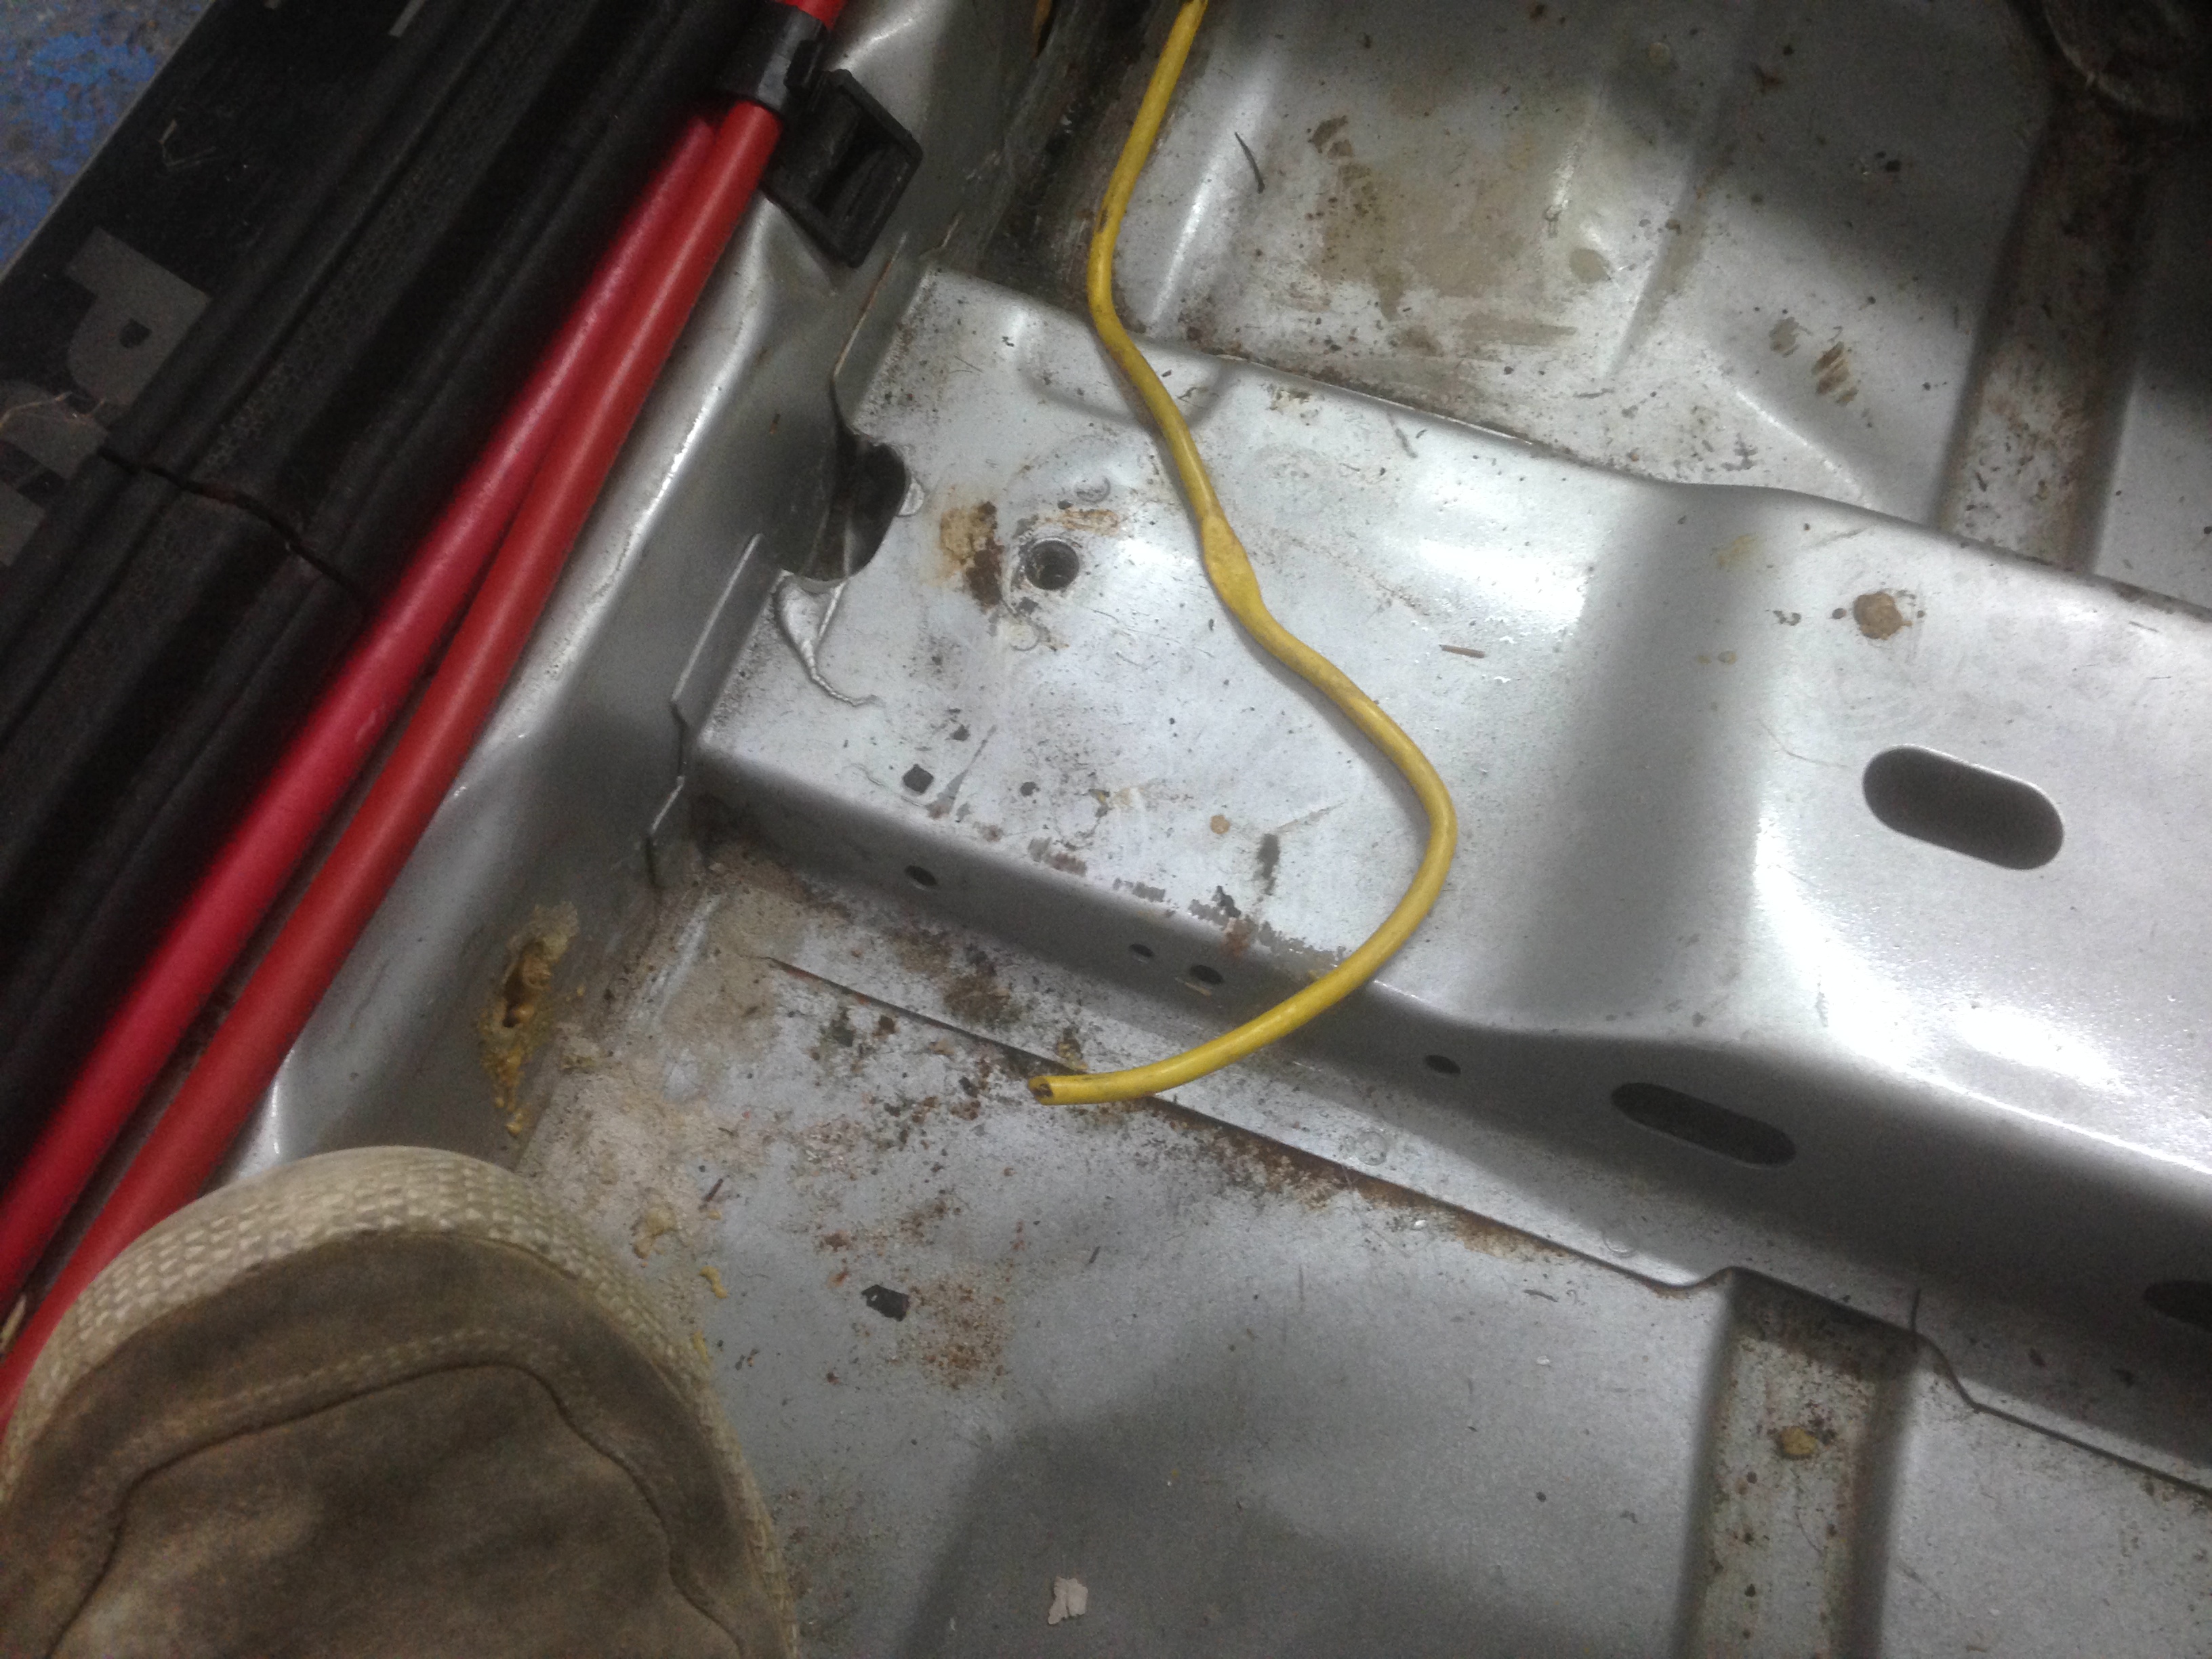
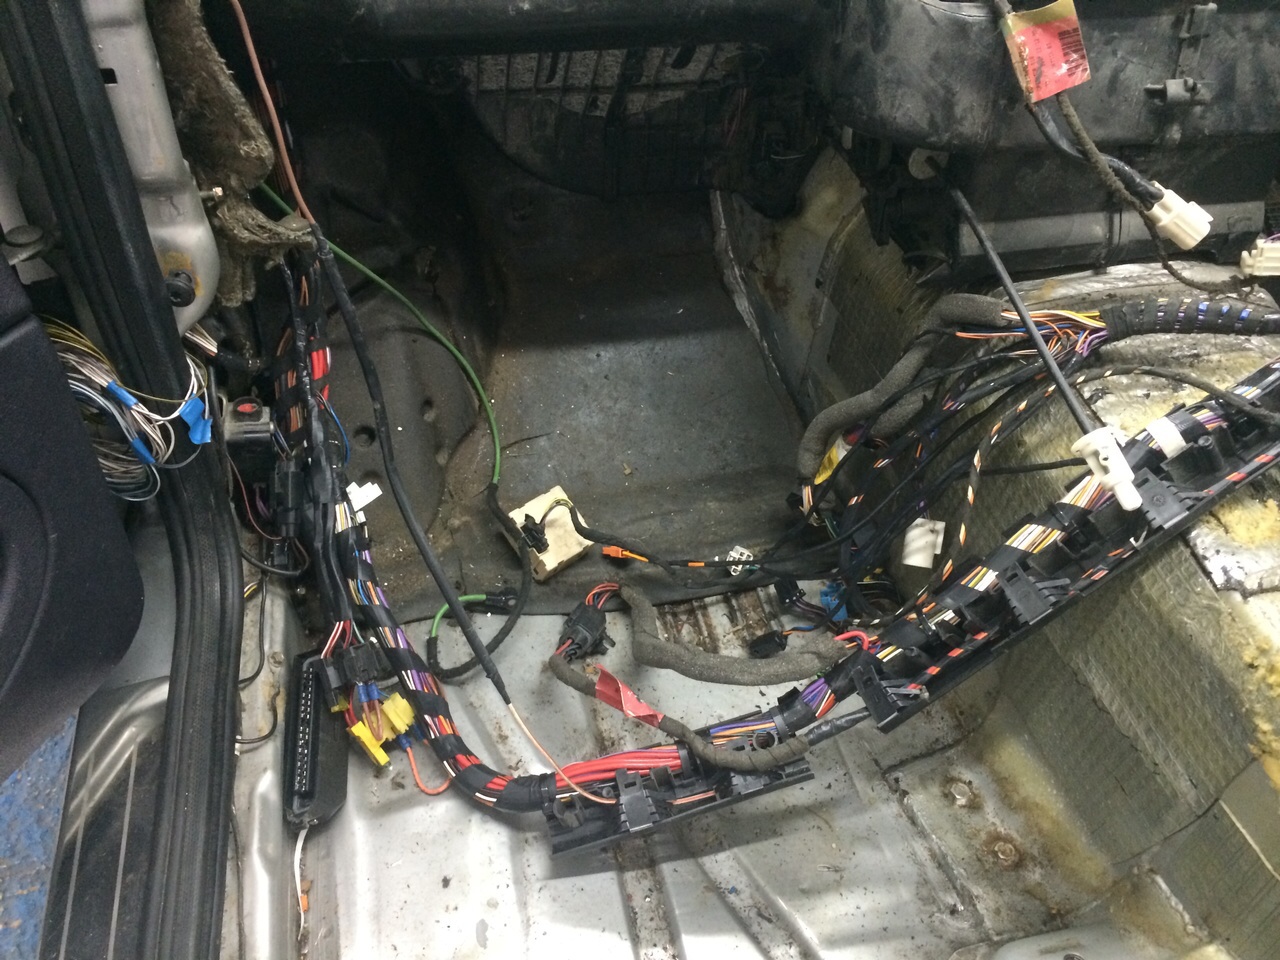
Some interesting wiring in the boot for the fuel pump.. Changing cable sizes
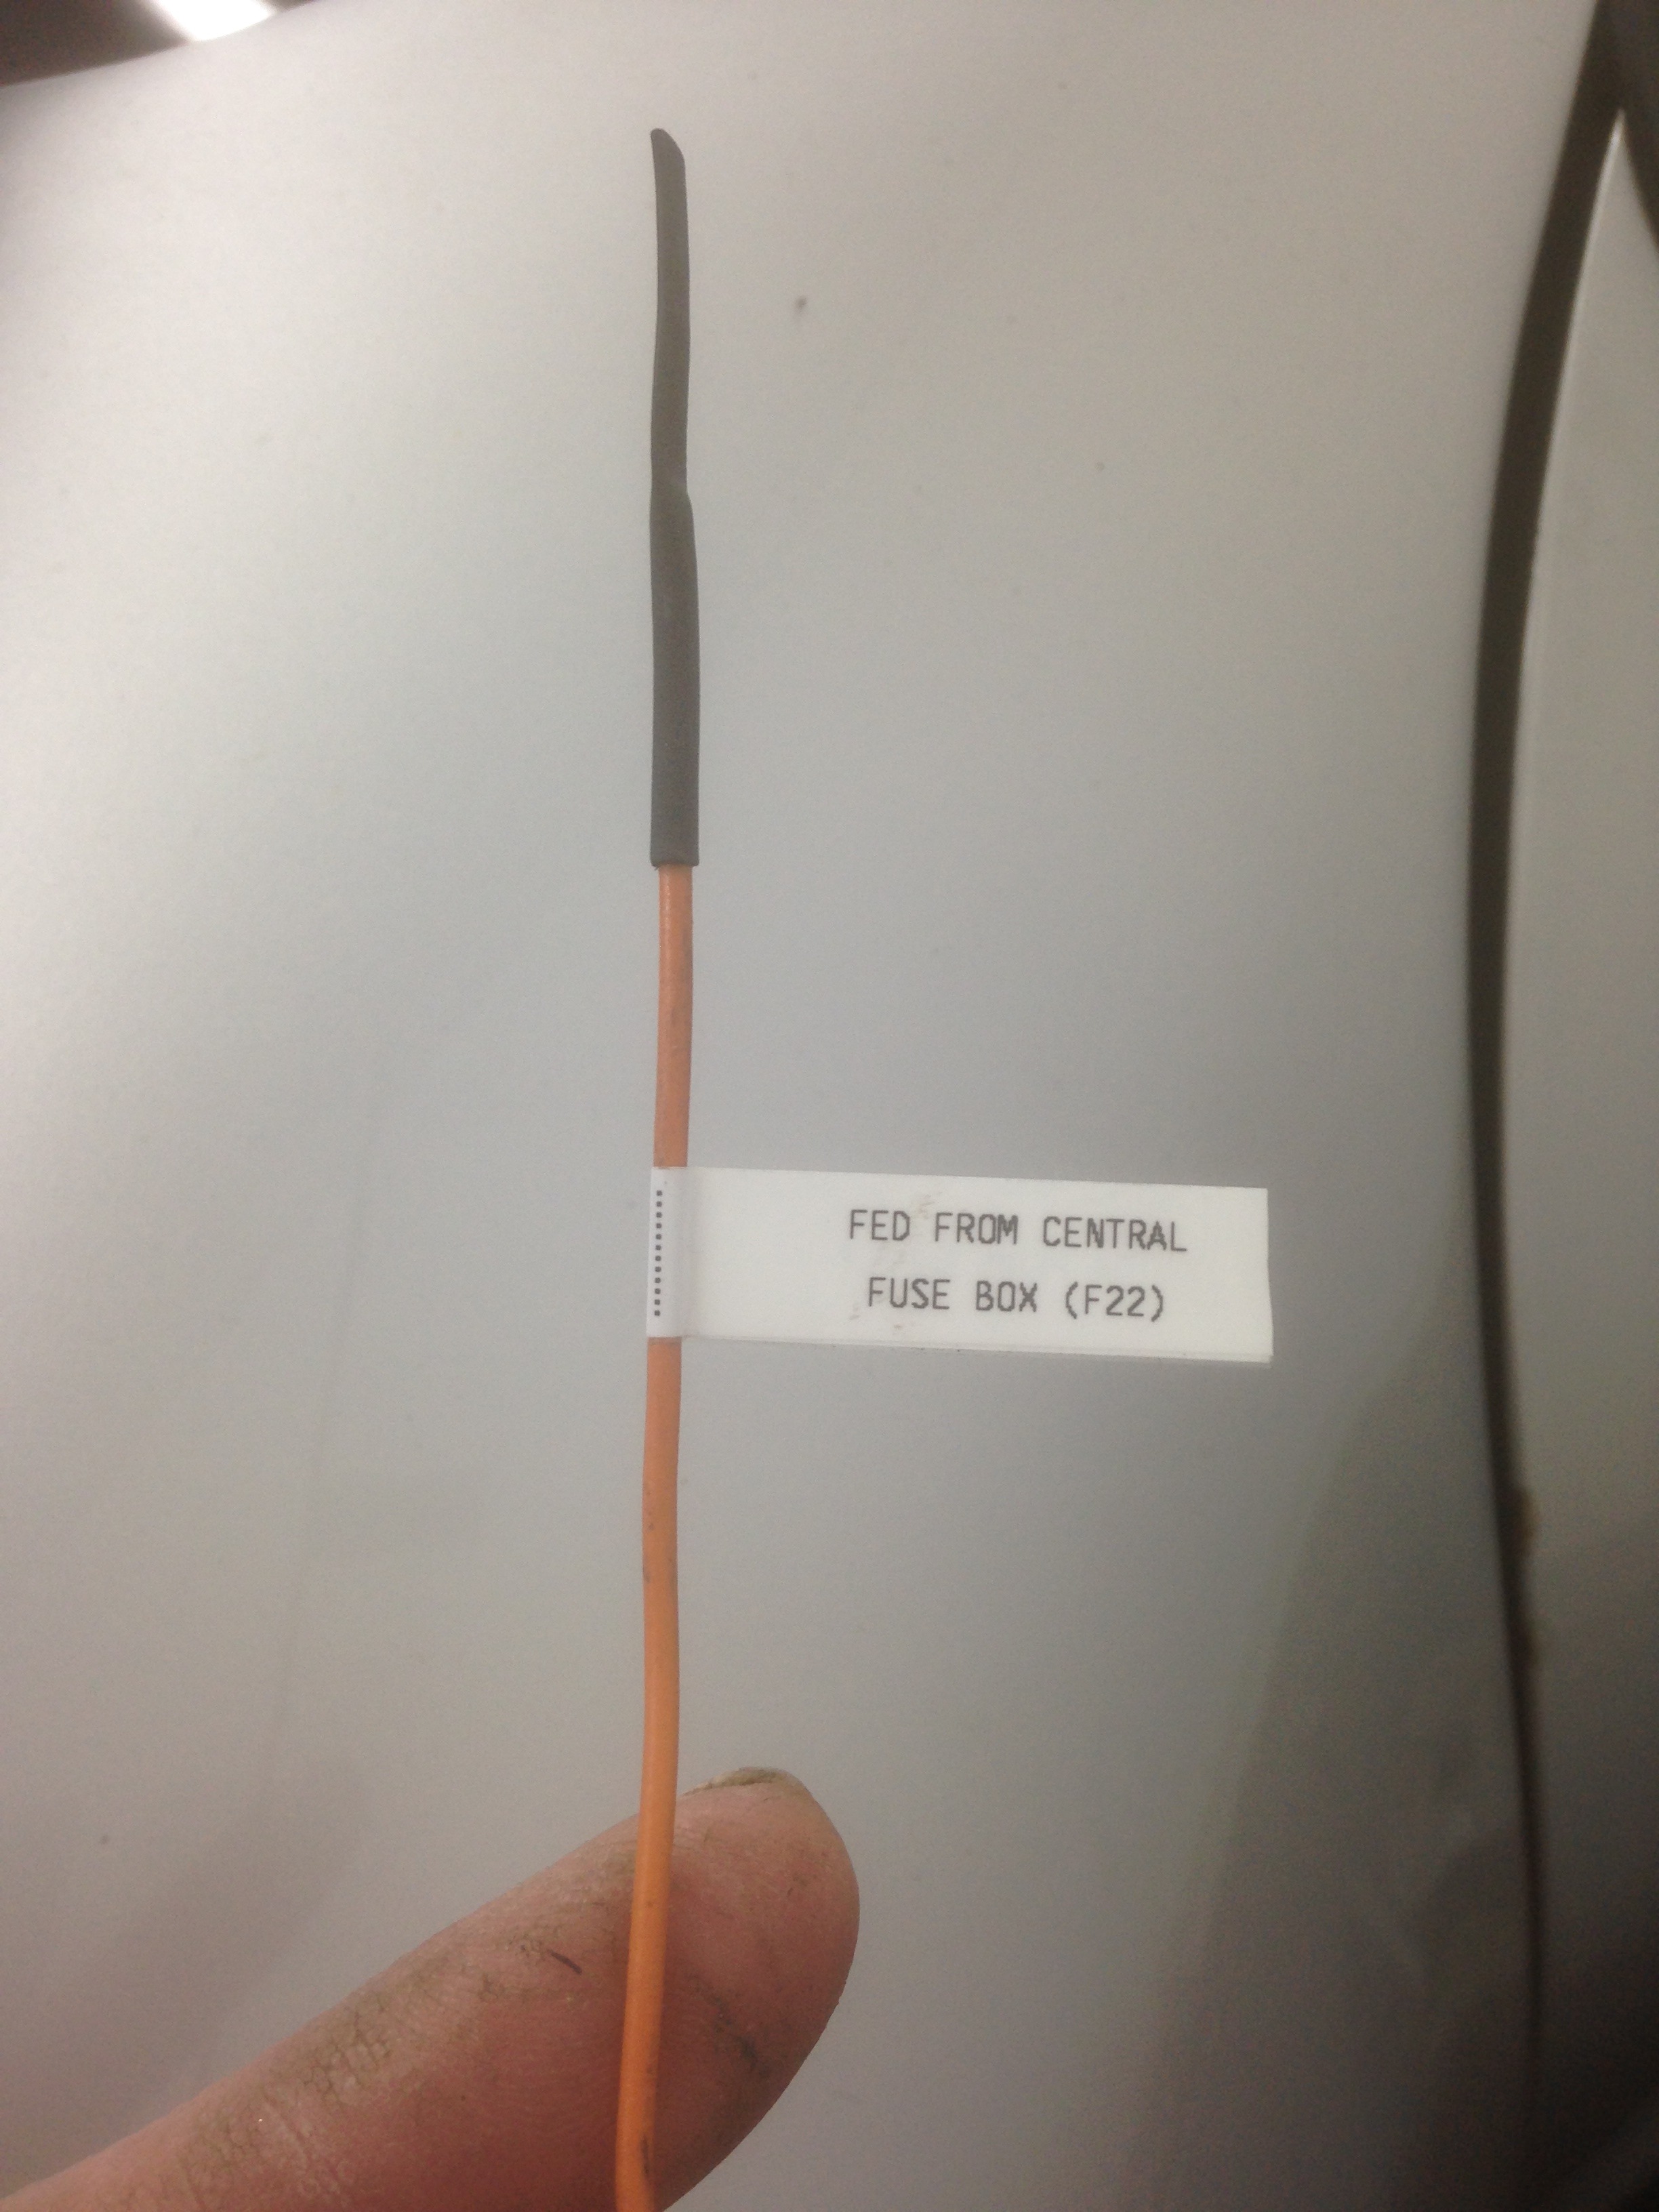
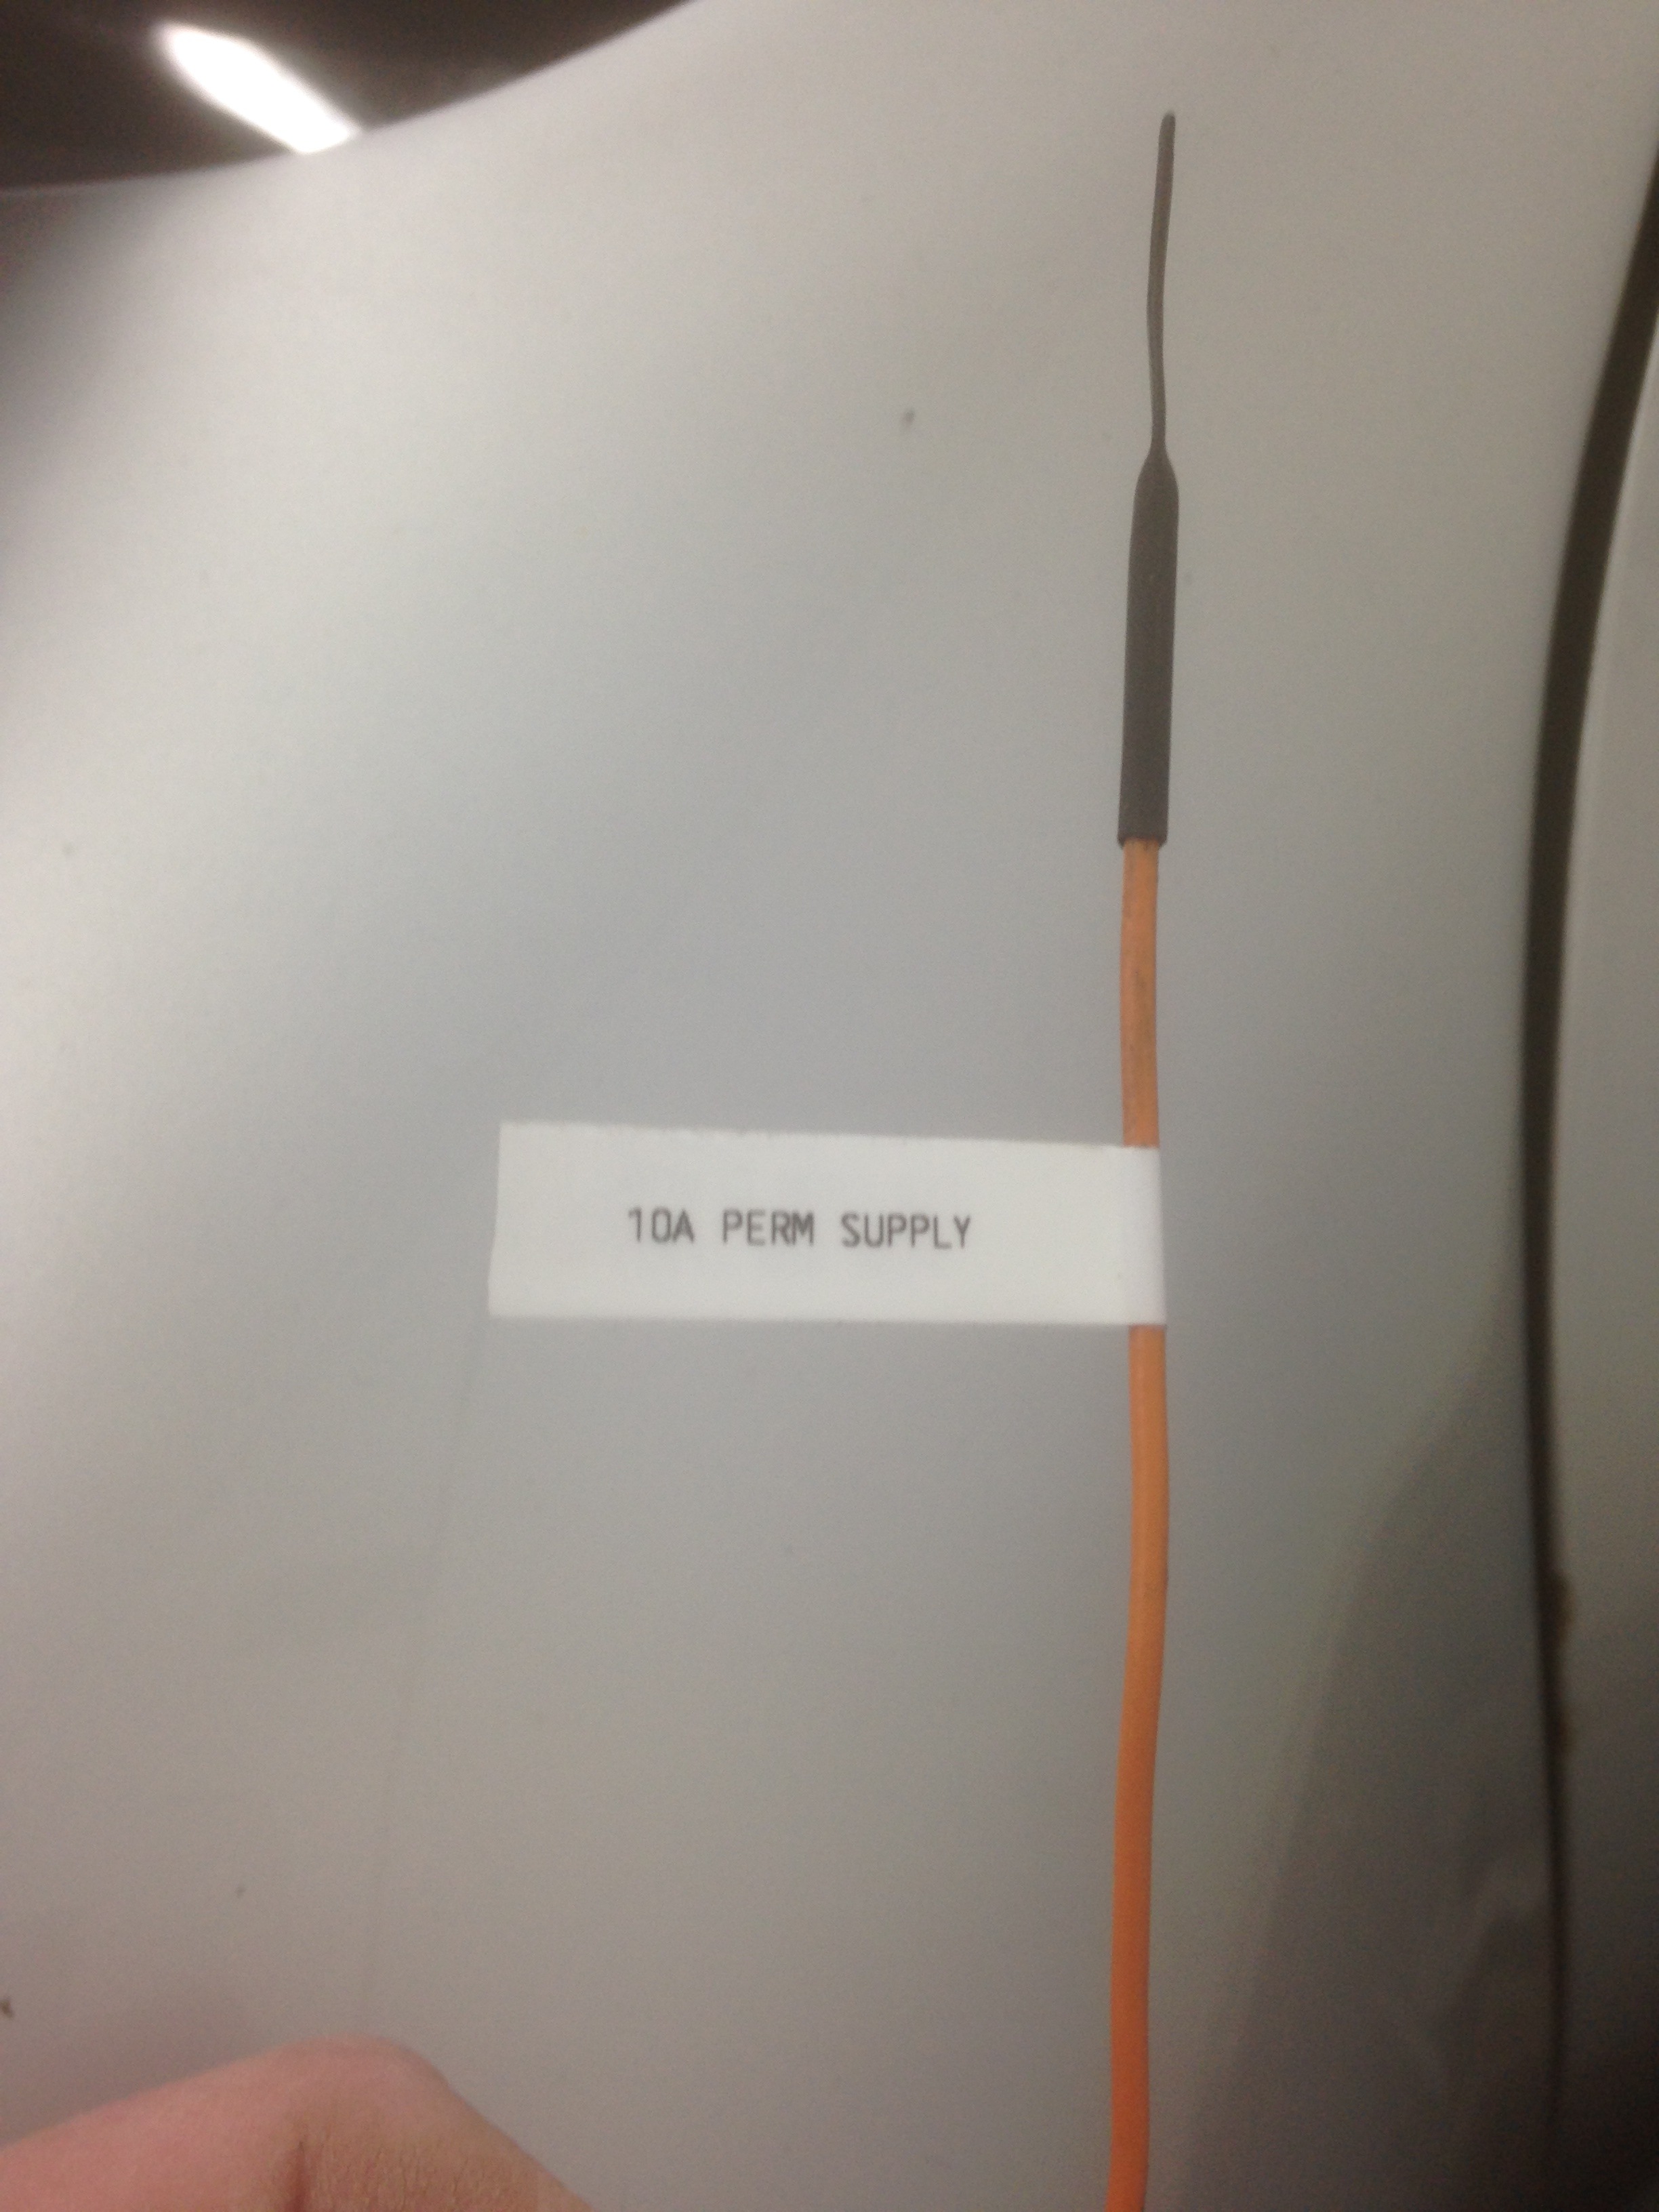
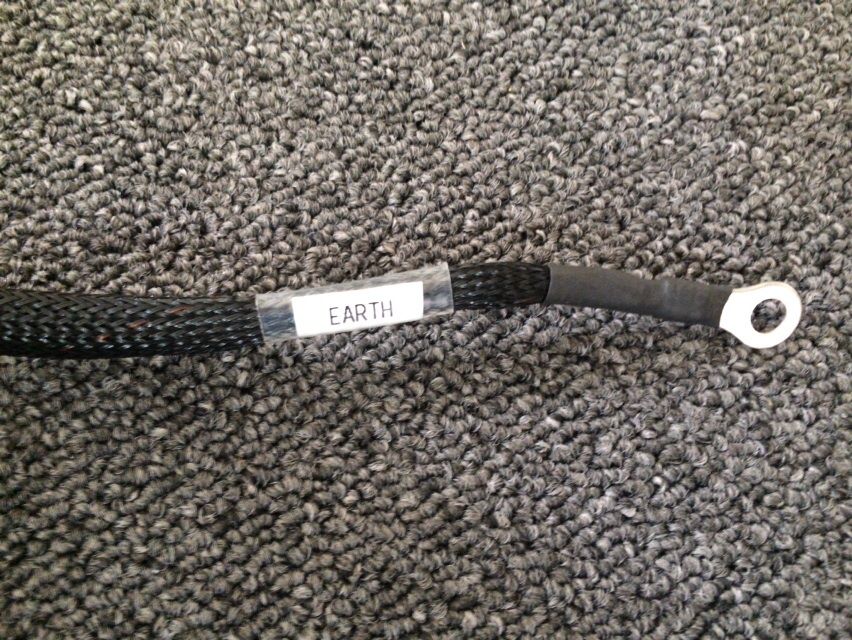
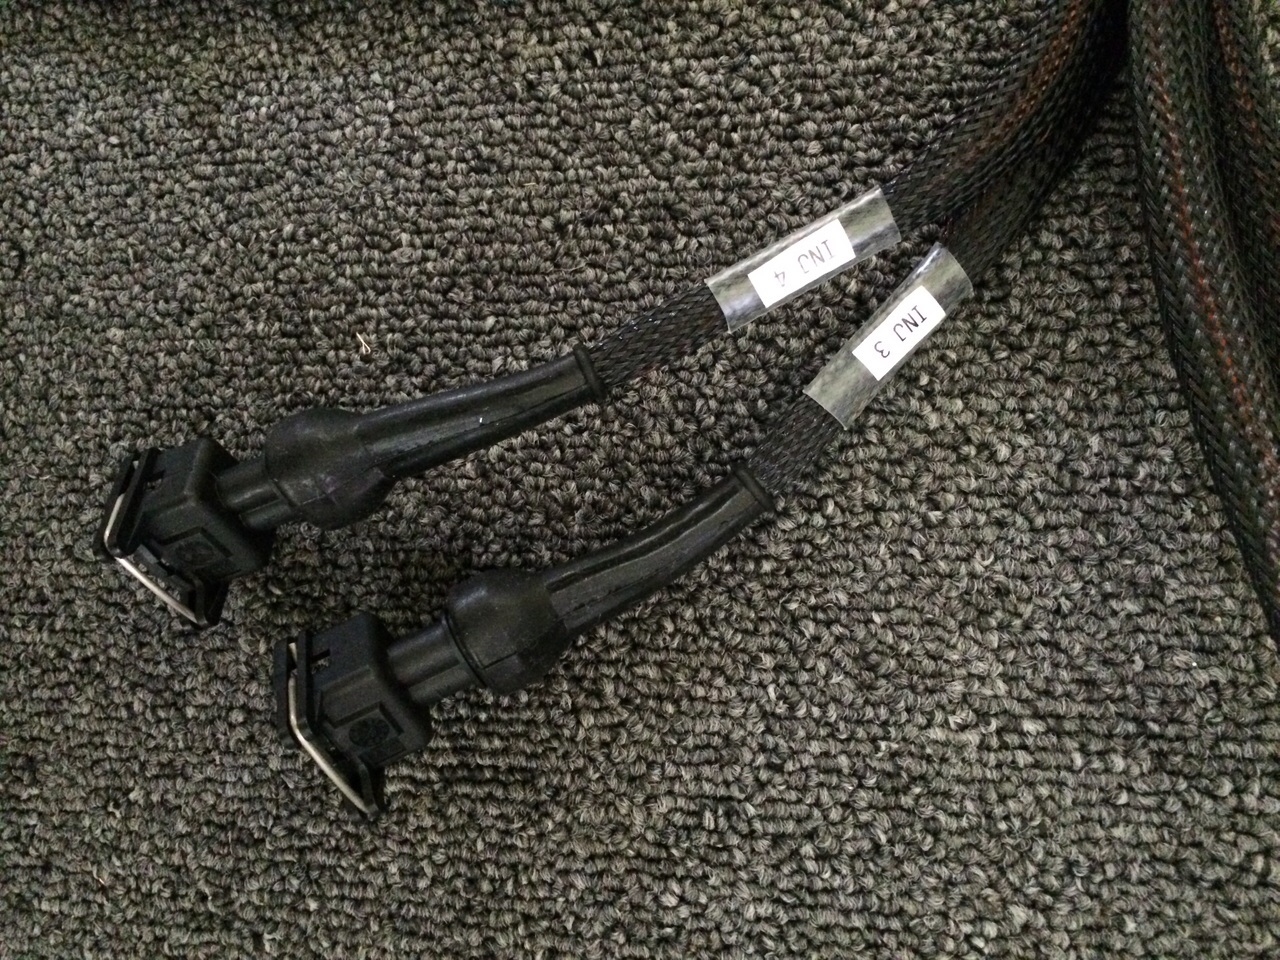
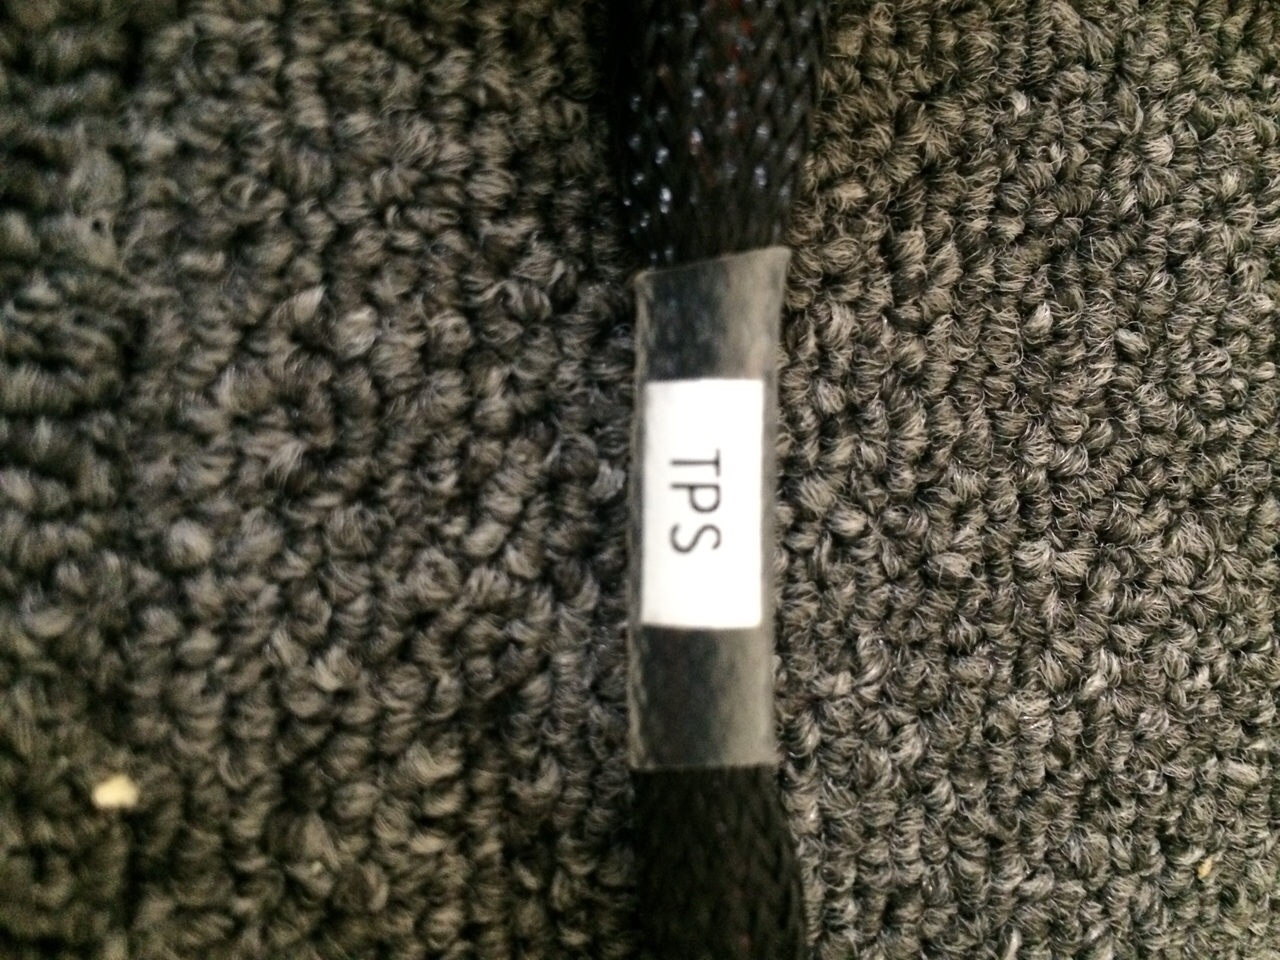
Using cable flags to identify wires in the future
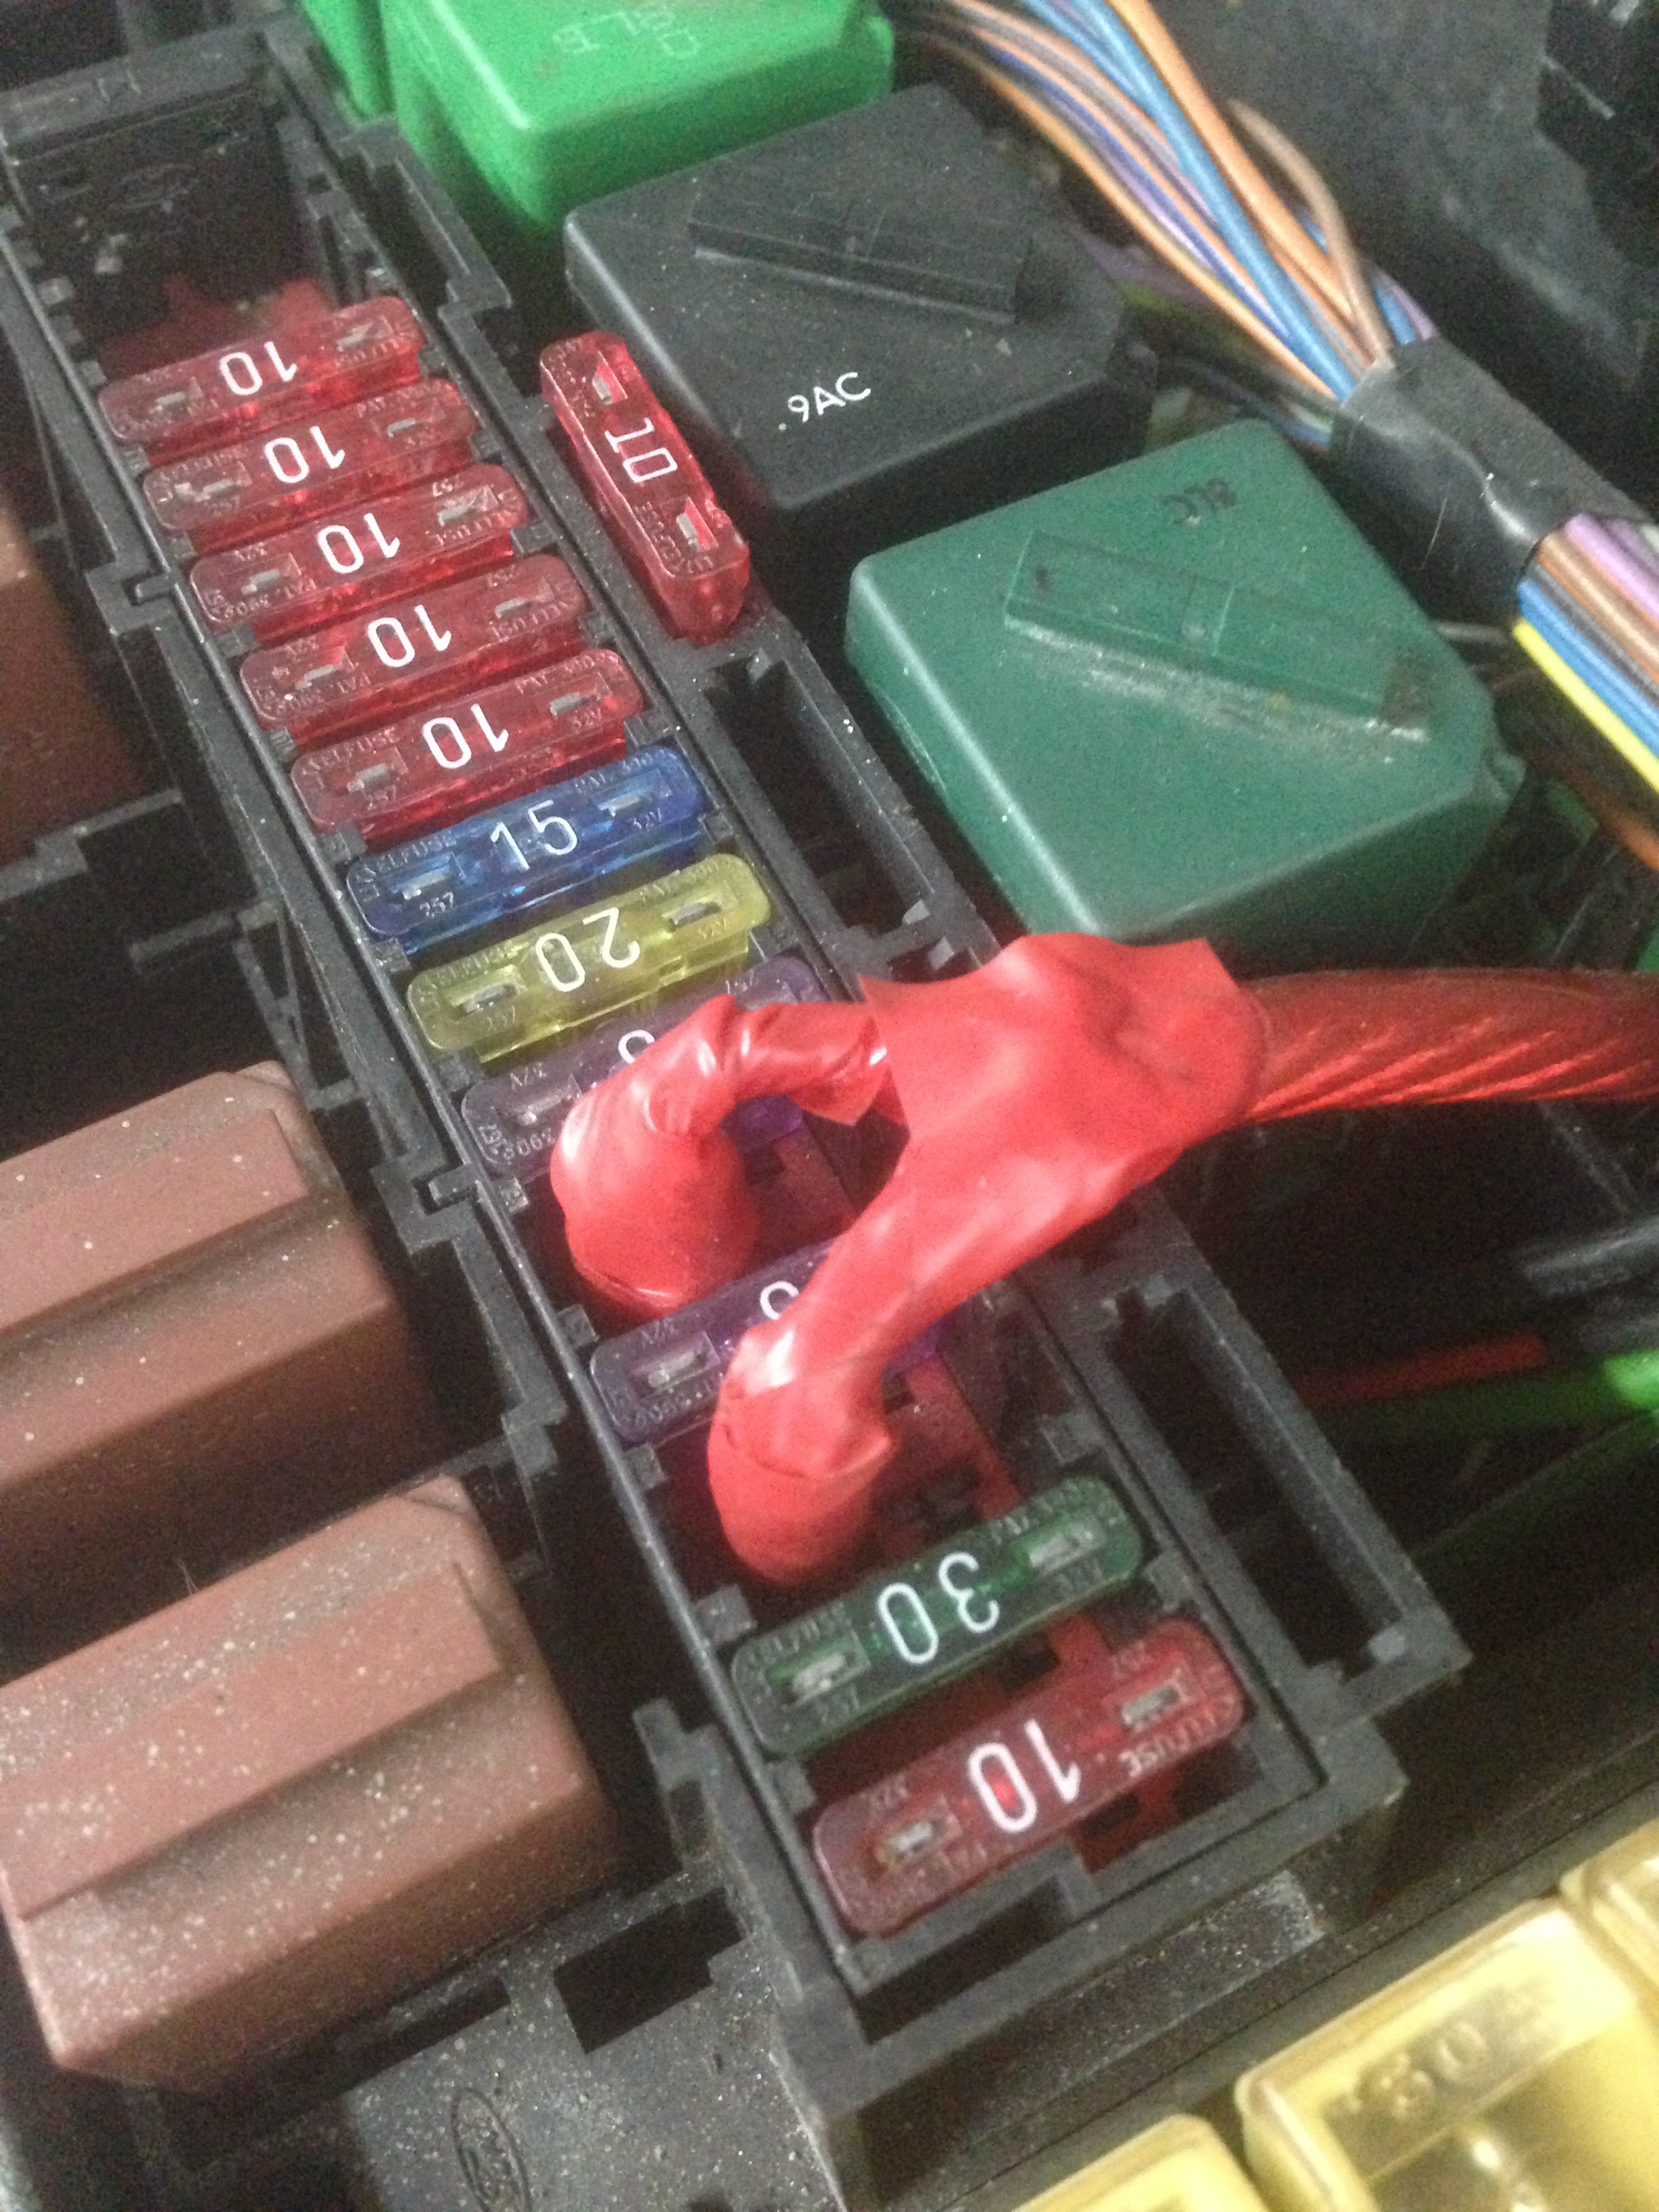
Might have something to do with why the 12v socket doesn't work
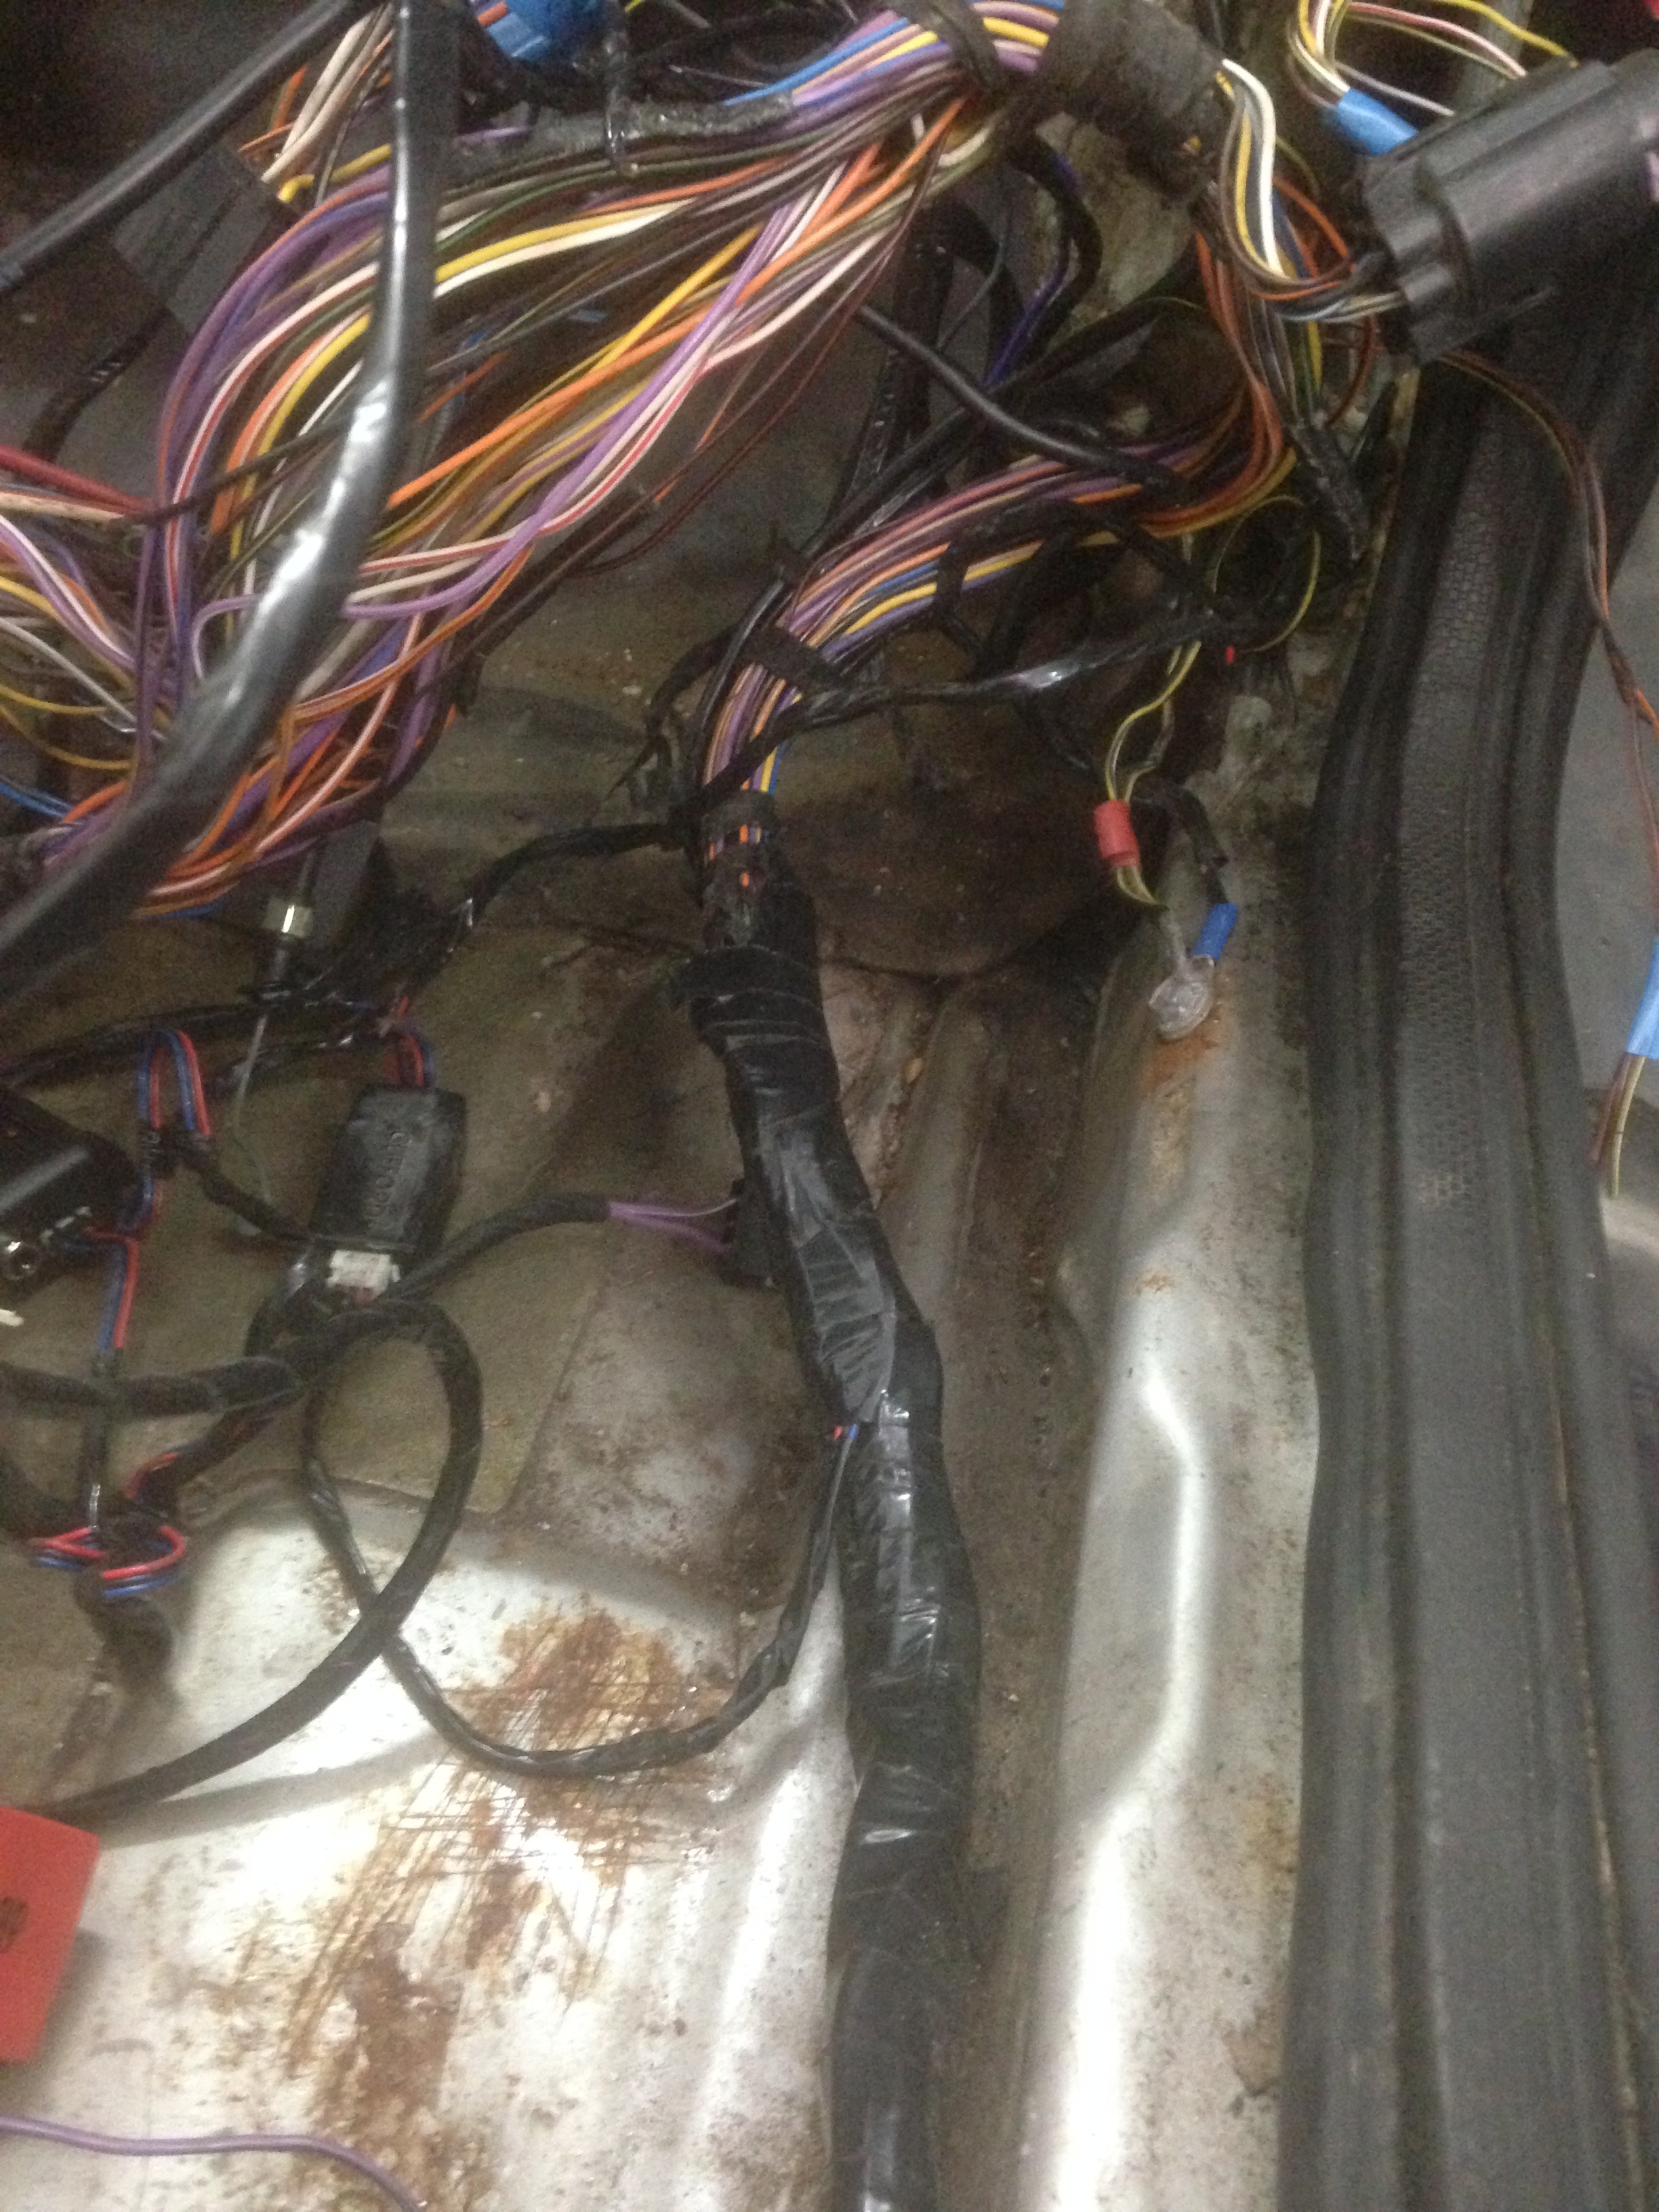
Although it doesn't look much this is towards the end of the loom tidying.. The larger red cable has now been removed
Wiring repairs to the car loom.. Soldered joints and heat shrunk
Loom starting to get taped up and tidied
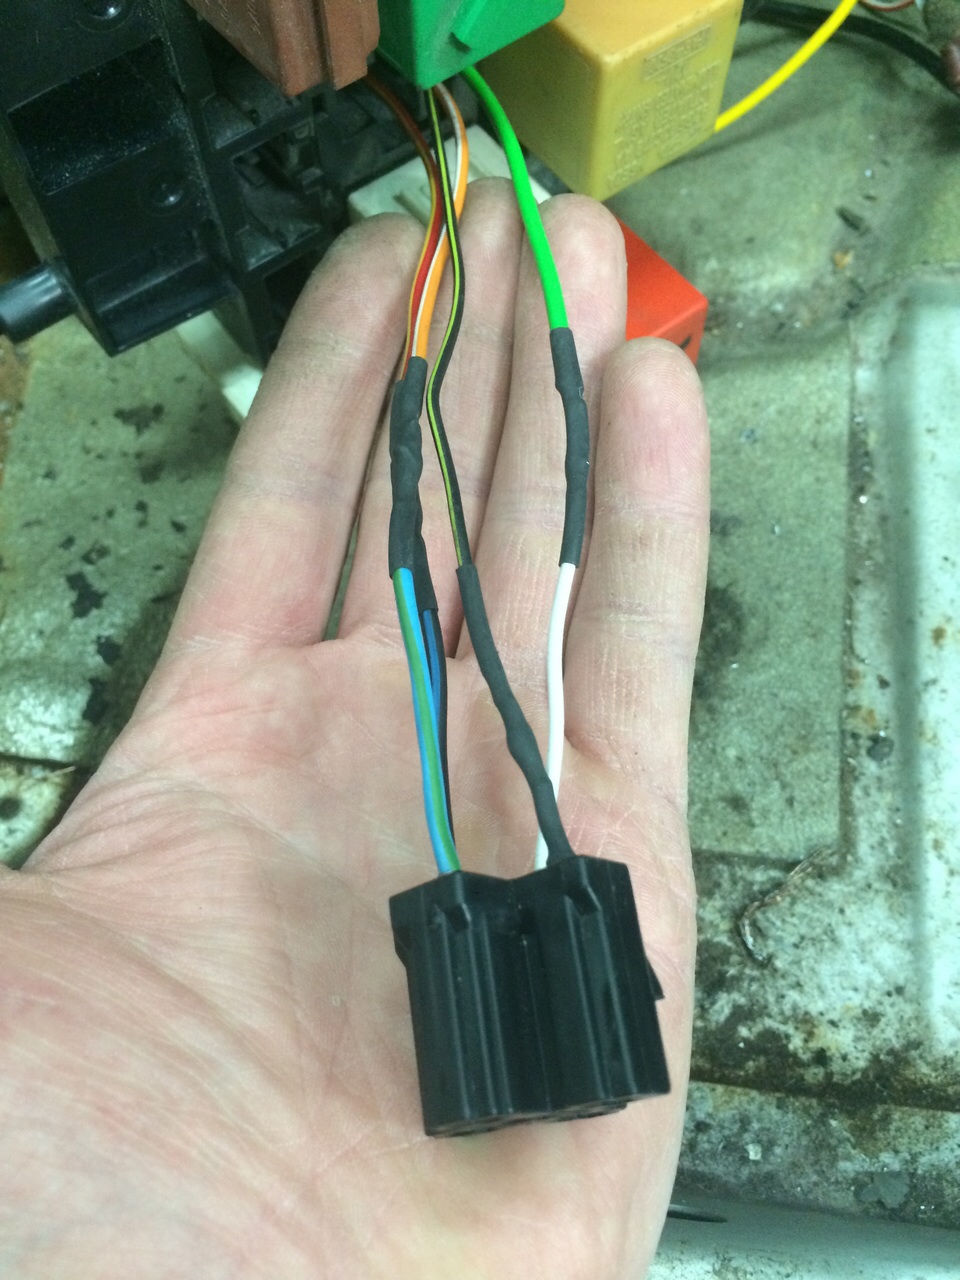
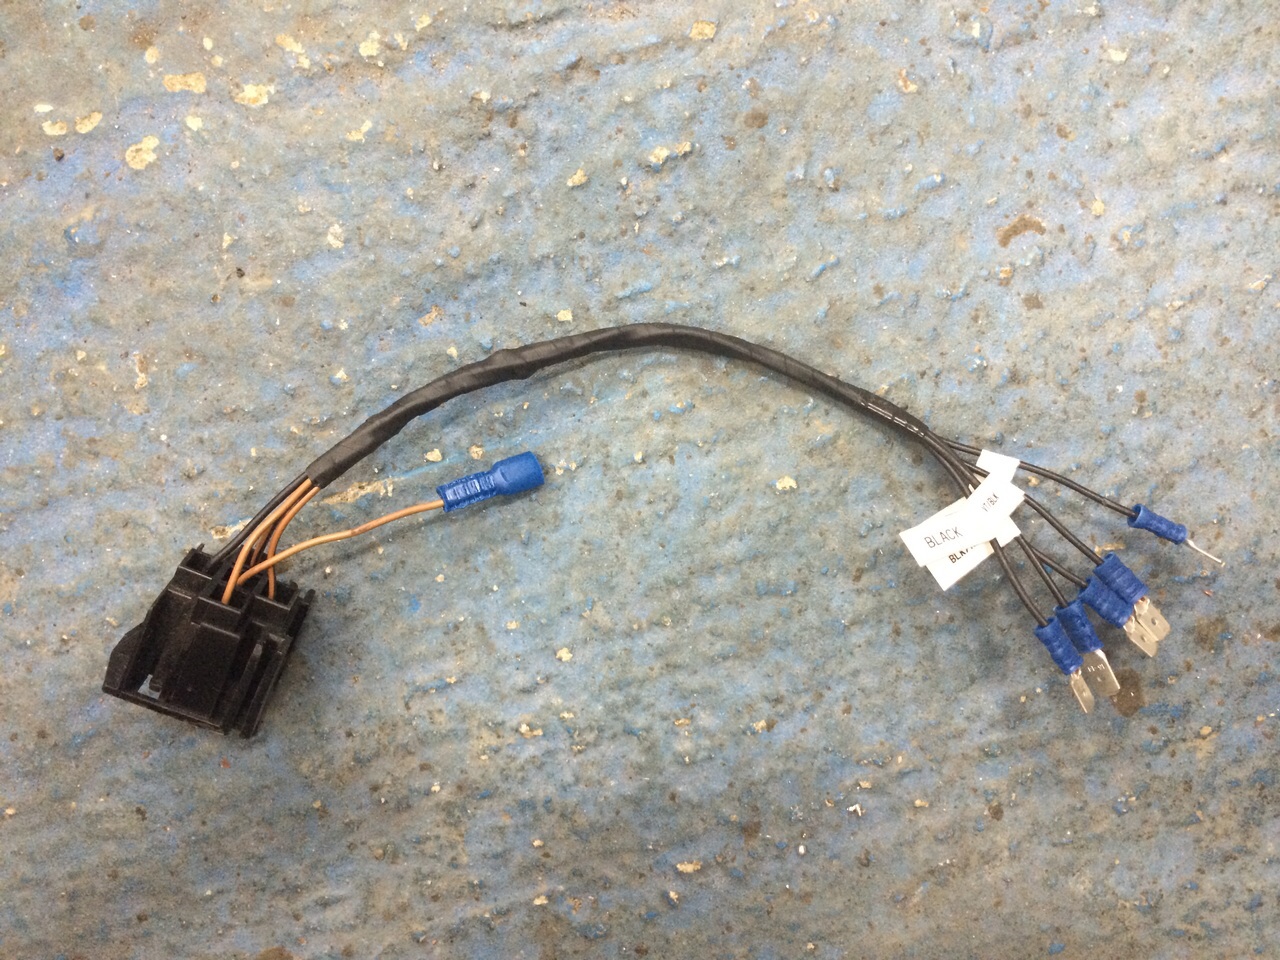
This is the small loom for the variable intermittent wiper, seen better days so made a new one
New alternator cable made ( only have a photo of one end?!)

Car loom tidied and finished, hopefully you can see the differences!
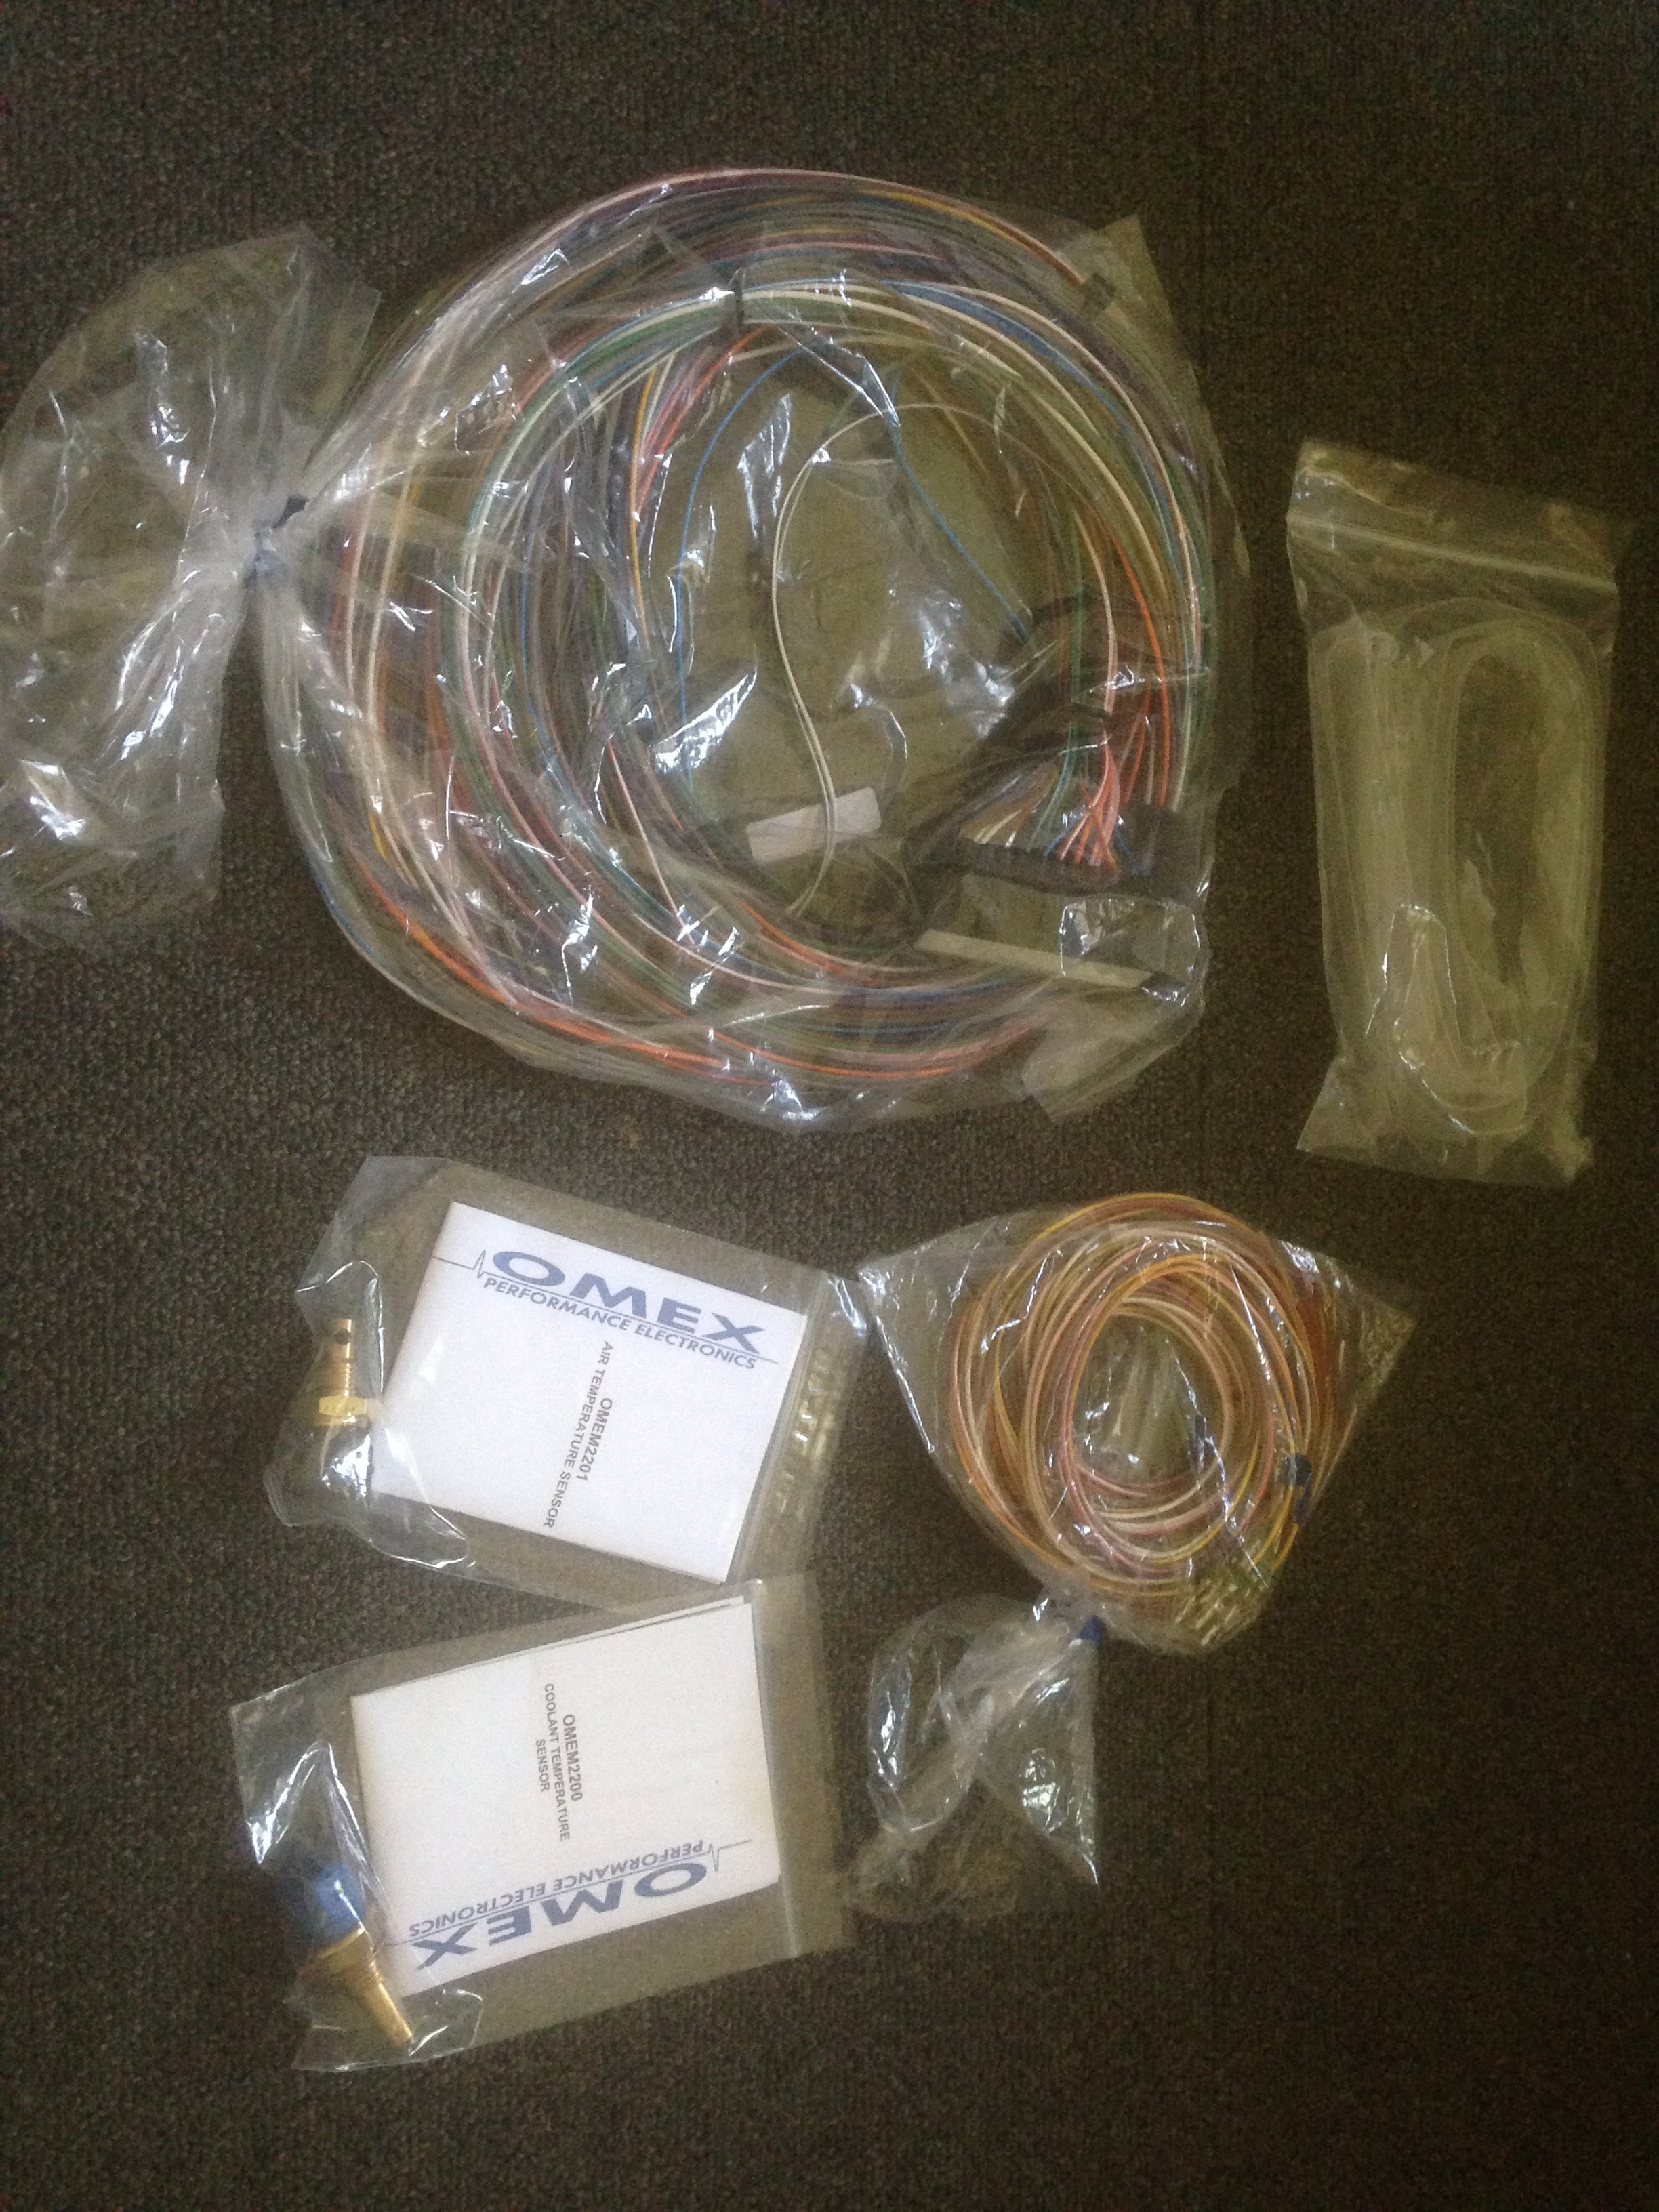
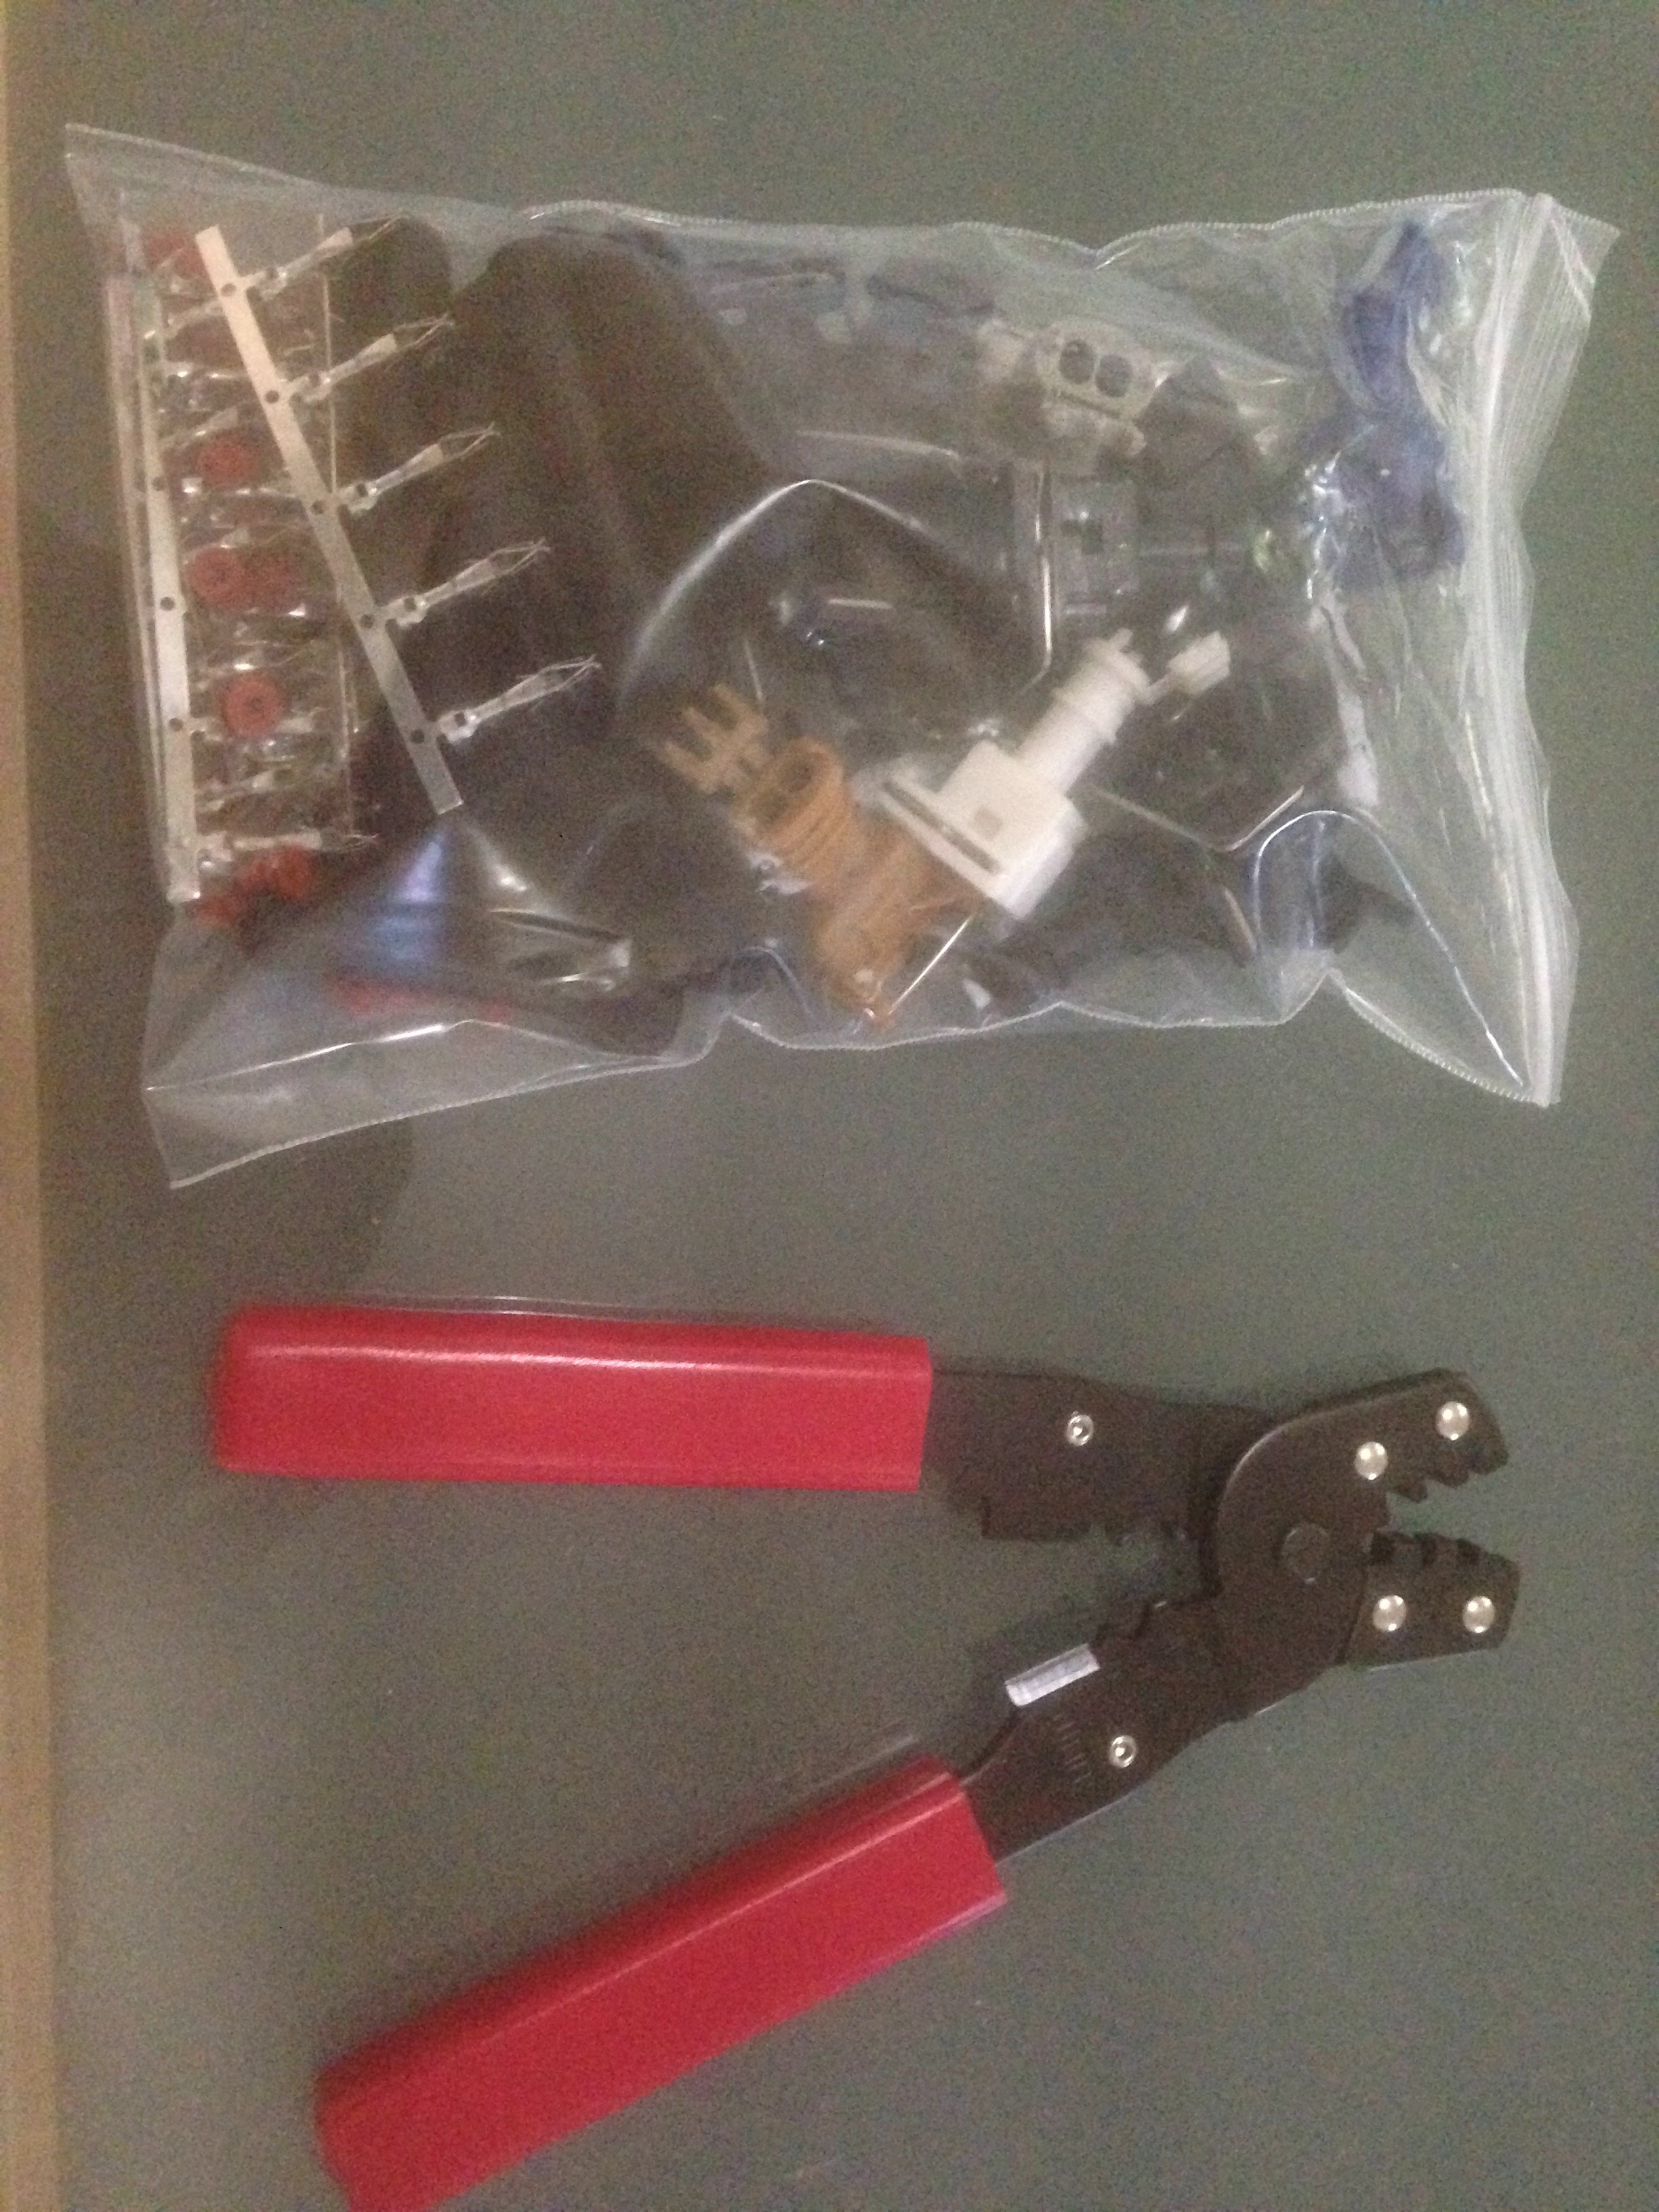
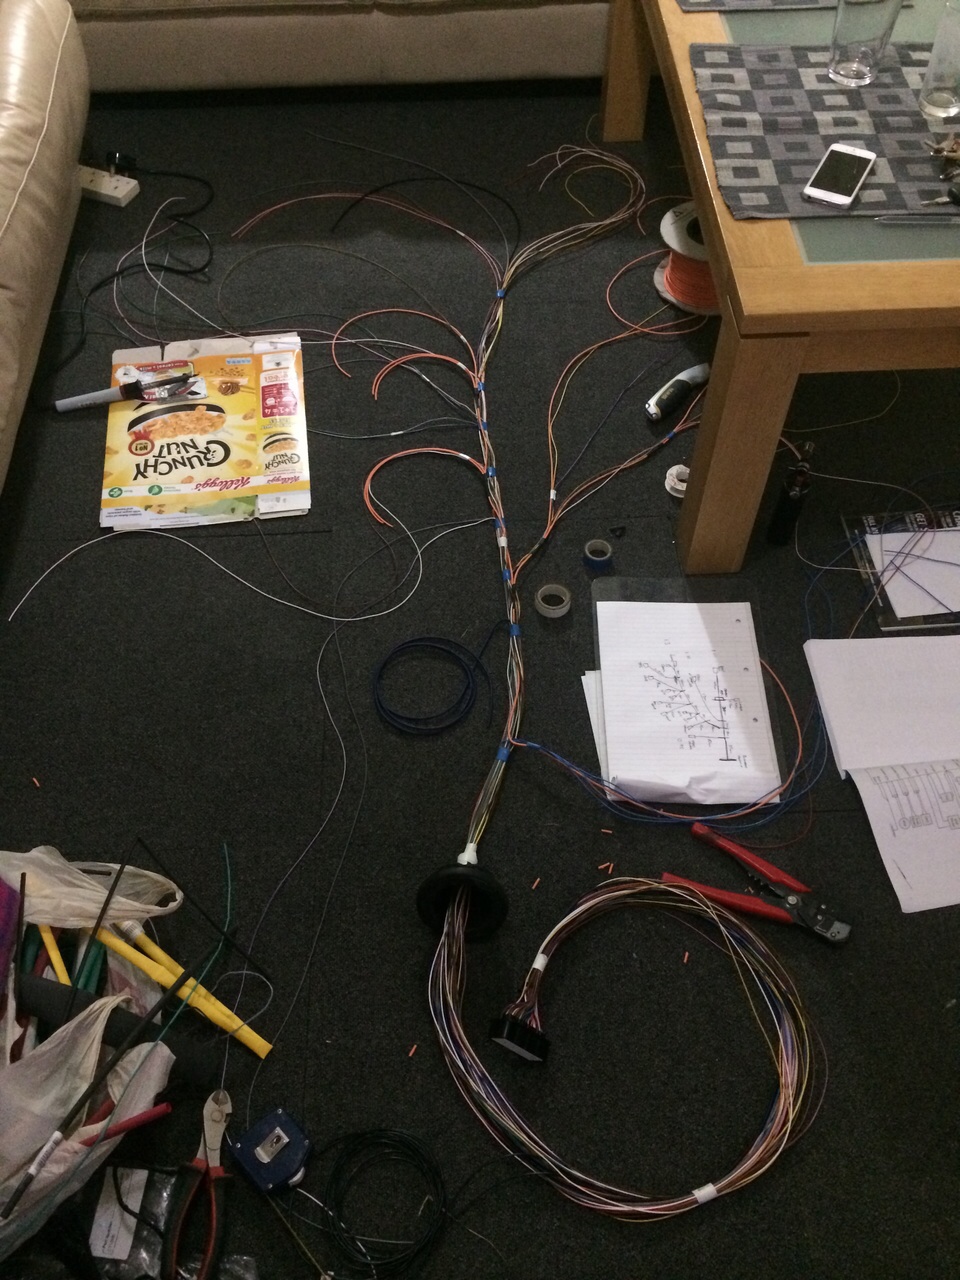
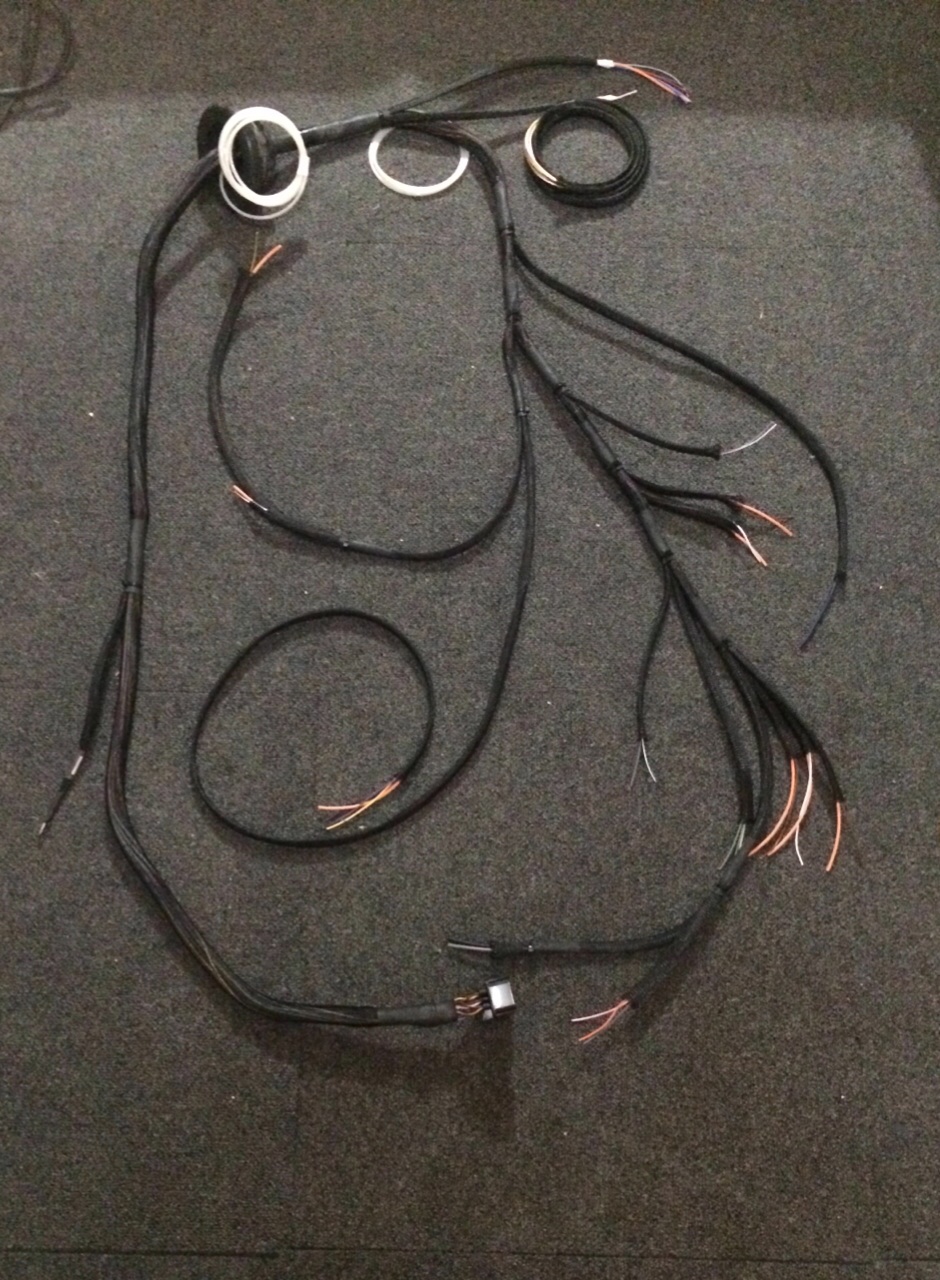
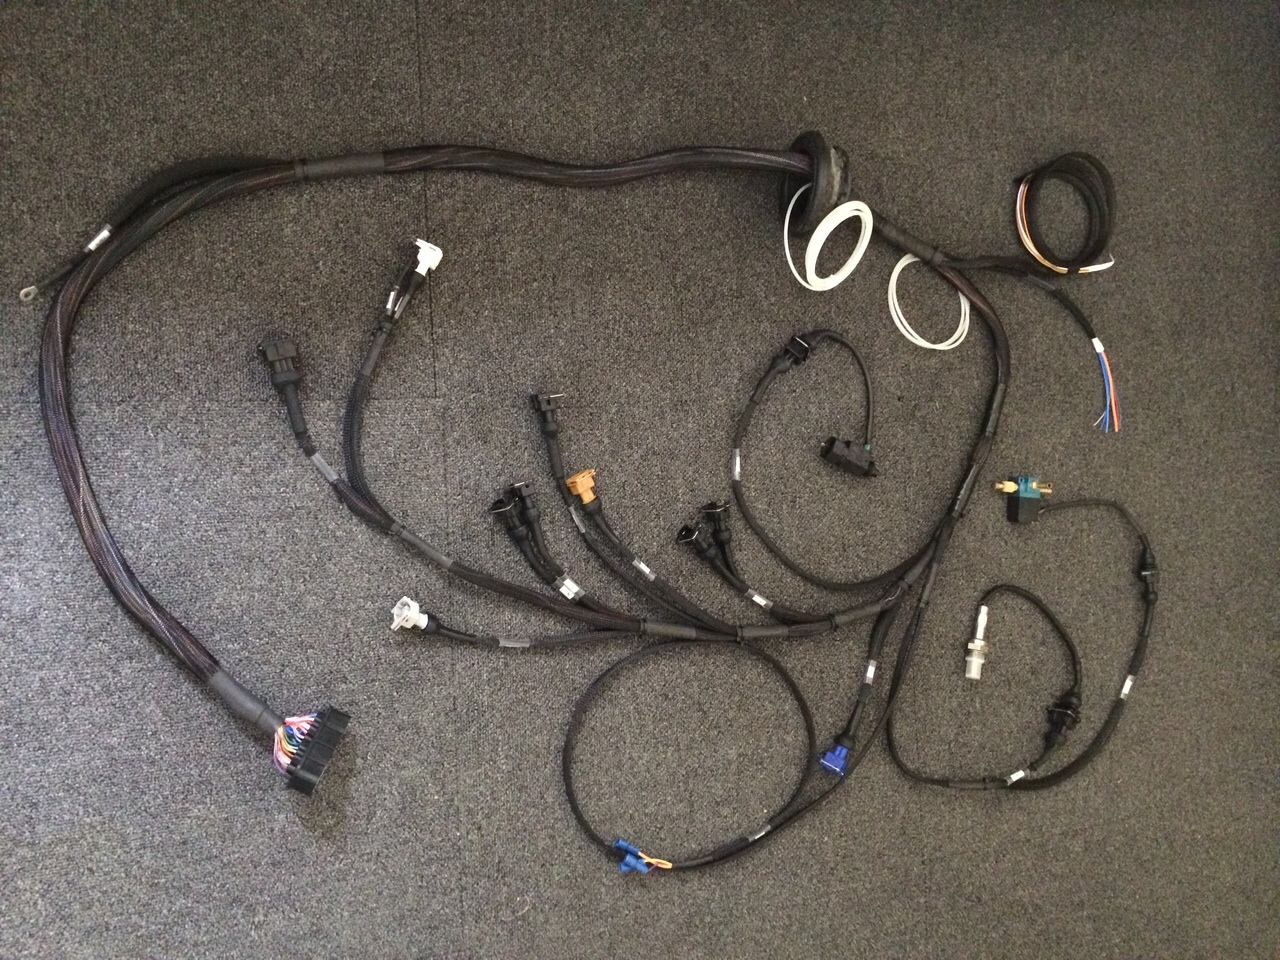
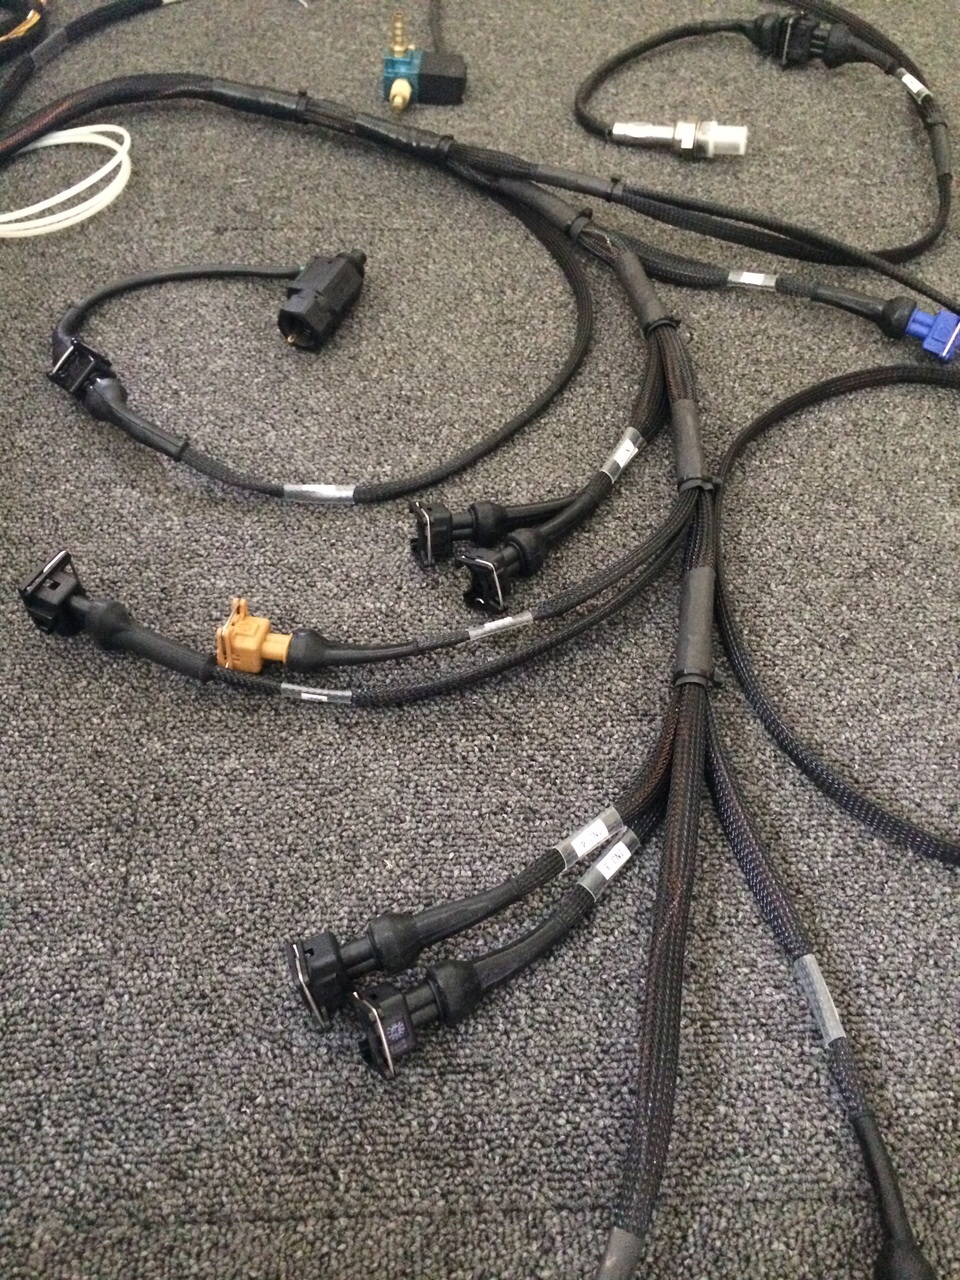
I then made the decision that now was the time to do something about the engine management and loom. The loom was the only area of bad wiring left (excluding planned re-do of the fuel pump wiring) and was letting the engine bay down. So I had a spare omex 600 ECU and thought for now this would work to get a better drive from the engine and allow me to make a new loom. So the parts were bought to make a start.
The all important bulkhead grommet that caused all this to happen in the first place.. Went to the scrapyard to source another one just for this loom

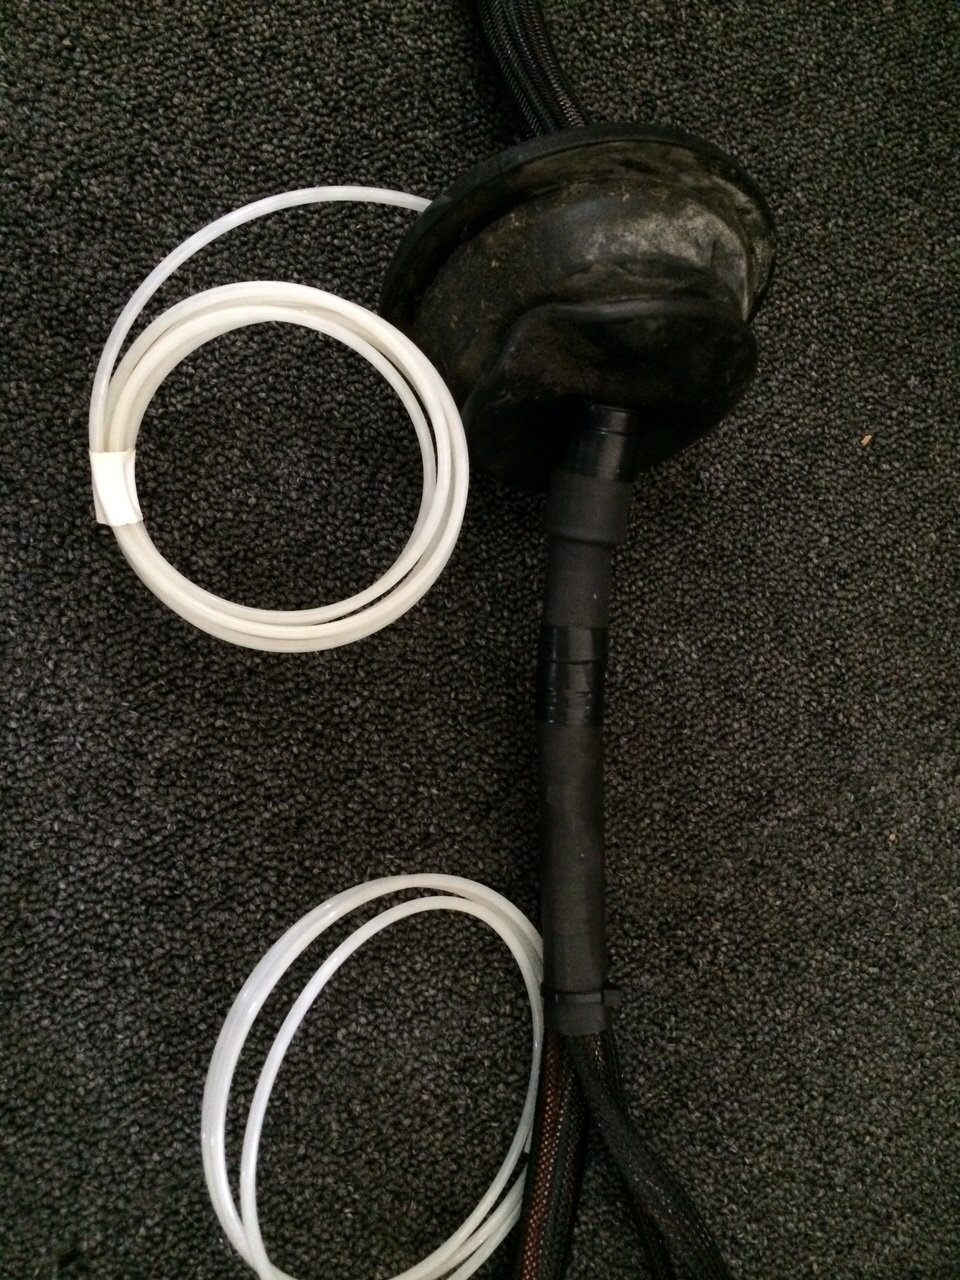
Vacuum pipe fitted in the loom to run boost gauge
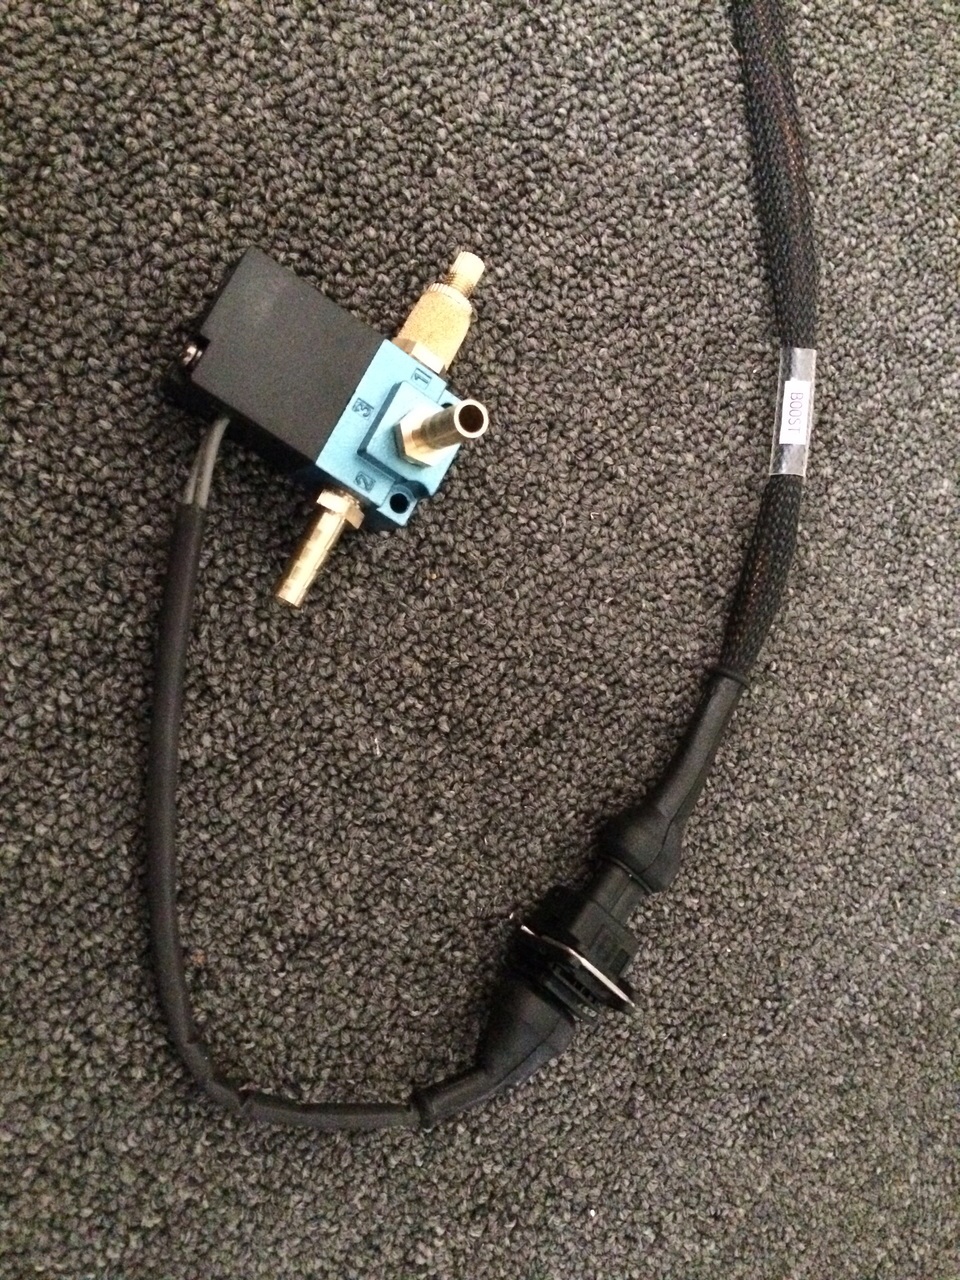
A new important addition will be proper boost control.. Not the current bleed valve!
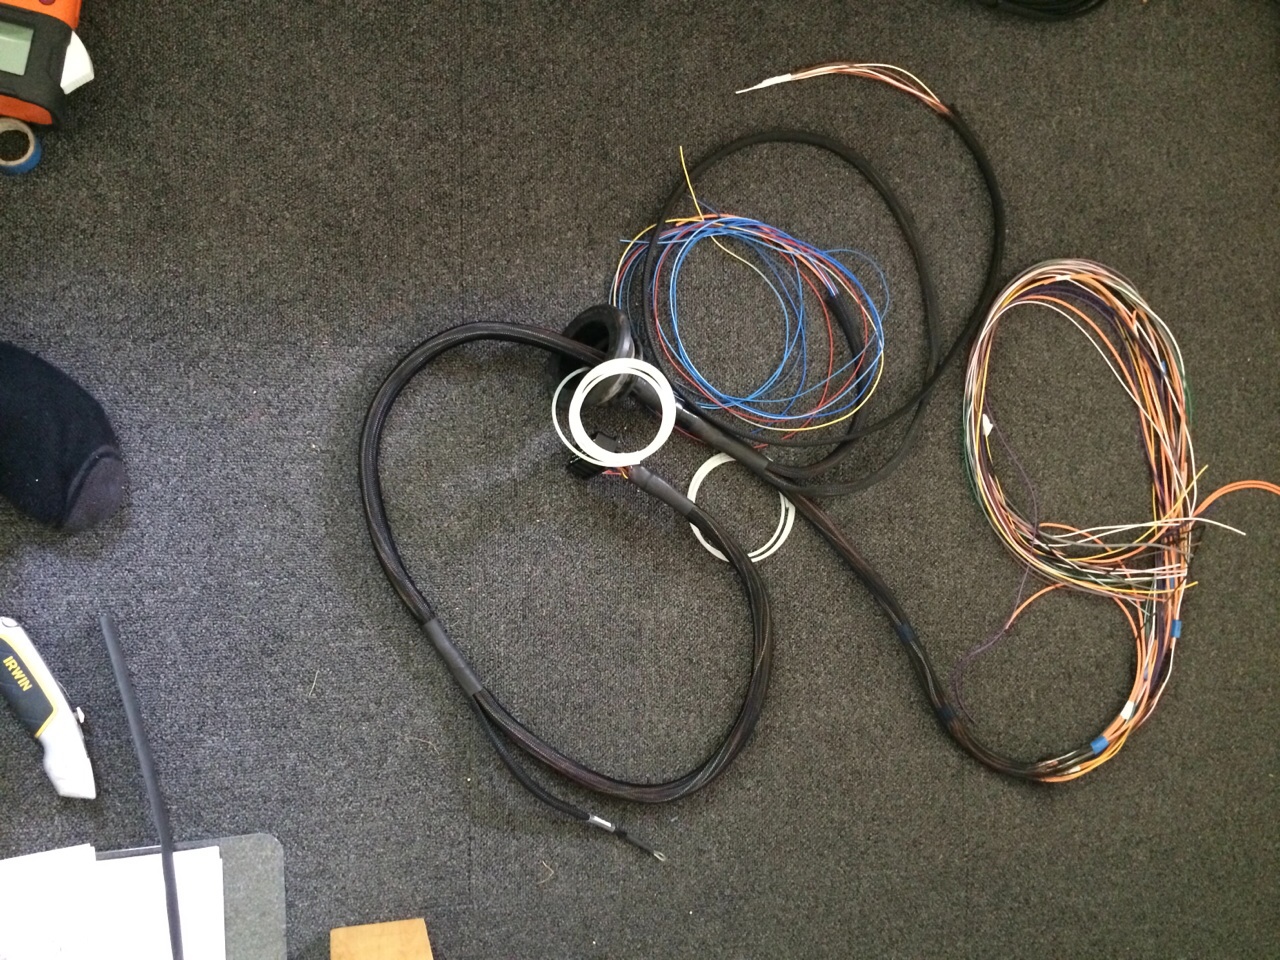
So all this to remove the existing messy loom
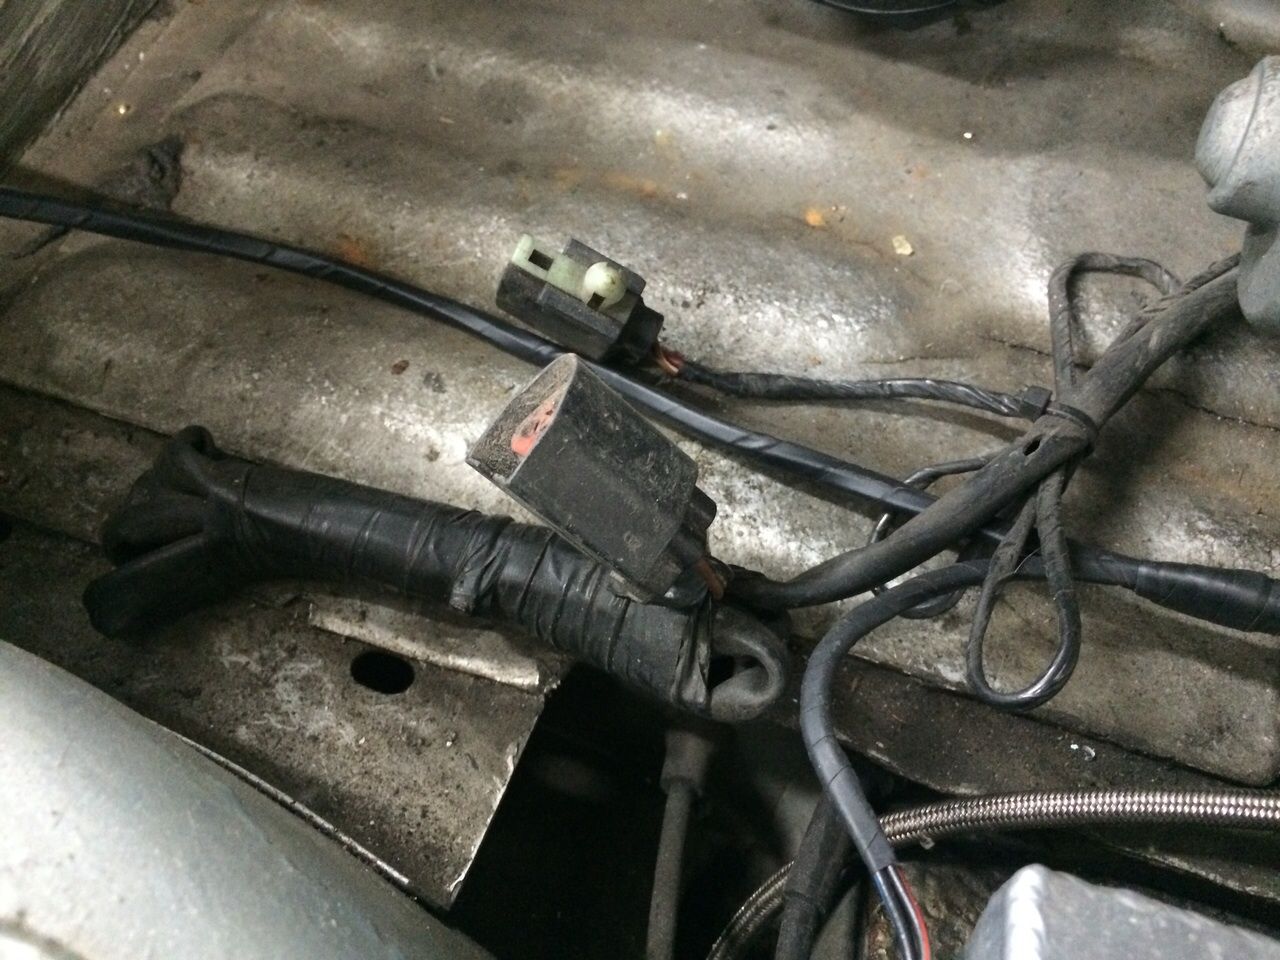
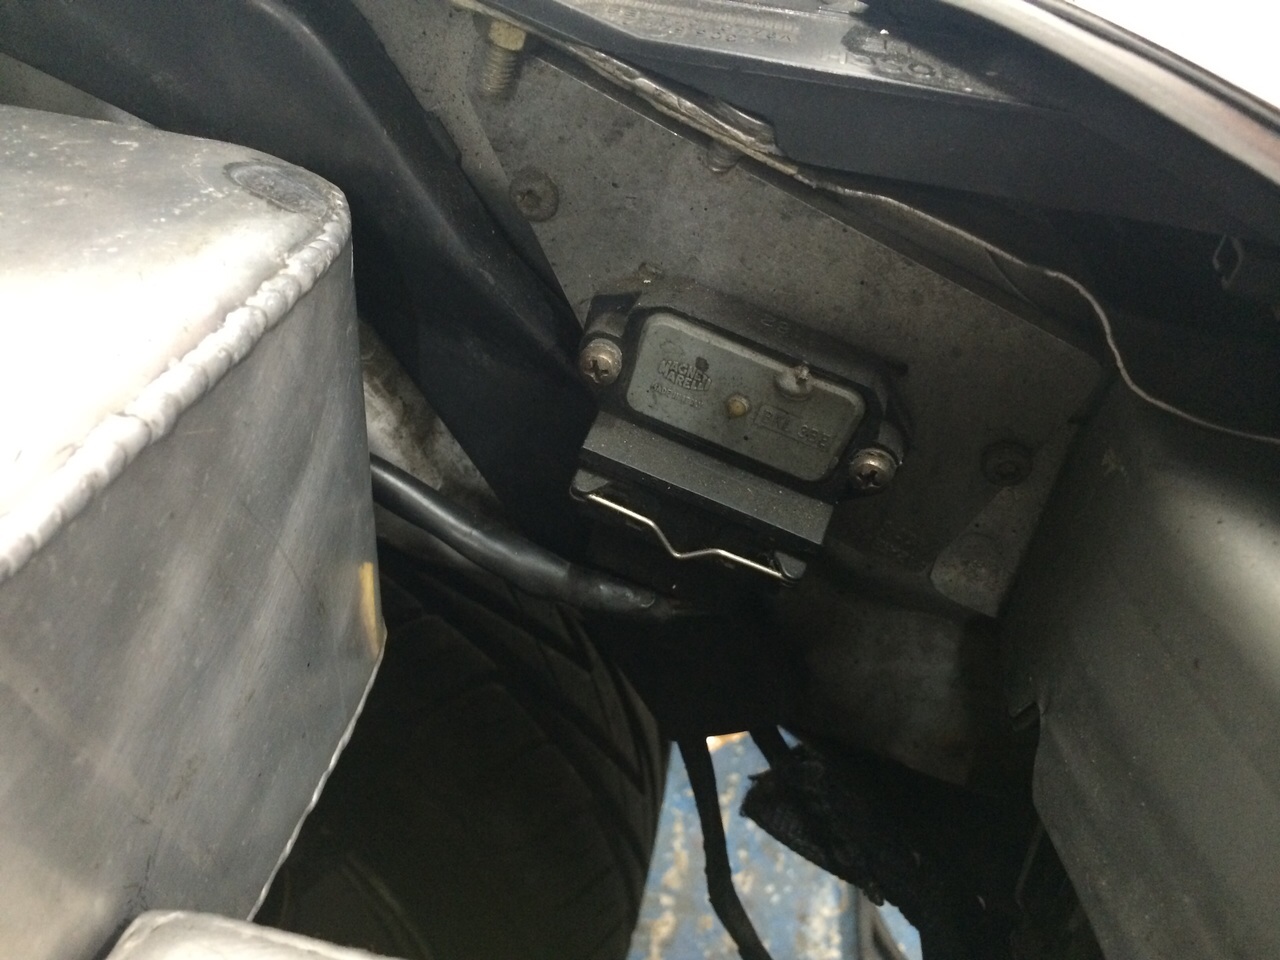
Also can now remove the ignition amp for the old management
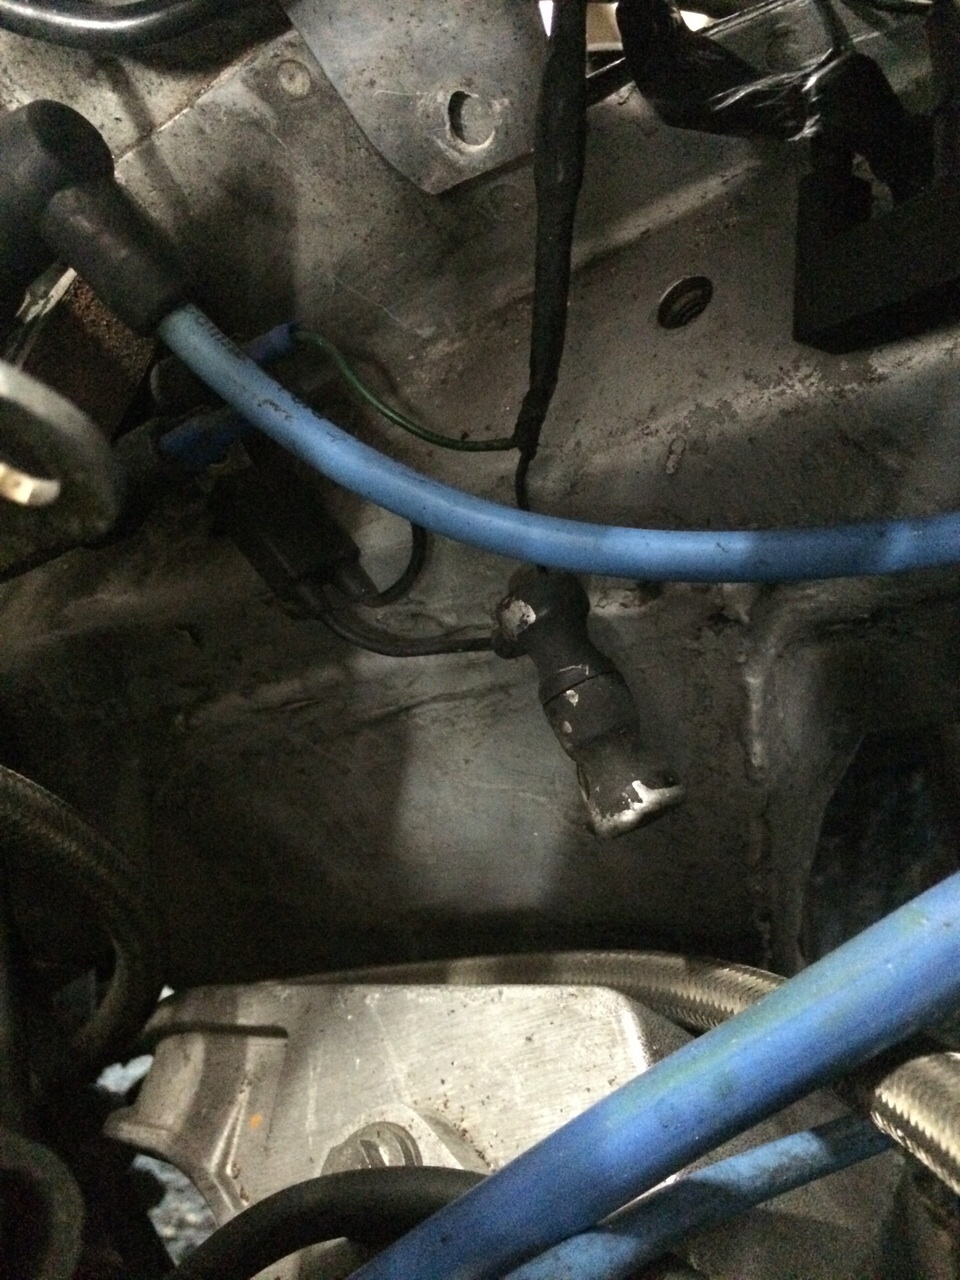
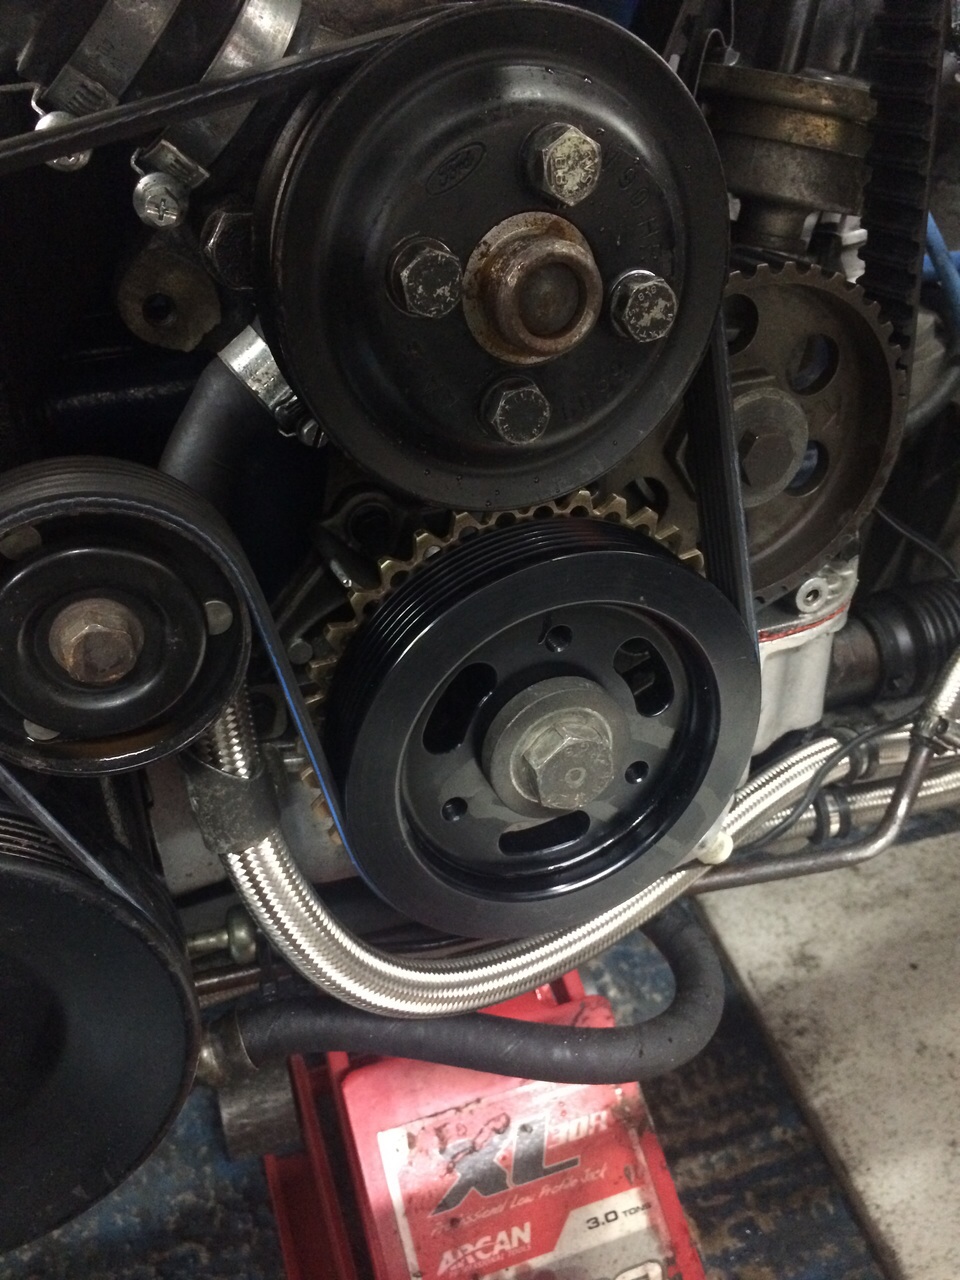
The new management requires a 36-1 toothed wheel for the crank sensor. Thankfully companies make these pulleys off the shelf so a nice black anodised one was bought and fitted
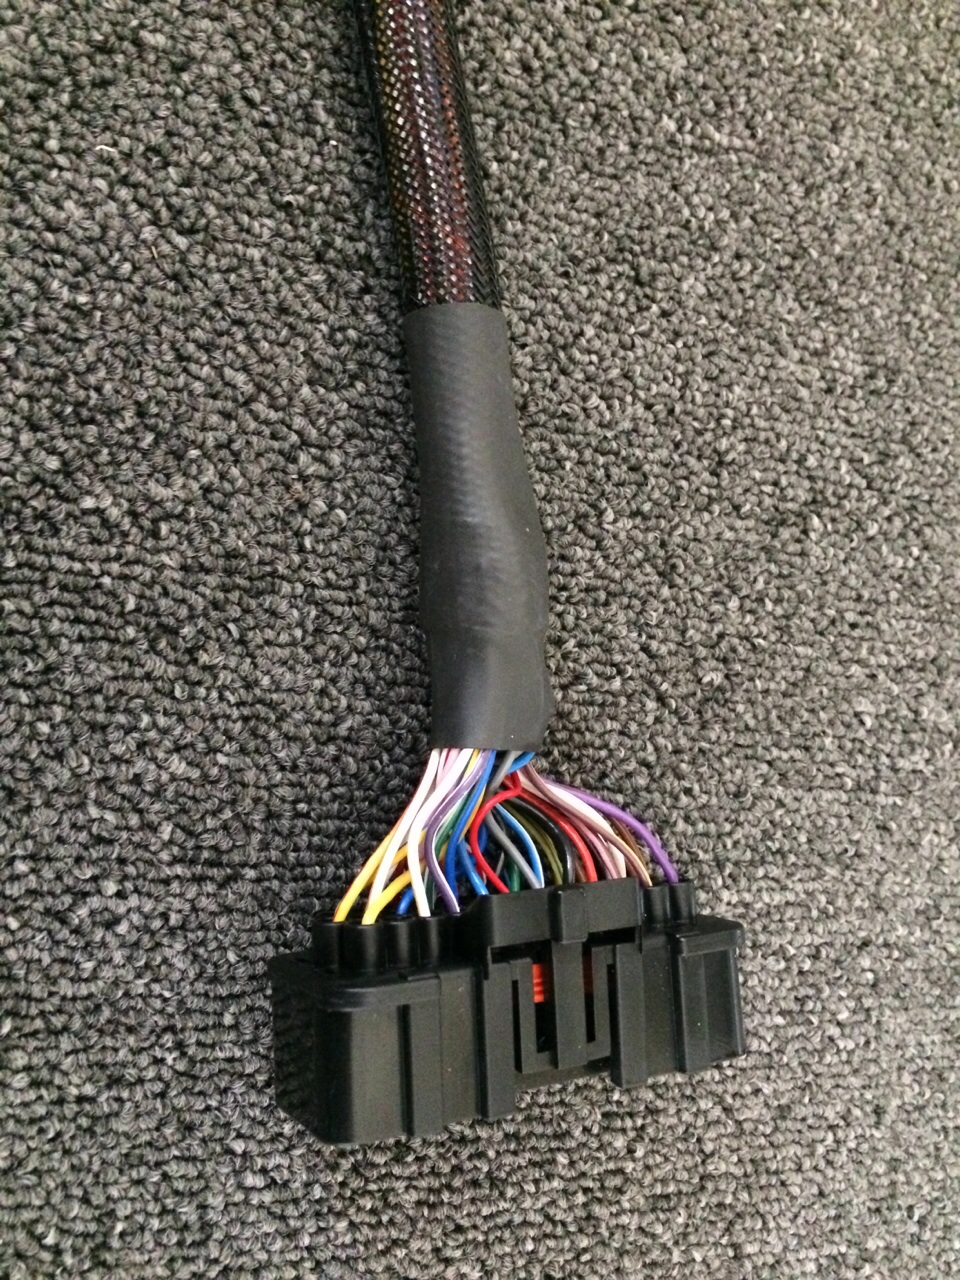
Loom fitted into the bay
So with that all done the interior was fitted back with a nice new dash and looking like a car again.. It was then time to load a base map onto the ECU and get the car running.. I am no mapper, I understand the basics but do not know how to correlate that onto an ECU map. A lot of back and forth with Omex and my tuner and finally I got the car running enough to drive it to the mappers.
One very nervous drive later and the car arrived at the mappers and set up in the hub dyno booth for its mapping session
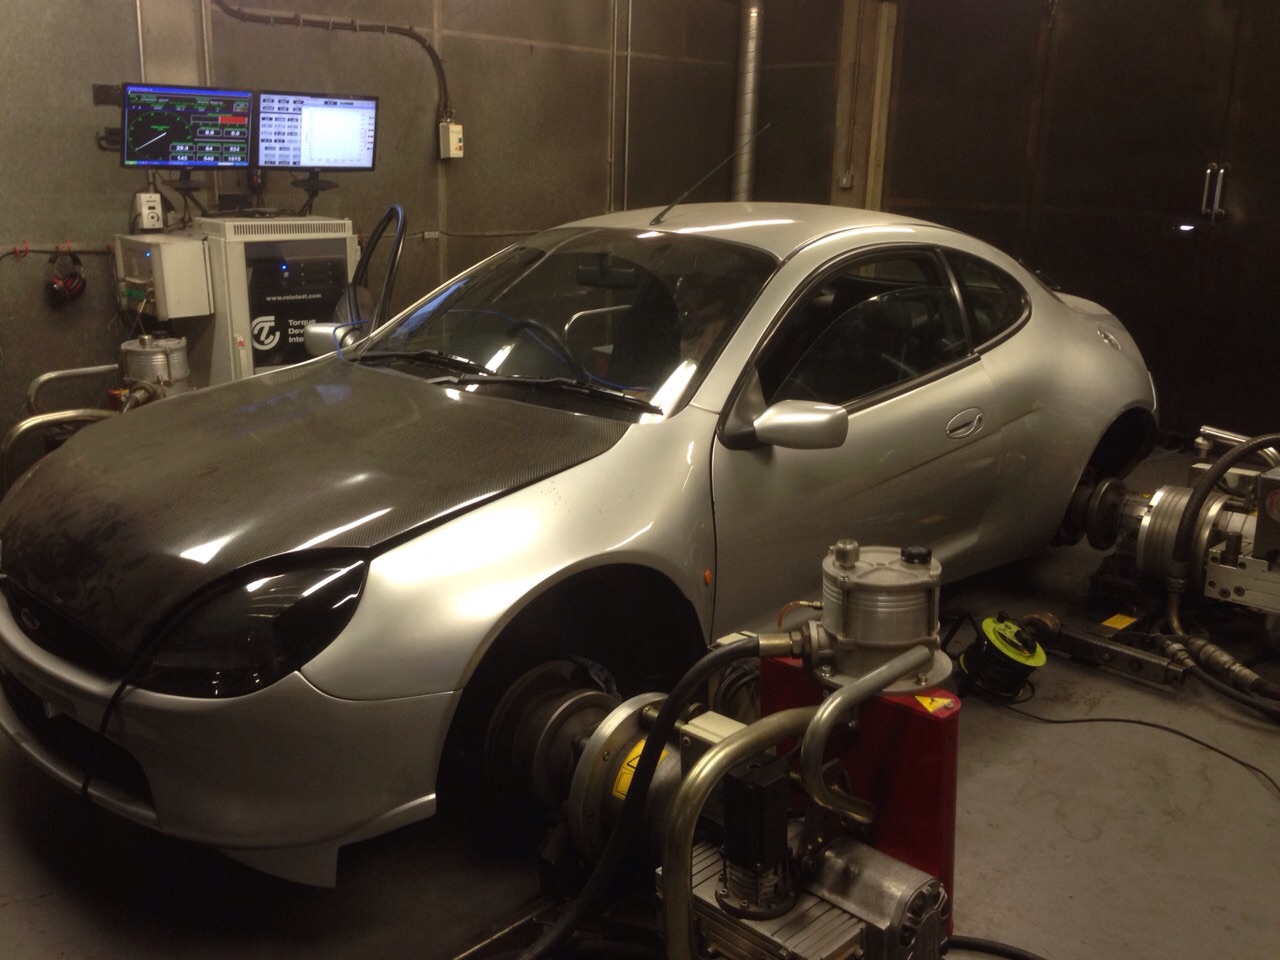
So... One good session later and the car for once performed faultlessly.. It made 348.8bhp at the hubs and 306 lbs/ft which has been ignition limited to protect the gearbox. It roughly equates to 420/430 bhp at the flywheel.
So with that I had a good drive home and the car is totally different. It is so smooth compared to the old management, and the smell of fuel is far less! It also noticeably used less fuel on the way home!
A good result after a number of weeks of work!
Nearly up to date now so will get the last updates up soon.
Thanks for looking!
After getting the car running and all things being well it was left on the driveway. Few days later I was out for the evening and it rained, came home to find the car battery flat as the alarm had been going off. I knew the car had some leaking issues shall we say but this was a little silly.
So put the car battery on charge and went inside for a while. Half hour later came back it to find the fuel pump running and the auxiliary fusebox relays clicking like crazy. Water had tracked down the wiring loom on the passenger side due to a massive hole through one of the bulkhead grommets, it had then run into the engine loom relays that were just hanging there and caused them to fail and get stuck on.
So with that and always knowing that the wiring on this car was interesting to say the least, it was time to strip it apart and find out what's going on.
Some of the photos are a little 'misty' as my phone was playing up so apologies for that, but hopefully you'll get the idea.
Interior out ready for dash to come out, and some of the messes I will need to sort.


Battery box was a mess to fit a larger battery than it was made for

Lack of airbag module means the drivers airbag is useless, seat restraints had also been cut out so I made the decision to remove it all and at some point change the steering wheel for something more desirable!


Once I got the dash out I realised it had seen better days, it had been hacked about all over the place. So a new one was sourced to be refitted


So with the dash out and all the wiring exposed I can now begin to repair and remove as required, the plan is to remove the old 1.7 ECU and all associated wiring, remove airbag wiring, repair any bodged connections and re-jig wiring for the conversion... Properly this time!


I'm also going to address the engine bay wiring as that is a little less than desired!


So I got to work and this is what I managed to get rid of

Decided to upgrade to a new battery, something a little smaller for the boot

Wiring to the horn was a bit suspect and the horn itself, so replaced with a newer dual tone item


This was the cable between the alternator and starter.. It had 4 joins in it!

More of the mess

Strange battery earth cable


Some interesting wiring in the boot for the fuel pump.. Changing cable sizes

Using cable flags to identify wires in the future


Might have something to do with why the 12v socket doesn't work

Although it doesn't look much this is towards the end of the loom tidying.. The larger red cable has now been removed

Wiring repairs to the car loom.. Soldered joints and heat shrunk

Loom starting to get taped up and tidied

This is the small loom for the variable intermittent wiper, seen better days so made a new one


New alternator cable made ( only have a photo of one end?!)

Car loom tidied and finished, hopefully you can see the differences!


I then made the decision that now was the time to do something about the engine management and loom. The loom was the only area of bad wiring left (excluding planned re-do of the fuel pump wiring) and was letting the engine bay down. So I had a spare omex 600 ECU and thought for now this would work to get a better drive from the engine and allow me to make a new loom. So the parts were bought to make a start.


The all important bulkhead grommet that caused all this to happen in the first place.. Went to the scrapyard to source another one just for this loom


Vacuum pipe fitted in the loom to run boost gauge

A new important addition will be proper boost control.. Not the current bleed valve!

So all this to remove the existing messy loom


Also can now remove the ignition amp for the old management

The new management requires a 36-1 toothed wheel for the crank sensor. Thankfully companies make these pulleys off the shelf so a nice black anodised one was bought and fitted

Loom fitted into the bay

So with that all done the interior was fitted back with a nice new dash and looking like a car again.. It was then time to load a base map onto the ECU and get the car running.. I am no mapper, I understand the basics but do not know how to correlate that onto an ECU map. A lot of back and forth with Omex and my tuner and finally I got the car running enough to drive it to the mappers.
One very nervous drive later and the car arrived at the mappers and set up in the hub dyno booth for its mapping session

So... One good session later and the car for once performed faultlessly.. It made 348.8bhp at the hubs and 306 lbs/ft which has been ignition limited to protect the gearbox. It roughly equates to 420/430 bhp at the flywheel.
So with that I had a good drive home and the car is totally different. It is so smooth compared to the old management, and the smell of fuel is far less! It also noticeably used less fuel on the way home!
A good result after a number of weeks of work!
Nearly up to date now so will get the last updates up soon.
Thanks for looking!
The following users liked this post:
bluntys1rsturbo (08-11-2015)
07-11-2015, 10:46 PM
#67
PassionFord Regular
Thread Starter
Cheers mate! I didn't think it was as bad as what I'm finding and believe me there is still a lot more but it is starting to get there. I keep going back through photos from when I got the car and I forget how bad it was!
07-11-2015, 11:20 PM
#68
Advanced PassionFord User
love reading the updates on this, I can't believe how bad it was underneath. Surprised it still functioned.
glad to see its getting sorted, bet its a bit lighter now without that bag of wiring in it. Some of them joins was just strange
glad to see its getting sorted, bet its a bit lighter now without that bag of wiring in it. Some of them joins was just strange
08-11-2015, 05:17 AM
#69
Boost addict
cracking update yet again fella, very impressive bit of loom fixing/tidying there couldnt believe how much of it was not needed.
seems like you have sorted most of the awful bodges now and i bet your happy now that its driving much better and making good power
seems like you have sorted most of the awful bodges now and i bet your happy now that its driving much better and making good power
08-11-2015, 05:24 PM
#72
how the hell could a so called tuner let a car leave the workshop with a wiring loom like that!!! its disgusting!!!
Glad you are working through all the jobs!!! hopefully by the time you are done it will be the car it should have been in the first place
Glad you are working through all the jobs!!! hopefully by the time you are done it will be the car it should have been in the first place
08-11-2015, 07:20 PM
#73
PassionFord Post Troll

Some great work your doing thier mate  who built this warren?
who built this warren?
08-11-2015, 08:27 PM
#74
PassionFord Regular
Thread Starter
It wasn't far off! There were a few burnt connections, one on the fuel pump wiring which isn't a surprise I guess.
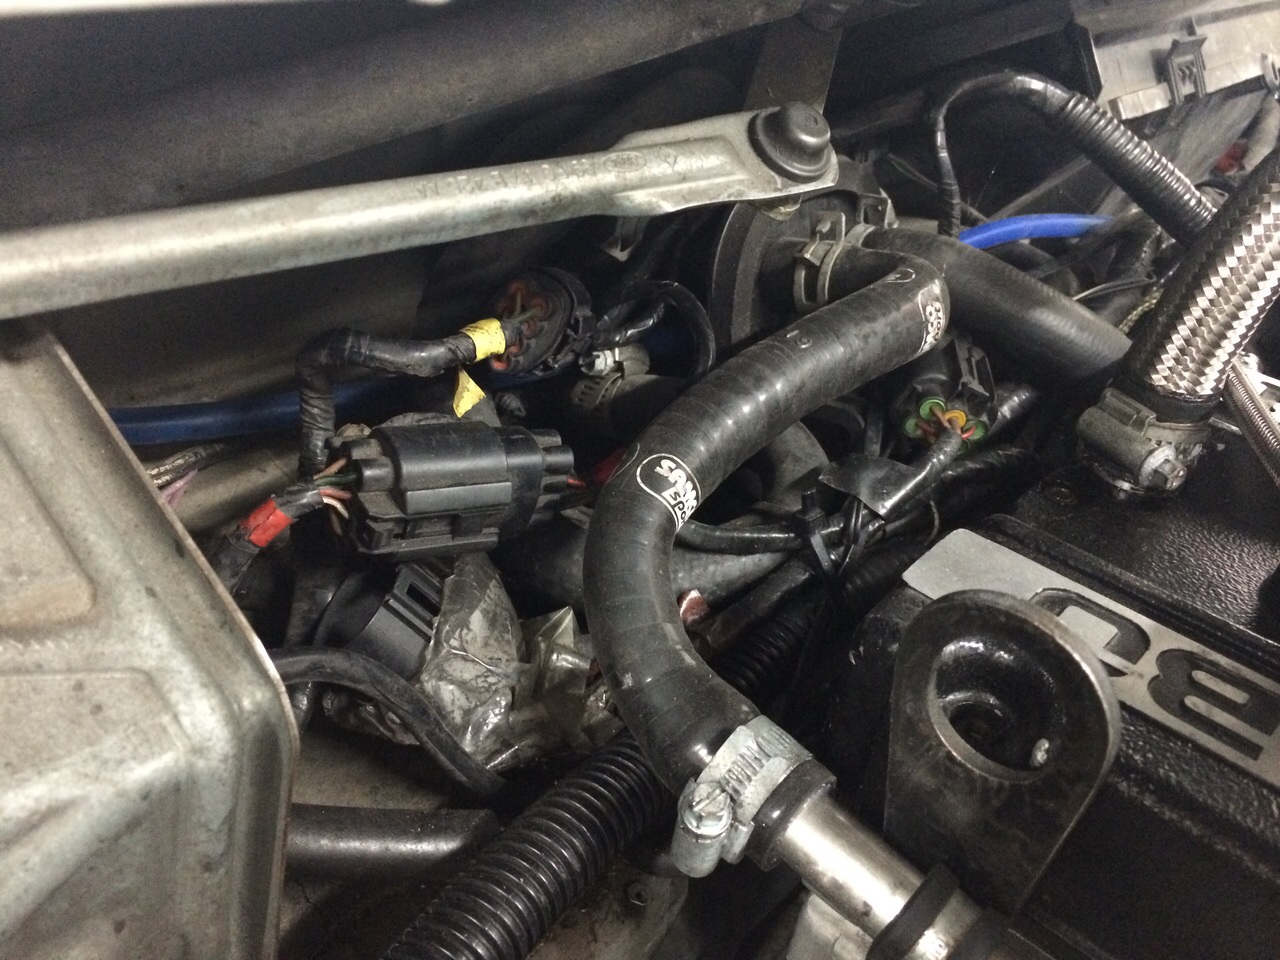
Thanks Glenn, I think the brake pump relay wrapped up in a food bag for weather proofing was the best bit.
Warren didn't build the car, he bought it from Tony at Pumaspeed who built/put the car together, the fabrication was done by a company called DJM. I'm not sure how long Tony had it before he sold it to Warren (might check the V5), but I know the car WS in fast ford in 2003.
Thanks for all the comments guys! I'll get some more up soon!
Dan
The following users liked this post:
smiley (08-11-2015)
 09-11-2015, 12:07 AM
#76
Warren didn't build the car, he bought it from Tony at Pumaspeed who built/put the car together, the fabrication was done by a company called DJM. I'm not sure how long Tony had it before he sold it to Warren (might check the V5), but I know the car WS in fast ford in 2003.
To be fair to the car, the only times its broken down was due to pumaspeeds bodges
and when i blew up the gearbox. Id loved to have done to the car the repair work that dan is doing now but it was a daily drive until my last year of ownership.
It really needed a strip down and rebuild to root out all the bodges.
Wouldnt surprise me if there is more to find the deeper you delve.
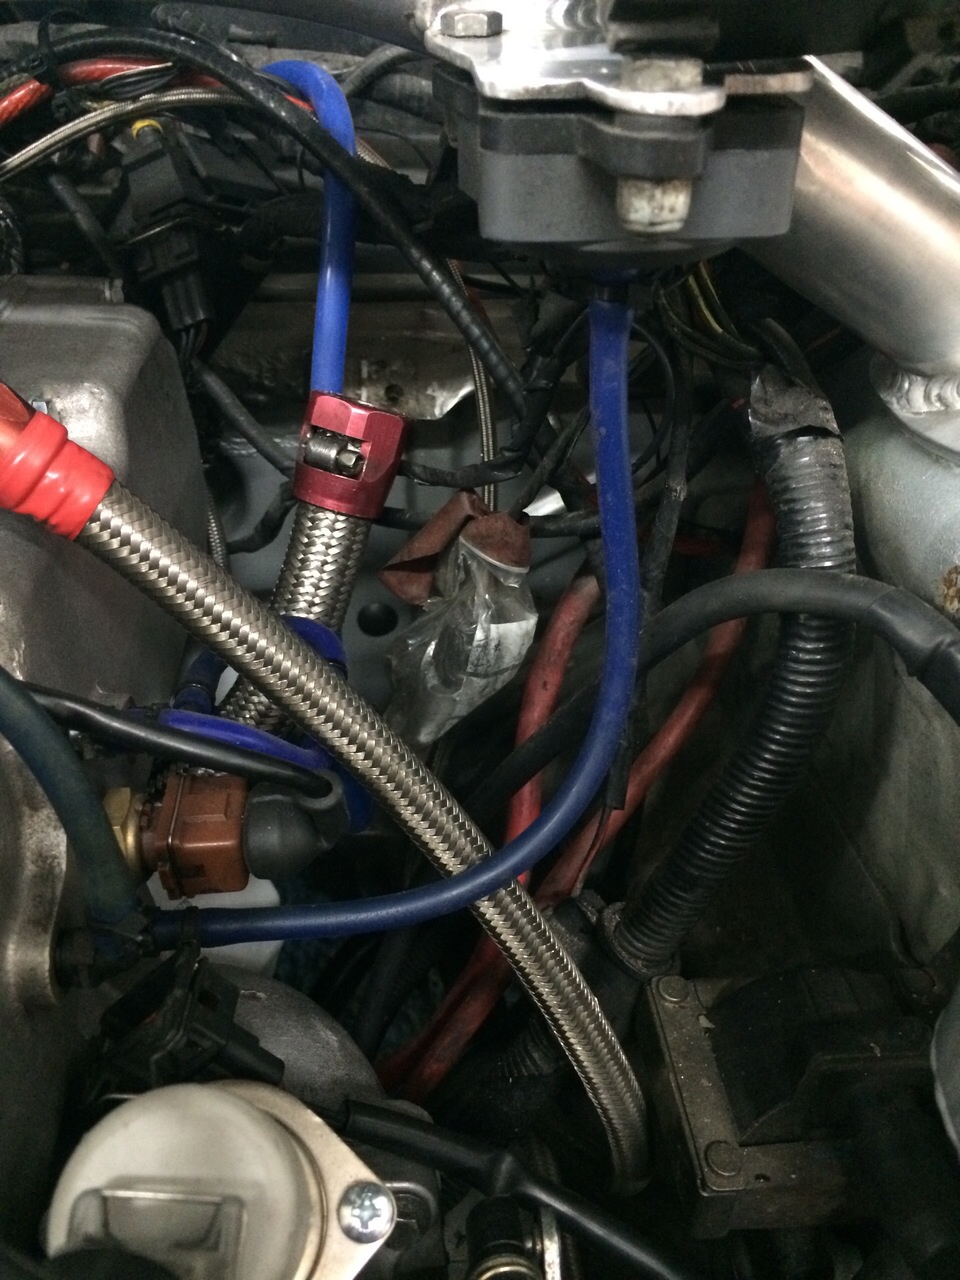
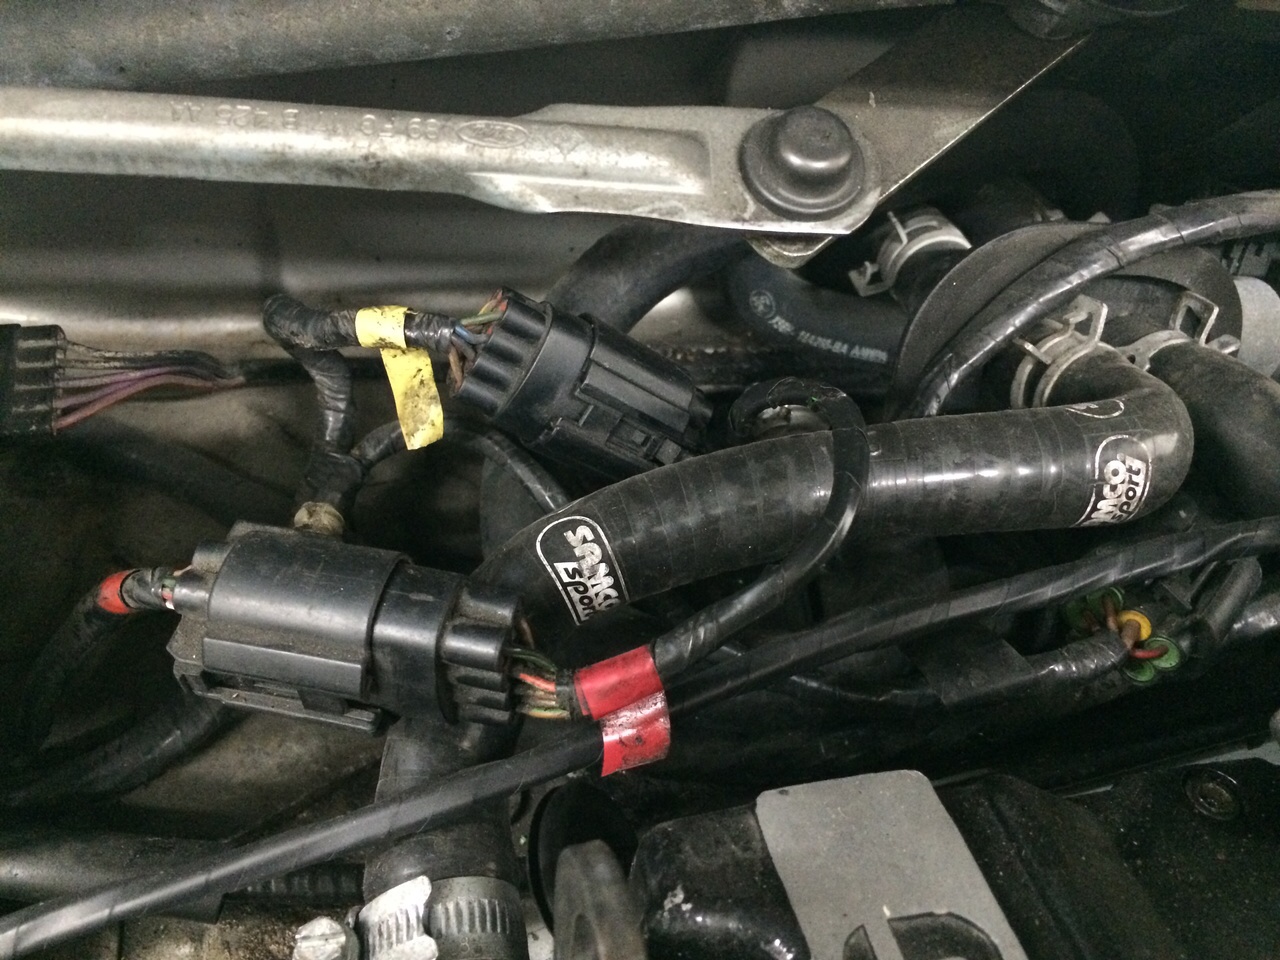
Its a real shame really. For me when i owned it, the bodges really took the shine off as clearly plenty of money had been thrown at it during the build, eg the good engine and fab work by DJM, so why the need for some quite frankly stupid bodges like the PAS hoses? wouldnt have cost much to build it with the right fittings to begin with. Half the water hoses were rubber, half were silicone - the ones you cant see were old rubber, so i routinely ended up replacing them as they wore out.
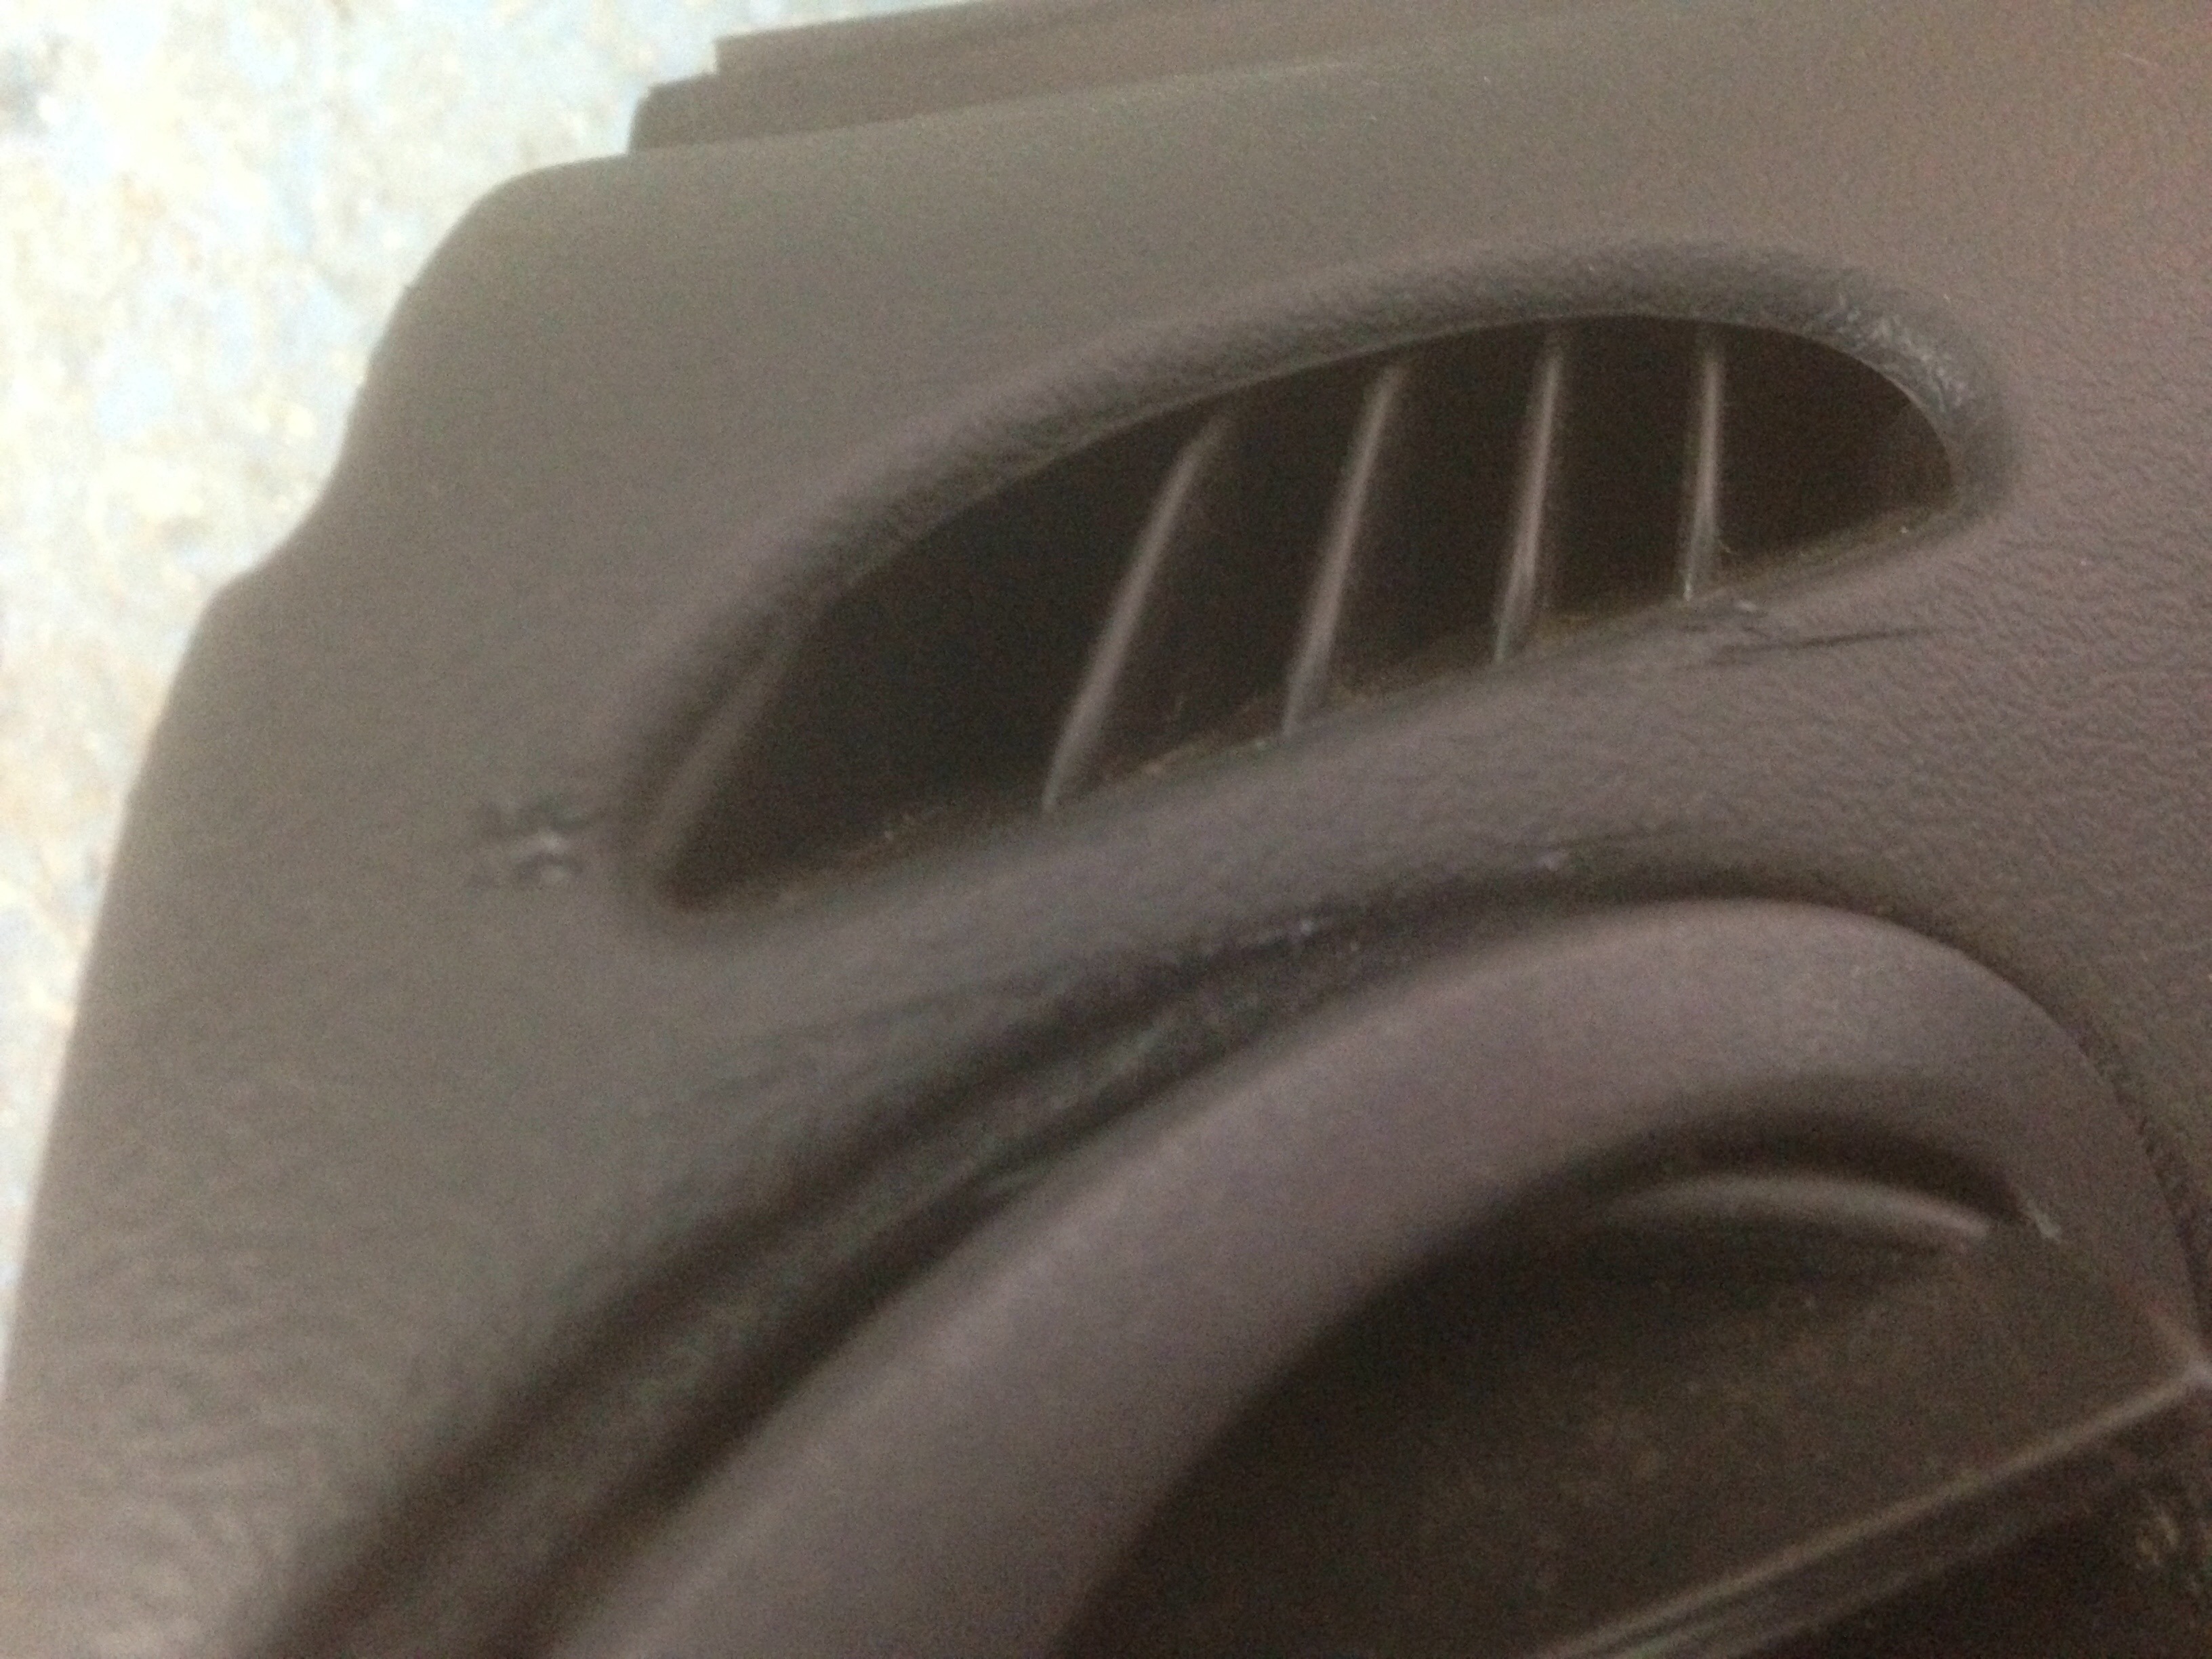
The dents in the bulkhead are clearly a pumaspeed bodge. This is how it came from DJM:
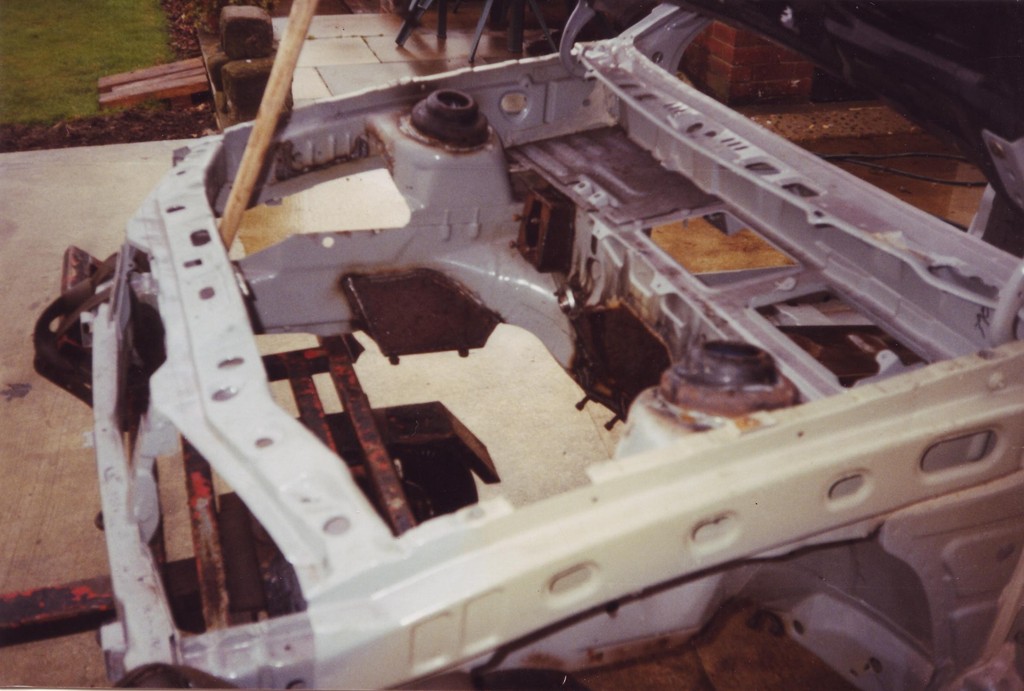
No dents!
so fuck knows why they did that??? It wouldnt have cost them much more time or money to do it properly in the first place.
 09-11-2015, 07:59 AM
#79
PassionFord Regular
Thread Starter
Thanks very much, it's certainly better than the state I got it in.
I've looked at the photos you gave me of the fab work from DJM and none of the metal work messes are there in the photos, so this has only happened during the build up of the car. It is a shame it for to this state as it could be something pretty good. I guess for now that's my que to get onto the next issue!
It isn't the best advert I just say, but like I've said before I don't know the circumstances around the build i.e budget/timescales and so it's difficult to say how bad or dare I say good it was.
Thanks very much Marc! I can get all the power steering sorted this week then!
It is TDI in Lakeside, and yes it was Sam that mapped this one for me. You can just about see him sitting in the car.
Thanks for all the comments again, will update soon.
I had it in june 2008.
To be fair to the car, the only times its broken down was due to pumaspeeds bodges and when i blew up the gearbox.
Id loved to have done to the car the repair work that dan is doing now but it was a daily drive until my last year of ownership.
It really needed a strip down and rebuild to root out all the bodges.
Wouldnt surprise me if there is more to find the deeper you delve.
Its a real shame really. For me when i owned it, the bodges really took the shine off as clearly plenty of money had been thrown at it during the build, eg the good engine and fab work by DJM, so why the need for some quite frankly stupid bodges like the PAS hoses? wouldnt have cost much to build it with the right fittings to begin with. Half the water hoses were rubber, half were silicone - the ones you cant see were old rubber, so i routinely ended up replacing them as they wore out.
The dents in the bulkhead are clearly a pumaspeed bodge. This is how it came from DJM:
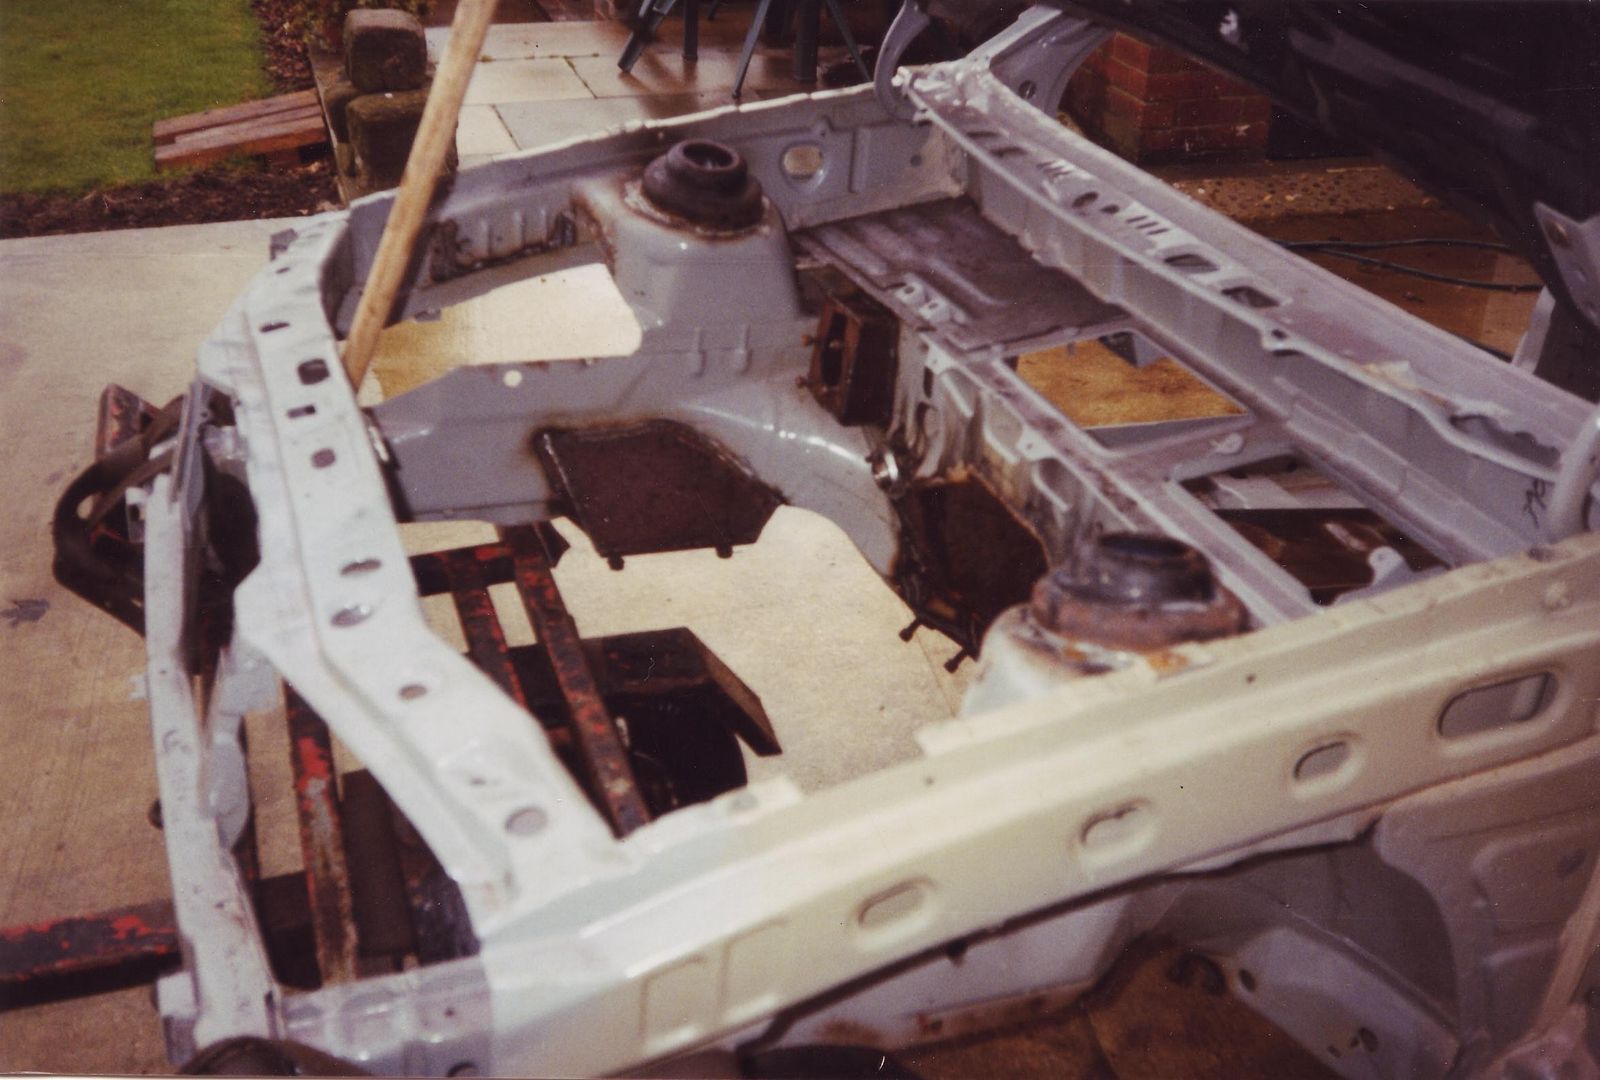
No dents! so fuck knows why they did that???
It wouldnt have cost them much more time or money to do it properly in the first place.
To be fair to the car, the only times its broken down was due to pumaspeeds bodges
and when i blew up the gearbox. Id loved to have done to the car the repair work that dan is doing now but it was a daily drive until my last year of ownership.
It really needed a strip down and rebuild to root out all the bodges.
Wouldnt surprise me if there is more to find the deeper you delve.
Its a real shame really. For me when i owned it, the bodges really took the shine off as clearly plenty of money had been thrown at it during the build, eg the good engine and fab work by DJM, so why the need for some quite frankly stupid bodges like the PAS hoses? wouldnt have cost much to build it with the right fittings to begin with. Half the water hoses were rubber, half were silicone - the ones you cant see were old rubber, so i routinely ended up replacing them as they wore out.
The dents in the bulkhead are clearly a pumaspeed bodge. This is how it came from DJM:
No dents!
so fuck knows why they did that??? It wouldnt have cost them much more time or money to do it properly in the first place.
It isn't the best advert I just say, but like I've said before I don't know the circumstances around the build i.e budget/timescales and so it's difficult to say how bad or dare I say good it was.
It is TDI in Lakeside, and yes it was Sam that mapped this one for me. You can just about see him sitting in the car.
Thanks for all the comments again, will update soon.