Cosvette v8 build started (way down)
 11-04-2015, 02:40 PM
#1
Car under constuction
Thread Starter
HI everyone.
I was thinking it was about time i made a thread about my car/project.
It have been rebuild many times. And i thought that if i made a thread about my build, it would be
best if i started from the beginning of my second build. It is the time i started to take pic`s of what i was doing.
So i hope you all enjoy this tread and what i have done.
There will be allot of pics here sence it is a few years i started with this (again) And i will explain what i have done
for every photo.
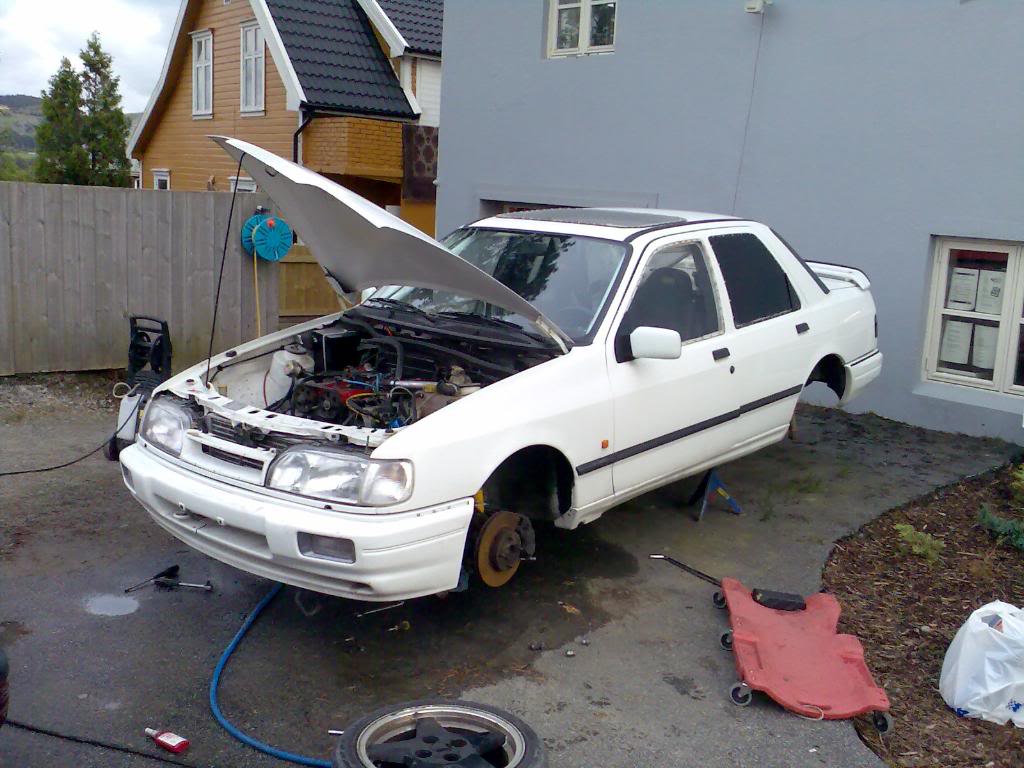
Well my car. I bought it in summer of 2007. It is a 1990 2WD sierra cosworth. Modified for race use only
It have a Quaife gear kit in the gearbox. Really short shifting. Sraight cut gears. No matter witch gear i am in and witch
rpm`s i am at, when i shift gear up or down there is only 500 rpm`s difference. Tis made the car really quick.
The engine was quite original. It had just minor mods, such as light portet head. standard cams. 550 cc injectors.
And a IHI RHC6 turbo. Max boost at 3700 rpm`s
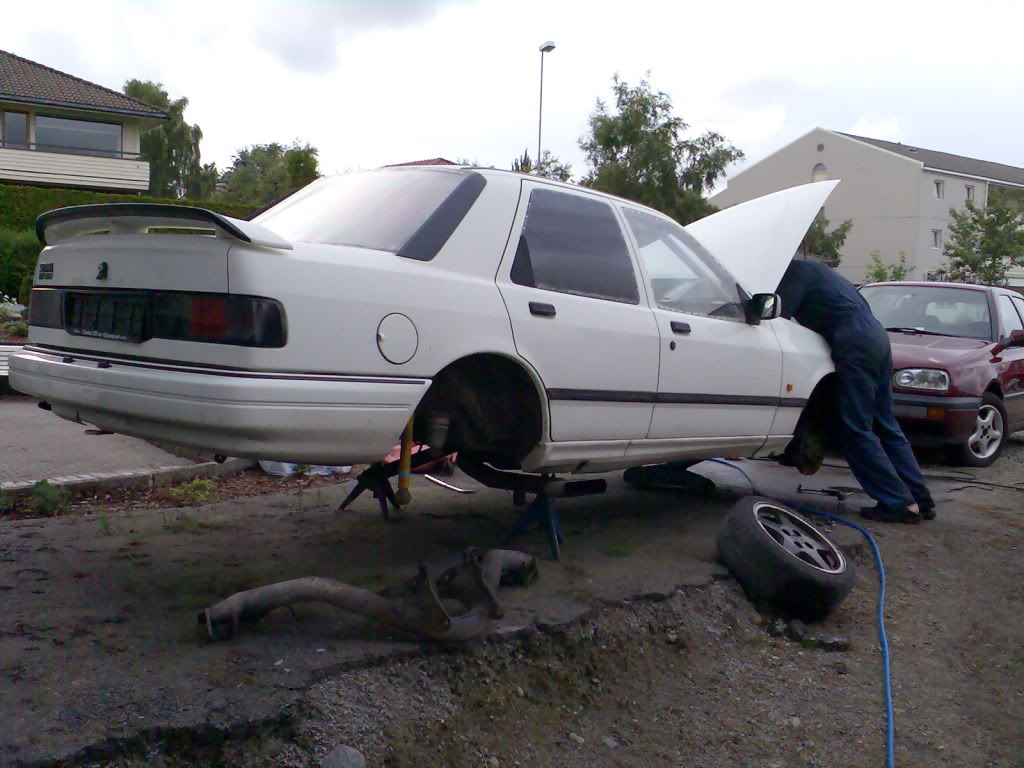
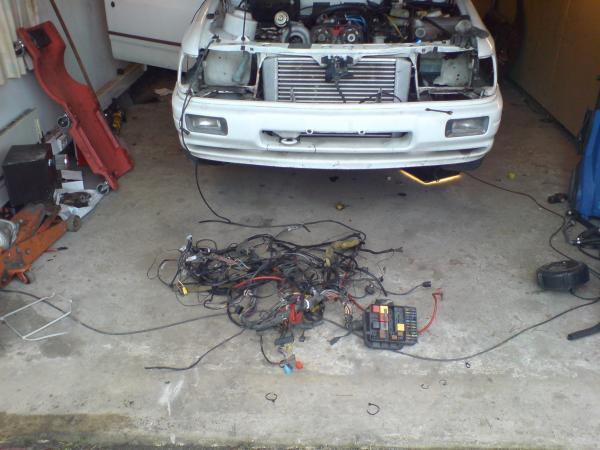
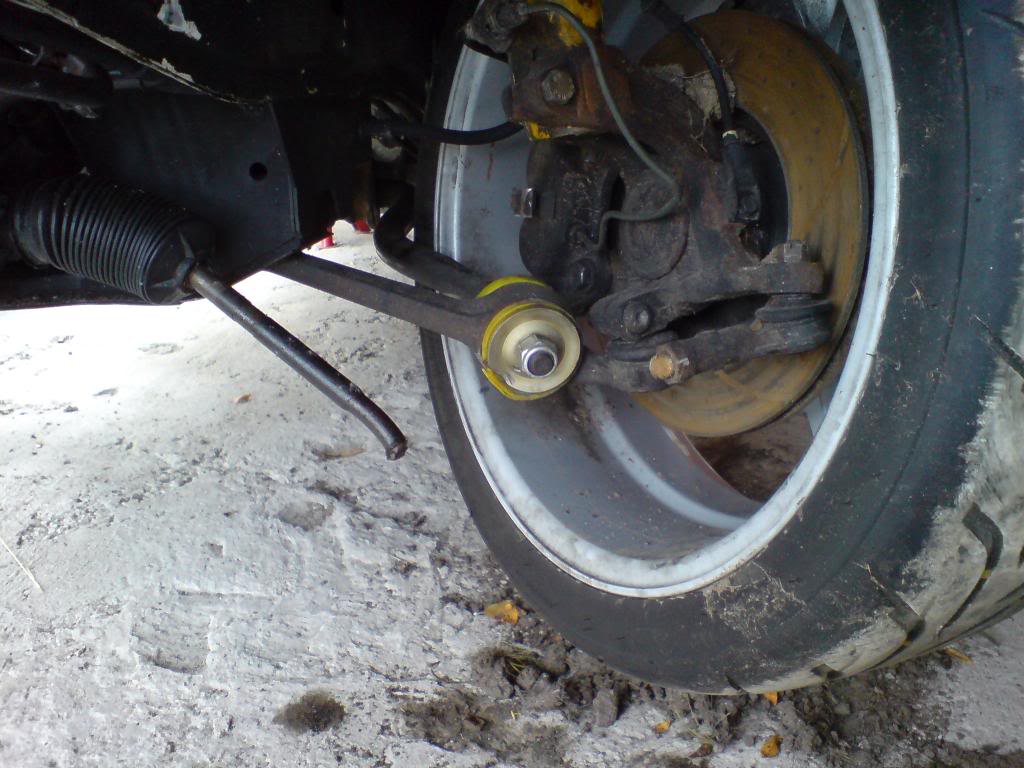
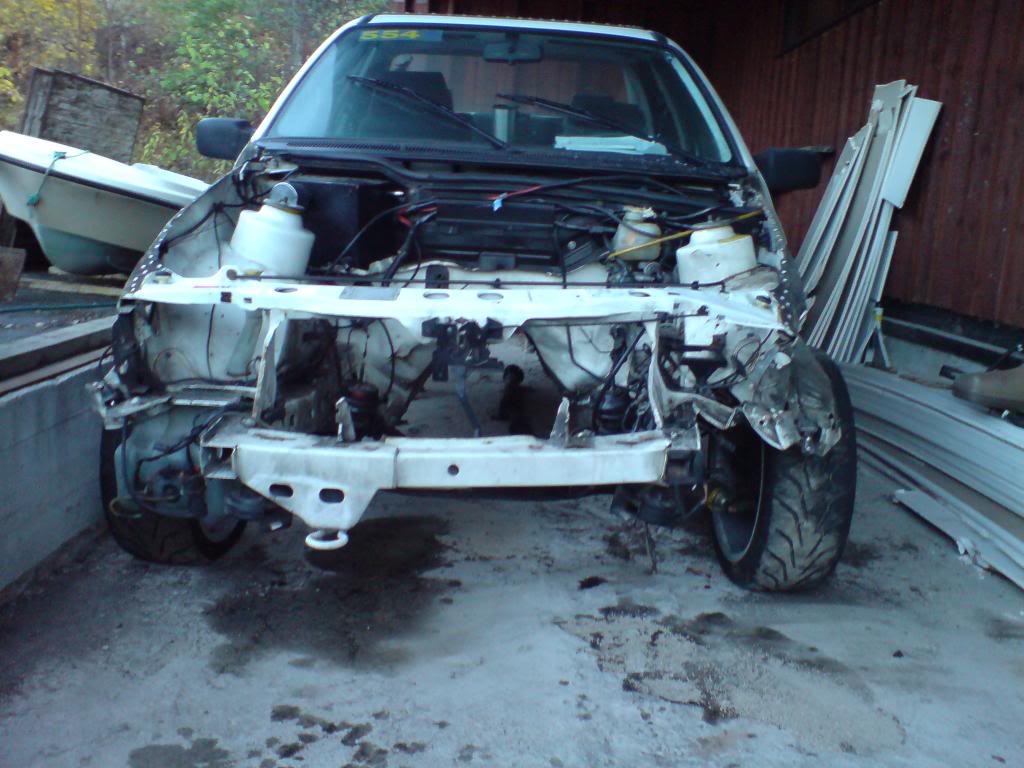
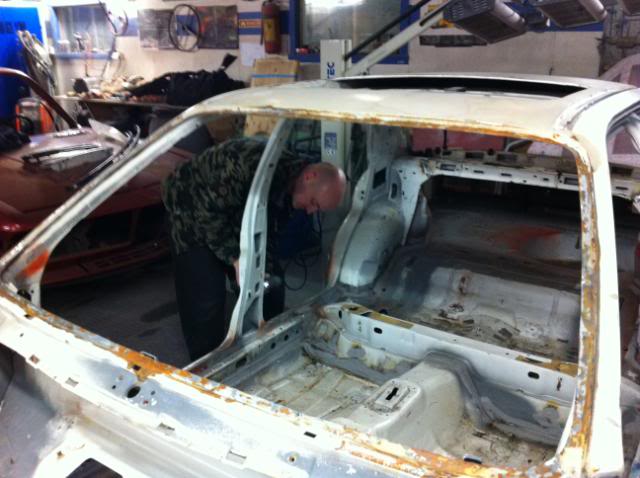
This is how the car look like when i bought it. I bought it from a friend that had bought this just for the suspension purpose.
Here he is working on removing the front and rear suspension. And change it with the suspension on his car.
He is going to use his only for racing and i am going for daily driver, so i didnt mind it at all.
Here i have cut out the roll cage. It is not alloved to have a full roll cage on a street car in Norway, unless the car is from before 1971.
Sorry for the bad quality

Then i bought a used harness for the car, and had some work cut out to get it in the car. I had to solder almoust every wire in this harness.
But it finally got ins the car.

I had to buy new doors, bonnet rear window, interior headliner for the roof, and the sunroof. to get it street legal.
I finally get the car finish and inspected, and woala i had a cosworth to drive with.
Sorry to disappoint everyone here, but i have no pic`s of it finish. My computer crashed and i was lucky to salvage some
of the photos, but not everyone.
The me and my friend decided to go for a track day at my home town. New with the car, and new with the track,
And everyone knows what happen then. YES you guessed it, I wrecked the car.
I lost traction on the rear in 60+ miles and hit the wall sideways.
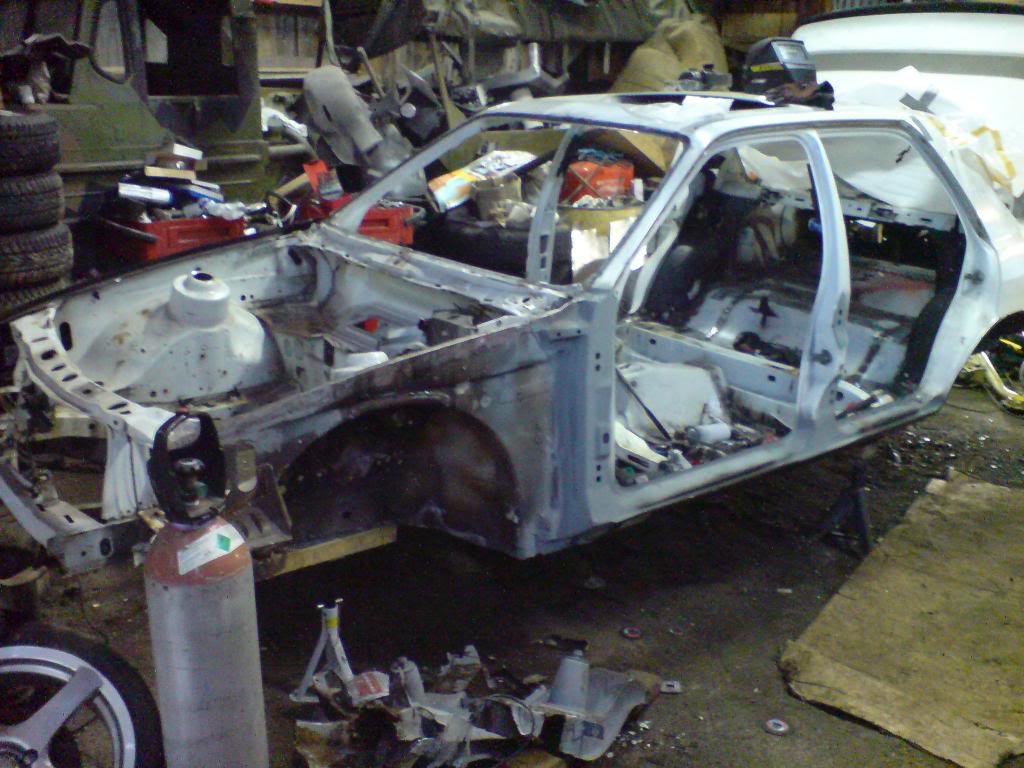
So now i had to inspect the wrek and see how much damage it was. Here it is....
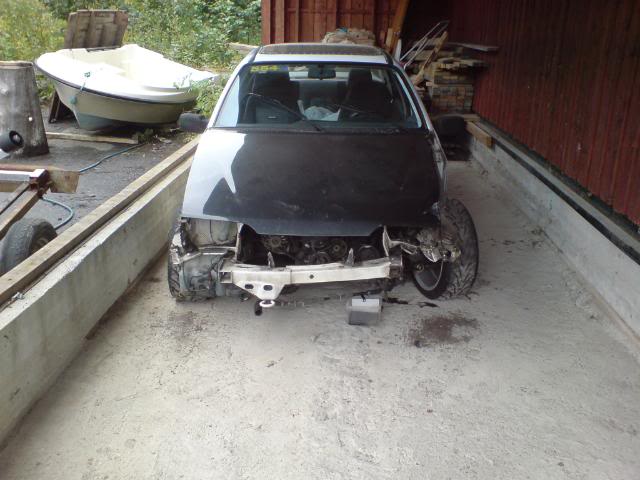
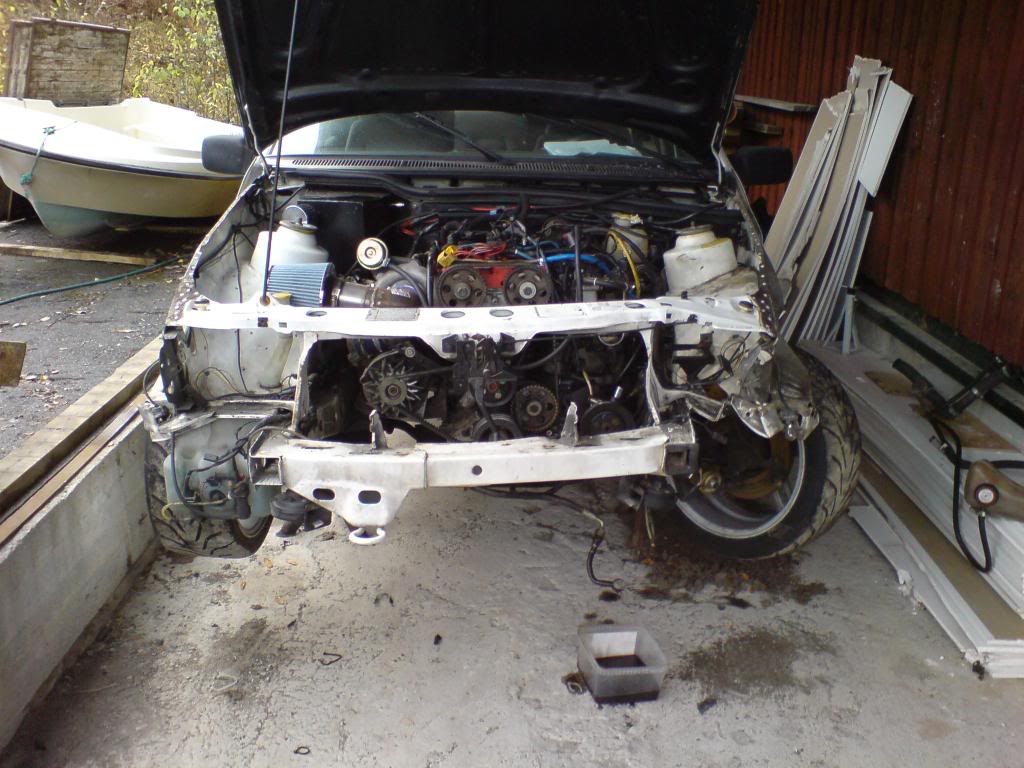
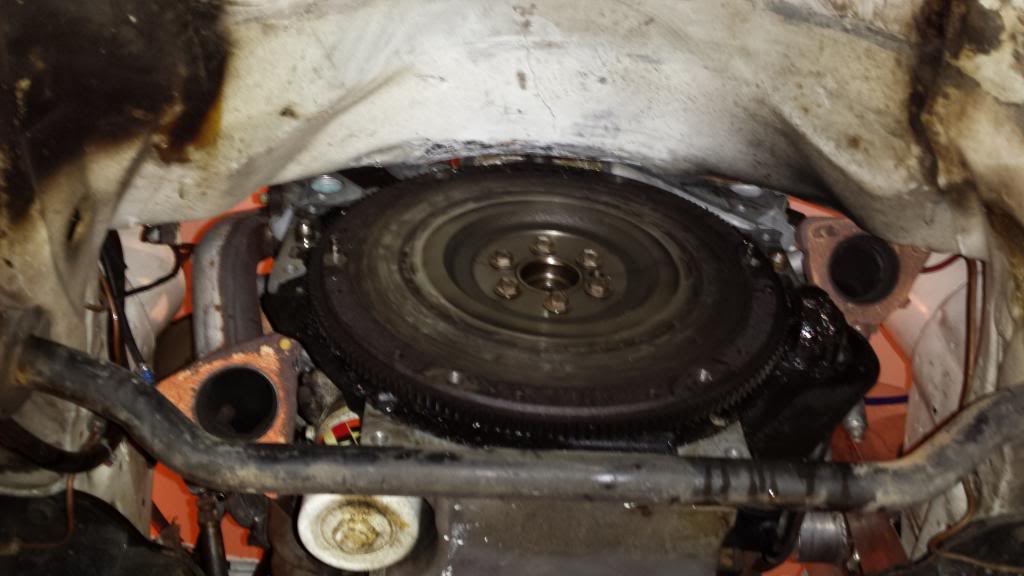
Then i got the engine out, and had a look. It didnt look that bad at all.
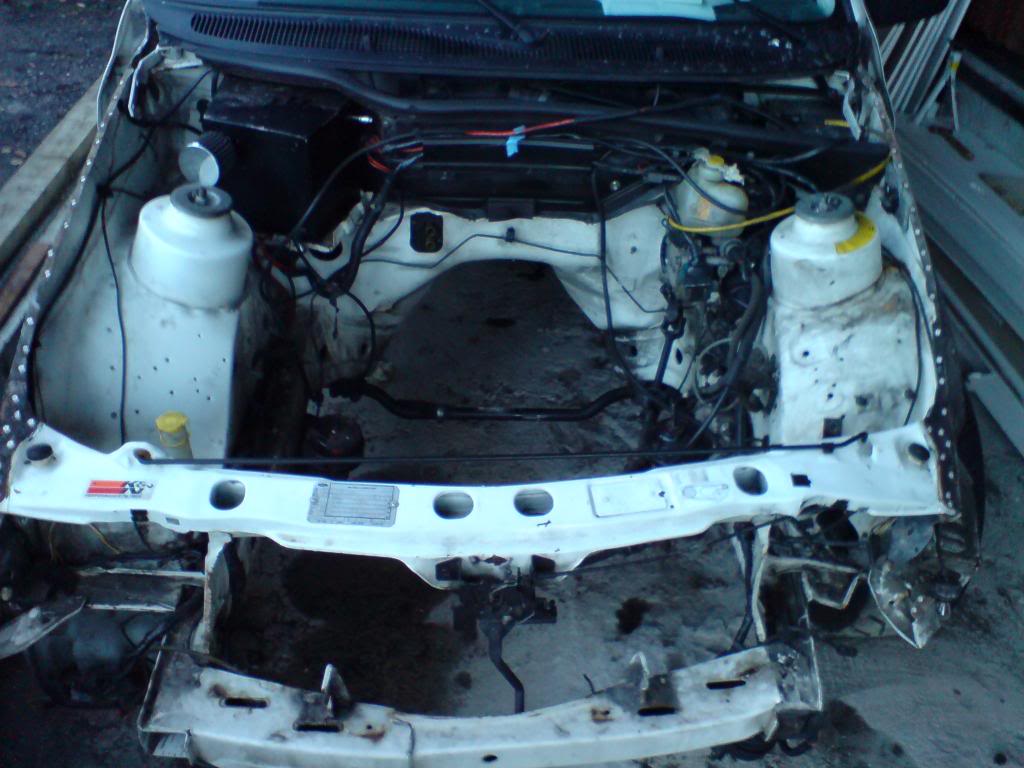
I called my friend that work at a body shop. We arrange to get the car there and measure how bad it really is.
more is coming
I was thinking it was about time i made a thread about my car/project.
It have been rebuild many times. And i thought that if i made a thread about my build, it would be
best if i started from the beginning of my second build. It is the time i started to take pic`s of what i was doing.
So i hope you all enjoy this tread and what i have done.
There will be allot of pics here sence it is a few years i started with this (again) And i will explain what i have done
for every photo.
Well my car. I bought it in summer of 2007. It is a 1990 2WD sierra cosworth. Modified for race use only
It have a Quaife gear kit in the gearbox. Really short shifting. Sraight cut gears. No matter witch gear i am in and witch
rpm`s i am at, when i shift gear up or down there is only 500 rpm`s difference. Tis made the car really quick.
The engine was quite original. It had just minor mods, such as light portet head. standard cams. 550 cc injectors.
And a IHI RHC6 turbo. Max boost at 3700 rpm`s
This is how the car look like when i bought it. I bought it from a friend that had bought this just for the suspension purpose.
Here he is working on removing the front and rear suspension. And change it with the suspension on his car.
He is going to use his only for racing and i am going for daily driver, so i didnt mind it at all.
Here i have cut out the roll cage. It is not alloved to have a full roll cage on a street car in Norway, unless the car is from before 1971.
Sorry for the bad quality


Then i bought a used harness for the car, and had some work cut out to get it in the car. I had to solder almoust every wire in this harness.
But it finally got ins the car.


I had to buy new doors, bonnet rear window, interior headliner for the roof, and the sunroof. to get it street legal.
I finally get the car finish and inspected, and woala i had a cosworth to drive with.
Sorry to disappoint everyone here, but i have no pic`s of it finish. My computer crashed and i was lucky to salvage some
of the photos, but not everyone.
The me and my friend decided to go for a track day at my home town. New with the car, and new with the track,
And everyone knows what happen then. YES you guessed it, I wrecked the car.
I lost traction on the rear in 60+ miles and hit the wall sideways.
So now i had to inspect the wrek and see how much damage it was. Here it is....
Then i got the engine out, and had a look. It didnt look that bad at all.
I called my friend that work at a body shop. We arrange to get the car there and measure how bad it really is.
more is coming
Last edited by finni racing; 18-04-2015 at 11:34 PM.

The following users liked this post:
tones61 (11-04-2015)
11-04-2015, 03:00 PM
#2
Car under constuction
Thread Starter
Then we got the car in the body shop, and up on the jig.
The first thing he did was to pull out the inner fender to is original position.
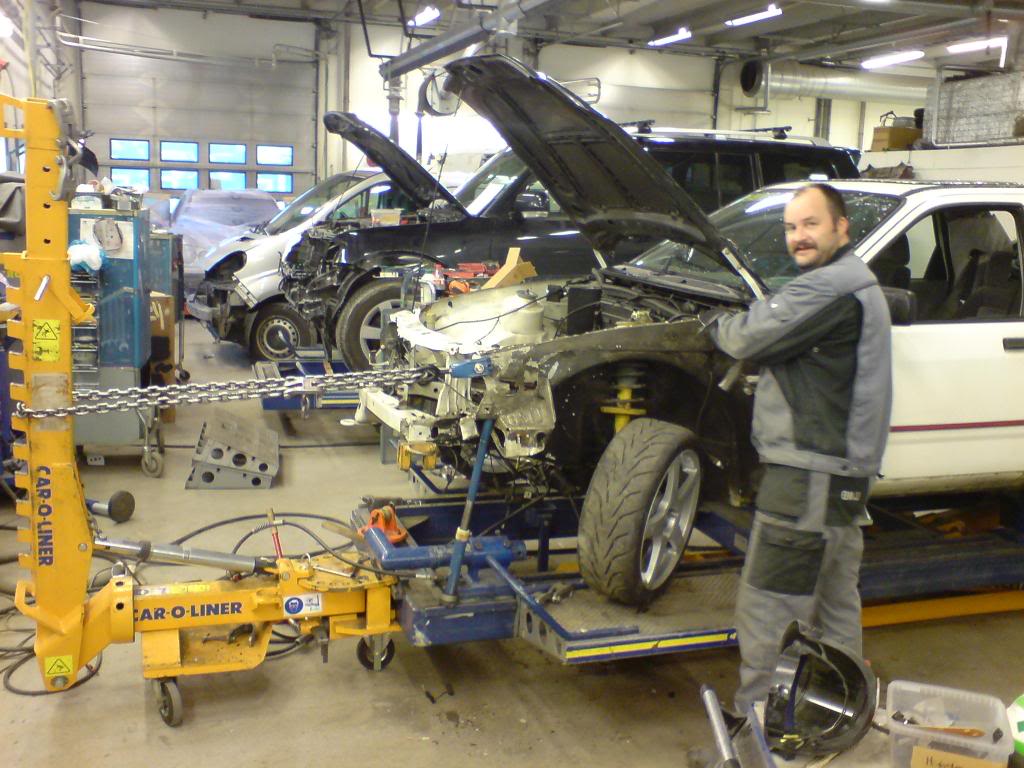
straightening some of the small dents in the inner fender with a hammer
Here we pulled the frame rail 15mm back, to the right position.
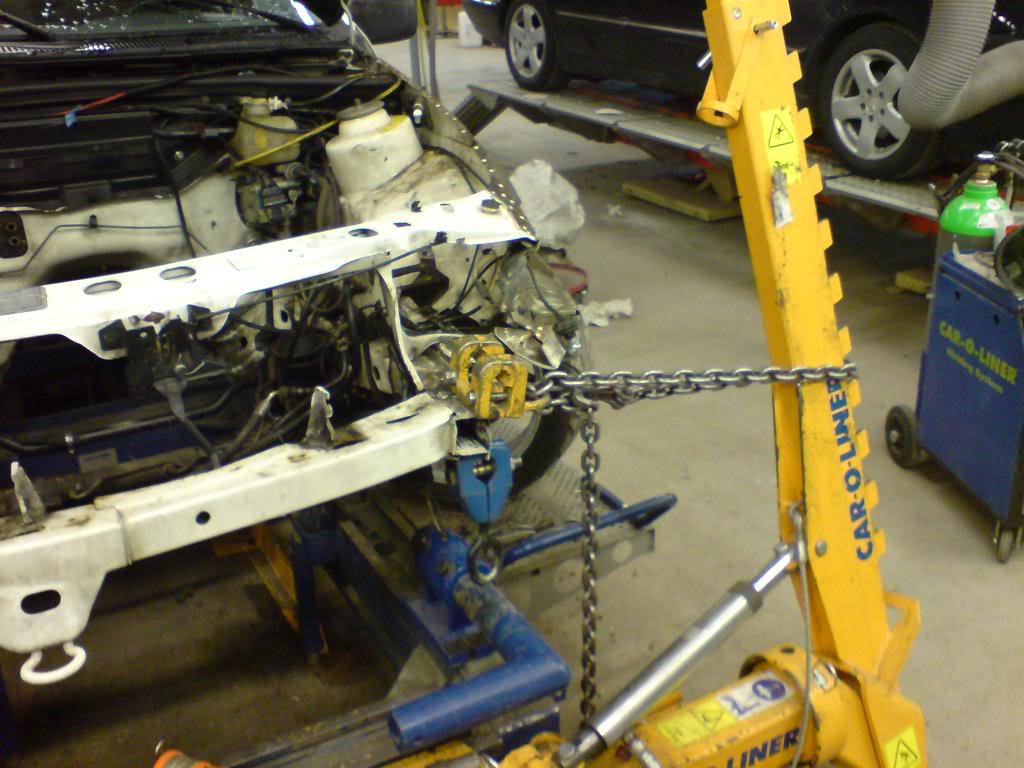
Here we pulled the frame rail down 15 to 20mm. This was the most serious damage. But a few pull`s
and it was all back where it belongs

Then it is time to get it back home, to start changing out panels so it would look like a car again.
More is coming
The first thing he did was to pull out the inner fender to is original position.
straightening some of the small dents in the inner fender with a hammer
Here we pulled the frame rail 15mm back, to the right position.
Here we pulled the frame rail down 15 to 20mm. This was the most serious damage. But a few pull`s
and it was all back where it belongs
Then it is time to get it back home, to start changing out panels so it would look like a car again.
More is coming
Last edited by finni racing; 18-04-2015 at 12:10 AM.
11-04-2015, 03:06 PM
#3
Car under constuction
Thread Starter
There will be allot of pics really fast here.
So everyone can see what has happen with the build.
These pics are old, and i have to pump out pics so i can get to where i am today.
Hope you all like what you see
So everyone can see what has happen with the build.
These pics are old, and i have to pump out pics so i can get to where i am today.
Hope you all like what you see
The following users liked this post:
finni racing (11-04-2015)
11-04-2015, 03:40 PM
#5
Car under constuction
Thread Starter
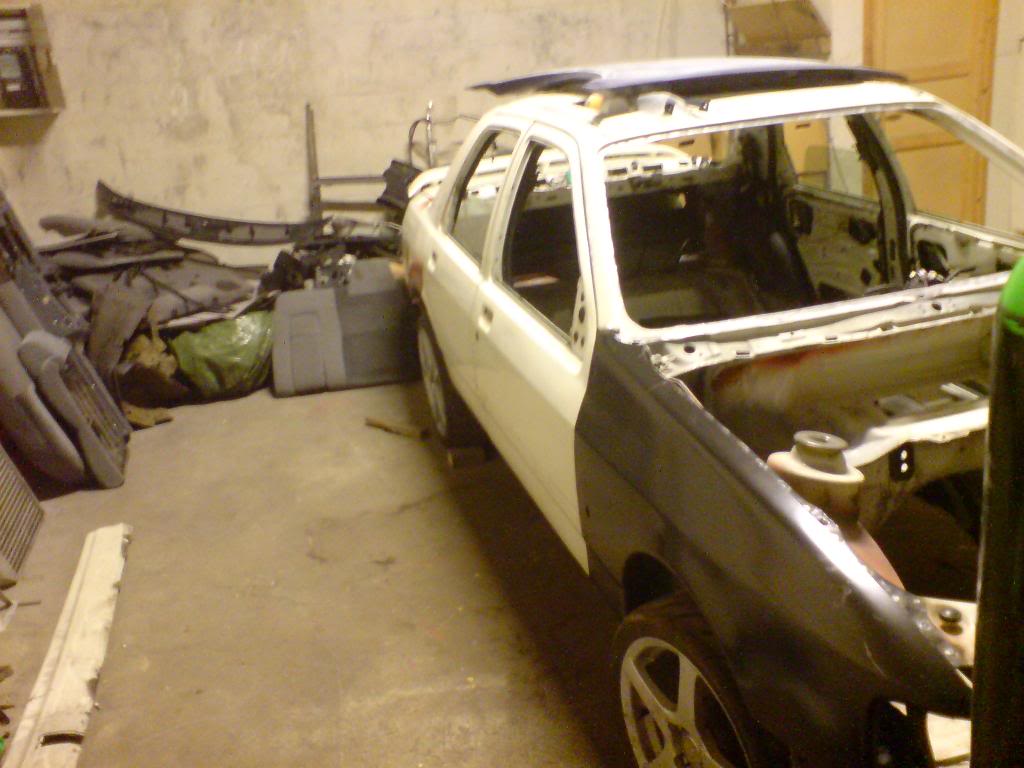
Then the car has been sitting for some time in the barn/garage, and i have done some work on it.
As i said earlier many of my pics where lost, when the PC crashed. But i will explain what i have done, and post what i have.
The crash have had it`s positive affect also. I found allot of rust on the car, and started with rust repairs.
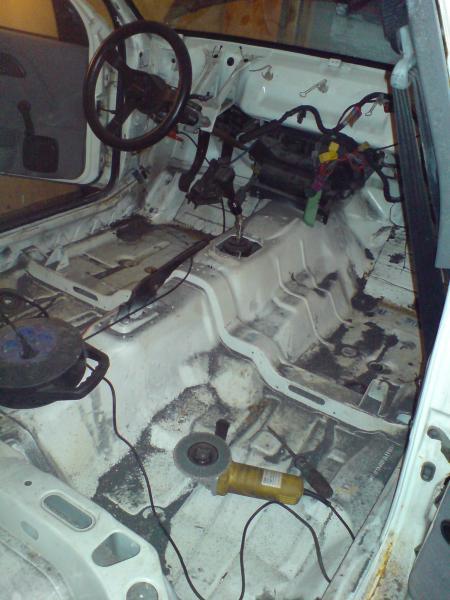
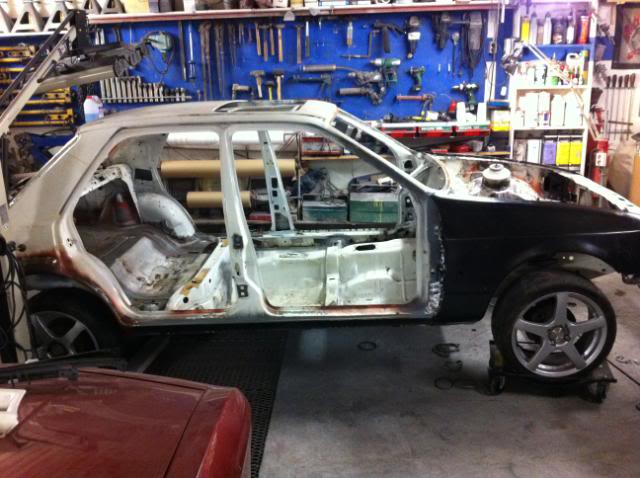
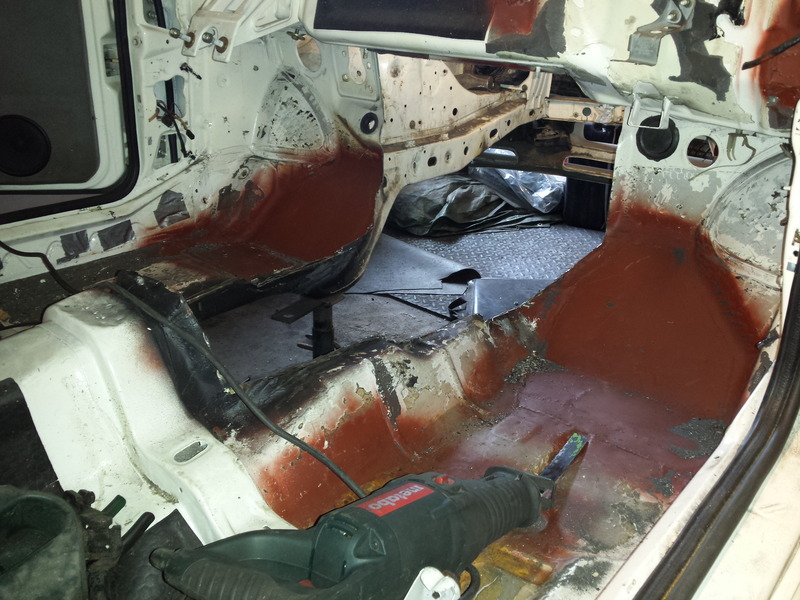
Here i have already had the whole floor pan out of the car. I was changing the doorstep on each side, But found that
the inner reinforcement for the floor was rusted away. So in order to fix that i had to take the entire floor pan out.
The floor pan and the door step`s are welded together with the reinforcement inside.
When the floor was out i had to reinforce the chassi so it would not bend.
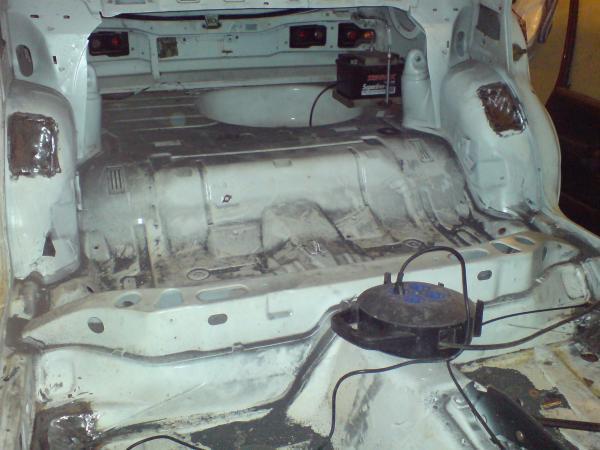
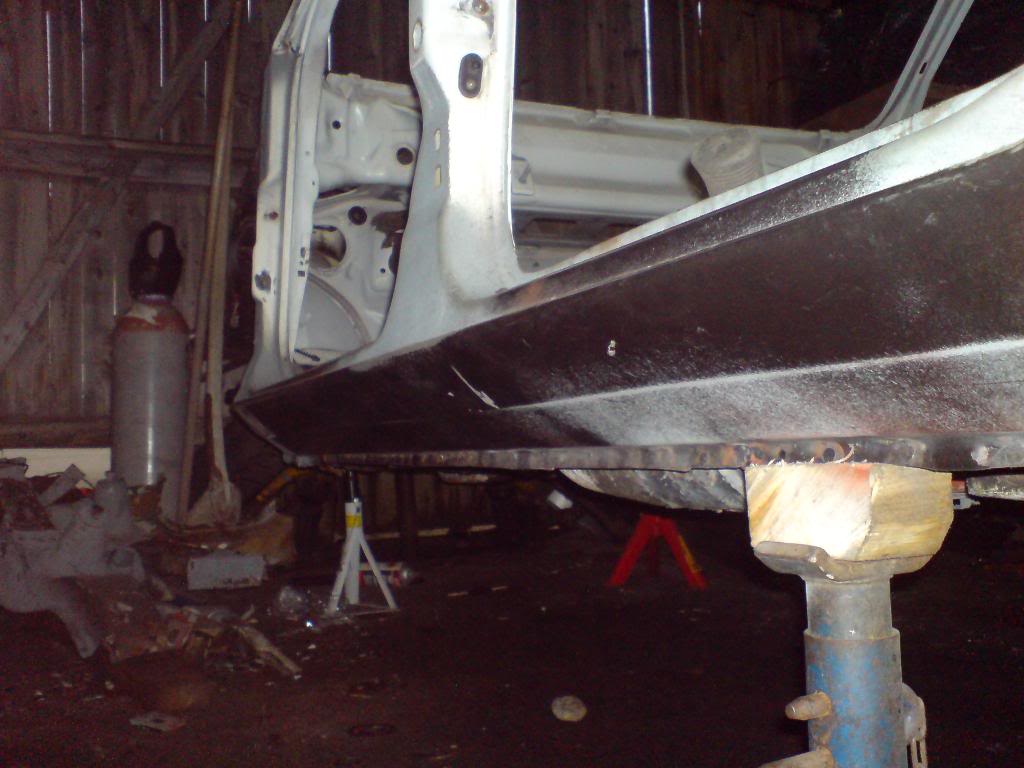
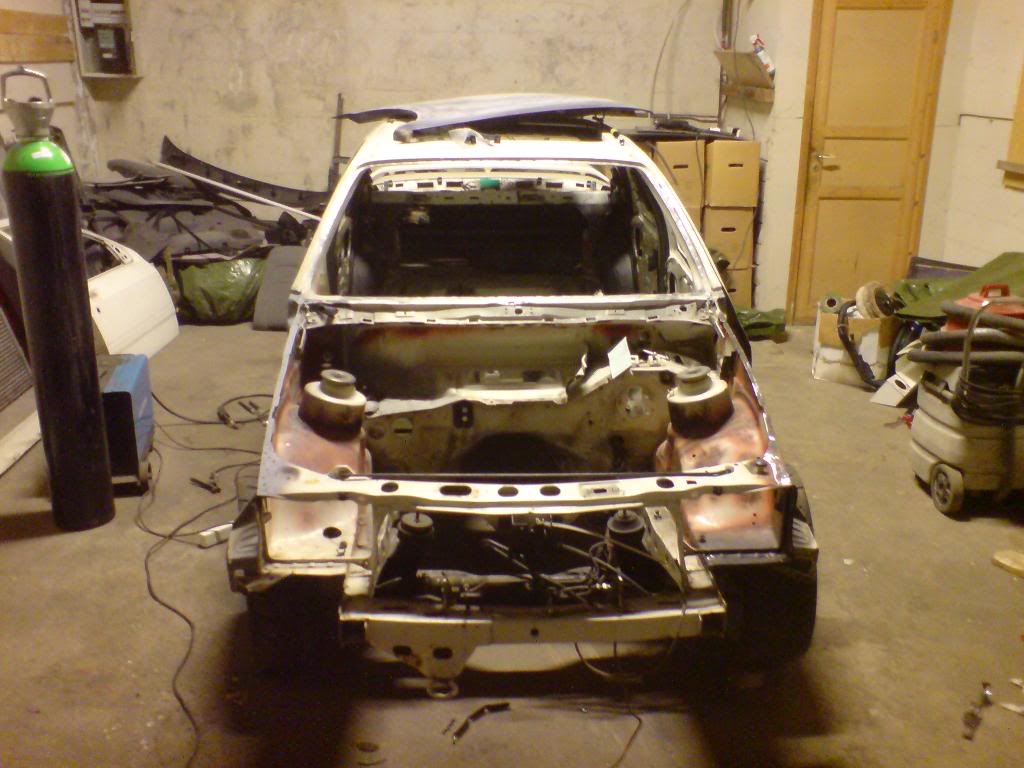
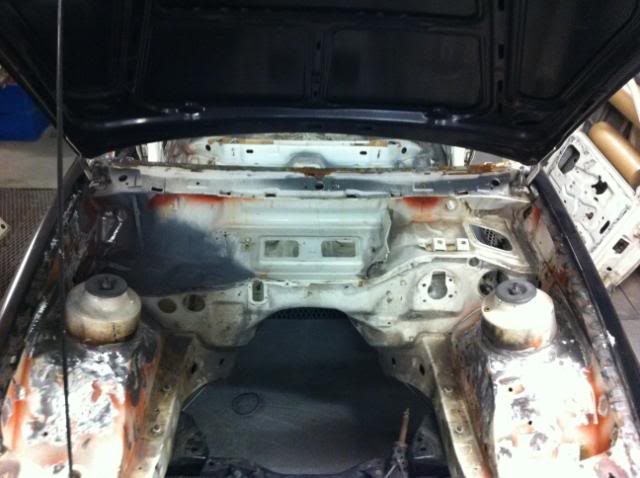
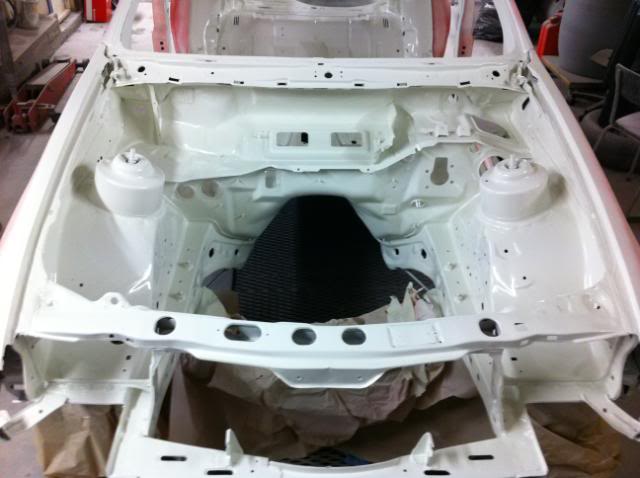
Here is a pic when the floor pan just got back in. You can also see that there is bare metal where the rear frame rail go.
They where also rusted, so they had to go. You can see the bits of them in the bottom of the pic
Here is the new door step welded in.
And here is the new rear frame rail welded back in.
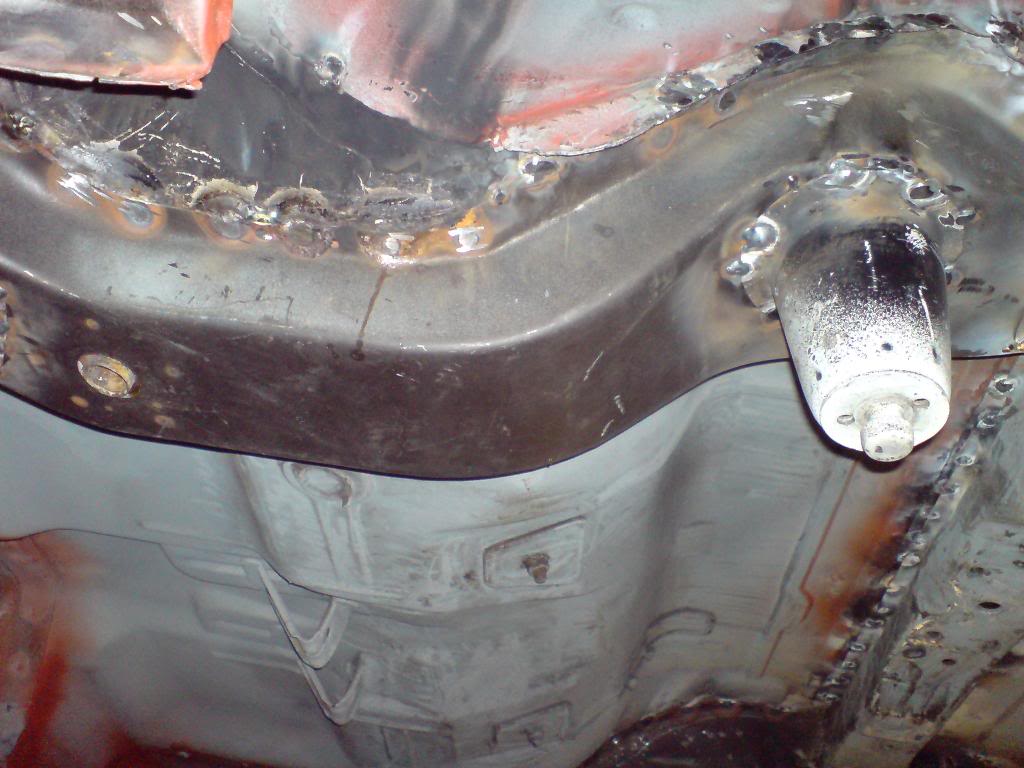
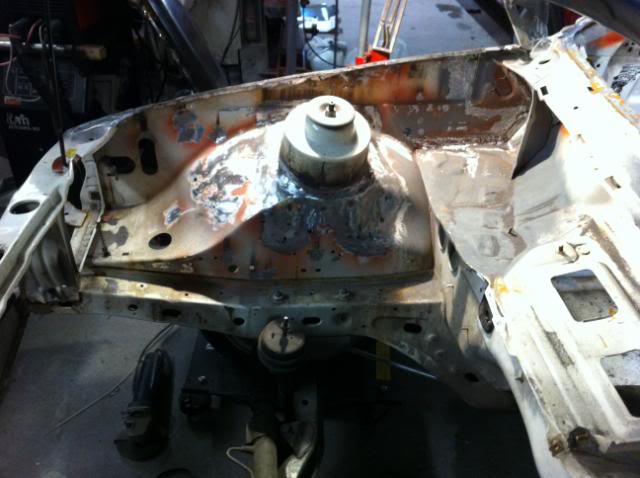
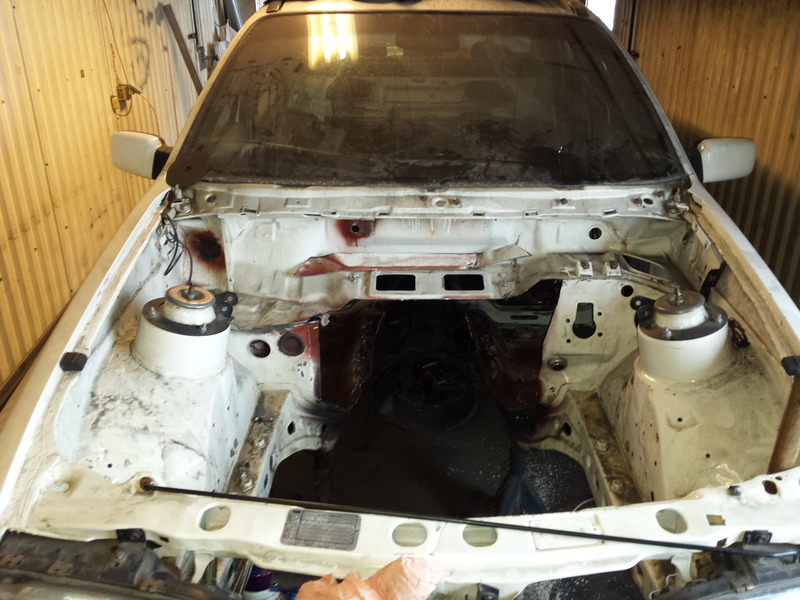
I change the back panel also. It was rusted where the frame rail is welded to it

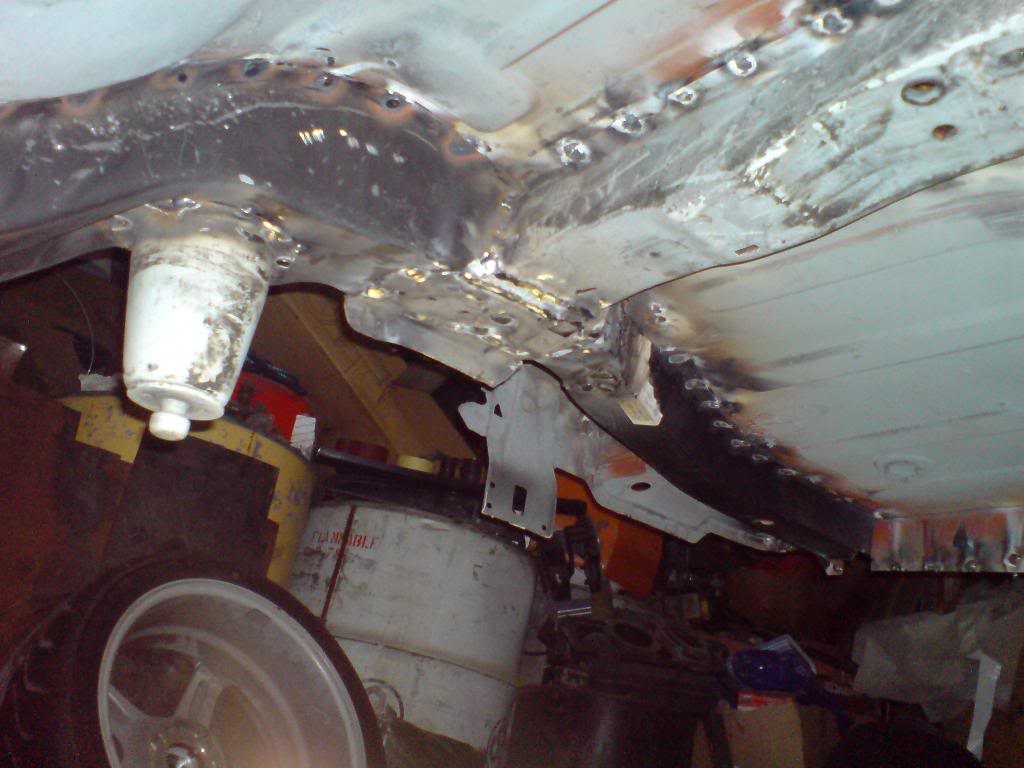
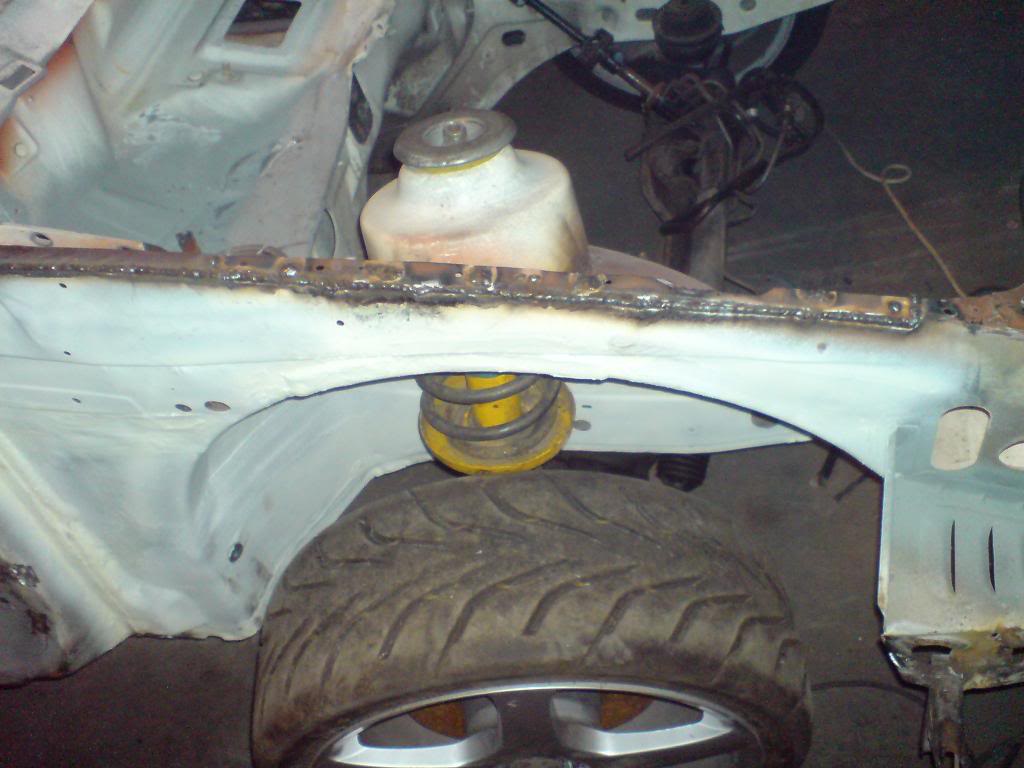
Then i welded the strut towers on both sides, for extra strength in the chassi.
Did the same at the front.
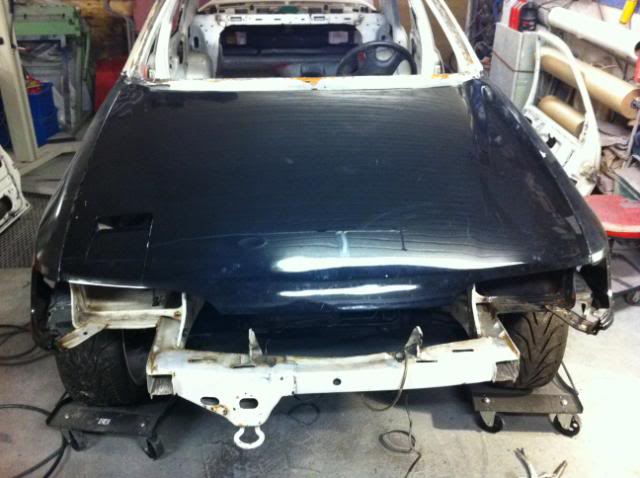
Then i test fitted the bonnet, fenders, lights, doors To see if there was more chassi work to be done.
And i started fixing the bonnet.
As i said earlier many of my pics where lost, when the PC crashed. But i will explain what i have done, and post what i have.
The crash have had it`s positive affect also. I found allot of rust on the car, and started with rust repairs.
Here i have already had the whole floor pan out of the car. I was changing the doorstep on each side, But found that
the inner reinforcement for the floor was rusted away. So in order to fix that i had to take the entire floor pan out.
The floor pan and the door step`s are welded together with the reinforcement inside.
When the floor was out i had to reinforce the chassi so it would not bend.
Here is a pic when the floor pan just got back in. You can also see that there is bare metal where the rear frame rail go.
They where also rusted, so they had to go. You can see the bits of them in the bottom of the pic

Here is the new door step welded in.

And here is the new rear frame rail welded back in.


I change the back panel also. It was rusted where the frame rail is welded to it

Then i welded the strut towers on both sides, for extra strength in the chassi.

Did the same at the front.

Then i test fitted the bonnet, fenders, lights, doors To see if there was more chassi work to be done.
And i started fixing the bonnet.


Last edited by finni racing; 18-04-2015 at 12:16 AM.
11-04-2015, 03:57 PM
#6
Car under constuction
Thread Starter
Then i did some bondoing on the roof, Allot of work sence the roof is curved in all directions.
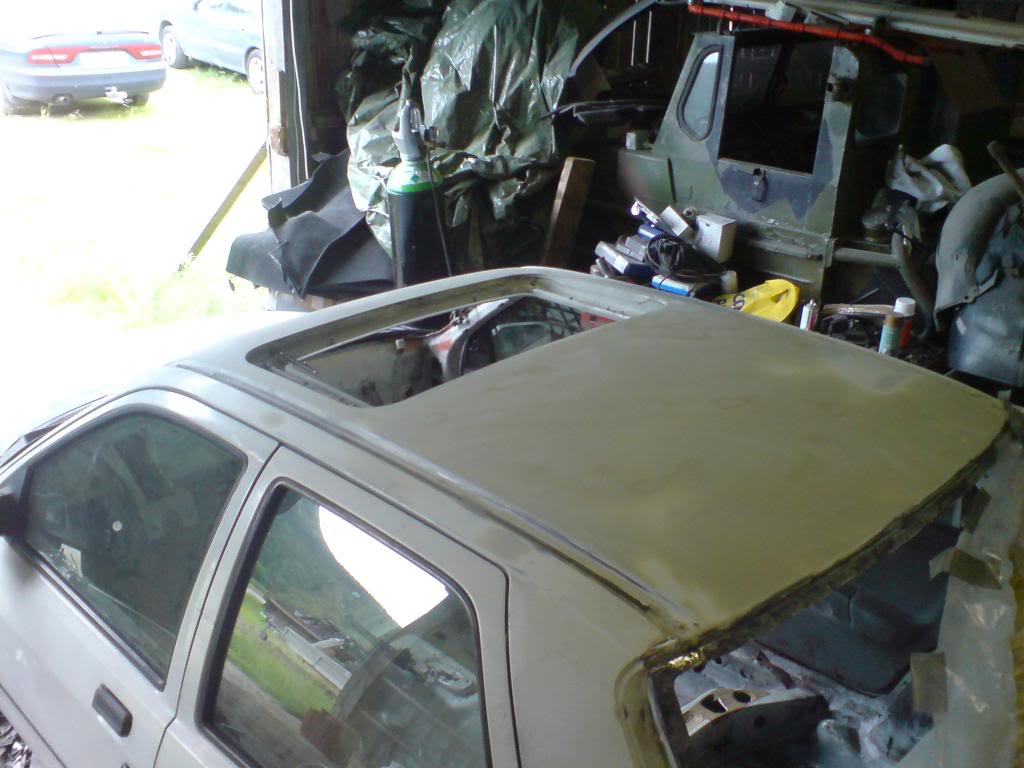
Then i change garage. More suitable for my build.
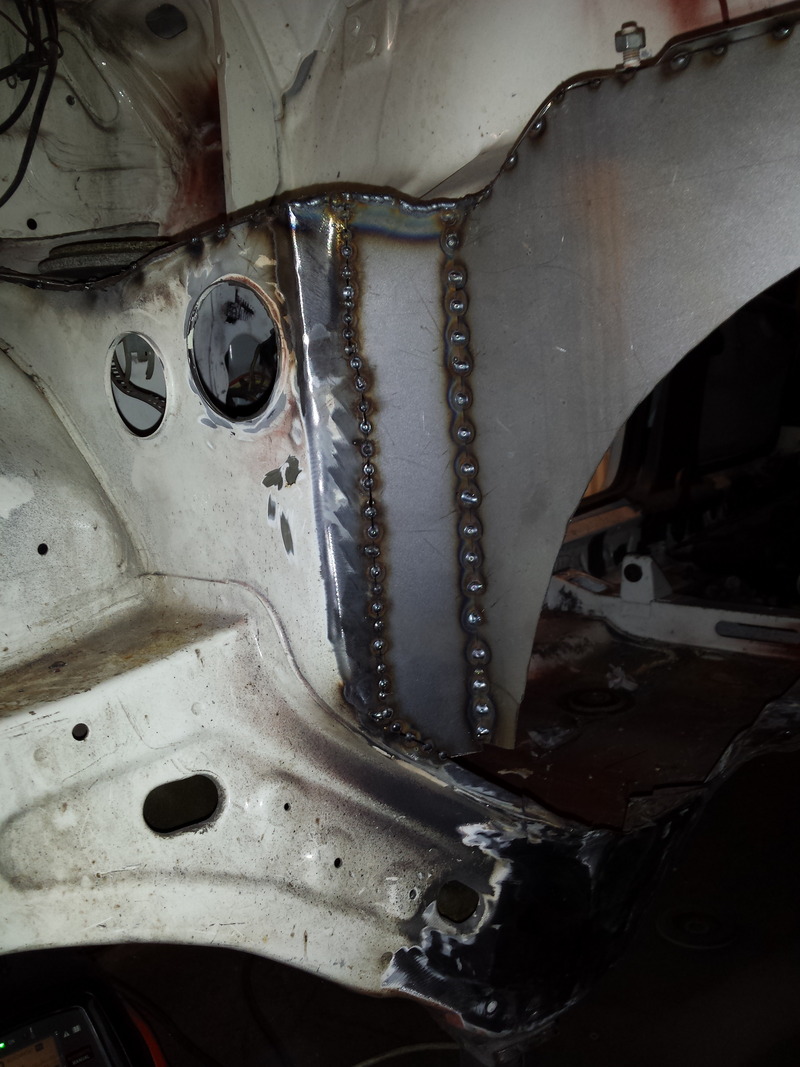
I change the corner of the inner fender so the headlight would fit properly.

I change the rear wheel arches. The old ones was rotten with rust.

I welded in a new peace of sheet on the inner fender, so the fender have something to be welded to.
I also did some rust repairs on the A-post, where the doors are mounted.
There i am finish with all the main body work. Only fine stuff left to do
So now there is time to get the car to another friend, that have a paint shop. Let him do the finishing details before paint

Then i change garage. More suitable for my build.

I change the corner of the inner fender so the headlight would fit properly.

I change the rear wheel arches. The old ones was rotten with rust.

I welded in a new peace of sheet on the inner fender, so the fender have something to be welded to.
I also did some rust repairs on the A-post, where the doors are mounted.

There i am finish with all the main body work. Only fine stuff left to do

So now there is time to get the car to another friend, that have a paint shop. Let him do the finishing details before paint
Last edited by finni racing; 18-04-2015 at 12:19 AM.
Trending Topics
11-04-2015, 04:31 PM
#8
Car under constuction
Thread Starter
At this point i havent started with the V8 build. This is just the beginning. The v8 did not pop in my mind berfore it was time to
rebuild the engine for the 3rd time.
It will come soon
11-04-2015, 04:41 PM
#9
Car under constuction
Thread Starter
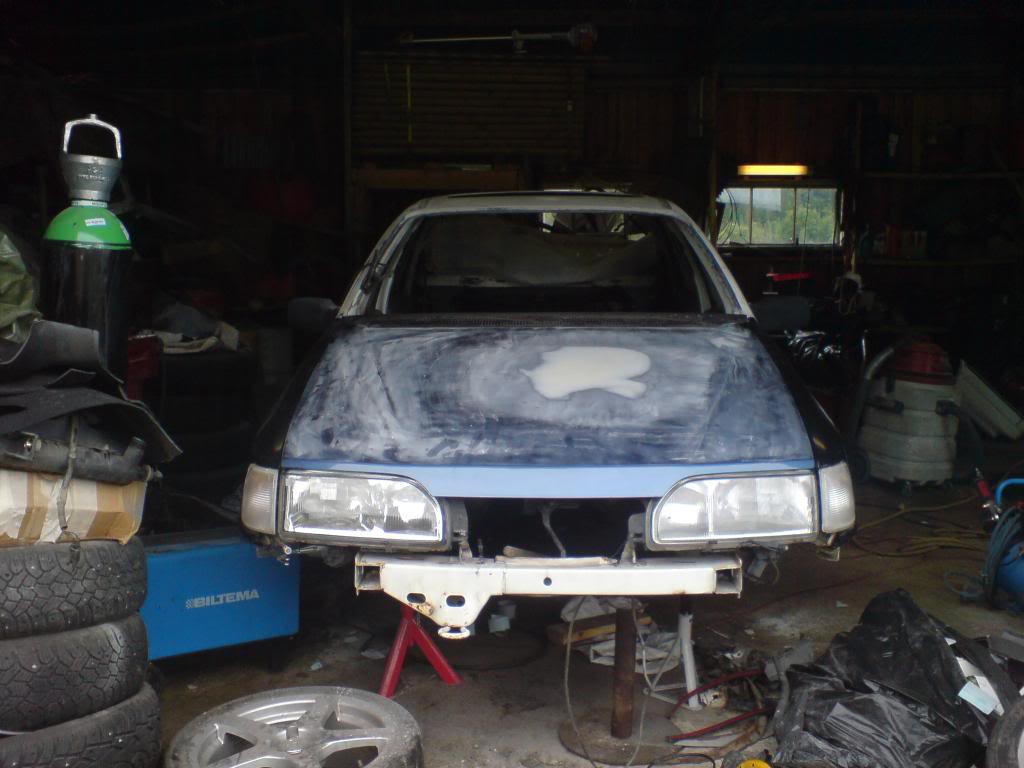
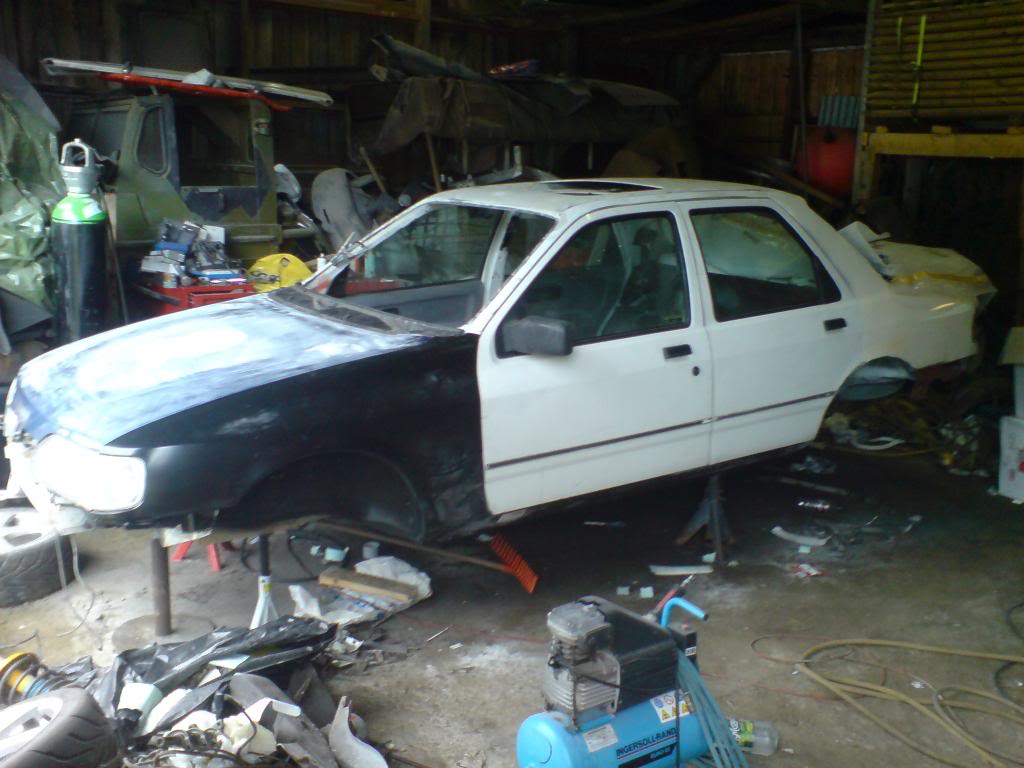
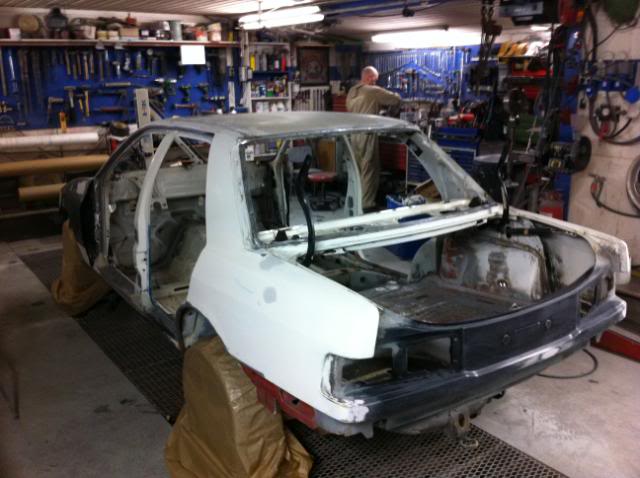
There the car has arrived to my friend`s paint shop. Finally after a winter under tarpaulin. So there was beginning to rust some places.
But nothing we cant fix

fitting of new fenders and new bonnet. Didnt get the blue on good, so i scraped it
Cleaning of surface rust, that has come during the winter
The master in work, hard to get a pic of him, but i got it.....
Then the bondoing has begun.


But nothing we cant fix


fitting of new fenders and new bonnet. Didnt get the blue on good, so i scraped it

Cleaning of surface rust, that has come during the winter


The master in work, hard to get a pic of him, but i got it.....

Then the bondoing has begun.


Last edited by finni racing; 18-04-2015 at 12:28 AM.

 11-04-2015, 04:48 PM
#11
Car under constuction
Thread Starter
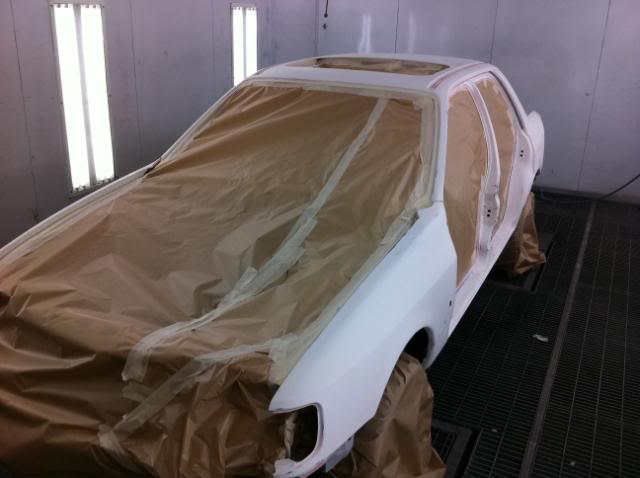
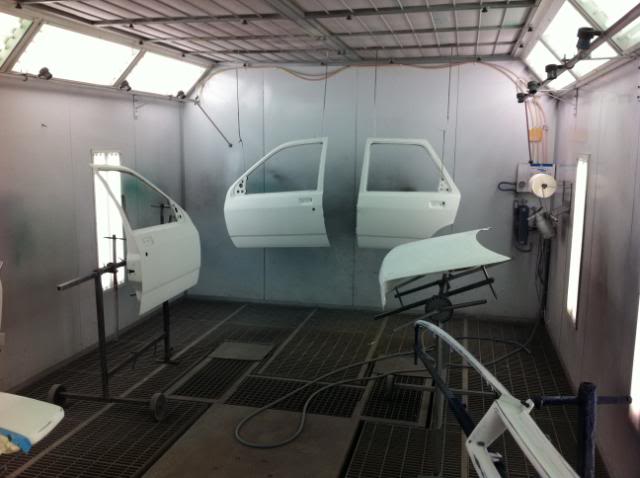
After sanding it was time for the paint job.

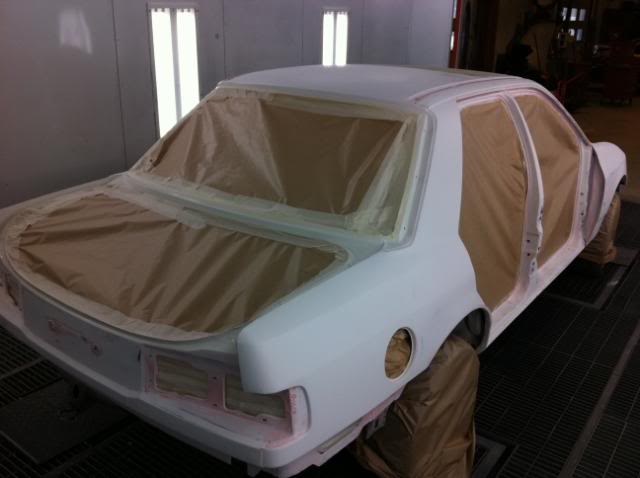
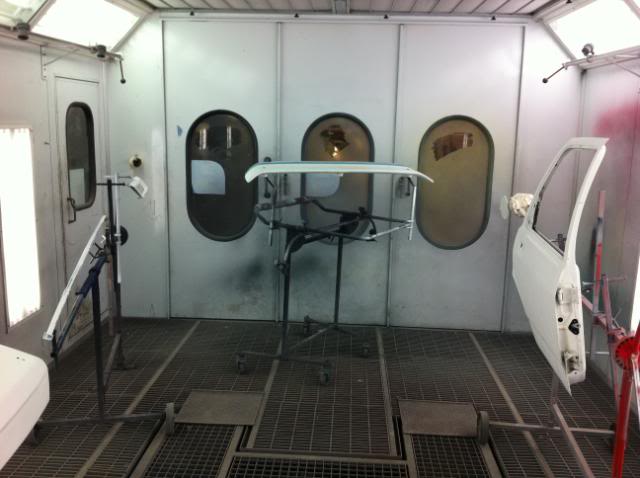
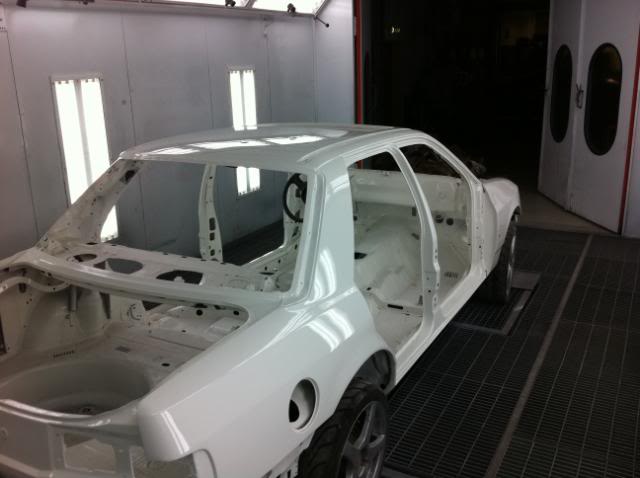
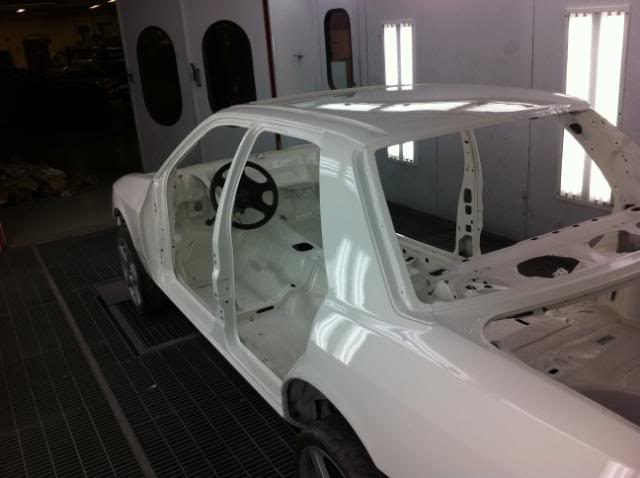
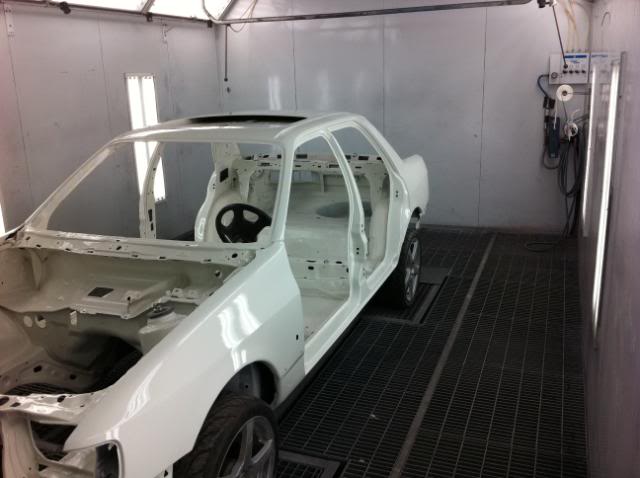
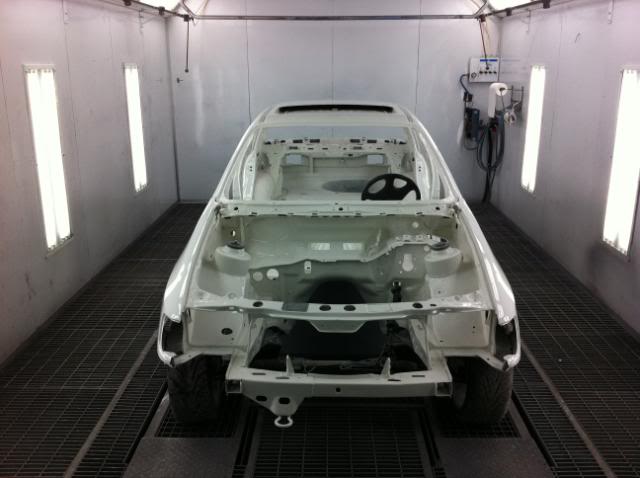
When i got the car back hoe, it was time for assembly.


Here the electrical is in.
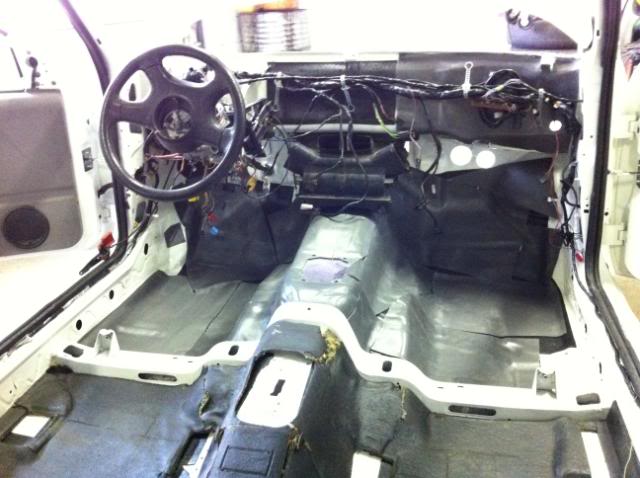


When i got the car back hoe, it was time for assembly.


Here the electrical is in.

Last edited by finni racing; 16-04-2015 at 08:37 AM.
11-04-2015, 04:59 PM
#12
Car under constuction
Thread Starter
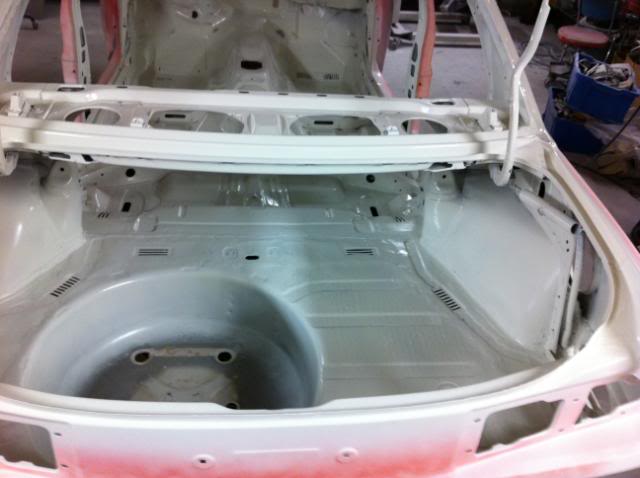
The trunk finish.

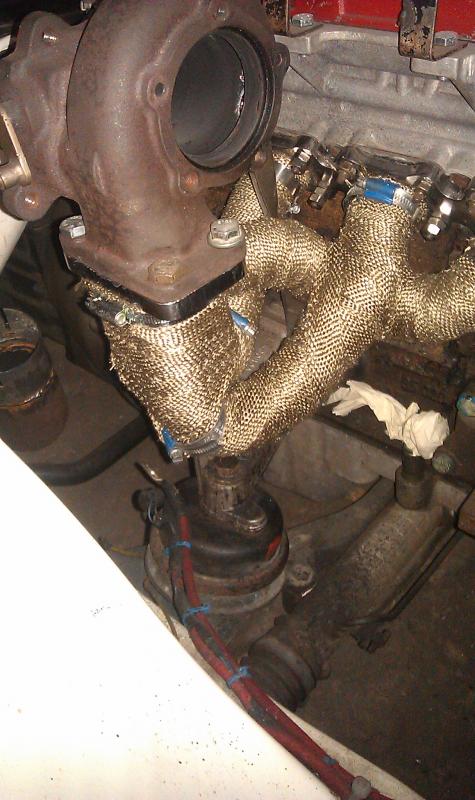
Engine and manufoild all in
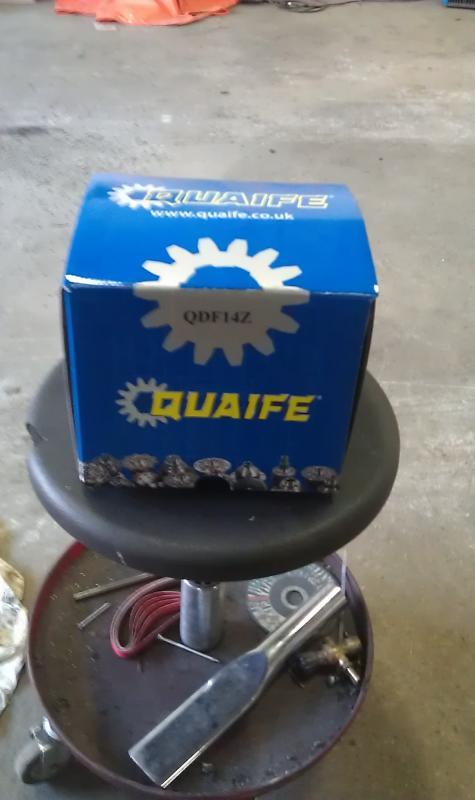
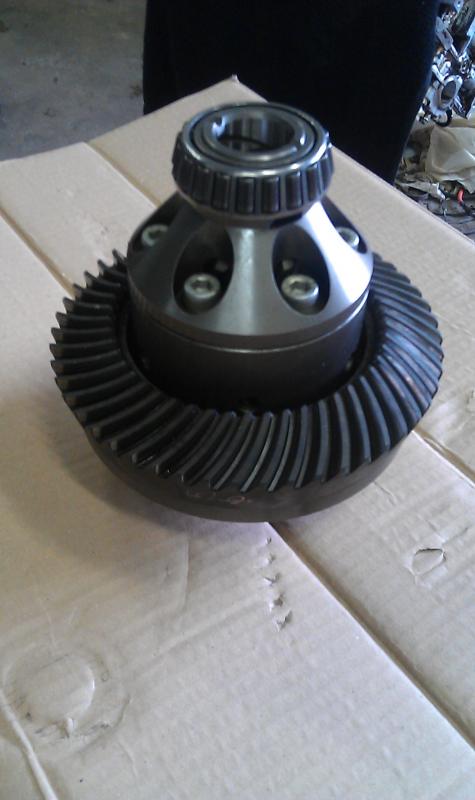
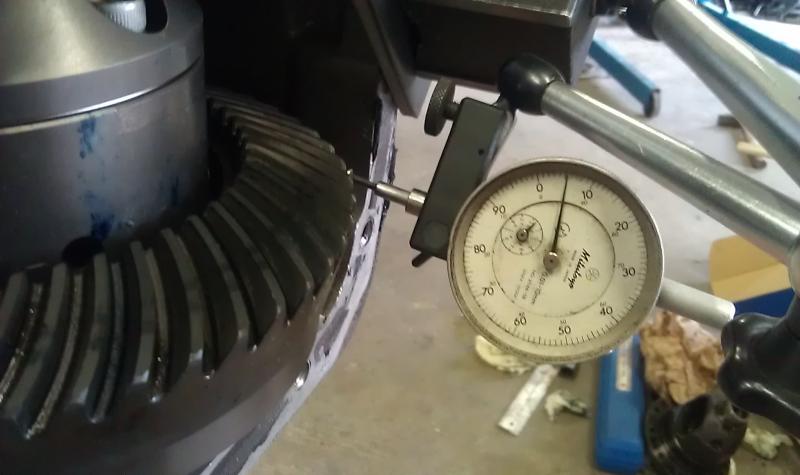
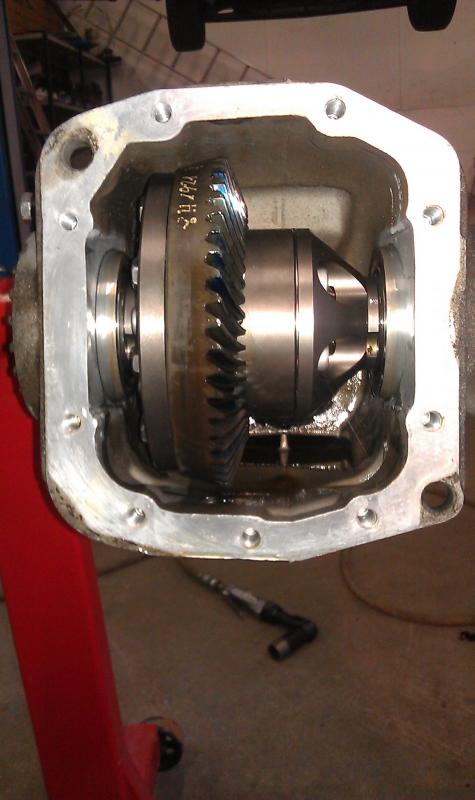
Differential work. Quaife
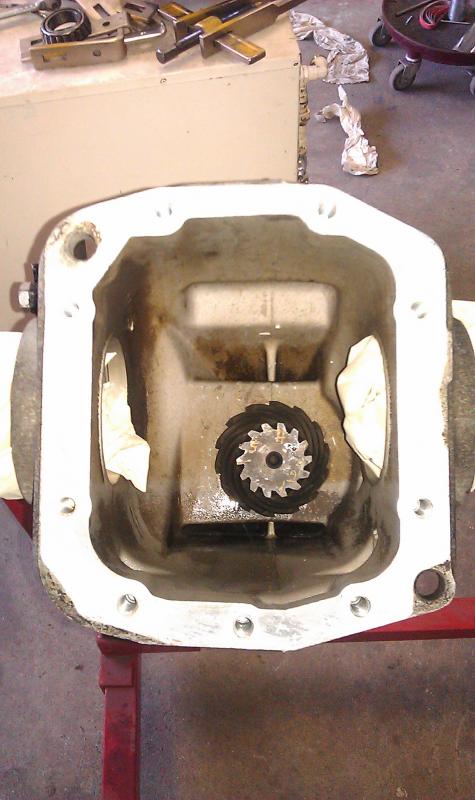
Massaging of the diff housing, so the new diff would fit
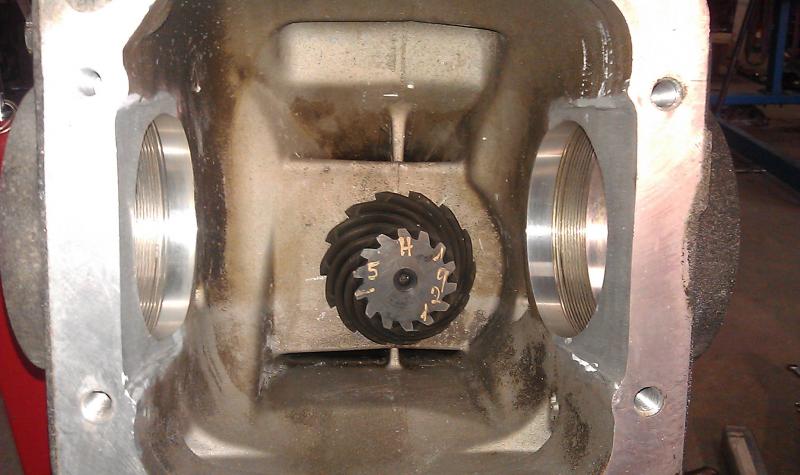
Blue paint to see the contact points

adjustng the backlash
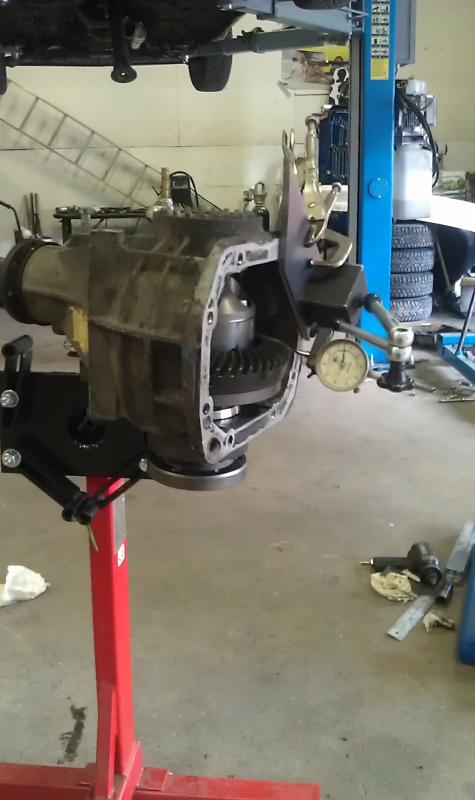
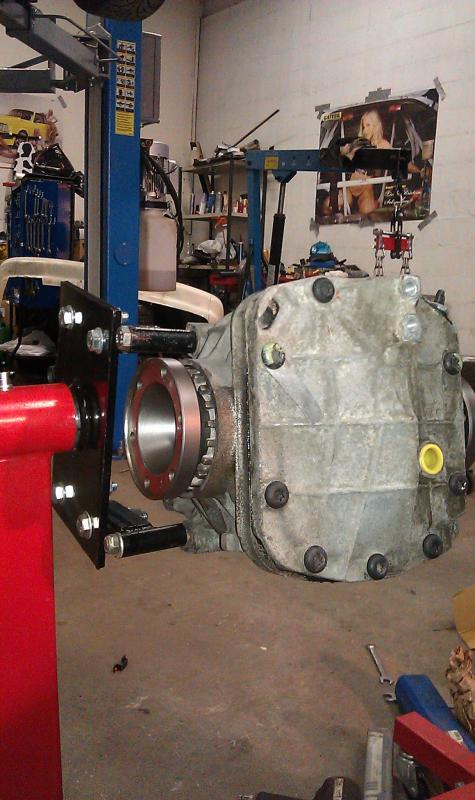
Diff mounted in
All assembled.
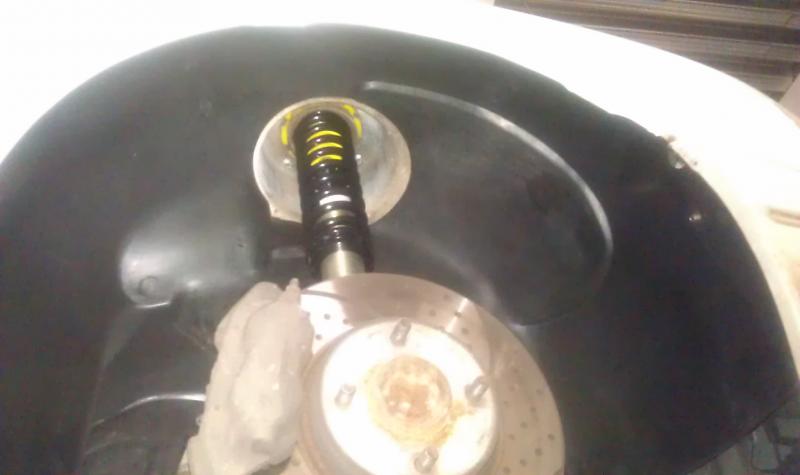
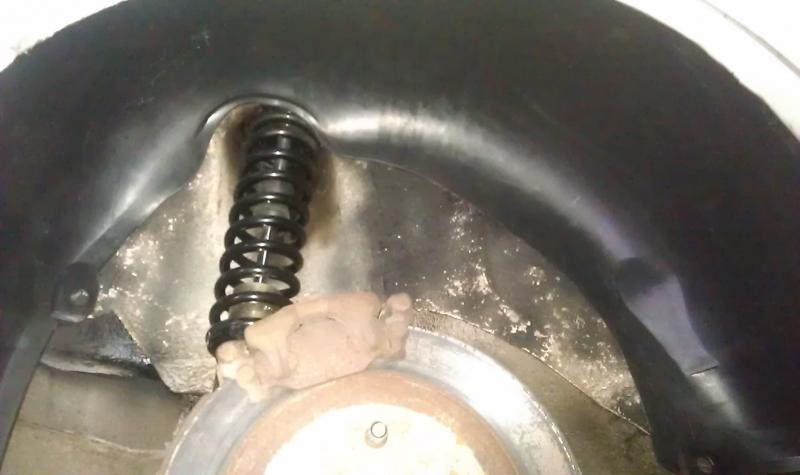
New lokari fenders front and back. With new GAZ coilovers
Nye lokari skermer og coilovers forran og bak.
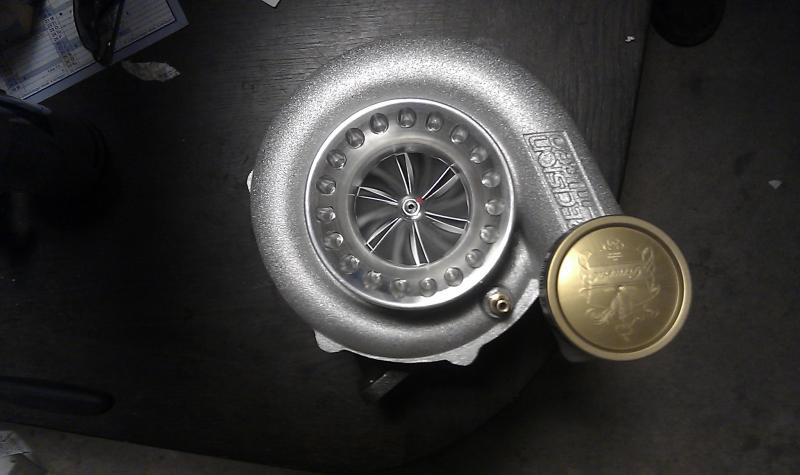
And in the end i had to change the turbo.

Engine and manufoild all in

Differential work. Quaife

Massaging of the diff housing, so the new diff would fit


Blue paint to see the contact points

adjustng the backlash


Diff mounted in

All assembled.

New lokari fenders front and back. With new GAZ coilovers
Nye lokari skermer og coilovers forran og bak.


And in the end i had to change the turbo.

Last edited by finni racing; 18-04-2015 at 12:33 AM.
11-04-2015, 05:03 PM
#13
Car under constuction
Thread Starter
That was the last of the pics of the beginning.
I unfortunately dont have pic`s of the car finish. never thaught about that.
It have been around 2 years now and Now i start with the V8 modification process.
I unfortunately dont have pic`s of the car finish. never thaught about that.
It have been around 2 years now and Now i start with the V8 modification process.
The following users liked this post:
finni racing (11-04-2015)
11-04-2015, 05:31 PM
#15
Car under constuction
Thread Starter
Thanks. I can honestly say there where several times i almost gave up the car.
But after being to some friends, and see what they are doing, i got my spirit back.
So now i spend all my free time on the car. But it is difficult sense i have my own company. Not easy to get away from work. Right now, the project is on hold, due to lack of parts. They will arrive soon, and then i can continue.
Pic`s of the V8 build is coming.
11-04-2015, 08:16 PM
#16
Car under constuction
Thread Starter
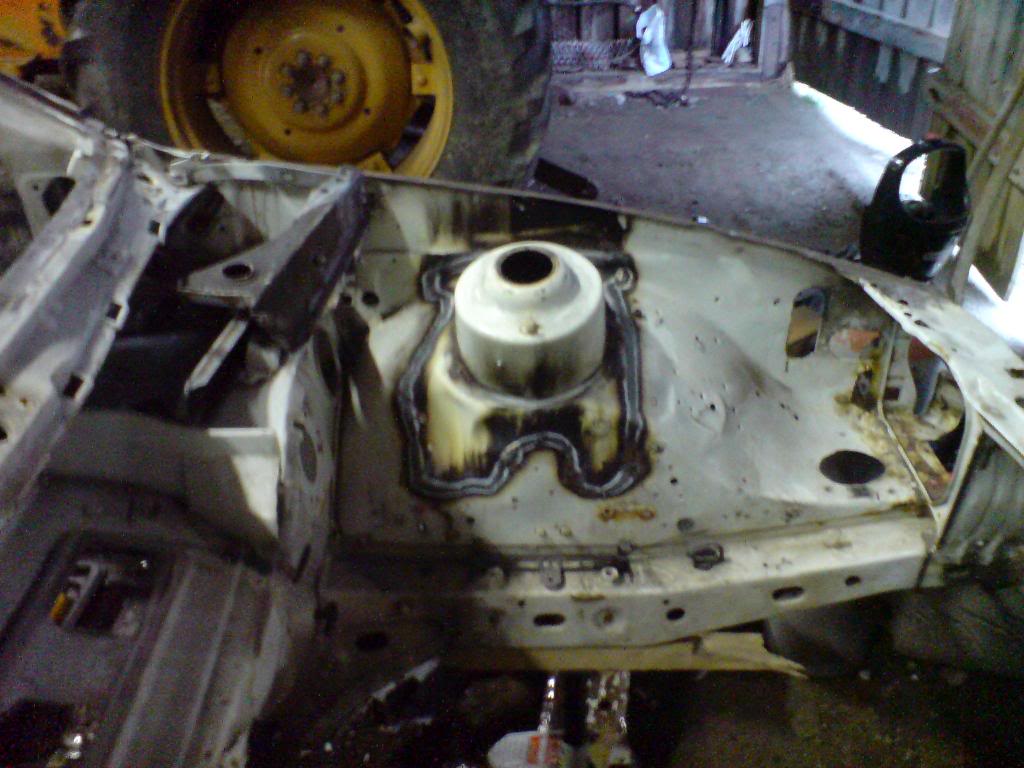
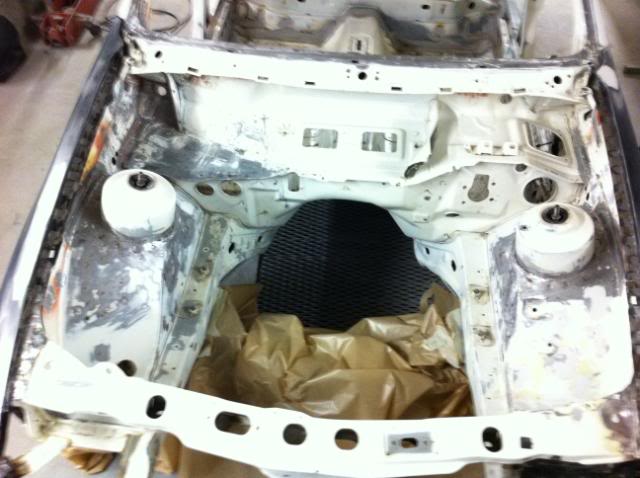
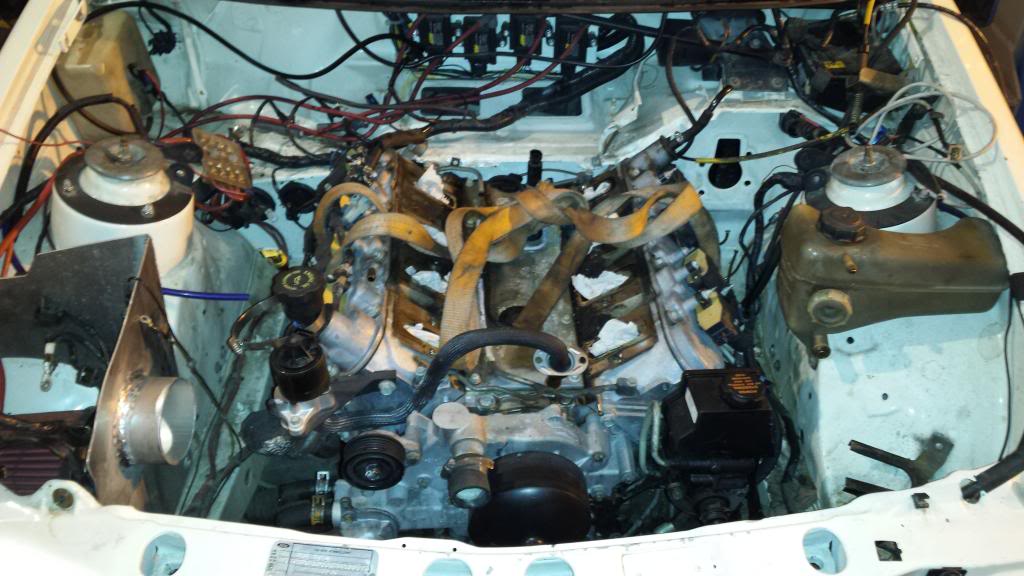
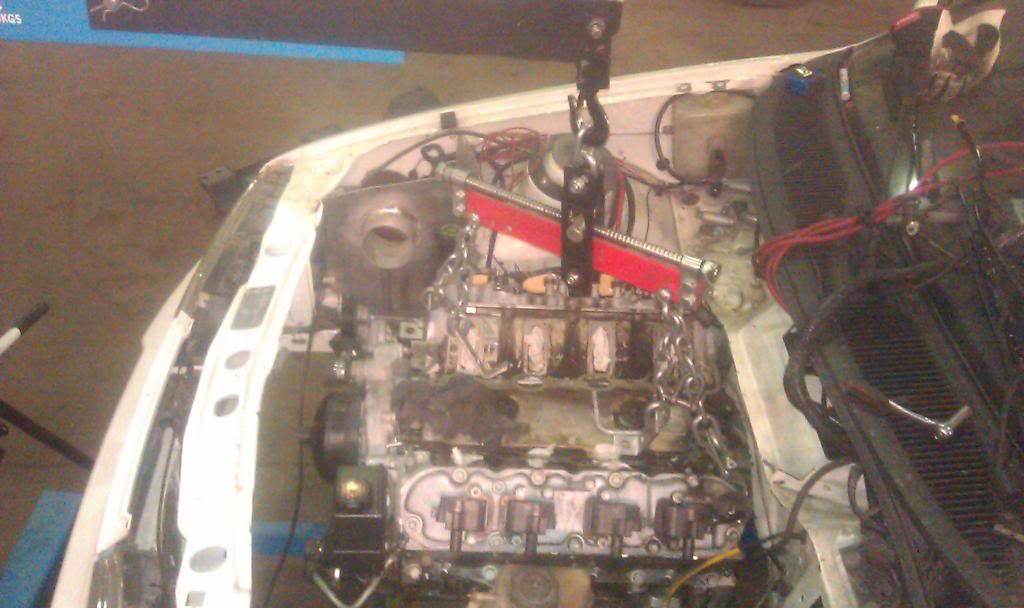
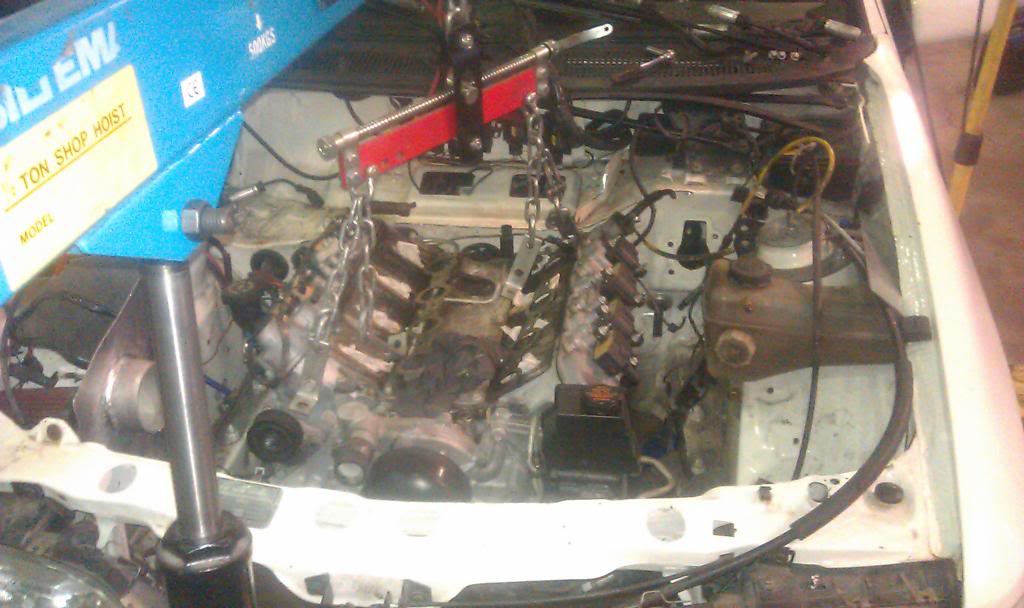
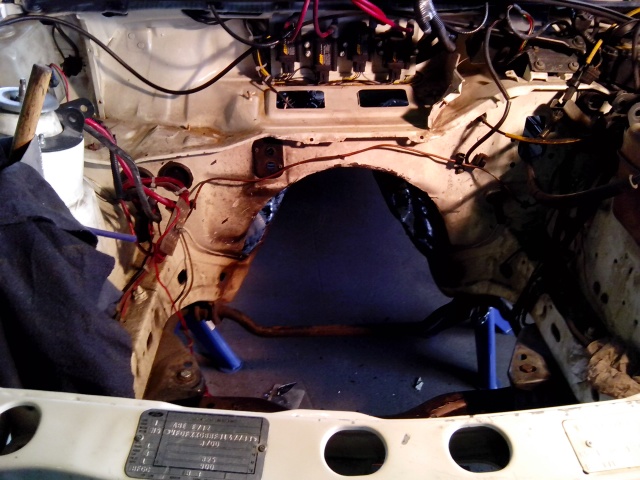
Now i have started with the V8 build. First i had to check if it would fit inside. Then engine bay i bigger than you think.
The engine is supported on a piece of 2 bye 4 stick, so i could get the engine in the right hight in the bay.
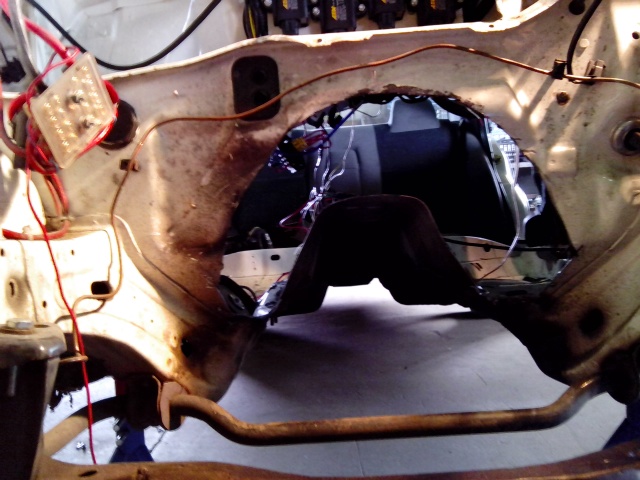
Then i had to check the tunnel to see what had to be done there.

As you can see the tunnel is quite small and has to be modified.
But first i have to get the engine to stand on it`s own two feet.
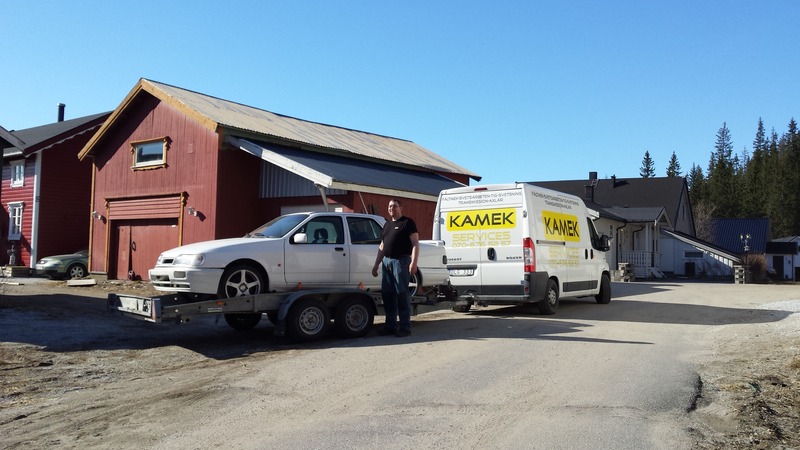
The project halted here for a while due to work. I just moved to SWEDEN and started my own company there.
So i found out that it was better to get the car home so that is what i did.
This is me, with my company car, last summer
The engine is supported on a piece of 2 bye 4 stick, so i could get the engine in the right hight in the bay.

Then i had to check the tunnel to see what had to be done there.


As you can see the tunnel is quite small and has to be modified.
But first i have to get the engine to stand on it`s own two feet.
The project halted here for a while due to work. I just moved to SWEDEN and started my own company there.
So i found out that it was better to get the car home so that is what i did.
This is me, with my company car, last summer

Last edited by finni racing; 13-04-2015 at 11:38 AM.
12-04-2015, 01:17 AM
#17
Car under constuction
Thread Starter
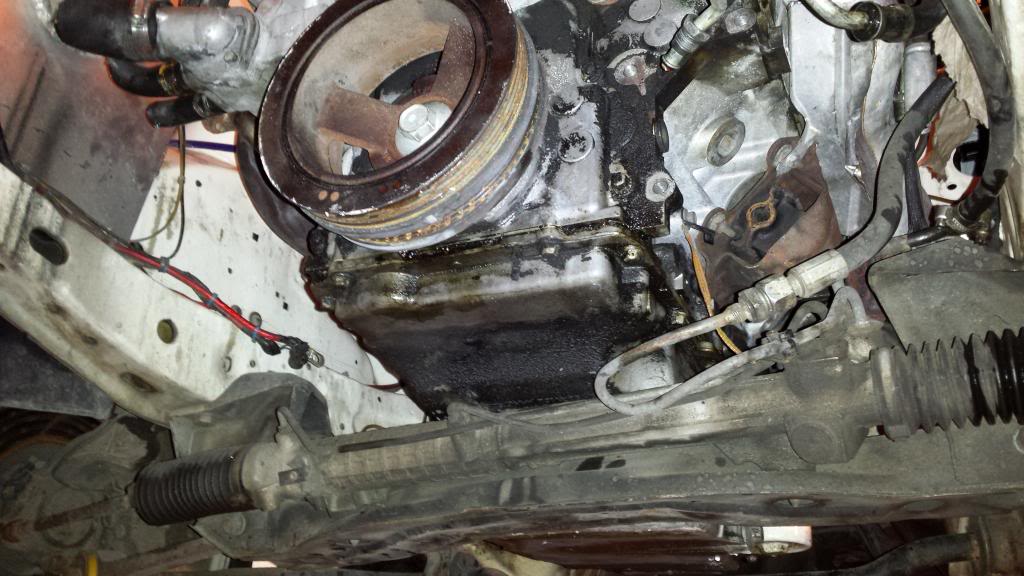
I could se that i had conflict with the front crossmember, and the oil sump.
So i cut out a piece of the crossmember and flipped the brackets for the steering rack. Cut away about 1 inch of the mounting holes of the rack.
Reinforced the crossmember with some 5 mill steel and flipped the piece i cut out so it would be a invert curve in the crossmember.
Then i notched the crossmember, so the splines on the rack didn`t come in conflict with the crossmember.
Then i cut out a piece of the oil sump. And moved the wall 1 inch backwards to clear the crossmember. Then i tig welded it back together.
This mod together with the crossmender mod, i could lower the engine below the cossi engine hight.

Then i lined up the engine and measured out the center line
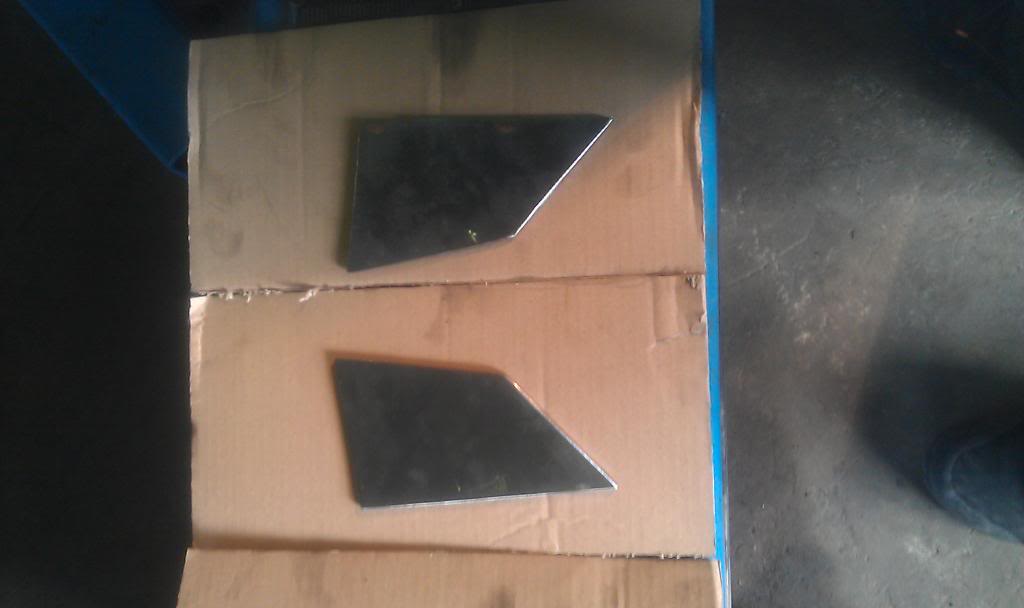
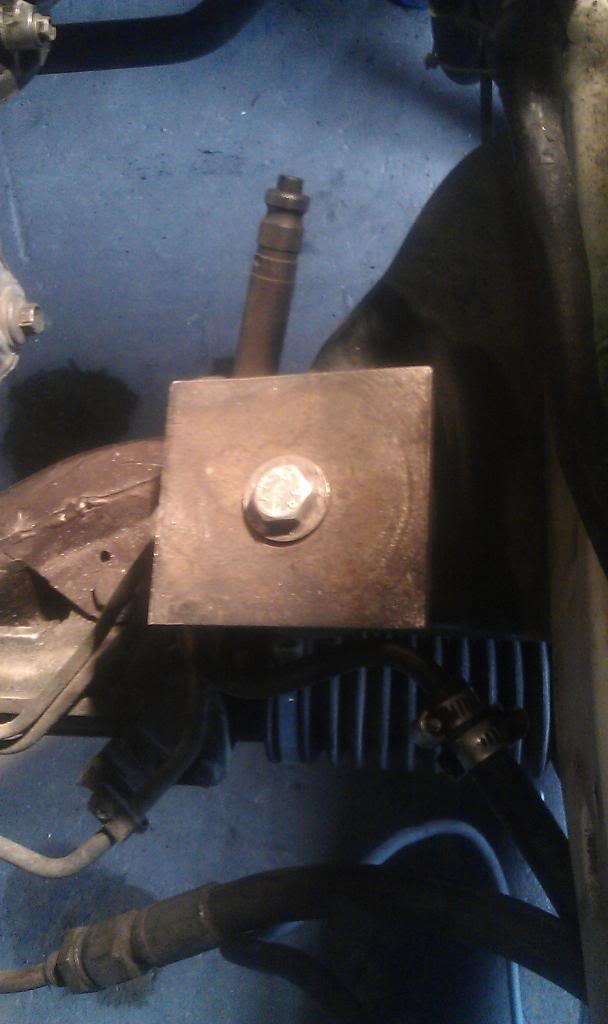
Then it is time to make the engine brackets. I used a ice hockey puck as an engine mount.
Then i made a square plate and bolted it to the mount. Made some templets out of cardboard, and then cut it out in 3 mill steel.
The motor mount that was on the engine, i modified and reused it. I cut everything away, and the i had only the back plate that is
bolted to the block left. This ment i could weld the engine mounts directly to that plate.
Tacked it all up, on both sides before welding.

There it is, sitting on its own.

Then i boxed in the backside of the engine mount and welded in a 5 mill gusset inside. Just to make it stronger.
And silver painted them

So i cut out a piece of the crossmember and flipped the brackets for the steering rack. Cut away about 1 inch of the mounting holes of the rack.
Reinforced the crossmember with some 5 mill steel and flipped the piece i cut out so it would be a invert curve in the crossmember.
Then i notched the crossmember, so the splines on the rack didn`t come in conflict with the crossmember.

Then i cut out a piece of the oil sump. And moved the wall 1 inch backwards to clear the crossmember. Then i tig welded it back together.
This mod together with the crossmender mod, i could lower the engine below the cossi engine hight.

Then i lined up the engine and measured out the center line


Then it is time to make the engine brackets. I used a ice hockey puck as an engine mount.
Then i made a square plate and bolted it to the mount. Made some templets out of cardboard, and then cut it out in 3 mill steel.

The motor mount that was on the engine, i modified and reused it. I cut everything away, and the i had only the back plate that is
bolted to the block left. This ment i could weld the engine mounts directly to that plate.

Tacked it all up, on both sides before welding.


There it is, sitting on its own.


Then i boxed in the backside of the engine mount and welded in a 5 mill gusset inside. Just to make it stronger.
And silver painted them

 13-04-2015, 12:02 AM
#19
Car under constuction
Thread Starter
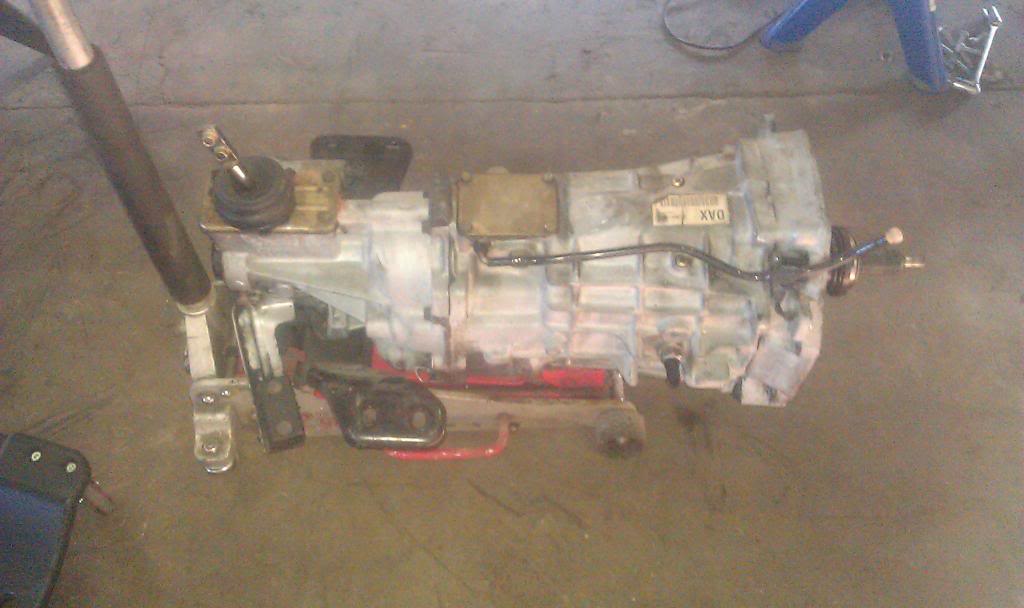
Done some more work. Not that much, but it had to be done.
I pulled the engine out, and measure the transmission, so i know how much to cut.
So then the grinder started, and it went berserk on the car.
More to come soon. I have to make some brackets so the transmission will sit steady on the jack, under test fitting.
I pulled the engine out, and measure the transmission, so i know how much to cut.
So then the grinder started, and it went berserk on the car.


More to come soon. I have to make some brackets so the transmission will sit steady on the jack, under test fitting.
13-04-2015, 08:35 AM
#22
Car under constuction
Thread Starter
13-04-2015, 08:46 AM
#23
Car under constuction
Thread Starter
I an ALSO consider running the rail frame i have, to link the rear and front together.
This would create a considrual allot more work into the buid. But i am also sertern it will be the srtongest part on this build.
I will post it, when i get to that point in progress.
Last edited by finni racing; 13-04-2015 at 11:33 AM.
13-04-2015, 08:53 AM
#24
Car under constuction
Thread Starter
I just have to walk around my storage, to see what i can find of good
materials, otherwise i have to order them home.
I did a test fit with a floor mounted brace bias unit, I belive i have to go for the hanging one
for space issues.
Anyone here that can recomend a good bias box with all i nned?
I have all the master cilynders and resorvar`s.
Was thinking about the stock one that has been modified.
Any sugjestions ?
Last edited by finni racing; 13-04-2015 at 06:20 PM.
14-04-2015, 10:22 PM
#26
Car under constuction
Thread Starter
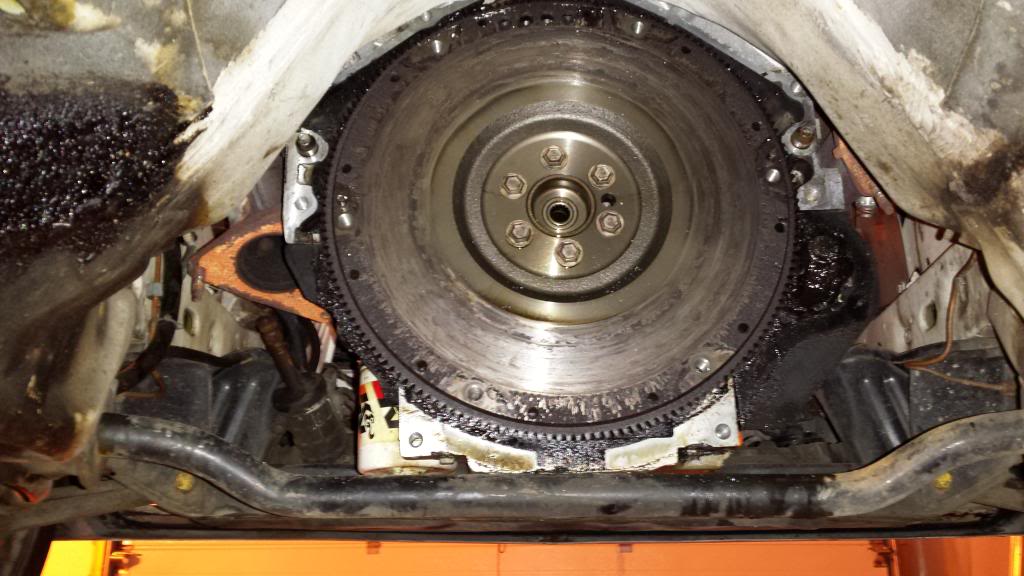
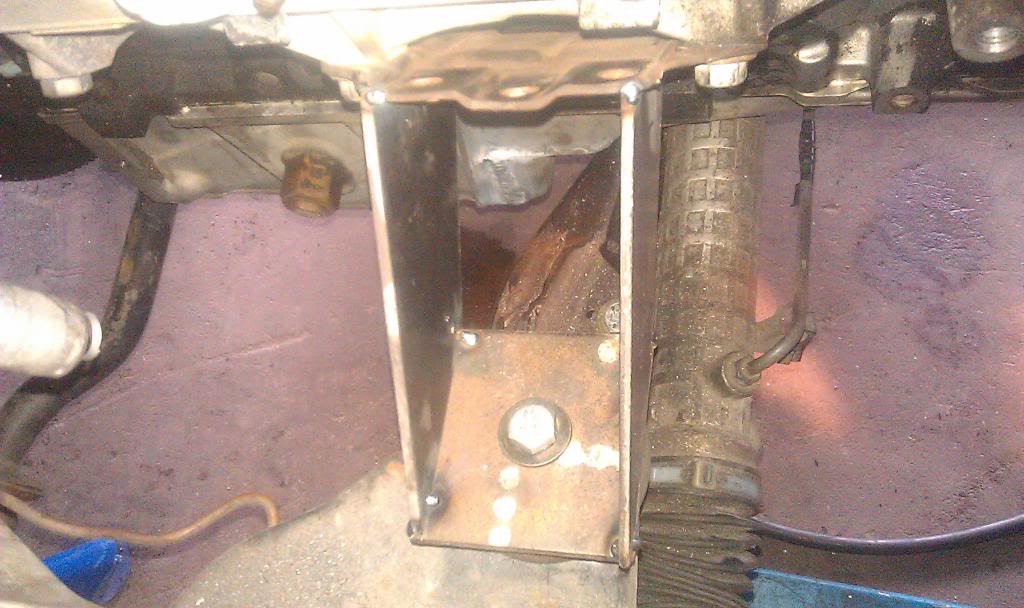
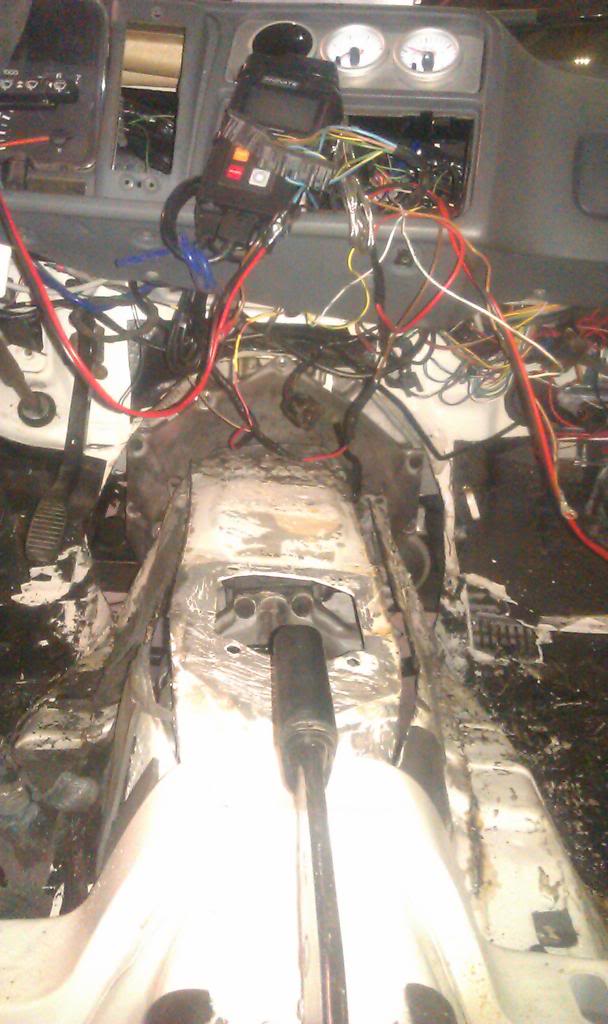
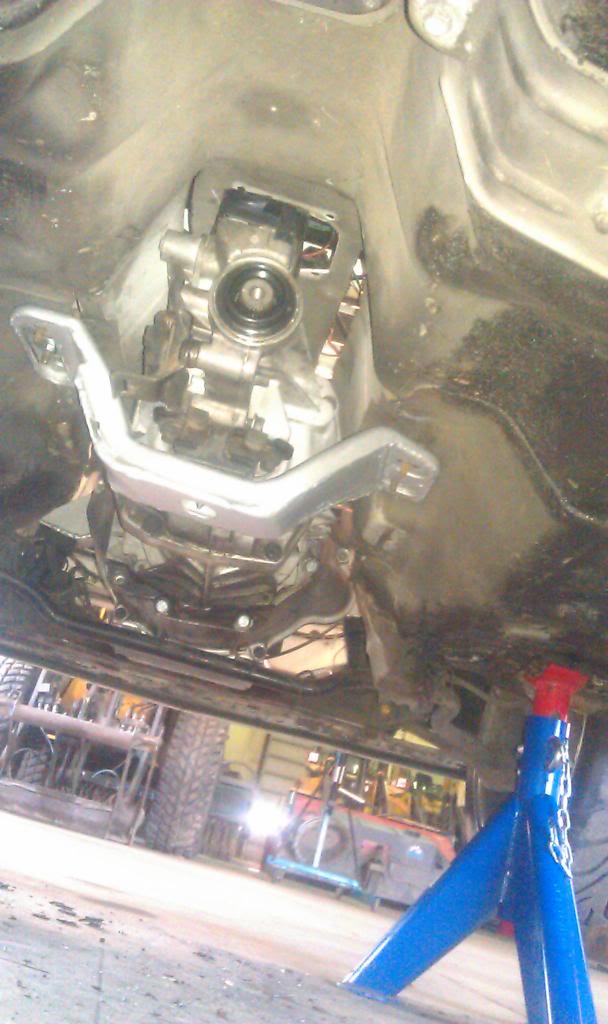
Then it is time to get this big boy under the car.
I have done this some time ago, so i post the pics little fast here. The reason for this is,
i was going to change the front suspension, and cross member, And it didnt quite fit like i had hoped and meassured.
So there is allot of fab work, time and material gone straight down the hole.
Well enough words, Here is the pics.
PS!!
Sorry for all the cables you see there. They are all gone now.
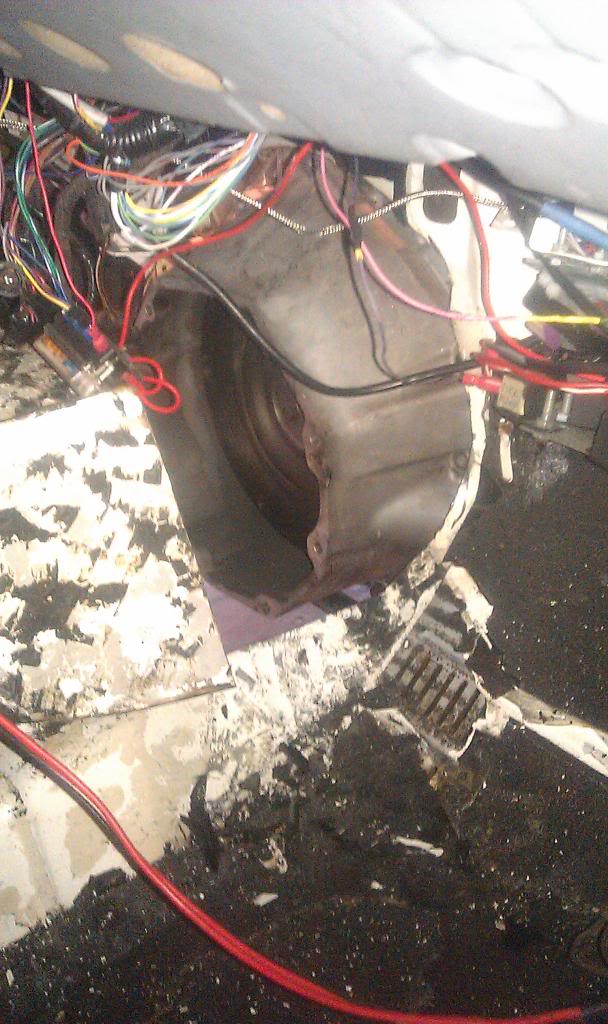

Then i fabricated new transmission bracket from the original that came with the tranny.

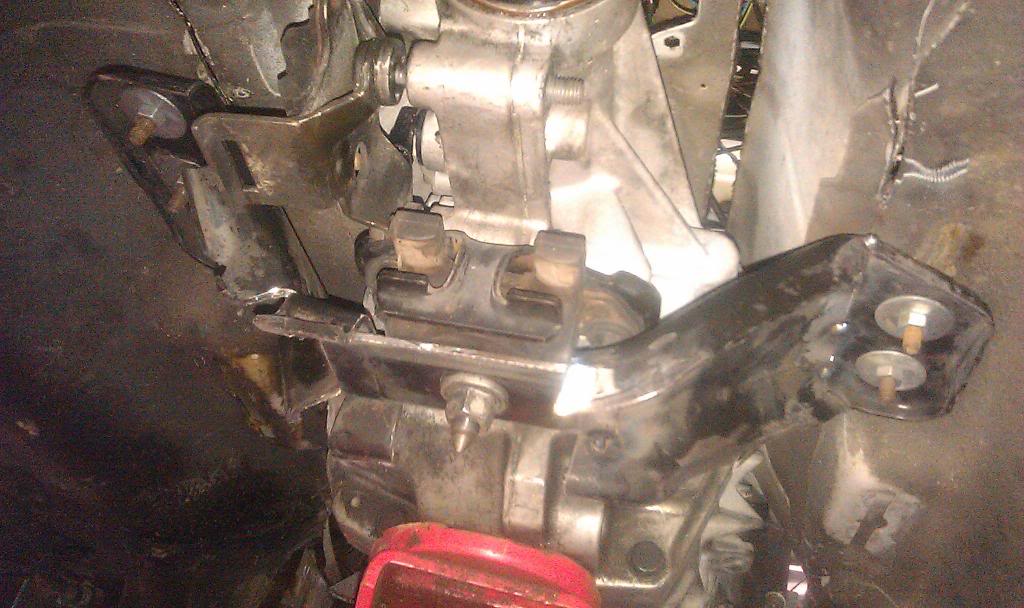
All tacked and ready to weld
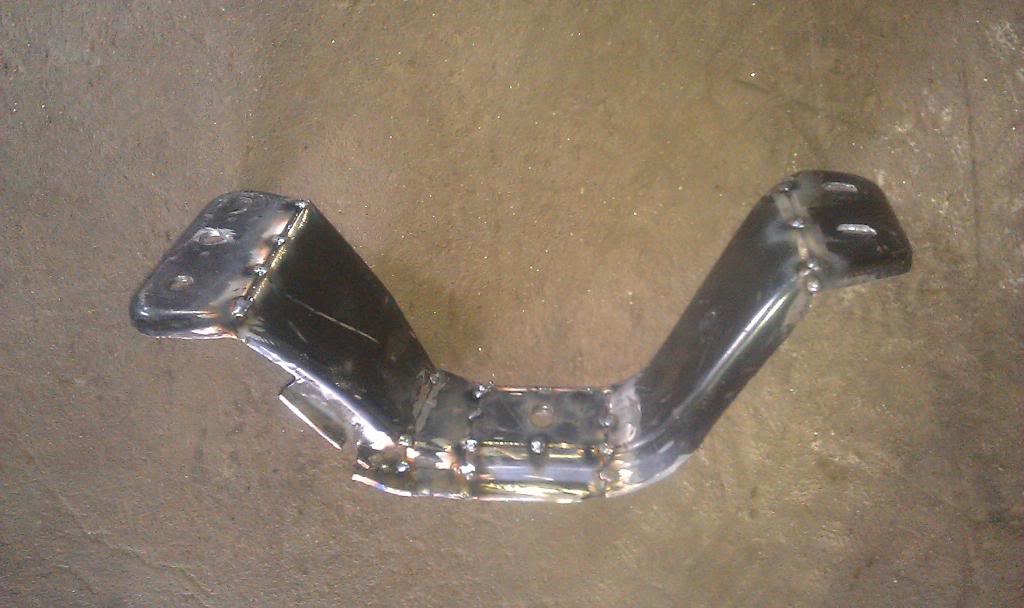
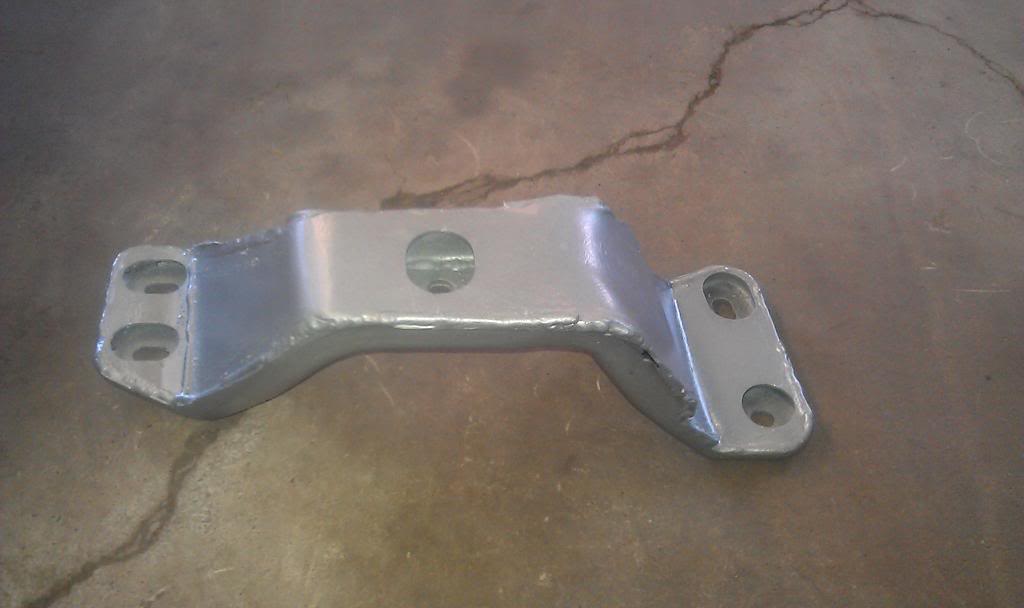
Finish bracket
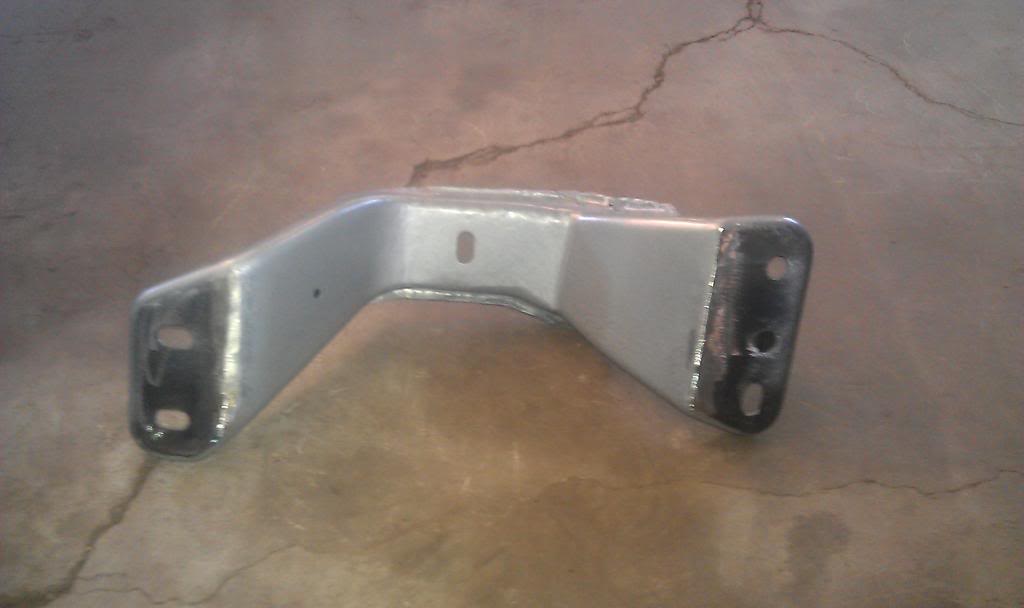
Tranny secured

I have done this some time ago, so i post the pics little fast here. The reason for this is,
i was going to change the front suspension, and cross member, And it didnt quite fit like i had hoped and meassured.
So there is allot of fab work, time and material gone straight down the hole.
Well enough words, Here is the pics.
PS!!
Sorry for all the cables you see there. They are all gone now.


Then i fabricated new transmission bracket from the original that came with the tranny.


All tacked and ready to weld

Finish bracket


Tranny secured
 14-04-2015, 10:36 PM
#27
Car under constuction
Thread Starter
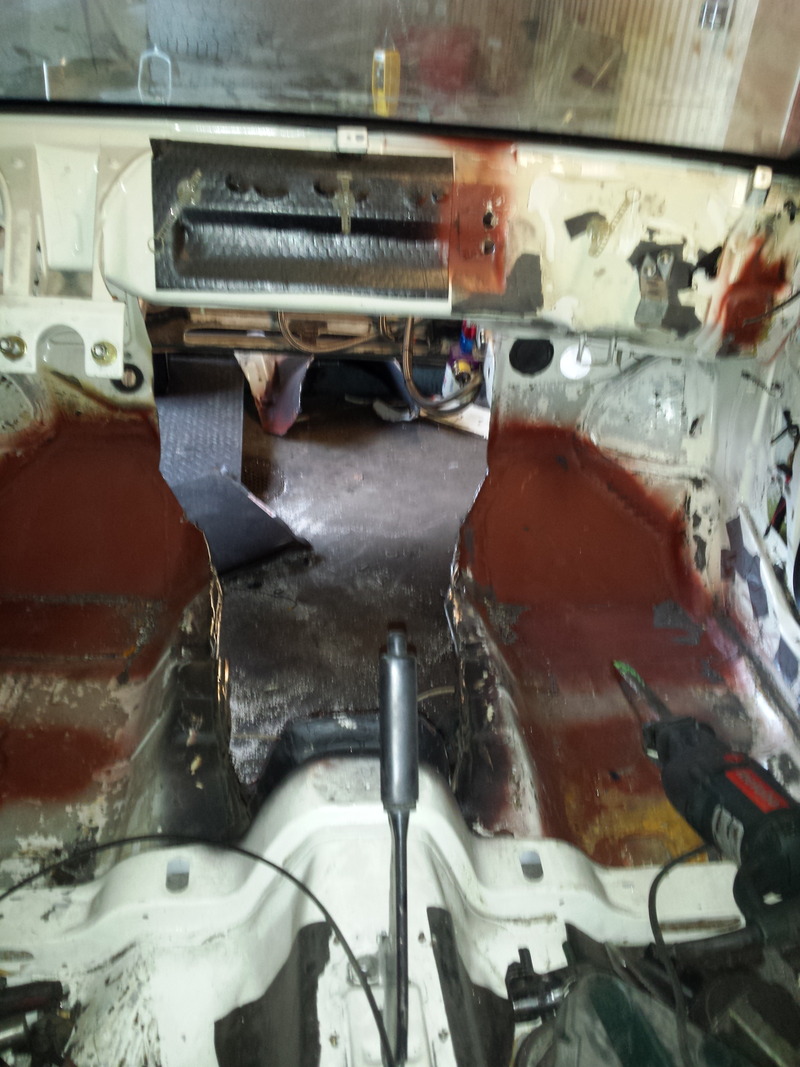
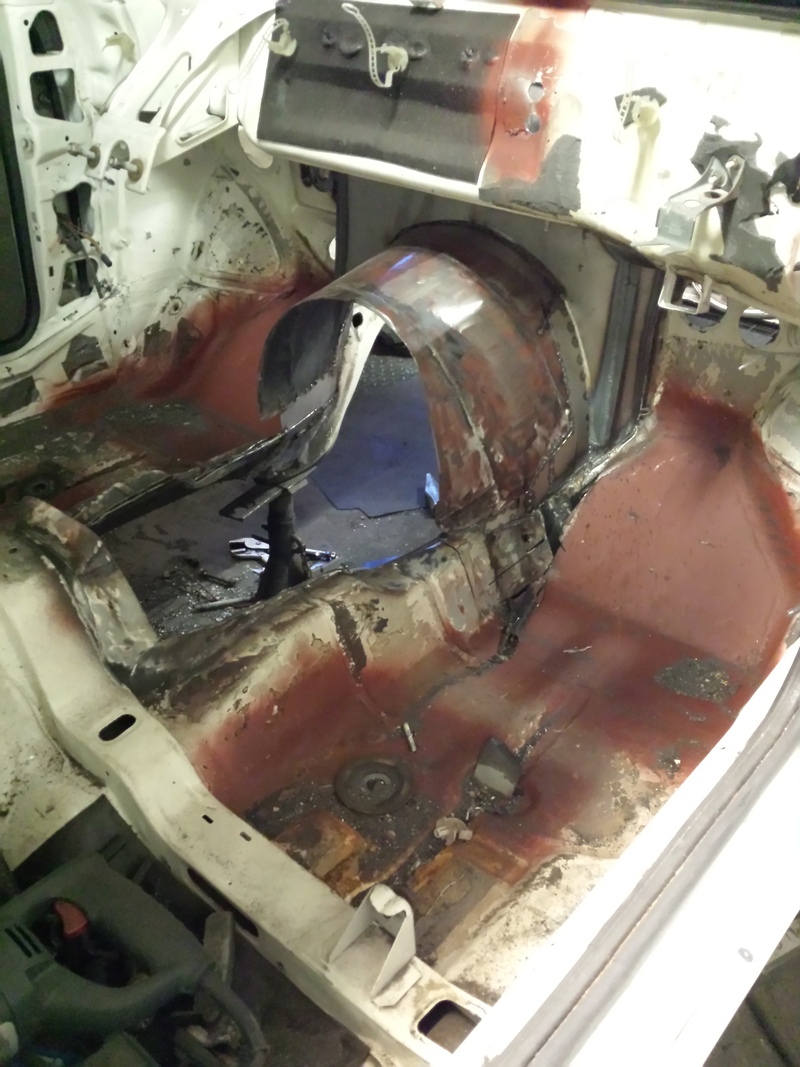
Tunnel Time.
I spent some time figured out how to make the transition between the tunnel and firewall.
To follow all the profiles in the firewall. Then it hit me, EASY. So easy that i never thought of it.
Just lay a piece of sheet under the tunnel, and push up in the middle. Then you get a
round curved plate. Weld it on, and cut of the parts that stick out of the firewall.
Here it is.....
And here is the rest.
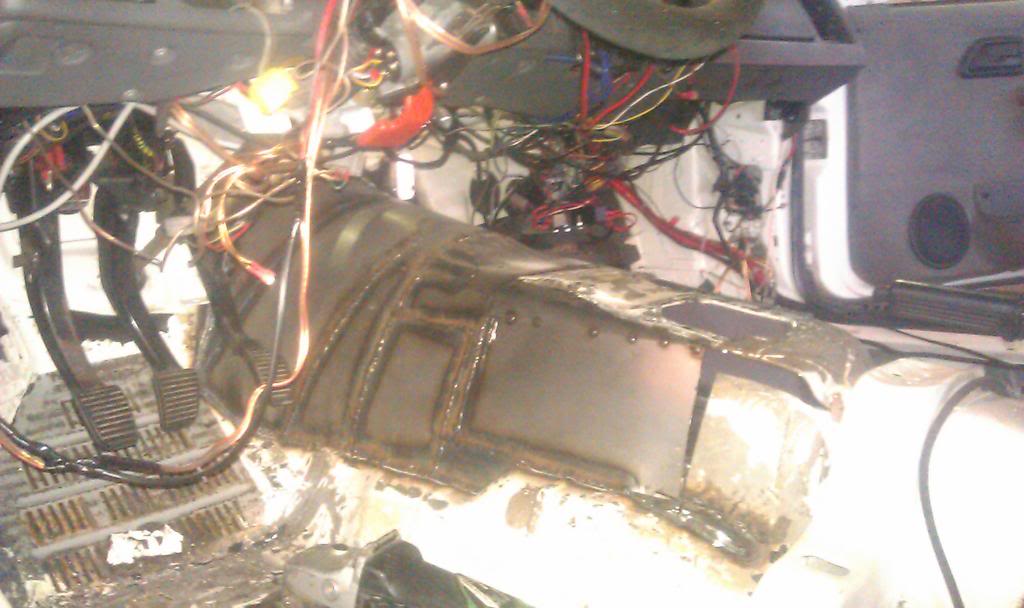
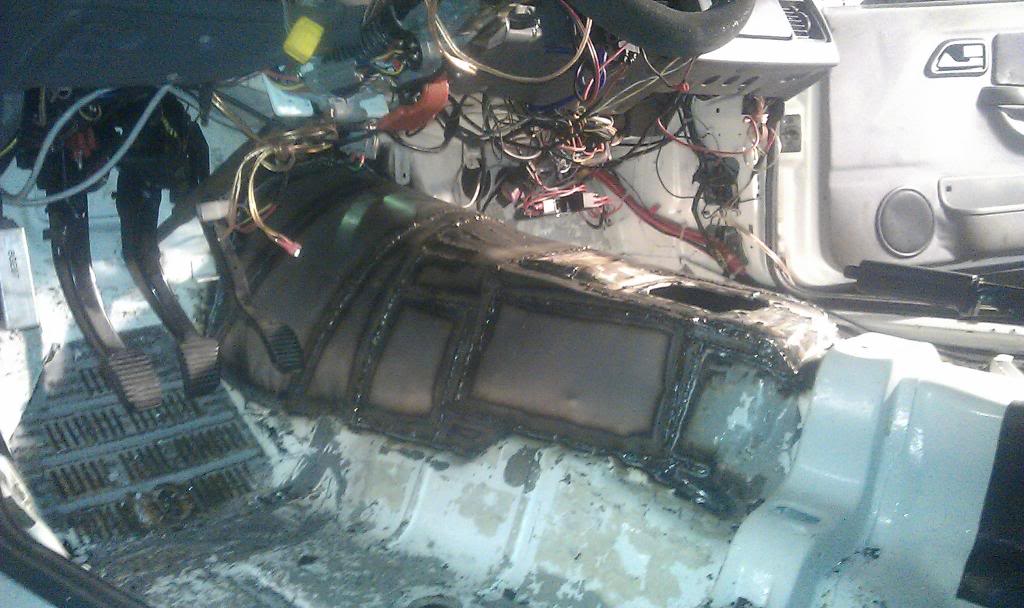
Finish. Just to grind the welds. I painted the tunnel black, just to prevent it from rusting.
So Today i started working on the new front suspension. Then i realised that the new crossmember
hiting the oil sump. The new crossmember does not have the bend like the cossi one have.
So i pulled the engine and tranny out again. Time for some serious chassi and suspension work.
I spent some time figured out how to make the transition between the tunnel and firewall.
To follow all the profiles in the firewall. Then it hit me, EASY. So easy that i never thought of it.
Just lay a piece of sheet under the tunnel, and push up in the middle. Then you get a
round curved plate. Weld it on, and cut of the parts that stick out of the firewall.
Here it is.....

And here is the rest.


Finish. Just to grind the welds. I painted the tunnel black, just to prevent it from rusting.
So Today i started working on the new front suspension. Then i realised that the new crossmember
hiting the oil sump. The new crossmember does not have the bend like the cossi one have.
So i pulled the engine and tranny out again. Time for some serious chassi and suspension work.
15-04-2015, 11:27 PM
#29
Car under constuction
Thread Starter
Thanks Glenn.
Then i have been spent 2 very long days, working on the COSVETTE.
I am about to change the front crossmember, when i realized that the crossmember
was in serious conflict with the oil sump.
So i pull the engine and tranny out. pulled out the suspension. Took out the complete electrical system, and dash.
Then i cut out the transmission tunnel AGAIN. And measured, draw lines, and then cut out the center piece of the firewall.
Made new plate to the center piece, and tacked it in. Measured again and i have moved the center piece 70 mill backwards. So if i take the flange on the firewall
away,i will get 20 mill. So totally i will get 90 mill. I think that will be perfect.
And it will give me clearance between the oil sump and crossmember.
It will also give me much better weight distribution.

More to come. Got to work tomorrow, so there will be a break on the build to Friday.
Then i have been spent 2 very long days, working on the COSVETTE.
I am about to change the front crossmember, when i realized that the crossmember
was in serious conflict with the oil sump.
So i pull the engine and tranny out. pulled out the suspension. Took out the complete electrical system, and dash.
Then i cut out the transmission tunnel AGAIN. And measured, draw lines, and then cut out the center piece of the firewall.
Made new plate to the center piece, and tacked it in. Measured again and i have moved the center piece 70 mill backwards. So if i take the flange on the firewall
away,i will get 20 mill. So totally i will get 90 mill. I think that will be perfect.
And it will give me clearance between the oil sump and crossmember.
It will also give me much better weight distribution.


More to come. Got to work tomorrow, so there will be a break on the build to Friday.
16-04-2015, 07:49 AM
#31
Car under constuction
Thread Starter
 16-04-2015, 10:07 AM
#32
Car under constuction
Thread Starter
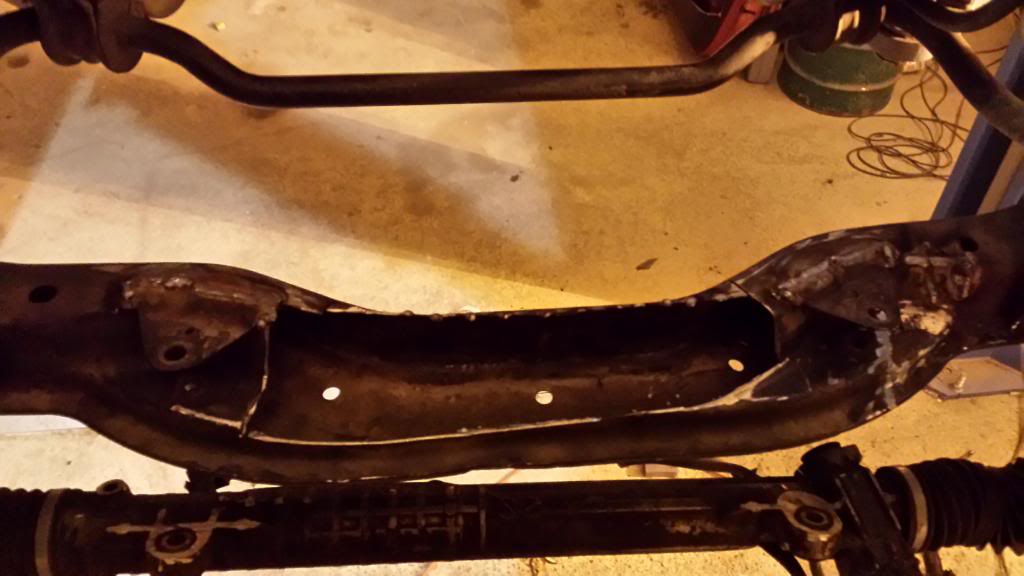
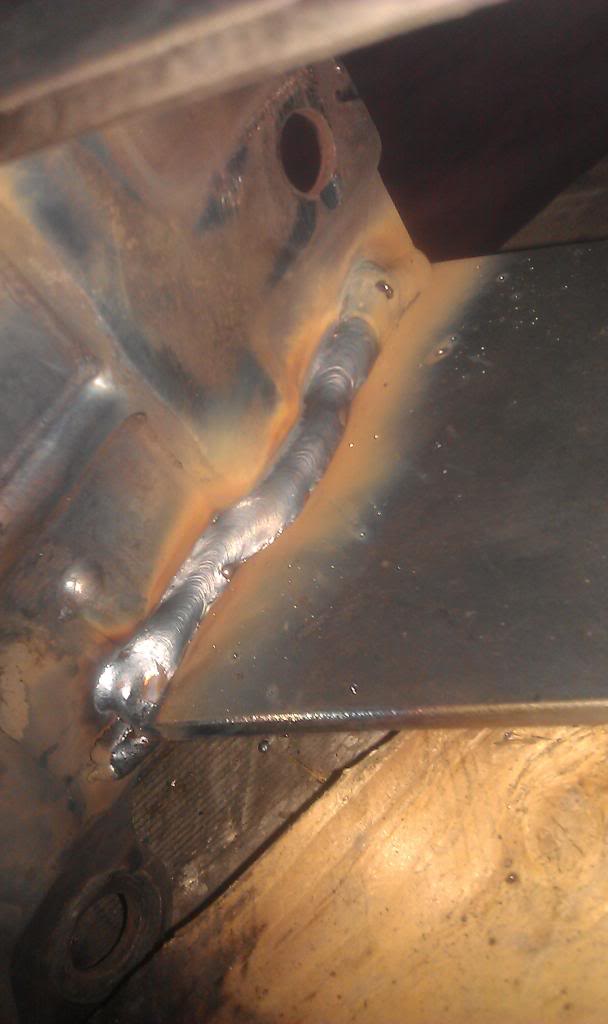
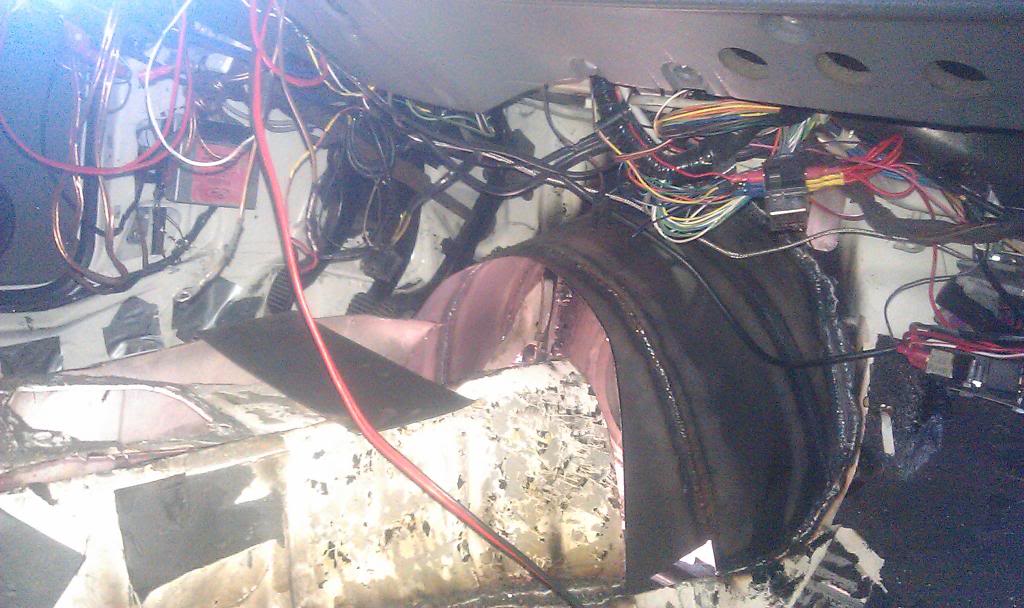
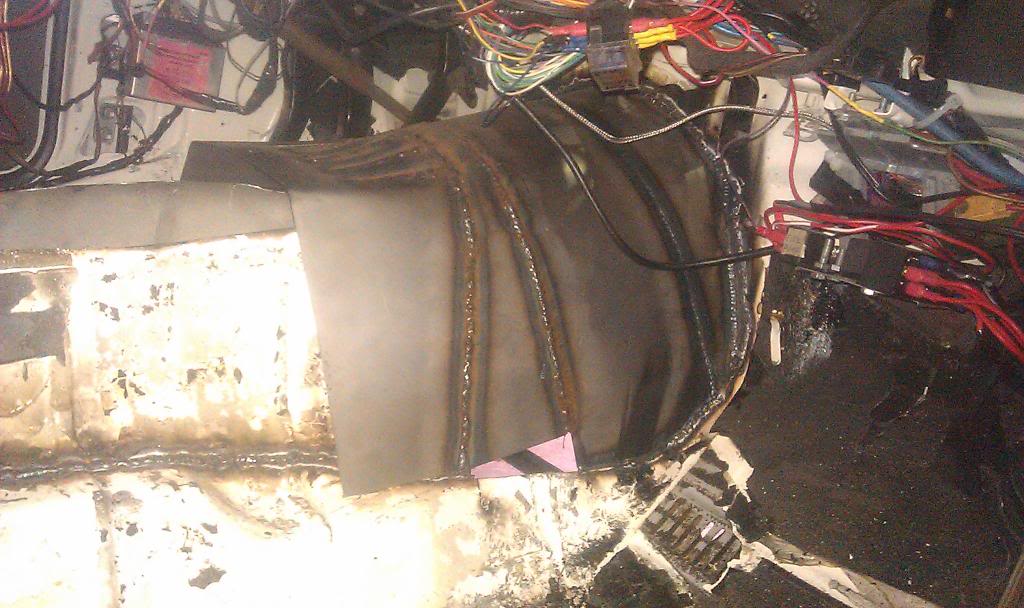
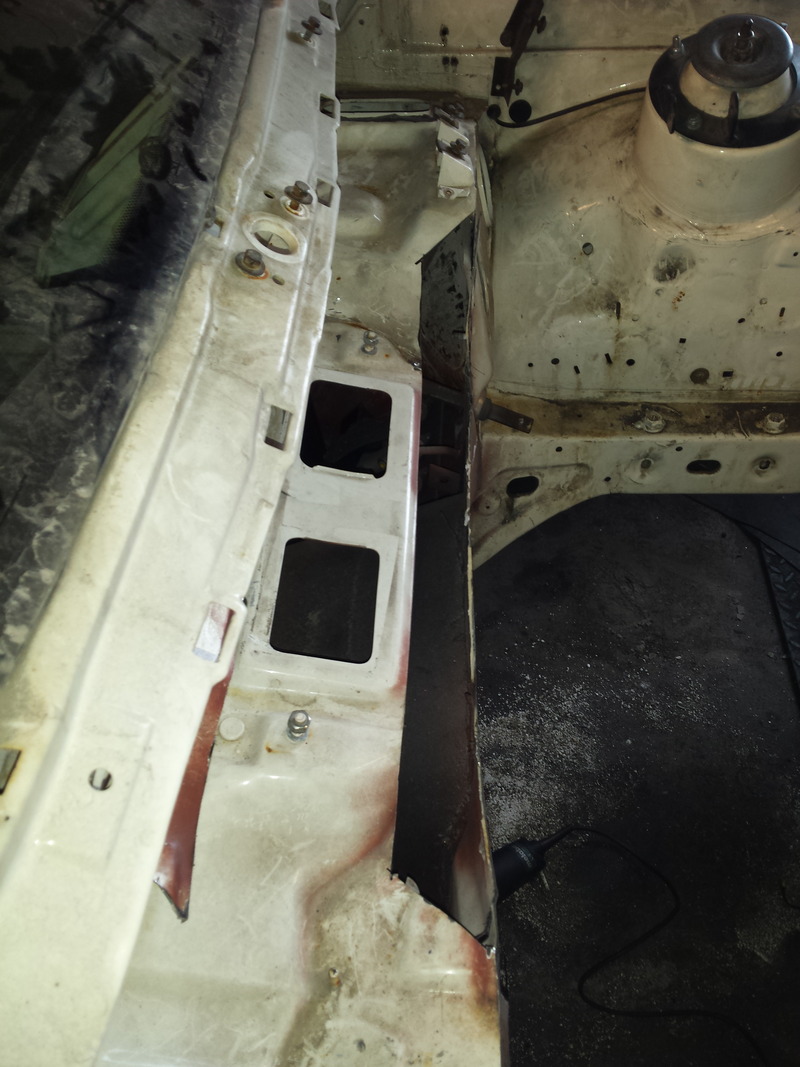
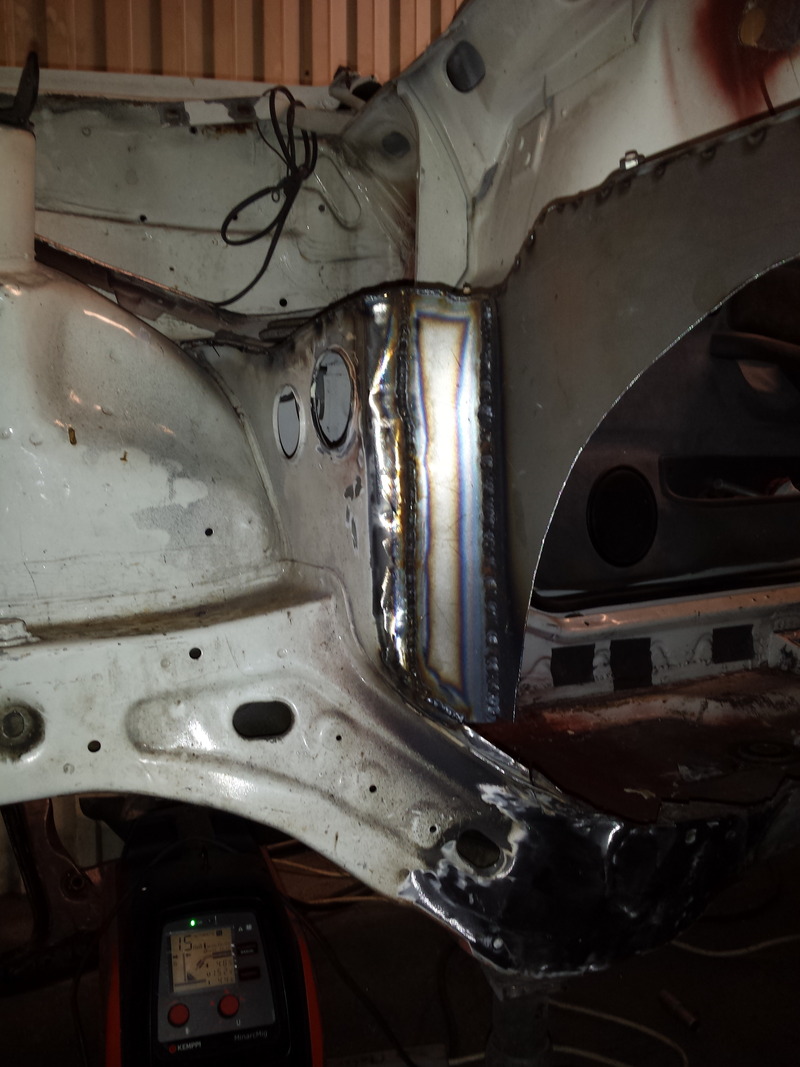
At the same time as i was modifying the chassi AGAIN, i was going to modify the
passenger side frame rail on the underside of the car.
I had some conflict with the header touching the frame rail. So i modify it to get
more clearance. Quite easy when the tunnel is out.
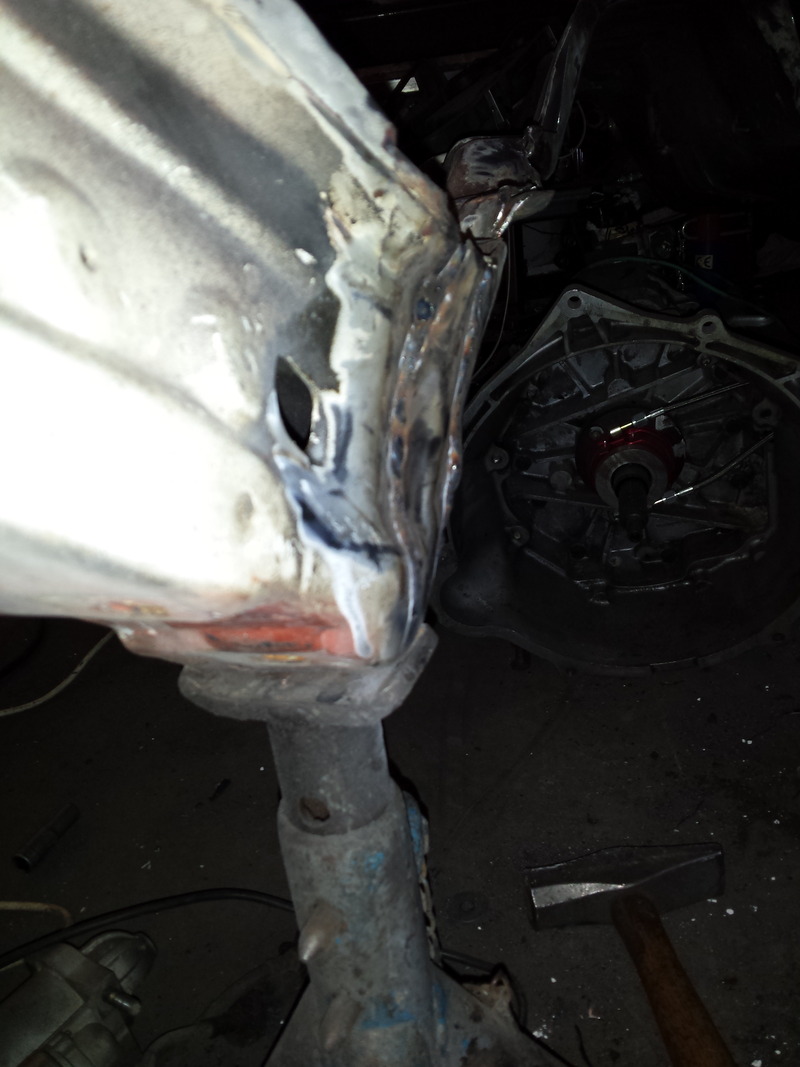
I cut in sections, and used my special tool (hammer) to smash it in. I massage the frame rail inwards
so that i didnt get any marks/dents in it.
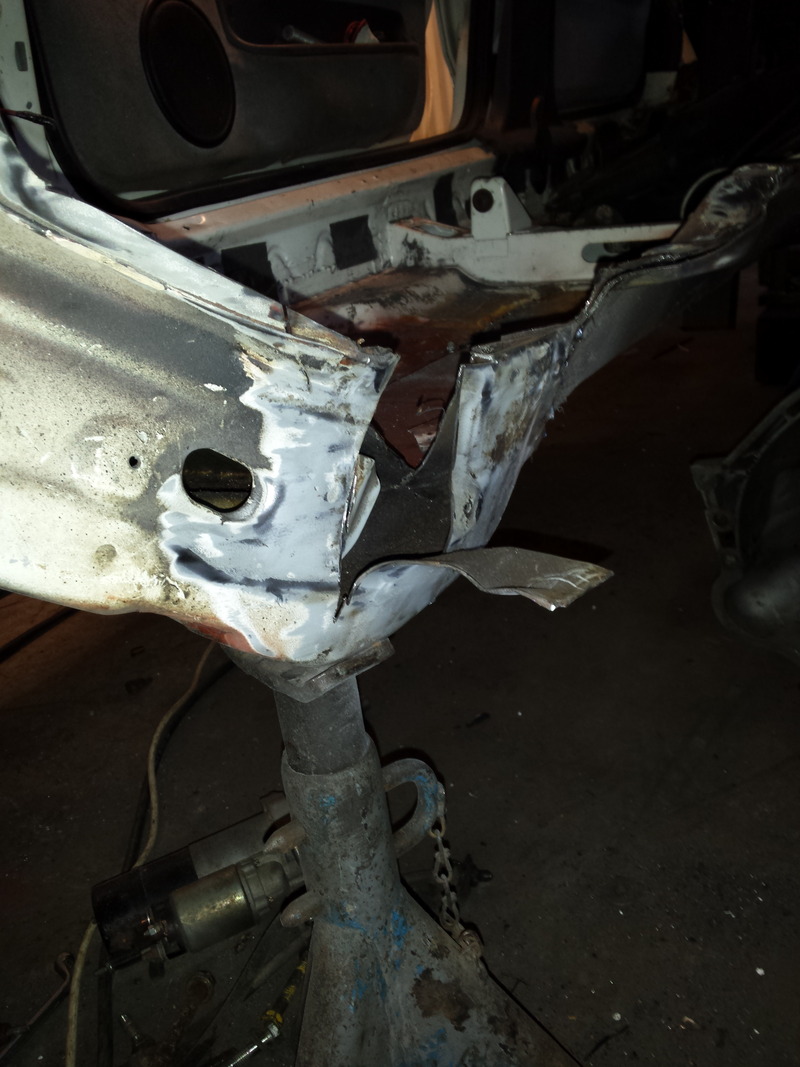
I started at the back end. massaging the floor inward, then i did the same with the frame, to i get a nice
fit .And welded it together.
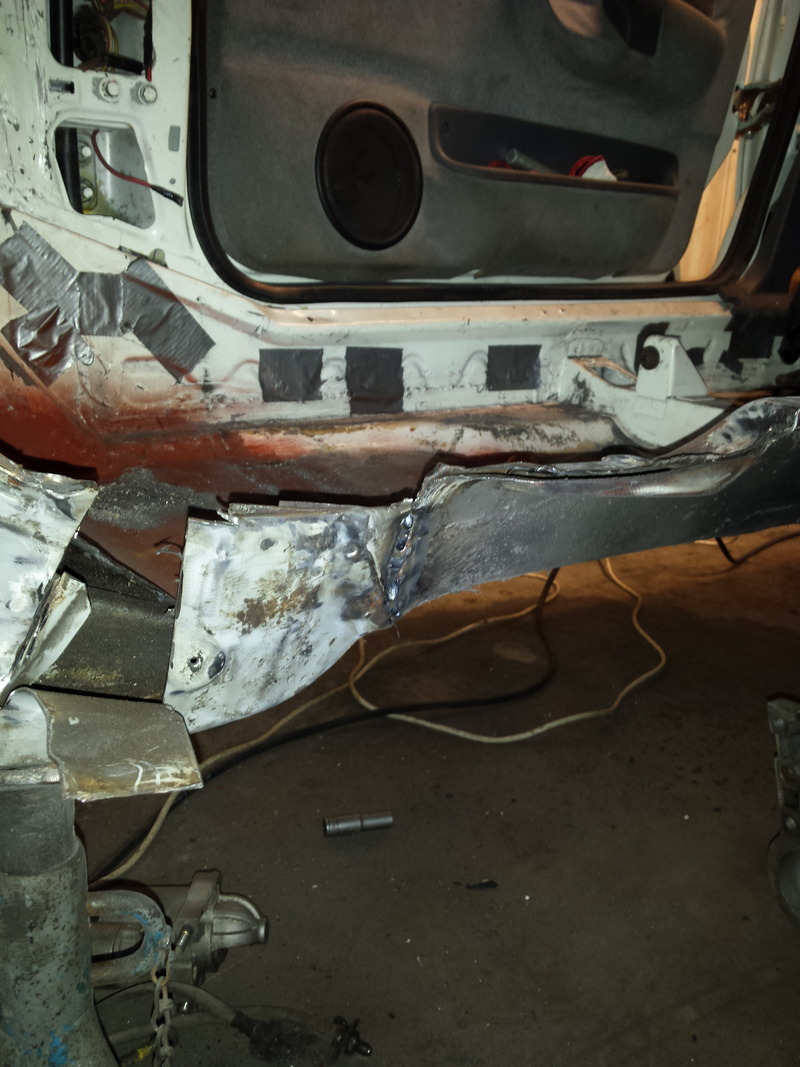
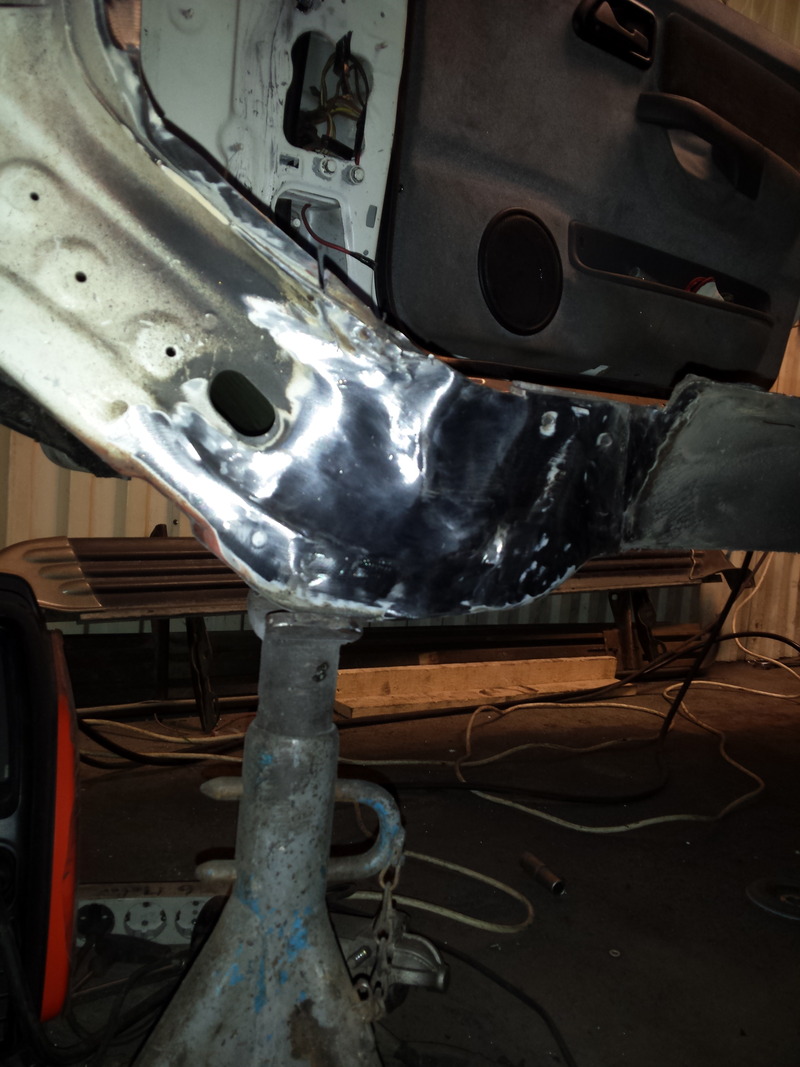
Then i did the same at the middle section. Cutting pieces so i would have a snugg fit. And welded all together
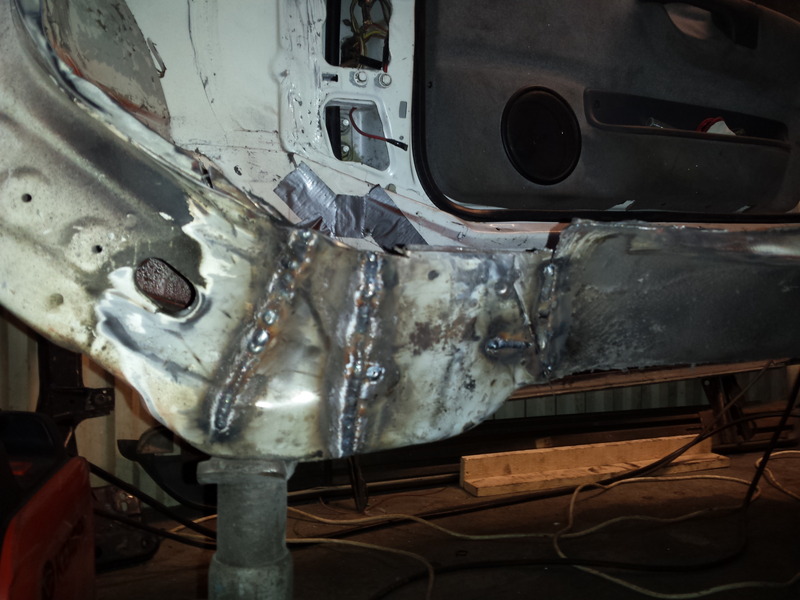
There i have got some more clearance. I think i made about 10to 15 mill with this mod.
Then i grinded it all down with a flapdisc. Can you see where the welding is?? couse i cant.
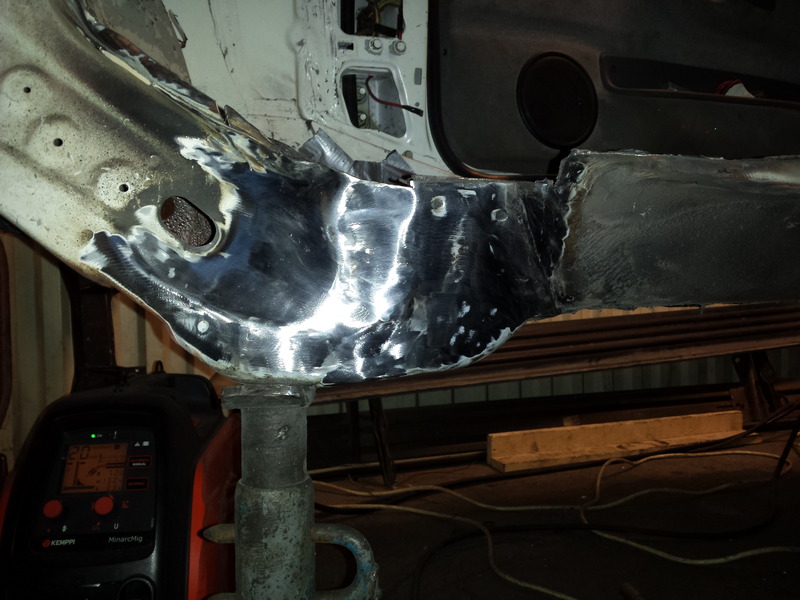
Well that is folks. Back to work, i have to finish this mods by sunday. Allot of work, and welding to do.
passenger side frame rail on the underside of the car.
I had some conflict with the header touching the frame rail. So i modify it to get
more clearance. Quite easy when the tunnel is out.
I cut in sections, and used my special tool (hammer) to smash it in. I massage the frame rail inwards
so that i didnt get any marks/dents in it.

I started at the back end. massaging the floor inward, then i did the same with the frame, to i get a nice
fit .And welded it together.

Then i did the same at the middle section. Cutting pieces so i would have a snugg fit. And welded all together

There i have got some more clearance. I think i made about 10to 15 mill with this mod.

Then i grinded it all down with a flapdisc. Can you see where the welding is?? couse i cant.


Well that is folks. Back to work, i have to finish this mods by sunday. Allot of work, and welding to do.

 16-04-2015, 10:14 PM
#36
Car under constuction
Thread Starter
There is not often i get time to work on my car. But i spend every free
minute working on it. This week it is little work at my shop, so i have
timer for my car.
minute working on it. This week it is little work at my shop, so i have
timer for my car.
17-04-2015, 08:26 PM
#37
Car under constuction
Thread Starter
I had to buy a new welder. I am very satisfied with this one.
I have used this for about two weeks now, and getting to know it. Makes welding a dream..
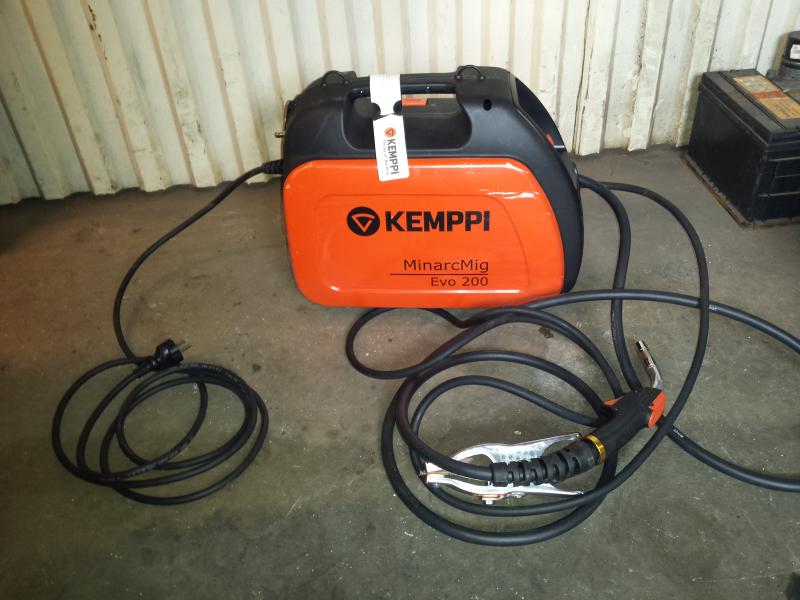
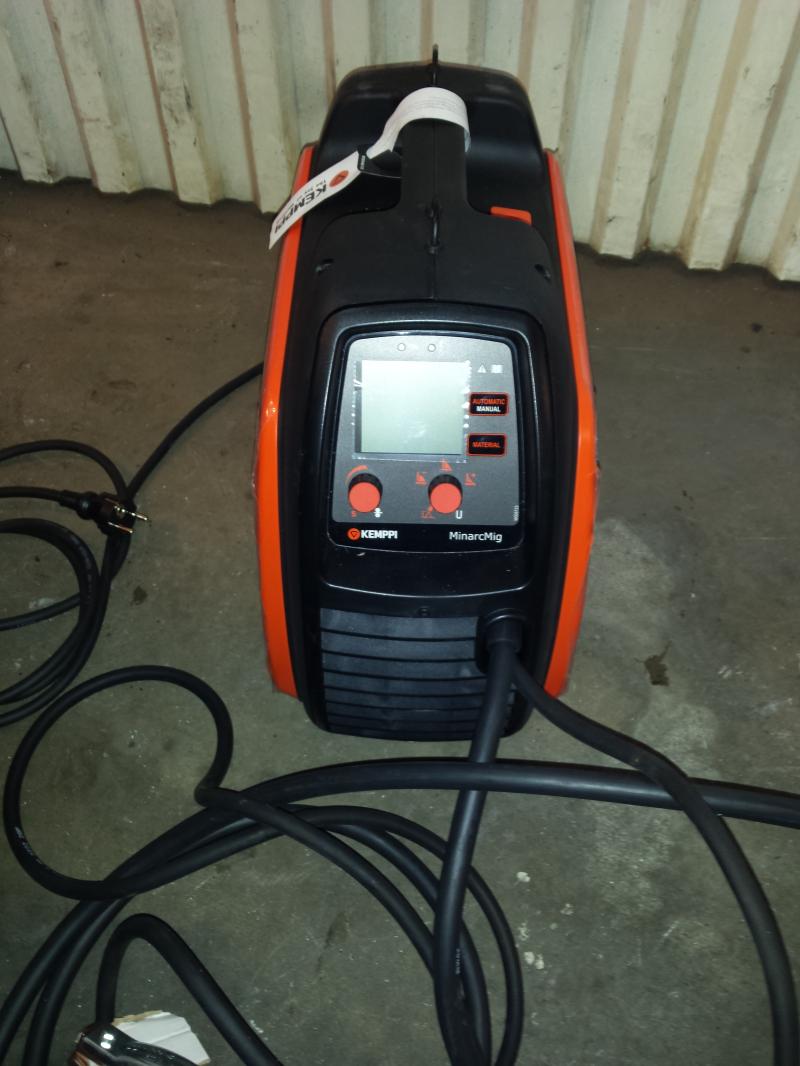
I have used this for about two weeks now, and getting to know it. Makes welding a dream..

 17-04-2015, 09:07 PM
#38
Car under constuction
Thread Starter
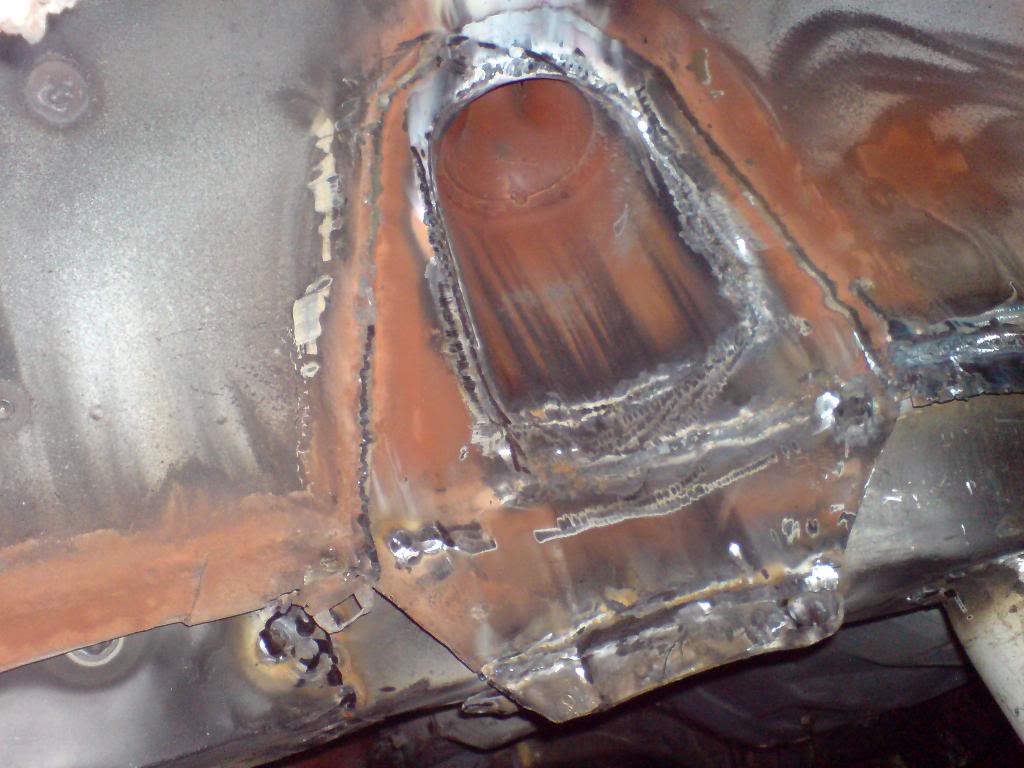
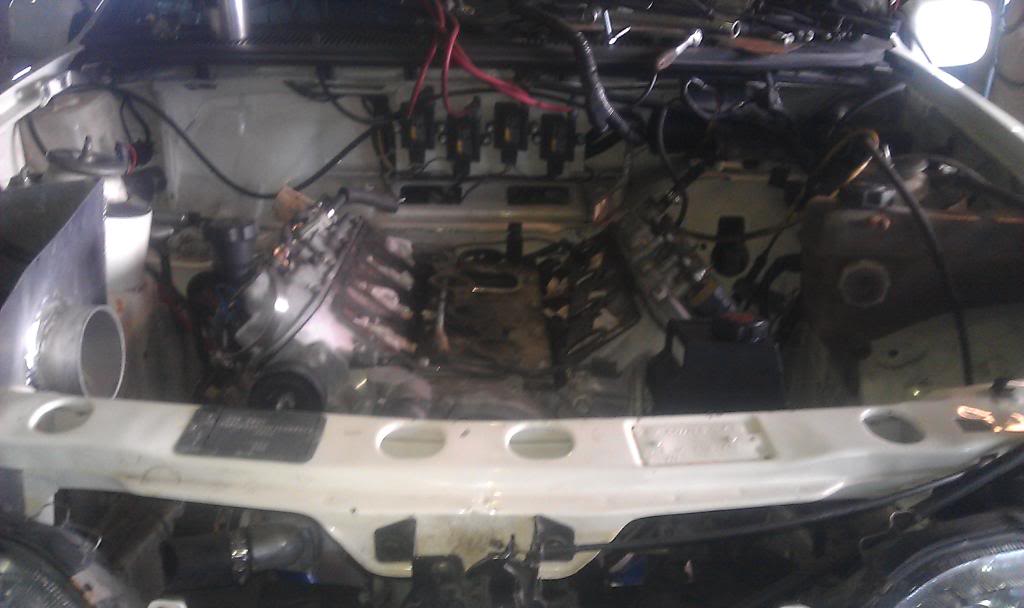
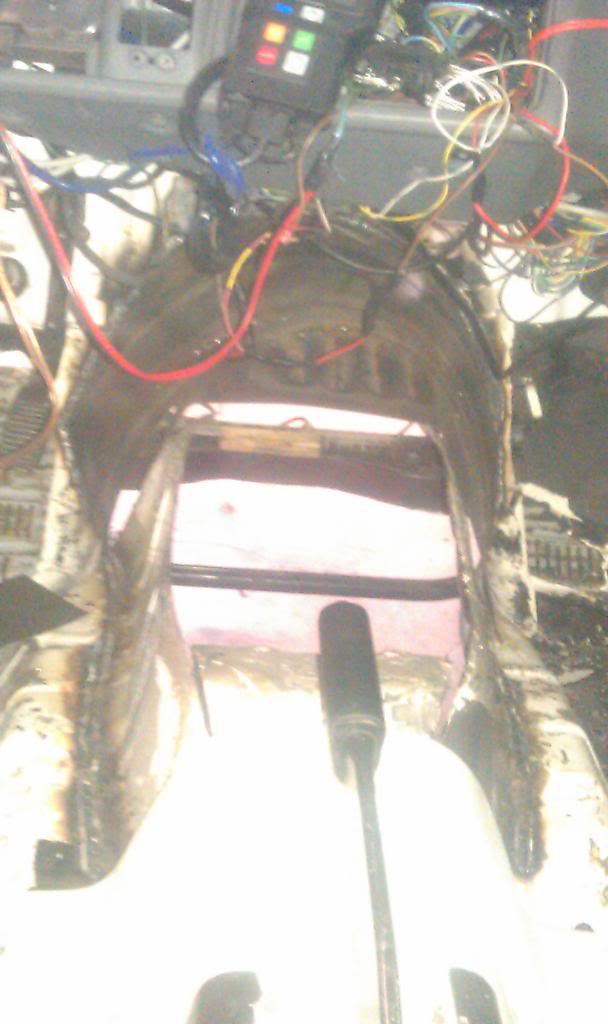
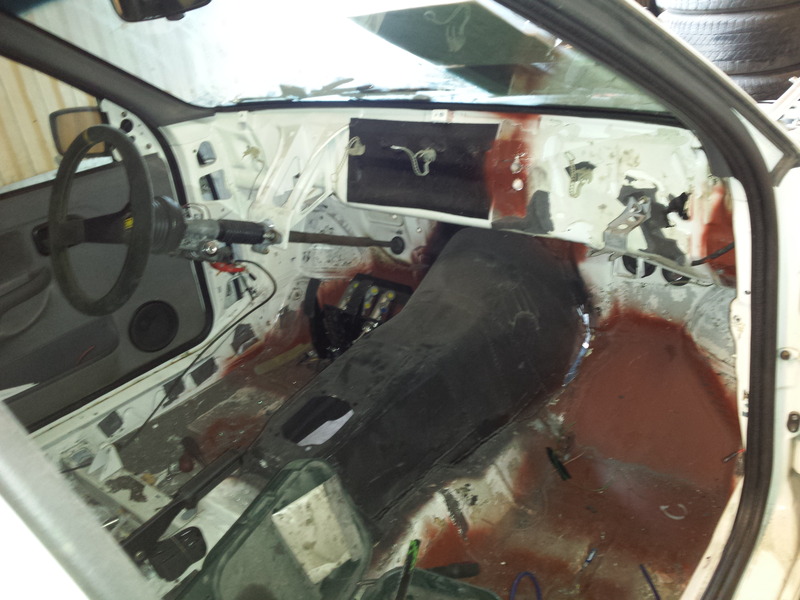
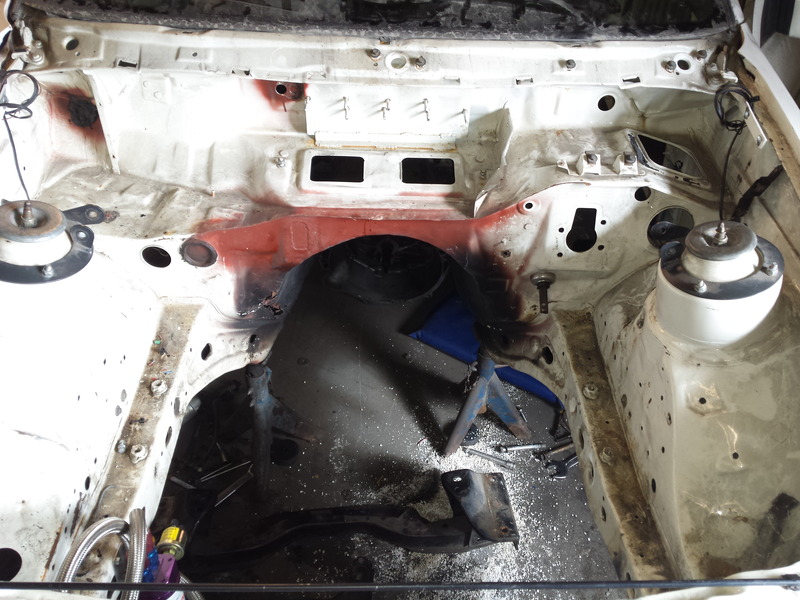
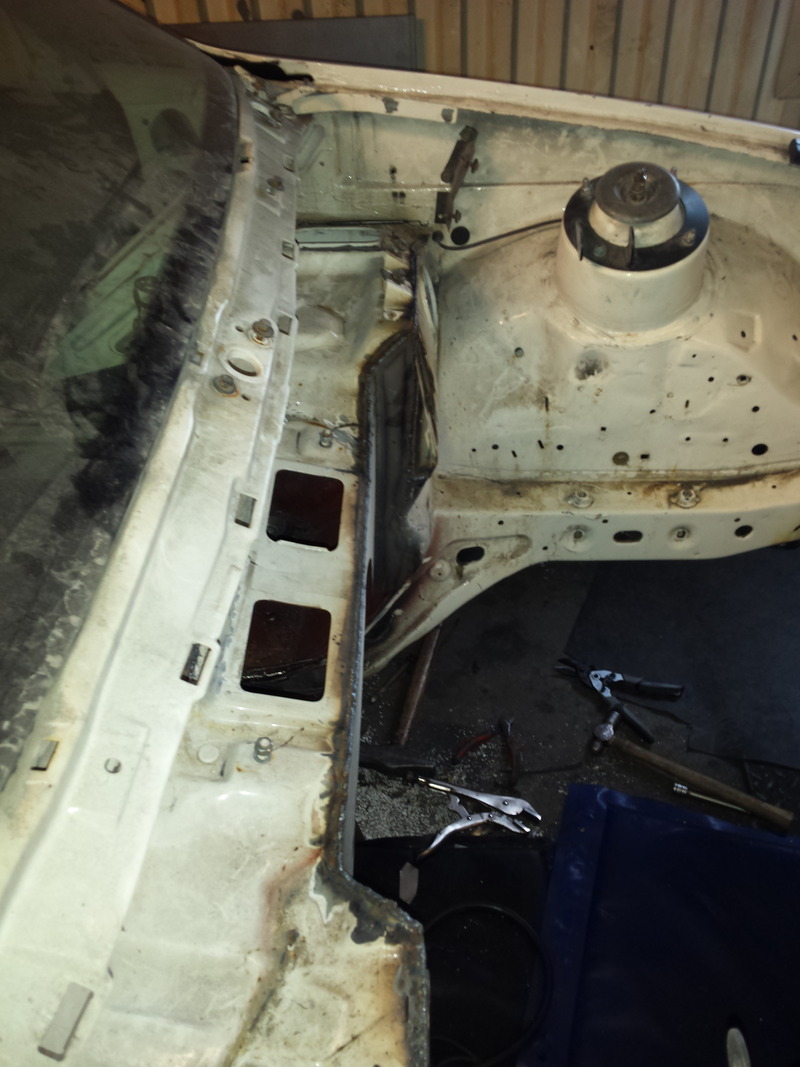
Well Then i got to do allot of work on the car. I got the firewall back in.
I made new panels so that i would get a flat surface as possible on the firewall. I need as
much clearance backwards as possible.
Then i was looking at the pic`s of the firewall, and thinking if i should bring it even more
backwards. Tomorrow i will do some measuring to see if it will work. I am thinking about bringing it
back 50 mill more...
Well enough talk, more pics..
Here i have tacked in the firewall.
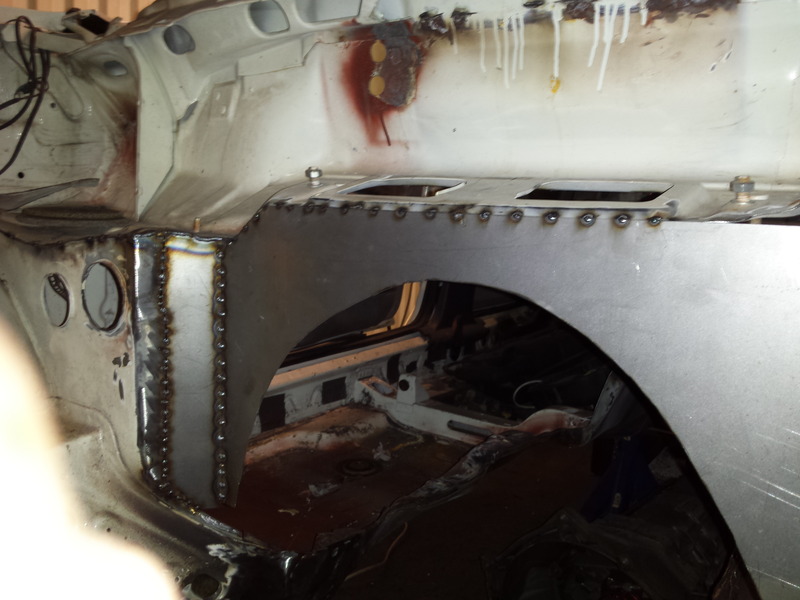

Forgot to take pic of the complete firewall, before welding it. But i remembered berfore i welded to much
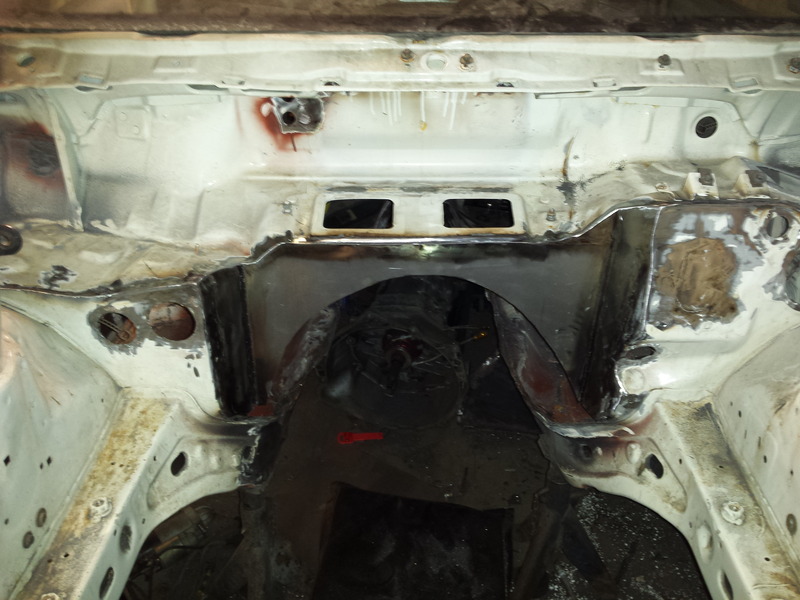
There it is all welded in. I also welded the hole for the brake servo.

Here it is all grinded down with a flap disc, I use this to get the smoothest surface as possible.
That mean less bondo, if needed at all.
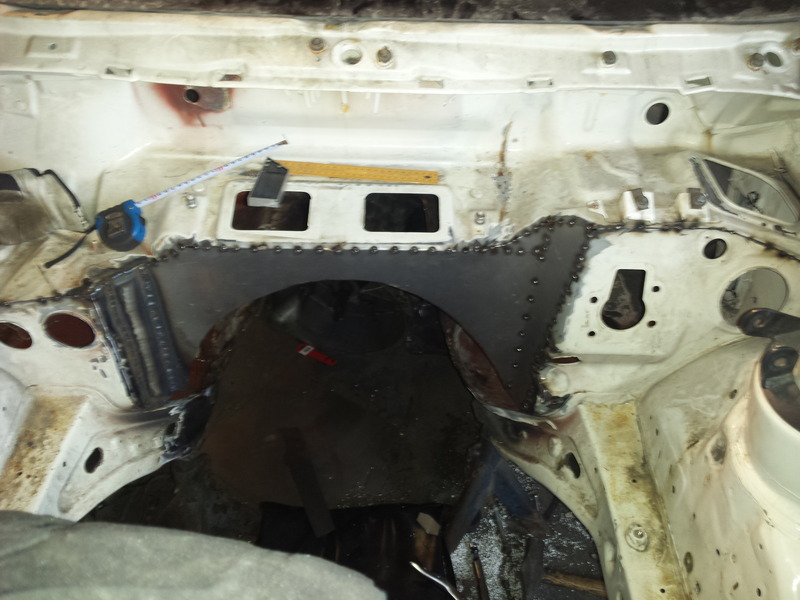
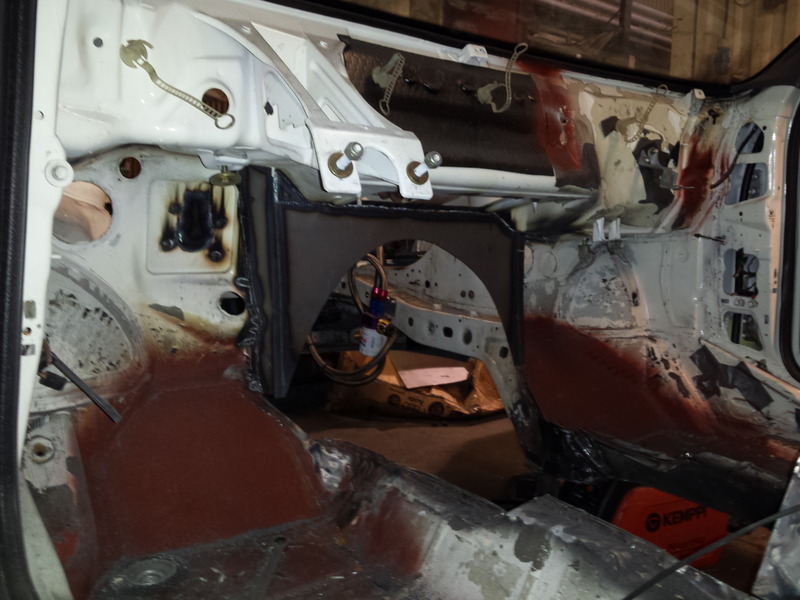
Inside view of the firewall.

Hope you all enjoy this thread.
I made new panels so that i would get a flat surface as possible on the firewall. I need as
much clearance backwards as possible.
Then i was looking at the pic`s of the firewall, and thinking if i should bring it even more
backwards. Tomorrow i will do some measuring to see if it will work. I am thinking about bringing it
back 50 mill more...
Well enough talk, more pics..
Here i have tacked in the firewall.


Forgot to take pic of the complete firewall, before welding it. But i remembered berfore i welded to much

There it is all welded in. I also welded the hole for the brake servo.


Here it is all grinded down with a flap disc, I use this to get the smoothest surface as possible.
That mean less bondo, if needed at all.

Inside view of the firewall.


Hope you all enjoy this thread.
18-04-2015, 10:42 PM
#40
Car under constuction
Thread Starter
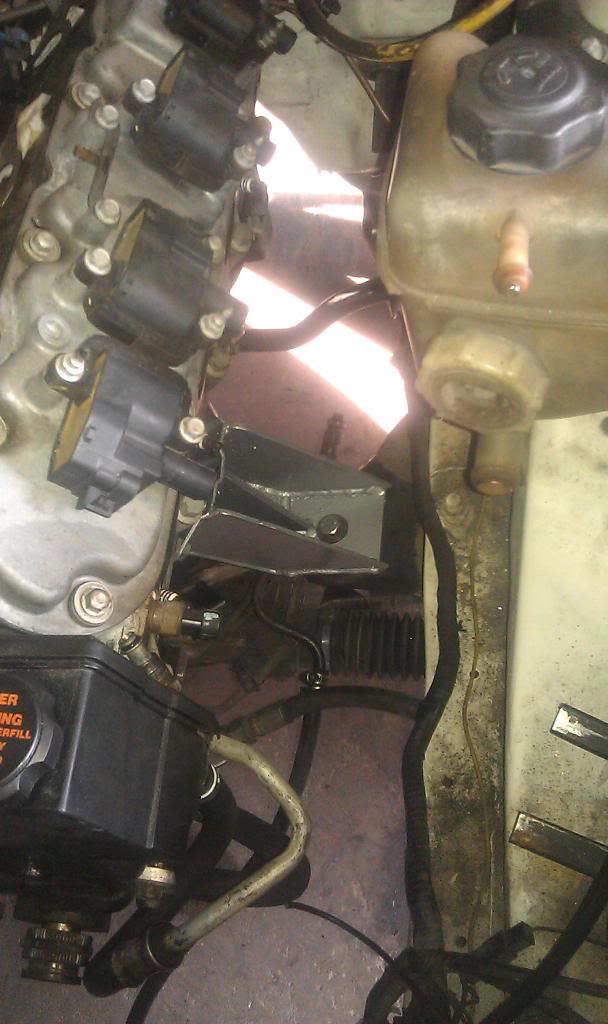
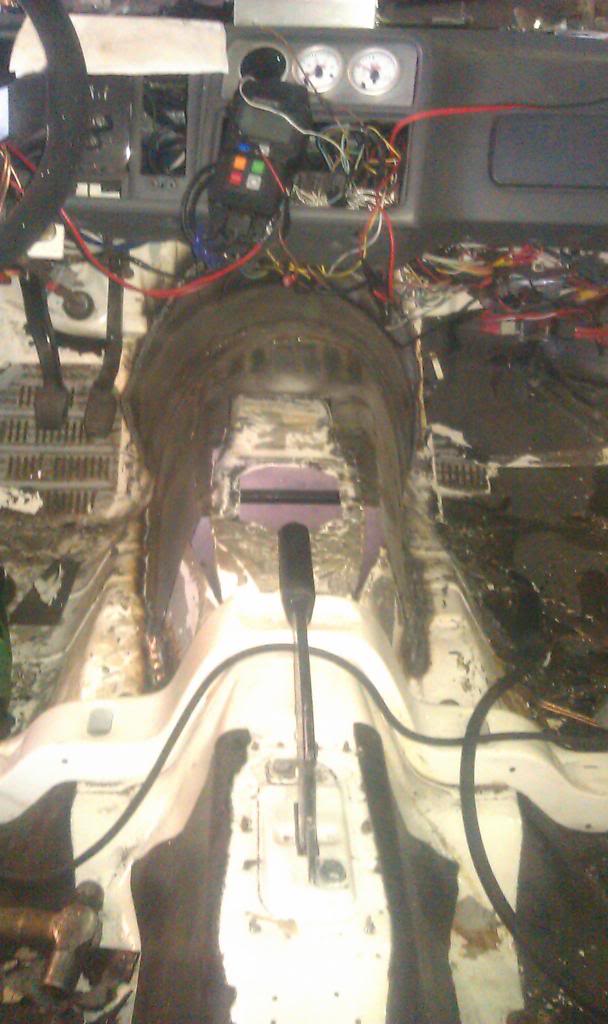
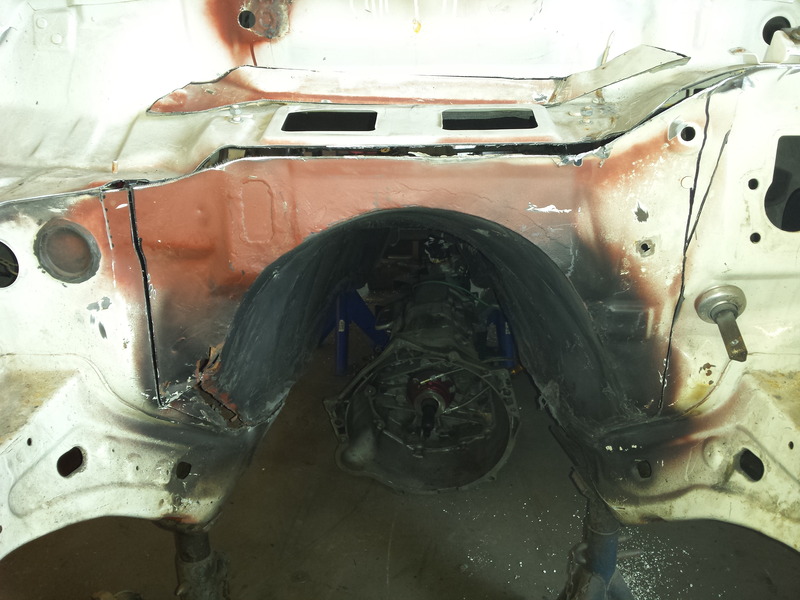
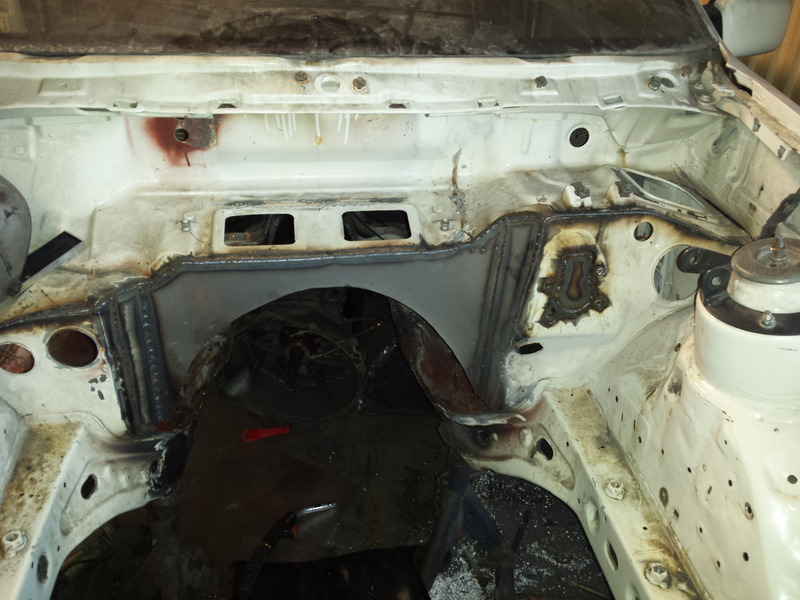
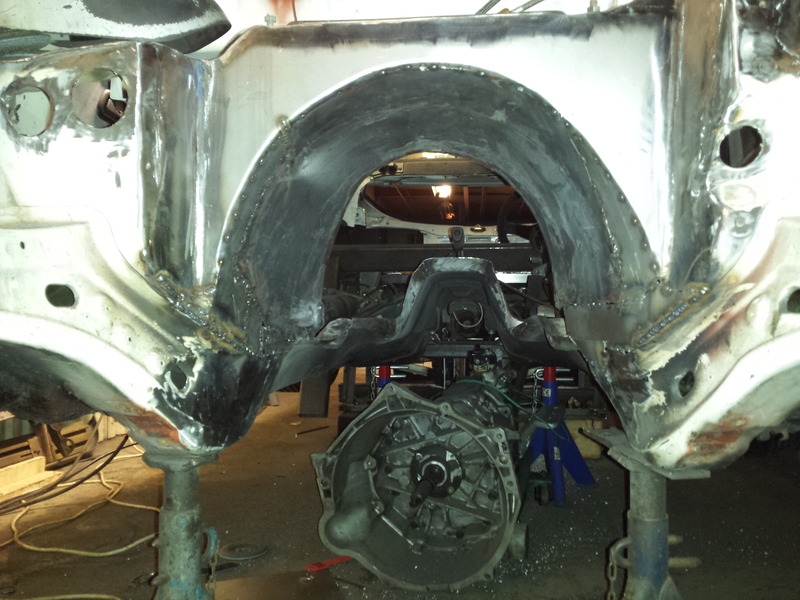
Then i have done some more work today.
I got the front part of the tunnel tacked in. Was quite harder to get it back in this time.
Didnt quite fit anymore. So i had to cut allot, and build it up with many small pieces.
Then i bent a flange on the firewall to the tunnel. So i get a more round transition
to the tunnel. And i will also get a double weld on it, inside and out for more strength.
sorry for the bad pic, will take a better one tomorrow.
And this is the inside view of the tunnel. have a feeling that the tunnel is a bit to tall.
I got the front part of the tunnel tacked in. Was quite harder to get it back in this time.
Didnt quite fit anymore. So i had to cut allot, and build it up with many small pieces.
Then i bent a flange on the firewall to the tunnel. So i get a more round transition
to the tunnel. And i will also get a double weld on it, inside and out for more strength.
sorry for the bad pic, will take a better one tomorrow.

And this is the inside view of the tunnel. have a feeling that the tunnel is a bit to tall.

Last edited by finni racing; 29-10-2015 at 08:10 PM.