Ford Escort MKII Zakspeed race car build
 01-03-2015, 09:45 AM
#1
Virgin
Thread Starter
Join Date: Feb 2015
Location: Cape Town
Posts: 8
Likes: 0
Received 0 Likes
on
0 Posts
Ford Escort MKII Zakspeed Build
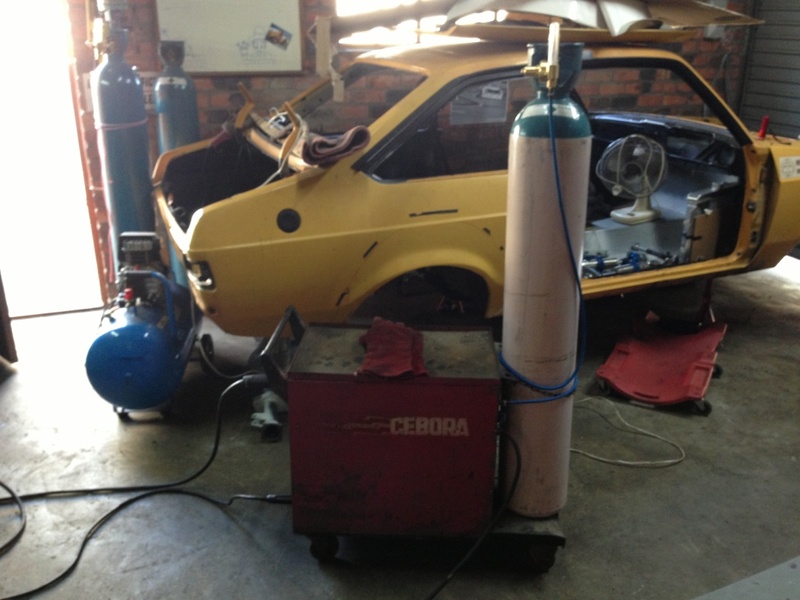
I am building a Group two Zakspeed lookalike to use for track racing. I am building this car not according to any specific rules or any regulations. I am building it to the best of my ability with in the money limits I have.
This may be a problem as our local track does not have a open class like most other tracks in South Africa. But there are a few invitational and other events where specific class and car type does not matter.
My Project started in April 2011. During this time and some years to follow I was in out of South Africa for work purposes which led to a slow start, not that things really got up to a flying pace.
I have posted my build as it went along from the start on http://www.fordescortclubsa.com but have now decided to share this on other sites as viewing on the Ford Escort Club SA is limited to members only.
I will basically copy and paste from the Escort Club SA forum and do some editing just to make sure it makes sense. From there I will update as I go.
2011
History
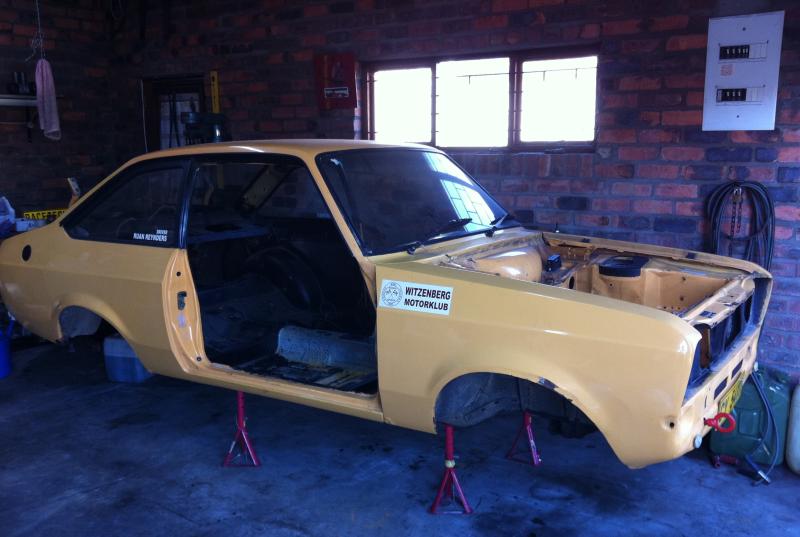
My father bought the Escort back in 1982 from his friend for R5300 with only a few kilos on the clock.
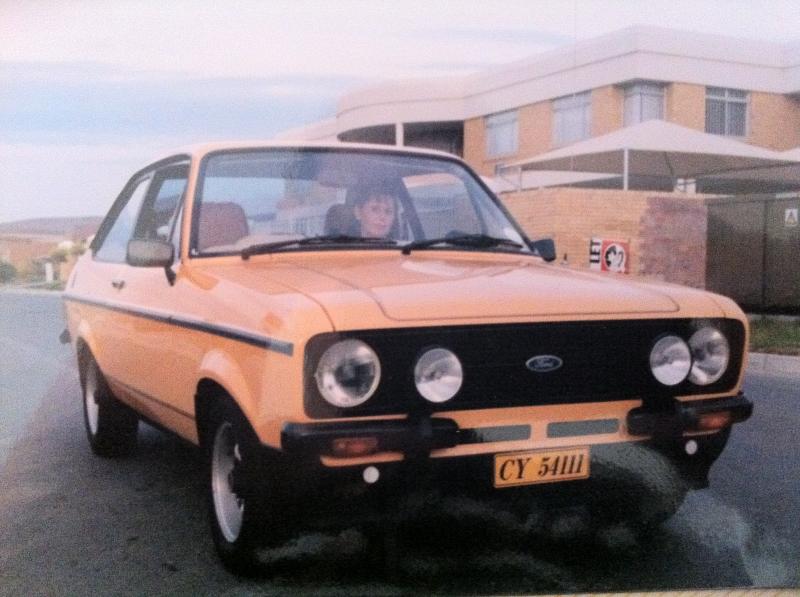
Yes that is my mother
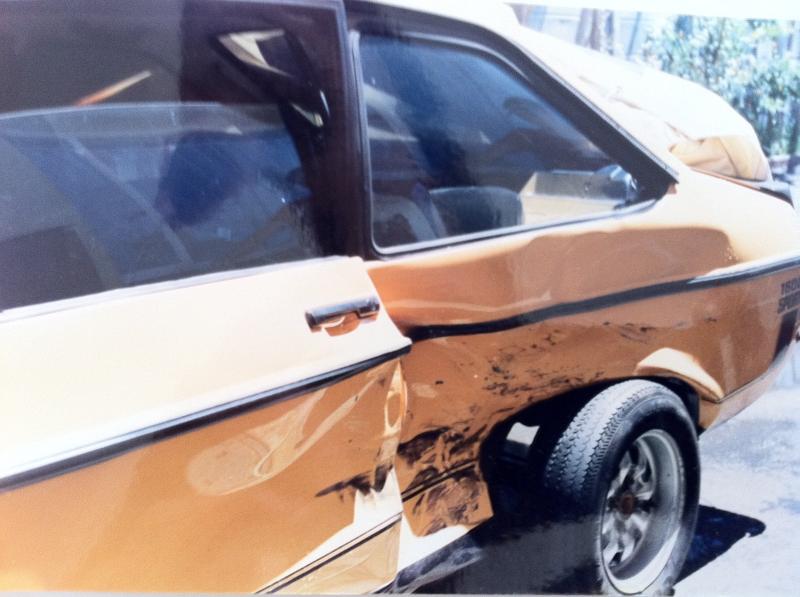
The car has been in our family ever since, it was passed on to my sister and then to me where I F%$# it up actually very quickly, had my first accident 3 months after I got my license and there went the originality with it.
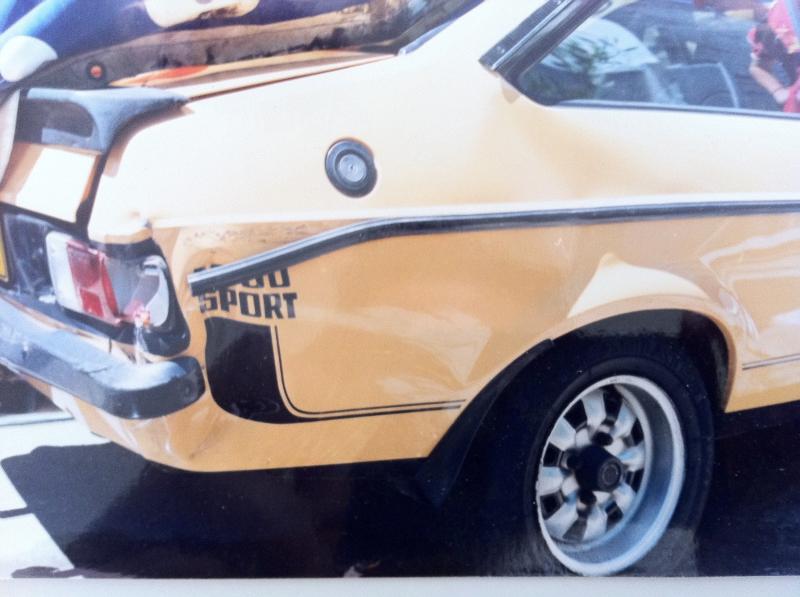
A year later the compression rings where worn out and then I had my first engine mods done. I ported the head, balanced the engine, lightened the fly wheel, re profiled the camshaft to BFC3 specifications and added a 36dcd Weber carberetor, kicked out 73kw and 140Nm
After a year or two I did a 2l Zetec conversion and changed the car to a track toy and used it for Gymkhanas and some open track days.
After a short period of this I was looking for something more. I really wanted to get more involved in some track racing, hill climbs and thought some endurance racing would be a nice challenge.
All I had in my mind was to build a car just as I want it. Not to any specific glass or specifications.
I decided to go with a Zakspeed look and the rest of the car I went in blind.
After some research I started collecting parts while I was out of the country. It was a nice feeling buying all these catalog part that you always see in the UK Ford magazines. This did how ever cost me a arm and a leg. But for me I always had the plan on doing the best that I can afford to build my car the way I see it.
So I had and bought the following over a period of probably a year.
One Escort
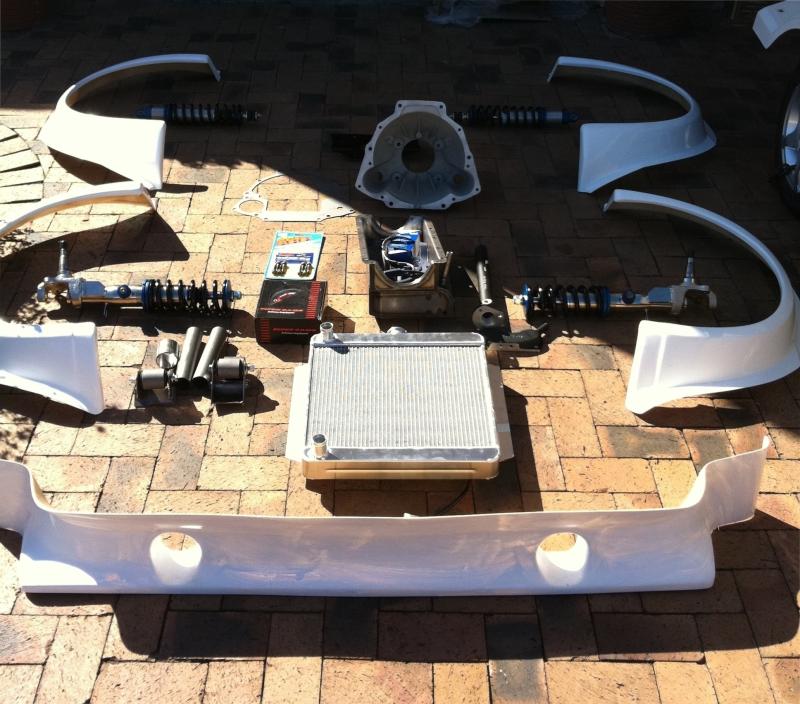
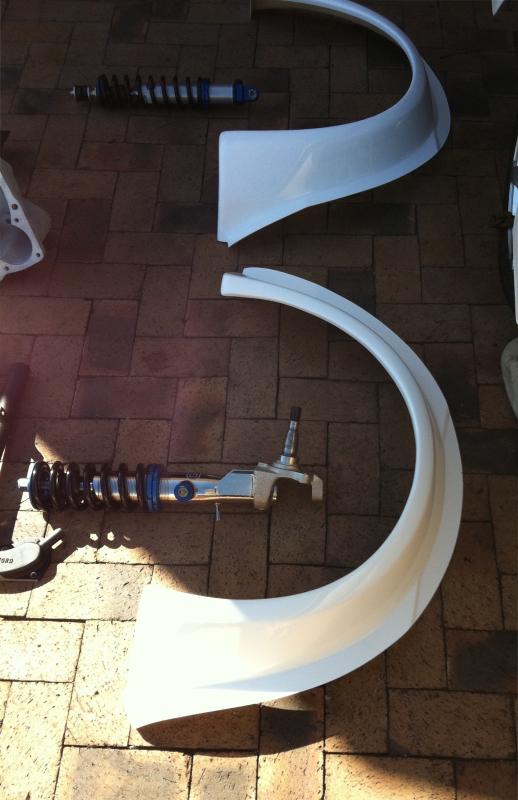
Group2 ZakSpeed kit
Zetec chassis mount kit
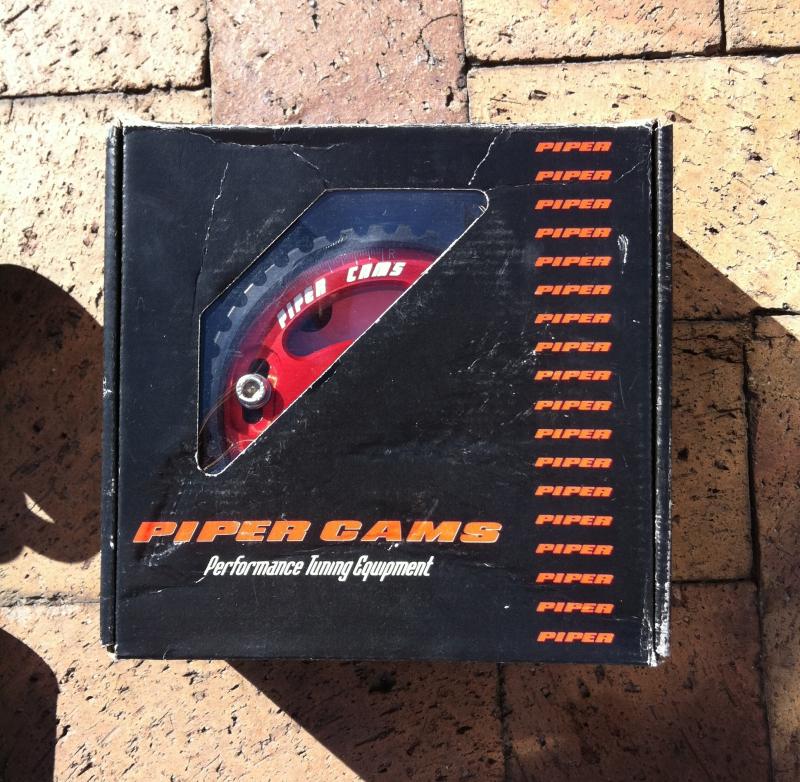
Piper Vernier pulleys
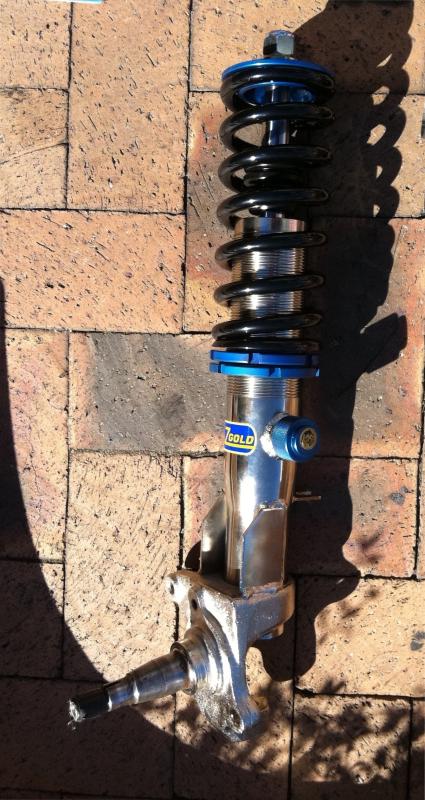
Gas gold front struts
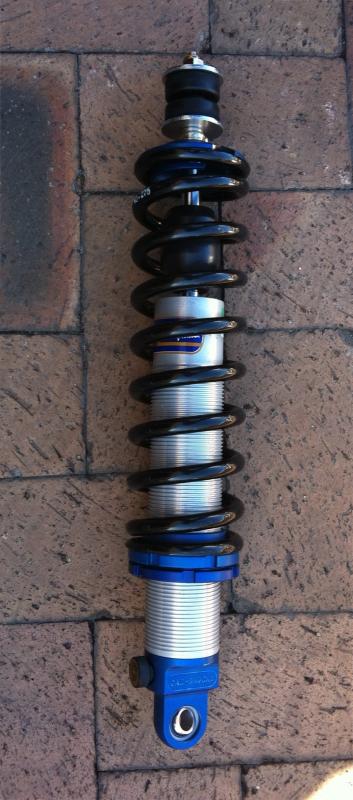
Gas gold rear struts
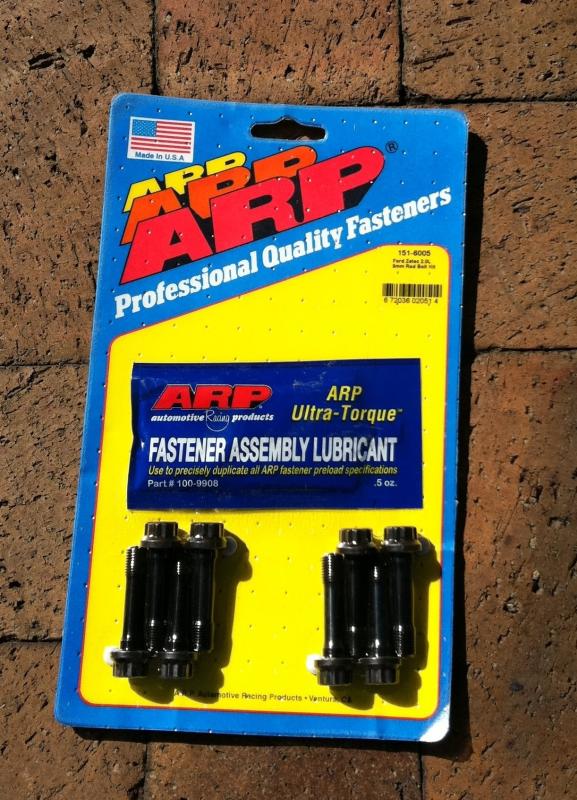
Zetec ARP bolts
Retro Ford dust shield for T9 gearbox

Retro Ford adjustable gearbox mounting for T9 gearbox
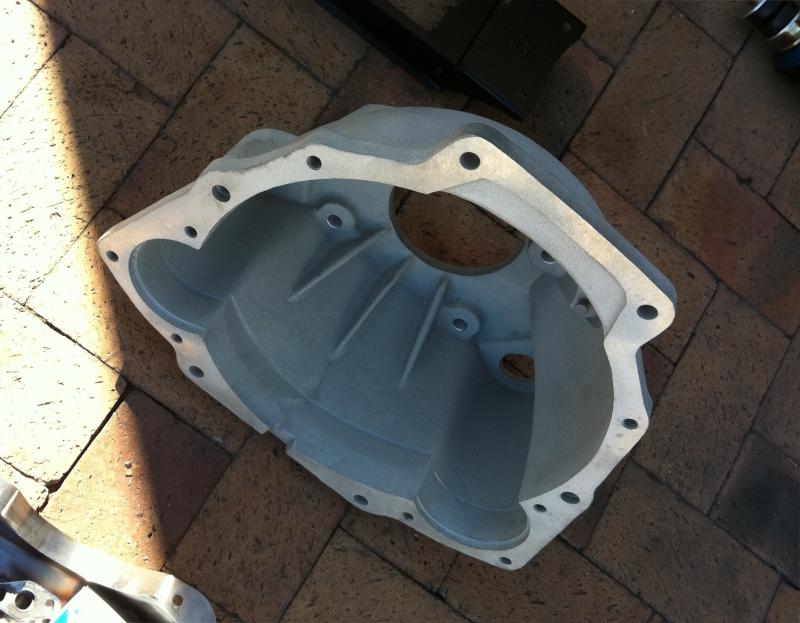
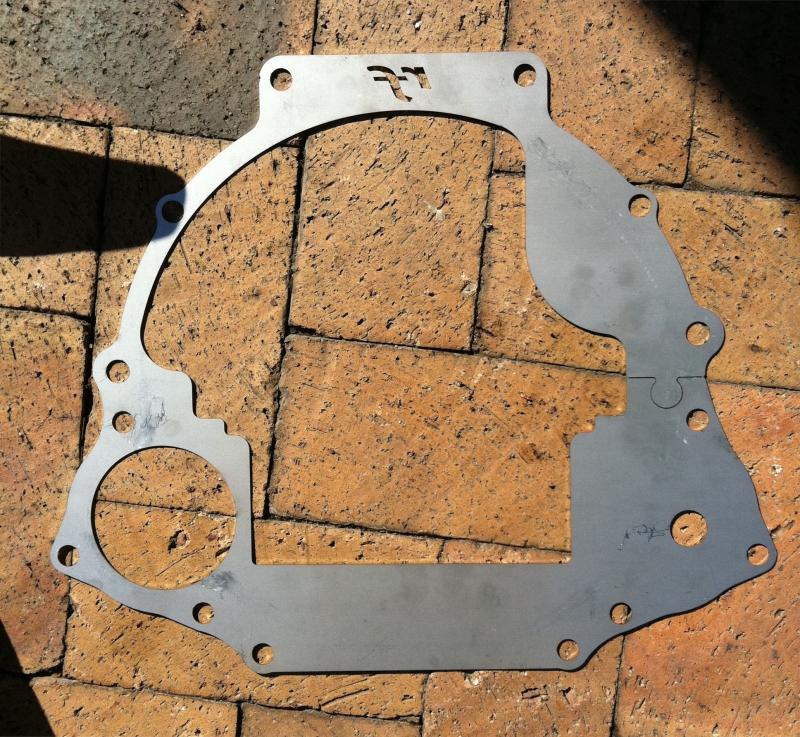
Aluminium bell housing
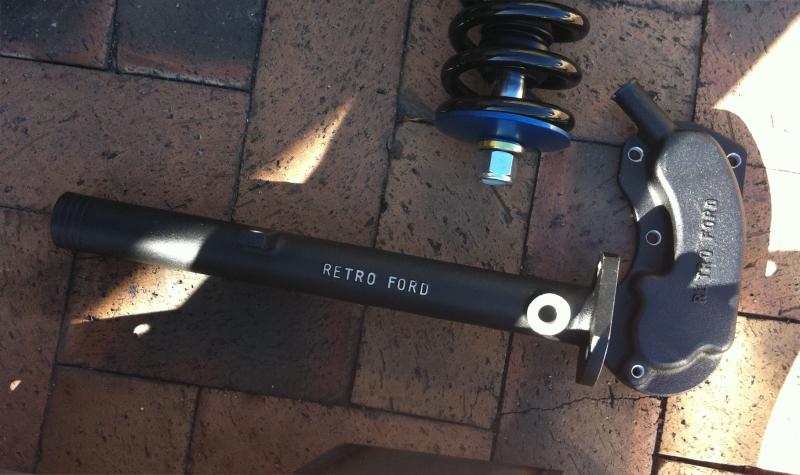
Retro Ford water rail
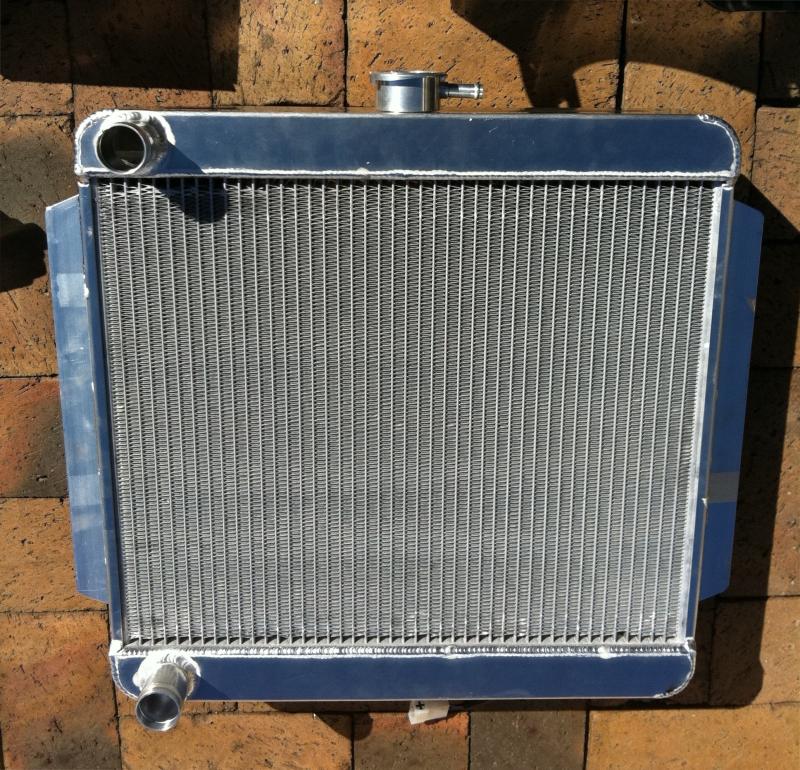
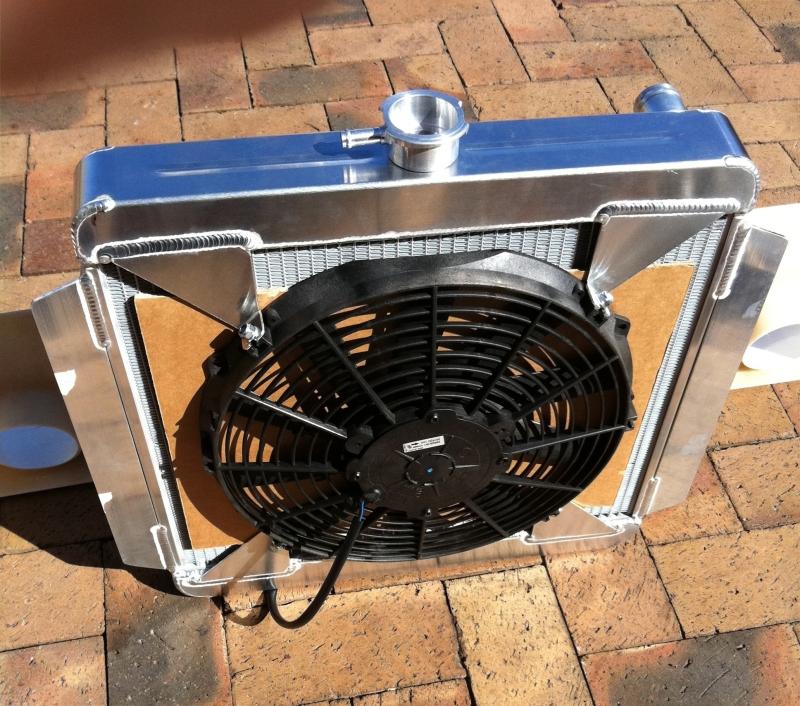
Aluminium radiator with fan
Zetec sump with baffles
Quickshift kit
Type 9 uprated box
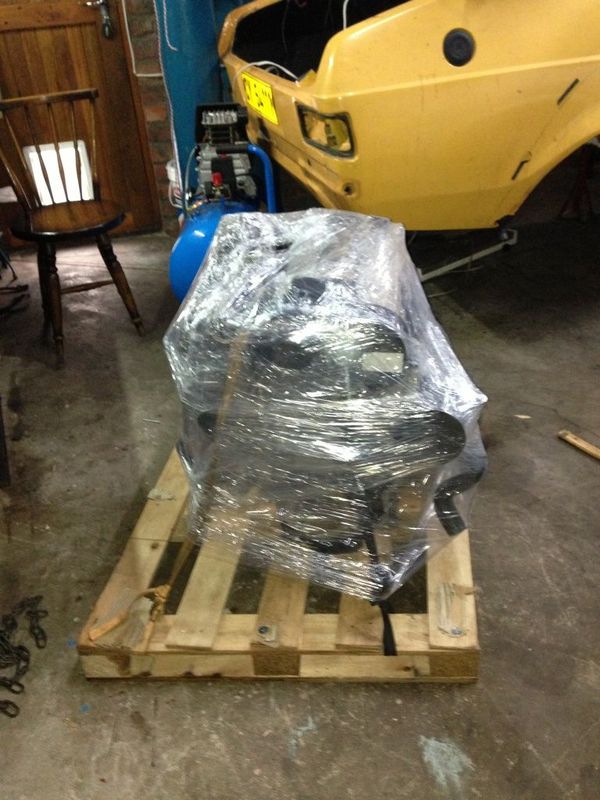
Two Duratech ST engines Zetec engine basically ( Came out of a Ford Focus ST170)
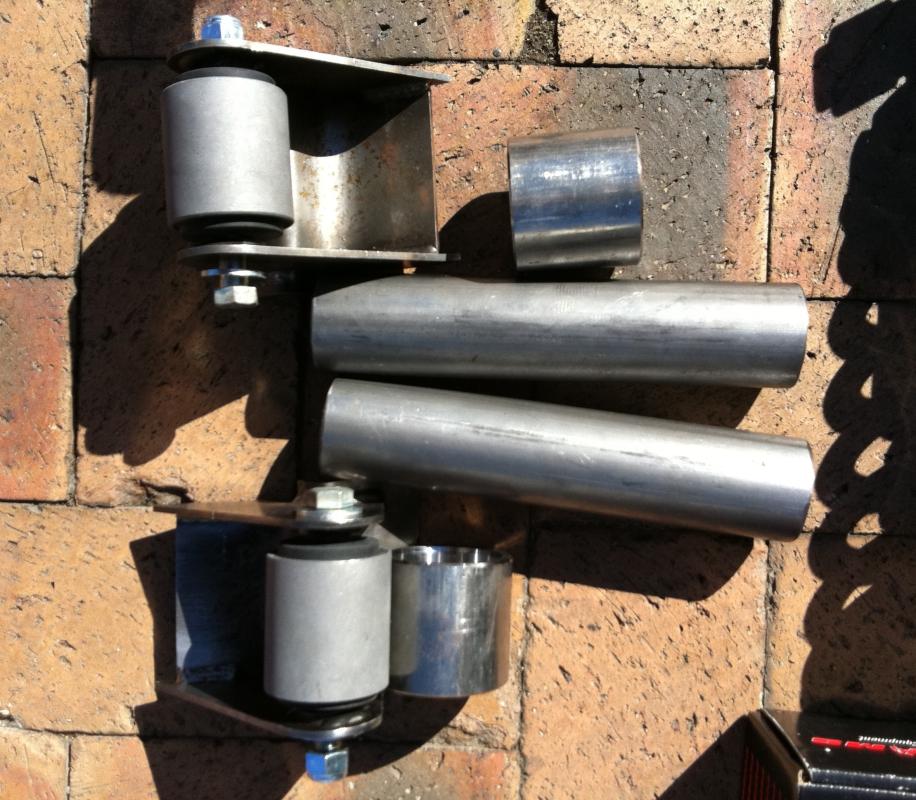
Tension strut kit
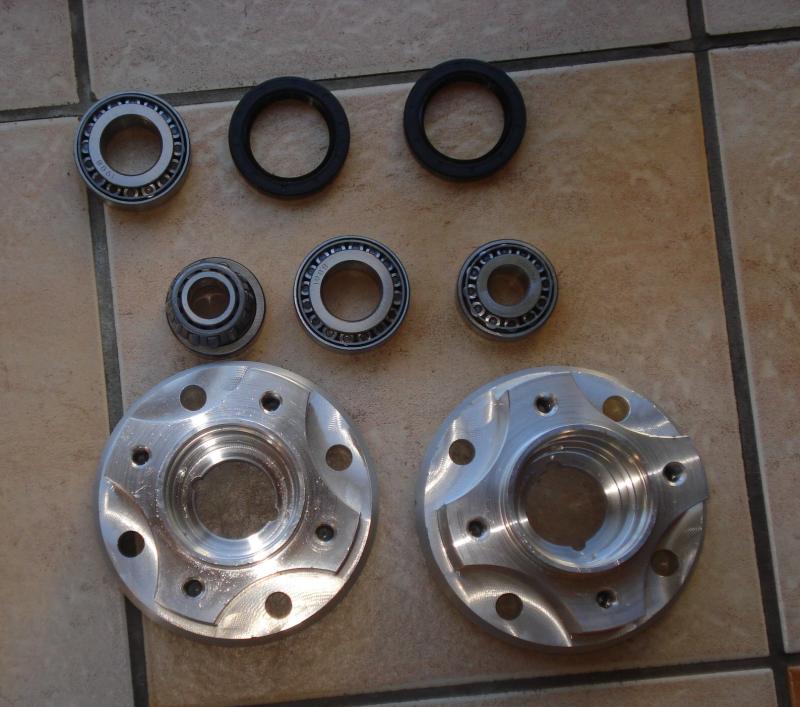
Group 4 Ally hubs with group 4 bearings
Group 4 Roll Bar (16mm �) & Link Kit
Turret kit

4 link kit
Watts linkage kit
Gearbox and diff tunnel boxes
Centre consul
Steering arms and other bits
The part I loved the most
Quaife ATB for atlas diff
I am building a Group two Zakspeed lookalike to use for track racing. I am building this car not according to any specific rules or any regulations. I am building it to the best of my ability with in the money limits I have.
This may be a problem as our local track does not have a open class like most other tracks in South Africa. But there are a few invitational and other events where specific class and car type does not matter.
My Project started in April 2011. During this time and some years to follow I was in out of South Africa for work purposes which led to a slow start, not that things really got up to a flying pace.
I have posted my build as it went along from the start on http://www.fordescortclubsa.com but have now decided to share this on other sites as viewing on the Ford Escort Club SA is limited to members only.
I will basically copy and paste from the Escort Club SA forum and do some editing just to make sure it makes sense. From there I will update as I go.
2011
History
My father bought the Escort back in 1982 from his friend for R5300 with only a few kilos on the clock.

Yes that is my mother
The car has been in our family ever since, it was passed on to my sister and then to me where I F%$# it up actually very quickly, had my first accident 3 months after I got my license and there went the originality with it.


A year later the compression rings where worn out and then I had my first engine mods done. I ported the head, balanced the engine, lightened the fly wheel, re profiled the camshaft to BFC3 specifications and added a 36dcd Weber carberetor, kicked out 73kw and 140Nm

After a year or two I did a 2l Zetec conversion and changed the car to a track toy and used it for Gymkhanas and some open track days.


After a short period of this I was looking for something more. I really wanted to get more involved in some track racing, hill climbs and thought some endurance racing would be a nice challenge.
All I had in my mind was to build a car just as I want it. Not to any specific glass or specifications.
I decided to go with a Zakspeed look and the rest of the car I went in blind.
After some research I started collecting parts while I was out of the country. It was a nice feeling buying all these catalog part that you always see in the UK Ford magazines. This did how ever cost me a arm and a leg. But for me I always had the plan on doing the best that I can afford to build my car the way I see it.
So I had and bought the following over a period of probably a year.

One Escort


Group2 ZakSpeed kit

Zetec chassis mount kit

Piper Vernier pulleys

Gas gold front struts

Gas gold rear struts

Zetec ARP bolts

Retro Ford dust shield for T9 gearbox

Retro Ford adjustable gearbox mounting for T9 gearbox

Aluminium bell housing

Retro Ford water rail


Aluminium radiator with fan

Zetec sump with baffles

Quickshift kit

Type 9 uprated box

Two Duratech ST engines Zetec engine basically ( Came out of a Ford Focus ST170)

Tension strut kit

Group 4 Ally hubs with group 4 bearings

Group 4 Roll Bar (16mm �) & Link Kit

Turret kit

4 link kit

Watts linkage kit


Gearbox and diff tunnel boxes

Centre consul

Steering arms and other bits
The part I loved the most


Quaife ATB for atlas diff
 01-03-2015, 09:48 AM
#2
Virgin
Thread Starter
Join Date: Feb 2015
Location: Cape Town
Posts: 8
Likes: 0
Received 0 Likes
on
0 Posts
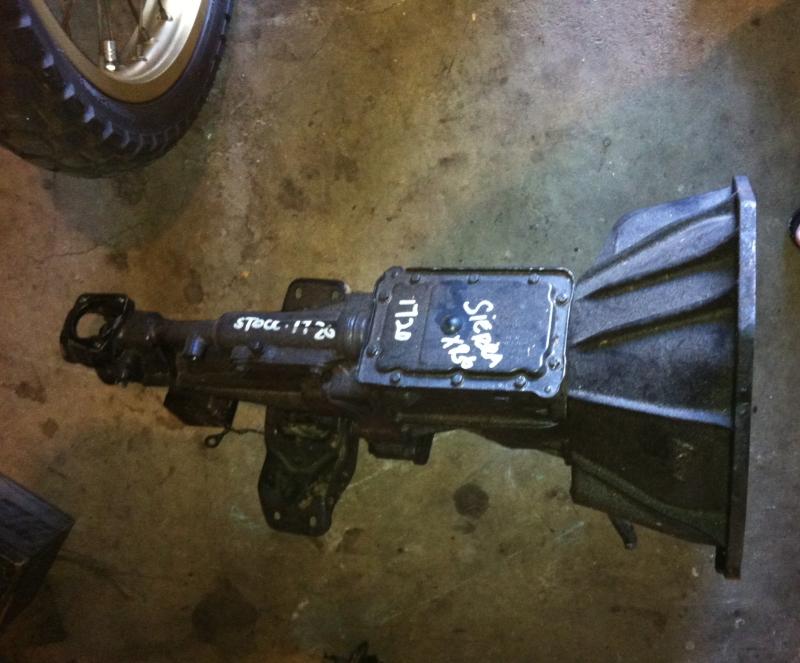
As time passed and the research followed I got worried about using the Type 9 Ford gearbox for the power that it can handle. Hi then sold my Type 9 and got me a Borg Warner T5 gearbox.
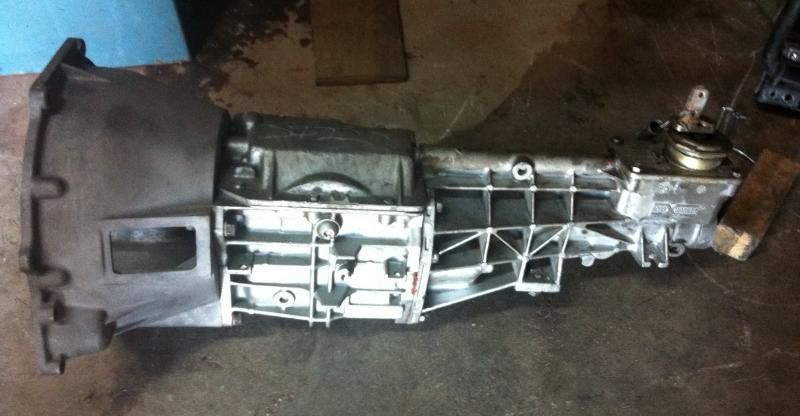
T5 Gearbox
Quaife Half shafts
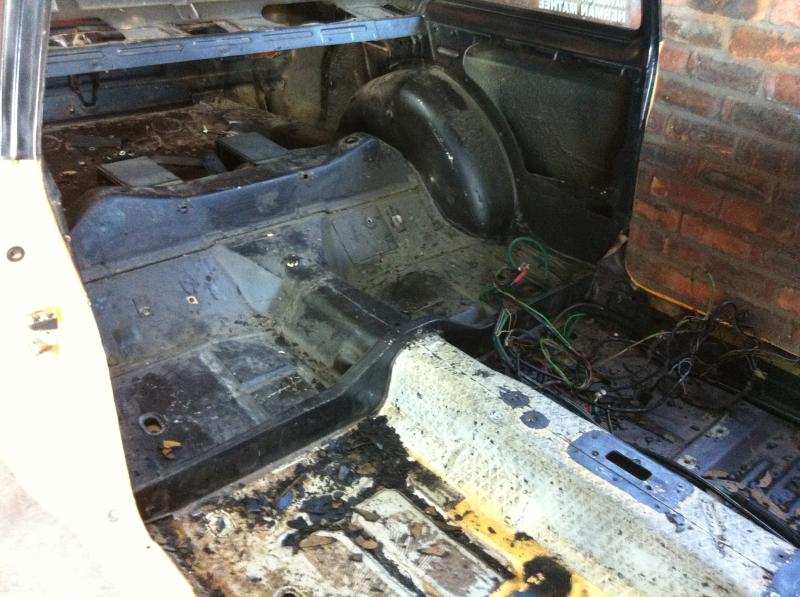
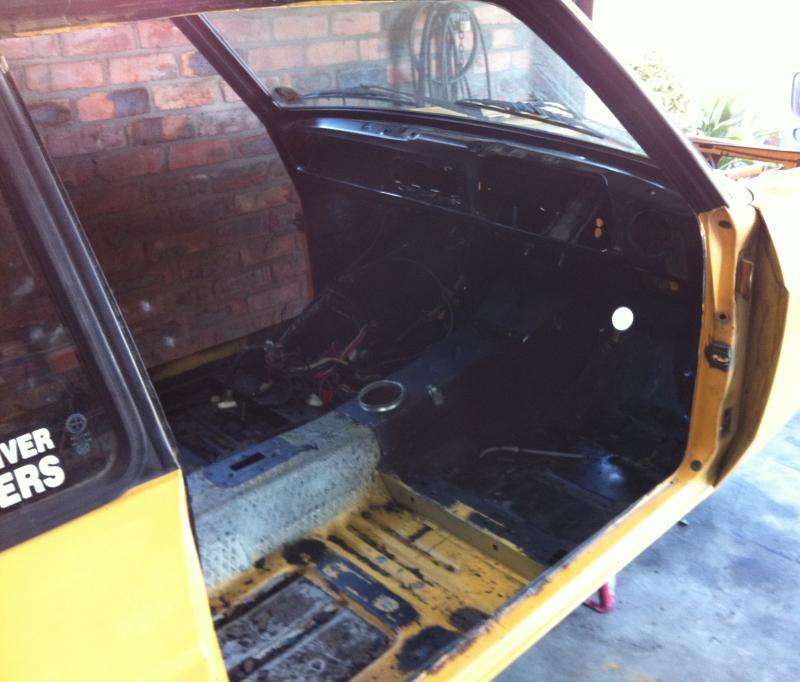
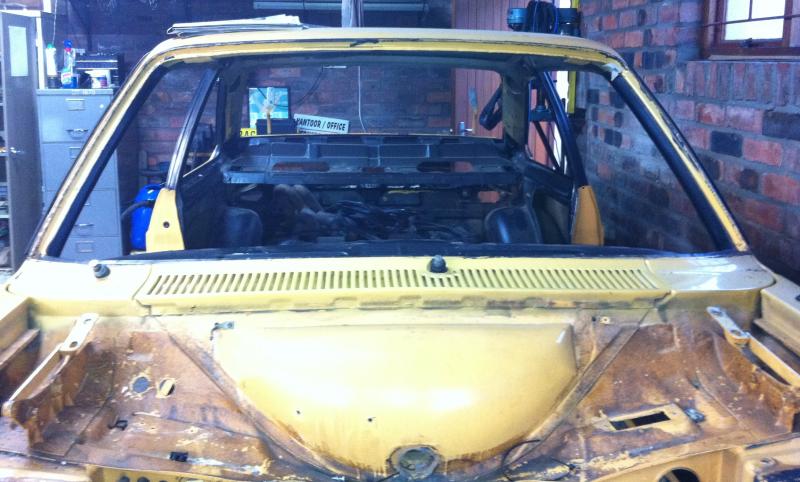
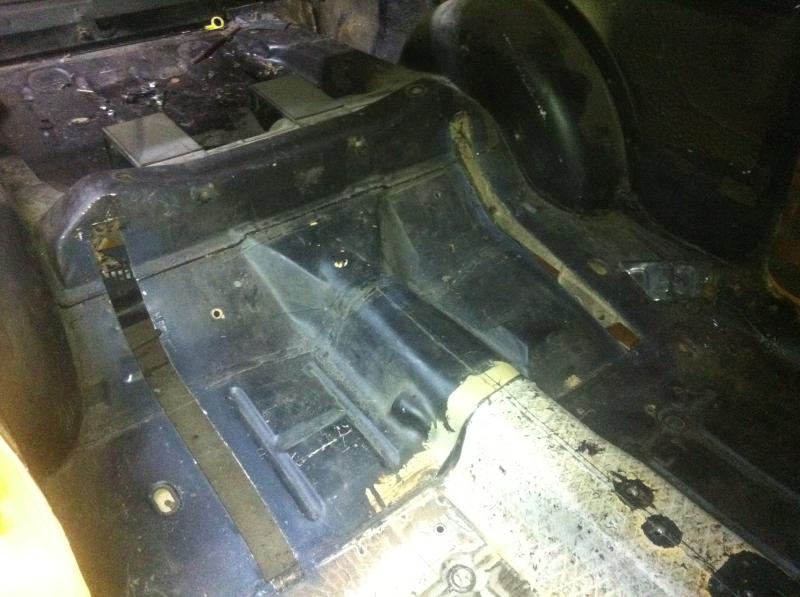
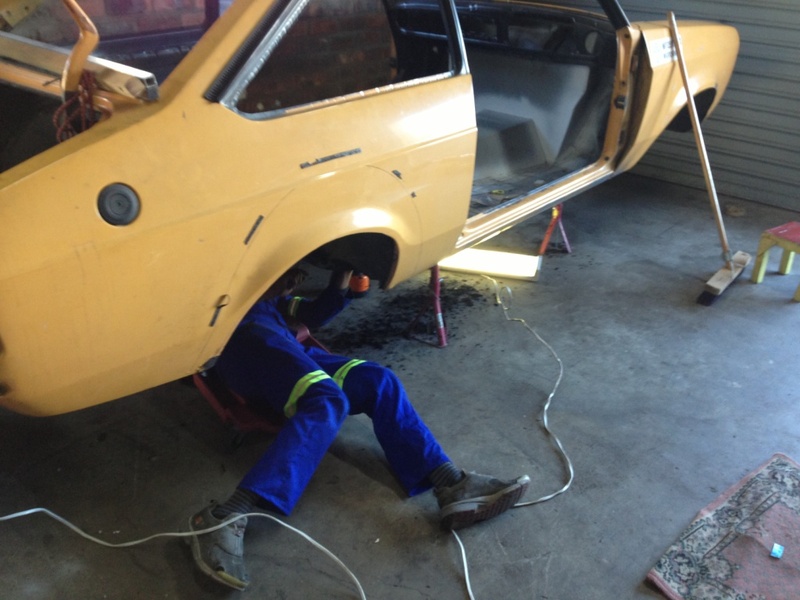
I stripped out the Escort of all the items I was not planning on using, which were basically 90% of them. I sold probably most of them and only kept what I was planning on putting back like the dash, grille, lights and bumpers and so.
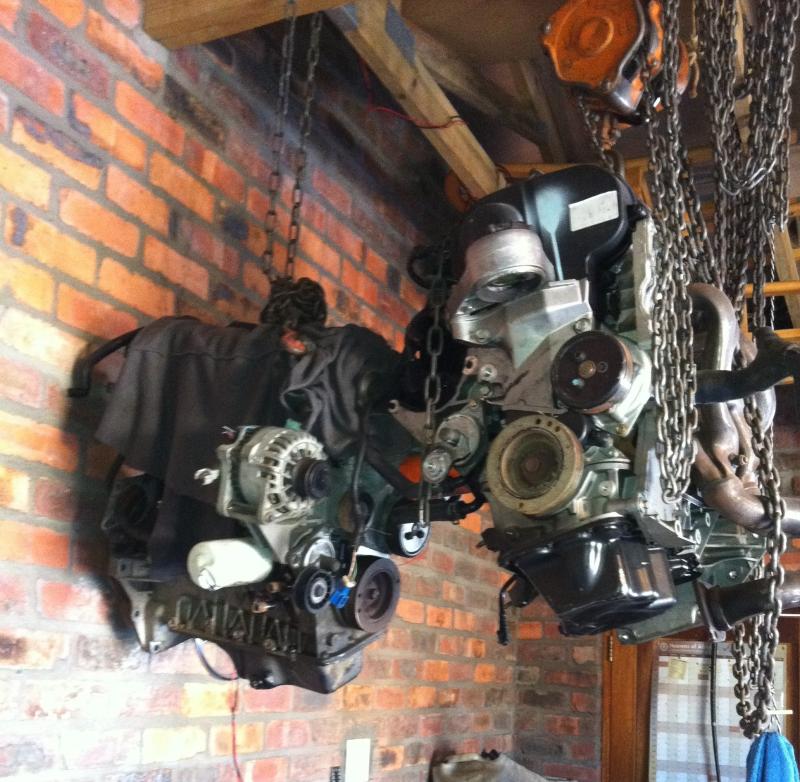
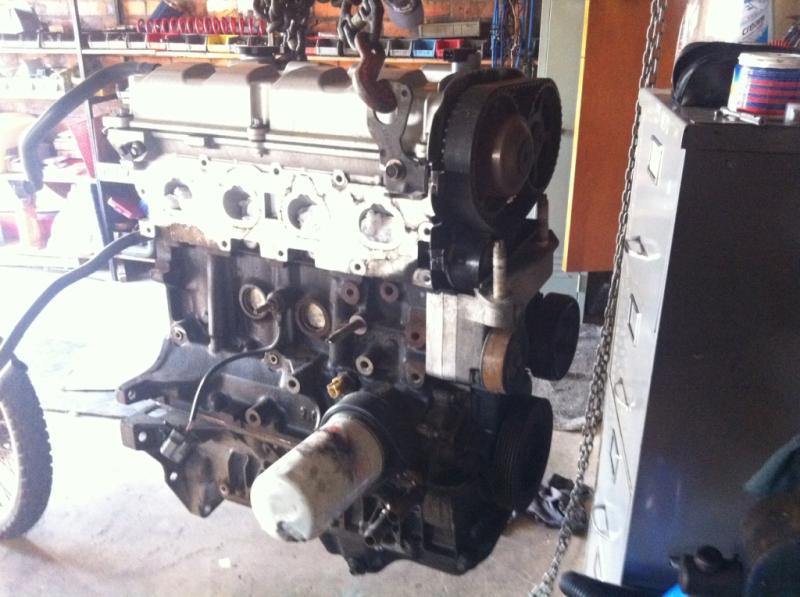
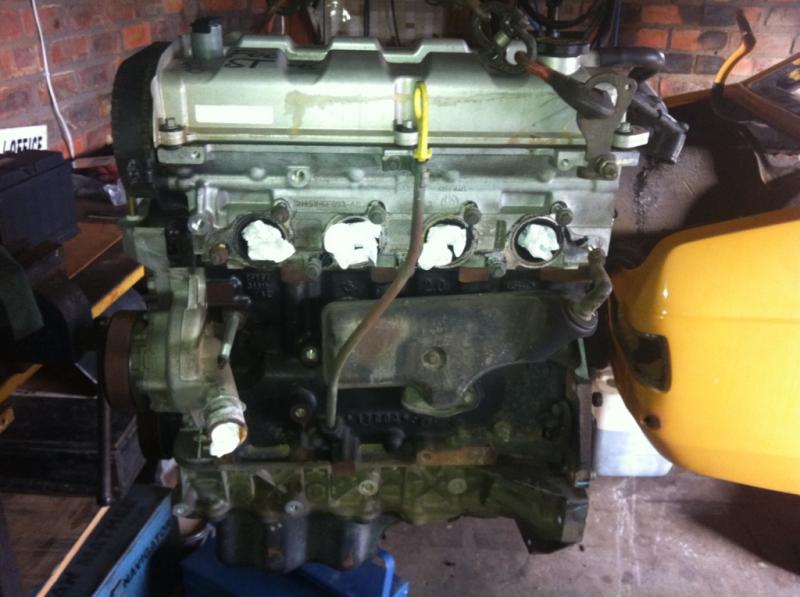
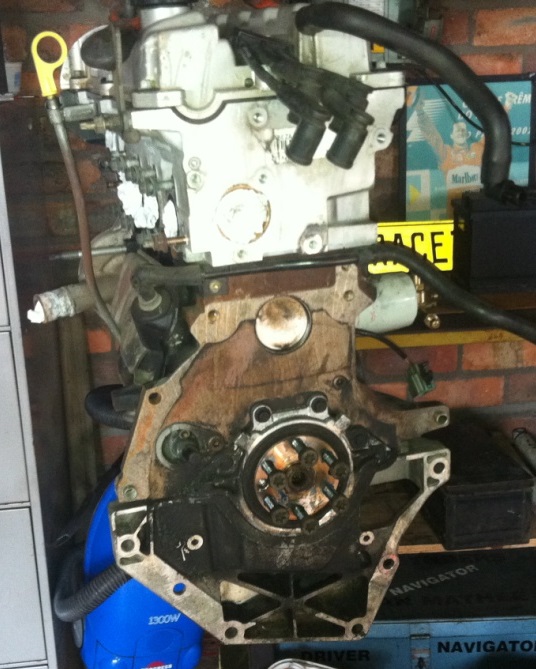
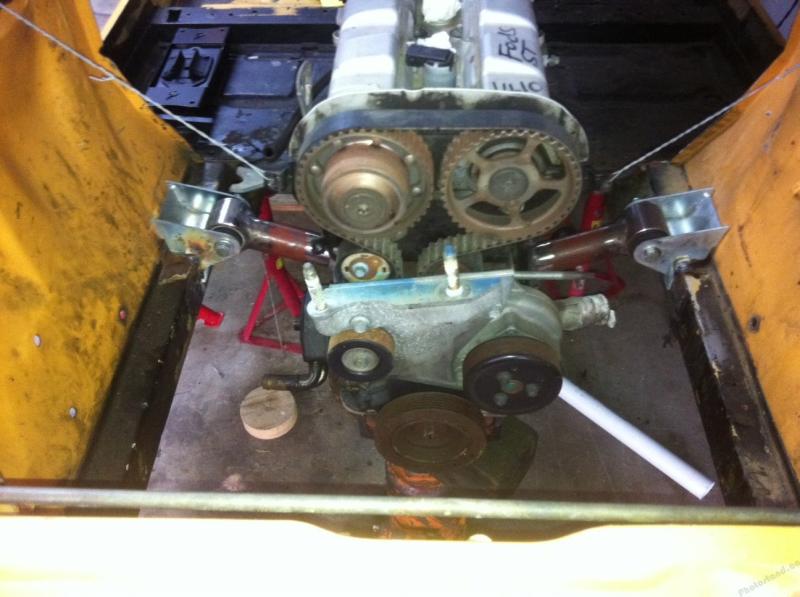
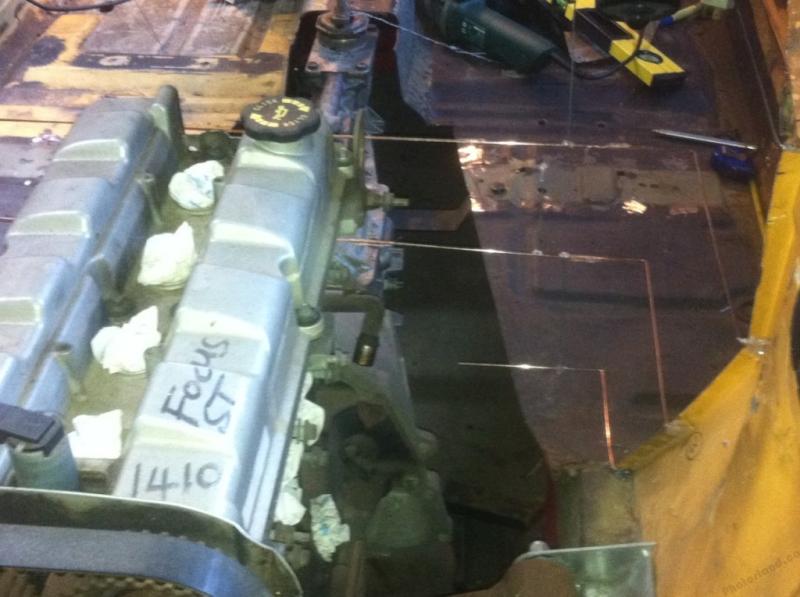
I bought two of the Duratec engine as I got it for a good deal, the one seems to have been in a front smash accident but the other one seemed fine. I stripped it from all the un wanted bits to get the measuring and fitting going.

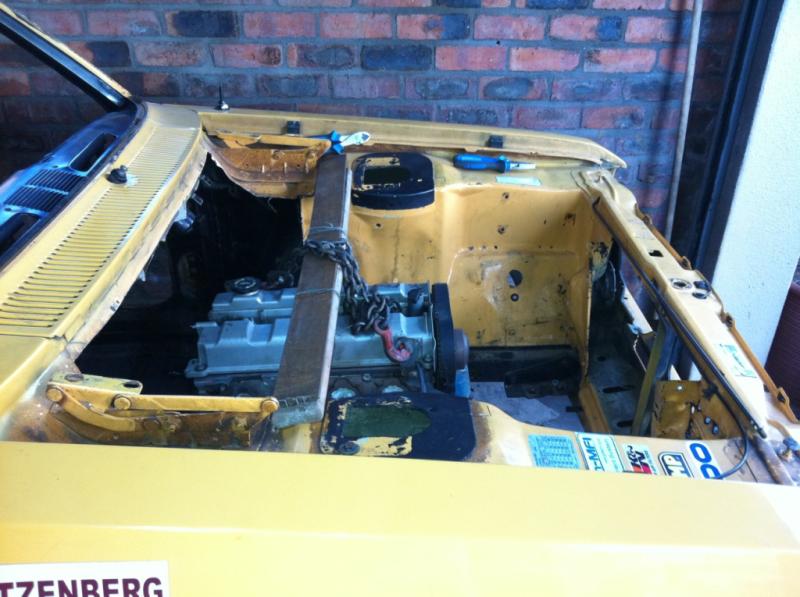
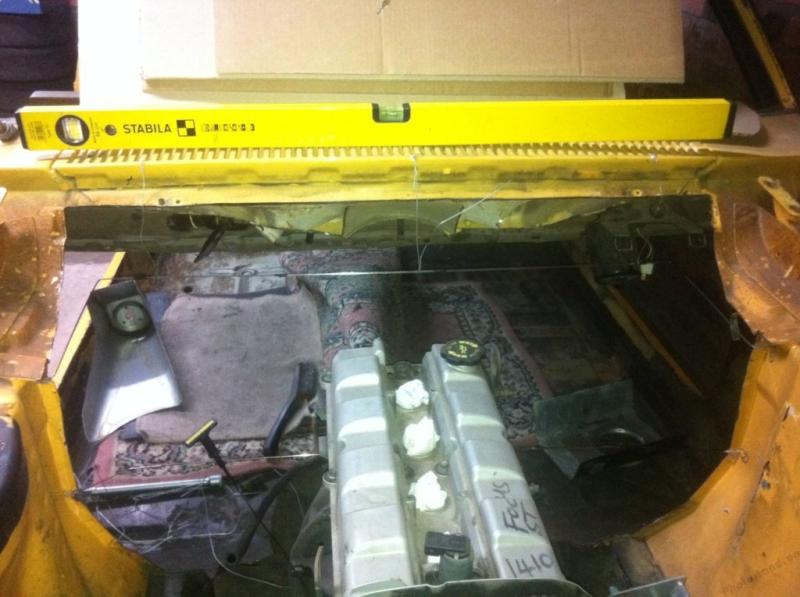
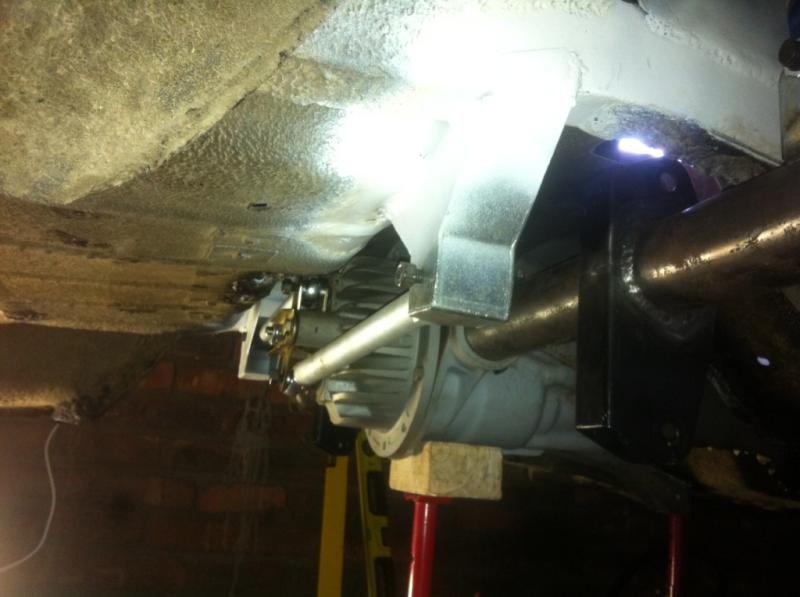
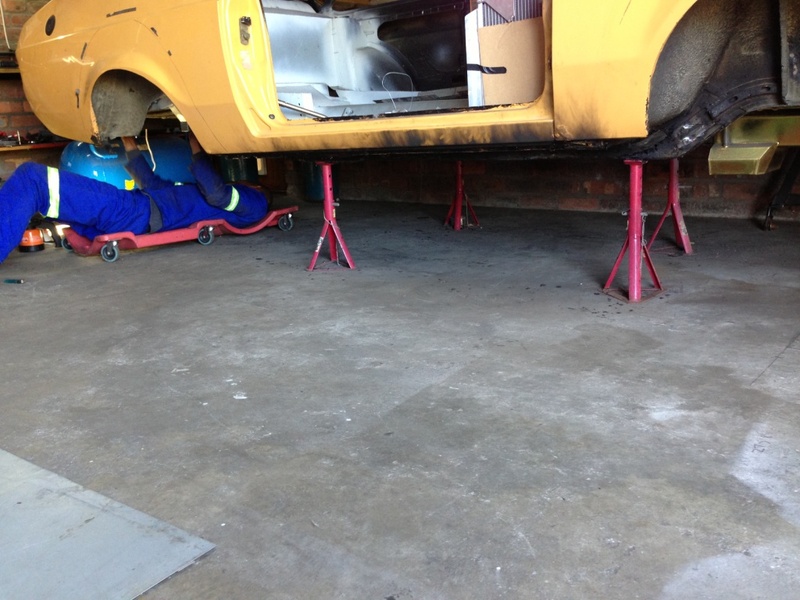
I wanted the engine as low as it could possibly be and as far back as I could get it. This caused a lot of headaches, but more of that to come.
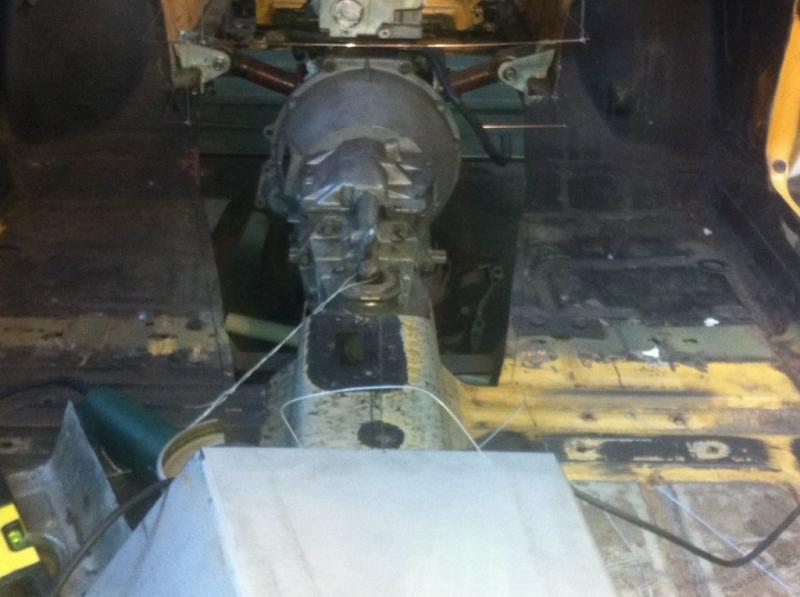
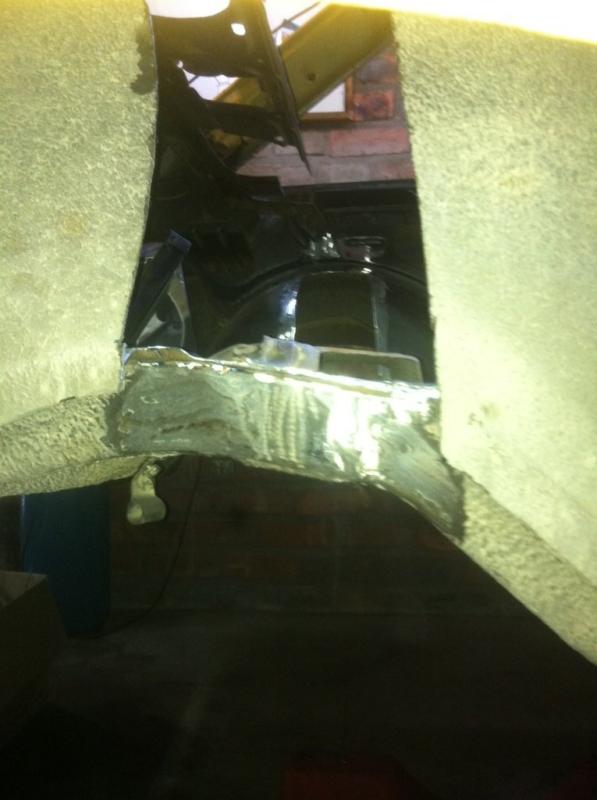
I proceeded to do some cutting out for the new gearbox tunnel. Can�t remember if this was before or after I got the idea to move the fire wall back.
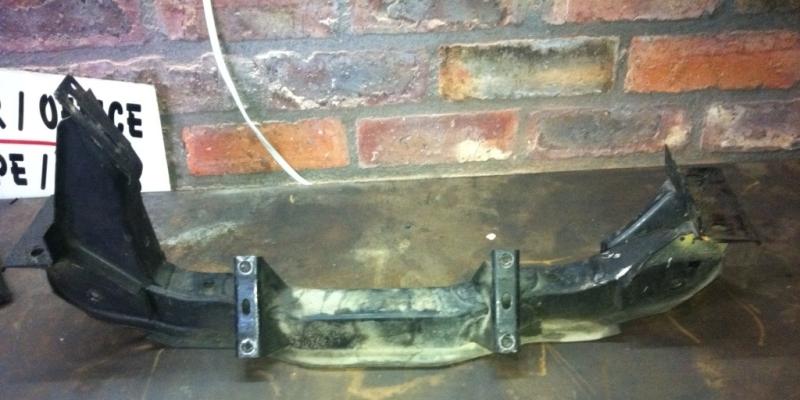
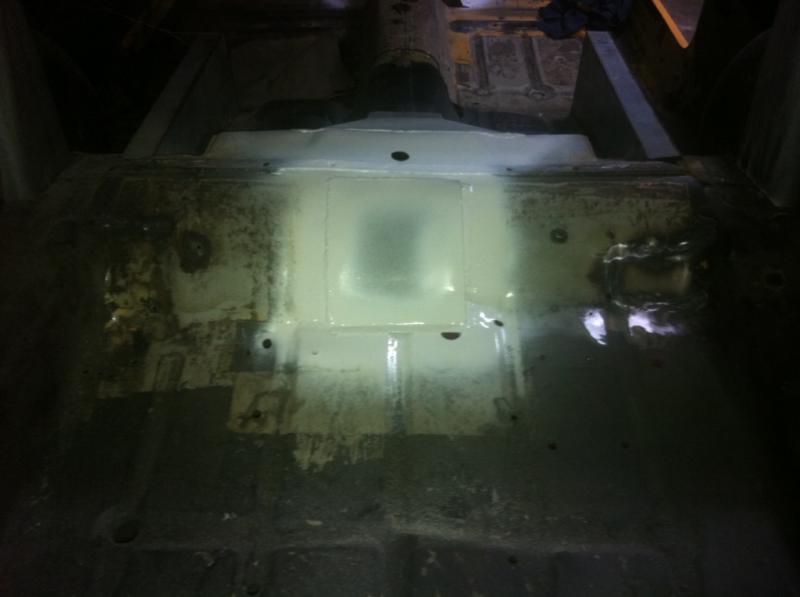
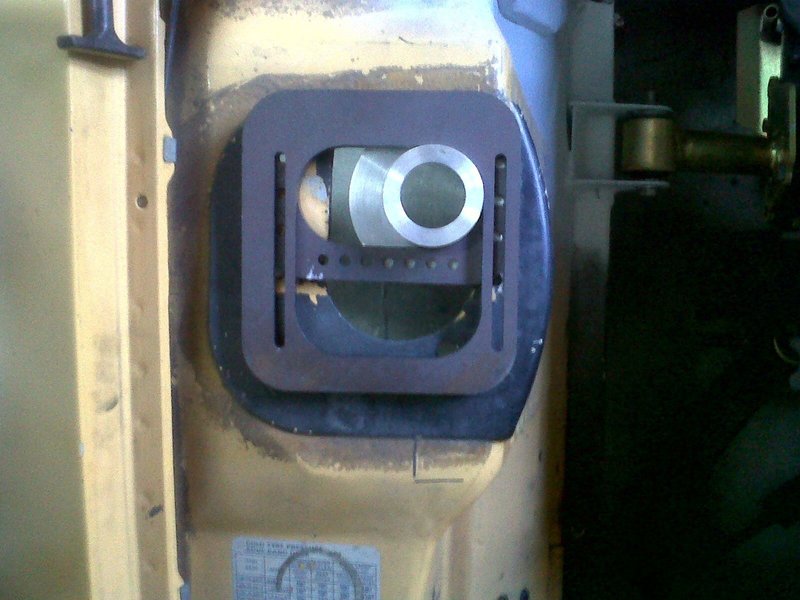
Due to the engine moving so low the standard cross member had to be removed and to be replaced by a new designed one
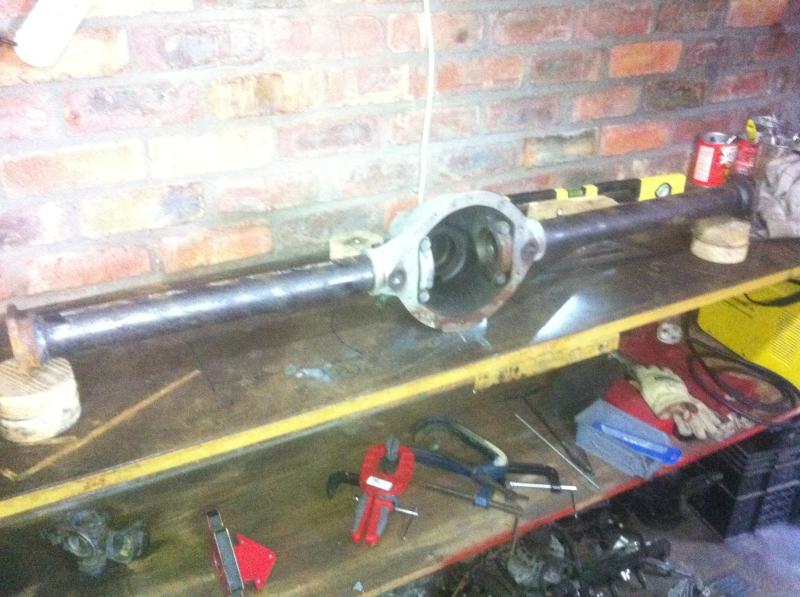
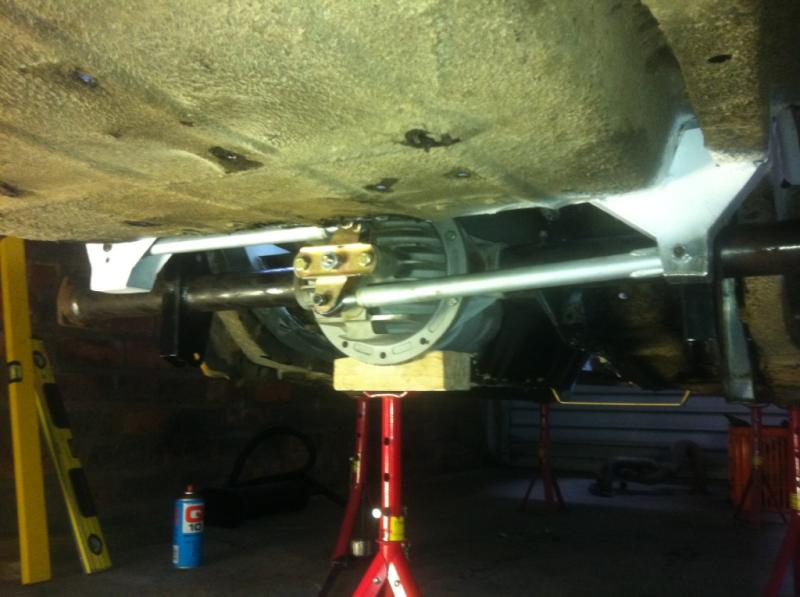
I decided to go with an imported Atlas axle from the UK. This is an Axle that offers plenty of aftermarket improved parts. As they are not available in South Africa, although some people do claim there are Atlas Axles here, I could not find one and all of the cars I was told might have them did not have an Atlas Axle in.
I did a preliminary back arch fit to measure up to order the Atlas axle. They can be ordered in different lengths and the quaife half shafts comes in an extra-long length to allow you to shorten them if required. This gave me a measurement of 1720mm arch to arch
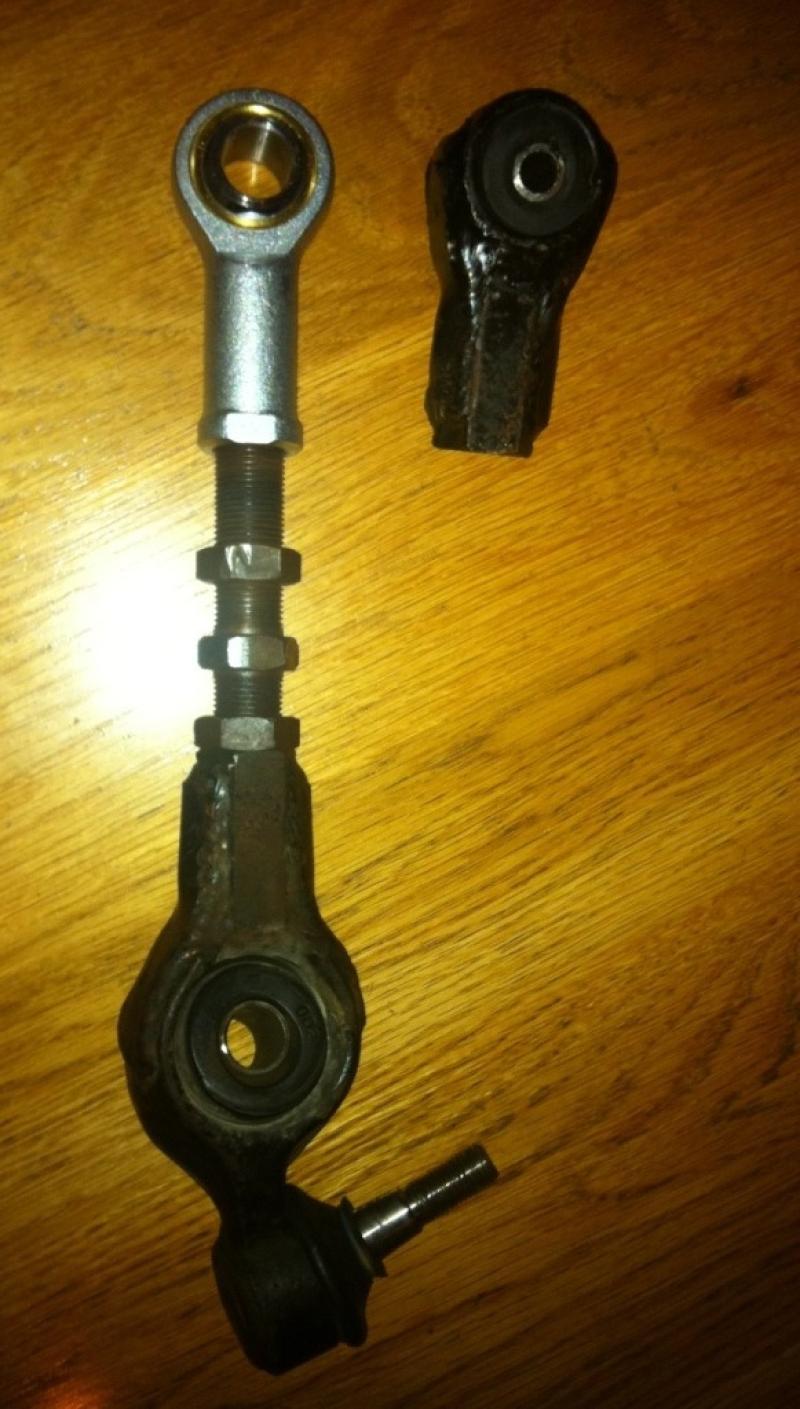
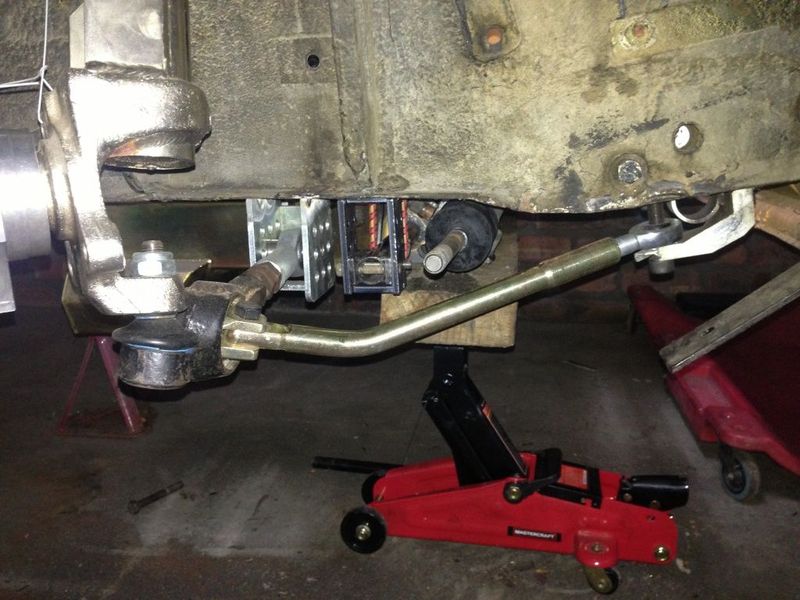
To get things going on the suspension I changed the polybush end to IKO Rod end on my already adjustable lower control arms.
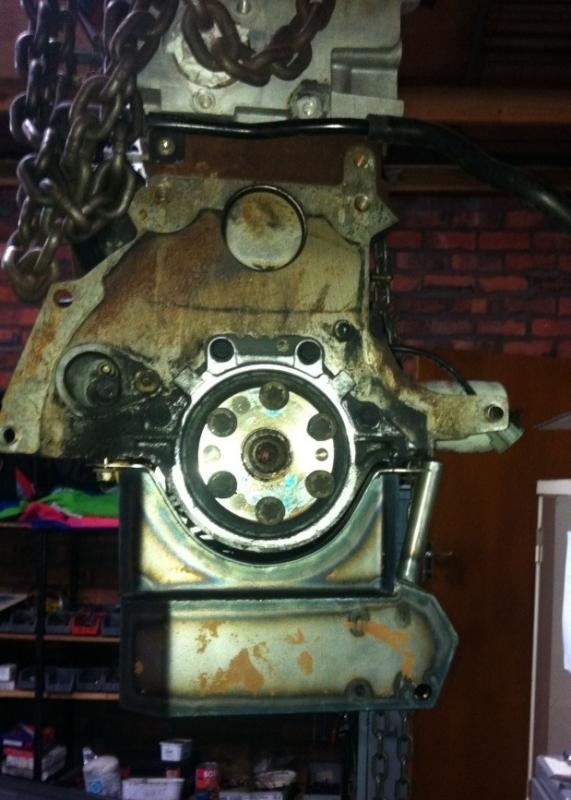
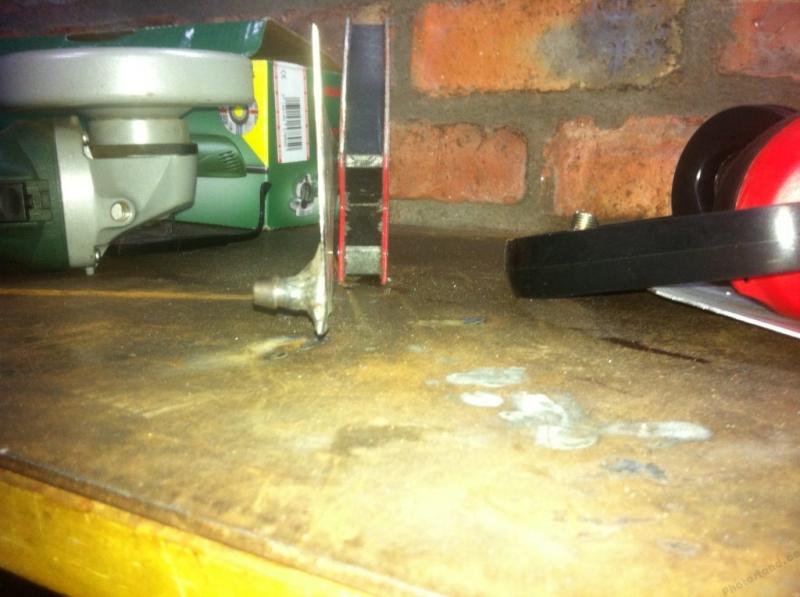
I removed the old sump to do a preliminary fit of the new one to get more info on my cross member design.
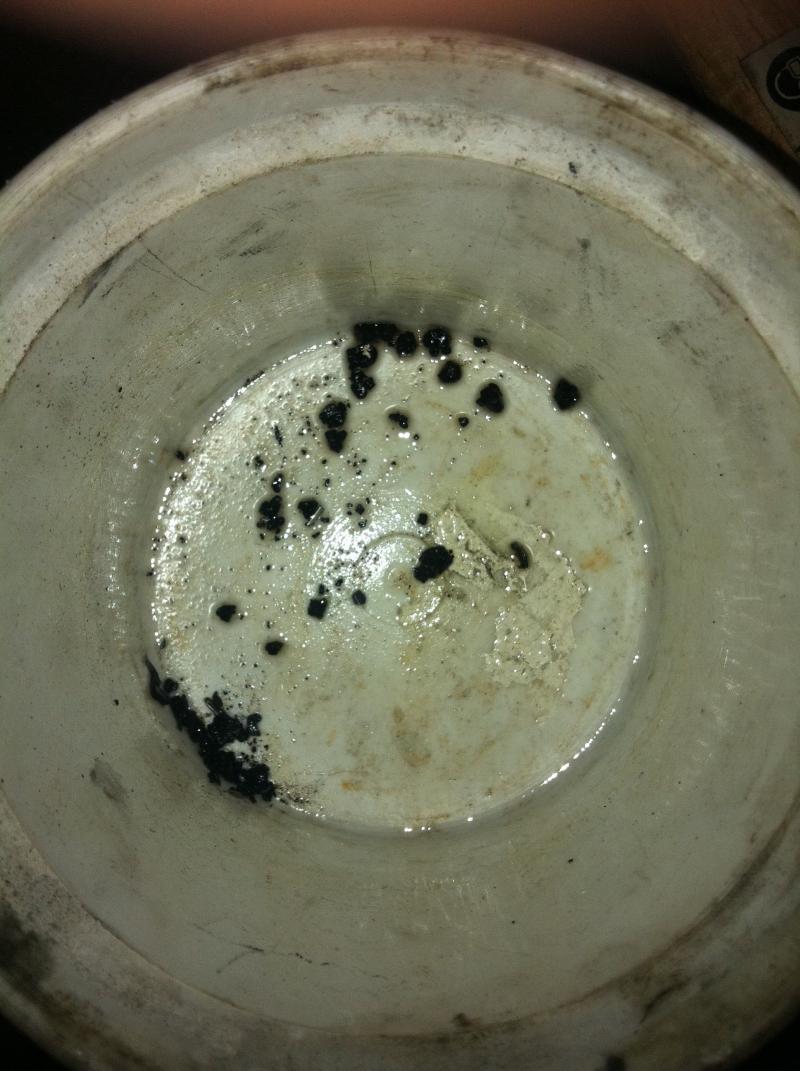
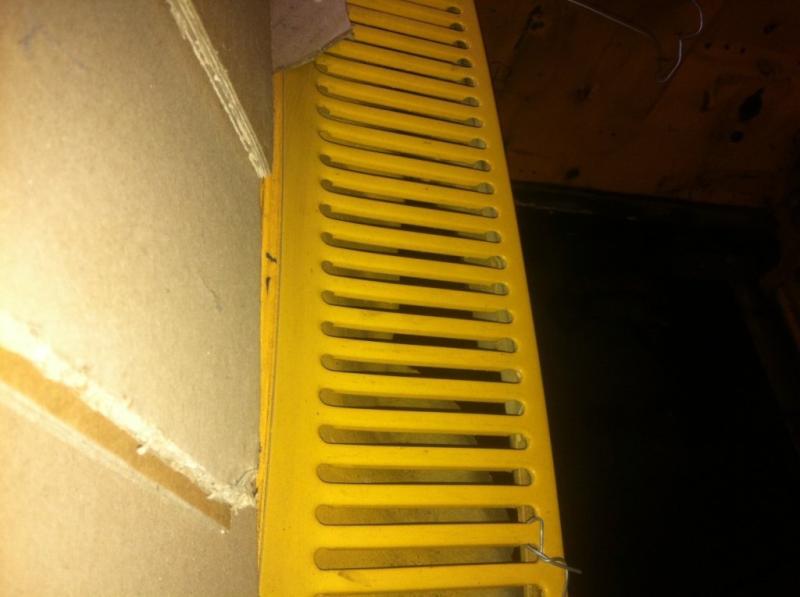
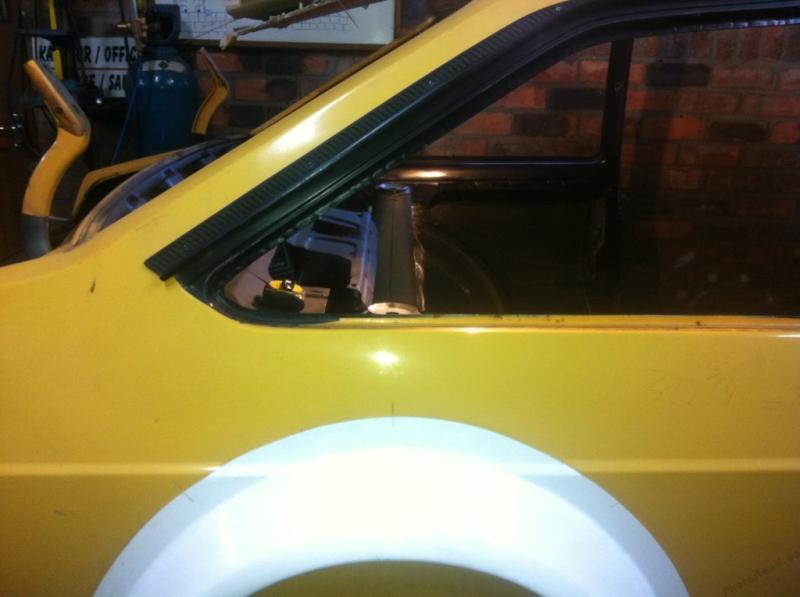
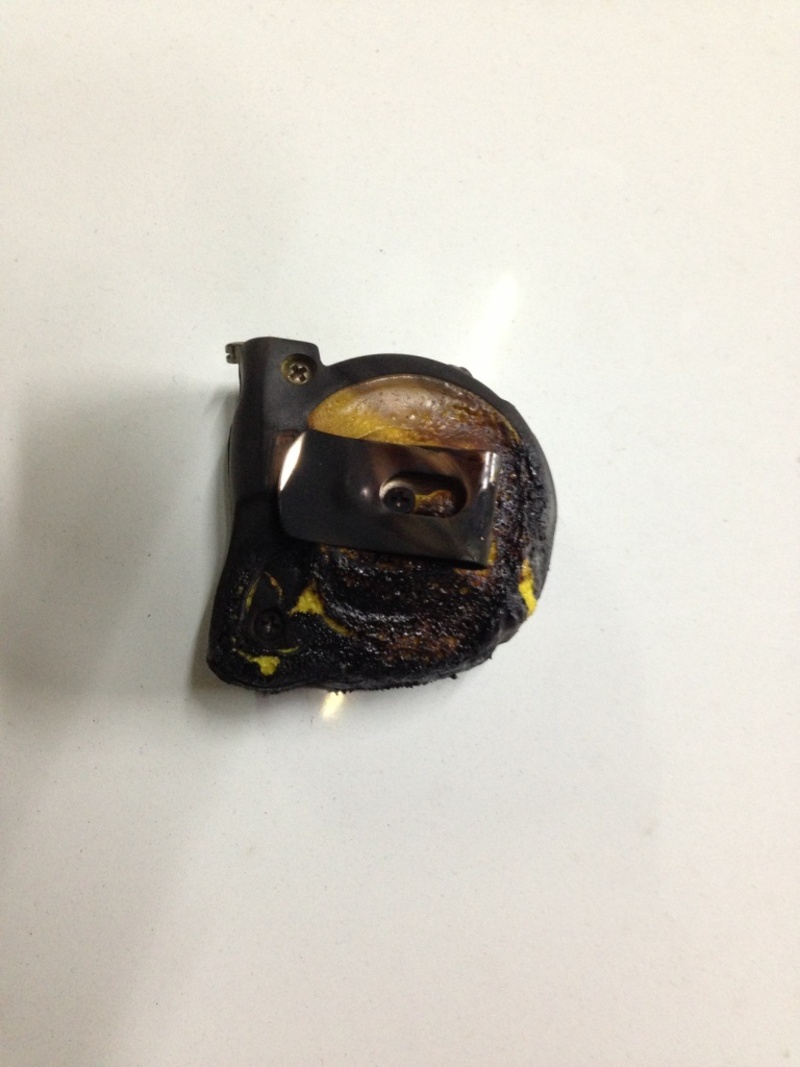
Found something in the old sump that I have not seen in a sump before, it�s black, hard and small but can be crushed!?!?!?! What can this be? My feeling it is like a carbon buildup of some sorts.
Something interesting I did not know. Oil sprayers for the pistons or conrods
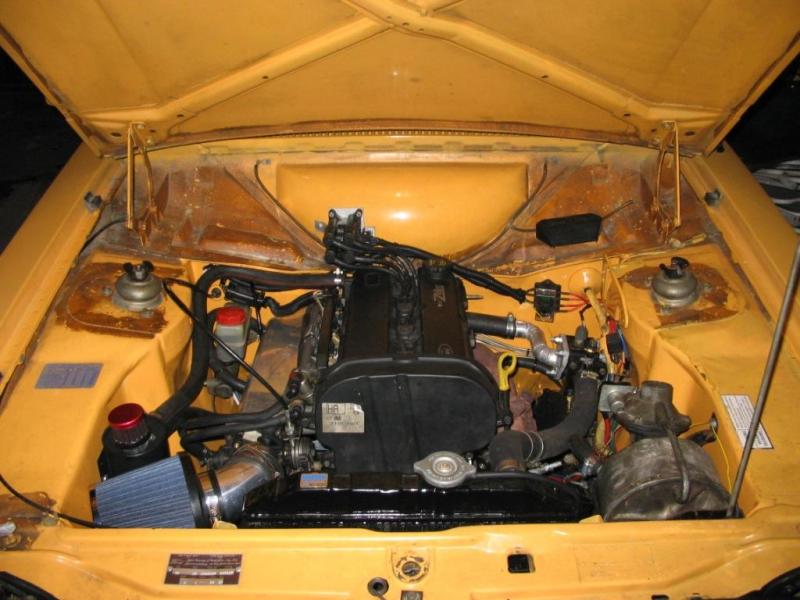
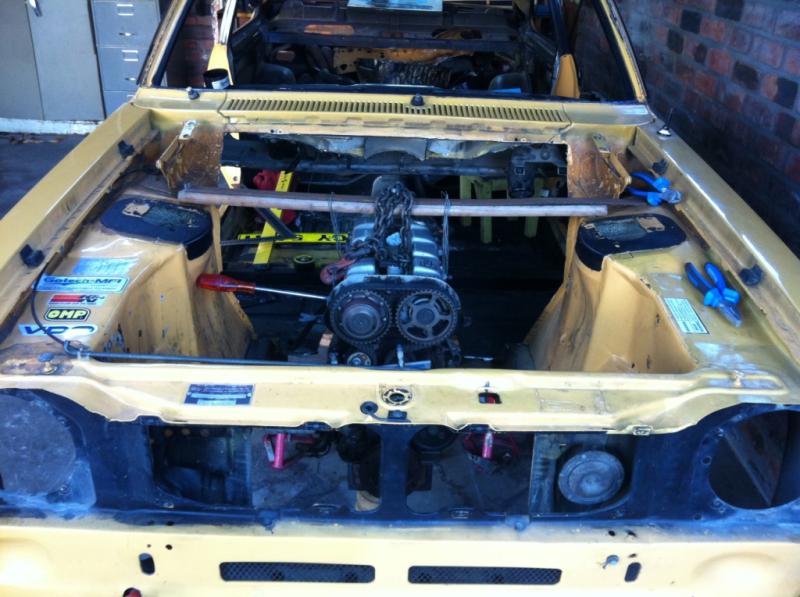
New sump on my Duzetec motor. Yes it�s not 100% a Zetec and not even 1% a Duratec but got called a Duratec.
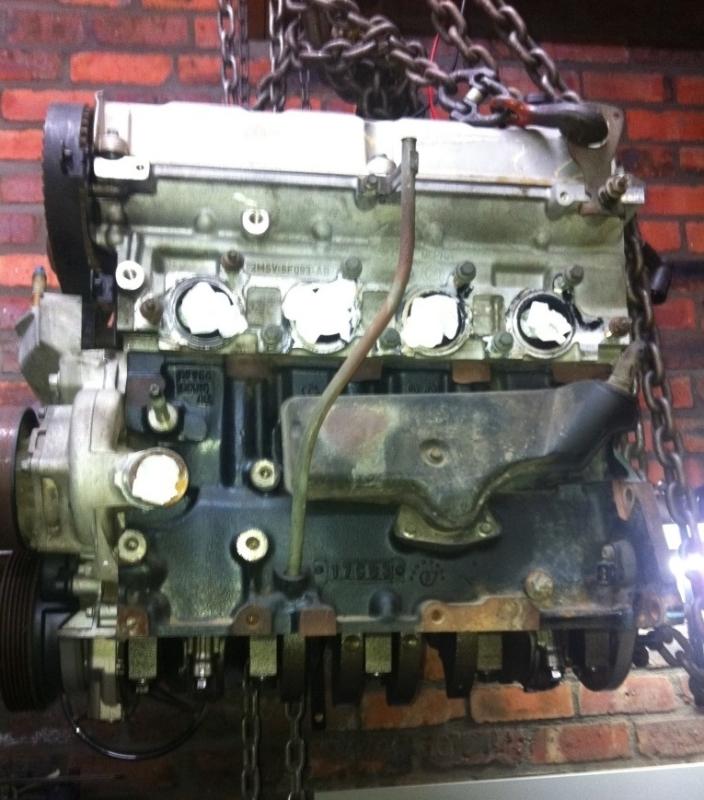
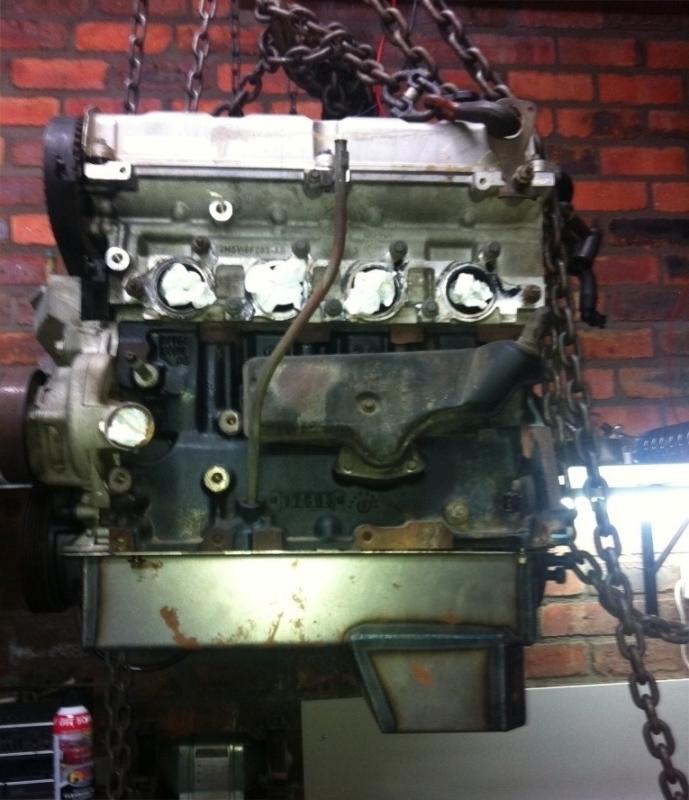
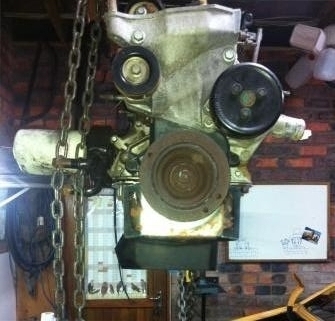
Bolted the Borg Warner T5 to my Duzetec. Fits with no problem
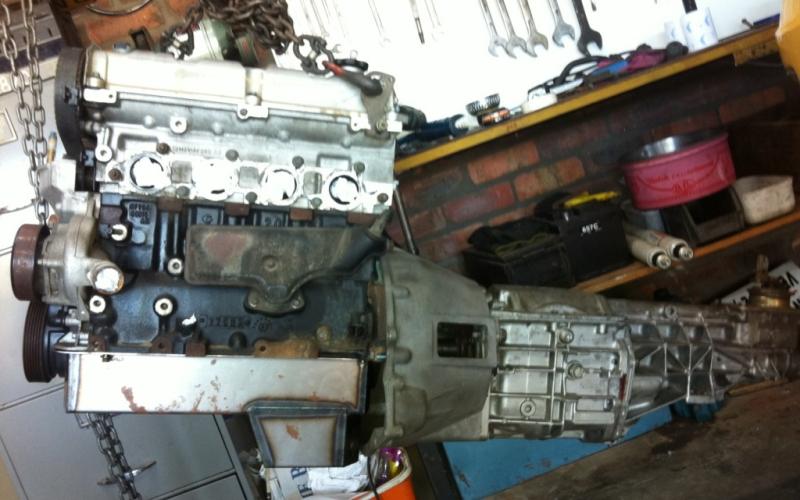
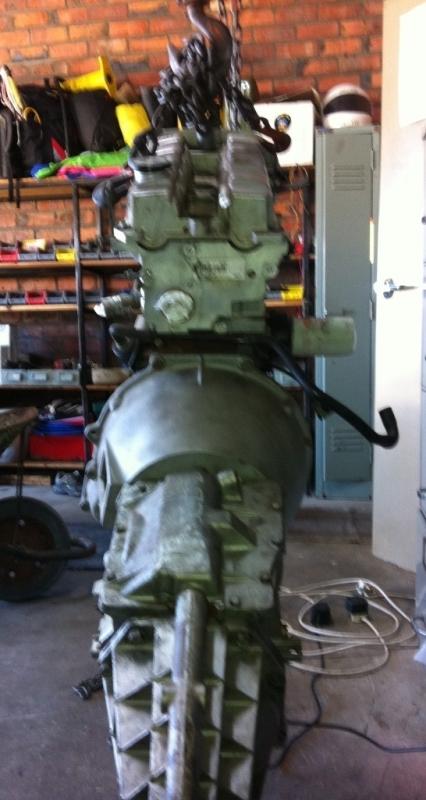
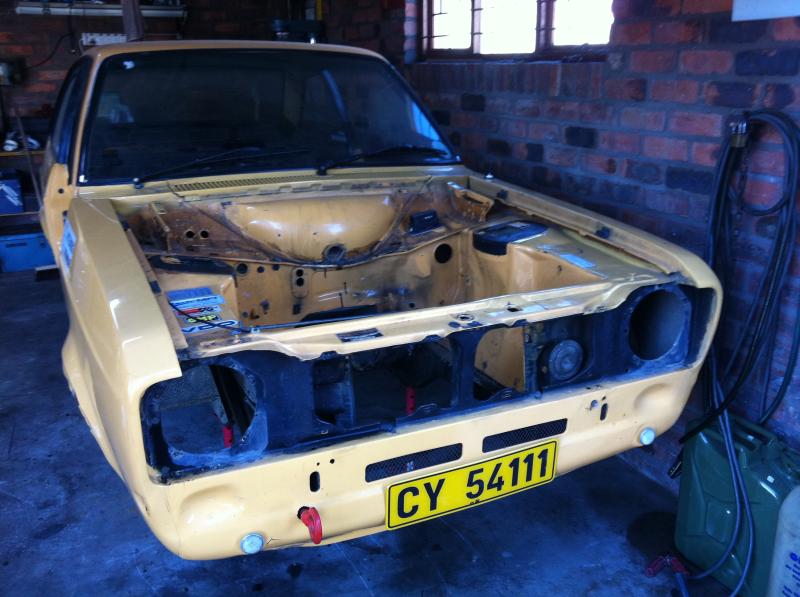
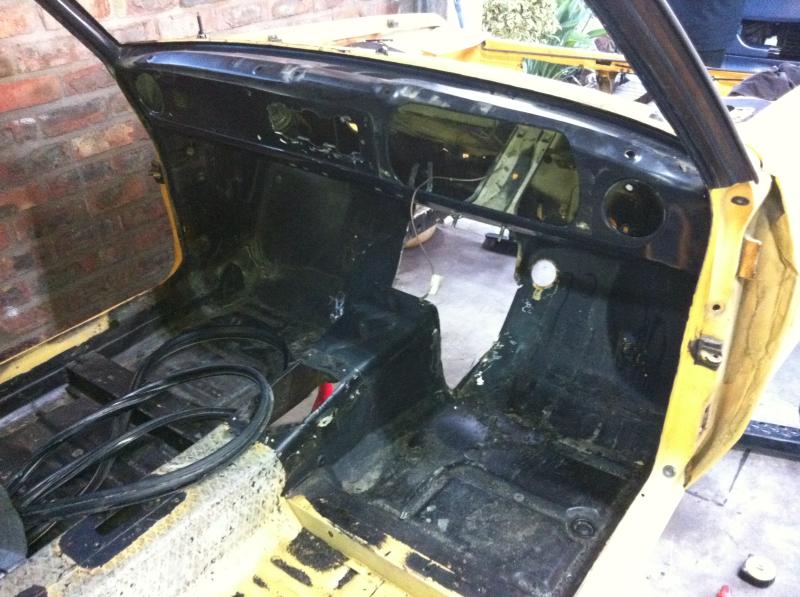
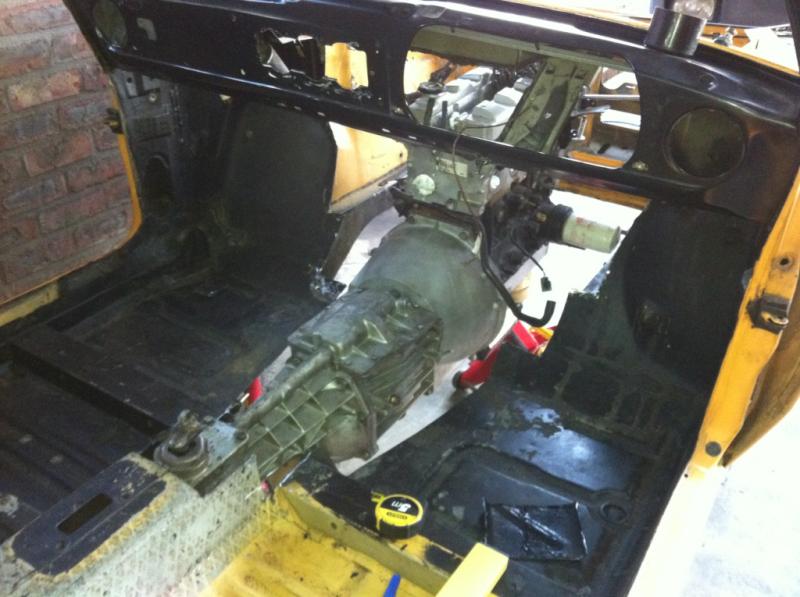
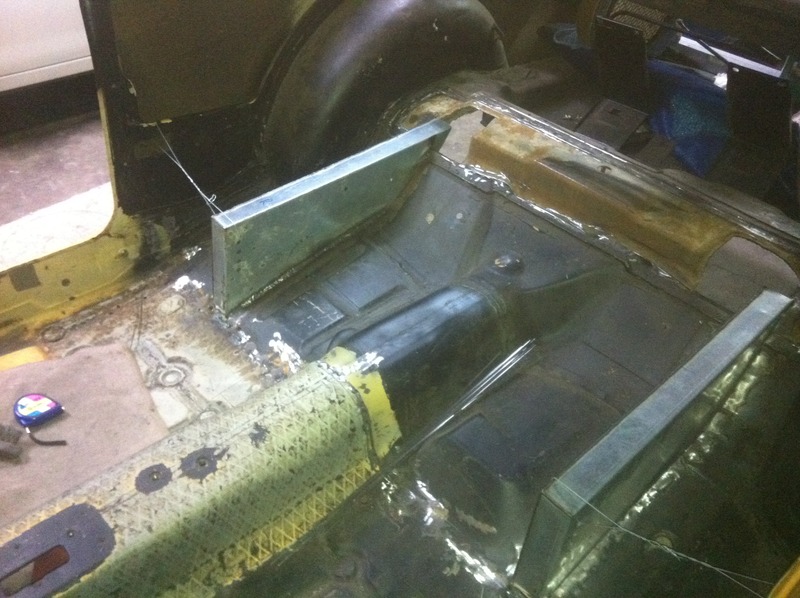
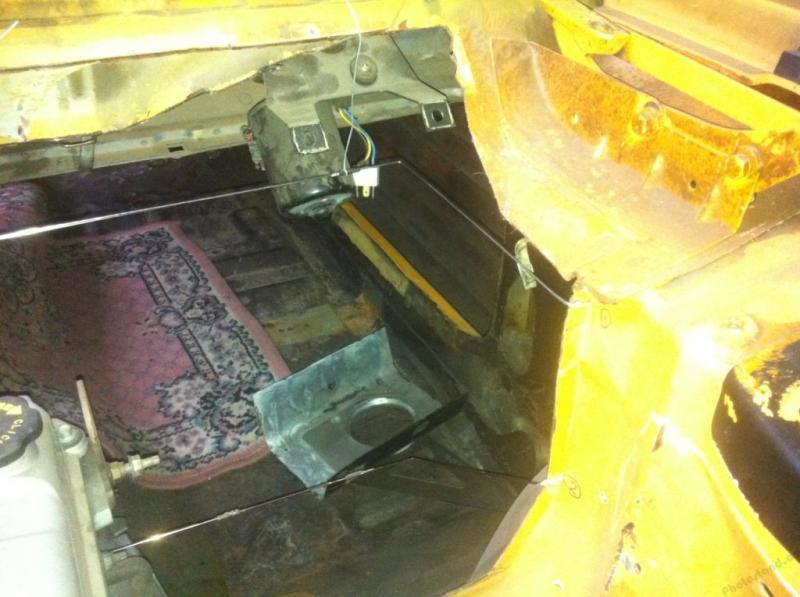
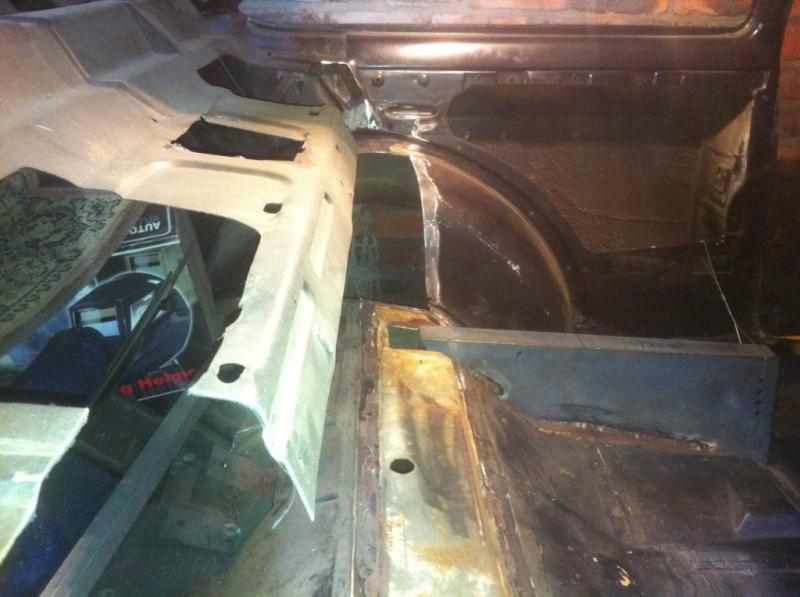
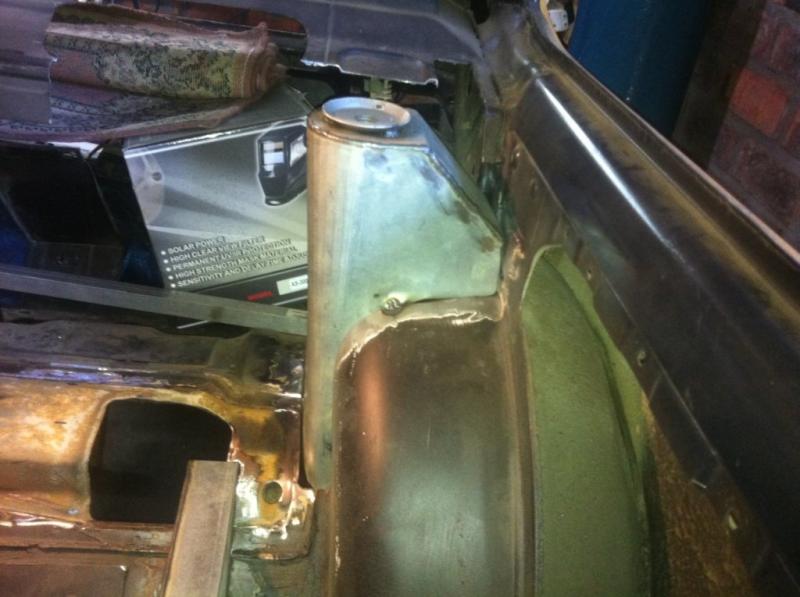
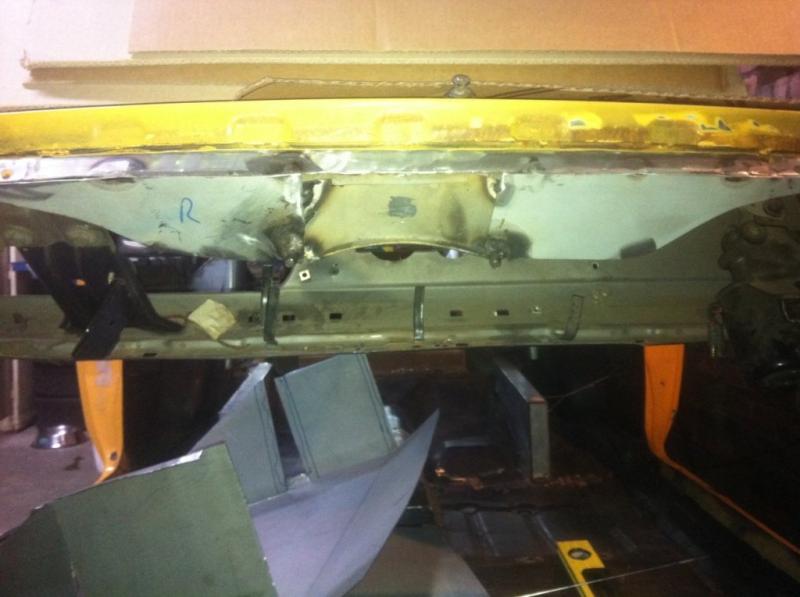
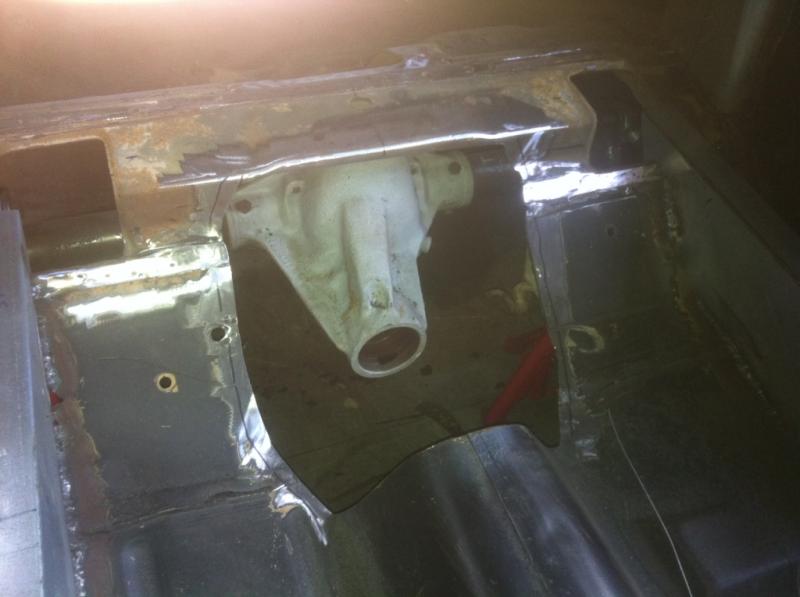
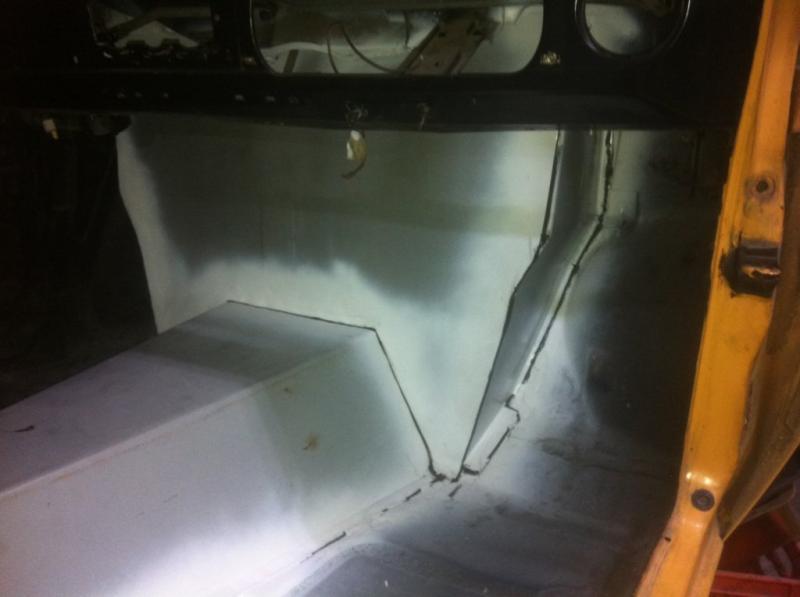
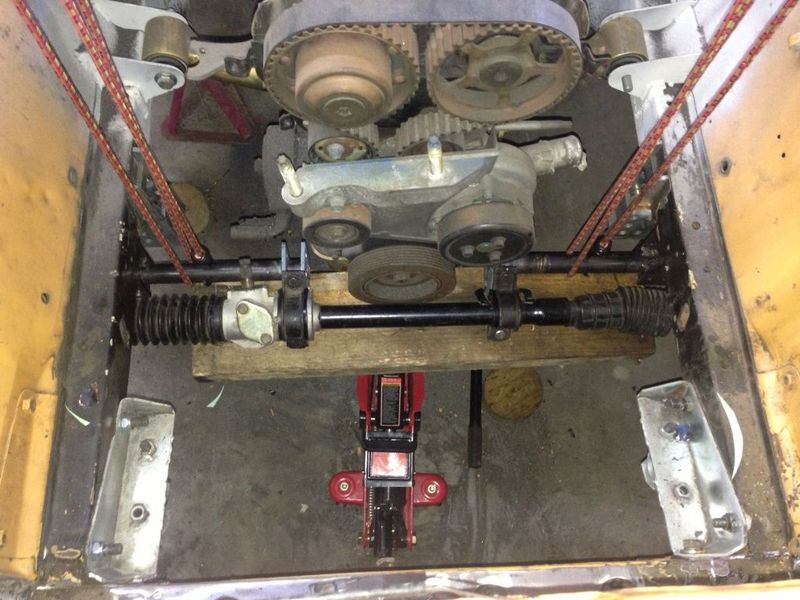
I have cut out the fire wall and most of the gearbox tunnel to positioned the engine and gearbox. I have moved the engine back about 100mm from the existing fire wall and as low as possible to try and improve the balance and handling of the car.
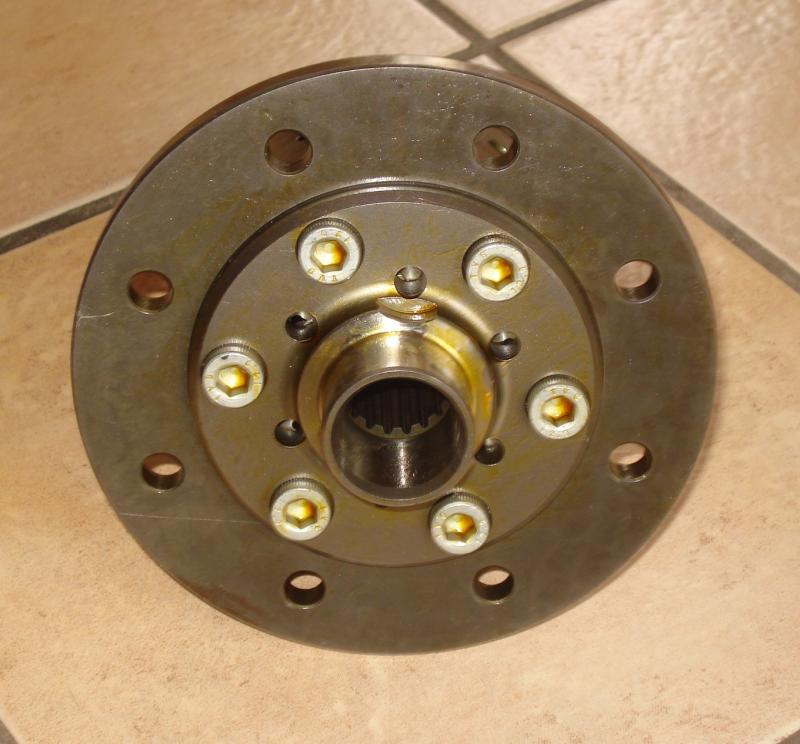
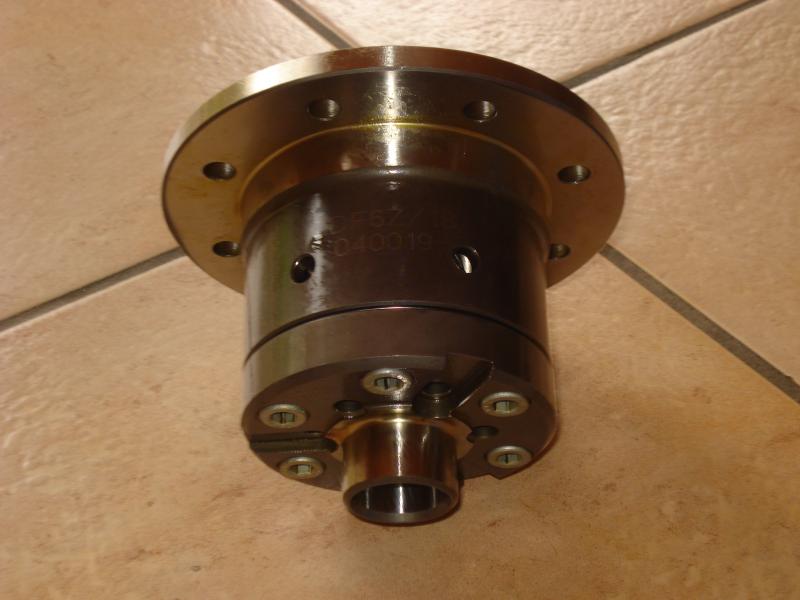
Atlas Axle casing landed from Fostek Engineering
Came with all bearings and 4.6 CWP
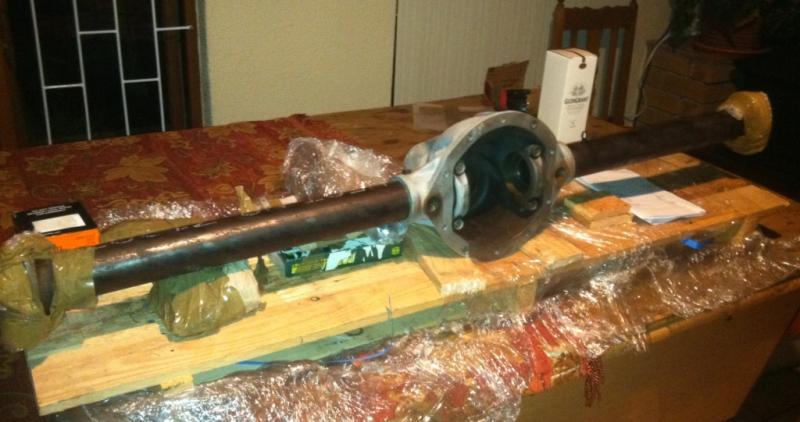
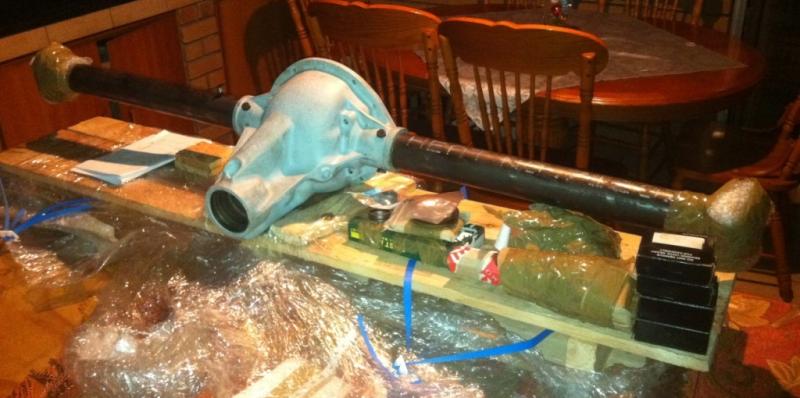
Below is a picture of how the Axle setup should be.
That is it for 2011. 2012 to follow shortly

T5 Gearbox

Quaife Half shafts
I stripped out the Escort of all the items I was not planning on using, which were basically 90% of them. I sold probably most of them and only kept what I was planning on putting back like the dash, grille, lights and bumpers and so.


I bought two of the Duratec engine as I got it for a good deal, the one seems to have been in a front smash accident but the other one seemed fine. I stripped it from all the un wanted bits to get the measuring and fitting going.


I wanted the engine as low as it could possibly be and as far back as I could get it. This caused a lot of headaches, but more of that to come.
I proceeded to do some cutting out for the new gearbox tunnel. Can�t remember if this was before or after I got the idea to move the fire wall back.


Due to the engine moving so low the standard cross member had to be removed and to be replaced by a new designed one

I decided to go with an imported Atlas axle from the UK. This is an Axle that offers plenty of aftermarket improved parts. As they are not available in South Africa, although some people do claim there are Atlas Axles here, I could not find one and all of the cars I was told might have them did not have an Atlas Axle in.
I did a preliminary back arch fit to measure up to order the Atlas axle. They can be ordered in different lengths and the quaife half shafts comes in an extra-long length to allow you to shorten them if required. This gave me a measurement of 1720mm arch to arch


To get things going on the suspension I changed the polybush end to IKO Rod end on my already adjustable lower control arms.

I removed the old sump to do a preliminary fit of the new one to get more info on my cross member design.
Found something in the old sump that I have not seen in a sump before, it�s black, hard and small but can be crushed!?!?!?! What can this be? My feeling it is like a carbon buildup of some sorts.

Something interesting I did not know. Oil sprayers for the pistons or conrods

New sump on my Duzetec motor. Yes it�s not 100% a Zetec and not even 1% a Duratec but got called a Duratec.


Bolted the Borg Warner T5 to my Duzetec. Fits with no problem


I have cut out the fire wall and most of the gearbox tunnel to positioned the engine and gearbox. I have moved the engine back about 100mm from the existing fire wall and as low as possible to try and improve the balance and handling of the car.


Atlas Axle casing landed from Fostek Engineering
Came with all bearings and 4.6 CWP


Below is a picture of how the Axle setup should be.

That is it for 2011. 2012 to follow shortly


 18-03-2015, 10:11 AM
#7
Virgin
Thread Starter
Join Date: Feb 2015
Location: Cape Town
Posts: 8
Likes: 0
Received 0 Likes
on
0 Posts
2012
So this is what I did during 2012
I finished the engine mountings, now to the gearbox mountings
I have moved to the back end of the car as I am waiting for somebody to bring me my gearbox mounting steel.
I had to put the wheel arches back on to establish the center line off the rear axle.

I have cut the slots for the 4 link system. Removed the rear seat mounting and where busy removing some more unwanted steel.
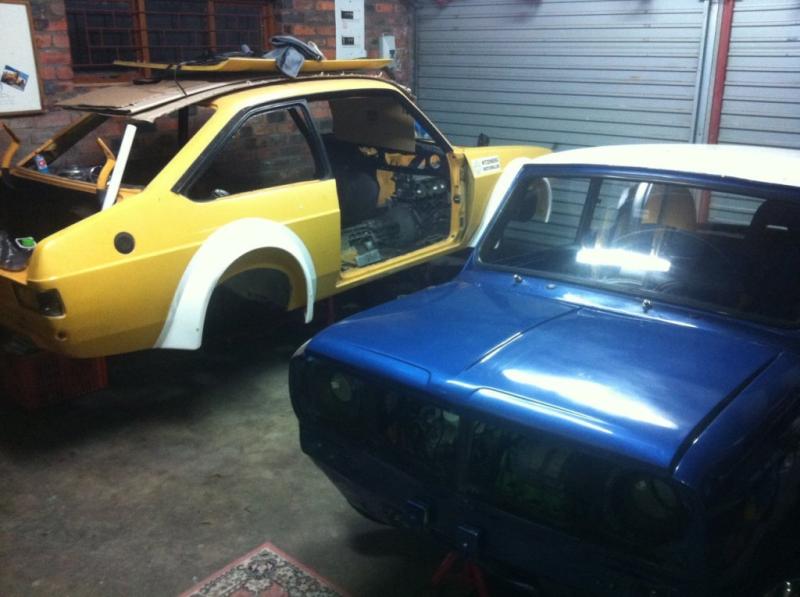
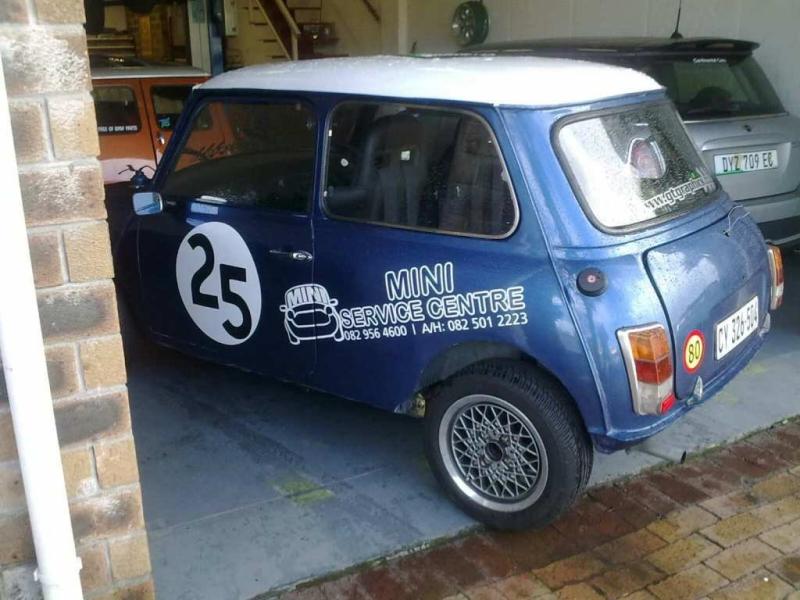
In between my build I bought and fixed up a Mini to do some Gymkhana, the urge was there to be involved in some racing.
This actually took allot of my time as it broke as much as I raced it.
It went from supposed to be a cheap no maintenance interim gymkhana replacement car to costing me allot off unnecessary bucks and taking up all my free time.
See problem below
Ok, back to work on the FORD,
I have picked up a sponsor for the Mini so now I have someone to help out on the Mini, thanks Mini Service Centre
I now had more free time for my Scort
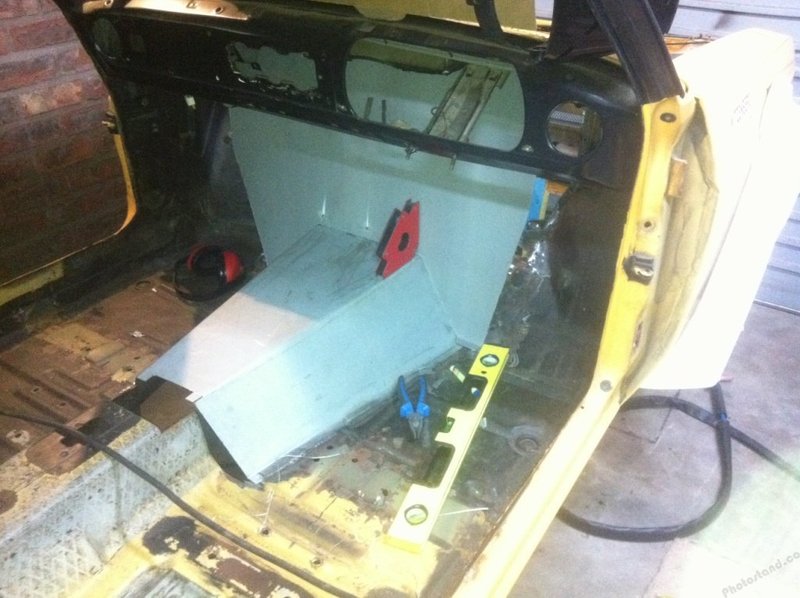
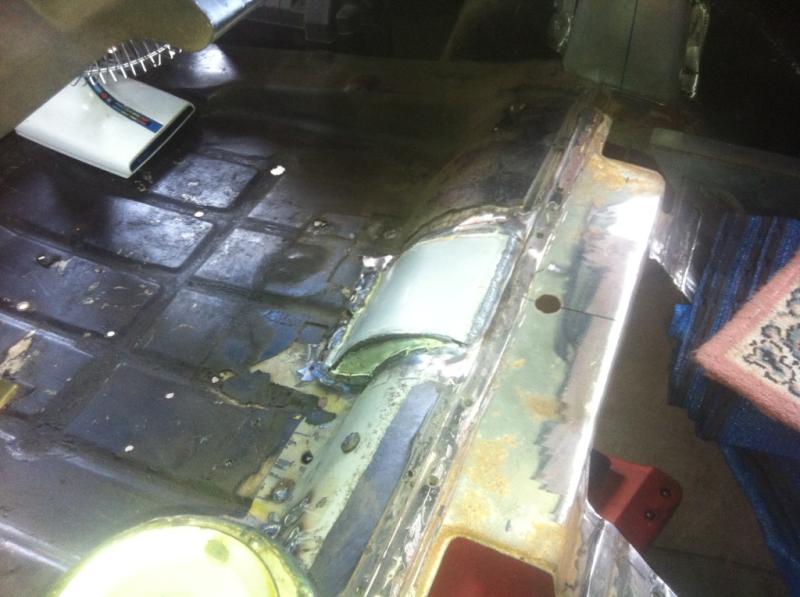
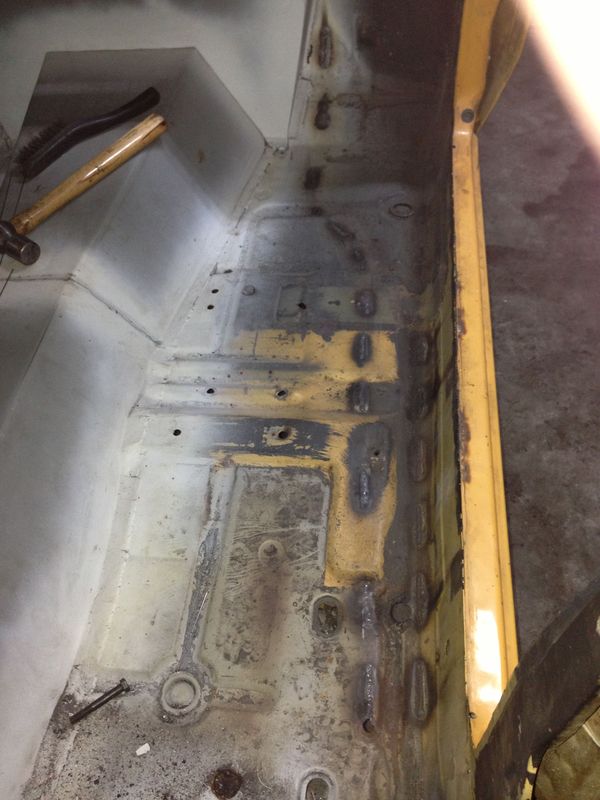
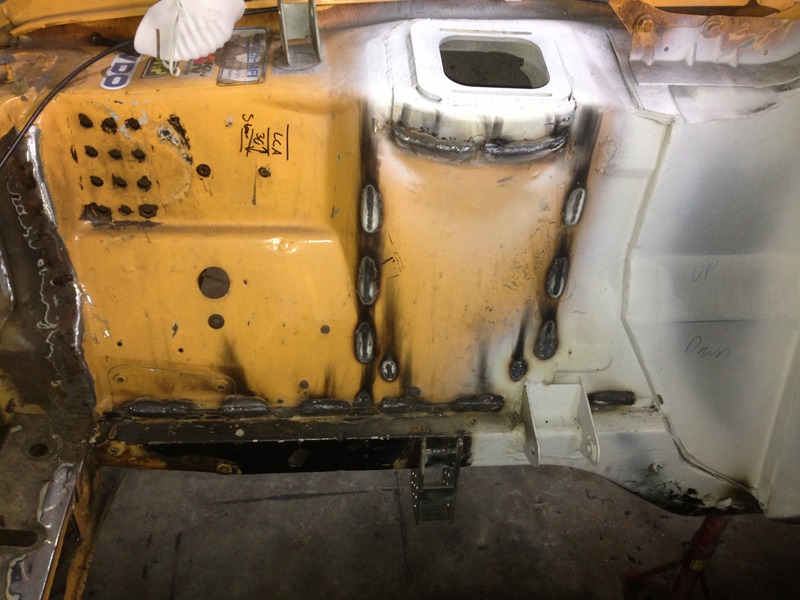
I have cleaned out the inside of the body of all the unnecessary metals and double plates in preparation for welding in the new parts.
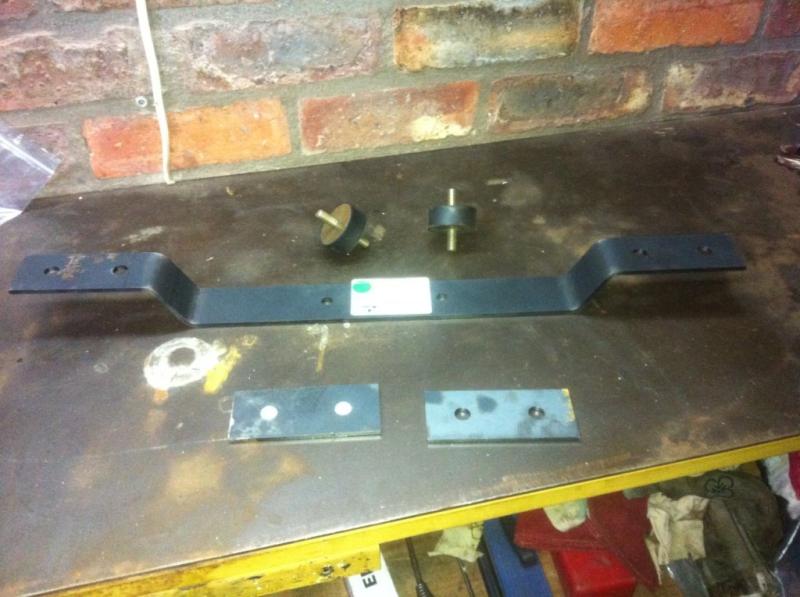
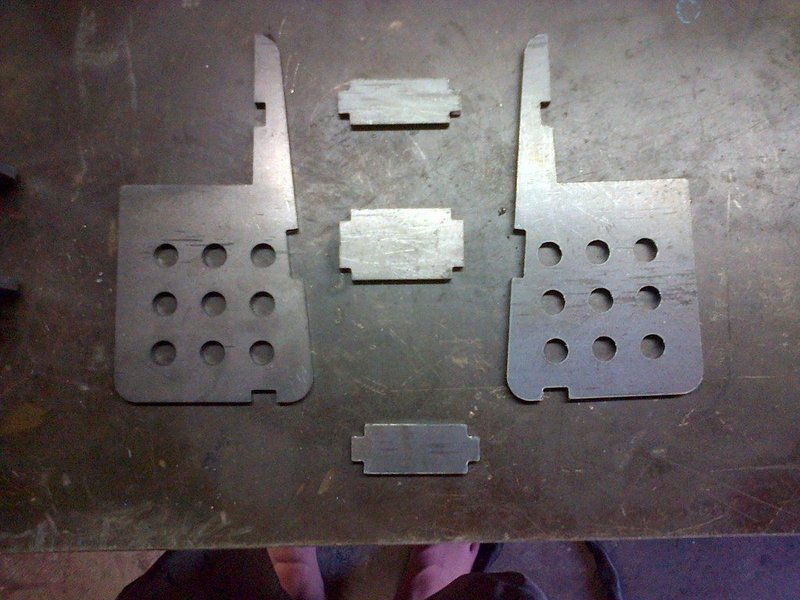
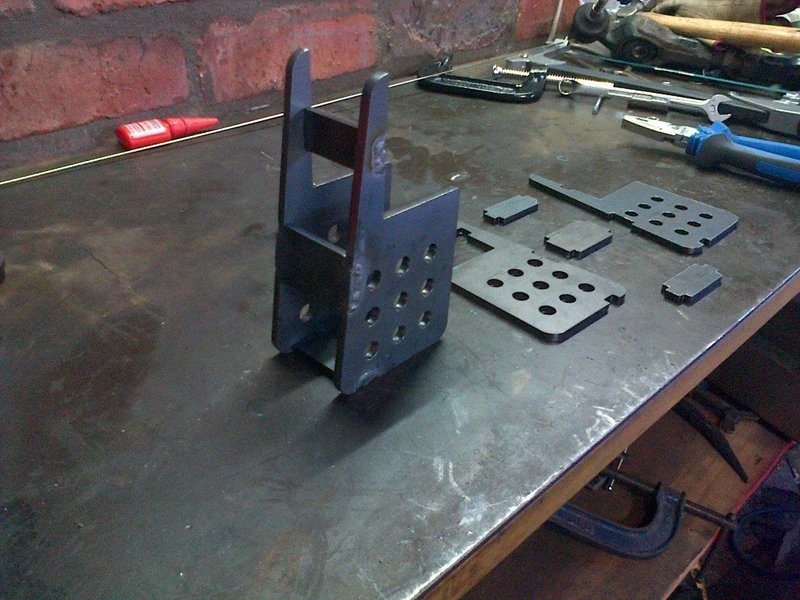
I sent my gearbox mounting drawing in for laser cutting and bending, got that back.
The reason for the long strait bottom is so that I can run the exhaust between the gearbox and in the tunnel.
I did not want to go below the mounting for the exhaust because then it would be too low as I have already mounted the engine and gearbox as low as possible.
Also did not want to make an additional tunnel next to the bracket just for the exhaust.

I made some top plates for extra support which I will most probably weld in.
Once I cut back the tunnel there will be enough space for the exhaust.
Since the last update I completed removing all the double plates. Really f up my back on this, still in pain
Next up is to clean the metal for welding. I will then start welding in the 4 link boxes soon
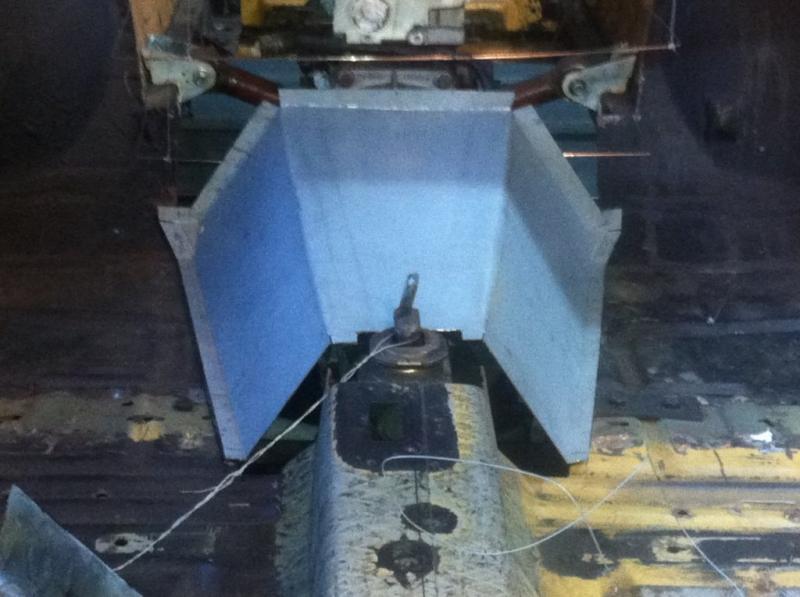
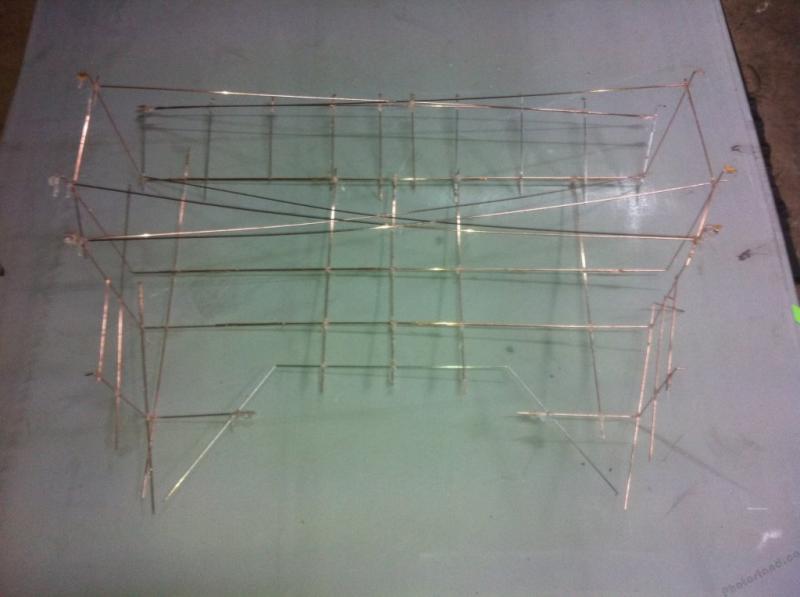
Started making my new gearbox tunnel out of wire and cart board as a sample before I get to the metal work
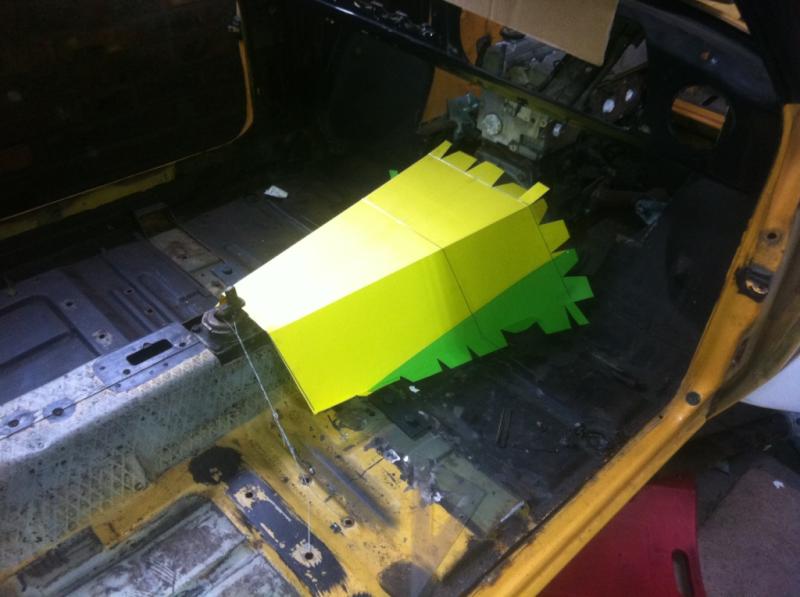
For some this might not be a big deal, even only a second nature.
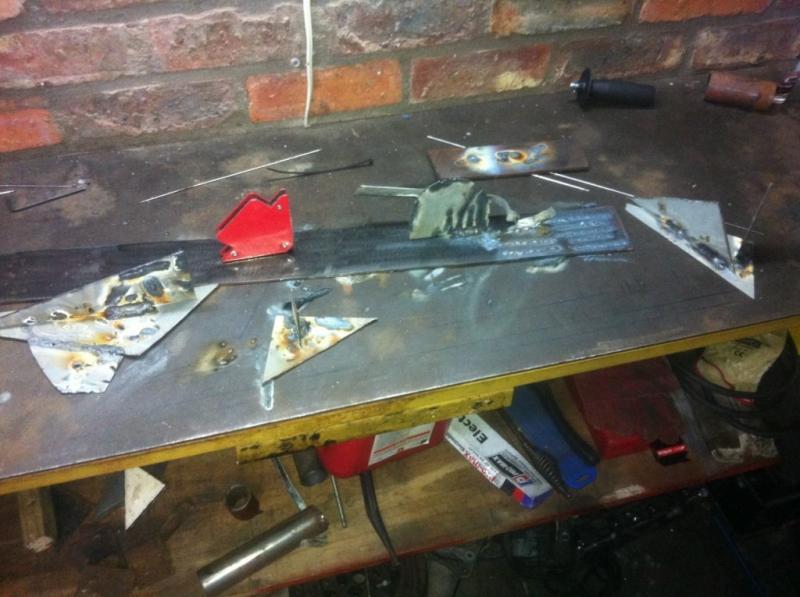
After some practice and even giving up I eventually got the hang of TIG welding
Did some practice
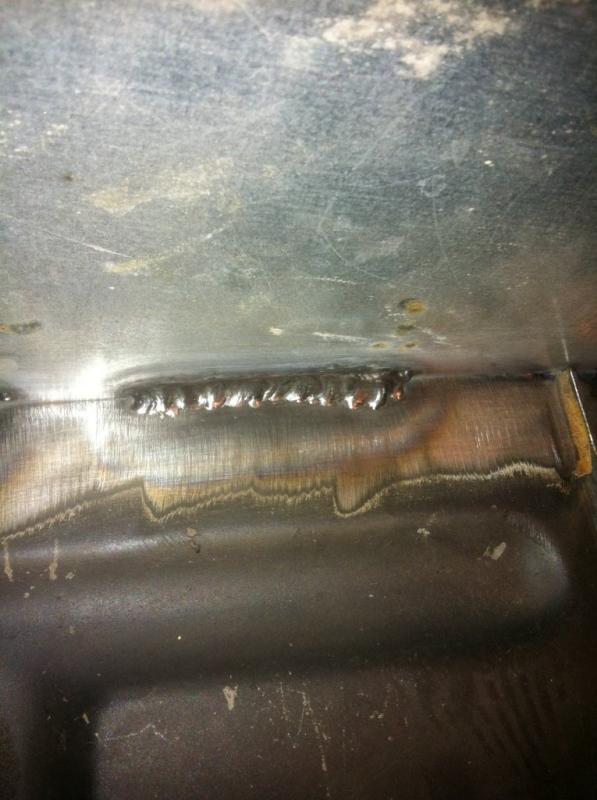
Started with the 4 link kit. Did some spot welds to keep it in place.
Think the welding so far looks good
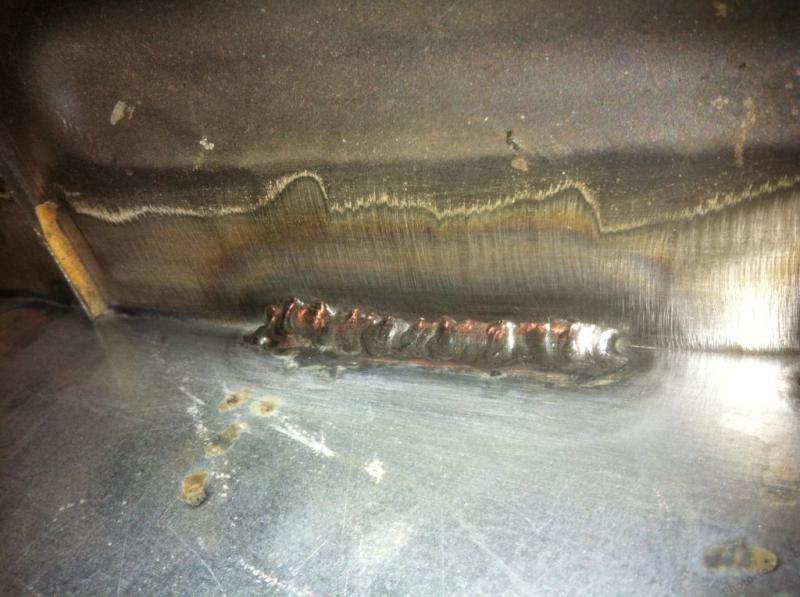

I am now confidant to weld the car and must say proud that I have the hang of TIG welding
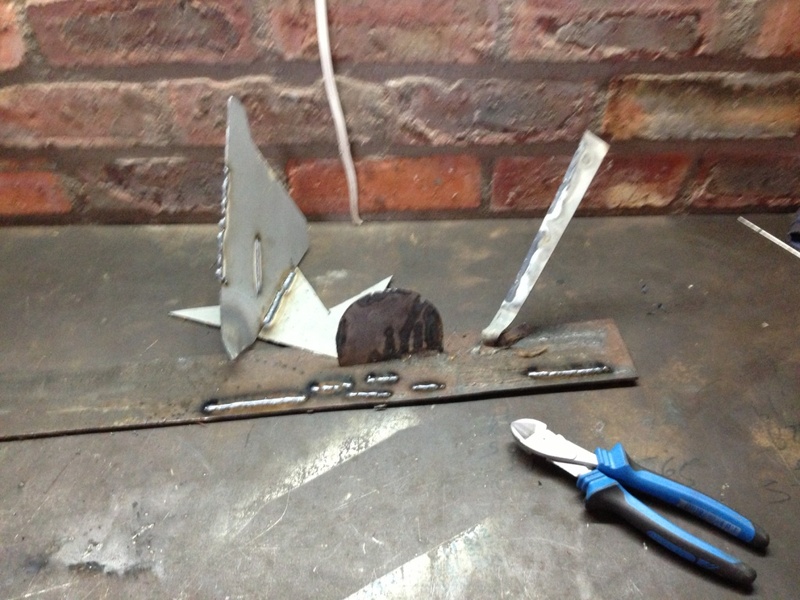
Have been working on the welding of the 4 link brackets. I find the most difficult part of the welding the uncomfortable positions that I have to weld in. It is a slow process as I can only weld in a certain position for about 15 minutes.
This is what is welded so far
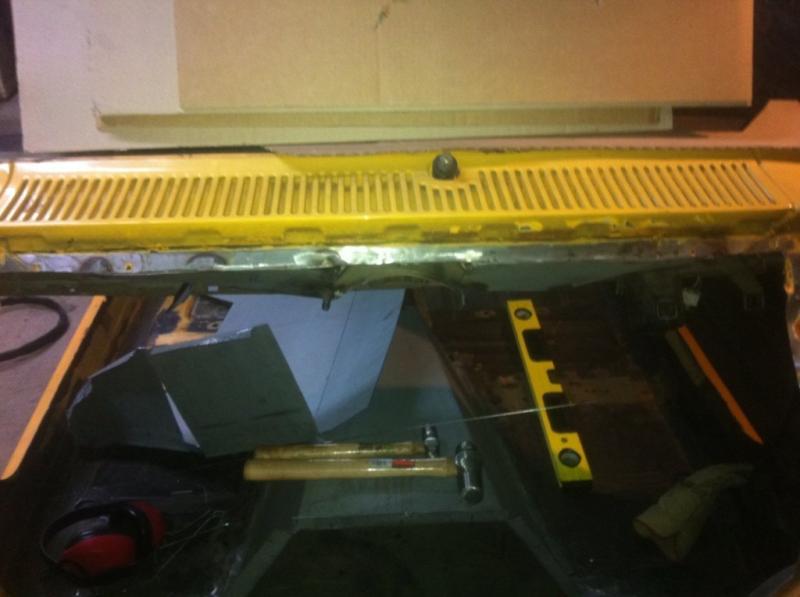
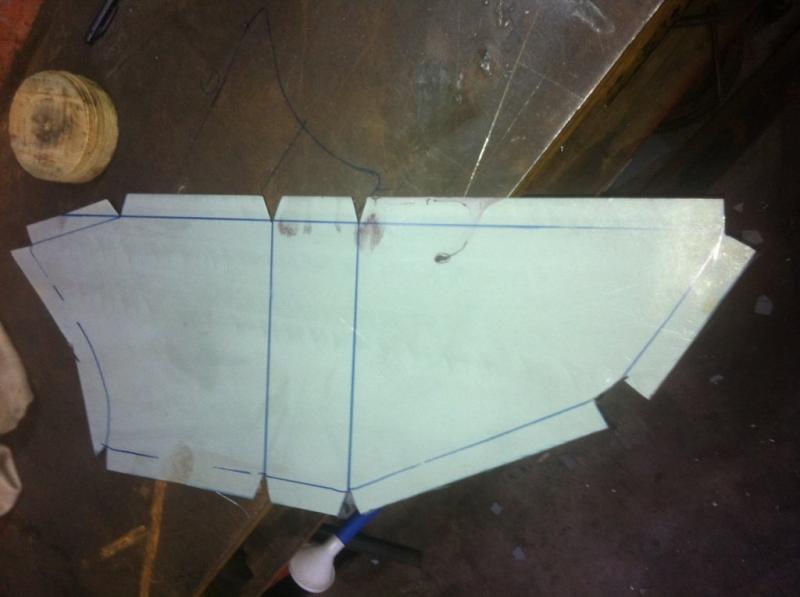
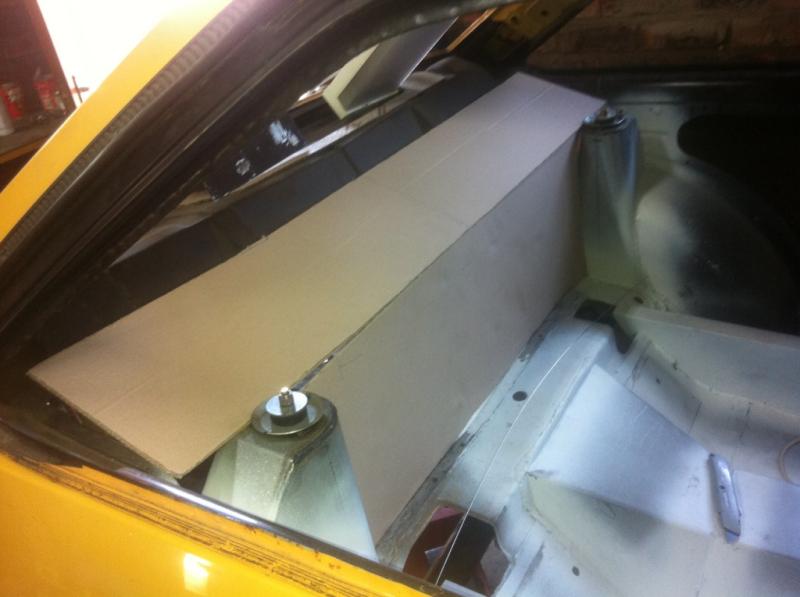
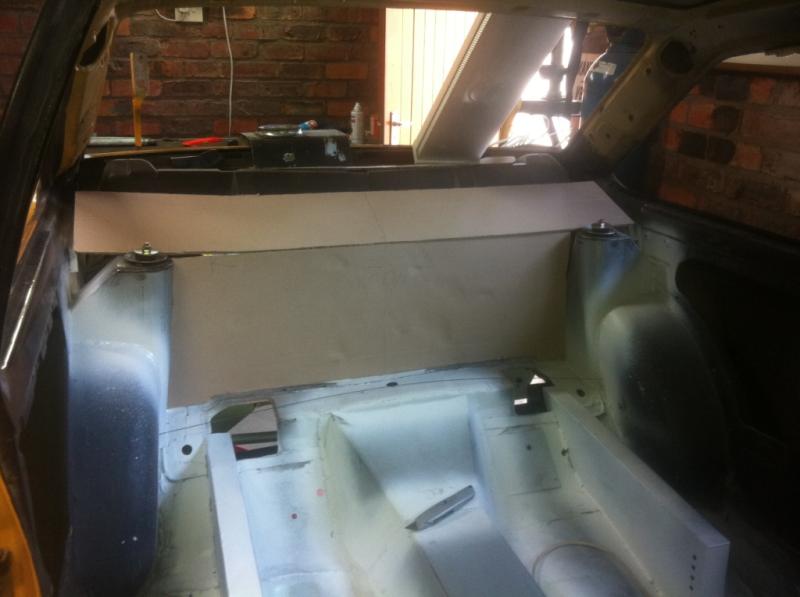
While I take breaks from the welding I started working on closing the front fire wall. I use the tig welding rods and bend them in the shape that I require. From there I will make a cart board sample and then move on to the plate. I am planning on buying some 1,2mm electro galvanized plates to start closing all the big holes in my Ford
Have anybody fitted the turrets as supplied from Rally design or from other suppliers or your own. Mine does not seem to puzzle in???.
Last one. Is the best way to mount your rear coil overs on your axle 100% vertical, angled or what is the theory behind this?
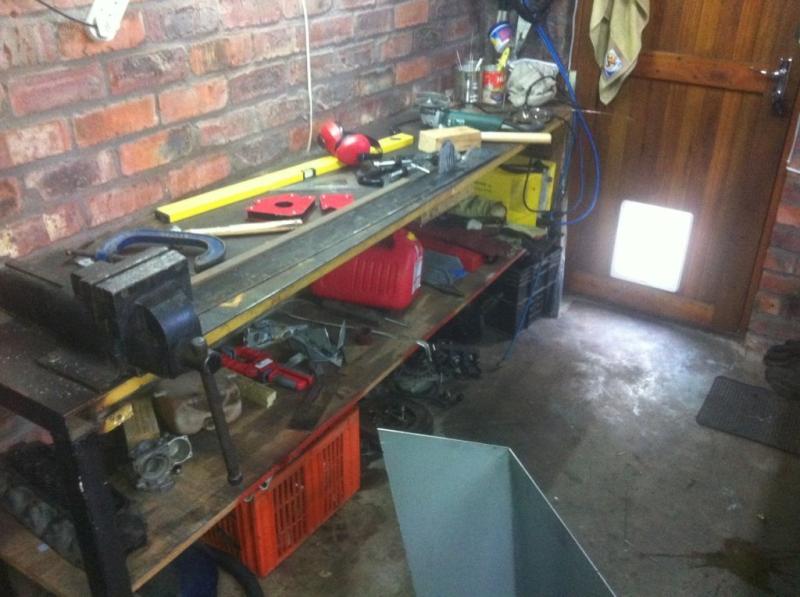
I picked up my sheets of 1.2mm electro galvanized sheets.
I then started with the gearbox tunnel.
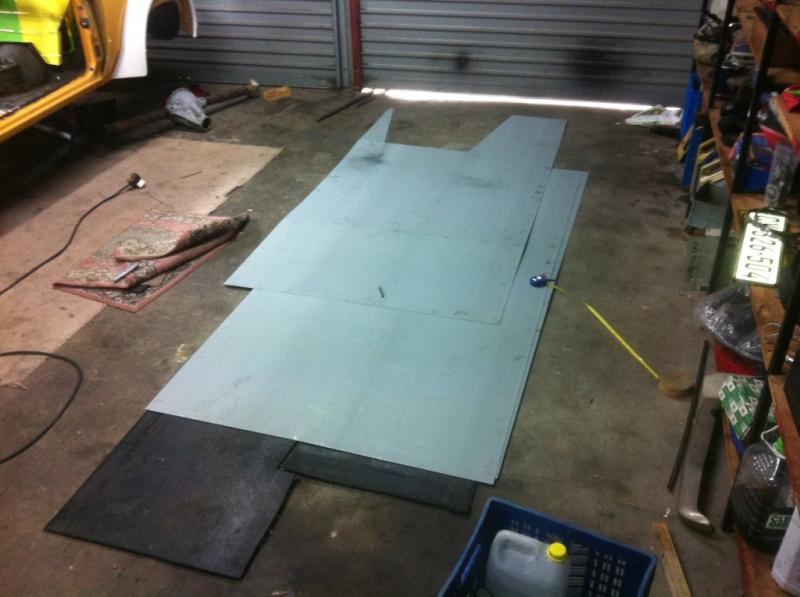
I have decided to bend the sheets myself.
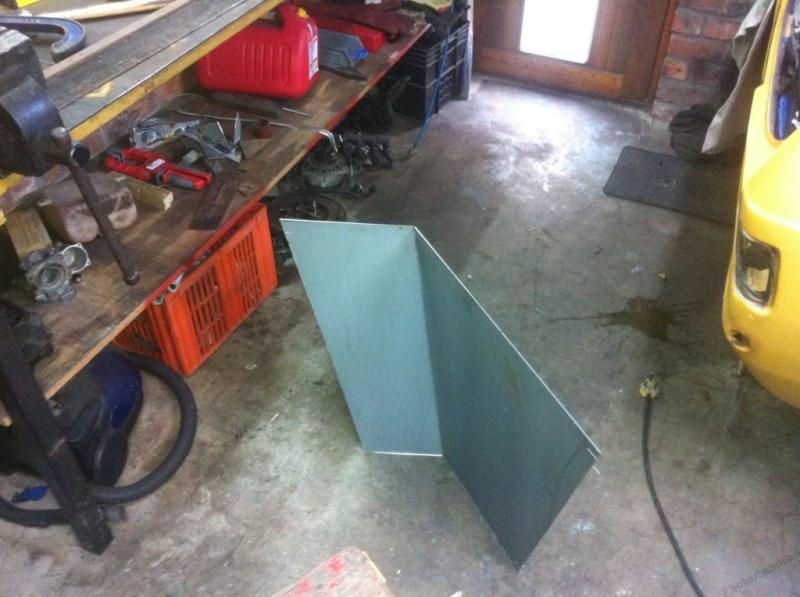
How I did this was by clamping down two pieces of steel on top of the sheet on the work bench on the line of where I wanted to bend the steel. I did put a piece of 1.2mm metal sheet in the middle under the plate as I found that the forces in the middle of the steel used for clamping was bending slightly and this resulted that the middle of the sheet making a long bend and not as sharp as at the ends. I pushed the plate evenly to get my desired angle.
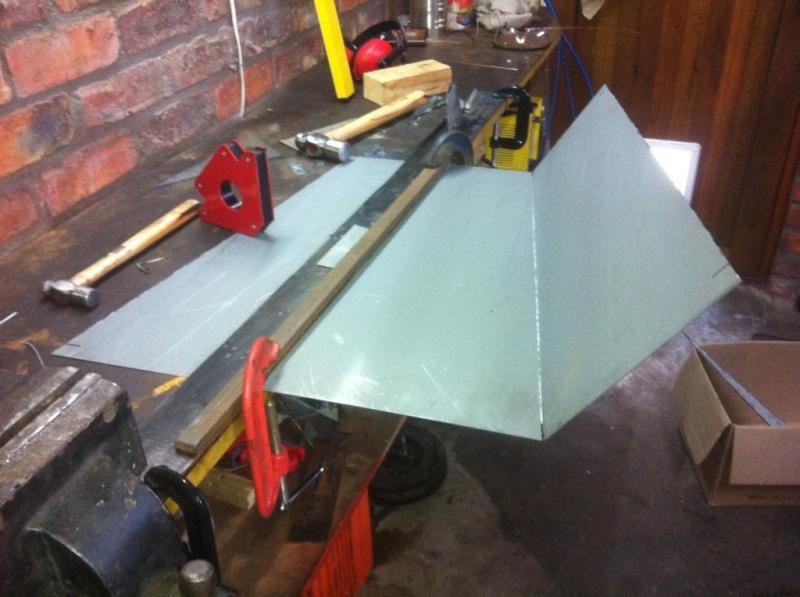
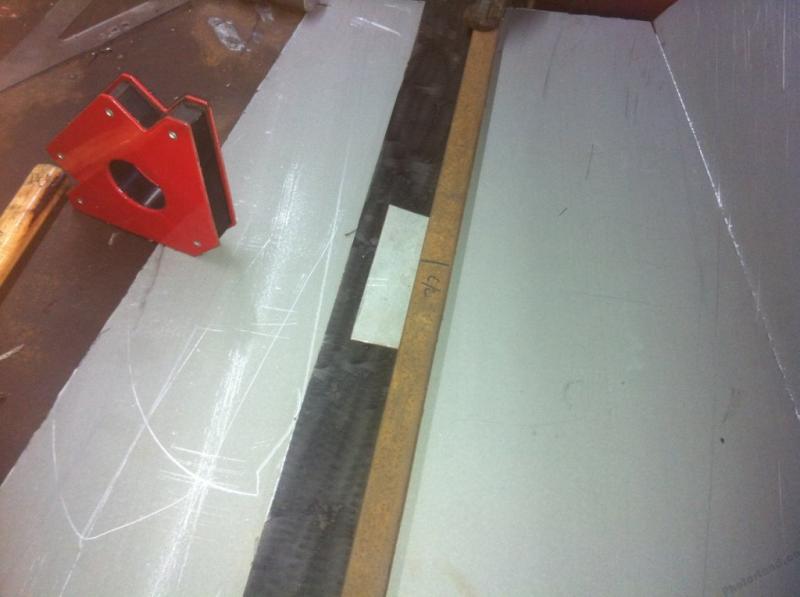
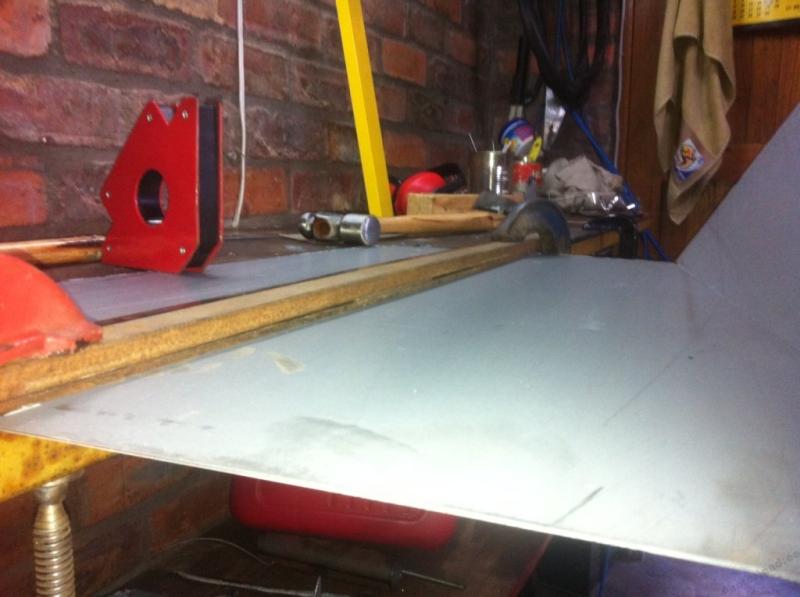
I used a block of timber and a hammer to get a slightly sharper bend. I use the timber block to spread the blow of the hammer to prevent dents. I still got some dents but you can hardly see them. Can more feel them

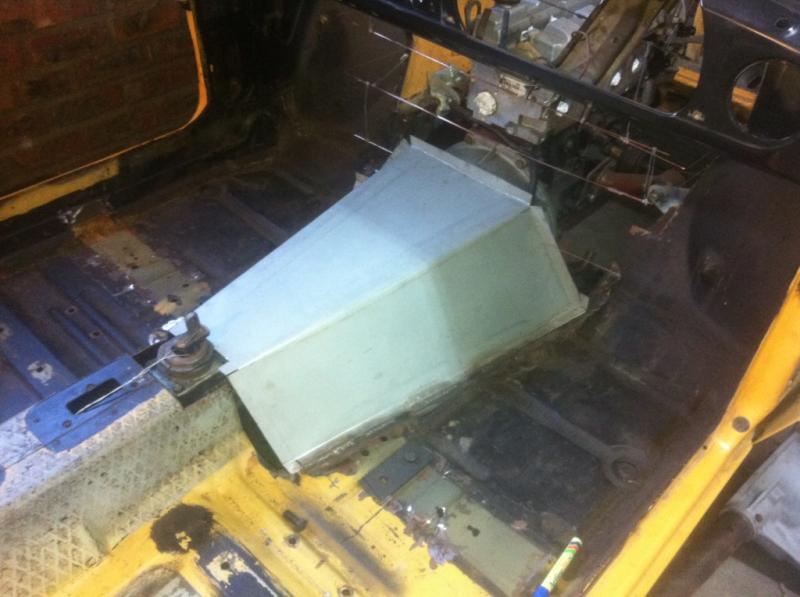
The result - my gearbox tunnel
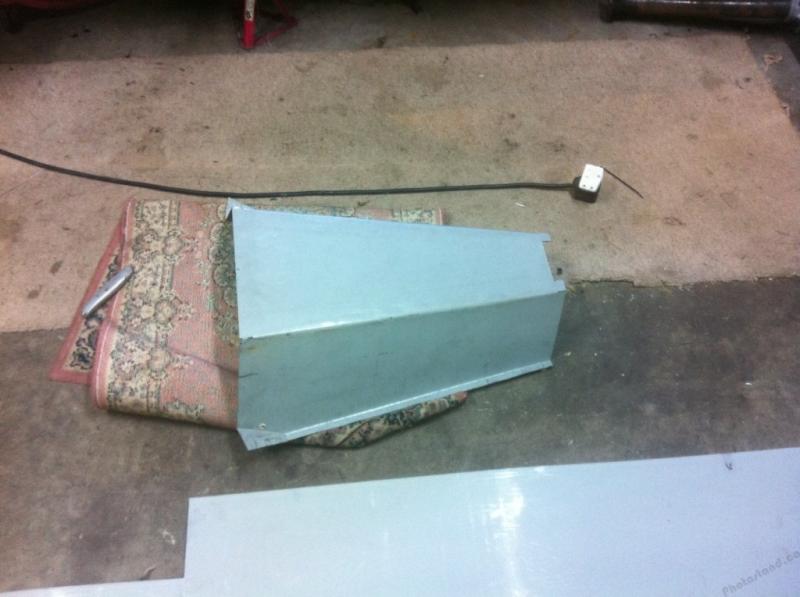
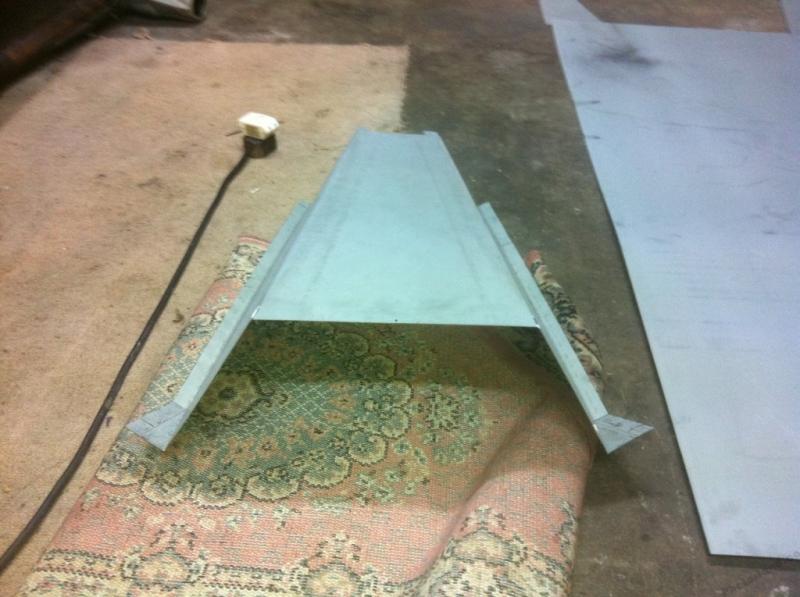
I have cut the last bits of steel out for the new tunnel.
There is now more than enough space to run the exhaust next to the gearbox
Now just to weld in
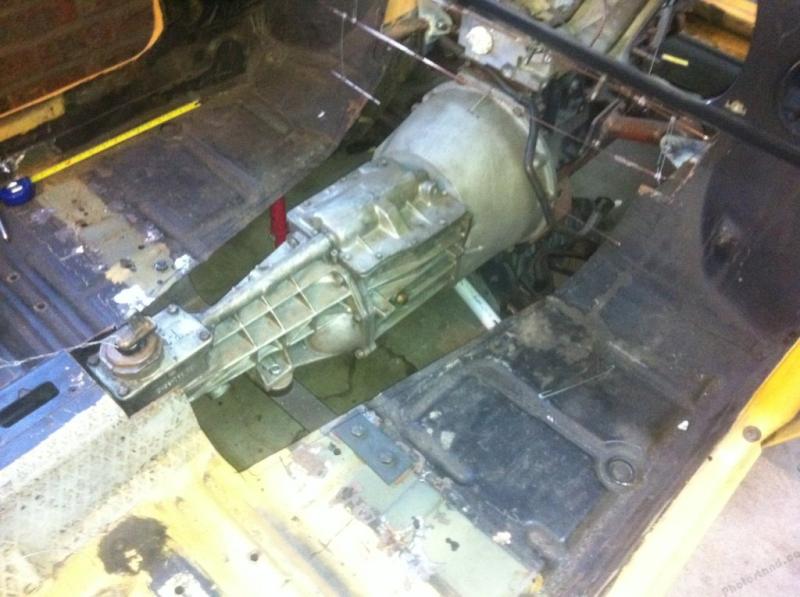
Gearbox tunnel welded in
So this is what I did during 2012
I finished the engine mountings, now to the gearbox mountings


I have moved to the back end of the car as I am waiting for somebody to bring me my gearbox mounting steel.
I had to put the wheel arches back on to establish the center line off the rear axle.

I have cut the slots for the 4 link system. Removed the rear seat mounting and where busy removing some more unwanted steel.

In between my build I bought and fixed up a Mini to do some Gymkhana, the urge was there to be involved in some racing.
This actually took allot of my time as it broke as much as I raced it.
It went from supposed to be a cheap no maintenance interim gymkhana replacement car to costing me allot off unnecessary bucks and taking up all my free time.
See problem below

Ok, back to work on the FORD,
I have picked up a sponsor for the Mini so now I have someone to help out on the Mini, thanks Mini Service Centre

I now had more free time for my Scort
I have cleaned out the inside of the body of all the unnecessary metals and double plates in preparation for welding in the new parts.
I sent my gearbox mounting drawing in for laser cutting and bending, got that back.
The reason for the long strait bottom is so that I can run the exhaust between the gearbox and in the tunnel.
I did not want to go below the mounting for the exhaust because then it would be too low as I have already mounted the engine and gearbox as low as possible.
Also did not want to make an additional tunnel next to the bracket just for the exhaust.


I made some top plates for extra support which I will most probably weld in.


Once I cut back the tunnel there will be enough space for the exhaust.
Since the last update I completed removing all the double plates. Really f up my back on this, still in pain

Next up is to clean the metal for welding. I will then start welding in the 4 link boxes soon
Started making my new gearbox tunnel out of wire and cart board as a sample before I get to the metal work

For some this might not be a big deal, even only a second nature.
After some practice and even giving up I eventually got the hang of TIG welding
Did some practice

Started with the 4 link kit. Did some spot welds to keep it in place.
Think the welding so far looks good


I am now confidant to weld the car and must say proud that I have the hang of TIG welding
Have been working on the welding of the 4 link brackets. I find the most difficult part of the welding the uncomfortable positions that I have to weld in. It is a slow process as I can only weld in a certain position for about 15 minutes.
This is what is welded so far

While I take breaks from the welding I started working on closing the front fire wall. I use the tig welding rods and bend them in the shape that I require. From there I will make a cart board sample and then move on to the plate. I am planning on buying some 1,2mm electro galvanized plates to start closing all the big holes in my Ford


Have anybody fitted the turrets as supplied from Rally design or from other suppliers or your own. Mine does not seem to puzzle in???.
Last one. Is the best way to mount your rear coil overs on your axle 100% vertical, angled or what is the theory behind this?
I picked up my sheets of 1.2mm electro galvanized sheets.
I then started with the gearbox tunnel.

I have decided to bend the sheets myself.

How I did this was by clamping down two pieces of steel on top of the sheet on the work bench on the line of where I wanted to bend the steel. I did put a piece of 1.2mm metal sheet in the middle under the plate as I found that the forces in the middle of the steel used for clamping was bending slightly and this resulted that the middle of the sheet making a long bend and not as sharp as at the ends. I pushed the plate evenly to get my desired angle.


I used a block of timber and a hammer to get a slightly sharper bend. I use the timber block to spread the blow of the hammer to prevent dents. I still got some dents but you can hardly see them. Can more feel them

The result - my gearbox tunnel


I have cut the last bits of steel out for the new tunnel.

There is now more than enough space to run the exhaust next to the gearbox


Now just to weld in

Gearbox tunnel welded in


Trending Topics
18-03-2015, 10:12 AM
#8
Virgin
Thread Starter
Join Date: Feb 2015
Location: Cape Town
Posts: 8
Likes: 0
Received 0 Likes
on
0 Posts
I will weld the last bits close to the fire wall once the fire wall is in
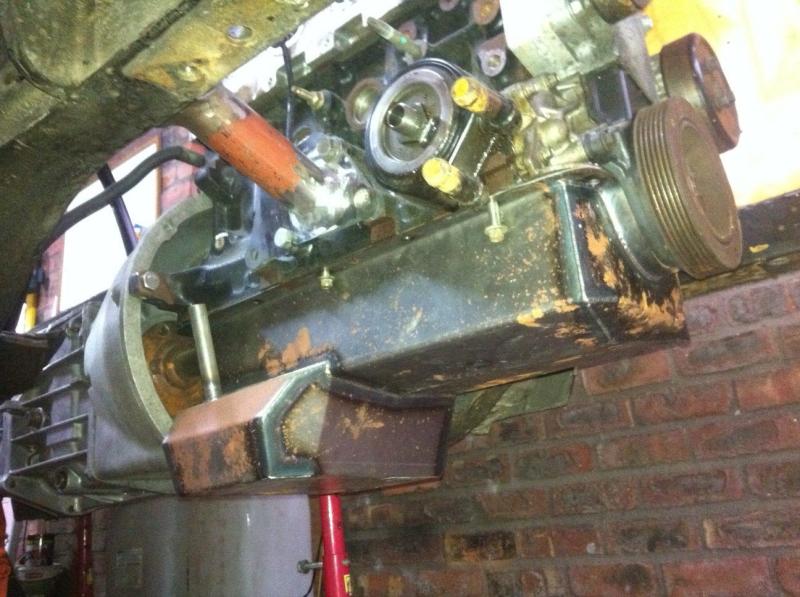
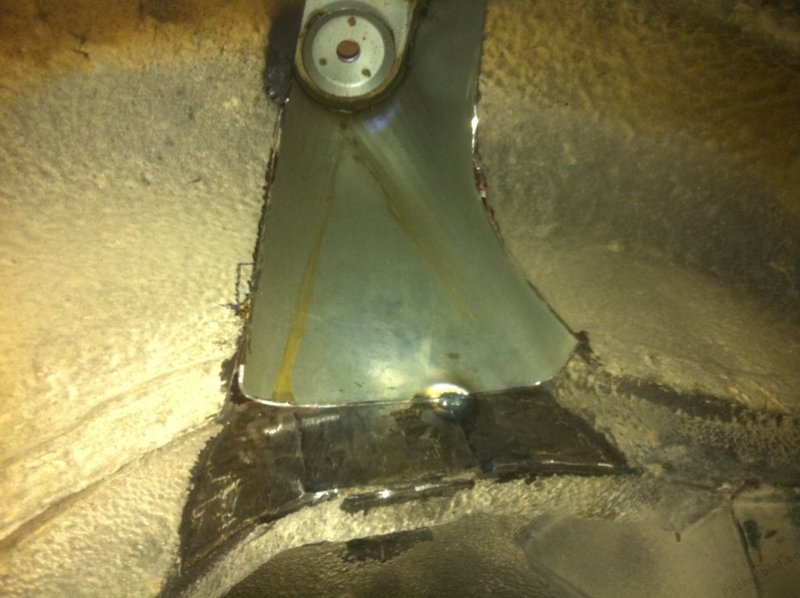
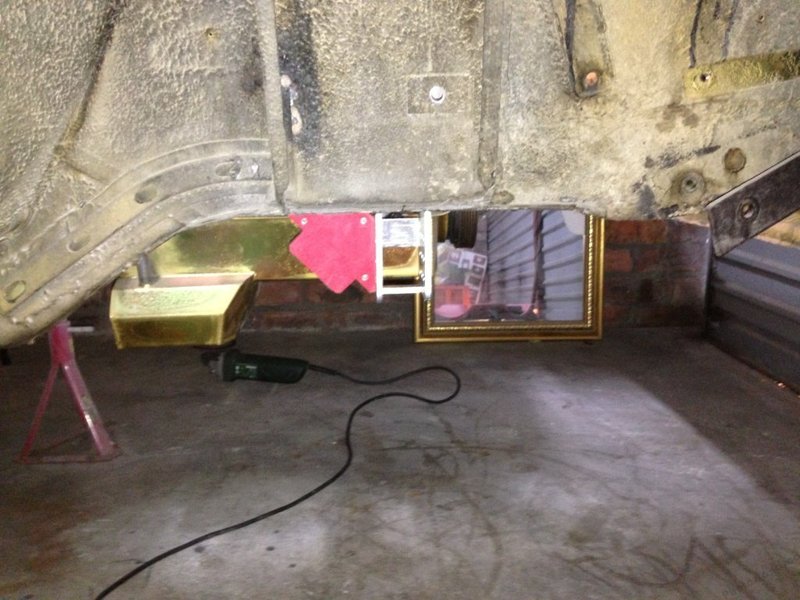
I removed the engine and gearbox to get going on the fire wall.
Welded the engine mountings, but they still to receive more support on top.
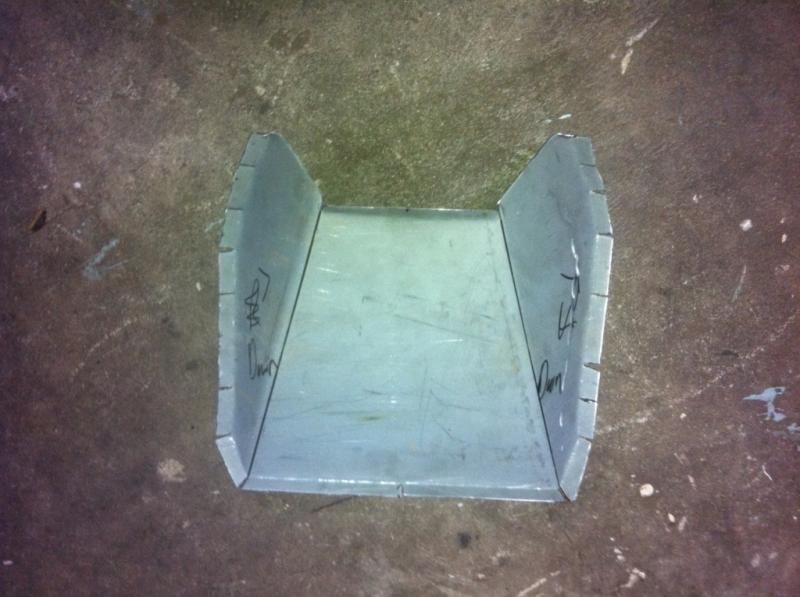
For the fire wall I made the profile out of welding wire and glued them together with a glue gun
Removed this maze of wire to make a cardboard sample
After that I made some notes for correction on my sample piece when it was fitted in the car.
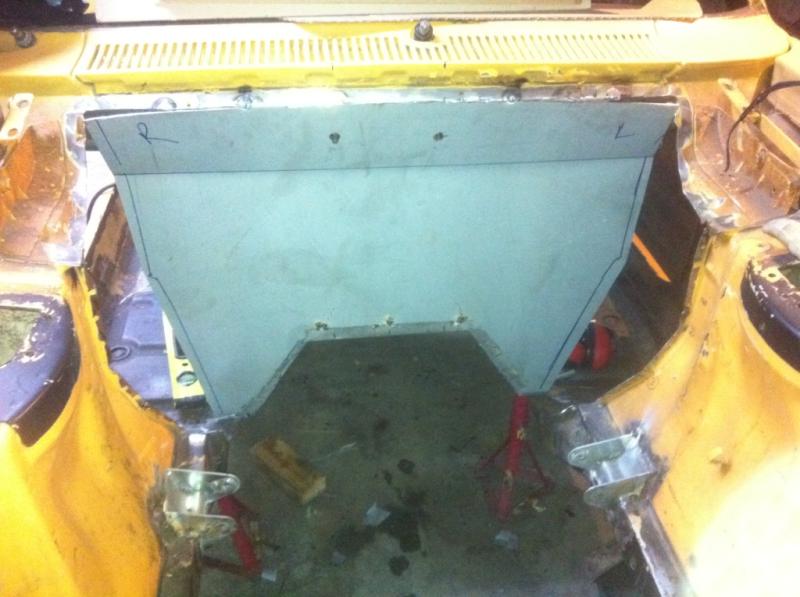
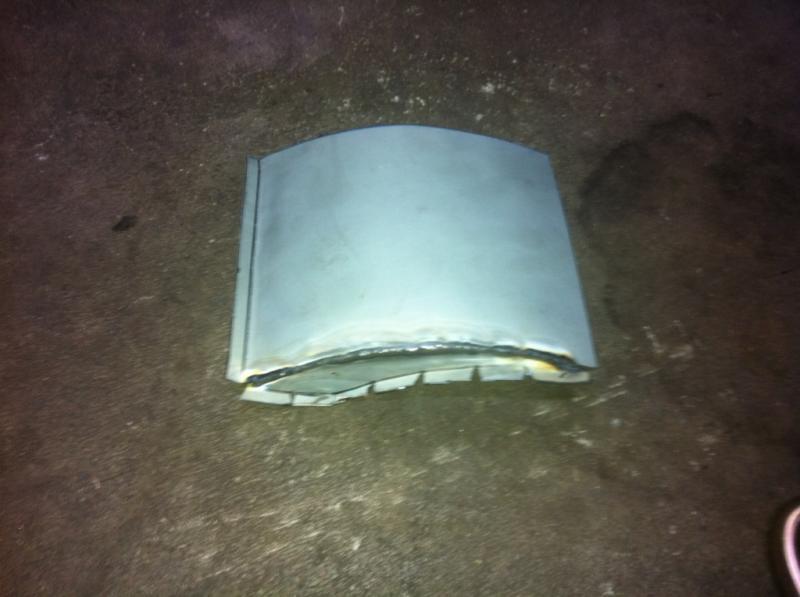
I folded it open and marked it on the metal sheet
I then I cut it out and started bending
Not so easy to bend two different bends on the same side
I managed to finish the plate for the firewall. Had to hammer on the left hand side to make it fit
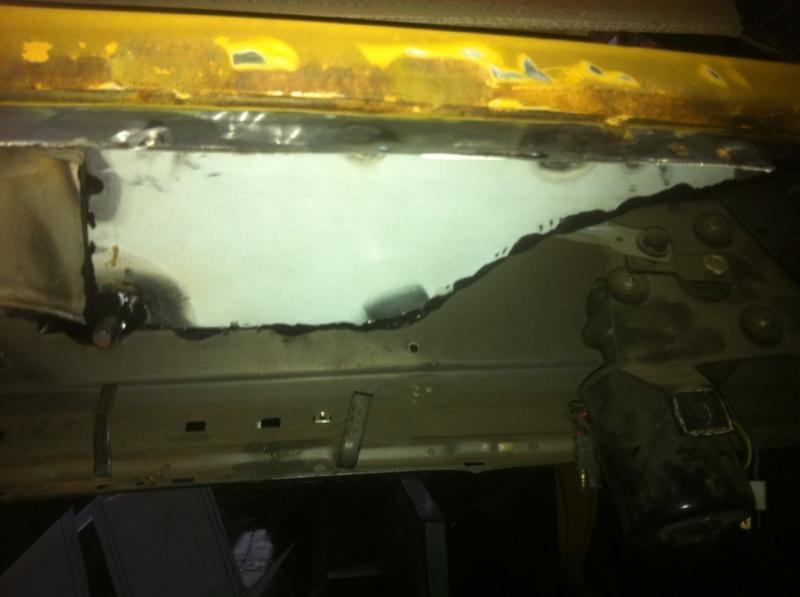
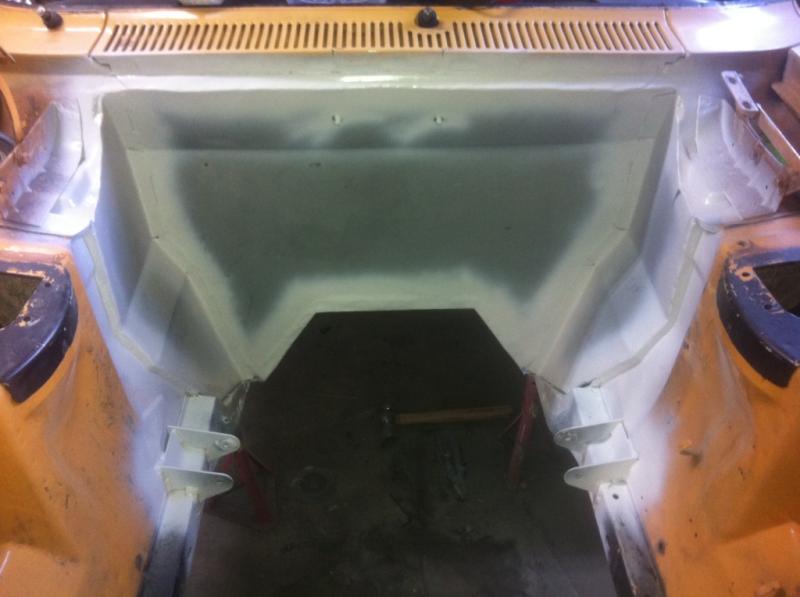
The square ness does not look that great but I could not go at an angle because if you look on the engine bay side you cannot get a throttle body in on the last cylinder and you will have to suddenly bend your branch coming out because the engine is so close to the firewall. I left the welding for later
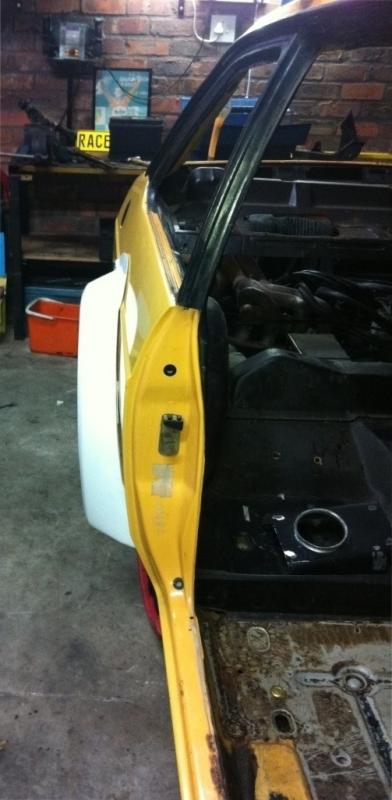
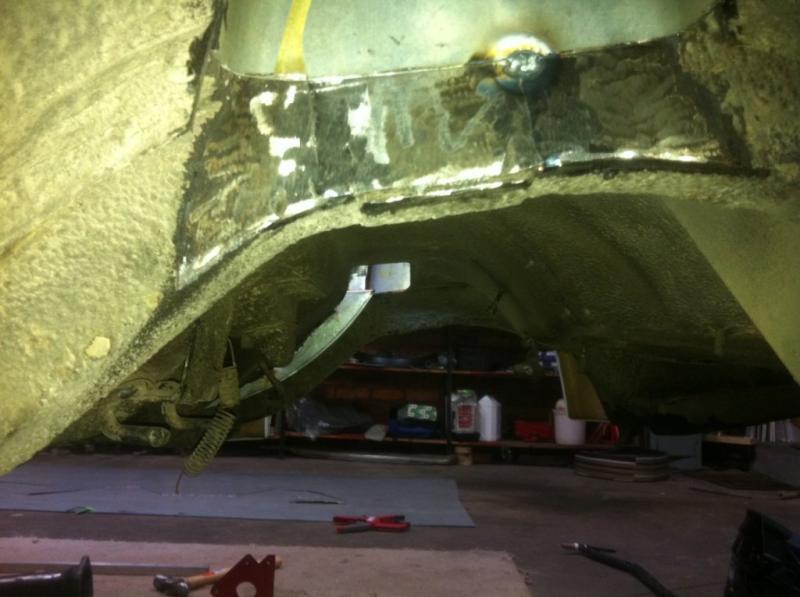
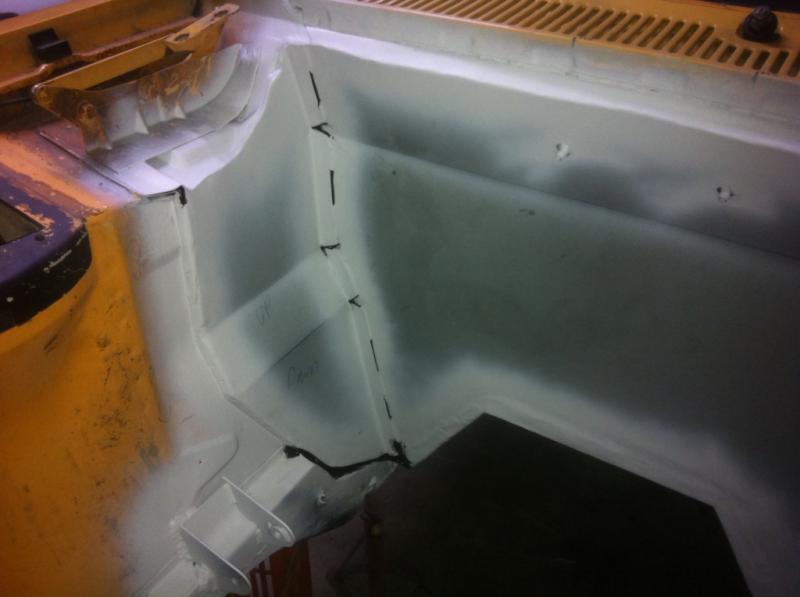
The firewall that moved back so much resulted in the air vents in front of the window to be open at the bottom. So if it is going to rain the car will be a pool inside
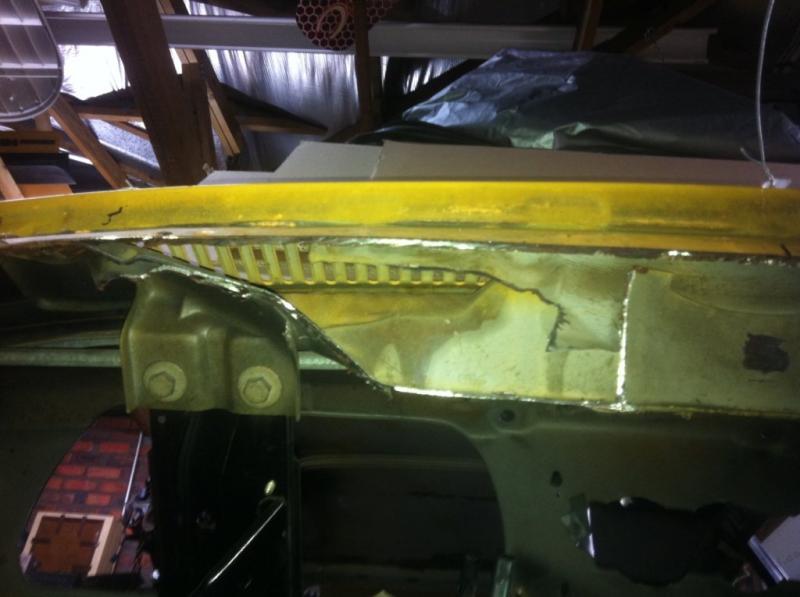
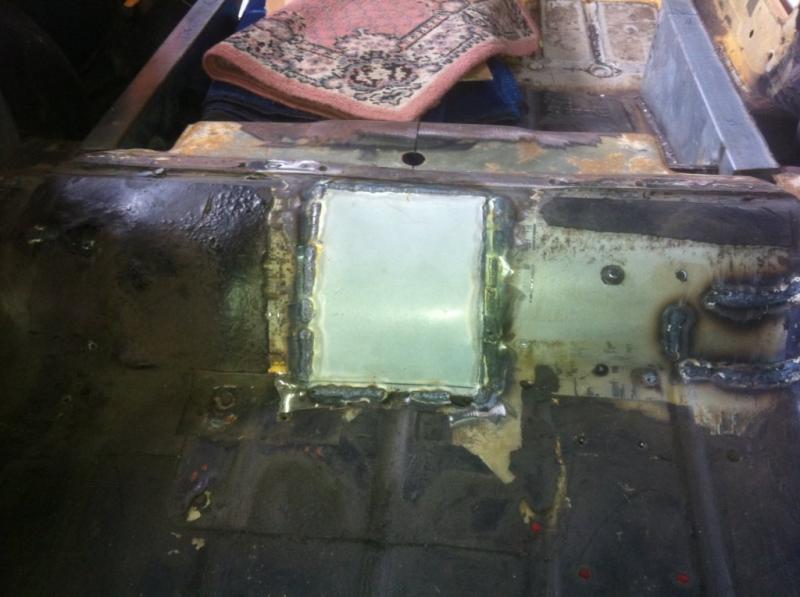
Made these plates to cover these openings
Still need to drain the water, the only thing builders had on a Sunday was these spray gun fittings

I drilled holes in the plate and pushed them through. Welded them on and grinded the back off to make it flush. I will pipe this out the car through the engine bay.
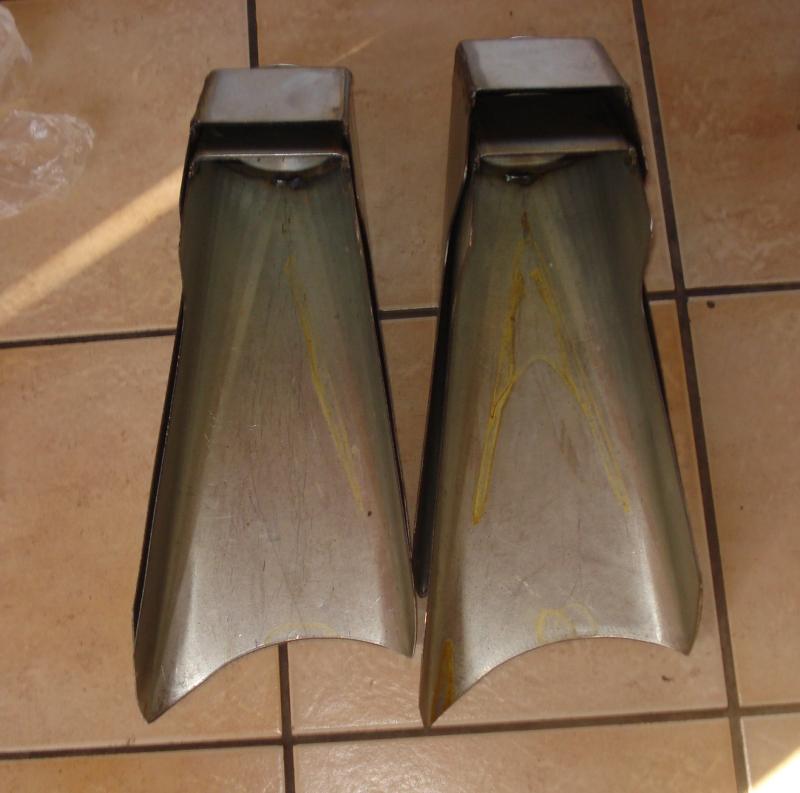
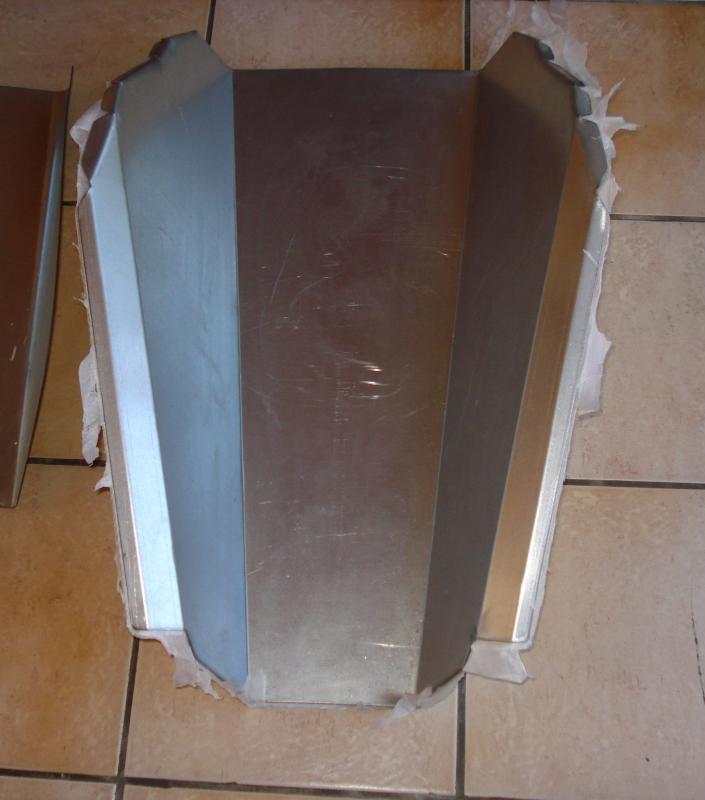
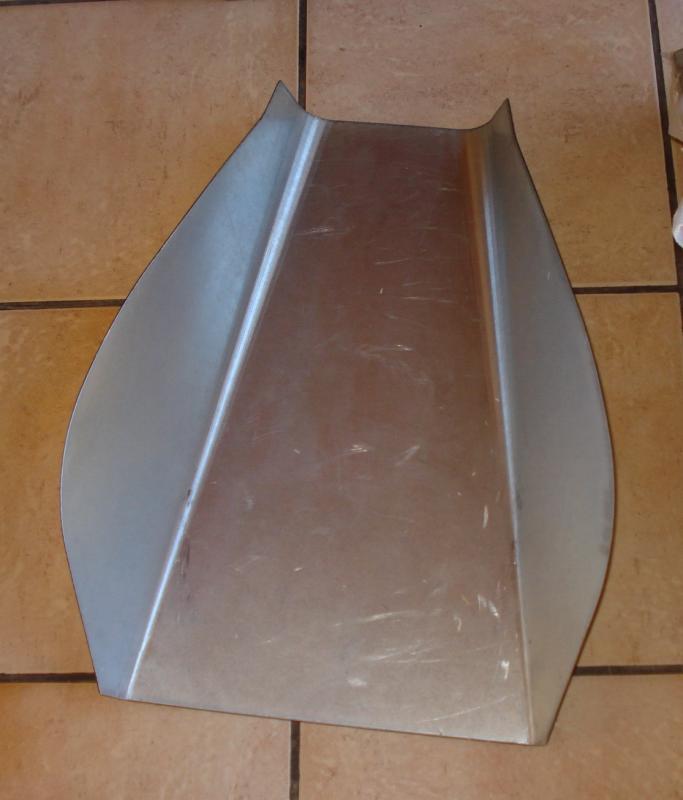
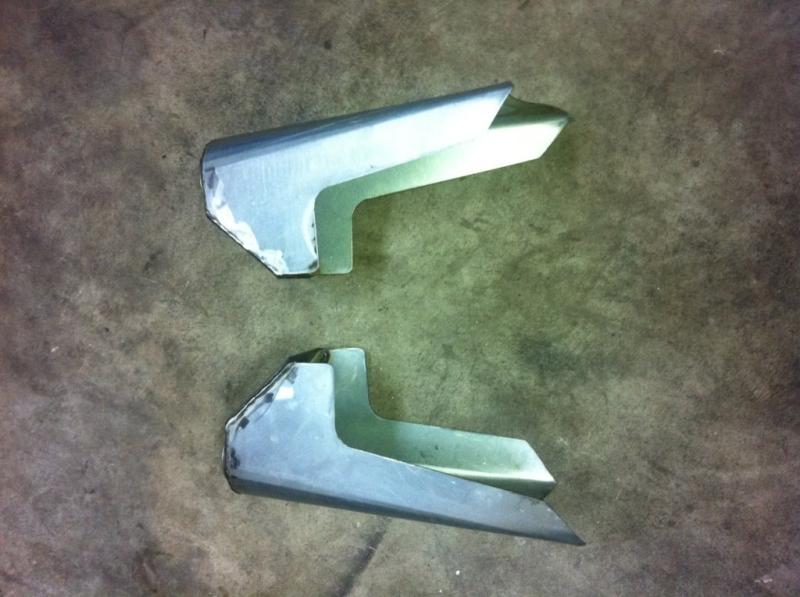
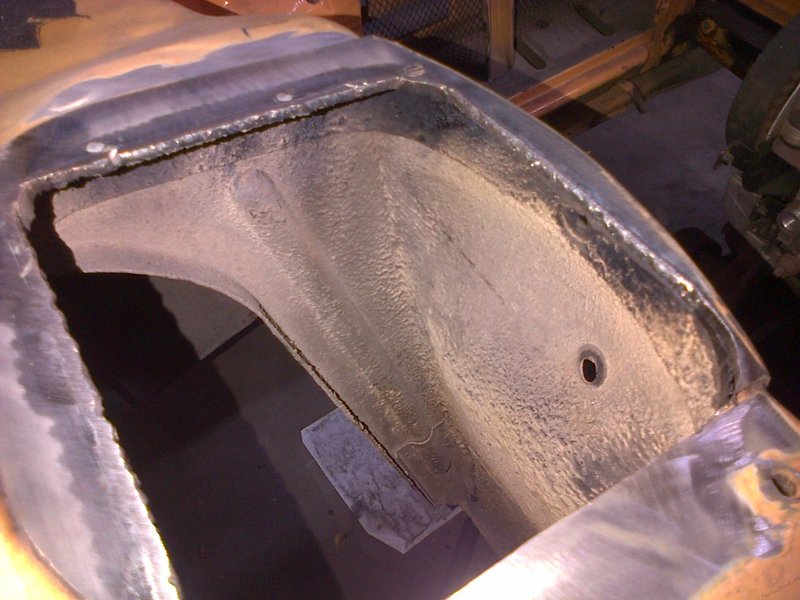
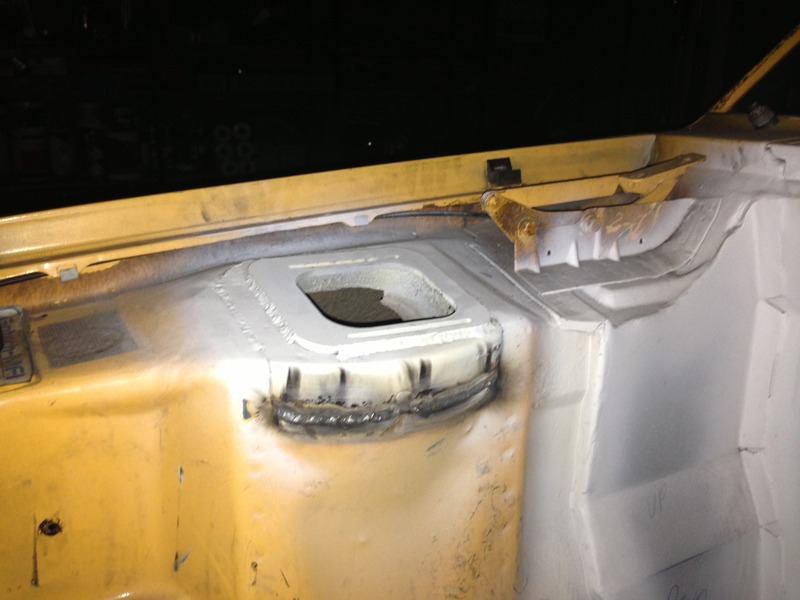
I started work on the turrets
I bought these turrets from Rally Design and they are supposed to be a straight fit. If you try to fit them or position them it does not seem to fit or be made for an Escort at all.
They are too long, it has a funny shape at the end that does not seem to match any shape in the car and and and....
Next step was make them fit. I marked my center line of the axle in the car, under the car, on the floor and on the turrets. Started to shape the turret and cut them shorter to fit.
I marked this out on the inside arch and cut it all away.
See that you have to cut off your diff bump stop bracket
Only after I have cut this all open I realized that the turrets actually needs no cutting or shaping and is a straight fit. But you can only see this once you have cut the arch open. Was I bit UPSET
DO NOT CUT UP YOU TURRETS, THE ARE A STRAIGHT FIT. MARK OUT, CUT OUT AND YOU WILL SEE. BE CAREFULL NOT TO CUT INTO YOUR CHASI
Sorry Rally Design
Any way had to make it work which I still could
Added allot of picture of the location because it took me long to finalize the position of them.
I started this week with finishing the air vent openings. Welded them both in sealed them and did a water test. It works!!!
I used a gasket sealer as this bonds good to metals and can take heat
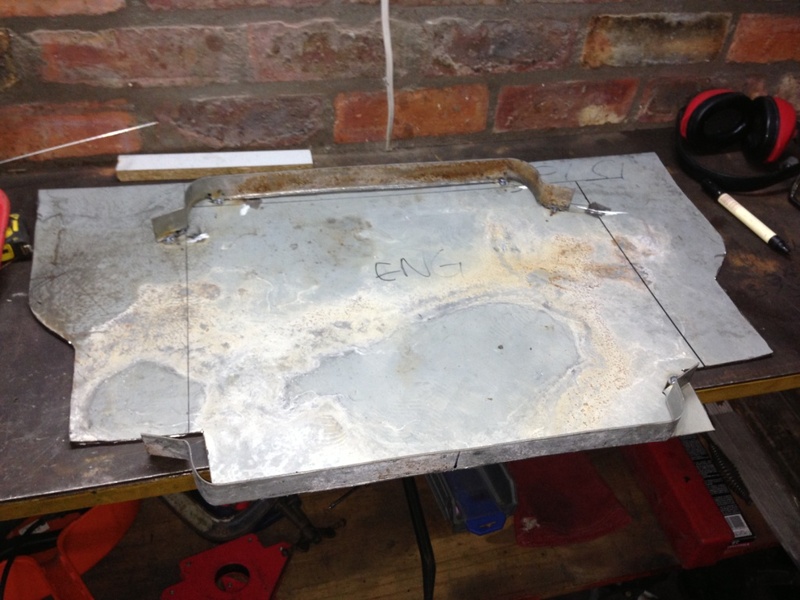
I have put the new front fire wall in and did not like it any more. Trying to bend a big sheet of steel in a hundred different bends is not easy. If you get one bend slightly out it has an effect on the next one and then suddenly things do not fit that nice any more. While staring at this I came up with another way of doing it.
Made one back piece
I removed the engine and gearbox to get going on the fire wall.
Welded the engine mountings, but they still to receive more support on top.

For the fire wall I made the profile out of welding wire and glued them together with a glue gun


Removed this maze of wire to make a cardboard sample


After that I made some notes for correction on my sample piece when it was fitted in the car.
I folded it open and marked it on the metal sheet


I then I cut it out and started bending

Not so easy to bend two different bends on the same side
I managed to finish the plate for the firewall. Had to hammer on the left hand side to make it fit


The square ness does not look that great but I could not go at an angle because if you look on the engine bay side you cannot get a throttle body in on the last cylinder and you will have to suddenly bend your branch coming out because the engine is so close to the firewall. I left the welding for later
The firewall that moved back so much resulted in the air vents in front of the window to be open at the bottom. So if it is going to rain the car will be a pool inside


Made these plates to cover these openings

Still need to drain the water, the only thing builders had on a Sunday was these spray gun fittings

I drilled holes in the plate and pushed them through. Welded them on and grinded the back off to make it flush. I will pipe this out the car through the engine bay.


I started work on the turrets
I bought these turrets from Rally Design and they are supposed to be a straight fit. If you try to fit them or position them it does not seem to fit or be made for an Escort at all.
They are too long, it has a funny shape at the end that does not seem to match any shape in the car and and and....


Next step was make them fit. I marked my center line of the axle in the car, under the car, on the floor and on the turrets. Started to shape the turret and cut them shorter to fit.
I marked this out on the inside arch and cut it all away.


See that you have to cut off your diff bump stop bracket
Only after I have cut this all open I realized that the turrets actually needs no cutting or shaping and is a straight fit. But you can only see this once you have cut the arch open. Was I bit UPSET
DO NOT CUT UP YOU TURRETS, THE ARE A STRAIGHT FIT. MARK OUT, CUT OUT AND YOU WILL SEE. BE CAREFULL NOT TO CUT INTO YOUR CHASI
Sorry Rally Design
Any way had to make it work which I still could


Added allot of picture of the location because it took me long to finalize the position of them.
I started this week with finishing the air vent openings. Welded them both in sealed them and did a water test. It works!!!


I used a gasket sealer as this bonds good to metals and can take heat
I have put the new front fire wall in and did not like it any more. Trying to bend a big sheet of steel in a hundred different bends is not easy. If you get one bend slightly out it has an effect on the next one and then suddenly things do not fit that nice any more. While staring at this I came up with another way of doing it.
Made one back piece

 18-03-2015, 10:13 AM
#9
Virgin
Thread Starter
Join Date: Feb 2015
Location: Cape Town
Posts: 8
Likes: 0
Received 0 Likes
on
0 Posts
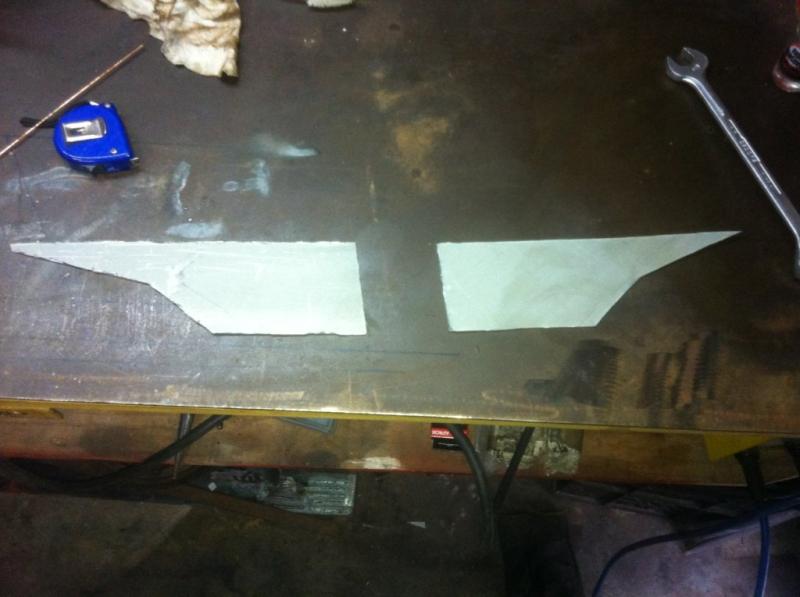
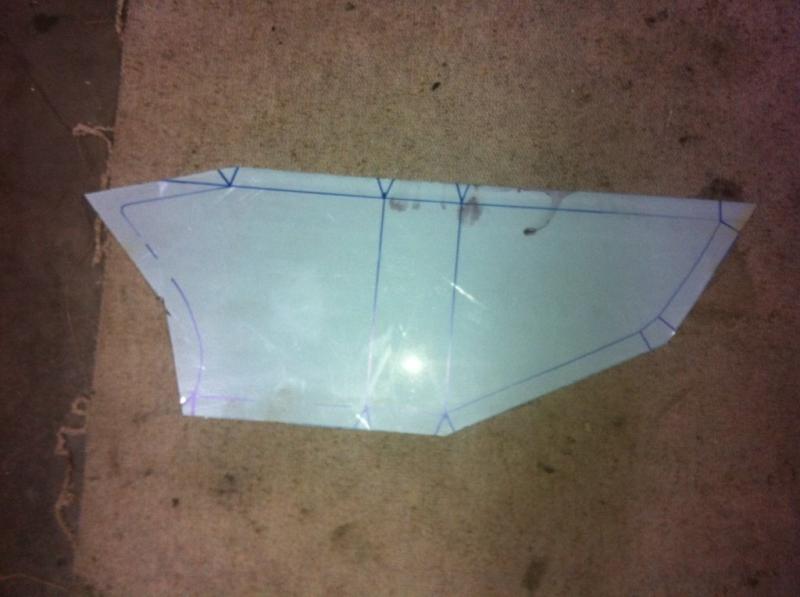
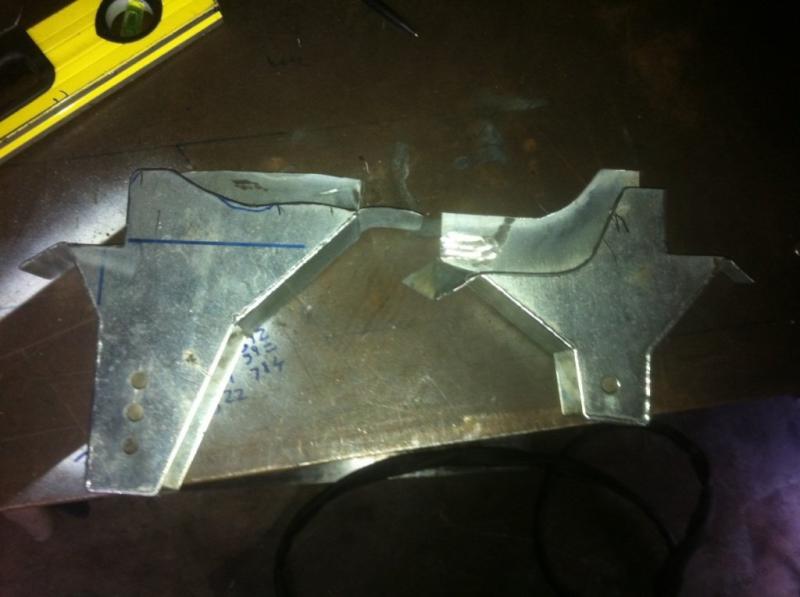
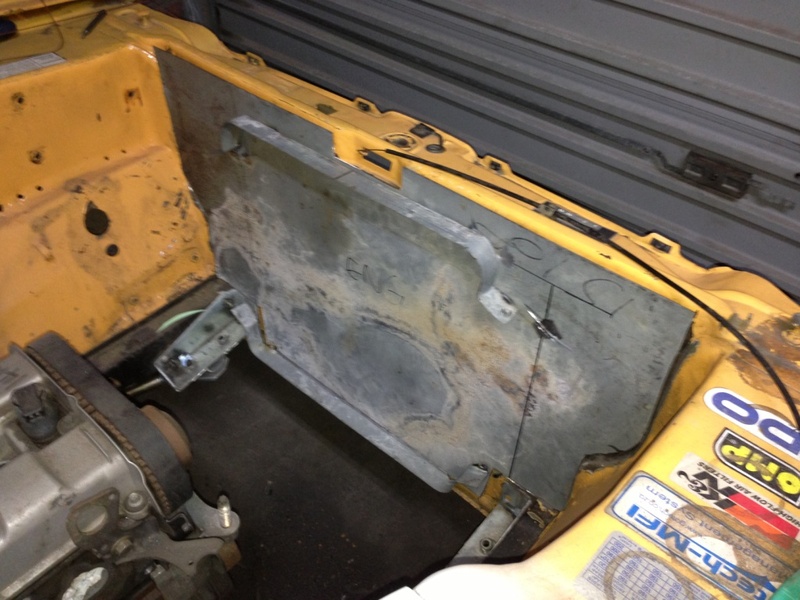
I was then left over with the side infills
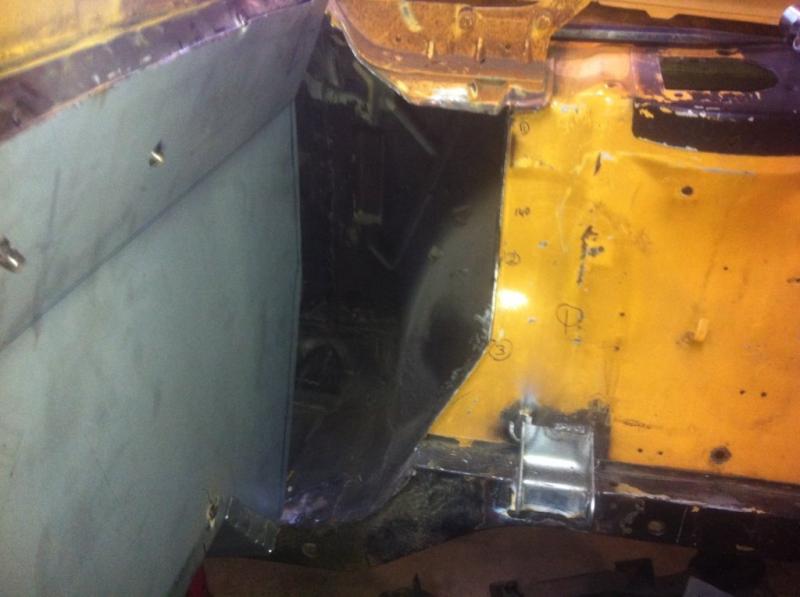
Made cart box samples and copied them over to the sheet
I then cut them out and bend them to the shape
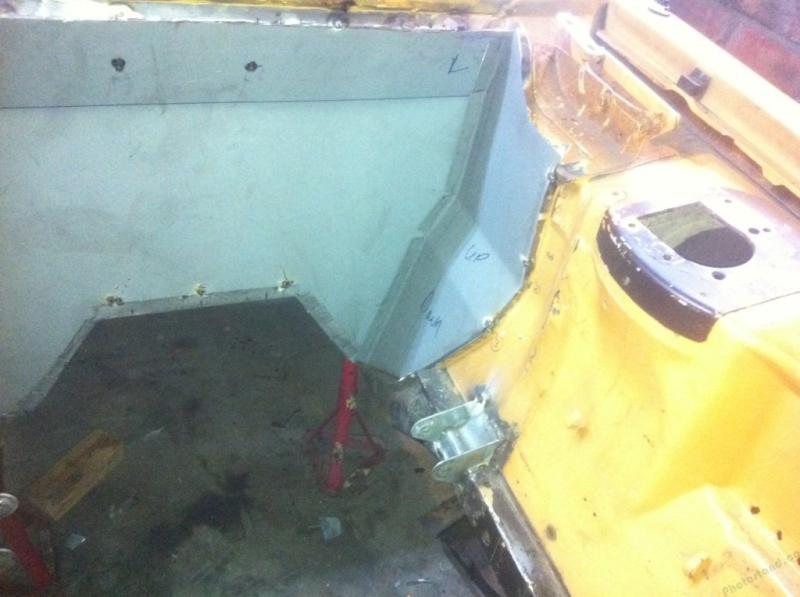
I tack welded this in and will weld it complete later.
This looked and fitted allot better than the first attempt.
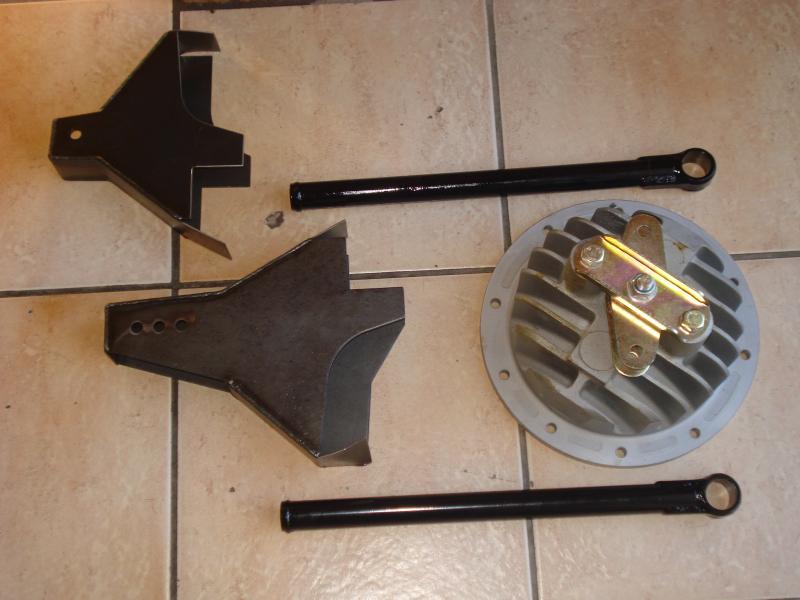
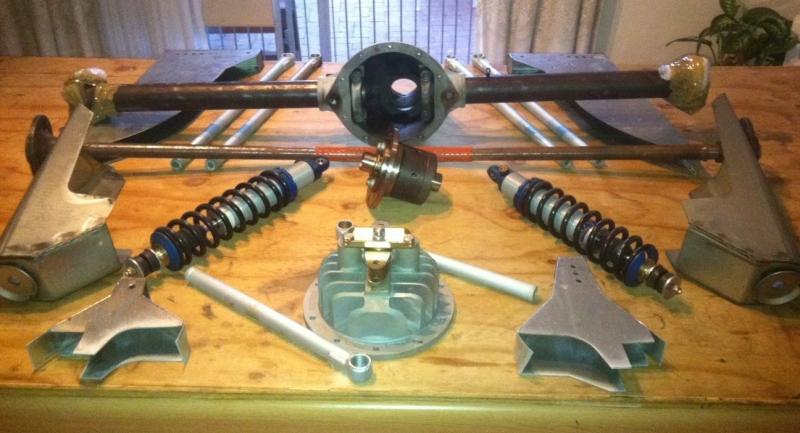
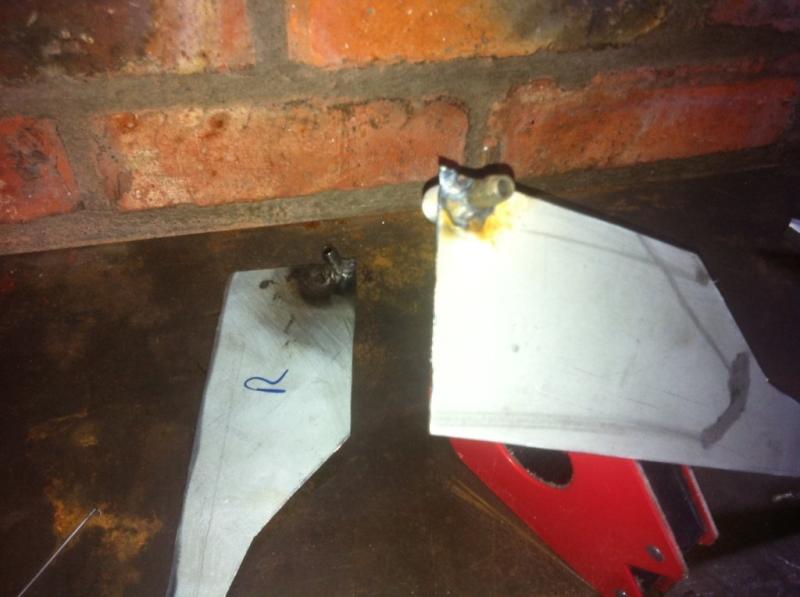
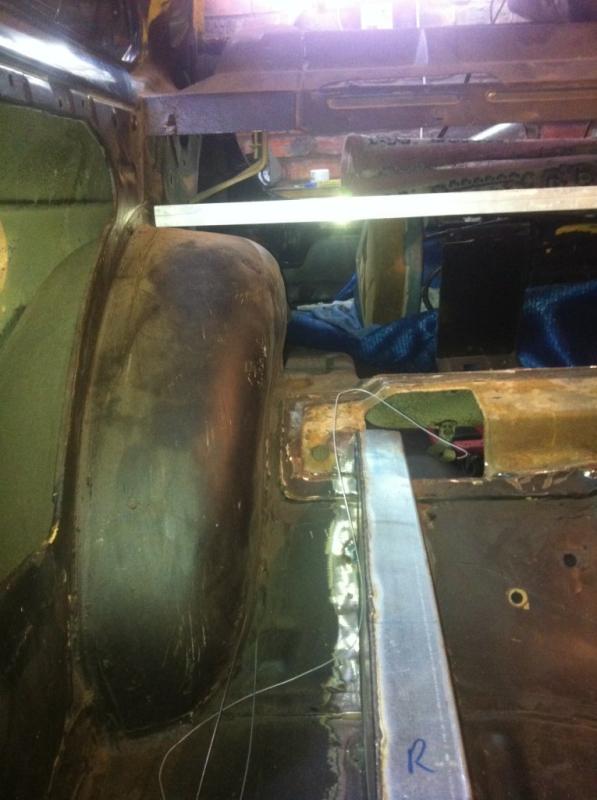
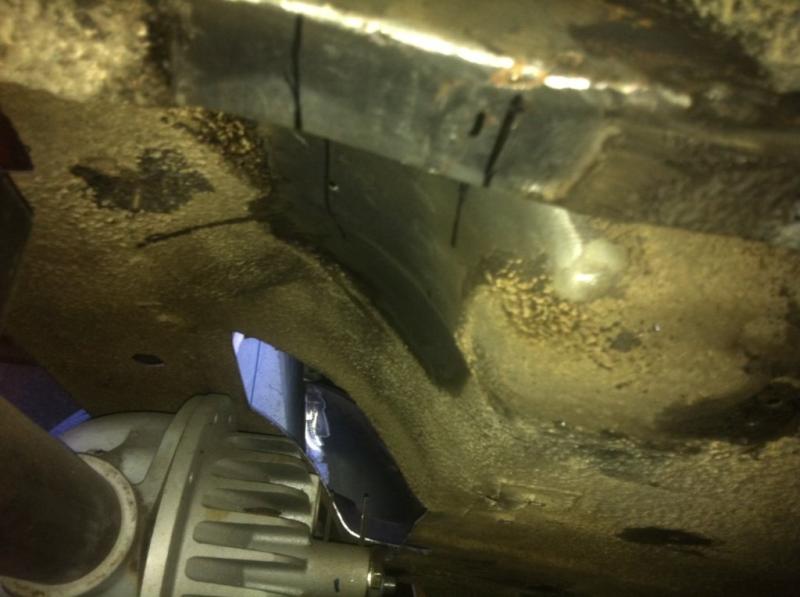
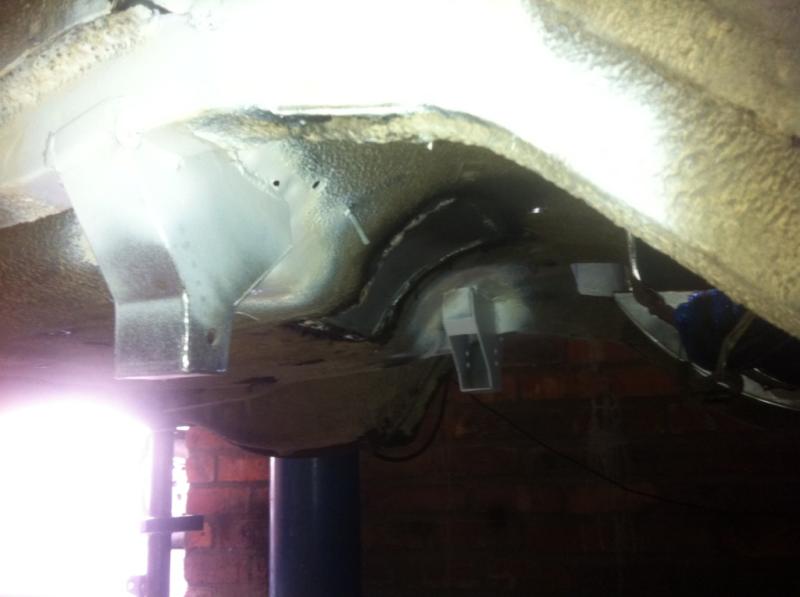
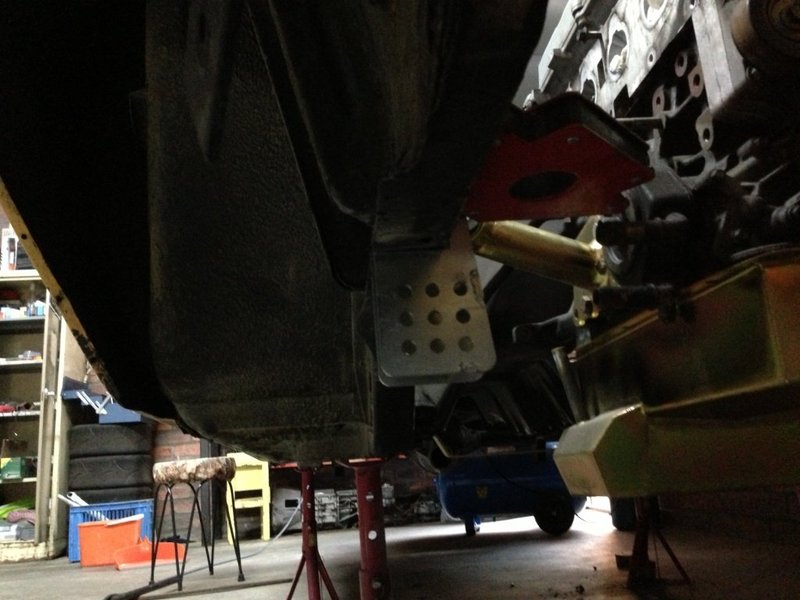
From here I moved to the axle.
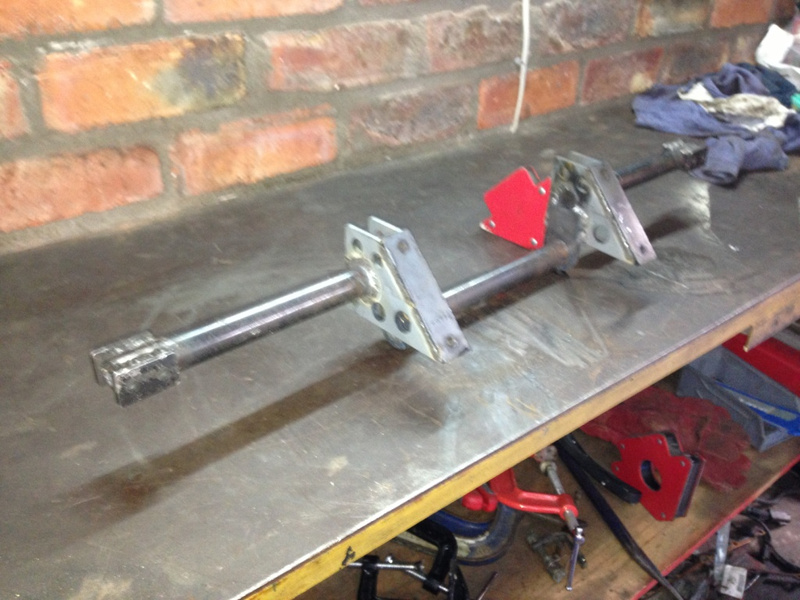
This is the Atlas axle imported from Fostek Engineering in the UK
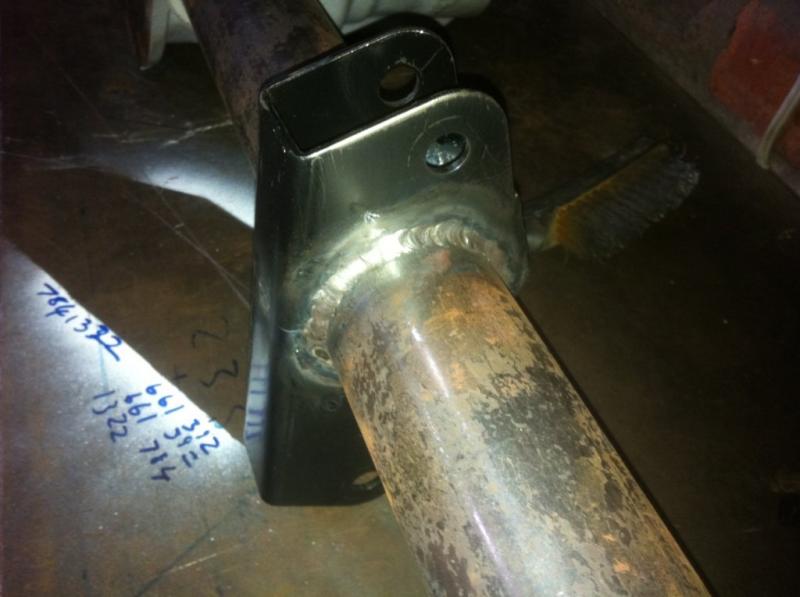
Welded in the four link brackets
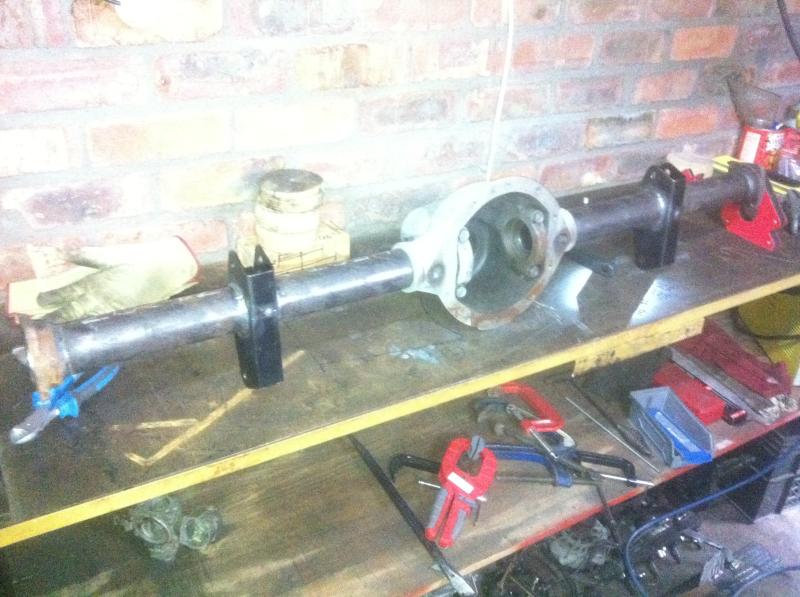
It is much easier to weld nice thick metals. The result is a pretty good looking weld. Impressed as I only learned how to weld a month or so ago
Tacked on the shock mounts
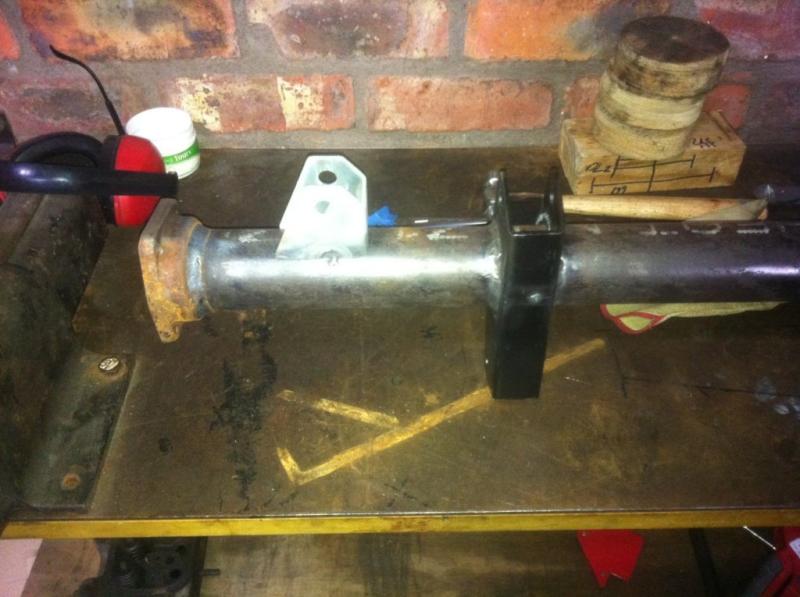
I then put the axle in place before welding the brackets in solid as I am worried that the springs will touch the sides of the turrets.
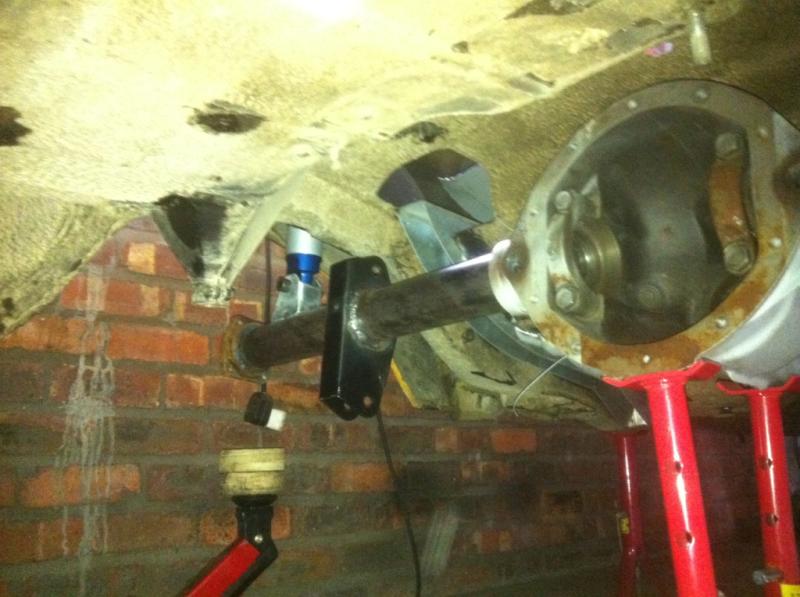
It seems ok but still worried as I am not sure how the suspension will move.
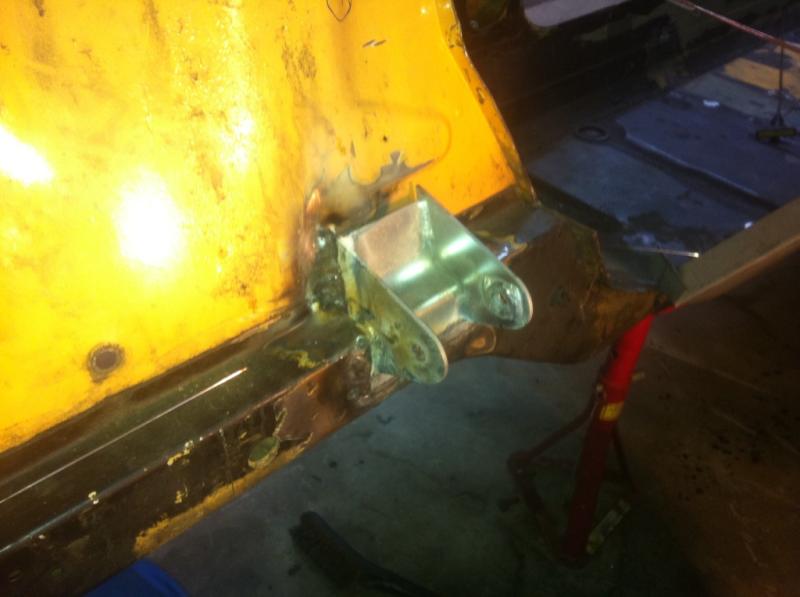
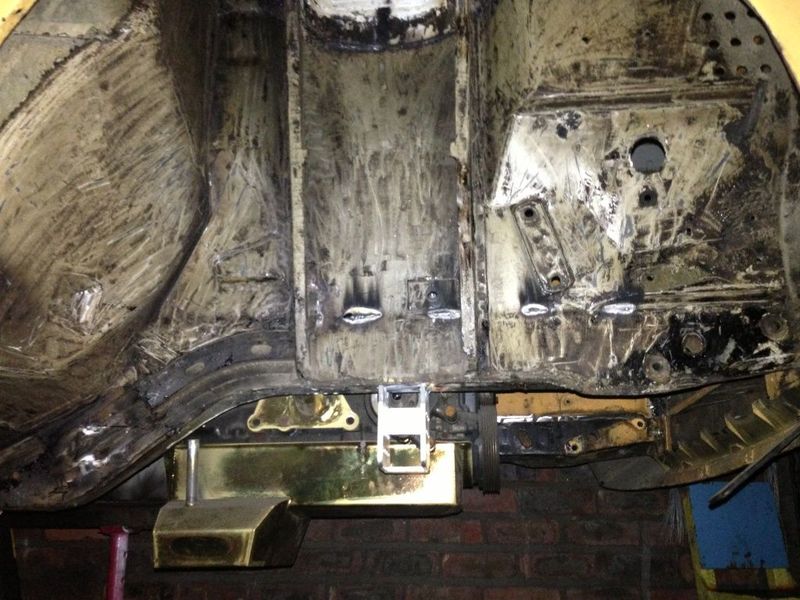
I reworked the watts link body brackets. Because the axle sits so high and off line of where whoever designed them to be I had to adjust them quite a bit
This is about max height. Ideal is +- 50mm lower
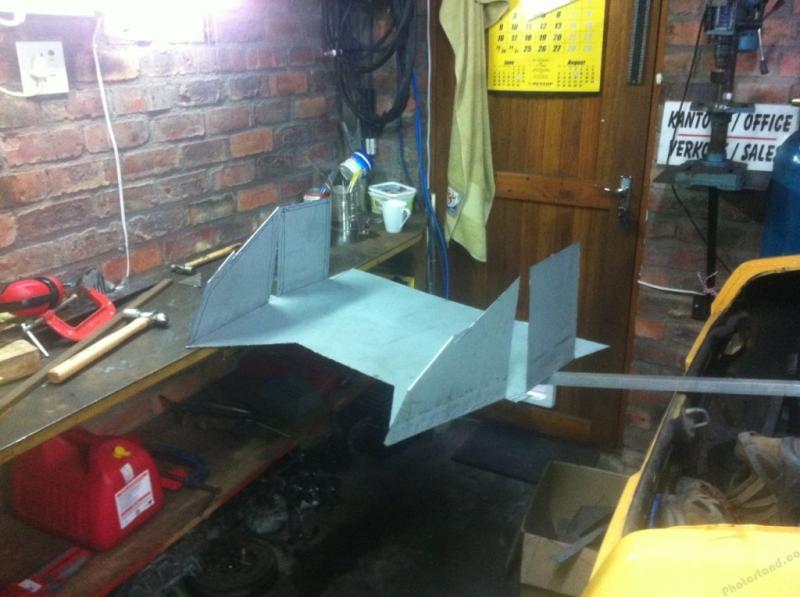
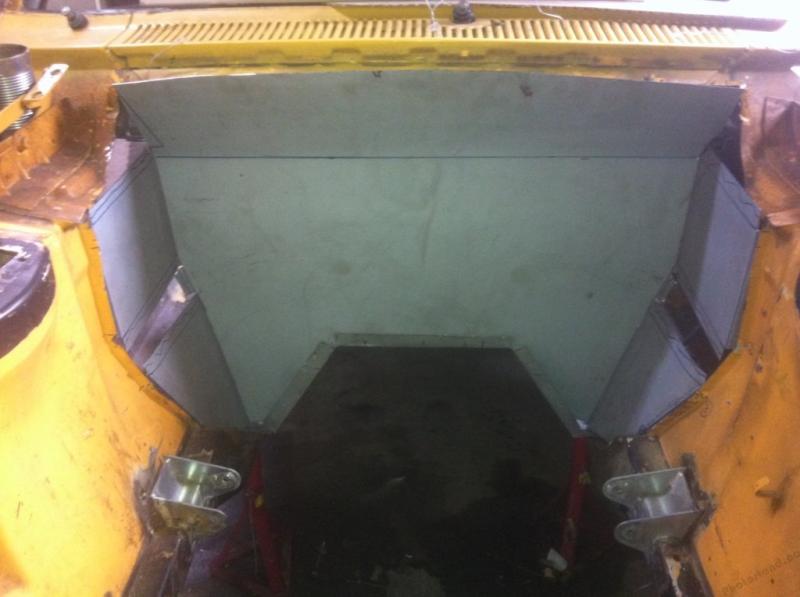
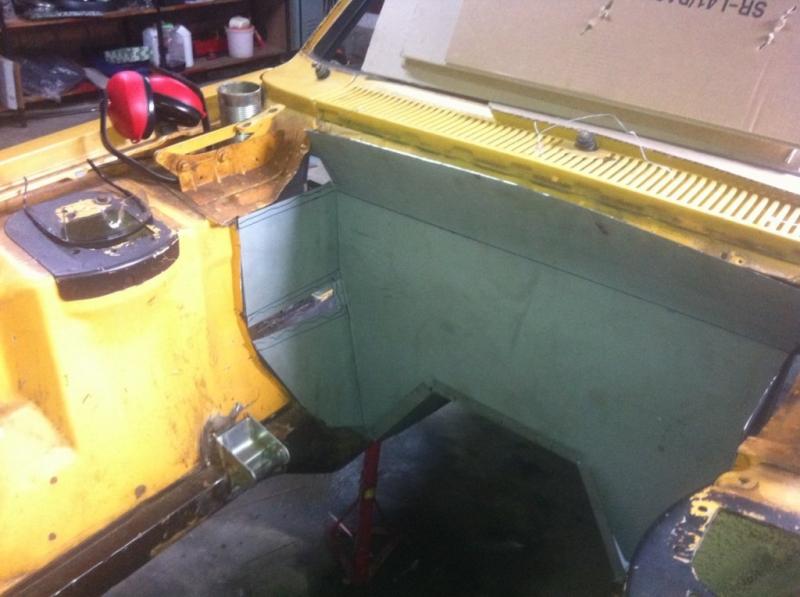
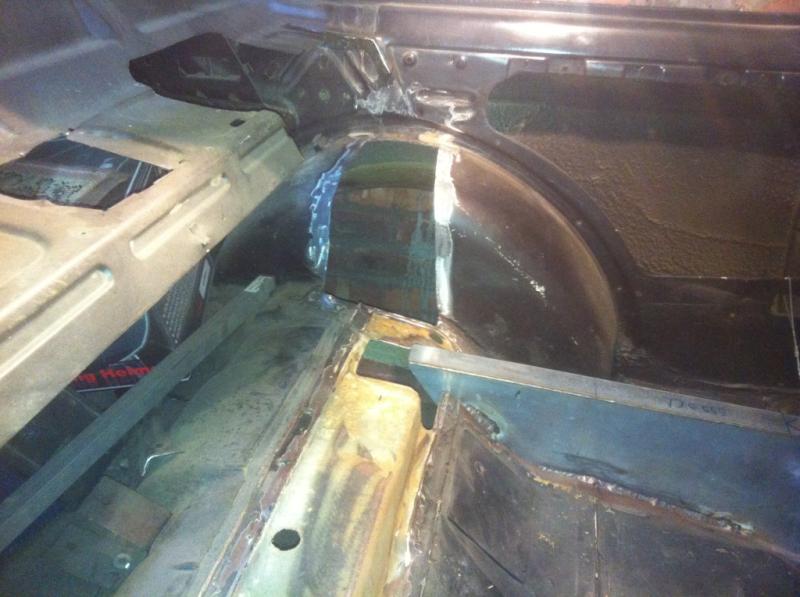
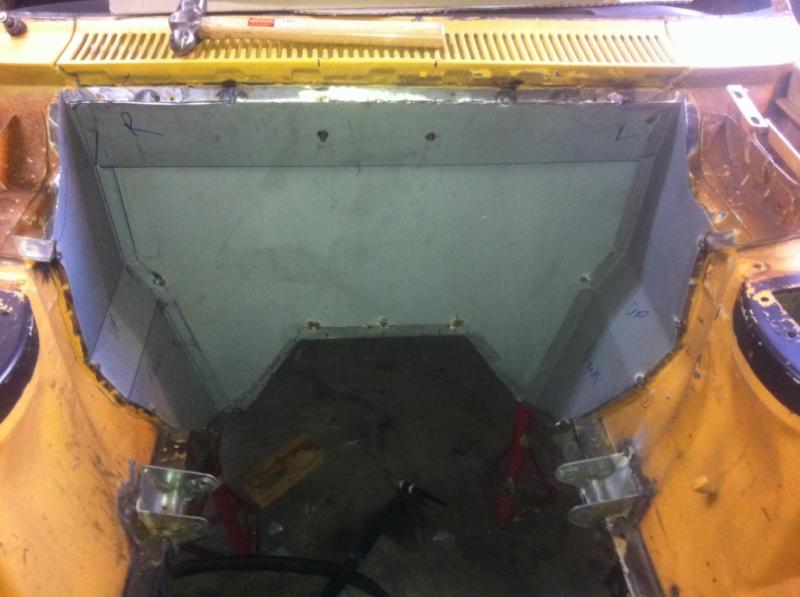
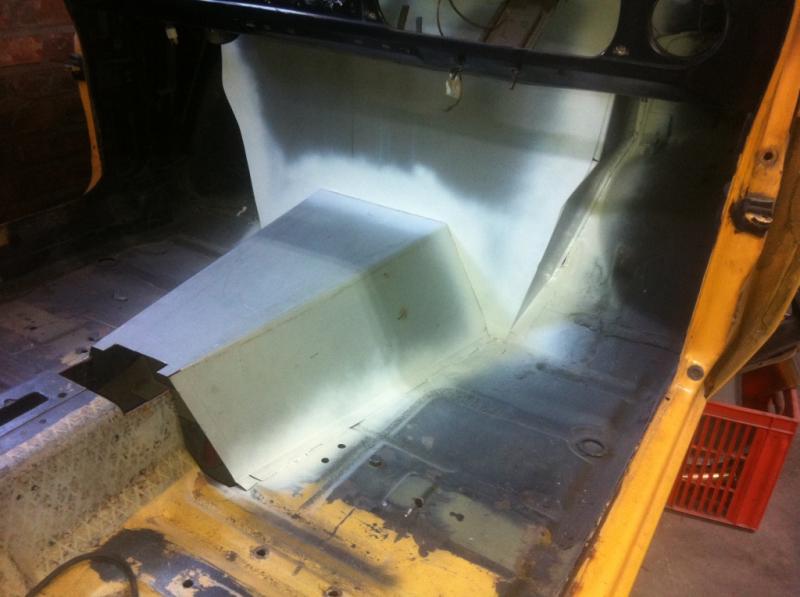
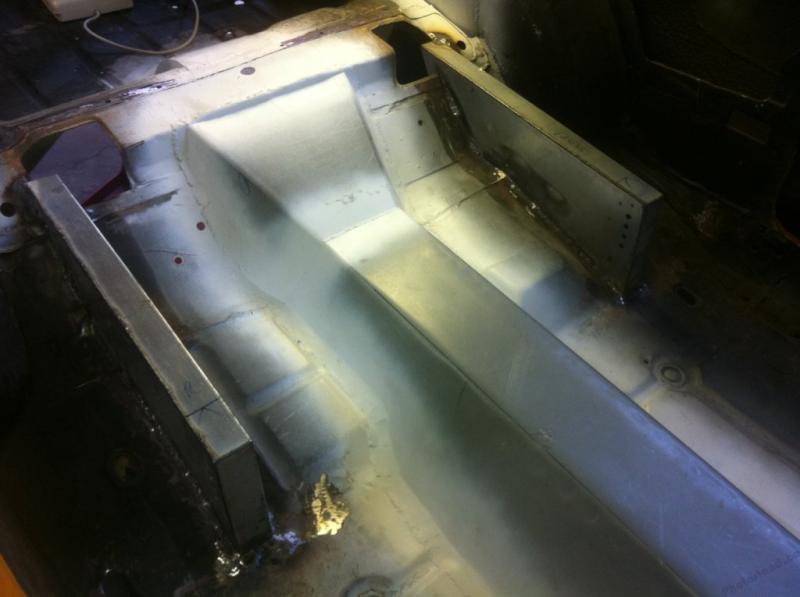
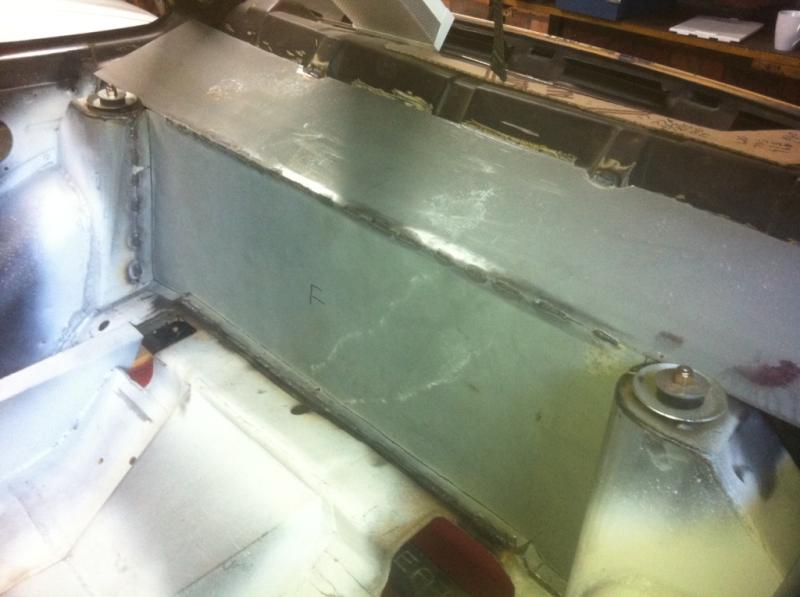
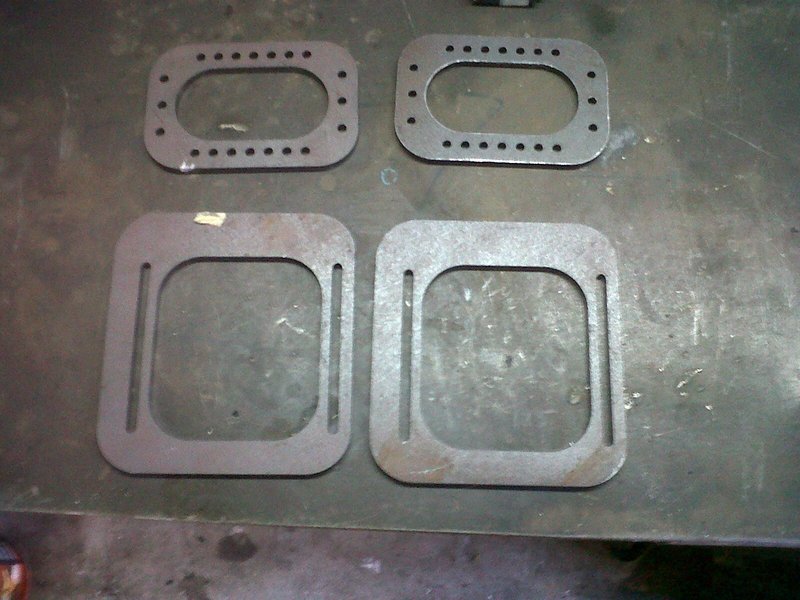
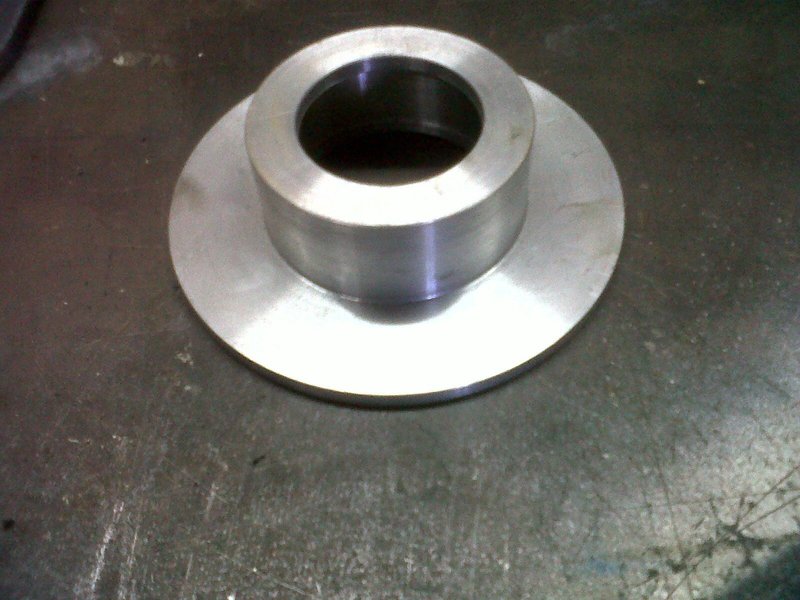
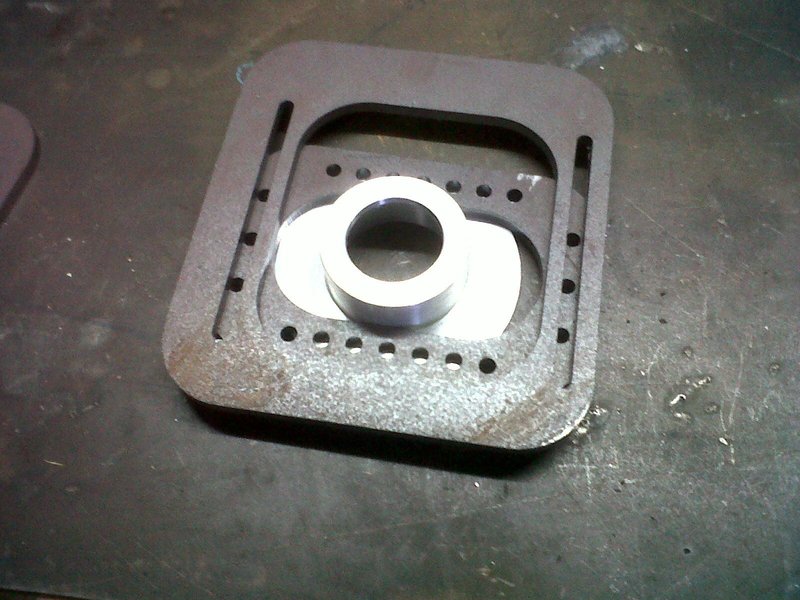
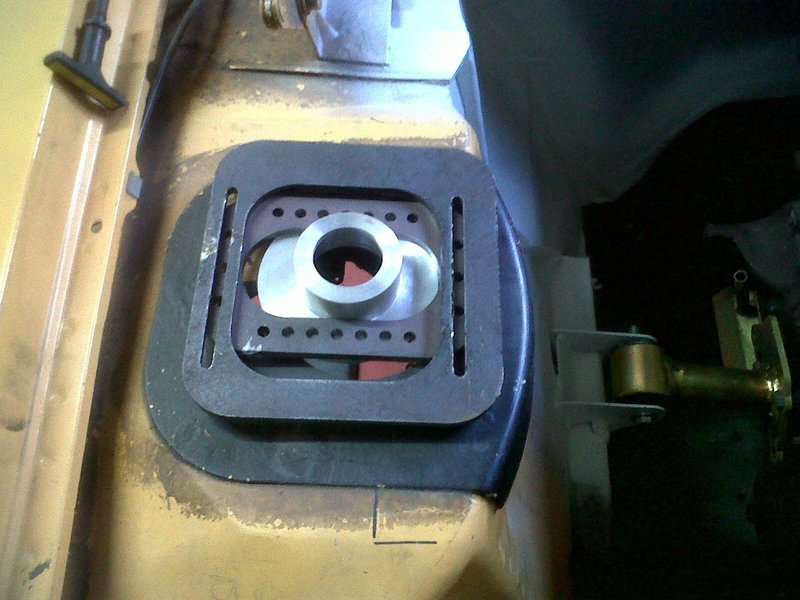
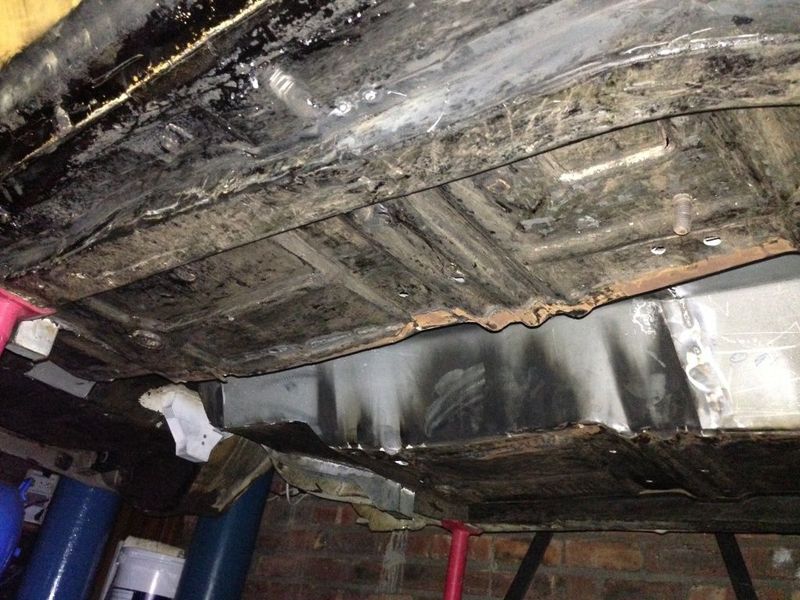
Diff tunnel cut out and new one made
Had to do the same at the back. The watts kit is big and hits the back.

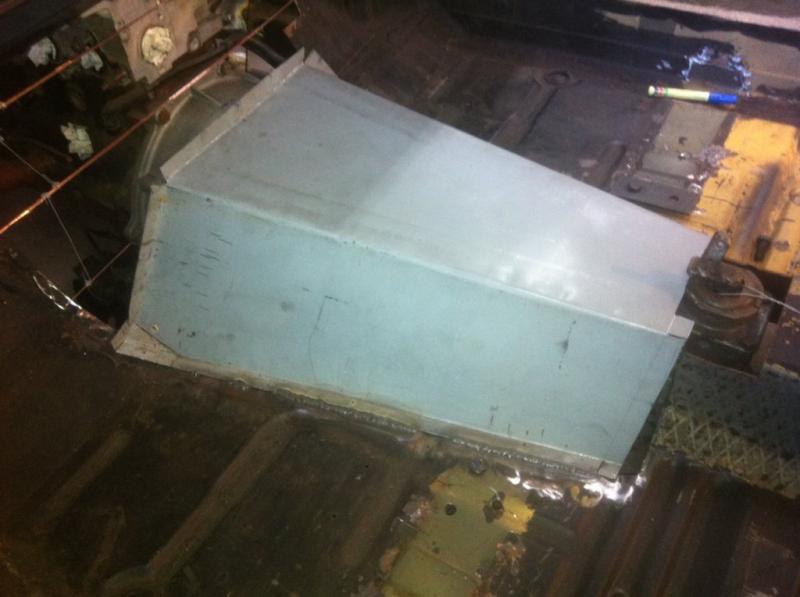
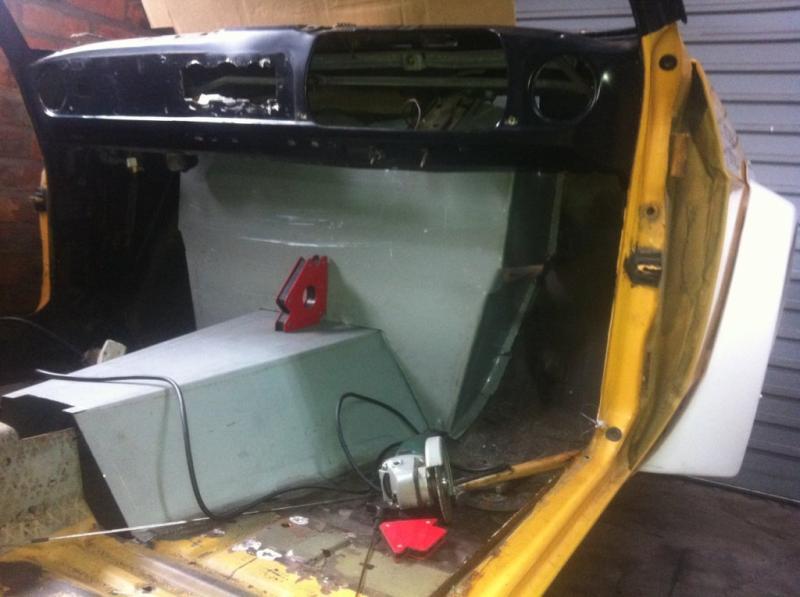
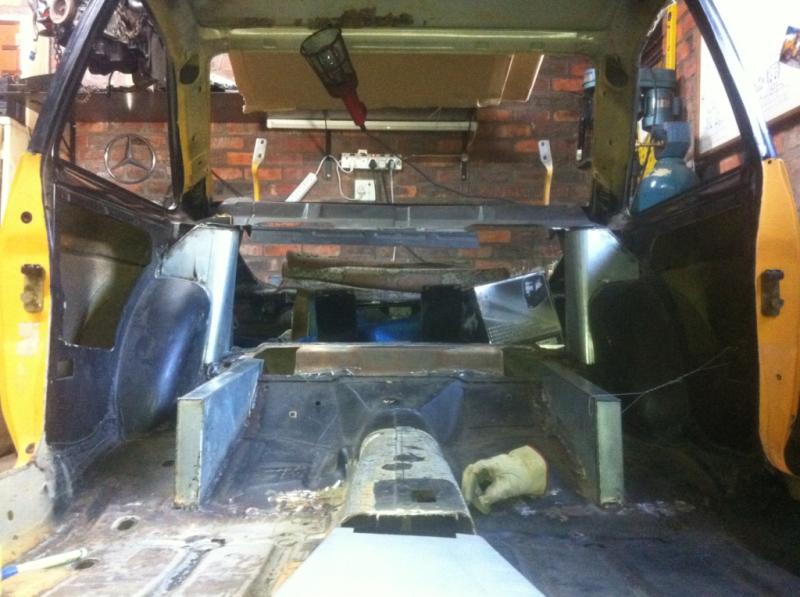
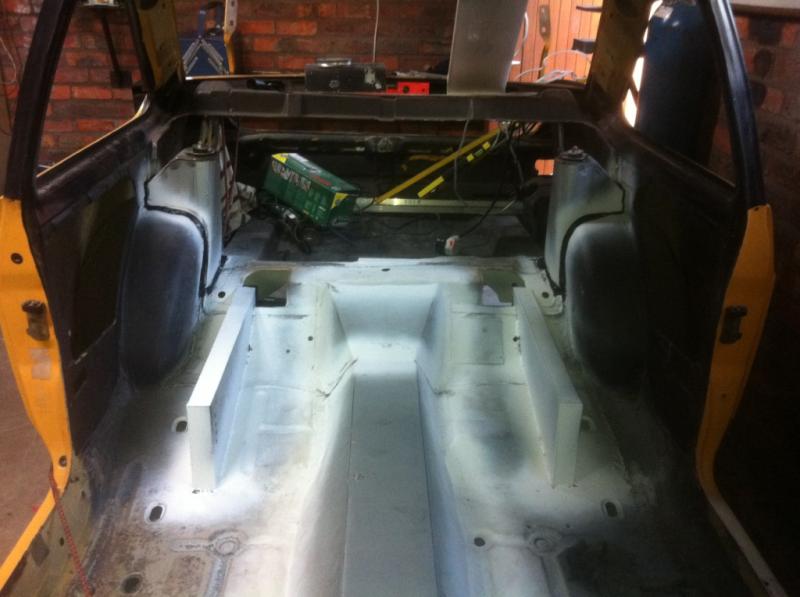
Most of the internal body parts are now made, have the rear fire wall and tunnel between the gearbox tunnel and diff tunnel remaining.
I am going to spend the next couple of weeks just welding all the parts in properly as I have tack welded most of them.
I welded in the back diff tunnel thing.
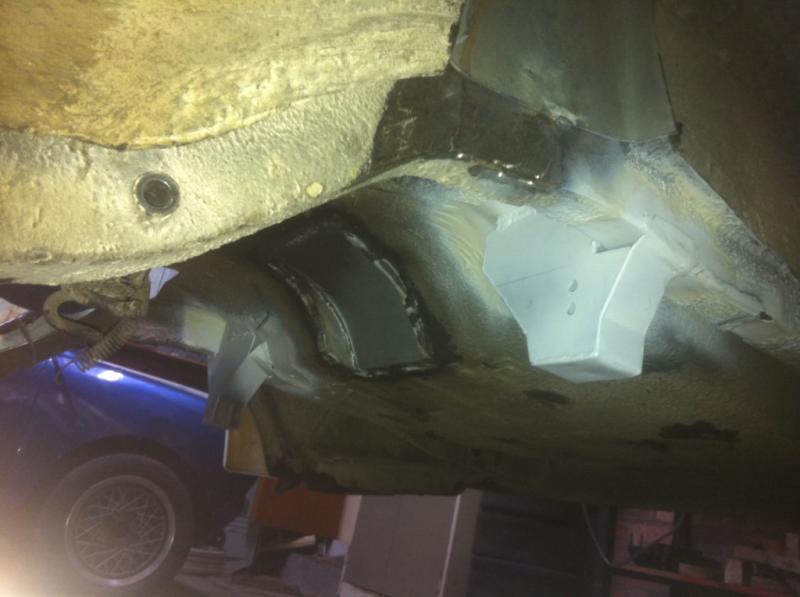
Watts brackets welded in
Front fire wall welding complete
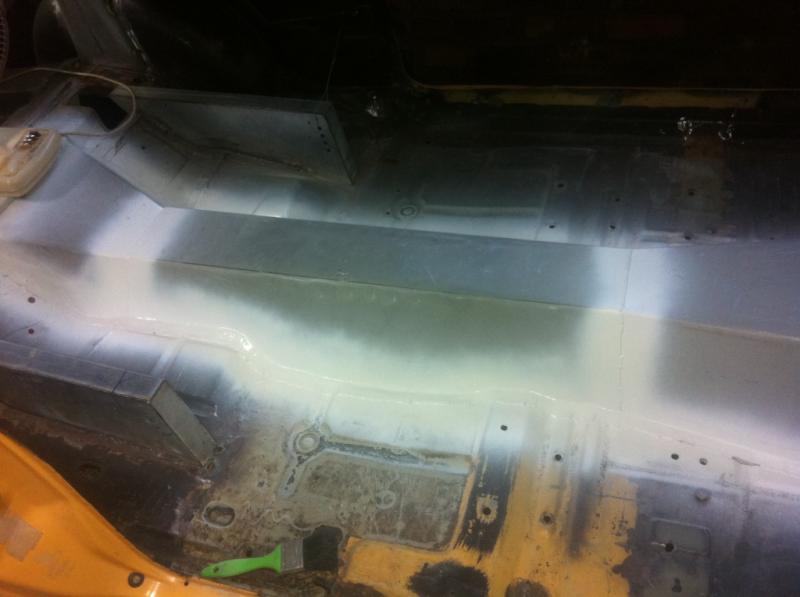
Have any of you used this product and how is this. It seems to make life easy. It�s a rust protector
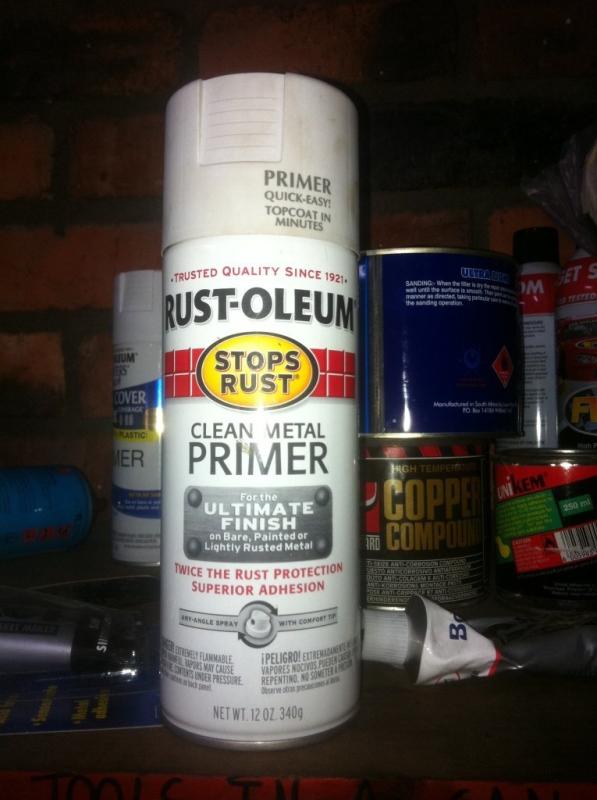
I finished the front fire wall and gave it a coat rust protector
Finished of the rear diff tunnel and diff back thing and coated with rust protector
I sealed the front fire wall everywhere, where there are no welding.
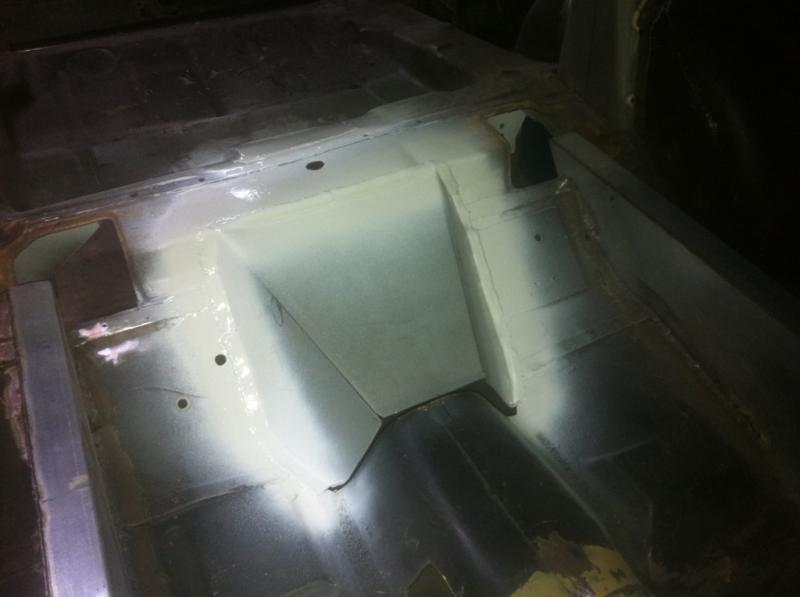
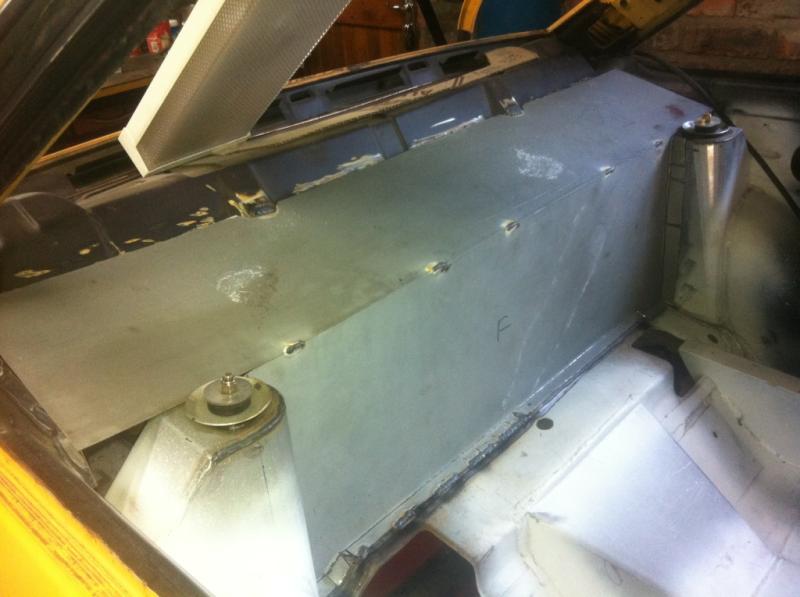
I made the tunnel between the diff and gearbox tunnel today. Tomorrow it�s welding time

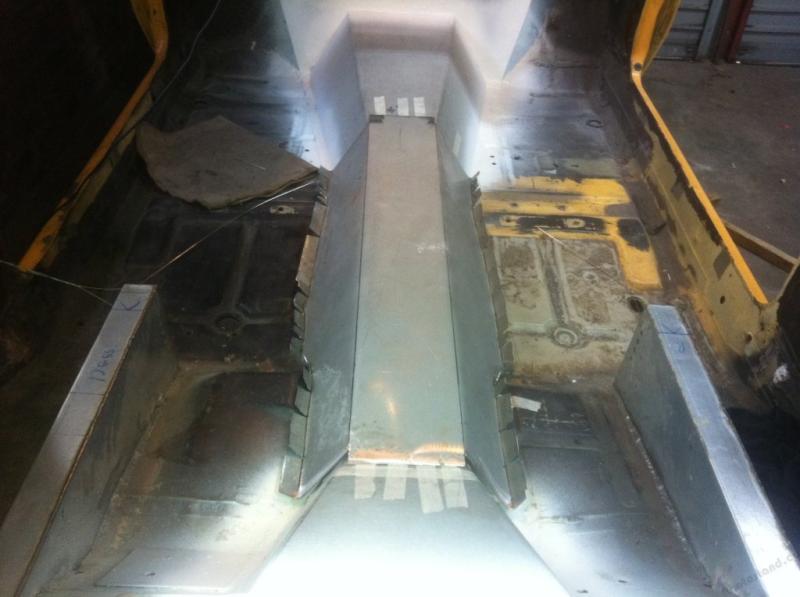
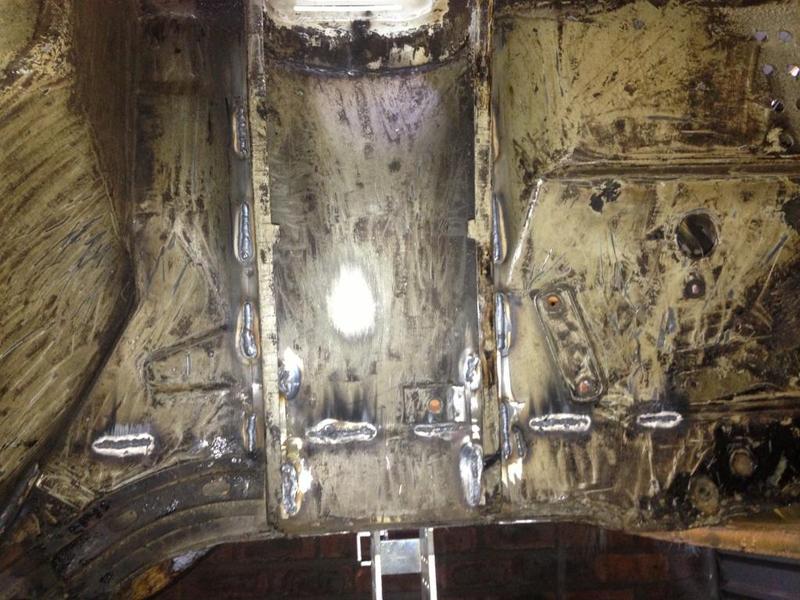
Tunnel welded
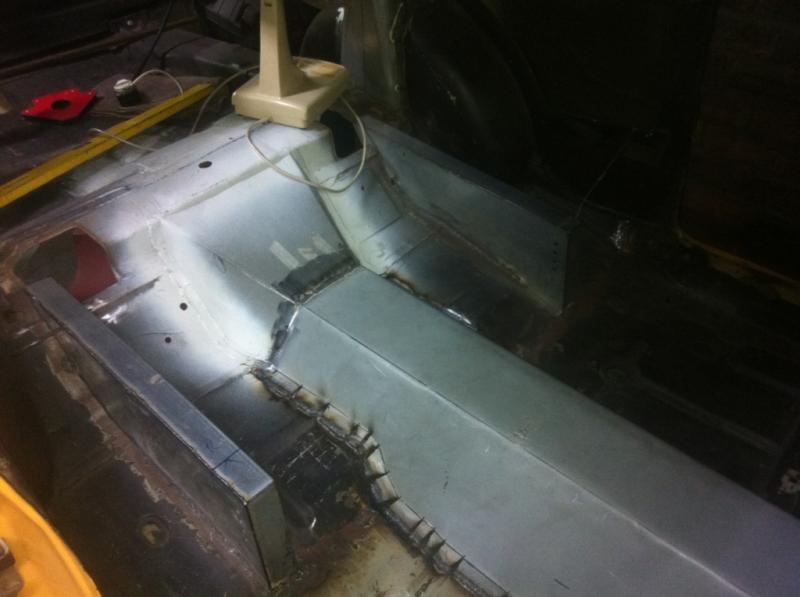
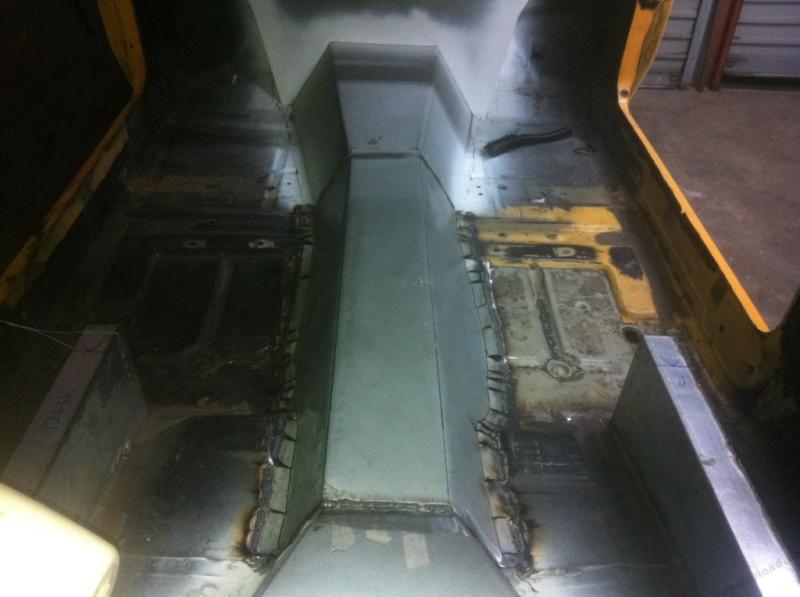
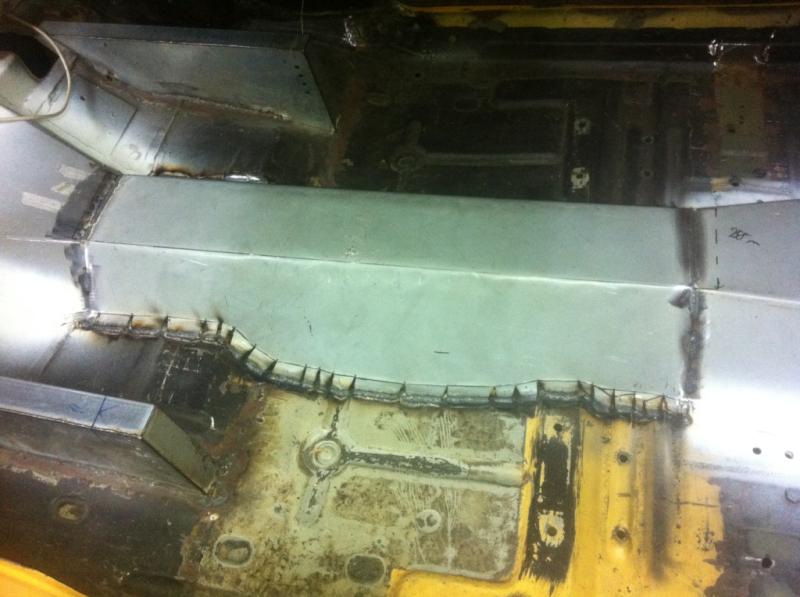
Tunnel finished
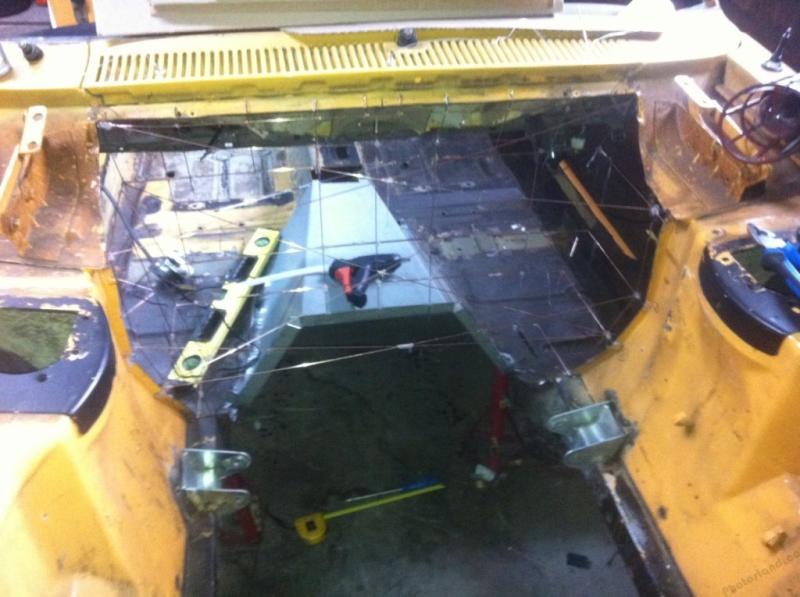
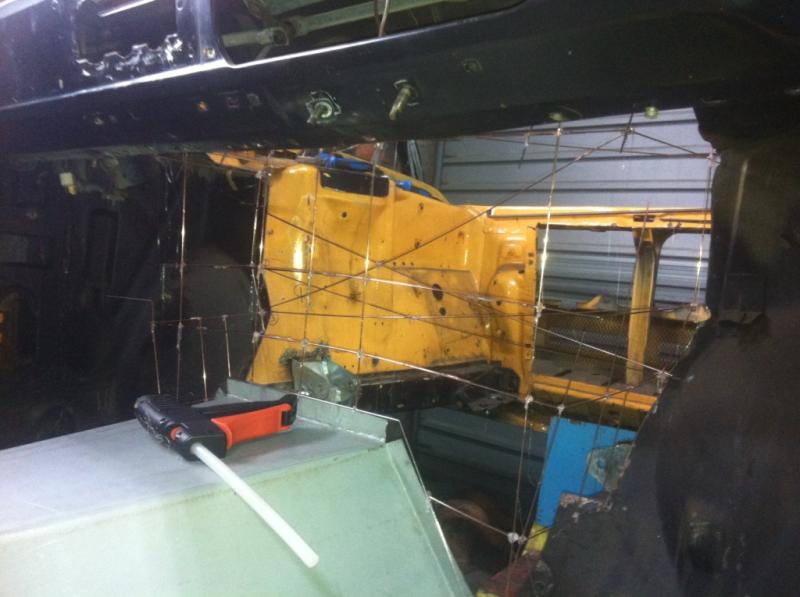
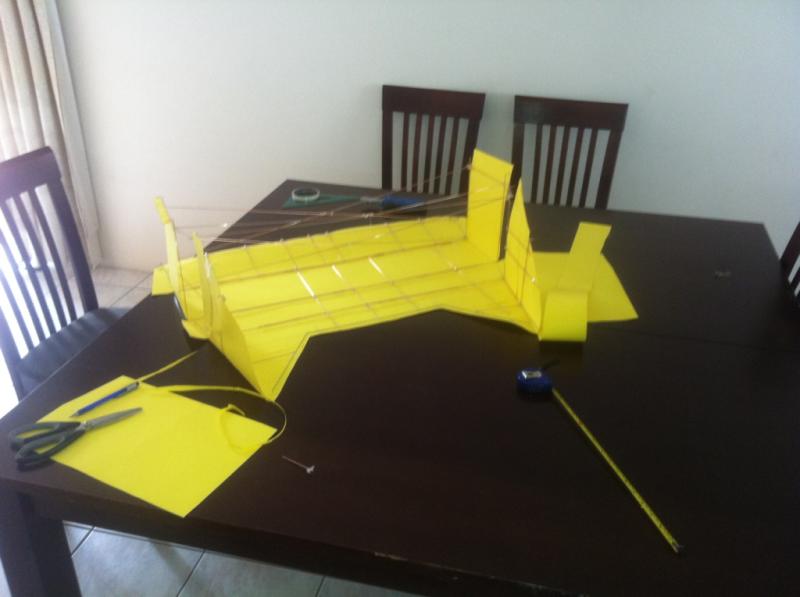
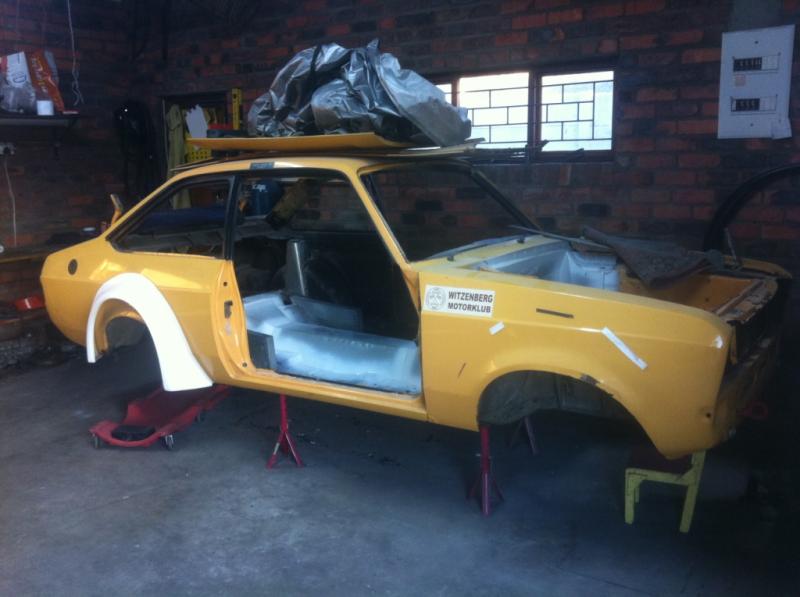
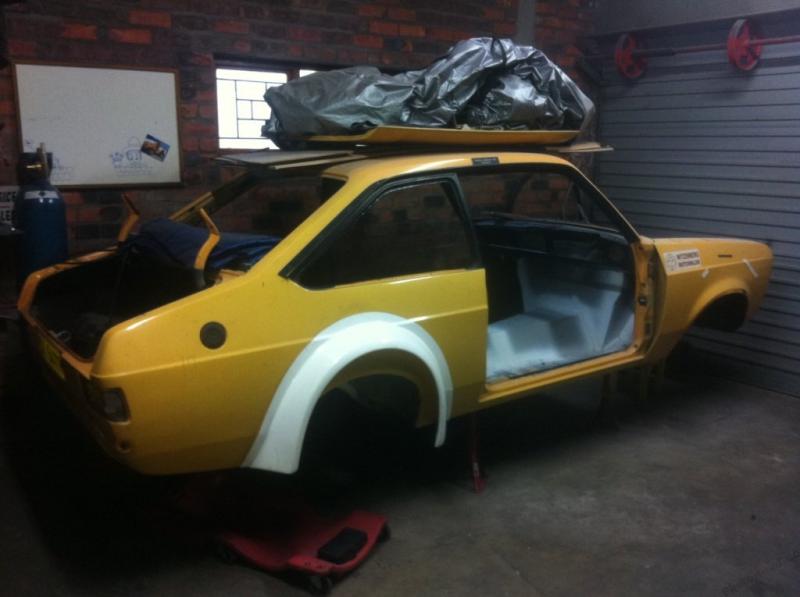
Some full pics of the car
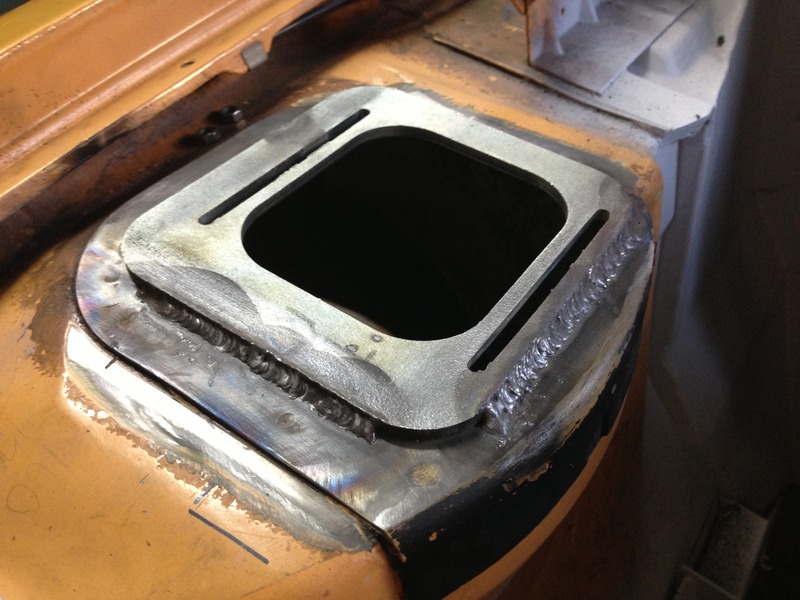
I welded the 4 link boxes and turret boxes complete
Rust coated all and sealed the turret boxes.
I've put the axle back to see if I have welded the watts brackets in the right place, seems ok.
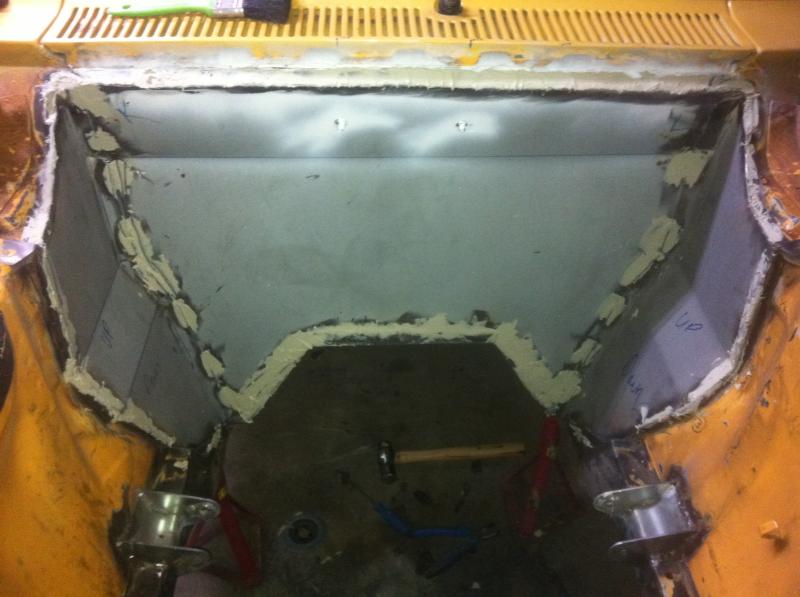
So I got going on the rear fire wall.
Made a cardboard mock up like always
Did the metal part and started welding
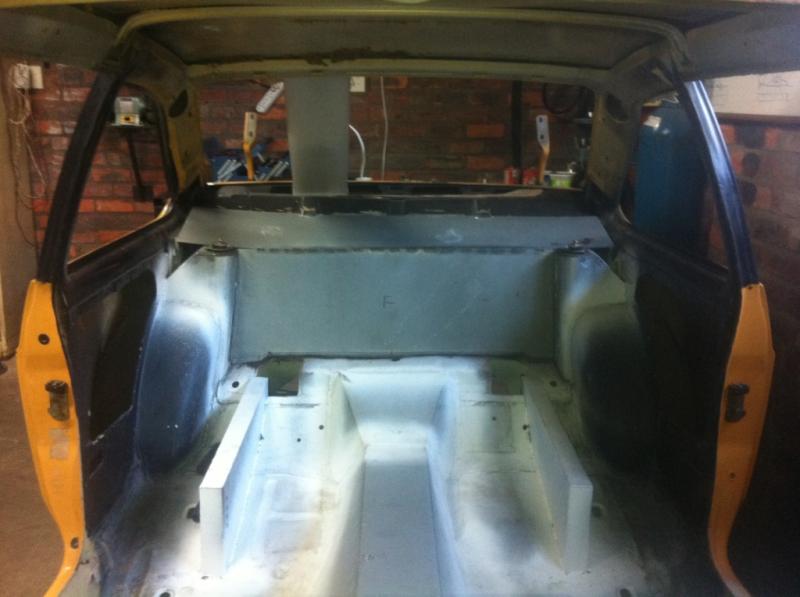
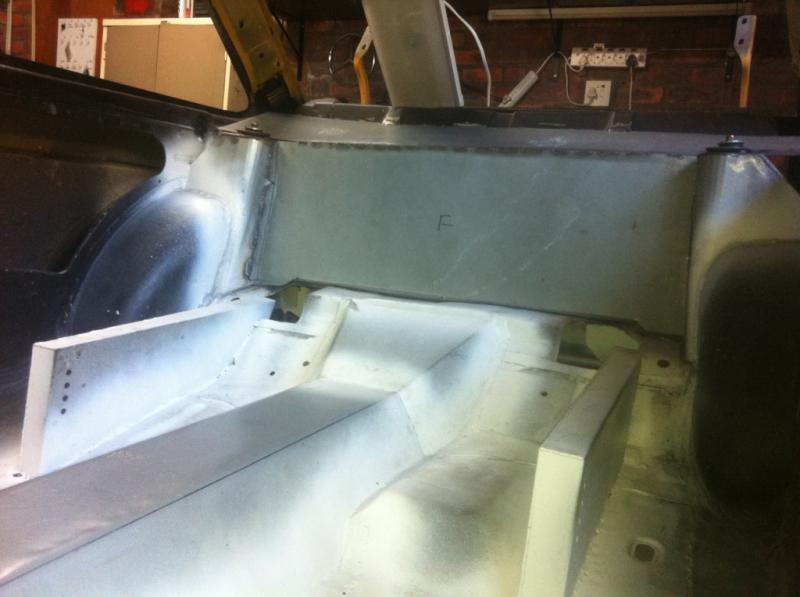
This fabrication went fairly easy and looks good. It supports the turrets nicely as well as I was slightly worried about the welding to the inside arches for turrets only.
And this it for 2012
Please check out www.madev.co.za for updates and the Dutsun rally car build.
2013 to follow shortly

Made cart box samples and copied them over to the sheet

I then cut them out and bend them to the shape


I tack welded this in and will weld it complete later.
This looked and fitted allot better than the first attempt.
From here I moved to the axle.
This is the Atlas axle imported from Fostek Engineering in the UK

Welded in the four link brackets

It is much easier to weld nice thick metals. The result is a pretty good looking weld. Impressed as I only learned how to weld a month or so ago

Tacked on the shock mounts

I then put the axle in place before welding the brackets in solid as I am worried that the springs will touch the sides of the turrets.


It seems ok but still worried as I am not sure how the suspension will move.
I reworked the watts link body brackets. Because the axle sits so high and off line of where whoever designed them to be I had to adjust them quite a bit


This is about max height. Ideal is +- 50mm lower

Diff tunnel cut out and new one made


Had to do the same at the back. The watts kit is big and hits the back.


Most of the internal body parts are now made, have the rear fire wall and tunnel between the gearbox tunnel and diff tunnel remaining.
I am going to spend the next couple of weeks just welding all the parts in properly as I have tack welded most of them.


I welded in the back diff tunnel thing.


Watts brackets welded in

Front fire wall welding complete
Have any of you used this product and how is this. It seems to make life easy. It�s a rust protector

I finished the front fire wall and gave it a coat rust protector


Finished of the rear diff tunnel and diff back thing and coated with rust protector


I sealed the front fire wall everywhere, where there are no welding.


I made the tunnel between the diff and gearbox tunnel today. Tomorrow it�s welding time


Tunnel welded


Tunnel finished

Some full pics of the car


I welded the 4 link boxes and turret boxes complete

Rust coated all and sealed the turret boxes.

I've put the axle back to see if I have welded the watts brackets in the right place, seems ok.


So I got going on the rear fire wall.
Made a cardboard mock up like always


Did the metal part and started welding


This fabrication went fairly easy and looks good. It supports the turrets nicely as well as I was slightly worried about the welding to the inside arches for turrets only.
And this it for 2012
Please check out www.madev.co.za for updates and the Dutsun rally car build.
2013 to follow shortly
18-03-2015, 07:50 PM
#12
PassionFord Post Troll

Great project nice work welcome to the forum 
 18-05-2015, 08:15 AM
#16
Virgin
Thread Starter
Join Date: Feb 2015
Location: Cape Town
Posts: 8
Likes: 0
Received 0 Likes
on
0 Posts
Thanks for all the comments and sorry that 2013 took so long.
This year was about completing the suspension and getting the brakes going
I did not do much in my 4 week holiday on the Ford, worked on the Mini to fix a oil leak. You have to take out the engine or you must be a gynecologist which I am unfortunately not just to fix the leak.
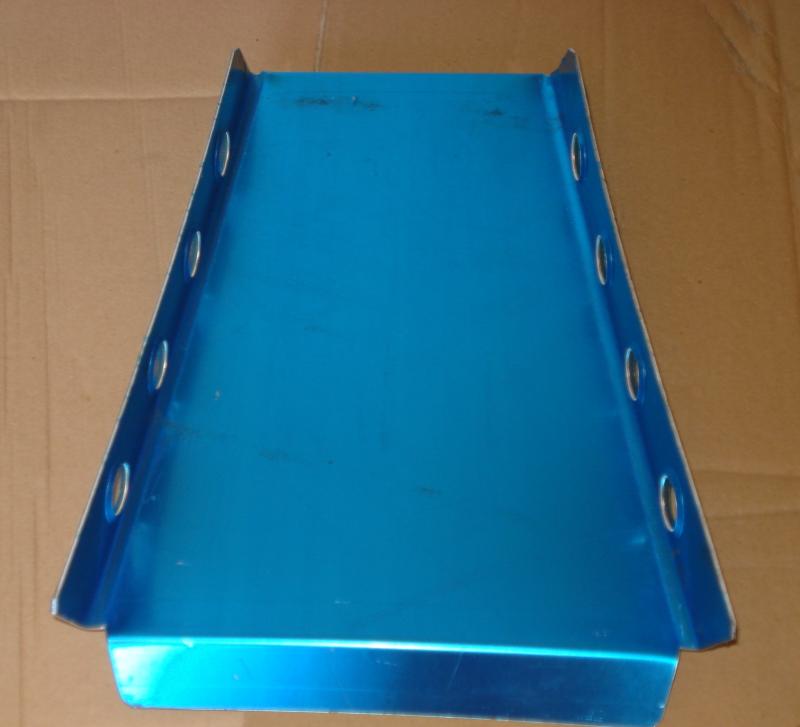
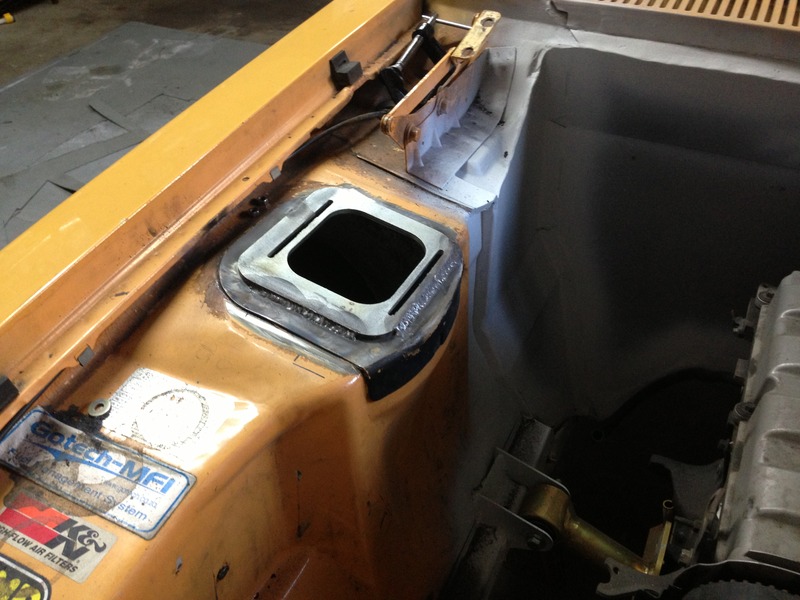
I received my castor camber plates back from laser cutting this week, they look great. This is the only thing I did for the 4 weeks on the Ford
Some pics, will assemble in next couple of days.
Laser cut parts
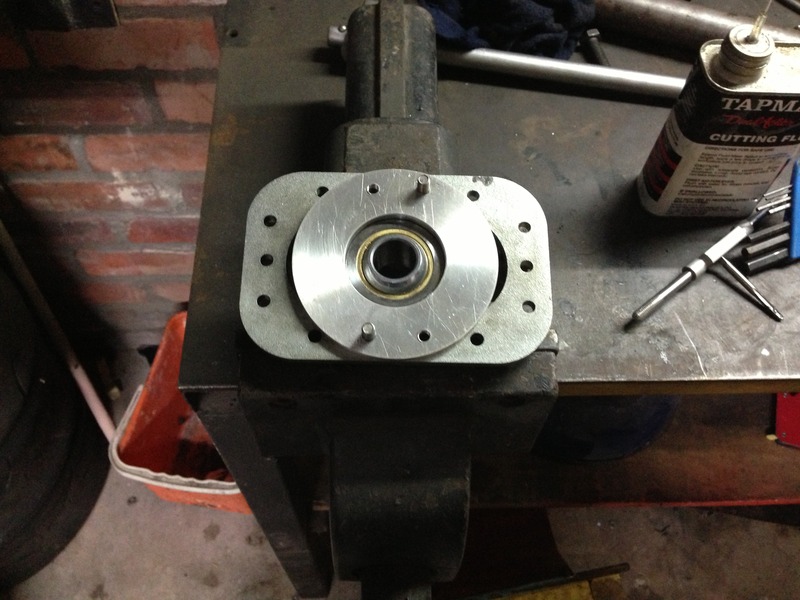
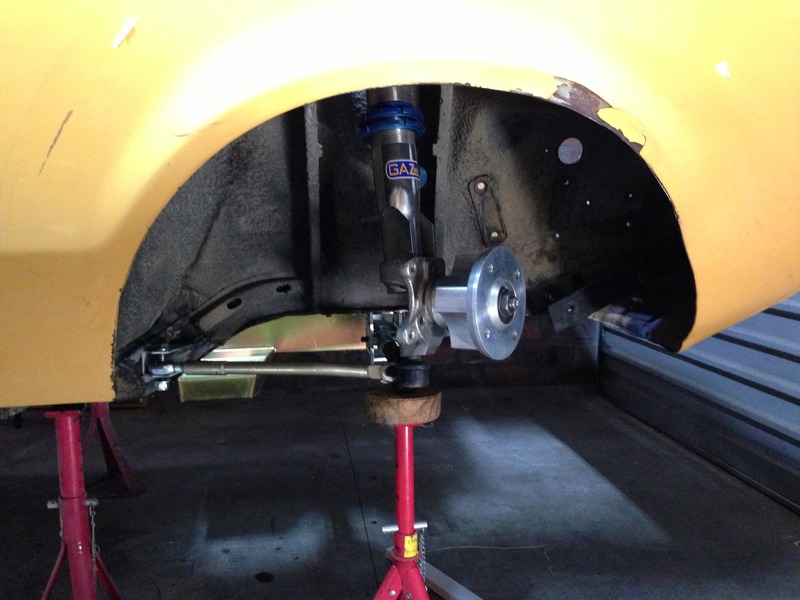
Had the top machined where swivel bearing will fit for the strut. The material seems to thin. Never seem to guess it right Will have to redo it at a later stage.
This can be max caster and camber
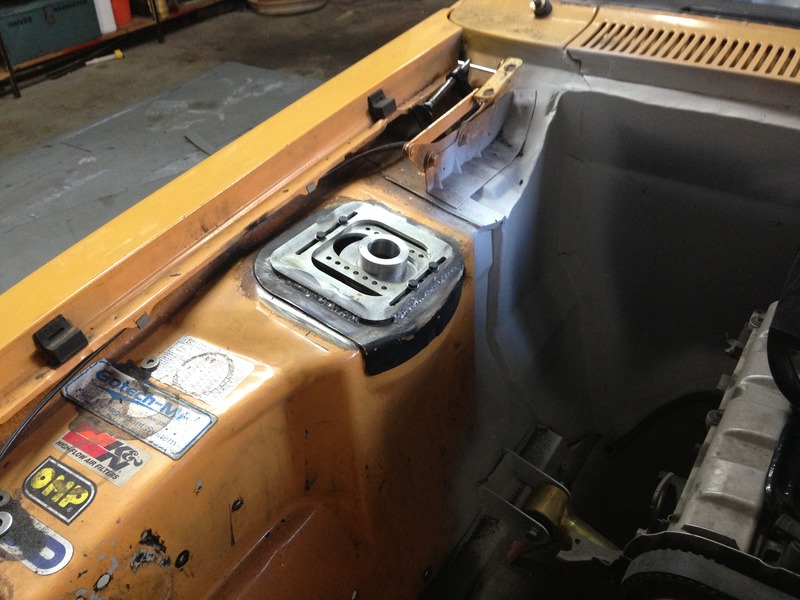
I had the steering cross member brackets laser cut
The bottom right hole is where the standard cross member hole would sit. All the holes are there for adjustment as I do not know where ideal for the car would be. But I reckoned up and out would be more ideal from standard.
Strut mounts welded in

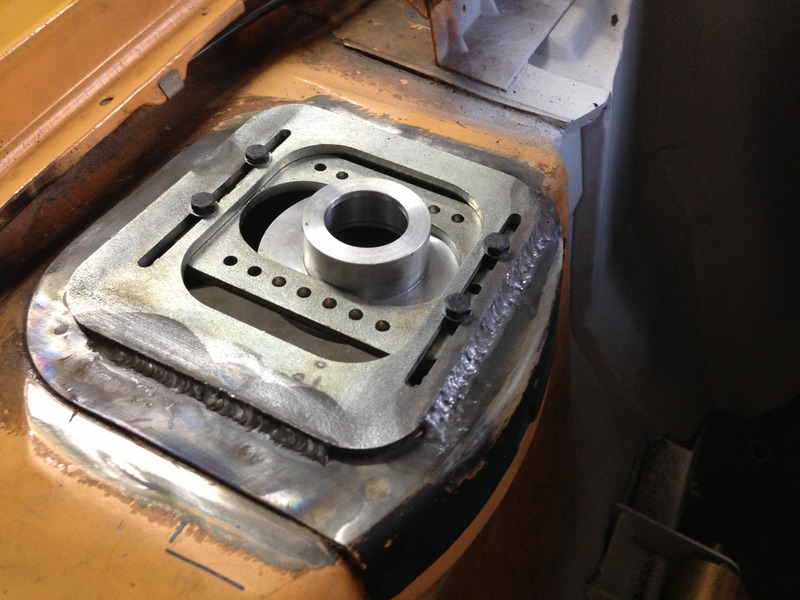
One step back,
The strut tower is made out of three elements, a cup under, the body and the top plate. If you cut such a big hole you weaken this quite a bit. You also lose some spot welds. I welded the 3 elements together to strengthen it.
I then welded the top plate to the body as I lost some of the original spot welds
Strut mount with bearing, wrong bolts still in. Have to go buy the right ones.
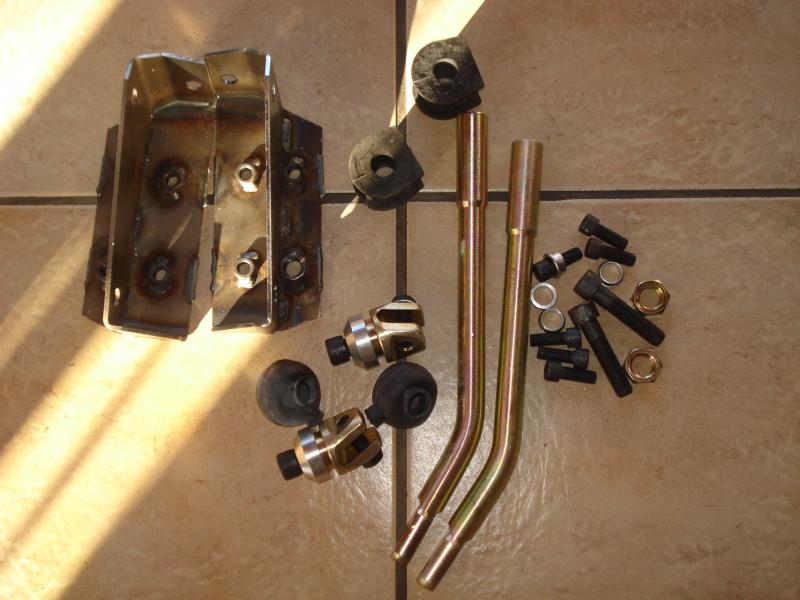
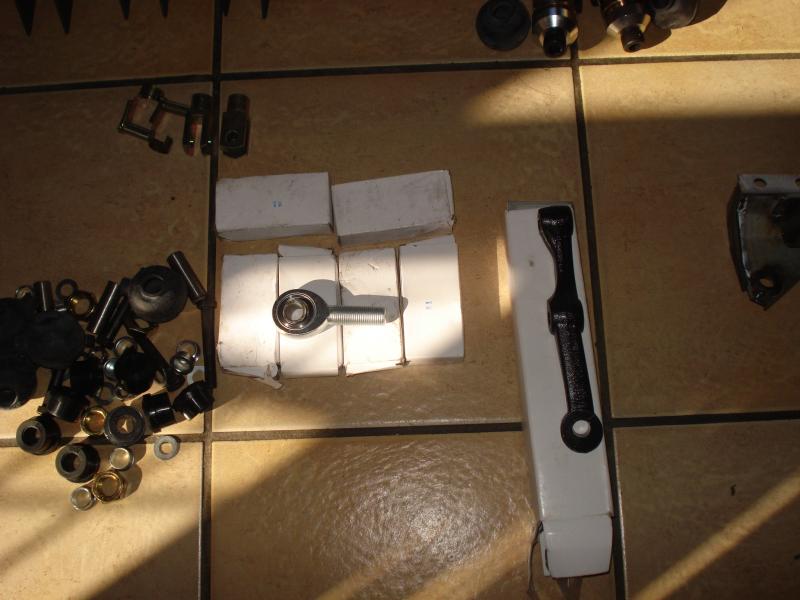
I have put the tension strut together with the lower control arm.

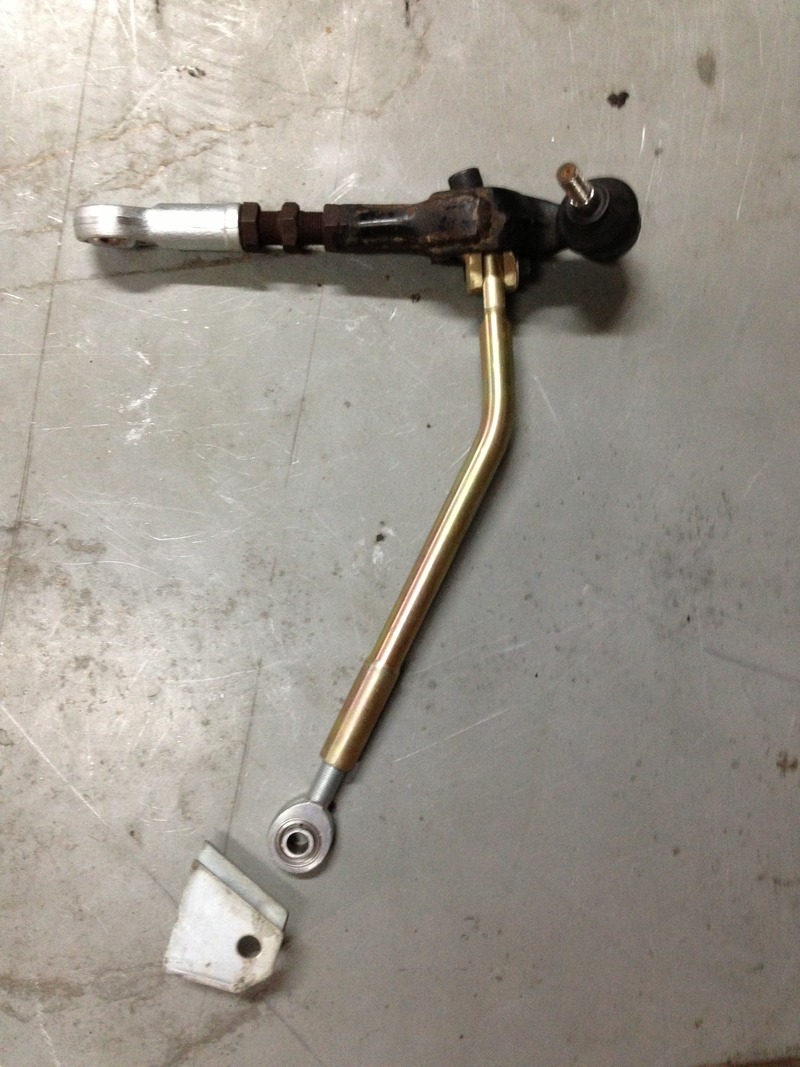
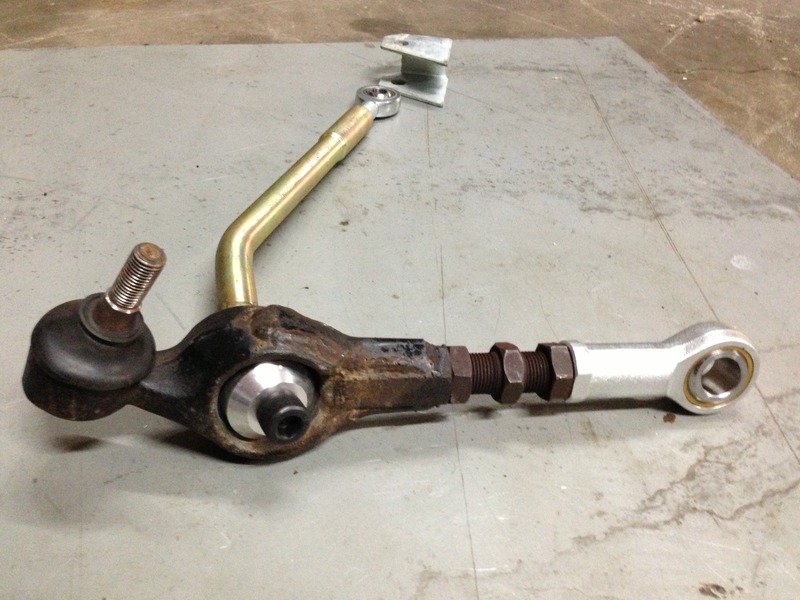
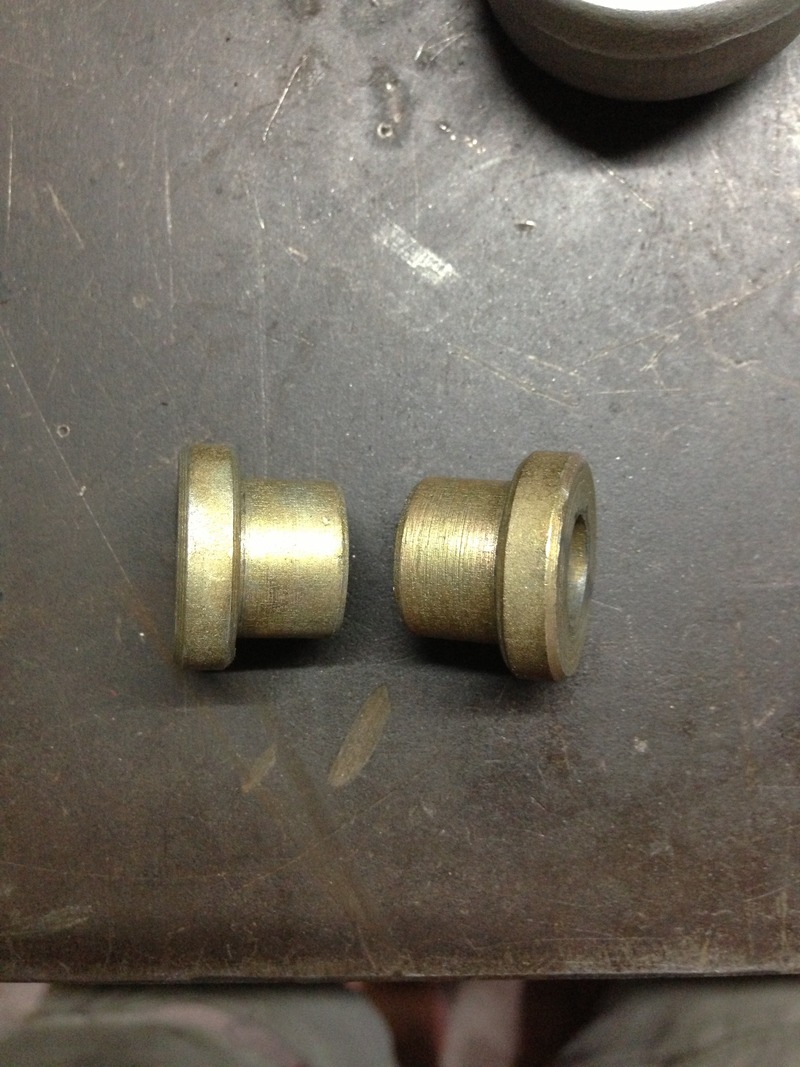
Had these bushes made to fit the lca rose joint as it is a 20dia and I am using a 10mm bolt.
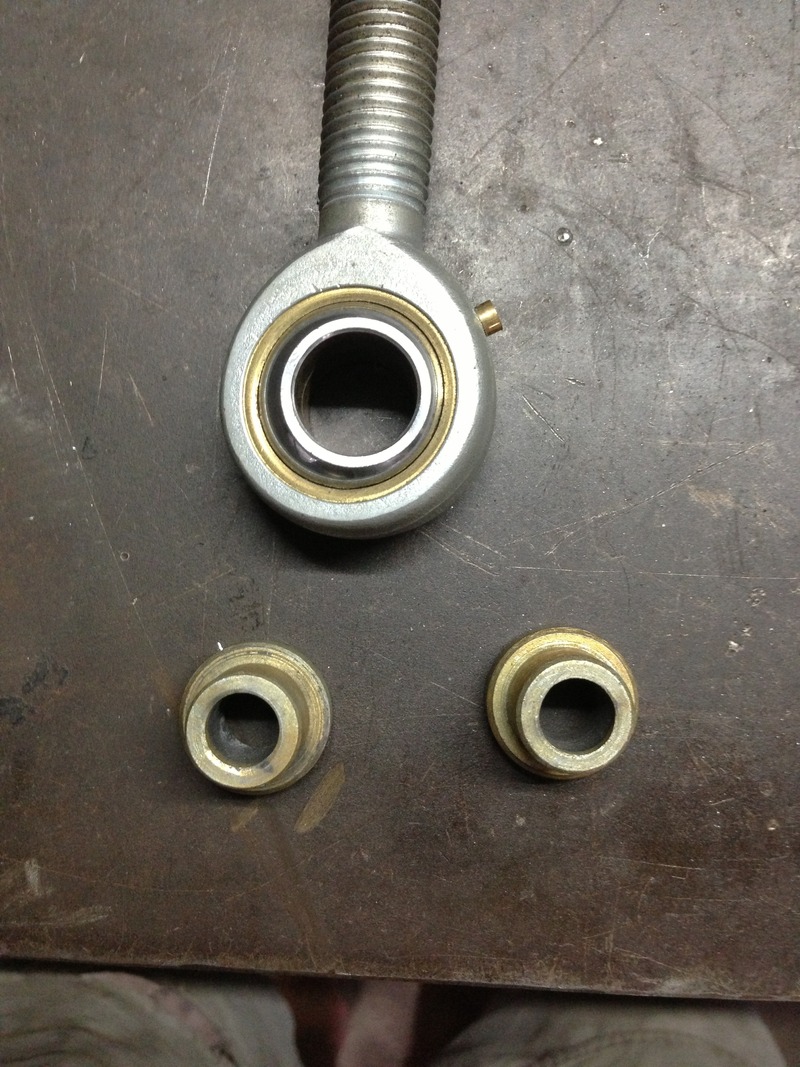
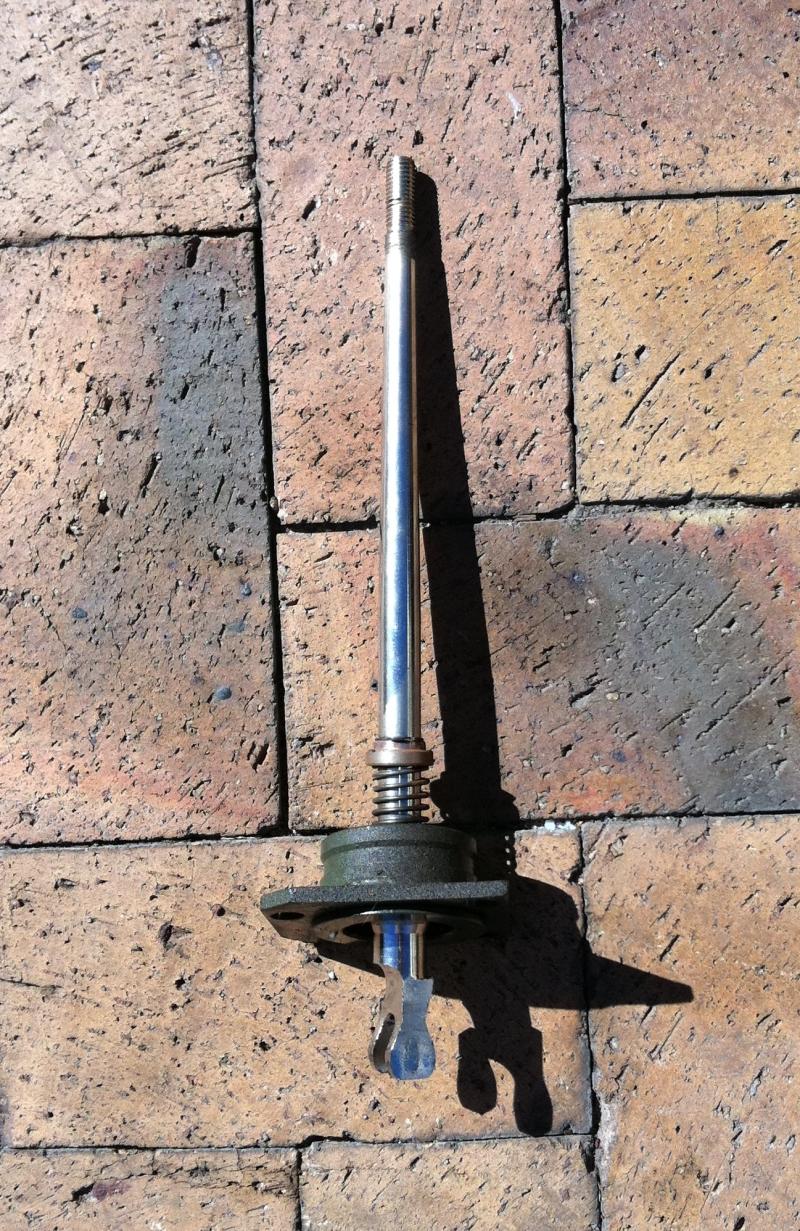
Pressed the bearings into hubs and hubs onto the struts
I Welded tension strut bracket to body after some measurements.
All just put together by tack welds as I now require a 15"wheel with a slick to test this setup.
This year was about completing the suspension and getting the brakes going
I did not do much in my 4 week holiday on the Ford, worked on the Mini to fix a oil leak. You have to take out the engine or you must be a gynecologist which I am unfortunately not just to fix the leak.
I received my castor camber plates back from laser cutting this week, they look great. This is the only thing I did for the 4 weeks on the Ford
Some pics, will assemble in next couple of days.
Laser cut parts

Had the top machined where swivel bearing will fit for the strut. The material seems to thin. Never seem to guess it right Will have to redo it at a later stage.


This can be max caster and camber

I had the steering cross member brackets laser cut


The bottom right hole is where the standard cross member hole would sit. All the holes are there for adjustment as I do not know where ideal for the car would be. But I reckoned up and out would be more ideal from standard.
Strut mounts welded in


One step back,
The strut tower is made out of three elements, a cup under, the body and the top plate. If you cut such a big hole you weaken this quite a bit. You also lose some spot welds. I welded the 3 elements together to strengthen it.

I then welded the top plate to the body as I lost some of the original spot welds


Strut mount with bearing, wrong bolts still in. Have to go buy the right ones.


I have put the tension strut together with the lower control arm.


Had these bushes made to fit the lca rose joint as it is a 20dia and I am using a 10mm bolt.


Pressed the bearings into hubs and hubs onto the struts

I Welded tension strut bracket to body after some measurements.


All just put together by tack welds as I now require a 15"wheel with a slick to test this setup.

 18-05-2015, 10:12 AM
#18
Virgin
Thread Starter
Join Date: Feb 2015
Location: Cape Town
Posts: 8
Likes: 0
Received 0 Likes
on
0 Posts
Things moving slowly like always, Mini have had lots of breakages so far, on my second Lumina so the Lumina club also keeping me busy and work is hectic. Excuses I know!!
I am busy with steering, on revision 4 already. Keep on cocking it up. Moving the engine so low as possible will have its advantages but now giving me headaches as it is where the steering should sit naturally. Moving it becomes a hassle with steering arms and buggering up your ackermann
Some pics, but not there yet
Had to redo this one again as it was a flop
I started on the radiator end while I was waiting week after week for my steering laser cut parts, set after set.
Still incomplete but moving forward
I Basically cut out the front end, added a new plate to fit the radiator. Slightly of center to allow some space for the oil cooler.
I Also change the compression strut to a tensions strut. After some research and advise this is the better option. Basically compression is for rally and tension for track.
Bought some 15"steellies and got a set of 15"slicks for free. Have to get them widened and center moved to suit.
It was time to remove all the rubberizing form the car
I used the plumbers torch and scraper for this.
Borrowed a mig welder from the Mathee brothers for the seam welding, Herman gave me some tips and off I went to go play
I did some practicing as it is my first time with this machine. Seemed easy enough on my scrap pieces but it went pretty crap on the car.
Got it right on the thicker stuff
Got frustrated with the mig so quickly moved back to tig. Did some nice welds with it. Now about 5% with the seam welding. Long hours ahead!!!
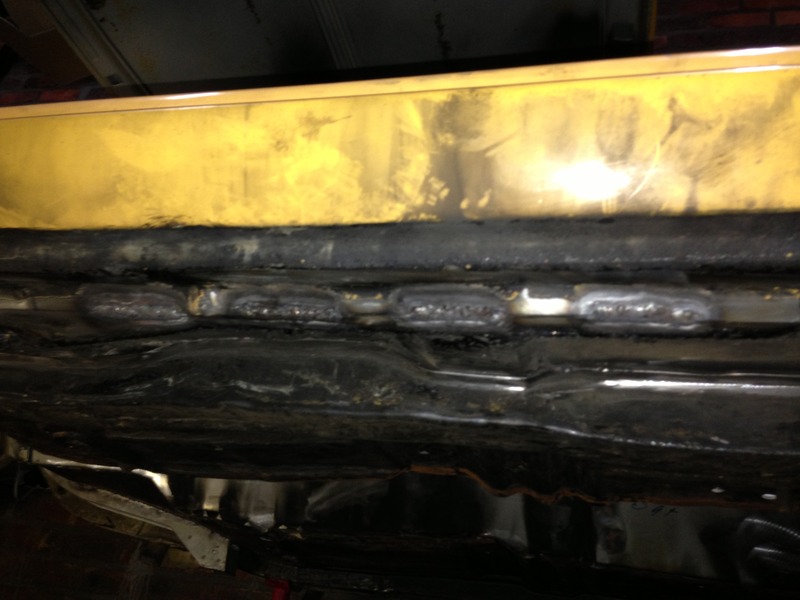
I marked out my welds, 50mm weld and 50mm gap. Put the tape in the inside of the car and started welding.
Do I need to explain what happened next?
Welding the chassis channel to the under body.
What I want to know if it is necessary to weld both sides of the channel to the under body?
I decided not to weld the other side of the chassis rail. I do not think it is necessary.
I Finished the steering rack mount.
Sold my extra Duratec engine
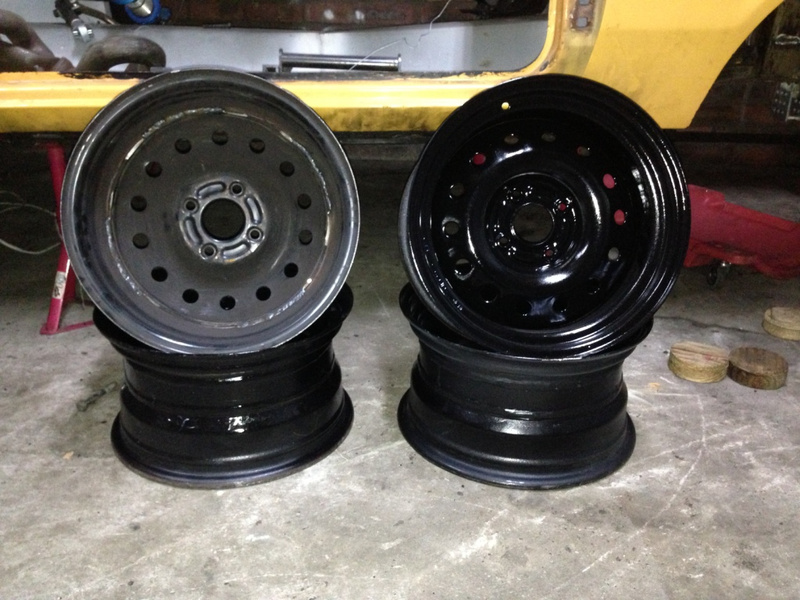
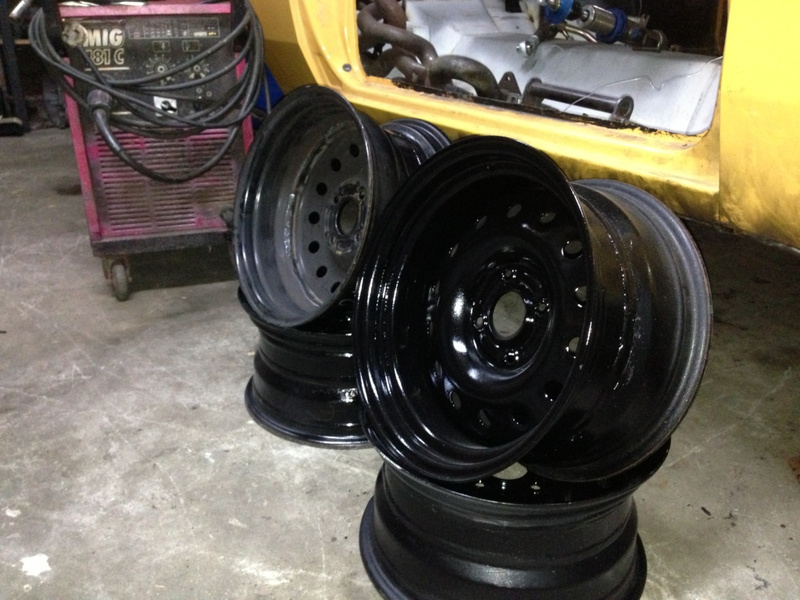
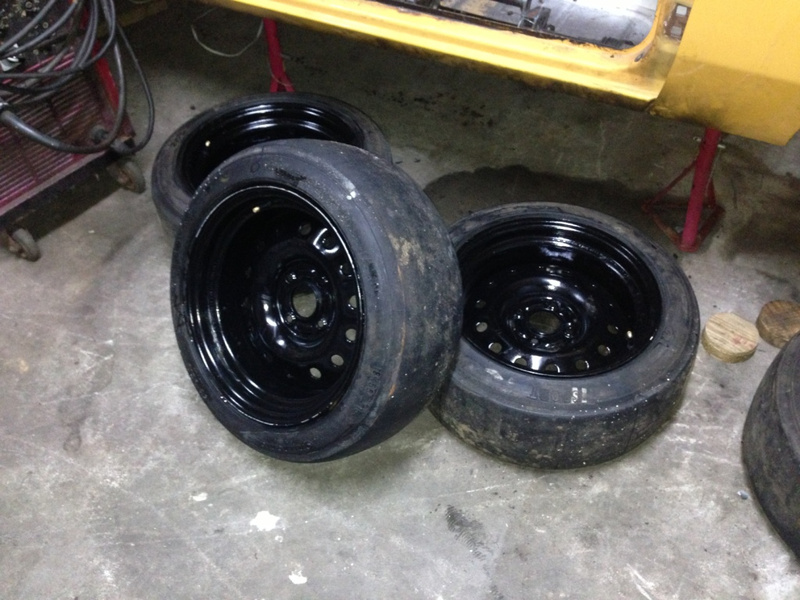
Got my wheels back last week. They are 15x8 with a 7mm off set.
I started this weekend on the cutting open the arches to get the wheels in to finish of the front suspension, steering and rear back inner arch.
I am busy with steering, on revision 4 already. Keep on cocking it up. Moving the engine so low as possible will have its advantages but now giving me headaches as it is where the steering should sit naturally. Moving it becomes a hassle with steering arms and buggering up your ackermann
Some pics, but not there yet


Had to redo this one again as it was a flop


I started on the radiator end while I was waiting week after week for my steering laser cut parts, set after set.
Still incomplete but moving forward


I Basically cut out the front end, added a new plate to fit the radiator. Slightly of center to allow some space for the oil cooler.
I Also change the compression strut to a tensions strut. After some research and advise this is the better option. Basically compression is for rally and tension for track.


Bought some 15"steellies and got a set of 15"slicks for free. Have to get them widened and center moved to suit.
It was time to remove all the rubberizing form the car
I used the plumbers torch and scraper for this.


Borrowed a mig welder from the Mathee brothers for the seam welding, Herman gave me some tips and off I went to go play

I did some practicing as it is my first time with this machine. Seemed easy enough on my scrap pieces but it went pretty crap on the car.

Got it right on the thicker stuff

Got frustrated with the mig so quickly moved back to tig. Did some nice welds with it. Now about 5% with the seam welding. Long hours ahead!!!

I marked out my welds, 50mm weld and 50mm gap. Put the tape in the inside of the car and started welding.
Do I need to explain what happened next?

Welding the chassis channel to the under body.
What I want to know if it is necessary to weld both sides of the channel to the under body?

I decided not to weld the other side of the chassis rail. I do not think it is necessary.


I Finished the steering rack mount.

Sold my extra Duratec engine

Got my wheels back last week. They are 15x8 with a 7mm off set.


I started this weekend on the cutting open the arches to get the wheels in to finish of the front suspension, steering and rear back inner arch.
18-05-2015, 10:20 AM
#19
PassionFord Regular

loving this  loads of pics, nice welds.
18-05-2015, 05:35 PM
#21
Virgin
Thread Starter
Join Date: Feb 2015
Location: Cape Town
Posts: 8
Likes: 0
Received 0 Likes
on
0 Posts


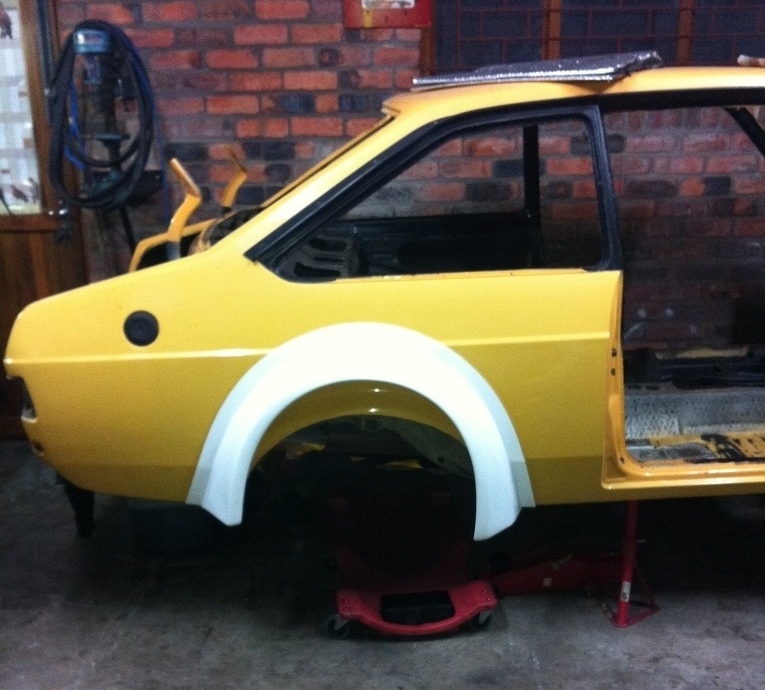
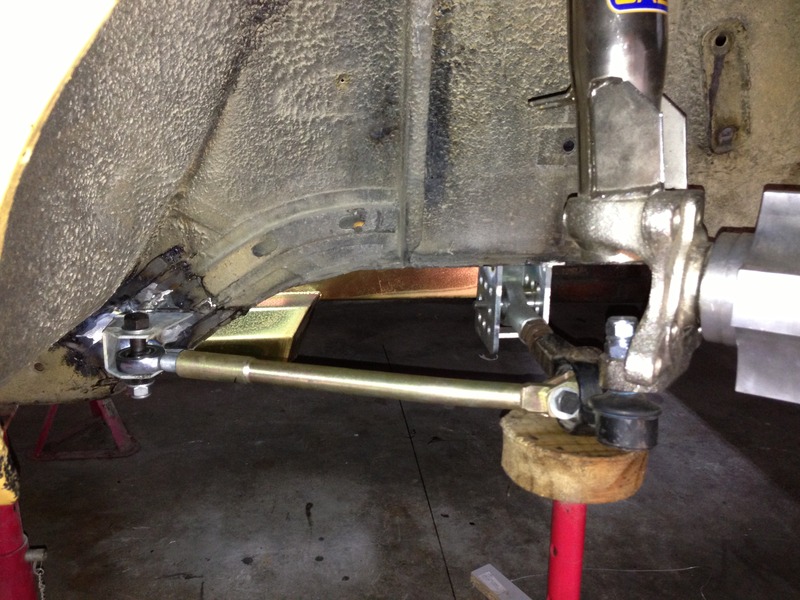
I Started in front, getting the exact position of the kit was not that easy as the moulds are not exact, especially the front scoop. I marked it at as close to where it should be to 100% as there is space for movement.
At the back it is easier as the arch can be slightly moved to your ideal position. At the back involves more work as you cut out your inner arch and will need to replace it.


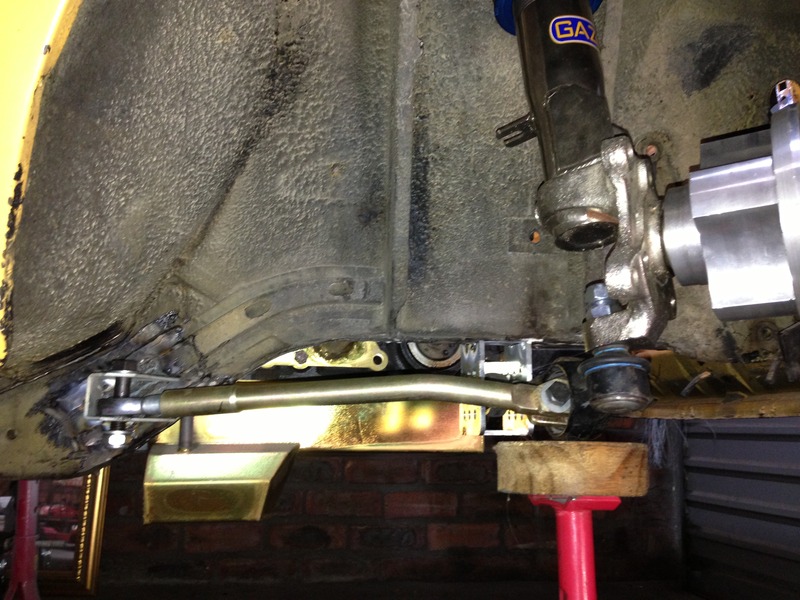
I Assembled the front suspension to start going on the steering rack.

I am almost done with the right rear arch, going to start on the left side for now and finish this one later.


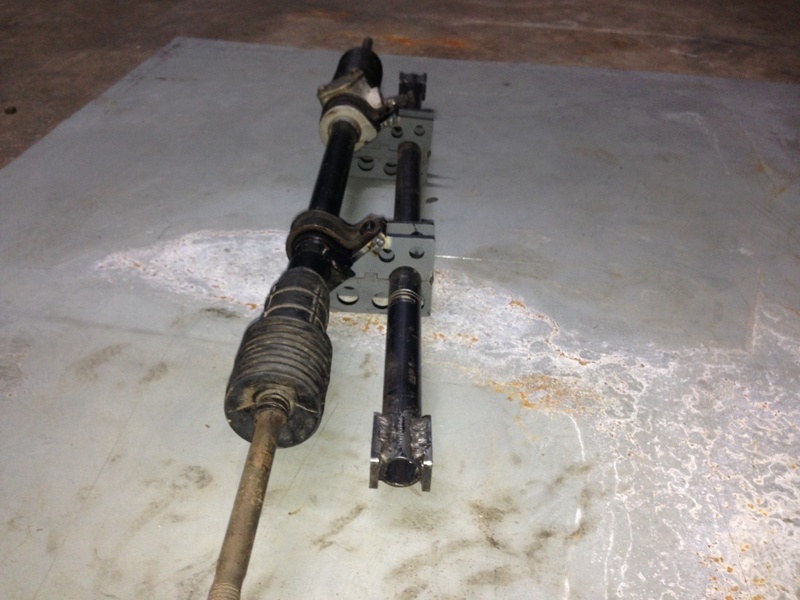
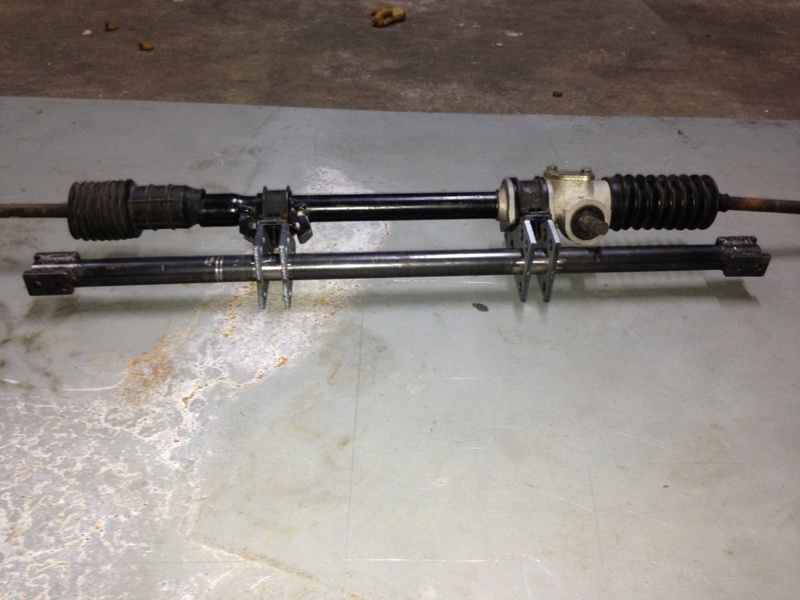
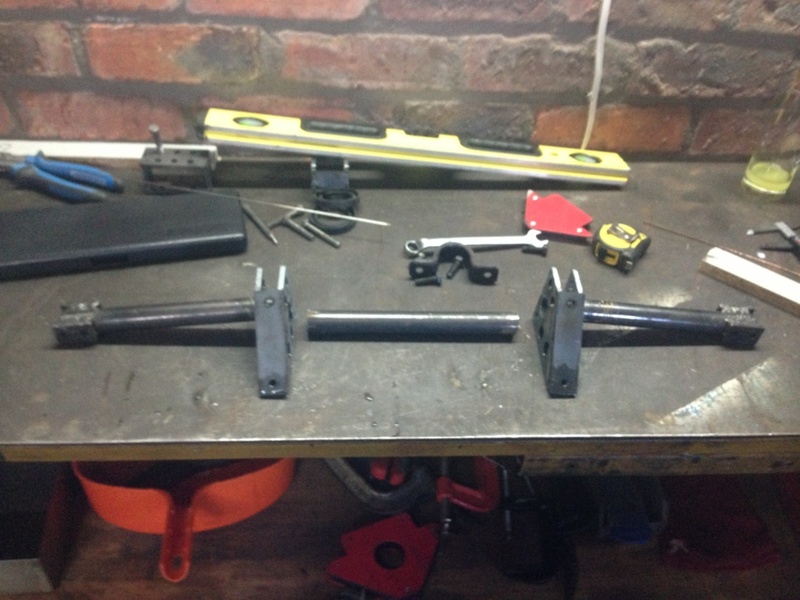
I have completed the steering rack cross member after hundreds of tries.


Mike borrowed me his car trolley that he build for is Mini project to me. This makes life so much easier. I felt stupid for not doing this long ago. Struggled my ass off to get the car up onto the thing, got my Father and brother in laws help in for that after I managed to crash the car to the ground.


This now allows me to work on any area of the car with plenty of space around me.


I then finished off all the arch work to all outstanding wheels, pre fitted the front scoop to get the idea and placement right for the front arches.
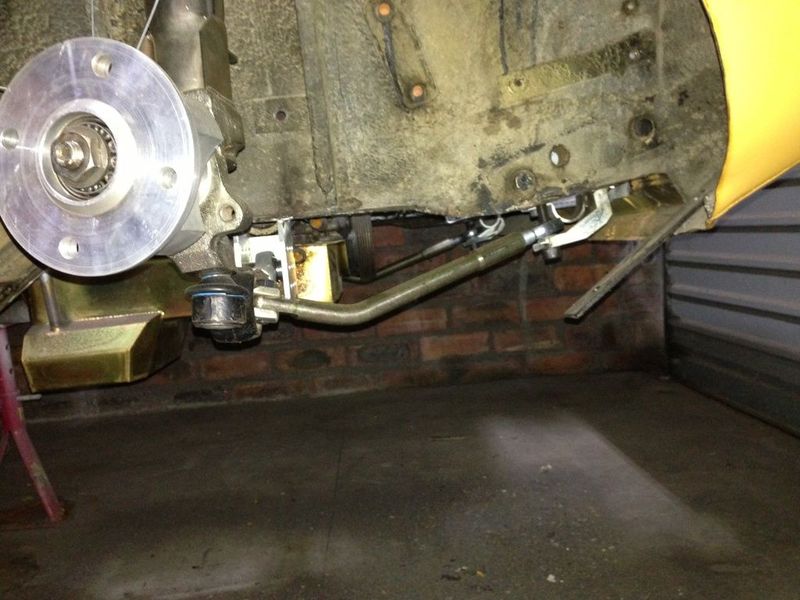
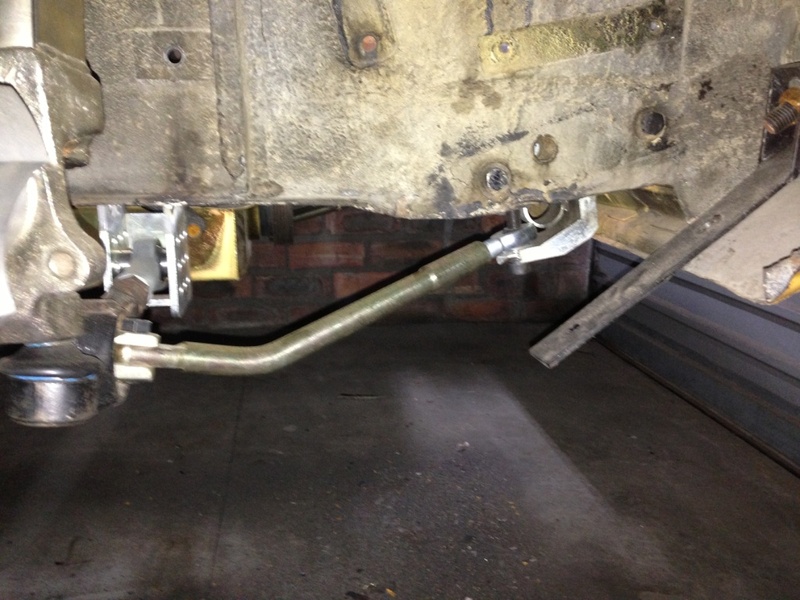
I started on my steering arms, was not that easy to get the Ackermann right. I started off by drawing hundreds of different scenarios on Auto Cad to make the wheels turn right. Please if you ever do change your steering geometry go look up on Ackermann. You do not want it wrong. I got it right eventually but still could not do it in a 3-4D situation on cad


I made up these temp adjustable steering arms just to see how my worked out theory steering arms position would react. It seems that it should work but my steering rack arms is to short, about 100mm to short. Ordered some extensions from Rally Design still waiting on those
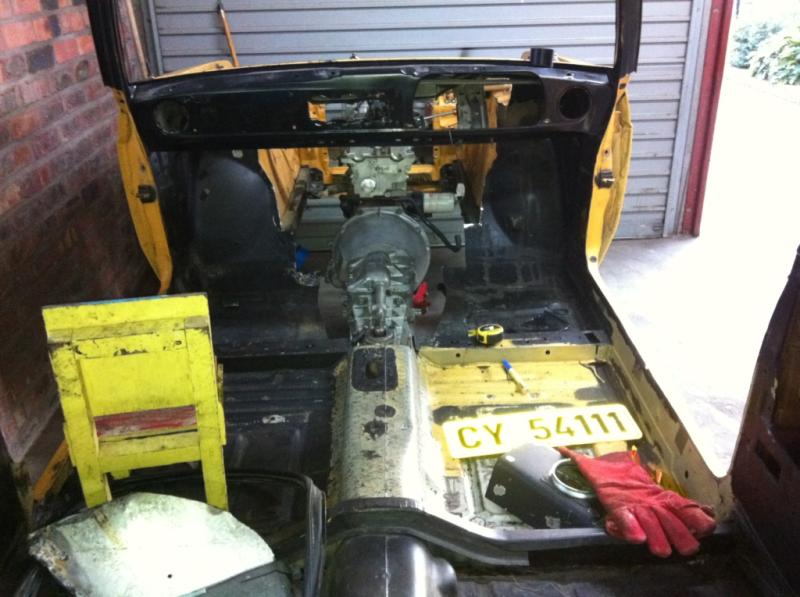
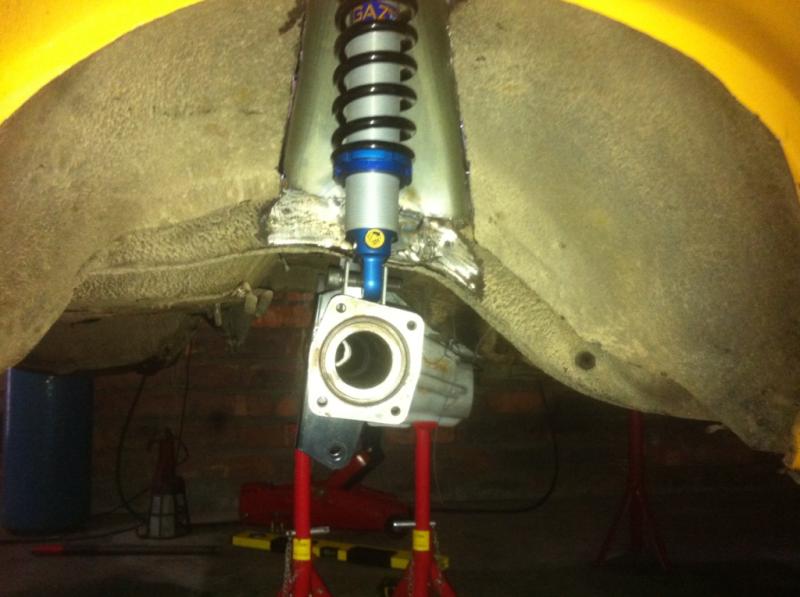
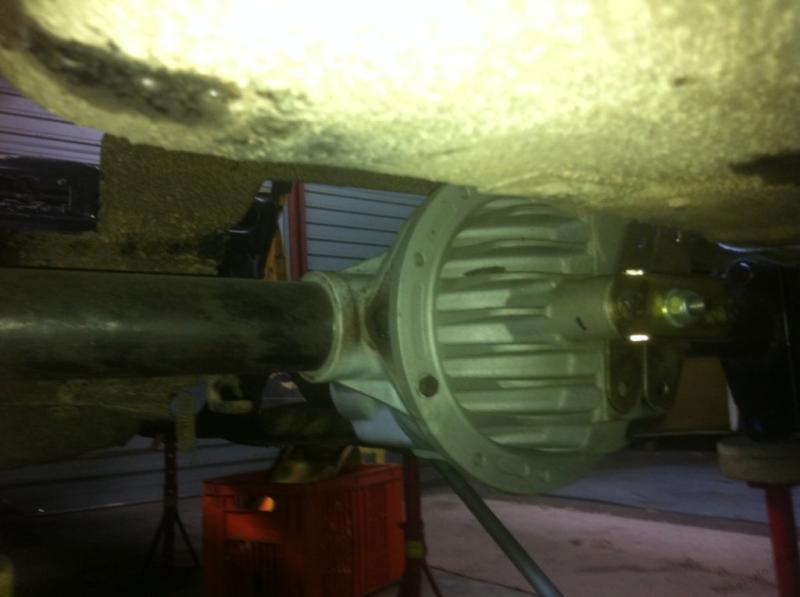
I had the axle assembled.


I then put the axle into its place


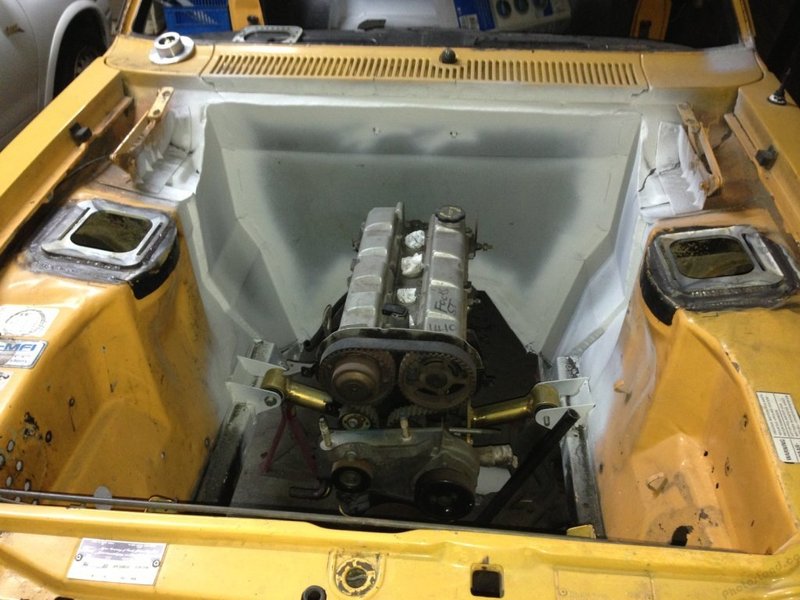
I am waiting on my wheel bearing retaining plates and steering arms from laser cutting. Then the car can stand on its own legs again after two years
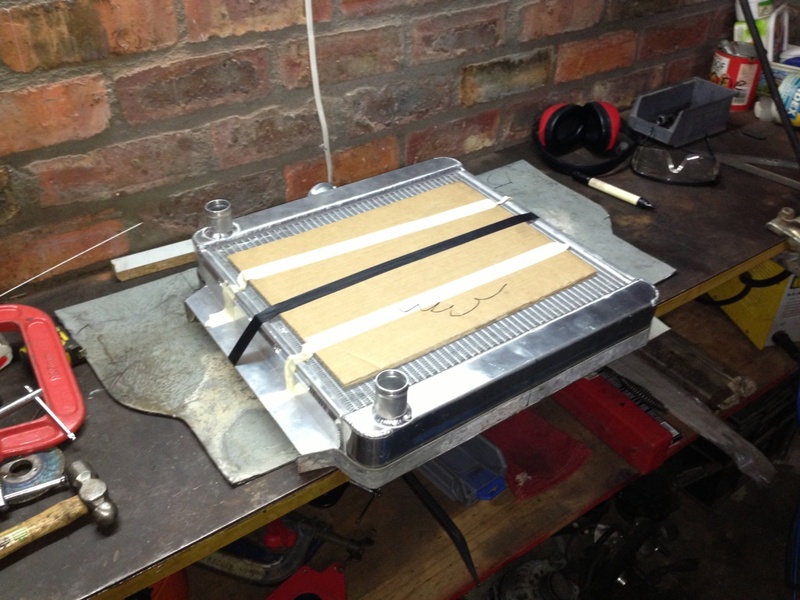
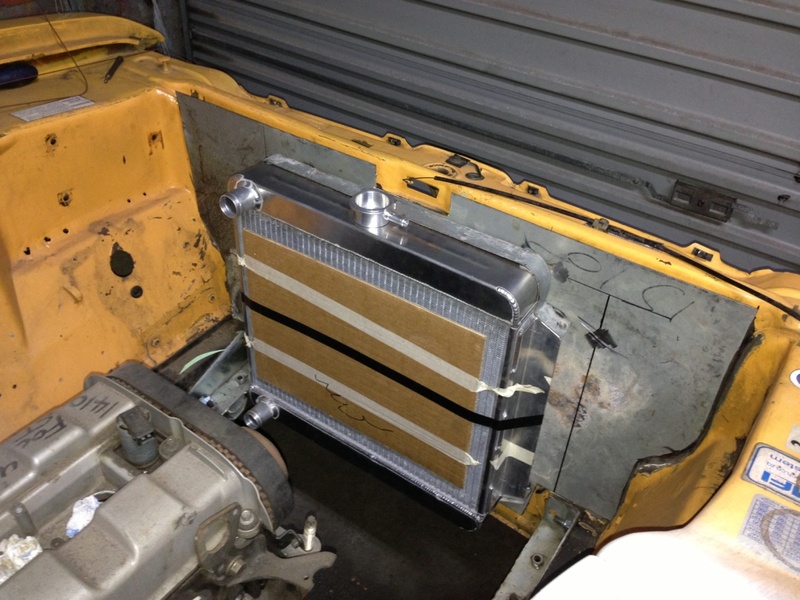
I finished the front section for mounting the radiator and oil cooler. I decided to mount the oil cooler to the engine side as it creates too many issues if you try and squeeze it in front of the radiator.


I added some rust protector as my parts seems to rust before I get a chance to put them in place.


All welded in


I managed to get the radiator mounted and the oil cooler in


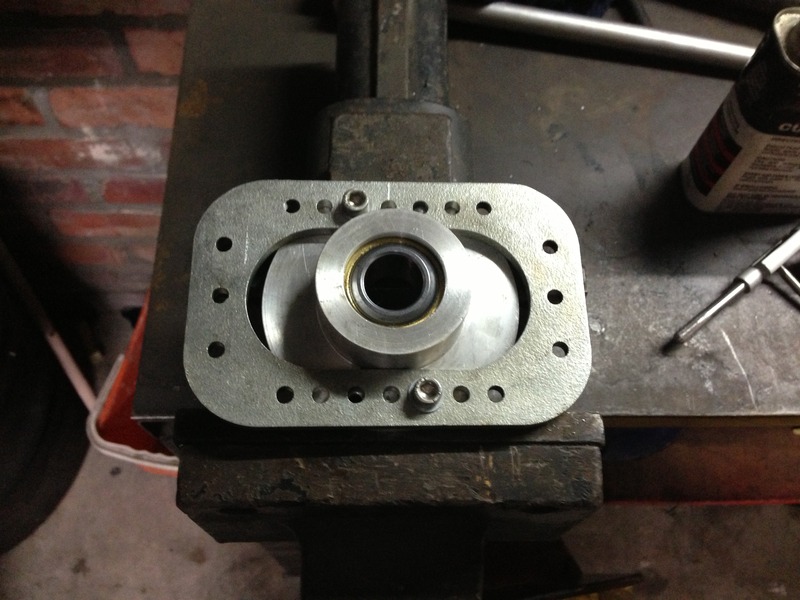
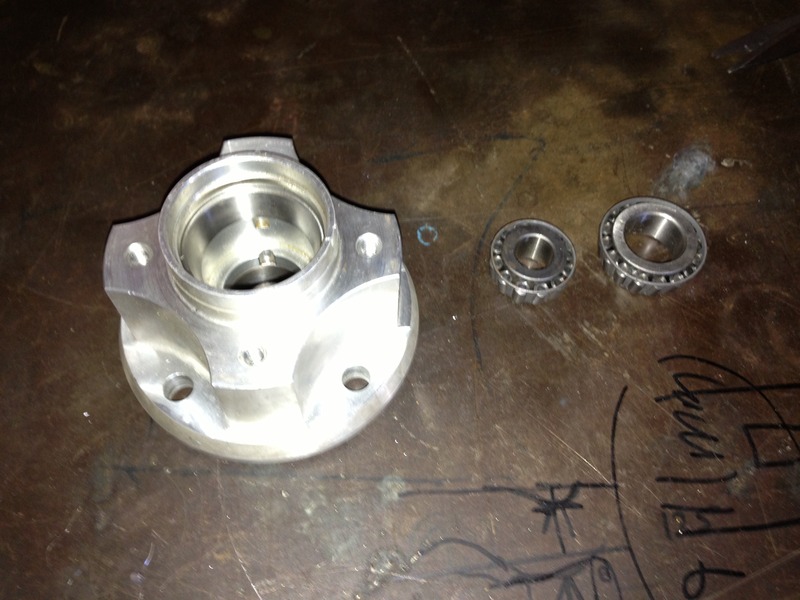
I made new bearing retaining plates from alluminium for the axle. Had them laser cut and then the center machined out to make space for the bearing


Thanks to the Mathee brothers for the machining
I received my poly bushes for the steering rack, end caps for aluminium hubs, brake fluid holders, steering arm ends to change to rose joint and some parts of my brake kit. The kit was a bit off a mess with plenty of missing and wrong parts.


Eventually received the missing parts

Temporary mounted them to measure for my steering arms again.

Got the pads with a mate�s shipment from South West Speed US

I could not really get the overall size of this kit so was a bit worried that it might not fit in 15" wheels. It measures about 340mm over all.


After three years the car is back on its own wheels

I pushed the car out to hose it down to get rid of 3 years of dust.


The steering arms are very tight against the rim and disc. Not much allowance for big suspension travel. Not ideal but for the track it should be fine. Moving the steering rack made things really difficult.


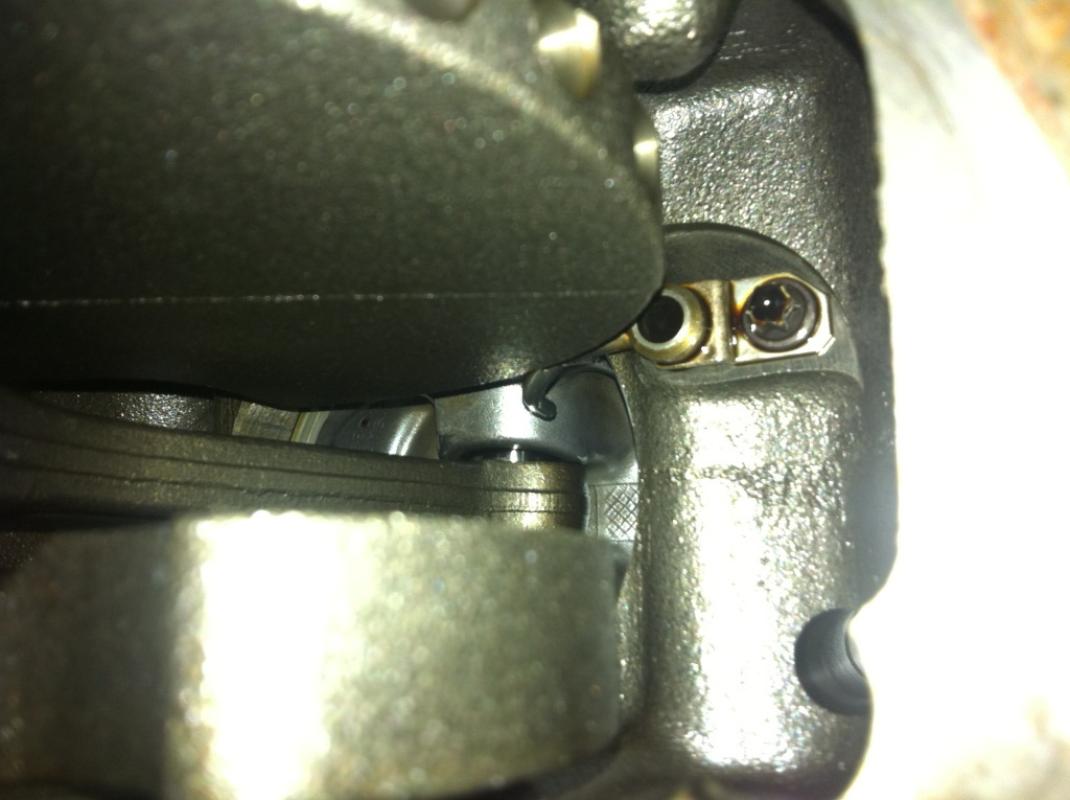
I started on the rear brakes. I chose the Fiesta mk6, I think they are 2002 - 2008 models, the ST150 shape. I went with the normal 1.4-1.6 front vented discs and calipers. I thought of going with the ST but I am sure all costs will be double just for the ST name The discs are 258x22 ventilated. The nice thing is that there are upgrade discs and pads available from Powerbrake and EBC. They also fit the Quaife flange perfectly with out any machining. This is a rare luck.
For starters I bought standard ones from local Midas, with the cheapest pads available just the get the brackets going.


I had my brackets for the rear calipers laser cut. No re drilling of holes required. Seems like I measured and drawn properly for once.


I also received my engine management, I bought the Vi-PEC V88 after recommendation from some friends. If you go through the specs it is far better than any off our local managements with plenty of safety features and nice to haves.

I completed my rear brake fitment yesterday. I welded the brackets together and gave them a coat ns5 primer, which should be black and came out brown for some reason?

I then welded the brackets to the axle, could not really get the best weld in at the front


I got a very nice weld in all the way at the back. It should be more than enough.
Brakes fitted


This was it for 2013
2014 to follow soon...............


Thread
Thread Starter
Forum
Replies
Last Post
matman
Ford Rs Parts For Sale (Not cosworth, or Cvh Turbo)
1
09-09-2015 05:45 PM
track.focus'd
Restorations, Rebuilds & Projects.
26
12-08-2015 05:53 PM