Matisse Blue Mk2 Orion Zetec Turbo Project
 29-08-2014, 01:02 PM
#41
PassionFord Regular
Thread Starter

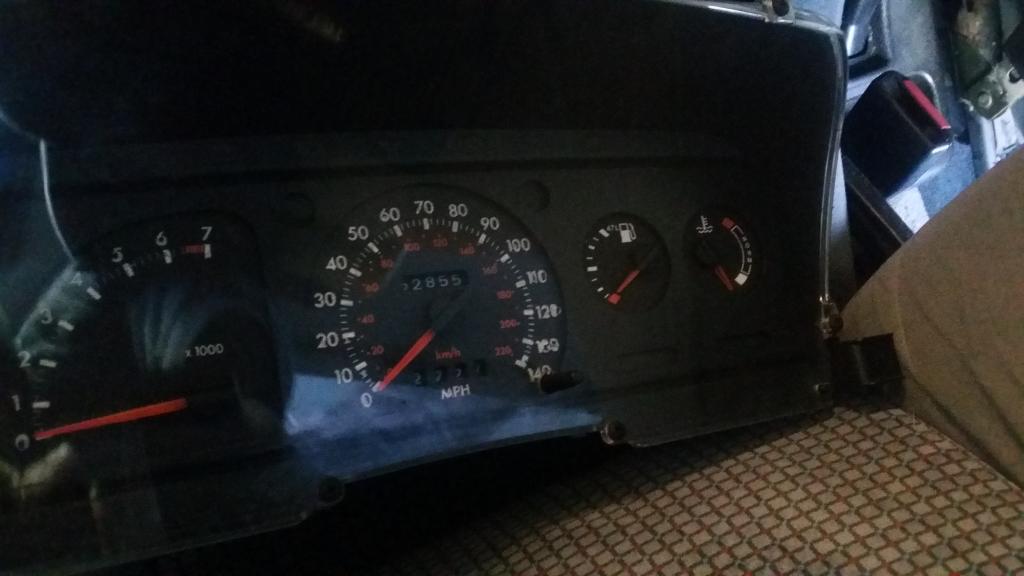
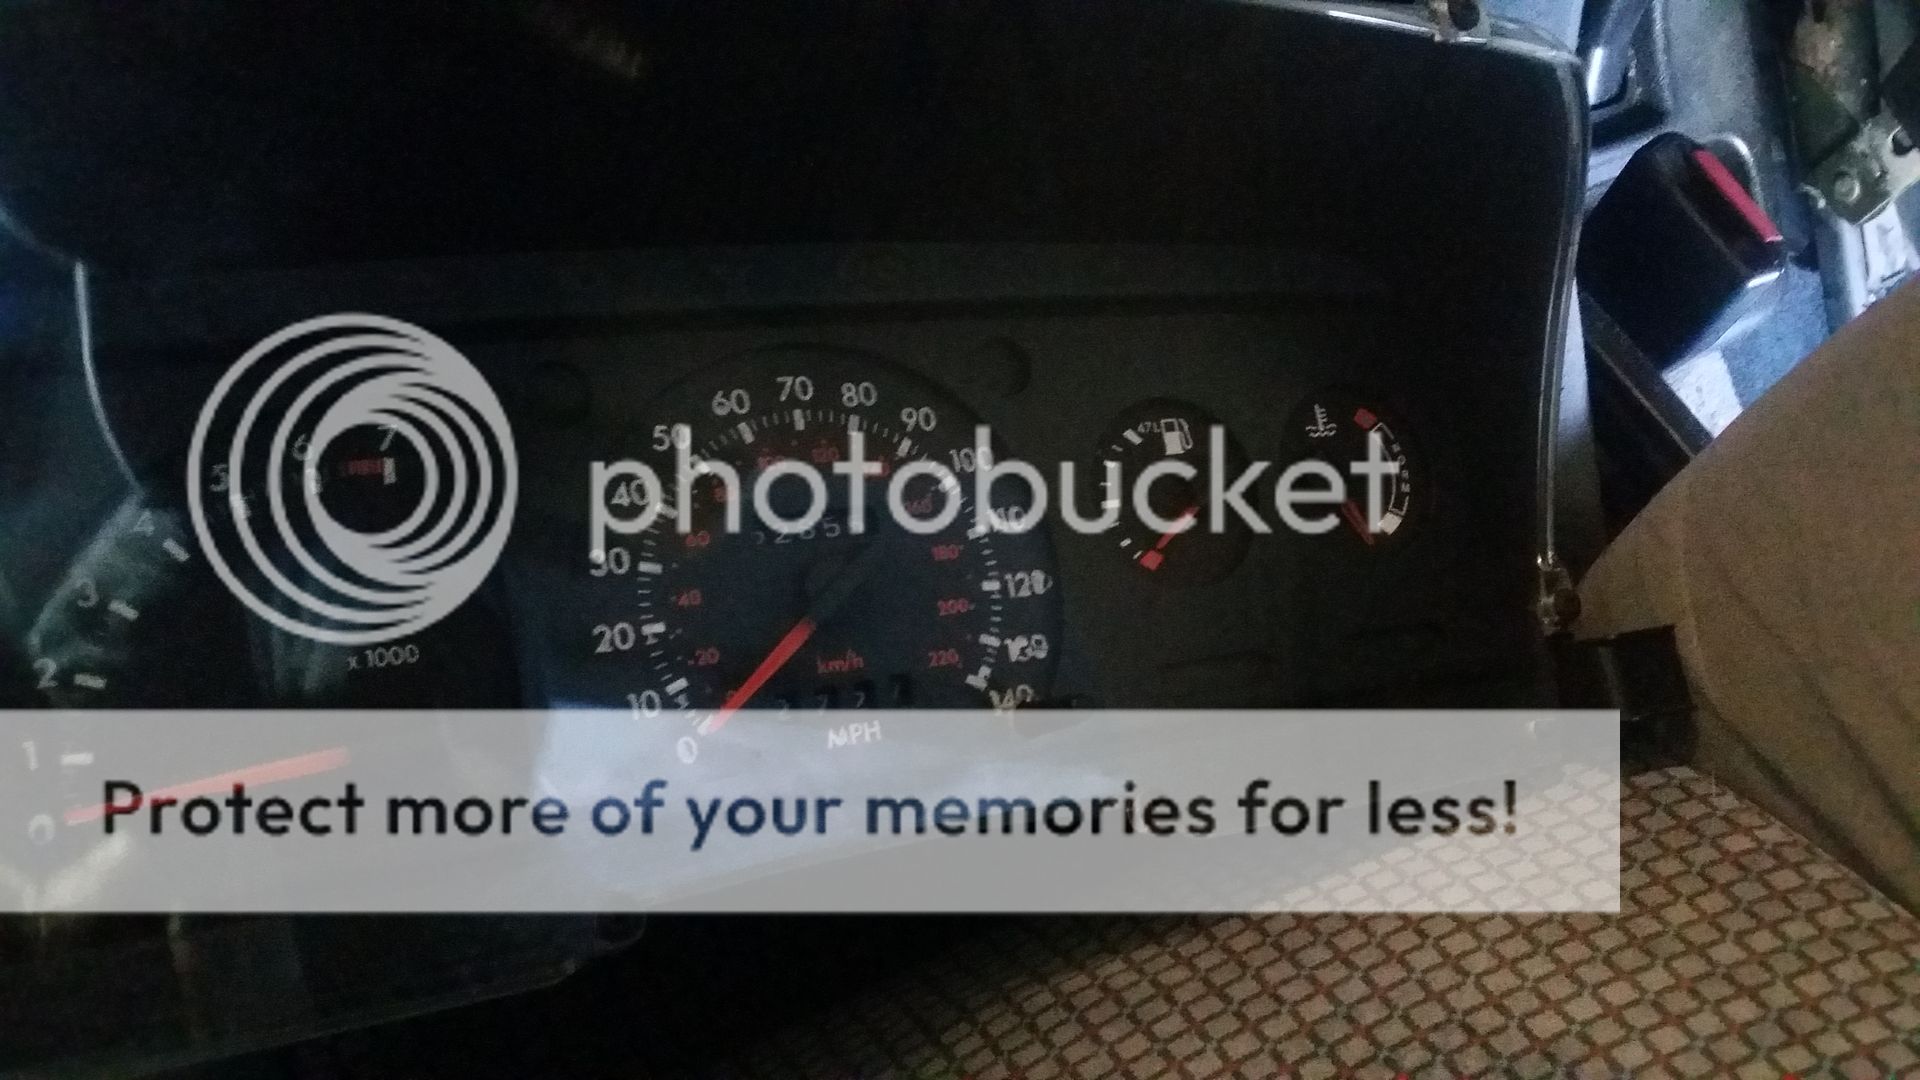
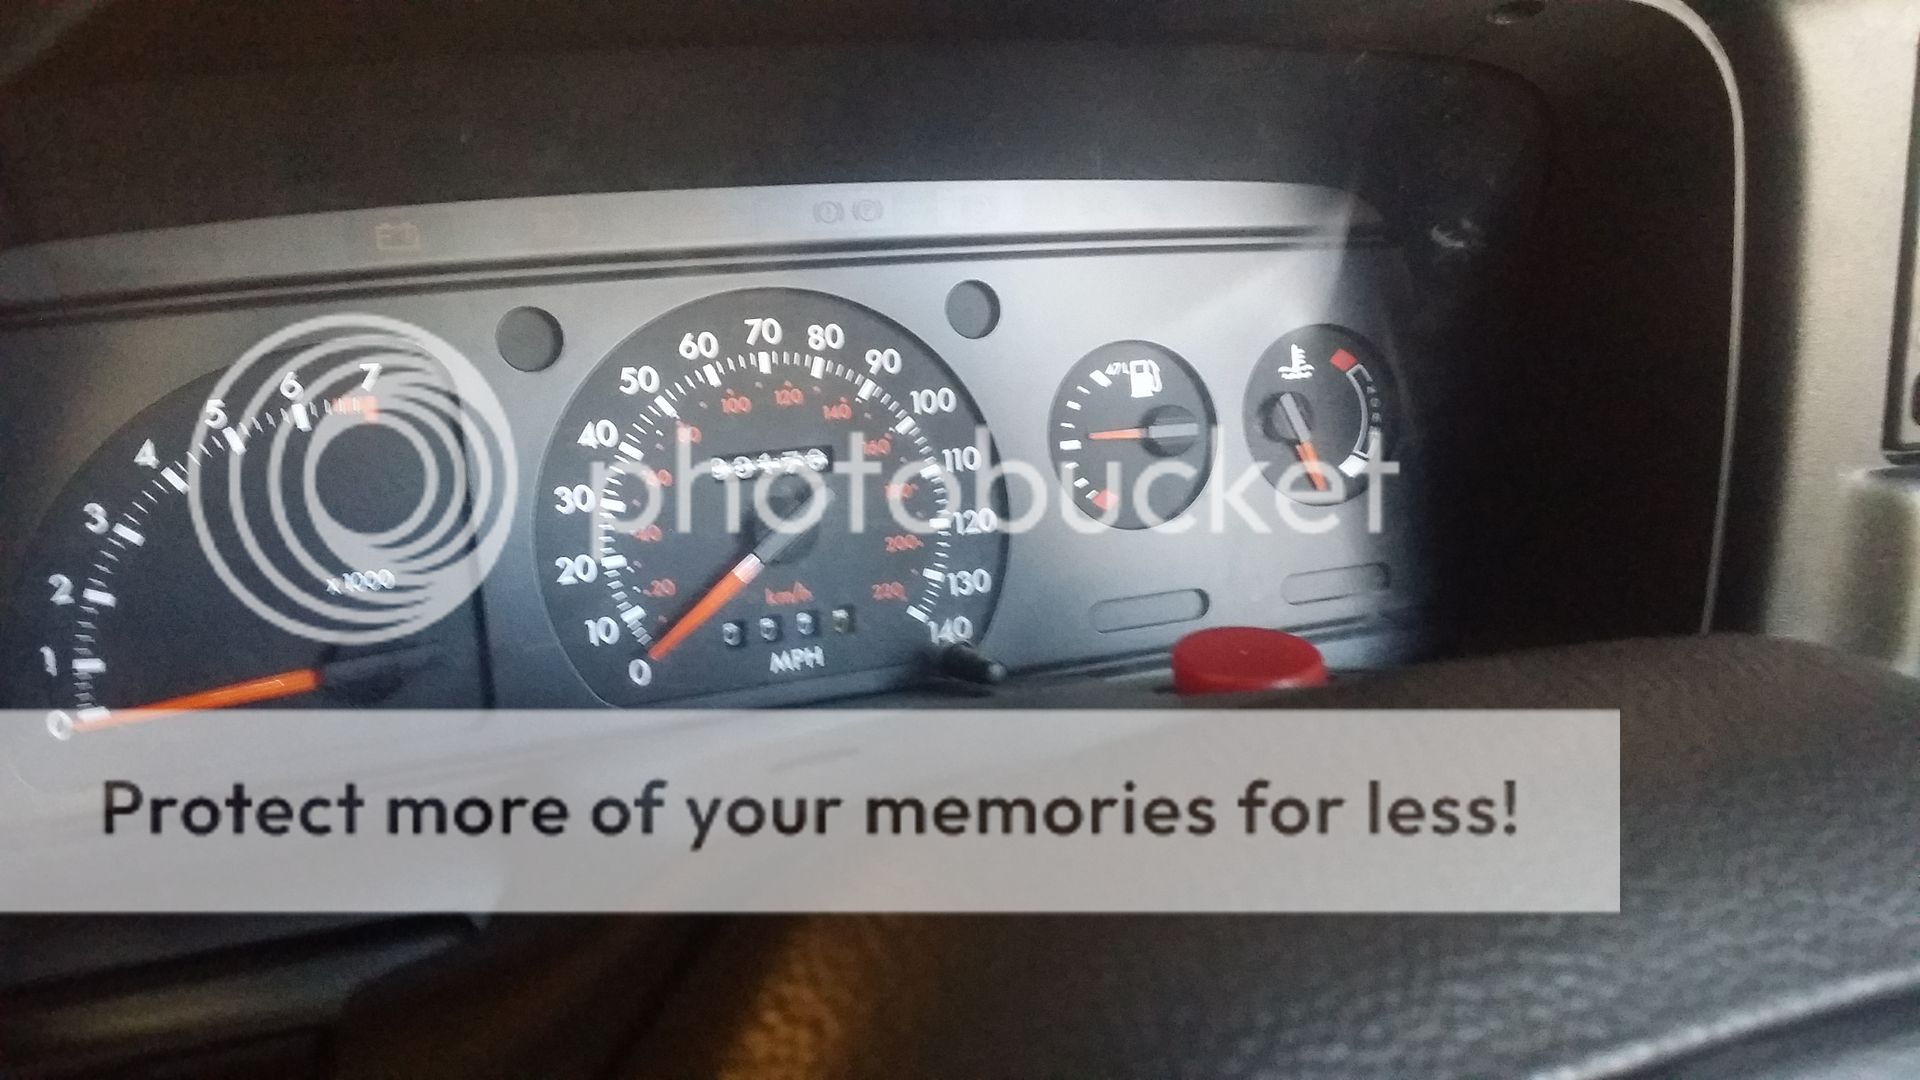
Something that was bothering me for a while was the clocks peeling and looking a bit grubby so managed to get a mint set of EFI clocks from a XR3i off a guy on one of the lcoal Facebook groups
Should be able to get my money back selling my old EFI clocks back on Ebay as they will be ideal for someone doing the conversion
Old set:
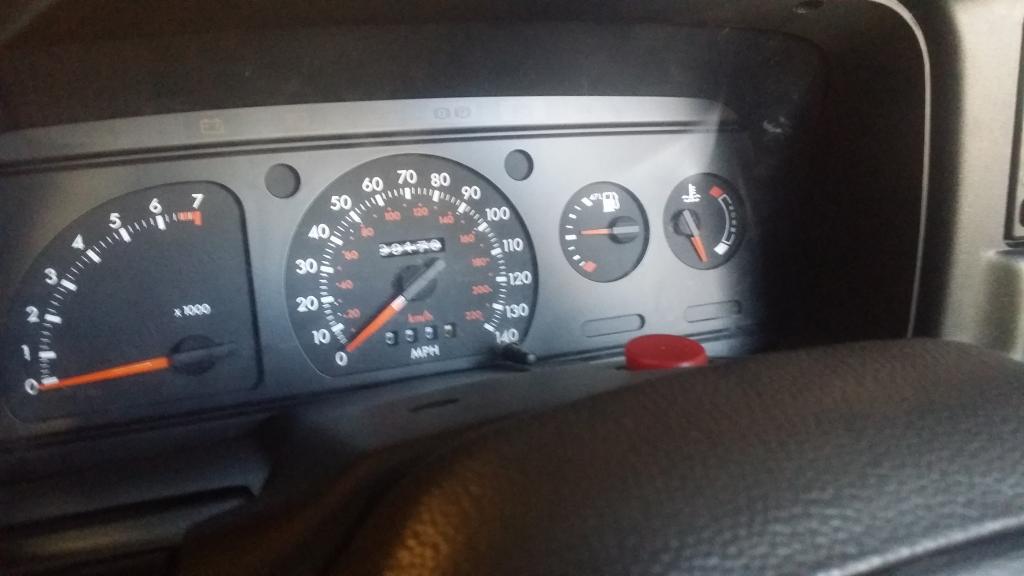
New Set:
Should be able to get my money back selling my old EFI clocks back on Ebay as they will be ideal for someone doing the conversion
Old set:
New Set:
 29-08-2014, 01:17 PM
#42
PassionFord Regular
Thread Starter
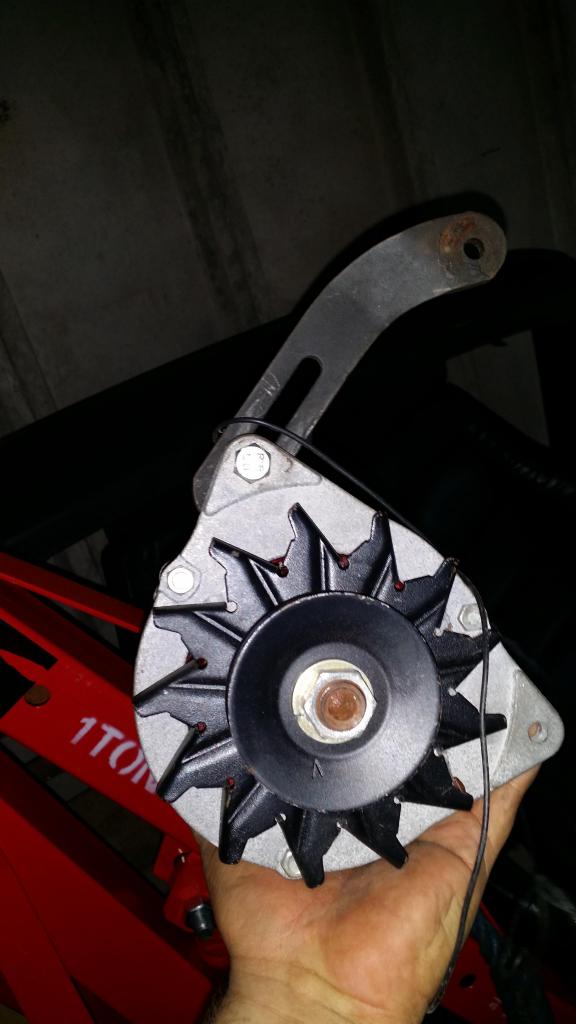
Had a look at the alternator today and thought it was about time to get the pulley swapped over, I had been putting this off for a while as it is a bitch to get the pulley off. I will be honest it ws probably the dodgeist removal method I have ever seen! My mate jammed a screw driver between the blades and the casing and then used a 400lb Impact/Buzz gun on it and my god did the bolt shift then! LOL!
This is an alternator that I haven't used before so we are going to test it by attaching the impact gun to the pulley and spinning it with a voltmeter attached to it, Unless anyone knows a safer method that is?
After a bit of messing around with bolt arrangements here is the before and after,
Before:
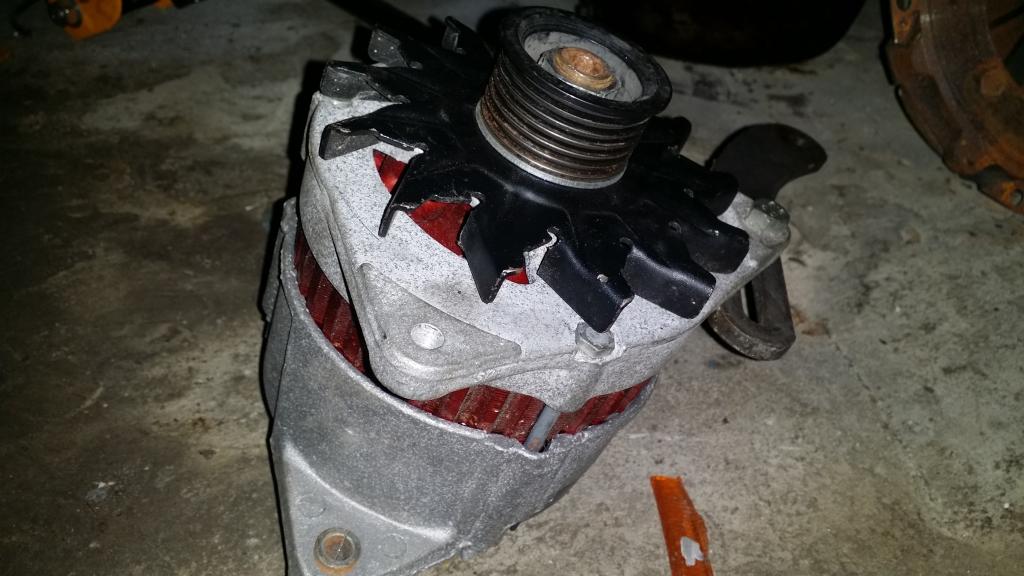
After:
This is an alternator that I haven't used before so we are going to test it by attaching the impact gun to the pulley and spinning it with a voltmeter attached to it, Unless anyone knows a safer method that is?
After a bit of messing around with bolt arrangements here is the before and after,
Before:
After:
03-09-2014, 12:45 AM
#43
PassionFord Regular
Thread Starter
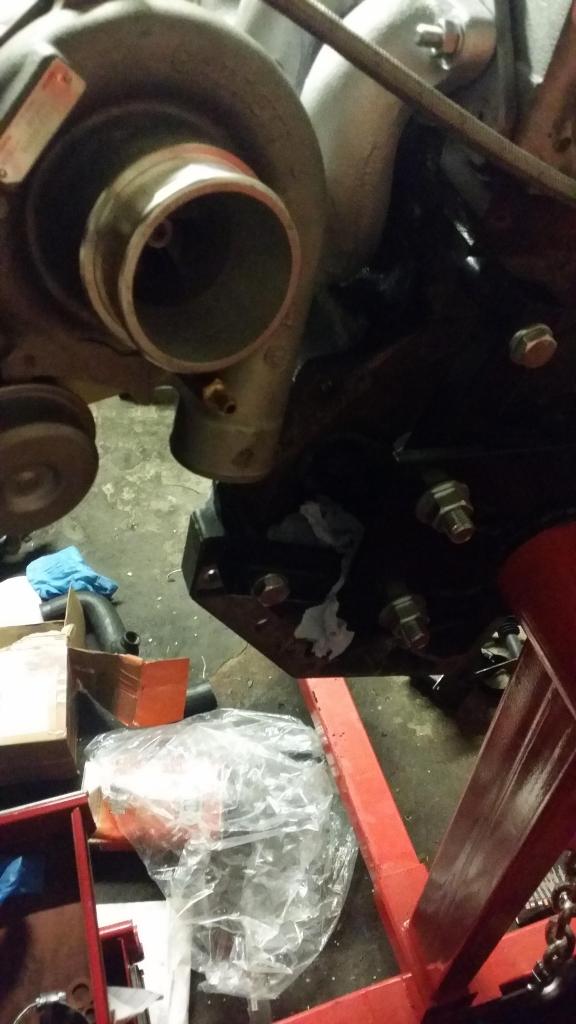
Decided to try and fit the turbo and manifold to the engine but things didn't quite work out Due to the size of the turbo it is now fouling on the engine block where the CPS goes
The problem is that even with the compressor housing spun, it still fouls it so I spoke to someone who is handy with the metal work and made me a nice spacer up in the right size so a happy chappy now!!
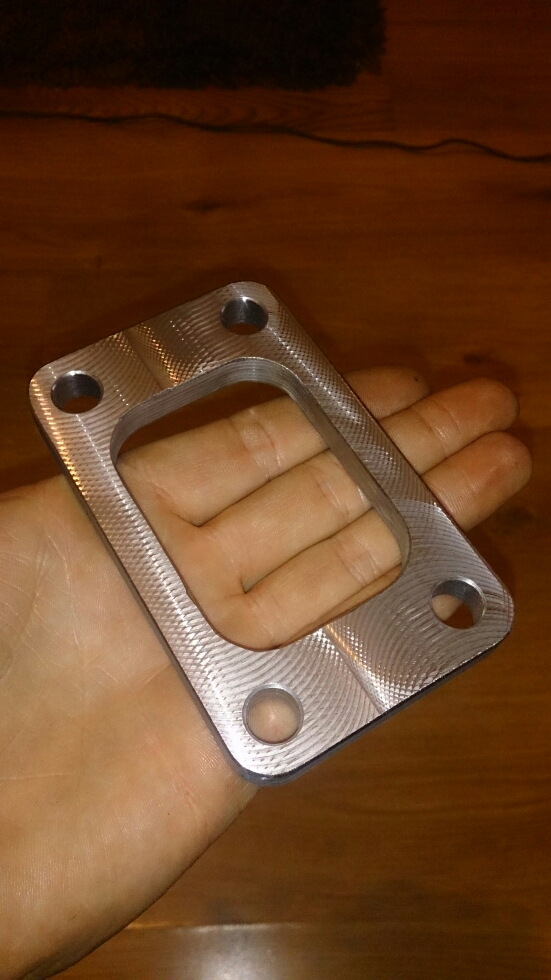
The problem is that even with the compressor housing spun, it still fouls it so I spoke to someone who is handy with the metal work and made me a nice spacer up in the right size so a happy chappy now!!
09-09-2014, 12:10 AM
#44
PassionFord Regular
Thread Starter
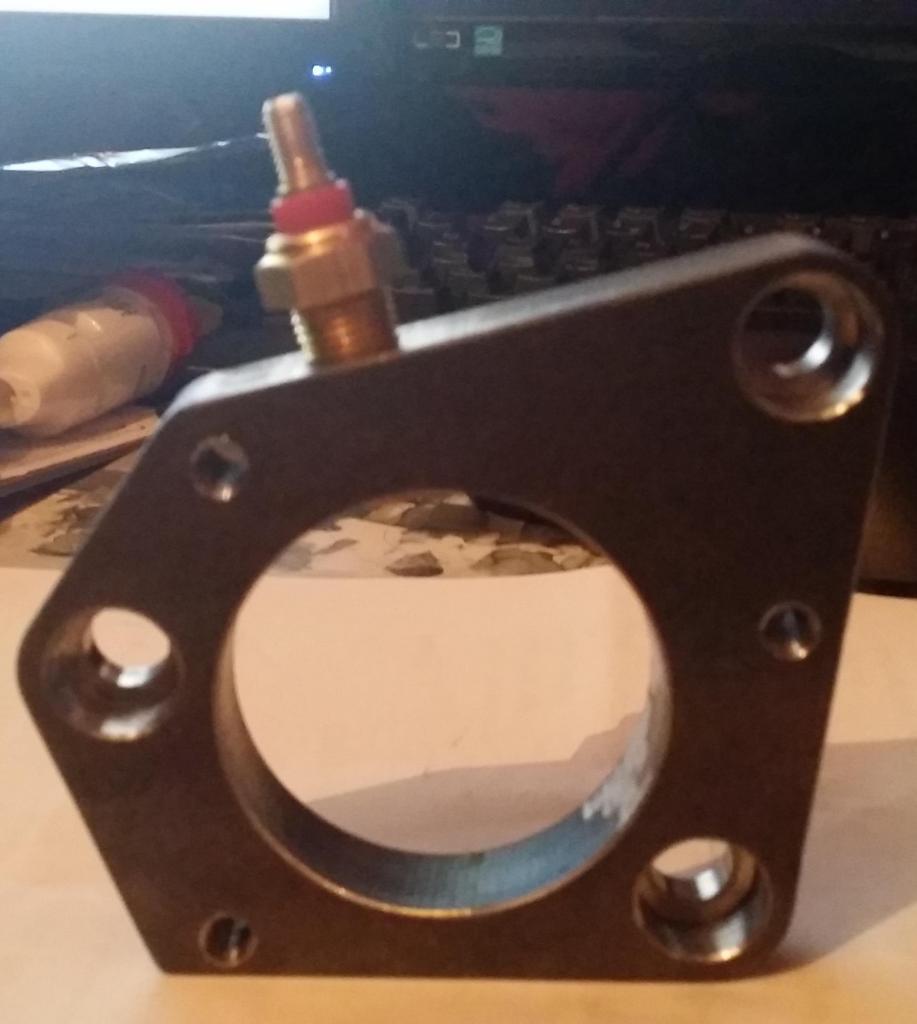
Whilst they were at it the guy also made me a thermostat adaptor so that I could continue using the CVH housing, Looked pretty smart!!
That was until I tried to fit the temperature sender into it, Looks like many years of heating up and cooling down took it's toll on the poor sender and the thing sheared off leaving the thread behind!!
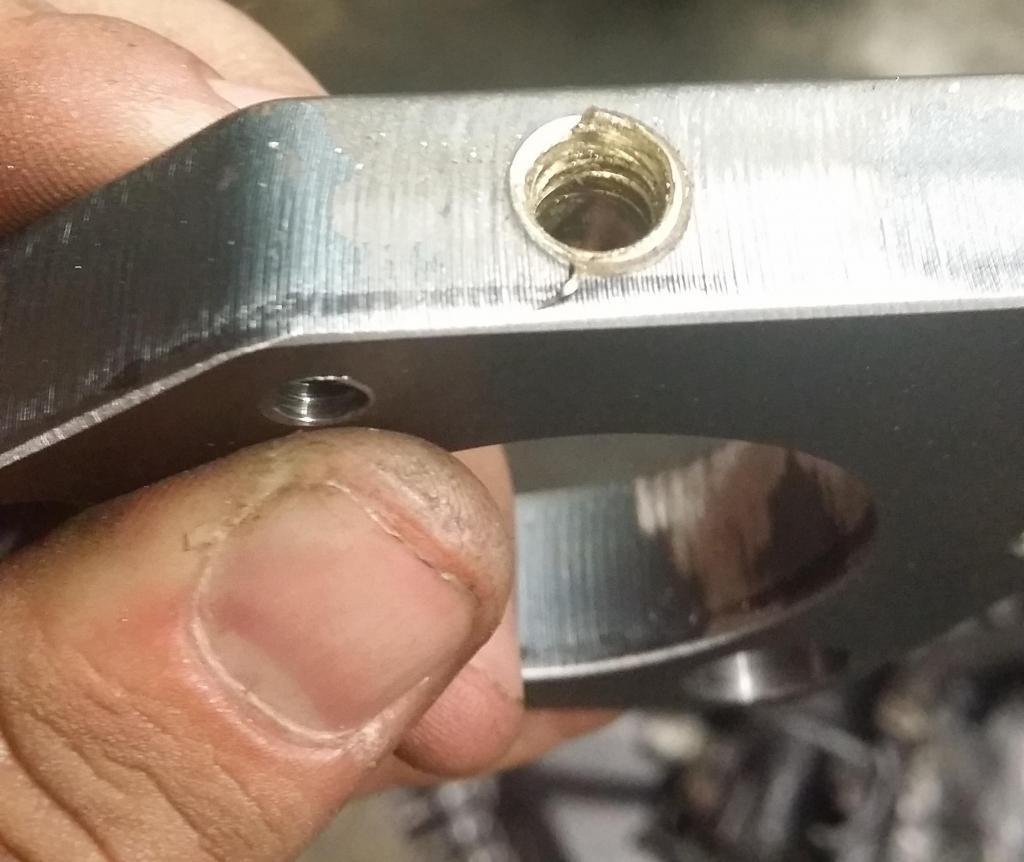
This left the thread in a complete mess and there was no option but to drill it out using a 8mm drill and an M10 tap/ Good as new!
That was until I tried to fit the temperature sender into it, Looks like many years of heating up and cooling down took it's toll on the poor sender and the thing sheared off leaving the thread behind!!
This left the thread in a complete mess and there was no option but to drill it out using a 8mm drill and an M10 tap/ Good as new!
09-09-2014, 07:42 PM
#45
PassionFord Post Whore!!
Something that was bothering me for a while was the clocks peeling and looking a bit grubby so managed to get a mint set of EFI clocks from a XR3i off a guy on one of the lcoal Facebook groups
Should be able to get my money back selling my old EFI clocks back on Ebay as they will be ideal for someone doing the conversion
Old set:
New Set:
Should be able to get my money back selling my old EFI clocks back on Ebay as they will be ideal for someone doing the conversion
Old set:
New Set:
Top clocks are different to bottom clocks...
One sets mfi one sets efi...
Can't remember whats what?
09-09-2014, 10:49 PM
#46
PassionFord Regular
Thread Starter
Don't say that mate, that is the last thing I need lol, I don't have the old set any more either, the only difference I can see is the colour of the revo at the top marker, is that it? what does yours have?
09-09-2014, 10:56 PM
#47
PassionFord Regular
Thread Starter
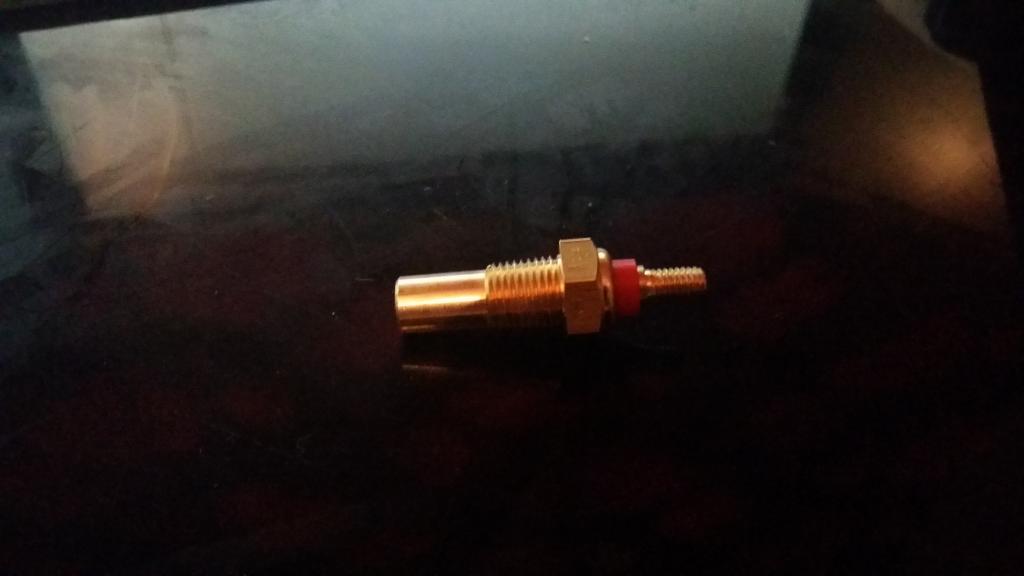
So I managed to source a new temperature sender locally after my last one met such an untimely end, the question I have though is what relevance does the colour have? I am only slightly sure that the old one was red or it could have been pink / peach but I think it was faded red so I purchased a new red one, I take it this is the correct one to be using here?
So dropped the temperature sender off to the metal drilling and tapping specialist (My DAD) lol
He is going to sort the mess I made out and then the new one can get fitted, What a drama lol I have hands like shovels haha
New Sender:
So dropped the temperature sender off to the metal drilling and tapping specialist (My DAD) lol
He is going to sort the mess I made out and then the new one can get fitted, What a drama lol I have hands like shovels haha
New Sender:
09-09-2014, 11:53 PM
#48
PassionFord Regular
Thread Starter
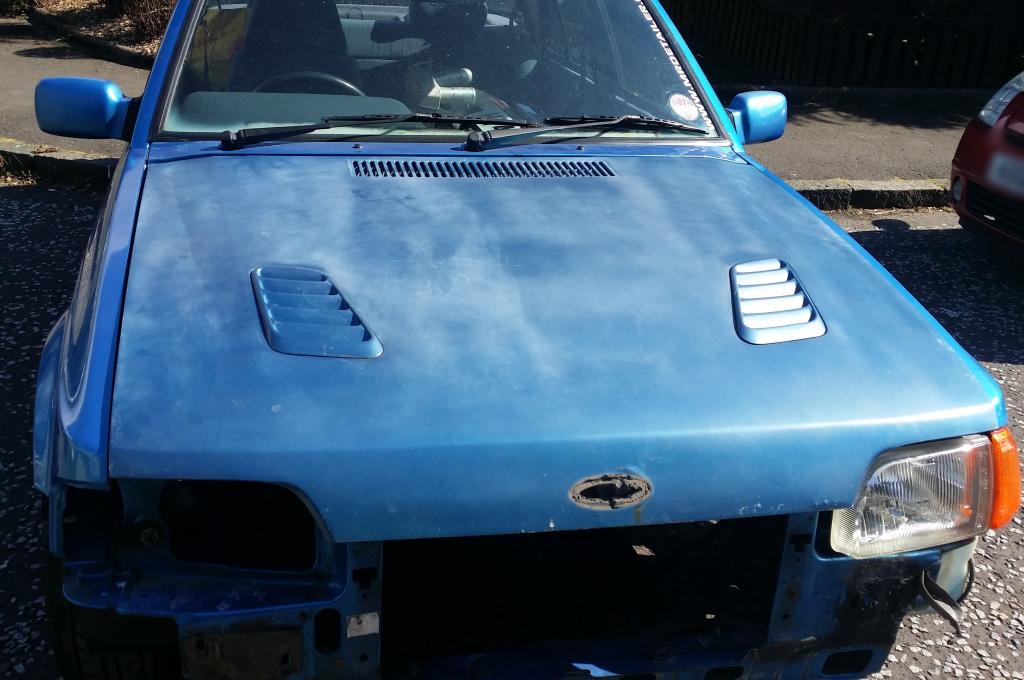
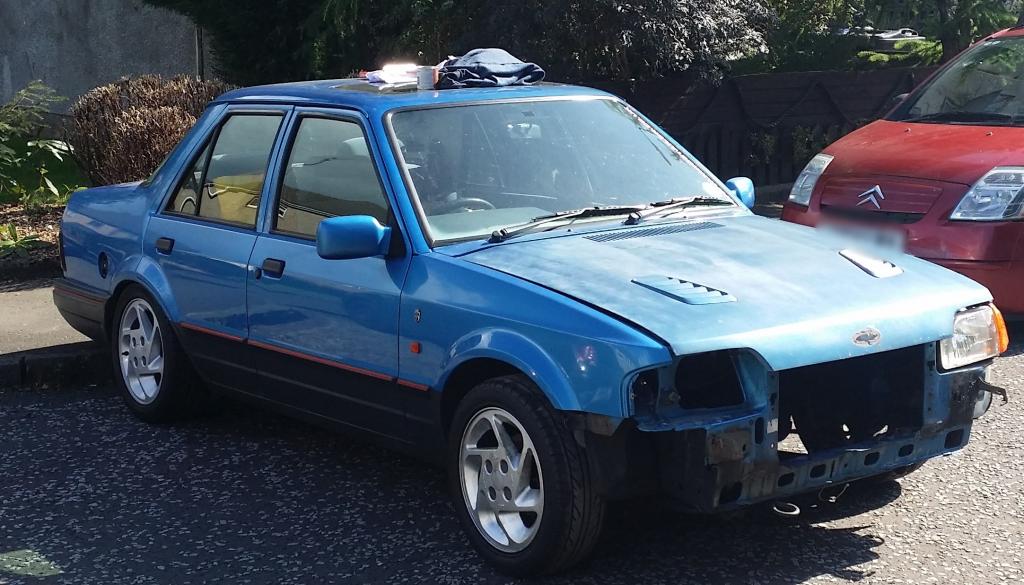
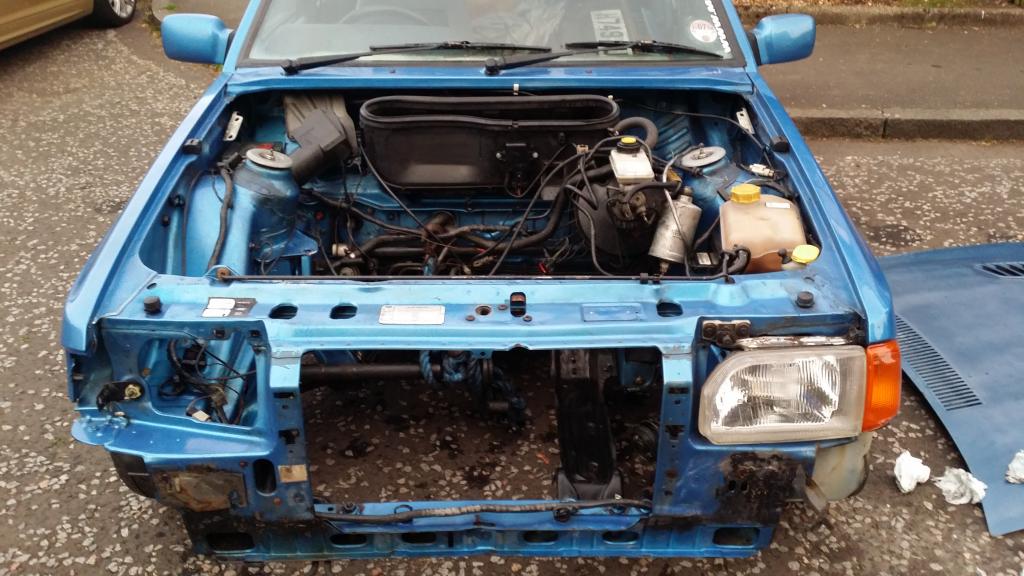
Today there was another nice day in Scotland for a change!! decided to push the car out and down the street to let it see daylight and to trial fit the turbo bonnet.
Impressed at how well the detailing work is still showing to be honest as it's been in a grubby unit for a few months now lol. Looks the part I think, can't get over what great conidtion the shell is in for it's age!
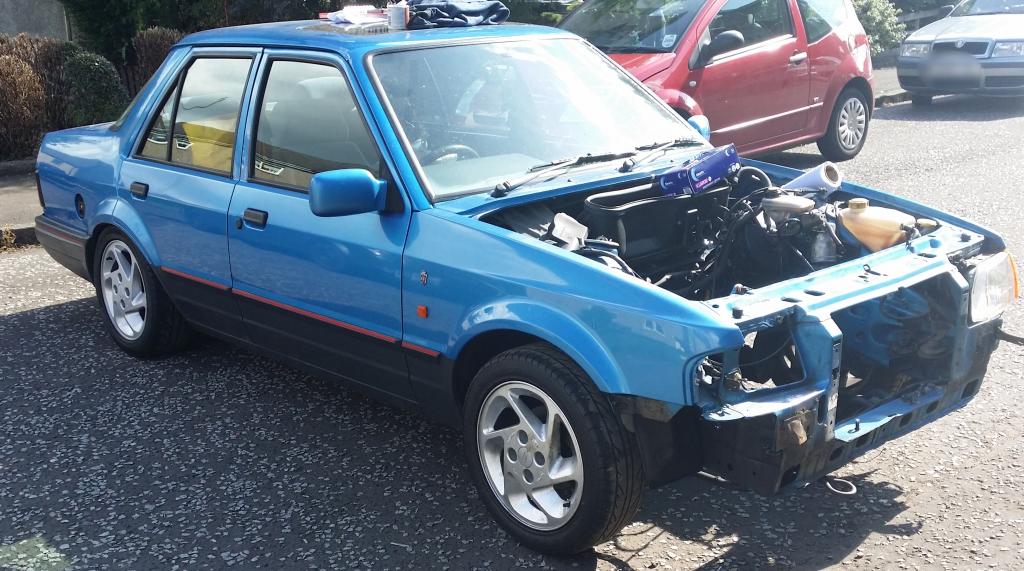
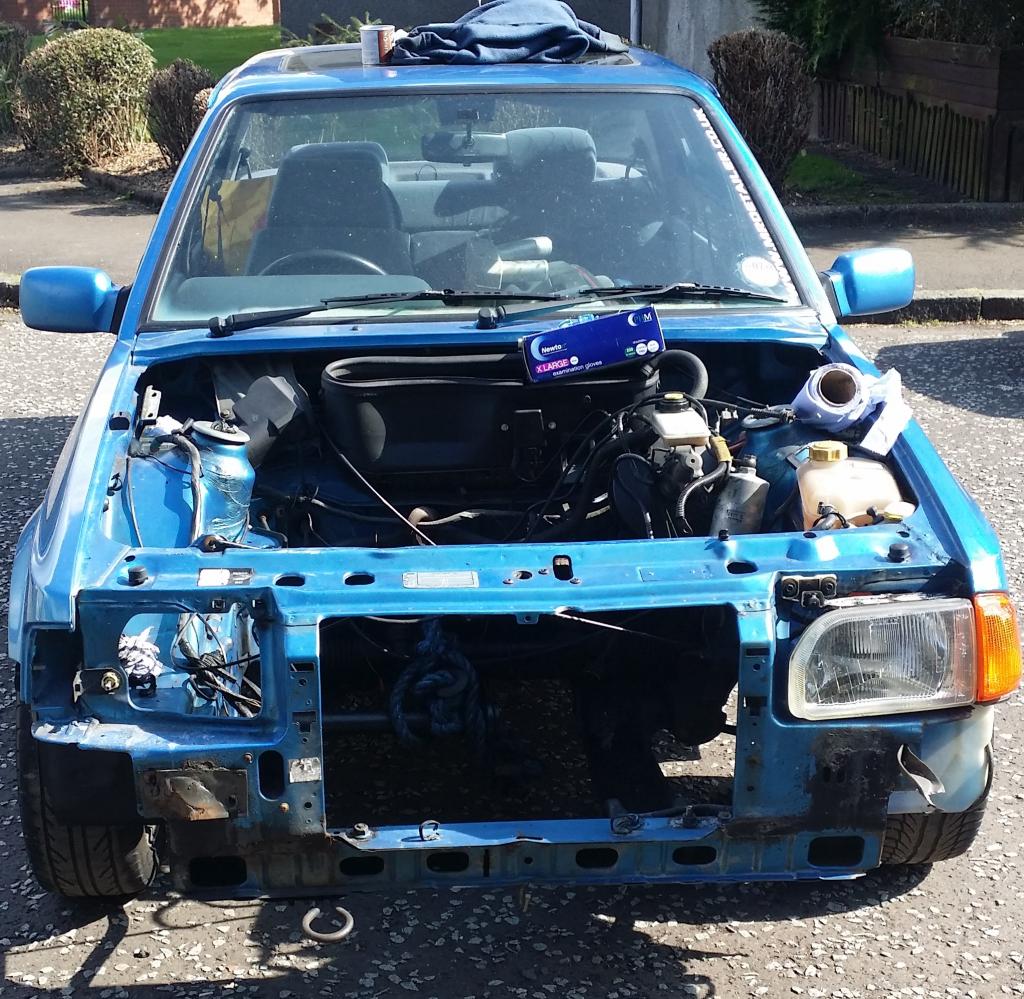
Managed to get a Turbo bonnet from Dundee for �40, It's had a rub down and needs a good freshen up before paint but at least it is kind of the right colour if you squint lol. Anyway I was sick of falling over it so decided to trial fit it, Made a nice difference to how the car looks already, Still can't believe how clean it is after it's last detail. Well impressed.
Impressed at how well the detailing work is still showing to be honest as it's been in a grubby unit for a few months now lol. Looks the part I think, can't get over what great conidtion the shell is in for it's age!
Managed to get a Turbo bonnet from Dundee for �40, It's had a rub down and needs a good freshen up before paint but at least it is kind of the right colour if you squint lol. Anyway I was sick of falling over it so decided to trial fit it, Made a nice difference to how the car looks already, Still can't believe how clean it is after it's last detail. Well impressed.
10-09-2014, 12:20 AM
#49
PassionFord Regular
Thread Starter
Whilst the weather was decent my mate kindly offered to spray the sump and oil pan for me as it was a caked in oil and all sorts
Spun it round on the engine stand (Much easier) and whipped the sump back off :
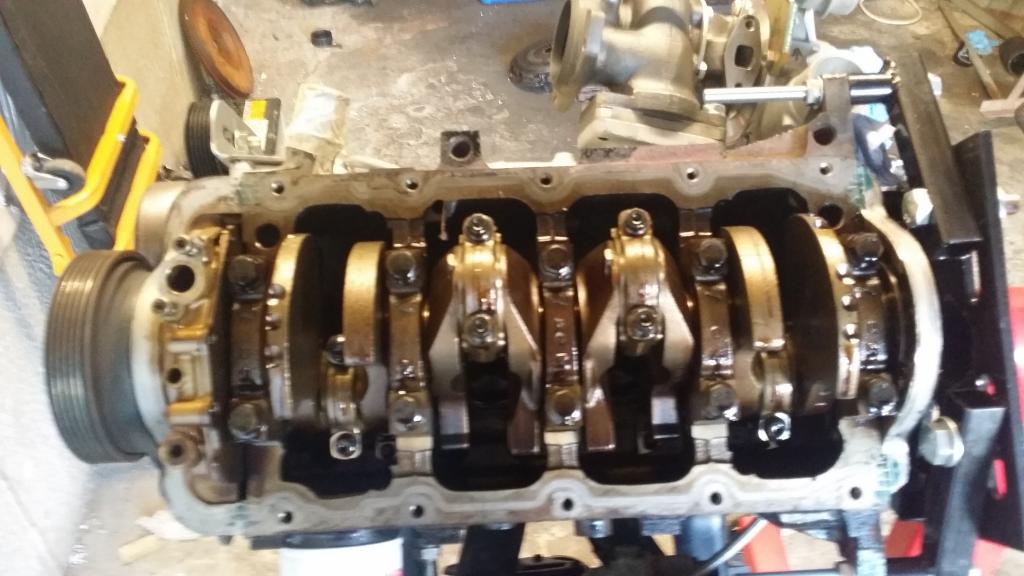
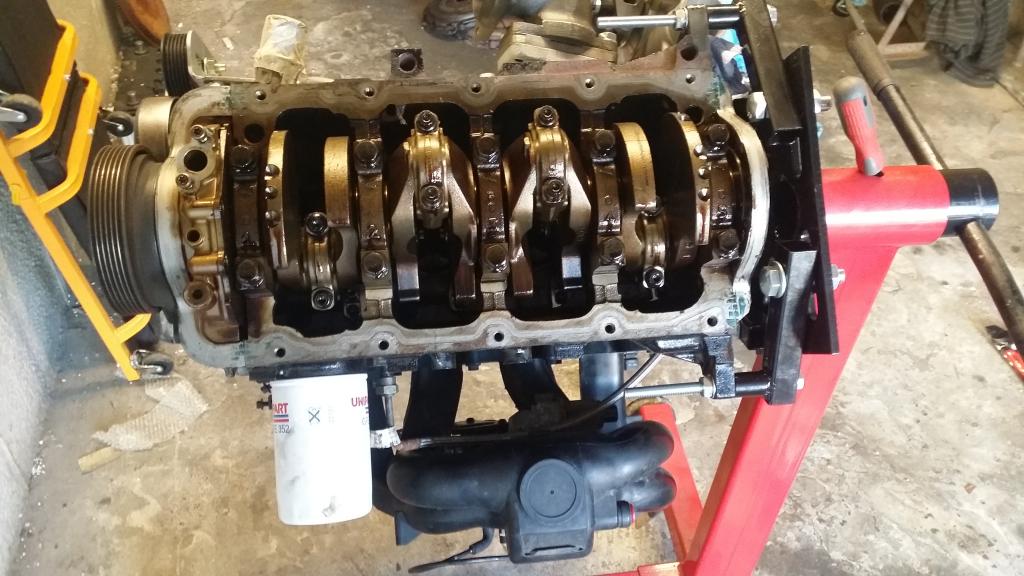
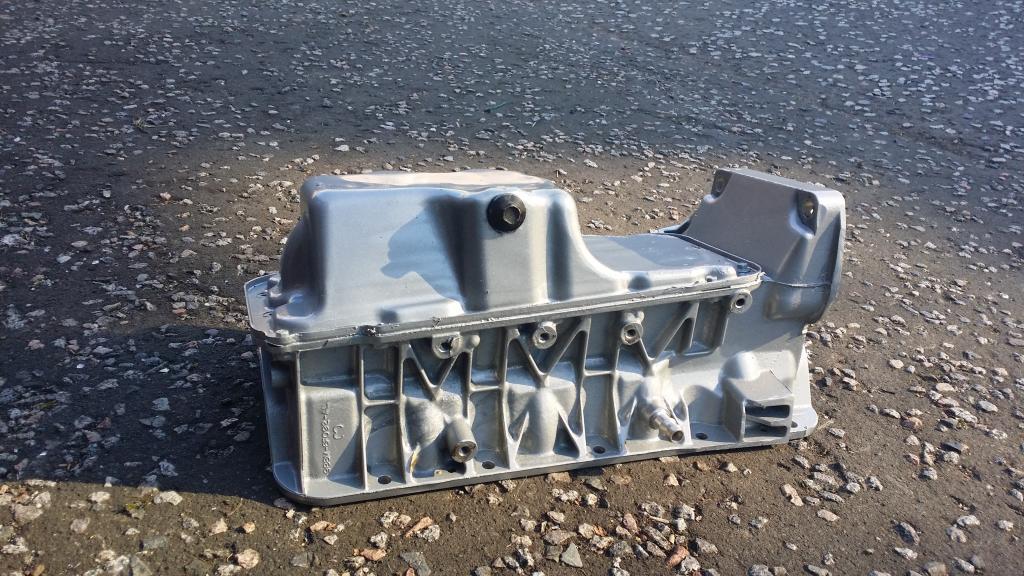
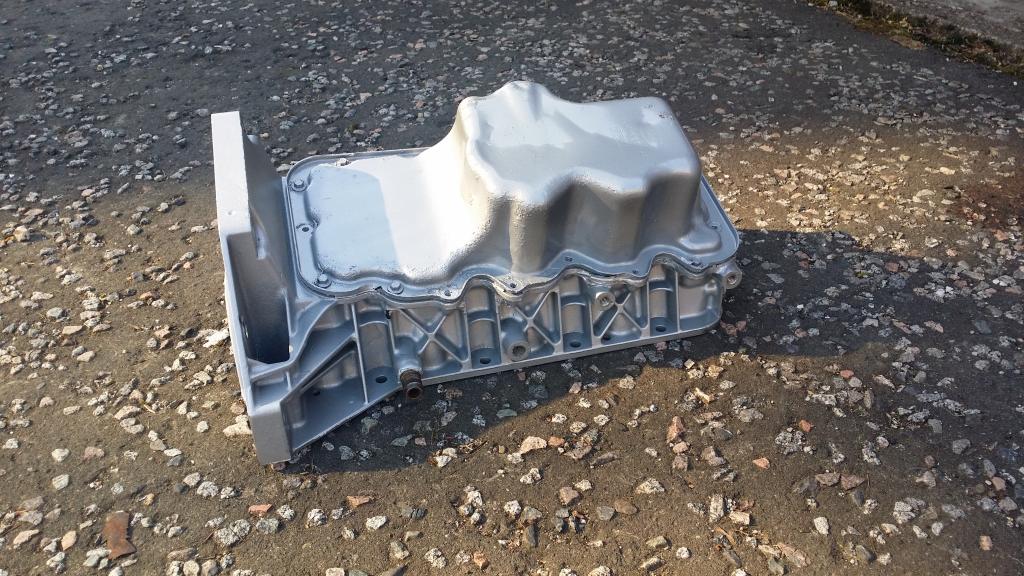
The Sump and pan after a 2 coat spray of Silver Hammerite - I thought it came up quite nice actually:
Spun it round on the engine stand (Much easier) and whipped the sump back off :
The Sump and pan after a 2 coat spray of Silver Hammerite - I thought it came up quite nice actually:
10-09-2014, 07:02 AM
#50
PassionFord Post Whore!!
11-09-2014, 12:01 AM
#51
PassionFord Regular
Thread Starter
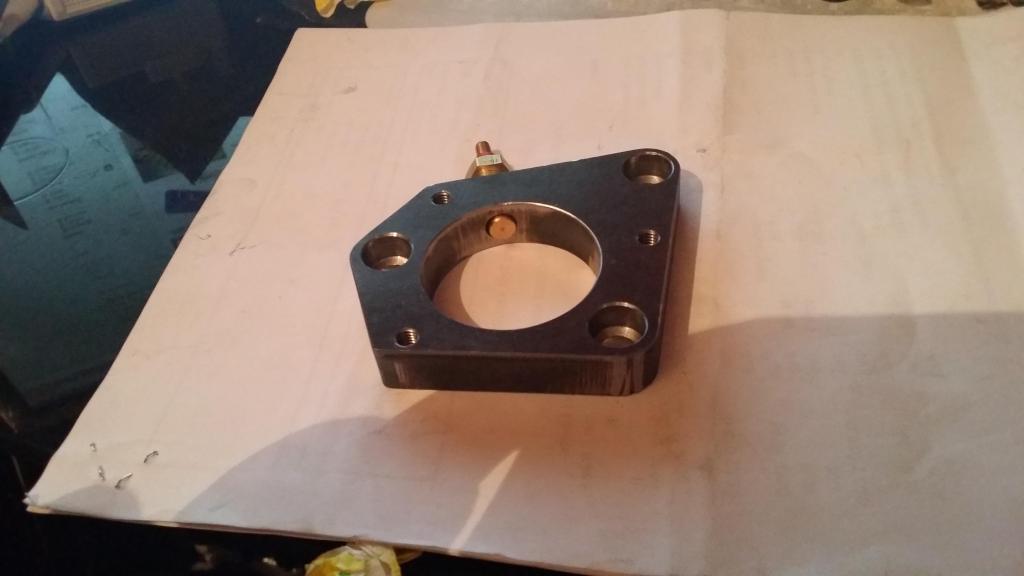
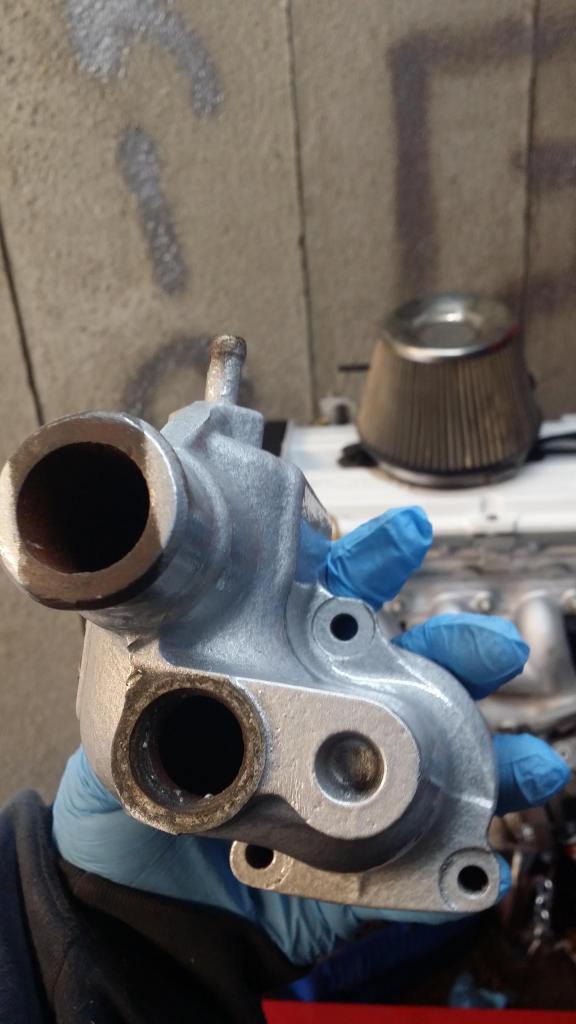
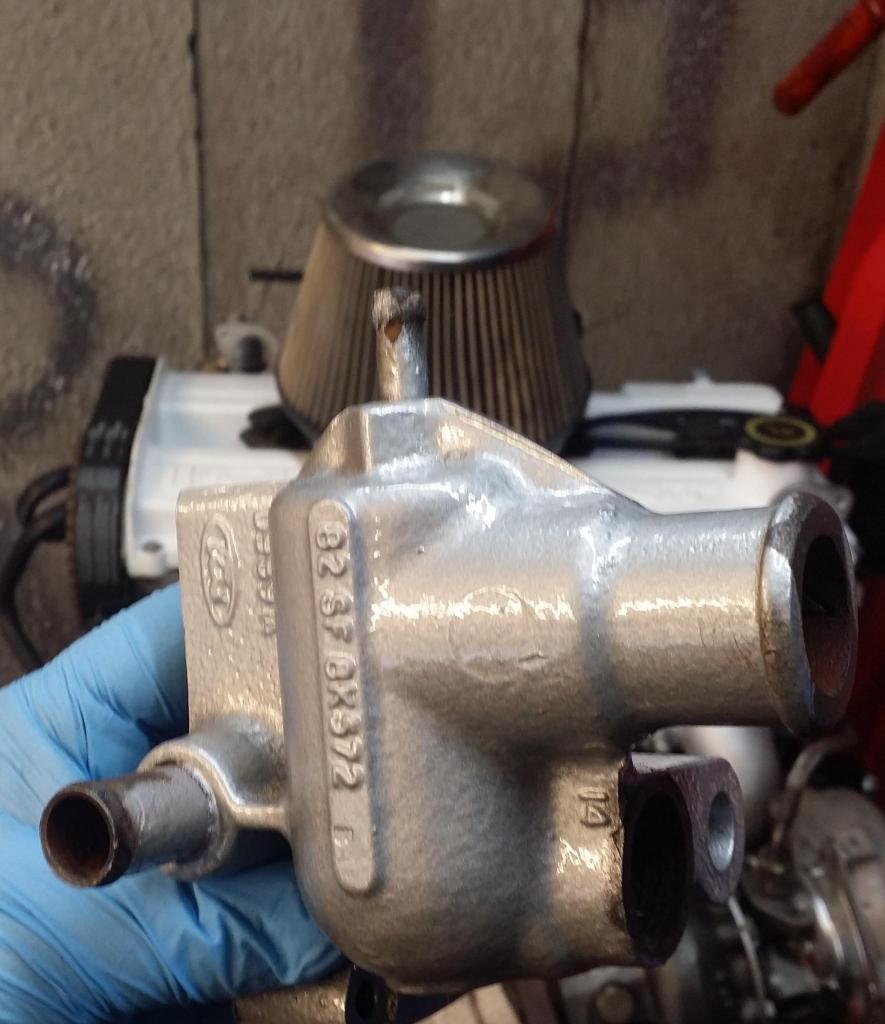
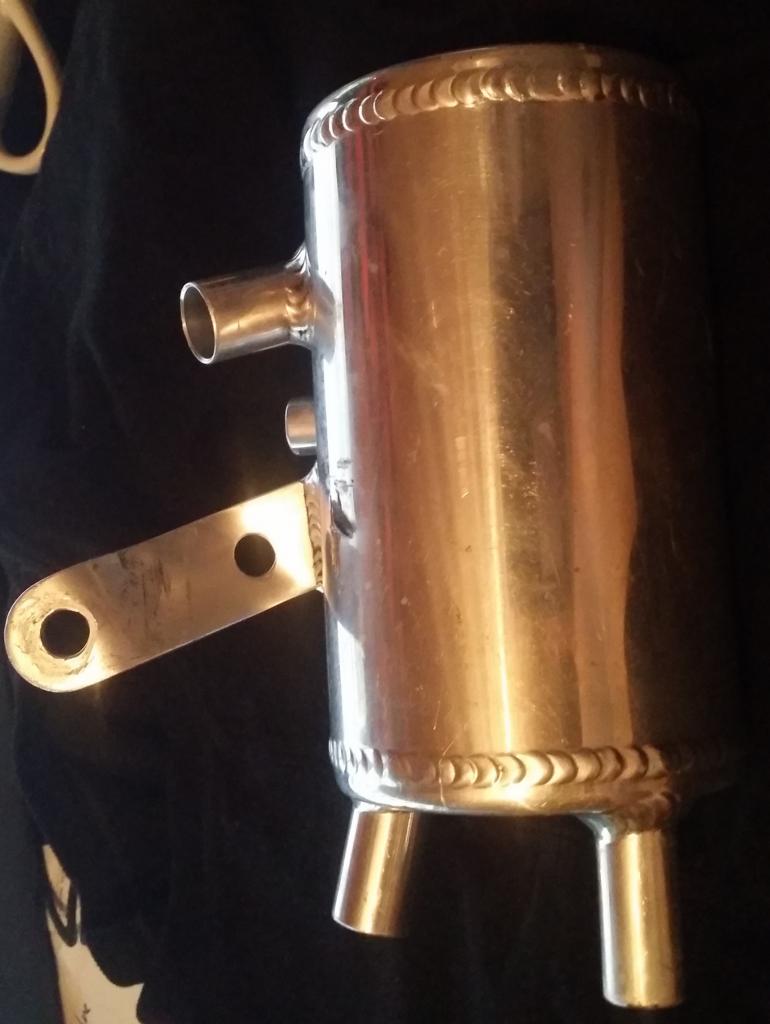
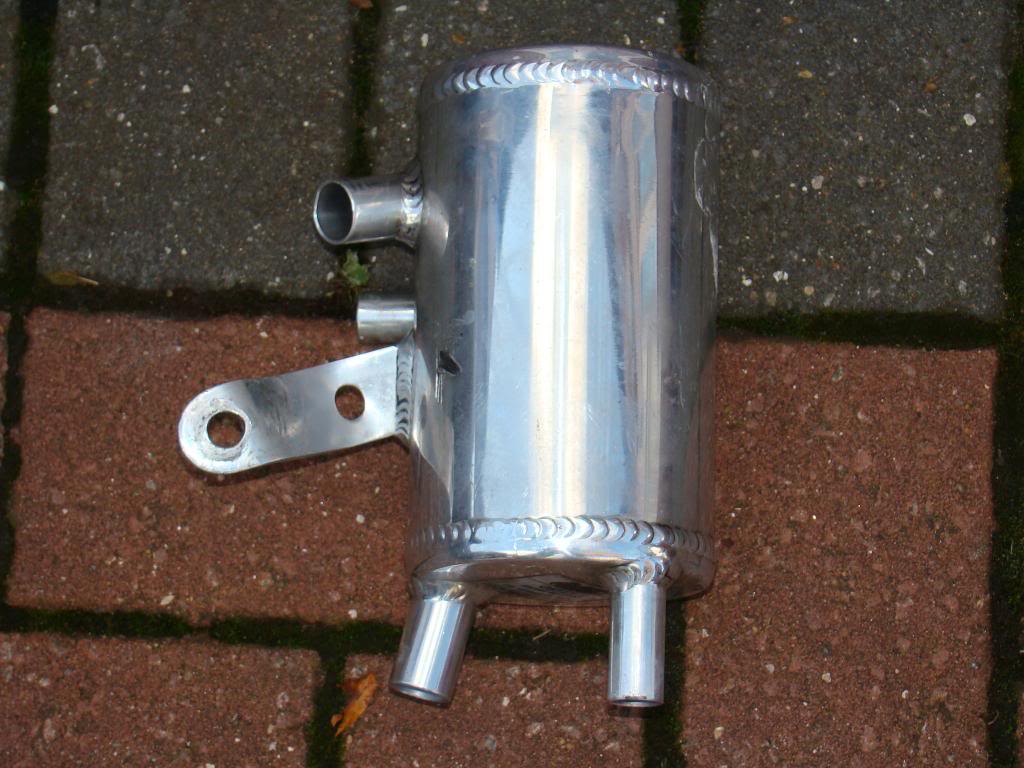
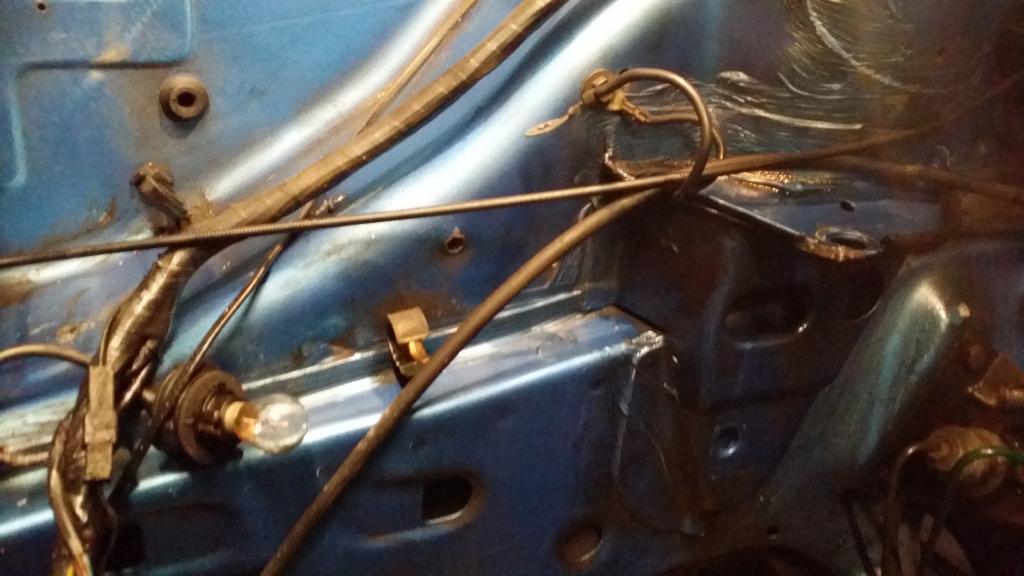
So looking into attaching the Thermostat housing from the CVH via the adaptor onto the Zetec head, Are all the CVH thermostat housings the same e.g Escort Bonus to Escort RS Turbo??
I removed the blanking plug to the right hand side, If my adaptor cannot be fixed can I use this thread to put the CVH temperature sensor into? Think Karlos mentioned it was possible?
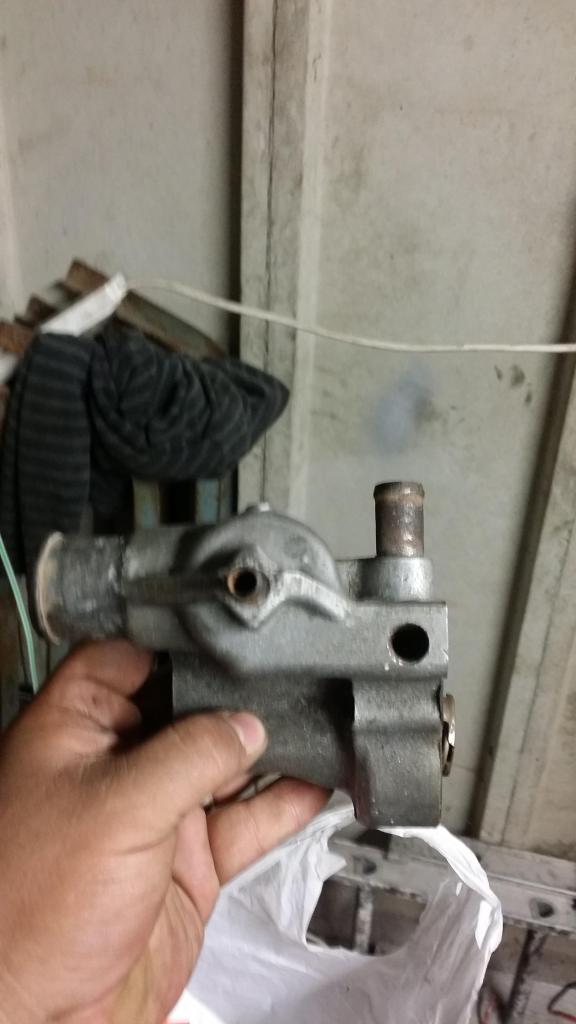
Other views of the Thermostat Housing
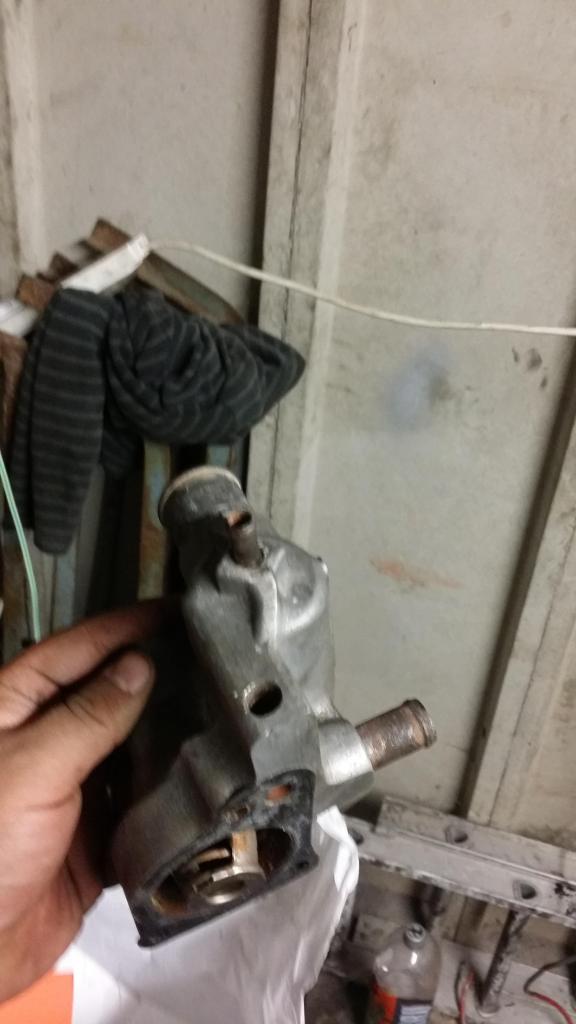
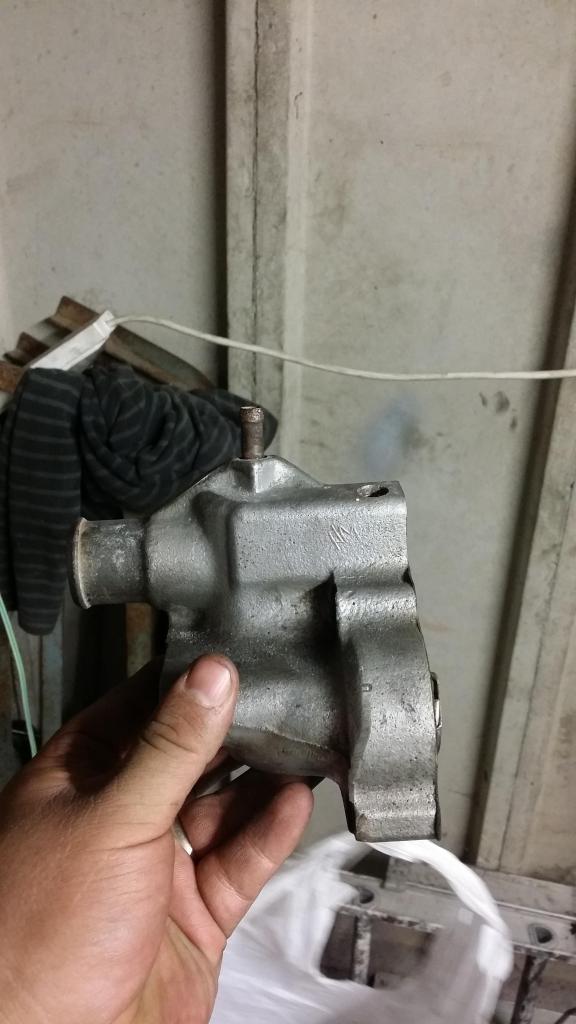
I removed the blanking plug to the right hand side, If my adaptor cannot be fixed can I use this thread to put the CVH temperature sensor into? Think Karlos mentioned it was possible?
Other views of the Thermostat Housing
11-09-2014, 12:12 AM
#52
PassionFord Regular
Thread Starter
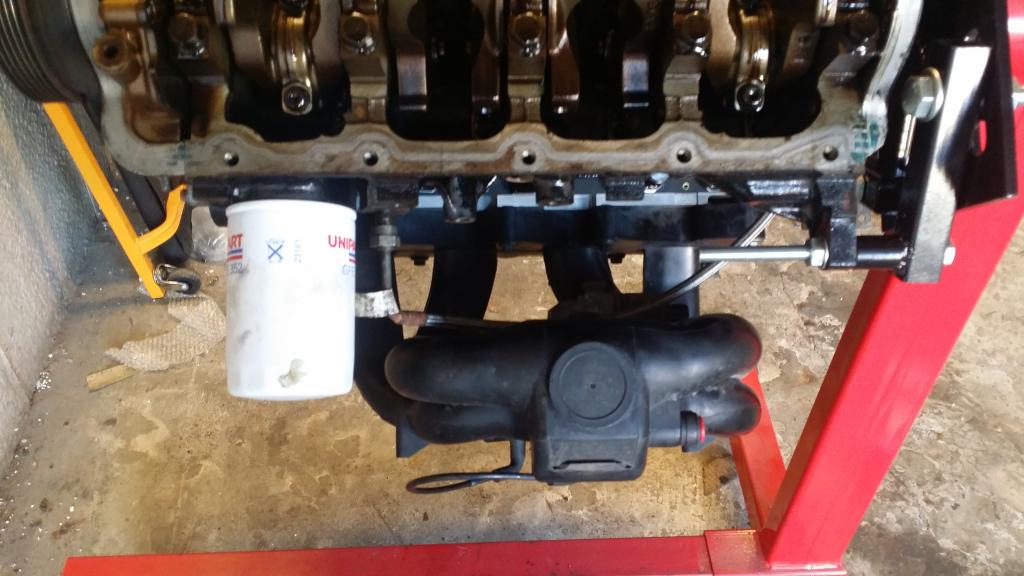
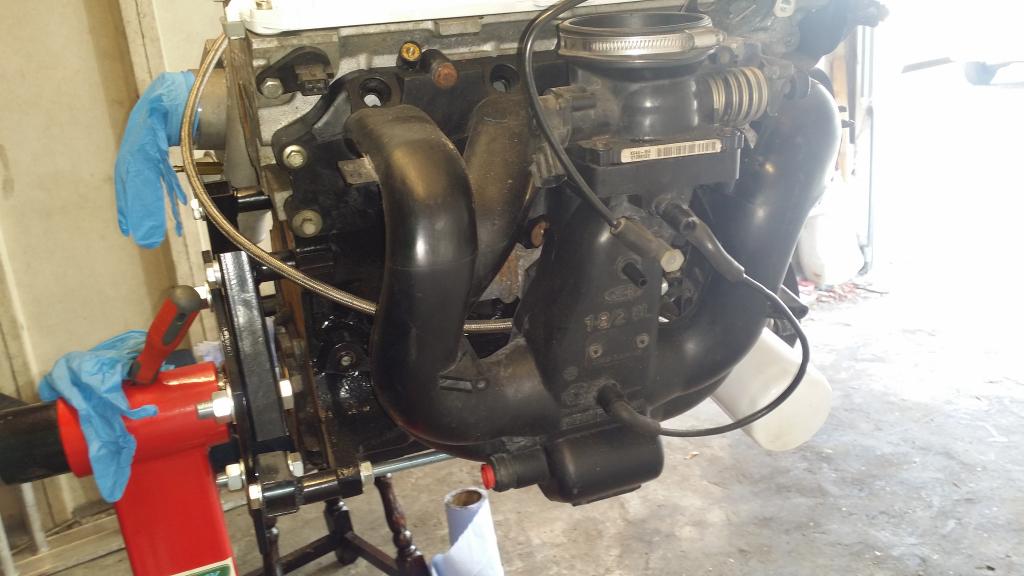
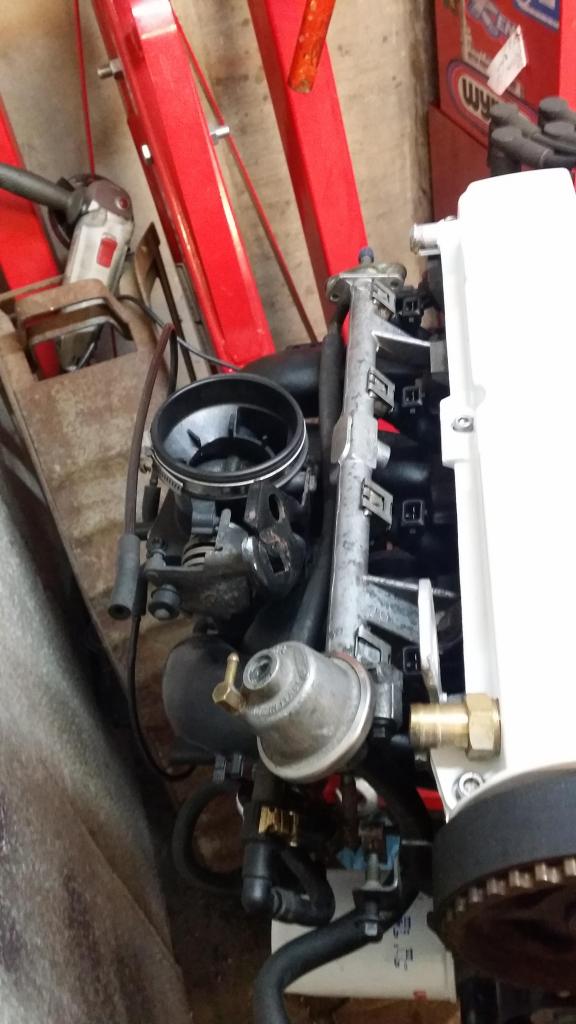
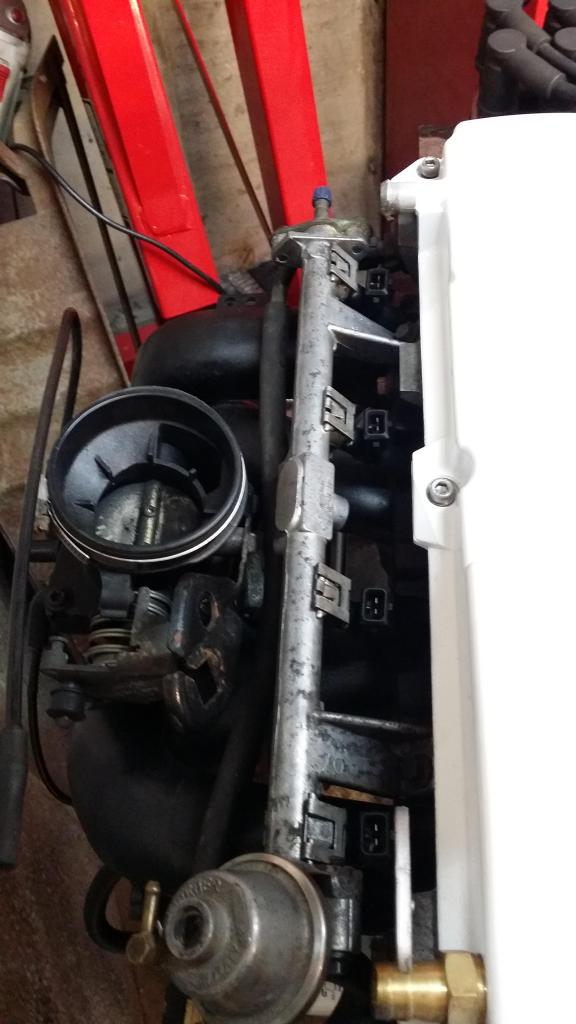
Also, I had read chat on the Escort RS Turbo Forum that the inlet manifolds came in two varients on the BlackTop and one fits and one fouls the brake bar at the back of the engine bay.
Can anyone tell me from the pictures below which one I likely have so that I can have it replaced before I go to fir the engine:
From the Side:
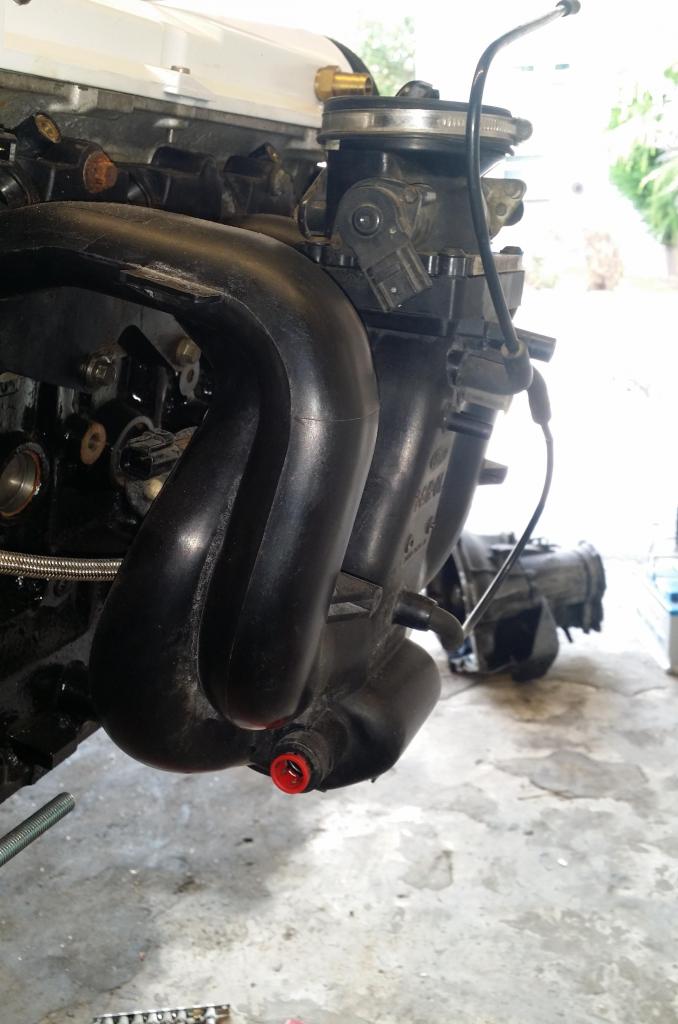
Side showing ISCV:
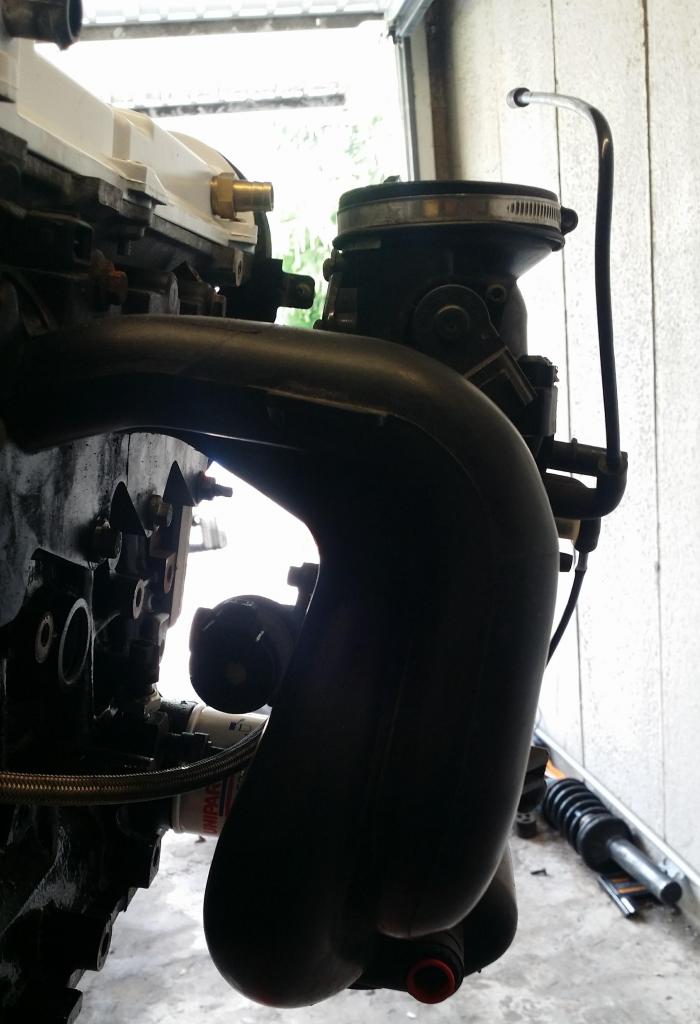
Picture from the back:
Can anyone tell me from the pictures below which one I likely have so that I can have it replaced before I go to fir the engine:
From the Side:
Side showing ISCV:
Picture from the back:
11-09-2014, 12:19 AM
#53
PassionFord Regular
Thread Starter
Here are the inner and outer measurements of the Throttle Body does this help at all? I assume this is a standard Focus / Mondeo TB?
Outer Measurements:
Inner Measurements:
Outer Measurements:
Inner Measurements:
14-09-2014, 10:17 PM
#54
PassionFord Regular
Thread Starter
So my dad came back to me and said that the thermostat housing has been rescued and retapped with an M10 tap.
Offered up the new tempearture sender (Even though I am unsure if the red banded one is the right one!! ) and it fits snugly and just needs a tighten up.
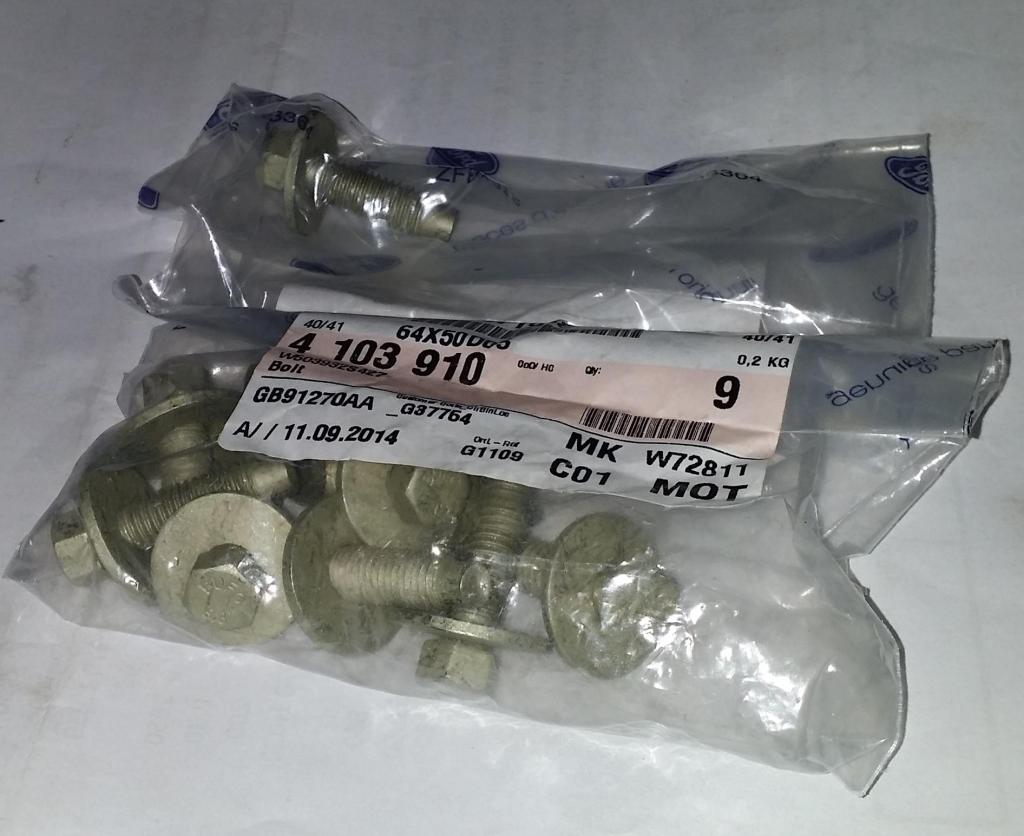
In my infitite wisdom I put all the bolts that I took off the sump prior to the work that was done on it into a tub, This was a great idea until it goes missing
So off to Ford to buy some sump bolts, Problem is I didnt have a registration number to go with so had to trawl ebay for a 2ltr zetec that I could see the registration on which wasn't an easy task trust me! The bolts are cheaper than I expected them to be from Ford to be fair and they were 90p each so bought myself 10
Offered up the new tempearture sender (Even though I am unsure if the red banded one is the right one!! ) and it fits snugly and just needs a tighten up.
In my infitite wisdom I put all the bolts that I took off the sump prior to the work that was done on it into a tub, This was a great idea until it goes missing
So off to Ford to buy some sump bolts, Problem is I didnt have a registration number to go with so had to trawl ebay for a 2ltr zetec that I could see the registration on which wasn't an easy task trust me! The bolts are cheaper than I expected them to be from Ford to be fair and they were 90p each so bought myself 10
14-09-2014, 11:30 PM
#55
PassionFord Regular
Thread Starter
Decided to start going around the engine and cleaning some other parts up and painting them where possible,
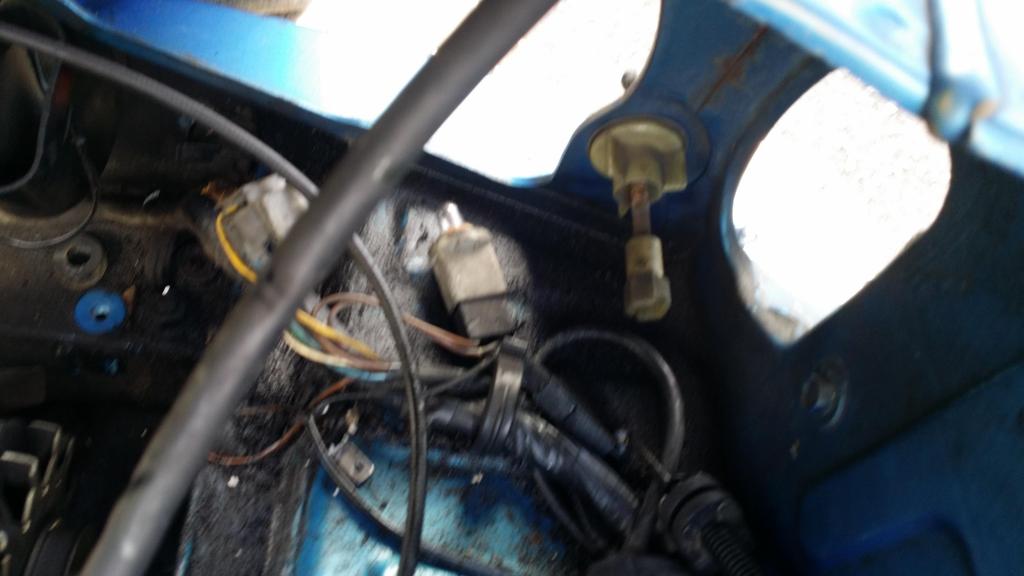
The coilpack bracket is very manky as you can see here:
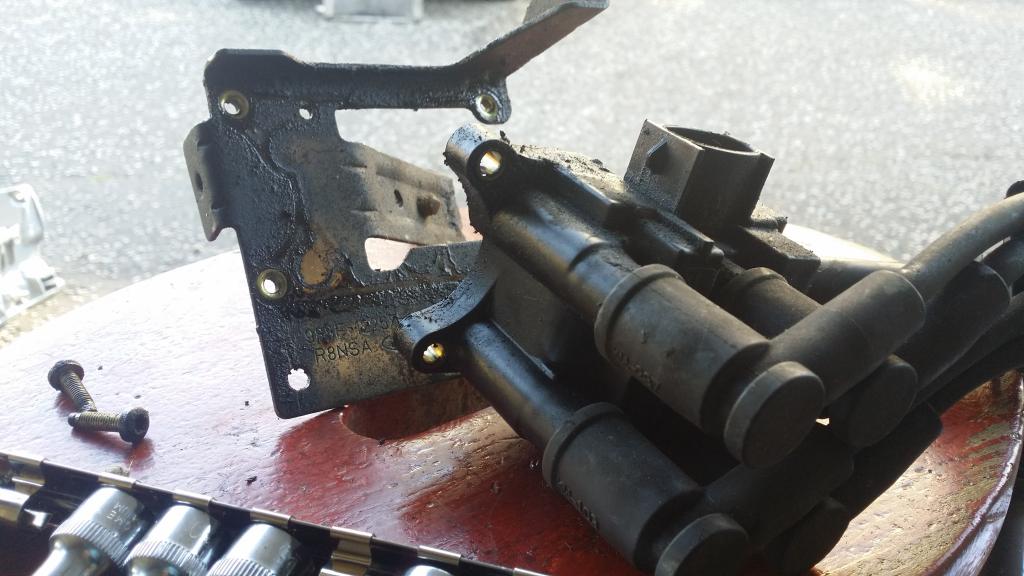
the question I have is can this be painted? The reason I ask is that it looks like it is using for earthing so obviously painting would prevent it doing this, I have it a good clean up anyway (Just forgot to get a pic!)
The coilpack bracket is very manky as you can see here:
the question I have is can this be painted? The reason I ask is that it looks like it is using for earthing so obviously painting would prevent it doing this, I have it a good clean up anyway (Just forgot to get a pic!)
14-09-2014, 11:52 PM
#56
PassionFord Regular
Thread Starter
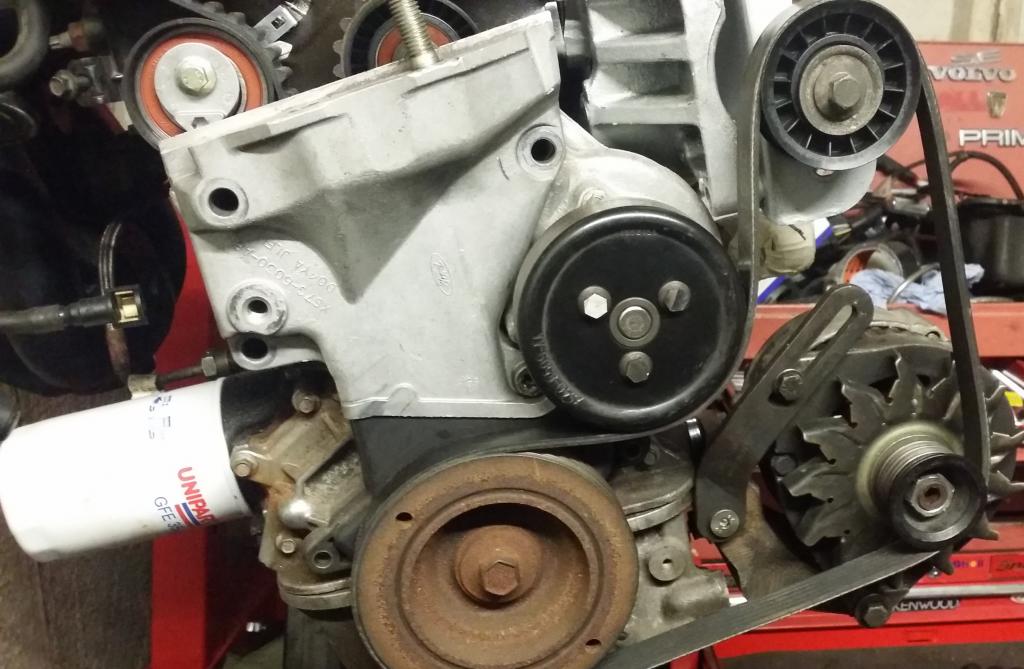
Made an attempt at offering up the alternator and the aux belt today prior to giving it a lick of paint.
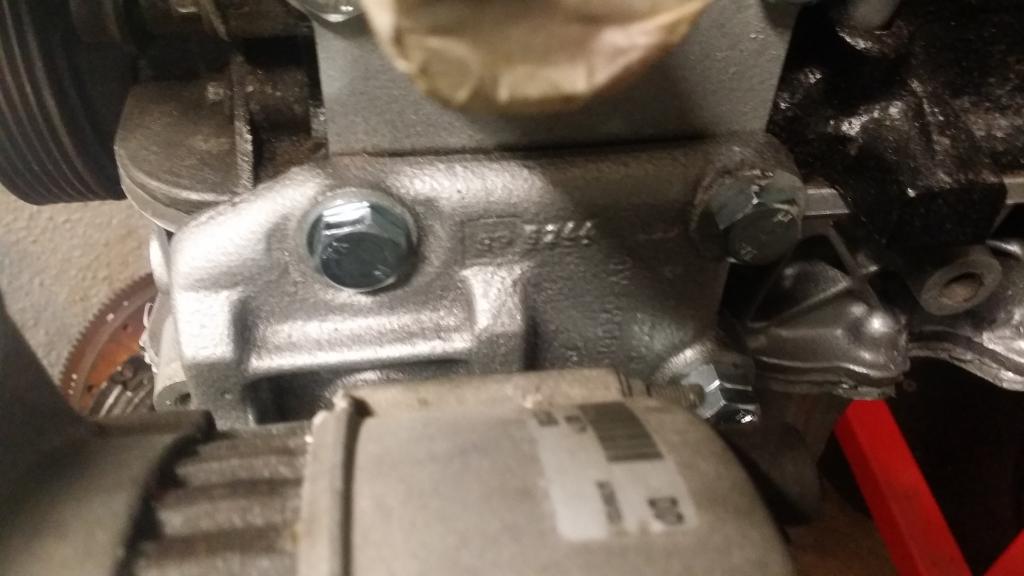
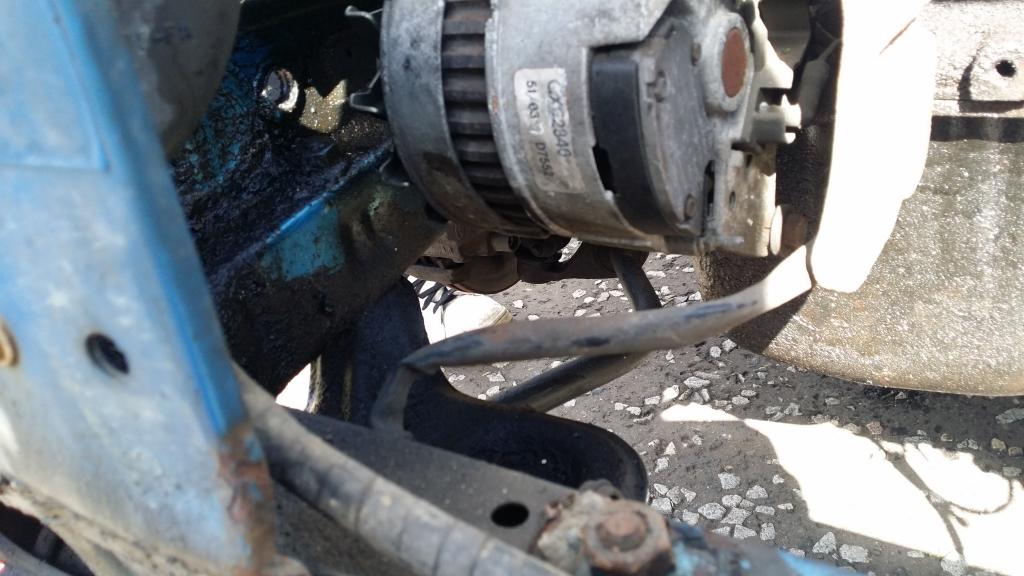
I have retained the original Alternator bracket and the arm from the car and was wondering what exactly I need to trim? I am using an adaptor plate that I got which also acts as a spacer, Is this enough for me not to have to trim any bits off the bracket and arm? seems to clear the sump as well, If you look at this pic you can see that the standard bolt adaptor bolts to the lower half of the spacer / adaptor plate:
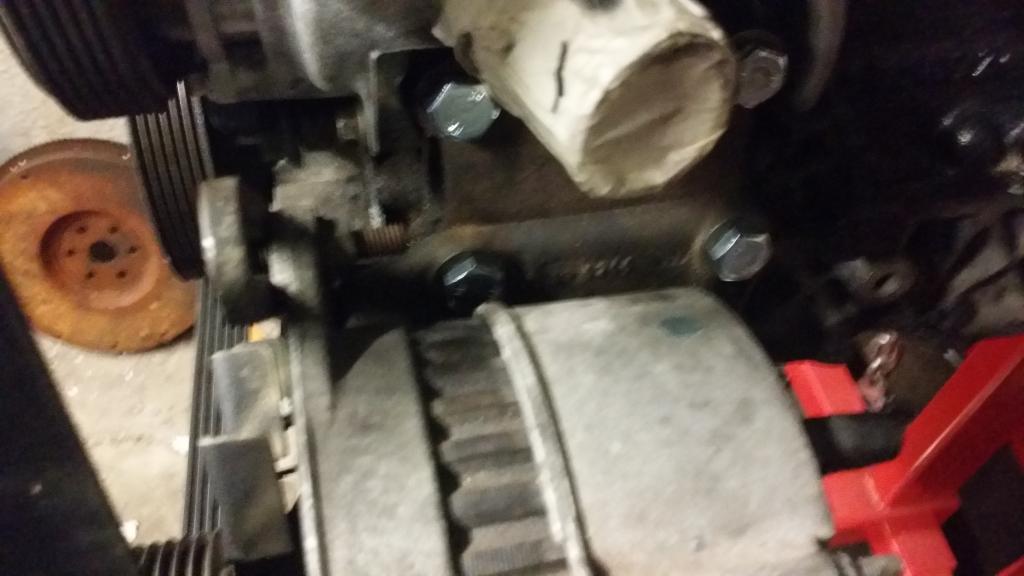
Also offered up the alternator belt up to the pulleys to see if I could get it to line up, does this look right?
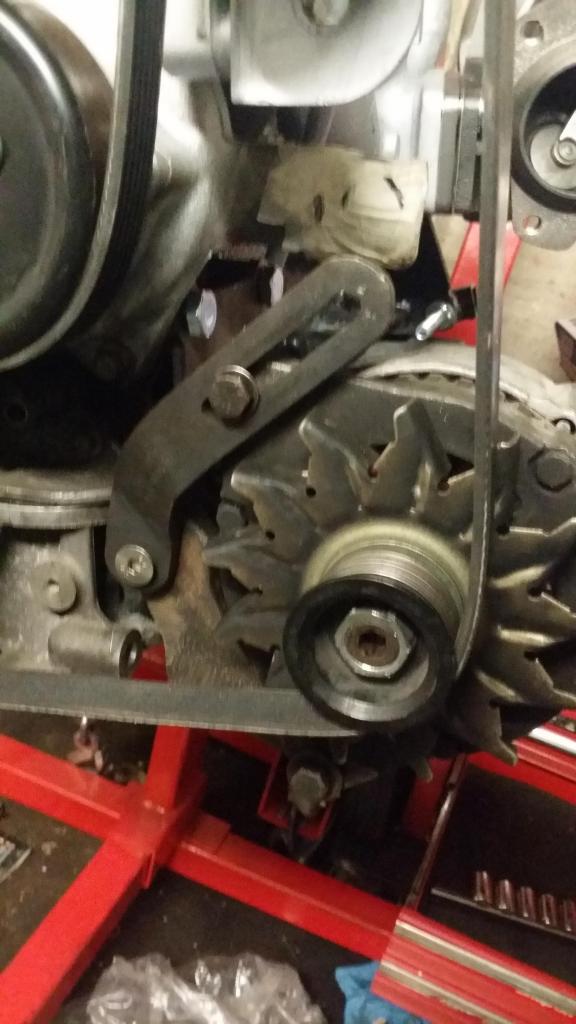
In this pic it shows how close it is to the sump but the shiney bit behind it is the mounting bracket / spacer which I think is enough to clear it?
This pic shows the arrangement of the Alternator arm (more of a reference pic for me to be honest)
I think I will give the brackets and arm a lick of paint tomorrow to make them look much more loved than the currently do
I have retained the original Alternator bracket and the arm from the car and was wondering what exactly I need to trim? I am using an adaptor plate that I got which also acts as a spacer, Is this enough for me not to have to trim any bits off the bracket and arm? seems to clear the sump as well, If you look at this pic you can see that the standard bolt adaptor bolts to the lower half of the spacer / adaptor plate:
Also offered up the alternator belt up to the pulleys to see if I could get it to line up, does this look right?
In this pic it shows how close it is to the sump but the shiney bit behind it is the mounting bracket / spacer which I think is enough to clear it?
This pic shows the arrangement of the Alternator arm (more of a reference pic for me to be honest)
I think I will give the brackets and arm a lick of paint tomorrow to make them look much more loved than the currently do
14-09-2014, 11:54 PM
#57
PassionFord Regular
Thread Starter
In fact whilst I remember, Re-using the same picture as above to make it easier to see what I am talking about, Does the Alloy timing belt cover need removed? The pics I have seen of ZT conversions don't have this fitted is this something that can be fitted or does it need removed? Answers on a postcard 

15-09-2014, 12:03 AM
#58
PassionFord Regular
Thread Starter
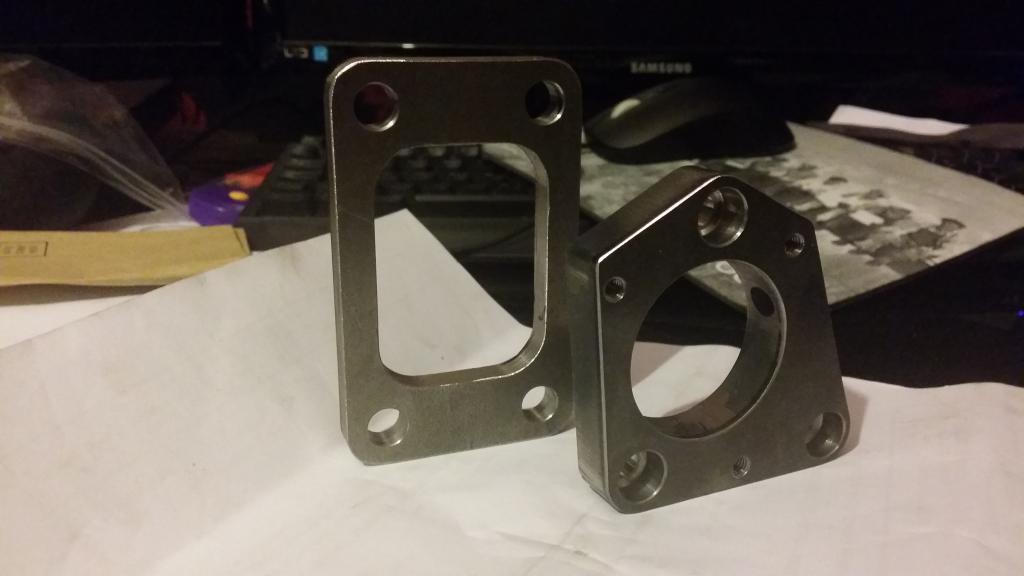
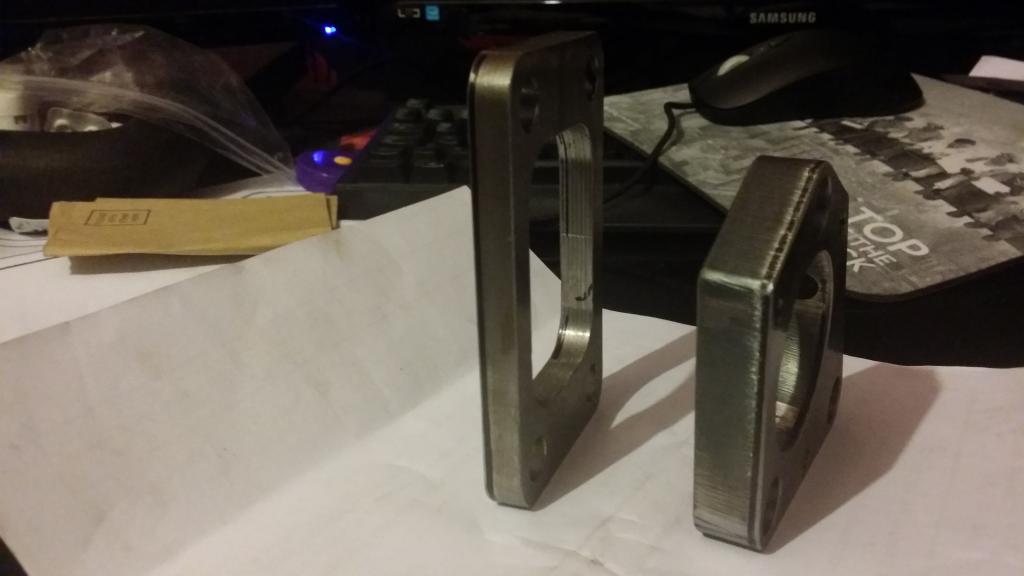
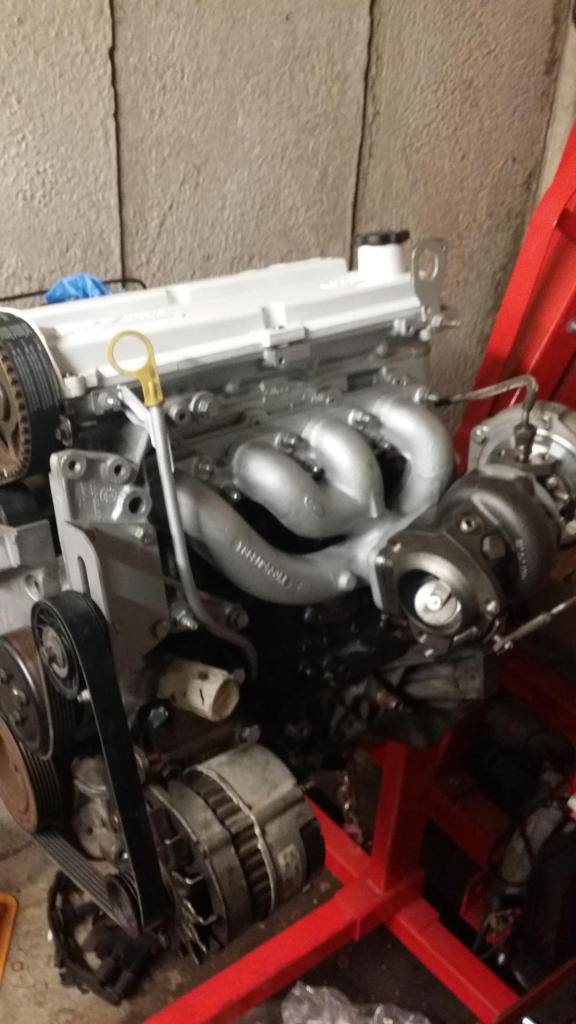
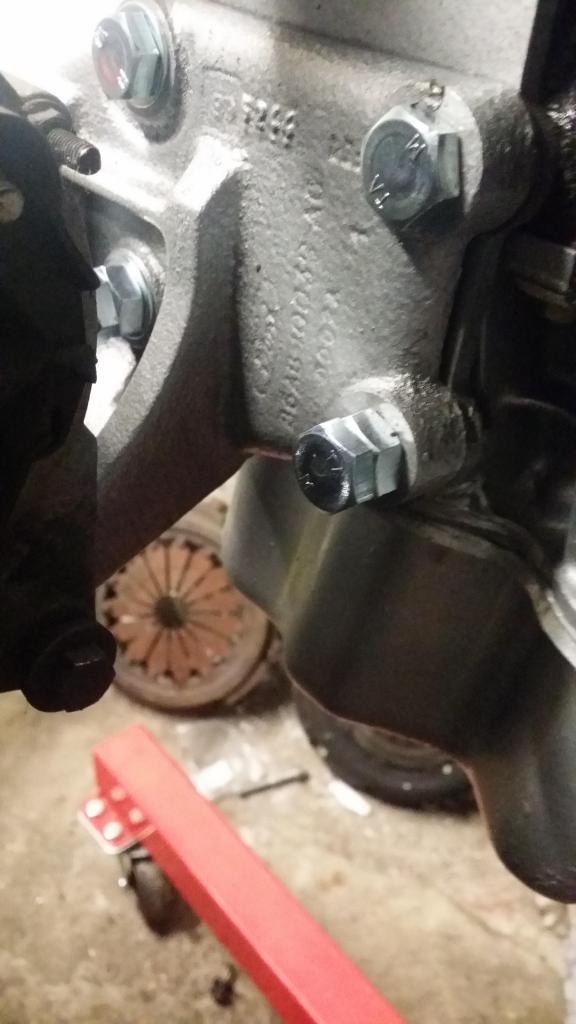
Managed to sort out the fouling problems with the turbo fouling the block by fitting the spacer plate I had made up,
I used a gasket either side of the adaptor which due to being 9.5mm thick meant that I had to buy longer ford manifold studs as the RST ones aren't long enough.
Turns out that the Cossie ones are up to the task so I used these.
From Block to Turbo It goes:
Block > Exhaust Gasket > Exhaust Manifold > T34 Gasket > T34 Adaptor Plate > T34 Gasket > T34 Turbo
This pic shows the adaptor in place and all looking snug:
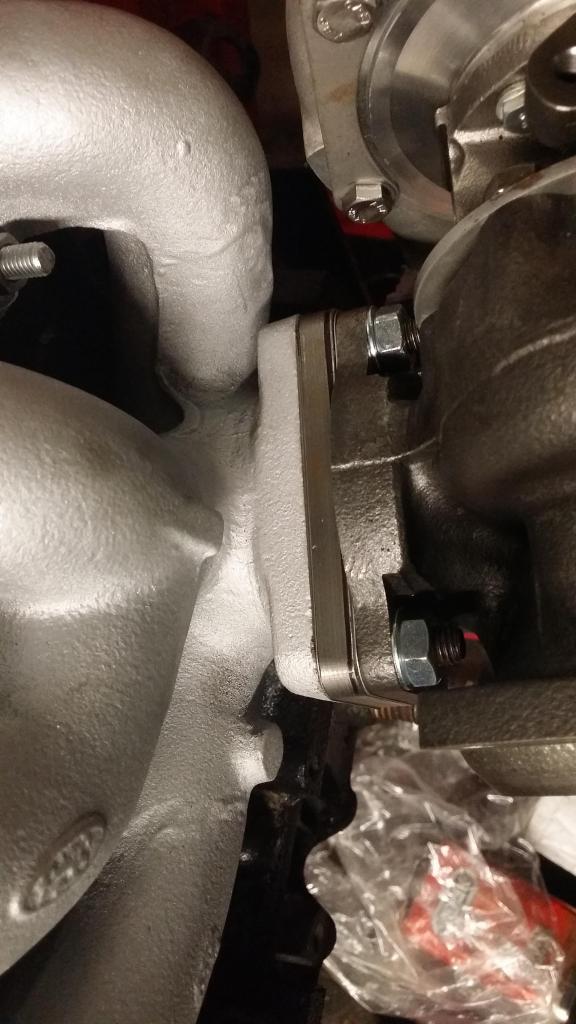
A bit more clearance than last time, Will still be tight!
Are the nuts I have used ok to use or do I have to use some uprated ones given that the exhaust manifold gets more than slightly hot?
I used a gasket either side of the adaptor which due to being 9.5mm thick meant that I had to buy longer ford manifold studs as the RST ones aren't long enough.
Turns out that the Cossie ones are up to the task so I used these.
From Block to Turbo It goes:
Block > Exhaust Gasket > Exhaust Manifold > T34 Gasket > T34 Adaptor Plate > T34 Gasket > T34 Turbo
This pic shows the adaptor in place and all looking snug:
A bit more clearance than last time, Will still be tight!
Are the nuts I have used ok to use or do I have to use some uprated ones given that the exhaust manifold gets more than slightly hot?
Last edited by HaggisTurbo; 15-09-2014 at 12:08 AM.
15-09-2014, 12:25 AM
#59
PassionFord Regular
Thread Starter
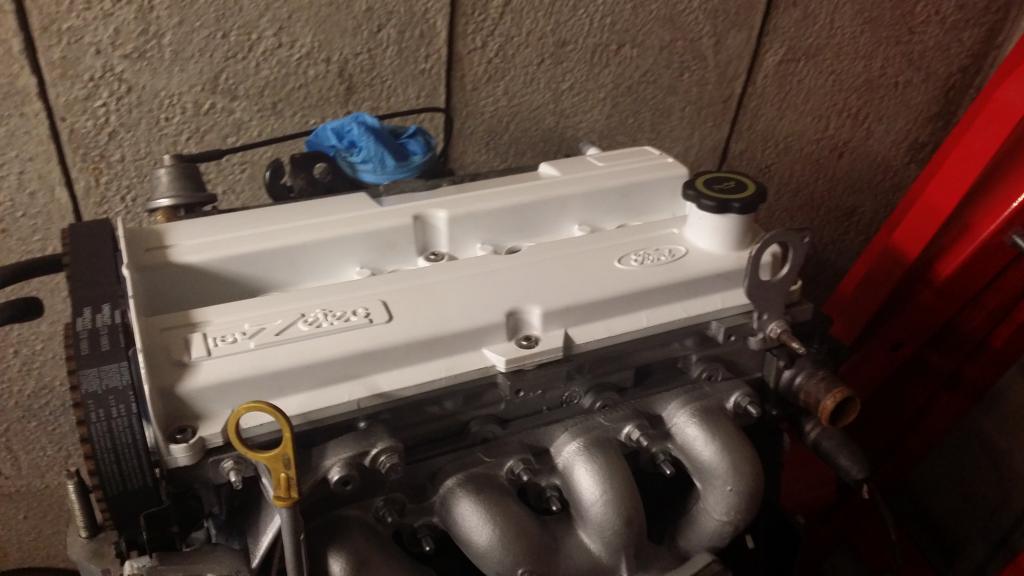
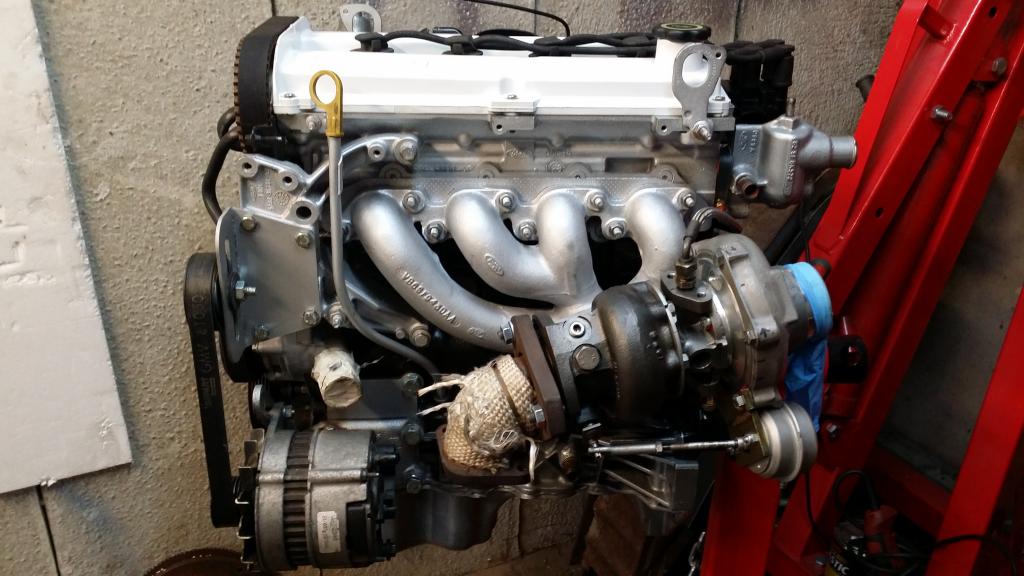
Here is the engine as it currently looks:
Just need to get the rest of the brackets painted up, Sump & Oil Pan fitted and then get the injector rail in and it's finished!
I think the paint and the new rocker cover has brought the car up really nice:
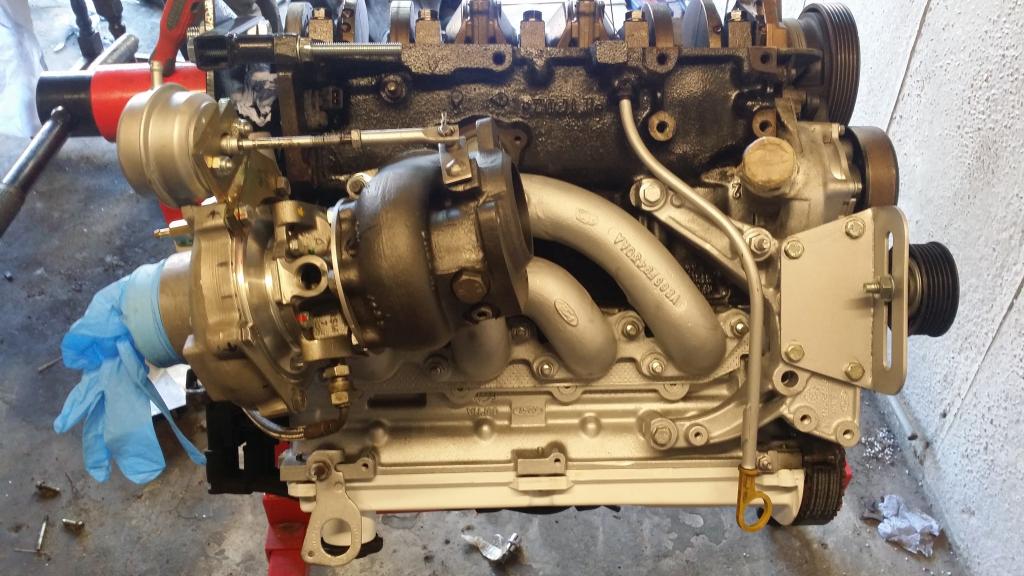
From the top:
Top shot with T34 Fitted:
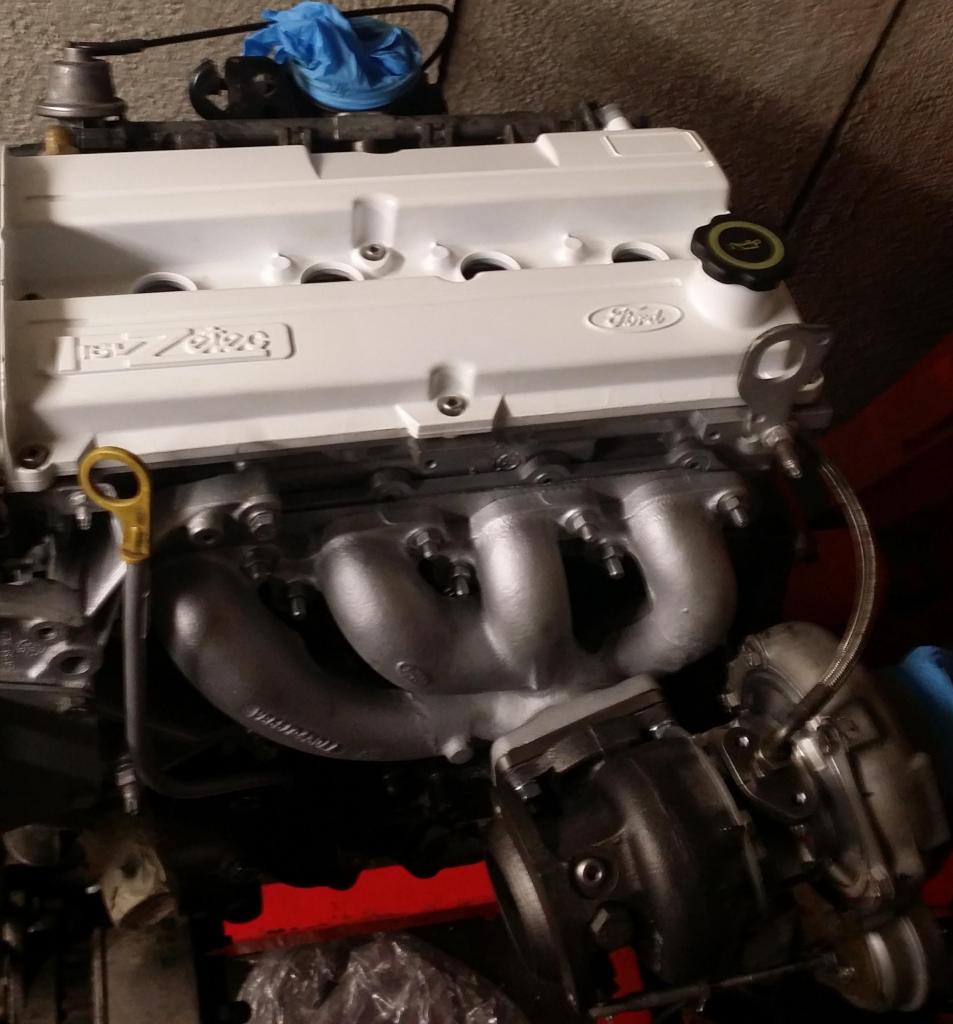
Side View with T34 Fitted (Shows the gap between turbo and block better:
Pictures of the engine as it stands:
Finally one of the engine upside down for Sump re-fitment
Just need to get the rest of the brackets painted up, Sump & Oil Pan fitted and then get the injector rail in and it's finished!
I think the paint and the new rocker cover has brought the car up really nice:
From the top:
Top shot with T34 Fitted:
Side View with T34 Fitted (Shows the gap between turbo and block better:
Pictures of the engine as it stands:
Finally one of the engine upside down for Sump re-fitment
23-09-2014, 12:34 AM
#60
PassionFord Regular
Thread Starter
Managed to get some more work done on the car today - First thing was to put the sump back together.
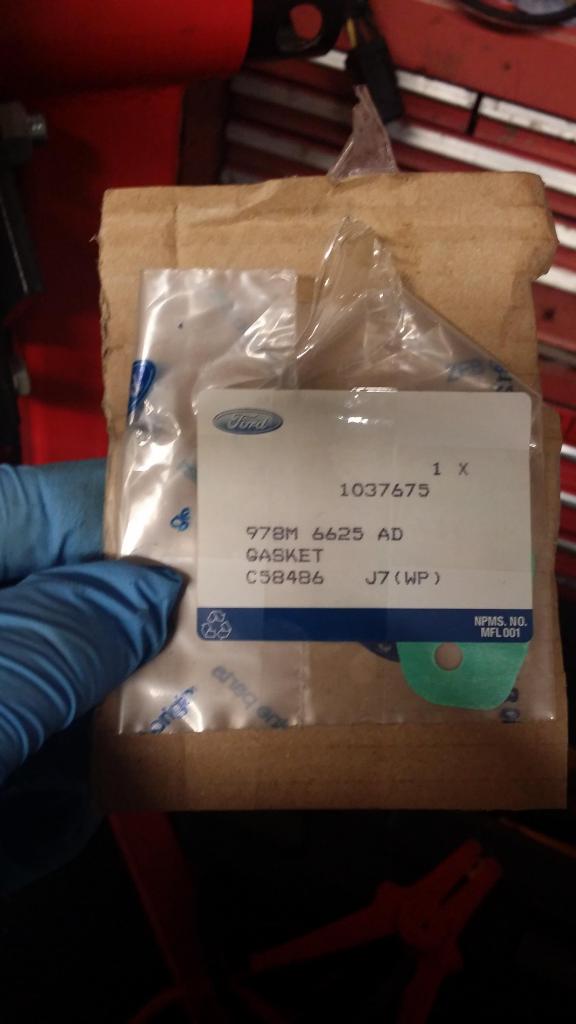
One thing I have learned whilst doing this conversion is that I am as well changing all the gaskets as I go, This one was no exception so new oil pickup pipe gasket arrived
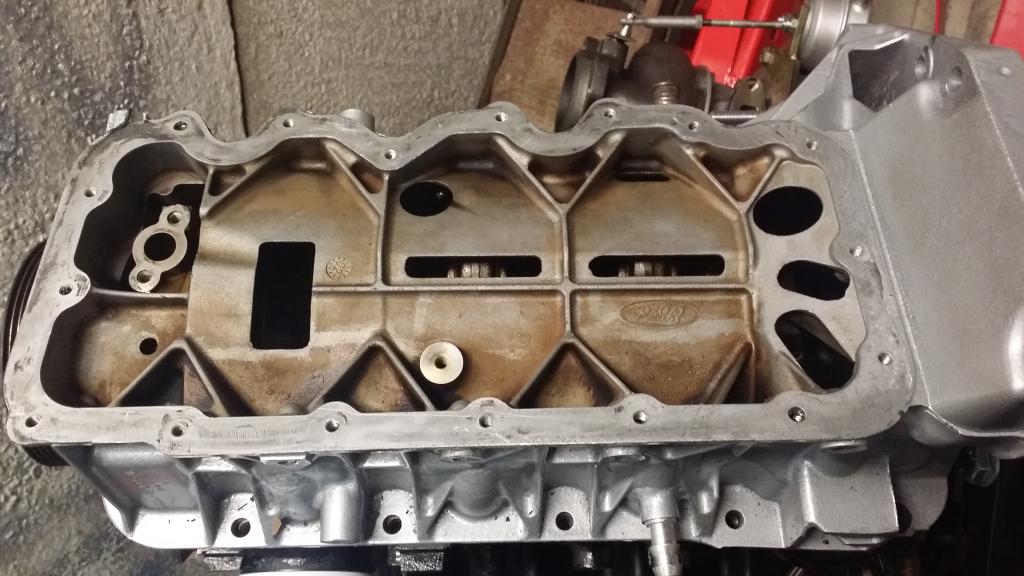
First thing was to give the facing of the upper sump a good clean as it had some paint overspray and wasn't looking too healthy before putting the sump back together again
Looking a lot better:
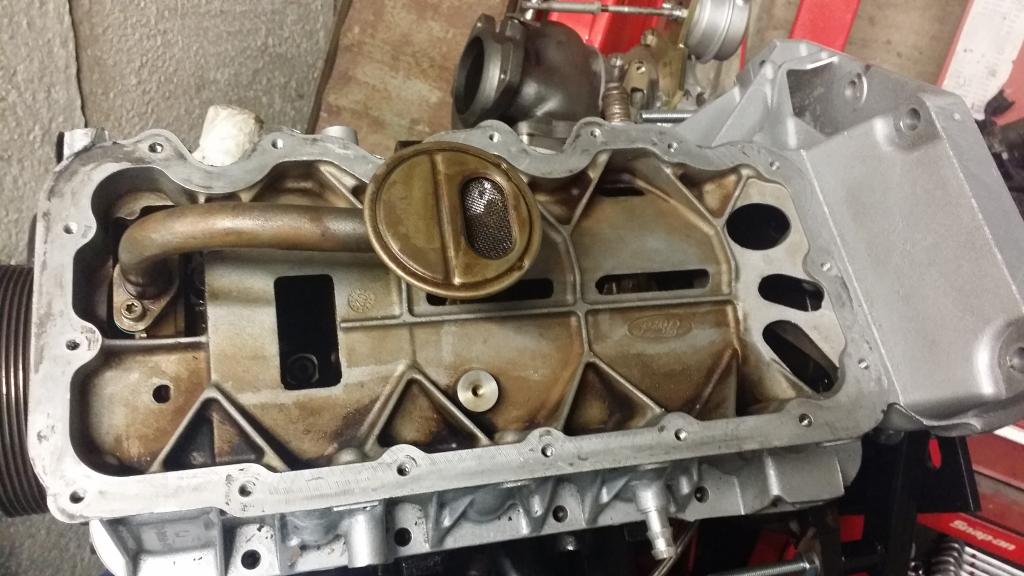
Fitted the gasket and the oil strainer back on, nearly overtighted it when I read the torque settings as Foot/Lb and not Inch/Lb lol
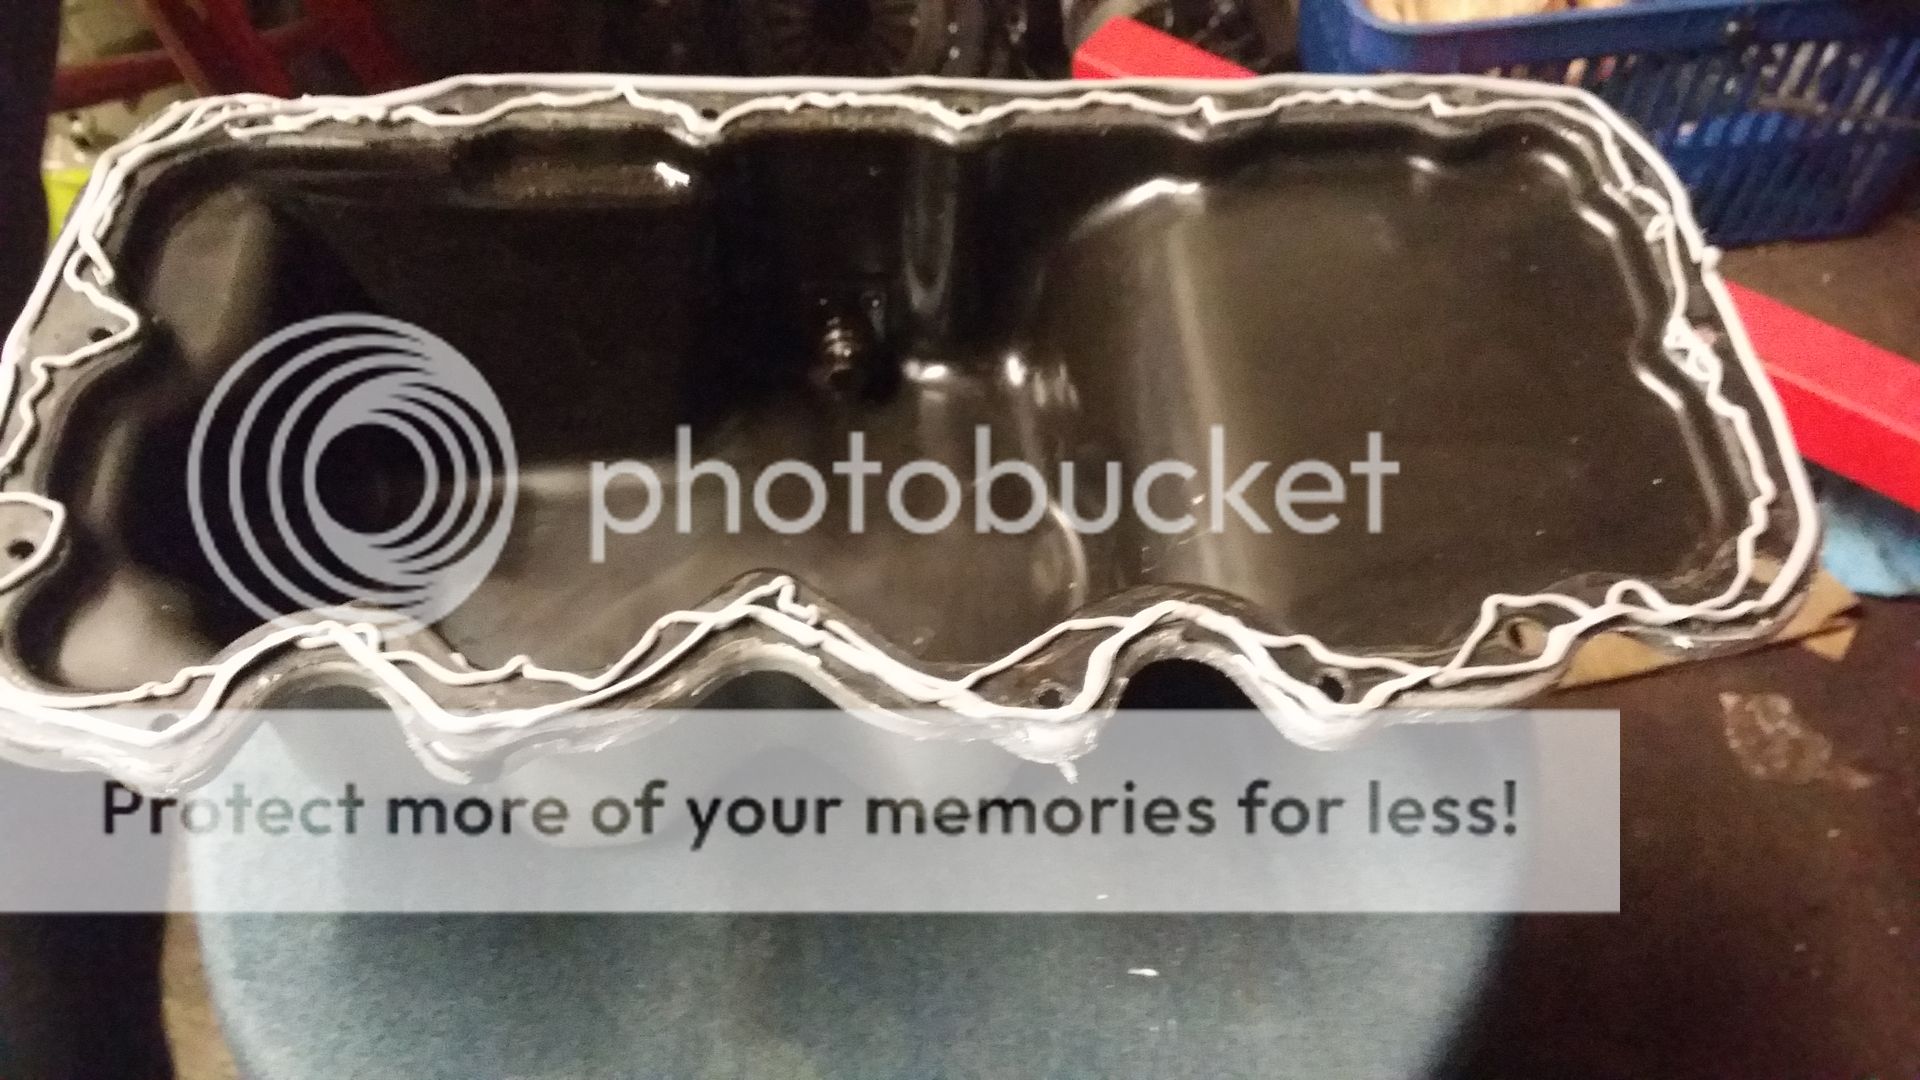
First time doing one of these lower sump pans and I think I might have went a bit mental with the sealant, Have I went a bit overboard? It went very splodgy but cleaned up the excess

One thing I have learned whilst doing this conversion is that I am as well changing all the gaskets as I go, This one was no exception so new oil pickup pipe gasket arrived
First thing was to give the facing of the upper sump a good clean as it had some paint overspray and wasn't looking too healthy before putting the sump back together again
Looking a lot better:
Fitted the gasket and the oil strainer back on, nearly overtighted it when I read the torque settings as Foot/Lb and not Inch/Lb lol
First time doing one of these lower sump pans and I think I might have went a bit mental with the sealant, Have I went a bit overboard? It went very splodgy but cleaned up the excess
23-09-2014, 12:38 AM
#61
PassionFord Regular
Thread Starter
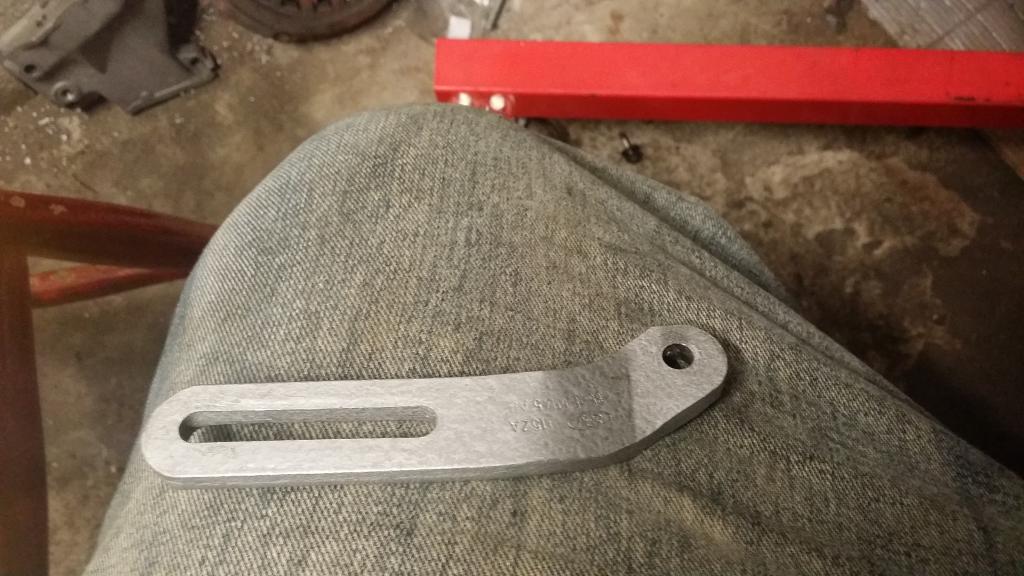
Sprayed some of the other bits before fitting back to the car:
Alternator Adjuster Arm
The Alternator mounting bracket with some new bolts (Forgot to get pic before fitting back to car!)
And again:
Alternator Adjuster Arm
The Alternator mounting bracket with some new bolts (Forgot to get pic before fitting back to car!)
And again:
23-09-2014, 07:51 PM
#62
Something that was bothering me for a while was the clocks peeling and looking a bit grubby so managed to get a mint set of EFI clocks from a XR3i off a guy on one of the lcoal Facebook groups
Should be able to get my money back selling my old EFI clocks back on Ebay as they will be ideal for someone doing the conversion
Old set:
New Set:
Should be able to get my money back selling my old EFI clocks back on Ebay as they will be ideal for someone doing the conversion
Old set:
New Set:
Just had a look at mine in my EFi cabby, if you look at the 7k on the rev counter the last tab is either red or white, my cabby is red and 2 sets out of my old ERST and my other MFi cabby are both white.
So Red = EFi and White = MFi
Ginger
.
23-09-2014, 09:58 PM
#63
PassionFord Regular
Thread Starter
Cheers Ginger, What I don't get though is how the previous ones were also working on my car without issue lol so who knows . Seems plausible though! there must be a fair amount of combinations and configurations
24-09-2014, 12:26 PM
#64
I've found that life I needed.. It's HERE!!

if it squidged out on the outside when you fitted it then it would have done the same on the inside and the extra eventually breaks off the inside and blocks up the oil pick up pipe.
Is there not a proper gasket you can use instead of sealant ? If not then be as sparing as you can with the sealant..
2p
30-09-2014, 10:04 PM
#65
PassionFord Regular
Thread Starter
Got the Deka IV 60lb injectors fitted into the zetec fuel rail along with the cossie fuel regulator, Debating whether to buy a pressure gauge to show the fuel pressure when mapping or will the tuner have a way of getting the pressure settings? In fact what is the standard pressure on one of these?
30-09-2014, 10:20 PM
#66
PassionFord Regular
Thread Starter
Managed to bag myself a Group A K&N Cosworth filter for mega cheap with the trumpet too. It also came with a brand new half size one if that can't be rescued.
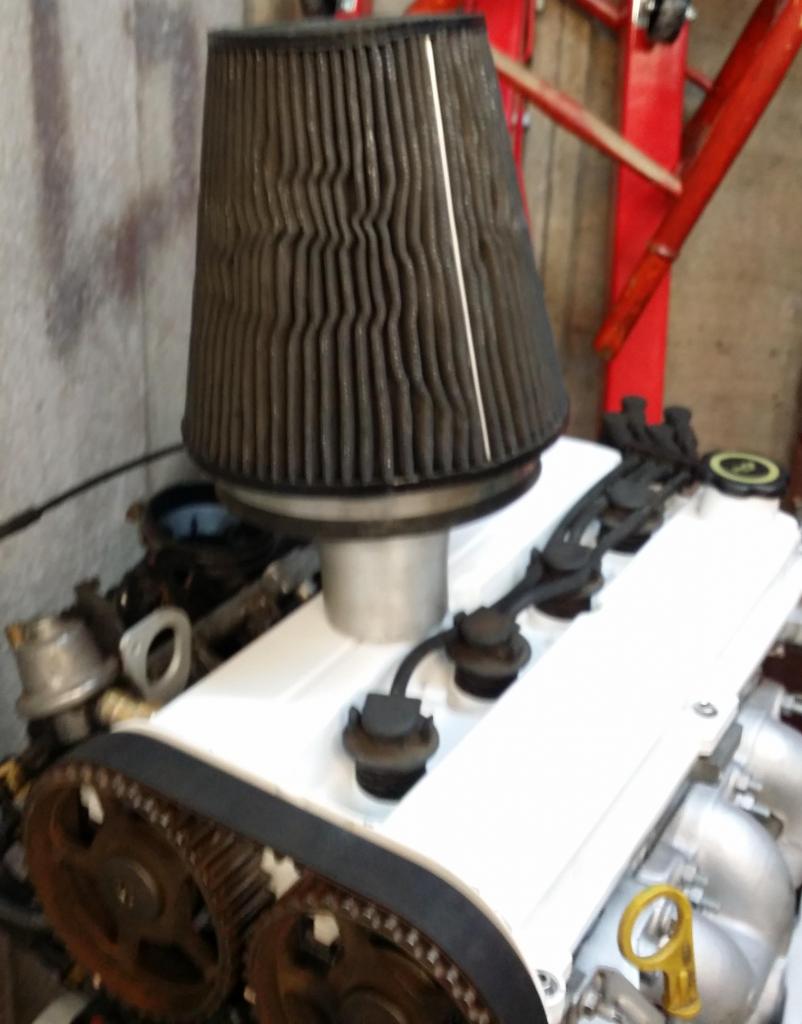
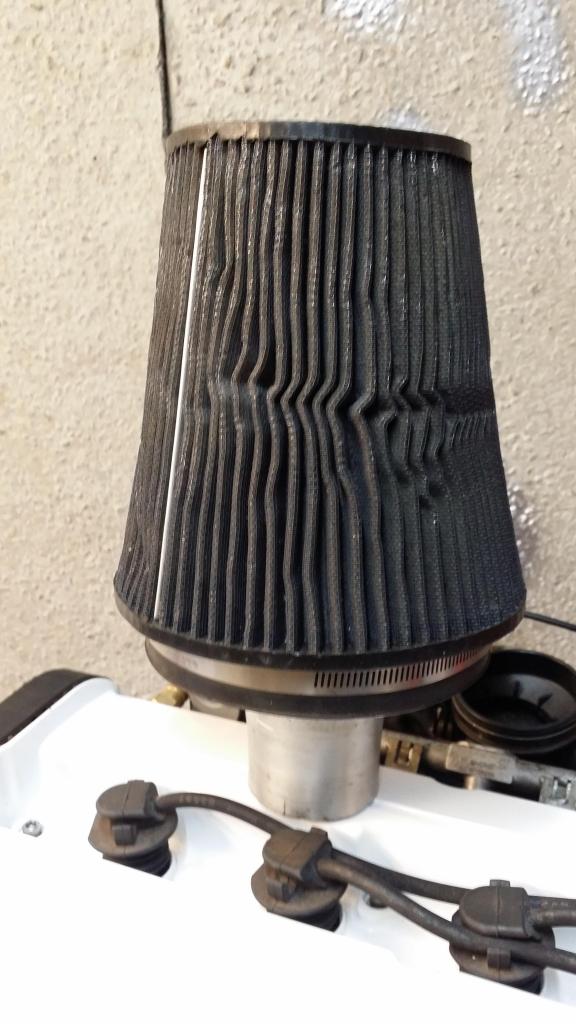
I am going to give it a proper clean through and then a proper re oil and see hw it looks then, I reckon it could look good as new failing that I will use the half size one!
The thing is I cannot believe how big this bloody thing is it is HUGGEE lol. If the cleaning it works then I will sell the half size one and make my money back!
30-09-2014, 10:29 PM
#67
PassionFord Regular
Thread Starter
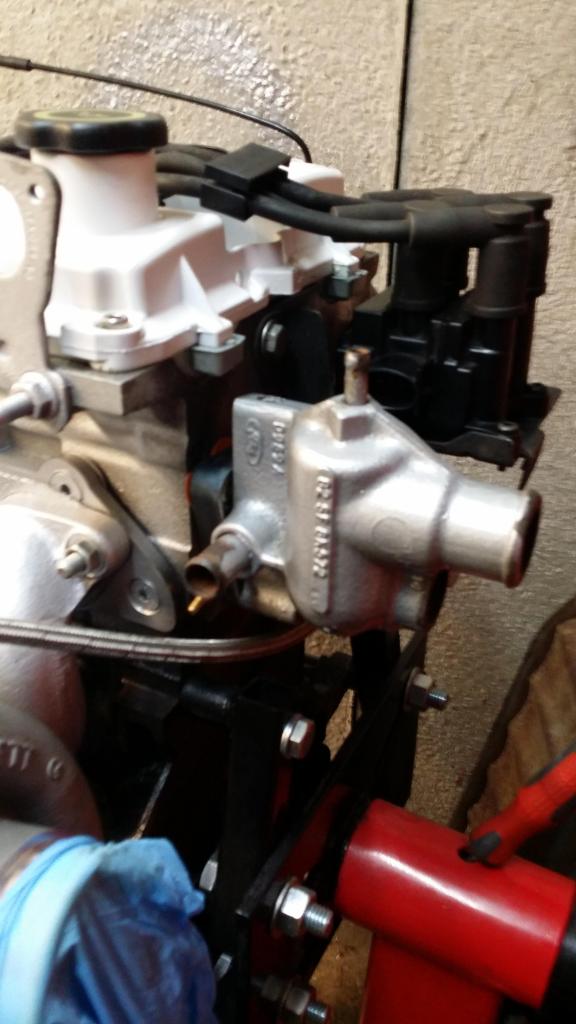
Gave the thermostat a good clean and rub down before giving it a good coat of silver hammerite and it has made it look 10x better and a lot more fresh. Bolted it up to the adaptor plate and although one of the bolts snapped it seems solid enough (Just kidding I will get a new bolt).
After paint had dried:
Fitted to the adaptor plate on the engine:
After paint had dried:
Fitted to the adaptor plate on the engine:
30-09-2014, 10:39 PM
#68
PassionFord Regular
Thread Starter
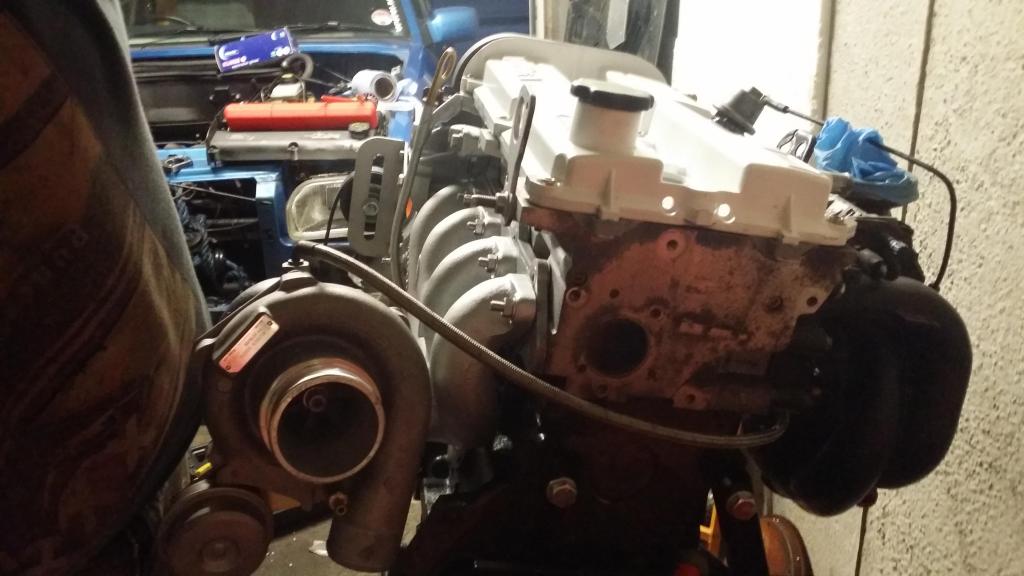
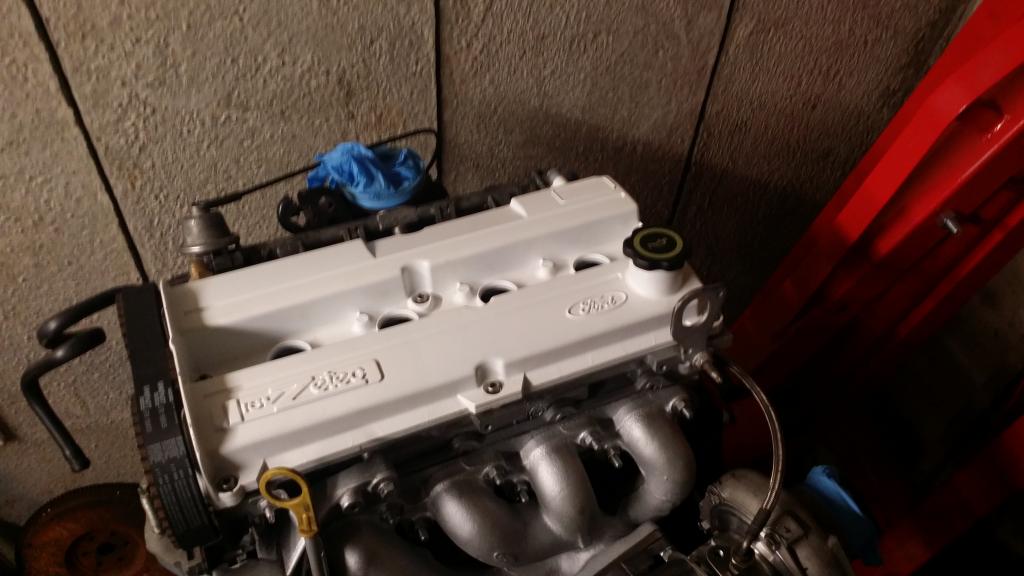
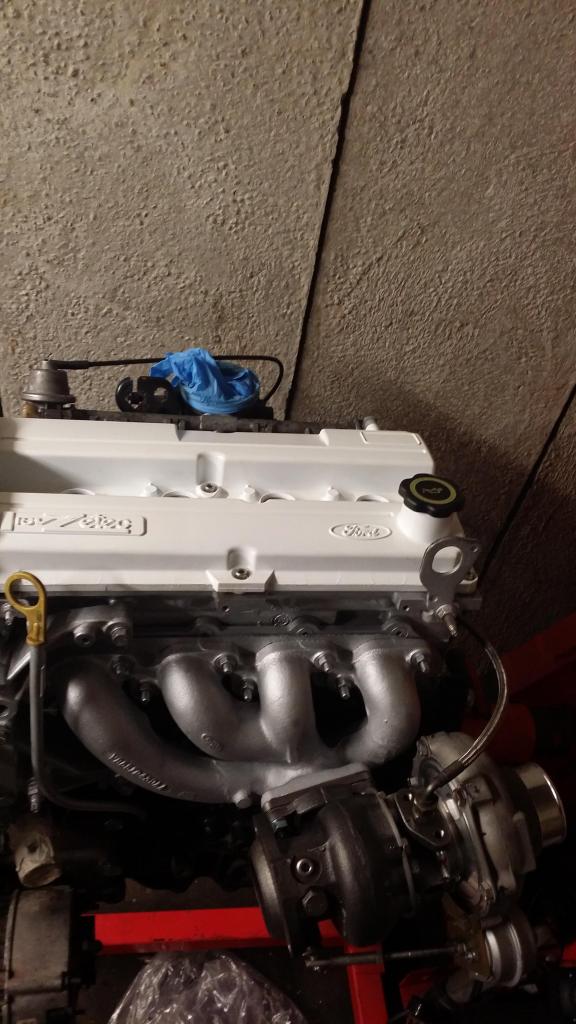
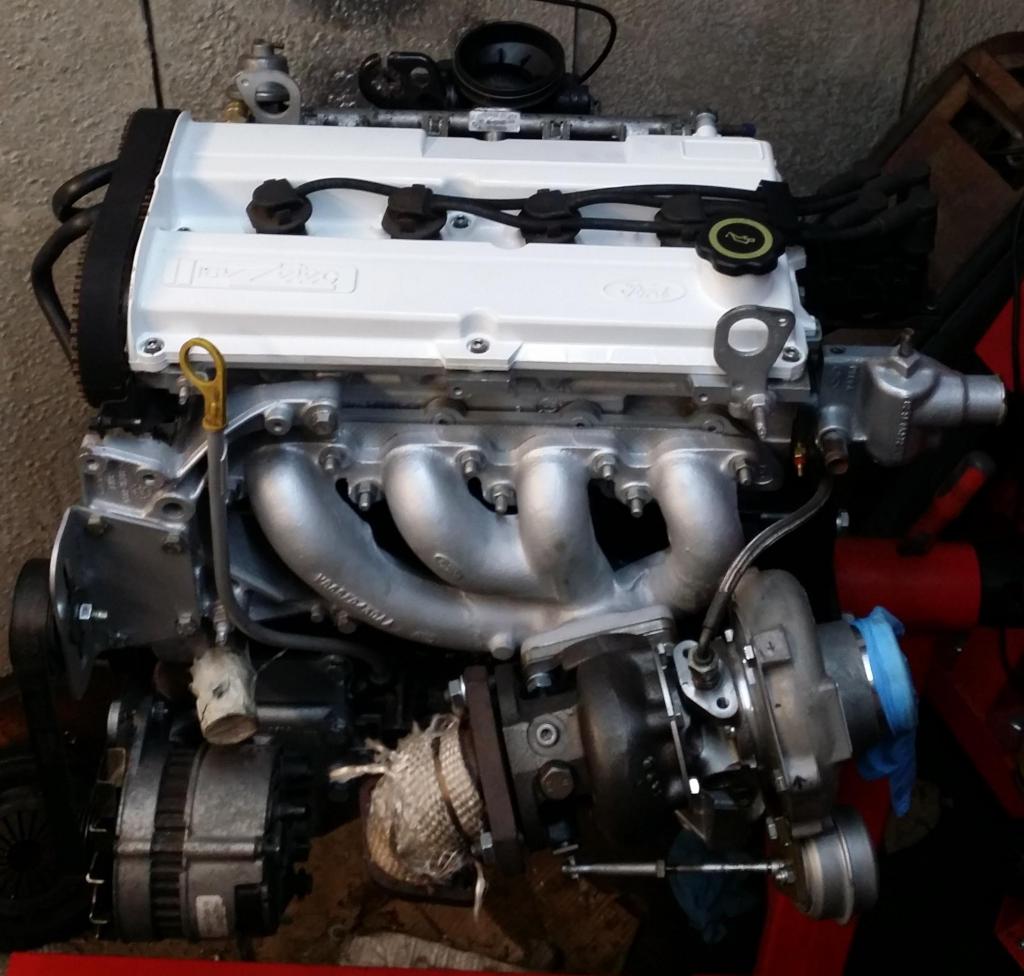
FINALLY! The engine is now complete well the physical build part anyway, Looks a lot better!
Here is the the front view of the engine:
A view from a bit higher up to show the rocker cover looks nice IMHO of course :
Side pic: Does the timing belt covers fit back on this or does it have to go in the engine bay looking like this, With the cover on I can't see how it will fit! Any opinions folks?

Here is the the front view of the engine:
A view from a bit higher up to show the rocker cover looks nice
Side pic: Does the timing belt covers fit back on this or does it have to go in the engine bay looking like this, With the cover on I can't see how it will fit! Any opinions folks?
30-09-2014, 10:56 PM
#69
PassionFord Regular
Thread Starter
Got myself an Escort Bailey RS Turbo breather, so much better than the standard one and for �40 I couldn't complain, Just need to figure out how to attach it to the zetec head as the mounting point is different!
01-10-2014, 10:29 PM
#70
PassionFord Post Whore!!
Timing cover needs conciderable work to get fitted, the alloy part needs cutting and modding I could only then get the top right bolt in and a blob of silicone on the left side.
I mounted my bailey breather to the heater box.
I mounted my bailey breather to the heater box.
02-10-2014, 10:43 PM
#71
PassionFord Regular
Thread Starter
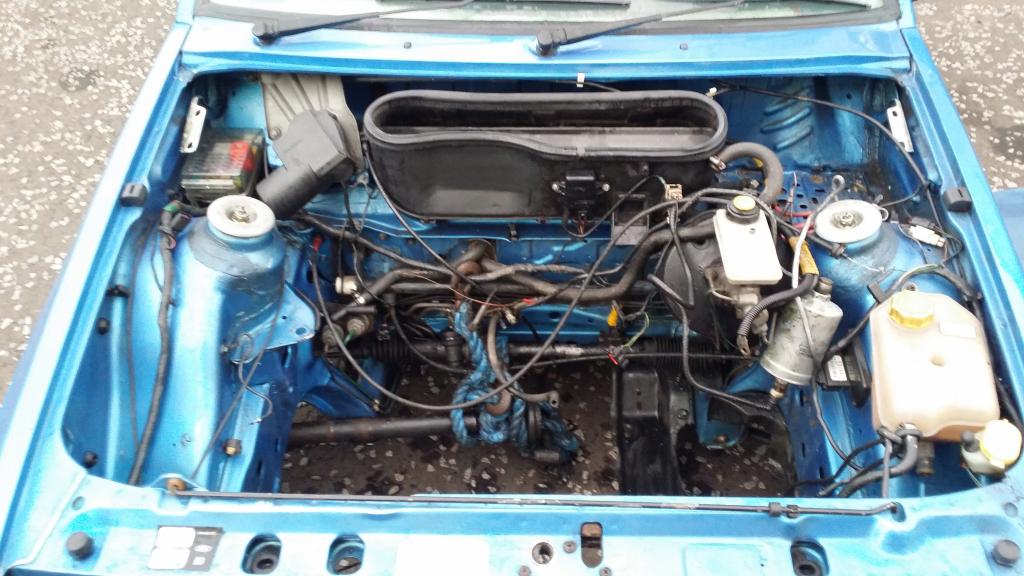
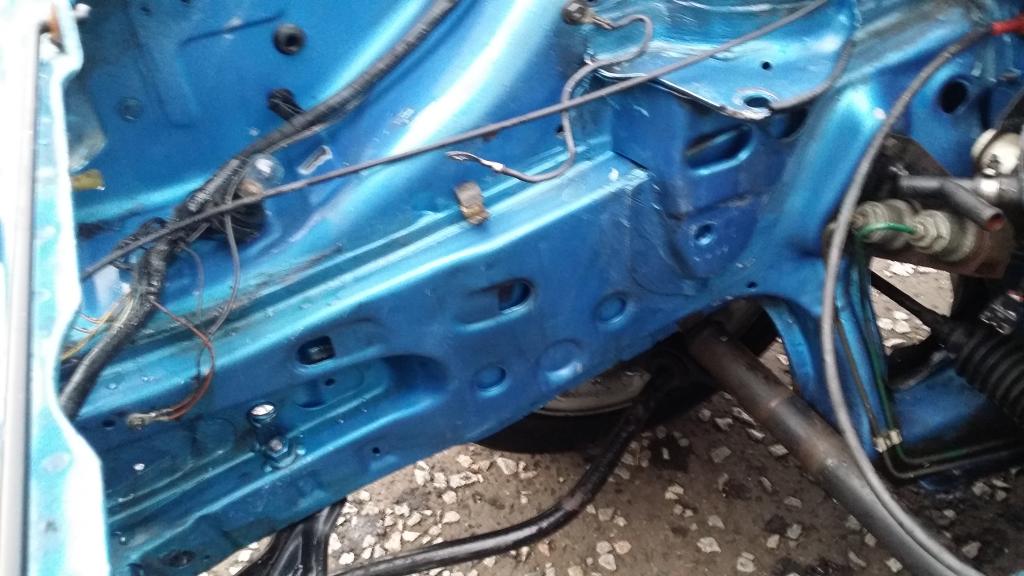
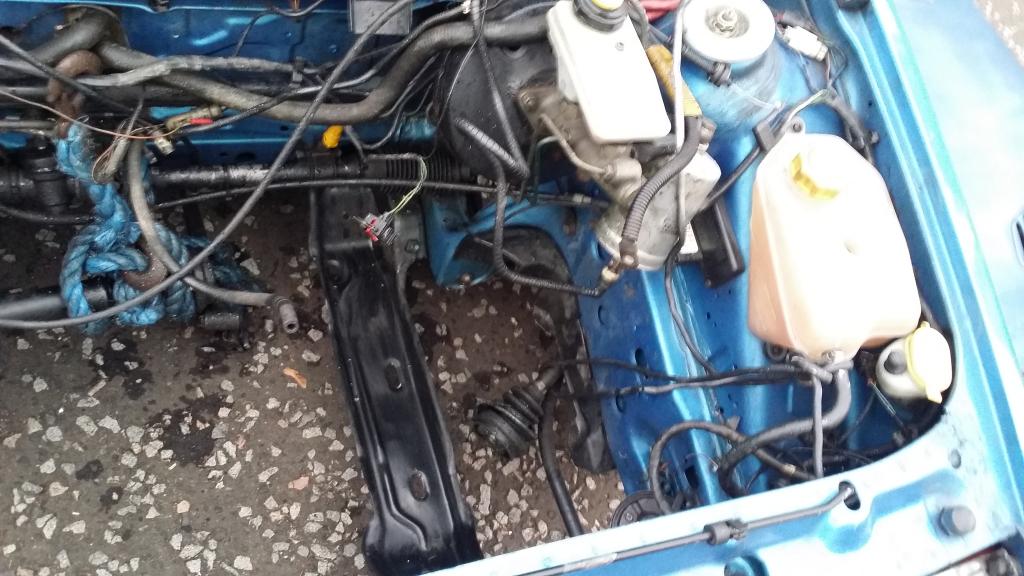
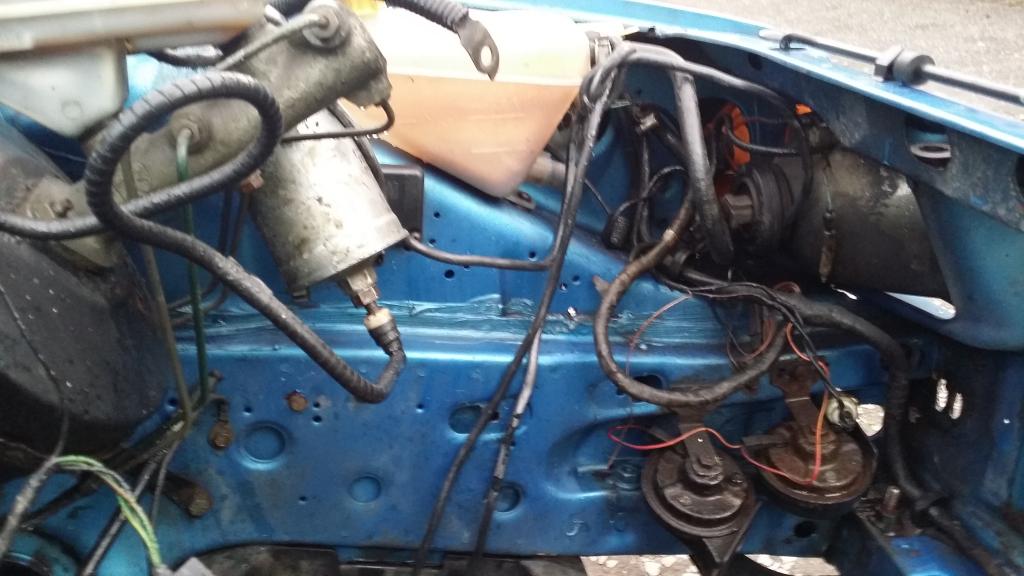
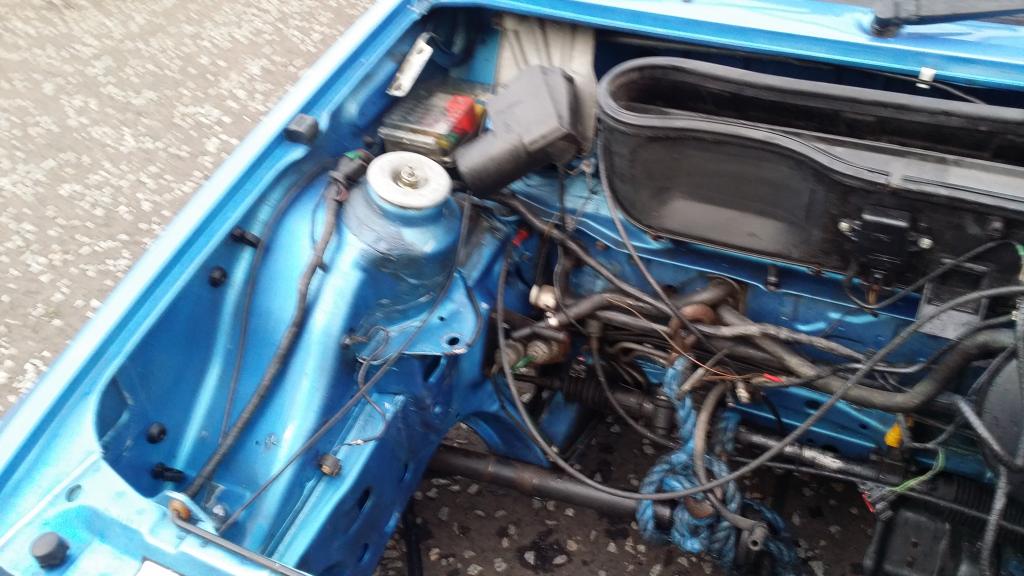
So did one thing today I said I would never do to an old ford and that is pressure wash the engine bay, I was always terrified of doing it incase the water would hide in places I could never see and it would slowly rot itself to death but then I figured it would prob do that anyway . Just Kidding, Anyway we had to push the car 250 metres down the road to the place it was getting the pressure wash and it was the longes t 250m of my life lol. Fired up the pressure washer and got some good results. Even dried it off afterwards in paranoia
Anyway here is before:
Anyway here is before:
Last edited by HaggisTurbo; 02-10-2014 at 10:45 PM.
 02-10-2014, 11:17 PM
#73
PassionFord Regular
Thread Starter
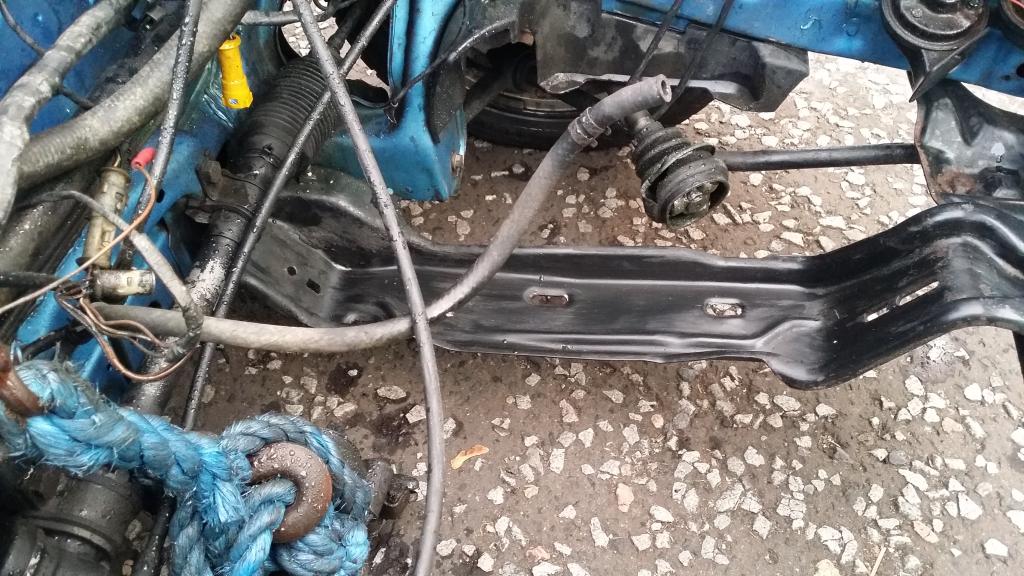
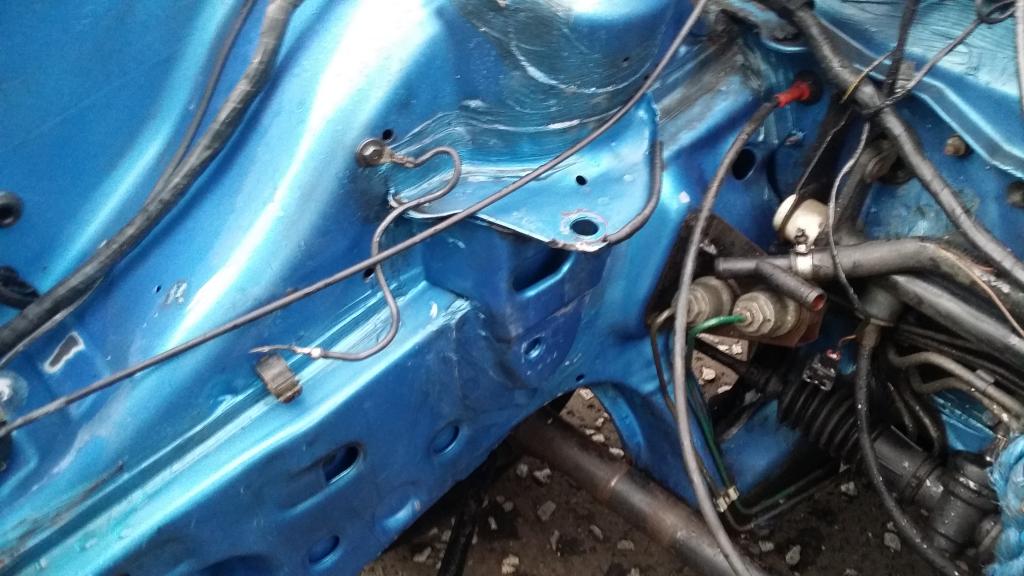
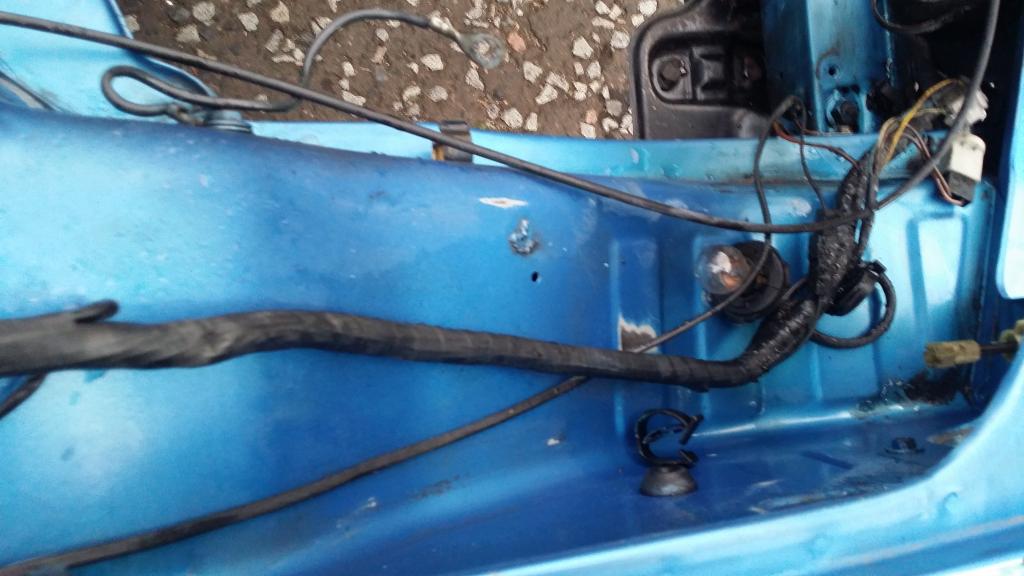
Although the pics in the previous post show a massive improvement it did unfortunately uncover some areas where the rust has settled in. 


The haven't holed or anything so I think the best solution for these is Kurust and Hammerite as it is out of view anyway and I don't think it's beyond help, unfortunately as I would like to replace the panels, cost and ability come into mind and I have neither lol, I will kurust it not ideal I know but hey!
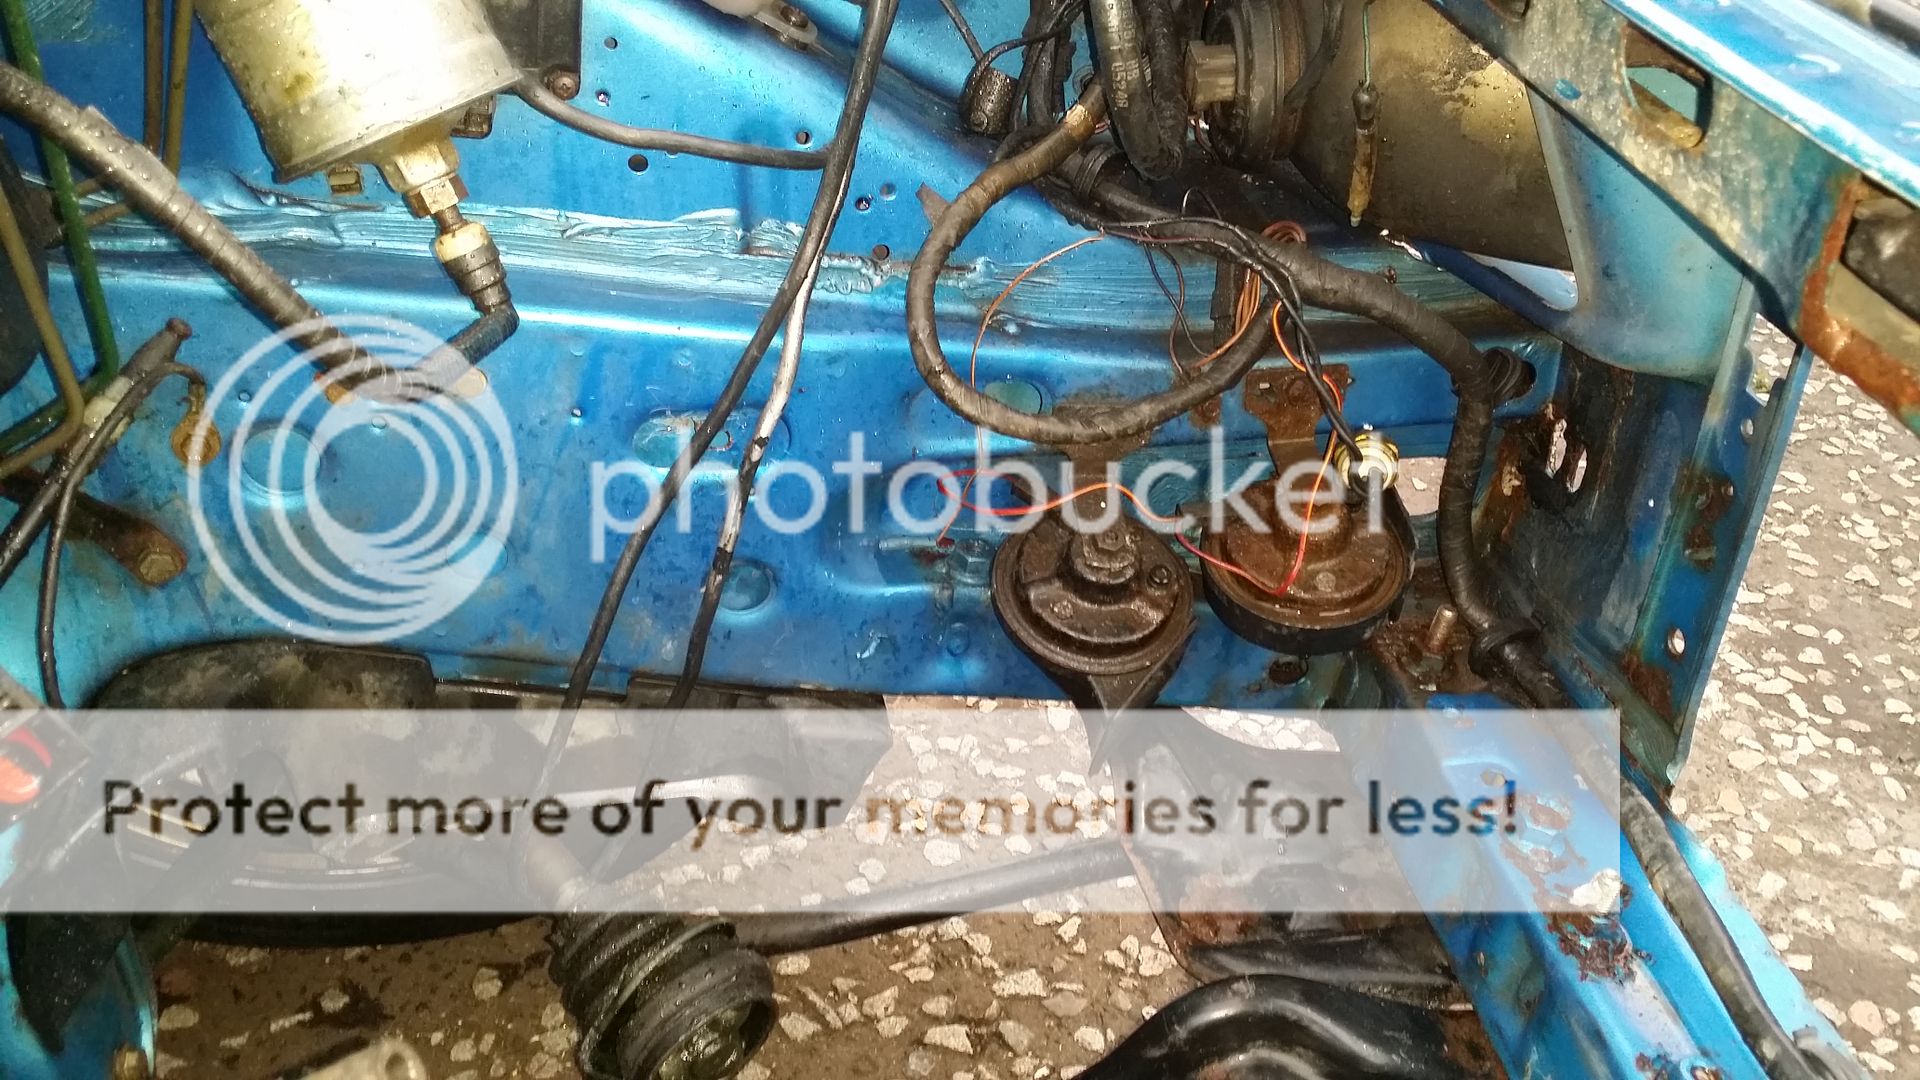
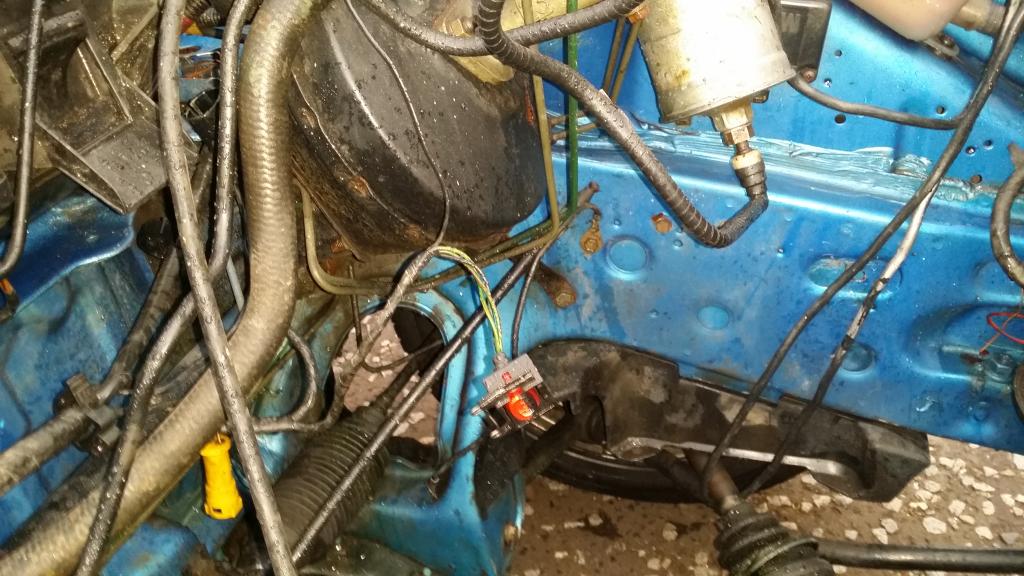
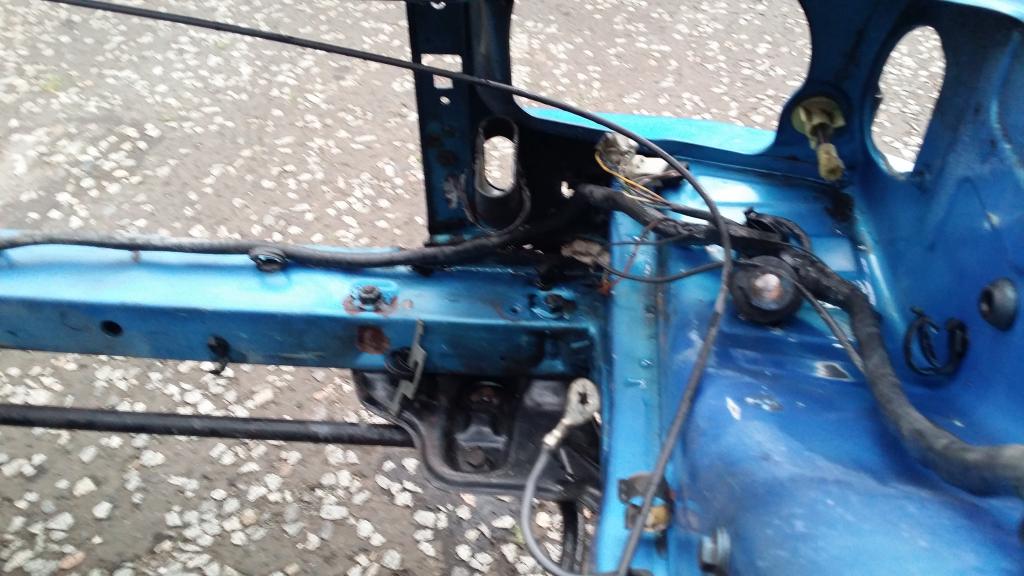
The haven't holed or anything so I think the best solution for these is Kurust and Hammerite as it is out of view anyway and I don't think it's beyond help, unfortunately as I would like to replace the panels, cost and ability come into mind and I have neither lol, I will kurust it not ideal I know but hey!
17-01-2015, 03:35 PM
#75
PassionFord Regular
Thread Starter
Hi Stu,
Not been much progress on this at the moment, waiting for some more cash seeing as its now after christmas lol,
Shopping list:
OFAM ecu (Turns out my car has 1AFA EFI management and the OFAM is a direct fit so much less hassle)
CP2000-35 Clutch for the Ka box so I dont need to worry about it again
Hoses and misc bits
That and it is ultra cold with snow up here at the moment so that also is impeding progress lol, How is the rebuild of yours coming along?
17-01-2015, 04:36 PM
#76
PassionFord Post Whore!!
Mines all done, back together a while. Done 52 miles, will tax it March this year. Get some more miles on it, then get it back on fully synthetic oil again.

Thread
Thread Starter
Forum
Replies
Last Post