Porting and Polishing: What's Involved.
 27-03-2014, 12:28 AM
#1

Hi all,
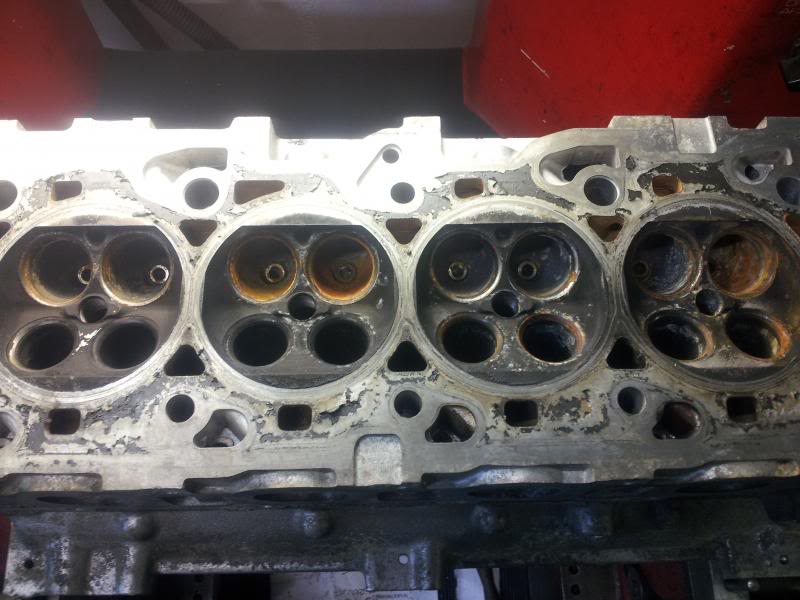
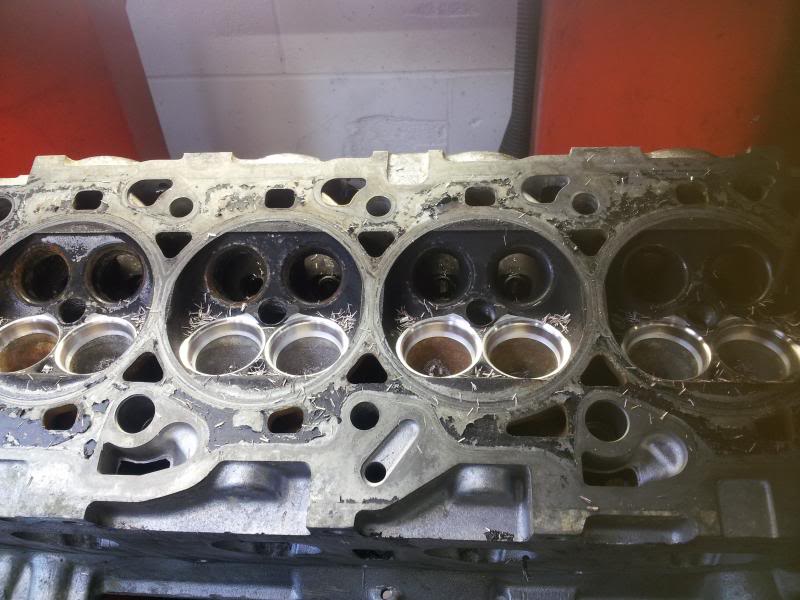
I'm currently in the process of porting and polishing a Zetec R head, so i thought i could share with you exactly what is involved! We start with a bare head, it has been stripped of all components and had a few hours in the hot wash. As you can probably tell, this head was not straight from a running car, it has been standing for some time:
Next, i find a pilot that's a nice fit in the guide, for this machine (Serdi) it should be able to slide into the guide, but you should not be able to feel any noticeable play.
Here i'm mounting the head on the machine at the correct angle using a spirit level that fits onto the pilot:
Once the head has been set up roughly, it's time for some fine tuning. I put the pilot into a tool holder with a straight 45� cutter and touch the cutter onto the seat on the far left of the head (as i'm looking at it):
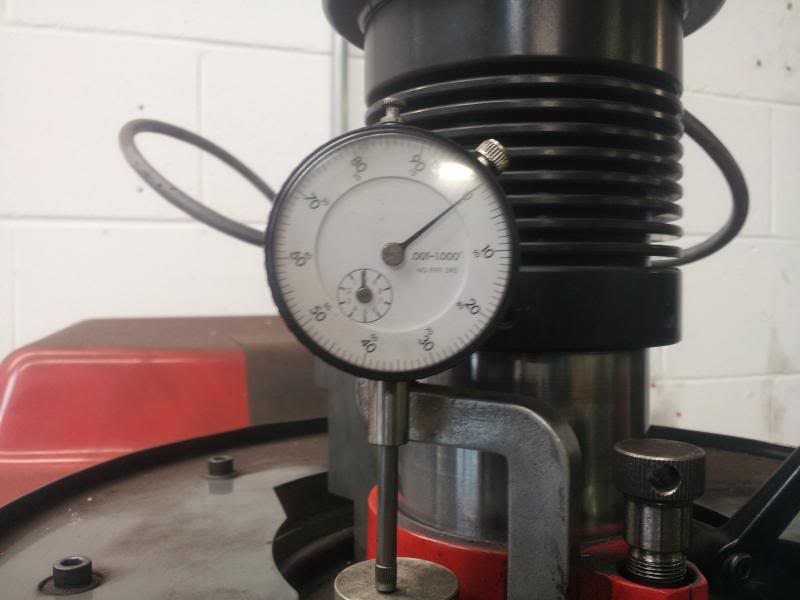
I then set the height gauge to zero, move the cutter to the seat on the far right of the head and check the height there:
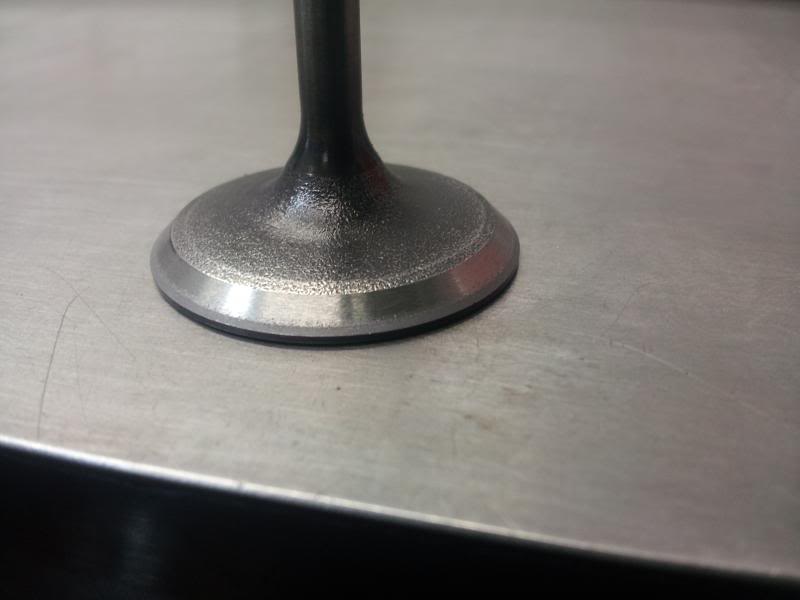
Luckily this head was set up perfectly first time, but it's not always the case and can require some jiggling around. Next job is to quickly face a couple of valves to use for some measuring:
Now, i use the setting tool on the valve to measure the outside edge (please note that this is the exhaust valve i'm measuring for picture purposes only, i'm actually going to start with the inlets):

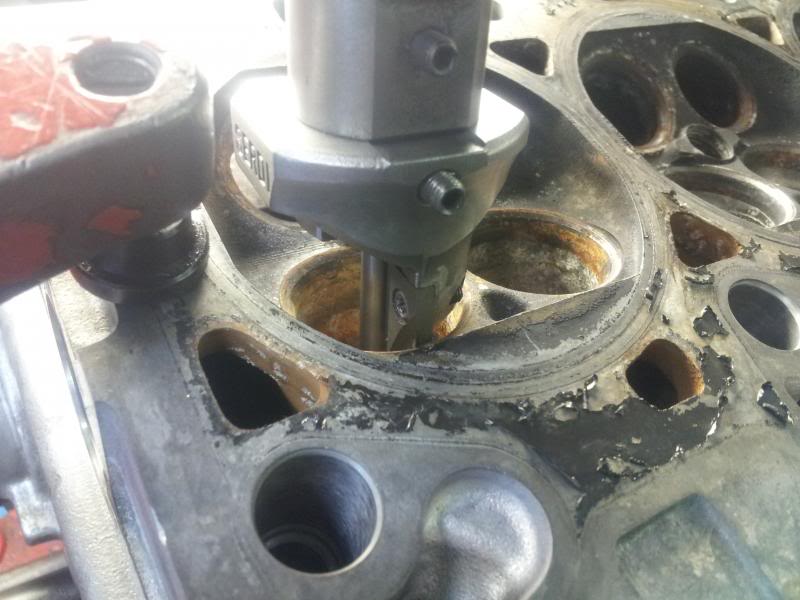
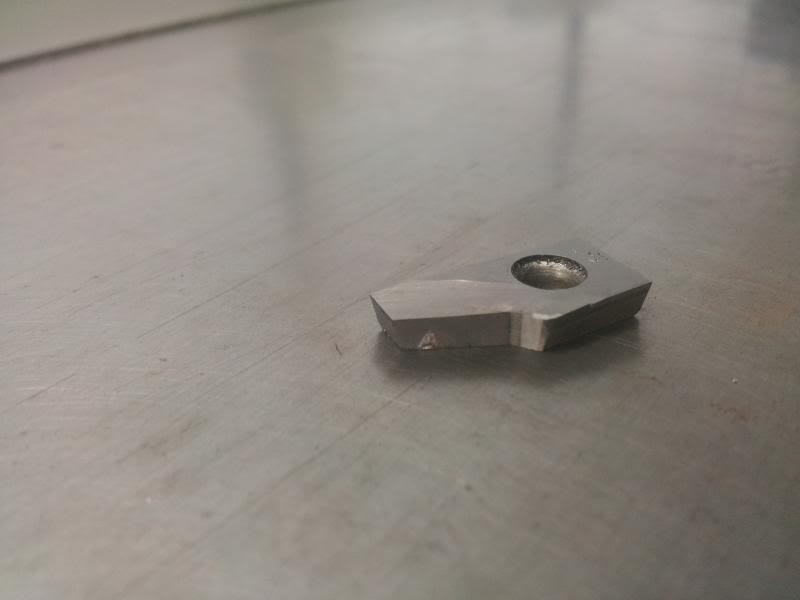
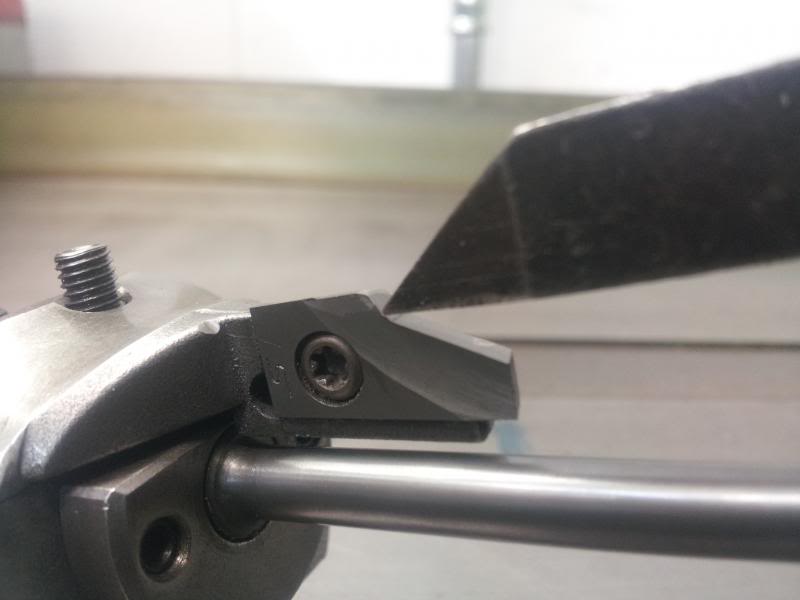
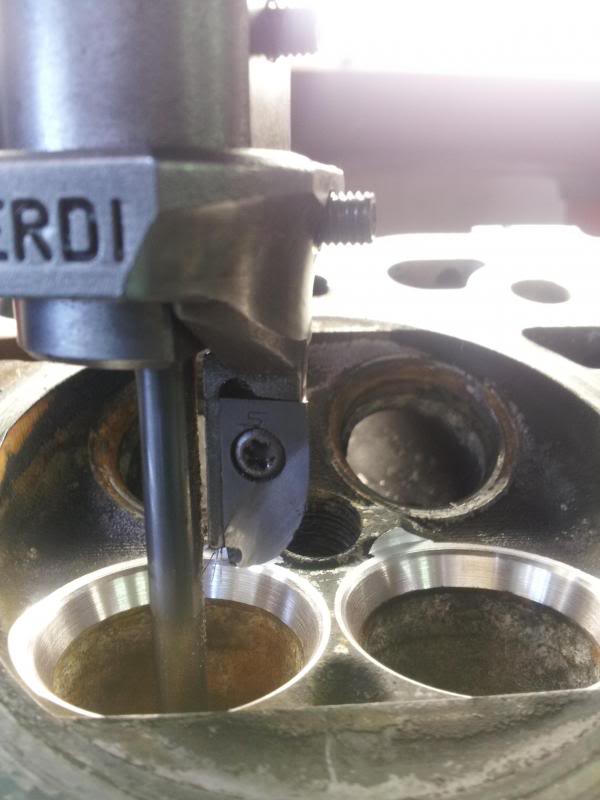
I now select the cutter i'm going to use, in this case, it's a 0.85mm wide 45� angle, with a 30� top angle and a 70� bottom angle:
I place the cutter and the pilot in the tool holder:
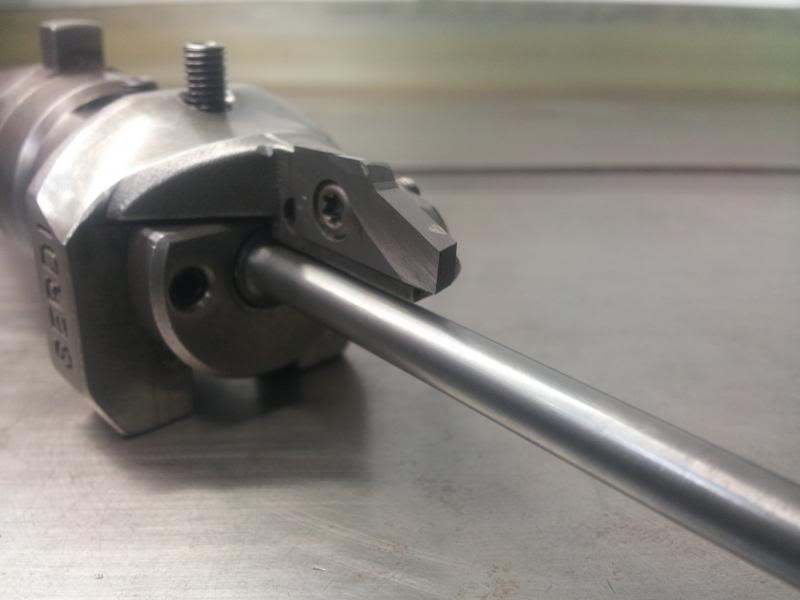
Now it's time to set the cutter width, i use the setting tool from the valve and set the outside edge of the cutters 45� angle to the same width as the outside edge of the valve. This should ensure maximum airflow:
I now cut the seat until i see a 45� angle appear at the outside edge of the seat:
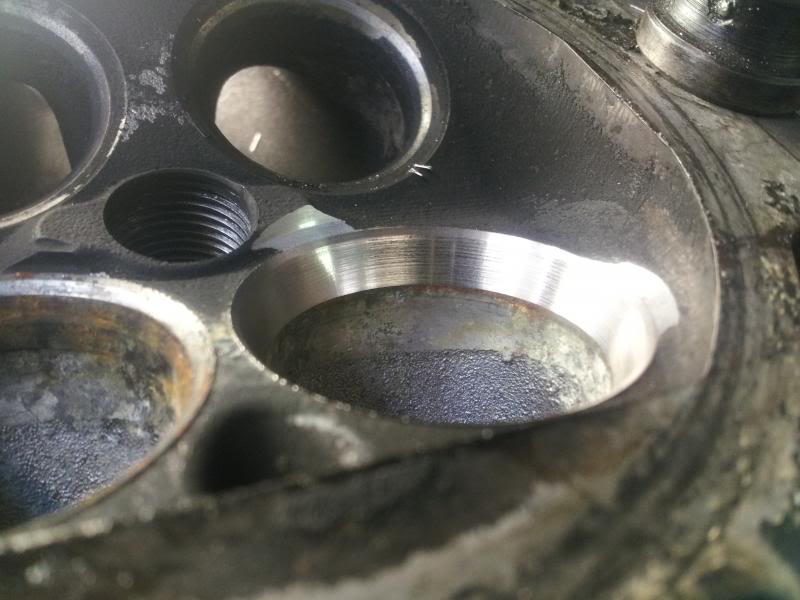
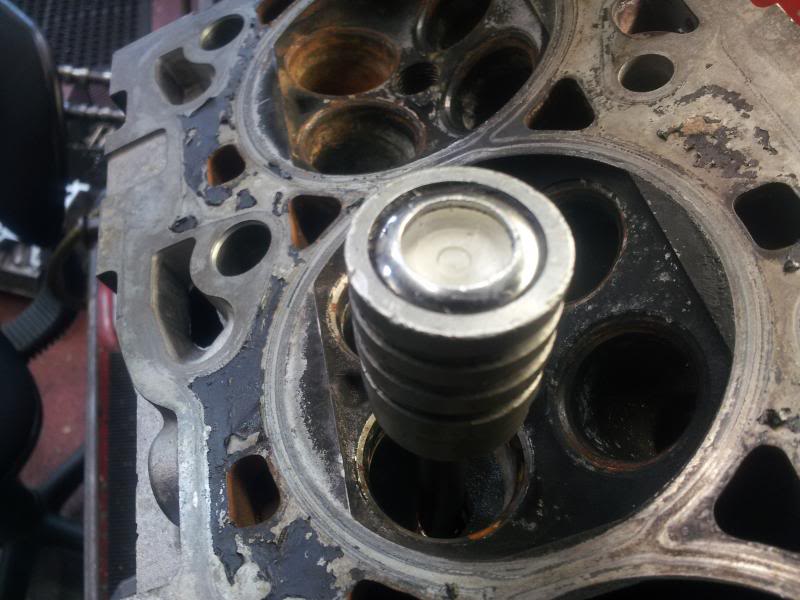
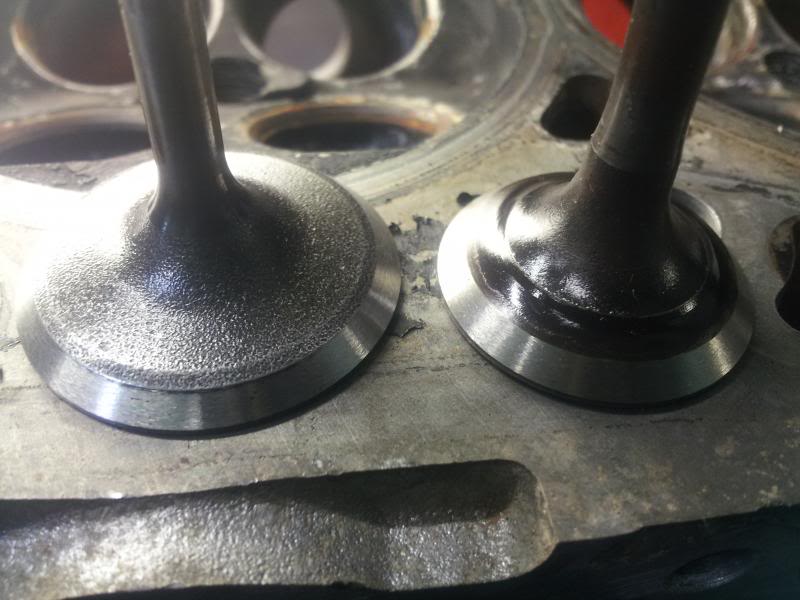
It's now time to check if the seat is where i would like it, i usually use engineers blue, but for purposes of the picture, i've lapped the valve in so it's easier to see the seat area. As you can see, it's right on the outside edge of the valve:
Here is the seat after lapping, I've decided it's a little too far out, so will need to adjust the tool holder and re-cut it to bring the seat in by around 0.2mm:
That's all for now, i'll hopefully update tomorrow. There is still a ton of work to do before i even show it a die grinder!
I'm currently in the process of porting and polishing a Zetec R head, so i thought i could share with you exactly what is involved! We start with a bare head, it has been stripped of all components and had a few hours in the hot wash. As you can probably tell, this head was not straight from a running car, it has been standing for some time:
Next, i find a pilot that's a nice fit in the guide, for this machine (Serdi) it should be able to slide into the guide, but you should not be able to feel any noticeable play.
Here i'm mounting the head on the machine at the correct angle using a spirit level that fits onto the pilot:
Once the head has been set up roughly, it's time for some fine tuning. I put the pilot into a tool holder with a straight 45� cutter and touch the cutter onto the seat on the far left of the head (as i'm looking at it):
I then set the height gauge to zero, move the cutter to the seat on the far right of the head and check the height there:
Luckily this head was set up perfectly first time, but it's not always the case and can require some jiggling around. Next job is to quickly face a couple of valves to use for some measuring:
Now, i use the setting tool on the valve to measure the outside edge (please note that this is the exhaust valve i'm measuring for picture purposes only, i'm actually going to start with the inlets):
I now select the cutter i'm going to use, in this case, it's a 0.85mm wide 45� angle, with a 30� top angle and a 70� bottom angle:
I place the cutter and the pilot in the tool holder:
Now it's time to set the cutter width, i use the setting tool from the valve and set the outside edge of the cutters 45� angle to the same width as the outside edge of the valve. This should ensure maximum airflow:
I now cut the seat until i see a 45� angle appear at the outside edge of the seat:
It's now time to check if the seat is where i would like it, i usually use engineers blue, but for purposes of the picture, i've lapped the valve in so it's easier to see the seat area. As you can see, it's right on the outside edge of the valve:
Here is the seat after lapping, I've decided it's a little too far out, so will need to adjust the tool holder and re-cut it to bring the seat in by around 0.2mm:
That's all for now, i'll hopefully update tomorrow. There is still a ton of work to do before i even show it a die grinder!
Last edited by Turbo Zetec; 27-03-2014 at 11:51 PM.
 27-03-2014, 07:50 AM
#2
Advanced PassionFord User
The seats look very slim? I would be a little concerned about them if your planning on turbo charging it? What about cutting the valve for two angles?
27-03-2014, 11:37 AM
#3
The seat width as pictured is too thin as it was hanging over the edge of the valve slightly, i've rectified it already this morning and now we have the full .85mm seat width on the valve. I've got no concerns running seats this thin on the inlet side, even on turbo engines. Exhaust seats i usually run at 1mm.
27-03-2014, 02:15 PM
#4
10K+ Poster!!

Wicked thread!! Look forward to updates.
27-03-2014, 11:48 PM
#6
Very little progress today as other jobs were more urgent. I started by rectifying the seat width as stated in my earlier post, then it was time for this:
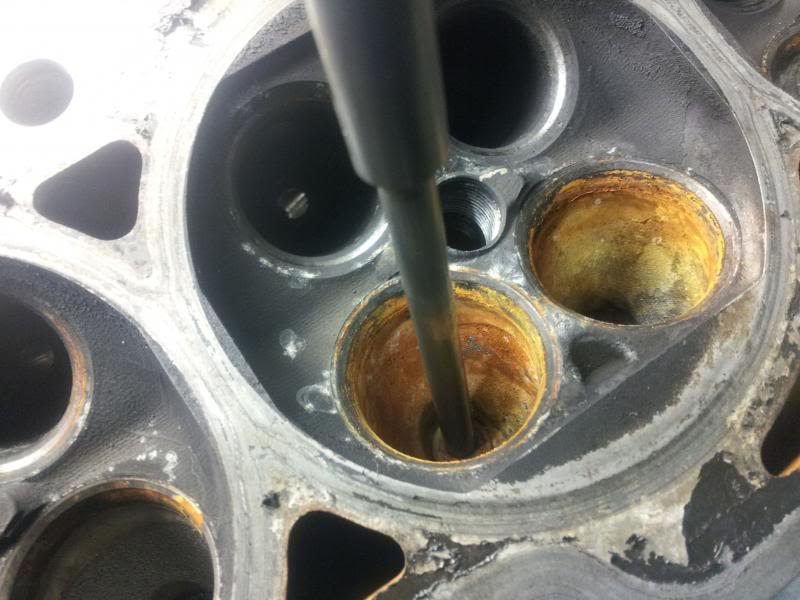
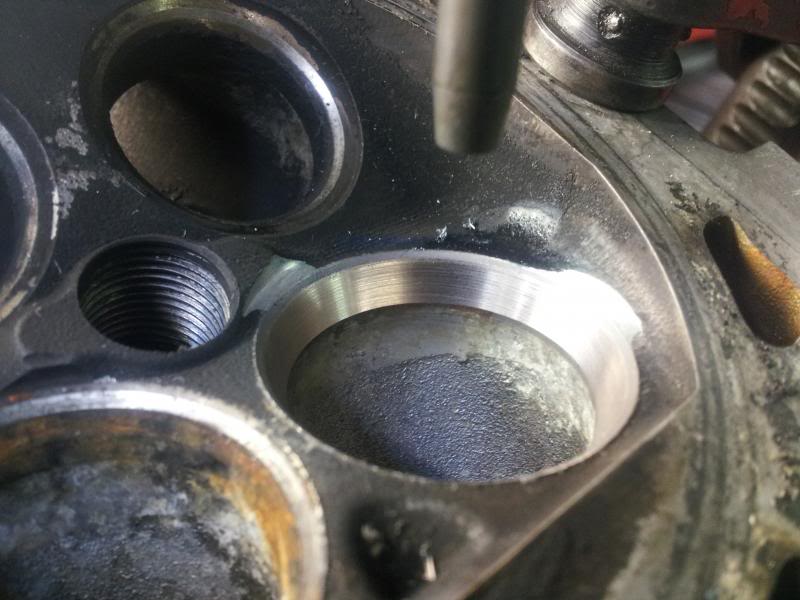
This cutter has been ground specifically for boring the throats of seats that we intend to modify. It's perfect as it does not leave any sharp edges at all, so blending the port into the seat becomes much easier later on. You can see here how much i've bored out of the middle, almost all of the bottom angle has disappeared:
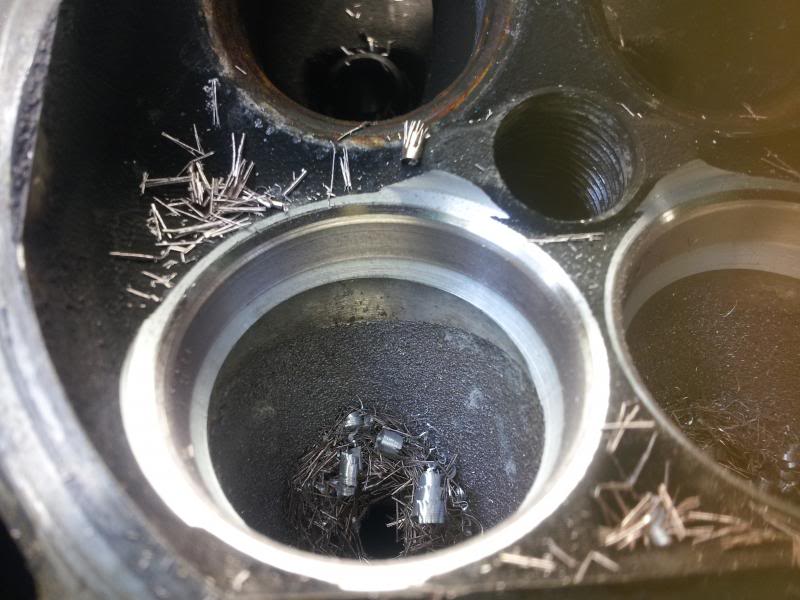
Again, i used the dial gauge to ensure all of the seats were the same. This shows up some minor variation in the casting/original machining:
That's all for now, hopefully i'll get onto the exhaust side tomorrow.
This cutter has been ground specifically for boring the throats of seats that we intend to modify. It's perfect as it does not leave any sharp edges at all, so blending the port into the seat becomes much easier later on. You can see here how much i've bored out of the middle, almost all of the bottom angle has disappeared:
Again, i used the dial gauge to ensure all of the seats were the same. This shows up some minor variation in the casting/original machining:
That's all for now, hopefully i'll get onto the exhaust side tomorrow.
Trending Topics
28-03-2014, 08:09 AM
#8

Good thread, but seriously.... A spirit level to get the valve angle... there's drawings with dimensions on. Set it to that angle.
A air bubble is pissing in the wind mate.
Each to their own
A air bubble is pissing in the wind mate.
Each to their own
28-03-2014, 11:26 AM
#9


Thread
Thread Starter
Forum
Replies
Last Post
Mc5506
Ford Escort RS Turbo
6
05-10-2015 09:57 PM
caprixpack
General Car Related Discussion.
0
25-09-2015 07:53 PM
timsrs
Ford Sierra/Sapphire/RS500 Cosworth
22
24-09-2015 08:14 PM