Puma engined KA.


 20-01-2014, 12:00 AM
#43
how you did the engine RH mount and the gearbox top mount?
Im thinking of welding in the engine mount panel out of the puma to solve the engine mount issue, to save doing a "hack and maimed" puma/ka one.
20-01-2014, 10:24 AM
#44
Yes but with puma shafts, wishbones, track rods etc it will be puma width (at the ball joints). Its not much different to sportka anyway.
how you did the engine RH mount and the gearbox top mount?
Im thinking of welding in the engine mount panel out of the puma to solve the engine mount issue, to save doing a "hack and maimed" puma/ka one.
how you did the engine RH mount and the gearbox top mount?
Im thinking of welding in the engine mount panel out of the puma to solve the engine mount issue, to save doing a "hack and maimed" puma/ka one.
 20-01-2014, 04:51 PM
#47
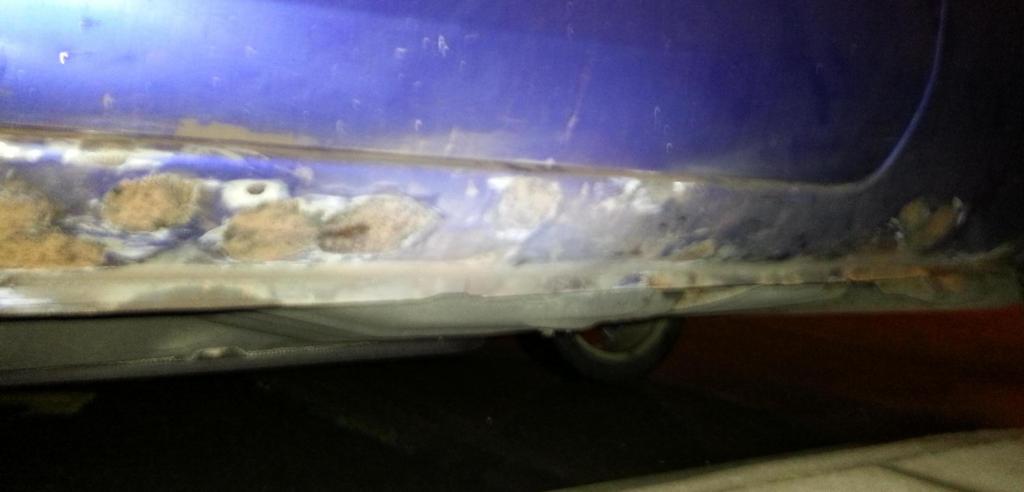
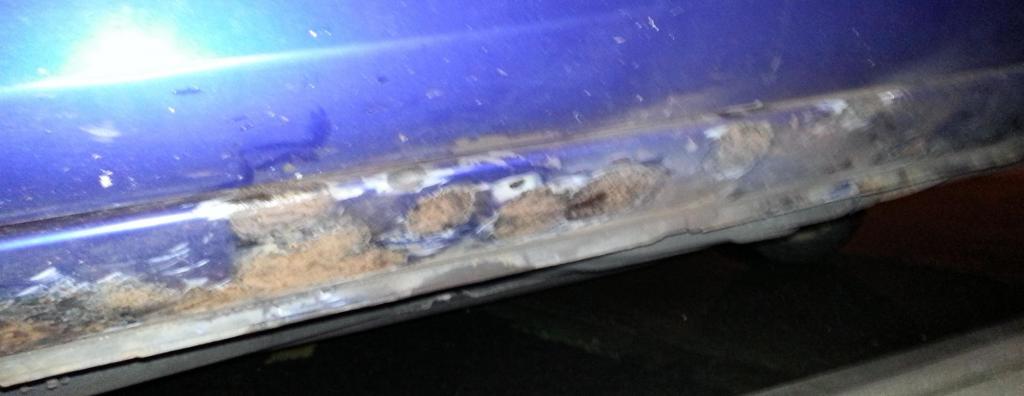
83k with a few faults. needs wishbones on front and drop links. Beginning to bubble around fuel filler and a couple of bubbles on sills, but nothing major really. Simple repair panel for the quarter, and complete new sills are only �20 each so might as well do them before it gets too bad.
Couldnt poke through with a screwdriver anywhere on the sills - which is rare on a KA and the turrets in the back are totally rust free (later puma/mk4 turrets it seems).
Couldnt poke through with a screwdriver anywhere on the sills - which is rare on a KA and the turrets in the back are totally rust free (later puma/mk4 turrets it seems).


 26-01-2014, 11:03 PM
#58
You can get away with the original engine being crap because its still more power than youd think a KA deserves. Ford only chose that engine because it was an off the shelf bolt in option albeit from south africa/south american markets. I imagine had they fitted the decent 1.7 or even 1.6 zetec se engine it would have bumped the cost up quite a bit.
I want to get the engine mounts done properly as so many conversions i see seem to be a bit of a bodge.
This is the pumaspeed effort:
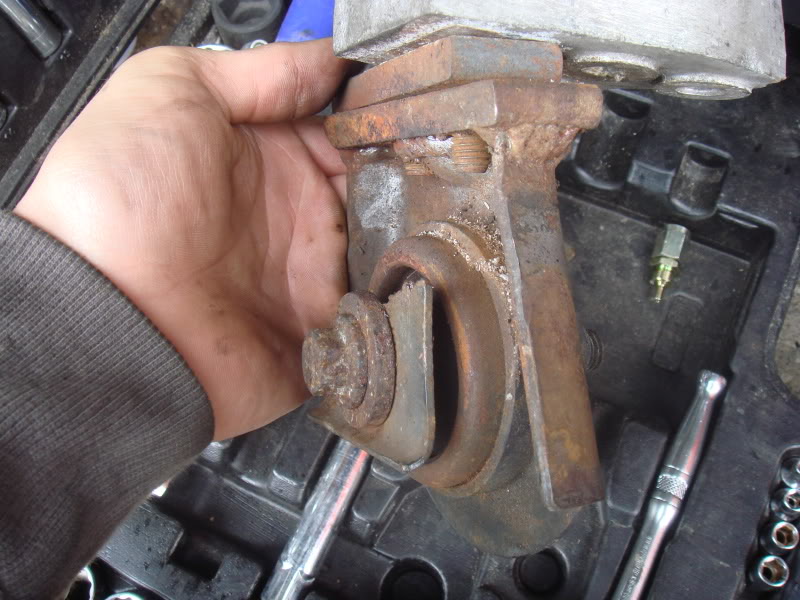
Yes that is the inner rear bush of a puma wishbone welded onto a bit of metal bolted to a puma engine mount certainly a bit crude IMO.
I want to get the engine mounts done properly as so many conversions i see seem to be a bit of a bodge.
This is the pumaspeed effort:
Yes that is the inner rear bush of a puma wishbone welded onto a bit of metal bolted to a puma engine mount
certainly a bit crude IMO.
27-01-2014, 01:07 AM
#60
Yeah and thats exactly why im thinking weld in the proper engine mount support panel out of any fiesta/puma between the chassis member and inner wing. You can then use a standard engine mount.
You can see the spot welded in panel in this photo:

You can see the spot welded in panel in this photo:
Last edited by Psycho Warren; 27-01-2014 at 01:22 AM.
 01-02-2014, 04:56 PM
#65
The first modification
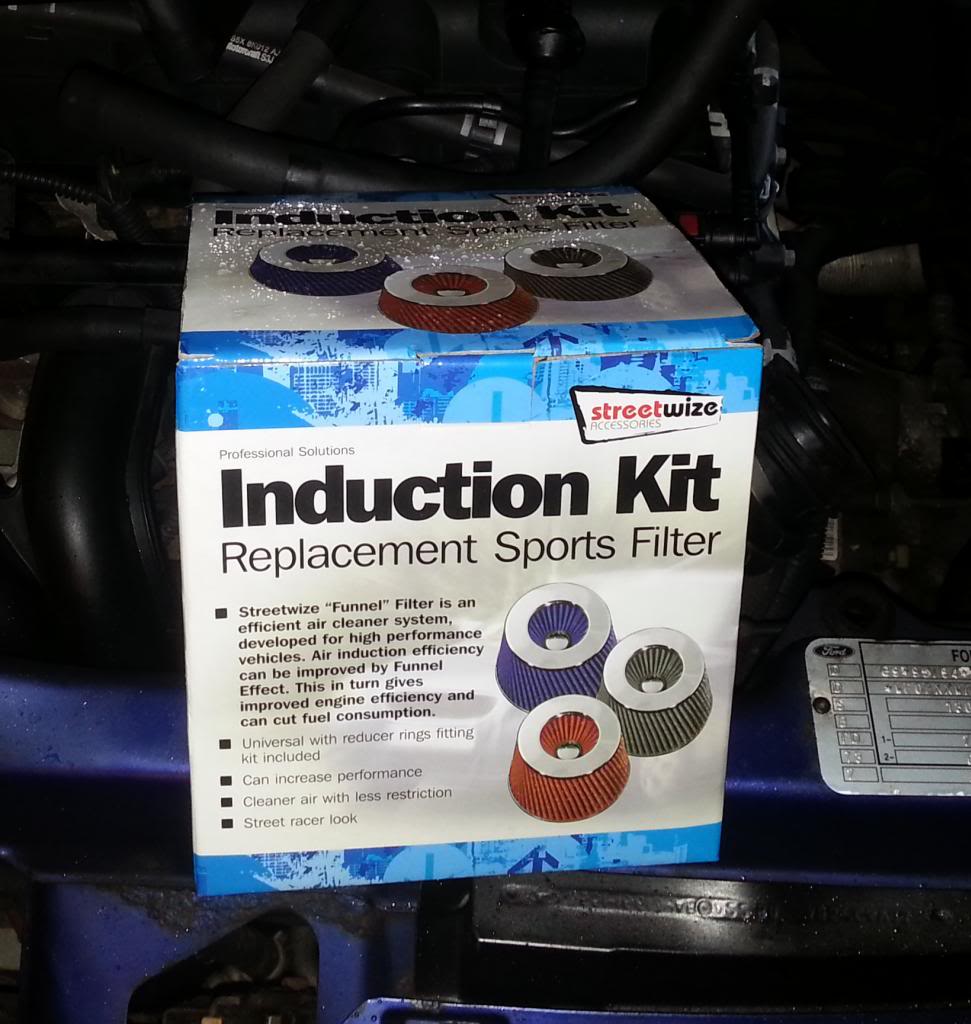
oh yes, JTF's finest engine modification
Fitted:
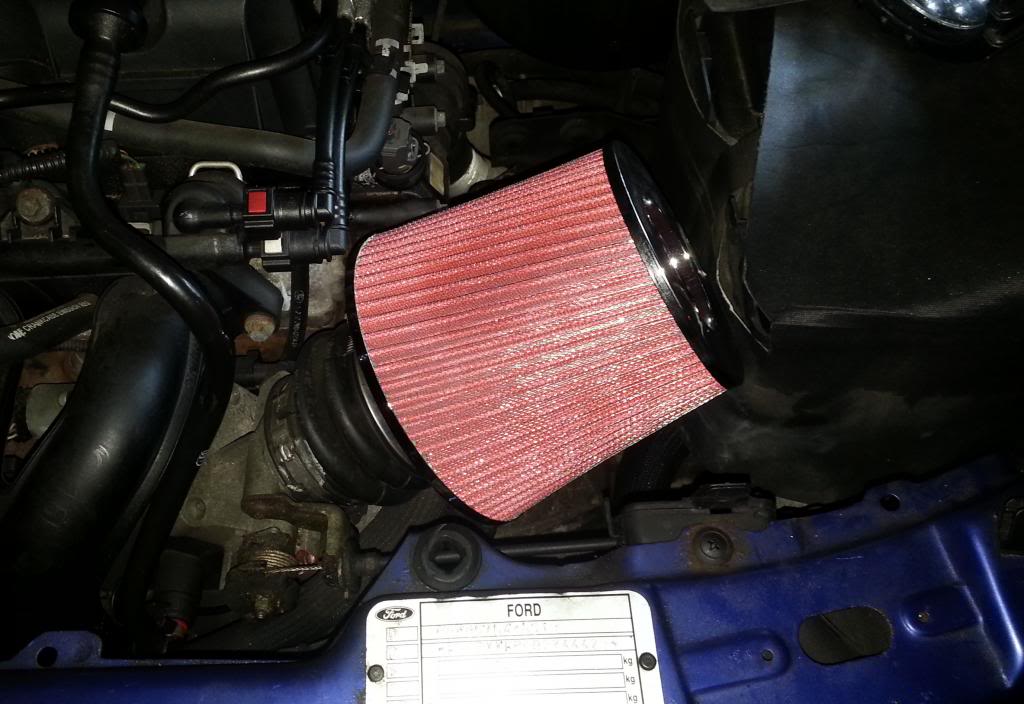
Now before you think im completely fucking insane, there is reasoning for fitting a silly cone filter.
The reason being im on the same insurance policy as was the cossie puma (now on laid up) and the insurers only cover modified cars so a standard Sportka they wernt keen on so it needed to be modified in the meantime until the engine conversion. So now its a "modified" car
oh yes, JTF's finest engine modification
Fitted:
Now before you think im completely fucking insane, there is reasoning for fitting a silly cone filter.
The reason being im on the same insurance policy as was the cossie puma (now on laid up) and the insurers only cover modified cars so a standard Sportka they wernt keen on so it needed to be modified in the meantime until the engine conversion. So now its a "modified" car
 02-02-2014, 09:28 PM
#68
big floppy donkey dick
Join Date: May 2003
Location: Rouse Sport heaven ;)
Posts: 4,514
Likes: 0
Received 3 Likes
on
3 Posts
Chris Birkbeck rallying
i used to supply them with engines, Focus rear brake conversions and all sorts
google them and, well speak to Chris
top lads and been doing it for donkeys years Warren.
i used to supply them with engines, Focus rear brake conversions and all sorts
google them and, well speak to Chris
top lads and been doing it for donkeys years Warren.
10-02-2014, 09:25 PM
#76
Minor update.
Been grinding back all the rust bubbles on the nearside sill. There were quite a few and TBH although i couldnt put a screwdriver through anywhere, I was expecting a couple of holes to need patching.
Mid way:
Got through it all and ground back to clean metal and NO holes anywhere!!
I've zinc'd it for tonight and will do more sanding back tomorrow then do the proper paint.
Then its the drivers sill which has literally 3 small bubbles compared to this sill so should be much quicker!!
Ive also got loads of cans of dinotrol cavity wax coming so once all done, flood the cavities time to slow down any internal rust.