My Diamond White Saph Rebuild
 18-08-2013, 08:39 AM
#1
Regular Contributor
Thread Starter

Hi there,
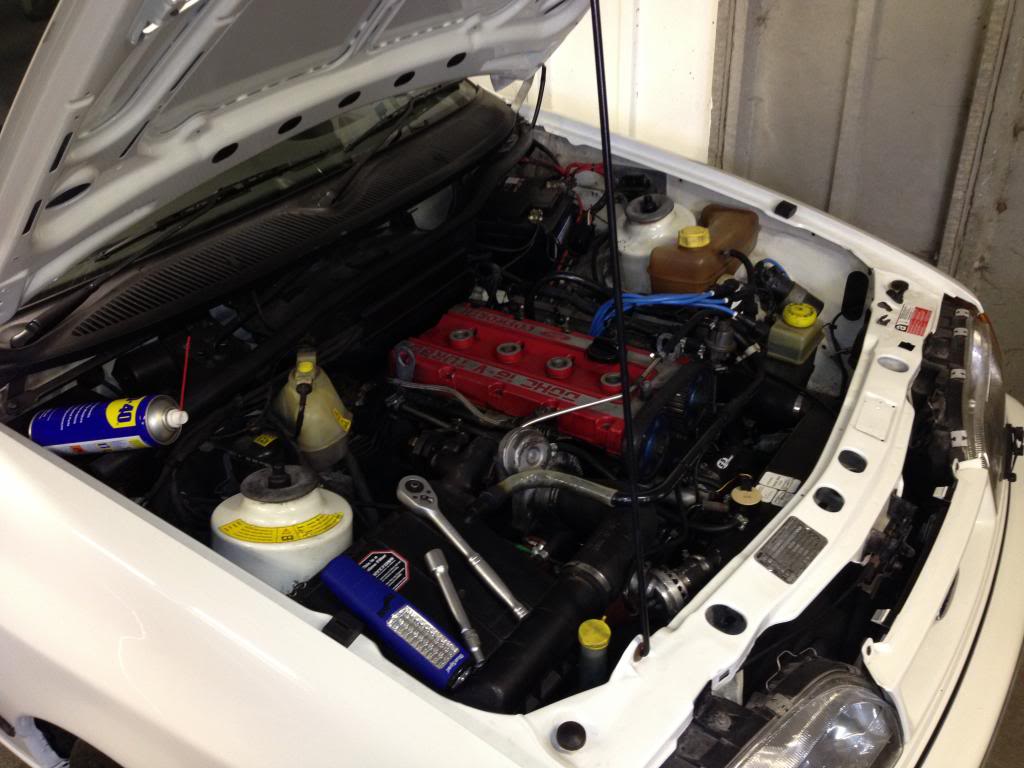
Fairly new here and only owned my Saph for around 4 months. Unfortunatly after covering a mere 1,000ish miles it developed a coolant pressurizing issue and started leaking coolant from the head.
Initial thoughts were probably a porous cylinder head.
After consulting a specialist and the price going up and up, i decided to grab the car by the knackers and attempt the work myself. I'd consider myself pretty mechanical competent and handy with a spanner. I'm a service engineer by trade, although working on wide format printers and embroidery machines.
Anyway enough of me rambling on ...
...
Time to use and abuse the WD40 and get everything soaked up ready for removal and avoid tears and broken knuckles later
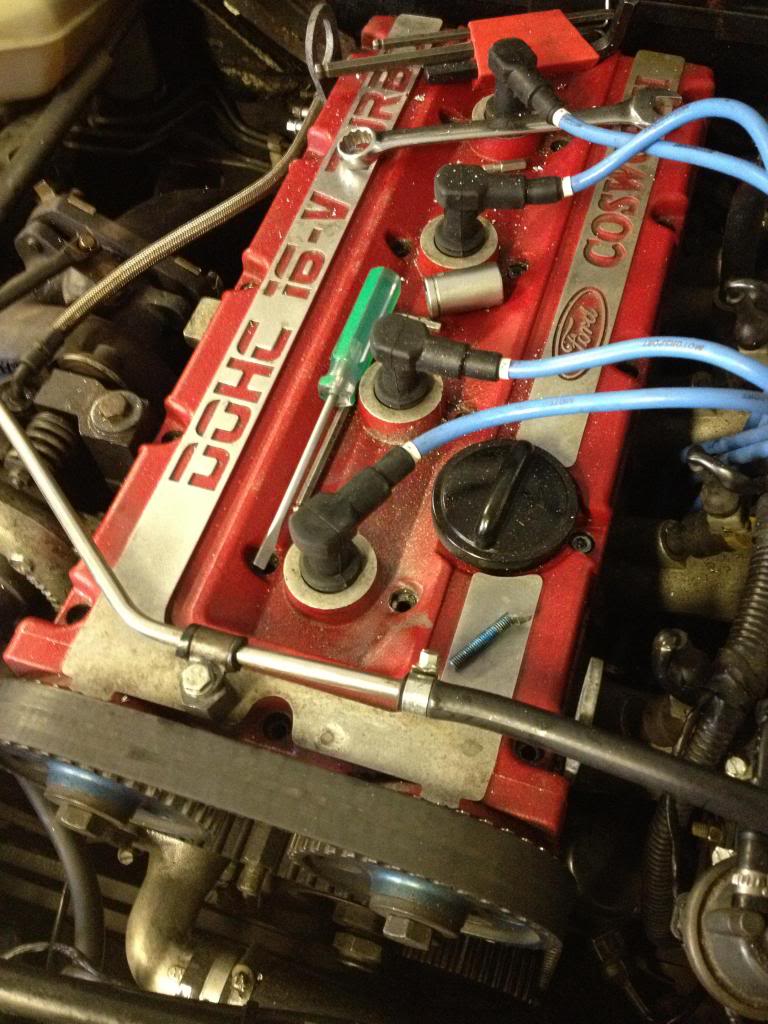
Seems the previous owner skimped out on fitting new cam cover bolts. 5 of them had no existent head left:
So, some abit of bosch here and there:
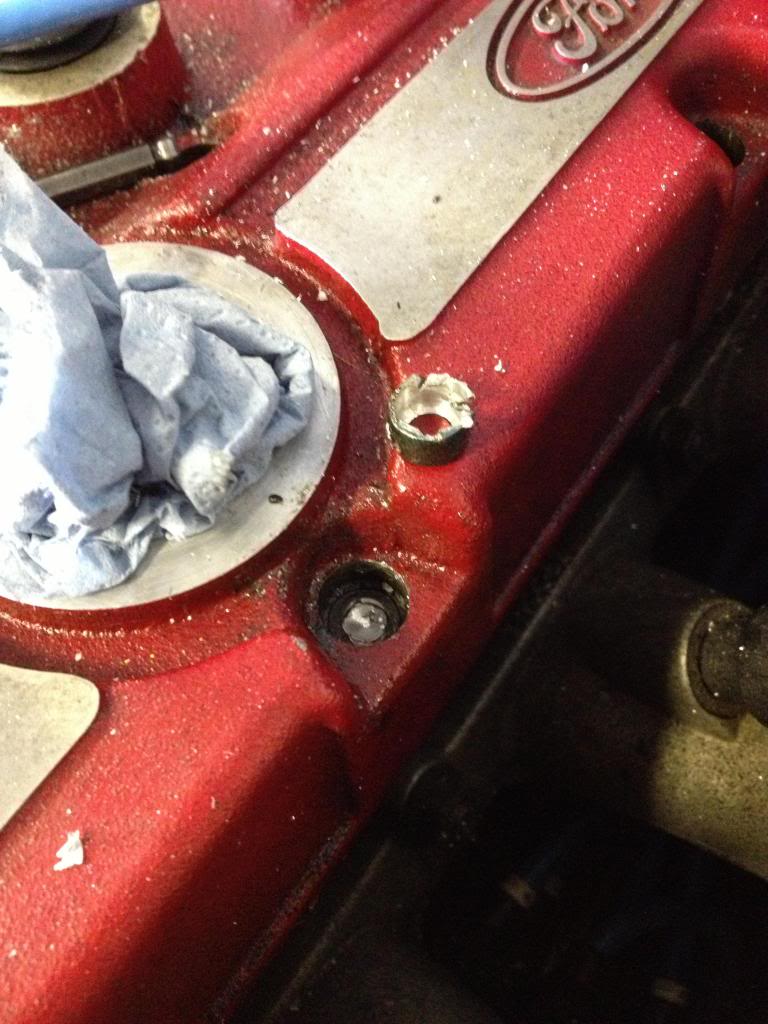
Ta daaa!!!
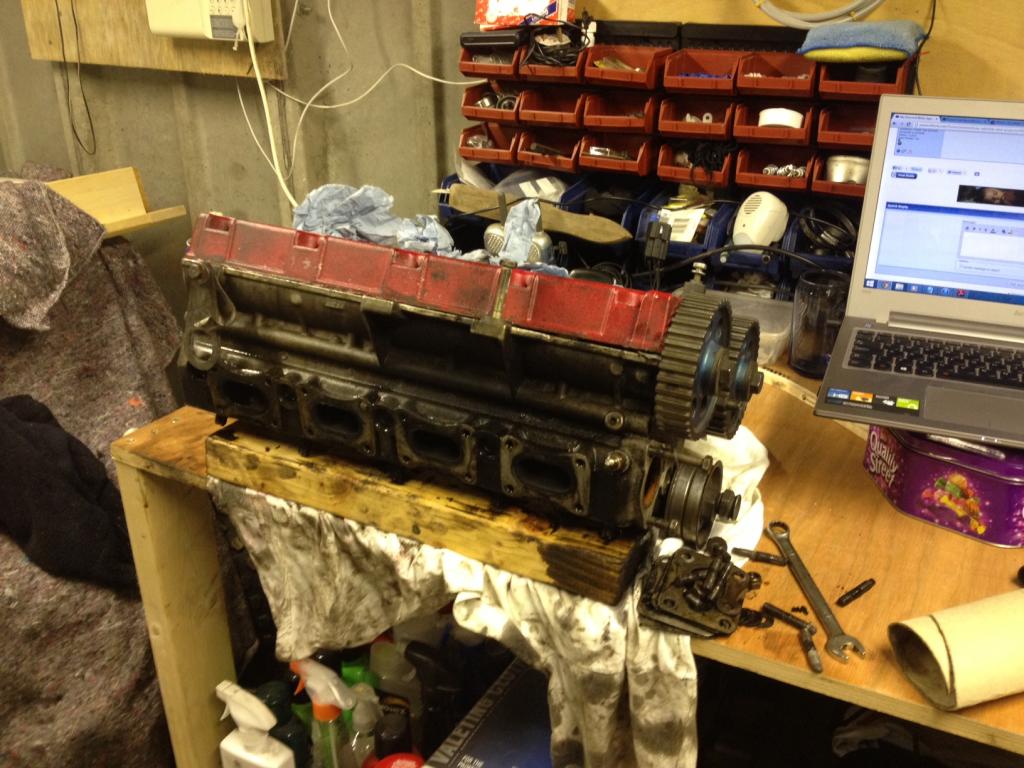
Really pleased with the condition of the cams, there appears to be minimal wear on the lobes, but then again i'm no expert.
Turbo and actuator in need of autosol loving. No front and back play, although some side to side. All good?:
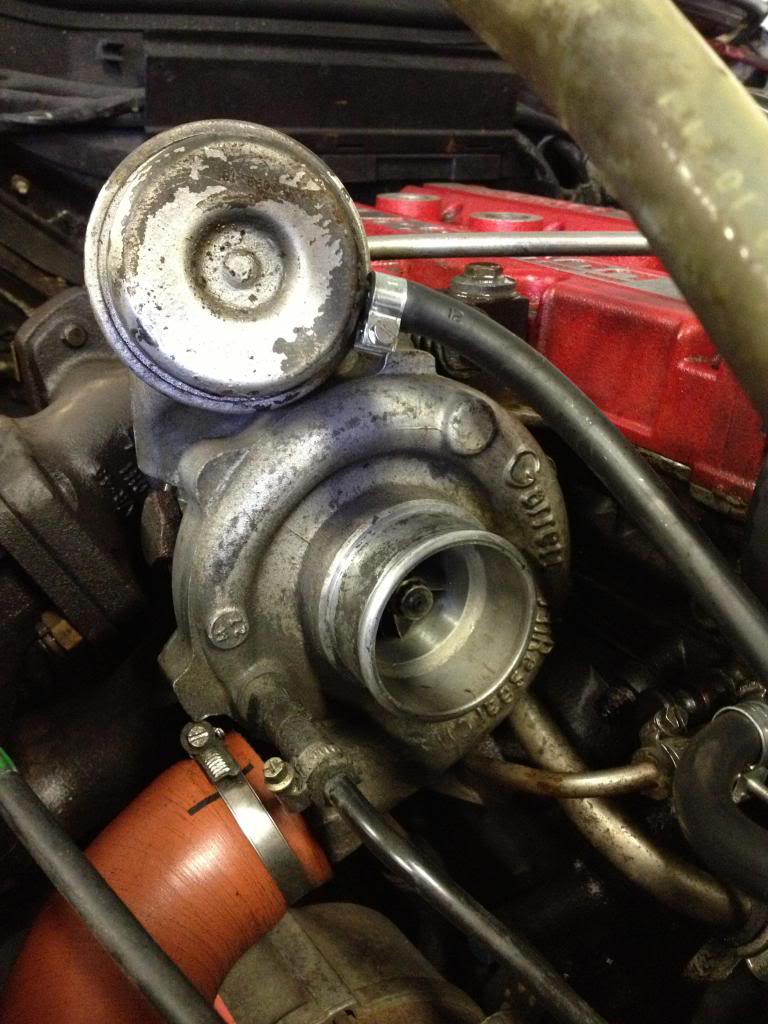
Tried removing the manifold from the turbo, although these 4 little sods tried my patients. Unsure how i'm going to get these off . Tried using a breaker bar but even that wouldn't shift them!
Fairly new here and only owned my Saph for around 4 months. Unfortunatly after covering a mere 1,000ish miles it developed a coolant pressurizing issue and started leaking coolant from the head.
Initial thoughts were probably a porous cylinder head.
After consulting a specialist and the price going up and up, i decided to grab the car by the knackers and attempt the work myself. I'd consider myself pretty mechanical competent and handy with a spanner. I'm a service engineer by trade, although working on wide format printers and embroidery machines.
Anyway enough of me rambling on
Time to use and abuse the WD40 and get everything soaked up ready for removal and avoid tears and broken knuckles later

Seems the previous owner skimped out on fitting new cam cover bolts. 5 of them had no existent head left:

So, some abit of bosch here and there:

Ta daaa!!!
Really pleased with the condition of the cams, there appears to be minimal wear on the lobes, but then again i'm no expert.

Turbo and actuator in need of autosol loving. No front and back play, although some side to side. All good?:

Tried removing the manifold from the turbo, although these 4 little sods tried my patients. Unsure how i'm going to get these off
. Tried using a breaker bar but even that wouldn't shift them!
 18-08-2013, 08:47 AM
#3
Regular Contributor
Thread Starter
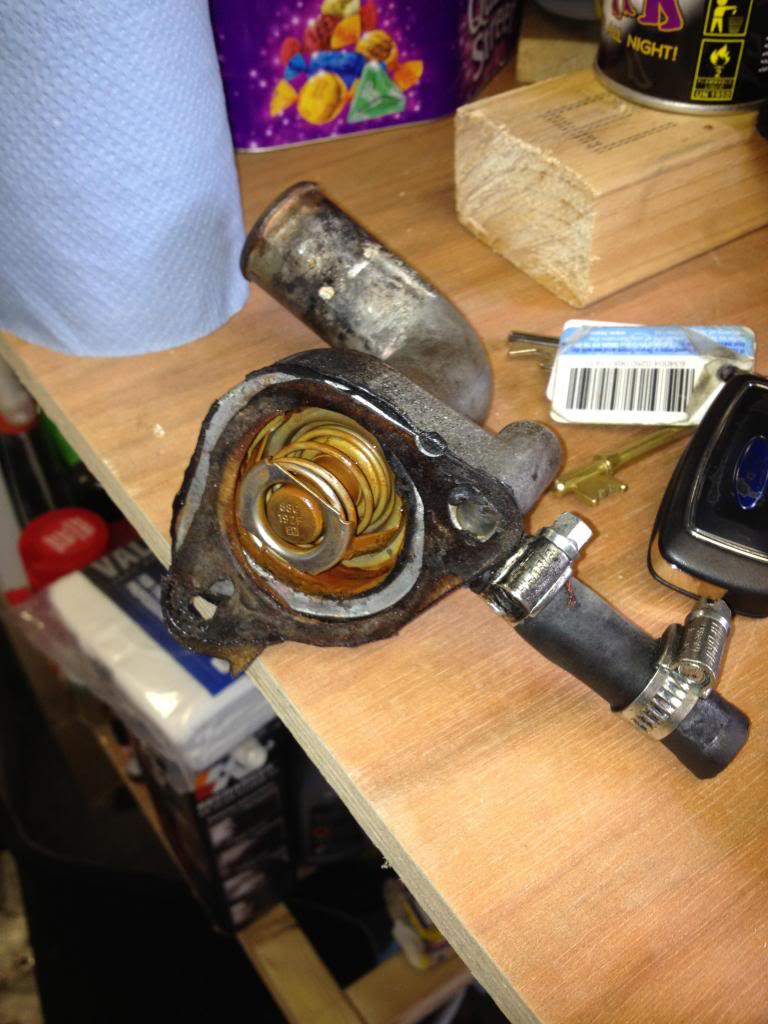
Pretty sure this thermostat has seen better days. Time to replace and fit a MSD thermostat at a later date 
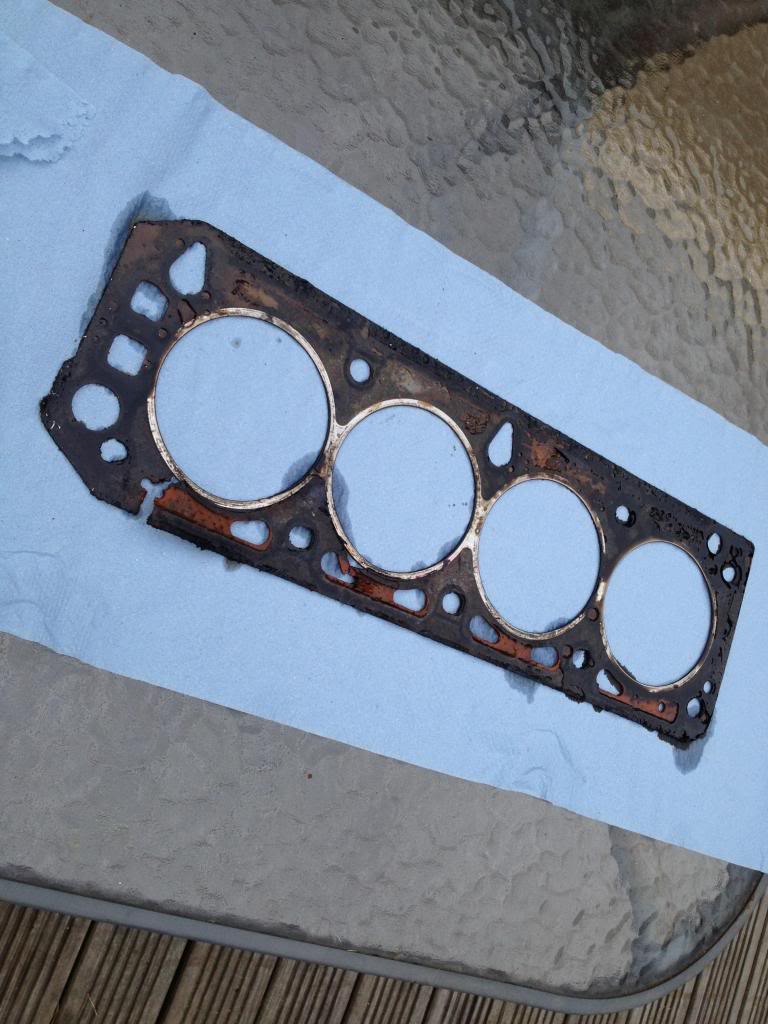
Here's the culprit and reason for my coolant leak. Looking at the condition of the gasket, i'm really surprised the car went as well as it has been doing. Temperature sat normal and never really over heated.
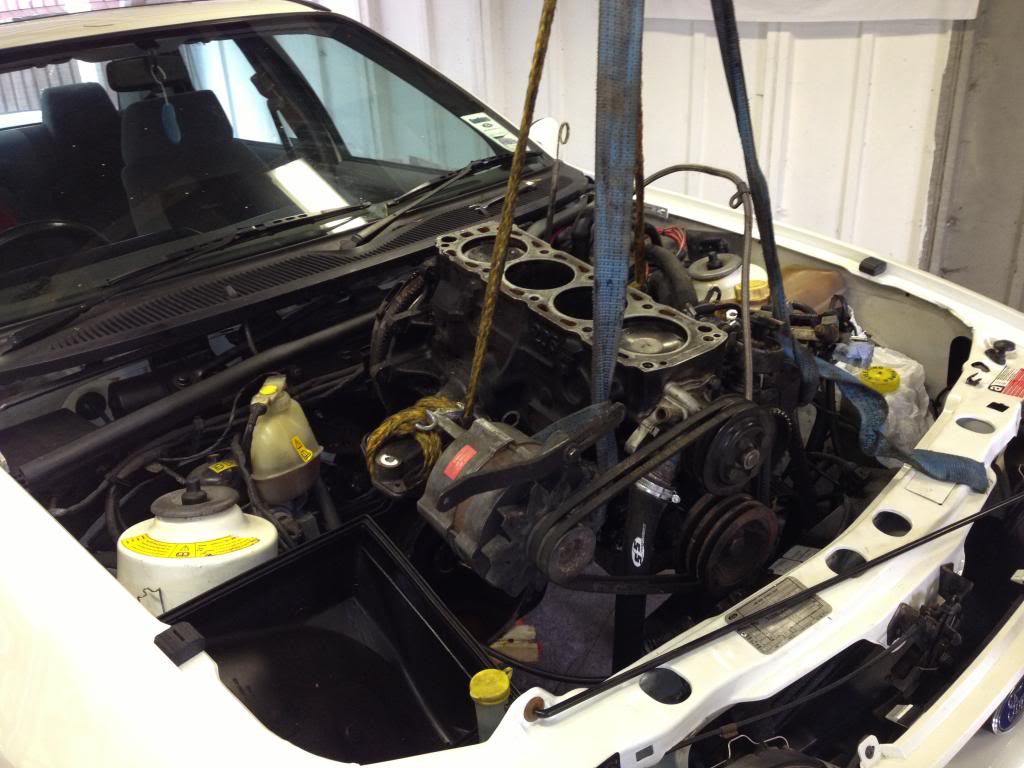
Block will be removed at some point today so i can get in the engine bay and give it a good scrub! 24 years of grease have taken their tole!
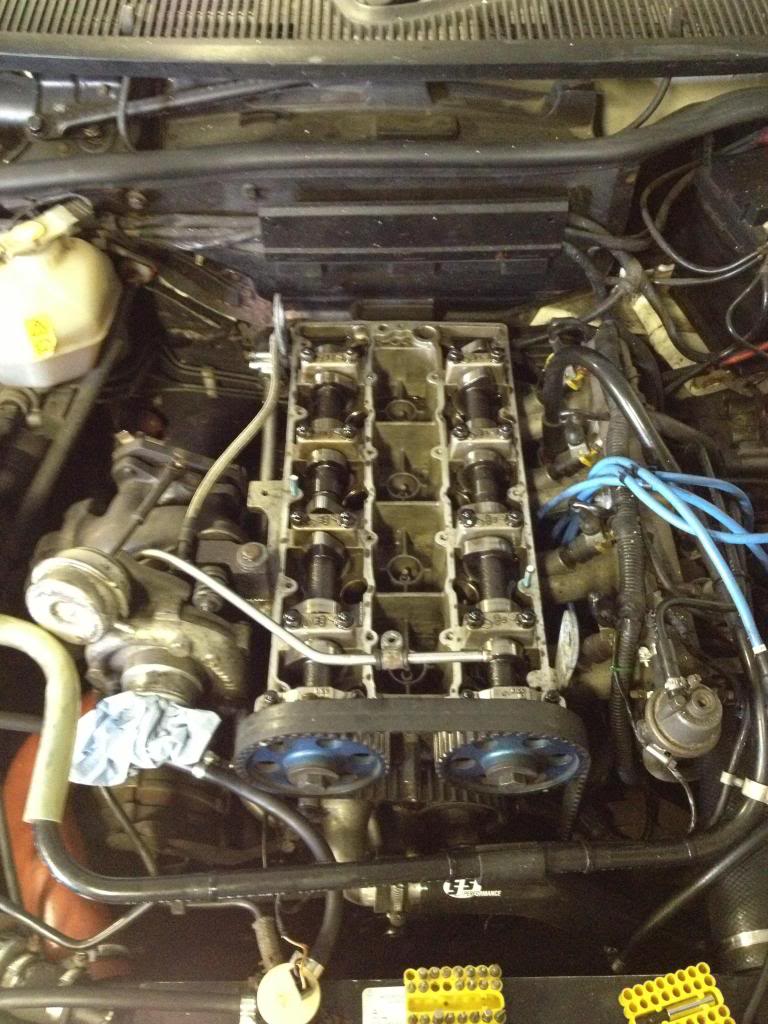
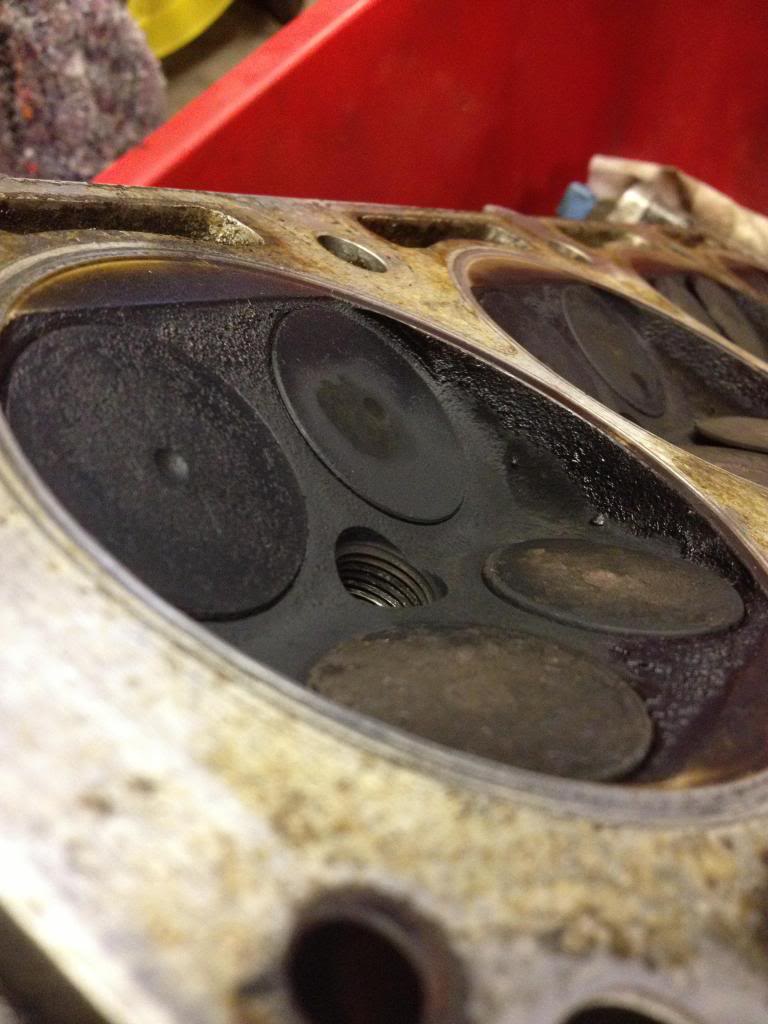
The engine seems to have suffered a cambelt failuire at some point in its life also, as on the inlet side all 4 pistons have grooves where the valves have had an impact at some point. Will these be ok to re use?
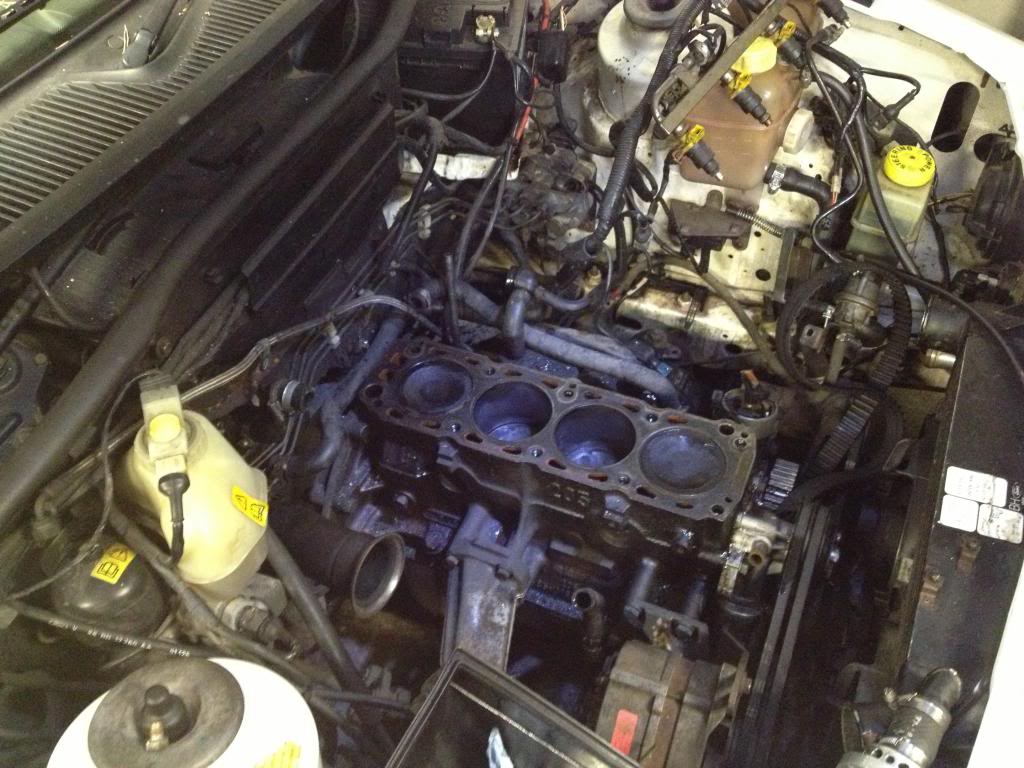
Head off ready to be stripped and sent off for a pressure test / skim:

That all for now folks, Might venture down the garage later and see what other bits i can tinker with tonight
Stay tuned.

Here's the culprit and reason for my coolant leak. Looking at the condition of the gasket, i'm really surprised the car went as well as it has been doing. Temperature sat normal and never really over heated.

Block will be removed at some point today so i can get in the engine bay and give it a good scrub! 24 years of grease have taken their tole!
The engine seems to have suffered a cambelt failuire at some point in its life also, as on the inlet side all 4 pistons have grooves where the valves have had an impact at some point. Will these be ok to re use?

Head off ready to be stripped and sent off for a pressure test / skim:

That all for now folks, Might venture down the garage later and see what other bits i can tinker with tonight
Stay tuned.
18-08-2013, 08:52 AM
#4
Regular Contributor
Thread Starter
18-08-2013, 09:12 AM
#6
Regular Contributor
Thread Starter
The engine sounded awesome, no tapping, no knocking, no smoke, even on boost.
My thoughts were to replace the bottom end bearings anyway. It'd be rude not to seeing as the engine's half way out.
Trending Topics
21-08-2013, 11:59 AM
#9
Regular Contributor
Thread Starter
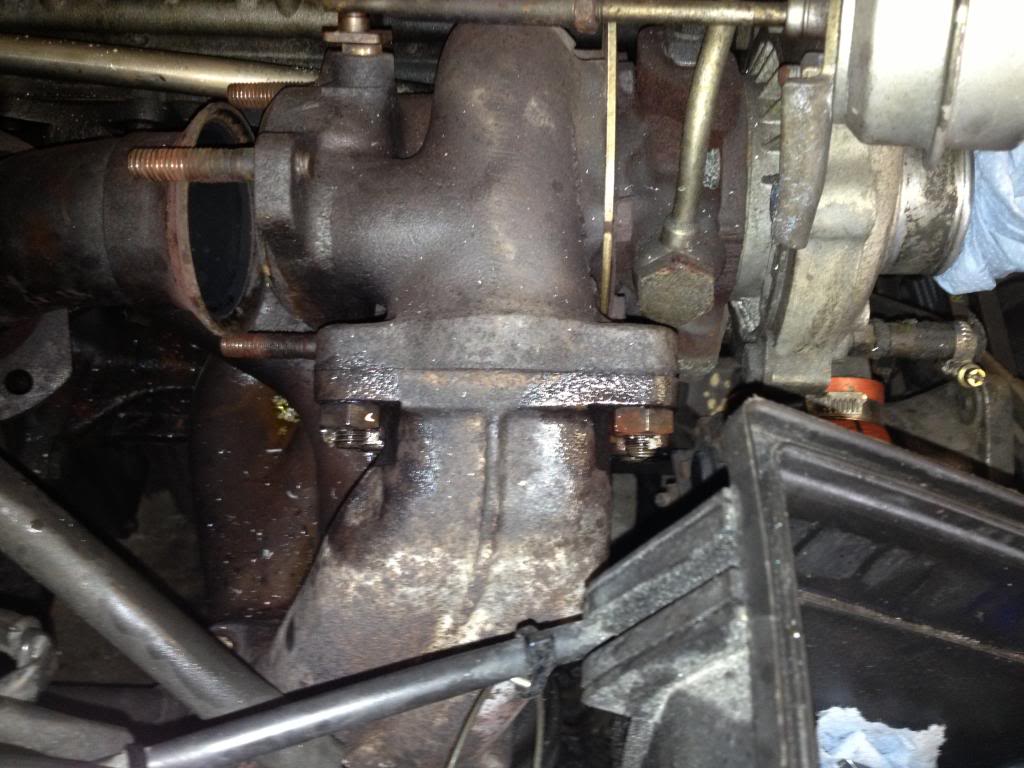
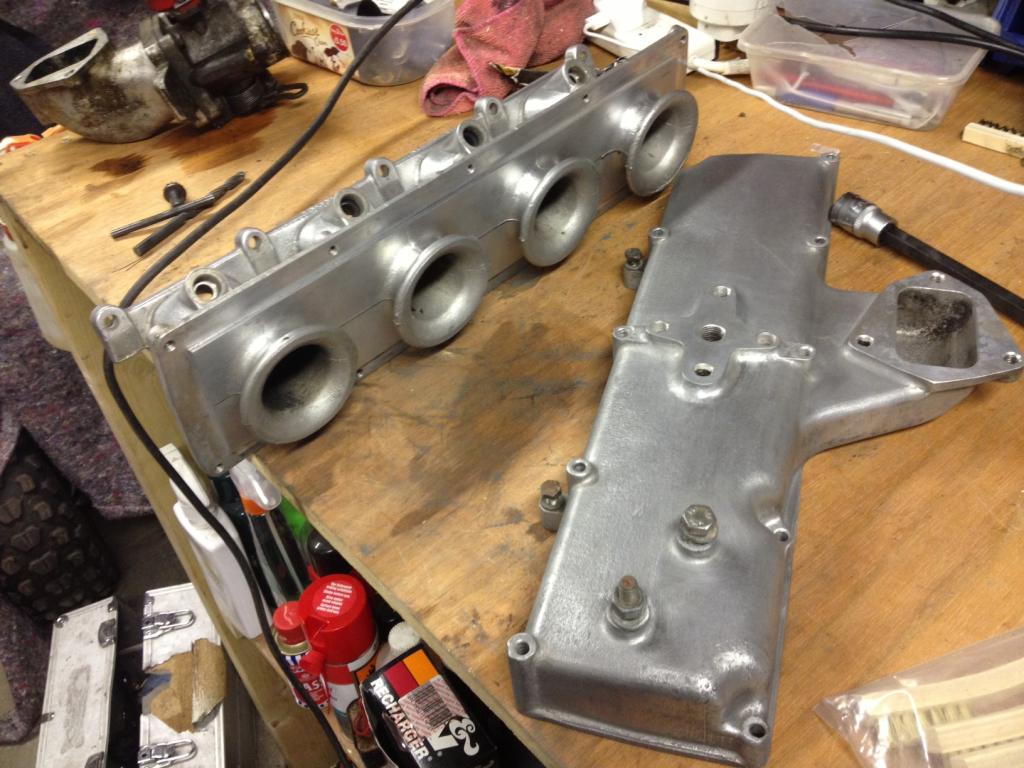
Removed the Exhaust manifold / Turbo from the head along with the inlet plenum. Found 3 previous studs on the exhaust side which have snapped. I'll let the machine shop deal with these when it goes in for a skim
Inlet plenum split apart. Long overdue a clean in my eyes!
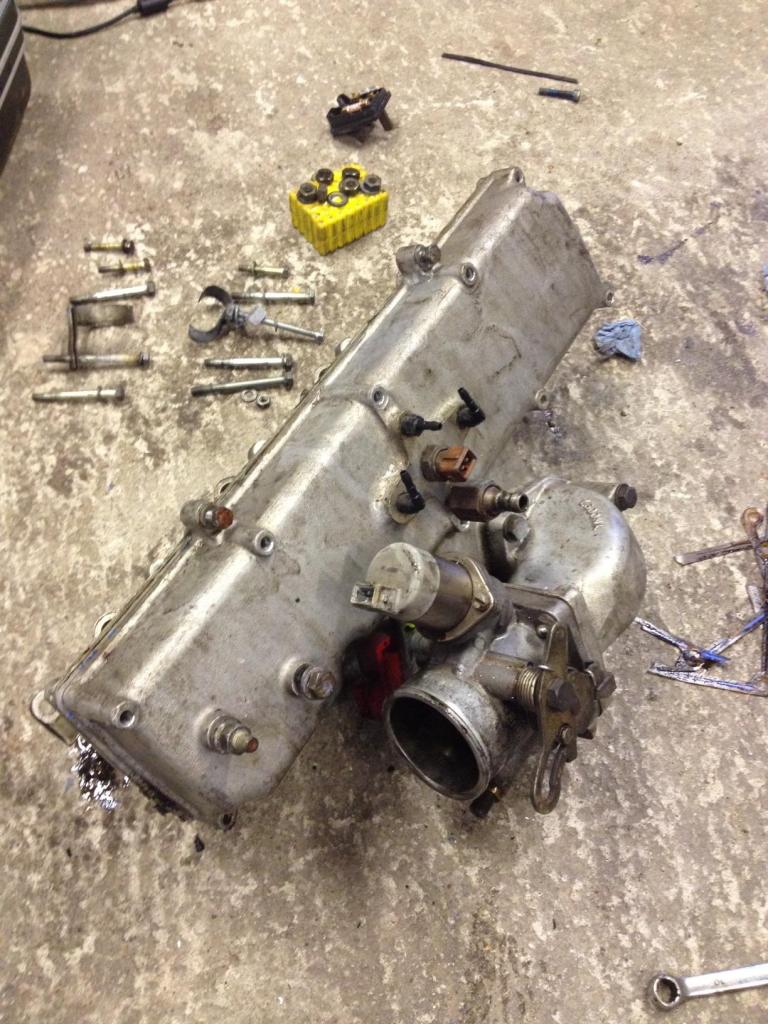
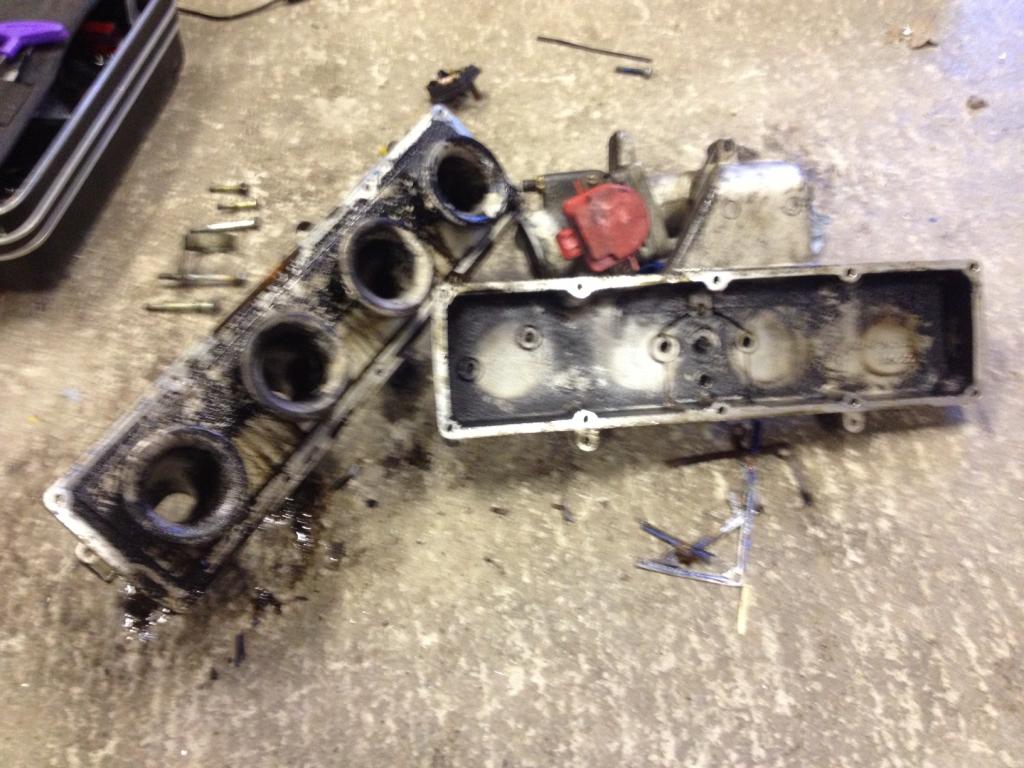
Spent a few hours cleaning the Plenum up last night ready to be bolted back together. Still needs abit more cleaning but the bottom end will hopefully be out tonight so i can inspect/renew the bearings.

Inlet plenum split apart. Long overdue a clean in my eyes!


Spent a few hours cleaning the Plenum up last night ready to be bolted back together. Still needs abit more cleaning but the bottom end will hopefully be out tonight so i can inspect/renew the bearings.

Last edited by L1AM_RS; 21-08-2013 at 12:03 PM.
21-08-2013, 02:23 PM
#11
Regular Contributor
Thread Starter
Cheers Lee,
Just taking my time with it really. First engine i've rebuilt. Just need to find out all the correct torque settings for everything when re-sitting.
Just taking my time with it really. First engine i've rebuilt. Just need to find out all the correct torque settings for everything when re-sitting.
21-08-2013, 06:22 PM
#16
Regular Contributor
Thread Starter
Thanks guys! I might be back on here with a few questions here and there haha!
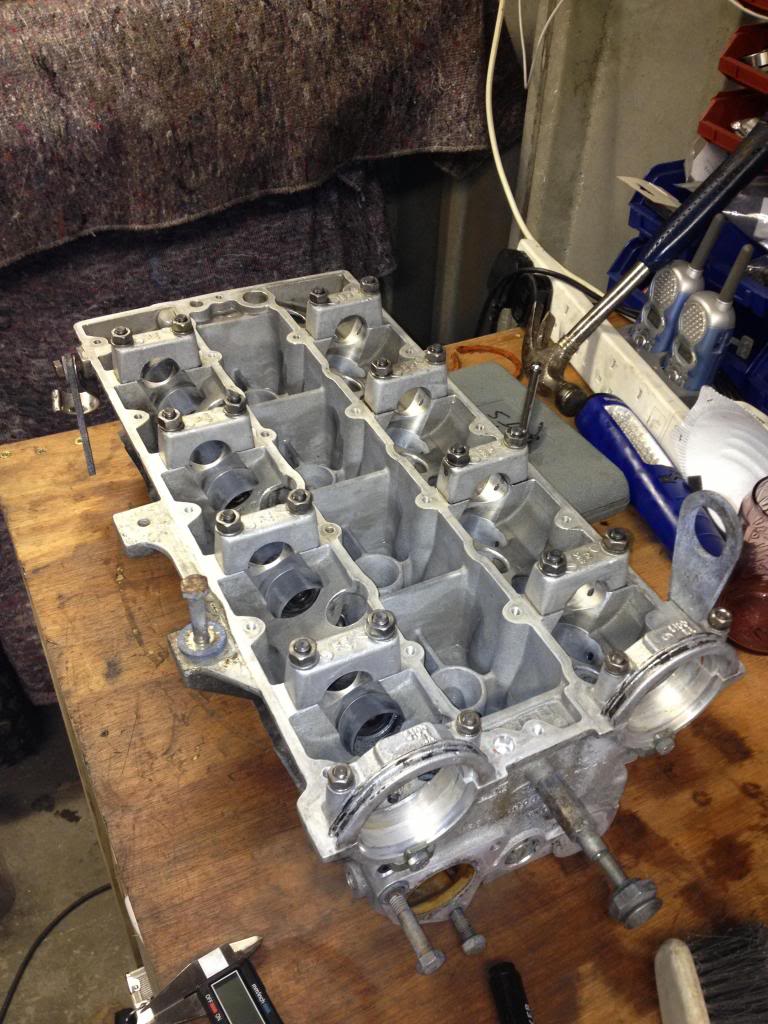
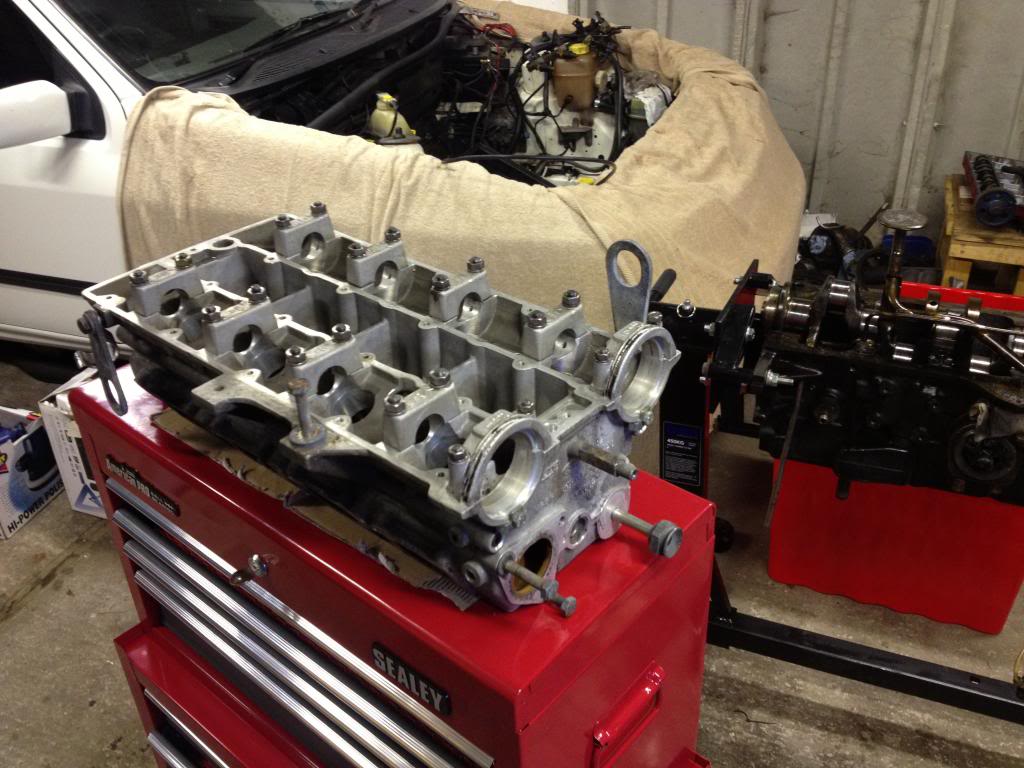
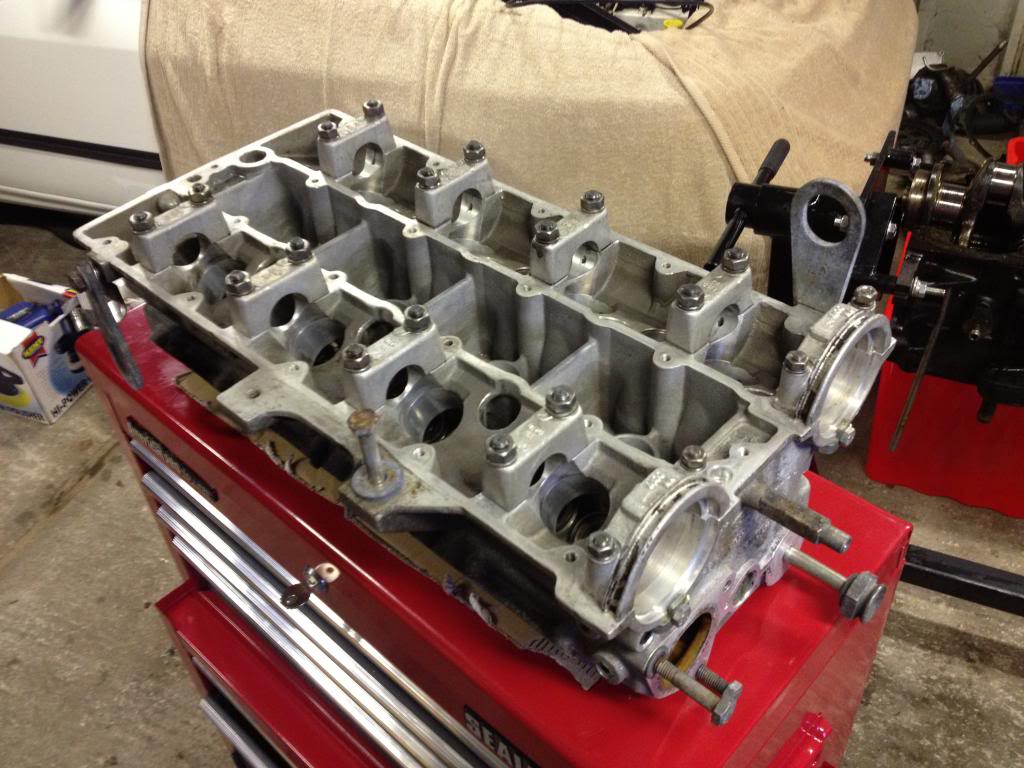
I've looked at the cylinder head and cant tell if its border line / last skim or not. My caliper's battery died so i can't measure it accurately.
Anyone with experience bare the good or bad news?
Cheers:
I've looked at the cylinder head and cant tell if its border line / last skim or not. My caliper's battery died so i can't measure it accurately.
Anyone with experience bare the good or bad news?
Cheers:

 21-08-2013, 10:02 PM
#20
Regular Contributor
Thread Starter
22-08-2013, 06:52 AM
#21
If you look in the corner of the head you will see a brass washer located down in the head ( on the face that bolts down onto the gasket / block )
post a pic of that and this will tell us how much the head has left before its down to its limit for SAFE use
 23-08-2013, 10:10 PM
#23
Regular Contributor
Thread Starter
Mongoose system turned up thanks to Paul @ Yorkshire RS spares!
Delivered pronto, Great condition and looks awesome just as described!
Old vs new
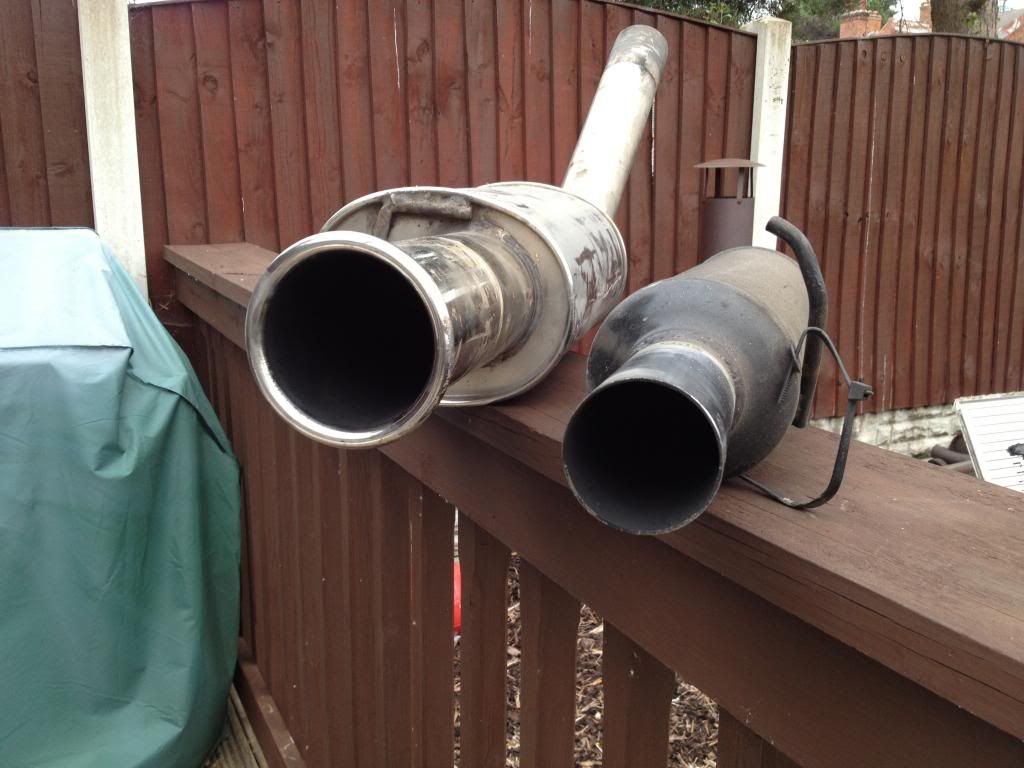
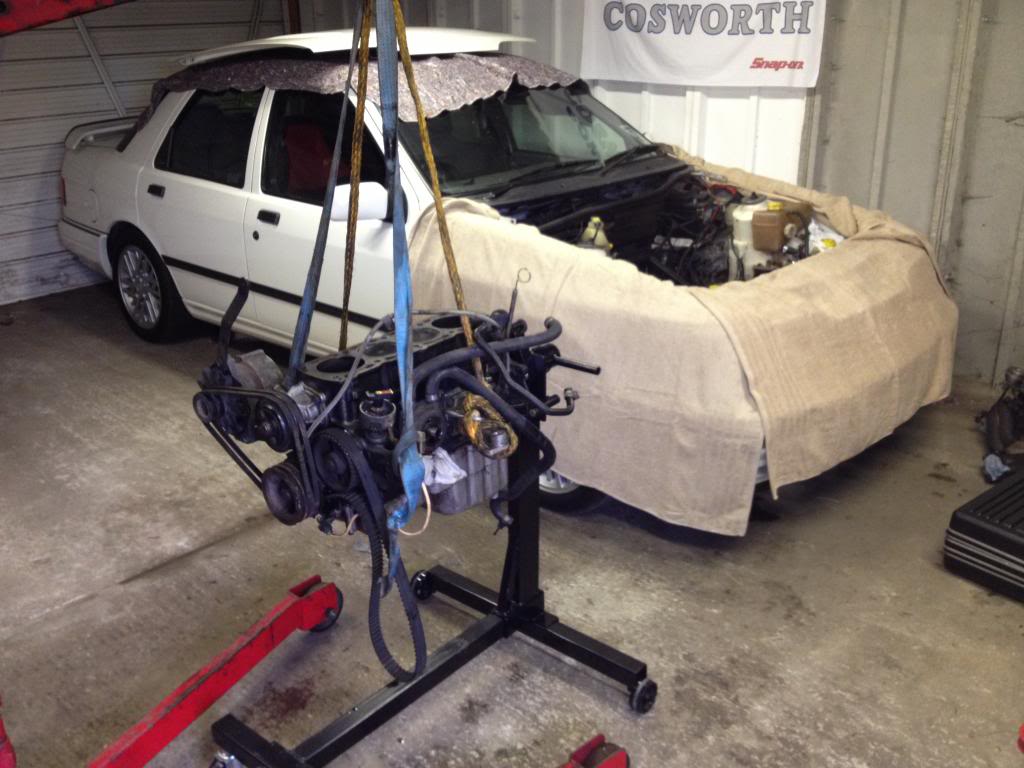
Hangin'!! - As you've probably noticed the lower coolant hose is still attached (oops) - A great selling point for the SFS performance hoses!!
Bay now looking empty. The point of no return!
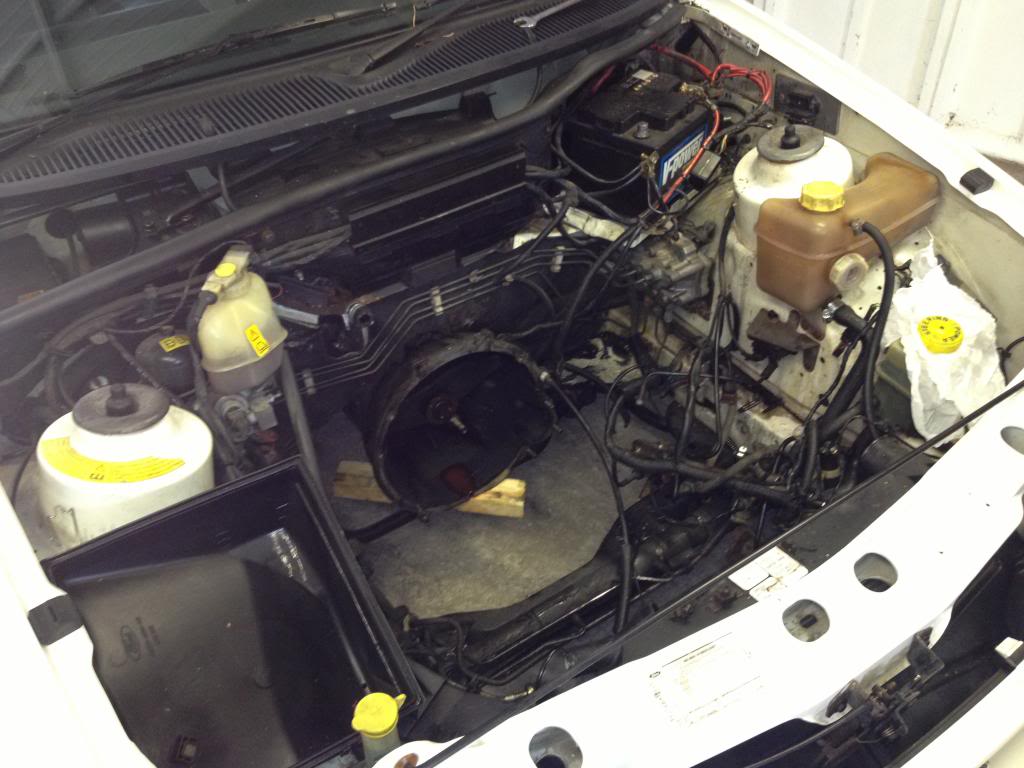
Sent my mate off down to Primarni for some towels to protect the wings / slam panel. Cheapest and effective tool I've bought in a long time.
Delivered pronto, Great condition and looks awesome just as described!

Old vs new

Hangin'!! - As you've probably noticed the lower coolant hose is still attached (oops) - A great selling point for the SFS performance hoses!!

Bay now looking empty. The point of no return!

Sent my mate off down to Primarni for some towels to protect the wings / slam panel. Cheapest and effective tool I've bought in a long time.

Last edited by L1AM_RS; 23-08-2013 at 10:12 PM.
23-08-2013, 10:27 PM
#25
Regular Contributor
Thread Starter
Cheers buddy!
Yeah the cleaning starts tomorrow, just need to pick up some industrial de-greaser .
.
I've decided i'm going to run 4x4 pocketed pistons but using the original rods. Is this wise?
Yeah the cleaning starts tomorrow, just need to pick up some industrial de-greaser
I've decided i'm going to run 4x4 pocketed pistons but using the original rods. Is this wise?
 25-08-2013, 08:45 AM
#27
Regular Contributor
Thread Starter
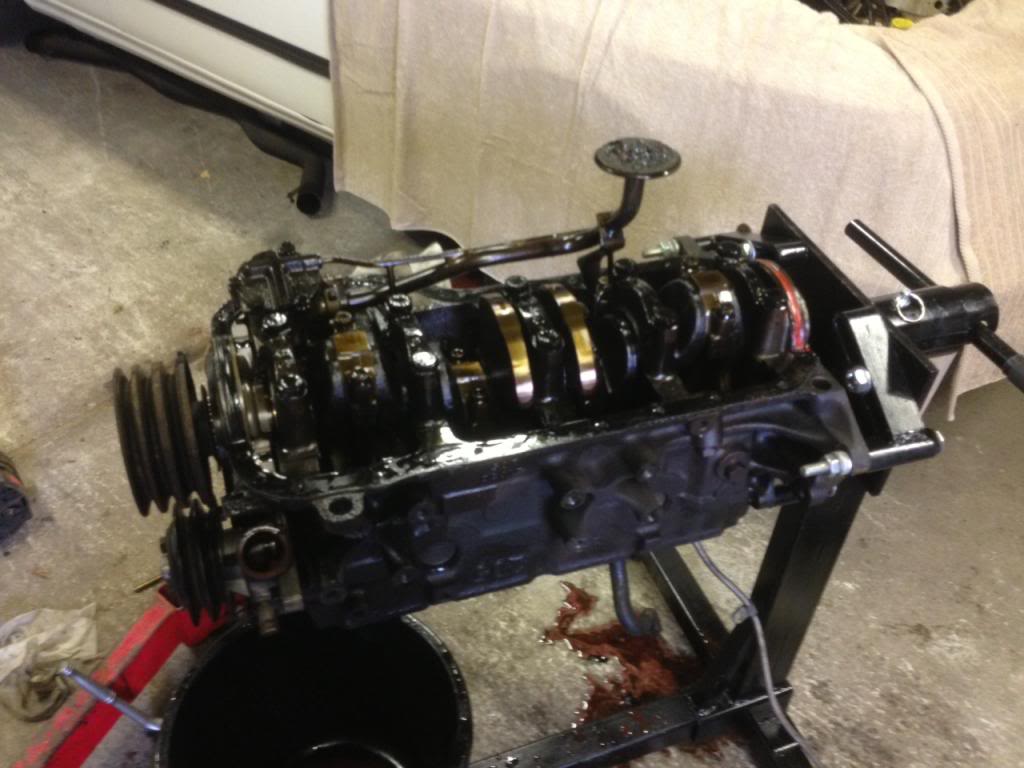
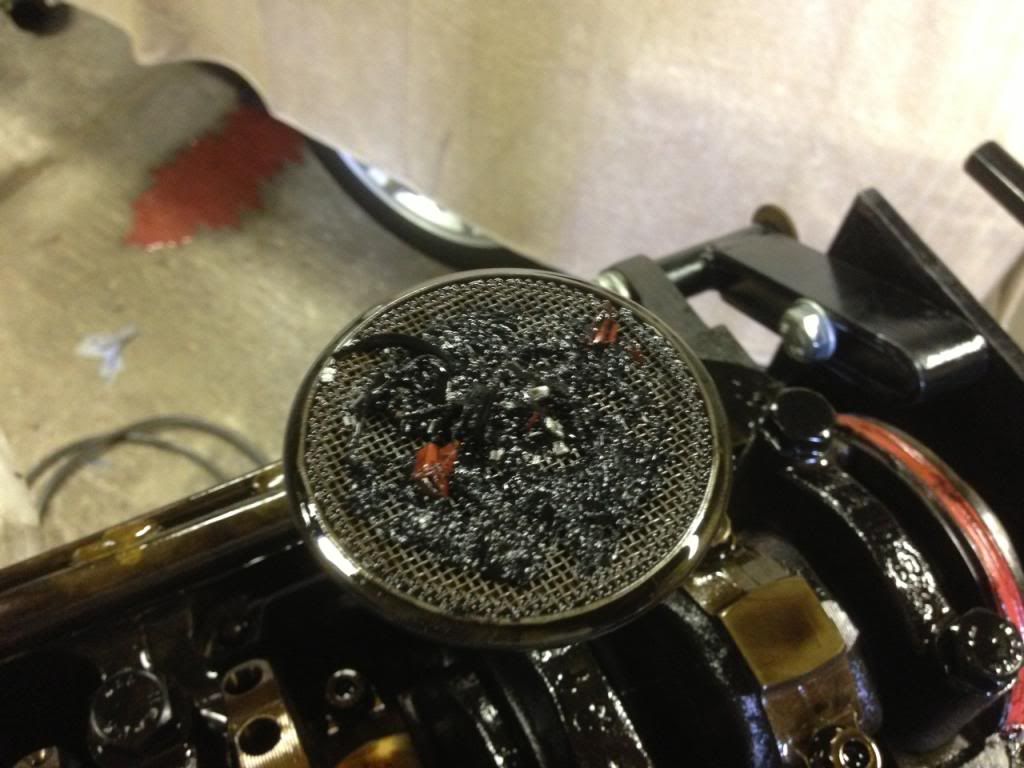
Spun the engine over and removed the sump bolts. All looks well.....
Minus the contamination on the oil pickup! Looks like i caught it just in time!
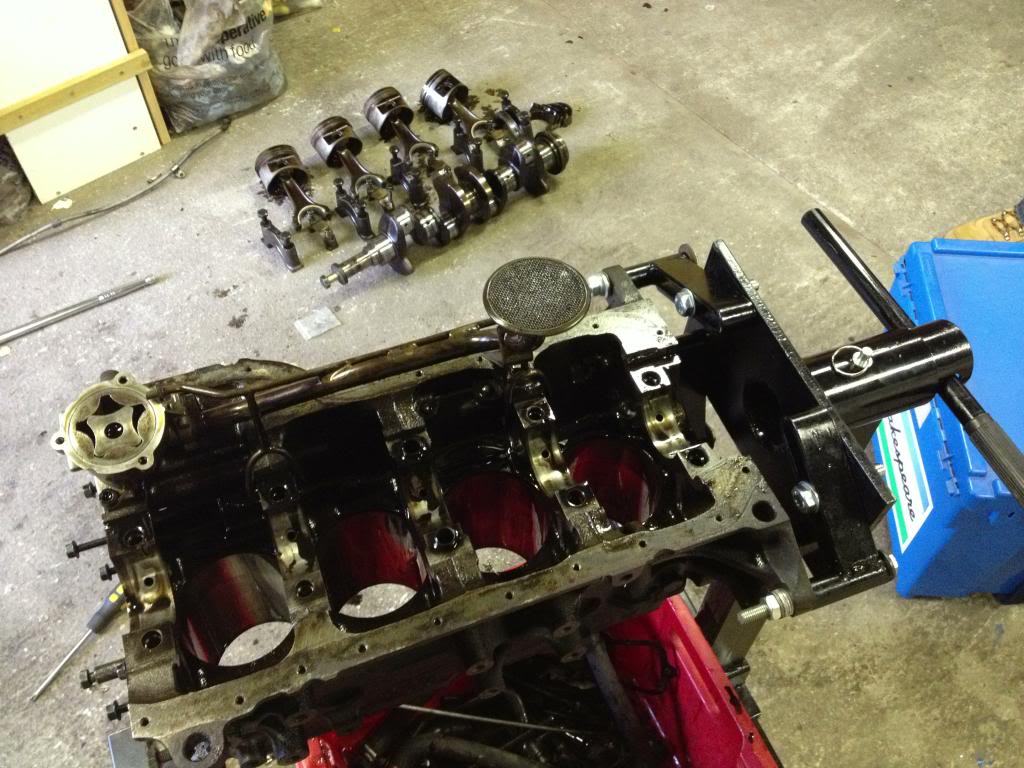
This is how i left it lastnight, Went to halfords to get the spline drivers to remove the oil pump but as usual being useless they didn't have any :/...


Minus the contamination on the oil pickup! Looks like i caught it just in time!

This is how i left it lastnight, Went to halfords to get the spline drivers to remove the oil pump but as usual being useless they didn't have any :/...
 25-08-2013, 07:47 PM
#28
Regular Contributor
Thread Starter
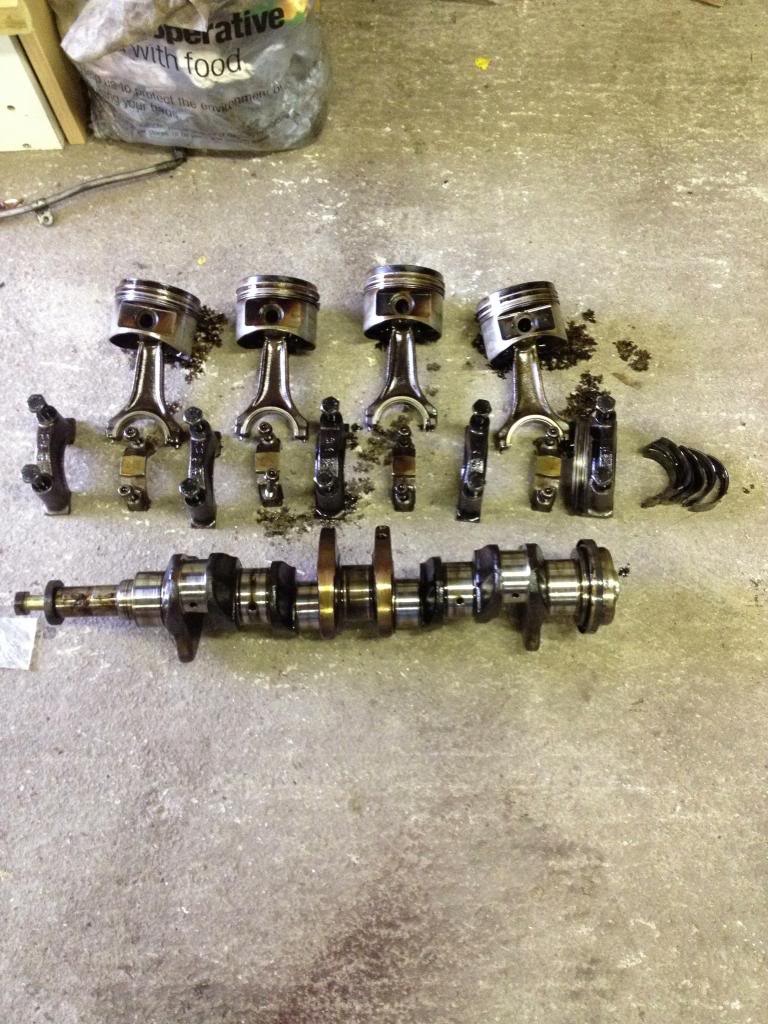
Pistons removed tonight, All looks very clean with minimal wear on the crank / bearings.
Has anyone else experienced issues with this sodding nut before? Its so tight its rounded off
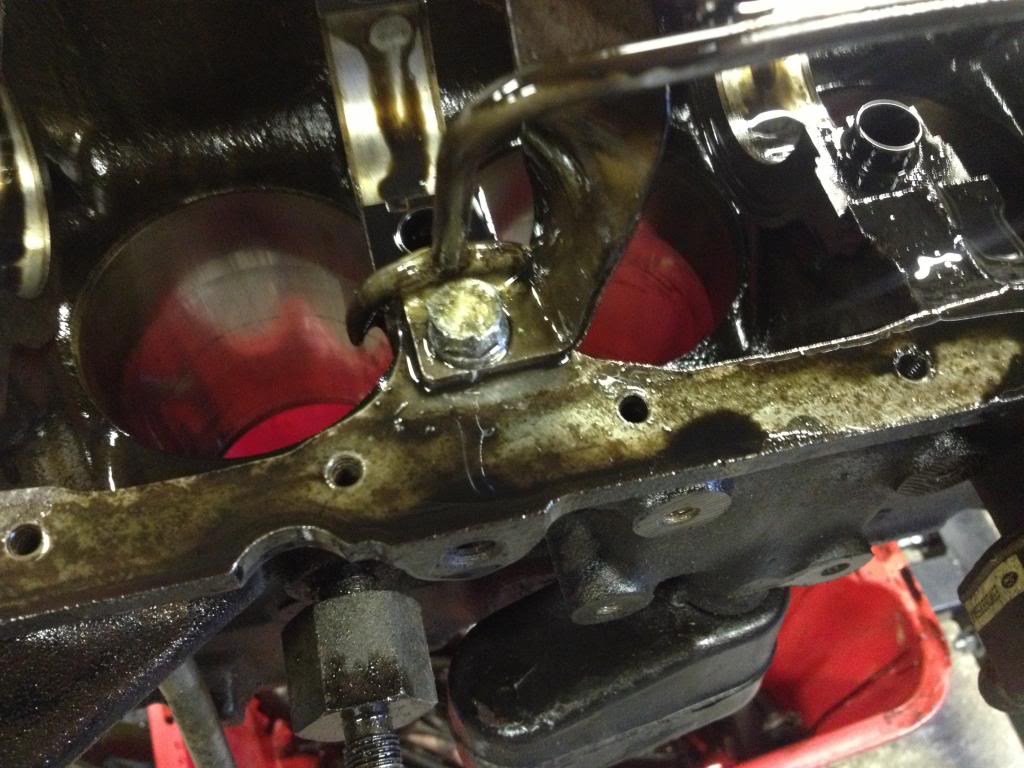


Has anyone else experienced issues with this sodding nut before? Its so tight its rounded off


 26-08-2013, 09:18 AM
#33
Regular Contributor
Thread Starter
There's some on another thread from when i first signed up mate. No rust, no dodgy panels full of filler. Its solid.
Yeah that's what i thought or weld a spanner on the top and use a bar to lever it off. Just bought a welder, need to do a few practice runs first.
I know what your saying buddy, It got like that lastnight so i just downed tools, packed everything up in order and scoffed out on a chinese lol! Cheers!
Well the car was standard when i bought it except a OMP exhaust system. I'm now planning for 330 - 350bhp. t-34 setup also so its pretty much future proof for 380. 
 26-08-2013, 12:31 PM
#37
Regular Contributor
Thread Starter
Cheers guys!
Now I've just ordered some standard Mahle bottom end bearings rated upto 400bhp. Will these be ok or on the border line for 380bhp? The car wont be used on a track all day long, only used on summer days on the roads.
Now I've just ordered some standard Mahle bottom end bearings rated upto 400bhp. Will these be ok or on the border line for 380bhp? The car wont be used on a track all day long, only used on summer days on the roads.
26-08-2013, 07:28 PM
#39
Regular Contributor
Thread Starter
26-08-2013, 08:33 PM
#40
Regular Contributor
Thread Starter
Today has been a long day arsing around! Went to machine mart to pick up a valve compressor, only to pick one up that was too small! Quick turn around later and we're back with another larger compressor! All valves removed to make way for some industrial de-greaser (doesn't like skin much haha!)
Found corossion forming around the water channels....Hopefully these can be fixed at the machiners when i send the head off.
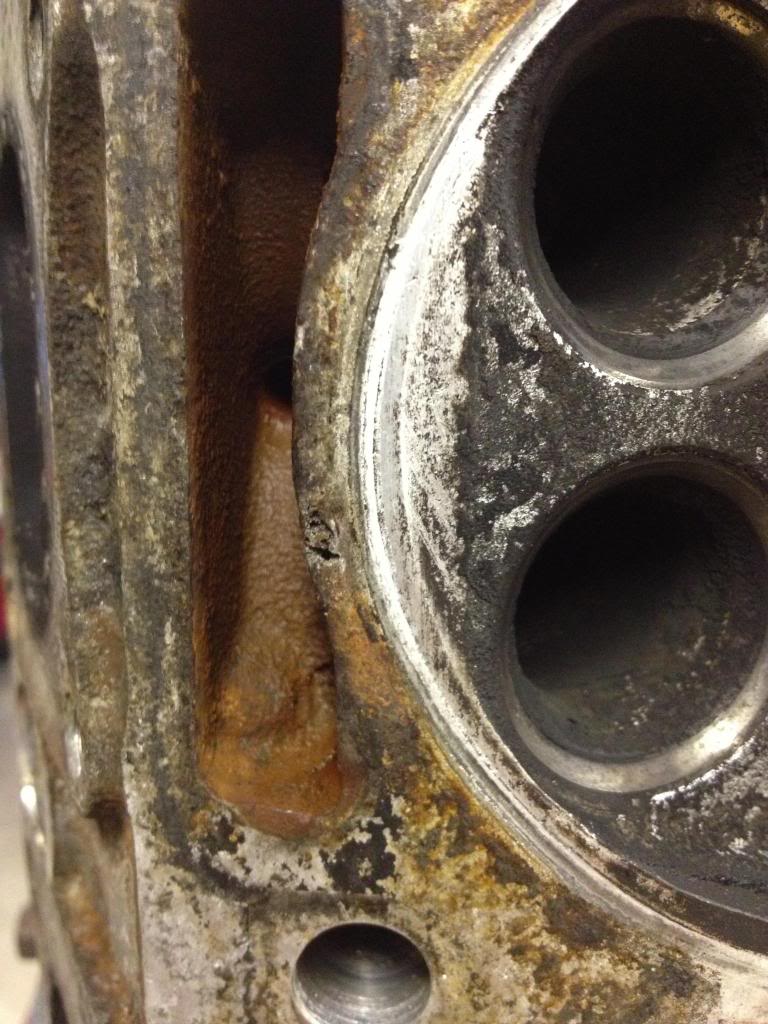
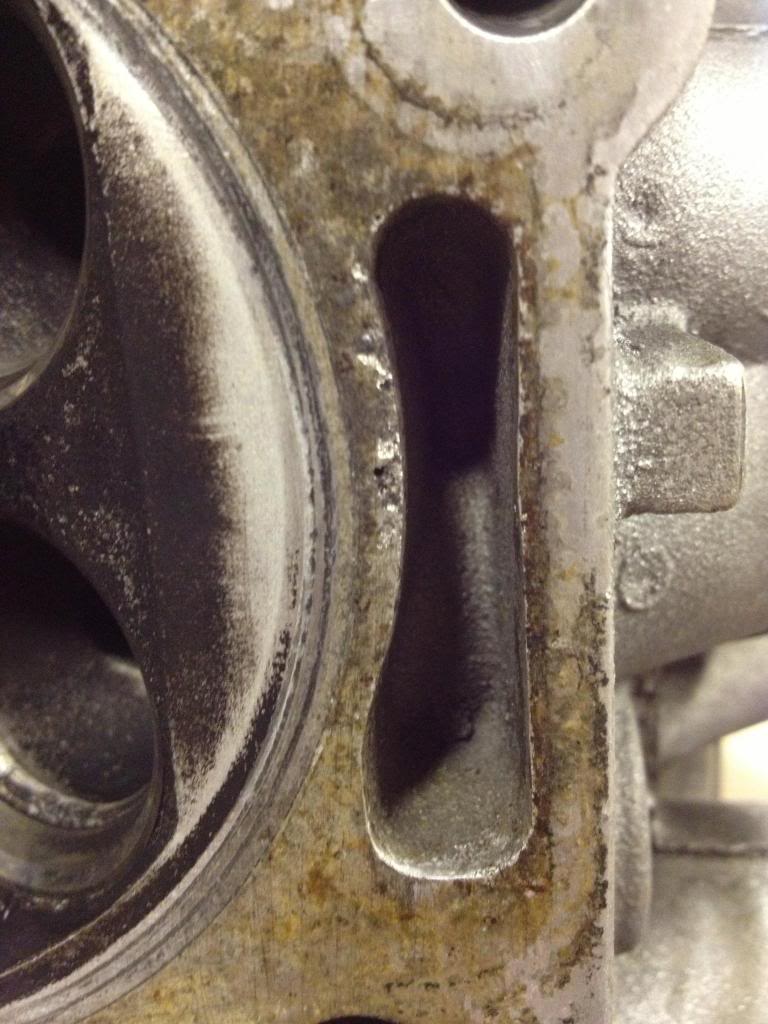


Found corossion forming around the water channels....Hopefully these can be fixed at the machiners when i send the head off.

