Ka RS Restoration - Updated 08/09/15
 14-07-2013, 01:09 PM
#1
PassionFord Regular
Thread Starter

Having started the restoration around 4-5 months ago, I thought for those interested I would create a thread to show how I was getting on.
I have had the car for nearly 11 years now and during that time I've been through many stages with it, including 5 years with a fiesta rs engine producing around 190bhp (can't remember the exact figure now) and recently about 3 years ago with the focus rs engine - after rounding off the cam lobes on the CVH.
Some of you may have seen the car, it was featured in Performance Ford about 2 years ago these were some of the photos taken of it:
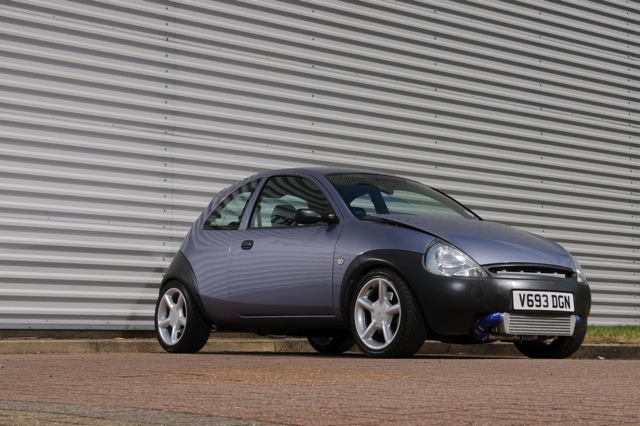
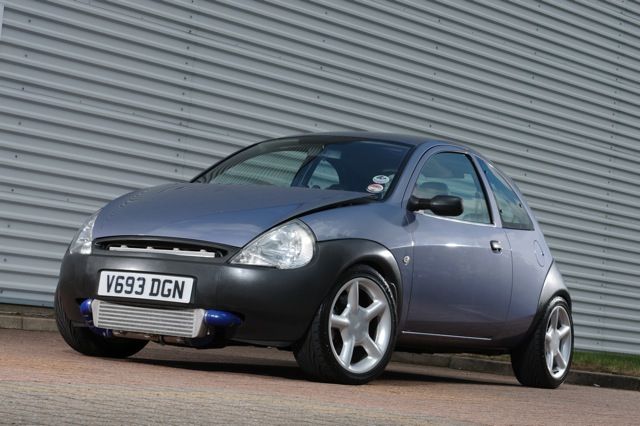
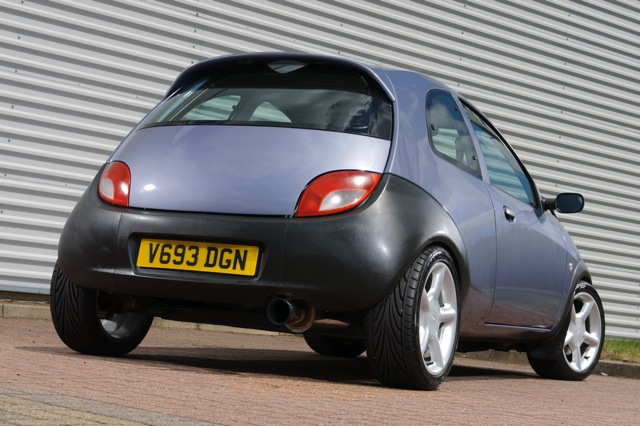

The car has been off the road now for nearly 2 years due to finding some rot a lot worse than I thought, needing some upgrades and needing a better place to work on the car. So first up was to move house (drastic I know) but I finally wanted somewhere at home I could work on the car and not have to rely on my parents falling down outbuildings!
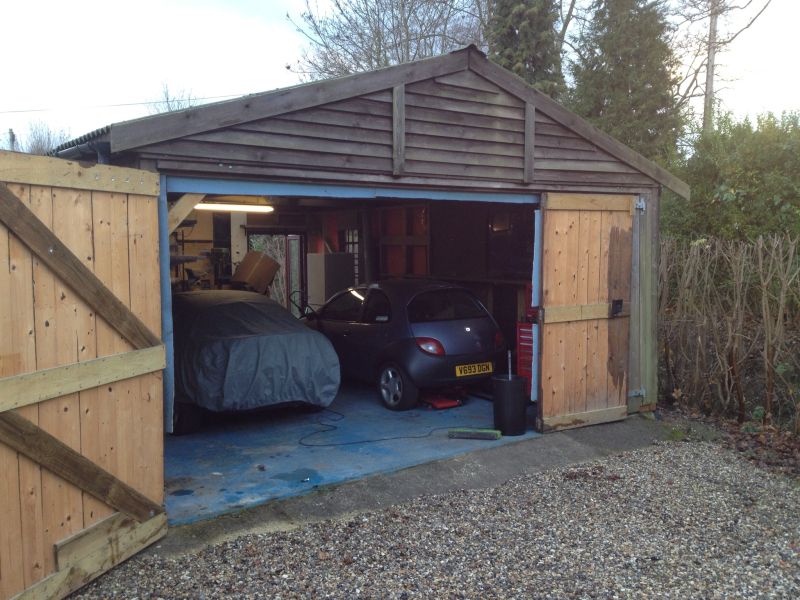
So a year ago now I moved and had this at home:
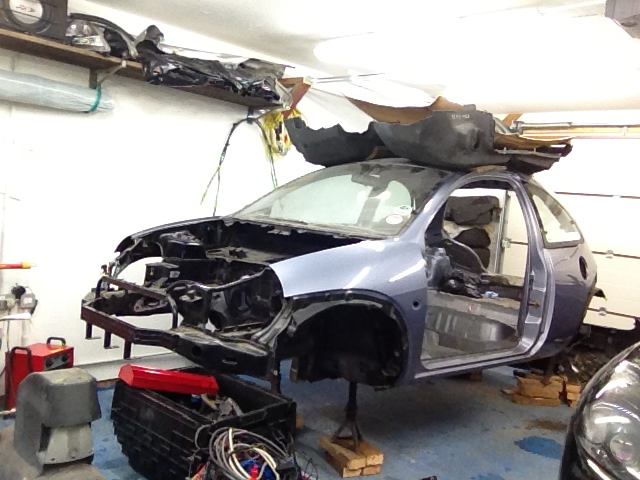
I will show the refurbishment of the workshop in another thread but in the end it looked like this:
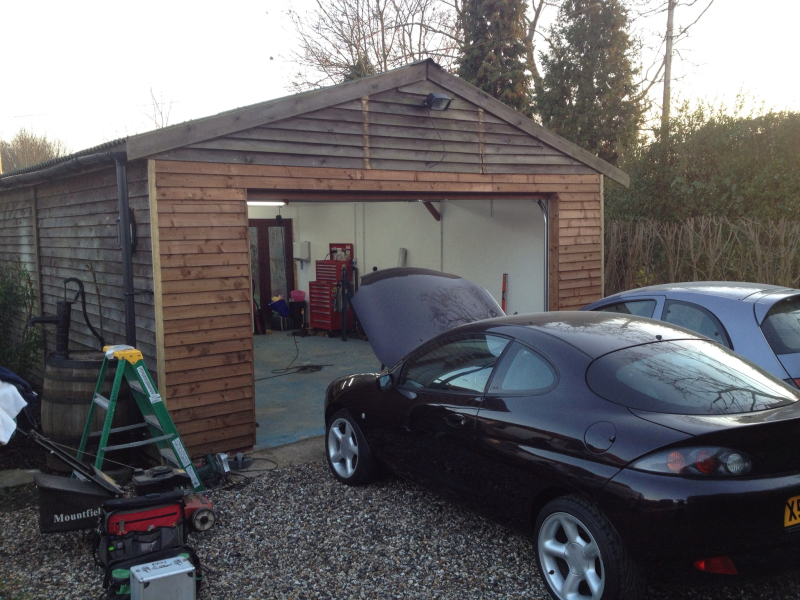

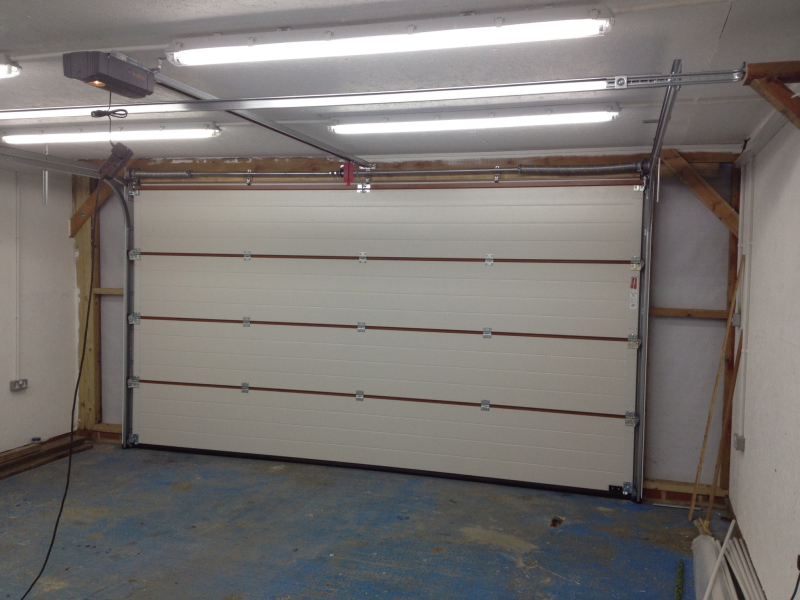
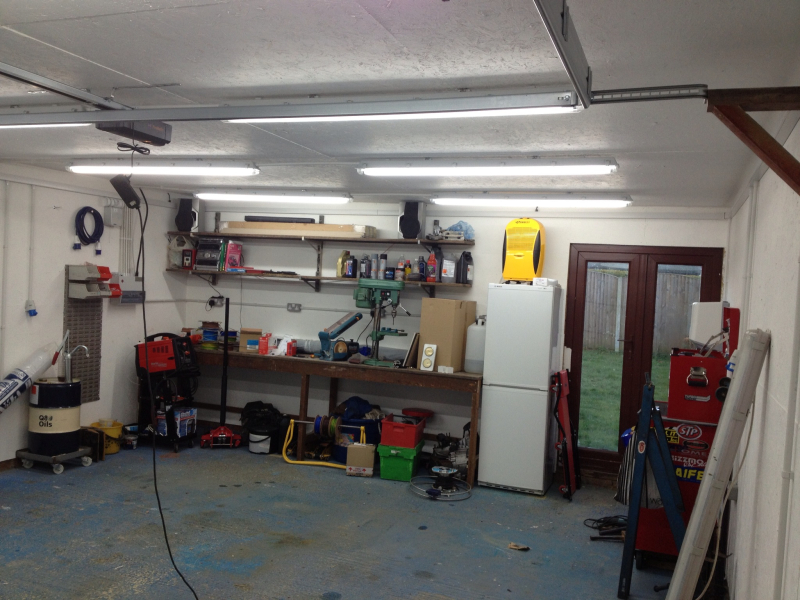
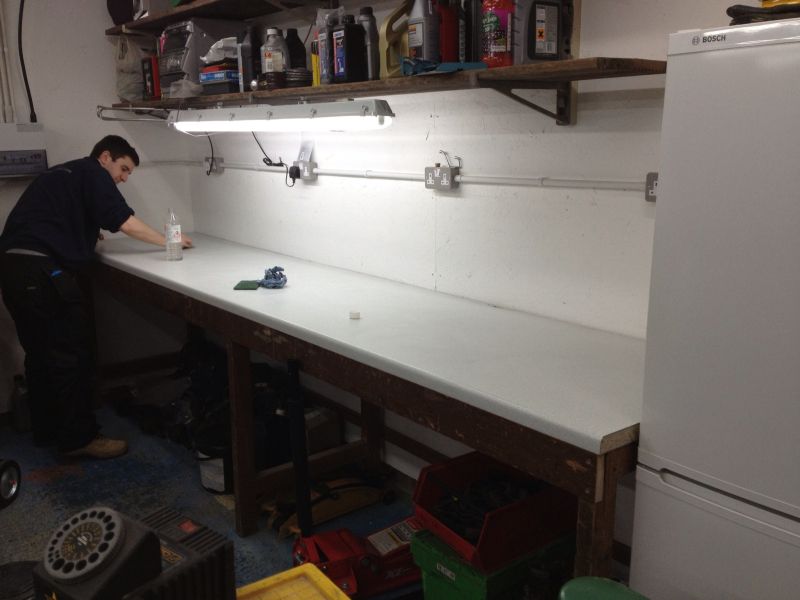
This took a couple of months to get the inside sorted, and is far better than what we had. As you can see the car is looking a little sorry for itself and this is the state it has been left in for too long now!
The puma you see belongs to my brother which also has the focus rs engine, he is currently upgrading to the RS MTX gearbox as he blew his hybrid IB5 box to bits. Something that I will eventually get to with this build.
So there you have the car as it stood about 4-5 months ago, progress has been slow but I will post where I am up to now over the next day or so.
Any comments welcome good or bad. Having had the car so long I have a lot of ideas of what I would like to achieve with it and where I want it to be but more will always help.. Or take me longer!
Thanks for looking.
Dan
I have had the car for nearly 11 years now and during that time I've been through many stages with it, including 5 years with a fiesta rs engine producing around 190bhp (can't remember the exact figure now) and recently about 3 years ago with the focus rs engine - after rounding off the cam lobes on the CVH.
Some of you may have seen the car, it was featured in Performance Ford about 2 years ago these were some of the photos taken of it:
The car has been off the road now for nearly 2 years due to finding some rot a lot worse than I thought, needing some upgrades and needing a better place to work on the car. So first up was to move house (drastic I know) but I finally wanted somewhere at home I could work on the car and not have to rely on my parents falling down outbuildings!
So a year ago now I moved and had this at home:
I will show the refurbishment of the workshop in another thread but in the end it looked like this:
This took a couple of months to get the inside sorted, and is far better than what we had. As you can see the car is looking a little sorry for itself and this is the state it has been left in for too long now!
The puma you see belongs to my brother which also has the focus rs engine, he is currently upgrading to the RS MTX gearbox as he blew his hybrid IB5 box to bits. Something that I will eventually get to with this build.
So there you have the car as it stood about 4-5 months ago, progress has been slow but I will post where I am up to now over the next day or so.
Any comments welcome good or bad. Having had the car so long I have a lot of ideas of what I would like to achieve with it and where I want it to be but more will always help.. Or take me longer!
Thanks for looking.
Dan
Last edited by McCloud 85; 08-09-2015 at 09:50 PM.

 14-07-2013, 02:00 PM
#3
PassionFord Regular

I like the look of what it was and like that you want to bring it back to life. 
What does the project require then? Bar the rot repairs, and where to you want to be with it come the end?
Hope all goes well and I'll keep logged in to your updates.
What does the project require then? Bar the rot repairs, and where to you want to be with it come the end?
Hope all goes well and I'll keep logged in to your updates.
14-07-2013, 02:31 PM
#5
PassionFord Regular
Thread Starter
The rot repairs are mainly both sills, one was worse than the other. Once they are done, I want to re-frame the front end to gain more space.
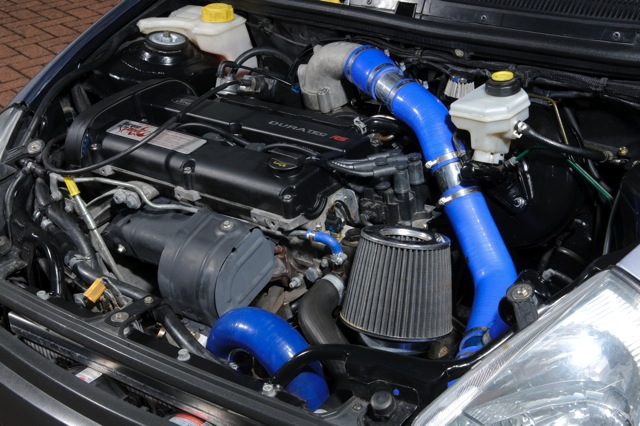
When the car was on the hub dyno last we found quite a number of in-efficiencies with the setup - boost pipe size, intercooler, cooling, air filter placement and more. Although it produced reasonable power (215bhp at the hubs) there was more to be gained by simply improving these aspects, so I want to re-design all of this.
There was then the incident with my brothers gearbox that made me doubt how long mine would last - so on the cards this time around will be a gearbox swap to the RS MTX box. This means that I'm going to re mount the engine as well to how it sits in the focus which is slightly tipped forward. Hopefully by doing this I will gain more clearance which will allow the bonnet to sit flat.
This just touches on what else I would like to do - the biggest change to the rest of the car will be the interior, I'm looking at fitting a roll cage to improve safety and handling. This will follow the bucket seats that were already test fitted just before I took it off the road.
So with all this the car has been completely stripped - photos follow.
Many Thanks
Last edited by McCloud 85; 14-07-2013 at 02:32 PM.
14-07-2013, 02:46 PM
#6
PassionFord Regular
Thread Starter
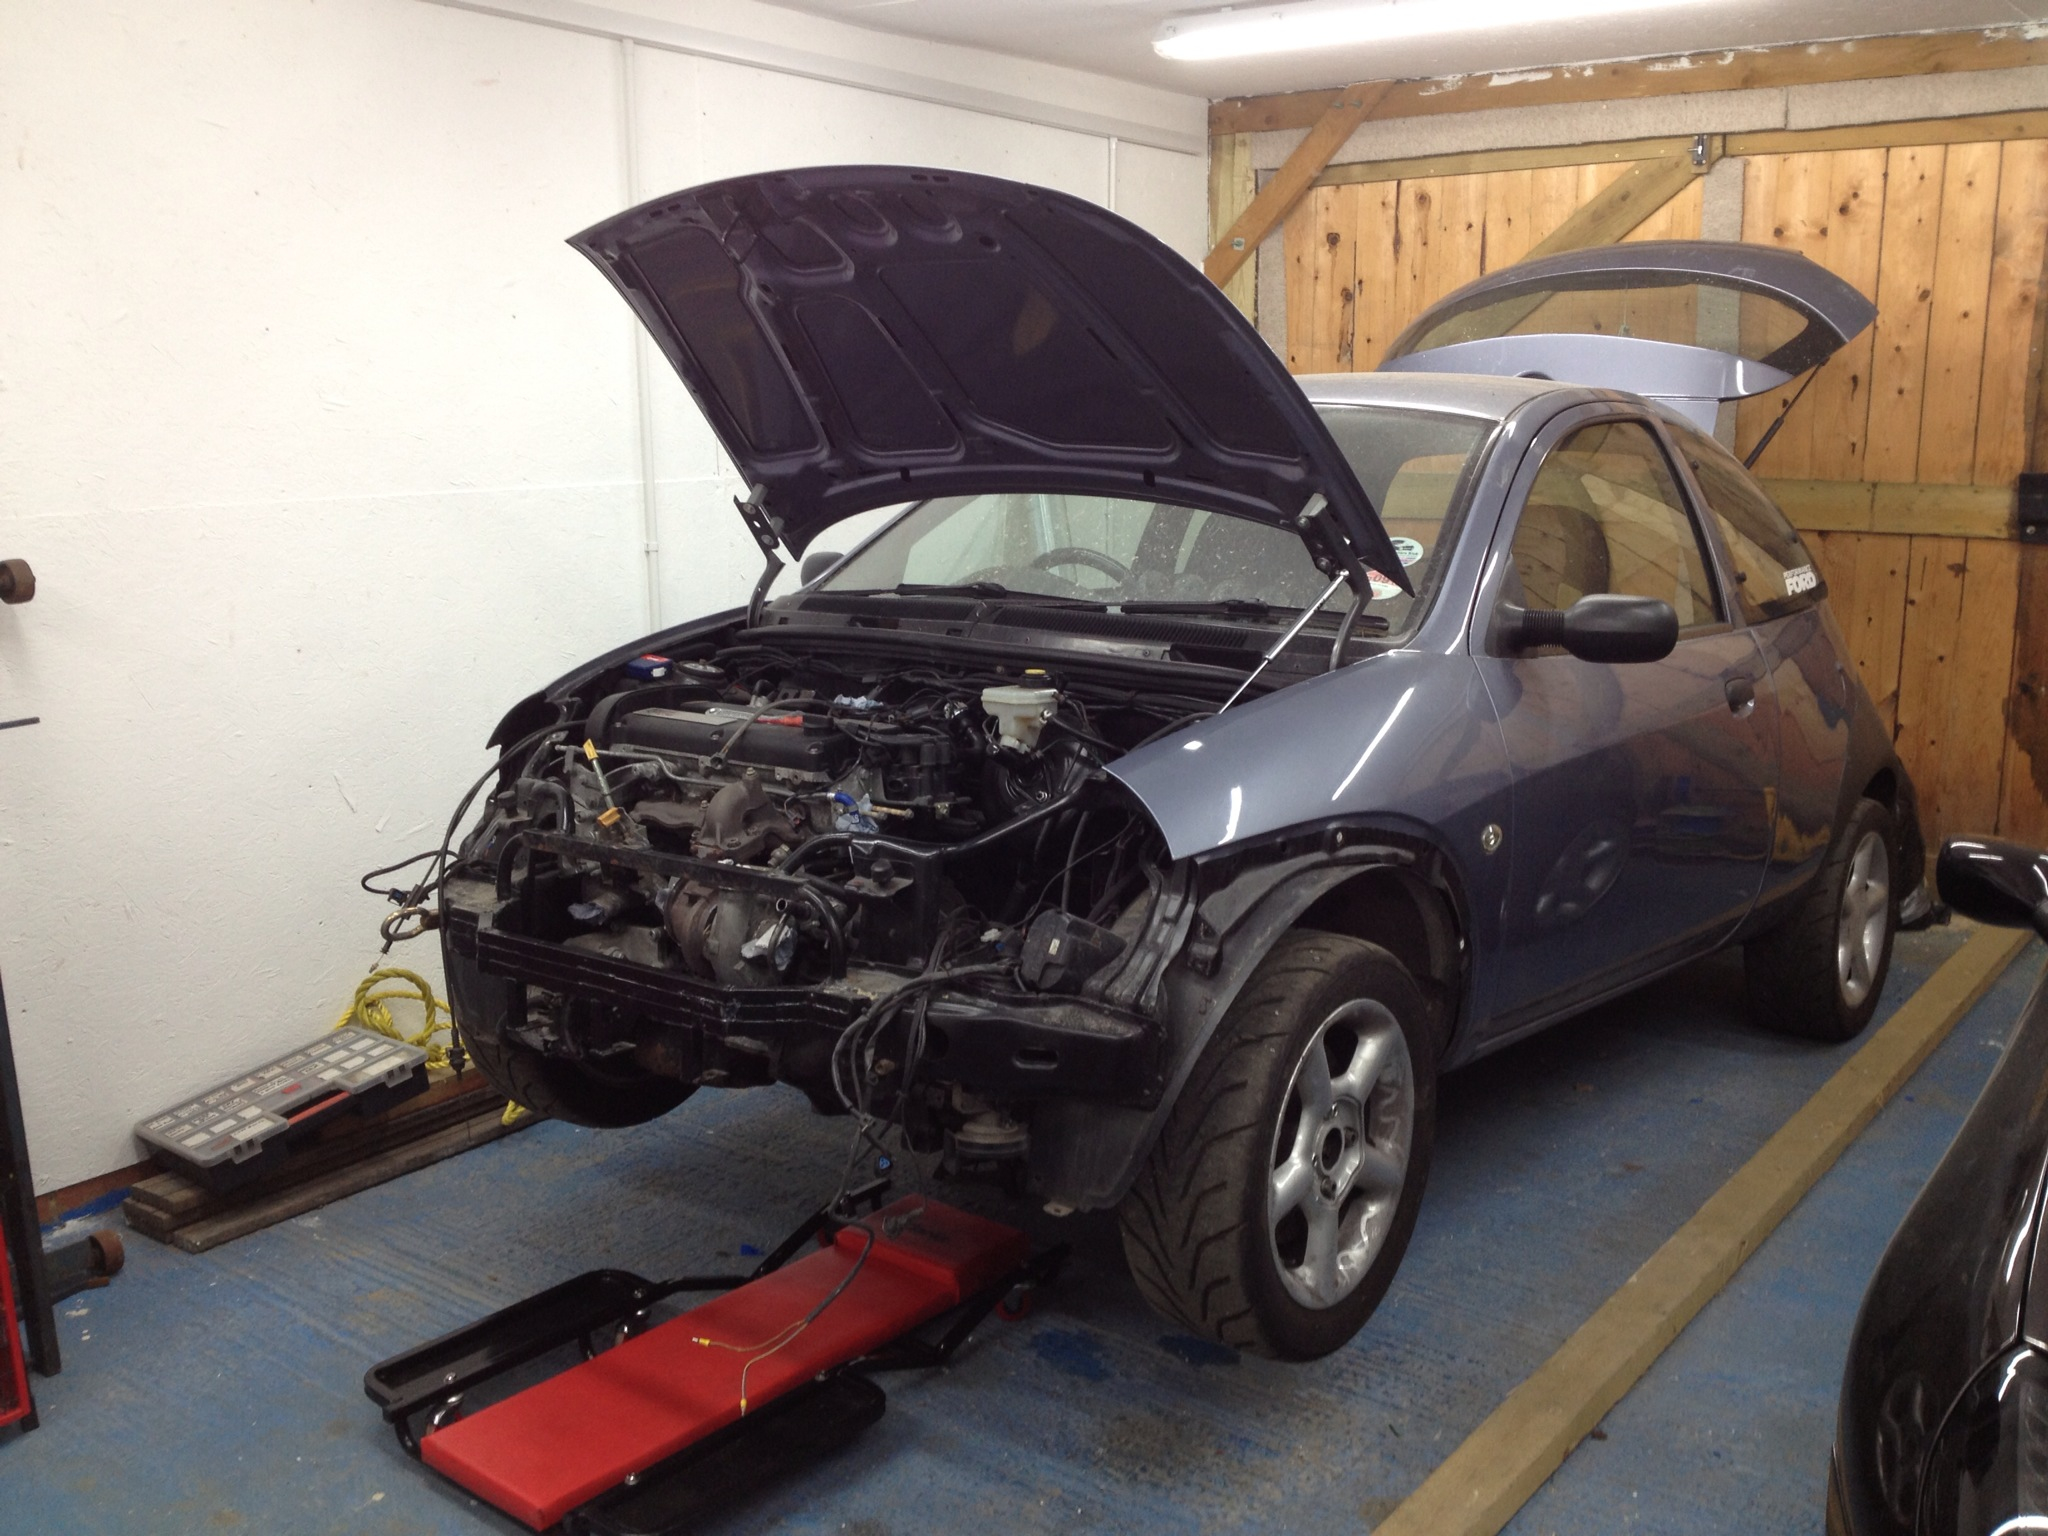
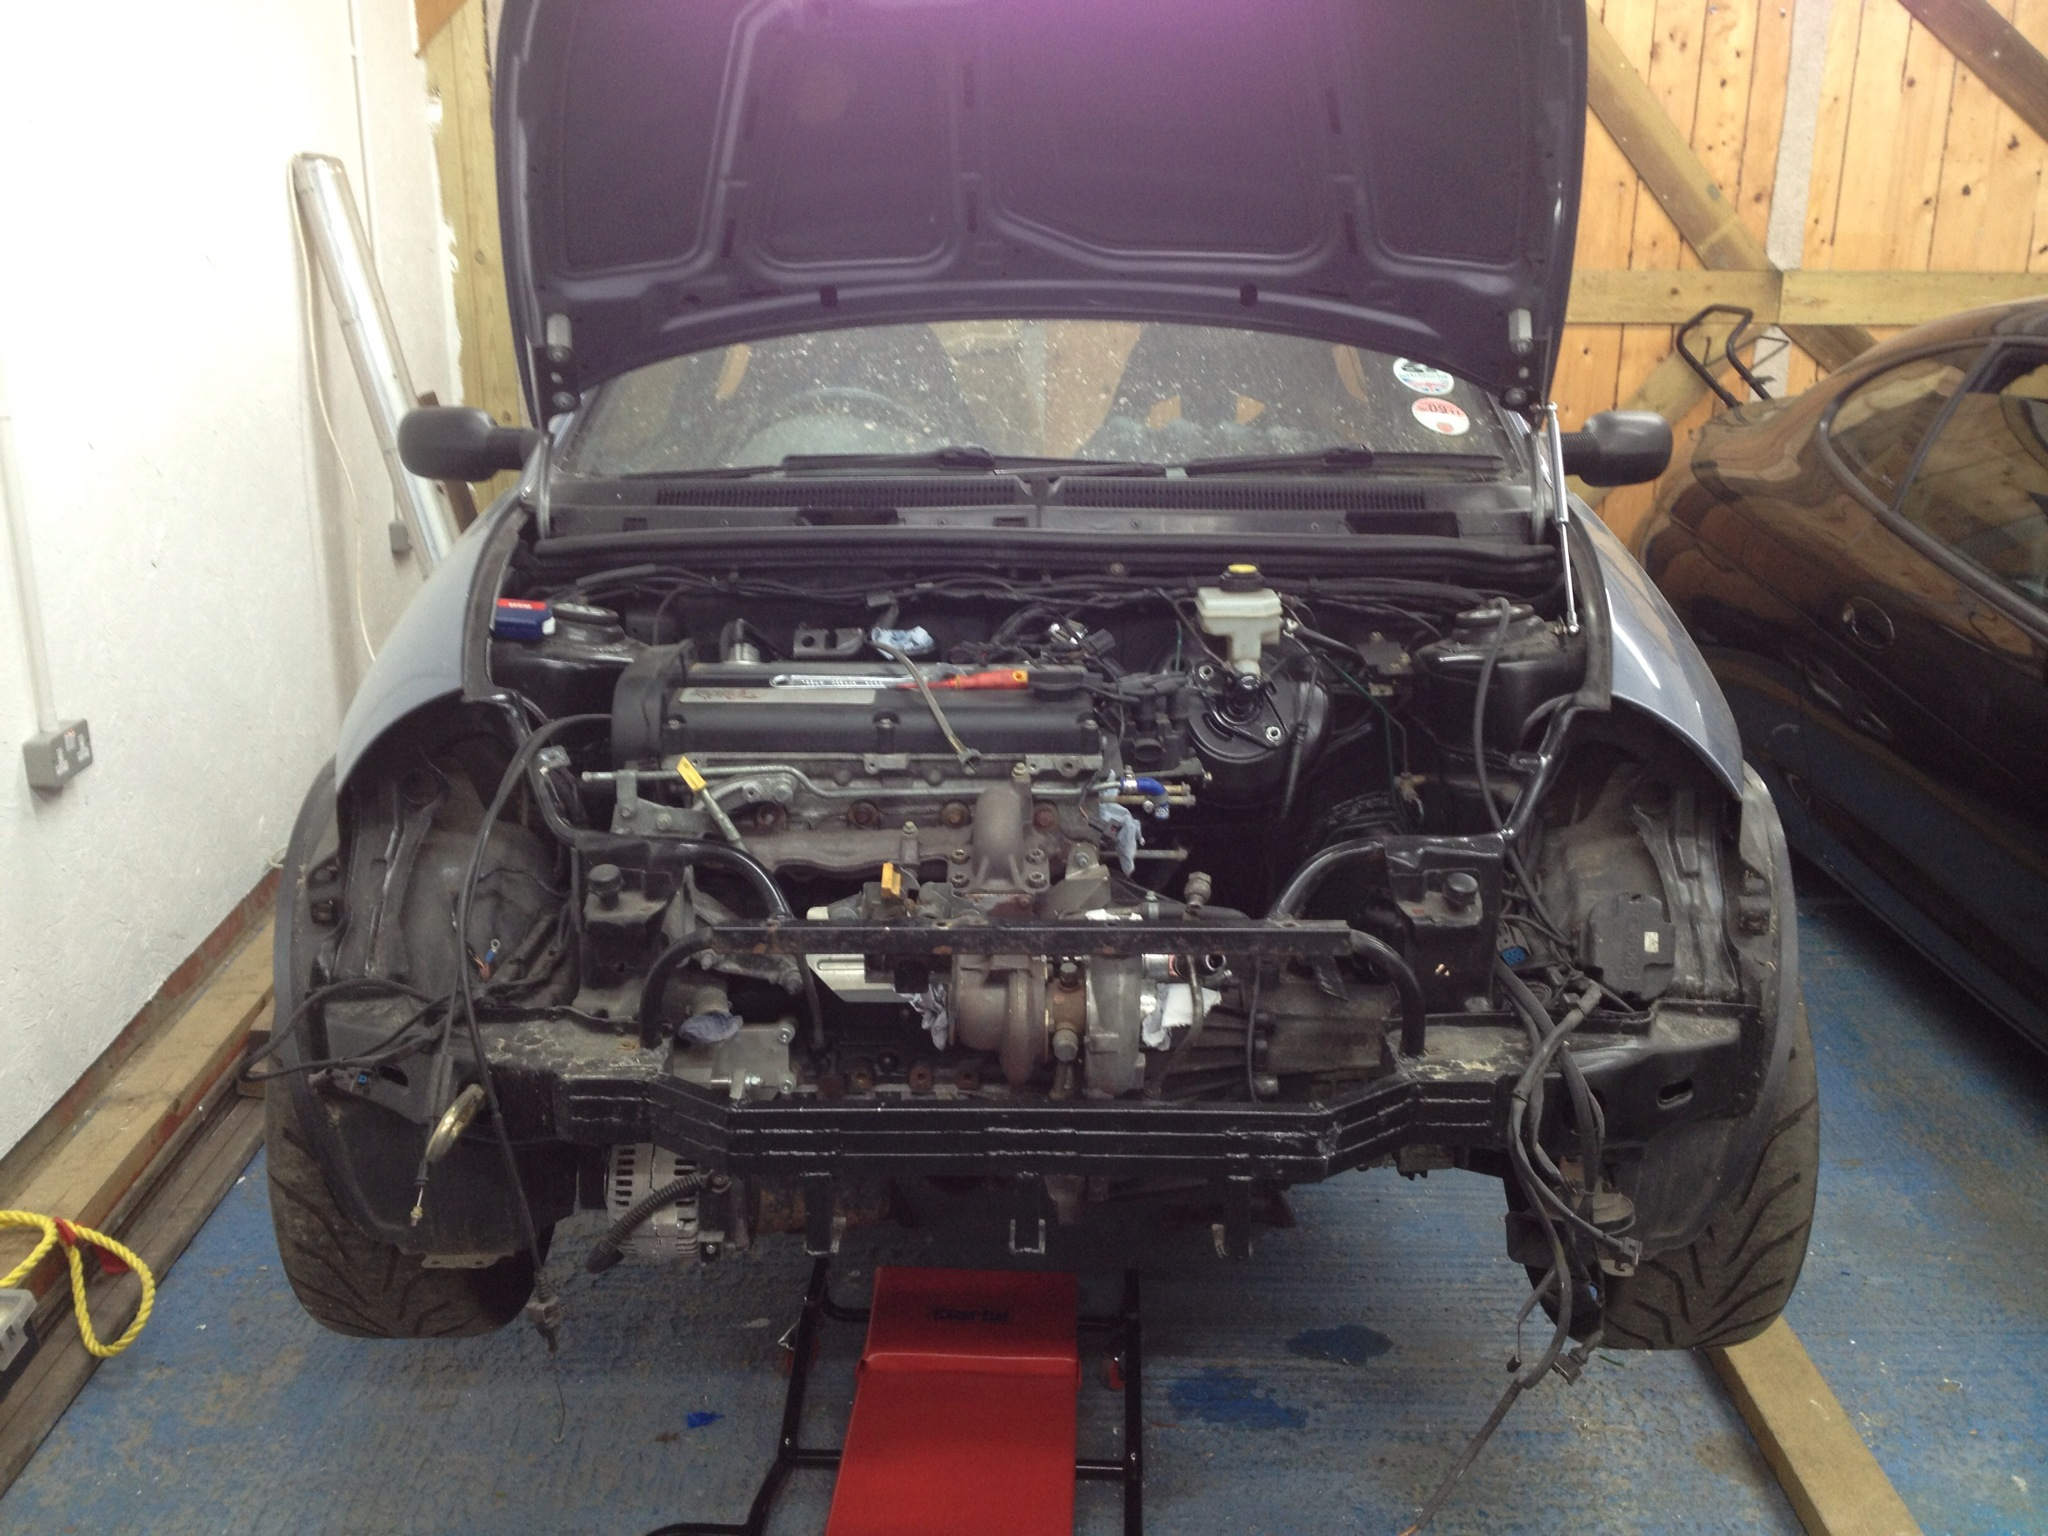
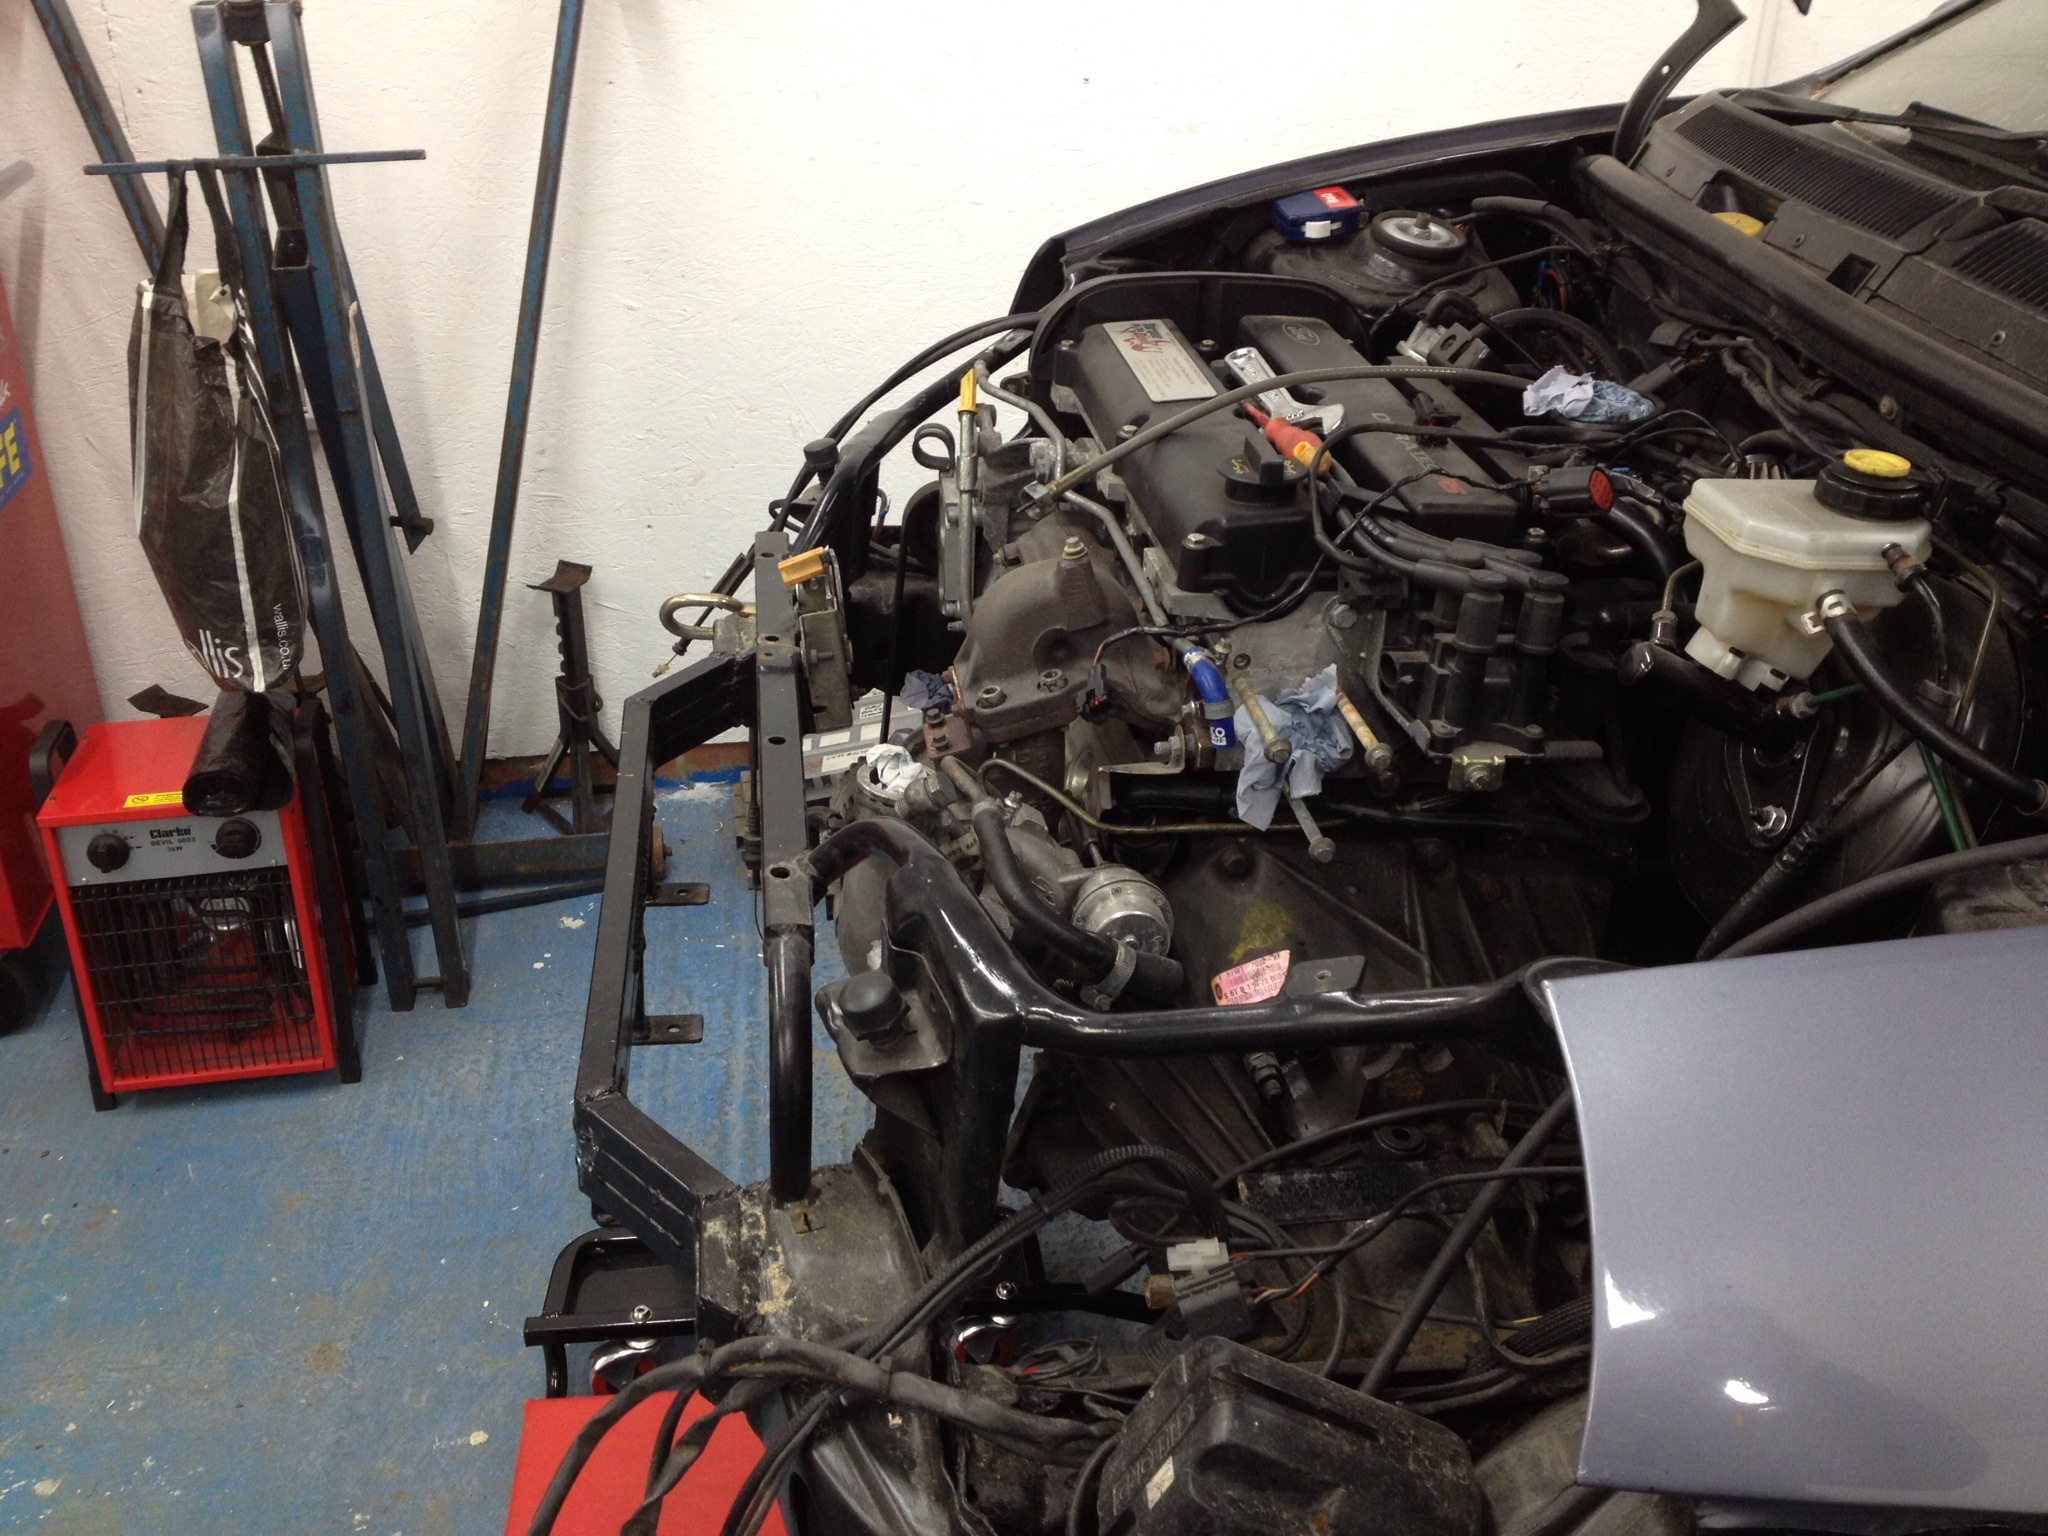
So as promised start of the restoration:
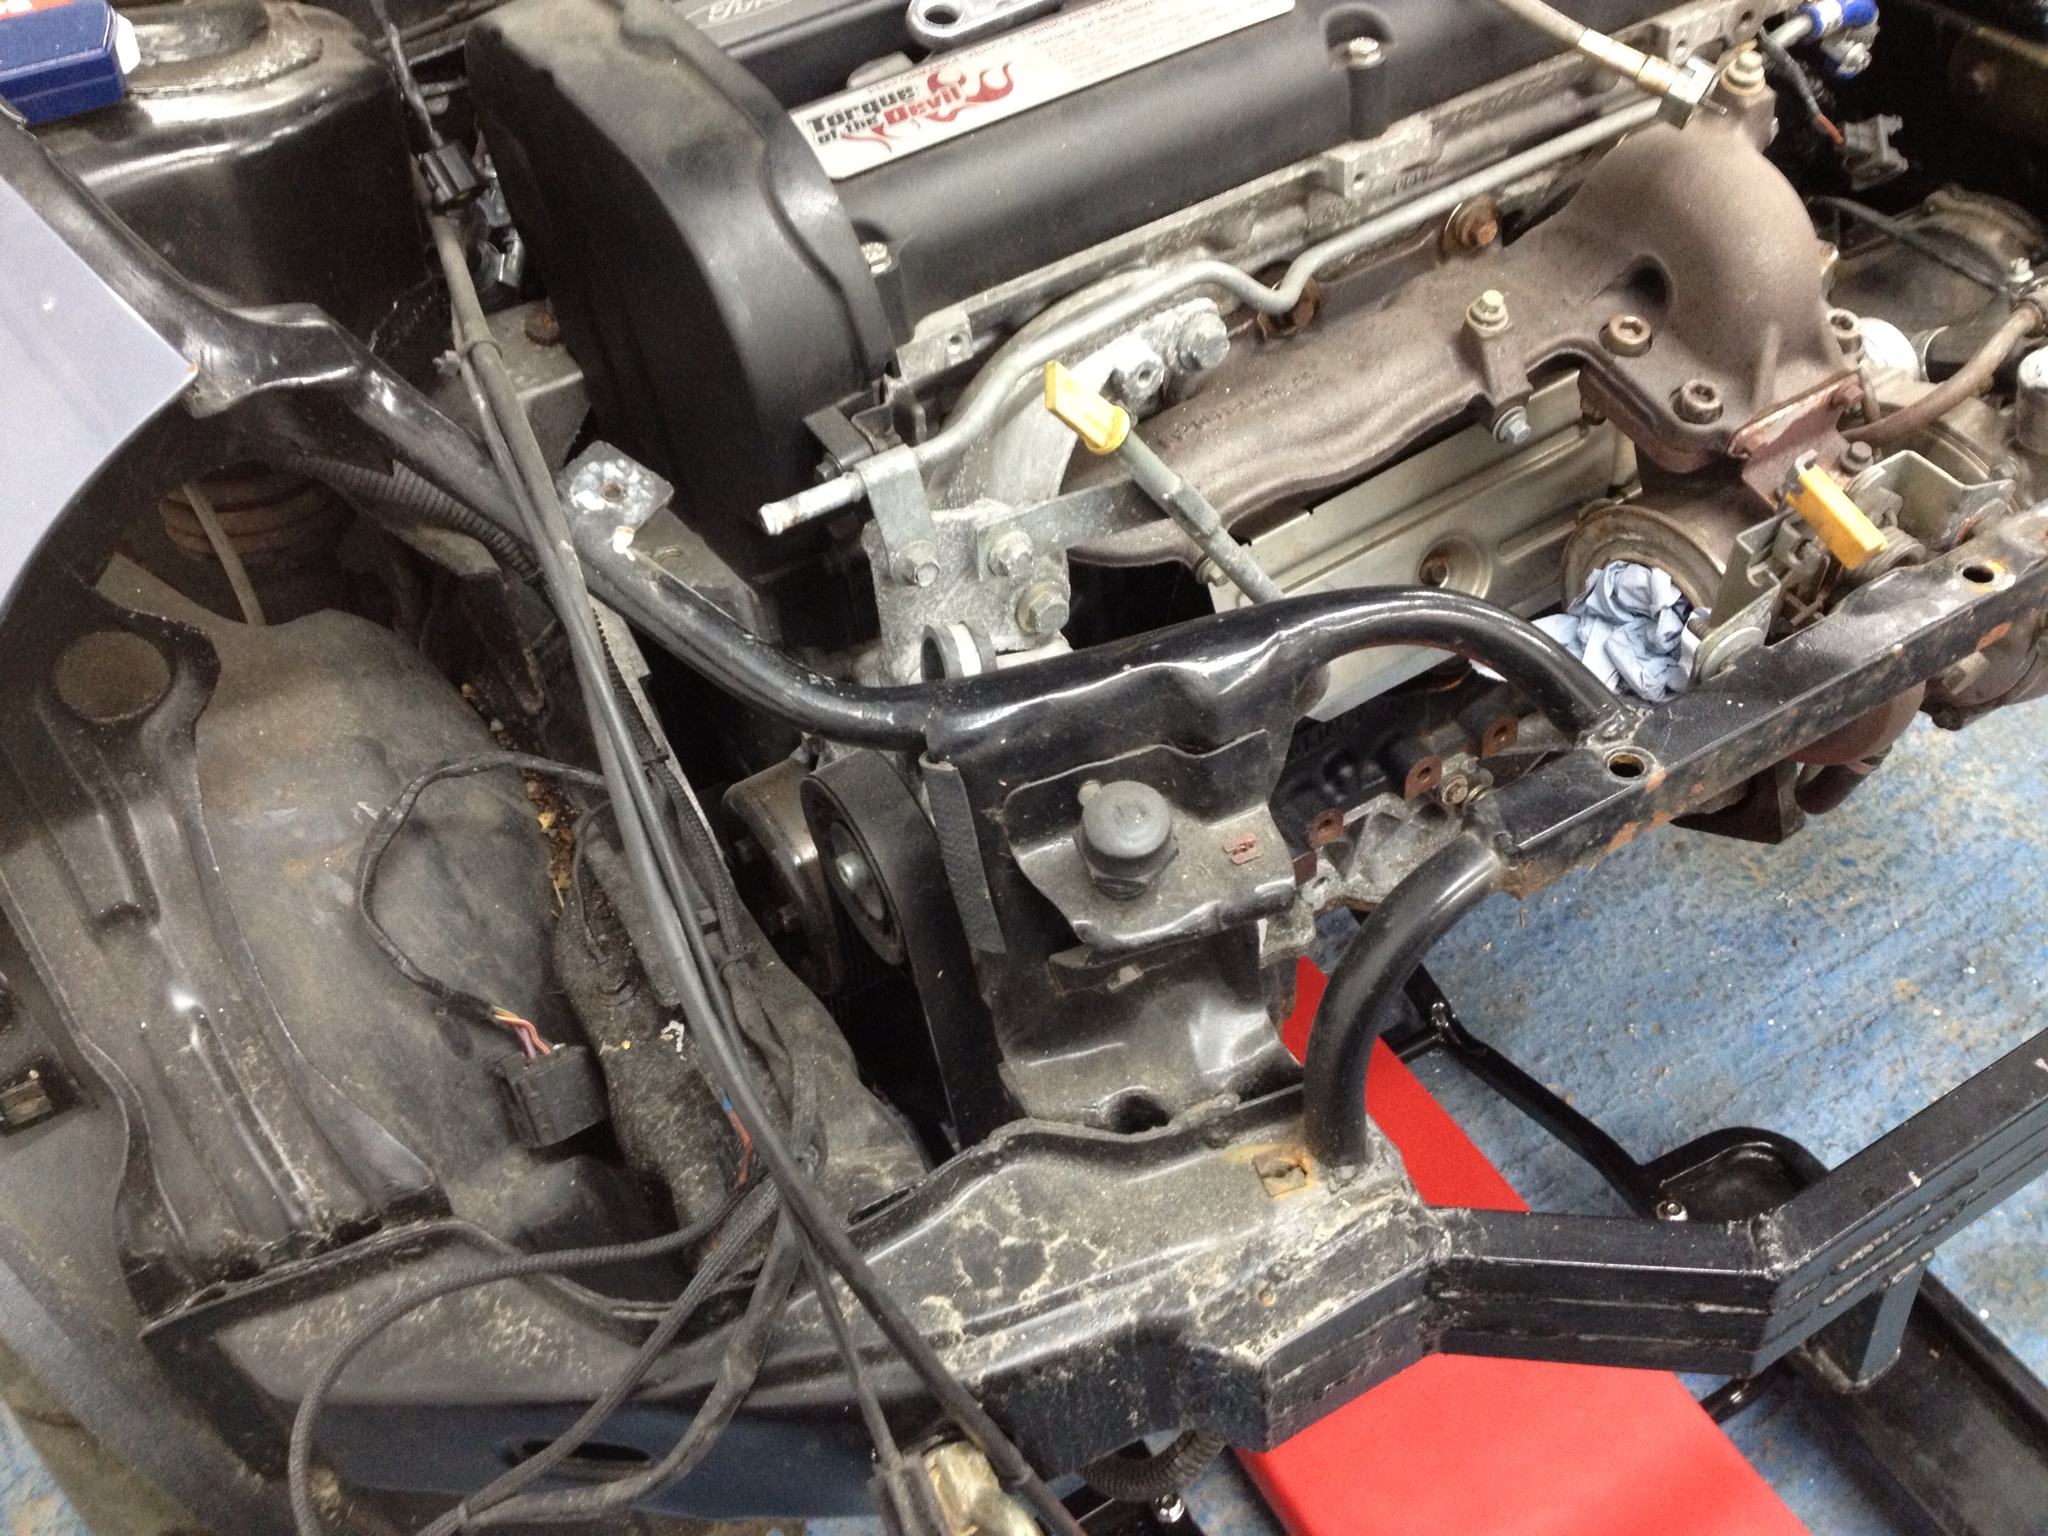
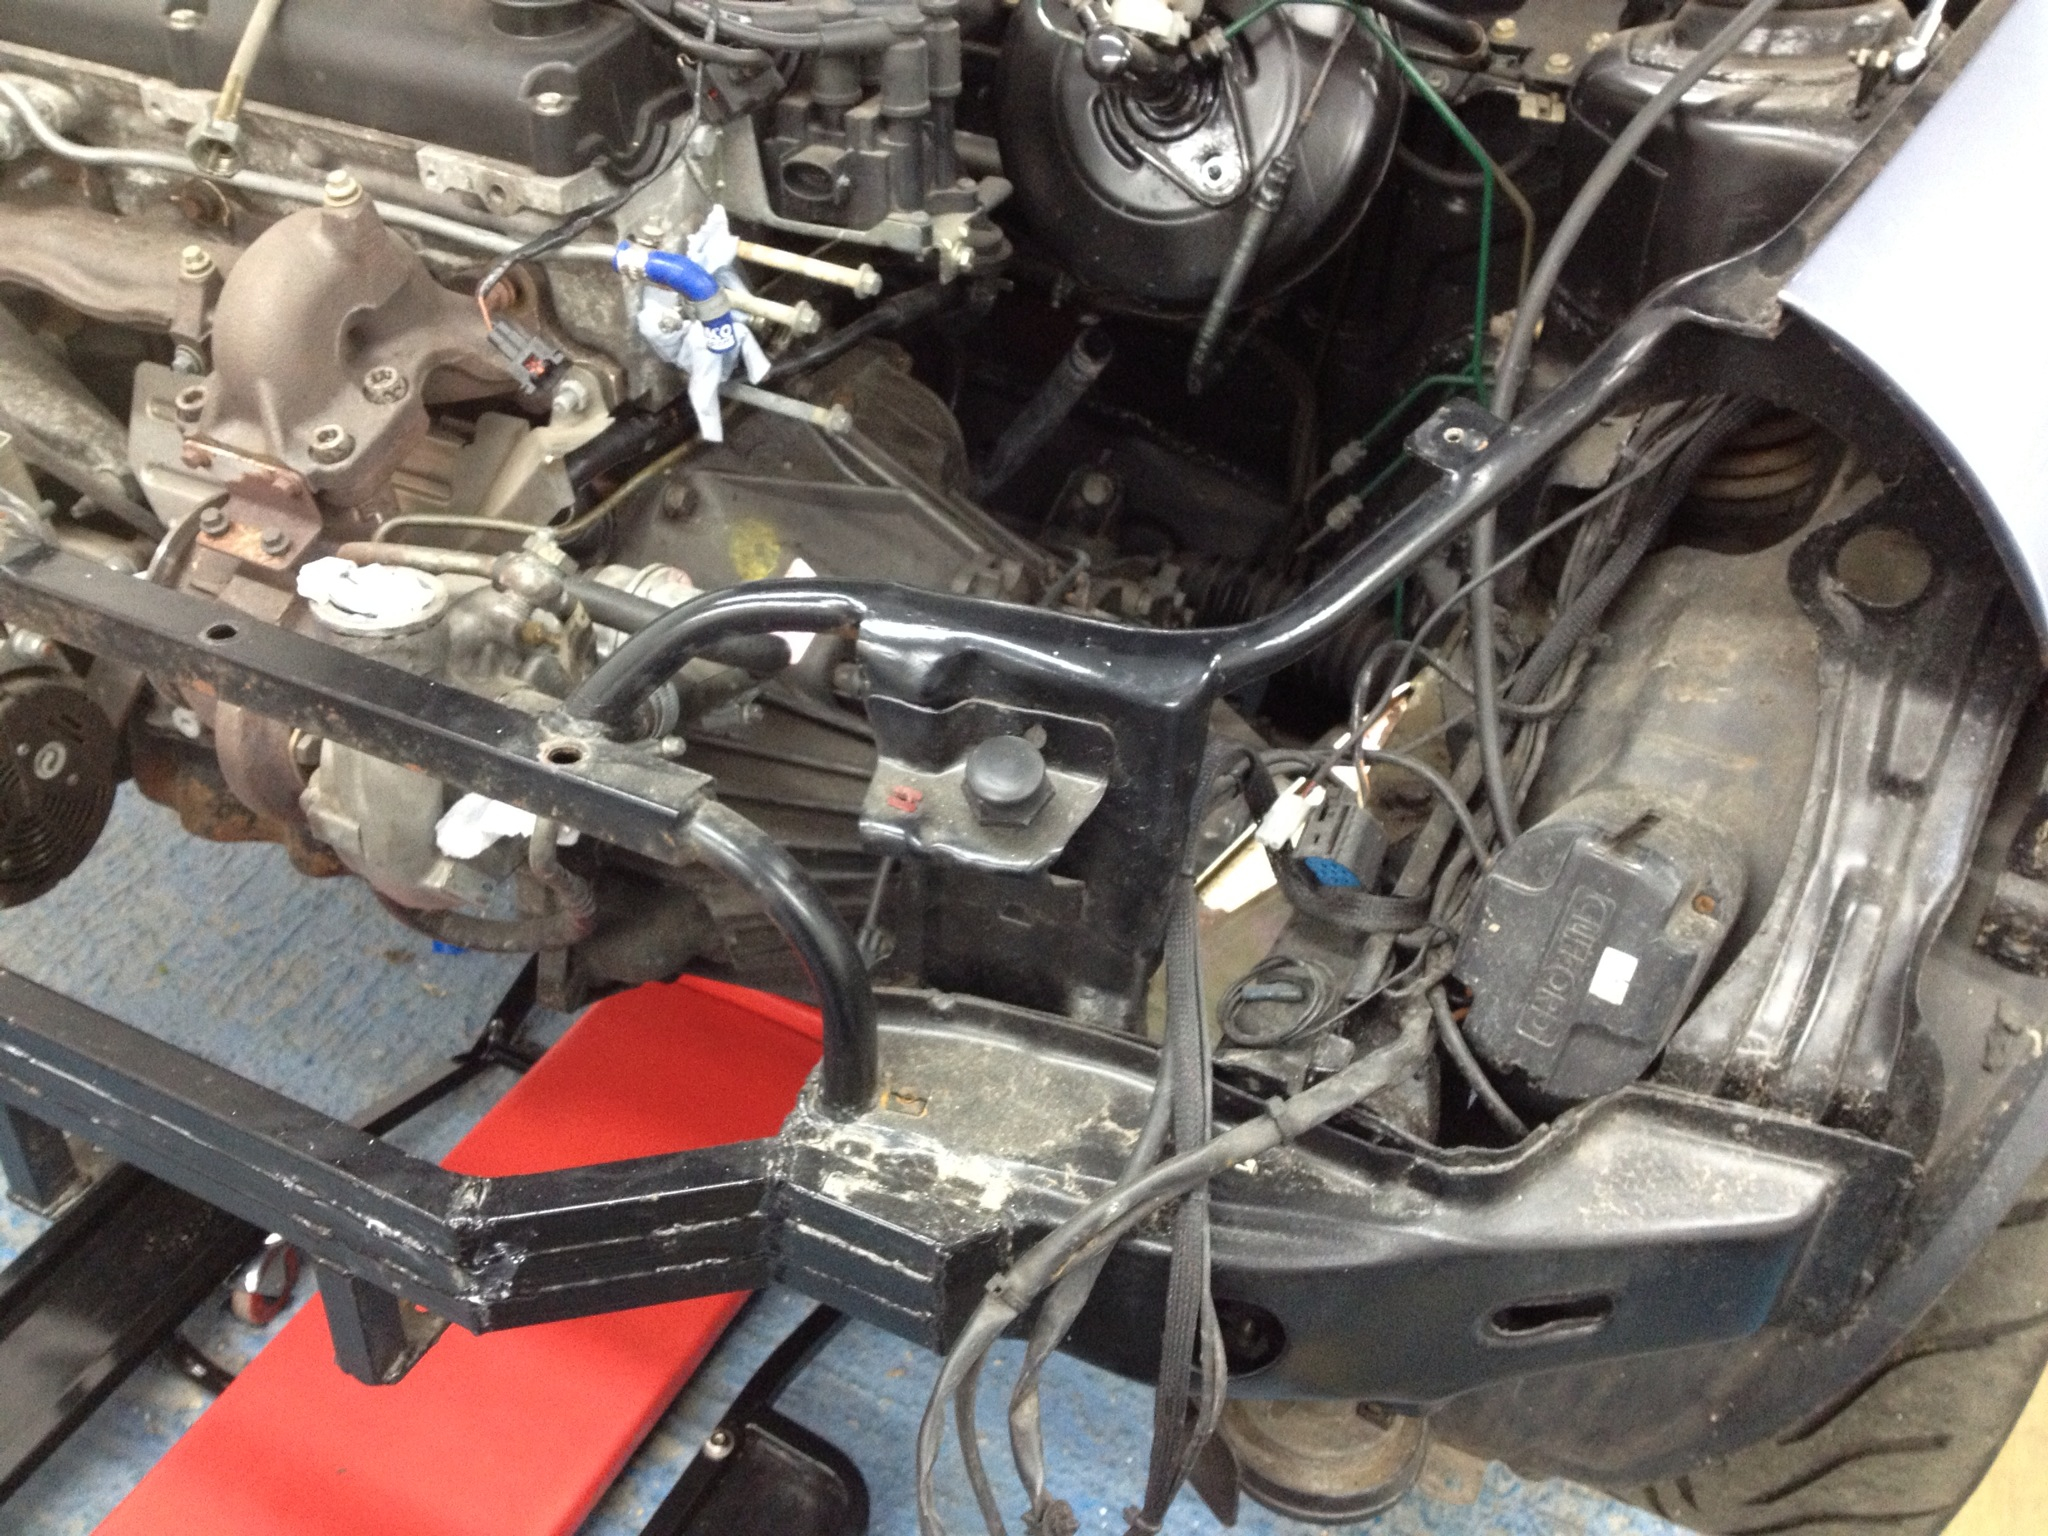
The car was sat in place in the workshop put on axle stands and the engine and gearbox lowered out:
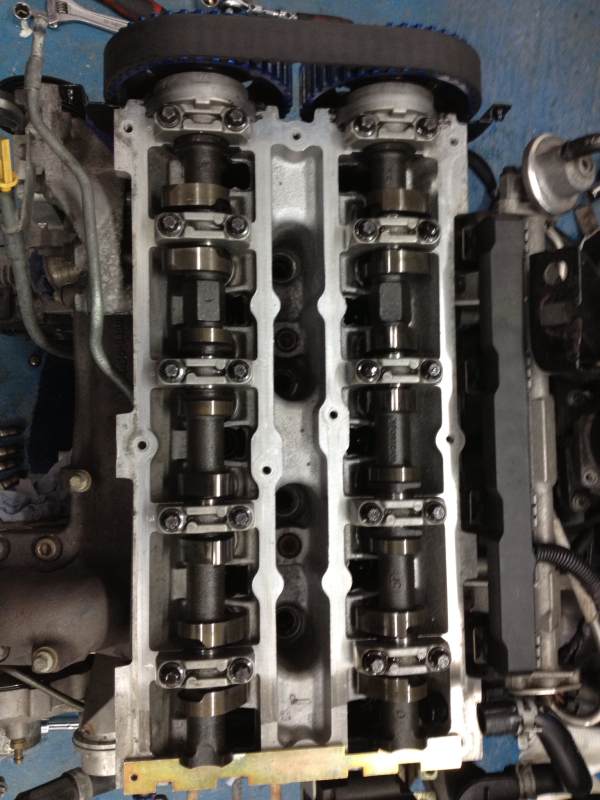
The mount used for the engine was an adapted CVH item, this caused some rocking when on the hub dyno which I didn't like, so with the new MTX box to go in it was decided to do away with this mount and move across to something similar to the focus mount. But in fitting this mount certain bits of the original mount and cam cover were cut away so this was all replaced (at great expense from ford) and the engine timed back up
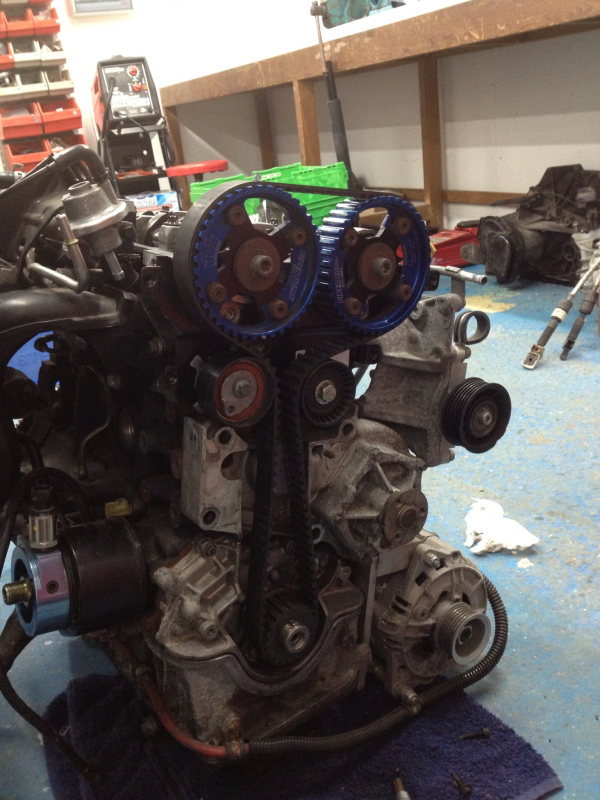
Nice and clean - though it's only been 5k or so since it was built!
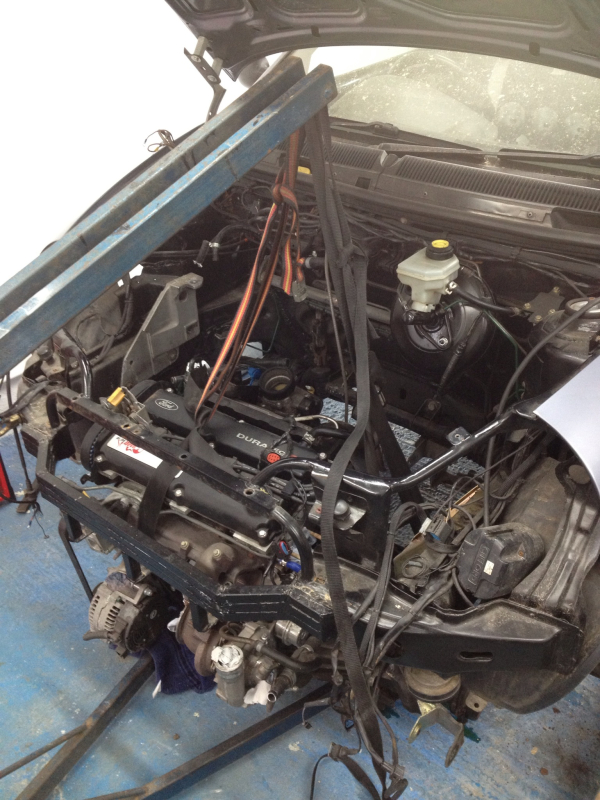
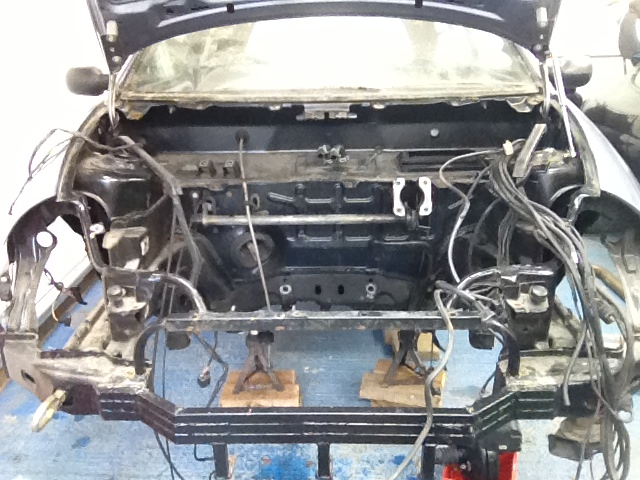
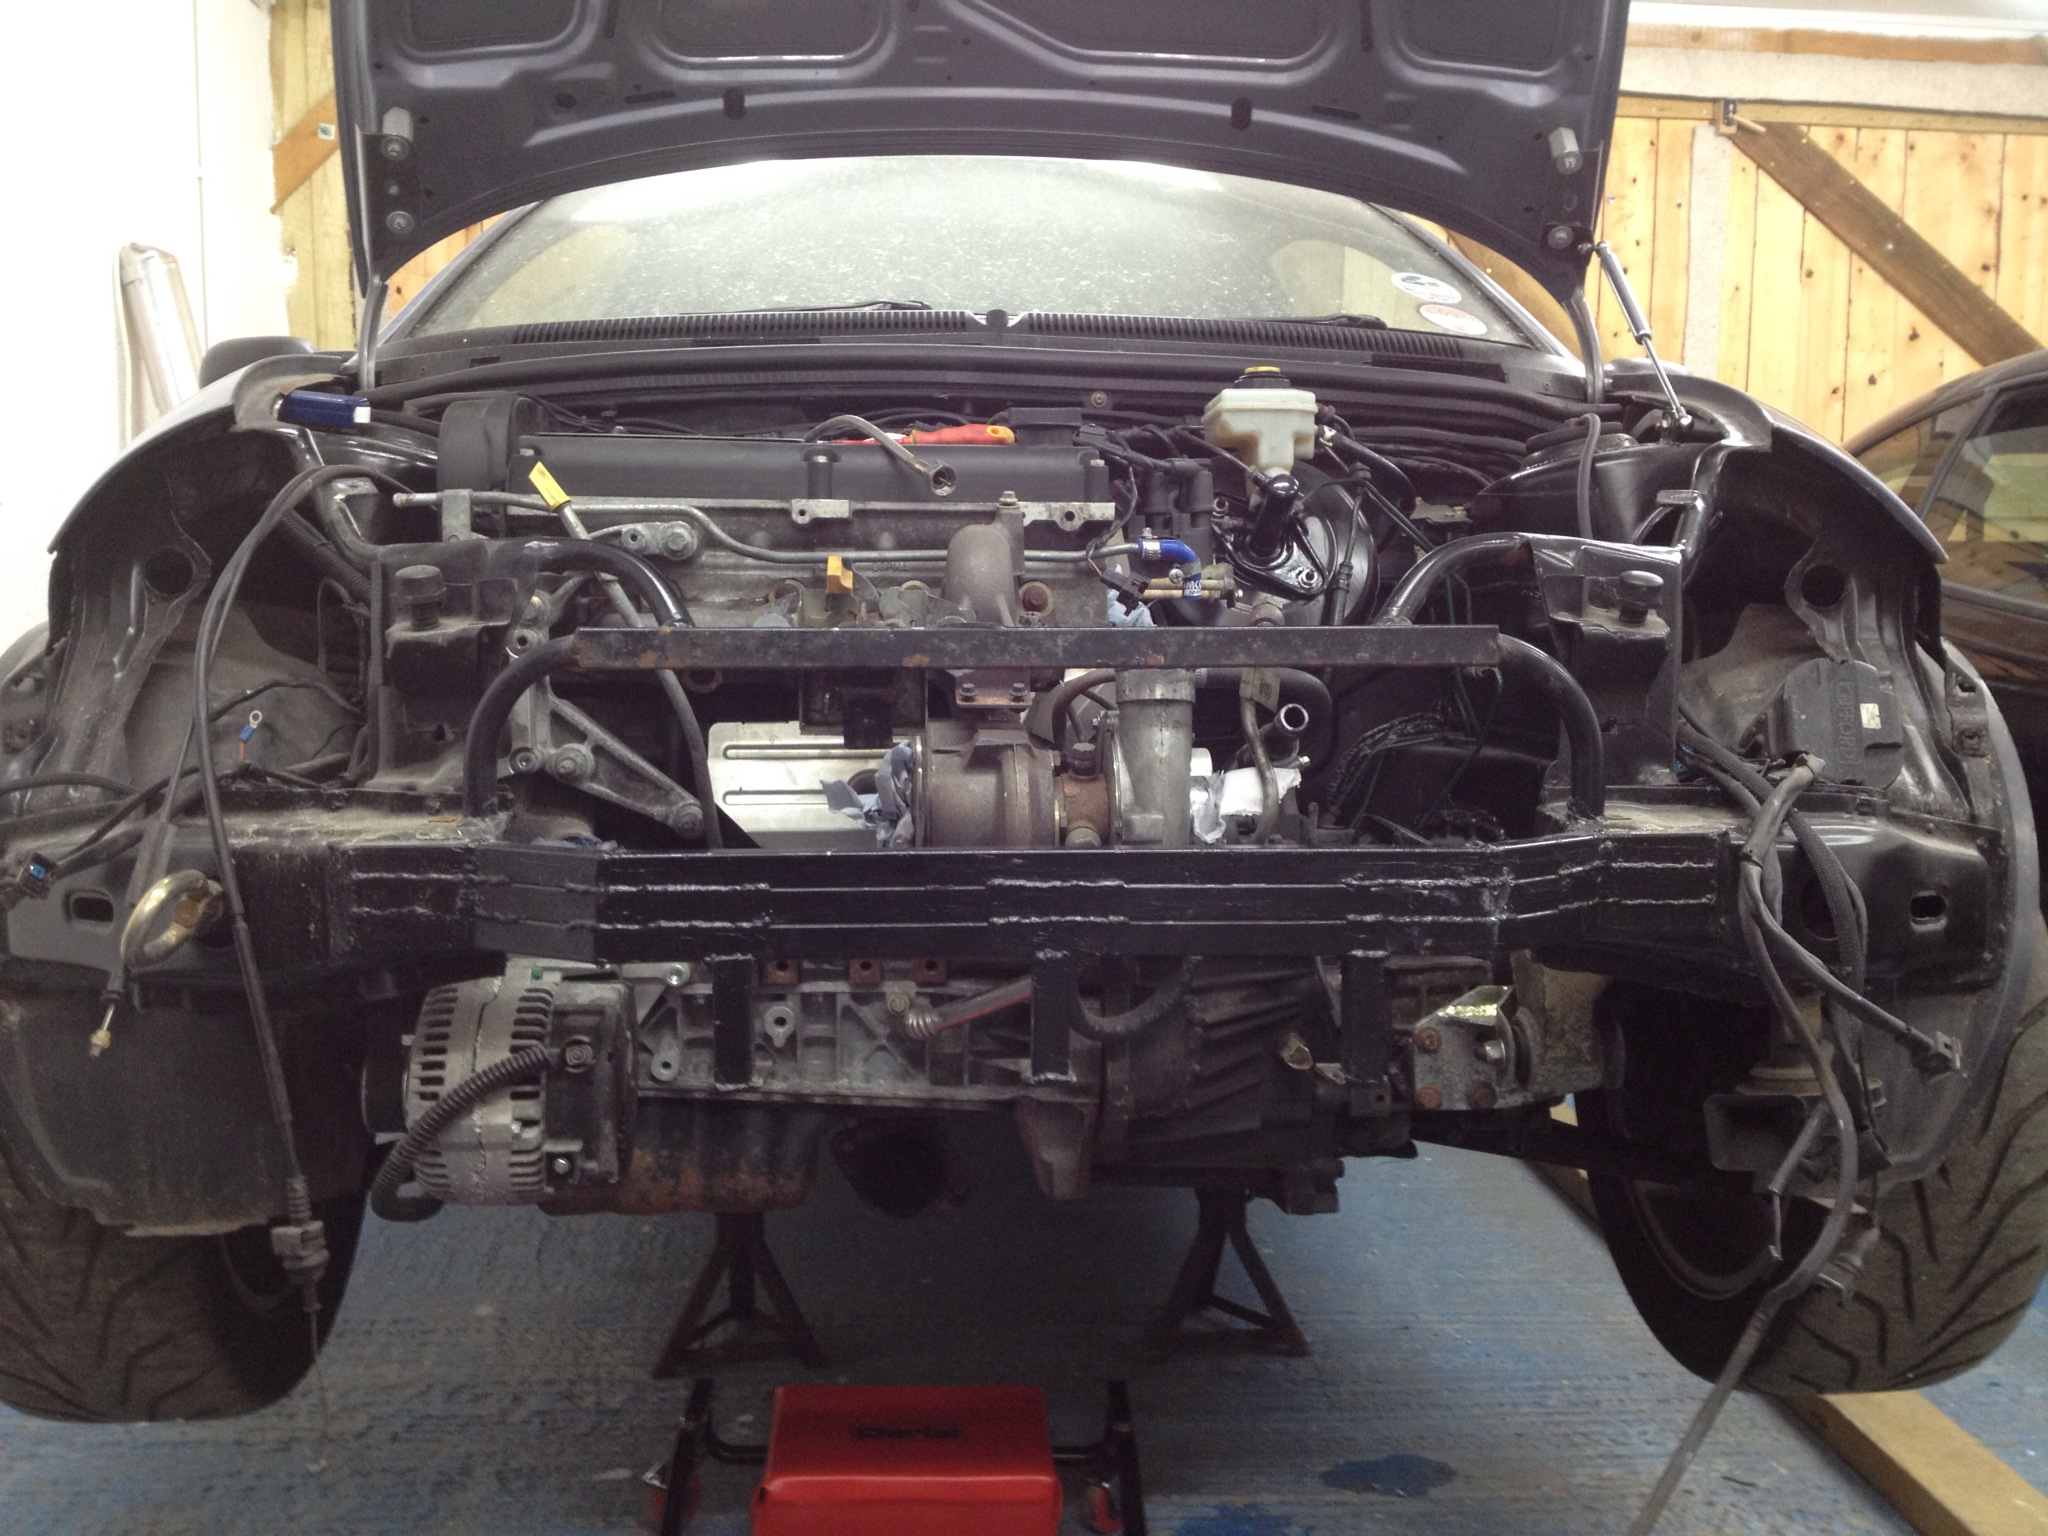
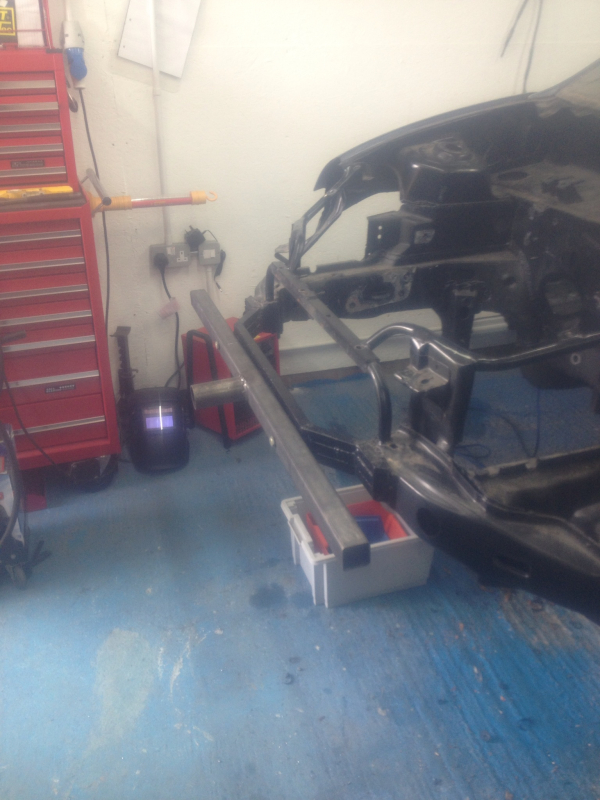
One empty-ish engine bay, here you can see the existing fabrication work at the front from the build a few years back. I now want to remove this and fabricate a completely bolt on front end, hopefully with more space
Inside getting stripped
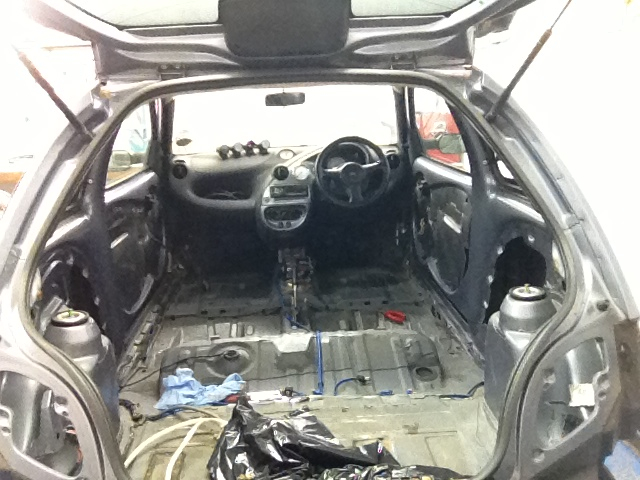
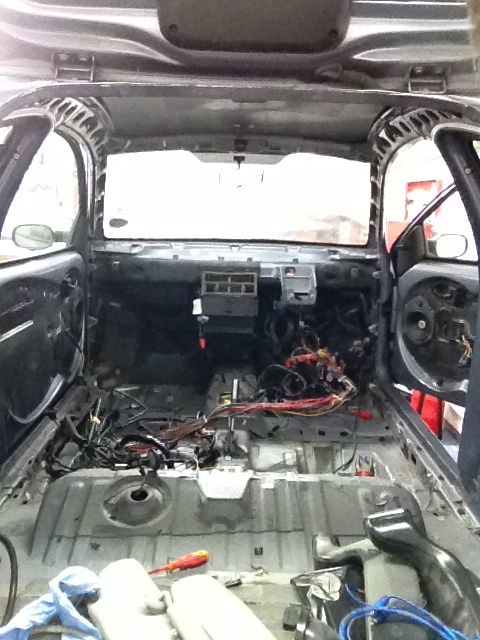
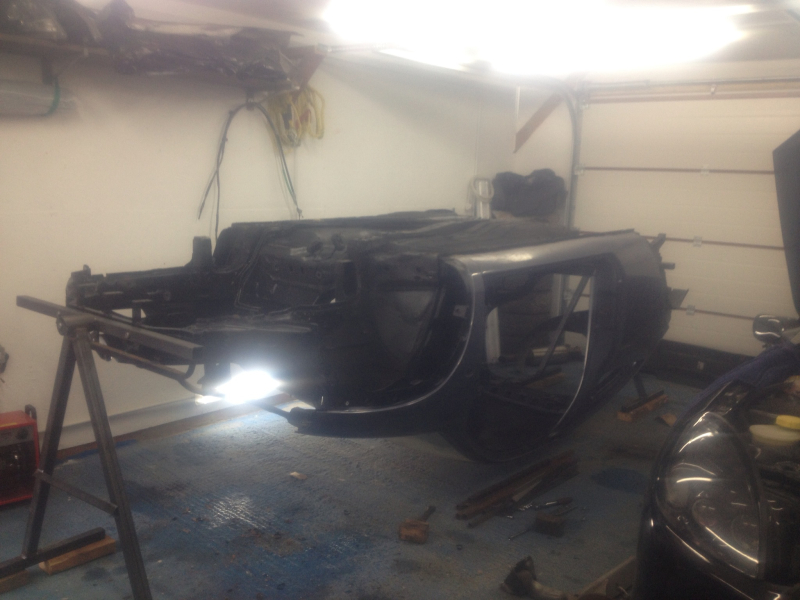
The car completely stripped
Many Thanks
Dan
The car was sat in place in the workshop put on axle stands and the engine and gearbox lowered out:
The mount used for the engine was an adapted CVH item, this caused some rocking when on the hub dyno which I didn't like, so with the new MTX box to go in it was decided to do away with this mount and move across to something similar to the focus mount. But in fitting this mount certain bits of the original mount and cam cover were cut away so this was all replaced (at great expense from ford) and the engine timed back up
Nice and clean - though it's only been 5k or so since it was built!
One empty-ish engine bay, here you can see the existing fabrication work at the front from the build a few years back. I now want to remove this and fabricate a completely bolt on front end, hopefully with more space
Inside getting stripped
The car completely stripped
Many Thanks
Dan

Trending Topics
14-07-2013, 06:46 PM
#9
PassionFord Regular
Thread Starter
Thanks for the replies.
Few more of the car just before the engine was taken out that I found:
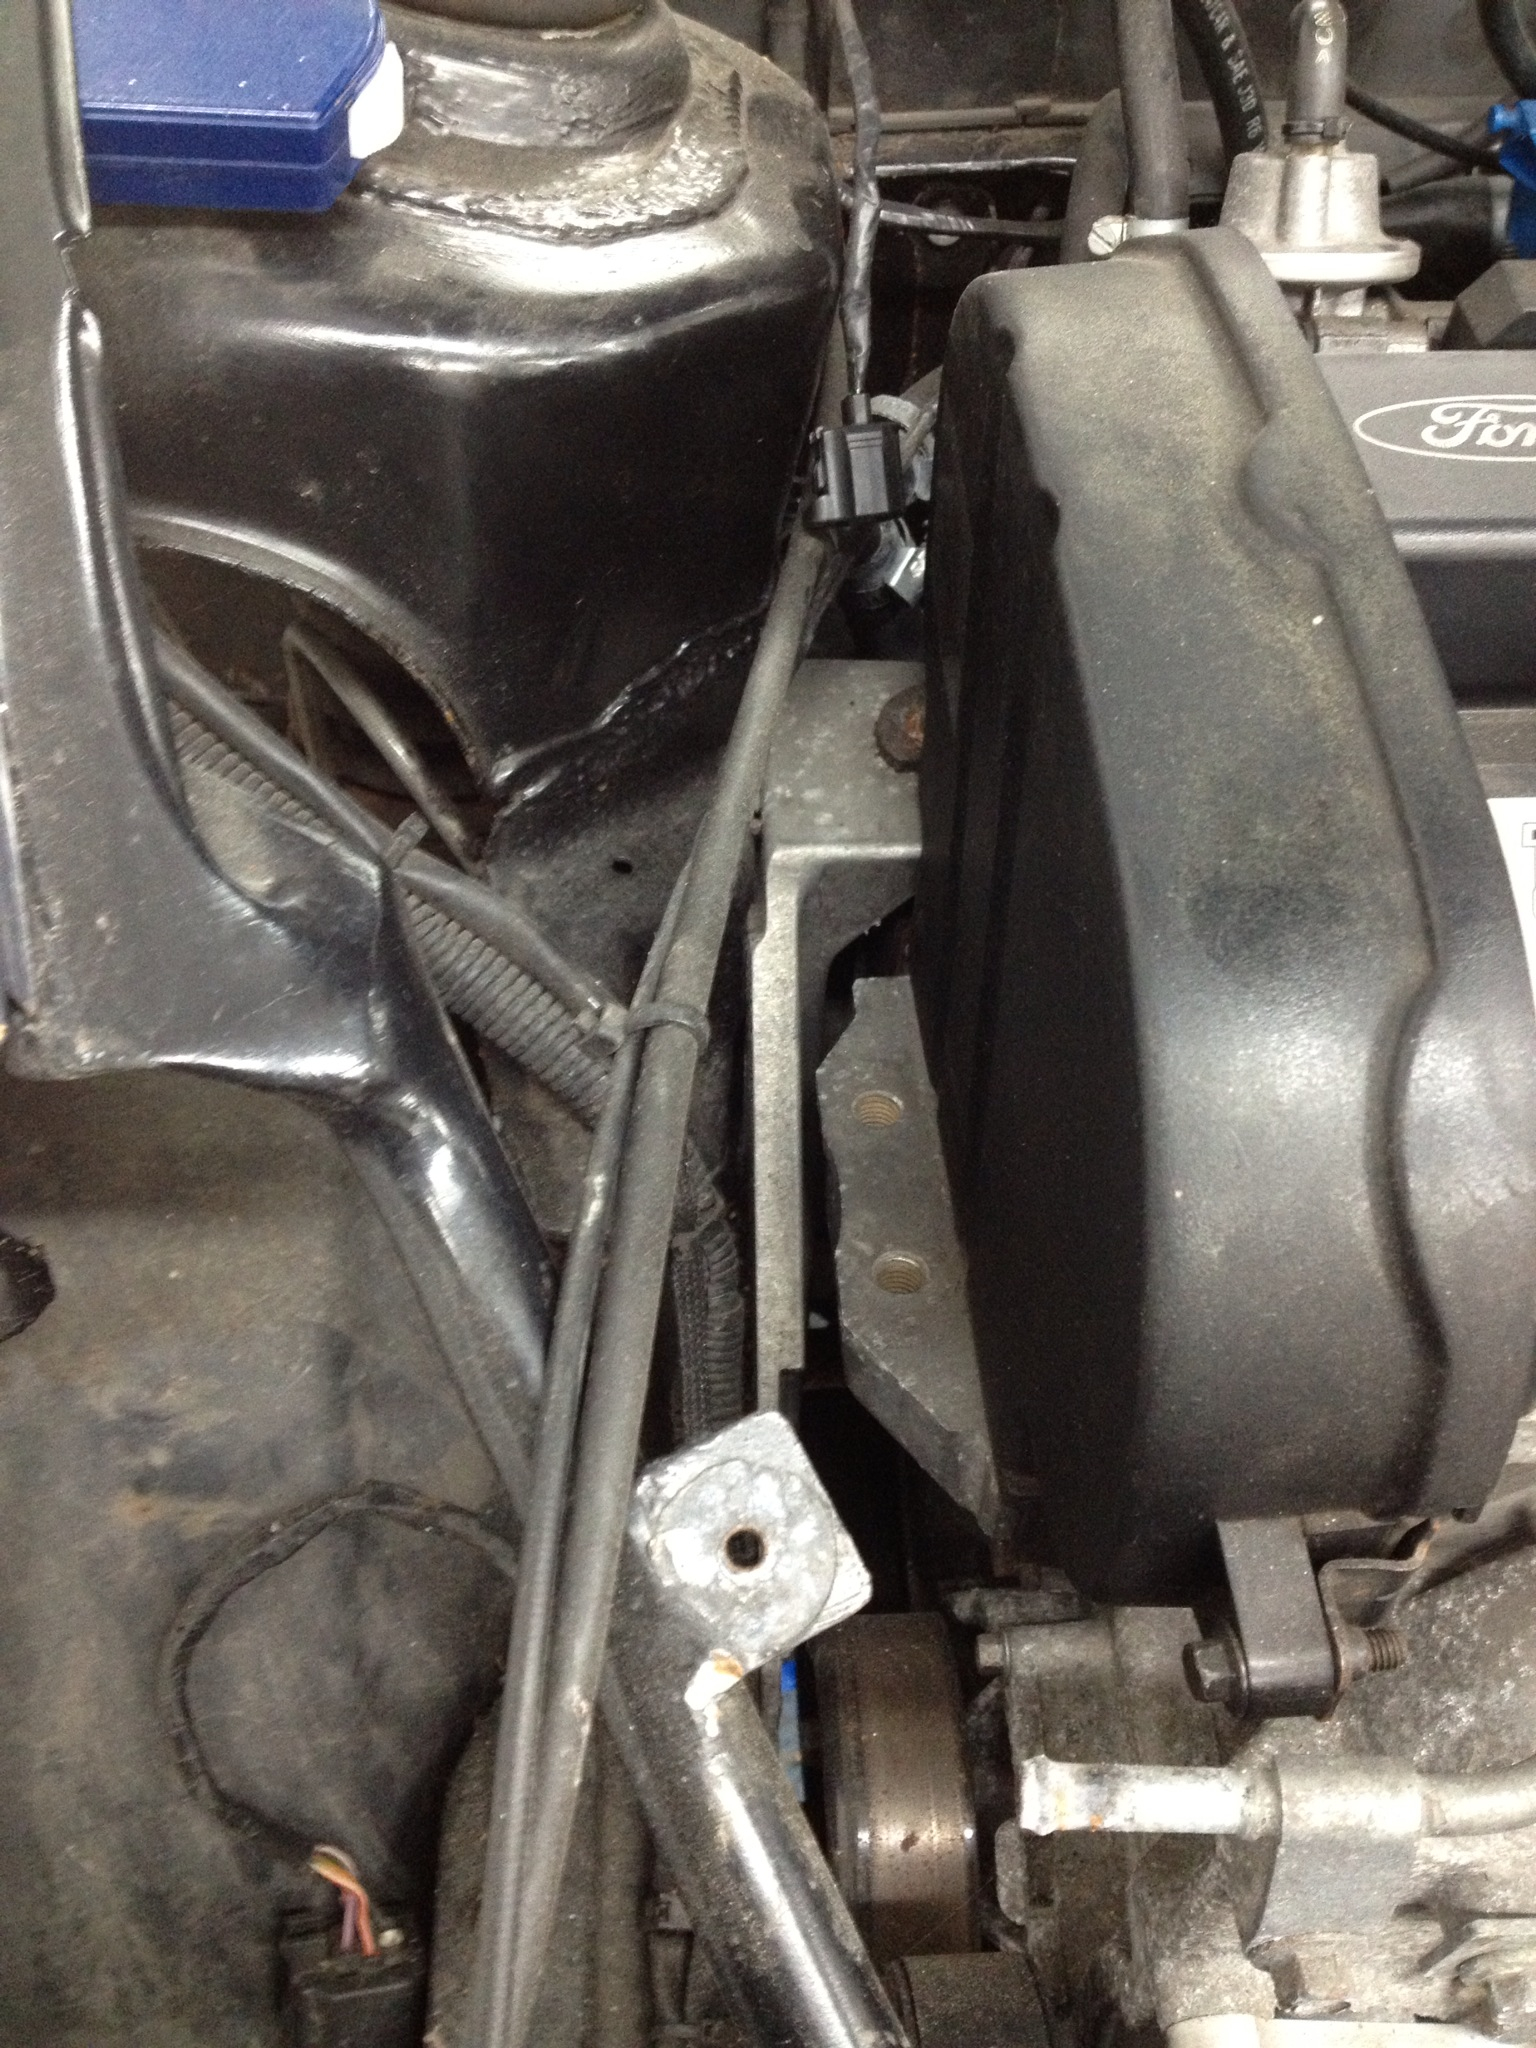
The IB5 box and rally mounts that are all due to be replaced
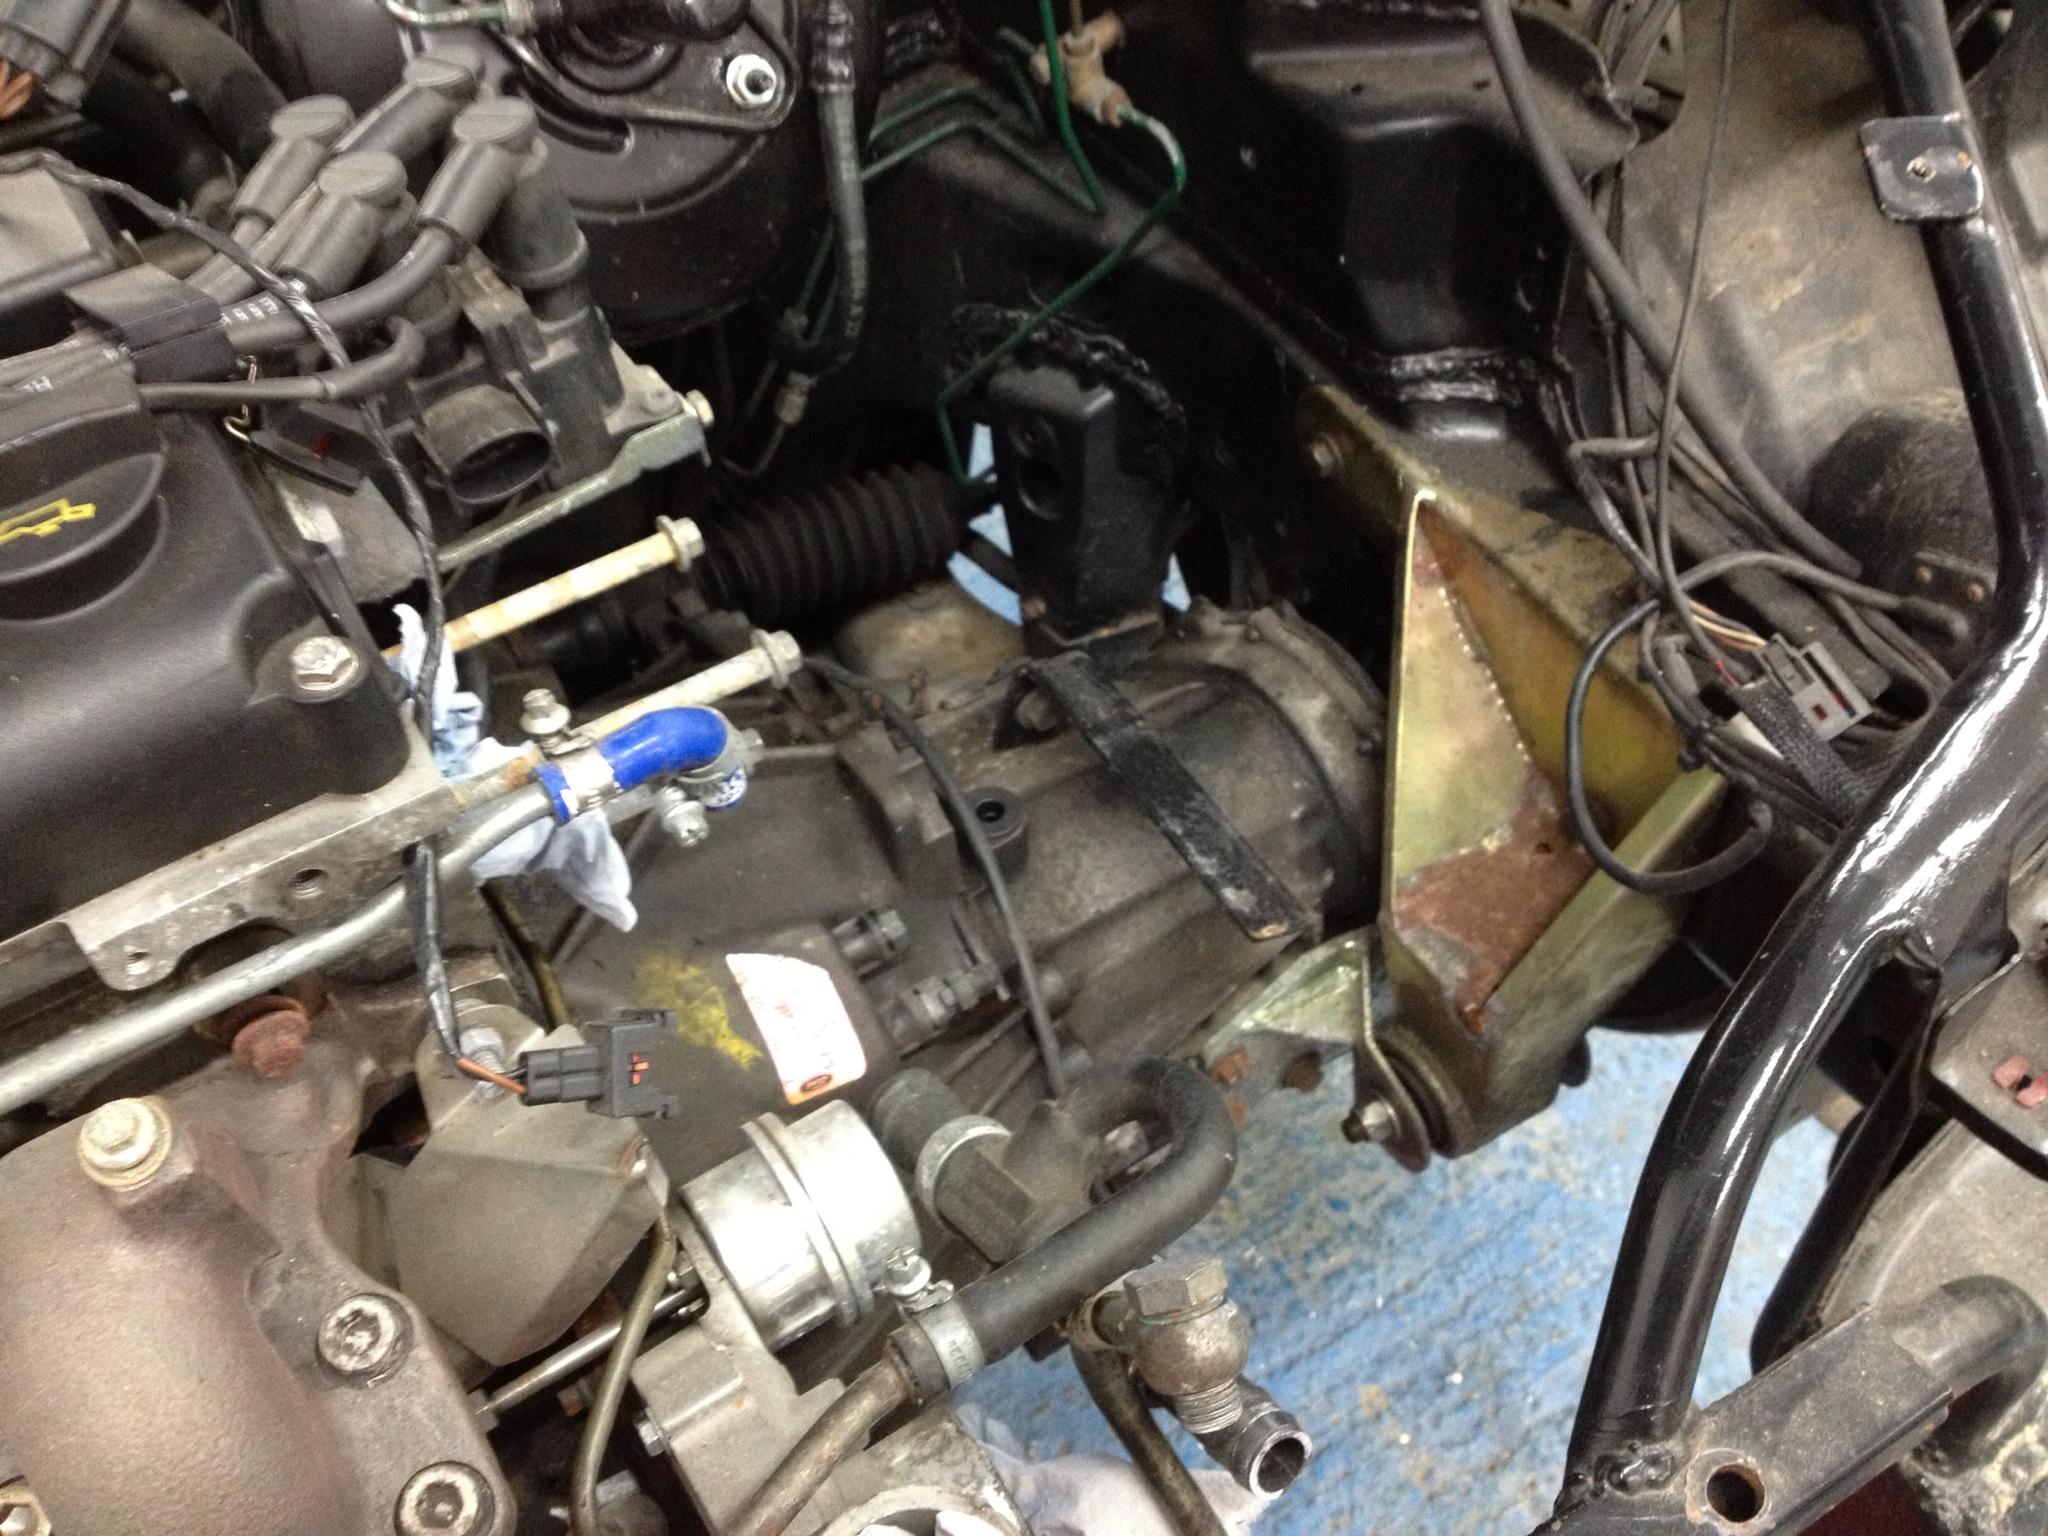
The CVH style mount that was used for the original conversion
The following will show why I have had to make the decision to take an all or nothing approach.. It was either repair properly once and for all or make a change
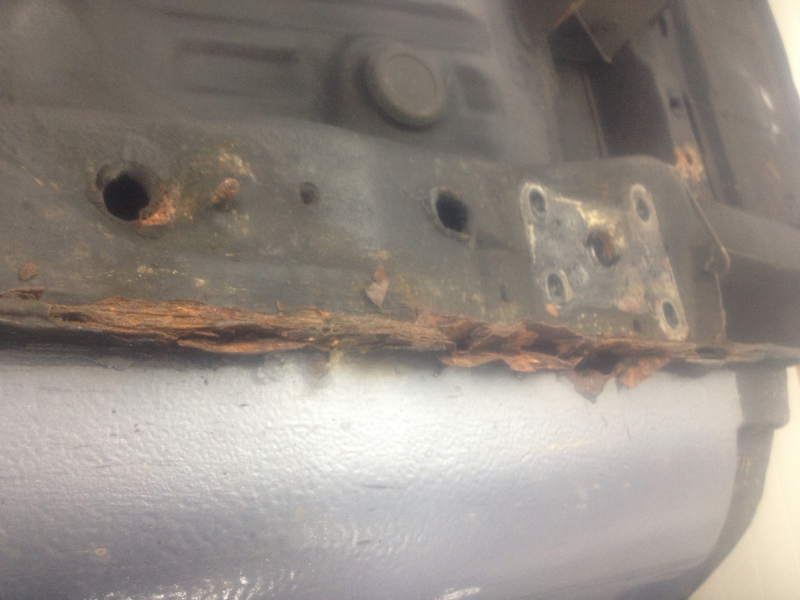
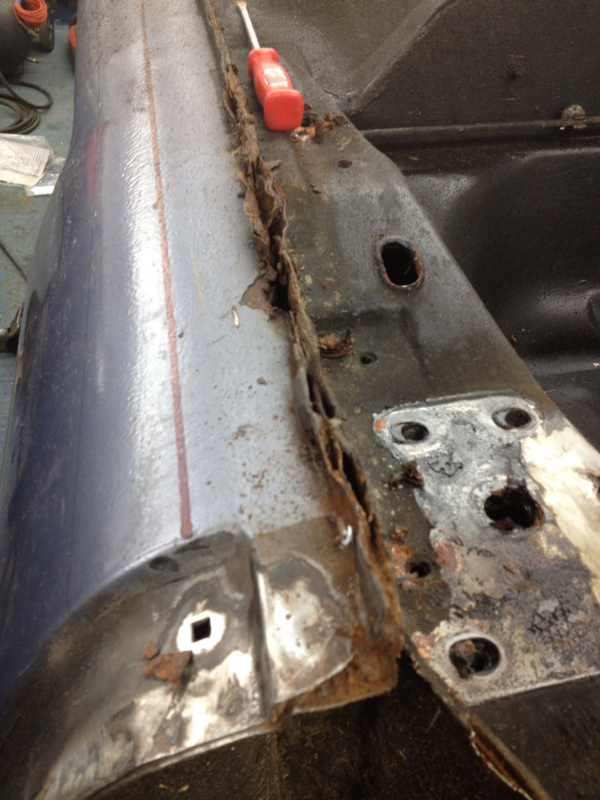
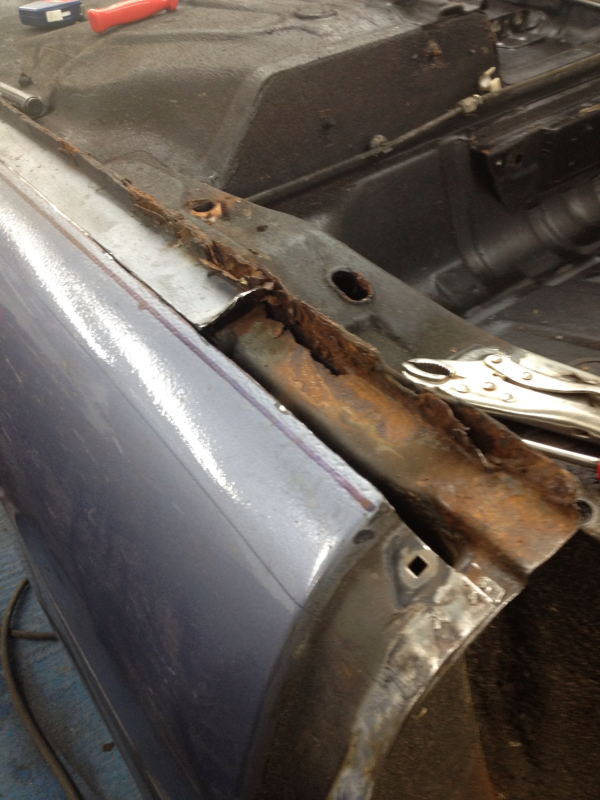
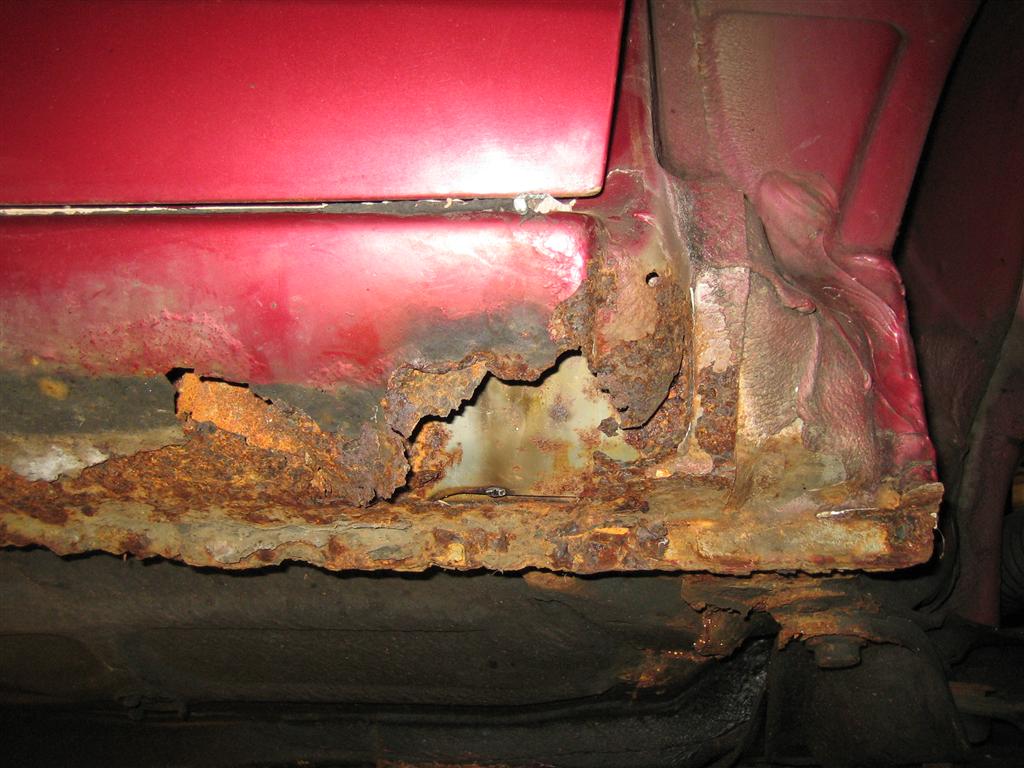
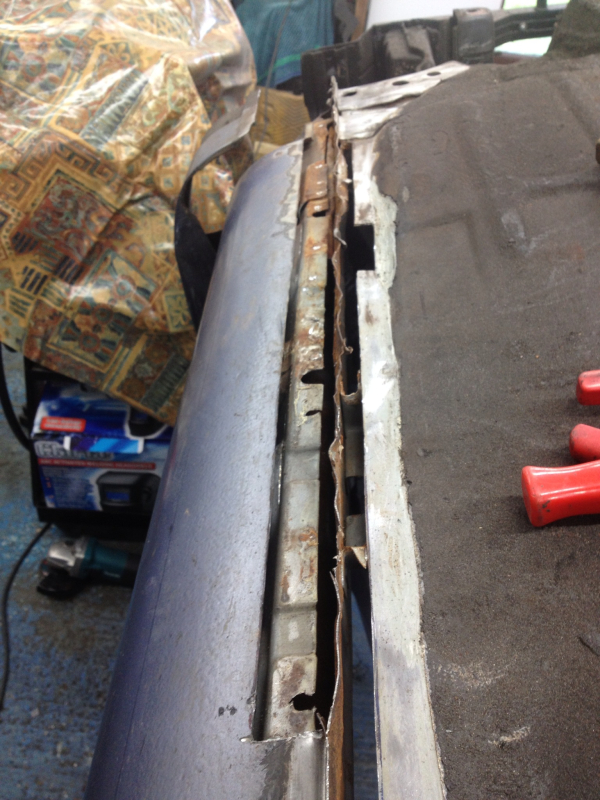
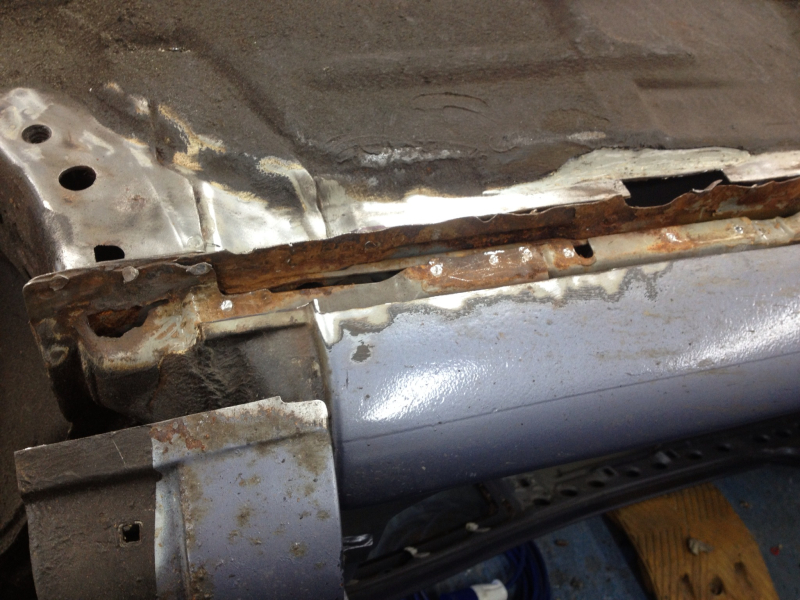
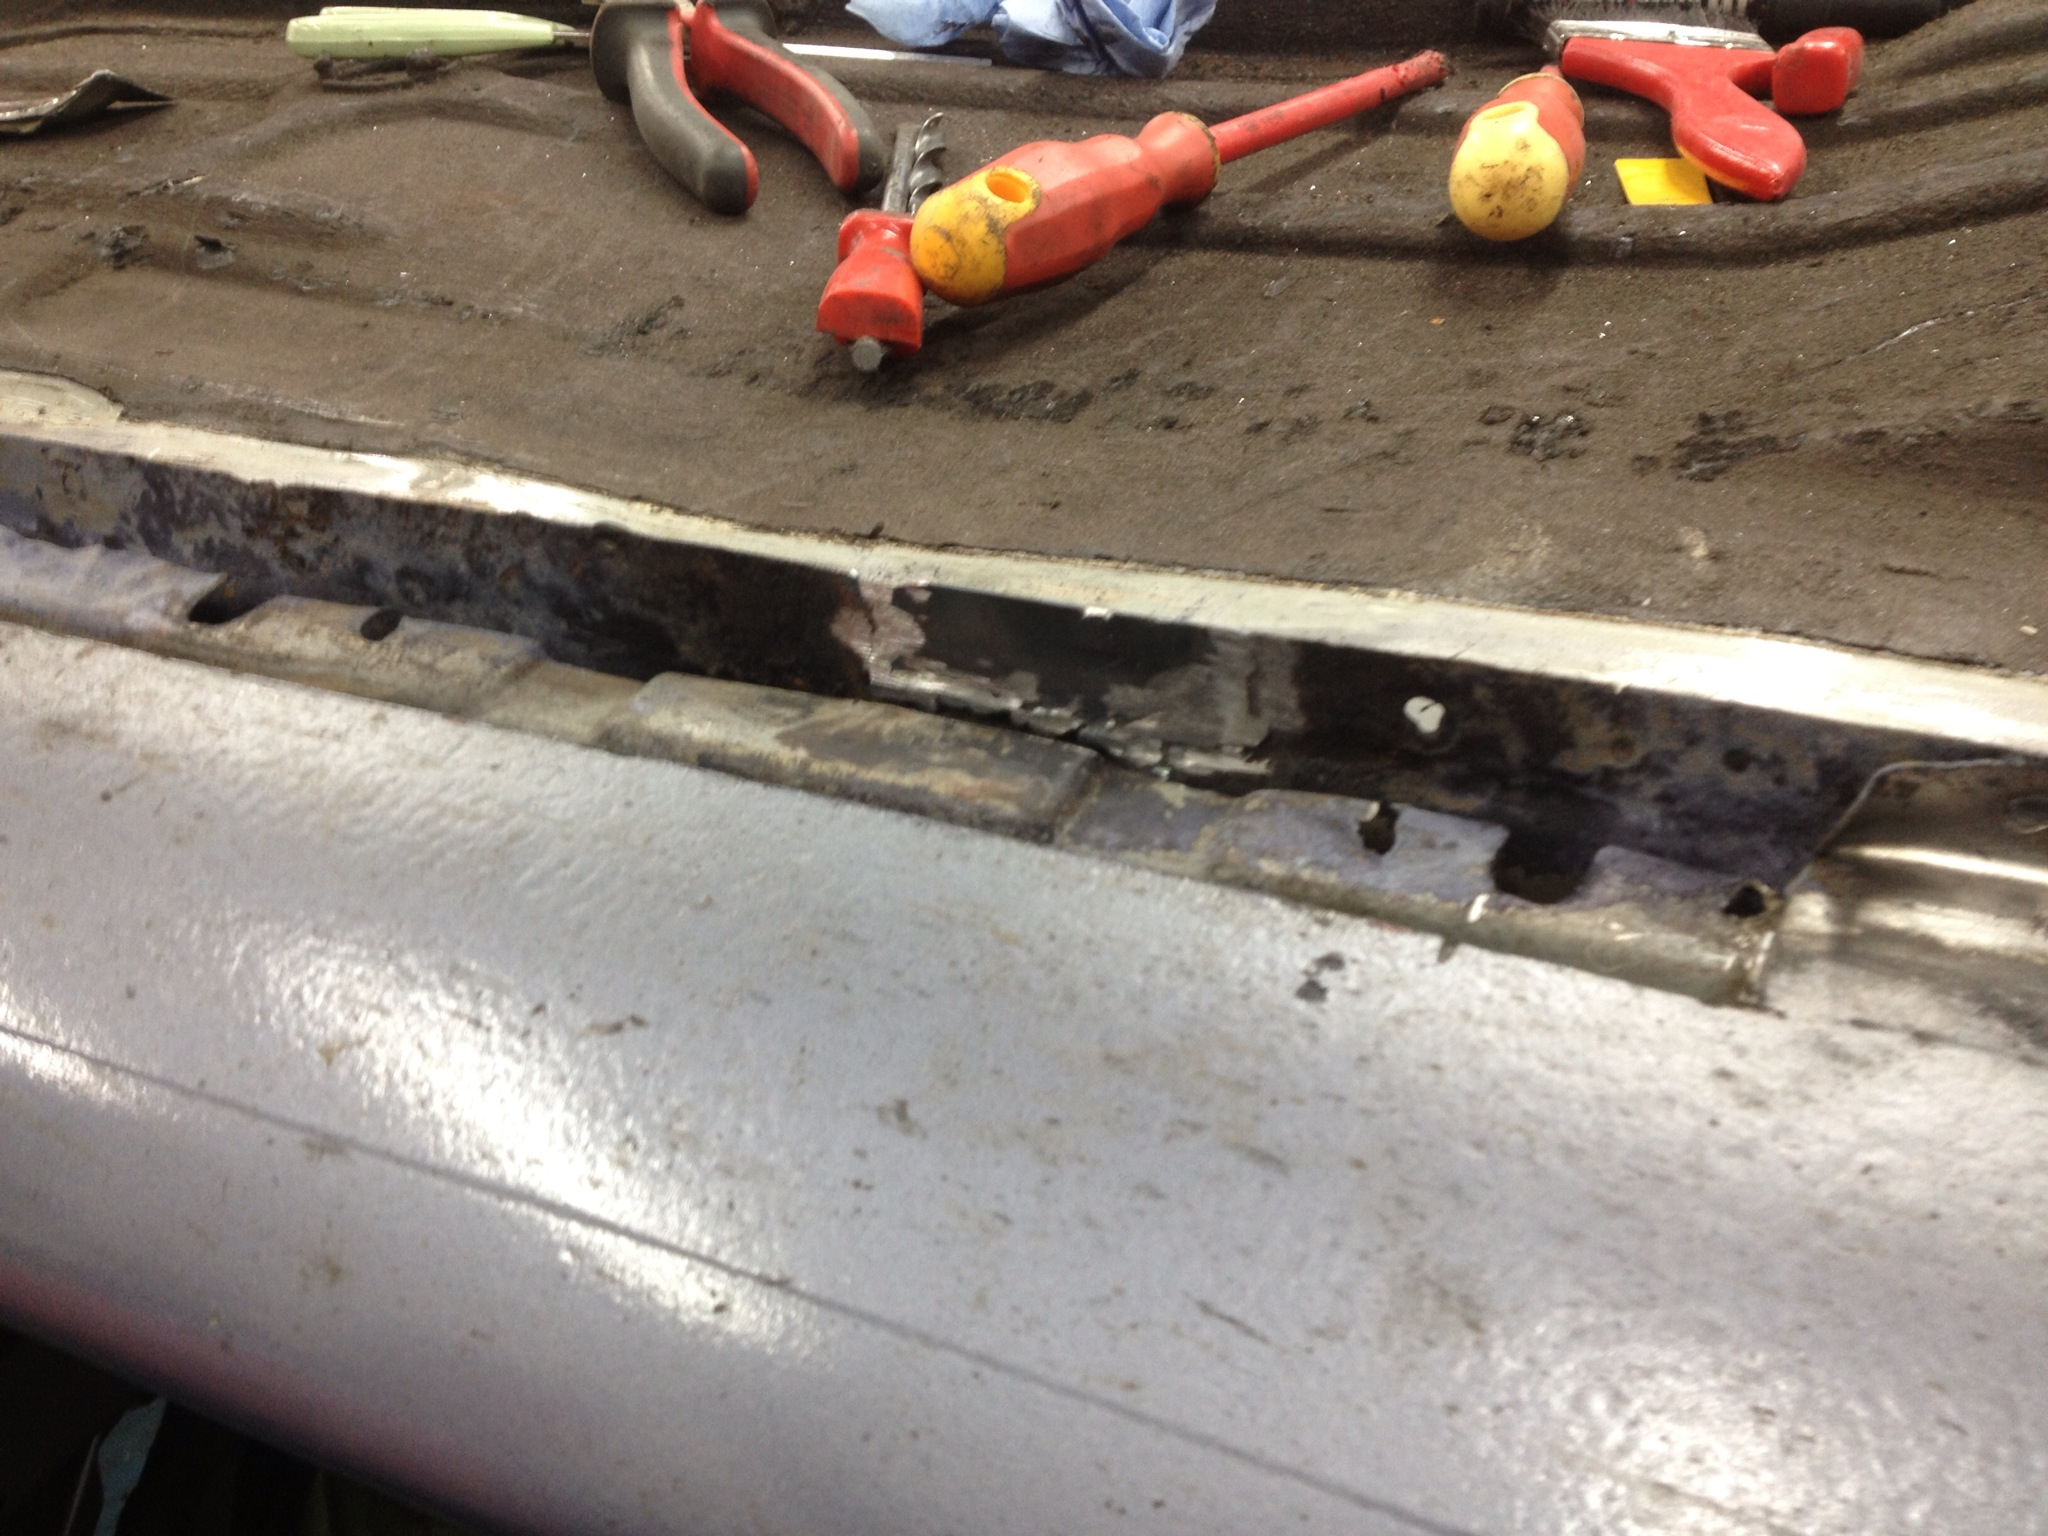
The sills...
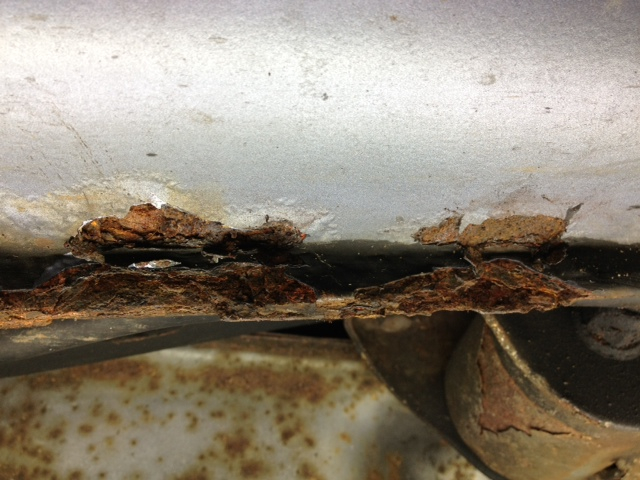

Where I had cut a test patch to see how bad before starting:
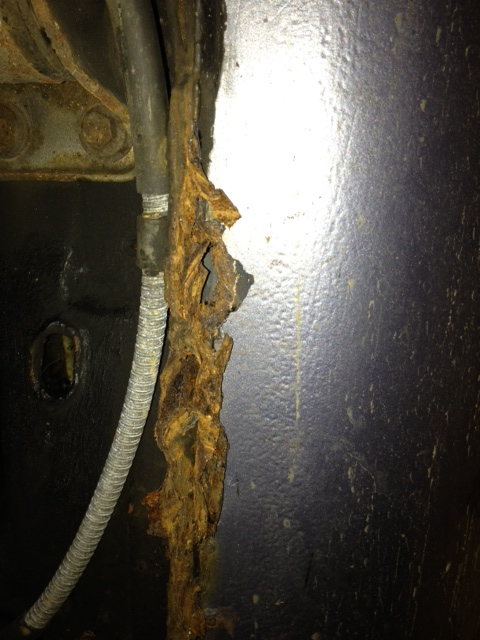
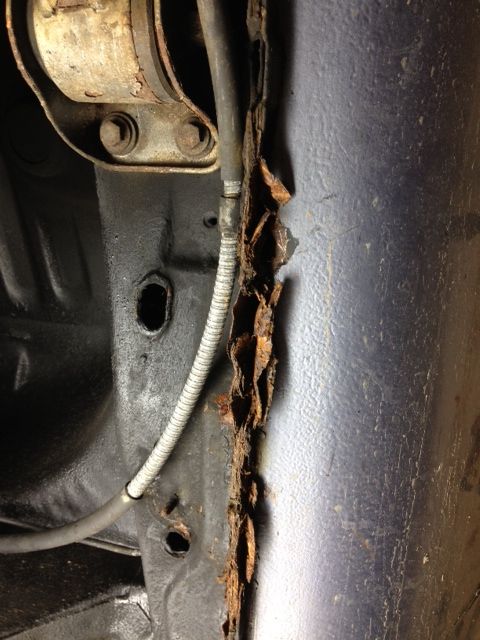
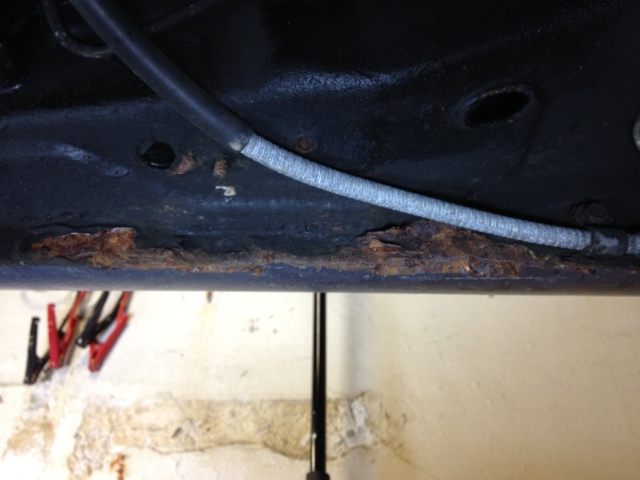
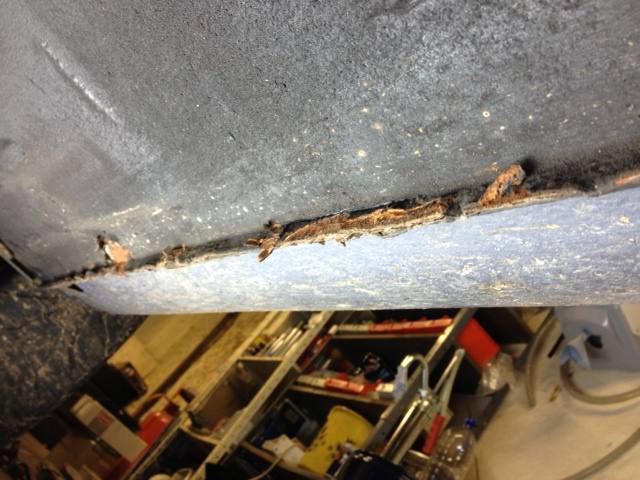
These photos of the sills were taken nearly 2 years ago now when I was going to start on some upgrade works. I knew they needed attention but wasn't until I got the screwdriver out that I realised how bad I had let them go. This is what made me realise if I wanted to repair and keep the car I needed a better environment to work in and spend some serious amounts of time on it..
More to follow!
Few more of the car just before the engine was taken out that I found:
The IB5 box and rally mounts that are all due to be replaced
The CVH style mount that was used for the original conversion
The following will show why I have had to make the decision to take an all or nothing approach.. It was either repair properly once and for all or make a change
The sills...
Where I had cut a test patch to see how bad before starting:
These photos of the sills were taken nearly 2 years ago now when I was going to start on some upgrade works. I knew they needed attention but wasn't until I got the screwdriver out that I realised how bad I had let them go. This is what made me realise if I wanted to repair and keep the car I needed a better environment to work in and spend some serious amounts of time on it..
More to follow!
 14-07-2013, 08:15 PM
#12
Passionford Addict
 14-07-2013, 08:34 PM
#13
PassionFord Regular
Thread Starter
Yes you can imagine my face when I saw them!!
This is true and that's exactly what I started looking for. But the cheap Ka's or bare shell's I came across seem to all have some form of rot issues if not the sills it would be the filler cap or quarter panels, arches etc. With the money I would spend on a new shell and then have to prep and protect ready for the rebuild I could spend on this one and repair it completely. Mine has only suffered around the sills... Everywhere else is rust free that I've found!
Exactly.. This was the main reason for repairing it. It's my first car.. First one I drove after passing my test.. Some 11 years now!!
Thanks
This is true and that's exactly what I started looking for. But the cheap Ka's or bare shell's I came across seem to all have some form of rot issues if not the sills it would be the filler cap or quarter panels, arches etc. With the money I would spend on a new shell and then have to prep and protect ready for the rebuild I could spend on this one and repair it completely. Mine has only suffered around the sills... Everywhere else is rust free that I've found!
Thanks
15-07-2013, 01:44 PM
#14
PassionFord Regular
Thread Starter
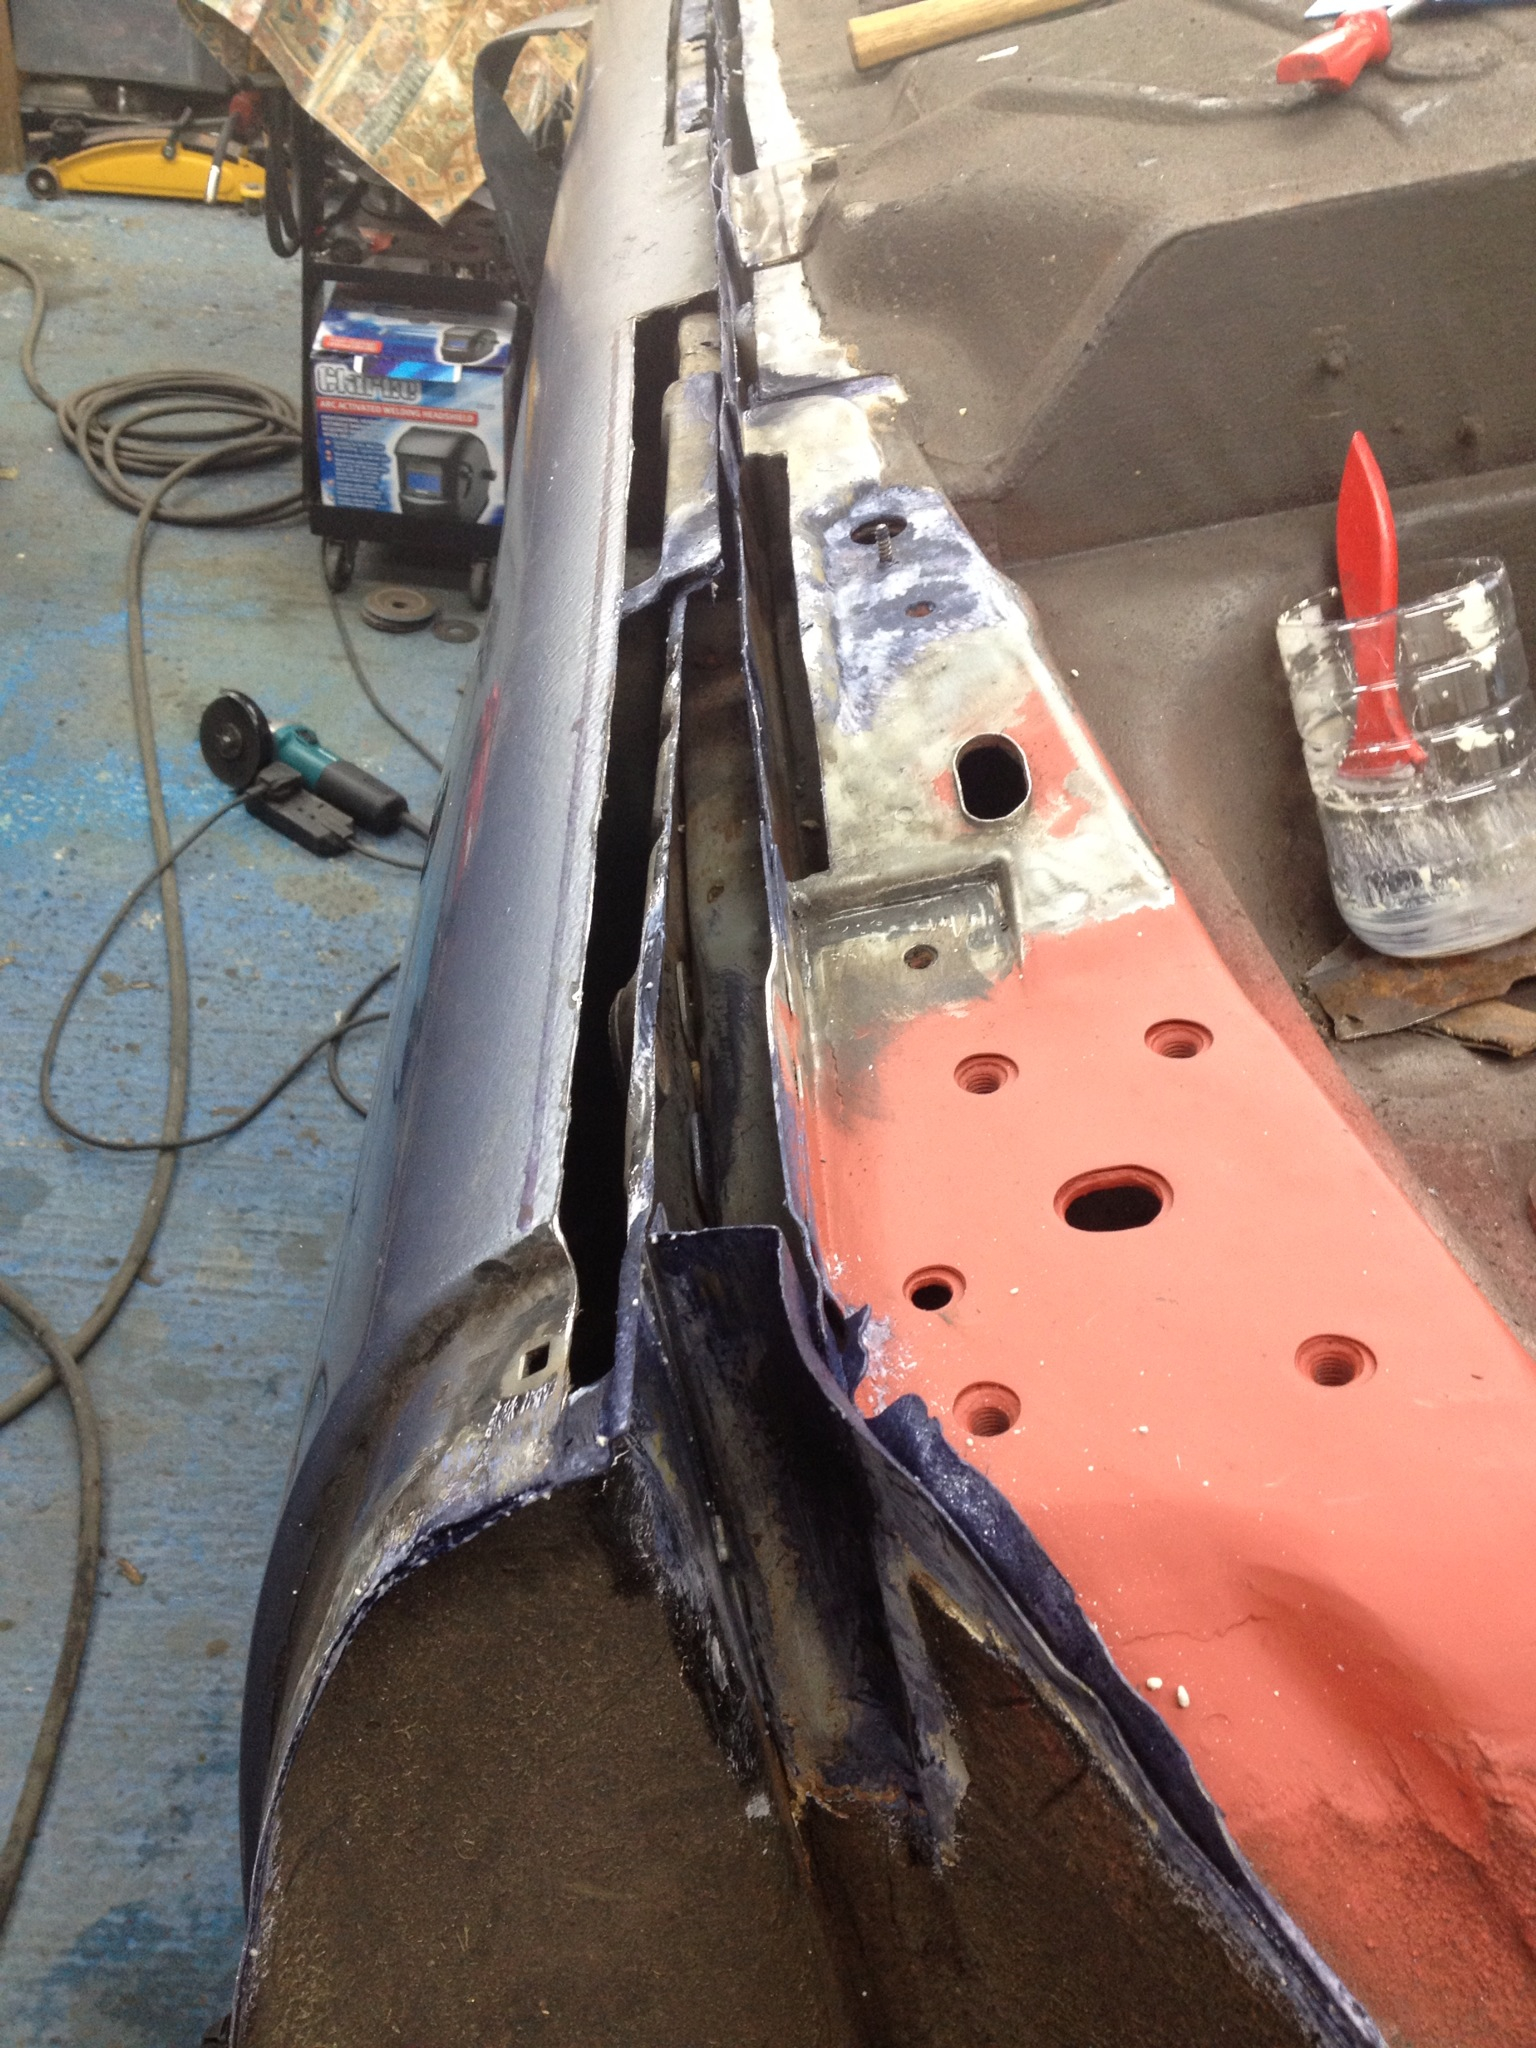
Right further progress:
Excuse the pic quality of the next few, I stupidly left a plastic film over the lens! A spit was bought to get much better access to the sills:
Upside down:
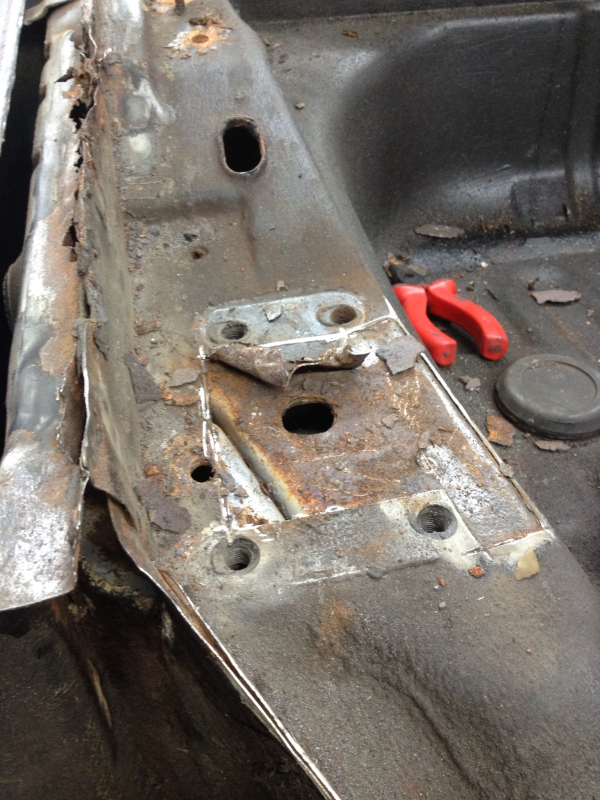
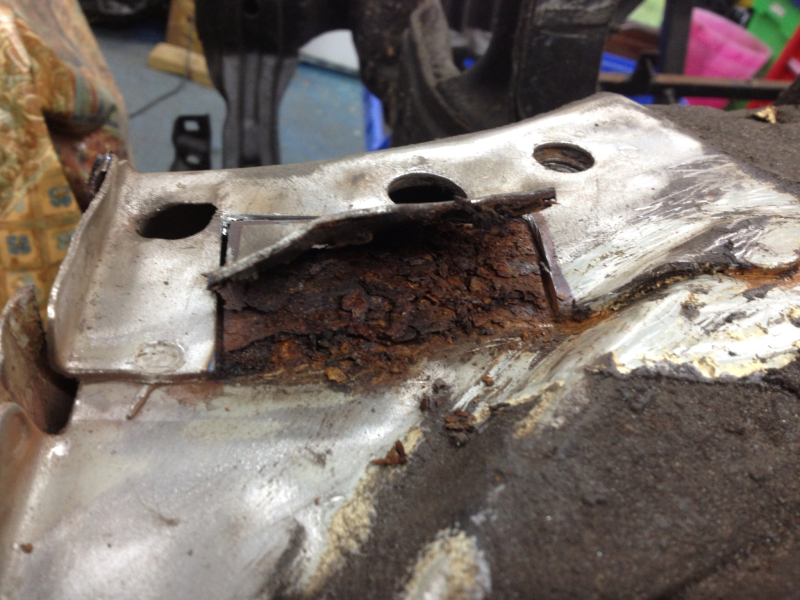
Drivers side to start with - this is towards the rear arch
'Small' blister by the rear beam mount
Sill

First sheet over the rear beam mount exposed
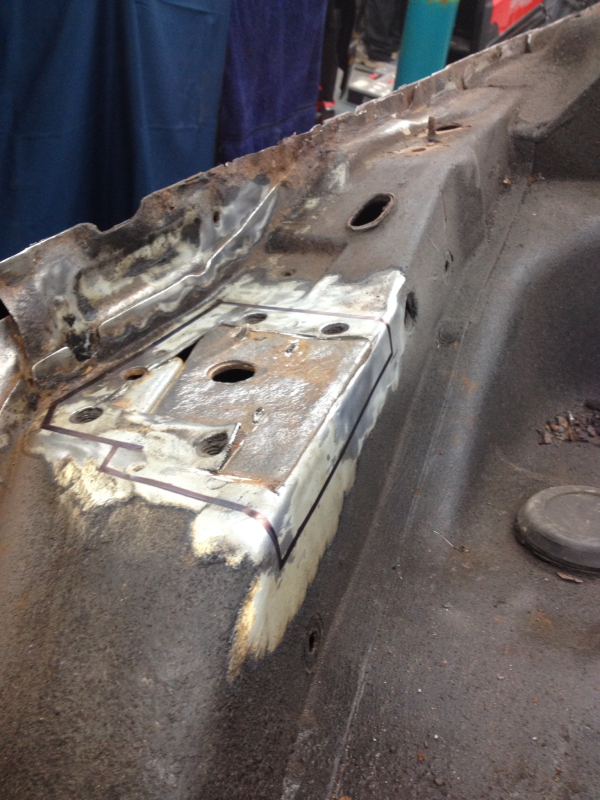
Area treated with Dinitrol RC800
Template made
Cut and laid in
Welded in
Flatted back
Primed for a bit of protection
More to follow
Thanks
Excuse the pic quality of the next few, I stupidly left a plastic film over the lens! A spit was bought to get much better access to the sills:
Upside down:
Drivers side to start with - this is towards the rear arch
'Small' blister by the rear beam mount
Sill
First sheet over the rear beam mount exposed
Area treated with Dinitrol RC800
Template made
Cut and laid in
Welded in
Flatted back
Primed for a bit of protection
More to follow
Thanks
15-07-2013, 06:06 PM
#16
Too many posts.. I need a life!!

Good work mate! Glad to see another old timer pulling an old one back to shape. I've made the decision to let someone rape me for all my lifes savings and do the panel work as I could take the work on but I've got no experiance and want it done before 2020! I agree that all Kas rust so you're aswell fixing the one you've got... then I found out how much it was going to cost... and still are going ahead with it!


Last edited by jammy86; 15-07-2013 at 06:09 PM.
 16-07-2013, 12:58 AM
#18
Too many posts.. I need a life!!

YES YES YES - Glad you are keeping it!
I came with my mate Craig up to one of the shows a few years ago with you and your brother, so wierd being a in a convoy of fast Ka's!
I have one of my very own now being put back together.
I came with my mate Craig up to one of the shows a few years ago with you and your brother, so wierd being a in a convoy of fast Ka's!
I have one of my very own now being put back together.
16-07-2013, 01:09 PM
#20
PassionFord Regular
Thread Starter
Jammy86 - I know what you mean, I would probably be looking at thousands to put this all right and have it all painted again by a body shop - I'm lucky I have a friend who is a painter and can give me reasonable rates!
Hobomassiv - That must have been one of the last shows the car went to either ford fair or trax that year! Guessing by your sig you have 'PUKKA' Ka now? Remember seeing this car in 2004.. That amongst others gave me the idea to do the rs turbo conversion I had originally. It's a nice car do you have any recent pics of it?
Many thanks for all the comments - giving me the reassurance that I've made the right decision!
Will update shortly.
16-07-2013, 01:21 PM
#21
PassionFord Regular
Thread Starter
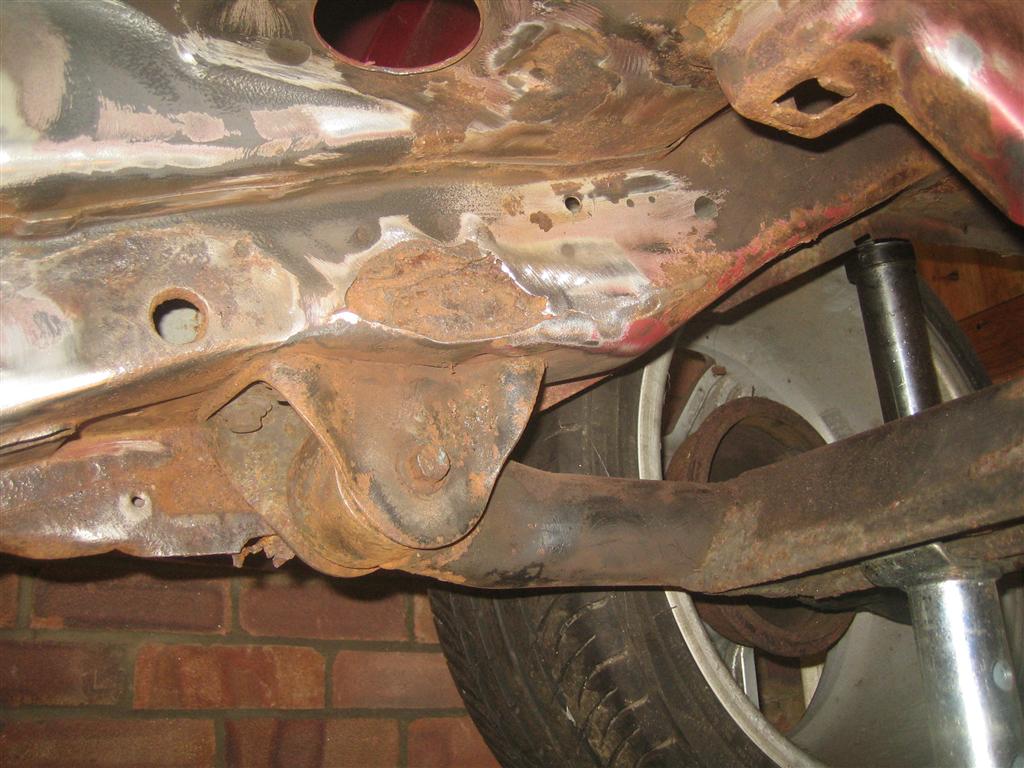
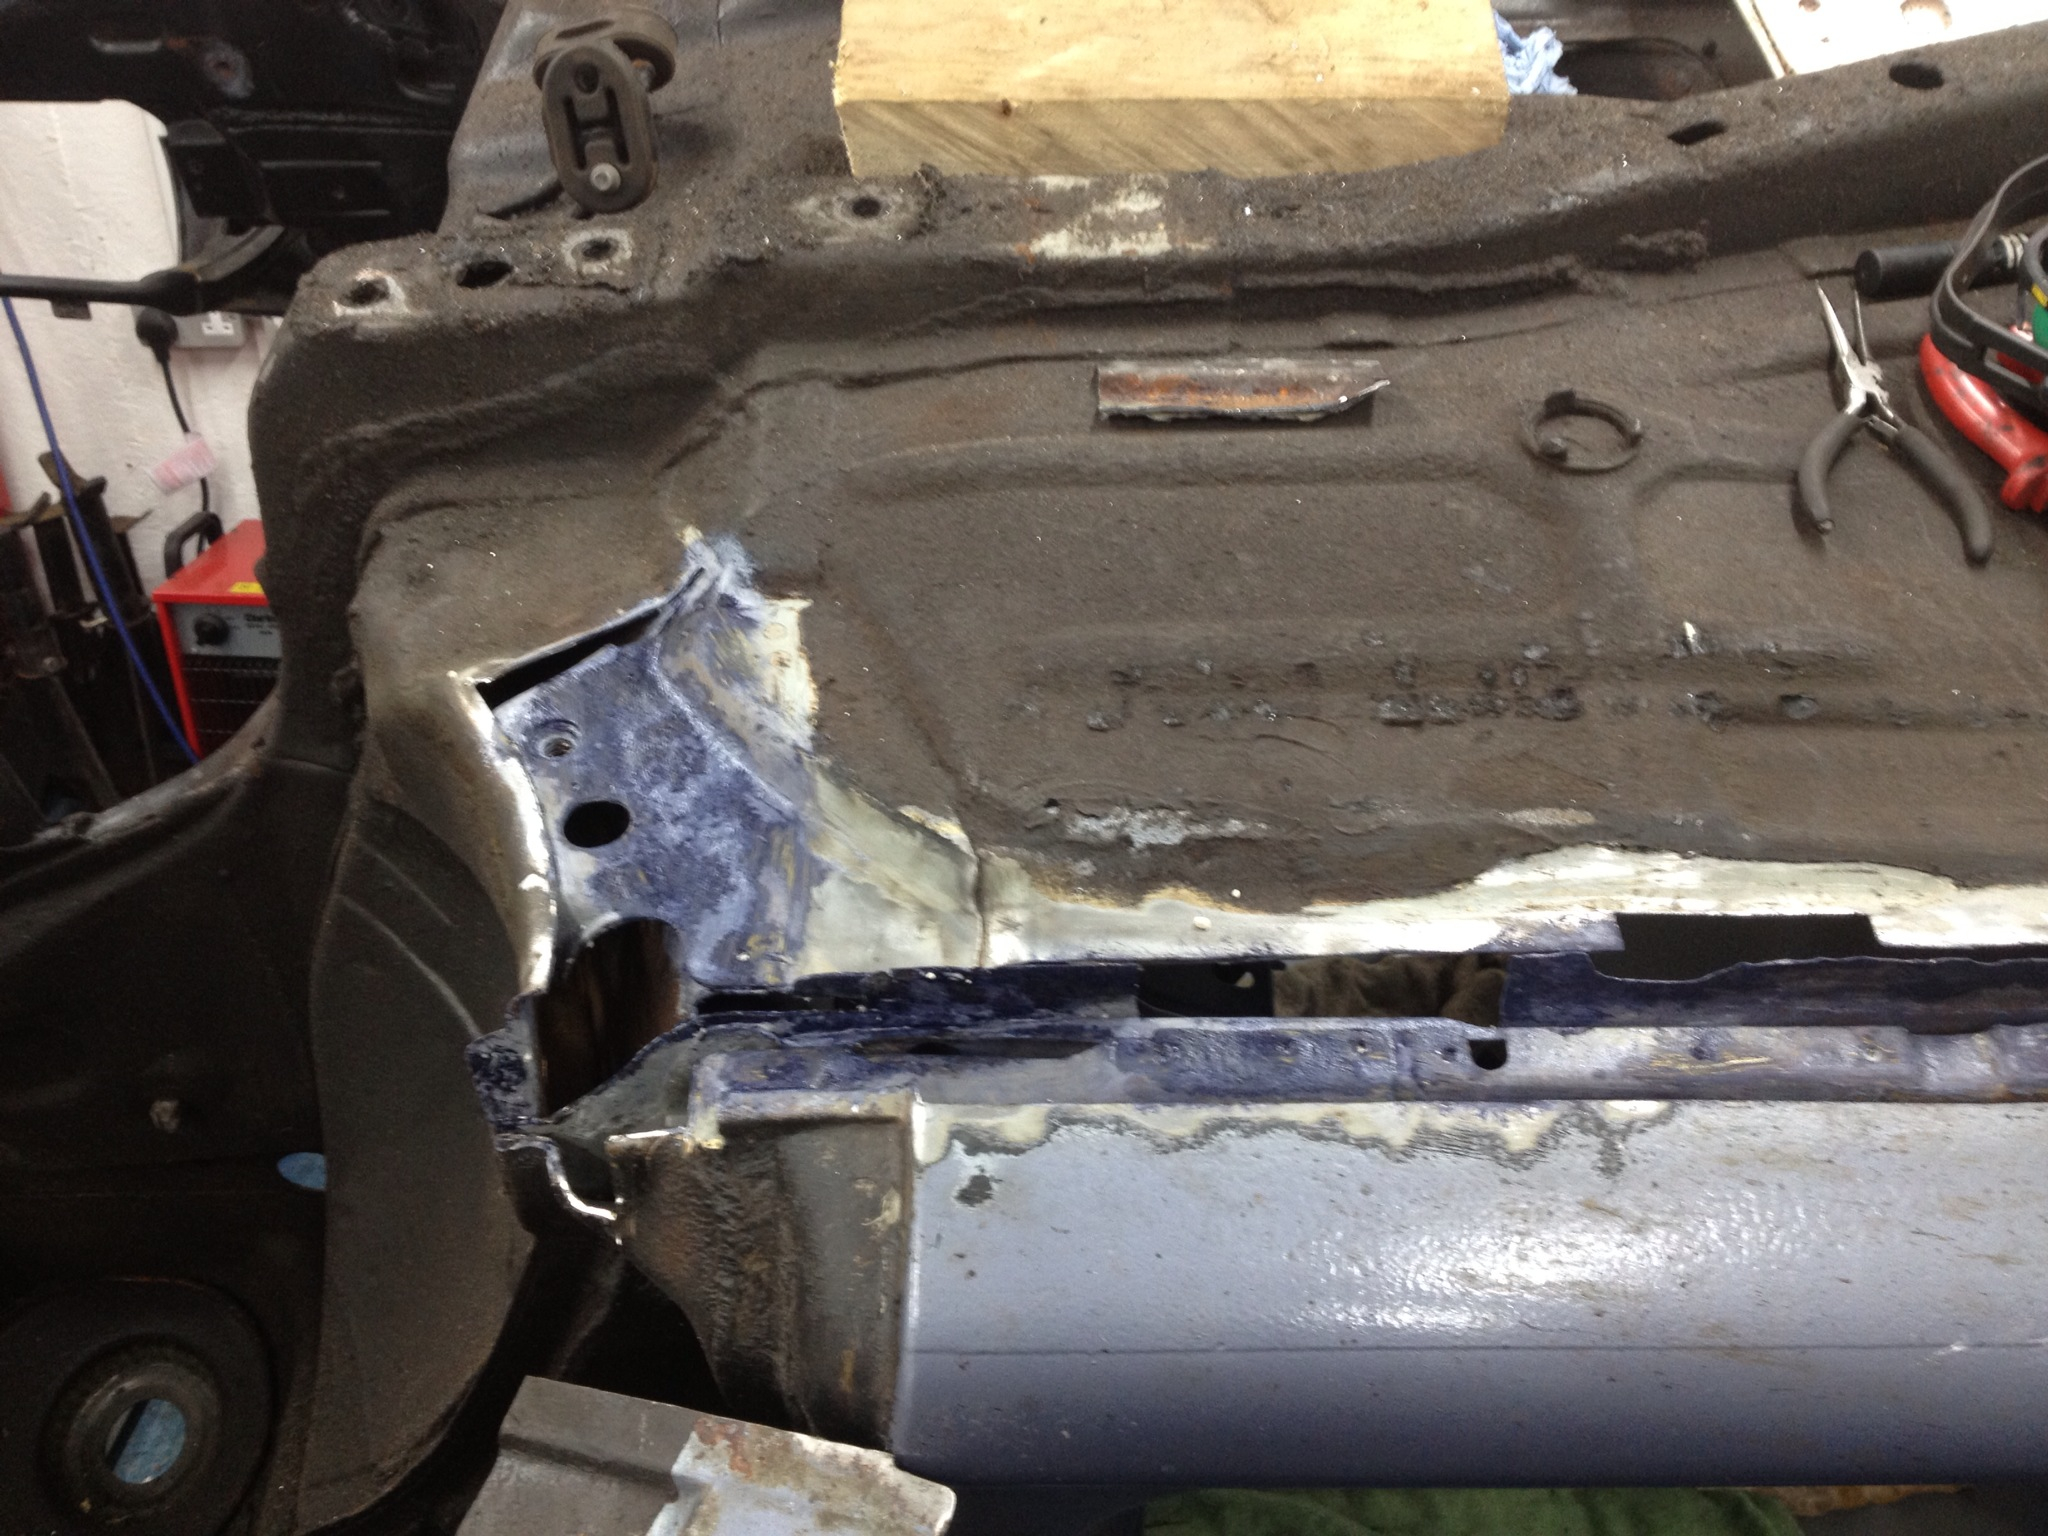
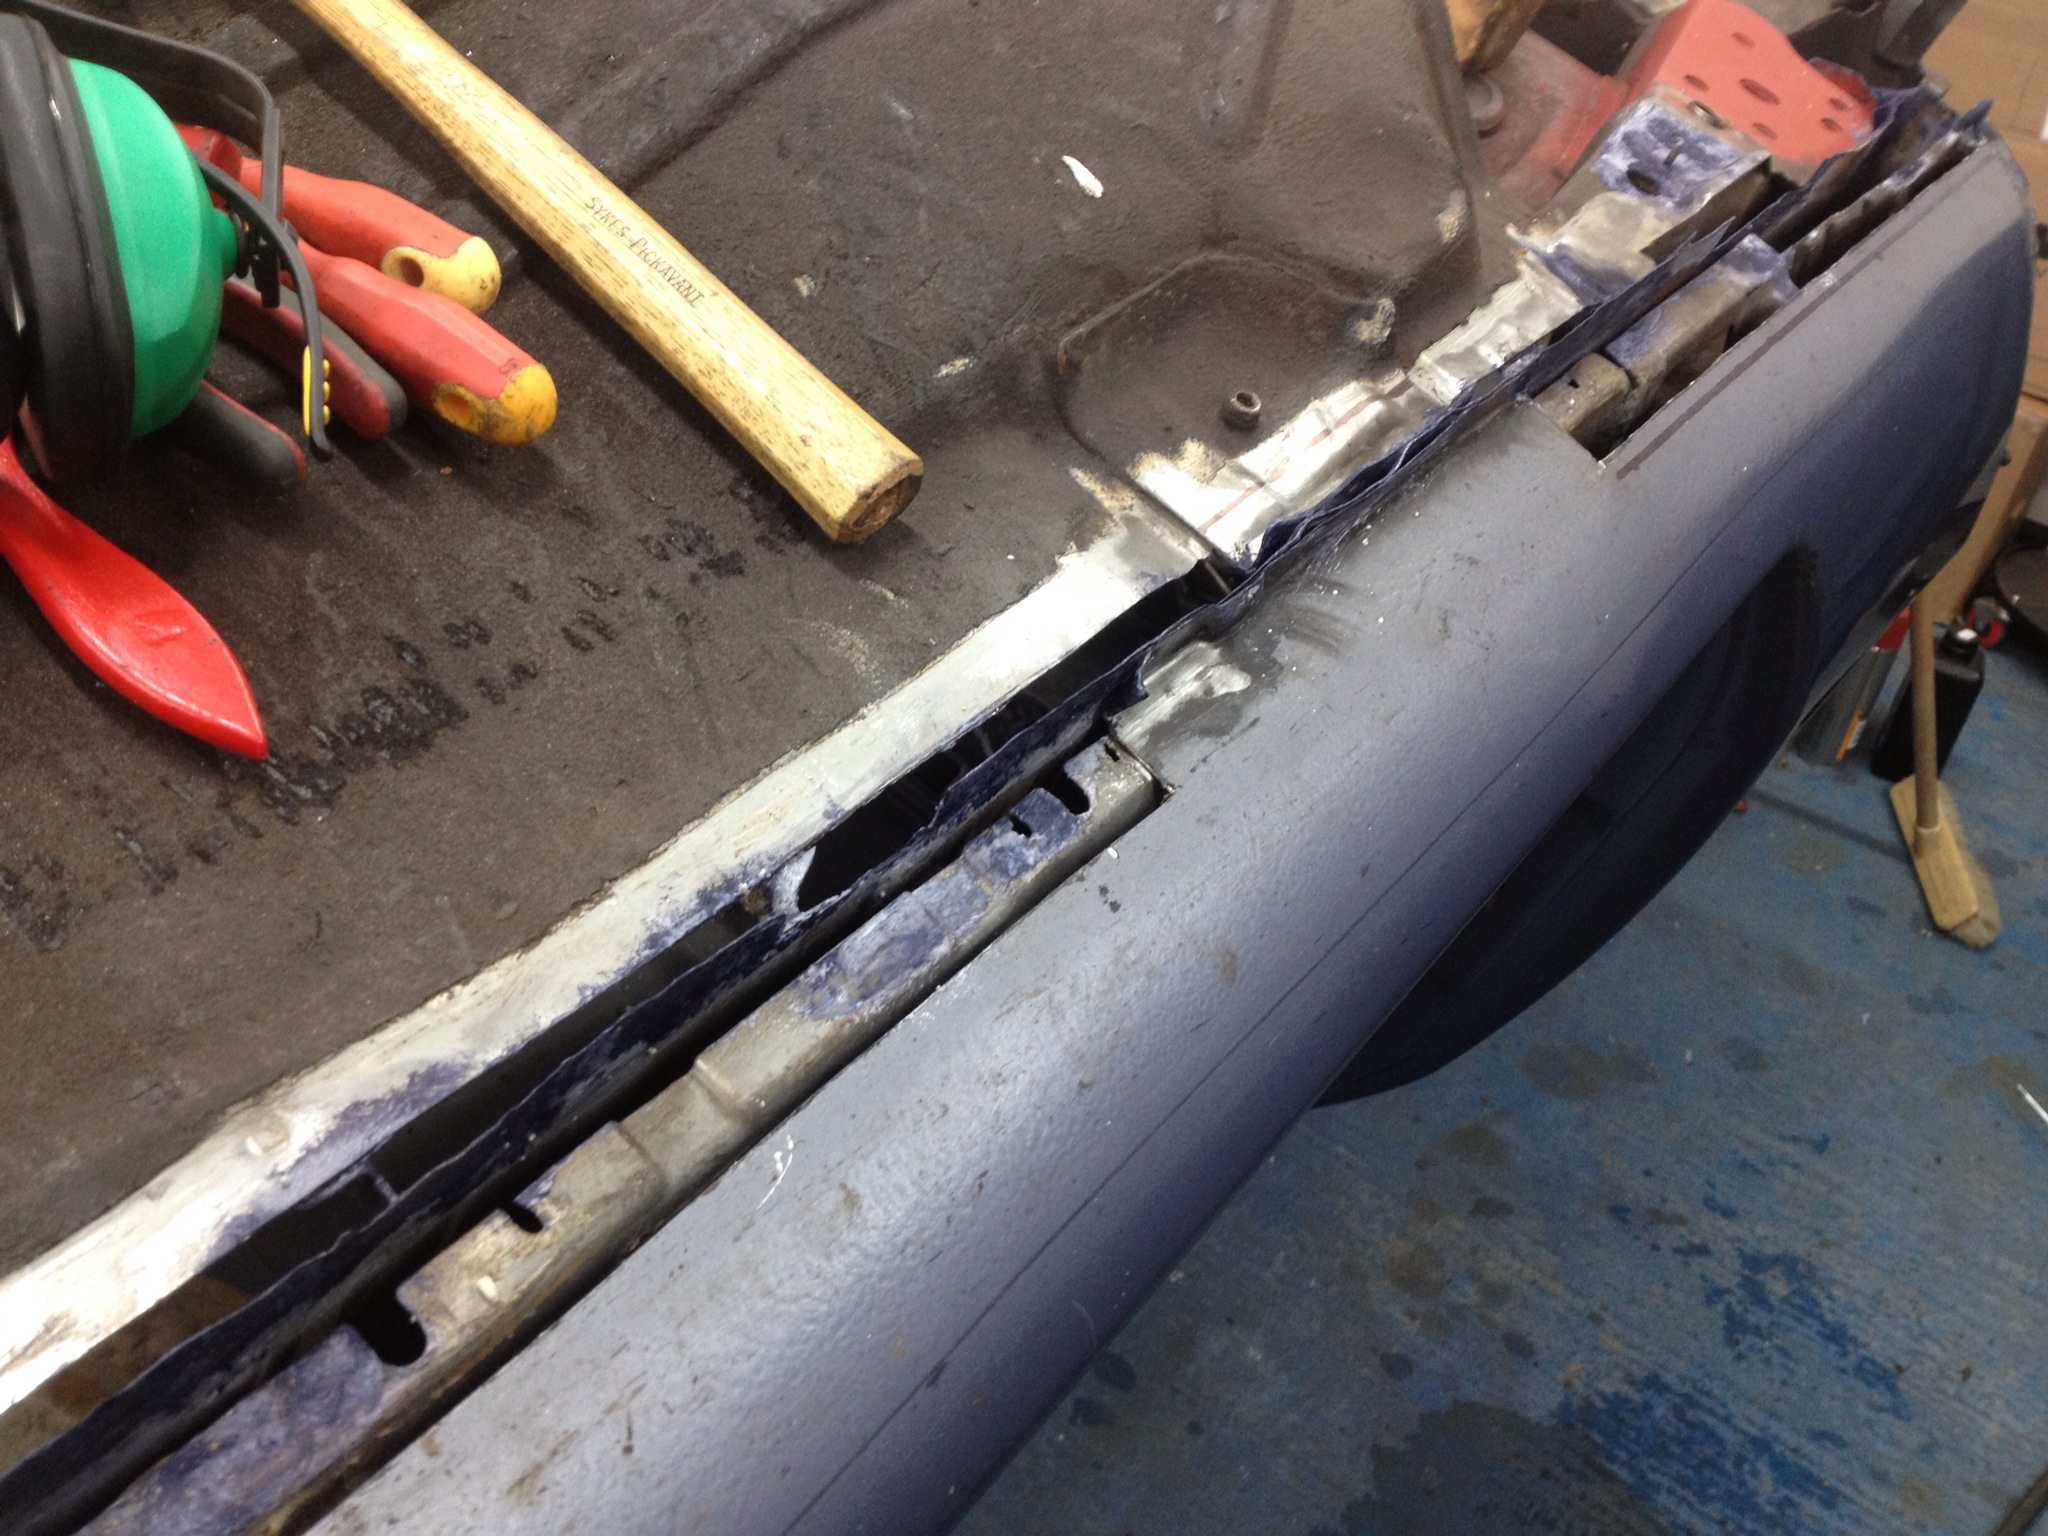
And so onto the next bit:
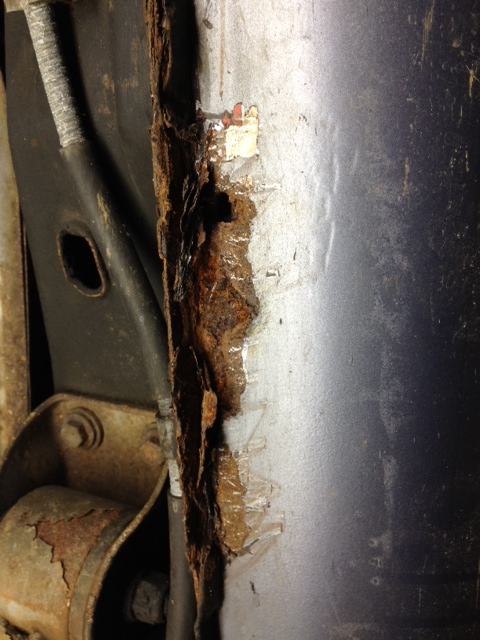
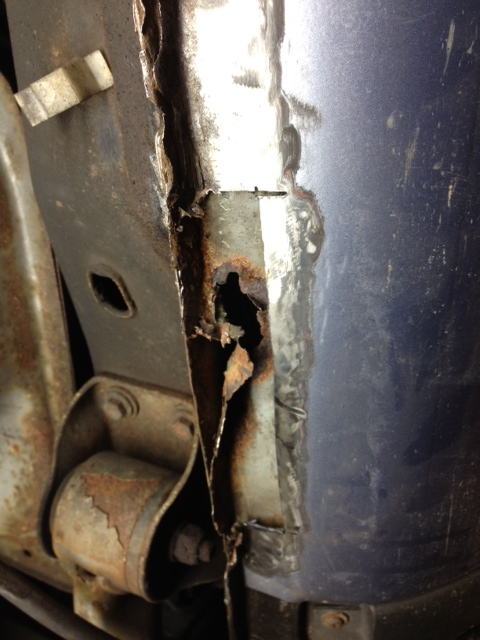
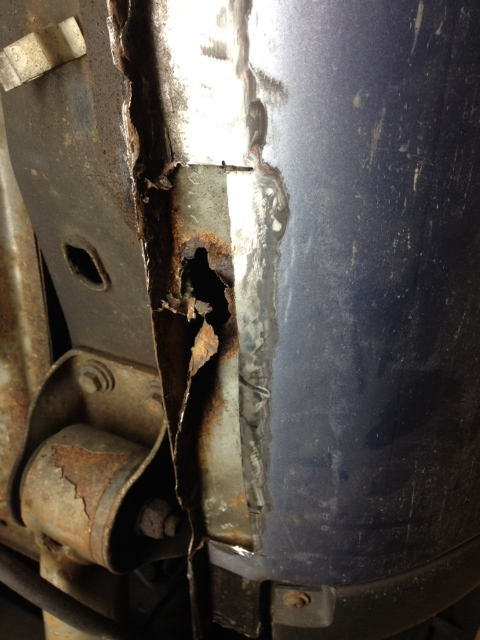
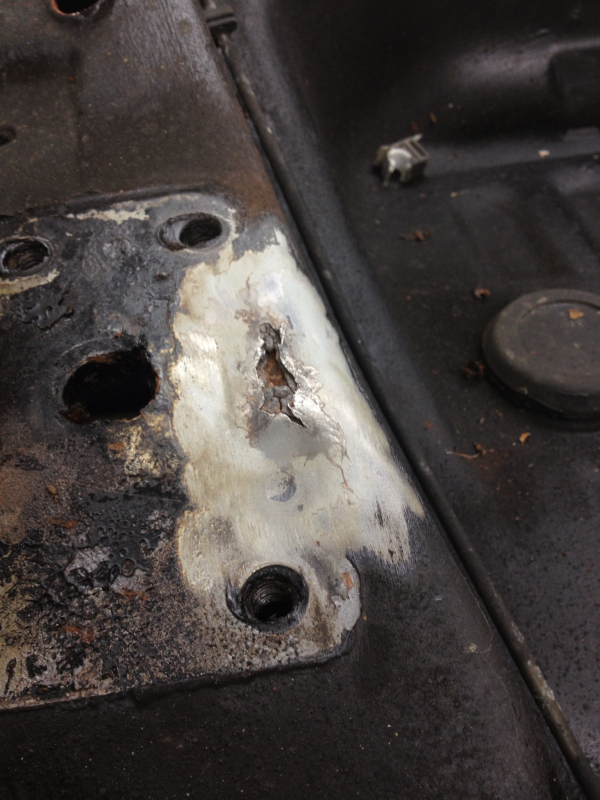
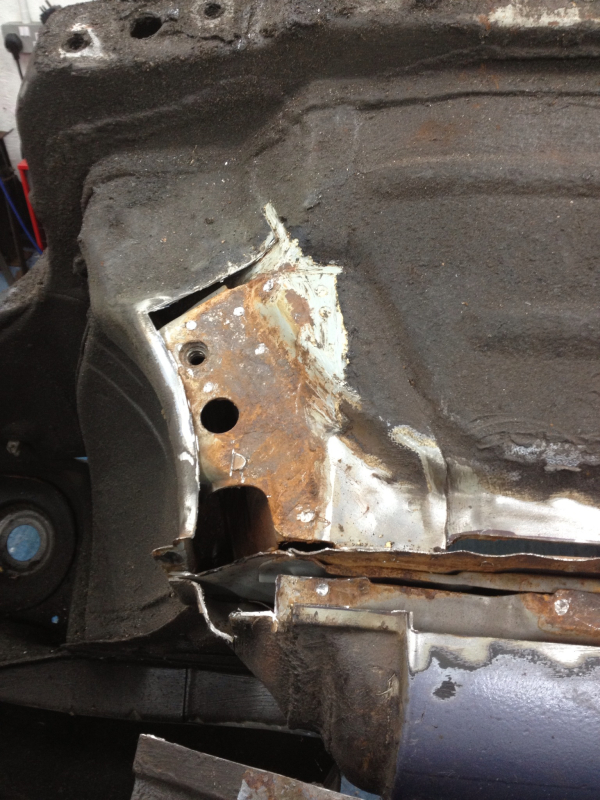
Starting to cut the rot out:
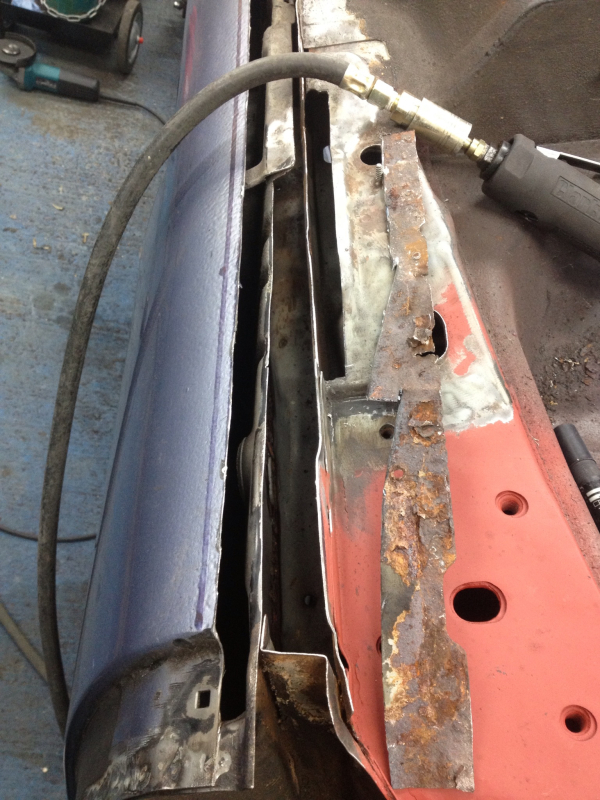
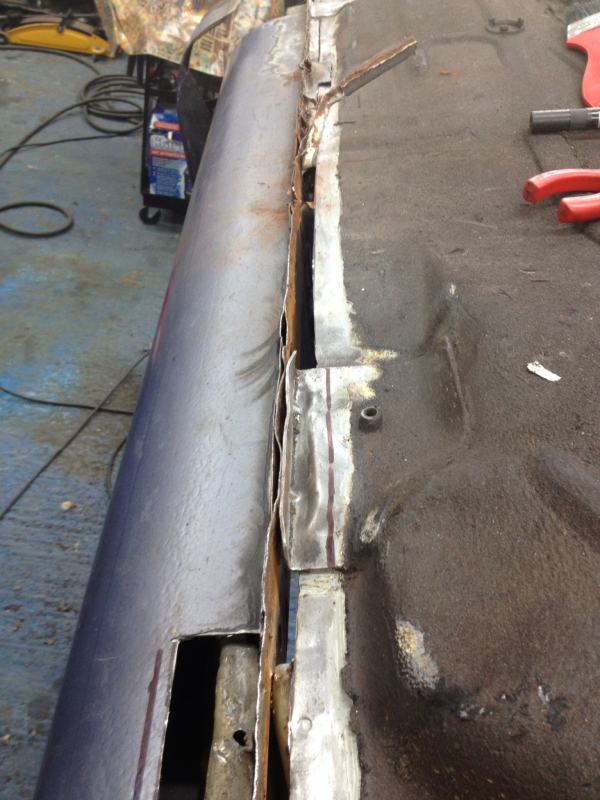
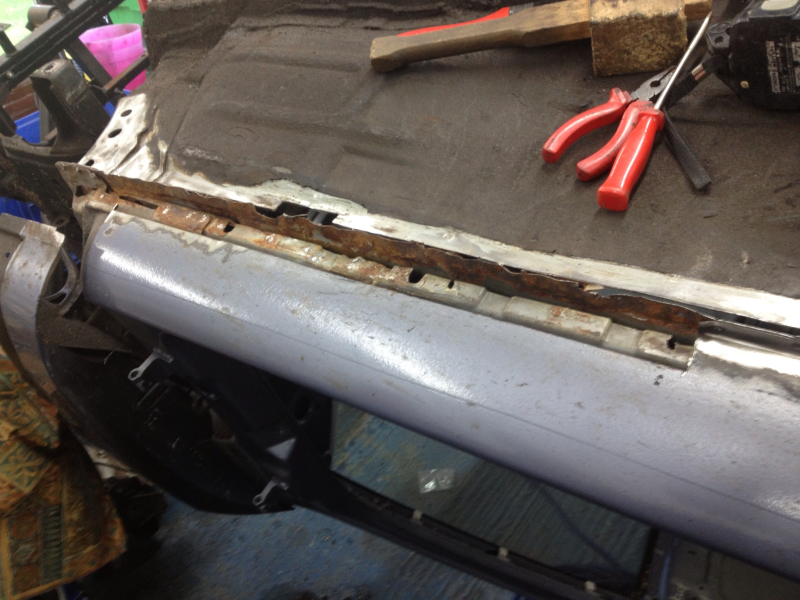


Small blister turns into another story similar to the rear beam mount!
That's it for now - need to upload more to photo bucket.
Starting to cut the rot out:
Small blister turns into another story similar to the rear beam mount!
That's it for now - need to upload more to photo bucket.
 16-07-2013, 04:20 PM
#25
PassionFord Regular
Thread Starter
Thanks for the comments guys.
Jam53ice - I do want a ramp but I don't think I have the height.. On the spit at the moment the car only clears the roof by about half a metre when turning!
More to come.
Jam53ice - I do want a ramp but I don't think I have the height.. On the spit at the moment the car only clears the roof by about half a metre when turning!
More to come.
16-07-2013, 07:05 PM
#26
Too many posts.. I need a life!!
Hobomassiv - That must have been one of the last shows the car went to either ford fair or trax that year! Guessing by your sig you have 'PUKKA' Ka now? Remember seeing this car in 2004.. That amongst others gave me the idea to do the rs turbo conversion I had originally. It's a nice car do you have any recent pics of it?
16-07-2013, 07:29 PM
#27
Too many posts.. I need a life!!
Certainly thousands is going to be correct  I'm replacing both sides completely as well as some rear chassis leg repair and a new rear and possibly front pannel...
I stripped all the seam sealer out of mine to find any more nastys and looking at your rot I would advise that you do the front seam inside the car, from where the gussets join to the front bulkhead along up over the tunnel. I found the water had walked along under the sealer right to the middle! I also found this to be true of the top most seam under the flat bit where the window wiper and HVAC bolt. On this one it looked like the rust started from the fabled wiring gromets and walked along. I found mostly surface rust here but it would be best for you to find it now!
I stripped all the seam sealer out of mine to find any more nastys and looking at your rot I would advise that you do the front seam inside the car, from where the gussets join to the front bulkhead along up over the tunnel. I found the water had walked along under the sealer right to the middle! I also found this to be true of the top most seam under the flat bit where the window wiper and HVAC bolt. On this one it looked like the rust started from the fabled wiring gromets and walked along. I found mostly surface rust here but it would be best for you to find it now!
16-07-2013, 07:58 PM
#28
PassionFord Regular
Thread Starter
Hobomassiv - it's good to hear your giving it the time and money it needs. Sounds like its going to be as nice of an example as I remember it to be. Top work!
Jammy86 - yes the seam sealer has a habit of hiding the bad bits - my floor looked good from the inside but when I stripped the sealer back the lip had gone through in many places.. Gutted to say the least! I'll take that on board, I am going to be taking all the seam sealer and waxoyl off the underside but will now look at those seams at the front... I know there are patches under the lip of the bulkhead in the engine bay so I'm expecting some repair work there. Looking at your pics again you've got your work cut out! I know how much time it takes to get it all cut out and repaired. Good luck!
Jammy86 - yes the seam sealer has a habit of hiding the bad bits - my floor looked good from the inside but when I stripped the sealer back the lip had gone through in many places.. Gutted to say the least! I'll take that on board, I am going to be taking all the seam sealer and waxoyl off the underside but will now look at those seams at the front... I know there are patches under the lip of the bulkhead in the engine bay so I'm expecting some repair work there. Looking at your pics again you've got your work cut out! I know how much time it takes to get it all cut out and repaired. Good luck!
17-07-2013, 05:37 PM
#33
PassionFord Post Whore!!

+1 I remember this car from the feature, couldn't stop looking at it. Loving the work so far, we all hate rust haha. Good luck with the rest of the rebuild. I await updates

 18-07-2013, 09:06 AM
#36
PassionFord Regular
Thread Starter
Sorry guys, it's all sorted now. Didn't realise it was happening as my email address on photo bucket was years out of date. Should be all good for the rest of the build!
Thanks
Thanks
18-07-2013, 01:01 PM
#38
PassionFord Regular
Thread Starter
Well once the rot is sorted, I want to redesign the front end and improve every part of the engine bay, so much so I think the only part that will mainly be the same is the engine! I'm itching to get started on this but have to keep going on the boring part of rust repair and underside restoration!
Thinking of a more track focused interior too.
Thanks for looking.
18-07-2013, 01:24 PM
#39
PassionFord Regular
Thread Starter
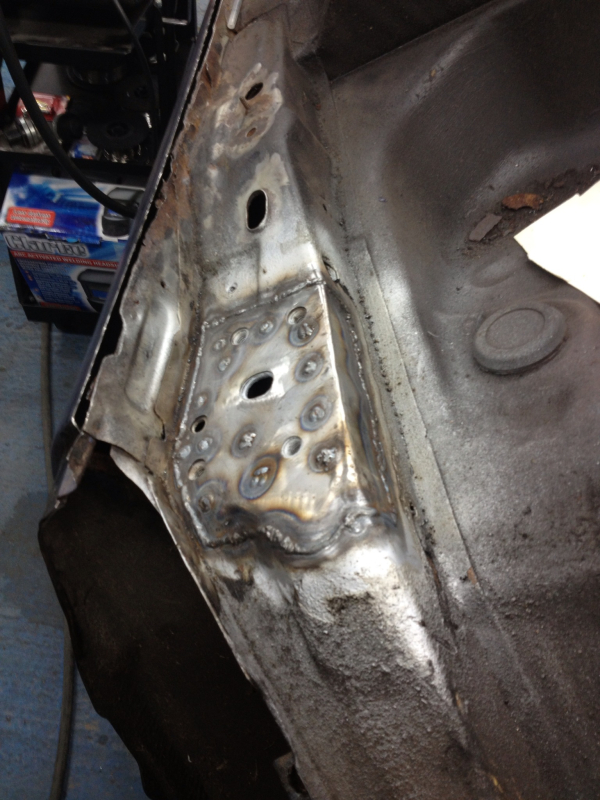
Right more progress made
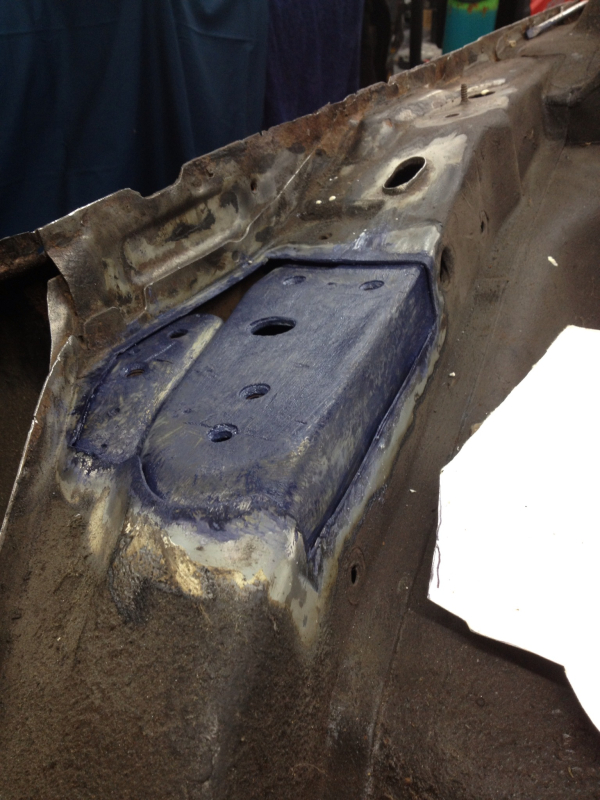
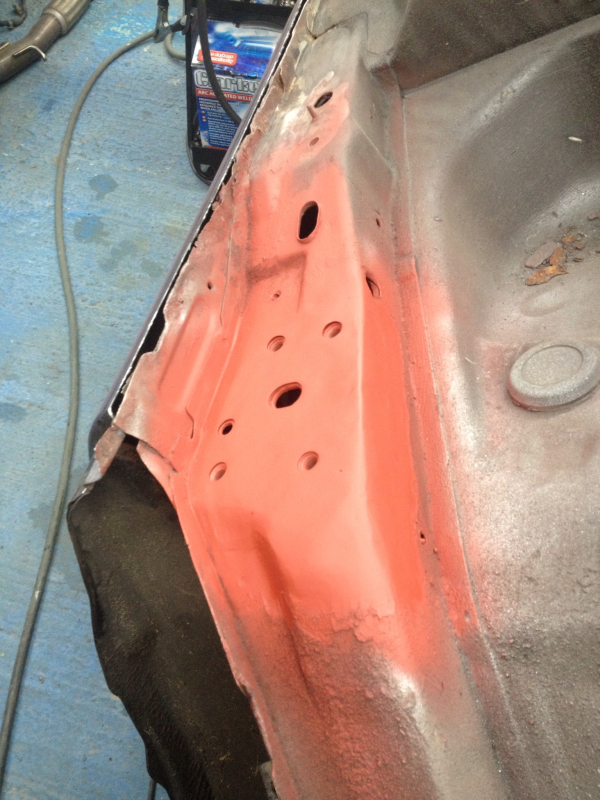
Areas treated with Dinitrol RC800:
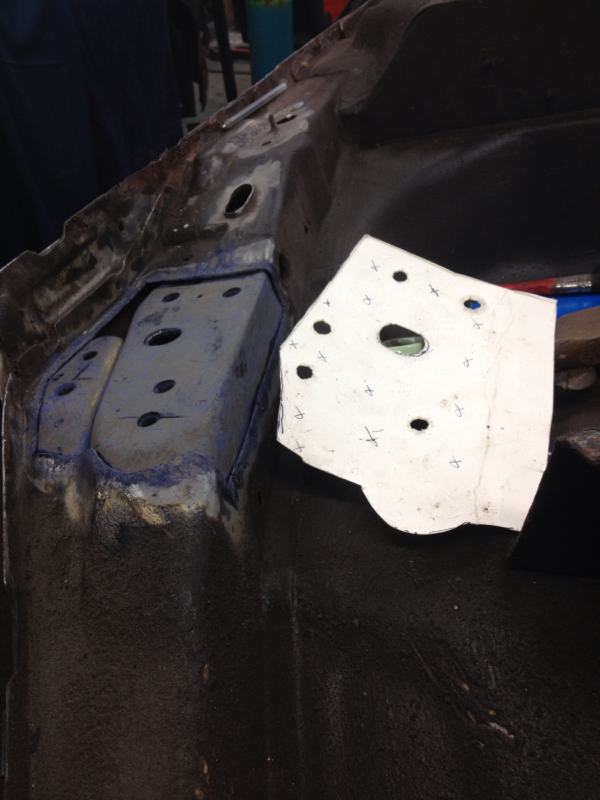
New template made, cut and welded in ready to be trimmed and flatted back:
Small repair made to inner sill panel:
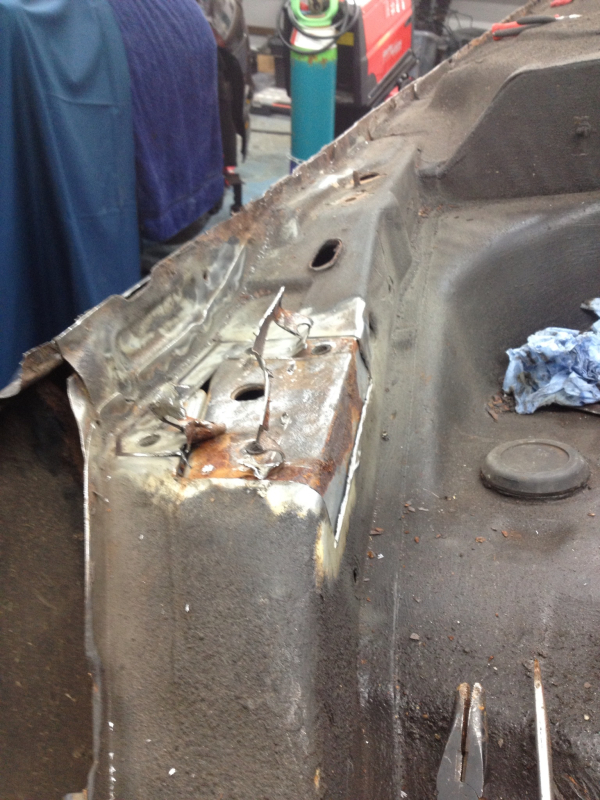
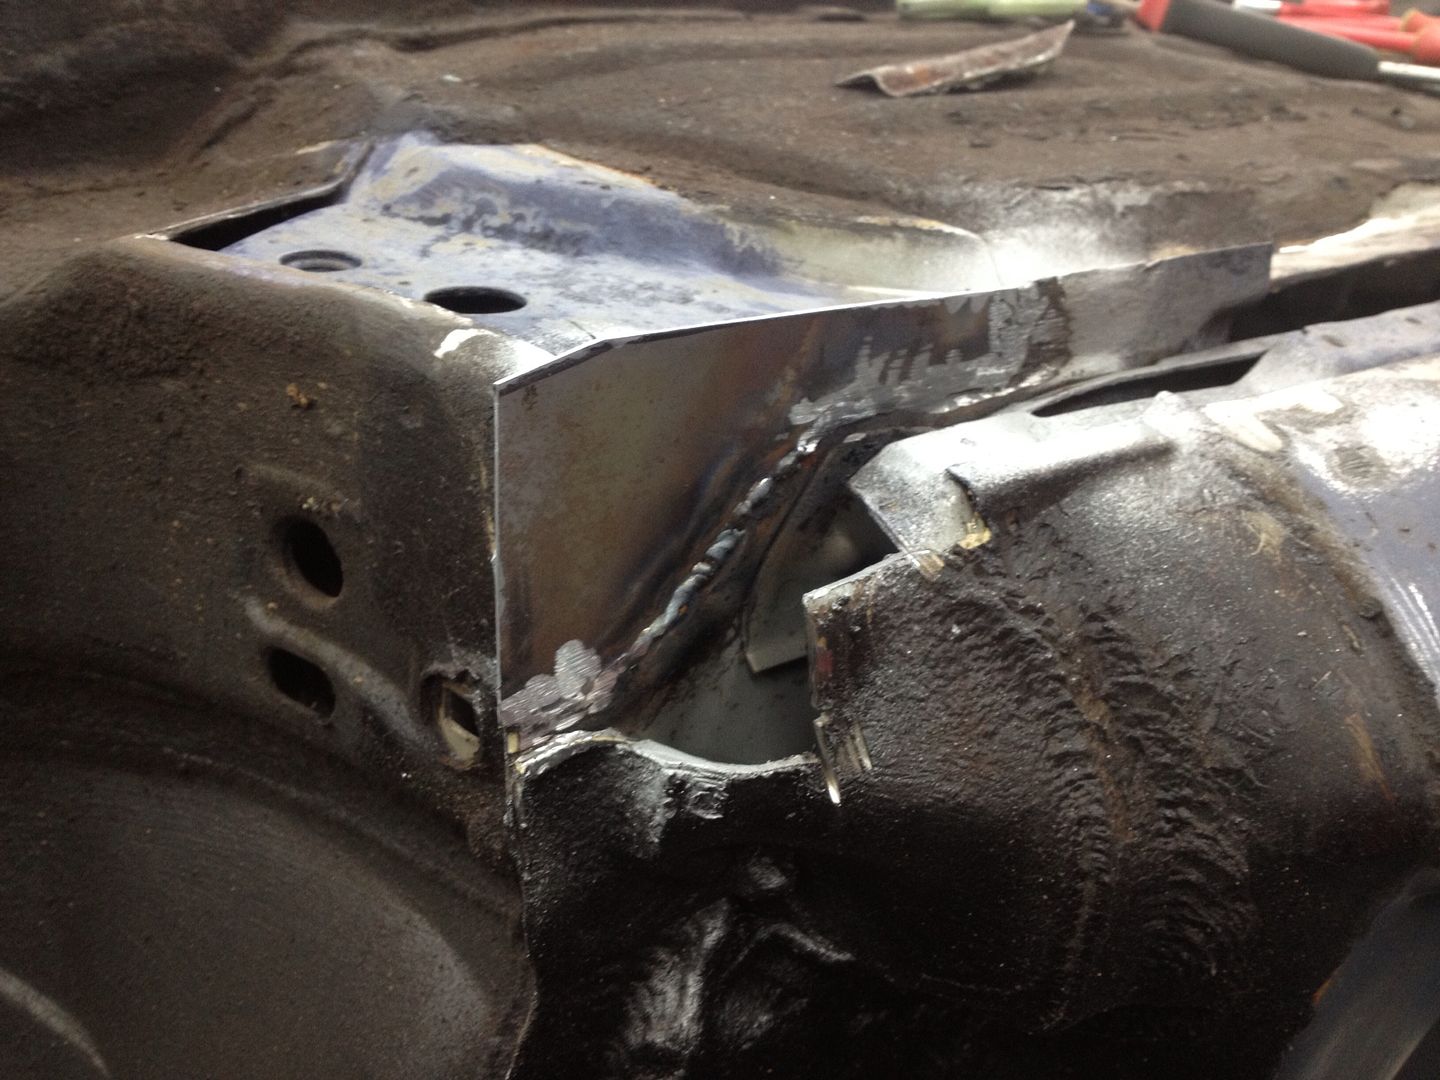
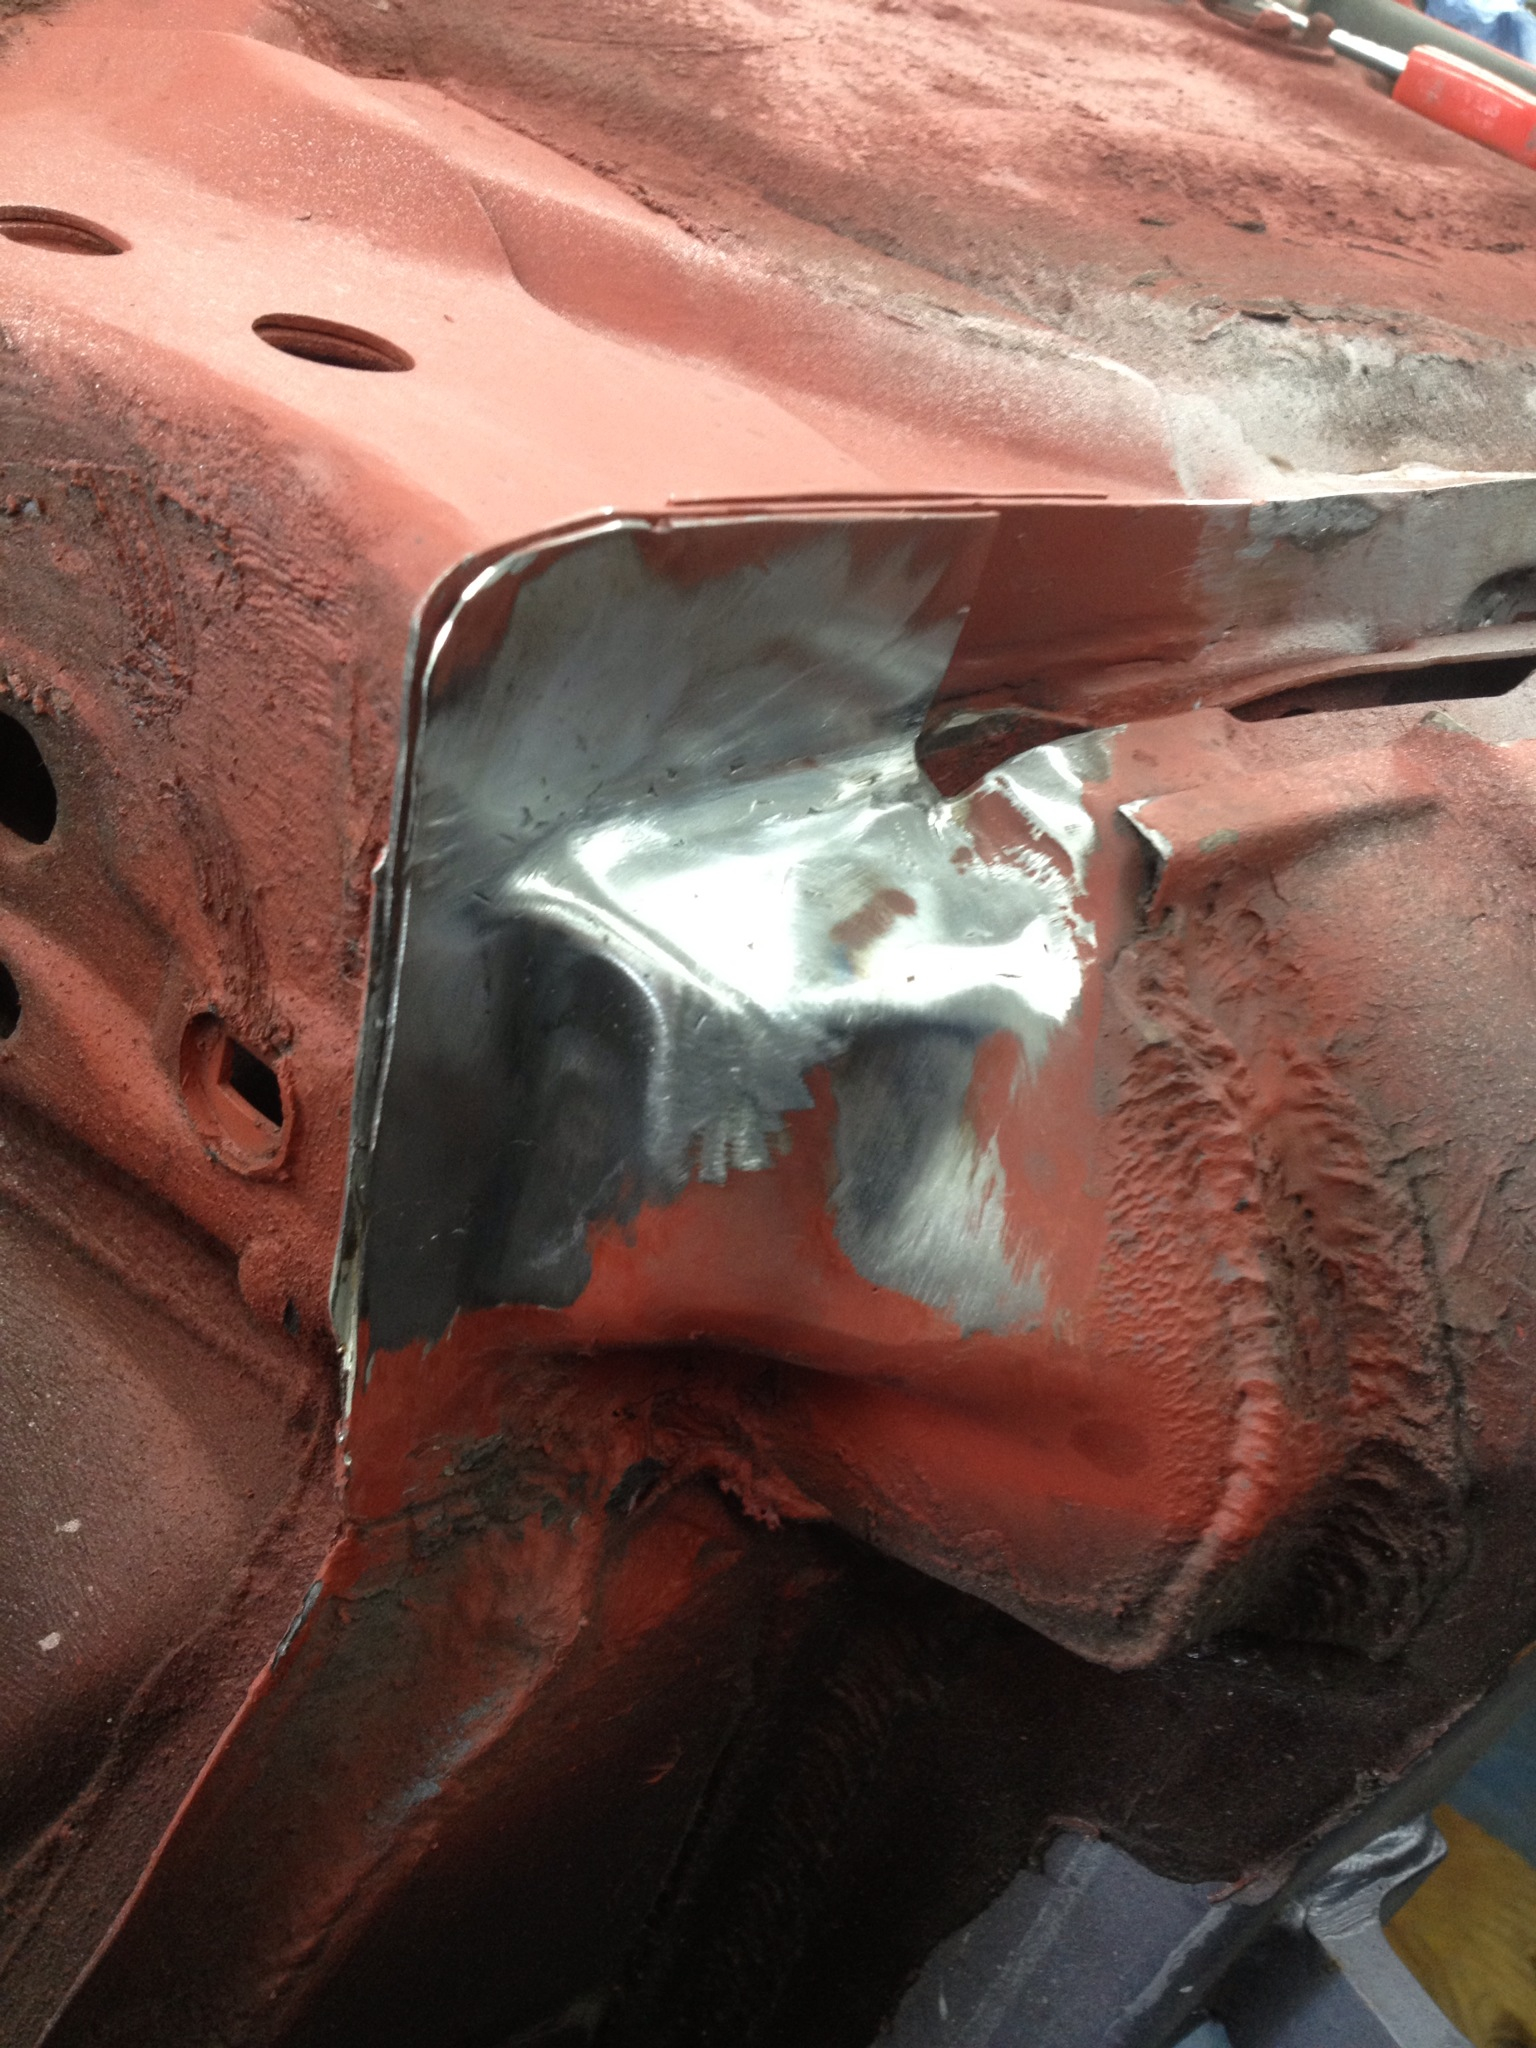
Front lower arm housing mount patch - template made, cut, trimmed and treated:
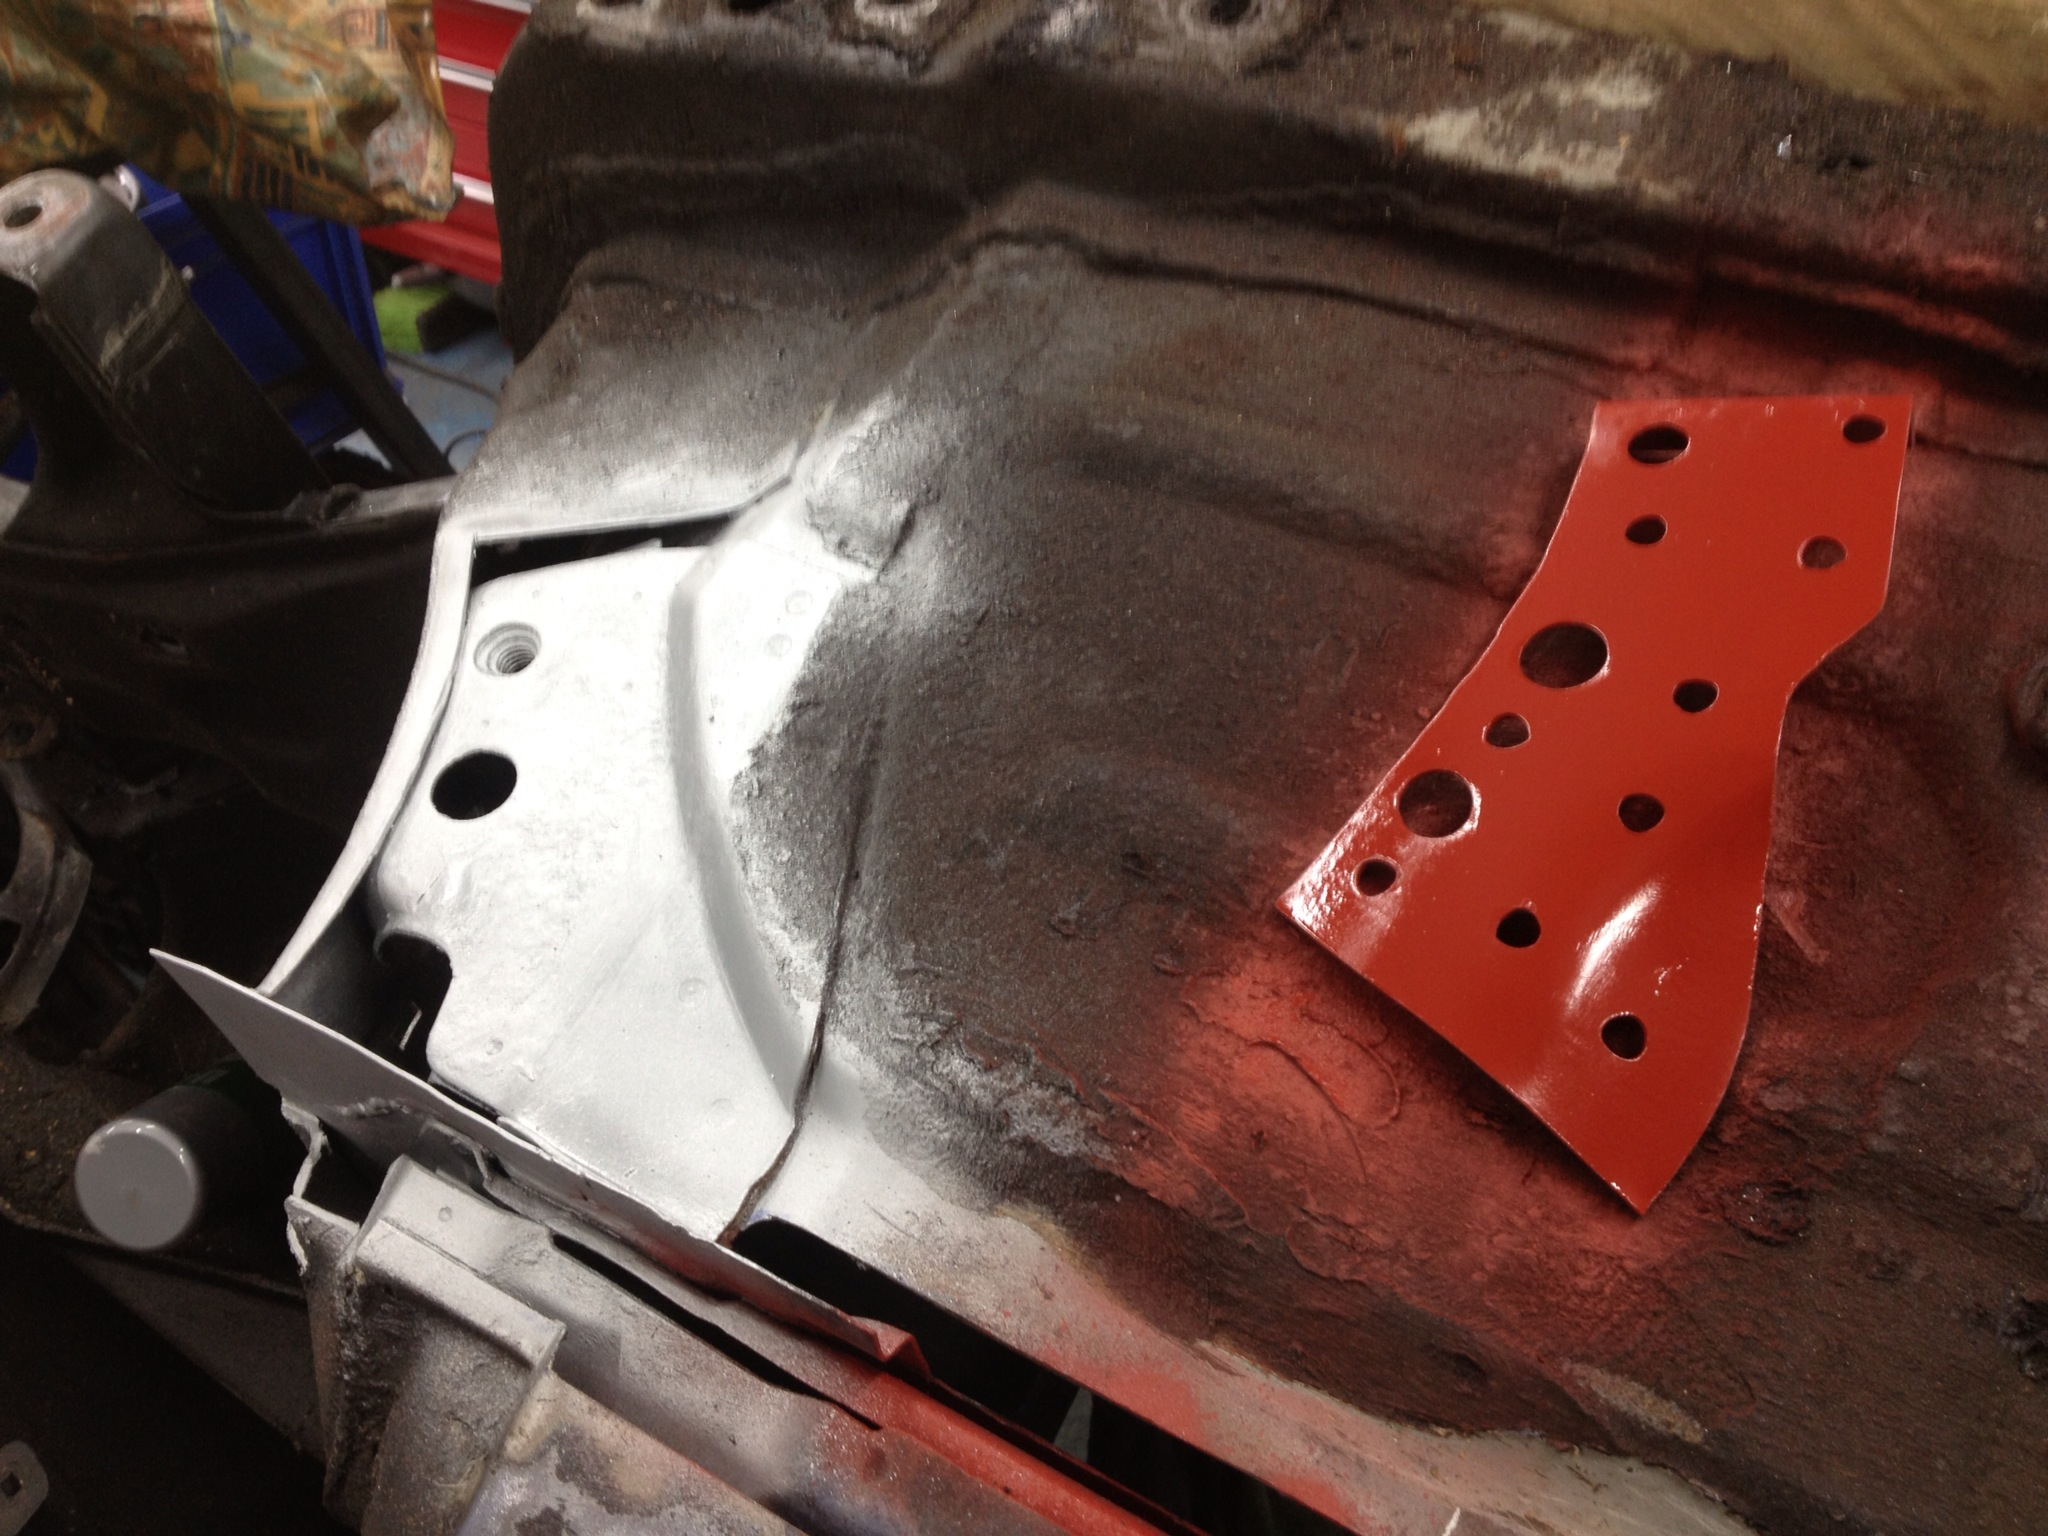
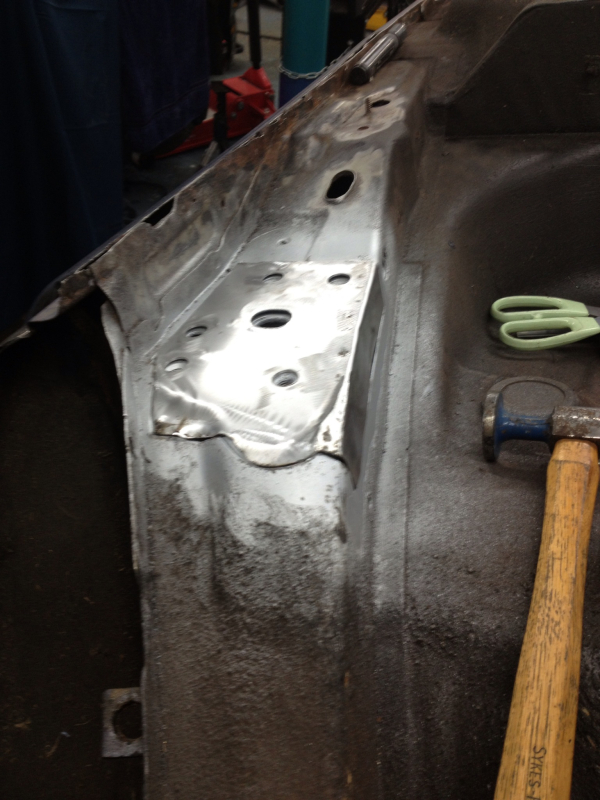
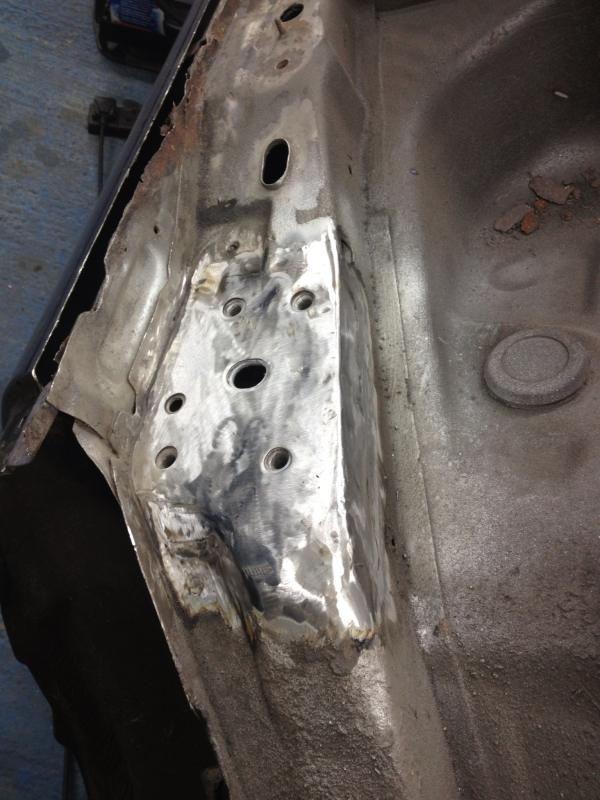
Welded in:
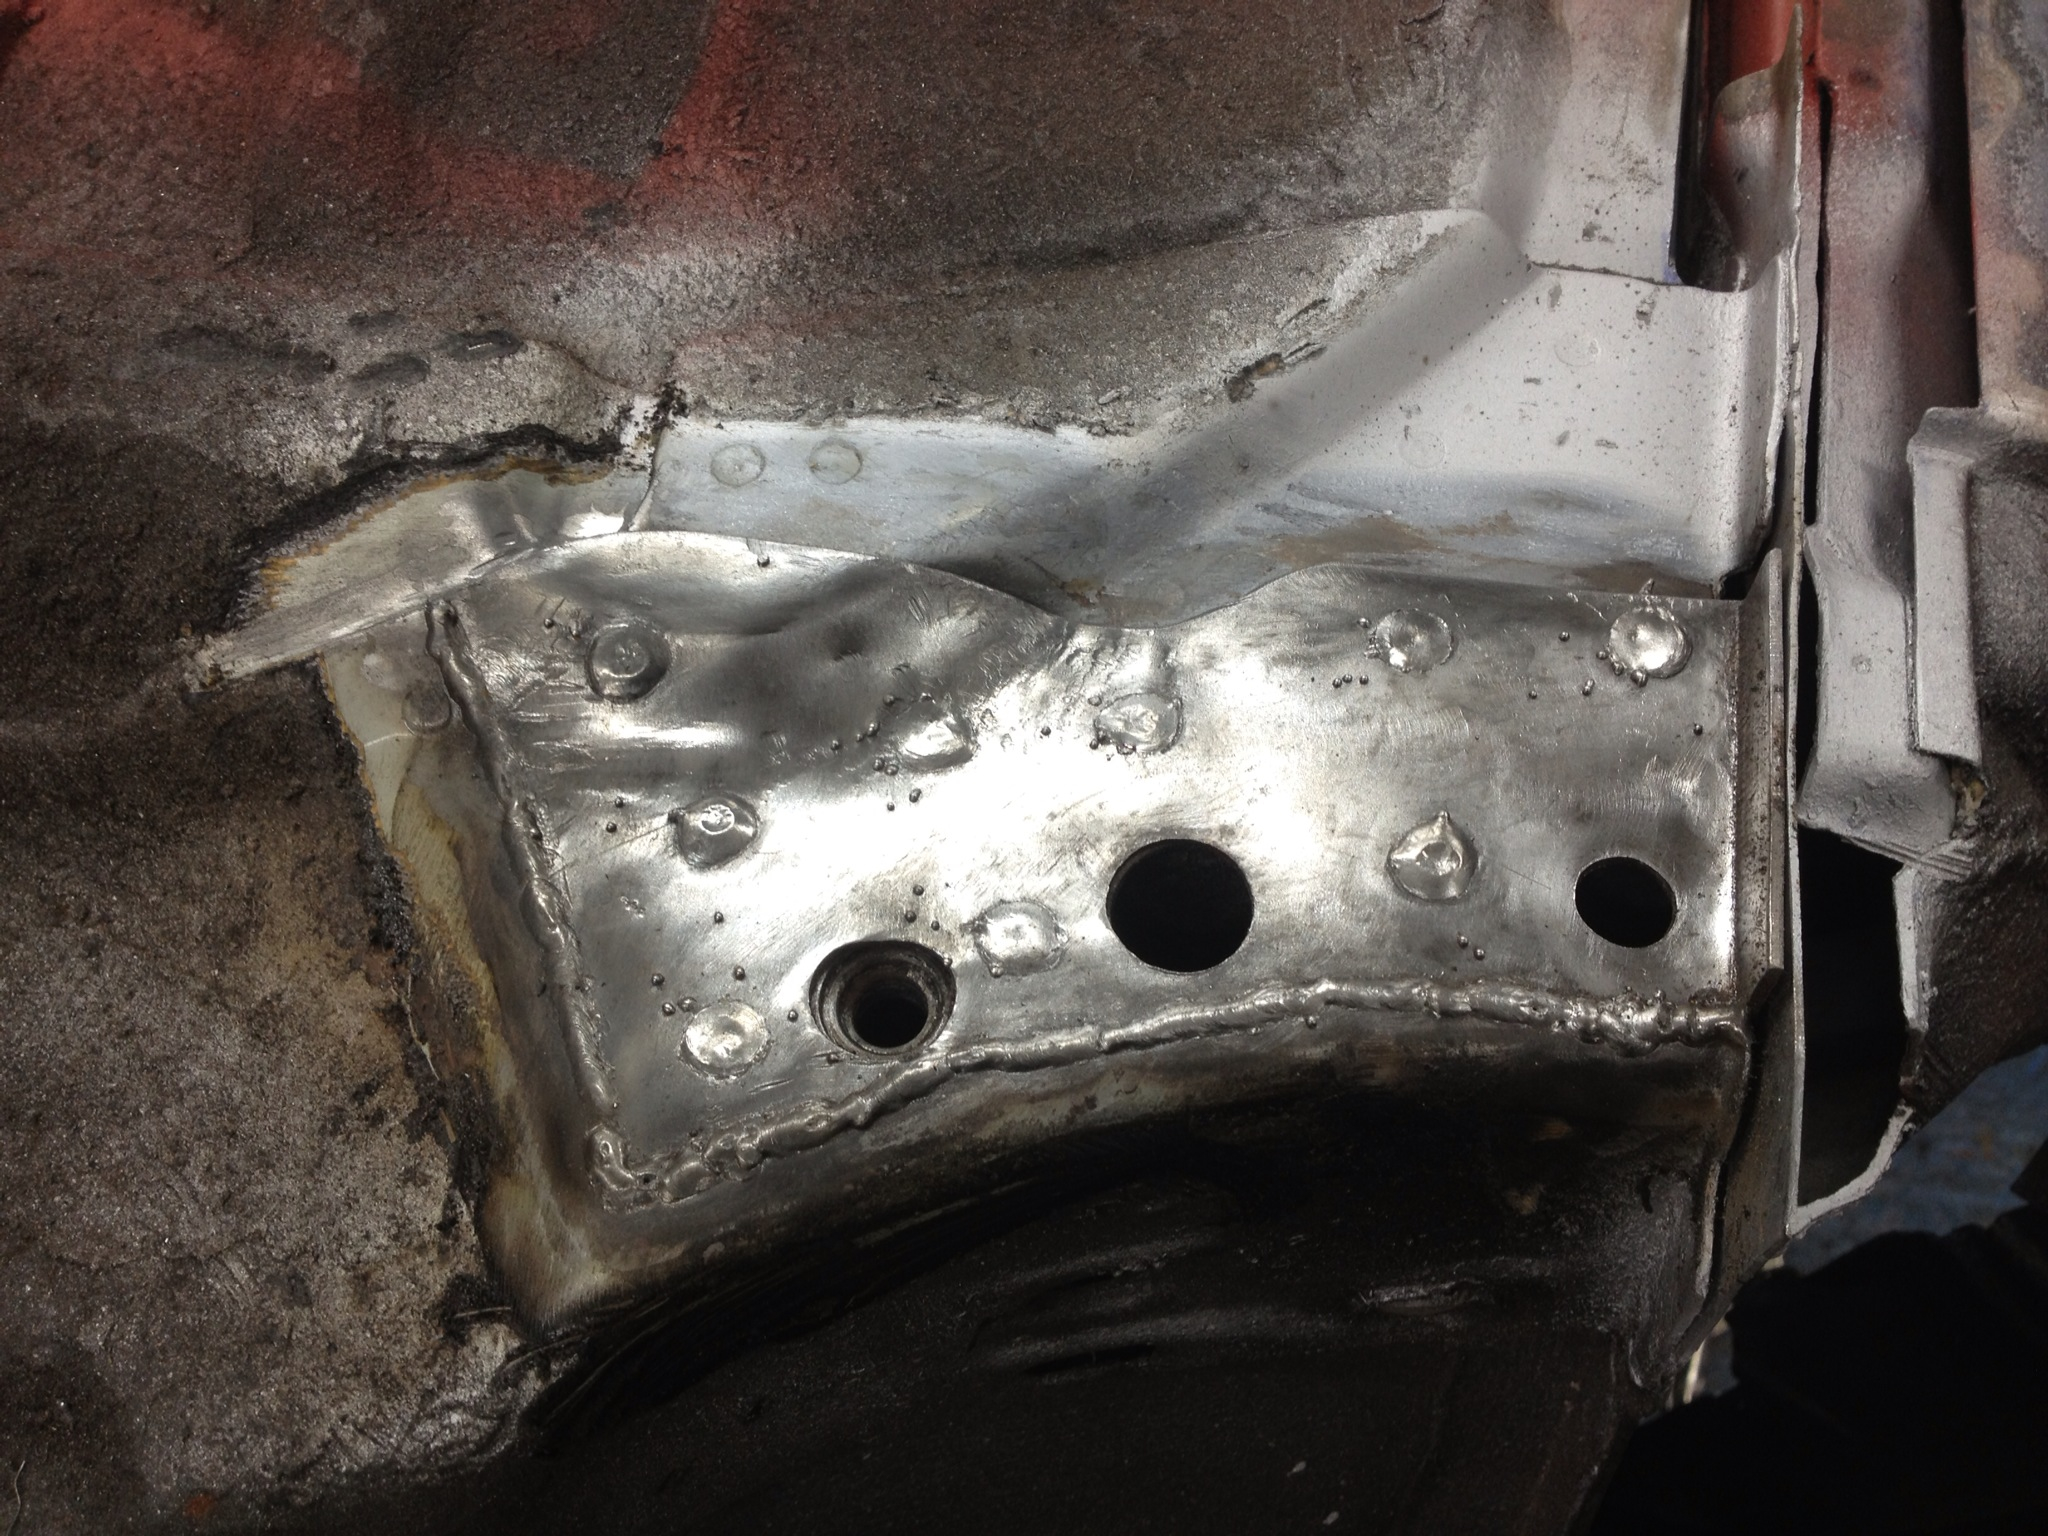
Flatted back:
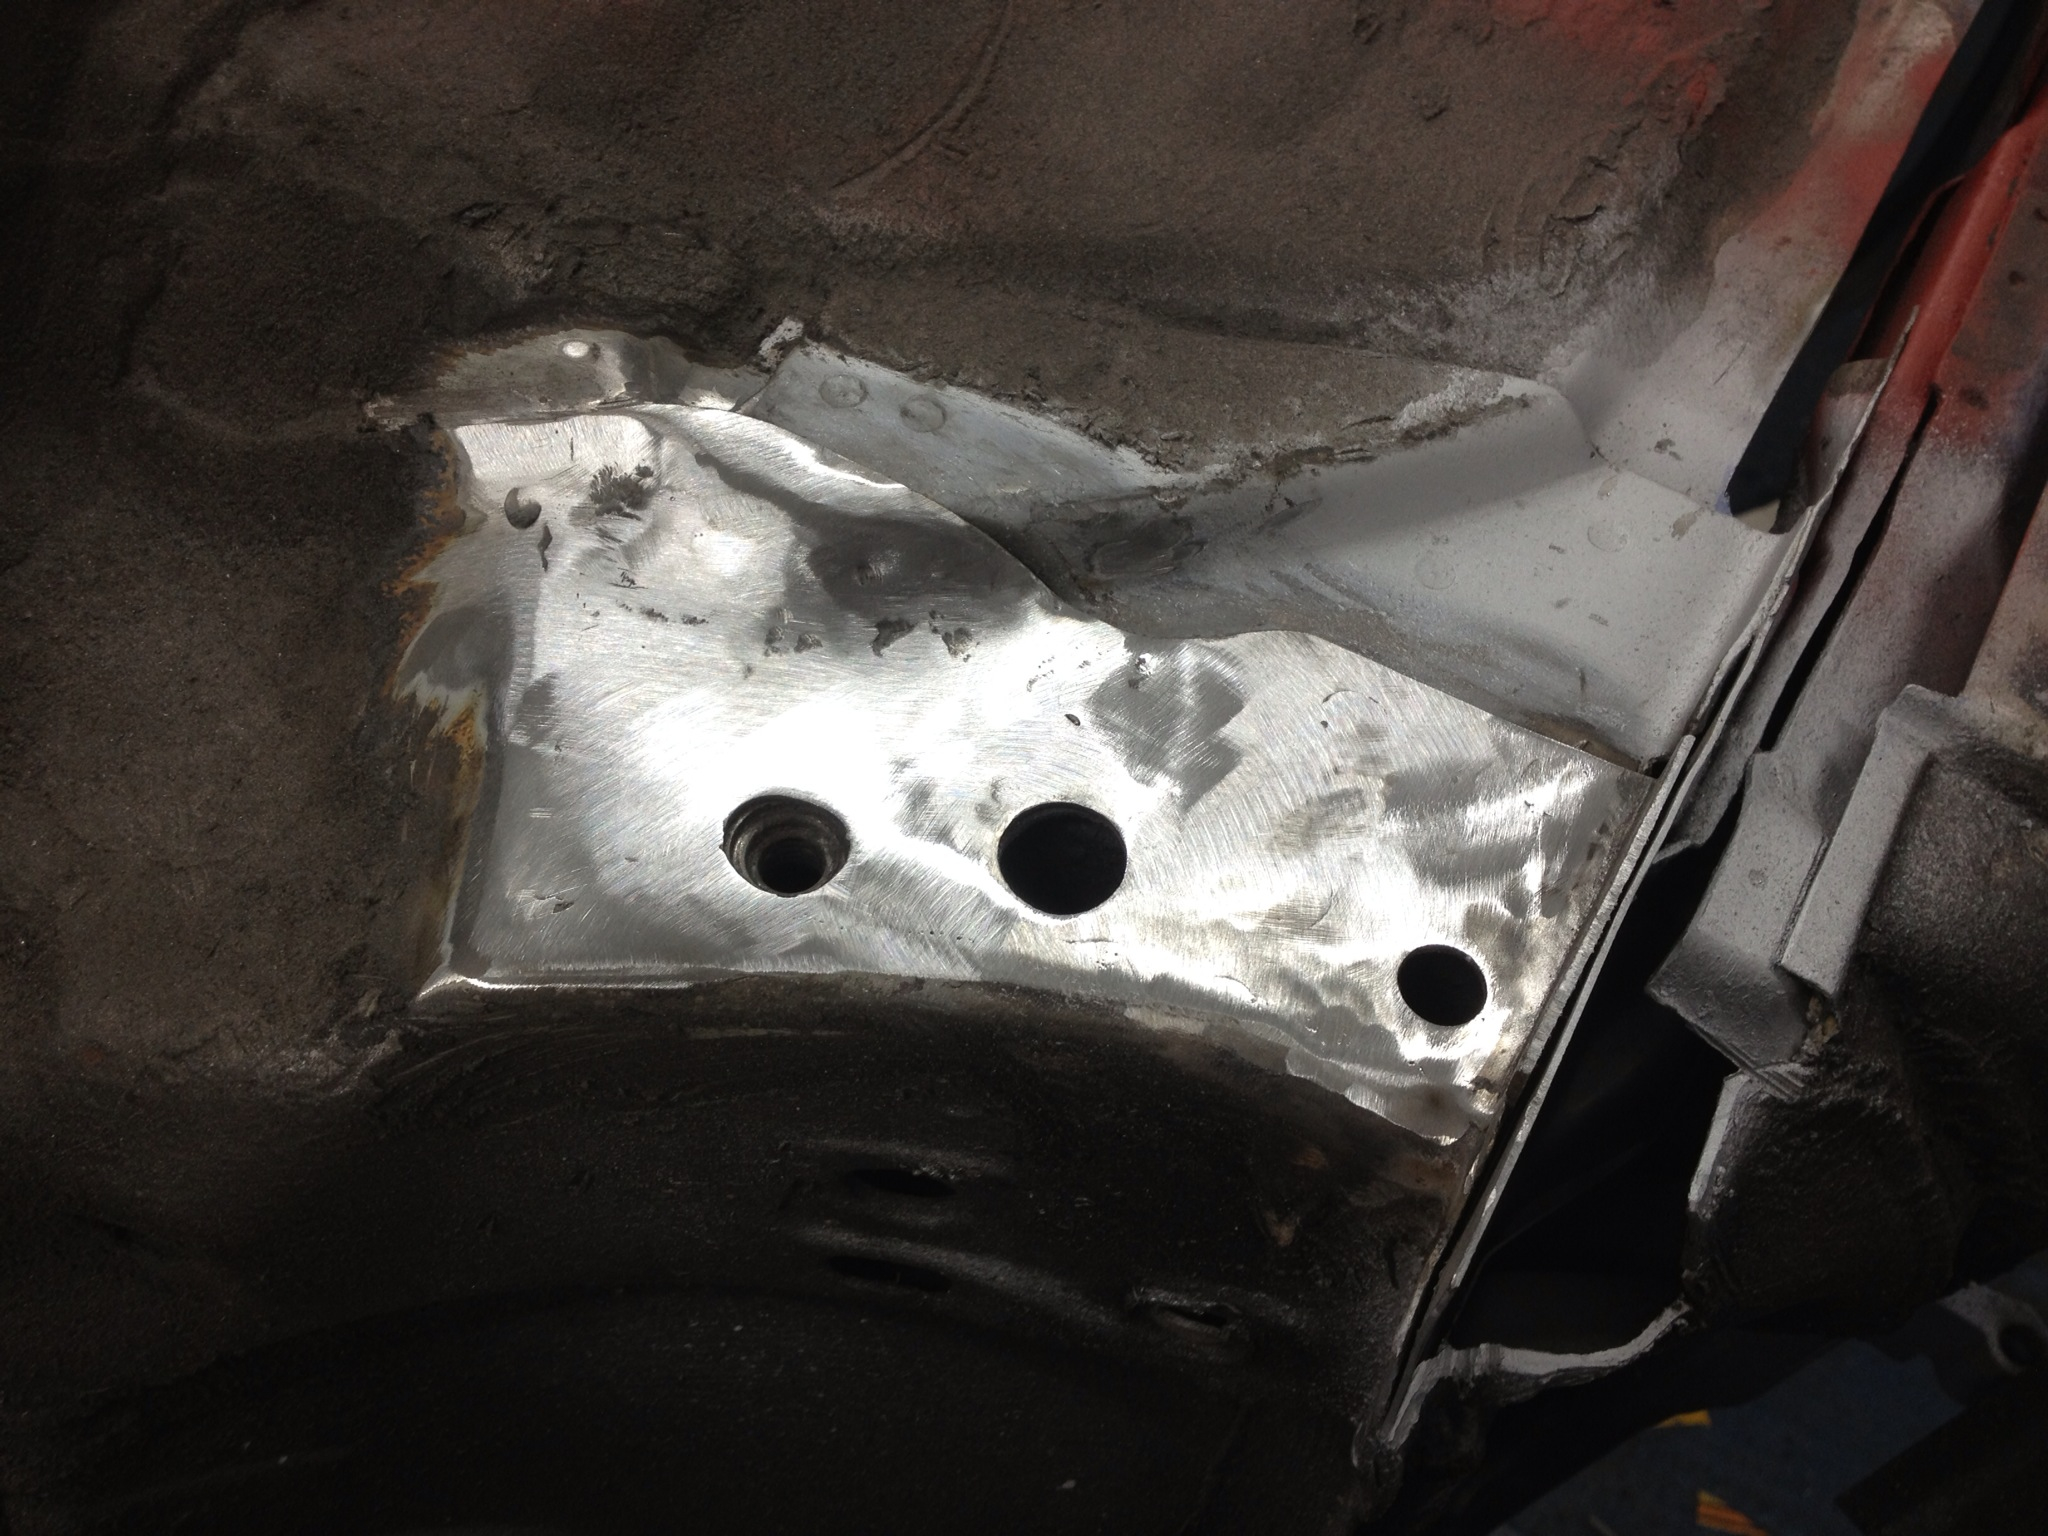
End of the sill beneath the front wing repaired and flatted back:
Let me know your thoughts.
More to follow.
Thanks
Areas treated with Dinitrol RC800:
New template made, cut and welded in ready to be trimmed and flatted back:
Small repair made to inner sill panel:
Front lower arm housing mount patch - template made, cut, trimmed and treated:
Welded in:
Flatted back:
End of the sill beneath the front wing repaired and flatted back:
Let me know your thoughts.
More to follow.
Thanks
18-07-2013, 03:11 PM
#40
Virgin

Join Date: Jun 2011
Location: huddersfield
Posts: 11
Likes: 0
Received 0 Likes
on
0 Posts
good progress, keep it coming.
cant wait to see the work on the front end, the new engine mount and gearbox.
learnt loads when you built this, hope to learn loads more!
cant wait to see the work on the front end, the new engine mount and gearbox.
learnt loads when you built this, hope to learn loads more!

