Smokestone Cosworth 4x4 to 2wd Project update 10/5/14 painted inlet
 25-04-2013, 09:39 PM
#1
10K+ Poster!!
Thread Starter
iTrader: (6)

Join Date: May 2003
Location: Middlesex AKA Planet earth!!!!
Posts: 11,659
Likes: 0
Received 5 Likes
on
5 Posts
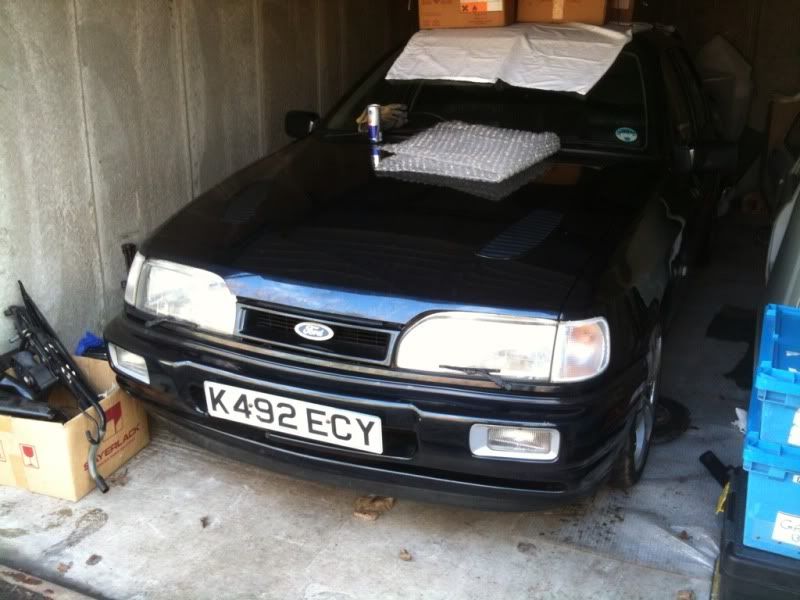
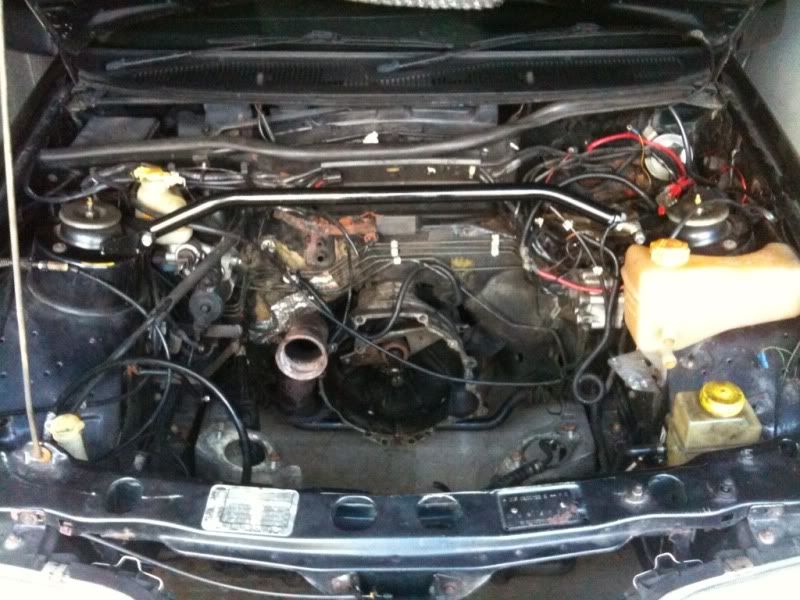
After alittle break from Ford's just after new year i picked up another cossie.Got this 1993 smokestone sapphire cosworth 4x4 which came complete apart from engine,front brakes and ecu.As i still have a pukka 2wd yb engine sitting in the garage and a complete 2wd axle front end along with afew other 2wd bits left over from the last cossie i broke there was only one way to go and thats off all the 4x4 parts that i dont need and replace with 2wd parts.
As im replacing parts i be painting them or cleaning as i go along just to tidy up the car,not going full concourse or anything like that but just want to make it presentable etc.
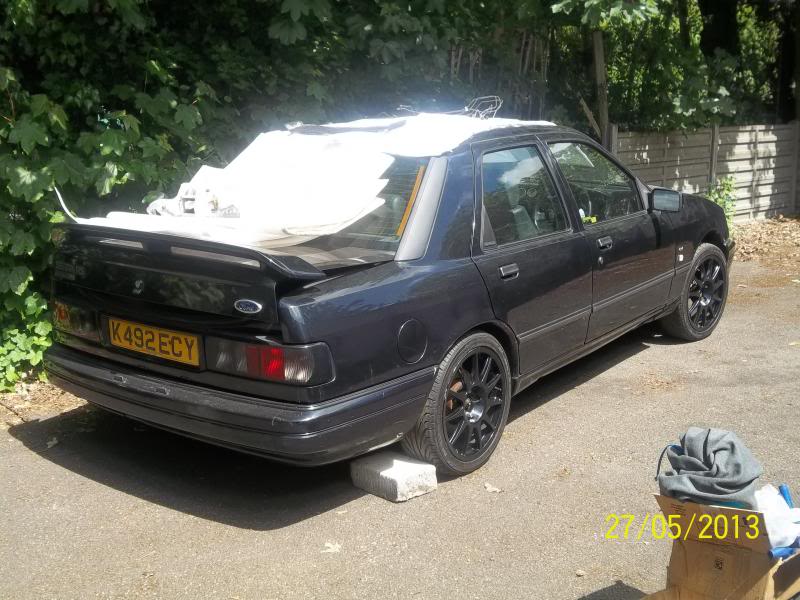
Heres picture of it day i got it in its new home
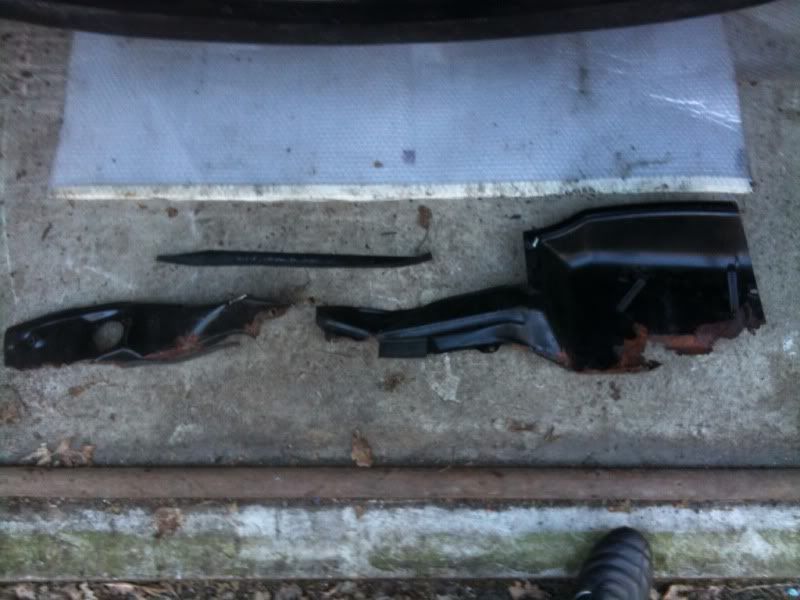
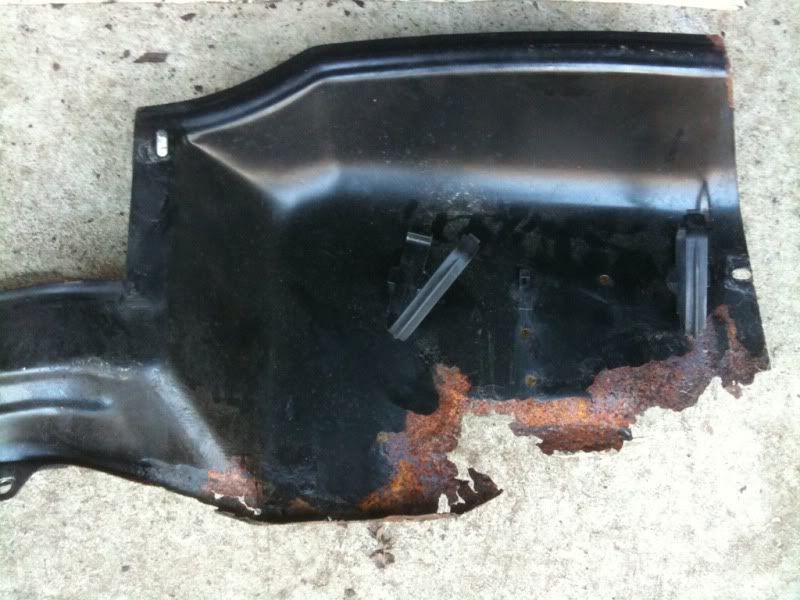
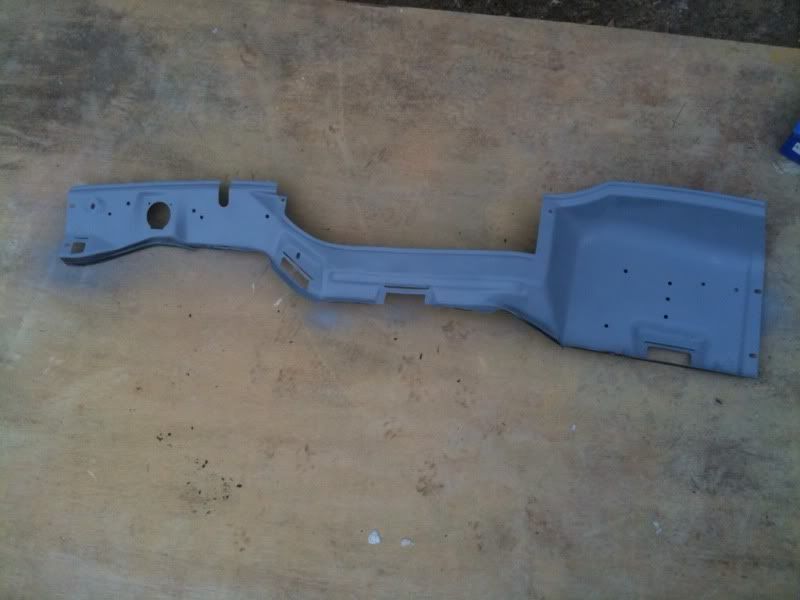
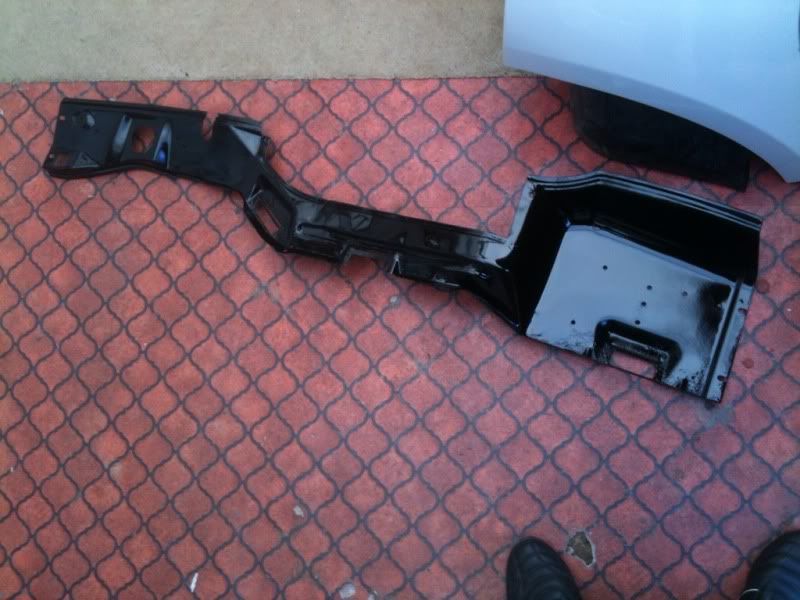
1st thing i done on the car was get hold of another bulkhead firewall panel as the one that was on the car was well rotten and rusted.Manage to get one off someone on here which was in alot better nick then the old one so got that off and gave the new one a quick tidy up and sprayed it nice gloss black.
Old one fell apart as it was removed
More progress to follow.
As im replacing parts i be painting them or cleaning as i go along just to tidy up the car,not going full concourse or anything like that but just want to make it presentable etc.
Heres picture of it day i got it in its new home
1st thing i done on the car was get hold of another bulkhead firewall panel as the one that was on the car was well rotten and rusted.Manage to get one off someone on here which was in alot better nick then the old one so got that off and gave the new one a quick tidy up and sprayed it nice gloss black.
Old one fell apart as it was removed
More progress to follow.
Last edited by RSCossieGaz; 10-05-2014 at 09:23 PM.
 26-04-2013, 07:01 AM
#2
PassionFord Post Whore!!
Nice project to play with
26-04-2013, 10:24 PM
#5
10K+ Poster!!
Thread Starter
iTrader: (6)
Join Date: May 2003
Location: Middlesex AKA Planet earth!!!!
Posts: 11,659
Likes: 0
Received 5 Likes
on
5 Posts
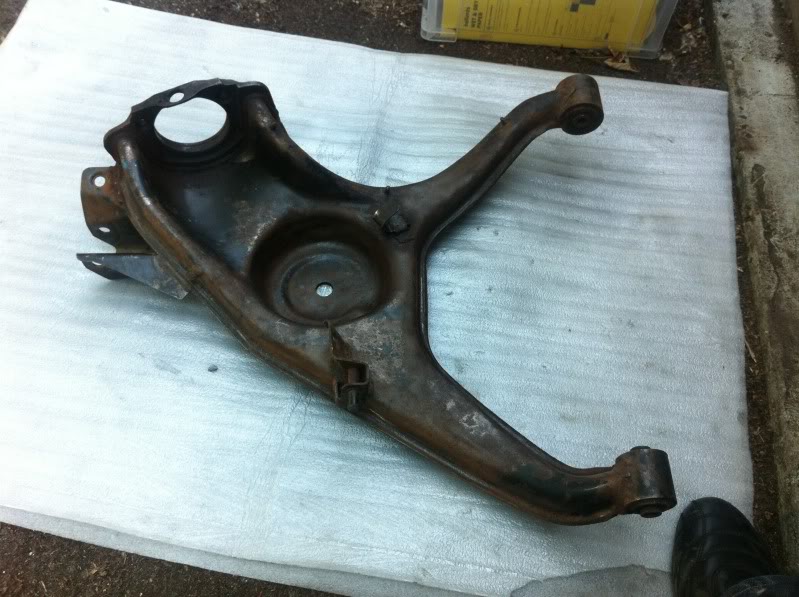
Stripped down the 2wd front end i had so can paint and clean everything before i reasemble back onto car.
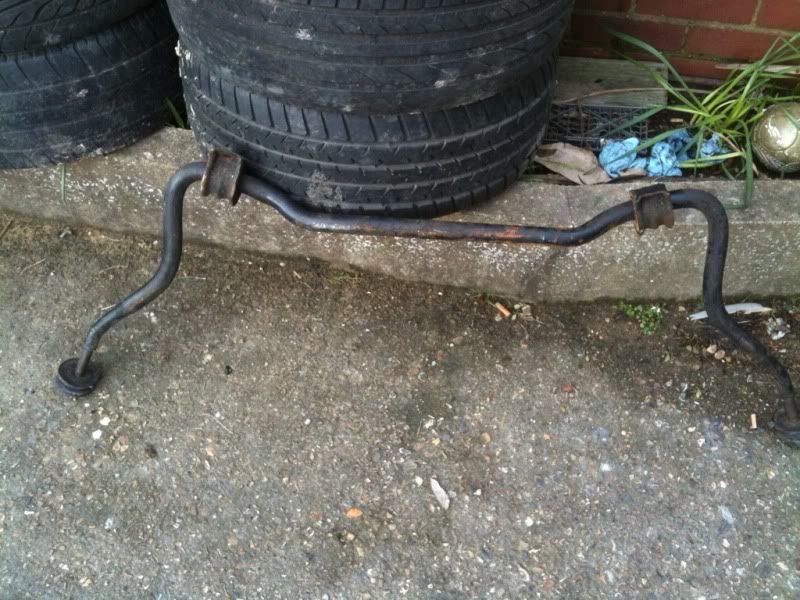
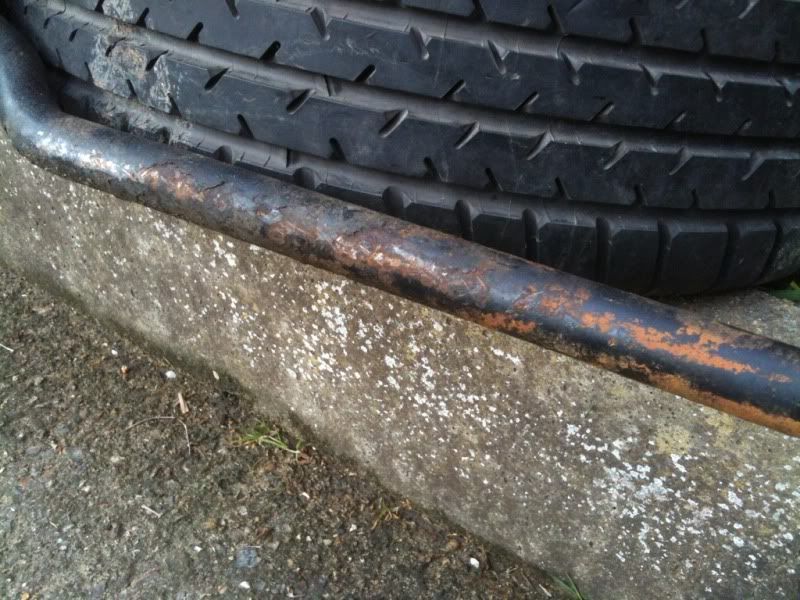
First of all grinded the loose rust on the anti roll bar,primered it then sprayed it gloss black.
After
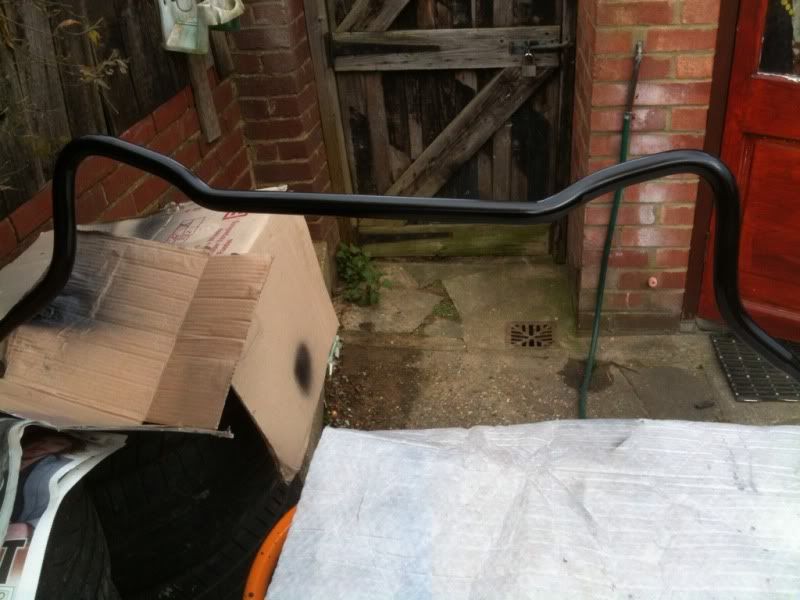
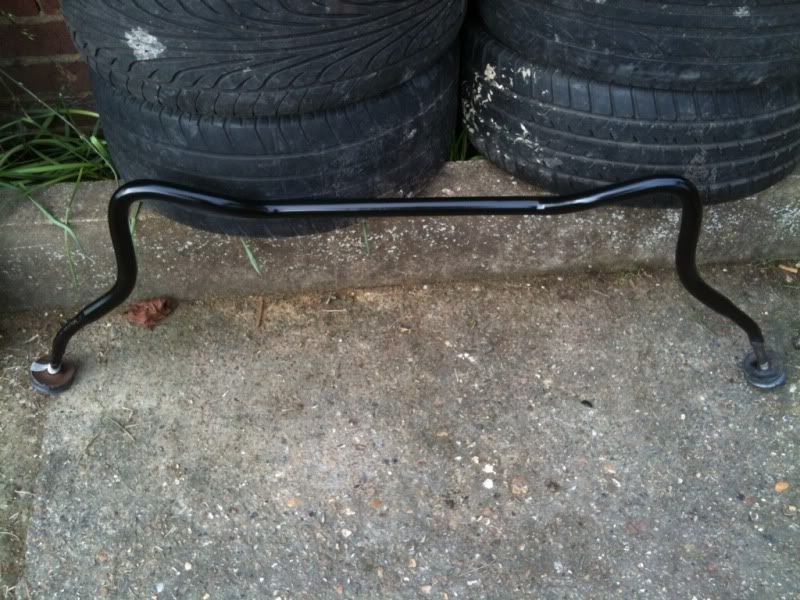
First of all grinded the loose rust on the anti roll bar,primered it then sprayed it gloss black.
After


Trending Topics


 02-05-2013, 07:48 PM
#12
10K+ Poster!!
Thread Starter
iTrader: (6)
Join Date: May 2003
Location: Middlesex AKA Planet earth!!!!
Posts: 11,659
Likes: 0
Received 5 Likes
on
5 Posts
Found a pair of Tca's in the garage that ive had for awhile which fortunatley had powerflex poly bushes in,even thou they were in good condition i thought i would give them a fresh coat of paint.So masked up the bushes and spayed them with hammerite smooth black.
Afew coats later and after they had dried.
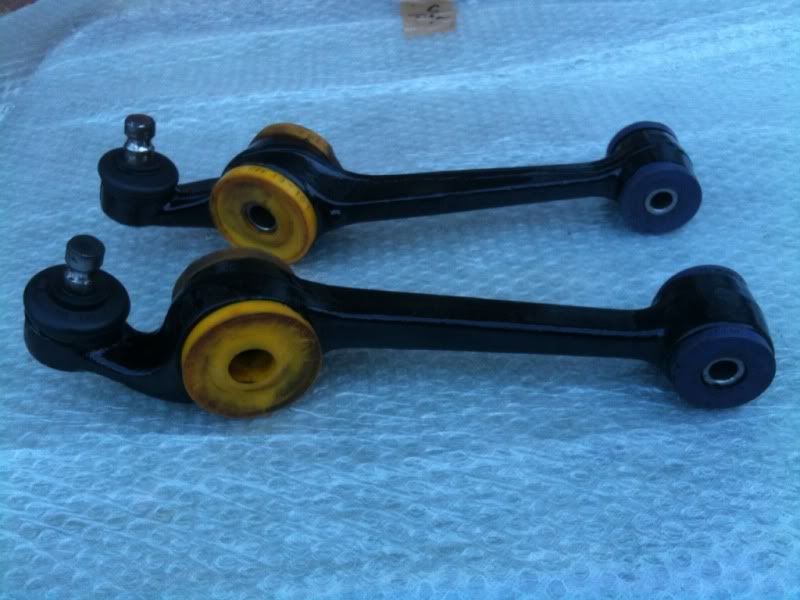
Afew coats later and after they had dried.
Last edited by RSCossieGaz; 02-05-2013 at 07:49 PM.
02-05-2013, 08:01 PM
#13
10K+ Poster!!
Thread Starter
iTrader: (6)
Join Date: May 2003
Location: Middlesex AKA Planet earth!!!!
Posts: 11,659
Likes: 0
Received 5 Likes
on
5 Posts
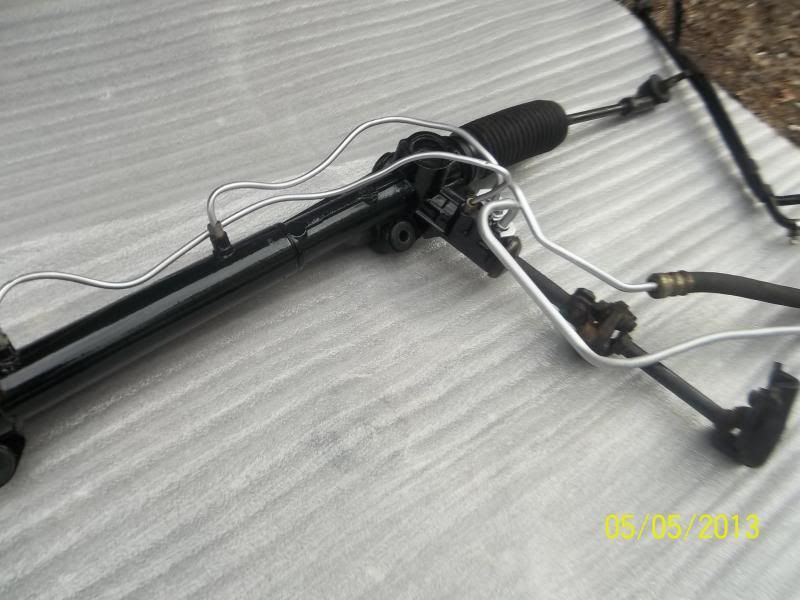
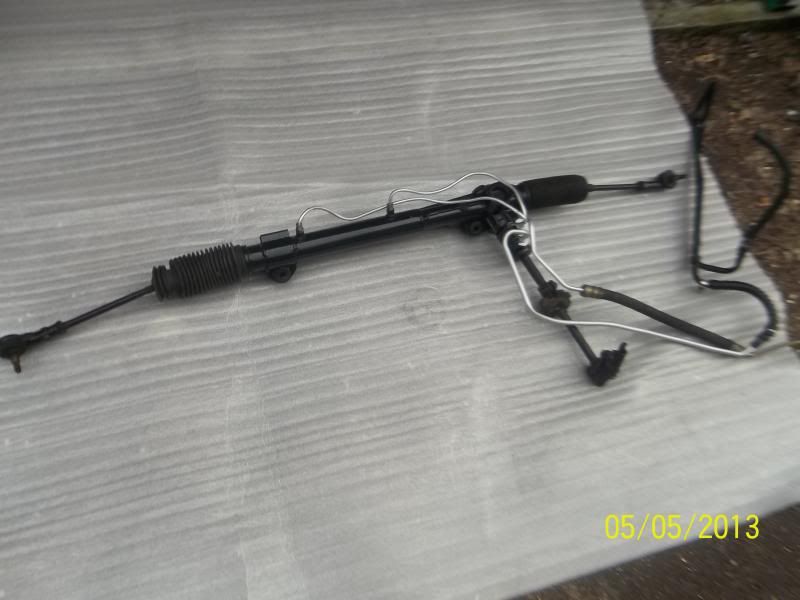
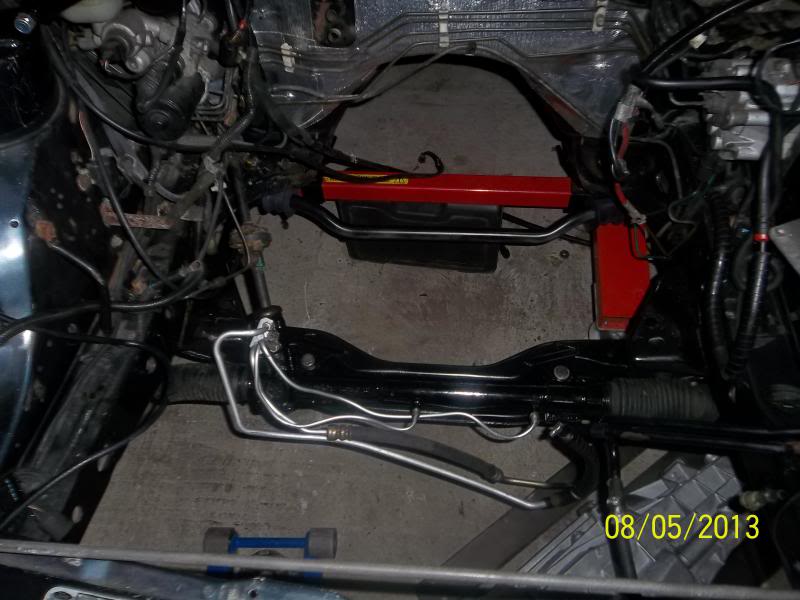
Next up its tackling the steering rack and crossmember craddle,removed the rack from the craddle.
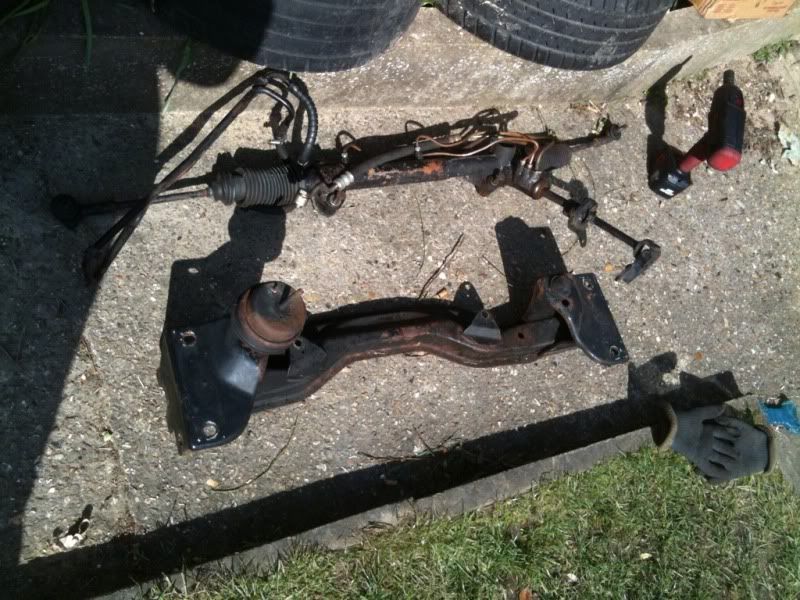
Gave the craddle a quick clean up and primed exposed areas
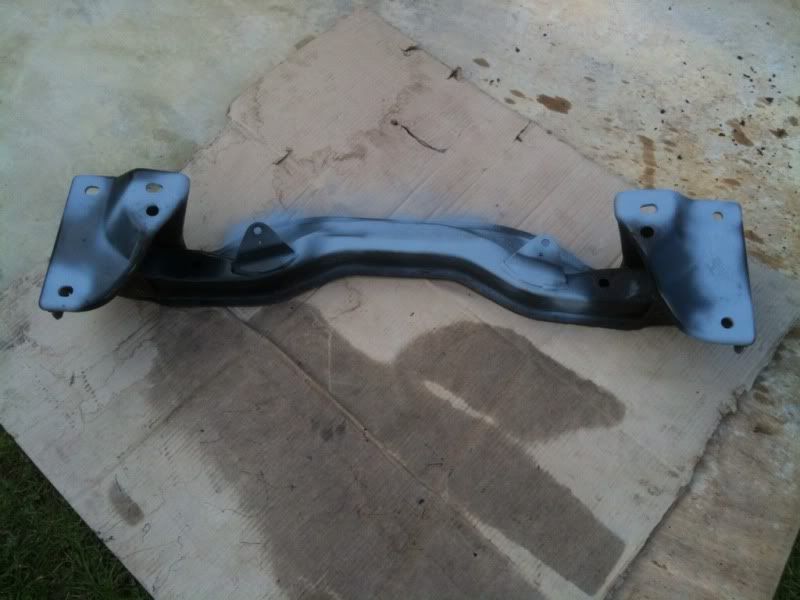
Then sprayed it couple of coats of gloss black
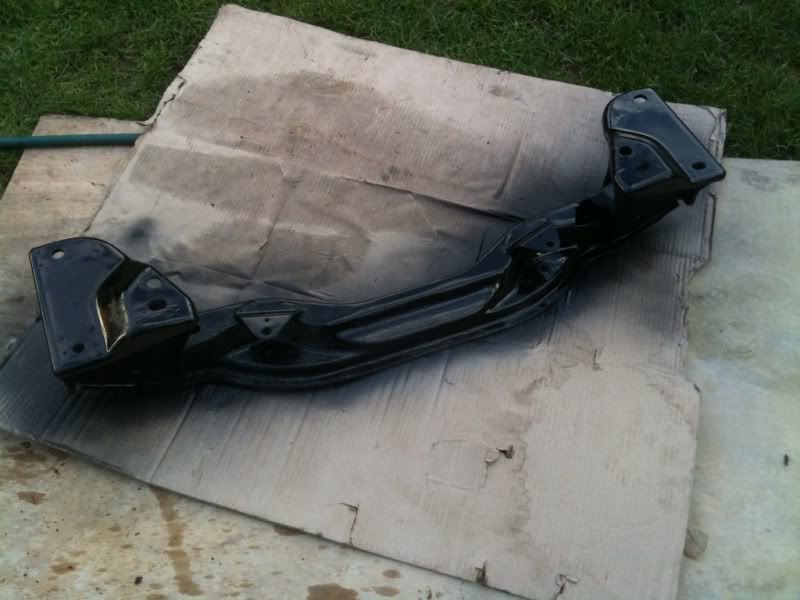
Its not mint but im happy with way its come out certainly freshened up abit more now.
Next is to sort out the steering rack!
Gave the craddle a quick clean up and primed exposed areas
Then sprayed it couple of coats of gloss black
Its not mint but im happy with way its come out certainly freshened up abit more now.
Next is to sort out the steering rack!

 05-05-2013, 09:12 PM
#19
10K+ Poster!!
Thread Starter
iTrader: (6)
Join Date: May 2003
Location: Middlesex AKA Planet earth!!!!
Posts: 11,659
Likes: 0
Received 5 Likes
on
5 Posts
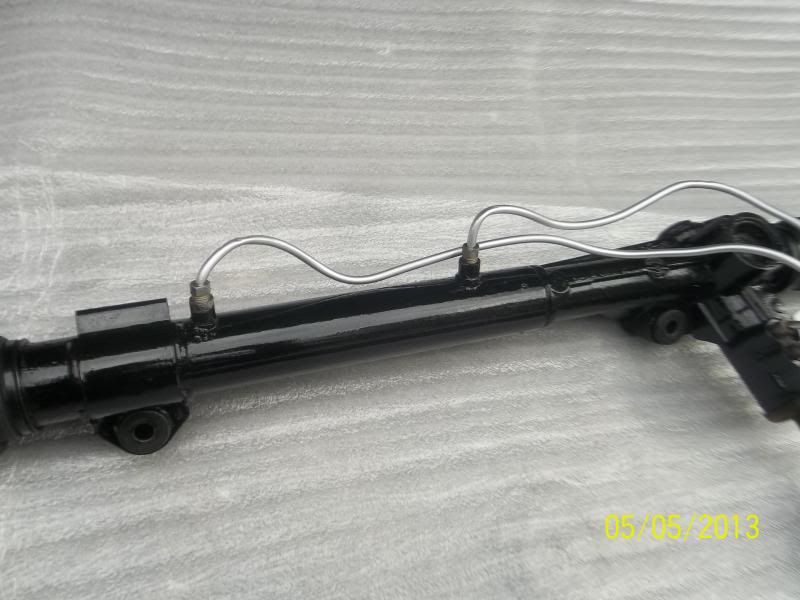
Next up was to clean up the steering rack which had abit of surface rust and generaly looked weathered etc.
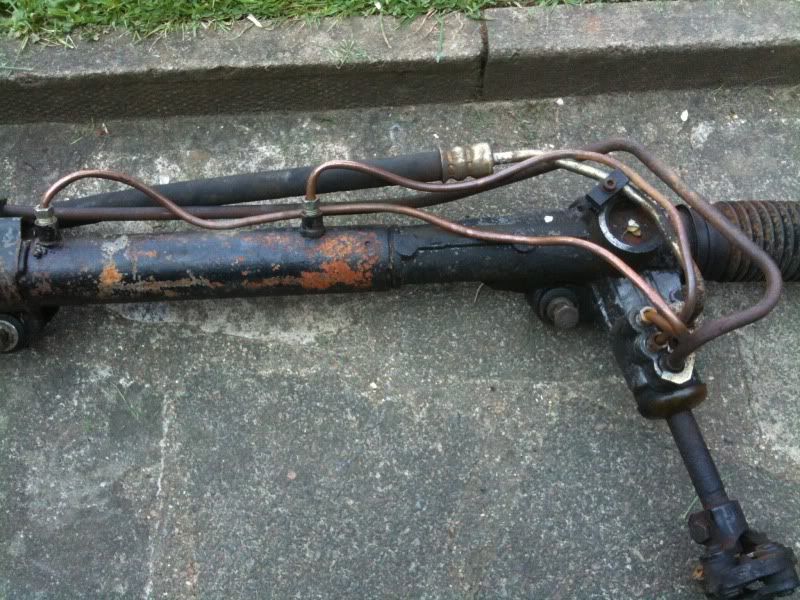
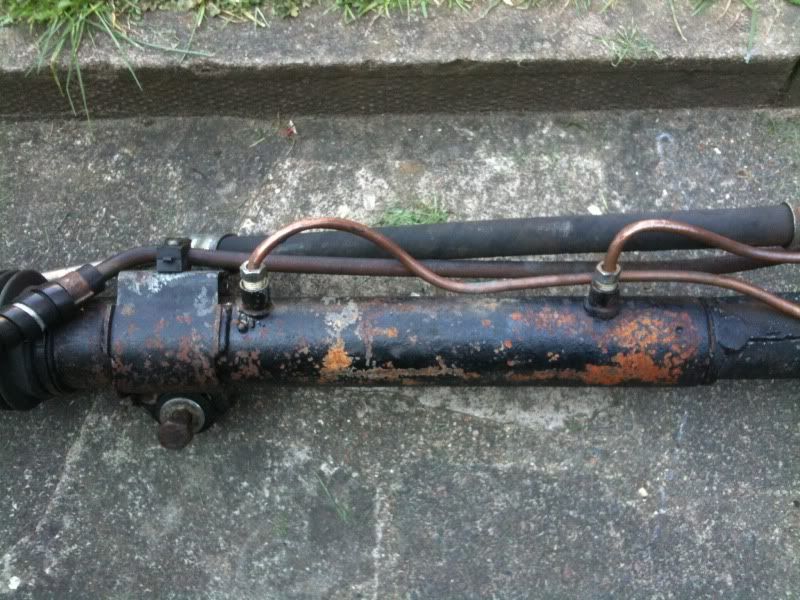
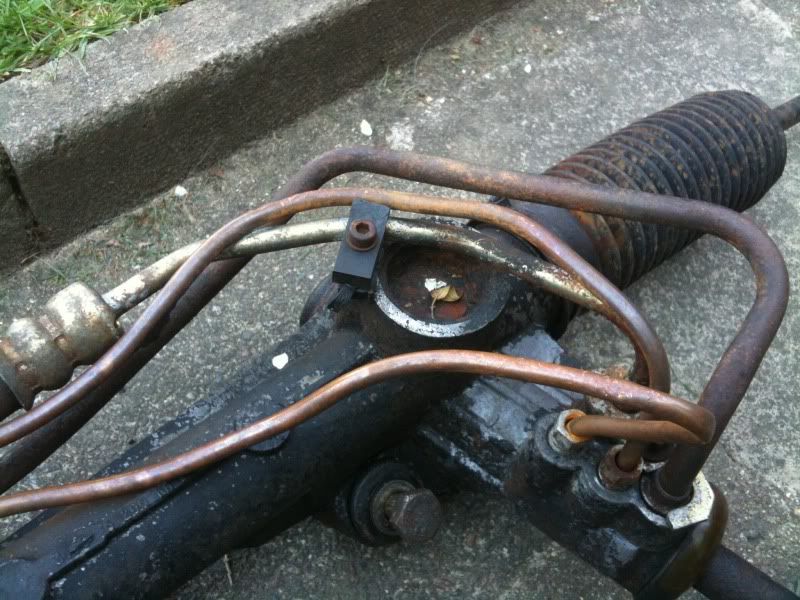
So got the dremel out and sanded out all the surface rust and generaly cleaned up the rest of the rack ready for spraying.Got some gloss black hammerite and painted the rack,once that had fully dried next up was to paint the pipes silver.
Im pretty pleased how it turned out
So got the dremel out and sanded out all the surface rust and generaly cleaned up the rest of the rack ready for spraying.Got some gloss black hammerite and painted the rack,once that had fully dried next up was to paint the pipes silver.
Im pretty pleased how it turned out
Last edited by RSCossieGaz; 05-05-2013 at 09:13 PM.
 05-05-2013, 10:02 PM
#21
10K+ Poster!!
Thread Starter
iTrader: (6)
Join Date: May 2003
Location: Middlesex AKA Planet earth!!!!
Posts: 11,659
Likes: 0
Received 5 Likes
on
5 Posts
While i was waiting for rack to dry i popped down to burton power and picked up some heat matting so can line the bulkhead transmission tunnel as the original heat proofing had perished over time so removed all that ready for the new stuff.
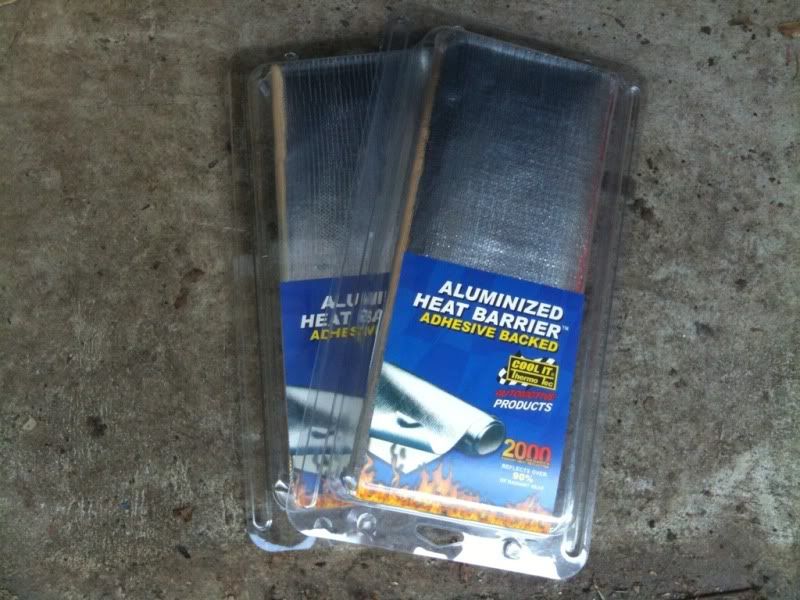
All the old perished heat proofing removed
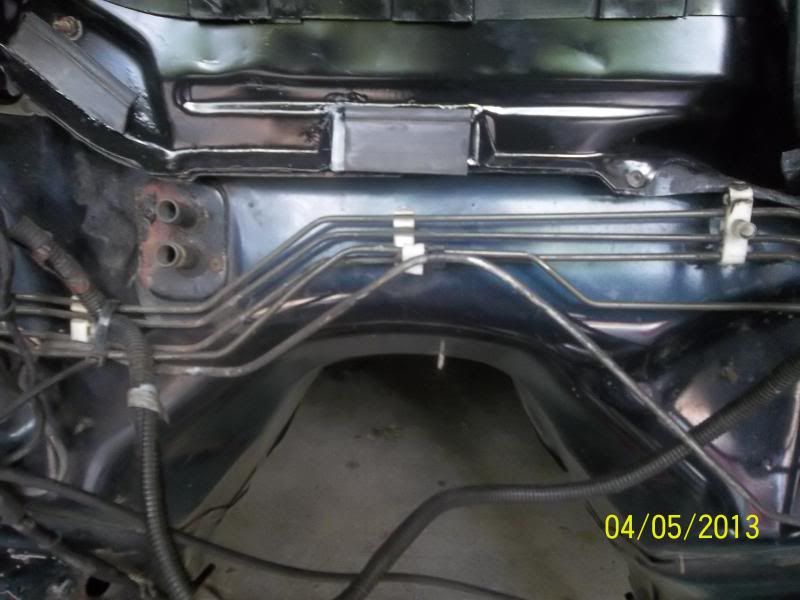
Hour later all fitted on was easier to apply then what i was expecting.
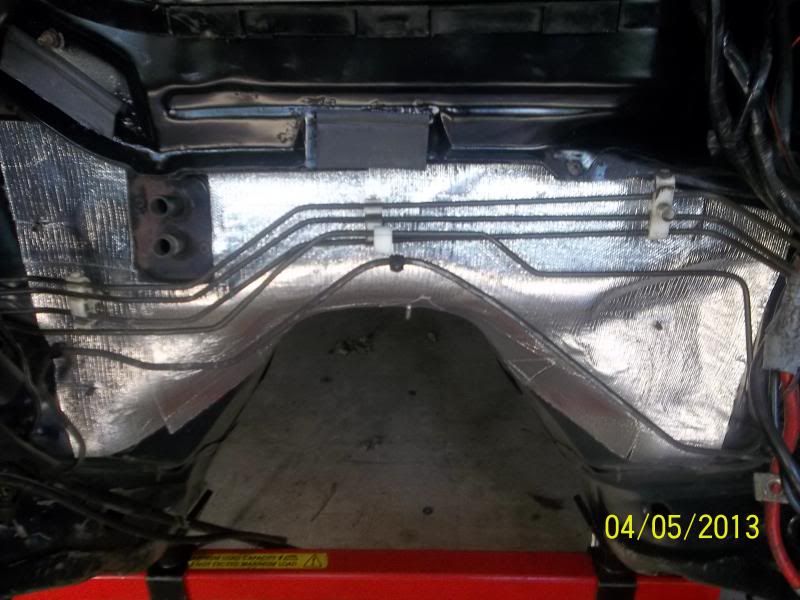
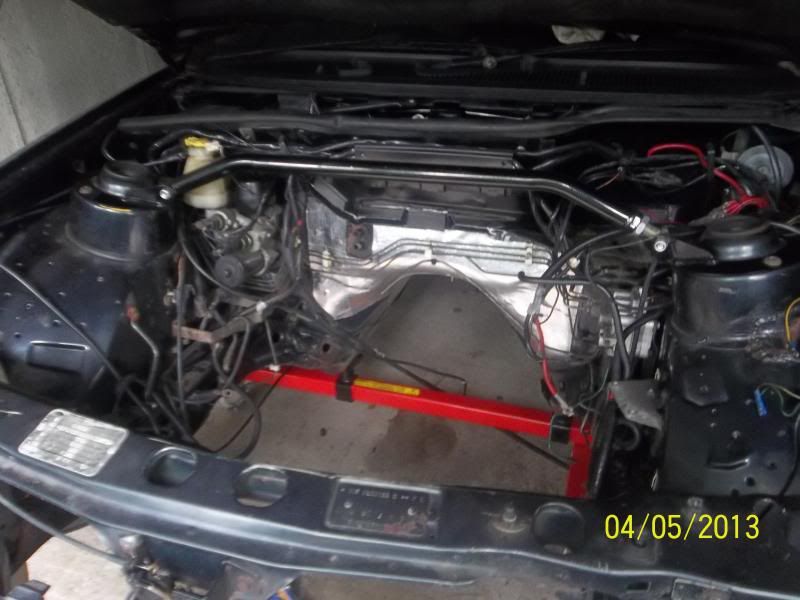
Once engines in and bay is all complete alot of this wont be seen but it looks alot more fresher now that the heat proofing and replacement bulkhead panel is all in now.
All the old perished heat proofing removed
Hour later all fitted on was easier to apply then what i was expecting.
Once engines in and bay is all complete alot of this wont be seen but it looks alot more fresher now that the heat proofing and replacement bulkhead panel is all in now.
20-05-2013, 10:51 PM
#23
10K+ Poster!!
Thread Starter
iTrader: (6)
Join Date: May 2003
Location: Middlesex AKA Planet earth!!!!
Posts: 11,659
Likes: 0
Received 5 Likes
on
5 Posts
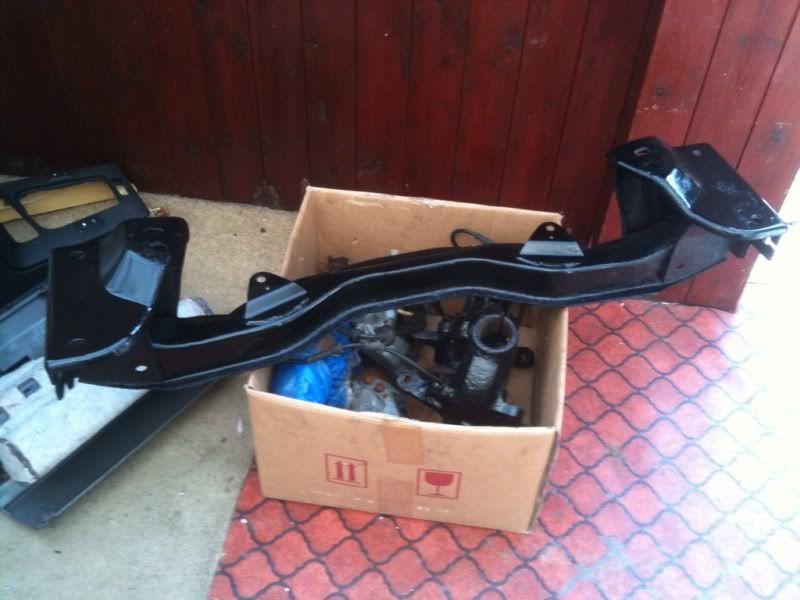
Abit more progress on the saph front crossmember and rack now bolted back into postion.
Got the front springs clamped (cheers Tony!) onto the koni's i bought off karl 3dr
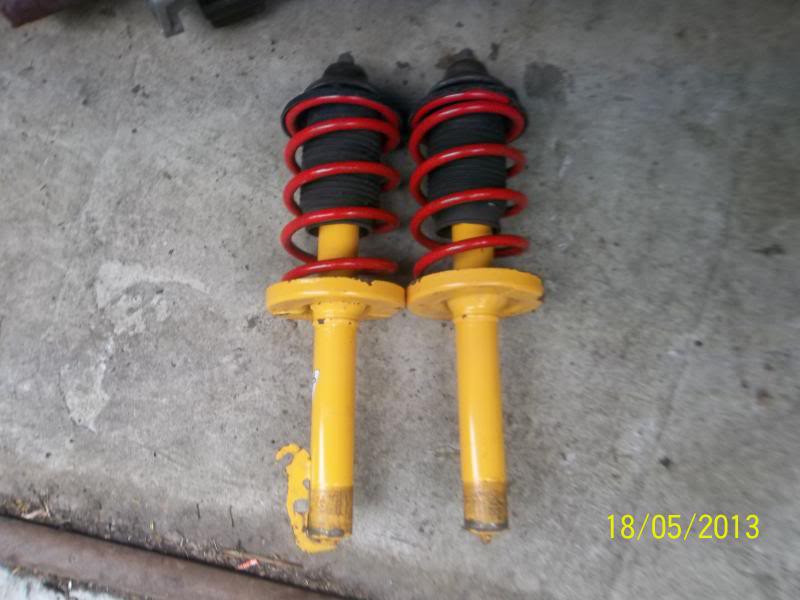
Then fitted the koni's onto the front hubs before fitting the front suspension back onto the car
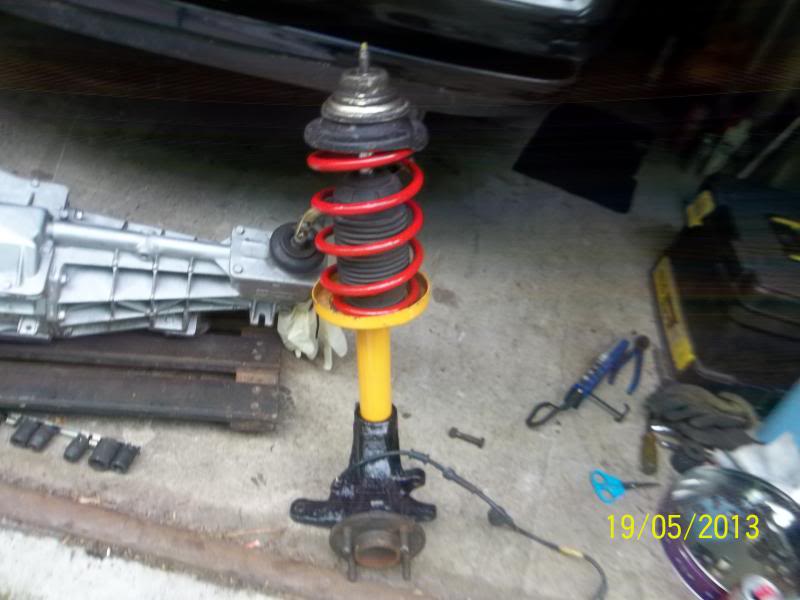
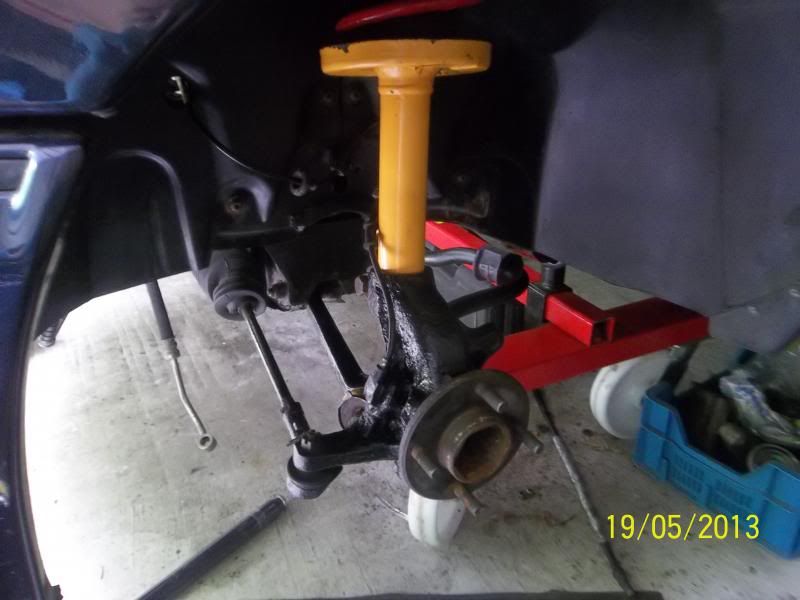
Thats now the front all fitted up just need to replace one of the tie rods as one of the threads is damaged so may well just buy a new pair now.
Got the front springs clamped (cheers Tony!) onto the koni's i bought off karl 3dr
Then fitted the koni's onto the front hubs before fitting the front suspension back onto the car
Thats now the front all fitted up just need to replace one of the tie rods as one of the threads is damaged so may well just buy a new pair now.
Last edited by RSCossieGaz; 20-05-2013 at 10:55 PM.
02-06-2013, 09:32 PM
#27
10K+ Poster!!
Thread Starter
iTrader: (6)
Join Date: May 2003
Location: Middlesex AKA Planet earth!!!!
Posts: 11,659
Likes: 0
Received 5 Likes
on
5 Posts
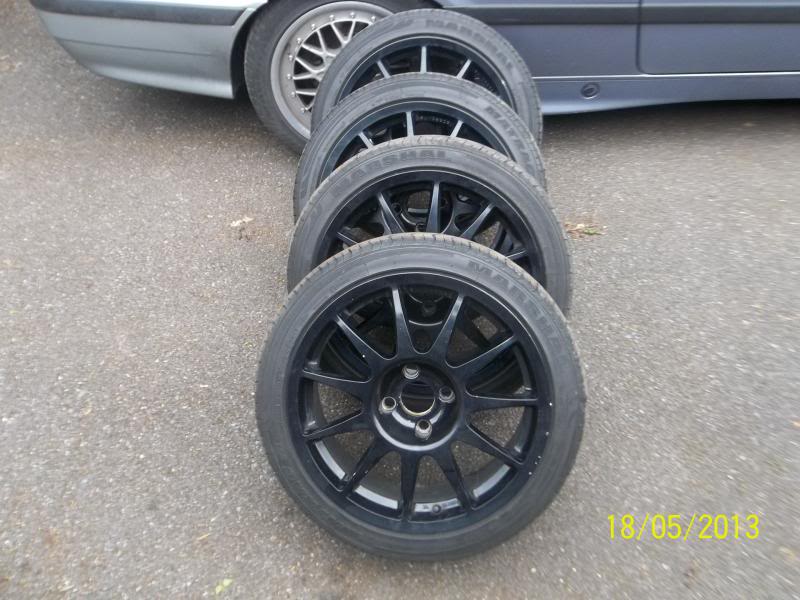
Picked up some alloys for the car thought i would go for something different that i havent had before there 17' speedline Turini's these will be refurbed later on before cars done.
Not much done on the car this week but got it out and swapped ends so can crack on with sorting out the rear end.
Desided to go completely 2wd rear end on the car now so have started collecting the bits i need got a 7.5 diff and picked up 2wd rear beam and arms today at santa pod,just need to source 2wd driveshafts now.
Last edited by RSCossieGaz; 02-06-2013 at 09:34 PM.
07-07-2013, 02:08 PM
#30
10K+ Poster!!
Thread Starter
iTrader: (6)
Join Date: May 2003
Location: Middlesex AKA Planet earth!!!!
Posts: 11,659
Likes: 0
Received 5 Likes
on
5 Posts
The rear end has all been removed from the car now and at classic ford show i picked up a 2wd rear beam complete along with another set of trailing arms- these being in better condition then what i took off the car.

2wd rear beam and arms in need of the refurbing.The beam is at working being sanded down and tided up etc while thats being done ive started on the rear trailing arms.
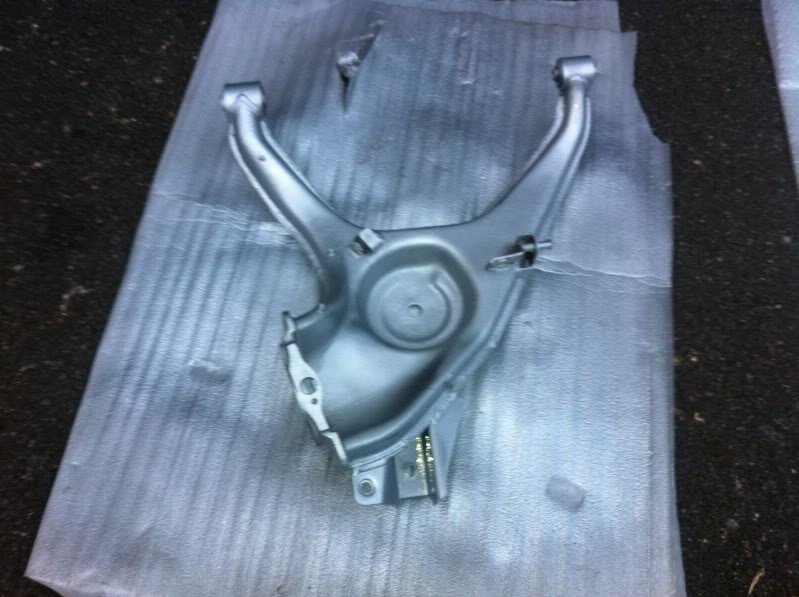
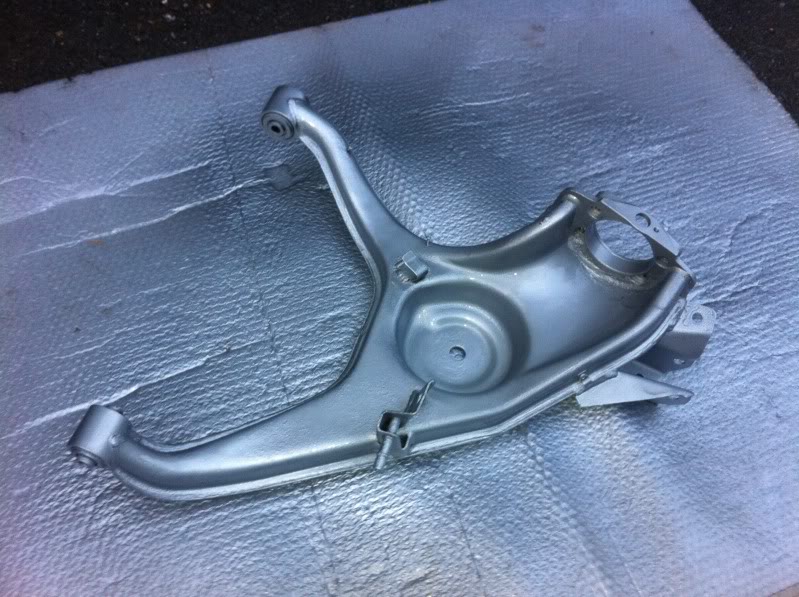
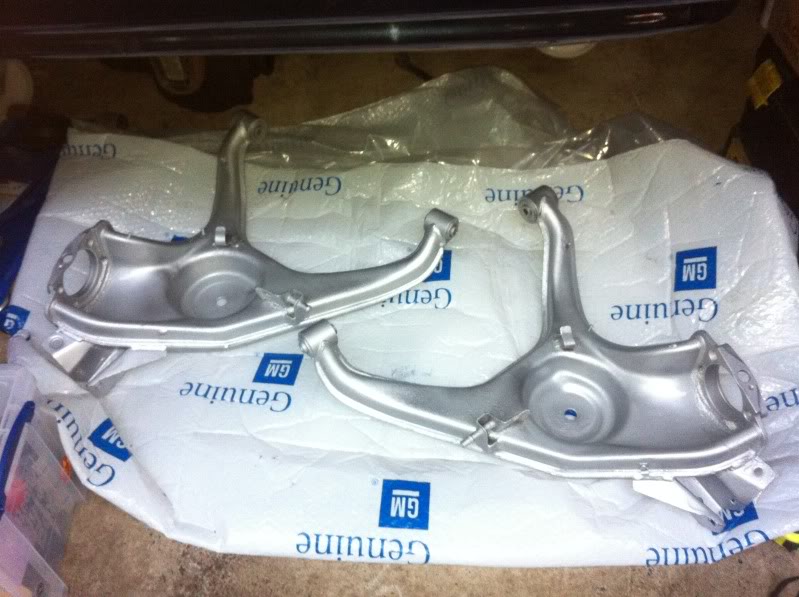
Rear trailing arms been wire brushed cleaned etc of loose rust etc ready for a coat of paint
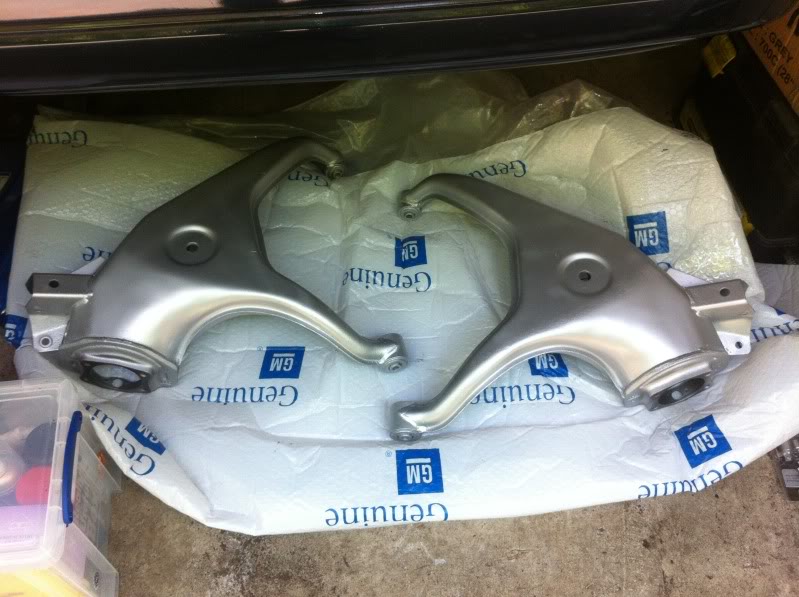
I desided to spray the arms in hammerite silver-will need afew coats once dry,also will be replacing the bushes for some poly bushed ones before it goes back under car.
2wd rear beam and arms in need of the refurbing.The beam is at working being sanded down and tided up etc while thats being done ive started on the rear trailing arms.
Rear trailing arms been wire brushed cleaned etc of loose rust etc ready for a coat of paint
I desided to spray the arms in hammerite silver-will need afew coats once dry,also will be replacing the bushes for some poly bushed ones before it goes back under car.

 12-08-2013, 06:46 PM
#40
10K+ Poster!!
Thread Starter
iTrader: (6)
Join Date: May 2003
Location: Middlesex AKA Planet earth!!!!
Posts: 11,659
Likes: 0
Received 5 Likes
on
5 Posts
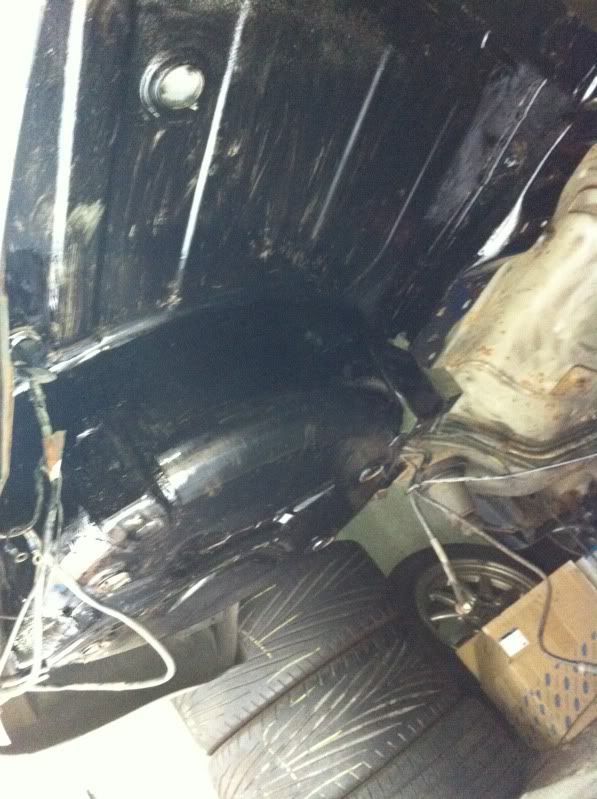
Ok bit of an update - along with the rear axle removed also now fuel craddle and fuel tank have been removed so the complete rear end is stripped now!
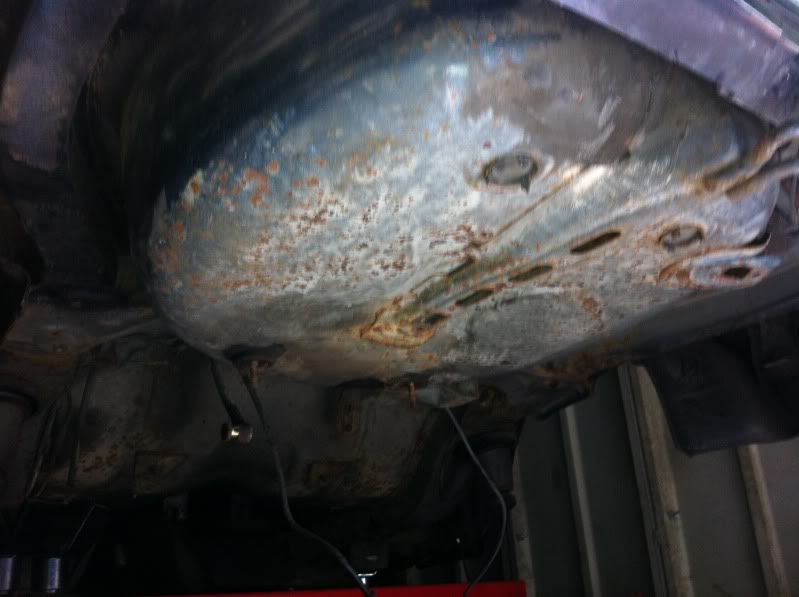
First of all i wire brushed drilled all of the lose rust and shit off from the underside of the spare wheel well and bootfloor above where the tank sits
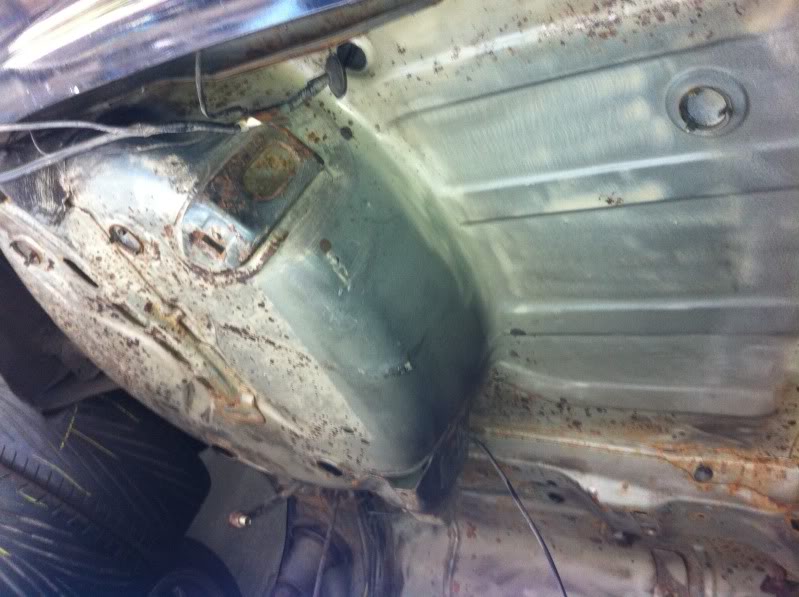
This is by no means going to be a concourse finish show car but just a good tidy up and smarten up the rear end.
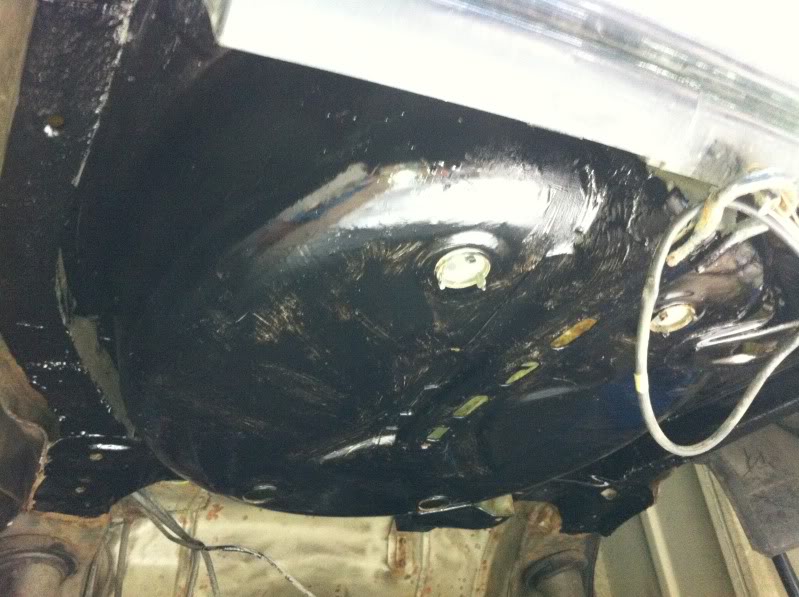
Now with most of the lose rust etc removed i gave the rear underside its 1st coat of hamerite black under body seal.
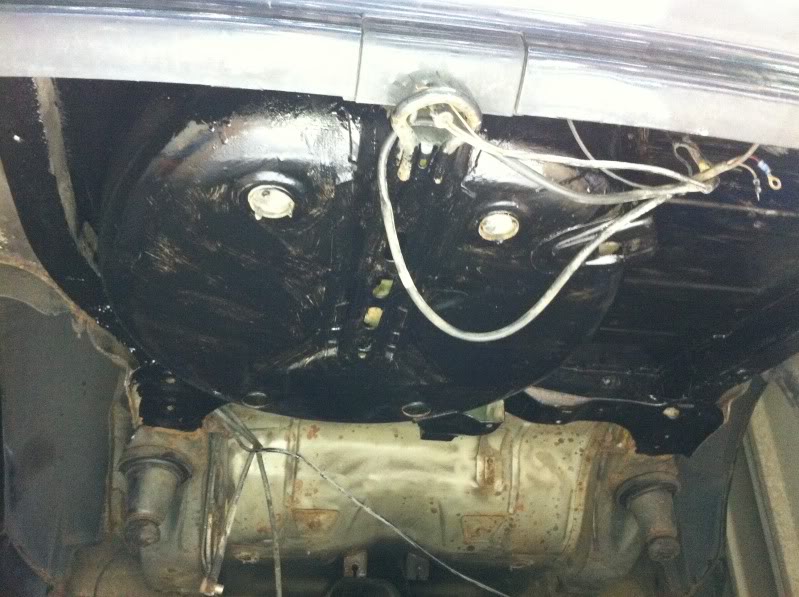
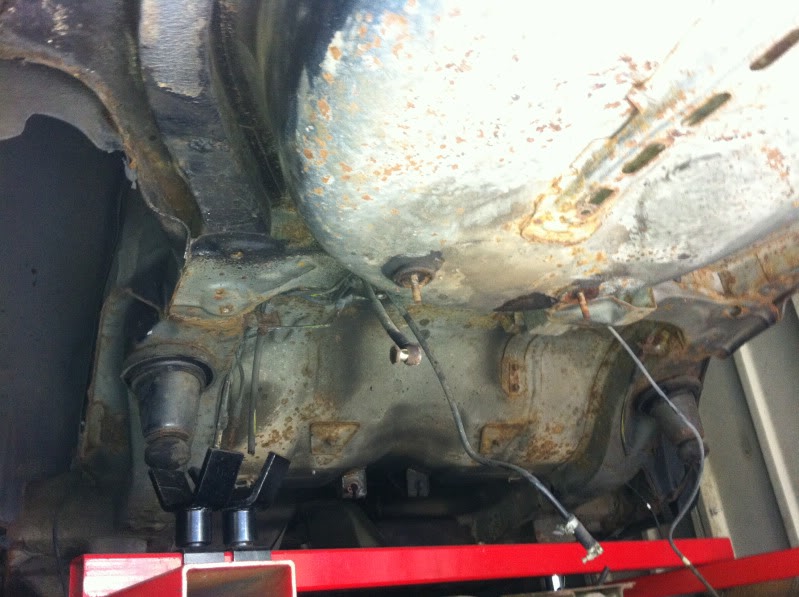
I left that for afew days to dry and then tacked the underside above where beam sits and painted that too along with giving the wheel well and boot floor a 2nd coat of paint.
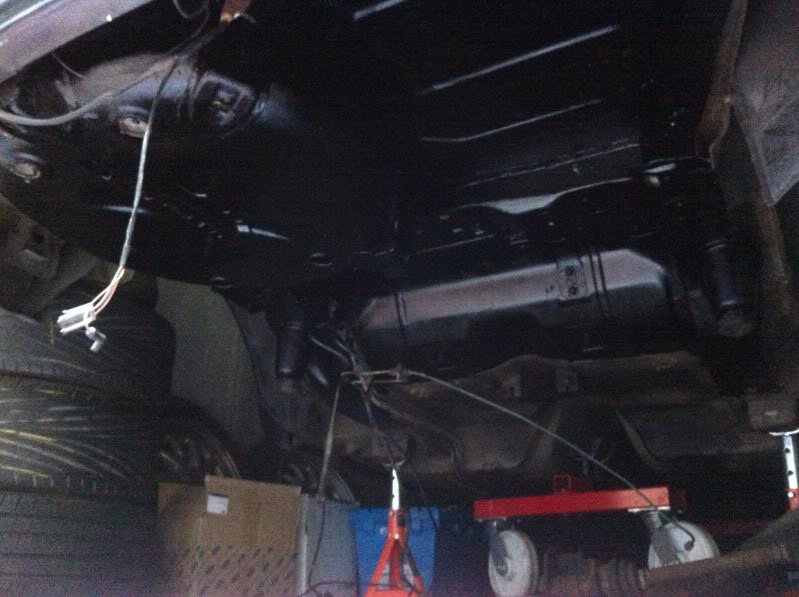
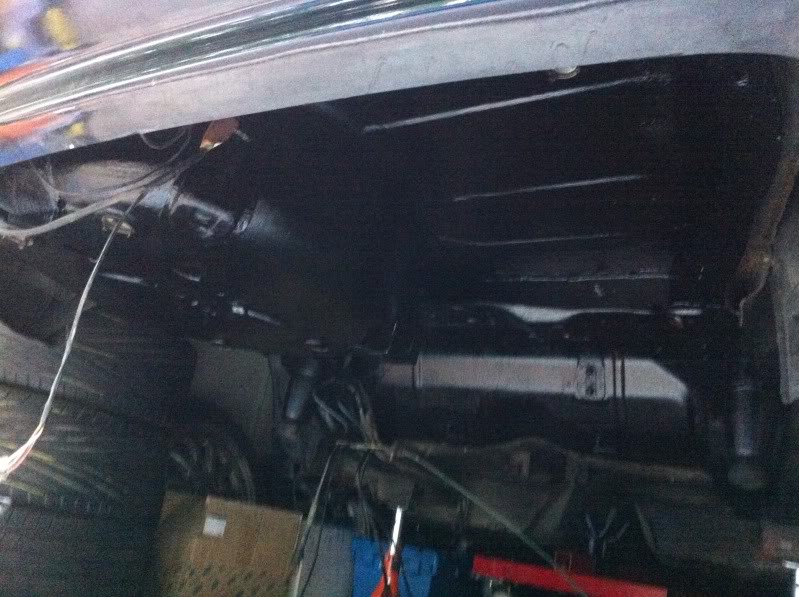
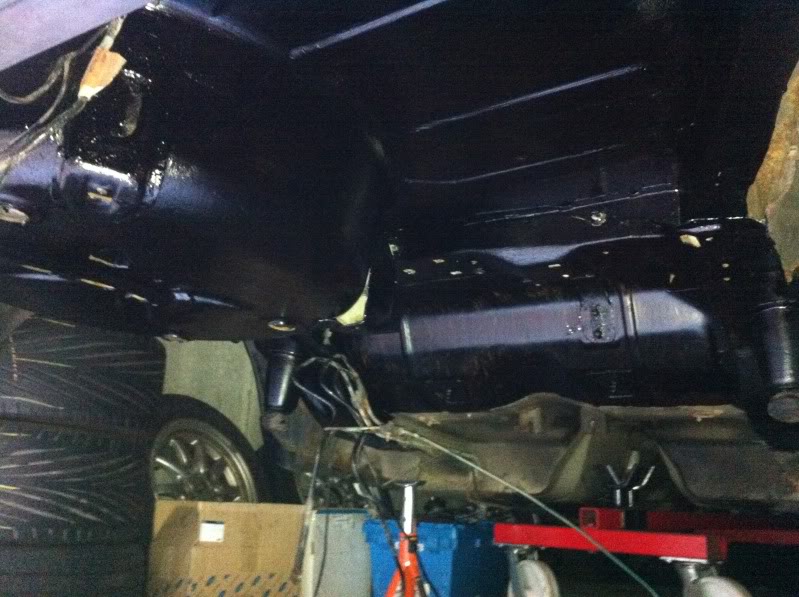
Left that now to dry and in few days will give beam section its 2nd coat and then carry on further back so in the end whole underside will be painted and undersealed.
First of all i wire brushed drilled all of the lose rust and shit off from the underside of the spare wheel well and bootfloor above where the tank sits
This is by no means going to be a concourse finish show car but just a good tidy up and smarten up the rear end.
Now with most of the lose rust etc removed i gave the rear underside its 1st coat of hamerite black under body seal.
I left that for afew days to dry and then tacked the underside above where beam sits and painted that too along with giving the wheel well and boot floor a 2nd coat of paint.
Left that now to dry and in few days will give beam section its 2nd coat and then carry on further back so in the end whole underside will be painted and undersealed.