Tim's Performance Blue S1600 *2.0 ECOBOOST ENGINE SWAP, 370lbft 270whp*


 06-09-2013, 04:39 PM
#122
S1600 Owner
Thread Starter

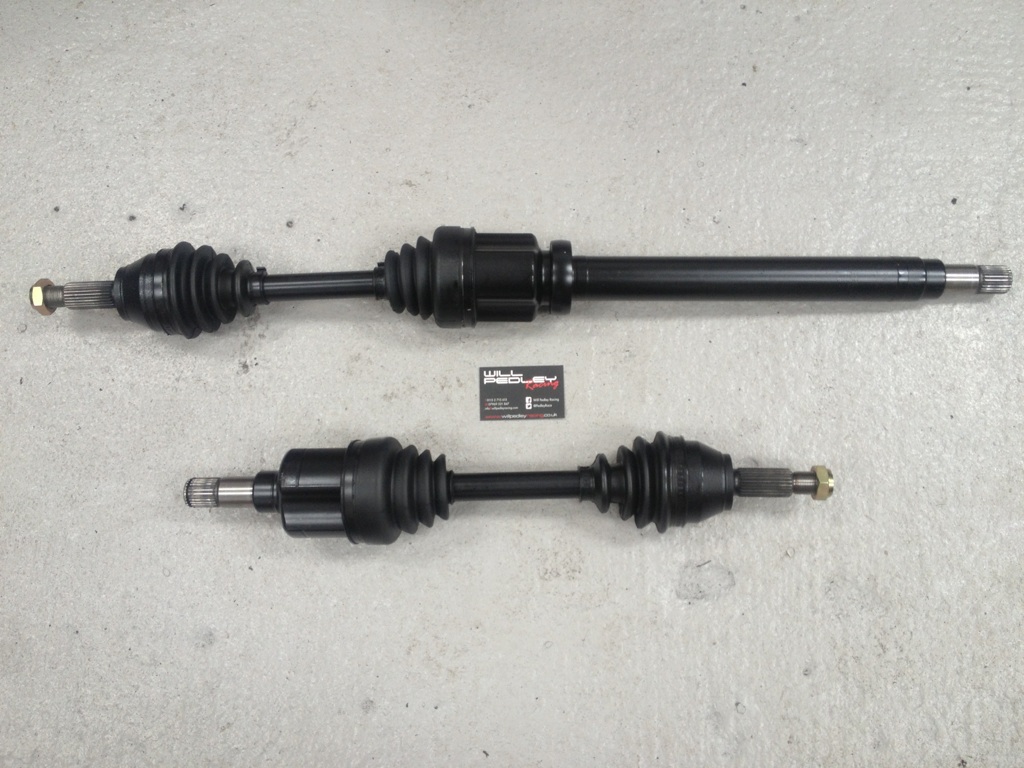
so drive shafts arrived...looking awesome!
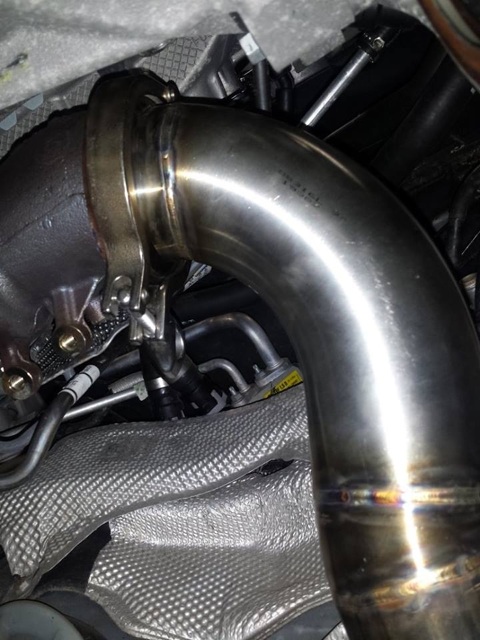
and had a couple of teaser pictures of the downpipe from the fabricator ahead of hopefully getting the car back from them next week to continue with everything else.
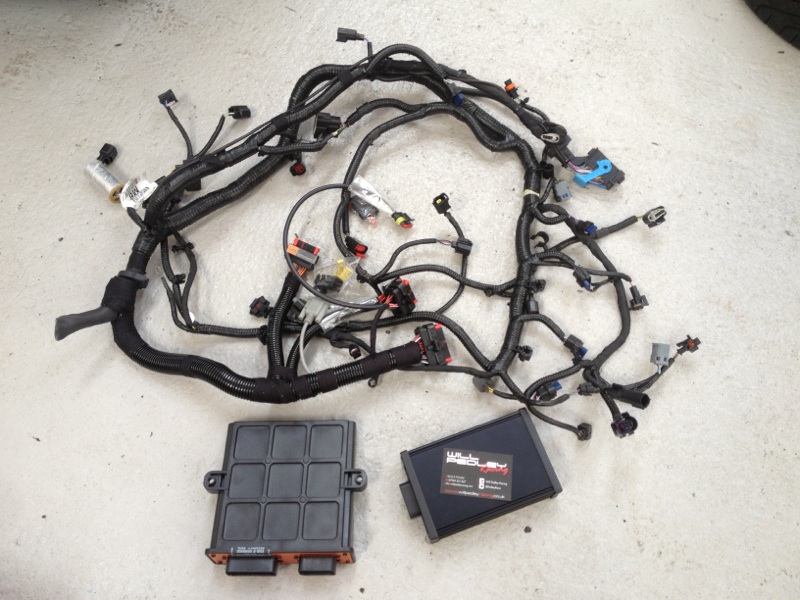
ECU is either delivered today or is due to be delivered next week and diff is paid for!
Hold up has been with the fabricators but hoping to have the car back to will end of next week and then full steam ahead with final fit and testing.....WOOP WOOP

and had a couple of teaser pictures of the downpipe from the fabricator ahead of hopefully getting the car back from them next week to continue with everything else.


ECU is either delivered today or is due to be delivered next week and diff is paid for!
Hold up has been with the fabricators but hoping to have the car back to will end of next week and then full steam ahead with final fit and testing.....WOOP WOOP
 09-09-2013, 02:02 AM
#126
Some one had the balls to do this eventually. I had a MK7 zs that i was going to drop the 1.6 eco boost from the ST in, But spur off the moment when i was unhappy with the car i tr added it in for a MK2 RS lol.
Really looking forward (like many) to the finished project.
Really looking forward (like many) to the finished project.
 26-10-2013, 07:34 PM
#130
S1600 Owner
Thread Starter
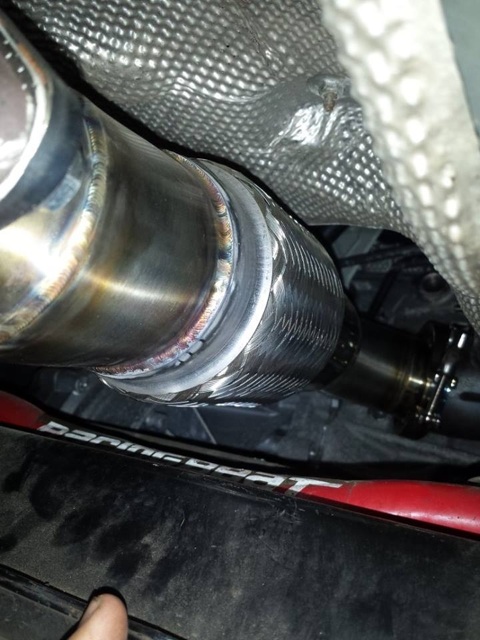
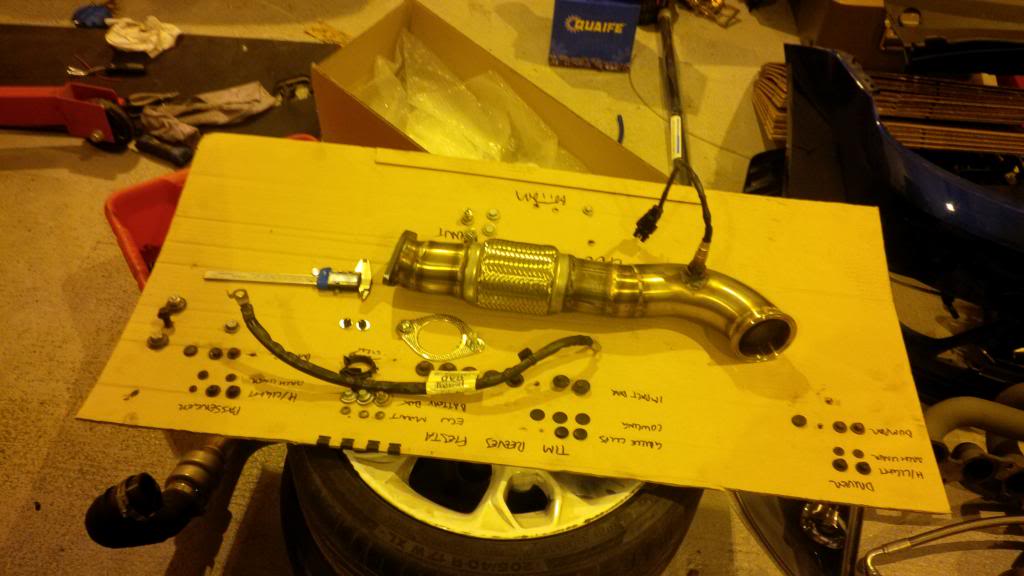
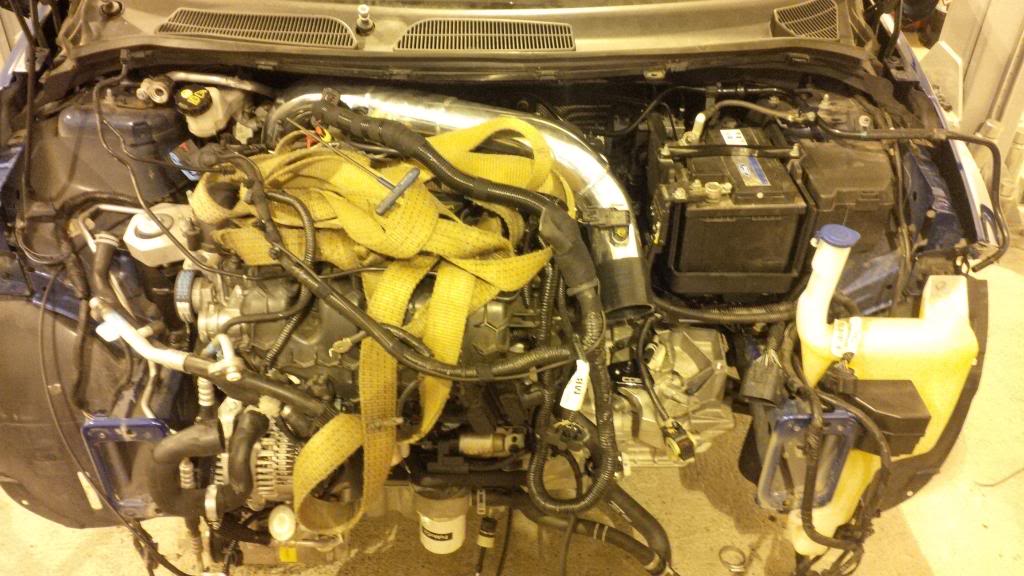
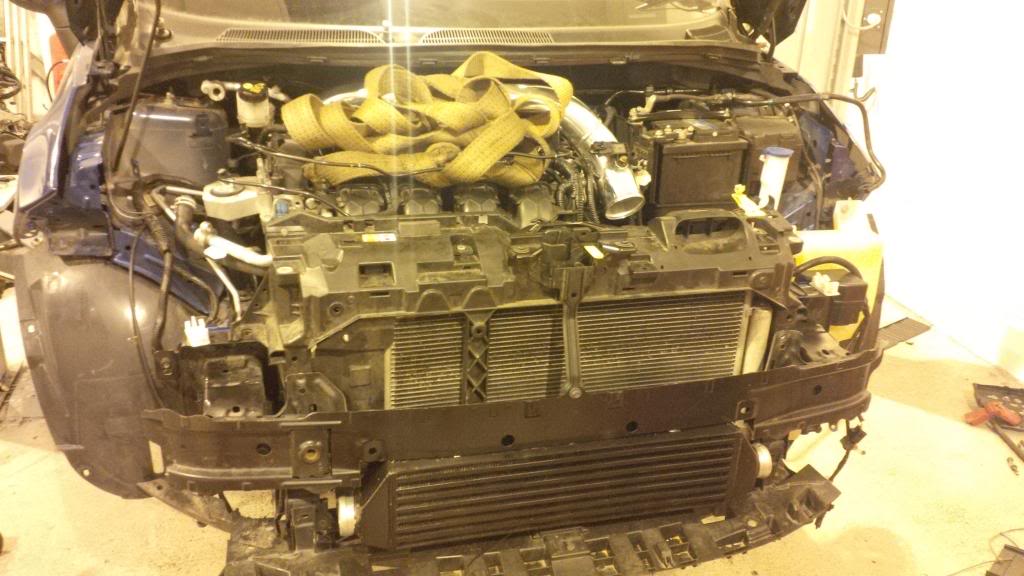
Right so we finally got the car back with everything from the fabricators done...... i can rest easier now that its back with will! (all this work took the fabricator three months -.-....ridiculous idiots!)
pick up this morning from the fabricator
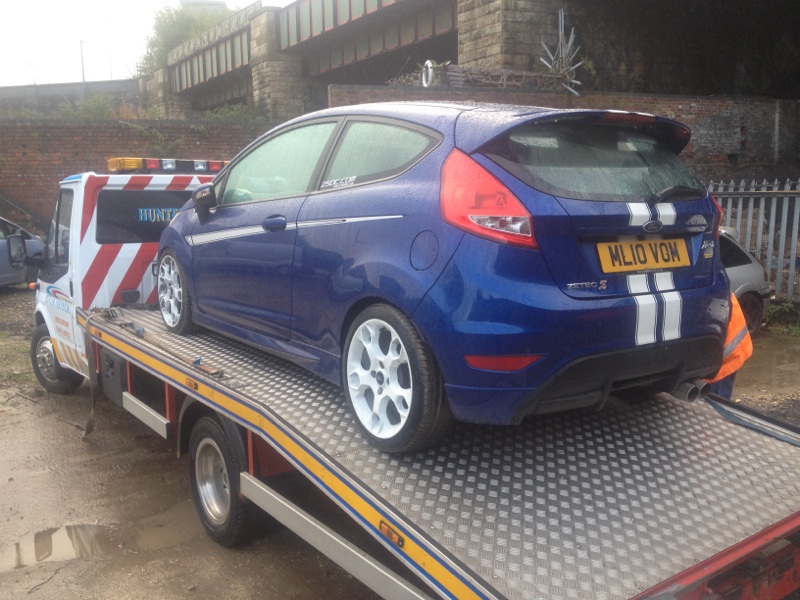
intercooler yo and gonna go with some black silicones to be total stealth
IMG_00000400_zps2f2bb483.jpg?t=1382815140[/URL]
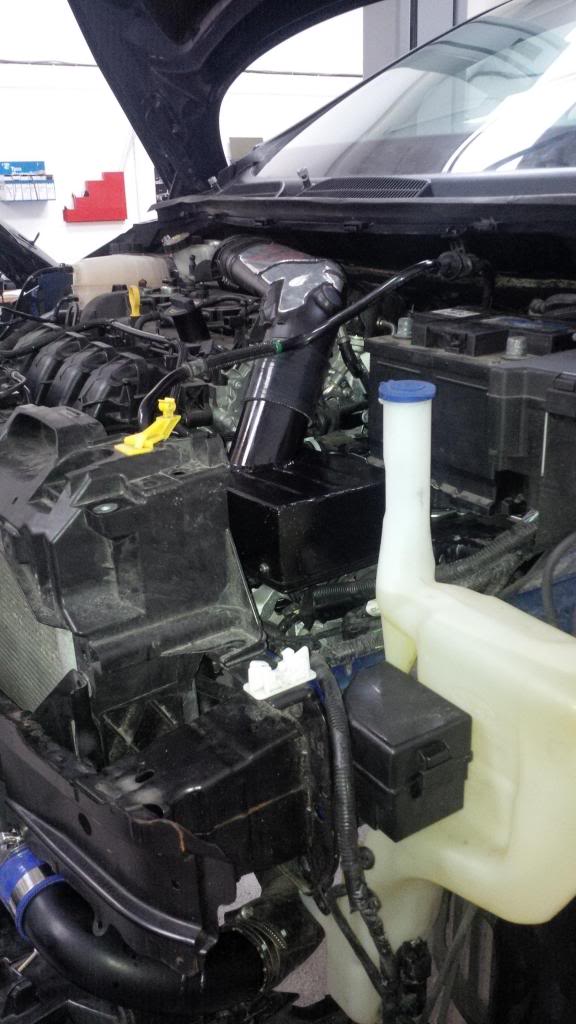
currently everything is there but about to be taken back apart so everything will be straight after final fit
IMG_00000401_zpse9f0f7c2.jpg?t=1382815168[/URL]
Airbox with audi rs6 panel filter so im told.
IMG_00000404_zps7f6e2a1e.jpg?t=1382815212[/URL]
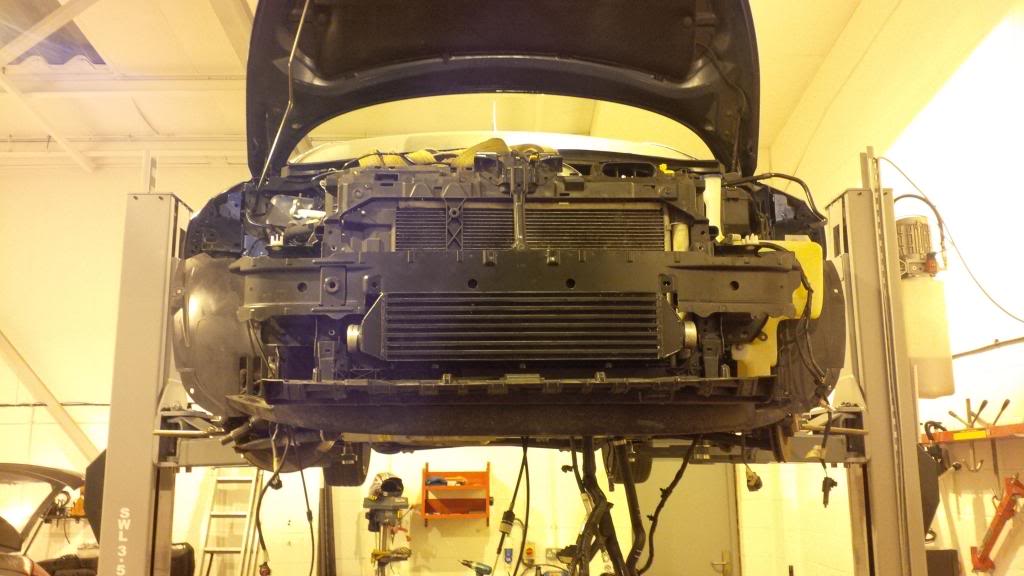
monster 50mm core rad that was the source of most of the headache -.-
IMG_00000415_zps50d829a8.jpg?t=1382815377[/URL]
and another look at it before i left the unit.
IMG_00000416_zps8555fe7c.jpg?t=1382815409[/URL]
So boost pipes, downpipe, battery tray, airbox, rad and intercooler..CHECK! ONWARD MARCH!
pick up this morning from the fabricator

intercooler yo and gonna go with some black silicones to be total stealth
IMG_00000400_zps2f2bb483.jpg?t=1382815140[/URL]
currently everything is there but about to be taken back apart so everything will be straight after final fit
IMG_00000401_zpse9f0f7c2.jpg?t=1382815168[/URL]
Airbox with audi rs6 panel filter so im told.

IMG_00000404_zps7f6e2a1e.jpg?t=1382815212[/URL]
monster 50mm core rad that was the source of most of the headache -.-
IMG_00000415_zps50d829a8.jpg?t=1382815377[/URL]
and another look at it before i left the unit.
IMG_00000416_zps8555fe7c.jpg?t=1382815409[/URL]
So boost pipes, downpipe, battery tray, airbox, rad and intercooler..CHECK! ONWARD MARCH!
26-10-2013, 08:59 PM
#132
S1600 Owner
Thread Starter
 30-10-2013, 10:04 PM
#135
willpedleyracing.co.uk

Now that everything is roughly where its going to live I can start to plan the final fit. Things are moving behind the scenes, will hopefully have some more photos for an update soon

 05-11-2013, 05:58 PM
#142
S1600 Owner
Thread Starter
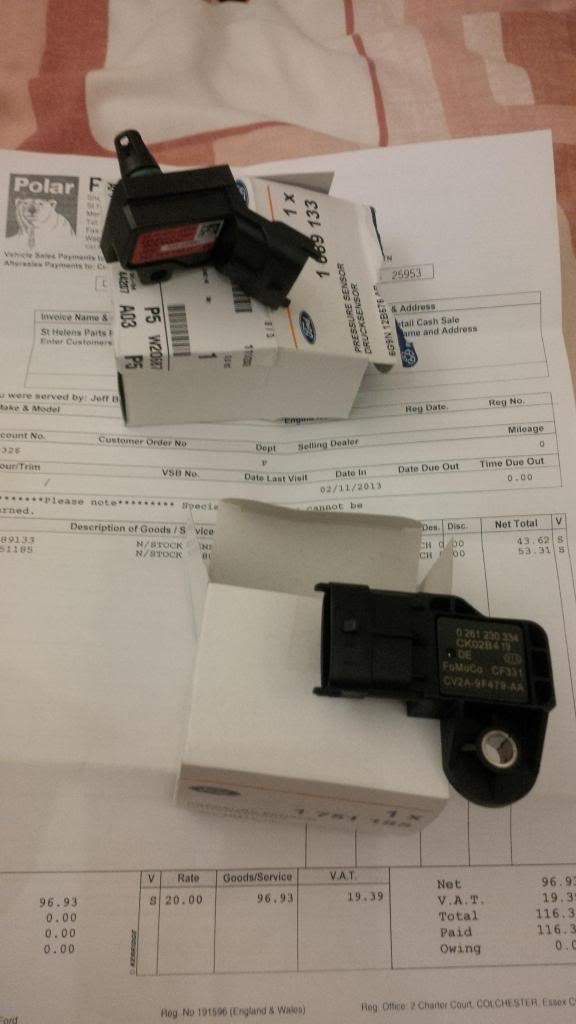
sensors picked up today.
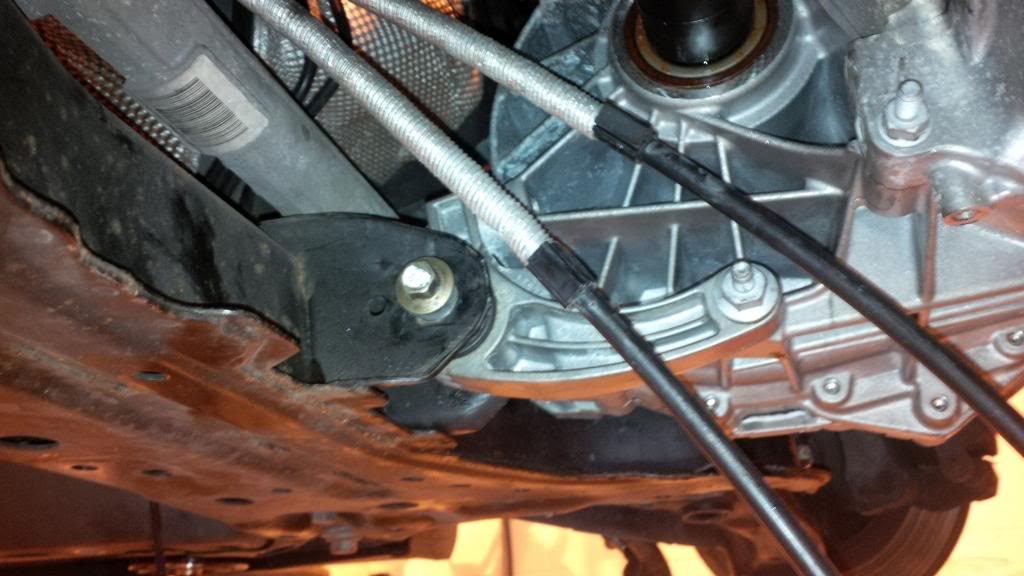
part of the subframe modification.
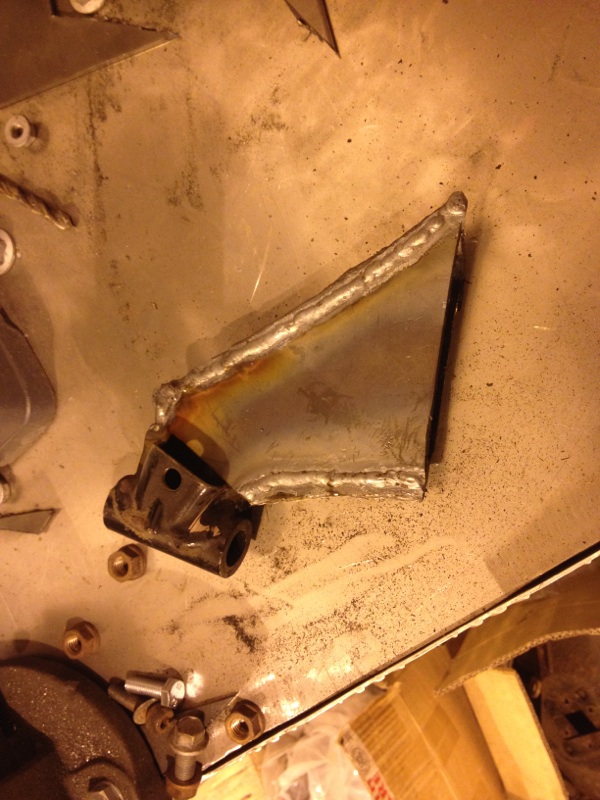
and engine back out for loom fitting and diff installation =]
Raw finished forge inlet pipe is due for delivery tomorrow and hopefully have the COBB short shift before Friday (FedEx have it at the moment)!

part of the subframe modification.

and engine back out for loom fitting and diff installation =]

Raw finished forge inlet pipe is due for delivery tomorrow and hopefully have the COBB short shift before Friday (FedEx have it at the moment)!
05-11-2013, 08:12 PM
#144
S1600 Owner
Thread Starter
Ermmmm not specifically but I'm between getting lifts and temp insurance on my mums car when I can get it cheap; also Will needs space in the unit, so we're powering toward having it finished within a month! Fingers crossed 
Last edited by TimWeeble; 05-11-2013 at 08:33 PM.
06-11-2013, 05:40 PM
#145
S1600 Owner
Thread Starter
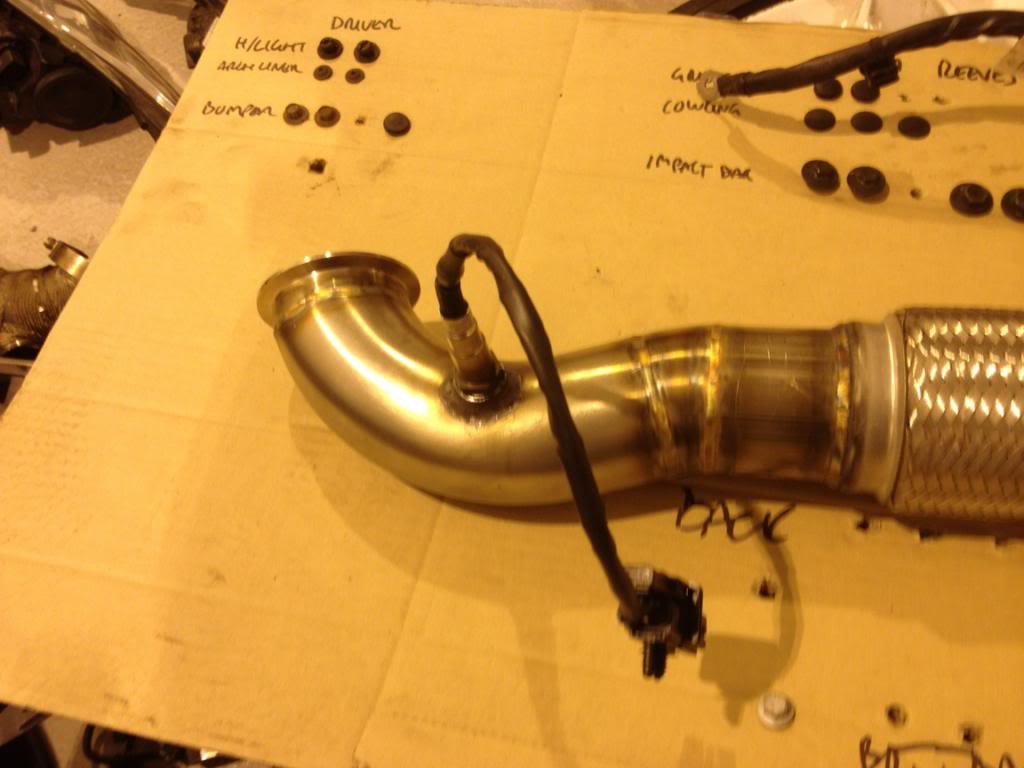
Shiny Shiny!
Forge induction pipe.
IMG_00000448_zpsa027f1c1.jpg?t=1383676496
IMG_00000455_zps58a50117.jpg?t=1383762767
IMG_00000456_zpsc5963c19.jpg?t=1383762799
COBB Short Shift
IMG_00000449_zps82378a9a.jpg?t=1383762487
IMG_00000450_zpsb1d5ed29.jpg?t=1383762521
IMG_00000451_zps1131a0dd.jpg?t=1383762674
Friday should be fun when i might actually get to work on the car myself for once in 6 months =]
08-11-2013, 09:50 PM
#146
S1600 Owner
Thread Starter
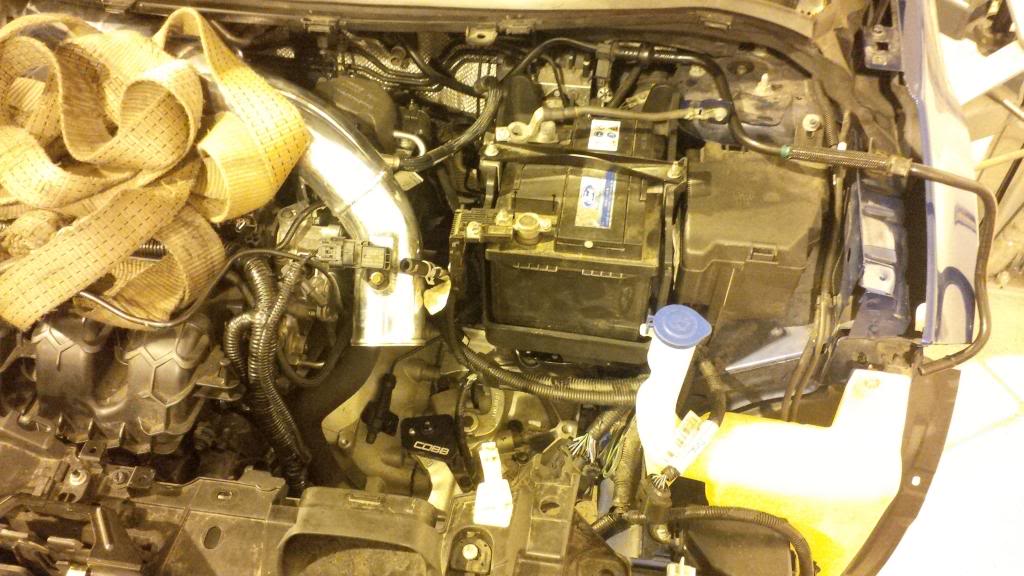
So Been over to Will's this evening to work on the car!
First up we Pikey rigged the earth on the welder and tacked the subframe in place whilst in situ. Will can then remove this next week and give it the full weld and clean up.
We then fitted the COBB short shift whilst the gearbox was off (the diff has been fitted and shimmed and is all good to go) and muscled the gearbox back on to the engine. Went on smooth as butter!
IMG_00000467_zpsaa670df6.jpg?t=1383949128
And as can be seen we eventually got the engine back in to test fit the forge induction pipe which has plenty of room as it turns out. Bearing in mind that the torque link isnt bolted in place in these photos so the engine does need to rotate forward a few degrees yet.
IMG_00000465_zpsb07ffa79.jpg?t=1383949098
then i decided to find out how far out of position the new pipe puts the airbox.
IMG_00000468_zpsa0d49786.jpg?t=1383949156
A fair bit lower and 20 degrees tilted up. However there is room and we should be able to order a custom 20 degree hose when we order all of our hosing next week. Its then just a case of adapting a bracket for the new mounting location. In addition this frees up some additional room for the ECU and IDC to be mounted so all in all a good buy and absolutely top service from forge.
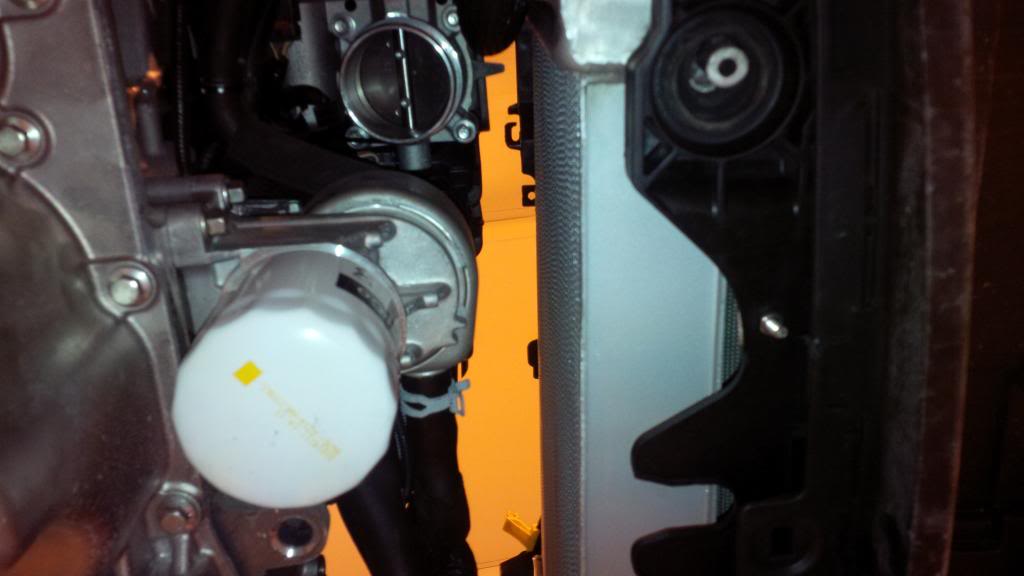
some better pictures of the airbox than i had when we first got the car back.
IMG_00000472_zps6c3b86bb.jpg?t=1383949216
The RS6 panel filter.
IMG_00000470_zps354f7594.jpg?t=1383949189
All in all a productive night though there is still plenty of work to do.... a big issue could be that we may have to remove the heater matrix to swap the shifter cables though once they are in there shouldn't be too much messing *fingers crossed*
Good Progress is being had atleast....ONWARD!
*Also much plugging in of the loom and then wondering what all the extra connectors are for was done by myself =D*
First up we Pikey rigged the earth on the welder and tacked the subframe in place whilst in situ. Will can then remove this next week and give it the full weld and clean up.
We then fitted the COBB short shift whilst the gearbox was off (the diff has been fitted and shimmed and is all good to go) and muscled the gearbox back on to the engine. Went on smooth as butter!
IMG_00000467_zpsaa670df6.jpg?t=1383949128
And as can be seen we eventually got the engine back in to test fit the forge induction pipe which has plenty of room as it turns out. Bearing in mind that the torque link isnt bolted in place in these photos so the engine does need to rotate forward a few degrees yet.
IMG_00000465_zpsb07ffa79.jpg?t=1383949098
then i decided to find out how far out of position the new pipe puts the airbox.
IMG_00000468_zpsa0d49786.jpg?t=1383949156
A fair bit lower and 20 degrees tilted up. However there is room and we should be able to order a custom 20 degree hose when we order all of our hosing next week. Its then just a case of adapting a bracket for the new mounting location. In addition this frees up some additional room for the ECU and IDC to be mounted so all in all a good buy and absolutely top service from forge.
some better pictures of the airbox than i had when we first got the car back.
IMG_00000472_zps6c3b86bb.jpg?t=1383949216
The RS6 panel filter.
IMG_00000470_zps354f7594.jpg?t=1383949189
All in all a productive night though there is still plenty of work to do.... a big issue could be that we may have to remove the heater matrix to swap the shifter cables though once they are in there shouldn't be too much messing *fingers crossed*
Good Progress is being had atleast....ONWARD!
*Also much plugging in of the loom and then wondering what all the extra connectors are for was done by myself =D*
09-11-2013, 03:20 PM
#148
S1600 Owner
Thread Starter
11-11-2013, 06:53 PM
#149
S1600 Owner
Thread Starter
AEM wideband lambda turned up today. Should've been here friday -.-
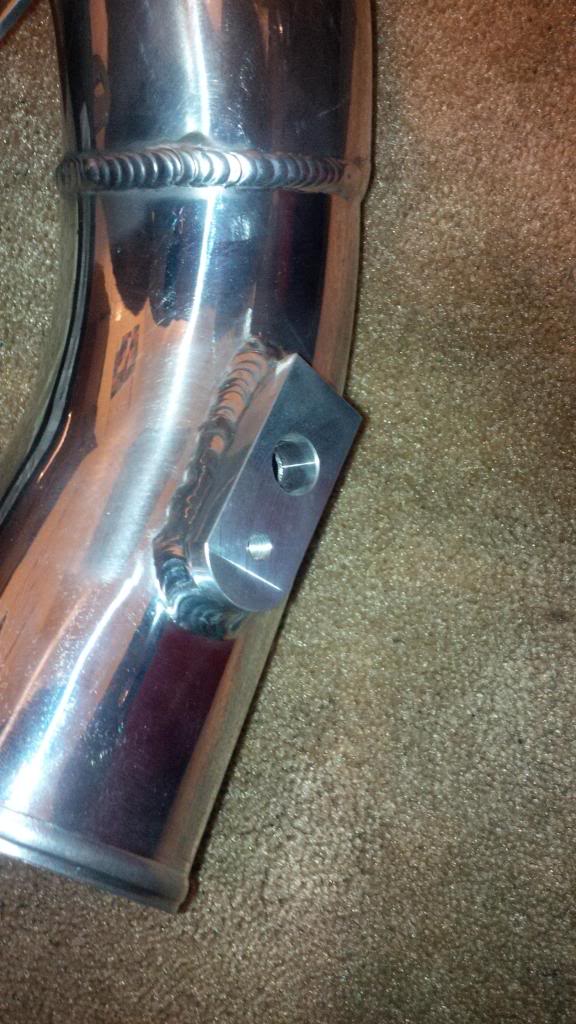
Boss Welded onto down pipe...Check!
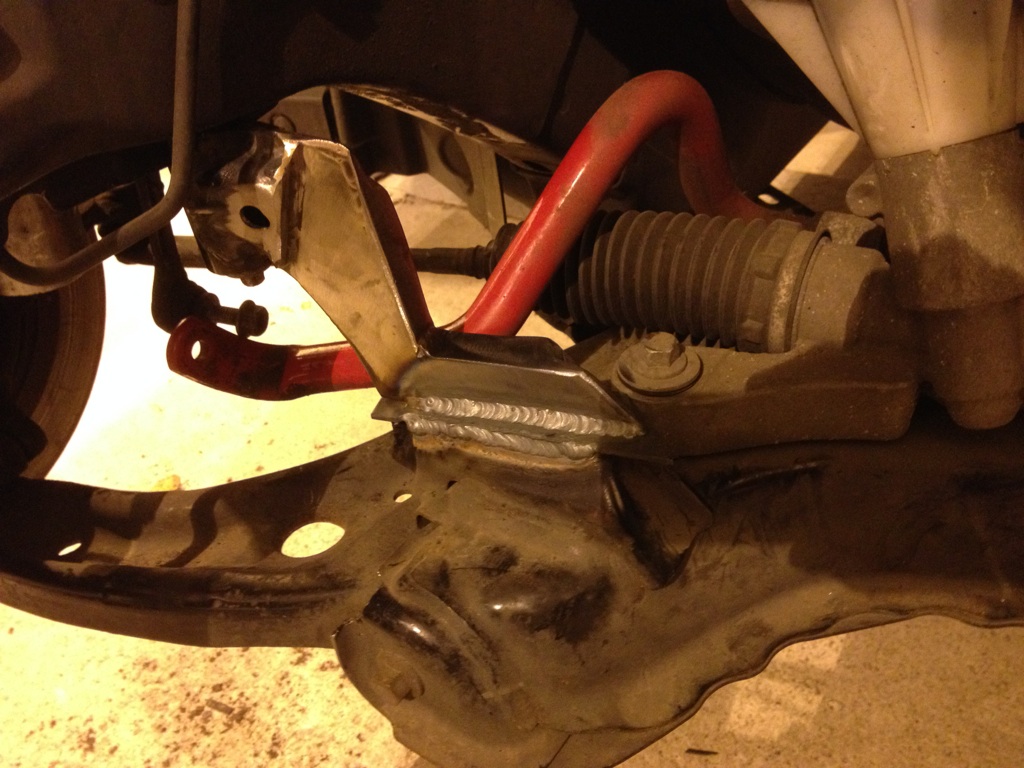
Sub frame welded and tidied up...Check!
Weld Spec - Tank =]
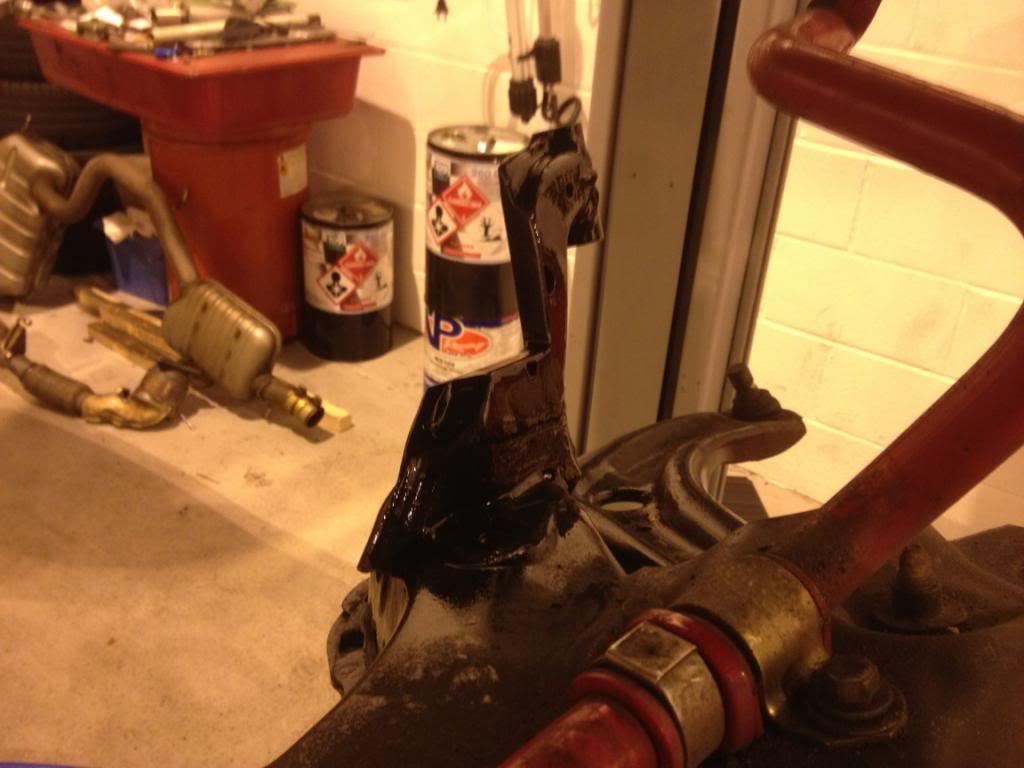
Looks quite thin from that angle but it should be plenty strong plated with 3mm steel.
Nice view of the racing beat ARB there as well for those that haven't seen it =]
Everything is rolling nicely now but still lots to do....i'm off over to Will's again on Friday for a full day of getting stuck in. I'll try and get some more pictures of the car in its stripped down state as well because the internet loves them :P
Boss Welded onto down pipe...Check!
Sub frame welded and tidied up...Check!
Weld Spec - Tank =]
Looks quite thin from that angle but it should be plenty strong plated with 3mm steel.
Nice view of the racing beat ARB there as well for those that haven't seen it =]
Everything is rolling nicely now but still lots to do....i'm off over to Will's again on Friday for a full day of getting stuck in. I'll try and get some more pictures of the car in its stripped down state as well because the internet loves them :P
 16-11-2013, 08:42 AM
#156
S1600 Owner
Thread Starter
So we initially used corrugated oem looking flexi pipe for the internal return and reg in the tank. However with the run we used it developed pin holes and was misting fuel during a pressure test. Back to rubber hosing it was. Will did look for a 4 bar oem pressure reg to fit in the bottom of the pump module to no avail so the solution we have come up with incorporates a 280lph walbro style pump fitted into the standard housing with the tea bag filter in the correct place. That then feeds the to donut fuel rail in the top of the module that can supply the HPFP via the standard fuel lines in the car. The return from the donut then comes through the side of the module and on to the Reg (the loop outside the module as shown was cut and the reg was inserted)which returns fuel to lift area of the module (should prevent any fuel starvation when the tank level is low). Reg was set at 4 bar and then thread locked in place and the boost compensation blanked off as its not needed with DI. We also wired the new pump to the original wiring with some nifty cool seal crimps.
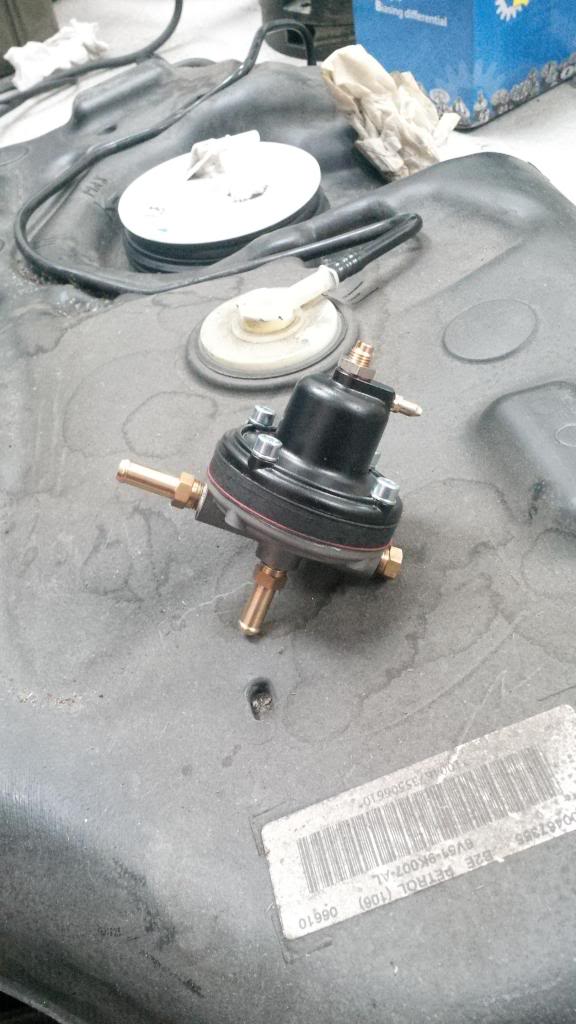
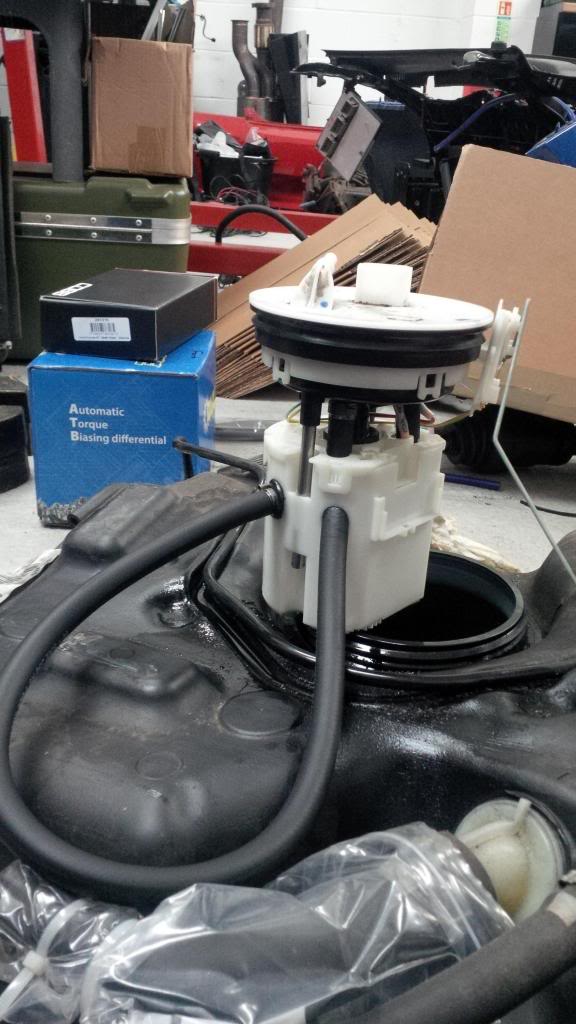
The reg was then hooked into the tank with enough line to put it right over in the corner and the module locked into its standard position. A quick shake test suggests we have no rattle and zero clips are doing a great job of holding all the lines on the barbs. We could then refit the tank and attached all of the OEM connectors and lines.
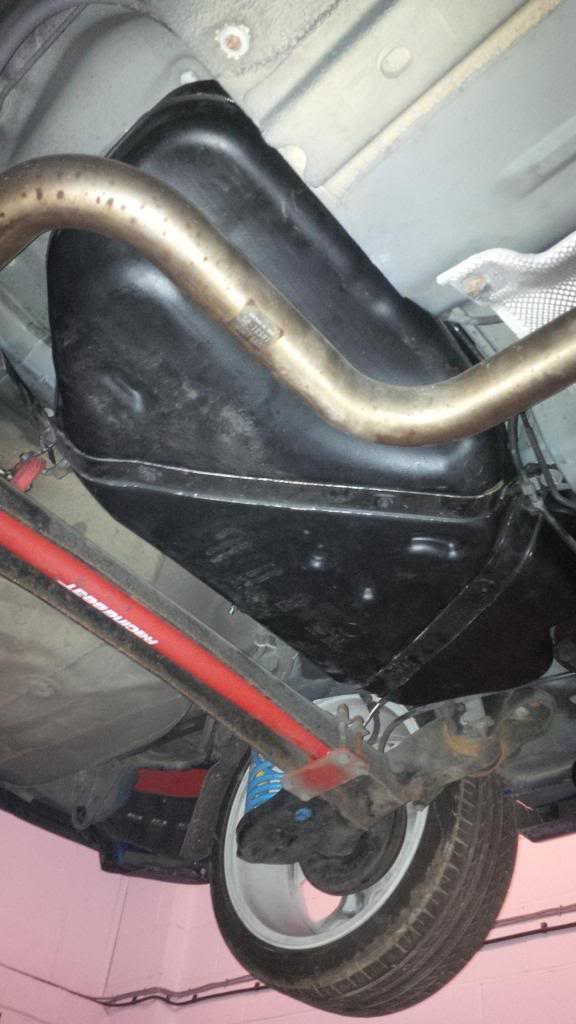
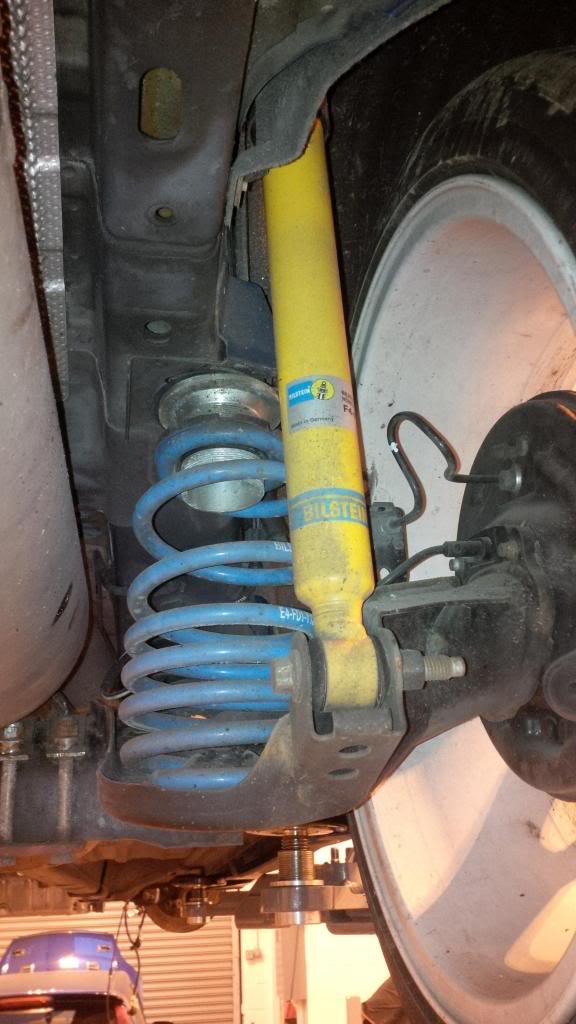
nice view of the racing beat rear ARB there as well.
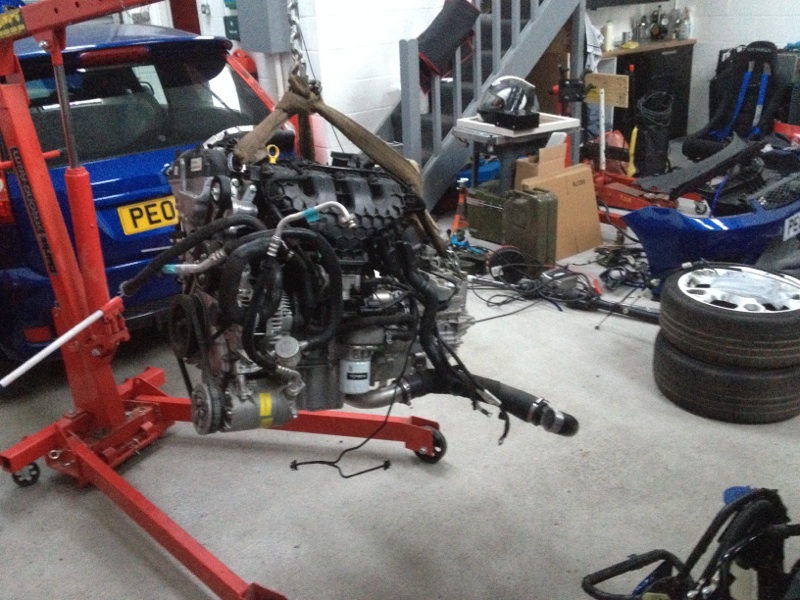
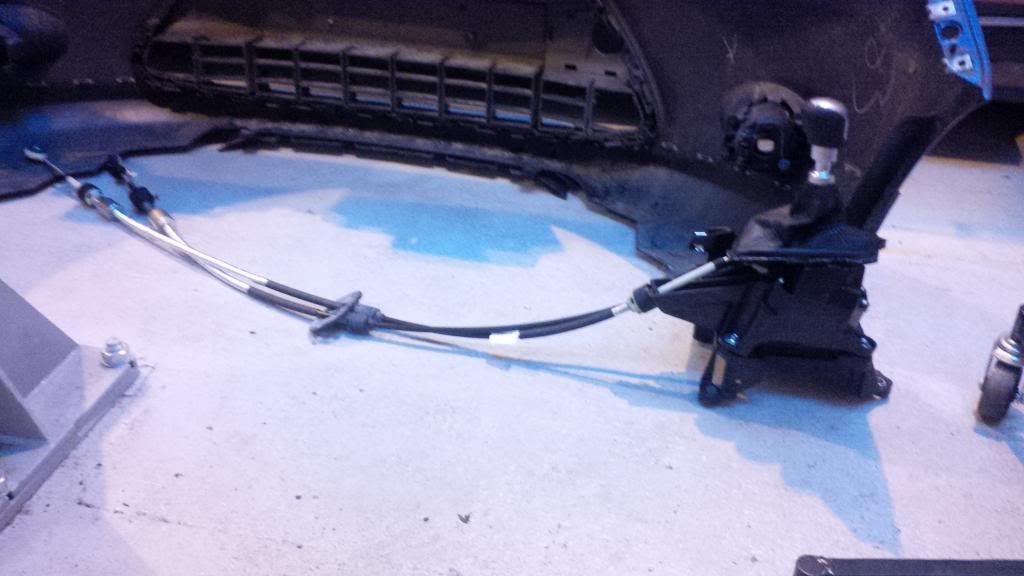
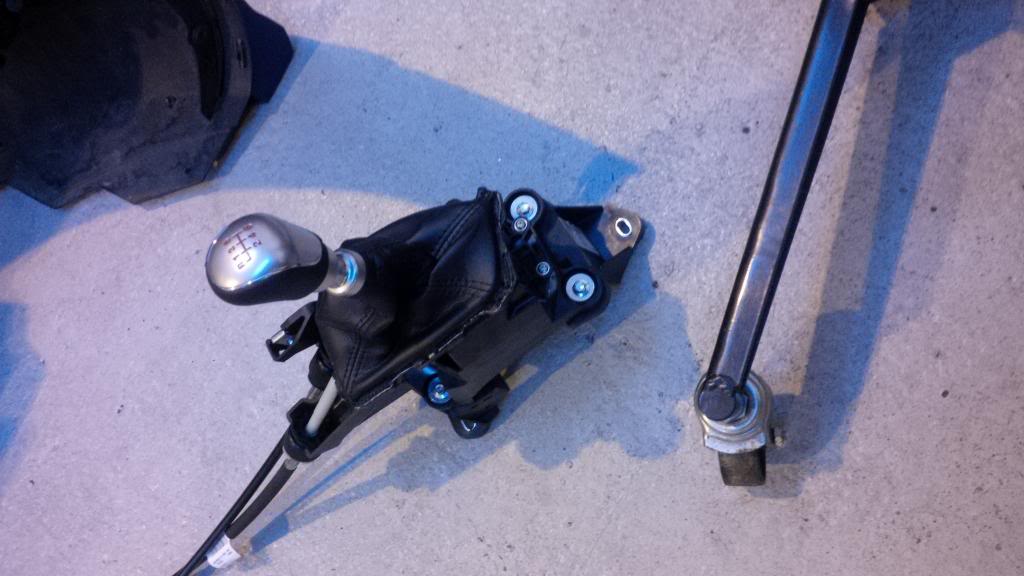
Whilst the subframe was off after the welding got a few pictures of the engine hung in place and also took some of the new shifter and cables which are going to be a nightmare to feed through the bulkhead thanks to the low slung heater matrix. (if anyone has any experience of this and any advice please let me know).
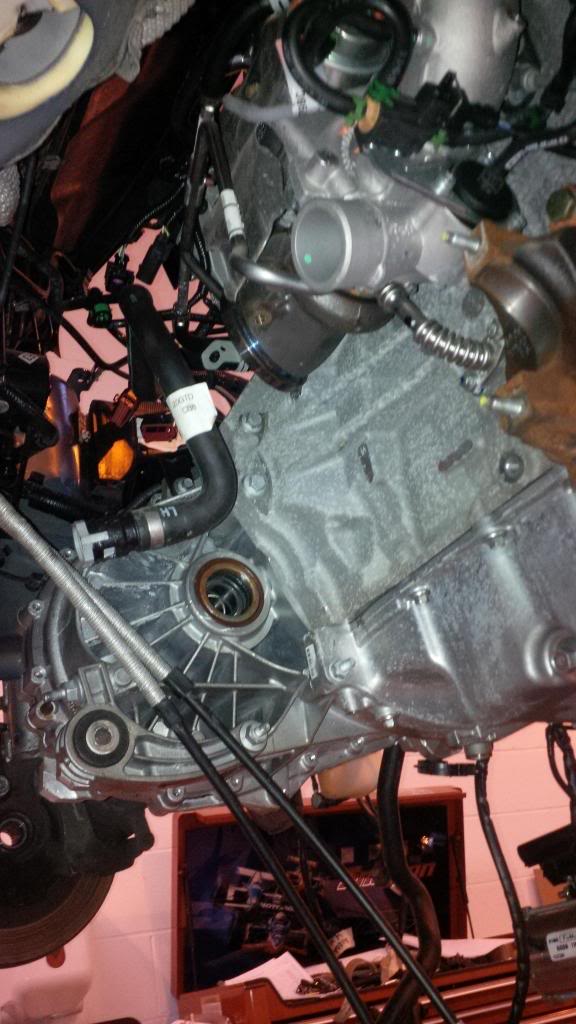
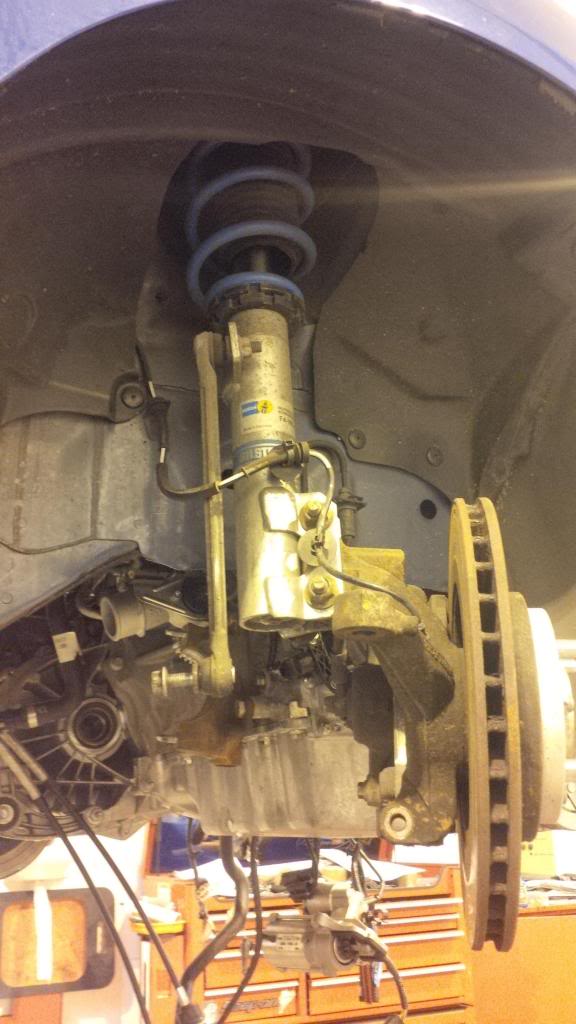
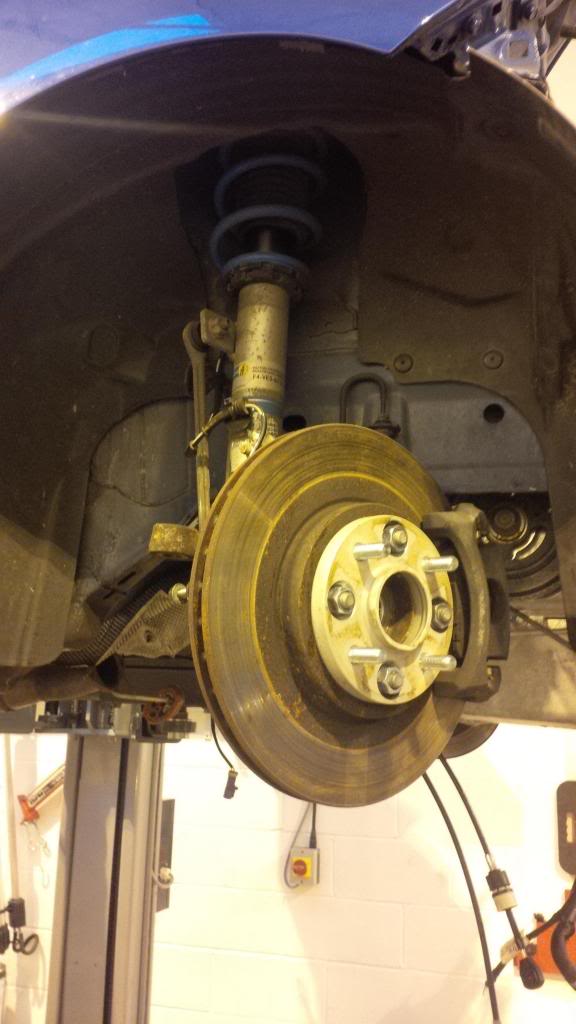
I thought id get some of the suspension whilst it was stripped down as i hadn't took many when i did the initial install.
And here's how everybody should store bolts when working on your car so that you know exactly where they are and where they came from!
From there we weren't happy with the battery tray so we put the subframe on to make sure everything was in place reused the OEM battery tray and in three hours did a better job than the fabricators managed in three months -.-
I then hung the front cradle on just to have a look at some spacing and what not whilst the subframe and all was attached.
We have ordered a shoulder bolt for the torque link so that we get the correct fit and just need to get some spacers turned for either side of the rubber.
Pretty tight between the front of the engine and the rad (but the cradle wasn't fully pushed forward here which gave another 10mm or so) but enough for a decent slimline fan!
getting a bit packed in there now.
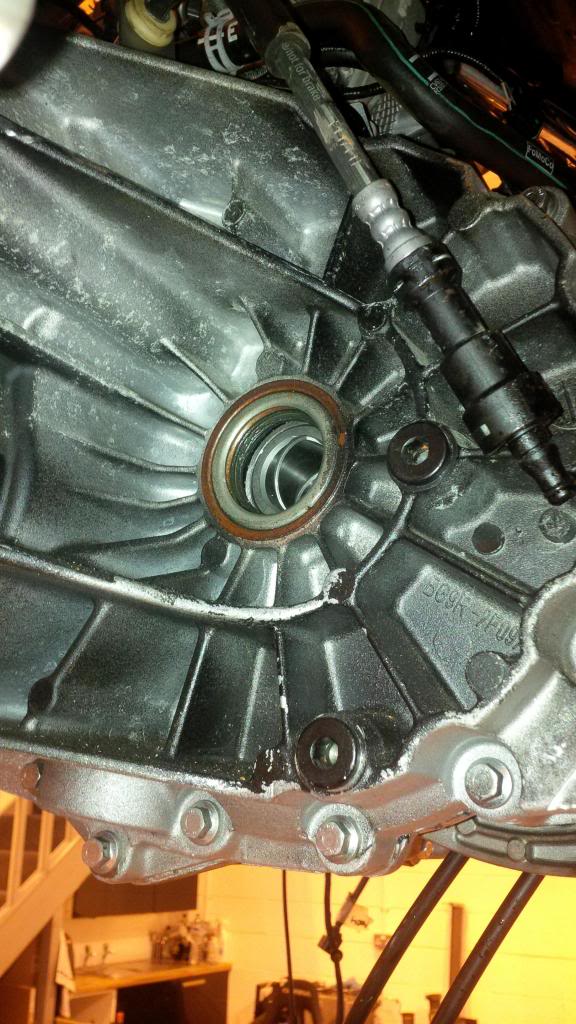
and then finally had chance to put all the bolts back in the gearbox and put the starter motor back on and plug a lot of the loom in to tidy it up and have a reccy of where we are actually at.
Also had a look at the airbox position with the new pipe, new battery tray and the cradle on and its pretty tight in there.
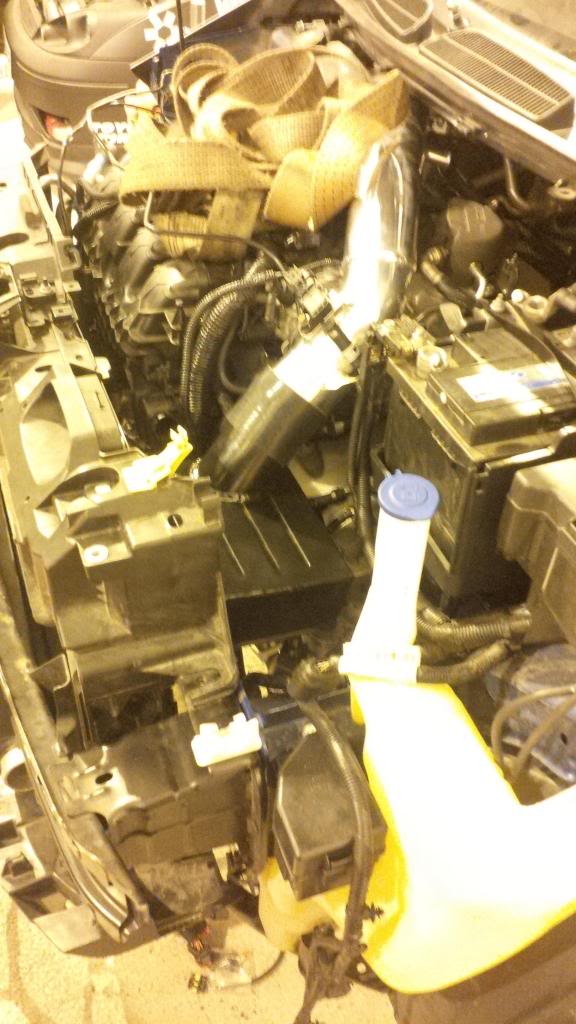

Luckily there's enough on the pipes that we can cut some material out and give the clearance required for a fan whilst still being able to mount the airbox =]
Its going to get even more mental around there when we mount the ECU and IDM in fairly OEM positions but the room is there we just need to package it correctly.
Other than the wiring which is Wills specialty most of the major headaches are now done other than the shifter cables and even then its just working out how to feed them through without removing the entire dash (the shifter will need a custom mount too but hopefully that's not too much trouble as i have my original shifter base ready to butcher).
Pressing on for having all the remaining pieces that are required on order by the end of the week and then its just a case of getting everything in place how we want it and wire it up ready to go!
I'll keep you posted!
The reg was then hooked into the tank with enough line to put it right over in the corner and the module locked into its standard position. A quick shake test suggests we have no rattle and zero clips are doing a great job of holding all the lines on the barbs. We could then refit the tank and attached all of the OEM connectors and lines.
nice view of the racing beat rear ARB there as well.
Whilst the subframe was off after the welding got a few pictures of the engine hung in place and also took some of the new shifter and cables which are going to be a nightmare to feed through the bulkhead thanks to the low slung heater matrix. (if anyone has any experience of this and any advice please let me know).
I thought id get some of the suspension whilst it was stripped down as i hadn't took many when i did the initial install.
And here's how everybody should store bolts when working on your car so that you know exactly where they are and where they came from!
From there we weren't happy with the battery tray so we put the subframe on to make sure everything was in place reused the OEM battery tray and in three hours did a better job than the fabricators managed in three months -.-
I then hung the front cradle on just to have a look at some spacing and what not whilst the subframe and all was attached.
We have ordered a shoulder bolt for the torque link so that we get the correct fit and just need to get some spacers turned for either side of the rubber.
Pretty tight between the front of the engine and the rad (but the cradle wasn't fully pushed forward here which gave another 10mm or so) but enough for a decent slimline fan!
getting a bit packed in there now.
and then finally had chance to put all the bolts back in the gearbox and put the starter motor back on and plug a lot of the loom in to tidy it up and have a reccy of where we are actually at.
Also had a look at the airbox position with the new pipe, new battery tray and the cradle on and its pretty tight in there.
Luckily there's enough on the pipes that we can cut some material out and give the clearance required for a fan whilst still being able to mount the airbox =]
Its going to get even more mental around there when we mount the ECU and IDM in fairly OEM positions but the room is there we just need to package it correctly.
Other than the wiring which is Wills specialty most of the major headaches are now done other than the shifter cables and even then its just working out how to feed them through without removing the entire dash (the shifter will need a custom mount too but hopefully that's not too much trouble as i have my original shifter base ready to butcher).
Pressing on for having all the remaining pieces that are required on order by the end of the week and then its just a case of getting everything in place how we want it and wire it up ready to go!
I'll keep you posted!


 17-11-2013, 05:09 PM
#159
Part of the Furniture

Ace build , Just out of interest did you or will coner weigh the car? Would be interesting to see just how much heavier the new lump has made the noise of the car ?