Sleeper themed 89' 3dr Sierra Pinto E85 turbo
 09-02-2013, 03:59 PM
#1
PassionFord Regular
Thread Starter
-EDIT- Will no longer be using Photobucket. Next up a very shortened version of this project.
2013 Bought a bonestock 1.6 Emax Sierra.
I swore to keep it totally stock and daily it.
At the year 2014 this happened:
Specs:
std 205 bottom end.
Lightly ported injection head with std valves.
Crane single springs.
Pipercams BP300 (292/12.57).
Long pad followers
Set of China 45DCOE's
Lightened flywheel.
Quick rack.
9" drums to the rear.
At the year 2016 something happened again:
Outside was kept almost stock:
Specs:
205 block, Cossie pistons & rods
Ported OHC head with 44.5 & 38 valves.
Crane single springs, hard pad followers, Newman Cams PH4.5 (284/12.03/11.95)
T34.64 Ebay turbo.
Lightened flywheel.
Megasquirt 1 V2.2 with TFi & boost control mods.
EV14 670 cc injectors.
Sytec 044 fuel pump, 8 mm plastic fuel lines.
Running on E85 fuel.
Approx 1.1 bar of boost.
Quick rack.
7" diff with viscous LSD.
Some updates 2017:
Specs:
205 block, Cossie pistons & rods
Ported OHC head with 44.5 & 38 valves.
Crane single springs, hard pad followers, Pipercams BP300 (292/12.57)
T34.64 Ebay turbo, 50 mm wastegate.
Lightened flywheel.
TTV Racing 4-puck clutch.
Megasquirt 1 V2.2 with TFi & boost control mods.
EV14 1100 cc injectors.
Sytec 044 fuel pump, 8 mm plastic fuel lines.
Running on E85 fuel.
Gonna map this for about 1.5 to 1.8 bar of boost.
Quick rack.
7.5" diff that has tighter fluids inside the LSD unit to make it hook.
Disc brakes at rear.
Front brakes are V6 type discs with Ferodo "trackday" pads.
"Race" engine and transmission mounts.
Diff and rear beam hard mounted to the chassis.
No longer a daily.
Next up the original first post:
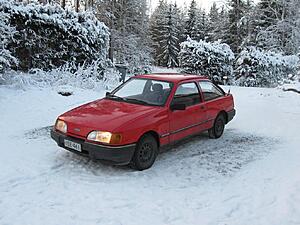
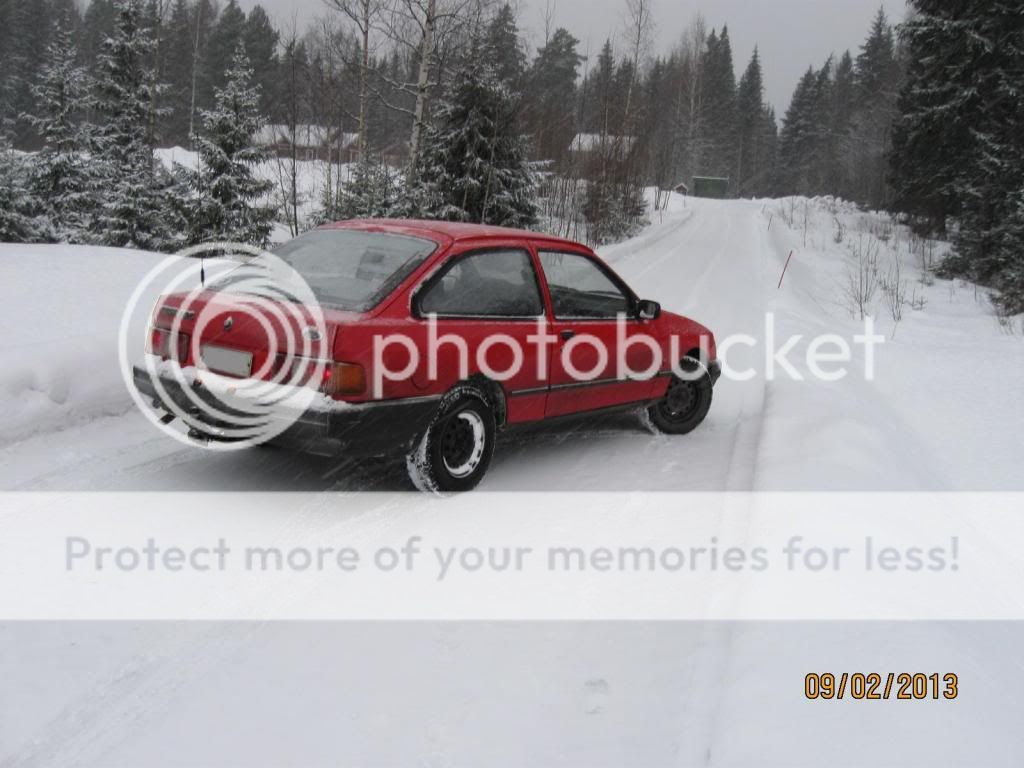
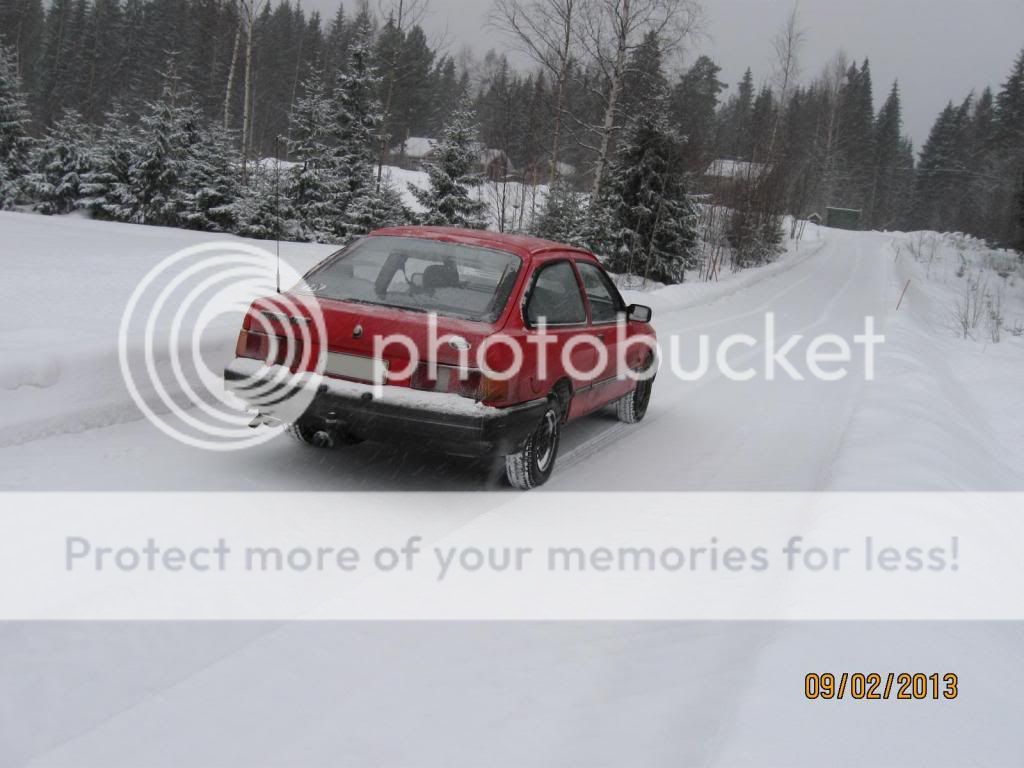
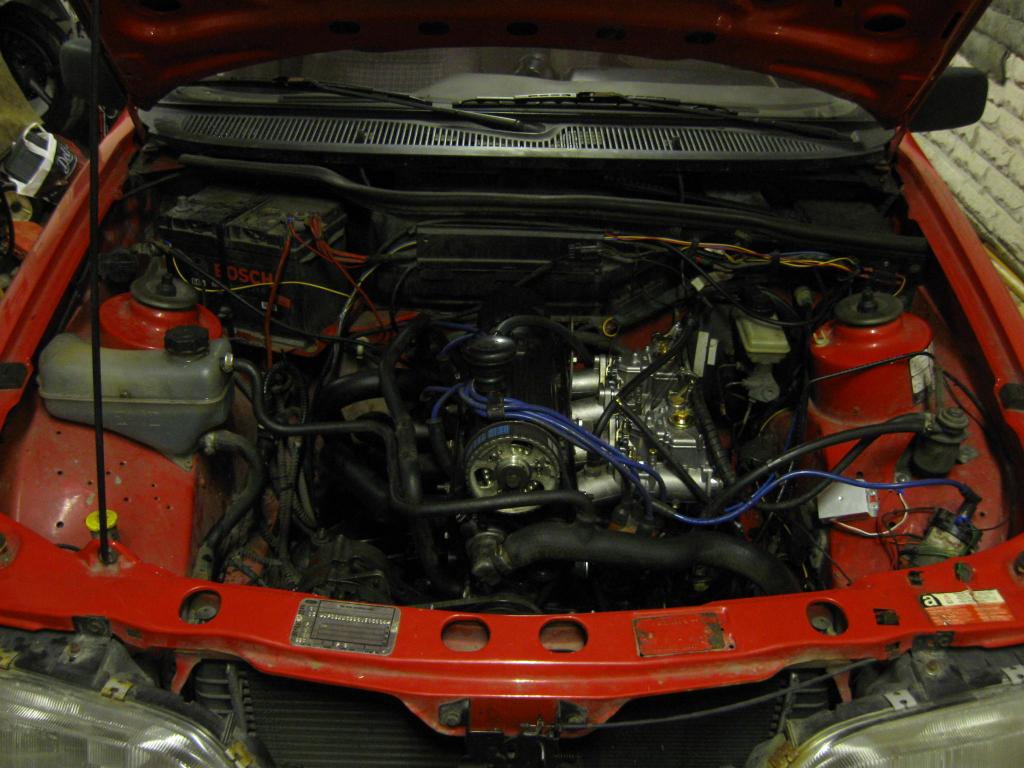
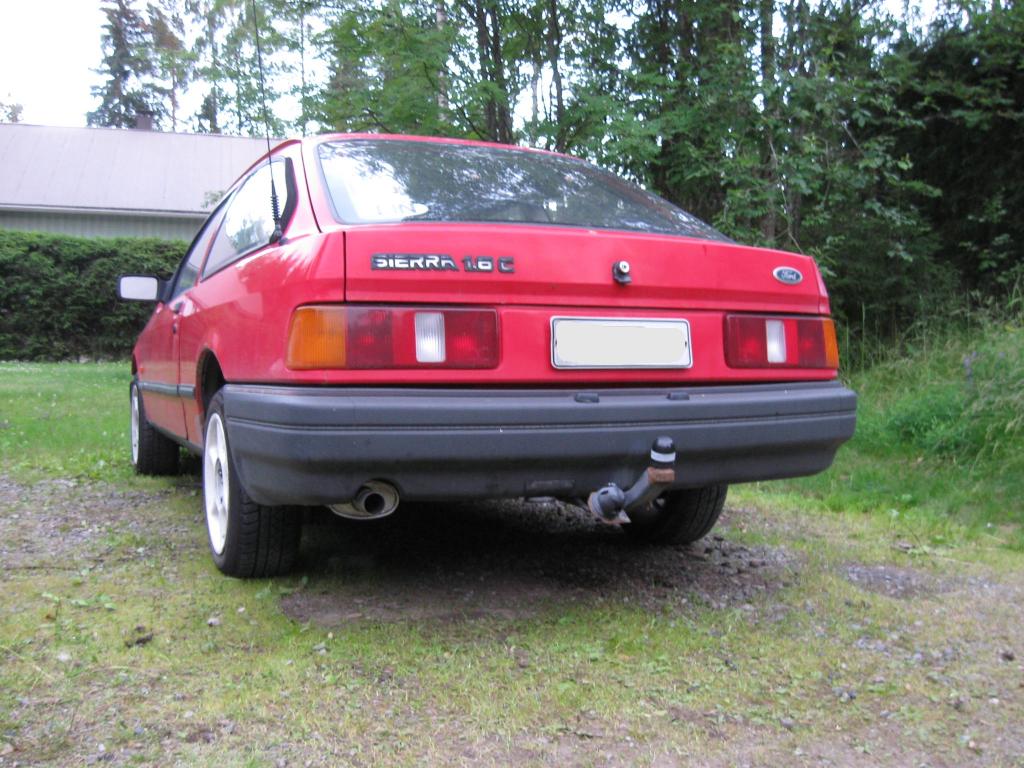
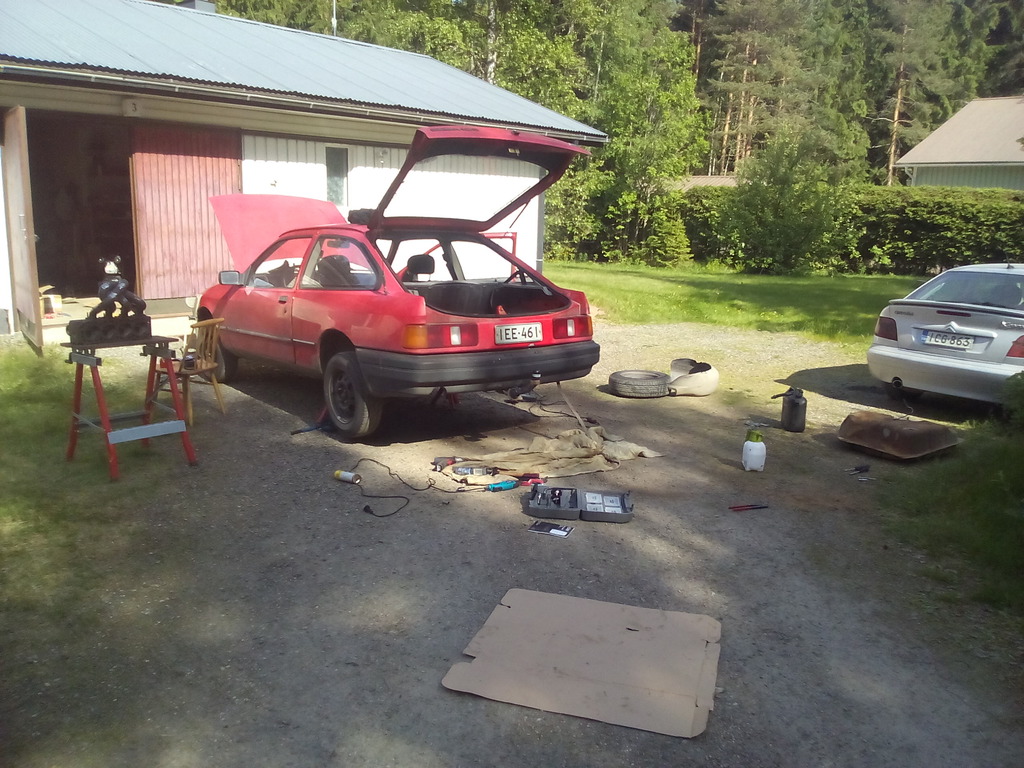
I have a new daily driver. I sold my Cossie looker and fancied something more in original condition for a change.
Spotted an ad for a pretty good looking '89 Sierra 1.6, with fresh MOT and only 600 euros so knew I had to work fast to get it. Immediately phoned the seller and bought it the next day.
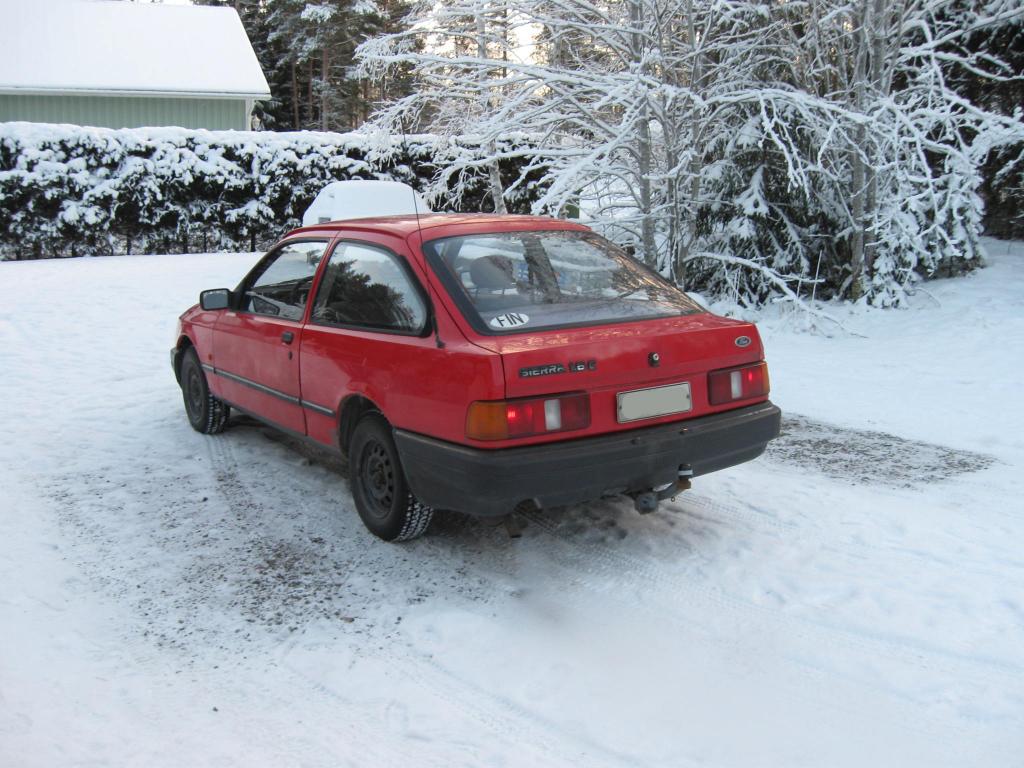
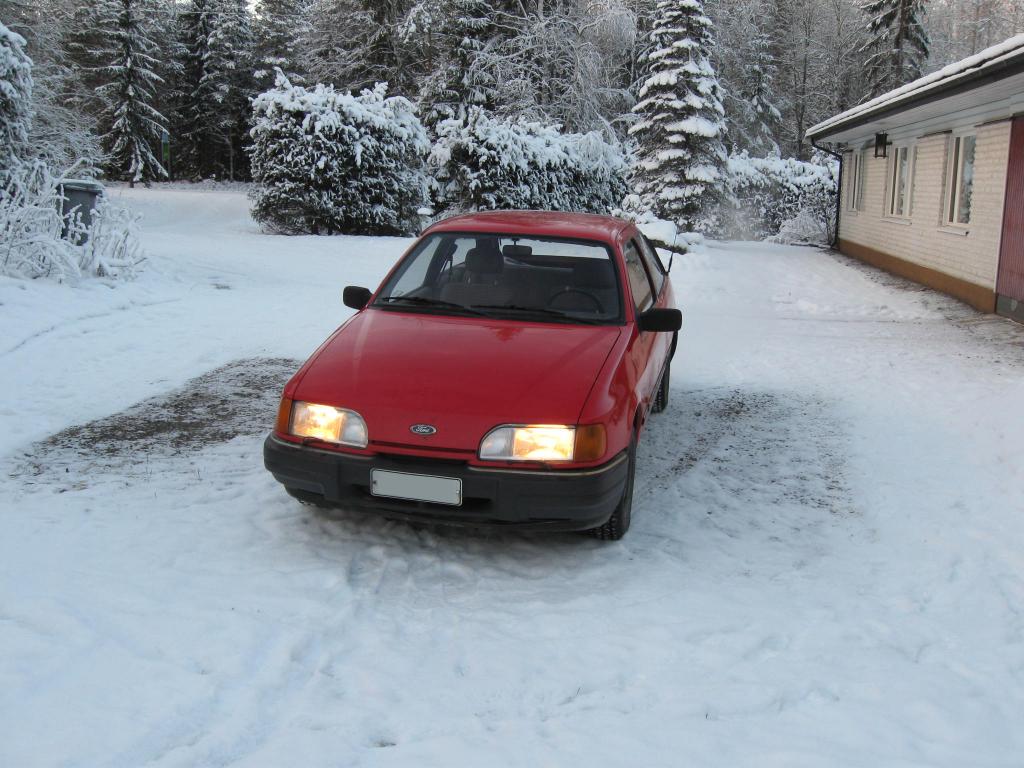
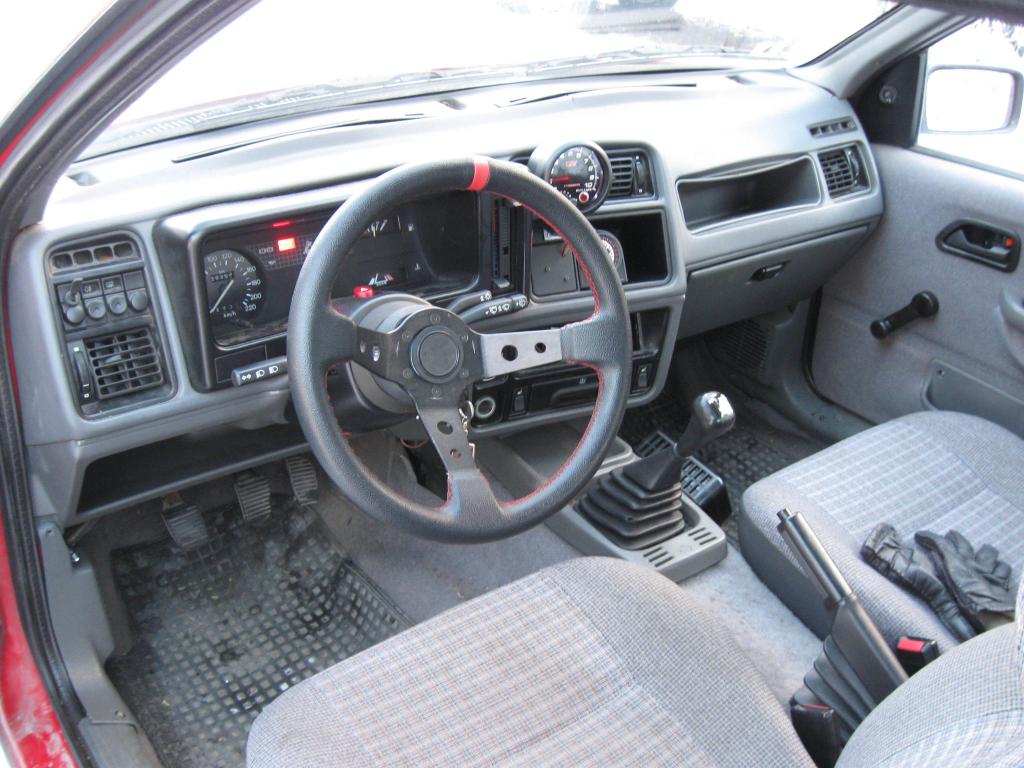
It's almost 100% original with no aftermarket accessories. Pretty mint in and out, there are little things here and there, but very nice for my standars at least. It's quite the time mahcine actually, shame that the original radio/cassette player worked for only two days.
Pictures don't make justice, didn't have a change to photo it two weeks ago when it was all clean and shiny.


This is not a big build project, but you all know it's never too simple with old cars so why not to make a thread about it.
The next day it gave me a funny surprise, starter motor didn't turn and huge amount of coolant had leaked from behind the water pump.
Added coolant and started the car with the help of a newer car and a tow rope.
Drove it then to the garage. I'm actually lucky to have parents who live in house with a pretty decent garage and tools so this is the place where I usually go to mend my cars.
Spent the next two days in the garage, changed the starter motor and water pump, glued the rear view mirror in place and removed one hideous phone bracket from the dash.
Also installed an inner heater (must have in Finnish winter).
I also had a look at the bottom of the car and it's quite solid. Of course it's not brand new, there are welds here and there but they seem to be done with some care and the whole bottom has been sprayed with a nice layer of rust protective mass (dunno if that's the right English term).
After two weeks of daily driving I'm quite happy, it drives really well, comfy and silent and goes straight. The old carbed pinto also always starts with ease and the valve train doesn't sound worn at all.
Fuel economy could be better, but this could also be affected by my heavy right foot. RWD + winter means sideways everywhere.
Future plans include keeping it mint.
If any modifications are ever done, they happen under the bonnet. No exterior mods of any kind (not even lowering it). I started to dream about building a 2.0 Pinto with little more poke (nothing extreme, but something fitting for a daily runner), but this all depends on how much time and money is left over after my main project (turbo Sierra in sig) is readyed for the drives of summer 2013.
2013 Bought a bonestock 1.6 Emax Sierra.

I swore to keep it totally stock and daily it.
At the year 2014 this happened:

Specs:
std 205 bottom end.
Lightly ported injection head with std valves.
Crane single springs.
Pipercams BP300 (292/12.57).
Long pad followers
Set of China 45DCOE's
Lightened flywheel.
Quick rack.
9" drums to the rear.
At the year 2016 something happened again:

Outside was kept almost stock:

Specs:
205 block, Cossie pistons & rods
Ported OHC head with 44.5 & 38 valves.
Crane single springs, hard pad followers, Newman Cams PH4.5 (284/12.03/11.95)
T34.64 Ebay turbo.
Lightened flywheel.
Megasquirt 1 V2.2 with TFi & boost control mods.
EV14 670 cc injectors.
Sytec 044 fuel pump, 8 mm plastic fuel lines.
Running on E85 fuel.
Approx 1.1 bar of boost.
Quick rack.
7" diff with viscous LSD.
Some updates 2017:

Specs:
205 block, Cossie pistons & rods
Ported OHC head with 44.5 & 38 valves.
Crane single springs, hard pad followers, Pipercams BP300 (292/12.57)
T34.64 Ebay turbo, 50 mm wastegate.
Lightened flywheel.
TTV Racing 4-puck clutch.
Megasquirt 1 V2.2 with TFi & boost control mods.
EV14 1100 cc injectors.
Sytec 044 fuel pump, 8 mm plastic fuel lines.
Running on E85 fuel.
Gonna map this for about 1.5 to 1.8 bar of boost.
Quick rack.
7.5" diff that has tighter fluids inside the LSD unit to make it hook.
Disc brakes at rear.
Front brakes are V6 type discs with Ferodo "trackday" pads.
"Race" engine and transmission mounts.
Diff and rear beam hard mounted to the chassis.
No longer a daily.
Next up the original first post:
I have a new daily driver. I sold my Cossie looker and fancied something more in original condition for a change.
Spotted an ad for a pretty good looking '89 Sierra 1.6, with fresh MOT and only 600 euros so knew I had to work fast to get it. Immediately phoned the seller and bought it the next day.
It's almost 100% original with no aftermarket accessories. Pretty mint in and out, there are little things here and there, but very nice for my standars at least. It's quite the time mahcine actually, shame that the original radio/cassette player worked for only two days.
Pictures don't make justice, didn't have a change to photo it two weeks ago when it was all clean and shiny.
This is not a big build project, but you all know it's never too simple with old cars so why not to make a thread about it.
The next day it gave me a funny surprise, starter motor didn't turn and huge amount of coolant had leaked from behind the water pump.
Added coolant and started the car with the help of a newer car and a tow rope.
Drove it then to the garage. I'm actually lucky to have parents who live in house with a pretty decent garage and tools so this is the place where I usually go to mend my cars.
Spent the next two days in the garage, changed the starter motor and water pump, glued the rear view mirror in place and removed one hideous phone bracket from the dash.
Also installed an inner heater (must have in Finnish winter).
I also had a look at the bottom of the car and it's quite solid. Of course it's not brand new, there are welds here and there but they seem to be done with some care and the whole bottom has been sprayed with a nice layer of rust protective mass (dunno if that's the right English term).
After two weeks of daily driving I'm quite happy, it drives really well, comfy and silent and goes straight. The old carbed pinto also always starts with ease and the valve train doesn't sound worn at all.
Fuel economy could be better, but this could also be affected by my heavy right foot. RWD + winter means sideways everywhere.
Future plans include keeping it mint.
If any modifications are ever done, they happen under the bonnet. No exterior mods of any kind (not even lowering it). I started to dream about building a 2.0 Pinto with little more poke (nothing extreme, but something fitting for a daily runner), but this all depends on how much time and money is left over after my main project (turbo Sierra in sig) is readyed for the drives of summer 2013.
Last edited by BigPeBe; 22-07-2017 at 11:23 AM.
 11-02-2013, 11:58 AM
#3
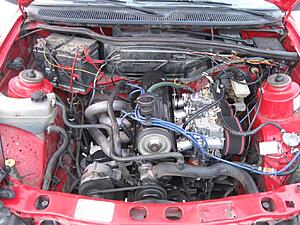
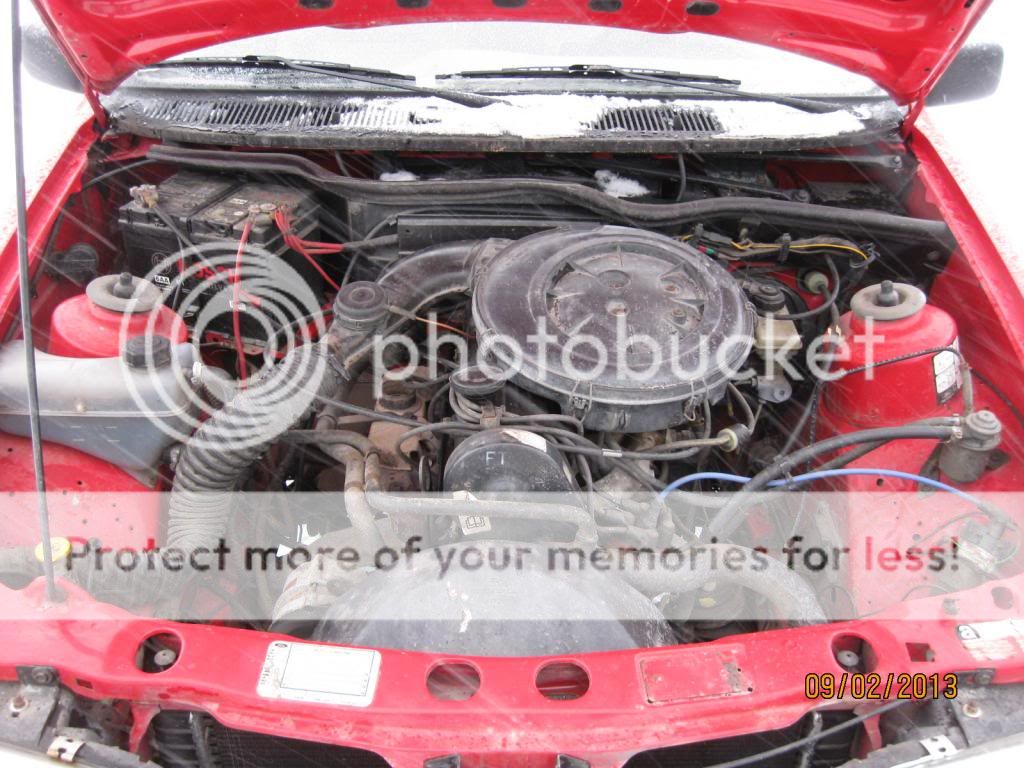
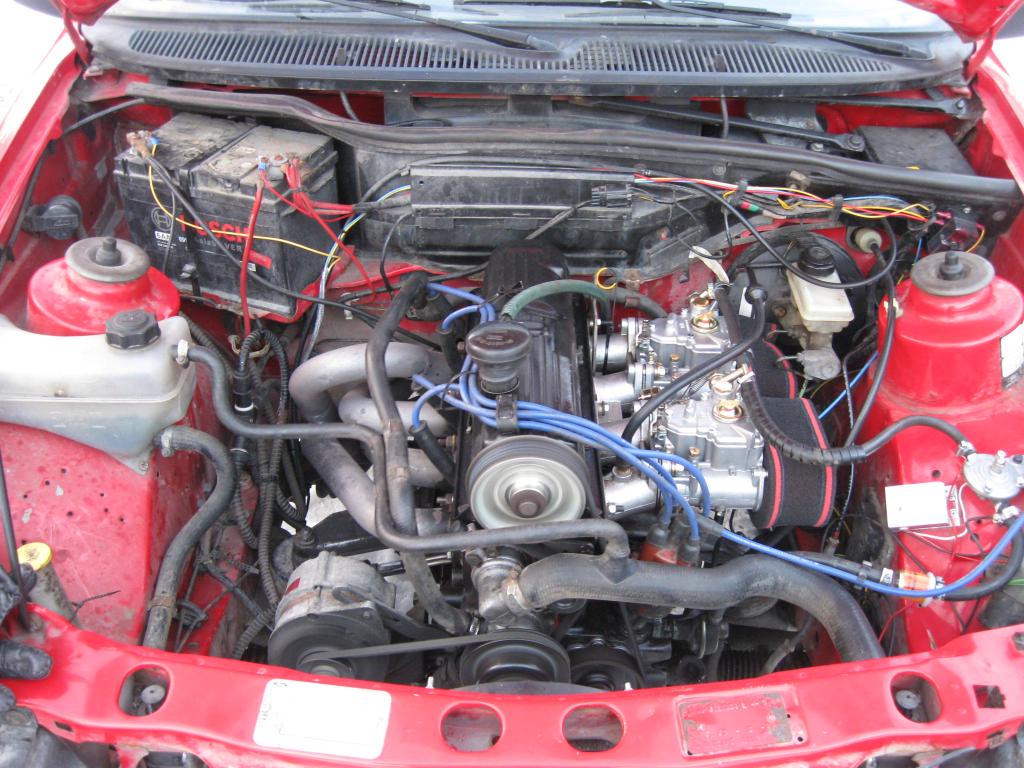
Am I seeing right, that you have older Weber-DGAV- carburettor there (the one with "water controlled" choke)? They are quite rare nowdays, for example I sold my own (before efi conversion) for 50euros. It went actually to Taunus
Well, anyway pretty original looking Mk2
Well, anyway pretty original looking Mk2
12-02-2013, 04:09 PM
#4
PassionFord Regular
Thread Starter
TY for the nice comments.
Yes I think that is a DGAV.
And no, not going to lower it. Actually for snow drifting this is way better to drive than my lowered Cossie looker was. Probably has a lot to do with camber of the rear wheels.
Exterior is going to stay 100% granpa style and this includes not lowering or even changing the wheels. Shame I don't have 13" steelies for summer tires...
03-03-2013, 03:50 PM
#5
PassionFord Regular
Thread Starter
Just bought a new camera, mainly for recording incar stuff with the other Sierra next summer, but of course I had to try it out with this too.
Quite happy with the product, cheaper than GoPro but doesn't seem to show it's price badly. Just have to wait and see how the microphone copes with the wastegate opening.
Quite happy with the product, cheaper than GoPro but doesn't seem to show it's price badly. Just have to wait and see how the microphone copes with the wastegate opening.
10-11-2013, 07:49 PM
#6
PassionFord Regular
Thread Starter
Abusing the stock Emax started to get a little old, so just today I went and bought an std. 205 engine. Soon gonna build "mild" N/A 2.0 Pinto for this, current plan for specs as follows:
Rebuilt 205 bottom end
Lightened flywheel
ARP bolts
Ported & skimmed injection head (about 1,5 mm lower with the Felpro gasket)
Burton BLF32/33 cam (300 degrees, but not much lift).
I have two sets of stock valve springs, so this and the low budget is reasoning behind the cam choice. I will be selecting the best springs from the two sets and this should allow 7000 rpm with the BLF32/33.
2x DCOE 45 for fuel delivery and a decent exhaust header.
Pictures and more text will follow when I have more parts collected and can start the build!
Last edited by BigPeBe; 10-11-2013 at 07:51 PM.
Trending Topics
11-11-2013, 06:33 PM
#8
Nice plan for becoming engine, except in one thing. I guess you propably are saving money in wrong point.. I mean the valve springs. In company called RallyRace (guess you know the place already?) there are stiffer springs and they cost about 79 euros.
After all you were talking about 7000rpm.
And yes I got stock valve springs in my pinto too, but it�s with original ECU/ignition, so the rev limiter is somewhere near 6000
After all you were talking about 7000rpm.
And yes I got stock valve springs in my pinto too, but it�s with original ECU/ignition, so the rev limiter is somewhere near 6000
11-11-2013, 06:54 PM
#9
PassionFord Regular
Thread Starter
Yes but you also have a high lift cam IIRC (134) which is a lot harder on valve springs. The cam I will be using is a low lift - long duration cam which is easy on the springs, because the cam profile rises a lot slower.
"Stiffer" doesn't always mean better.
My cam and spring choice is actually a result of reading about these on the famous Des Hammill's book.
+ I'm not after big bhp, but I want a much more lively engine.
I'm planning on measuring the spring tensions to make sure they are good for the amount of lift the cam has.
Last edited by BigPeBe; 11-11-2013 at 06:58 PM.
20-01-2014, 09:03 PM
#10
PassionFord Regular
Thread Starter
Finally have been active with the engine build.
The specs are now actually considerably bigger than originally was planned as seen in the posts above.
-std. 205 bottom end
-ported and lowered injection head
-Piper Cams BP300 cam (292 degrees and 12.57 mm lift)
-long pad followers
-stiffer valve springs
-adjustable cam gear
-lightened flywheel
-2x 45 DCOE carbs (36 chokes) "chinese Webers" (FAJS 45 DCOE)
-75 mm intake manifold
-Martelius 4-2-1 header
We started with the bottom end. I found an std. 205 bottom end in good nick for a cheap price and even new bearings came with it.
There is barely any noticeable wear on the bores.
We checked the bearing clearances with Plastigauge and they were all good.
Assembled it back together.
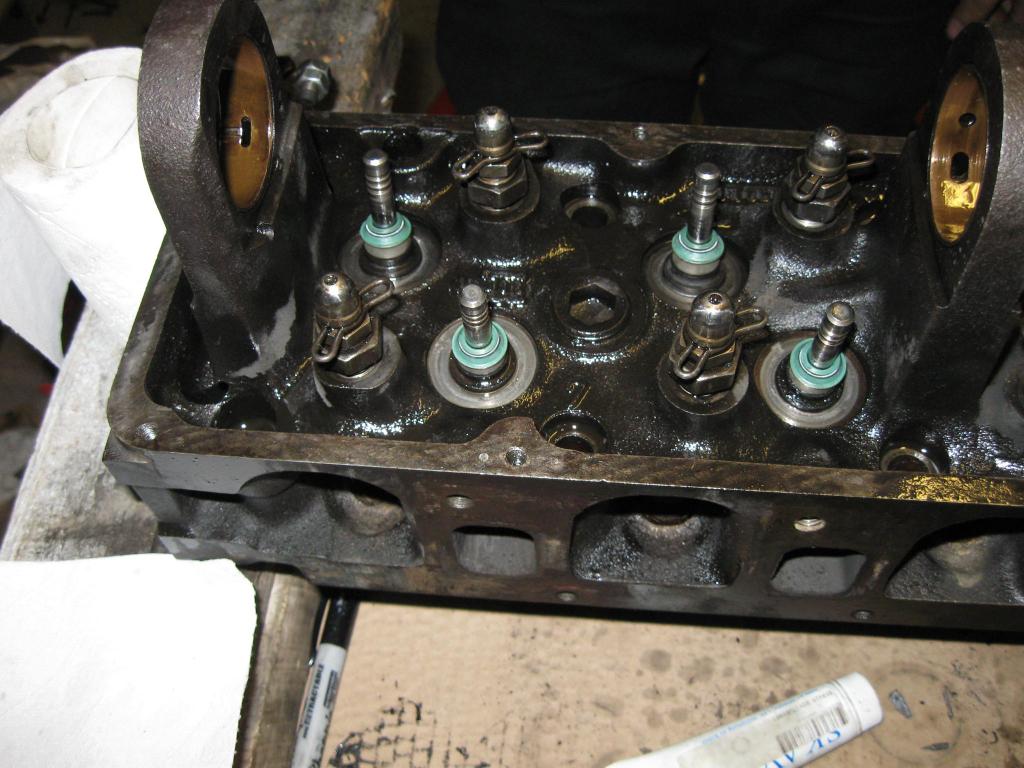
Next up was the head. This is a ported/skimmed head that have been lying around for few years waiting for a bottom end to go on top of.
Lapped the valves:
Next up cam in and checking the rocker geometry:
Near percect geometry:
New valve stem seals in:
Bolting stuff together:
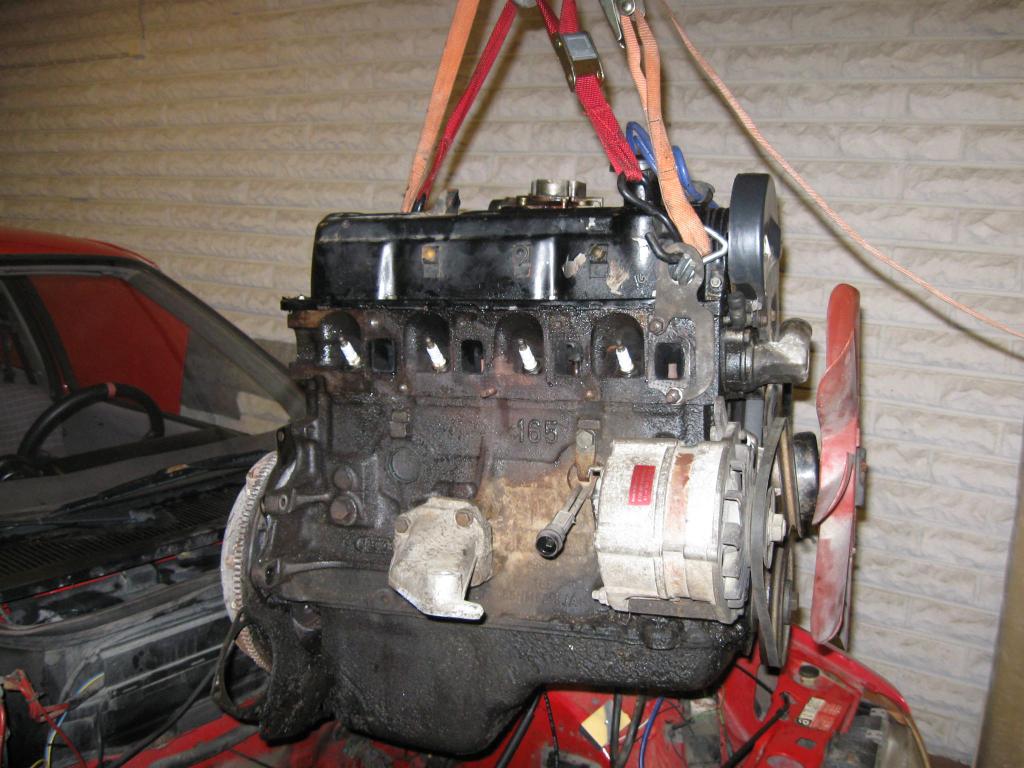
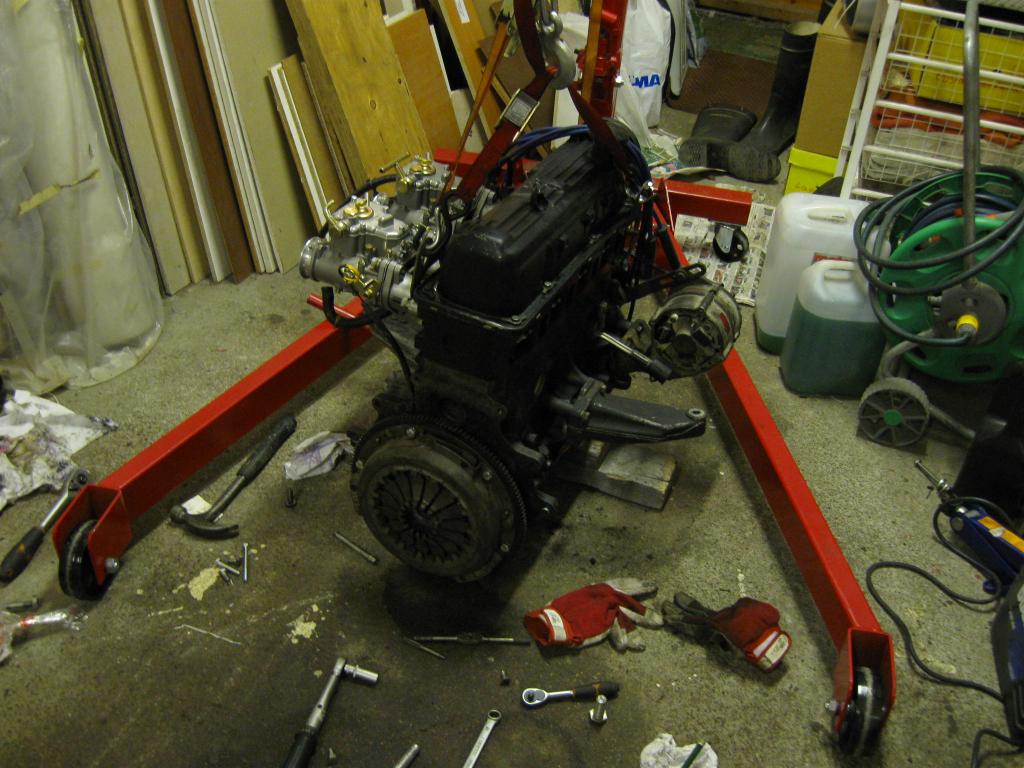
Next up was removing the old Emax 1.6 engine. I originally planned to put the whole engine together and then just do the swap at one go, but decided to do this after all. Easier to swap all the necessary parts from the old engine to the new when they both are out.
Emax:
Away it goes:
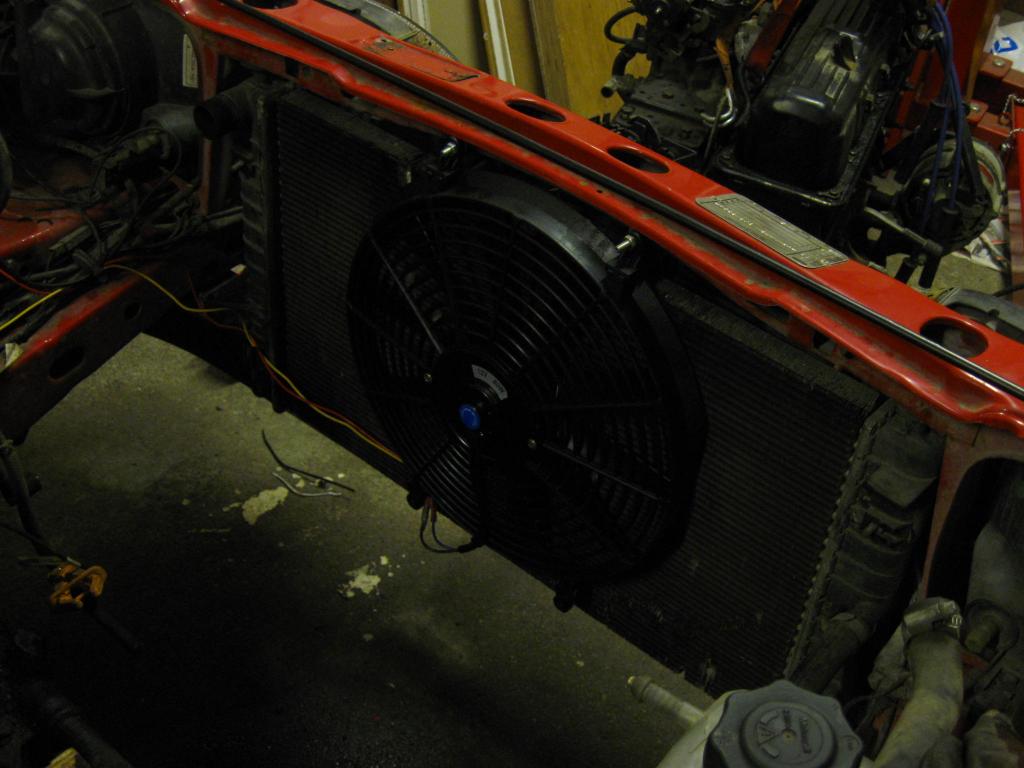
Installed an electric fan:
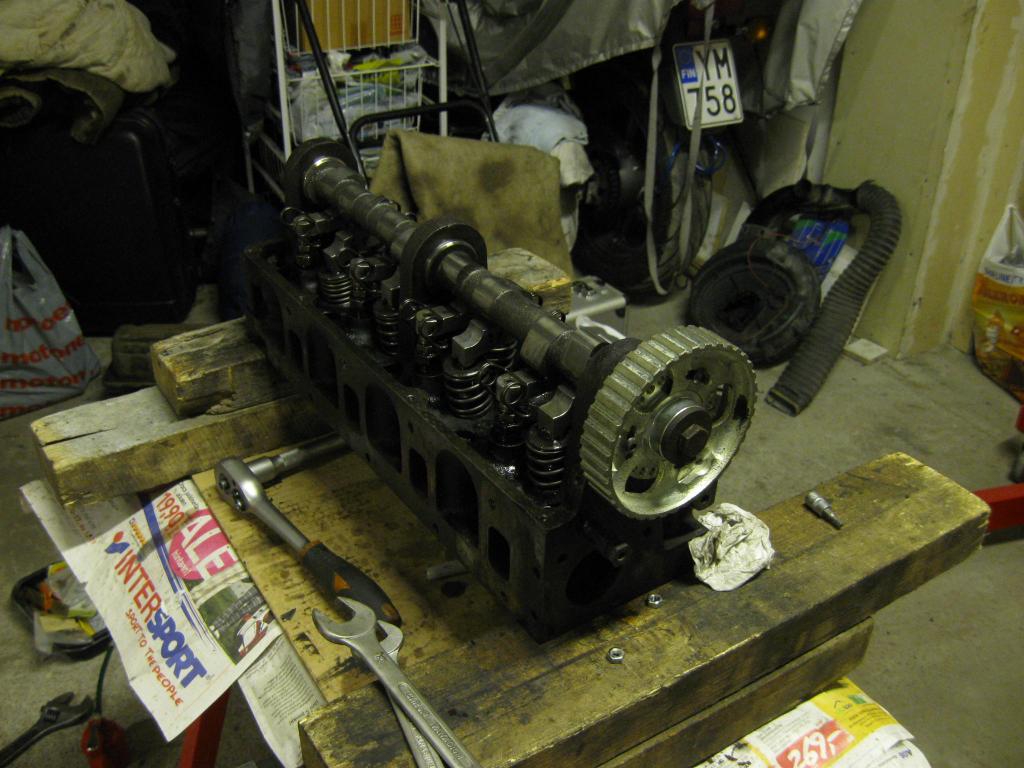
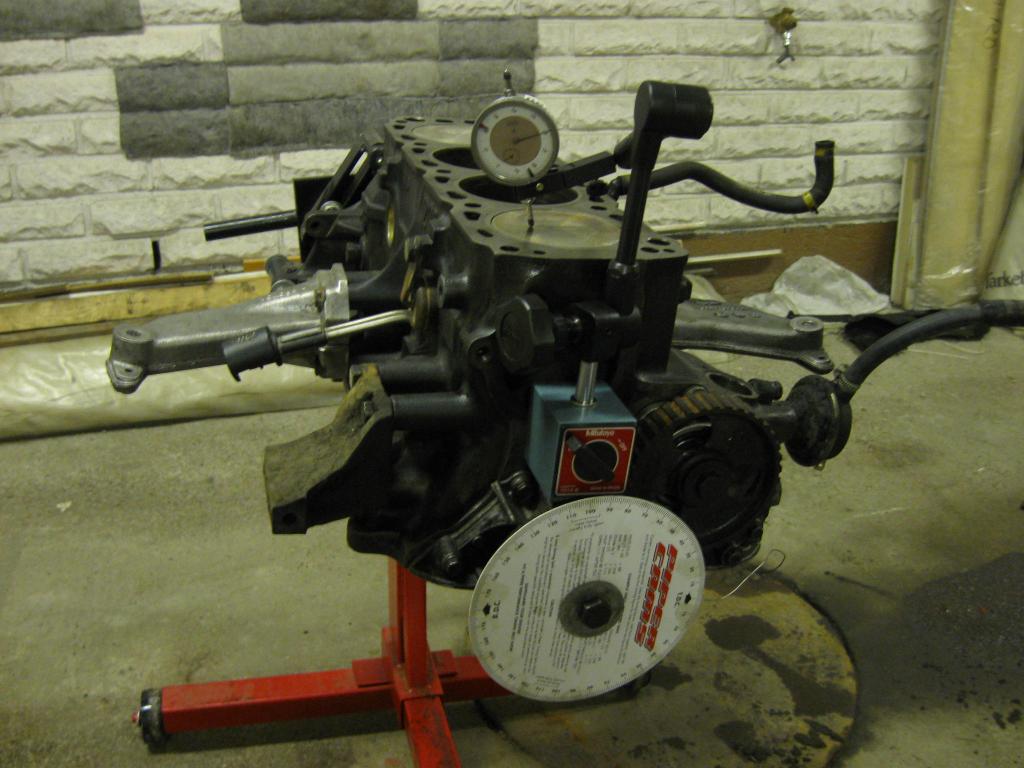
Then back on working with the "new" engine. Checking the correct TDC point:
Fitted the head next, with Felpro gasket. The head is lowered 1mm, so I wanted to use Felpro, because it's ~0.5mm lower than std gasket, so it gives me a total of 1.5mm lower head without a visit to a machine shop.
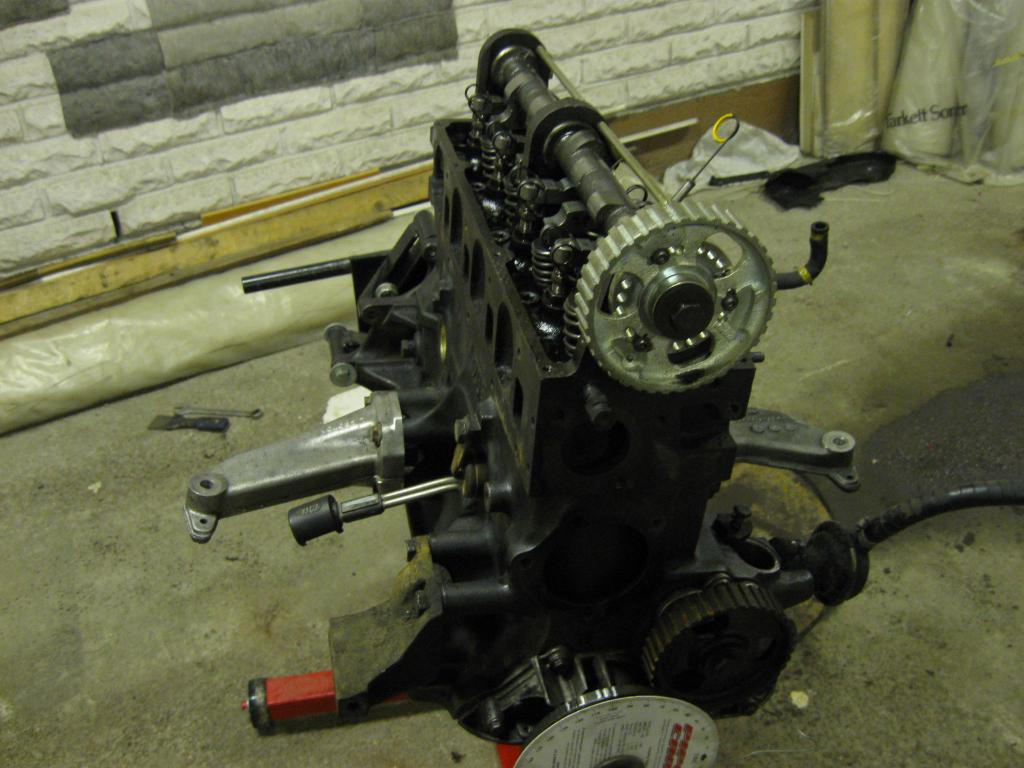
Cam timing. Made few different timing marks, so it's easy to adjust the timing afterwards if necessary.
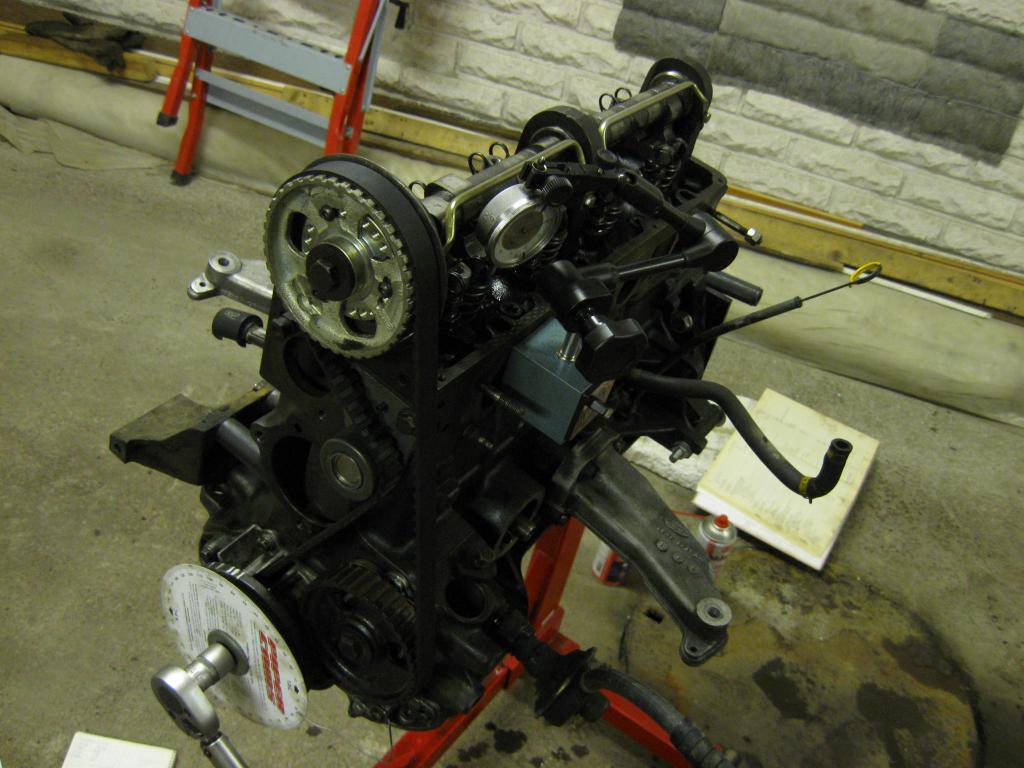
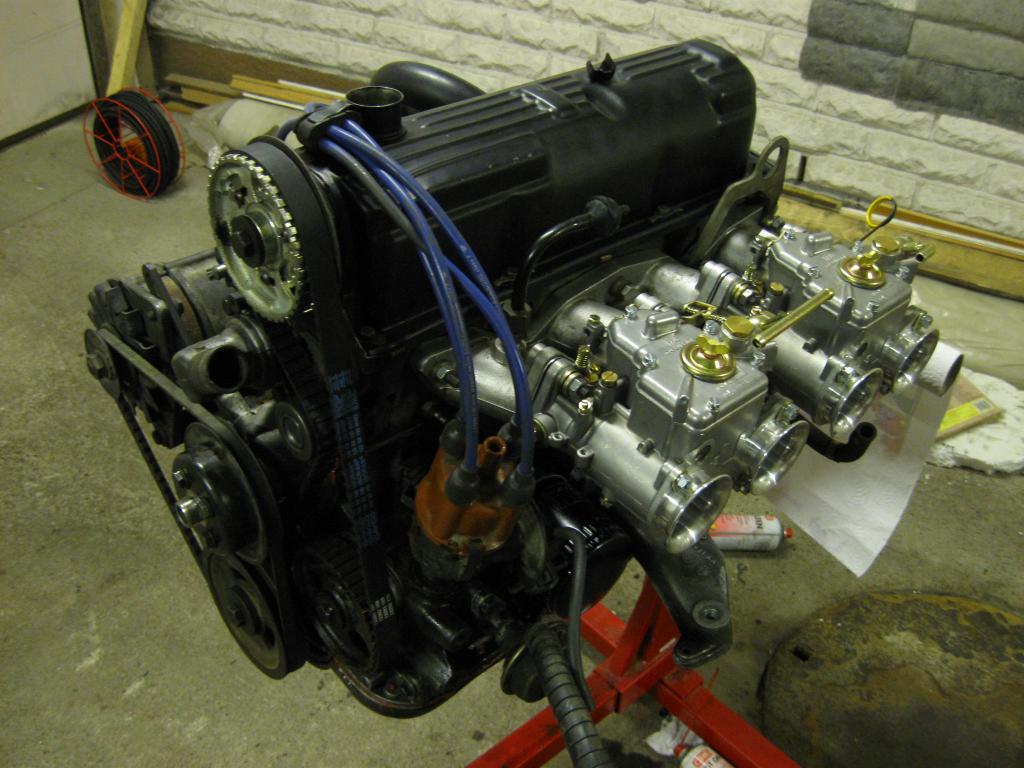
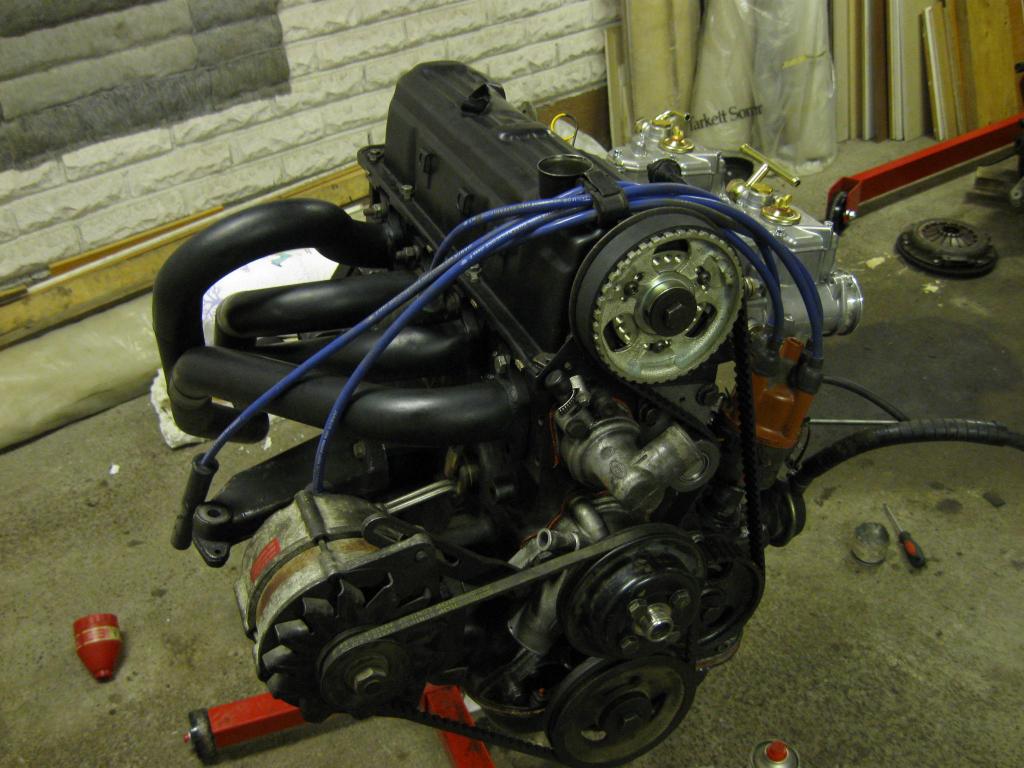
Bolting some random stuff on:
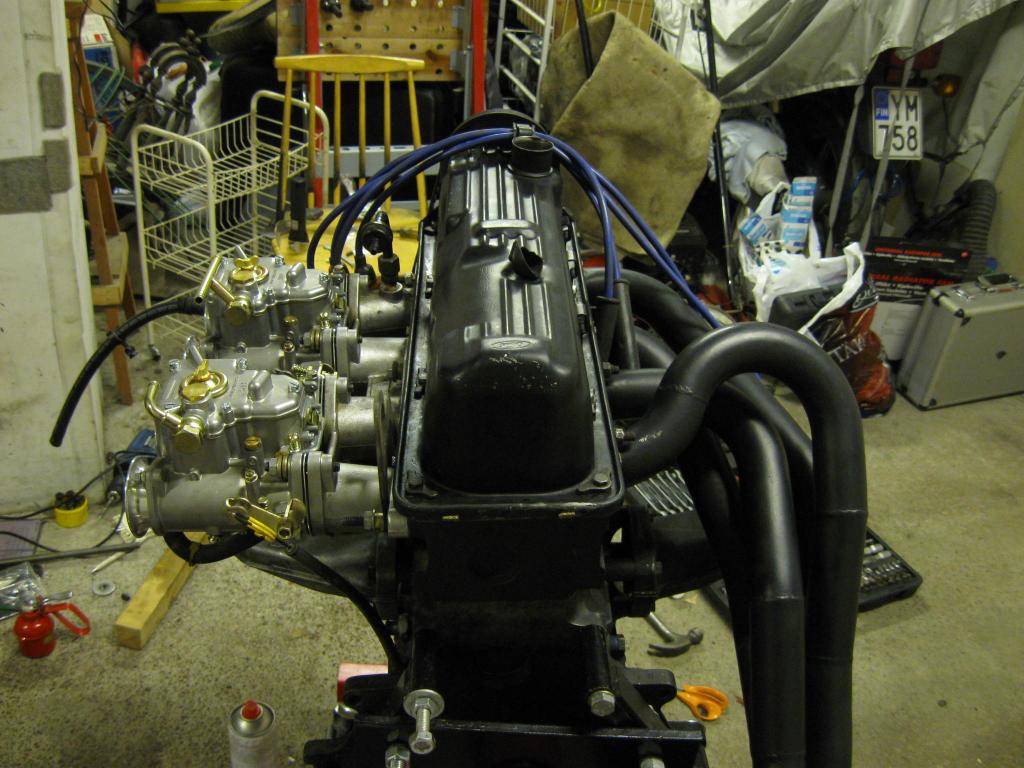
Lovely looking carbs:
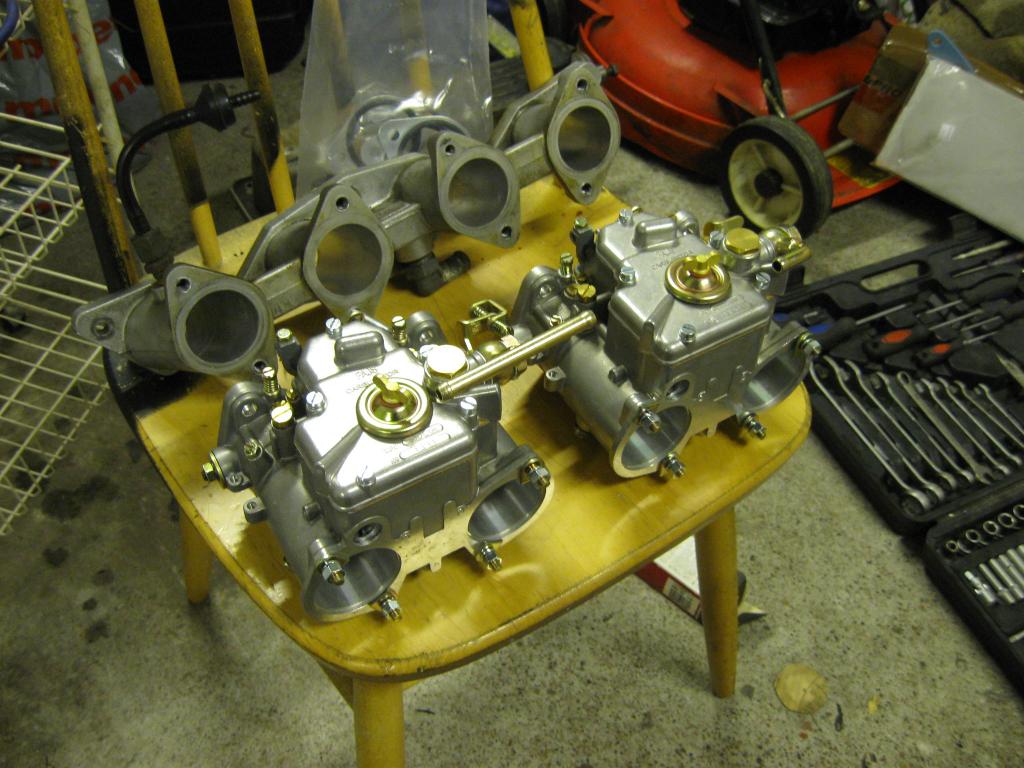
Header making a visit too:
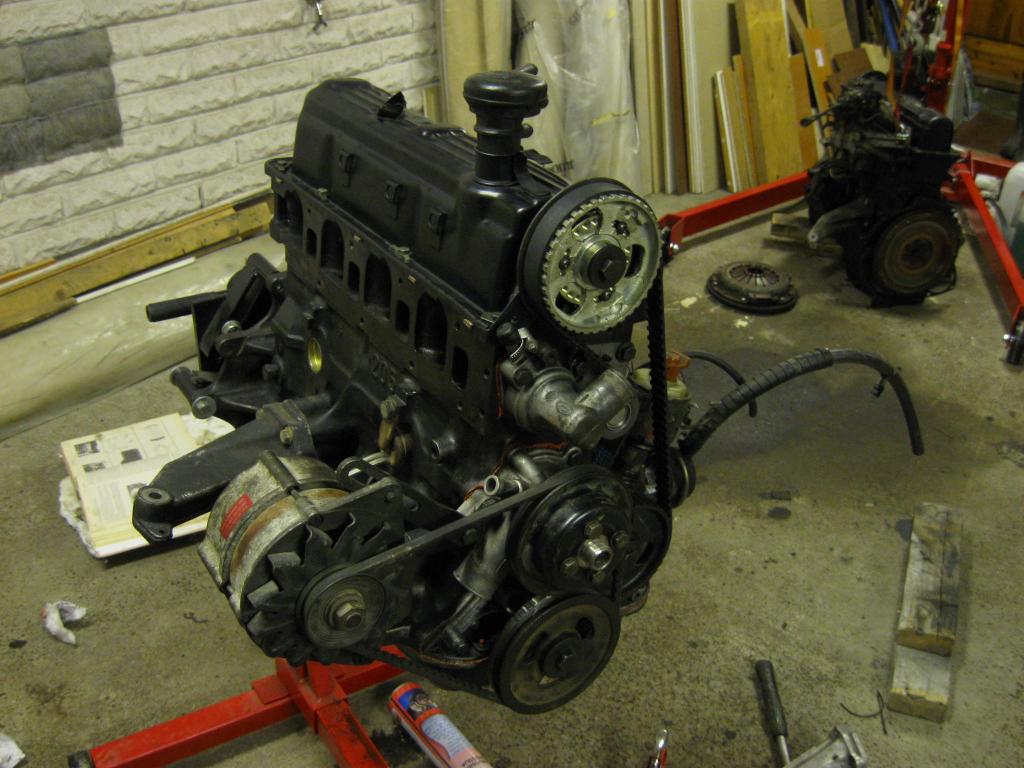
Intake manifold and double carbs on:
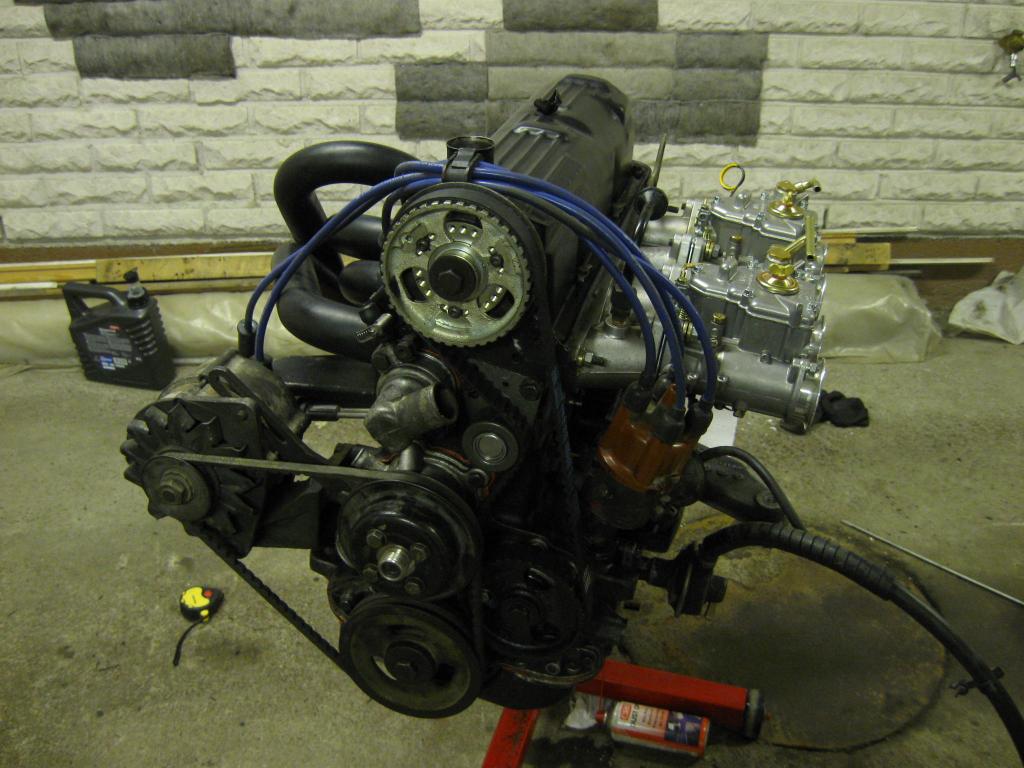
At this point I checked the carb balance somewhat together from the progression holes.
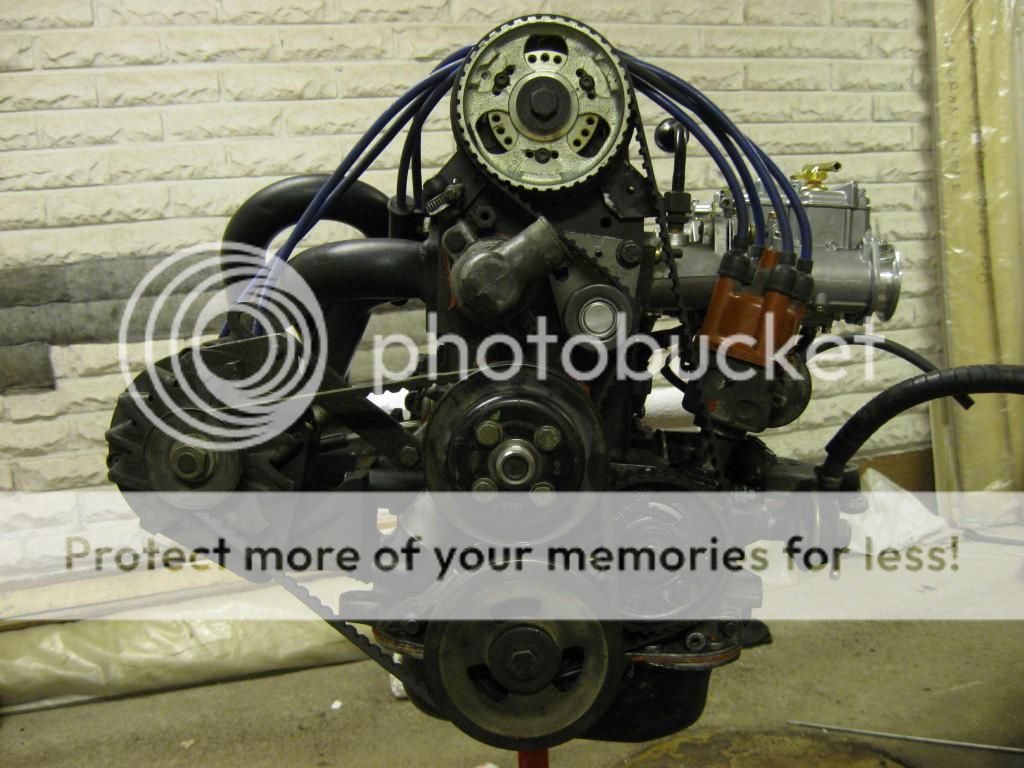
Lovely looking engine in my eyes, so next up few atmospheric pictures:
At this point we poured oil in to the engine and runned the oil pump with drilling machine to see that each cam gets it's oil squirt.
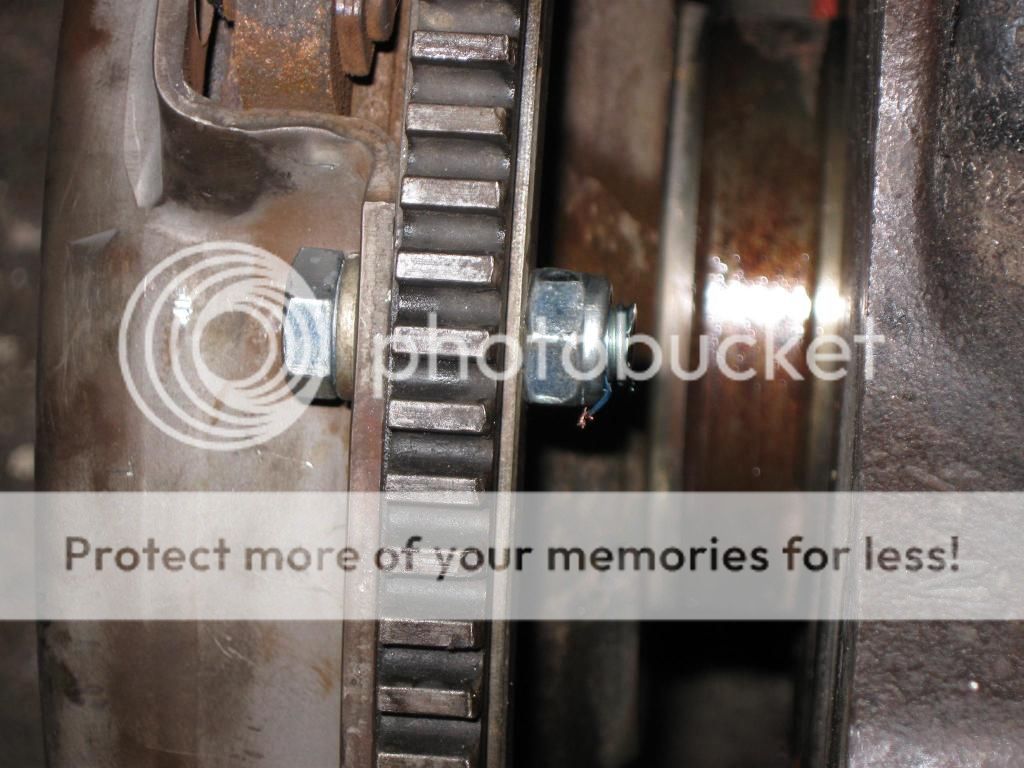
Next we installed the lightened flywheel (with ARPs) and clutch package to the back end of the engine. A bit of a nasty surprise was that one of the bolt holes in the flywheel for the clutch assembly had a worn out thread. After some thinking we thought about replacing all of the clutch assembly bolts with longer ones and using nuts on the other side. Couldn't find any reason against so bolted it on with them + Loctite.
Engine ready for lifting:
Sinked in:
Rest of stuff back together and coolant in too:
Finally we were at the point where first start and cam brake-in procedure were next on to-do list.
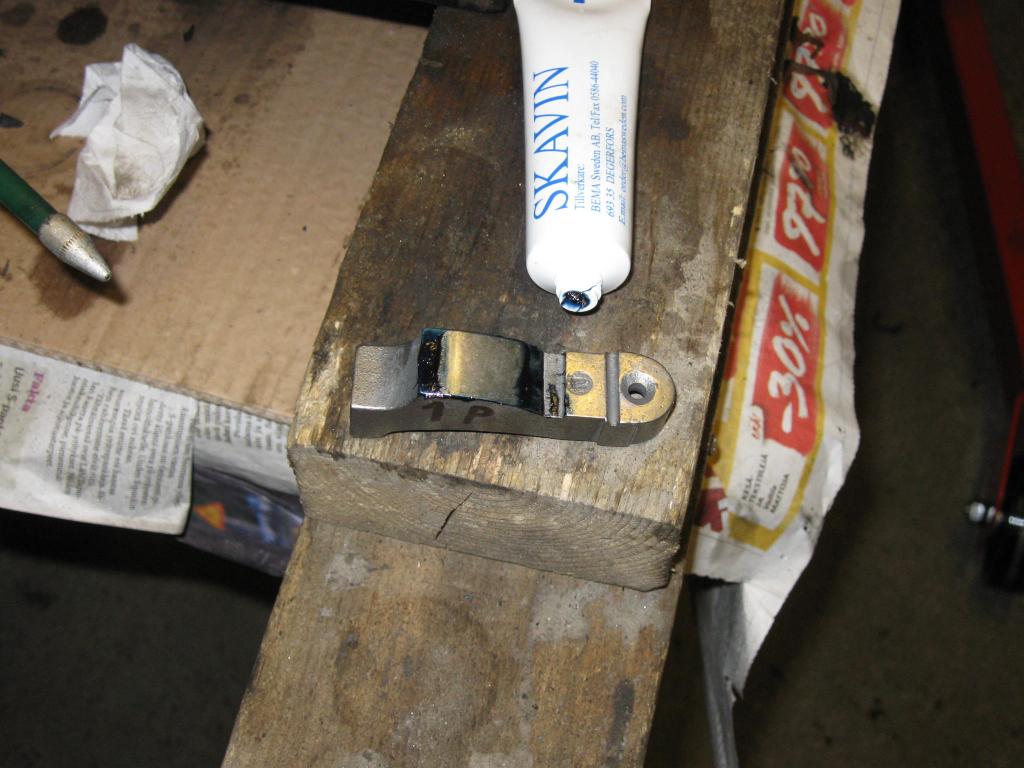
Since then few little problems. First we flooded the carbs with too much fuel pressure and after figuring that out we still couldn't get it idle properly. Noticed that the other carb is constantly leaking fluid from the accelerator pump circuit.
Well no other choice than to remove the leaking carb and start figuring out the problem. As it turns out I got myself a bad chinese product (). The little "bearing" ball on the accelerator circuit should seal up to the cone shape on the bottom, but the machining was poor so it leaks out fuel constantly. Not the best picture but the markings on the seal surface are visible:
Good thing is that even if I opted for a chinese product, I bought them from a Finnish firm, so there should be not too much hassle getting a replacement against warranty. I'm going the make a call tomorrow and hopefully get a new carb this week so we can start with getting this running properly!
The specs are now actually considerably bigger than originally was planned as seen in the posts above.
-std. 205 bottom end
-ported and lowered injection head
-Piper Cams BP300 cam (292 degrees and 12.57 mm lift)
-long pad followers
-stiffer valve springs
-adjustable cam gear
-lightened flywheel
-2x 45 DCOE carbs (36 chokes) "chinese Webers" (FAJS 45 DCOE)
-75 mm intake manifold
-Martelius 4-2-1 header
We started with the bottom end. I found an std. 205 bottom end in good nick for a cheap price and even new bearings came with it.
There is barely any noticeable wear on the bores.
We checked the bearing clearances with Plastigauge and they were all good.

Assembled it back together.

Next up was the head. This is a ported/skimmed head that have been lying around for few years waiting for a bottom end to go on top of.
Lapped the valves:

Next up cam in and checking the rocker geometry:

Near percect geometry:

New valve stem seals in:

Bolting stuff together:

Next up was removing the old Emax 1.6 engine. I originally planned to put the whole engine together and then just do the swap at one go, but decided to do this after all. Easier to swap all the necessary parts from the old engine to the new when they both are out.
Emax:

Away it goes:

Installed an electric fan:

Then back on working with the "new" engine. Checking the correct TDC point:

Fitted the head next, with Felpro gasket. The head is lowered 1mm, so I wanted to use Felpro, because it's ~0.5mm lower than std gasket, so it gives me a total of 1.5mm lower head without a visit to a machine shop.

Cam timing. Made few different timing marks, so it's easy to adjust the timing afterwards if necessary.

Bolting some random stuff on:

Lovely looking carbs:

Header making a visit too:

Intake manifold and double carbs on:

At this point I checked the carb balance somewhat together from the progression holes.
Lovely looking engine in my eyes, so next up few atmospheric pictures:


At this point we poured oil in to the engine and runned the oil pump with drilling machine to see that each cam gets it's oil squirt.
Next we installed the lightened flywheel (with ARPs) and clutch package to the back end of the engine. A bit of a nasty surprise was that one of the bolt holes in the flywheel for the clutch assembly had a worn out thread. After some thinking we thought about replacing all of the clutch assembly bolts with longer ones and using nuts on the other side. Couldn't find any reason against so bolted it on with them + Loctite.

Engine ready for lifting:

Sinked in:

Rest of stuff back together and coolant in too:

Finally we were at the point where first start and cam brake-in procedure were next on to-do list.
Since then few little problems. First we flooded the carbs with too much fuel pressure and after figuring that out we still couldn't get it idle properly. Noticed that the other carb is constantly leaking fluid from the accelerator pump circuit.
Well no other choice than to remove the leaking carb and start figuring out the problem. As it turns out I got myself a bad chinese product (

Good thing is that even if I opted for a chinese product, I bought them from a Finnish firm, so there should be not too much hassle getting a replacement against warranty. I'm going the make a call tomorrow and hopefully get a new carb this week so we can start with getting this running properly!
Last edited by BigPeBe; 20-01-2014 at 09:04 PM.
28-01-2014, 08:08 PM
#12
PassionFord Regular
Thread Starter
Ok this is now finally on the road again. The new carb arrived today, so then just adjusted the float levels, changed some jets and installed it back in.
Car is working very well now! Lovely sound those carbs are making.
It took some time, but after some adjusting got a good idle so went for a drive.
Drives good, works just like it should. Tho it's possible that I advanced the cam a little too much now, meaning the engine feels VERY torquish now. But it's so slippery now that I have to wait for spring/summer to tune the engine finally.
 29-01-2014, 02:53 PM
#15
PassionFord Regular
Thread Starter
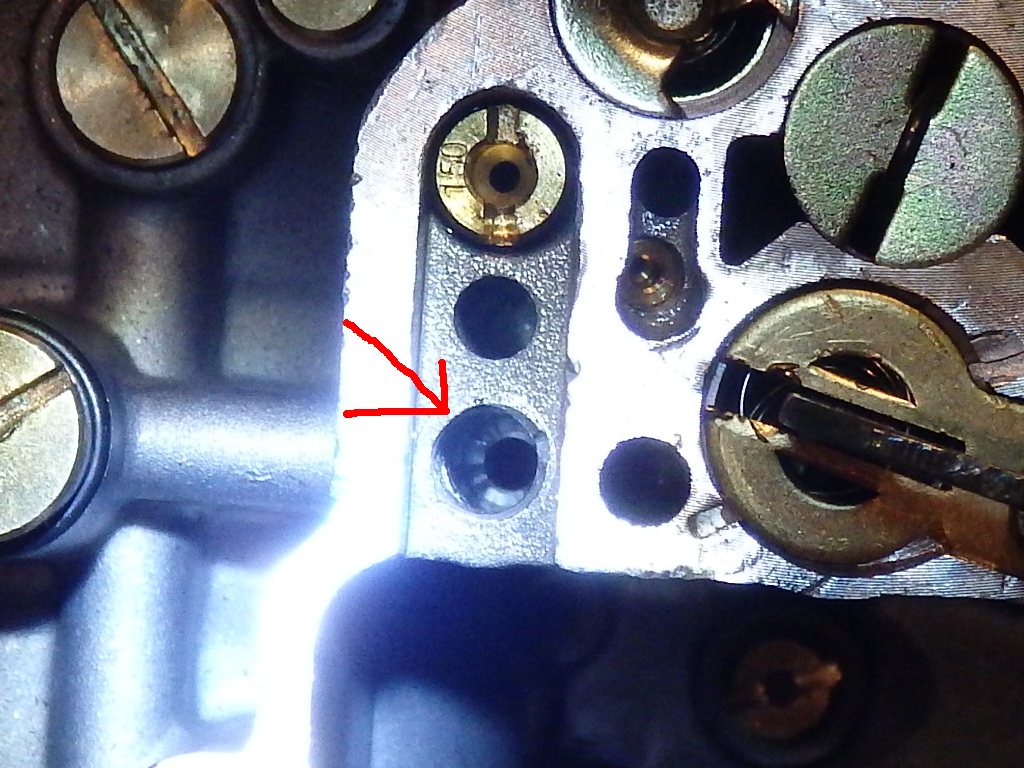
If you are referring to the jet seen on the picture, it's the starter jet.
If not I'm wondering how did you know I'm running 150 mains now?
Well anyway, I had 145 mains as a starting point, but changed to 150 because the AFR seemed a little lean. But I can get a proper reading on the spring when roads are not so slippery and I can do proper full throttle sweeps thru the rev range. The AFR meter is a bit too slow to react in these conditions.
29-01-2014, 07:28 PM
#16
PassionFord Regular
Thread Starter
Today I balanced the carbs a little more, idles little nicer now.
Then we adjusted the ignition timing some.
We tried to adjust the Powerspark soft cut rev limiter, but I'm not quite happy of this product. Probably gonna order a FMI (Finnish Motor Instruments) rev limiter some day. I already had one spare, but a stupid me sold it last fall.
Engine is working quite well now, only little downside is that when cruising with very little throttle opening the AFR gets too lean and it sometimes gives a little spit out of the carbs. Seems like I need to fiddle still some with the idle circuit.
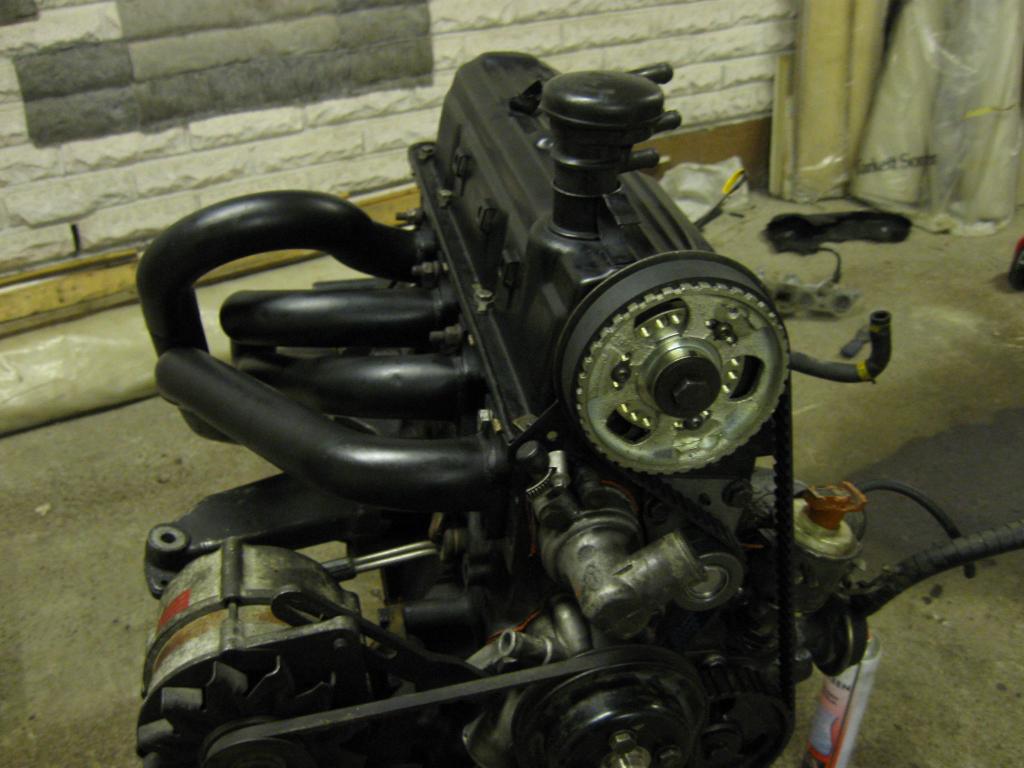
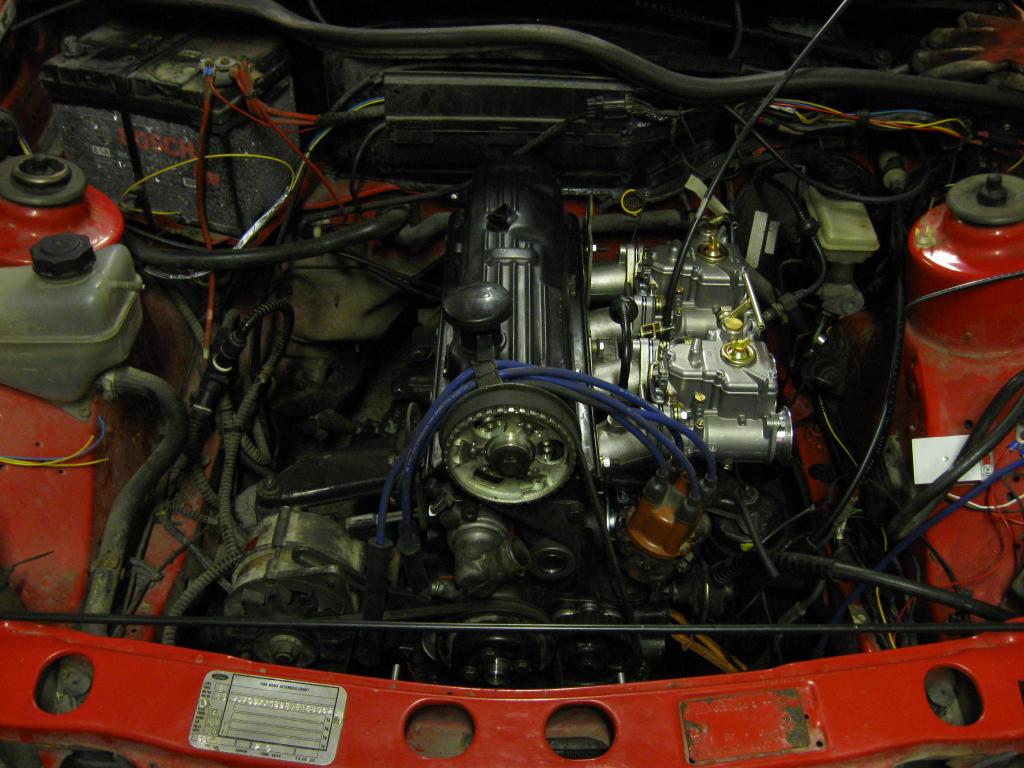
Took some better pictures today on the daylight:

Then we adjusted the ignition timing some.
We tried to adjust the Powerspark soft cut rev limiter, but I'm not quite happy of this product. Probably gonna order a FMI (Finnish Motor Instruments) rev limiter some day. I already had one spare, but a stupid me sold it last fall.
Engine is working quite well now, only little downside is that when cruising with very little throttle opening the AFR gets too lean and it sometimes gives a little spit out of the carbs. Seems like I need to fiddle still some with the idle circuit.
Took some better pictures today on the daylight:


Last edited by BigPeBe; 30-01-2014 at 03:39 PM.
15-03-2014, 09:02 PM
#17
PassionFord Regular
Thread Starter
Since we had few warm days I thought about doing some tuning before it gets cold again. First I shortened the throttle lever between the carbs, it was a little too long so the throttle cable didn't pull it 100% down, there were maybe two millimeters missing from the throttle action. So now the butterflys can be fully opened with the throttle pedal.
Then it was time to get on to the cam timing, like I said it was a bit too advanced. Just a little problem, one of the allen bolts holding the cam gear adjustment in place didn't want to open so I accidentally rounded the allen socket. Well it was no biggie, friend brought me some new hard bolts and we were able to unscrew the rounded one by hammering a bigger torx socket in it and then using that to open it. So we replaced all the three locking screws for better ones.
Moved the rpm limiter from 6000 to little over 7000 rpm and retarded the cam a little. It took few test runs and cam timing adjustments to achieve what I wanted. Pulls better now and sounds really mint close the 7000 rpm redline.
The following users liked this post:
BigPeBe (31-01-2015)
15-07-2014, 08:35 PM
#19
PassionFord Regular
Thread Starter
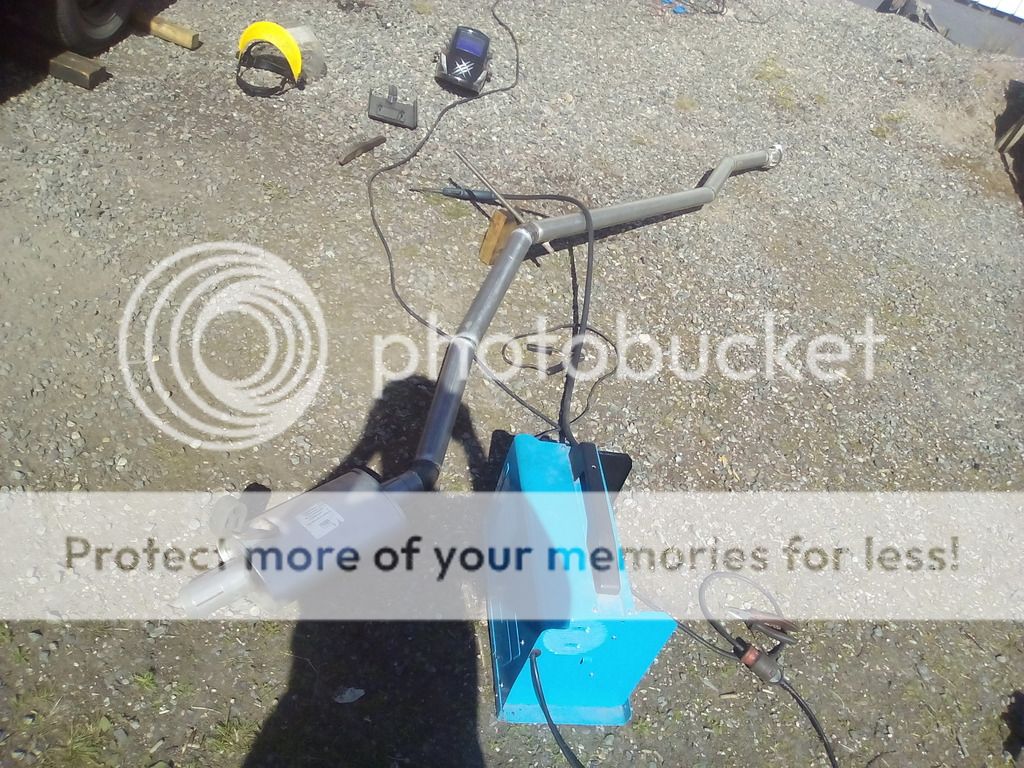
Finally gathered the motivation to fabricate the exhaust to it's final form.
First I cut the exhaust from the bit where it reduces from 2" to the factory tiny piping.
Leftover:
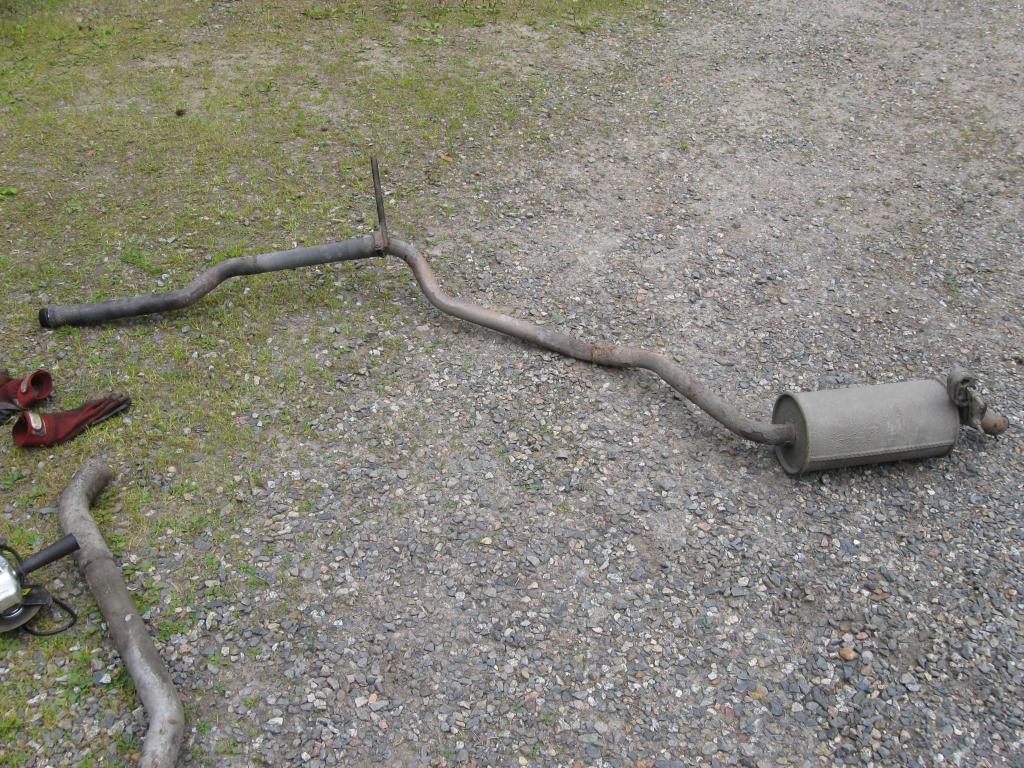
Then I started to fit pieces of exhaust together under the car and tack welded it when it seemed to sit nicely. I used a leftover piece (the bends) from the former exhaust of the Turbo-Sierra. Then I removed the exhaust again and welded it properly. Fitted a one back box.
Installed it back on the car and started the engine, woah, too much noise now! It sounded more like a Honda with big ass exhaust, not good. Luckily I had a one spare silencer (also seen in the pic above) that was left over from my former Cossie-looker Sierra. Removed the exhaust and welded the silencer to the middle.
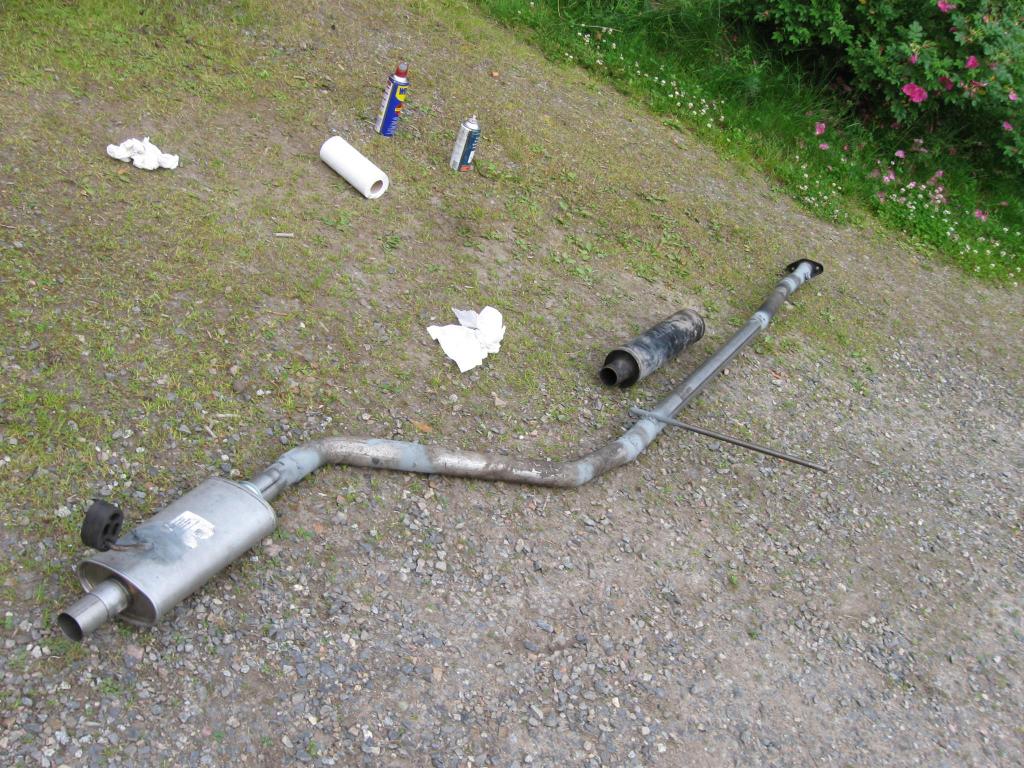
Installed the exhaust back on the car and started it up, much better now!
Now I have a full 2" system with two straight thru mufflers.
I think it ended up looking quite good actually, a little sportier than stock but not too much to think it couldn't have left like this from the factory:
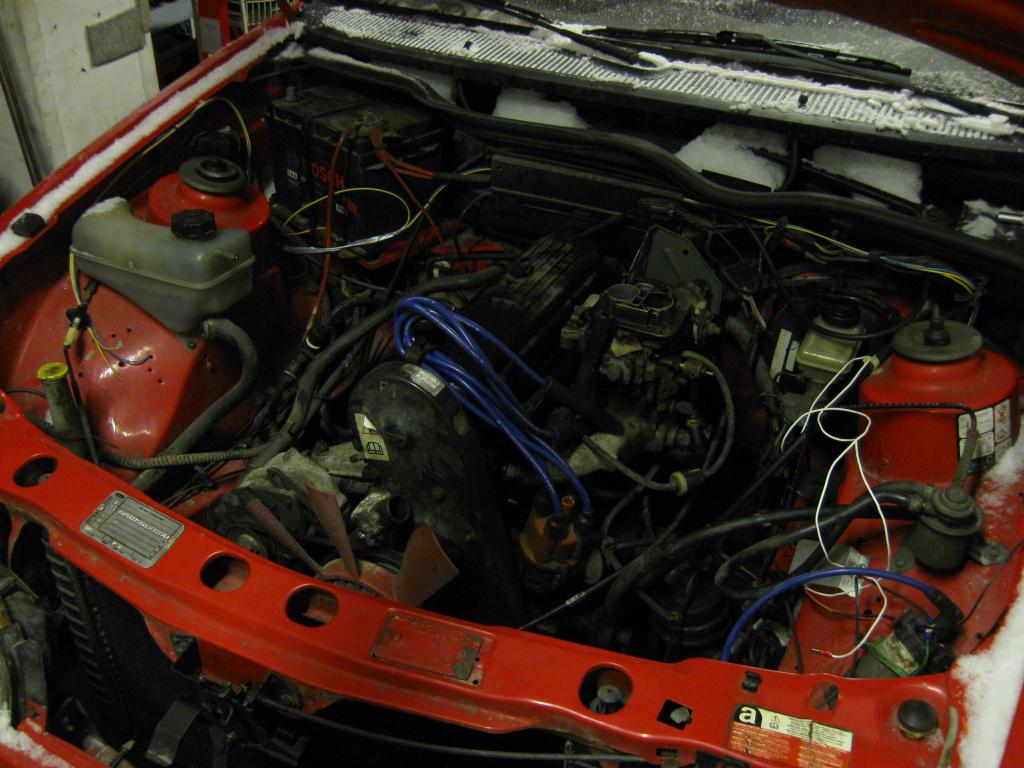
Gotta say I'm very happy with the way it sounds now, it's not too loud to make cruising feel uncomfortable, but the sound emitted when accelerating is really, really nice. Loud but doesn't cover the induction noise. Actually my daily driven makes now much better noises than the Turbo-Sierra.
+One random picture from engine bay. I changed some of the fuel hoses because for some reason the rubber hoses didn't seem to hold up.

First I cut the exhaust from the bit where it reduces from 2" to the factory tiny piping.
Leftover:

Then I started to fit pieces of exhaust together under the car and tack welded it when it seemed to sit nicely. I used a leftover piece (the bends) from the former exhaust of the Turbo-Sierra. Then I removed the exhaust again and welded it properly. Fitted a one back box.

Installed it back on the car and started the engine, woah, too much noise now! It sounded more like a Honda with big ass exhaust, not good. Luckily I had a one spare silencer (also seen in the pic above) that was left over from my former Cossie-looker Sierra. Removed the exhaust and welded the silencer to the middle.
Installed the exhaust back on the car and started it up, much better now!
Now I have a full 2" system with two straight thru mufflers.
I think it ended up looking quite good actually, a little sportier than stock but not too much to think it couldn't have left like this from the factory:

Gotta say I'm very happy with the way it sounds now, it's not too loud to make cruising feel uncomfortable, but the sound emitted when accelerating is really, really nice. Loud but doesn't cover the induction noise. Actually my daily driven makes now much better noises than the Turbo-Sierra.
+One random picture from engine bay. I changed some of the fuel hoses because for some reason the rubber hoses didn't seem to hold up.
 20-10-2014, 08:59 PM
#23
PassionFord Regular
Thread Starter
A tiny brake upgrade. The old 8" rear drums had seen better days, so decided to install 9" rear brakes.
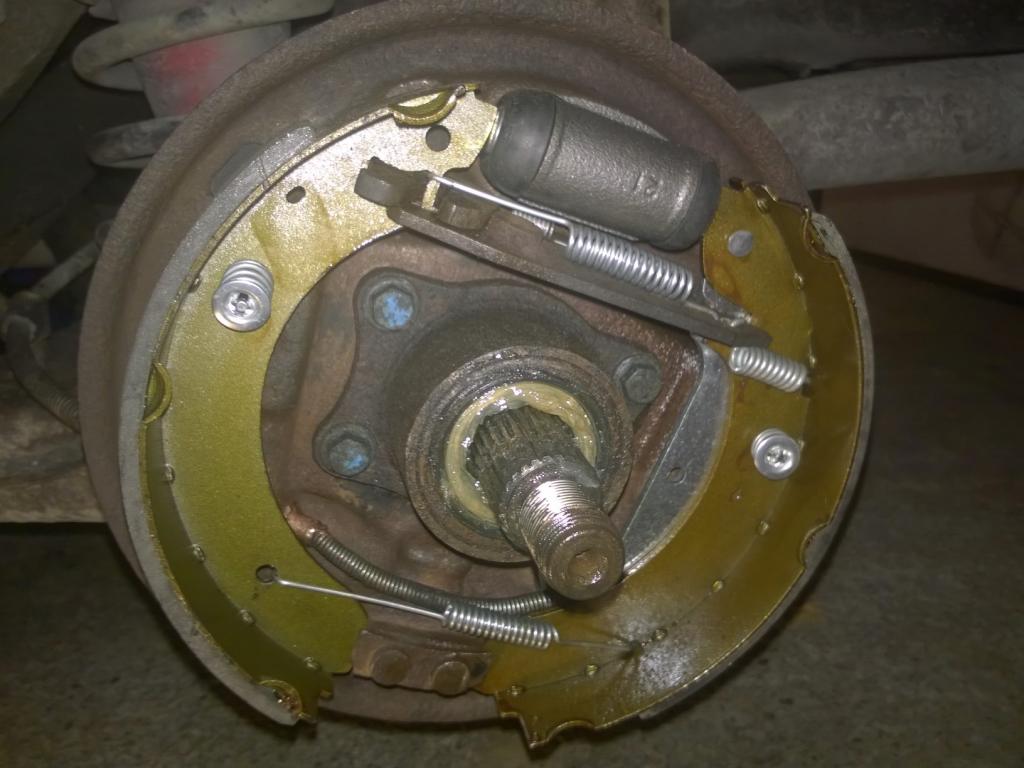
Brakes feel surprisingly lots better than they did.
I have also been trying to find a 7" rear diff with visco LSD and other required parts for the conversion, but no luck lately. I'll probably put in a welded diff which will do, until I can source all the needed bits.

Brakes feel surprisingly lots better than they did.
I have also been trying to find a 7" rear diff with visco LSD and other required parts for the conversion, but no luck lately. I'll probably put in a welded diff which will do, until I can source all the needed bits.
Last edited by BigPeBe; 20-10-2014 at 09:02 PM.
07-12-2014, 03:48 PM
#24
PassionFord Regular
Thread Starter
It happens so I bought an ignition kit from Accuspark.
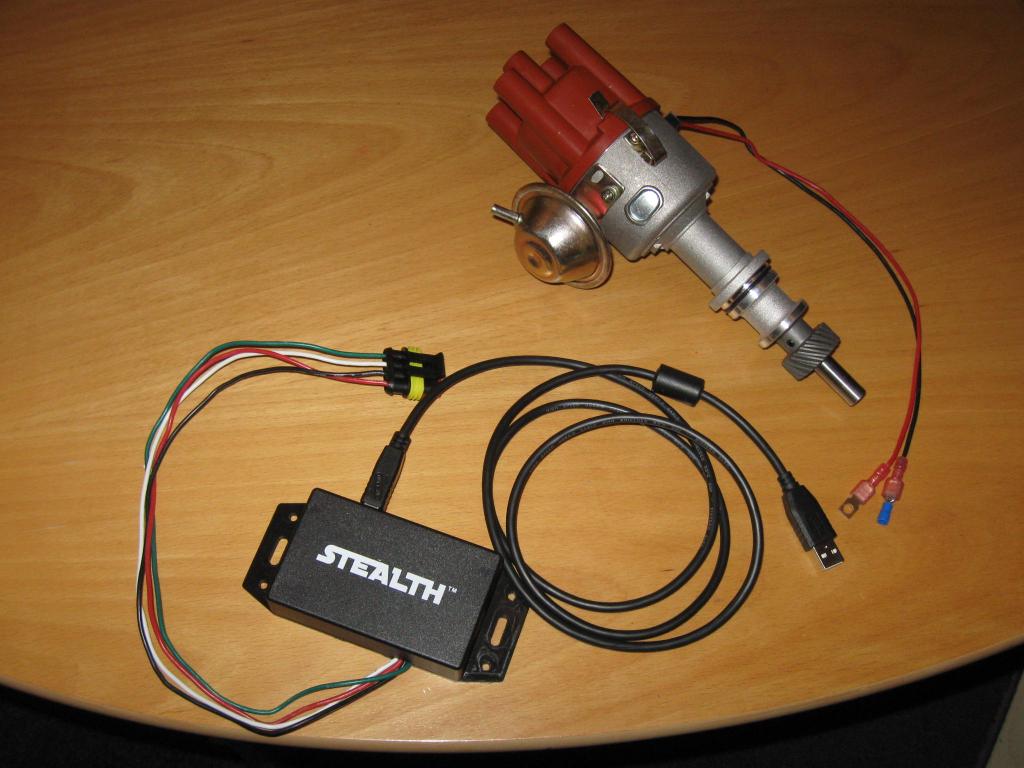
Pinto distributor converted to pointless ignition and with locked mechanical advance + BlackBox ignition ECU that connects to a laptop.
Installed all the necessary wiring etc. yesterday and swapped the distributor.
Got the car running fine first, uploaded a new ignition curve to the ignition controller and checked with timing light it was adjusting properly.
It did at first but then suddenly the car stopped and when I tried to start it again, it was popping on the exhaust. Turned the engine to TDC point, lifted the dizzy cap and saw a rotor arm that was now pointing to the number 2 cylinder instead of the first! For some reason it had turned to a very late timing all on it's own.
Lifted the dizzy off and seems something clearly broke, it doesn't rotate nicely with fingers like it did before installation.
I contacted Accuspark thru Ebay and hopefully will be getting a new dizzy soon. Meanwhile I installed the old dizzy back on and the car is running fine again.
Last edited by BigPeBe; 07-12-2014 at 03:50 PM.
12-12-2014, 02:40 PM
#26
PassionFord Regular
Thread Starter
Similar effect could be achieved with using a dizzy with centrifugal advancing mechanism and changing the springs to softer ones. But this is laptop adjustable so easier to achieve the end result I'm looking for.
I myself never have changed the valve stem seals with the head in place, so haven't really thought about it, but on a quick thought I think that should be possible. Just remove the followers, and before removing the valve keepers make sure the valves don't drop inside the cylinders. I believe some people have used rope, stuffing the combustion chamber with it so the valves can't drop down. Also I dunno how easy or hard it's use the valve spring compressor, while the head is in place.
11-01-2015, 07:19 PM
#27
PassionFord Regular
Thread Starter
Accuspark distributors seem to be quite bad quality. The electronical components itself seem fine, but the distributors they use seem quite bad.
New distributor arrived against warranty and same problem again. Initially everything was working fine, but after giving a little bit of a rev the engine died with an interesting sound *click click click*.
Rotor arm again was pointing way late. After lifting the dizzy we made some measurements. It seems that the gearwheel is just slightly smaller than original (maybe just two tenths of a millimeter, but still) and there is actually some side play in the bearing.
The only sensible theory we could make out of this, is that the side play with the smaller gearwheel allows the gearwheel move enough so it jumps few cogs! Of course this makes the timing late and also explains the weird sound.
I'm now considering of sourcing an ORIGINAL Pinto dizzy and converting it to pointless with the electronic components that are in the "new" dizzy I got from Accuspark. Or a refund.
Anyways, car is now running fine again, with the original dizzy.
 09-05-2015, 04:51 PM
#29
PassionFord Regular
Thread Starter
Thanks! If you are talking about the pcv valve that's in the left side of the block (one way valve for the breather system) I didn't exactly do much with it. I just checked it's working had a bit of a clean and jammed a piece of hose in (I happened to have hose that's the correct diameter). The hose is just pointed to the underside of the car so the fumes don't go all over messing the engine bay.
The following users liked this post:
wetandwindy2 (09-05-2015)
09-05-2015, 05:46 PM
#30
Thanks! If you are talking about the pcv valve that's in the left side of the block (one way valve for the breather system) I didn't exactly do much with it. I just checked it's working had a bit of a clean and jammed a piece of hose in (I happened to have hose that's the correct diameter). The hose is just pointed to the underside of the car so the fumes don't go all over messing the engine bay.
ok thanks seems nice and easy then cheers
23-06-2016, 05:29 PM
#31
PassionFord Regular
Thread Starter
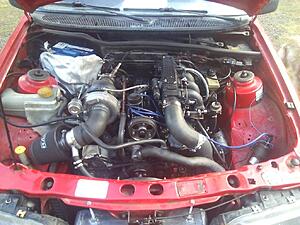
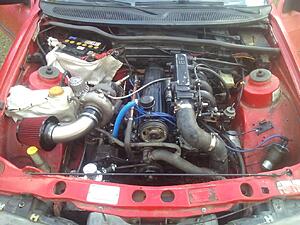
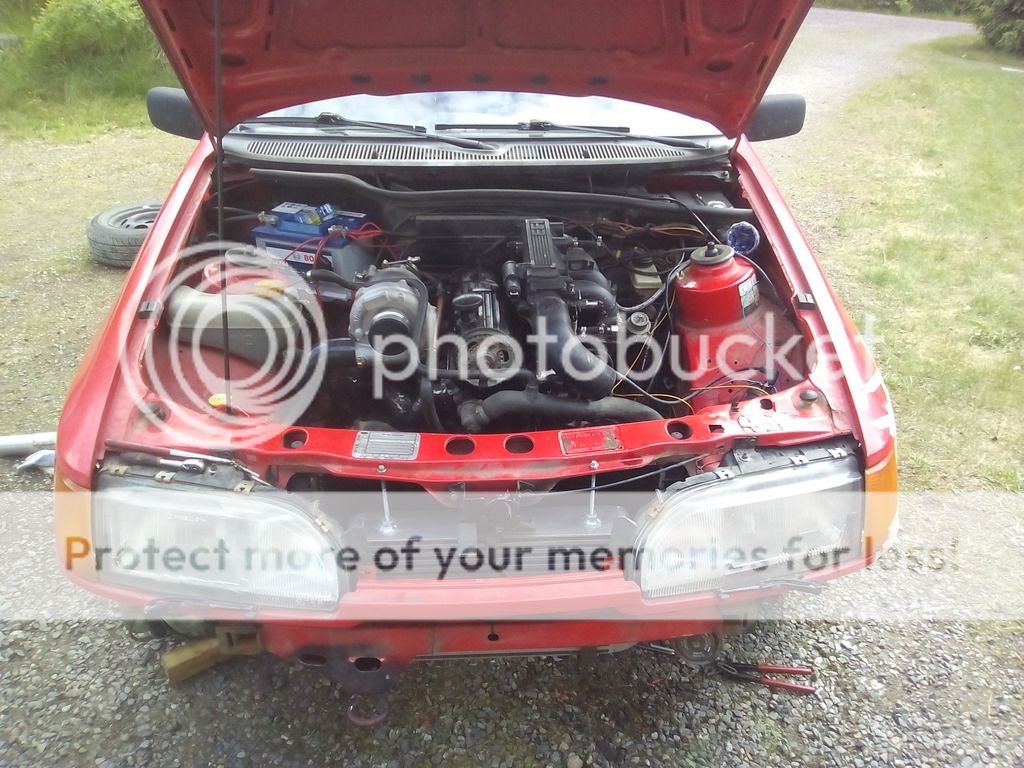
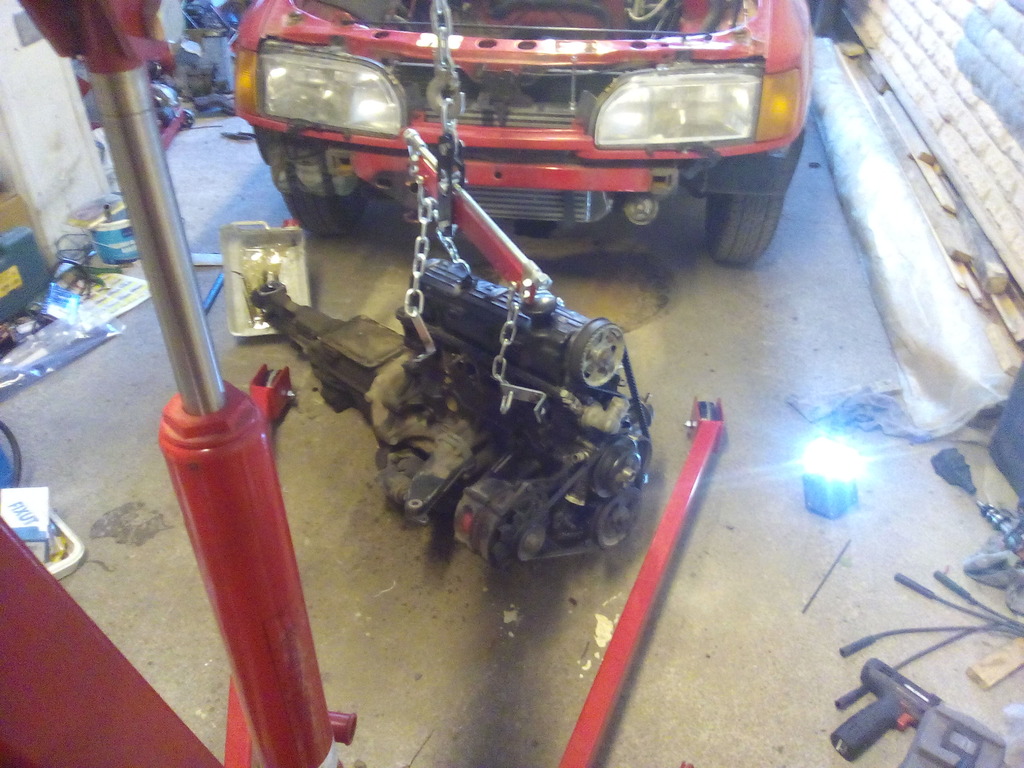
WTF guys, suddenly a turbo in my daily?
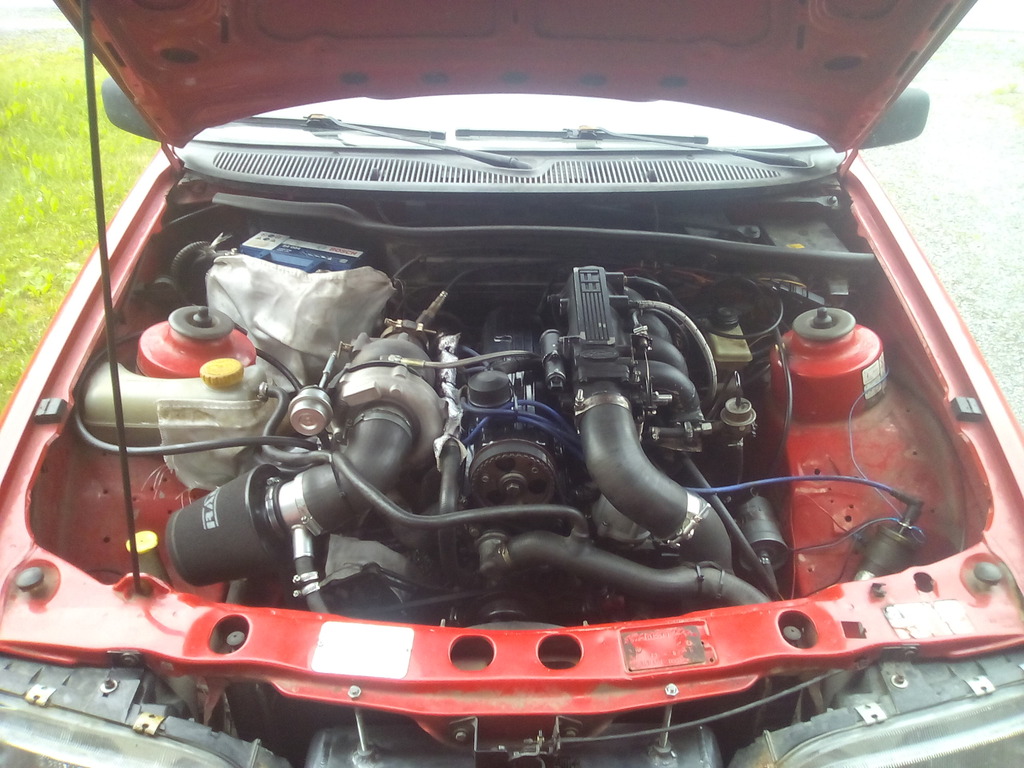
Next up two weeks of work in one post. Maybe not the most detailed post about this little project, but I'll try to include everything I recall. I used two weeks of my summer vacation for this.
While I was working with the diff my friend was going over the wiring loom. Shortly, the old engine loom (MS1) was removed from my other Sierra and modified to fit to this one. Sounds simple but it took quite a lot of time because over the course of time we had modified the original loom few times and now we wanted a loom that had all the bits we need, but tidy. My friend also made a whole new relay wiring for the fuel pump (bigger wires for the pump). Also new wiring for new gauges.
So now this car has Megasquirt 1 V2.2 with Ford TFi ignition and electronic boost control.
It was a easy decision to take the ECU and wiring from the other Sierra, because it'll get a whole new ECU and a loom with wasted spark at a later date anyways.
About the diff then? Of course I would need a LSD.
I started with prepping the driveshafts. I made "hybrid" driveshafts with push in joints outboard and lobro joints inboard. I used push in driveshafts that have outside diameter of 27 mm, because they have the right splines on the inboard side to fit the lobro joints. I used the smaller lobro type, IIRC the bigger ones don't fit.
First brake the push in type joint's outer shell.
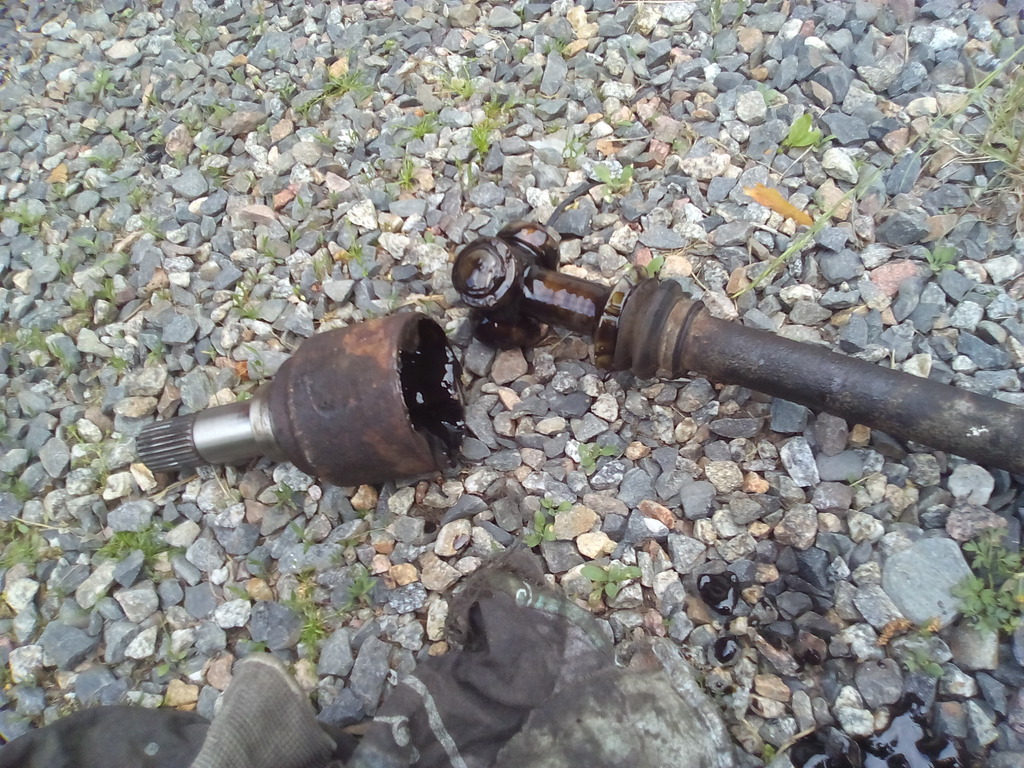
Then remove the locking clip and hammer the rest of the joint out.
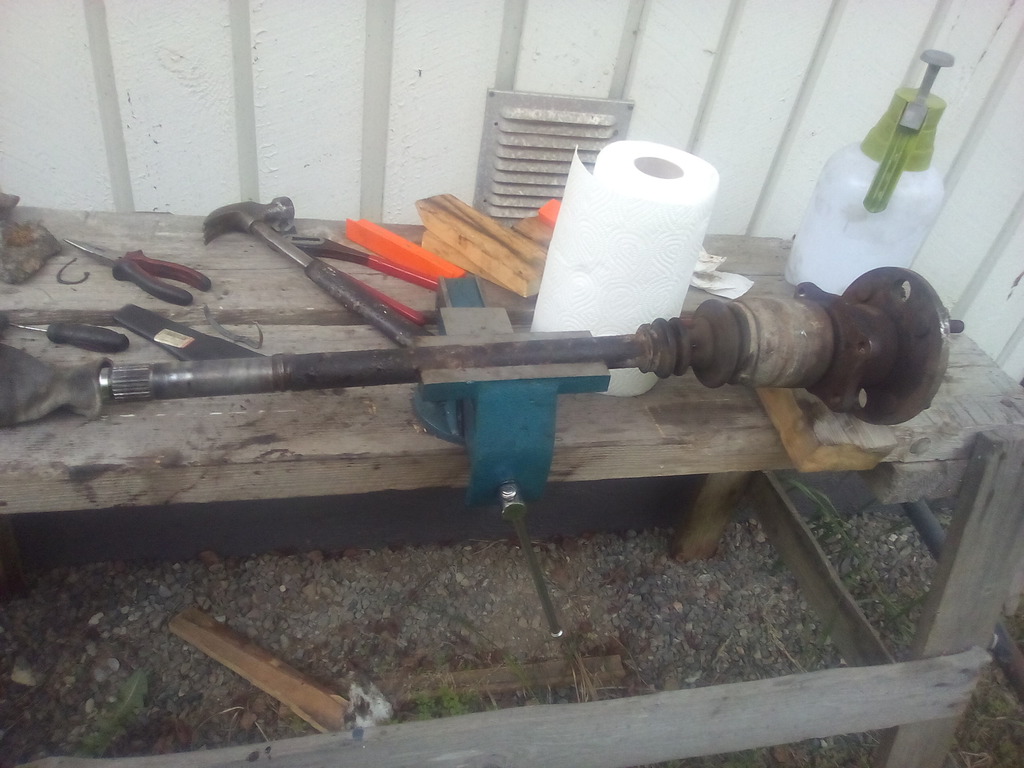
Now the lobro joint will slip on easily, just push it on and attach locking clip, grease some shit up and fit the rubber boots.
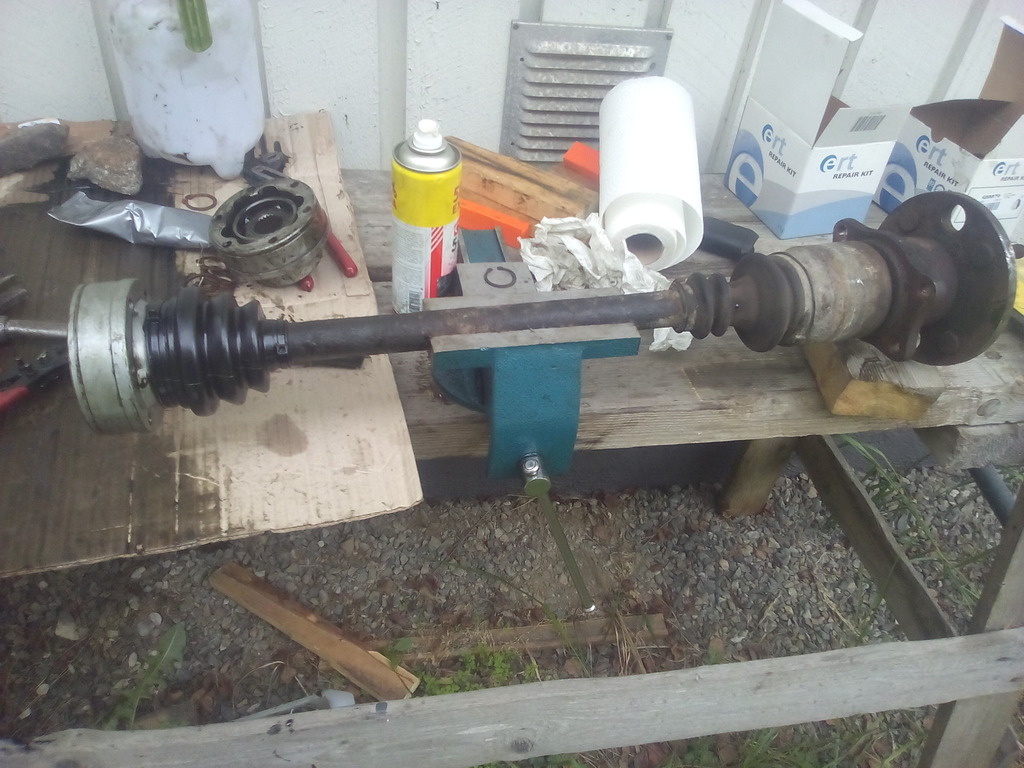
And now we have a driveshaft that will fit between a 7" visco diff and drum brakes. Repeat for the other side.
Next up the diff itself. I had already bought a separate visco unit with tighter visco liquids inside (60 000 cps). So I fitted this inside a regular 7" open diff.
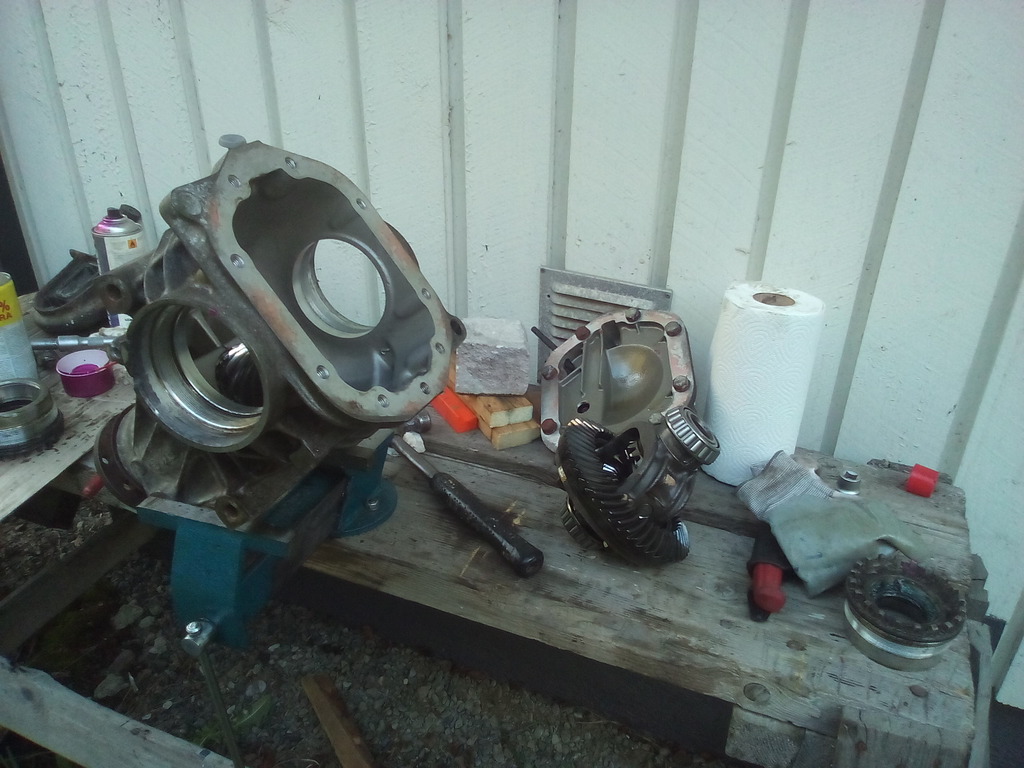
LSD vs open diff unit:
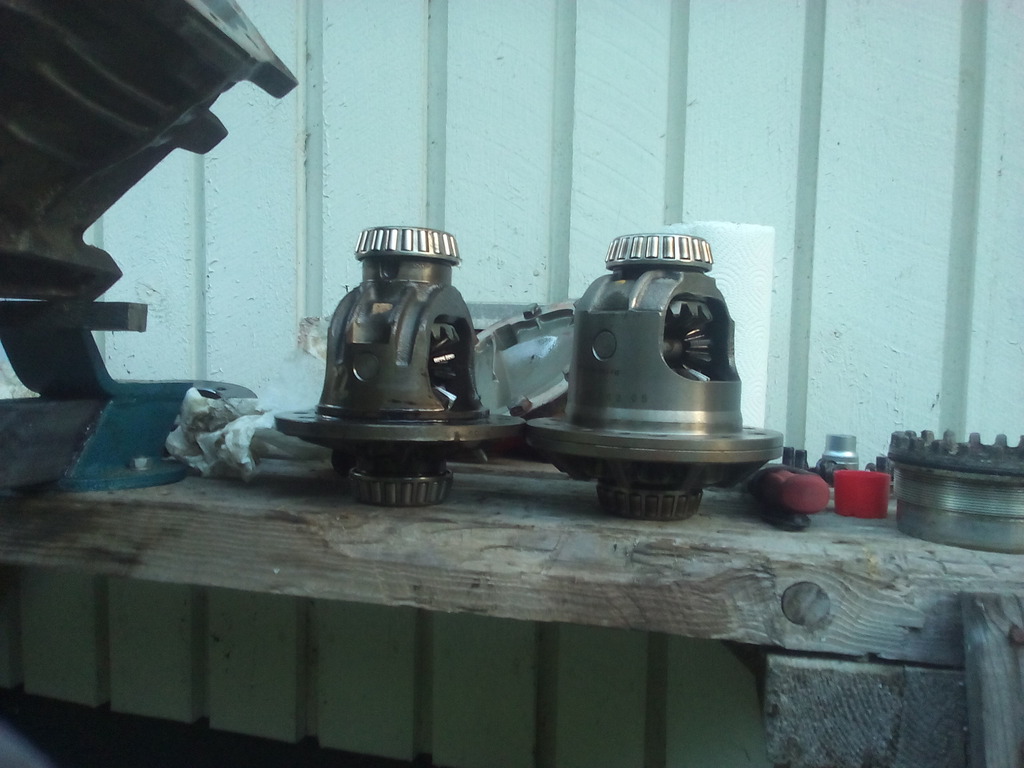
I just swapped the drive gear from the open diff to the visco unit.
Installed the visco unit inside the 7" diff casing. Also put in the lobro stubs with c-clips to convert it to fully working LSD lobro type diff.
New oils in too.
So diff was ready for installation now.
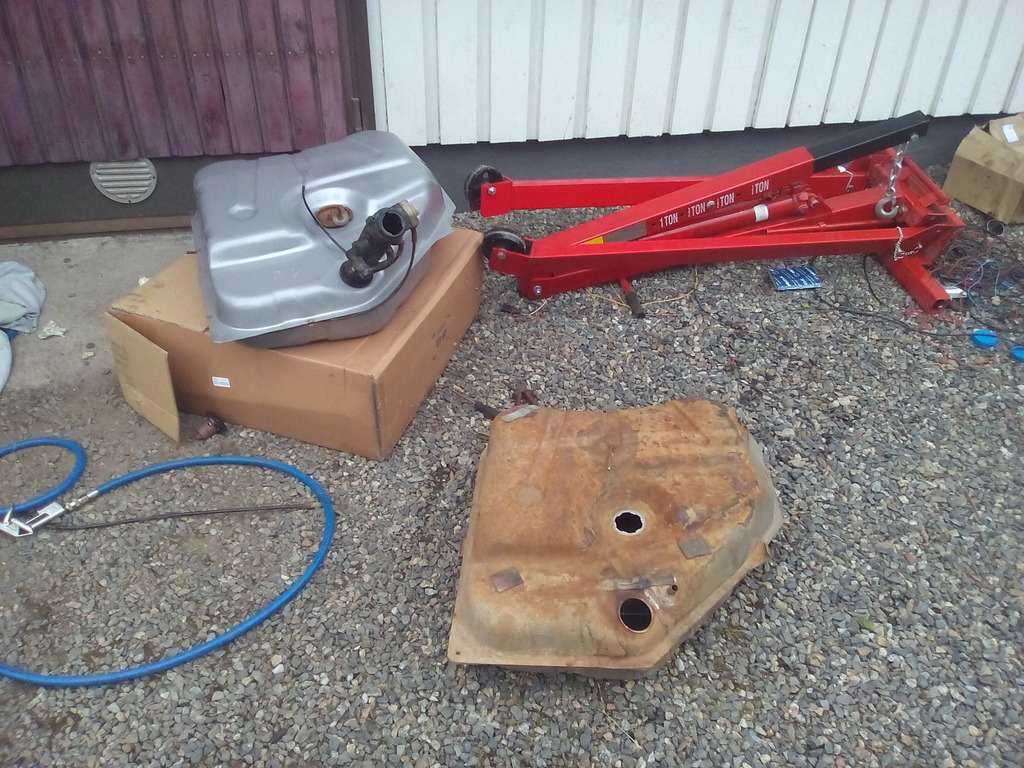
Installed. Also in picture the new injection type fuel tank.
When removing the old tank we had to brake the original bolt/nut mountings so we also welded in some new bolts to the car for easy installation.
Old and new.
In this picture at the same time we are working on at least three things, wiring loom, swapping fuel tank and fixing the exhaust manifold. At moments there was three guys working on the same car. Without handy friends like this it would be impossible to make projects like this in a two week schedule, so big thanks to my friends! That exhaust manifold I got pretty cheaply, it was supposed to be in working condition but a friend ended up welding it a lot to get to an acceptable level! Was cracked from pretty much everywhere, both MIG and TIG were in good use here.
Intercooler.
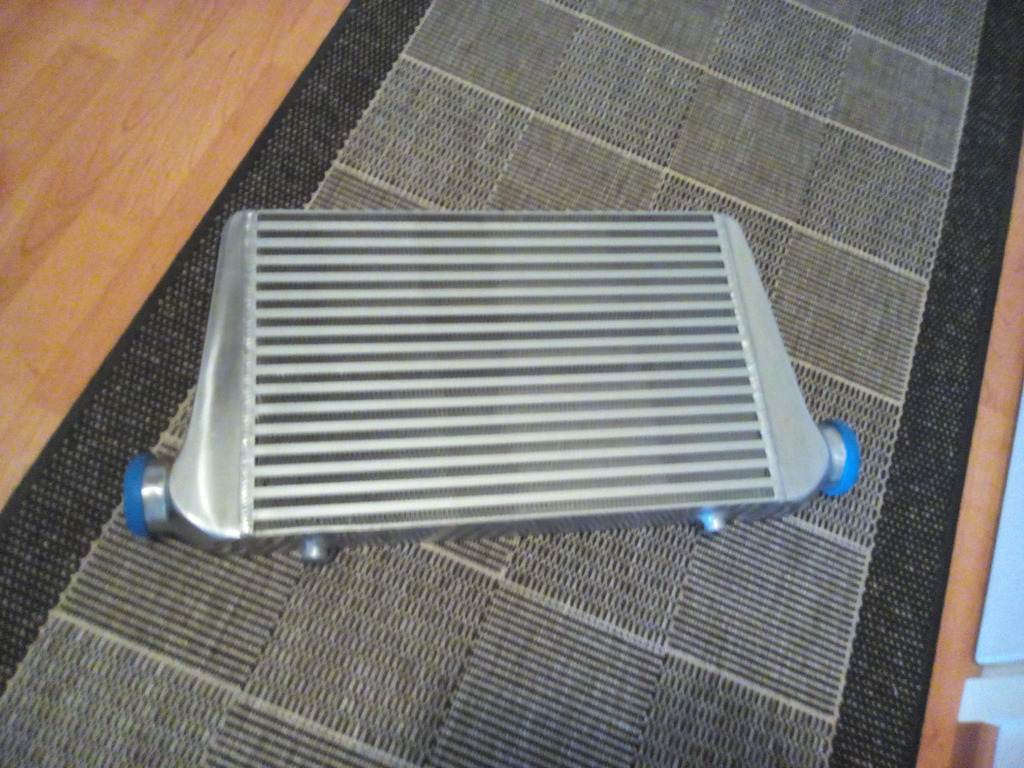
Finding it's place.
ATMO engine still at front we dummy fitted the manifolds and turbo so we could start fitting and fabricating some piping.
Boost piping got "bead rolled" with a welder so there should be no problems with boost pipes or hoses blowing off.
Picture of exhaust.
To the outside it has a pretty sweet sound, but I gotta say after driving some I'm thinking I need to fit a different muffler at some point, because to the inside it's just too damn civilized to my taste.
We fitted new fuel lines too. Now they are 8 mm polyamide piping. Fitted a Sytec 044 fuel pump too. And a fuel filter that can take E85. Yes, it's running on ethanol now.
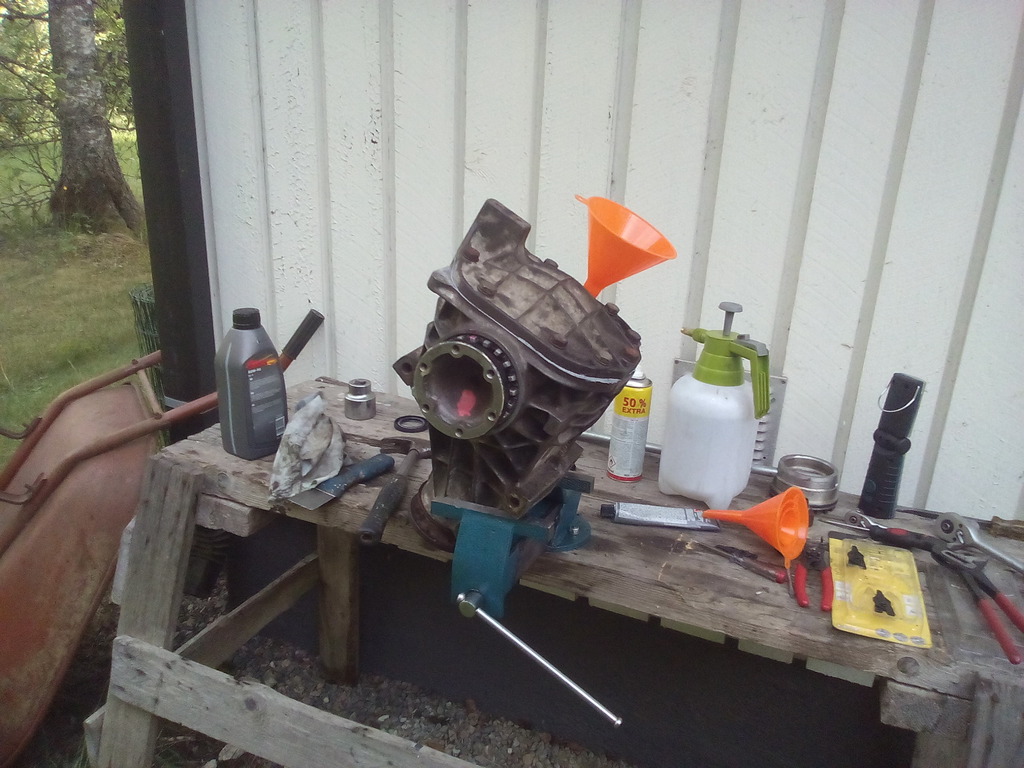
To the engine stuff next then.
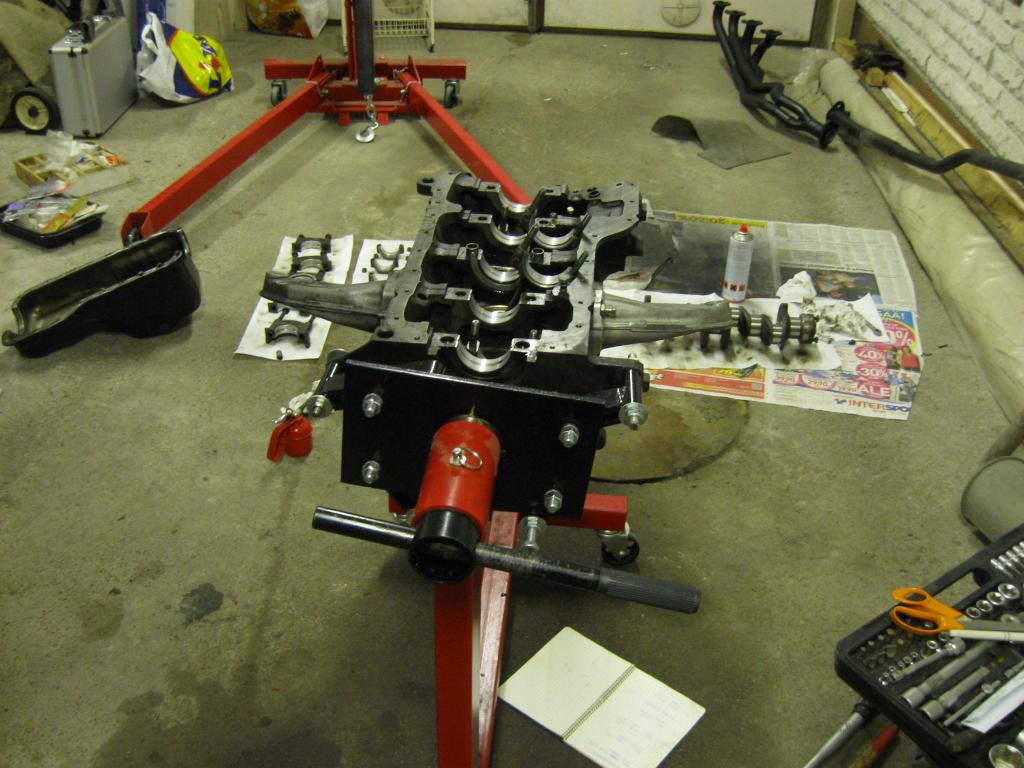
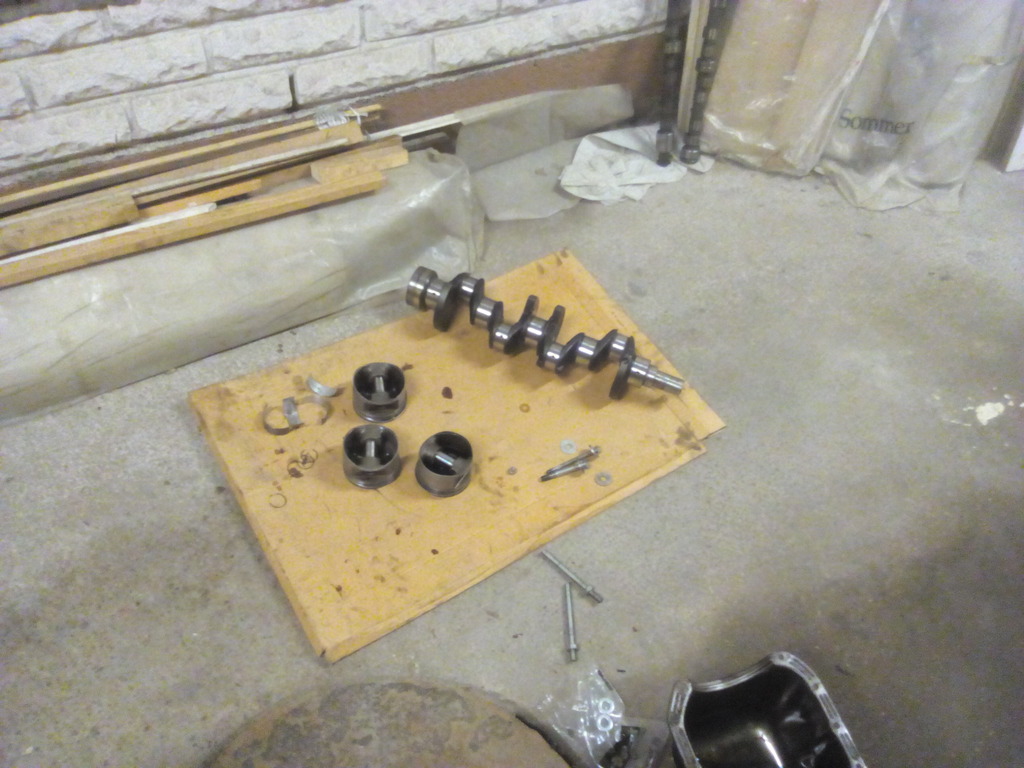
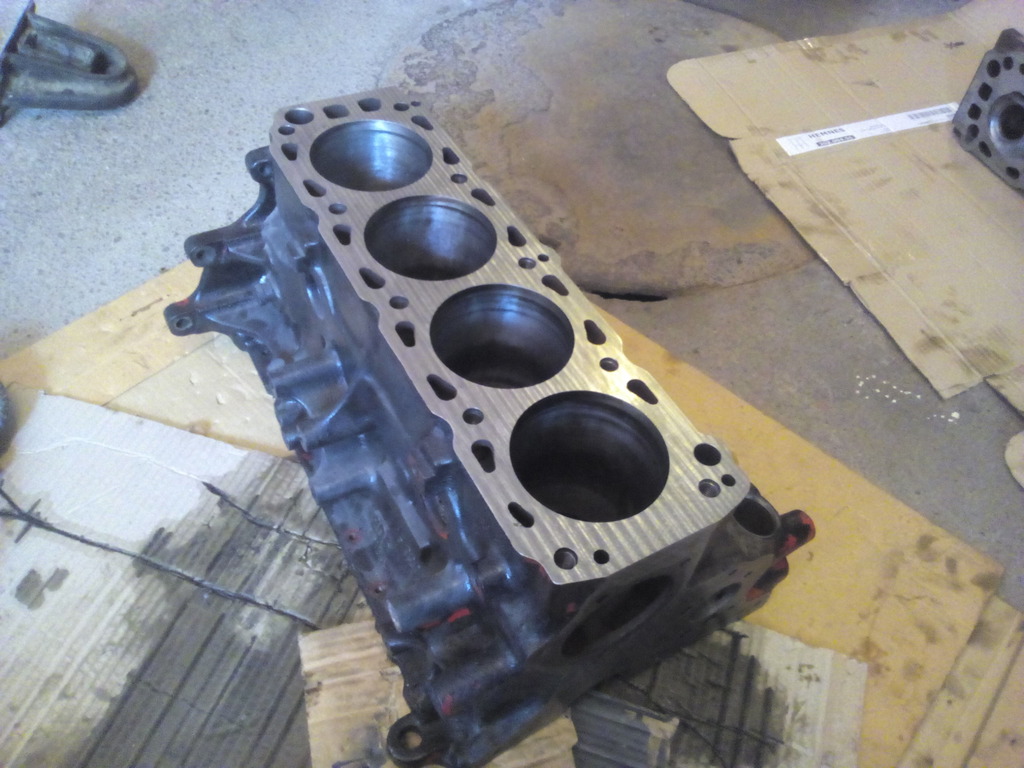
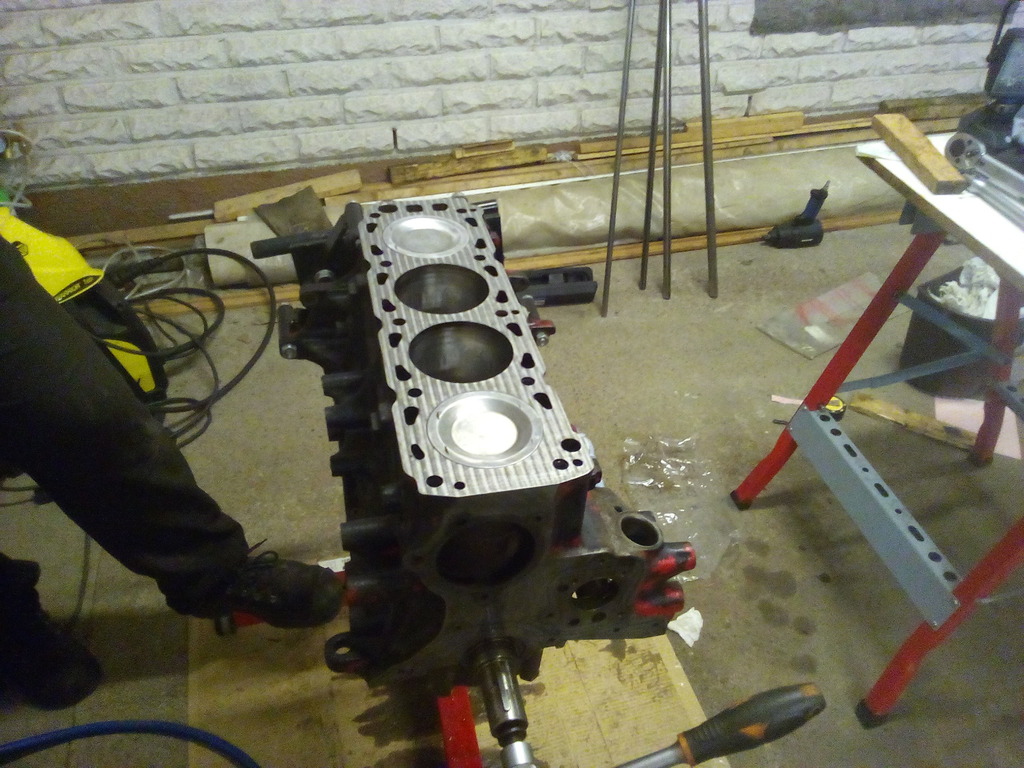
205 block and some random micrometers.
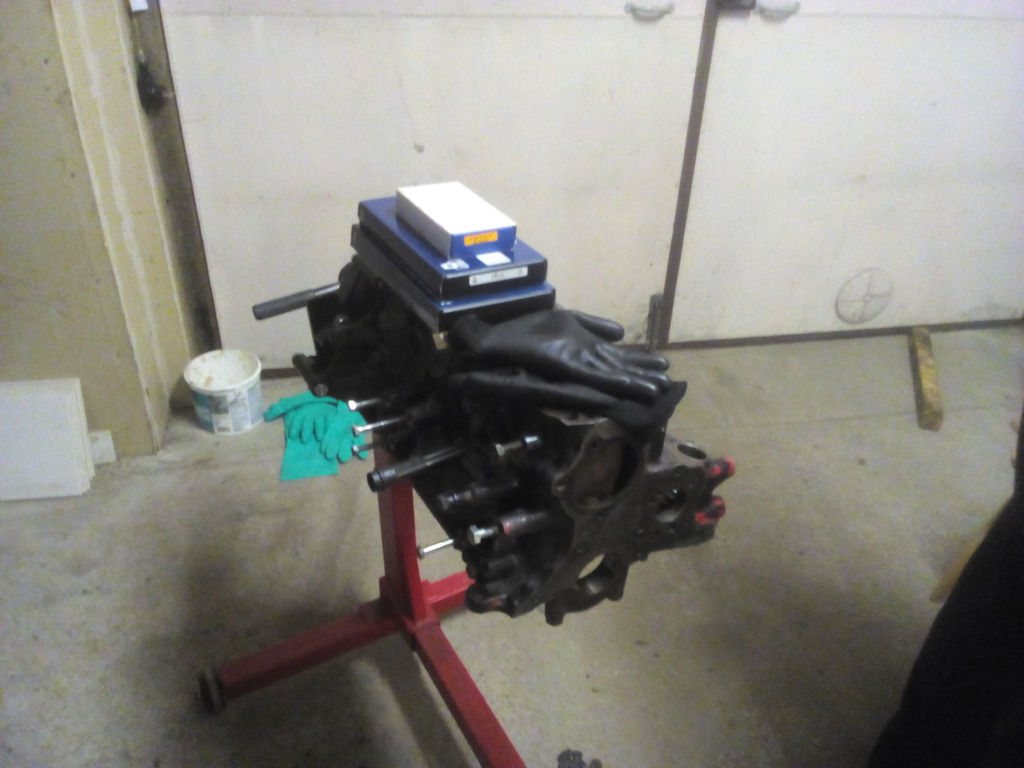
Is crankshaft and some random pistons.
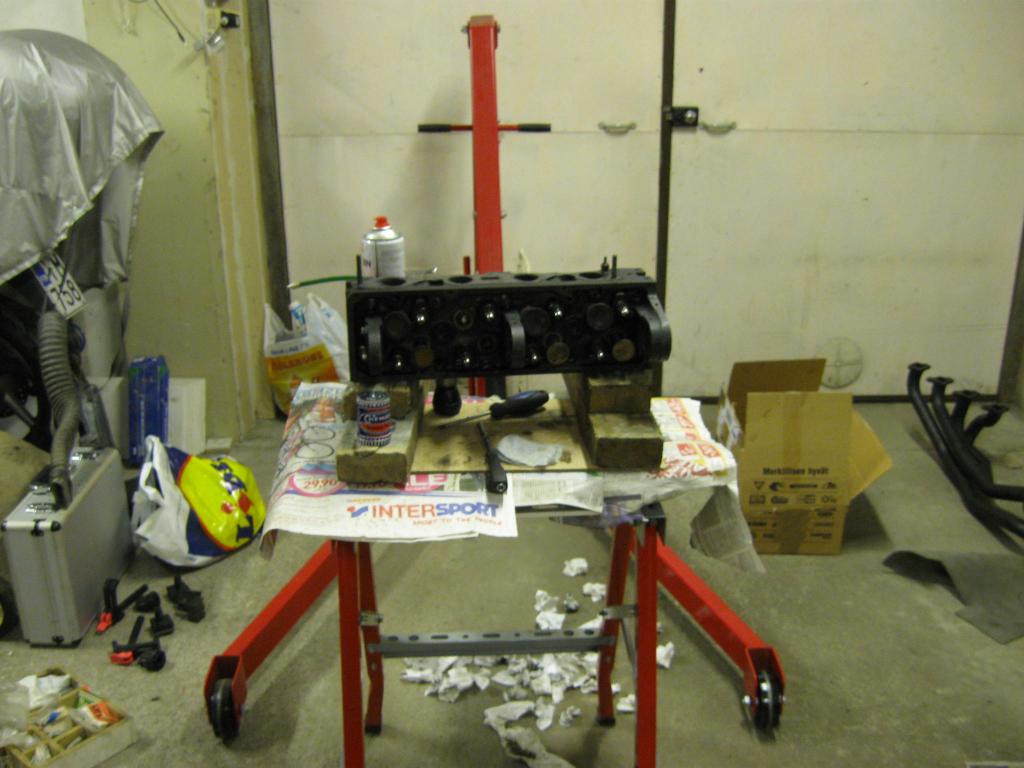
Taking head apart and some other stuff on a random picture.
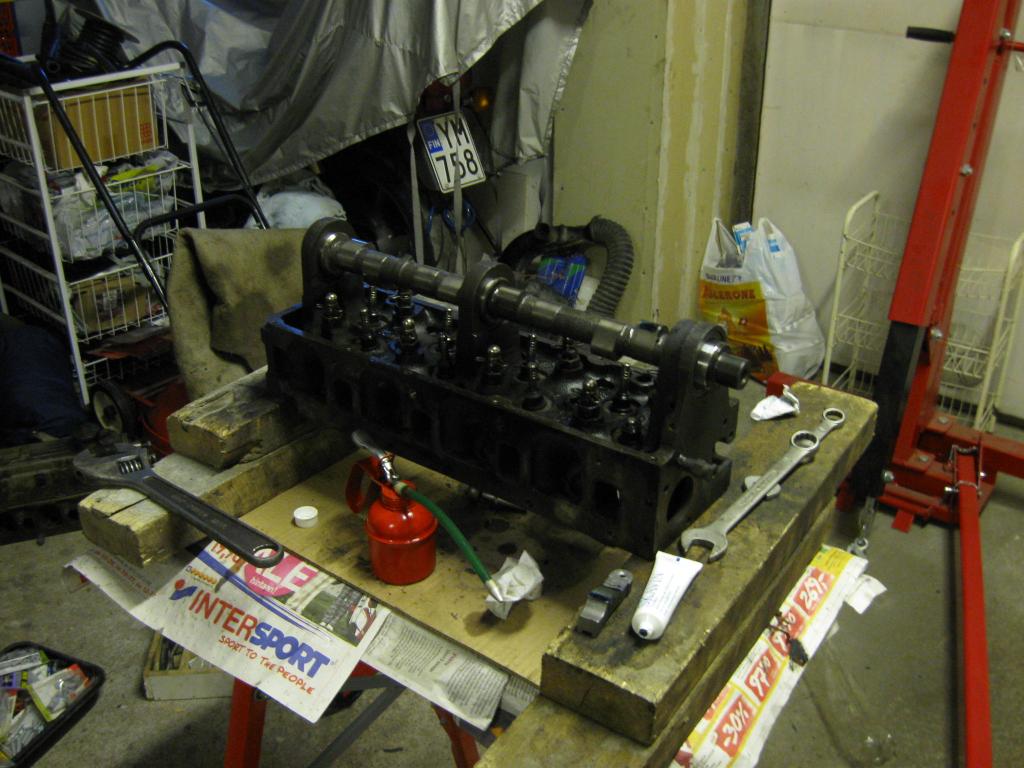
Head that I'm using I got second hand. It's ported and has 44.5 intake and 38 exhaust valves. Valves stick up higher than originally, so I had to find a cam with smaller base circle. It already was fitted with a cam that sounded good on paper (Cat Cams 281 degree cam), but the valve geometry was fucked up because it had a base circle too big. Good thing I have few different cams with different base circles and different follower models laying around so I could check what combination works best. It appears that I need a cam with 27 to 28 mm base circle so I called a local rally parts seller (RallyRaceFIN) and had a conversation with the guy. I told him what kind of cam I want and he checked some base circles. I ended up ordering a Newman Cams PH4.5 and a set of hard pad followers.
Cam has 284 degrees and 12.03 mm lift intake and 11.95 exhaust. 52 degrees of overlap, so still a bit on the mild side, but yet enough to offer a nice cammed idle on a single throttle body application.
I checked the follower geometry with the new parts and it was good, also measured the valve lift and it was very close the cam's specs so I was happy.
I made three timing marks on the cam gear, for 60%, 80% and 100% exhaust valve lift from intake valve lift at TDC during the overlap. It is now in the middle setting, which is only about two degrees advanced from the cam's specification (108 ATDC vs 110). We will see what kind of timing works the best when we really get to mapping this engine.
I cc'd some combustions chambers and calculated compression ratios. For ethanol usage this head isn't the best, because the combustion chambers have been extensively modified. This means that we have to skim the head to the maximum amount and even this won't give as much CR as I would want. But it will have to do because I have two big valve heads laying around and I'm reserving the better one to the white Sierra.
Localc CNC shop skimmed the head and straightened up the block surface.

Then yet another dummy build and measuring everything up and calculate CR. CR ended up being 8.1:1 with the 4wd Cossie pistons I'll be using. Acceptable I guess.
Bottom end getting assembled.
Head too.
And the whole crap.
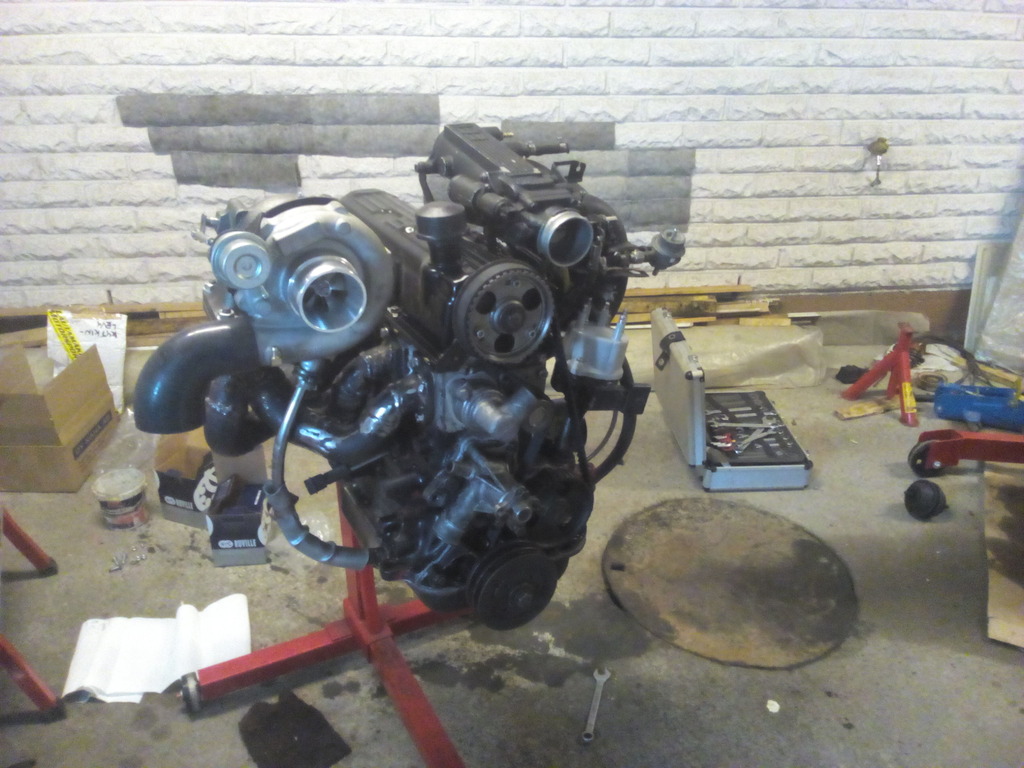
That turbo is a Chinese T34.64 with some porting job done to the wastegate side by a friend.
ATMO getting lifted away.
Flywheel, clutch and gearbox assembled on to the turbo engine.

Flywheel is lightened. Stiffer clutch cover and a 4 plate sintered clutch. Changed the gearbox oils while at it. Also swapped the engine mounts for new ones because the old ones were loose as fuck.
Found it's home.
Next up was first start and cam break in. It all went pretty easily, my new settings for the ECU for ethanol were close enough so the car started right up and timing wasn't badly off either.
Next up was some mild break in pulls and an oil change. It's already quite peppy with the pussy boost (0.5bar). But when we get to really mapping it I'm planning on getting about 300 bhp with a conservative boost for daily driving. But map it for a bigger boost too (for special occasions of course wink wink) if the 670 cc injectors flow enough.
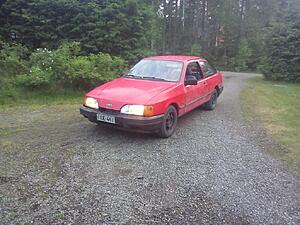
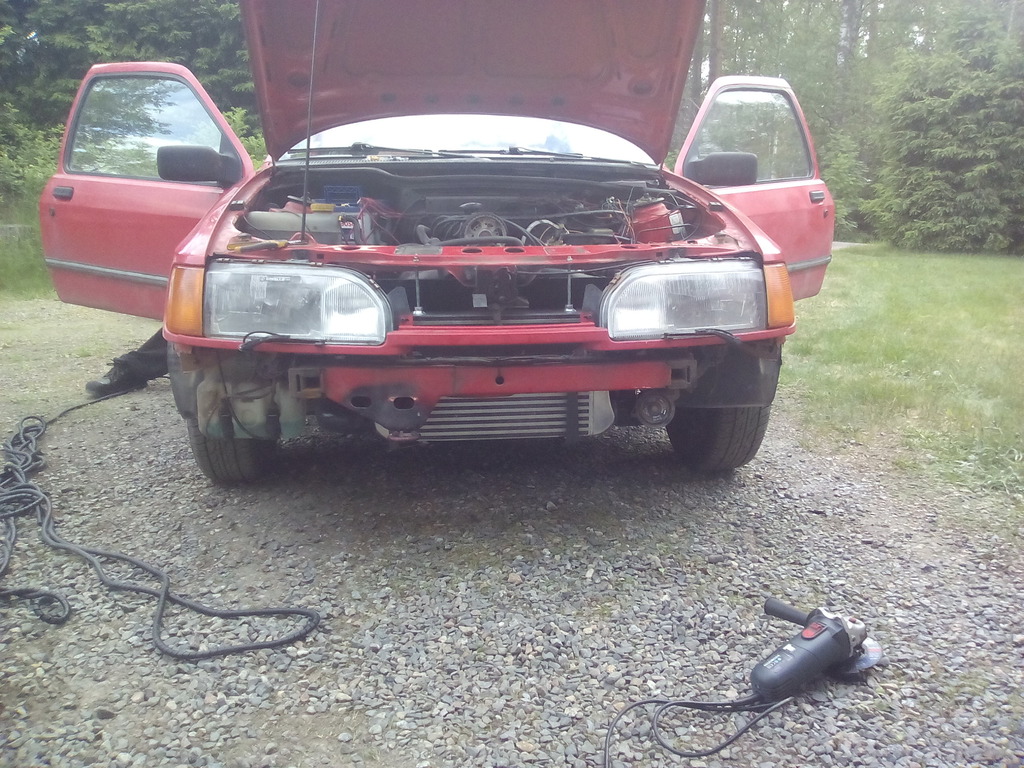
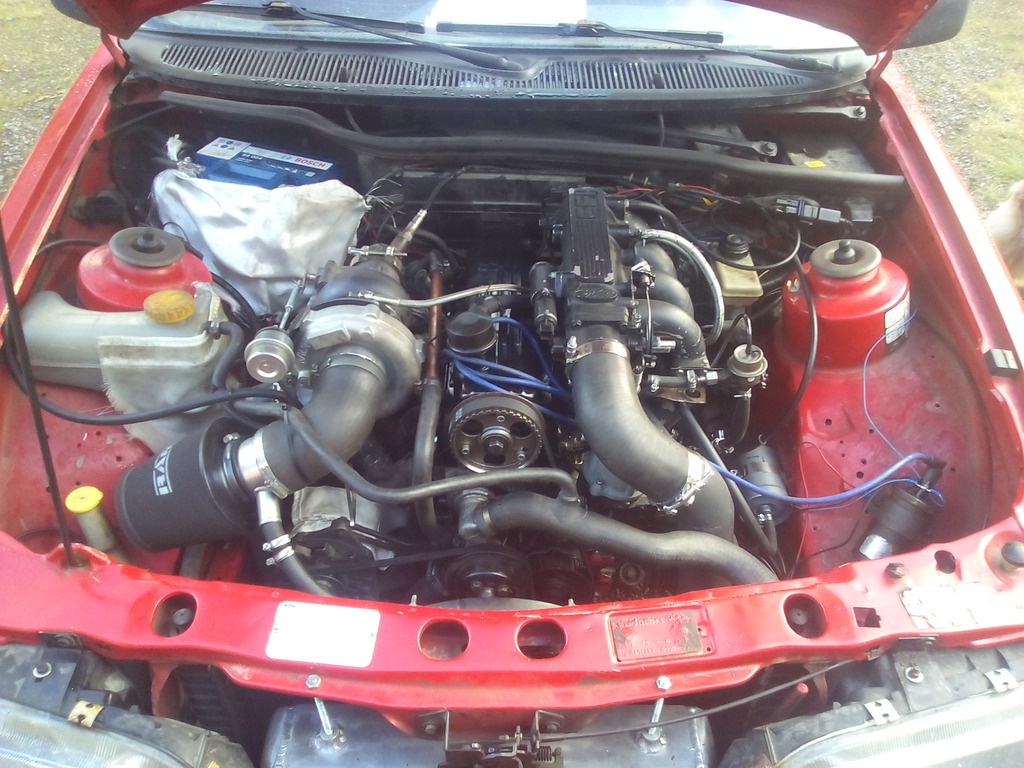
Sadly I had to modify the front end a bit, because full stealth mode didn't flow enough cool air to the radiator.
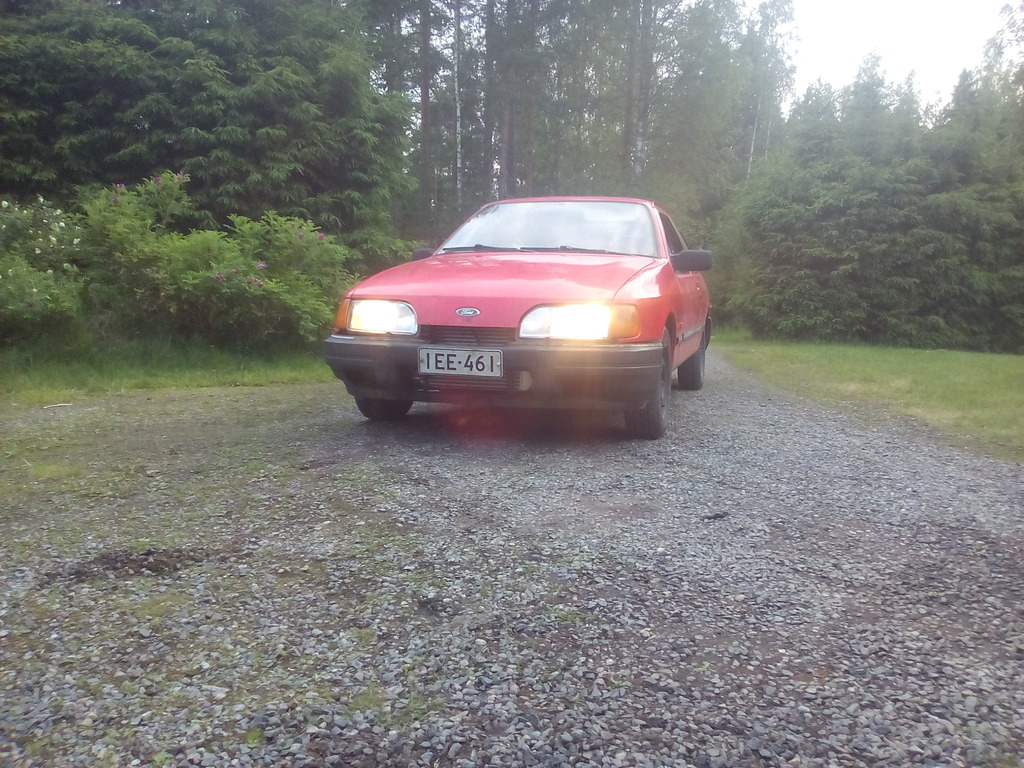
And yeah, those tires are 175 wide. I actually bought those steelies to get rid of the alloys so it's as much of a sleeper as possible. It's sketchy as fuck to drive and I love it.
Quick recap on the current spec.
205 block, Cossie pistons (4wd) & rods.
Ported Pinto head with 44.5 and 38 valves.
Crane single springs, hard pad followers, Newman Cams PH4.5 (284/12.03/11.95)
T34.64 turbo (from Ebay of course)
Megasquirt 1 V2.2, TFi and boost control mod.
EV14 670 cc injectors
Sytec 044 fuel pump, 8 mm plastic fuel lines.
7" LSD diff with tighter visco liquids (60 000 cps).
Also a little video from the first drives:

Next up two weeks of work in one post. Maybe not the most detailed post about this little project, but I'll try to include everything I recall. I used two weeks of my summer vacation for this.
While I was working with the diff my friend was going over the wiring loom. Shortly, the old engine loom (MS1) was removed from my other Sierra and modified to fit to this one. Sounds simple but it took quite a lot of time because over the course of time we had modified the original loom few times and now we wanted a loom that had all the bits we need, but tidy. My friend also made a whole new relay wiring for the fuel pump (bigger wires for the pump). Also new wiring for new gauges.
So now this car has Megasquirt 1 V2.2 with Ford TFi ignition and electronic boost control.
It was a easy decision to take the ECU and wiring from the other Sierra, because it'll get a whole new ECU and a loom with wasted spark at a later date anyways.
About the diff then? Of course I would need a LSD.
I started with prepping the driveshafts. I made "hybrid" driveshafts with push in joints outboard and lobro joints inboard. I used push in driveshafts that have outside diameter of 27 mm, because they have the right splines on the inboard side to fit the lobro joints. I used the smaller lobro type, IIRC the bigger ones don't fit.
First brake the push in type joint's outer shell.

Then remove the locking clip and hammer the rest of the joint out.

Now the lobro joint will slip on easily, just push it on and attach locking clip, grease some shit up and fit the rubber boots.

And now we have a driveshaft that will fit between a 7" visco diff and drum brakes. Repeat for the other side.
Next up the diff itself. I had already bought a separate visco unit with tighter visco liquids inside (60 000 cps). So I fitted this inside a regular 7" open diff.

LSD vs open diff unit:

I just swapped the drive gear from the open diff to the visco unit.
Installed the visco unit inside the 7" diff casing. Also put in the lobro stubs with c-clips to convert it to fully working LSD lobro type diff.

New oils in too.
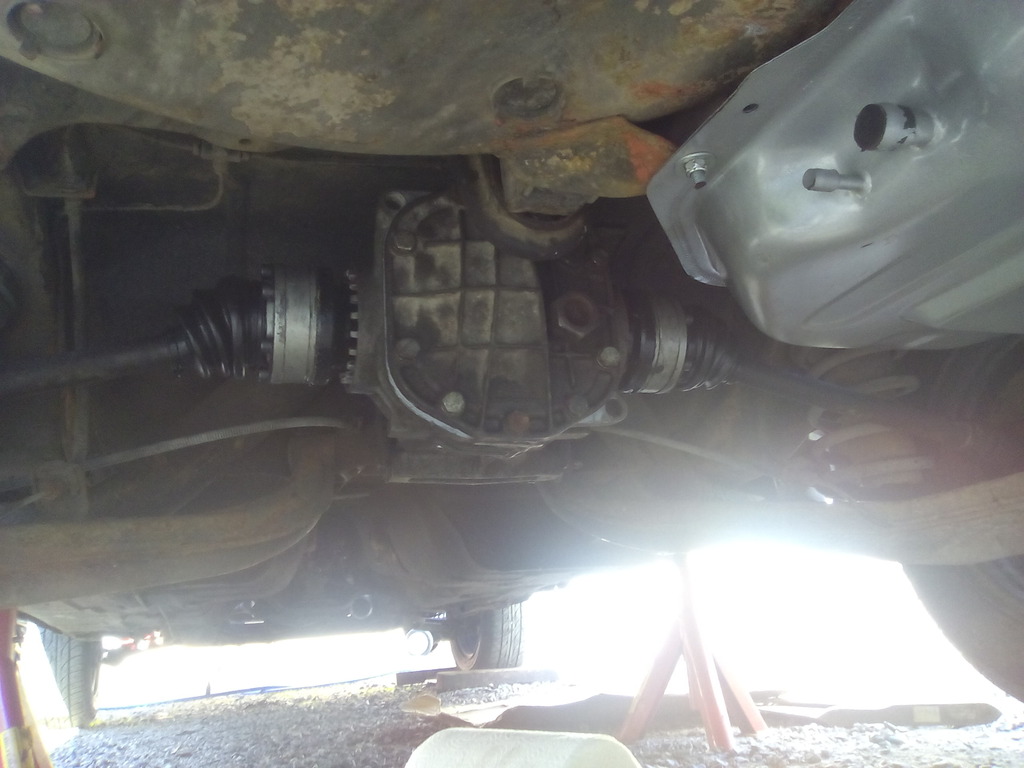
So diff was ready for installation now.
Installed. Also in picture the new injection type fuel tank.

When removing the old tank we had to brake the original bolt/nut mountings so we also welded in some new bolts to the car for easy installation.
Old and new.


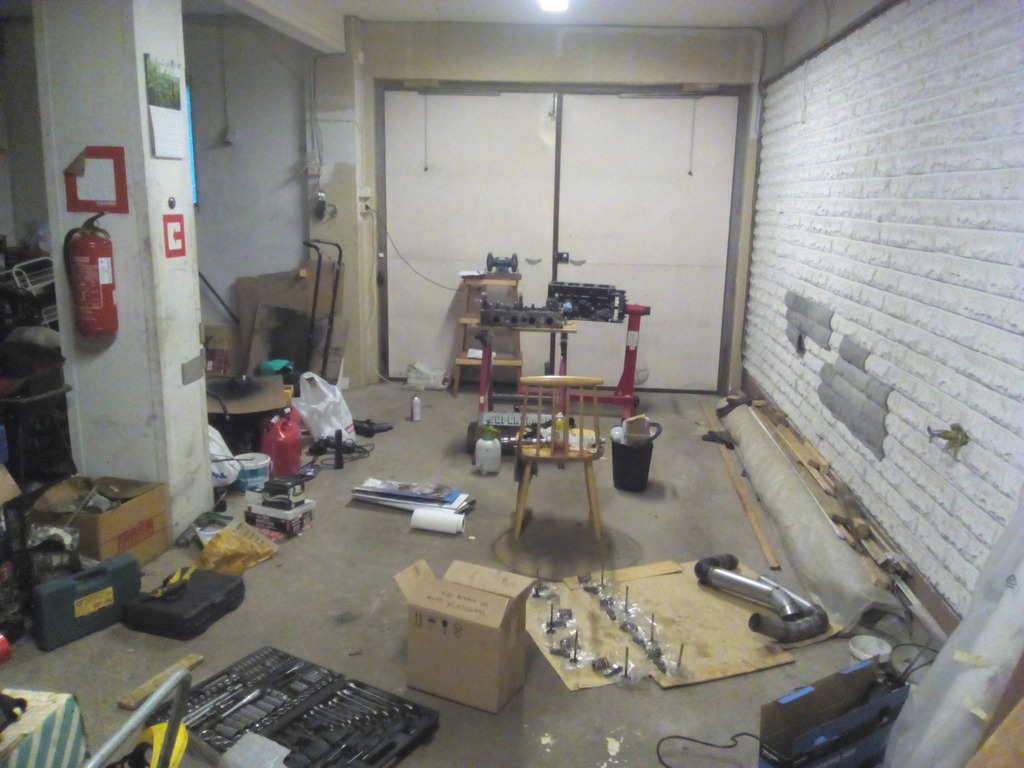
In this picture at the same time we are working on at least three things, wiring loom, swapping fuel tank and fixing the exhaust manifold. At moments there was three guys working on the same car. Without handy friends like this it would be impossible to make projects like this in a two week schedule, so big thanks to my friends! That exhaust manifold I got pretty cheaply, it was supposed to be in working condition but a friend ended up welding it a lot to get to an acceptable level! Was cracked from pretty much everywhere, both MIG and TIG were in good use here.
Intercooler.

Finding it's place.

ATMO engine still at front we dummy fitted the manifolds and turbo so we could start fitting and fabricating some piping.

Boost piping got "bead rolled" with a welder so there should be no problems with boost pipes or hoses blowing off.
Picture of exhaust.

To the outside it has a pretty sweet sound, but I gotta say after driving some I'm thinking I need to fit a different muffler at some point, because to the inside it's just too damn civilized to my taste.
We fitted new fuel lines too. Now they are 8 mm polyamide piping. Fitted a Sytec 044 fuel pump too. And a fuel filter that can take E85. Yes, it's running on ethanol now.
To the engine stuff next then.
205 block and some random micrometers.

Is crankshaft and some random pistons.

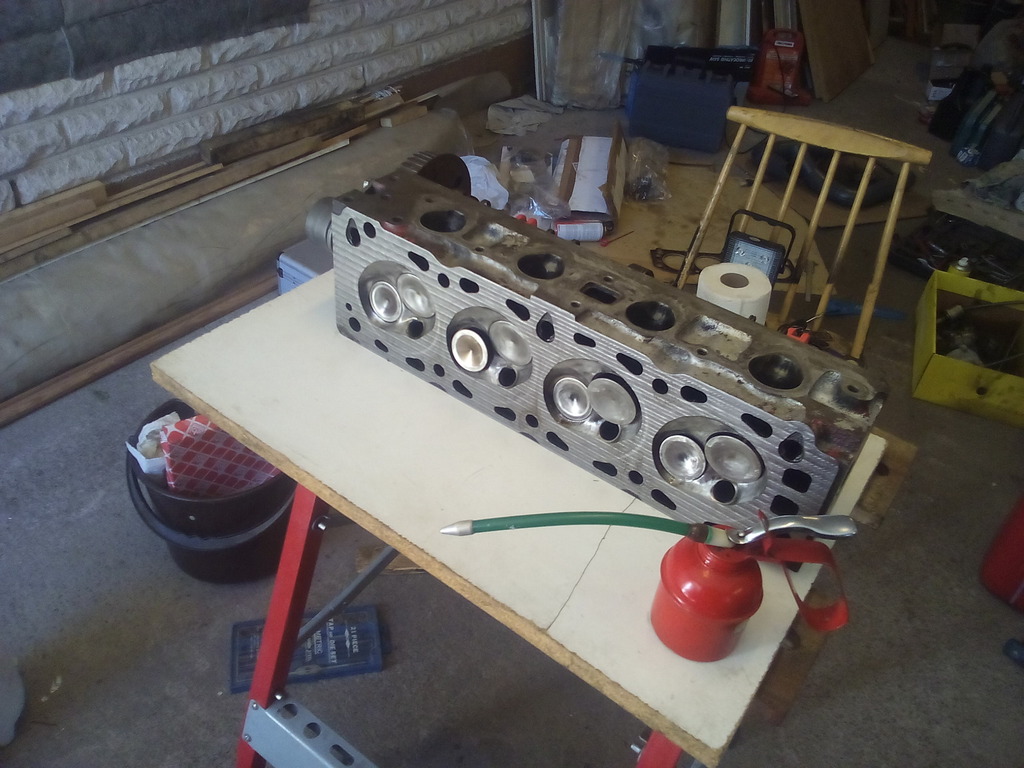
Taking head apart and some other stuff on a random picture.

Head that I'm using I got second hand. It's ported and has 44.5 intake and 38 exhaust valves. Valves stick up higher than originally, so I had to find a cam with smaller base circle. It already was fitted with a cam that sounded good on paper (Cat Cams 281 degree cam), but the valve geometry was fucked up because it had a base circle too big. Good thing I have few different cams with different base circles and different follower models laying around so I could check what combination works best. It appears that I need a cam with 27 to 28 mm base circle so I called a local rally parts seller (RallyRaceFIN) and had a conversation with the guy. I told him what kind of cam I want and he checked some base circles. I ended up ordering a Newman Cams PH4.5 and a set of hard pad followers.
Cam has 284 degrees and 12.03 mm lift intake and 11.95 exhaust. 52 degrees of overlap, so still a bit on the mild side, but yet enough to offer a nice cammed idle on a single throttle body application.
I checked the follower geometry with the new parts and it was good, also measured the valve lift and it was very close the cam's specs so I was happy.
I made three timing marks on the cam gear, for 60%, 80% and 100% exhaust valve lift from intake valve lift at TDC during the overlap. It is now in the middle setting, which is only about two degrees advanced from the cam's specification (108 ATDC vs 110). We will see what kind of timing works the best when we really get to mapping this engine.
I cc'd some combustions chambers and calculated compression ratios. For ethanol usage this head isn't the best, because the combustion chambers have been extensively modified. This means that we have to skim the head to the maximum amount and even this won't give as much CR as I would want. But it will have to do because I have two big valve heads laying around and I'm reserving the better one to the white Sierra.
Localc CNC shop skimmed the head and straightened up the block surface.


Then yet another dummy build and measuring everything up and calculate CR. CR ended up being 8.1:1 with the 4wd Cossie pistons I'll be using. Acceptable I guess.
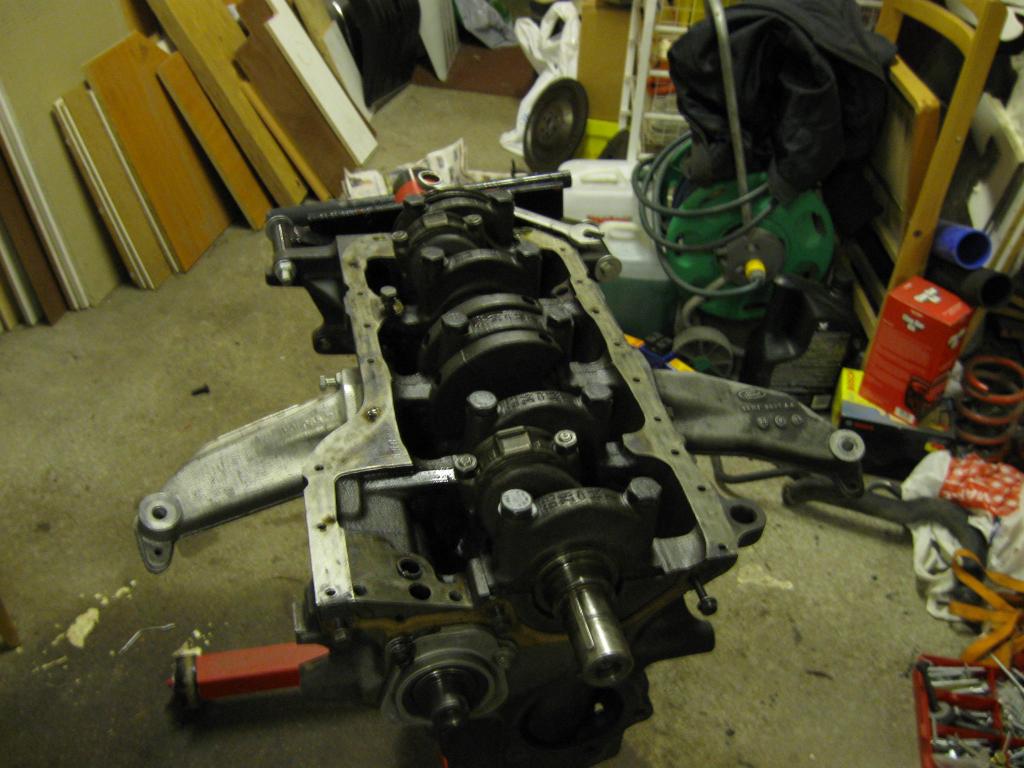
Bottom end getting assembled.

Head too.

And the whole crap.

That turbo is a Chinese T34.64 with some porting job done to the wastegate side by a friend.
ATMO getting lifted away.

Flywheel, clutch and gearbox assembled on to the turbo engine.

Flywheel is lightened. Stiffer clutch cover and a 4 plate sintered clutch. Changed the gearbox oils while at it. Also swapped the engine mounts for new ones because the old ones were loose as fuck.
Found it's home.

Next up was first start and cam break in. It all went pretty easily, my new settings for the ECU for ethanol were close enough so the car started right up and timing wasn't badly off either.
Next up was some mild break in pulls and an oil change. It's already quite peppy with the pussy boost (0.5bar). But when we get to really mapping it I'm planning on getting about 300 bhp with a conservative boost for daily driving. But map it for a bigger boost too (for special occasions of course wink wink) if the 670 cc injectors flow enough.
Sadly I had to modify the front end a bit, because full stealth mode didn't flow enough cool air to the radiator.

And yeah, those tires are 175 wide. I actually bought those steelies to get rid of the alloys so it's as much of a sleeper as possible. It's sketchy as fuck to drive and I love it.
Quick recap on the current spec.
205 block, Cossie pistons (4wd) & rods.
Ported Pinto head with 44.5 and 38 valves.
Crane single springs, hard pad followers, Newman Cams PH4.5 (284/12.03/11.95)
T34.64 turbo (from Ebay of course)
Megasquirt 1 V2.2, TFi and boost control mod.
EV14 670 cc injectors
Sytec 044 fuel pump, 8 mm plastic fuel lines.
7" LSD diff with tighter visco liquids (60 000 cps).
Also a little video from the first drives:
The following users liked this post:
XR4i - Sebastian (23-06-2016)

The following users liked this post:
BigPeBe (23-06-2016)
The following users liked this post:
BigPeBe (28-06-2016)

The following users liked this post:
BigPeBe (06-07-2016)
17-07-2016, 07:22 PM
#35
PassionFord Regular
Thread Starter
Thanks for the nice comments.
Saturday was a nice day. Swapped the radiator for Airtec 60 mm model, no heat problems anymore...
Moved the map sensor to a less vibrating place and changed the hose to a more solid one. Map signal is now nice and steady.
After these we finally got to mapping this for some decent boost. First we started with making a map for the boost controller to get steady boost curve and then we started making the spark map. Using combination of Virtual Dyno and Arse Dyno we found a spark map that reaches MBT so were very happy.
Cant give any real bhp numbers of course, but currently running 1 to 1.1 bar of boost and feels about the same than the Is Sierra did with 1.5 to 1.8 bar. So yeah big surprise the big valve head flows better...
Here's a video with some flames from the exhaust.
The following 2 users liked this post by BigPeBe:
mrbox (17-07-2016),
XR4i - Sebastian (17-07-2016)
17-07-2016, 09:12 PM
#36
Passionford Addict
Just read the full thread and loving it. Videos awesome and car looks pretty nippy so fair play to you.
And at the start of the thread you weren't going to modify it and I thought yeah I've heard this one before and look at it now
Any idea what sort of power this could be? Well and truly subscribed
And at the start of the thread you weren't going to modify it and I thought yeah I've heard this one before and look at it now
Any idea what sort of power this could be? Well and truly subscribed
The following users liked this post:
BigPeBe (17-07-2016)
17-07-2016, 09:18 PM
#37
PassionFord Regular
Thread Starter

It's somewhere around 300 bhp. With bigger injectors it should basically be a 400+ bhp capable engine without going mental with the boost, but I'm not gonna even dream about that with the current gearbox. Even 300 is probably gonna break some type 9s at some point.
18-07-2016, 06:36 PM
#38
PassionFord Regular
Thread Starter
Anyone know any good clutches that could take +400 Nm everyday and fit between Pinto and type 9?
I'm currently having a little bit of slippage on bigger gears when I hit boost and I probably have to limit the torque a bit with taking few degrees advance out from 4500 rpm or so.
The clutch is currently on 215 mm Pinto flywheel, clutch cover is stronger than stock but I don't know the exact specs and the clutch plate is a new 4 paddle sintered one. Same clutch worked with the other Sierra that made 380 or so Nm, but now I'm so close to the limit that I will probably have to change it sooner than I would like to.
18-07-2016, 07:07 PM
#39
Haha, thats a good sign that you have slippage (well, regarding to the power of course). I saw some 240mm conversions on skogenracing! Search pinto, and use google translate, it translates pretty well to english!