Yet another budget-built, Sierra Mk1 3dr ´84, "last steps" *FINISHED!*
 27-01-2013, 01:08 PM
#1
RalliArttu
Thread Starter
Hello from Finland!
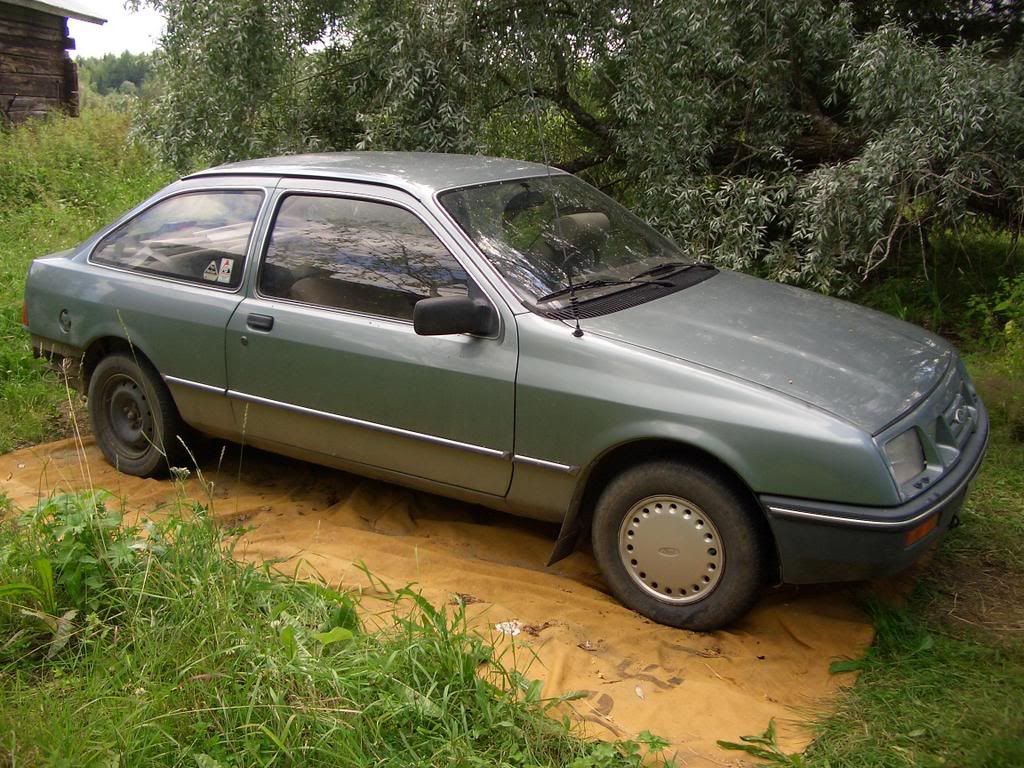
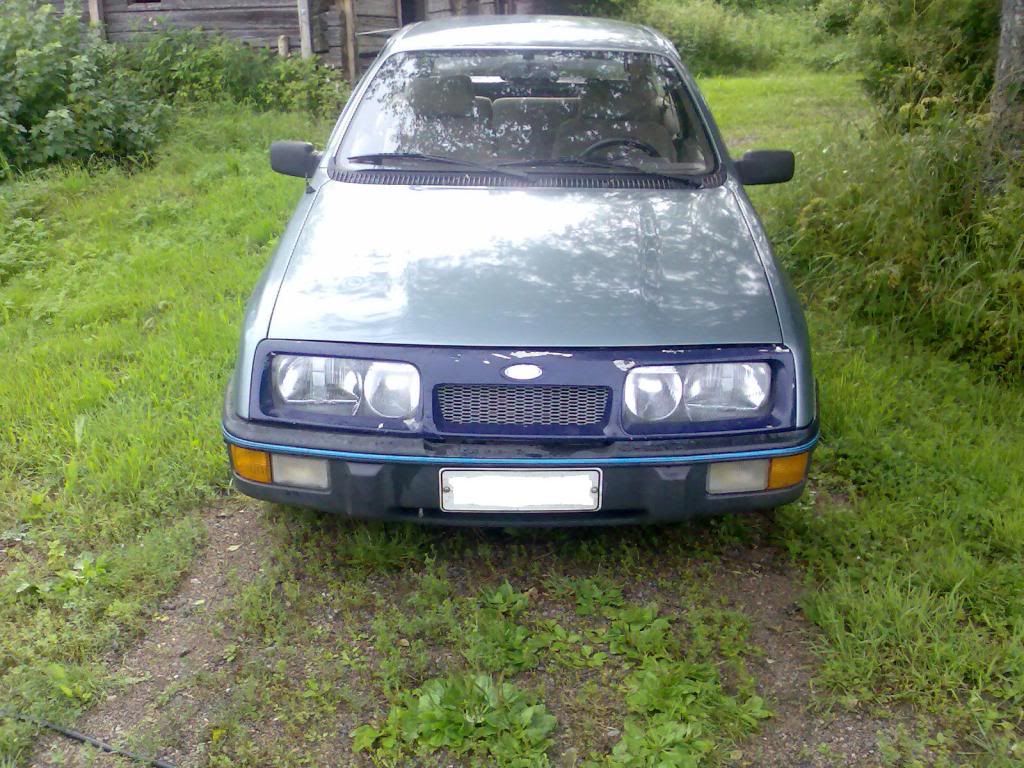
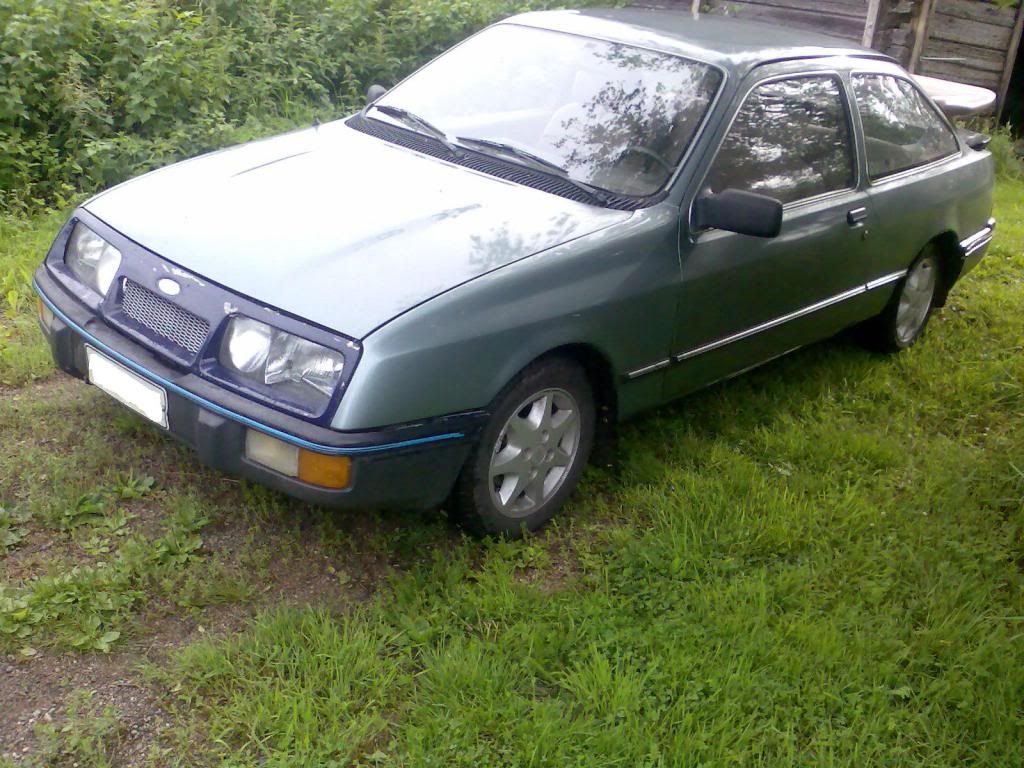
I decided to tell something about my budget-built project, which is 3-door Ford Sierra Mk1, from year 1984. I´ve bought this car in August 2007, so I have owned it almost 6 years (oh man that time goes fast...).
Car was in original shape, with 2.0 litre Pinto engine, yes with a Weber DGAV- carburettor, and drum brakes at rear. Luckily there was a five-speed-gearbox already, in good conditition, and its still there and working fine!
Few pics, before rebuilt:

Along the years, I have done many changes, to chassis, brakes, drivetrain and engine. In 2009 I installed 4wd-Cosworth rearbeam (yes a locked-diff), dicsbrakes to every corner, new -40mm lowering springs, and of course new shock absorbers. Some welding was also done for MoT.
In 2010 new master brake cylinder from 4wd cossie, was installed, so as cossie- "wing" and cossie front grill. I did also weld a new exhaust 2˝" pipe with two Simons mufflers, it´s little noisy, but does pass MoT when I put "choker" inside rear muffler Naturally on the street I take it away
In 2011 only succesful mod was the installation of new yellow bushes to front tracking arms and anti-rollbar.
2012 was really a year of change, because in that year I rebuilted the engine. Crankshaft was grinded to first undersize (dunno is it a right term?), cylinders were honed. I used new bearings, piston rings ja high pressure oil pump in re-assembly.
Pics about engine rebuilt:

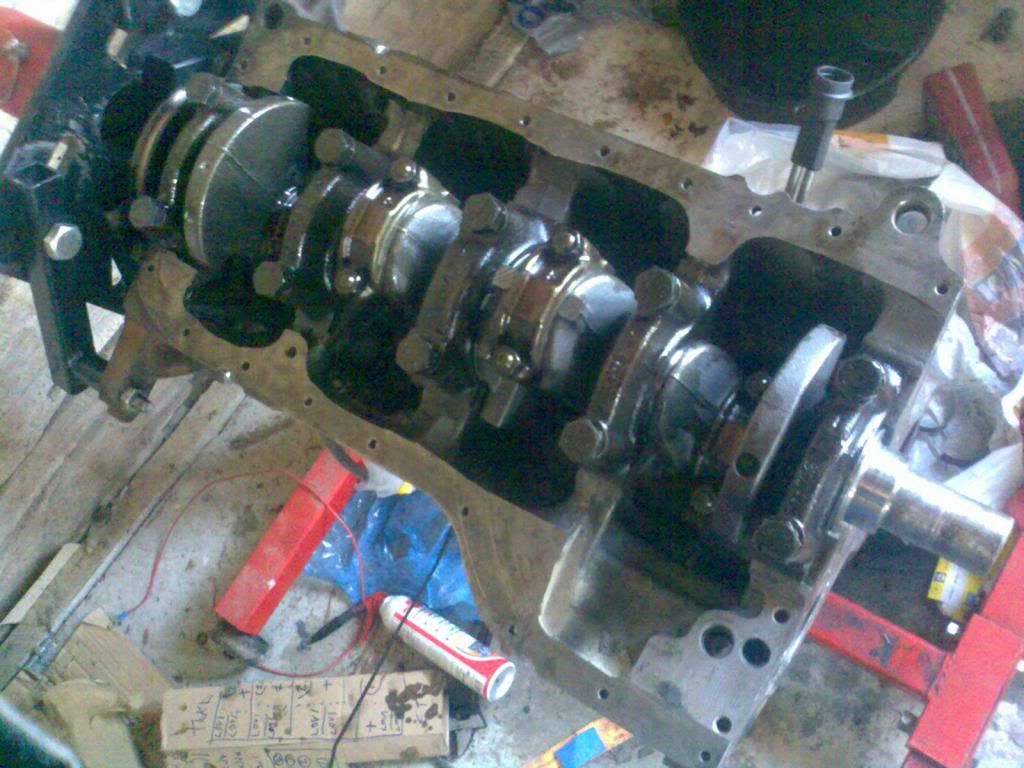

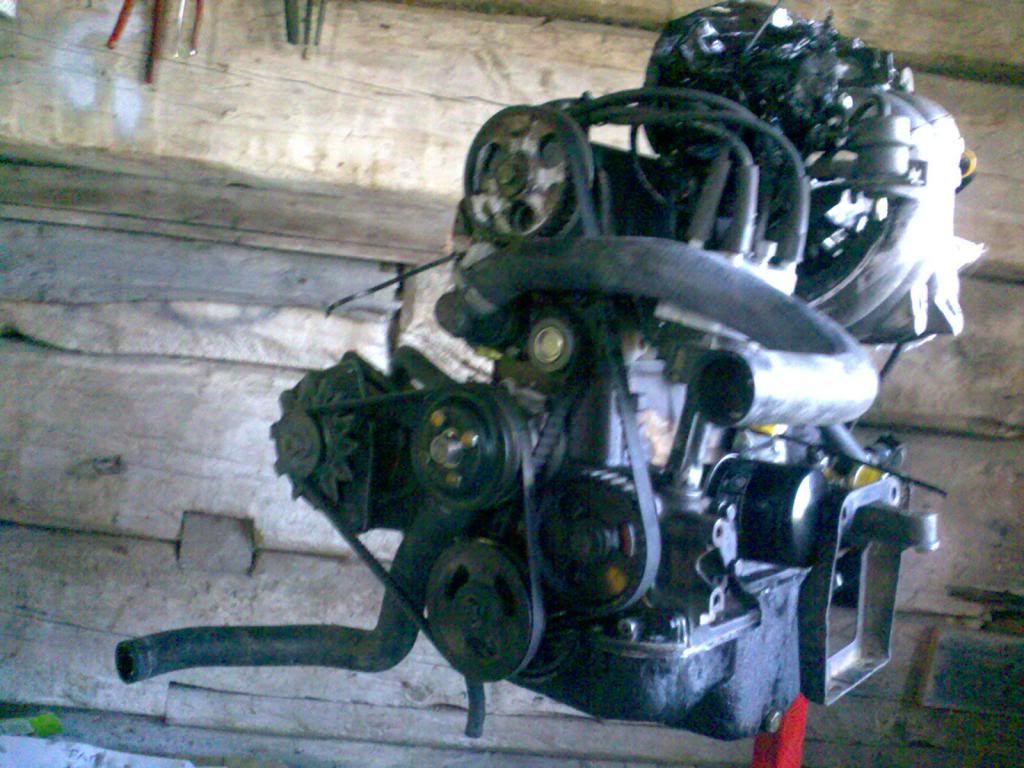

Cylinder head was made professional, hard pad followers and and Burton Bf134 "mild" camshaft were installed. The head itself is from 1.6 litre Taunus, so it gives very high compression ratio
The fuel system is totally re-done, I´ve changed injection model fuel tank, fuel lines, and inlet manifold. While driving I´m monitoring engine managment systems work with Innovate MTX-L wideband set. In other words I see AFR-value all the time.

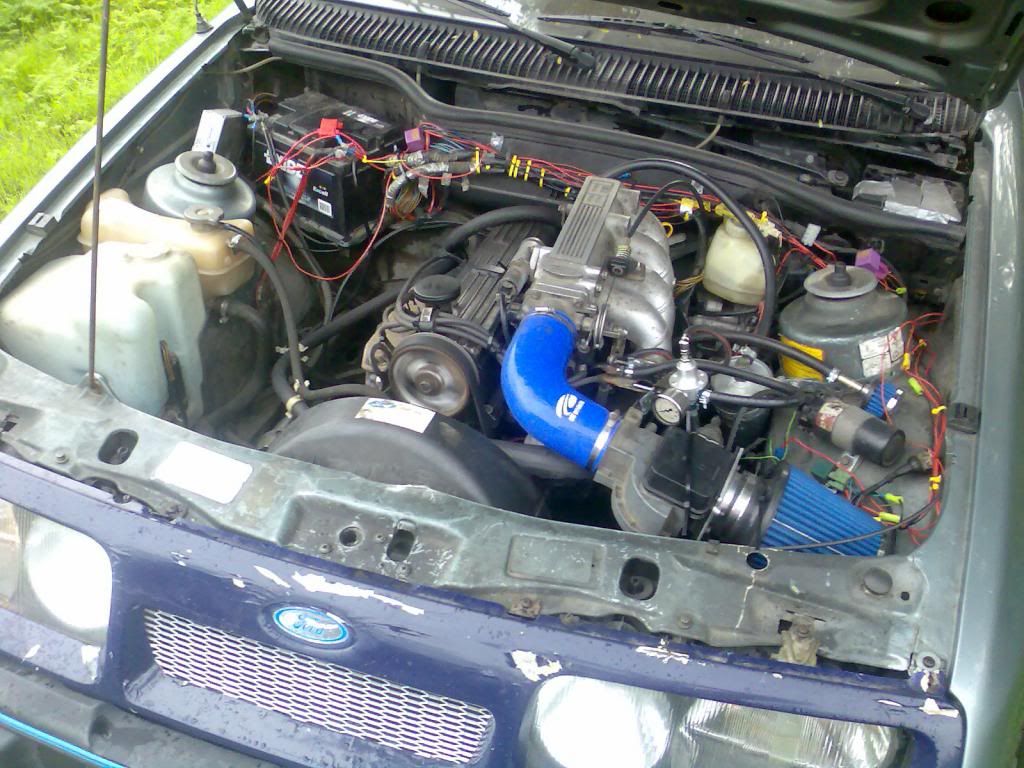
As you can see it´s running well!
In this point I have to remind, that except the cylinder head I´ve done all the jobs by myself.
Now Sierra looks like in these picrutes. Yeah, it needs some bodywork, and there are some upgrades what I will do during this sping.


For example there is some welding to do, allthough that shouldn´t be a problem to me, cause I´ve passed IIW (International Institute of Welding) tests and I do have education for welding...
AND SORRY ABOUT MY VERY BAD ENGLISHHHH.
I decided to tell something about my budget-built project, which is 3-door Ford Sierra Mk1, from year 1984. I´ve bought this car in August 2007, so I have owned it almost 6 years (oh man that time goes fast...).
Car was in original shape, with 2.0 litre Pinto engine, yes with a Weber DGAV- carburettor, and drum brakes at rear. Luckily there was a five-speed-gearbox already, in good conditition, and its still there and working fine!
Few pics, before rebuilt:
Along the years, I have done many changes, to chassis, brakes, drivetrain and engine. In 2009 I installed 4wd-Cosworth rearbeam (yes a locked-diff), dicsbrakes to every corner, new -40mm lowering springs, and of course new shock absorbers. Some welding was also done for MoT.
In 2010 new master brake cylinder from 4wd cossie, was installed, so as cossie- "wing" and cossie front grill. I did also weld a new exhaust 2˝" pipe with two Simons mufflers, it´s little noisy, but does pass MoT when I put "choker" inside rear muffler
In 2011 only succesful mod was the installation of new yellow bushes to front tracking arms and anti-rollbar.
2012 was really a year of change, because in that year I rebuilted the engine. Crankshaft was grinded to first undersize (dunno is it a right term?), cylinders were honed. I used new bearings, piston rings ja high pressure oil pump in re-assembly.
Pics about engine rebuilt:
Cylinder head was made professional, hard pad followers and and Burton Bf134 "mild" camshaft were installed. The head itself is from 1.6 litre Taunus, so it gives very high compression ratio
The fuel system is totally re-done, I´ve changed injection model fuel tank, fuel lines, and inlet manifold. While driving I´m monitoring engine managment systems work with Innovate MTX-L wideband set. In other words I see AFR-value all the time.
As you can see it´s running well!
In this point I have to remind, that except the cylinder head I´ve done all the jobs by myself.
Now Sierra looks like in these picrutes. Yeah, it needs some bodywork, and there are some upgrades what I will do during this sping.
For example there is some welding to do, allthough that shouldn´t be a problem to me, cause I´ve passed IIW (International Institute of Welding) tests and I do have education for welding...
AND SORRY ABOUT MY VERY BAD ENGLISHHHH.
Last edited by RalliArttu; 29-07-2013 at 01:10 PM.
 27-01-2013, 04:42 PM
#4
Fart of the Purniture
Welcome, always have time for a read on Sierra projects
Your English is written better than some English people - so don't ever apologize for that.
Nice work too
Your English is written better than some English people - so don't ever apologize for that.
Nice work too
 27-01-2013, 06:04 PM
#6
RalliArttu
Thread Starter
Thanks from your feedback guys
In august I did already some welding job.
There are few pics of holes...
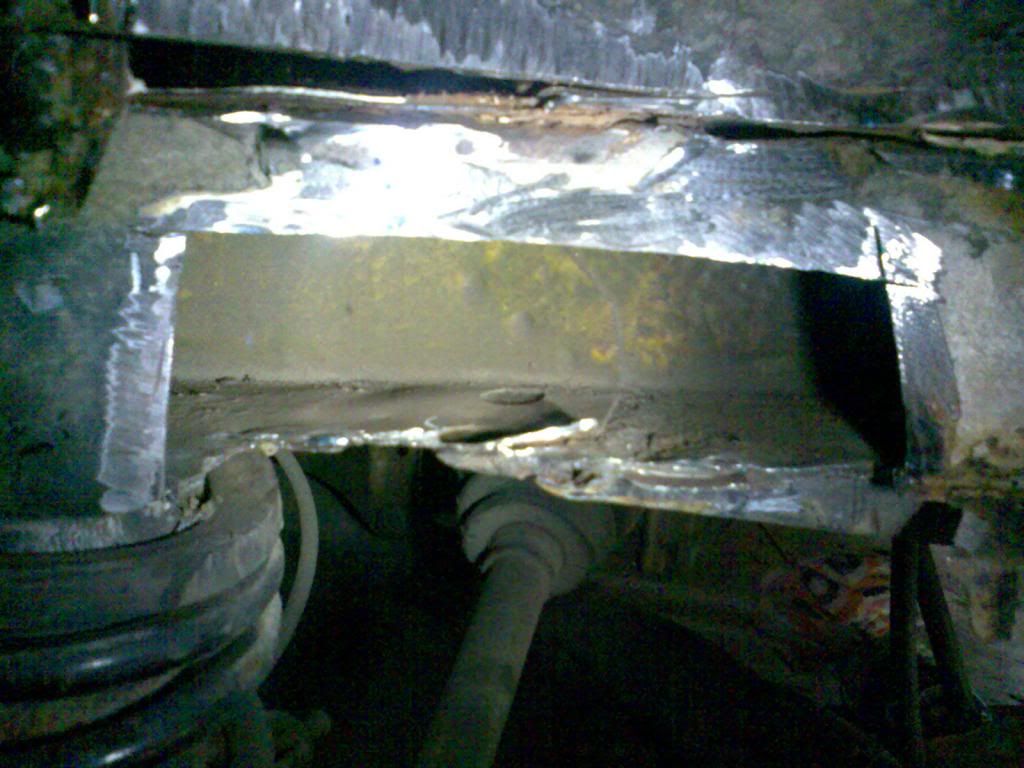
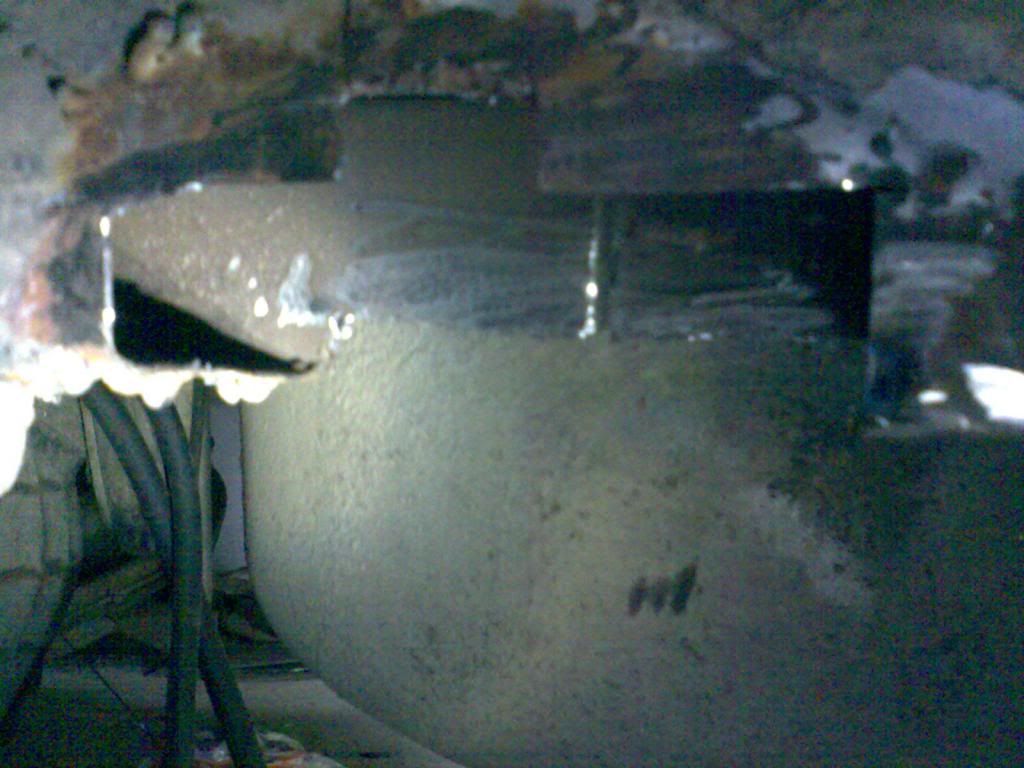
…and then some pics after MIG-therapy
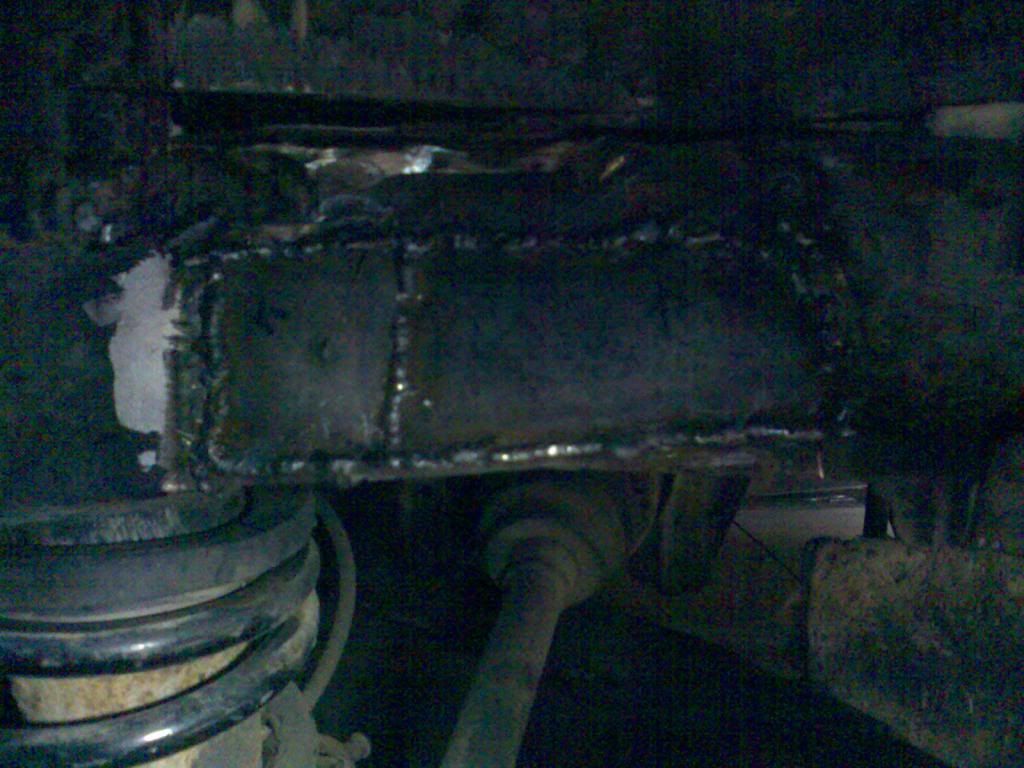

The joints were made by “butt-weld”- style so those places wont rust immediately again. And yes welds were made with Esab, Kemppi is just too much for my wallet...
Last weeks I also changed a new heater matrix, and I adjusted/checked valve clearences. Tomorrow a new stiffer front anti-rollbar (from V6 models) will find its place underneath Sierras suspension.
If I remember, I´ll add some pics of anti-rollbar installation.
In august I did already some welding job.
There are few pics of holes...
…and then some pics after MIG-therapy
The joints were made by “butt-weld”- style so those places wont rust immediately again. And yes welds were made with Esab, Kemppi is just too much for my wallet...
Last weeks I also changed a new heater matrix, and I adjusted/checked valve clearences. Tomorrow a new stiffer front anti-rollbar (from V6 models) will find its place underneath Sierras suspension.
If I remember, I´ll add some pics of anti-rollbar installation.
Last edited by RalliArttu; 27-01-2013 at 06:08 PM.
28-01-2013, 12:21 PM
#7
RalliArttu
Thread Starter
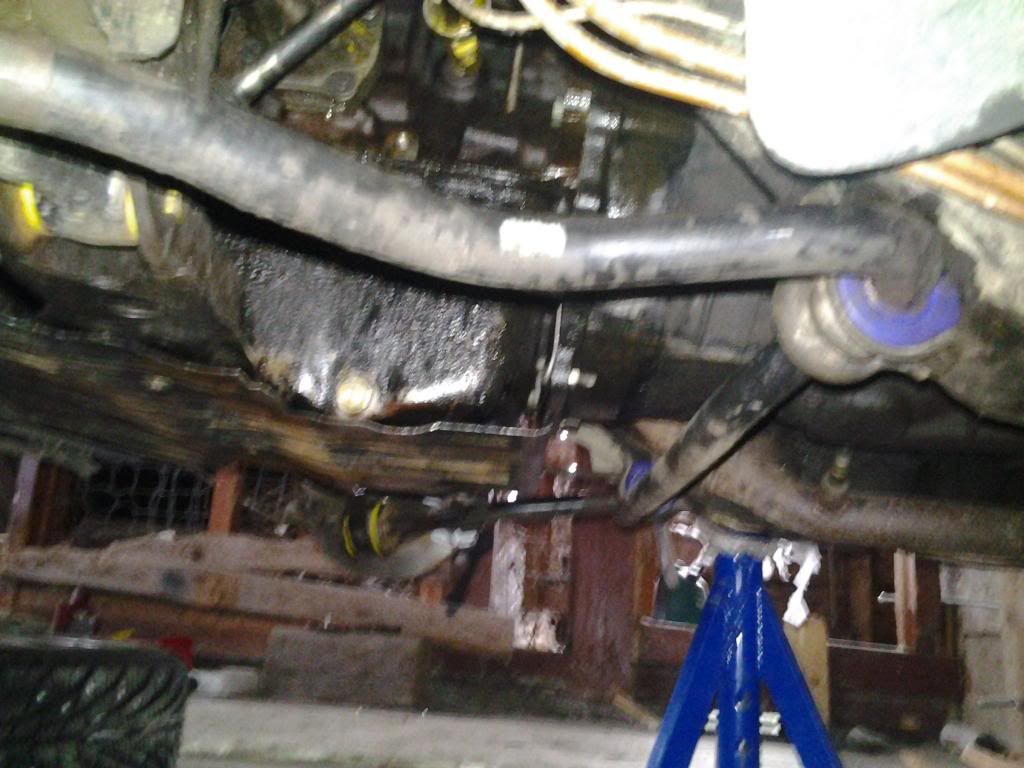
I installed new stiffer anti-rollbar as I promised yesterday. The original was 22mm, so this mod should give a very good frontend! Also new Powerflex pushes are in the picture
Trending Topics
13-02-2013, 12:34 PM
#9
RalliArttu
Thread Starter

Yesterday I bleeded brakes with assistance of my friend. There is a picture of that cossie-master-cylinder.

I did also by a performance exhaust manifold.

But yes, it´s a do-it-yourself model, so some welding needs to be done.
Last edited by RalliArttu; 13-02-2013 at 03:37 PM.
13-02-2013, 01:32 PM
#10
Fart of the Purniture
You have been busy
I cannot see your video as work does not permit this
I wish I could weld my own car, it is too much for my wallet also
Keep up the great work, looks like you have more fun with the manifold!
I cannot see your video as work does not permit this
I wish I could weld my own car, it is too much for my wallet also
Keep up the great work, looks like you have more fun with the manifold!
13-02-2013, 03:32 PM
#11
RalliArttu
Thread Starter
Yeah, manifold needs little work to be fitted in But it should be quite easy, because I got muck better welding equipment now, than had three years ago when I weld the exhaust pipe together.
This was what I had long time ago:

And the last welds were done with this:
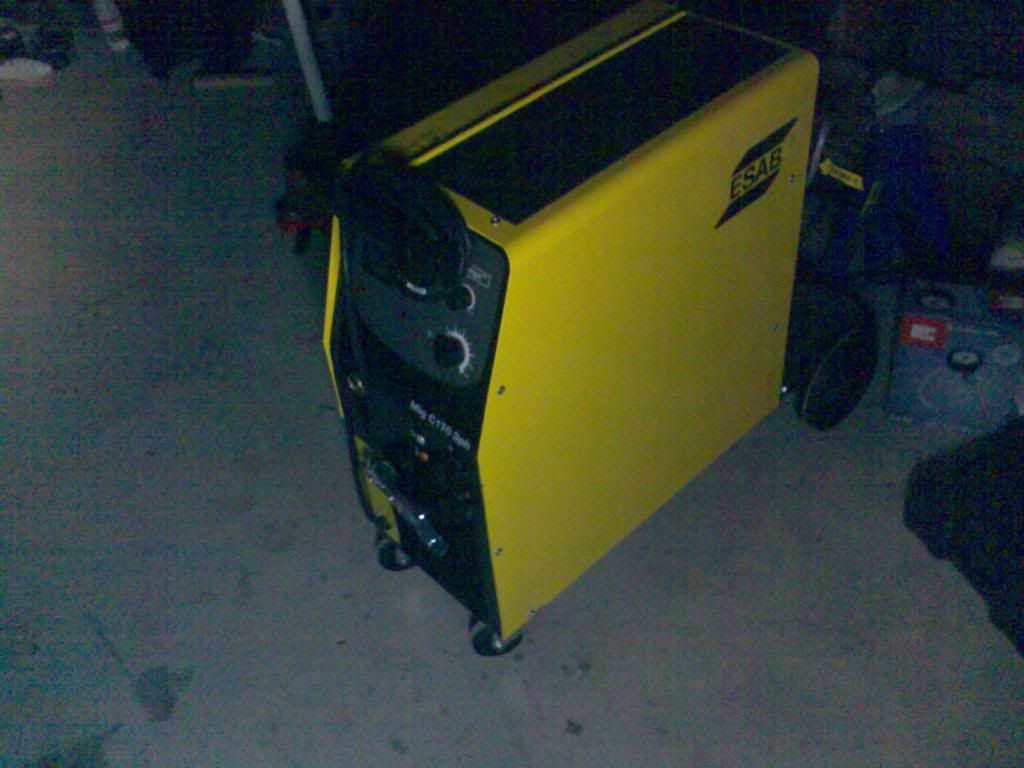
As you can see there is a great difference. The Esab has maximum 170A current, so even thicker metals will be melt As a shielding gas I use carbonoxyde (CO2).
This was what I had long time ago:
And the last welds were done with this:
As you can see there is a great difference. The Esab has maximum 170A current, so even thicker metals will be melt
Last edited by RalliArttu; 13-02-2013 at 03:36 PM.
11-03-2013, 01:50 PM
#12
RalliArttu
Thread Starter
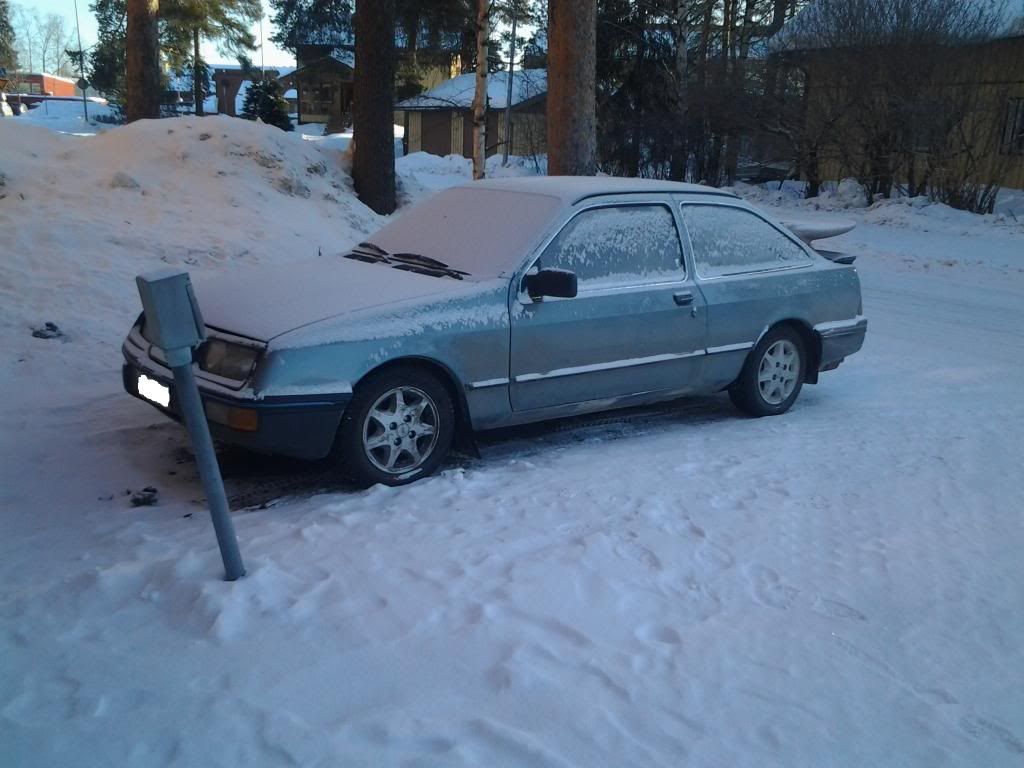
Already last week I took Sierra on road again, more like on icy-road
I also adjusted the fuel-air-mixture, with help of innovate-wide band. I did tighten the spring inside MAF and raise fuel pressure. It´s still not perfect, but doesn´t go so rich on acceleration or too lean in idle.
 19-03-2013, 02:35 PM
#14
RalliArttu
Thread Starter
I made short video, with my friends HD-camera, as you see there is a little drift in beginning
BTW Clock isn´t showing right time, because this viedo was took today..
Last edited by RalliArttu; 19-03-2013 at 02:36 PM.
17-04-2013, 04:00 PM
#15
PassionFord Regular
Hello!
I see on the first picture you have the mask with the extra lights, I believe this is the mask Hella made? Do you have any better pictures of it?
I'm asking because I'm considering buying one and using the extra light holes as an air feed for my turbo pinto, but I dunno if the holes line up decently so I'm wondering how much of a work it would be to route the air to the air filter and possibly to the intercooler.
BTW nice work, I used to have a very similar spec pinto in my ex-daily drive, it makes for a nice "torqy" engine for every day usage. Still have the head in my garage waiting for a car and block to go on top of.
18-04-2013, 01:19 PM
#17
RalliArttu
Thread Starter
I got some pics, today already, if these were what you meant...?


It´s pretty good condition, and I don´t propably install it back anymore, it just too grandpa for my taste... Unless I don´t change my mind some day


It´s pretty good condition, and I don´t propably install it back anymore, it just too grandpa for my taste... Unless I don´t change my mind some day
18-04-2013, 02:12 PM
#18
PassionFord Regular
Thanks for the pictures, they help a bit. I'll be going to see the car over the weekend and check under the hood if there is any way of routing the air from those holes.
21-04-2013, 02:21 PM
#19
RalliArttu
Thread Starter
I´ve welded few places, but my shielding gas run out, and I need to wait at least a week while it´s beeing filled
Anyway, today I managed to replace after market cambelt with original (Ford signed) one. Because belt was off, I also installed new tensioner and the belt for alternator.
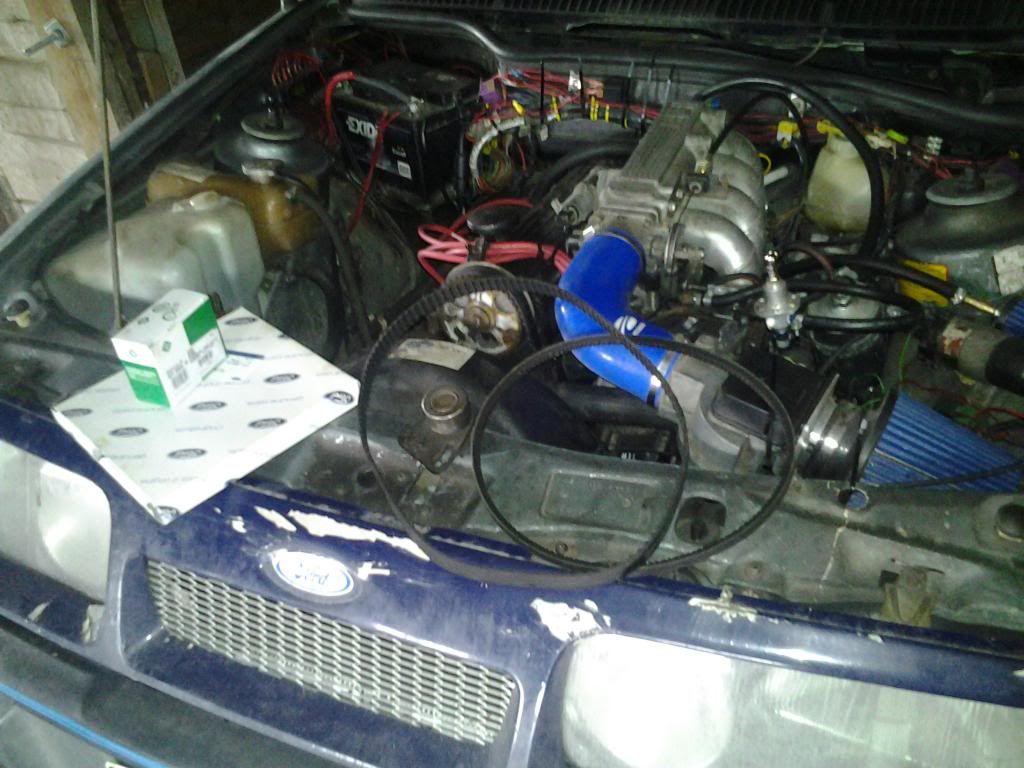
Gotta hope that I got my shielding gas bottle back next week, because this delay is already pissing me off...
Anyway, today I managed to replace after market cambelt with original (Ford signed

Gotta hope that I got my shielding gas bottle back next week, because this delay is already pissing me off...
22-04-2013, 12:32 PM
#21
RalliArttu
Thread Starter
Yeah, one the cars last steps is the paint job, and if everything goes well, I´ll do it in this summer. So bumpers, front grille and cossie wing are coming on same color with rest of the body. And yes this ain´t full cossie replica, I call it more like "iS- replica"...
01-05-2013, 05:10 PM
#22
RalliArttu
Thread Starter
Last weekend I got my gas bottle back, and that meant green light for welding again.

There were three tis kind of holes in the joint of floor and sideskirt/panel.

One of previos type of holes fixed.

This how I made one spot. The inner side from thicker metal...

...and the out side from thinner sheet.

There was also a big hole in passengers floor. Some the joints were fine but some of them became pretty nasty, cause my lovely Esabs wire feed wasn´t partly working properly One of the causes might be the wire itself, because it´s two years old...
Today I started to put the interior back together. Only front seats are remaining, but I will install them tomorrow. Hopefully this car will be rolling in the streets next week, hopefully.

There were three tis kind of holes in the joint of floor and sideskirt/panel.

One of previos type of holes fixed.

This how I made one spot. The inner side from thicker metal...

...and the out side from thinner sheet.

There was also a big hole in passengers floor. Some the joints were fine but some of them became pretty nasty, cause my lovely Esabs wire feed wasn´t partly working properly
One of the causes might be the wire itself, because it´s two years old...Today I started to put the interior back together. Only front seats are remaining, but I will install them tomorrow. Hopefully this car will be rolling in the streets next week, hopefully.
02-05-2013, 06:09 PM
#23
RalliArttu
Thread Starter
Put the interior back together today, and I also made one mile test drive, everything works fine. I guess it might be wise to change sparkplugs. They gotta be pretty dirty, cause I did run with a quite rich mixture (afr was like 11-12) in last fall...
12-05-2013, 07:12 AM
#24
RalliArttu
Thread Starter
Right now I got a problem, my clutch has started to slip over 4000rpm with 3rd and 4th gear Well what makes it so big problem? Let me explain.. The clutch I use now have been balanced as a same "package" with crankshaft, flywheel and cam pulley. Well, as you may guess the balance gonna go atleast wrong when change a new one, which I have to do, if I´m going to drive anymore in this summer. I propably need to ask more info from the machinery shop guy who did the balancing job, that how bad is this clutch change for my engine
When I get to garage today, I´ll take exhaust, and driveshaft away, so the gearbox will faster to pull backwards, as soon as the clutch parts arrive
Well what makes it so big problem? Let me explain.. The clutch I use now have been balanced as a same "package" with crankshaft, flywheel and cam pulley. Well, as you may guess the balance gonna go atleast wrong when change a new one, which I have to do, if I´m going to drive anymore in this summer. I propably need to ask more info from the machinery shop guy who did the balancing job, that how bad is this clutch change for my engine When I get to garage today, I´ll take exhaust, and driveshaft away, so the gearbox will faster to pull backwards, as soon as the clutch parts arrive
19-05-2013, 10:10 PM
#25
PassionFord Regular
Are you sure the clutch itself is faulty? I used to have similar problem with my ex Sierra, but it was the automatic clutch cable adjuster on the pedal which didn't adjust properly without manual help and this caused the clutch to be little pressed all the time.
20-05-2013, 12:46 PM
#26
RalliArttu
Thread Starter
Well I´m not 100% sure, but the cable itself is new, and the "halfmoon" in pedal was in good condition ("teeths" were solid). Or what did you mean with manual help?
(BTW Except the plate itself, I´ve got all the other clutch parts waiting and ready to install)
(BTW Except the plate itself, I´ve got all the other clutch parts waiting and ready to install)
06-06-2013, 02:00 PM
#28
RalliArttu
Thread Starter
New clutch parts has been installed and I´ve driven the most happiest 80 kilometers in this summer The arrival of the plate itself took almost two weeks, cause I order it all the way from Germany... It was half of the price, that it was in Finland, shipping inculded

A real pain in the ass, was to get spigot bearing off from crank shaft, well I managed to do it with a little modified internal extractor.

And there they are, new clutch parts, made by Sahcs.
I also gave myself a deadline for the paint job, and it´s next month

A real pain in the ass, was to get spigot bearing off from crank shaft, well I managed to do it with a little modified internal extractor.

And there they are, new clutch parts, made by Sahcs.
I also gave myself a deadline for the paint job, and it´s next month
23-06-2013, 07:08 PM
#29
RalliArttu
Thread Starter
I started to work on with exhaust manifold...

At first (after couple of fittings) I did some welding, also made hole for lambda-sensor.

There´s a layout pic, before installation.

...and there it is! I do need to modify the rest of exhaust pipe too, later.
But there is some misfortune around my Sierra too, and it looks like that left side front wheel bearing is gone... I noticed that when shook the wheel. Well I did the same job on the right side few years ago, so not a big deal. Just gotta hope that there is SKF- bearing kits in local dealer, cause I don´t wanna use "neverheard"- stuff.

At first (after couple of fittings) I did some welding, also made hole for lambda-sensor.

There´s a layout pic, before installation.

...and there it is!
But there is some misfortune around my Sierra too, and it looks like that left side front wheel bearing is gone... I noticed that when shook the wheel. Well I did the same job on the right side few years ago, so not a big deal. Just gotta hope that there is SKF- bearing kits in local dealer, cause I don´t wanna use "neverheard"- stuff.
14-07-2013, 01:27 PM
#30
RalliArttu
Thread Starter
After I changed wheel bearing I drove a lot, sideways too, but then I decided really took those last steps on this project, paint job, oh yeah!!

At first I made protection to parts of car that are not being painted.

Then it was time to fix a nasty dent on rear hatch.

There was a crack on front bumper, so I fixed with (what else can it be than...) fibre glass.

Also the front grille, needed some fibre glass on its back.

And this is the look of bumper right before plastic primer. See, no crack!

Then it was time for epoxy primer layer.
I got few problems with spray gun and acryl filler, the gun itself jammed Actually I just forgot to add acryl thinner in the mixture

So by this far boot and that enormous rear wing, had filler layer over them.

As well as bumpers too.

The fromt grille took lots of work, cause it did had a crappy paint by its earlier owner.
And finally, some pics of new paint, with a clear coat on it, your welcome guys:


Up next I just need to do a little weld on front bumper mounting, put car back together and enjoy the summer again (Well maybe there are few other thing that needs to be done but...)

At first I made protection to parts of car that are not being painted.

Then it was time to fix a nasty dent on rear hatch.

There was a crack on front bumper, so I fixed with (what else can it be than...) fibre glass.

Also the front grille, needed some fibre glass on its back.

And this is the look of bumper right before plastic primer. See, no crack!

Then it was time for epoxy primer layer.
I got few problems with spray gun and acryl filler, the gun itself jammed
Actually I just forgot to add acryl thinner in the mixture
So by this far boot and that enormous rear wing, had filler layer over them.

As well as bumpers too.

The fromt grille took lots of work, cause it did had a crappy paint by its earlier owner.
And finally, some pics of new paint, with a clear coat on it, your welcome guys:


Up next I just need to do a little weld on front bumper mounting, put car back together and enjoy the summer again
(Well maybe there are few other thing that needs to be done but... 16-07-2013, 04:29 PM
#32
RalliArttu
Thread Starter
Yes, I put the car back together today, more pics when rolling on road again, BUT I´ll hope these two photos give your guys a hint, what I´m going for...


Some more on sunday.


Some more on sunday.
23-07-2013, 01:30 PM
#34
RalliArttu
Thread Starter
I supposed to upload pics of painted car, but that´s when it hits you...

..or actually I hit, to Opel (Vauxhall in England) Omega... Well it wasn´t a bad "crash" after all. I´ve bought some plastic kit. I have rest of the basic stuff already, primer, paint, glass fibre kit etc... Allthough I gotta be really lucky, first day on road after paint job, and afternoon there´s collision
I´ll propably start repair job tomorrow, and MAYBE next week I got some photos of finished Sierra
 28-07-2013, 08:34 AM
#36
RalliArttu
Thread Starter
Fixing up my Sierra after collision...

Ready for primer and paint.

And there it is color and clear coat layer on it.

Back together. Of course it doesn´t look as good as before this accident, but it´s more solid now Once again I´m ready to floor throttle and doing some opposite lock

Ready for primer and paint.

And there it is color and clear coat layer on it.

Back together. Of course it doesn´t look as good as before this accident, but it´s more solid now
29-07-2013, 01:08 PM
#38
RalliArttu
Thread Starter
Yeah I´ll try to be more careful in the future Well actually I did drove a gravel road nearby, with speed of 100kph, rearend drifting, to get some confidence back, but yes I´m gonna be careful for on
All right, car is painted and working, so as Beavis and Butthead would say: "we´re like done", and that´s right, cause the last steps of this project have been taken now. And here are the famous last pictures:


Up next I´m gonna just drive, enjoy and repair IF necessary. In finland we say that this kinda project isn´t ever finished, and I may do few things on the future:
-Install Megasquirt engine managment, or even install a new cylinder head with larger valves, who knows?
- Put a pair of better front seats, Recaro or some after market models
-Install electric fans to radiator
Allthough, there is big possibilty that I´ll buy myself a new project (Mk1 of course), and this one finds a new happy owner.
Anyway, it was very nice to tell you guys about my project here on PF, and when I get next one I´ll definately report here. Thanks for your company!

Thread
Thread Starter
Forum
Replies
Last Post
nico12
Restorations, Rebuilds & Projects.
6
31-12-2015 04:42 PM
Adam Graham
Restorations, Rebuilds & Projects.
7
06-09-2015 06:04 AM

