Project Fiesta ST500 Evolution
 24-06-2013, 09:21 AM
#81
Regular Contributor
Thread Starter

Join Date: Mar 2012
Location: Doncaster
Posts: 241
Likes: 0
Received 0 Likes
on
0 Posts
A little more work from the weekend then. I've been working on the rear shock turrets. Not really made that much progress, as most of the time was spent working things out and checking everything over and over again. And then checking again just to make sure! I'll only get one shot at getting this right, so have to be sure.
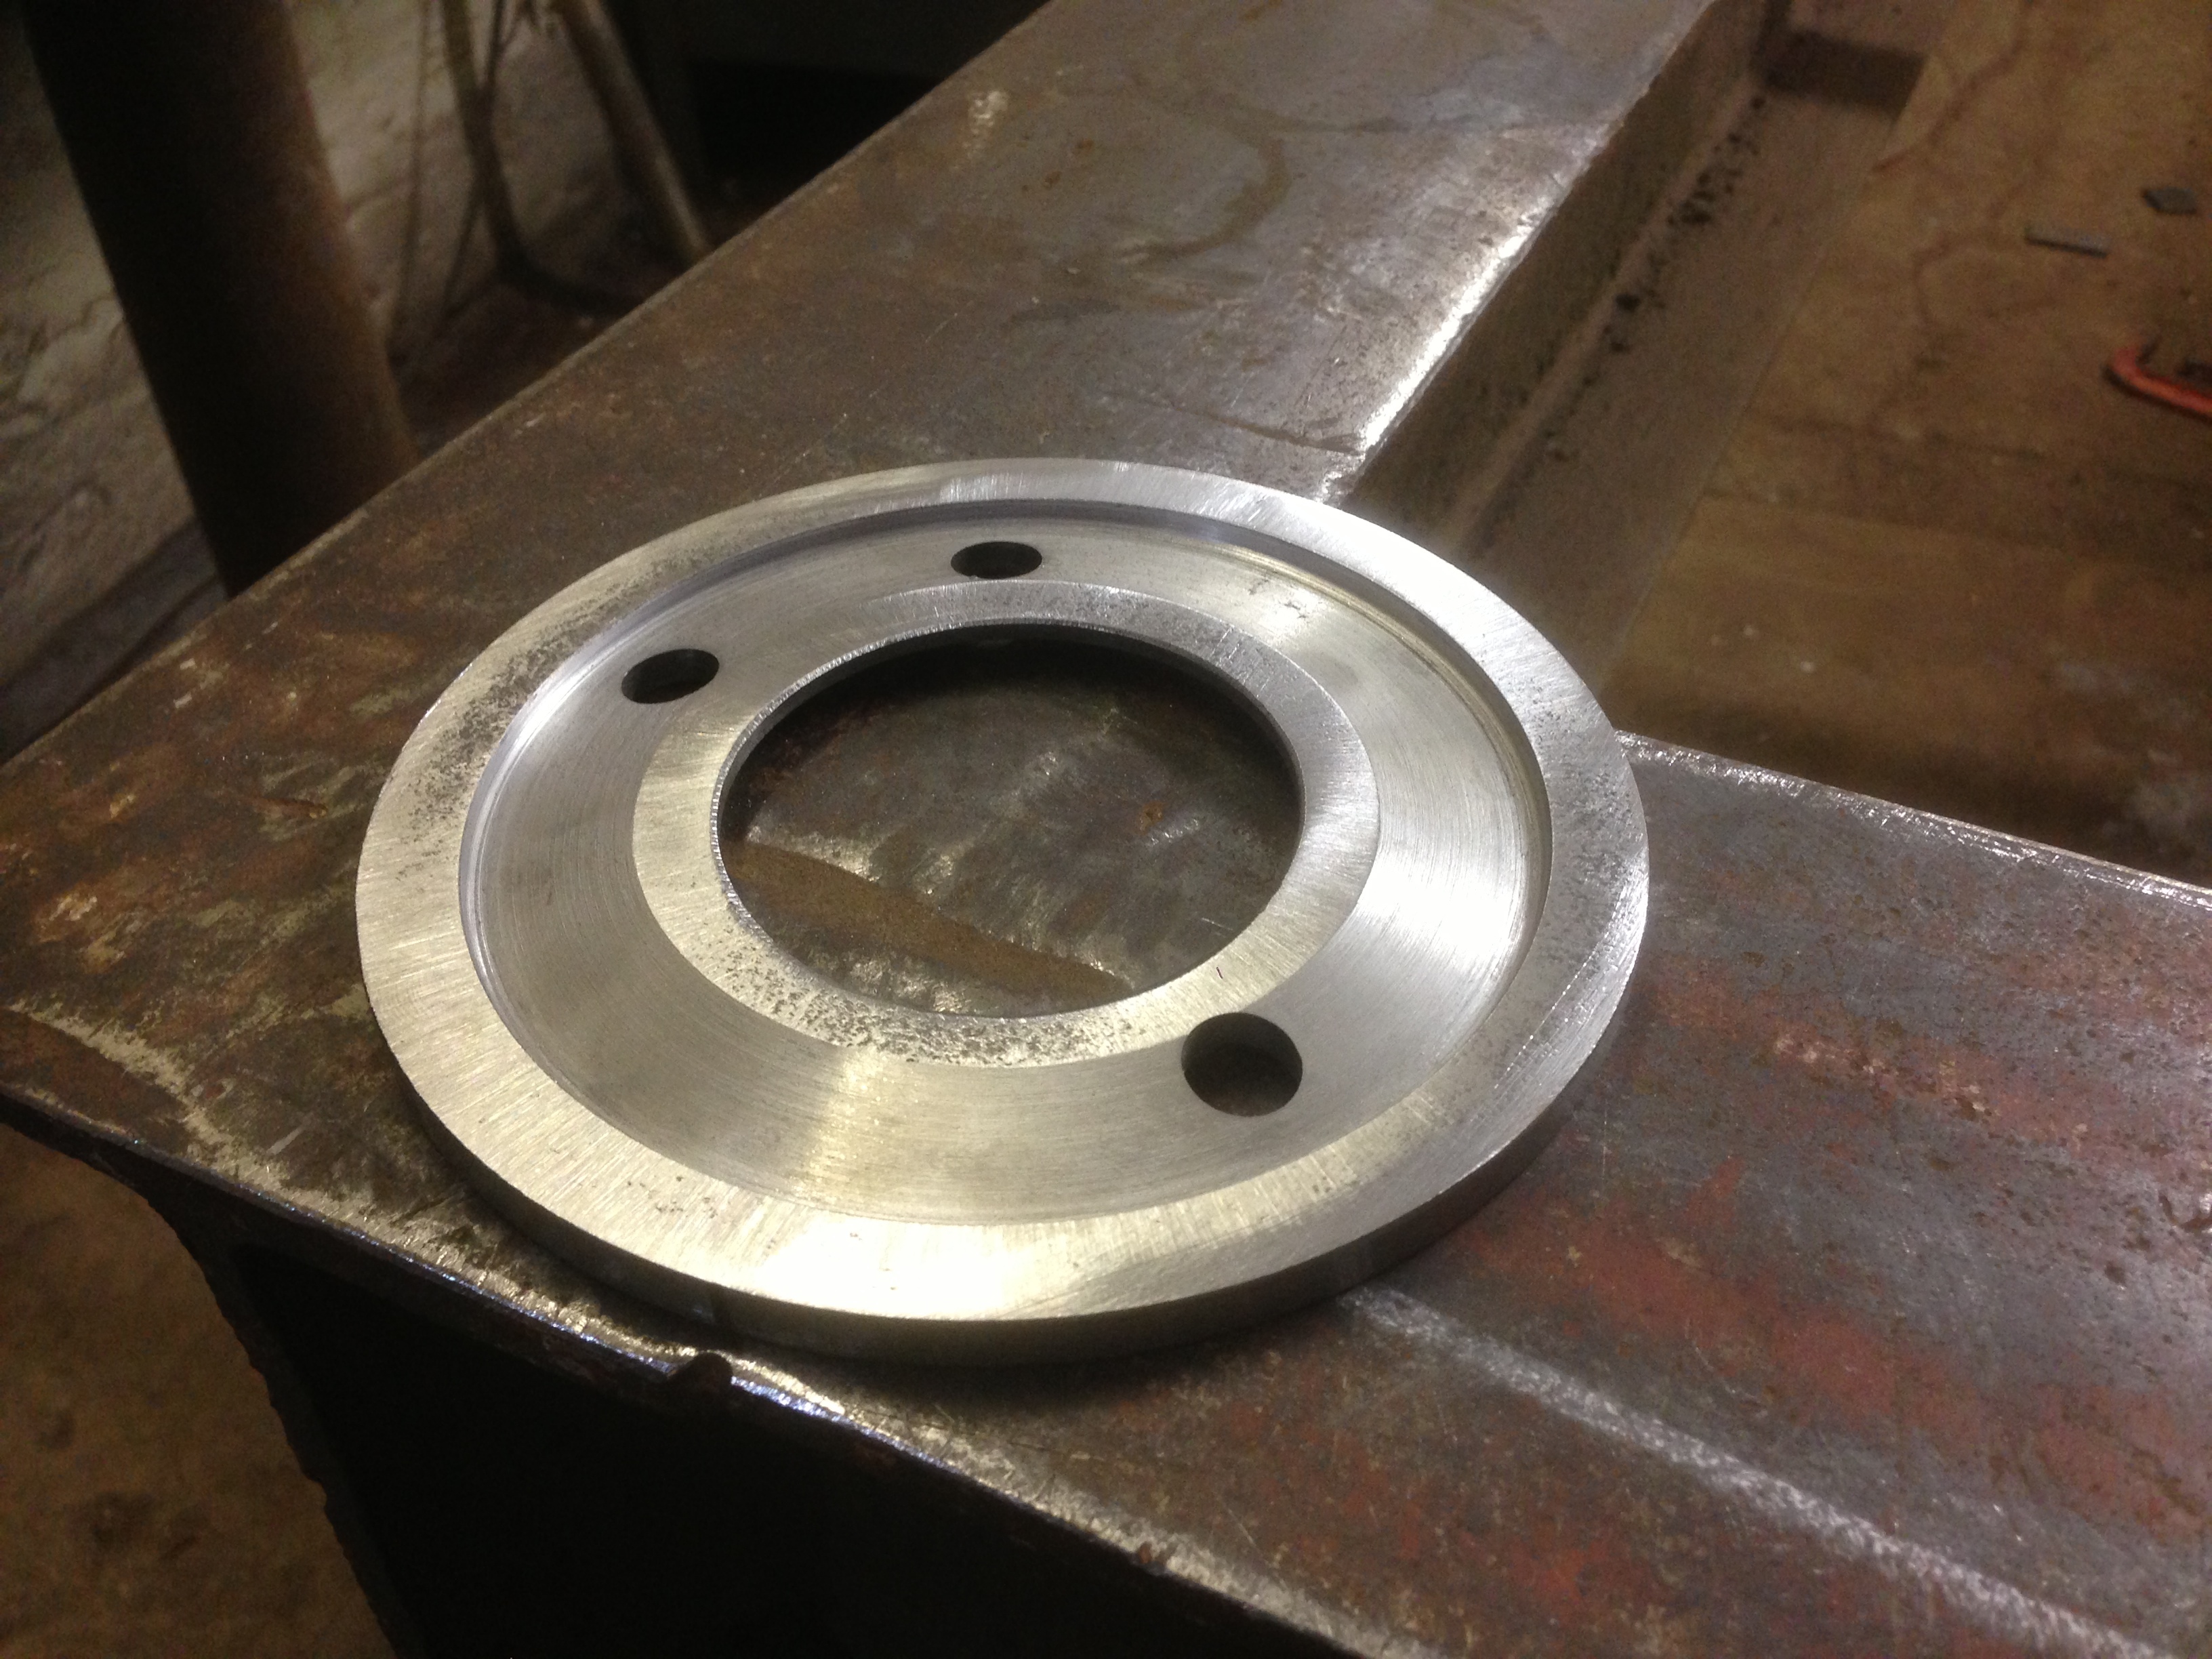
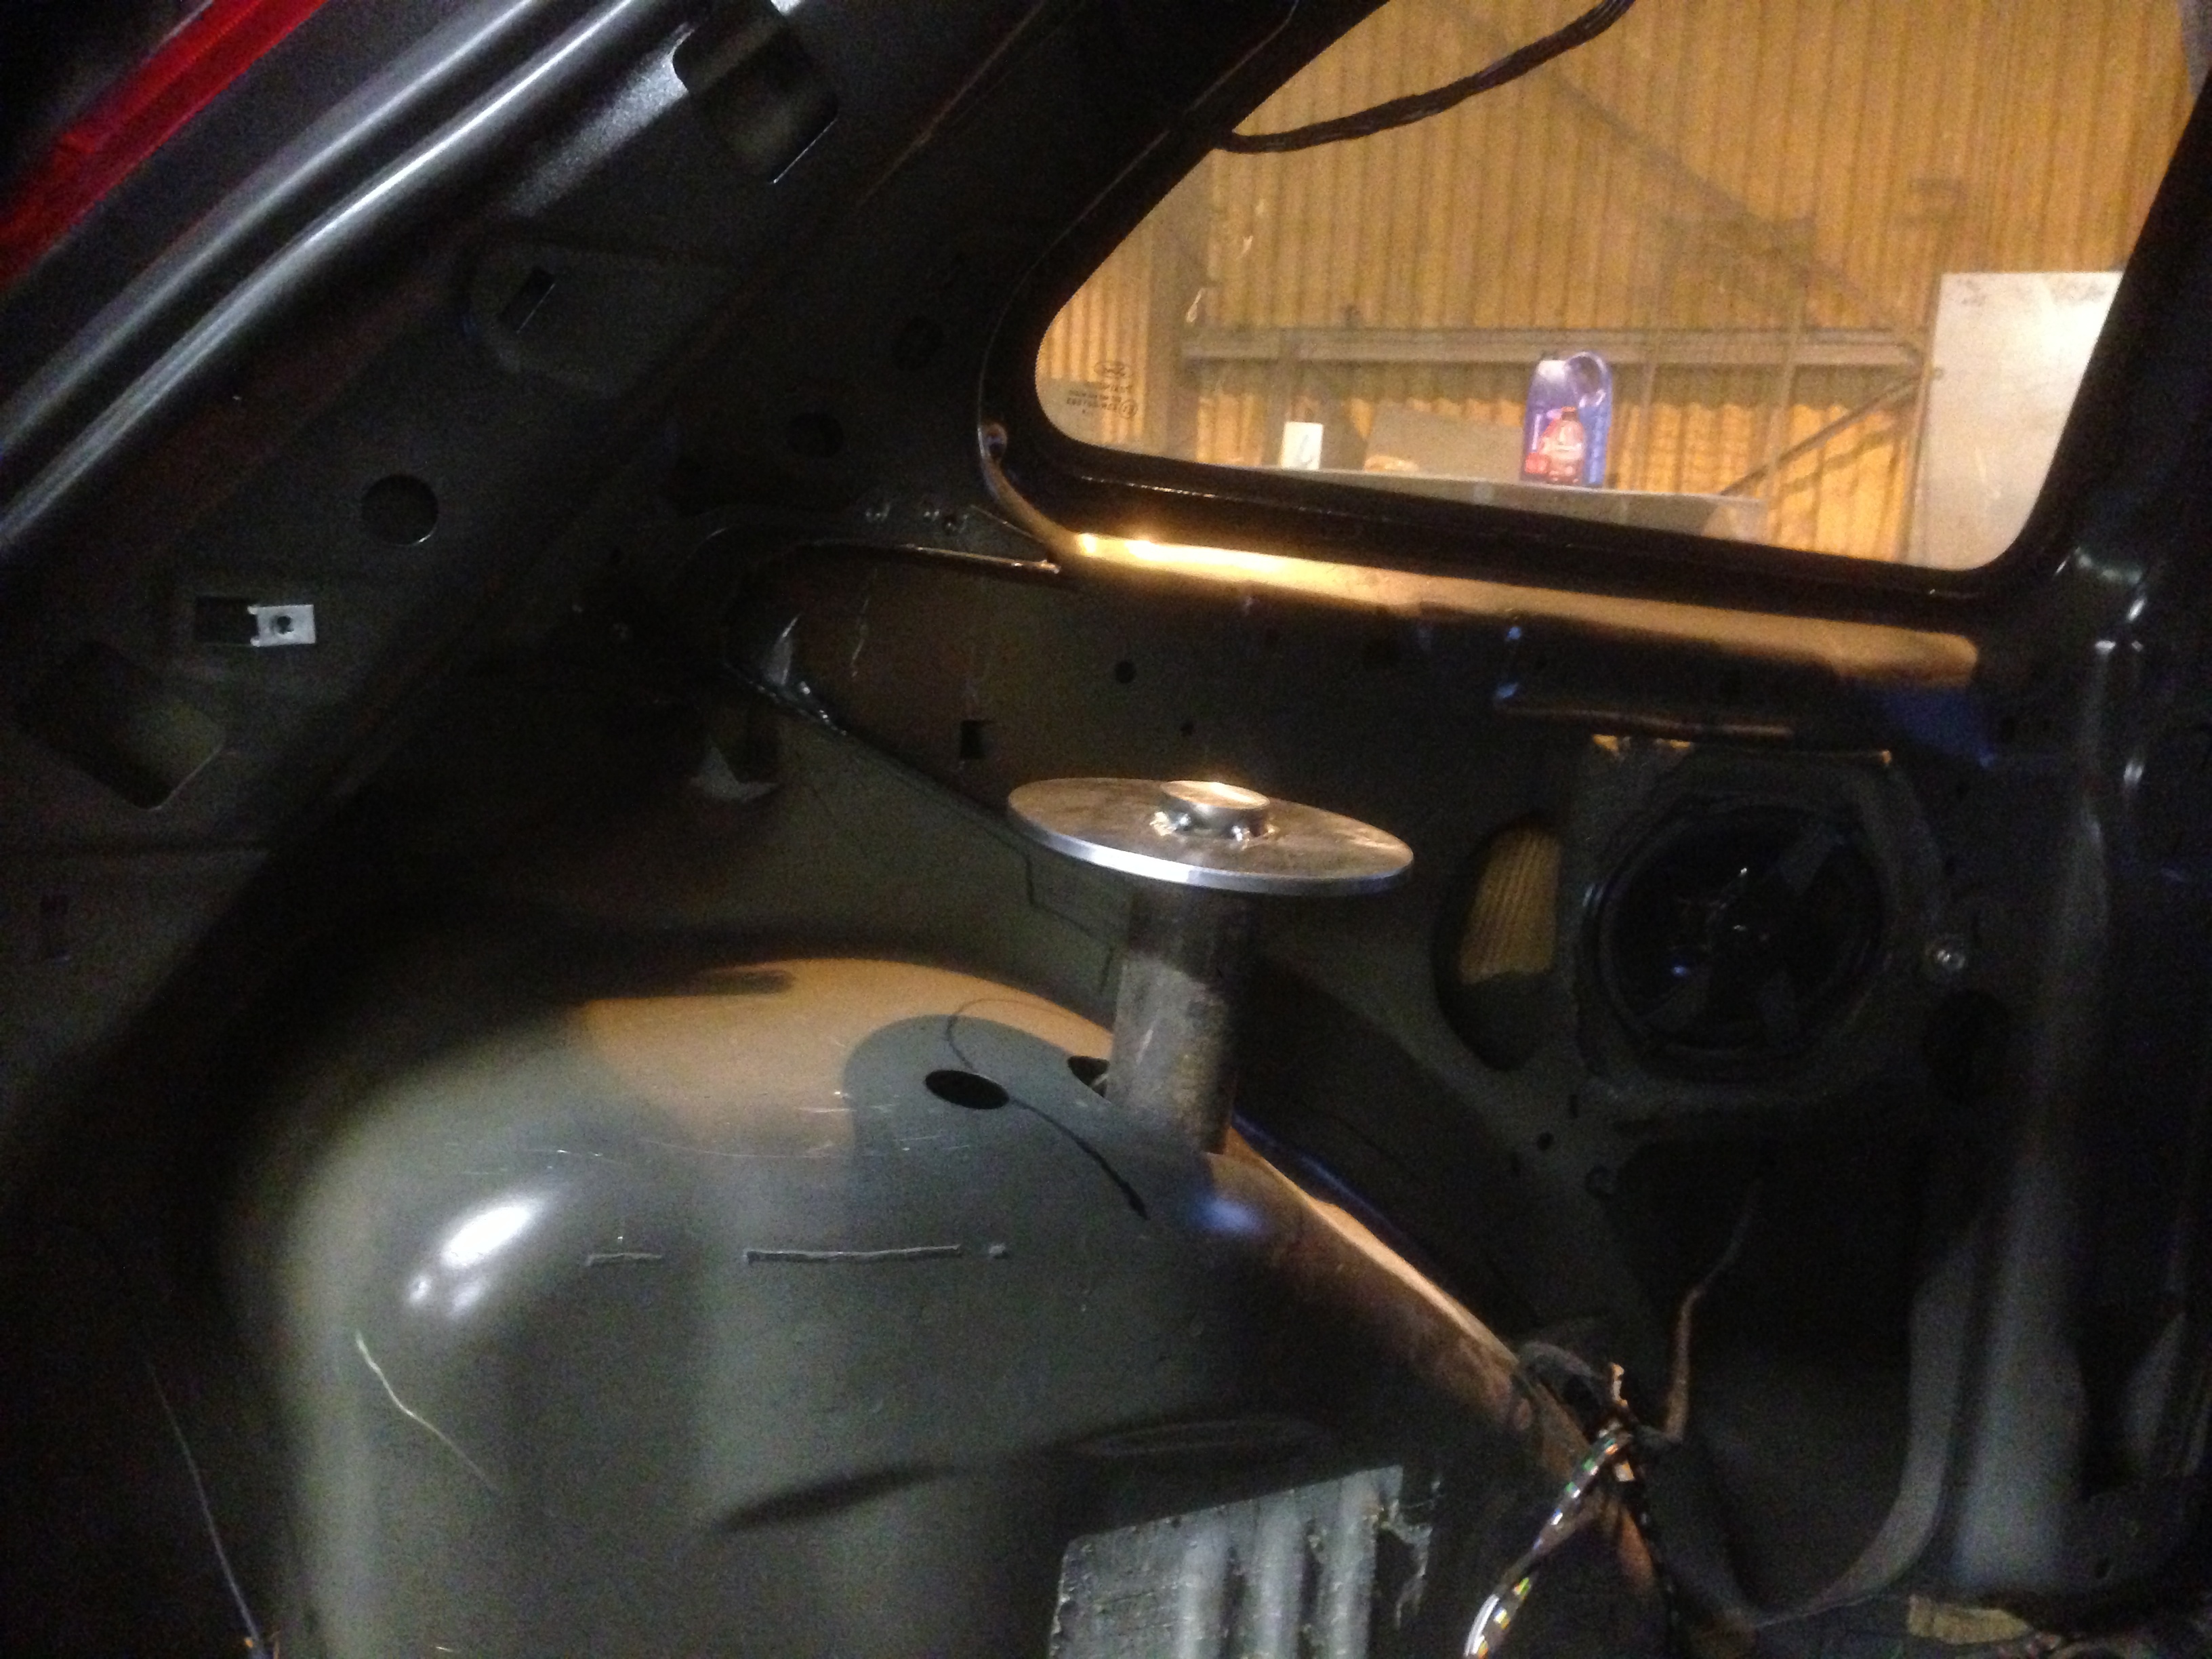
Started out by machining these strut tops on the lathe. A bit awkward as the struts I'm using have a slight taper at the top. Works better we the strut seats in the top mount real nice, but just makes it a little harder to make on the old manual lathe we have here.
The underneath:
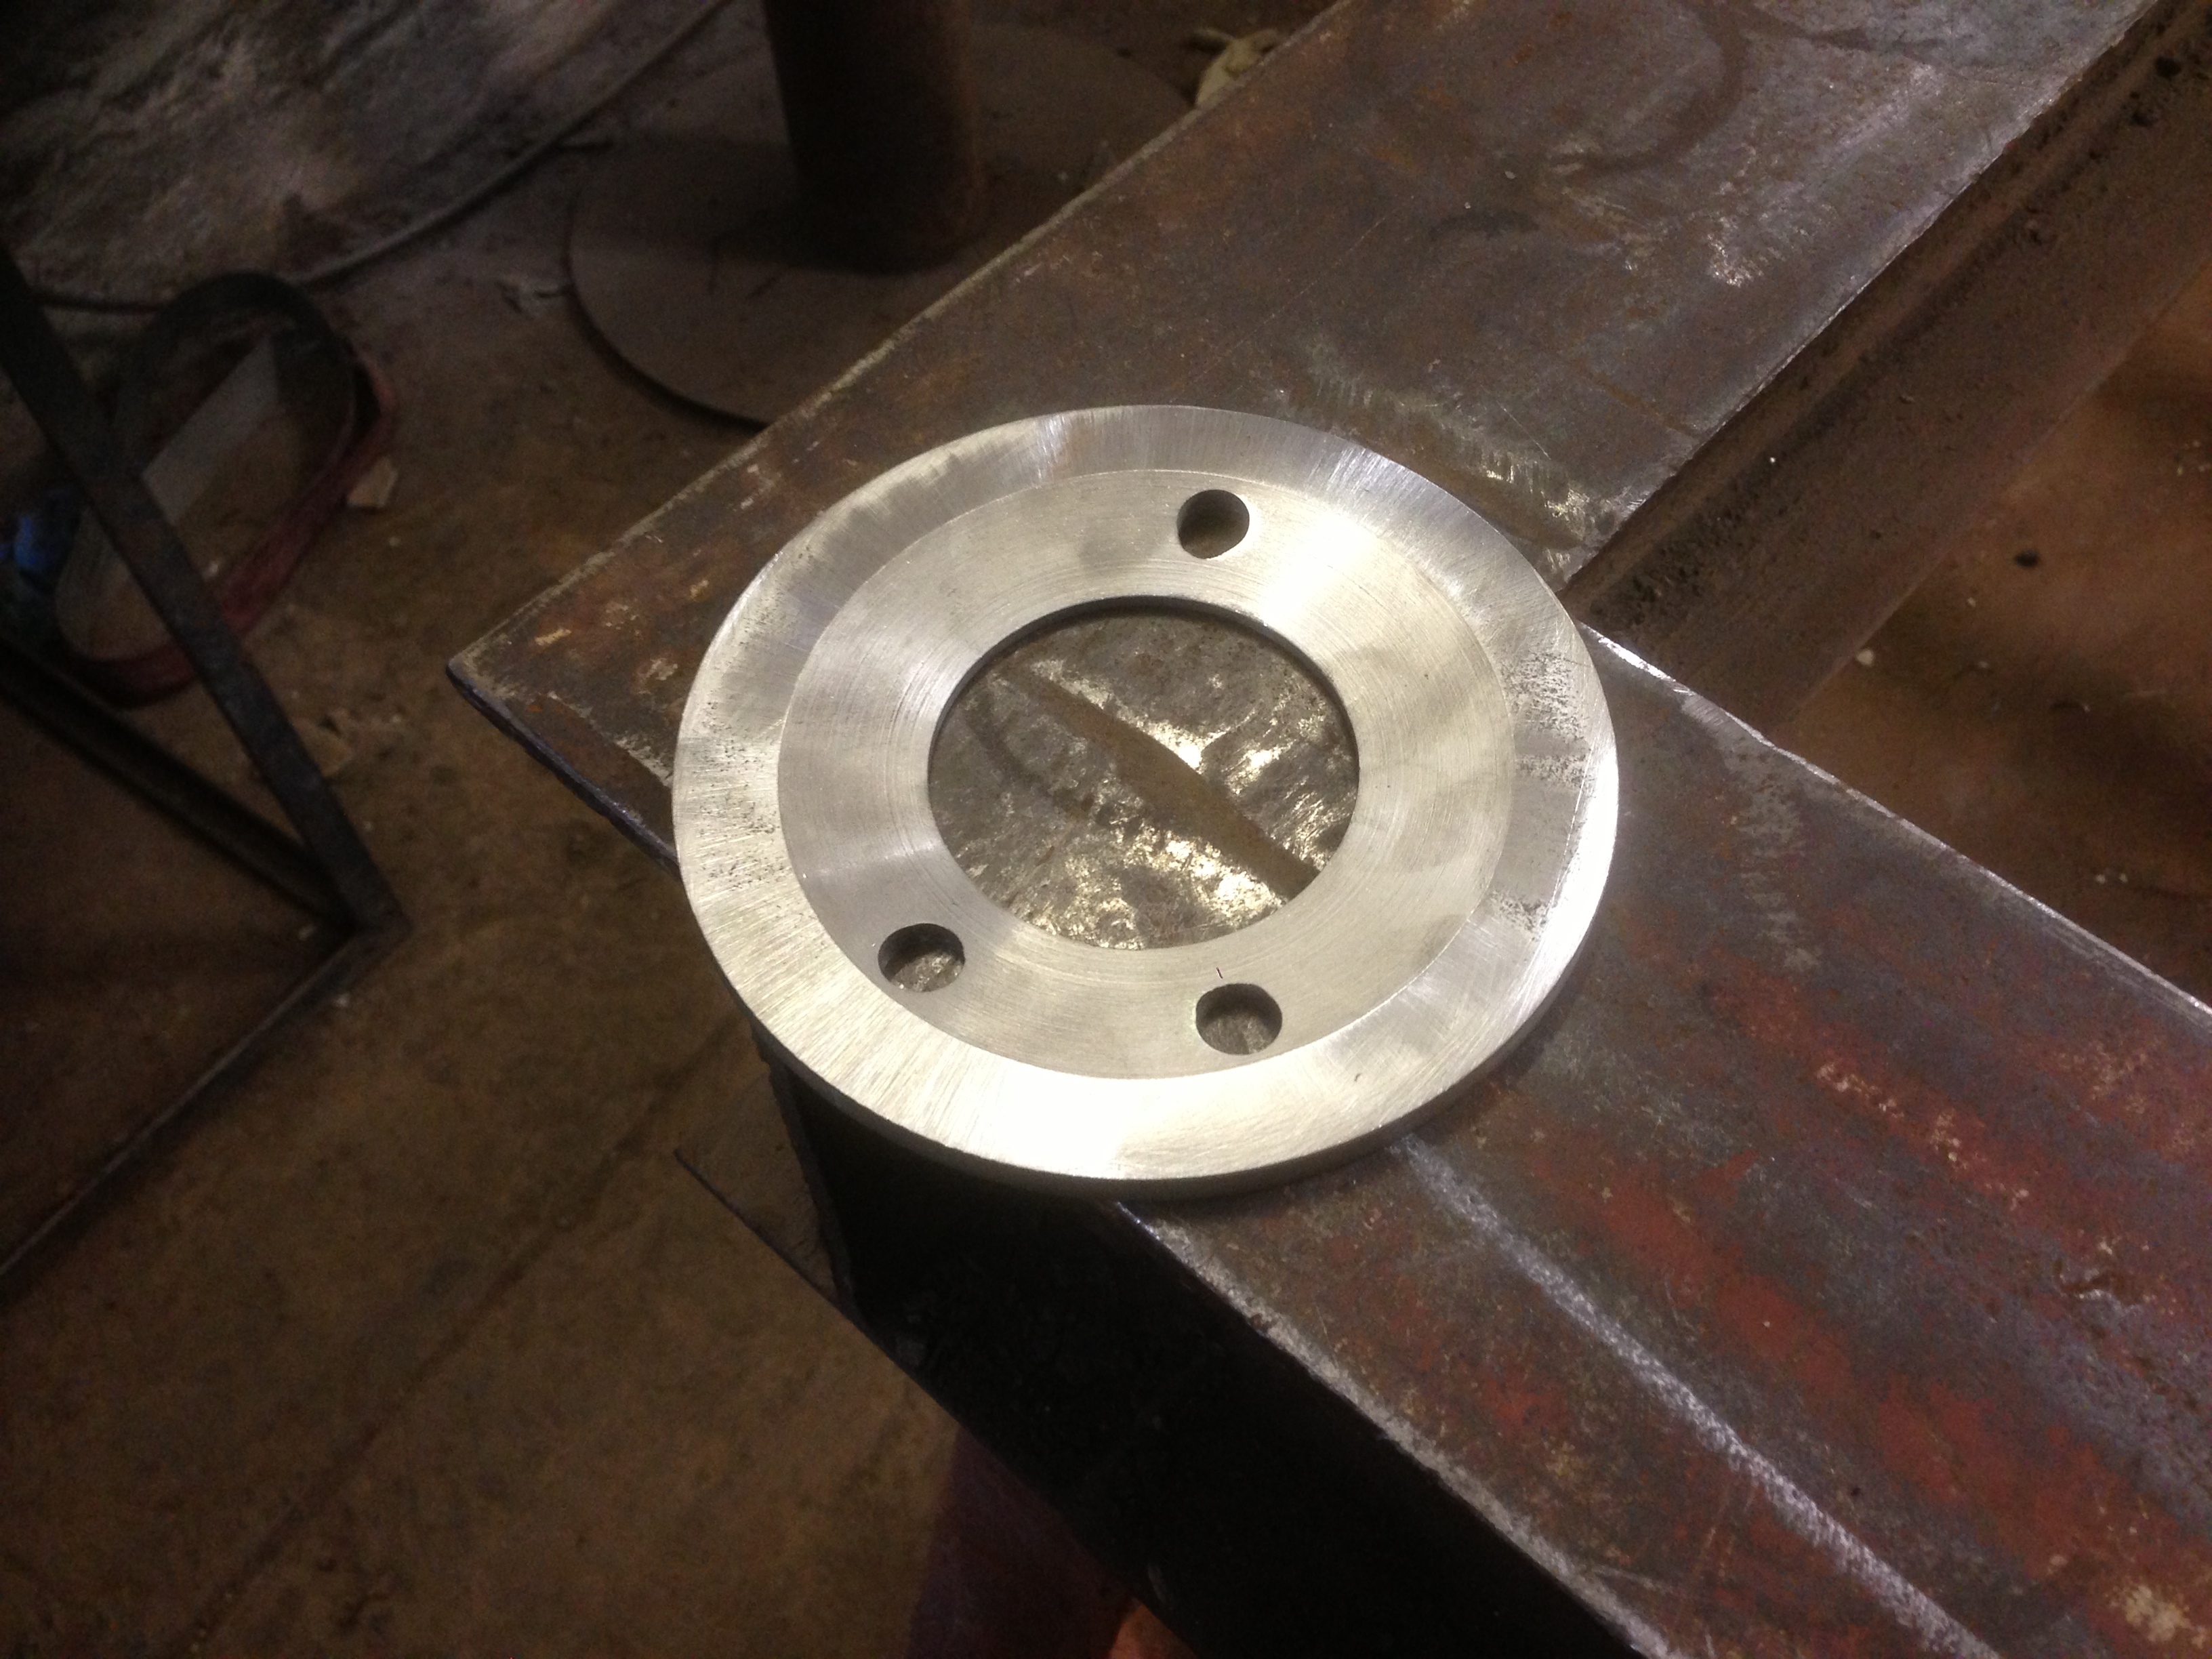
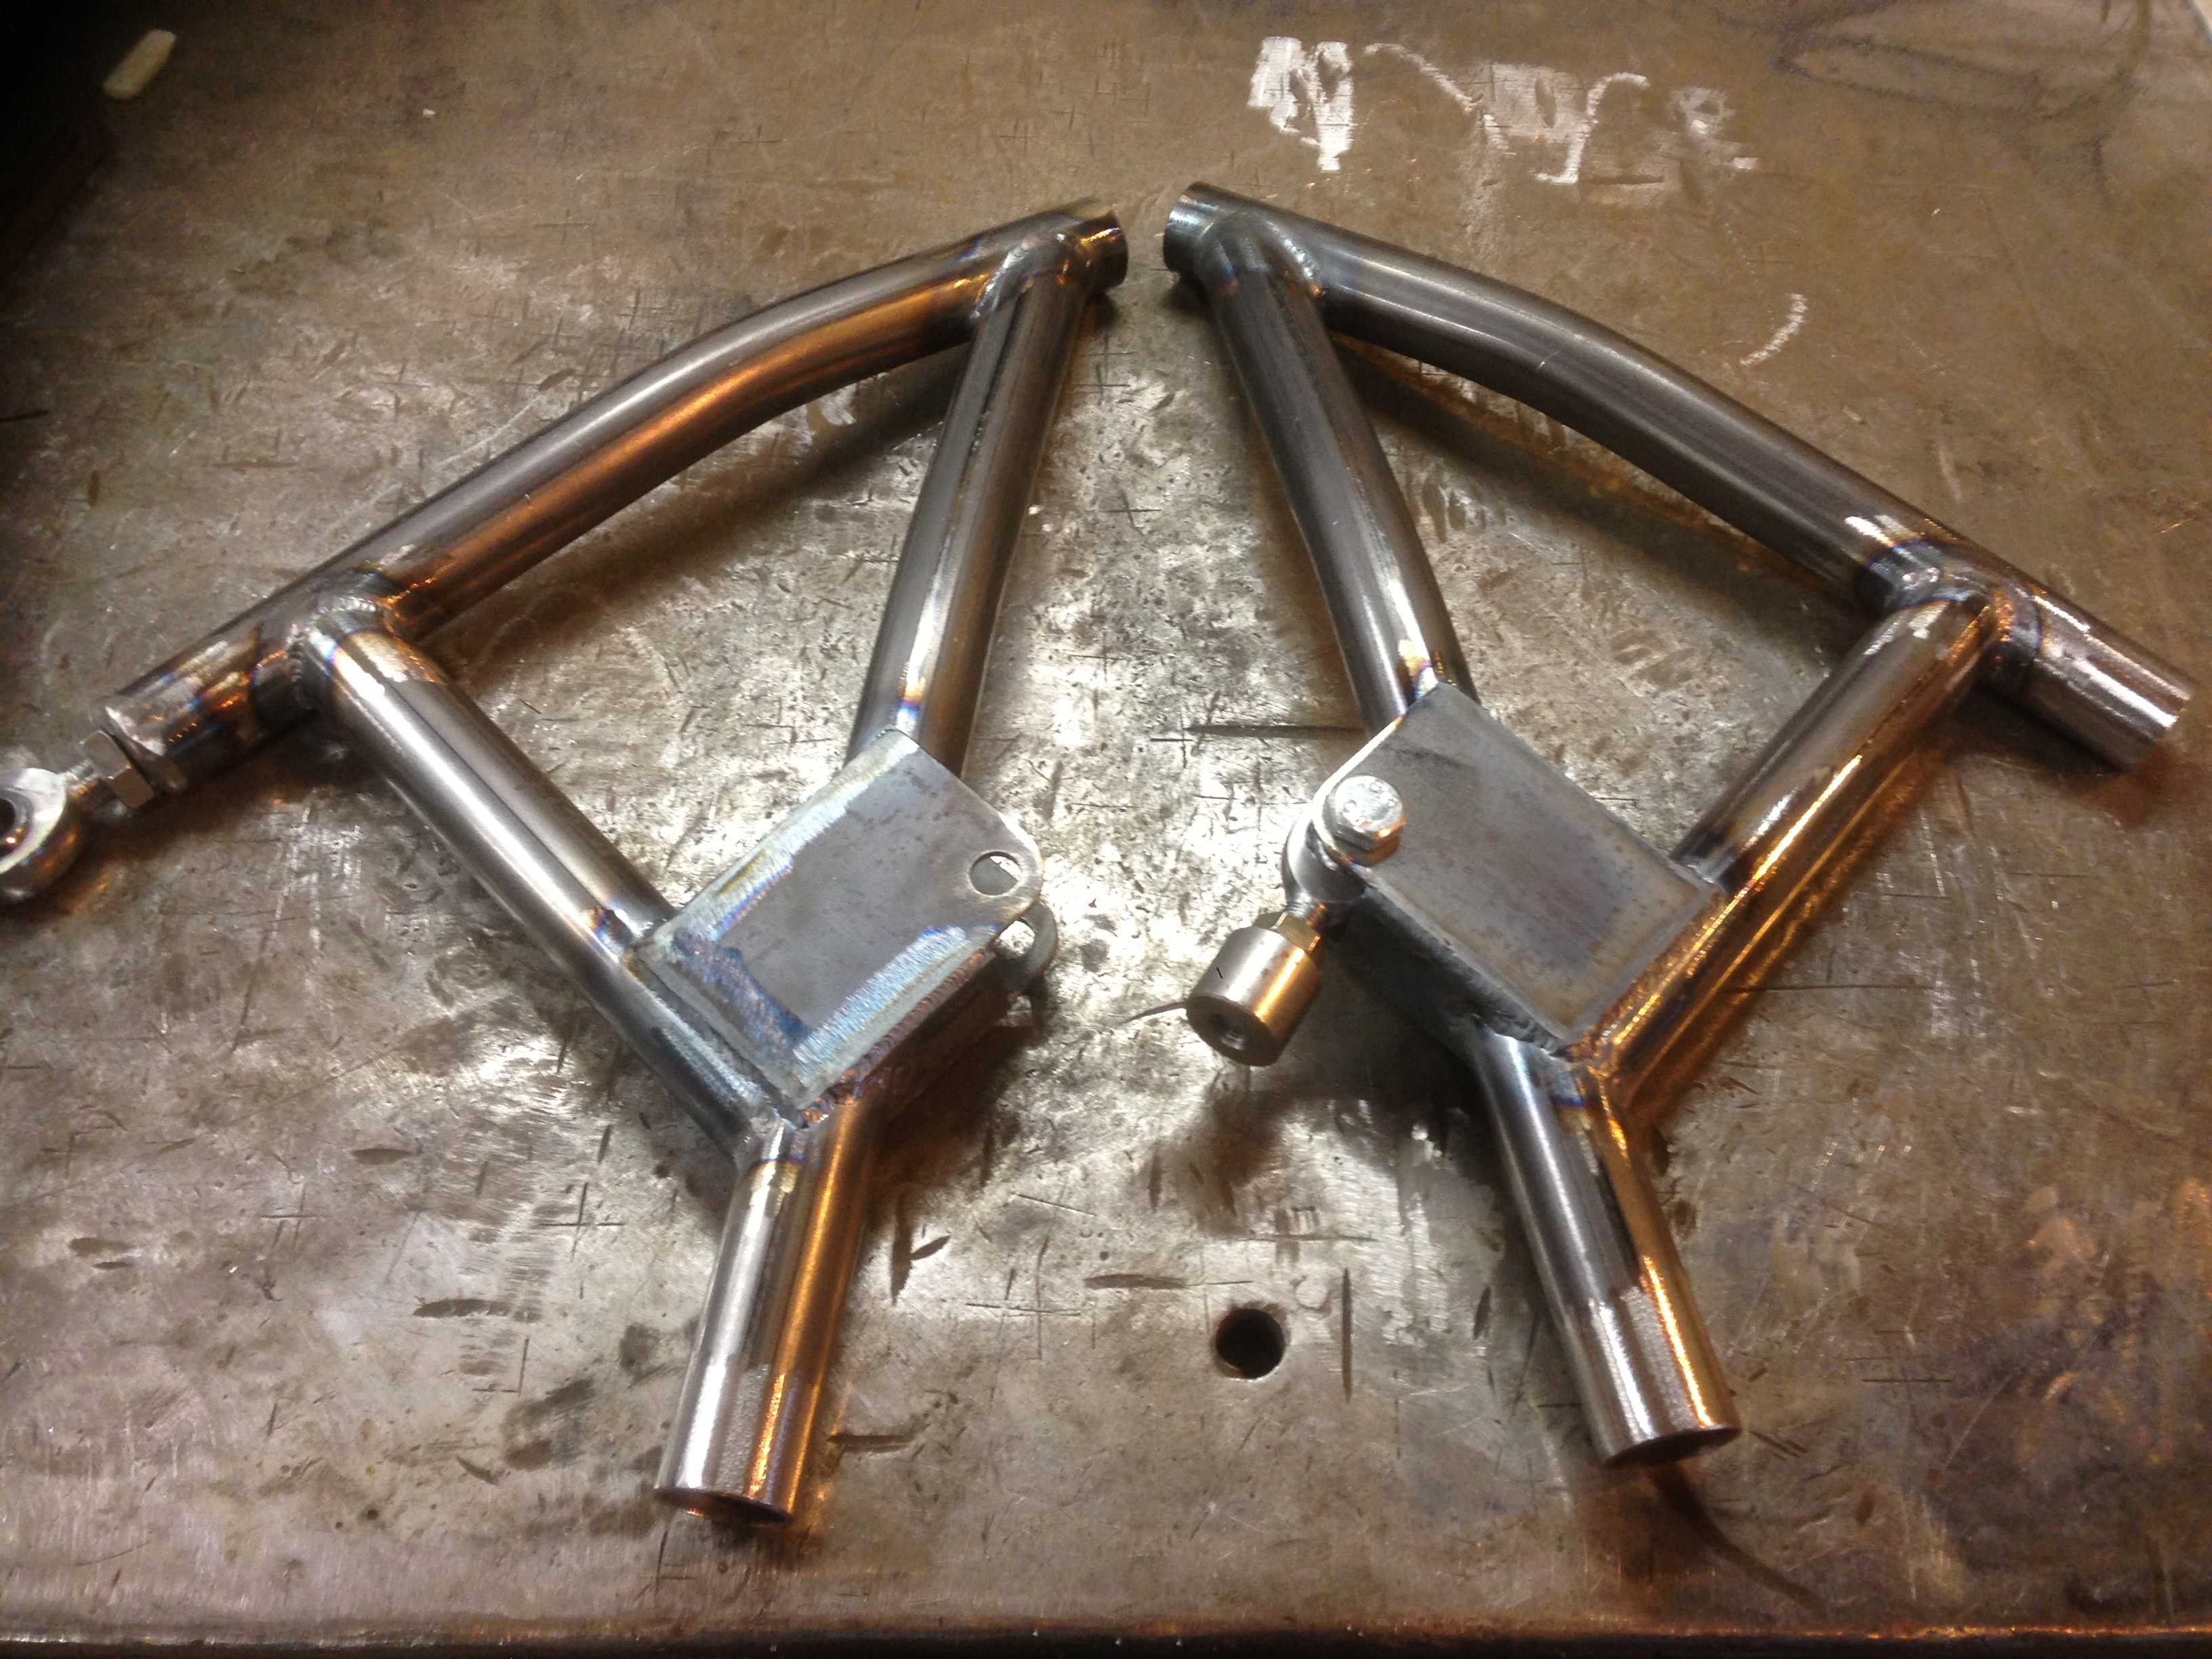
The top had to be cut at an angle too, as the bolts don't come up straight - had to do this to keep the nuts sat flat on the plate when it's all tightened up:
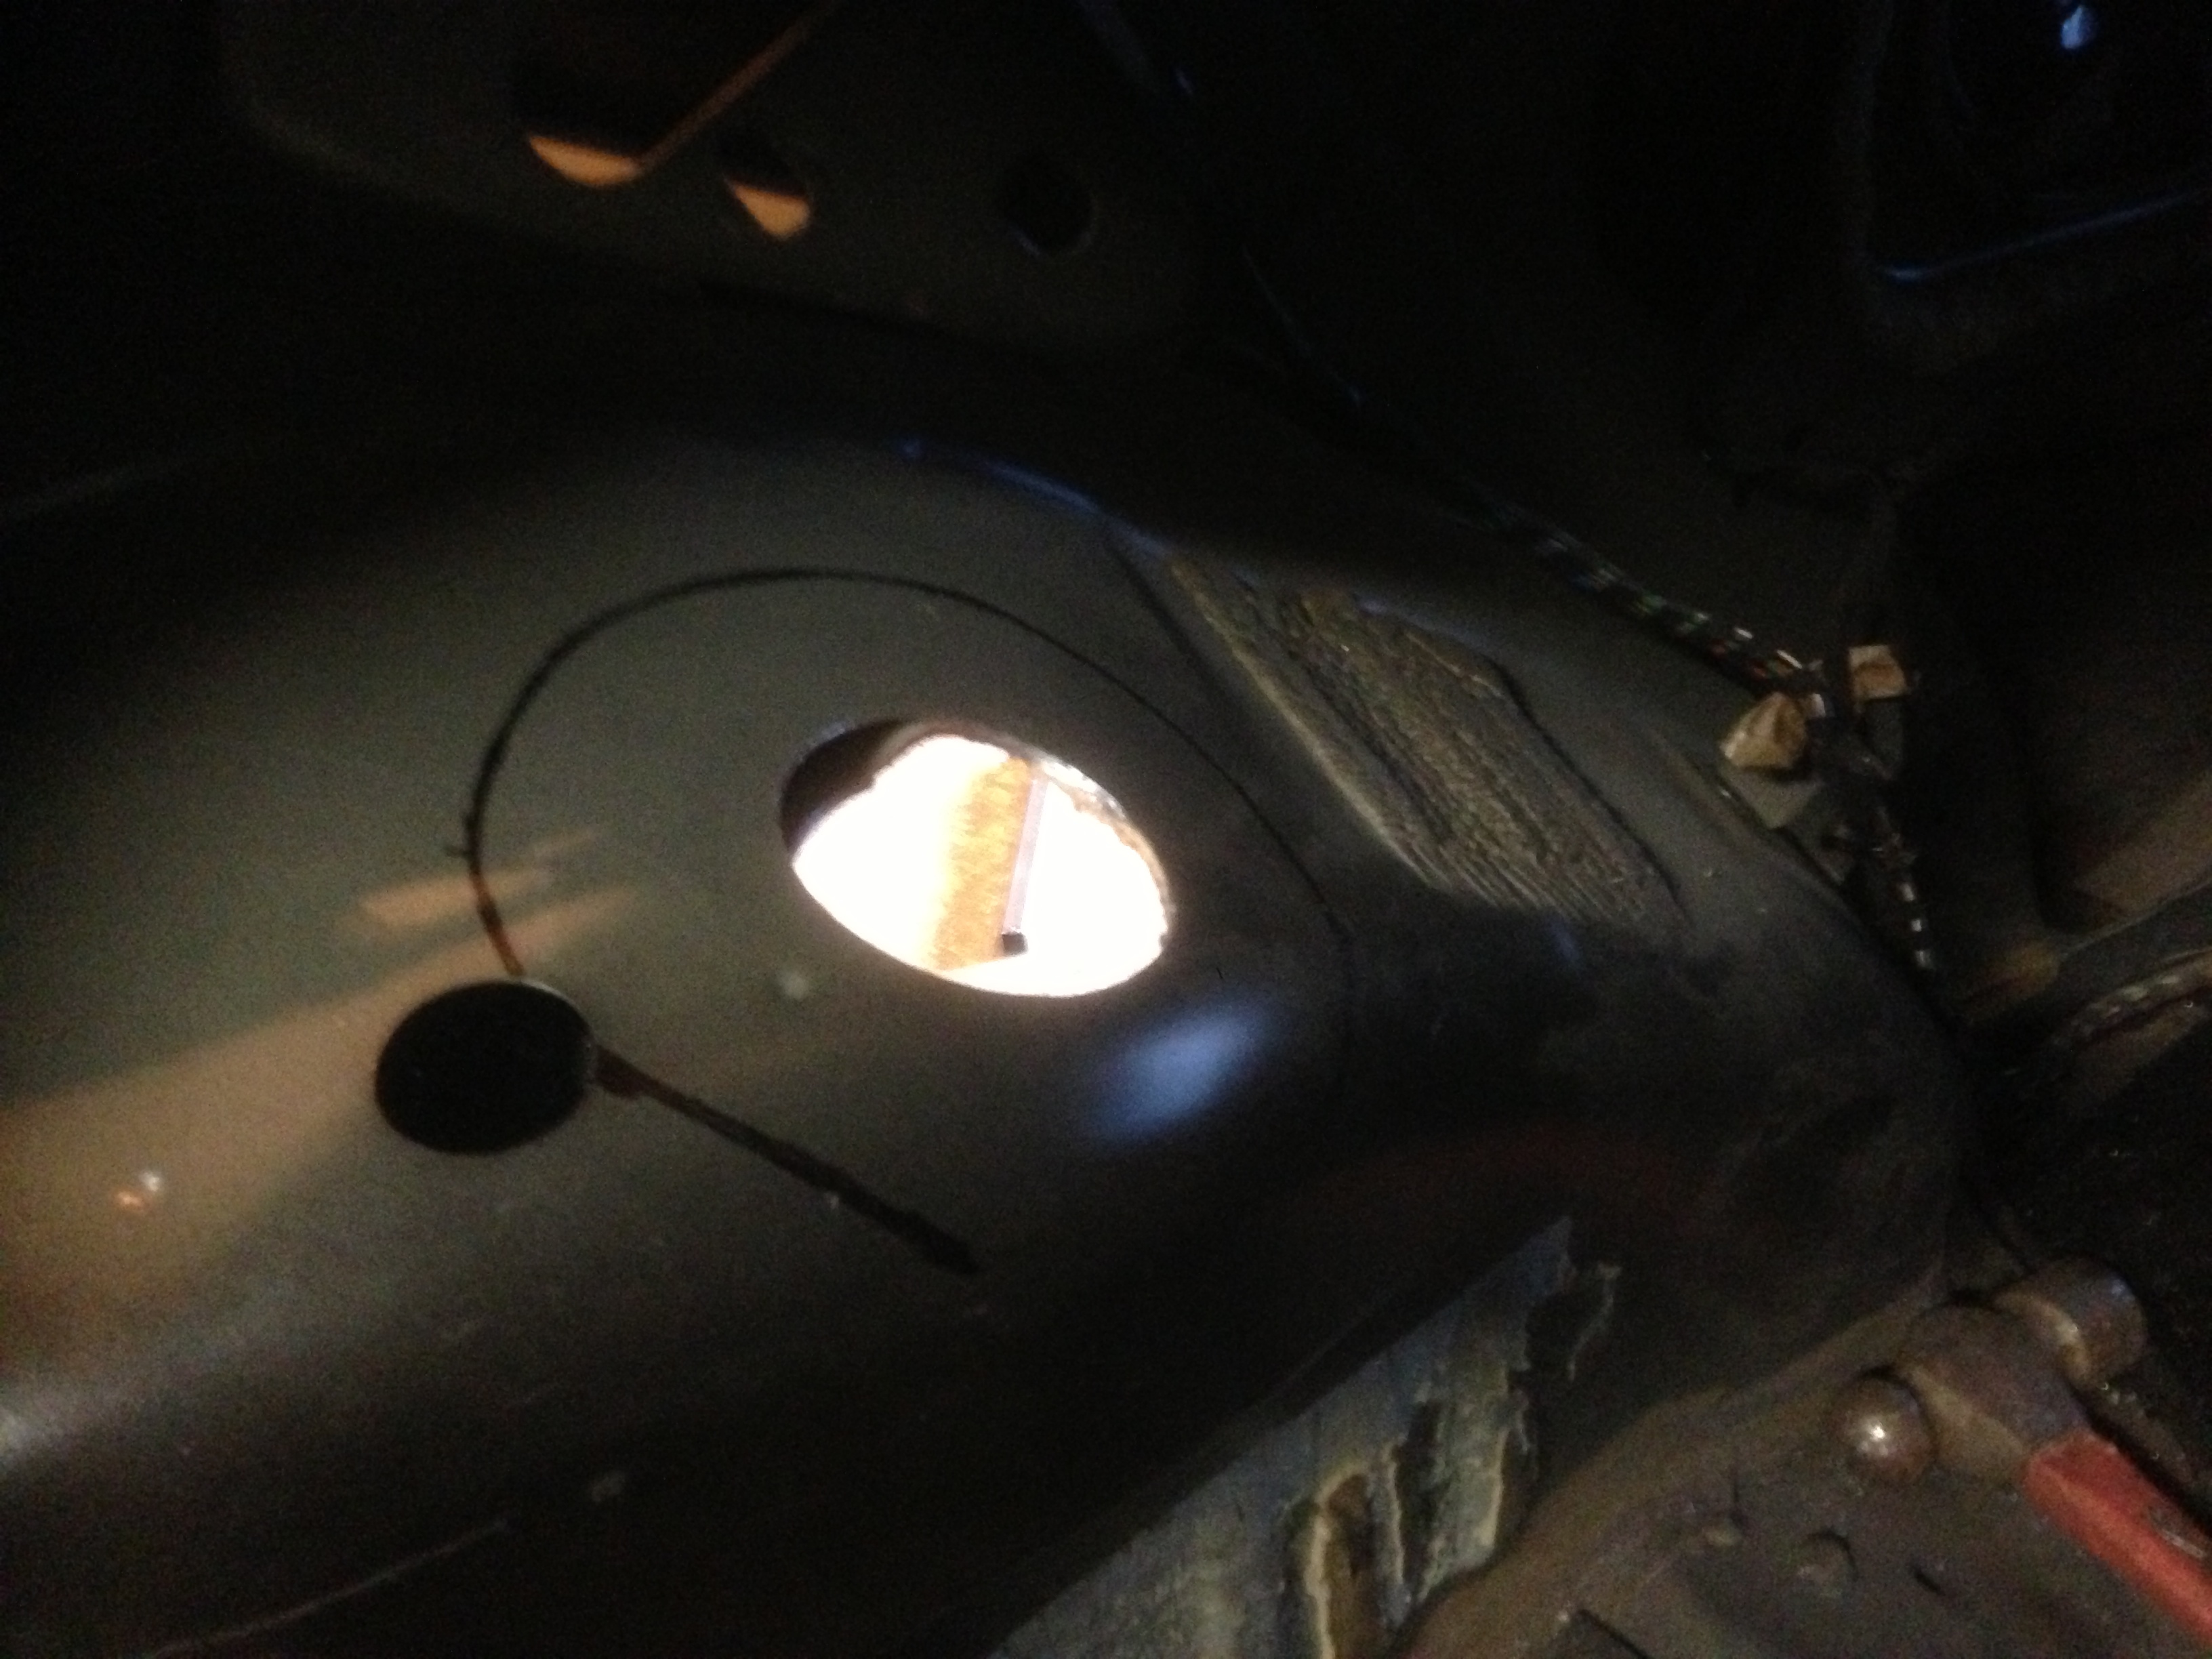
Then cut a small hole in the top of the arch. Made a dummy strut to put through to check out the angles and mark out the bigger hole (6") I need to cut:
That's it for now unfortunately. Spent around 30 hours on the car over the weekend and that's all I have to show for it haha.
Things will get a bit more interesting soon, I promise. Just ordered 30m of CDS tubing this morning to do the rollcage - got it all planned out to tie the cradle in etc.
Started out by machining these strut tops on the lathe. A bit awkward as the struts I'm using have a slight taper at the top. Works better we the strut seats in the top mount real nice, but just makes it a little harder to make on the old manual lathe we have here.
The underneath:
The top had to be cut at an angle too, as the bolts don't come up straight - had to do this to keep the nuts sat flat on the plate when it's all tightened up:
Then cut a small hole in the top of the arch. Made a dummy strut to put through to check out the angles and mark out the bigger hole (6") I need to cut:
That's it for now unfortunately. Spent around 30 hours on the car over the weekend and that's all I have to show for it haha.
Things will get a bit more interesting soon, I promise. Just ordered 30m of CDS tubing this morning to do the rollcage - got it all planned out to tie the cradle in etc.

 06-07-2013, 04:32 PM
#87
Regular Contributor
Thread Starter
Join Date: Mar 2012
Location: Doncaster
Posts: 241
Likes: 0
Received 0 Likes
on
0 Posts
Long day today!
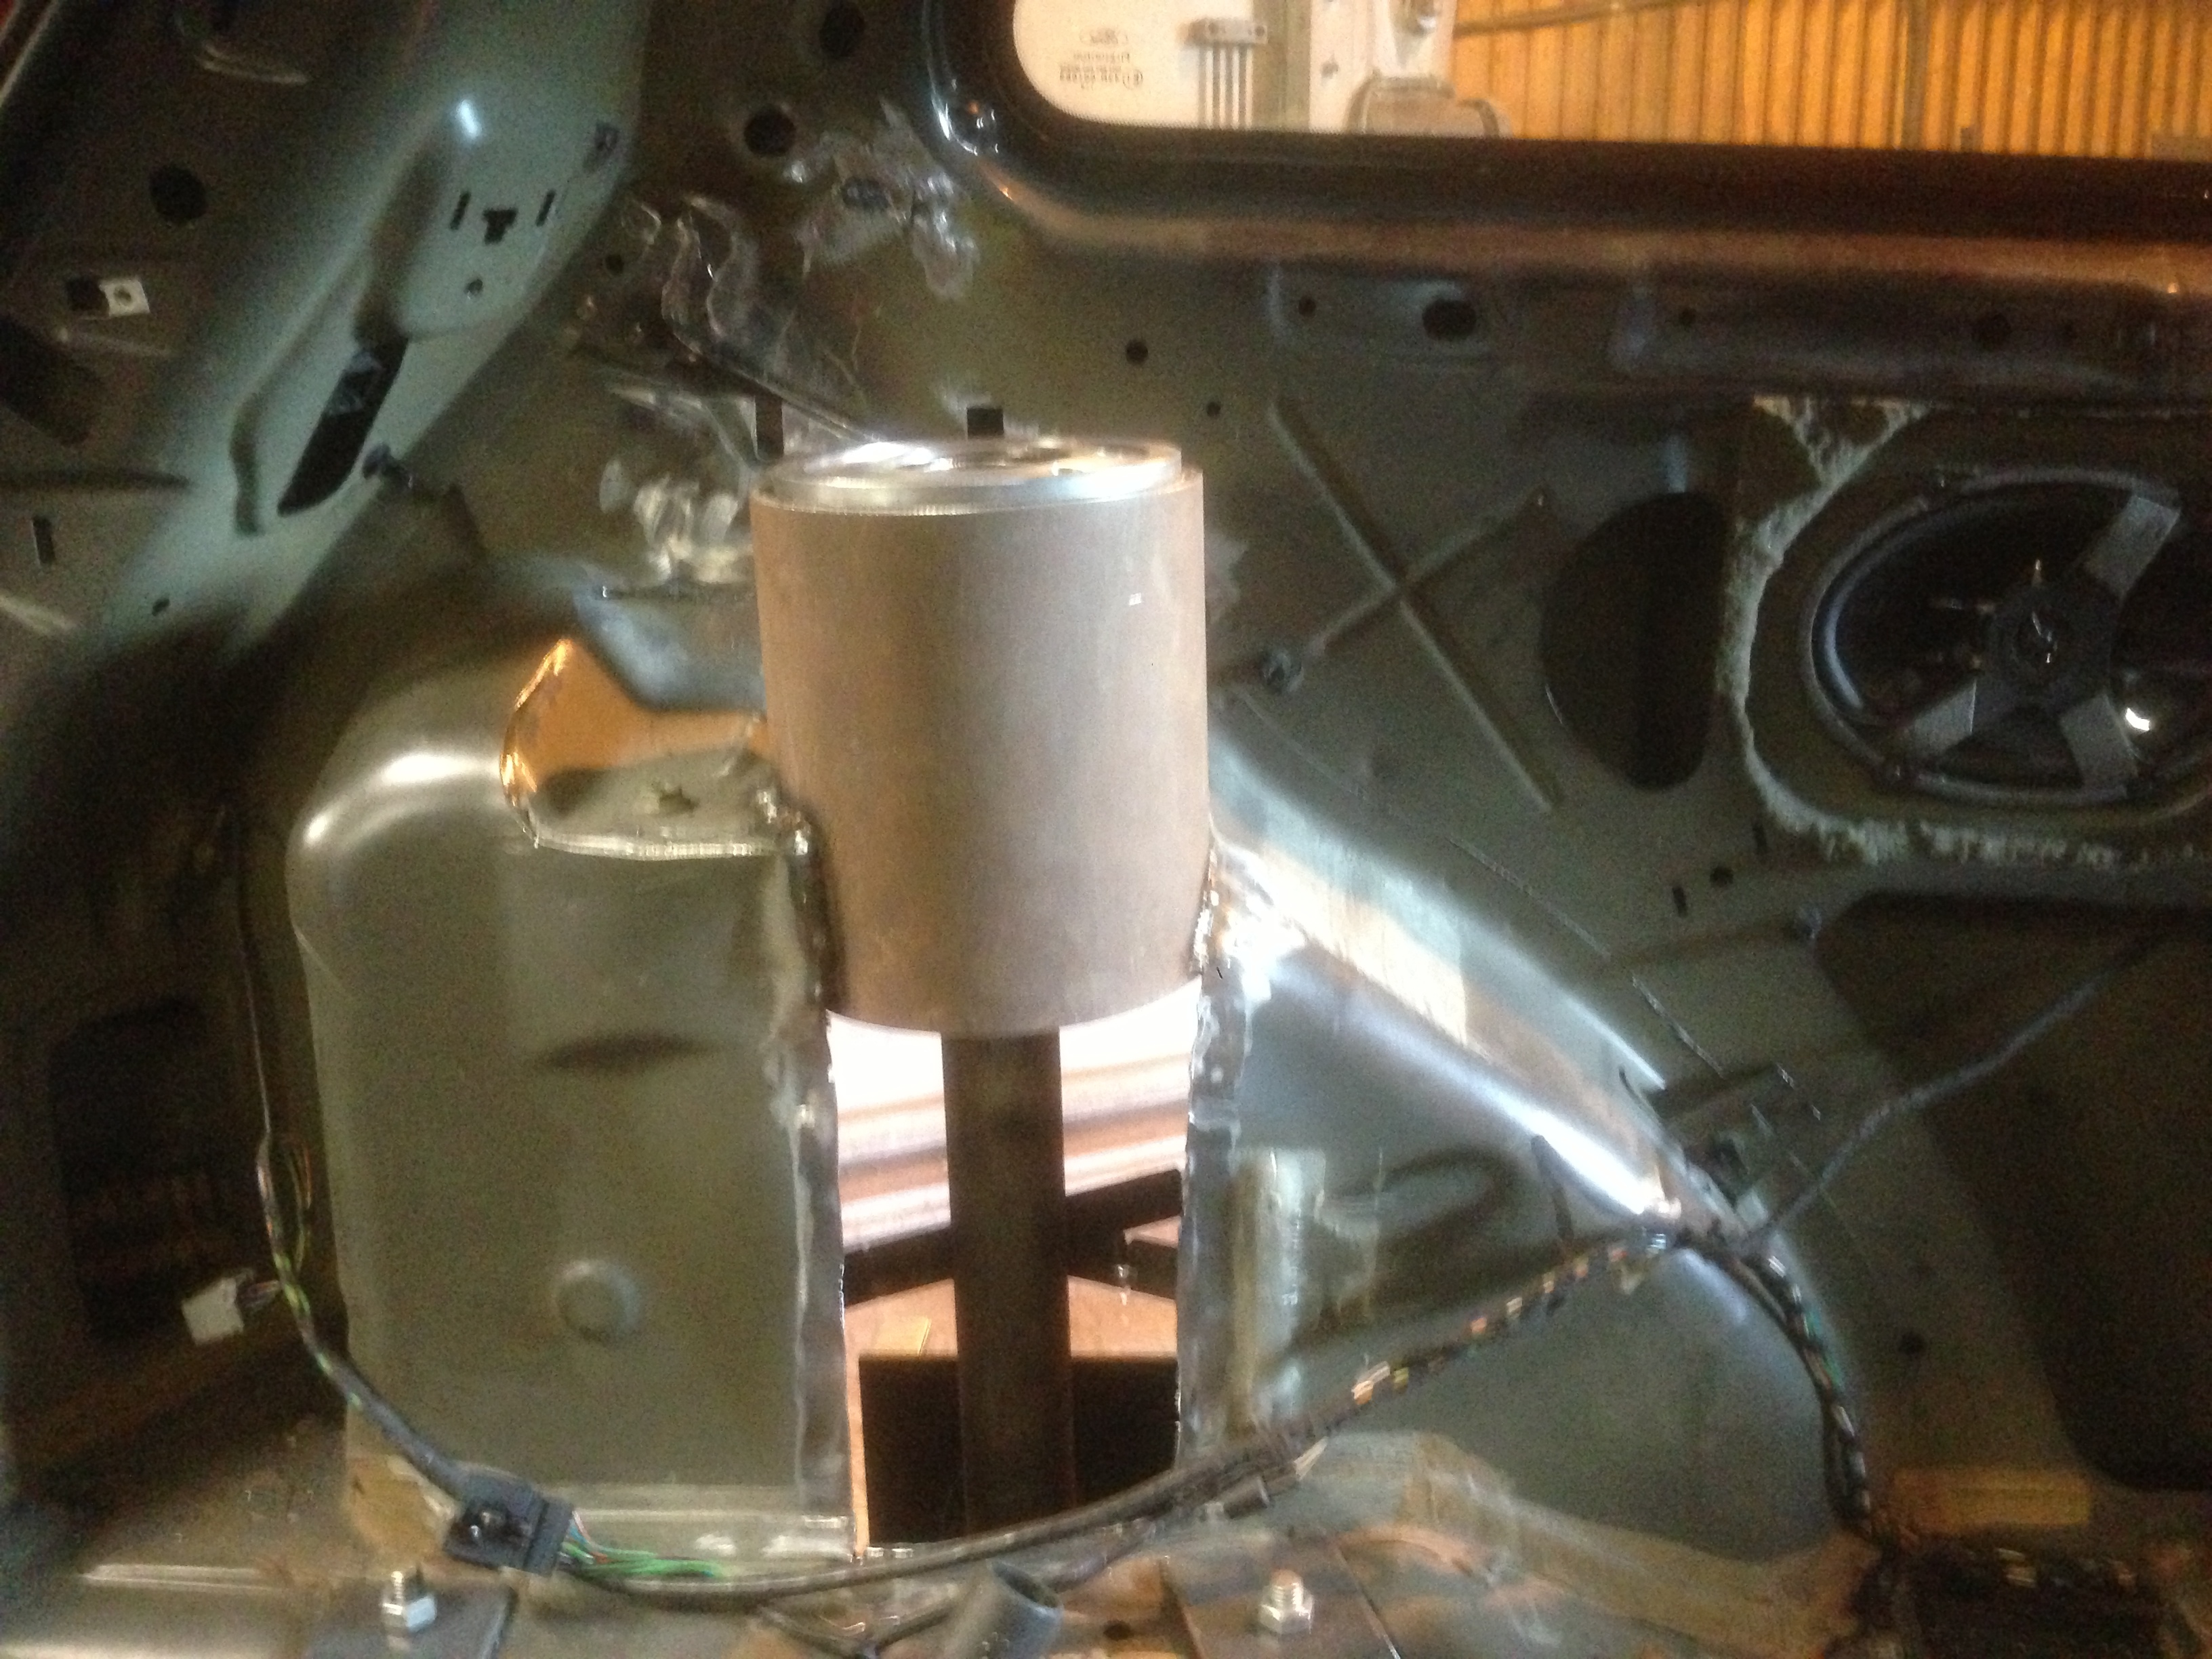
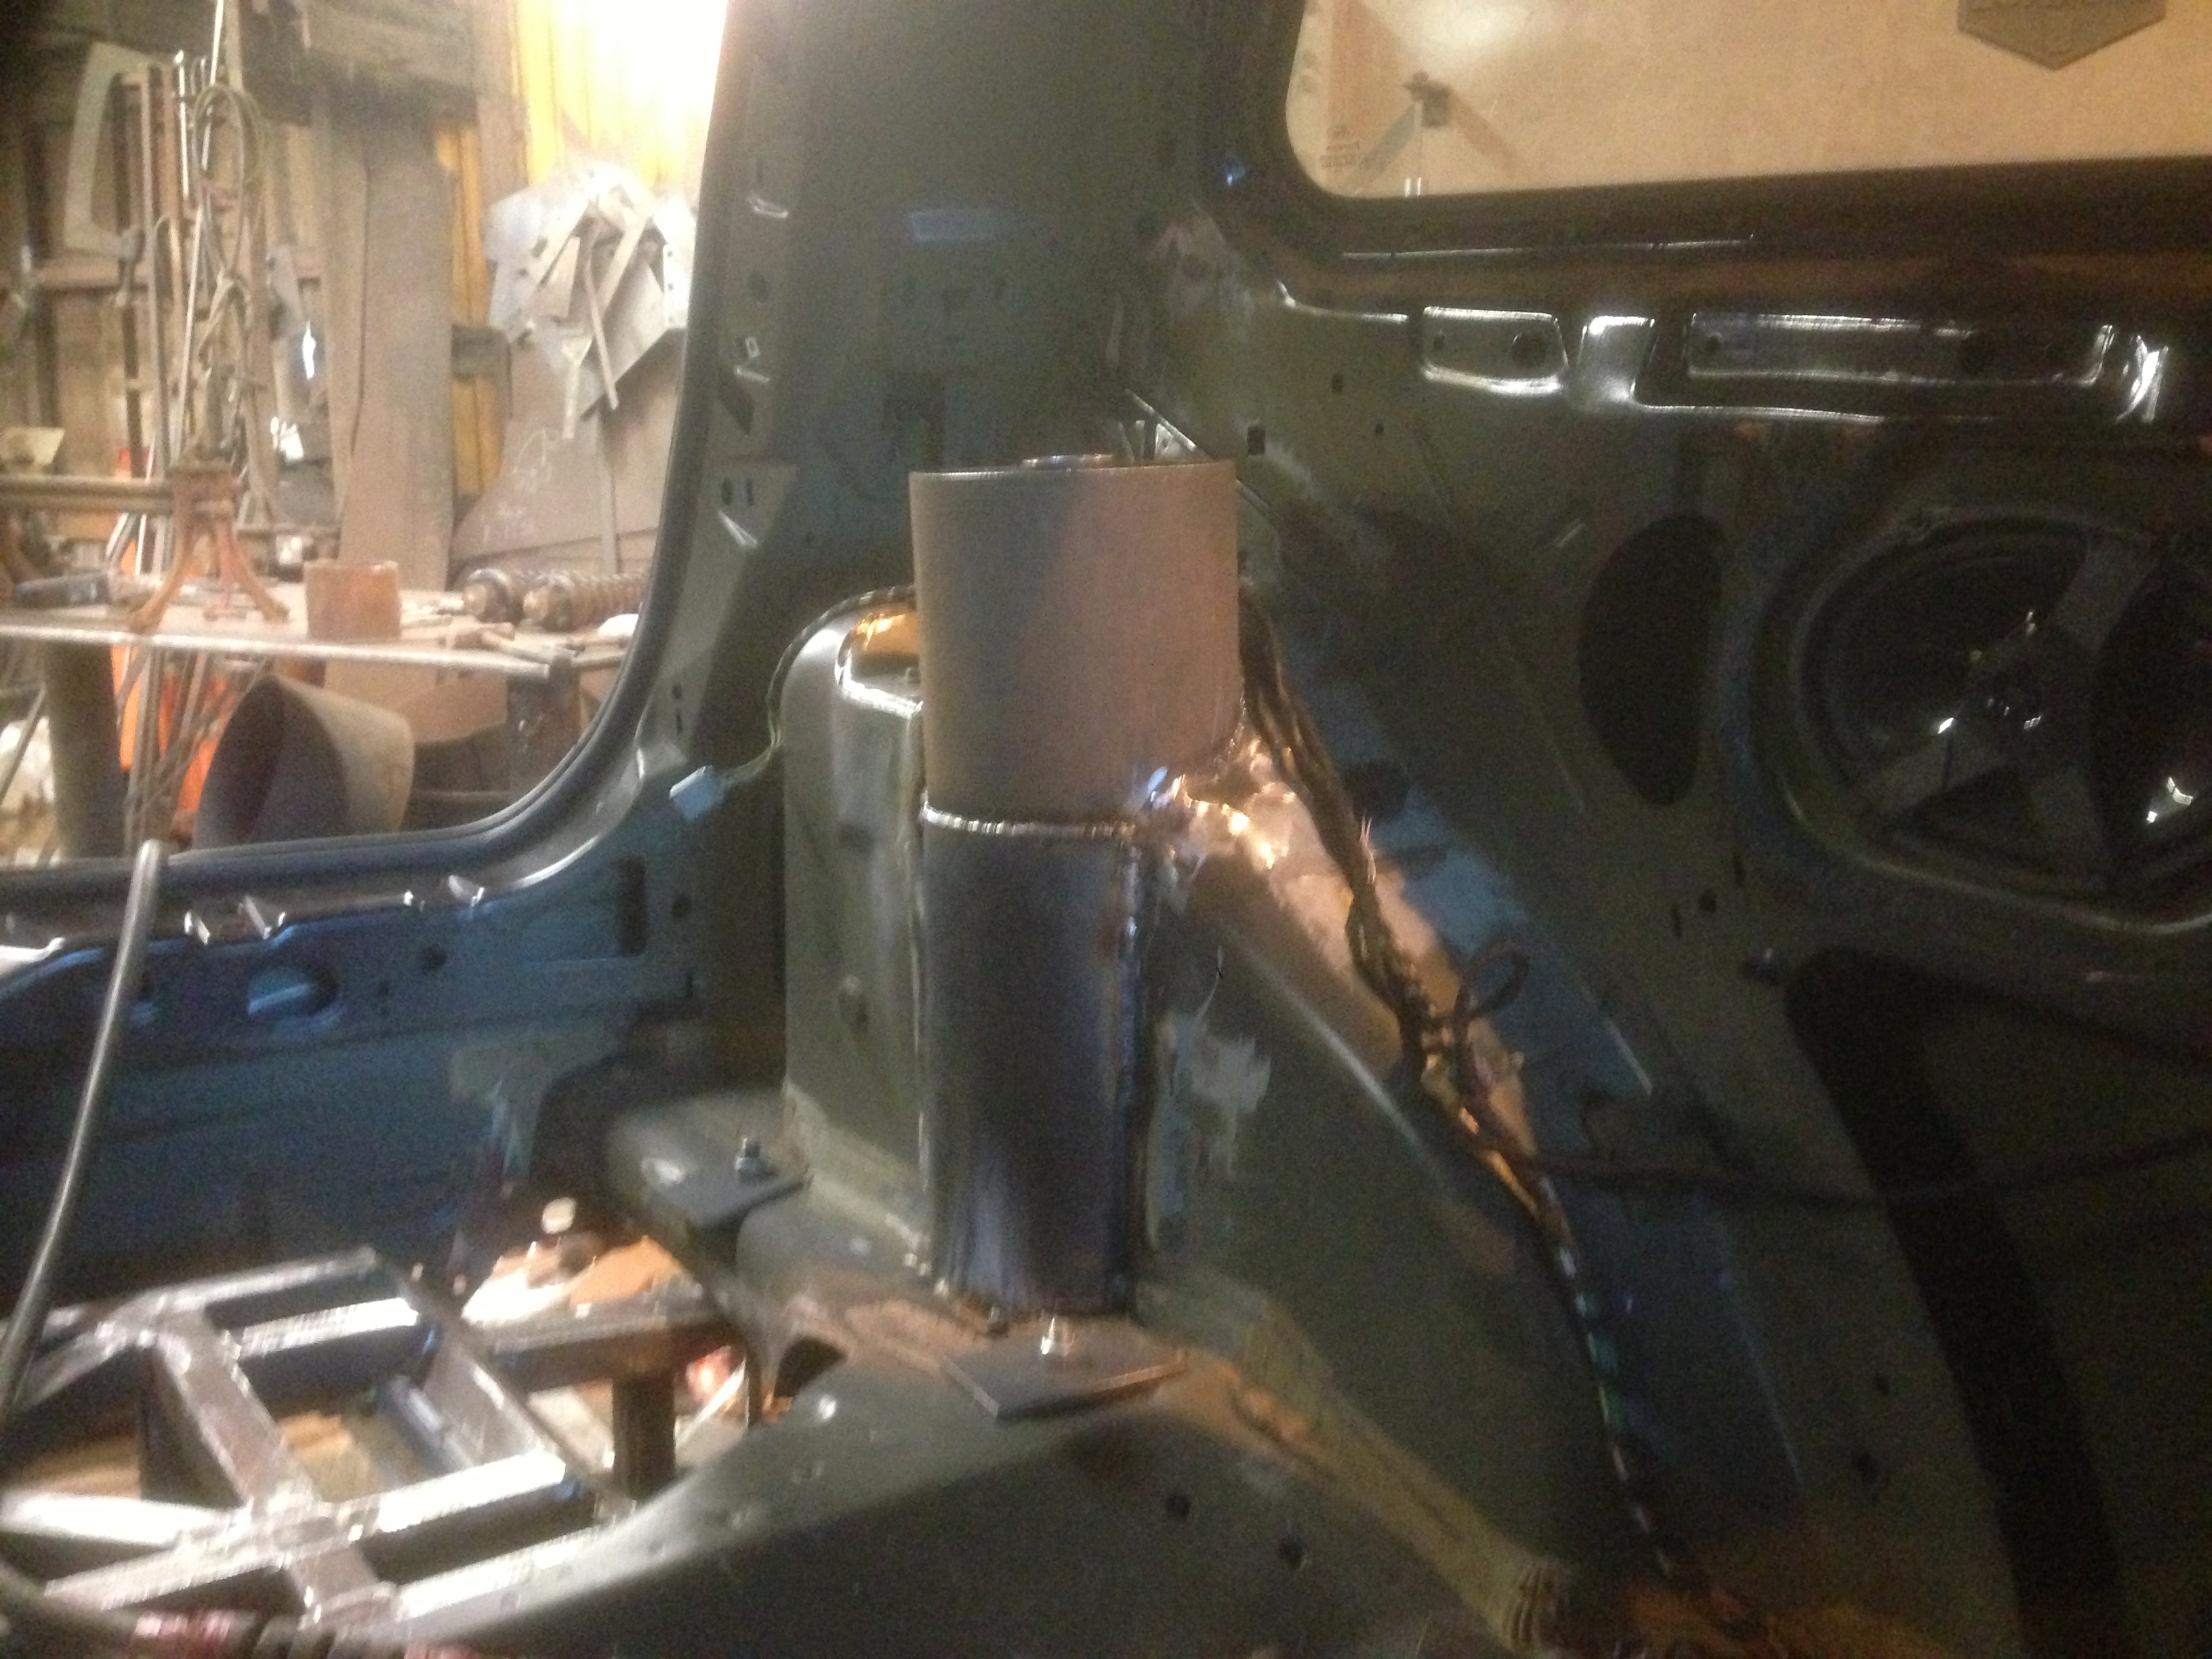
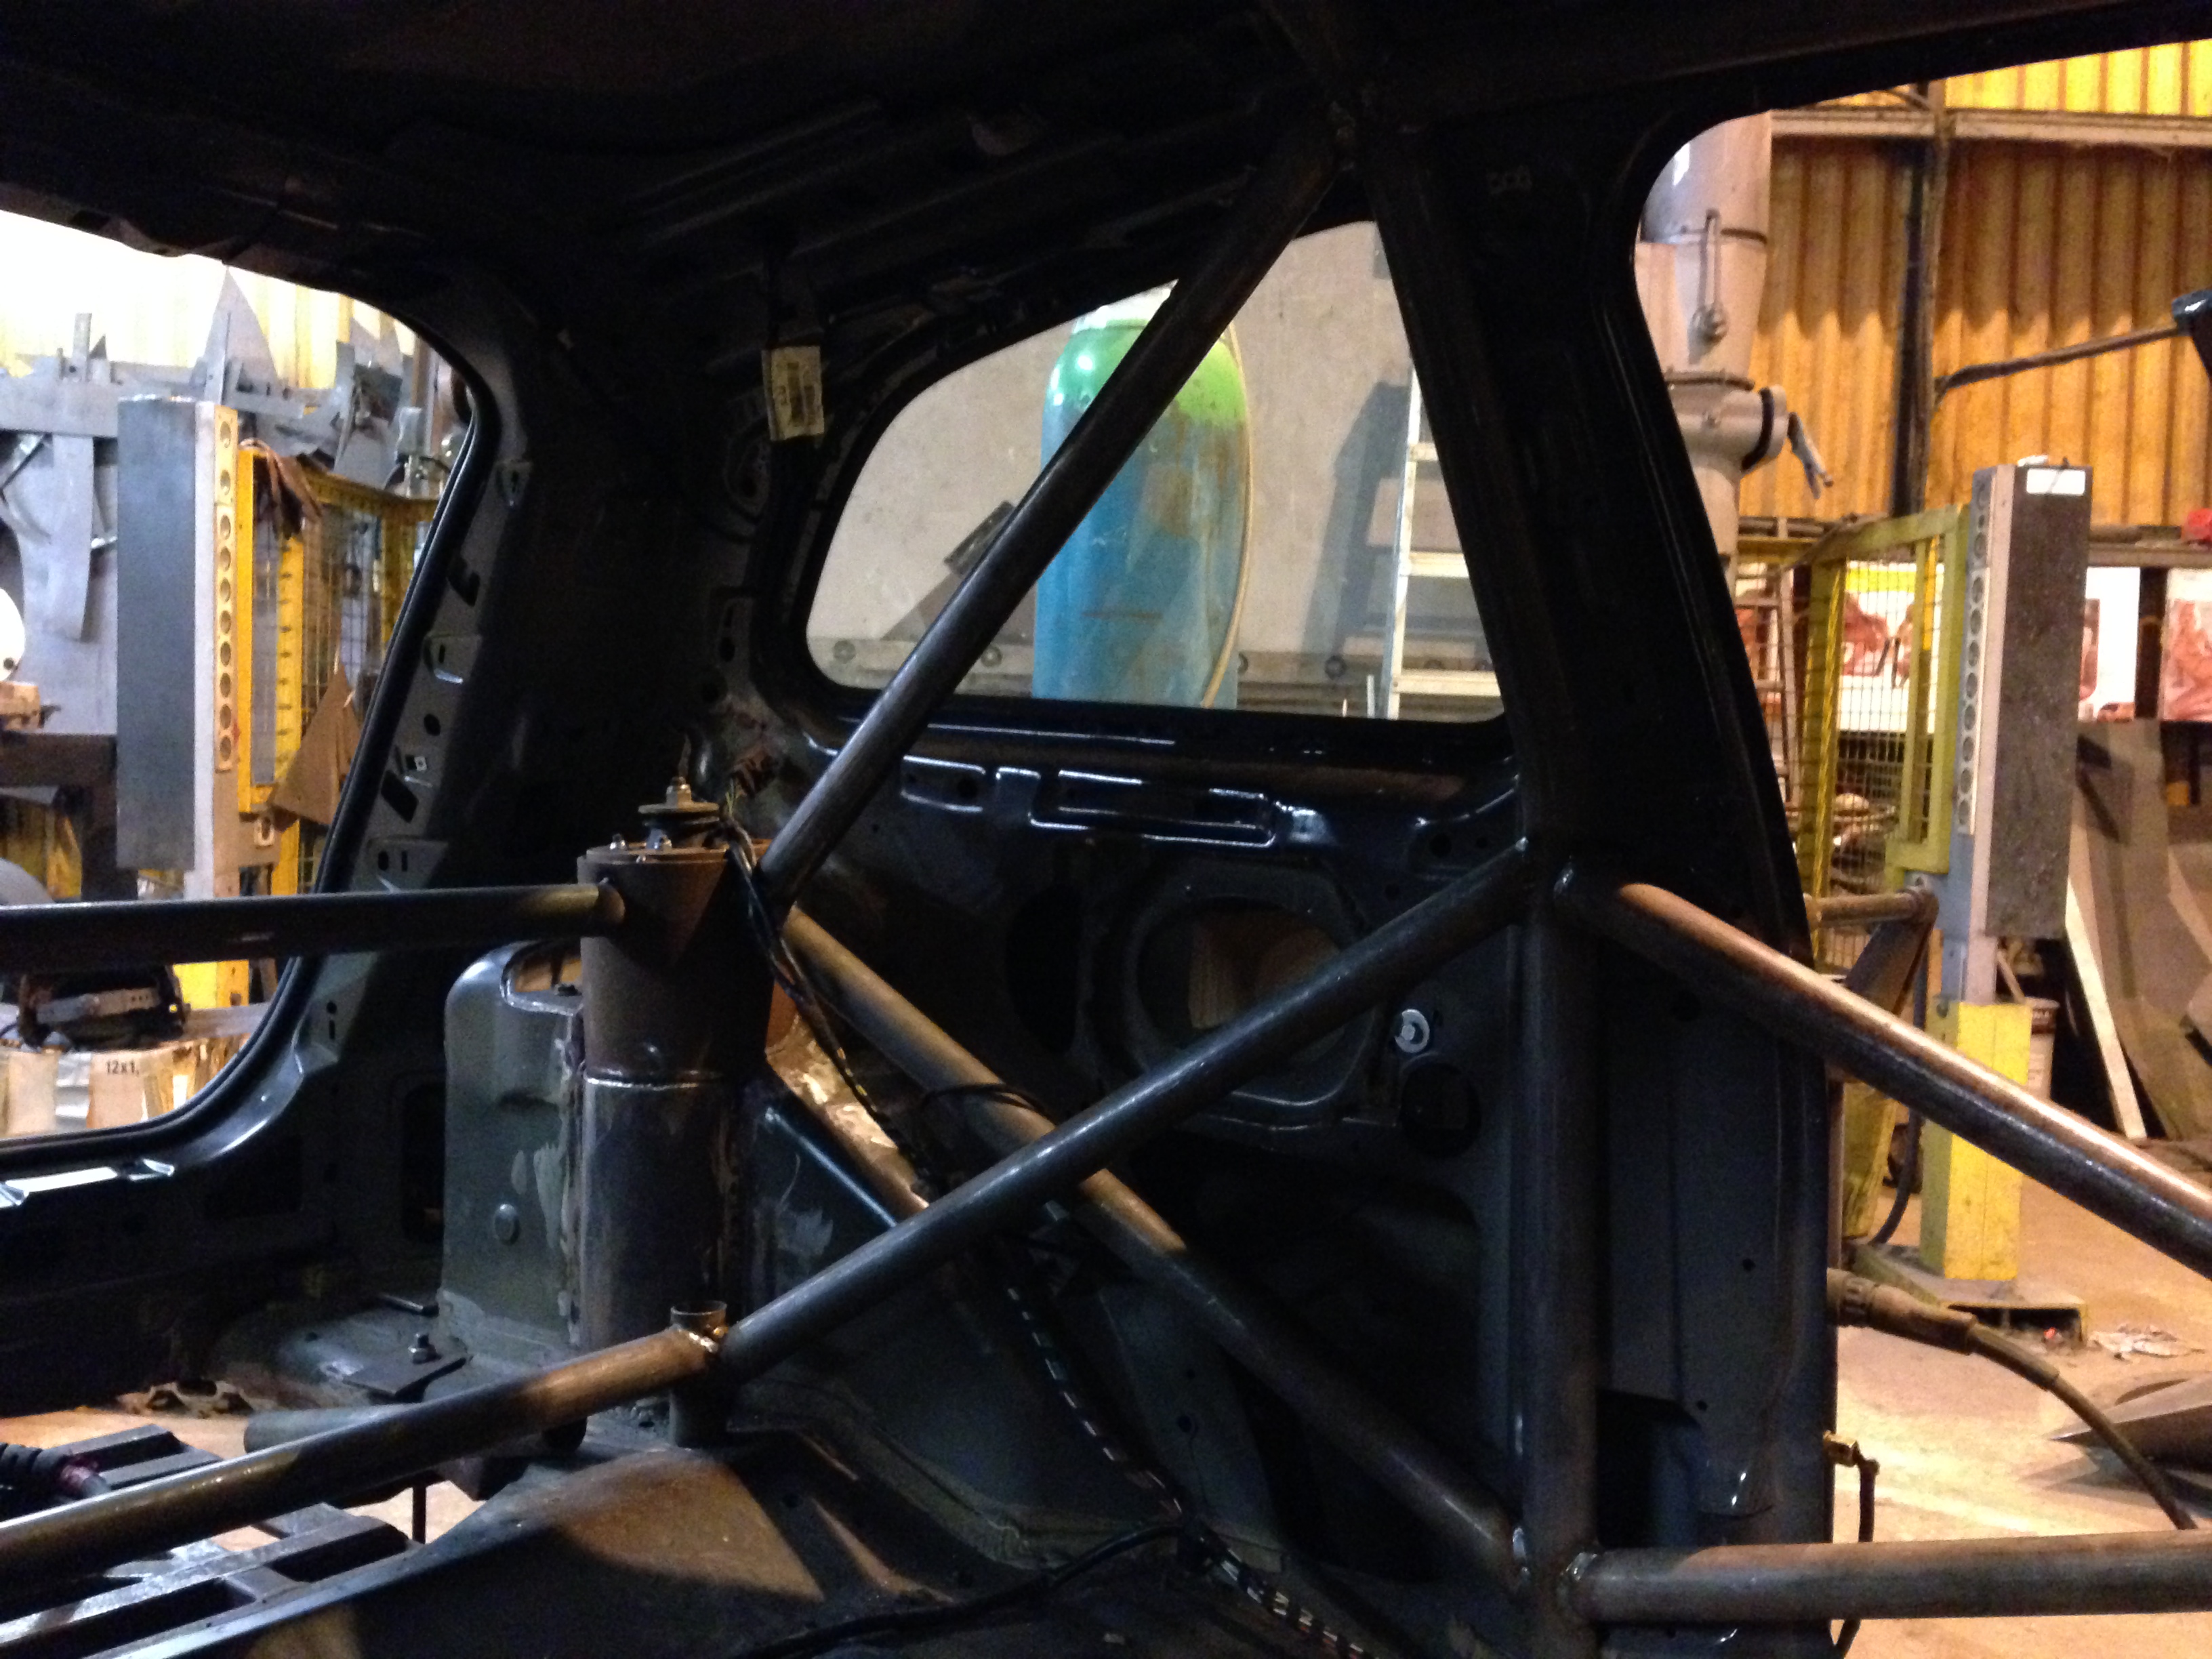
Hit the workshop at 6am. Firstly set up the underside jigs for turret alignment, then chopped out another big hole in the top of the arch. Got the turret in and welded - happy days! Now need to weld in the top mounts on both sides, then all set for making a start on the cage in the morning.
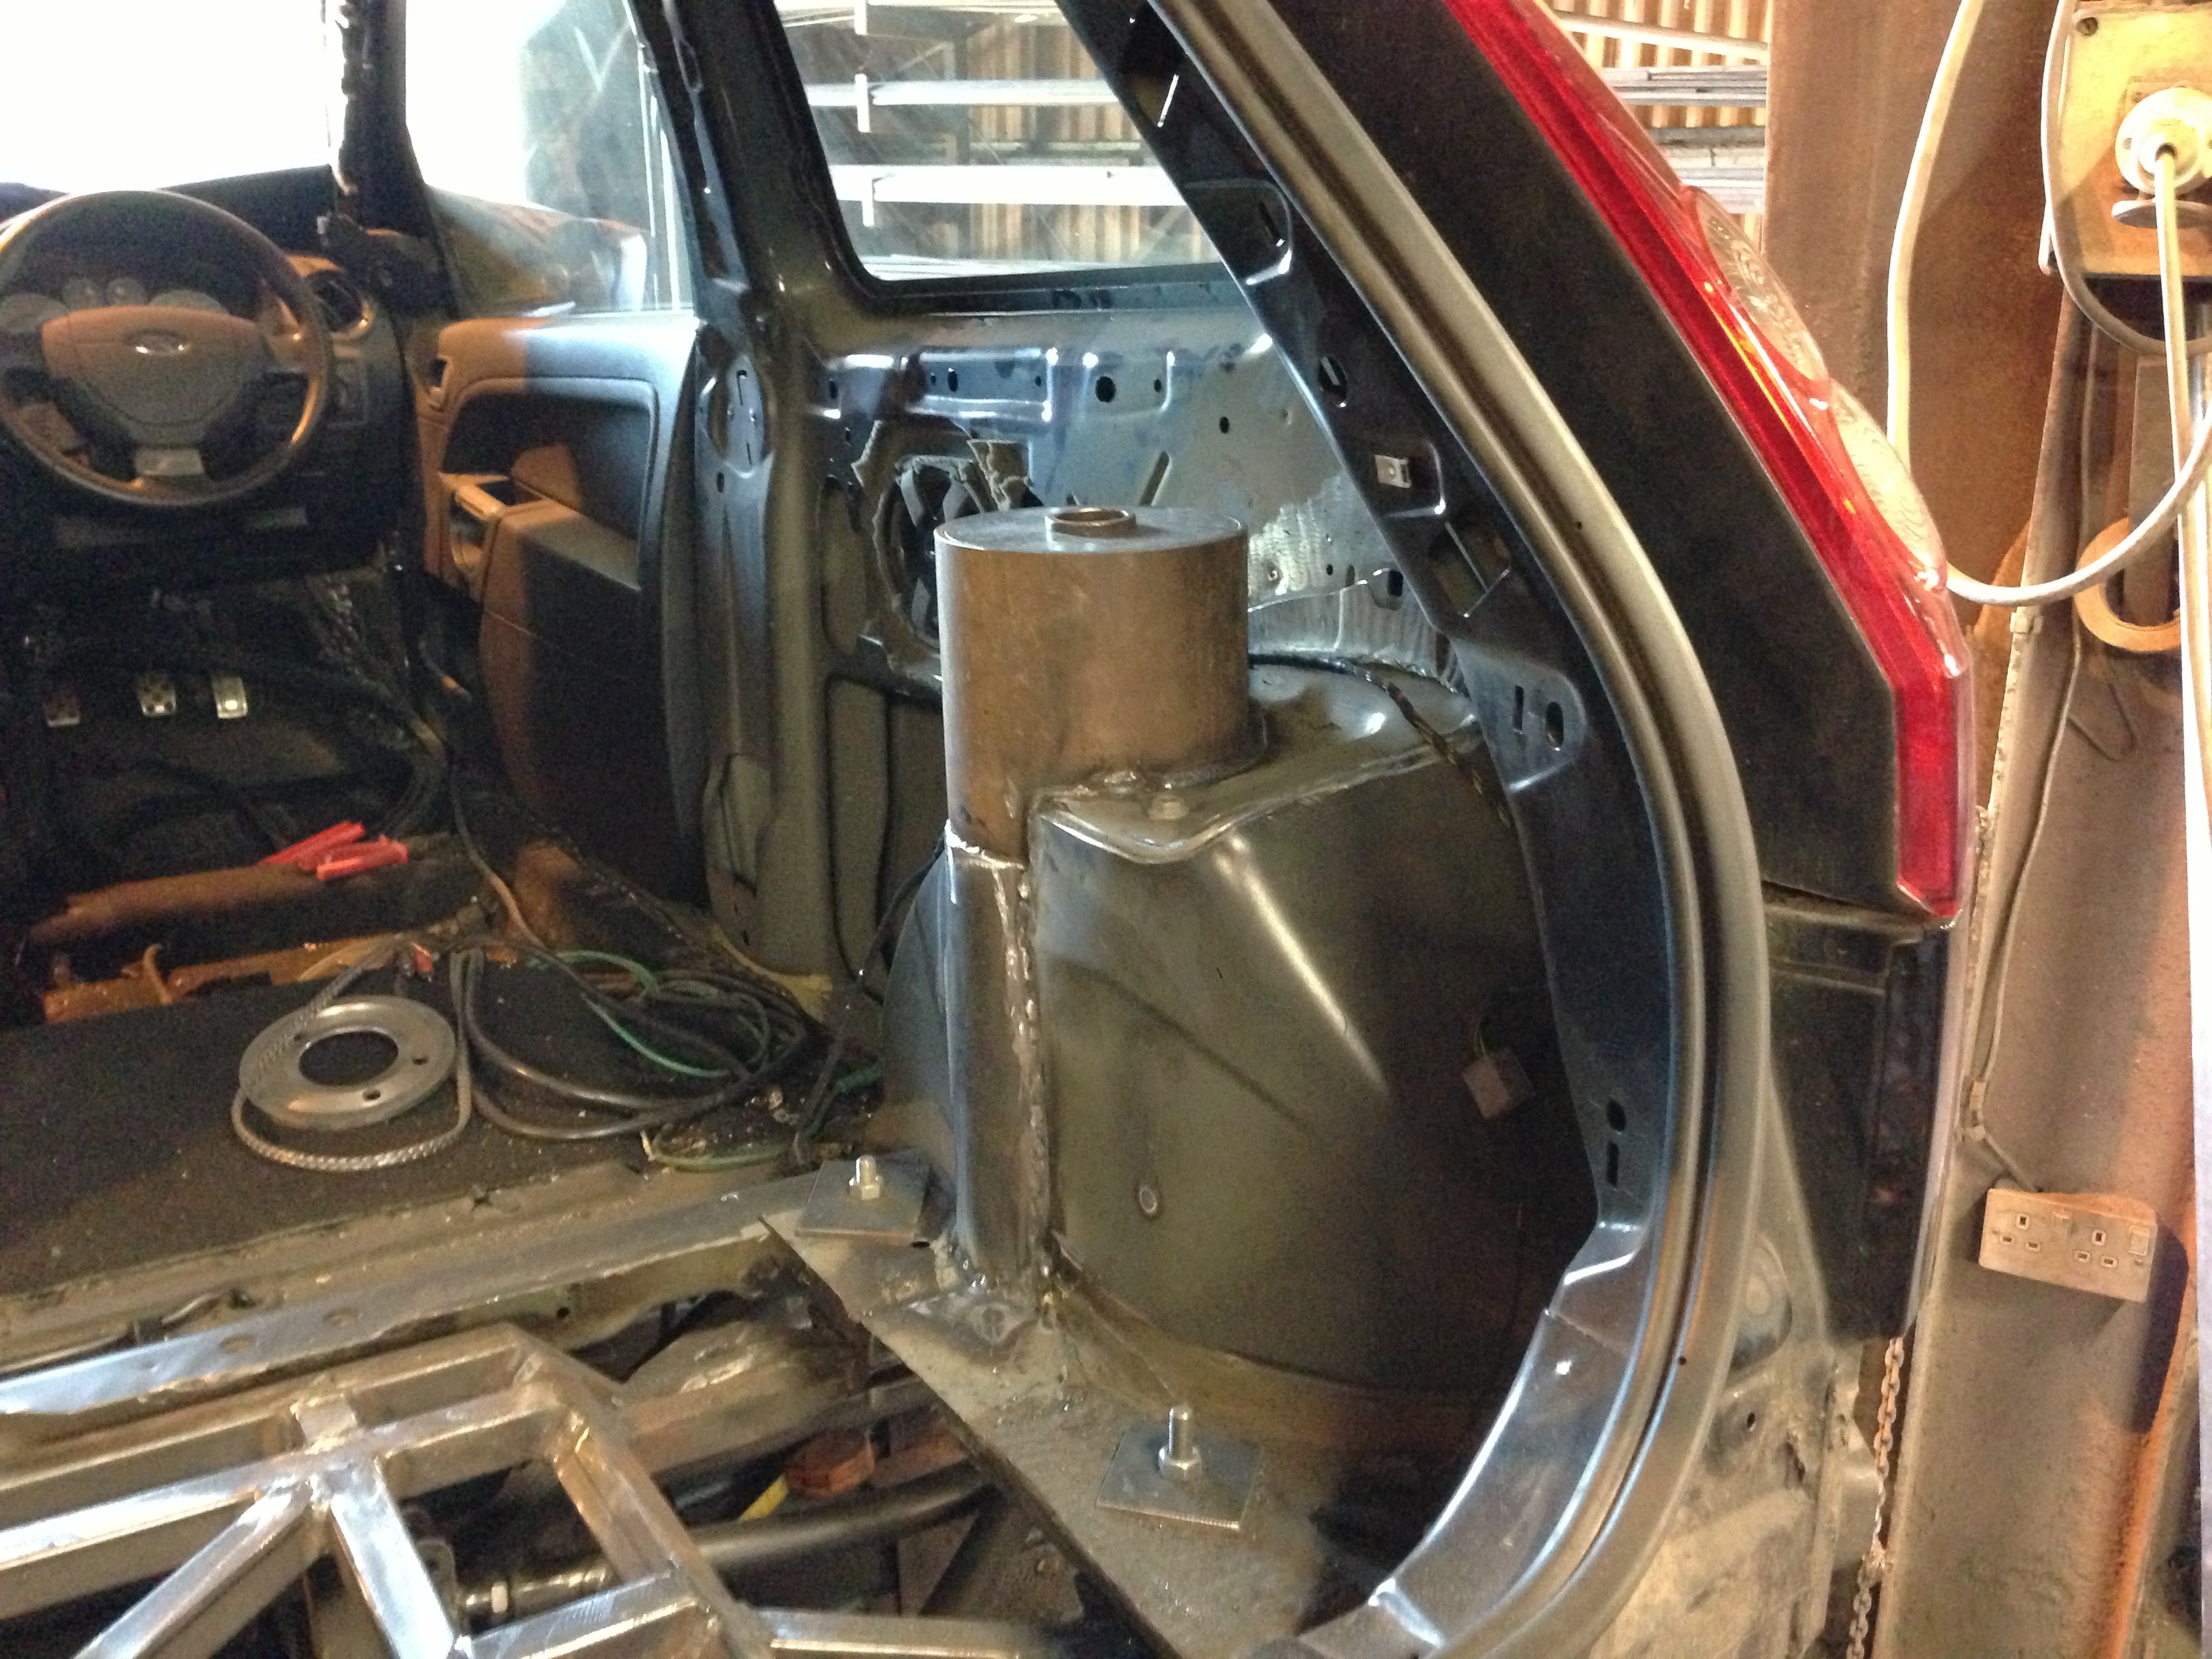
Hit the workshop at 6am. Firstly set up the underside jigs for turret alignment, then chopped out another big hole in the top of the arch. Got the turret in and welded - happy days! Now need to weld in the top mounts on both sides, then all set for making a start on the cage in the morning.
08-07-2013, 05:47 PM
#89
Regular Contributor
Thread Starter
Join Date: Mar 2012
Location: Doncaster
Posts: 241
Likes: 0
Received 0 Likes
on
0 Posts
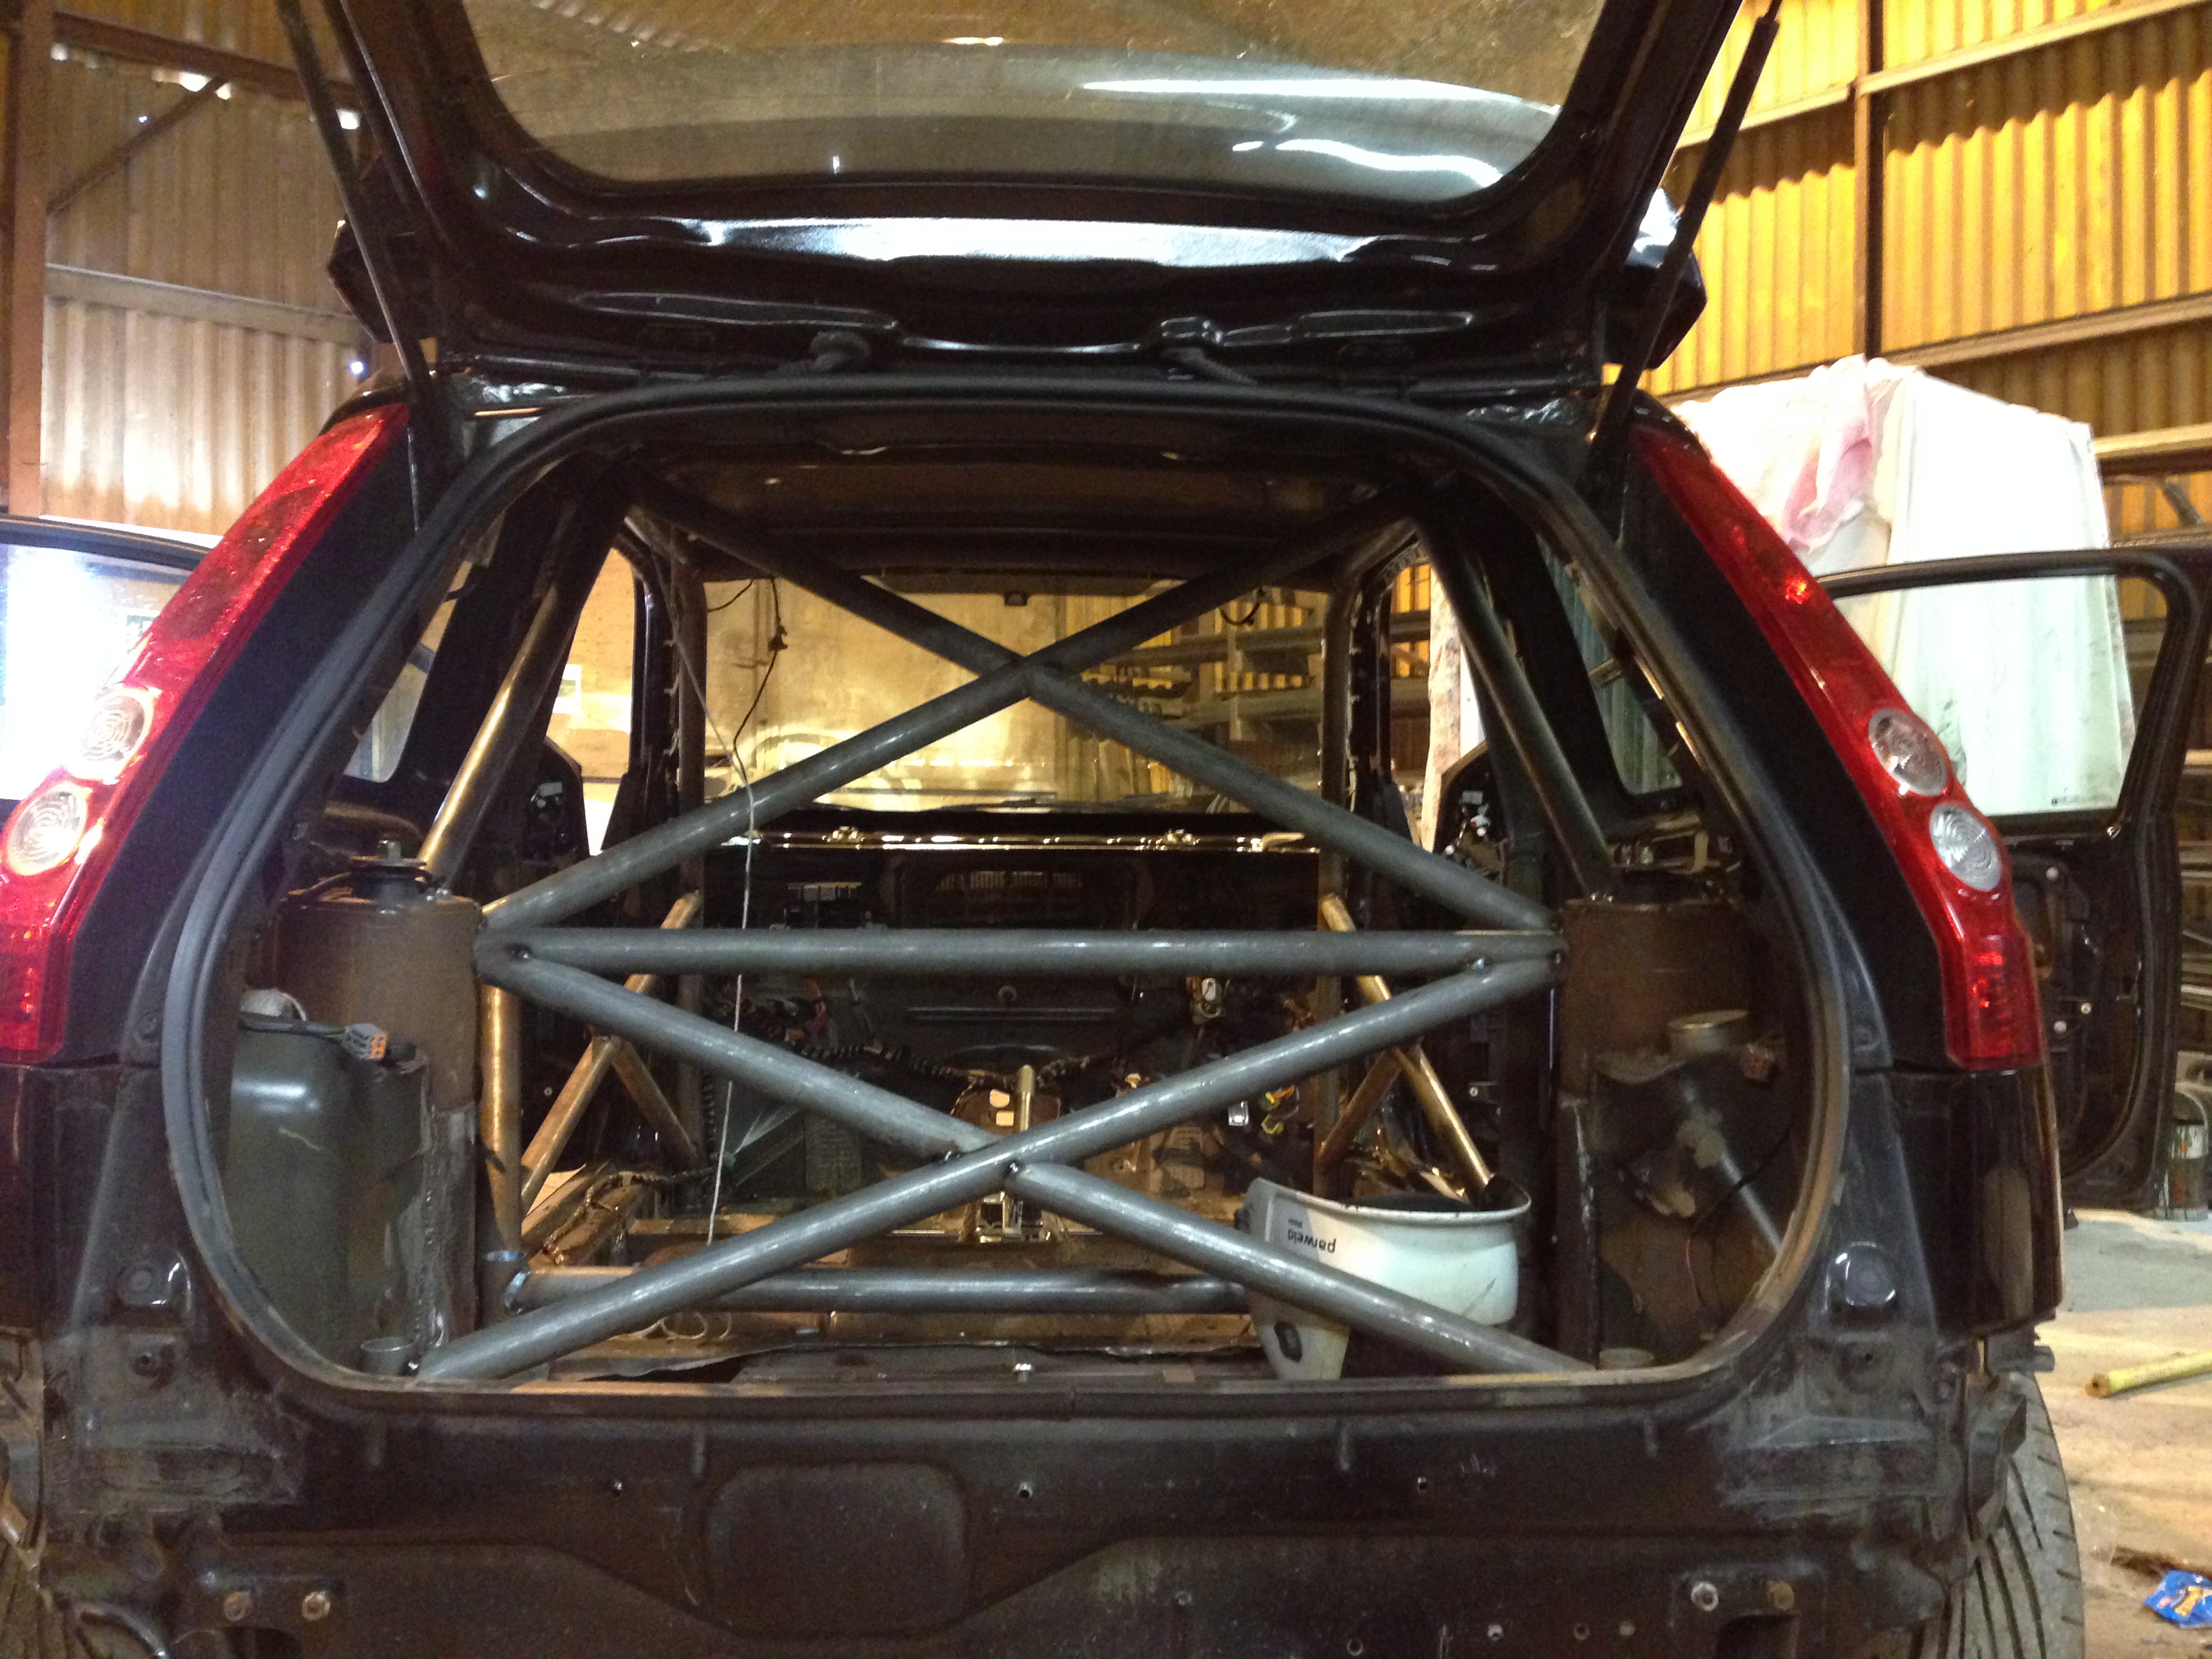
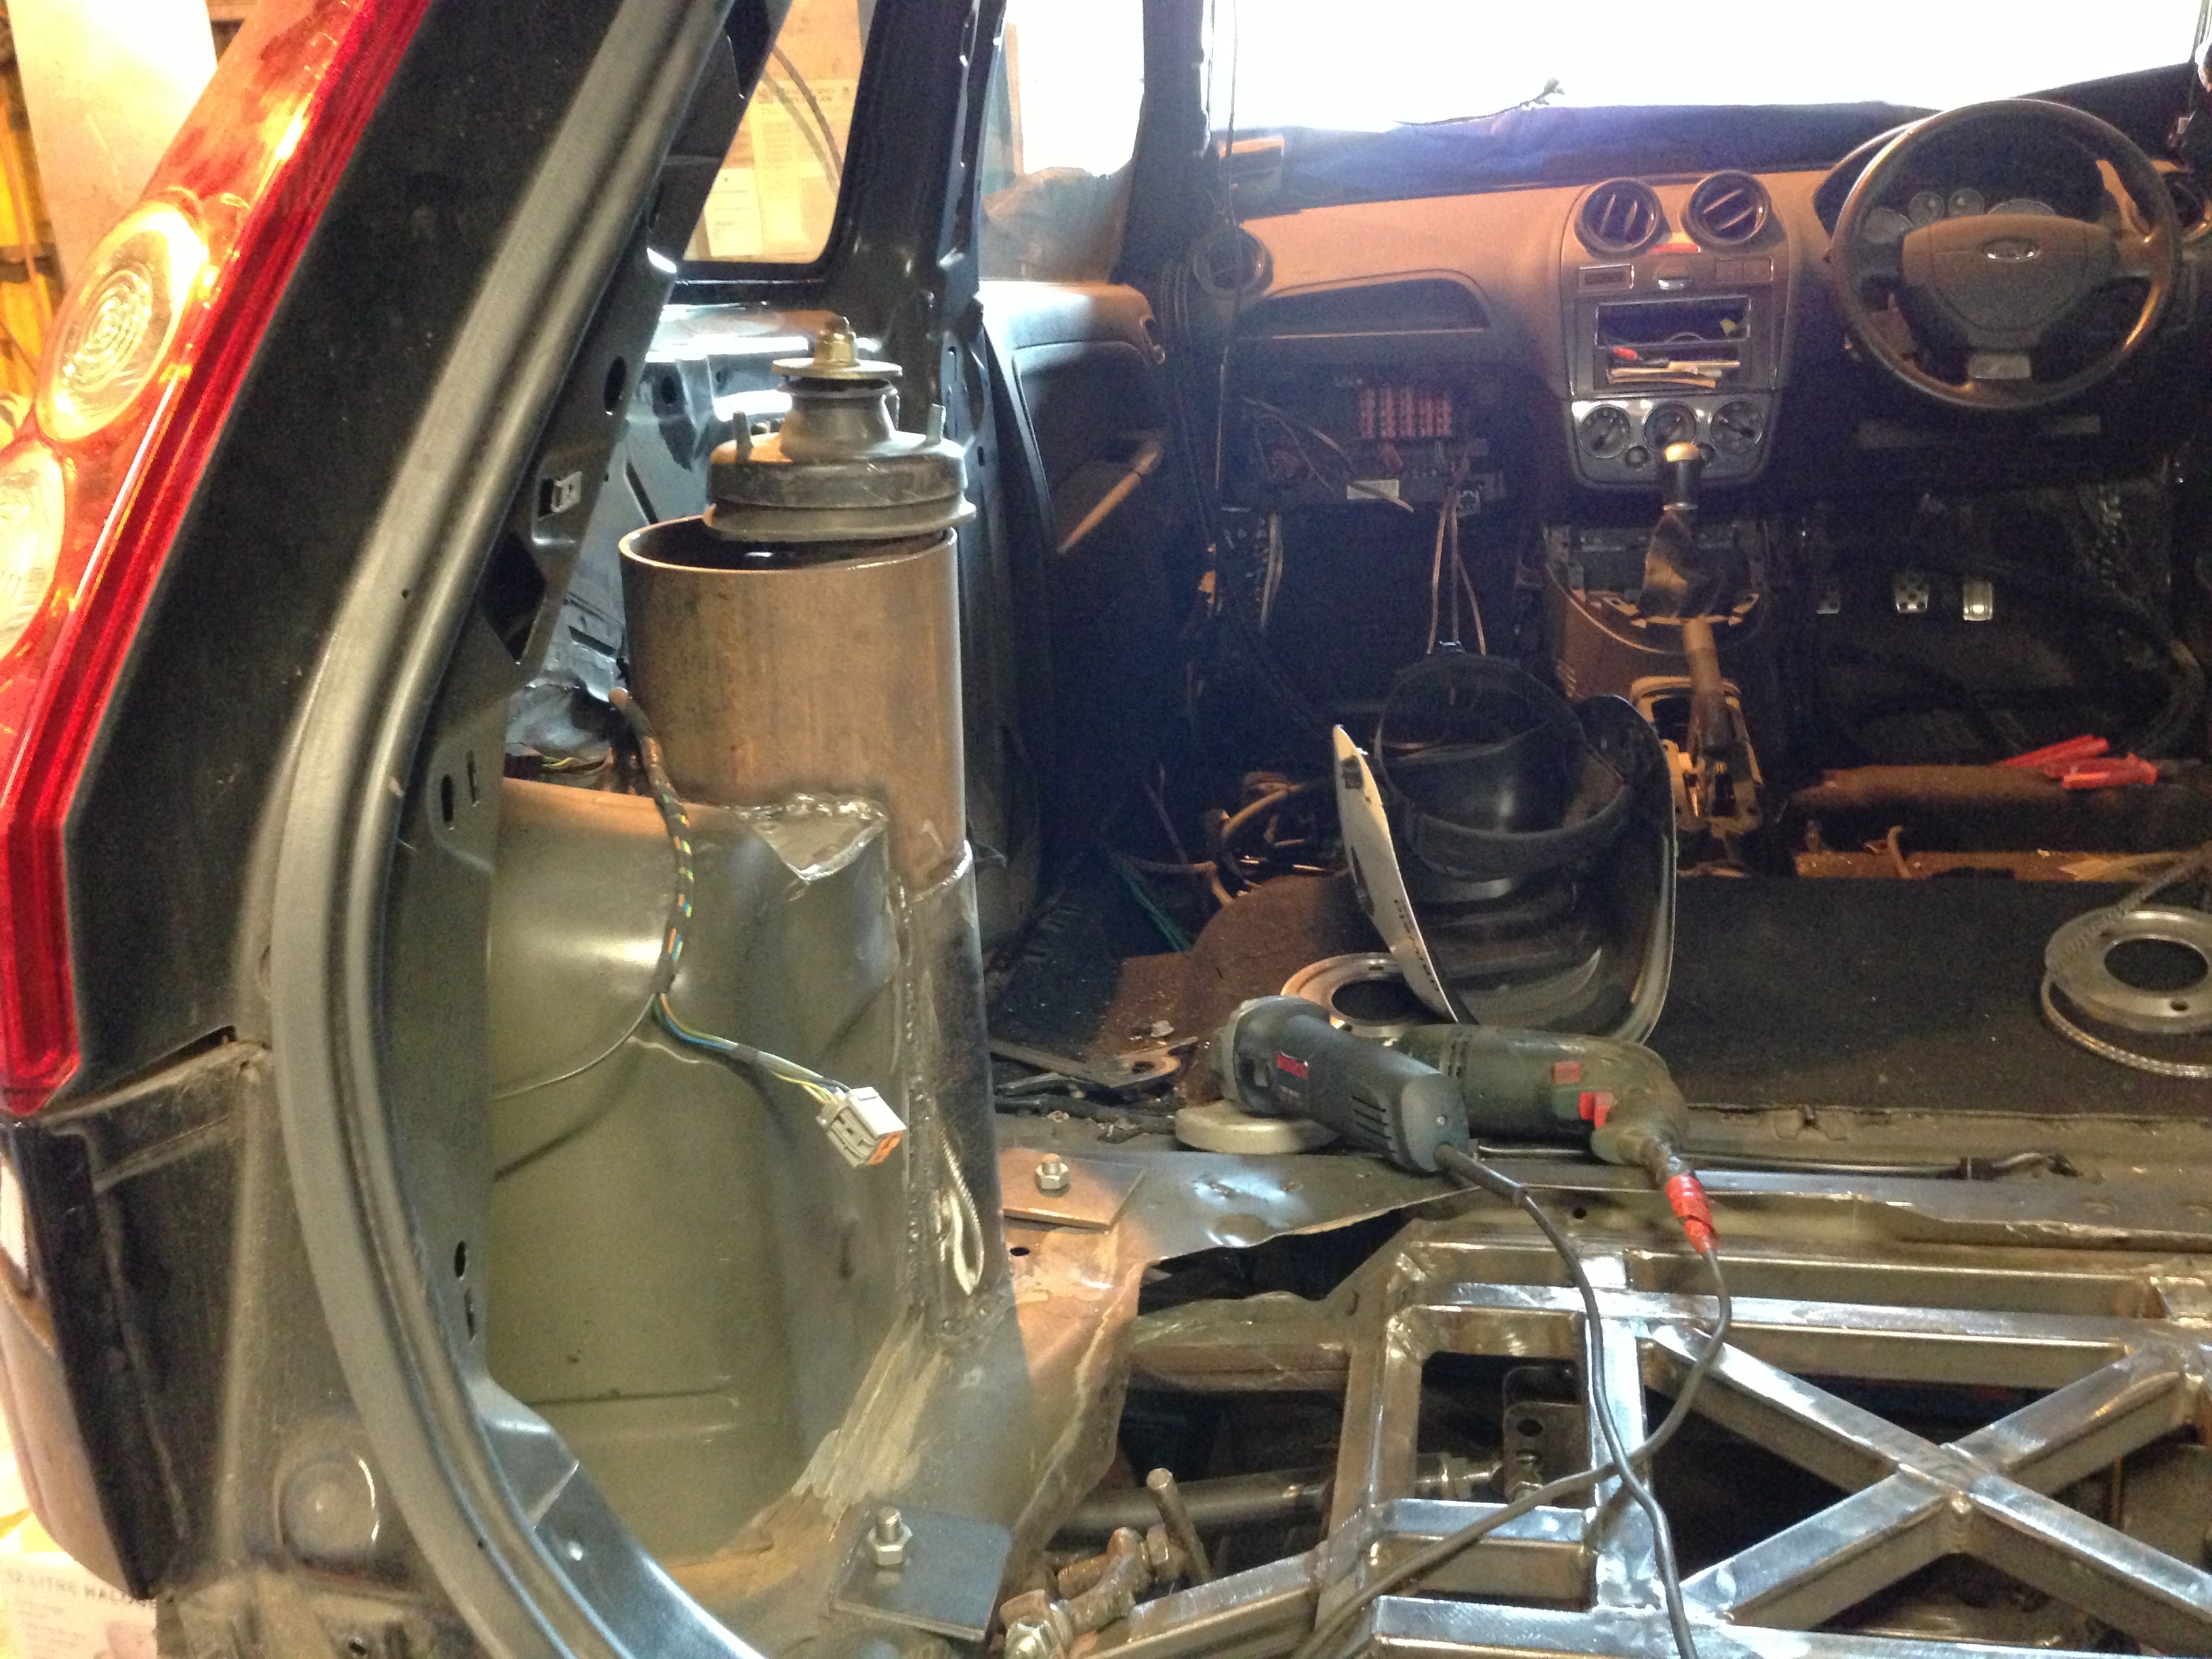
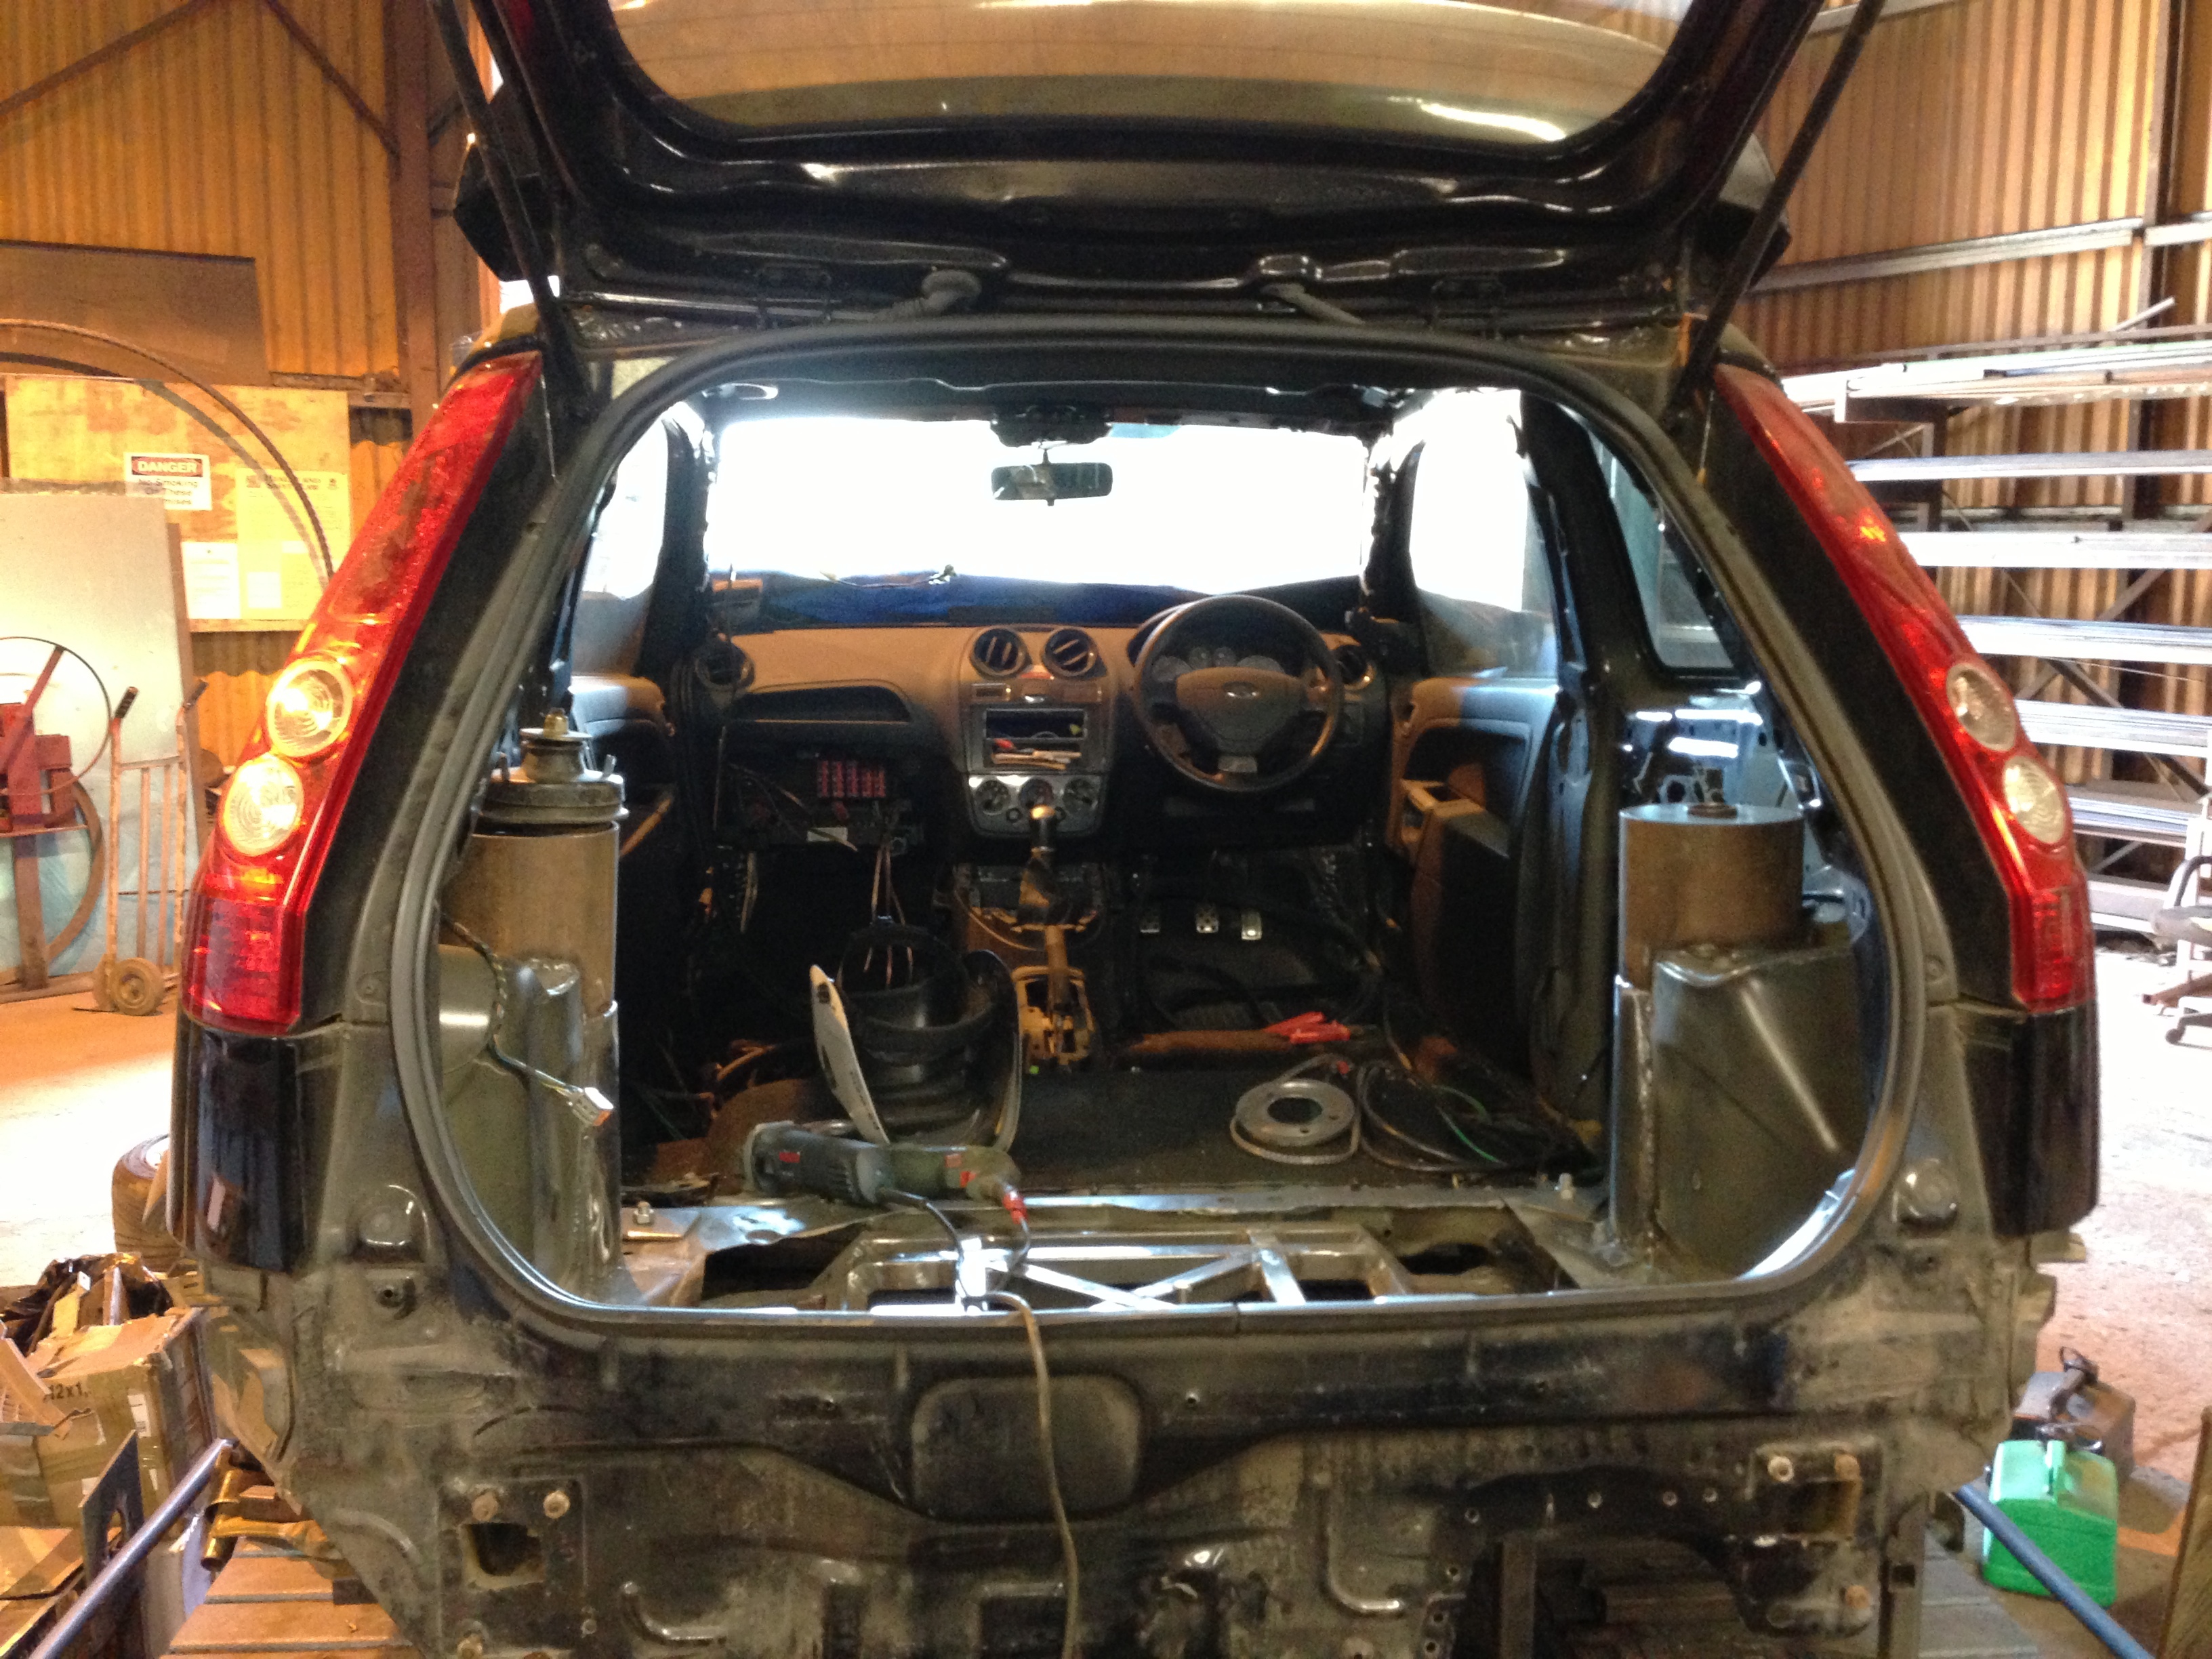
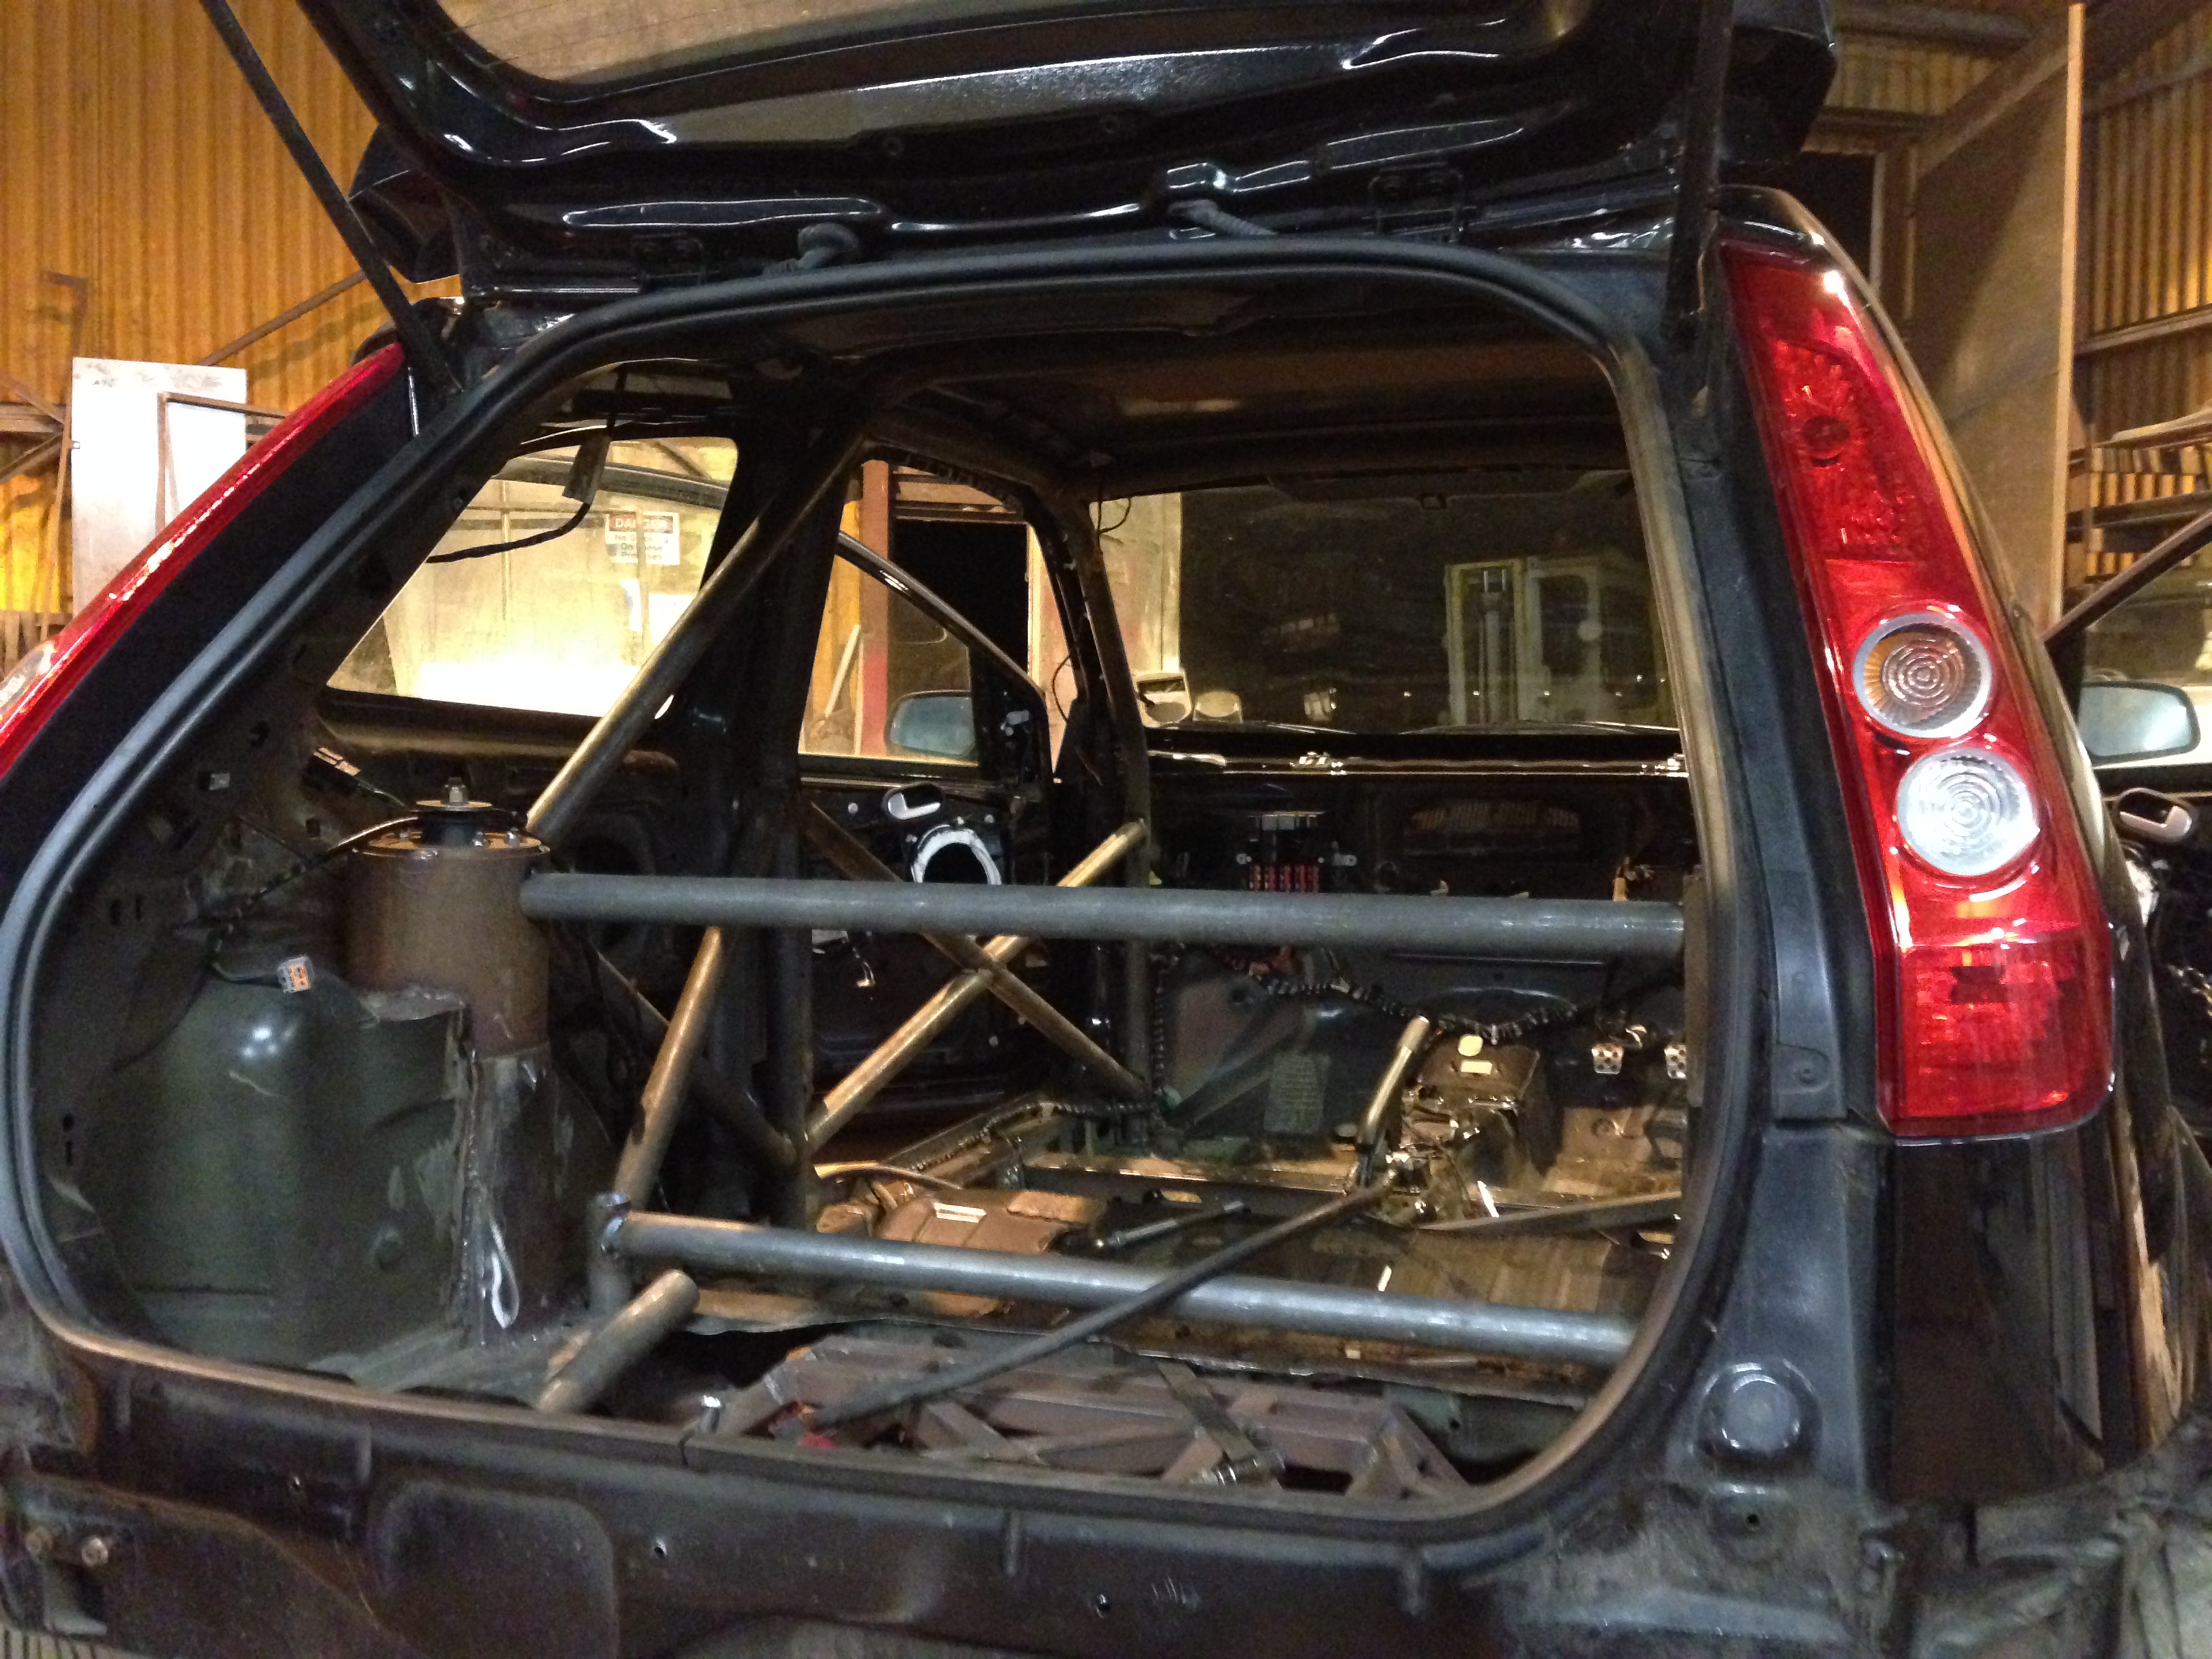
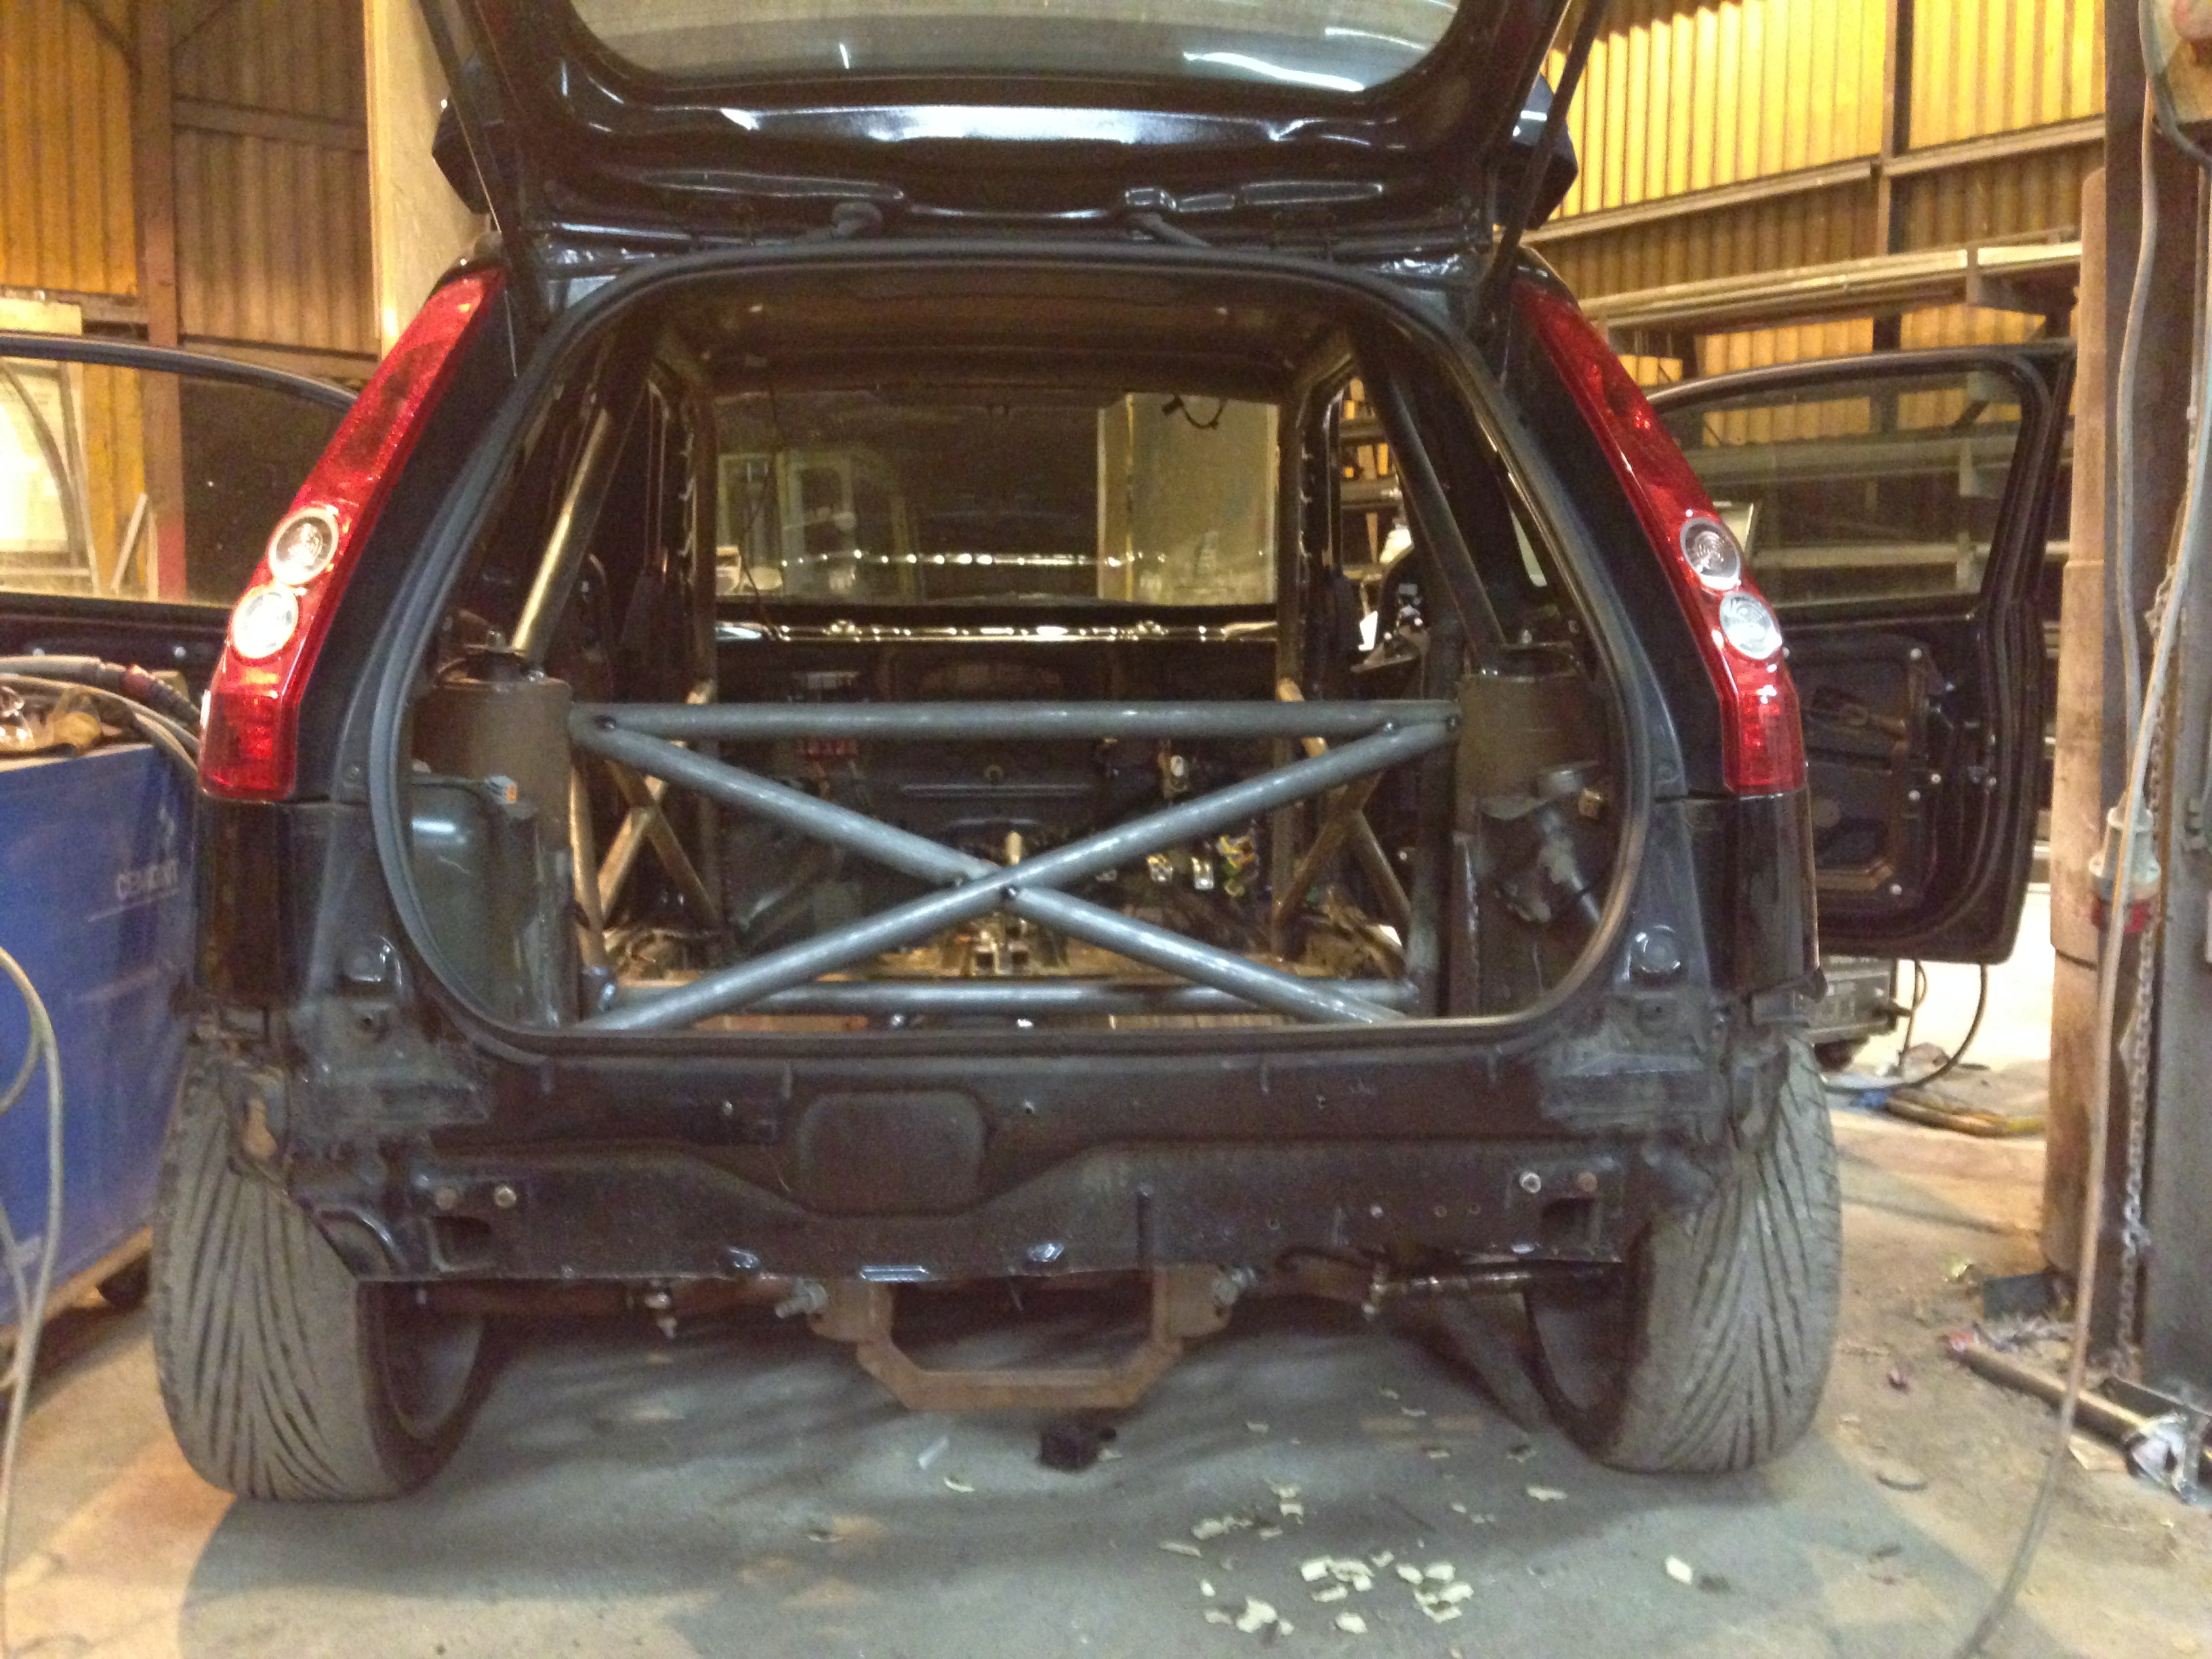
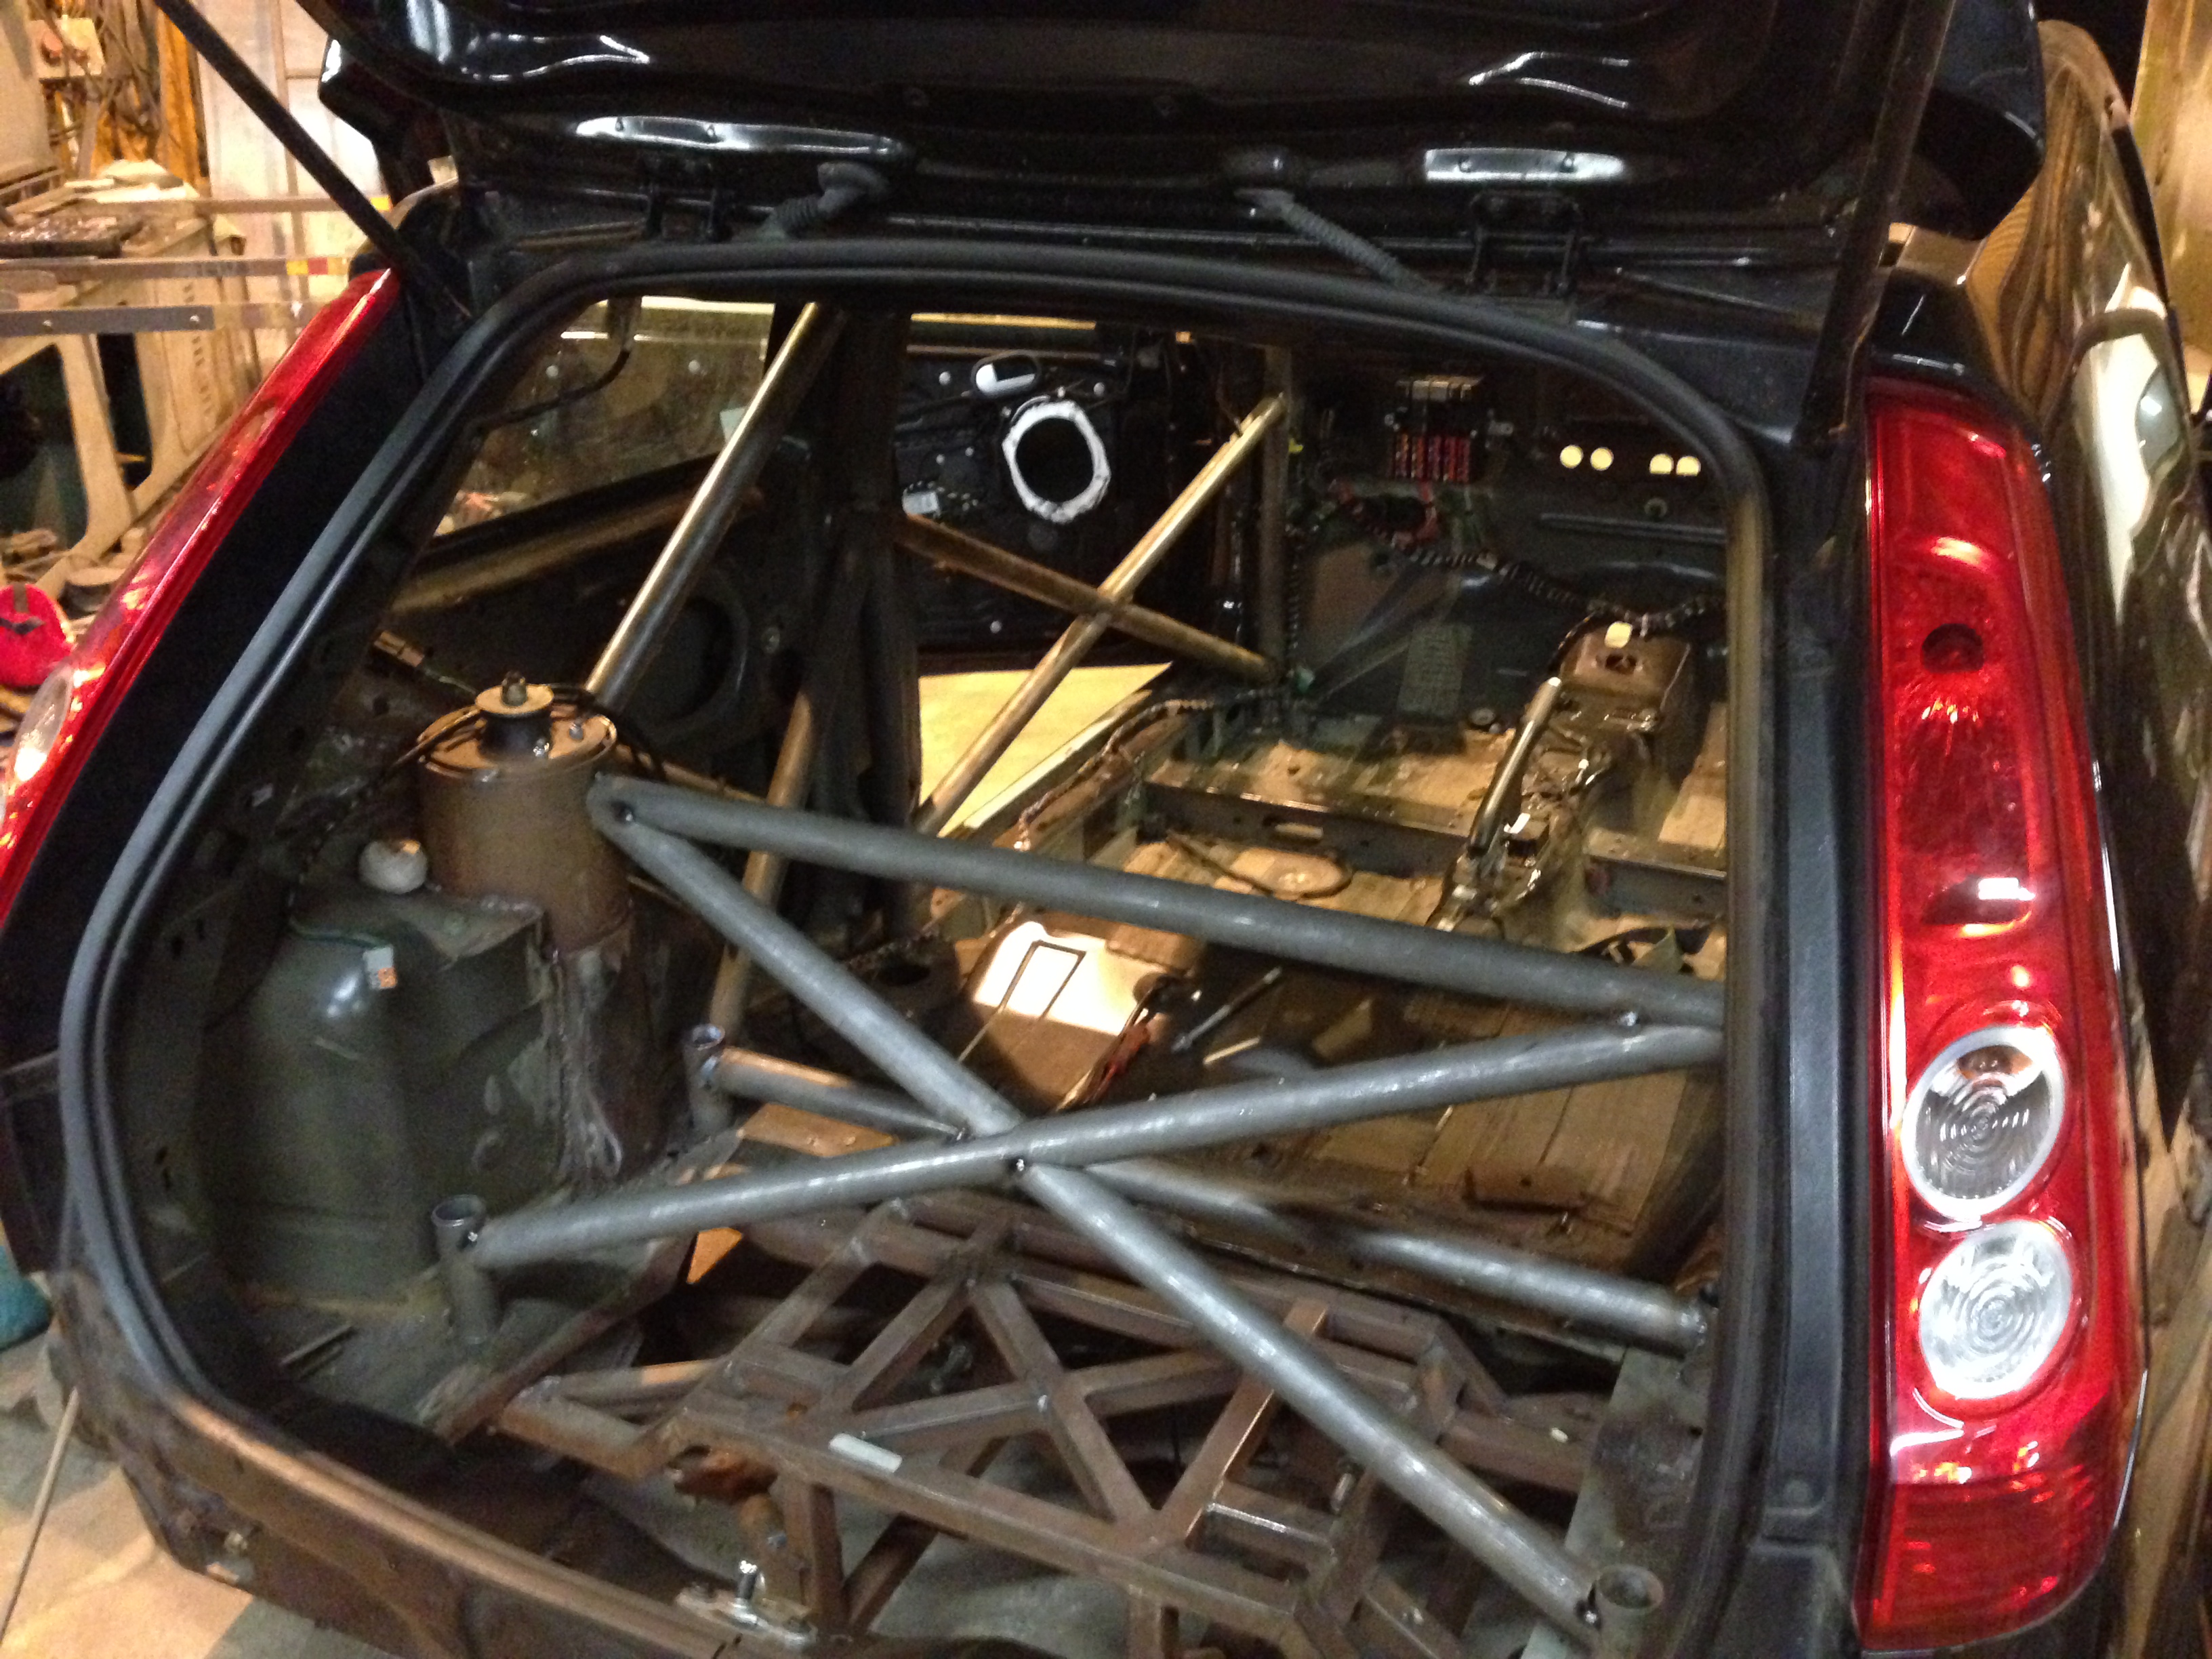
Just cut the back end off (only rough - I'll trim it neatly another time), can get a better view of the cradle etc now. I'll have to get it powder coated a nice vibrant colour in the near future!

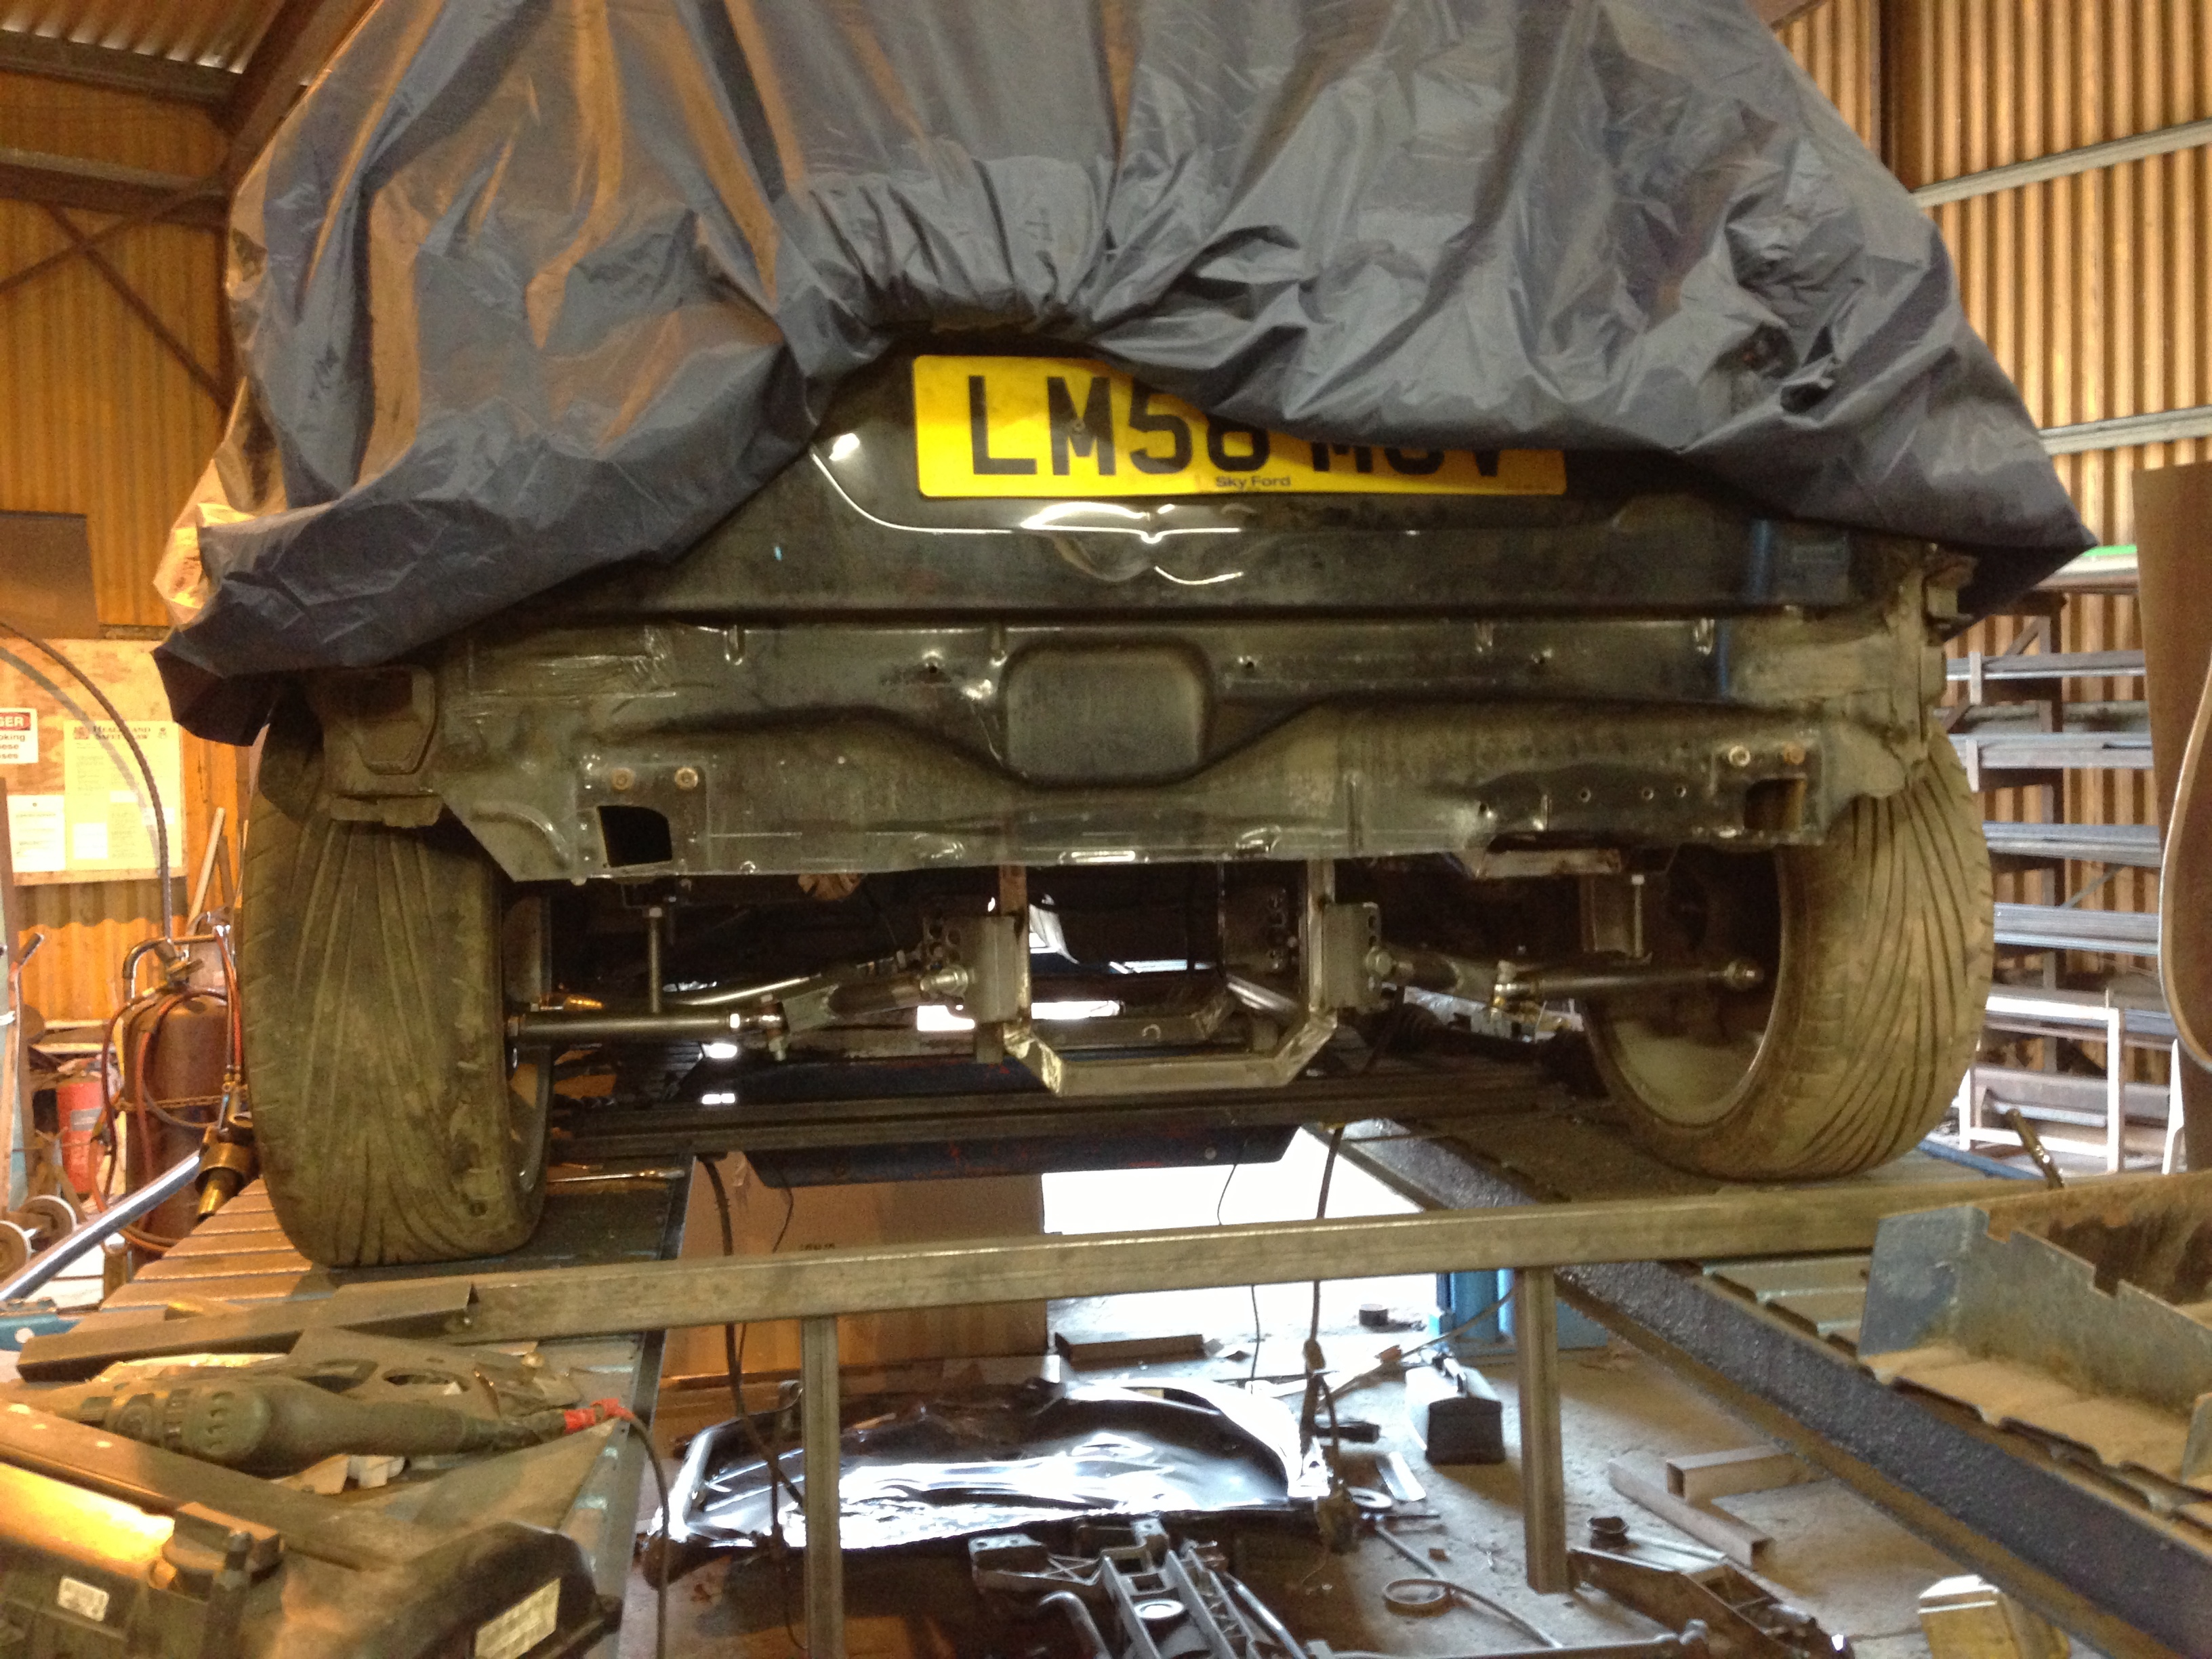
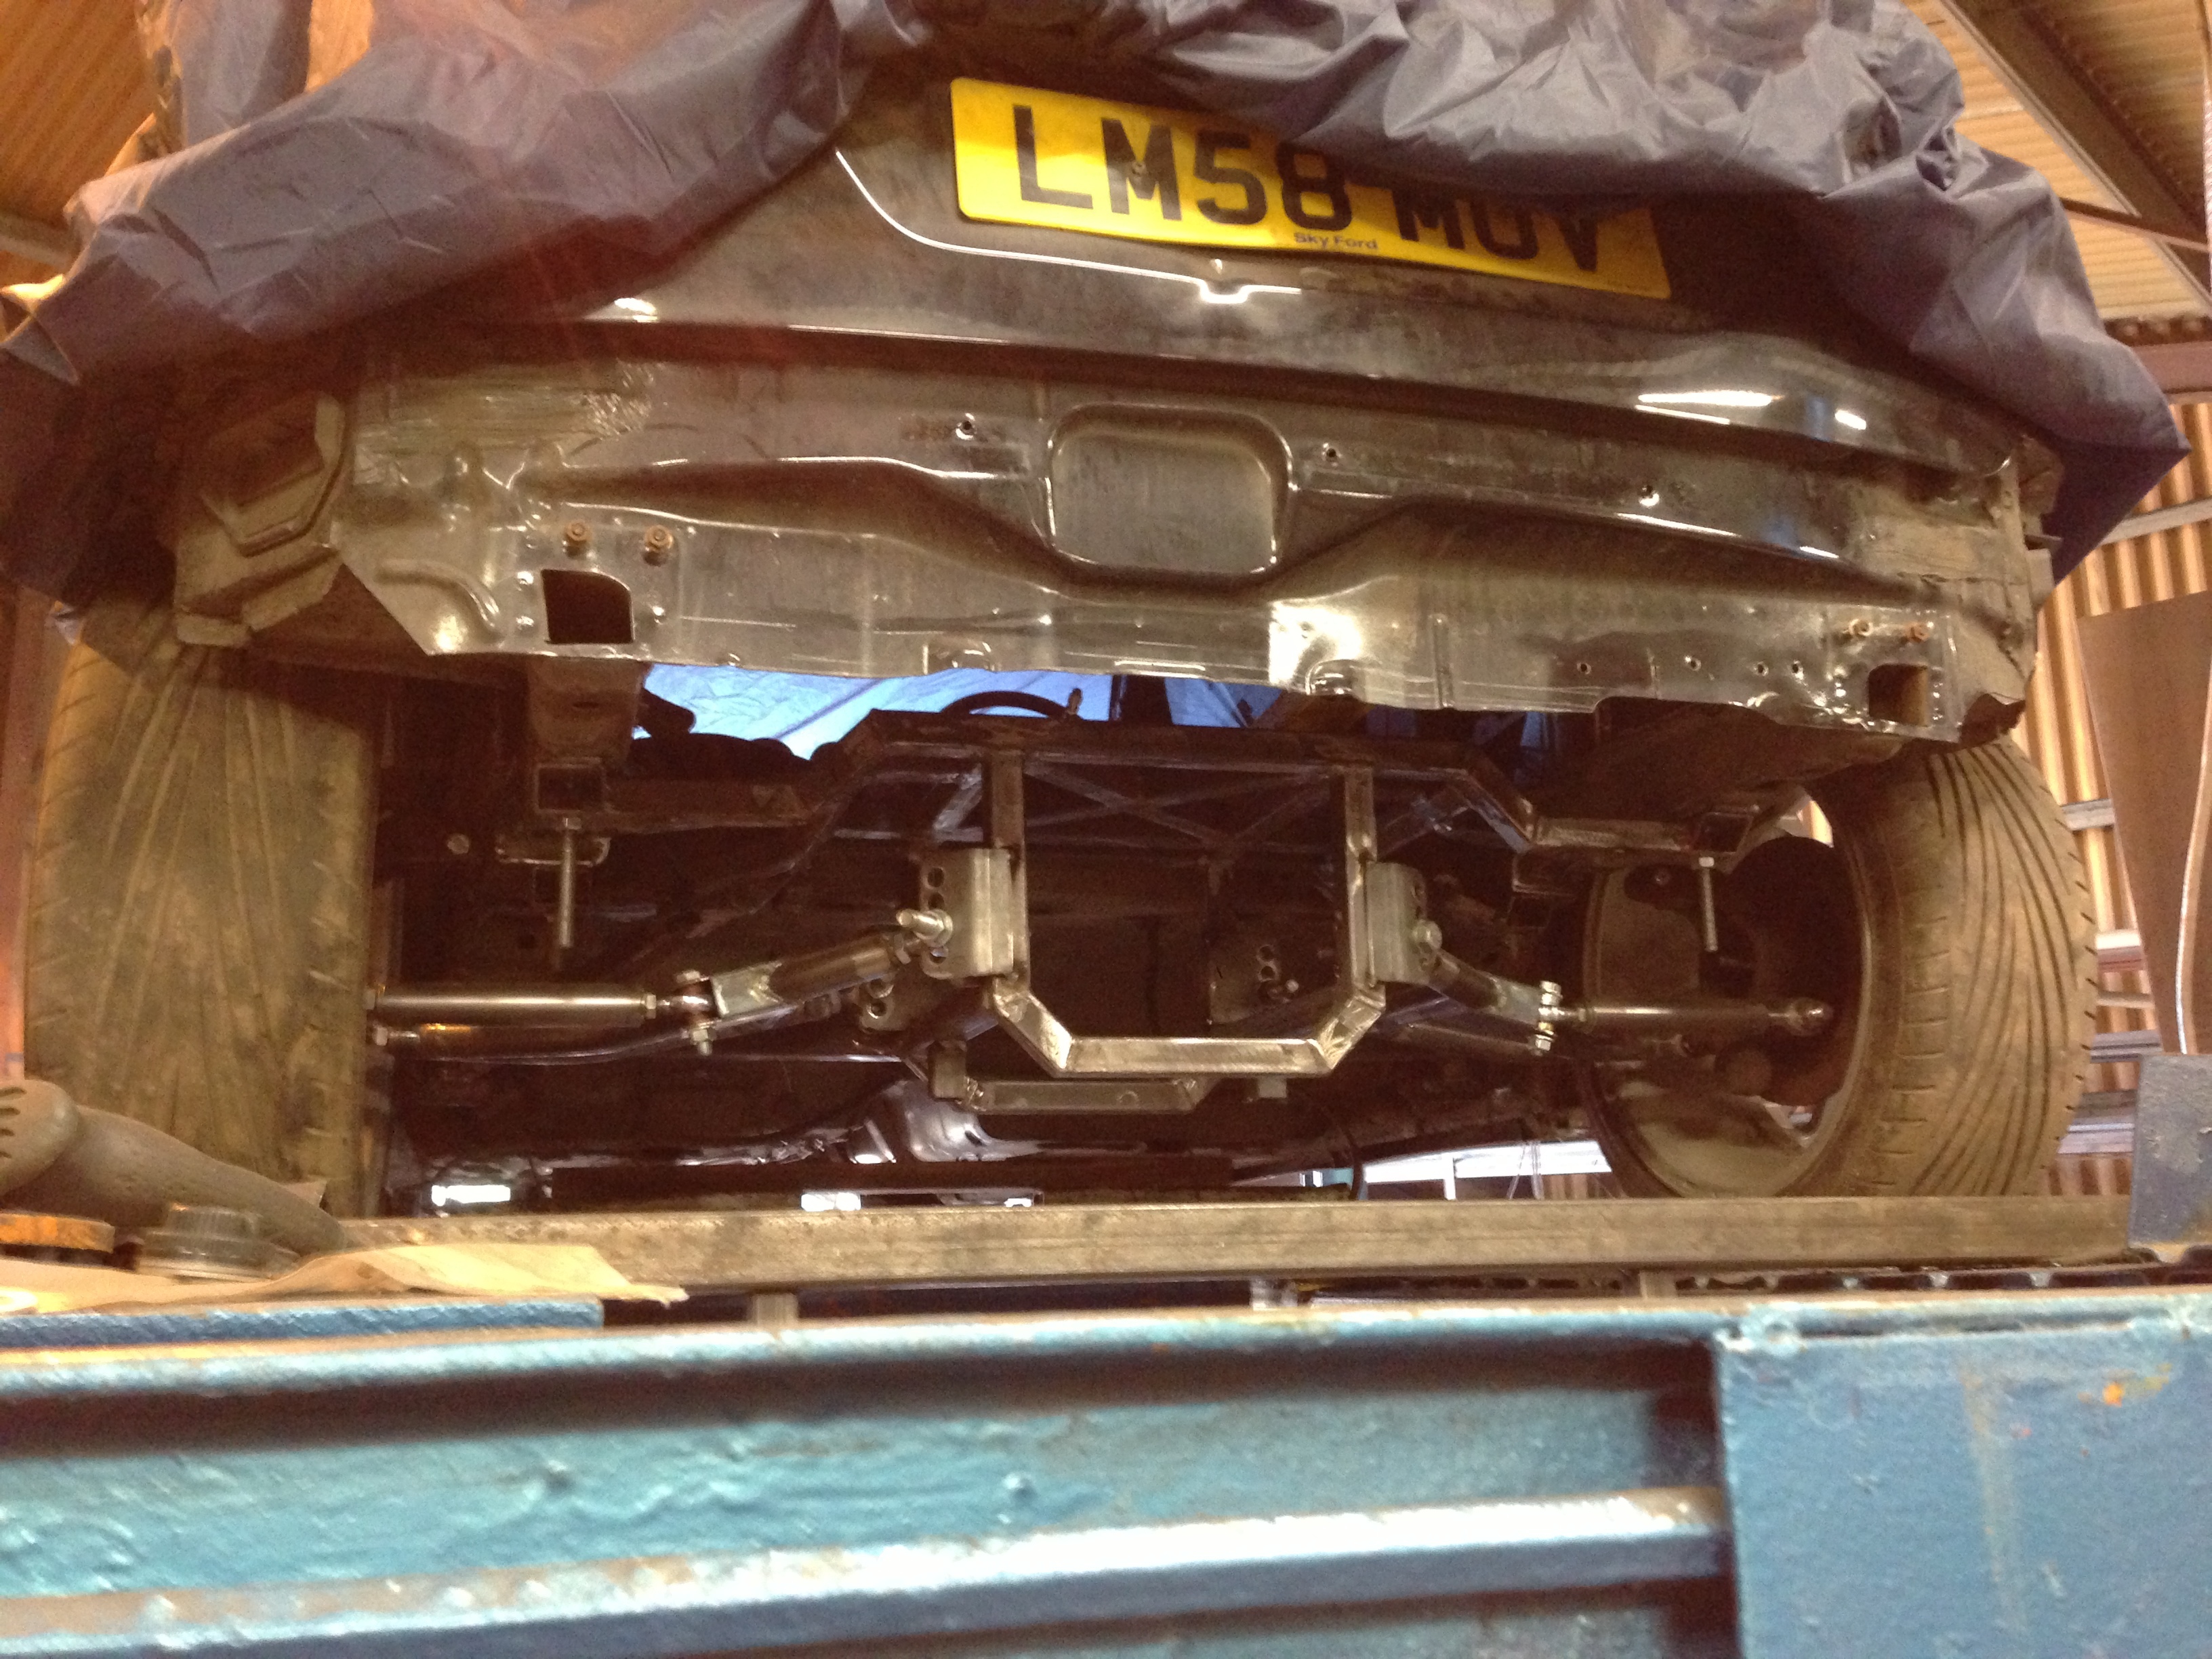
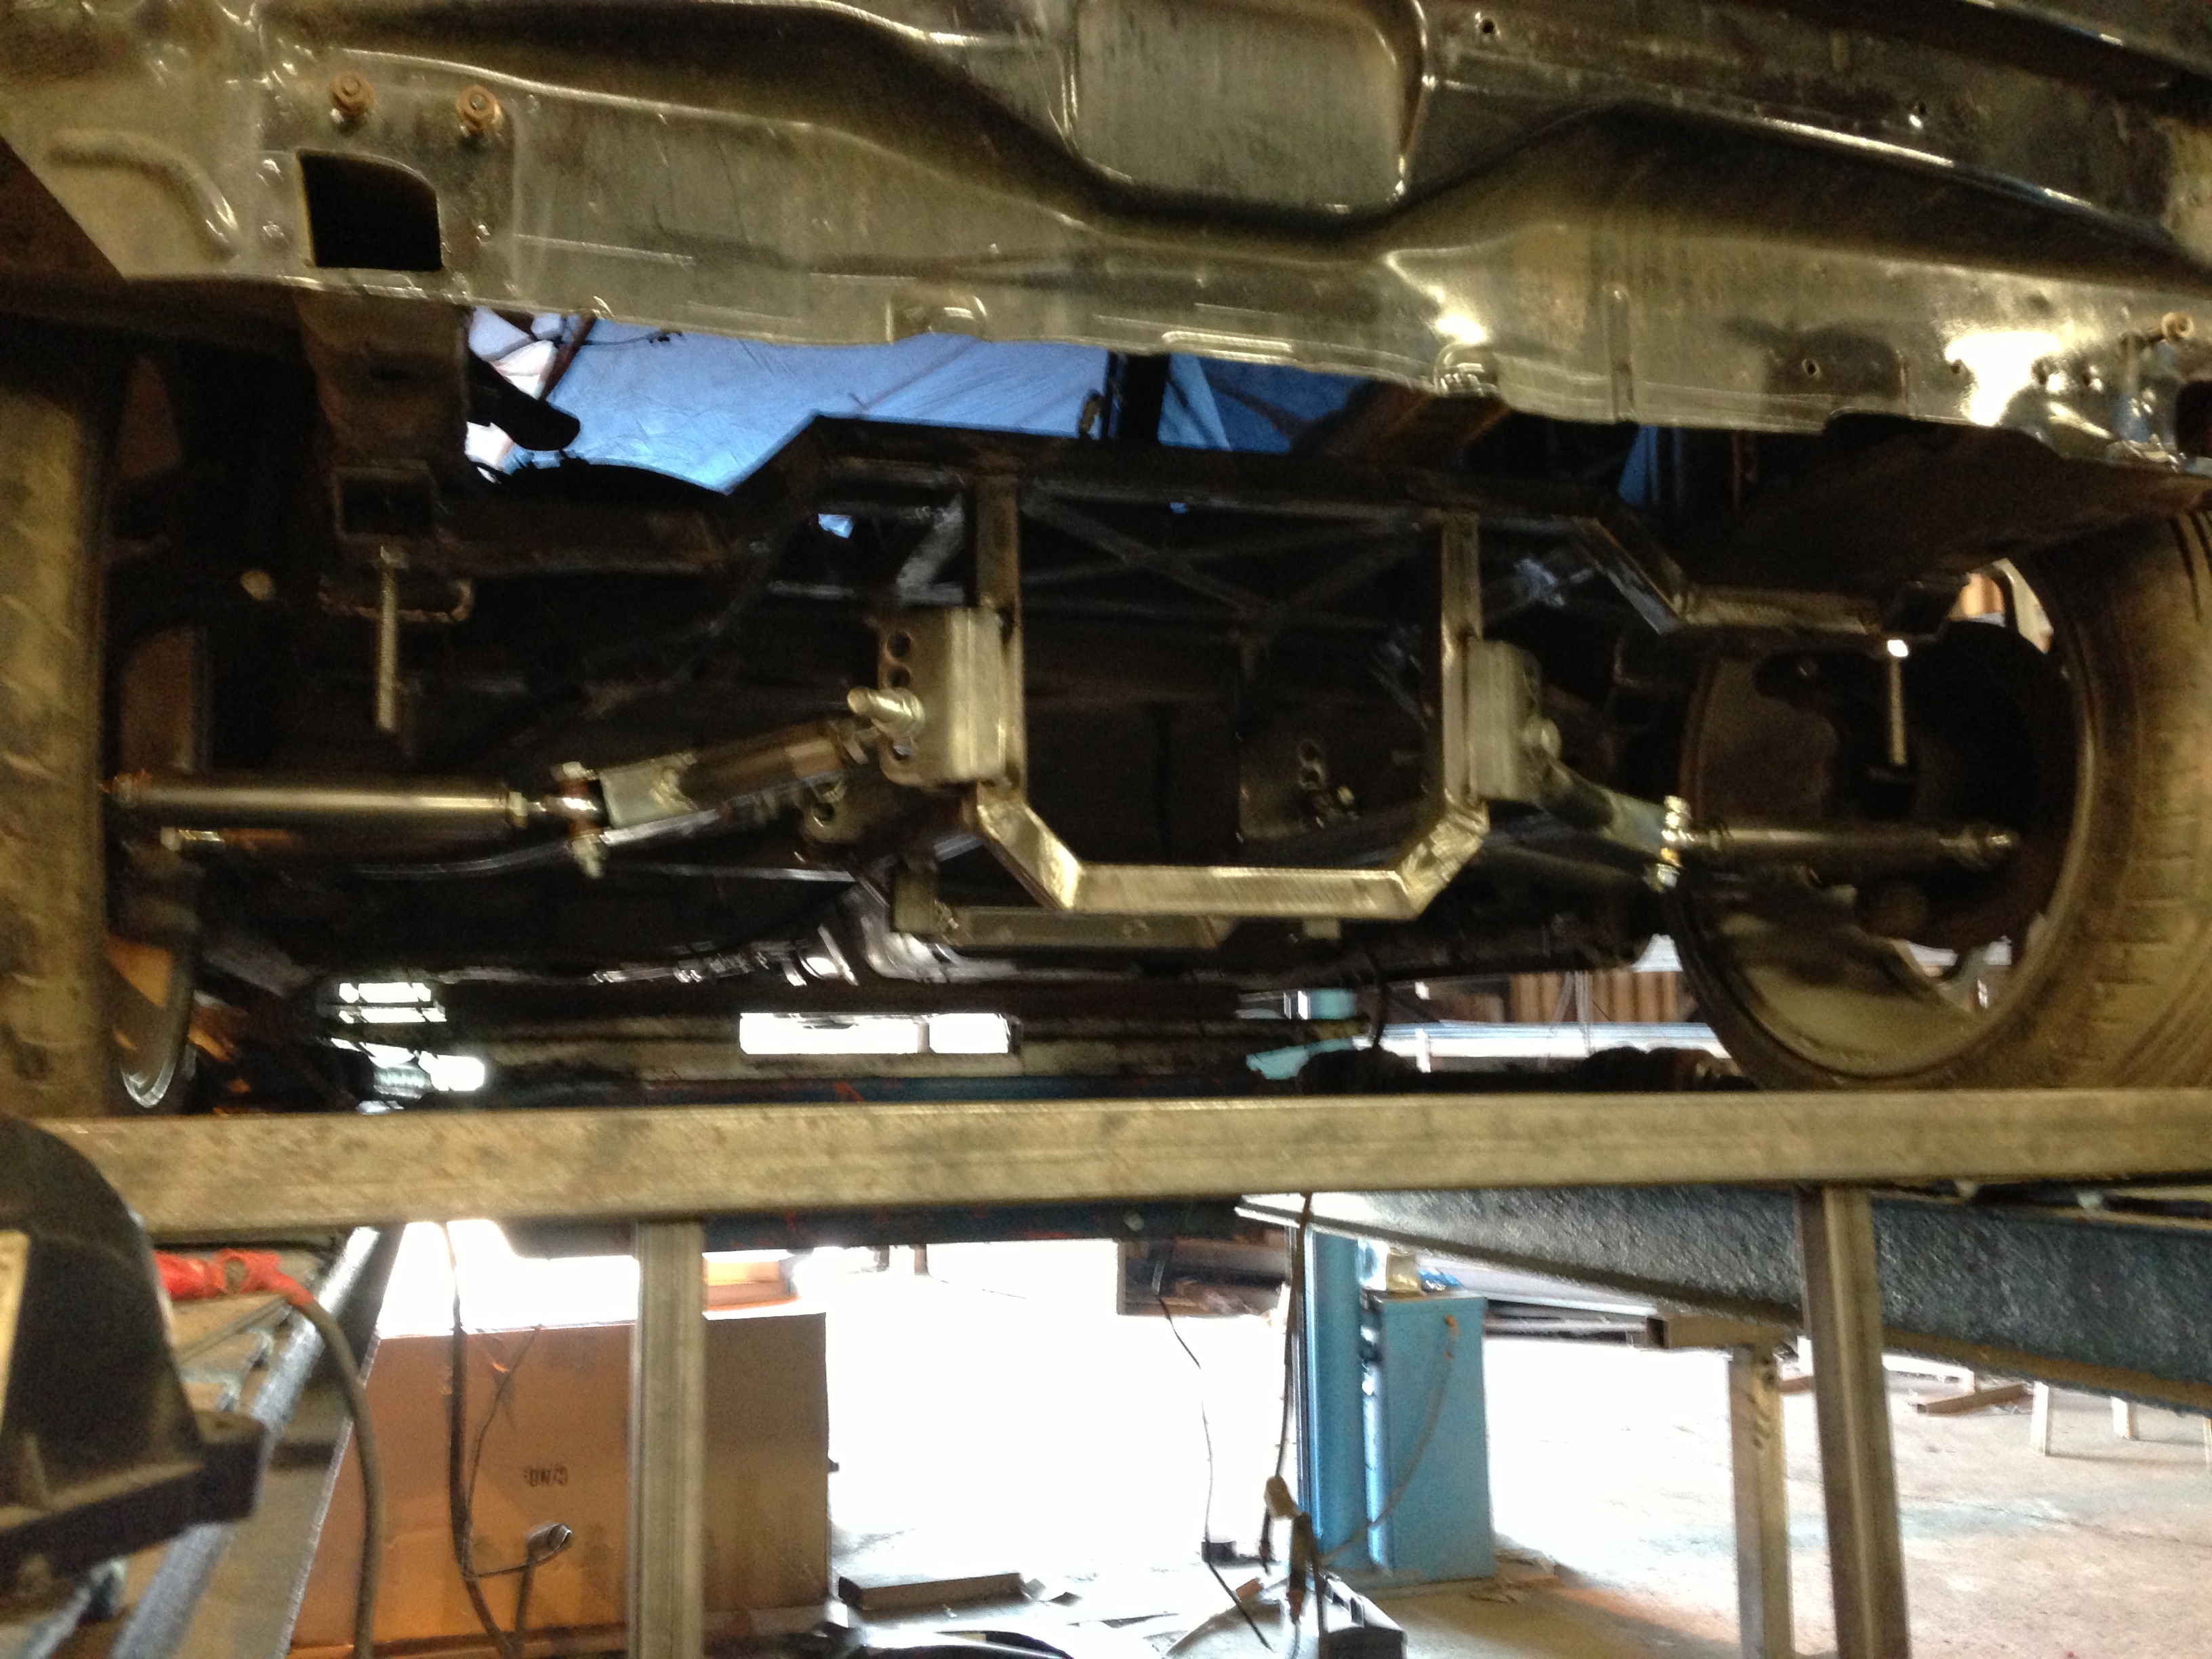
If anyone's got some colour suggestions, please speak up!
If anyone's got some colour suggestions, please speak up!
08-07-2013, 06:45 PM
#90
I've found that life I needed.. It's HERE!!
How awesome is this going to be seriously? 
I'd go Kawasaki green for the cradle and other bits, if you keep the black on top that is..
I'd go Kawasaki green for the cradle and other bits, if you keep the black on top that is..
15-07-2013, 11:04 PM
#91
Regular Contributor
Thread Starter
Join Date: Mar 2012
Location: Doncaster
Posts: 241
Likes: 0
Received 0 Likes
on
0 Posts
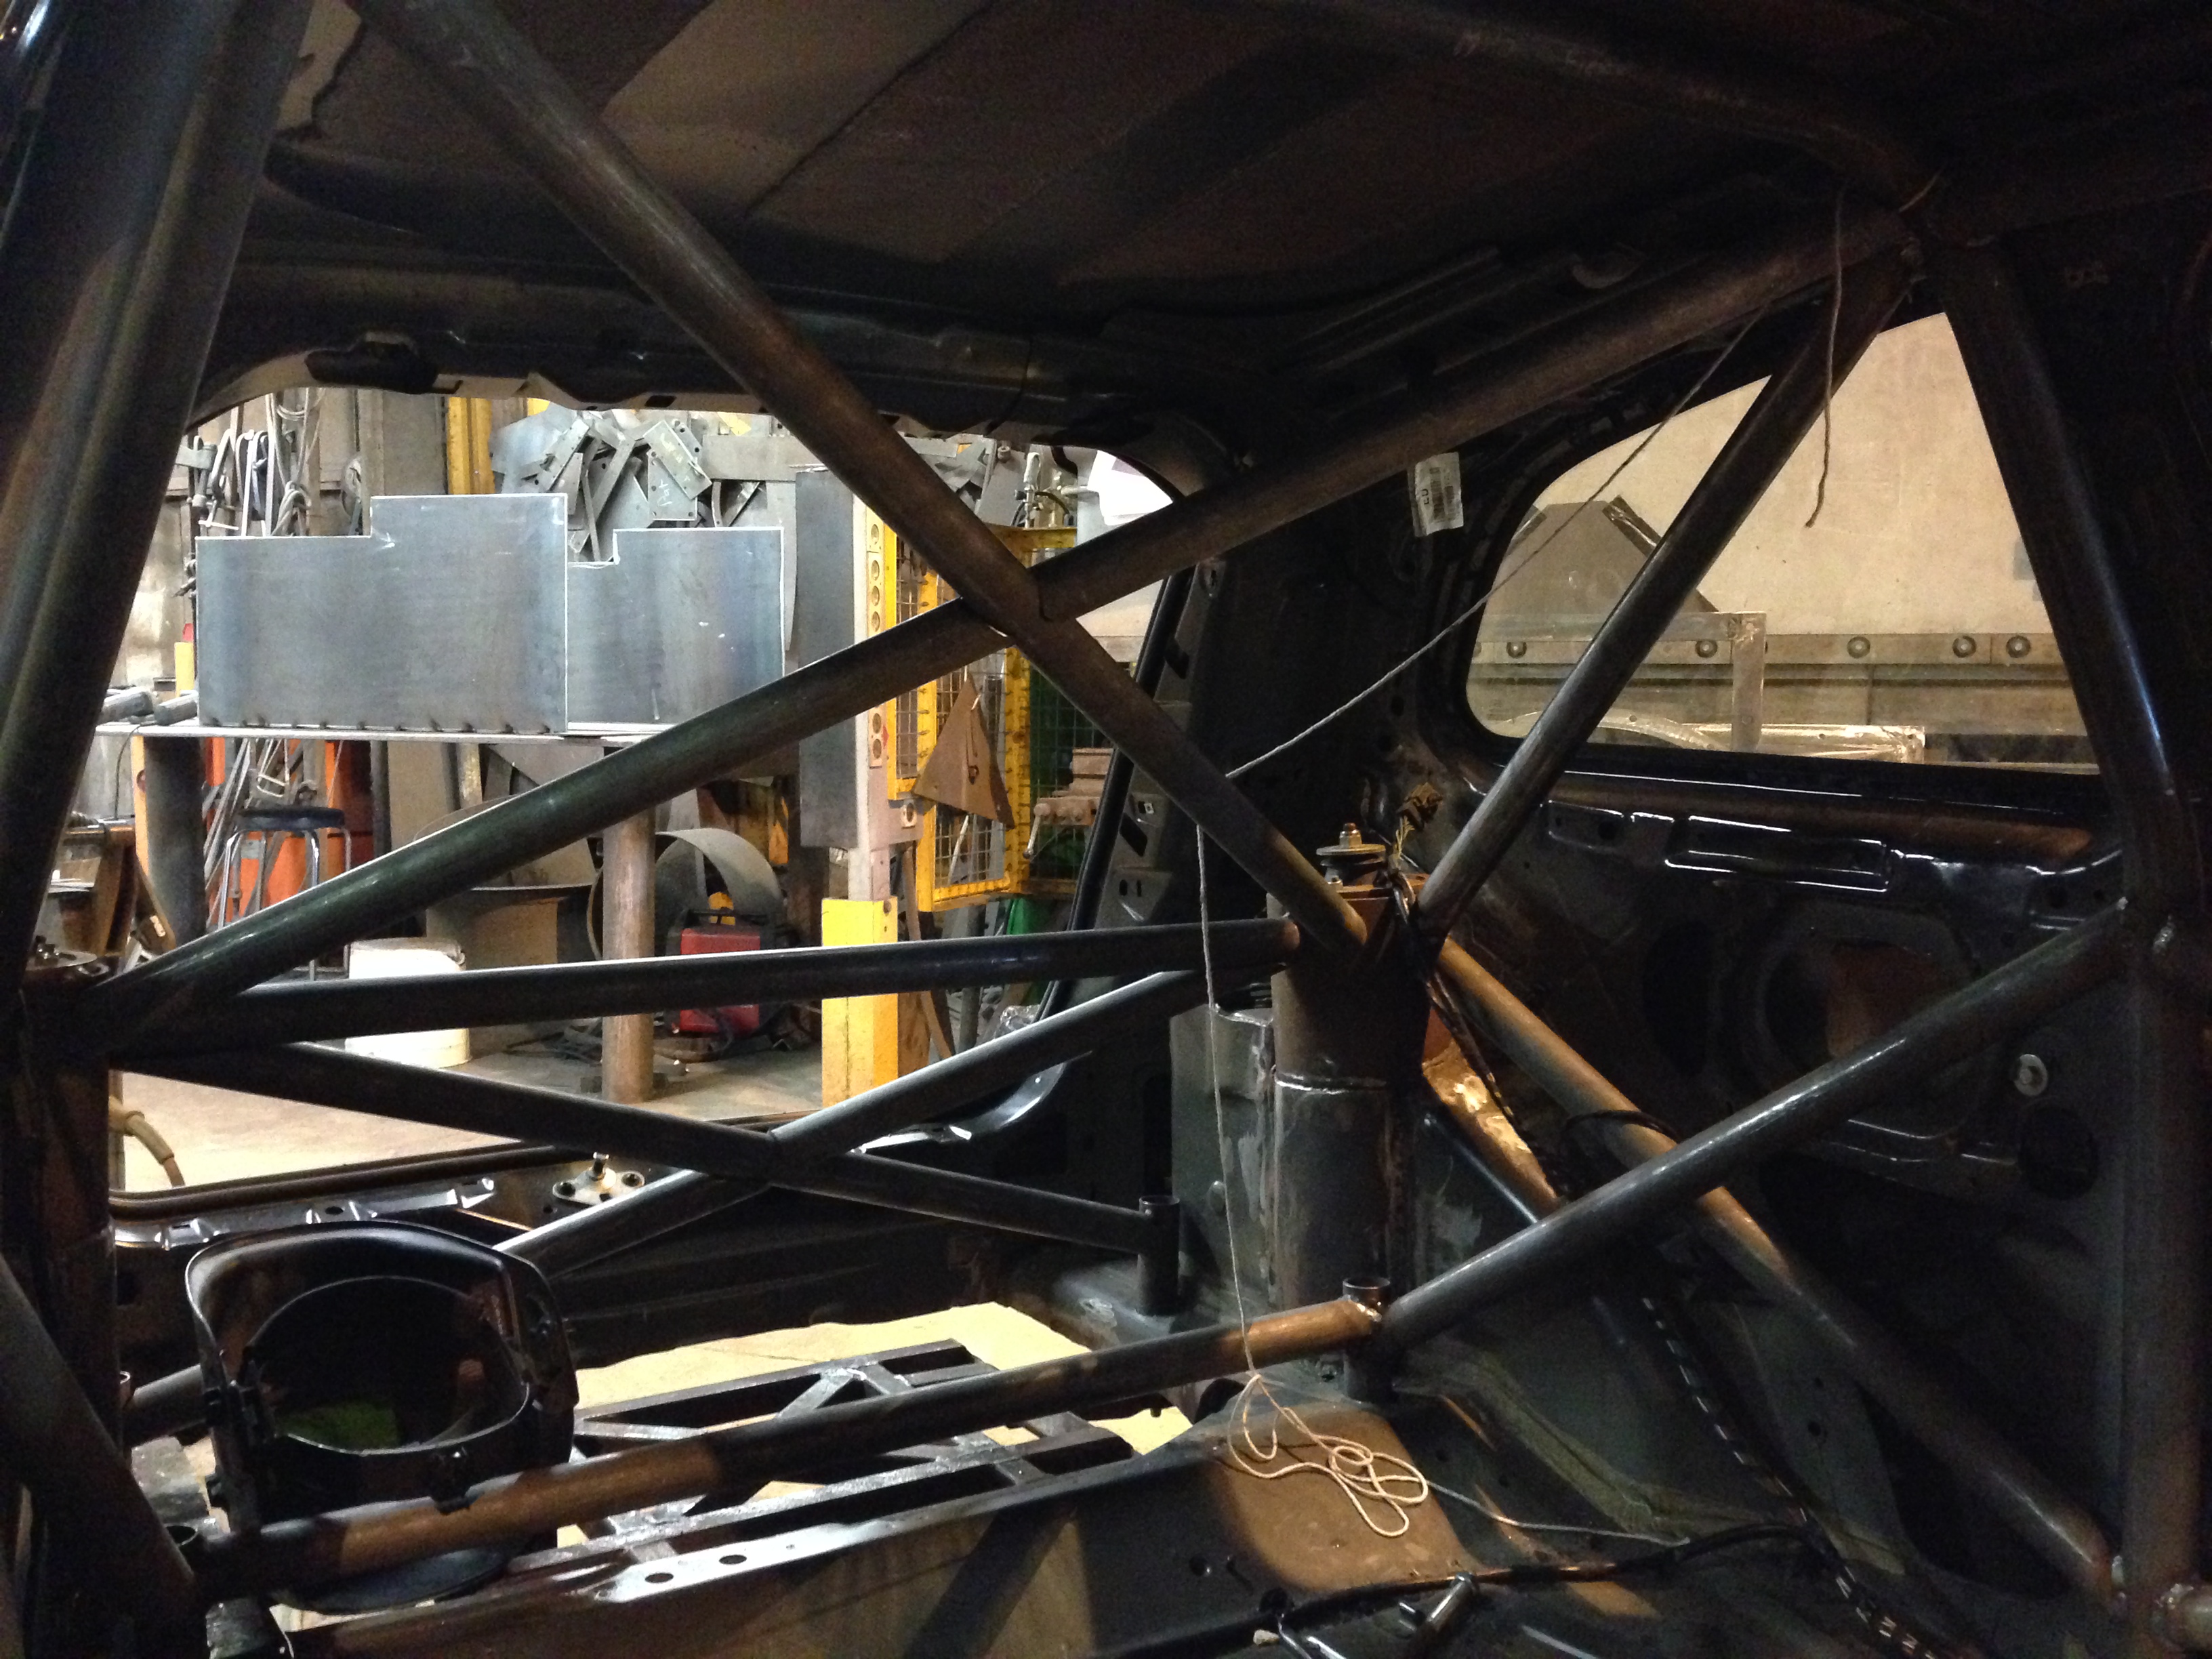
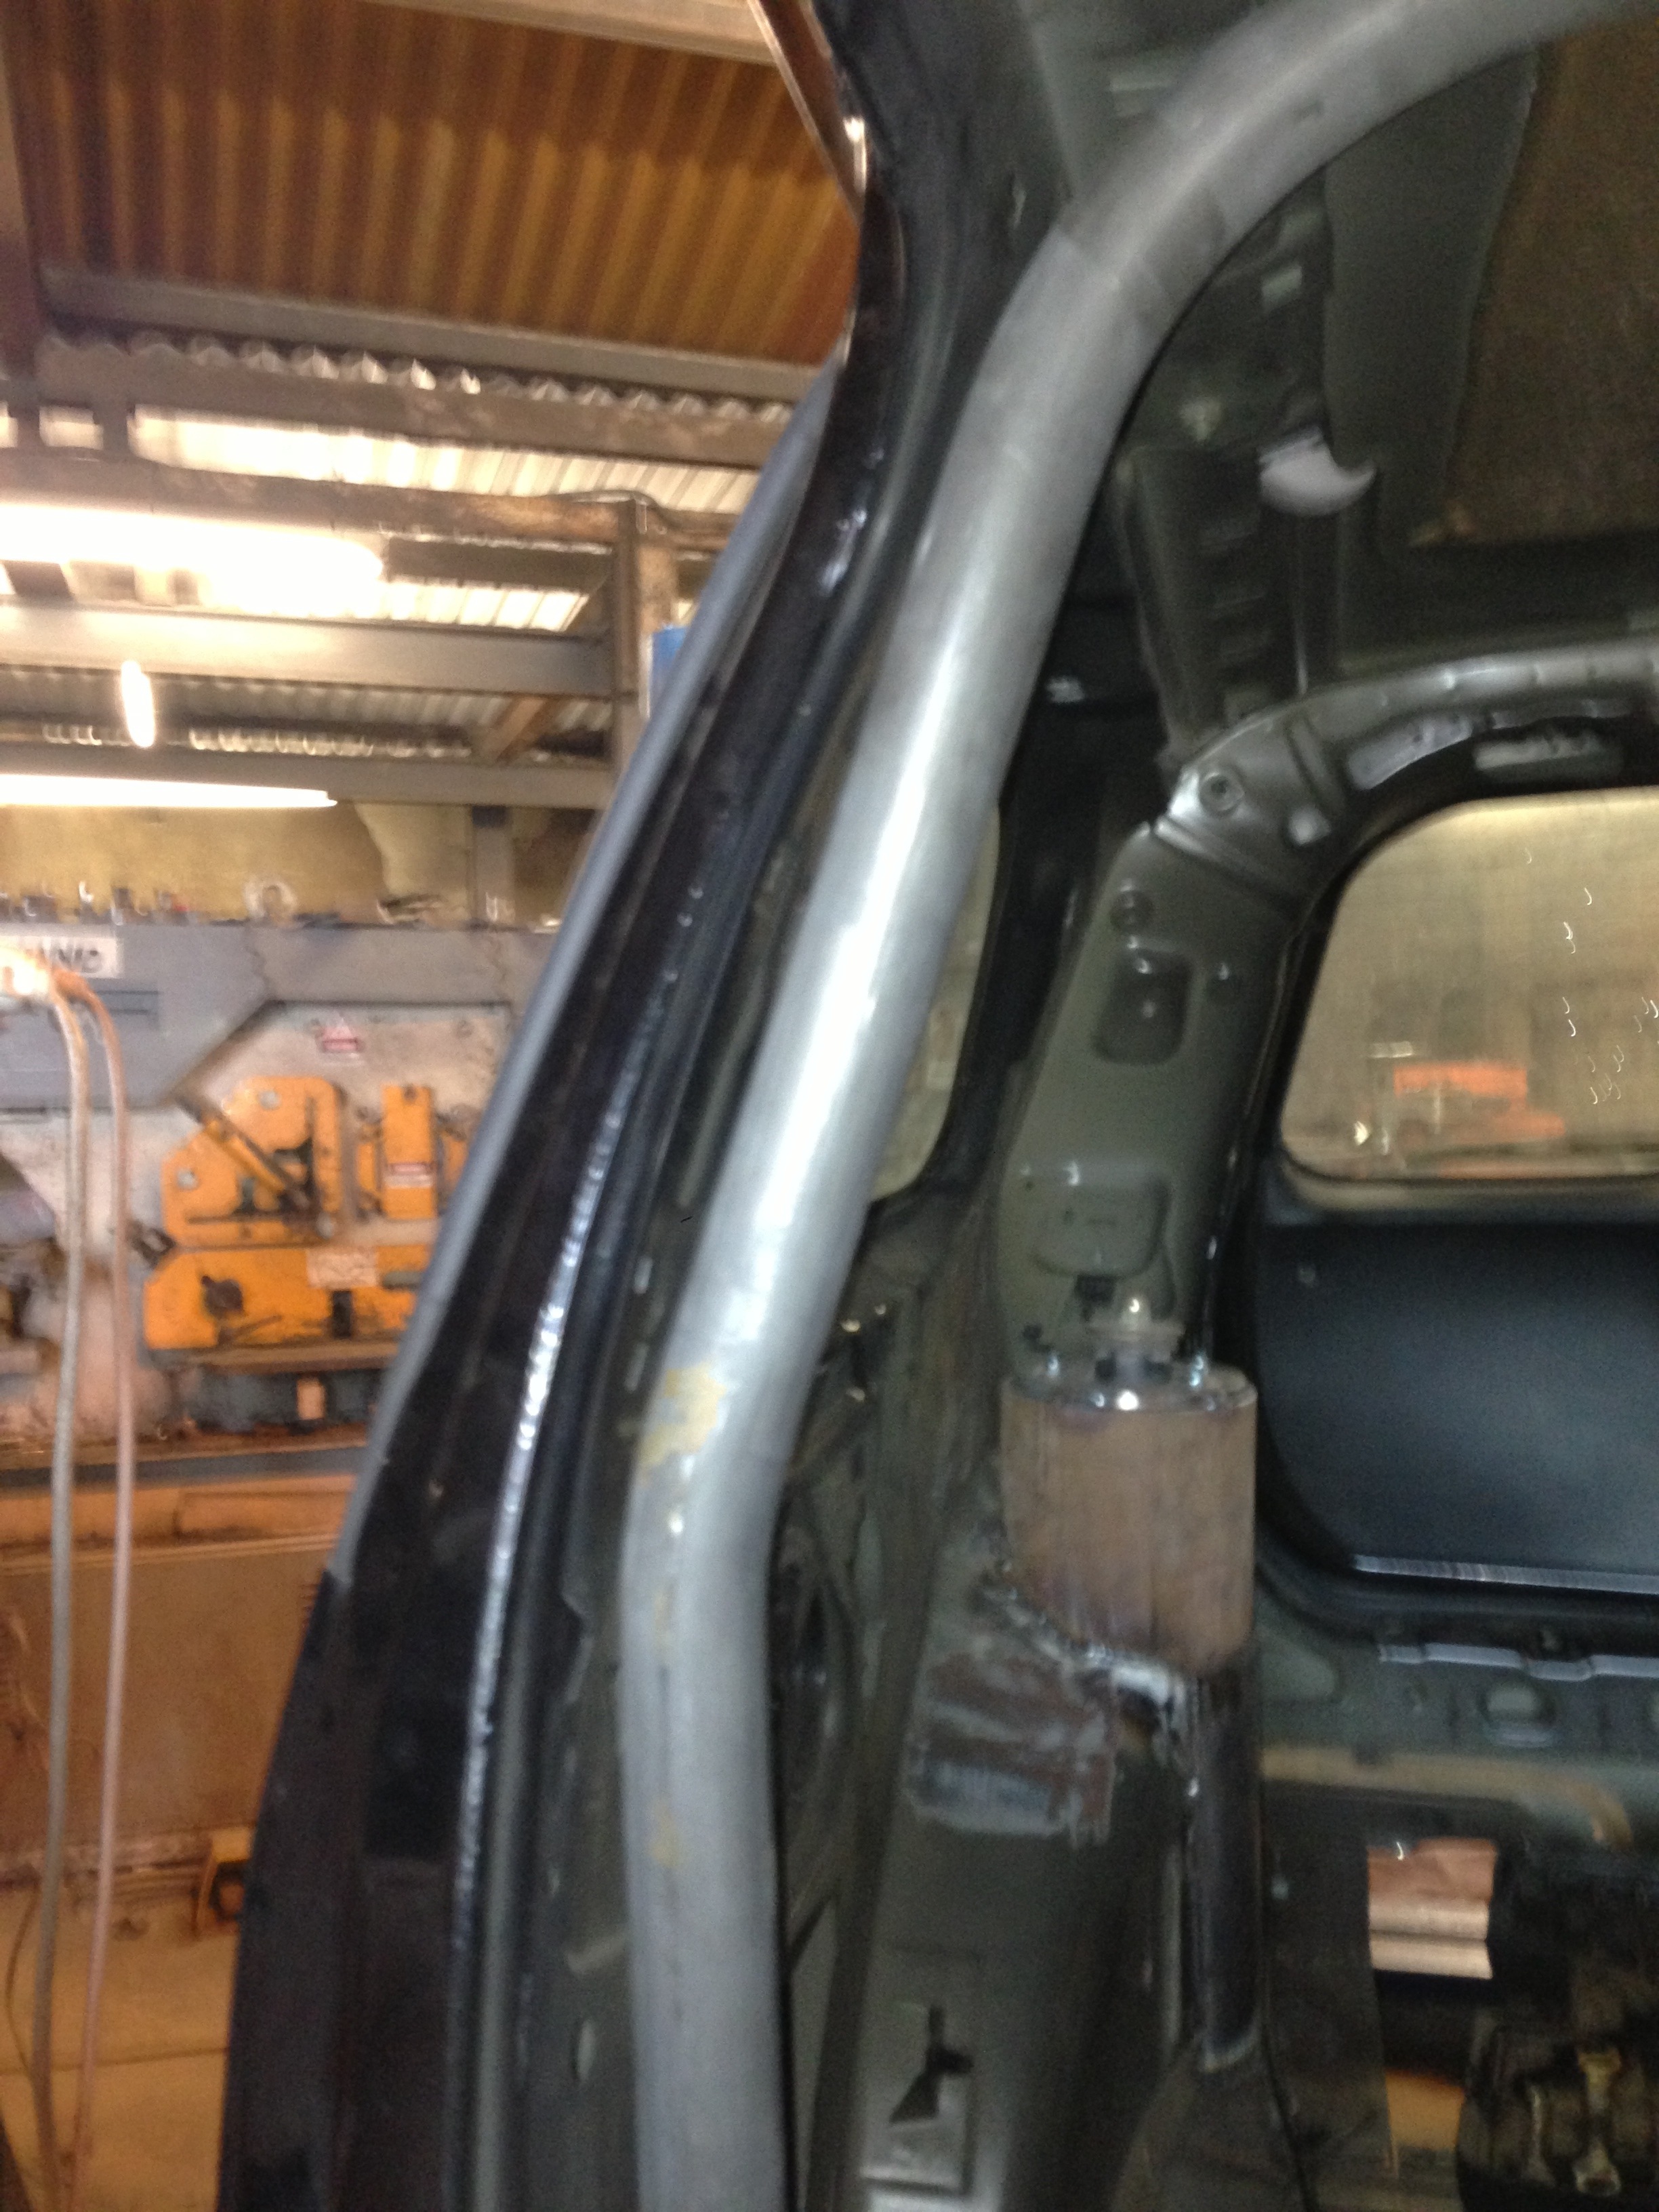
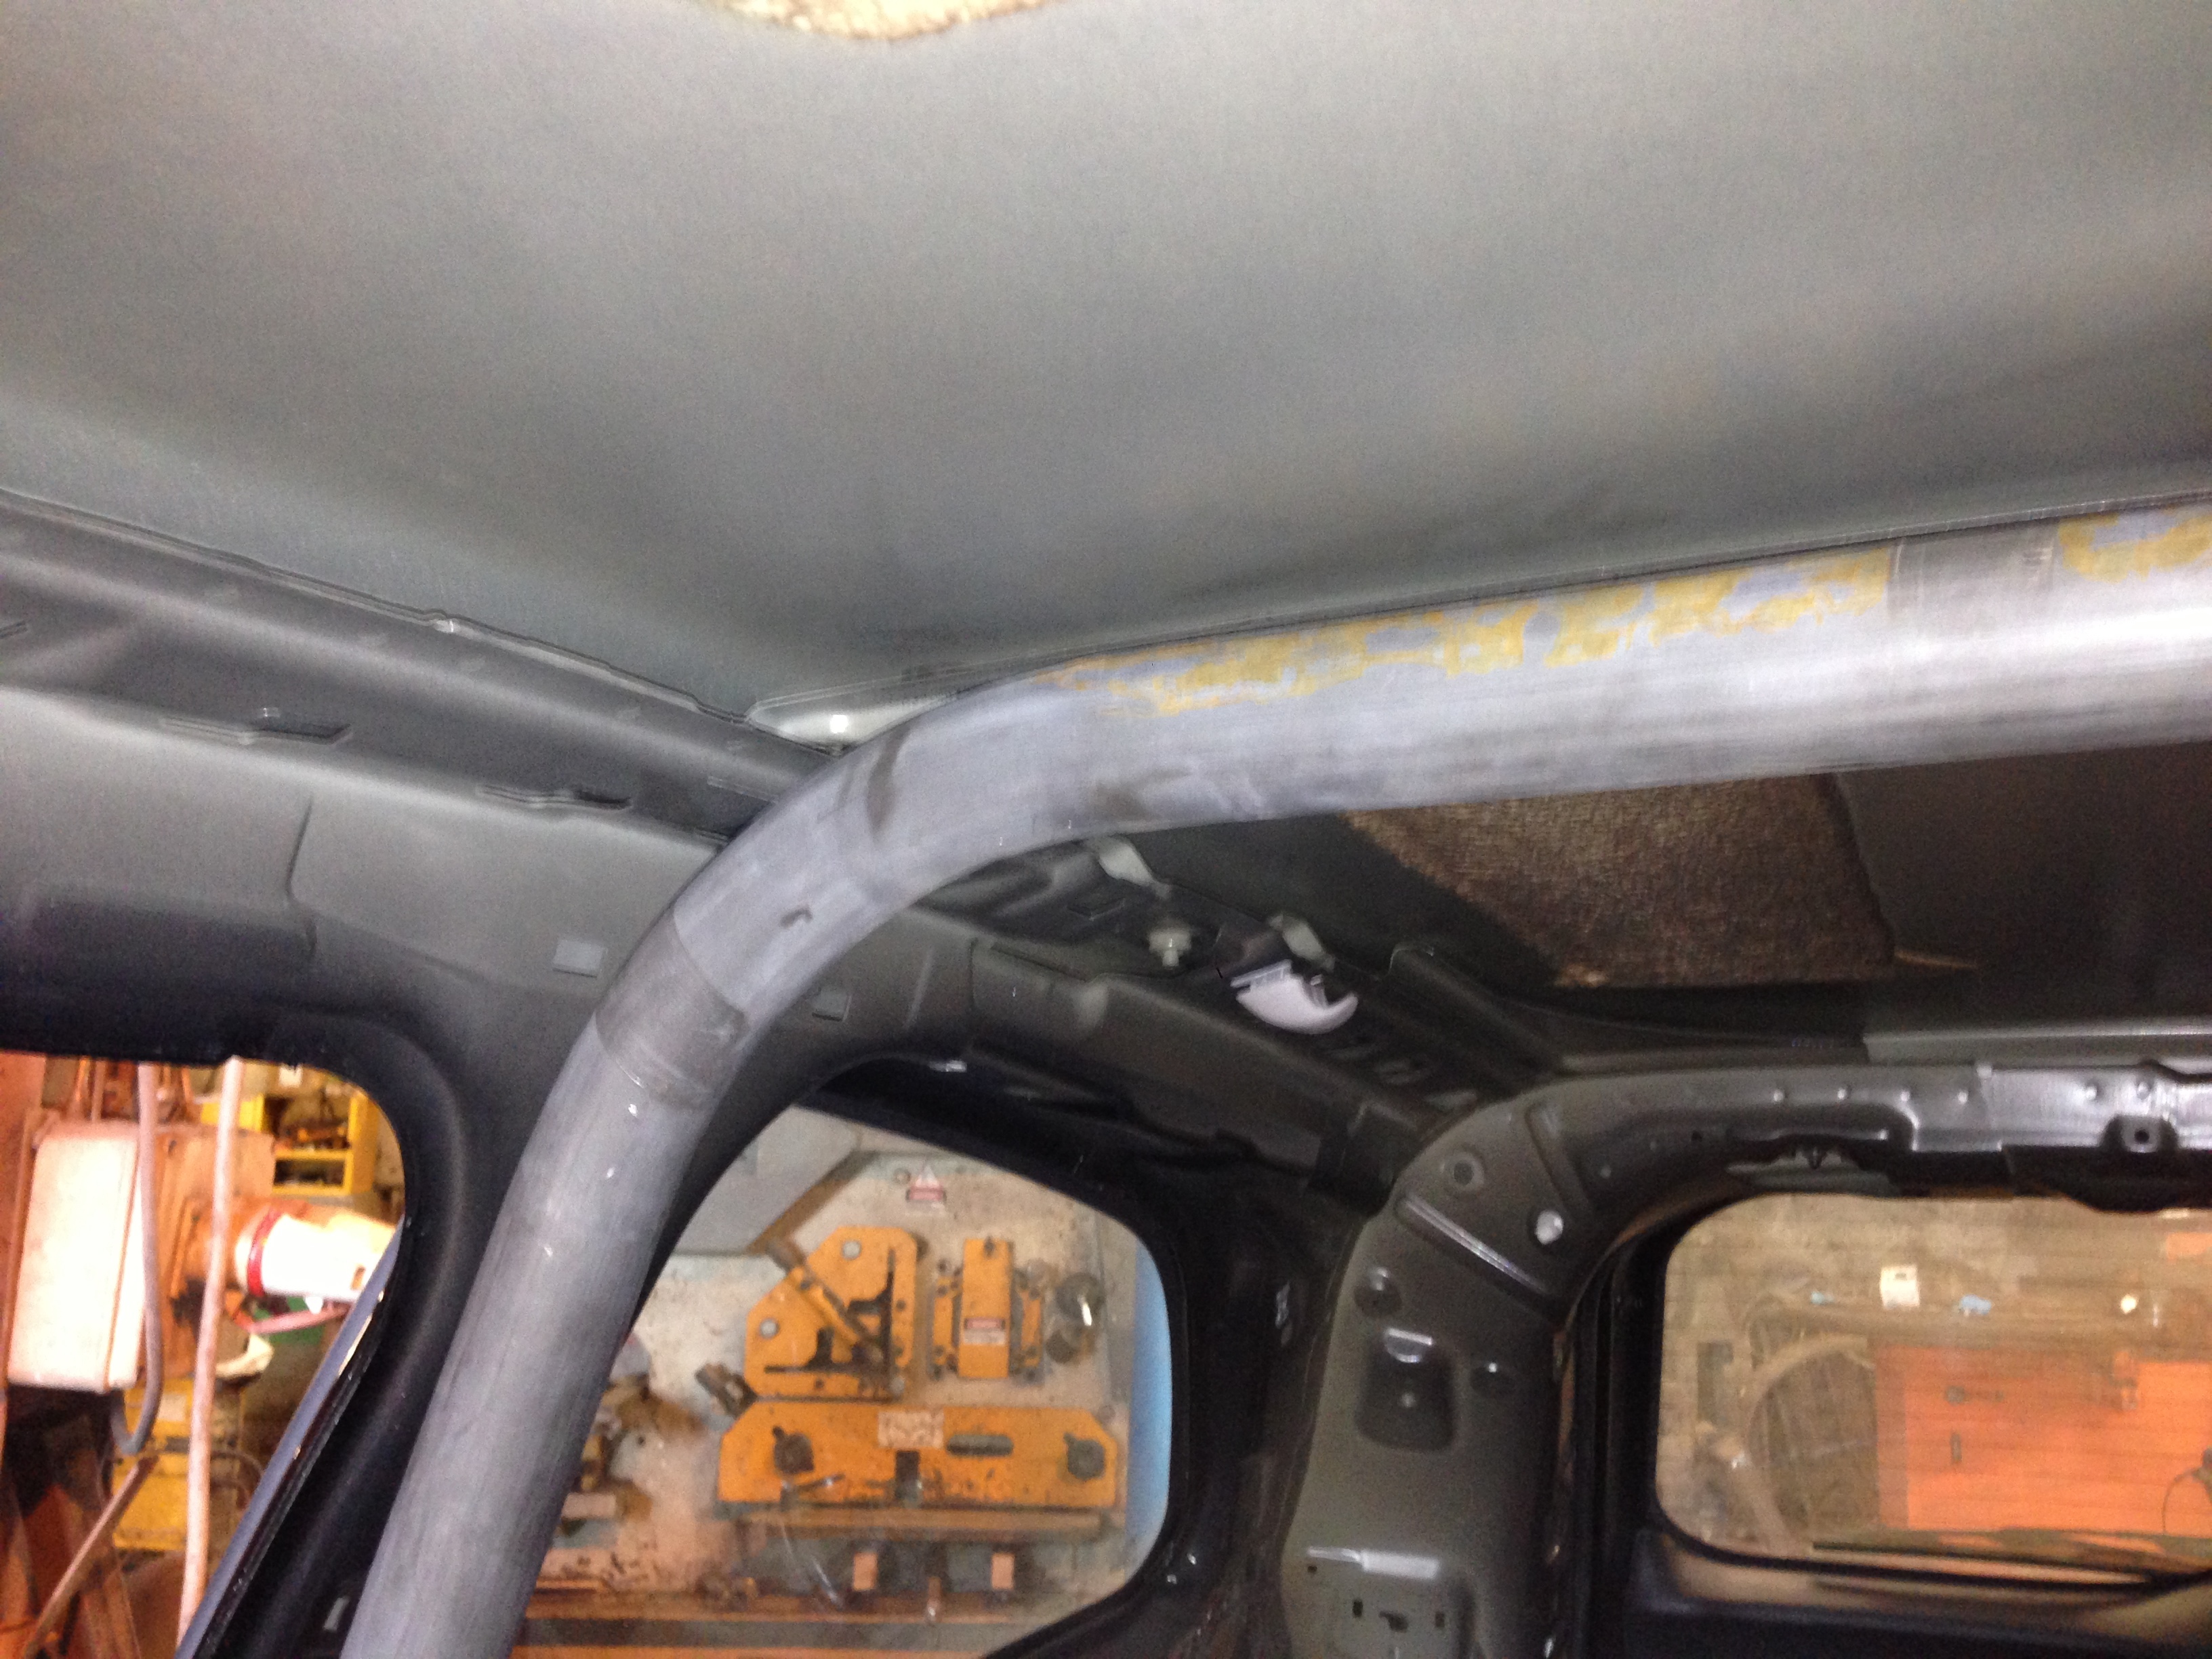
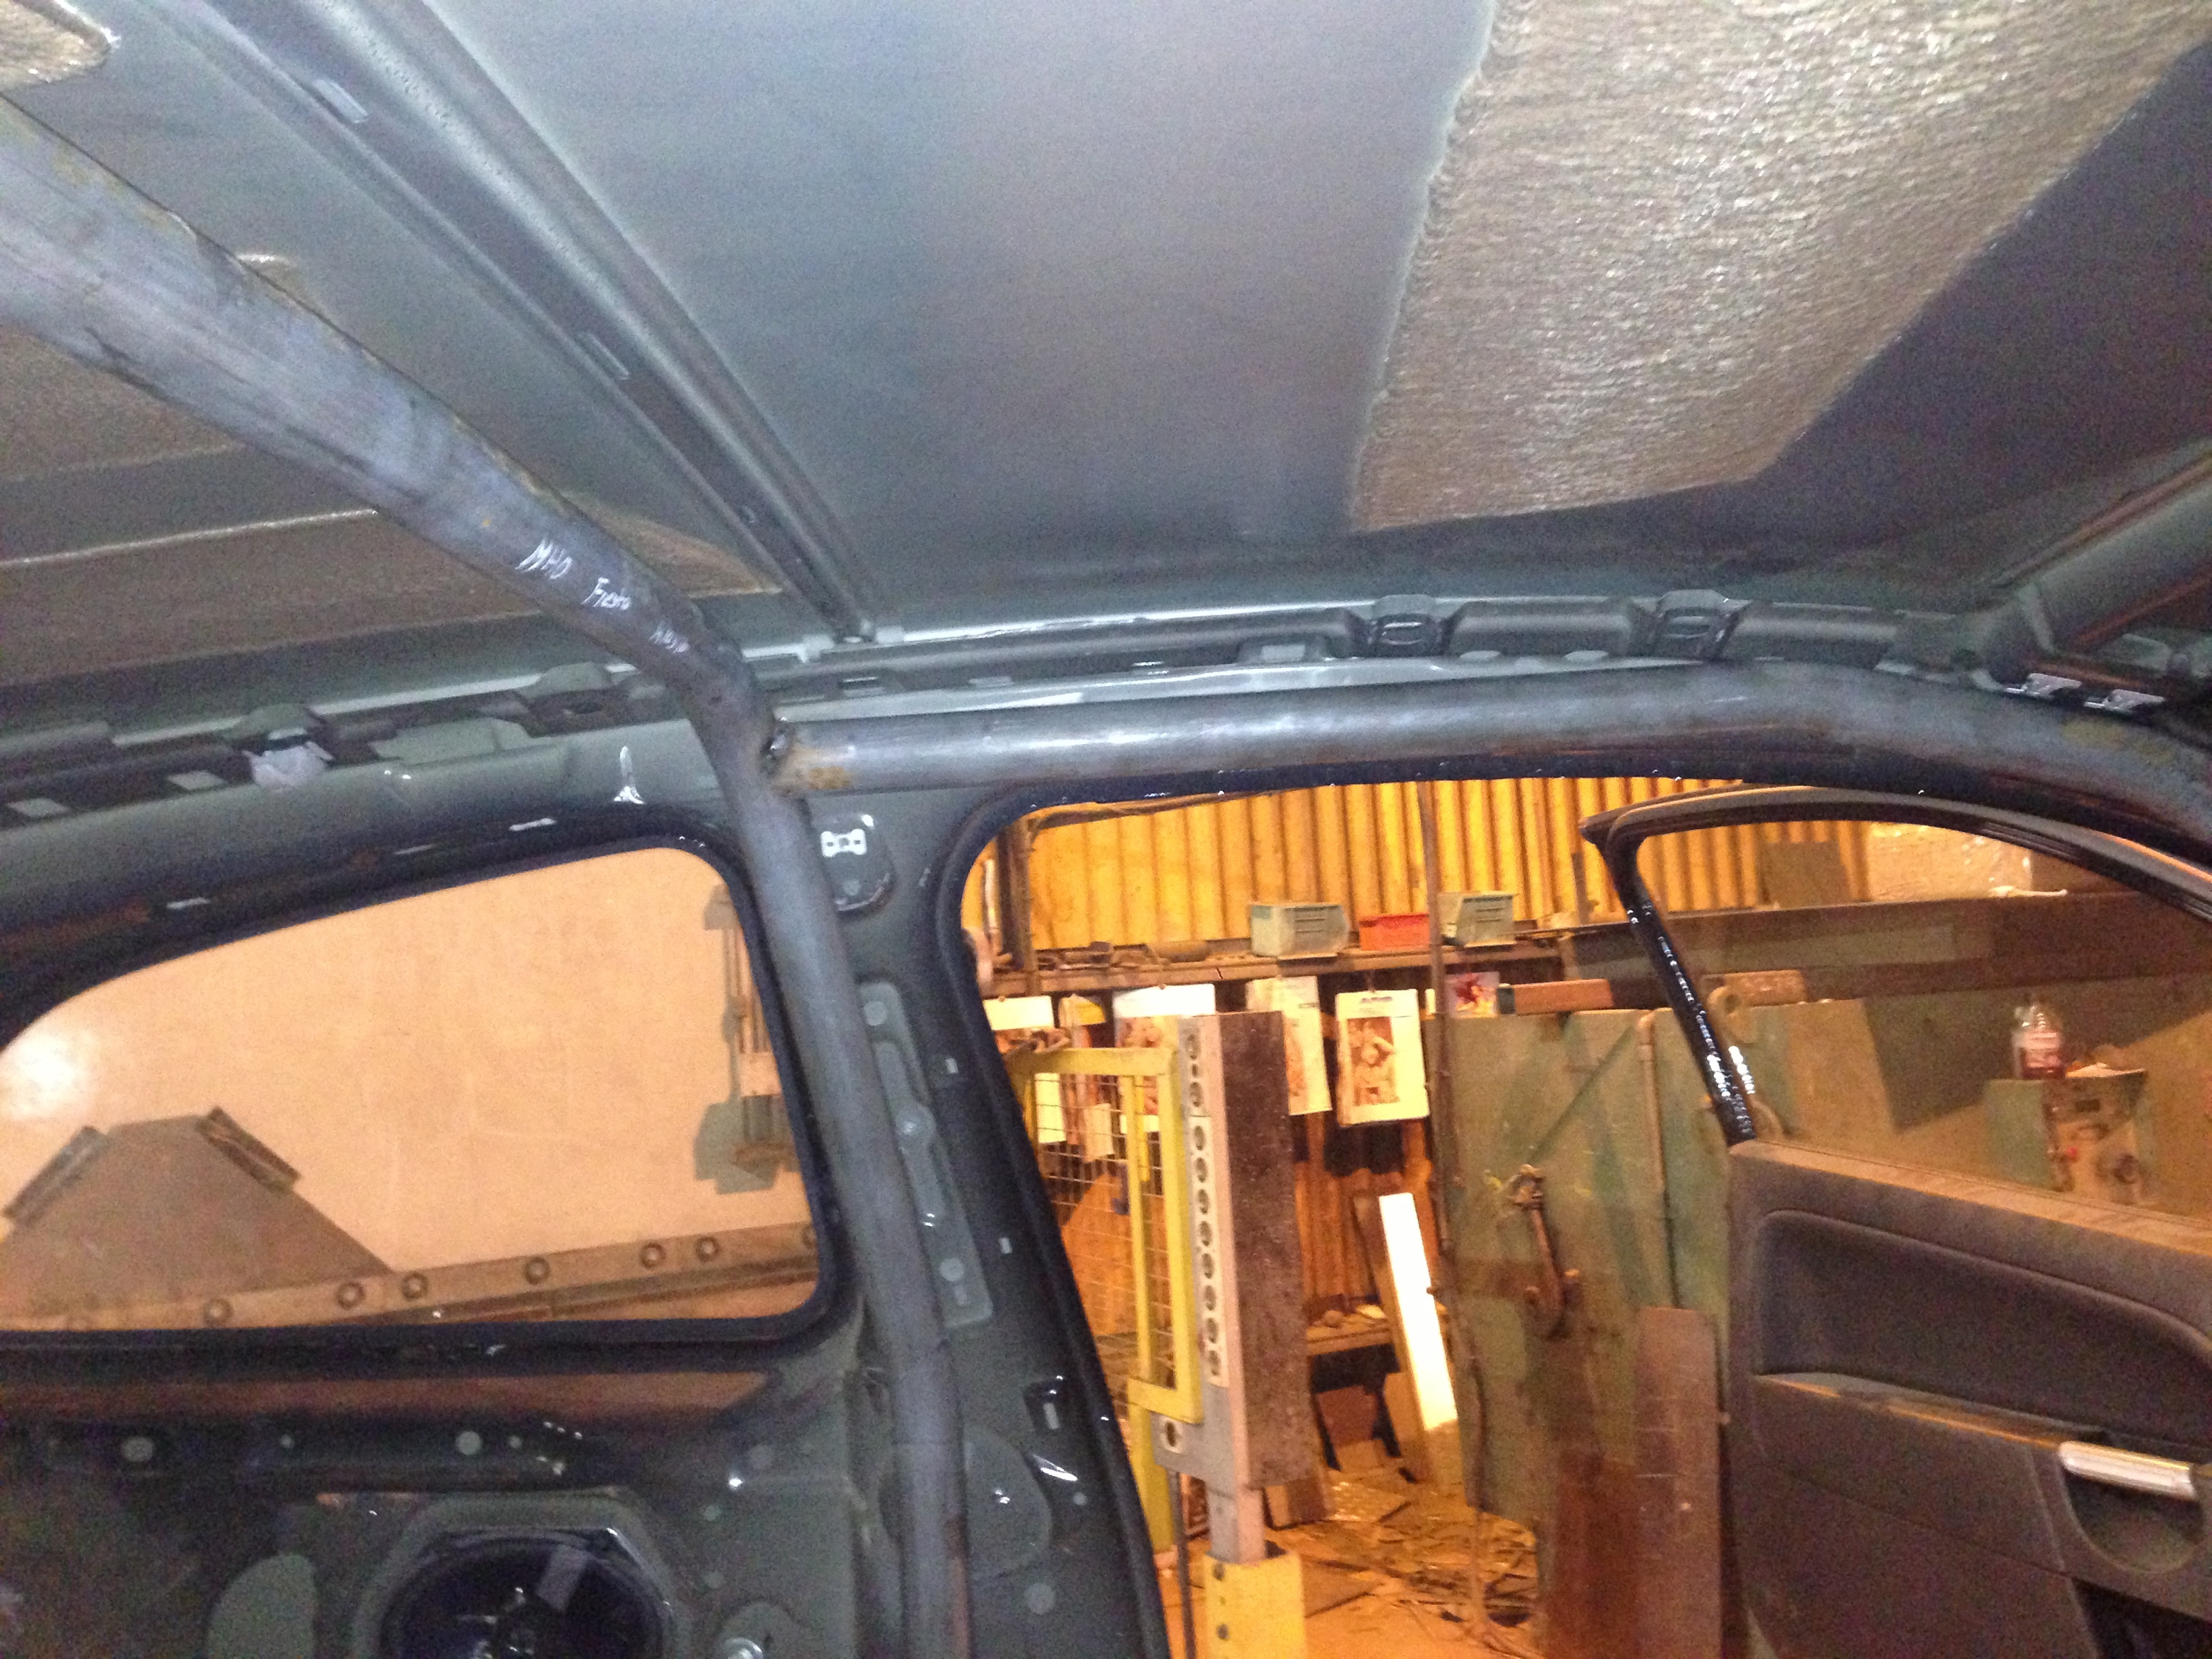
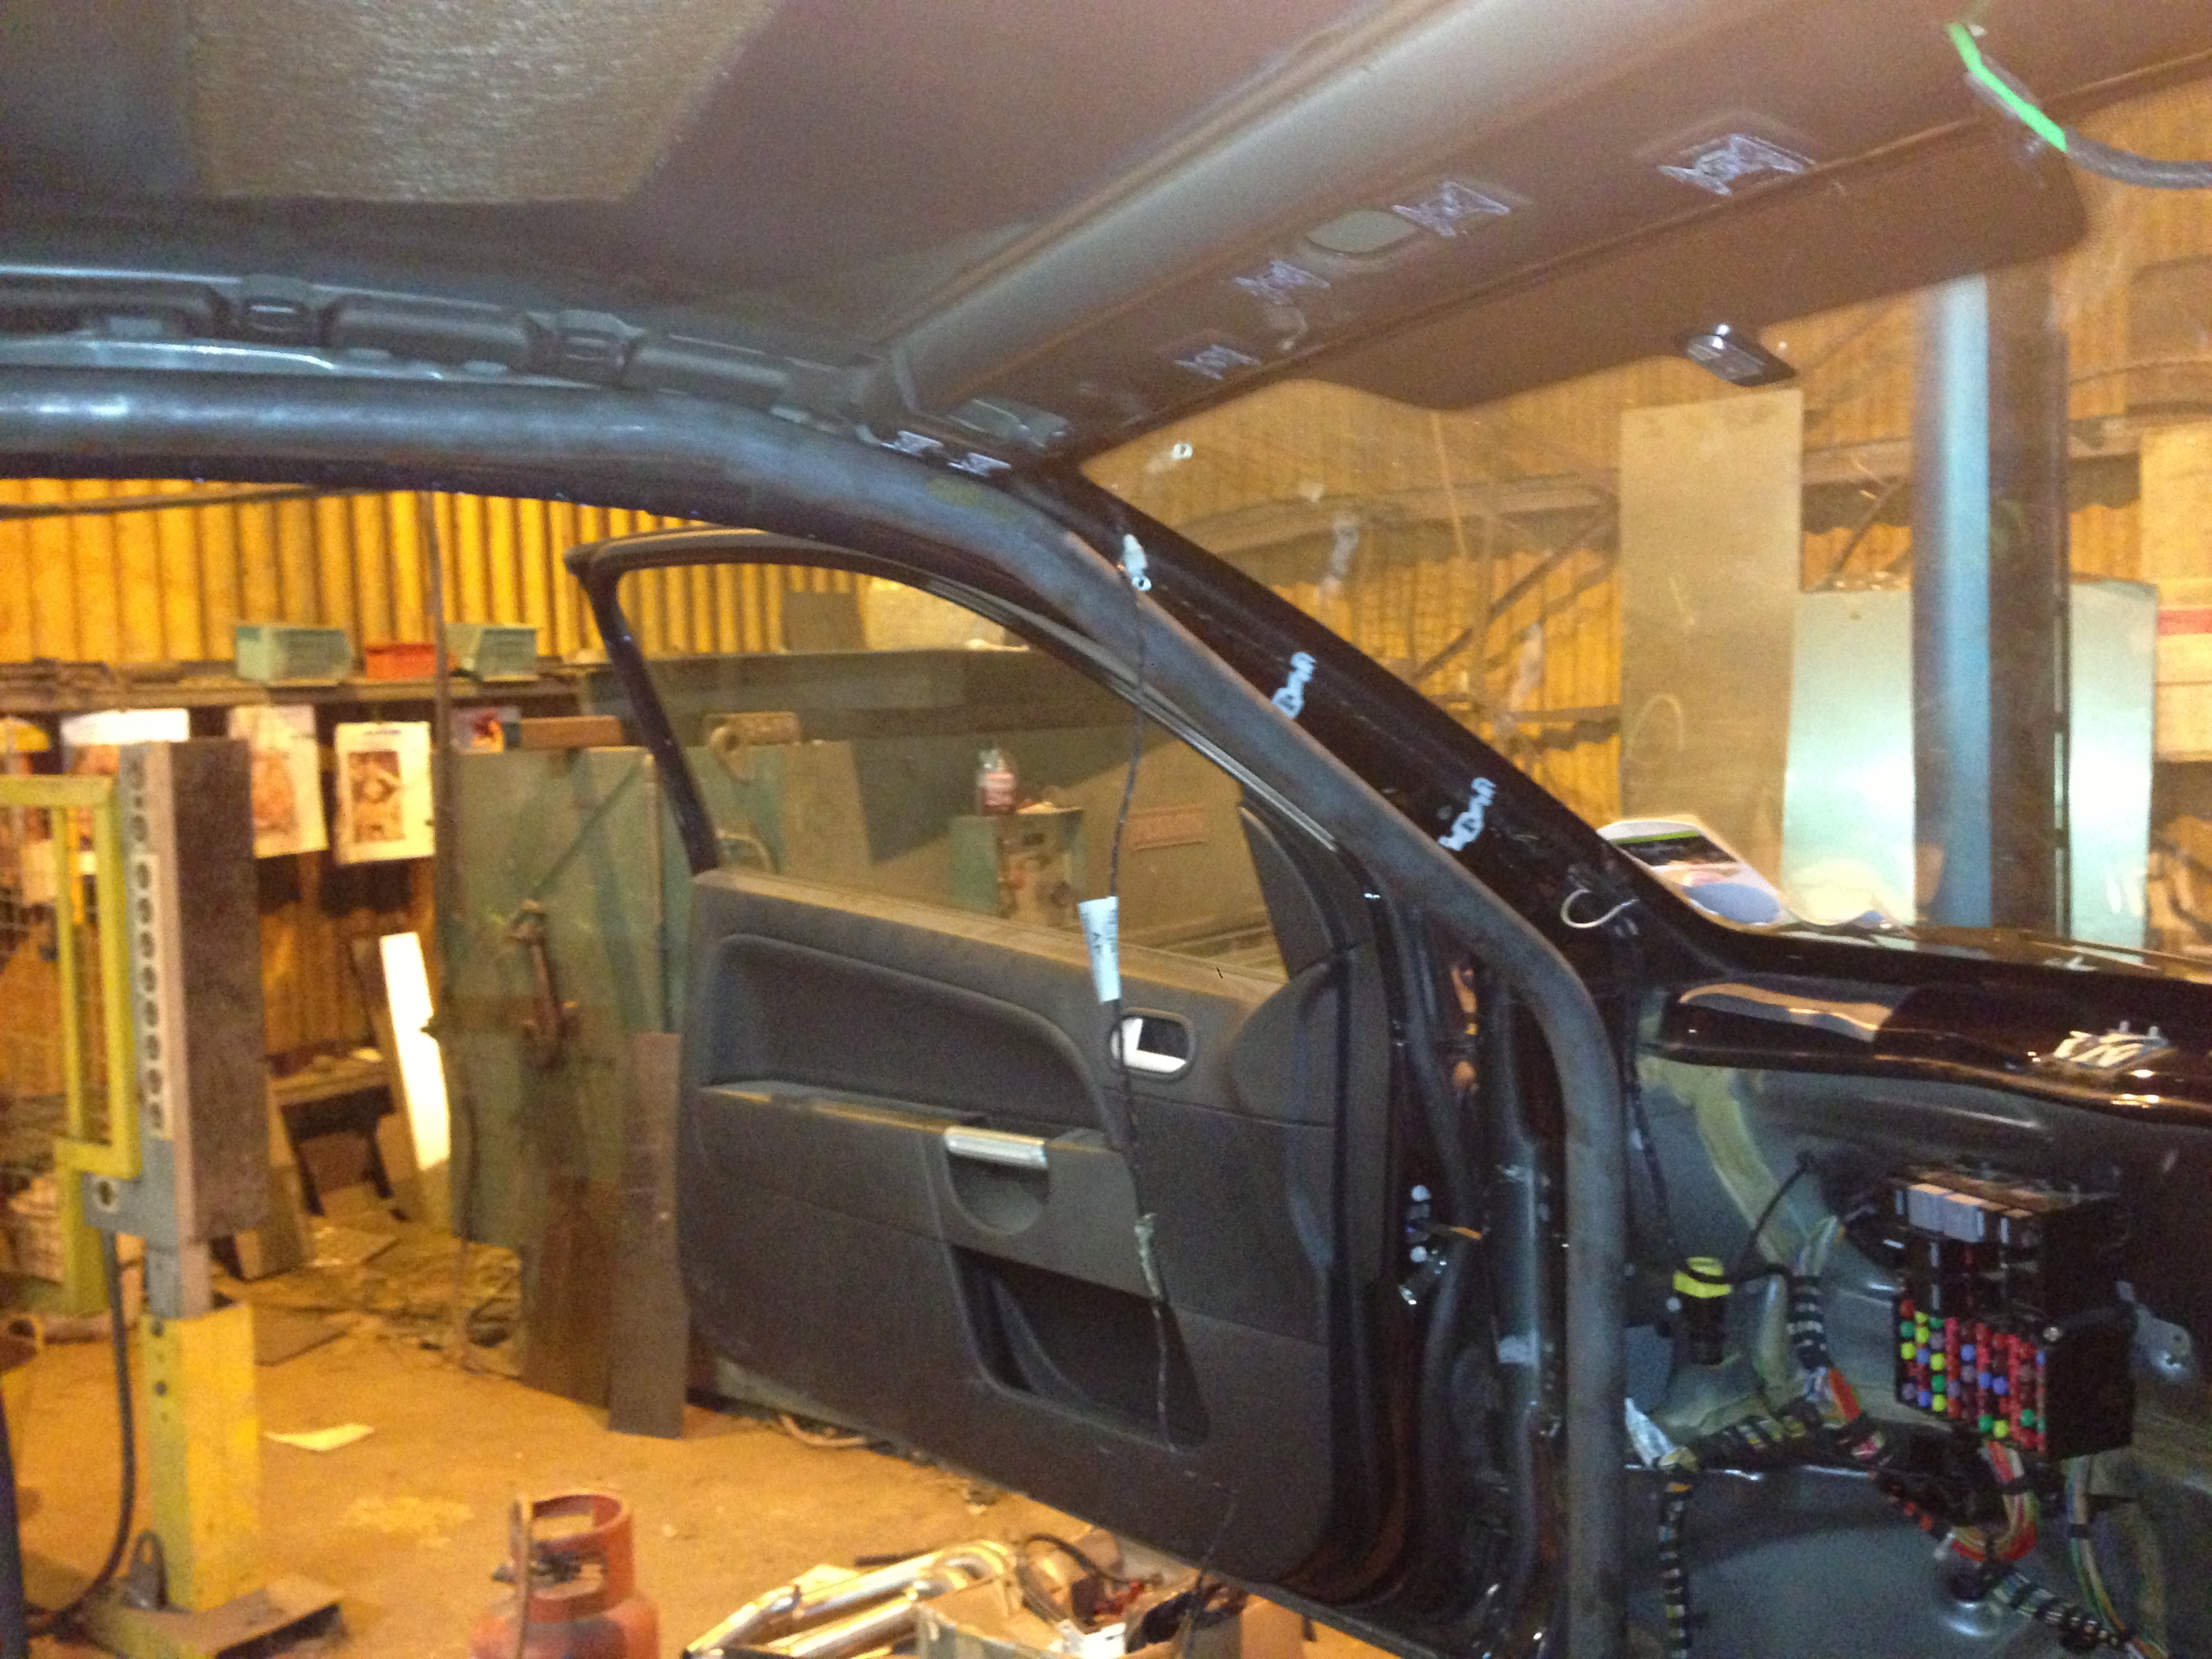
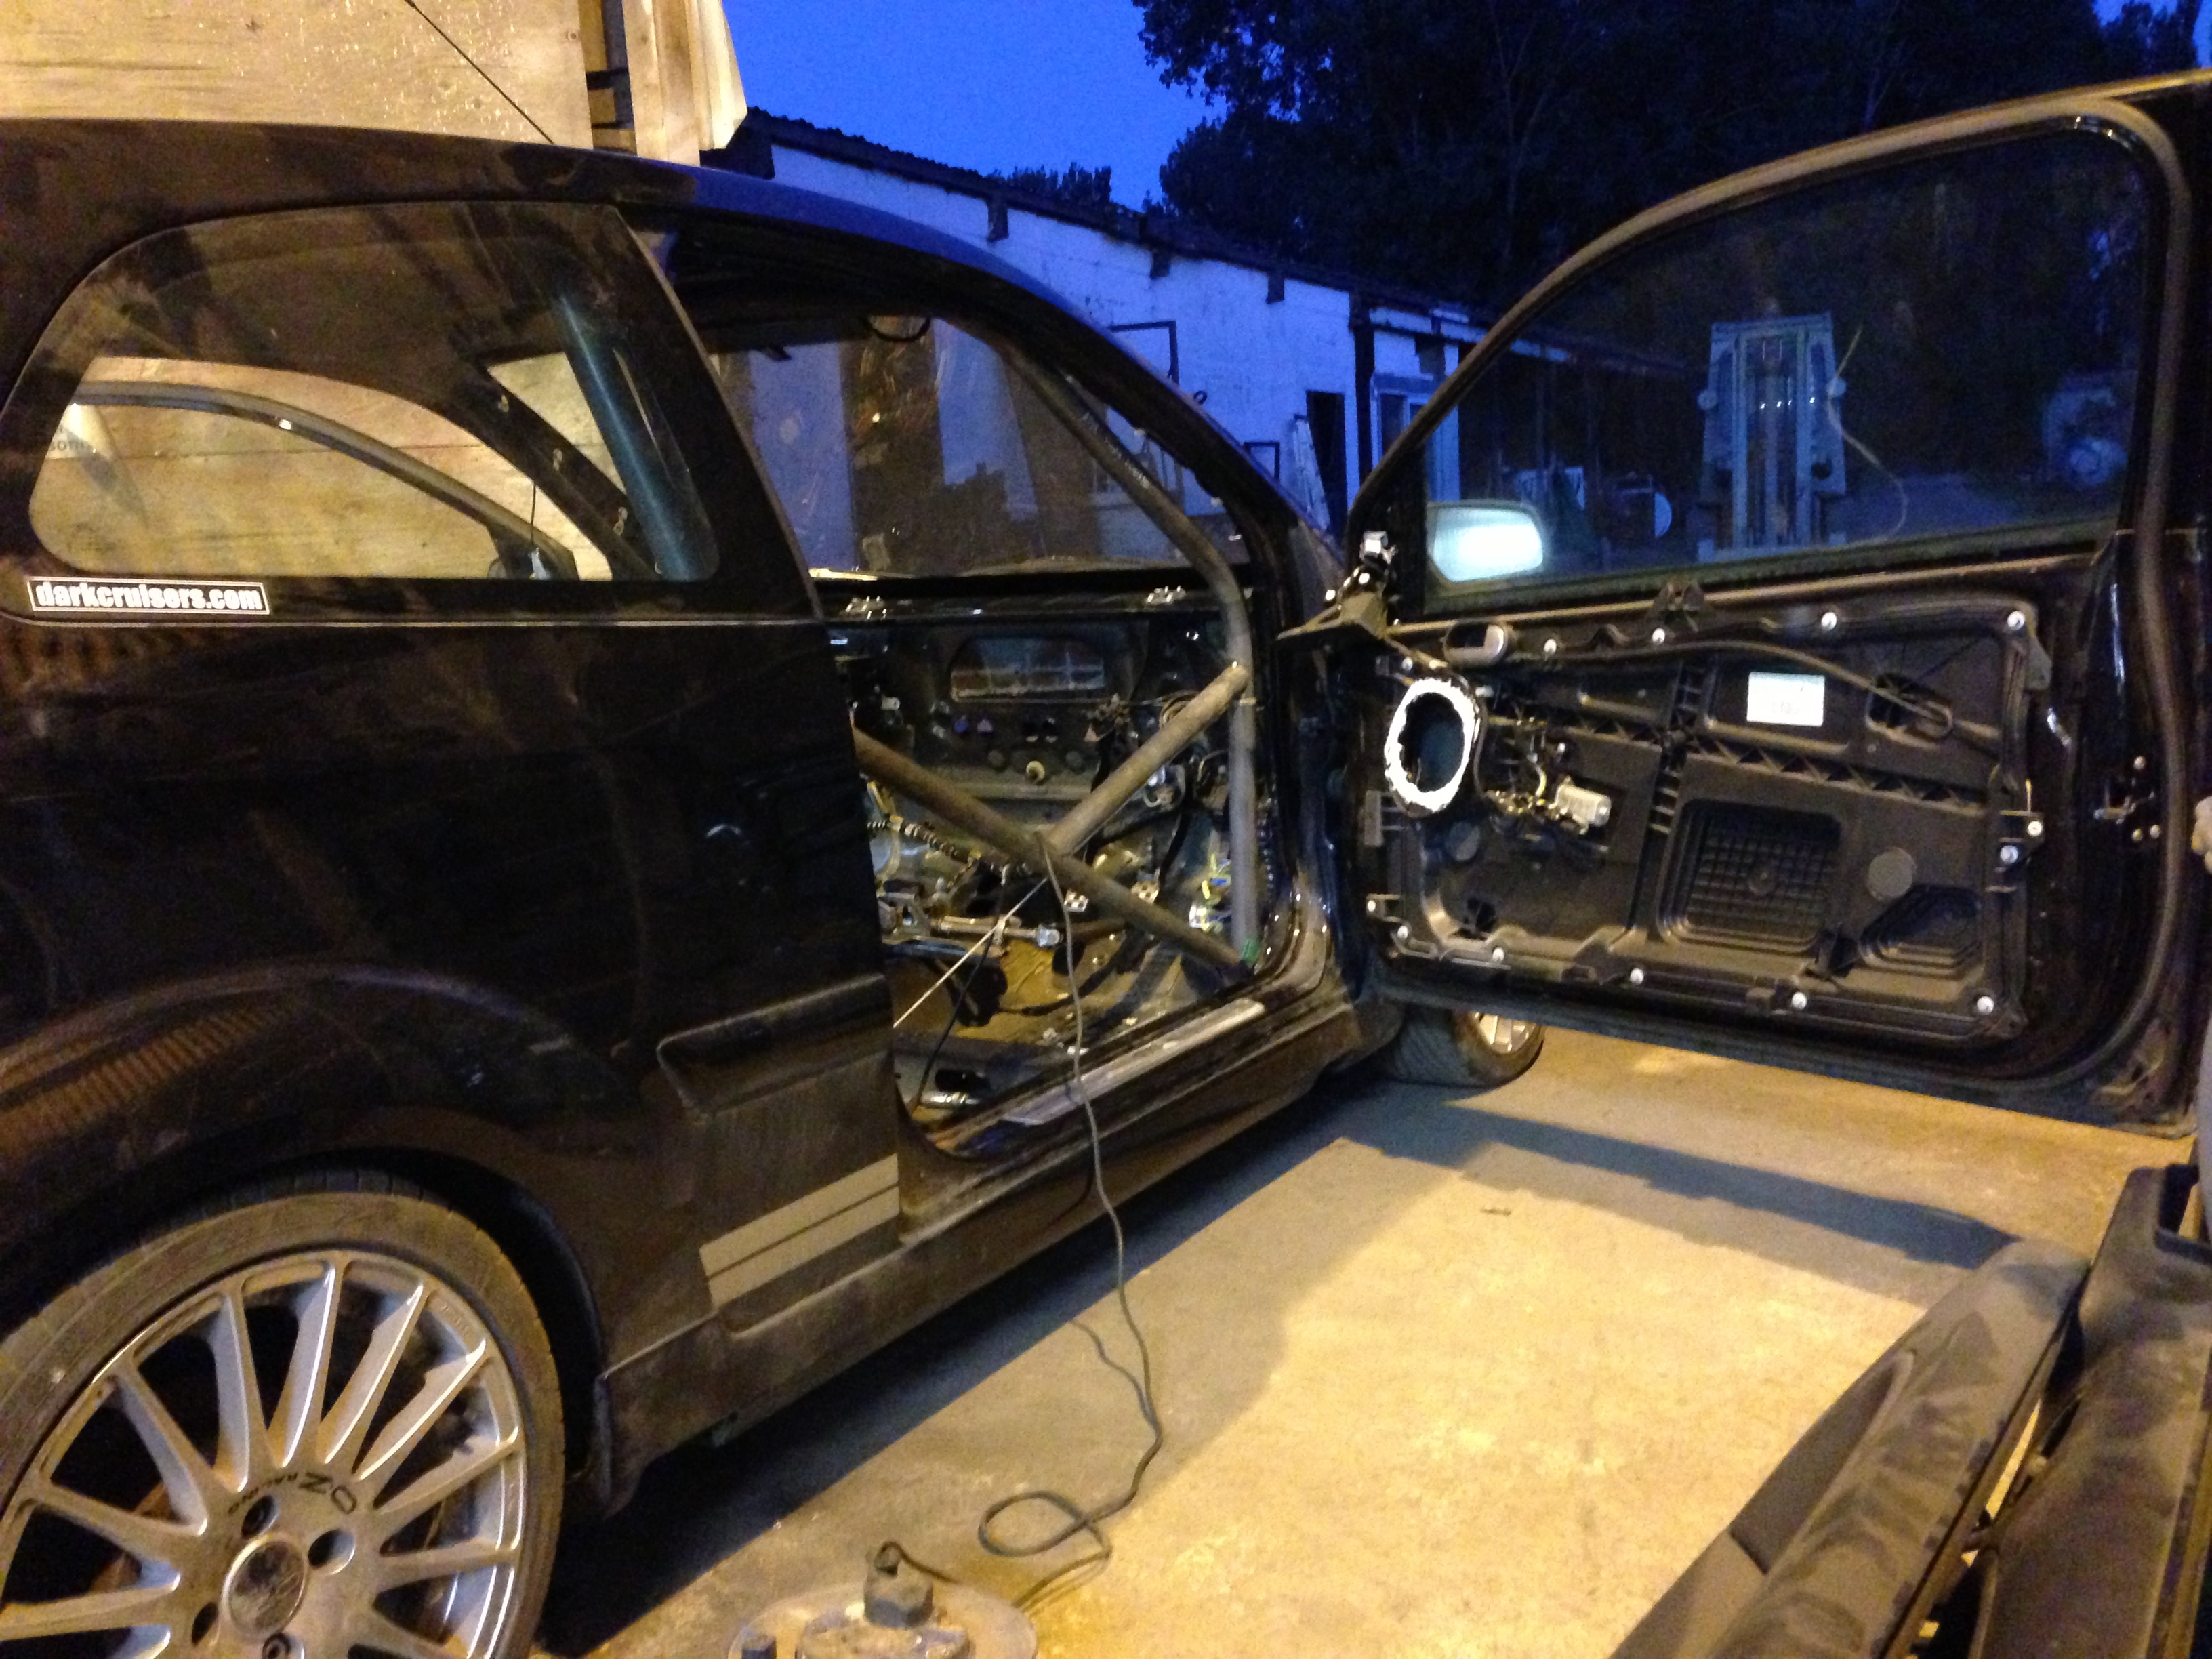
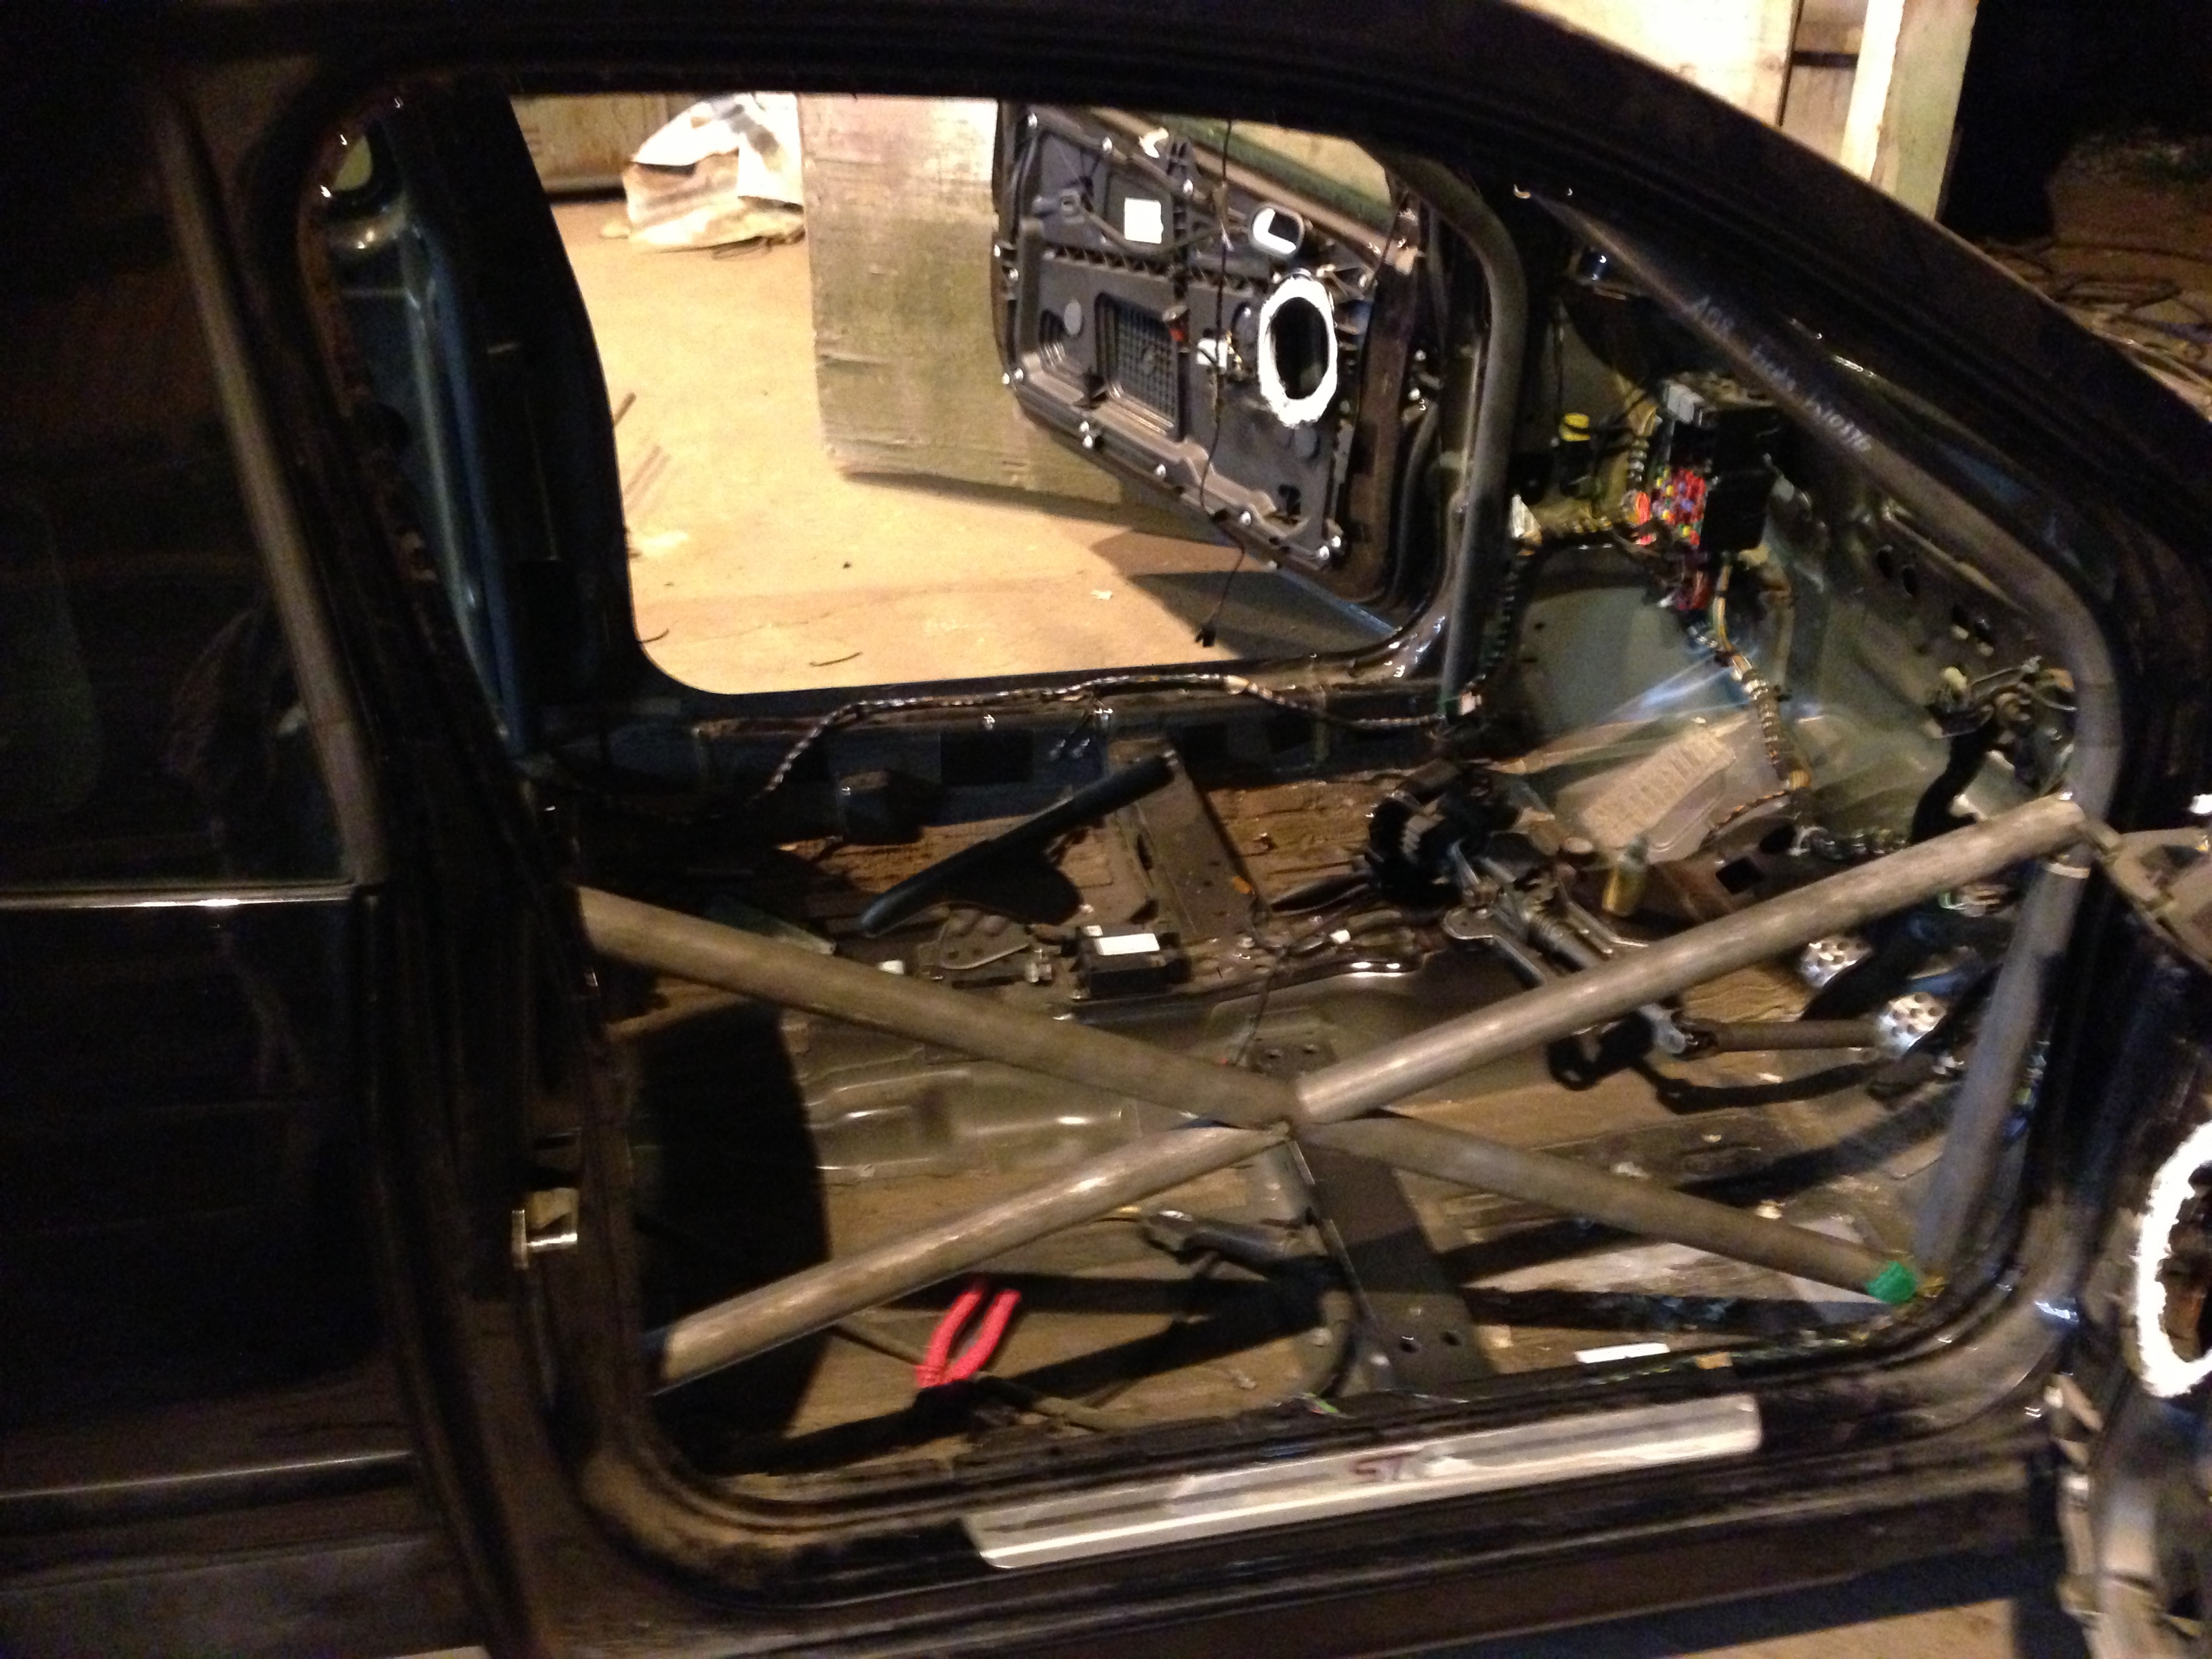
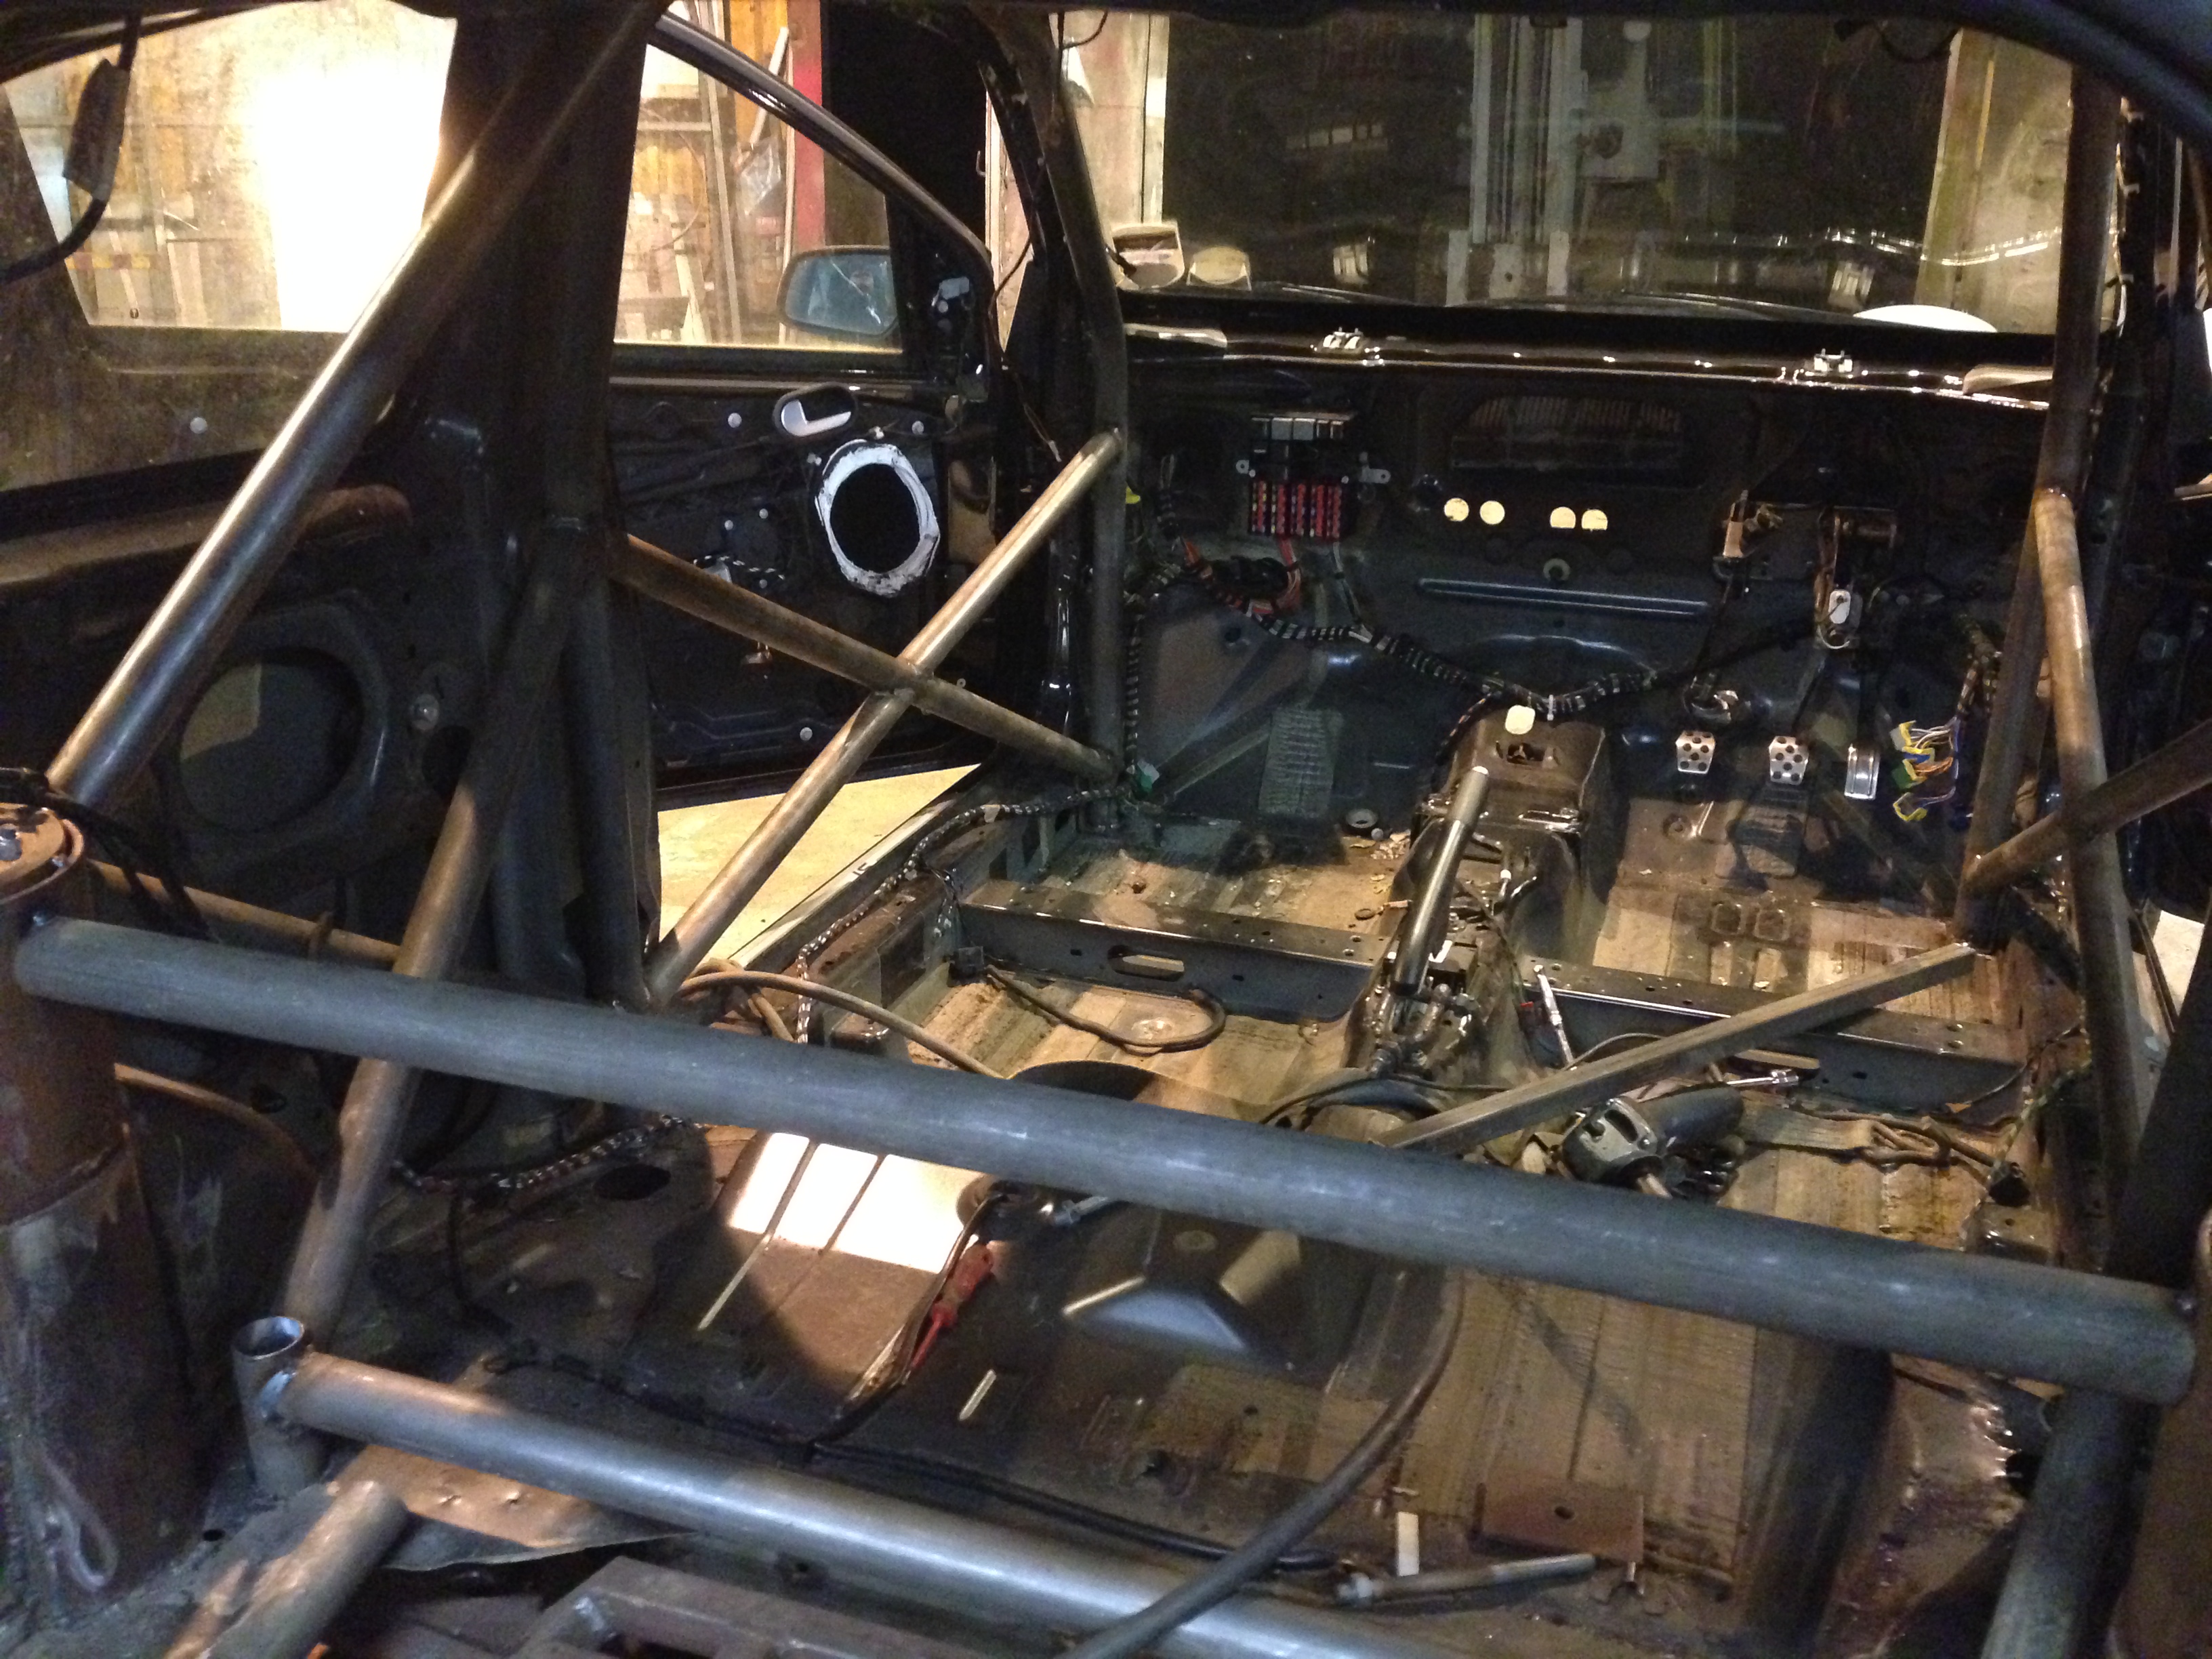
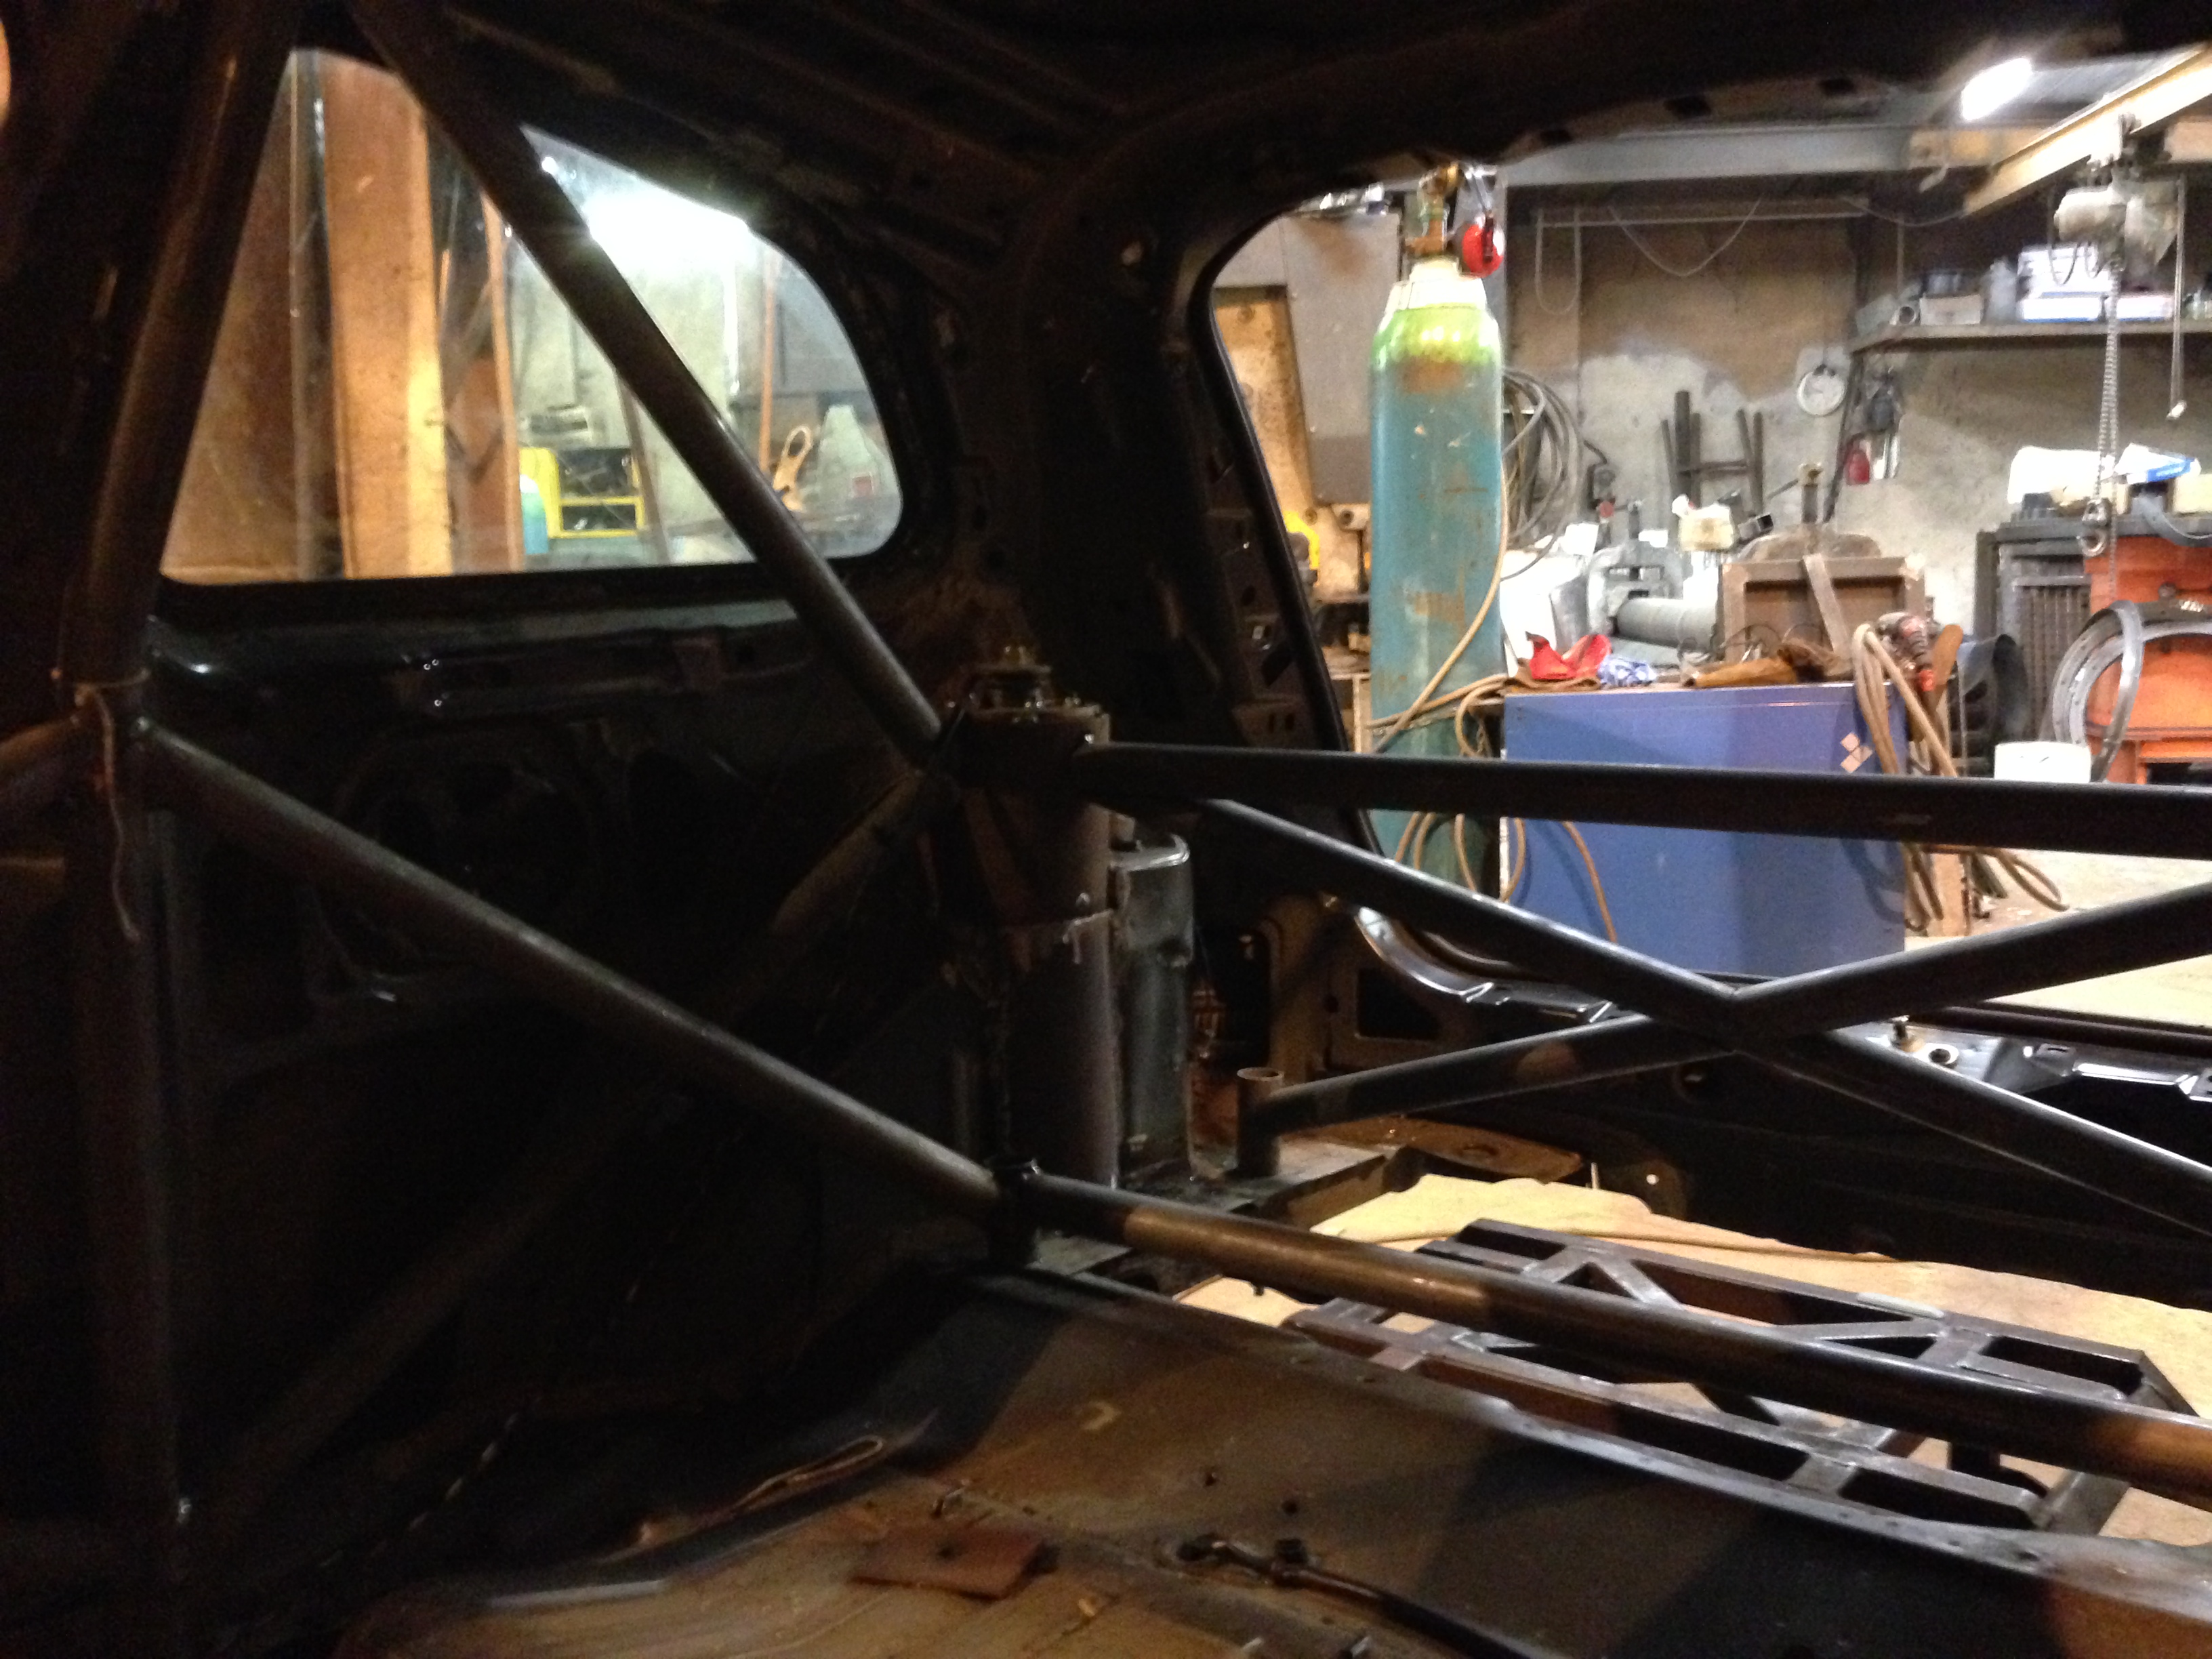
Got the main structure of the cage in tonight. Got it fitting really tight against the pillars and roof.It actually sits inside the B pillar at its base. Around another 25-30 meters of tubing still to add though!
16-07-2013, 06:04 AM
#92
PassionFord Regular

Nice work there. Cage looking good so far. How far you going with it? Full on x section across the back and doors or keeping it fairly simple? Look forward to more updates.
 27-07-2013, 06:02 PM
#95
Regular Contributor
Thread Starter
Join Date: Mar 2012
Location: Doncaster
Posts: 241
Likes: 0
Received 0 Likes
on
0 Posts
I've officially gone mad...
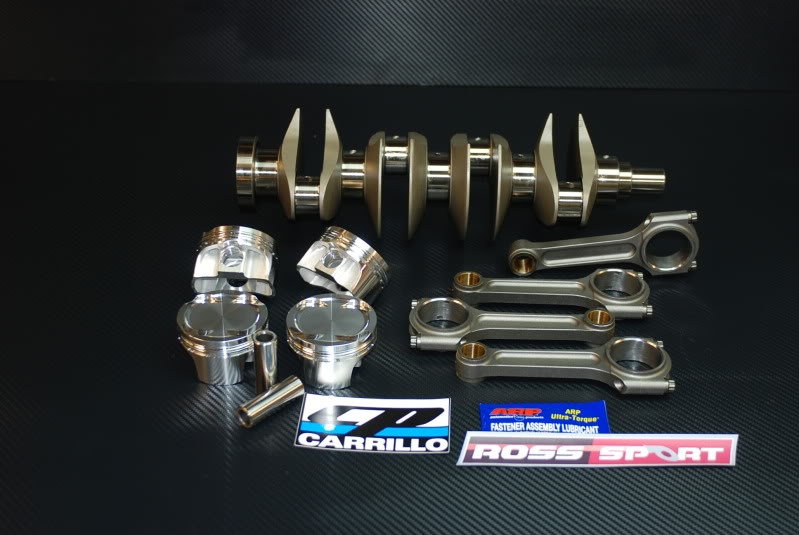
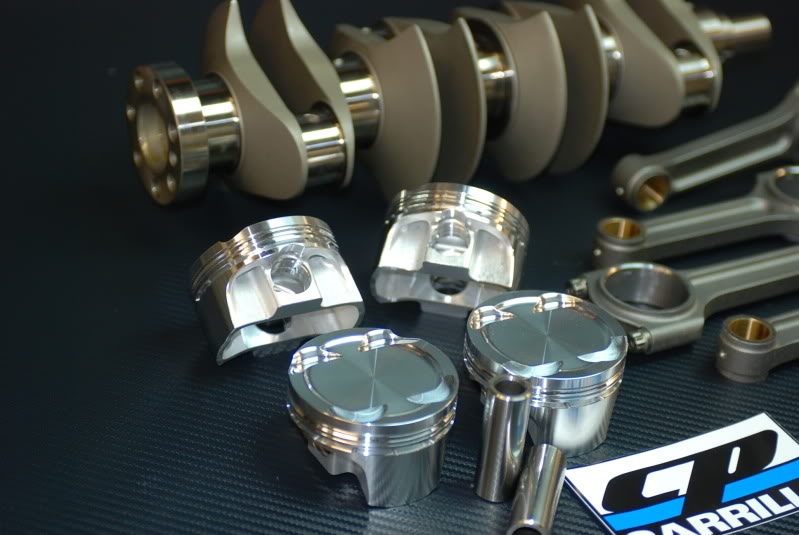
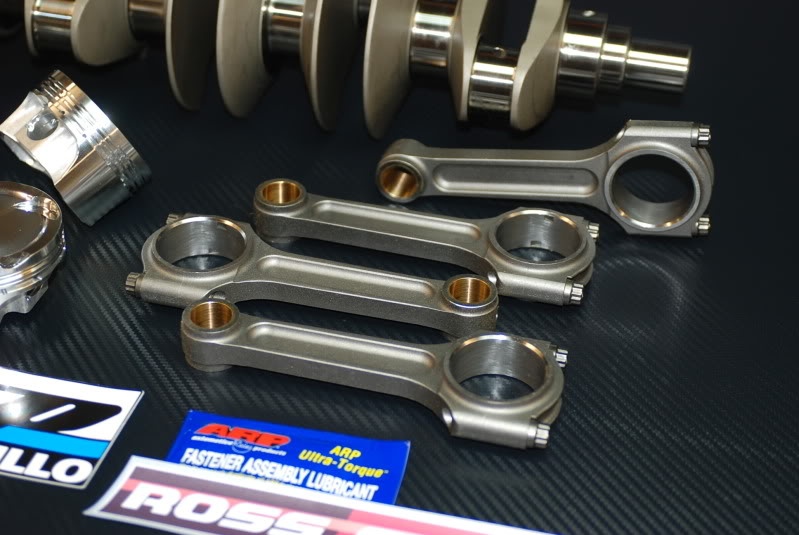
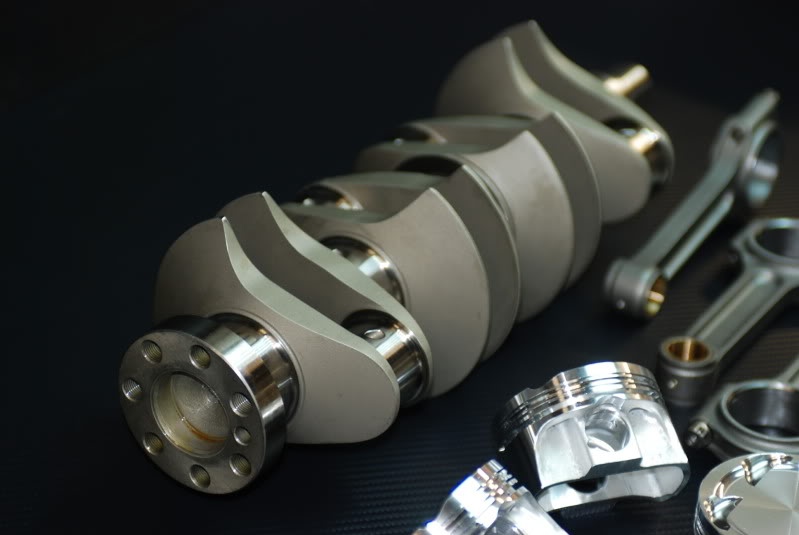
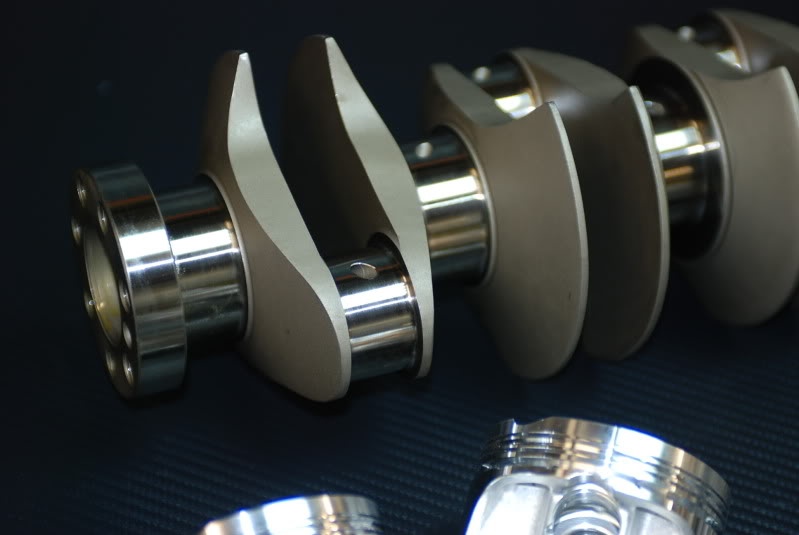
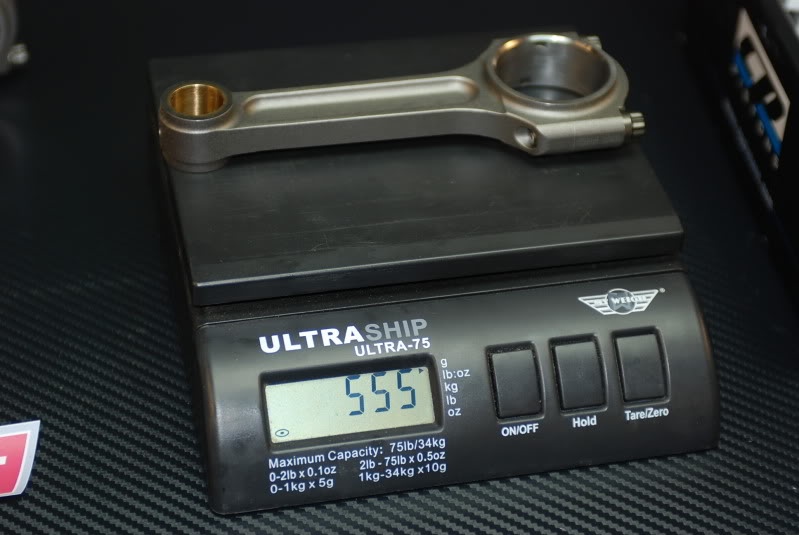

2.2 stroker billet crank, longer R&R rods, and fancy CP pistons. I'm told it'll be pretty happy at 8700rpm and capable of upwards of 900bhp - not that I'll be pushing it that far
Proper pics to follow when I've actually collected it all
2.2 stroker billet crank, longer R&R rods, and fancy CP pistons. I'm told it'll be pretty happy at 8700rpm and capable of upwards of 900bhp - not that I'll be pushing it that far
Proper pics to follow when I've actually collected it all
Last edited by Beetlejuice; 27-07-2013 at 06:14 PM.
 01-08-2013, 06:36 PM
#97
Ben

Wow.
Speechless, what an awesome machine, incredible attention to detail and the fabrication skills are second to none.
That crank is a work of art, be a shame to bolt it inside never to be seen again!
Speechless, what an awesome machine, incredible attention to detail and the fabrication skills are second to none.
That crank is a work of art, be a shame to bolt it inside never to be seen again!

 Porn
01-08-2013, 11:00 PM
Porn
01-08-2013, 11:00 PM
#99
Advanced PassionFord User

must admit this is one of the best spec'd and fabricated home builds i've seen in a while and will probably be in touch with you in a few months as i'm putting same engine but mounted to mtx to keep it fwd in a mk4 escort just getting them bolted together at moment and having a custom flywheel made


 21-10-2013, 11:37 AM
#110
Regular Contributor
Thread Starter
Join Date: Mar 2012
Location: Doncaster
Posts: 241
Likes: 0
Received 0 Likes
on
0 Posts
Well I did something on the car at the weekend! It needs to be a little wider to get some more manly tyres in, so started having a little play on Saturday night. Still had a spare front end in a jig from some time ago, so that saves messing the car up when I inevitably :censored: up
Disclaimer - I have absolutely no idea what I'm doing... Just making it up as I go along.
Anyway, I got one of the front arches looking something like and it's now about ready for me to have a go at taking a mould off it.

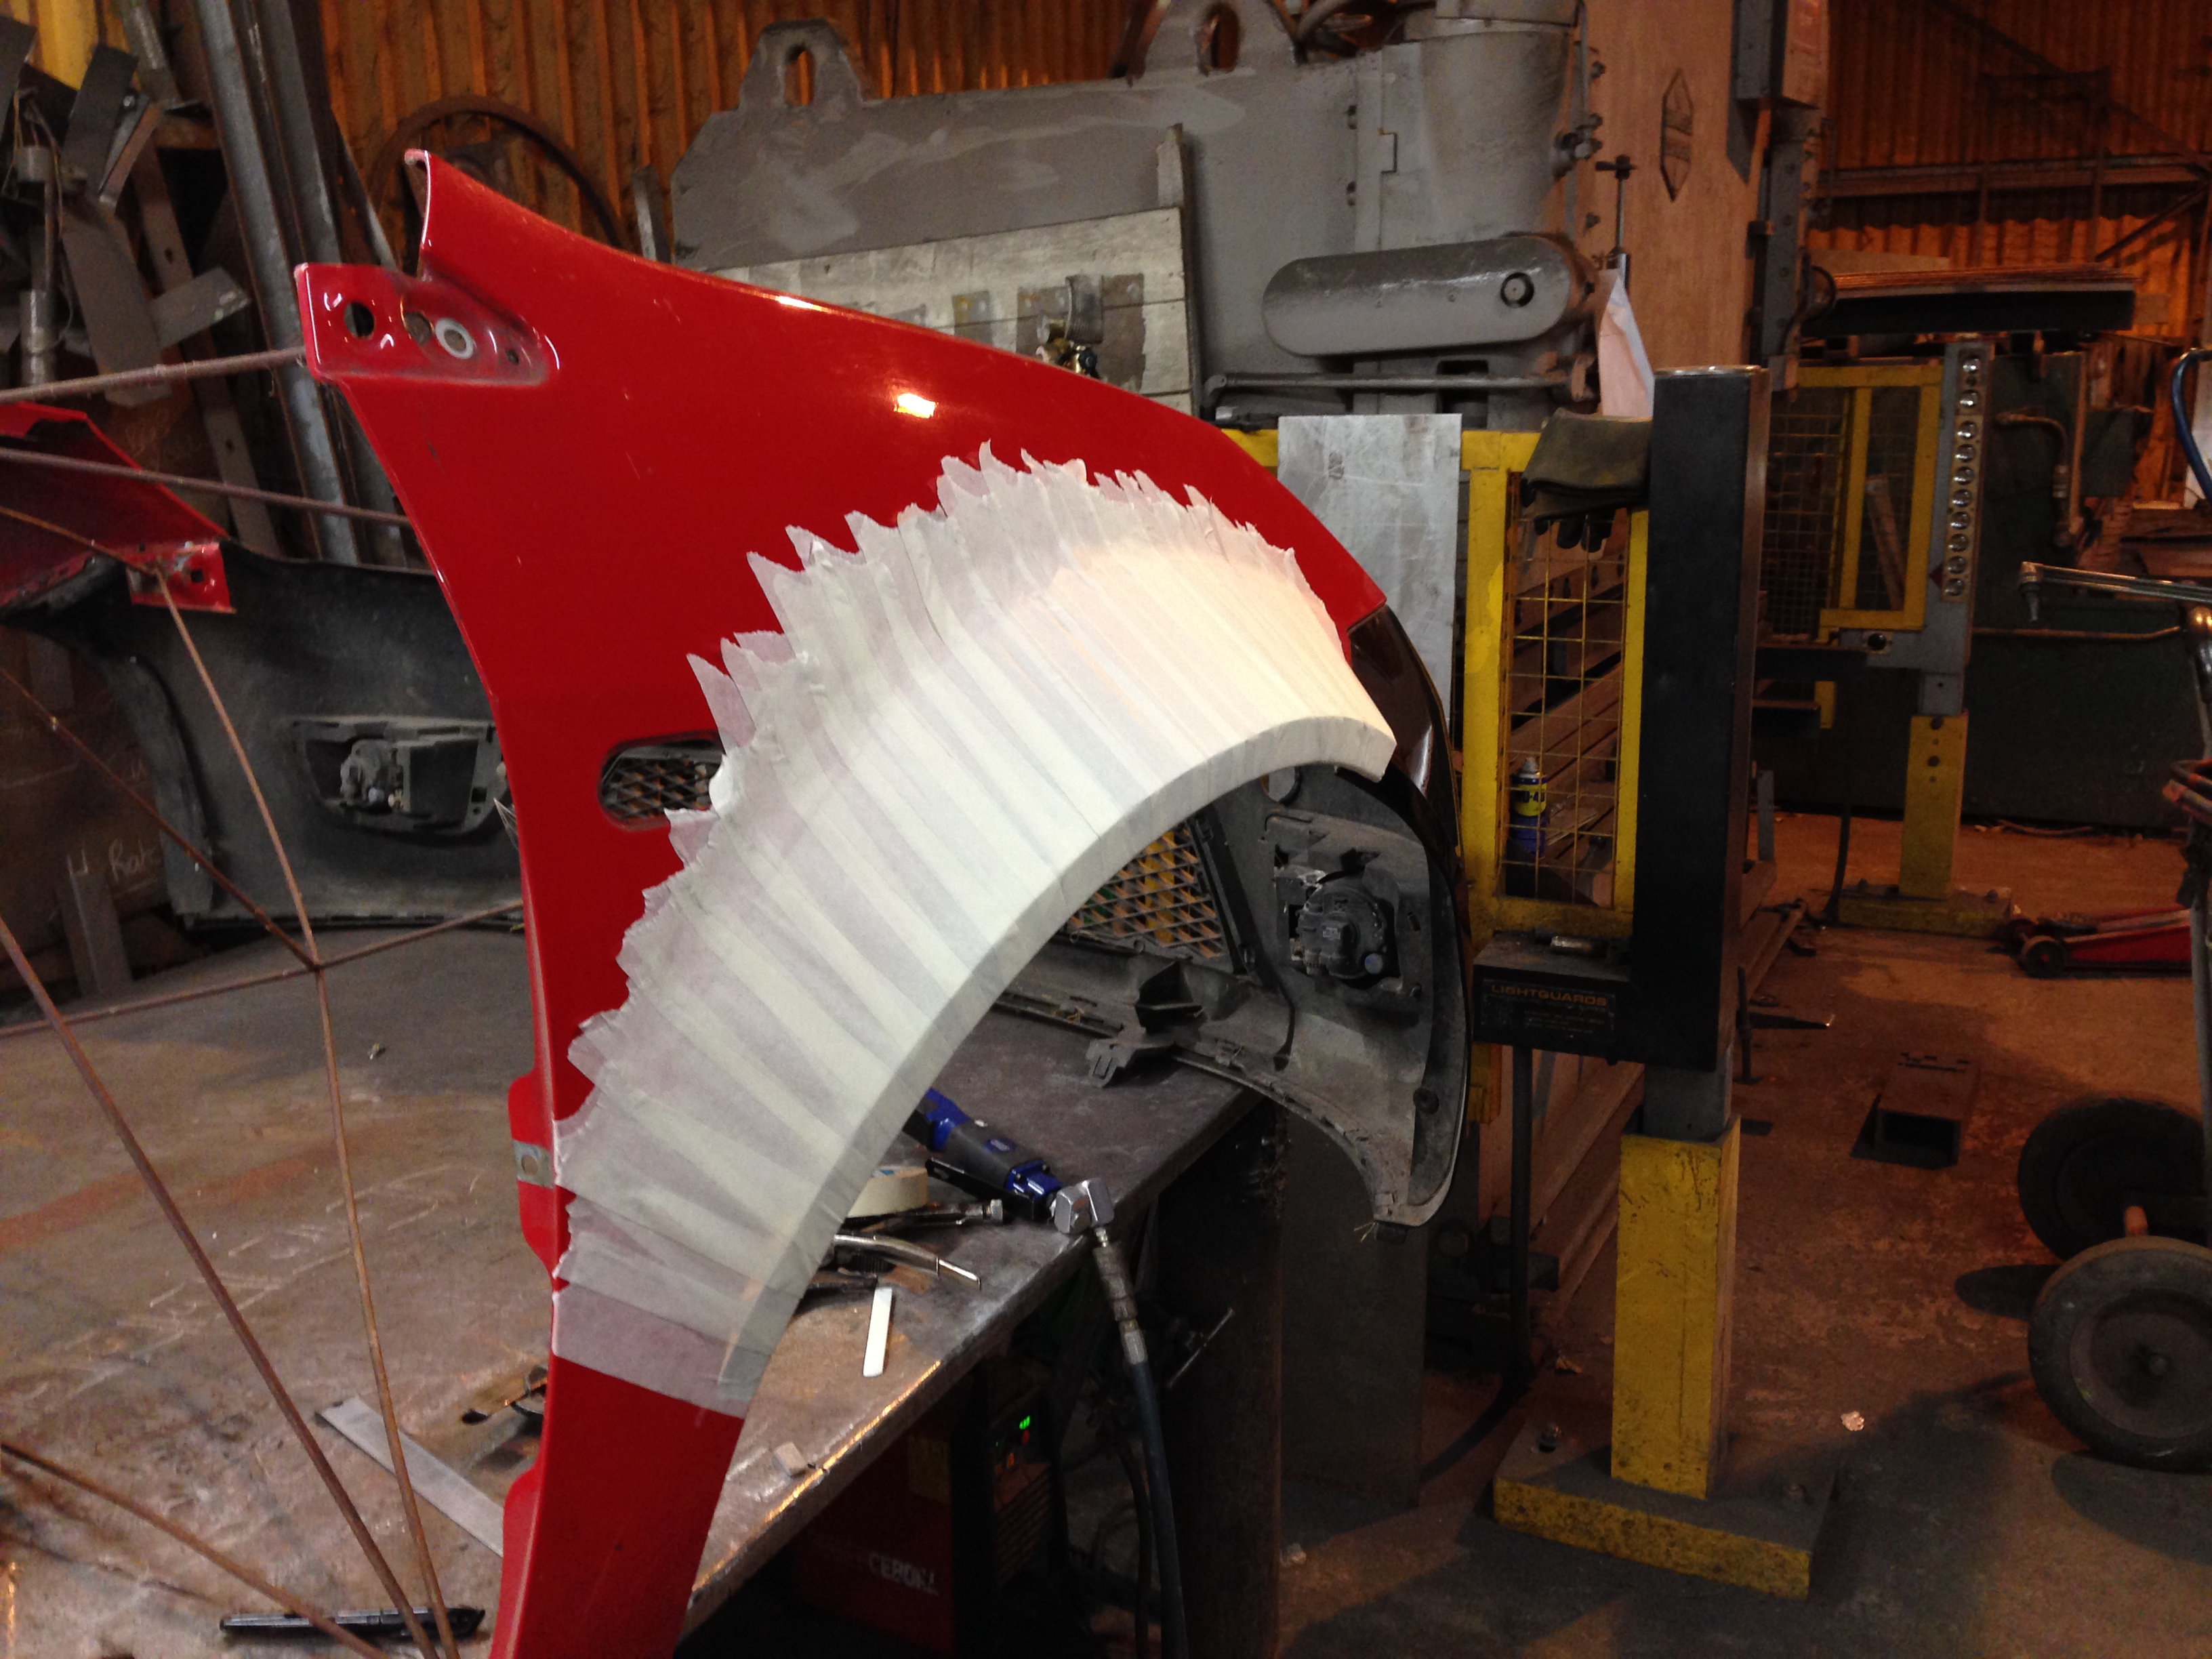
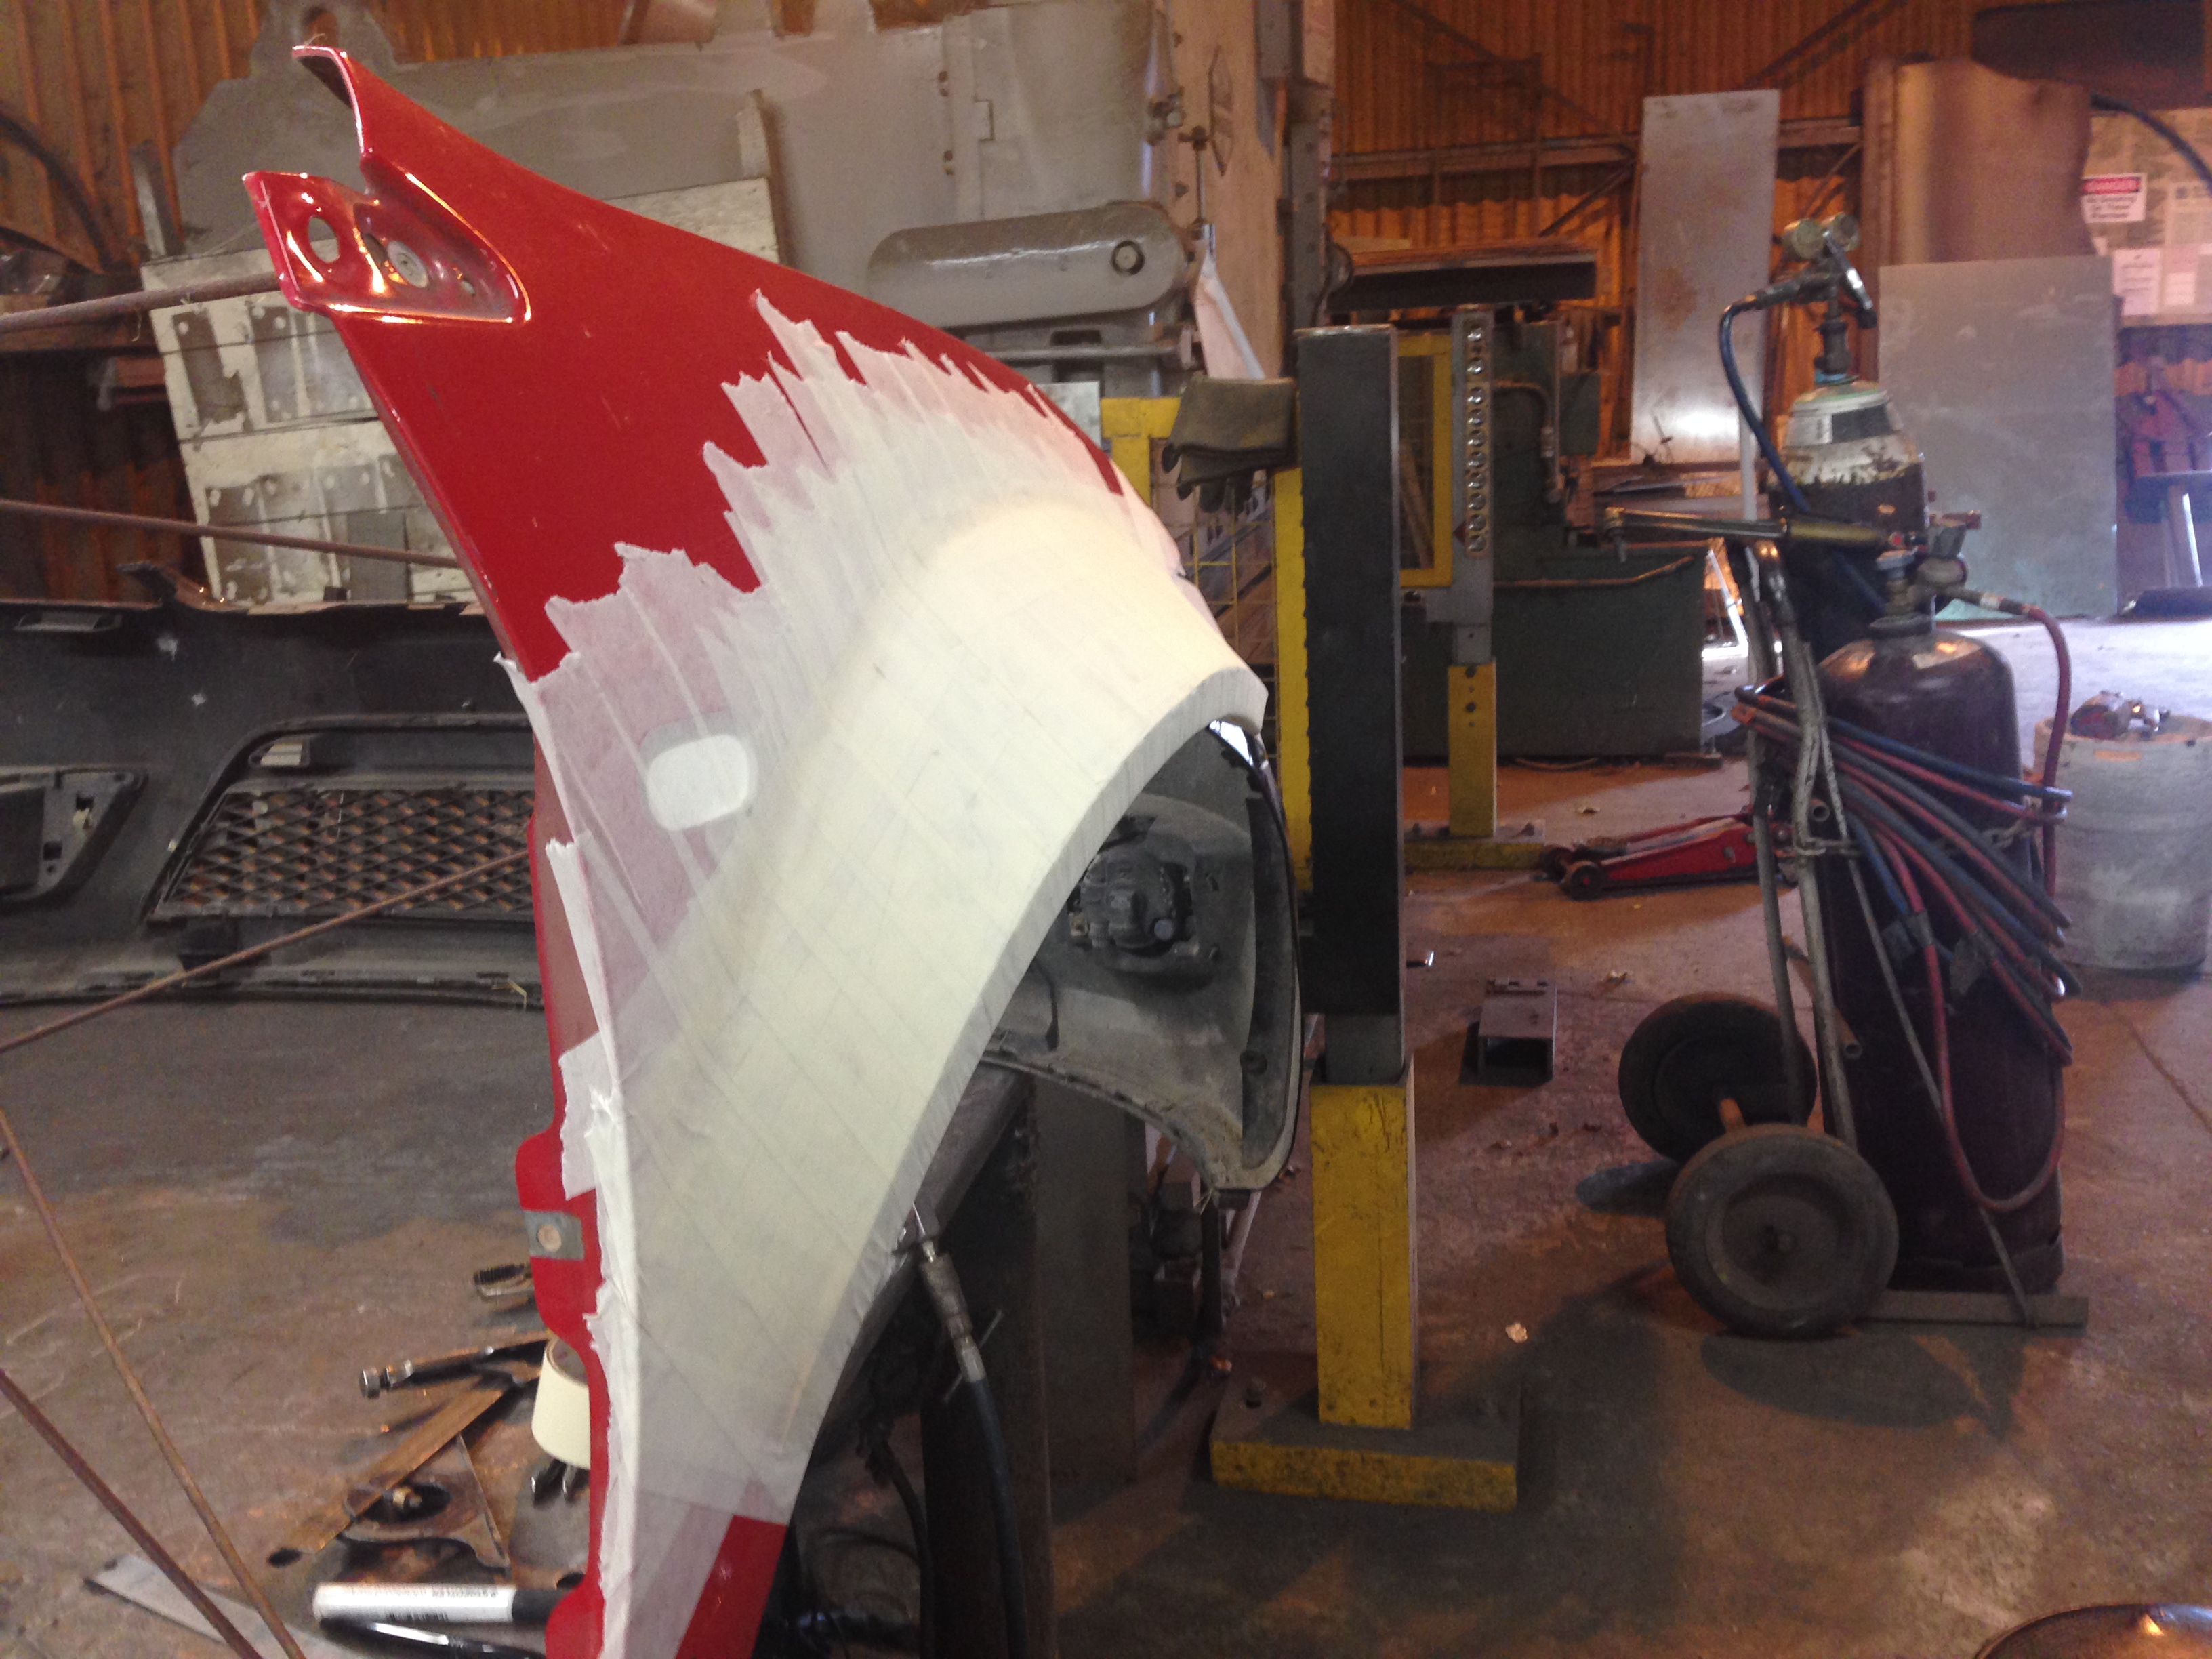
Disclaimer - I have absolutely no idea what I'm doing... Just making it up as I go along.
Anyway, I got one of the front arches looking something like and it's now about ready for me to have a go at taking a mould off it.
17-11-2013, 09:17 PM
#112
Regular Contributor
Thread Starter
Join Date: Mar 2012
Location: Doncaster
Posts: 241
Likes: 0
Received 0 Likes
on
0 Posts
So here's a full weekend's work then... Had enough for the day now, so here's as far as I've got:
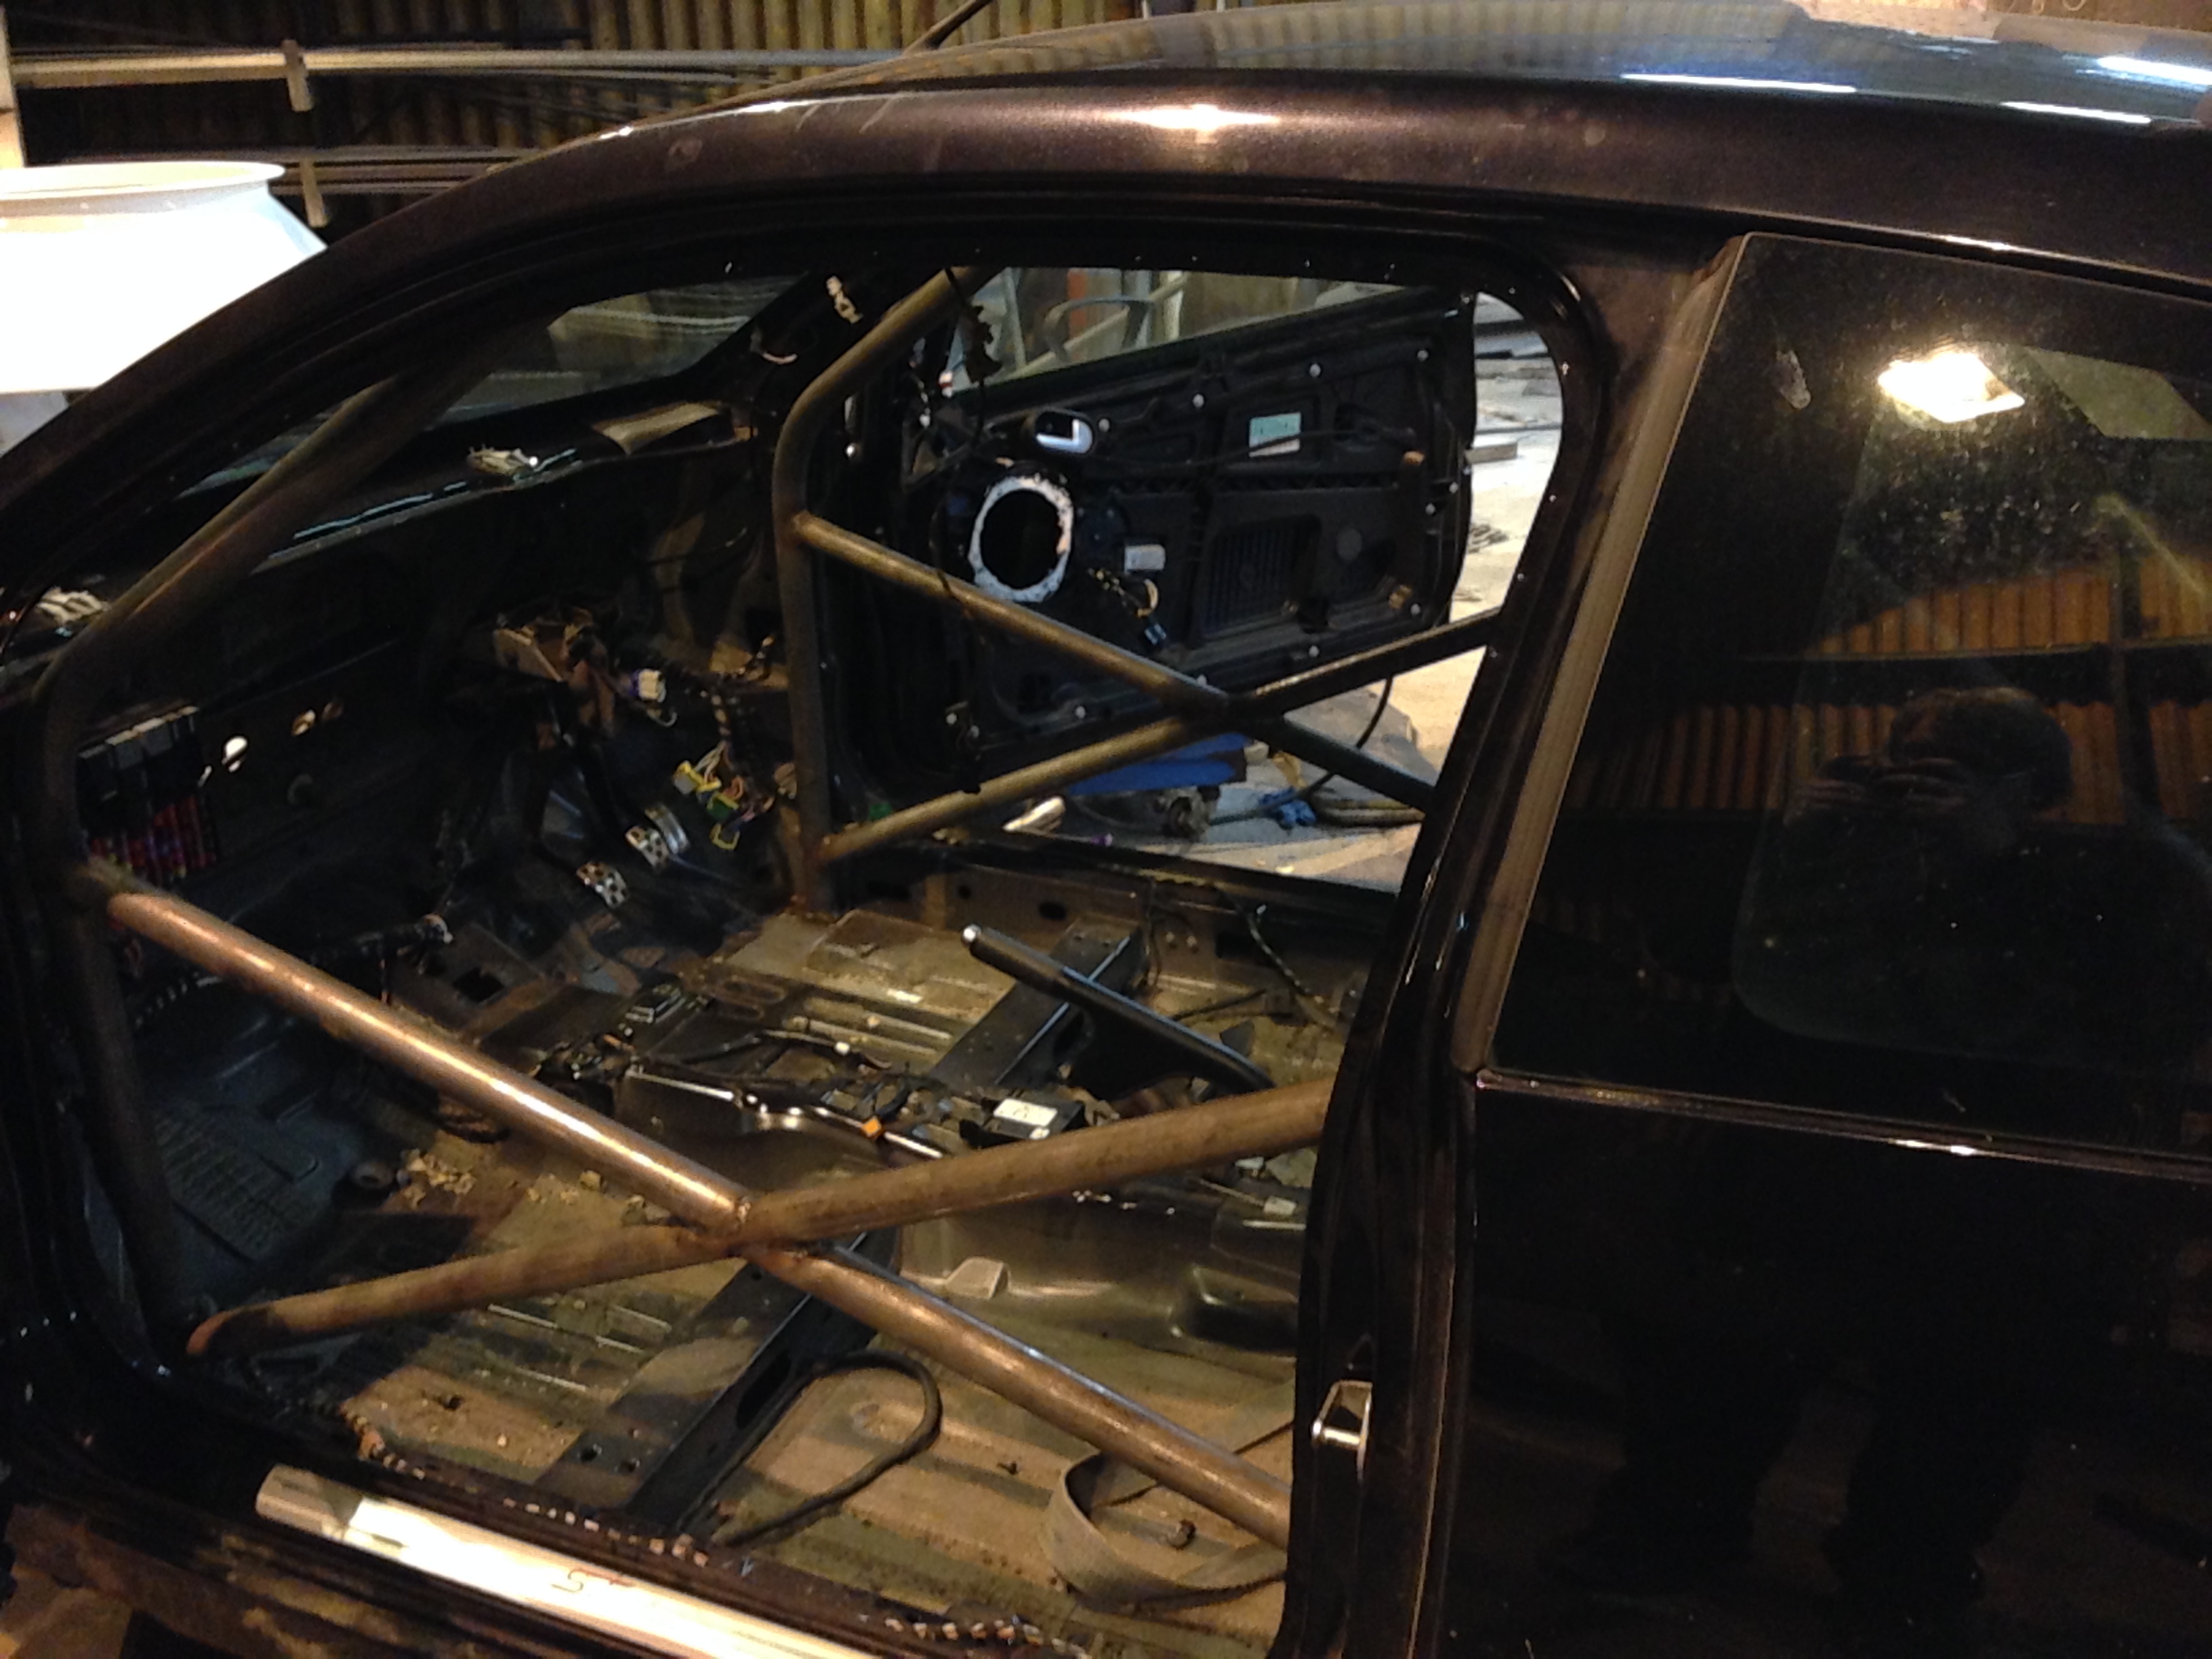
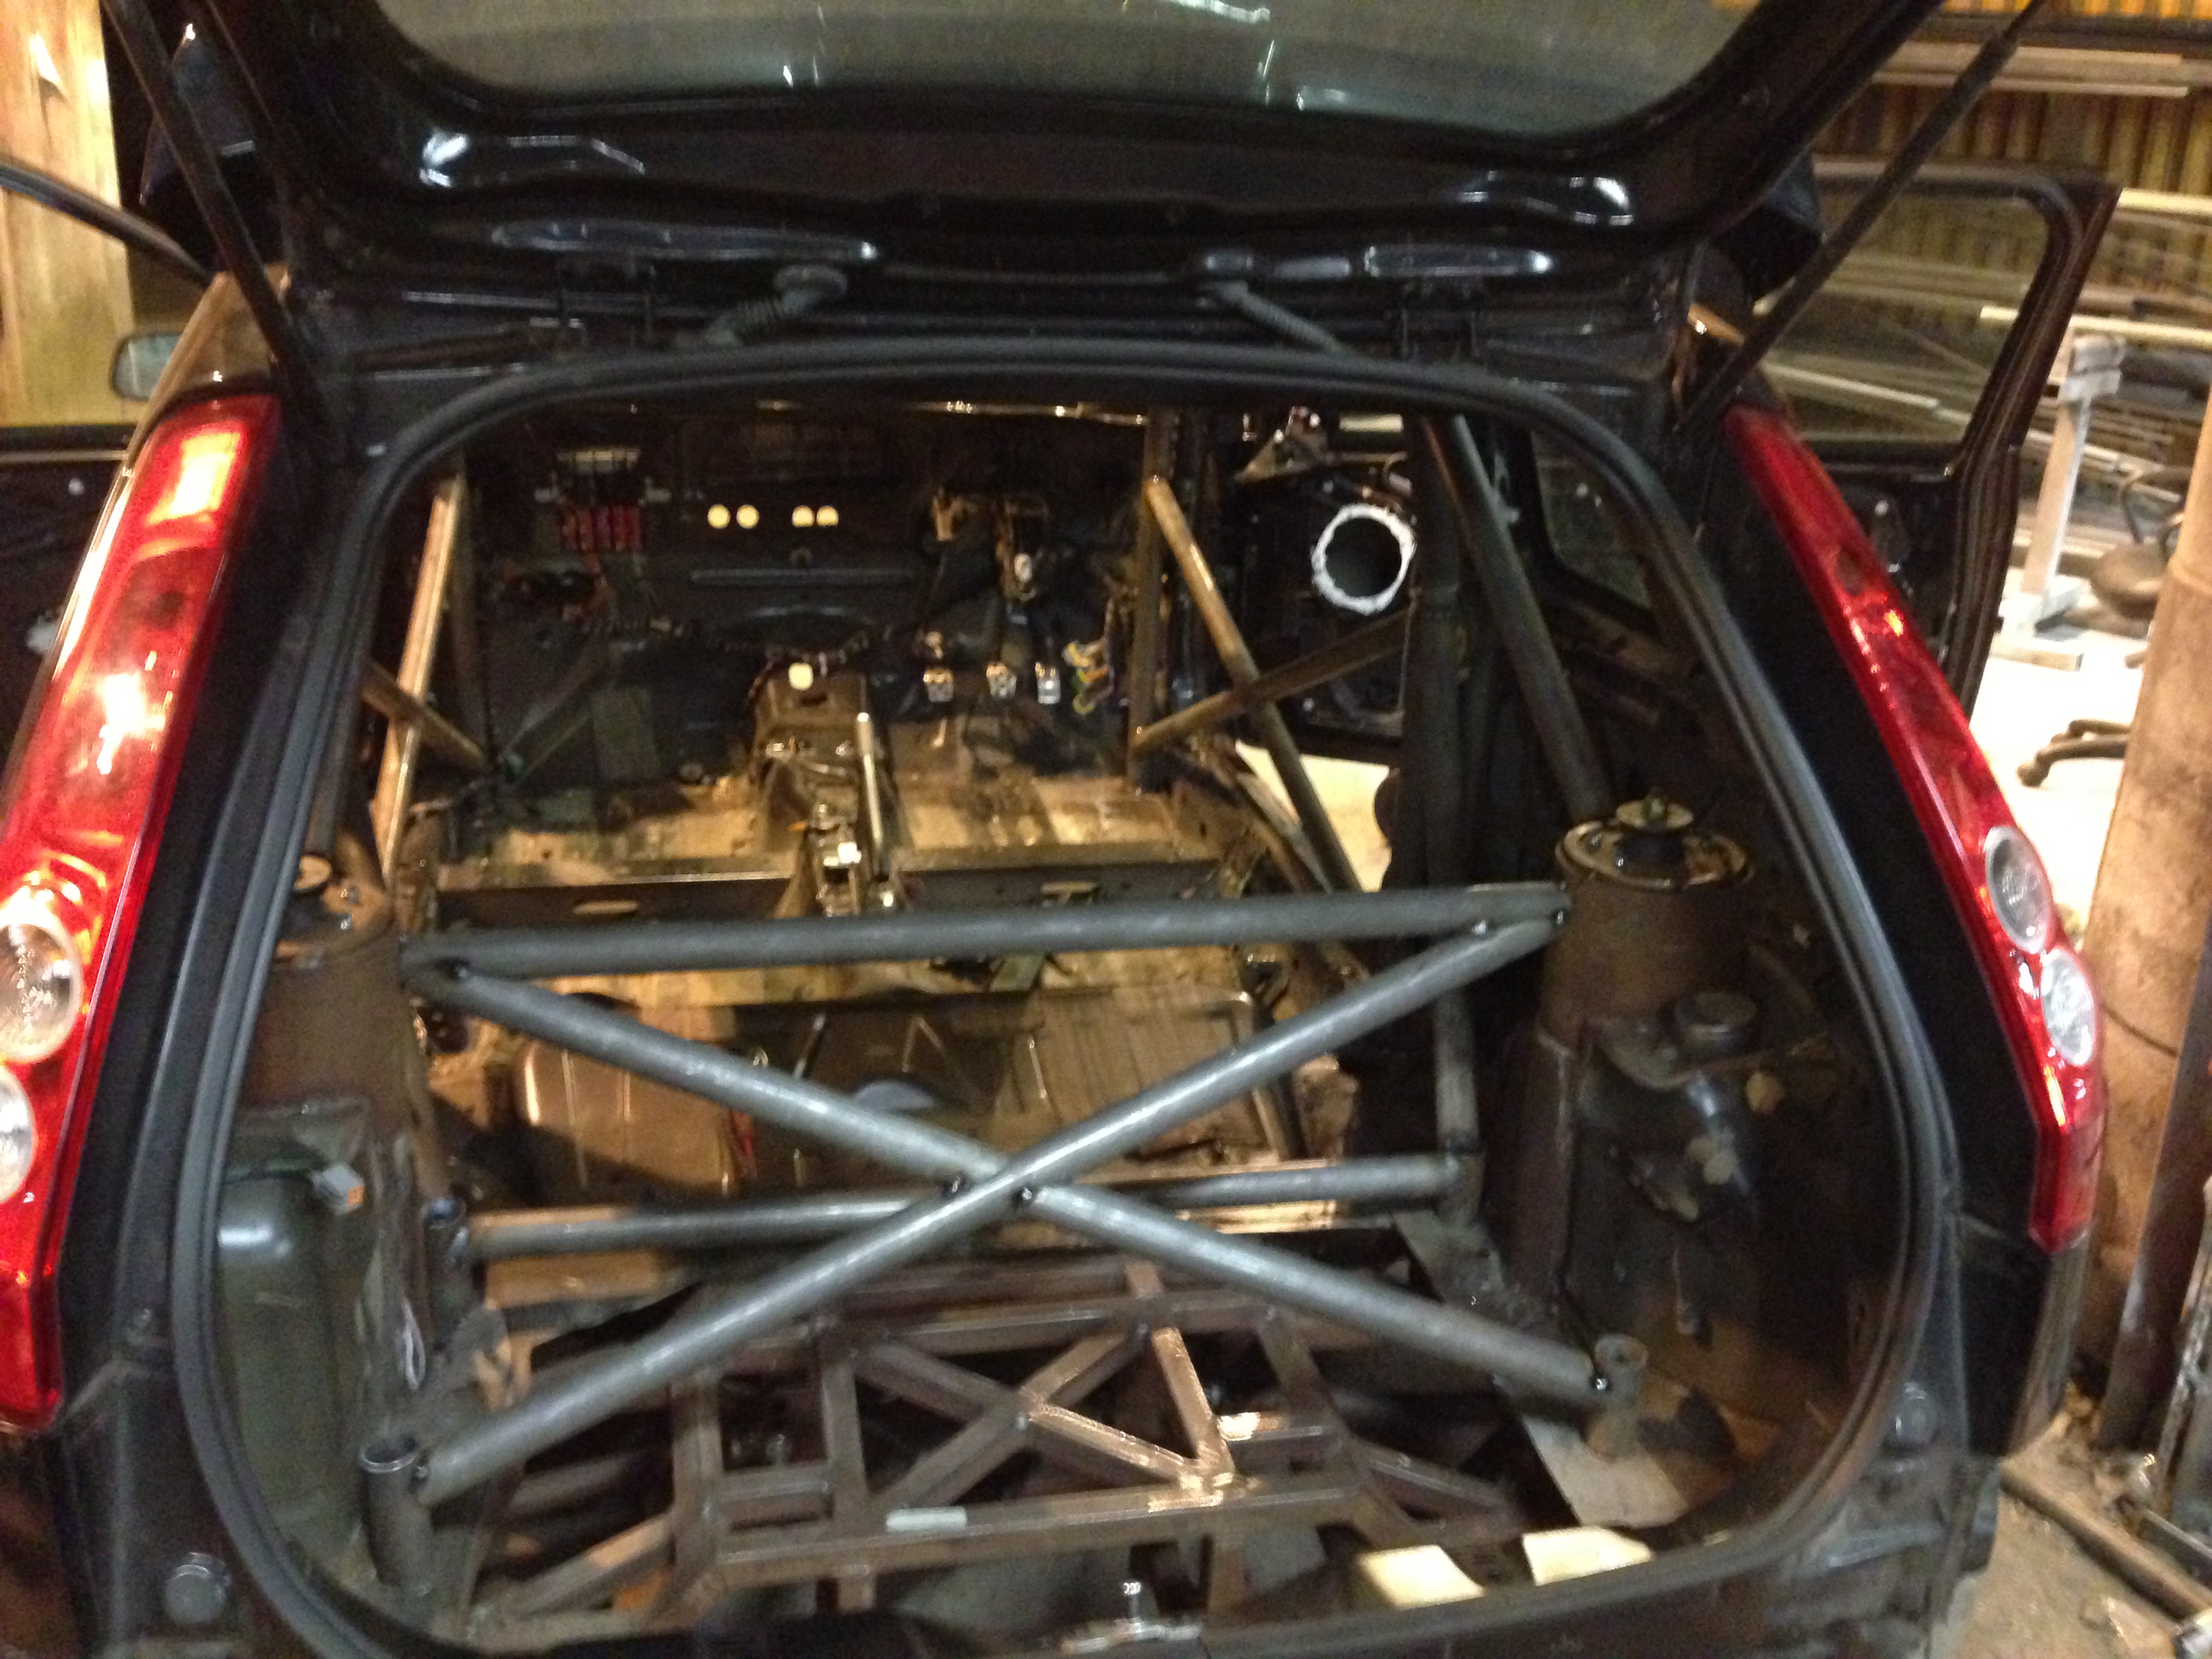
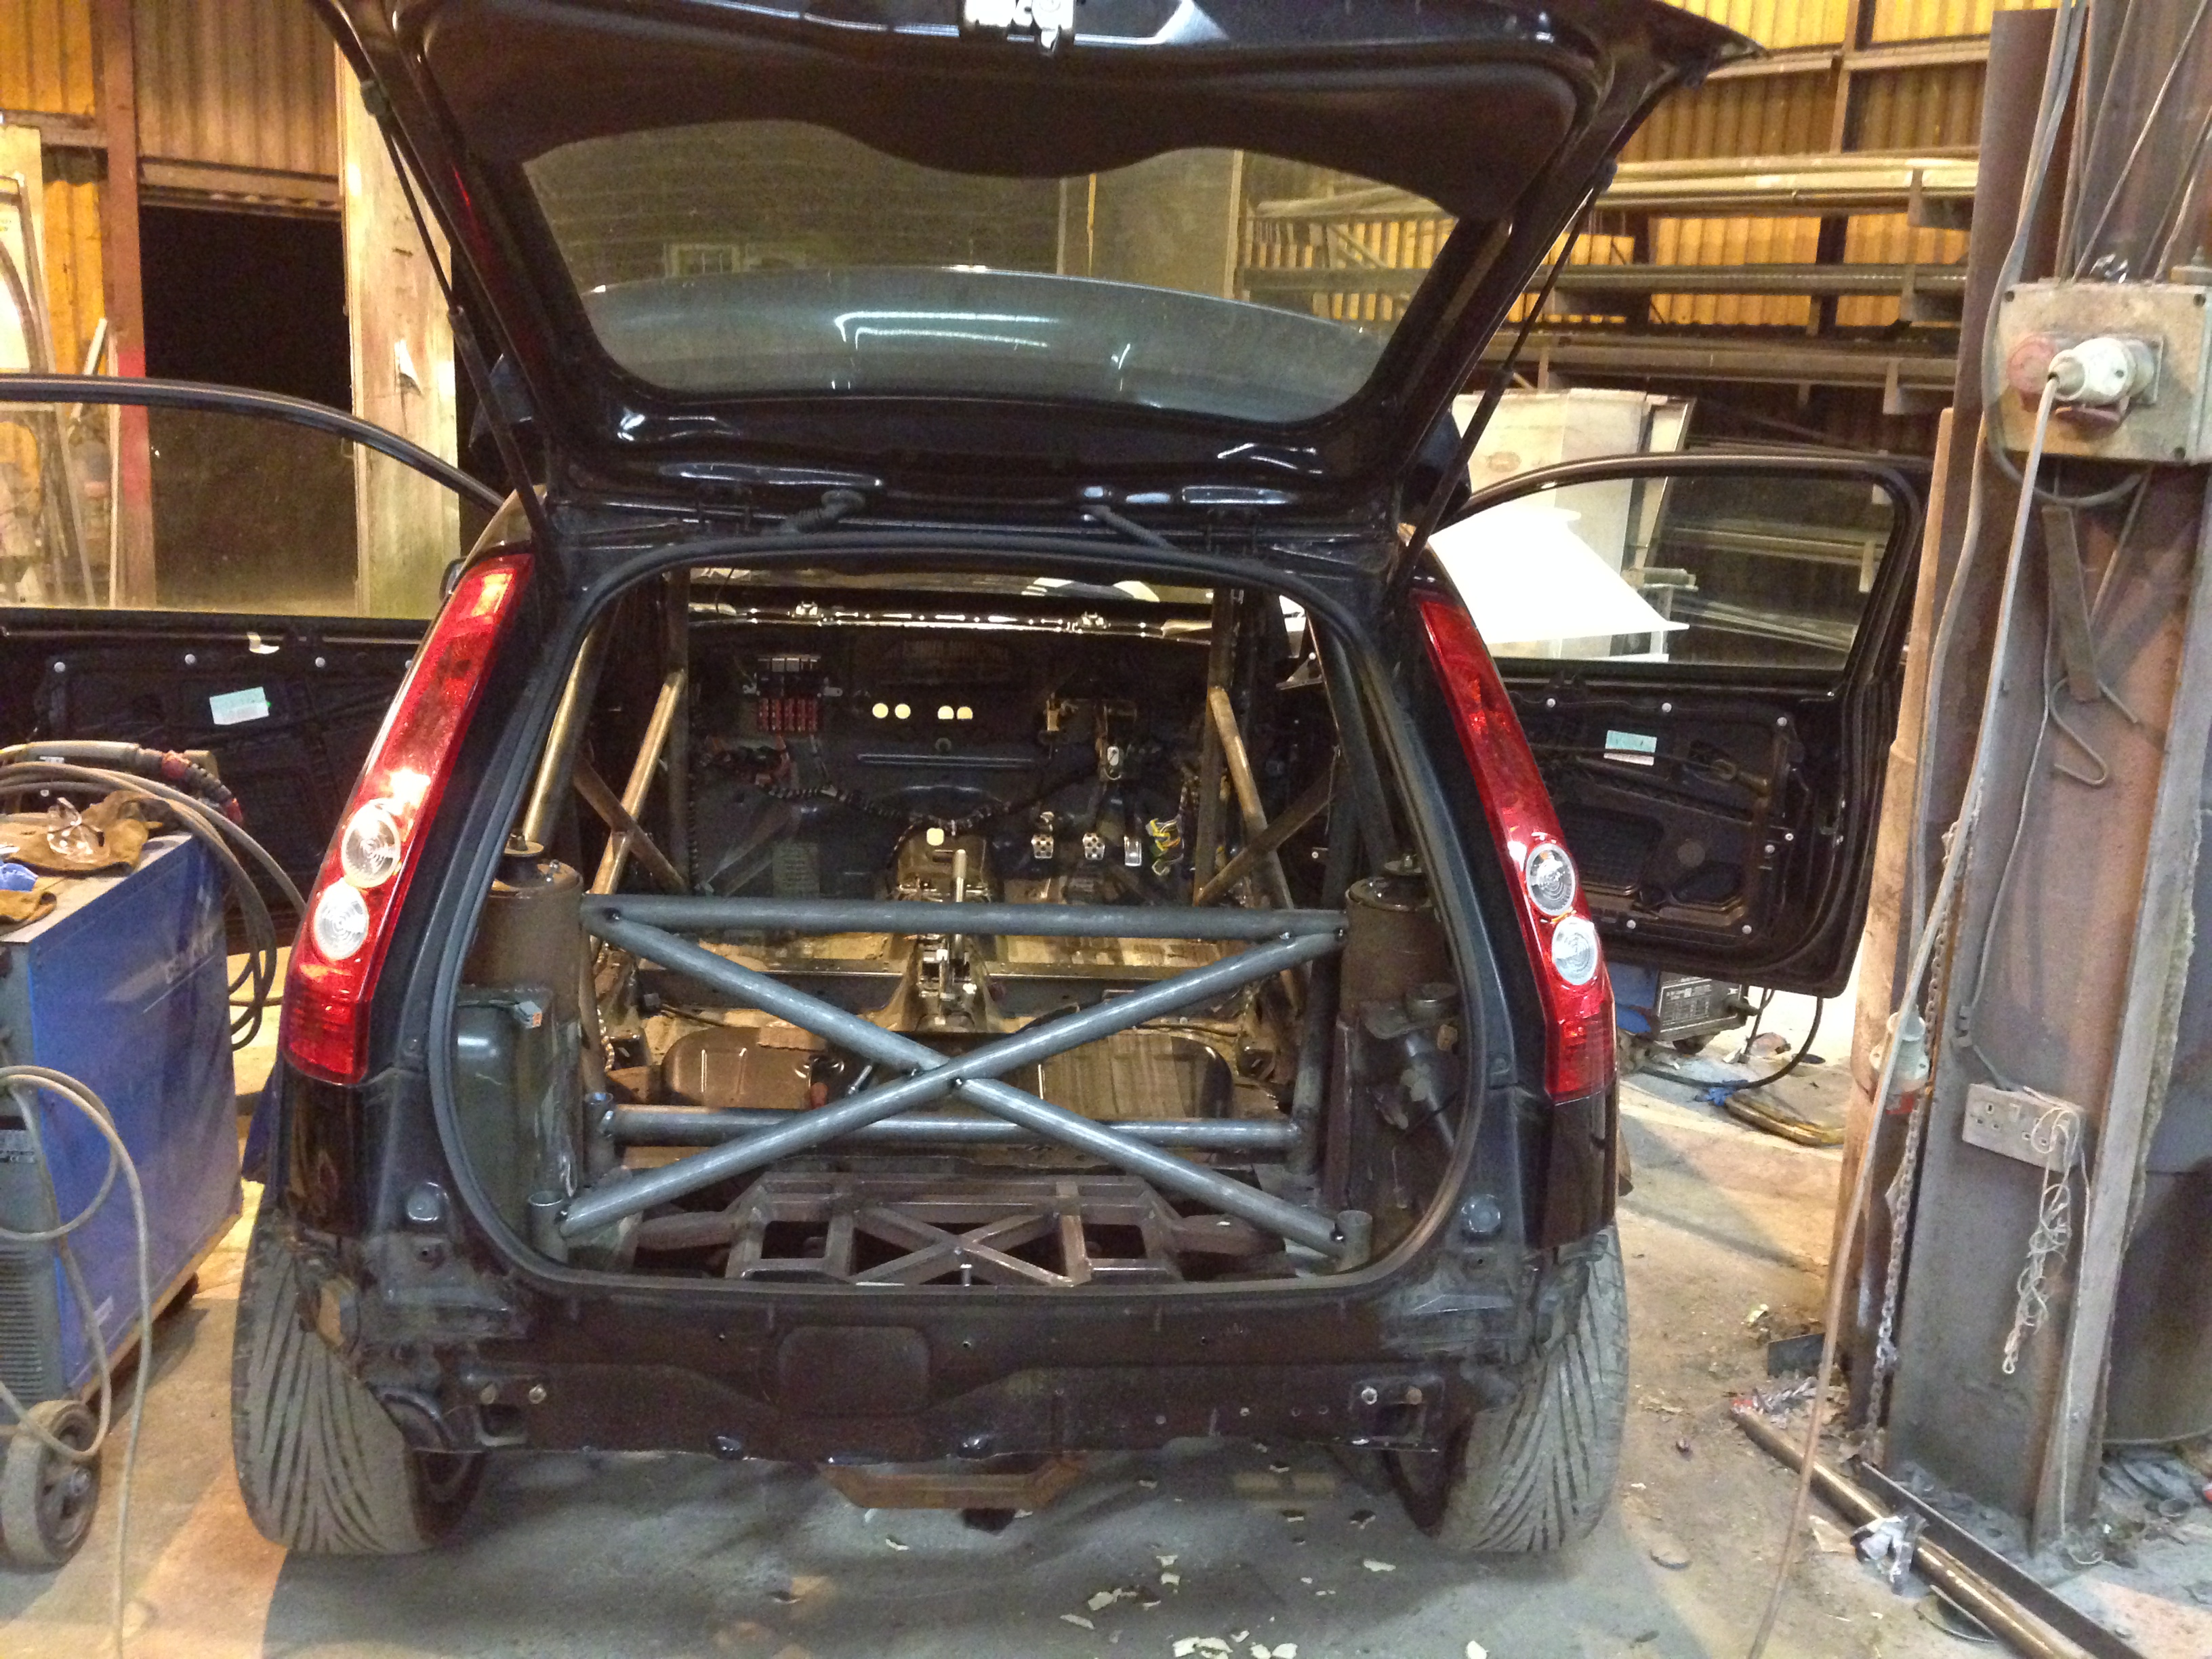

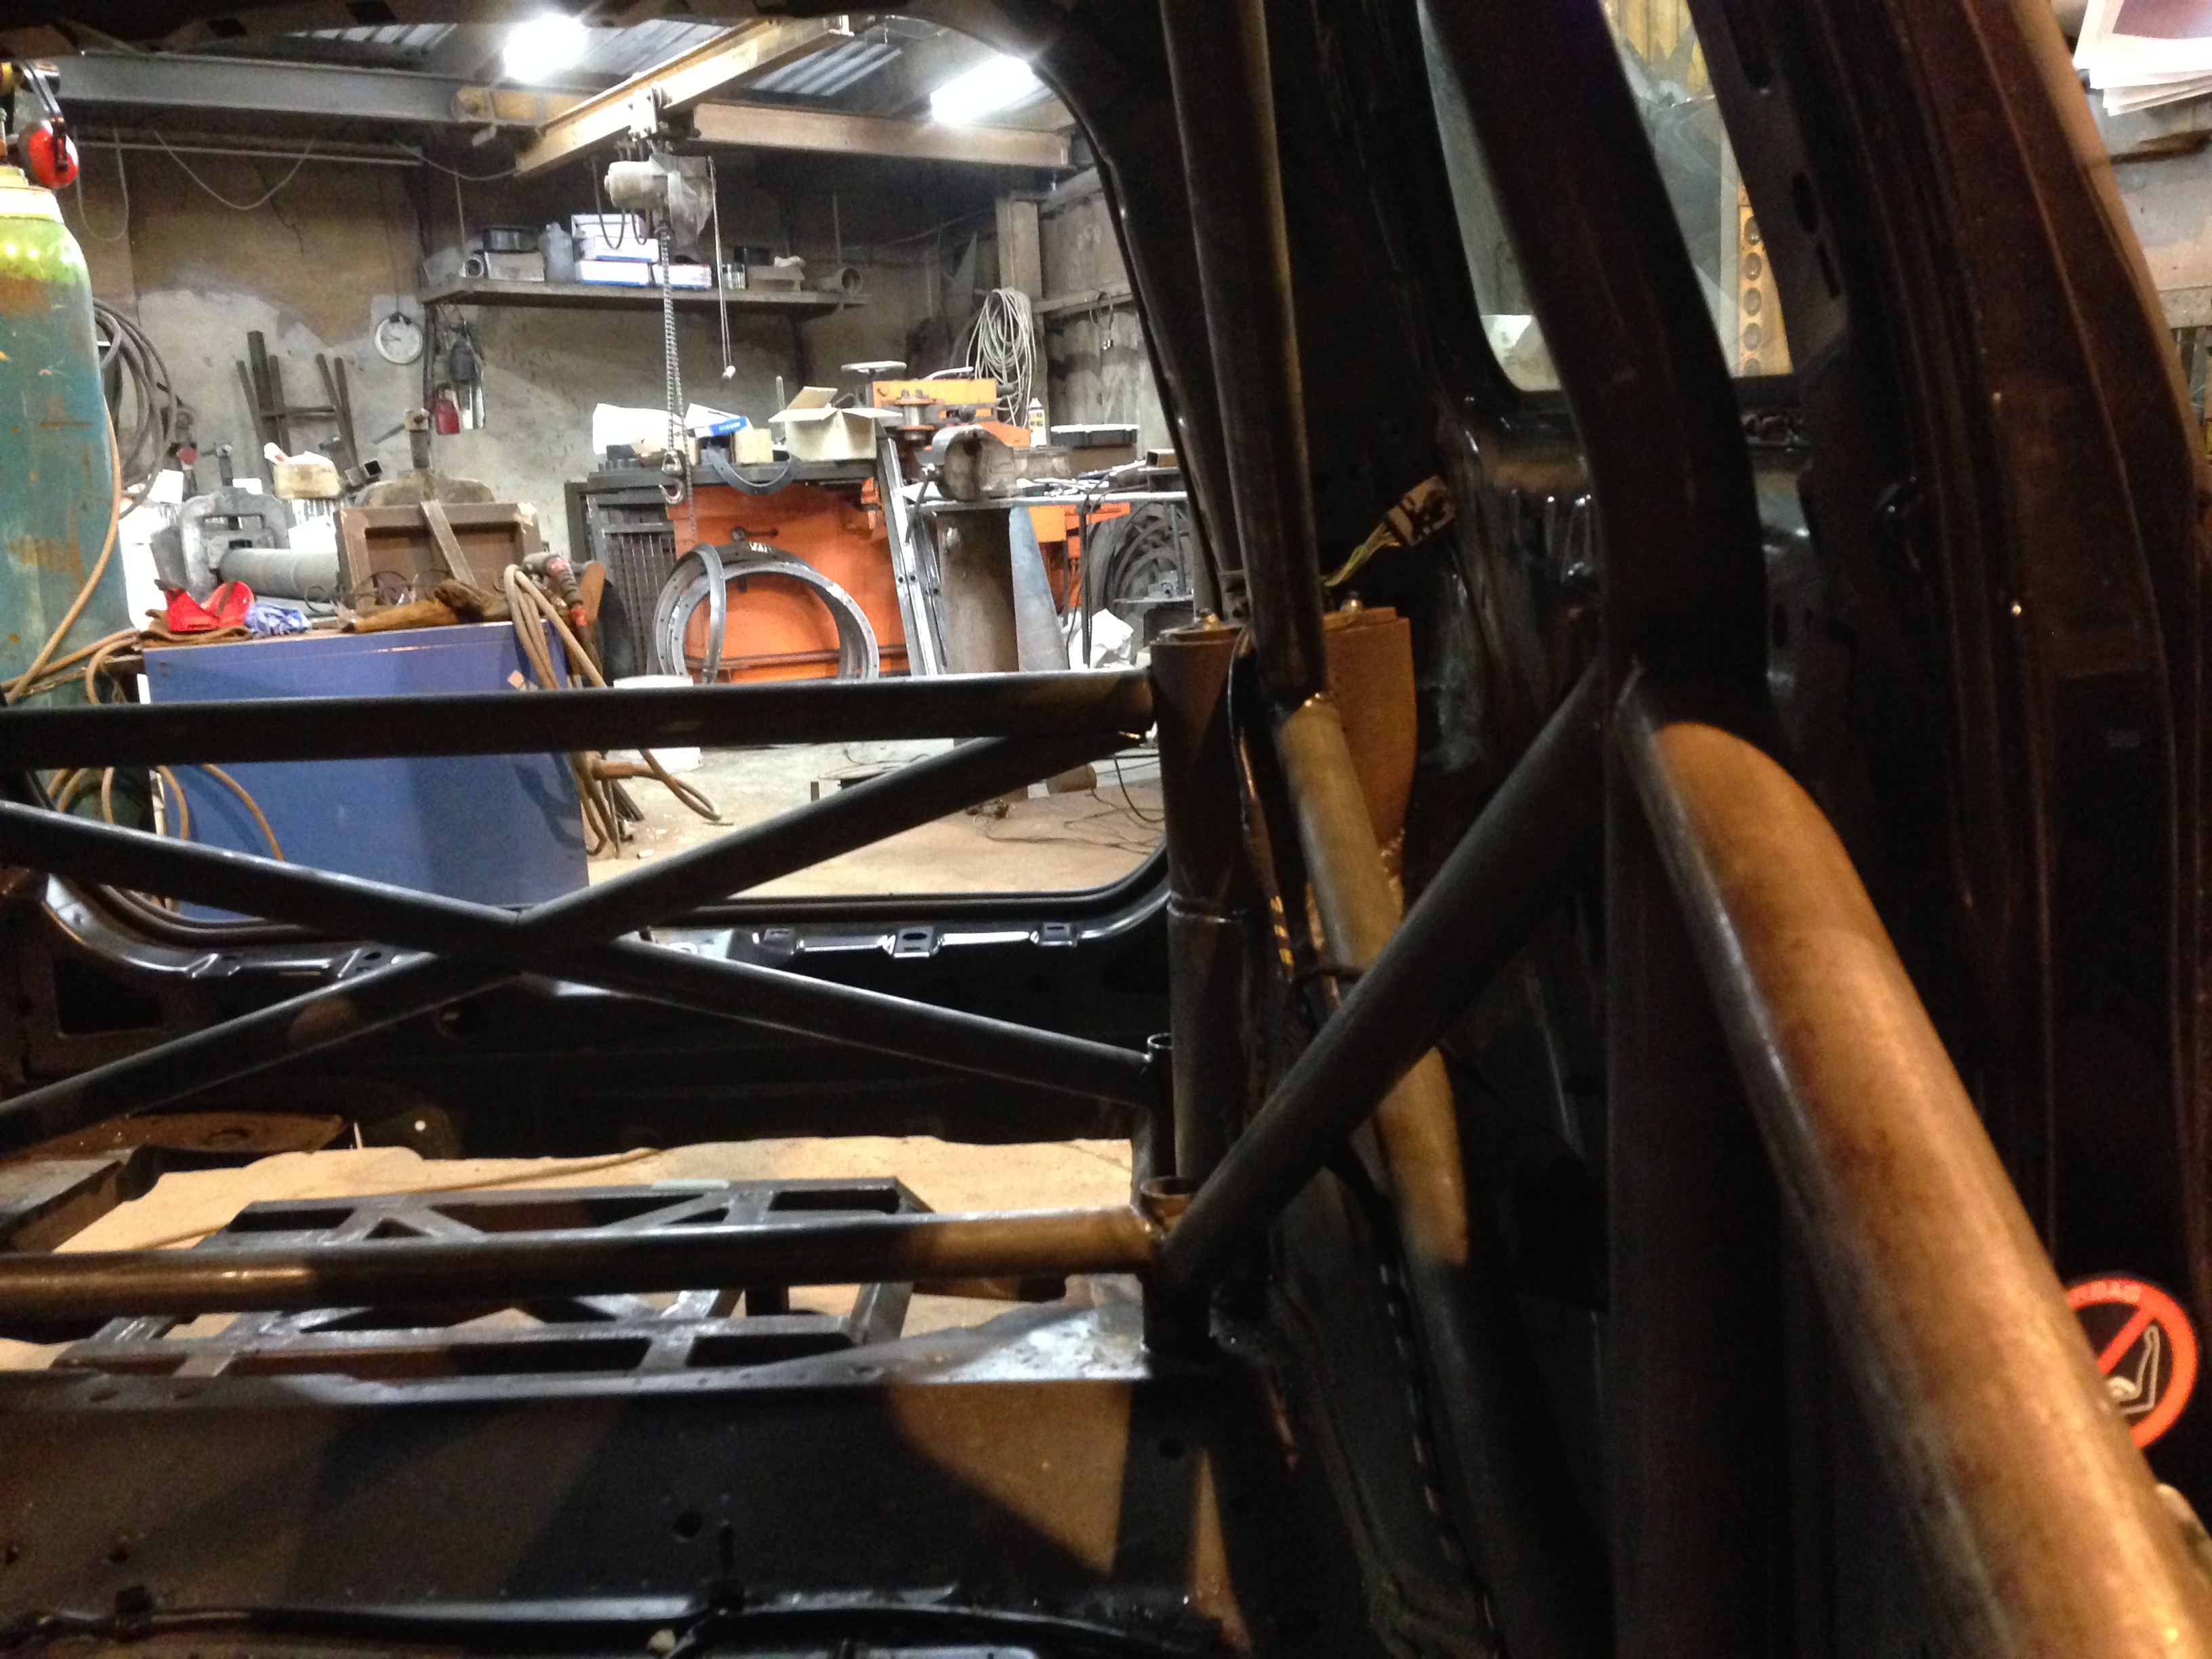
All the main roll over structure is in and fully welded. Made a good start on the rear cradle mounts, but still a fair bit to do with that.
Still have the main X's to put in and a whole lot more at the front through the firewall to the front turrets. Then a load of extra bracing I've got planned to try and stop it tearing itself to pieces