Mk1 Focus RS replica (United States) Build
 05-08-2012, 06:51 PM
#1
Wahay!! I've lost my Virginity!!
Thread Starter

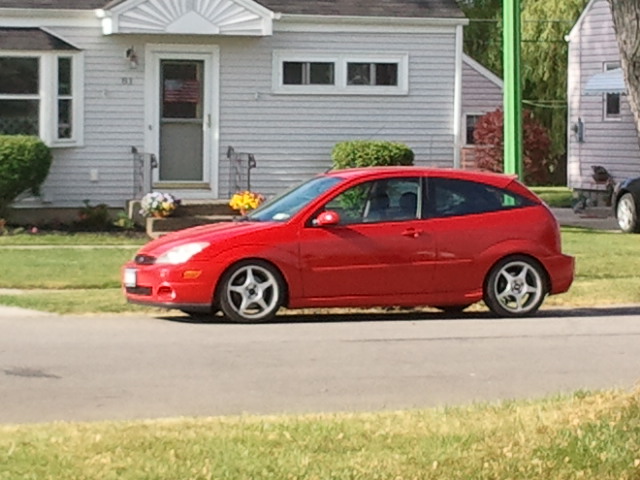
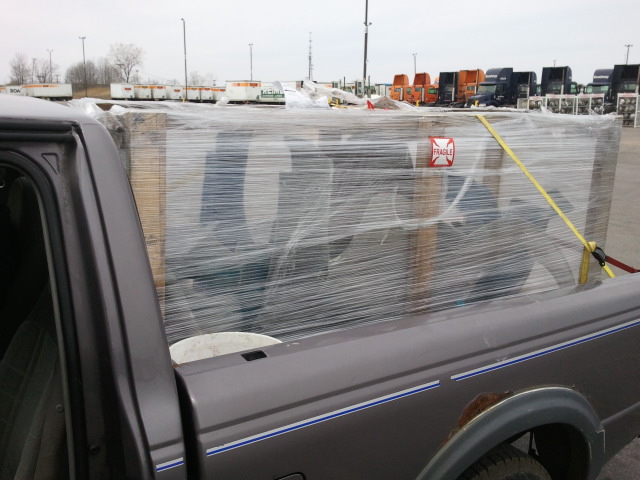
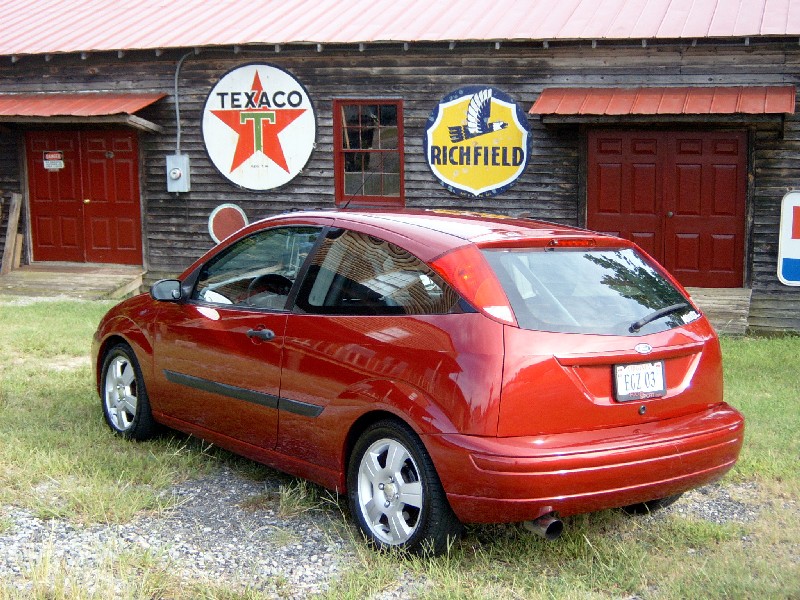
well, I've been collecting and building(yes building) parts for about a year now, and I'm finally set to get moving on this project. I traded in my beater today for a brand new F150 so now I have a reliable vehicle to drive daily while I work on the Focus build. Starting life as a 2003 SVT:
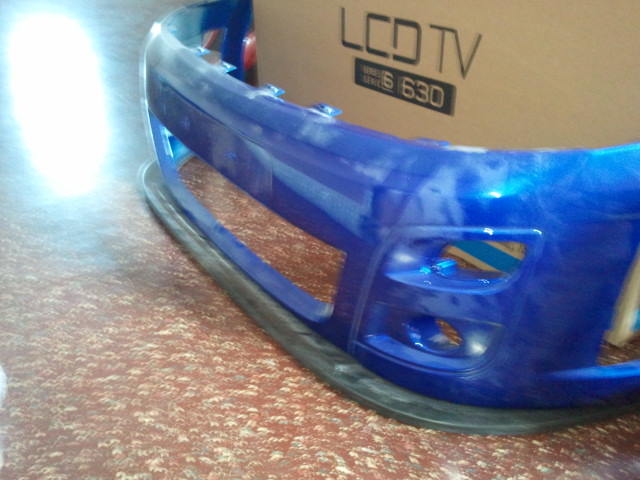
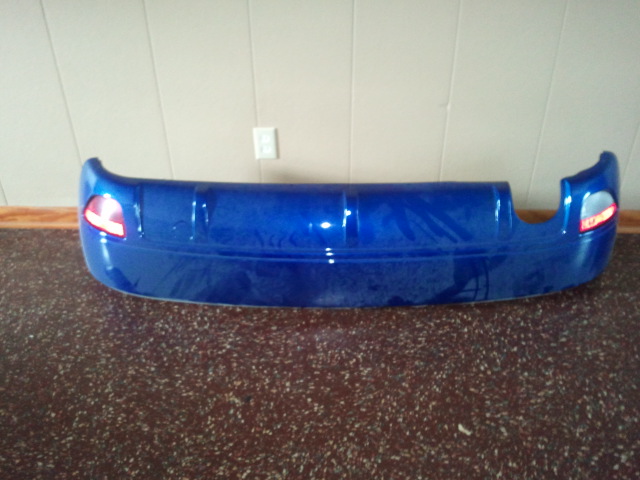
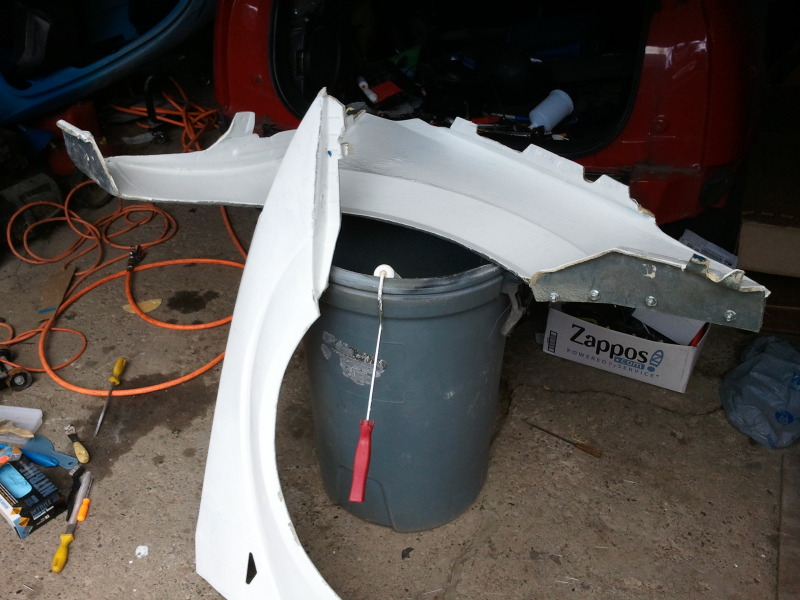
I used to have a Euro facelift front bumper and 98spec rear bumper, with rieger lip up front.....but someone backed into the front end and it got broken to bits, so I put it through insurance and used the money to buy the last set of RS bumpers from Capaldi.
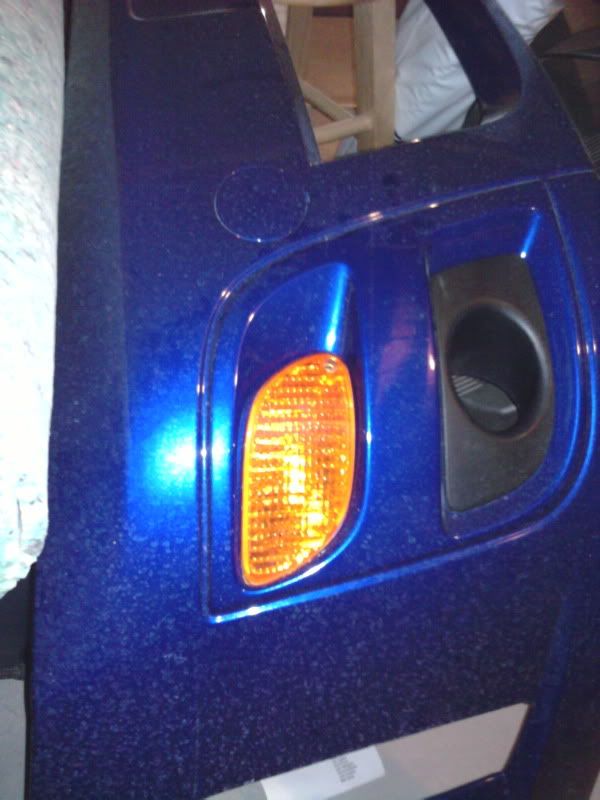
So then I had to start sourcing all the other parts. Scouring ebay.co.uk I was able to get the foglight bezels, brake duct vents, front indicators, and rear fog and reversing lights complete with bulb sockets. I got a splitter from Spudo, and a wing from Cayse. Then I hit a wall, not being able to find sideskirts or fenders and quarterpanels, I had to get creative.....
An opportunity arose..... a fellow member here doing an RS conversion had obtained a set of RS skirts that were damaged....I messaged and offered to make all the repairs for FREE, if he would just pay shipping to me and back with the aggreement that I would be allowed to make a mold of them....and to my pleasant surprise, he agreed!
Here's a link to that journey (quite a learning experience)
http://forums.focaljet.com/euro-rs-c...zs-skirts.html
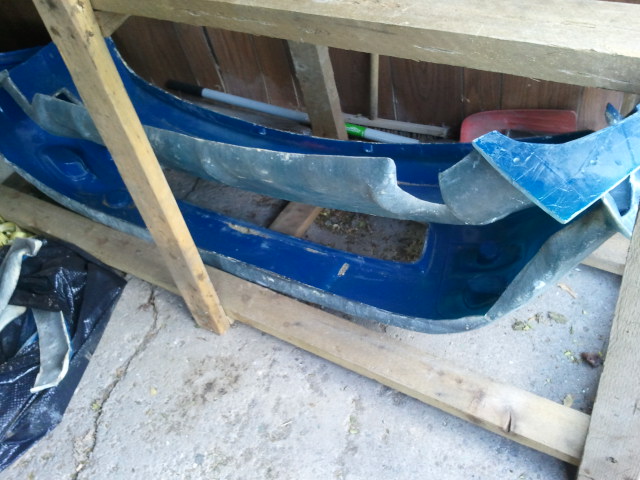
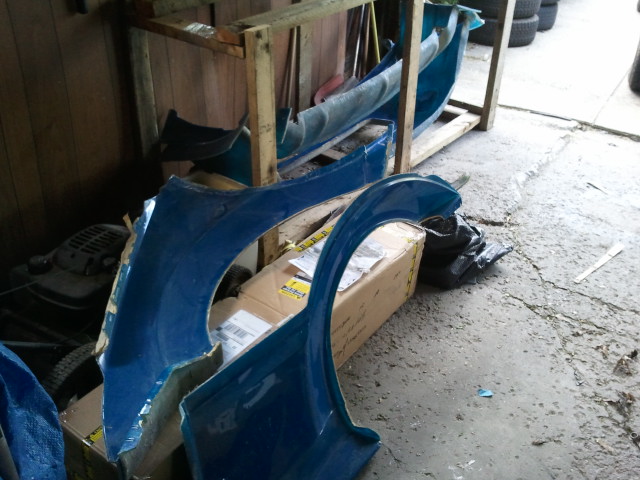
So I still needed fenders and quarterpanels! About 6-8 months go by of me searching for these.....my gameplan was to obtain a set and make molds like PUMASPEED has in the Uk, they sell fiberglass replicas of the OEM panels for conversion purposes.....but then something incredible happened. I recieved an email from a member here, that he knew of a fellow up in British Columbia that had a complete set of molds (besides sideskirts.....weird, that's what I made!).....he had fenders, quarterpanels, and both bumpers molded from OEM stuff and was willing to SELL THE MOLDS!!!!!
I got in contact with this gent(Member BUREL here on passionford), and we negotiated over numerous emails until we settled on a price. MAN, was I a happy camper! what a huge savings in time and energy not having to source panels, then make the molds myself!
So here they are all unpacked:

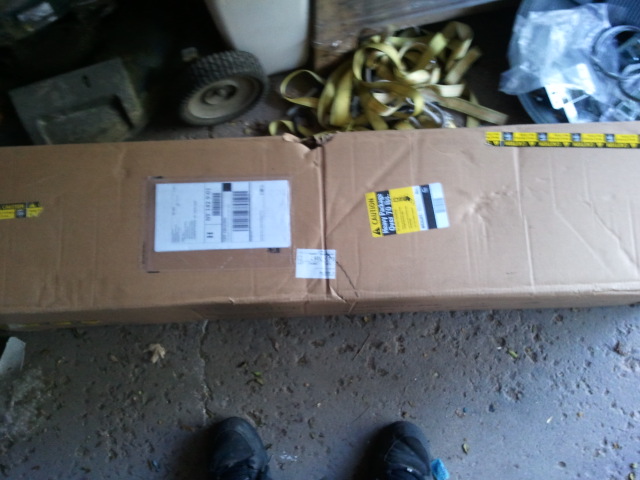
bought a 50" wide roll of fiberglass, 80yards long to make all my parts
So I'm going to get started over the weekend setting up the molds and begin fabricating the front fenders and Quarterpanels, I figure I can have the front clip finished, painted, and mounted in the next week or two time permitting.....Then I'll have to clean out my garage and pull the car in to remove rear glass and start working on the rear quarters. I have a concept image I made in photoshop but I can't find it right now, I'll have to post it up later on......
Thanks for reading!
I used to have a Euro facelift front bumper and 98spec rear bumper, with rieger lip up front.....but someone backed into the front end and it got broken to bits, so I put it through insurance and used the money to buy the last set of RS bumpers from Capaldi.
So then I had to start sourcing all the other parts. Scouring ebay.co.uk I was able to get the foglight bezels, brake duct vents, front indicators, and rear fog and reversing lights complete with bulb sockets. I got a splitter from Spudo, and a wing from Cayse. Then I hit a wall, not being able to find sideskirts or fenders and quarterpanels, I had to get creative.....
An opportunity arose..... a fellow member here doing an RS conversion had obtained a set of RS skirts that were damaged....I messaged and offered to make all the repairs for FREE, if he would just pay shipping to me and back with the aggreement that I would be allowed to make a mold of them....and to my pleasant surprise, he agreed!
Here's a link to that journey (quite a learning experience)
http://forums.focaljet.com/euro-rs-c...zs-skirts.html
So I still needed fenders and quarterpanels! About 6-8 months go by of me searching for these.....my gameplan was to obtain a set and make molds like PUMASPEED has in the Uk, they sell fiberglass replicas of the OEM panels for conversion purposes.....but then something incredible happened. I recieved an email from a member here, that he knew of a fellow up in British Columbia that had a complete set of molds (besides sideskirts.....weird, that's what I made!).....he had fenders, quarterpanels, and both bumpers molded from OEM stuff and was willing to SELL THE MOLDS!!!!!
I got in contact with this gent(Member BUREL here on passionford), and we negotiated over numerous emails until we settled on a price. MAN, was I a happy camper! what a huge savings in time and energy not having to source panels, then make the molds myself!
So here they are all unpacked:
bought a 50" wide roll of fiberglass, 80yards long to make all my parts
So I'm going to get started over the weekend setting up the molds and begin fabricating the front fenders and Quarterpanels, I figure I can have the front clip finished, painted, and mounted in the next week or two time permitting.....Then I'll have to clean out my garage and pull the car in to remove rear glass and start working on the rear quarters. I have a concept image I made in photoshop but I can't find it right now, I'll have to post it up later on......
Thanks for reading!
 05-08-2012, 06:52 PM
#2
Wahay!! I've lost my Virginity!!
Thread Starter
don't get your hopes up just yet....haven't set any fiberglass in the molds....but these are my concept images I whipped up in photoshop....couple different wheel options...
Stock RS wheels, painted gunmetal (probably won't be able to get a set, and they are 18x8...I want wider)
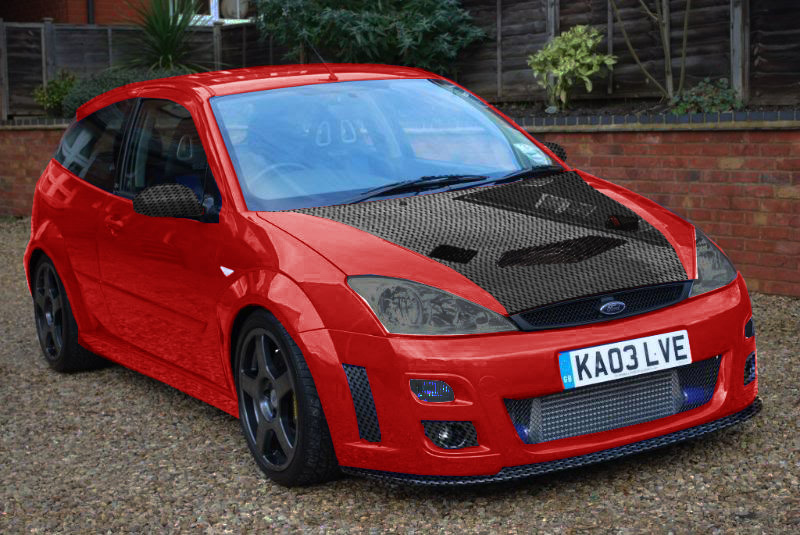
17x9 SC replica Mustang wheels in 4x10⁸
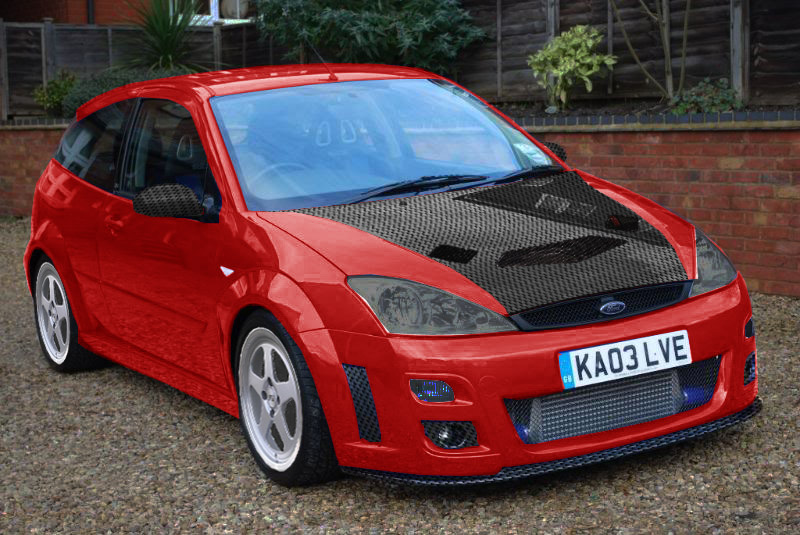
Other wheel I'm considering but haven't PS'd is 03 cobra reps in gloss black.....same basic 5-spoke pattern as the SC's, just they are slightly concave right to the enge where the SC's have a lip....so It's basically a decision on whether or not I want wheels with a lip/dish.....and the comparison against the RS stock wheels is sufficient to make that decision. Open to opinions on this as well....
Stock RS wheels, painted gunmetal (probably won't be able to get a set, and they are 18x8...I want wider)
17x9 SC replica Mustang wheels in 4x10⁸
Other wheel I'm considering but haven't PS'd is 03 cobra reps in gloss black.....same basic 5-spoke pattern as the SC's, just they are slightly concave right to the enge where the SC's have a lip....so It's basically a decision on whether or not I want wheels with a lip/dish.....and the comparison against the RS stock wheels is sufficient to make that decision. Open to opinions on this as well....
05-08-2012, 06:53 PM
#3
Wahay!! I've lost my Virginity!!
Thread Starter
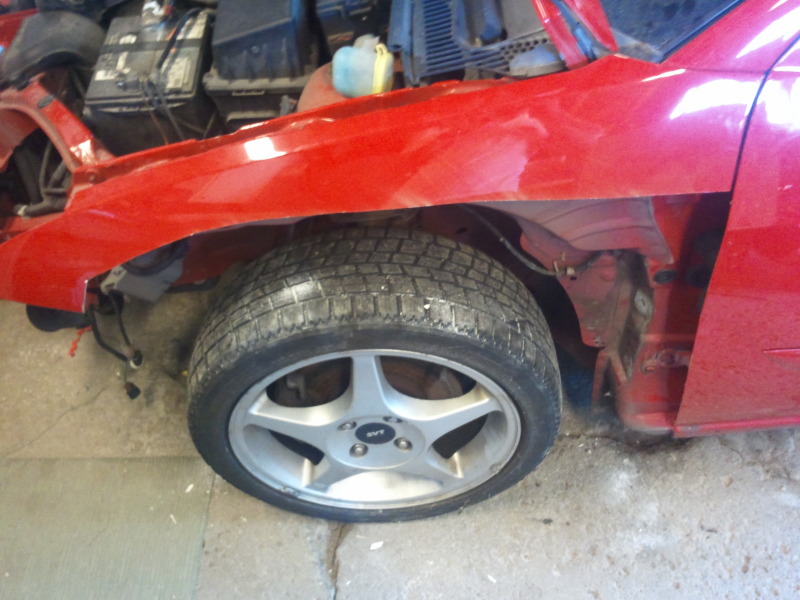
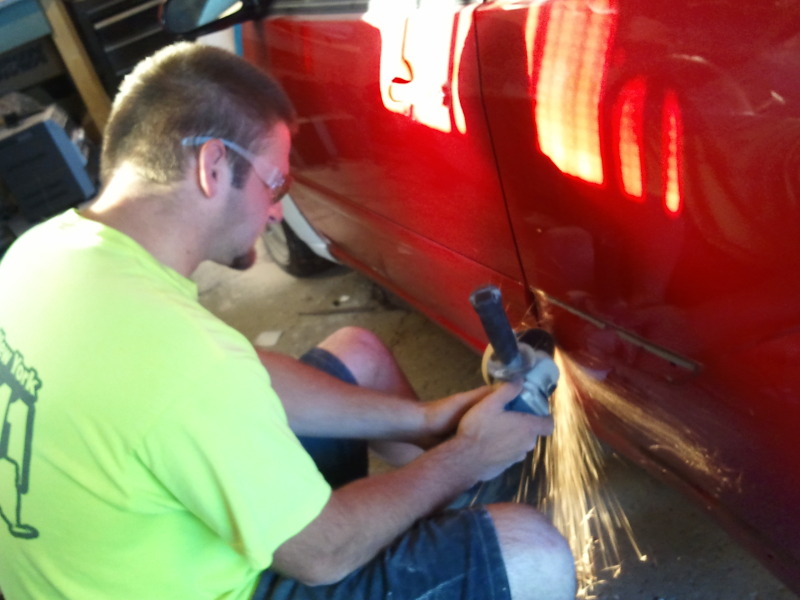
took most of the front clip off.....I'm saving a step here becuase I previously already modified the steel bumper to fit the lower profile euro bumper 
I'll get the sideskirts and fenders off sometime later this week.
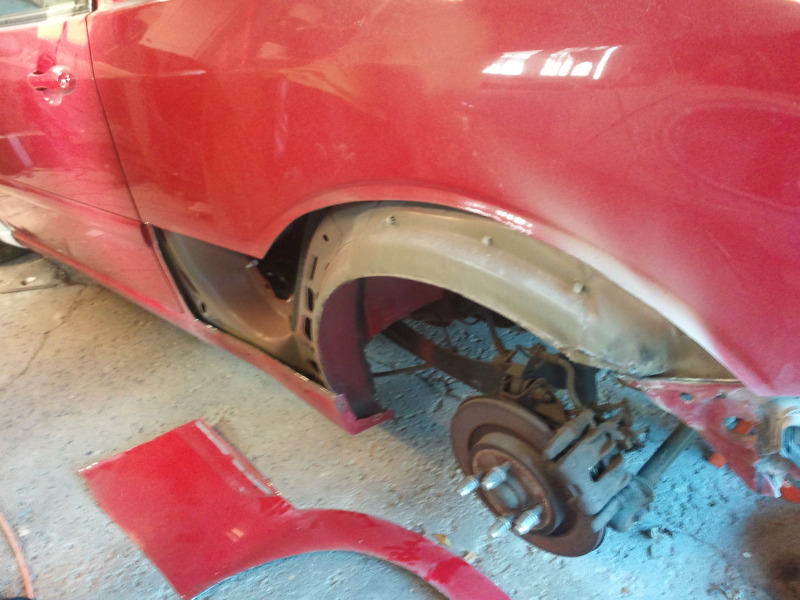
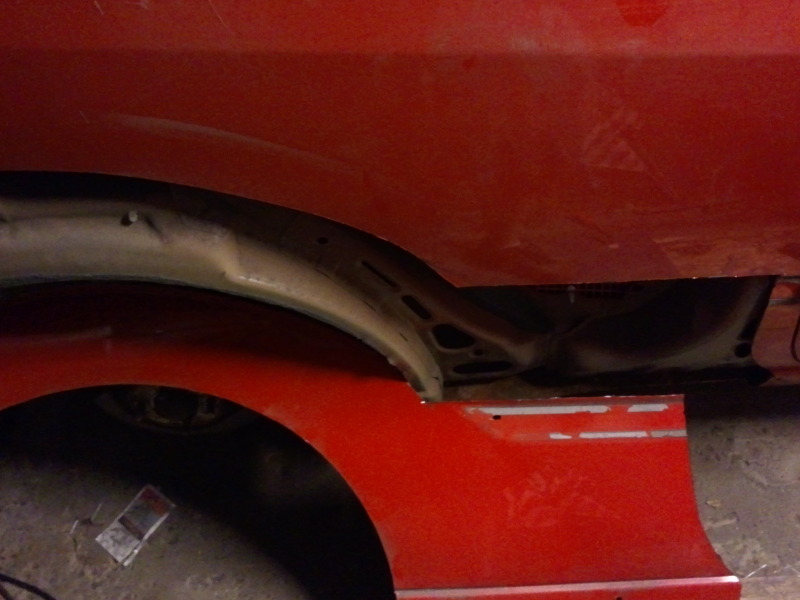
Got the sideskirts and fenders off today, and confirmed my suspicions(sp?) that this car was in at least one wreck unreported to carfax....
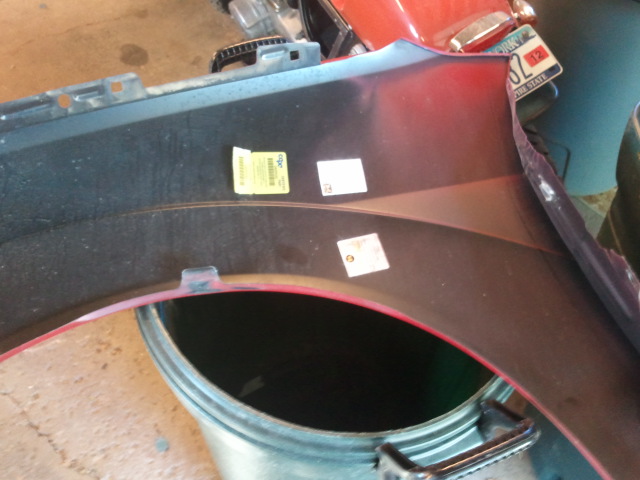
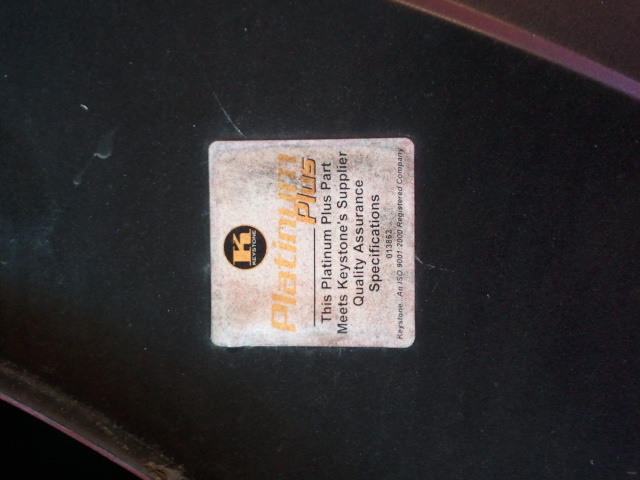
Passenger fender is a Keystone replacement part....
I ordered what I think is the last of the detail peices needed.....
fender markers
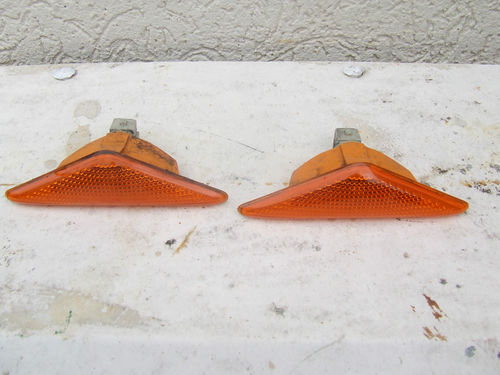
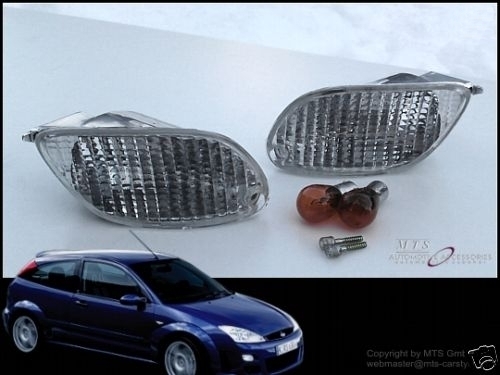
bumper markers (I already have amber ones, and clear fender indicators.....going to try both colors and see which I like more)
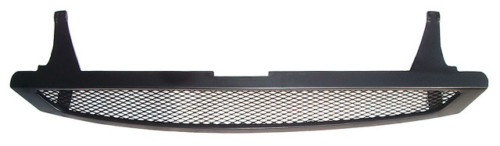
RS replica grill (I might be a dick and mold this too, HAHA)
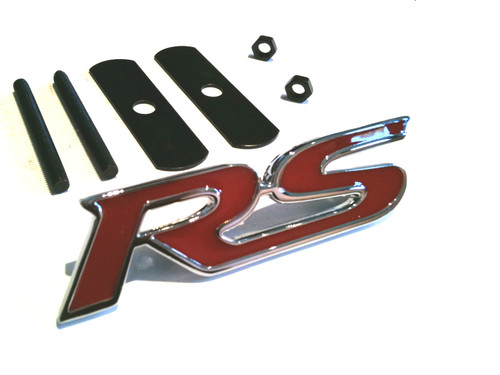
"RS" grille emblem, this isn't a true focus RS emblem, just generic....I'm thinking driverside centered at the edge of the grille to be different)
Then three of the red ones of these:
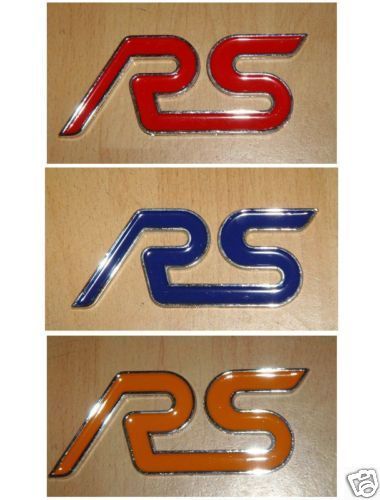
one on each glossy area of the door (pillar), and one on the tailgate
I'm planning to whip up the CF front splitter this weekend/week using a beat up used splitter I snagged as a template. After that I'll make front fenders and paint the front bumper/fenders and get the front clip on.
I'll get the sideskirts and fenders off sometime later this week.
Got the sideskirts and fenders off today, and confirmed my suspicions(sp?) that this car was in at least one wreck unreported to carfax....
Passenger fender is a Keystone replacement part....
I ordered what I think is the last of the detail peices needed.....
fender markers
bumper markers (I already have amber ones, and clear fender indicators.....going to try both colors and see which I like more)
RS replica grill (I might be a dick and mold this too, HAHA)
"RS" grille emblem, this isn't a true focus RS emblem, just generic....I'm thinking driverside centered at the edge of the grille to be different)
Then three of the red ones of these:
one on each glossy area of the door (pillar), and one on the tailgate
I'm planning to whip up the CF front splitter this weekend/week using a beat up used splitter I snagged as a template. After that I'll make front fenders and paint the front bumper/fenders and get the front clip on.
05-08-2012, 06:55 PM
#4
Wahay!! I've lost my Virginity!!
Thread Starter
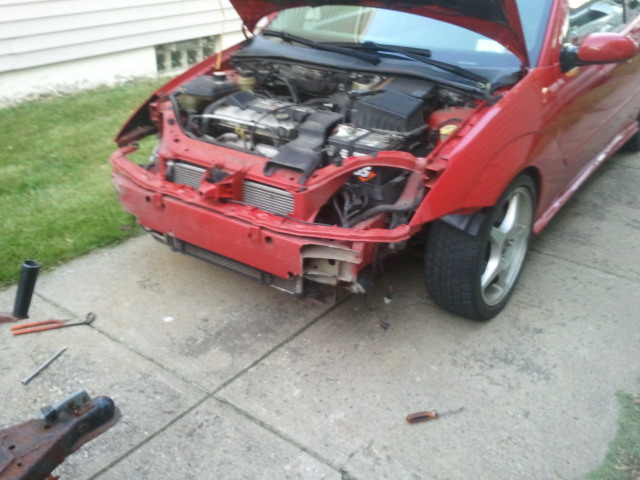
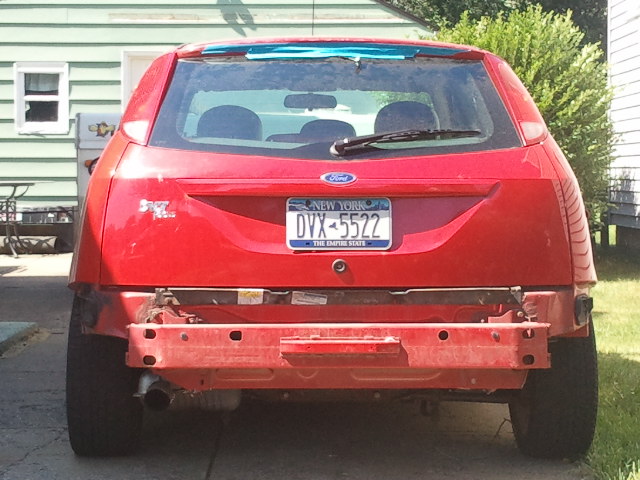
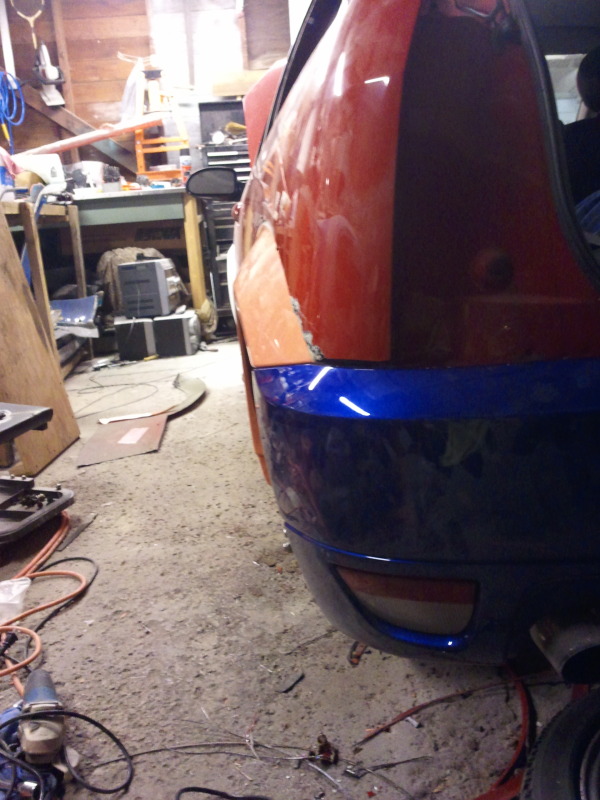
Removed the rear bumper, crash foam, and SVT wing today
Going to start making the front lip mold tomorrow for a CF splitter. I'll post progress on that as I go. Late next week I plan to set up the front fender molds and lay my fiberglass for those, so maybe in two weeks I'll have the front clip finished. I did a practice mold out of cardboard and came up with a pretty awesome way to make them if I do say so myself.
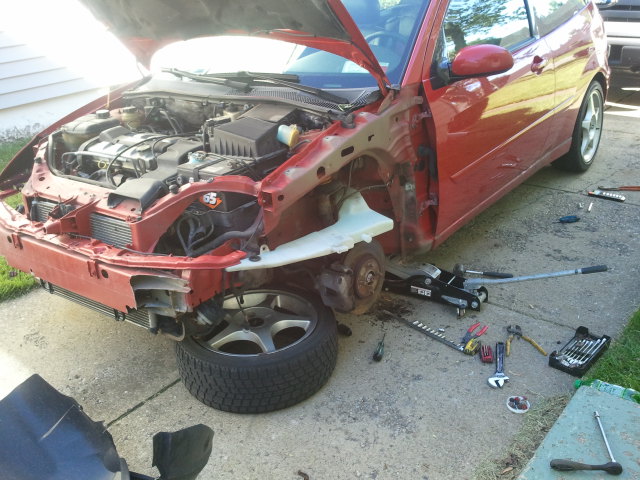
I decided to clear some room in the garage and pull the focus in so I could really tear into it. Then Pirite(Luke) and Checko(Nick) showed up and really lit a fire under my ass to go nuts wrenching today. This is the result of a super awesome epic 14hr wrench-day.
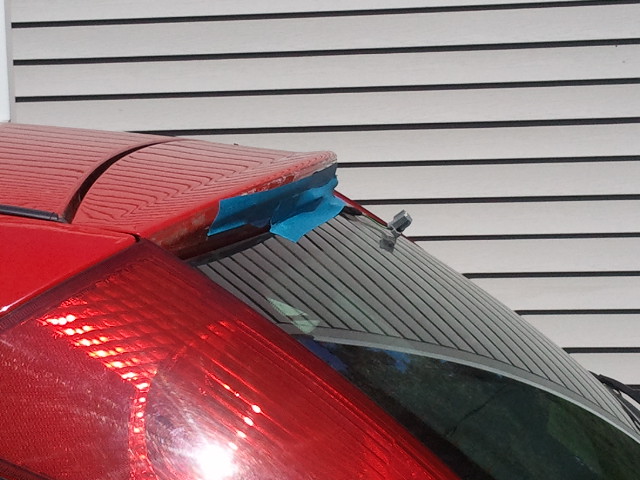
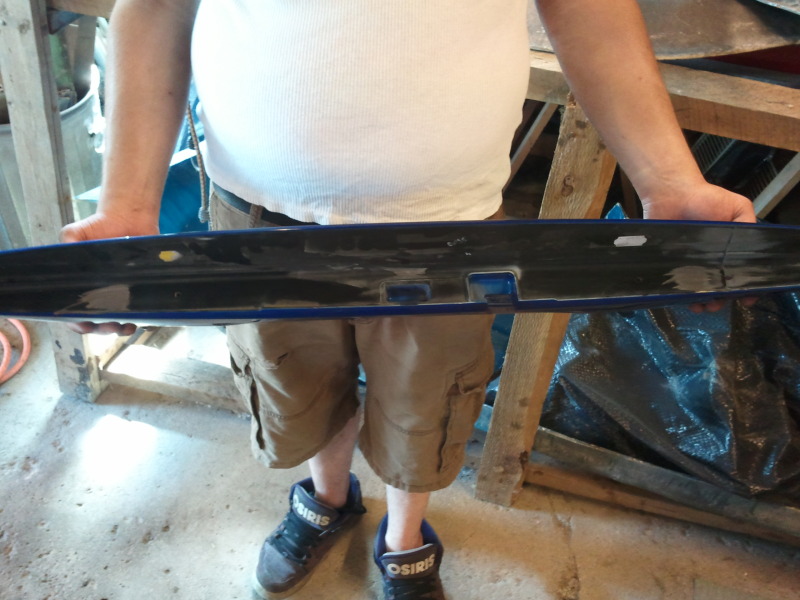
For starters, I realized the RS wing requires a specific brakelight (discontinued and ridiculous to find).....and the mounting points are different than stock US Focus's.......so instead of cutting up my hatch(Well, sort of) I decided I was going to MAKE the RS wing fit....afterall, I bought mine damaged and only spent $50 on it so I don't feel bad for a second chopping it up.
Step 1: cut off mounting tabs
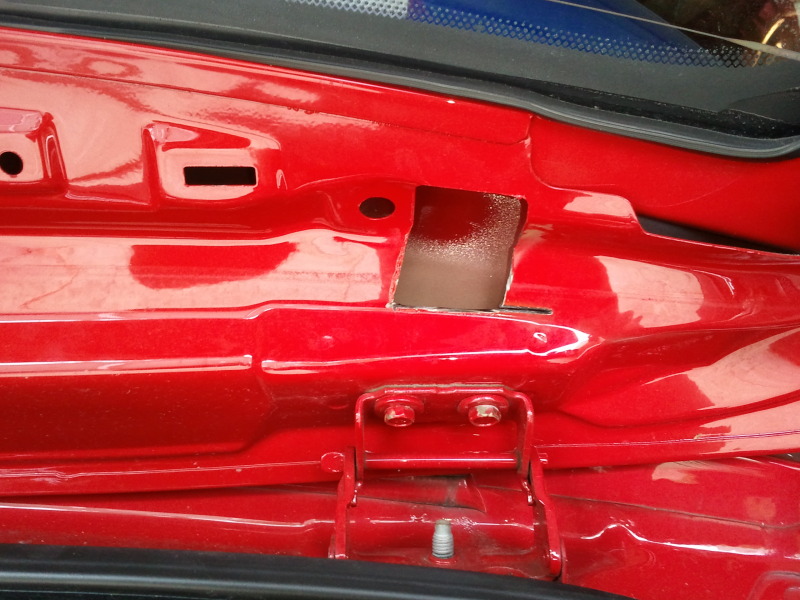
Step 2: mark where original holes are to mount with screws, drill pilot holes, mount up (****, I still have to do a little cutting)
-This is what I had to cut to gain access with a 1/4" rachet for putting in screws

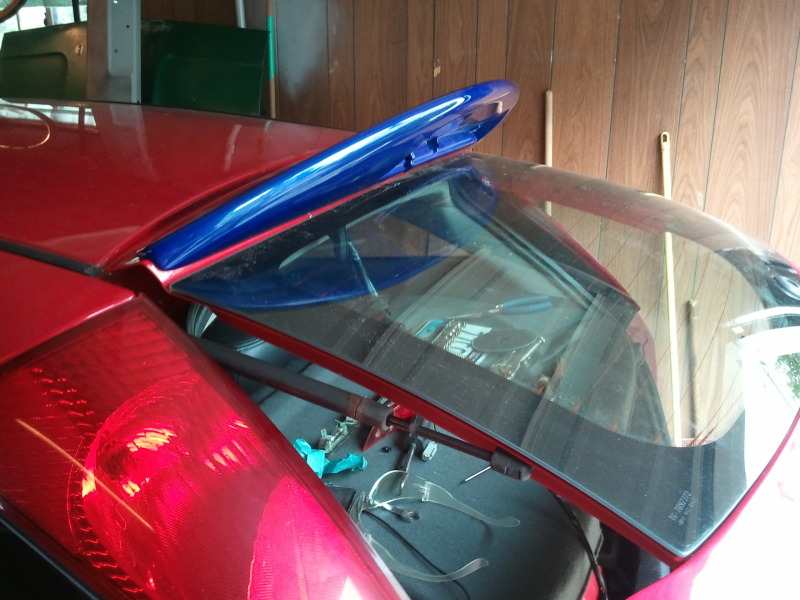
Now that's settled.....time to address the brakelight issue. Some quick thinking, I decide to make a quick mold off the stock SVT wing so that I can retain use of the standard US focus 3rd brakelight.
Trimmed it up, chopped the **** out of the RS wing so it'd have a home, and temporarily mounted it to figure out how I'm going to blend this in.
Sweet, I like the way it's coming out.....going to set this aside for another day....once I have it all finished I'm going to make a mold of this wing and make CF versions for resale.
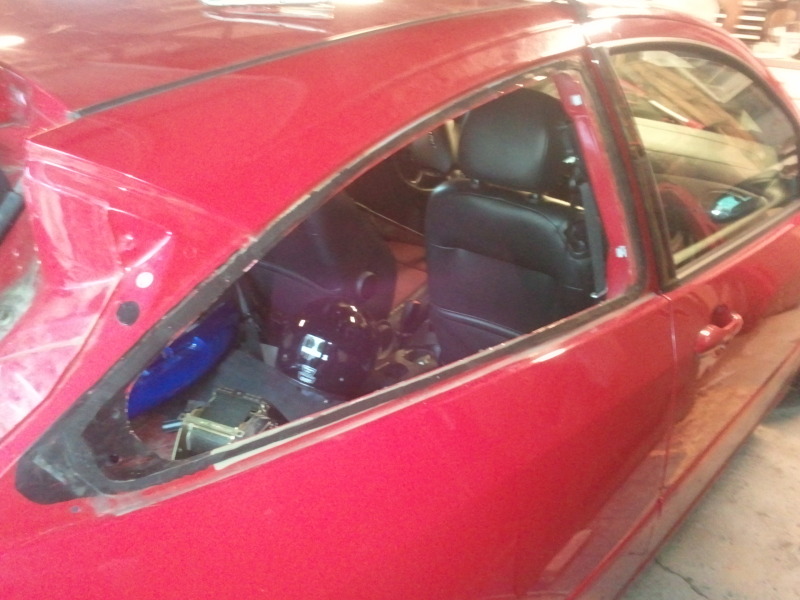
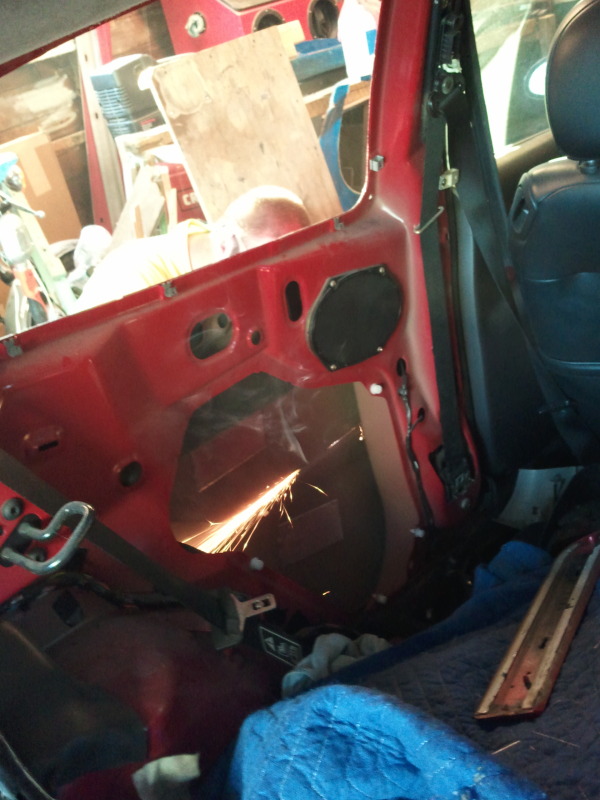
OK, so we moved on to yanking out the entire rear interior to gain access to the rear hatch glass.
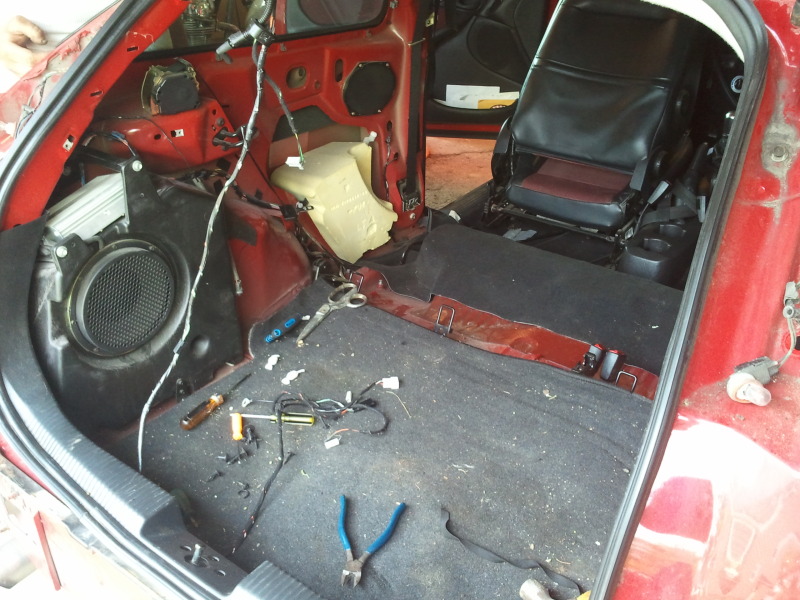
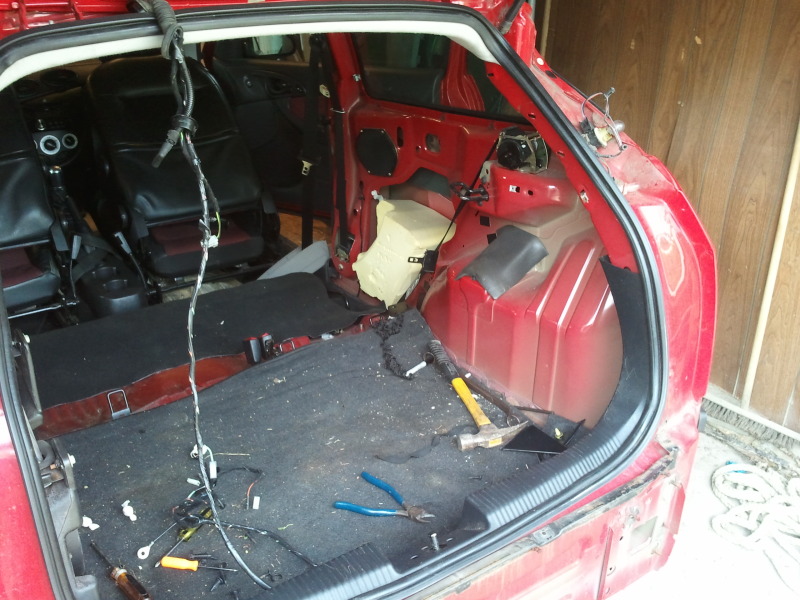
and removed the hatch itself.....mine is badly rotted, so I'll be scoping the junkyard for a replacement.
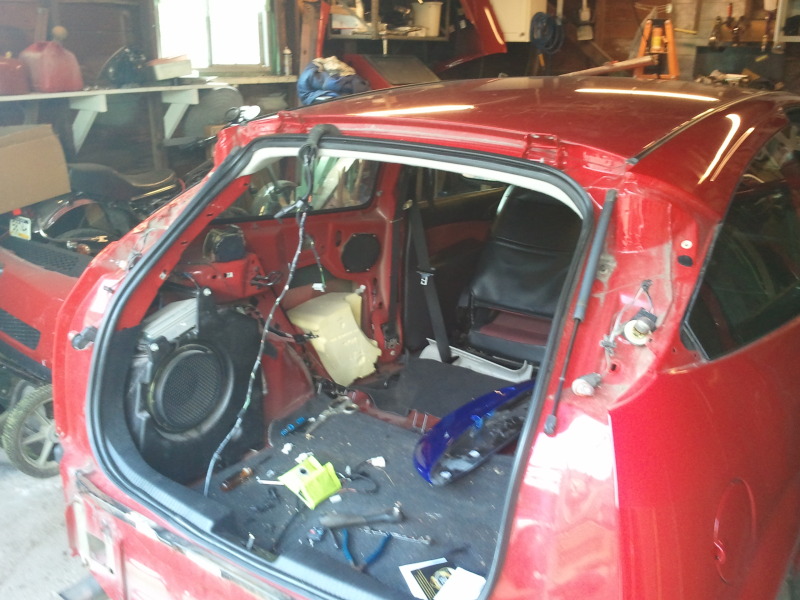
Then we attacked removing the glass. This was a royal pain, thank god there were three of us! probably took about 2hrs, but we got them out without damaging!
(couldn't get a good pic of the other side sorry)
SO, now it sits and waits for me to whip up the fiberglass panels and start doing bodywork and paint.
I'm pretty damn excited. Awesome day in the garage regardless of the ridiculous heat.
Going to start making the front lip mold tomorrow for a CF splitter. I'll post progress on that as I go. Late next week I plan to set up the front fender molds and lay my fiberglass for those, so maybe in two weeks I'll have the front clip finished. I did a practice mold out of cardboard and came up with a pretty awesome way to make them if I do say so myself.
I decided to clear some room in the garage and pull the focus in so I could really tear into it. Then Pirite(Luke) and Checko(Nick) showed up and really lit a fire under my ass to go nuts wrenching today. This is the result of a super awesome epic 14hr wrench-day.
For starters, I realized the RS wing requires a specific brakelight (discontinued and ridiculous to find).....and the mounting points are different than stock US Focus's.......so instead of cutting up my hatch(Well, sort of) I decided I was going to MAKE the RS wing fit....afterall, I bought mine damaged and only spent $50 on it so I don't feel bad for a second chopping it up.
Step 1: cut off mounting tabs
Step 2: mark where original holes are to mount with screws, drill pilot holes, mount up (****, I still have to do a little cutting)
-This is what I had to cut to gain access with a 1/4" rachet for putting in screws
Now that's settled.....time to address the brakelight issue. Some quick thinking, I decide to make a quick mold off the stock SVT wing so that I can retain use of the standard US focus 3rd brakelight.
Trimmed it up, chopped the **** out of the RS wing so it'd have a home, and temporarily mounted it to figure out how I'm going to blend this in.
Sweet, I like the way it's coming out.....going to set this aside for another day....once I have it all finished I'm going to make a mold of this wing and make CF versions for resale.
OK, so we moved on to yanking out the entire rear interior to gain access to the rear hatch glass.
and removed the hatch itself.....mine is badly rotted, so I'll be scoping the junkyard for a replacement.
Then we attacked removing the glass. This was a royal pain, thank god there were three of us! probably took about 2hrs, but we got them out without damaging!
(couldn't get a good pic of the other side sorry)
SO, now it sits and waits for me to whip up the fiberglass panels and start doing bodywork and paint.
I'm pretty damn excited. Awesome day in the garage regardless of the ridiculous heat.
05-08-2012, 06:56 PM
#5
Wahay!! I've lost my Virginity!!
Thread Starter
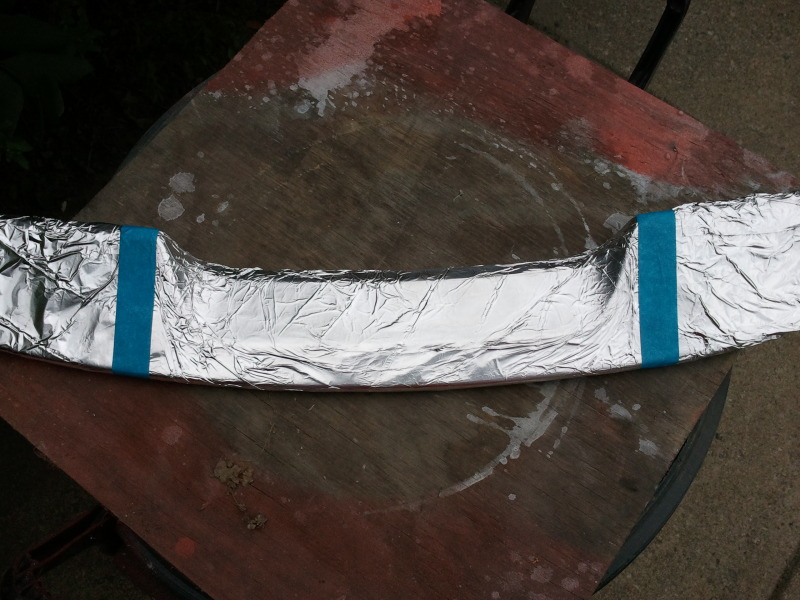
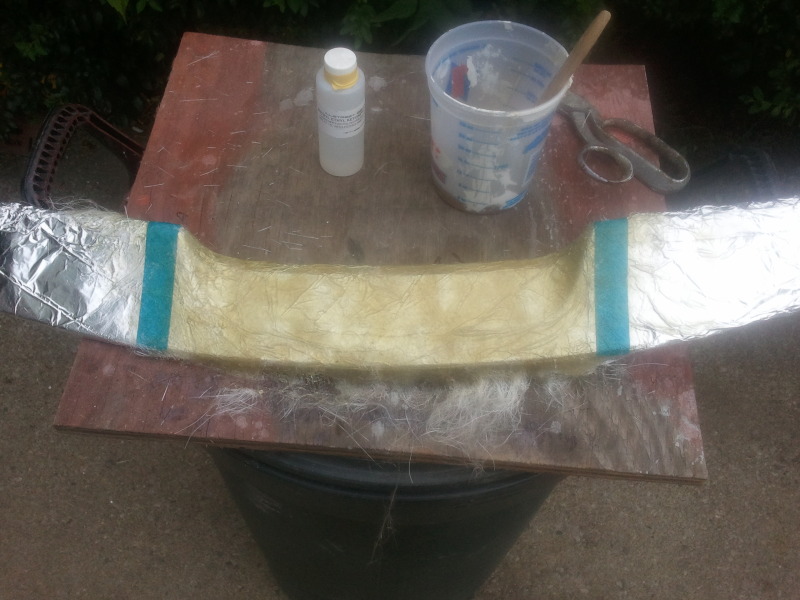
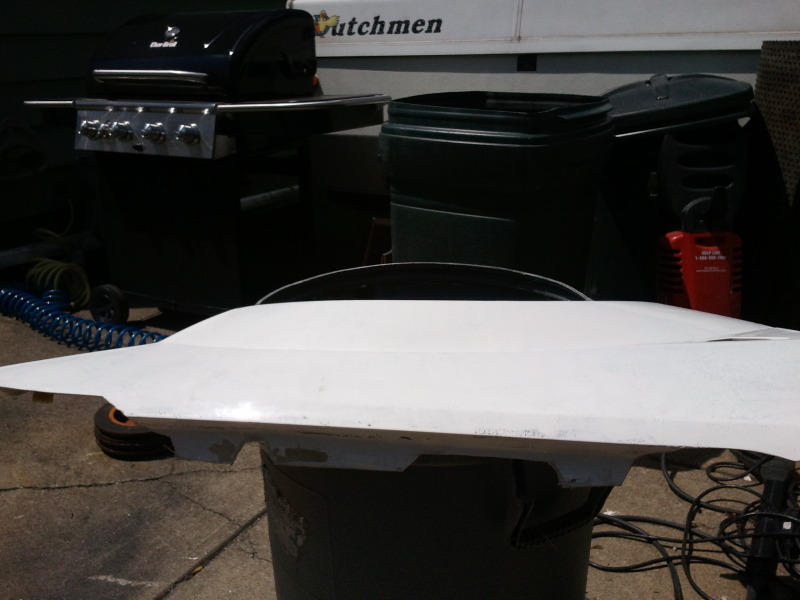
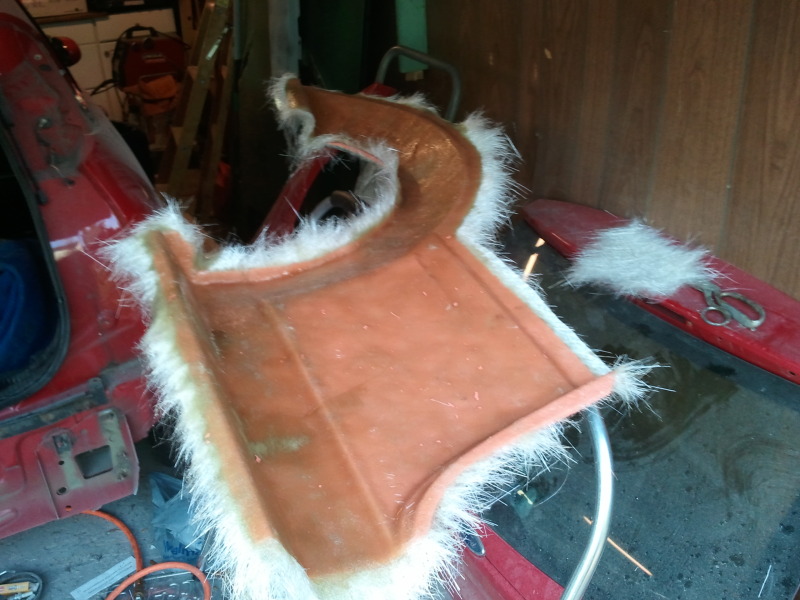
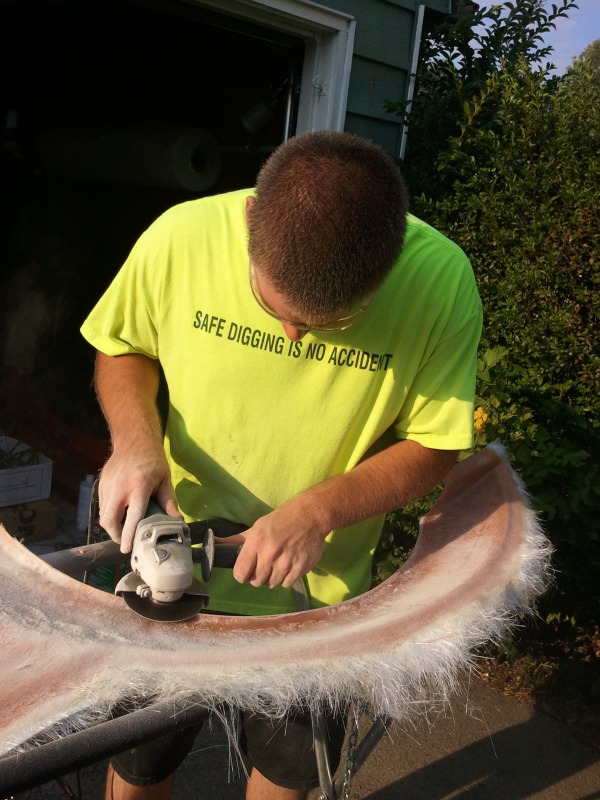
Spend a couple hours today and got one fender laid up.
Assembled the mold for the passenger fender:
I forgot to take pictures after mold release and gel coat, so my apologies for that bur here's the final layup:
5 layers of 1.5oz chopped strand matt
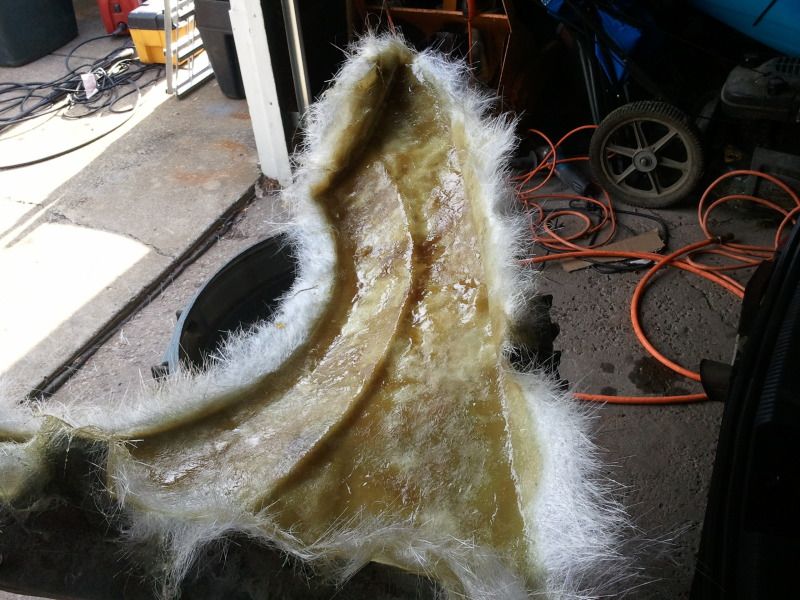
Not a TON of progress, but I'm going to chip away a little at a time, I'm pretty burnt out from my cafe-racer CB550 build so I'm not exactly hyper-motivated to be in the garage a lot lol.
Assembled the mold for the passenger fender:
I forgot to take pictures after mold release and gel coat, so my apologies for that bur here's the final layup:
5 layers of 1.5oz chopped strand matt
Not a TON of progress, but I'm going to chip away a little at a time, I'm pretty burnt out from my cafe-racer CB550 build so I'm not exactly hyper-motivated to be in the garage a lot lol.
05-08-2012, 06:56 PM
#6
Wahay!! I've lost my Virginity!!
Thread Starter
Popped it out of the mold today:
Trimmed it all up:
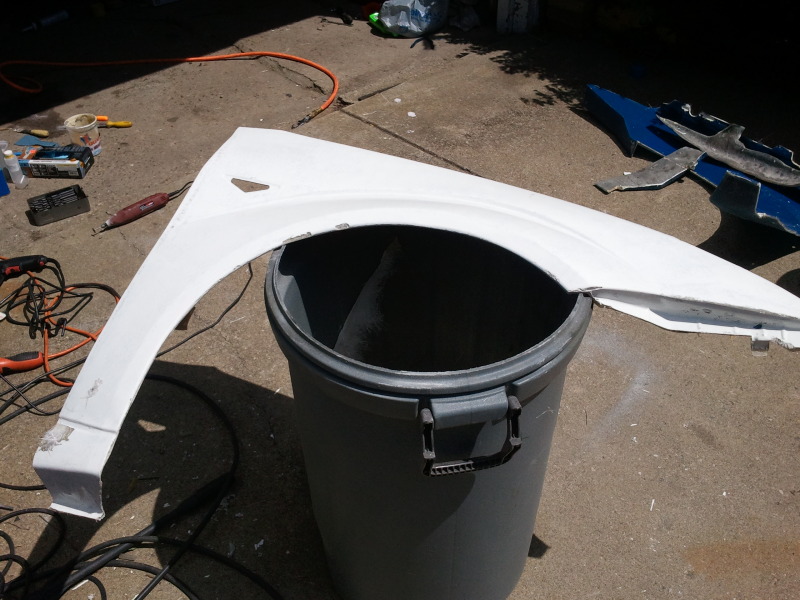
fitted the side marker:
it didn't lay out as perfect as I had hoped, there's some dead spots (air bubbles) along the lip of the wheel opening where the matt didn't lay all the way flat up to the gel coat, so I'll have to do some touch-up work with a little fiber reinforced body filler along the lip, but overall it didn't come out too bad.
I put together the mold for the other side and just layed the gel coat, gotta go back out in about 35mins to start laying fiberglass.
I figure if I can get the other side trimmed up and ready tomorrow after work, then lay up one of the quarterpanels tomorrow, pop that out & trim tuesday and then lay up the other quarterpanel afterwards.....by friday I can have a front clip on the car and start marking up the car for where to cut out the stock quarters on the rear.
stay tuned!
Trimmed it all up:
fitted the side marker:
it didn't lay out as perfect as I had hoped, there's some dead spots (air bubbles) along the lip of the wheel opening where the matt didn't lay all the way flat up to the gel coat, so I'll have to do some touch-up work with a little fiber reinforced body filler along the lip, but overall it didn't come out too bad.
I put together the mold for the other side and just layed the gel coat, gotta go back out in about 35mins to start laying fiberglass.
I figure if I can get the other side trimmed up and ready tomorrow after work, then lay up one of the quarterpanels tomorrow, pop that out & trim tuesday and then lay up the other quarterpanel afterwards.....by friday I can have a front clip on the car and start marking up the car for where to cut out the stock quarters on the rear.
stay tuned!
05-08-2012, 07:00 PM
#7
Wahay!! I've lost my Virginity!!
Thread Starter
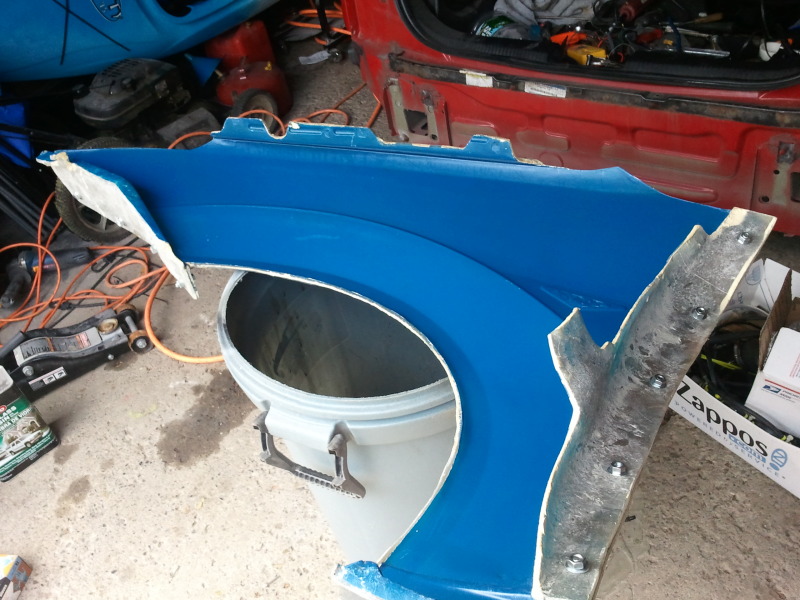
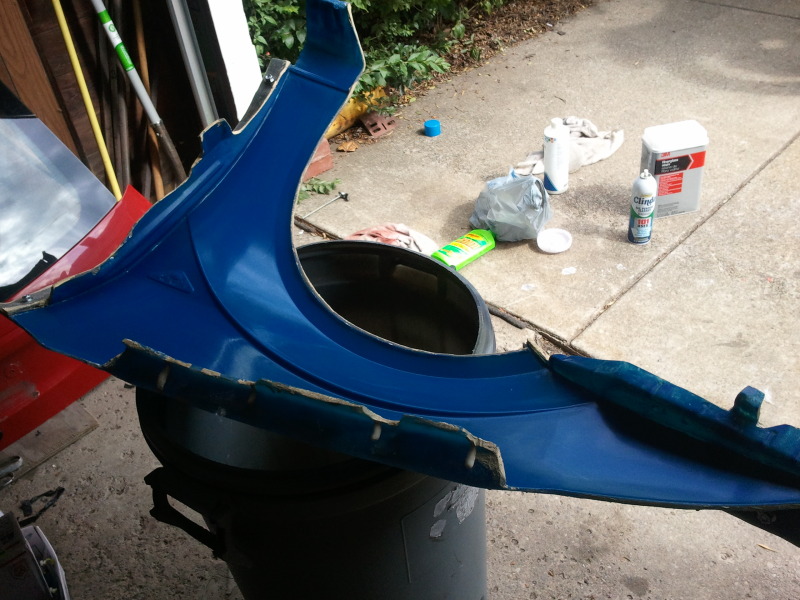
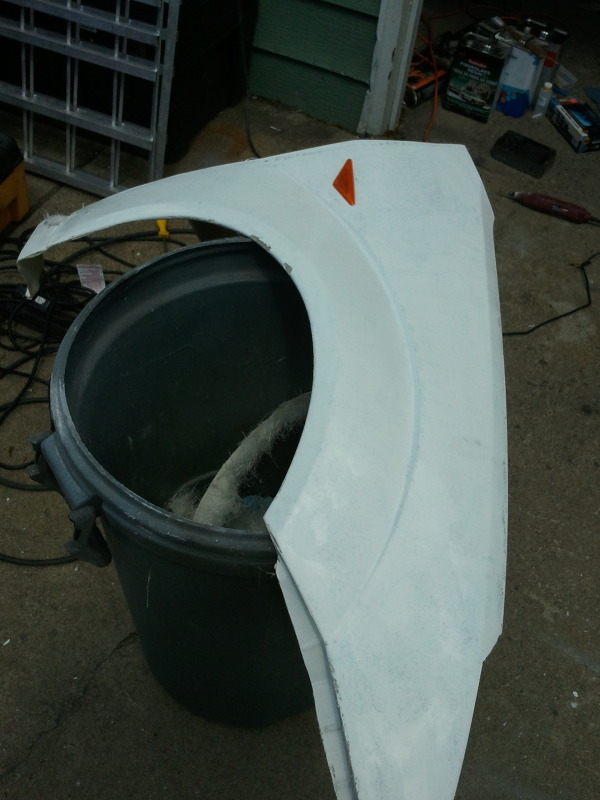
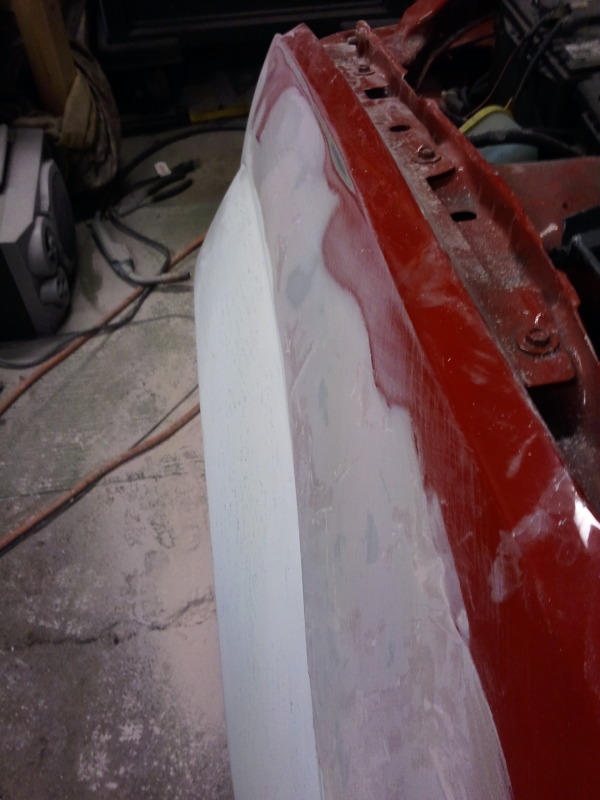
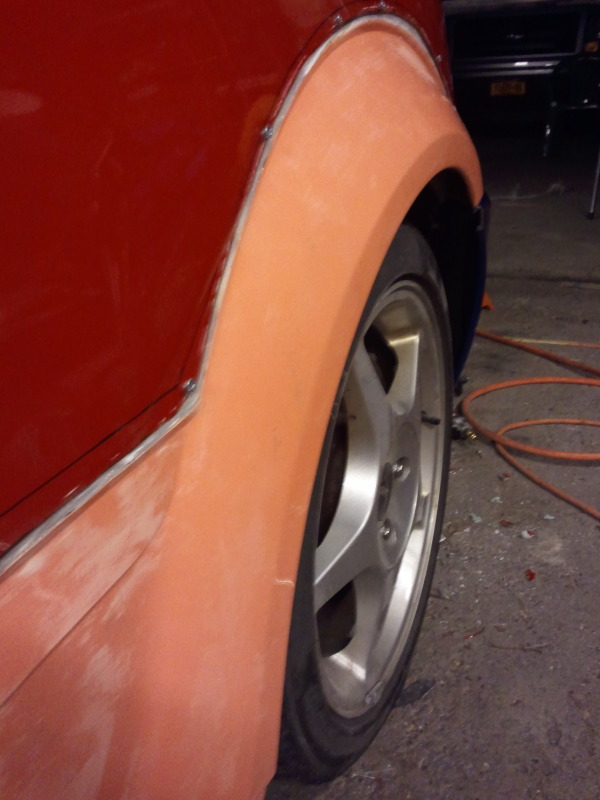
Got the other fender laid up
Pulled the other fender out of the mold, will trim it and then make up some filler for the areas that need touch-up on both fenders.
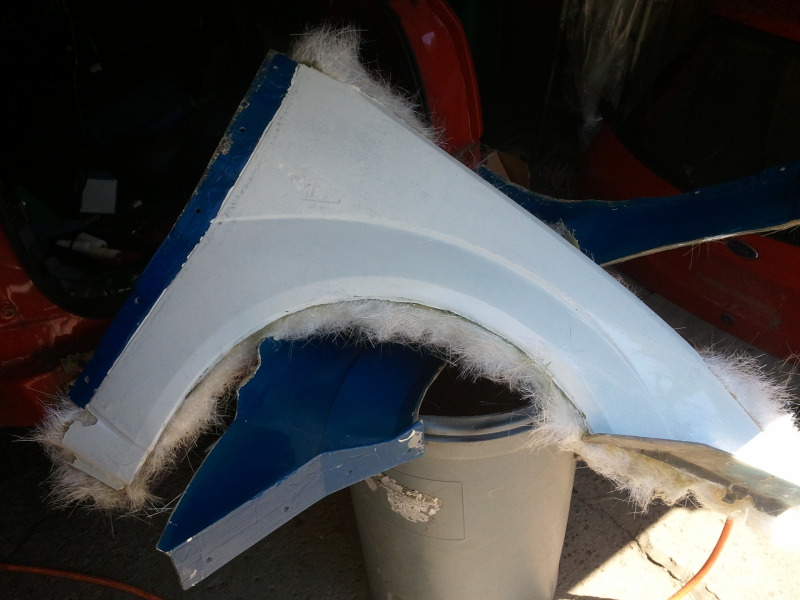
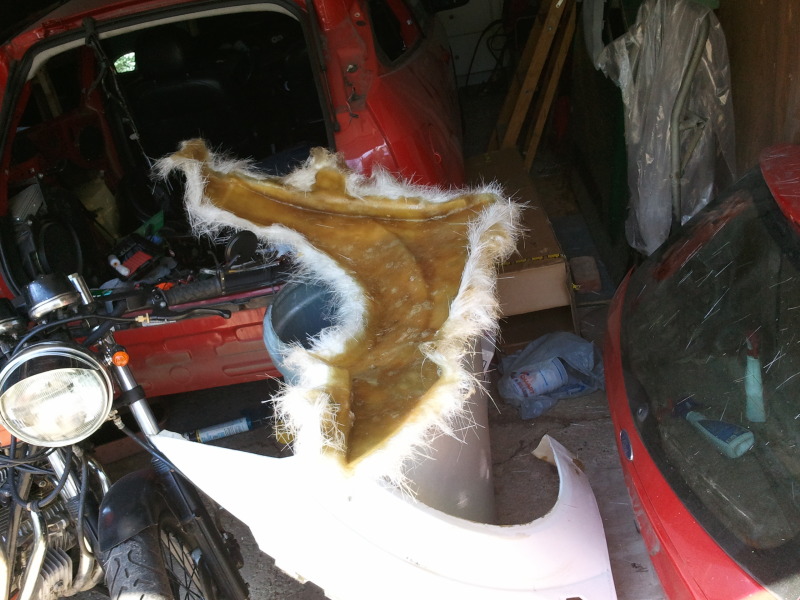
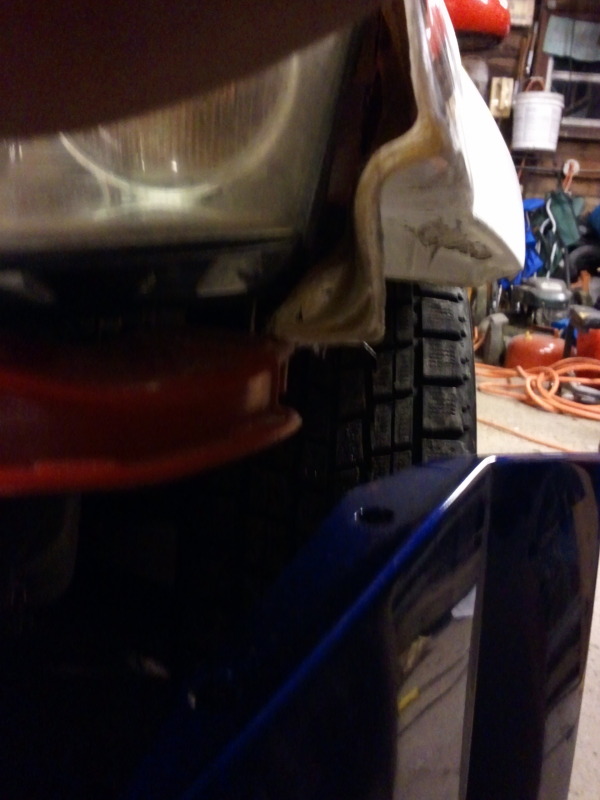
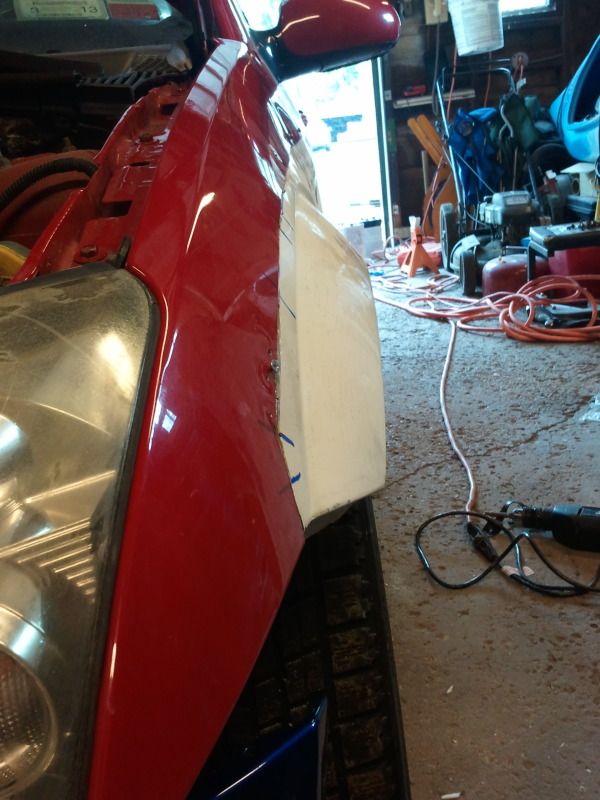
Long story short......the fender molds are garbage. now that the parts are out of the mold and mocked up on the car, it's painfully obvious that the molds were made on damaged fenders. holding lamps a few feet away and examining from a few different angles you are able to see creases that had existed in the metal fender when the molds were made. What this resulted in is changing the angle of the nose of the fender where it meets the headlight and bumper.....rendering the molds and the fenders that were to come from them useless. (don't fret, I have a plan.....not excited about it, but I have a plan)
Pics of how bad fitment is:
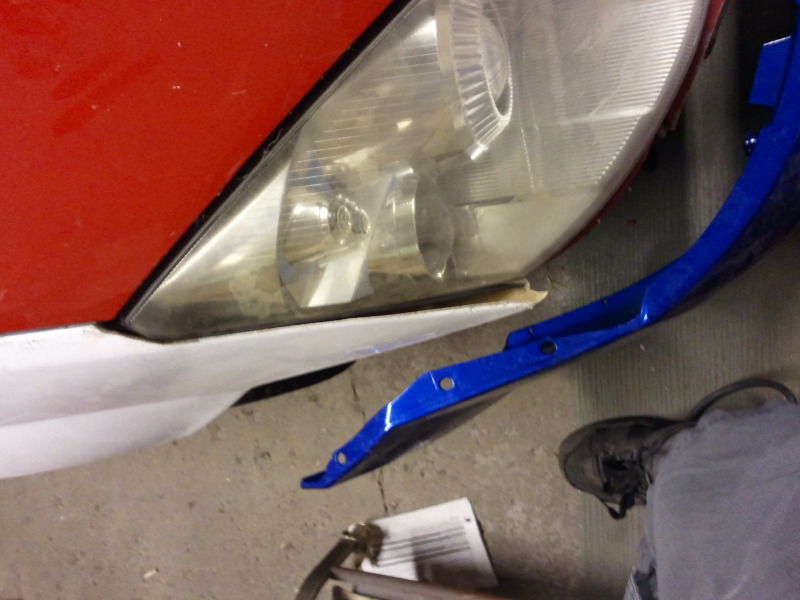
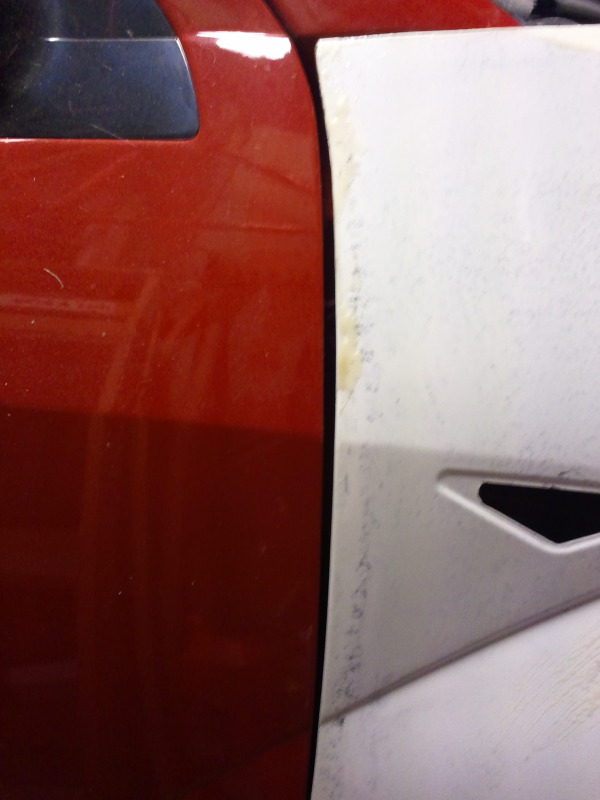
as you can see, fitment around the headlight is NOWHERE NEAR CLOSE
my new gameplan is to cut about an inch above the flair on these fiberglass fenders, and then set them over the stock metal fenders I took off the car and trace the cut line. I'm going to utilize the entire top part of the stock fenders so that fitment/gaps along the hood line and headlight are OEM, and fuse/blend the RS flairs onto that piece to achieve a replica RS fender. Then I'm going to make a fresh mold from the corrected fenders. This really sucks ******* because of what I spent on these molds.....but it's still cheaper than OEM focus RS sheetmetal parts and at least I can recoup losses by selling replicas after the molds are corrected. At least then I can rest assured that the parts I produce and sell will fit CORRECTLY.
I wish I had the time and resources to make up these fenders when I first received the molds, but it's much too late now to hold the seller accountable for this.
I guess saturday morning is when I'll be tackling it....as I won't have the time until then.
Pulled the other fender out of the mold, will trim it and then make up some filler for the areas that need touch-up on both fenders.
Long story short......the fender molds are garbage. now that the parts are out of the mold and mocked up on the car, it's painfully obvious that the molds were made on damaged fenders. holding lamps a few feet away and examining from a few different angles you are able to see creases that had existed in the metal fender when the molds were made. What this resulted in is changing the angle of the nose of the fender where it meets the headlight and bumper.....rendering the molds and the fenders that were to come from them useless. (don't fret, I have a plan.....not excited about it, but I have a plan)
Pics of how bad fitment is:
as you can see, fitment around the headlight is NOWHERE NEAR CLOSE
my new gameplan is to cut about an inch above the flair on these fiberglass fenders, and then set them over the stock metal fenders I took off the car and trace the cut line. I'm going to utilize the entire top part of the stock fenders so that fitment/gaps along the hood line and headlight are OEM, and fuse/blend the RS flairs onto that piece to achieve a replica RS fender. Then I'm going to make a fresh mold from the corrected fenders. This really sucks ******* because of what I spent on these molds.....but it's still cheaper than OEM focus RS sheetmetal parts and at least I can recoup losses by selling replicas after the molds are corrected. At least then I can rest assured that the parts I produce and sell will fit CORRECTLY.
I wish I had the time and resources to make up these fenders when I first received the molds, but it's much too late now to hold the seller accountable for this.
I guess saturday morning is when I'll be tackling it....as I won't have the time until then.
Trending Topics
05-08-2012, 07:01 PM
#8
Wahay!! I've lost my Virginity!!
Thread Starter
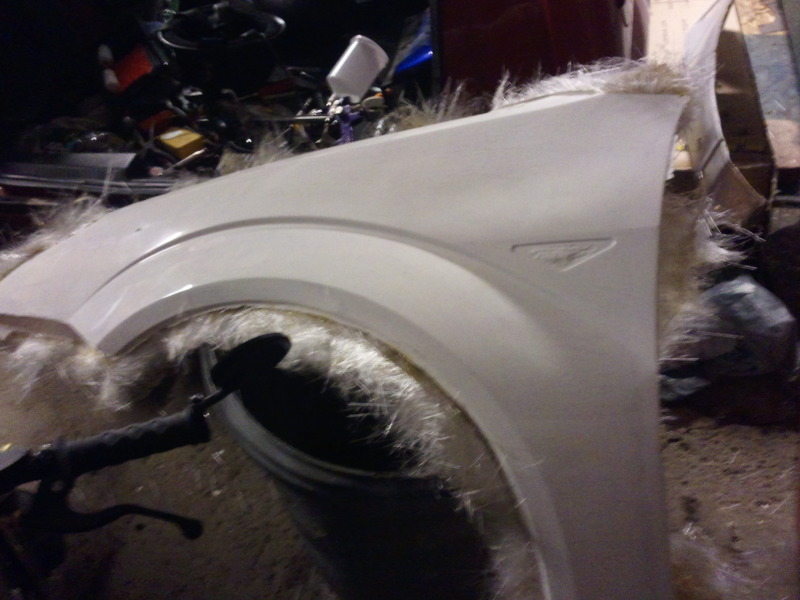
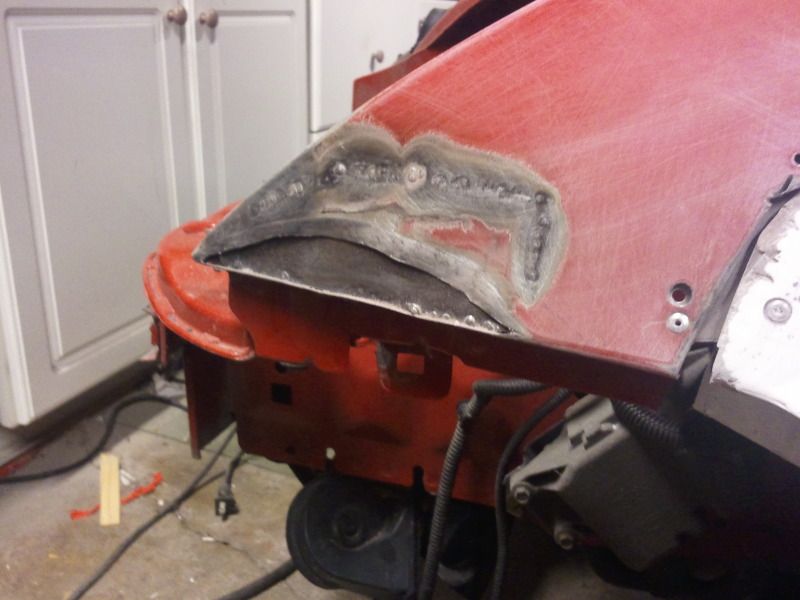
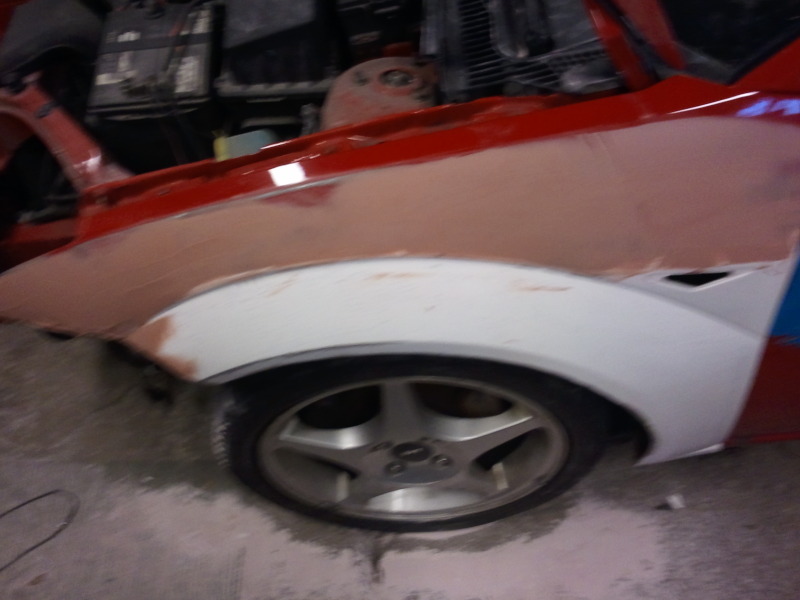
Checko came by today and gave me a hand with the fenders..... cut up the stock ones and the fiberglass ones and used pieces of each one to get a good-fitting fender. gameplan is to make these fit and look right, then mold them, and make complete fiberglass fenders out of the mold so I don't have to worry about the seam cracking from vibration or expansion/contraction.
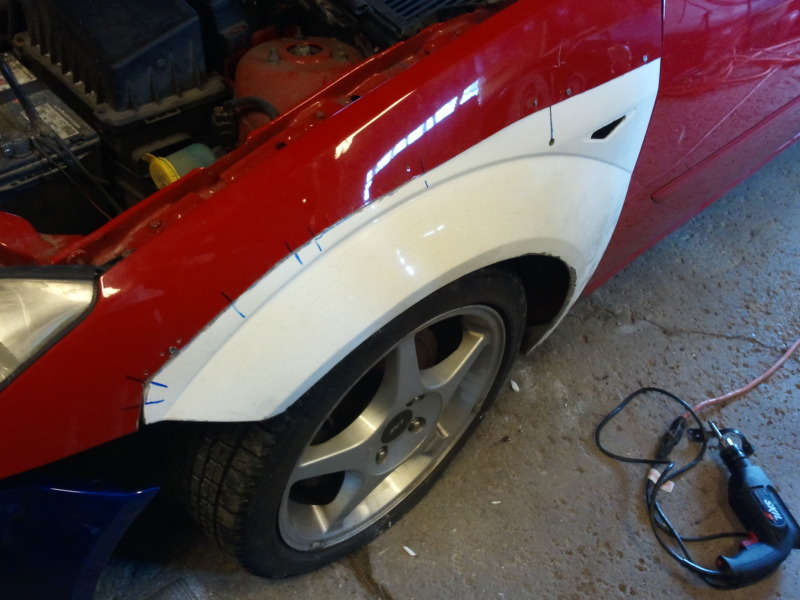
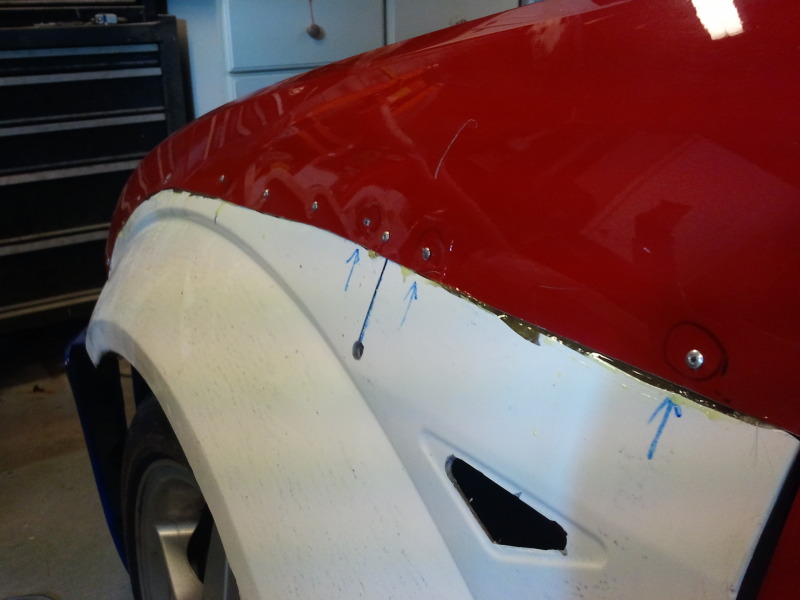
driver's side is epoxied together and pop-riveted, ran out of epoxy so the passenger side is just held in alignment temporarily with self tapping screws
driver's side is epoxied together and pop-riveted, ran out of epoxy so the passenger side is just held in alignment temporarily with self tapping screws
05-08-2012, 07:01 PM
#9
Wahay!! I've lost my Virginity!!
Thread Starter
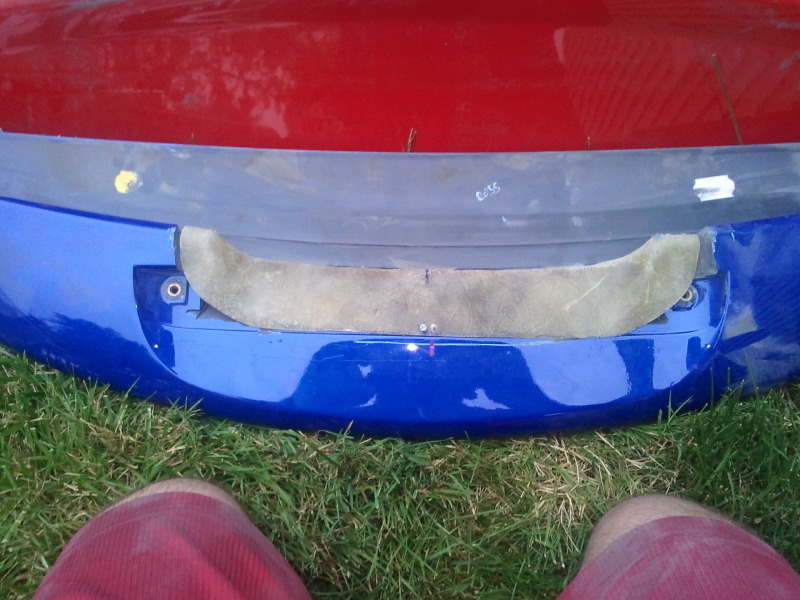
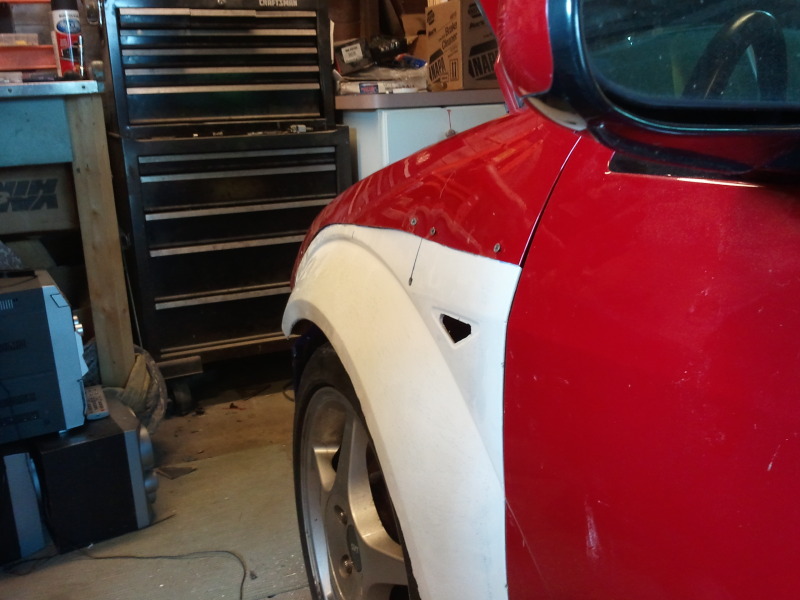
well, I'm starting to think I need to try to find someone with genuine RS front fenders and try to borrow them for molding purposes. This is turning into a clusterf*(%
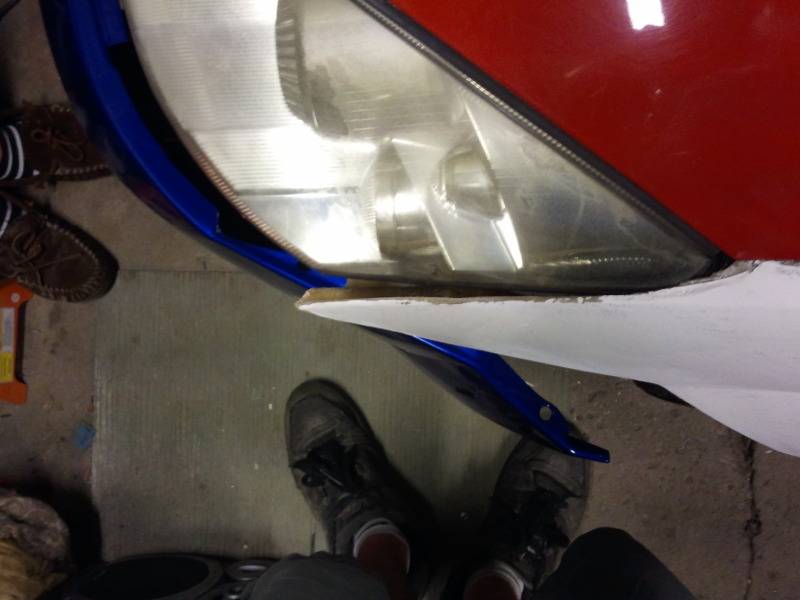
Mounted the bumper......NEWS FLASH! The RS fender's nose is much more "flat" than the standard fender(which has a bit of a curve to it)
pic from below:
so I traced the line of the bumper, and went at the fender with the grinder to cut the curve out of it. Then I welded a flat patch behind it so I could smooth it all out with fiberglass and body filler.
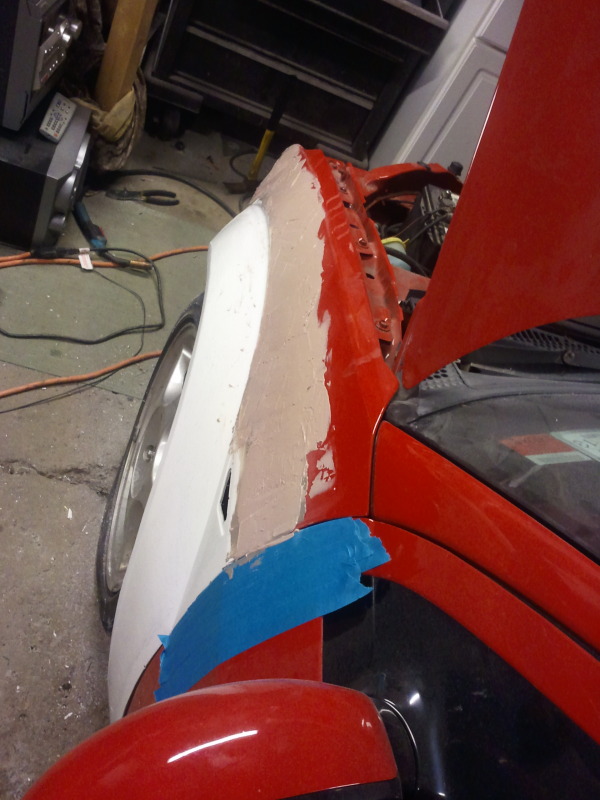
definitely not excited about how it's coming out right now, and would MUCH MUCH rather re-mold an OEM genuine (not dented to piss) RS fender set. Fantastic, I'll have to do this all over again on the passenger side. :-/
Mounted the bumper......NEWS FLASH! The RS fender's nose is much more "flat" than the standard fender(which has a bit of a curve to it)
pic from below:
so I traced the line of the bumper, and went at the fender with the grinder to cut the curve out of it. Then I welded a flat patch behind it so I could smooth it all out with fiberglass and body filler.
definitely not excited about how it's coming out right now, and would MUCH MUCH rather re-mold an OEM genuine (not dented to piss) RS fender set. Fantastic, I'll have to do this all over again on the passenger side. :-/
 06-08-2012, 12:47 AM
#11
Wahay!! I've lost my Virginity!!
Thread Starter
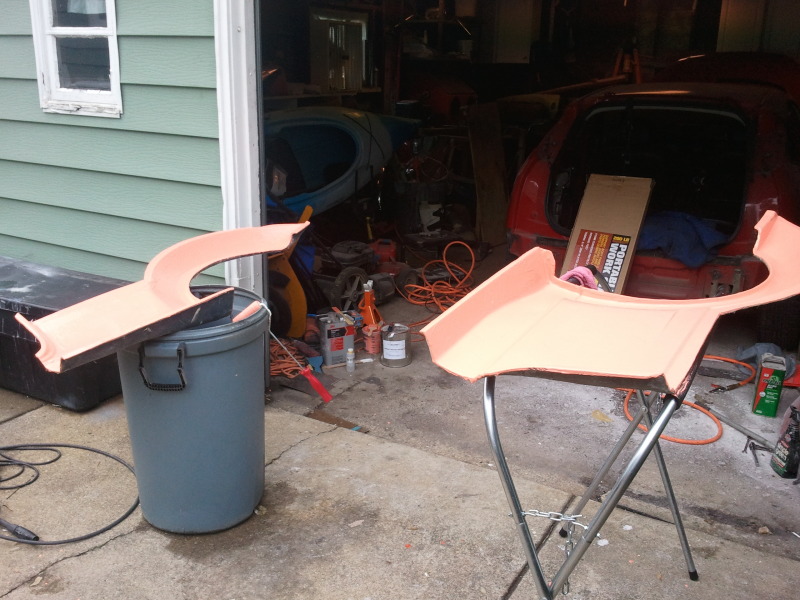
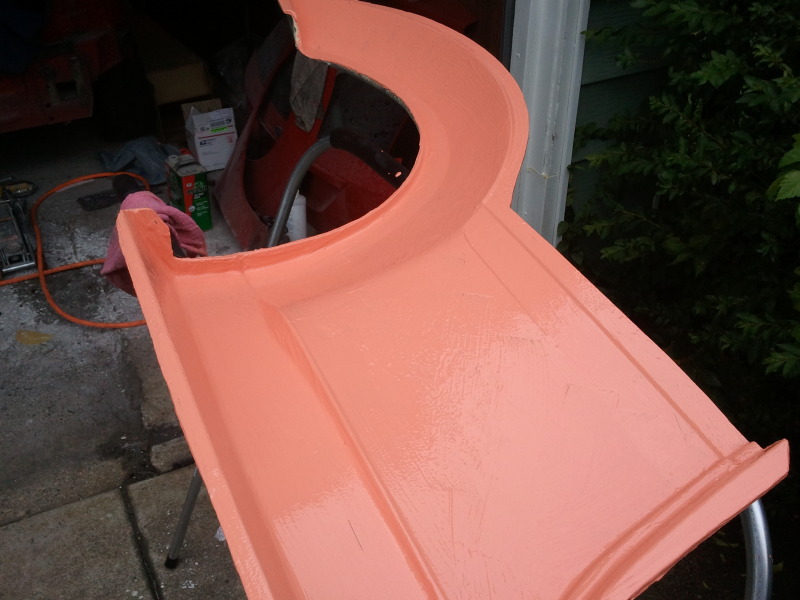
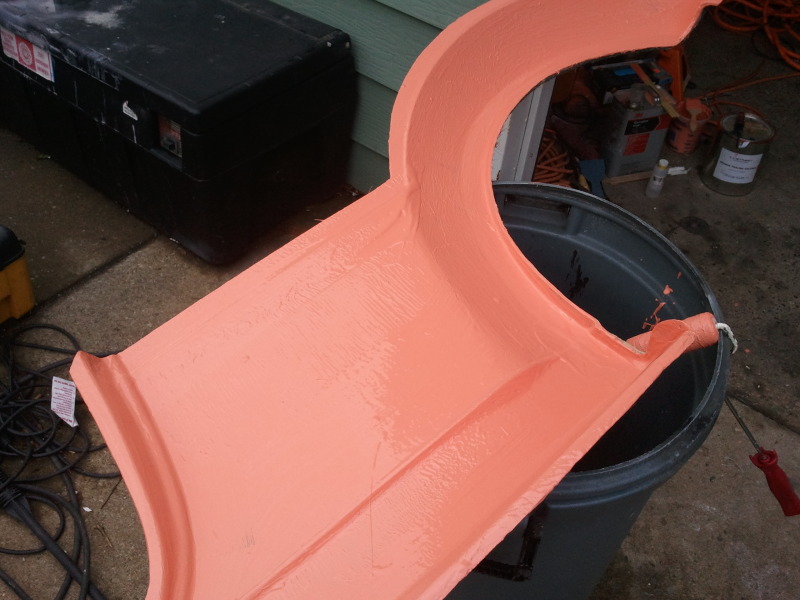
Checko is such a nice dude he came over again and helped me lay up BOTH rear quarterpanels. The coral pink color of the gelcoat is because I was low on white gelcoat and mixed in some orange gelcoat so I'd have enough.....produced that funny pinkish color haha.
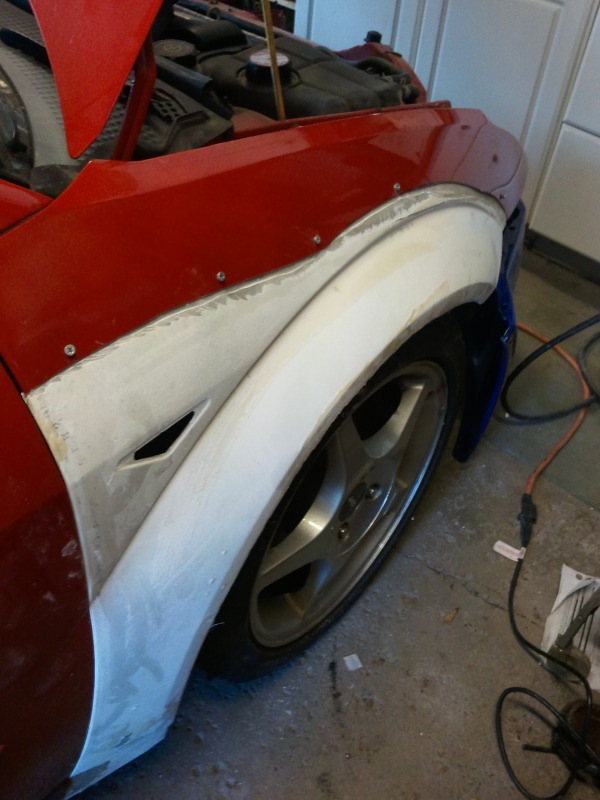
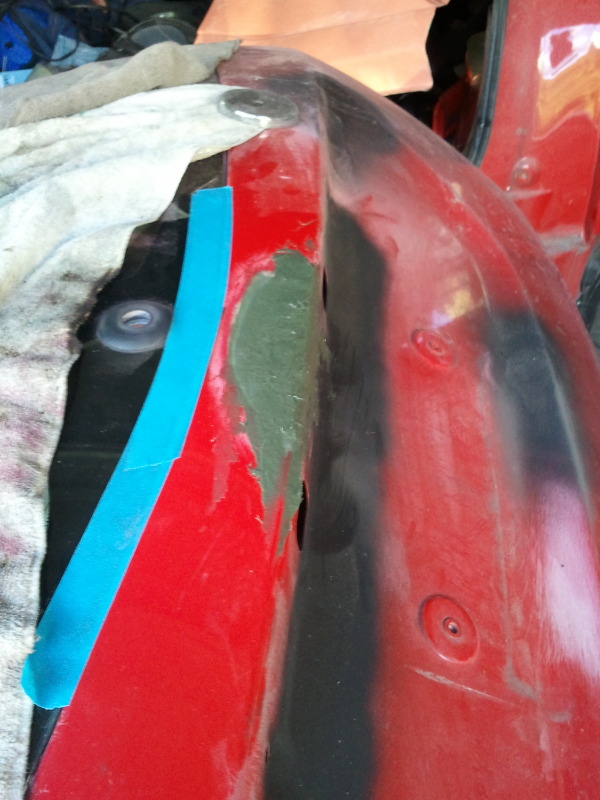
and I started block sanding the seam on the driver front fender
fender is gonna need another layer of filler minimum. Man is this a pain in the butt.
and I started block sanding the seam on the driver front fender
fender is gonna need another layer of filler minimum. Man is this a pain in the butt.
Last edited by Focusinprogress; 08-08-2012 at 05:52 PM.
06-08-2012, 05:41 PM
#12
Wahay!! I've lost my Virginity!!
Thread Starter
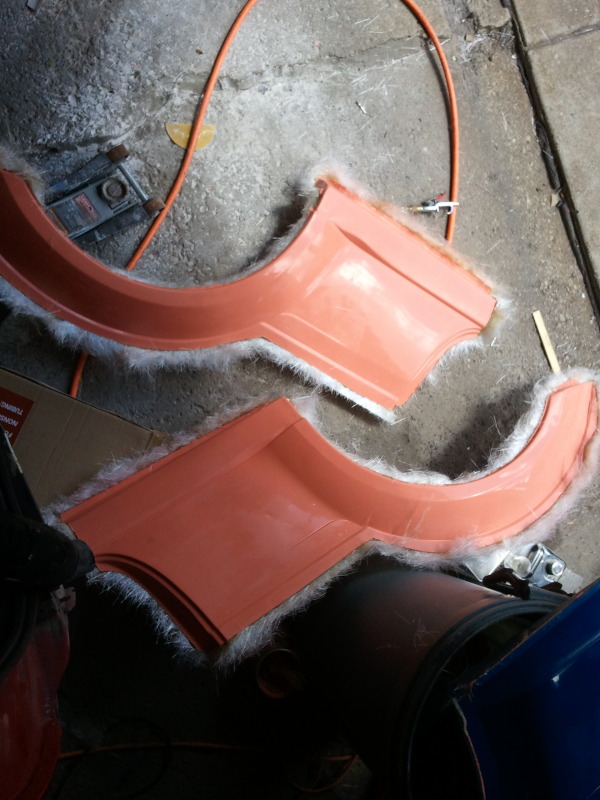
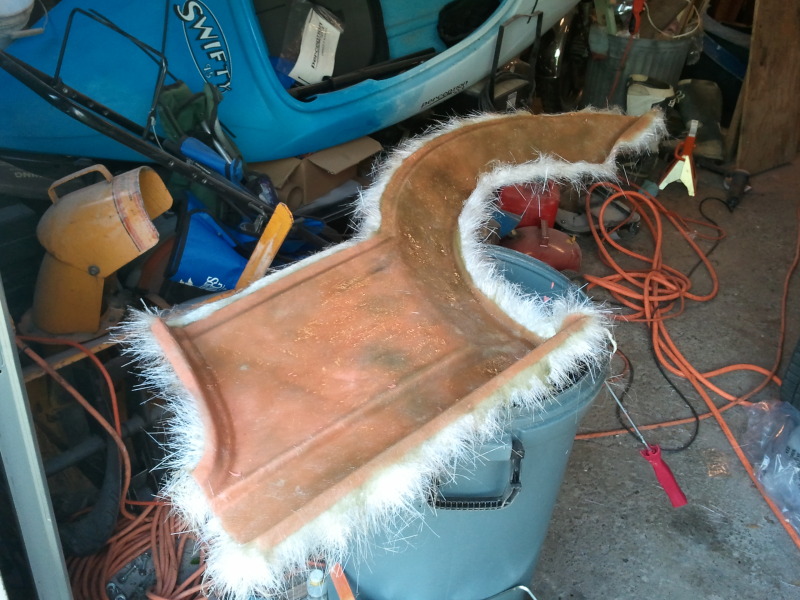
popped 'em out on lunch, look fantastic. hopefully they fit better than the front fenders...... I'll be gettin' out the grinder over the next few days and cutting up the stock quarters to get these fitted in.
06-08-2012, 06:32 PM
#14
Wahay!! I've lost my Virginity!!
Thread Starter
09-08-2012, 02:03 AM
#16
Wahay!! I've lost my Virginity!!
Thread Starter
WHAT HAVE I DONE!?!?!?
lol
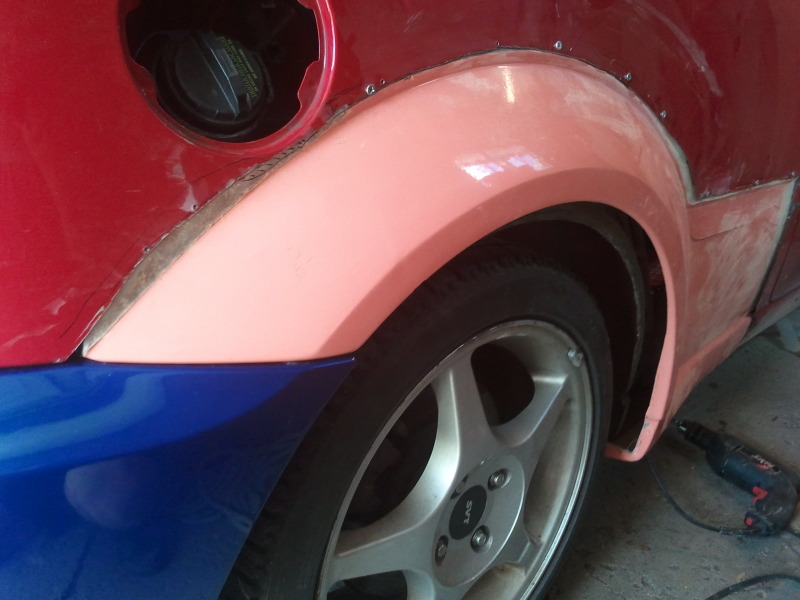
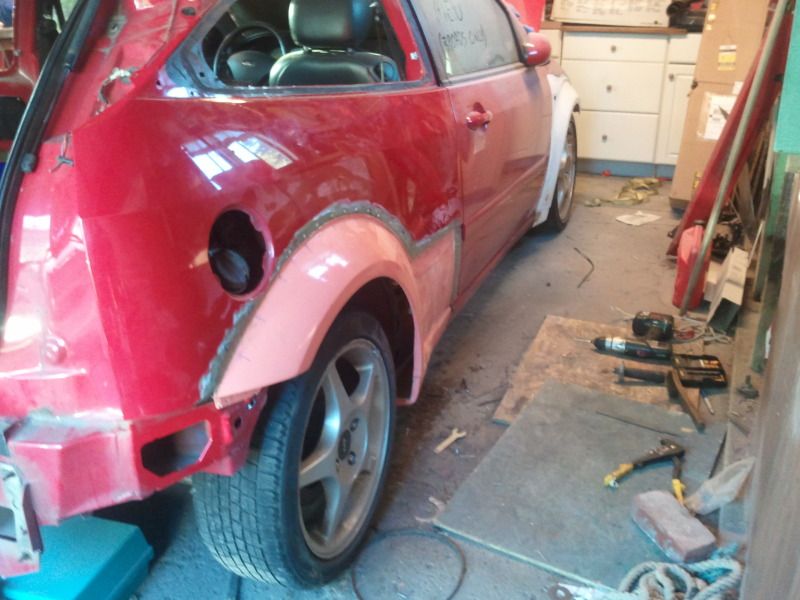
got the driver side rear quarter panel mocked up thanks to Luke (pirite)
lots 'o cuttin'
trimming the excess from the fiberglass panels
I ground the edge of the flair down as far as possible to have the same effect of "rolled" fenders of a metal flair
Then after numerous test-fits and trimming until it sat just right, I beveled the flange so that once I bod the flair to the body of the car from behind it, the top surface of the fiberglass will be flush with the top surface of the existing metal (will make for easy body-filler work)
(lots of dust flying in those two pics)
mocked up with screws for now:
look how much more wheel I'll be able to run....
That's all for tonight....I'm going to try to get the other side to the same point over the weekend....
lol
got the driver side rear quarter panel mocked up thanks to Luke (pirite)
lots 'o cuttin'
trimming the excess from the fiberglass panels
I ground the edge of the flair down as far as possible to have the same effect of "rolled" fenders of a metal flair
Then after numerous test-fits and trimming until it sat just right, I beveled the flange so that once I bod the flair to the body of the car from behind it, the top surface of the fiberglass will be flush with the top surface of the existing metal (will make for easy body-filler work)
(lots of dust flying in those two pics)
mocked up with screws for now:
look how much more wheel I'll be able to run....
That's all for tonight....I'm going to try to get the other side to the same point over the weekend....
 09-08-2012, 08:22 PM
#21
Wahay!! I've lost my Virginity!!
Thread Starter
something like that....I don't want to let the cat out of the bag just yet....but I will say it will have more than 4 cylinders and more than 2 of the wheels will be putting the power to the ground. I bought a donor car after spending years researching....
09-08-2012, 09:26 PM
#24
Wahay!! I've lost my Virginity!!
Thread Starter
09-08-2012, 09:50 PM
#25
Advanced PassionFord User

Epic work! This will be a regular read for me
10-08-2012, 09:30 AM
#29
Regular Contributor
 10-08-2012, 06:43 PM
#30
Wahay!! I've lost my Virginity!!
Thread Starter
Everything posted in this thread is about 3 weeks worth of work, doing a couple hours every couple of days. For someone not having to actually produce the parts with fiberglass and just needed to cut and mount, this conversion could be done in a weekend.

 11-08-2012, 01:39 AM
#32
Wahay!! I've lost my Virginity!!
Thread Starter
put another coat of body filler on the front driver fender
Then removed the rub strip from the hatch to attack the rust spots:

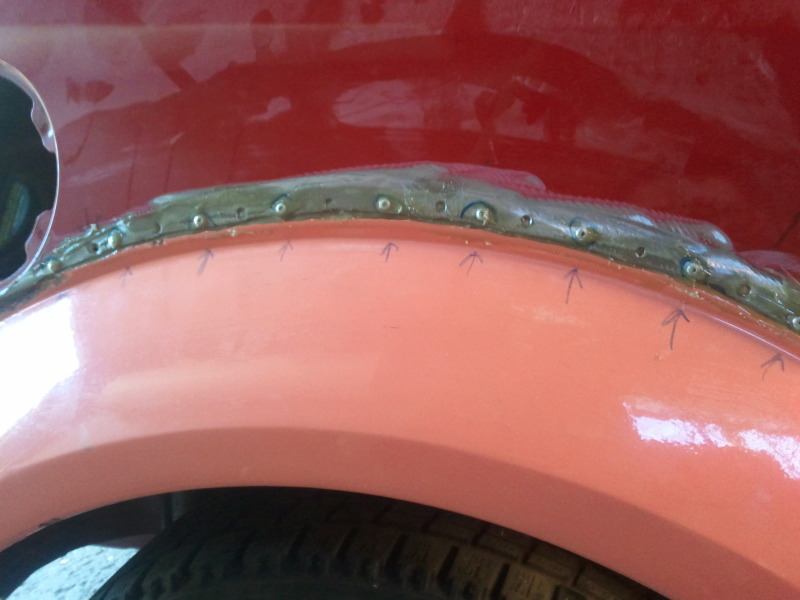
Then I made sure to document the process of how to cut the quarterpanels to isntall the fiberglass RS replica parts....
Start out by measuring in a few spots and marking 2" off the edge of the door jam, then eye-ball the same curve like so:
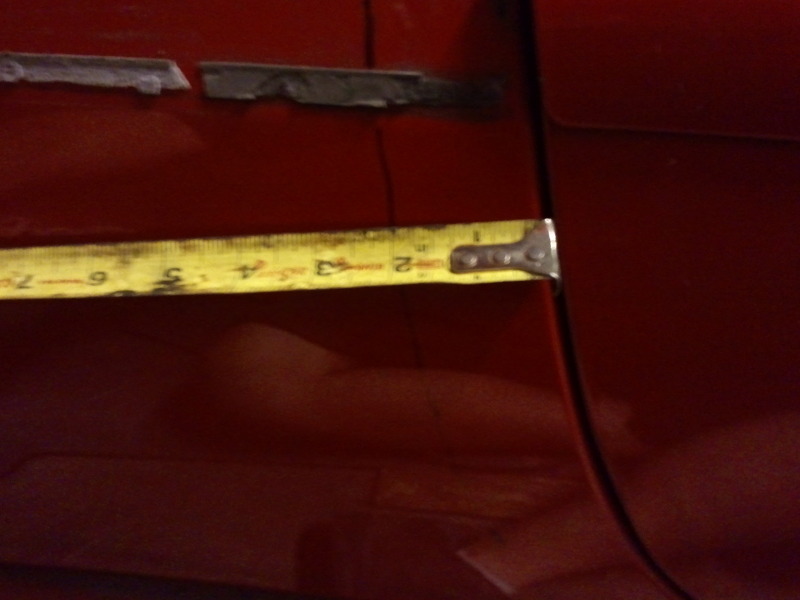
then, your cut line is going to be only about a 1/16" above the recessed area where the rub strip is. measure along that line 16" from the door jam as a rough starting point like so:
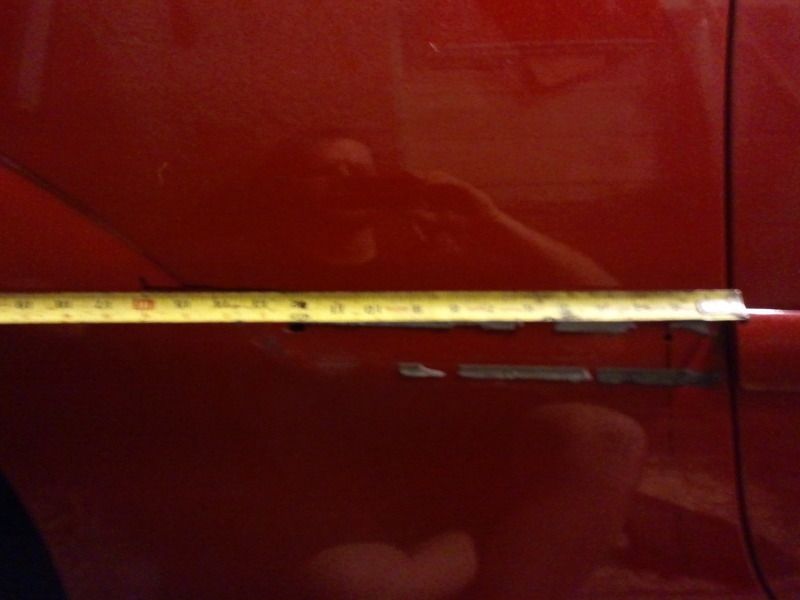
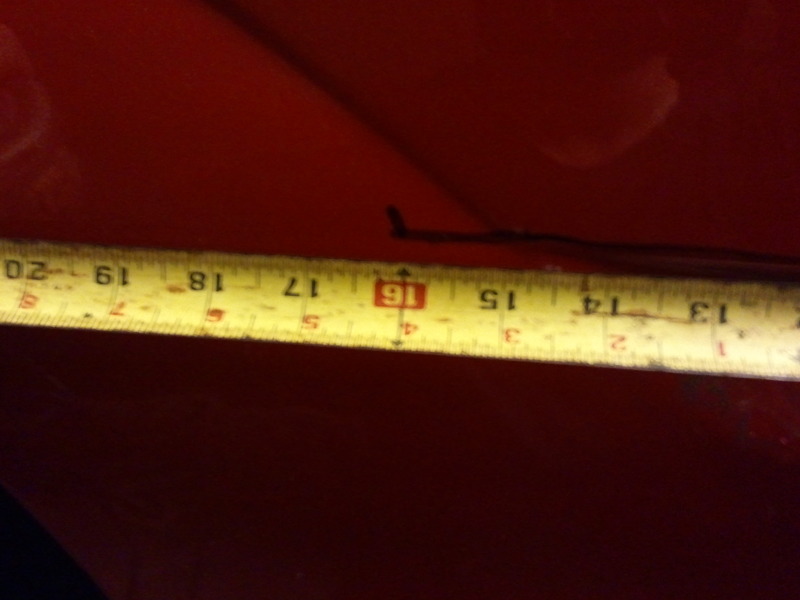
then from here your cut line is going to gradually make its way up to the current flair's body line, and continue similar to the rub strip area, just a 1/16" or less above the current indent
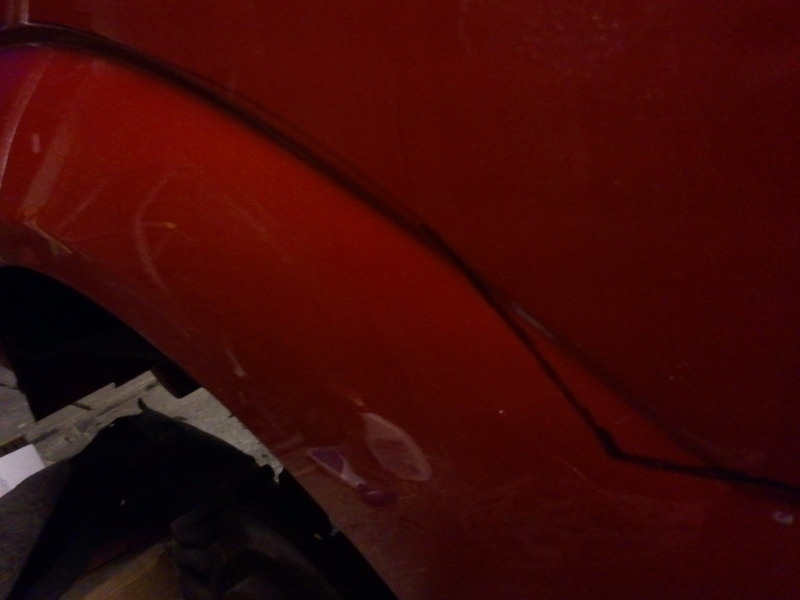
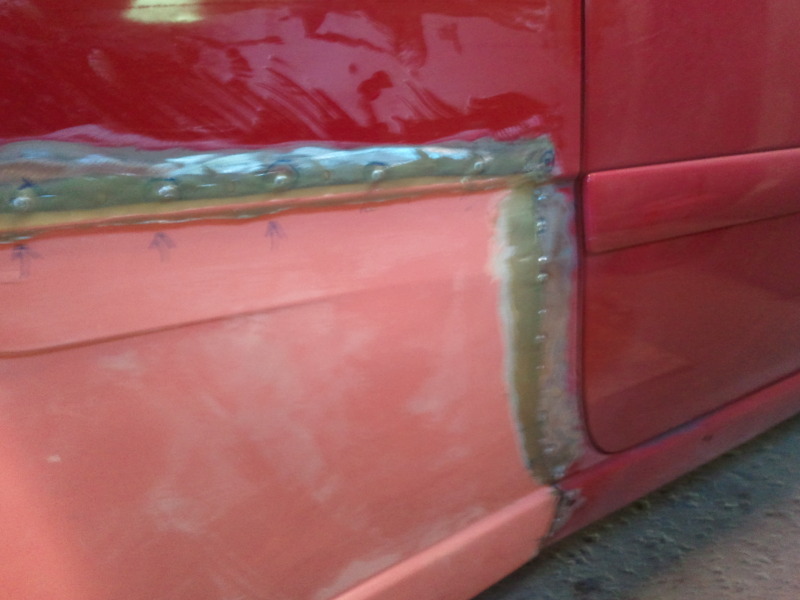
then your going to cut about 1/16" or less along the actual fender-well so that the whole panel comes off, included the flange with the spotwelds
Next, cut along the bottom of the rocker, just after it rolls underneath. Then remove the huge chunk you just cut out:

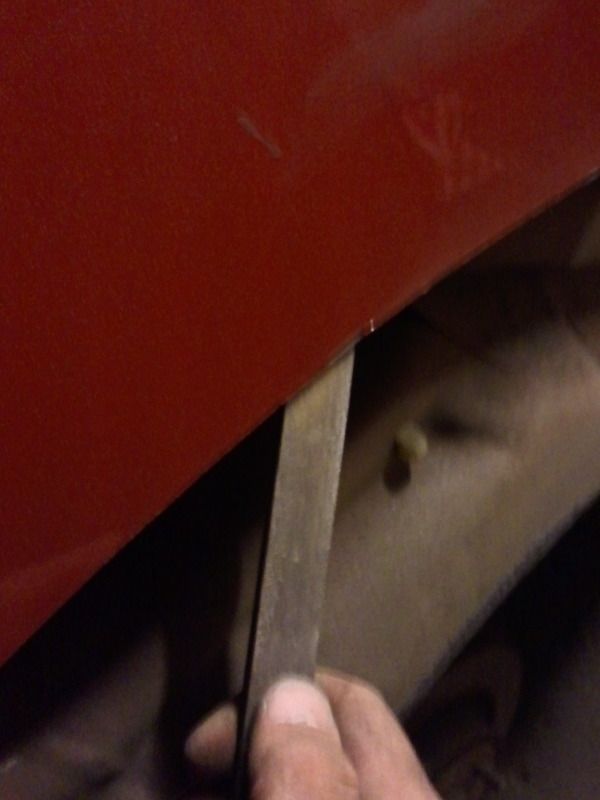
at this point, you will want to bevel the fiberglass panel like I did in the previous post where I did the other side's QP and do a series of test fits, adjusting the cut until you end up with perfect fitment.....then use a file to de-burr the inside edge so nothing can interfere when you bond the fiberglass flair to the metal
(I'll pick up from here tomorrow)
Then removed the rub strip from the hatch to attack the rust spots:
Then I made sure to document the process of how to cut the quarterpanels to isntall the fiberglass RS replica parts....
Start out by measuring in a few spots and marking 2" off the edge of the door jam, then eye-ball the same curve like so:
then, your cut line is going to be only about a 1/16" above the recessed area where the rub strip is. measure along that line 16" from the door jam as a rough starting point like so:
then from here your cut line is going to gradually make its way up to the current flair's body line, and continue similar to the rub strip area, just a 1/16" or less above the current indent
then your going to cut about 1/16" or less along the actual fender-well so that the whole panel comes off, included the flange with the spotwelds
Next, cut along the bottom of the rocker, just after it rolls underneath. Then remove the huge chunk you just cut out:
at this point, you will want to bevel the fiberglass panel like I did in the previous post where I did the other side's QP and do a series of test fits, adjusting the cut until you end up with perfect fitment.....then use a file to de-burr the inside edge so nothing can interfere when you bond the fiberglass flair to the metal
(I'll pick up from here tomorrow)
 13-08-2012, 01:38 PM
#34
Wahay!! I've lost my Virginity!!
Thread Starter
Well, my weekend went like crap because I agreed to help out a co-worker and do her front wheel bearings on her 2008 escape.....and I ended up recieving a deffective motorcraft bearing from RockAuto and had to re-do the entire job all over again....11hrs total on my saturday :/
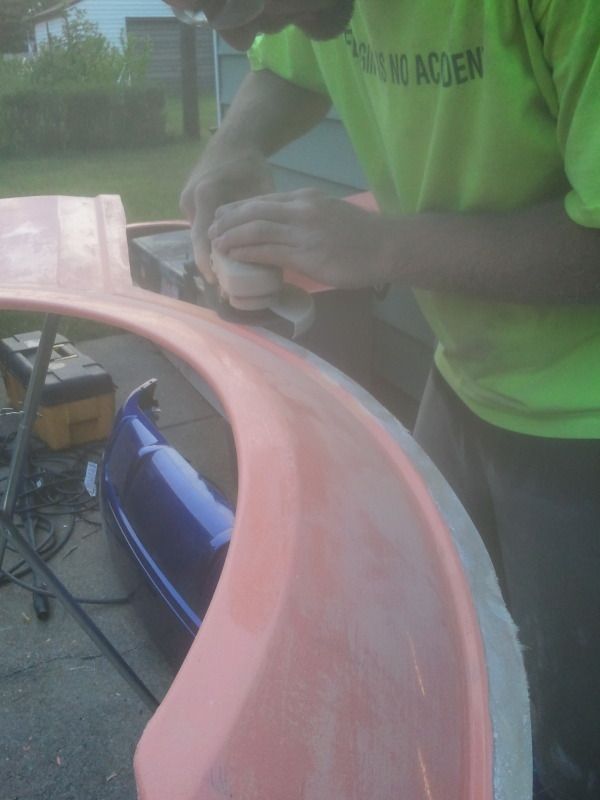
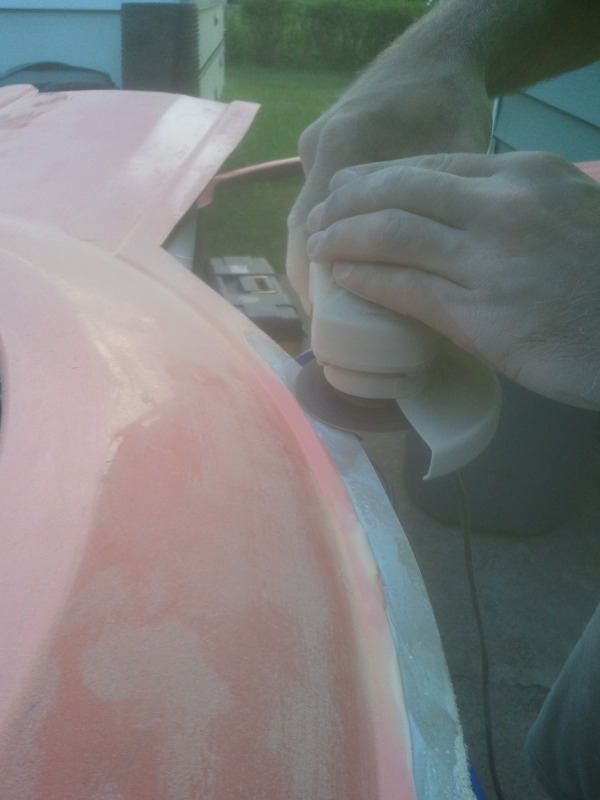
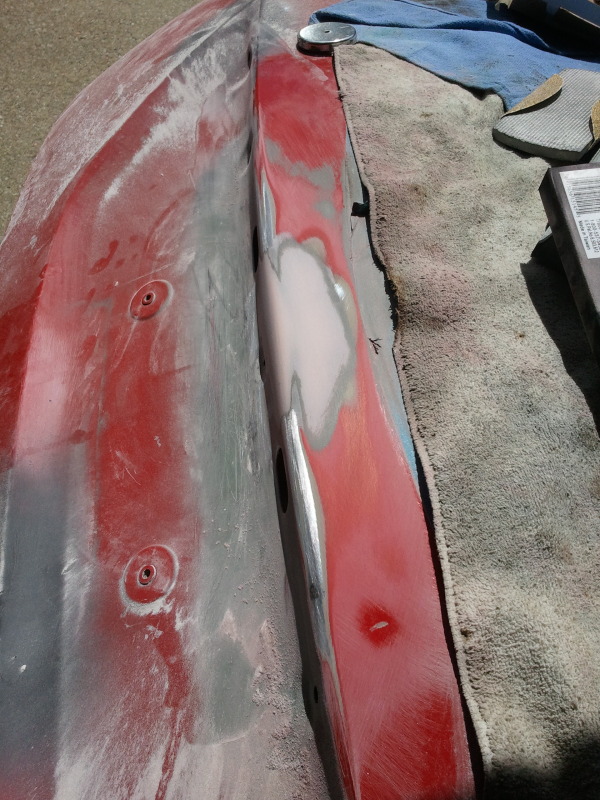
Anyways, Sunday morning after I cut my lawn and trimmed my shrubs I found a little time to block-sand out the driver fender and check it out with some primer.....still needs a little more work but it's coming along nicely.
Anyways, Sunday morning after I cut my lawn and trimmed my shrubs I found a little time to block-sand out the driver fender and check it out with some primer.....still needs a little more work but it's coming along nicely.
17-08-2012, 05:43 PM
#35
Wahay!! I've lost my Virginity!!
Some serious work going into this mate. The looks you're going to get will be insane. I didn't ever realise there was such a massive amount of difference between the UK spec and US spec focus tbh.
17-08-2012, 07:33 PM
#36
Wahay!! I've lost my Virginity!!
Thread Starter
for example....
here's what our 99-2004 looks like:

as you can see our bumpers stick out much farther and have rub-strip treatments rather than being nice and smooth like the 98-01 you guys had
then in 2005 we got a "facelift" which changed just the front end a bit to this:
I personally bought an st170 euro facelift front and 98 smooth rear and had mine trated like this for a while (until someone backed into it in a parking lot and wrecked the whole front end):

So I used the insurance money to buy the RS bumpers and that was the start of this build
Last edited by Focusinprogress; 17-08-2012 at 07:40 PM.
17-08-2012, 10:01 PM
#37
Regular Contributor
little inspiration off the front cover of this months fast ford magazine over in the uk
http://www.google.co.uk/imgres?q=fas...52&tx=43&ty=54
its a vinyl wrapped rs
http://www.google.co.uk/imgres?q=fas...52&tx=43&ty=54
its a vinyl wrapped rs
17-08-2012, 11:39 PM
#38
Wahay!! I've lost my Virginity!!
Thread Starter
Just went out and did a little work....
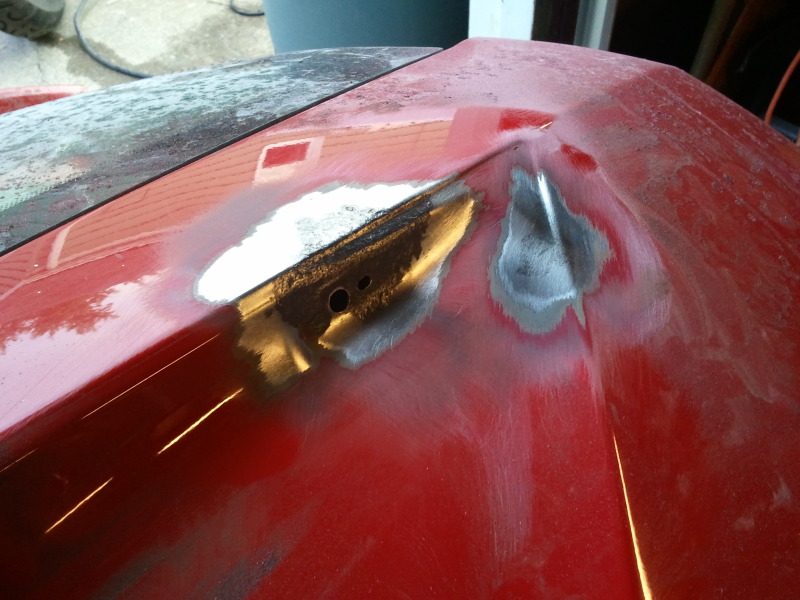
Decided I want to shave the ford emblem on the hatch just to give it a sneaky touch that makes people think "I can't tell whats different, but I don't think that's totally stock"
so I wire-wheeled the paint off the area, and made a paper template....then cut it out of sheetmetal and formed the bodyline with a hammer and dolly in my vice
Result:
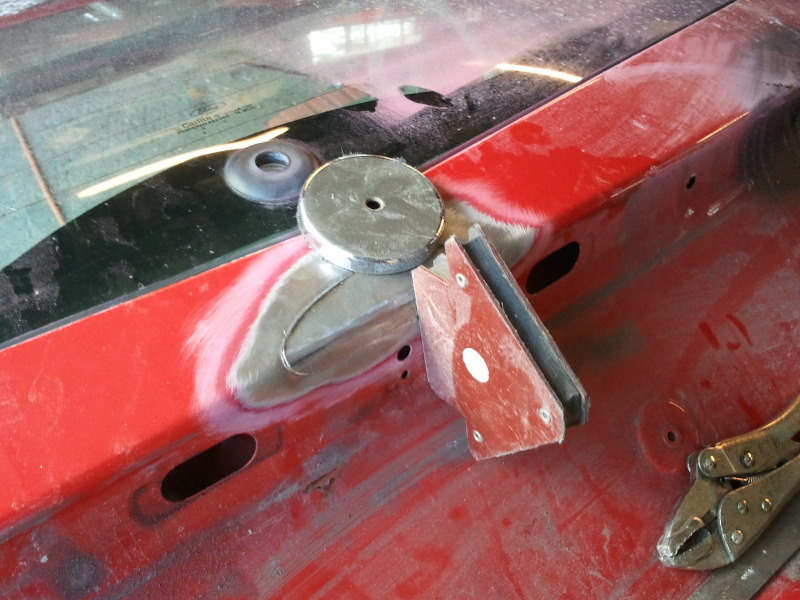
Then I welded it in place:
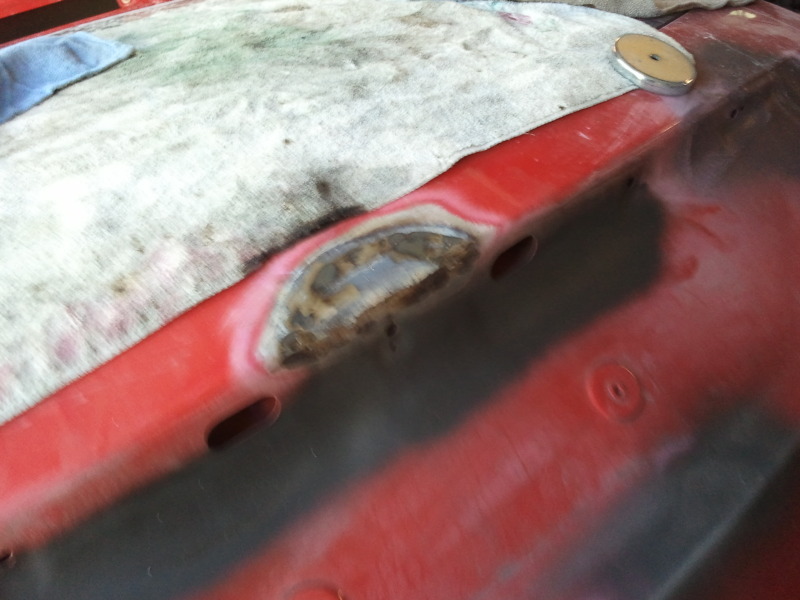
Then I ground it down with the grinder, cleaned it, and applied some body filler:
I also put what I think is the last layer of body filler on the driver front fender, but forgot to take a picture. The extra panel bond I ordered is supposed to come in tomorrow mid-morning, so hopefully by the time I have the passenger rear quarter mocked up with screws like the driver side currently is, the FedEx guy will pay me a visit. I'm hoping to have both rear quarters permanently affixed tomorrow and both front fenders ready to be molded. If I have time I'll actually build the molds tomorrow but I'm not holding my breath. Might have to lay the molds sunday morning.
Decided I want to shave the ford emblem on the hatch just to give it a sneaky touch that makes people think "I can't tell whats different, but I don't think that's totally stock"
so I wire-wheeled the paint off the area, and made a paper template....then cut it out of sheetmetal and formed the bodyline with a hammer and dolly in my vice
Result:
Then I welded it in place:
Then I ground it down with the grinder, cleaned it, and applied some body filler:
I also put what I think is the last layer of body filler on the driver front fender, but forgot to take a picture. The extra panel bond I ordered is supposed to come in tomorrow mid-morning, so hopefully by the time I have the passenger rear quarter mocked up with screws like the driver side currently is, the FedEx guy will pay me a visit. I'm hoping to have both rear quarters permanently affixed tomorrow and both front fenders ready to be molded. If I have time I'll actually build the molds tomorrow but I'm not holding my breath. Might have to lay the molds sunday morning.
19-08-2012, 12:28 AM
#39
Wahay!! I've lost my Virginity!!
Thread Starter
blocked down the hatch area where the ford emblem was and hit it with some high-build primer
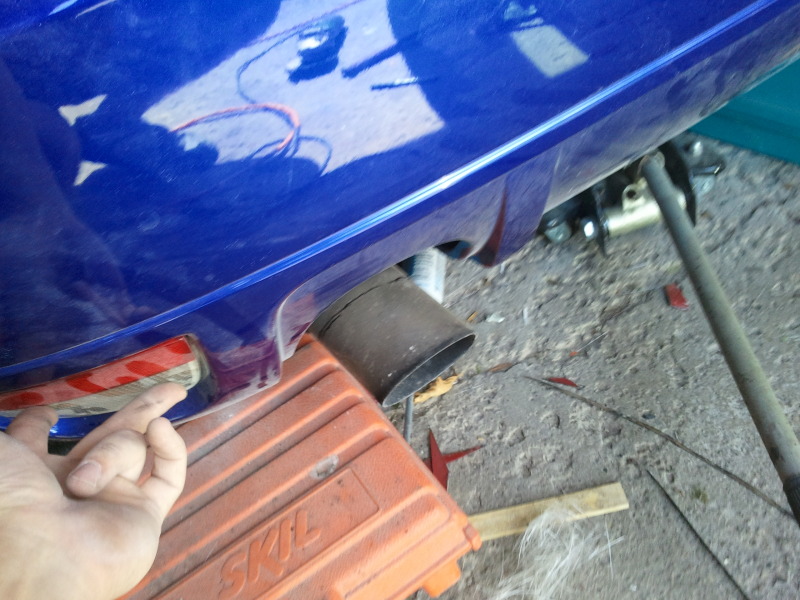
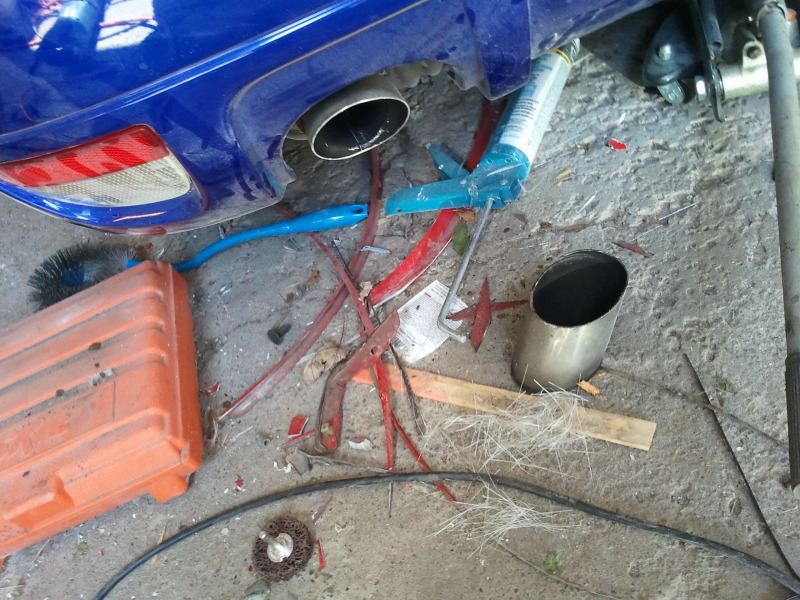
Cut down the tail pipe cause it sticks out way too far
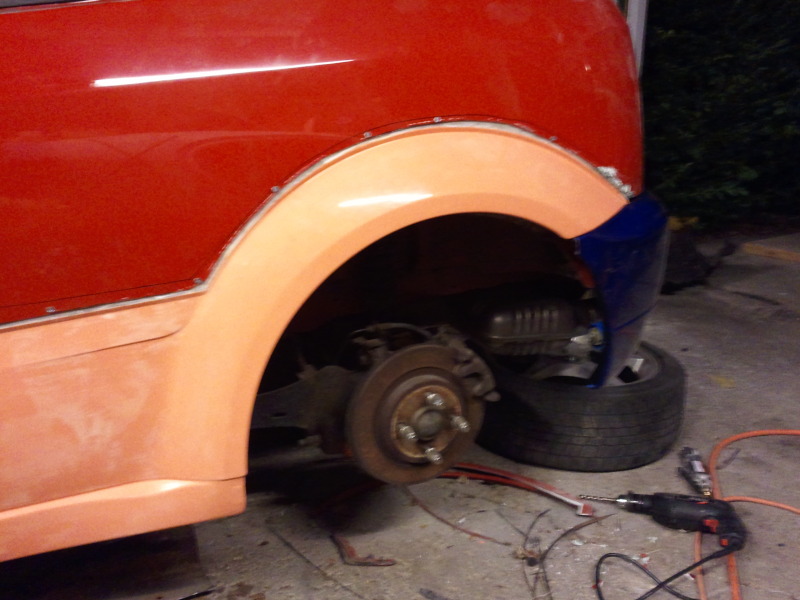
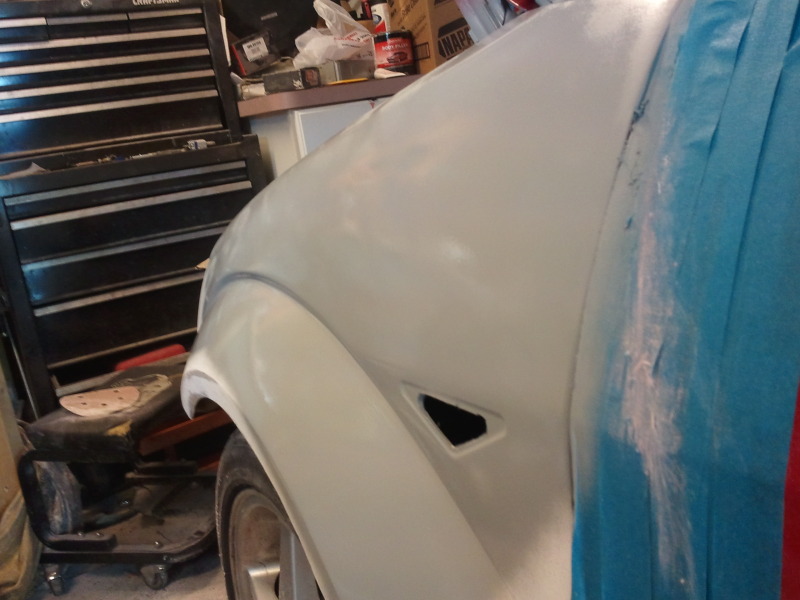
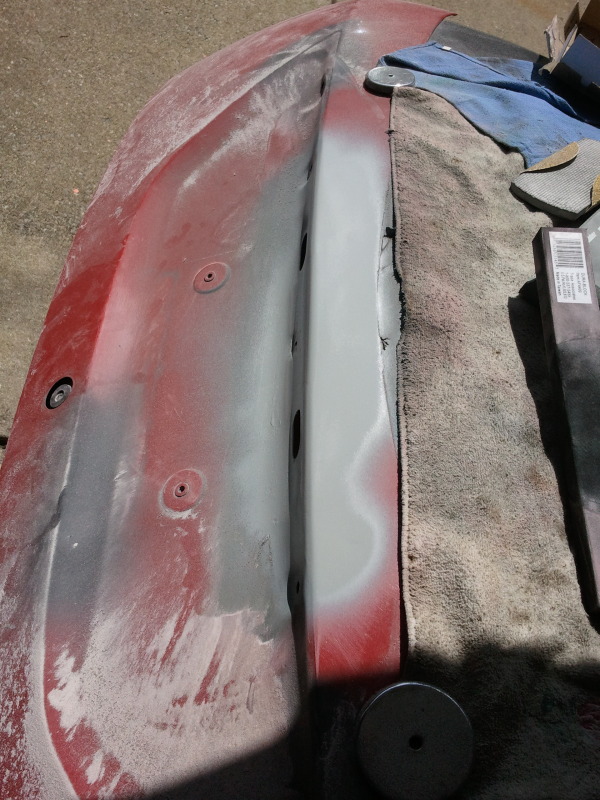
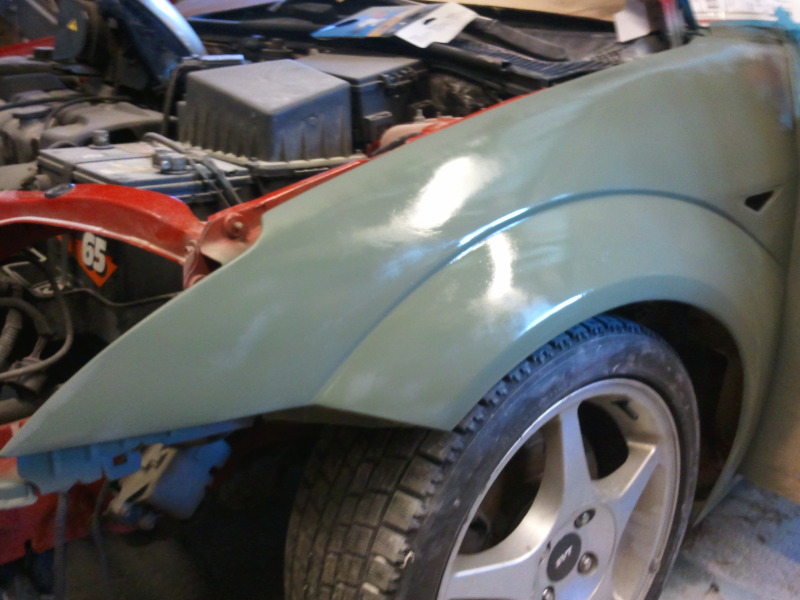
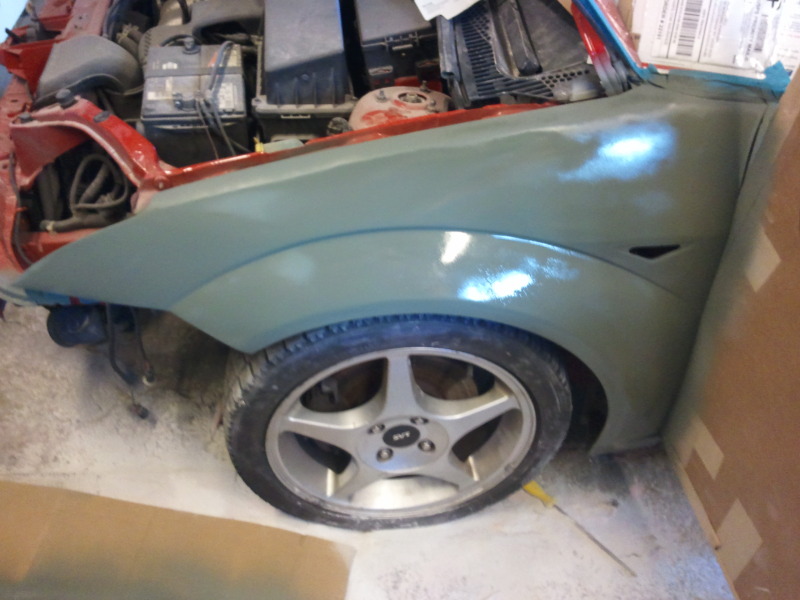
then I finished up the driver front fender and sprayed it in primer. gotta do some minor touch-ups but its nearly perfect
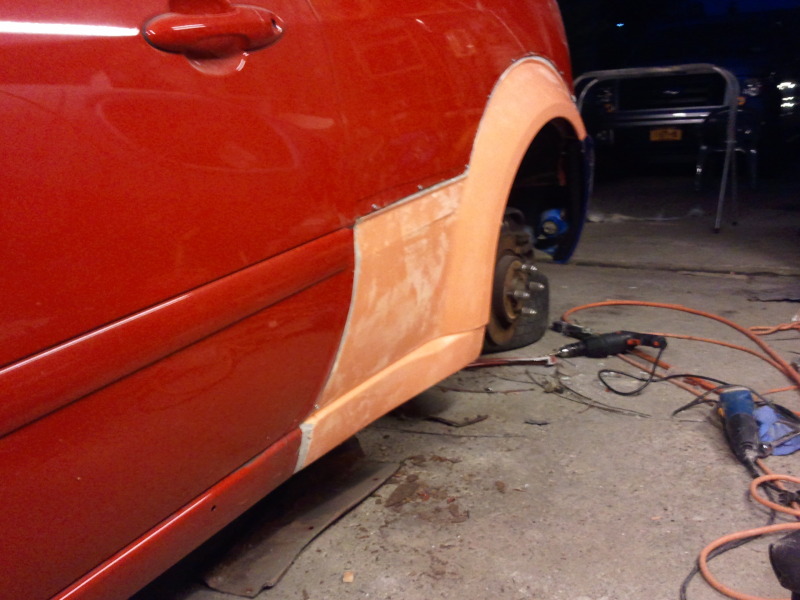
Then Checko helped me out getting the passenger rear quarter mocked up and bonded
drilled a CRAP TON of 1/8 pilot holes, with plans to put a pop-rivet temporarily in every other hole. I counter-sank the front of the ones NOT getting rivets on the outside of the metal and the backside of EVERY hole on the fiberglass.....I plan to drill the heads off the pop-rivets, and any that fall out I'm going to put more panel-bond through them....so the counter-sinks will take up the glue and act as a rivet by not being able to pull through or anything due to the taper on either side from the countersink.
I ran out of rivets and patience for today, only got done about half of what I thought I would. might do more tomorrow morning
Cut down the tail pipe cause it sticks out way too far
then I finished up the driver front fender and sprayed it in primer. gotta do some minor touch-ups but its nearly perfect
Then Checko helped me out getting the passenger rear quarter mocked up and bonded
drilled a CRAP TON of 1/8 pilot holes, with plans to put a pop-rivet temporarily in every other hole. I counter-sank the front of the ones NOT getting rivets on the outside of the metal and the backside of EVERY hole on the fiberglass.....I plan to drill the heads off the pop-rivets, and any that fall out I'm going to put more panel-bond through them....so the counter-sinks will take up the glue and act as a rivet by not being able to pull through or anything due to the taper on either side from the countersink.
I ran out of rivets and patience for today, only got done about half of what I thought I would. might do more tomorrow morning

