Mk1 Focus RS replica (United States) Build

 26-09-2012, 11:33 PM
#82
Wahay!! I've lost my Virginity!!
Thread Starter

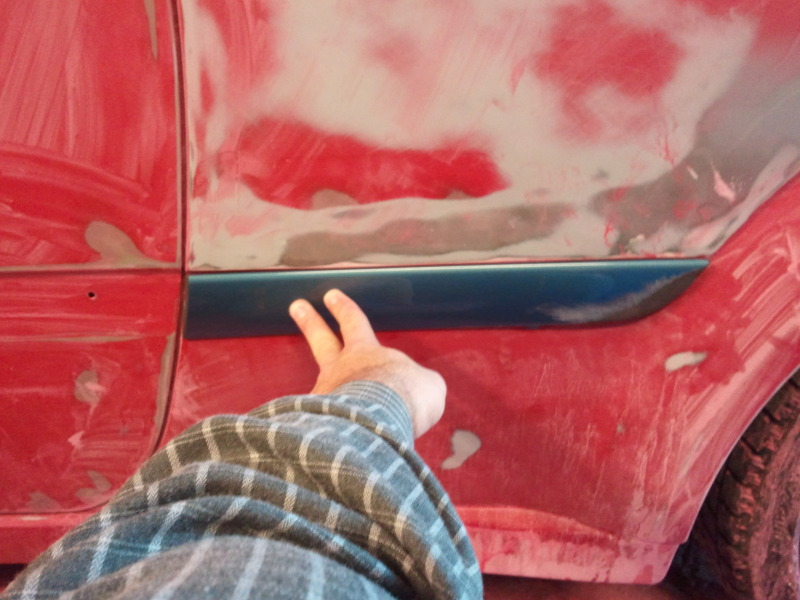
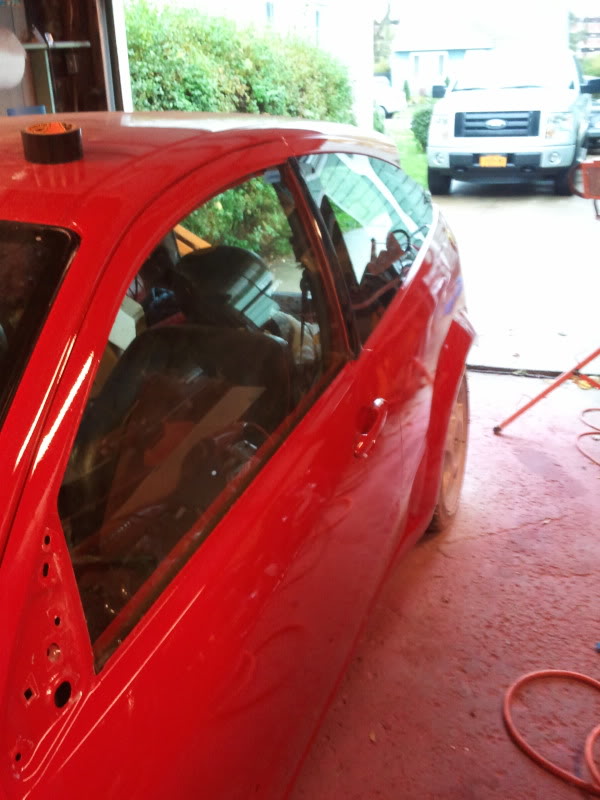
so since all the sanding was pissing me off, I decided to work on something else cause I had some free time today....
here's the only patch left to be "half done" (I.E. the driver side all sanded)
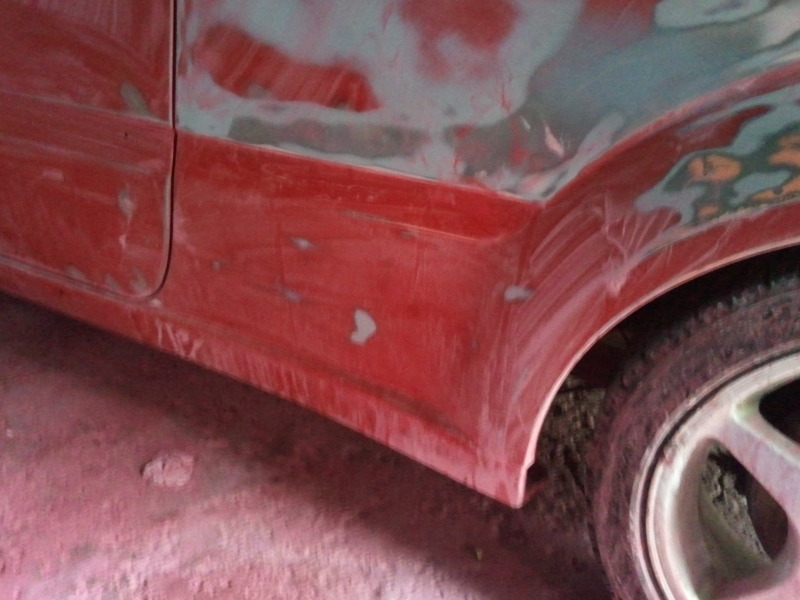
just that area from the door to the arch below the rub strip line.
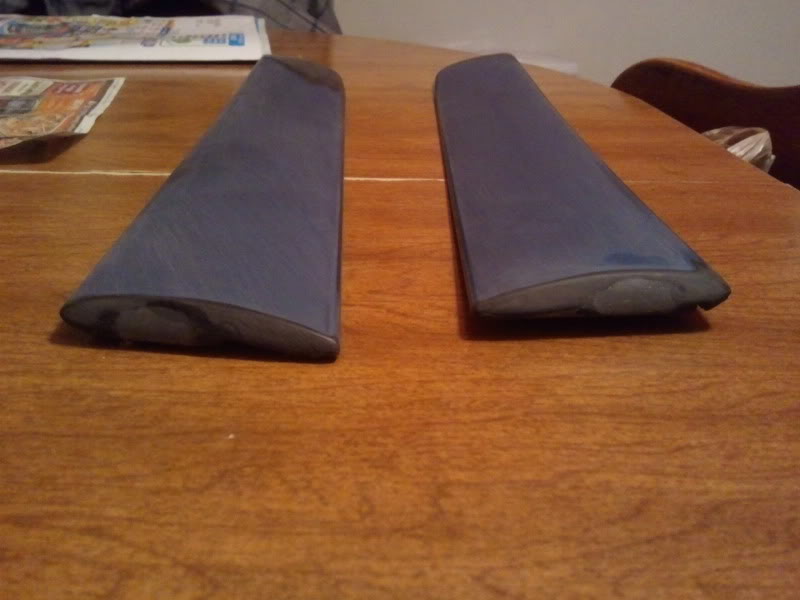
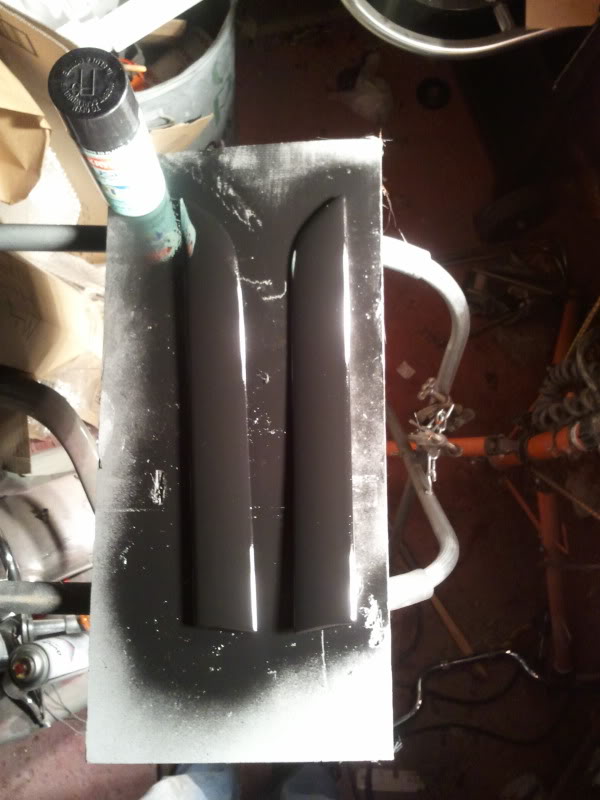
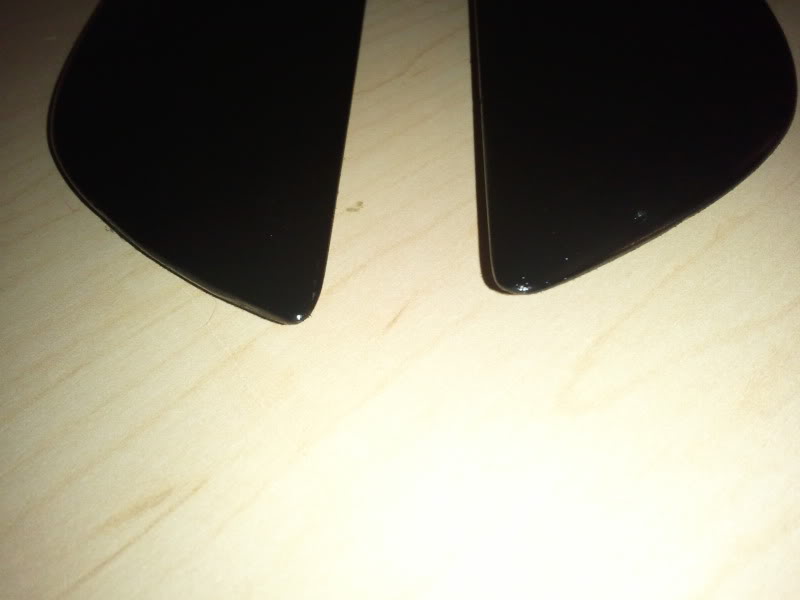
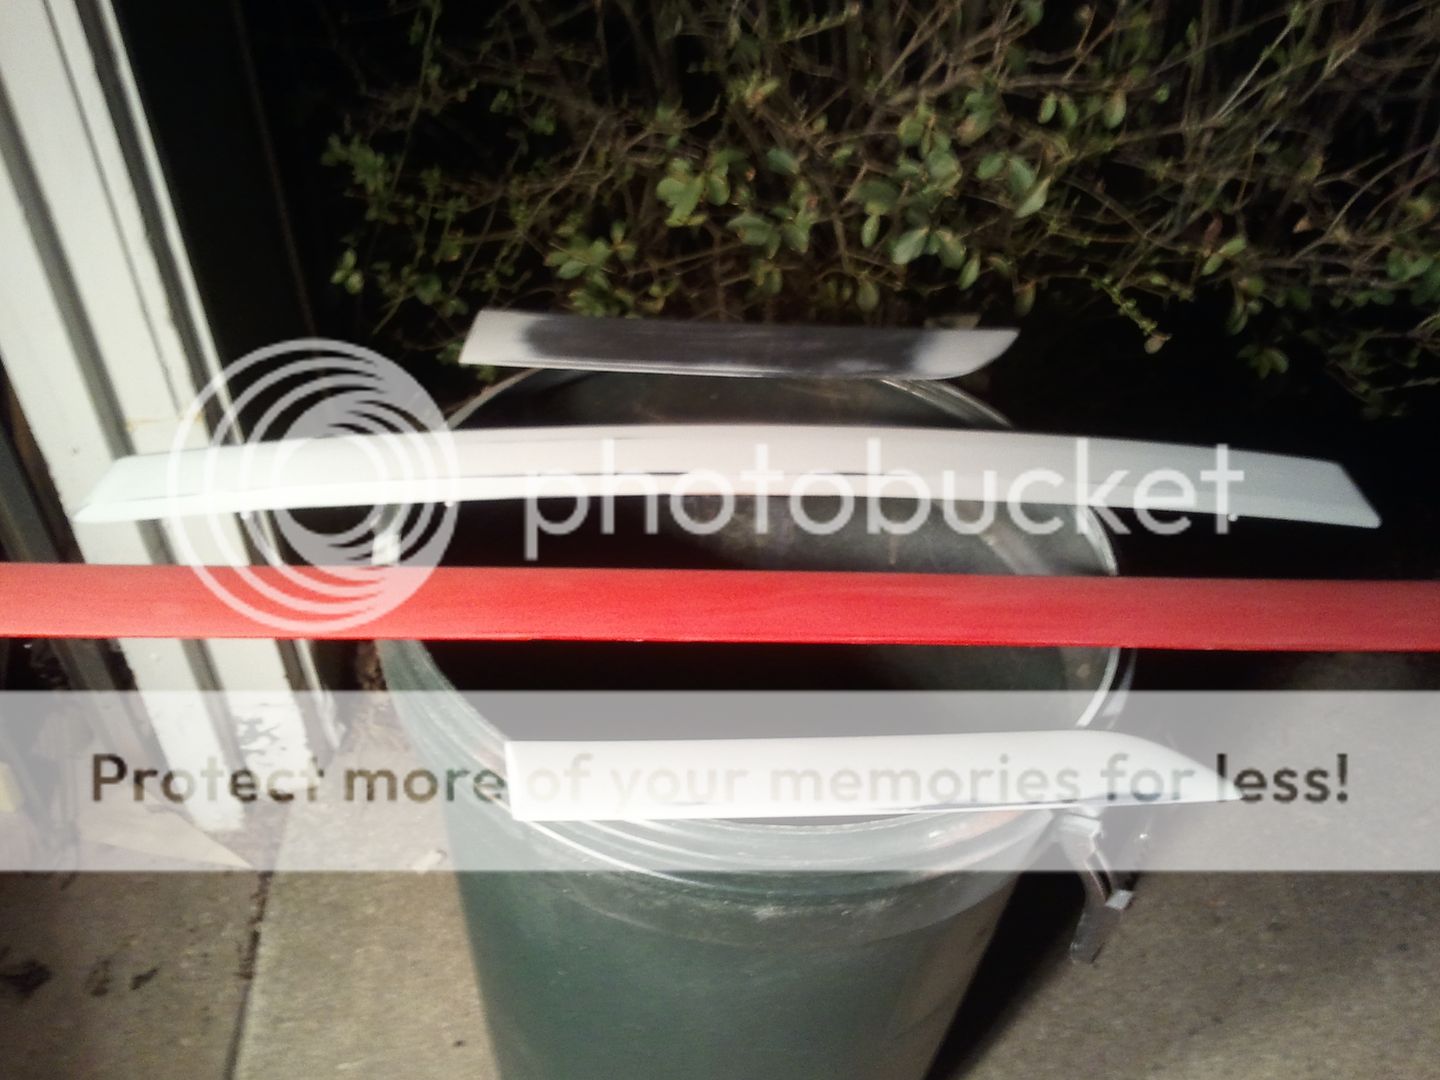
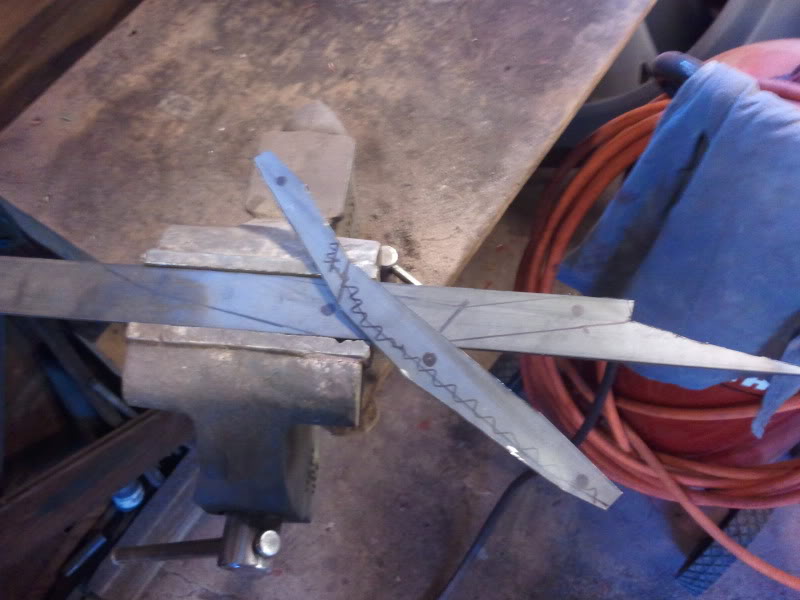
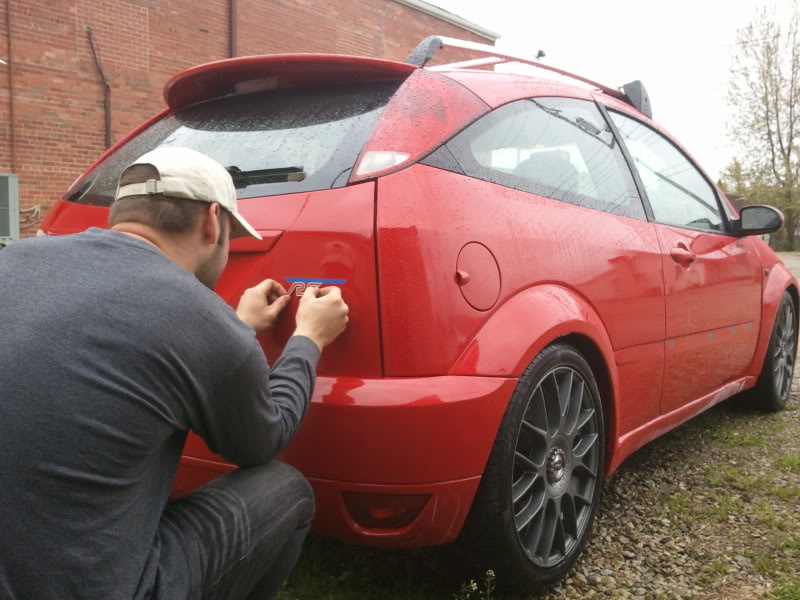
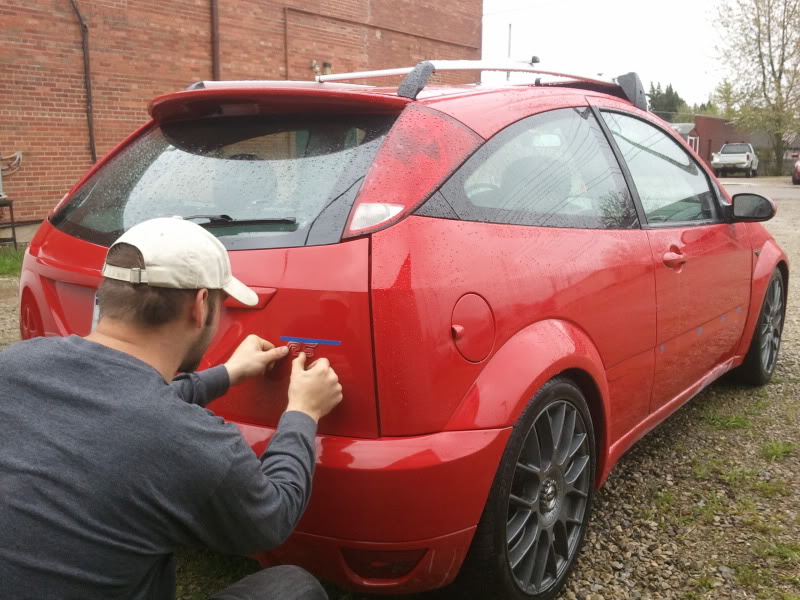
speaking of rub strips, that's what I worked on.
as you can see, the RS even has a unique curvature not equal to standard rub strips:
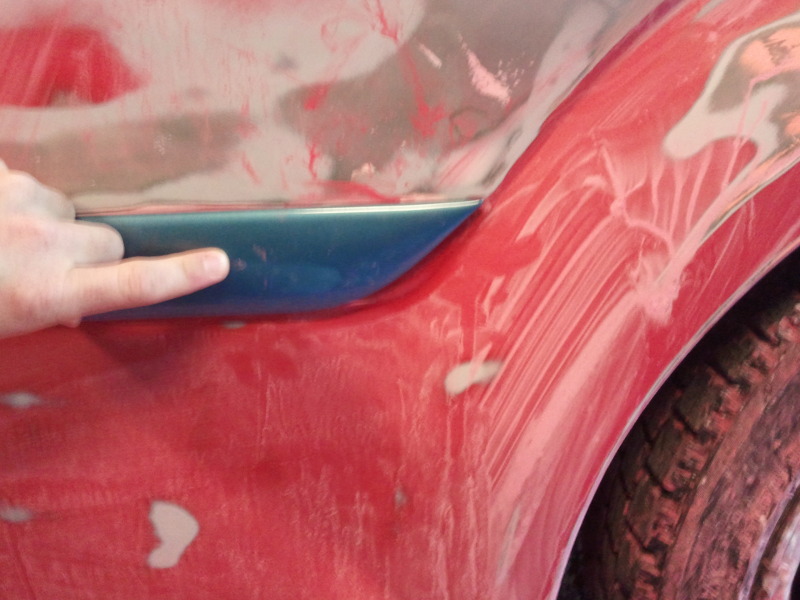
so I made a paper template and cut the rub strip to the right shape:
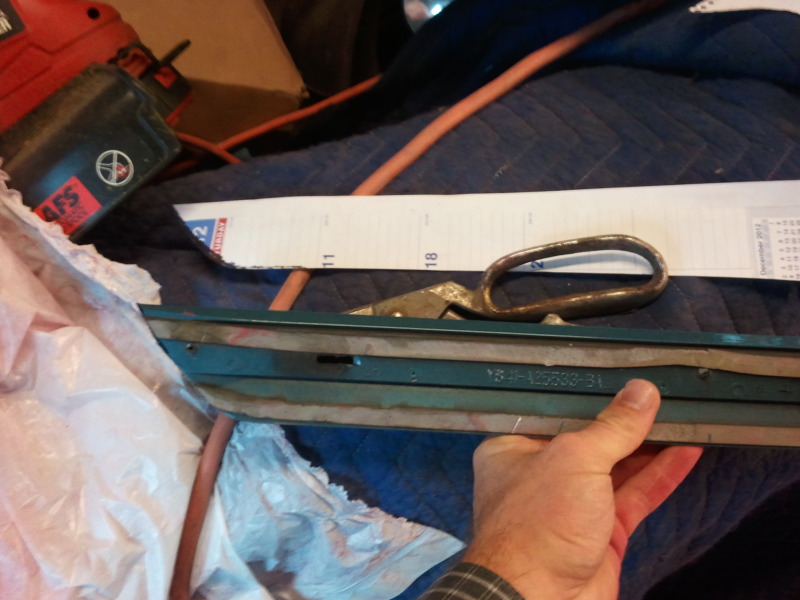
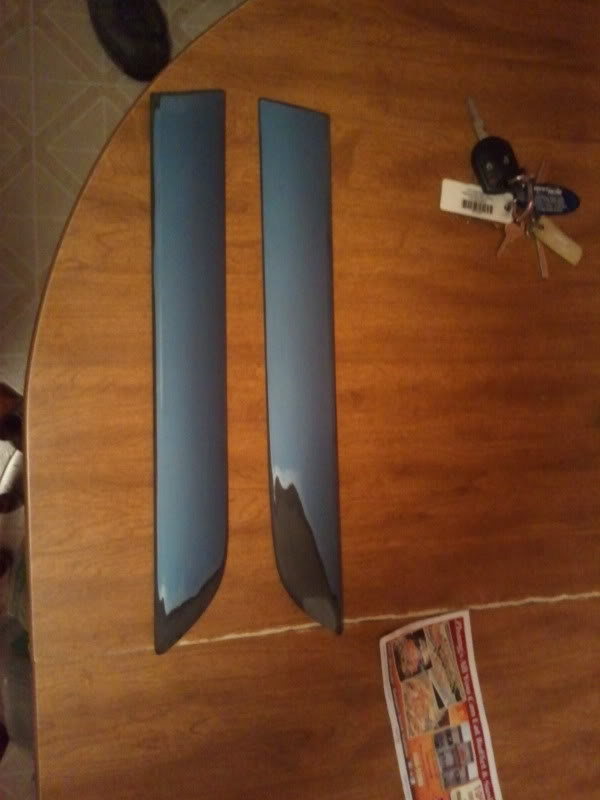
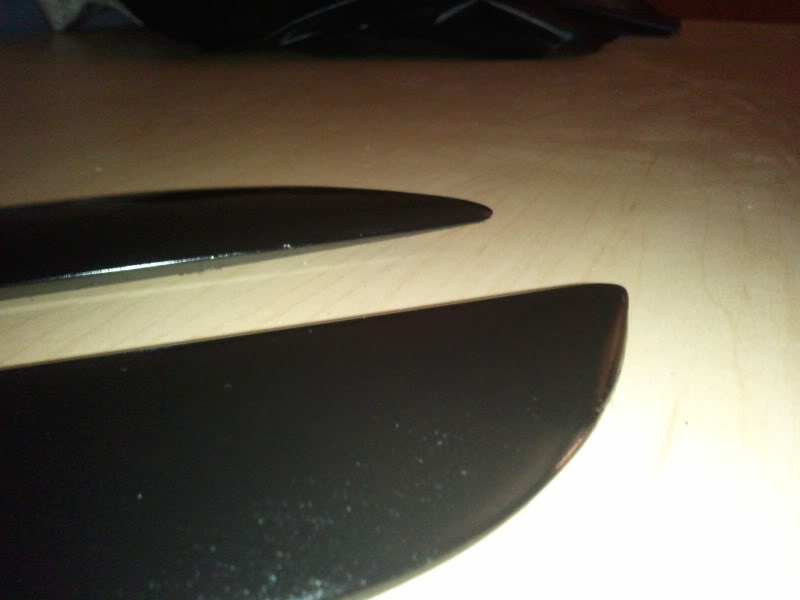
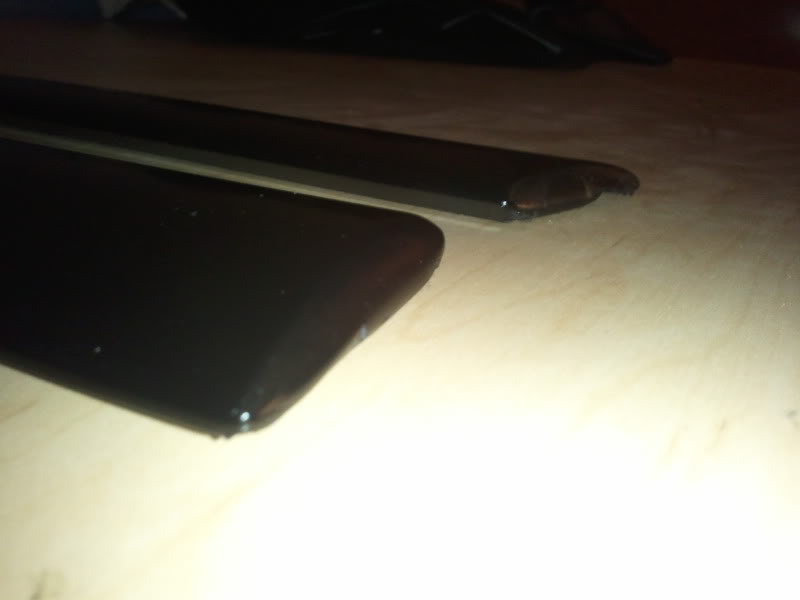
just like I expected, there's a dead-zone inside that I'll have to fill with two-part epoxy on either end now that I cut this thing
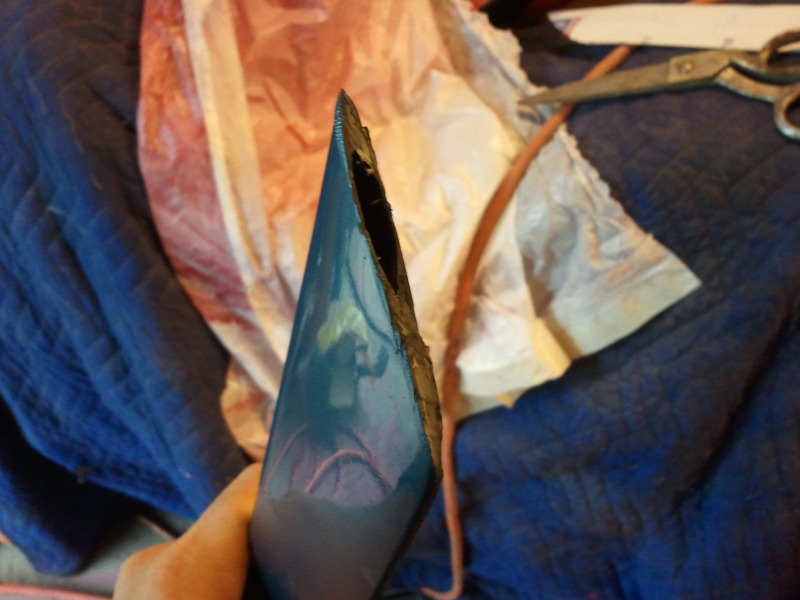

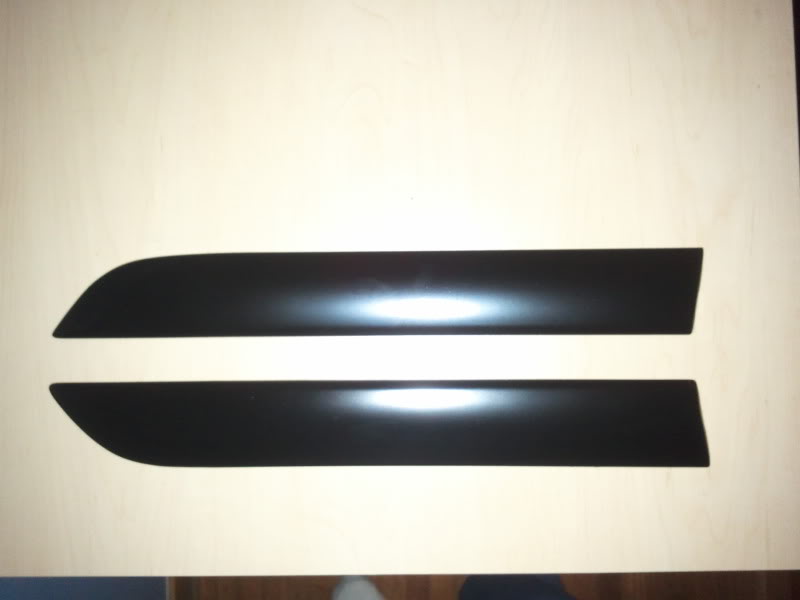
after some further trimming and sanding it into shape:

I can't seem to find my epoxy so I'll have to grab some more before I can finish the strips.
here's the only patch left to be "half done" (I.E. the driver side all sanded)
just that area from the door to the arch below the rub strip line.
speaking of rub strips, that's what I worked on.
as you can see, the RS even has a unique curvature not equal to standard rub strips:
so I made a paper template and cut the rub strip to the right shape:
just like I expected, there's a dead-zone inside that I'll have to fill with two-part epoxy on either end now that I cut this thing
after some further trimming and sanding it into shape:
I can't seem to find my epoxy so I'll have to grab some more before I can finish the strips.
15-10-2012, 01:12 AM
#83
Wahay!! I've lost my Virginity!!
Thread Starter
I had plans to re-paint today, but the car had other ideas apparently....
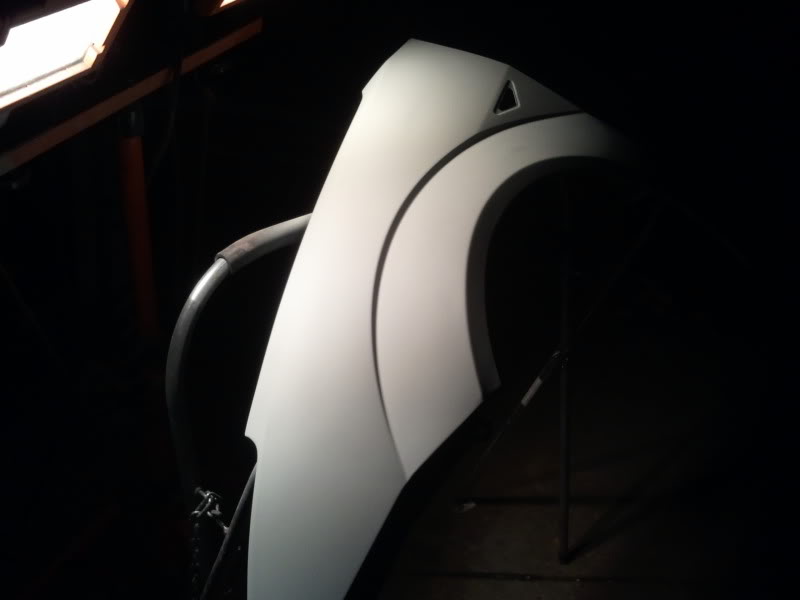
I spent almost 6hrs working on it and it's still not ready. by making sure ALL of the old paint was off, I sanded through the gelcoat in some spots and exposed small pinholes in the fiberglass flares.....and everytime I fill the ones I find, and go to sand the filler down, I expose more. So I'm continuously chasing these pinholes before I can paint. I've got the driver side I THINK ready. I sprayed it with SEM rattle-can filler primer instead of buying a whole quart.....and the passenger side MAY be currently in it's last skim-coat of filler I HOPE.
Looks like the next chance I have at proper weather is wednesday. It's probably best I didnt paint today, as it ended up being way too humid anyhow.
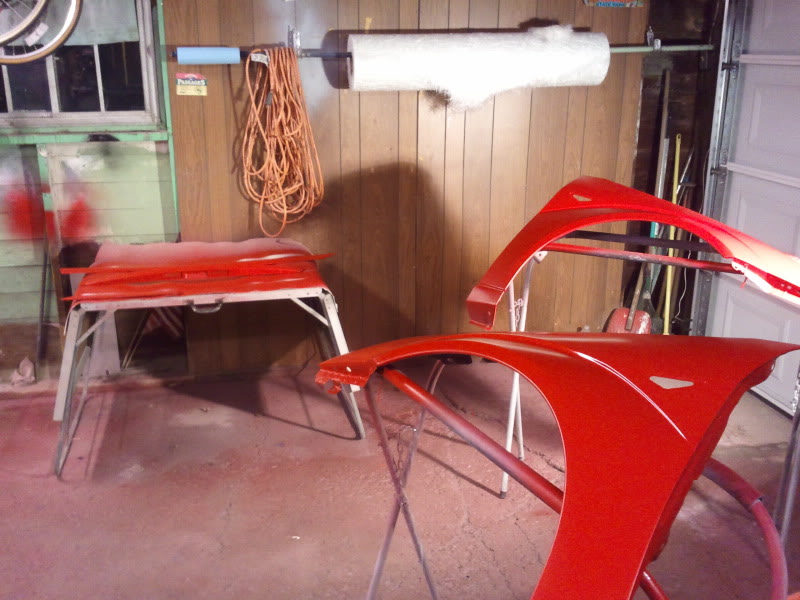
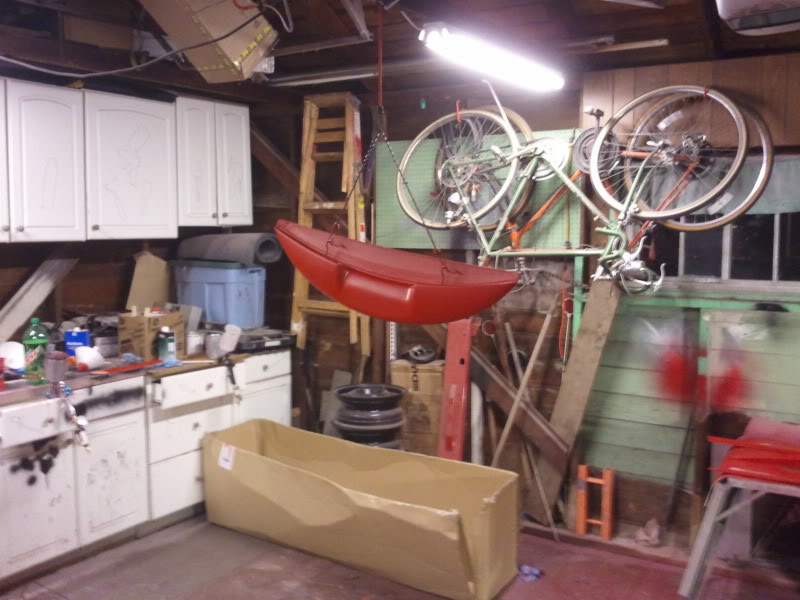
but, I snapped some pics anyways:
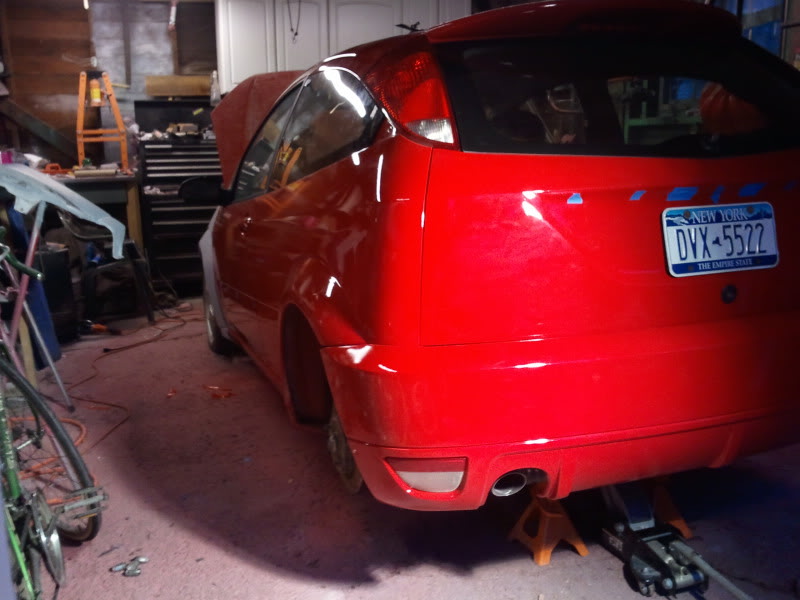
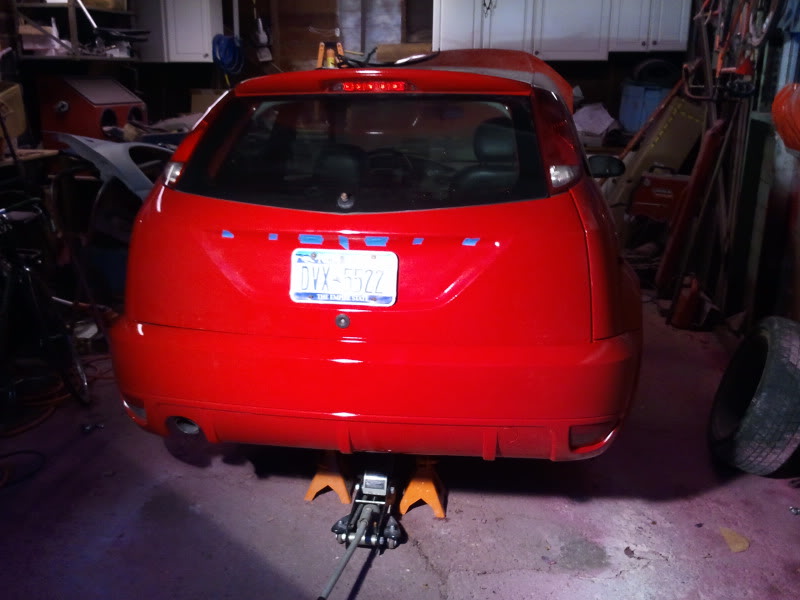
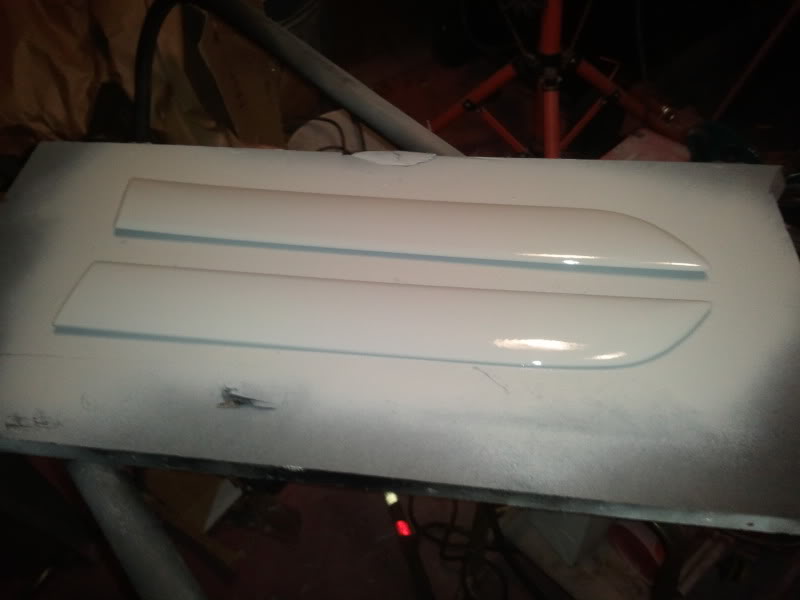
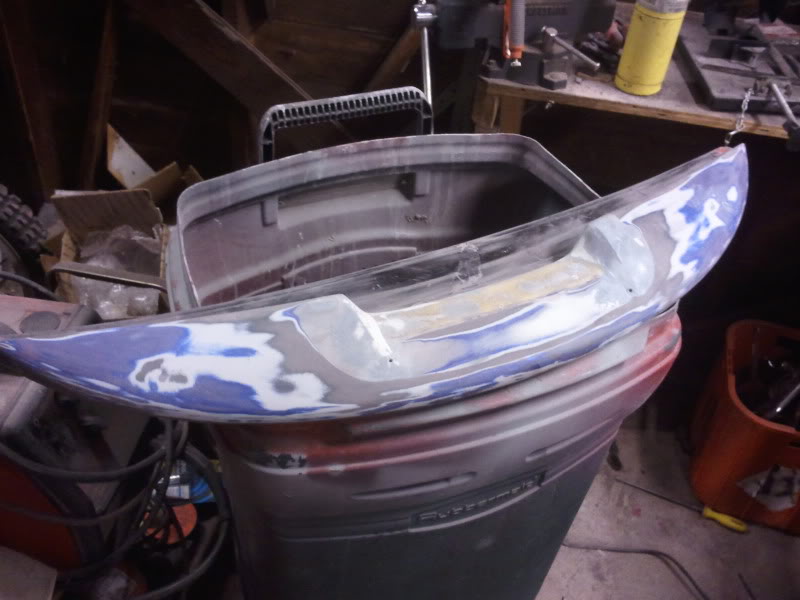
Here's how the hatch/boot came out (realized I didn't take many pics of it)
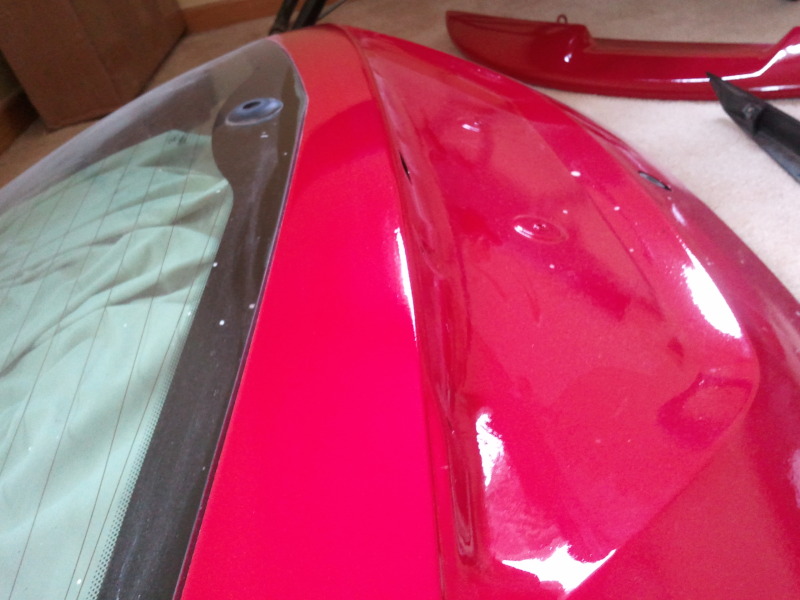
(I still have to finish shaving the emblem from the trim piece)
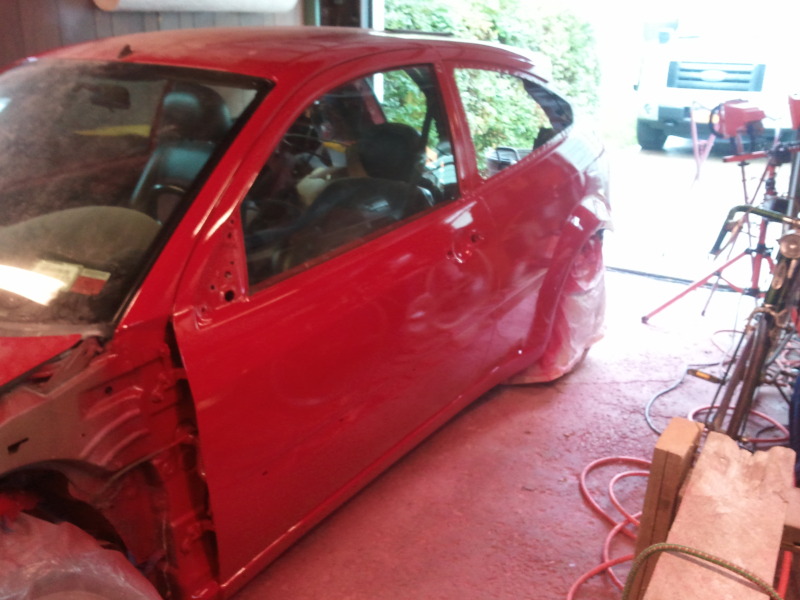
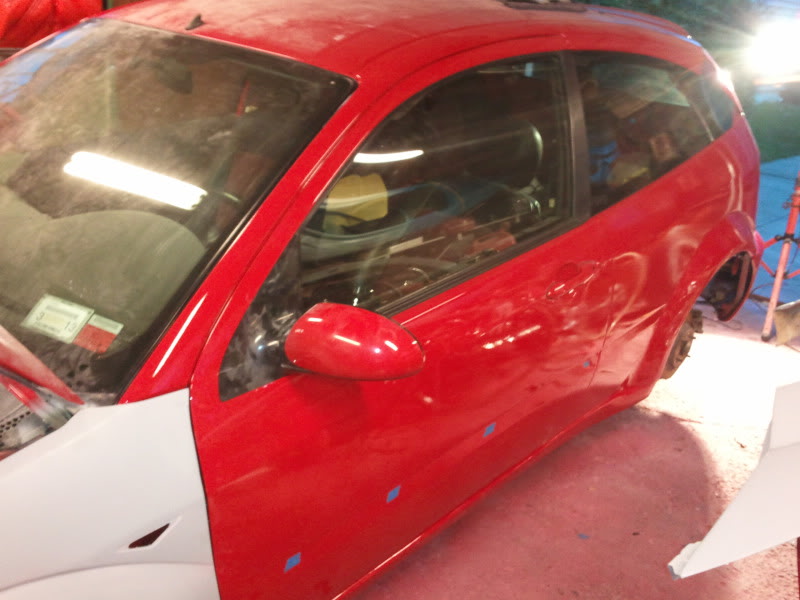
and the car after 21hrs of sanding, first all in 320 until the mistake-paint was gone, then again in 600 wet for prep.
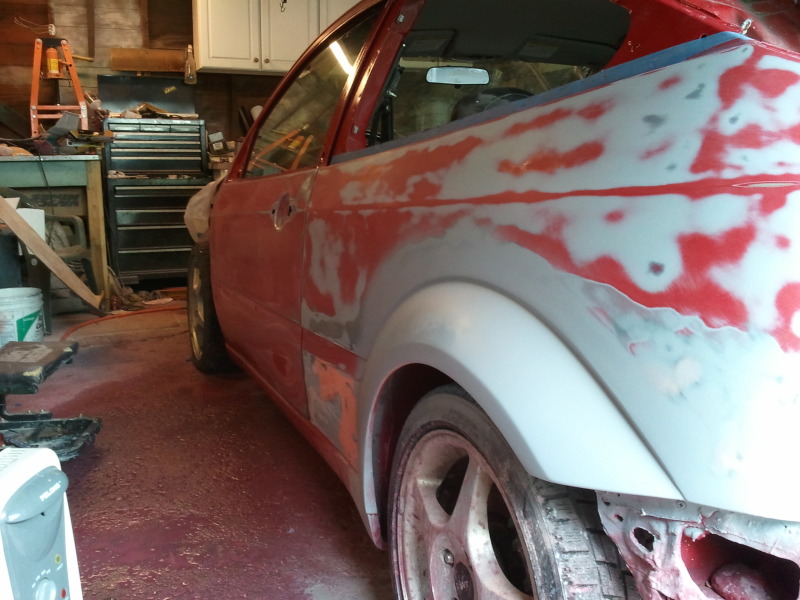

I did also re-mask off the rear quarter window openings and the windows on the doors....but no pics of that. Still have to mask the roof, finish repairs on the rear flairs, and THEN maybe I can paint wednesday. If this doesn't come out good, I'm seriously setting the car on fire and claiming the insurance and getting out of the focus game.
I spent almost 6hrs working on it and it's still not ready. by making sure ALL of the old paint was off, I sanded through the gelcoat in some spots and exposed small pinholes in the fiberglass flares.....and everytime I fill the ones I find, and go to sand the filler down, I expose more. So I'm continuously chasing these pinholes before I can paint. I've got the driver side I THINK ready. I sprayed it with SEM rattle-can filler primer instead of buying a whole quart.....and the passenger side MAY be currently in it's last skim-coat of filler I HOPE.
Looks like the next chance I have at proper weather is wednesday. It's probably best I didnt paint today, as it ended up being way too humid anyhow.
but, I snapped some pics anyways:
Here's how the hatch/boot came out (realized I didn't take many pics of it)
(I still have to finish shaving the emblem from the trim piece)
and the car after 21hrs of sanding, first all in 320 until the mistake-paint was gone, then again in 600 wet for prep.
I did also re-mask off the rear quarter window openings and the windows on the doors....but no pics of that. Still have to mask the roof, finish repairs on the rear flairs, and THEN maybe I can paint wednesday. If this doesn't come out good, I'm seriously setting the car on fire and claiming the insurance and getting out of the focus game.
 can't wait to see it painted!
18-10-2012, 03:06 AM
can't wait to see it painted!
18-10-2012, 03:06 AM
#85
Wahay!! I've lost my Virginity!!
Thread Starter
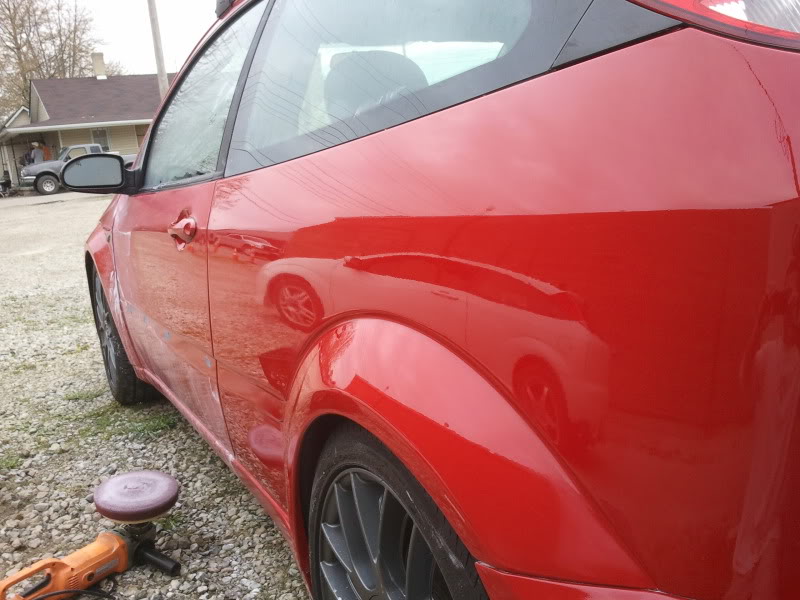
UGH...this car is totally fighting me every step of the way. Basically, everything I work on for myself comes out like shit while work I do for other people always goes smoothly.
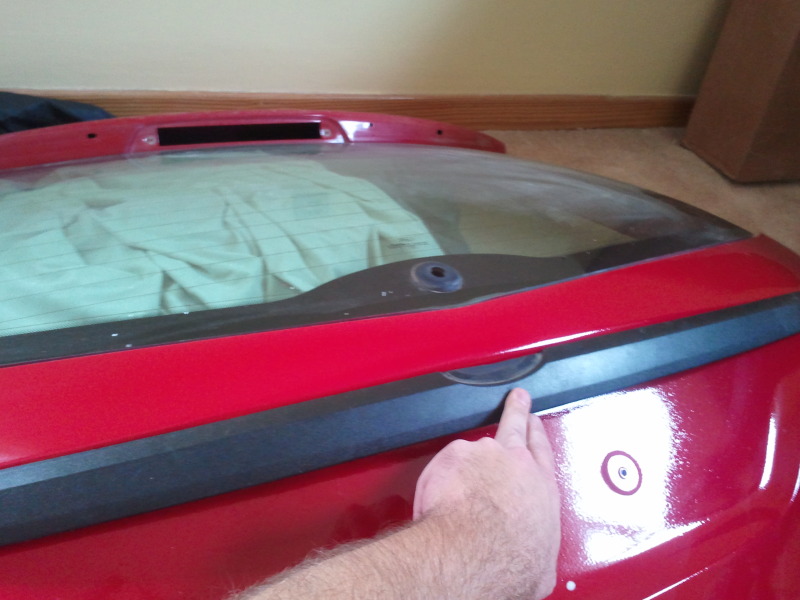
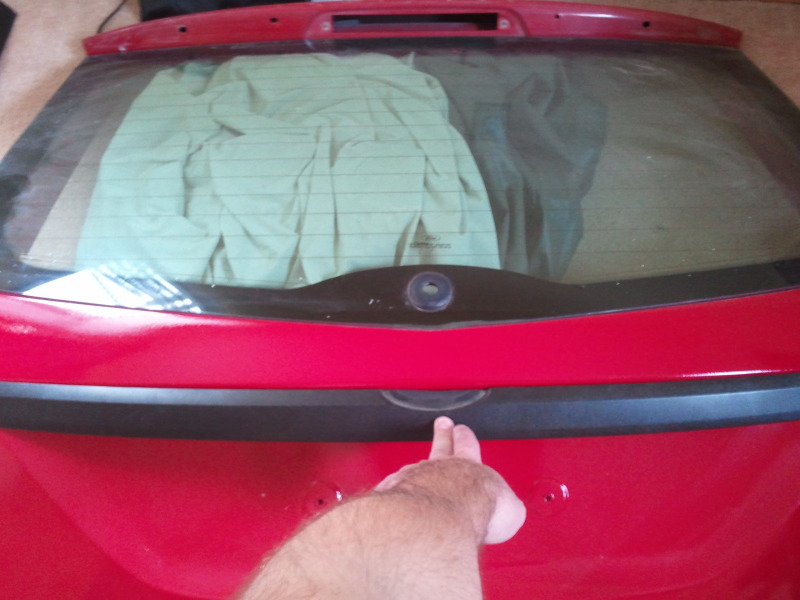
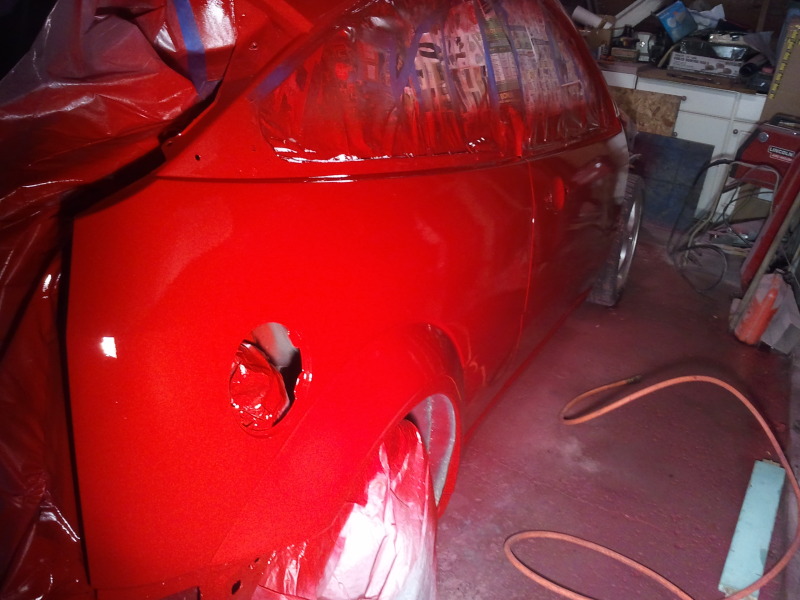
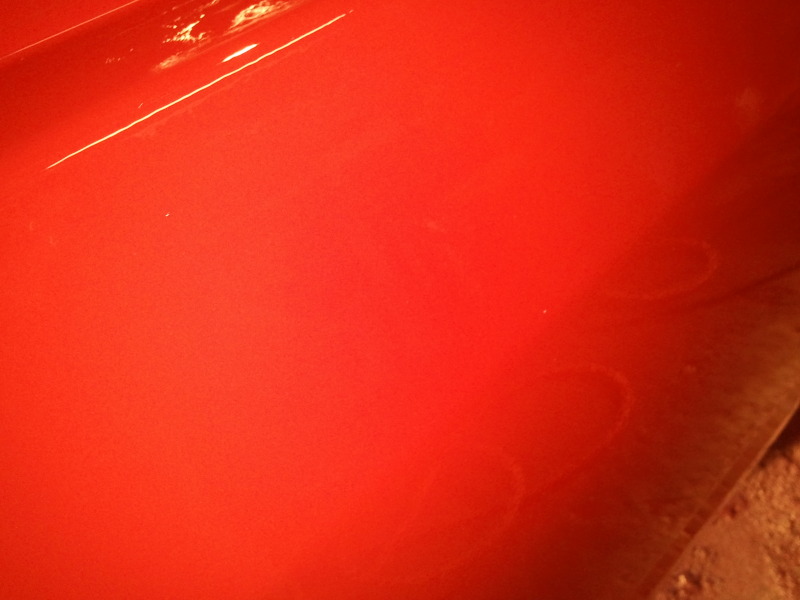
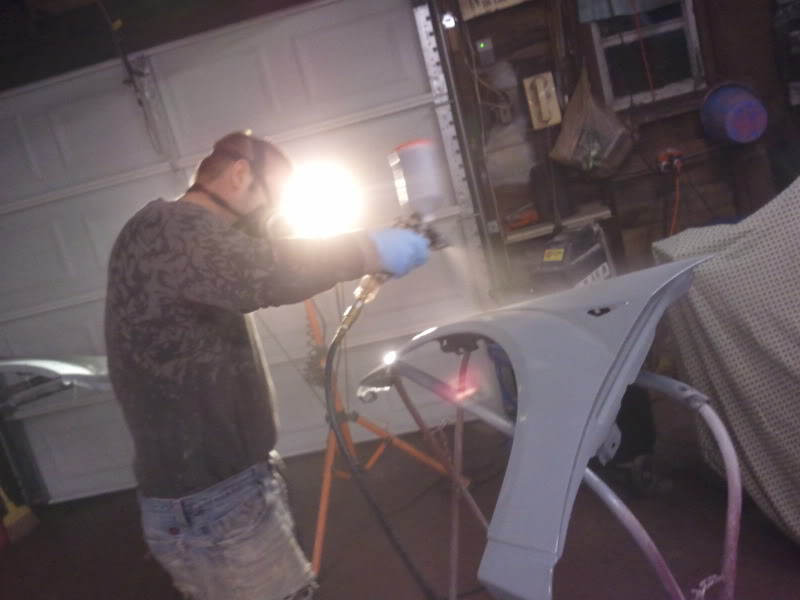
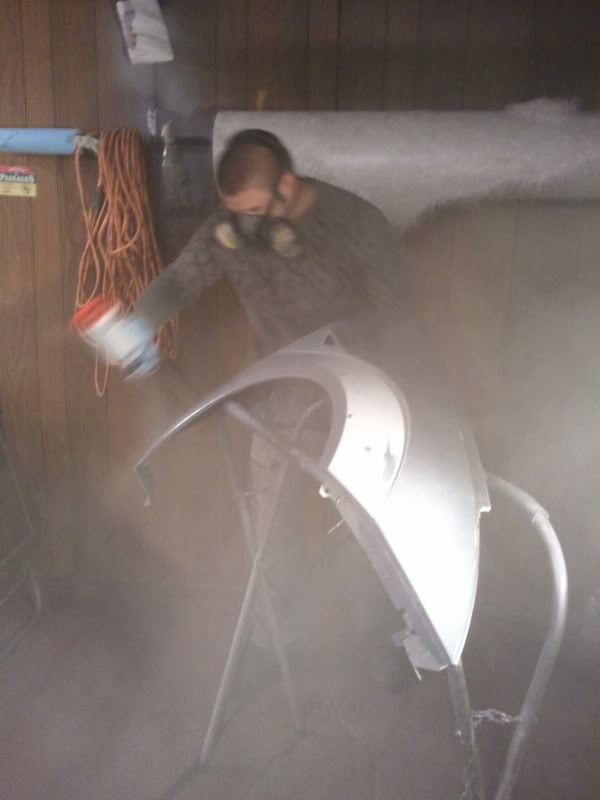
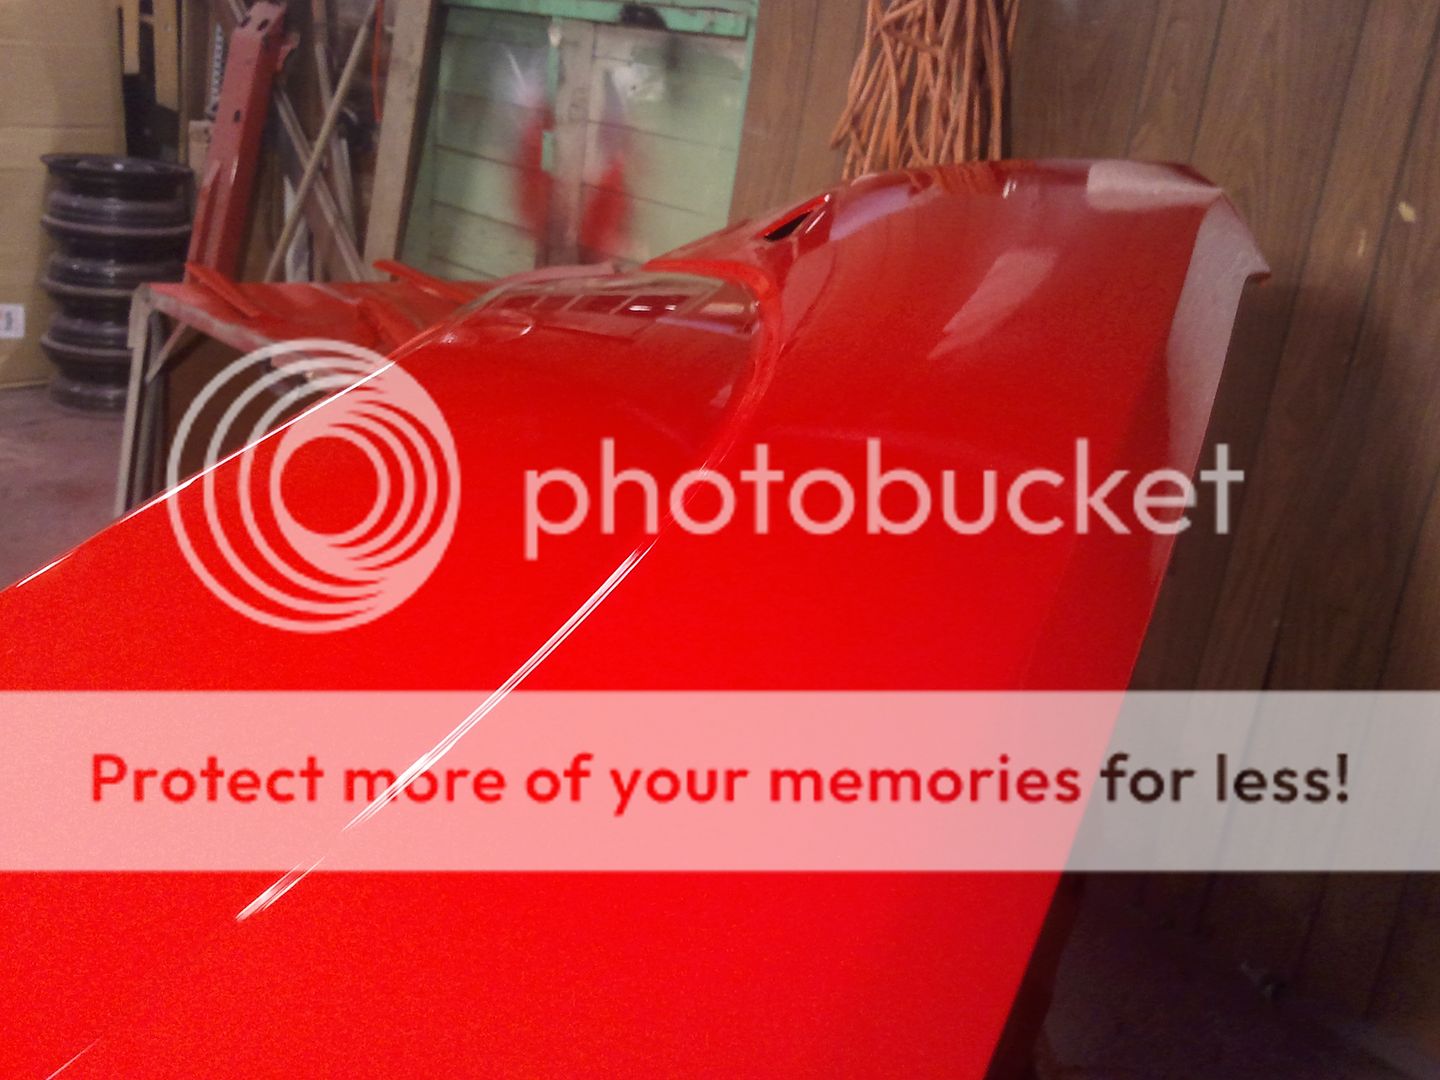
So, I have the whole car prepped....I go to start spraying....I get to the third coat of color after two light coats, and start to get the SAME GOD DAMNED LIFTING SHIT happening again. I don't know WHAT THE FUCK is going on, but it's god damned annoying. It was nowhere near as bad as the last time, so I just waited a little extra time between coats and did 3 more coats to kind of try to level it out and hide it since last time this happened wetsanding with 600 seemed to make the issue WORSE. Anyways, to sum things up.....I said fuck it and continued with the paintjob.
Here's the shit I'm talking about:

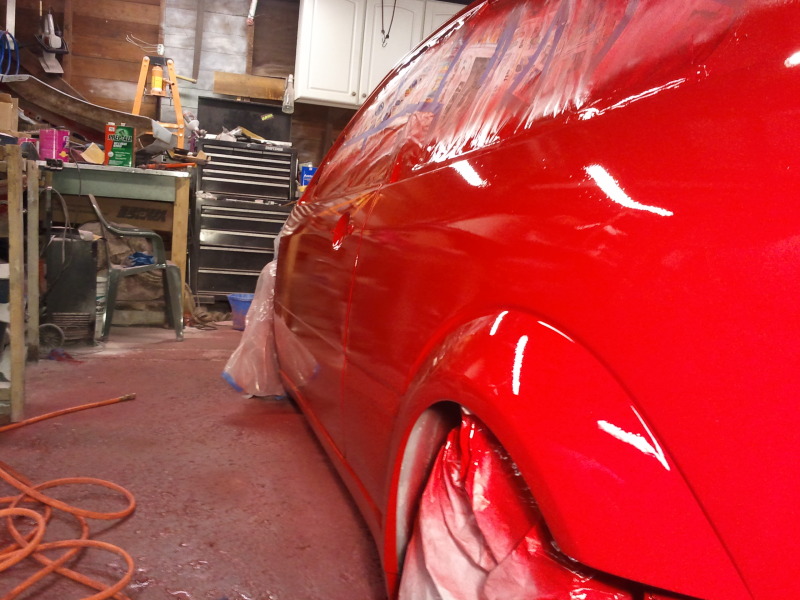
so I figured since it's not metallic it could possibly hide in the clear.....so I banged on a crap-ton of clear in three coats (two real heavy) and got it done.
I did however put a couple runs in it....so I'll have to let it harden up for a few weeks (might just wait until spring) to go ahead with wetsanding them out and buffing it.
probably going to leave the car sit for a week before attempting to put the glass back in and get into re-assembly.
So, I have the whole car prepped....I go to start spraying....I get to the third coat of color after two light coats, and start to get the SAME GOD DAMNED LIFTING SHIT happening again. I don't know WHAT THE FUCK is going on, but it's god damned annoying. It was nowhere near as bad as the last time, so I just waited a little extra time between coats and did 3 more coats to kind of try to level it out and hide it since last time this happened wetsanding with 600 seemed to make the issue WORSE. Anyways, to sum things up.....I said fuck it and continued with the paintjob.
Here's the shit I'm talking about:
so I figured since it's not metallic it could possibly hide in the clear.....so I banged on a crap-ton of clear in three coats (two real heavy) and got it done.
I did however put a couple runs in it....so I'll have to let it harden up for a few weeks (might just wait until spring) to go ahead with wetsanding them out and buffing it.
probably going to leave the car sit for a week before attempting to put the glass back in and get into re-assembly.
 28-10-2012, 04:32 PM
#87
Wahay!! I've lost my Virginity!!
Thread Starter
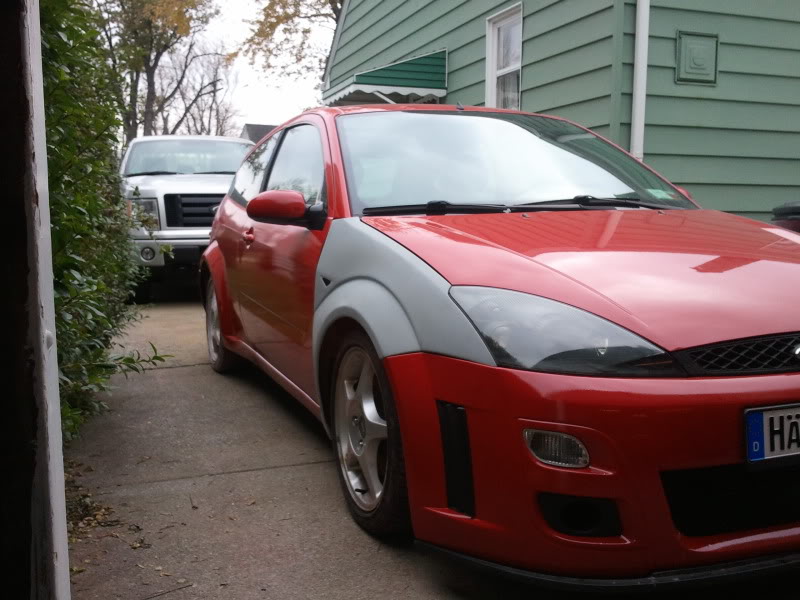
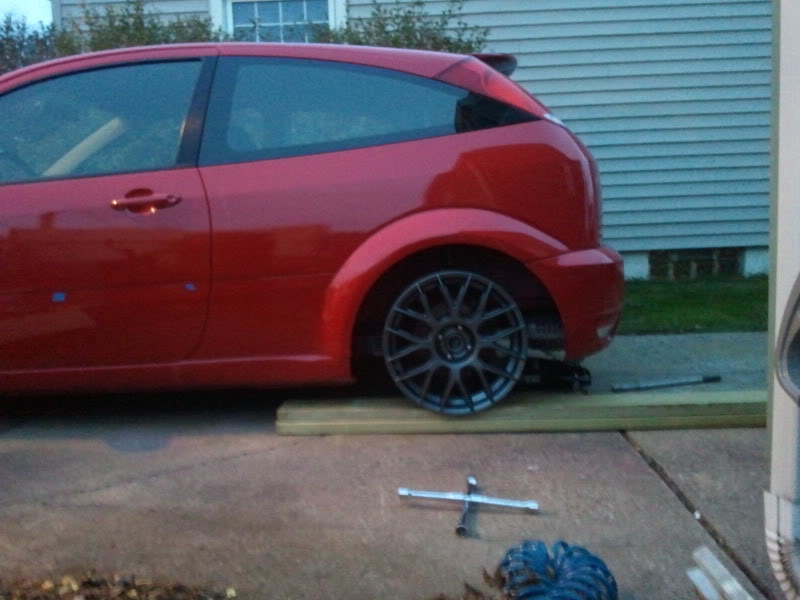
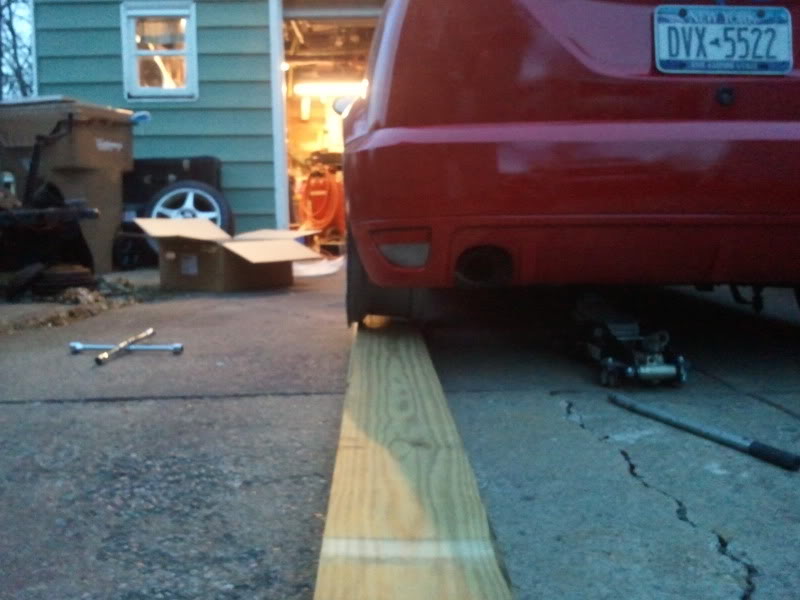
so yesterday my dad came over and helped me put the rear glass in, and then I started re-assembling.....
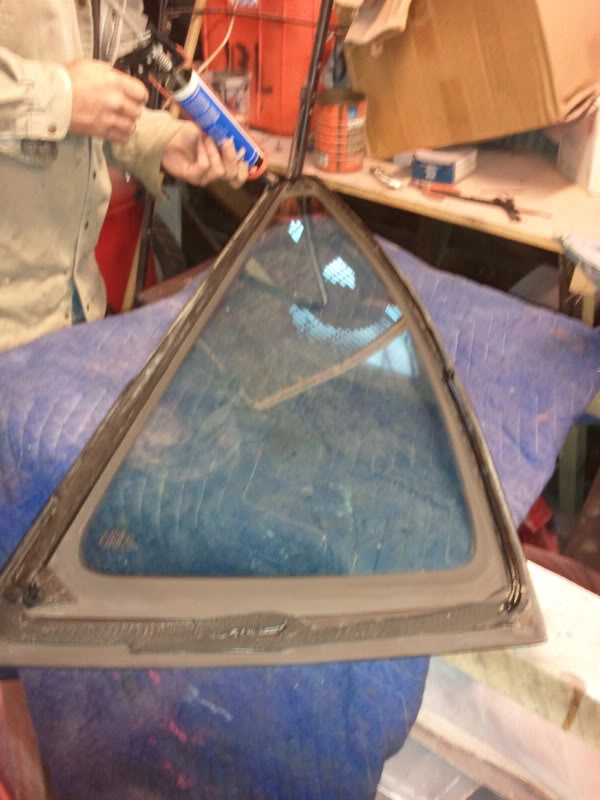
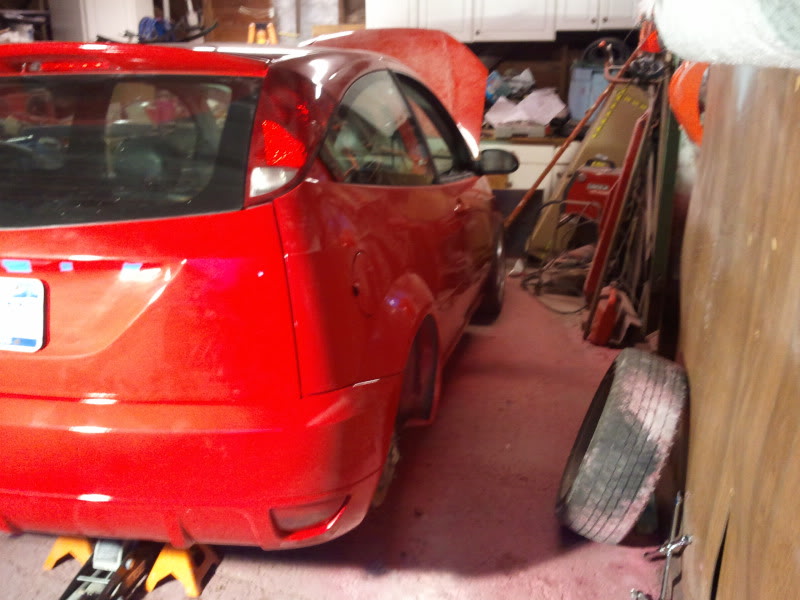
still fighting with the passenger side fender though so front clip isn't on yet
still fighting with the passenger side fender though so front clip isn't on yet
08-11-2012, 01:47 PM
#88
Wahay!! I've lost my Virginity!!
Thread Starter
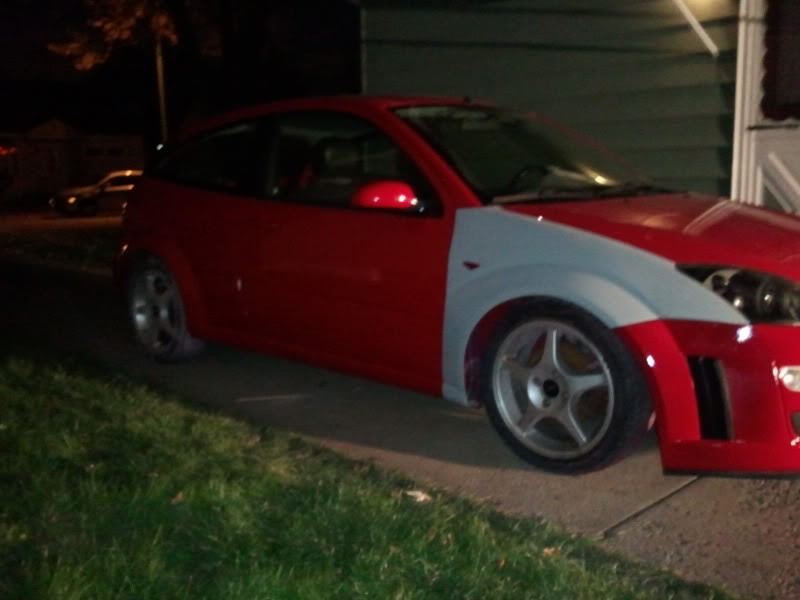
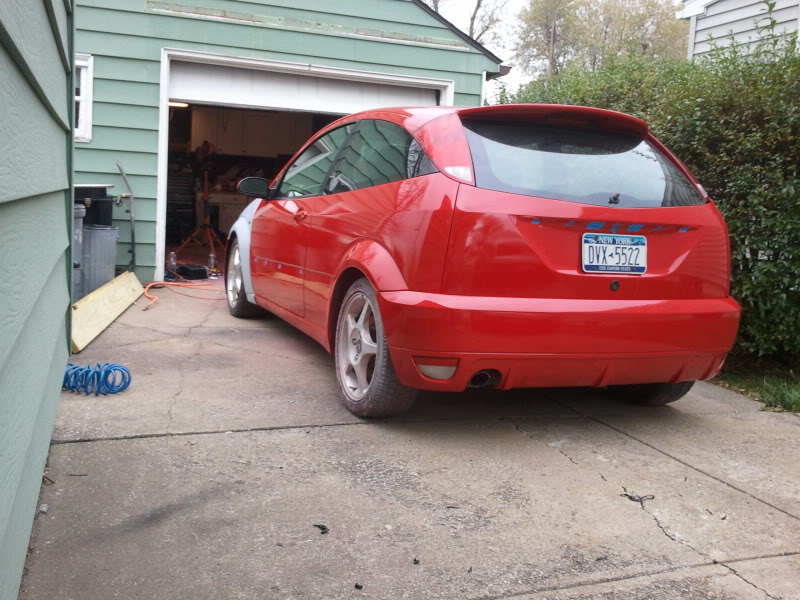
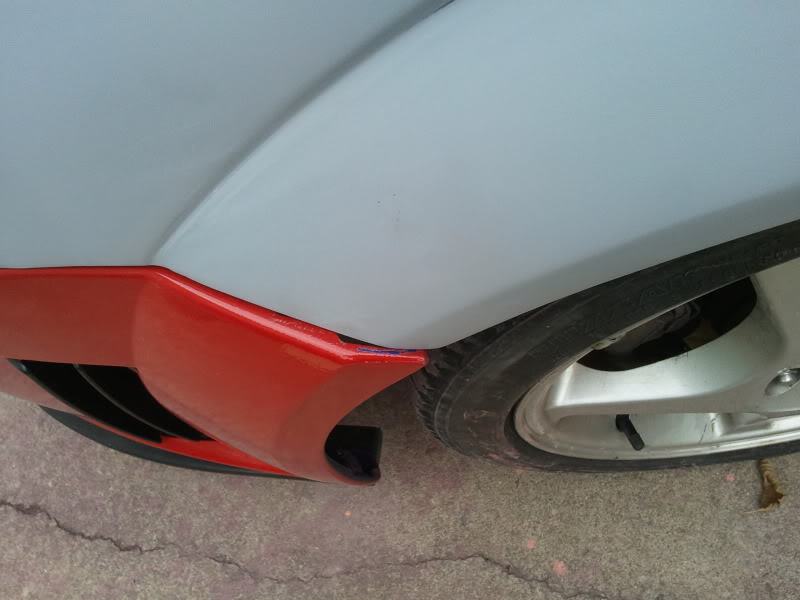
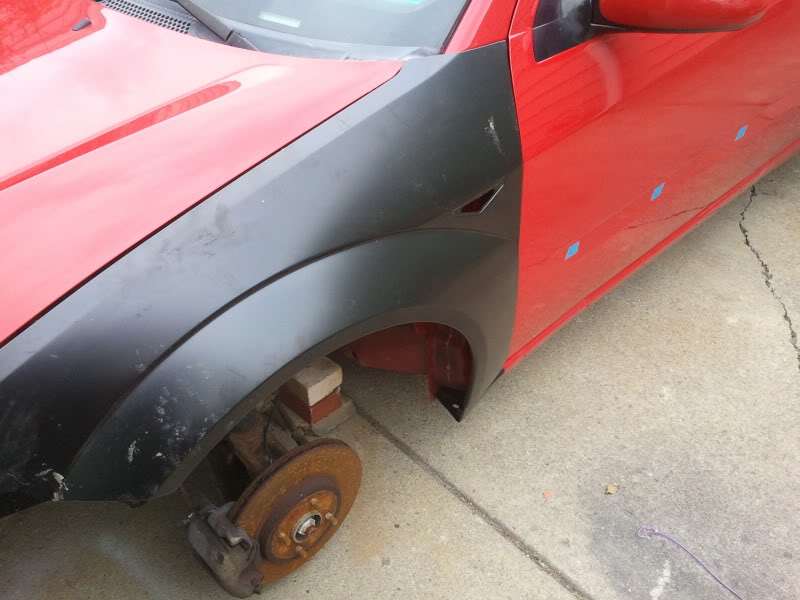
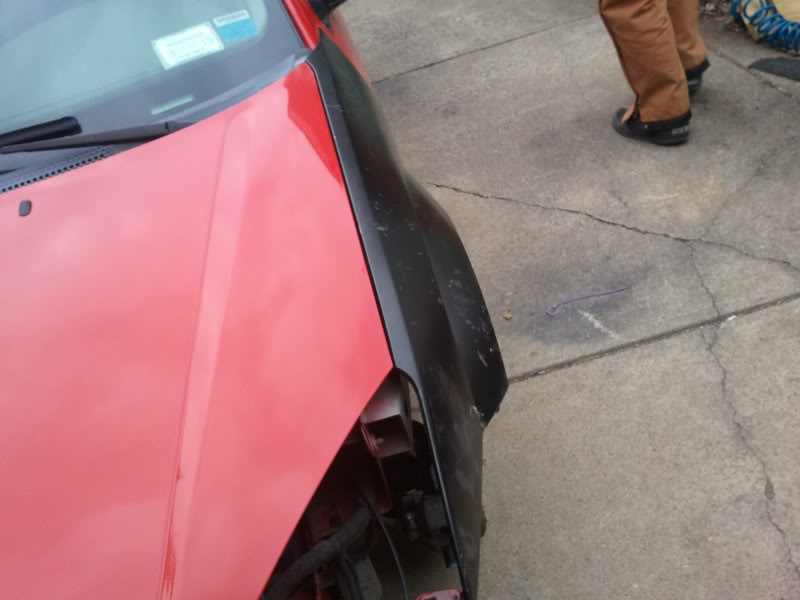
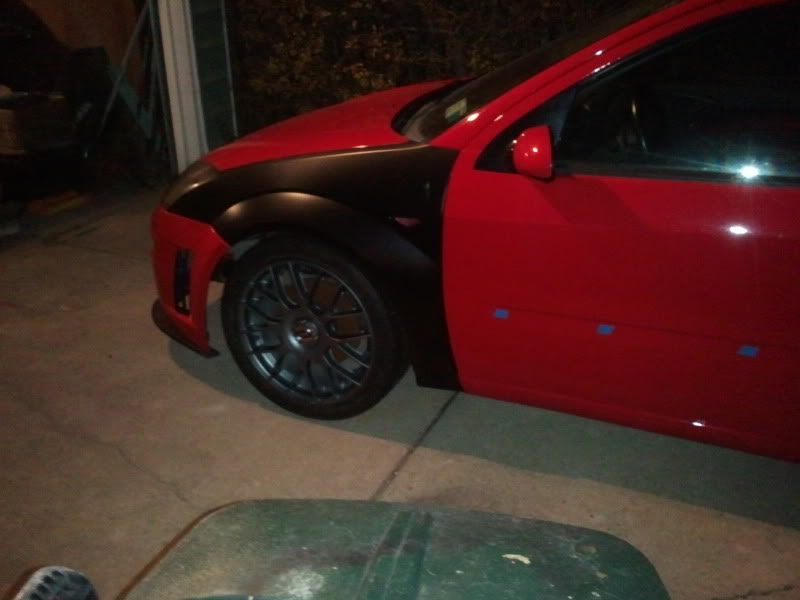
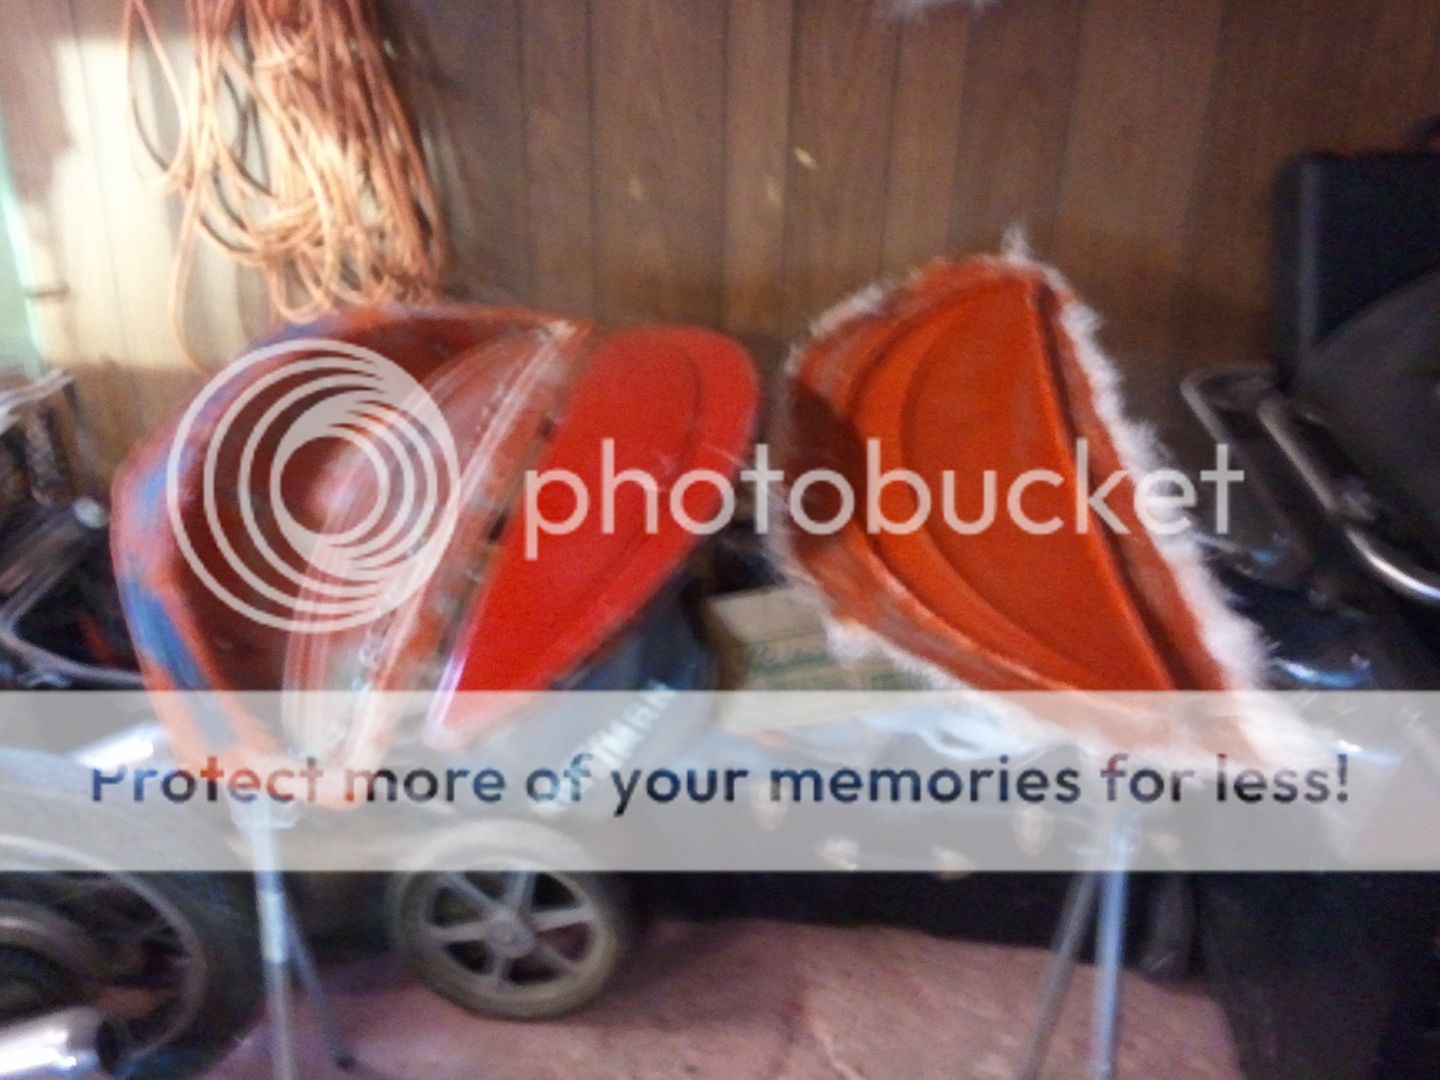
Well, I put it together.....but not without a hitch.....basically, these fenders suck. They're better than the ones I produced from the molds, but still not good enough..... The flare portion of the passenger side is good, but along the door fits terrible...and I chipped the new paint on the leading edge of the door, gonna have to remove door and repaint in spring :-/
the driver side fits the hood and door great, but the flare is off by a decent margin, I'm not happy with these results, so I'm pretty damn lucky I happened upon a set of OEM metal RS fenders for sale. Paid for them today so that I can make proper molds and coincidentally make proper fiberglass fenders come spring.....
two quick pics (sorry about the low quality)
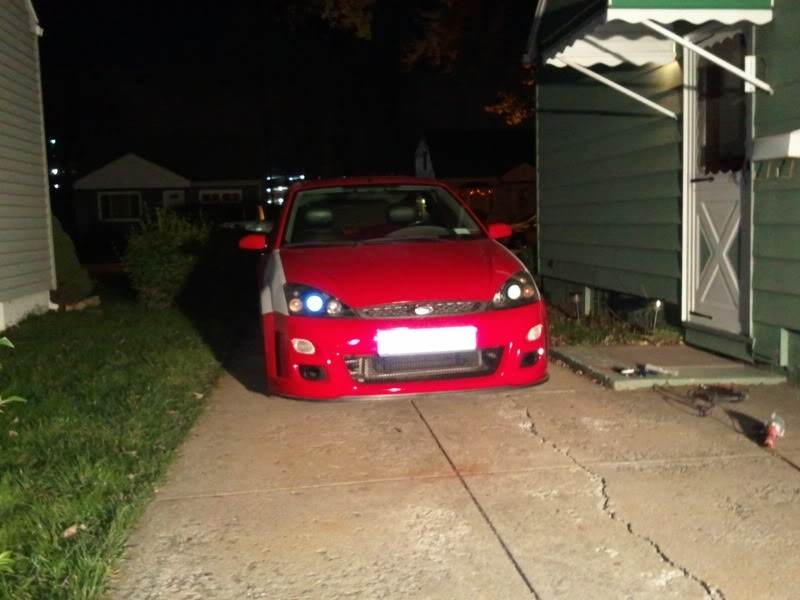
new problem though....I moved the car around under it's own power twice, but now it seems to have developed a short....only thing I touched wiring-wise is the tail lights so I'm gonna have to pull those and see whats going on because now the car won't turn over, just trips out from the short.
the driver side fits the hood and door great, but the flare is off by a decent margin, I'm not happy with these results, so I'm pretty damn lucky I happened upon a set of OEM metal RS fenders for sale. Paid for them today so that I can make proper molds and coincidentally make proper fiberglass fenders come spring.....
two quick pics (sorry about the low quality)
new problem though....I moved the car around under it's own power twice, but now it seems to have developed a short....only thing I touched wiring-wise is the tail lights so I'm gonna have to pull those and see whats going on because now the car won't turn over, just trips out from the short.
08-11-2012, 05:09 PM
#90
Part of the Furniture

yeh cant help but think youv not only wasted alot of time but also money and effort , why dont you just buy some fiberglass wings or even just use the real ones you now have?
http://www.phoenix-autosport.co.uk/p...ocus%20mk1.htm
http://www.phoenix-autosport.co.uk/p...ocus%20mk1.htm
 08-11-2012, 05:31 PM
#92
Wahay!! I've lost my Virginity!!
Thread Starter
yeh cant help but think youv not only wasted alot of time but also money and effort , why dont you just buy some fiberglass wings or even just use the real ones you now have?
http://www.phoenix-autosport.co.uk/p...ocus%20mk1.htm
http://www.phoenix-autosport.co.uk/p...ocus%20mk1.htm
I have MANY reasons. As stated early on, I bought these molds off of a member from this very site (birel)..... I was unaware that the molds were contructed from BENT/DAMAGED RS wings.....
My goal was, and always has been, to produce fiberglass RS pieces here in the united states....no one does yet, and I feel the market is pretty hot for these parts right now.
I'm going to make sure the OEM metal wings fit properly when I recieve them, and then make new molds off them to produce replicas (as my original intentions were)
Once I'm confident that I've produced suitable fiberglass wings, then I will be able to offer/sell FULL KITS for RS conversion all in fiberglass.
If my goal was only to build my own RS, then I'd absolutely just paint the metal OEM wings and keep them.....but from a selling standpoint, if I'm not going to use my own product on my personal vehicle, how can I expect someone else to? I meant for my own car to serve as a demonstration of the use of the parts that I plan to make and sell to others, as well as bits and pieces of this built thread to become a "how-to" on installing these parts (once I have the bugs worked out of course)
09-11-2012, 06:40 PM
#93
Wahay!! I've lost my Virginity!!
Thread Starter
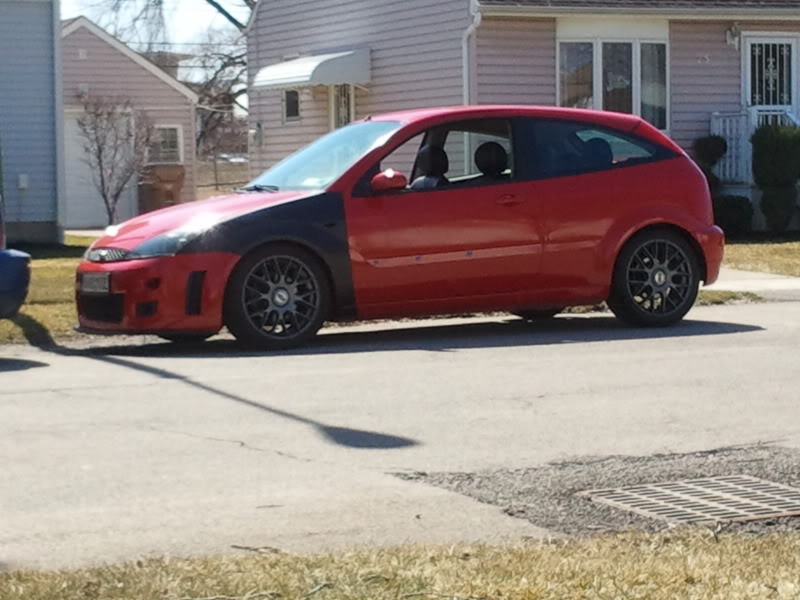
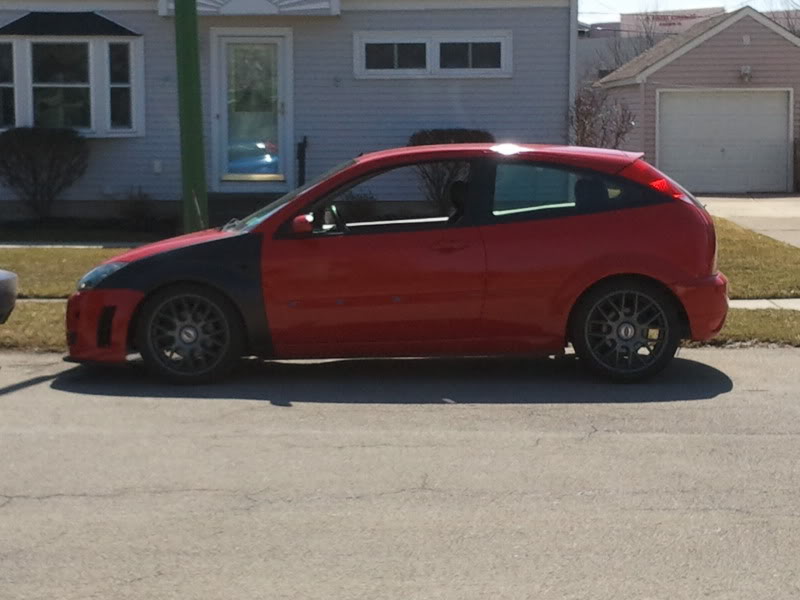
I just got it running on my lunch break and drove it back to work.
turned out to be dirty battery connections and corrosion at the grounding wires @ the framerail
Pic-Whore time.......
I'll start with the good and then follow up with the issues.
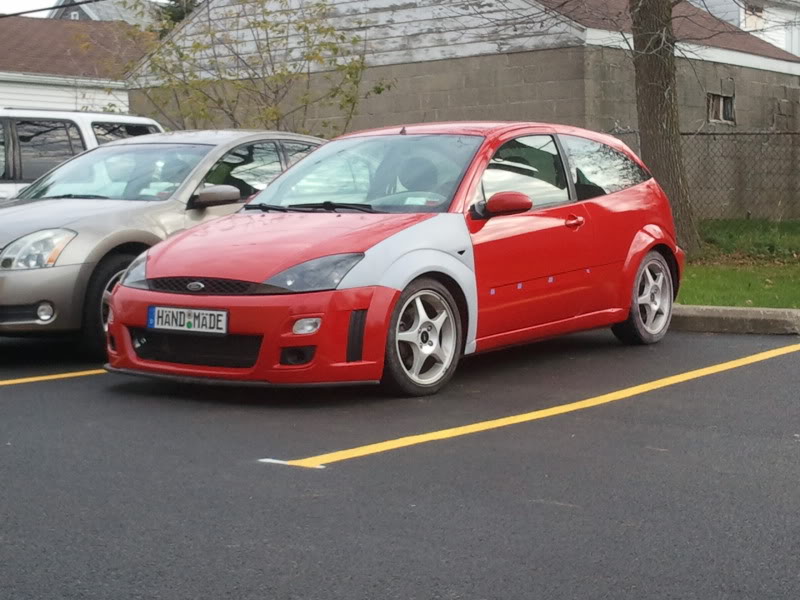
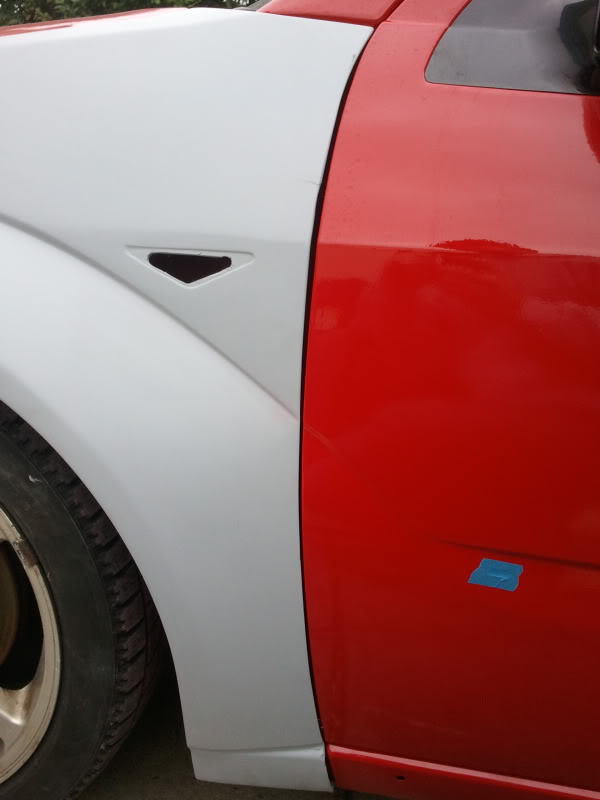
OK, now....the fender fitment issues
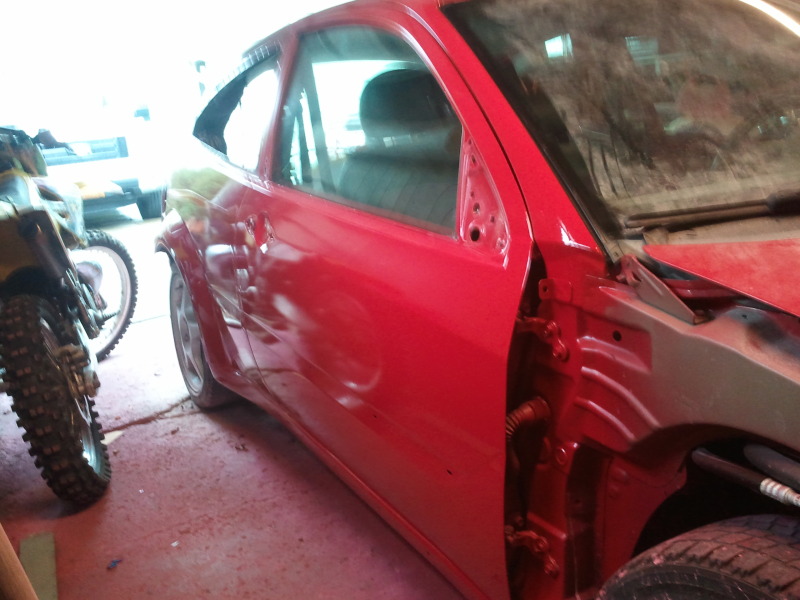
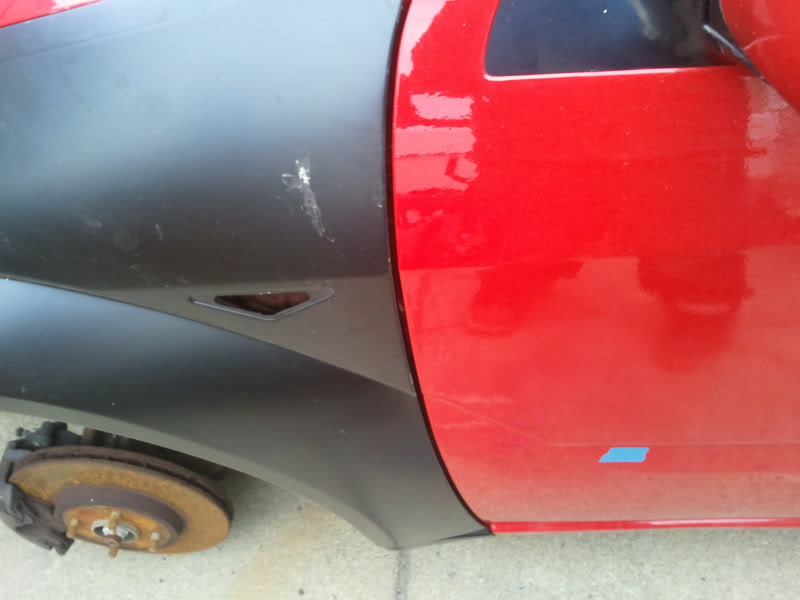
passenger side:
Down here, its too tight of a clearance @ the middle area of the door, but then opens up toward the rocker panel
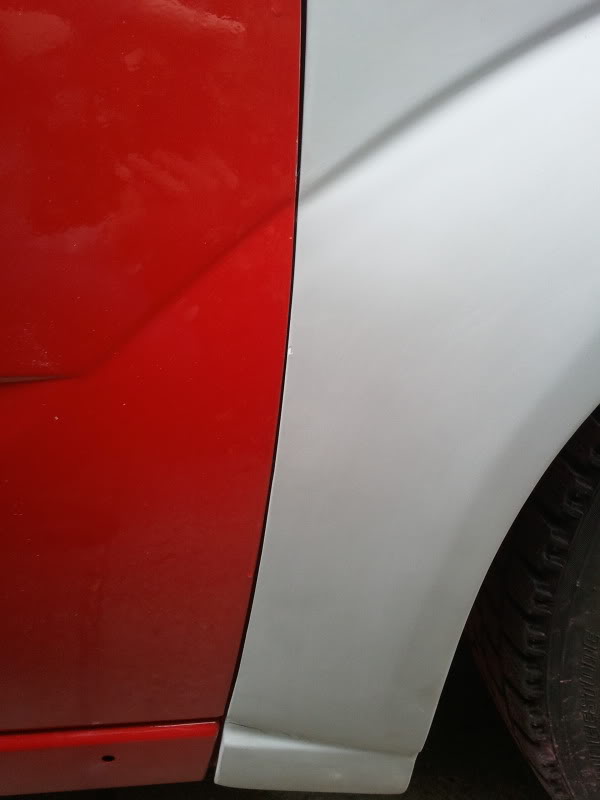
Then at the top it opens up again, doesnt sit too nice against the A-pillar, and bows inward instead of outward where the bodyline changes
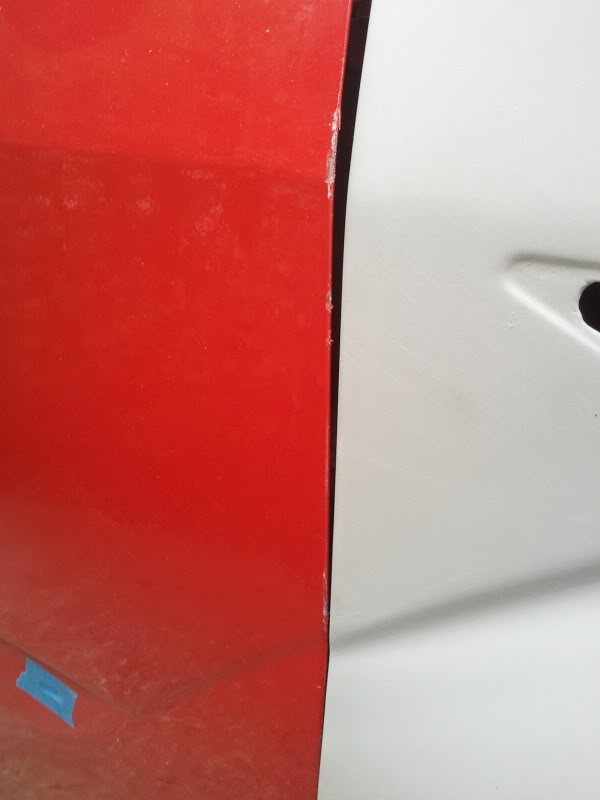

then it's a pretty decent fit at the arch....the leading edge/nose could use some tweaking, but I give up on these.....I bought REAL RS fenders to mold instead.
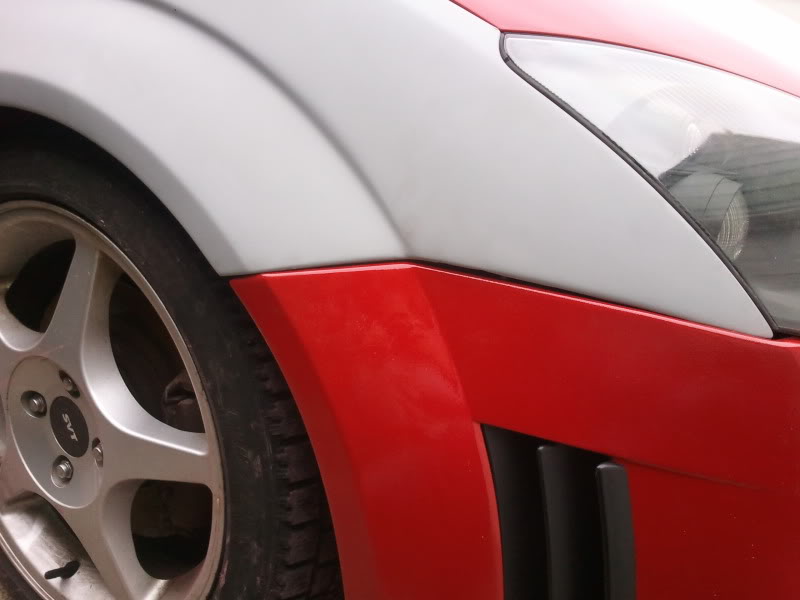
Driver side: Fits decent along the door, a-pillar, and hood....
then fits like doo-doo along the arch area.
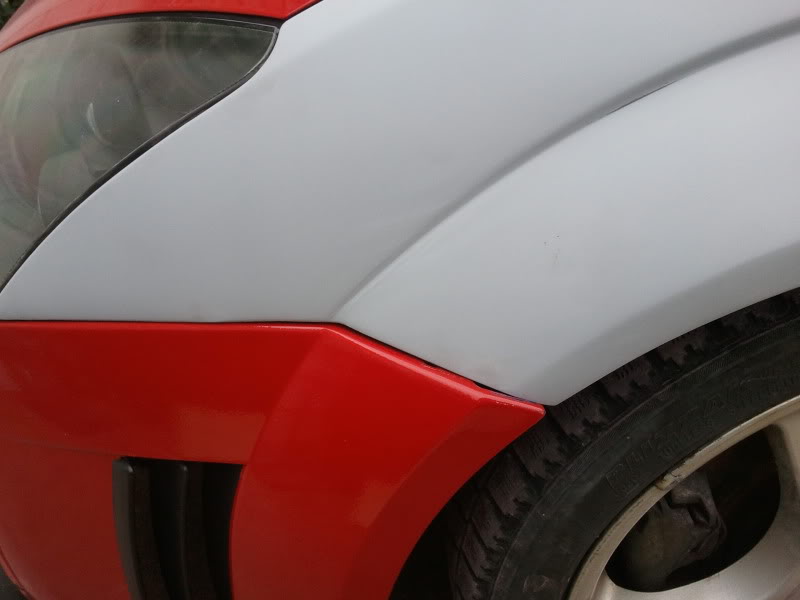
they fit bad in the opposite places LOL. whatever, I'm driving it!
turned out to be dirty battery connections and corrosion at the grounding wires @ the framerail
Pic-Whore time.......
I'll start with the good and then follow up with the issues.
OK, now....the fender fitment issues
passenger side:
Down here, its too tight of a clearance @ the middle area of the door, but then opens up toward the rocker panel
Then at the top it opens up again, doesnt sit too nice against the A-pillar, and bows inward instead of outward where the bodyline changes
then it's a pretty decent fit at the arch....the leading edge/nose could use some tweaking, but I give up on these.....I bought REAL RS fenders to mold instead.
Driver side: Fits decent along the door, a-pillar, and hood....
then fits like doo-doo along the arch area.
they fit bad in the opposite places LOL. whatever, I'm driving it!
10-11-2012, 03:12 PM
#94
ɔɐᴘʈᴀᴉи ᴀᵴʙο

Lots of hard work has gone into this and it will certainly pay off when finished! Great job so far and it's good that you haven't lost enthusiasm and given up.
Keep up the good work
Keep up the good work
 30-04-2013, 04:39 PM
#96
Wahay!! I've lost my Virginity!!
Thread Starter
So, I realized I have been forgetting to update on this site.....I'll bring all of you up to speed.
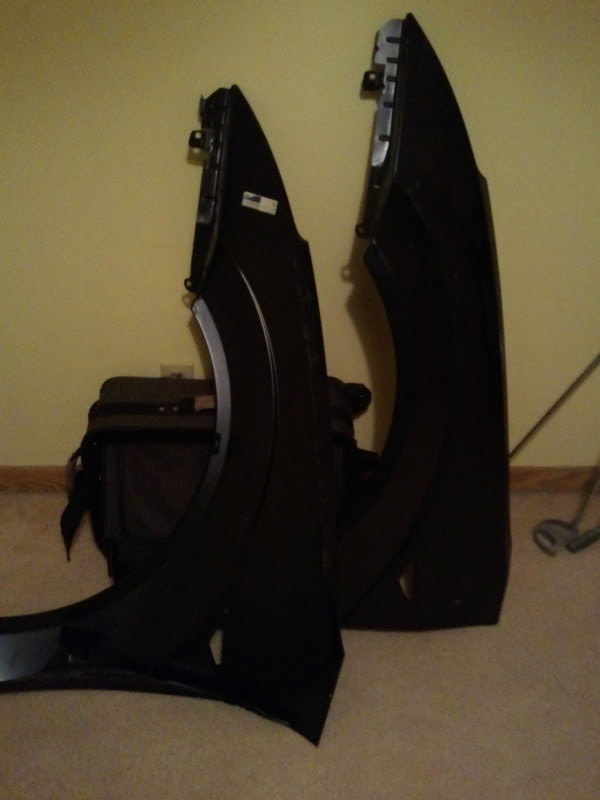
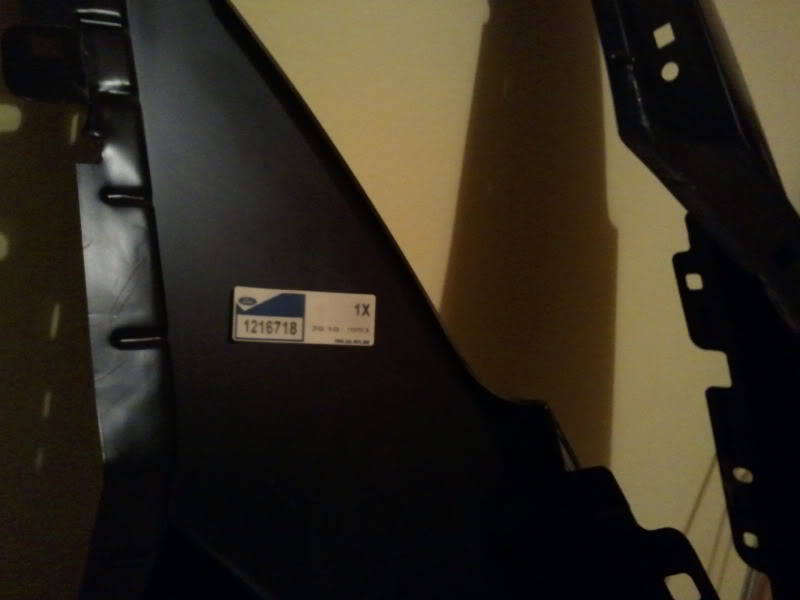
got my hands on Ford OEM RS front fenders for re-molding purposes, will be selling these in the spring to re-coup my cost on them...
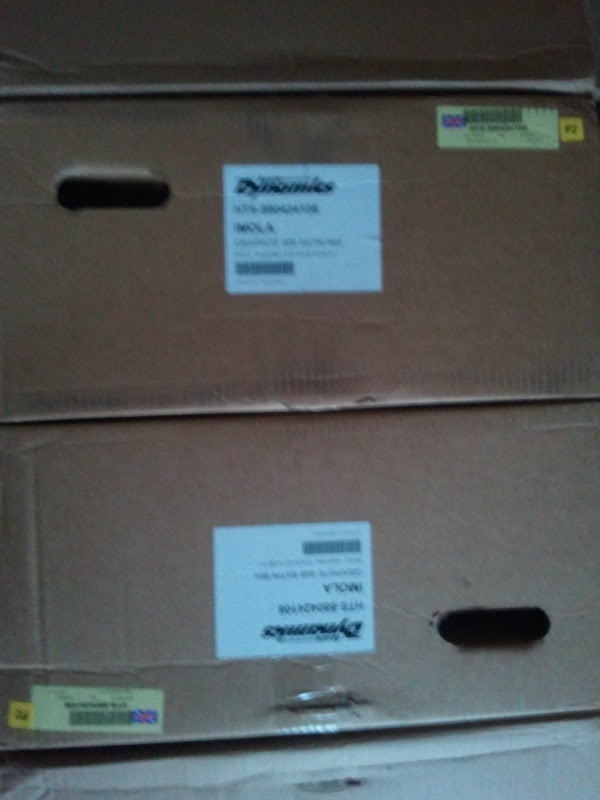
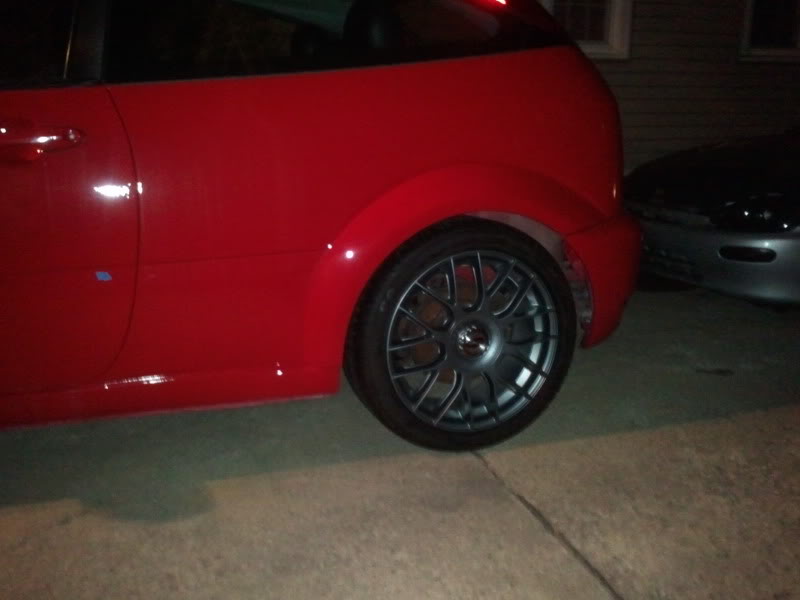
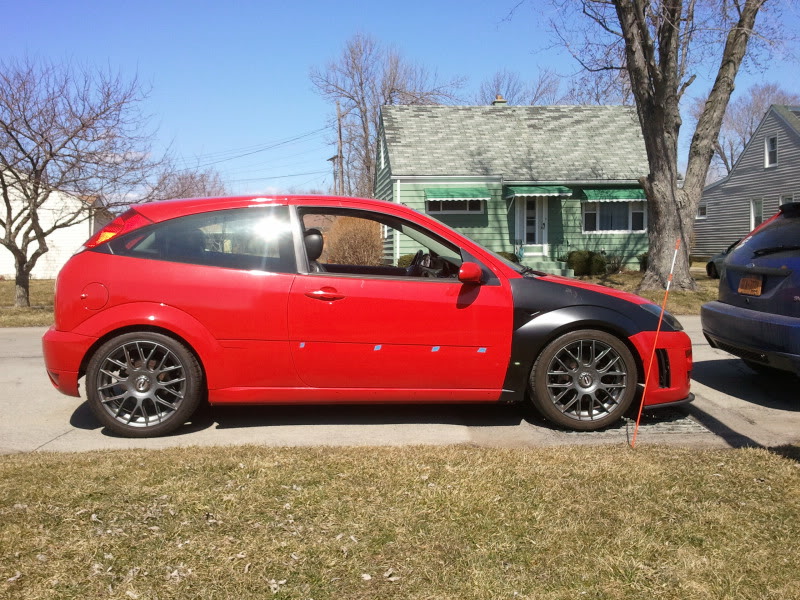
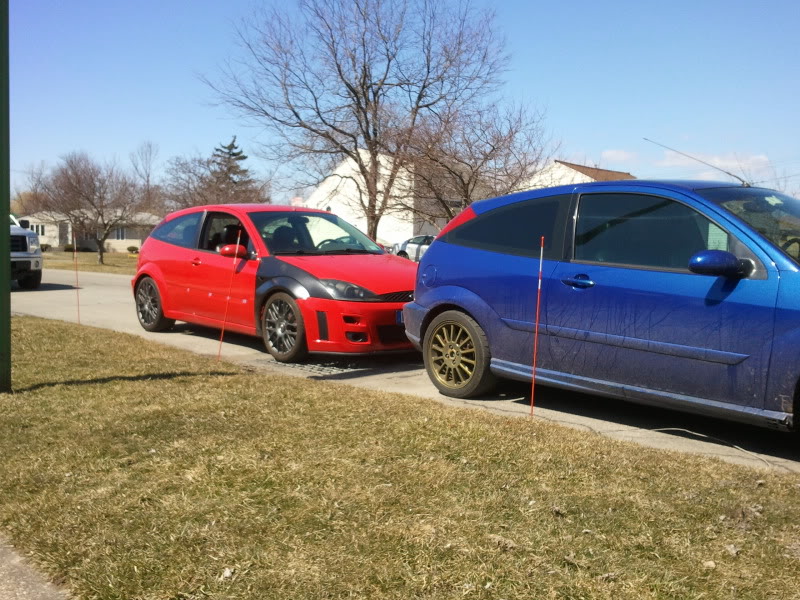
Also, two of my TeamDynamics wheels came today, hoping to get some time for a test fit soon before we really get serious snow
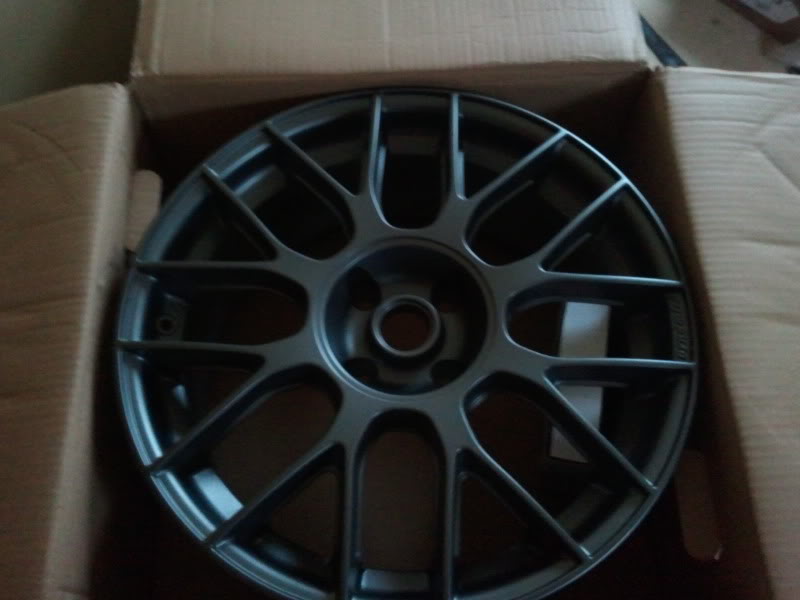
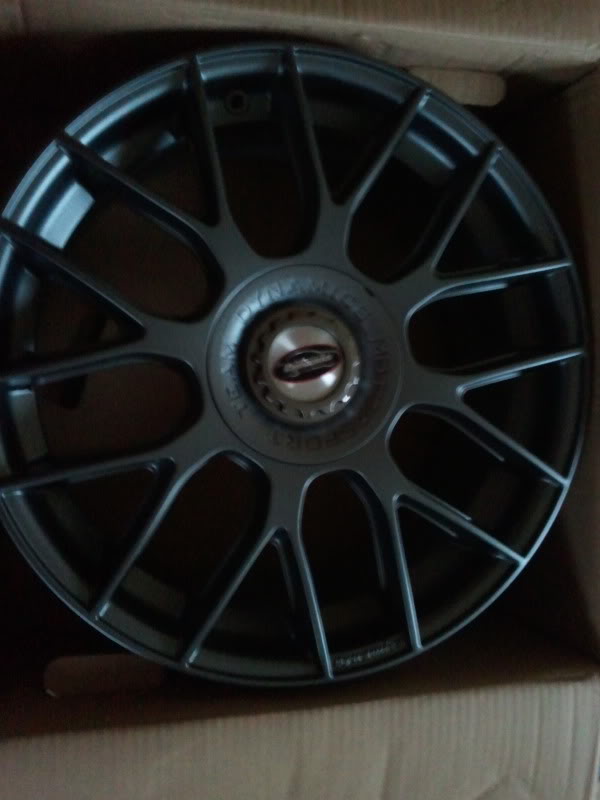
Wheel test fit photos....

I think to be PERFECT, I could run like a 5mm spacer or so, but beyond that I'm REALLY happy with them....
Decided to go out and swap the REAL fenders on to see if I have any tweaking to do for molding them.....driver side literally sat perfect....passenger side seems to have gotten a touch bent during shipping, so I have a few things to do before molding that one.
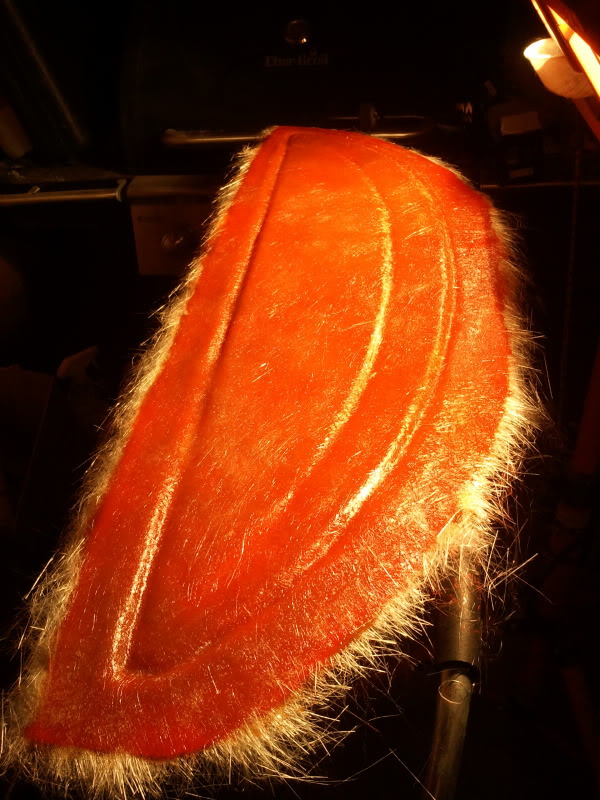
started working on setting up the mold for the rear wing....more as I get further along tonight...waiting for silicone to dry before applying mold release followed by gelcoat and fiberglass....
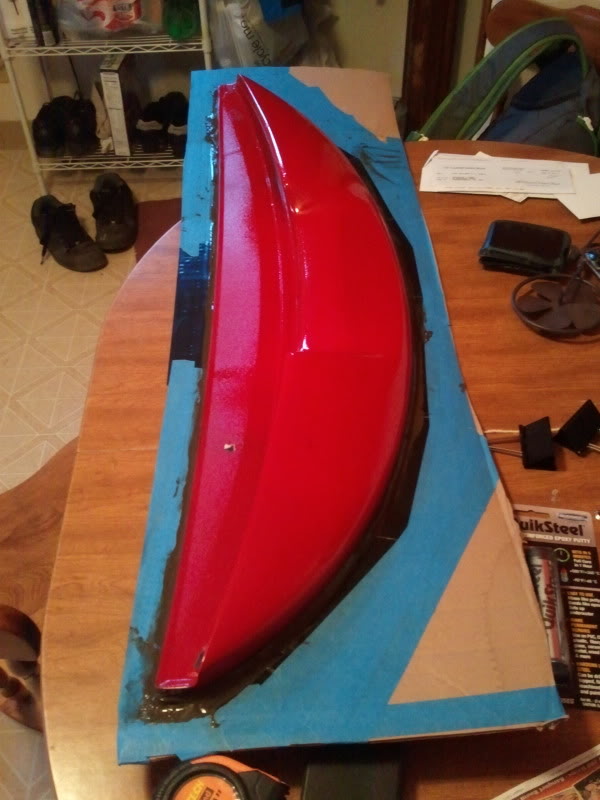
in gelcoat!
laying tons of fiberglass matt
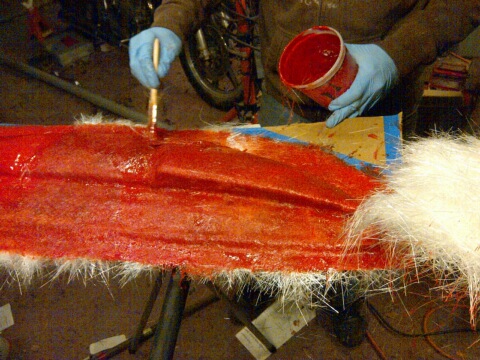
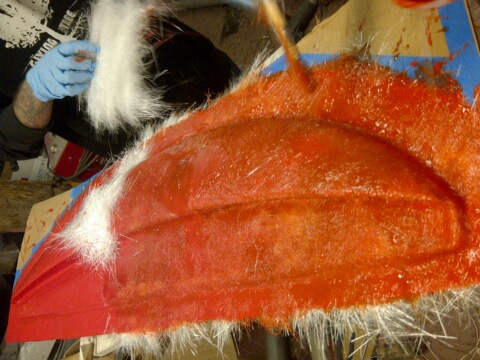
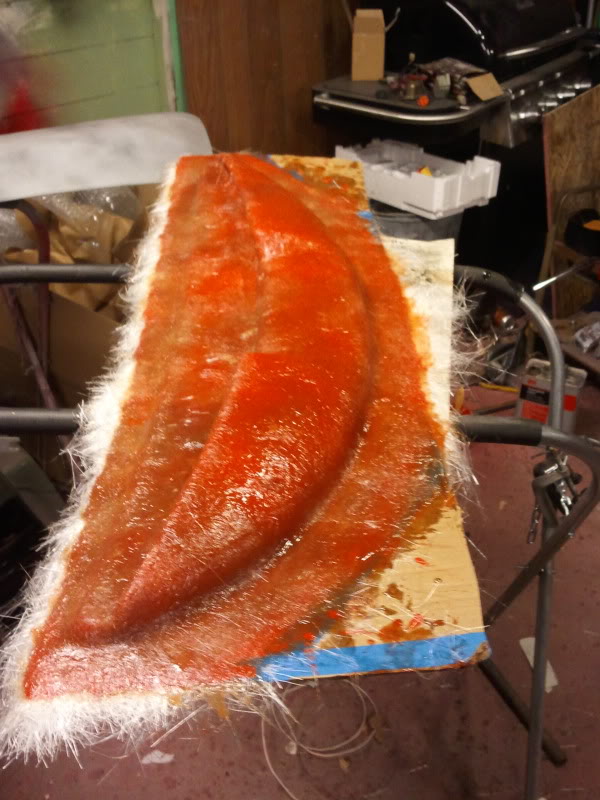
got about 5 layers on there, will let cure until tomorrow and pop it off, then lay up the other said against the flange I've now made...
got my hands on Ford OEM RS front fenders for re-molding purposes, will be selling these in the spring to re-coup my cost on them...
Also, two of my TeamDynamics wheels came today, hoping to get some time for a test fit soon before we really get serious snow
Wheel test fit photos....
I think to be PERFECT, I could run like a 5mm spacer or so, but beyond that I'm REALLY happy with them....
Decided to go out and swap the REAL fenders on to see if I have any tweaking to do for molding them.....driver side literally sat perfect....passenger side seems to have gotten a touch bent during shipping, so I have a few things to do before molding that one.
started working on setting up the mold for the rear wing....more as I get further along tonight...waiting for silicone to dry before applying mold release followed by gelcoat and fiberglass....
in gelcoat!
laying tons of fiberglass matt
got about 5 layers on there, will let cure until tomorrow and pop it off, then lay up the other said against the flange I've now made...
30-04-2013, 04:42 PM
#97
Wahay!! I've lost my Virginity!!
Thread Starter
sooooooo, good news bad news....
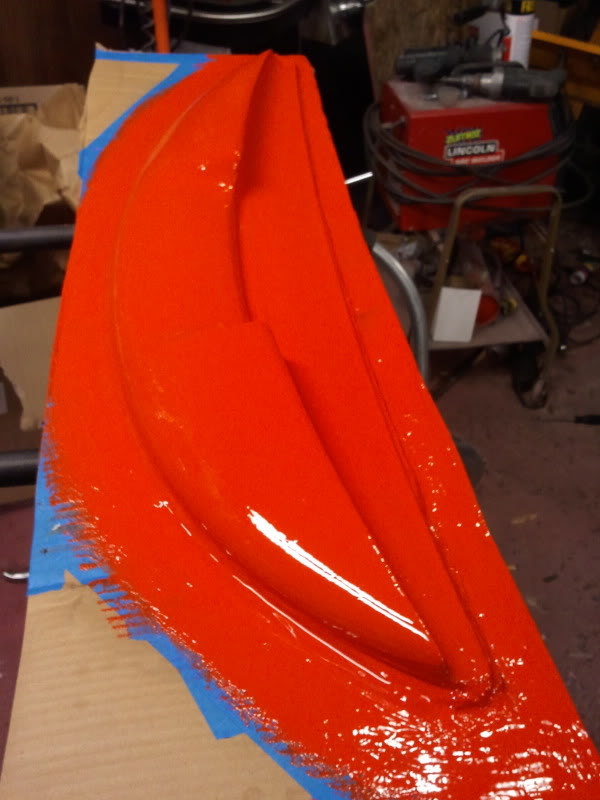
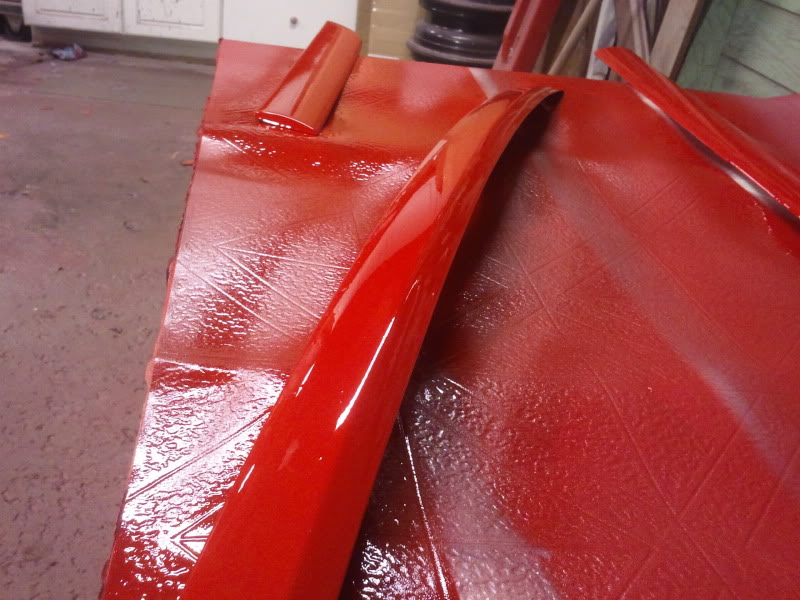
the good news is the mold is going to work out, but the heat and whatnot generated in the chemical reaction from the gelcoat caused the paint on the wing to bubble and peel.
got the quarter panel rub strips shaped up and ready for some high-build....Didn't have any adhesion promoter around so decided to spray with krylon fusion I had sitting around....going to wetsand again after it dries and spray down with filler primer (probably tomorrow)
used the driver-side that I already cut to shape as a template for the passenger side, then filled in the spots where I broke into the voids in the casting and wetsanded in 320
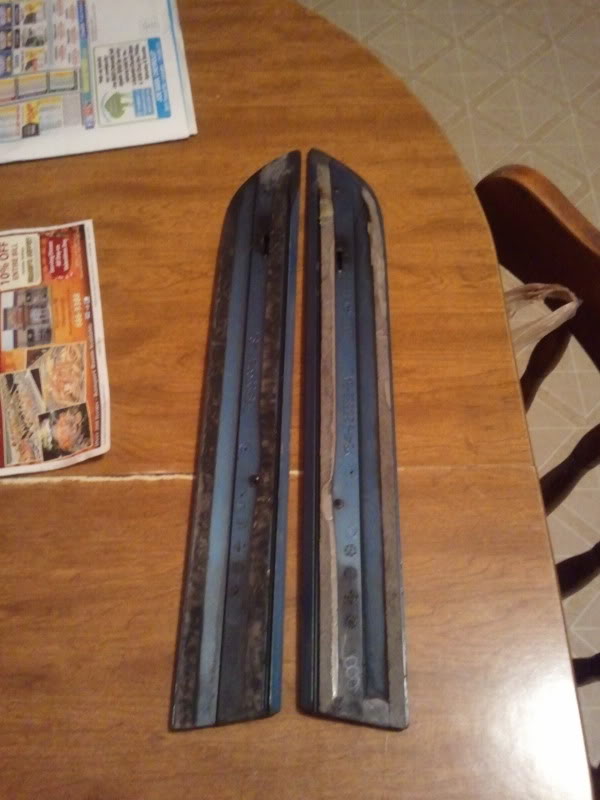
then sprayed with the krylon fusion
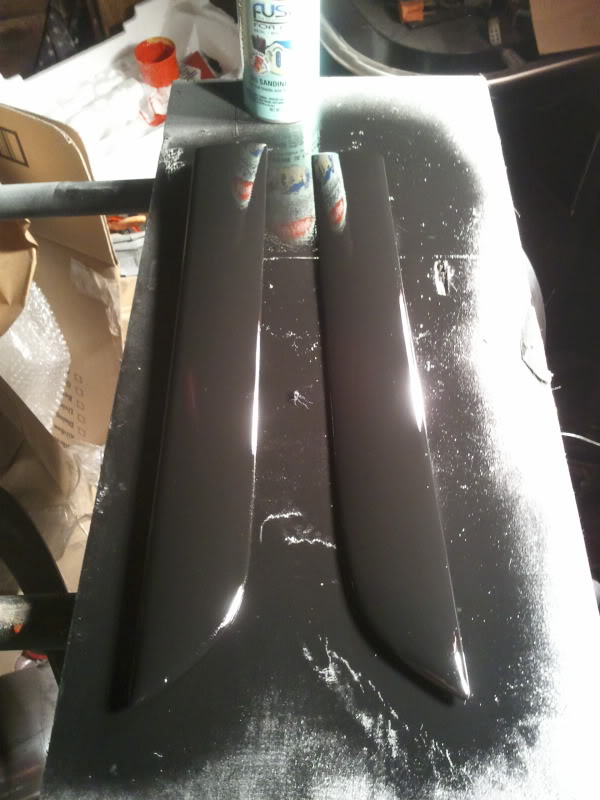
for anyone unfamilier, these started out life as the rear rubstrips from a 4dr sedan focus....I cut them to fit the RS quarterpanel. I don't know how the "plastic weld" epoxy will hold up long-term....so I might buy casting urethane to make flexible molds of these and make solid ones from two-part urethane mix (and then sell replicas LOL)
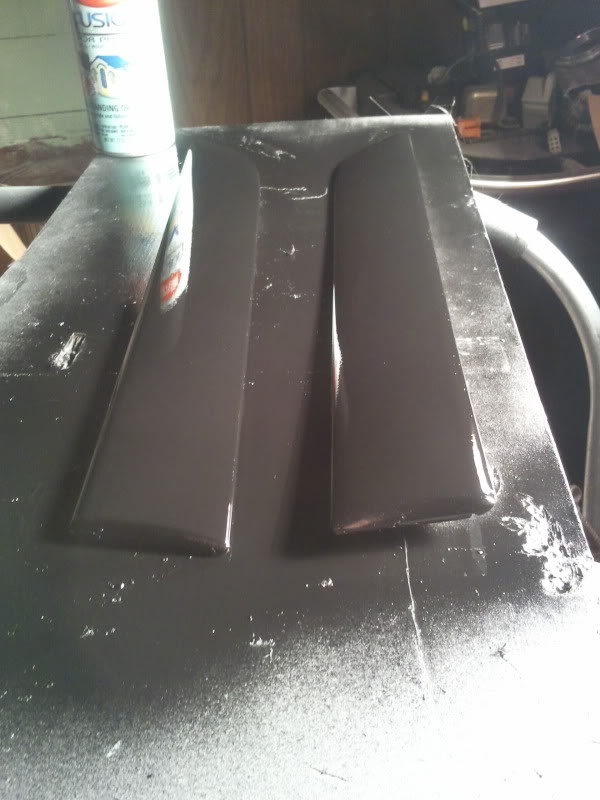
Just brought them in....I couldn't get all of the scratches totally out pre-paint because of how soft the urethane is once you're through the paint....so I'll let these cure more over night and wetsand them with 400 and filler-prime them and repeat until smooth/perfect.
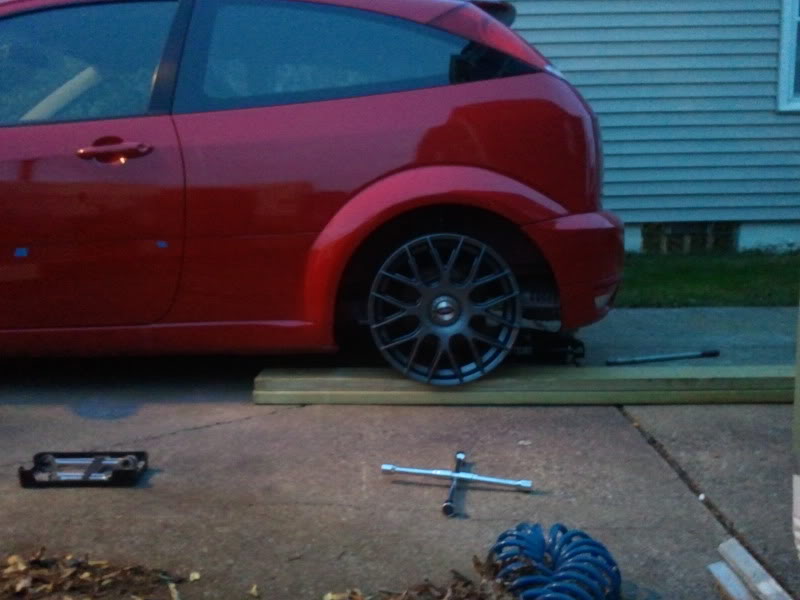
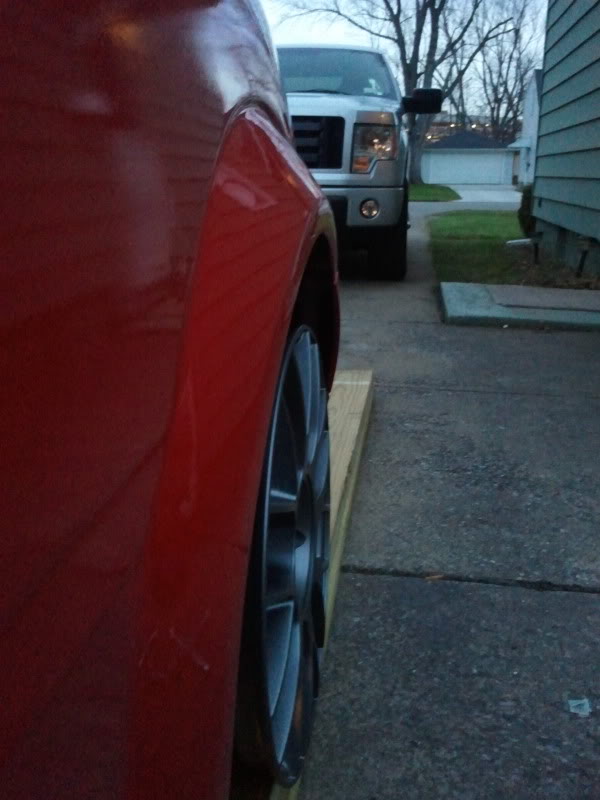
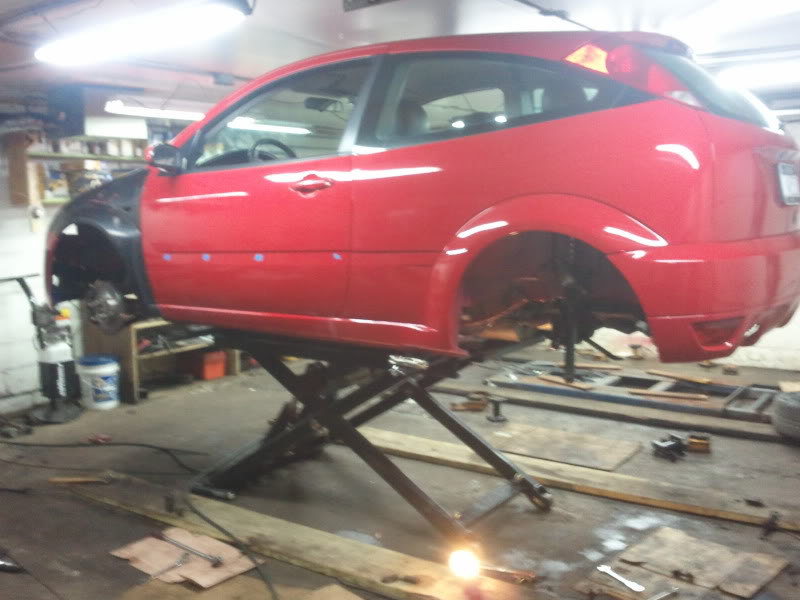
wetsanded and high-build primed the rub strips tonight, and tried to get a couple pics of the wheels.....I'll get better ones once I can move the car around.....it's sitting probably about an inch higher that it will, it had been up in the air on jackstands for the entire winter with the suspension unloaded and it was just set down off the jack.
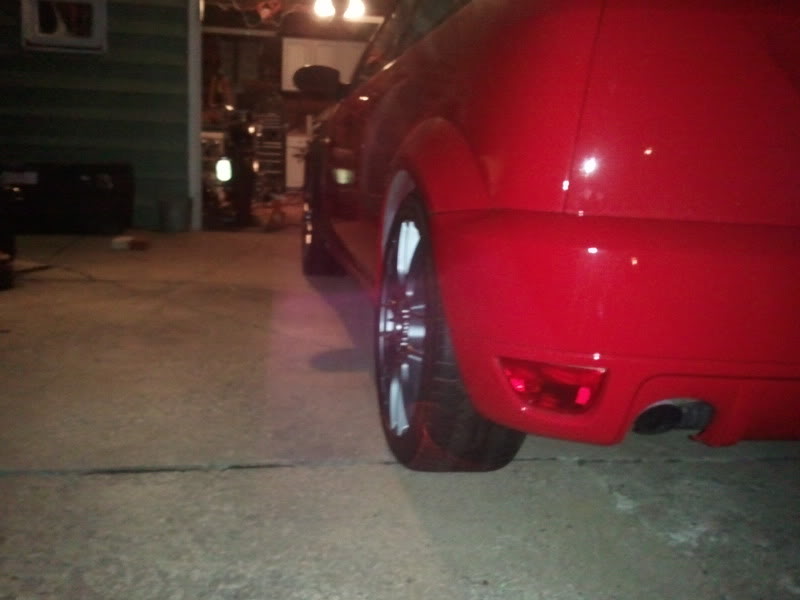
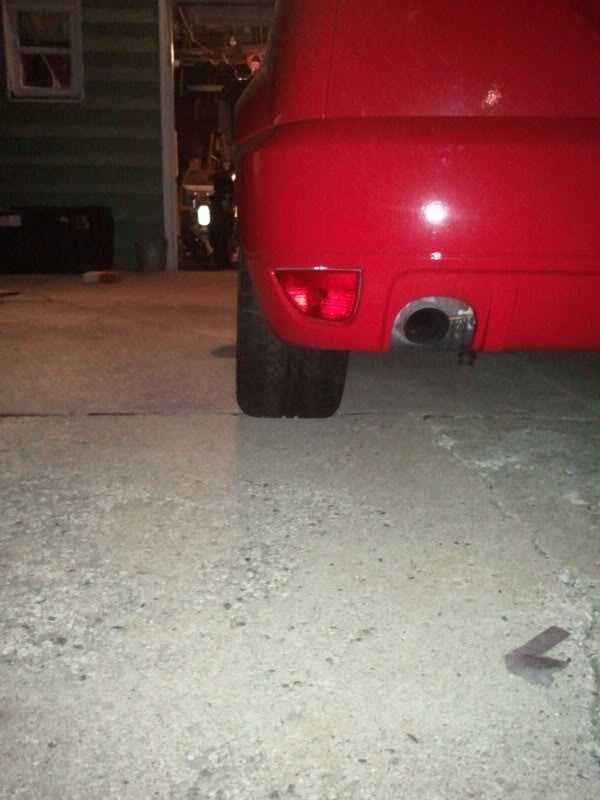
well, I got the car out for a spin to go get gas and snap a few pics of it on the new wheels....
needs to be a little lower and roughly 10mm spacers.
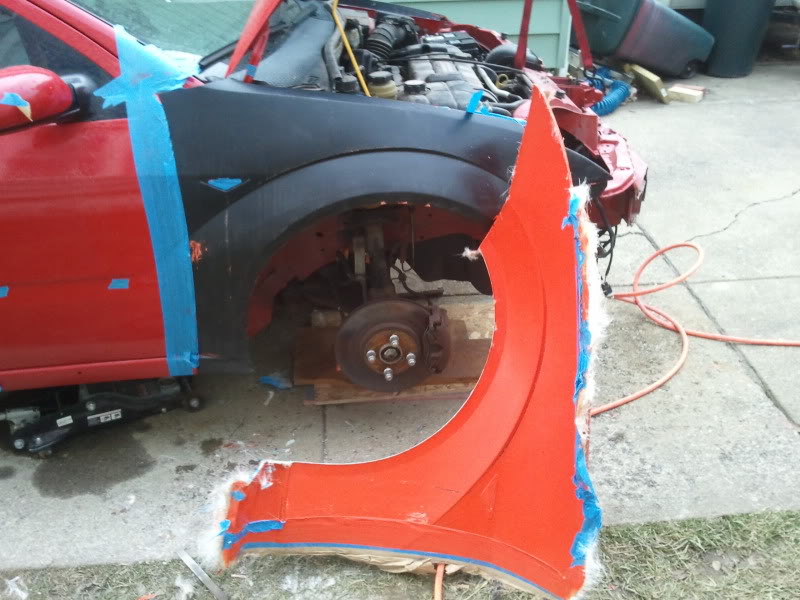
Set out to mold both front fenders today, and it simply did not happen. got one side mostly done, will need to add some layers once I can pull it off the car and lay it on it's side.
I'm honestly getting really burnt out working on this car so much and trying to get these molds taken care of. I'm really starting to doubt I'll be able to finish it in time for Spring Into Focus....

molded it on the car because I was concerned without it all being mounted up that the molds would make fenders that would be difficult to pull into correct fitment. Going to have to pull these off and then make a bolt-on flange to get the shape of the inner fender where it bolts in behind the door and all that. It's supposed to rain tomorrow, so I'm hoping it cures in time to pop it off tonight. I'm trying hard to stay motivated, but I'm beginning to resent the car/labor.
the good news is the mold is going to work out, but the heat and whatnot generated in the chemical reaction from the gelcoat caused the paint on the wing to bubble and peel.
got the quarter panel rub strips shaped up and ready for some high-build....Didn't have any adhesion promoter around so decided to spray with krylon fusion I had sitting around....going to wetsand again after it dries and spray down with filler primer (probably tomorrow)
used the driver-side that I already cut to shape as a template for the passenger side, then filled in the spots where I broke into the voids in the casting and wetsanded in 320
then sprayed with the krylon fusion
for anyone unfamilier, these started out life as the rear rubstrips from a 4dr sedan focus....I cut them to fit the RS quarterpanel. I don't know how the "plastic weld" epoxy will hold up long-term....so I might buy casting urethane to make flexible molds of these and make solid ones from two-part urethane mix (and then sell replicas LOL)
Just brought them in....I couldn't get all of the scratches totally out pre-paint because of how soft the urethane is once you're through the paint....so I'll let these cure more over night and wetsand them with 400 and filler-prime them and repeat until smooth/perfect.
wetsanded and high-build primed the rub strips tonight, and tried to get a couple pics of the wheels.....I'll get better ones once I can move the car around.....it's sitting probably about an inch higher that it will, it had been up in the air on jackstands for the entire winter with the suspension unloaded and it was just set down off the jack.
well, I got the car out for a spin to go get gas and snap a few pics of it on the new wheels....
needs to be a little lower and roughly 10mm spacers.
Set out to mold both front fenders today, and it simply did not happen. got one side mostly done, will need to add some layers once I can pull it off the car and lay it on it's side.
I'm honestly getting really burnt out working on this car so much and trying to get these molds taken care of. I'm really starting to doubt I'll be able to finish it in time for Spring Into Focus....
molded it on the car because I was concerned without it all being mounted up that the molds would make fenders that would be difficult to pull into correct fitment. Going to have to pull these off and then make a bolt-on flange to get the shape of the inner fender where it bolts in behind the door and all that. It's supposed to rain tomorrow, so I'm hoping it cures in time to pop it off tonight. I'm trying hard to stay motivated, but I'm beginning to resent the car/labor.
30-04-2013, 04:43 PM
#98
Wahay!! I've lost my Virginity!!
Thread Starter
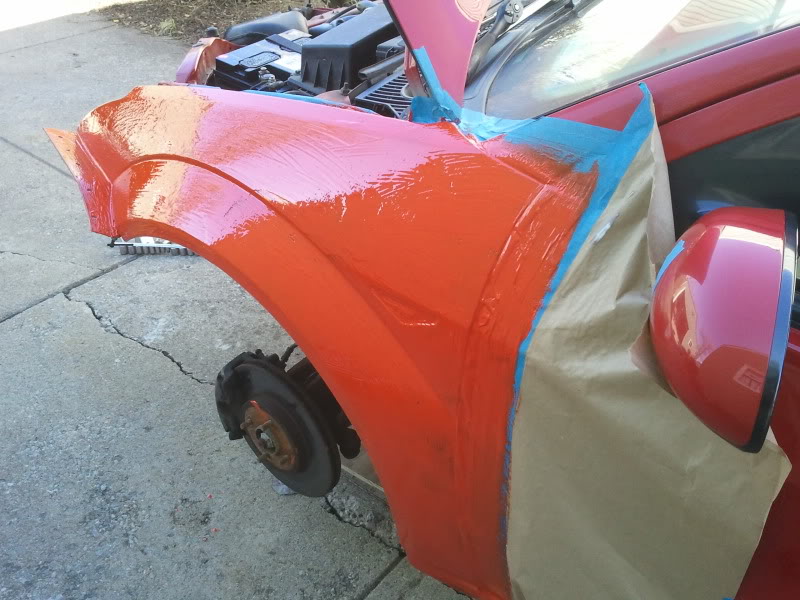
Well, I blew off some steam, regrouped, and decided to press on and mold the passenger fender last night.
after tape-off, prep, and mold release:

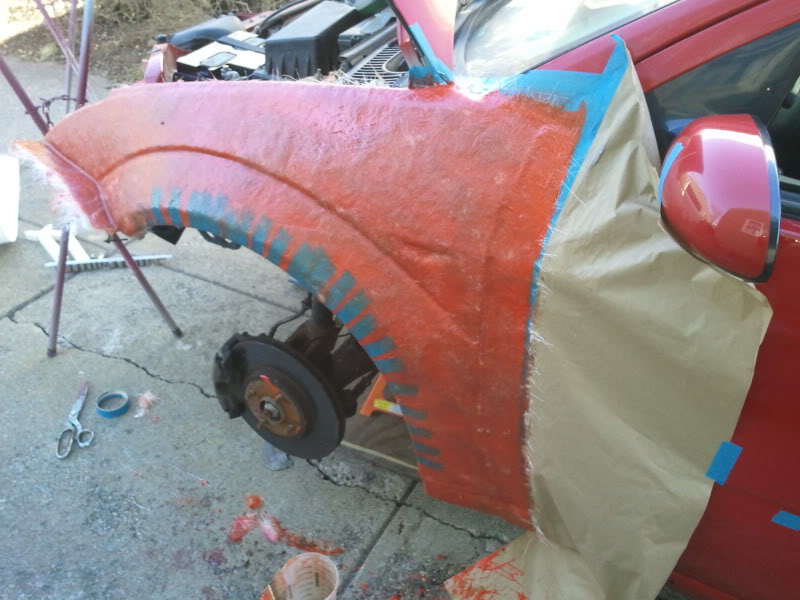
after Gelcoat and multiple layers of fiberglass:
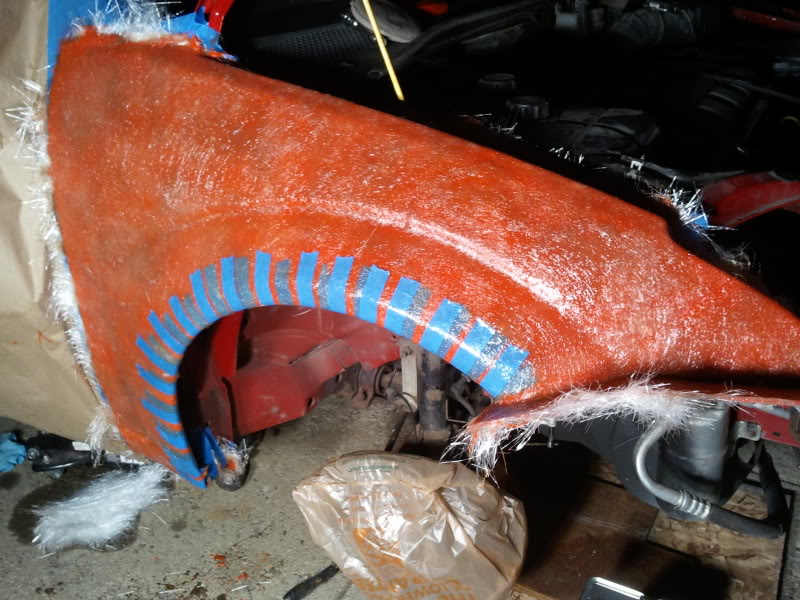
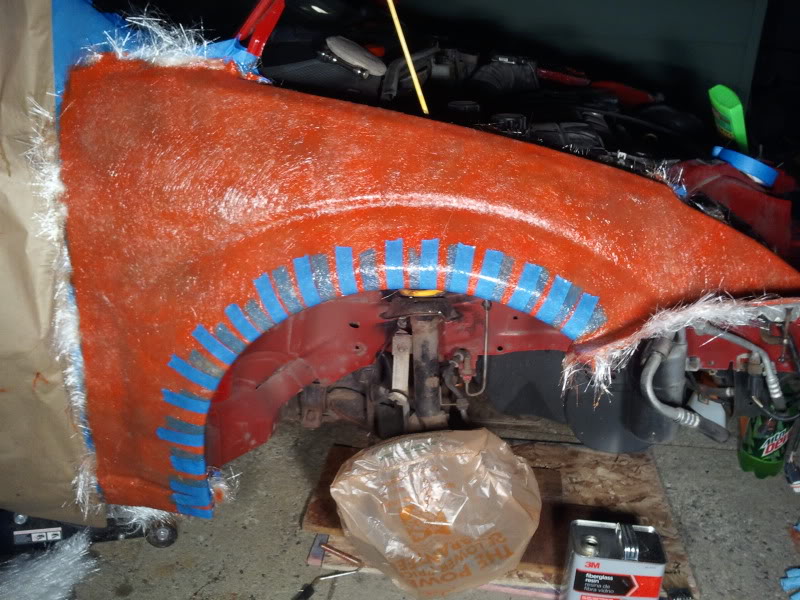
The reason you see blue tape in the layers along the edge of the wheel arch is because the fiberglass wouldn't stay in place over the rolled edge due to the orientation of the fender since I have molded it while it's mounted instead of on top of a table/bench....so I used the tape to hold the layers in place while they cure. I haven't pulled the mold off yet, probably won't have time to get it off until tomorrow morning.
This still no telling whether or not I'll finish by SiF, but I may just come down with the metal fenders mounted (still in primer) missing rub strips and stuff like that if I can't get all of that situated.
popped the mold off the passenger fender last night.....overall this one went WAY better than the driver side.....couple small touch-ups necessary, but nothing major at all.
will be pulling both fenders later this week to make the mold-flange for the inner mounting flanges of both fenders where they bolt to the inner fender and up by the A-piller in the doorjam.
Then I just have to prep/paint:
-fenders
-rub strips
-door handles
-wing
And then all that's left for the car to be "done"
-change wiring pigtails for euro singnals (bumper AND fender)
-install newly painted parts
-make shaved hatch trim/grab handle and paint/install
-wire rear fog lights
-wetsand and buff/polish the entire car.
Looks like I MAY get it done in time for Spring into Focus afterall....
beyond that, I do want to remove and repaint the passenger door because I chipped the leading edge of it with the previous fiberglass abortions of fenders, and I'm still waiting for my RS sideskirts to get shipped over from the UK so I can repair/mold them....those will be the last aesthetic bits the car will get....but those are less important than the list for SiF.
got some work done today, pulled the fenders off the car and set them back into the molds I made and then whipped up the flange molds.

even cured quick enough to zip the holes in for bolting the flanges in place and pop them off. DONE!
I spent a bunch of time on the mold for the wing, but didn't get too far on that....maybe later this week.
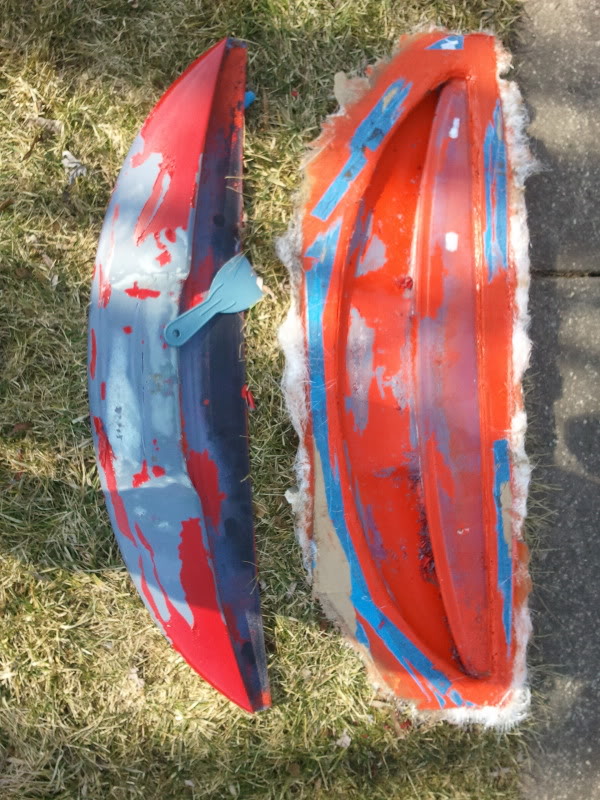
I got most of the bottom half of the mold for the rear wing "tooled" (read: fixed the areas where it molded the wrinkles created by the paint de-laminating from the wing during molding)
Then Checko gave me a hand laying up the top half of the mold.
This pic came out a little blurry, but the top part of the mold popped off pretty well, and doesn't really need any tooling, just trimming.
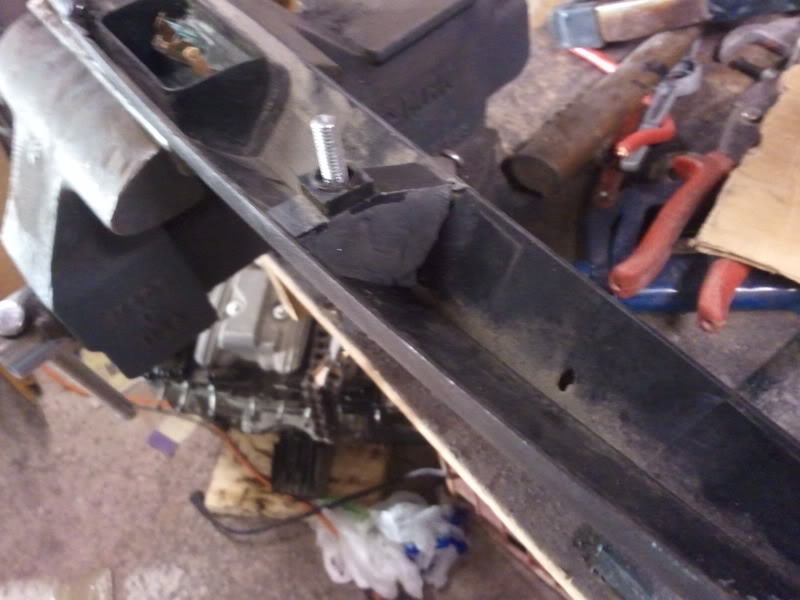
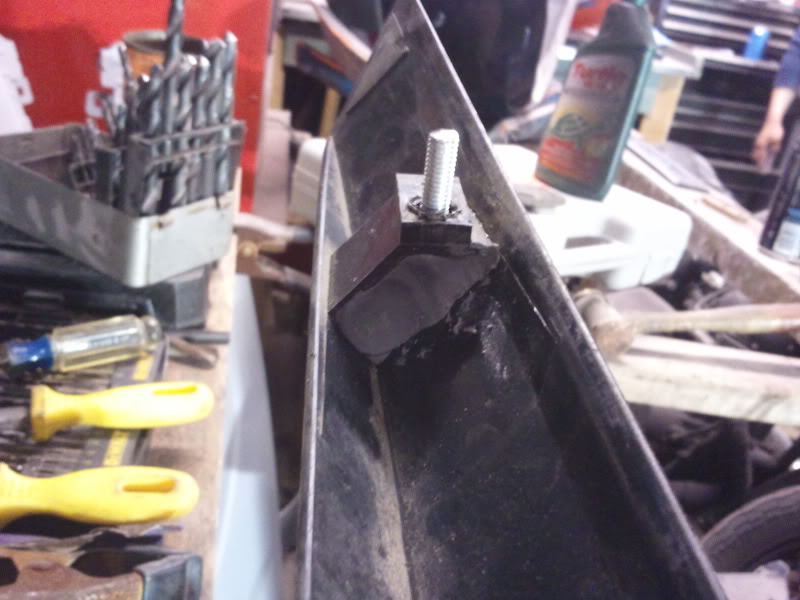
Then I got right to work on repairing all of the busted studs (all 5 broke, I fixed 4) on my hatch trim/grab handle.....used a kneading epoxy (think JB-Stick, but in a bodyshop quality brand) to put some bolts in after I drilled out the remainder of the old studs....and popped some holes through the strip and countersunk the outside of those holes so the epoxy would push through and create a rivet-type bond (can't pull through).

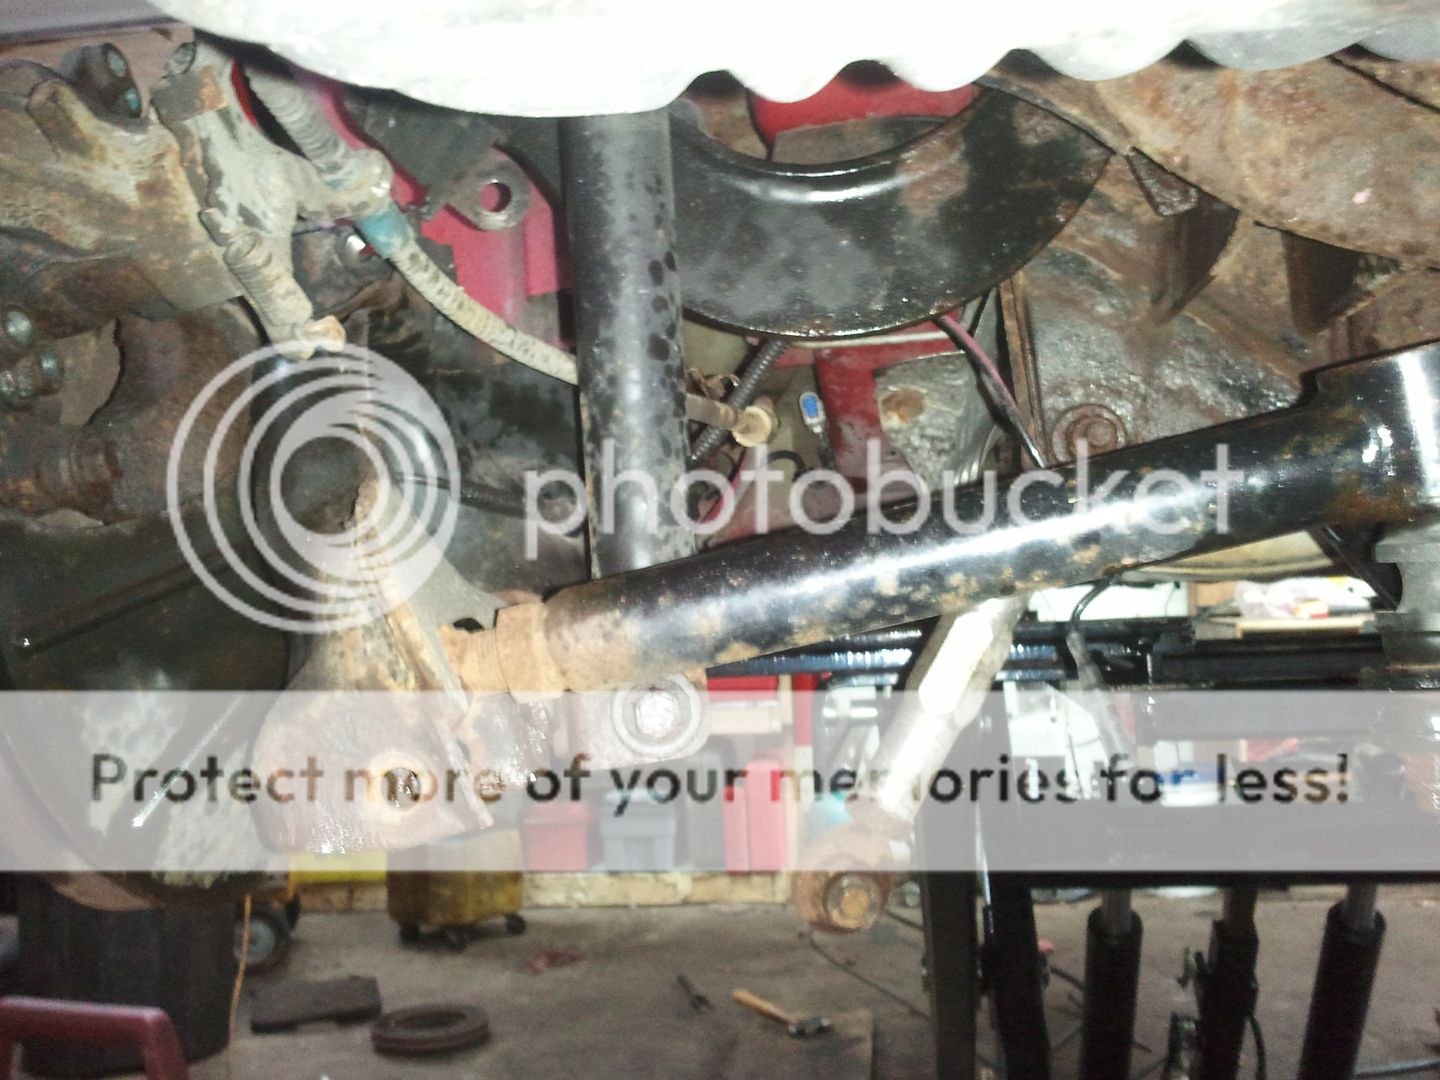
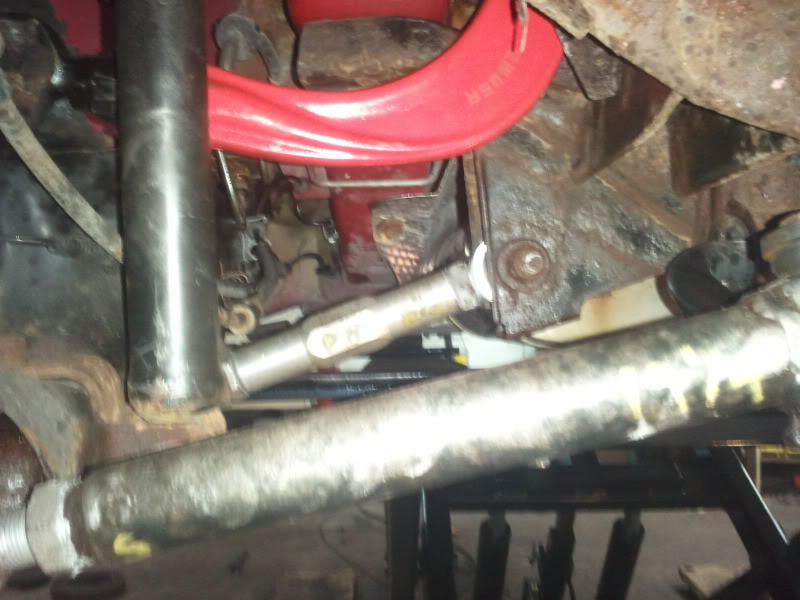
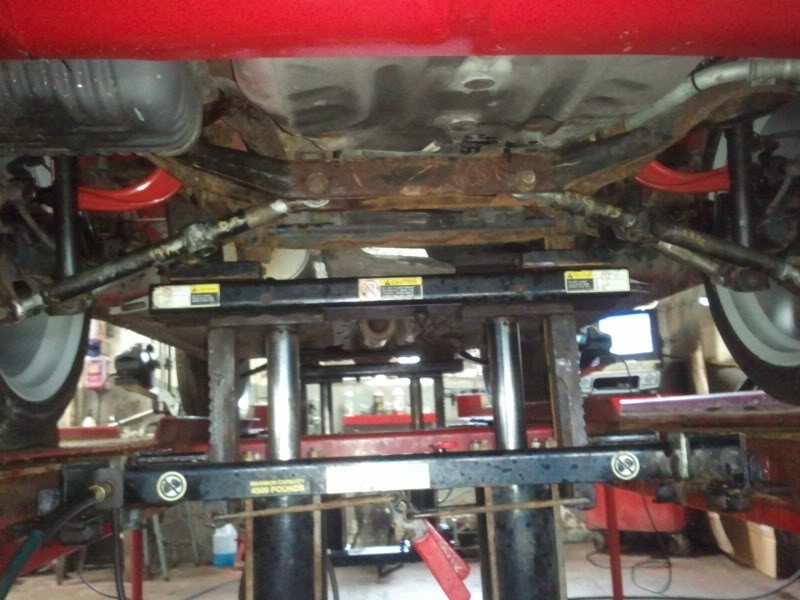
Firstly, major shoutout to "pirite" for being a MAJOR help today. spent nearly 10hrs today completely overhauling my suspension and brakes, and he put it on the Hunter and did my alignment for me.
Secondly, my g/f has been getting super pissed at me for spending all of my time on the car.
Swapped out front brakes, front lower control arms, replaced the heims in my Focus-Central rear control arms and toe arms, installed adjustable camber arms, and did a lot of swearing in the process.

probably going to try to prep and paint my fenders, rub strips, and wing either monday or tuesday, hopefully can get it all done and the car back together by thursday evening to head down to Ohio Friday afternoon for the weekend to hit up Spring into Focus
after tape-off, prep, and mold release:
after Gelcoat and multiple layers of fiberglass:
The reason you see blue tape in the layers along the edge of the wheel arch is because the fiberglass wouldn't stay in place over the rolled edge due to the orientation of the fender since I have molded it while it's mounted instead of on top of a table/bench....so I used the tape to hold the layers in place while they cure. I haven't pulled the mold off yet, probably won't have time to get it off until tomorrow morning.
This still no telling whether or not I'll finish by SiF, but I may just come down with the metal fenders mounted (still in primer) missing rub strips and stuff like that if I can't get all of that situated.
popped the mold off the passenger fender last night.....overall this one went WAY better than the driver side.....couple small touch-ups necessary, but nothing major at all.
will be pulling both fenders later this week to make the mold-flange for the inner mounting flanges of both fenders where they bolt to the inner fender and up by the A-piller in the doorjam.
Then I just have to prep/paint:
-fenders
-rub strips
-door handles
-wing
And then all that's left for the car to be "done"
-change wiring pigtails for euro singnals (bumper AND fender)
-install newly painted parts
-make shaved hatch trim/grab handle and paint/install
-wire rear fog lights
-wetsand and buff/polish the entire car.
Looks like I MAY get it done in time for Spring into Focus afterall....
beyond that, I do want to remove and repaint the passenger door because I chipped the leading edge of it with the previous fiberglass abortions of fenders, and I'm still waiting for my RS sideskirts to get shipped over from the UK so I can repair/mold them....those will be the last aesthetic bits the car will get....but those are less important than the list for SiF.
got some work done today, pulled the fenders off the car and set them back into the molds I made and then whipped up the flange molds.
even cured quick enough to zip the holes in for bolting the flanges in place and pop them off. DONE!
I spent a bunch of time on the mold for the wing, but didn't get too far on that....maybe later this week.
I got most of the bottom half of the mold for the rear wing "tooled" (read: fixed the areas where it molded the wrinkles created by the paint de-laminating from the wing during molding)
Then Checko gave me a hand laying up the top half of the mold.
This pic came out a little blurry, but the top part of the mold popped off pretty well, and doesn't really need any tooling, just trimming.
Then I got right to work on repairing all of the busted studs (all 5 broke, I fixed 4) on my hatch trim/grab handle.....used a kneading epoxy (think JB-Stick, but in a bodyshop quality brand) to put some bolts in after I drilled out the remainder of the old studs....and popped some holes through the strip and countersunk the outside of those holes so the epoxy would push through and create a rivet-type bond (can't pull through).
Firstly, major shoutout to "pirite" for being a MAJOR help today. spent nearly 10hrs today completely overhauling my suspension and brakes, and he put it on the Hunter and did my alignment for me.
Secondly, my g/f has been getting super pissed at me for spending all of my time on the car.
Swapped out front brakes, front lower control arms, replaced the heims in my Focus-Central rear control arms and toe arms, installed adjustable camber arms, and did a lot of swearing in the process.
probably going to try to prep and paint my fenders, rub strips, and wing either monday or tuesday, hopefully can get it all done and the car back together by thursday evening to head down to Ohio Friday afternoon for the weekend to hit up Spring into Focus
30-04-2013, 04:47 PM
#99
Wahay!! I've lost my Virginity!!
Thread Starter
Well, I spent the last 6hrs in the garage. I've got both fenders ready for a final rob down in 400 grit, the rub strips and hatch trim are rubbed down in 400 already, and I am nearly done with repairs to the wing. I'll have to do some more sanding on the wing tomorrow before getting it in 400 grit, then 400 the fenders, and everything is ready for paint. planning to finish up and then paint tomorrow after work, then let everything sit/cure until thursday after work to re-assemble, then leave for ohio friday afternoon(taking a half day at work fri)
[img]https://img.photobucket.com/albums/v112/focusinprogress/2013-04-22233620_zpsae396d8f.jpg/[img]
Ugh, Why am I always finishing up paintjobs after 3am?!?!?
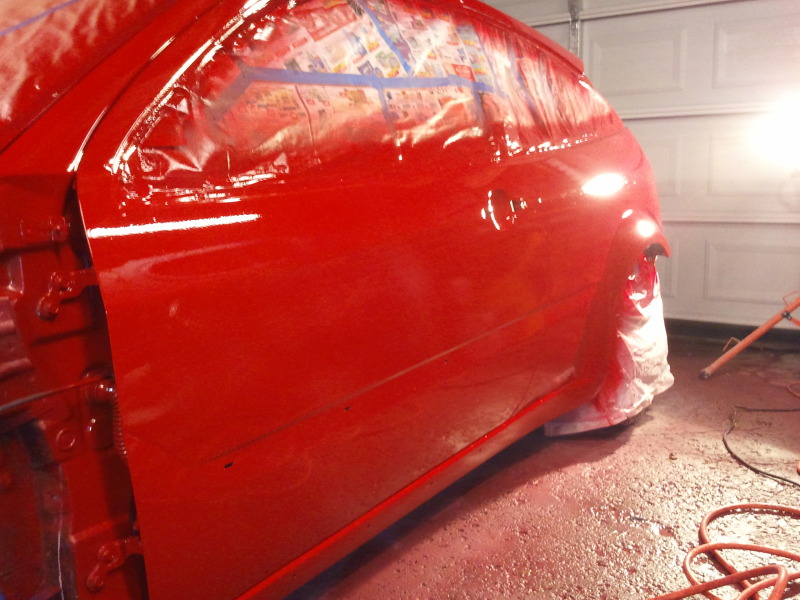
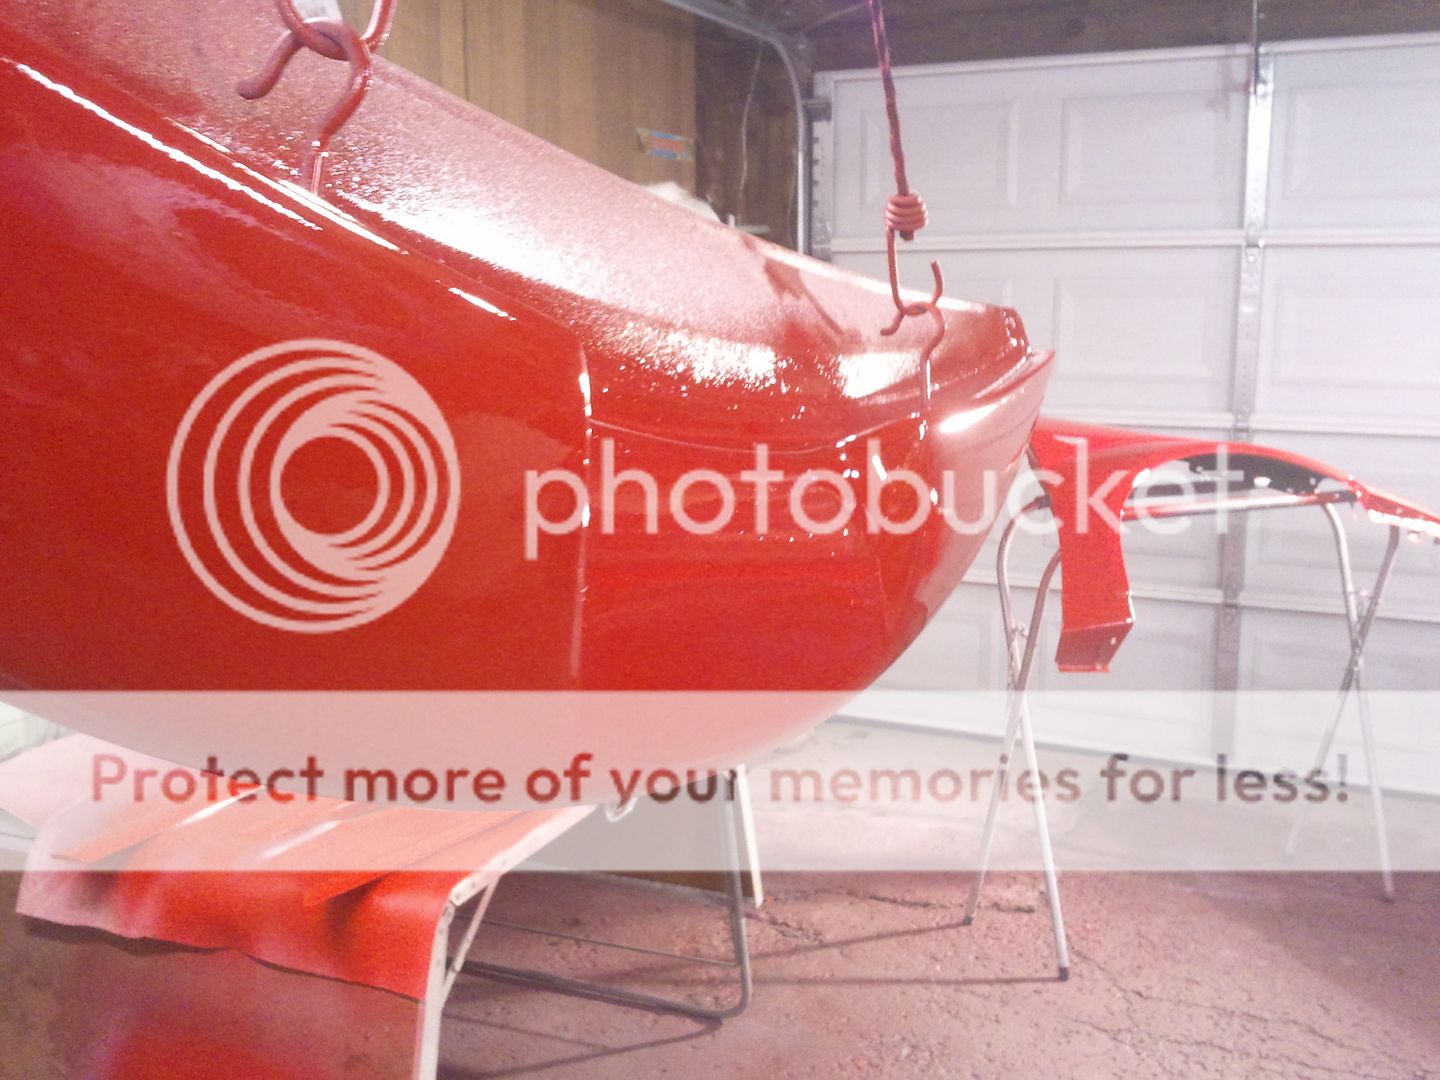
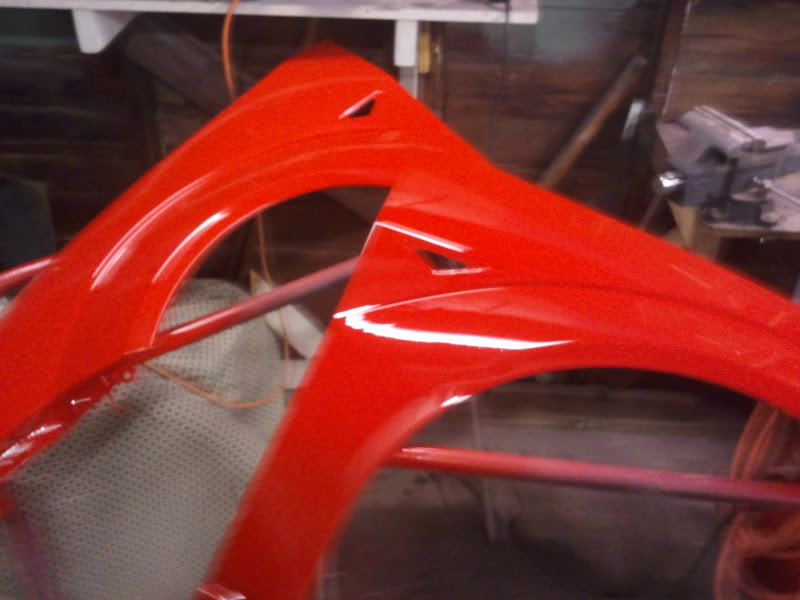
anyways, kinda fought an uphill battle with the paint process, but in the end I was victorious. First, I was in a hurry cause it was already 10pm when I was trying to spray sealer....and ran the sealer on one of the fenders. So I waited for it to dry and wetsanded with 400....Then on color I kept having lift, so had to wait for the color to dry, then wetsand with 600 and hit the next coat. ended up with 4 coats of paint to make it go away. Finally I got to clear....and realized I had less hardener than I thought....barely had enough. got 3 SOLID coats of clear on, and I have to say it came out pretty damn good. Well, aside from one QP rub strip that lifted REALLY bad and I couldn't save it. going to have to sand that one down and pound some adhesion promoter on it before trying again. And I put a beefy run on the top of the wing from having it hanging too upright.
Pics!!!
(this is probably where I ran the sealer lol)
after 4 coats of color
First clear
[img]https://img.photobucket.com/albums/v112/focusinprogress/2013-04-24024813_zps8d7bbd25.jpg[/img[
second clear
Third clear
Going to leave this stuff sit until thursday after work and then assemble the car.
Car: Assembled 90%
Drove it just like this down to ohio, and met up with my good friend Bonacci01
So, spent a couple hours today wetsanding and Bonacci01 did a FANTASTIC job buffing my car....And I forgot to post up how I made up some mounting brackets for the fender-bumper

I'll get some over-all pics tomorrow......but for the record, I'm SUPER HAPPY with the way this is coming out. STOKED.
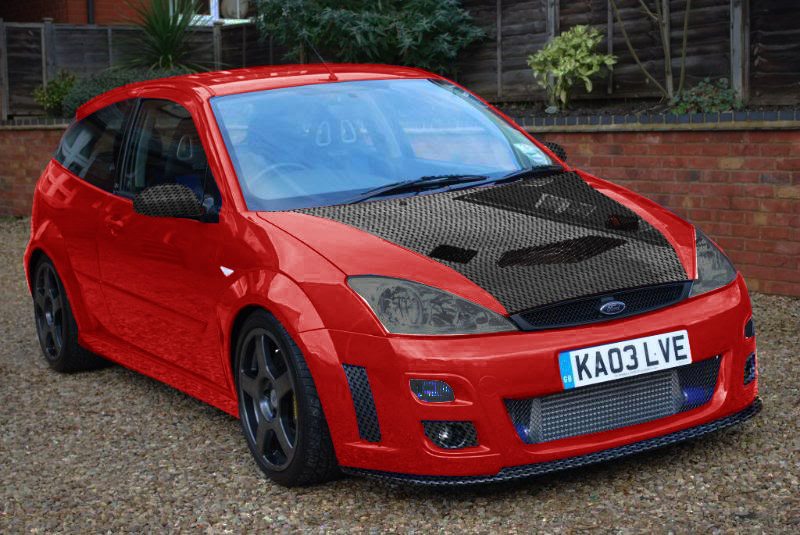
I'm waiting on some more pics from the Spring inot Focus meet to pop up so I can add them here.....but I got a good pic near Bonacci01's place before I left to head back home to buffalo, to compare to my original photoshop "concept".....I'm pretty close....it'll get a little closer as I swap out a few little things here and there, but it's just about right where I thought I'd be with it.
and some pics before the meet of me putting the finishing touches on (always late!)
Now we're all caught up to yesterday!
I'm waiting on a pair of damaged RS skirts to ship from the UK, and I'll repair those and save them for when I repair the muffed up paint job on the passenger rear rub strip and put some vents in the hood....so I can spray all of that stuff all at once!
[img]https://img.photobucket.com/albums/v112/focusinprogress/2013-04-22233620_zpsae396d8f.jpg/[img]
Ugh, Why am I always finishing up paintjobs after 3am?!?!?
anyways, kinda fought an uphill battle with the paint process, but in the end I was victorious. First, I was in a hurry cause it was already 10pm when I was trying to spray sealer....and ran the sealer on one of the fenders. So I waited for it to dry and wetsanded with 400....Then on color I kept having lift, so had to wait for the color to dry, then wetsand with 600 and hit the next coat. ended up with 4 coats of paint to make it go away. Finally I got to clear....and realized I had less hardener than I thought....barely had enough. got 3 SOLID coats of clear on, and I have to say it came out pretty damn good. Well, aside from one QP rub strip that lifted REALLY bad and I couldn't save it. going to have to sand that one down and pound some adhesion promoter on it before trying again. And I put a beefy run on the top of the wing from having it hanging too upright.
Pics!!!
(this is probably where I ran the sealer lol)
after 4 coats of color
First clear
[img]https://img.photobucket.com/albums/v112/focusinprogress/2013-04-24024813_zps8d7bbd25.jpg[/img[
second clear
Third clear
Going to leave this stuff sit until thursday after work and then assemble the car.
Car: Assembled 90%
Drove it just like this down to ohio, and met up with my good friend Bonacci01
So, spent a couple hours today wetsanding and Bonacci01 did a FANTASTIC job buffing my car....And I forgot to post up how I made up some mounting brackets for the fender-bumper
I'll get some over-all pics tomorrow......but for the record, I'm SUPER HAPPY with the way this is coming out. STOKED.
I'm waiting on some more pics from the Spring inot Focus meet to pop up so I can add them here.....but I got a good pic near Bonacci01's place before I left to head back home to buffalo, to compare to my original photoshop "concept".....I'm pretty close....it'll get a little closer as I swap out a few little things here and there, but it's just about right where I thought I'd be with it.
and some pics before the meet of me putting the finishing touches on (always late!)
Now we're all caught up to yesterday!
I'm waiting on a pair of damaged RS skirts to ship from the UK, and I'll repair those and save them for when I repair the muffed up paint job on the passenger rear rub strip and put some vents in the hood....so I can spray all of that stuff all at once!
30-04-2013, 05:35 PM
#100
I bet the perspective change is weird, over here in the Uk that almost looks like a normal focus really, they are not uncommon sights, but over in the US, you dont have an RS model so i bet people think its a custom build.
Looks good though!
Looks good though!
30-04-2013, 11:15 PM
#102
PassionFord Regular

Just read the whole thread even though I need to go to bed! Really enjoyed reading it and am gutted with how much messing about you had to do to get it right! Top effort though. Ill remember all these tips for when I come to spray my car.
 01-05-2013, 08:10 PM
#104
Wahay!! I've lost my Virginity!!
Thread Starter
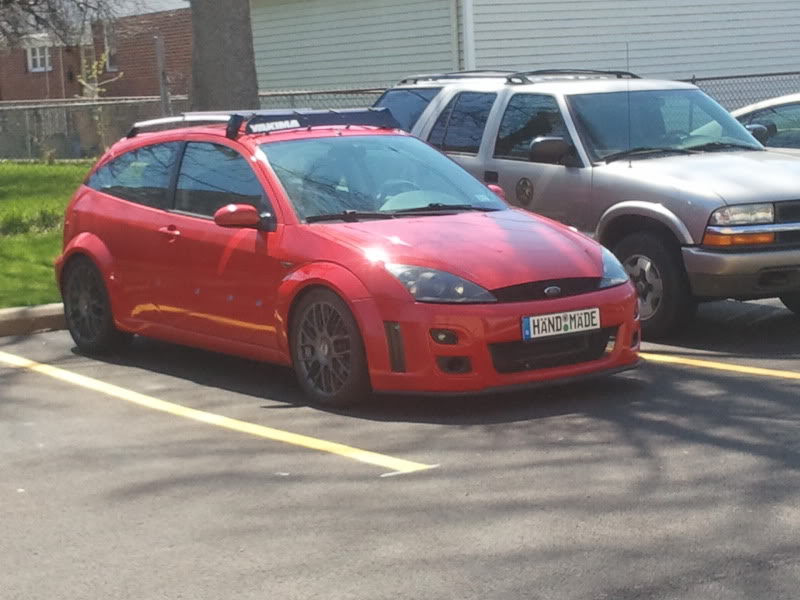
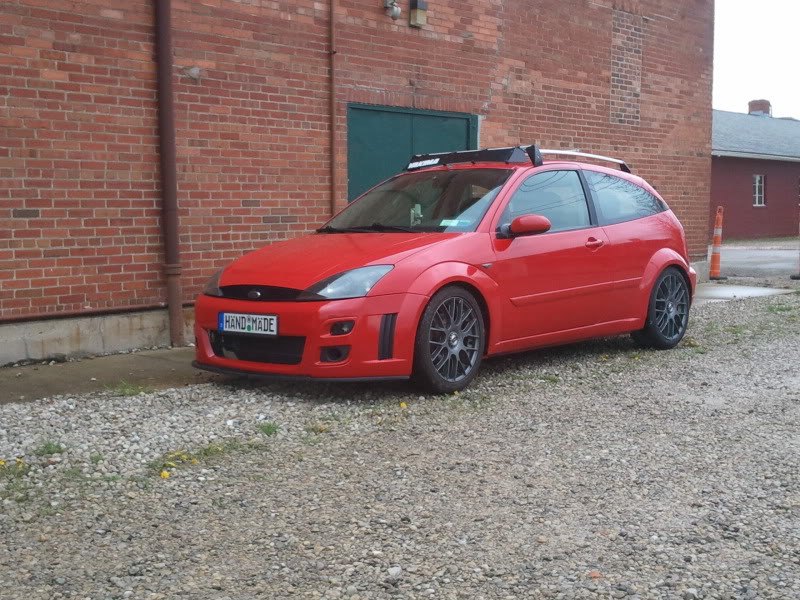
thanks for the kind words everyone! Yeah over here there are only maybe 6 or 7 RS replica's including mine.....and if someone isn't a focus enthusiast it looks no different to them 
The rack is OEM ford from the UK, sofuc89uk has been swapping some parts with me, as my car started life as an SVT model.....and he wanted to do an SVT conversion over in the UK....he traded me this roof rack for SVT sideskirts
The rack is OEM ford from the UK, sofuc89uk has been swapping some parts with me, as my car started life as an SVT model.....and he wanted to do an SVT conversion over in the UK....he traded me this roof rack for SVT sideskirts
06-08-2014, 12:23 PM
#106
Virgin

Join Date: Aug 2014
Location: new jersey
Posts: 1
Likes: 0
Received 0 Likes
on
0 Posts
So i Have spent at least a good 2 work hours reading every post and checking out every picture. about a month ago i started shopping around for an MK1 to do an RS swap. Man did i think it would be much easier journey. Still interested in doing it, but anyway. its been over a year, please tell us you still have her. LETS SEE SOME PICS!
Did you do the drivetrain swap?
how about the moldings, did you ever get them set up to be kitted out?
Did you do the drivetrain swap?
how about the moldings, did you ever get them set up to be kitted out?
07-08-2014, 07:07 PM
#107
Wahay!! I've lost my Virginity!!
Thread Starter
So i Have spent at least a good 2 work hours reading every post and checking out every picture. about a month ago i started shopping around for an MK1 to do an RS swap. Man did i think it would be much easier journey. Still interested in doing it, but anyway. its been over a year, please tell us you still have her. LETS SEE SOME PICS!
Did you do the drivetrain swap?
how about the moldings, did you ever get them set up to be kitted out?
Did you do the drivetrain swap?
how about the moldings, did you ever get them set up to be kitted out?
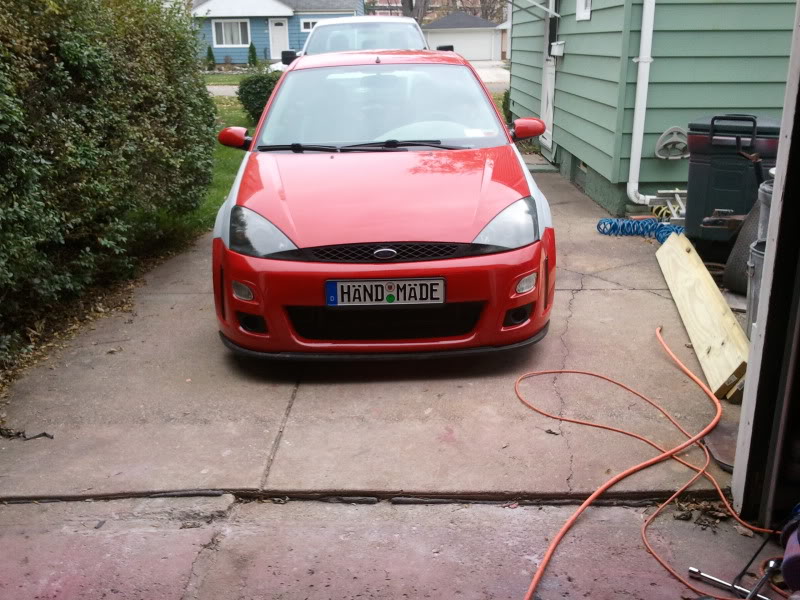
anyways, here's what I forgot to put on here after my most recent update
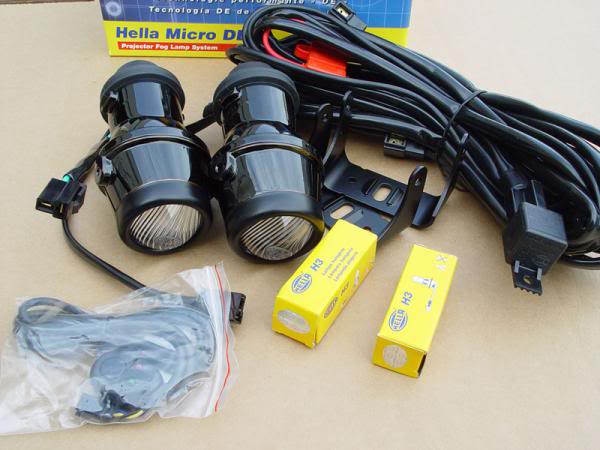
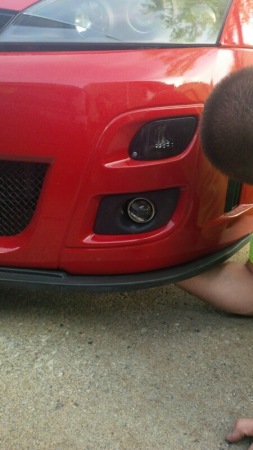

as you can see, some hella spot lights were made to fit the RS foglight openings and some mk2 RS replica hood vents were bought from ebay and installed. They've faded in the sun....which I expected given they were raw ABS plastic. I'll be sanding them down and painting them a metallic gloss black I think. I hope over winter to attack all the maintenance on it, do the sideskirts, fix where my bike fell on it, and install some of the european interior bits I've been slowly collecting.
07-08-2014, 08:00 PM
#108
15000

Join Date: Aug 2013
Location: Swindon
Posts: 41
Likes: 0
Received 0 Likes
on
0 Posts
I have just read through all this, and you have now taken away all my excuses not to deal with my scabby arches on my Mondeo. You have done a fantastic job on this. I am astounded by the effort you have put into this. Well done.
 28-05-2015, 09:10 PM
#110
Ford Focus Specialist
REALLY loving the efforts you've gone through to do something which is pretty unique where you are - I don't think anyone can fault you for effort.
However your efforts and struggles do highlight that sometimes......
- holding out and sourcing the correct parts from the start (genuine RS wings/fenders) is a better solution in the longer term, regardless of the cost.
- some jobs are just beyond the scope of mere mortals and should be left to the professionals (bodywork and painting).
It will all be worth it once the car is 'finished' though and you'll have something which would really stand out, even if it was over here in Europe.

Thread
Thread Starter
Forum
Replies
Last Post
salsheikh
Alloy wheels and ICE for sale
0
30-07-2015 08:45 PM

