Mk1 Focus RS replica (United States) Build
 19-08-2012, 05:45 PM
#41
Wahay!! I've lost my Virginity!!
Thread Starter

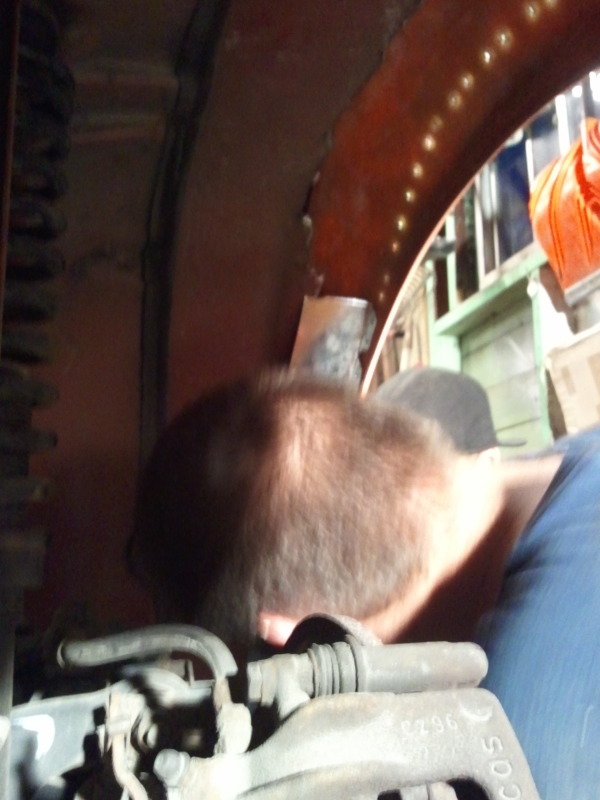
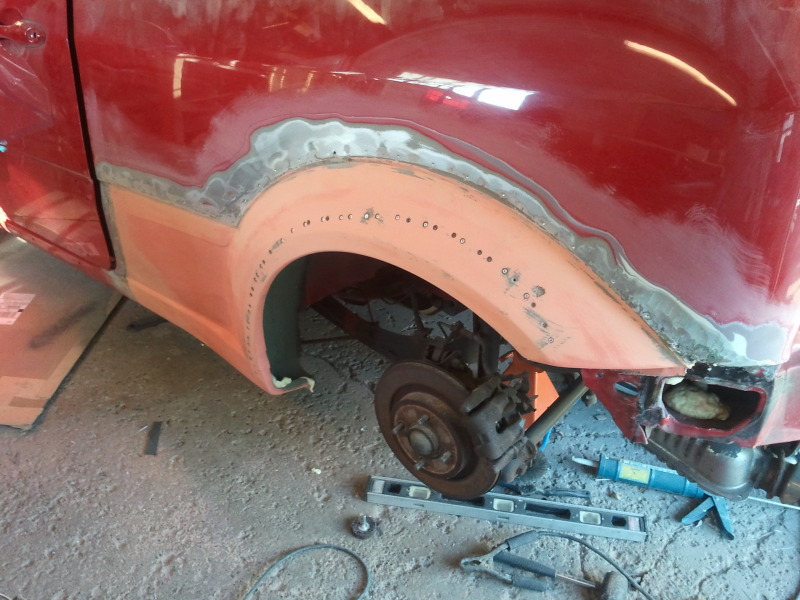
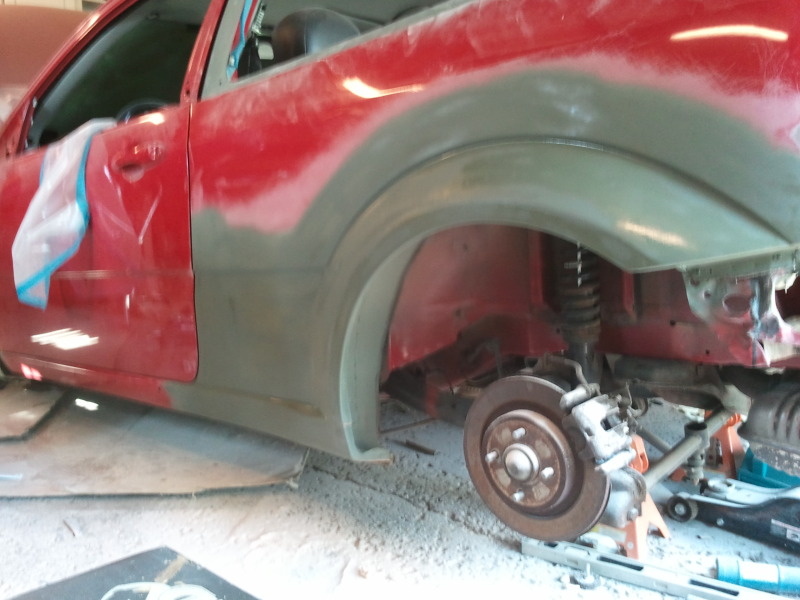
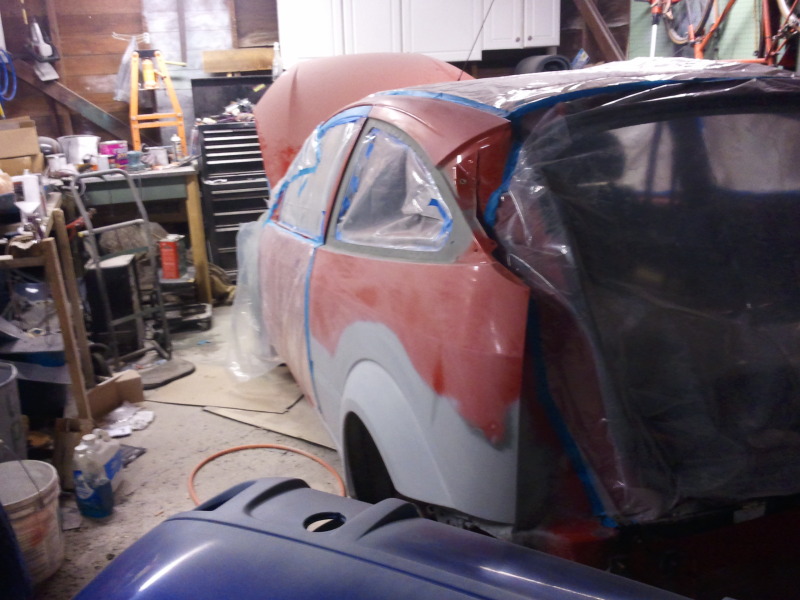
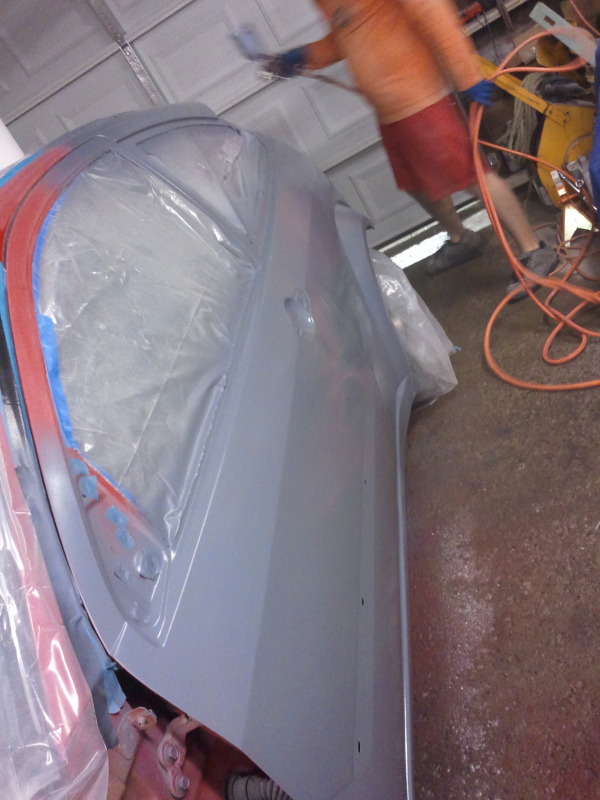
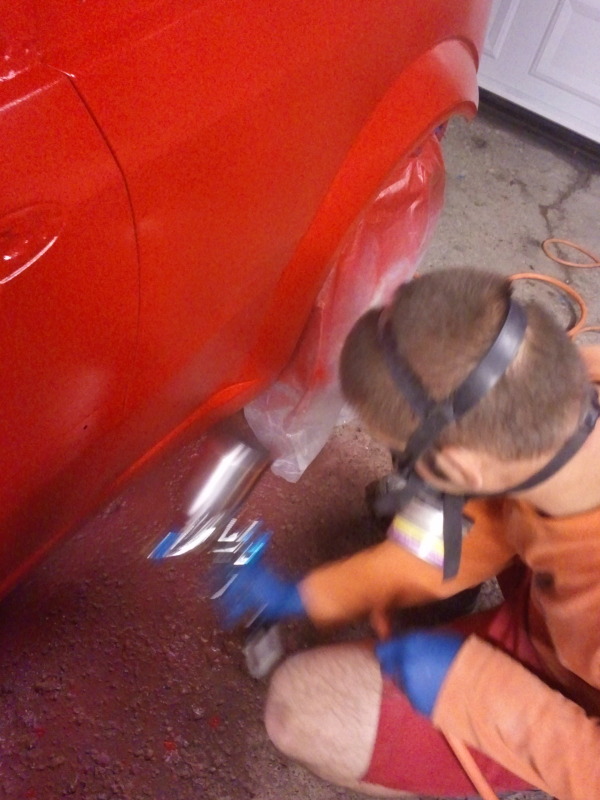
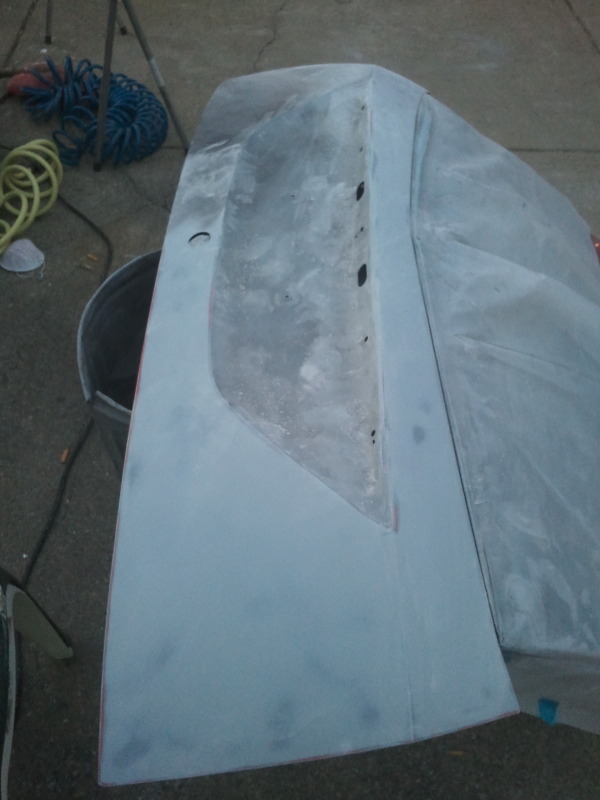
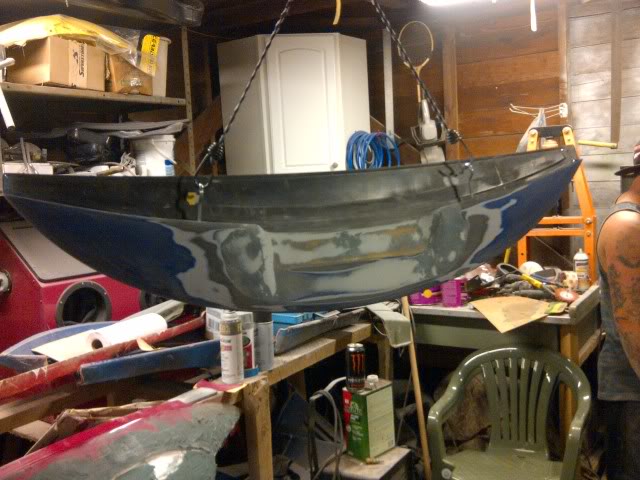
Got the other quarter panel mounted permanently this morning with the help (yet again) of Checko.
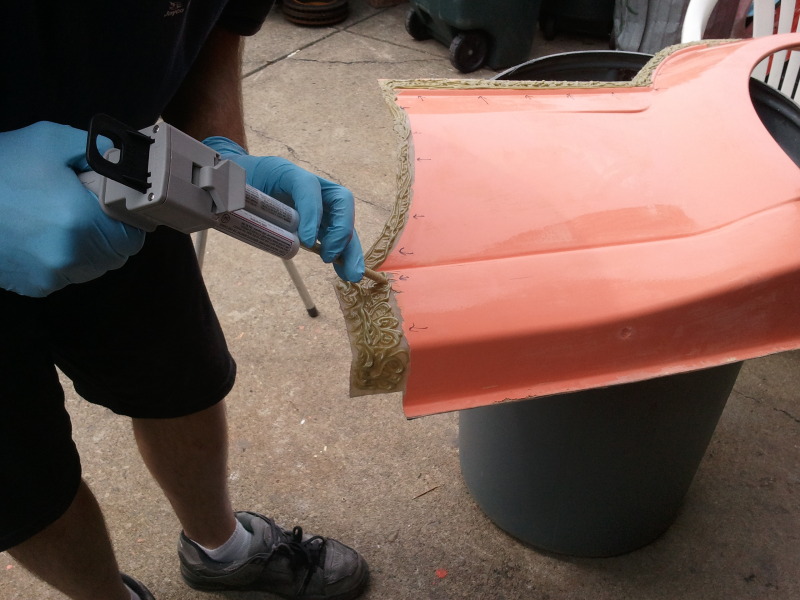
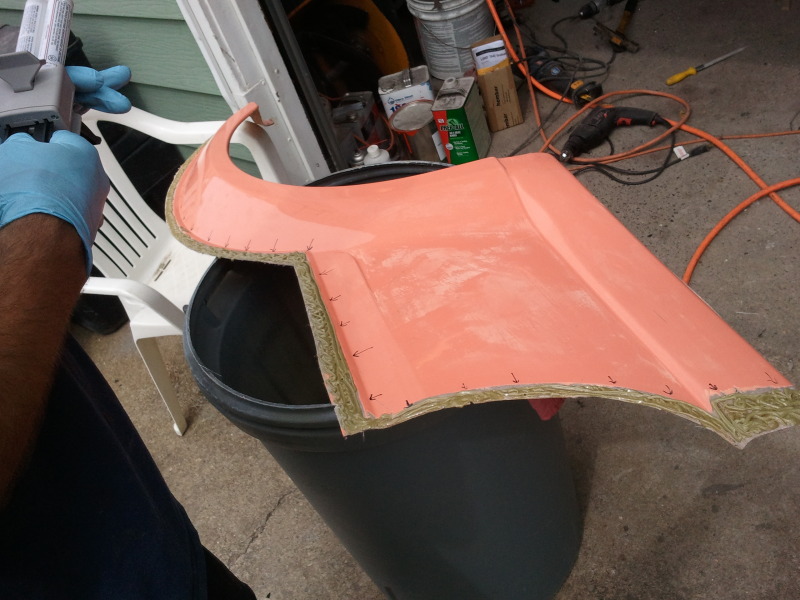
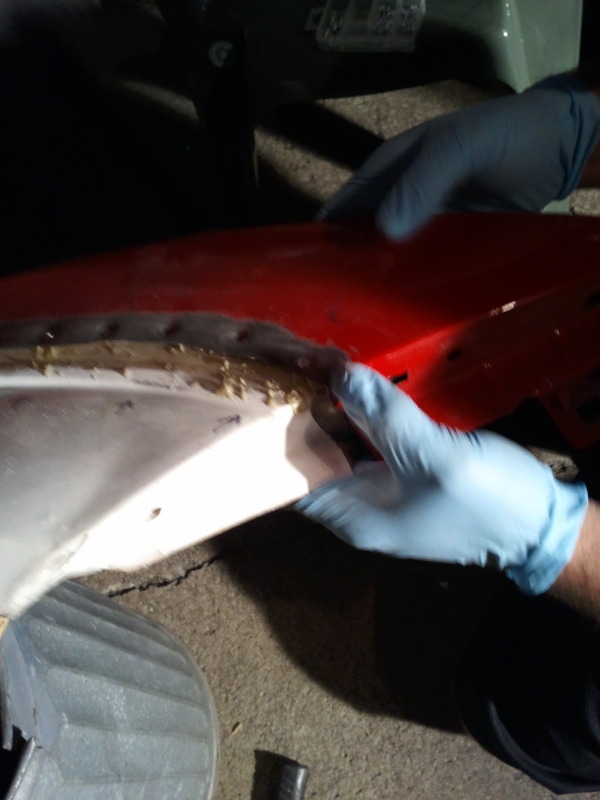
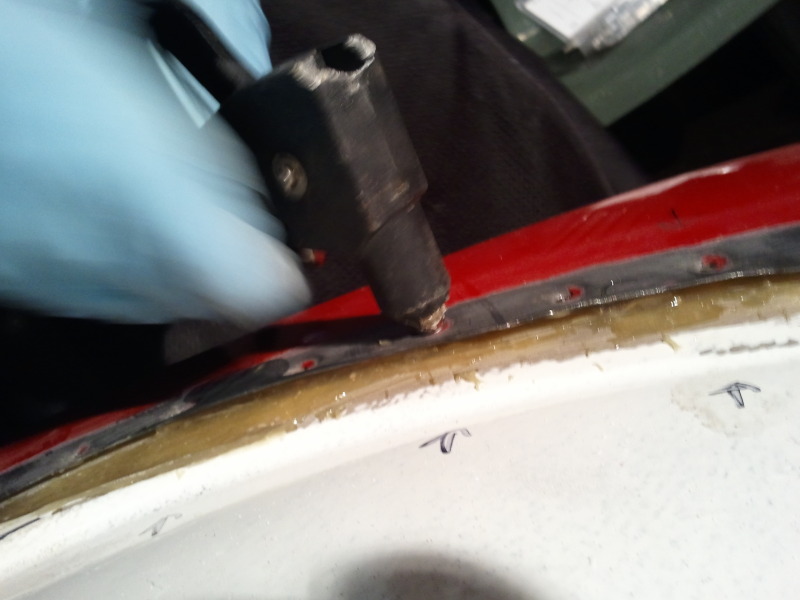
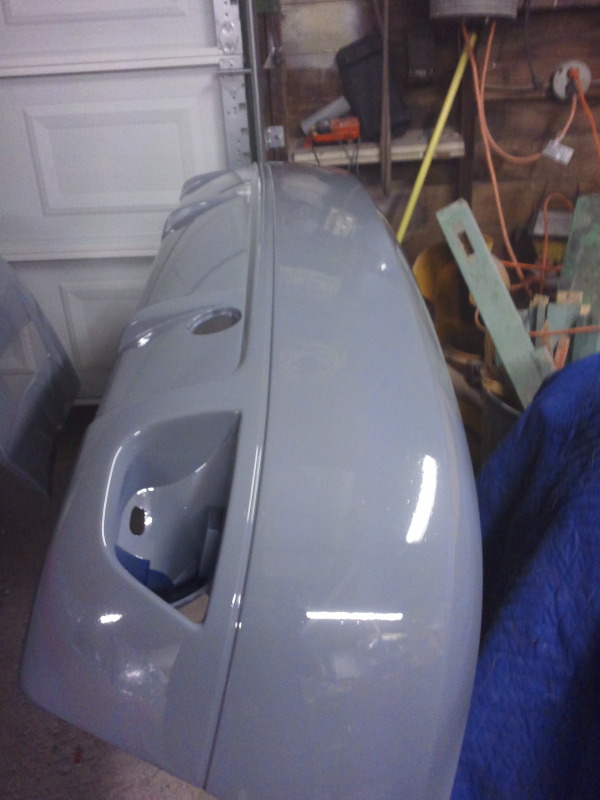
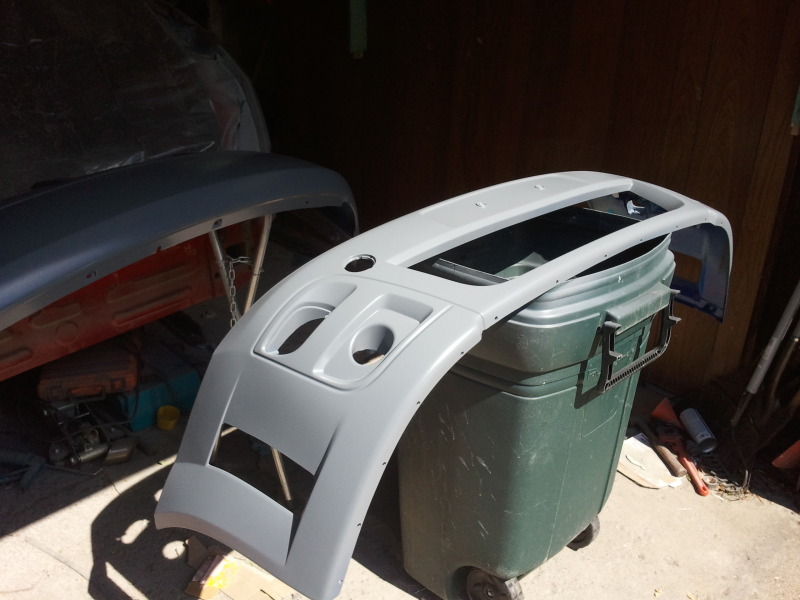
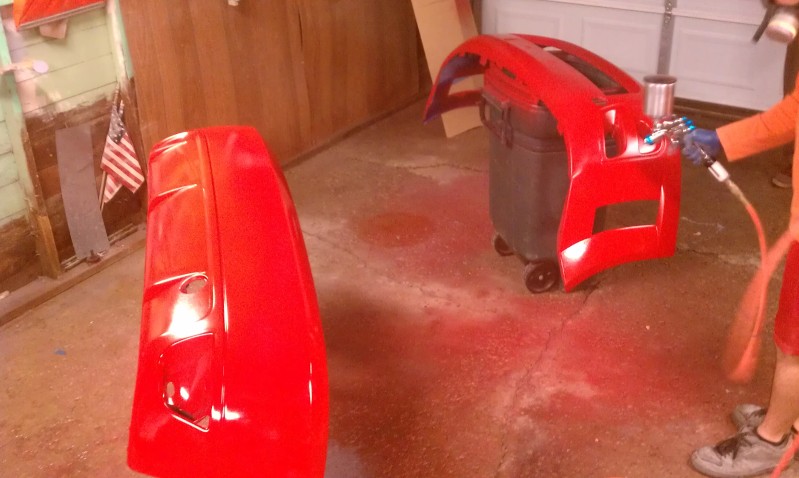
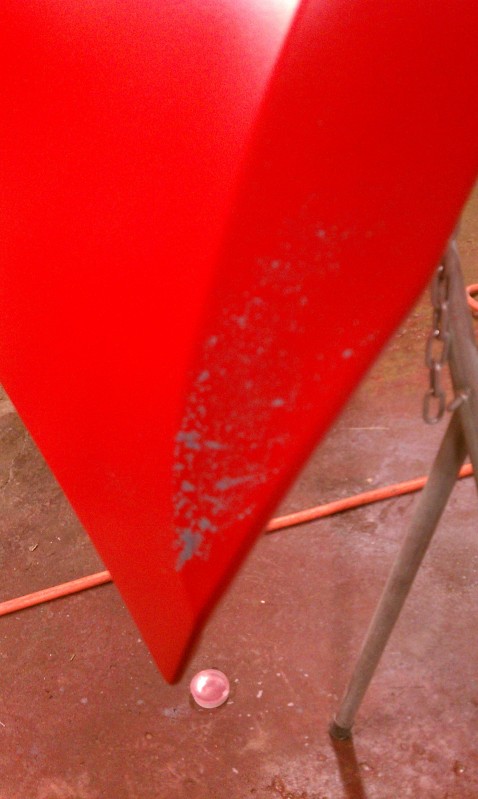
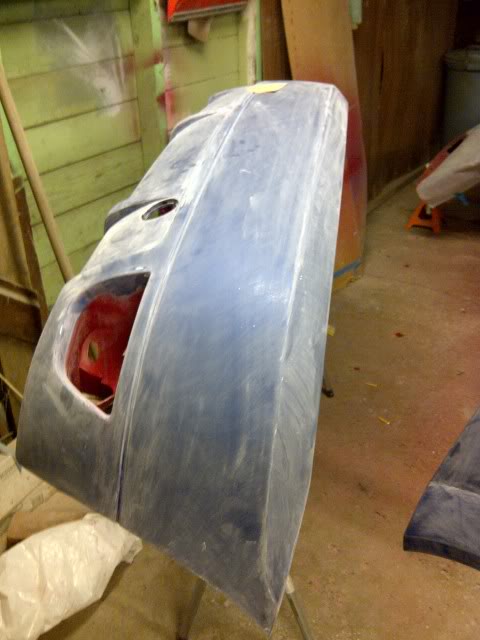
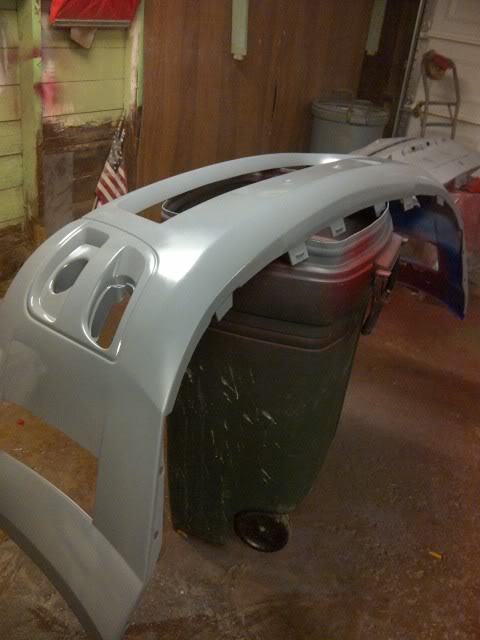
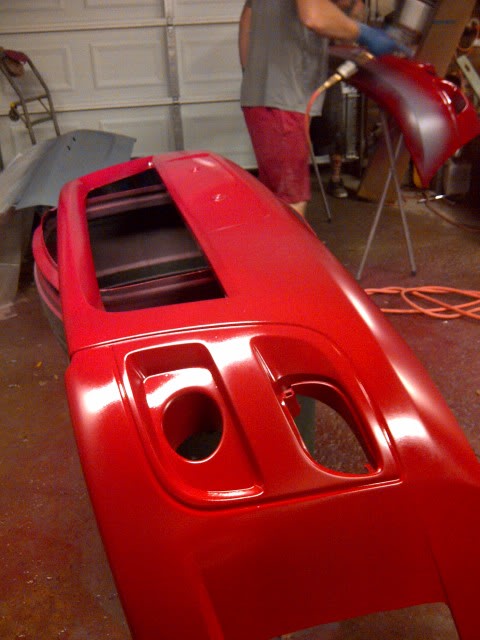
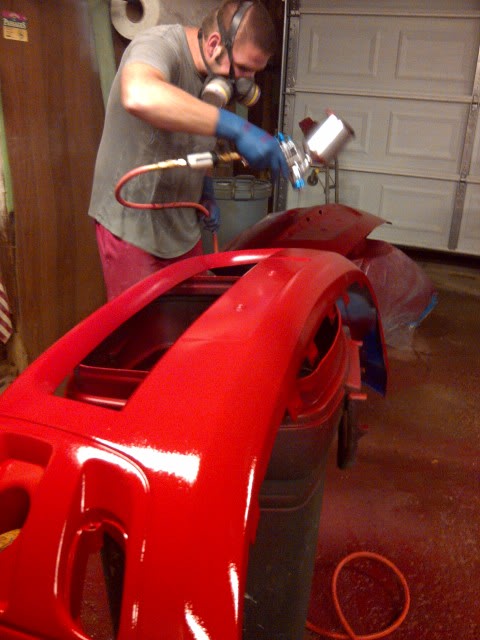
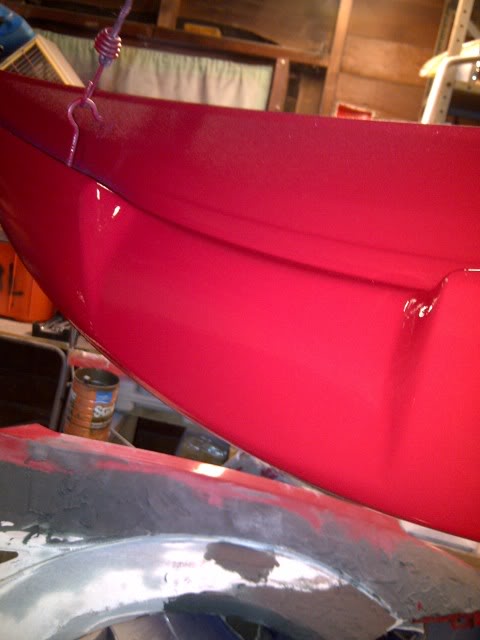
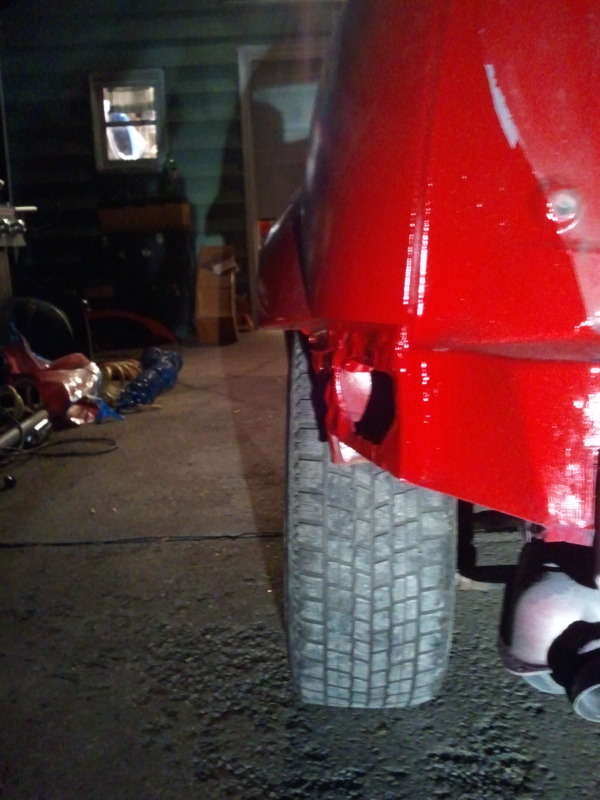
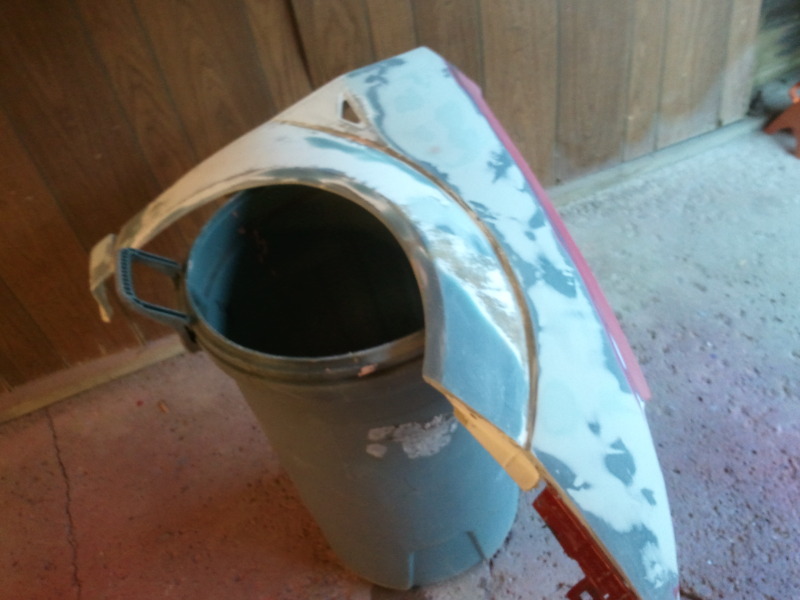
The rear bumper when I got it a long time ago came damaged.....corner was chipped off. made a cardboard backer by tracing the good side, and pounded a bunch of epoxy over it to make a new corner
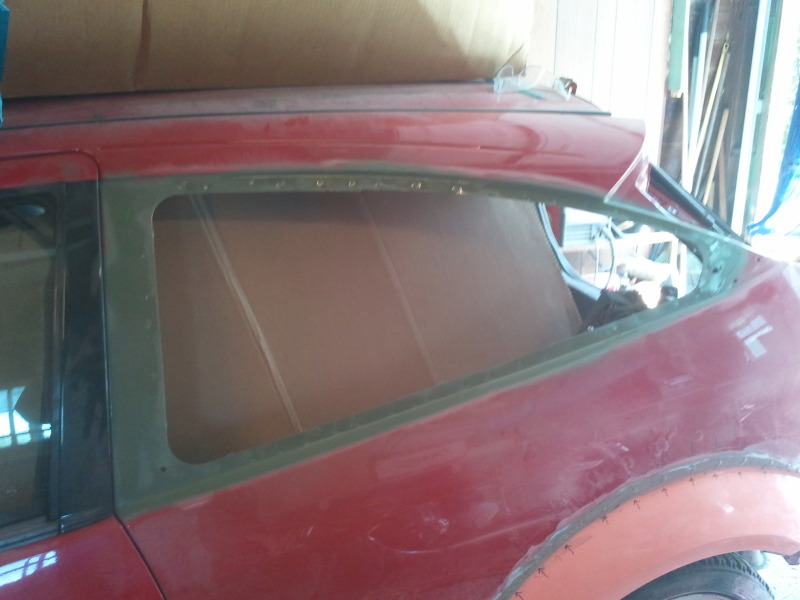
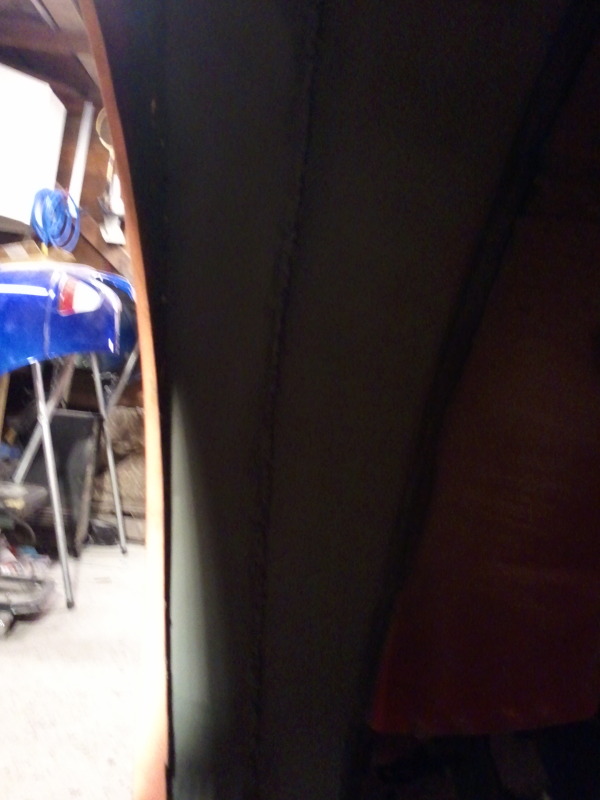
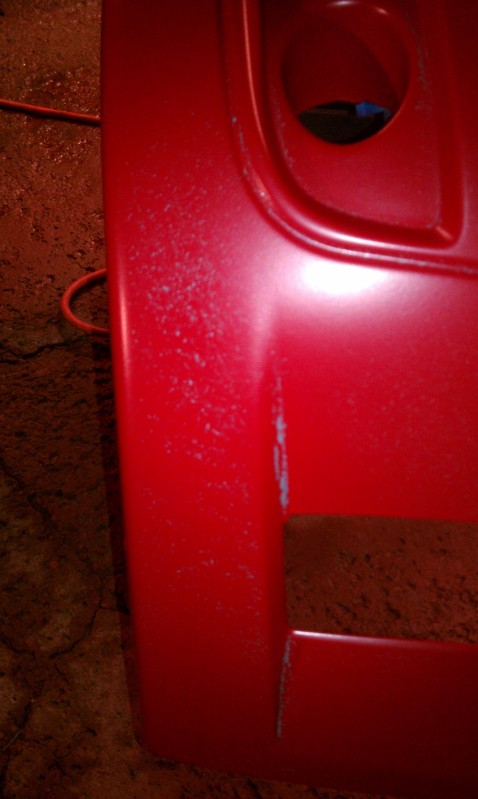
then I wire-wheeled the old window-weld adhesive off and etch-primed the opening
The rear bumper when I got it a long time ago came damaged.....corner was chipped off. made a cardboard backer by tracing the good side, and pounded a bunch of epoxy over it to make a new corner
then I wire-wheeled the old window-weld adhesive off and etch-primed the opening
 21-08-2012, 02:33 AM
#42
Wahay!! I've lost my Virginity!!
Thread Starter
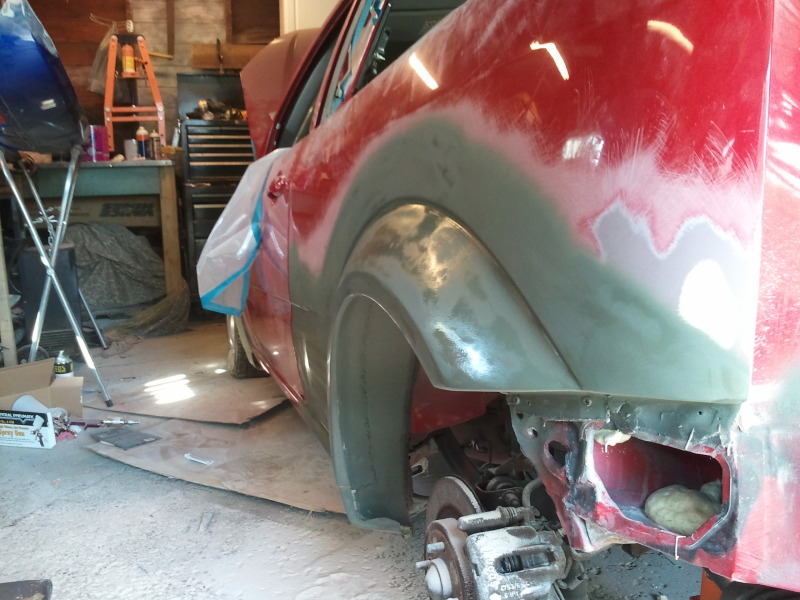
UGH, I'm REALLY getting burnt out on this thing. Every time I go to work on it with a list in my head of things I plan to get done, I get about half of the list done. Luke and Nick came over yet again to lend hands.
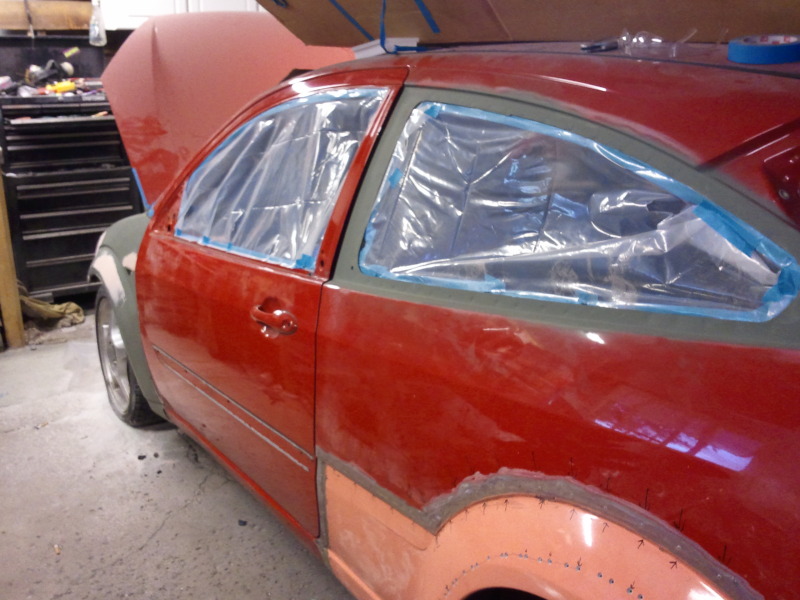
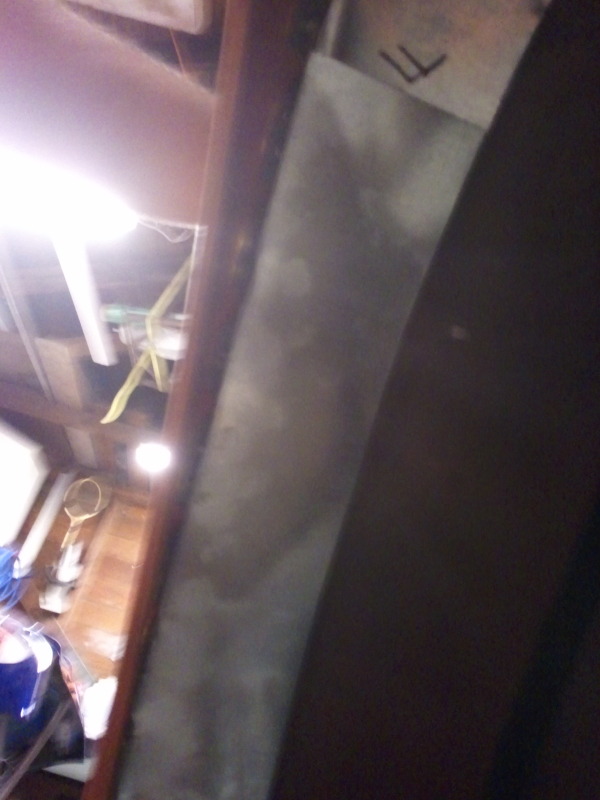
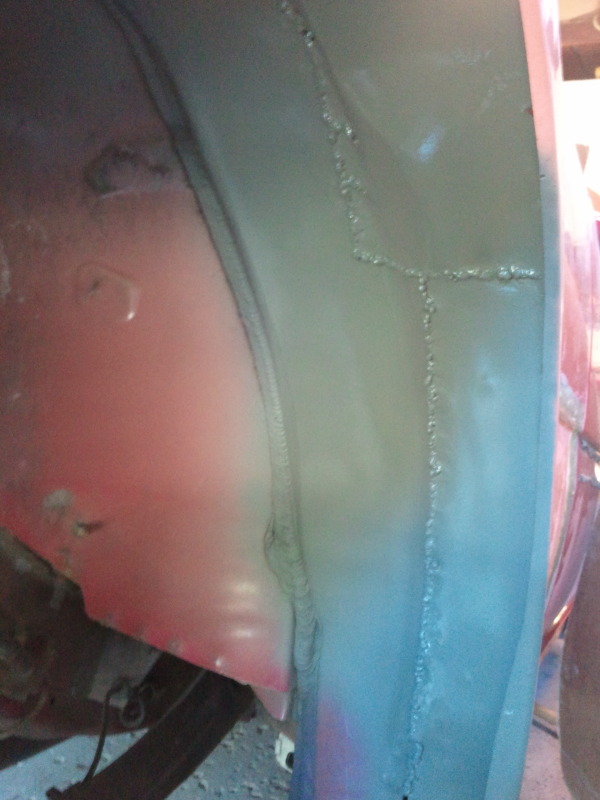
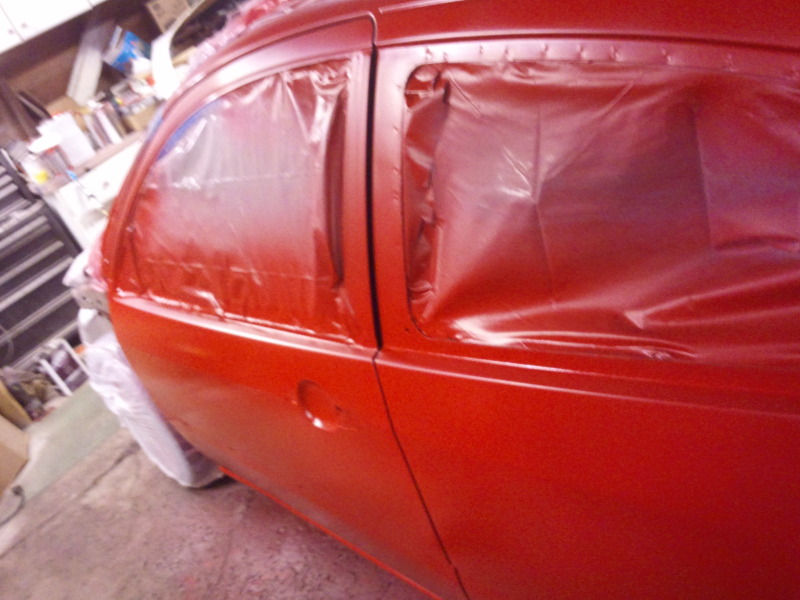
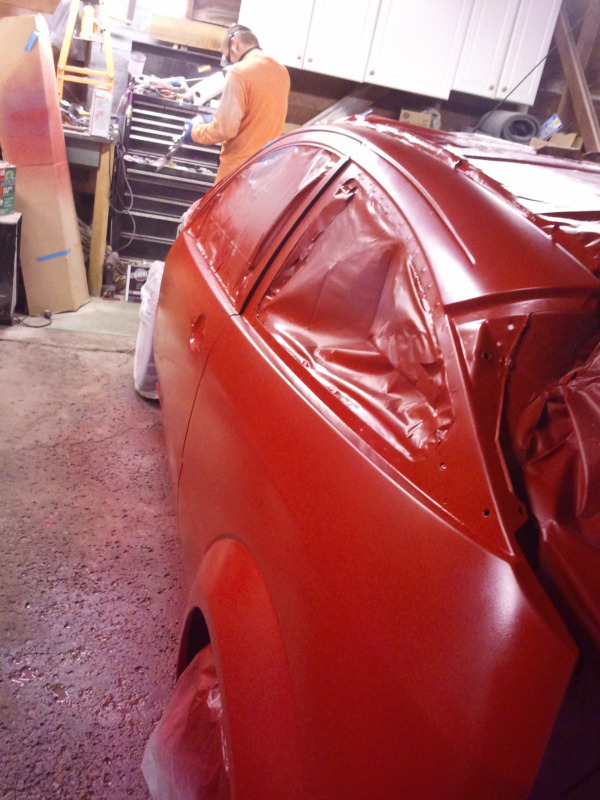
Nick went ahead and removed all me weather stripping and trims from the doors, and bagged the window openings for me
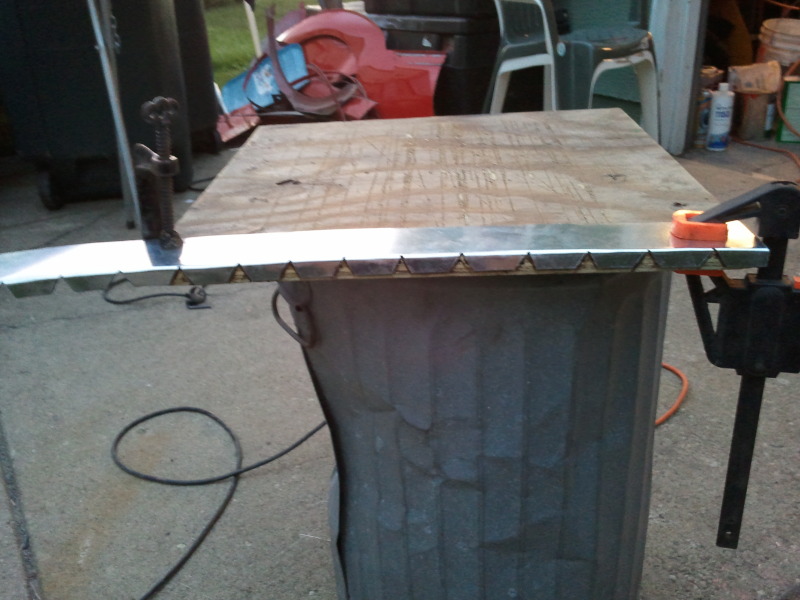
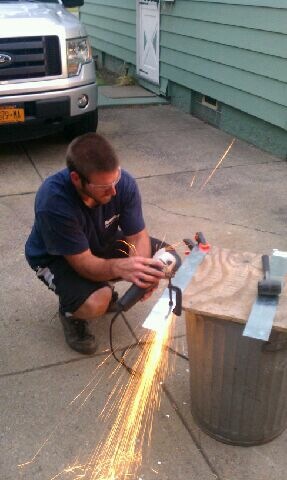
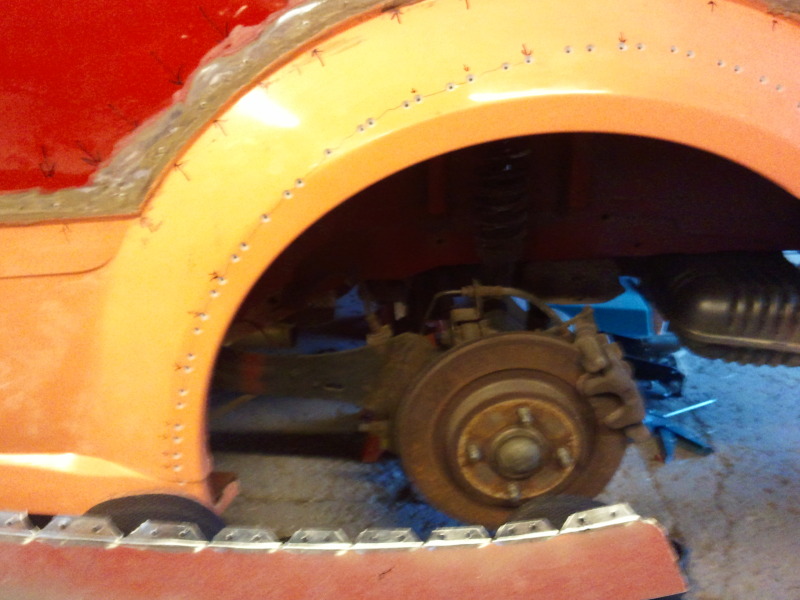
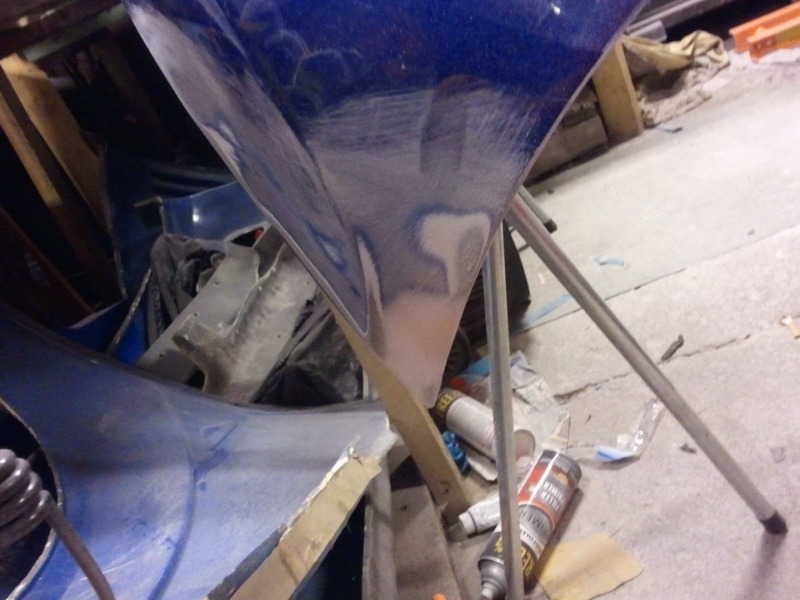
Luke went around and removed all the adhesive tape from where the trims were, and I set him up to cut some strips of sheetmetal for me so I could connect the inner fender to the new quarterpanel.
once luke cut the strips for me I did this:
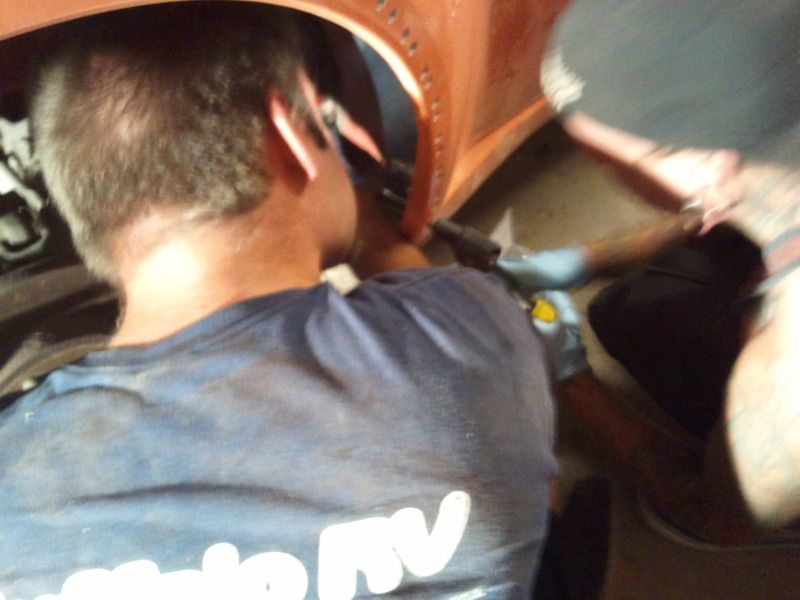
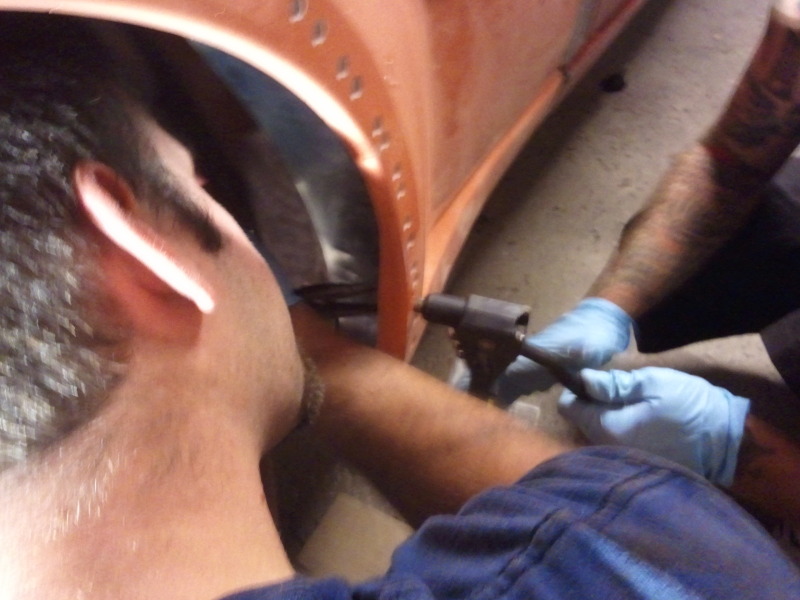
hammered a flange on one end, made releif cuts, and drilled holes for pop-rivets
then I set the strips into the wheelwell and marked where all the holes ended up, then came back and drilled the holes through (all from the back obv.)
Then I used a countersink bit on the outside of each of the holes to recess the rivets so they'll be hidden by fusor and bodyfiller later.
I started to repeat that procedure on the other side, but I only measured the driver side and assumed I had cut them both in the same spot. I did not. PISS. it was already 9:30 so I didn't want to be running an angle grinder and pissing off the neighbors so I called it a night.
Other things of note:
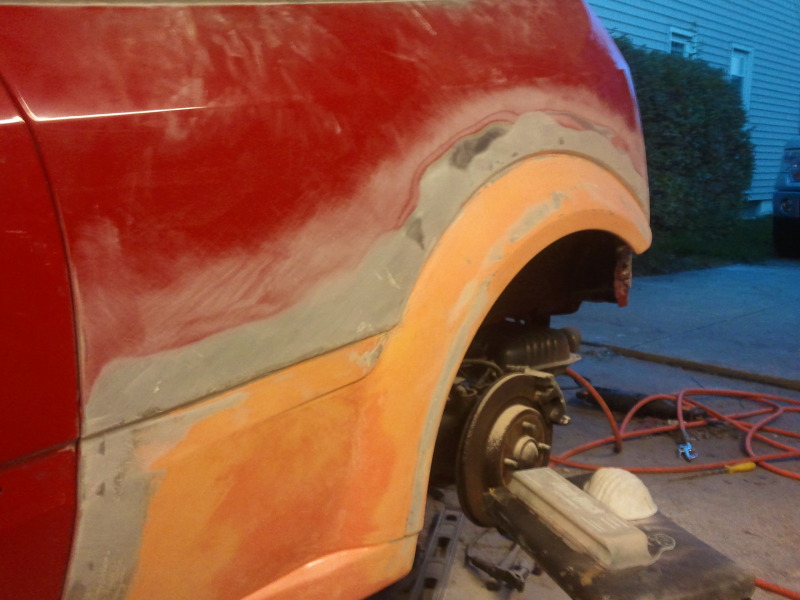
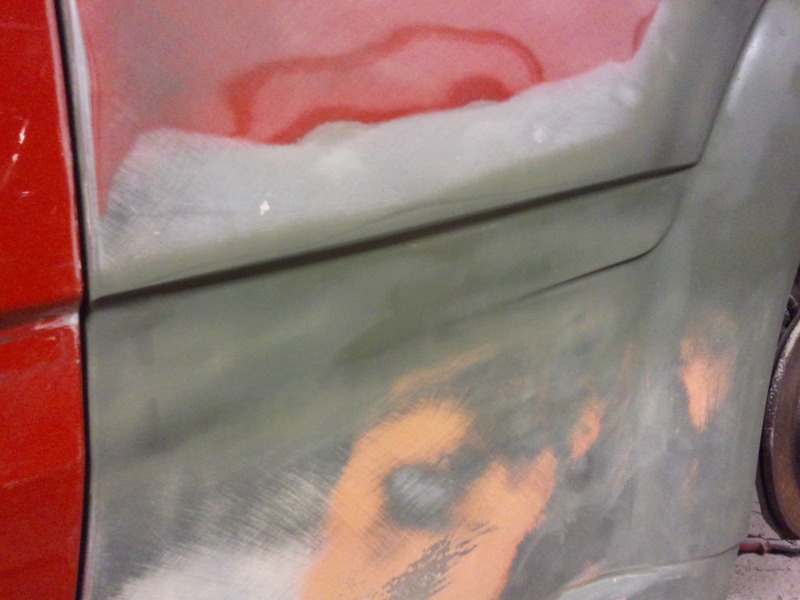
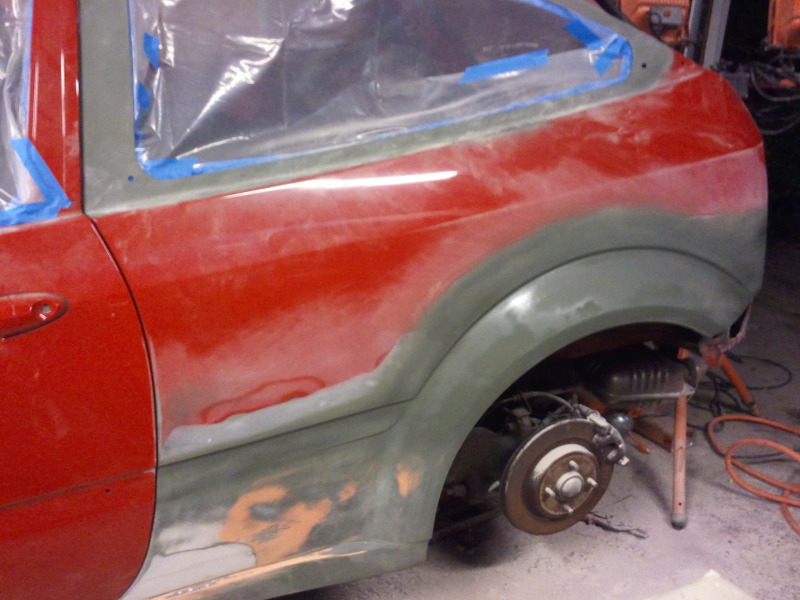
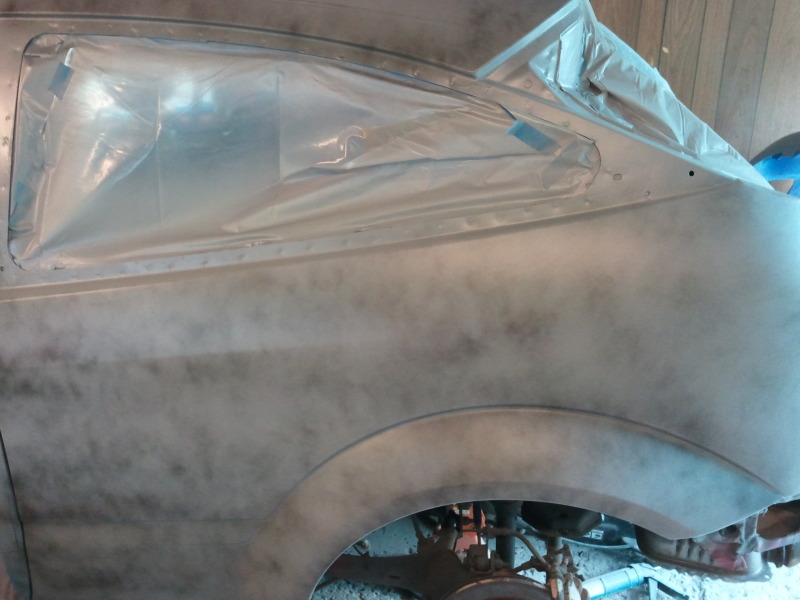
Everytime I block out the driver fender I find a new blemish or two that needs taken care of. I blocked and primed it yet again tonight, and found a couple more defects that I have to take care of again before it's ready for molding.
I haven't even touched the passenger fender since I mocked up the two halves. I have decided that I'm going to get the inner fender strips all ready to go and the passenger fender ready to go and bond them all at once so I don't waste any of the panel bond by having it harden in the nozzle. I'm hoping I can at least get the strips and fender bonded tomorrow night and the driver fender hopefully DONE.
I'm considering finishing everything besides the front fenders and using the hybrid fenders for the rest of the season unpainted to save time and get some miles on it before winter. The way I see it, I have at least 2-3 days worth of work just to get the passenger hybrid fender ready to mold. Then if I'm going to make the molds, that's a day. Then if I want to make fresh full fiberglass fenders that's another day minimum. Then those will need a day or two of bodywork to prep for paint. That's nearly a week just to do fenders, YIKES.
I still have to remove the windshield, rainguard trims, and address any imperfections in the doors and roof, not to mention the remaining bodywork on the rear quarters. BOY am I stressing. All this plus my father is calling me literally every day harping on my to get going on some of the bodywork for the challenger. He's taking it to a picnic saturday... so I have to find time to fix a few dents in the spare hood, block that down, and get it at least in black primer-sealer by then.
Yeah.....I'm f****d....
Nick went ahead and removed all me weather stripping and trims from the doors, and bagged the window openings for me
Luke went around and removed all the adhesive tape from where the trims were, and I set him up to cut some strips of sheetmetal for me so I could connect the inner fender to the new quarterpanel.
once luke cut the strips for me I did this:
hammered a flange on one end, made releif cuts, and drilled holes for pop-rivets
then I set the strips into the wheelwell and marked where all the holes ended up, then came back and drilled the holes through (all from the back obv.)
Then I used a countersink bit on the outside of each of the holes to recess the rivets so they'll be hidden by fusor and bodyfiller later.
I started to repeat that procedure on the other side, but I only measured the driver side and assumed I had cut them both in the same spot. I did not. PISS. it was already 9:30 so I didn't want to be running an angle grinder and pissing off the neighbors so I called it a night.
Other things of note:
Everytime I block out the driver fender I find a new blemish or two that needs taken care of. I blocked and primed it yet again tonight, and found a couple more defects that I have to take care of again before it's ready for molding.
I haven't even touched the passenger fender since I mocked up the two halves. I have decided that I'm going to get the inner fender strips all ready to go and the passenger fender ready to go and bond them all at once so I don't waste any of the panel bond by having it harden in the nozzle. I'm hoping I can at least get the strips and fender bonded tomorrow night and the driver fender hopefully DONE.
I'm considering finishing everything besides the front fenders and using the hybrid fenders for the rest of the season unpainted to save time and get some miles on it before winter. The way I see it, I have at least 2-3 days worth of work just to get the passenger hybrid fender ready to mold. Then if I'm going to make the molds, that's a day. Then if I want to make fresh full fiberglass fenders that's another day minimum. Then those will need a day or two of bodywork to prep for paint. That's nearly a week just to do fenders, YIKES.
I still have to remove the windshield, rainguard trims, and address any imperfections in the doors and roof, not to mention the remaining bodywork on the rear quarters. BOY am I stressing. All this plus my father is calling me literally every day harping on my to get going on some of the bodywork for the challenger. He's taking it to a picnic saturday... so I have to find time to fix a few dents in the spare hood, block that down, and get it at least in black primer-sealer by then.
Yeah.....I'm f****d....
22-08-2012, 04:05 AM
#43
Wahay!! I've lost my Virginity!!
Thread Starter
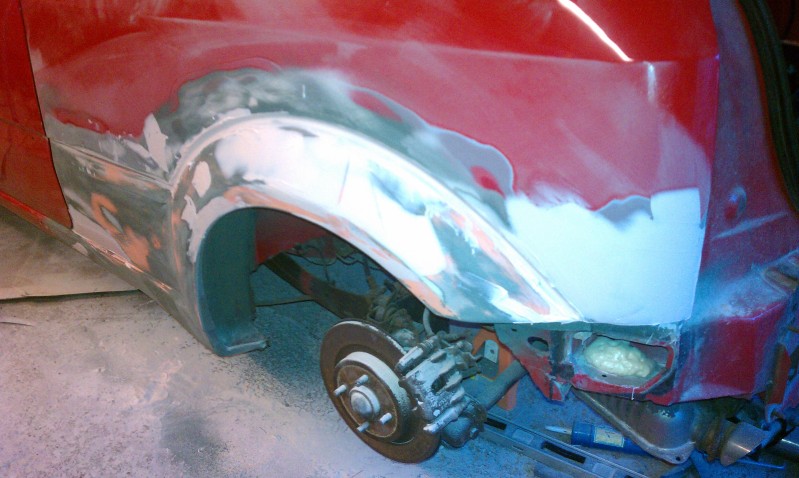
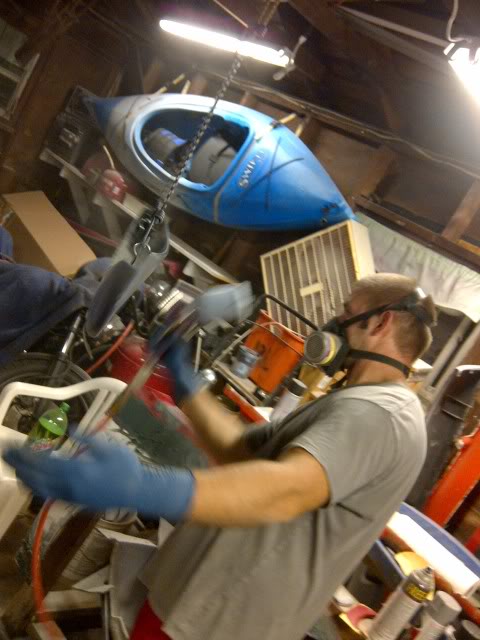
got an assload done tonight surprisingly. Luke and Nick AND my buddy john all came by today to contribute. Didn't take all that many pics of alot of it because we were in the zone, I had luke shoot a few with my phone towards the end so I'd have a few to show and narrate lol.
Things that got done:
-blocked down, scuffed, and filler primed the hood for the '74 challenger :-P
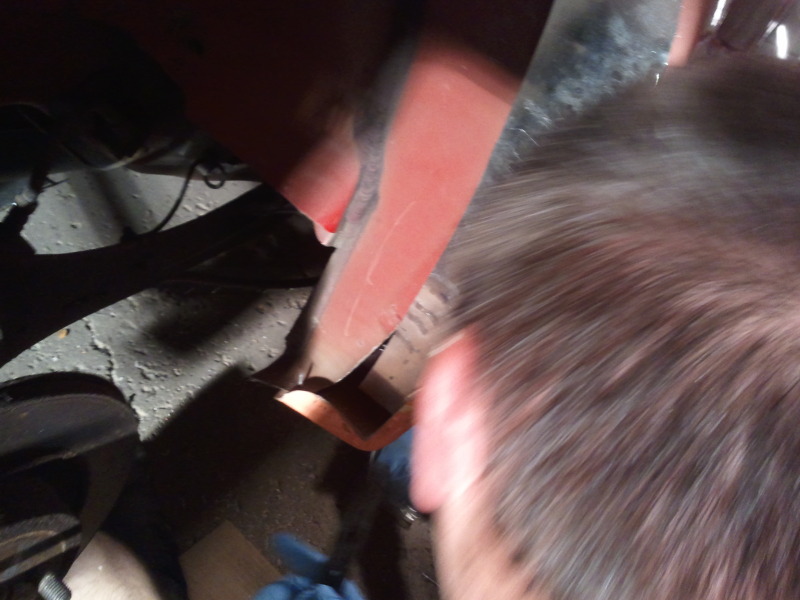
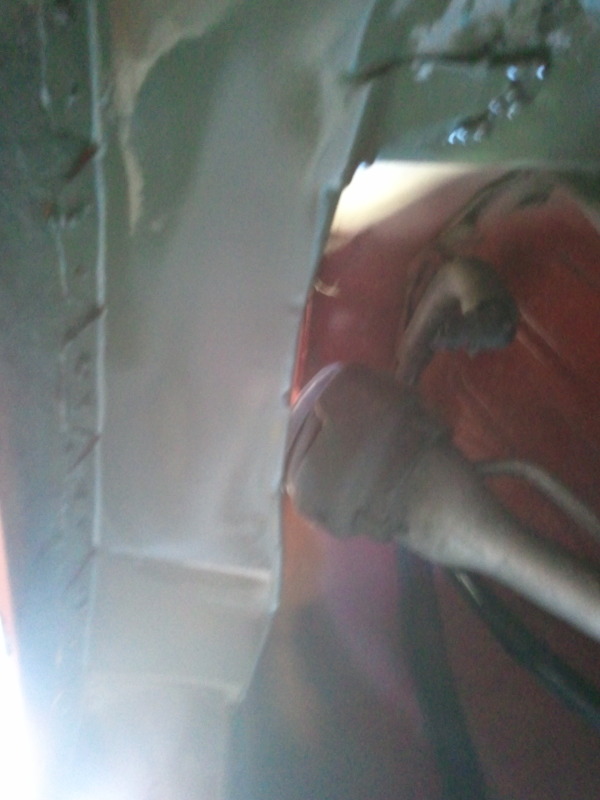
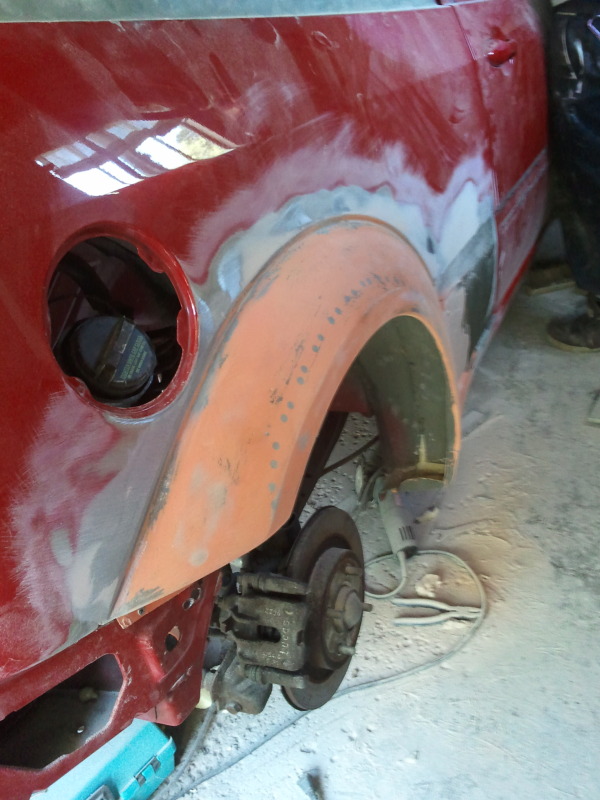
-mocked up and drilled/countersunk for the inner fender patch strips on the passenger side
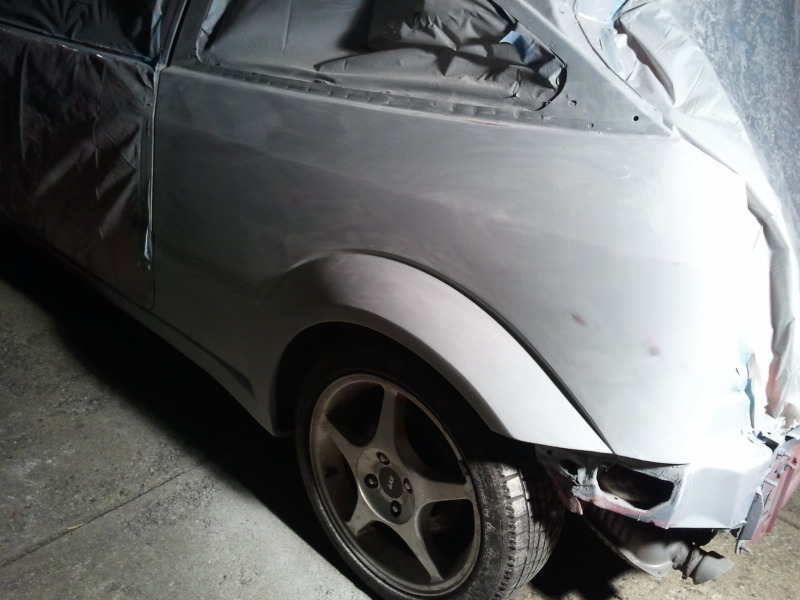
-drilled and countersunk/dimpled the front fender to bond the two halves together
-bonded and riveted inner fender patch strips on BOTH sides in the rear
-bonded and riveted the tow halves for the front passenger fender
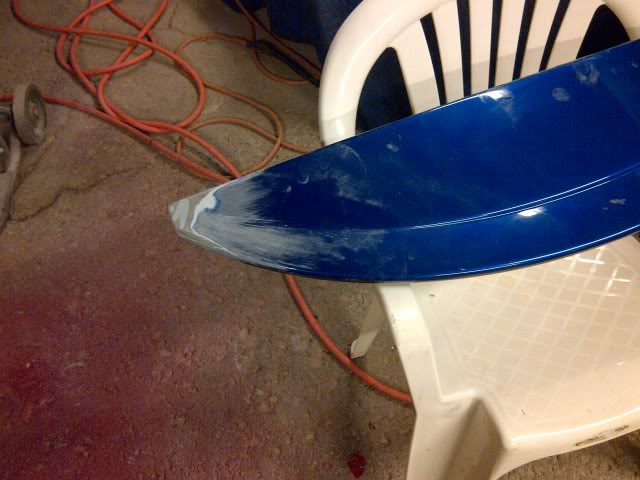
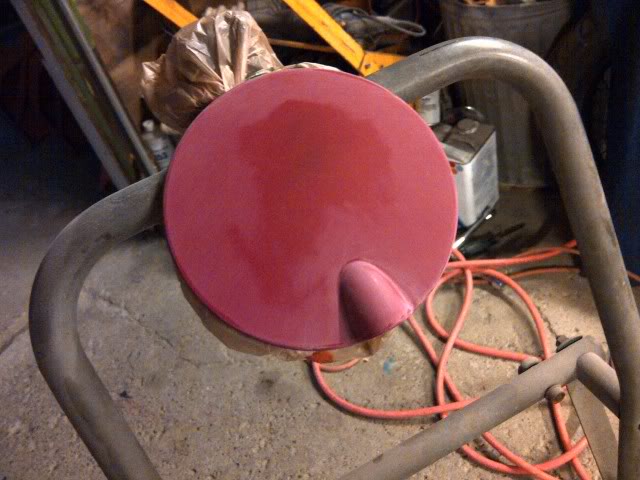
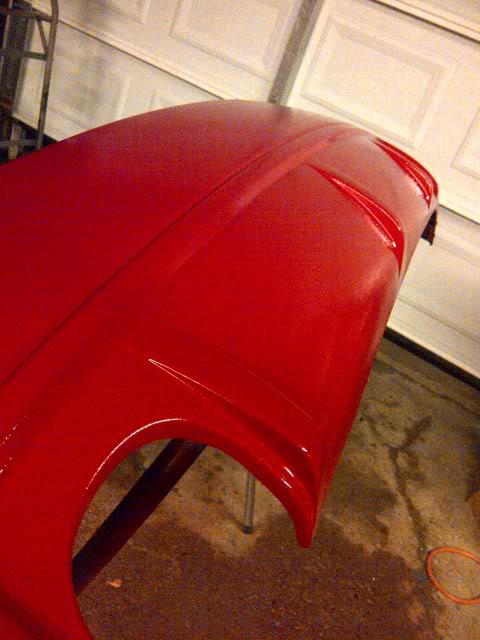
-applied body filler to the corner I repaired on the rear bumper
-accidentally panel-bonded a bunch of my hair to my left ear and made a few spikes in my hair with panel bond, unknowingly until I went to scratch an itch by my hear about 20mins later. holy shit did that hurt pulling out all the hair that was bonded!
pics!
fender:
(yes we chipped off a hunk of the pop-riveter from smacking it on the ground to get the tails out after riveting)
Things that got done:
-blocked down, scuffed, and filler primed the hood for the '74 challenger :-P
-mocked up and drilled/countersunk for the inner fender patch strips on the passenger side
-drilled and countersunk/dimpled the front fender to bond the two halves together
-bonded and riveted inner fender patch strips on BOTH sides in the rear
-bonded and riveted the tow halves for the front passenger fender
-applied body filler to the corner I repaired on the rear bumper
-accidentally panel-bonded a bunch of my hair to my left ear and made a few spikes in my hair with panel bond, unknowingly until I went to scratch an itch by my hear about 20mins later. holy shit did that hurt pulling out all the hair that was bonded!
pics!
fender:
(yes we chipped off a hunk of the pop-riveter from smacking it on the ground to get the tails out after riveting)
23-08-2012, 02:08 AM
#44
Wahay!! I've lost my Virginity!!
Thread Starter
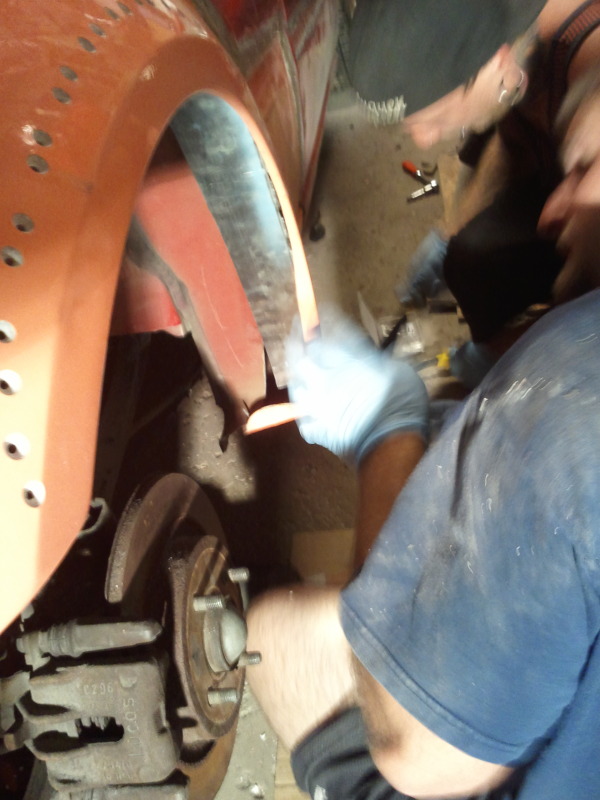
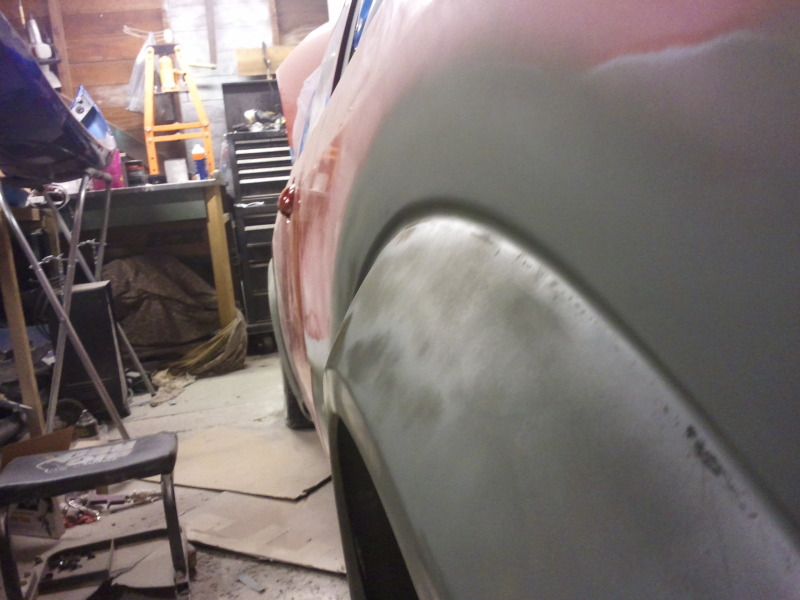
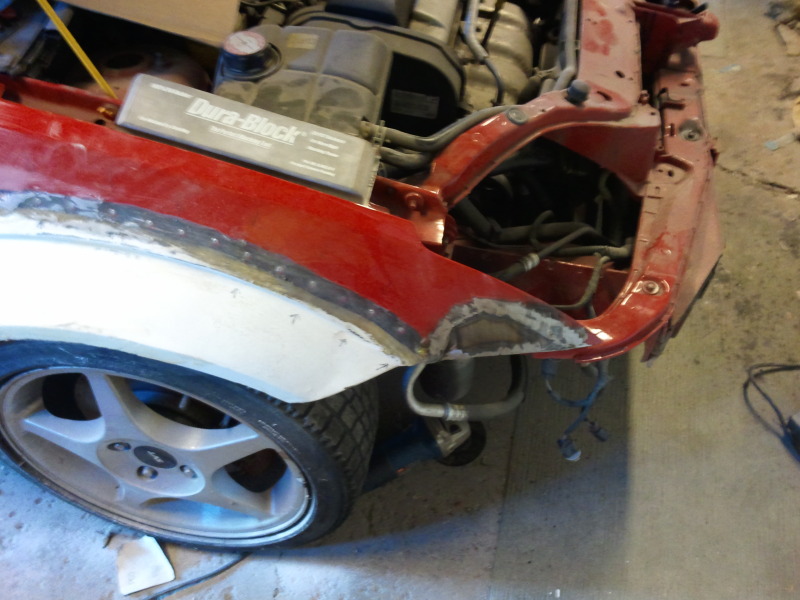
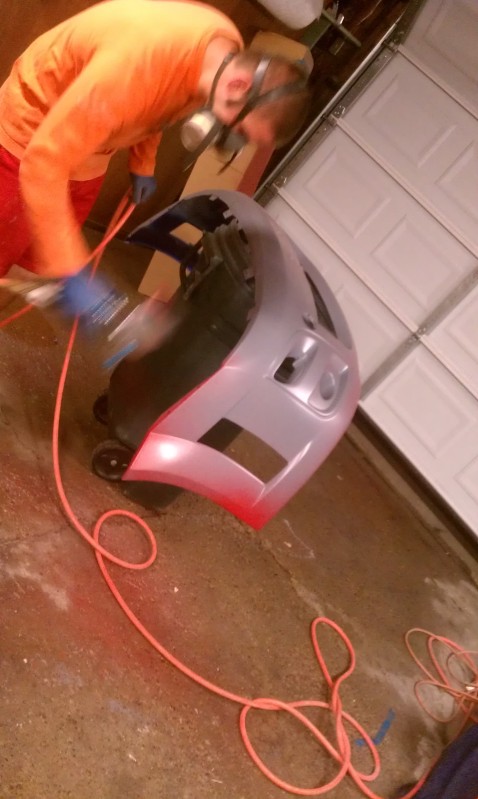
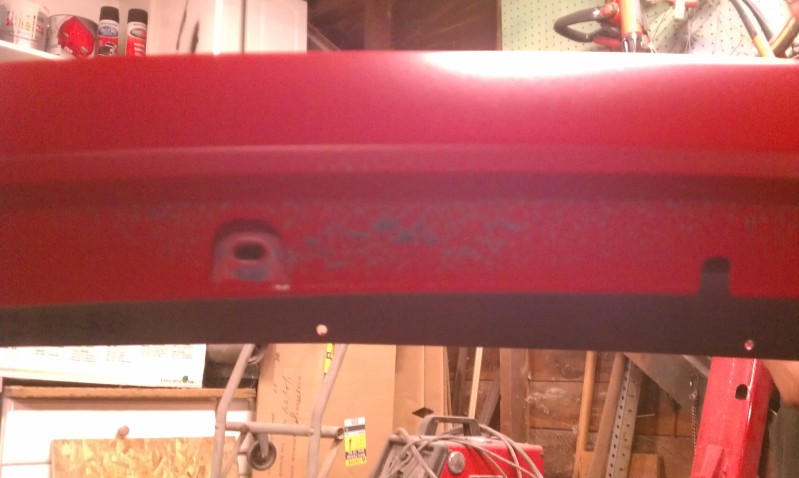
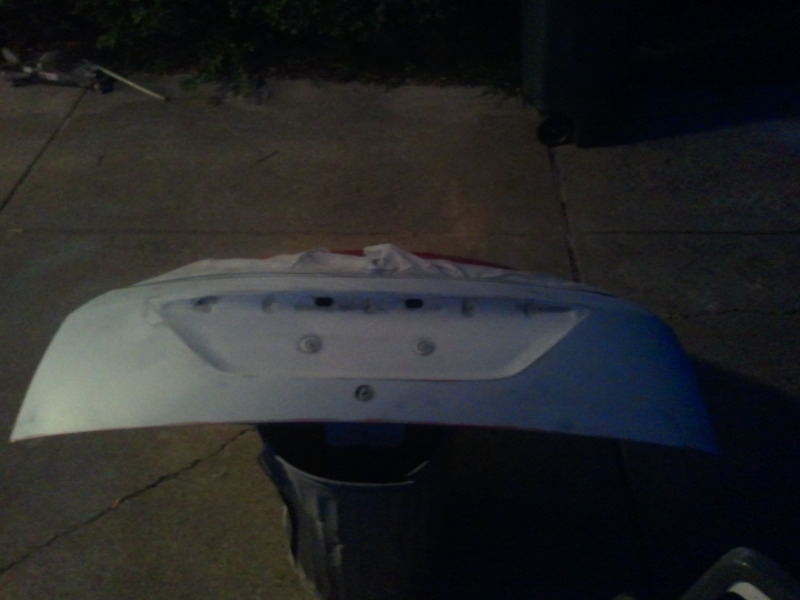
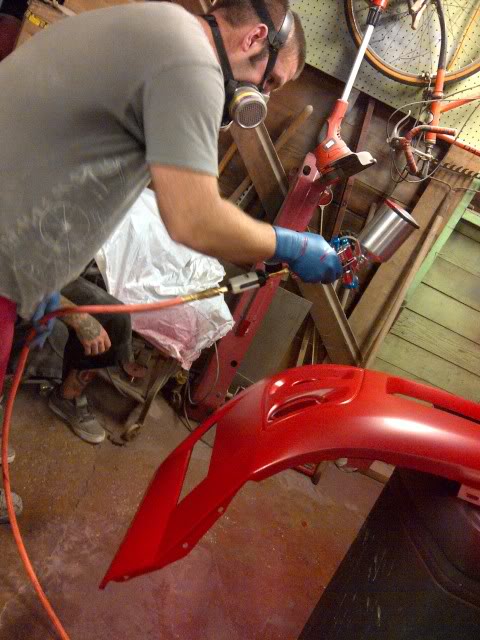
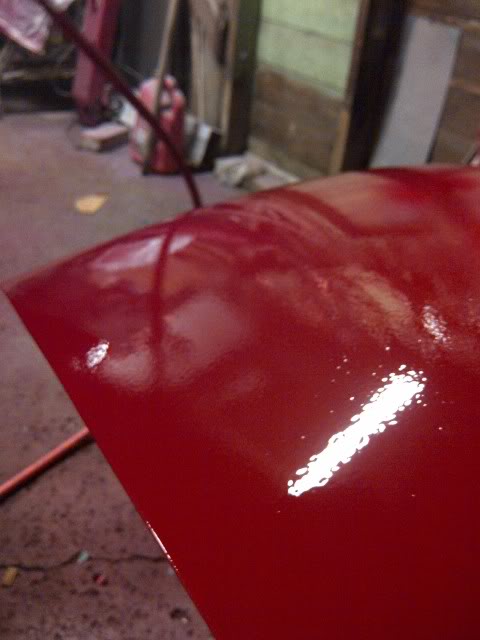
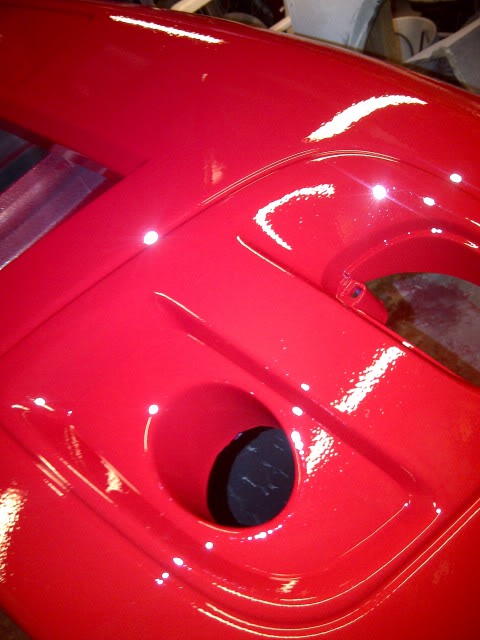
finished the inner fender patches tonight by welding them in to the existing metal. wire brushed them, cleaned them, and sprayed in acid-etch primer.
also finished the repair on the corner of the rear bumper
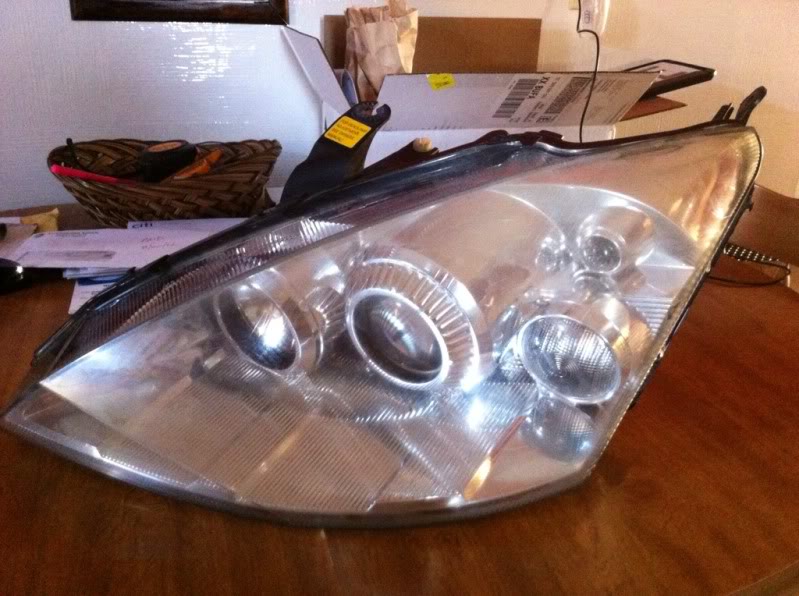
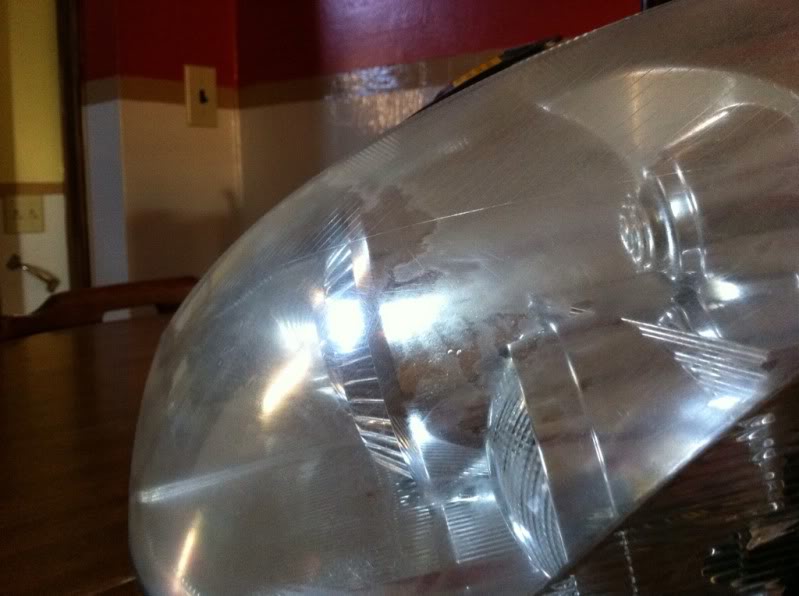
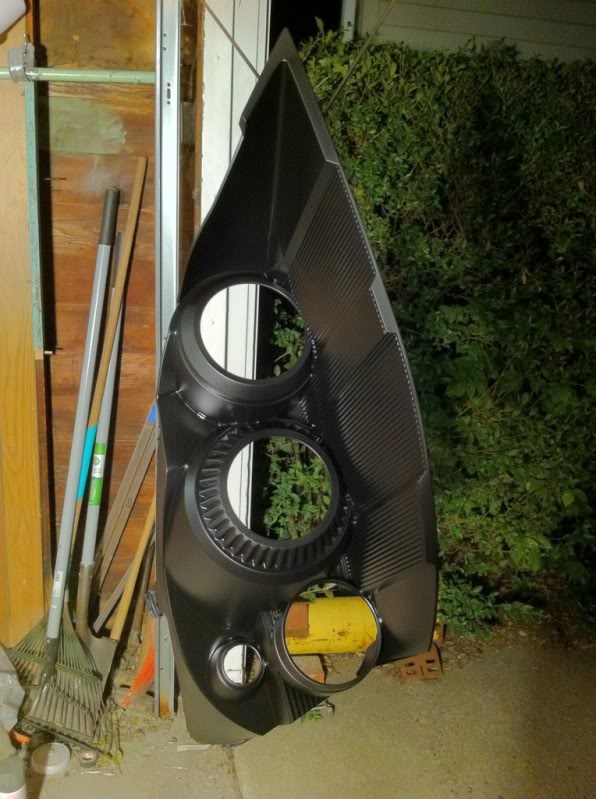
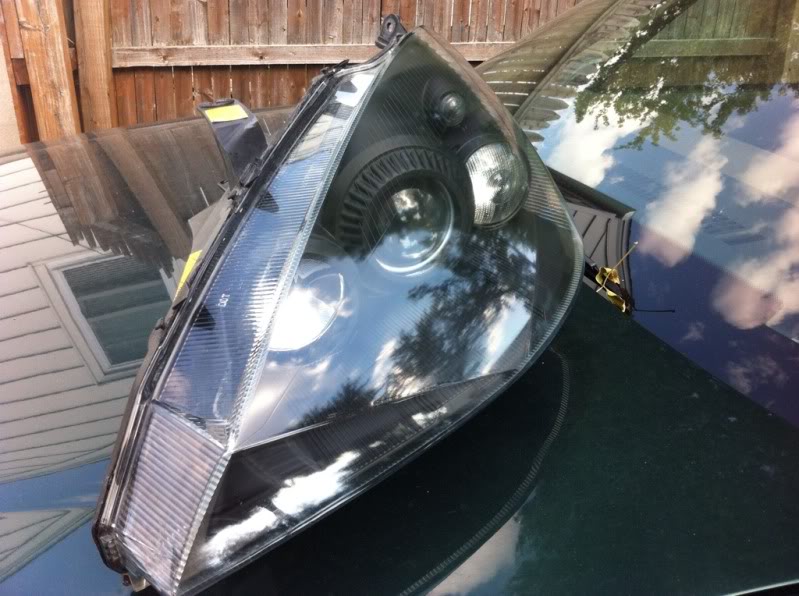
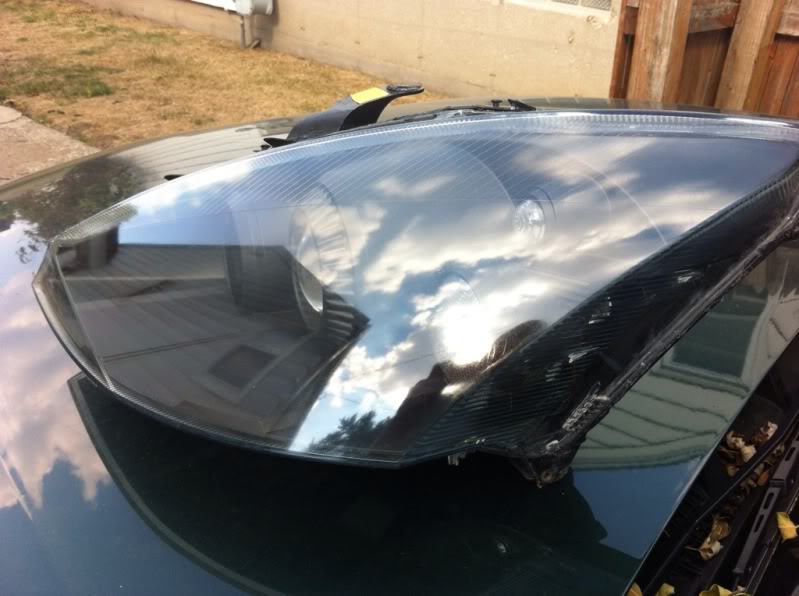
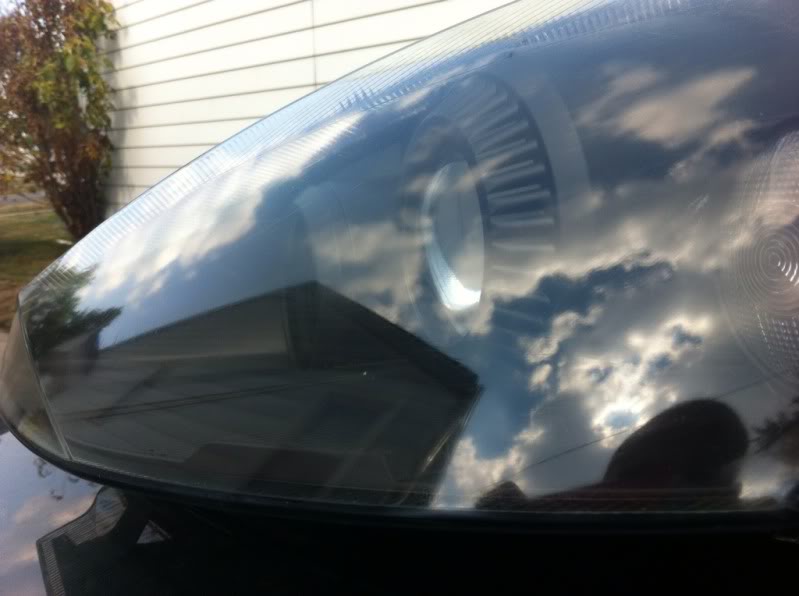
meanwhile, Chris came by as he's an expert on refurbishing headlights, so we baked mine and did the black inside treatment and he's going to take them home and refurbish the exterior of the lenses like new!
YAY!
also finished the repair on the corner of the rear bumper
meanwhile, Chris came by as he's an expert on refurbishing headlights, so we baked mine and did the black inside treatment and he's going to take them home and refurbish the exterior of the lenses like new!
YAY!
28-08-2012, 08:27 PM
#45
Wahay!! I've lost my Virginity!!
Thread Starter
All I really have for an update is my friend chris is an expert at refurbishing headlights, and mine were TERRIBLE. so we baked them apart and did the black insides conversion and he took them home to refurbish and treat the lenses with UV-protectant:

I've been too burnt out on it from putting in 4-6hrs a day for 3 weeks straight so I've been taking a minor break. I might get back into it later this week. All that's left is drill the heads off the set-rivets on the rear quarters, apply tigerhair bodyfiller over the seams, and sand to perfection. Then paint.
I've been too burnt out on it from putting in 4-6hrs a day for 3 weeks straight so I've been taking a minor break. I might get back into it later this week. All that's left is drill the heads off the set-rivets on the rear quarters, apply tigerhair bodyfiller over the seams, and sand to perfection. Then paint.
31-08-2012, 12:32 AM
#47
Wahay!! I've lost my Virginity!!
Thread Starter
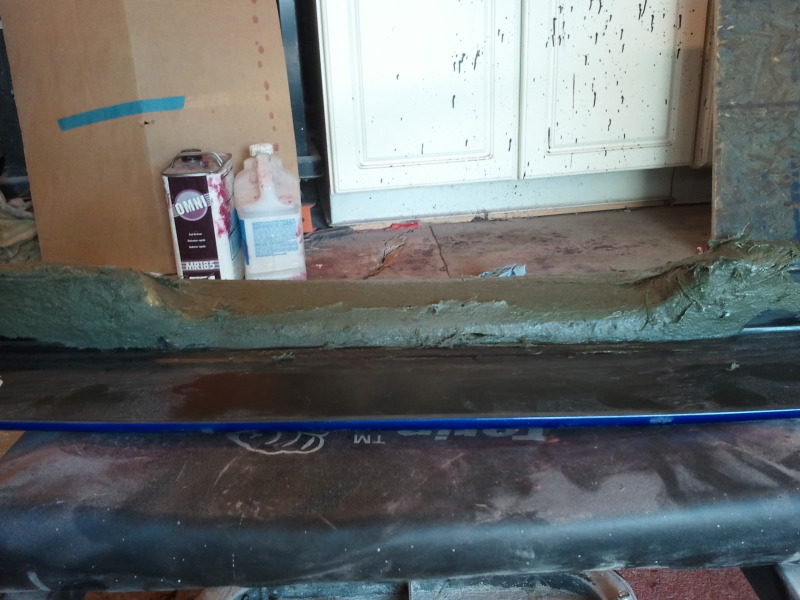
well I did a little more today after work. Drilled the heads off the pop-rivets on the driver side rear quarter, and threw on some short-strand infused body filler on, then block sanded down. Going to need another coat or two to get it perfect, but this is a royal pain in the nuts.

04-09-2012, 03:03 PM
#48
Wahay!! I've lost my Virginity!!
Thread Starter
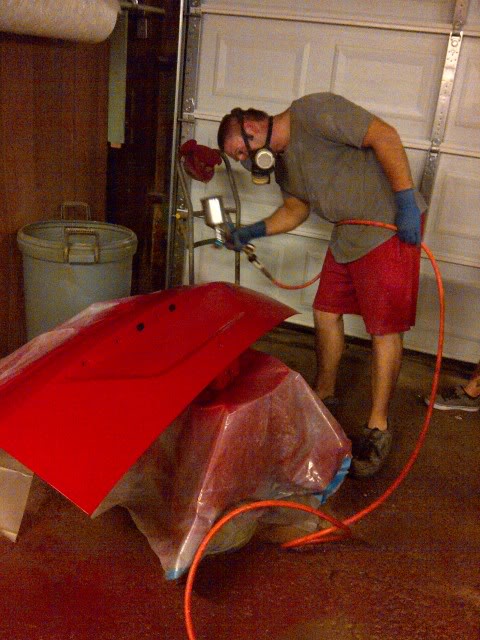
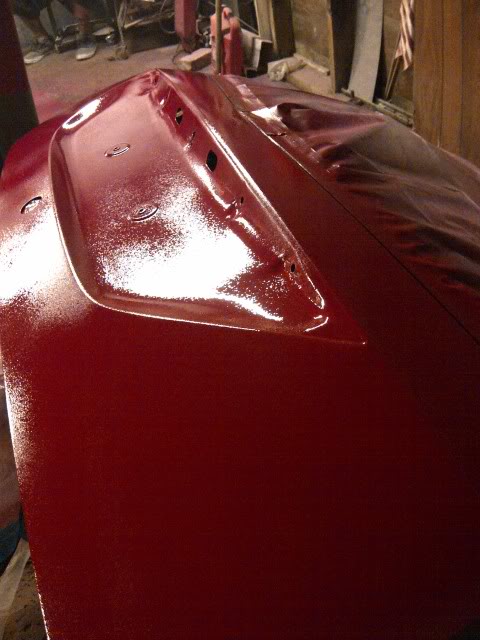
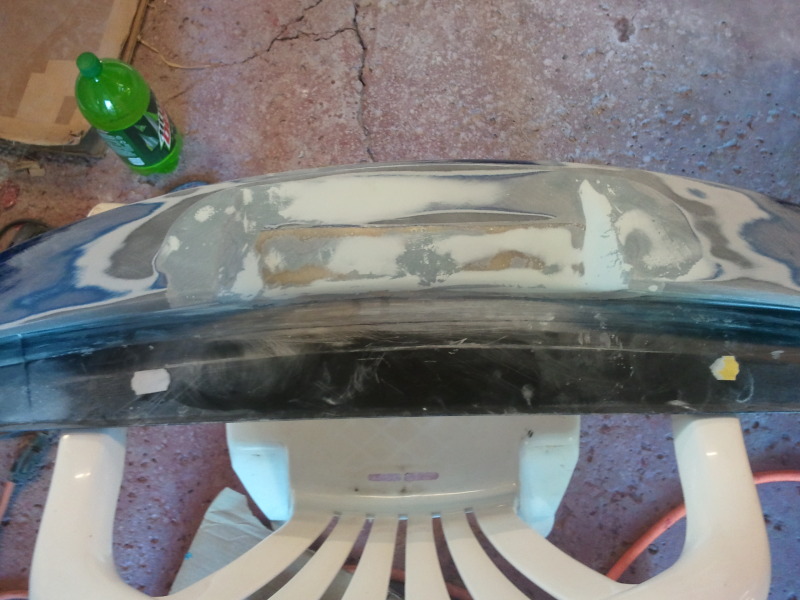
worked on it a bit yesterday. I'm in the part of the build that sucks the absolute most.......laying body filler and block sanding for hours to get things to look right. These next four pictures are at least 6hrs worth of filler/sanding work 
this is after one coat of tiger hair filler, followed by a coat of regular filler.
Then after some touch-ups and whatnot I decided to spray with primer to see where I'm at. It's getting pretty close, but still needs some work. The major shapes are there, but I need to do some more filler work and start stepping my sandpaper grits up so it smooths out nice. right now it's in 80-grit for shape, so I'm gonna jump to 180 on the next pass, then 320, then I'll spray the whole deal in primer/surfacer (high-build) to sand out with 600 and 800 grit before sealer and paint.
probably have another 6-10hrs of work to go just on this quarter, then repeat for the other side, and repeat for the passenger front fender. Lots of work still to go, trying to keep motivated.
05-09-2012, 12:04 AM
#49
Advanced PassionFord User
its getting there dude, keep at it. fiberglass can be a pain to work with, i bought some over fenders from eurostop in usa for my e30 but the front two were totaly different so im in the process of making them equal but i realy cannot be arsed with it anymore haha
keep at it mate, get the prep right and the rest is easy!
keep at it mate, get the prep right and the rest is easy!
07-09-2012, 01:43 AM
#51
Wahay!! I've lost my Virginity!!
Thread Starter
Tonight my buddy Nick came by to lend a hand again......We blocked down the driver rear quarter again, and found what I think to be the last imperfections....I think once this layer gets sanded out it'll be ready for high-build primer......
then we sanded down the excess glue from the passenger rear quarter and laid up the seams with tiger-hair filler.

then we sanded down the excess glue from the passenger rear quarter and laid up the seams with tiger-hair filler.
08-09-2012, 02:27 AM
#53
Wahay!! I've lost my Virginity!!
Thread Starter
Checko stopped by again and got me off the couch. The driver side rear is done. Just needs primer-surfacer and 400-grit wetsand before paint. Going to get up tomorrow and jump right on the passenger side and see how far I can get before I get too tired/frustrated.
09-09-2012, 07:49 PM
#54
Wahay!! I've lost my Virginity!!
Thread Starter
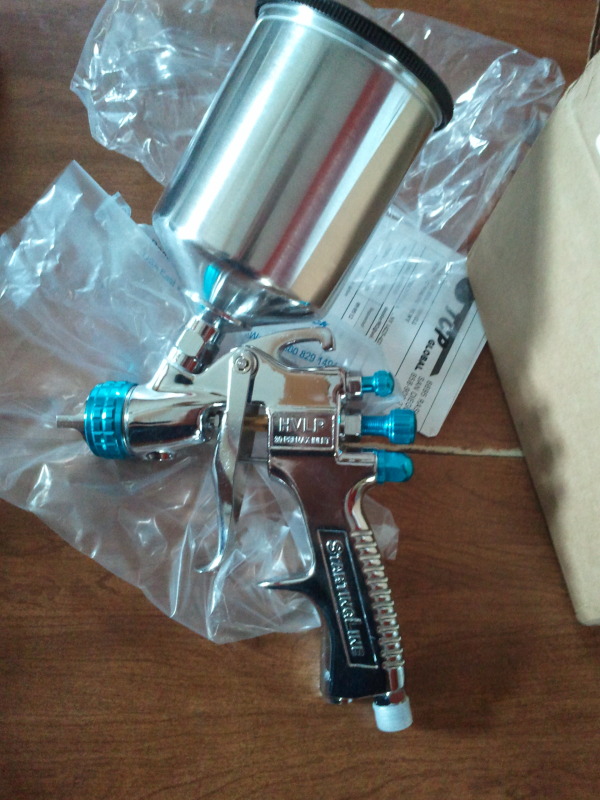
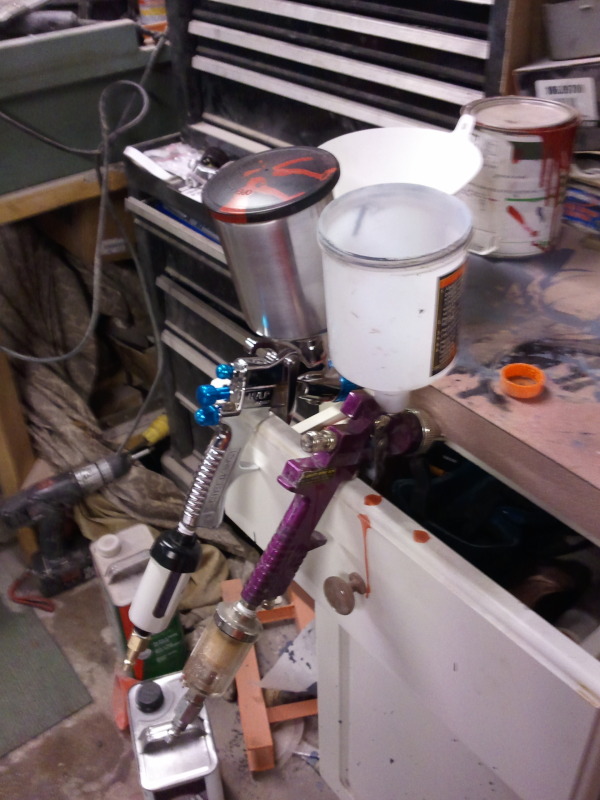
spent most of the day yesterday and most of the day today working on it. Got both rear quarters 100% ready for high-build primer-surfacer.


Also mocked the front bumper and passenger fender up so I could "flatten" the nose like I did on the other side....
Also, my paint gun arrived
DeVilbiss Startingline
Also mocked the front bumper and passenger fender up so I could "flatten" the nose like I did on the other side....
Also, my paint gun arrived
DeVilbiss Startingline
11-09-2012, 04:10 AM
#55
Wahay!! I've lost my Virginity!!
Thread Starter
OH MY DAYUM UPDATE!
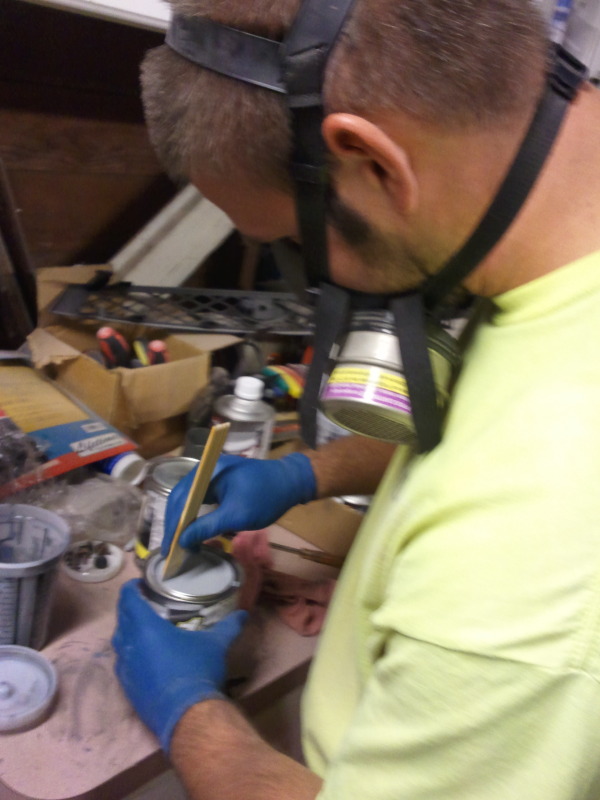
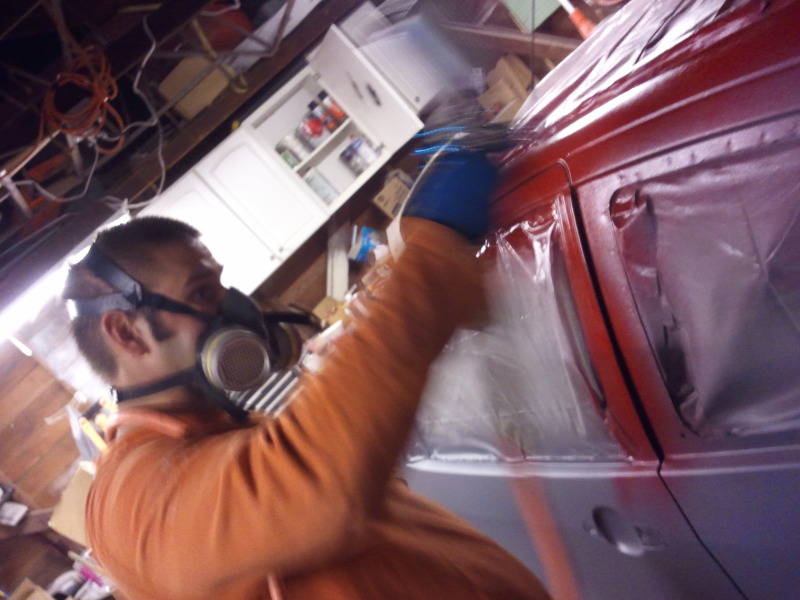
Pirite came over just as I finished taping and bagging the car for paint, and helped me scuff the bumpers for sealer.
me mixing sealer:
car bagged, luke scuffing and prep-all'ing the bumpers
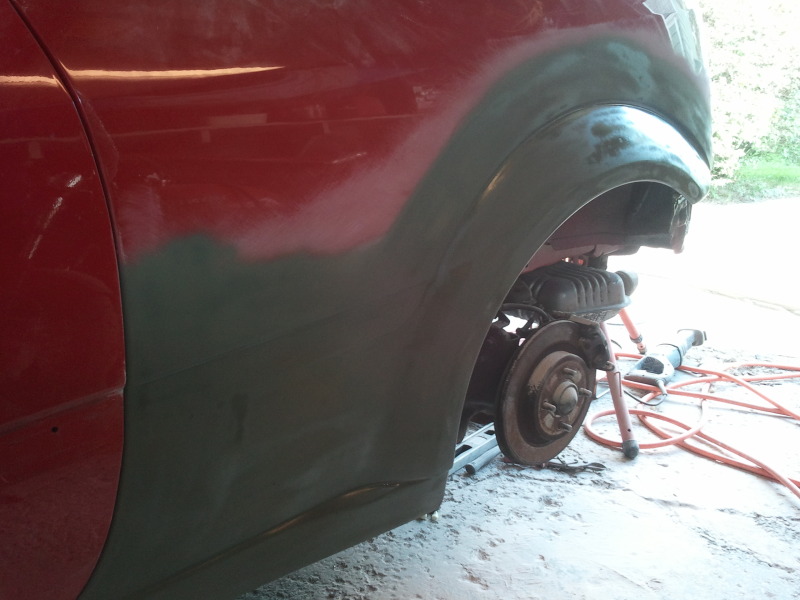
after all prep work, ready for high-build surfacer:
ACTION SHOTS YOOOOOOOO!!!!!111!!!11!!
after sealer:
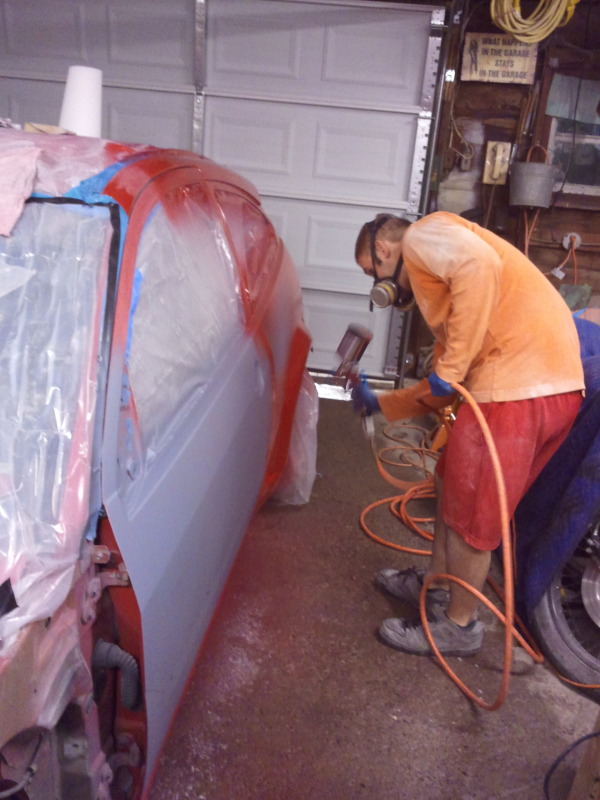
Then sprayed both quarters in high-build, and taught luke how to lay some primer....I let him spray most of the driver quarter and then just passed over it to make sure coverage was good. He did pretty damn good for a first try!
then my phone/camera died and we didnt get pics of the passenger side. Poop.
Pirite came over just as I finished taping and bagging the car for paint, and helped me scuff the bumpers for sealer.
me mixing sealer:
car bagged, luke scuffing and prep-all'ing the bumpers
after all prep work, ready for high-build surfacer:
ACTION SHOTS YOOOOOOOO!!!!!111!!!11!!
after sealer:
Then sprayed both quarters in high-build, and taught luke how to lay some primer....I let him spray most of the driver quarter and then just passed over it to make sure coverage was good. He did pretty damn good for a first try!
then my phone/camera died and we didnt get pics of the passenger side. Poop.
11-09-2012, 01:27 PM
#58
Wahay!! I've lost my Virginity!!
Thread Starter
I had a little time before work this morning so I went out and sprayed a guide-coat on the quarters so I can block them out with 400 grit tonight.
 11-09-2012, 05:26 PM
#61
Wahay!! I've lost my Virginity!!
Thread Starter
Realized I never got a shot of the front bumper in sealer, so I snapped one on lunch break
Tonight I'm going to put wheels back on the car and roll it out of the garage, clean/sweep the floor to get all the heavy dust from all the filler/sanding work, wet the floor....and I'm planing on spraying base and clear on the hatch and both bumpers before bed tonight.
Tonight I'm going to put wheels back on the car and roll it out of the garage, clean/sweep the floor to get all the heavy dust from all the filler/sanding work, wet the floor....and I'm planing on spraying base and clear on the hatch and both bumpers before bed tonight.
11-09-2012, 05:46 PM
#63
i like it! how much would it have cost to import an RS over from here and swap the dash, rack, etc etc?
infact, scrap that, how much would it have cost to import an EU mk1 RS from germany or somewhere, that already has the wheel on the right side...
edit to say i mean 'correct side' asin left, not right.
infact, scrap that, how much would it have cost to import an EU mk1 RS from germany or somewhere, that already has the wheel on the right side...
edit to say i mean 'correct side' asin left, not right.
Last edited by m4tt274; 11-09-2012 at 05:47 PM.
11-09-2012, 06:25 PM
#64
Wahay!! I've lost my Virginity!!
Thread Starter
i like it! how much would it have cost to import an RS over from here and swap the dash, rack, etc etc?
infact, scrap that, how much would it have cost to import an EU mk1 RS from germany or somewhere, that already has the wheel on the right side...
edit to say i mean 'correct side' asin left, not right.
infact, scrap that, how much would it have cost to import an EU mk1 RS from germany or somewhere, that already has the wheel on the right side...
edit to say i mean 'correct side' asin left, not right.
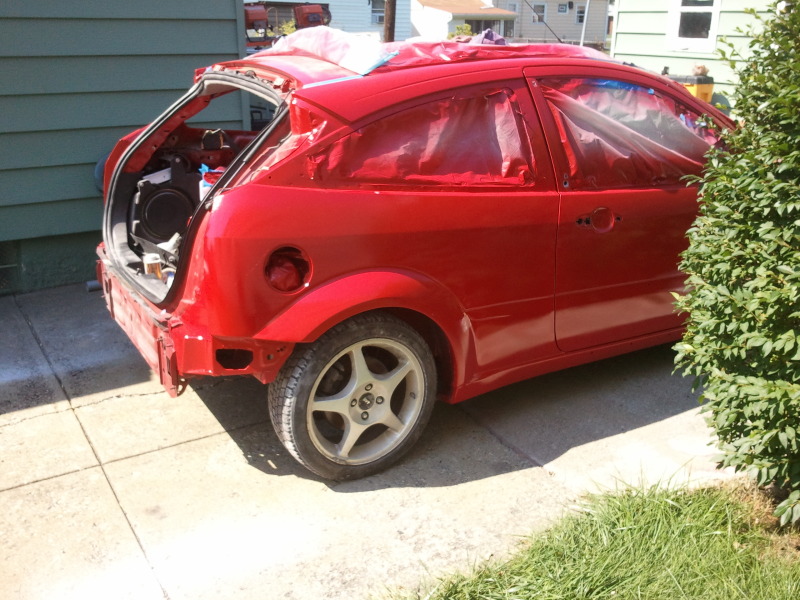
A fellow in Texas has spent YEARS importing all OEM parts a little at a time and started with a standard US shell from a beaten-up ZX3. He started with the bare shell on a rotisserie, swapped over real RS sheetmetal quarterpanels, painted it imperial blue, etc etc etc......EVERY part in the car is a true OEM RS piece.....he has said he's spent over $40,000USD to build a perfect RS here.
Since I have done all of the work myself, I've only spent about $2500USD on the molds, $1000USD in fiberglass and paint materials, $500 on real RS bumpers, maybe $500 on small bits and trim pieces, and I would estimate about 200 hours of labor.
I own the car outright already, no money owed. So for less than $5,000USD I'll have a very personalized RS with my own touch put to it, produced with my very own blood sweat and tears.

 11-09-2012, 08:10 PM
#66
Lucifer II - 666
Great project.
 12-09-2012, 08:45 AM
#69
Wahay!! I've lost my Virginity!!
Thread Starter
OK, so it's almost 4:30am right now. I come bearing BAD, and GOOD news......
Before reading ANY further, prepare yourself. This update, will be putting all previous updates to absolute shame.
So, I came home from work, and my buddies Nick, Luke, and Chris all stopped by to lend a hand in various tasks. Chris came by with my headlights totally refurbished (Came out STELLAR!)

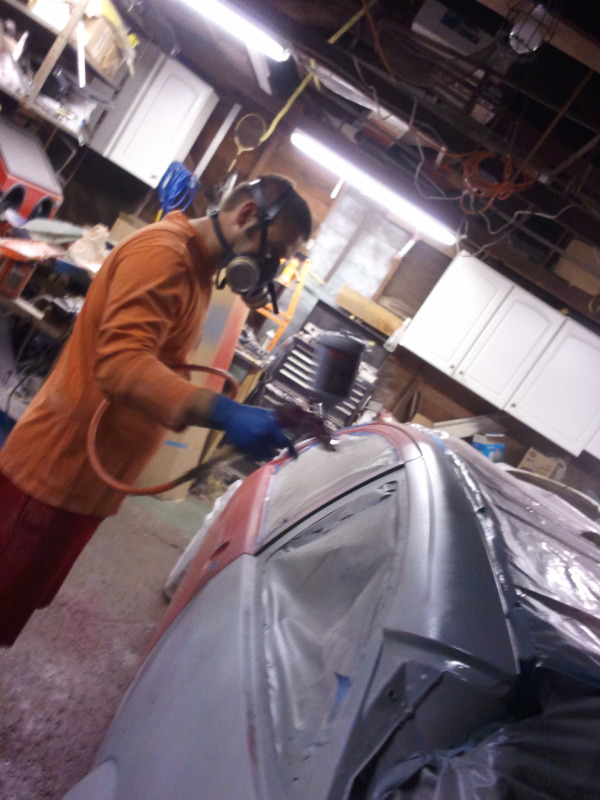
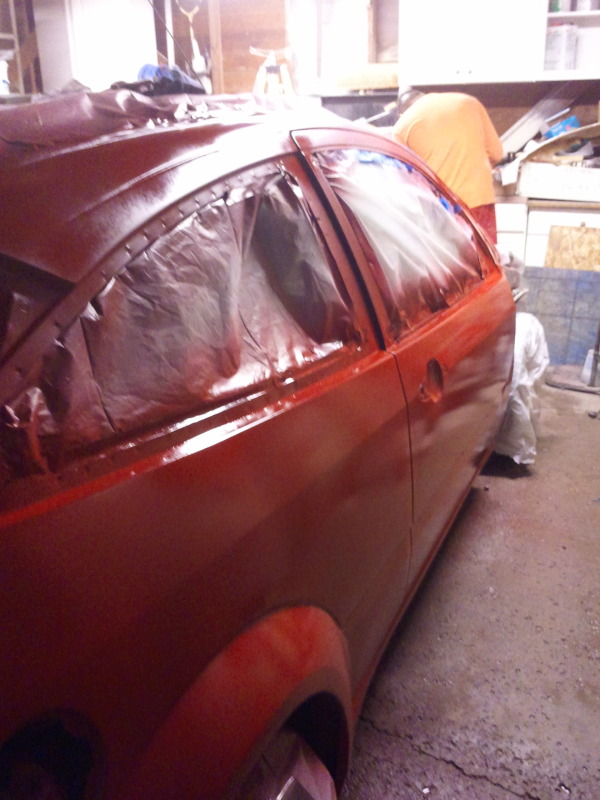
Luke and Nick helped me push the car out of the garage, clean up, wet the floor, and set up to paint the hatch and bumpers. This is where things went downhill.
I started out by spraying sealer on the hatch. It Fisheye'd. BAD. So I decided that's not getting paint tonight. Move on to the bumpers. I was excited to use my new DeVilbiss gun for base/clear....and I neglected to scuff and prep-all the sealer on the bumpers......yeah, the paint lifted. BAD. @#$%^&*
"YAY! Look how good they're coming out! WAIT.....WHAT DAFUQ?!?!?!?!?!?!"
Now both bumpers need to be TOTALLY sanded back down and start all over with sealer/paint/clear
So, I did some swearing, some kicking and throwing of objects nearby, and punched the cabinets. Then I took a deep breath and sat down. Nick started blocking down the driver rear quarter in the driveway and Luke ran for a pizza. Feeling pretty beaten, I just kinda didn't feel like doing anything else. Chris and Nick went on their way around 7pm or so.
But hold on to your hats folks. Pirite offered to stick around (poor fool). What happened next is the type of stuff legends are made of. We decided that we weren't losing this battle with paint today.
Luke suggested we at least finish blocking the quarterpanels. So we did. Now, I don't know WHY I got the crazy idea in my head, but at this point it's about 10pm. I look at luke with a bit of a grin and ask....."wanna stay up late??" he goes "Oh GAWD, why??"
"Let's pull the car in and paint the whole damn thing. TONIGHT."
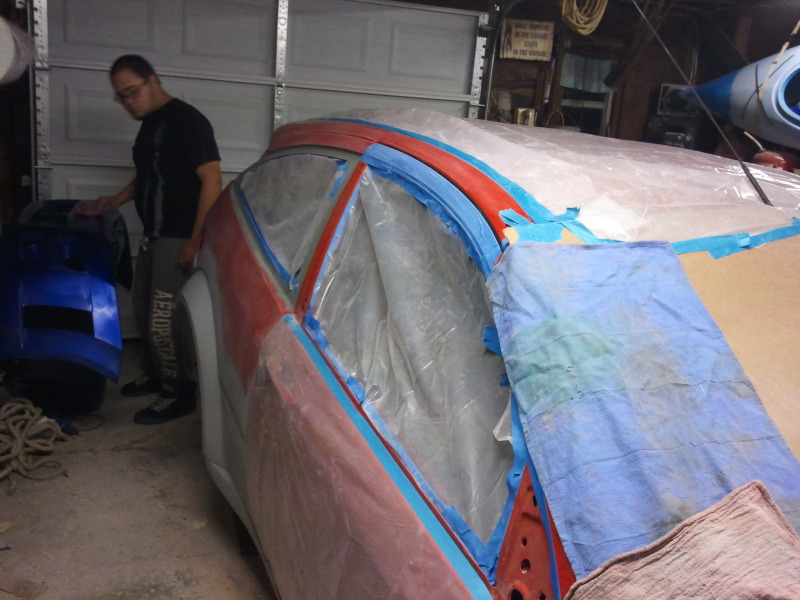
We rolled the car in the garage, wet the floor, scuffed the doors, bagged the front end.....anddddddd
I PAINTED THE WHOLE M-F'ING CAR BISHEZZZZZZZ!!!!!!111!!!1!!!1!1
Quarter's after blocking:

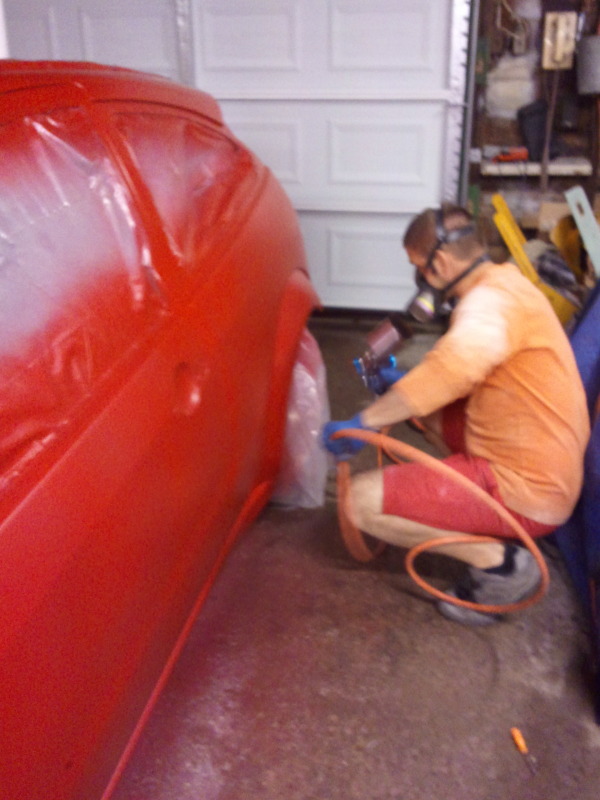
Getting my equipment set up
doors scuffed, car masked/bagged:
OH SNAP! Spraying sealer at about 1am

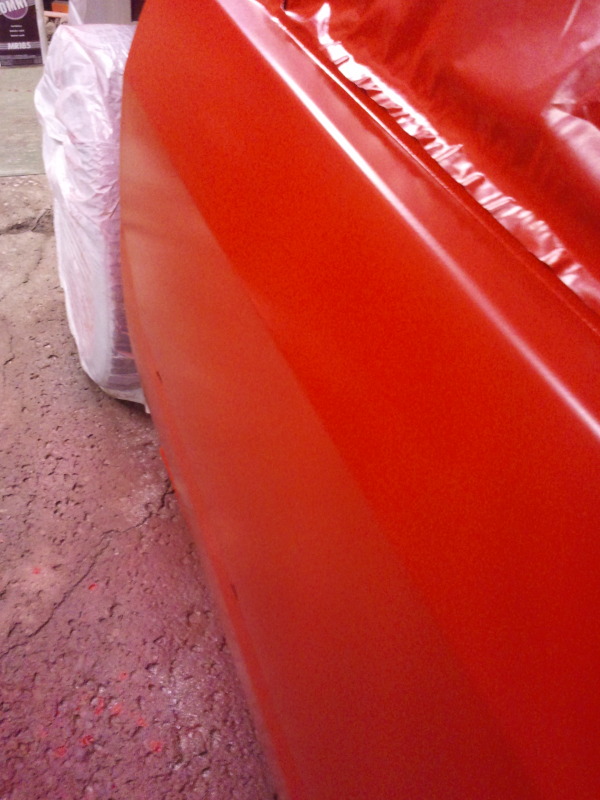
Then, I started spraying the Dupont Chromabase
MAN OH MAN do I LOVE my DeVilbiss

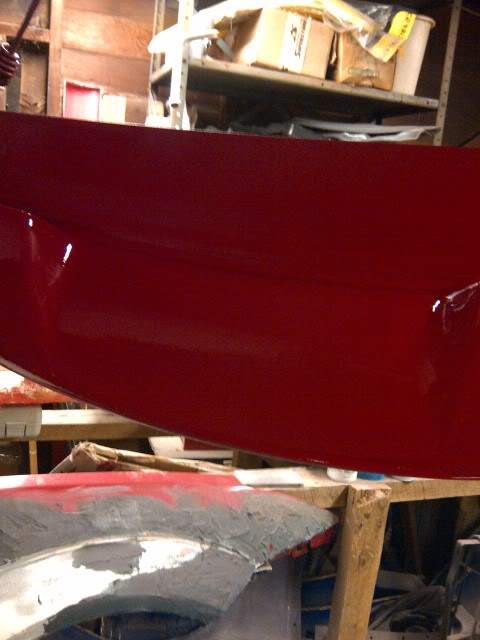
After two LIGHT coats:
Then I came back and did two HEAVY coats of base, followed by clear (excuse pics if they are out of order, I can't tell by thumbnail which are before or after clear):
SO, BIG BIG thanks to Luke for sticking around, Chris for doing a phenomenal job saving my headlights, Checko and his buddy Derrick for starting to block the quarters and prepping various things tonight, and the dear lord baby jesus lyin' in his manger for watching over us in our quest for decent amateur paintwork.
Before reading ANY further, prepare yourself. This update, will be putting all previous updates to absolute shame.
So, I came home from work, and my buddies Nick, Luke, and Chris all stopped by to lend a hand in various tasks. Chris came by with my headlights totally refurbished (Came out STELLAR!)
Luke and Nick helped me push the car out of the garage, clean up, wet the floor, and set up to paint the hatch and bumpers. This is where things went downhill.
I started out by spraying sealer on the hatch. It Fisheye'd. BAD. So I decided that's not getting paint tonight. Move on to the bumpers. I was excited to use my new DeVilbiss gun for base/clear....and I neglected to scuff and prep-all the sealer on the bumpers......yeah, the paint lifted. BAD. @#$%^&*
"YAY! Look how good they're coming out! WAIT.....WHAT DAFUQ?!?!?!?!?!?!"
Now both bumpers need to be TOTALLY sanded back down and start all over with sealer/paint/clear
So, I did some swearing, some kicking and throwing of objects nearby, and punched the cabinets. Then I took a deep breath and sat down. Nick started blocking down the driver rear quarter in the driveway and Luke ran for a pizza. Feeling pretty beaten, I just kinda didn't feel like doing anything else. Chris and Nick went on their way around 7pm or so.
But hold on to your hats folks. Pirite offered to stick around (poor fool). What happened next is the type of stuff legends are made of. We decided that we weren't losing this battle with paint today.
Luke suggested we at least finish blocking the quarterpanels. So we did. Now, I don't know WHY I got the crazy idea in my head, but at this point it's about 10pm. I look at luke with a bit of a grin and ask....."wanna stay up late??" he goes "Oh GAWD, why??"
"Let's pull the car in and paint the whole damn thing. TONIGHT."
We rolled the car in the garage, wet the floor, scuffed the doors, bagged the front end.....anddddddd
I PAINTED THE WHOLE M-F'ING CAR BISHEZZZZZZZ!!!!!!111!!!1!!!1!1
Quarter's after blocking:
Getting my equipment set up
doors scuffed, car masked/bagged:
OH SNAP! Spraying sealer at about 1am
Then, I started spraying the Dupont Chromabase
MAN OH MAN do I LOVE my DeVilbiss
After two LIGHT coats:
Then I came back and did two HEAVY coats of base, followed by clear (excuse pics if they are out of order, I can't tell by thumbnail which are before or after clear):
SO, BIG BIG thanks to Luke for sticking around, Chris for doing a phenomenal job saving my headlights, Checko and his buddy Derrick for starting to block the quarters and prepping various things tonight, and the dear lord baby jesus lyin' in his manger for watching over us in our quest for decent amateur paintwork.
12-09-2012, 01:14 PM
#70
Wahay!! I've lost my Virginity!!
Thread Starter
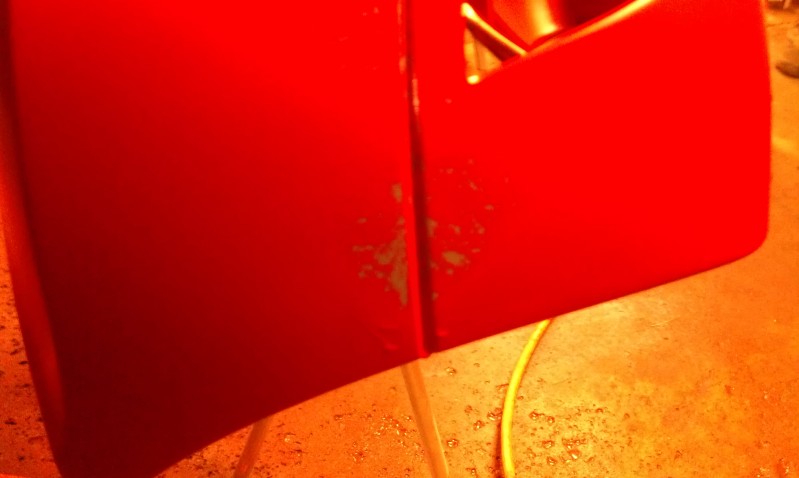
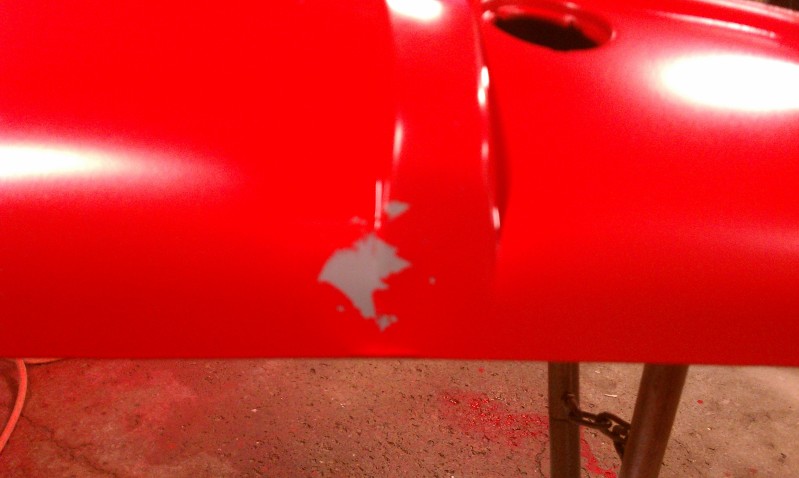
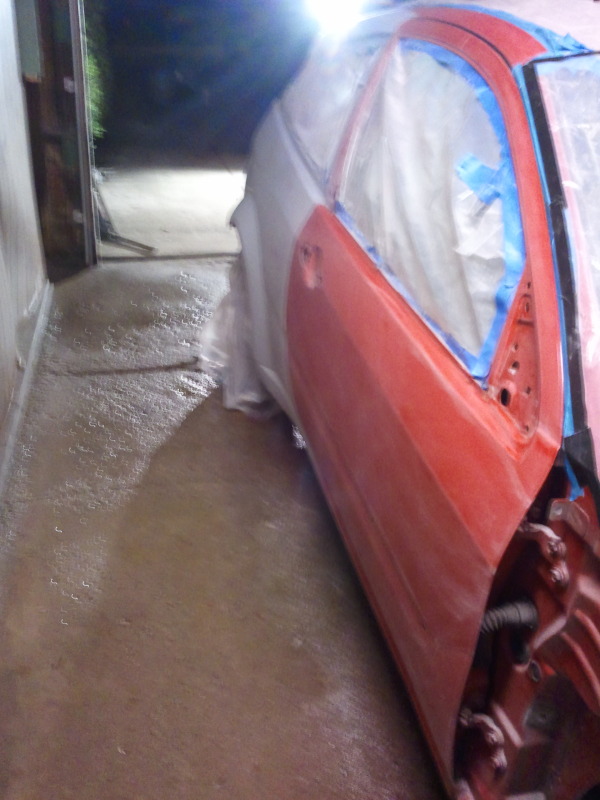
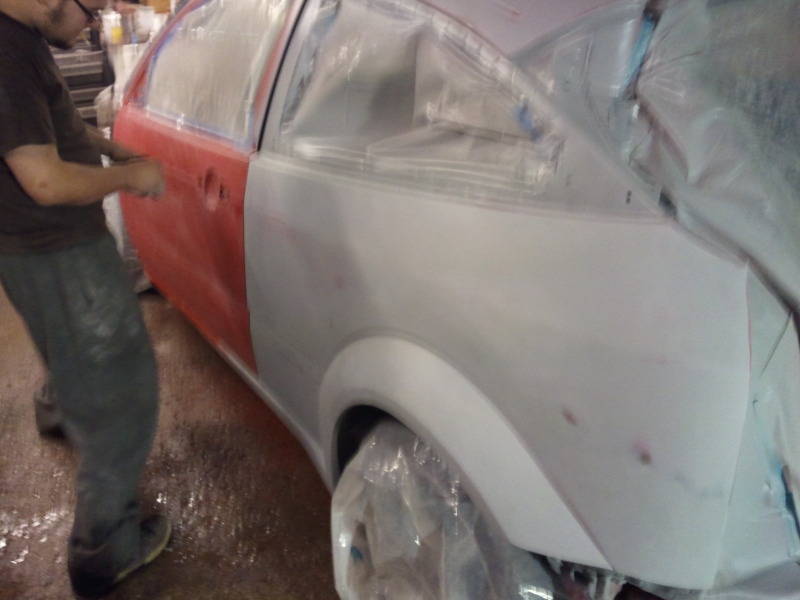
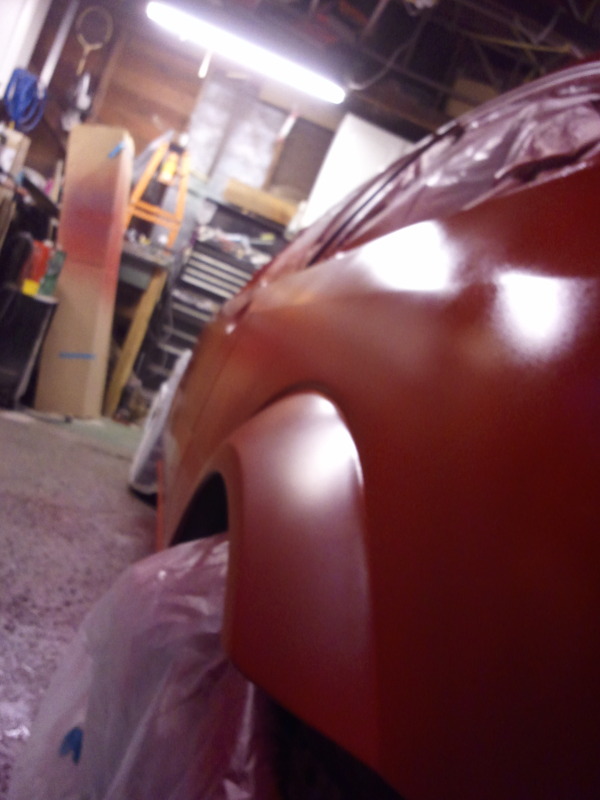
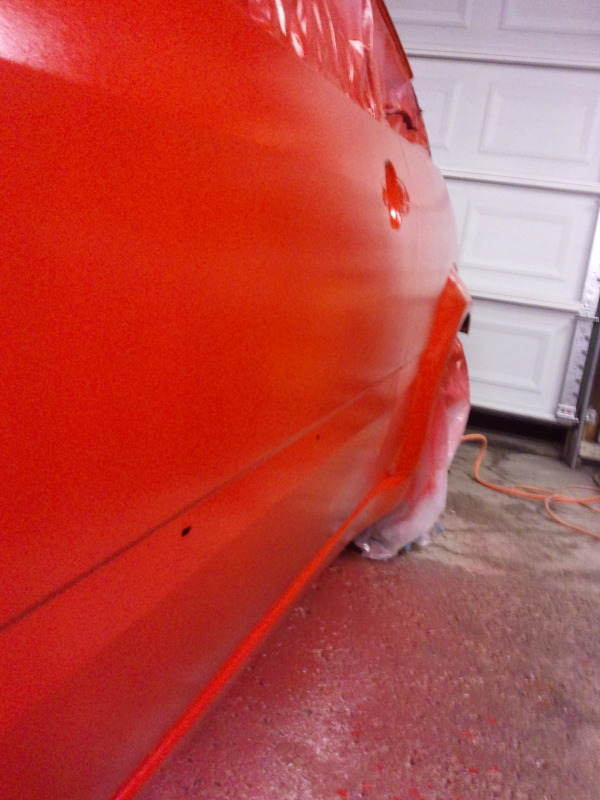
Took a look at it this morning......eh, not 100% about it, but it'll be ok after some work. something flew into it right on the ledge of the top of the passenger quarter (along the bottom of where the quarter window goes) and I'm going to have to sand it and touch it up with a little paint and spot-clear. It's also way more orange-peely than I wanted it to be, but I guess that just means more wetsanding and buffing.
 13-09-2012, 02:59 AM
#72
Wahay!! I've lost my Virginity!!
Thread Starter
So I went at it again after work and the gym (yes on 3hrs sleep)
blocking the high-build on the hatch
all blocked out
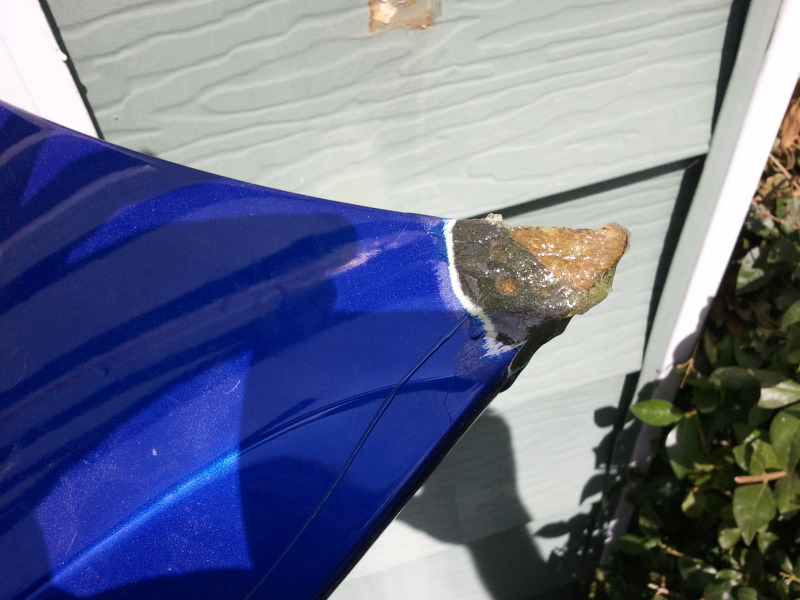
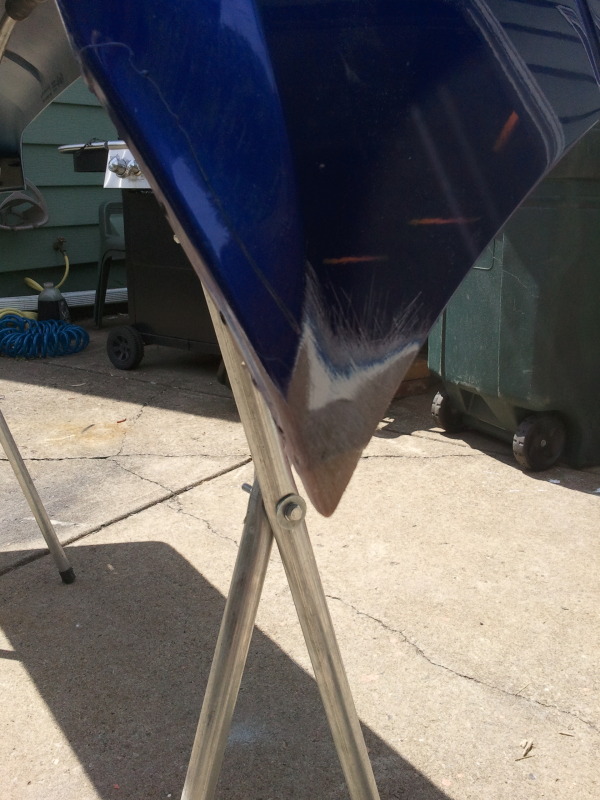
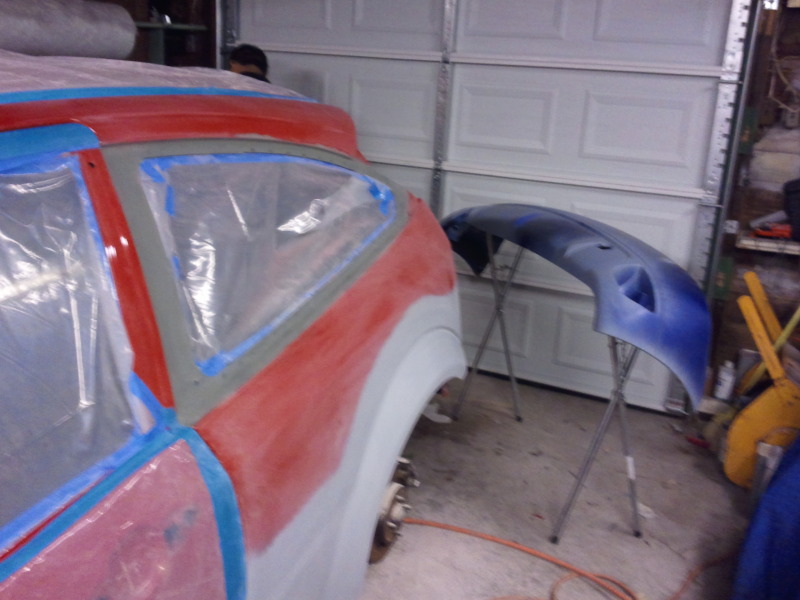
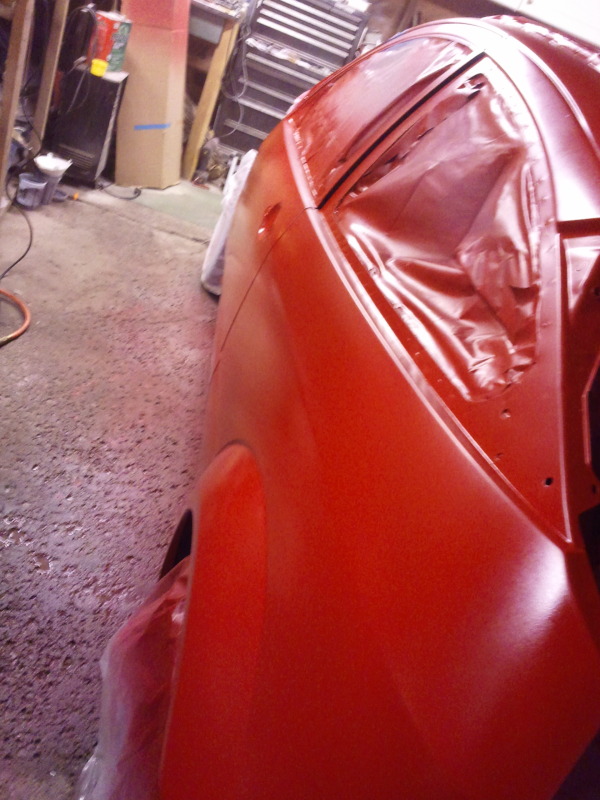
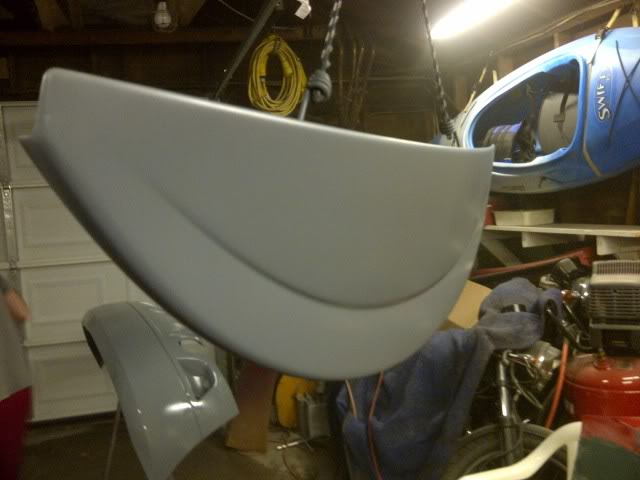
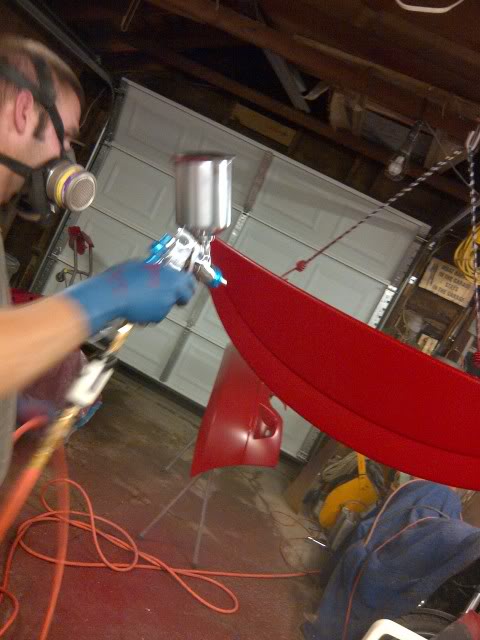
Then I started working on the wing from way earlier in the thread
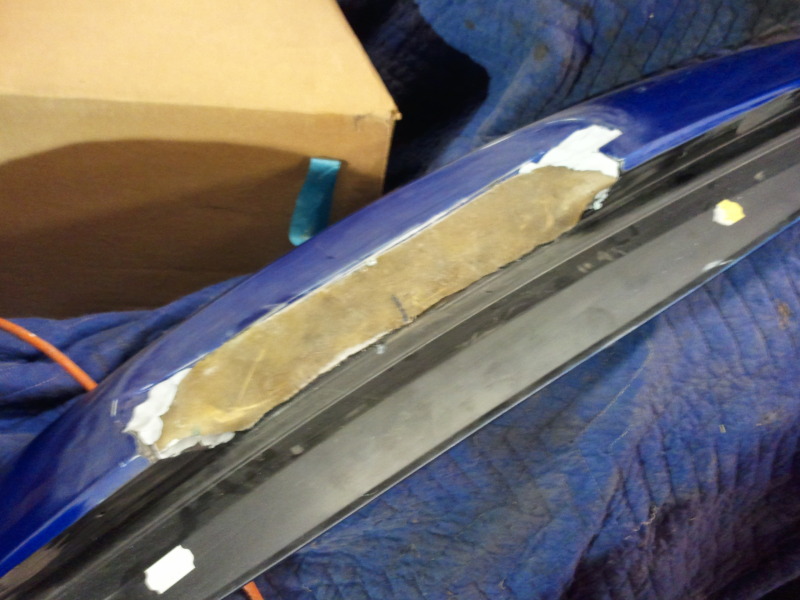
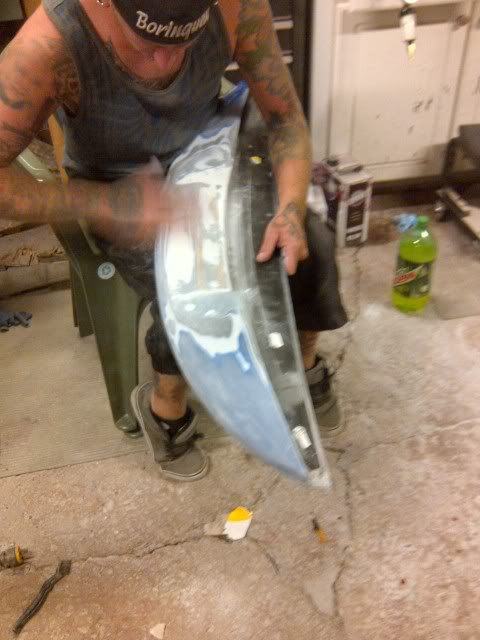
Then I spent about 2hrs stripping the messed up paint and sealer off the bumpers.
Tomorrow I'm going to re-scuff the bumpers, clean the living hell out of them with prep-all, and paint them along with the hatch. If I think I can make the time I may try to finish the wing first so I can paint that as well, leaving nothing left to paint besides fenders and hood later down the road. I don't have time to finish/mold/re-make/paint a set of fenders for the Letchworth G2G
blocking the high-build on the hatch
all blocked out
Then I started working on the wing from way earlier in the thread
Then I spent about 2hrs stripping the messed up paint and sealer off the bumpers.
Tomorrow I'm going to re-scuff the bumpers, clean the living hell out of them with prep-all, and paint them along with the hatch. If I think I can make the time I may try to finish the wing first so I can paint that as well, leaving nothing left to paint besides fenders and hood later down the road. I don't have time to finish/mold/re-make/paint a set of fenders for the Letchworth G2G
14-09-2012, 03:38 AM
#73
Wahay!! I've lost my Virginity!!
Thread Starter
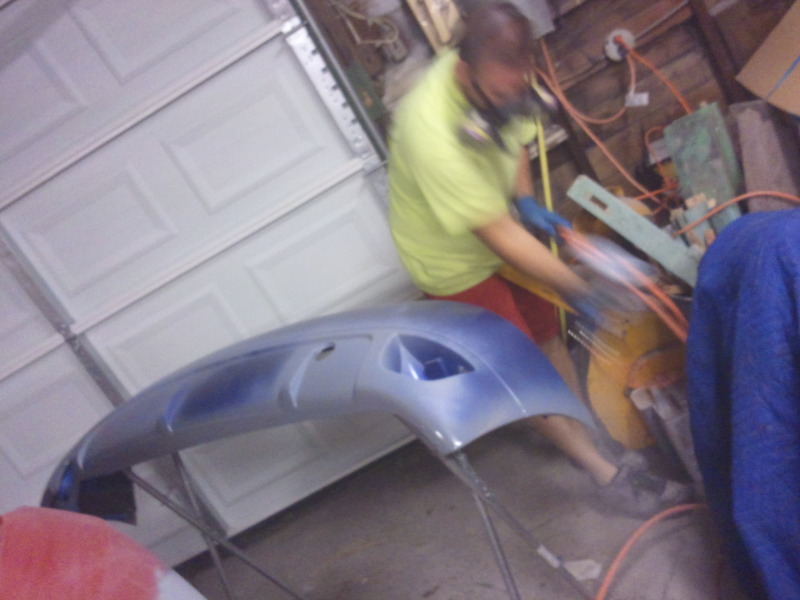
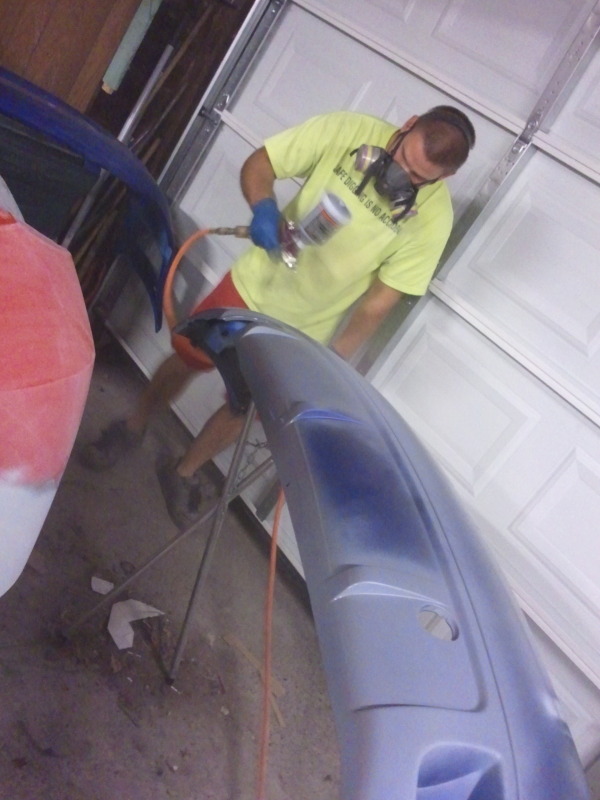
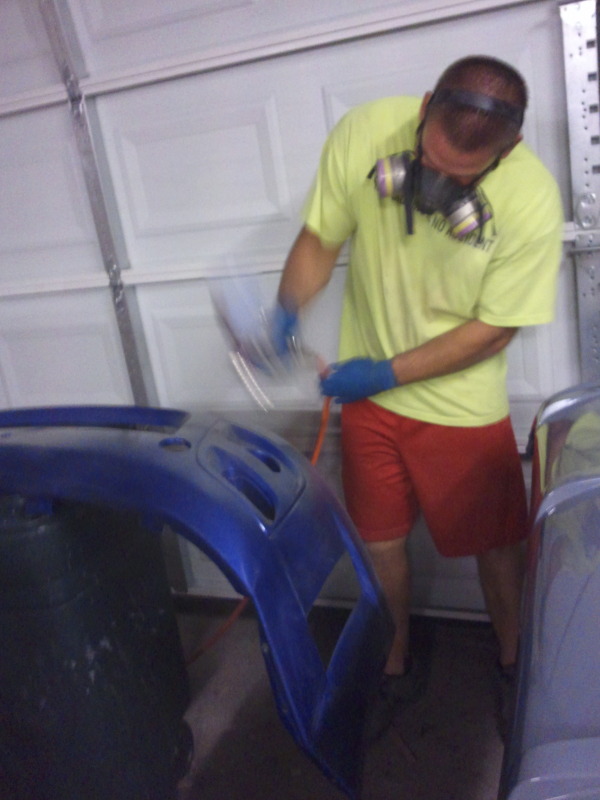
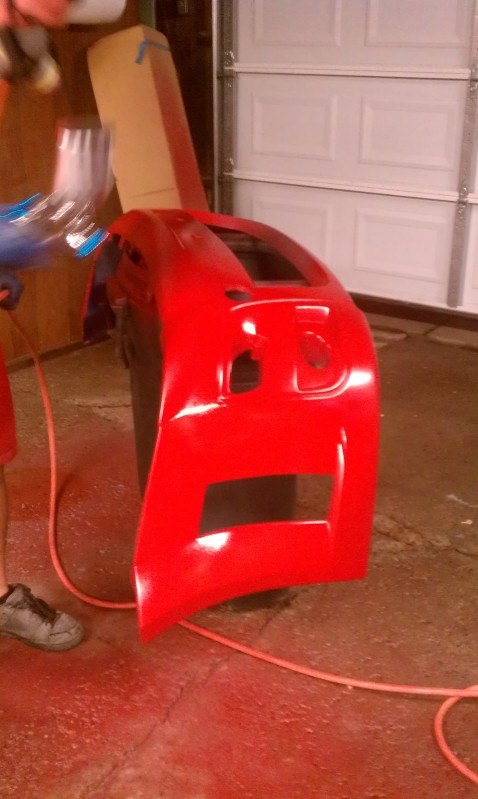
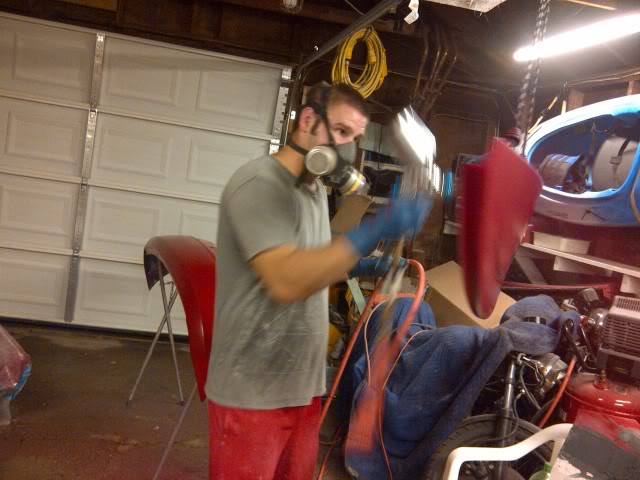
went and picked up a pressure gauge for the DeVilbiss and was able to dial in the spray pattern WAYYYYYY better due to it. I let the pics do the talking.....
finished mod'ing the RS wing to utilize factory brakelight:
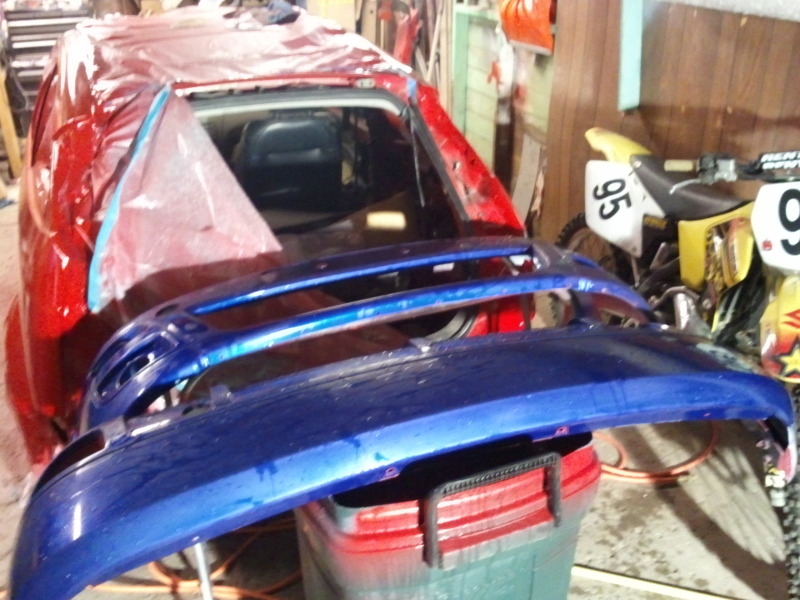
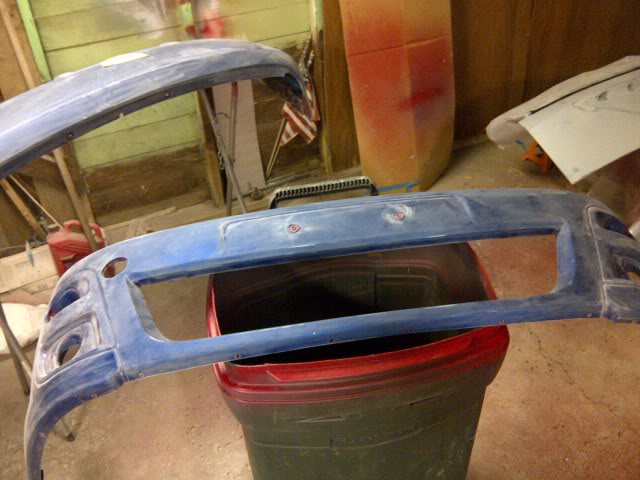
then fixed the corner that broke off:
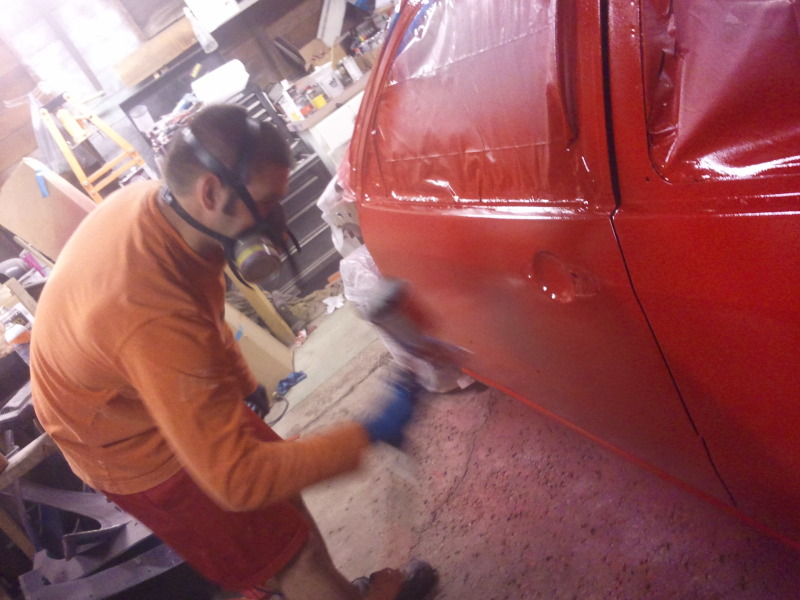
then Checko scuffed it for paint:
Oh yeah, while I was working on that dung-pile of a passenger fender, Luke and Checko also re-scuffed the bumpers
and also the gas door:
Then it became time to start the paint process.
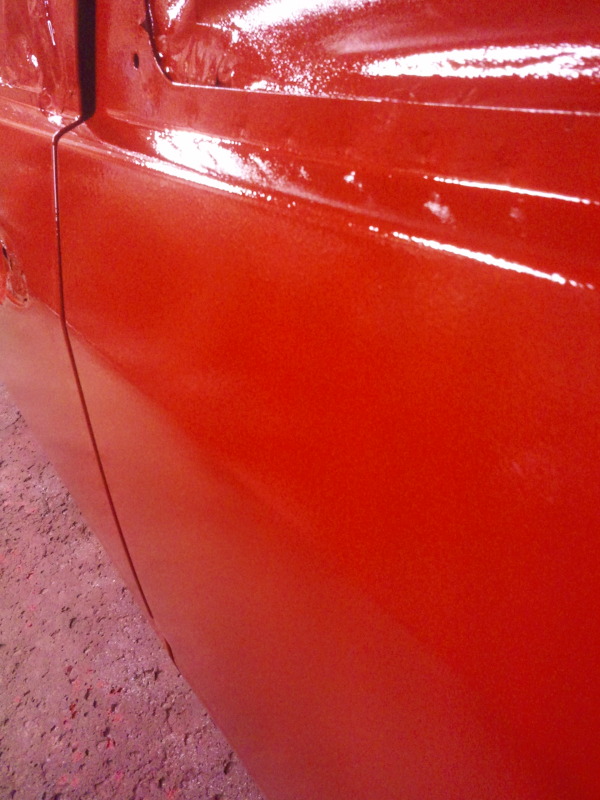
Sealer:
Base Coats:
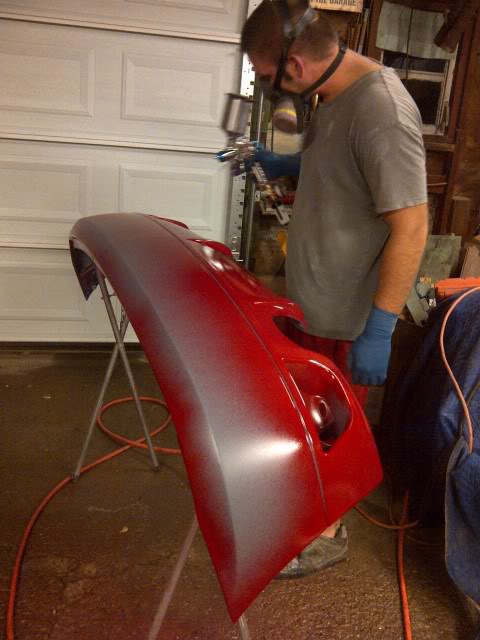

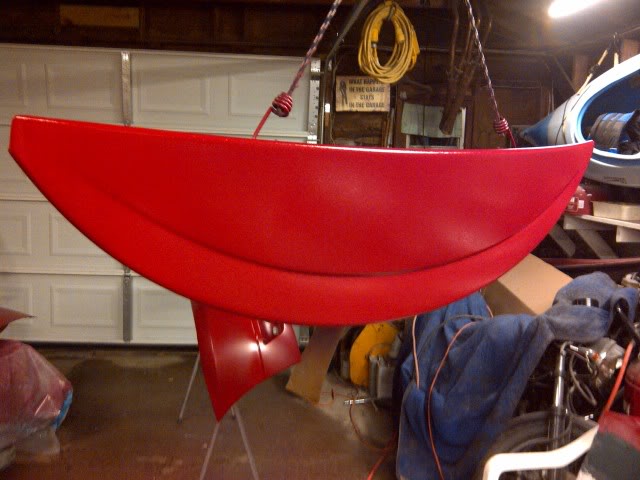

Two coats of clear:


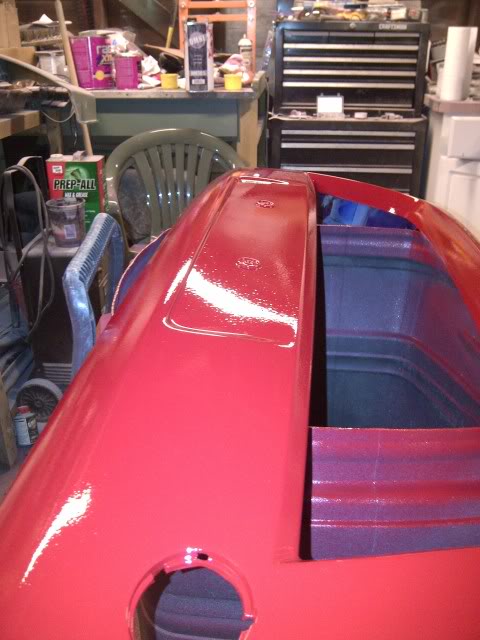


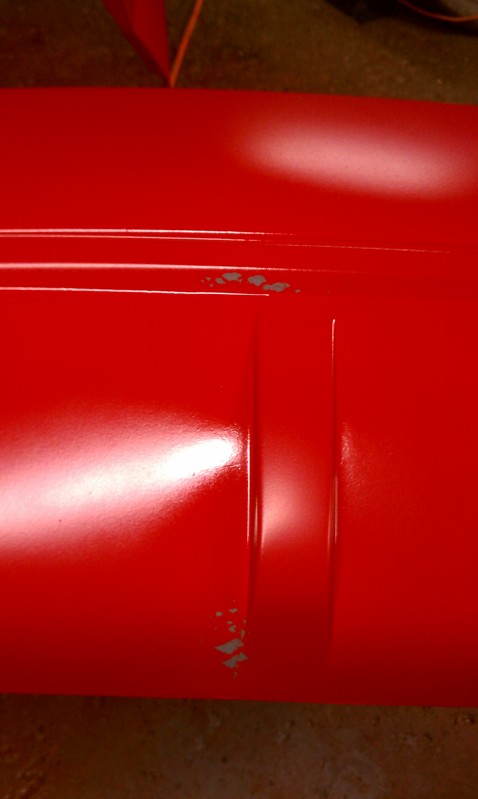
SUUUUUUUPERRRR happy about how everything went AND came out tonight. Even fixed the spot where the moth eff'd up the paint on the passenger quarter. Gonna let it all cure til saturday morning and spend the day assembling the car.
Yet another big thanks to Luke and Checko for their volunteer'd time and superb efforts to aid me in this labor-intensive build. Wouldn't be NEAR where I am without their help!
finished mod'ing the RS wing to utilize factory brakelight:
then fixed the corner that broke off:
then Checko scuffed it for paint:
Oh yeah, while I was working on that dung-pile of a passenger fender, Luke and Checko also re-scuffed the bumpers
and also the gas door:
Then it became time to start the paint process.
Sealer:
Base Coats:
Two coats of clear:
SUUUUUUUPERRRR happy about how everything went AND came out tonight. Even fixed the spot where the moth eff'd up the paint on the passenger quarter. Gonna let it all cure til saturday morning and spend the day assembling the car.
Yet another big thanks to Luke and Checko for their volunteer'd time and superb efforts to aid me in this labor-intensive build. Wouldn't be NEAR where I am without their help!
14-09-2012, 01:33 PM
#75
Wahay!! I've lost my Virginity!!
Thread Starter
Oh, I forgot to post these pics from when I was altering the wing becuase my phone had died while I was working on the car and never uploaded them.....

Rolled the car out in the sun
Oh, and LOLLERSTANCE with SVT wheels hahahaha
Rolled the car out in the sun
Oh, and LOLLERSTANCE with SVT wheels hahahaha
16-09-2012, 05:35 AM
#76
Wahay!! I've lost my Virginity!!
Thread Starter
This post will contain NO good news.
.....................
Today was a really bad day. I cannot put into words the level of anxiety, disappointment, and frustration I'm currently feeling.
The short version of the story, is I cannot get the shell to take paint.
The long version:
I got up early today all happy-go-lucky thinking I was going to do a quick wetsand and buff job on the shell, and then glue in the rear quarter glass and generally re-assemble the car. That is NOT the chain of events that occurred.
What DID happen, is the clear was not nearly thick enough.....which I now know/contribute to not having a gauge/pressure adjuster AT THE GUN when I painted the shell (I had bought one, but it turned out to leak more air than it let through and since it was 1am that night when I started painting I chose to go on without it. First mistake). You can probably guess what happened....punched right through into the color within a few passes with the 1000grit paper. So at this point, I was unhappy with the paintjob anyways and decided that I would attempt to bang out a complete re-paint today. Nick and Jesse were present today to help out.....
We re-scuffed the entire car in 400grit to accept new paint and re-taped/bagged the car back up. wet the garage floor and cleaned the shell with prep-all (second mistake, apparently).
When I went to spray a light coat of base coat back on, it lifted/rippled in a handful of very random spots. Choice words were shouted through my respirator. At this point, I phoned-a-friend and called a good friend from ohio that paints for a living. His recommendation was to let that coat of base dry, and then lightly sand the spots that wrinkled and spray a REALLY light mist coat of base again, and continue with the light coats until certain it's not going to do it again. He said that you cant let anything contaminate base coat during the paint process, and that when we scuffed and then used prep-all, the prep-all is most likely what caused the lifting (so was recommended that I not use it after this 600 grit touch-up).
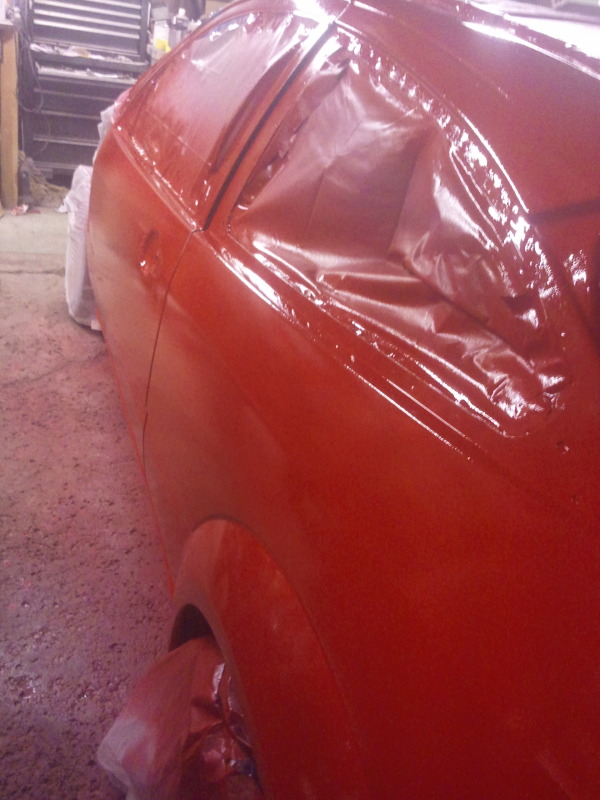
So I did exactly that, and after sanding with 600 grit I blew the dust off with a blow-gun and tried to mist on some base. did this twice, and by the second time there was enough paint on there to make it apparent that these wrinkles were not leaving me alone. They came back, and came back WORSE.
I cleaned my DeVilbiss and packed it up. I'm done with this. I'm going to call back my friend from ohio tomorrow for further advice. I'm really feeling let down here. All I really wanted was for the shell to be painted, because then I could put the glass in and have it together....I really wish this paint issue happened on a bumper or the hatch door or something that was removable to deal with later. Instead the whole car sits now until I figure out how to deal with this mess.
I tried to capture what it did, but it was hard. Only way to describe is it looks like krylon wrinkle or hammered texture paint in areas.
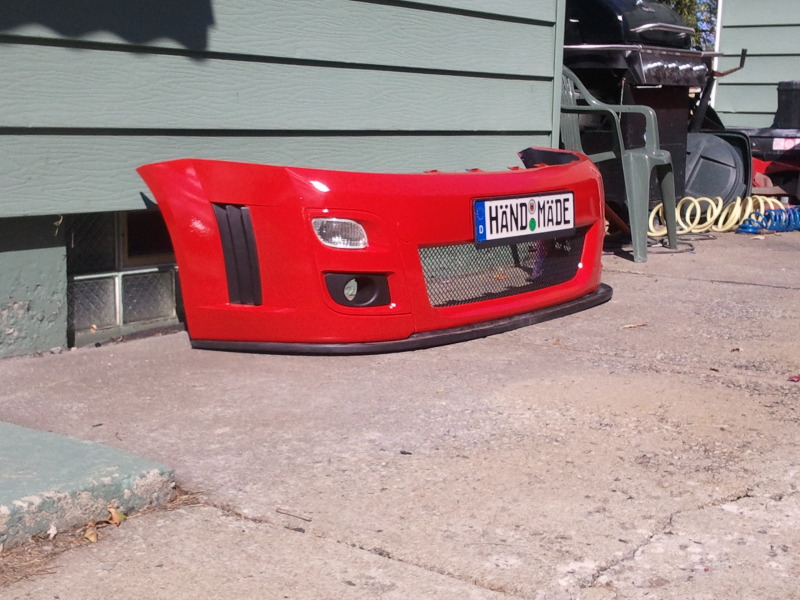
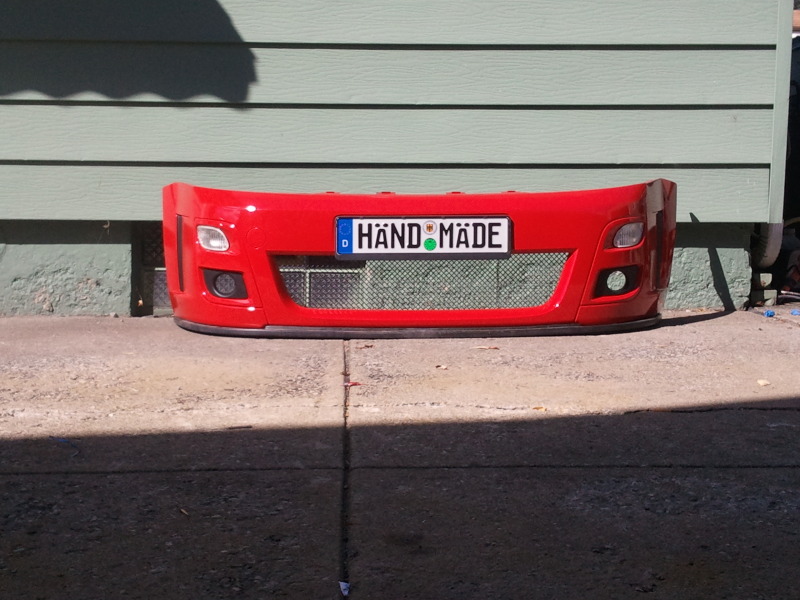
only good thing I can try to report is that I did an awful lot of work on the passenger fender (but still needs a little more) and assembled the front bumper
I don't expect to have anything else to put in here for at least a few days.
.....................
Today was a really bad day. I cannot put into words the level of anxiety, disappointment, and frustration I'm currently feeling.
The short version of the story, is I cannot get the shell to take paint.
The long version:
I got up early today all happy-go-lucky thinking I was going to do a quick wetsand and buff job on the shell, and then glue in the rear quarter glass and generally re-assemble the car. That is NOT the chain of events that occurred.
What DID happen, is the clear was not nearly thick enough.....which I now know/contribute to not having a gauge/pressure adjuster AT THE GUN when I painted the shell (I had bought one, but it turned out to leak more air than it let through and since it was 1am that night when I started painting I chose to go on without it. First mistake). You can probably guess what happened....punched right through into the color within a few passes with the 1000grit paper. So at this point, I was unhappy with the paintjob anyways and decided that I would attempt to bang out a complete re-paint today. Nick and Jesse were present today to help out.....
We re-scuffed the entire car in 400grit to accept new paint and re-taped/bagged the car back up. wet the garage floor and cleaned the shell with prep-all (second mistake, apparently).
When I went to spray a light coat of base coat back on, it lifted/rippled in a handful of very random spots. Choice words were shouted through my respirator. At this point, I phoned-a-friend and called a good friend from ohio that paints for a living. His recommendation was to let that coat of base dry, and then lightly sand the spots that wrinkled and spray a REALLY light mist coat of base again, and continue with the light coats until certain it's not going to do it again. He said that you cant let anything contaminate base coat during the paint process, and that when we scuffed and then used prep-all, the prep-all is most likely what caused the lifting (so was recommended that I not use it after this 600 grit touch-up).
So I did exactly that, and after sanding with 600 grit I blew the dust off with a blow-gun and tried to mist on some base. did this twice, and by the second time there was enough paint on there to make it apparent that these wrinkles were not leaving me alone. They came back, and came back WORSE.
I cleaned my DeVilbiss and packed it up. I'm done with this. I'm going to call back my friend from ohio tomorrow for further advice. I'm really feeling let down here. All I really wanted was for the shell to be painted, because then I could put the glass in and have it together....I really wish this paint issue happened on a bumper or the hatch door or something that was removable to deal with later. Instead the whole car sits now until I figure out how to deal with this mess.
I tried to capture what it did, but it was hard. Only way to describe is it looks like krylon wrinkle or hammered texture paint in areas.
only good thing I can try to report is that I did an awful lot of work on the passenger fender (but still needs a little more) and assembled the front bumper
I don't expect to have anything else to put in here for at least a few days.
 16-09-2012, 07:01 PM
#79

Hey bud I'm guessing ur painting in solvent , and with the clear in a garage I'd do 3 full coats not a gripper and one coat, leave the solvent for a few days to air out , flat down your paint any were you go though the clear get some good aerosol primer warm the bit up with a heat gun dust some primer on lighty leave to dry repeat 3/4 times then just flat the primer with somthing like 1000 soft pad not goin mad and don't brake back though aghen , make sure you have degreased 2 times using a solvent based paint degreaser , if your not gonna use paint overals then make sure you ur self are free from contaminates such as deoderent ! Make sure each coat of paint is dry before putting on the next with the colour , in temp of 28/30 dec c I'd leave 5 mins between layers , on the clear make sure it's warm (above 19 deg c ) but not to hot (30 deg c ) and leave 5/10 mins between coats , hope this info may be of some use I know you have some one helpin but every little helps
Last edited by luke89; 16-09-2012 at 07:02 PM.
16-09-2012, 07:26 PM
#80
The paint was still drying from the last paint
Job , solvents ate into the clear coat , always
Lay dust coats down on job your having repaint
,flat area down and dust paint on (hold trigger half open) so just air coming
Out not paint an force dry that way followed by very lite
Dust coat same again force dry with air , if this
Fails again paint the panel with a barcoat , clear sealer
This seal everything underneath but must be left 24 hours
Before painting on top of it. That way you get no
Solvents eating in to clear coat