My 24v sapphire, re-shell
 30-03-2012, 03:22 PM
#1

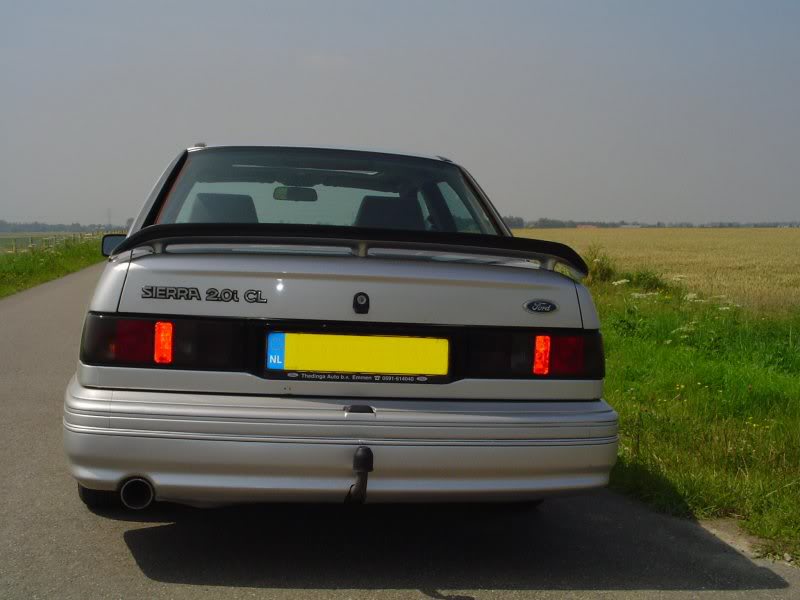
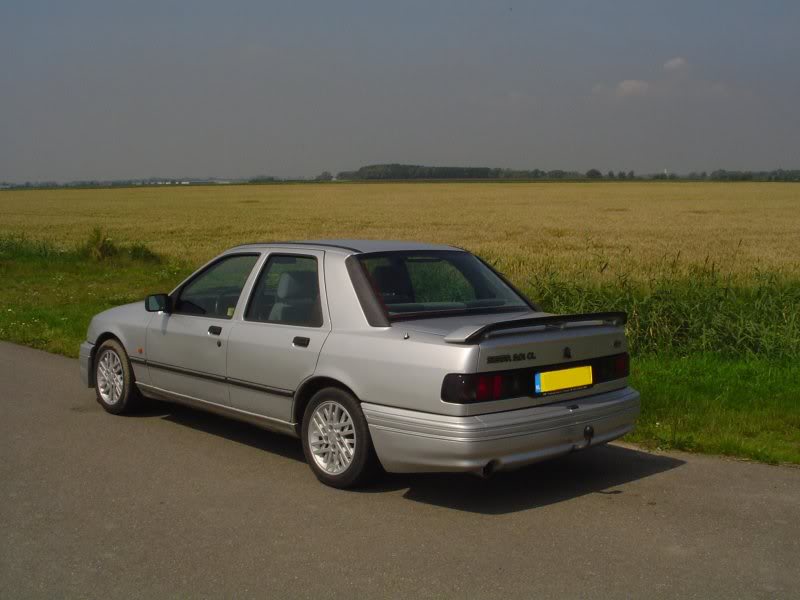
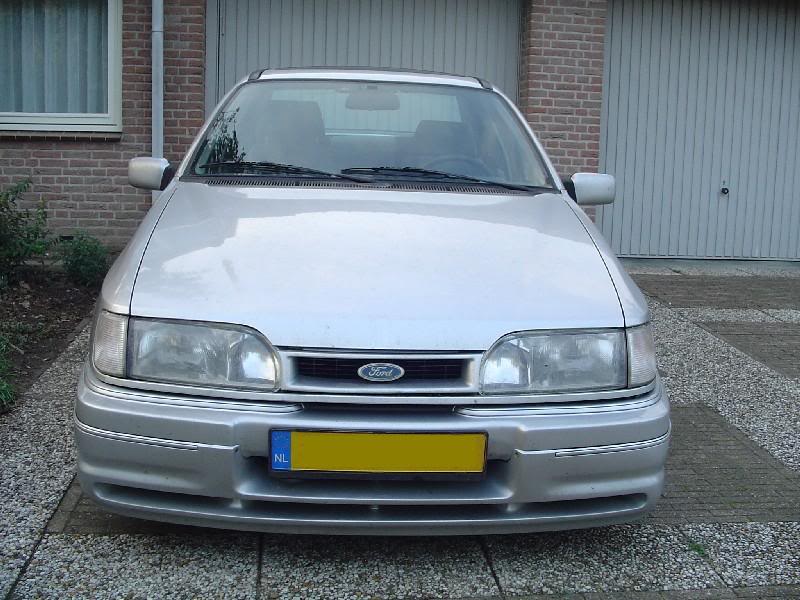
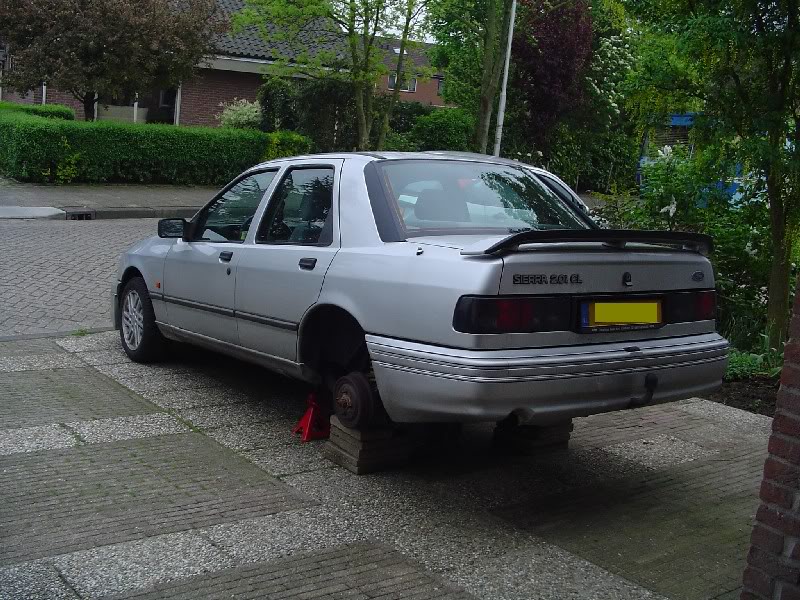
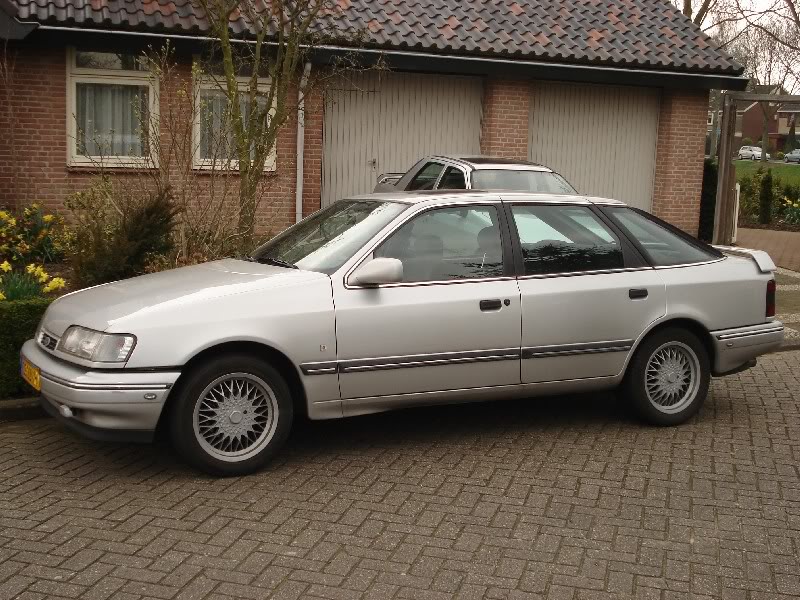
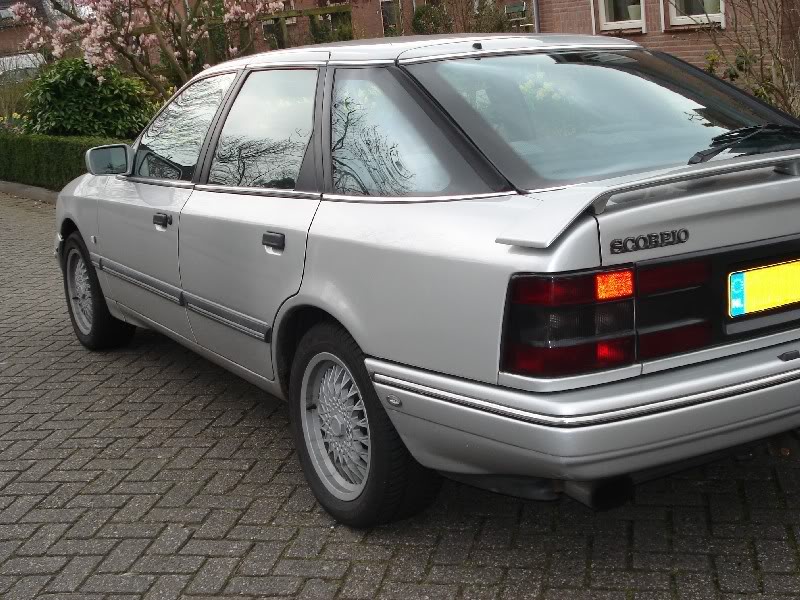
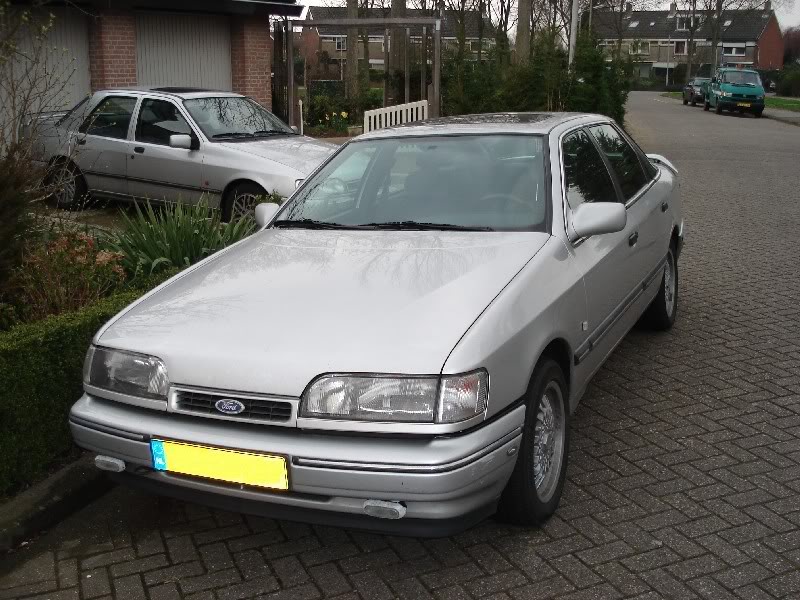
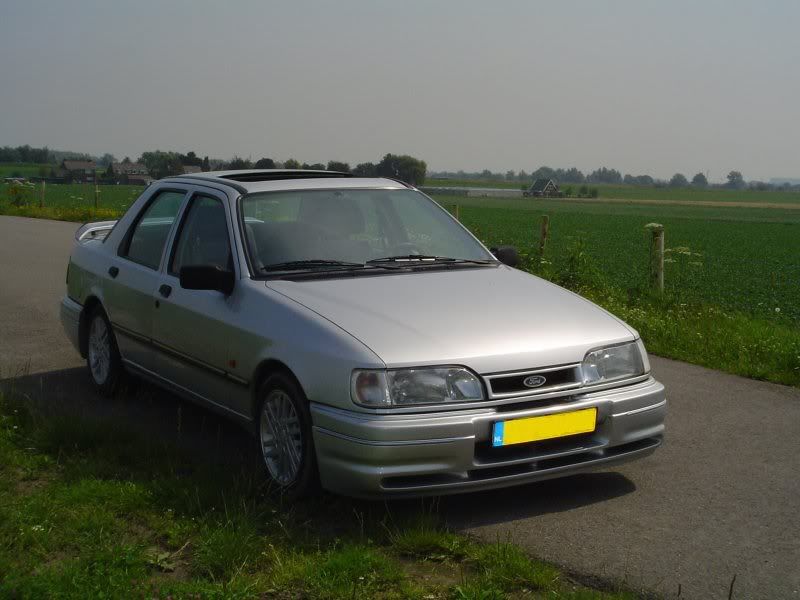
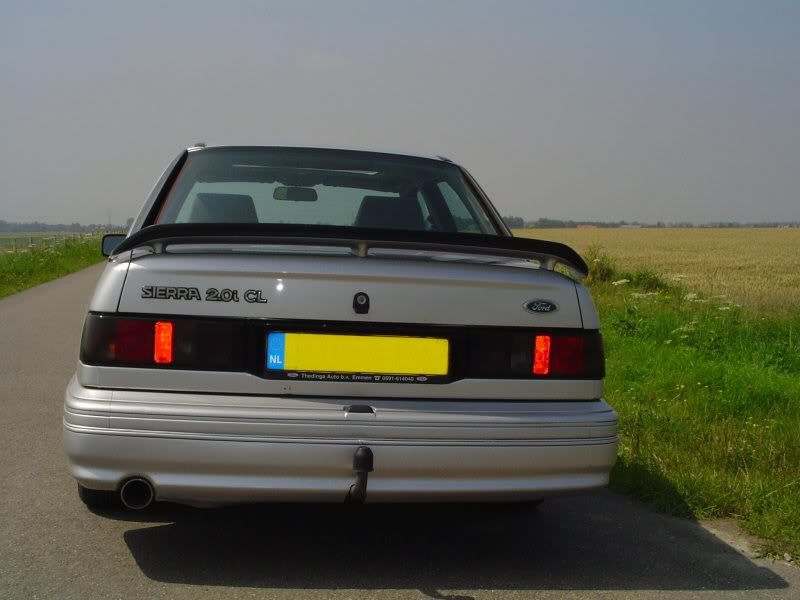
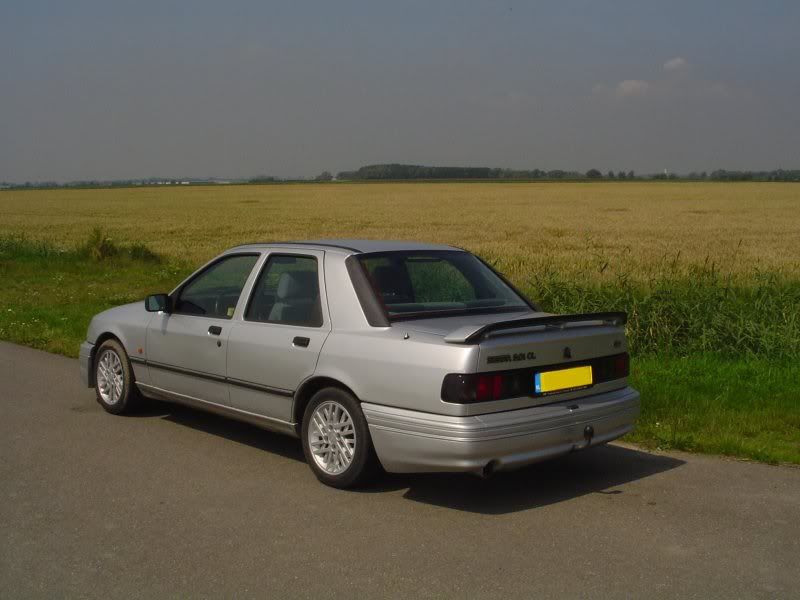
By now it's almost 11 years ago that I bought my sapph. It was a basic CL version, without even a revcounter although it had a sunroof fitted, and had run about 140.000 km.
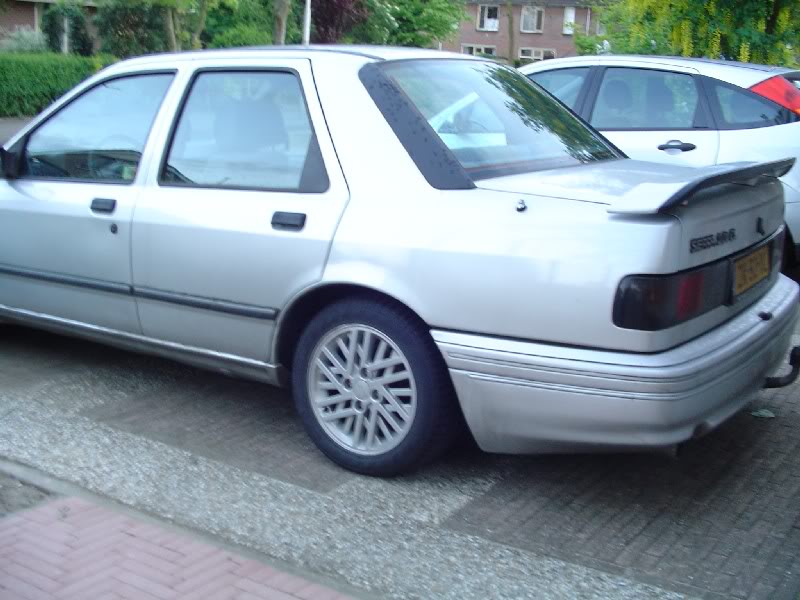
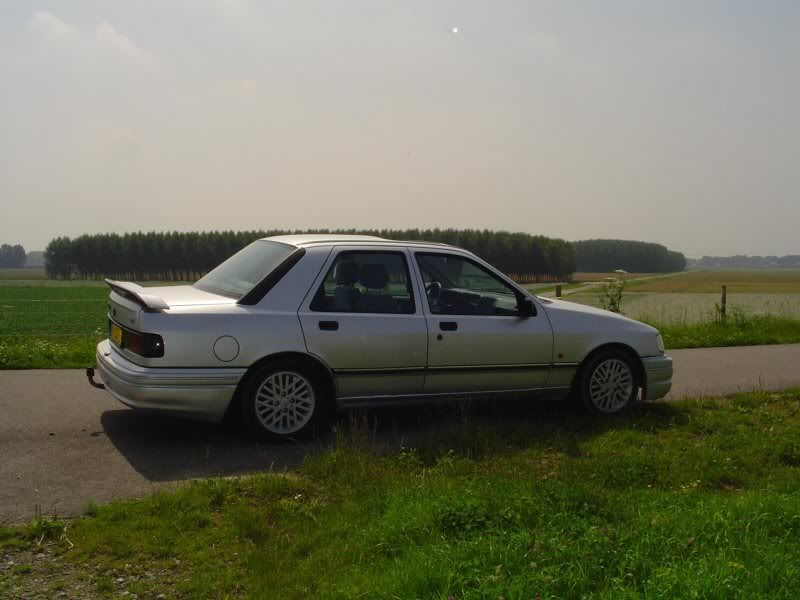
At the time it looked like this, although I already fitted the cosworth spoiler and cosworth wheels before taking the pic:
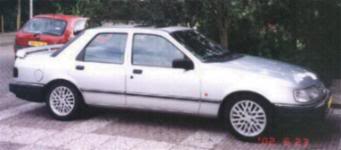
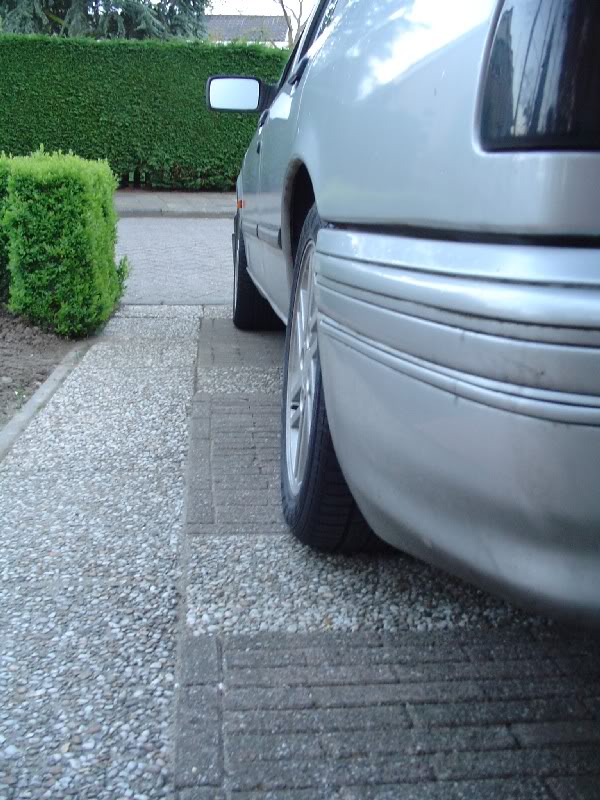
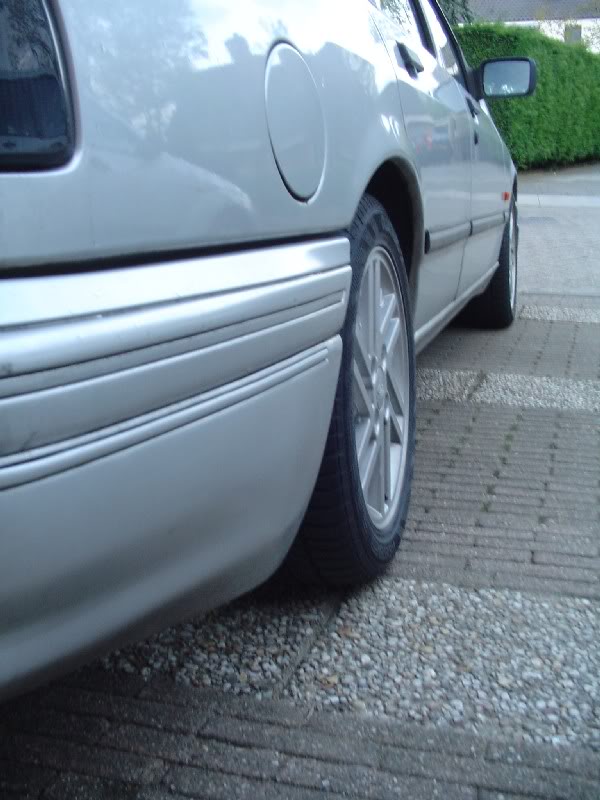
After that I fitted a cosworth grill, skirts and RS bumpers.

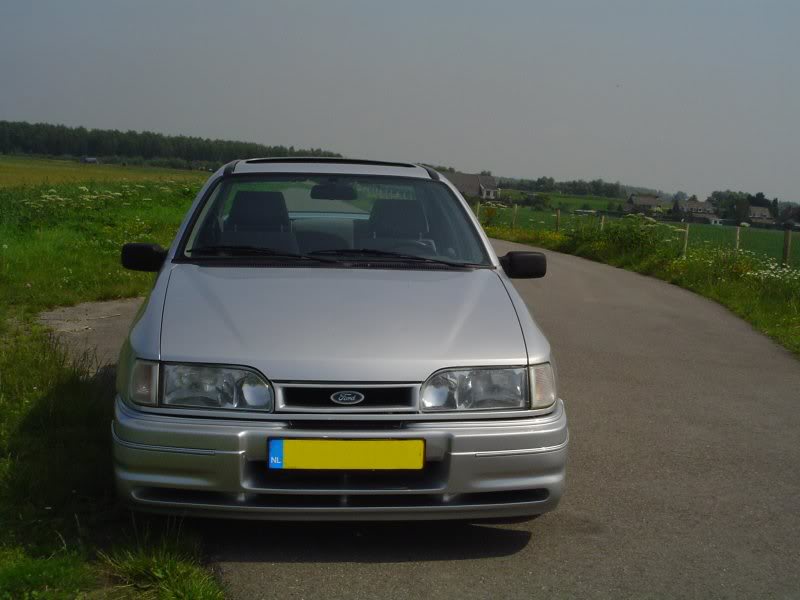
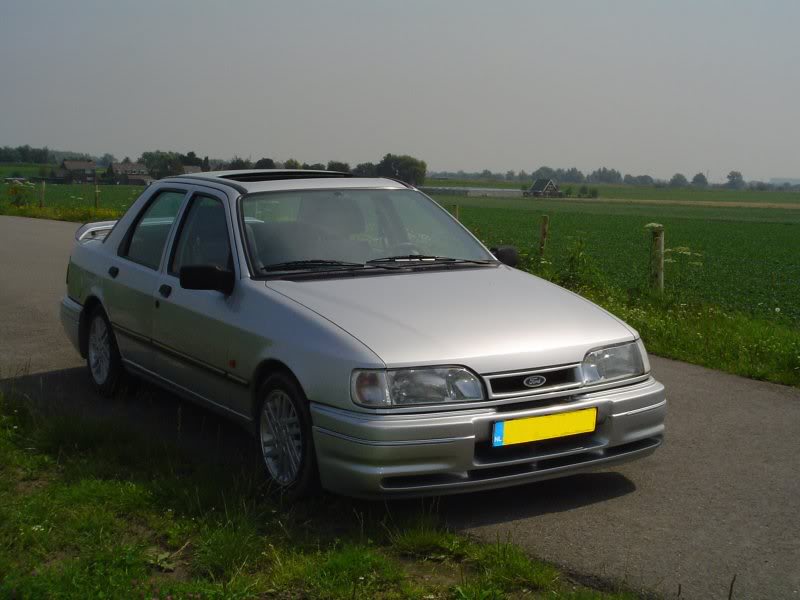

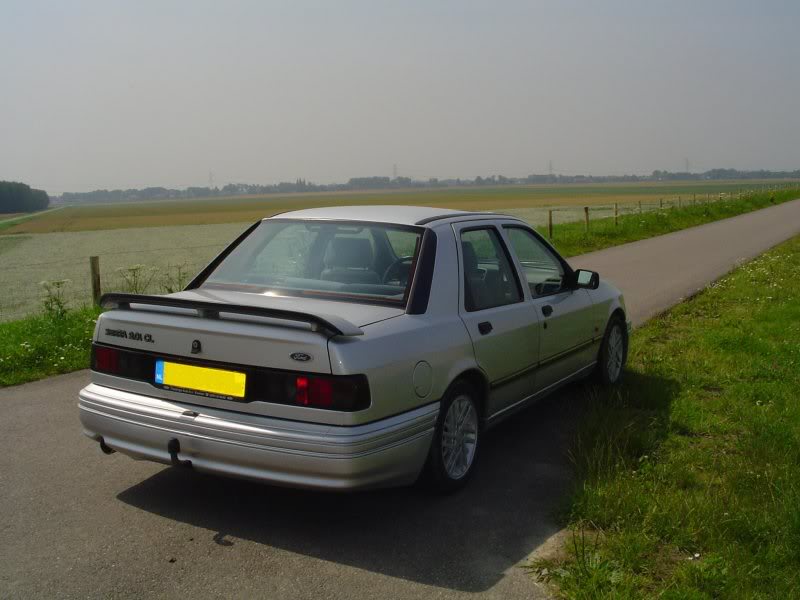
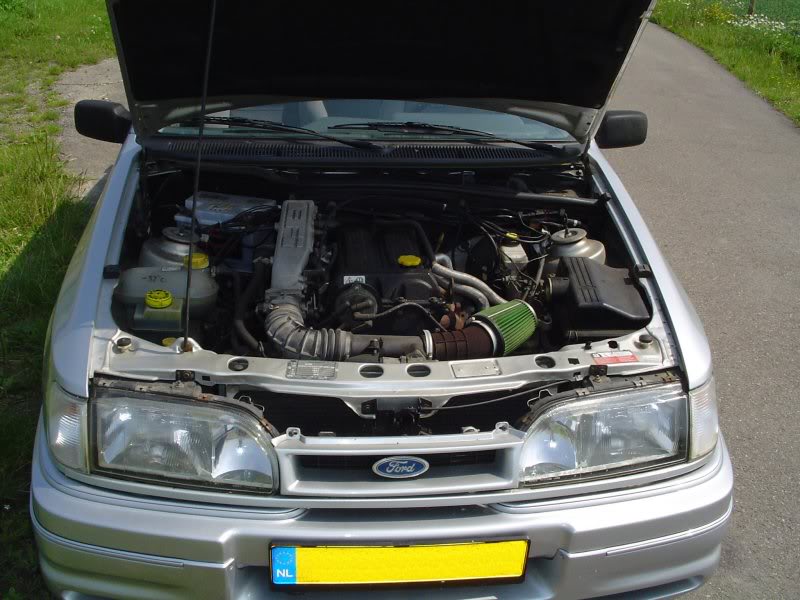
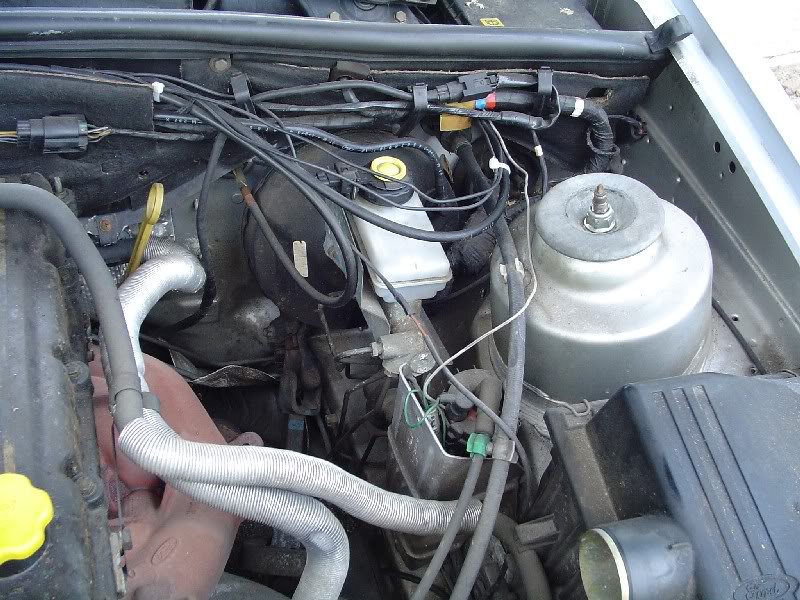
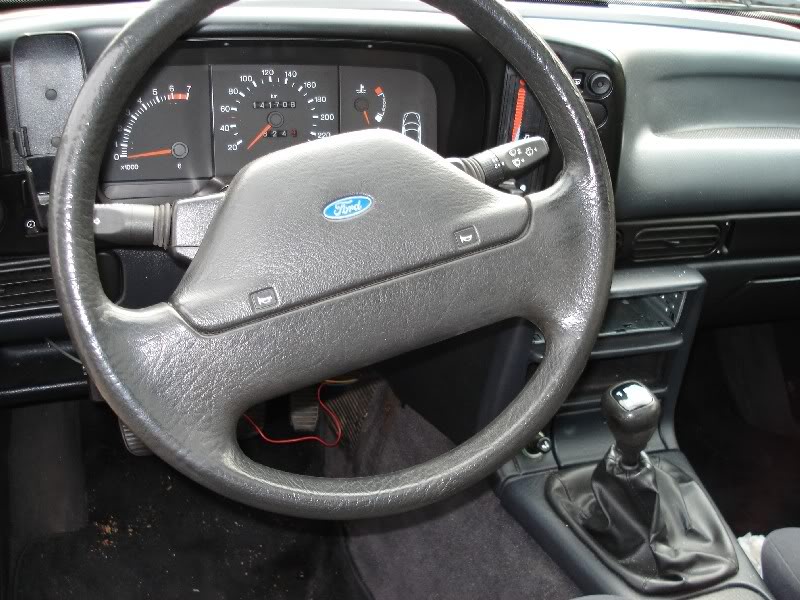
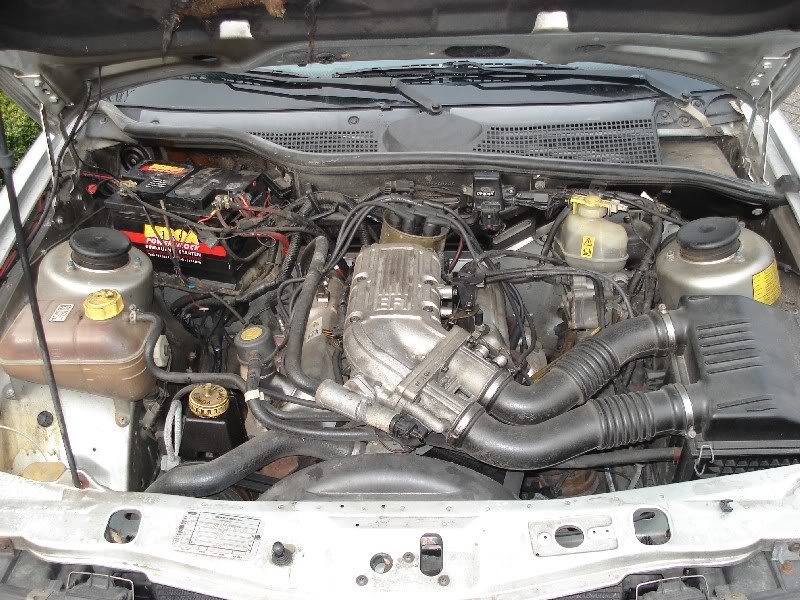
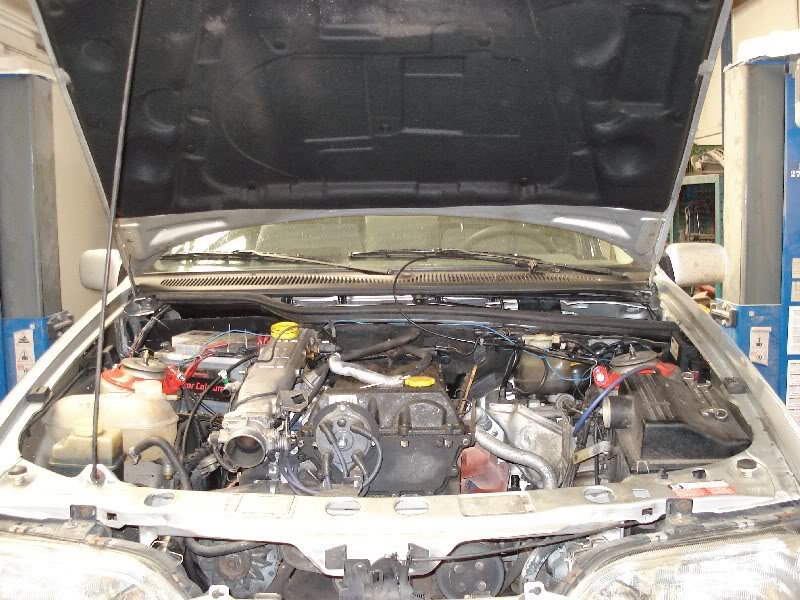
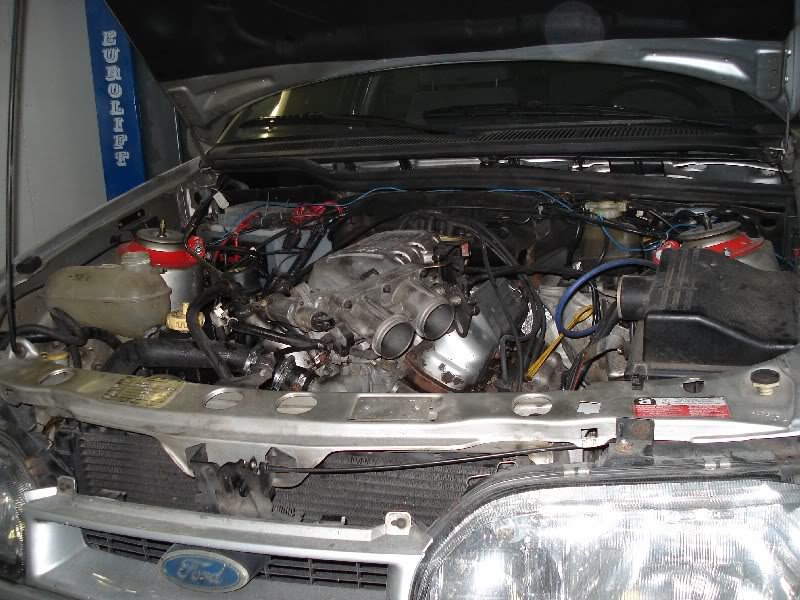
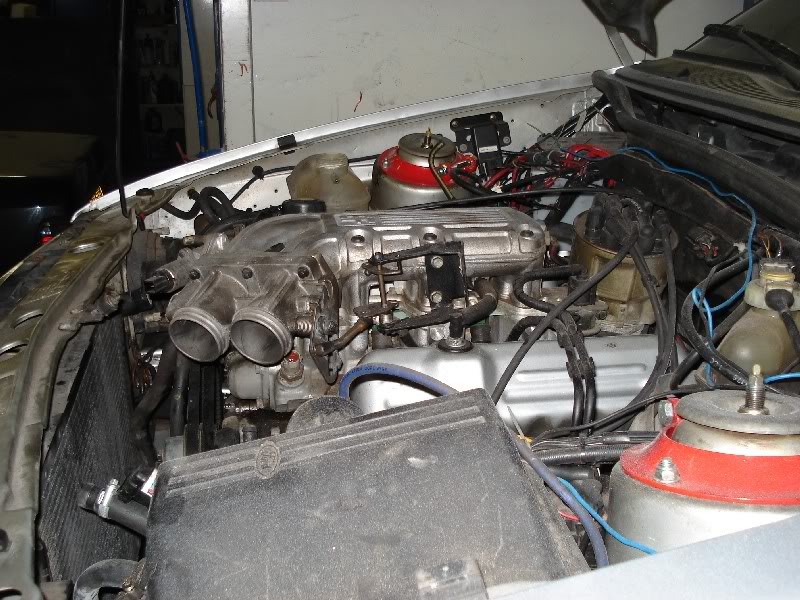
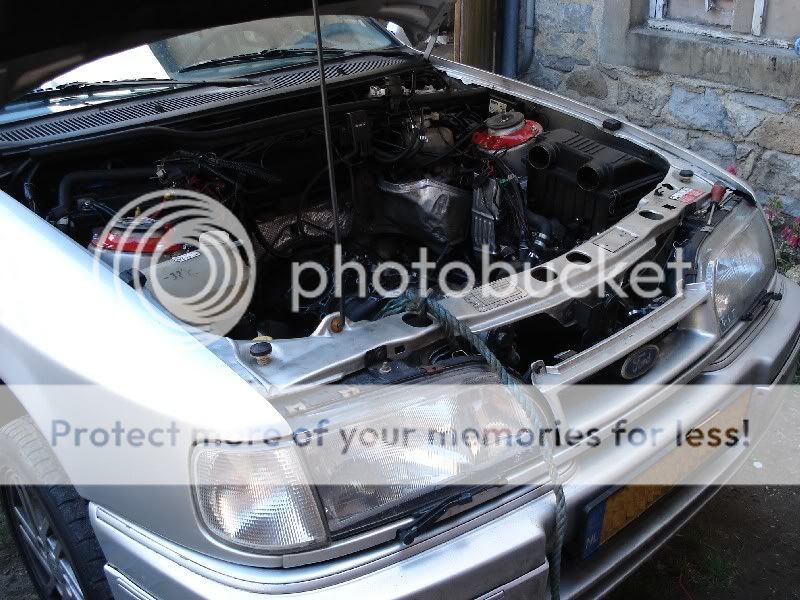
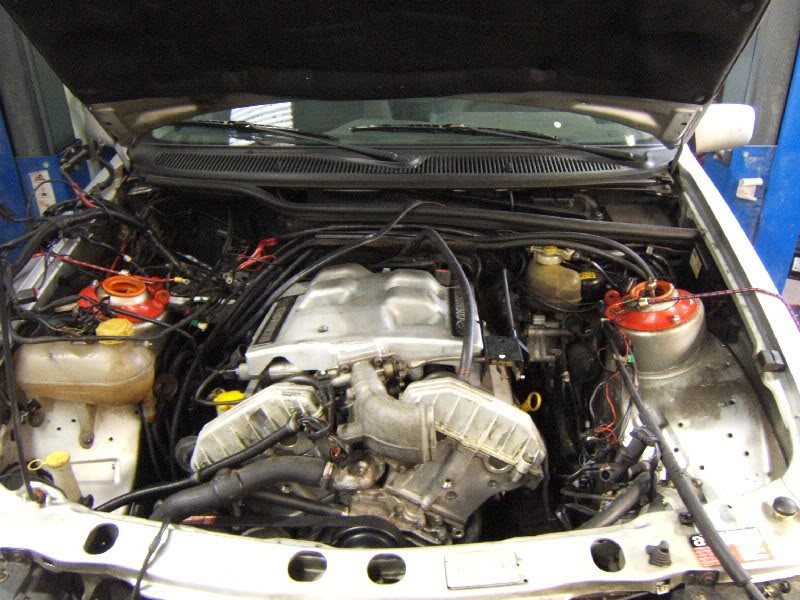
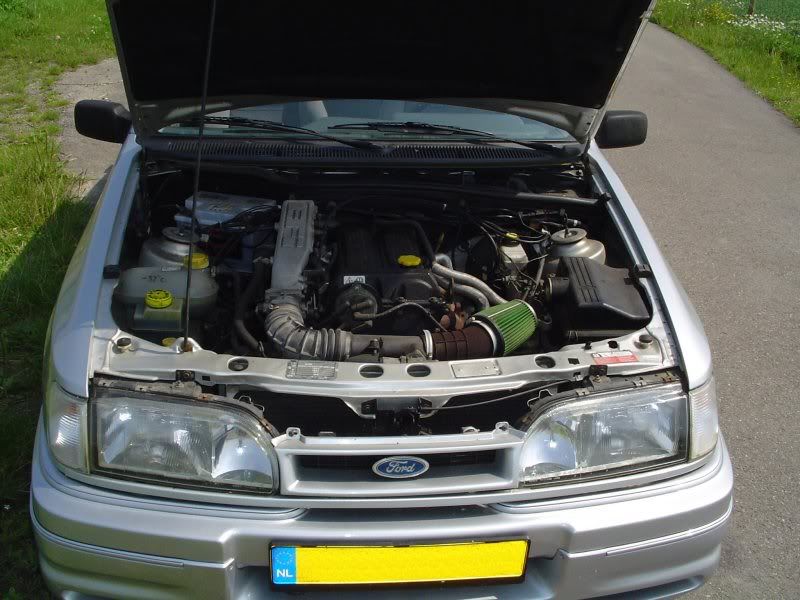
And a picture from under the bonnet, with a 2.0i DOHC to which I fitted a Green filter kit.
At the time it looked like this, although I already fitted the cosworth spoiler and cosworth wheels before taking the pic:
After that I fitted a cosworth grill, skirts and RS bumpers.
And a picture from under the bonnet, with a 2.0i DOHC to which I fitted a Green filter kit.
Last edited by Marc sierra; 14-04-2020 at 12:51 PM.
 30-03-2012, 03:26 PM
#2
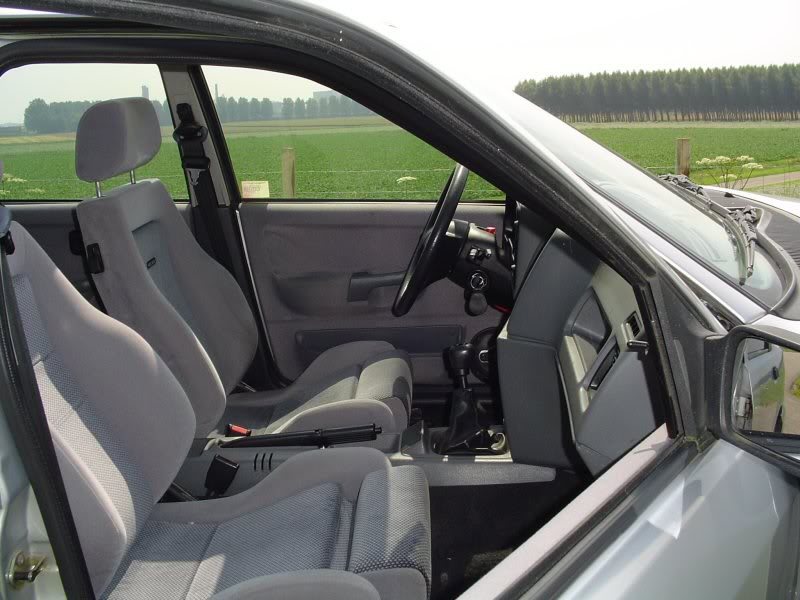
After that I fitted a set of Recaro seats. The trim matched the original upholstry exactly, so it looked like it belonged there.
And I got some colour coded mirrors fitted.
And I got some colour coded mirrors fitted.
Last edited by Marc sierra; 14-04-2020 at 12:50 PM.
30-03-2012, 03:49 PM
#3
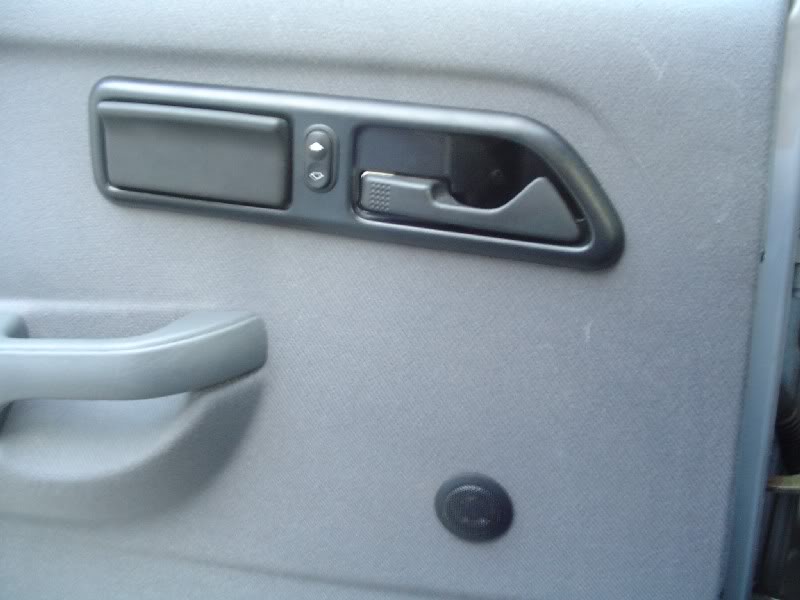
Then I found a set of electric windows. As it was a base version it also didn't have those... 
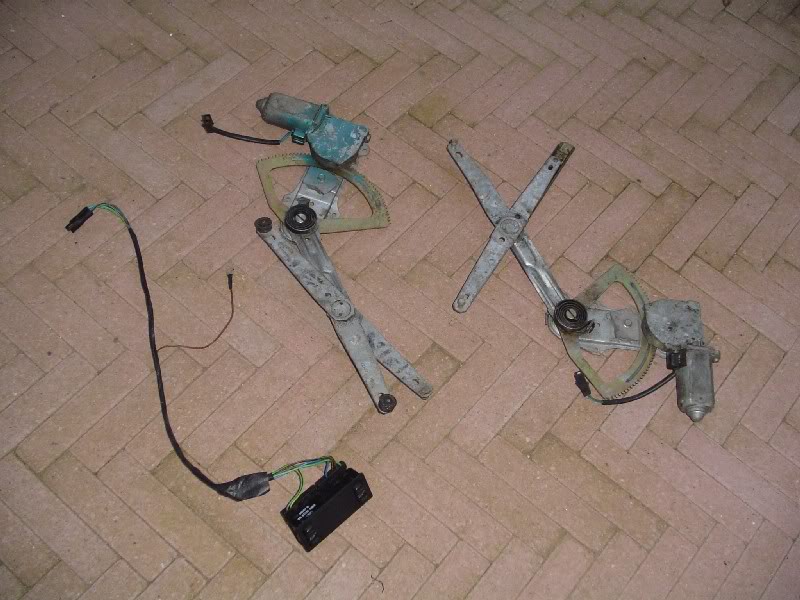
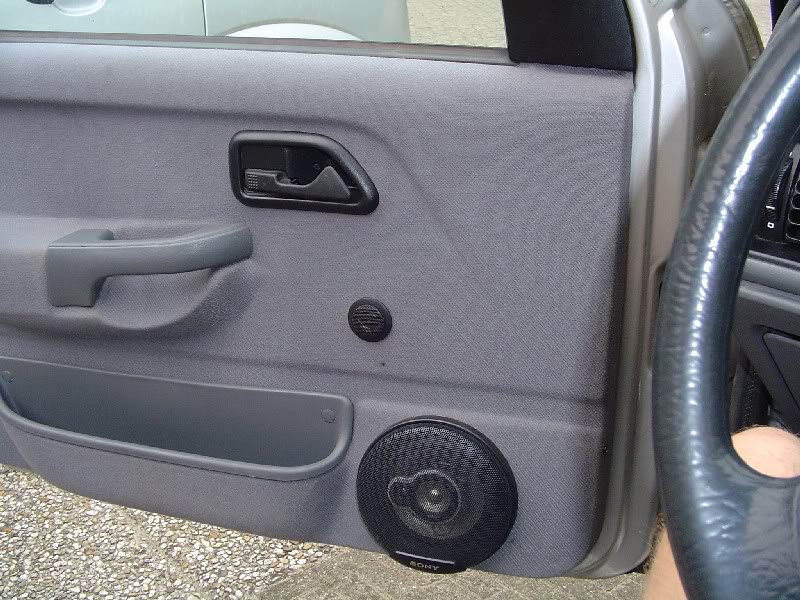
The holes in the door trim I filled with a set of tweeters.

Later I also got a set or rear electric windows for from the UK.
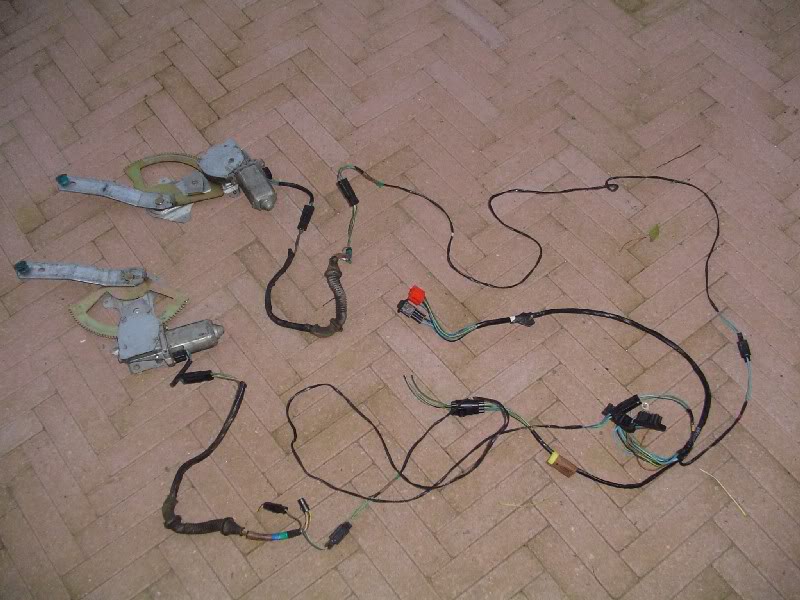
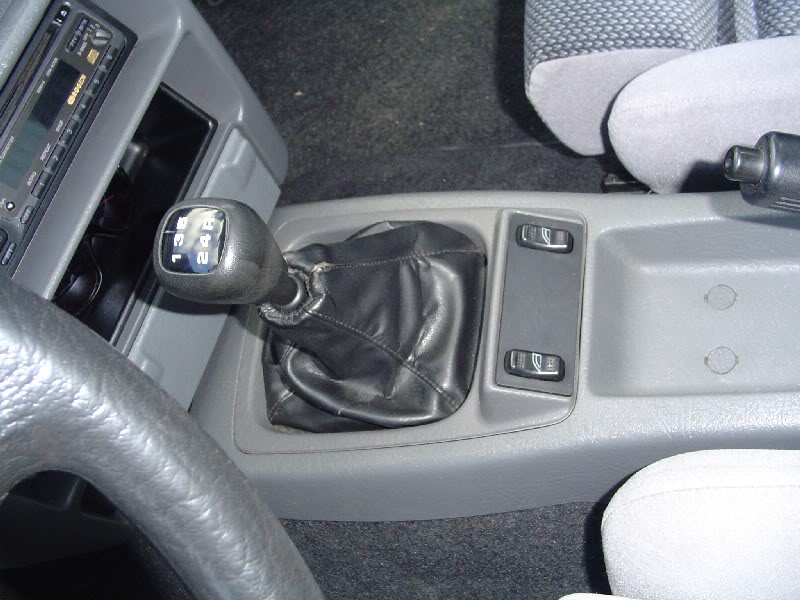
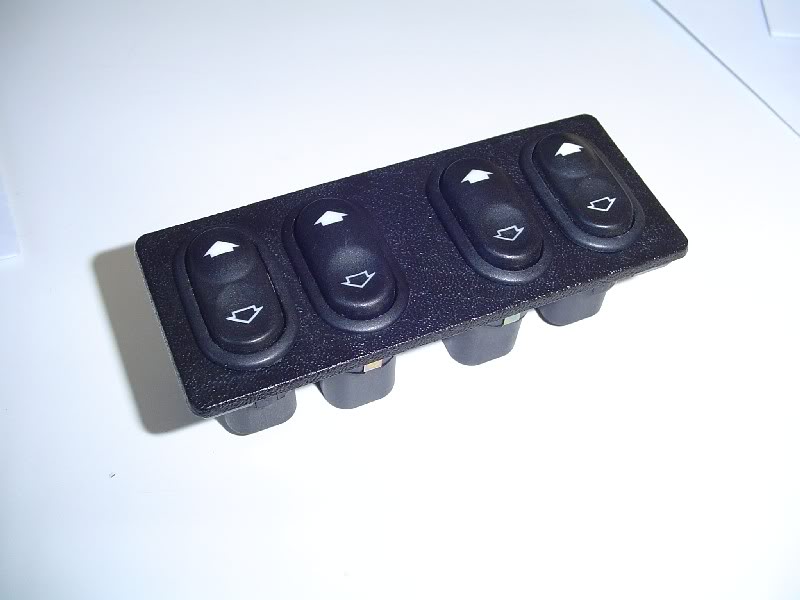
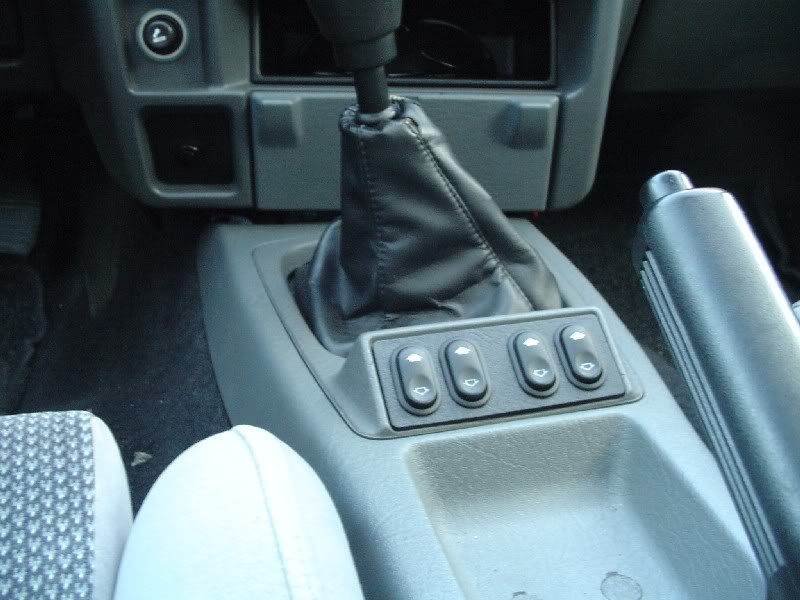
Since I didn't have the switches that go with it I fitted a set of Scorpio switches to the standard blanking plate. I think it looks nicer than the standard switches and these are also lit.
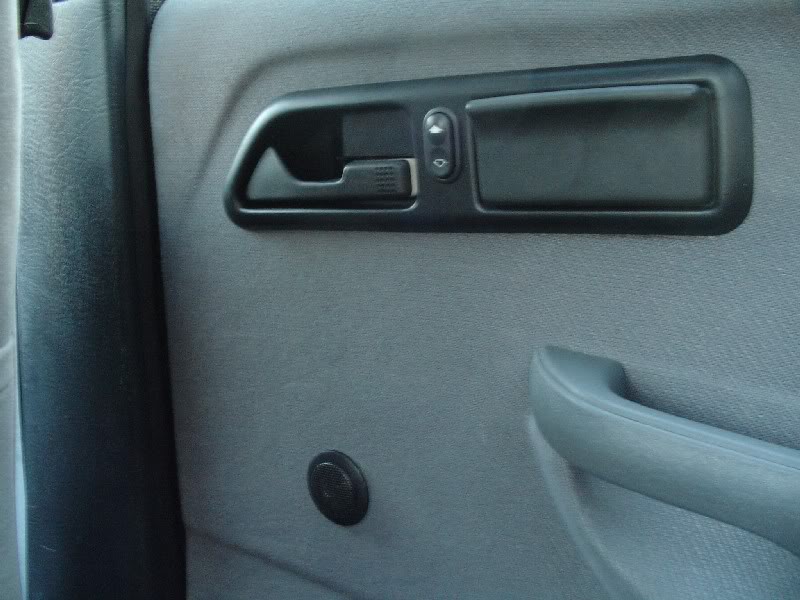
I fitted the rear switches next to the door handles, IMO a much better place than the standard ones. For the rear door trims I used the same tweeters as for the front.
And the switches in the dark.
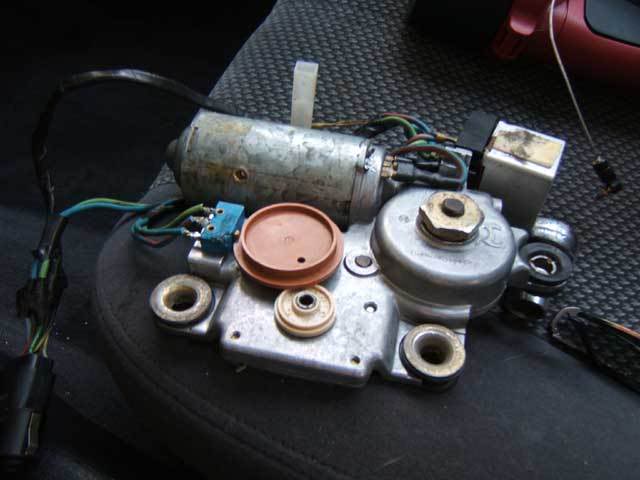
And at the same time I also got an electric sunroof motor.
The holes in the door trim I filled with a set of tweeters.
Later I also got a set or rear electric windows for from the UK.
Since I didn't have the switches that go with it I fitted a set of Scorpio switches to the standard blanking plate. I think it looks nicer than the standard switches and these are also lit.
I fitted the rear switches next to the door handles, IMO a much better place than the standard ones. For the rear door trims I used the same tweeters as for the front.
And the switches in the dark.
And at the same time I also got an electric sunroof motor.

 31-03-2012, 08:00 AM
#5
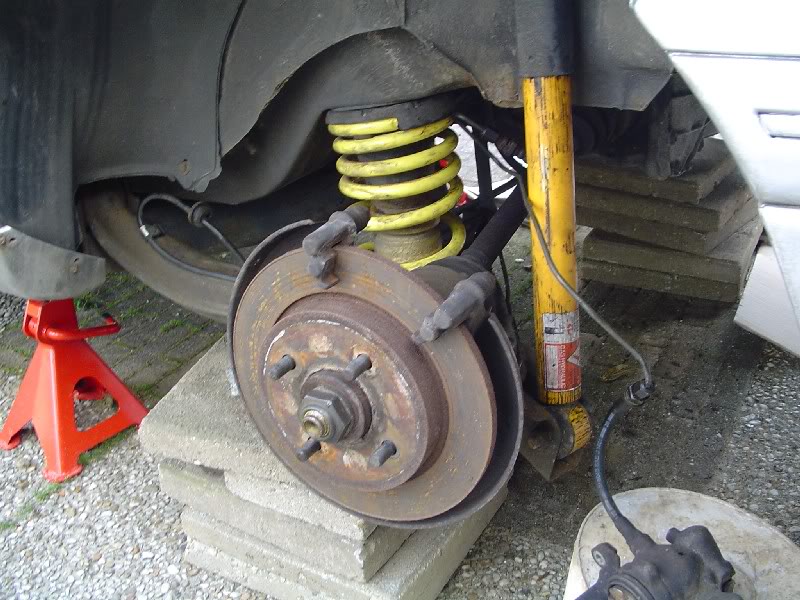
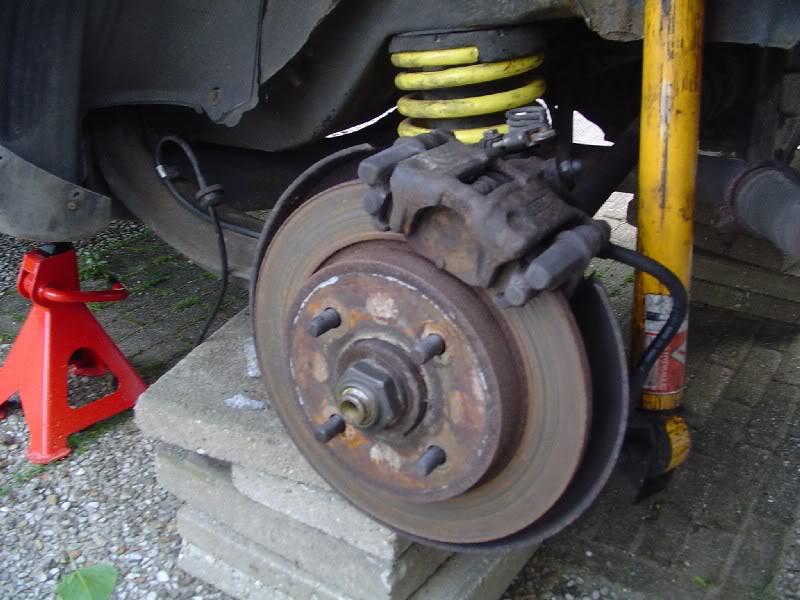
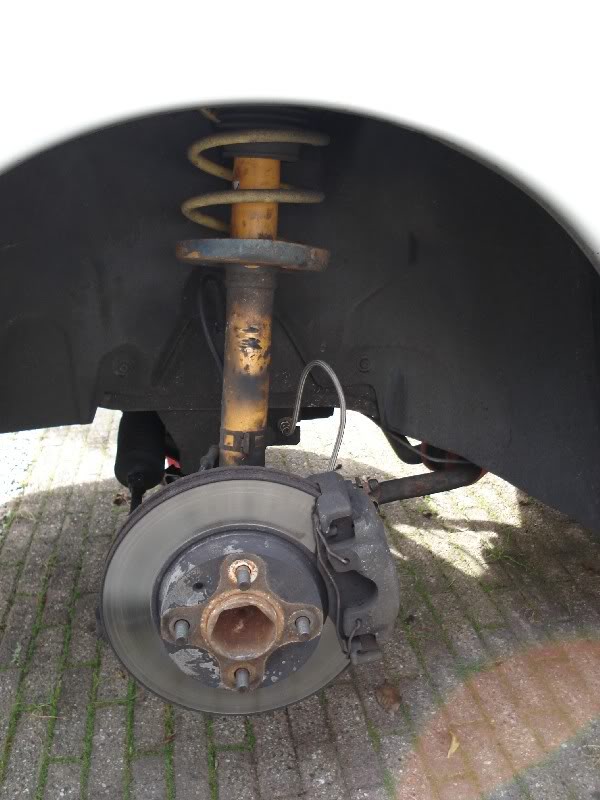
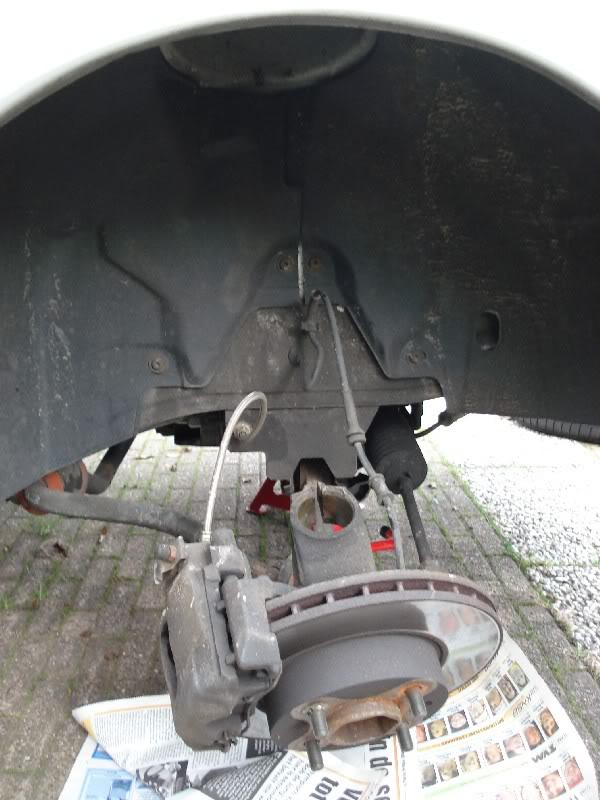
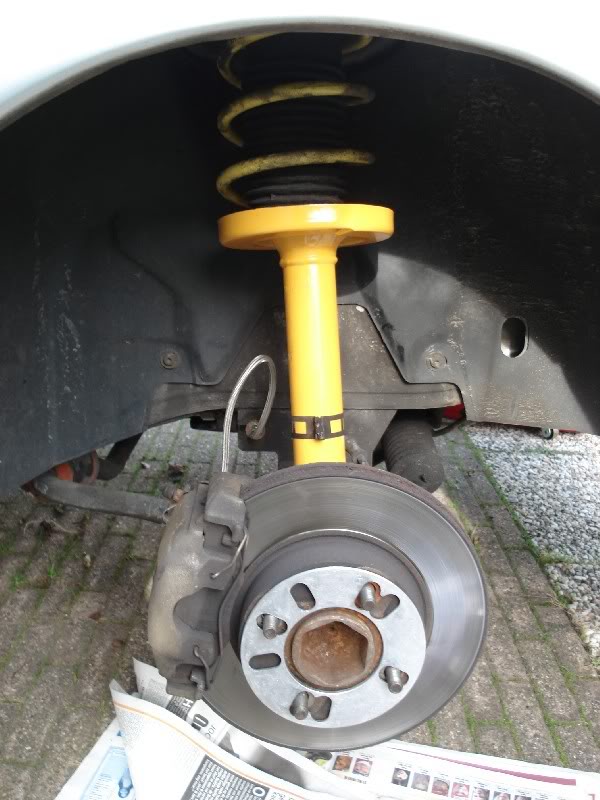
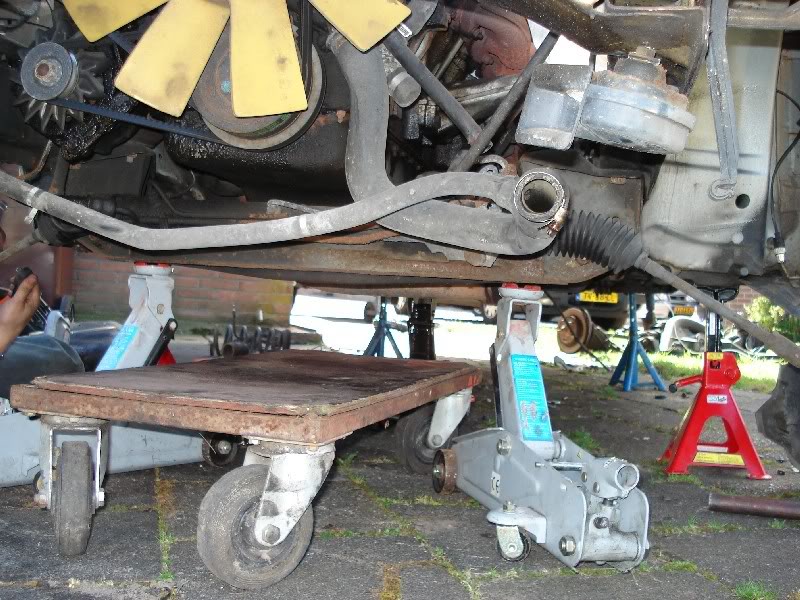
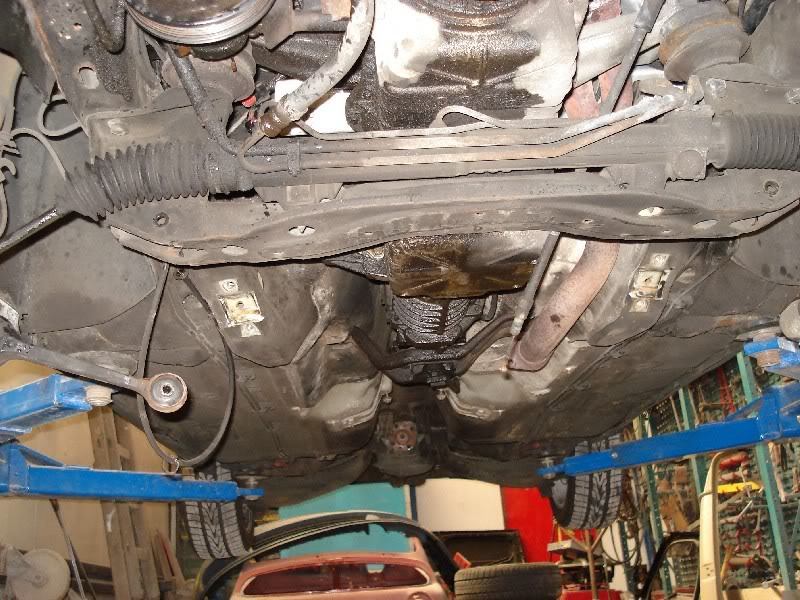
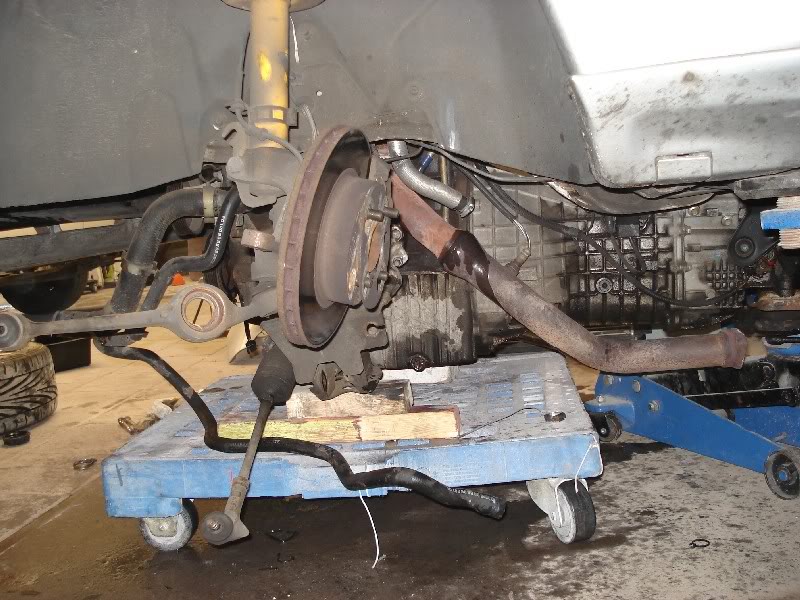
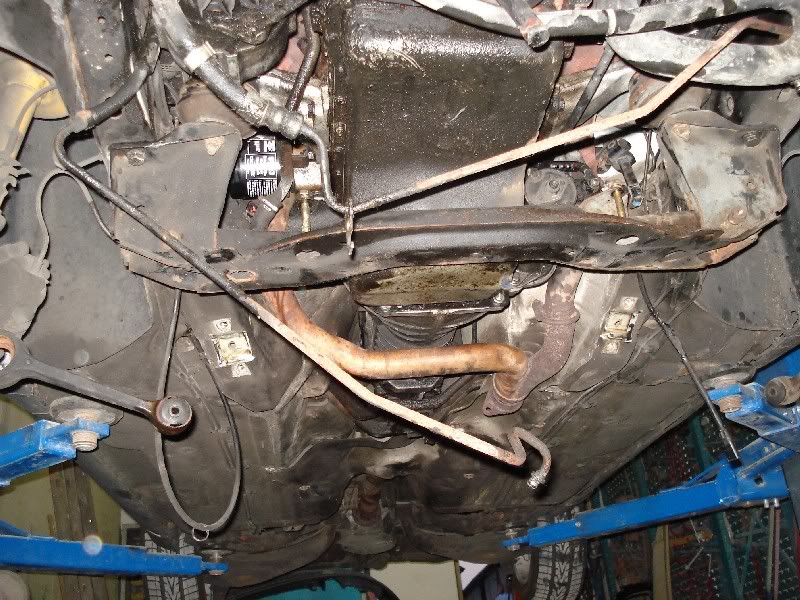
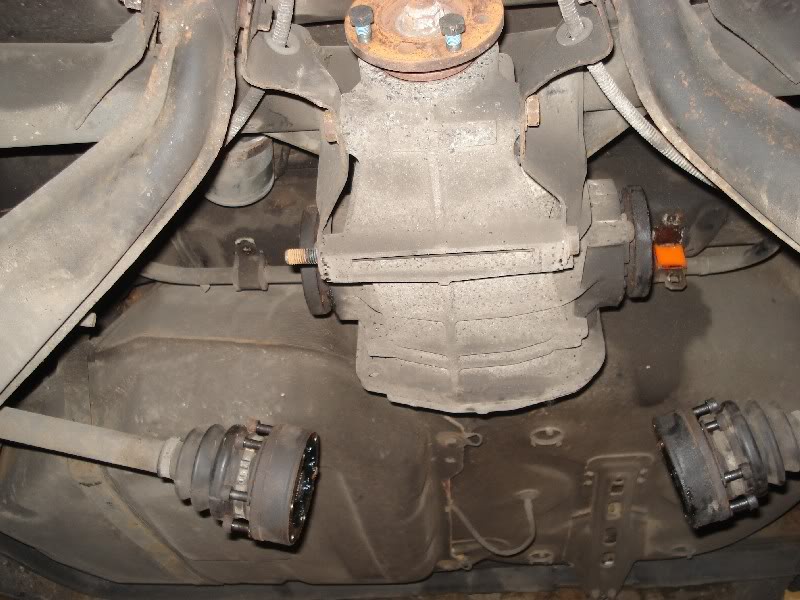
Earlier I already changed the 240 mm front brakes for 260 mm brakes. Now it was time to replace the standard rear drums for discs.
Removed the exhaust, towbar brackets and the shocks.
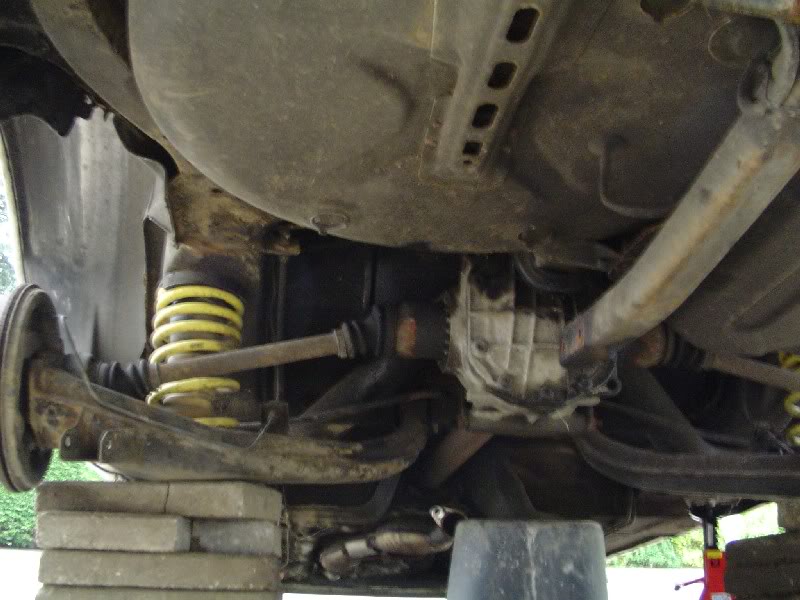
The whole rear beam was being replaced by this:
The beam from a Granada Cosworth 24v, with lsd, 18 mm arb and also disc brakes.
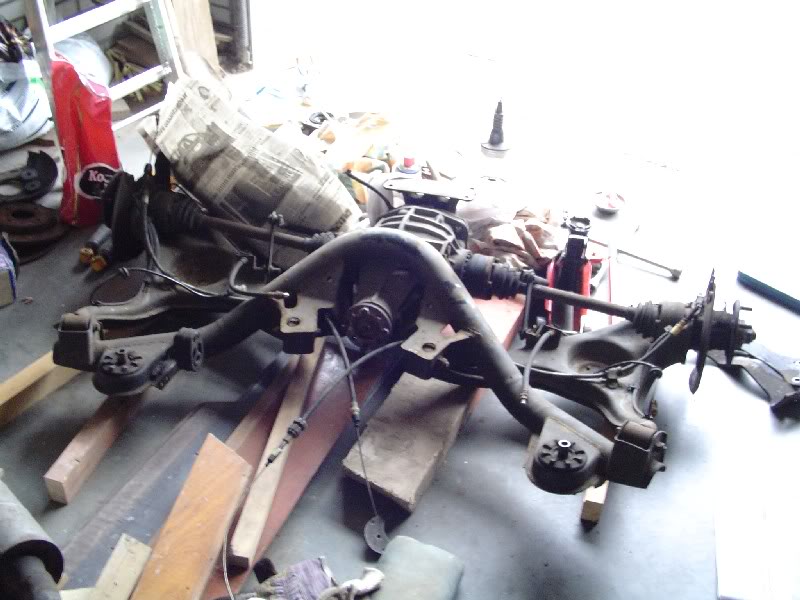
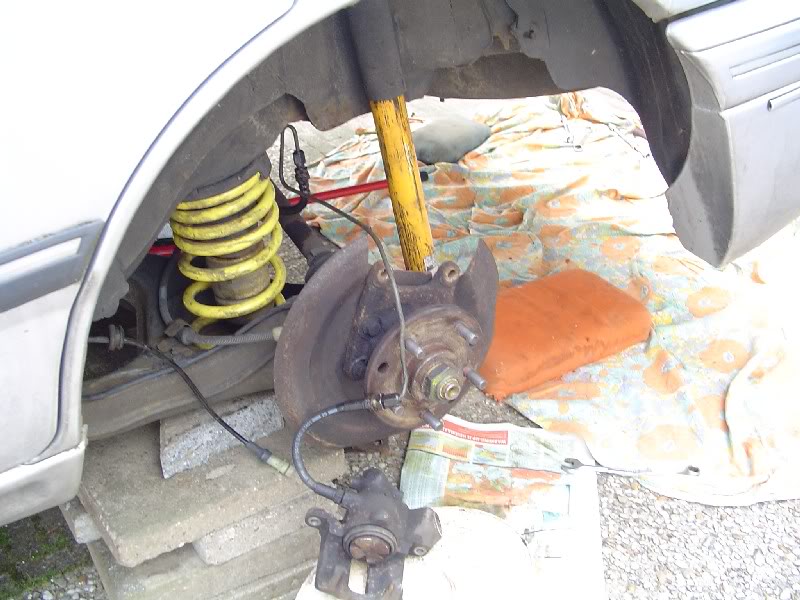
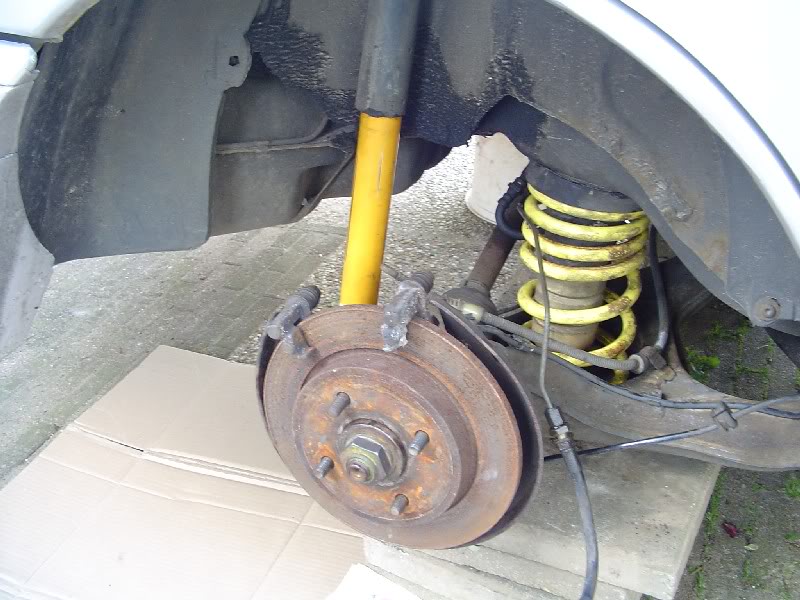
And with the beam fitted. The shocks have been replaced by Koni shocks for a Sierra Cosworth as the lower fitment is different than on a standard Sierra. It still has the 5 stud Granada hubs.
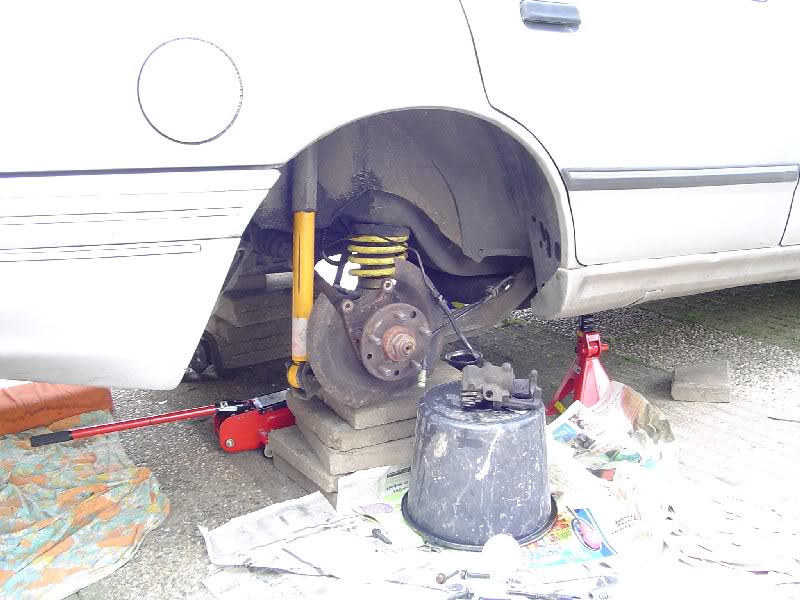
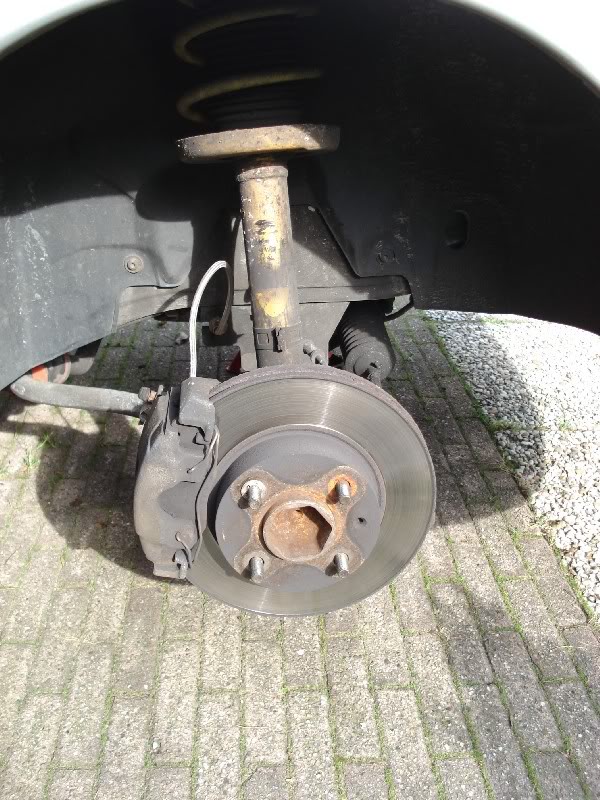
Removing the Granada hubs is a bit of a pain. The Sierra hubs have a hole in the drive flange to undo the bolts to the arms, but the Granada doesn't have that.
I had to modify the towbar brackets a bit because the 7.5" diff didn't fit.
And changed the Granada hubs for the Sierra hubs. I fitted the smaller bearing carriers as I was going to fit the 253 mm solid discs instead of 273 mm.

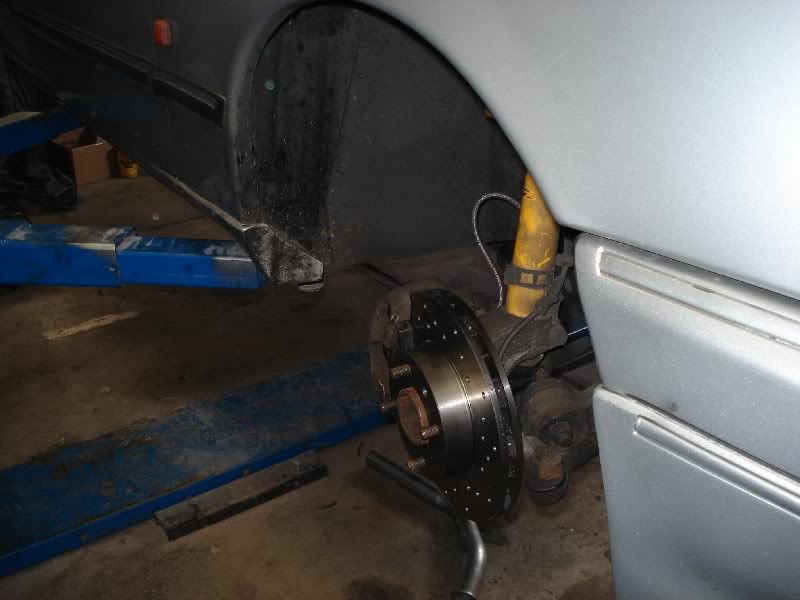
And the discs and caliper carriers fitted.
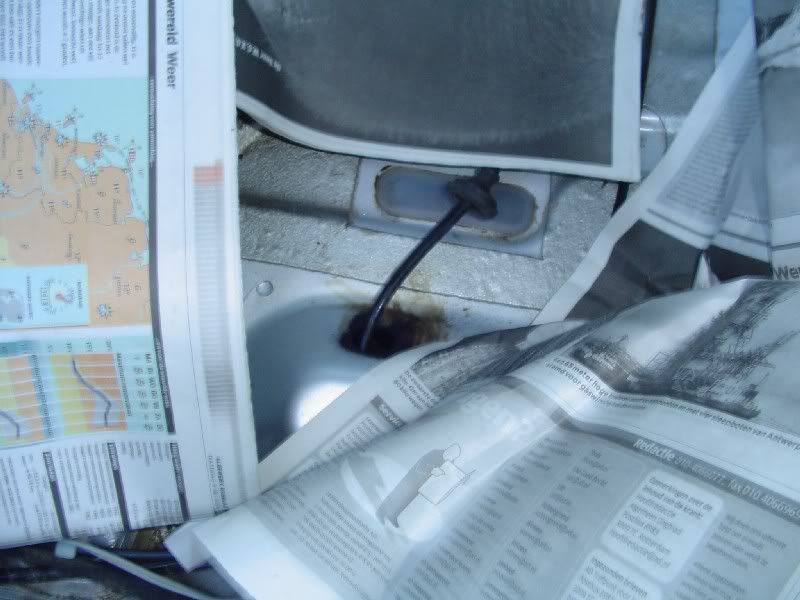
The rear beam now also had the mounting holes for the ABS sensors. Unfortunately my shell didn't have the holes for the sensors.
 [/quote]
Fitted the calipers to both sides.
And the exhaust back on.
 [/quote]
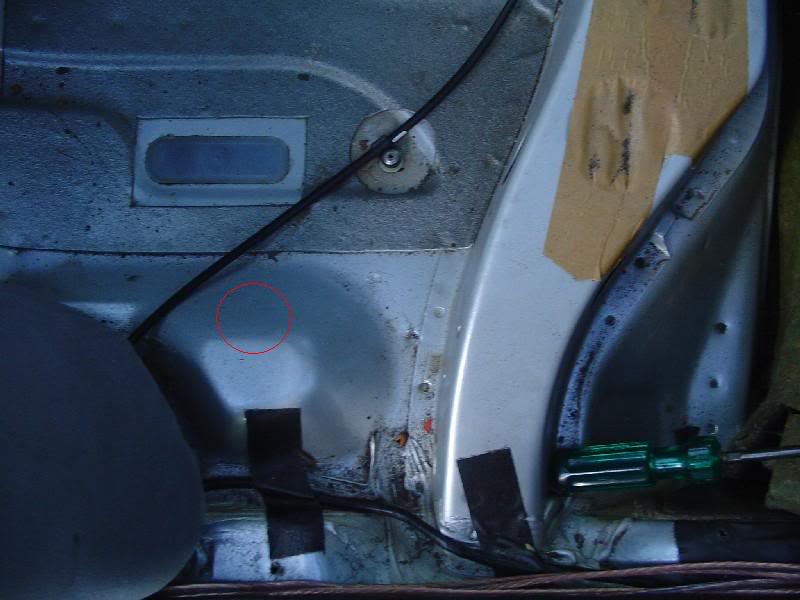
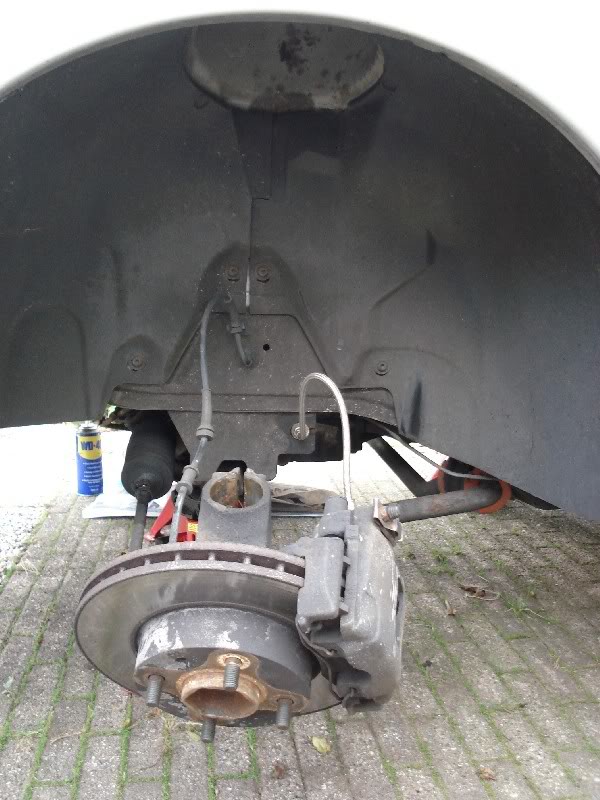
I didn't want to cut the ABS cables, so I drilled the holes for the sensor cables in the floor.
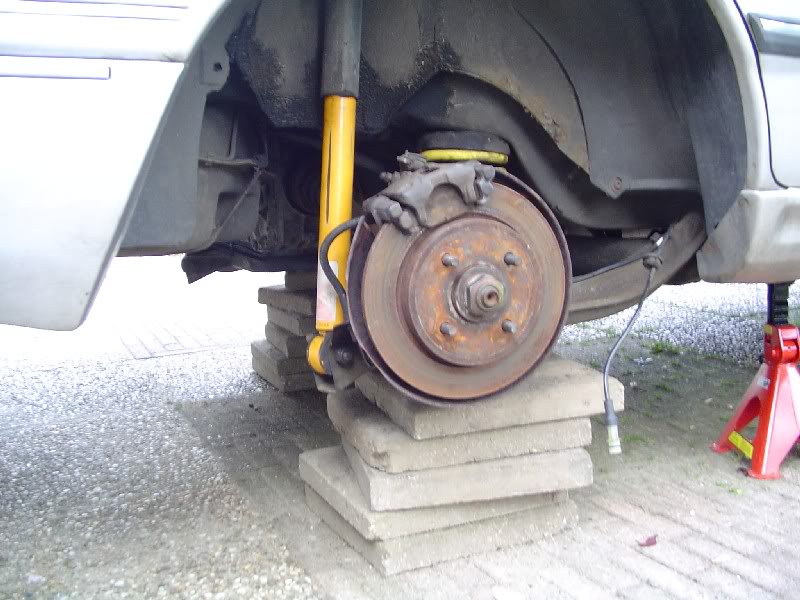
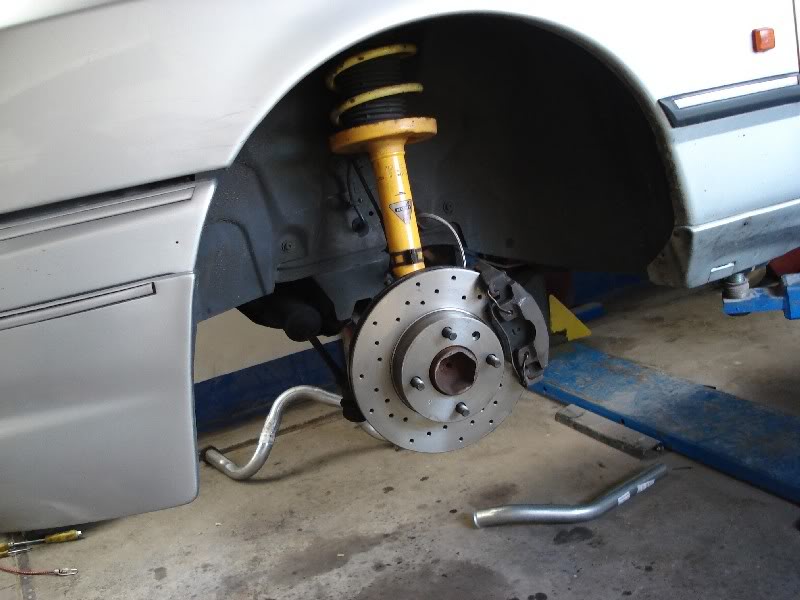
And the car back on its wheels.
The rear camber was a bit negative now as the Granada arms have slightly more camber than the Sierra ones due to the higher ride height.
To fix the camber problem I fitted a couple of shims in between the bearing carriers and the arms.
Removed the exhaust, towbar brackets and the shocks.
The whole rear beam was being replaced by this:
The beam from a Granada Cosworth 24v, with lsd, 18 mm arb and also disc brakes.
And with the beam fitted. The shocks have been replaced by Koni shocks for a Sierra Cosworth as the lower fitment is different than on a standard Sierra. It still has the 5 stud Granada hubs.
Removing the Granada hubs is a bit of a pain. The Sierra hubs have a hole in the drive flange to undo the bolts to the arms, but the Granada doesn't have that.
I had to modify the towbar brackets a bit because the 7.5" diff didn't fit.
And changed the Granada hubs for the Sierra hubs. I fitted the smaller bearing carriers as I was going to fit the 253 mm solid discs instead of 273 mm.
And the discs and caliper carriers fitted.
The rear beam now also had the mounting holes for the ABS sensors. Unfortunately my shell didn't have the holes for the sensors.
[/quote]Fitted the calipers to both sides.
And the exhaust back on.
[/quote]I didn't want to cut the ABS cables, so I drilled the holes for the sensor cables in the floor.
And the car back on its wheels.
The rear camber was a bit negative now as the Granada arms have slightly more camber than the Sierra ones due to the higher ride height.
To fix the camber problem I fitted a couple of shims in between the bearing carriers and the arms.
01-04-2012, 11:42 AM
#6
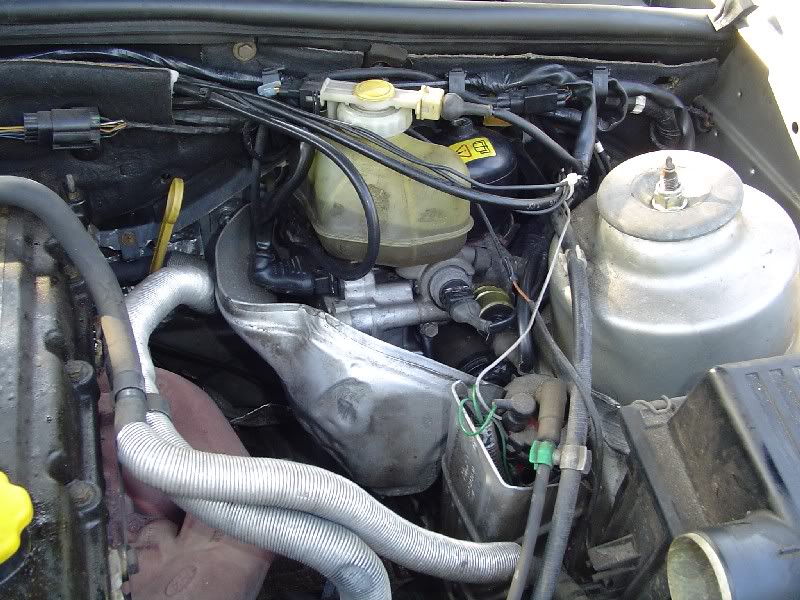
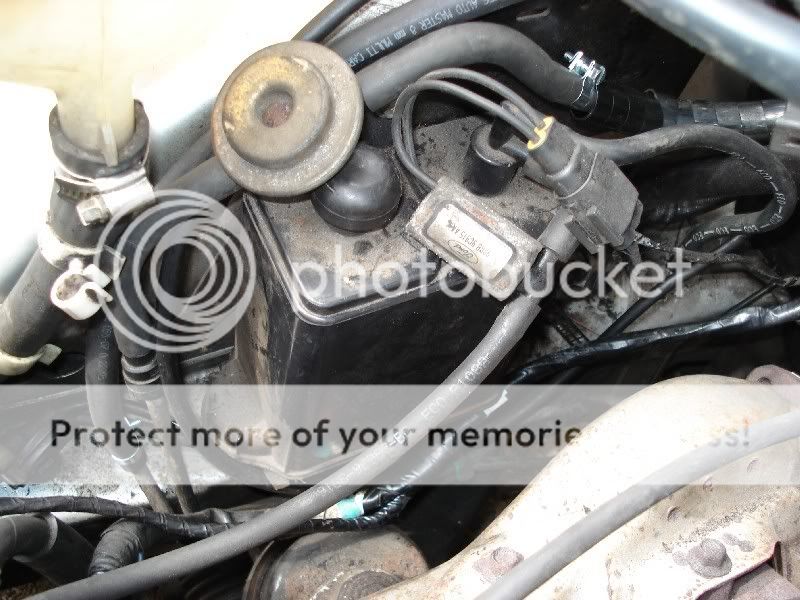
As I now already had the ABS sensors for the rear wheels it seemed nice to also have ABS.  So I also fitted some front hubs with sensors and got all the rest of the ABS stuff.
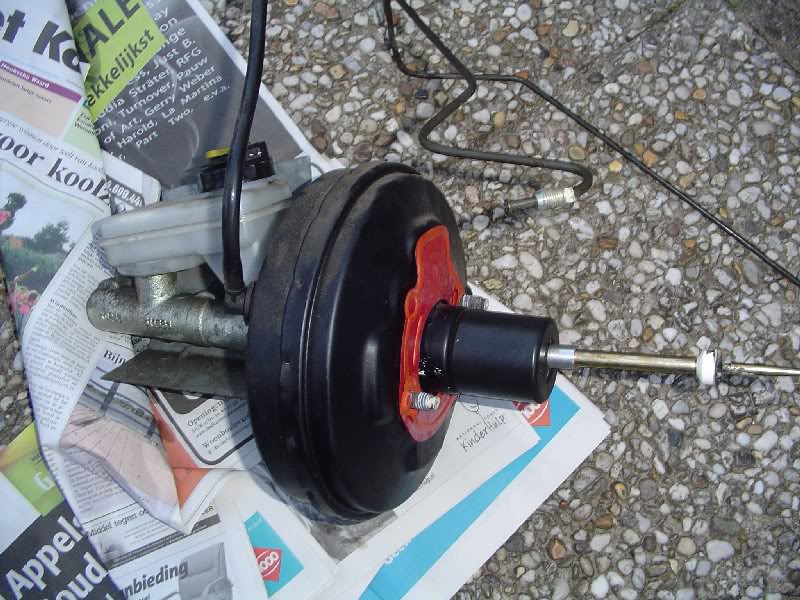
First I put in all the wiring and the computer, as I needed to keep the car driveable as I needed it everyday to get to work. But once that was done it was time to change the MC.
And the ABS MC, ready to be installed.
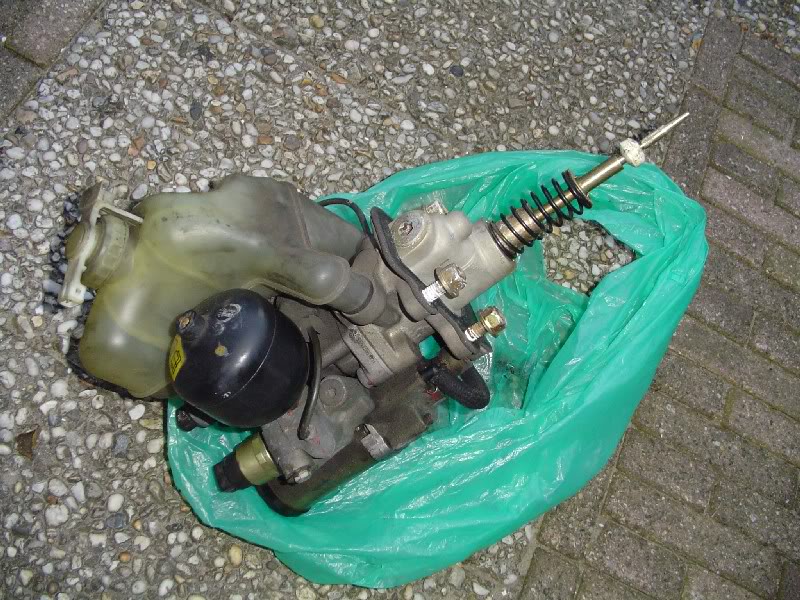
The old one out.
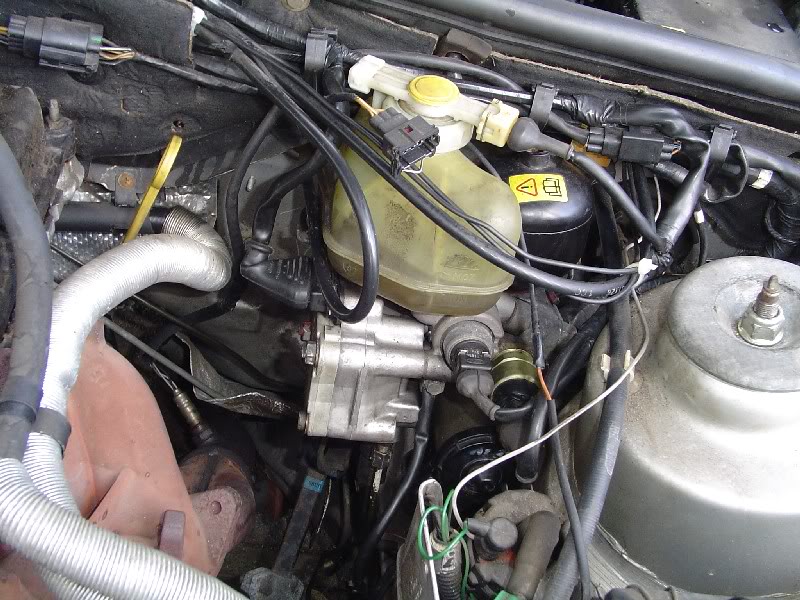
Later I had the brake warning light coming on in a traffic jam. It turned out it was getting too hot without the heat shield. So I found on off a Granada and fitted that. After that no more issues with the system.
First I put in all the wiring and the computer, as I needed to keep the car driveable as I needed it everyday to get to work. But once that was done it was time to change the MC.
And the ABS MC, ready to be installed.
The old one out.
Later I had the brake warning light coming on in a traffic jam. It turned out it was getting too hot without the heat shield. So I found on off a Granada and fitted that. After that no more issues with the system.
01-04-2012, 08:31 PM
#7
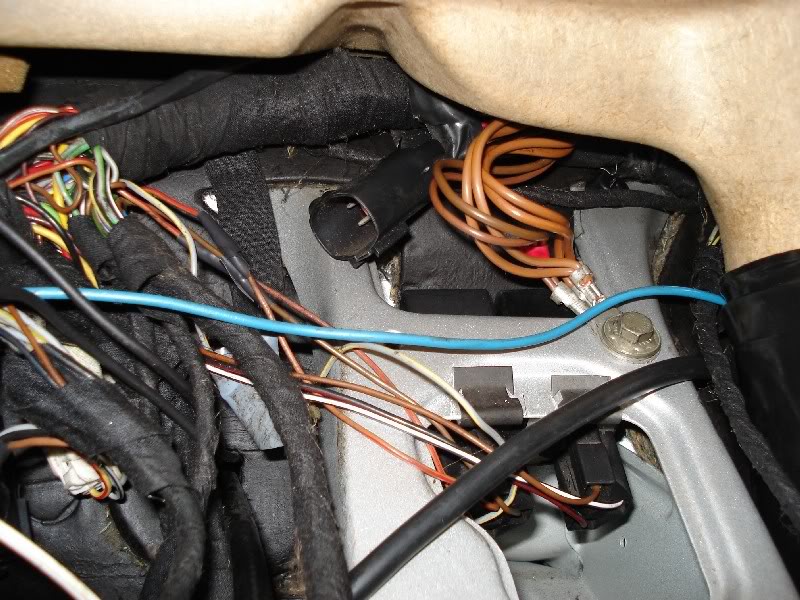
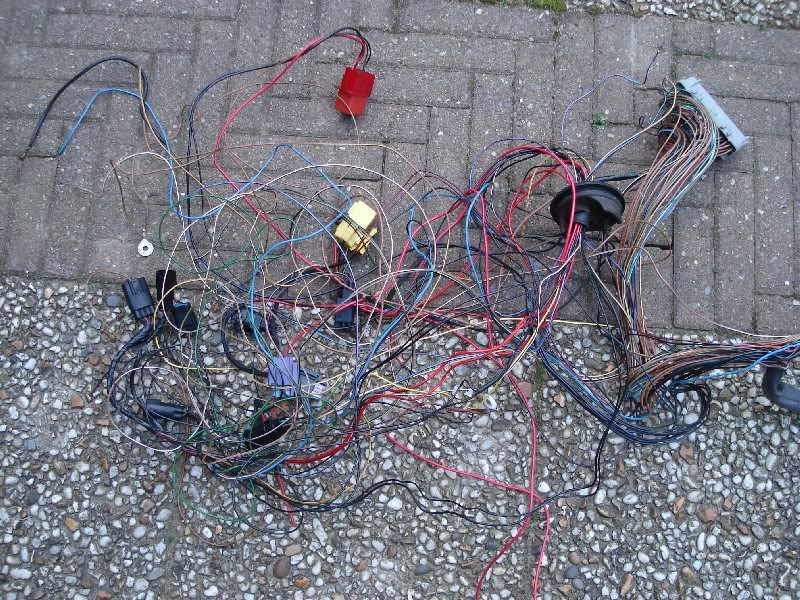
As the wiring and the fuse box was a bit of a mess (I added the revcounter, electric windows, delayed interior lighting, variable wiper intermittant) I wanted to improve that.
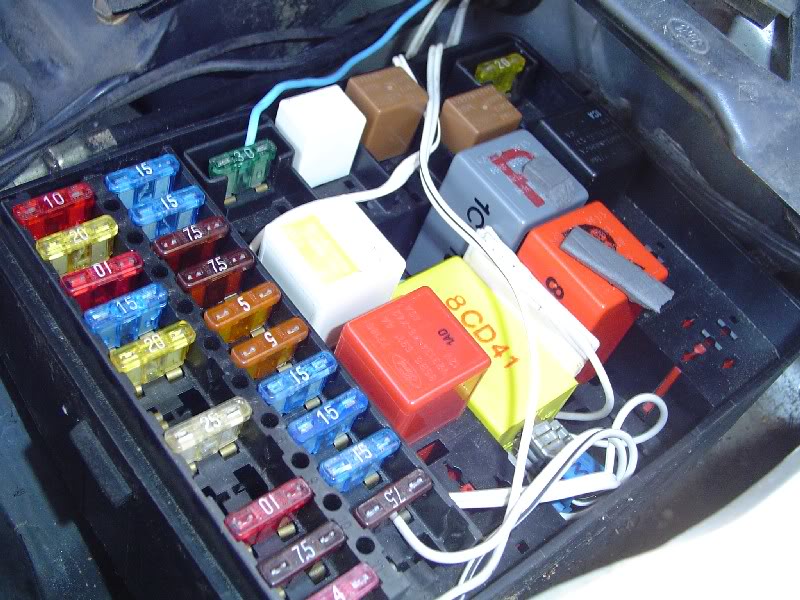
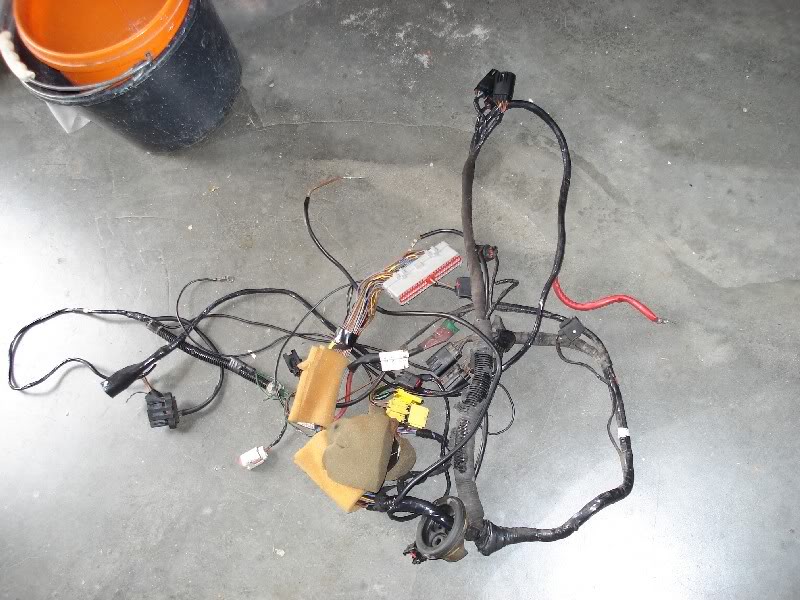
Luckily I found a '90 Ghia sapphire in the scrapyard, which is quite rare in Holland. I took the loom and all the other electric goodies from that car so I could upgrade my own CL to Ghia spec.
The complete Ghia loom.

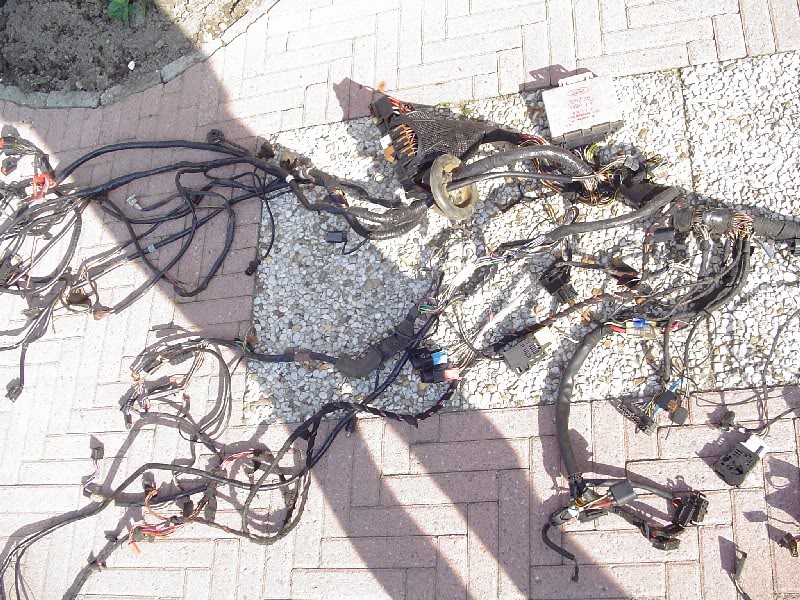
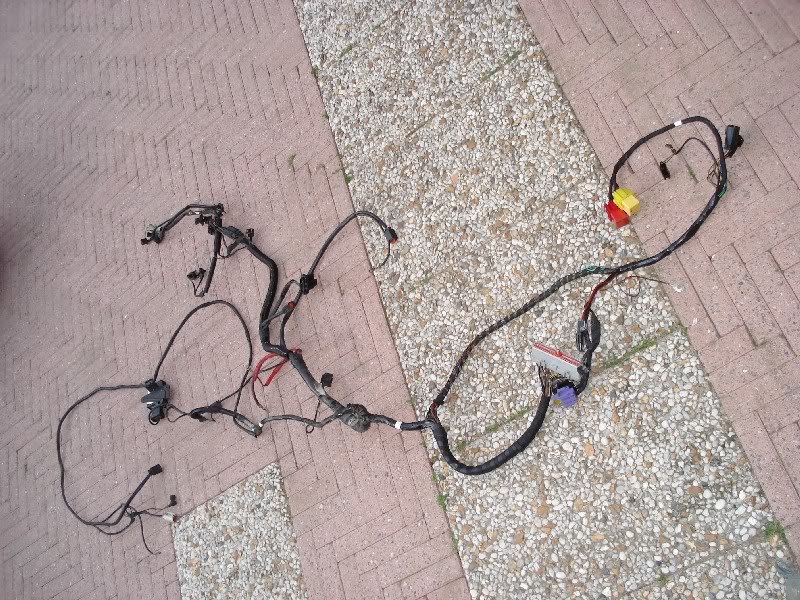
Taking the old CL loom out.


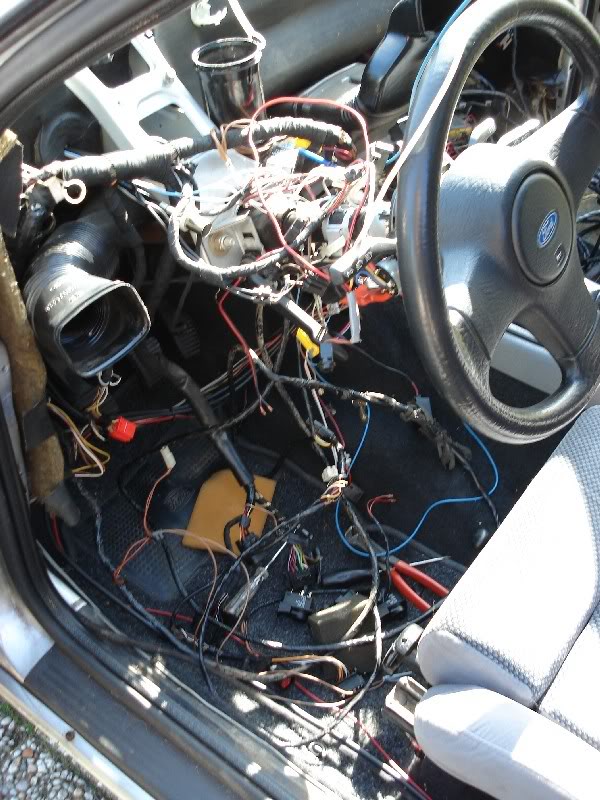
Some parts lying in the garage.
Putting the Ghia loom in.
Luckily I found a '90 Ghia sapphire in the scrapyard, which is quite rare in Holland. I took the loom and all the other electric goodies from that car so I could upgrade my own CL to Ghia spec.
The complete Ghia loom.
Taking the old CL loom out.
Some parts lying in the garage.
Putting the Ghia loom in.
Trending Topics
 03-04-2012, 03:10 PM
#9
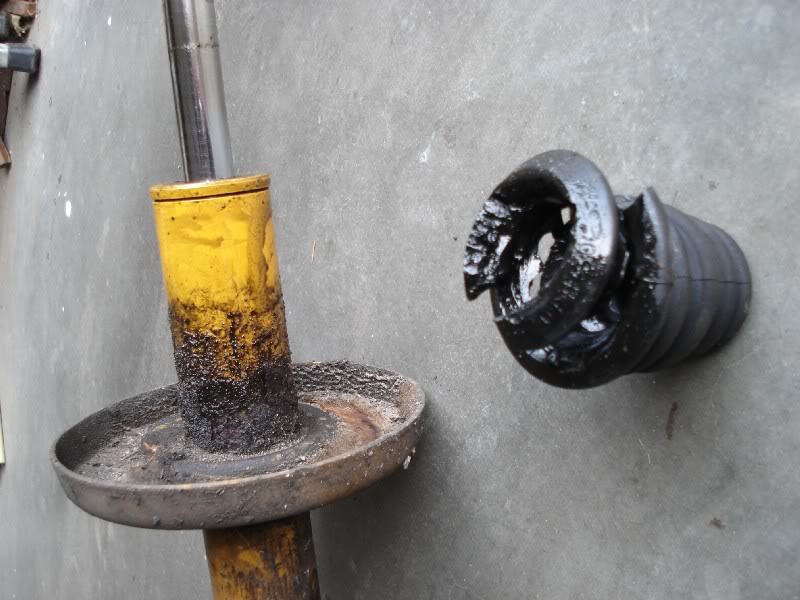
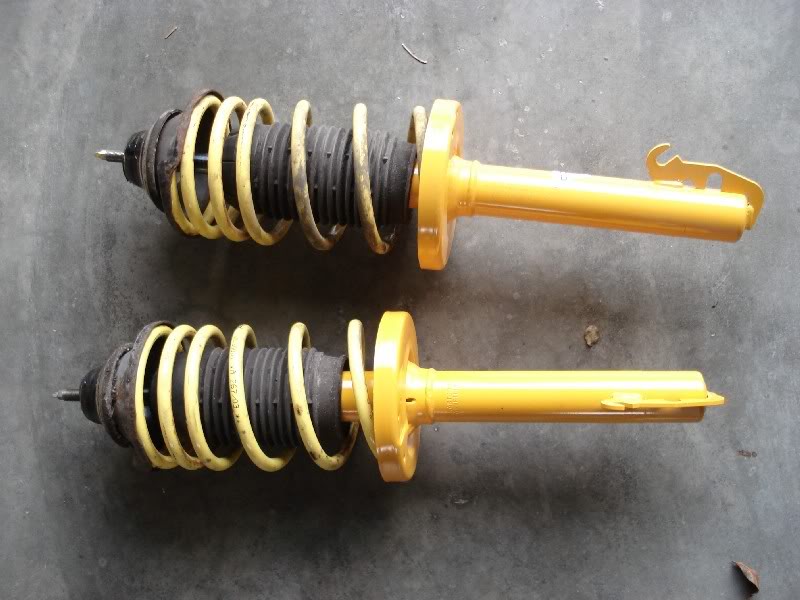
Found a set of new front Koni shocks on eBay Germany for a new price.
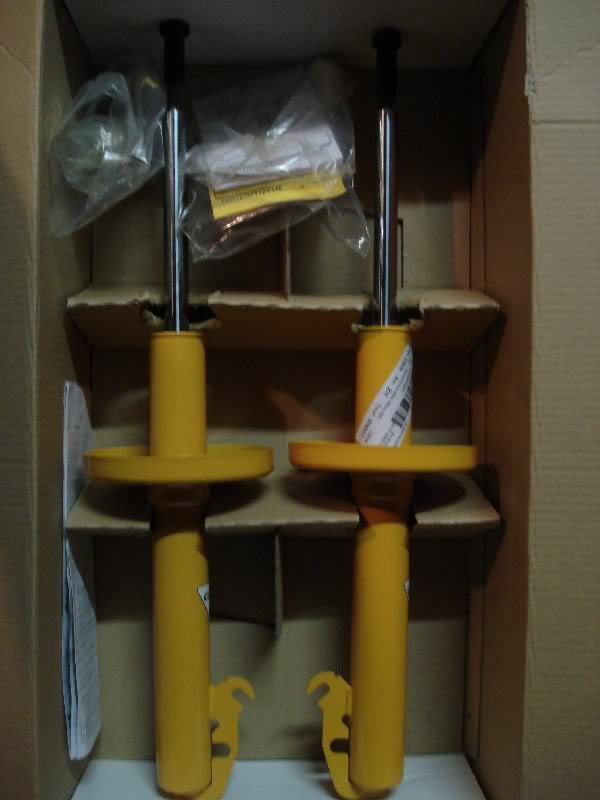
Old shocks removed.
One of the old shocks turned out to be leaking, never noticed though...
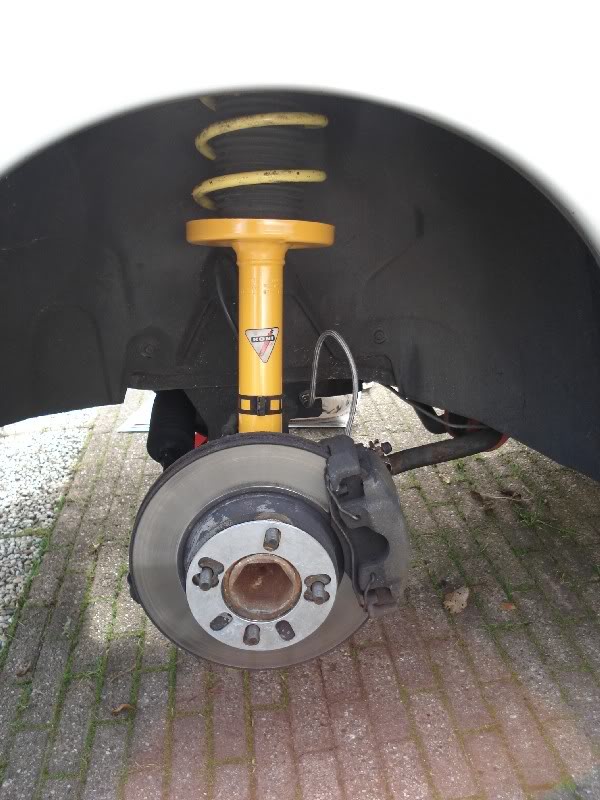
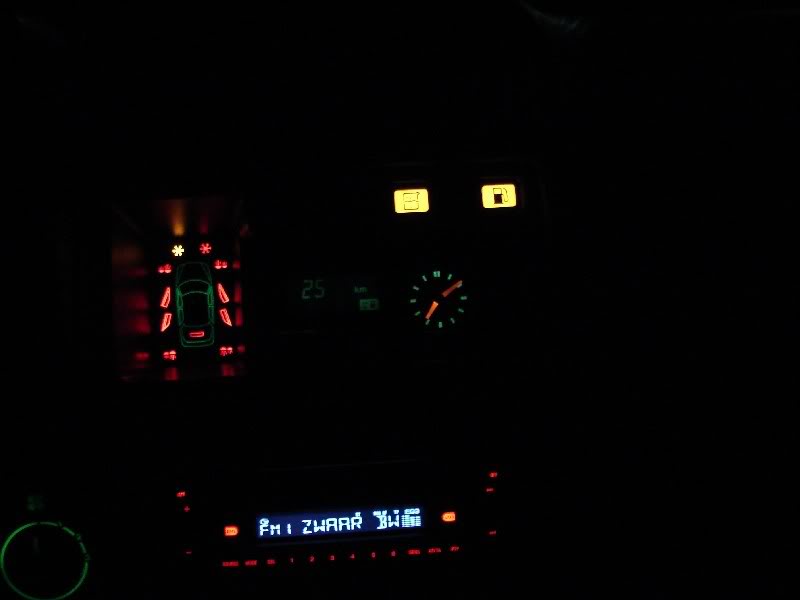
And found a fuel computer on eBay UK. I had never seen one in Holland before. Luckily it plugged right into the Ghia loom behind the clocks.
Fitted the fuel computer next to the AWS system.
Old shocks removed.
One of the old shocks turned out to be leaking, never noticed though...
And found a fuel computer on eBay UK. I had never seen one in Holland before. Luckily it plugged right into the Ghia loom behind the clocks.
Fitted the fuel computer next to the AWS system.
Last edited by Marc sierra; 03-04-2012 at 03:23 PM.
03-04-2012, 07:49 PM
#11
As I was driving 200 km each day the twincam was running on LPG. I always wanted a faster Sierra, but a Cosworth wasn't suitable for the long distance or LPG. Therefore I got the idea to fit a 2.9 V6 and run that on LPG. So I bought a 2.9 12v Granada mk3 with a manual box.

The goal was to put this engine and gearbox in the Sierra. The original twincam had done 252.000 km and still going strong, but a V6 is nicer.
The goal was to put this engine and gearbox in the Sierra. The original twincam had done 252.000 km and still going strong, but a V6 is nicer.
 04-04-2012, 09:52 AM
#17
Regular Contributor
Join Date: May 2010
Location: Dublin, Ireland
Posts: 324
Likes: 0
Received 0 Likes
on
0 Posts
I thought Id heard something about manual MT75's for the V6 being available in Europe.. If they're plentiful you could probably make some money through selling them
04-04-2012, 04:42 PM
#20
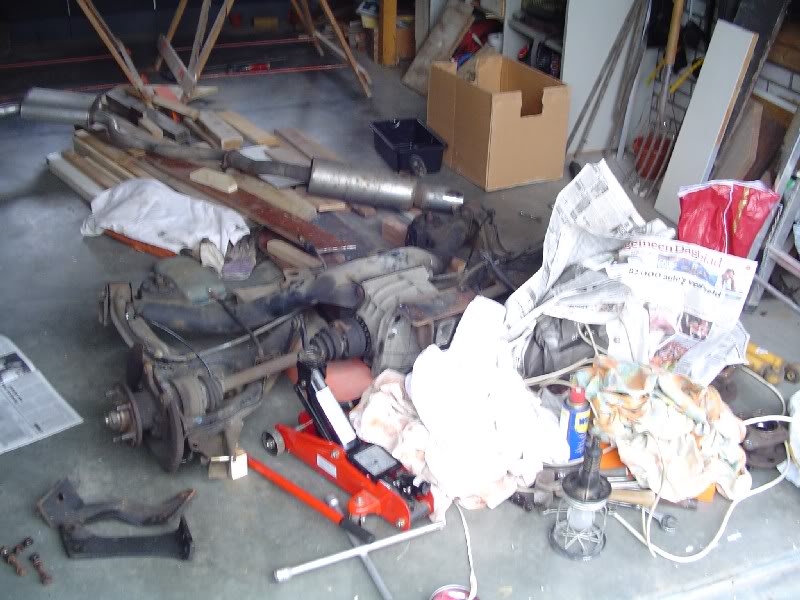
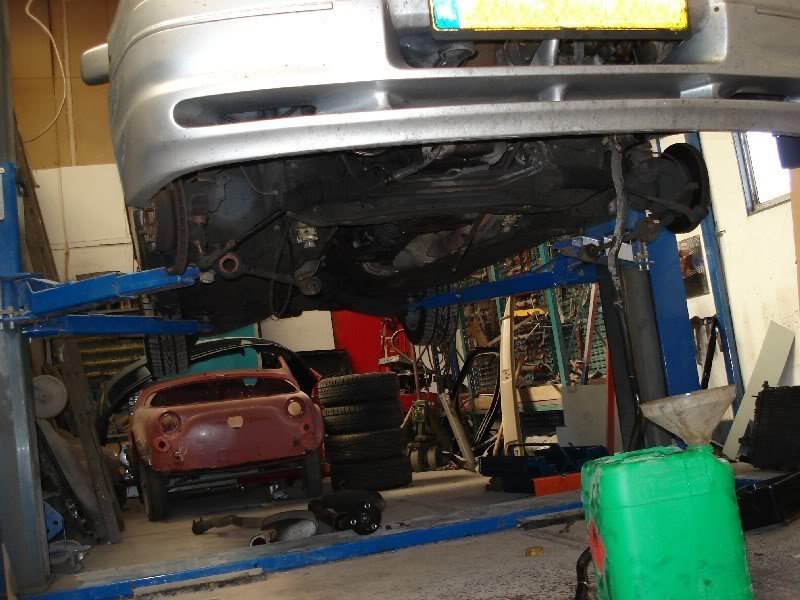
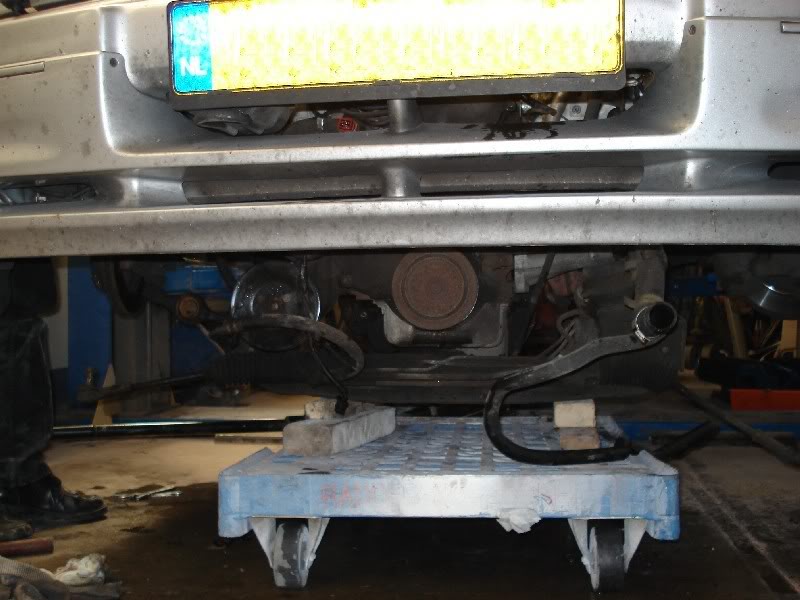
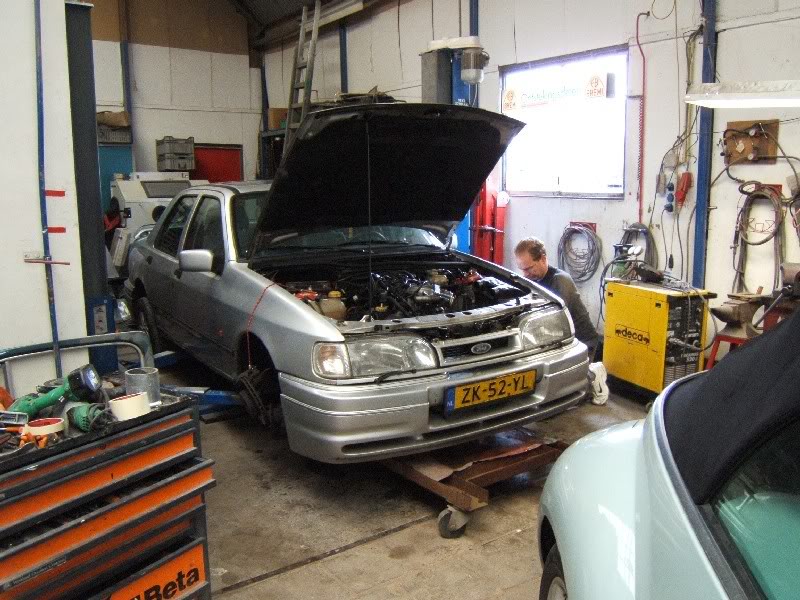
Then it was time to take the Granada (or actually Scorpio ) apart. Maybe a bit of a waste as it was quite a nice and low mileage (140.000 km) car.
Anyway, the car on axle stands and the head lights, grill and bumper removed.
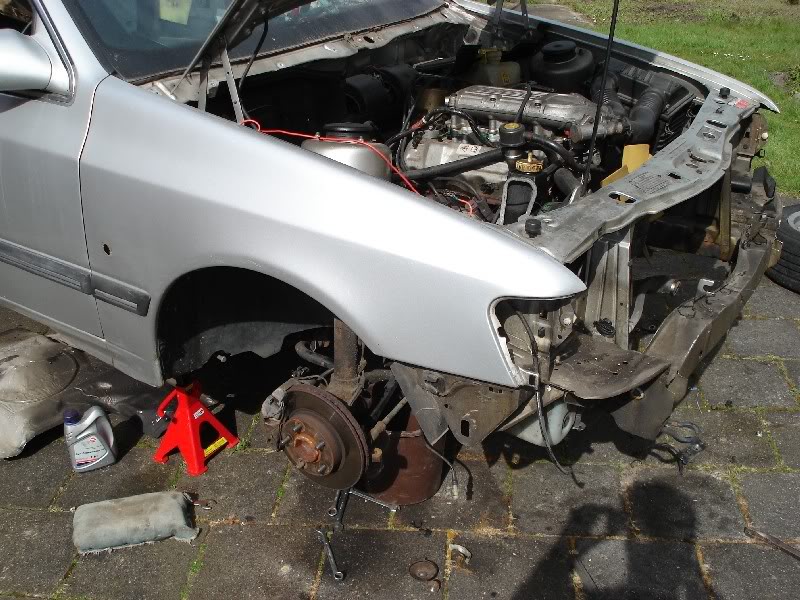
Front suspension removed.
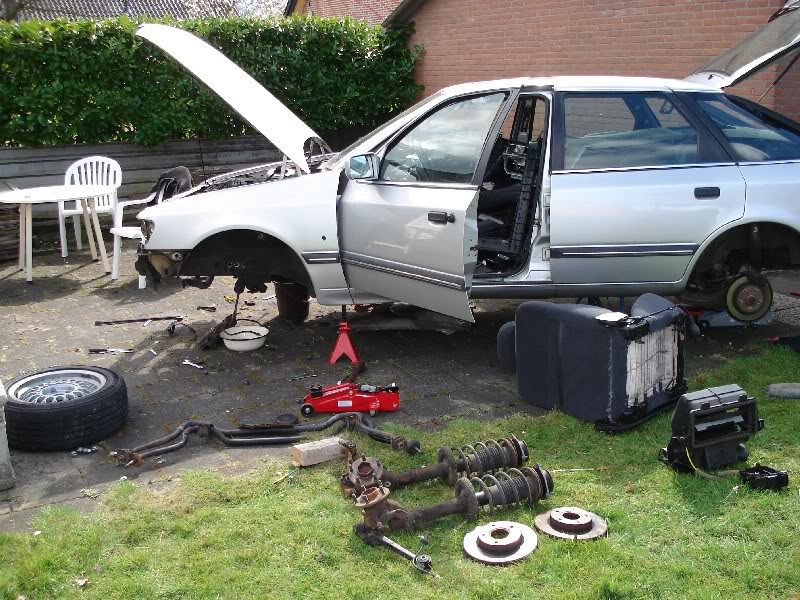
Rear beam removed.
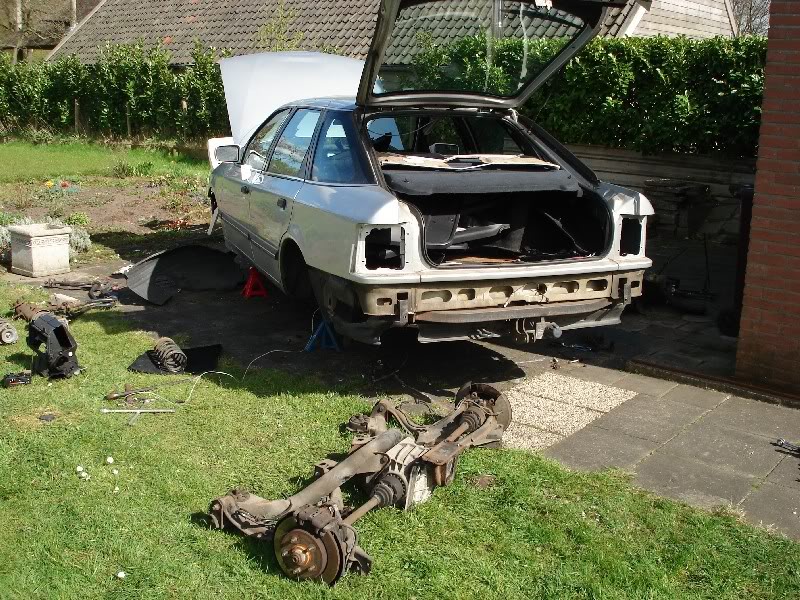
After that I put a few jacks underneath the subframe and gearbox to take the engine out.
The engine and gearbox out.
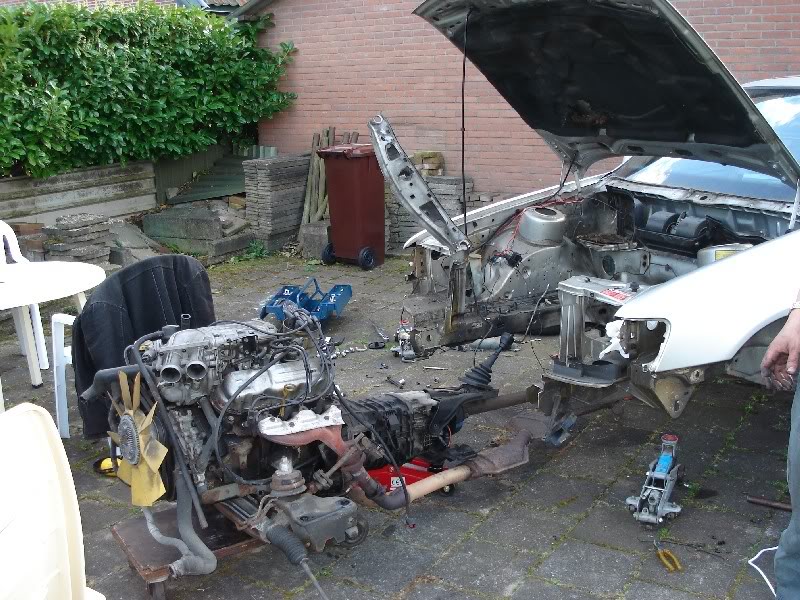
Engine and gearbox seperated.
After I took all useable things off the empty shell was picked up by a scrapper.
Anyway, the car on axle stands and the head lights, grill and bumper removed.
Front suspension removed.
Rear beam removed.
After that I put a few jacks underneath the subframe and gearbox to take the engine out.
The engine and gearbox out.
Engine and gearbox seperated.
After I took all useable things off the empty shell was picked up by a scrapper.
05-04-2012, 05:32 PM
#21
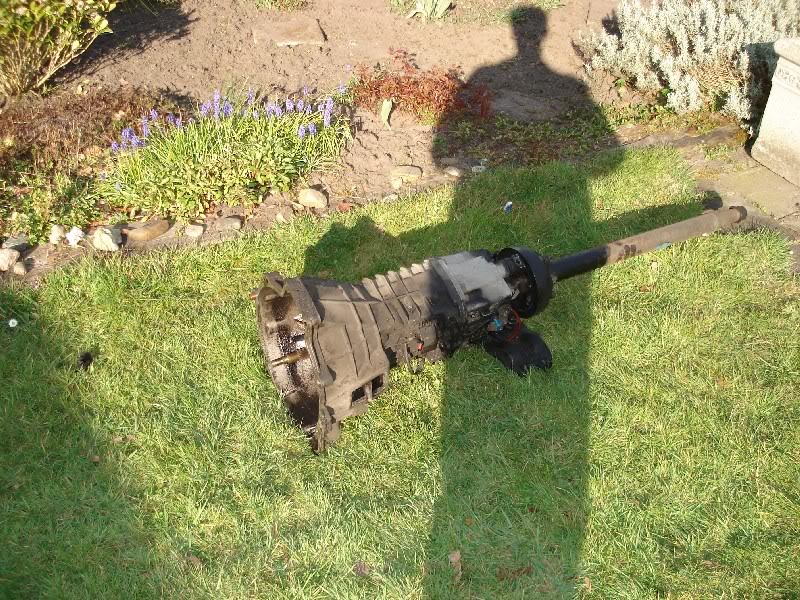
Since the engine and box where ready to go in it was time to remove the twincam. So up on a two post lift and removed the exhaust and front suspension.
Prop removed.
Disconnecting everything from the engine.

After that the bolts from the subframe and gearbox mount were loosened. The car was going to go up with the lift leaving the engine and box on the trolley.
And of course we forgot a wire.
Out with the twincam.
Empty engine bay...
Rolled the 2.9 12v underneath using the same trolley.
Then lowered the car back over the engine and bolted it back and refitted the prop.
Still some time left to fit the radiator.
But after that it was time to call it a day.
Prop removed.
Disconnecting everything from the engine.
After that the bolts from the subframe and gearbox mount were loosened. The car was going to go up with the lift leaving the engine and box on the trolley.
And of course we forgot a wire.
Out with the twincam.
Empty engine bay...
Rolled the 2.9 12v underneath using the same trolley.
Then lowered the car back over the engine and bolted it back and refitted the prop.
Still some time left to fit the radiator.
But after that it was time to call it a day.
10-04-2012, 08:19 PM
#22
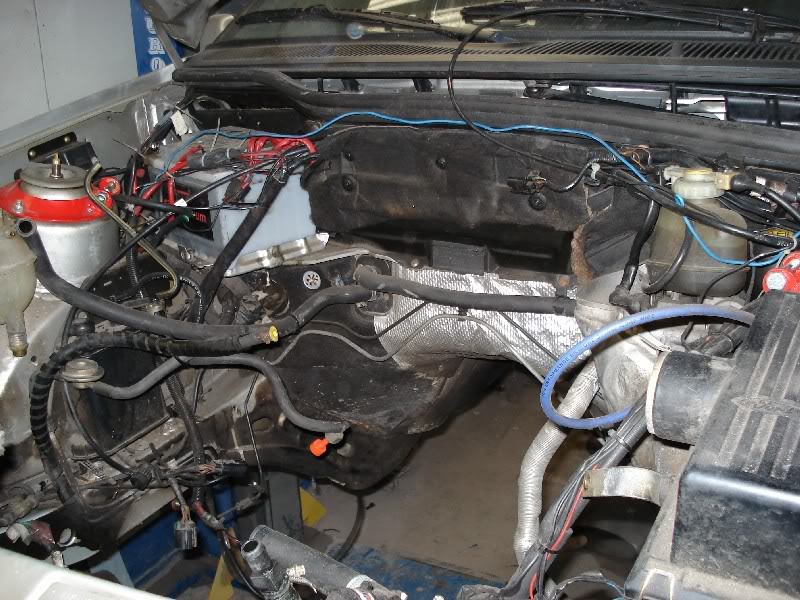
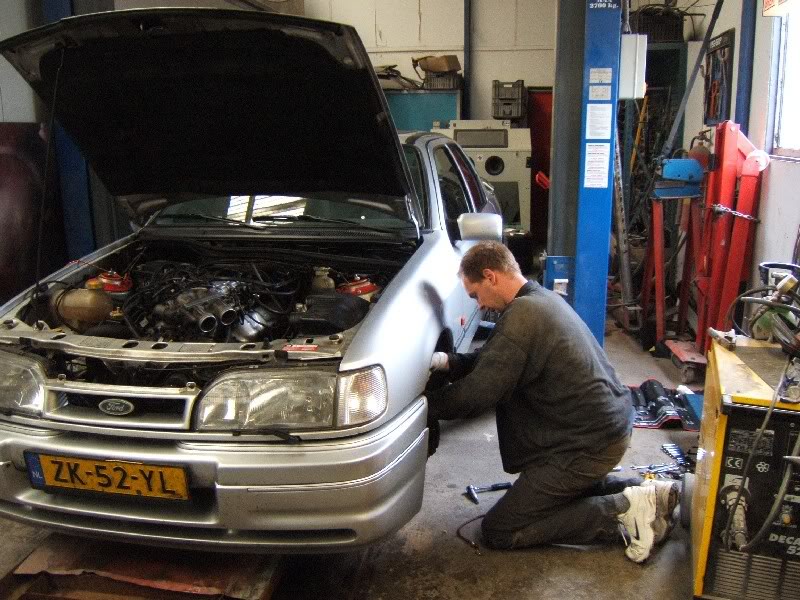
After that it was time to put the remaining things back on. The 2.9 normally uses a viscous fan, but I don't really like that, so I put the electrical fans from the twincam on. I also put the front suspension and the exhaust back on. I also put the calipers back on and bled them, as I took them off to remove the front subframe.
As the loom, and fuel lines weren't done yet I towed the car home. At home I fitted the throttle and clutch cable and removed the DOHC loom.
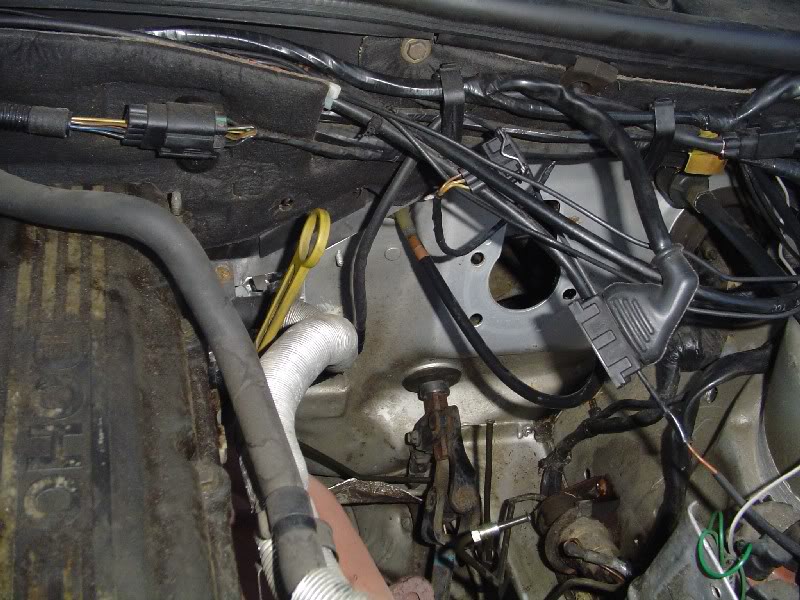
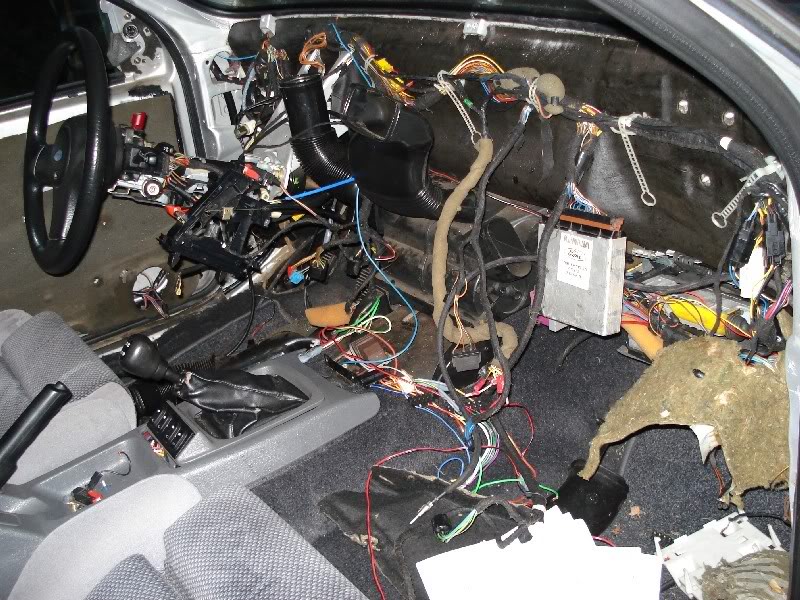
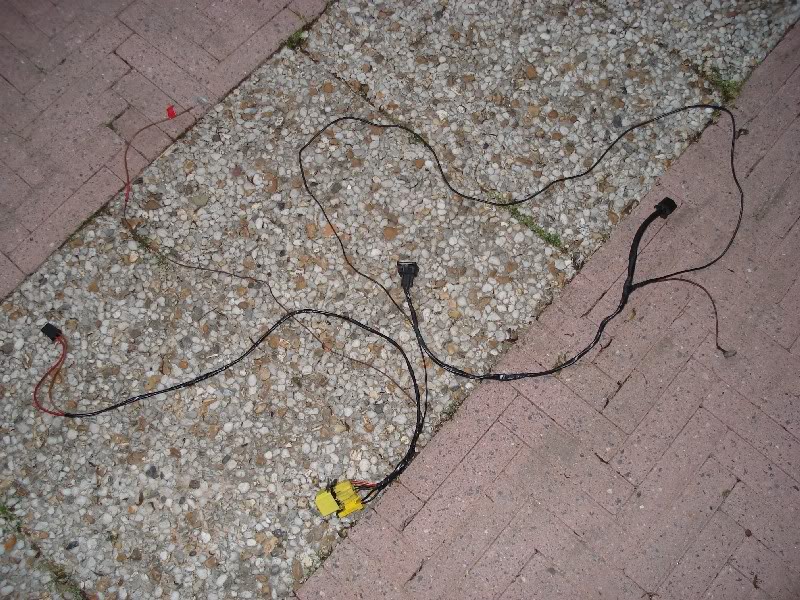
The next day I started modifying the Granada loom to be fitted to the Sierra. The Granada uses 2 plugs and a relay behind the dash to connect the engine loom to the main loom.
In a Sierra (1990 model) there are no relays in the engine loom as they are all in the fuse box. That's why the Sierra has 3 instead of 3 plugs to connect the engine loom to the main loom. To mod the Granada loom I got a Sierra DOHC loom from the scrapyard.
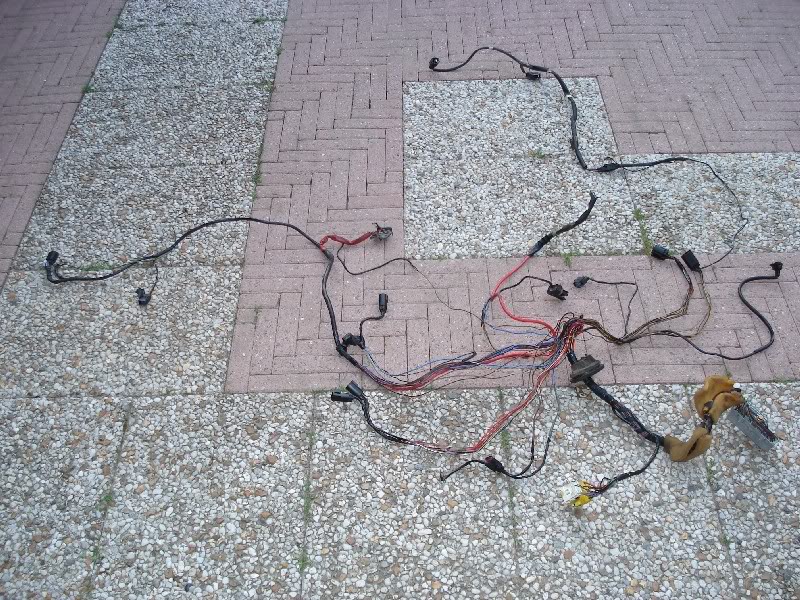
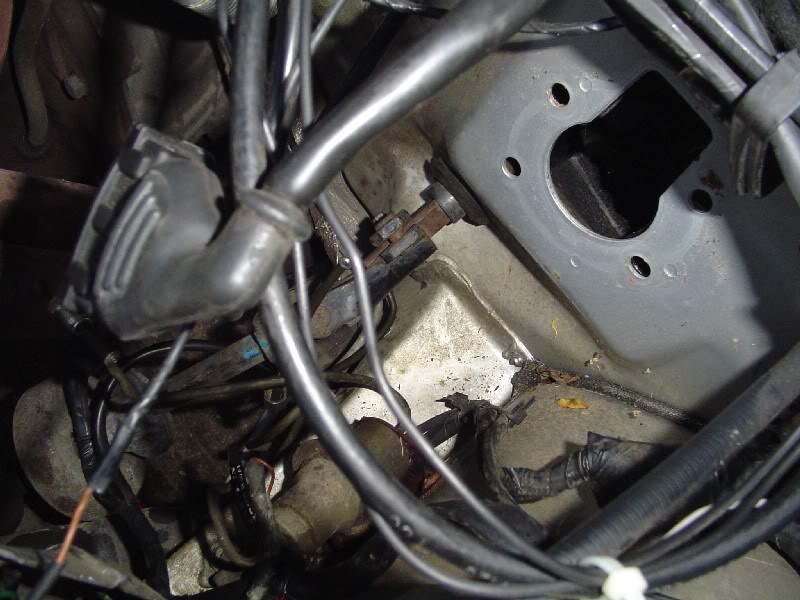
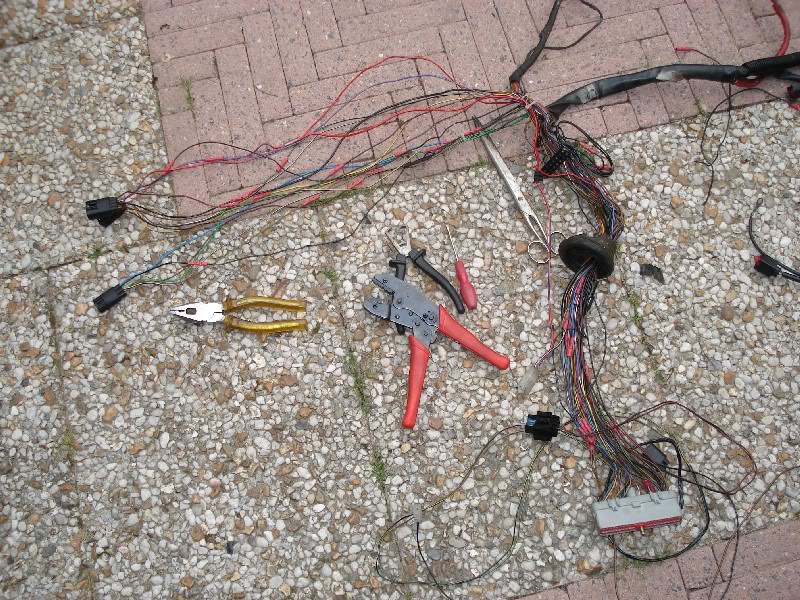
Removed the tape and checked where all the wires need to go.

After that I cut the wires to the correct length and fitted them to the 3 Sierrra plugs.

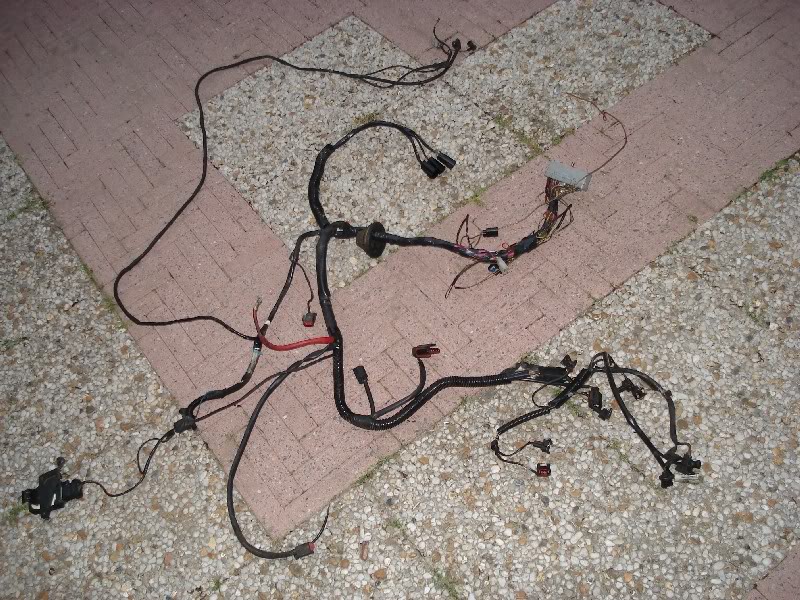
When everything was connected I taped it back in to make a Sierra 2.9 loom (2.9 Sierras are very rare in Holland, otherwise I would have saved all the work and simply got an XR4x4 loom).
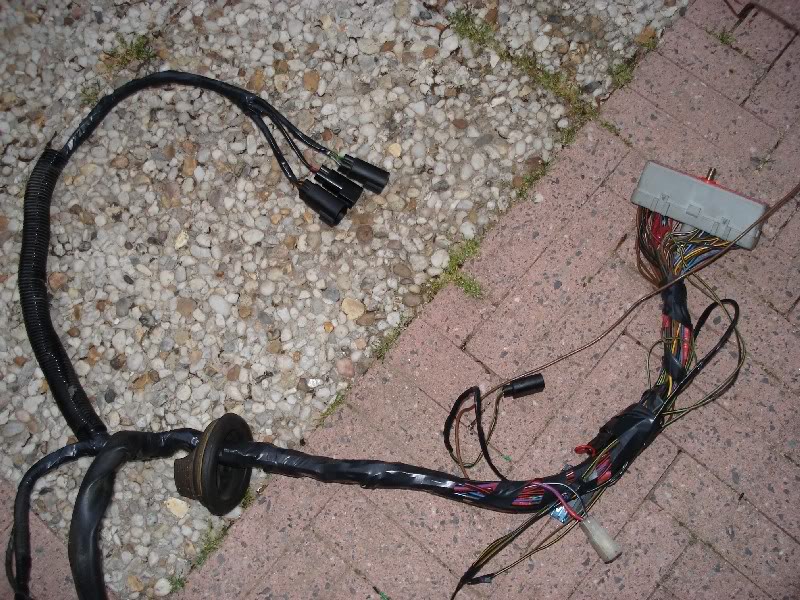
After that I made a small loom for the electric fans.
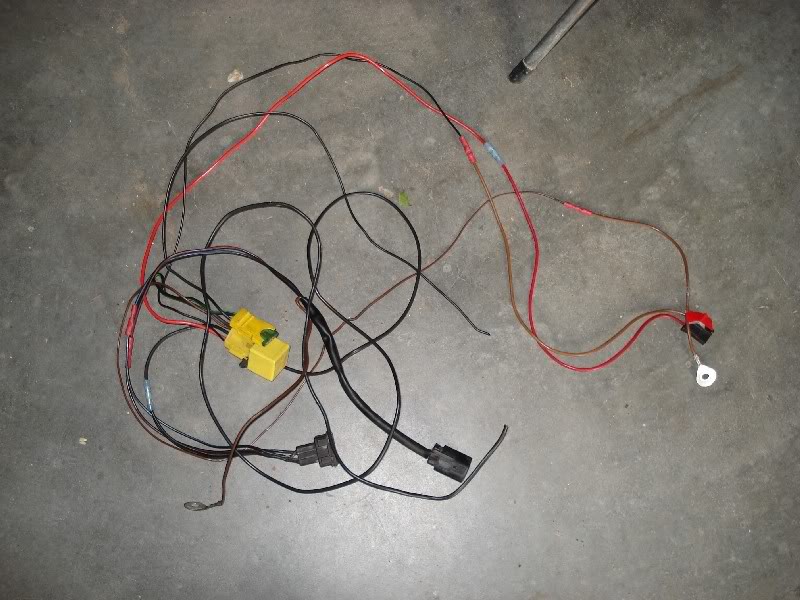
Taped in.
As the loom, and fuel lines weren't done yet I towed the car home. At home I fitted the throttle and clutch cable and removed the DOHC loom.
The next day I started modifying the Granada loom to be fitted to the Sierra. The Granada uses 2 plugs and a relay behind the dash to connect the engine loom to the main loom.
In a Sierra (1990 model) there are no relays in the engine loom as they are all in the fuse box. That's why the Sierra has 3 instead of 3 plugs to connect the engine loom to the main loom. To mod the Granada loom I got a Sierra DOHC loom from the scrapyard.
Removed the tape and checked where all the wires need to go.
After that I cut the wires to the correct length and fitted them to the 3 Sierrra plugs.
When everything was connected I taped it back in to make a Sierra 2.9 loom (2.9 Sierras are very rare in Holland, otherwise I would have saved all the work and simply got an XR4x4 loom).
After that I made a small loom for the electric fans.
Taped in.
12-04-2012, 09:02 PM
#23
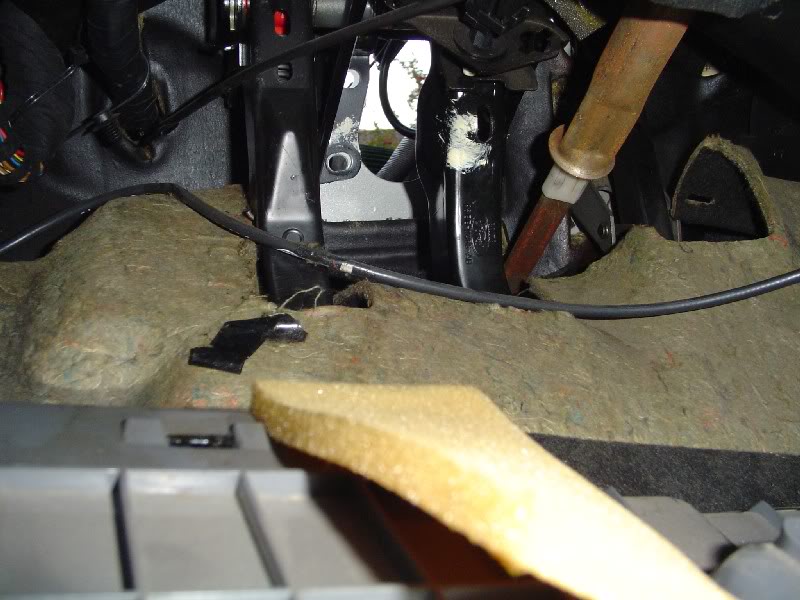
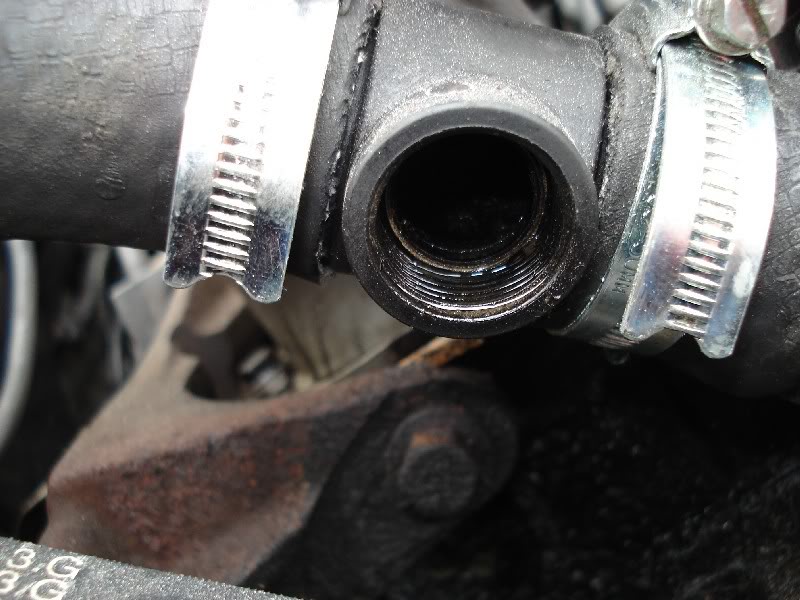
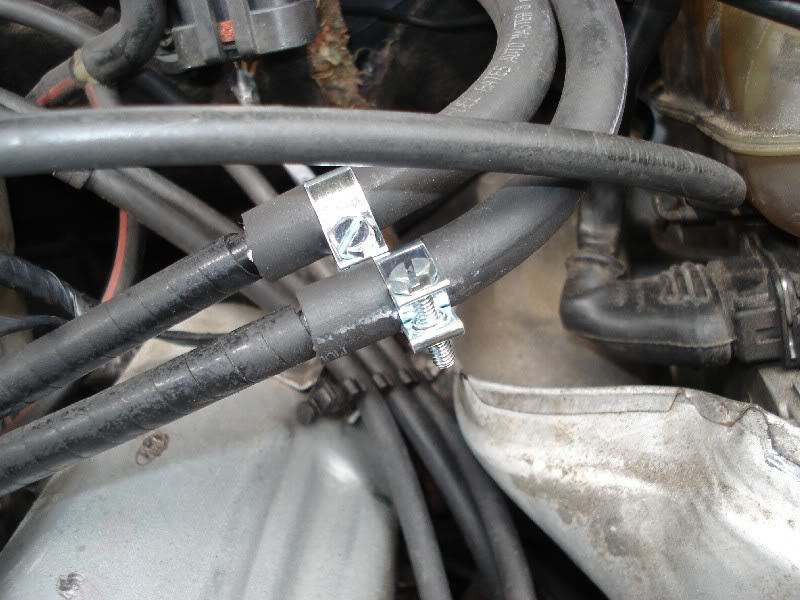
To switch the twincam electric fans I put an adapter in the hose from the thermostat to the rad.
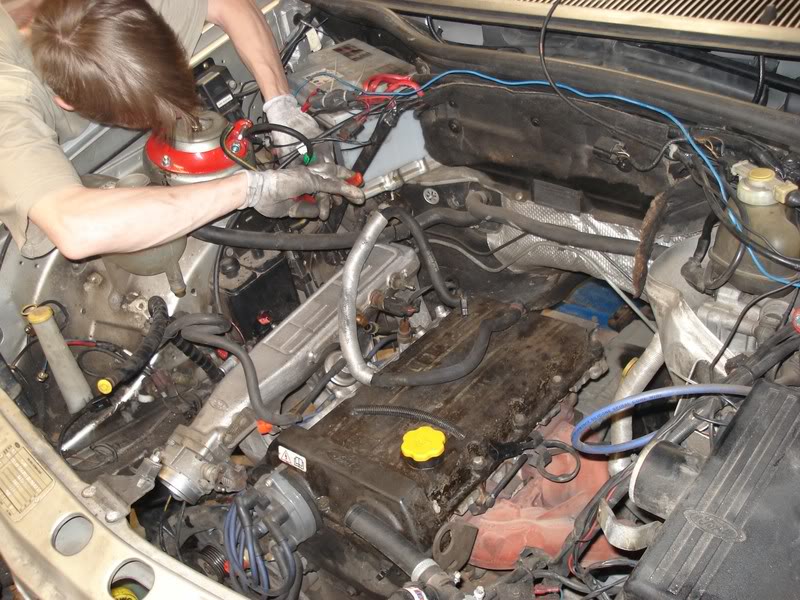
After that I put the loom and ECU in. Then it was time to connect the fuel lines.
Filled up the PAS and the coolant system before firing it up for the first time. Luckily it ran straight away, so no errors made whiling modifying the loom.

Time for the first test drive. Everything was fine, although I noticed the speedo wasn't working. It turned out the Granada gearbox didn't have a mechanical speedo drive as the Granada only uses the electrical signal from the gearbox. 
Fortunately I still had the box from the twincam, so I took the speedo drive from that one. Jacked the Sierra up again, took the exhaust, heat shield and gearbox mount off.
The speed sensor from the twincam box.
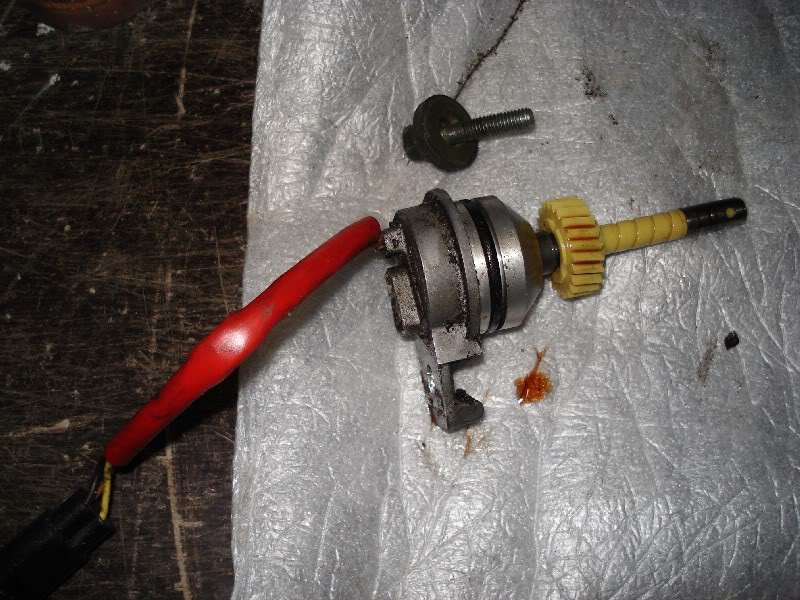
But after checking it a bit better I found out the worm wheel inside the gearbox was also different, so I also had to swap those.
Picked up some tools from the local Ford garage, who are always very helpful.
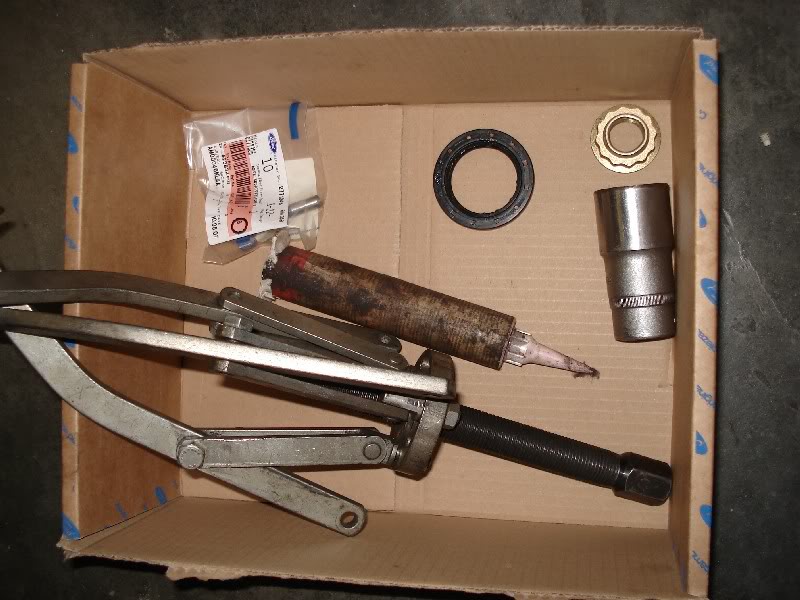
A new 12-sided 30 mm nut, a new oil seal and a speedo cog with 23 teeth. Originally the twincam had a speedo cog with 22 teeth, but that is not the correct one.
And a 30 mm, 12-sided deep socket to get the nut from the output shaft of the gearbox and pully puller to pull the drive flange from the output shaft.
Removed the flange from the twincam box so I could take out the worm wheel.
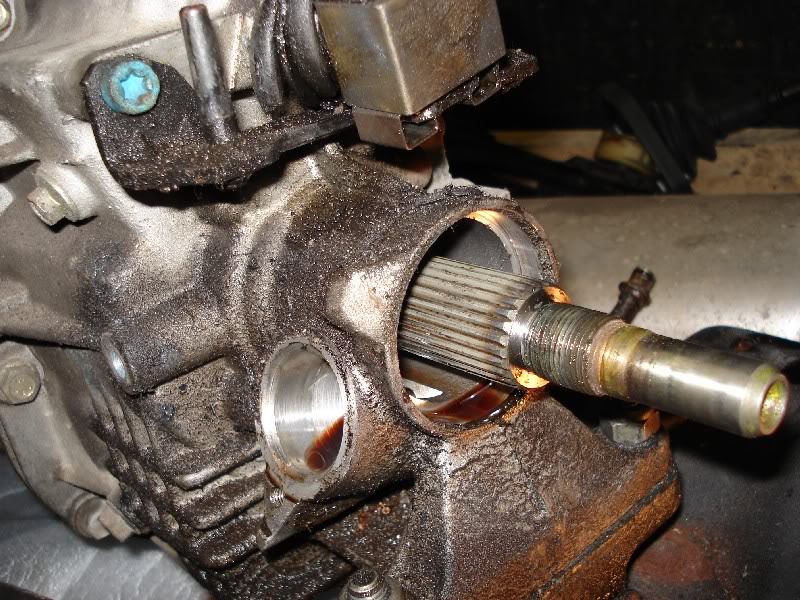
The worm wheel that was the reason for everything.
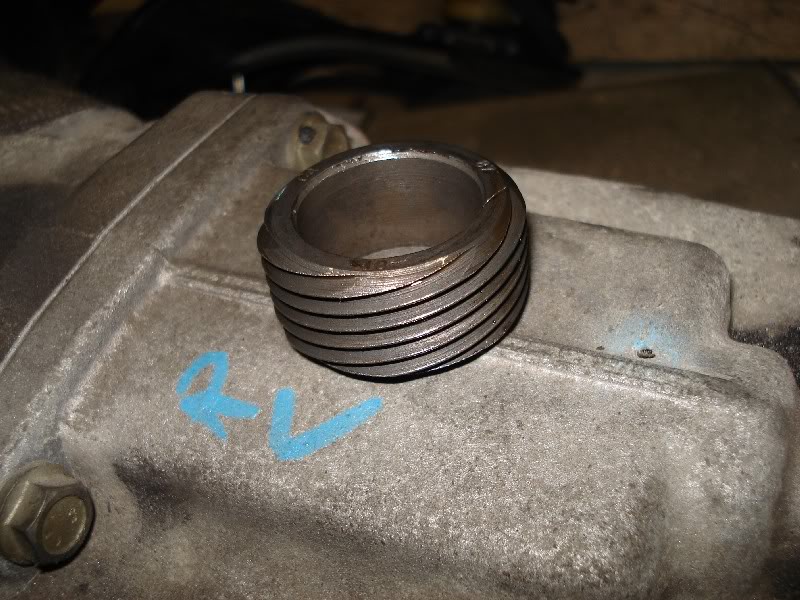
Now I had to do everything again but now underneath the car to remove the old worm wheel and fit the new one. The Sierra and Granada one next to each other, the difference is quite clear...
Fitted the speedo cog and the cable to the box and put the gearbox mount, heat shield and exhaust back on. Finally ready!
After that I put the loom and ECU in. Then it was time to connect the fuel lines.
Filled up the PAS and the coolant system before firing it up for the first time. Luckily it ran straight away, so no errors made whiling modifying the loom.
Time for the first test drive.
Fortunately I still had the box from the twincam, so I took the speedo drive from that one. Jacked the Sierra up again, took the exhaust, heat shield and gearbox mount off.
The speed sensor from the twincam box.
But after checking it a bit better I found out the worm wheel inside the gearbox was also different, so I also had to swap those.
Picked up some tools from the local Ford garage, who are always very helpful.
A new 12-sided 30 mm nut, a new oil seal and a speedo cog with 23 teeth. Originally the twincam had a speedo cog with 22 teeth, but that is not the correct one.
And a 30 mm, 12-sided deep socket to get the nut from the output shaft of the gearbox and pully puller to pull the drive flange from the output shaft.
Removed the flange from the twincam box so I could take out the worm wheel.
The worm wheel that was the reason for everything.
Now I had to do everything again but now underneath the car to remove the old worm wheel and fit the new one. The Sierra and Granada one next to each other, the difference is quite clear...
Fitted the speedo cog and the cable to the box and put the gearbox mount, heat shield and exhaust back on. Finally ready!
 20-04-2012, 03:05 PM
#26
Thanks for the kind words.
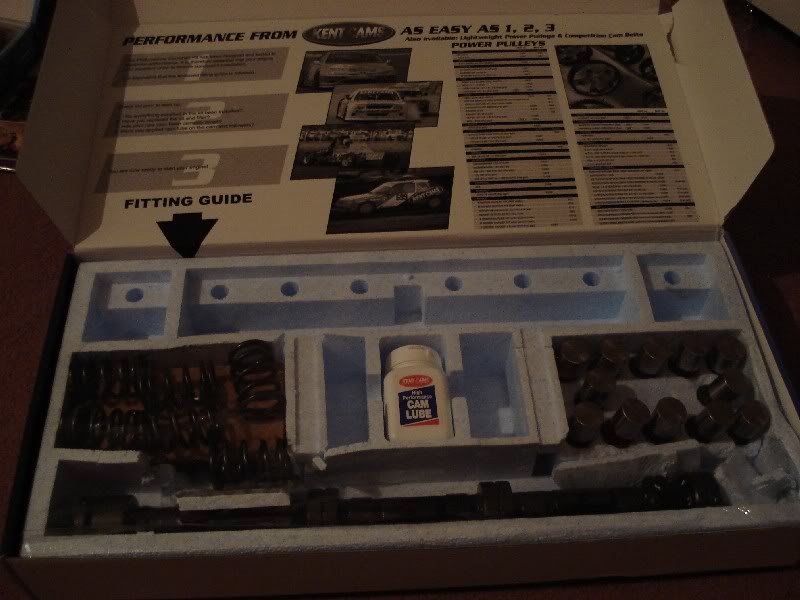
Some time later I bought a Kent fastroad cam kit for my 2.9 12v.
Marty, who is also on here somewhere, helped me putting it in (or more the other way around ), as at the time I didn't have much experience yet working on engine internals.
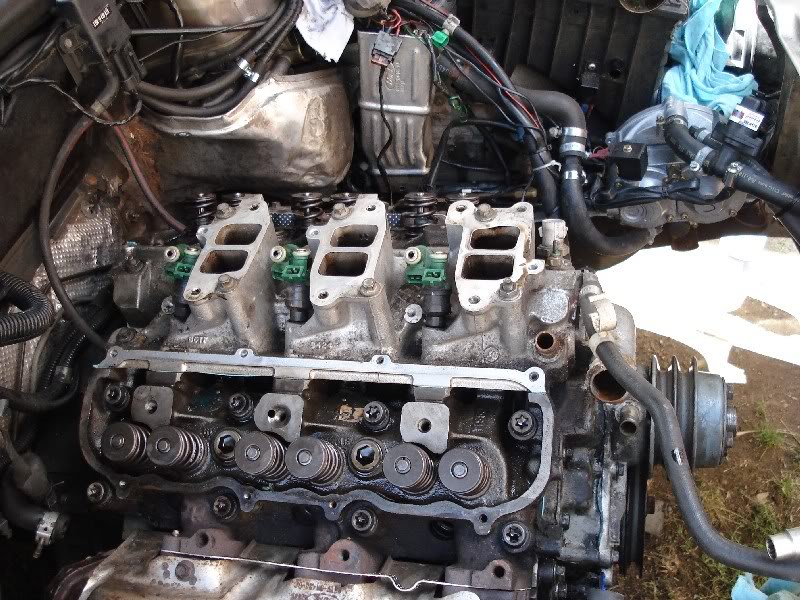
To put the cam in the heads need to be taken off, so we started with removing the top of the inlet manifold.
After that the distributor and fuel rail were taken off.
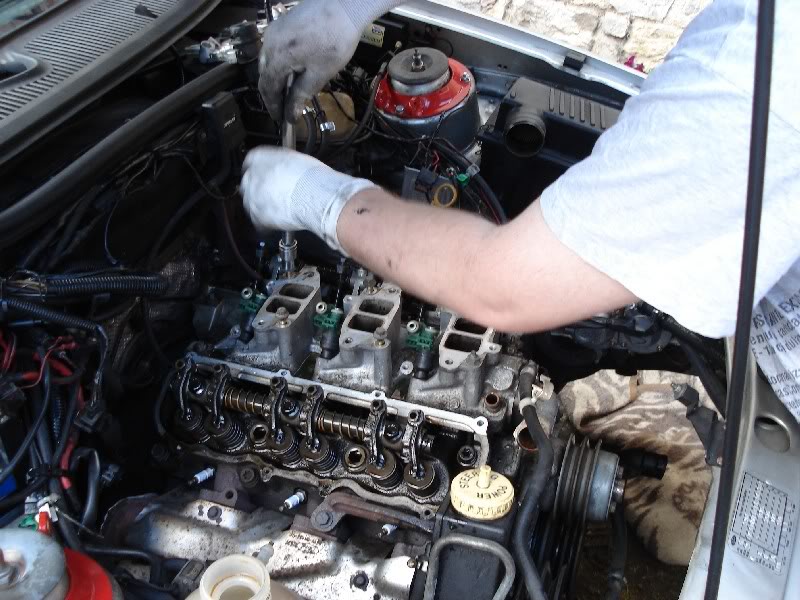
And the inlet manifold off.
Removed the rocker shafts.
And both cilinder heads removed.
And lastly, the timing cover.
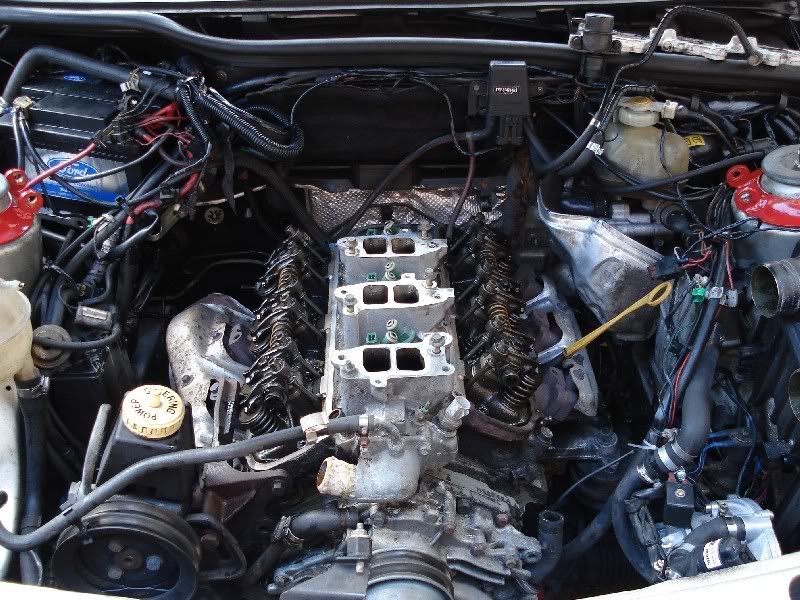
After one day the car was standing like this.
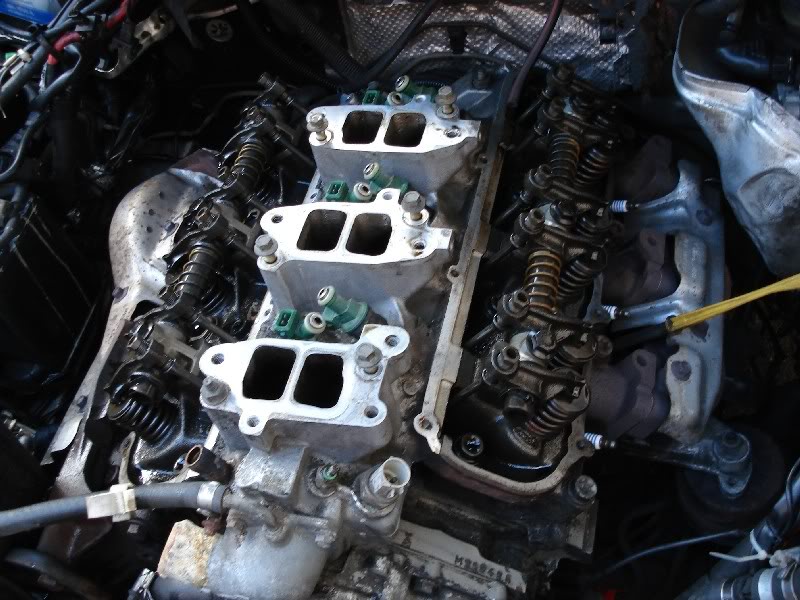
The next day the heads were cleaned, the valves were lapped in and the new valve springs were fitted. We also fitted the new cam but I forgot to take pictures.
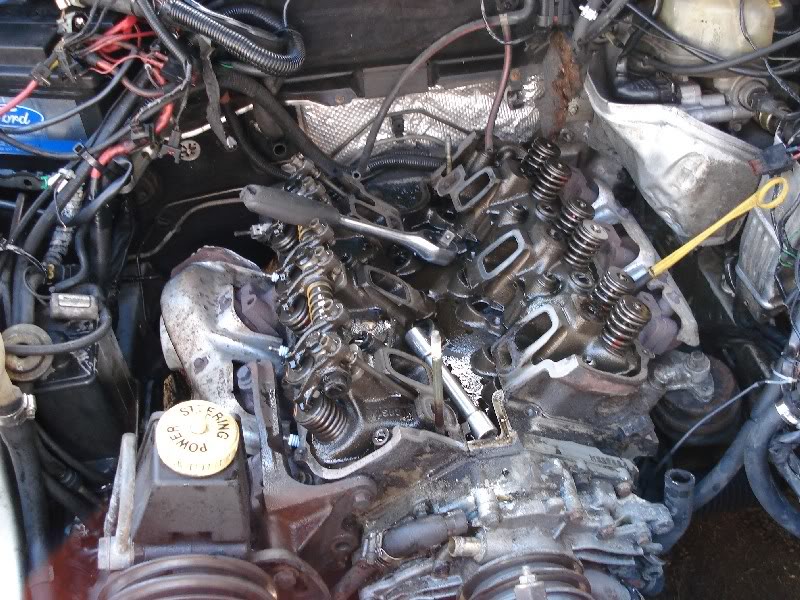
The heads and the inlet fitted again.
Fuel rail, rocker shafts and distributor back on.
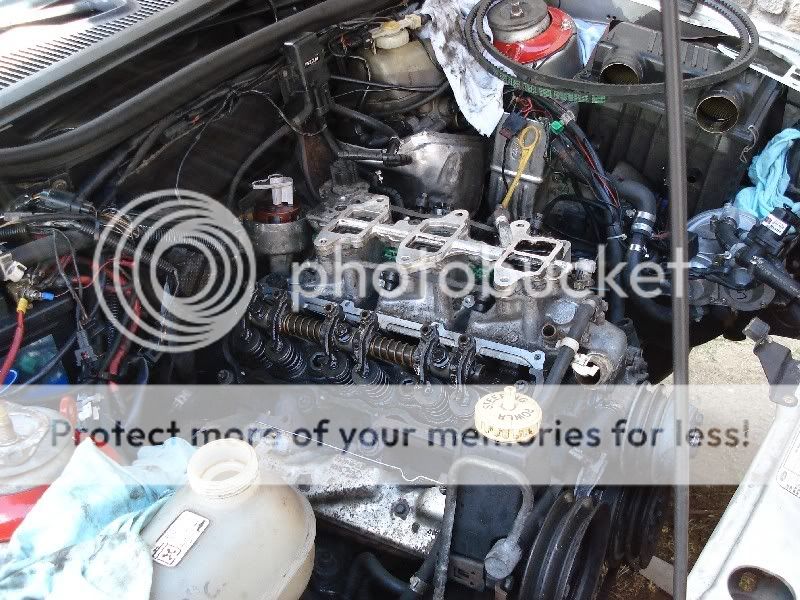
And after that fully back together again of course, but I again forgot to take more pictures...
Some time later I bought a Kent fastroad cam kit for my 2.9 12v.
Marty, who is also on here somewhere, helped me putting it in (or more the other way around
), as at the time I didn't have much experience yet working on engine internals.To put the cam in the heads need to be taken off, so we started with removing the top of the inlet manifold.
After that the distributor and fuel rail were taken off.
And the inlet manifold off.
Removed the rocker shafts.
And both cilinder heads removed.
And lastly, the timing cover.
After one day the car was standing like this.
The next day the heads were cleaned, the valves were lapped in and the new valve springs were fitted. We also fitted the new cam but I forgot to take pictures.
The heads and the inlet fitted again.
Fuel rail, rocker shafts and distributor back on.
And after that fully back together again of course, but I again forgot to take more pictures...
02-05-2012, 03:32 PM
#29
Thanks for the kind words.
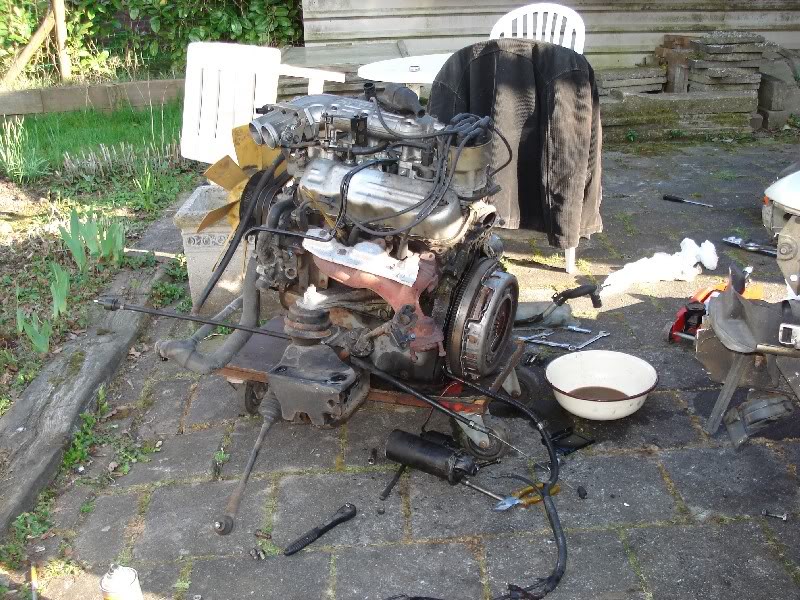
After having driven the 12v a while I kind of got used to the power. On top of that it didn't really run that well on LPG, low MPG and high CO, so I decided to fit something else.
First removing the exhaust and prop again and then disconnected all hoses and wiring. After that a friend came to give me a hand and we took the brakes off.
Then it was time to remove the engine (again).

The 12v with the box and clutch removed.
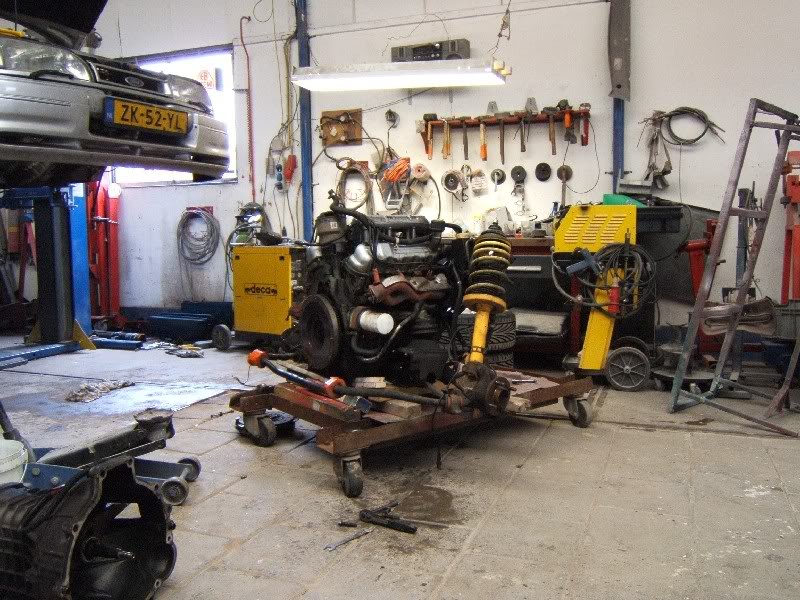

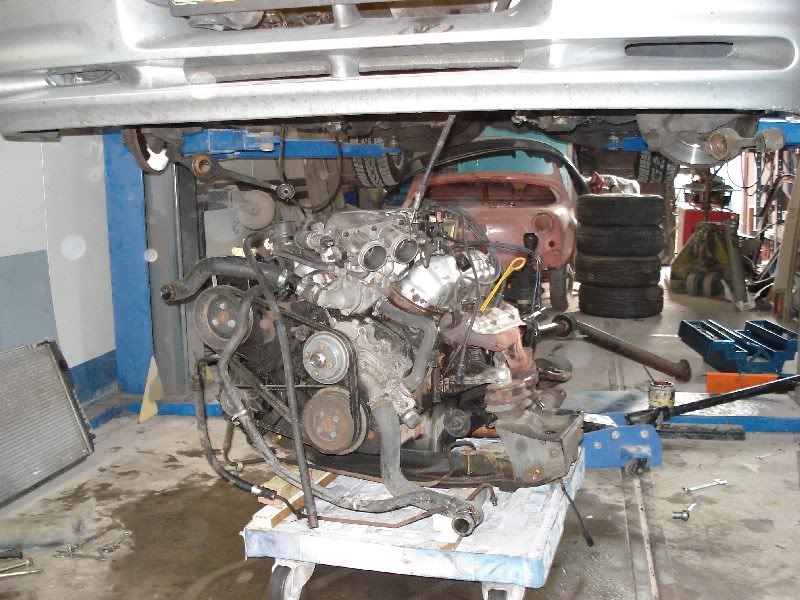
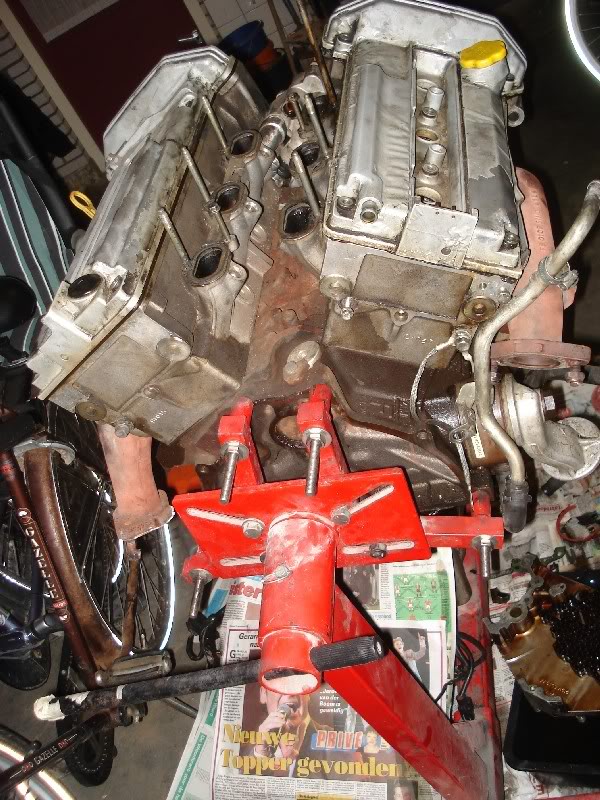
Time to get the new engine ready.
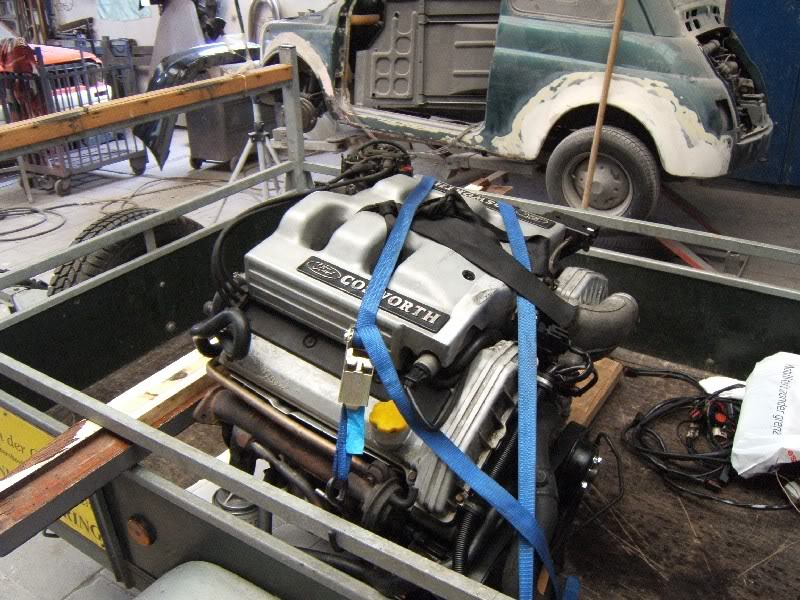
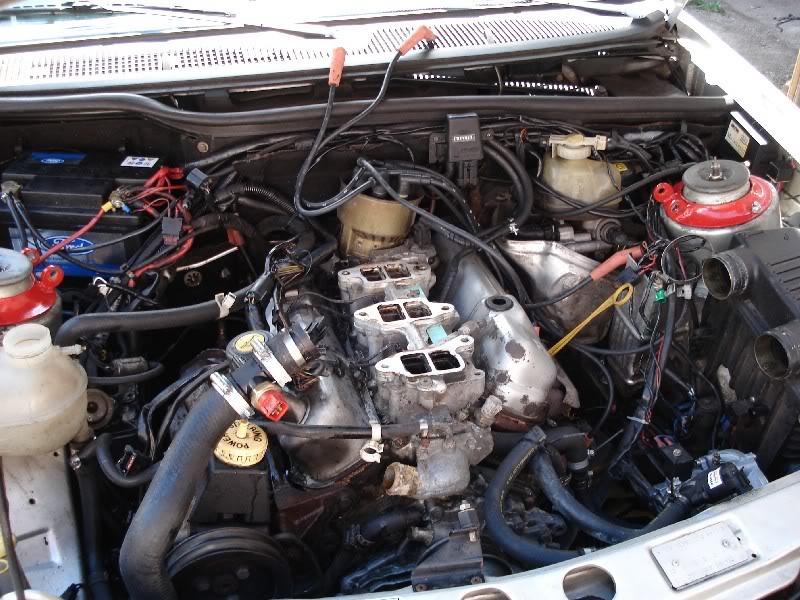
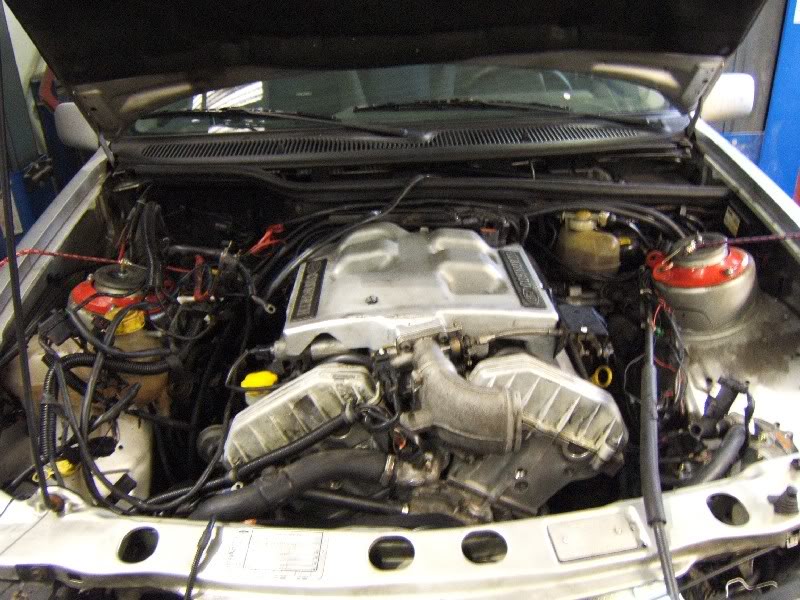
24v BOA on the engine hoist
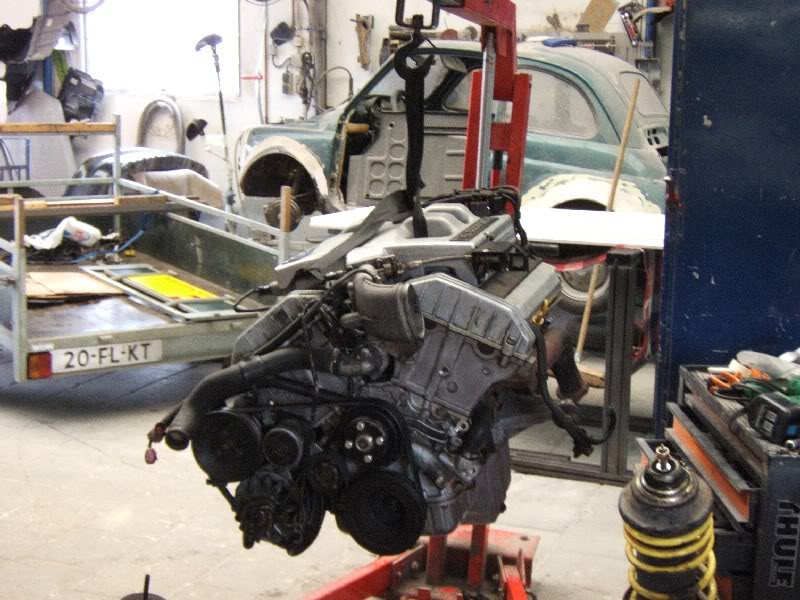
Putting it on the engine subframe.

Then fitted the 12v flywheel and a new clutch kit to the engine.
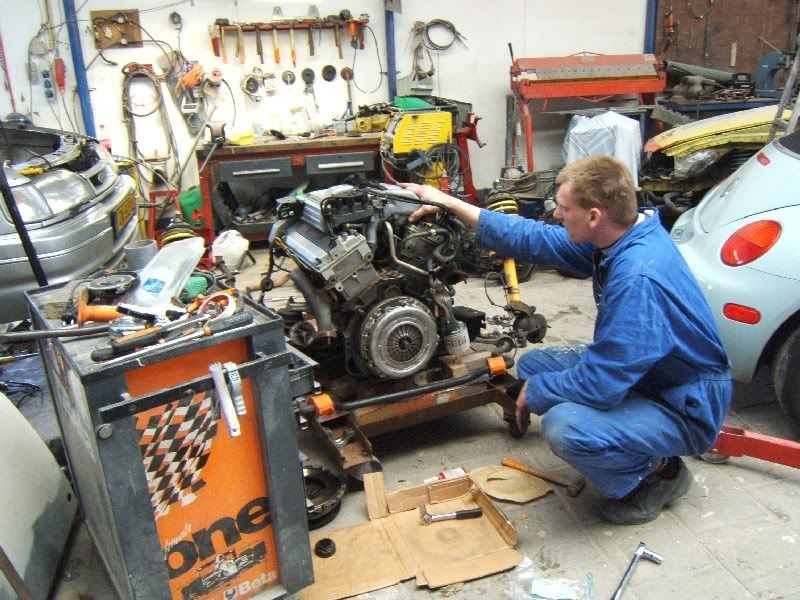
And the box back on.
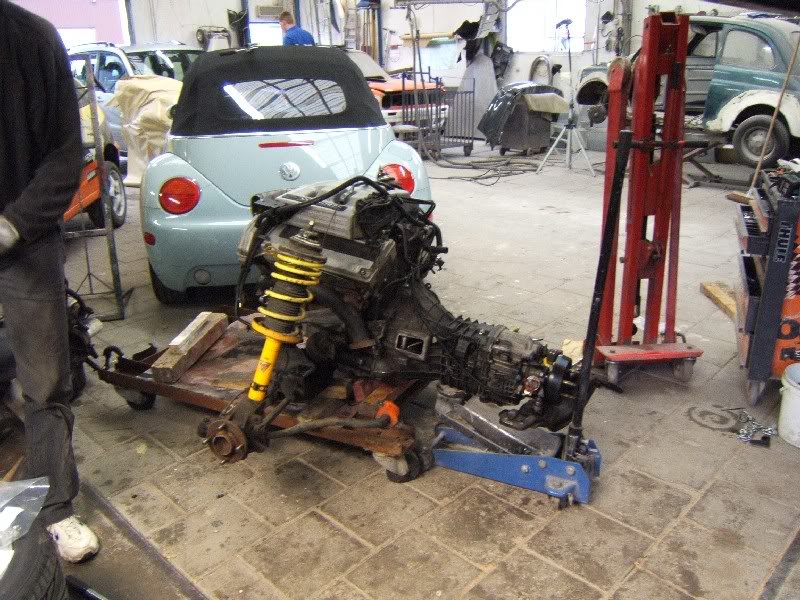
And lowered the car over the engine and box to position them correctly.
Then it was time to mount the subframe, gearbox mount, arb and struts.
Still had some time to fit the radiator with the electric fans and some coolant hosed. But at 21.30 I called it a day, kind of exhausting when working from 9 am.
After having driven the 12v a while I kind of got used to the power. On top of that it didn't really run that well on LPG, low MPG and high CO, so I decided to fit something else.
First removing the exhaust and prop again and then disconnected all hoses and wiring. After that a friend came to give me a hand and we took the brakes off.
Then it was time to remove the engine (again).
The 12v with the box and clutch removed.
Time to get the new engine ready.
24v BOA on the engine hoist
Putting it on the engine subframe.
Then fitted the 12v flywheel and a new clutch kit to the engine.
And the box back on.
And lowered the car over the engine and box to position them correctly.
Then it was time to mount the subframe, gearbox mount, arb and struts.
Still had some time to fit the radiator with the electric fans and some coolant hosed. But at 21.30 I called it a day, kind of exhausting when working from 9 am.
 02-05-2012, 07:04 PM
#32
Yes, a straight swap. By if I remember correct the ABS unit uses seperate brake pipes for the front calipers and the standard unit does not. But can't say for sure as it's been about 7 years since I fitted the ABS.
Last edited by Marc sierra; 02-05-2012 at 07:08 PM.
03-05-2012, 09:21 PM
#34
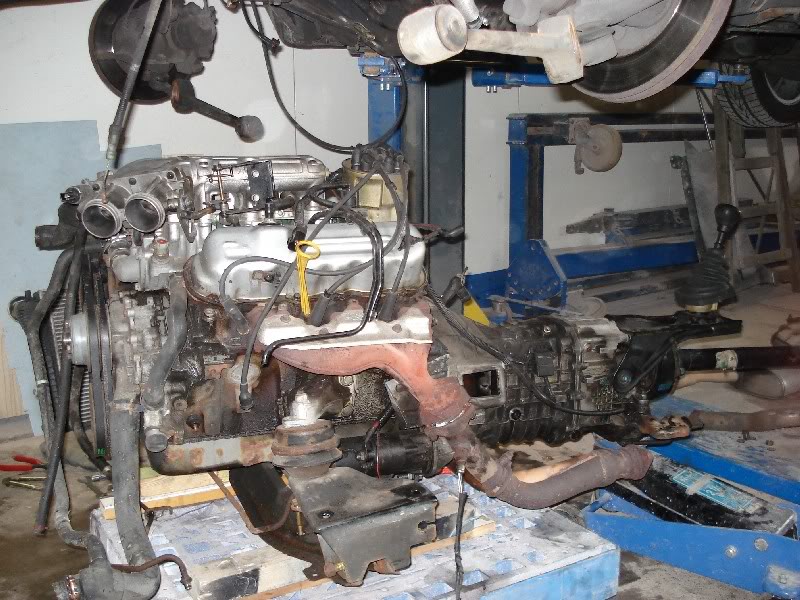
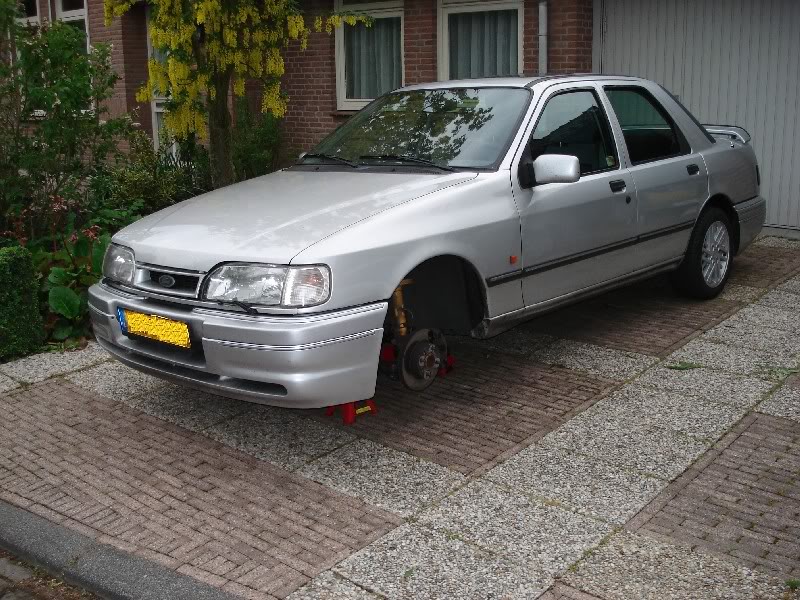
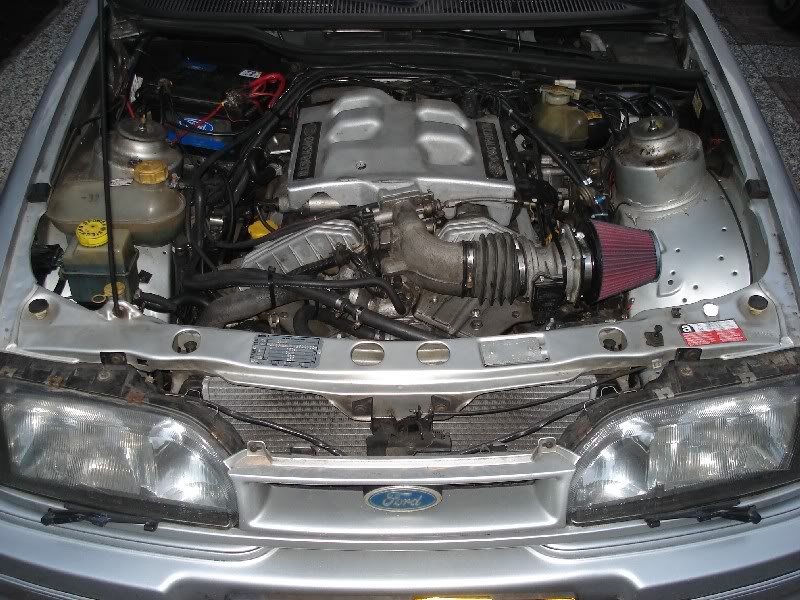
As the brakes were off and I still had to fit new discs and pads I put those on. Brembo discs with Ferodo DS2500 pads.
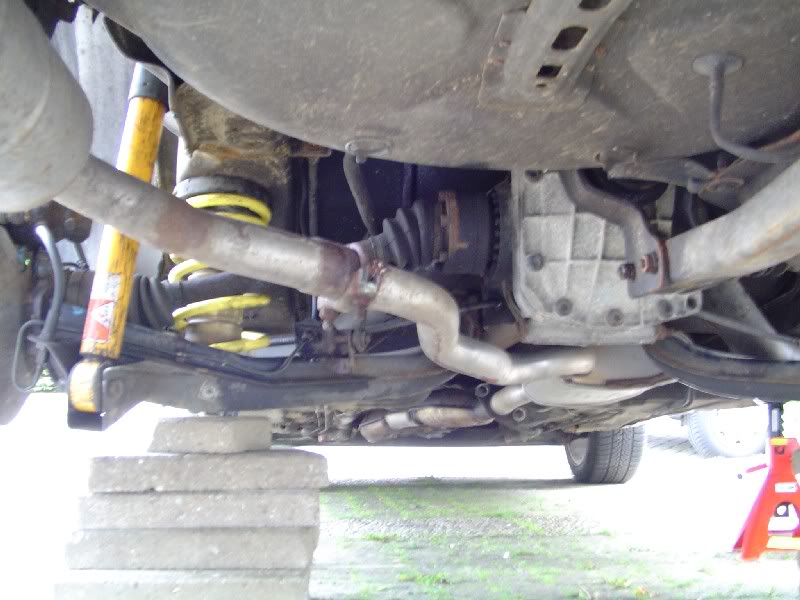
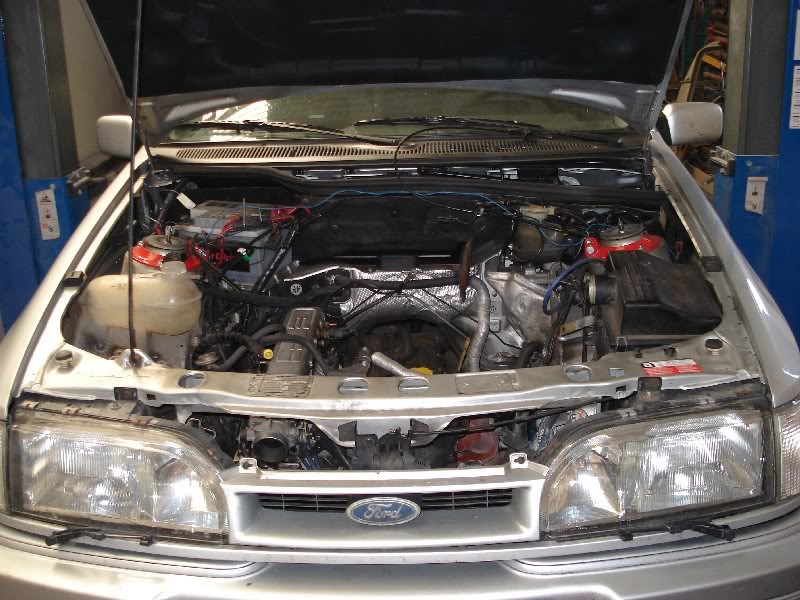
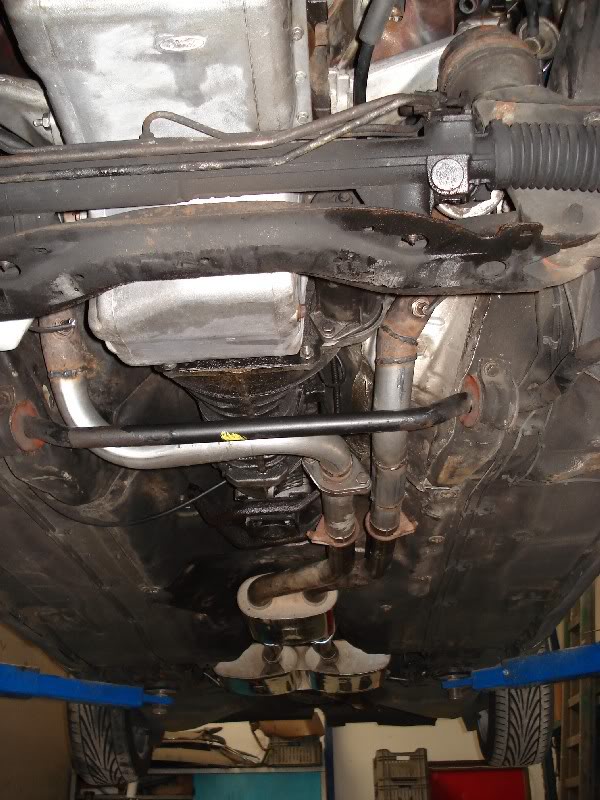
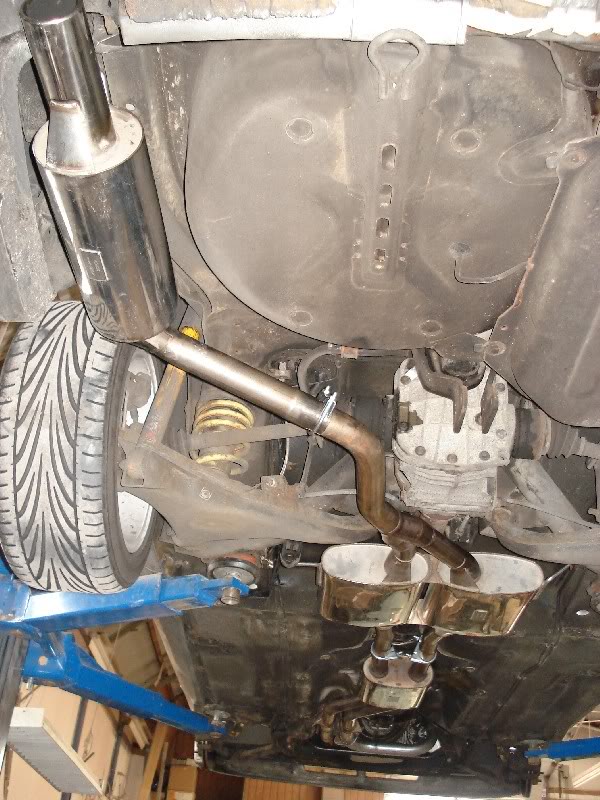
After that it was time to fit the exhaust. I got a complete stainless steel Magnex exhaust for an 2.9 XR4x4 off eBay.
First I fitted the centre and rear silencers so it was clear how the downpipes needed to be made.

Together with the Magnex exhaust I got a new set of 2.9 12v downpipes so I could use those to make 24v downpipes that fit the Magnex system. Halfway the right downpipe I put an extra flange to be able to remove the exhaust more easily if needed.
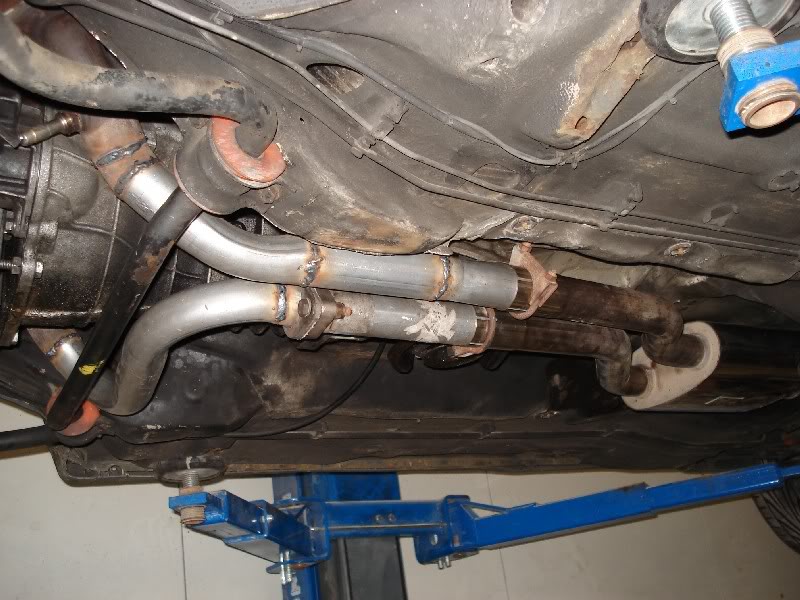
Then I fitted all exhaust clamps and the exhaust was ready.
I also had to adapt the engine loom. I removed the tape from the part where the 3 connectors needed to be behind the battery.
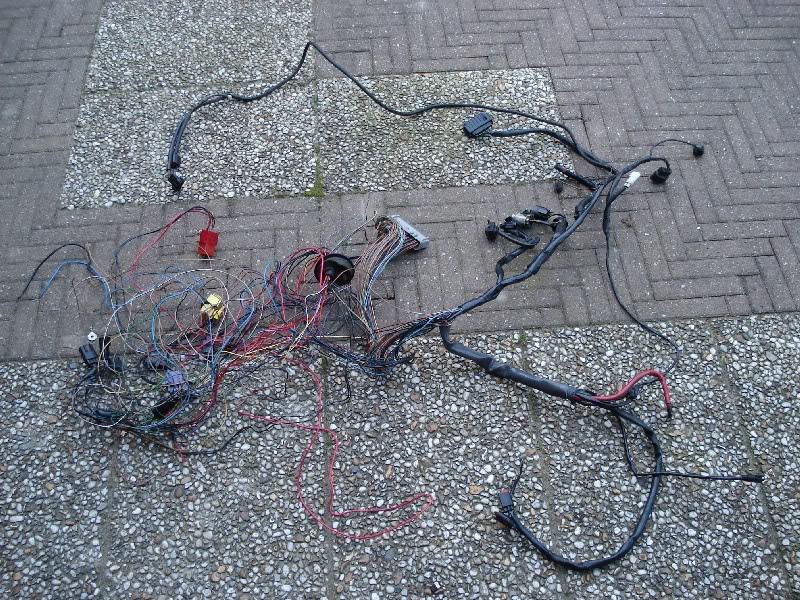
Afterwards I taped it back in so it looked like a standard Sierra 24v loom.
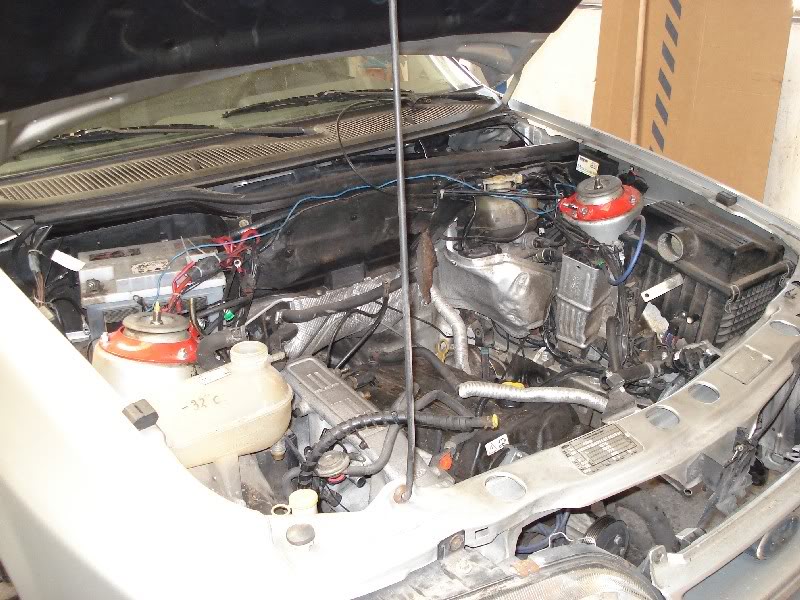
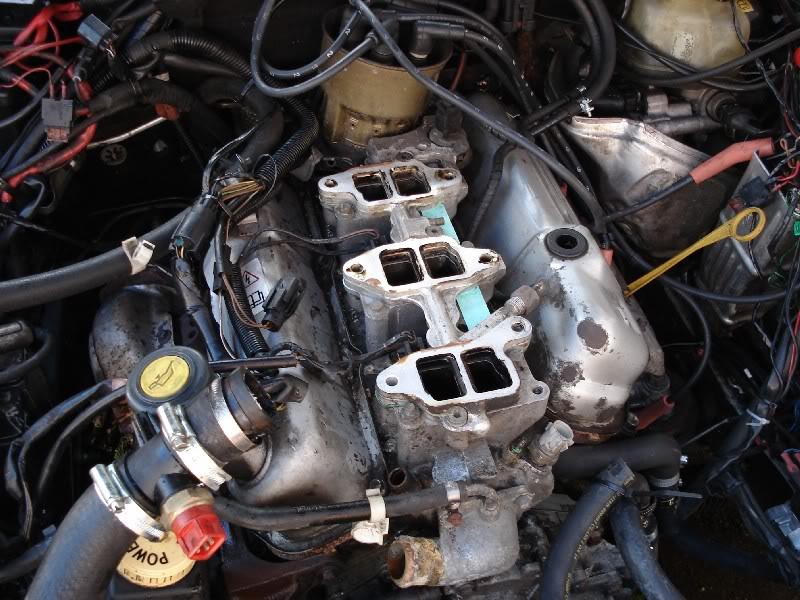
Swapped the 12v loom for the 24v loom and fitted the new K&N filter. 24v conversion finished.
After that it was time to fit the exhaust. I got a complete stainless steel Magnex exhaust for an 2.9 XR4x4 off eBay.
First I fitted the centre and rear silencers so it was clear how the downpipes needed to be made.
Together with the Magnex exhaust I got a new set of 2.9 12v downpipes so I could use those to make 24v downpipes that fit the Magnex system. Halfway the right downpipe I put an extra flange to be able to remove the exhaust more easily if needed.
Then I fitted all exhaust clamps and the exhaust was ready.
I also had to adapt the engine loom. I removed the tape from the part where the 3 connectors needed to be behind the battery.
Afterwards I taped it back in so it looked like a standard Sierra 24v loom.
Swapped the 12v loom for the 24v loom and fitted the new K&N filter. 24v conversion finished.
19-05-2012, 12:52 PM
#36
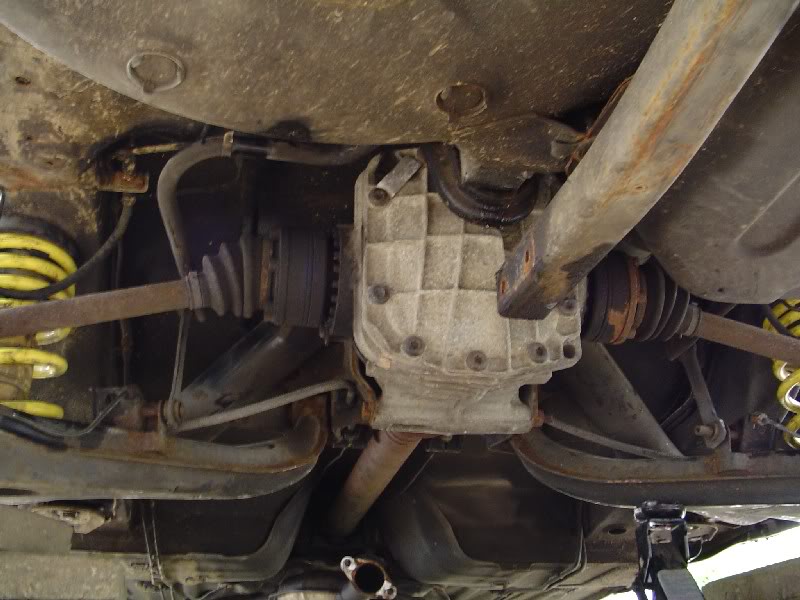
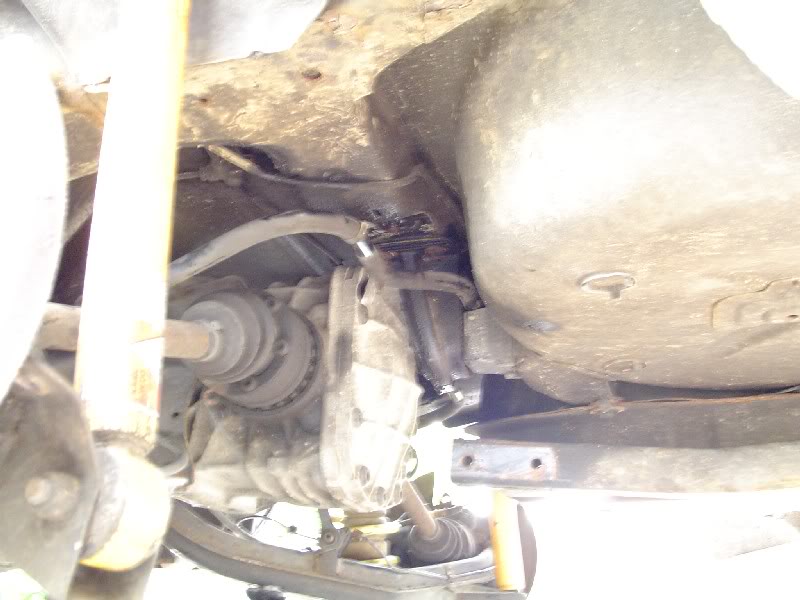
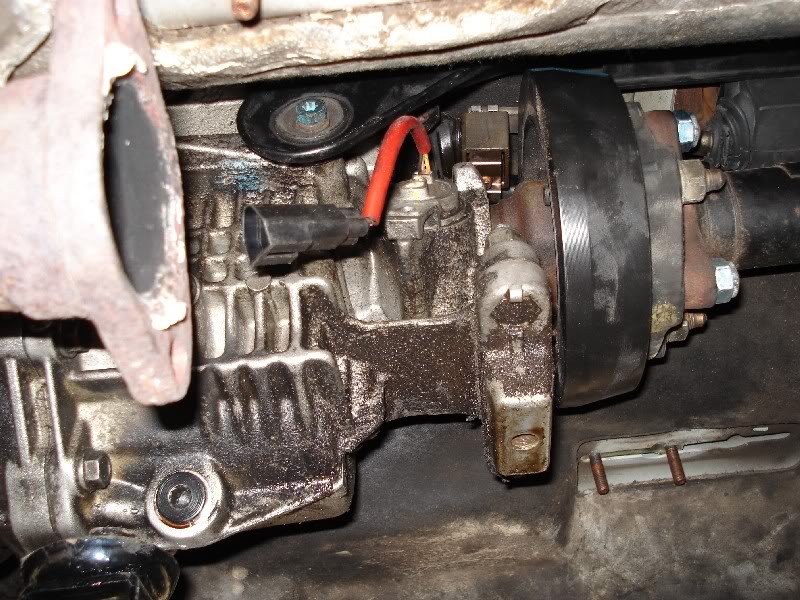
Since the 24v has quite a bit of torque and the 2wd Sierra 2.9 as standard should have a 3.36:1 diff I wanted to fit such a diff. Luckily I found one from a Granada 2.5 TD. But I wanted to retain the LSD, so I brought the differential to a guy to have a LSD part fitted to it. The guy also cleaned it and painted it. I must say it looks very nice.
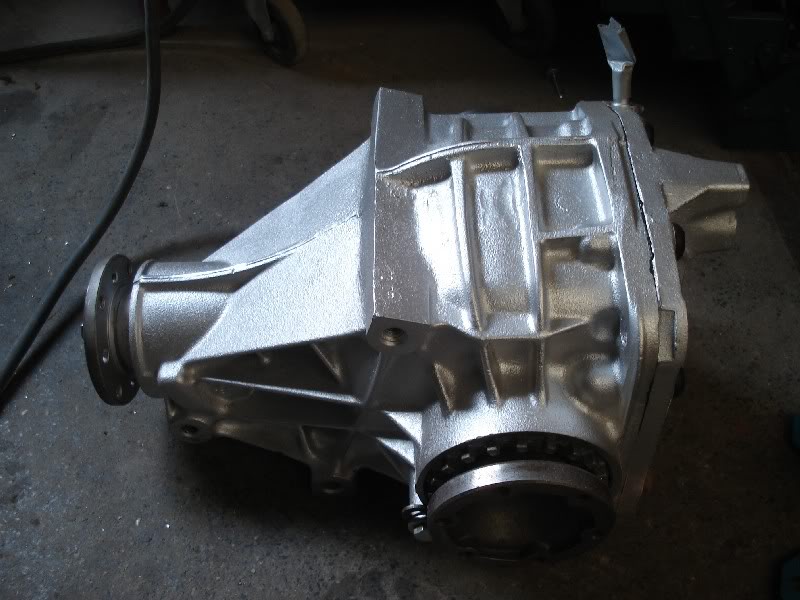
Tuesday I started taking the old diff out. Unfortunately some of the driveshaft bolts were very tight, so I broke one of my T45 Torx bits. Eventually they all out without damaging the bolt heads.

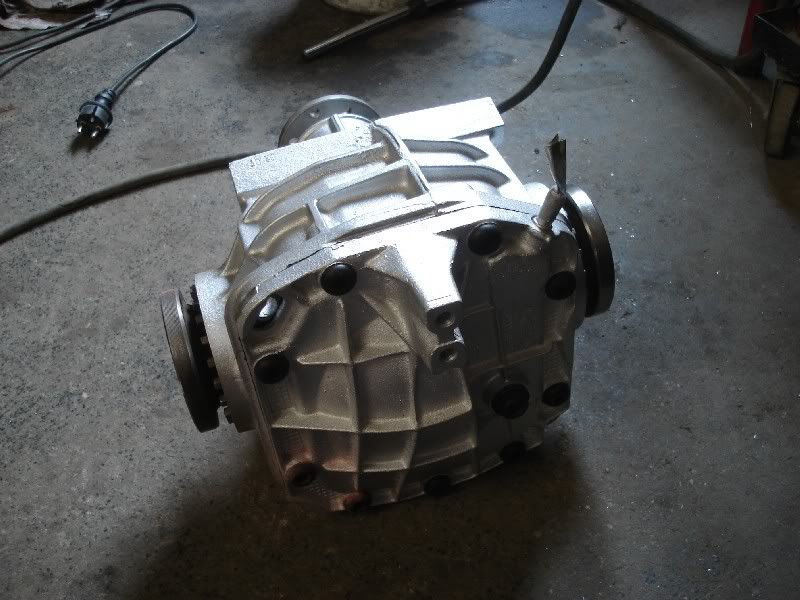
I also had a alloy diff mount with a PU bush lying around for a while.
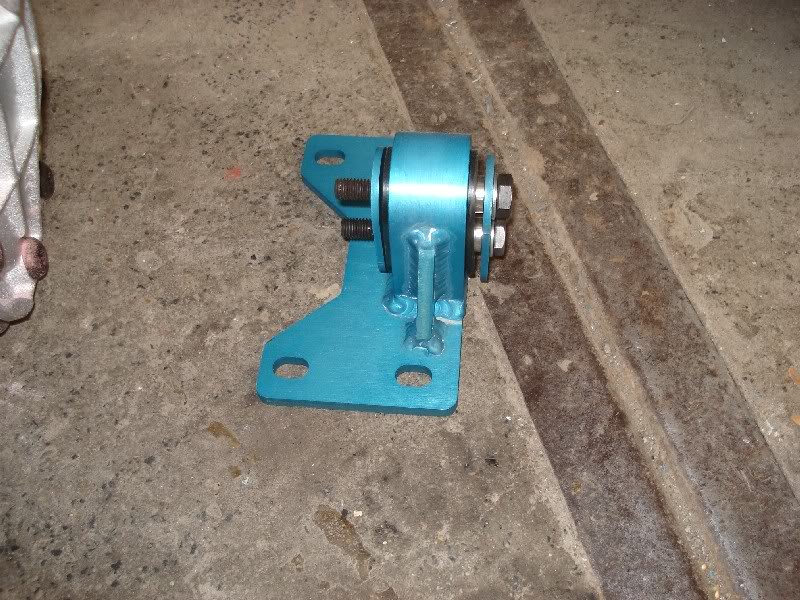
So with fitting the 3.36:1 LSD I also fitted the new diff mount. The diff mount isn't a really nice fit. I had to take out one of the plates and the washer on the top bolt, but still the top bolt hit the arb. In the end I got a "flush fit" kit for it.

In order to make the speedo read correctly, I had to change the speedo cog. With the 3.64 diff I had a 23 teeth blue cog in the gearbox. Since 22 teeth is the lowest number of teeth according to MC I fitted that one to the box.
But after driving it I found out the speedo is underreading, so I had another look in MC and it turns out that there is 21 teeth cog for the Granada, so I ordered that one.
Tuesday I started taking the old diff out. Unfortunately some of the driveshaft bolts were very tight, so I broke one of my T45 Torx bits.
I also had a alloy diff mount with a PU bush lying around for a while.
So with fitting the 3.36:1 LSD I also fitted the new diff mount. The diff mount isn't a really nice fit.
In order to make the speedo read correctly, I had to change the speedo cog. With the 3.64 diff I had a 23 teeth blue cog in the gearbox. Since 22 teeth is the lowest number of teeth according to MC I fitted that one to the box.
But after driving it I found out the speedo is underreading, so I had another look in MC and it turns out that there is 21 teeth cog for the Granada, so I ordered that one.
21-05-2012, 08:01 PM
#38
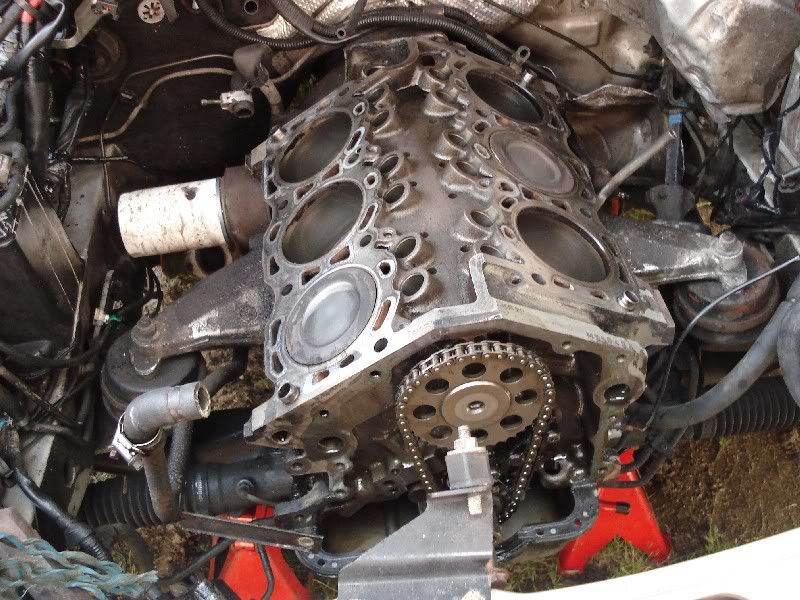
After driving the 24v for about 10k km things went very wrong unfortunately. The hydraulic chain tensioner started leaking oil. I suppose because of this the chain was not fully tensioned and "hitting" the chain guides. The guides broke and the chain jumped a few teeth on the cam sprockets. 
So it was time to get the engine out and on an engine stand.
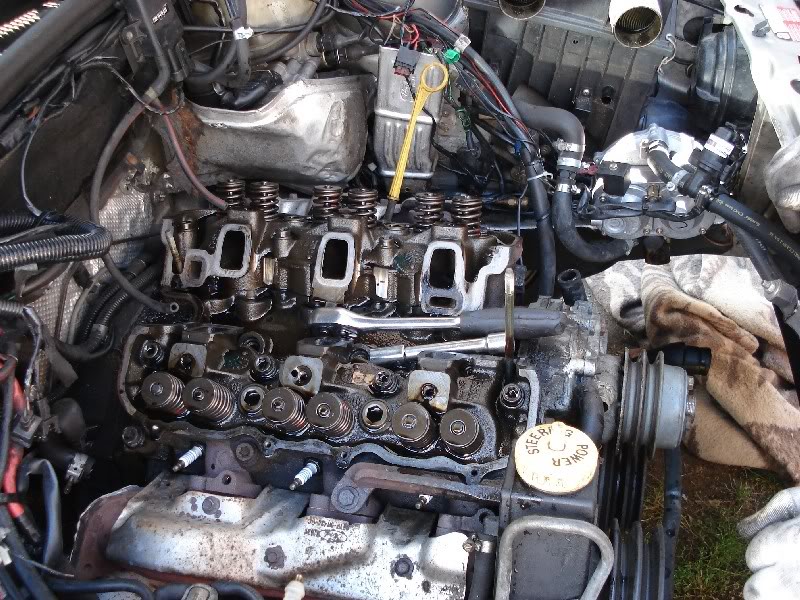
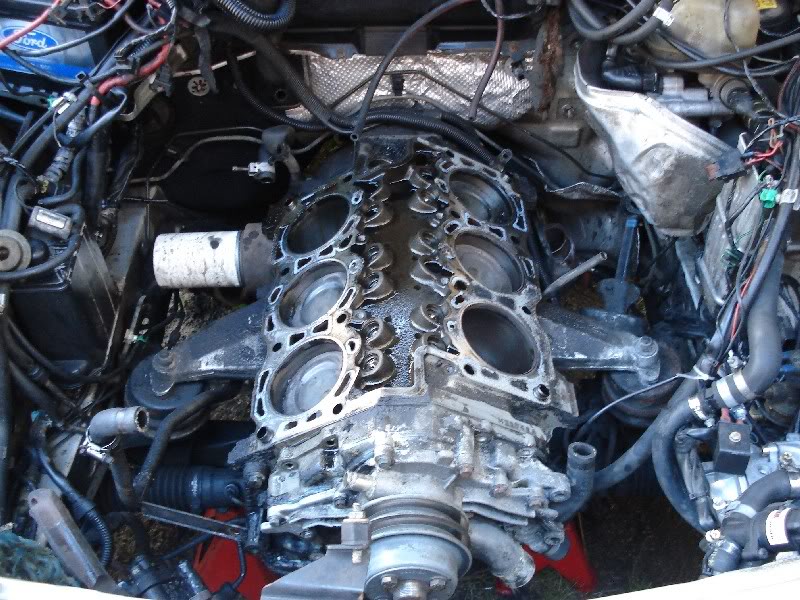
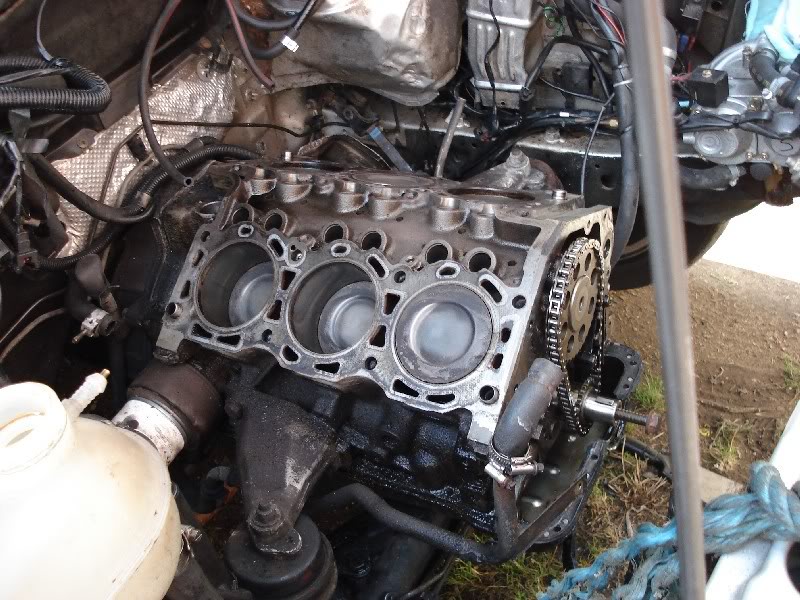
Took some parts off...
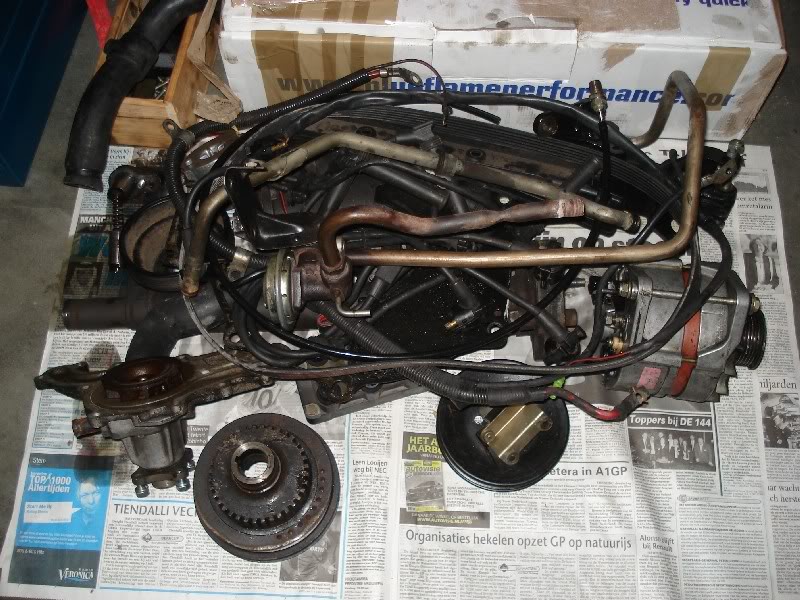
Making the block look a bit more naked..

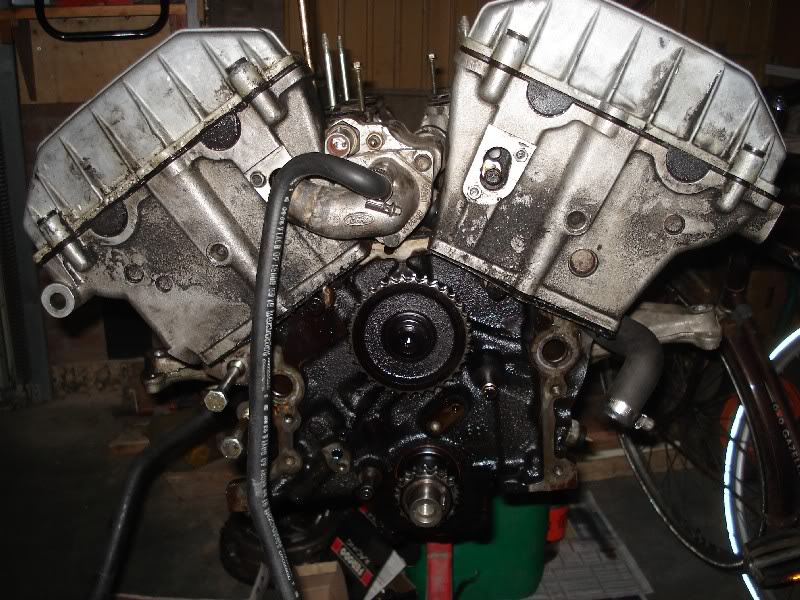
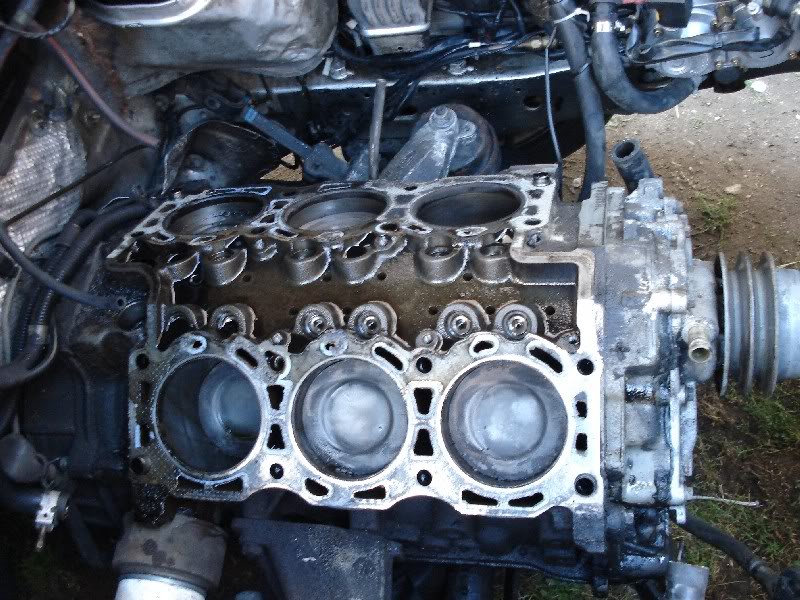
The engine from underneath with the sump taken off.
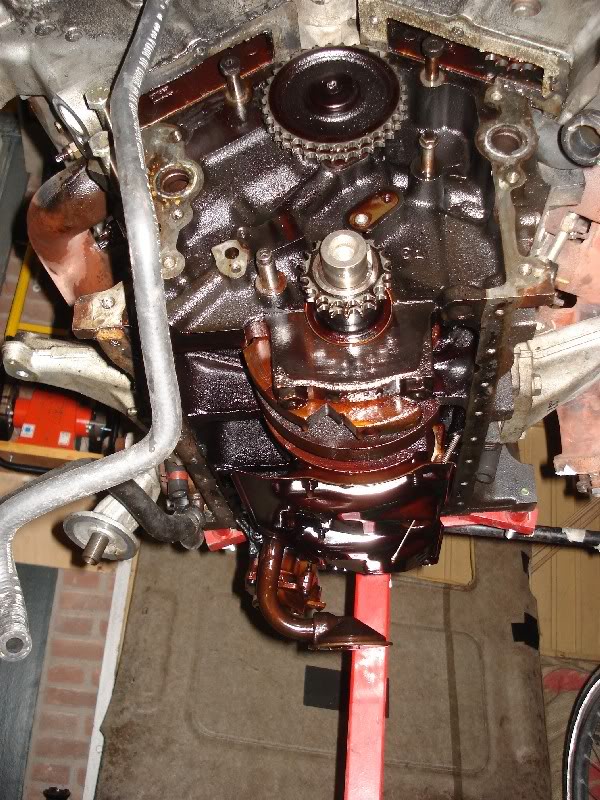
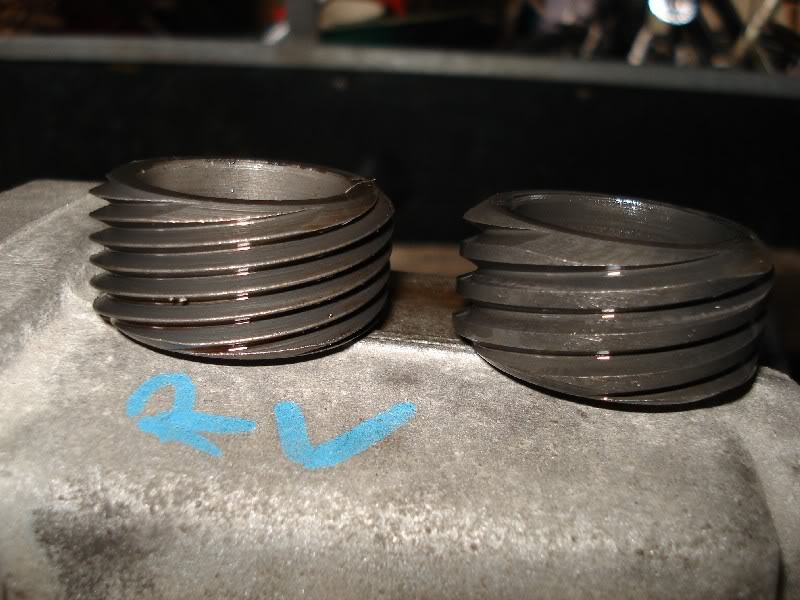
The two chain guides at the bottom were still there, although the plastic guide had cracked. All other guides were "missing". I found them in the sump in pieces...
So it was time to get the engine out and on an engine stand.
Took some parts off...
Making the block look a bit more naked..
The engine from underneath with the sump taken off.
The two chain guides at the bottom were still there, although the plastic guide had cracked. All other guides were "missing". I found them in the sump in pieces...
28-05-2012, 11:12 PM
#39
PassionFord Regular

By now it's almost 11 years ago that I bought my sapph. It was a basic CL version, without even a revcounter although it had a sunroof fitted, and had run about 140.000 km.
At the time it looked like this, although I already fitted the cosworth spoiler and cosworth wheels before taking the pic:

After that I fitted a cosworth grill, skirts and RS bumpers.


And a picture from under the bonnet, with a 2.0i DOHC to which I fitted a Green filter kit.
At the time it looked like this, although I already fitted the cosworth spoiler and cosworth wheels before taking the pic:
After that I fitted a cosworth grill, skirts and RS bumpers.
And a picture from under the bonnet, with a 2.0i DOHC to which I fitted a Green filter kit.
Where can i get bumpers like these ? cool project m8
 29-05-2012, 07:04 AM
#40
PassionFord Post Whore!!
Fantastic work mate.
You certainly know what you are doing.
Keep up the good work
You certainly know what you are doing.
Keep up the good work

