My Mark One Escort Build


 06-01-2012, 01:49 PM
#43
Wahay!! I've lost my Virginity!!
Thread Starter

Join Date: Apr 2010
Location: Essex
Posts: 58
Likes: 0
Received 0 Likes
on
0 Posts
Cheers for the positive comments.
Haven't really got much done since I last posted, been a bit held up whilst waiting for more parts to turn up.
However I picked up my Cossie Engine on Wednesday, can't wait to fit it Here are some pics..
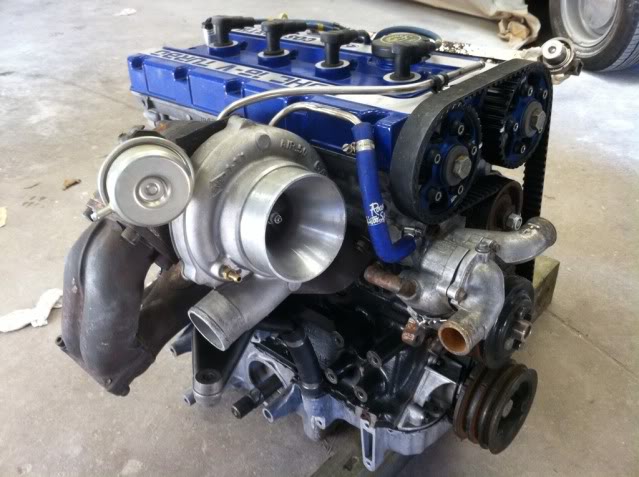
It had a Harvey Gibbs rebuild only 5 months ago, and hasn't even been run since.
The rebuild included, Forged Pistons, Main & Big End Bearings, Block Bore, Block Skim, Head Skim, New Plugs, Uprated Pump, WRC Head Gasket, New Gaskets/Seals, Crank Polish, Ported Head etc.
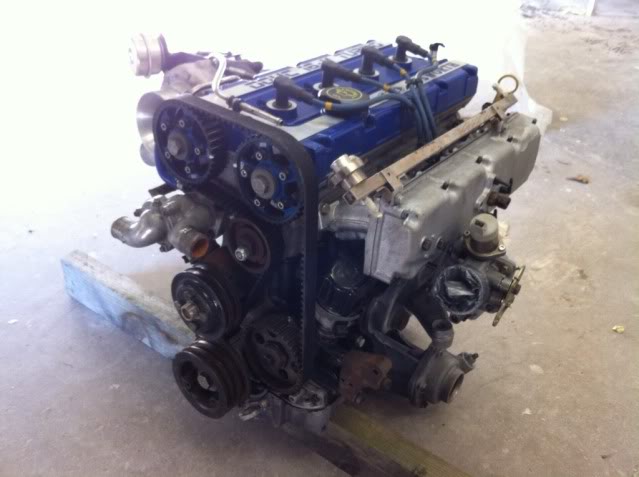
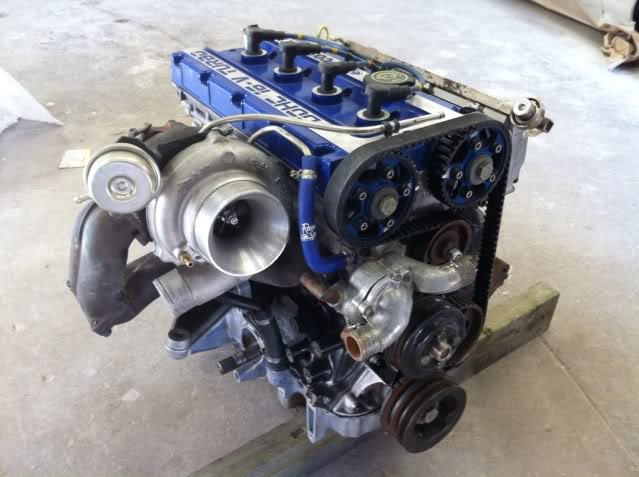
And it was already on a 200 Block, Long Studded, Siemens 83lb Injectors, Uprated Lifters, Kent Verniers, AP Racing Organic Clutch, and the GT3071R. Was running a L8 MSD management. As you can see, it's currently on a 4WD sump, but I have a 2WD one which will be changed very soon.
I've got a few plans for the Engine, need to get a few bits painted, polished & anodized first, Refurb the Cam cover. I may also fit a Hart plenum, and possibly a External Wastegate if required. I'll see how it goes.
My only concern at the mo, it wether the 2WD manifold is going to run too close to the inner wing. It will have a heat shield anyways, but I don't want to burn my paint. I'm sure we'll figure it out though.
Haven't really got much done since I last posted, been a bit held up whilst waiting for more parts to turn up.
However I picked up my Cossie Engine on Wednesday, can't wait to fit it
It had a Harvey Gibbs rebuild only 5 months ago, and hasn't even been run since.
The rebuild included, Forged Pistons, Main & Big End Bearings, Block Bore, Block Skim, Head Skim, New Plugs, Uprated Pump, WRC Head Gasket, New Gaskets/Seals, Crank Polish, Ported Head etc.
And it was already on a 200 Block, Long Studded, Siemens 83lb Injectors, Uprated Lifters, Kent Verniers, AP Racing Organic Clutch, and the GT3071R. Was running a L8 MSD management. As you can see, it's currently on a 4WD sump, but I have a 2WD one which will be changed very soon.
I've got a few plans for the Engine, need to get a few bits painted, polished & anodized first, Refurb the Cam cover. I may also fit a Hart plenum, and possibly a External Wastegate if required. I'll see how it goes.
My only concern at the mo, it wether the 2WD manifold is going to run too close to the inner wing. It will have a heat shield anyways, but I don't want to burn my paint. I'm sure we'll figure it out though.
07-01-2012, 05:16 PM
#44
Wahay!! I've lost my Virginity!!
Thread Starter
Join Date: Apr 2010
Location: Essex
Posts: 58
Likes: 0
Received 0 Likes
on
0 Posts
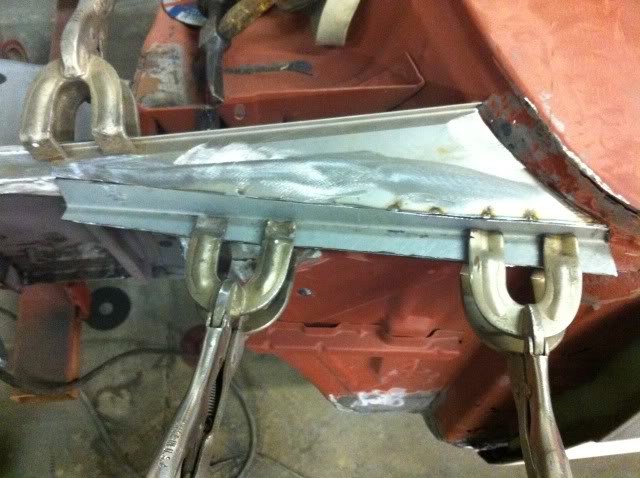
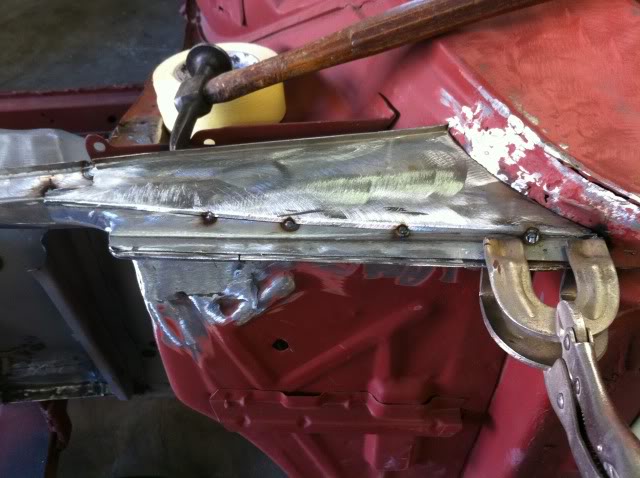
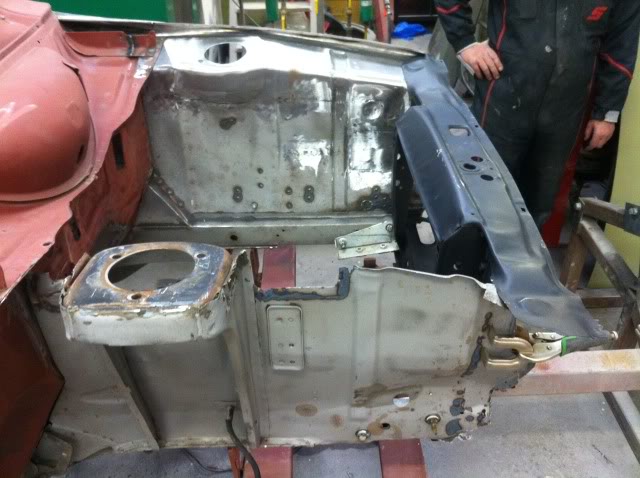
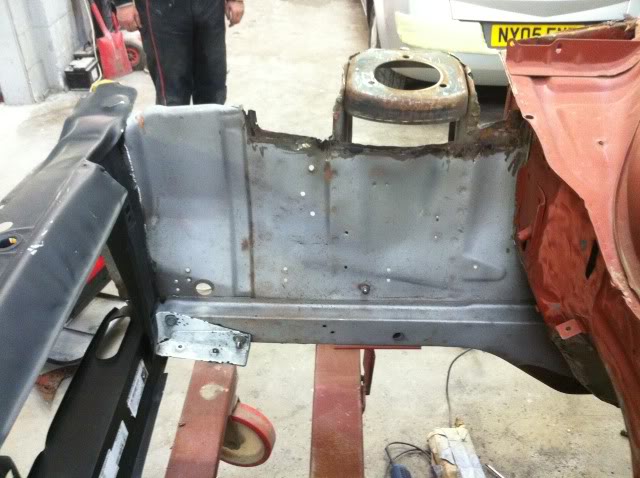
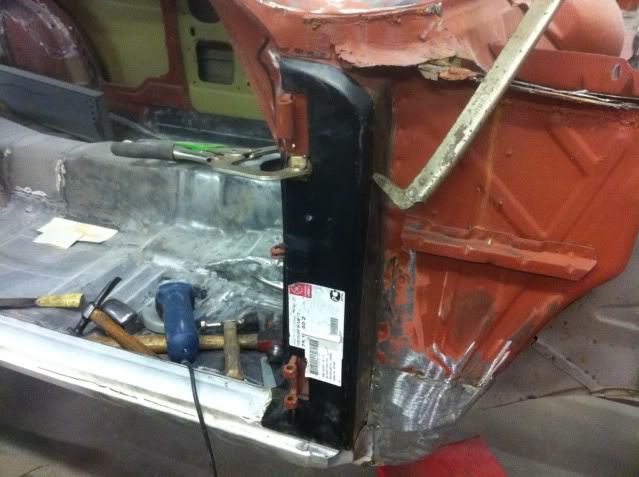
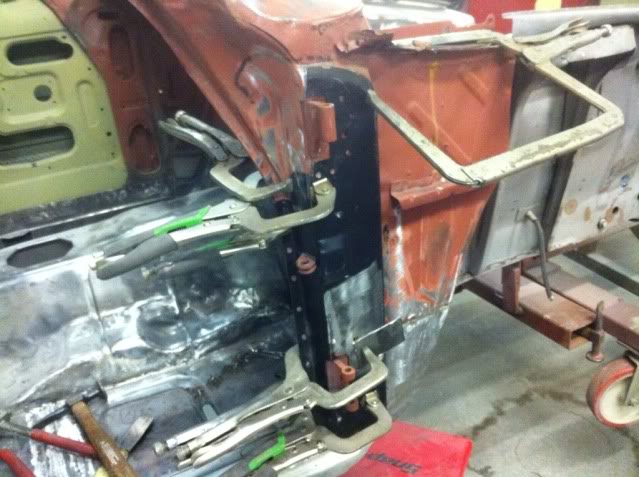
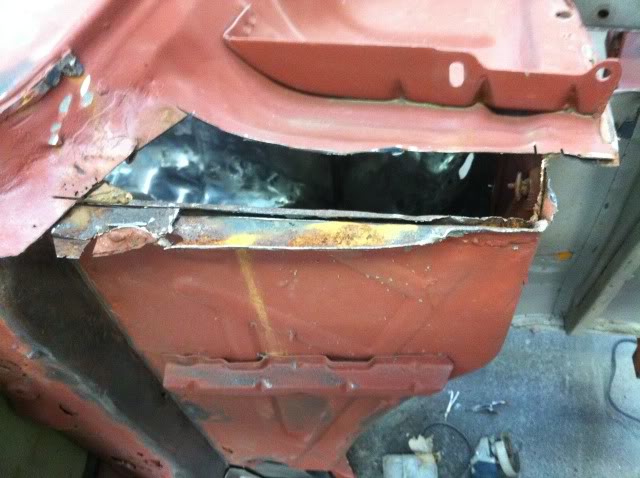
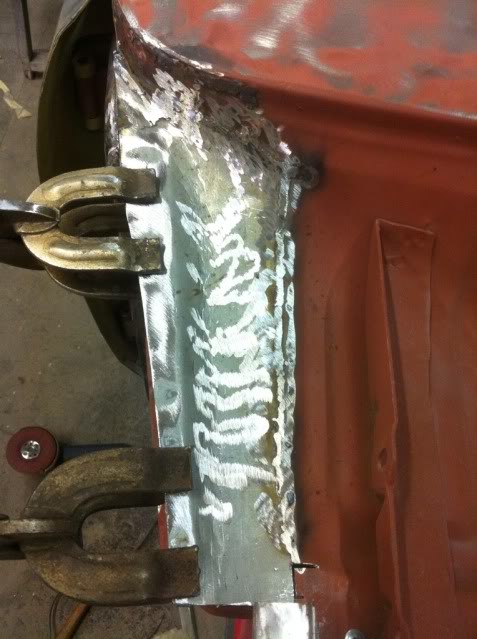
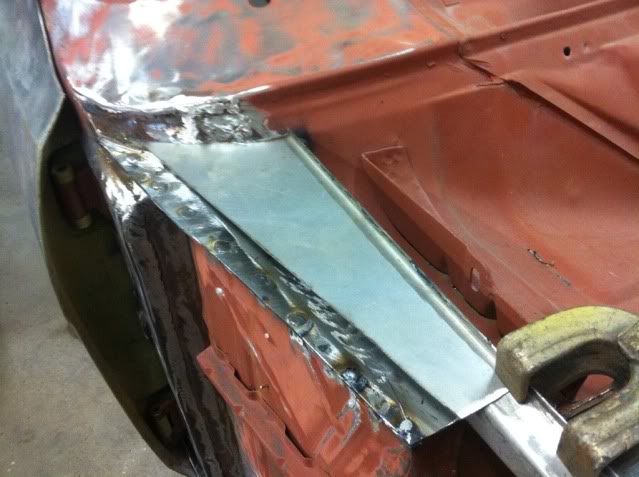
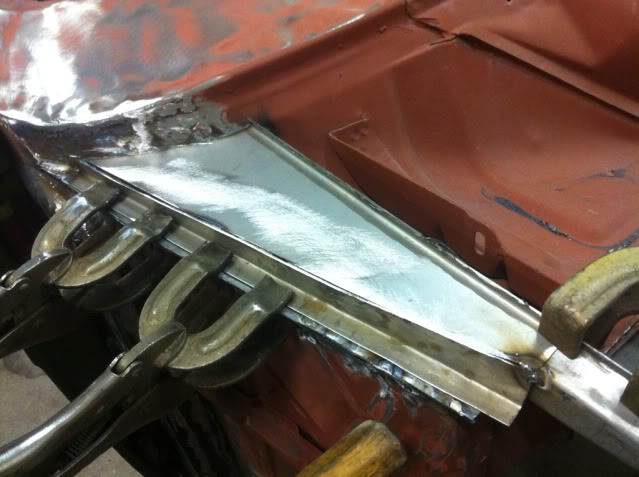
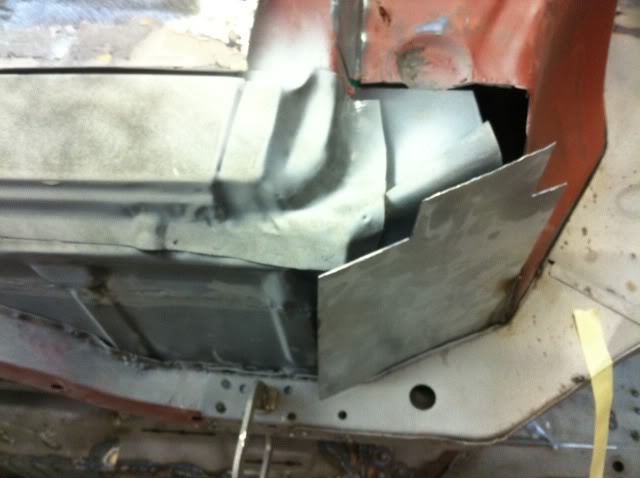
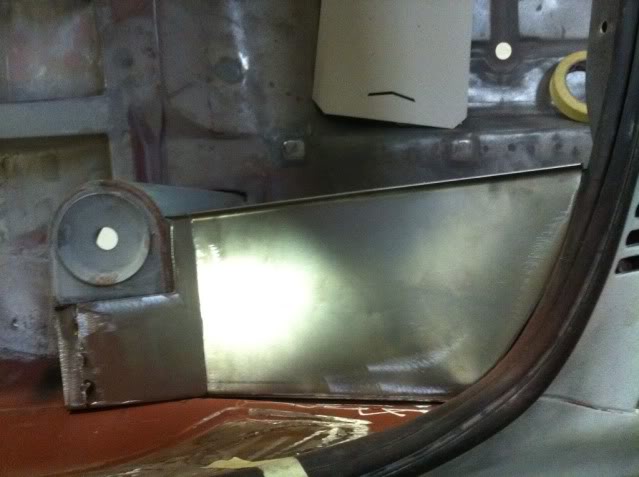
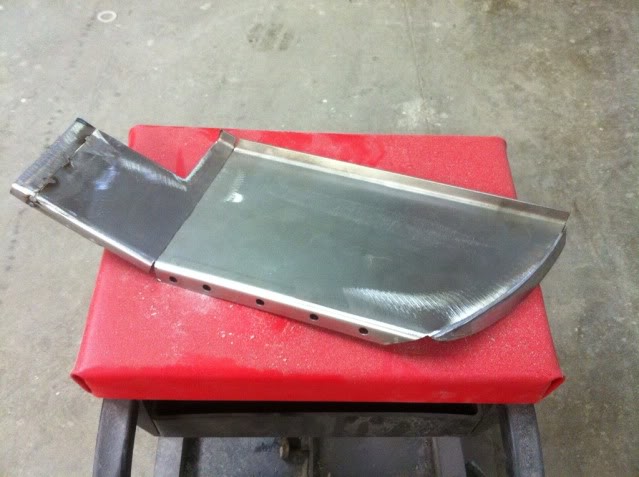
Got a few hours done on the car today, began welding the new top rail to the near side inner wing. Cut the pan supports off for the time being, since they need a few repairs.
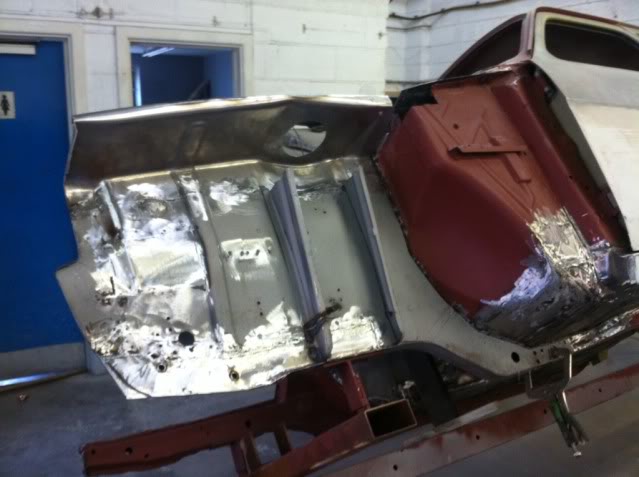
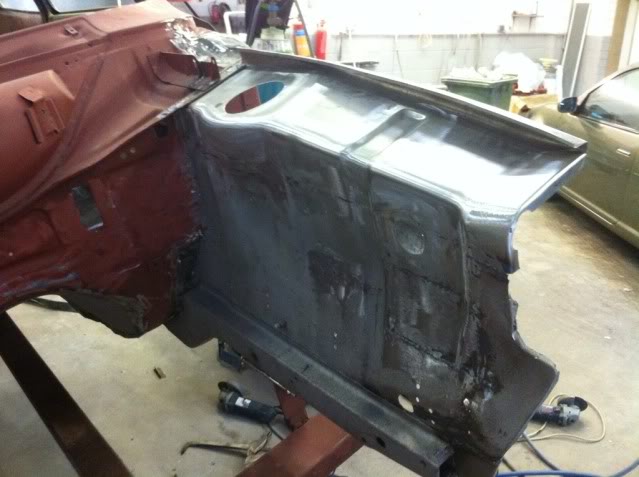
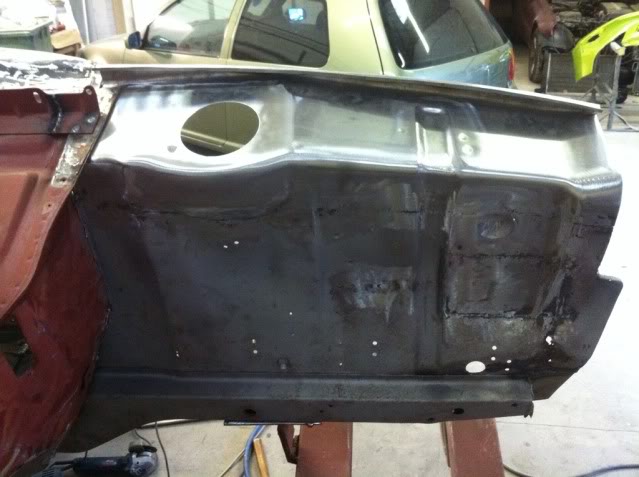

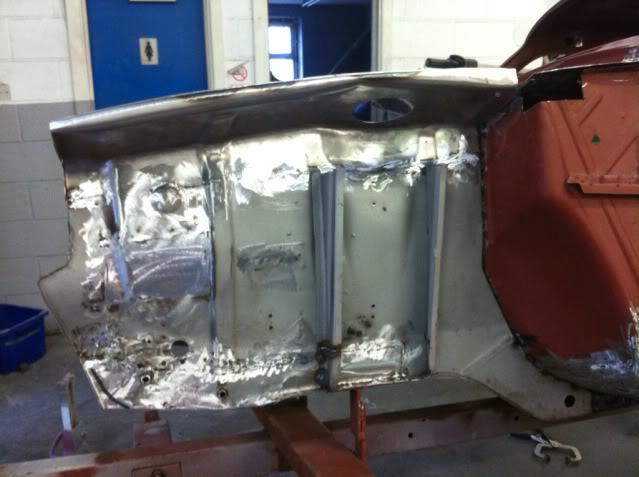
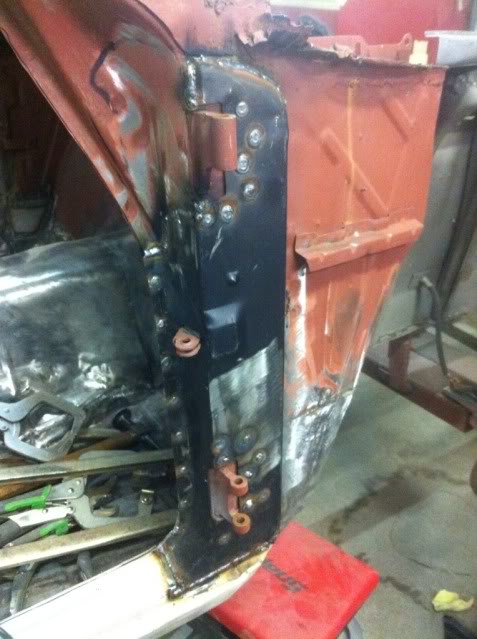
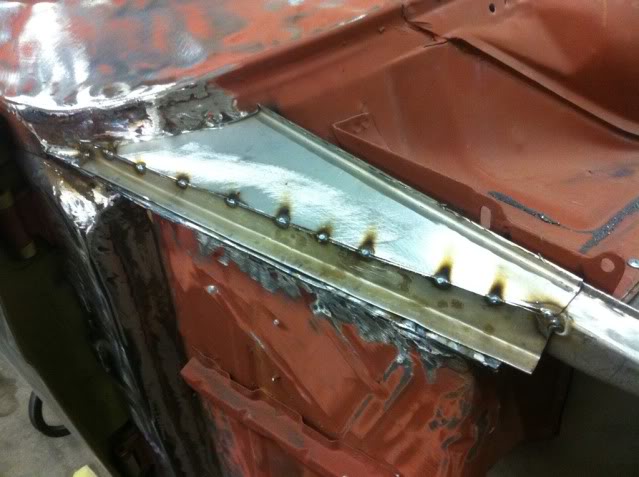
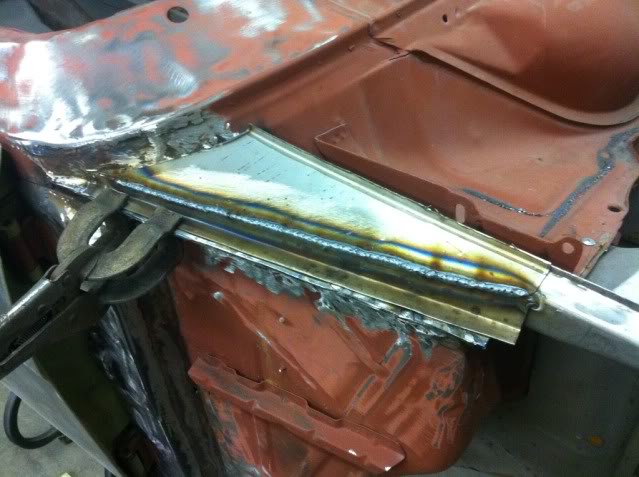
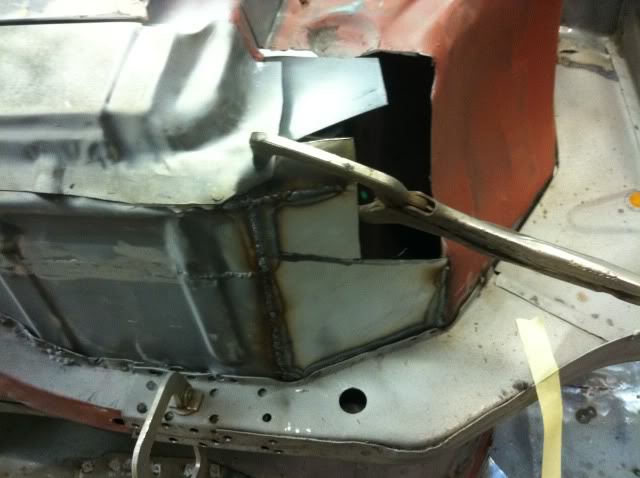
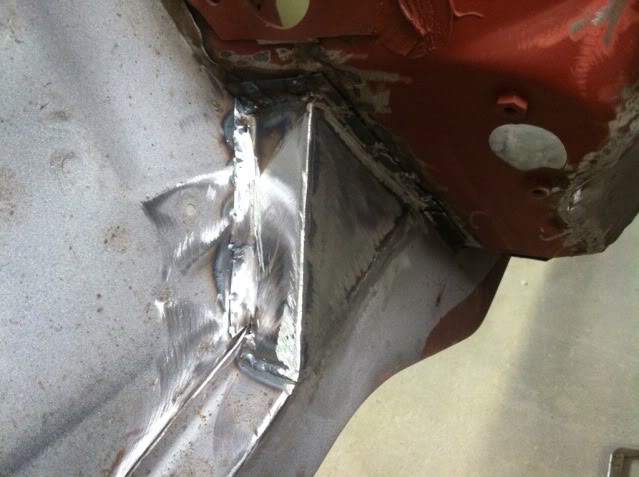
That's most of the inner wing welded. We then welded up most the holes, since they're not necessary. And made a gusset for strengthening.
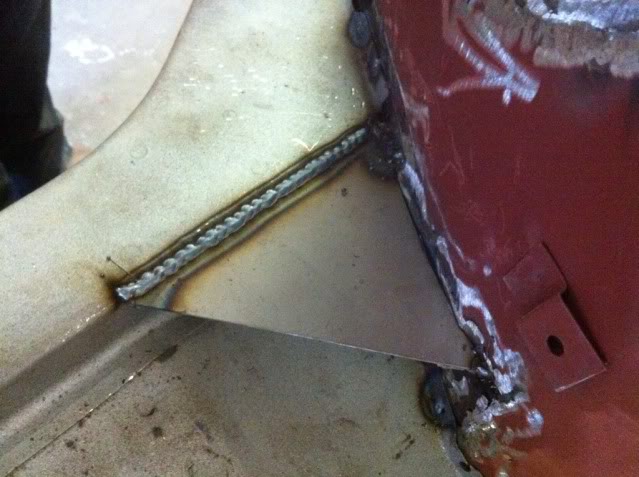
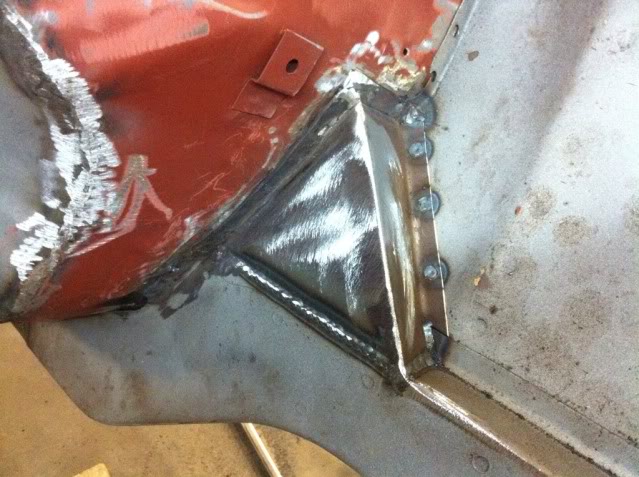
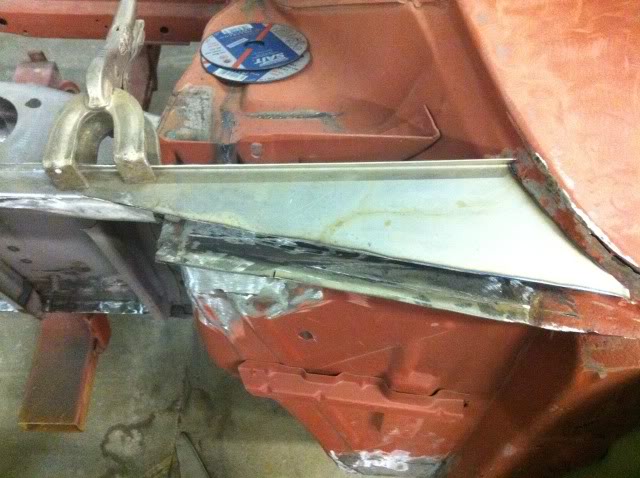
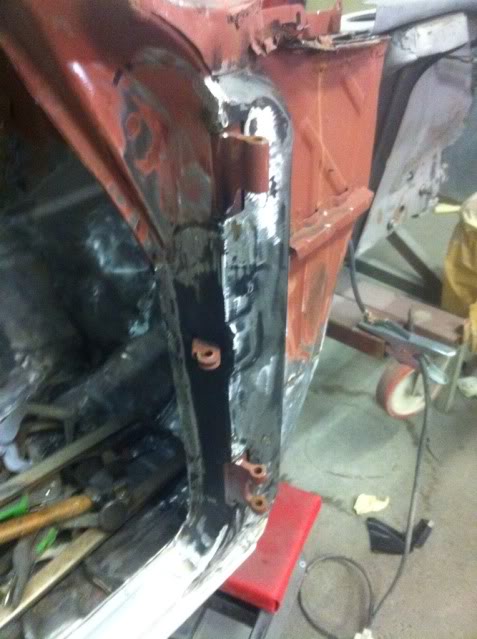
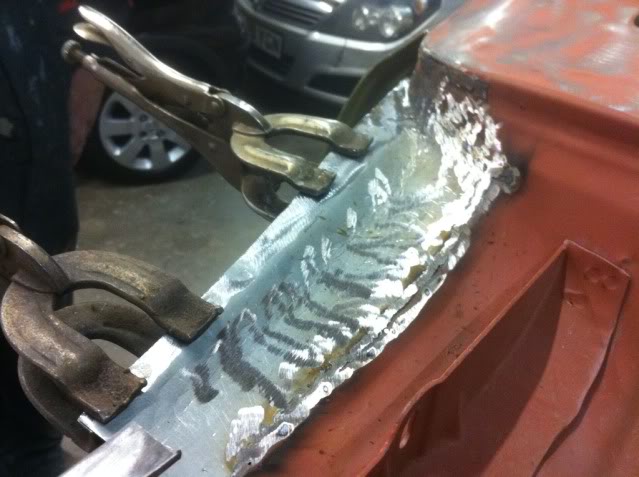
As you see, we made a lip which continued off the chassis rail, to make it look neater. Looks much better compared to the old bodged ones..
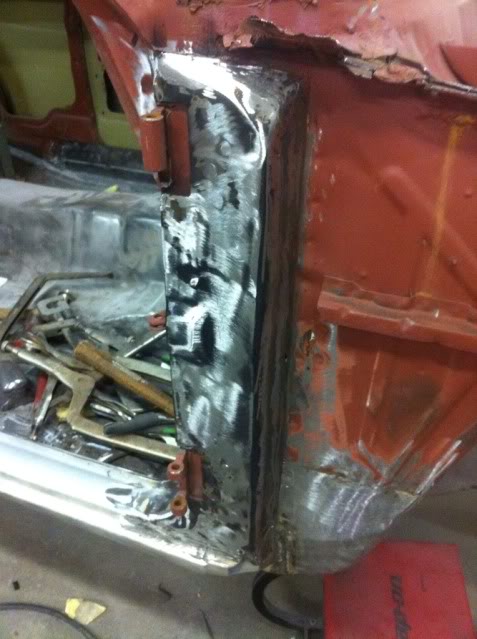
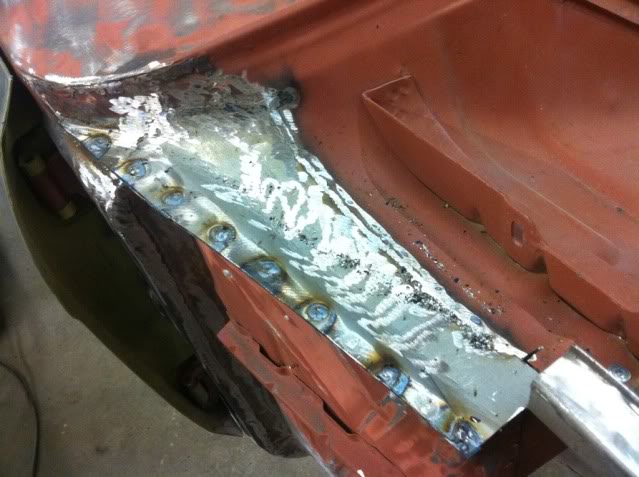
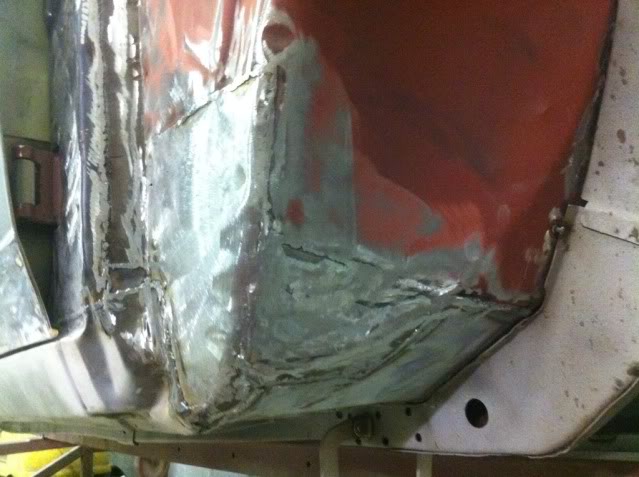
And this is the inner wing now..
Next job is repairing the pan supports and welding them back together, and then the drip rail. I'll get some pics up in the week.
That's most of the inner wing welded. We then welded up most the holes, since they're not necessary. And made a gusset for strengthening.
As you see, we made a lip which continued off the chassis rail, to make it look neater. Looks much better compared to the old bodged ones..
And this is the inner wing now..
Next job is repairing the pan supports and welding them back together, and then the drip rail. I'll get some pics up in the week.
 14-01-2012, 08:51 PM
#47
Wahay!! I've lost my Virginity!!
Thread Starter
Join Date: Apr 2010
Location: Essex
Posts: 58
Likes: 0
Received 0 Likes
on
0 Posts
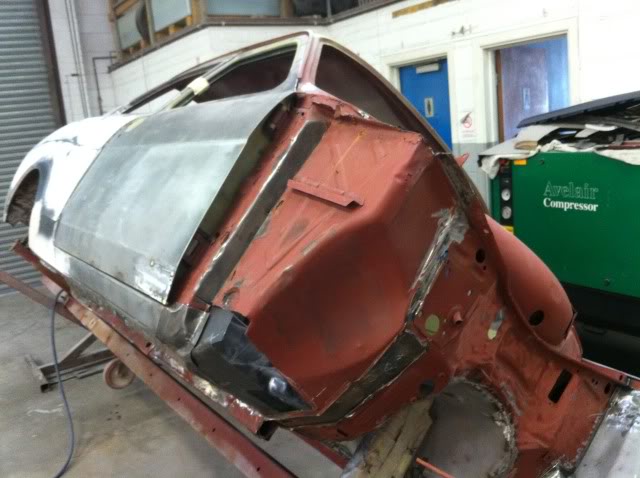
We've cracked on with the car a fair bit in the past week, it's really starting to make progress now. The rest of the panels arrived Tuesday..
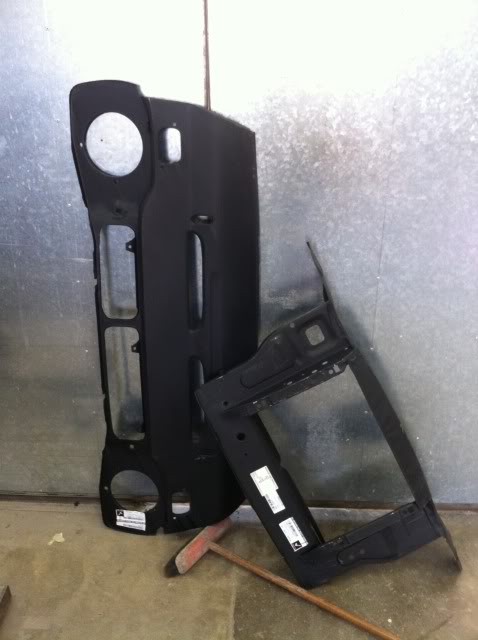
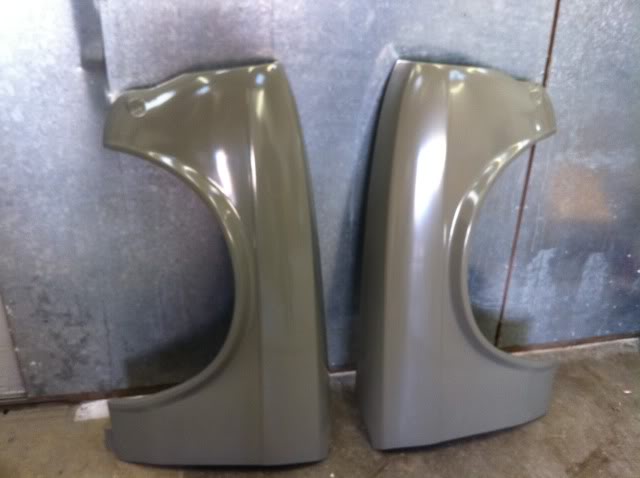
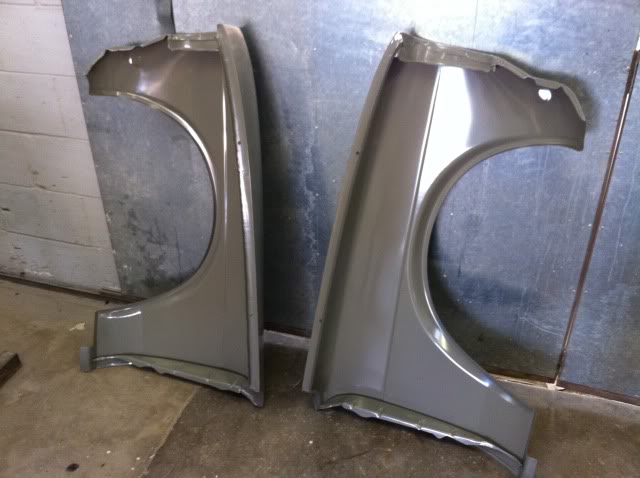
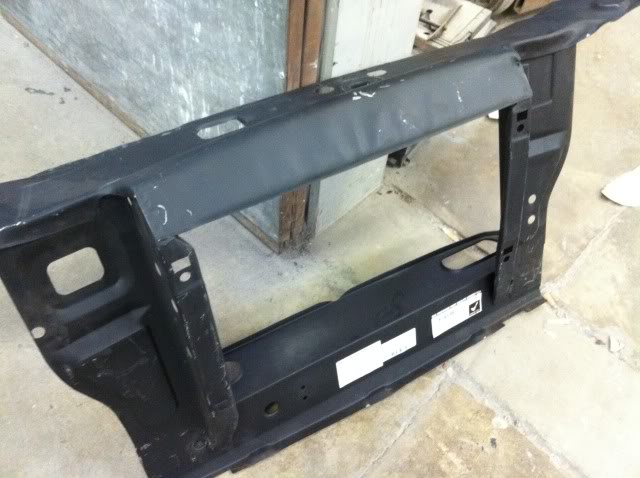
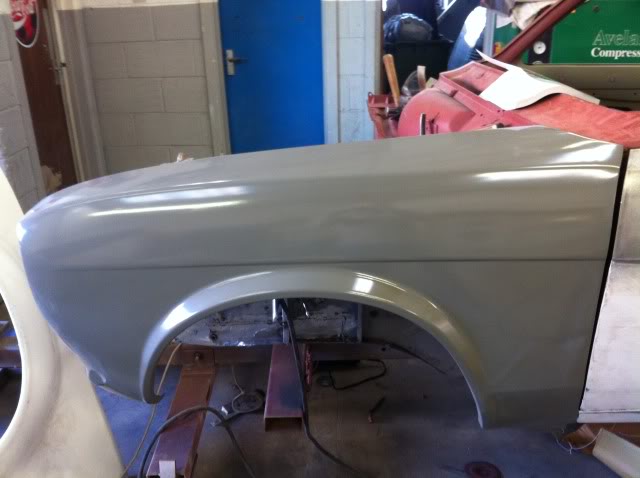
Really pleased with the Mexico wings, their much better than I was expecting. However the front inner panel was pretty shite though. The slam panel doesn't line up with the Rad Supports like it should, so just going to order a new one next week. It was still handy to line up the inner wings though.
We first made a flitch panel for the nearside front wing.


Got the wing on, which surprisingly fit really well, but the flitch panel had to be lowered slightly.
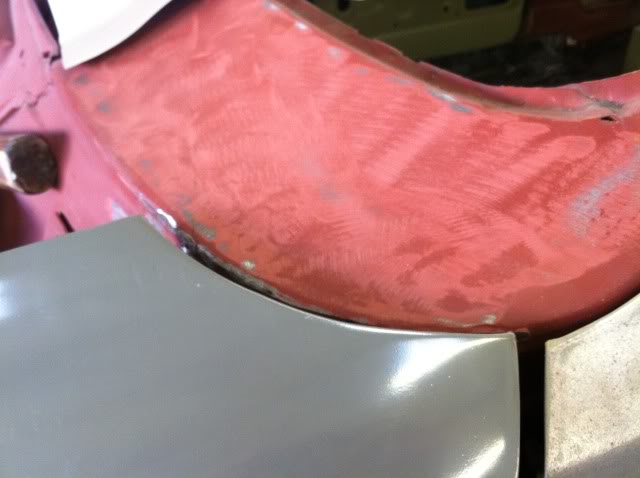
Cut the off side inner wing off.
Lined up the new one.
The bodged up area on the inner wing was removed, but now as you can see the top plate doesn't quite come down quite far enough to marry up with the inner wing, so that will need to have a piece welded in. Luckily it's only a few mm.
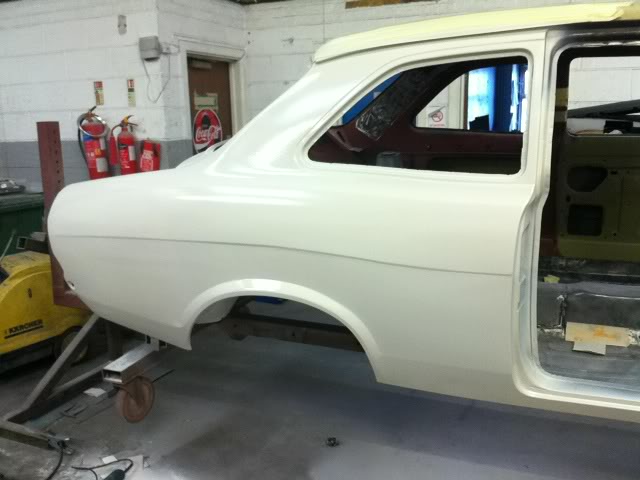
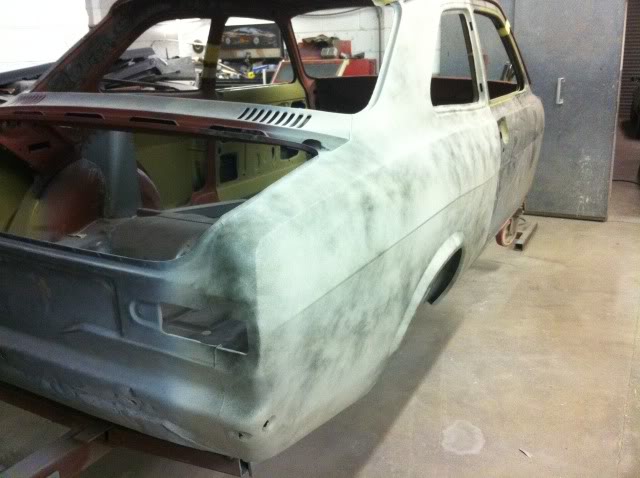
Also managed to get the near side quarter in Reface today. Really pleased with how it's came out. We've put a more defined edge in the swage line as well as the arch. Which is different but still subtle. It's still not perfect, but it's almost there.
Next job is replacing both A-Posts and getting the inner wing welded on. We've welded up the front offside footwell as well today, but it's not quite finished. I'll get the pictures up Monday or something.
Really pleased with the Mexico wings, their much better than I was expecting. However the front inner panel was pretty shite though. The slam panel doesn't line up with the Rad Supports like it should, so just going to order a new one next week. It was still handy to line up the inner wings though.
We first made a flitch panel for the nearside front wing.
Got the wing on, which surprisingly fit really well, but the flitch panel had to be lowered slightly.
Cut the off side inner wing off.
Lined up the new one.
The bodged up area on the inner wing was removed, but now as you can see the top plate doesn't quite come down quite far enough to marry up with the inner wing, so that will need to have a piece welded in. Luckily it's only a few mm.
Also managed to get the near side quarter in Reface today. Really pleased with how it's came out. We've put a more defined edge in the swage line as well as the arch. Which is different but still subtle. It's still not perfect, but it's almost there.
Next job is replacing both A-Posts and getting the inner wing welded on. We've welded up the front offside footwell as well today, but it's not quite finished. I'll get the pictures up Monday or something.


 15-01-2012, 10:33 AM
#52
Wahay!! I've lost my Virginity!!
Thread Starter
Join Date: Apr 2010
Location: Essex
Posts: 58
Likes: 0
Received 0 Likes
on
0 Posts
Cheers for the positive comments, much appreciated!
There's certainly a lot to do still, but most the welding is done. Just need to finish the front end. Make a roll cage, make a rear bulkhead, rear crossmember etc. I need to get a new dash for it as well. Once it's in paint it should all come together pretty quickly.
There's certainly a lot to do still, but most the welding is done. Just need to finish the front end. Make a roll cage, make a rear bulkhead, rear crossmember etc. I need to get a new dash for it as well. Once it's in paint it should all come together pretty quickly.
15-01-2012, 12:07 PM
#53
Wahay!! I've lost my Virginity!!

loving this, i was following an audi the other day with the same name on it, then i clicked rah its a prestige build!!!! derrrrrrrrrr, love a mk 1 with that lump aintcha gunna nd wide rears ???
15-01-2012, 12:27 PM
#54
Wahay!! I've lost my Virginity!!
Thread Starter
Join Date: Apr 2010
Location: Essex
Posts: 58
Likes: 0
Received 0 Likes
on
0 Posts
And the rear arches have been extended but their still standard, so will hopefully run about 7.5 on the rear, and 7 on the front. Will see when I've got my axle fitted.
 sweet
sweet

 18-01-2012, 08:11 AM
#58
Wahay!! I've lost my Virginity!!
Thread Starter
Join Date: Apr 2010
Location: Essex
Posts: 58
Likes: 0
Received 0 Likes
on
0 Posts
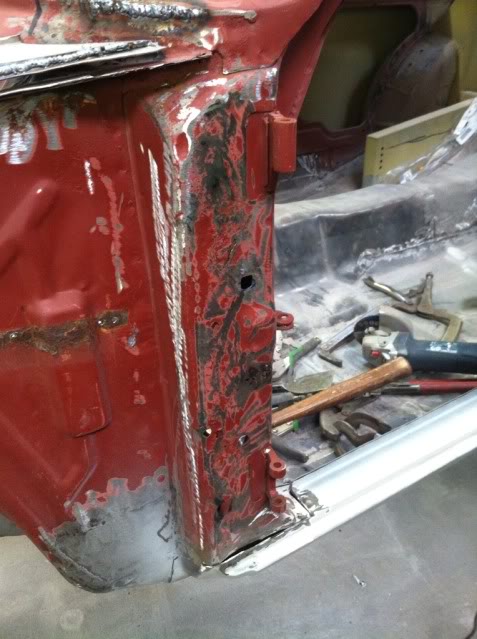
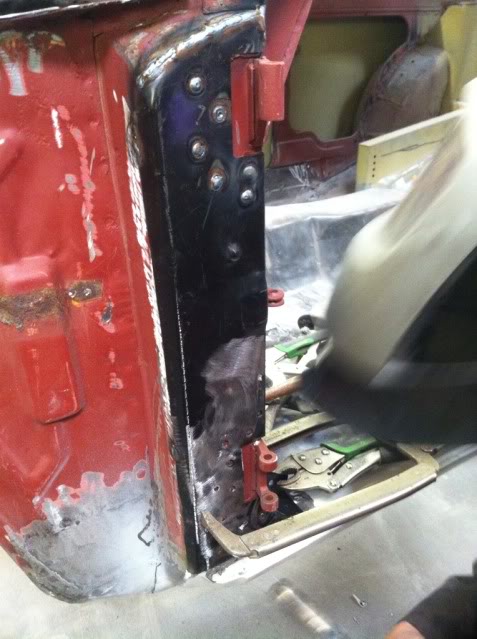
Cheers for the comments. Got one offside A Pillar replaced last night.
Cut out the outer skin and welded the cut the new one in, the original was beyond rotten.
Cut out the outer skin and welded the cut the new one in, the original was beyond rotten.

 18-01-2012, 12:32 PM
#62
Wahay!! I've lost my Virginity!!
Thread Starter
Join Date: Apr 2010
Location: Essex
Posts: 58
Likes: 0
Received 0 Likes
on
0 Posts
Cheers people
Got another repair done for under the flitch panel, have made it the same shape as the other side, how they are originally.
Will hopefully do the near side A Pillar tonight, I'll upload the pics later if I get time.
Got another repair done for under the flitch panel, have made it the same shape as the other side, how they are originally.
Will hopefully do the near side A Pillar tonight, I'll upload the pics later if I get time.
19-01-2012, 01:20 PM
#63
Wahay!! I've lost my Virginity!!
Thread Starter
Join Date: Apr 2010
Location: Essex
Posts: 58
Likes: 0
Received 0 Likes
on
0 Posts
Made the off side flitch panel last night.

Both sides are still free floating for the time being, to allow for adjustment with the wings. But the majority of it is welded.
Both sides are still free floating for the time being, to allow for adjustment with the wings. But the majority of it is welded.
21-01-2012, 09:08 PM
#64
Wahay!! I've lost my Virginity!!
Thread Starter
Join Date: Apr 2010
Location: Essex
Posts: 58
Likes: 0
Received 0 Likes
on
0 Posts
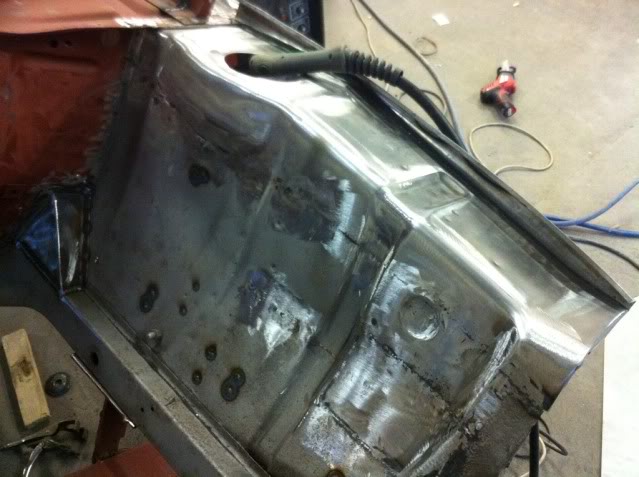
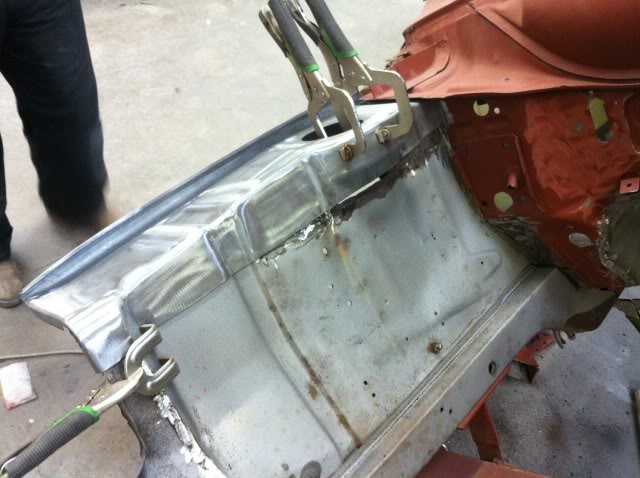
Repaired the offside footwell last week, only just uploaded the pictures.
Got the main shape of it, but may still need a little bit of beating about, but its basically there.
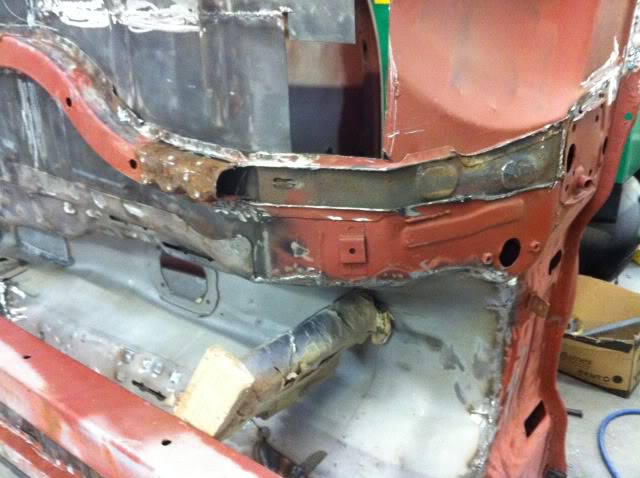
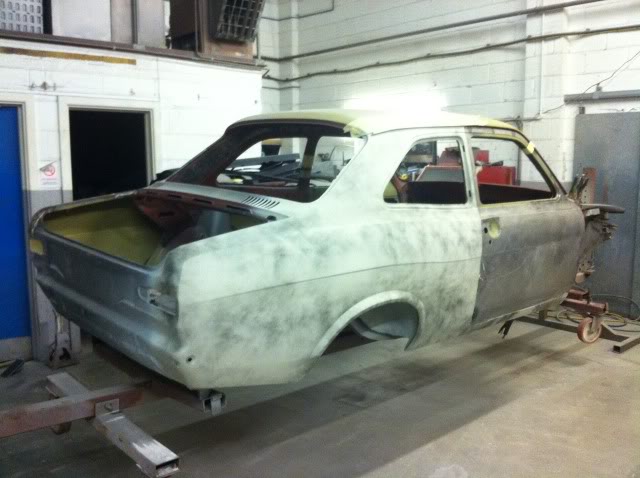
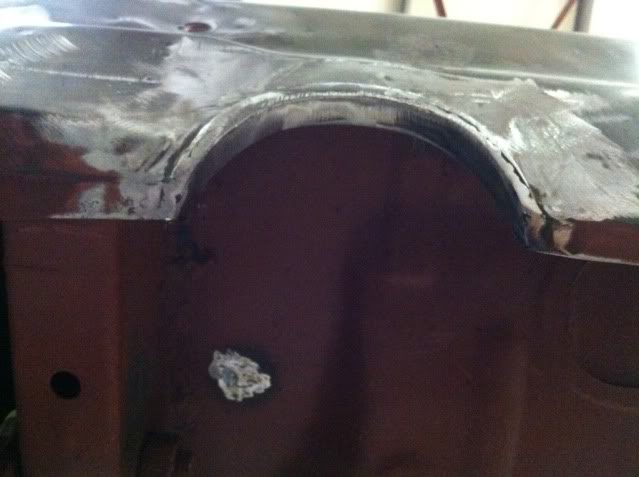
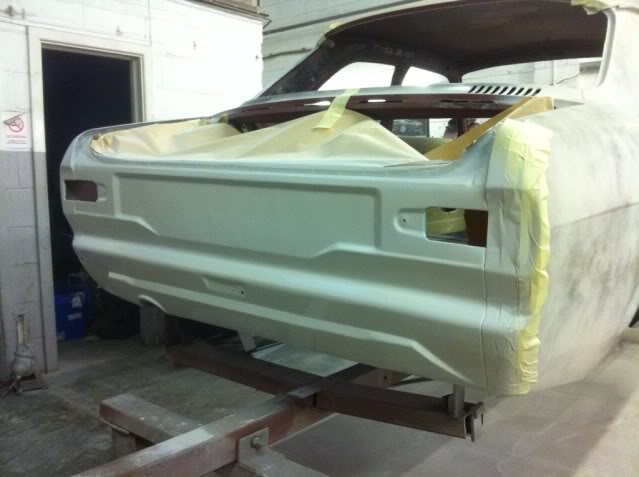
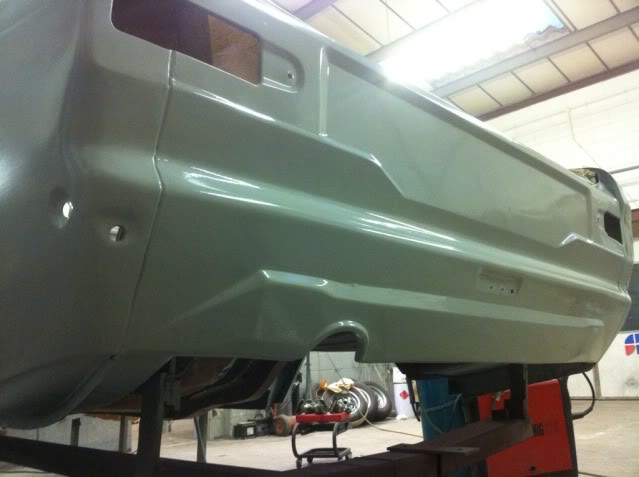
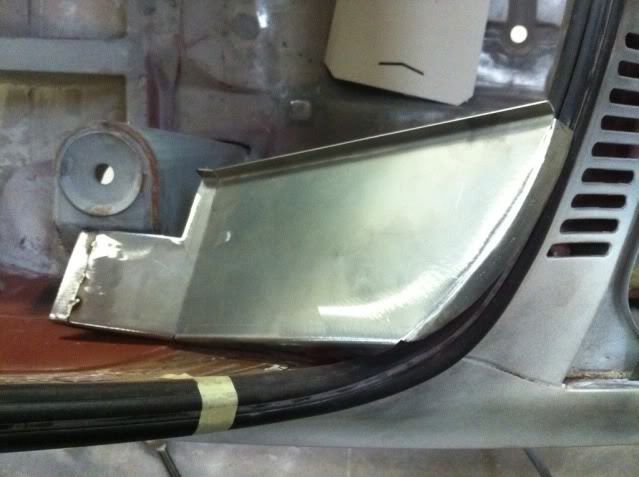
An we made a larger exhaust hole in the back panel, with a custom lip, which has came out really well. I'm going to run a full 3" pipe, so we didn't make it too big, just about right.
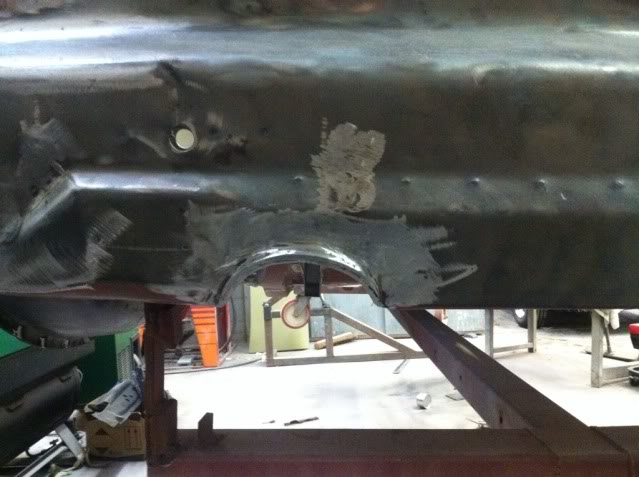
Then got the back panel all complete and the nearside rear quarter, and got them both in Reface.
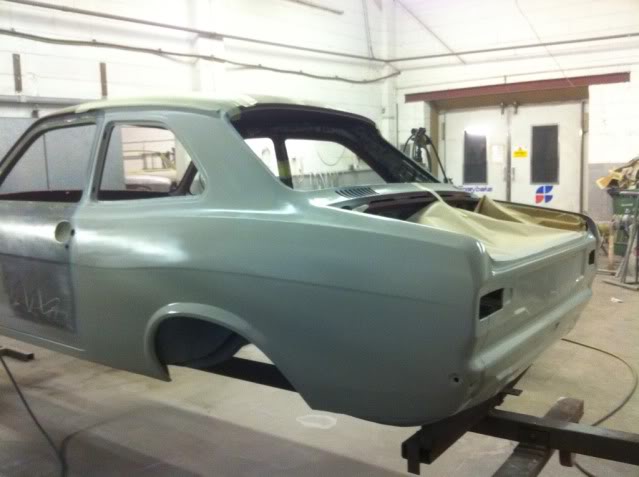

The car is really getting well on the way now. Most people I speak to, think its a bit ambitious hoping to get it complete for May. But we think it's do-able
Got the main shape of it, but may still need a little bit of beating about, but its basically there.
An we made a larger exhaust hole in the back panel, with a custom lip, which has came out really well. I'm going to run a full 3" pipe, so we didn't make it too big, just about right.
Then got the back panel all complete and the nearside rear quarter, and got them both in Reface.
The car is really getting well on the way now. Most people I speak to, think its a bit ambitious hoping to get it complete for May. But we think it's do-able
21-01-2012, 10:27 PM
#66
Wahay!! I've lost my Virginity!!
Thread Starter
Join Date: Apr 2010
Location: Essex
Posts: 58
Likes: 0
Received 0 Likes
on
0 Posts
And yeah I was planning on running an Atlas with Quaife Shafts and a Gripper LSD. From what I've heard that should take the power.
I'm not too sure yet though, a couple of people suggested using a Mustang or an Explorer axle. Only downside is that their massive, heavy and ugly.

 21-01-2012, 10:48 PM
#68
Wahay!! I've lost my Virginity!!
Thread Starter
Join Date: Apr 2010
Location: Essex
Posts: 58
Likes: 0
Received 0 Likes
on
0 Posts
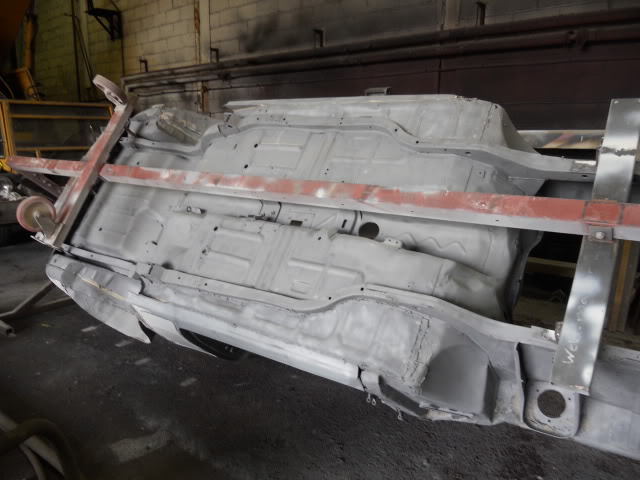
Cheers Mark. And no I got it done at a place in Witham called South East Galvanizers, their just off the A12 next to Essex Turbo's. We get all our customers cars done there, they do a thorough job. None of the car's panels get blasted obviously.
The place your thinking of is Simon Morris's, just opposite the station. That's only up the road from me. However they only really do commercials and HGV's.
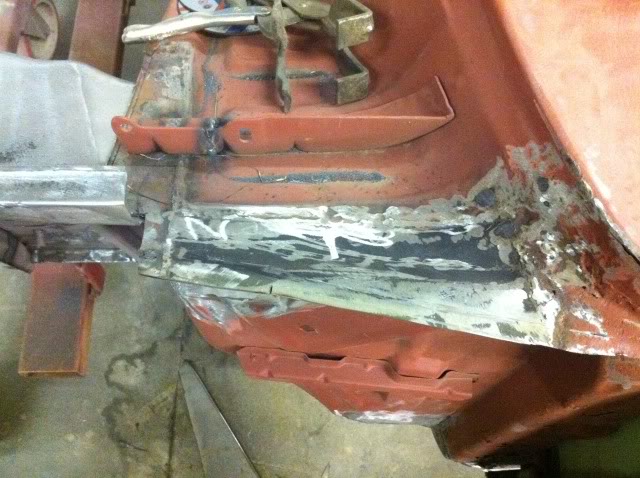
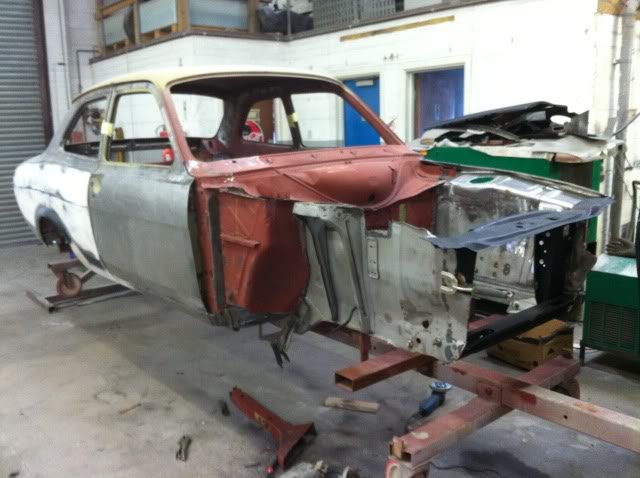
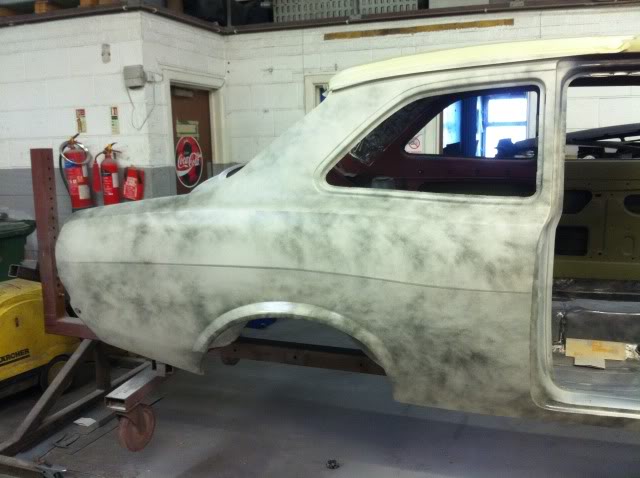
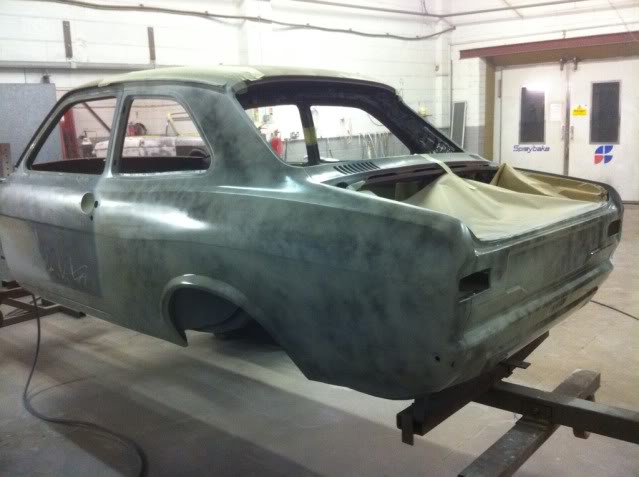
But yeah, a sandblast or acid dip is a must do for any full restoration. Quite surprising to see whats hidden underneath the paint and filler. This actually looked like an ok shell before it was blasted
The place your thinking of is Simon Morris's, just opposite the station. That's only up the road from me. However they only really do commercials and HGV's.
But yeah, a sandblast or acid dip is a must do for any full restoration. Quite surprising to see whats hidden underneath the paint and filler. This actually looked like an ok shell before it was blasted
Last edited by Ginn L; 21-01-2012 at 10:49 PM.
21-01-2012, 11:15 PM
#69
PassionFord Post Whore!!
iTrader: (2)

Love the subtle touches like the arches and the exhaust clearence in the back panel
gonna be one special car when finished
i hope i enjoy looking around this as much as the saxon
gonna be one special car when finished
i hope i enjoy looking around this as much as the saxon
21-01-2012, 11:27 PM
#70
Wahay!! I've lost my Virginity!!
Thread Starter
Join Date: Apr 2010
Location: Essex
Posts: 58
Likes: 0
Received 0 Likes
on
0 Posts
Thank you mate, their not really too noticeable which is kinda what I like about them. Quite a few people wouldn't notice the difference in the arches without comparing it to a standard car.
An haha hopefully you will, I'll do my best
An haha hopefully you will, I'll do my best
21-01-2012, 11:45 PM
#71
22-01-2012, 01:05 AM
#72
Wahay!! I've lost my Virginity!!
Thread Starter
Join Date: Apr 2010
Location: Essex
Posts: 58
Likes: 0
Received 0 Likes
on
0 Posts
Yeah the fabrication on the Saxon was definitely quite involved, obviously a lot more than this.
An I'm glad he is, because the car wouldn't hold together very well with my fabrication/welding skills
An I'm glad he is, because the car wouldn't hold together very well with my fabrication/welding skills
22-01-2012, 11:14 PM
#76
Wahay!! I've lost my Virginity!!
Thread Starter
Join Date: Apr 2010
Location: Essex
Posts: 58
Likes: 0
Received 0 Likes
on
0 Posts
Cheers mate, much appreciated. Your JWRC build is looking the bollocks, will be good to see it when complete!
Ok great cheers, I have considered an 8", only thing that puts me off is the size and look of it. They're just ugly. I'll have to decide soon though what to do.
Ok great cheers, I have considered an 8", only thing that puts me off is the size and look of it. They're just ugly. I'll have to decide soon though what to do.
 30-01-2012, 08:13 PM
#80
Wahay!! I've lost my Virginity!!
Thread Starter
Join Date: Apr 2010
Location: Essex
Posts: 58
Likes: 0
Received 0 Likes
on
0 Posts
Cheers Foose an Dave/Stu!
Got a bit more done at the weekend.
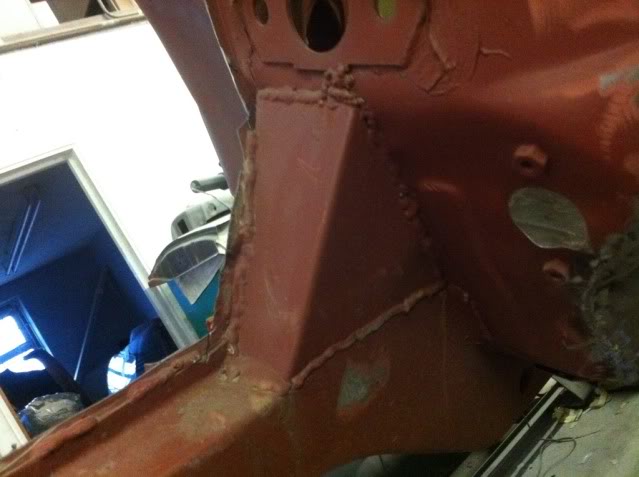
Off side Gusset welded in.
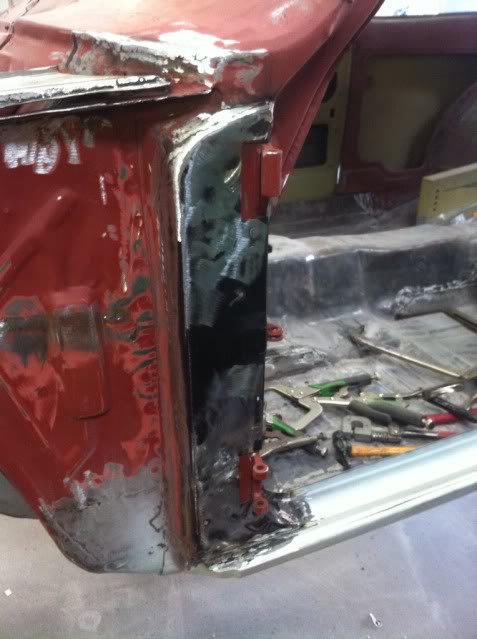
Near side A post done, the outer skin was cut out first of course.
Then started on making the rear bulkhead/fire wall. Will have to be made in 5-6 pieces, but we began making the sides. Used slightly thicker steel to prevent distortion when welding the main pieces together.
Both sides have been made and welded in now, I'll get the pictures up in the week.
Got a bit more done at the weekend.
Off side Gusset welded in.
Near side A post done, the outer skin was cut out first of course.
Then started on making the rear bulkhead/fire wall. Will have to be made in 5-6 pieces, but we began making the sides. Used slightly thicker steel to prevent distortion when welding the main pieces together.
Both sides have been made and welded in now, I'll get the pictures up in the week.

