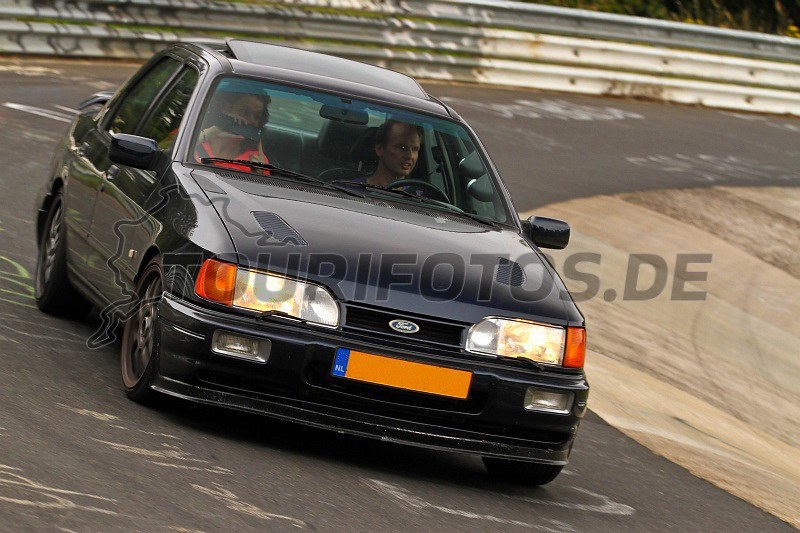
Dutch Sierra Cosworth 4x4 - home made power measurement


 02-07-2014, 03:19 PM
#43
Very nice Project! I remember this Saph was for sale very long. Good to know it has gone into good hands. 
Do you have any plans for the 6 degree beam? Would be interesting to see.
Do you have any plans for the 6 degree beam? Would be interesting to see.
Last edited by DaveCrack; 02-07-2014 at 03:20 PM.
02-07-2014, 03:44 PM
#44
Thanks mate!
What do you mean by plans for the 6 degree beam? If I would make them on order you mean? It already took me a lot of time to have this one made because the welder is a very busy guy, so I won't be making any on order.
What do you mean by plans for the 6 degree beam? If I would make them on order you mean? It already took me a lot of time to have this one made because the welder is a very busy guy, so I won't be making any on order.
03-07-2014, 06:59 PM
#46
It actually isn't that difficult. You need to check how far the joint needs to be moved forward. On the inside of the standard mounting there is a bent in the metal, the joint should be moved 13.8 cm forward from that bent. But it's a bit difficult to explain without pictures, which I unfortunately don't have anymore. You should also make sure the joint isn't placed too high as it will hit the floor of the car.
Before cutting up the beam and arms they should be placed in a jig in the normal driving position to make sure the geometry is correct after welding everthing back together.
Before cutting up the beam and arms they should be placed in a jig in the normal driving position to make sure the geometry is correct after welding everthing back together.
09-08-2014, 07:36 AM
#47
Another problem on the Nurburgring was that the brakes vibrated insanely. Probably that was down to them overheating at some point. It didn't seem like the discs were warped. But apparently discs almost never warp and the vibration is due to brake pad deposits on the brake disc, giving the disc an uneven thickness causing the vibrations.
Since the Cosworth brakes aren't that good anyway (although at the time the press thought they were quite good) and the car has more power than standard I thought it would be a good idea to also improve the brakes. Unfortunately that isn't easy with a 4x4 because of the low disc offset, there is very small room between the disc surface and the inside of the wheel spokes. Because of that it's almost impossible to fit multiple piston calipers, unless your wheels give a lot of clearance. But with my wheels that wasn't the case.
So I went looking for other options I found that Reyland does a 308 mm kit with the standard calipers. The kit was specially made to fit inside the 16" Escort Cosworth wheels. Since I'm using 17" wheels I ideally wanted to go a bit bigger. So I sent an email to Martin whether they could do a similair kit, but with bigger discs, and this was very well possible.
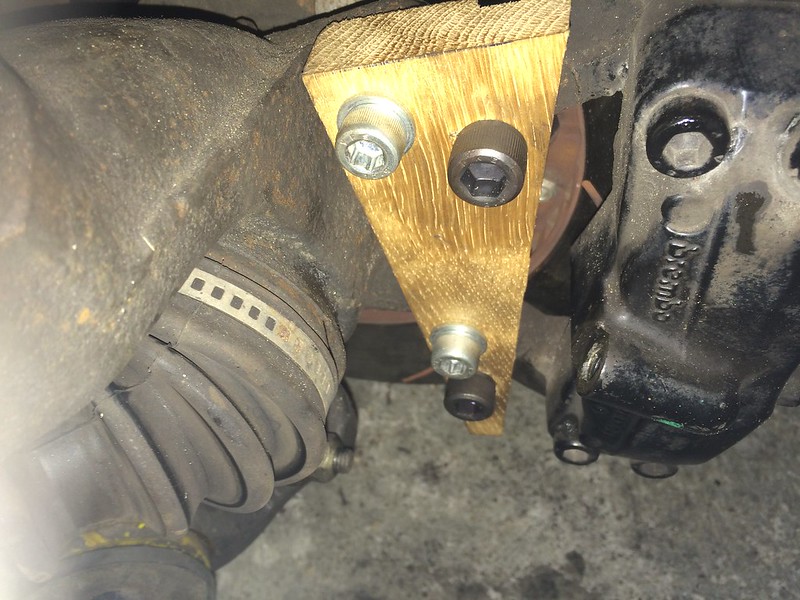
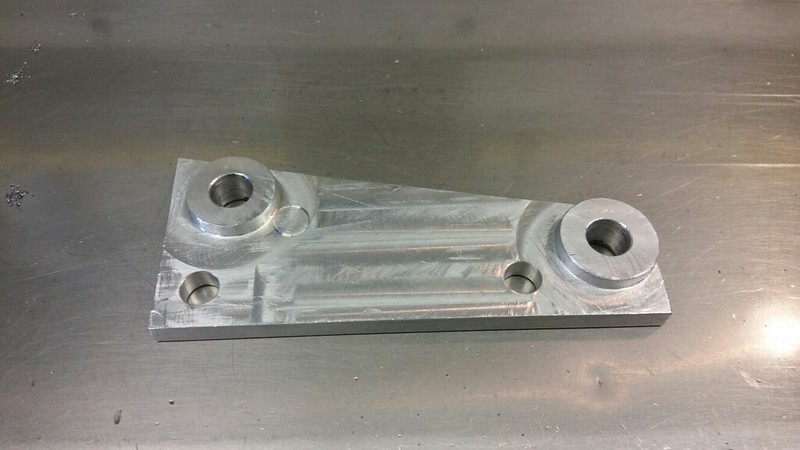
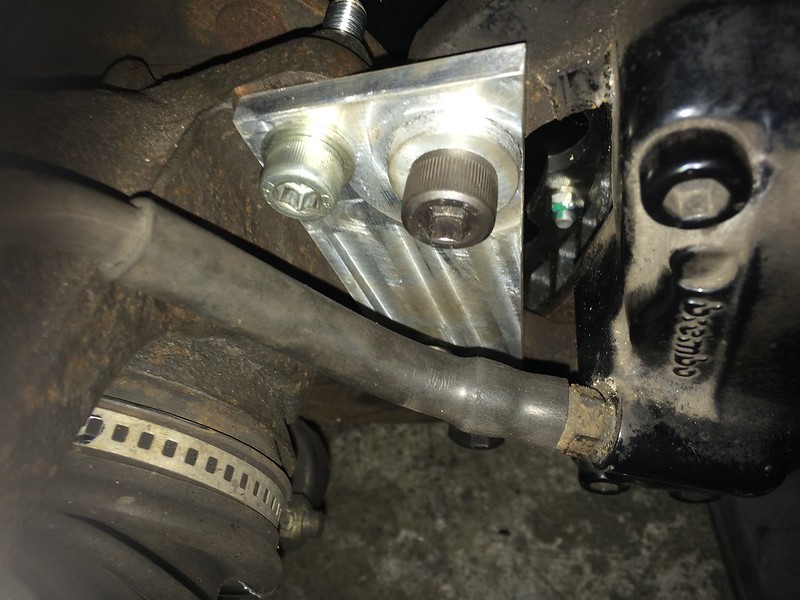
After a while Martin sent me a bracket to relocate the caliper to match a 330 mm disc. The bracket was to test whether the 330 mm kit would actually fit.
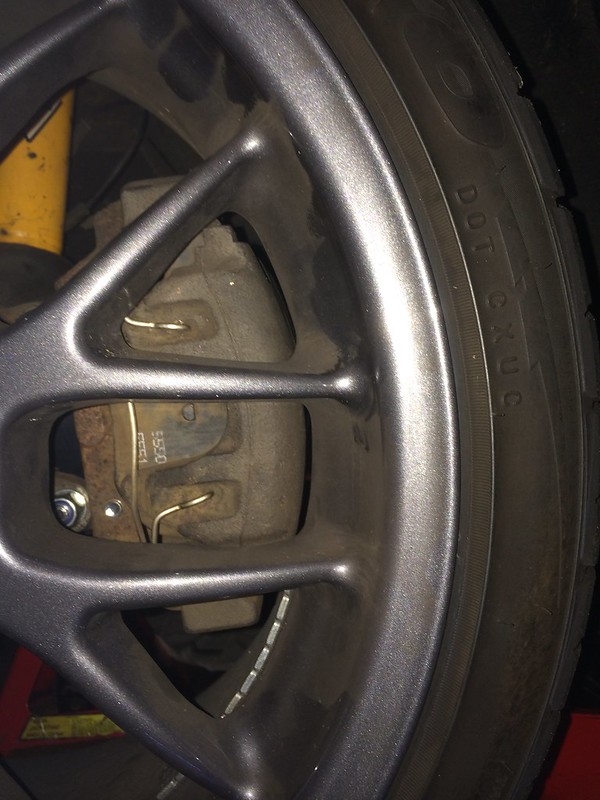
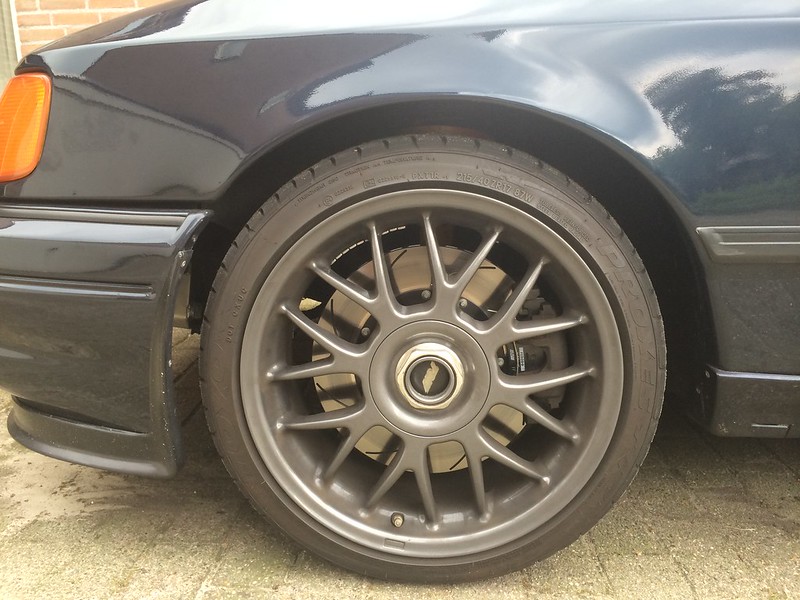
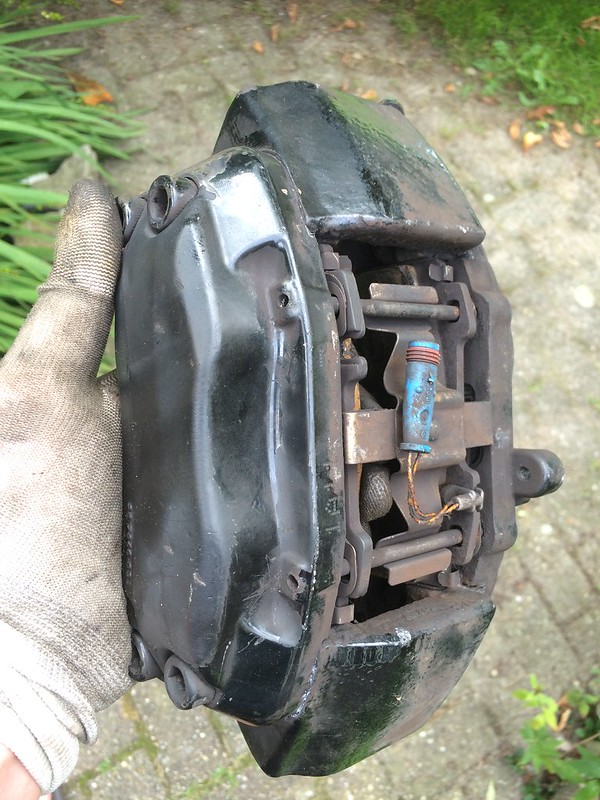
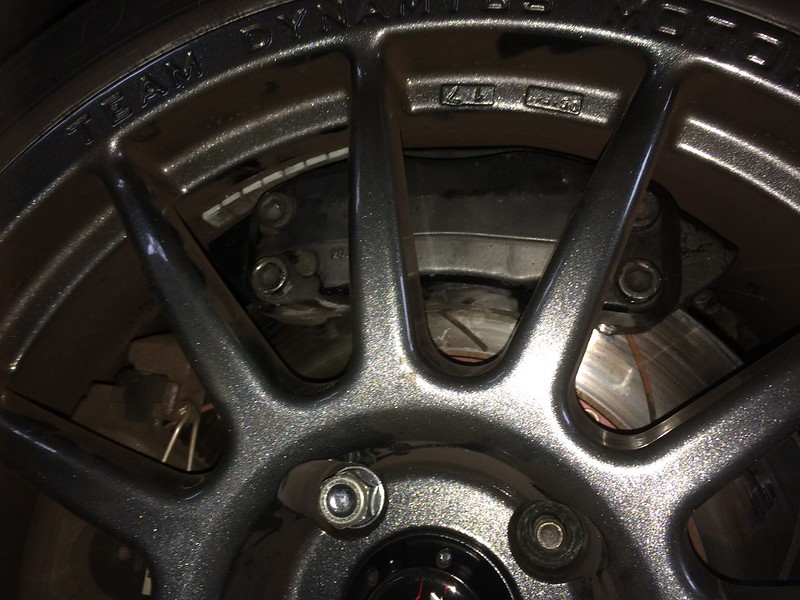
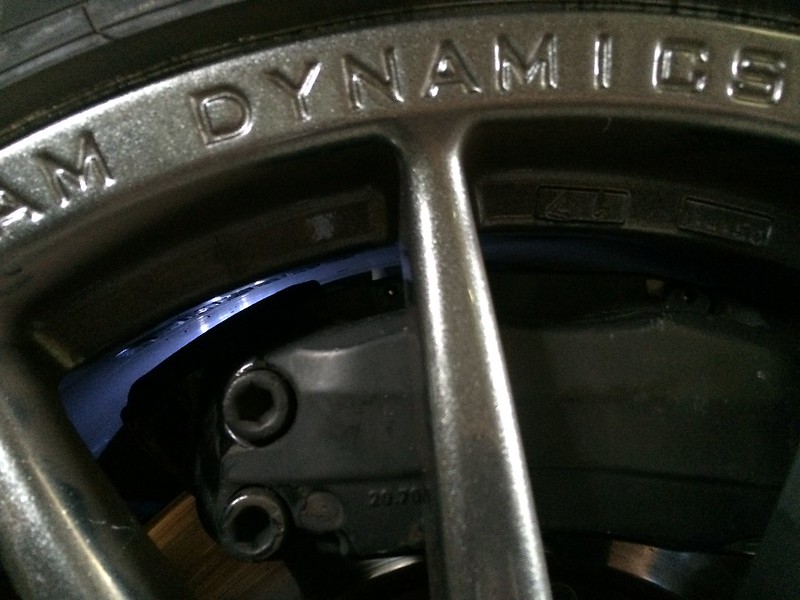
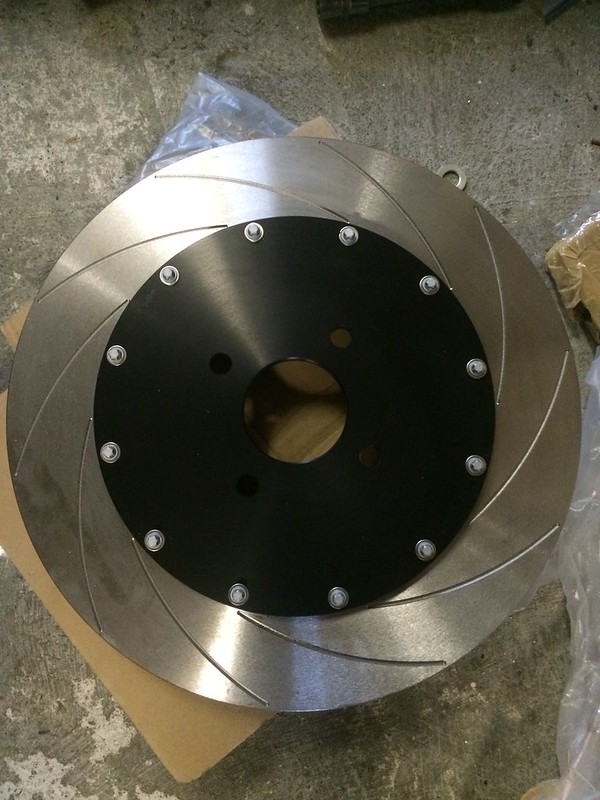
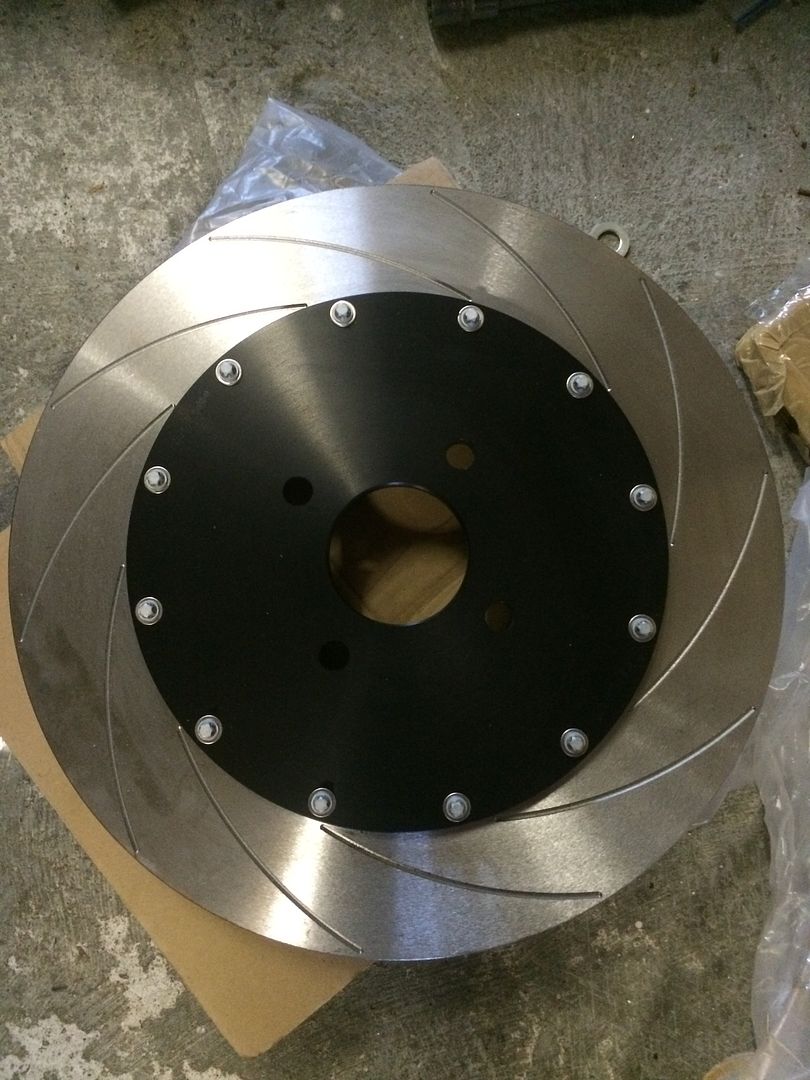
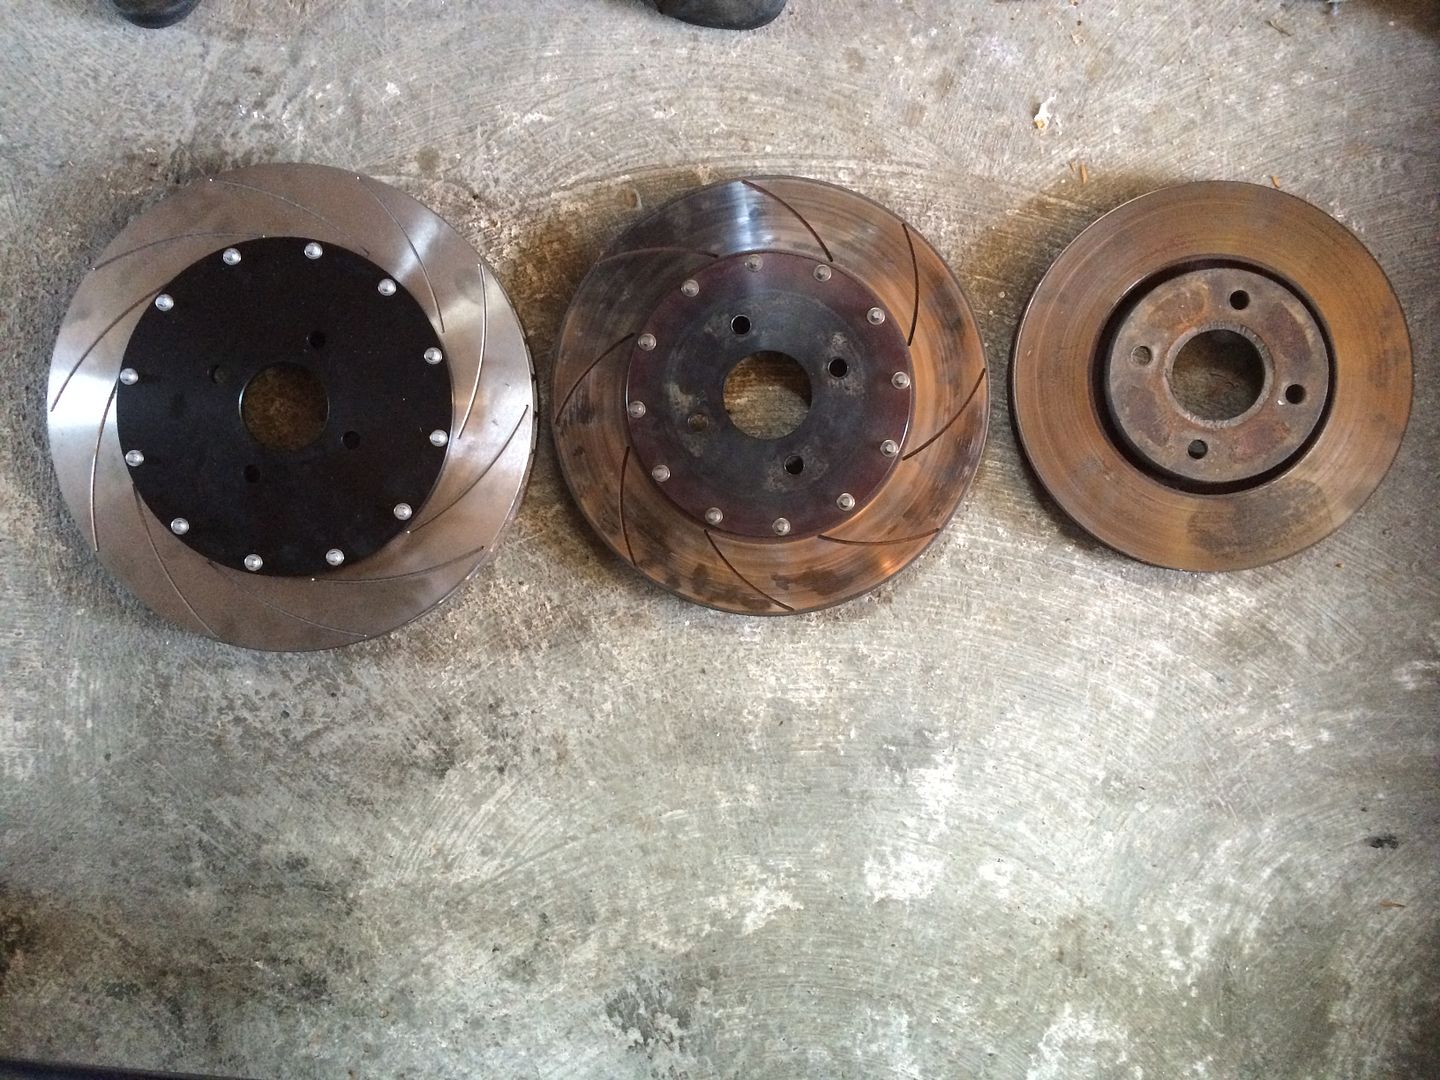
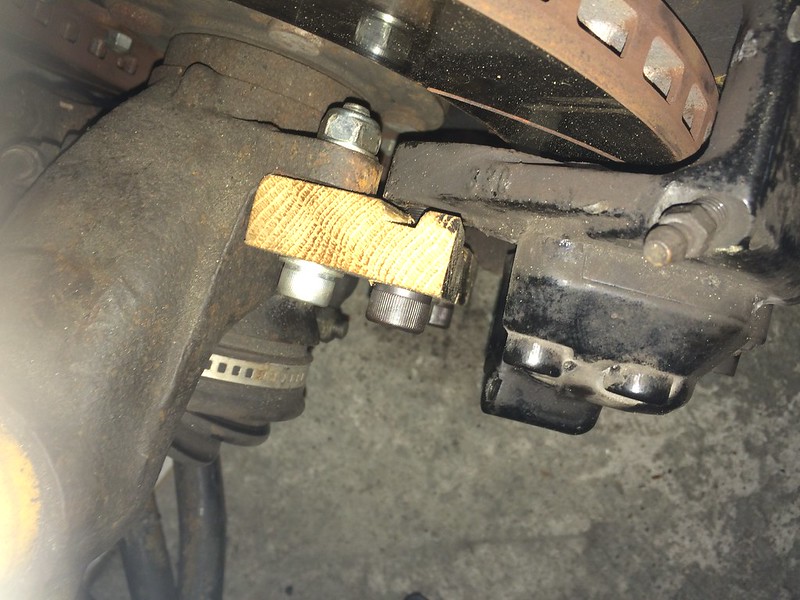
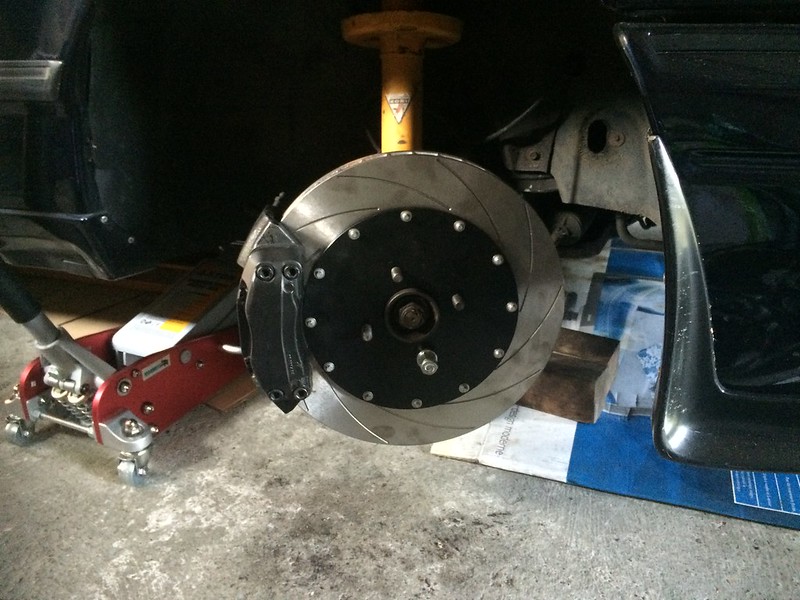
The clearance to the wheels was just OK, but it was so tight that there was no room for the wheel balancing weights. So in the end I opted for a 320 mm kit to solve the issue. A comparison between the old and new disc.
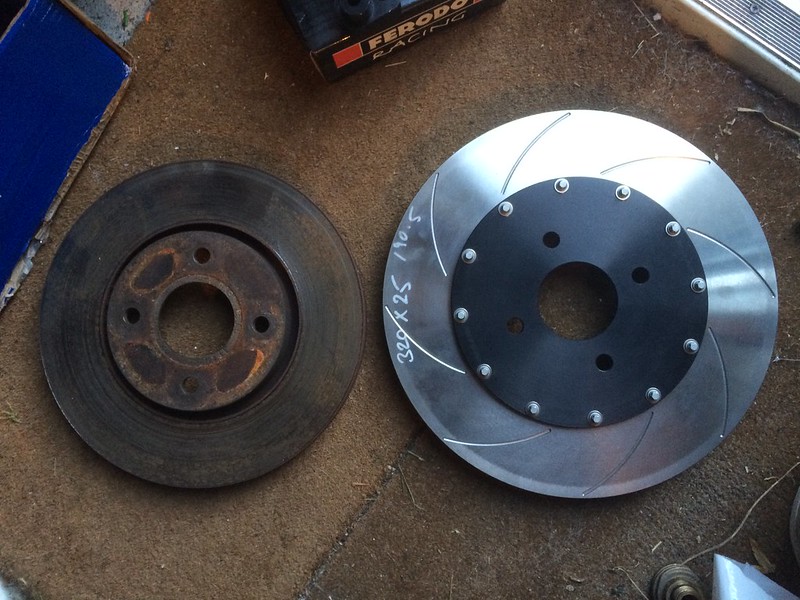
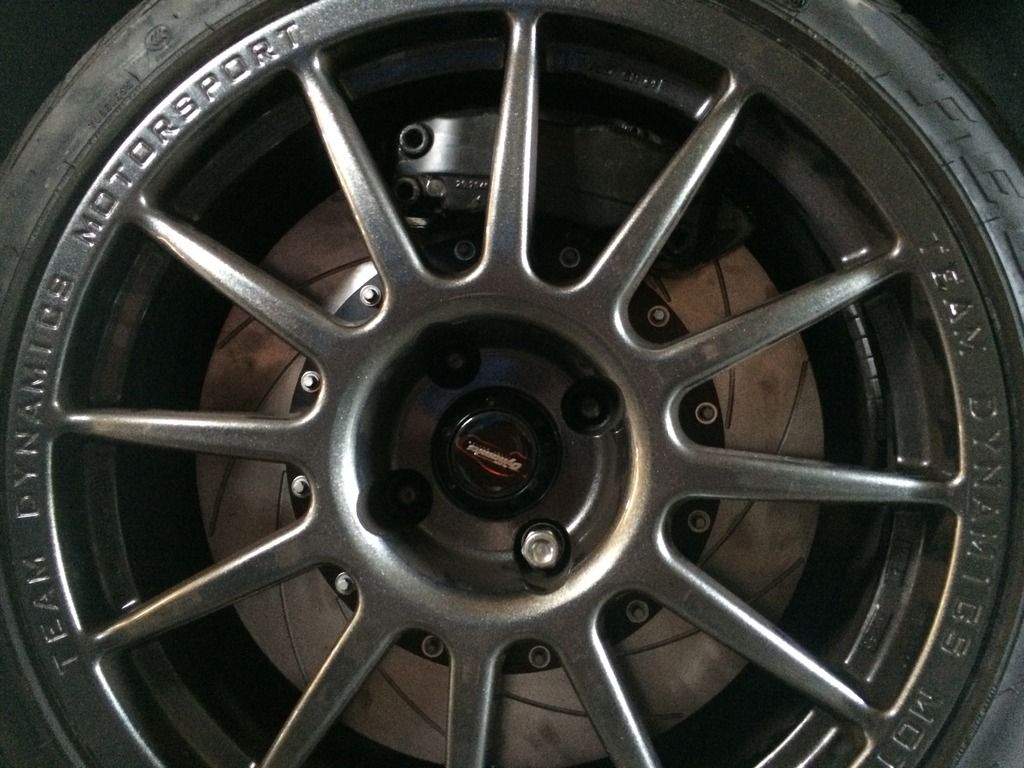
And after that I fitted the kit, together with Ferodo DS2500 pads. Since the radius of the discs was a lot bigger I needed to file off quite a lot of the caliper carrier at the edges, but in the end the kit fitted fine.
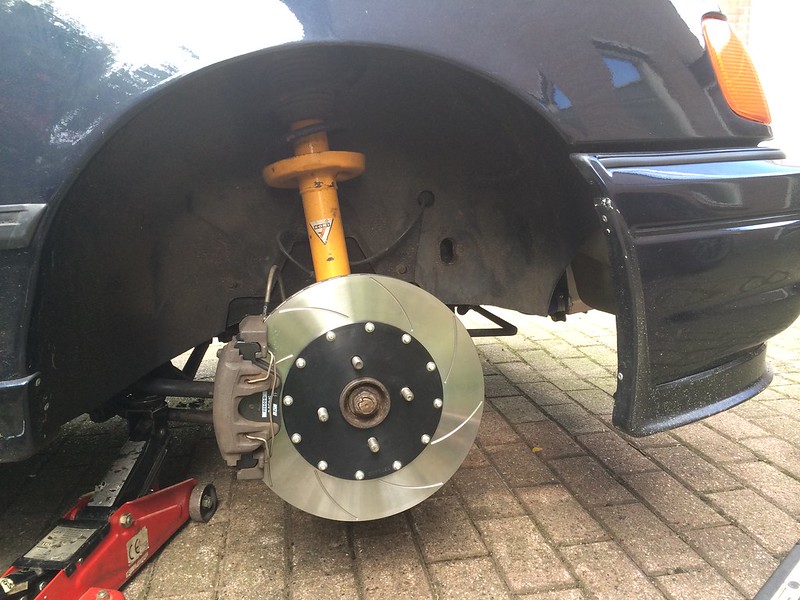
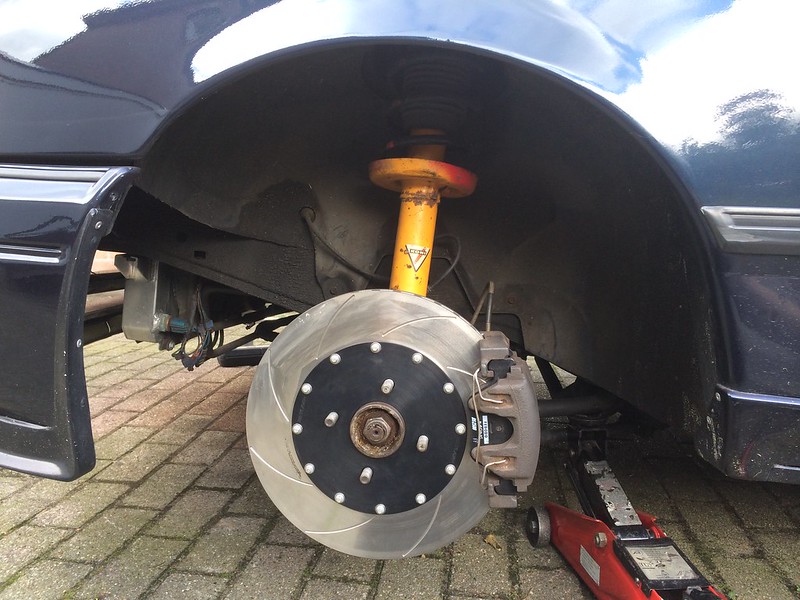
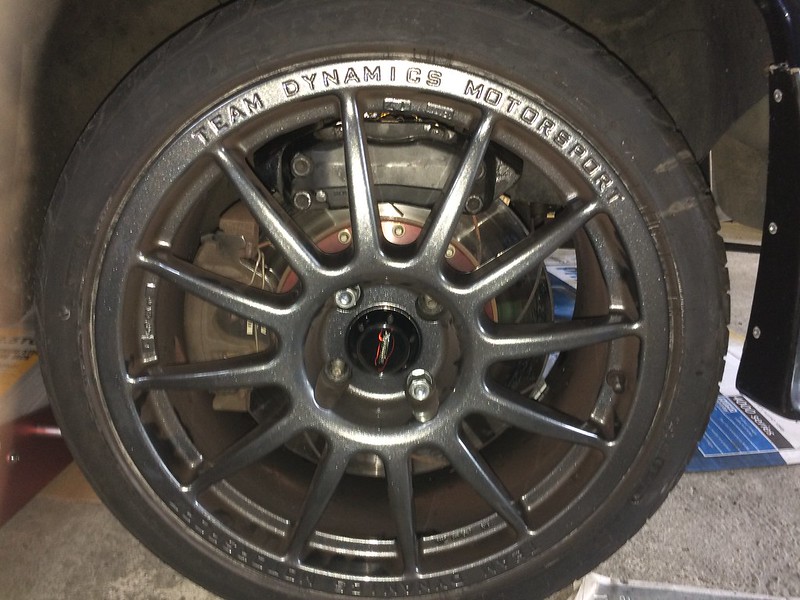
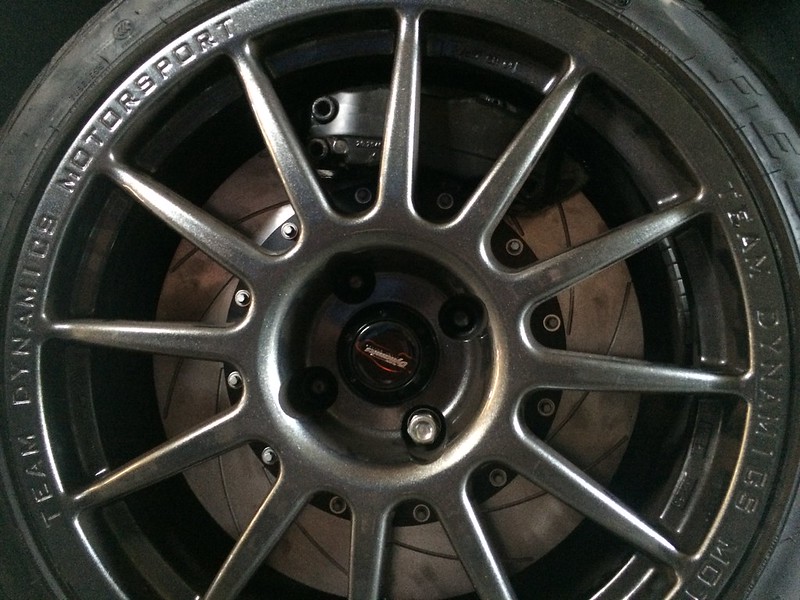
And the wheel back on.
Since the Cosworth brakes aren't that good anyway (although at the time the press thought they were quite good) and the car has more power than standard I thought it would be a good idea to also improve the brakes. Unfortunately that isn't easy with a 4x4 because of the low disc offset, there is very small room between the disc surface and the inside of the wheel spokes. Because of that it's almost impossible to fit multiple piston calipers, unless your wheels give a lot of clearance. But with my wheels that wasn't the case.
So I went looking for other options I found that Reyland does a 308 mm kit with the standard calipers. The kit was specially made to fit inside the 16" Escort Cosworth wheels. Since I'm using 17" wheels I ideally wanted to go a bit bigger. So I sent an email to Martin whether they could do a similair kit, but with bigger discs, and this was very well possible.
After a while Martin sent me a bracket to relocate the caliper to match a 330 mm disc. The bracket was to test whether the 330 mm kit would actually fit.
The clearance to the wheels was just OK, but it was so tight that there was no room for the wheel balancing weights.
And after that I fitted the kit, together with Ferodo DS2500 pads. Since the radius of the discs was a lot bigger I needed to file off quite a lot of the caliper carrier at the edges, but in the end the kit fitted fine.
And the wheel back on.
Last edited by Marc sierra; 27-07-2017 at 02:10 PM.
 13-08-2014, 09:42 PM
#50
PassionFord Post Whore!!
Good work there mate.
Thinking of doing the brakes on mine.
Looking at 330 front and 300 rear with standard calipers.
Thinking of doing the brakes on mine.
Looking at 330 front and 300 rear with standard calipers.
15-08-2014, 02:54 PM
#52
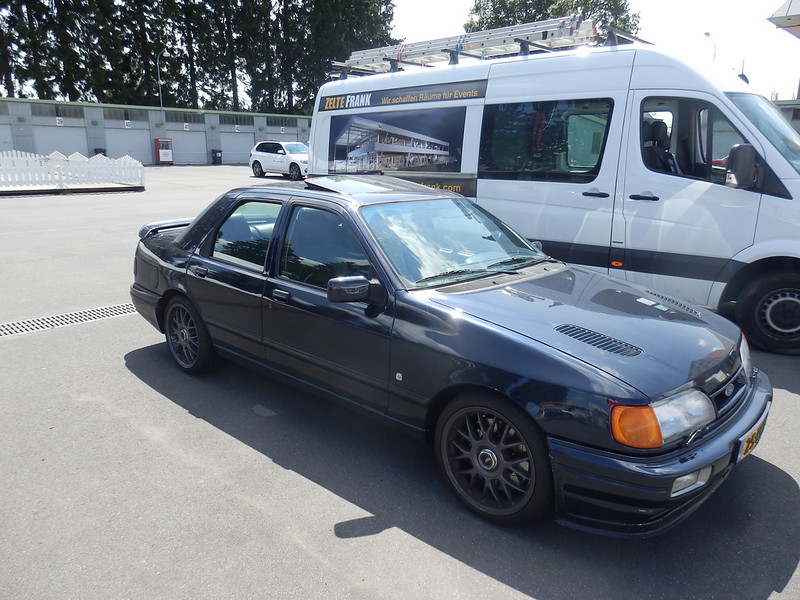
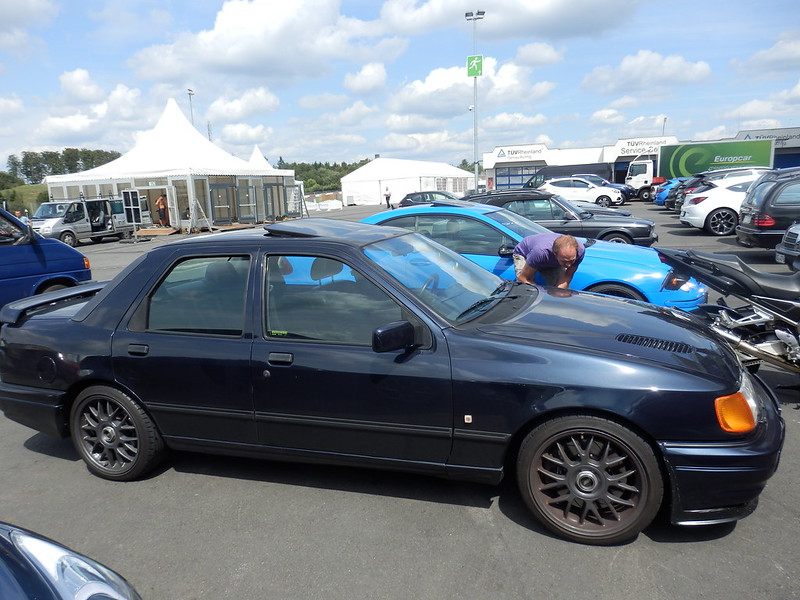
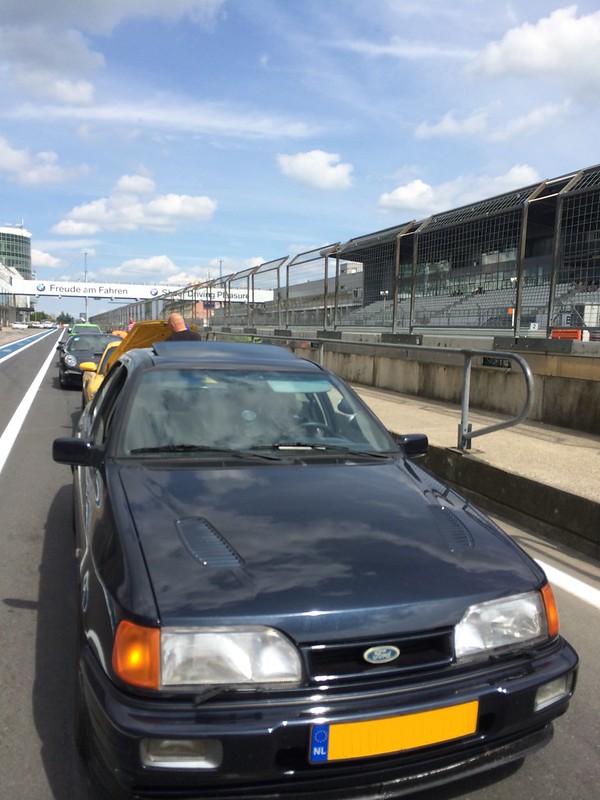
Last week I went to the Nurburging, on Wednesday both the GP track and the Nordschleife were open. At the beginning of the afternoon we first went to the GP track. When I parked the car at the parking lot I noticed a lot of brown dust on the right front wheel. I also checked the left front wheel, but there was not a lot of dust, and neither was it brown. So this worried me a bit.
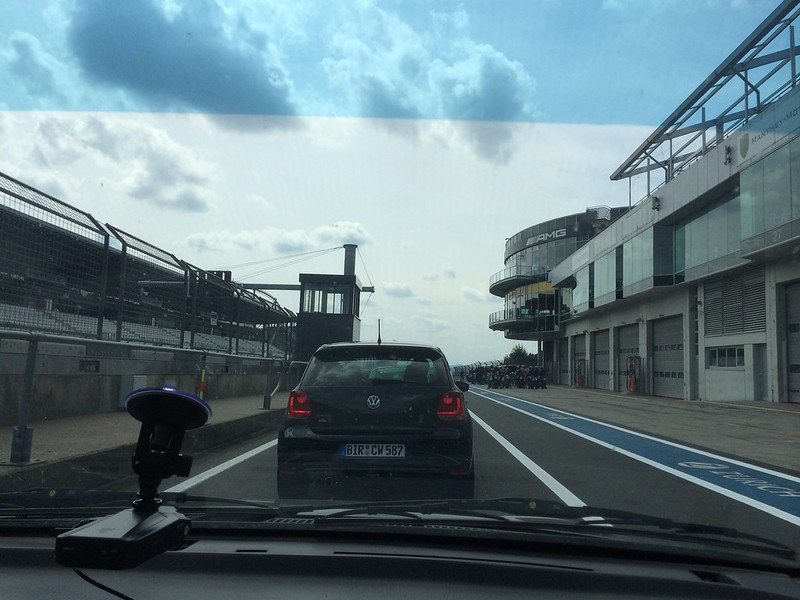
Then we got a card for 4 entries to either GP circuit or Nordschleife.
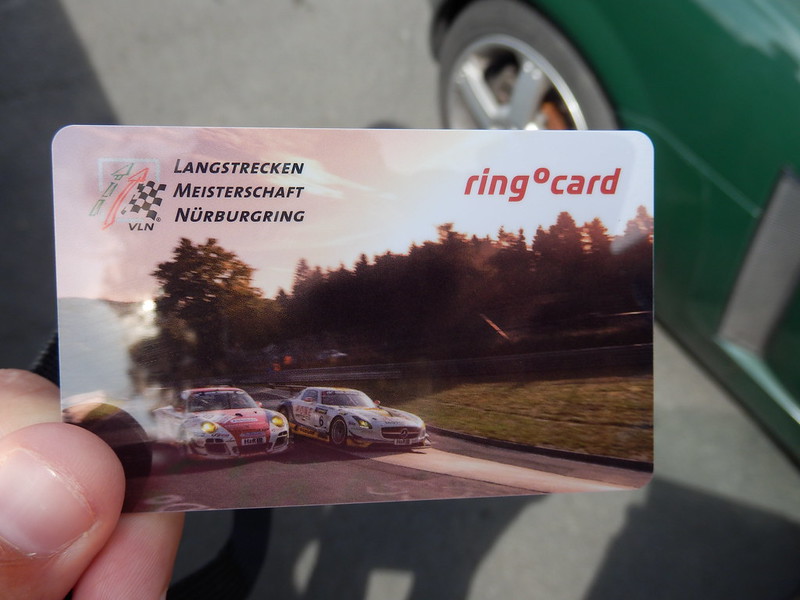
Ready to go on the GP track.
Once on the track I noticed the brown dust on the right front wheel wasn't the only strange thing. When braking hard the car pulled strongly to the left. So I decided to take it easy, especially with braking. After a while the brakes seemed to get better and after about 2 laps the car braked normally.
A movie my girlfriend made from the passenger seat.
[youtube]vc9YOOqK4eA[/youtube]
After that we went off the track to fill up the tank and I also set the odometer to 0. Then back to the circuit and waiting to go back out on the track.

And again the first 2 laps the car pulled to the left while braking. Also again it went away after about 2 laps. Probably the right side braked better when the pads/discs were hotter.
Sierra Cosworth 4x4 on Nurburgring GP track 06-08-14 session 2 - YouTube
Whent back to the let the car cool off a bit and then back to the pits for another run.
And again the same with the brakes. Unfortunately I don't have a movie from the last run, but I came across another youtube movie where I was visible (at 7.20).
Nurburgring F1 Boxster - YouTube
After that we went to the Nordschleife and did a lap there. Since I don't know the track at all and the car again had problems with the brakes I took it very easy. The result was that the brakes never really heated up much, so it was a bit worrying if you suddenly need to brake hard. In the end I would rather have spend the last run on the GP track than on the Nordschleife.
And a movie from the Nordschleife:
Sierra Cosworth 4x4 Nordschleife 06-08-14 - YouTube
After that we went for dinner and then filled up the tank again for the trip home. It needed 23 liters while the odometer only read 93 km, so 11.5 mpg on average. Ah whatever, as long as you have fun.
The changes I made to the car worked quite good. Last year I slid from side to side on the leather seats, but this year it was no problem at all with the cloth center part of the seats.
Also the rear beam was an improvement. The car had a lot less understeer than last year. Last year the car really understeered when turning into the corner at the end of the straight. This year it turned in perfectly without any understeer. Also coming onto the straight after the second corner it handled really nicely. Full throttle in second gear already half way through the corner, it started to slide over 4 wheels slightly, I love the four wheel drive system! The brakes were also an improvement, last year the whole car vibrated while braking and now there was no vibration at all and the brakes (when working OK) were really good. But I still need to find what the problem is when the brakes are cold...
Then we got a card for 4 entries to either GP circuit or Nordschleife.
Ready to go on the GP track.
Once on the track I noticed the brown dust on the right front wheel wasn't the only strange thing. When braking hard the car pulled strongly to the left. So I decided to take it easy, especially with braking. After a while the brakes seemed to get better and after about 2 laps the car braked normally.
A movie my girlfriend made from the passenger seat.
[youtube]vc9YOOqK4eA[/youtube]
After that we went off the track to fill up the tank and I also set the odometer to 0. Then back to the circuit and waiting to go back out on the track.
And again the first 2 laps the car pulled to the left while braking. Also again it went away after about 2 laps. Probably the right side braked better when the pads/discs were hotter.
Sierra Cosworth 4x4 on Nurburgring GP track 06-08-14 session 2 - YouTube
Whent back to the let the car cool off a bit and then back to the pits for another run.
And again the same with the brakes. Unfortunately I don't have a movie from the last run, but I came across another youtube movie where I was visible (at 7.20).
Nurburgring F1 Boxster - YouTube
After that we went to the Nordschleife and did a lap there. Since I don't know the track at all and the car again had problems with the brakes I took it very easy. The result was that the brakes never really heated up much, so it was a bit worrying if you suddenly need to brake hard. In the end I would rather have spend the last run on the GP track than on the Nordschleife.
And a movie from the Nordschleife:
Sierra Cosworth 4x4 Nordschleife 06-08-14 - YouTube
After that we went for dinner and then filled up the tank again for the trip home. It needed 23 liters while the odometer only read 93 km, so 11.5 mpg on average. Ah whatever, as long as you have fun.
The changes I made to the car worked quite good. Last year I slid from side to side on the leather seats, but this year it was no problem at all with the cloth center part of the seats.
Also the rear beam was an improvement. The car had a lot less understeer than last year. Last year the car really understeered when turning into the corner at the end of the straight. This year it turned in perfectly without any understeer.
Last edited by Marc sierra; 27-07-2017 at 02:17 PM.
05-06-2015, 08:35 AM
#53
It turned out that the front right wheel bearing had some play. After tightening the main nut it was all good. Because of the play the disc ground a bit of metal of the caliper carrier. The metal dust oxidized very quickly, giving the brown dust on the wheel. I guess the dust was also causing the poor braking on the right. The brakes are now perfect. Maybe not as good as an AP set, but definately a huge improvement over the standard brakes.
15-07-2015, 07:19 PM
#54
A few years ago I already found a set of new Siemens 55s.
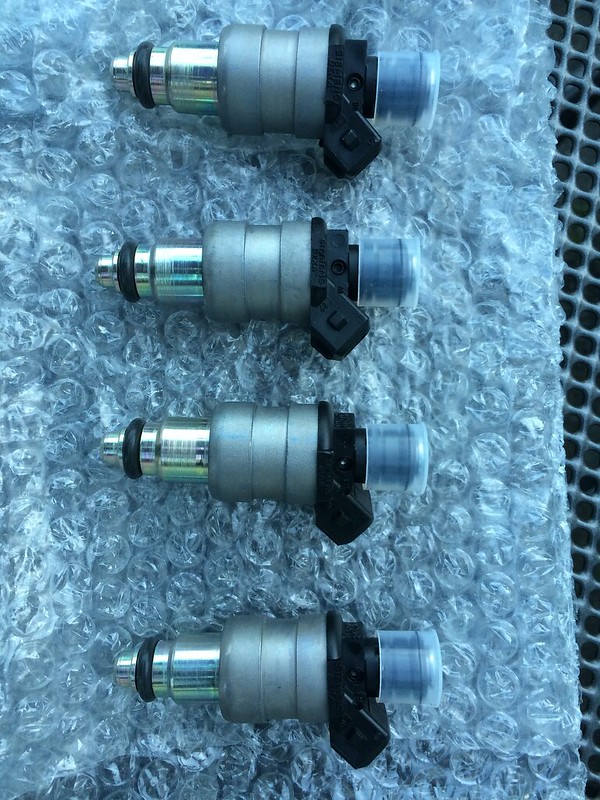
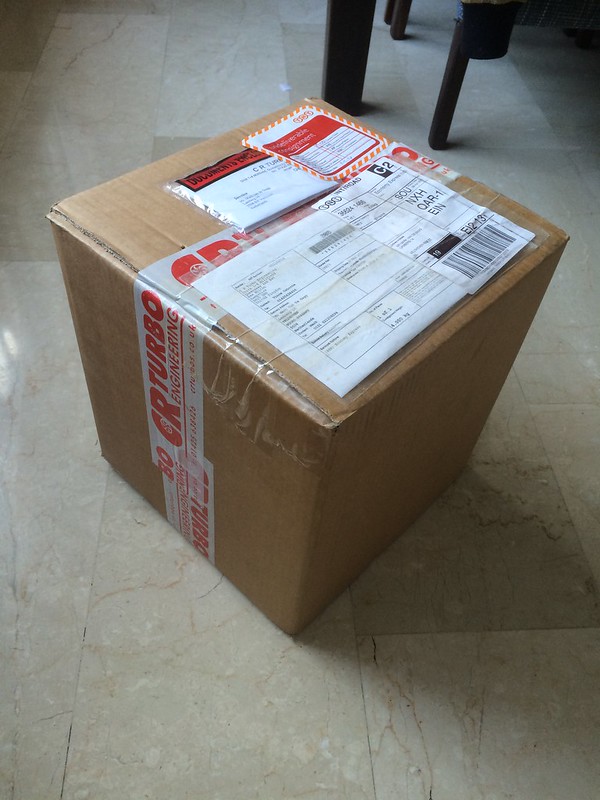
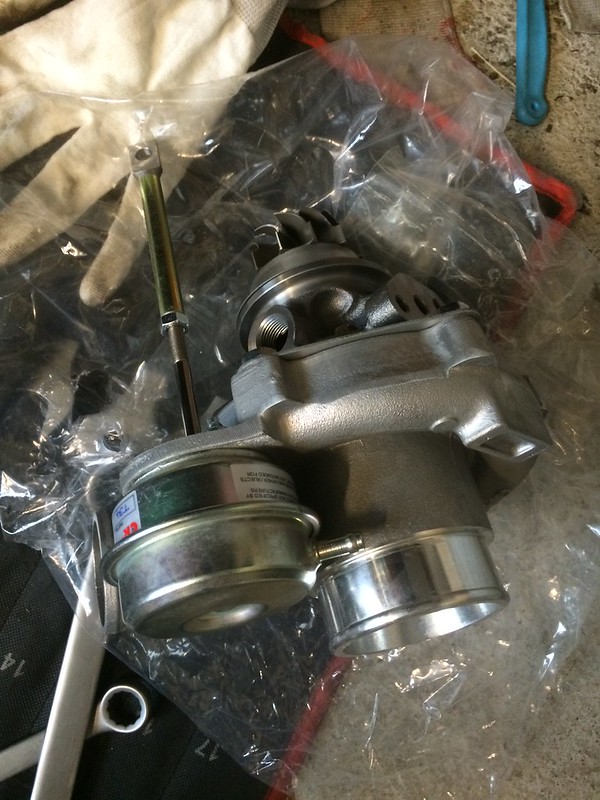
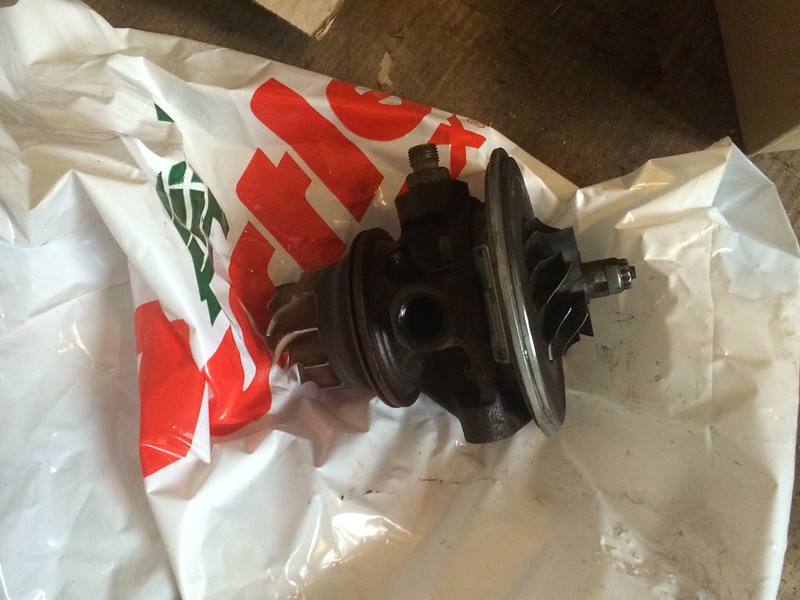
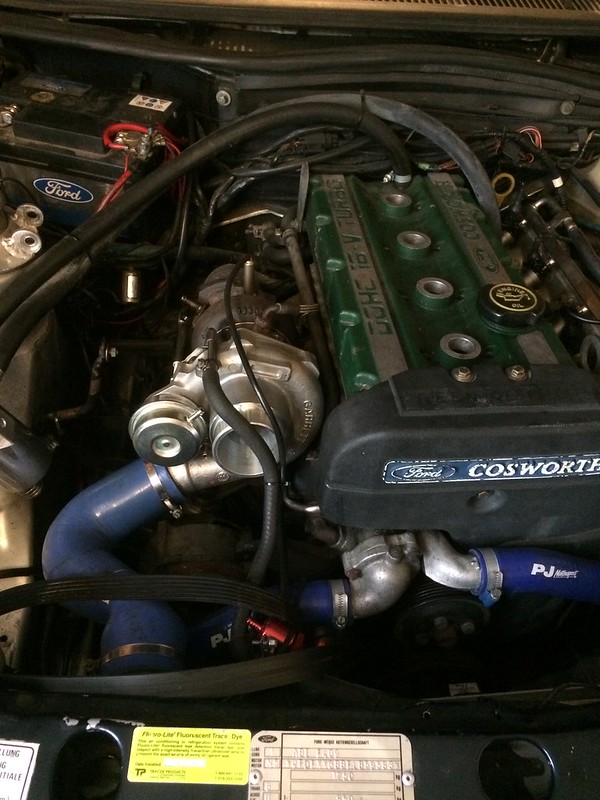
After having them on the shelf for a while I also wanted to make use of them. So I ordered a package from CR Turbo's.
A new T34 with 360 degree bearing and uprated oilseals. I also ordered a -34 actuator with it.
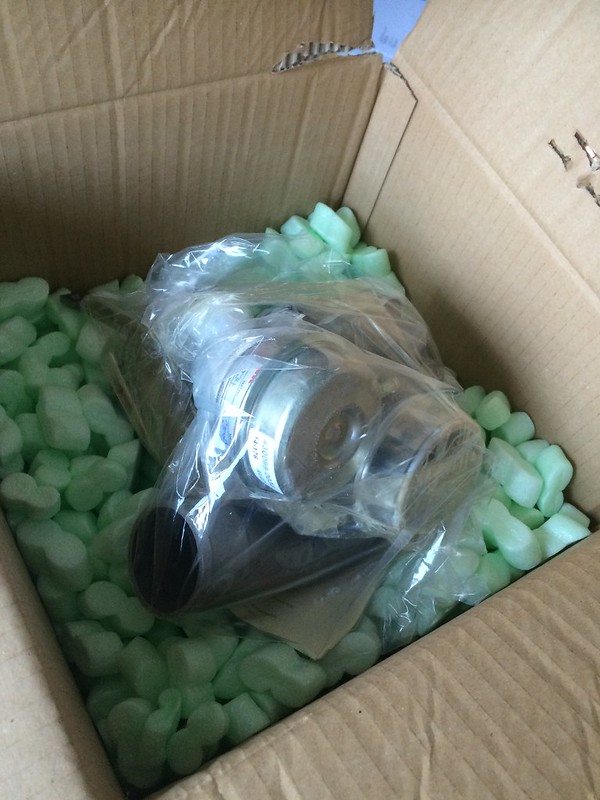
The idea was to use the .48 turbine housing from the standard T3, so I ordered the turbo without turbine housing.
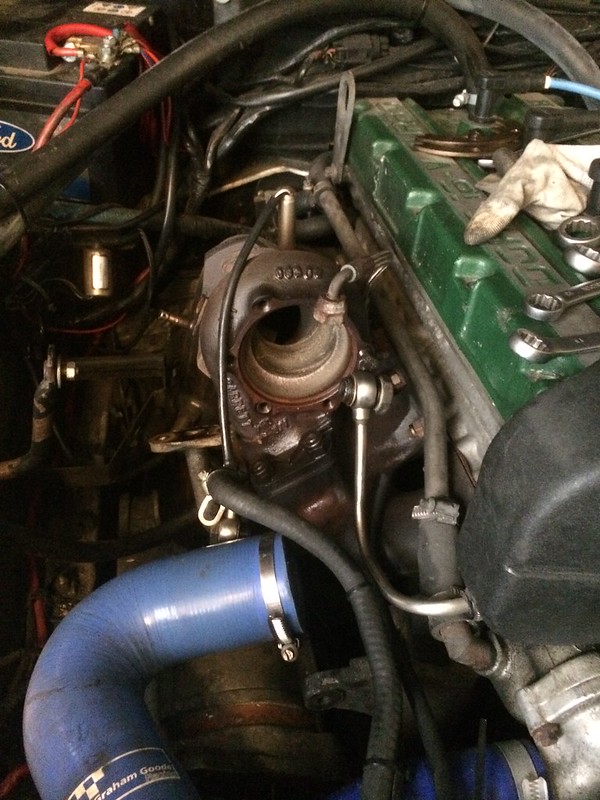
I then stardard to remove the old turbo. I didn't expect it to be such a pain though. Some bolts that hold the turbo core to the turbine housing are very difficult to reach. But eventually the old turbo came off.
Empty turbine housing on the engine.
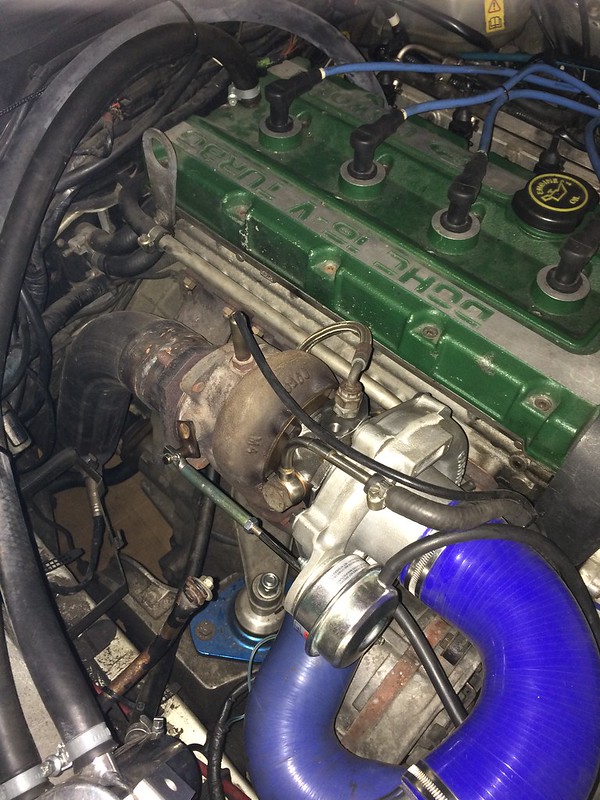
In order to fit the new turbo I removed the compressor housing, as otherwise I didn't see a way to tighten the bottom bolts of the turbine housing and oil return pipe.
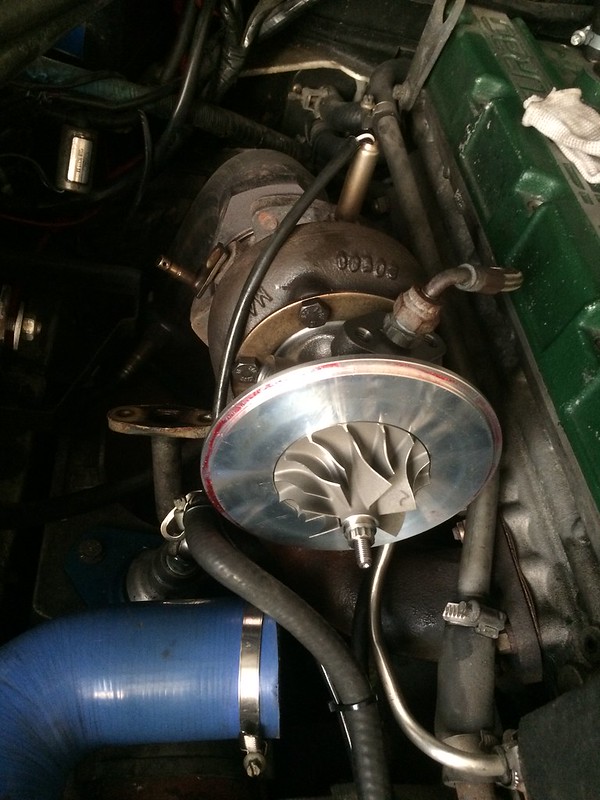
After that the compressor housing could be fitted again.
Mounted the new actuator with the correct pretension.
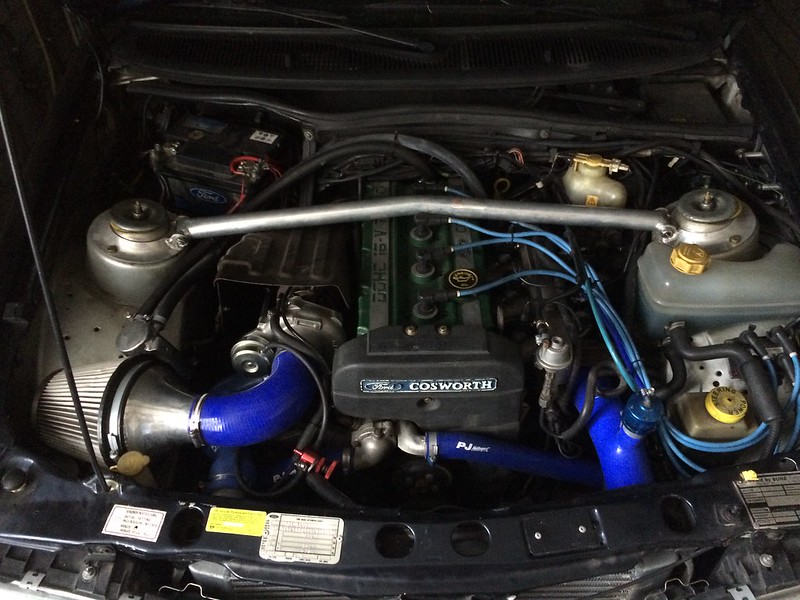
After the turbo was fitted I also put the new injectors in. When that was done the heat shield and strutbrace were put back on.
Of course I also needed a different chip to go with the new turbo and injectors. So I had my old MSD chip upgraded to the new spec.
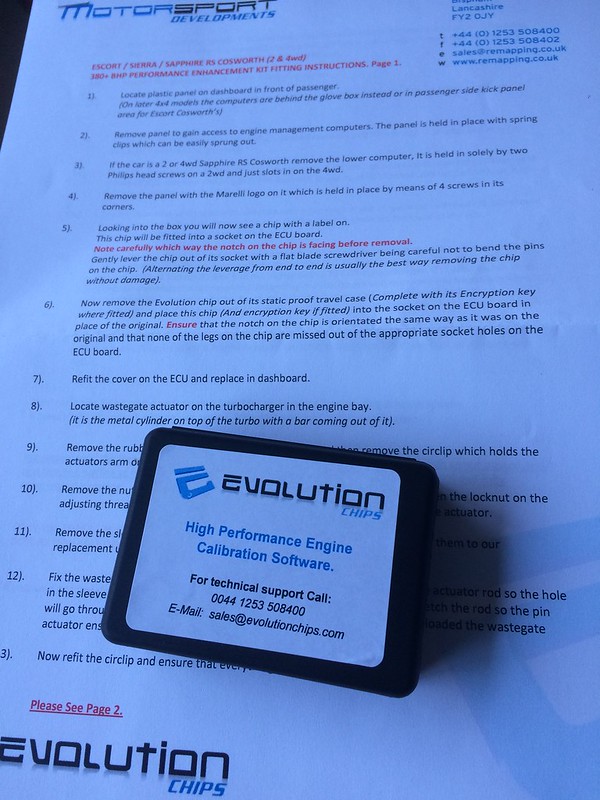
The actual chip.
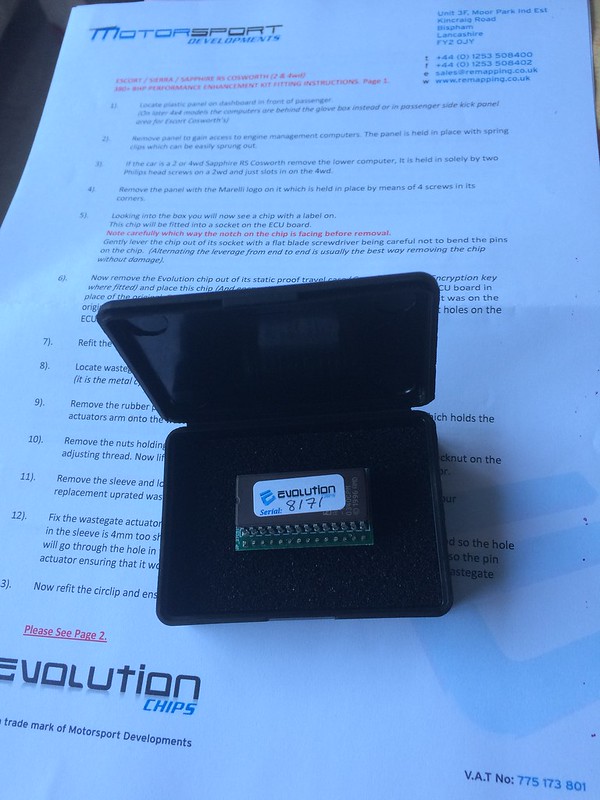
And fitted it to the ECU.

Just need to set the boost pressure and check the fueling.
After having them on the shelf for a while I also wanted to make use of them. So I ordered a package from CR Turbo's.
A new T34 with 360 degree bearing and uprated oilseals. I also ordered a -34 actuator with it.
The idea was to use the .48 turbine housing from the standard T3, so I ordered the turbo without turbine housing.
I then stardard to remove the old turbo. I didn't expect it to be such a pain though. Some bolts that hold the turbo core to the turbine housing are very difficult to reach. But eventually the old turbo came off.
Empty turbine housing on the engine.
In order to fit the new turbo I removed the compressor housing, as otherwise I didn't see a way to tighten the bottom bolts of the turbine housing and oil return pipe.
After that the compressor housing could be fitted again.
Mounted the new actuator with the correct pretension.
After the turbo was fitted I also put the new injectors in. When that was done the heat shield and strutbrace were put back on.
Of course I also needed a different chip to go with the new turbo and injectors. So I had my old MSD chip upgraded to the new spec.
The actual chip.
And fitted it to the ECU.
Just need to set the boost pressure and check the fueling.
Last edited by Marc sierra; 27-07-2017 at 02:24 PM.
15-07-2015, 08:06 PM
#56
Some bikes weren't going that fast, but most of them are impossible to keep up with. They make you feel like you are standing still on the straights. I saw a video of a bike doing about 270 km/h on the straight, while I did about 180/190 km/h to give you an idea.
17-07-2015, 02:47 PM
#57
The new setup is running well. At first the computer had to adjust to the new injectors, but after a while it was running closed loop perfectly with an AFR of 14.7 on my wideband lambda. After that I started increasing the boost pressure and checking the AFR, which also good. Boost pressure is now set to about 1.5 bar, at which I got an AFR of about 11.3.
So with the new setup working nicely, where can you enjoy it more than on the track. So Sunday I went to the Nurburgring GP track together with a friend. Last year I already bought a mount for my phone so I could make videos without someone holding the phone. The fun thing is that I now also have an app that measures your times, speeds and G-forces through corners, which you can use later to see where you could improve.
Video of the first session:
Video of the second session:
During the second session the coolant temperature gauge suddenly went through near the red. So I backed off and went off the track as soon as possible. When checking under the bonnet I couldn't find any strange things and I also noticed that the needle was now even past the red on the temperature gauge. After the car had cooled down for an hour I checked it again and the needle was still all the way at the top. So in the end it was only the sensor that died, but still scary when you suddenly seeing it go into the red while on track.
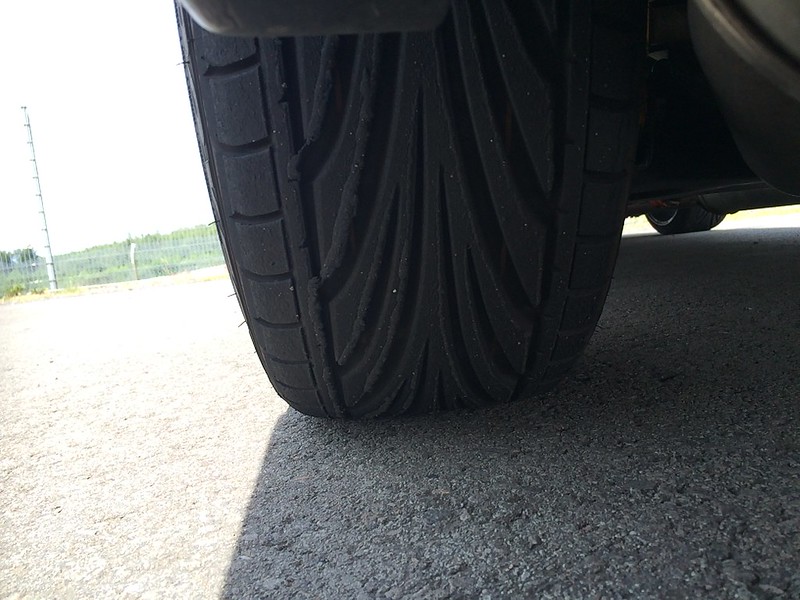
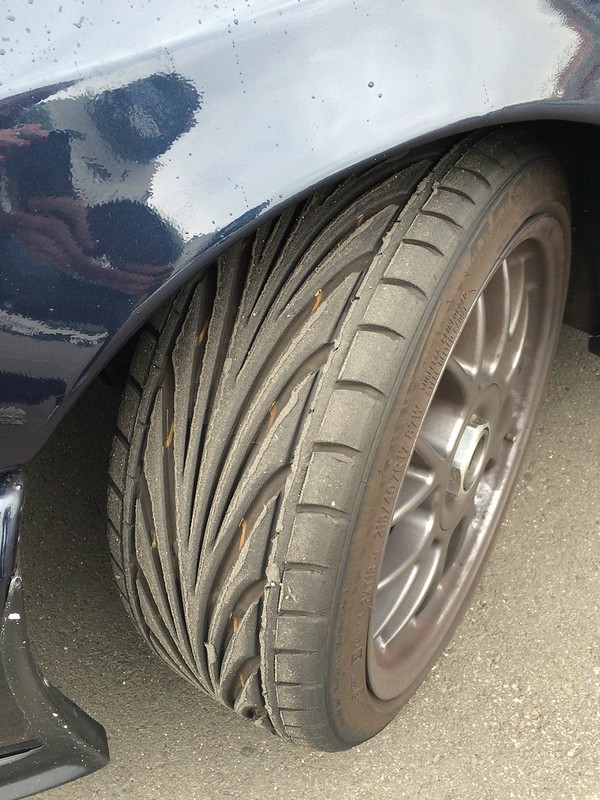
After a few laps on the track the tyres do look a bit less good...
So with the new setup working nicely, where can you enjoy it more than on the track.
Video of the first session:
Video of the second session:
During the second session the coolant temperature gauge suddenly went through near the red. So I backed off and went off the track as soon as possible. When checking under the bonnet I couldn't find any strange things and I also noticed that the needle was now even past the red on the temperature gauge. After the car had cooled down for an hour I checked it again and the needle was still all the way at the top. So in the end it was only the sensor that died, but still scary when you suddenly seeing it go into the red while on track.
After a few laps on the track the tyres do look a bit less good...
Last edited by Marc sierra; 27-07-2017 at 02:31 PM.
27-07-2015, 11:03 AM
#58
Just found out all 4 Konis were at the softest setting. Not that great when going on track. Have now changed them all to the hardest setting. I am a bit curious how it will feel now because it was quite soft last time, especially when turning in and under braking.
17-05-2016, 09:23 AM
#60
After the winter it was time to do something to the Cosworth again. It was already 5 years that the timing belt was changed, so I again put a new one on. At the same time I did an oil and oil filter change.
I also have a new temperature sender fitted, which was very kindly supplied by Cossynut2. The one I put in last year gave a too high temperature reading.
I also fitted a new MSD fan loom. Before I removed the old wiring I first tested it. It turned out one fan wasn't even running and after switching if on/off a few times the other also stopped working. But with the new loom both are working perfectly again.
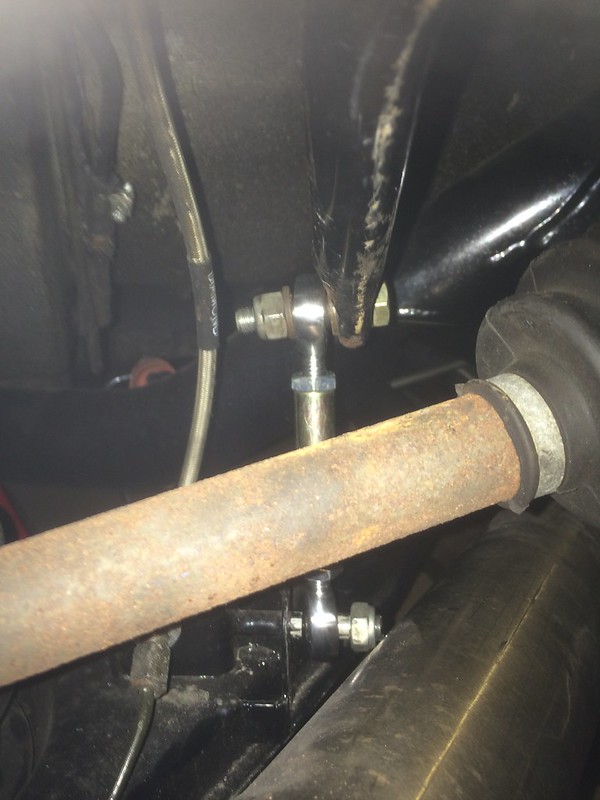
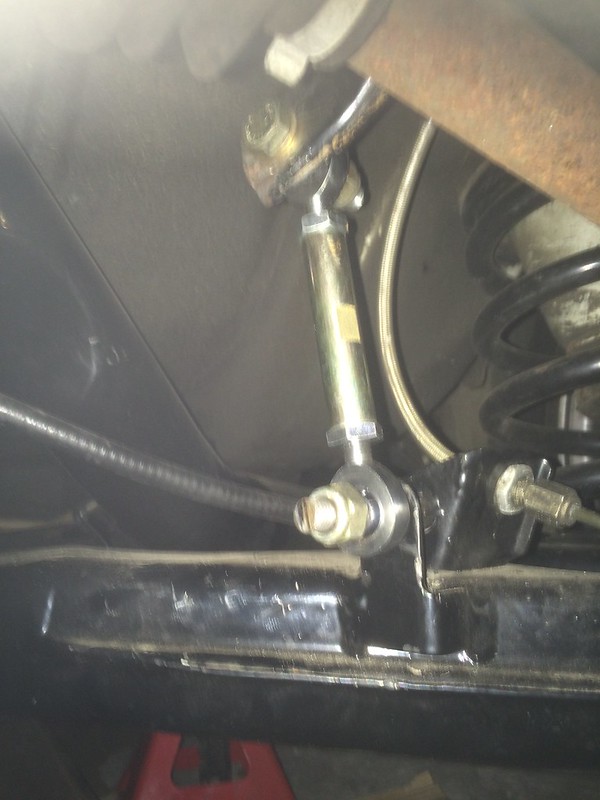
And lastly I fitted a 21 mm arb from a Scorpio 24v to the rear instead of the standard 18 mm one, making it about 85% stiffer. I also replaced the droplinks with rose jointed ones to make it even more stiff.
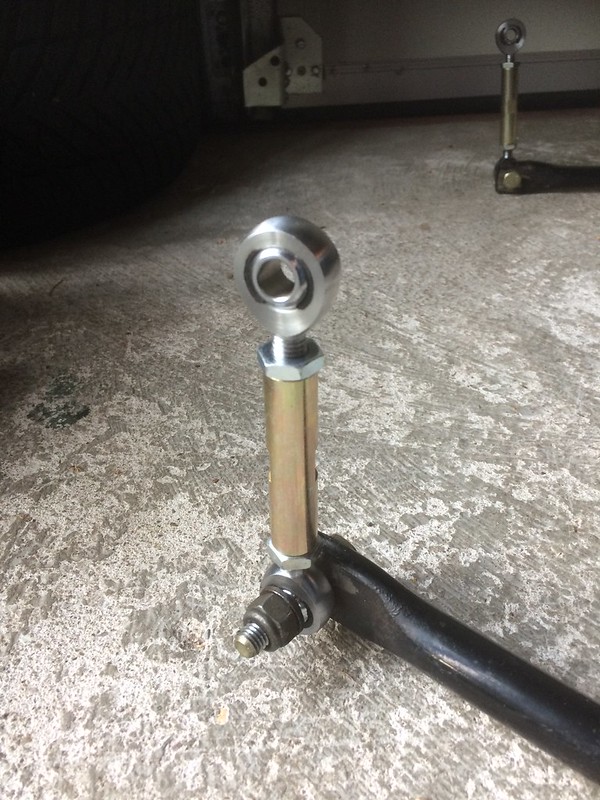
And fitted.
I also have a new temperature sender fitted, which was very kindly supplied by Cossynut2.
I also fitted a new MSD fan loom. Before I removed the old wiring I first tested it. It turned out one fan wasn't even running and after switching if on/off a few times the other also stopped working.
But with the new loom both are working perfectly again.And lastly I fitted a 21 mm arb from a Scorpio 24v to the rear instead of the standard 18 mm one, making it about 85% stiffer. I also replaced the droplinks with rose jointed ones to make it even more stiff.
And fitted.
Last edited by Marc sierra; 27-07-2017 at 02:33 PM.
18-05-2016, 05:59 AM
#62
Only a bit of motorway, after which it started to run on 3 cylinders, which turned out to be a broken spark plug.
I won't expect to notice much on the road. But on the track it still had a bit of understeer, which should be reduced by running a stiffer rear arb. So I'm curious to find out how it will behave on the track now. It should be a bit better anyway, as I found out that last year all shocks were set to the softest setting. 
I won't expect to notice much on the road. But on the track it still had a bit of understeer, which should be reduced by running a stiffer rear arb. So I'm curious to find out how it will behave on the track now.
01-06-2016, 06:37 AM
#63
Last year I bought a Rouse splitter from Stephan. After lying on the attic for almost a year I decided it was finally time to fit it.  In my opinion it looks quite a bit better than the splitter it had previously.
After the replacing the broken spark plug I noticed a strong fuel smell when I took the oil cap off. So I decided to change the oil. A bit of a shame as the oil had only done 30 miles since changing. But rather 70 euros of oil than needing new bearings or a turbo.
After everything was done I still needed to see if it really ran perfect again. So I took it to the unrestricted German Autobahn, which is only about 10 to 15 minutes away from home. It seems to be running OK again. The only thing I noticed was that when shifting from 3rd to 4th gear it took a bit of time before it started pulling again. You can also notice it in the video from the sound of the engine. I think the dumpvalve stayed open for a second or so. So I decided to remove the dumpvalve. Next time it will be chatter instead of the dumpvalve noise.
After the replacing the broken spark plug I noticed a strong fuel smell when I took the oil cap off. So I decided to change the oil. A bit of a shame as the oil had only done 30 miles since changing.
But rather 70 euros of oil than needing new bearings or a turbo.After everything was done I still needed to see if it really ran perfect again. So I took it to the unrestricted German Autobahn, which is only about 10 to 15 minutes away from home. It seems to be running OK again.
Last edited by Marc sierra; 27-07-2017 at 02:35 PM.
10-07-2016, 07:58 AM
#64
After thinking about how stable the car was above 200 km/h I had the feeling the tracking wasn't 100%. So I again had the car aligned. Because of the crappy alignment equipment of the place I went last time settings were indeed not correct. Because of the last measurement I placed 2 washers between the rear right bearing carrier and suspension arm to give 1 degree extra camber. But it now turned out it had 1 degree camber too much. The right rear wheel also didn't have enough toe in to my liking.
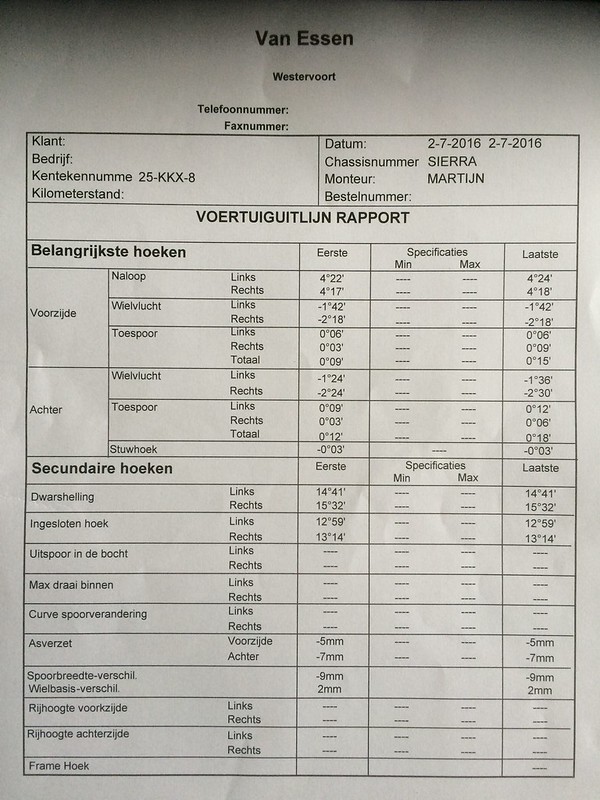
After correcting the front toe (which was also not enough toe in) the guy at the alignment shop was nice enough to let me go home and remove the washers from the rear right wheel and come back to check/align the rear. When I removed the washers I also added a thin shim to give the wheel a bit more toe in.
When I came back to the alignment shop the car was placed on a different alignment bank than in the morning. The camber of the rear wheel was now perfect, but now the front wheels didn't have enough toe in.
(0�06' according to this machine, but I didn't get a print out). After that we put the car back on the same alignment bank as in the morning to see what the reading was there. And now it was back at 0�15'.
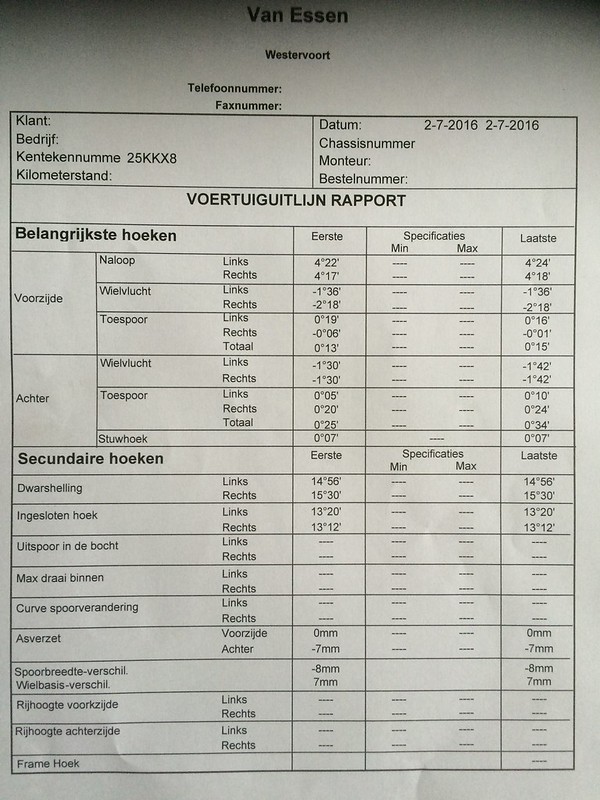
So both front and rear didn't have enough toe in, which explains why the car was not as stable at high speed as it should have been. But now I still wonder which of the alignment banks was correct for the front toe. If it was the other system it now still hasn't got enough toe in. With both this car and the 2.9 24v I have been to 4 different places for aligning it and the readings have always been different. It seems like none of the systems are really accurate. A difference of 0�09' is half of what the toe in should be 0�18'.
After correcting the front toe (which was also not enough toe in) the guy at the alignment shop was nice enough to let me go home and remove the washers from the rear right wheel and come back to check/align the rear. When I removed the washers I also added a thin shim to give the wheel a bit more toe in.
When I came back to the alignment shop the car was placed on a different alignment bank than in the morning. The camber of the rear wheel was now perfect, but now the front wheels didn't have enough toe in.
(0�06' according to this machine, but I didn't get a print out). After that we put the car back on the same alignment bank as in the morning to see what the reading was there. And now it was back at 0�15'.
So both front and rear didn't have enough toe in, which explains why the car was not as stable at high speed as it should have been. But now I still wonder which of the alignment banks was correct for the front toe. If it was the other system it now still hasn't got enough toe in. With both this car and the 2.9 24v I have been to 4 different places for aligning it and the readings have always been different. It seems like none of the systems are really accurate. A difference of 0�09' is half of what the toe in should be 0�18'.
Last edited by Marc sierra; 27-07-2017 at 02:36 PM.
24-07-2016, 05:23 PM
#66
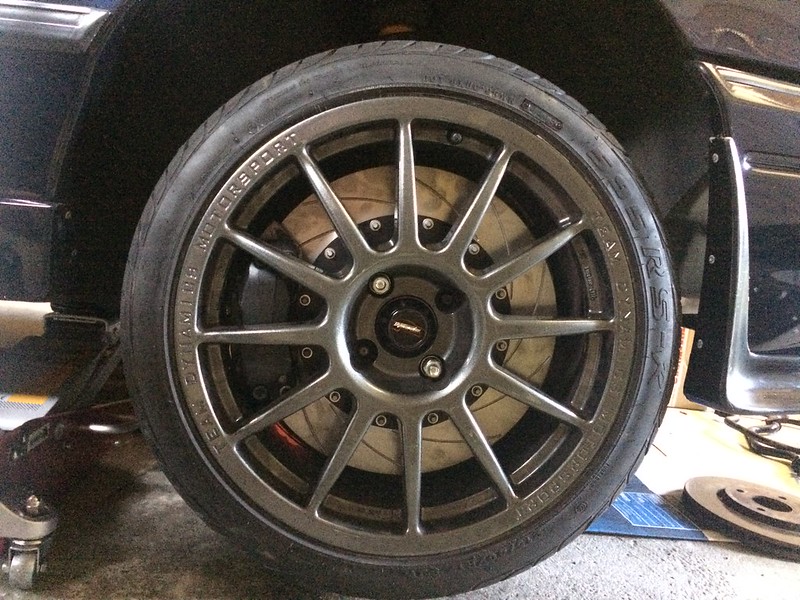
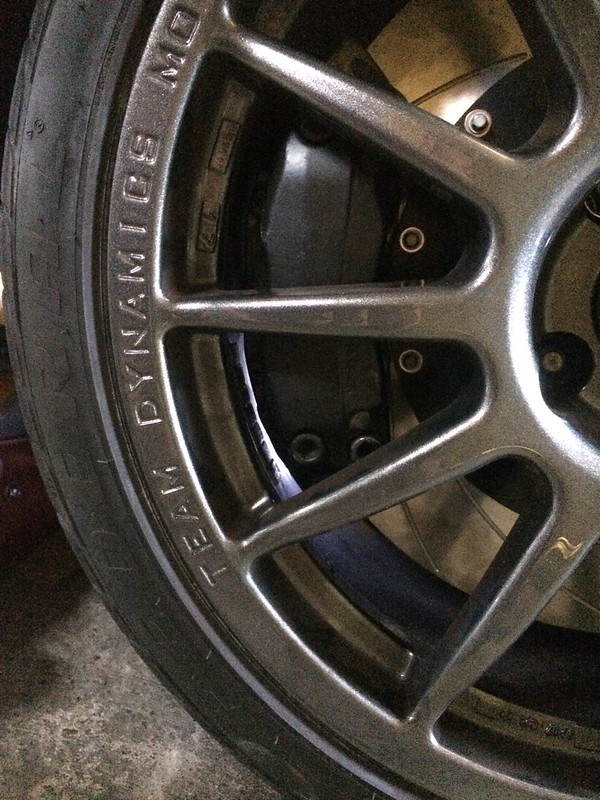
A while ago I bought a set of wheels for the Cosworth. They are Team Dynamics Pro Race 1.2 wheels in exact the same size (17x8 ET35) as the TSW Hockenheims I had on it before. The wheels have Federal 595 RS-R tyres in 215/40 R17, as I was looking for a tyre that would do well on the track.
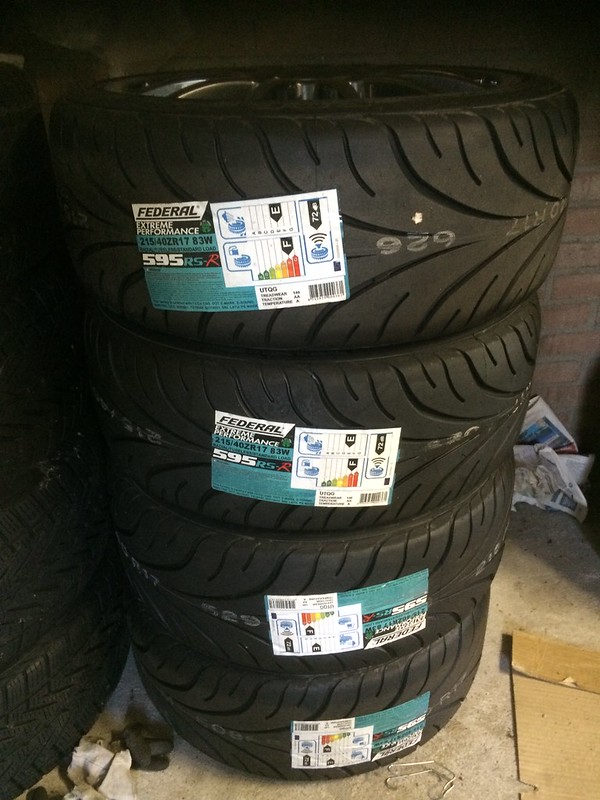
But I forgot to take a picture of the wheels fitted to the car.
With the new wheels I took the car to the Nurburgring GP track again. The track was only open for a short time so I only did one session. Unfortunately the app on my phone didn't start, so I didn't get any movies this time.
With only one session I did still find out how the car handled with the Konis set to the hardest setting and with the new 21 mm arb. Last year the car had a bit too much understeer to my liking, hence the bigger arb on the rear now. Braking and turning into the corning felt much more stable, probably because of the harder setting of the Konis. I didn't find any understeer now, but generally the rear of the car felt a bit light and I even got some (probably lift off) oversteer. The first time was easy to correct, but the second time I nearly spun. It oversteered to the right when doing about 50 to 55 mph. After some opposite lock it slid the other way and after that one again to the right. Luckily I caught it after that one, but in my head I was already going off the track backwards. After that I took it a bit easier as I didn't want go off, especially at even higher speed.
I already changed the setting of the rear shocks from hardest to medium to hopefully reduce the lift off oversteer. To make the overall balance of the car a bit better I want to fit a 29 mm front arb from an Escort Cosworth.
A short video from the pits.
And a video where I just pass someone at the start of the video.
But I forgot to take a picture of the wheels fitted to the car.
With the new wheels I took the car to the Nurburgring GP track again. The track was only open for a short time so I only did one session. Unfortunately the app on my phone didn't start, so I didn't get any movies this time.
With only one session I did still find out how the car handled with the Konis set to the hardest setting and with the new 21 mm arb. Last year the car had a bit too much understeer to my liking, hence the bigger arb on the rear now. Braking and turning into the corning felt much more stable, probably because of the harder setting of the Konis. I didn't find any understeer now, but generally the rear of the car felt a bit light and I even got some (probably lift off) oversteer. The first time was easy to correct, but the second time I nearly spun. It oversteered to the right when doing about 50 to 55 mph. After some opposite lock it slid the other way and after that one again to the right. Luckily I caught it after that one, but in my head I was already going off the track backwards.
I already changed the setting of the rear shocks from hardest to medium to hopefully reduce the lift off oversteer. To make the overall balance of the car a bit better I want to fit a 29 mm front arb from an Escort Cosworth.
A short video from the pits.
And a video where I just pass someone at the start of the video.
Last edited by Marc sierra; 27-07-2017 at 02:38 PM.
15-09-2016, 08:35 AM
#67
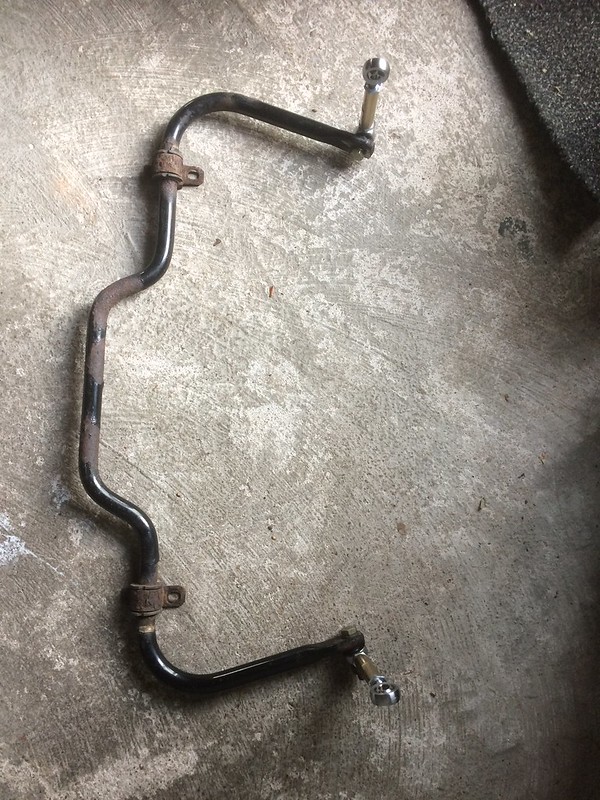
Since I couldn't find a front Escort Cosworth arb I decided to reduce the stiffness of the rear arb. I have now fitted a 20 mm arb from a regular Scorpio (not 24V).
As a comparison, from left to right a 18 mm, 20 mm and 21 mm arb.
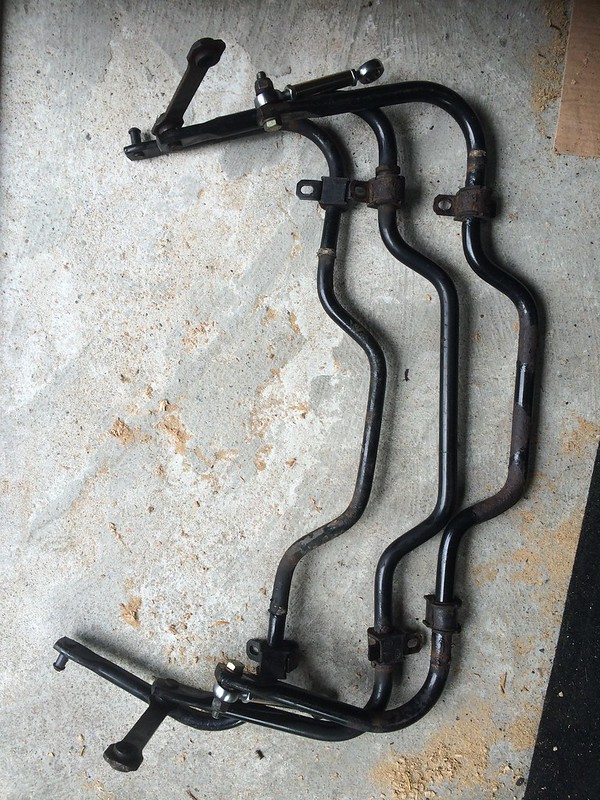
As a comparison, from left to right a 18 mm, 20 mm and 21 mm arb.
Last edited by Marc sierra; 27-07-2017 at 02:40 PM.
24-09-2016, 12:24 PM
#68
Last time I went to the Nurburgring I bought 4 tickets. But since the track opened very late I only got to drive once. Last Wednesday it was nice weather and one of the last opportunities this year to use the remaining tickets. So around 14.30 I left to Germany. After about 150 miles and some traffic jams due to road works I arrived around 17.40 at the Ring, just 20 minutes before the track opened. As I already had a ticket I headed straight to the pits. I just had enough time to install and set up my phone to record the laps, put all the things away that I had with me and put on the helmet. In all the hurry I forgot to put my seat belt on, so I had to do that while driving out of the pits.
With the thinner rear arb the car was now better balanced. Maybe it was also partly because of the rear Konis were set to the mid setting instead of the hardest. But I'm thinking of putting them back to the hardest setting anyway, as I had the feeling the car was diving more during braking and rolling more when turning into corners than last time. Maybe then the rear arb needs to be softer again, but I'll find that out next time. I still had some oversteer in the first session in the Mercedes Arena (the exact same location as last time), but this time it was easily controllable (first video at around 6:35).
My fastest lap was now 2.39.86. Last year I did a fastest time of 2.43.00, so it's getting better each time. The new tires will also help with that, as according to the accelerometers I now regularly reached 1.1g with some up to 1.2g. On the other tires I did 1.0 to 1.1g.
After driving three times for 15 minutes each my tickets were out and it was getting dark. So I filled up the tank and headed back home. On the Autobahn I hit 150 mph for a moment, which is nice to do in a legal way in Germany. The Cossie held up very well during the day, I did about 350 miles of which about 50 miles on the track.
My first session:
Second session:
Third session:
With the thinner rear arb the car was now better balanced. Maybe it was also partly because of the rear Konis were set to the mid setting instead of the hardest. But I'm thinking of putting them back to the hardest setting anyway, as I had the feeling the car was diving more during braking and rolling more when turning into corners than last time. Maybe then the rear arb needs to be softer again, but I'll find that out next time. I still had some oversteer in the first session in the Mercedes Arena (the exact same location as last time), but this time it was easily controllable (first video at around 6:35).
My fastest lap was now 2.39.86. Last year I did a fastest time of 2.43.00, so it's getting better each time.
After driving three times for 15 minutes each my tickets were out and it was getting dark. So I filled up the tank and headed back home. On the Autobahn I hit 150 mph for a moment, which is nice to do in a legal way in Germany.
My first session:
Second session:
Third session:
Last edited by Marc sierra; 24-09-2016 at 12:30 PM.
 29-09-2016, 09:36 AM
#70
The main reason I changed the TSW Hockenheim wheels for the Team Dynamics wheels is that the Hockenheim wheels didn't have much room on the inside. Because of that I was limited to single pot calipers, as pistons on the outside of the brake disc would hit the inside of the weel spokes. The Team Dynamics wheels have the spokes much further to the outside so now calipers with multiple pistons will fit.
After a lot of reseach and puzzling I found a set of calipers that I can use. They are 4 pot Brembos from a Mercedes W220 S500. The size of the pistons should match well with the standard cossie calipers. The cossie has a single piston with 60 mm diameter, which gives a surface of 2827 mm2. To not make the stroke of the brake pedal larger I didn't want a bigger piston surface area than original. On these Brembo calipers the upper pistons are 44 mm and the lower ones 40 mm in diameter. On calipers with pistons on both sides of the disc you should only count one side. These pistons then give a surface area of 2777 m2, which matches well with the original value of 2827 mm2.
What was also nice is that the 2 calipers only cost me 120 pounds.
Last edited by Marc sierra; 27-07-2017 at 02:41 PM.
04-10-2016, 01:20 PM
#71
The Mercedes S500 where the Brembo calipers are from has discs that are 330 mm in diameter with a thickness of 32 mm. I also chose these calipers because of the disc thickness, as the wider discs have wider cooling channels and therefor cool better.
To make the brakes as good as possible I want to use the biggest discs that fit inside the wheels. To measure the size I placed a caliper on top of my current 320 mm discs. I then spaced the caliper outwards until I had just enough clearance left between the caliper and wheel.
The clearance that is left between caliper and wheel.
Last edited by Marc sierra; 27-07-2017 at 02:44 PM.
13-10-2016, 12:45 PM
#72
The new brake discs from Reyland are in, they are 356x32 mm.
The 356 mm next to my current 320 mm and next to that the original 278 mm discs.

Just to be sure I test fitted the new discs and calipers with the wheels, as it would be a waste if the discs were too big. But fortunately it all fits as intended.
Now I just need a pair of brackets to fit the calipers.
The 356 mm next to my current 320 mm and next to that the original 278 mm discs.
Just to be sure I test fitted the new discs and calipers with the wheels, as it would be a waste if the discs were too big. But fortunately it all fits as intended.
Now I just need a pair of brackets to fit the calipers.
Last edited by Marc sierra; 27-07-2017 at 02:45 PM.
13-10-2016, 03:17 PM
#73
The new brake discs from Reyland are in, they are 356x32 mm.
The 356 mm next to my current 320 mm and next to that the original 278 mm discs.
Just to be sure I test fitted the new discs and calipers with the wheels, as it would be a waste if the discs were too big. But fortunately it all fits as intended.
Now I just need a pair of brackets to fit the calipers.

The 356 mm next to my current 320 mm and next to that the original 278 mm discs.

Just to be sure I test fitted the new discs and calipers with the wheels, as it would be a waste if the discs were too big. But fortunately it all fits as intended.

Now I just need a pair of brackets to fit the calipers.
30-10-2016, 04:54 PM
#75
In order to fabricate the caliper adapters I first tried something using cardboard. After that I made a few adapters from wood until I had one that fitted quite well. It's not completely perfect because the drilling in wood by hand wasn't that accurate, but for wood it's good enough.
And with the wheel fitted.
The clearance between caliper and wheel.

And with the wheel fitted.
The clearance between caliper and wheel.
Last edited by Marc sierra; 27-07-2017 at 02:49 PM.
 09-11-2016, 03:00 PM
#77
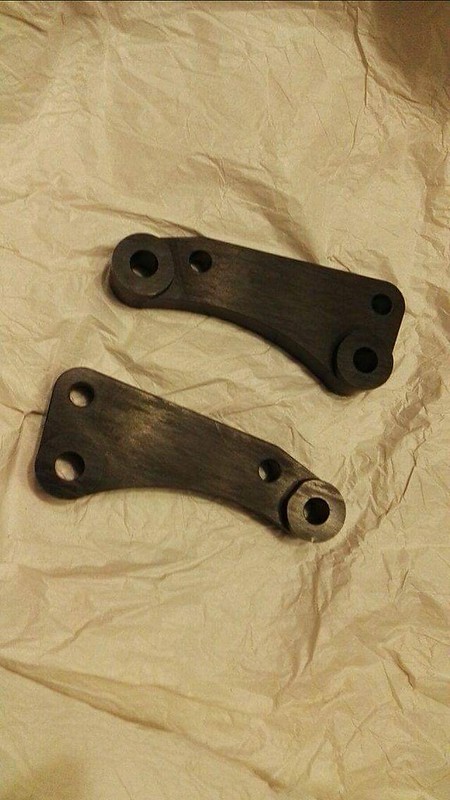
The metal test version of the caliper bracket is also done. Stephan made one for me based on a drawing I sent him. It needs a few dimensions to be changed slightly, but not by much.
Last edited by Marc sierra; 27-07-2017 at 02:50 PM.
18-11-2016, 07:43 PM
#78
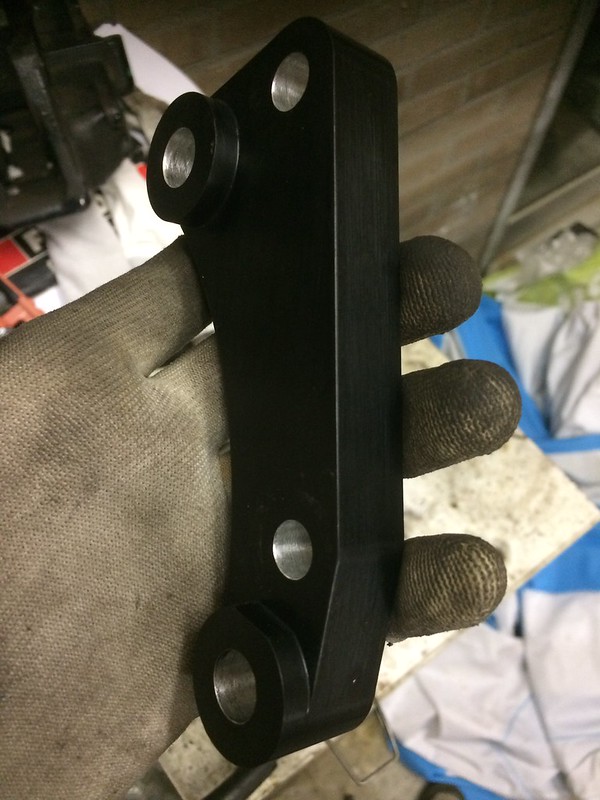
The caliper brackets have been finished now. I have a 3D file of the brackets and had them made on a CNC by a friend of a colleaque.
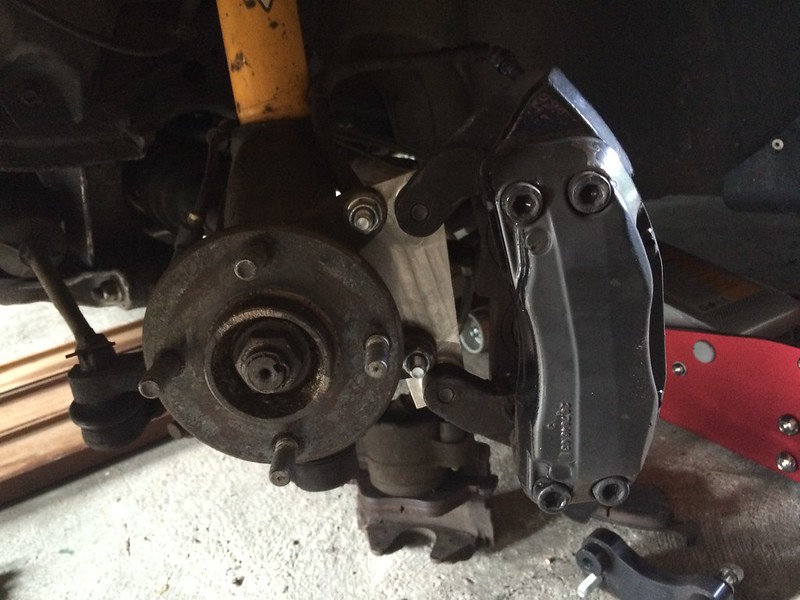
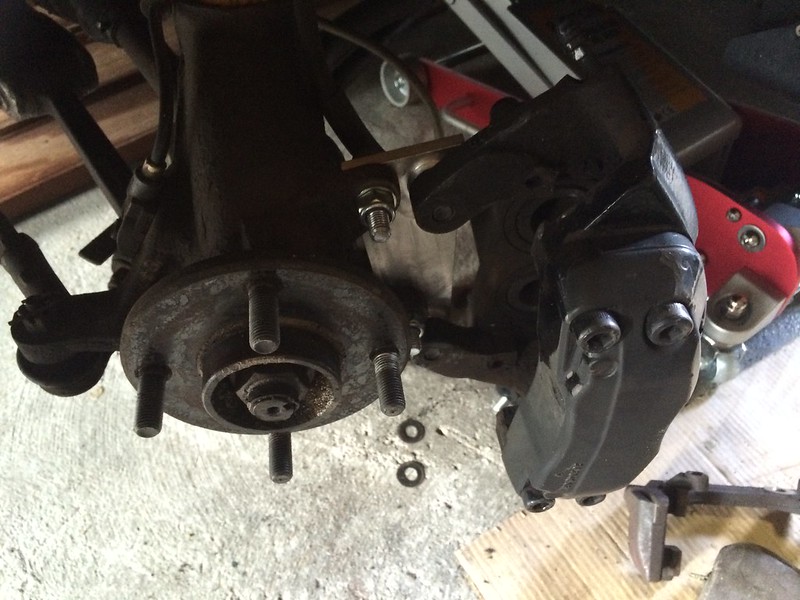
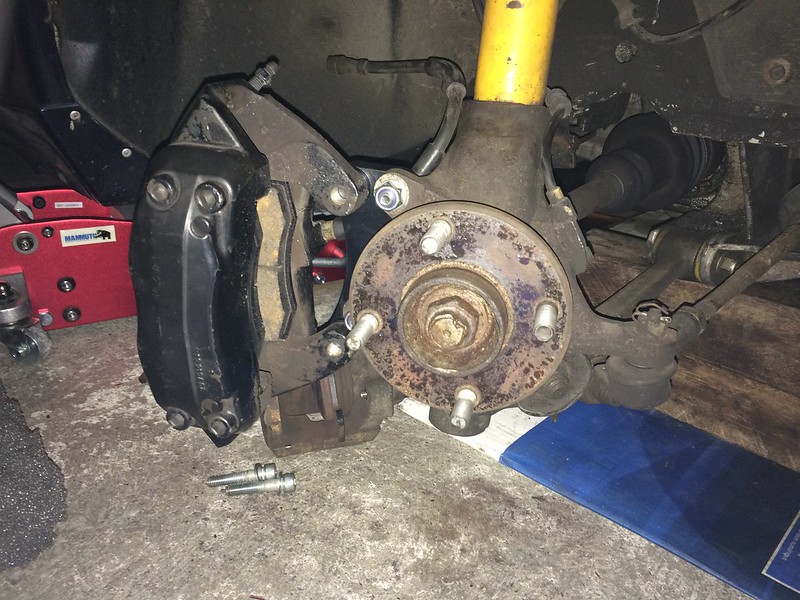
A bracket fitted to the hub.
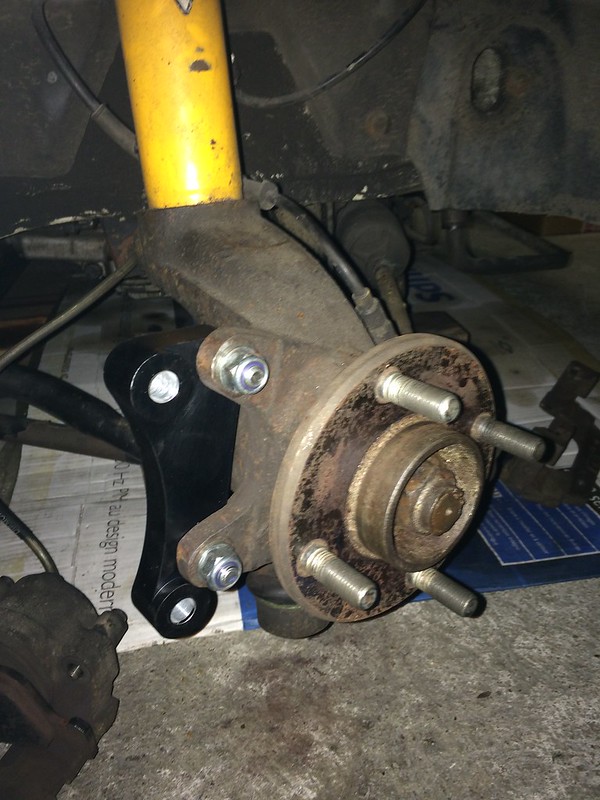
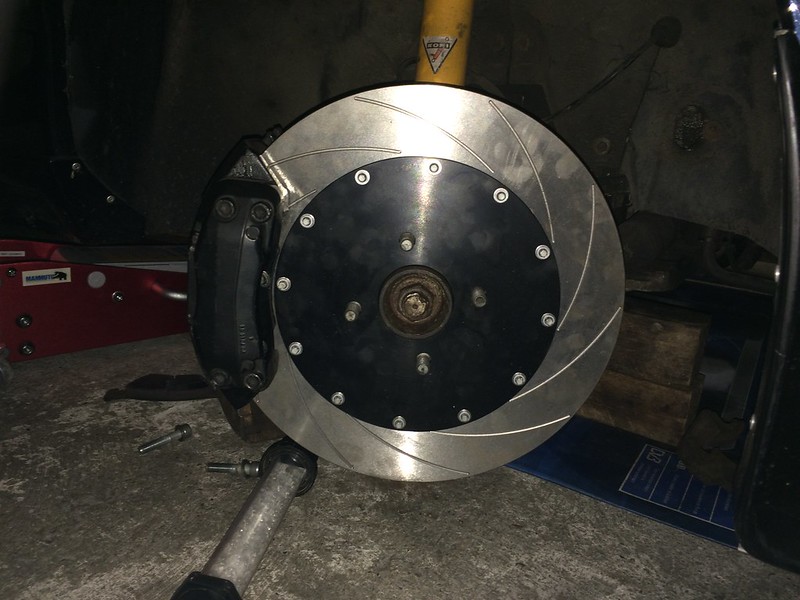
With the caliper fitted to the bracket.
And with the disc fitted.
The backside of the hub.
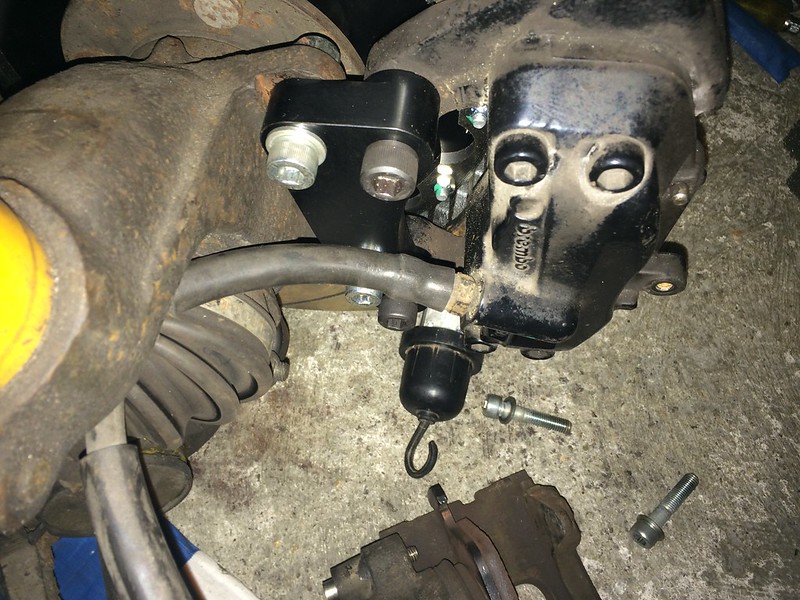
A bracket fitted to the hub.
With the caliper fitted to the bracket.
And with the disc fitted.
The backside of the hub.
Last edited by Marc sierra; 27-07-2017 at 02:53 PM.
 08-02-2017, 01:16 PM
#80
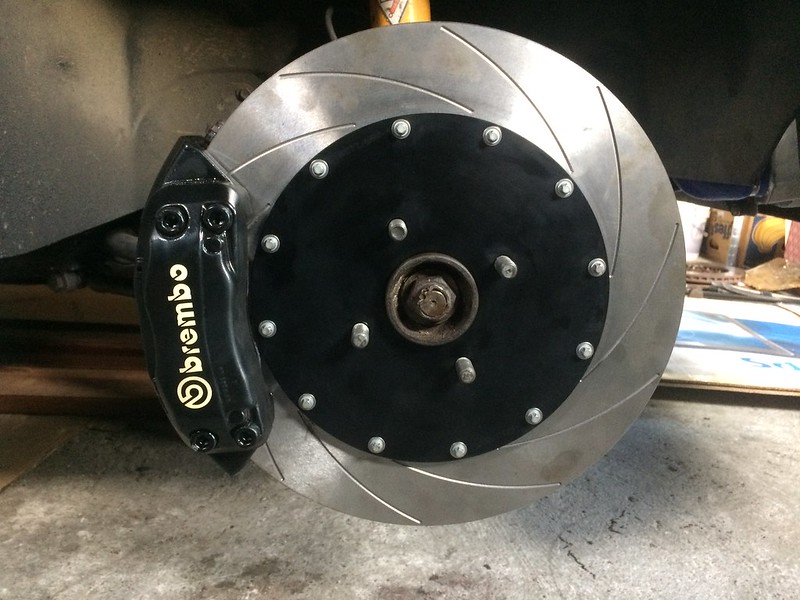
The Sapph is off the road for the winter so I wasn't really in a hurry to finish my brake upgrade. But I finally found some time and motivation to continue. The Brembo calipers weren't that great looking anymore so I decided to do something about it before fitting them. I didn't really want them to be shiny red so I opted for just stealthy black. I first sprayed them with some very high temperature primer and afterwards with VHT caliper paint.
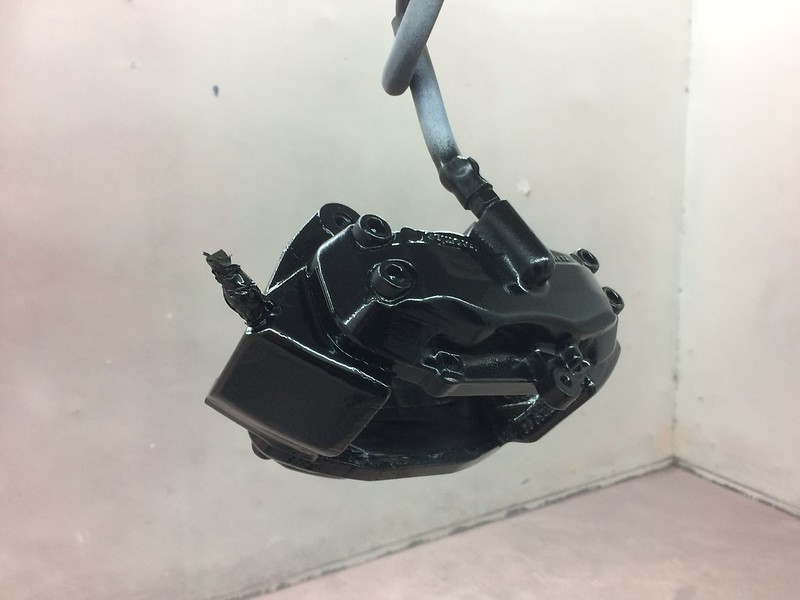
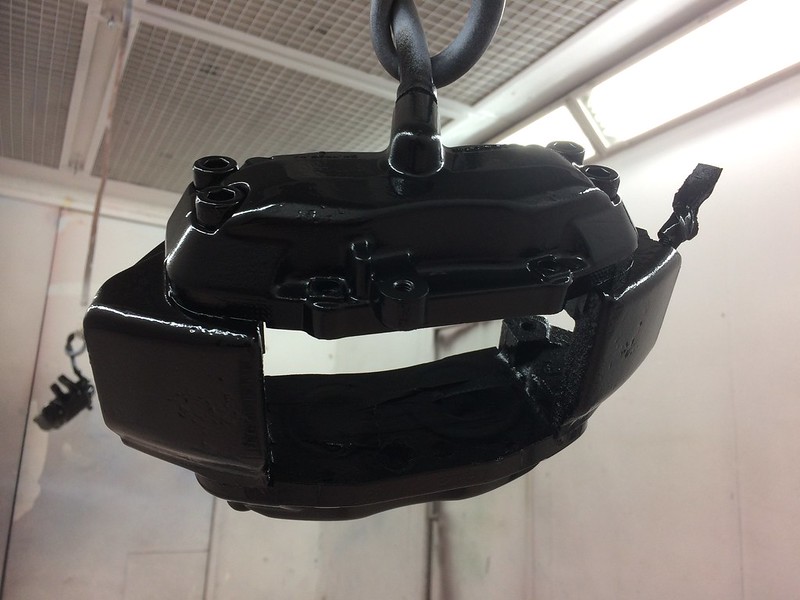
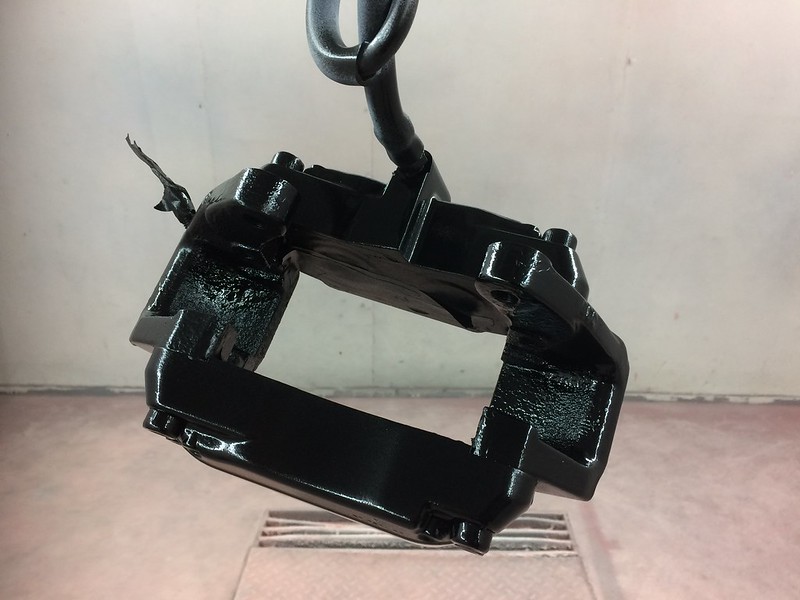
When they dried thoroughly I put some white Brembo decals on the sides and after that I put another layer of VHT clear coat over, but forgot to take any pictures of that.
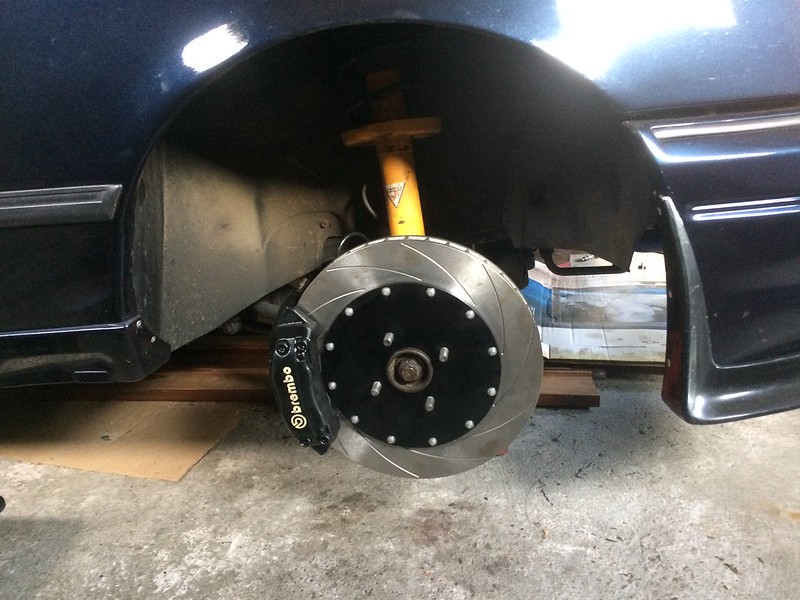
I also got a set of banjo hoses so I could now finally fit the calipers together with a set of Ferodo DS2500 pads. Now the only thing left to do is bleed the brakes.
When they dried thoroughly I put some white Brembo decals on the sides and after that I put another layer of VHT clear coat over, but forgot to take any pictures of that.
I also got a set of banjo hoses so I could now finally fit the calipers together with a set of Ferodo DS2500 pads. Now the only thing left to do is bleed the brakes.
Last edited by Marc sierra; 27-07-2017 at 02:55 PM.