V8 Sierra 3dr Track Day Car - Adios!

 12-02-2012, 03:58 PM
#82
PassionFord Regular
Thread Starter

Hi Everyone, thought I'd do a little update.*
I popped over to MDA this morning to do a seat fitting and finalise pedal box position.*
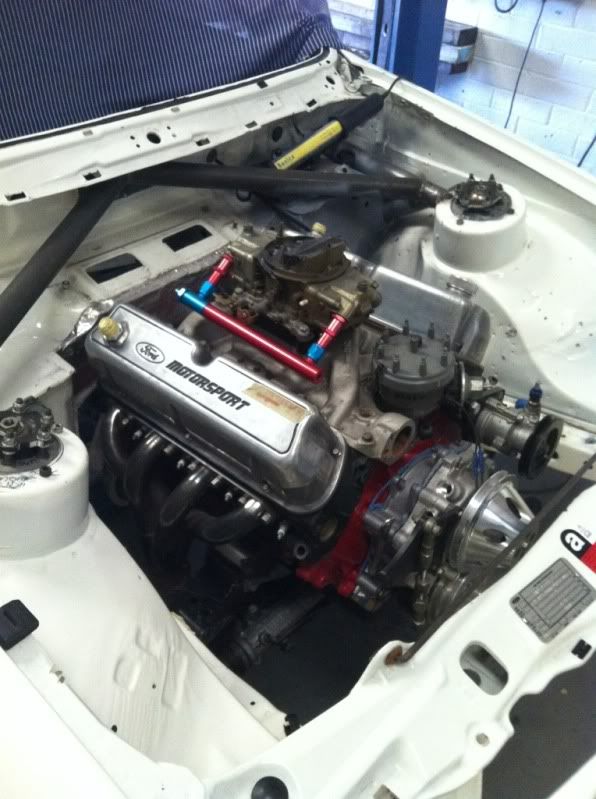
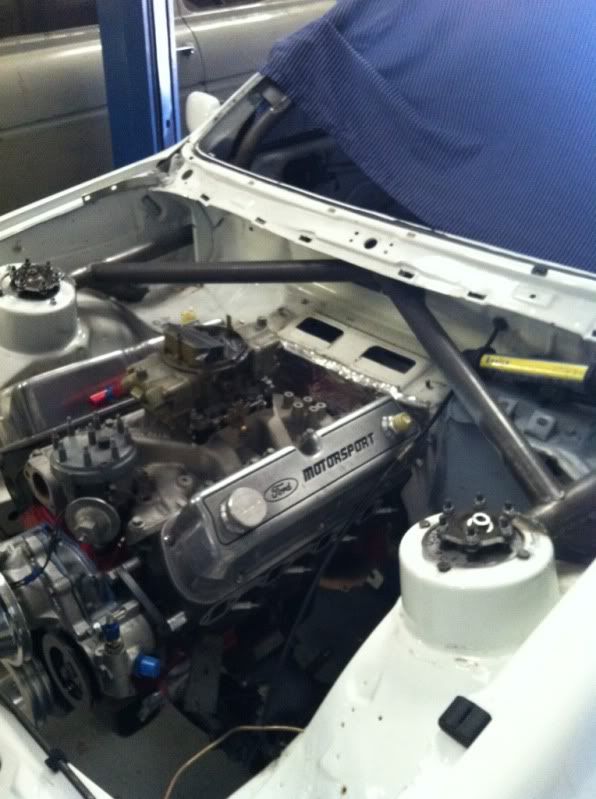
It gave me chance to catch up with Adrian who is building up all the ancillaries on the engine. As you can see it's starting to look the part now:

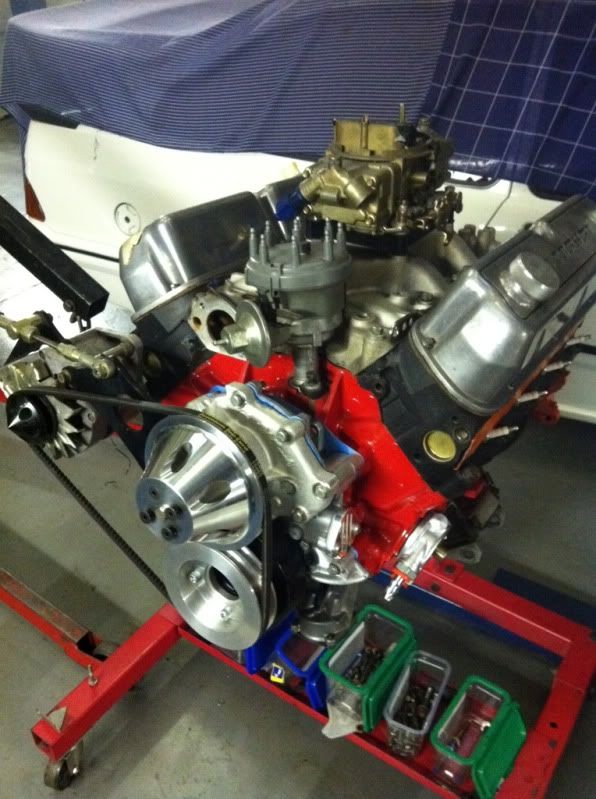
The new timing cover, water pump and pulleys are on. Everything lines up too which is a result! (Phew..) We now need to take a look at the PAS pump mounting.
This is the pump that's going on:
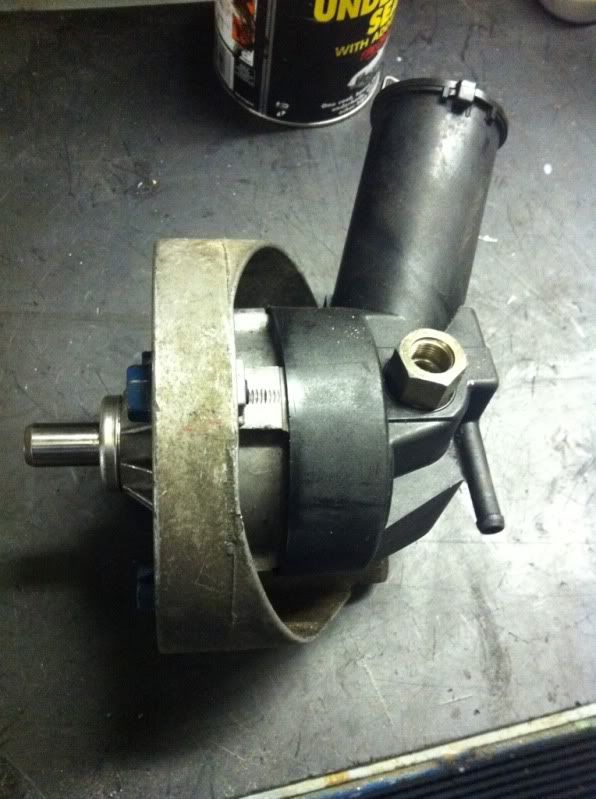
Just a boggo Ford item for starters, but we'll definitely benefit if we can ditch the heavy mounting bracket in favour of something lighter and more adjustable. I'll need to do some searching and see what I can come up with, but if no joy the lads could look at making something up.
So engine-wise not far to go... Sump and dipstick to sort and then we're in plumbing and fuelling territory.
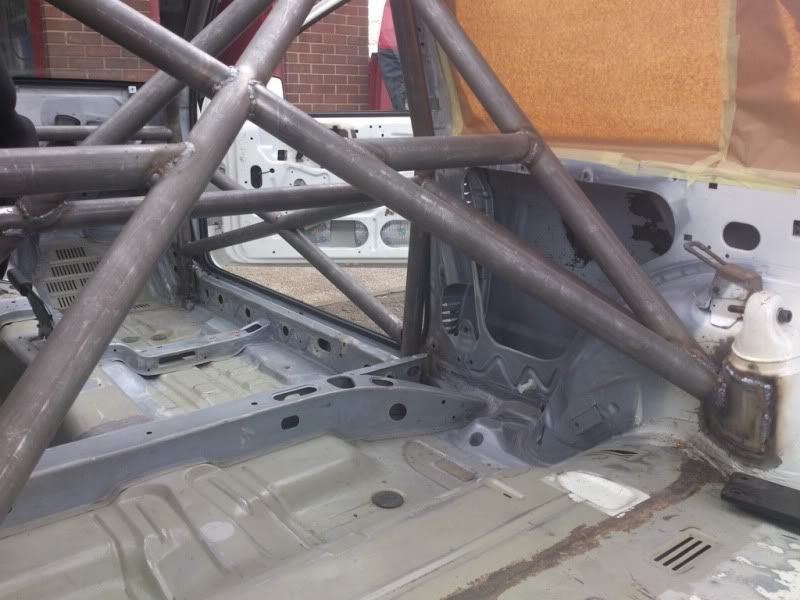
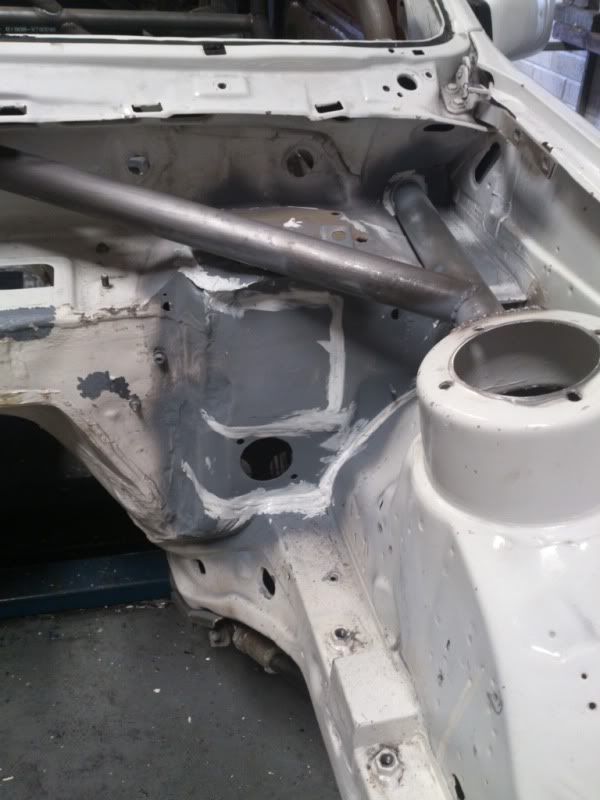
Mat's been busy with the cage and pedal box. He's happy with the pedal box now, so that's ready to be made up. And as you can see below work has started on bringing the cage out to the turrets:
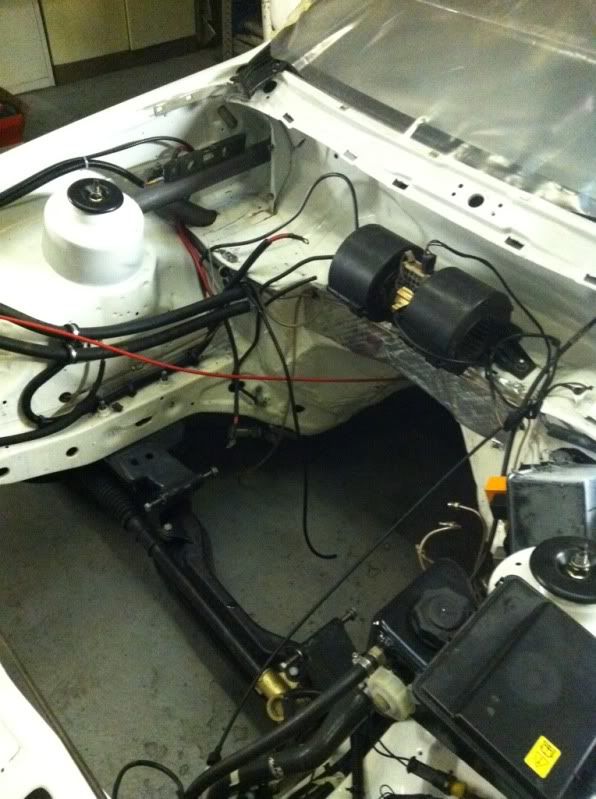
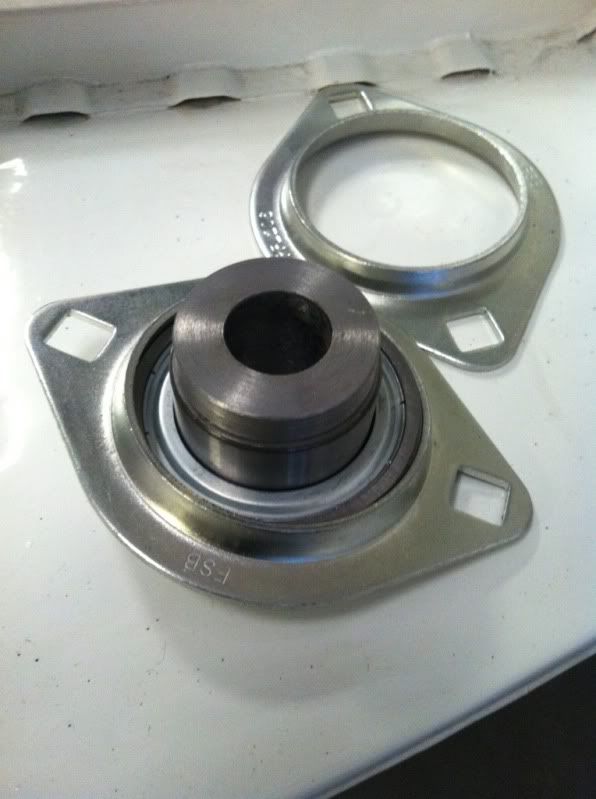
Speaking of turrets, I've just got hold of these from Tony at www.touringcarspares.com*
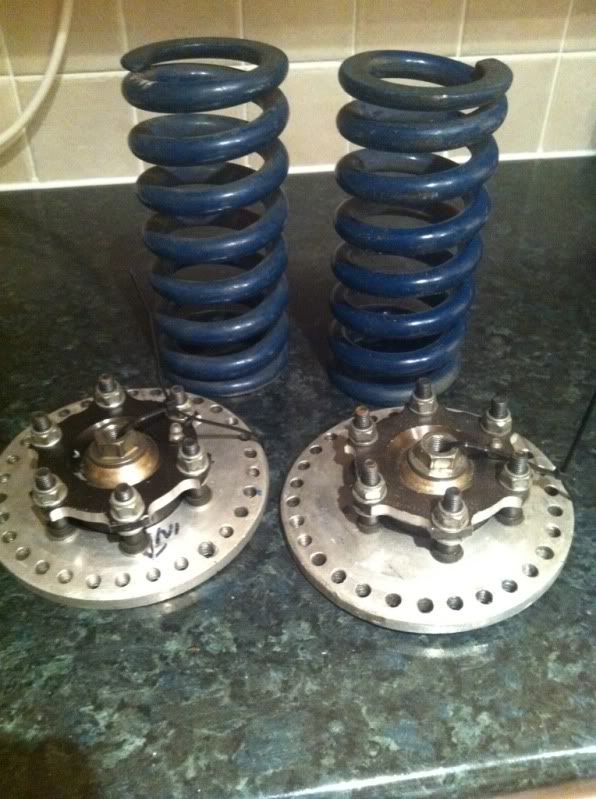
The springs are 8" 780lb if memory serves, and the top mounts are a WRC bearing sitting on spacers and a std eccentric top mount. Should give me lots of adjustability, and will work well with the gpA bilsteins that are going on.
I discovered this week that those struts are to fat to work with my 3 door hubs, so I'm using some 24v Scorpio ones I had laying about. They have the larger diameter strut opening. I did a little dry run on the bench last week, and crucially all my brake kit fits ok - a big relief!*
Cheers for now,
Iain
I popped over to MDA this morning to do a seat fitting and finalise pedal box position.*
It gave me chance to catch up with Adrian who is building up all the ancillaries on the engine. As you can see it's starting to look the part now:
The new timing cover, water pump and pulleys are on. Everything lines up too which is a result! (Phew..) We now need to take a look at the PAS pump mounting.
This is the pump that's going on:
Just a boggo Ford item for starters, but we'll definitely benefit if we can ditch the heavy mounting bracket in favour of something lighter and more adjustable. I'll need to do some searching and see what I can come up with, but if no joy the lads could look at making something up.
So engine-wise not far to go... Sump and dipstick to sort and then we're in plumbing and fuelling territory.
Mat's been busy with the cage and pedal box. He's happy with the pedal box now, so that's ready to be made up. And as you can see below work has started on bringing the cage out to the turrets:
Speaking of turrets, I've just got hold of these from Tony at www.touringcarspares.com*
The springs are 8" 780lb if memory serves, and the top mounts are a WRC bearing sitting on spacers and a std eccentric top mount. Should give me lots of adjustability, and will work well with the gpA bilsteins that are going on.
I discovered this week that those struts are to fat to work with my 3 door hubs, so I'm using some 24v Scorpio ones I had laying about. They have the larger diameter strut opening. I did a little dry run on the bench last week, and crucially all my brake kit fits ok - a big relief!*
Cheers for now,
Iain
04-03-2012, 08:34 PM
#83
PassionFord Regular
Thread Starter
A little more progress on the car to report.
Work is progressing nicely at MDA.
Adrian is trial fitting my 'new' Merkur PAS rack into the existing cross-member. A little more material needs to be removed from the custom V8 mounts to allow the column shaft to fit.
Mat is continuing to weld up the cage - work is focussed on the front turret triangulation at the moment - and also the custom pedal box which looks a great solution.
When the rack is in it's resting place, and the front part of the cage complete, then we'll look into fitting the cross member etc back in which will signal time for the engine to go back in too...
I've never been quite happy with the boggo Ford PAS pump, and by chance I found this on e-bay the other week.

It's an ex Nascar pump with aeromotive fittings. (They used similar V8's to mine) It must be a quarter of the weight of the original I pictured in my last post - although I will have to source a separate fluid resevoir of course, and get a bracket made to fit it all. I thought at first I really had my prayers answered as it came with a really nice pulley too, then I quickly realised it's a grooved pulley, whereas I need a V-belt pulley. Not to worry... 2 steps forward and all that...
Given that things are moving along I needed to turn my attention quickly to getting tyres fitted on my Comp 6sp MO's. I went for Toyo R1R's. 225/40 (18).
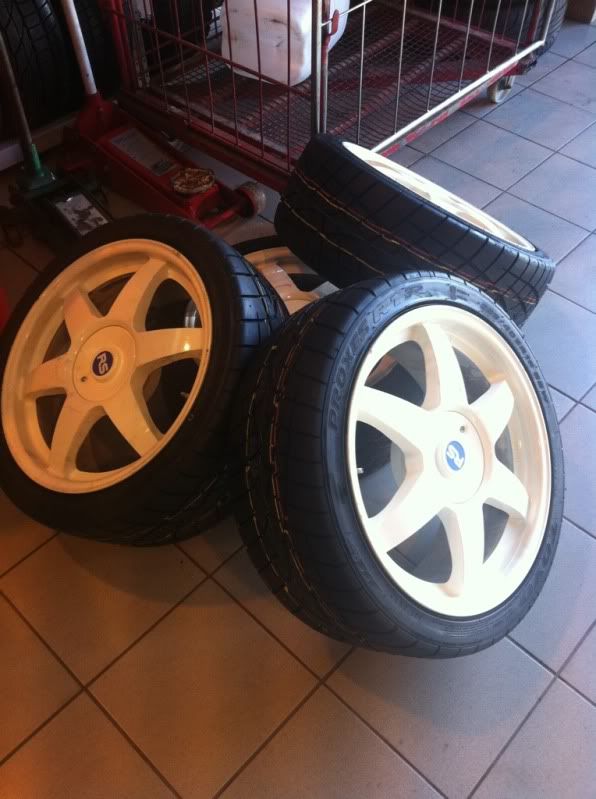
They're a track day tire sitting roughly between the T1R's(?) for the road and the R888's for the (dry) track. With any luck they should be able to deal with our inconsistent weather! Size-wise I will be ok on the back, but I think I'll need to do some serious trimming on the front arches. 215's would have been ideal but they're hard to come by, so I'll just see how I get on with these to begin with. With a V8 and something like 3* neg camber to deal with, the more rubber the better I reasoned..
I've also needed to sort my hubs out. These are Scorpio 24v items. They didn't need anything more than a good clean up and a lick of paint, so out came the wire brush attachments and the drill.. Here's the before and after..
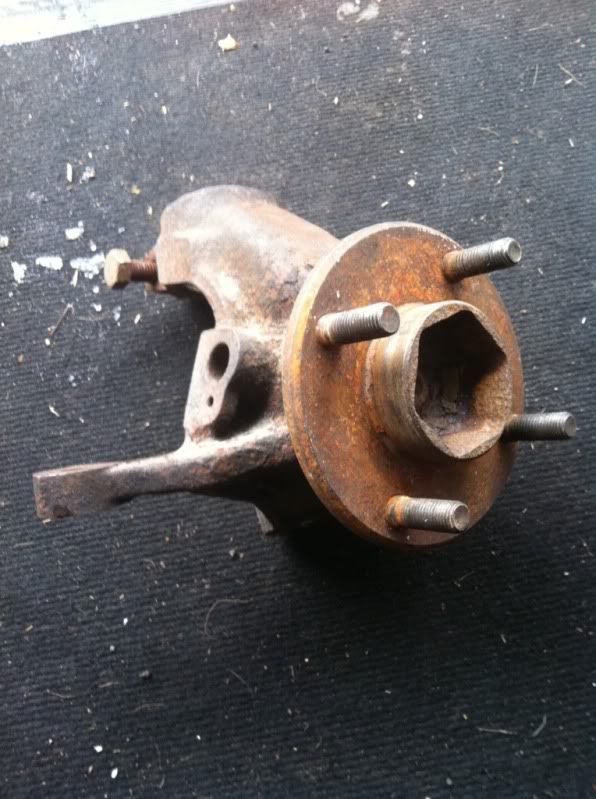
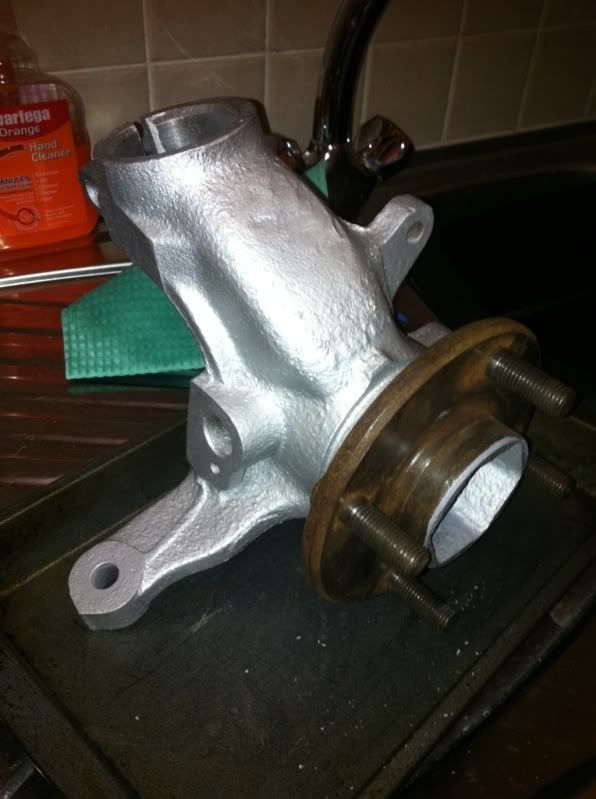
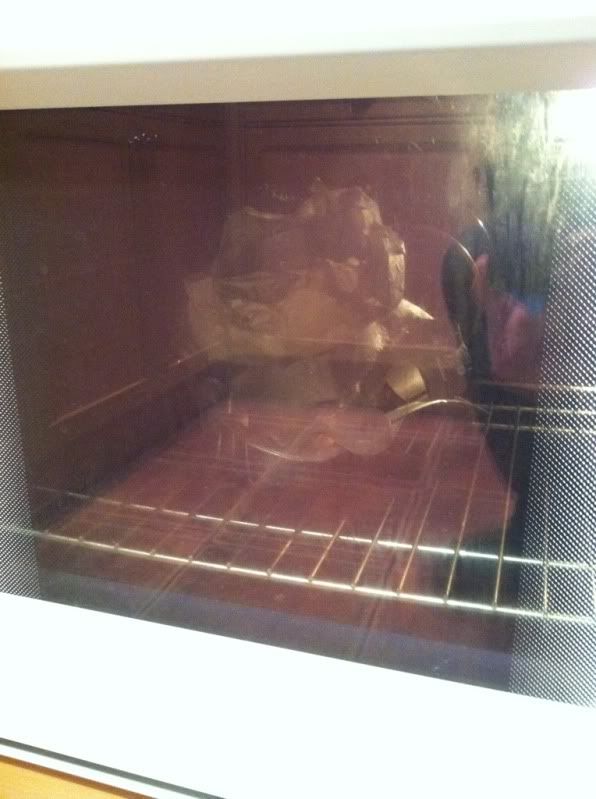
I'm pretty pleased with the way they turned out. I painted them in high temp silver. As the finish of that tends to be quite flat and not so good for keeping clean, I've used Gunk Engine lacquer on top. With these high temp paints I also find that a spell in the oven helps the paint go off nicely (Don't tell the missus..)
Apart from that I've been busy sourcing a few Goodridge fittings for the oil breather, as well as the oil cooler. All told I'm spent out with 3 more weeks to pay day - I knew those tires would dent the budget!!!
Cheers
Iain
Work is progressing nicely at MDA.
Adrian is trial fitting my 'new' Merkur PAS rack into the existing cross-member. A little more material needs to be removed from the custom V8 mounts to allow the column shaft to fit.
Mat is continuing to weld up the cage - work is focussed on the front turret triangulation at the moment - and also the custom pedal box which looks a great solution.
When the rack is in it's resting place, and the front part of the cage complete, then we'll look into fitting the cross member etc back in which will signal time for the engine to go back in too...
I've never been quite happy with the boggo Ford PAS pump, and by chance I found this on e-bay the other week.
It's an ex Nascar pump with aeromotive fittings. (They used similar V8's to mine) It must be a quarter of the weight of the original I pictured in my last post - although I will have to source a separate fluid resevoir of course, and get a bracket made to fit it all. I thought at first I really had my prayers answered as it came with a really nice pulley too, then I quickly realised it's a grooved pulley, whereas I need a V-belt pulley. Not to worry... 2 steps forward and all that...
Given that things are moving along I needed to turn my attention quickly to getting tyres fitted on my Comp 6sp MO's. I went for Toyo R1R's. 225/40 (18).

They're a track day tire sitting roughly between the T1R's(?) for the road and the R888's for the (dry) track. With any luck they should be able to deal with our inconsistent weather! Size-wise I will be ok on the back, but I think I'll need to do some serious trimming on the front arches. 215's would have been ideal but they're hard to come by, so I'll just see how I get on with these to begin with. With a V8 and something like 3* neg camber to deal with, the more rubber the better I reasoned..
I've also needed to sort my hubs out. These are Scorpio 24v items. They didn't need anything more than a good clean up and a lick of paint, so out came the wire brush attachments and the drill.. Here's the before and after..
I'm pretty pleased with the way they turned out. I painted them in high temp silver. As the finish of that tends to be quite flat and not so good for keeping clean, I've used Gunk Engine lacquer on top. With these high temp paints I also find that a spell in the oven helps the paint go off nicely (Don't tell the missus..)
Apart from that I've been busy sourcing a few Goodridge fittings for the oil breather, as well as the oil cooler. All told I'm spent out with 3 more weeks to pay day - I knew those tires would dent the budget!!!
Cheers
Iain
Last edited by IainRS1700T; 01-06-2013 at 09:18 PM.
04-03-2012, 09:25 PM
#85
PassionFord Regular
Thread Starter
We've all done it Glenn! (Haven't we...?)
Who hasn't used the dishwasher every now and then for coolant hoses and header tanks heh heh...!
The kitchen is a gold mine of appliances!
Iain
Who hasn't used the dishwasher every now and then for coolant hoses and header tanks
The kitchen is a gold mine of appliances!
Iain
04-03-2012, 10:22 PM
#87
PassionFord Regular
Thread Starter
I'll offer some pics next time I'm there to show a comparison. IIRC the 'outward throw' of the hub from where the strut sits to flange where the wheel sits is different..
Hopefully with the comp struts and the top mounts I can get away with it. Adjustable TCA's might help also, but bump steer is my main concern.
Cheers
Iain
13-04-2012, 09:13 PM
#88
PassionFord Regular
Thread Starter
Well, this was buried 8 pages back, so it must be time for an update!
I've sourced a few steering bits and pieces in the States which I had sent to a mate in California, who I hooked up with last week, so it turned out to be a cheap way of getting them home.
I went to KRC for a PAS resevoir and fitting bracket for the nascar pump I have. The fitting bracket attaches to bosses on the cylinder head. I hope I have enough clearance for the pulley now, but time will tell.
You can also see here the new V belt pulley I needed to replace the existing one. With any luck that will be PAS sorted now.
The build has been progressing on the front end, with the turret triangulation sorted and just waiting final welding. Mat has managed to avoid the fan motor, by fabricating box section to the bulkhead which mates up to the tube sitting behind the dash.
Looking back I don't think I posted the more recent pics of the cage on the inside - looking the part in there now.
The new ZF pas rack is also in using my original cross member - with a bit of persuasion from the MDA chaps..

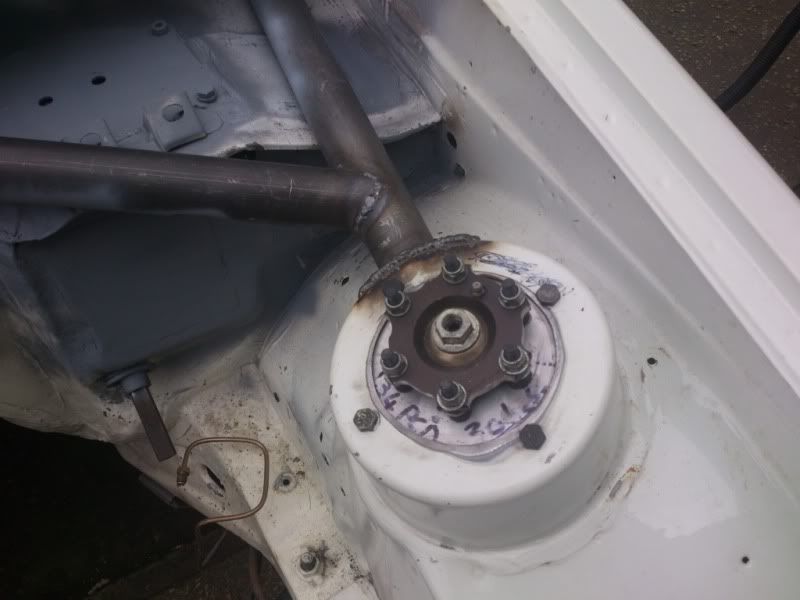
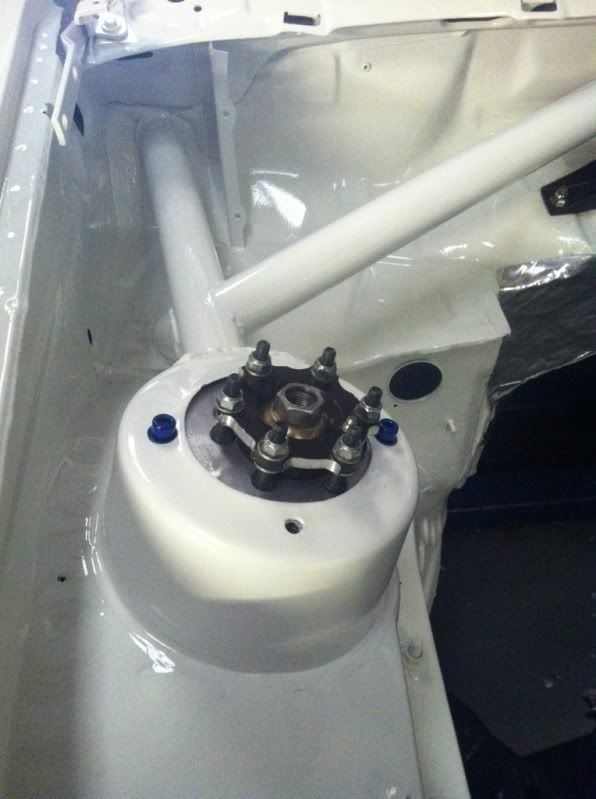
The suspension top mounts have also been sorted, and look the part - well chuffed with how they turned out
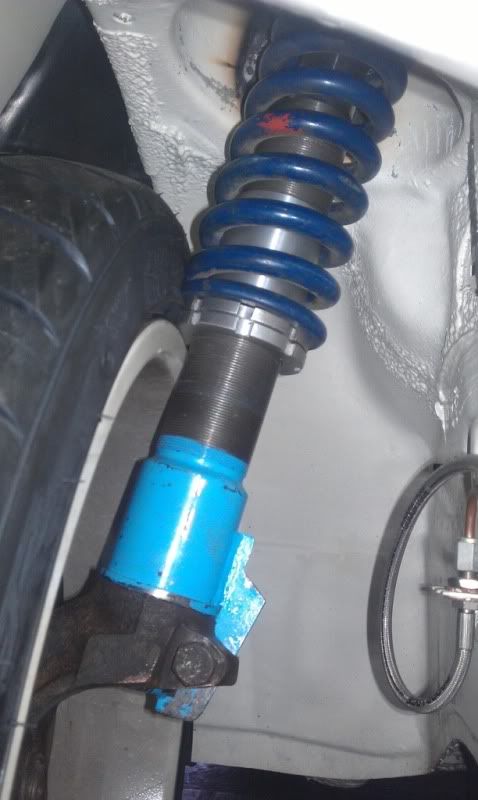
Less successful has been the front bilsteins and scorpio hubs. I've ended up with all sorts of clearance issues there. This is with spacers on, and it's still touching the rim - they just don't reach out far enough compared to the Cossie ones.
I thought some 4x4 gp A hubs I had might solve it, but they'll throw the wheels out too far, I'll never get them tucked under the arches! So I've decided to keep the 3dr hubs and and have got my hands on some leda struts to fit, so hopefully that will be job done. I might need to investigate the damping (bump/rebound) though. The later works cars ran 525/225, so it would be miraculous to say the least if the ledas turned out similar, so I might send them off to Gaz where the ex leda boys are for a re-valve. For the peace of mind alone it will be worth it.
James with the Sapphire on here with a Jag diff needed to get some spacers made up for the drive shafts we both have. Mark from MK did those for him, so this week I've asked him to fab some up for me too.
I've also ordered a custom alloy radiator from Rad Tec. As I don't need to make space for an intercooler I can spec the rad much taller - it'll go right up under the slam panel, so basically it'll be the size of a large RS500 intercooler. I've pushed the boat out and ordered twin 14" spal fans as well as based on my short experience of the car on the road, cooling is at a premium!
Over the next month Mat is looking at final weld up of the engine bay triangulation. Before paint the engine will be trial fitted to see how the steering column looks with the manifold - it was close before and might be different again with the pas rack fitted now. Once that's sorted then the bay can have a fresh lick of paint and it's time to move on.
I'm getting desperate to drive the thing already! My mates are off to a track day at Oulton Park next week (Ginetta and Lotus 2-11) so I'm hoping to tag along and have a bit of a ride with them. I can't wait to do the same in mine!!!
Cheers
Iain
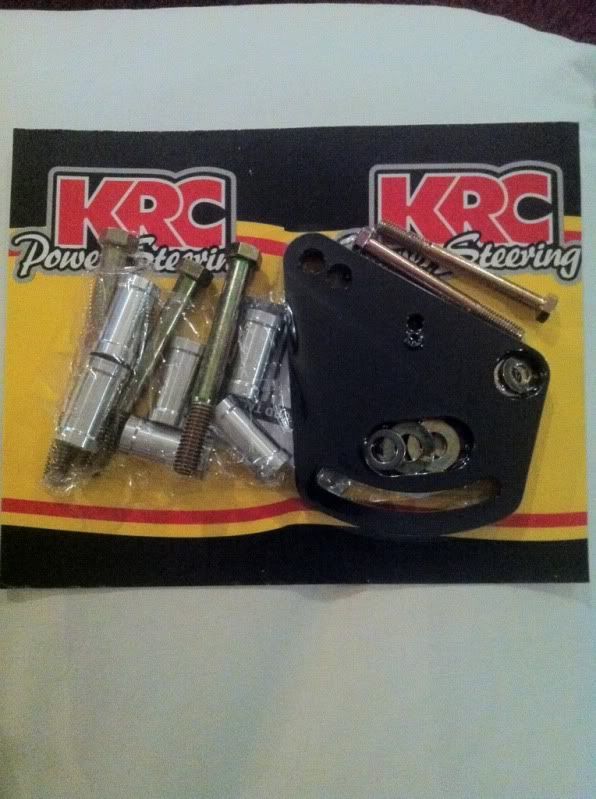
I've sourced a few steering bits and pieces in the States which I had sent to a mate in California, who I hooked up with last week, so it turned out to be a cheap way of getting them home.
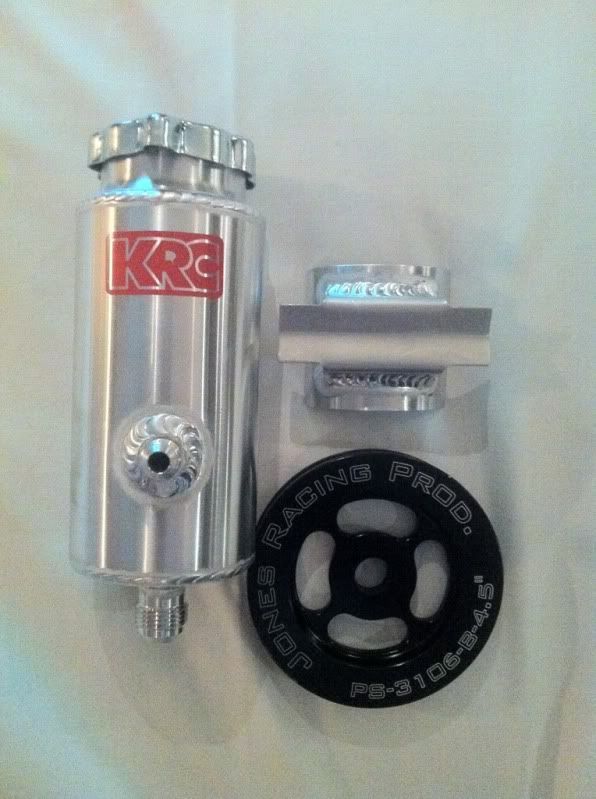
I went to KRC for a PAS resevoir and fitting bracket for the nascar pump I have. The fitting bracket attaches to bosses on the cylinder head. I hope I have enough clearance for the pulley now, but time will tell.


You can also see here the new V belt pulley I needed to replace the existing one. With any luck that will be PAS sorted now.
The build has been progressing on the front end, with the turret triangulation sorted and just waiting final welding. Mat has managed to avoid the fan motor, by fabricating box section to the bulkhead which mates up to the tube sitting behind the dash.

Looking back I don't think I posted the more recent pics of the cage on the inside - looking the part in there now.

The new ZF pas rack is also in using my original cross member - with a bit of persuasion from the MDA chaps..

The suspension top mounts have also been sorted, and look the part - well chuffed with how they turned out

Less successful has been the front bilsteins and scorpio hubs. I've ended up with all sorts of clearance issues there. This is with spacers on, and it's still touching the rim - they just don't reach out far enough compared to the Cossie ones.

I thought some 4x4 gp A hubs I had might solve it, but they'll throw the wheels out too far, I'll never get them tucked under the arches! So I've decided to keep the 3dr hubs and and have got my hands on some leda struts to fit, so hopefully that will be job done. I might need to investigate the damping (bump/rebound) though. The later works cars ran 525/225, so it would be miraculous to say the least if the ledas turned out similar, so I might send them off to Gaz where the ex leda boys are for a re-valve. For the peace of mind alone it will be worth it.
James with the Sapphire on here with a Jag diff needed to get some spacers made up for the drive shafts we both have. Mark from MK did those for him, so this week I've asked him to fab some up for me too.
I've also ordered a custom alloy radiator from Rad Tec. As I don't need to make space for an intercooler I can spec the rad much taller - it'll go right up under the slam panel, so basically it'll be the size of a large RS500 intercooler. I've pushed the boat out and ordered twin 14" spal fans as well as based on my short experience of the car on the road, cooling is at a premium!
Over the next month Mat is looking at final weld up of the engine bay triangulation. Before paint the engine will be trial fitted to see how the steering column looks with the manifold - it was close before and might be different again with the pas rack fitted now. Once that's sorted then the bay can have a fresh lick of paint and it's time to move on.
I'm getting desperate to drive the thing already! My mates are off to a track day at Oulton Park next week (Ginetta and Lotus 2-11) so I'm hoping to tag along and have a bit of a ride with them. I can't wait to do the same in mine!!!
Cheers
Iain
Last edited by IainRS1700T; 01-06-2013 at 09:25 PM. Reason: Reinstating photo links
 14-04-2012, 04:31 AM
#90
Regular Contributor

Hi ian looking good some nice touches,going to be a lot of fun when it is finished.Been talking to the lad who has been restoring brians rs1700t and a lad in south Africa dont want to post any thing on internet, this is my email address paulrs1700t@hotmail.co.uk speak soon regards paul
15-04-2012, 07:55 PM
#93
PassionFord Regular
Thread Starter
Yep cheers for that Paul, have replied!
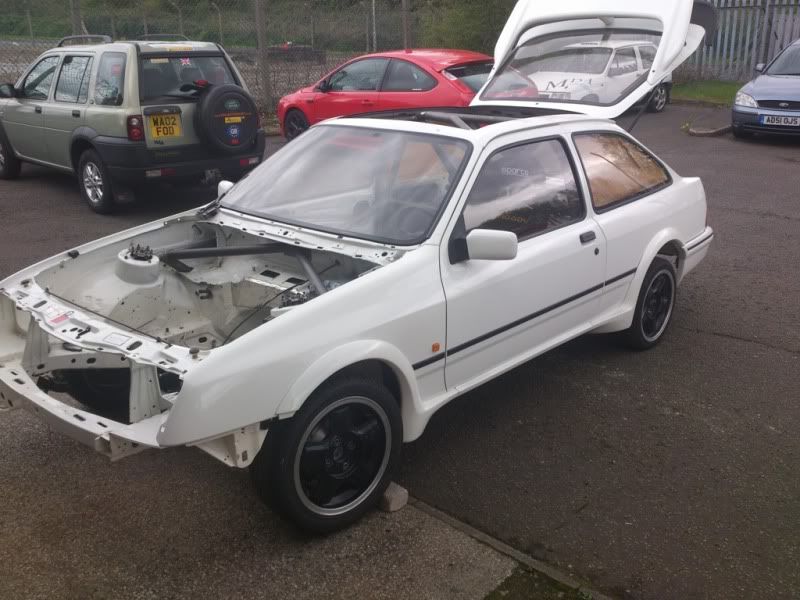
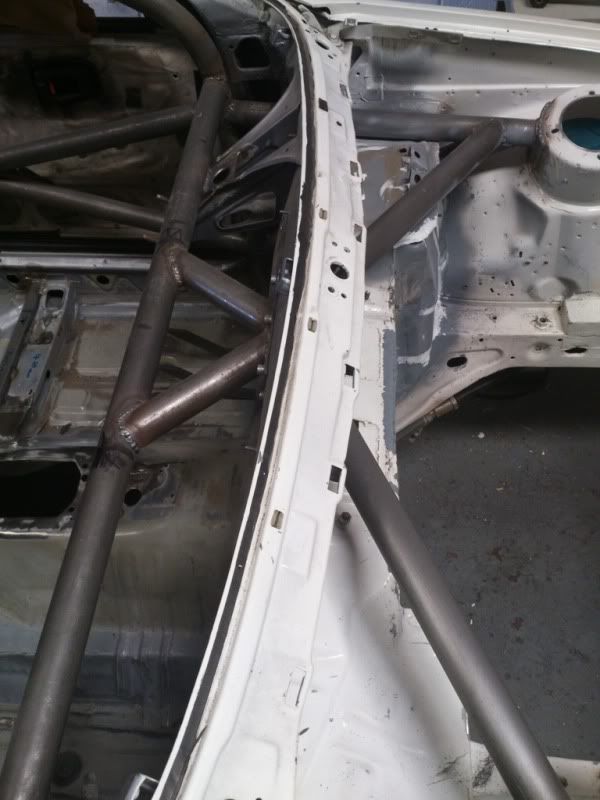
I've got a shed load of pics through from Mat at MDA which bring the whole cage build up to date, so I thought I'd stick them up here.
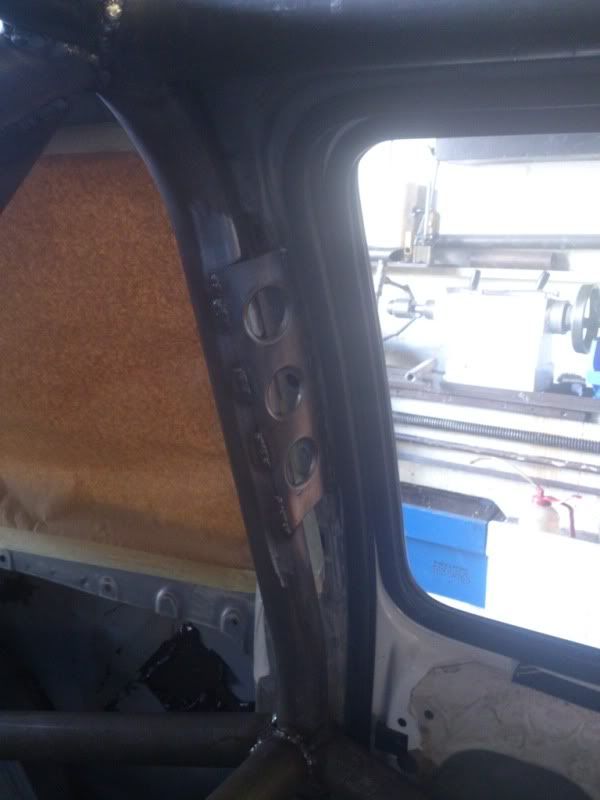
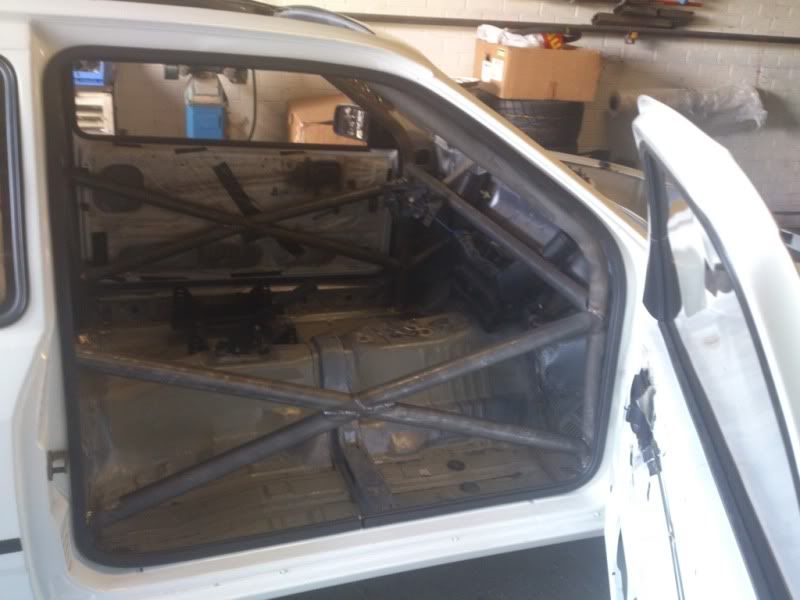
I love the one with no roof on - can't wait to see the carbon roof filling the space tho. The screen has to come out for the bracing of the windscreen pillar bars, so it will give us the chance to bond the roof properly into the screen aperture, rather than just tuck it under the rubber.

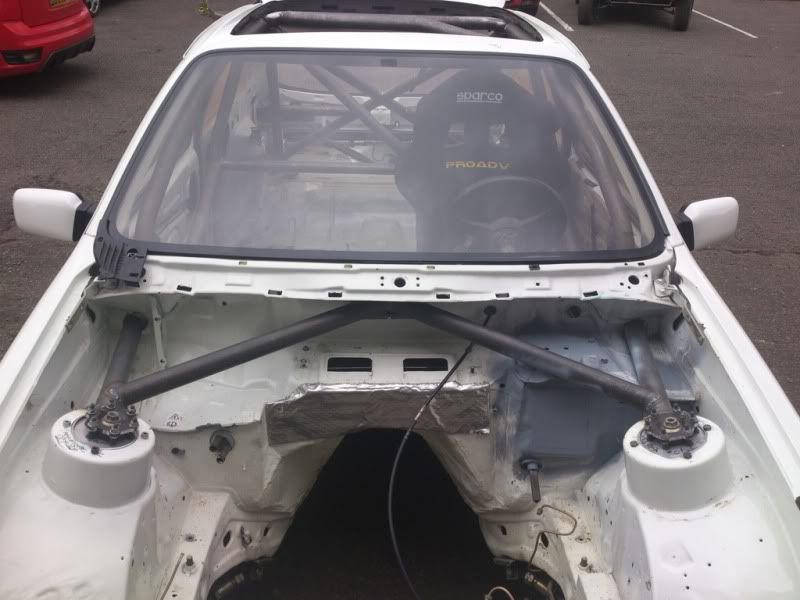
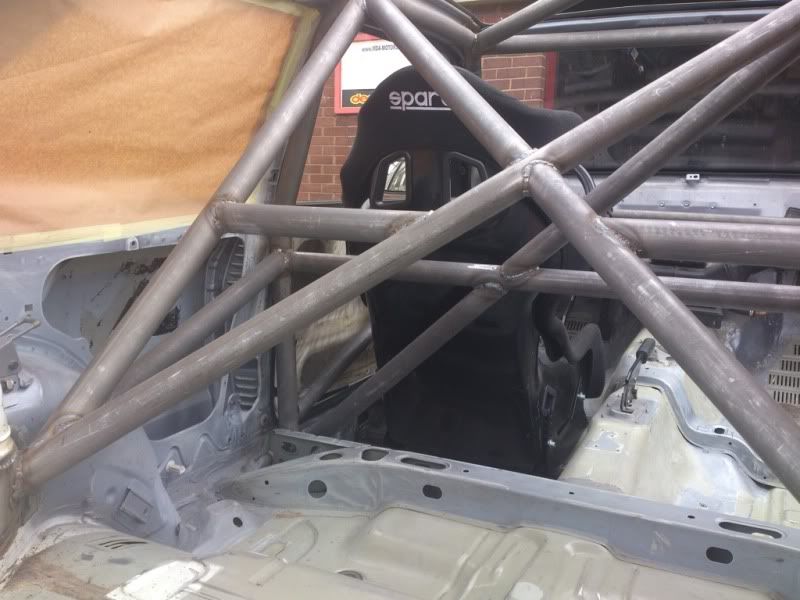
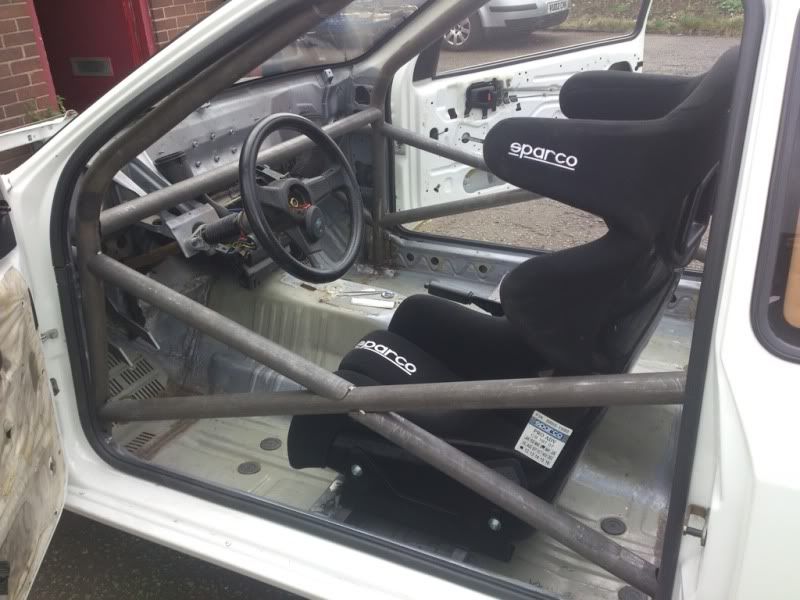
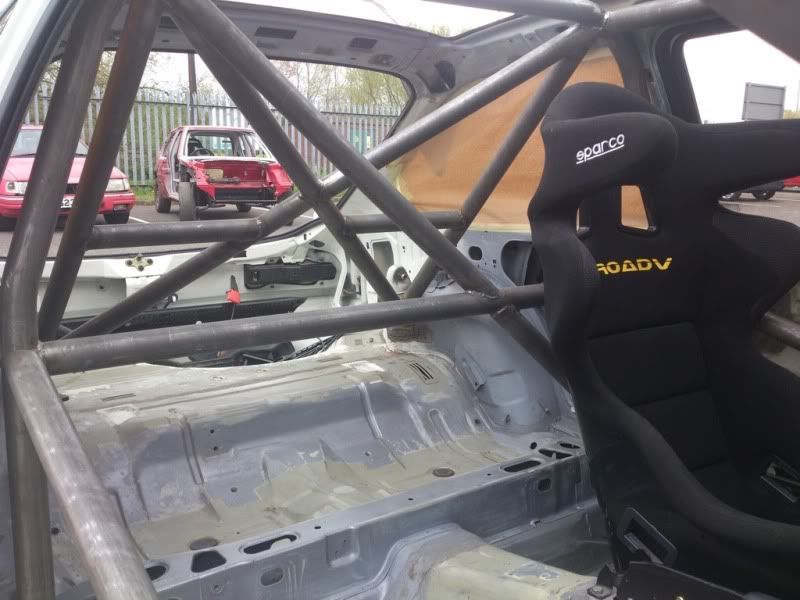
Apart from bracing the pillar bars, the only remaining part of the cage to finish is the triangulation between the rear turrets which will form a rigid mounting for the top of the Jag LSD. All good stuff and my thanks go to Mat and Adrian at MDA for the late nights and weekends so far!
Cheers
Iain
I've got a shed load of pics through from Mat at MDA which bring the whole cage build up to date, so I thought I'd stick them up here.
I love the one with no roof on - can't wait to see the carbon roof filling the space tho. The screen has to come out for the bracing of the windscreen pillar bars, so it will give us the chance to bond the roof properly into the screen aperture, rather than just tuck it under the rubber.


Apart from bracing the pillar bars, the only remaining part of the cage to finish is the triangulation between the rear turrets which will form a rigid mounting for the top of the Jag LSD. All good stuff and my thanks go to Mat and Adrian at MDA for the late nights and weekends so far!
Cheers
Iain
Last edited by IainRS1700T; 01-06-2013 at 09:46 PM. Reason: Reinstating photo links
15-04-2012, 11:54 PM
#94
Regular Contributor
Very nice Ian bet you well pleased,You carnt beat some proper fabrication,and taking screen out to do the roof is definitely right way to go, it will look allot better and possibly having the windscreen seal not sitting right and leaking in water is a big no no.
speak soon Paul. PS you have mail, thanks for reply, glad you liked
speak soon Paul. PS you have mail, thanks for reply, glad you liked
21-04-2012, 05:22 PM
#96
PassionFord Regular
Thread Starter
Hi Chaps,
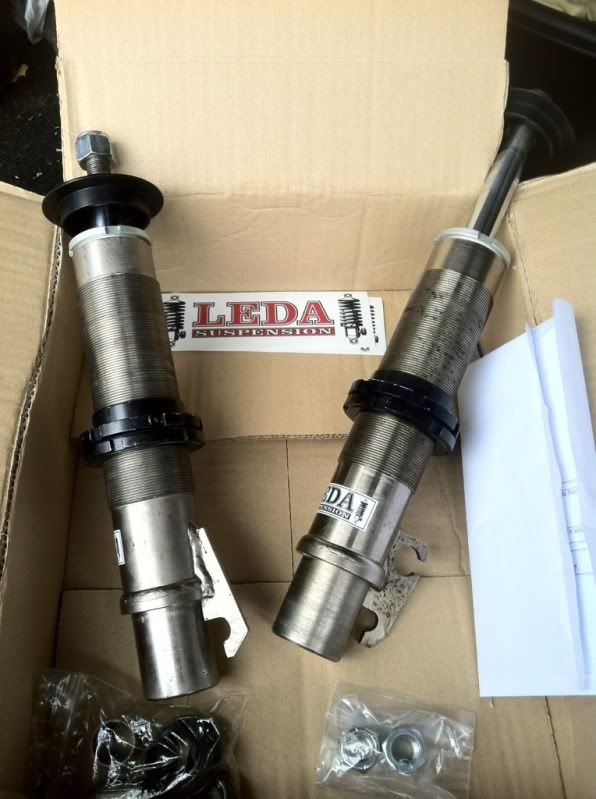
I've made a bit of progress on the dampers I got last week to replace the bilsteins.
I've got these units from RS breakers down in Portsmouth:

These are 3dr specific, & although a few yrs old are actually unused. Leda are happy to rebuild and spec them how I want, which would be fine, but obviously cost a few bob. What I really wanted to do is find out how they are set up to begin with.
As luck would have it Blink Motorsport turned up in a search, and they're just a few miles down the road from me.
http://www.blinkmotorsport.com/index.html
I spoke to Richard there this morning and left the dampers with him.
They have a damper dynomometer which can give me an accurate assessment of bump & rebound (and a whole lot more I didn't understand!)
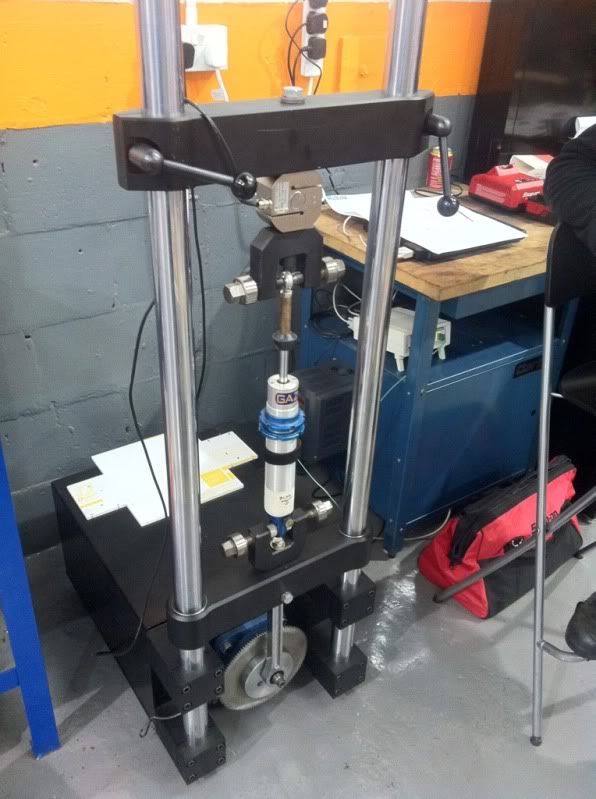
They need to rig up a different lower mount to take the base of the strut, but hopefully by next week I should have some numbers..
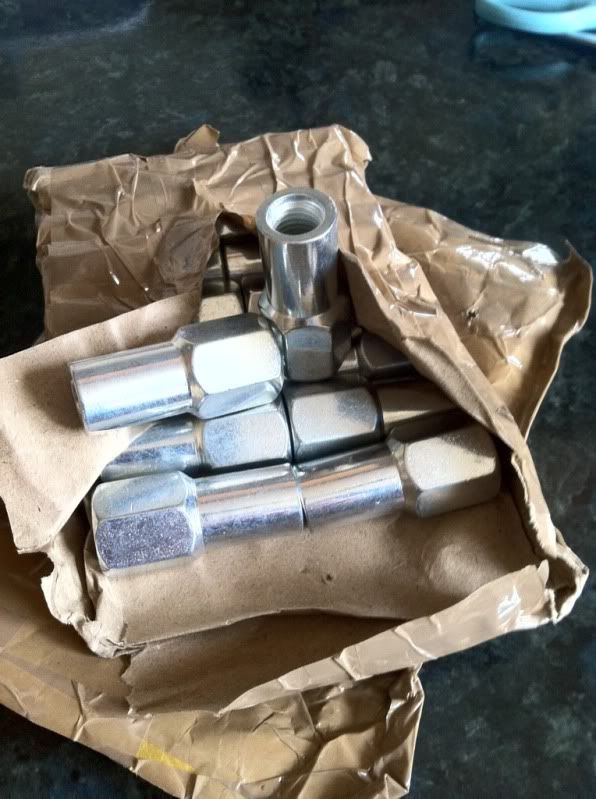
Mat at MDA also discovered last week my compo's were group A fitting. I hadn't realised, so hastily ordered some of the conversion nuts off the 'bay which arrived this week so I can fit them to standard studs:
I've also been collecting more hose fittings than you can shake a stick at for oil cooler, fuel system and oil breather/catch tank, just to make sure the build isn't held up further down the line. A fuel swirl pot's on the way too..
I had a blast at the MSV track day at Oulton Park last week, and spent the afternoon today spectating at the Lancer Register's sprint championship Rd2 at Oulton Park - that looked great fun and very professional too. With untimed practice in the morning and timed runs in the afternoon, competitors got about 20 runs in which ain't bad for Ł120..
Cheers
Iain
I've made a bit of progress on the dampers I got last week to replace the bilsteins.
I've got these units from RS breakers down in Portsmouth:

These are 3dr specific, & although a few yrs old are actually unused. Leda are happy to rebuild and spec them how I want, which would be fine, but obviously cost a few bob. What I really wanted to do is find out how they are set up to begin with.
As luck would have it Blink Motorsport turned up in a search, and they're just a few miles down the road from me.
http://www.blinkmotorsport.com/index.html
I spoke to Richard there this morning and left the dampers with him.
They have a damper dynomometer which can give me an accurate assessment of bump & rebound (and a whole lot more I didn't understand!)

They need to rig up a different lower mount to take the base of the strut, but hopefully by next week I should have some numbers..
Mat at MDA also discovered last week my compo's were group A fitting. I hadn't realised, so hastily ordered some of the conversion nuts off the 'bay which arrived this week so I can fit them to standard studs:

I've also been collecting more hose fittings than you can shake a stick at for oil cooler, fuel system and oil breather/catch tank, just to make sure the build isn't held up further down the line. A fuel swirl pot's on the way too..
I had a blast at the MSV track day at Oulton Park last week, and spent the afternoon today spectating at the Lancer Register's sprint championship Rd2 at Oulton Park - that looked great fun and very professional too. With untimed practice in the morning and timed runs in the afternoon, competitors got about 20 runs in which ain't bad for Ł120..
Cheers
Iain
Last edited by IainRS1700T; 01-06-2013 at 09:36 PM. Reason: Photo links reinstated
25-04-2012, 08:42 PM
#97
PassionFord Regular
Thread Starter
Things havent worked out at Blink for damper testing unfortunately.
Richard explained that their dyno fittings are for dampers with eyelet style fittings (ie for double wishbones) rather than a Macphearson strut style end. They've tried all sorts of ways to clamp it to no avail - at least not without spending loads which would make it unviable cost wise as they don't have the demand.
Nevertheless it was worth a go and the guys clearly know their stuff there. Might be worth paying a visit in the future for a full chassis set up when I'm up and running...
So I've bitten the bullet and sent them off to Leda for a full rebuild. I'm aiming for the last works RS500 settings which were 525/225 at base level (and went up to 600). Roger at Leda has said he might even be able to incorporate some bump/rebound adjustment for me which would be great. Unfortunately they've got a bit of a backlog with the racing season getting underway, but I'll have to wait and get it done right first time.
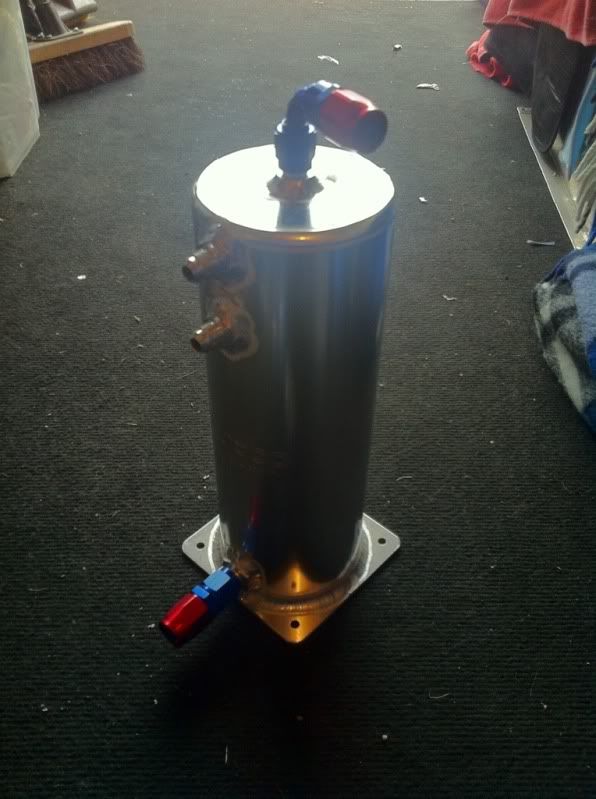
Otherwise not too much to report. I've sorted all my aeromotive fittings now, so just left with a big jigsaw puzzle of part a fits into part b etc etc. My fuel swirl pot from OBP arrived this week. Just a cheapie, and although not pretty, should do the job fine. Trialled here with a few of the fittings that arrived this week too.
I've an in-tank Bosch pump in the ATL cell which will feed into this via -6. It'll be characteristic of usual fuel injection style delivery, but after the swirl pot everything will be -8 and pumped out via Holley pump and regulator to the Holley double pumper carb I'm running. That's all big in vols but lower pressure - typically just 5psi or so - which is much lower than the fuel inj systems. The swirl pot should act as a decent buffer between the two systems, and as long as the in-tank pump can keep the swirl pot topped up I'll be fine.
The rad should be with me from rad-tec next week. I spoke to them today to get some bosses added in on the top, so i can bolt it up to the slam panel. It'll be just a bit of extra support to the mounts under the chassis rails which seems wise given the extra size of it.
The last remaining component in the bay to get hold of will be the oil breather/catch tank. A bit further down the line I'll have a measure up of the space between the cage and the bulkhead and see what can be done.
I went along to another track day with my mates on Tuesday - that's three times along to Oulton Park in the space of a week.. Some nice cars going through their paces - everything from track slag sheds up to Astons and Ferrari GT cars. The boys held their own in the 2-11 Lotus and the Ginetta G20. Great fun - I'm getting so desparate to drive mine now it's killing me.. I keep eyeing up the wife's Impreza but she'd kill me if I stacked it!
Cheers for now,
Iain
Richard explained that their dyno fittings are for dampers with eyelet style fittings (ie for double wishbones) rather than a Macphearson strut style end. They've tried all sorts of ways to clamp it to no avail - at least not without spending loads which would make it unviable cost wise as they don't have the demand.
Nevertheless it was worth a go and the guys clearly know their stuff there. Might be worth paying a visit in the future for a full chassis set up when I'm up and running...
So I've bitten the bullet and sent them off to Leda for a full rebuild. I'm aiming for the last works RS500 settings which were 525/225 at base level (and went up to 600). Roger at Leda has said he might even be able to incorporate some bump/rebound adjustment for me which would be great. Unfortunately they've got a bit of a backlog with the racing season getting underway, but I'll have to wait and get it done right first time.
Otherwise not too much to report. I've sorted all my aeromotive fittings now, so just left with a big jigsaw puzzle of part a fits into part b etc etc. My fuel swirl pot from OBP arrived this week. Just a cheapie, and although not pretty, should do the job fine. Trialled here with a few of the fittings that arrived this week too.

I've an in-tank Bosch pump in the ATL cell which will feed into this via -6. It'll be characteristic of usual fuel injection style delivery, but after the swirl pot everything will be -8 and pumped out via Holley pump and regulator to the Holley double pumper carb I'm running. That's all big in vols but lower pressure - typically just 5psi or so - which is much lower than the fuel inj systems. The swirl pot should act as a decent buffer between the two systems, and as long as the in-tank pump can keep the swirl pot topped up I'll be fine.
The rad should be with me from rad-tec next week. I spoke to them today to get some bosses added in on the top, so i can bolt it up to the slam panel. It'll be just a bit of extra support to the mounts under the chassis rails which seems wise given the extra size of it.
The last remaining component in the bay to get hold of will be the oil breather/catch tank. A bit further down the line I'll have a measure up of the space between the cage and the bulkhead and see what can be done.
I went along to another track day with my mates on Tuesday - that's three times along to Oulton Park in the space of a week.. Some nice cars going through their paces - everything from track slag sheds up to Astons and Ferrari GT cars. The boys held their own in the 2-11 Lotus and the Ginetta G20. Great fun - I'm getting so desparate to drive mine now it's killing me.. I keep eyeing up the wife's Impreza but she'd kill me if I stacked it!
Cheers for now,
Iain
Last edited by IainRS1700T; 01-06-2013 at 09:37 PM.
26-04-2012, 03:47 PM
#98
10K+ Poster!!
iTrader: (4)
Well, this was buried 8 pages back, so it must be time for an update!
I've sourced a few steering bits and pieces in the States which I had sent to a mate in California, who I hooked up with last week, so it turned out to be a cheap way of getting them home.
I went to KRC for a PAS resevoir and fitting bracket for the nascar pump I have. The fitting bracket attaches to bosses on the cylinder head. I hope I have enough clearance for the pulley now, but time will tell.


You can also see here the new V belt pulley I needed to replace the existing one. With any luck that will be PAS sorted now.
The build has been progressing on the front end, with the turret triangulation sorted and just waiting final welding. Mat has managed to avoid the fan motor, by fabricating box section to the bulkhead which mates up to the tube sitting behind the dash.

Looking back I don't think I posted the more recent pics of the cage on the inside - looking the part in there now.

The new ZF pas rack is also in using my original cross member - with a bit of persuasion from the MDA chaps..

The suspension top mounts have also been sorted, and look the part - well chuffed with how they turned out

Less successful has been the front bilsteins and scorpio hubs. I've ended up with all sorts of clearance issues there. This is with spacers on, and it's still touching the rim - they just don't reach out far enough compared to the Cossie ones.

I thought some 4x4 gp A hubs I had might solve it, but they'll throw the wheels out too far, I'll never get them tucked under the arches! So I've decided to keep the 3dr hubs and and have got my hands on some leda struts to fit, so hopefully that will be job done. I might need to investigate the damping (bump/rebound) though. The later works cars ran 525/225, so it would be miraculous to say the least if the ledas turned out similar, so I might send them off to Gaz where the ex leda boys are for a re-valve. For the peace of mind alone it will be worth it.
James with the Sapphire on here with a Jag diff needed to get some spacers made up for the drive shafts we both have. Mark from MK did those for him, so this week I've asked him to fab some up for me too.
I've also ordered a custom alloy radiator from Rad Tec. As I don't need to make space for an intercooler I can spec the rad much taller - it'll go right up under the slam panel, so basically it'll be the size of a large RS500 intercooler. I've pushed the boat out and ordered twin 14" spal fans as well as based on my short experience of the car on the road, cooling is at a premium!
Over the next month Mat is looking at final weld up of the engine bay triangulation. Before paint the engine will be trial fitted to see how the steering column looks with the manifold - it was close before and might be different again with the pas rack fitted now. Once that's sorted then the bay can have a fresh lick of paint and it's time to move on.
I'm getting desperate to drive the thing already! My mates are off to a track day at Oulton Park next week (Ginetta and Lotus 2-11) so I'm hoping to tag along and have a bit of a ride with them. I can't wait to do the same in mine!!!
Cheers
Iain
I've sourced a few steering bits and pieces in the States which I had sent to a mate in California, who I hooked up with last week, so it turned out to be a cheap way of getting them home.
I went to KRC for a PAS resevoir and fitting bracket for the nascar pump I have. The fitting bracket attaches to bosses on the cylinder head. I hope I have enough clearance for the pulley now, but time will tell.
You can also see here the new V belt pulley I needed to replace the existing one. With any luck that will be PAS sorted now.
The build has been progressing on the front end, with the turret triangulation sorted and just waiting final welding. Mat has managed to avoid the fan motor, by fabricating box section to the bulkhead which mates up to the tube sitting behind the dash.
Looking back I don't think I posted the more recent pics of the cage on the inside - looking the part in there now.
The new ZF pas rack is also in using my original cross member - with a bit of persuasion from the MDA chaps..
The suspension top mounts have also been sorted, and look the part - well chuffed with how they turned out
Less successful has been the front bilsteins and scorpio hubs. I've ended up with all sorts of clearance issues there. This is with spacers on, and it's still touching the rim - they just don't reach out far enough compared to the Cossie ones.
I thought some 4x4 gp A hubs I had might solve it, but they'll throw the wheels out too far, I'll never get them tucked under the arches! So I've decided to keep the 3dr hubs and and have got my hands on some leda struts to fit, so hopefully that will be job done. I might need to investigate the damping (bump/rebound) though. The later works cars ran 525/225, so it would be miraculous to say the least if the ledas turned out similar, so I might send them off to Gaz where the ex leda boys are for a re-valve. For the peace of mind alone it will be worth it.
James with the Sapphire on here with a Jag diff needed to get some spacers made up for the drive shafts we both have. Mark from MK did those for him, so this week I've asked him to fab some up for me too.
I've also ordered a custom alloy radiator from Rad Tec. As I don't need to make space for an intercooler I can spec the rad much taller - it'll go right up under the slam panel, so basically it'll be the size of a large RS500 intercooler. I've pushed the boat out and ordered twin 14" spal fans as well as based on my short experience of the car on the road, cooling is at a premium!
Over the next month Mat is looking at final weld up of the engine bay triangulation. Before paint the engine will be trial fitted to see how the steering column looks with the manifold - it was close before and might be different again with the pas rack fitted now. Once that's sorted then the bay can have a fresh lick of paint and it's time to move on.
I'm getting desperate to drive the thing already! My mates are off to a track day at Oulton Park next week (Ginetta and Lotus 2-11) so I'm hoping to tag along and have a bit of a ride with them. I can't wait to do the same in mine!!!
Cheers
Iain
this will be awesome when done
 26-04-2012, 07:01 PM
#99
PassionFord Regular
Thread Starter
Cheers fella.
It was cooling that played me up in it's first incarnation as a road car.
With each piston 4" in diameter they chuck some heat out! With a new rad, bigger fans, new water pump, and thermostatic s/wich plate to a 19row oil cooler, hopefully I will have all bases covered this time!
Cheers
Iain
It was cooling that played me up in it's first incarnation as a road car.
With each piston 4" in diameter they chuck some heat out! With a new rad, bigger fans, new water pump, and thermostatic s/wich plate to a 19row oil cooler, hopefully I will have all bases covered this time!
Cheers
Iain

 28-04-2012, 01:38 PM
#105
PassionFord Regular
Thread Starter
I absolutely love this..
http://www.ebay.co.uk/itm/1984-FORD-...06342157775801
There's a lad with a red 3dr and a 302w V8 in it, but kept sleeper style.
This is crying out for the same treatment!
Iain
http://www.ebay.co.uk/itm/1984-FORD-...06342157775801
There's a lad with a red 3dr and a 302w V8 in it, but kept sleeper style.
This is crying out for the same treatment!
Iain
28-04-2012, 07:31 PM
#106
10K+ Poster!!
iTrader: (4)
Cheers fella.
It was cooling that played me up in it's first incarnation as a road car.
With each piston 4" in diameter they chuck some heat out! With a new rad, bigger fans, new water pump, and thermostatic s/wich plate to a 19row oil cooler, hopefully I will have all bases covered this time!
Cheers
Iain
It was cooling that played me up in it's first incarnation as a road car.
With each piston 4" in diameter they chuck some heat out! With a new rad, bigger fans, new water pump, and thermostatic s/wich plate to a 19row oil cooler, hopefully I will have all bases covered this time!
Cheers
Iain
keep up the good work fella its looking awesome
 28-04-2012, 08:41 PM
#107
PassionFord Regular
Thread Starter
they can be troublesome mate, my 327 chevy on a triple core big rad was getting hot when i had a 12" cheapo ebay fan so i got a pacet 16" puller it was Ł87 but my god it moves some air cured all my problems due to doing constant 0 - 80 mph runs back to back im solely reliant on my fan.
keep up the good work fella its looking awesome
keep up the good work fella its looking awesome
Cheers
Iain
07-05-2012, 09:12 PM
#108
PassionFord Regular
Thread Starter
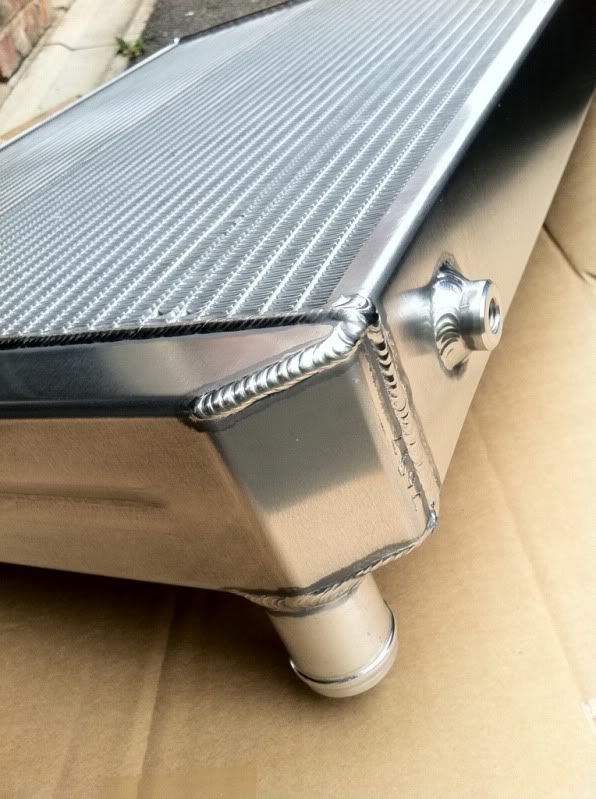
Hey my ]radiator arrived
And if Carlsberg did radiators they'd look like this:
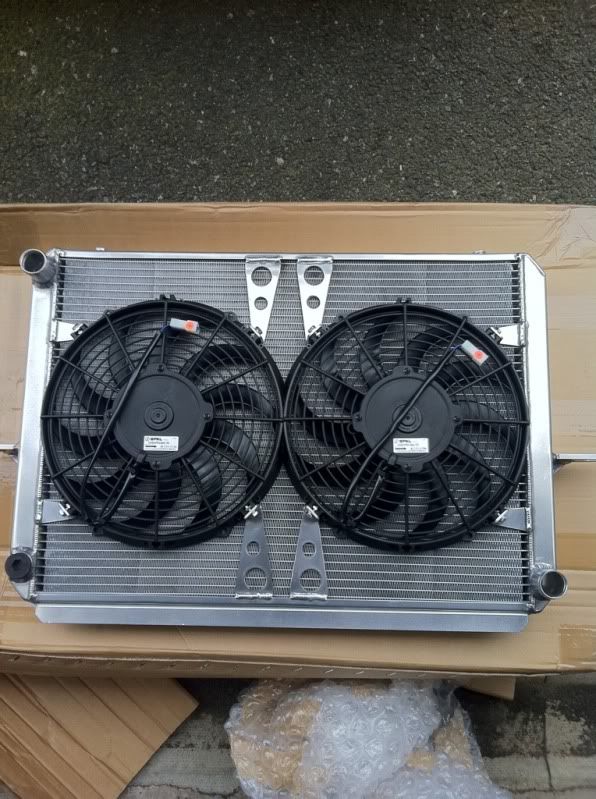
It's a whopper! It's basically the dimensions of a large RS500 style intercooler, so it will tuck right up under the slam panel.
Rad tec welded some bosses to the top so a bracket of two can be used to help support the weight of it. Some sizeable brackets on the side help too.
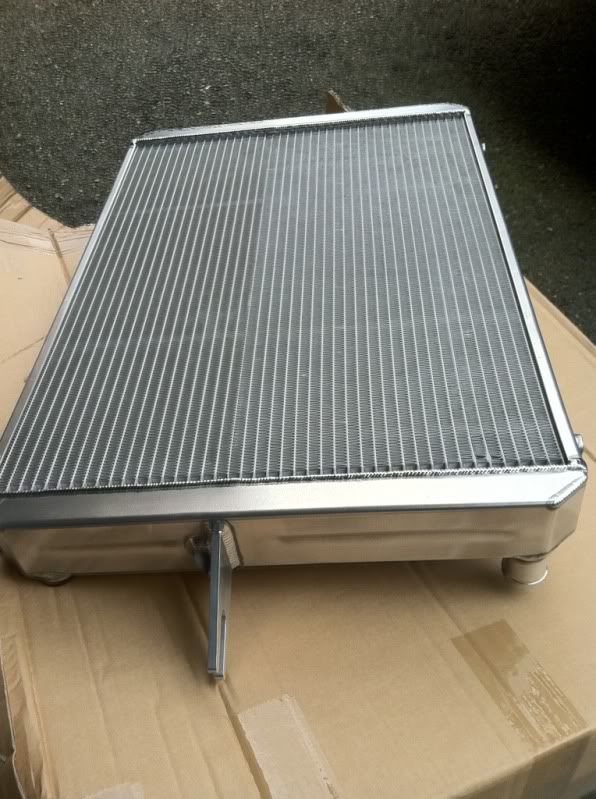
And fair play to rad tec, with the twin Spal fans as well, it wasn't cheap, but the build quality is top notch...
I've also got a load more of these..
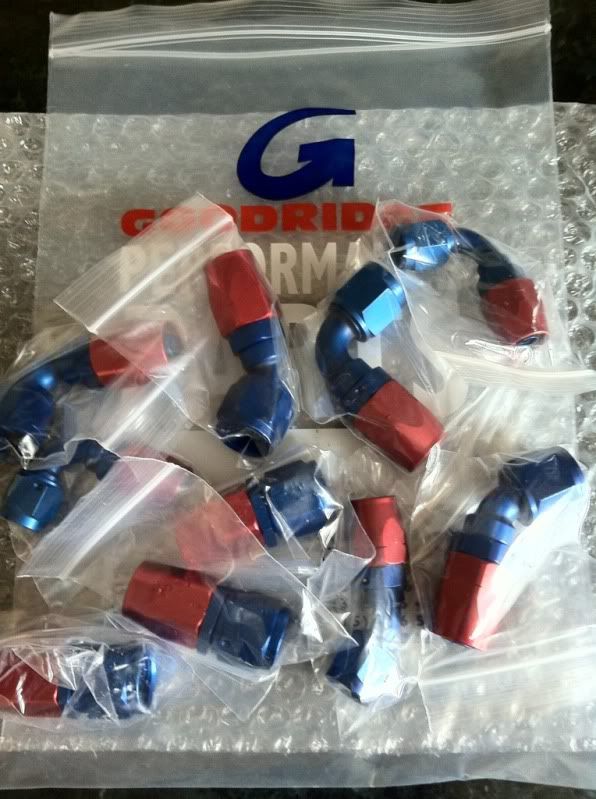
After spending a small fortune on Goodridge stuff a while back, I thought when I needed some more that I'd try one of UK eBay suppliers' own stuff and see if I could save a few bob.
I needn't have bothered.. The stuff was crap, and proved without a doubt that you get what you pay for! Fortunately I got refunded and sent the stuff back, but i did then find a good supplier of Goodridge stuff at decent prices, so I bit the bullet.. (again!)
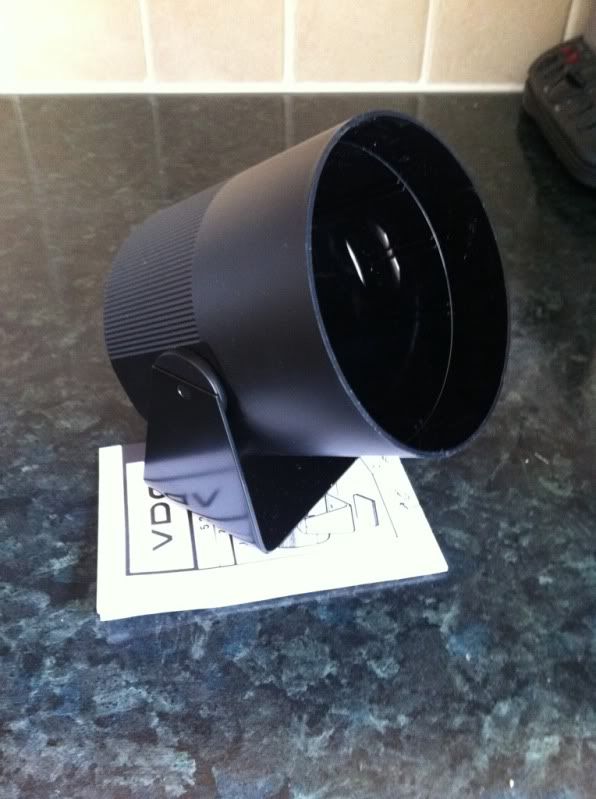
I spent an enjoyable few hours at the Stoneleigh kit car show yesterday, and picked up a VDO gauge pod for my 80mm tacho. I want this thing slap back in my eye line on top of the dash! Then again, at 80mm I shouldn't miss it
The screen came out of the car last week - thankfully in one piece as it was a NOS item - so Mat could weld in the pillar support brackets to the cage. I'm dropping the diff off this week too then the fun can start on the back end of the car...
Cheers for now,
Iain
And if Carlsberg did radiators they'd look like this:

It's a whopper! It's basically the dimensions of a large RS500 style intercooler, so it will tuck right up under the slam panel.
Rad tec welded some bosses to the top so a bracket of two can be used to help support the weight of it. Some sizeable brackets on the side help too.

And fair play to rad tec, with the twin Spal fans as well, it wasn't cheap, but the build quality is top notch...

I've also got a load more of these..

After spending a small fortune on Goodridge stuff a while back, I thought when I needed some more that I'd try one of UK eBay suppliers' own stuff and see if I could save a few bob.
I needn't have bothered.. The stuff was crap, and proved without a doubt that you get what you pay for! Fortunately I got refunded and sent the stuff back, but i did then find a good supplier of Goodridge stuff at decent prices, so I bit the bullet.. (again!)
I spent an enjoyable few hours at the Stoneleigh kit car show yesterday, and picked up a VDO gauge pod for my 80mm tacho. I want this thing slap back in my eye line on top of the dash! Then again, at 80mm I shouldn't miss it

The screen came out of the car last week - thankfully in one piece as it was a NOS item - so Mat could weld in the pillar support brackets to the cage. I'm dropping the diff off this week too then the fun can start on the back end of the car...
Cheers for now,
Iain
Last edited by IainRS1700T; 01-06-2013 at 09:41 PM. Reason: Reinstated links for photos
11-05-2012, 08:36 PM
#109
PassionFord Regular
Thread Starter
Well so much for my posh radiator...
I offered it up to the car when I popped over to MDA yesterday.
With one side correct on the mounting on the chassis rail, look where the other side is:
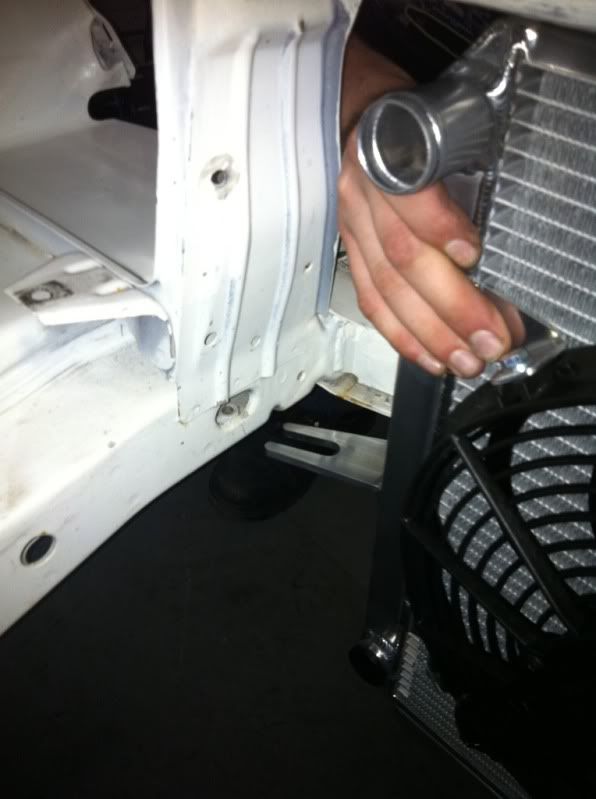
Not good eh? That's going back to radtec on Monday...
On a happier note I'm chuffed to bits with how my US sourced bits have worked out to fit my Nascar pas pump:
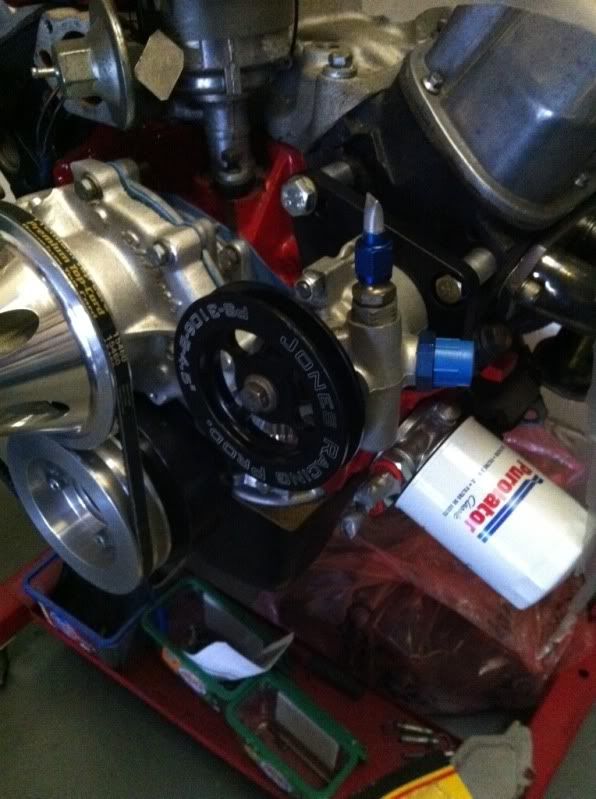
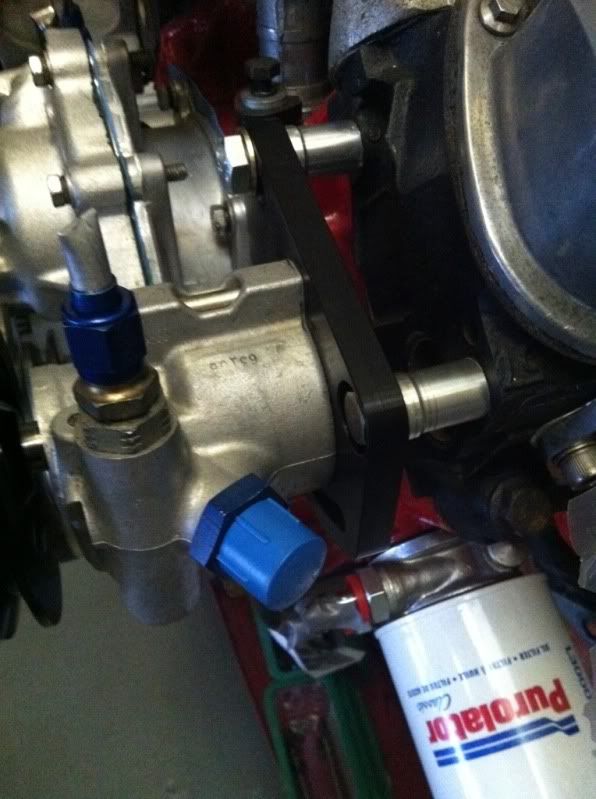
That's worked out a treat. It's funny how the little things can make you smile. It looks like the belt will miss everything so that should be a goer.
I dropped the diff off as well as it's time for Mat to get his thinking cap on and see the best way to mount it picking up the cage.
Talking of the cage the final work was done on bracing the windscreen and B pillars:
That's all from me for now.
Cheers everyone
Iain
I offered it up to the car when I popped over to MDA yesterday.
With one side correct on the mounting on the chassis rail, look where the other side is:

Not good eh? That's going back to radtec on Monday...
On a happier note I'm chuffed to bits with how my US sourced bits have worked out to fit my Nascar pas pump:


That's worked out a treat. It's funny how the little things can make you smile. It looks like the belt will miss everything so that should be a goer.
I dropped the diff off as well as it's time for Mat to get his thinking cap on and see the best way to mount it picking up the cage.
Talking of the cage the final work was done on bracing the windscreen and B pillars:


That's all from me for now.
Cheers everyone
Iain
Last edited by IainRS1700T; 01-06-2013 at 09:44 PM. Reason: Reinstating links for Photos
01-06-2012, 09:05 PM
#110
PassionFord Regular
Thread Starter
Hi Folks,
In Germany with work this week, so with a few mins on my hands I thought I'd update the thread a little bit.
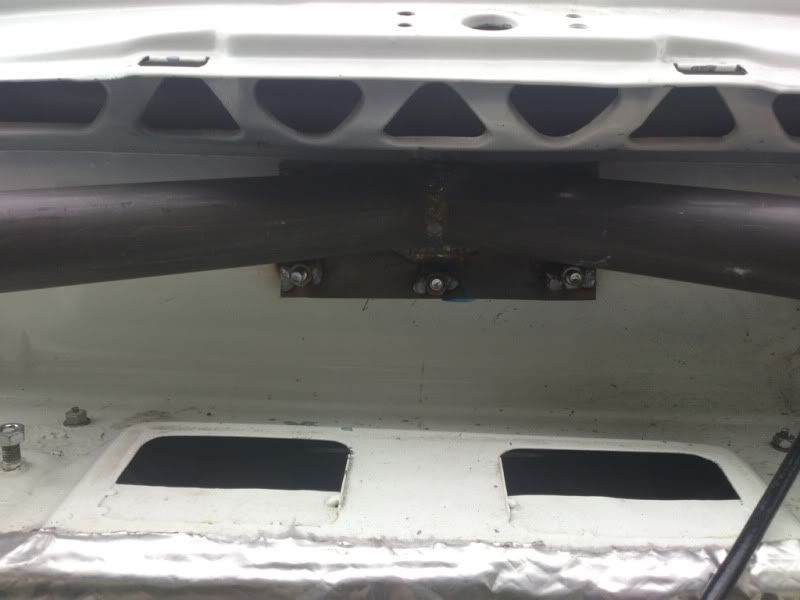
I went over the MDA the other week with a few bits and pieces. Mat is now at the point where we need to think about mounting the diff via the cage through the floor. What we wanted to be careful with was the positioning of the 80L ATL fuel cell in the car; mid cage or in the boot? There was a chance that in the boot, we'd be interfering with the tubes extending from the turrets into the centre of the floor to the top of the diff.
So I loaded up my daily; a Forester STI (I'm quite a fan of the Scoobs too y'know..) with the the fuel cell in it's alloy container, as well as the carbon roof in case that was needed.
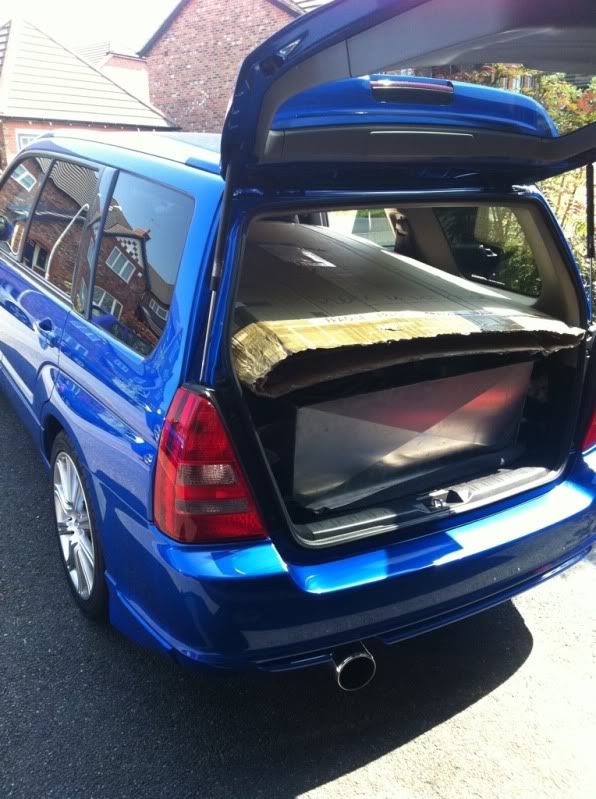
It's a great daily that always puts a smile on my face and can swallow up the whole family and all the crap that comes with them!
At MDA we offered up the cell (minus container) in the middle and the back;
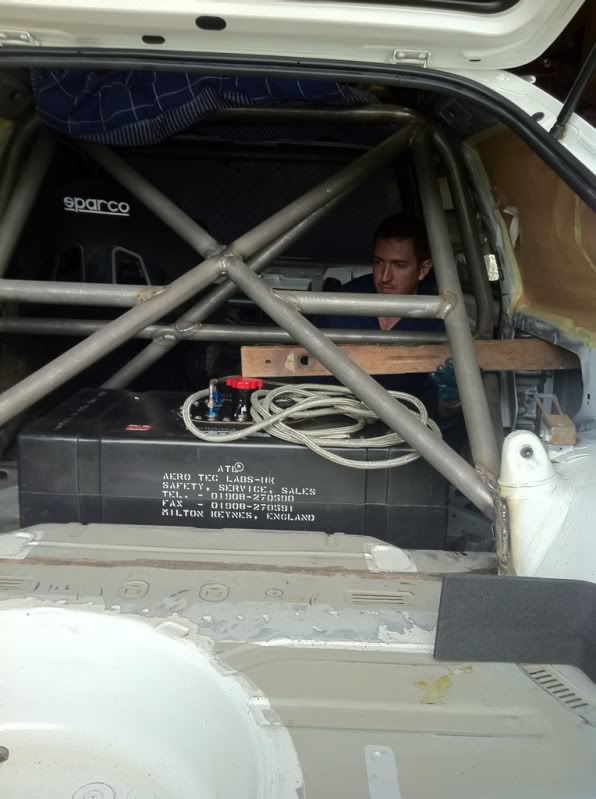
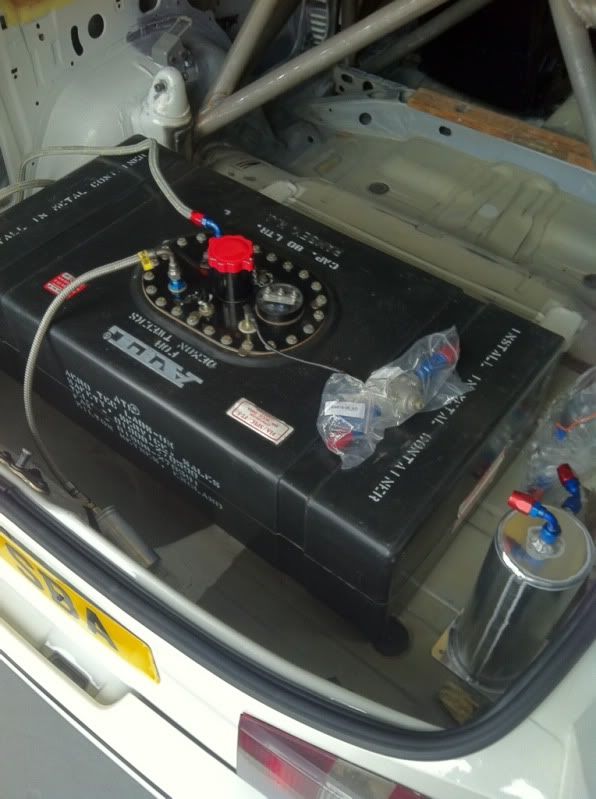
You can see in the middle position there's not alot of fall for a fuel filler cap to the rear qtr panel of the bodywork, and would probably need either a cage mounted filler, or window (if poly-carb) mounted filler.
After some thought, we decided that given the weight of the engine up front that having it out the back would suit weight distribution better, as well as allowing easy filling from inside the boot. It didn't appear to encroach on the likely extensions to the cage for the diff mounting either, so that was job done. We'll even turn the tank the right way round when we fit it Mat will need to fab some supports across the spare wheel well also, as i don't plan to cut that out for a flat floor at this point.
In the coming week or two the boys are looking to mount the engine and box, juggle the bearing position for the steering column so it misses the manifold, and if that's all good take it all out again to paint it. After that it should hopefully be just a large ikea DIY job: fit part a to part b...
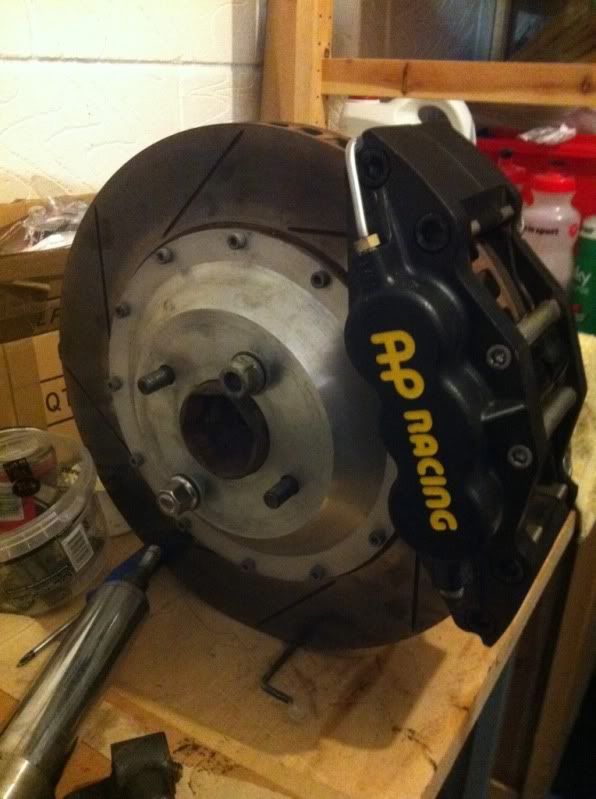
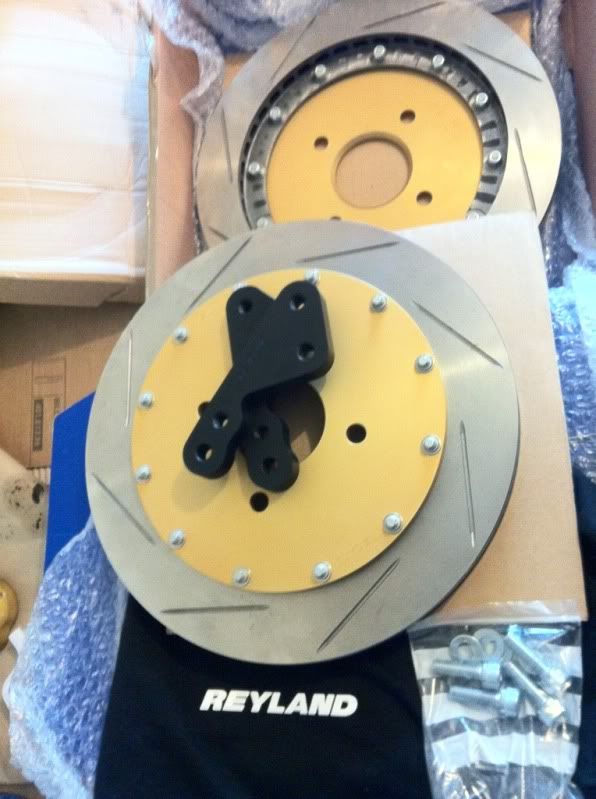
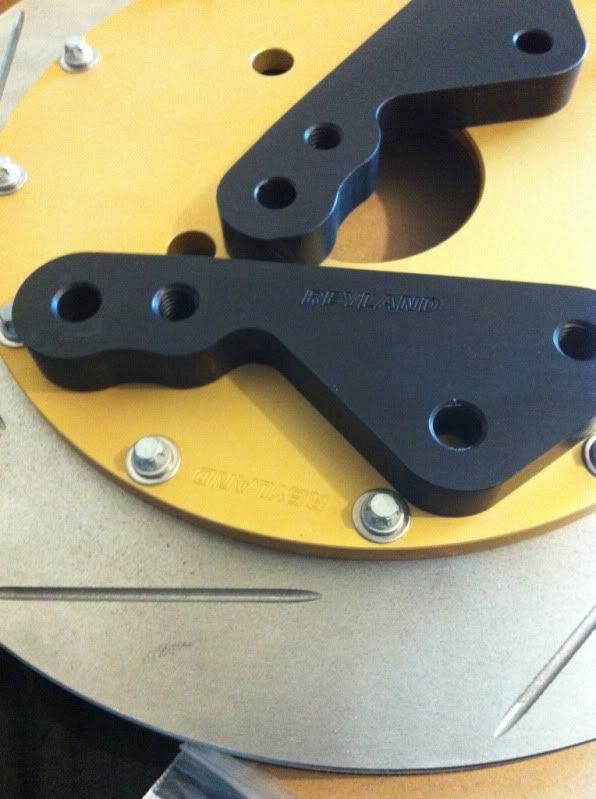
One thing that had been bugging me was the std rear brakes. With the huge AP 6 pots and discs up front, and std 2wd rears it was a pretty unbalanced looking affair. After speaking with Martin at Reyland I ordered his 300mm upgrade kit.
I have to say these are a cracking bit of kit. I was really impressed with the attention to detail, and I'm amazed more folk aren't fitting them to their cars. Apart from great 300mm vented discs, the alloy bells are well finished and engraved with the Reyland logo - so too are the even the anodised brackets. The fixing bolts are decent as well. I sourced a pr 4x4 rear calipers in need of a refurb for peanuts, so that's great set of rear brakes for not much money, and I get to keep the standard handbrake too.
I haven't heard anything from Radtec regarding my rad so I need to get onto them when I get home next week. And that's about it for now.
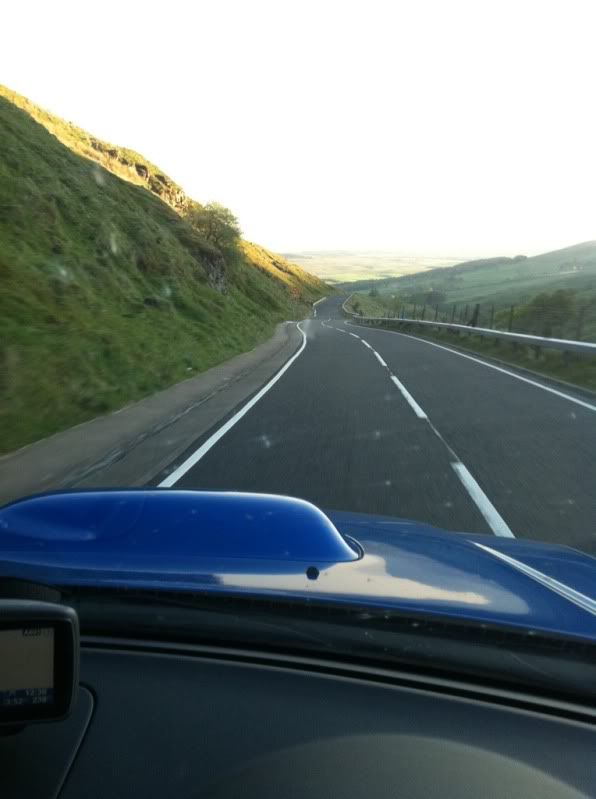
Oh, I've got to tell you.. I went up to Scotland for a family wedding last weekend. On the way up to a castle near Stirling I was driving four up with the Mrs and Kids and was thinking these roads are awesome.. but of course I was doing 40mph... I then thought 'I wonder if I can sneak out for a bit of a drive later on..?' Well that evening we found we were short of milk in the lodge we had rented, so of course I lept at the chance to go and get some... I don't think my good lady was banking on me taking an hour and a half that evening to get it, but bloody hell I had a cracking time in the FSTI on some superb driving roads. It was getting late in the evening and no-one was about but it had been a hot day and was still pretty warm.. My new Yoko advans got a helluva work out I was on the Fintry road - the A803 - to Lennoxtown and it comes highly recommended, as does a FSTI to be fair
Cheers everyone, have a good weekend
Iain
In Germany with work this week, so with a few mins on my hands I thought I'd update the thread a little bit.
I went over the MDA the other week with a few bits and pieces. Mat is now at the point where we need to think about mounting the diff via the cage through the floor. What we wanted to be careful with was the positioning of the 80L ATL fuel cell in the car; mid cage or in the boot? There was a chance that in the boot, we'd be interfering with the tubes extending from the turrets into the centre of the floor to the top of the diff.
So I loaded up my daily; a Forester STI (I'm quite a fan of the Scoobs too y'know..) with the the fuel cell in it's alloy container, as well as the carbon roof in case that was needed.

It's a great daily that always puts a smile on my face and can swallow up the whole family and all the crap that comes with them!
At MDA we offered up the cell (minus container) in the middle and the back;


You can see in the middle position there's not alot of fall for a fuel filler cap to the rear qtr panel of the bodywork, and would probably need either a cage mounted filler, or window (if poly-carb) mounted filler.
After some thought, we decided that given the weight of the engine up front that having it out the back would suit weight distribution better, as well as allowing easy filling from inside the boot. It didn't appear to encroach on the likely extensions to the cage for the diff mounting either, so that was job done. We'll even turn the tank the right way round when we fit it
In the coming week or two the boys are looking to mount the engine and box, juggle the bearing position for the steering column so it misses the manifold, and if that's all good take it all out again to paint it. After that it should hopefully be just a large ikea DIY job: fit part a to part b...
One thing that had been bugging me was the std rear brakes. With the huge AP 6 pots and discs up front, and std 2wd rears it was a pretty unbalanced looking affair. After speaking with Martin at Reyland I ordered his 300mm upgrade kit.
I have to say these are a cracking bit of kit. I was really impressed with the attention to detail, and I'm amazed more folk aren't fitting them to their cars. Apart from great 300mm vented discs, the alloy bells are well finished and engraved with the Reyland logo - so too are the even the anodised brackets. The fixing bolts are decent as well. I sourced a pr 4x4 rear calipers in need of a refurb for peanuts, so that's great set of rear brakes for not much money, and I get to keep the standard handbrake too.


I haven't heard anything from Radtec regarding my rad so I need to get onto them when I get home next week. And that's about it for now.
Oh, I've got to tell you.. I went up to Scotland for a family wedding last weekend. On the way up to a castle near Stirling I was driving four up with the Mrs and Kids and was thinking these roads are awesome.. but of course I was doing 40mph... I then thought 'I wonder if I can sneak out for a bit of a drive later on..?' Well that evening we found we were short of milk in the lodge we had rented, so of course I lept at the chance to go and get some... I don't think my good lady was banking on me taking an hour and a half that evening to get it, but bloody hell I had a cracking time in the FSTI on some superb driving roads. It was getting late in the evening and no-one was about but it had been a hot day and was still pretty warm.. My new Yoko advans got a helluva work out
Cheers everyone, have a good weekend
Iain
Last edited by IainRS1700T; 01-06-2013 at 09:50 PM. Reason: Reinstating links for photos
 25-06-2012, 11:57 AM
#113
PassionFord Regular
Thread Starter
Cheers Chaps
Funnily enough Mark, after a long wait the rad arrived on Thurs and it was still wrong! I actually e-mailed Keith the director to check they'd done anything, or maybe sent the old one back by mistake!
So needless to say it was still coming up short, and I think they believe I have some strangely dimensioned Sierra as they've never had any problems before..
It's back with them now and I've been promised a quick turn around this time, so here's hoping for third time lucky.
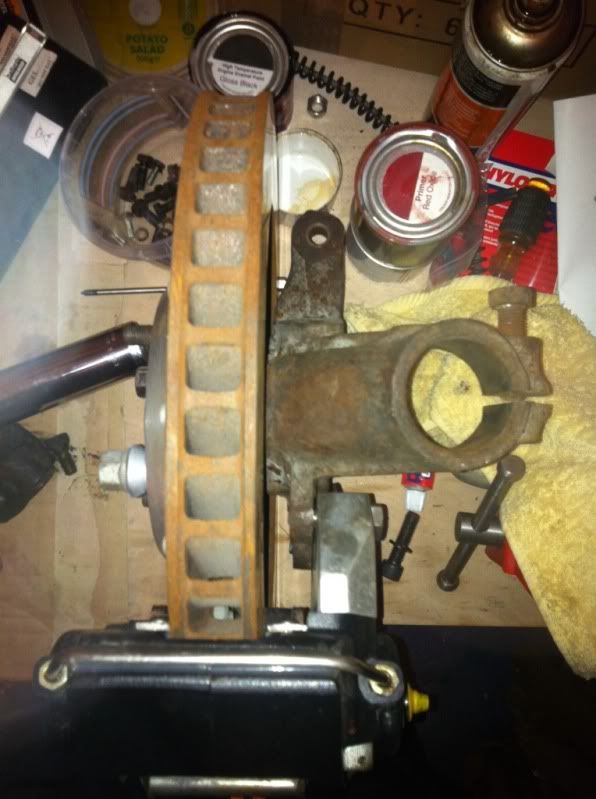
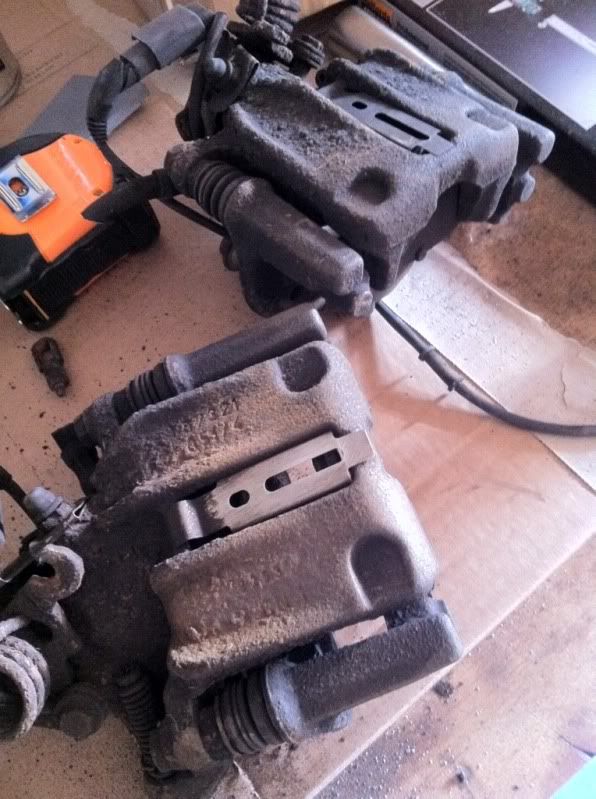
In the meantime I've had my first go at refurbing the rear calipers, which turned out to be straightforward enough:
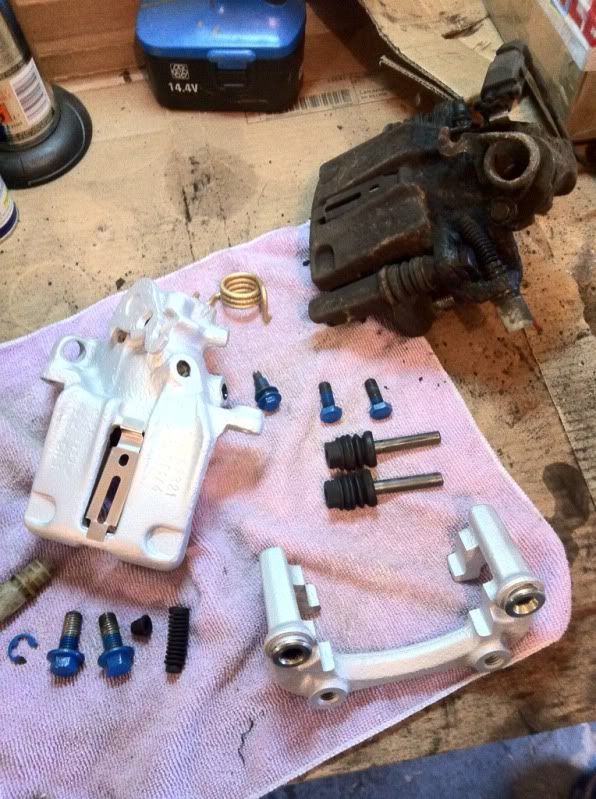
One more to do. Can anyone recommend a good source for new bleed nipples please?!
Roger from Leda has been in touch to say the work has been completed on the front coilovers. I gave him some basic requirements for bump and rebound and left them to it.. He blew my doors off with the technical summary of what they've done, so it might be worth a fuller post to explain everything! I'm pleased with their service though, but I'll have to wait and see how they perform once I'm up and running.
I'm gonna give Mat at MDA a quick bell today for a progress report. I've heard the engine and box are in so that the steering column bearing can be sized up (for column to miss the manifold) it'll be a shame it'll have to come out again though!
Cheers
Iain
Funnily enough Mark, after a long wait the rad arrived on Thurs and it was still wrong! I actually e-mailed Keith the director to check they'd done anything, or maybe sent the old one back by mistake!
So needless to say it was still coming up short, and I think they believe I have some strangely dimensioned Sierra as they've never had any problems before..
It's back with them now and I've been promised a quick turn around this time, so here's hoping for third time lucky.
In the meantime I've had my first go at refurbing the rear calipers, which turned out to be straightforward enough:

One more to do. Can anyone recommend a good source for new bleed nipples please?!
Roger from Leda has been in touch to say the work has been completed on the front coilovers. I gave him some basic requirements for bump and rebound and left them to it.. He blew my doors off with the technical summary of what they've done, so it might be worth a fuller post to explain everything! I'm pleased with their service though, but I'll have to wait and see how they perform once I'm up and running.
I'm gonna give Mat at MDA a quick bell today for a progress report. I've heard the engine and box are in so that the steering column bearing can be sized up (for column to miss the manifold) it'll be a shame it'll have to come out again though!
Cheers
Iain
Last edited by IainRS1700T; 01-06-2013 at 09:51 PM.
15-07-2012, 08:32 PM
#114
PassionFord Regular
Thread Starter
Hi Everyone,
Time for a long overdue update.
A bit of progress to report; the chaps at MDA have mated the Tremec TKO box to the engine and positioned it back in the car...
Adrian found the gearbox touches the tunnel marginally at one point, which a quick 'dressing' will sort.
Other than that it sat in fine. Swapping to a PAS rack is giving us some headaches with the steering column linkage touching the manifold though. It seems like the angle of the pinion in this rack (ZF) is different to the old manual one, and also a Cosworth version, but as its such a good ratio I'll stick with it.
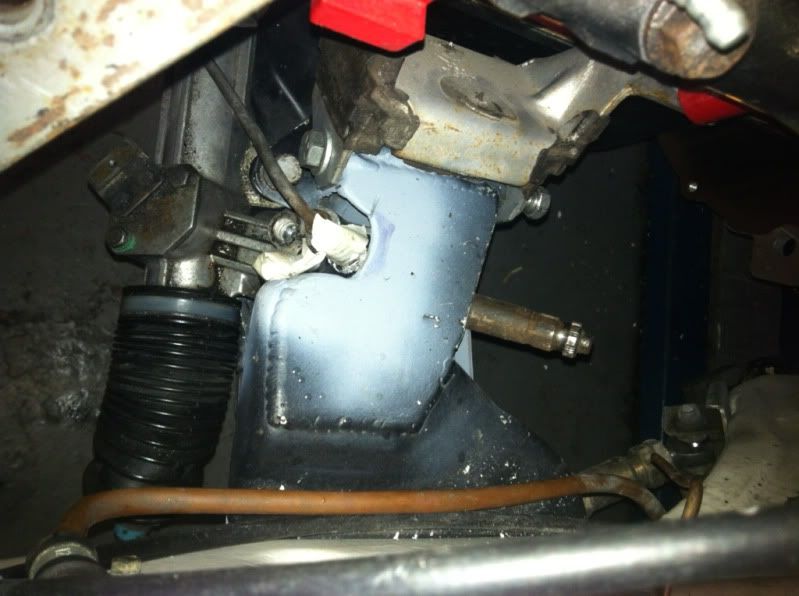
Adrian suggested a 909 UJ might help, so Dewitts got one out to me in 24hrs. They know how to charge though!
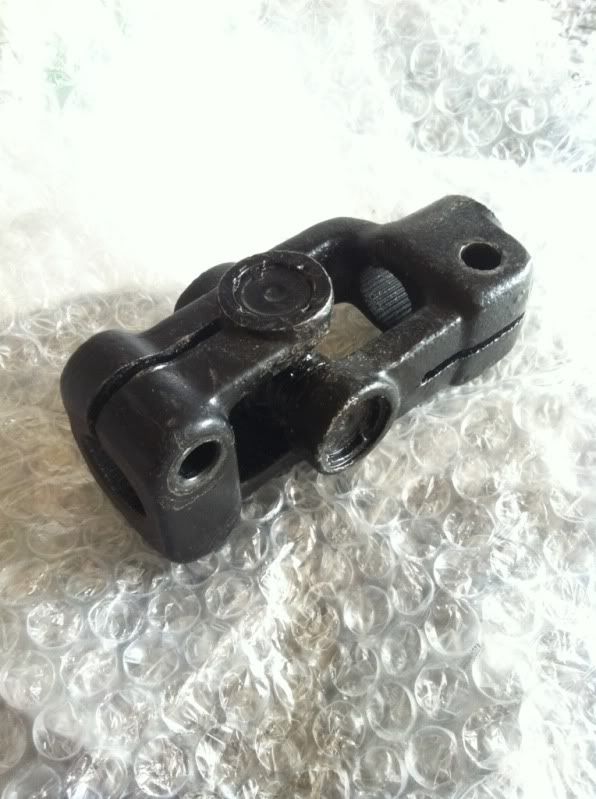
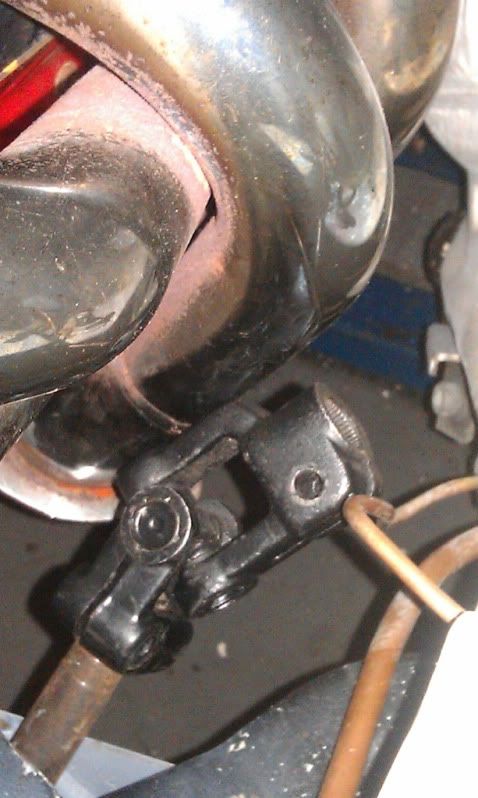
t's certainly a lot slimmer than the regular Ford rubbery-disc job, whilst being alot stronger too I'm sure. The only trouble is it didn't give us quite enough clearance!
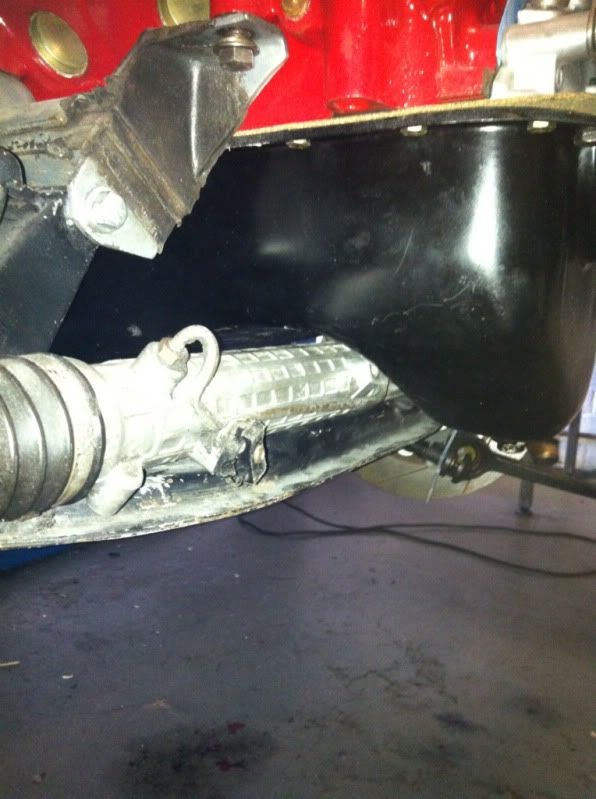
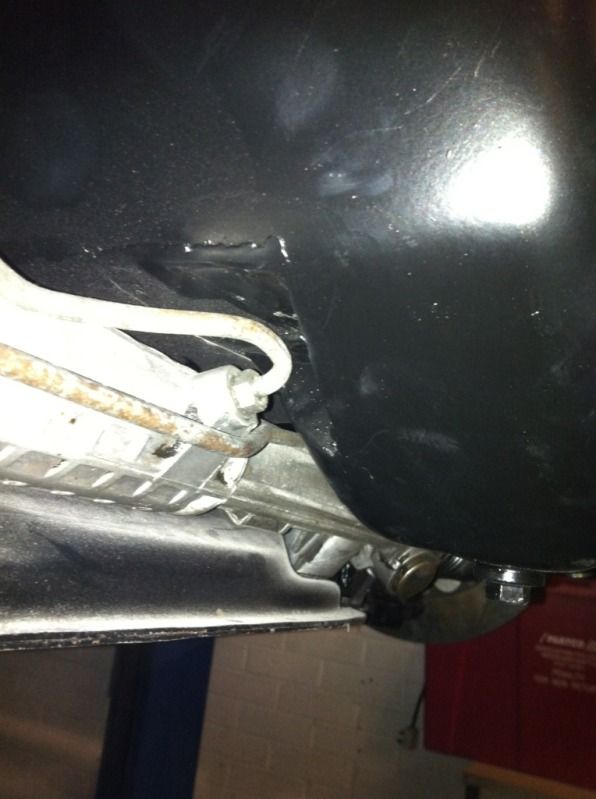
The rack is also giving us problems with the sump as well! Here you can see the mid rack fitting hiding behind the front bowl.. These sumps are made by Ford Racing for Fox body Mustang conversions, so this front part isn't too critical and will take some fabrication without affecting it's function.
As you can tell by now the engine will be coming out again. Mat is going to weld in the brackets for the spherical bearing for the steering column through the bulkhead once the engine's out again. It's a much stronger part than the original plastic bush too.
We'll aim to pull the column across a bit with this bearing, but it won't be enough to make the new UJ work, so we've accepted we'll need to modify the manifold around the column to make it all fit properly.
On a lighter note, these are my rejuvenated Leda coilovers and I dropped them off at MDA too this week.*
I will now ditch the scorpio 24v hubs and Bilsteins and use the Ledas with the original 3dr hubs. And yes... It would have been easier to do that in the first place!*
I'm now working away for a month, so with the diff bars to do and then interior paint hopefully we'll be into assembly mode when I'm back.
Cheers for now,
Iain
Time for a long overdue update.
A bit of progress to report; the chaps at MDA have mated the Tremec TKO box to the engine and positioned it back in the car...


Adrian found the gearbox touches the tunnel marginally at one point, which a quick 'dressing' will sort.
Other than that it sat in fine. Swapping to a PAS rack is giving us some headaches with the steering column linkage touching the manifold though. It seems like the angle of the pinion in this rack (ZF) is different to the old manual one, and also a Cosworth version, but as its such a good ratio I'll stick with it.

Adrian suggested a 909 UJ might help, so Dewitts got one out to me in 24hrs. They know how to charge though!

t's certainly a lot slimmer than the regular Ford rubbery-disc job, whilst being alot stronger too I'm sure. The only trouble is it didn't give us quite enough clearance!


The rack is also giving us problems with the sump as well! Here you can see the mid rack fitting hiding behind the front bowl.. These sumps are made by Ford Racing for Fox body Mustang conversions, so this front part isn't too critical and will take some fabrication without affecting it's function.
As you can tell by now the engine will be coming out again. Mat is going to weld in the brackets for the spherical bearing for the steering column through the bulkhead once the engine's out again. It's a much stronger part than the original plastic bush too.

We'll aim to pull the column across a bit with this bearing, but it won't be enough to make the new UJ work, so we've accepted we'll need to modify the manifold around the column to make it all fit properly.
On a lighter note, these are my rejuvenated Leda coilovers and I dropped them off at MDA too this week.*

I will now ditch the scorpio 24v hubs and Bilsteins and use the Ledas with the original 3dr hubs. And yes... It would have been easier to do that in the first place!*
I'm now working away for a month, so with the diff bars to do and then interior paint hopefully we'll be into assembly mode when I'm back.
Cheers for now,
Iain
Last edited by IainRS1700T; 01-06-2013 at 10:00 PM. Reason: Reinstating links for photos
05-09-2012, 09:14 PM
#116
PassionFord Regular
Thread Starter
It's update time!
I'm pleased to say I've got some good progress to report since last time.
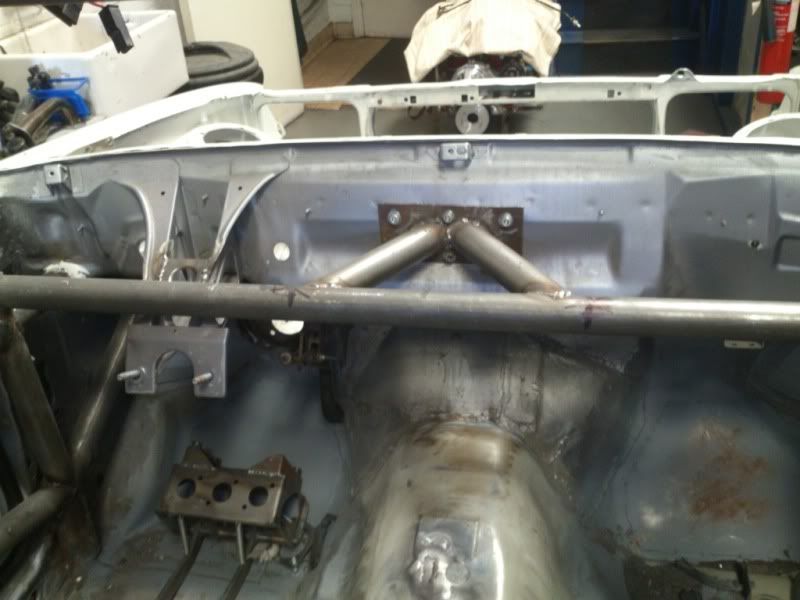
With all the fab work completed recently in the engine bay, Mat at MDA was able to prep, prime and paint the engine bay this weekend just gone.
After the fab work:
Prep and a lick of primer:
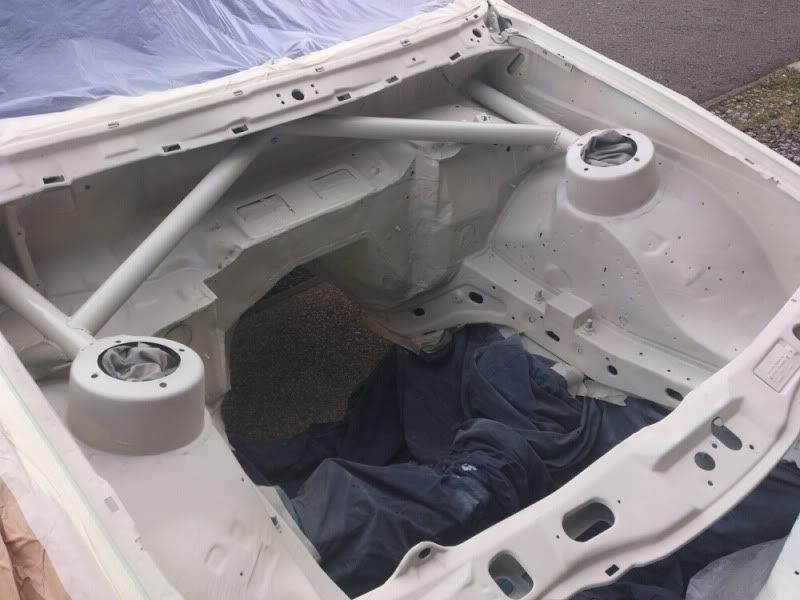
And final coats:
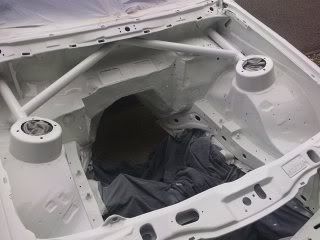
I'm well chuffed with the outcome. Mat won't profess to being a painter, but to my eyes (and for my needs) he's done a great job. It's better now than it ever was before he started!
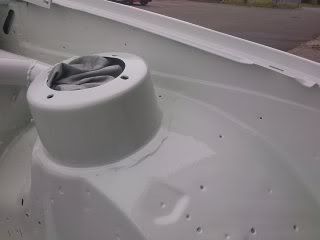
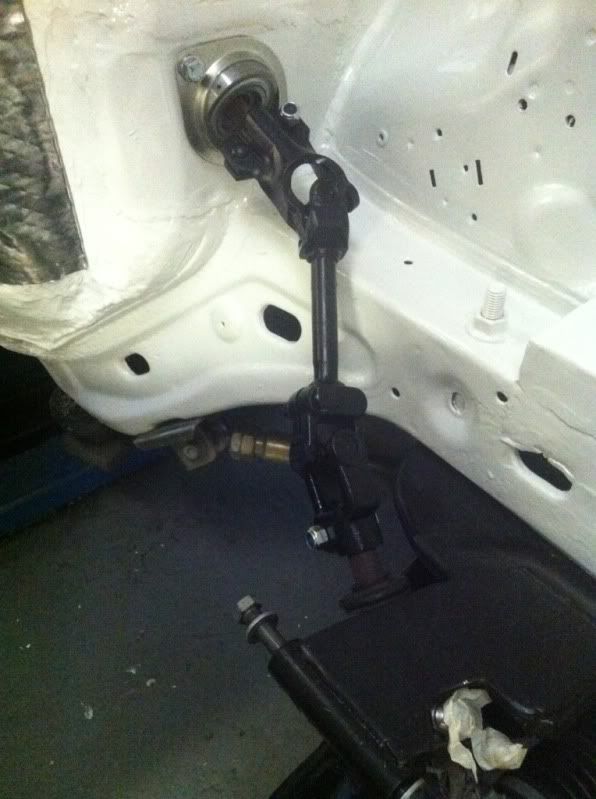
Things are now being refitted in the bay; This is one of my fave bits. It's a pukka bearing (just mocked up here) for the steering column. The bulkhead was prepped specifically for the bearing. It allowed us to play a little with the position of the column, but in conjunction with the 909 UJ and PAS rack should provide a solid and reliable set up and a big improvement on the standard stuff. You can see where the bulkhead has been reinforced for the bias-box also.
Adrian made me a pair of top nuts for the struts. With the strut bearing sitting on top hats, a sleeved nut with the thread extending down through the mount was needed. It's in the manner of the original Bilstein 909 nuts, but different diameter & thread. (Didn't get such a good pic of that..)
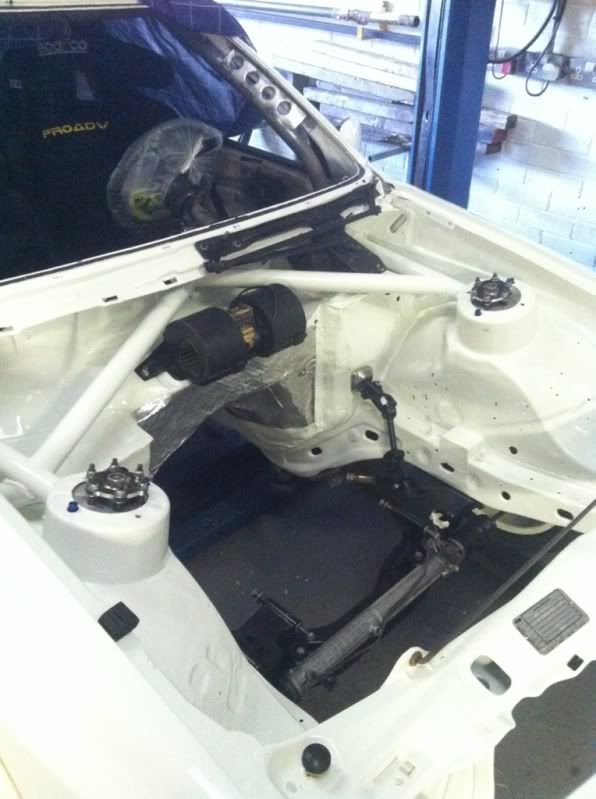
Heater blowers, some heat insulation, all front suspension, cross member and rack are all in waiting for the engine now.
The sump was fouling the PAS fitting half way along the rack very slightly, so that needs a little fettling. A new sump gasket is on it's way so once the sump is done that little lot and the box can go back in for good!!!
The gearbox cross member I'd used on the C4 auto box (ie a bit of flat steel and two bushes) works a treat on the Tremec box too, so that will be pressed into service and the tunnel needed only a slight tap to allow the box to fit. Mat un-did a few bits inside where the previous ratchet shifter lived as well.
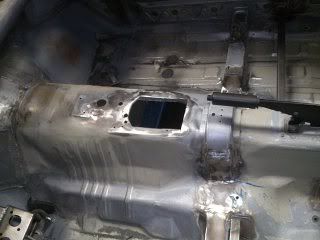
With the front suspension properly in position, the front wheels are on and gave us a chance to assess fitment. Based on this pic, we've got some work to do!
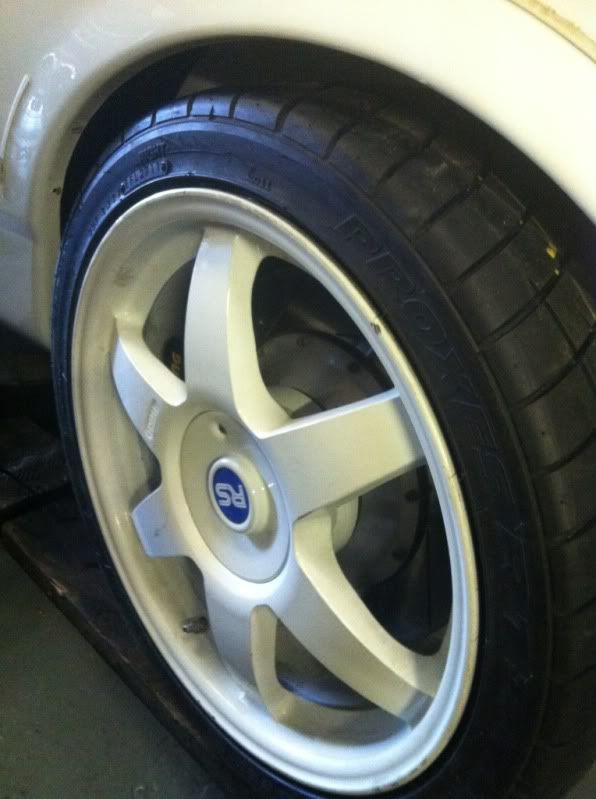
Well, wheel arches are over-rated anyway! I've done a lot of reading on how the works teams used to tackle this - especially when they got to running 18's on the front towards the end of the RS500 touring car campaigns. There was a couple of different approaches, but it's clear there was quite alot of major surgery going on. I'll be looking to trim a good inch of the arch (on the wing) pretty much most of the way around, and possibly flare it a bit; then trim the lip off the inside of the bodykit arch and bond it on. The flare will help kick out the bodykit just a fraction. Some of the teams actually re-positioned the bodykit - rotating it upwards and back towards the door slightly to gain more clearance. If you look at some of the RS500 touring cars and see 1/2" gap or more at the leading edge of the plastic arch to the top of the bumper, then this is what they've been up to...
Finally Radtec came through with the radiator (hooray)! It only took three attempts, and even now I'm not sure they believe the dimensions I asked for to fit the Sierra chassis rails, but at least we're there now. My daughter managed to delete the rad pic before I've saved it, but suffice it to say it fits well, and on this last occasion I managed to get them to leave the supports un-slotted, so we can drill some mounting holes exactly where we want them.
Matt has prepped up the rear beam and diff location, and seems confident that the powr-loc Jag diff will sit ok. I've been waiting on the necessary spacers for the Wilson drive shafts since April (!) but have been promised they will be with us this week then everything can be properly mated up and fabbed into position.
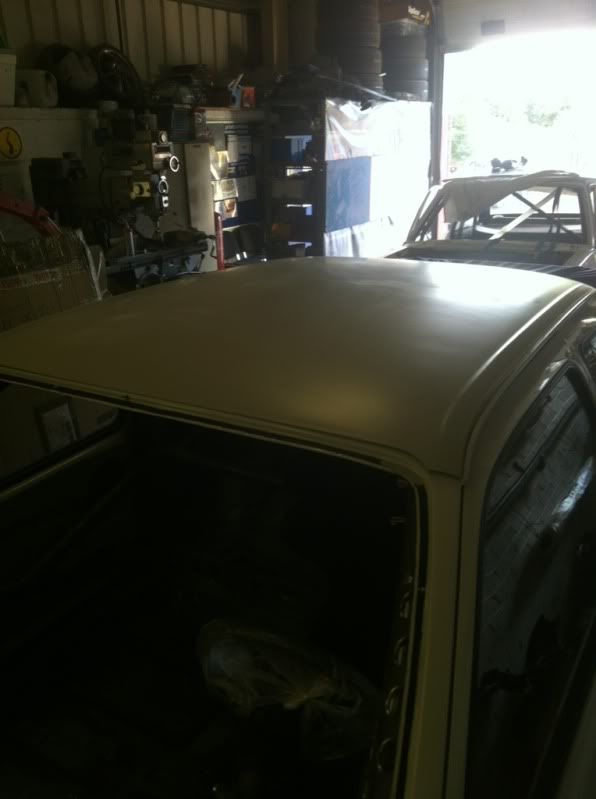
That will get us back to rolling status again and at that point it goes off to the paintshop for the interior and carbon roof to be painted. We laid the roof on this week to see how it fits, and it fitted great. Nothing two mins of sandpaper won't sort, and as it's already primed, it's ready to be bonded in place. I'm sure with a full cage in, the painter will be making full use of the hole in the roof though, before bonding the roof on
Hopefully a couple of weeks will see it back with MDA and fully painted. I can't wait!!!!!
Cheers all,
Iain
I'm pleased to say I've got some good progress to report since last time.
With all the fab work completed recently in the engine bay, Mat at MDA was able to prep, prime and paint the engine bay this weekend just gone.
After the fab work:


Prep and a lick of primer:

And final coats:


I'm well chuffed with the outcome. Mat won't profess to being a painter, but to my eyes (and for my needs) he's done a great job. It's better now than it ever was before he started!
Things are now being refitted in the bay; This is one of my fave bits. It's a pukka bearing (just mocked up here) for the steering column. The bulkhead was prepped specifically for the bearing. It allowed us to play a little with the position of the column, but in conjunction with the 909 UJ and PAS rack should provide a solid and reliable set up and a big improvement on the standard stuff. You can see where the bulkhead has been reinforced for the bias-box also.

Adrian made me a pair of top nuts for the struts. With the strut bearing sitting on top hats, a sleeved nut with the thread extending down through the mount was needed. It's in the manner of the original Bilstein 909 nuts, but different diameter & thread. (Didn't get such a good pic of that..)

Heater blowers, some heat insulation, all front suspension, cross member and rack are all in waiting for the engine now.

The sump was fouling the PAS fitting half way along the rack very slightly, so that needs a little fettling. A new sump gasket is on it's way so once the sump is done that little lot and the box can go back in for good!!!

The gearbox cross member I'd used on the C4 auto box (ie a bit of flat steel and two bushes) works a treat on the Tremec box too, so that will be pressed into service and the tunnel needed only a slight tap to allow the box to fit. Mat un-did a few bits inside where the previous ratchet shifter lived as well.

With the front suspension properly in position, the front wheels are on and gave us a chance to assess fitment. Based on this pic, we've got some work to do!

Well, wheel arches are over-rated anyway! I've done a lot of reading on how the works teams used to tackle this - especially when they got to running 18's on the front towards the end of the RS500 touring car campaigns. There was a couple of different approaches, but it's clear there was quite alot of major surgery going on. I'll be looking to trim a good inch of the arch (on the wing) pretty much most of the way around, and possibly flare it a bit; then trim the lip off the inside of the bodykit arch and bond it on. The flare will help kick out the bodykit just a fraction. Some of the teams actually re-positioned the bodykit - rotating it upwards and back towards the door slightly to gain more clearance. If you look at some of the RS500 touring cars and see 1/2" gap or more at the leading edge of the plastic arch to the top of the bumper, then this is what they've been up to...
Finally Radtec came through with the radiator (hooray)! It only took three attempts, and even now I'm not sure they believe the dimensions I asked for to fit the Sierra chassis rails, but at least we're there now. My daughter managed to delete the rad pic before I've saved it, but suffice it to say it fits well, and on this last occasion I managed to get them to leave the supports un-slotted, so we can drill some mounting holes exactly where we want them.
Matt has prepped up the rear beam and diff location, and seems confident that the powr-loc Jag diff will sit ok. I've been waiting on the necessary spacers for the Wilson drive shafts since April (!) but have been promised they will be with us this week then everything can be properly mated up and fabbed into position.
That will get us back to rolling status again and at that point it goes off to the paintshop for the interior and carbon roof to be painted. We laid the roof on this week to see how it fits, and it fitted great. Nothing two mins of sandpaper won't sort, and as it's already primed, it's ready to be bonded in place. I'm sure with a full cage in, the painter will be making full use of the hole in the roof though, before bonding the roof on

Hopefully a couple of weeks will see it back with MDA and fully painted. I can't wait!!!!!
Cheers all,
Iain
Last edited by IainRS1700T; 01-06-2013 at 10:19 PM. Reason: Reinstating links for photos
05-09-2012, 09:52 PM
#117
PassionFord Regular

Cheers for the comments Iain
Good picture here showing the front arch gap
http://www.rs500cosworth.com/6.html
Good picture here showing the front arch gap
http://www.rs500cosworth.com/6.html
06-09-2012, 06:06 AM
#118
PassionFord Regular
Thread Starter
That's the one!
You can also see the same rotation of the arch kit on the back of the car as well on the Texaco (Eggenburger) car.
Cheers
Iain
You can also see the same rotation of the arch kit on the back of the car as well on the Texaco (Eggenburger) car.
Cheers
Iain

