V8 Sierra 3dr Track Day Car - Adios!
 06-09-2012, 12:43 PM
#121

+1
Coming along nicely, I'm on a similar journey myself.... V8 in a mk3 escort van with a sierra front pan getting grafted in.
Couple of questions where did u get the steering column bearing assembly from? And do you know the details of the wheels(j and ET), I need to squeeze 17's under the front with coilovers but with mk3 escort wings, they are split rims so I'm trying work out the max inner barrel I need to source.
Cheers
 06-09-2012, 06:46 PM
#122
PassionFord Regular
Thread Starter

+1
Couple of questions where did u get the steering column bearing assembly from? And do you know the details of the wheels(j and ET), I need to squeeze 17's under the front with coilovers but with mk3 escort wings, they are split rims so I'm trying work out the max inner barrel I need to source.
Cheers
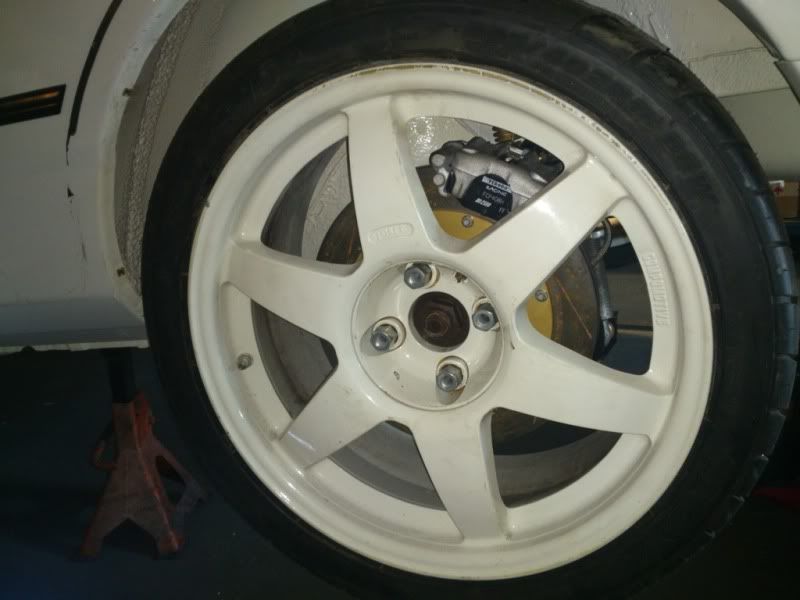
I'm not sure how much it will help with your Escort, but my wheels are 8x18" et 33.. As you can see they don't really fit..
If you're going big budget on your split rims it might be working picking up some cheap used alloys in a similar size to what you want and see how it looks and have a measure up...
I don't think the bearing started out life intended for a bulkhead/steering column. It's been adapted to suit I think but I'll check with Mat or Adrian tmw & come back to you. The column was a Cossie one (shortened) and mated to the 909 UJ from Dewitts. The UJ was a pricey item - I think eBay would prove a worthwhile hunting ground for something similar though.
Cheers for now
Iain
 06-09-2012, 09:09 PM
#124
PassionFord Regular
Thread Starter
Tell me about it Mark!!! I know exactly what you mean.
I enjoyed going to the Donington kit car show at the weekend just so I could hear the Cobra & GT40 replicas roll by for my V8 fix
Judging by the standards you're setting with your shell prep it looks like you're doing alright there! One more winter and you'll be ready
Cheers
Iain
I enjoyed going to the Donington kit car show at the weekend just so I could hear the Cobra & GT40 replicas roll by for my V8 fix
Judging by the standards you're setting with your shell prep it looks like you're doing alright there! One more winter and you'll be ready
Cheers
Iain
07-09-2012, 11:00 AM
#125
Hi There,
I'm not sure how much it will help with your Escort, but my wheels are 8x18" et 33.. As you can see they don't really fit..
If you're going big budget on your split rims it might be working picking up some cheap used alloys in a similar size to what you want and see how it looks and have a measure up...
I don't think the bearing started out life intended for a bulkhead/steering column. It's been adapted to suit I think but I'll check with Mat or Adrian tmw & come back to you. The column was a Cossie one (shortened) and mated to the 909 UJ from Dewitts. The UJ was a pricey item - I think eBay would prove a worthwhile hunting ground for something similar though.
Cheers for now
Iain
Yes the details on the column bearing assembly would be very handy.

Last edited by neilnewboy; 08-09-2012 at 01:15 AM.
16-12-2012, 06:41 AM
#126
PassionFord Regular
Thread Starter
Hi Folks,
A good update for you here. It's beginning to feel like we're breaking the back of it now!
It proved a bit of a mission for Mat at MDA to sort the rear beam and Jag Diff conversion, but it's sorted now.
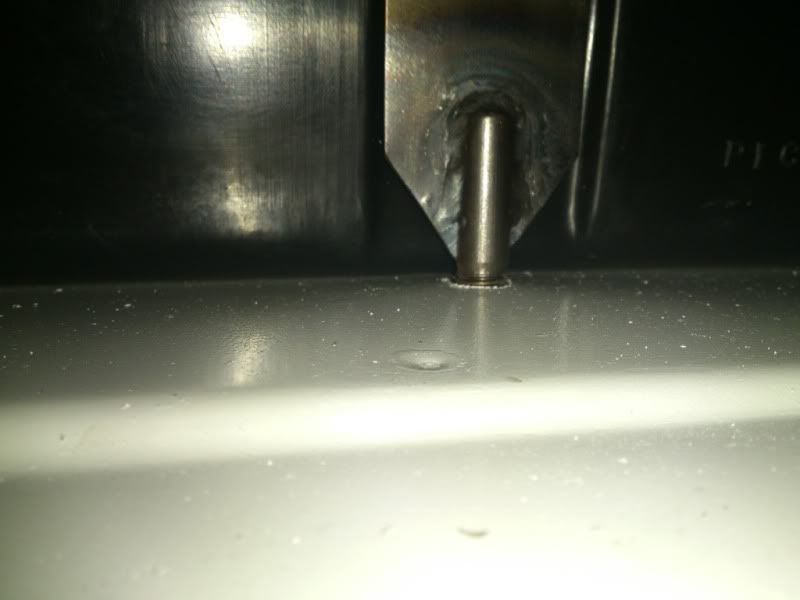
Alot of head scratching concerned the drive shaft lengths. Following on from previous conversions (Rod Tarry's being the first) I had my drive shafts manufactured by Wilson (same co.) to the same dimensions, but as you can see the shorter side came up short and the longer side came up too long..
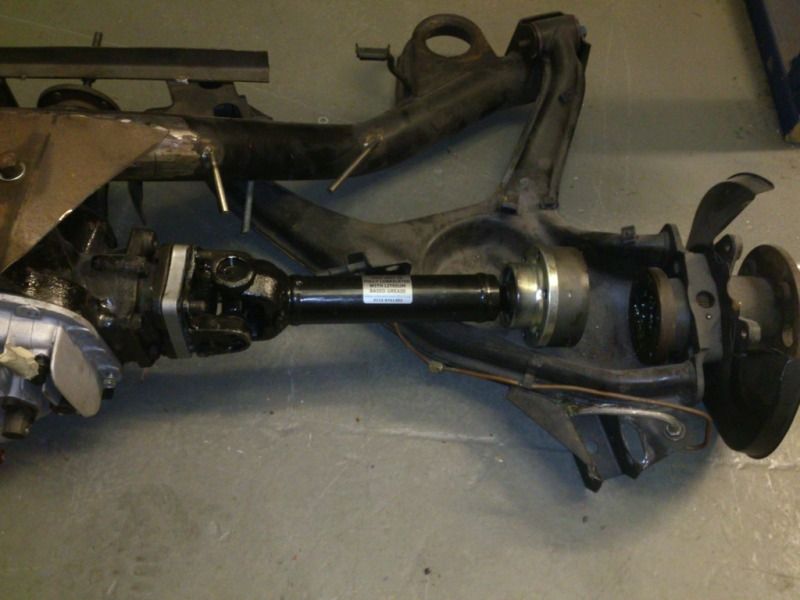
This is how short the short side was. It was a similar story but vv on the other side.
This was with the diff fully jigged up with everything properly square and in position. Mat used a temporary version of the intended mount of the beam (so ignore the thin off cut of steel):

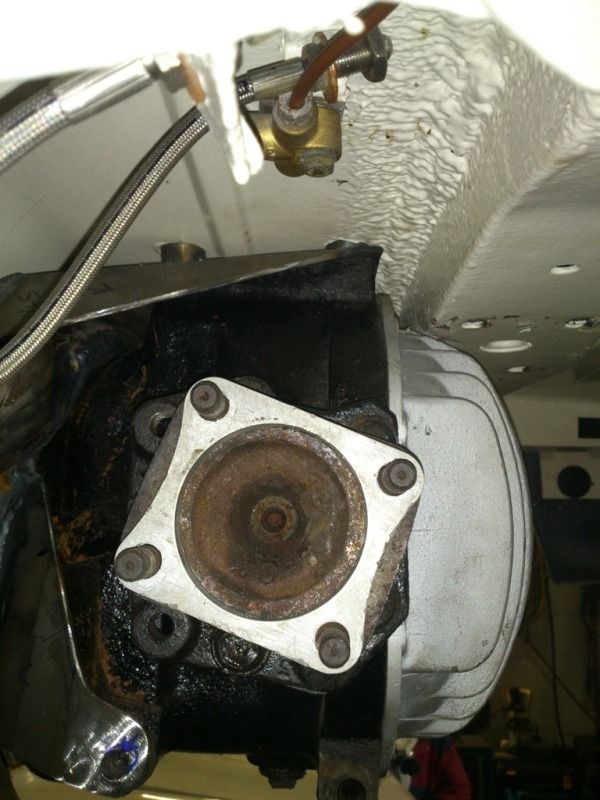
And if he attempted to rely on the drive shaft length to position the diff, (by loosening off the diff mount bolts) this is what happened:

Clearly it knocked the diff way off line. After double checking and checking again against a spare beam we came to the conclusion that for whatever reason, the drive shaft lengths weren't right for our circumstances and they needed to go back to Wilson. It's most likely that our diff casing is different to the other diffs that had been used in this conversion. Nevertheless, Wilson were very helpful and remanufactured the driveshafts for me for just the cost of the labour, so hats off to those guys for helping me out.
As soon as the new shafts came back they fitted straight in with no hassle, and with everything lined up as it should be. Mat then cracked on with fabricating the proper beam mounts for the diff - on the top mating surface and also down underneath as well. There's a few potential spots to fabricate mounting points.
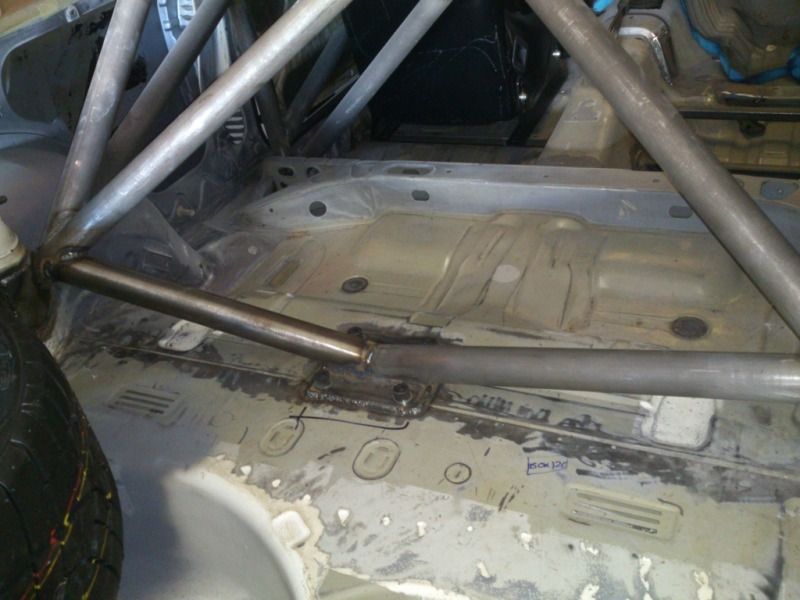
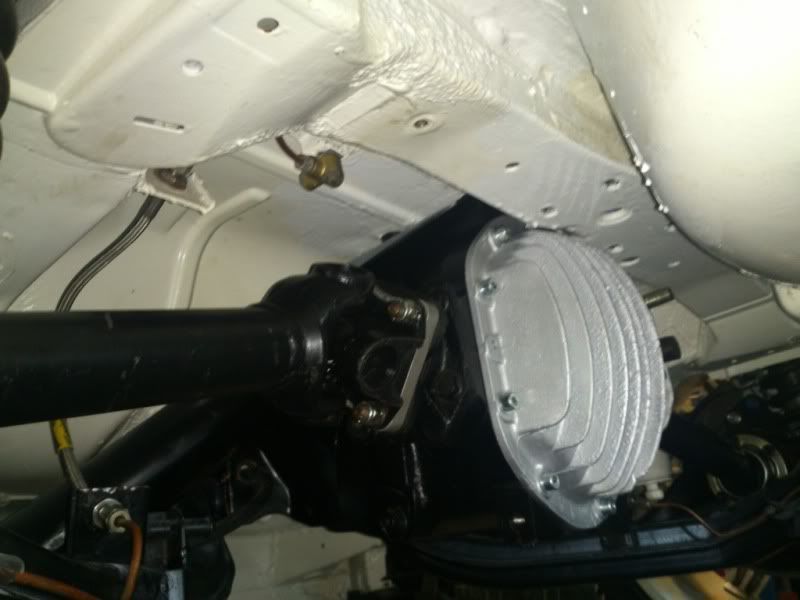
This pic shows the beam and diff mounted in position and you can see the top and side mounts that Mat fabricated from the beam. On this next one you can just about see the mounts tying in through the floor panel of the shell:
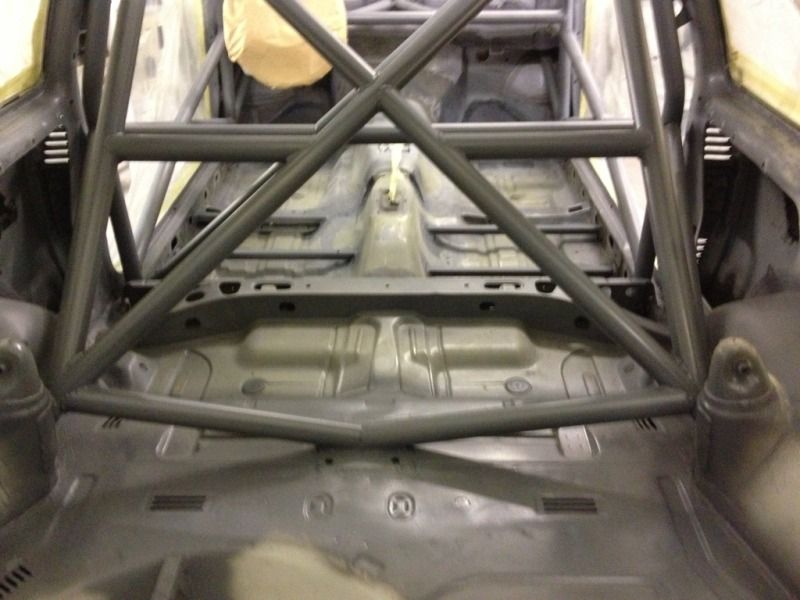
With the beam sorted Mat could then tackle the reinforcing of diff mount via the cage inside the car. I don't have to worry about any NVH niceities so using the cage in this way provides added security to the diff mounting. This is what we came up with:
With that job done a big hurdle had been cleared, and it was time to crack on with getting the cage painted and the carbon roof fitted and painted. Before it went a busines near MDA has a shot blasting service so the beam could go round the corner for a good clean up and Mat did the honours with the satin black on it's return. Unfortunately no pics of it in all it's glory though!
With the car now rolling once again, it was time to get it to the bodyshop. We trusted this job to a thoroughly good bloke by the name of Wesley Doherty at http://www.smarttechniques.co.uk/index.htm over in Deeside. Wez is on 07931516415 if you need to reach him. Wez must surely be the only paint guy I know who kept to his schedule!
I've got a few pics along the way; this is the first blow over with etch primer:
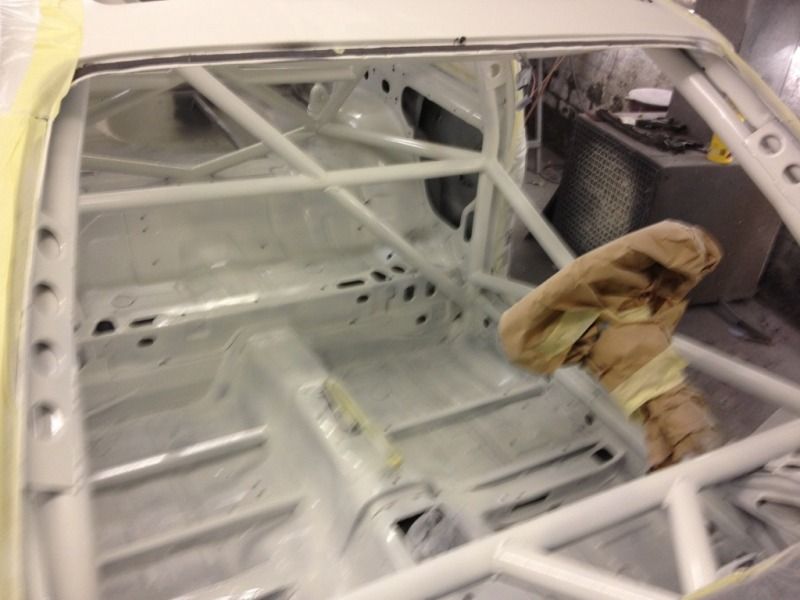
Then first colour coat - beginning to look like the real deal now:
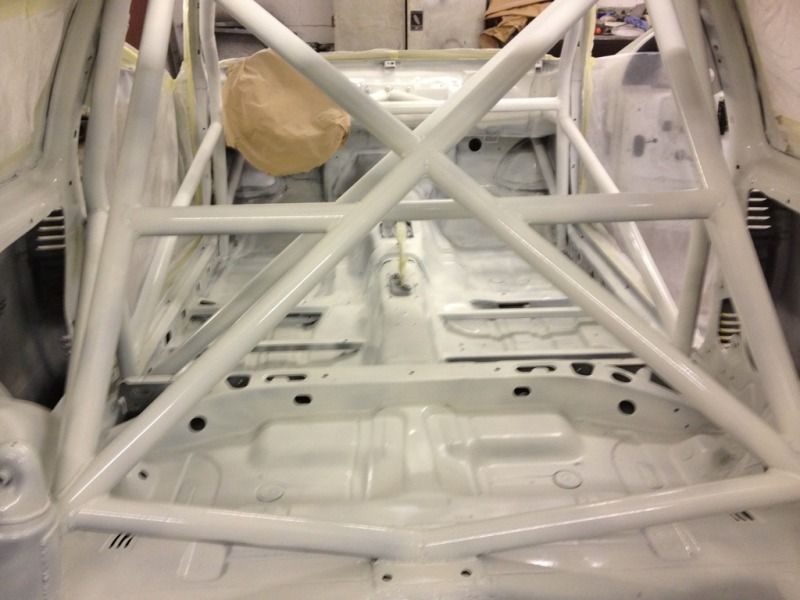
Must have a been a bonus for Wez not to have a roof to worry about - a cage can't be the easiest thing to paint!

And wait for it.. (drum roll please..) The carbon roof is ON!!!!!!!!!!!
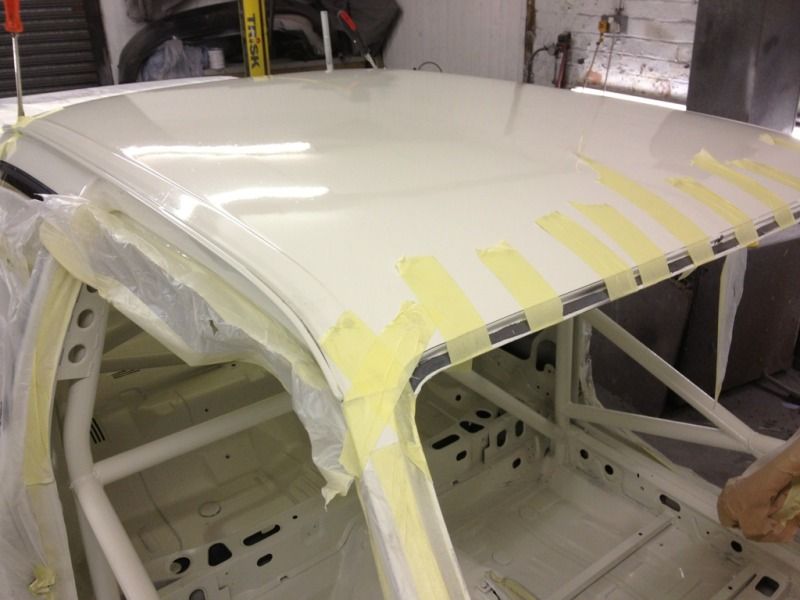
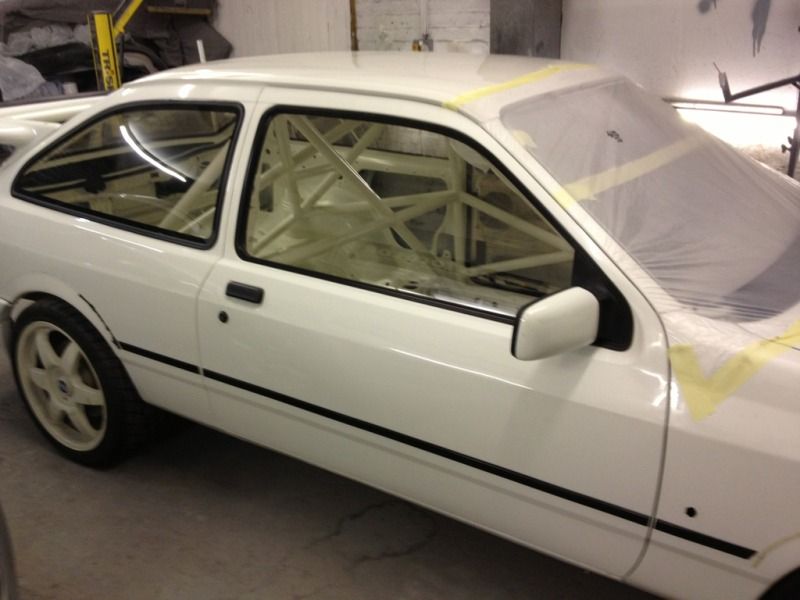
It looks a fair 'ole climbing frame in there..
That feels like a big moment in the build seeing the roof finally fitted. And it's good to see it wheeled outside in the light:
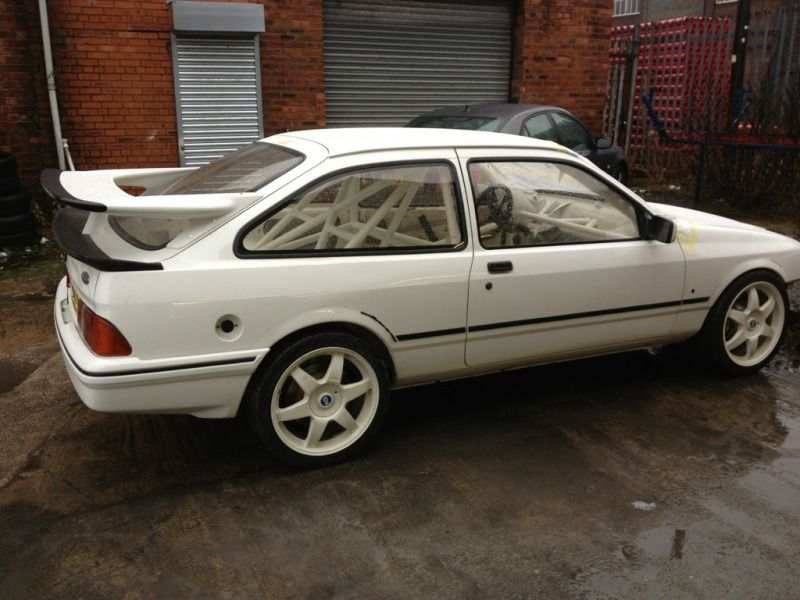
Obviously no body kit fitted etc, but nice to see it rolling in some shape or form! It feels alot closer to completion now, and I know I can begin to look forward to some track days next year.
Next major job is to get busy on the front arches and find some clearance for the front wheels. I think the backs might even need a little trim, but it's been low on the list of priorities until now so the memory is a bit hazy. Also high up the list is (another) custom prop shaft, which we can measure up for now everything else is in place. And I also need to sort out the loom and fuse box placement. The fuse box was a casulty when the cage was reinforced through the bulkhead to the turret tops, so that will need a new home now.
Most of the rest of the car is good to be fitted up with just some comparitively minor bits and pieces like brake master cylinders, brake lines etc to be sourced.
Is that light at the end of the tunnel I see..?!
Thanks as always to Mat and Adrian at MDA for their unwavering enthusiasm for the project.
Cheers
Iain
A good update for you here. It's beginning to feel like we're breaking the back of it now!
It proved a bit of a mission for Mat at MDA to sort the rear beam and Jag Diff conversion, but it's sorted now.
Alot of head scratching concerned the drive shaft lengths. Following on from previous conversions (Rod Tarry's being the first) I had my drive shafts manufactured by Wilson (same co.) to the same dimensions, but as you can see the shorter side came up short and the longer side came up too long..
This is how short the short side was. It was a similar story but vv on the other side.
This was with the diff fully jigged up with everything properly square and in position. Mat used a temporary version of the intended mount of the beam (so ignore the thin off cut of steel):
And if he attempted to rely on the drive shaft length to position the diff, (by loosening off the diff mount bolts) this is what happened:
Clearly it knocked the diff way off line. After double checking and checking again against a spare beam we came to the conclusion that for whatever reason, the drive shaft lengths weren't right for our circumstances and they needed to go back to Wilson. It's most likely that our diff casing is different to the other diffs that had been used in this conversion. Nevertheless, Wilson were very helpful and remanufactured the driveshafts for me for just the cost of the labour, so hats off to those guys for helping me out.
As soon as the new shafts came back they fitted straight in with no hassle, and with everything lined up as it should be. Mat then cracked on with fabricating the proper beam mounts for the diff - on the top mating surface and also down underneath as well. There's a few potential spots to fabricate mounting points.
This pic shows the beam and diff mounted in position and you can see the top and side mounts that Mat fabricated from the beam. On this next one you can just about see the mounts tying in through the floor panel of the shell:
With the beam sorted Mat could then tackle the reinforcing of diff mount via the cage inside the car. I don't have to worry about any NVH niceities so using the cage in this way provides added security to the diff mounting. This is what we came up with:
With that job done a big hurdle had been cleared, and it was time to crack on with getting the cage painted and the carbon roof fitted and painted. Before it went a busines near MDA has a shot blasting service so the beam could go round the corner for a good clean up and Mat did the honours with the satin black on it's return. Unfortunately no pics of it in all it's glory though!
With the car now rolling once again, it was time to get it to the bodyshop. We trusted this job to a thoroughly good bloke by the name of Wesley Doherty at http://www.smarttechniques.co.uk/index.htm over in Deeside. Wez is on 07931516415 if you need to reach him. Wez must surely be the only paint guy I know who kept to his schedule!
I've got a few pics along the way; this is the first blow over with etch primer:
Then first colour coat - beginning to look like the real deal now:
Must have a been a bonus for Wez not to have a roof to worry about - a cage can't be the easiest thing to paint!
And wait for it.. (drum roll please..) The carbon roof is ON!!!!!!!!!!!
It looks a fair 'ole climbing frame in there..
That feels like a big moment in the build seeing the roof finally fitted. And it's good to see it wheeled outside in the light:
Obviously no body kit fitted etc, but nice to see it rolling in some shape or form! It feels alot closer to completion now, and I know I can begin to look forward to some track days next year.
Next major job is to get busy on the front arches and find some clearance for the front wheels. I think the backs might even need a little trim, but it's been low on the list of priorities until now so the memory is a bit hazy. Also high up the list is (another) custom prop shaft, which we can measure up for now everything else is in place. And I also need to sort out the loom and fuse box placement. The fuse box was a casulty when the cage was reinforced through the bulkhead to the turret tops, so that will need a new home now.
Most of the rest of the car is good to be fitted up with just some comparitively minor bits and pieces like brake master cylinders, brake lines etc to be sourced.
Is that light at the end of the tunnel I see..?!
Thanks as always to Mat and Adrian at MDA for their unwavering enthusiasm for the project.
Cheers
Iain
Last edited by IainRS1700T; 01-06-2013 at 05:58 PM.

 17-12-2012, 01:36 AM
#131
PassionFord Regular
Thread Starter
Thanks for your kind comments guys, glad you like it.
I'm away with work at the moment but over the Christmas period I'll take some more pics and post the details.
Cheers
Iain
I'm away with work at the moment but over the Christmas period I'll take some more pics and post the details.
Cheers
Iain
10-01-2013, 09:12 PM
#134
PassionFord Regular
Thread Starter
Hi All,
Thanks to everyone for all their positive feedback - it's much appreciated
Update time and things are moving on nicely!
Mat and Adrian at MDA have been cracking on so I have a few more pics to update the build.
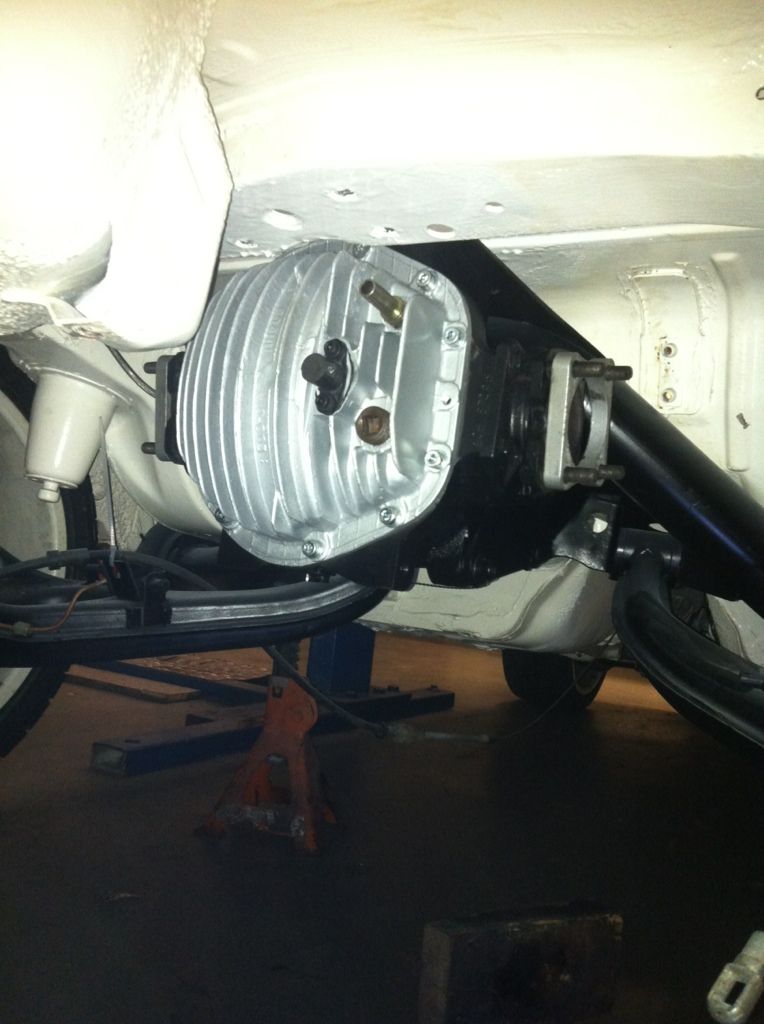
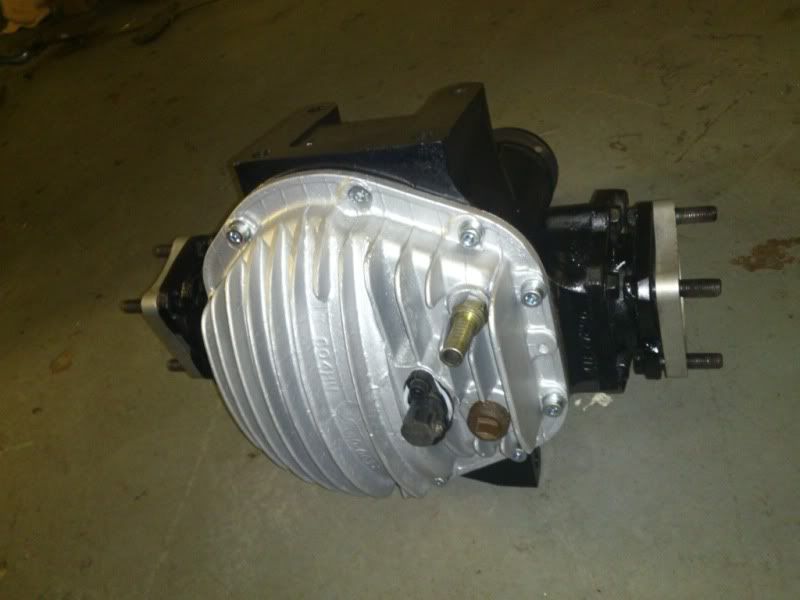
To recap on the diff conversion; the full Jag LSD & Wilson driveshafts are now looking good in their new home.
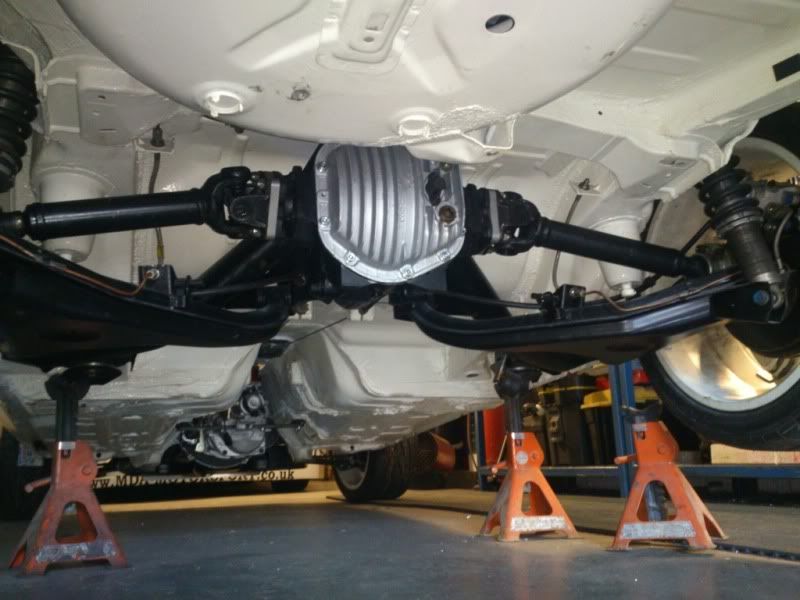
All the better for a lick of paint too. A bit of research concluded that Castrol Axle Z limited slip 90 (1.5L) was the best stuff for this diff so that's what we went with.
I still marvel at the size of those driveshafts!
Remember when I set out to do this car I wanted the running gear to be as bulletproof as possible so time on a track day isn't taken up with running issues or breakages. Hopefully this diff conversion will go along way to achieving that. The diffs are cheap as cheaps with a 10.5" CWP so what's not to like!
Keeping all this in place is an addition to the roll cage through the floor, nylon rear beam mounts and 909 suspension. Mat took the precaution of strengthening the lower mounts of the trailing arms with these little wings:
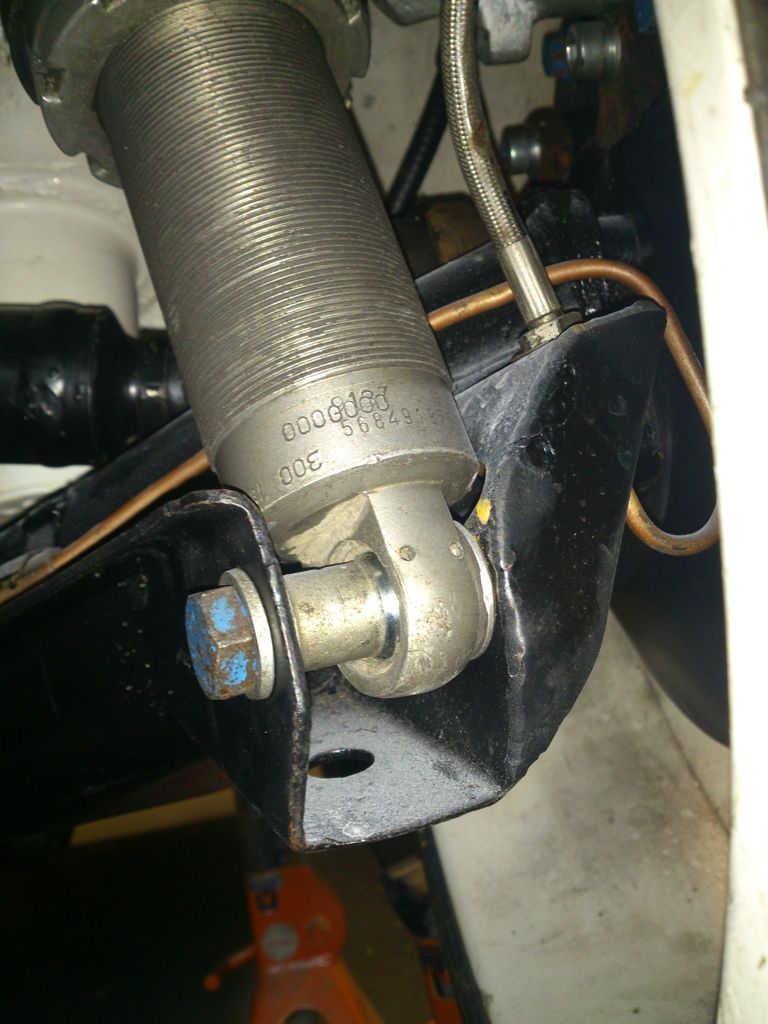
The shocks themselves are 300/150 spec with 350lb springs. That's pretty firm, but there's quite a lot of weight out this end; 85L fuel cell, the bigger diff & driveshafts too. Plus with track day use only I think that's a good starting point. In fact I've robbed that spec from the touring car set ups used in '87 or '88' (I can't recall off the top of my head) so that'll do!
Next up was the ATL fuel cell I'd bought ages ago ahead of starting the build, so it's good to get 'round to fitting it. Mat had fabricated a support across the spare wheel well in anticipation of this stage, and it ended up working out nicely. Here's where we ended up:
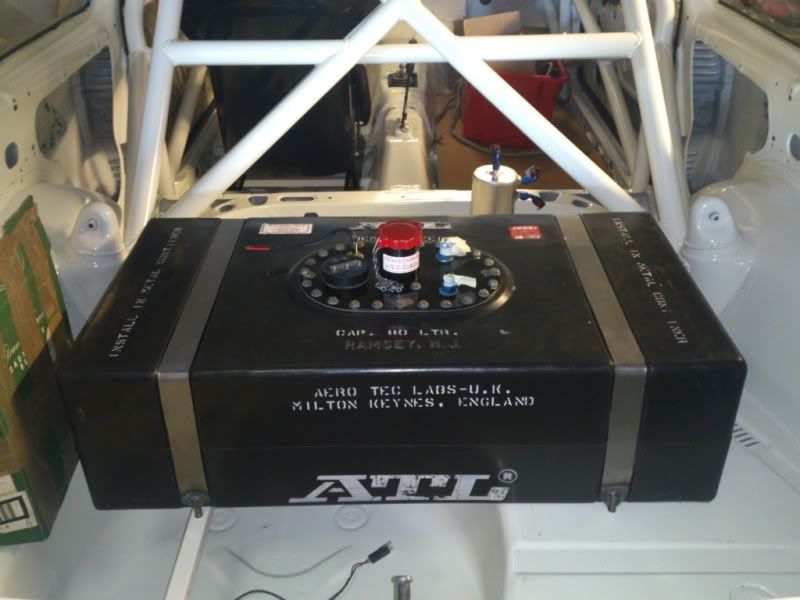
As I mentioned its a decent size so it was a relief that it slotted in so nicely between the wheel arches.
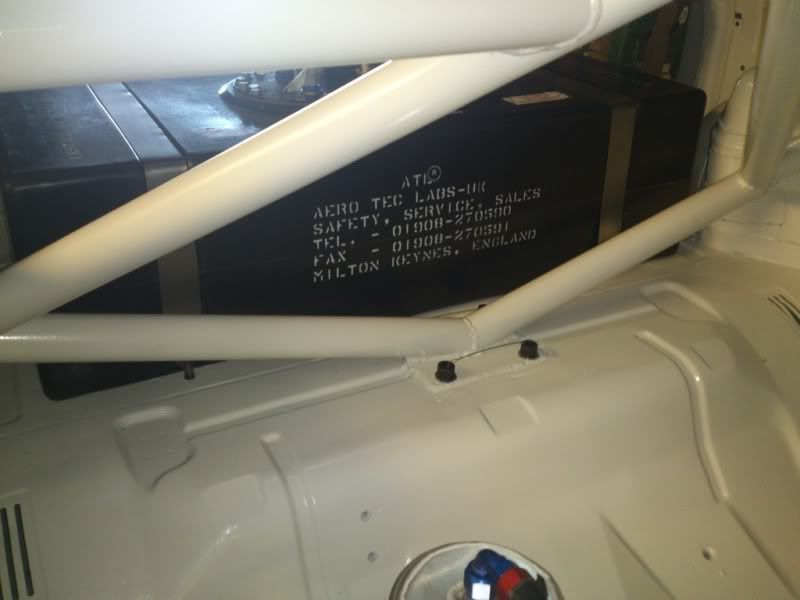
Mat did a great job on fabricating the tank straps with a nice threaded fitting through the floor.
That leaves the filter, swirl pot and pump to fix in position.
The rear brakes are also complete. I've already covered my refurb of some used 4x4 calipers. I opted for these so I could fit Reyland's big disc conversion and very nice is it too. Looks small behind 18" MO's though!
Mat and Adrian are currently getting creative with arch clearance issues. We've studied some the 'ahem' shall we say, innovative methods the works teams used to cram 18" wheels (towards the end of the Sierra's life in touring cars) under the arches. It looks like Mat has nailed it. I'm going to have a look tmw night, so I hope to take some pics and I'll report back.
Just a couple more gratuitous pics to end on! Window guy should be out any day to fit the screen..
We were all surprised how solid the carbon roof became once it was fitted too.

Cheers,
Iain
PS Neil, to answer your Q, yes the cage ends were notched into the sills.
Thanks to everyone for all their positive feedback - it's much appreciated
Update time and things are moving on nicely!
Mat and Adrian at MDA have been cracking on so I have a few more pics to update the build.
To recap on the diff conversion; the full Jag LSD & Wilson driveshafts are now looking good in their new home.
All the better for a lick of paint too. A bit of research concluded that Castrol Axle Z limited slip 90 (1.5L) was the best stuff for this diff so that's what we went with.
I still marvel at the size of those driveshafts!
Remember when I set out to do this car I wanted the running gear to be as bulletproof as possible so time on a track day isn't taken up with running issues or breakages. Hopefully this diff conversion will go along way to achieving that. The diffs are cheap as cheaps with a 10.5" CWP so what's not to like!
Keeping all this in place is an addition to the roll cage through the floor, nylon rear beam mounts and 909 suspension. Mat took the precaution of strengthening the lower mounts of the trailing arms with these little wings:
The shocks themselves are 300/150 spec with 350lb springs. That's pretty firm, but there's quite a lot of weight out this end; 85L fuel cell, the bigger diff & driveshafts too. Plus with track day use only I think that's a good starting point. In fact I've robbed that spec from the touring car set ups used in '87 or '88' (I can't recall off the top of my head) so that'll do!
Next up was the ATL fuel cell I'd bought ages ago ahead of starting the build, so it's good to get 'round to fitting it. Mat had fabricated a support across the spare wheel well in anticipation of this stage, and it ended up working out nicely. Here's where we ended up:
As I mentioned its a decent size so it was a relief that it slotted in so nicely between the wheel arches.
Mat did a great job on fabricating the tank straps with a nice threaded fitting through the floor.
That leaves the filter, swirl pot and pump to fix in position.
The rear brakes are also complete. I've already covered my refurb of some used 4x4 calipers. I opted for these so I could fit Reyland's big disc conversion and very nice is it too. Looks small behind 18" MO's though!
Mat and Adrian are currently getting creative with arch clearance issues. We've studied some the 'ahem' shall we say, innovative methods the works teams used to cram 18" wheels (towards the end of the Sierra's life in touring cars) under the arches. It looks like Mat has nailed it. I'm going to have a look tmw night, so I hope to take some pics and I'll report back.
Just a couple more gratuitous pics to end on! Window guy should be out any day to fit the screen..
We were all surprised how solid the carbon roof became once it was fitted too.
Cheers,
Iain
PS Neil, to answer your Q, yes the cage ends were notched into the sills.
Last edited by IainRS1700T; 01-06-2013 at 06:09 PM.
 11-01-2013, 05:44 PM
#139
Happily retired

 11-01-2013, 07:02 PM
#142

Rod, I'm not sure if you were joking about the comment regarding me, but I remember phoning you asking if you minded me giving info out to anyone, and you said you didn't mind!
I can't believe you had all the issues with the shafts Iain

 13-01-2013, 03:05 PM
#146
PassionFord Regular

Rod, I'm not sure if you were joking about the comment regarding me, but I remember phoning you asking if you minded me giving info out to anyone, and you said you didn't mind!
I can't believe you had all the issues with the shafts Iain I don't think it was the diff either - mine was fin played and had the speedo drive etc too! They are rare apparently. Just really can't work out why you had the issues
I can't believe you had all the issues with the shafts Iain
The drive supplied first time around where massivly incorrect for what was required. I agree there should be differance and I cant understand it either. The diff was postioned so the centre lines where the same as the yb diff and all jigged up to do so. And as pics previoulsy posted the shafts didnt fit, as if the diff needed to be moved over by 30mm, but then the input flange would not be on the same axis as the sapp diff.
Its an odd one.
13-01-2013, 03:31 PM
#149
PassionFord Regular
 13-01-2013, 09:39 PM
#151
PassionFord Regular
Thread Starter
Hi Gents,
Sorry for the radio silence this weekend, I've been swapping the daily driver.
Thanks everyone for your kind comments. James and Rod - I didn't want to start a war, sorry boys! Broadmoor - would love to see your 3dr in the flesh - it needs to get out this year! It's still a reference point for a track day 3dr IMHO.
As Mat said the drive shafts were a real head scratcher, and with everything laid out in front of us we were checking and double checking. I even took a spare beam to cross reference!
It's just one of those things and Wilson were really good about re-doing them for me. It wasn't their fault afterall. I'm still inclined to think that my diff casing might be different or something like that? Without asking Rod to scramble under his car with a tape measure (honestly, no need to do that) then we can't be sure. As Mat said getting everything true and square was the main thing, and we got there in the end.
Mark (V8) I seem to recall I paid Ł150 for this diff. Alot of jag breakers will have whole rear axles for Ł200 or so, and they can't be bothered to strip everything down as the diff is the bit everyone wants, so they just sell the whole lot. Not lightweight though as you could imagine... I can't recall all the ratios. I think mine is 3.54:1. Remember its a powr-lok (sic) diff not a Dana one (don't touch those). How's your car looking?
Mark (MK) we didn't do the 6deg thing at this stage because there's so much going on with the entire project. There comes a point when I'd like to continue to see things moving forward and heading towards completion. That way I can be track day-ing comparatively soon. Something like 6deg mods might not sound a large hump in the road, but (aside from the extra cost) the delay in getting the car rolling again would have mean't a longer wait for interior paint & roof fitting, and then that would have knocked on the window fitting, then the dash and so on. It's one of those things on next winter's list - but lets get some driving done first!
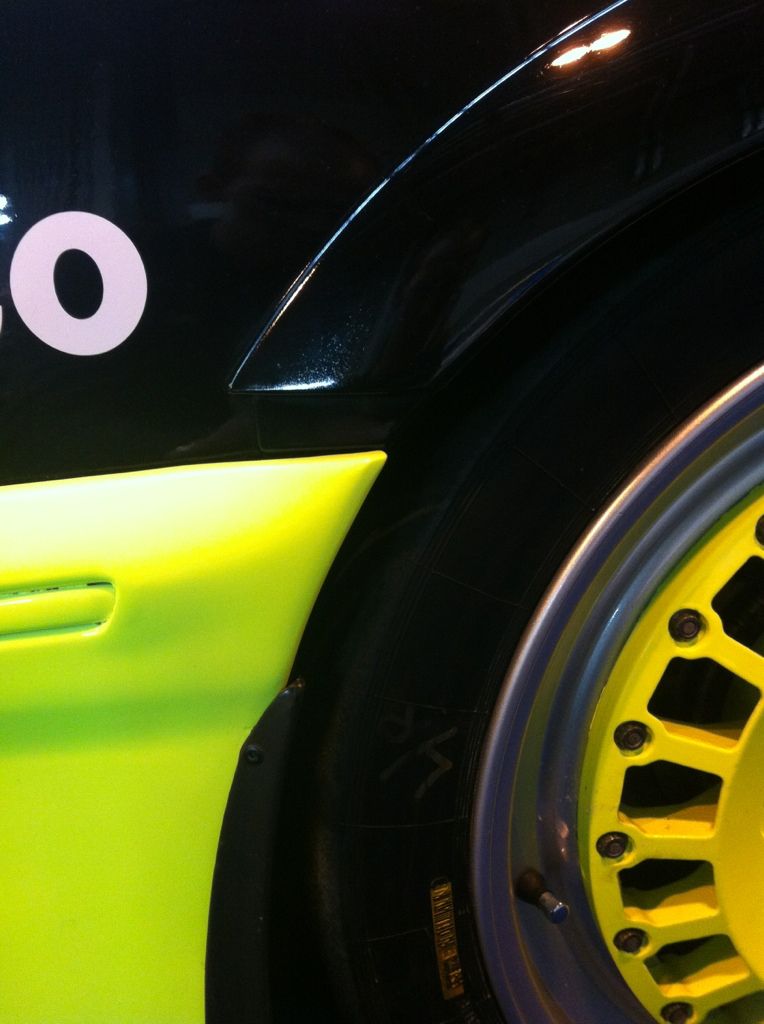
Arches are on the agenda now. If you're of a nervous (concours type) disposition, look away now..
I'm running 18's up front with 225's on so a fair bit of the arch needs trimming. Mat found a great way to do also find a bit more room as well, but he might want to keep that one a secret - Mat?!
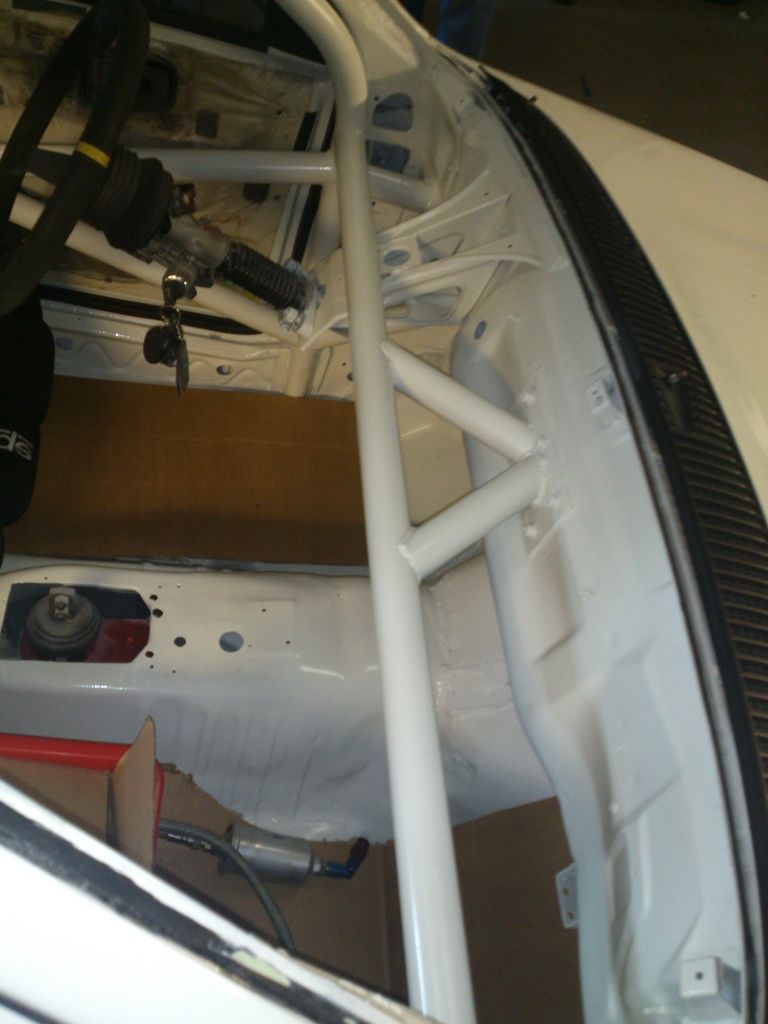
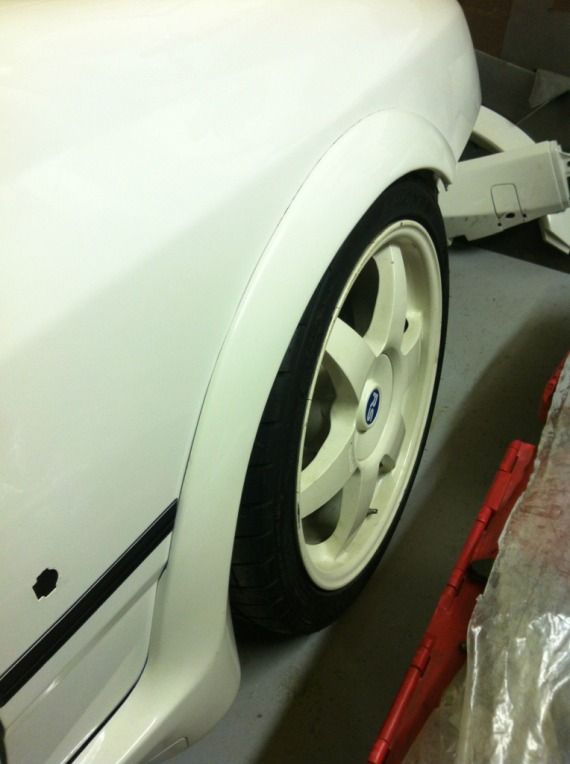
This is how the OSF looks ( minus the arch kit):
Fair bit sticking out on that side. This is where we're up to on the NSF:
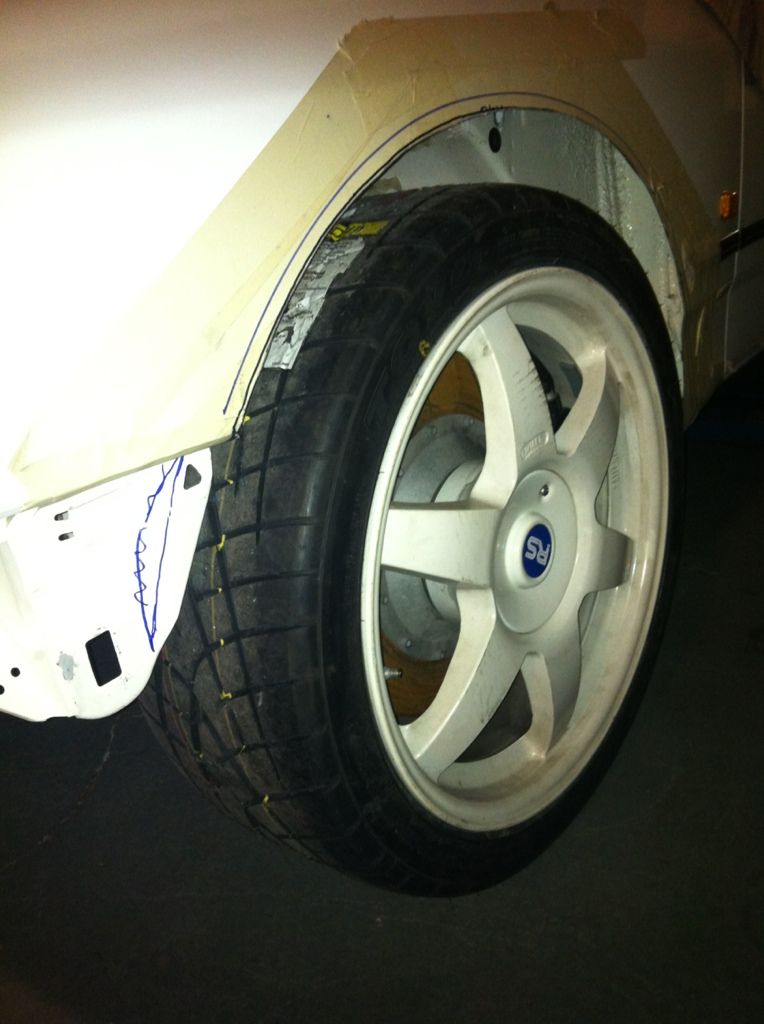
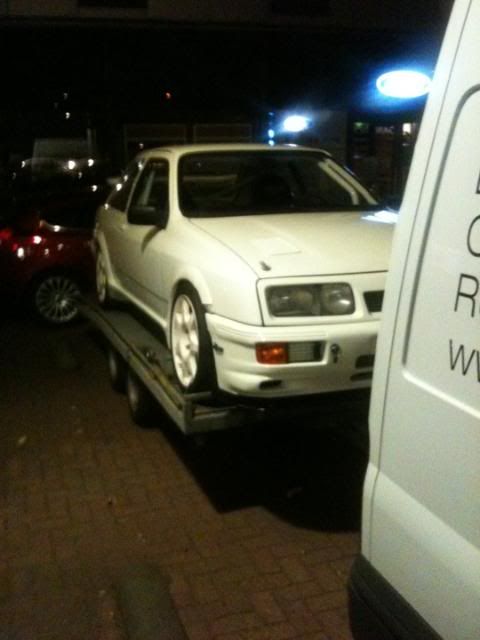
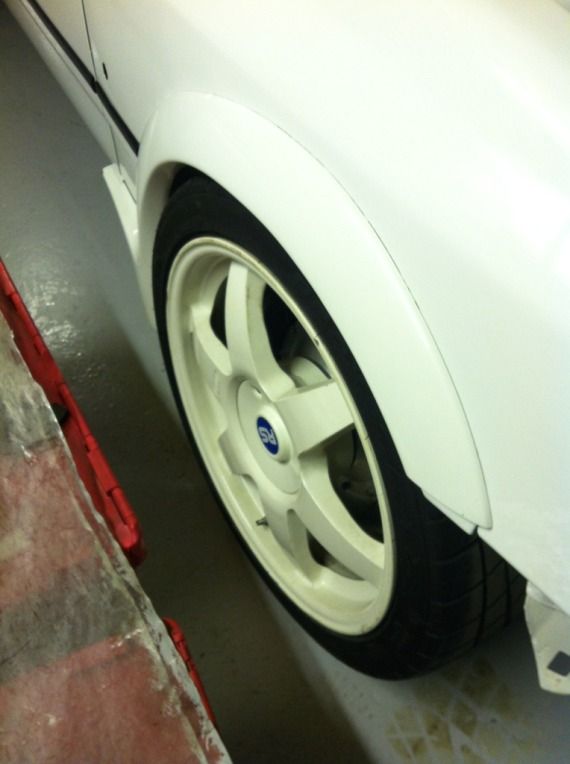
The blue line was the original top of the kit. We'll rotate the kit backwards like the works cars which finds some room too. It's the reason why you can always see the lip at the front of the arch kit above the top of the bumper instead of behind it:
That car's on 17's too. This coupled with moving the bumper out slightly (and a bit more trimming to the edge) plus Mat's secret tweak should net us the clearance we need. Obviously I'll not have alot of vertical travel to worry about, but keeping clearance for full steering lock was important.
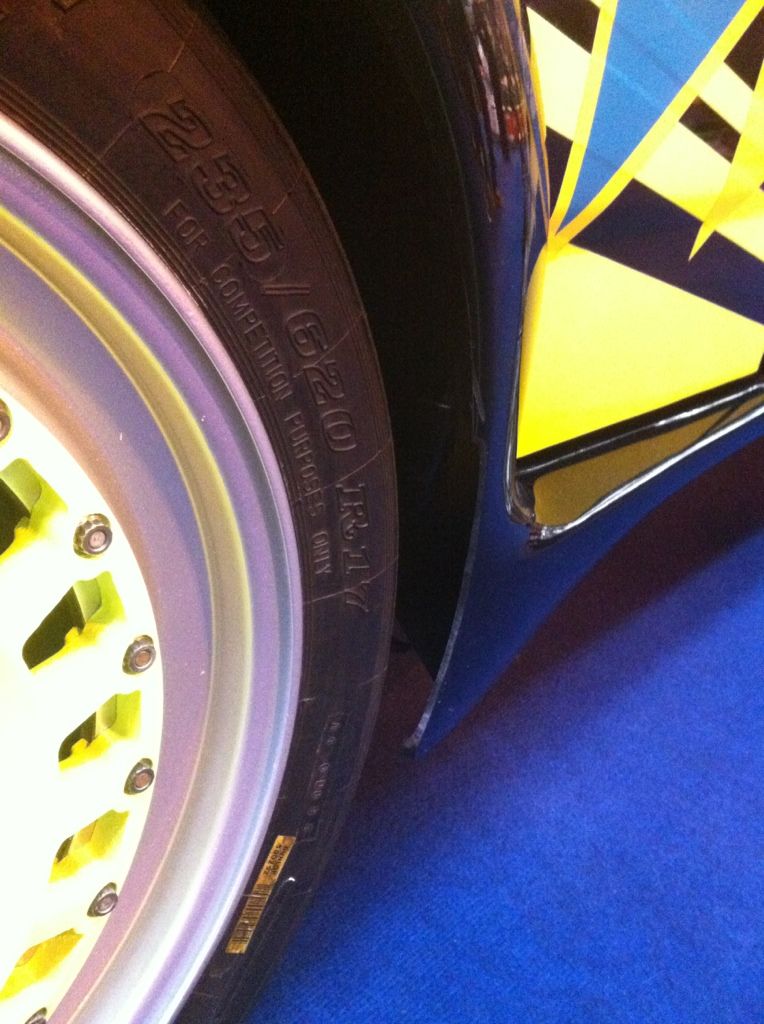
The back looks a bit more straightforward but this one (at Autosport today) had a lot out of the arch kit;
The front screen was also fitted last week. I'm still on a mission to sort AP Racing master cylinders (CP4623's) so let me know if you know a good (cheap!) source...! And we've got a bit of playtime with fuel filter, swirl pot & pump still to sort.
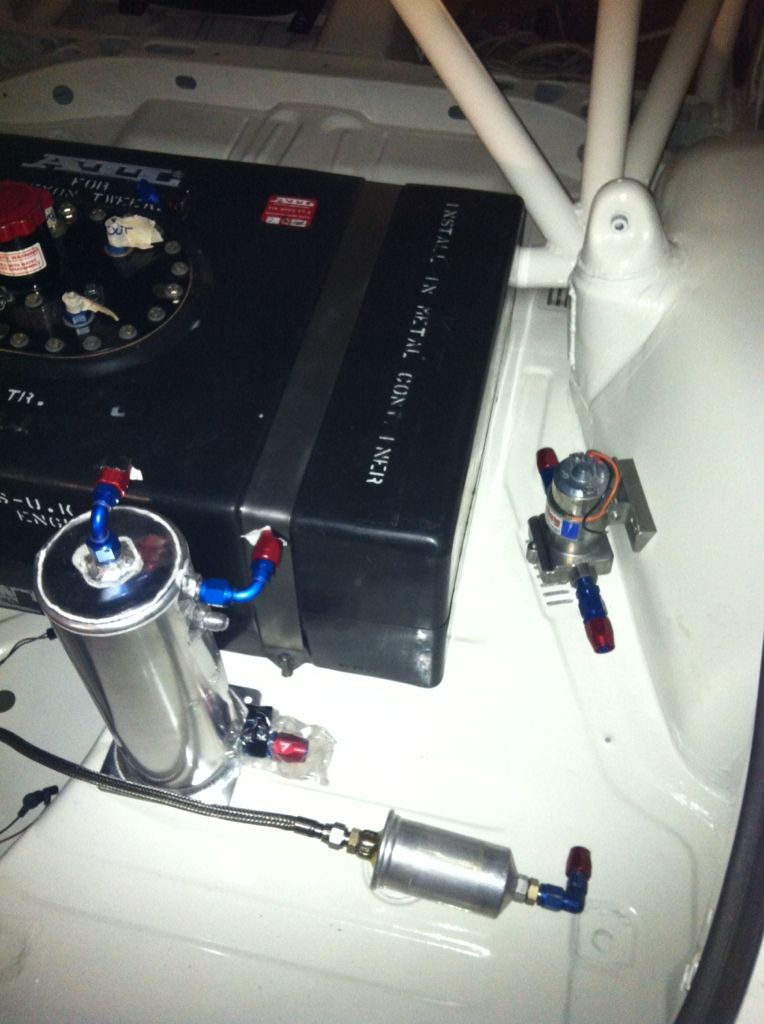
This is mocked up with the original filter that came with the tank when I bought it. I plan on replacing that.
Cheers lads, and thanks for taking the time to contribute to the build of my car. It's much appreciated.
Iain
Sorry for the radio silence this weekend, I've been swapping the daily driver.
Thanks everyone for your kind comments. James and Rod - I didn't want to start a war, sorry boys! Broadmoor - would love to see your 3dr in the flesh - it needs to get out this year! It's still a reference point for a track day 3dr IMHO.
As Mat said the drive shafts were a real head scratcher, and with everything laid out in front of us we were checking and double checking. I even took a spare beam to cross reference!
It's just one of those things and Wilson were really good about re-doing them for me. It wasn't their fault afterall. I'm still inclined to think that my diff casing might be different or something like that? Without asking Rod to scramble under his car with a tape measure (honestly, no need to do that) then we can't be sure. As Mat said getting everything true and square was the main thing, and we got there in the end.
Mark (V8) I seem to recall I paid Ł150 for this diff. Alot of jag breakers will have whole rear axles for Ł200 or so, and they can't be bothered to strip everything down as the diff is the bit everyone wants, so they just sell the whole lot. Not lightweight though as you could imagine... I can't recall all the ratios. I think mine is 3.54:1. Remember its a powr-lok (sic) diff not a Dana one (don't touch those). How's your car looking?
Mark (MK) we didn't do the 6deg thing at this stage because there's so much going on with the entire project. There comes a point when I'd like to continue to see things moving forward and heading towards completion. That way I can be track day-ing comparatively soon. Something like 6deg mods might not sound a large hump in the road, but (aside from the extra cost) the delay in getting the car rolling again would have mean't a longer wait for interior paint & roof fitting, and then that would have knocked on the window fitting, then the dash and so on. It's one of those things on next winter's list - but lets get some driving done first!
Arches are on the agenda now. If you're of a nervous (concours type) disposition, look away now..
I'm running 18's up front with 225's on so a fair bit of the arch needs trimming. Mat found a great way to do also find a bit more room as well, but he might want to keep that one a secret - Mat?!
This is how the OSF looks ( minus the arch kit):

Fair bit sticking out on that side. This is where we're up to on the NSF:

The blue line was the original top of the kit. We'll rotate the kit backwards like the works cars which finds some room too. It's the reason why you can always see the lip at the front of the arch kit above the top of the bumper instead of behind it:

That car's on 17's too. This coupled with moving the bumper out slightly (and a bit more trimming to the edge) plus Mat's secret tweak
The back looks a bit more straightforward but this one (at Autosport today) had a lot out of the arch kit;

The front screen was also fitted last week. I'm still on a mission to sort AP Racing master cylinders (CP4623's) so let me know if you know a good (cheap!) source...! And we've got a bit of playtime with fuel filter, swirl pot & pump still to sort.

This is mocked up with the original filter that came with the tank when I bought it. I plan on replacing that.
Cheers lads, and thanks for taking the time to contribute to the build of my car. It's much appreciated.
Iain
Last edited by IainRS1700T; 01-06-2013 at 08:54 PM. Reason: Reinstating the photo links
14-01-2013, 06:46 PM
#152
Too many posts.. I need a life!!
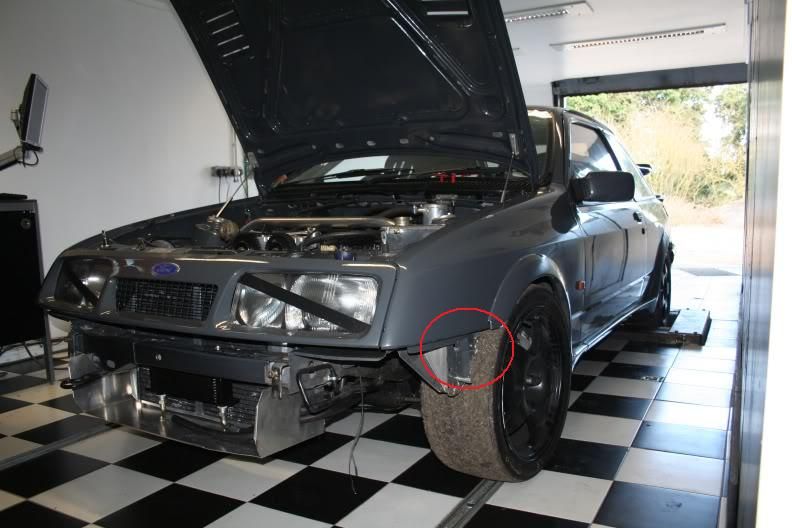
Don't know if it helps fella...but we always run a spacer here (red circle) to push the front wing/bumper out more...and the purists need never know 
15-01-2013, 08:26 PM
#153
PassionFord Regular
Thread Starter
We'll give that bit a little nudge and we'll also mount a spacer with a female thread and a bolt on the outside of the bumper going through to the spacer. I don't have much confidence in those little plastic widgets that make up the oem mounts.
Cheers,
Iain
 31-01-2013, 08:07 PM
#155
PassionFord Regular
Thread Starter
Wow yes, you did end up creating a lot of room there. I like that!
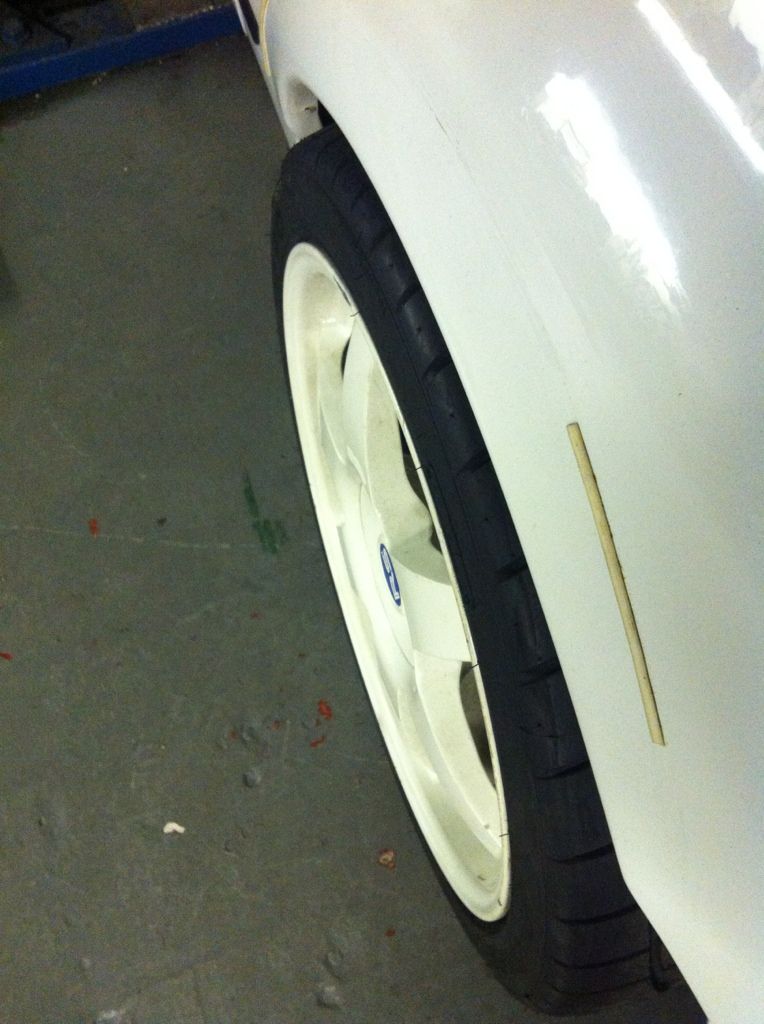
This is where we're up to so far with my arch mods:
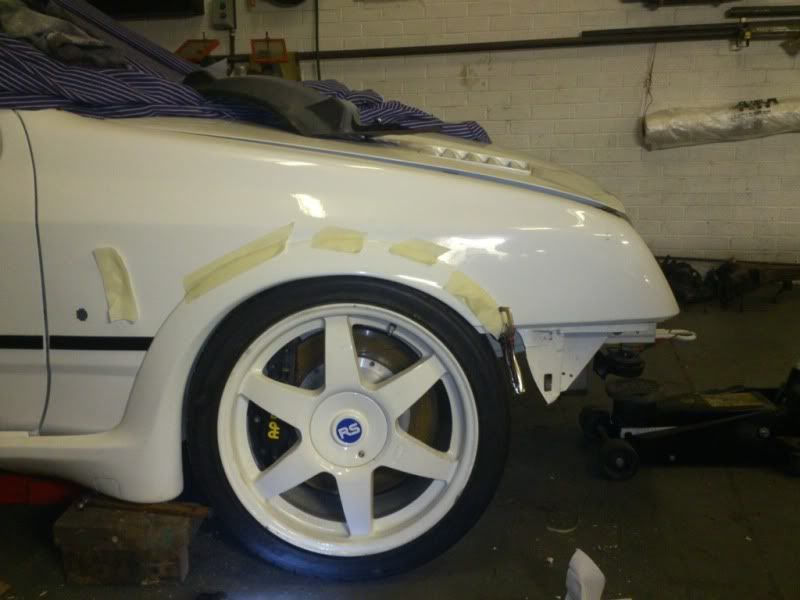
Looks really good IMHO. You can see where the front bumper mount has been trimmed also. (I need to peel those rubbing strips off too - they'll be on the 'bay!)
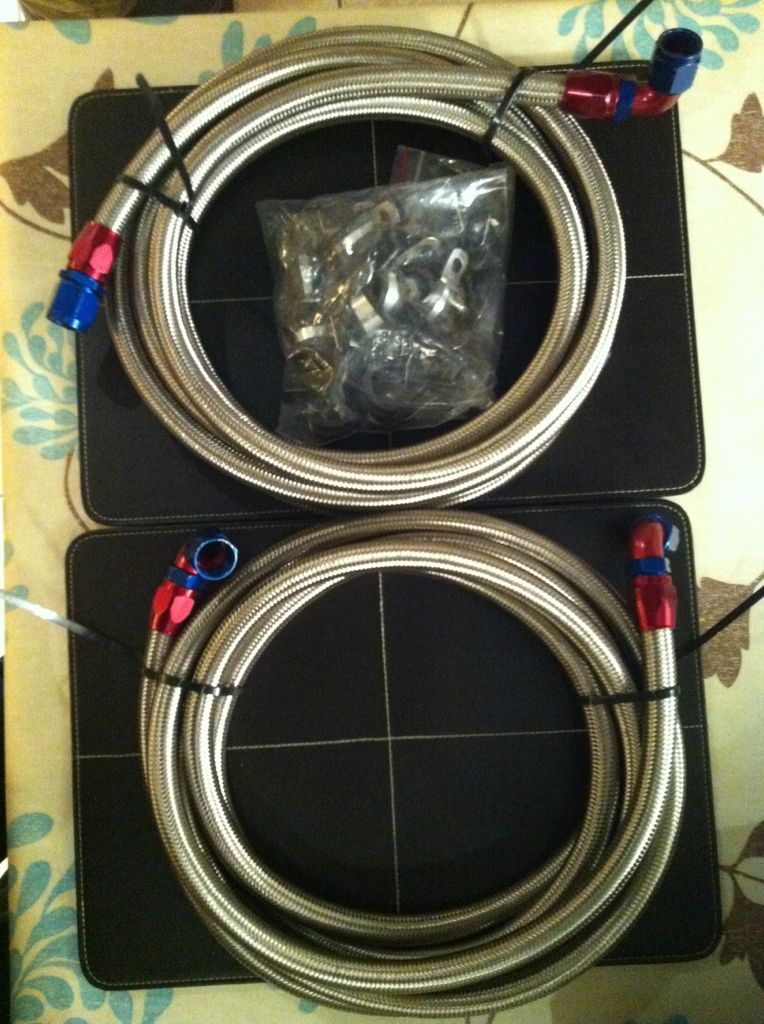
I've also sourced some -8 fuel lines from Martin breaking his Saff here on PF
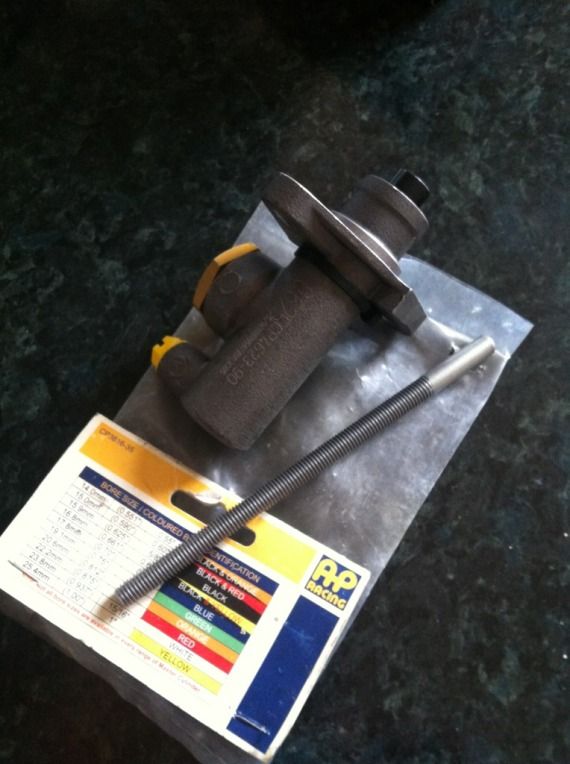
And so far I've got two out of the three needed AP m/cylinders. The last one was barely used for Ł50, so I was chuffed with that;
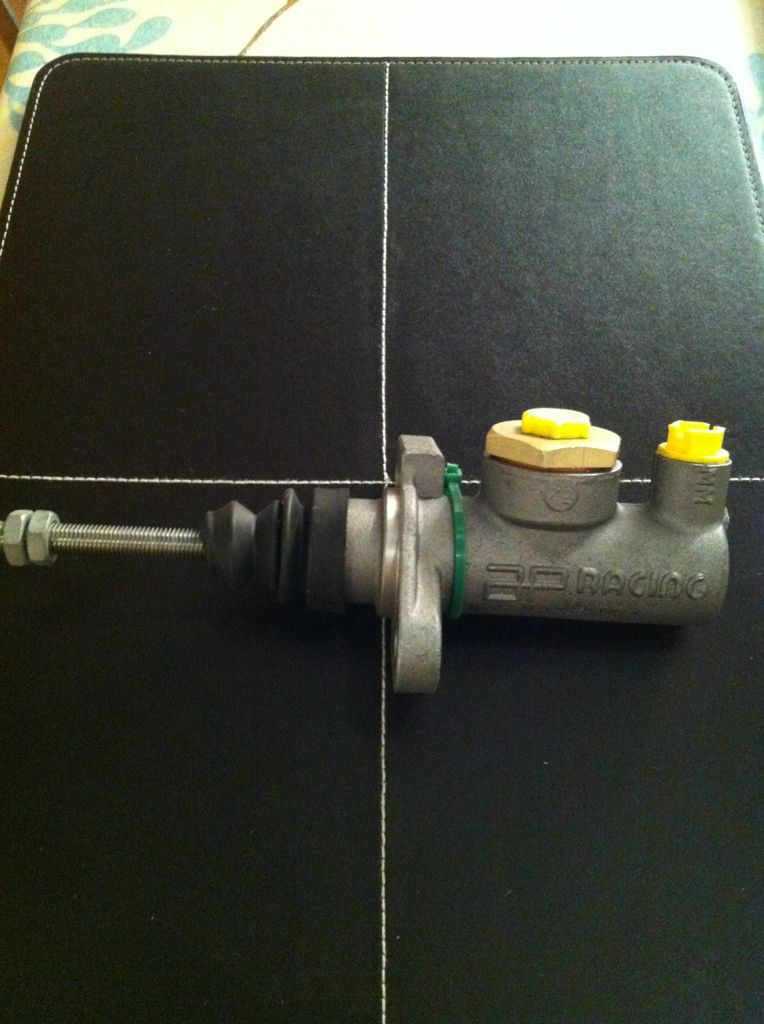
These have the offset mount to match the bias box Mat makes which is a design similar to the F2 maxi kit car he's built. I just need a 0.625 m/c now and that will complete the trio.
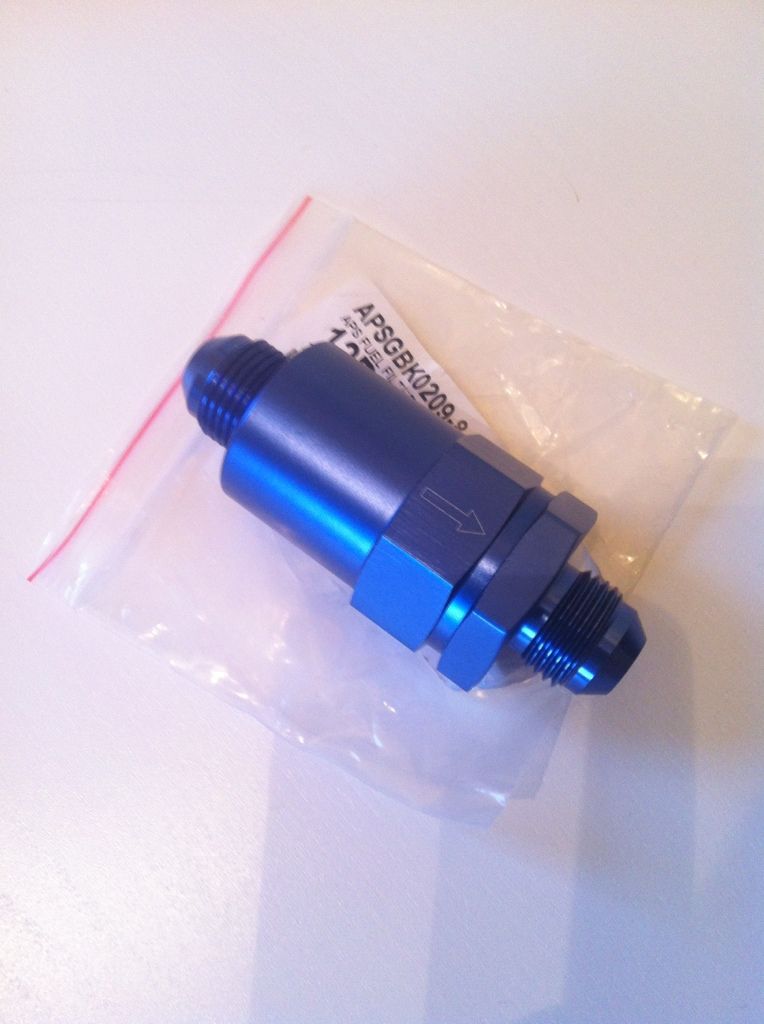
I've also opted for a simple in-line fuel filter before the pump. Being a carb based engine the bulkier injection style filter (in the previous pics) aren't ideal.
I didn't intend on updating today as I'll be dropping in the workshop tmw, so I'll see how those arches are looking close up.
Cheers for now
Iain
This is where we're up to so far with my arch mods:

Looks really good IMHO. You can see where the front bumper mount has been trimmed also. (I need to peel those rubbing strips off too - they'll be on the 'bay!)
I've also sourced some -8 fuel lines from Martin breaking his Saff here on PF

And so far I've got two out of the three needed AP m/cylinders. The last one was barely used for Ł50, so I was chuffed with that;

These have the offset mount to match the bias box Mat makes which is a design similar to the F2 maxi kit car he's built. I just need a 0.625 m/c now and that will complete the trio.
I've also opted for a simple in-line fuel filter before the pump. Being a carb based engine the bulkier injection style filter (in the previous pics) aren't ideal.

I didn't intend on updating today as I'll be dropping in the workshop tmw, so I'll see how those arches are looking close up.
Cheers for now
Iain
Last edited by IainRS1700T; 01-06-2013 at 08:58 PM. Reason: reinstating photo links
07-03-2013, 08:08 PM
#156
PassionFord Regular
Thread Starter
Hi Folks,
Some nice progress to report. The fuel system is getting there. The arch mods are coming on. The flocked dash is in and I've spent a small fortune on more Goodridge and AP stuff (again!).
The OSF arch now looks like this, finished:
Everything clears as it should so I'm pretty pleased with how that turned out. Other side next, then we know we'll have to do a bit of fettling on the front bumper too.
Mat's plumbed in the back end of the fuel system. Nice and simple for a carb'd engine:
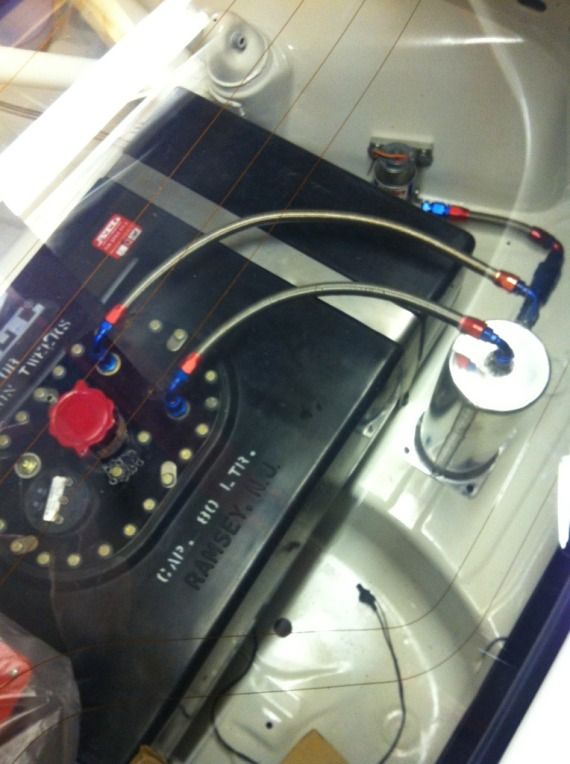
Now I've passed on the bulkhead fitting Mat can route up through to the engine bay. Then we'll need to figure out connection to the fuel log (double pumper Holley, don't forget!) I think we'll end up opting for a -8 weld on fitting, but I'll have a look for an adaptor first up.
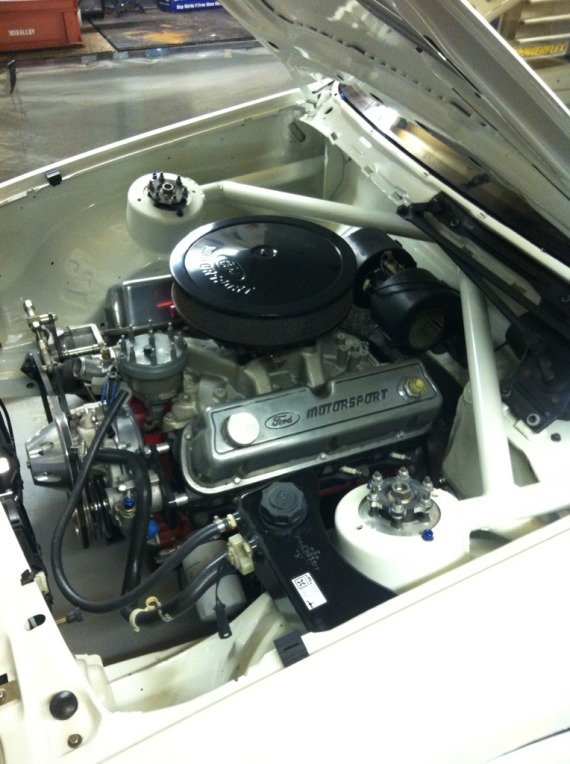
Gratuitous engine bay shot (why not?)!
Adrian at MDA has done a great job flocking the dash. Had it been a right hooker I might have had second thoughts on flocking a perfect dash, but there's not so much call for LHD stuff, so what the hell. He bonded in a panel at each end where the window vents were because the cage rules out plumbing the vents back in.
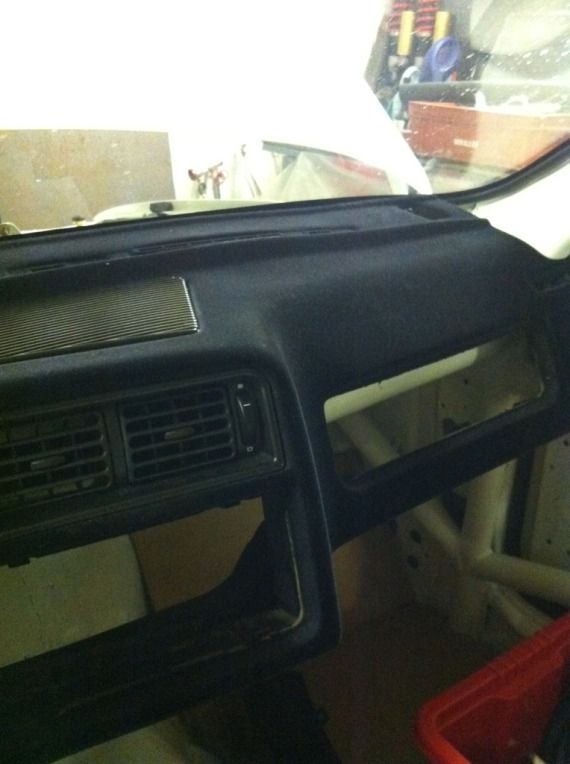
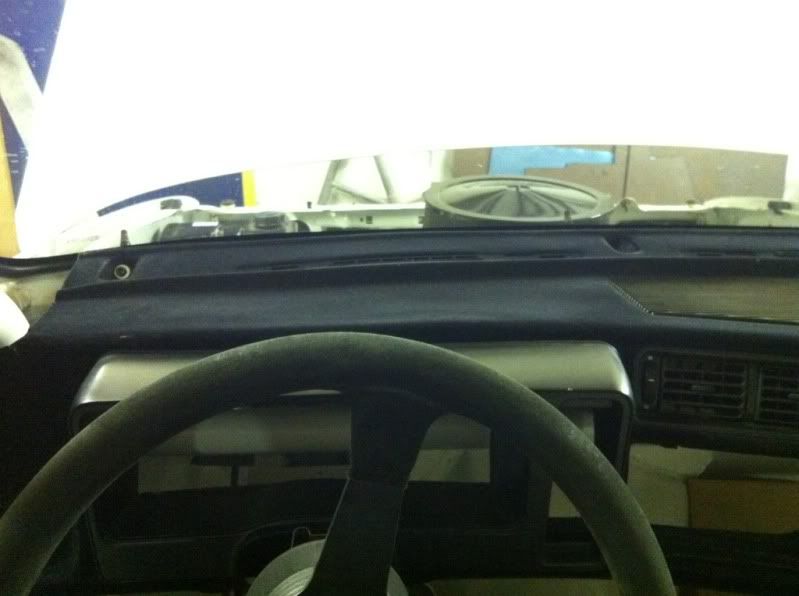
I realised tonight though that my original clocks aren't going to fit back in with the bulkhead part of the cage running behind the dash, so I'll need some inspiration for a solution to get my clocks and guages sorted out.
Well I've learned alot about Goodridge fittings, hoses and AP parts in this build - mostly about how bloody expensive it is! Anyway, my shopping list is pretty much bought now. It was endless; banjos, twin banjo's, -4 banjo's, -3 banjo's you name it, I needed it!
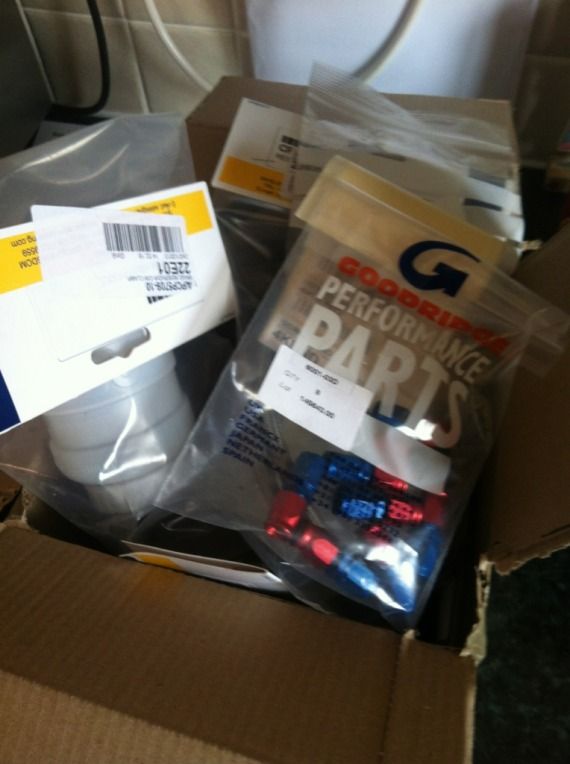
Had to laugh when one order arrived, from Cam Auto Developments, complete with Haribo's and a can of Red Bull in the blister packs! Must know about the trials and tribulations of a car build..... A stiffer drink might have been even more welcome

The biggest problem I faced was only solved today. I couldn't for the life of me find an AP master cylinder to match the others, but in a 0.625 size. I tried all the usual suspects and in the end called AP for some advice. I already knew they were three weeks away from stock, so they suggested I try Questmead in Rochdale as they are one of their largest stockists. Long story short they had one with a non captive pushrod in stock and also had the right (separately sold) pushrod, so I couldn't get my credit card out quick enough! Good service too, so recommended.
There we go, that's where we're up to! So many elements v close to completion, but the electrics still looming (no pun intended) on the horizon.
Cheers
Iain
Some nice progress to report. The fuel system is getting there. The arch mods are coming on. The flocked dash is in and I've spent a small fortune on more Goodridge and AP stuff (again!).
The OSF arch now looks like this, finished:


Everything clears as it should so I'm pretty pleased with how that turned out. Other side next, then we know we'll have to do a bit of fettling on the front bumper too.
Mat's plumbed in the back end of the fuel system. Nice and simple for a carb'd engine:

Now I've passed on the bulkhead fitting Mat can route up through to the engine bay. Then we'll need to figure out connection to the fuel log (double pumper Holley, don't forget!) I think we'll end up opting for a -8 weld on fitting, but I'll have a look for an adaptor first up.
Gratuitous engine bay shot (why not?)!

Adrian at MDA has done a great job flocking the dash. Had it been a right hooker I might have had second thoughts on flocking a perfect dash, but there's not so much call for LHD stuff, so what the hell. He bonded in a panel at each end where the window vents were because the cage rules out plumbing the vents back in.


I realised tonight though that my original clocks aren't going to fit back in with the bulkhead part of the cage running behind the dash, so I'll need some inspiration for a solution to get my clocks and guages sorted out.
Well I've learned alot about Goodridge fittings, hoses and AP parts in this build - mostly about how bloody expensive it is! Anyway, my shopping list is pretty much bought now. It was endless; banjos, twin banjo's, -4 banjo's, -3 banjo's you name it, I needed it!

Had to laugh when one order arrived, from Cam Auto Developments, complete with Haribo's and a can of Red Bull in the blister packs! Must know about the trials and tribulations of a car build..... A stiffer drink might have been even more welcome

The biggest problem I faced was only solved today. I couldn't for the life of me find an AP master cylinder to match the others, but in a 0.625 size. I tried all the usual suspects and in the end called AP for some advice. I already knew they were three weeks away from stock, so they suggested I try Questmead in Rochdale as they are one of their largest stockists. Long story short they had one with a non captive pushrod in stock and also had the right (separately sold) pushrod, so I couldn't get my credit card out quick enough! Good service too, so recommended.
There we go, that's where we're up to! So many elements v close to completion, but the electrics still looming (no pun intended) on the horizon.
Cheers
Iain
Last edited by IainRS1700T; 01-06-2013 at 09:08 PM. Reason: Reinstating photo links
 08-03-2013, 11:55 AM
#159
PassionFord Regular
Thread Starter
Cheers fellas, I appreciate it
From ordering at 4.30pm last night with Questmead, my new AP master cylinder got to me before lunchtime today. Good service still exists!
Tracked down a 5/8 unf to -8 adaptor for the Holley fuel log last night too, so happy days.
Cheers
Iain
From ordering at 4.30pm last night with Questmead, my new AP master cylinder got to me before lunchtime today. Good service still exists!

Tracked down a 5/8 unf to -8 adaptor for the Holley fuel log last night too, so happy days.
Cheers
Iain
Last edited by IainRS1700T; 01-06-2013 at 09:09 PM.
