my mk2 escort estate *project rot box* update 12/9/12 metal work begins :)
 17-04-2012, 09:58 PM
#41
I've found that life I needed.. It's HERE!!
Thread Starter
iTrader: (8)

Join Date: Dec 2006
Location: eastbourne
Posts: 1,350
Likes: 0
Received 0 Likes
on
0 Posts
went and collected a few more bits from escort-tec the other day 
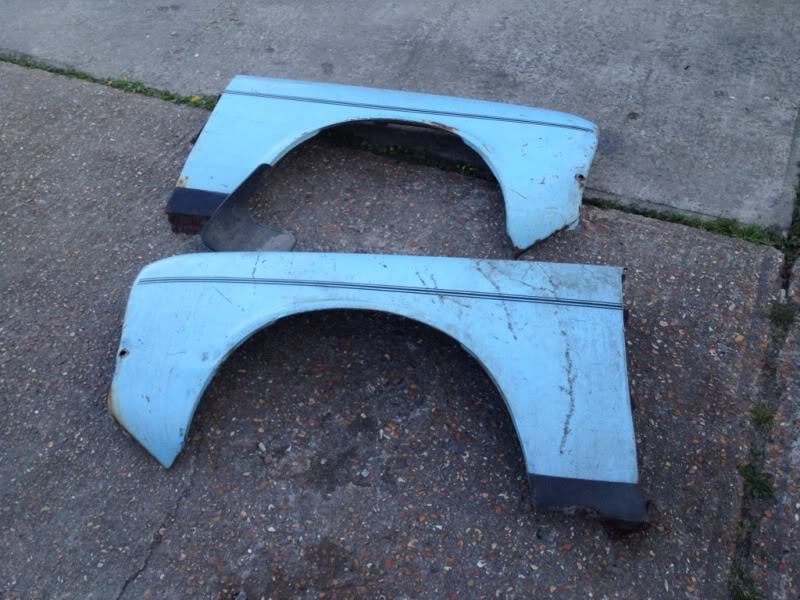
first up, a pair of wings
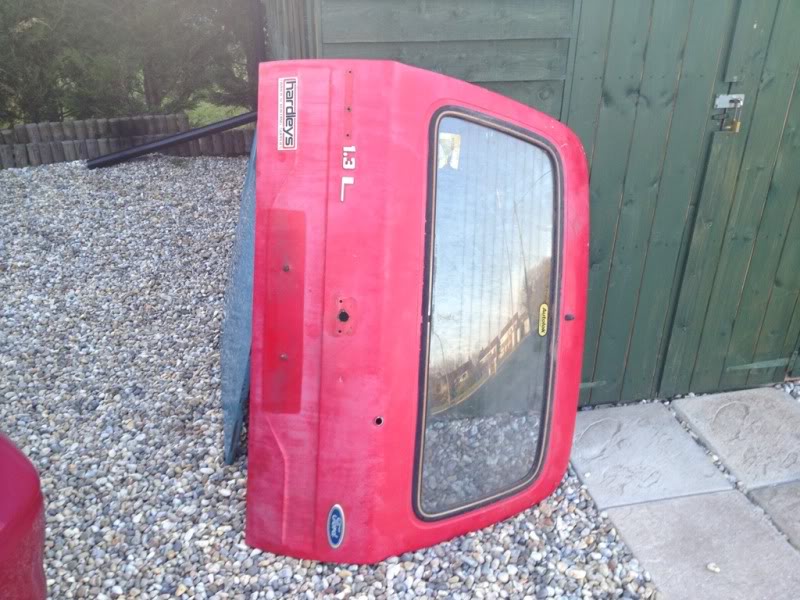
new tailgate
and a new bonnet
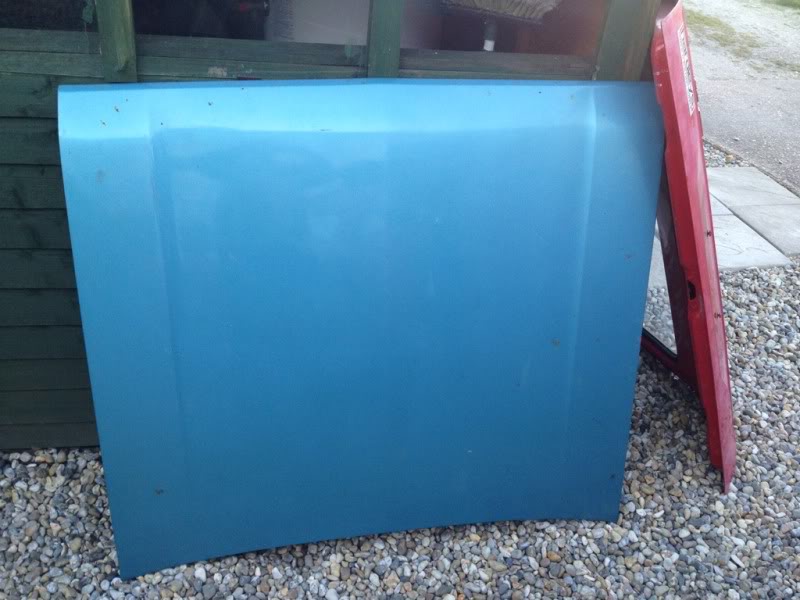
the tailgate needs a little touching up in one spot and the wings need to be repaired slightly but a dam site better than what's fitted atm and the bonnets just has a couple of patchs of surface rust on the underside so just a rub down needed for that
not sure wether to crack on an fit the new panels as and when i get them or hold out for the other bits to arrive, take it off the road and sort it all out in one go? and just fill all the bad bits for now and make it look as pressentable as i can for summer??
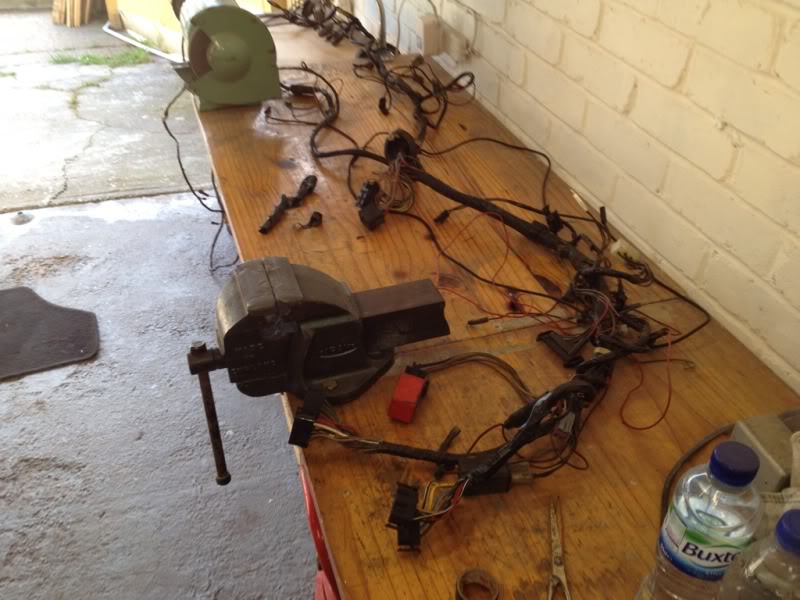
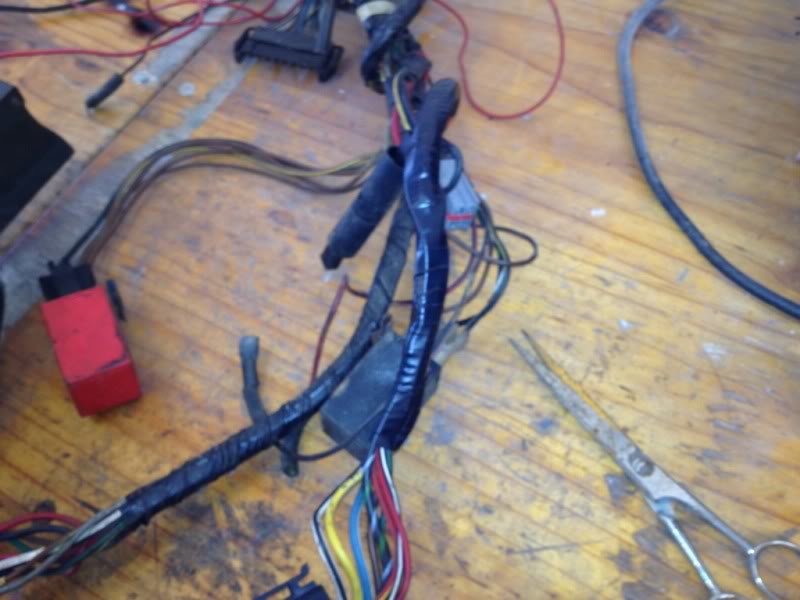
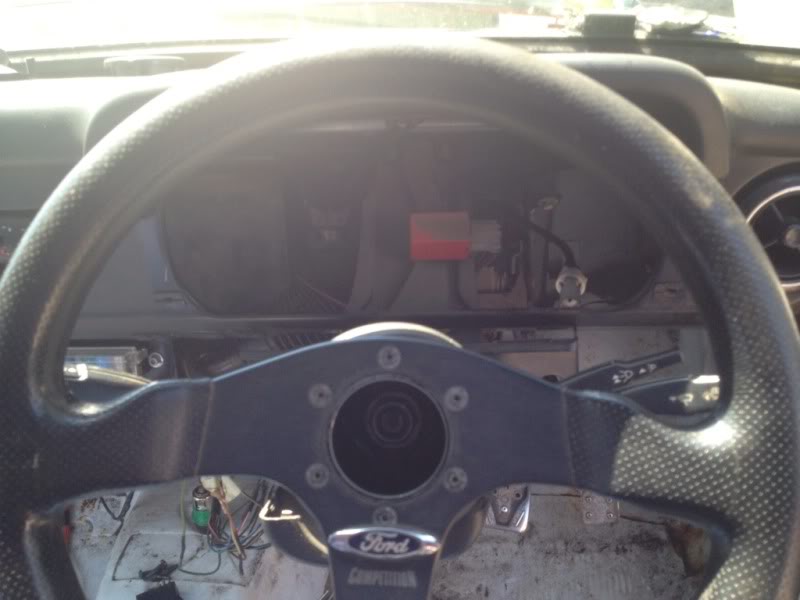
in between collecting parts and work i'v been slowly sorting through the wireing, this is the first time iv had a proper go at wireing so im taking my time and fingers crossed it'l all work first time lol
this is the wireing to the instrument cluster
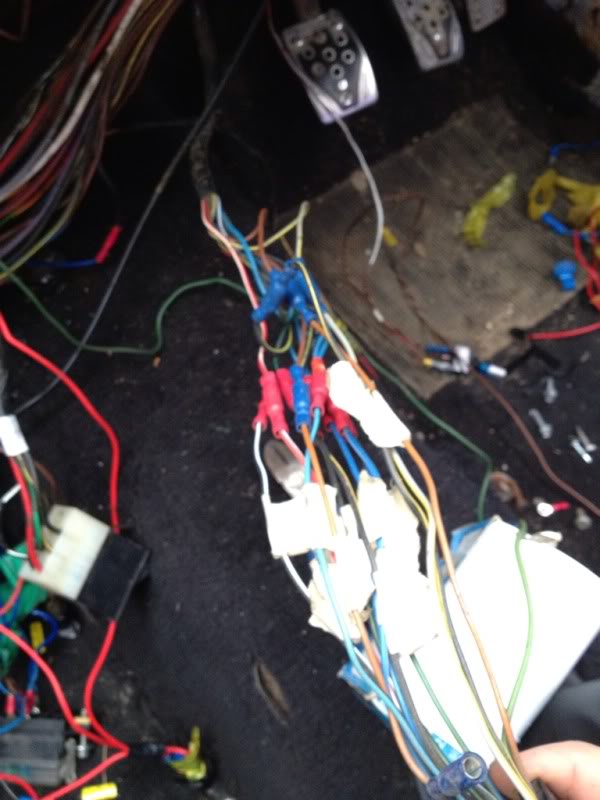
for some reason someone has cut every wire at some point and connected it all back up with bullet connectors :banghead: why they felt the need to do that i dont know?
so i'v gone through each wire, removed the bullet connectors and soldered the wires together and heat shrinked them :thumbsup:
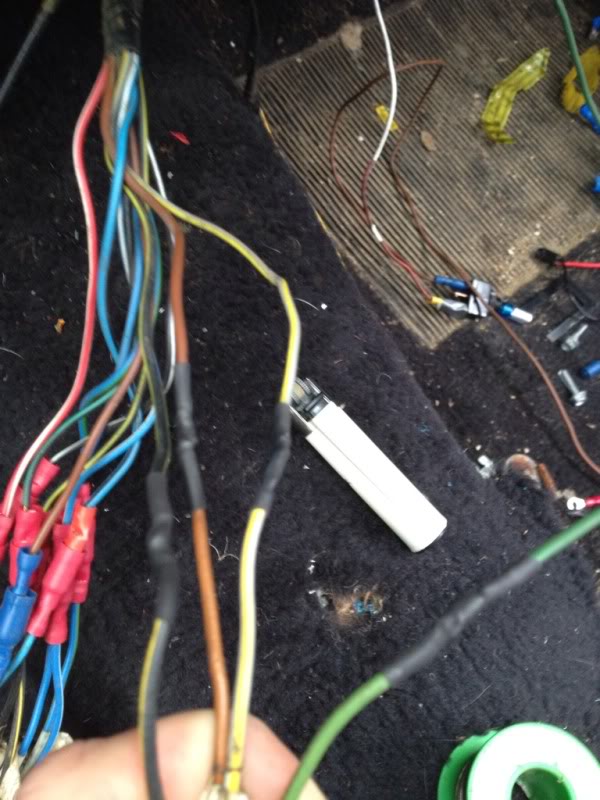
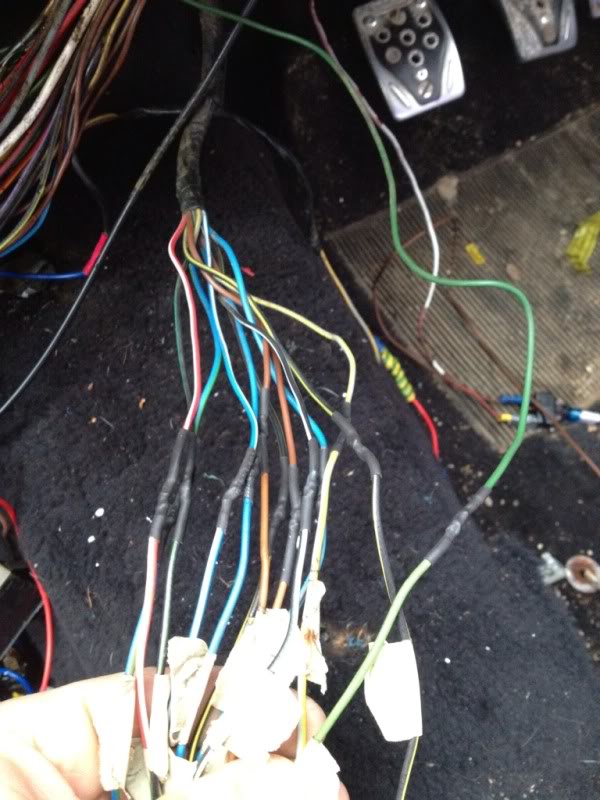
still have quite abit of wireing to sort through but im stuck with the heater blower switch atm, there 3 wires coming out the back of the switch, 1 brown (earth?) 1 brown+ red and 1 brown + white wire and i have a brown coming from the blower which i assume is earth again? and a brown and purple wire (i think, cant really remember now) so with the switch, is the brown/red wire power live to the switch and the other brown/white wire the switch live to the blower?
if someone could point me in the right driection with this that would be awesome!!
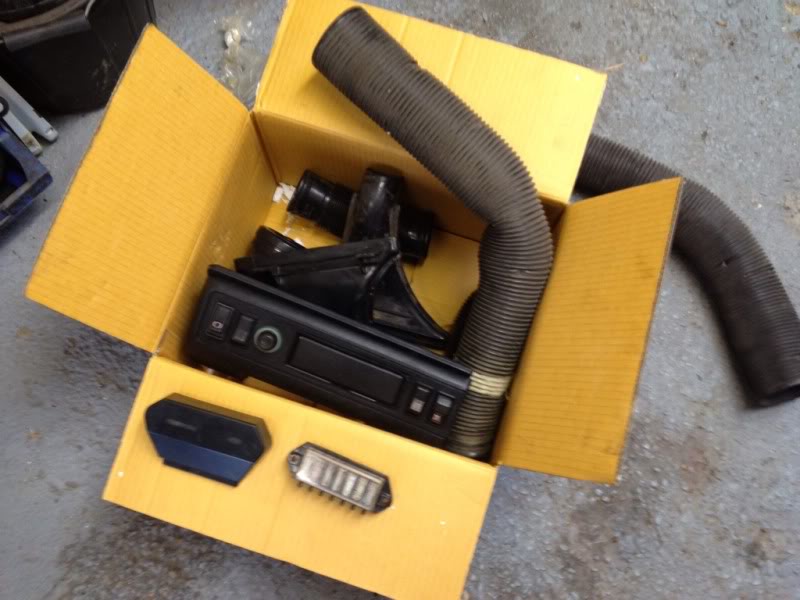
this is all that was there...
if anyone has any wireing diagrams they could post up id be soo greatfull!!
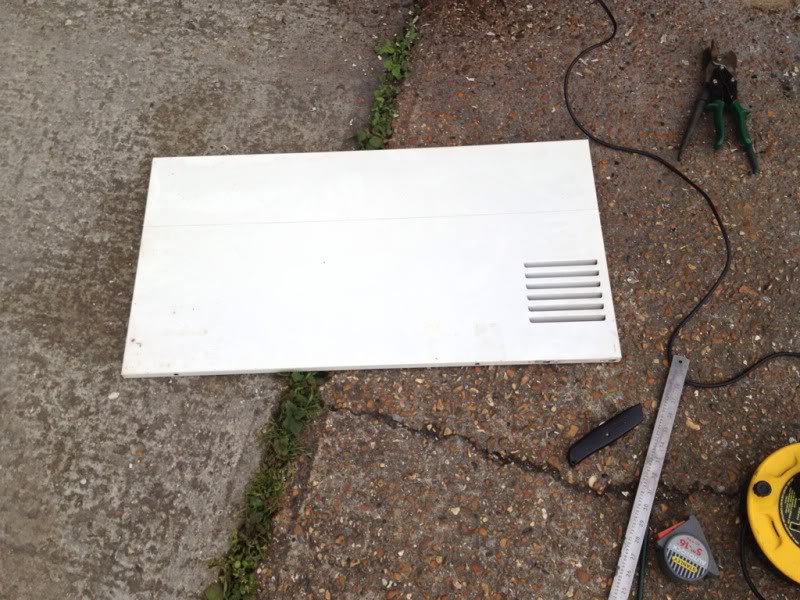
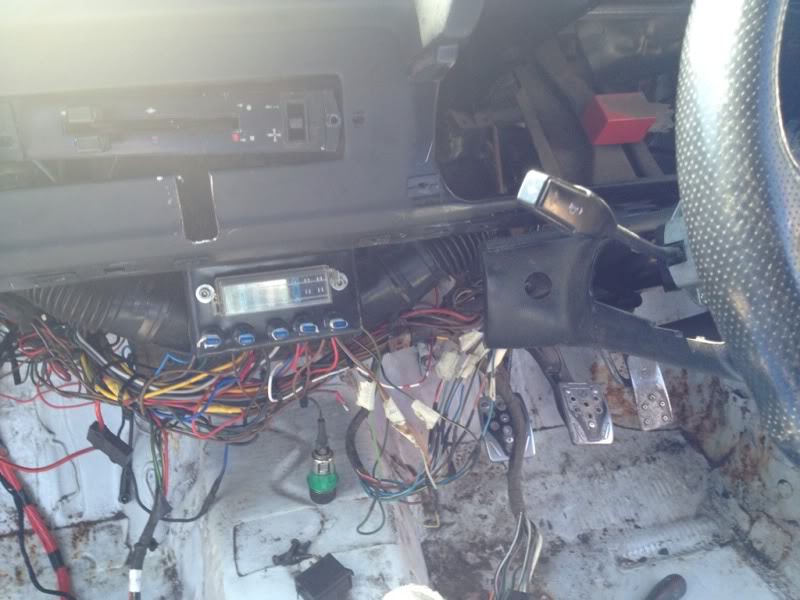
i was hoping to do abit more wireing after work today but it was dark by the time i got home so decided to have a bash at making a plate/bracket to hold the fuse box under the dash and came up with this...
old glow worm boiler side casing lol

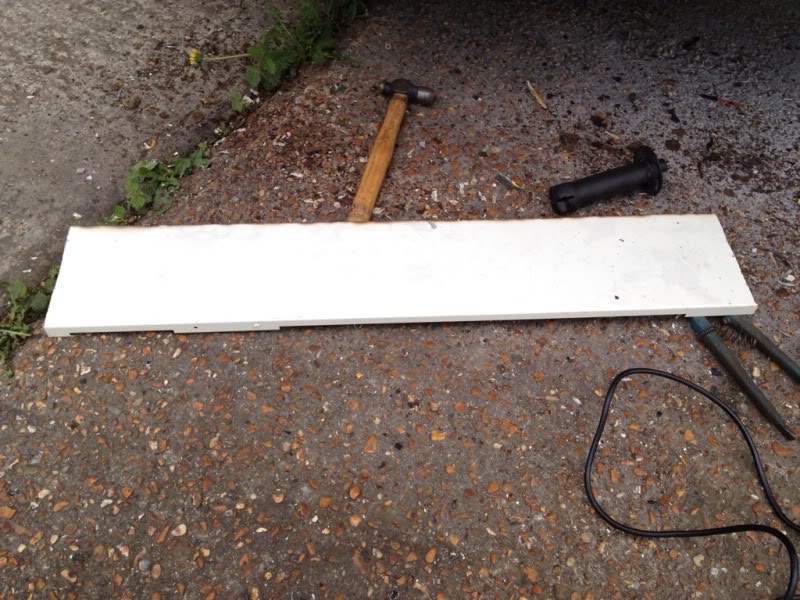
and what i ended up with...
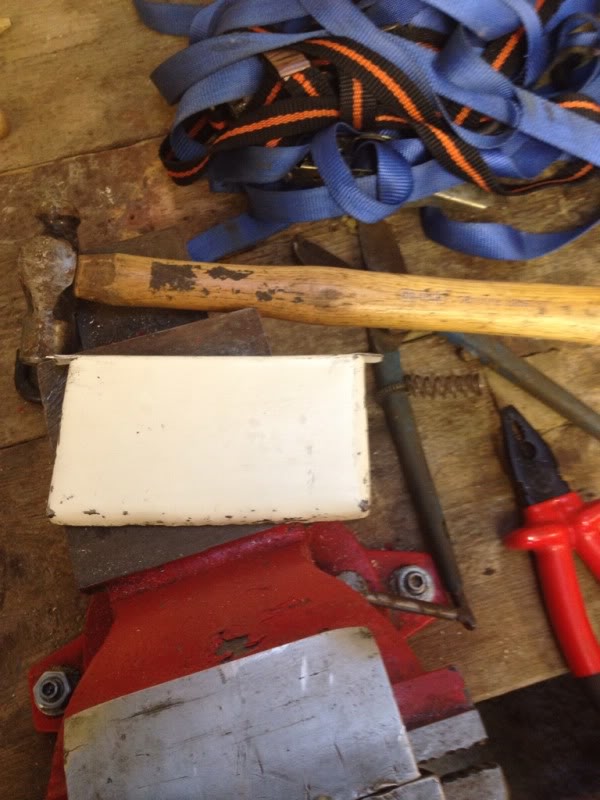
i still need to cut the middle out for the fuse box to sit into, paint it and mount it in the car but this is only temporary anyway, idealy id like to re-do it at some point in ally and make it look abit more fancy.
hopfully get abit more done tomorrow weather and work permitting ofcourse.
first up, a pair of wings
new tailgate
and a new bonnet
the tailgate needs a little touching up in one spot and the wings need to be repaired slightly but a dam site better than what's fitted atm and the bonnets just has a couple of patchs of surface rust on the underside so just a rub down needed for that
not sure wether to crack on an fit the new panels as and when i get them or hold out for the other bits to arrive, take it off the road and sort it all out in one go? and just fill all the bad bits for now and make it look as pressentable as i can for summer??
in between collecting parts and work i'v been slowly sorting through the wireing, this is the first time iv had a proper go at wireing so im taking my time and fingers crossed it'l all work first time lol
this is the wireing to the instrument cluster
for some reason someone has cut every wire at some point and connected it all back up with bullet connectors :banghead: why they felt the need to do that i dont know?
so i'v gone through each wire, removed the bullet connectors and soldered the wires together and heat shrinked them :thumbsup:
still have quite abit of wireing to sort through but im stuck with the heater blower switch atm, there 3 wires coming out the back of the switch, 1 brown (earth?) 1 brown+ red and 1 brown + white wire and i have a brown coming from the blower which i assume is earth again? and a brown and purple wire (i think, cant really remember now) so with the switch, is the brown/red wire power live to the switch and the other brown/white wire the switch live to the blower?
if someone could point me in the right driection with this that would be awesome!!
this is all that was there...
if anyone has any wireing diagrams they could post up id be soo greatfull!!
i was hoping to do abit more wireing after work today but it was dark by the time i got home so decided to have a bash at making a plate/bracket to hold the fuse box under the dash and came up with this...
old glow worm boiler side casing lol
and what i ended up with...
i still need to cut the middle out for the fuse box to sit into, paint it and mount it in the car but this is only temporary anyway, idealy id like to re-do it at some point in ally and make it look abit more fancy.
hopfully get abit more done tomorrow weather and work permitting ofcourse.
 17-04-2012, 10:09 PM
#42

Mate iv also used boiler casing on the estate to mount the fuse boxes,
The heater blower has the purple which is a permanent live to the motor and an earth that splits to a resister then onto the switch I think, my resister was broken so I sourced one off a kit car to give me 2 speeds, trial and error and it's easy
The heater blower has the purple which is a permanent live to the motor and an earth that splits to a resister then onto the switch I think, my resister was broken so I sourced one off a kit car to give me 2 speeds, trial and error and it's easy
17-04-2012, 10:19 PM
#43
I've found that life I needed.. It's HERE!!
Thread Starter
iTrader: (8)
Join Date: Dec 2006
Location: eastbourne
Posts: 1,350
Likes: 0
Received 0 Likes
on
0 Posts
lol, atleast im not the only one then 
what you just said about the wireing just sound complicated, im a complete an utter novice on wireing so if you could explain in more detail that would be awesome!
where have you got your purple wire running to? and is the resister just like an inline thing or something?
i really do hate not knowing much sometimes lol
lol
what you just said about the wireing just sound complicated, im a complete an utter novice on wireing so if you could explain in more detail that would be awesome!
where have you got your purple wire running to? and is the resister just like an inline thing or something?
i really do hate not knowing much sometimes
lol
21-04-2012, 10:46 PM
#44
I've found that life I needed.. It's HERE!!
Thread Starter
iTrader: (8)
Join Date: Dec 2006
Location: eastbourne
Posts: 1,350
Likes: 0
Received 0 Likes
on
0 Posts
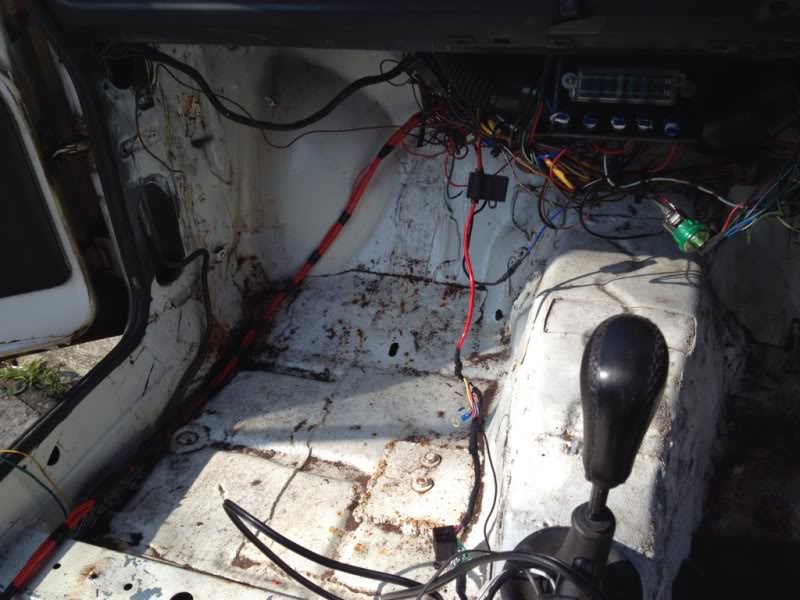
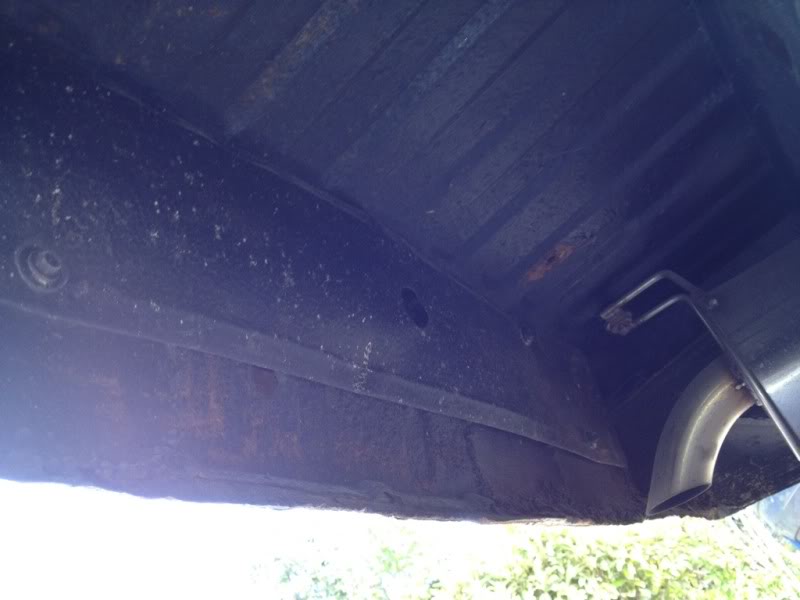
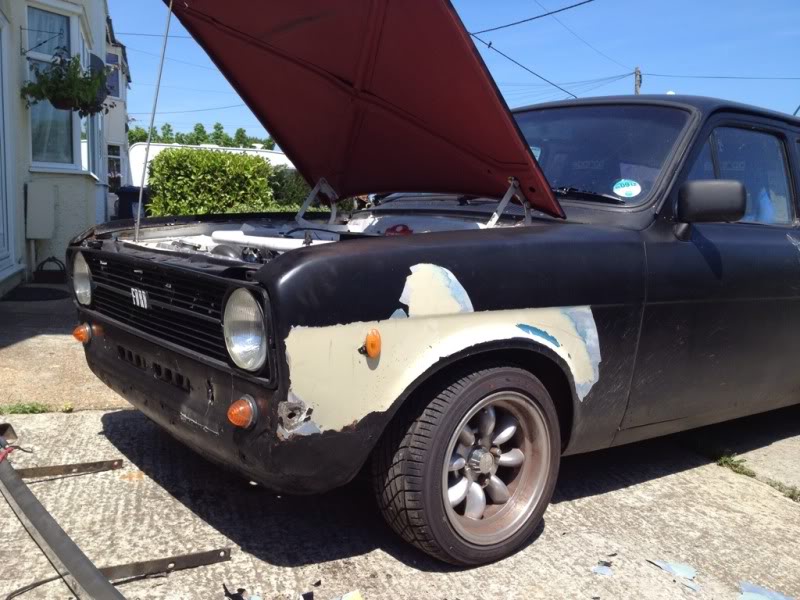
been playing with the hearse (what its now called apparently) again, i started by removing the carpet to see what state the floor was in and i was quite suprised to only find a little bit of rot hiding... but there's some dodgy plates that the gearbox cradle bolts to..
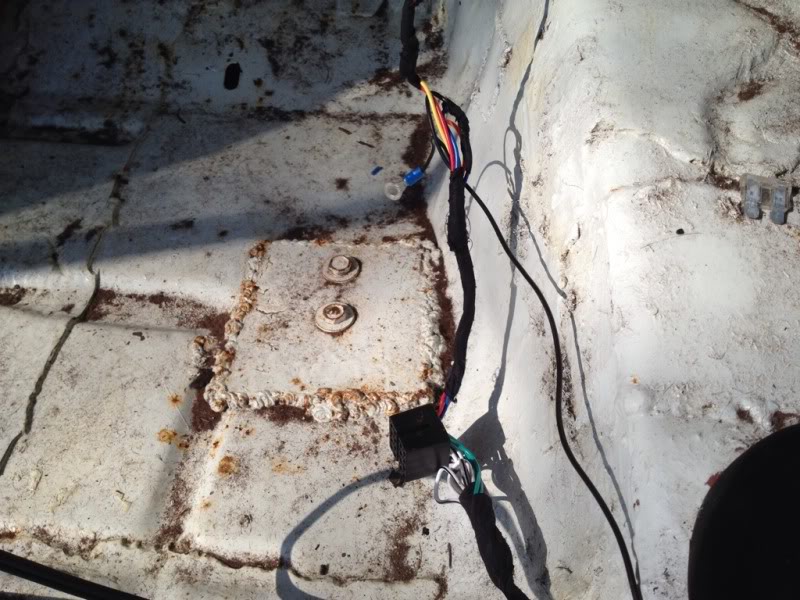
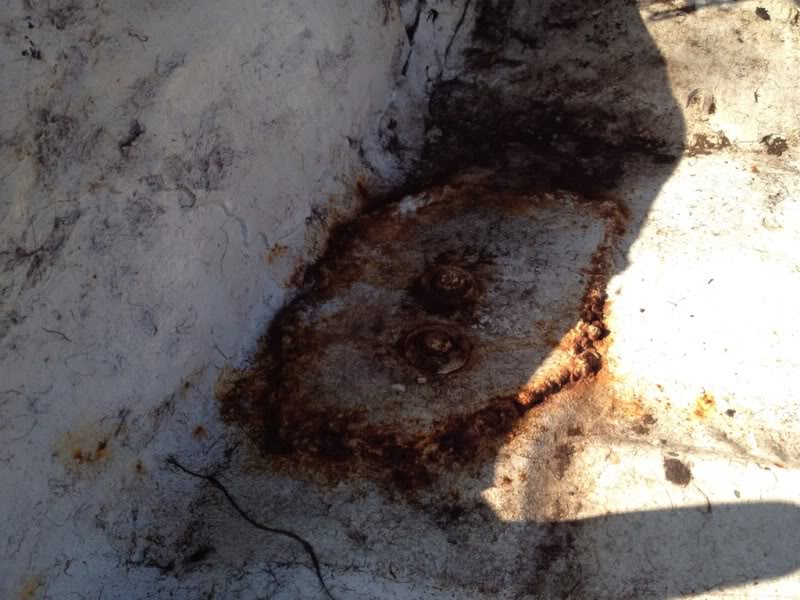
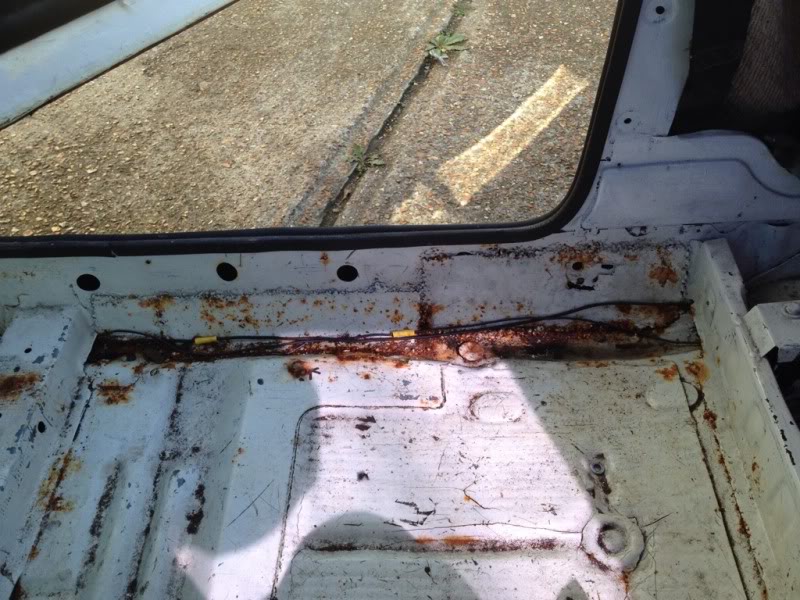
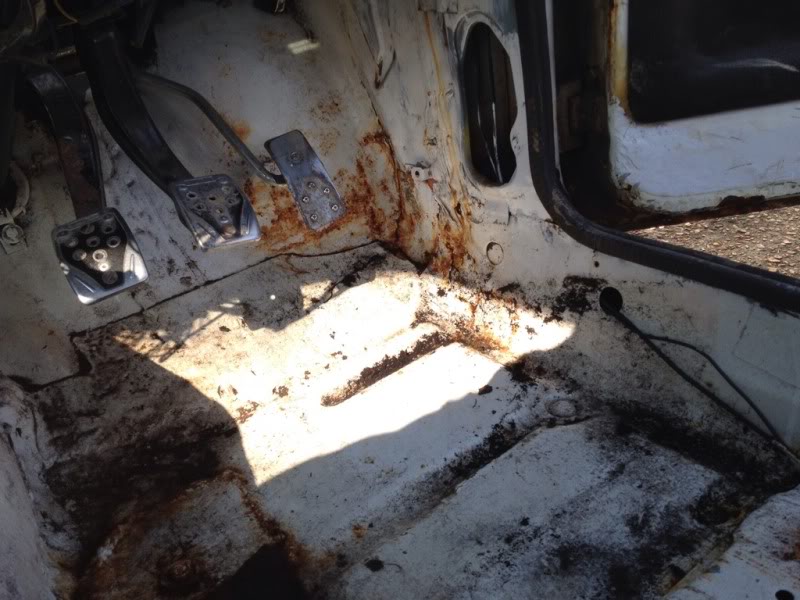
the inner sills on the passenger side look pretty solid, but the drivers side has been patched up a couple of times so il take the plates off next time im out there and see whats lurking behind :unsure:
had this turn up the other day aswel, nice new boot lock so i can actually lock the car up lol
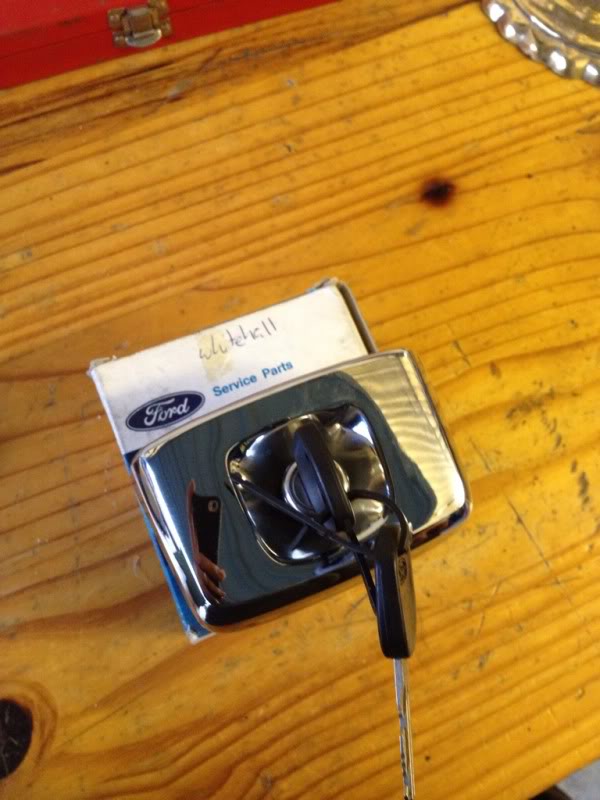
janky old one...
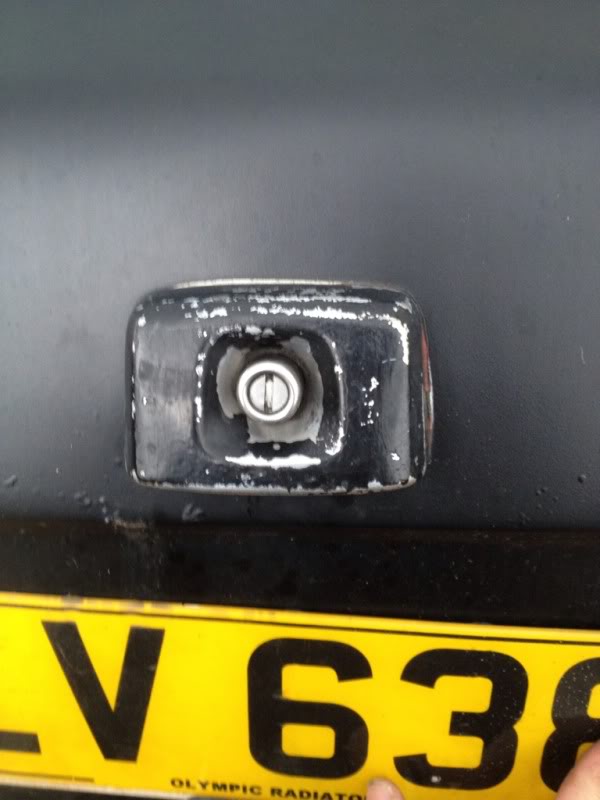
nice new one
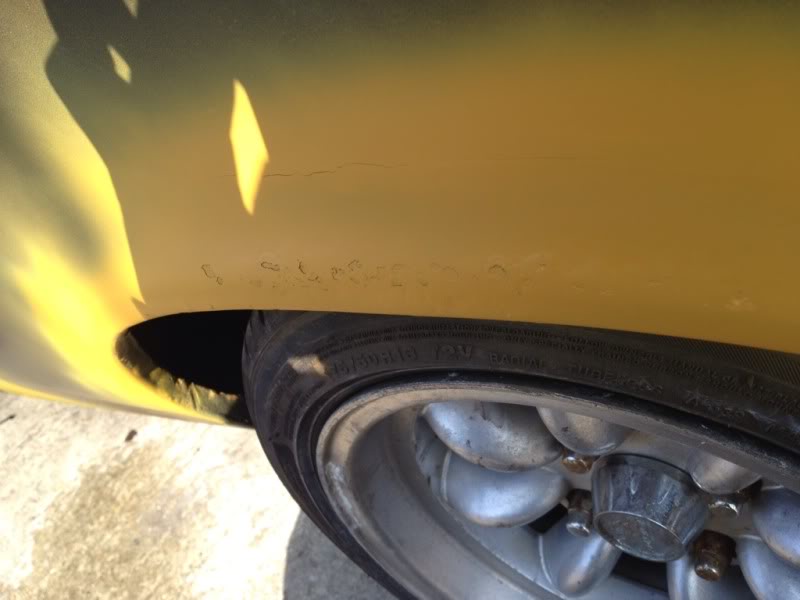
also had a poke around on the body work while the weather was nice the other day, rubbed down the bubbling around the n/s/r arch to see just how bad it is and it's pretty shot so just put some prima on to cover the bare metal, and done the same in a few other spots aswel.
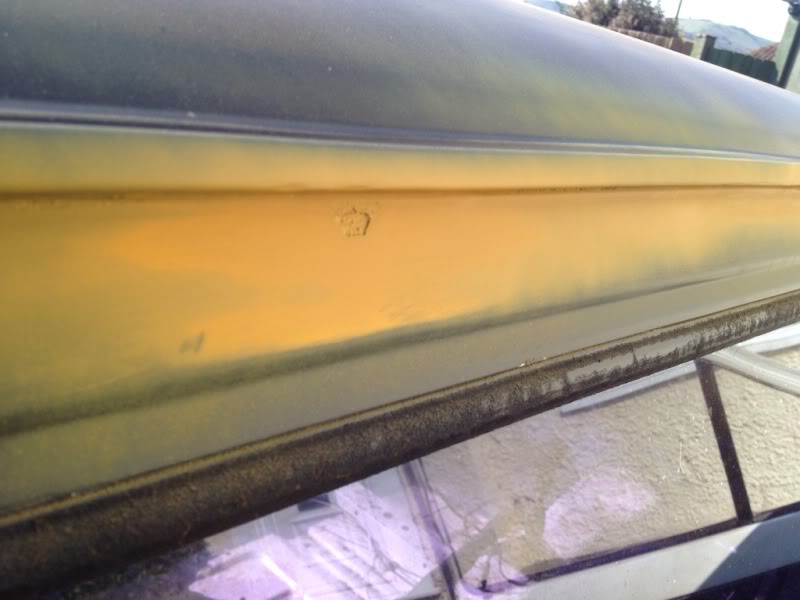
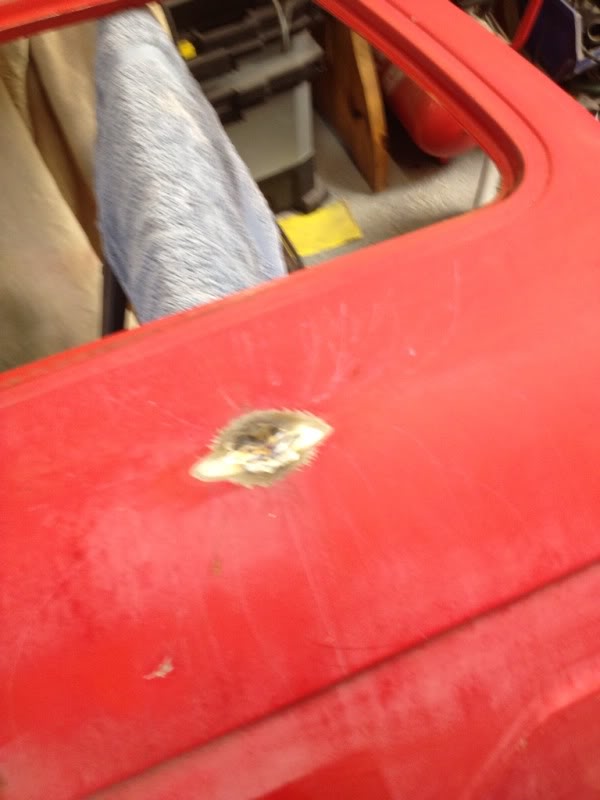
hole above the o/s/r window
random pic
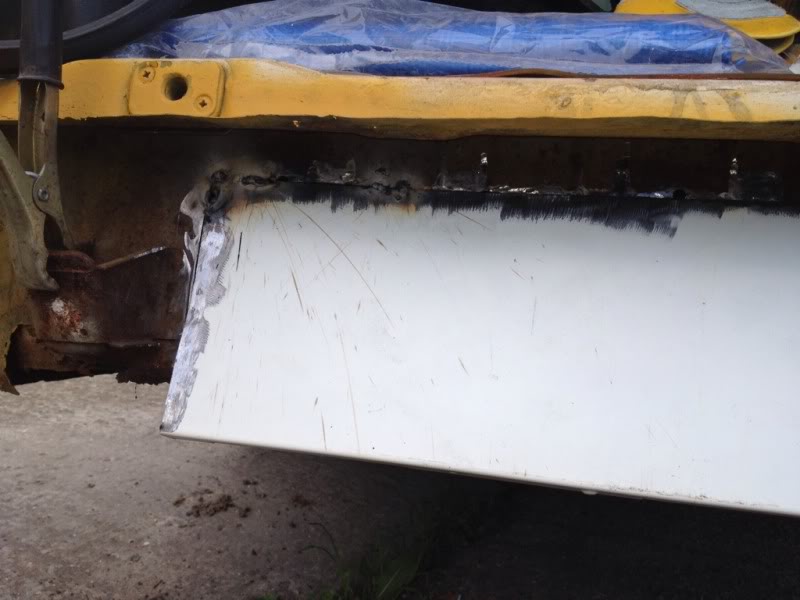
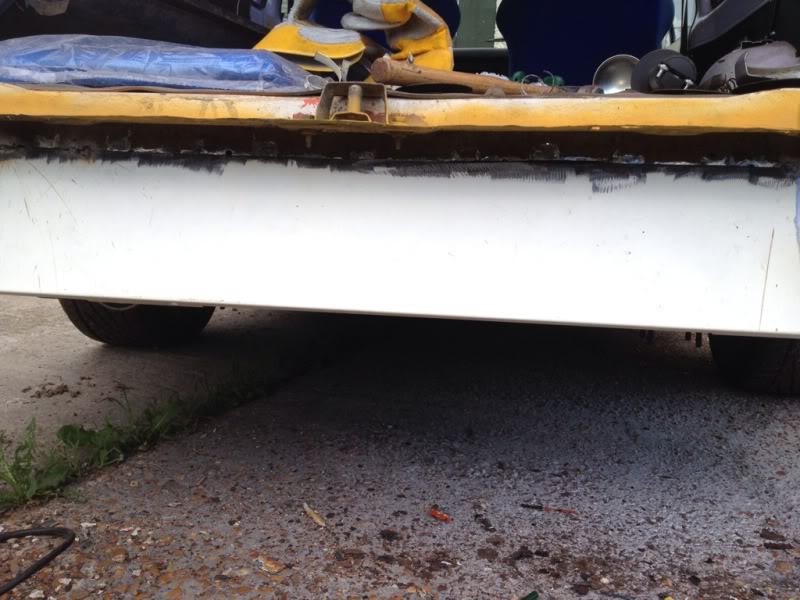
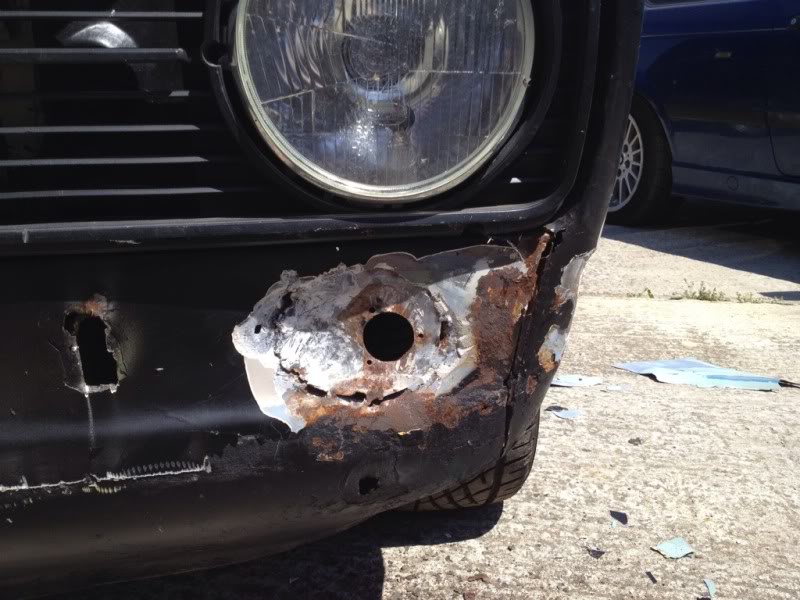
while i had my tools out there i decided to remove the front lower bib thing and see how it was looking behind it and found this...

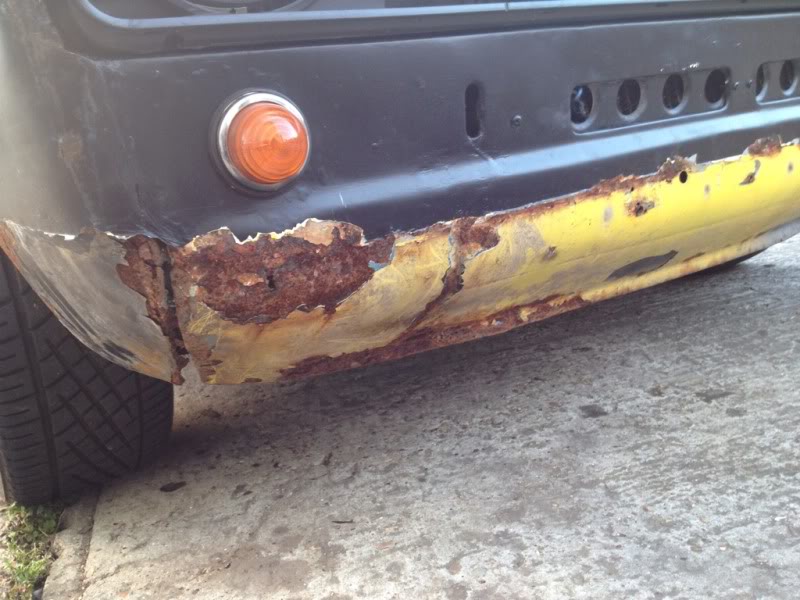
the other side isnt so bad so just rubbed it down and primered it
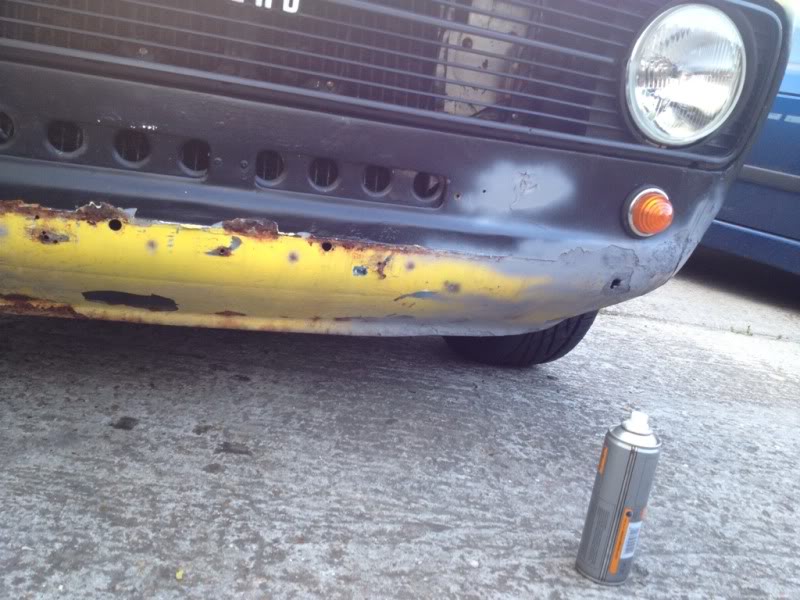
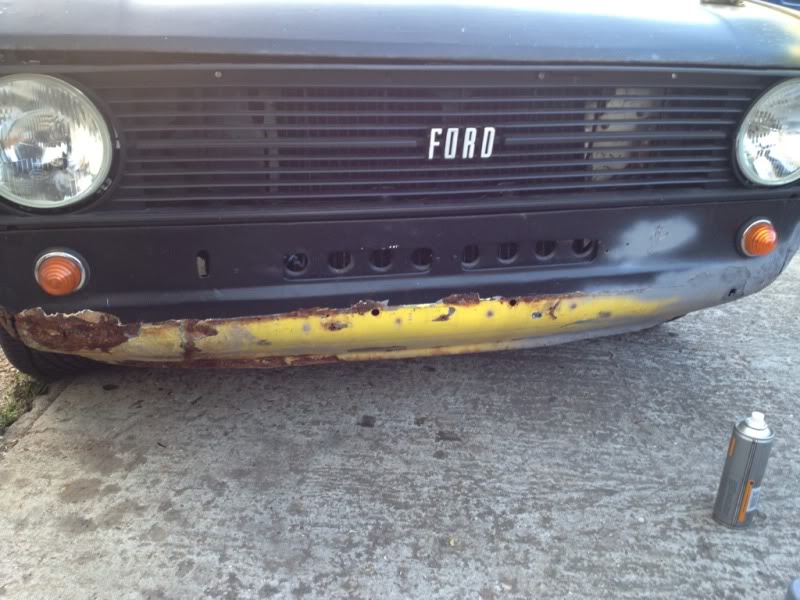
not sure wether to chop out the rot and replace or just go all out and get a new front panel?
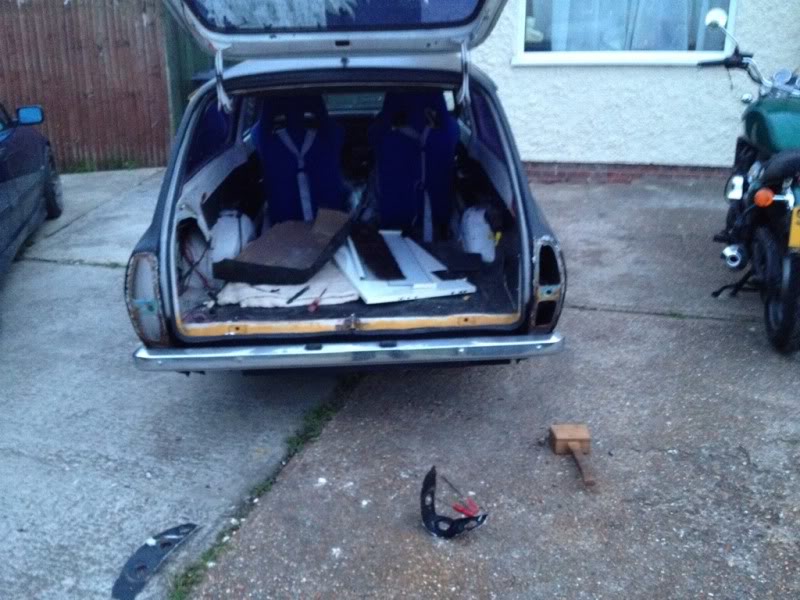
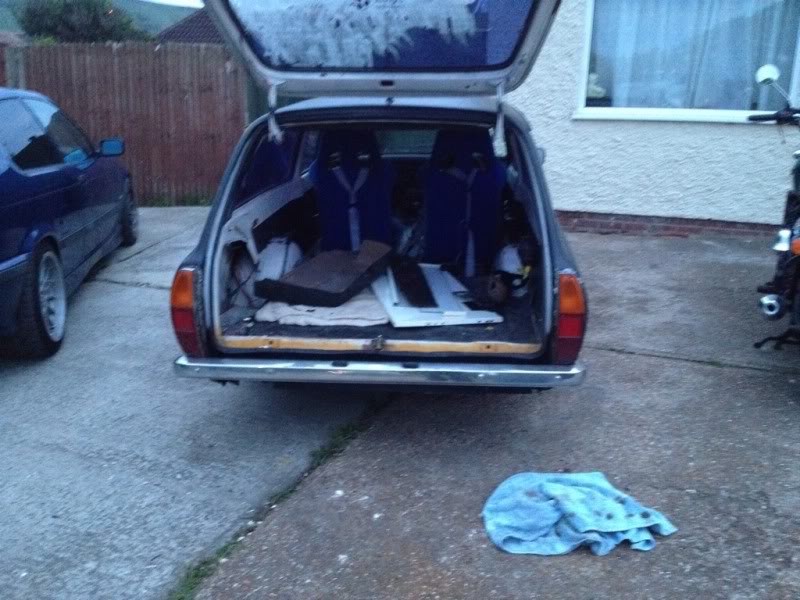
and a random pic of how the battery's been positioned in the spare wheel well at the rear lol
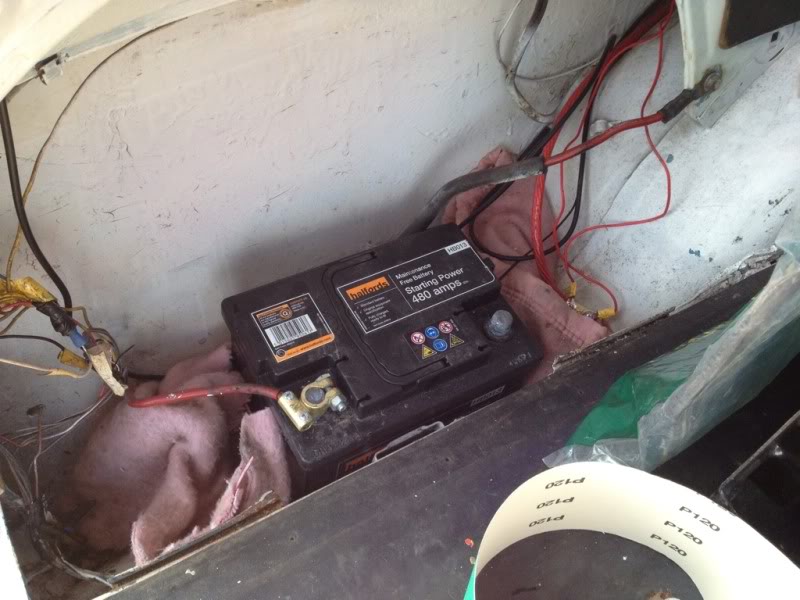
notice the nice pink blanket thats been used to secure the battery in place pmsl!
and finally, a few pics of this nice little jem i saw at work the other day.

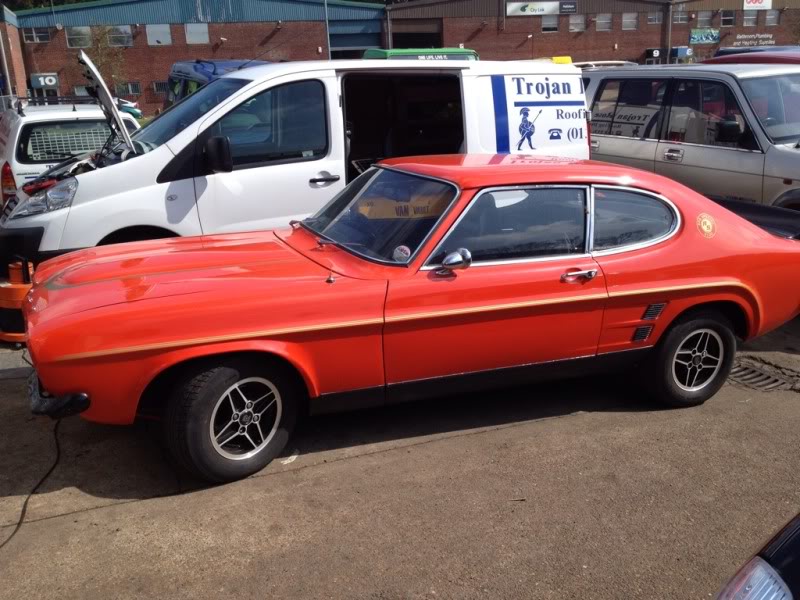
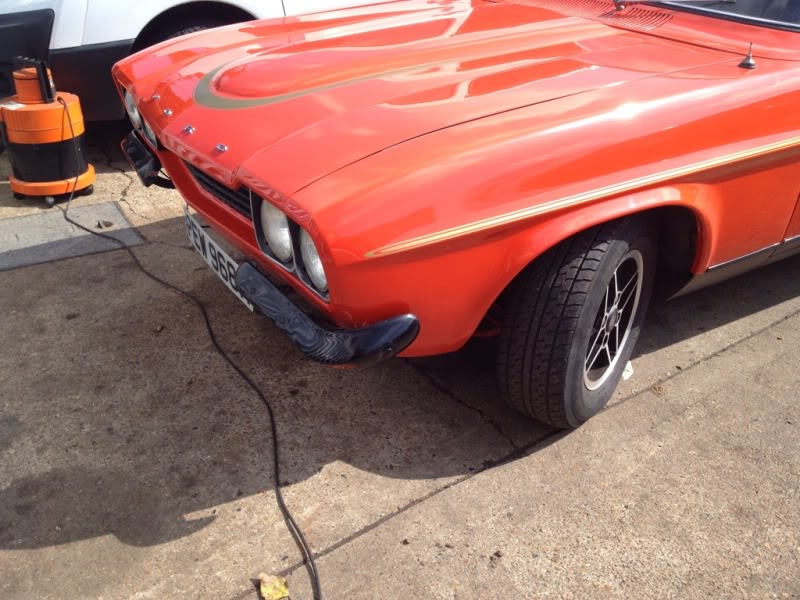

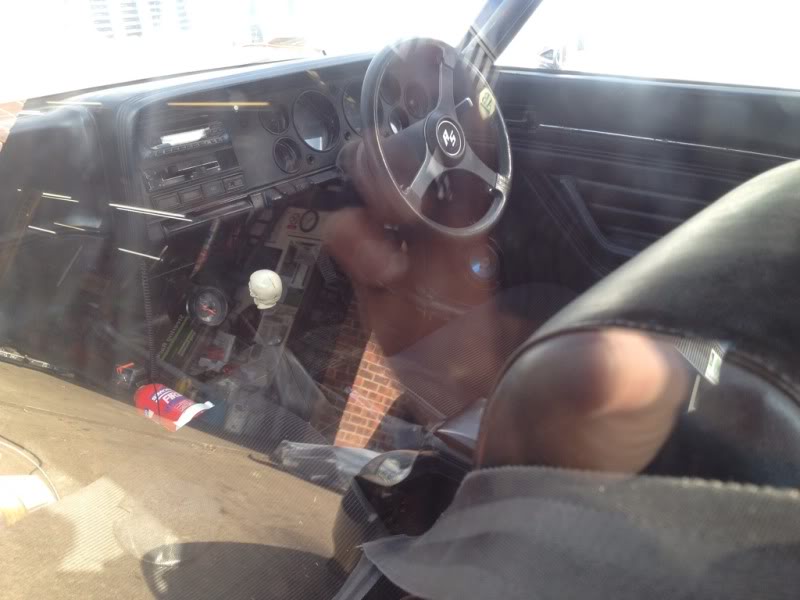
stunning car!
anyway, as always, il updte as an when
the inner sills on the passenger side look pretty solid, but the drivers side has been patched up a couple of times so il take the plates off next time im out there and see whats lurking behind :unsure:
had this turn up the other day aswel, nice new boot lock so i can actually lock the car up lol
janky old one...
nice new one
also had a poke around on the body work while the weather was nice the other day, rubbed down the bubbling around the n/s/r arch to see just how bad it is and it's pretty shot so just put some prima on to cover the bare metal, and done the same in a few other spots aswel.
hole above the o/s/r window
random pic
while i had my tools out there i decided to remove the front lower bib thing and see how it was looking behind it and found this...
the other side isnt so bad so just rubbed it down and primered it
not sure wether to chop out the rot and replace or just go all out and get a new front panel?
and a random pic of how the battery's been positioned in the spare wheel well at the rear lol
notice the nice pink blanket thats been used to secure the battery in place pmsl!
and finally, a few pics of this nice little jem i saw at work the other day.
stunning car!
anyway, as always, il updte as an when
22-04-2012, 10:36 AM
#46
I've found that life I needed.. It's HERE!!
Thread Starter
iTrader: (8)
Join Date: Dec 2006
Location: eastbourne
Posts: 1,350
Likes: 0
Received 0 Likes
on
0 Posts
Yes mate, standard rear lights look soo much better! By quarters, do you mean the front bumper?
If so then possibly, iv got a full length bumper for it atm but I havnt decided wether or not to keep the full length of have quarters, everyone seems to go with quarter bumpers these days which sort of makes me want to keep the full length...?
If so then possibly, iv got a full length bumper for it atm but I havnt decided wether or not to keep the full length of have quarters, everyone seems to go with quarter bumpers these days which sort of makes me want to keep the full length...?
28-04-2012, 08:18 PM
#49
I've found that life I needed.. It's HERE!!
Thread Starter
iTrader: (8)
Join Date: Dec 2006
Location: eastbourne
Posts: 1,350
Likes: 0
Received 0 Likes
on
0 Posts
update time, only a little one though
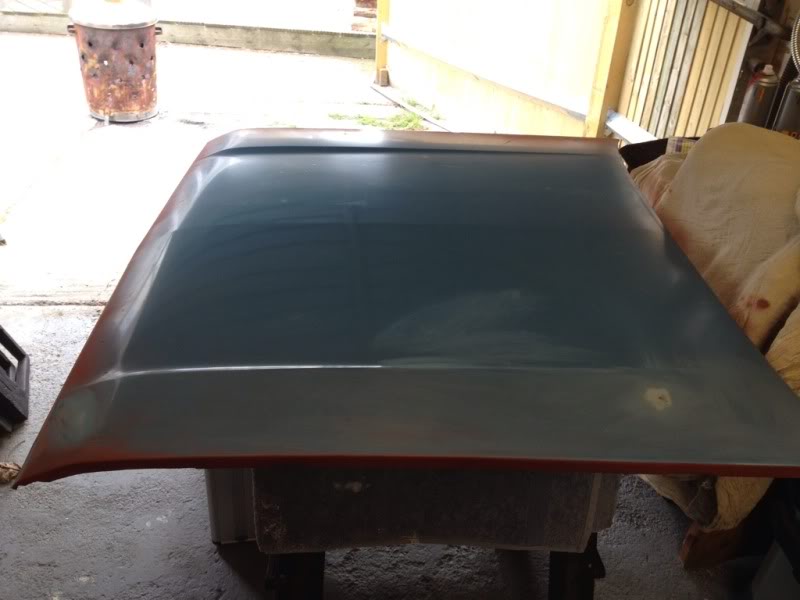
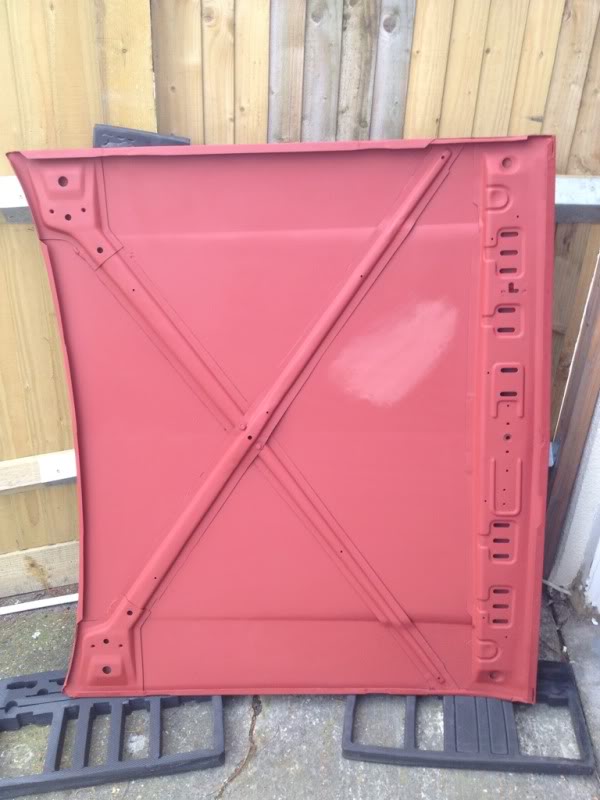
made a start on the new bonnet the other day, it was relatively clean but had abit of surface rust on the underside so i set about rubbing it all down to prevent the rust getting any worse and gave it a coat of primer.
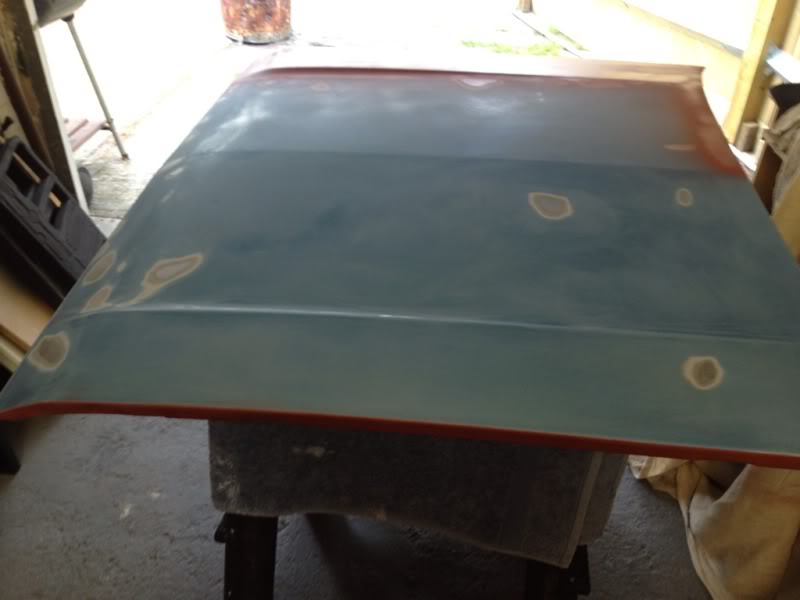
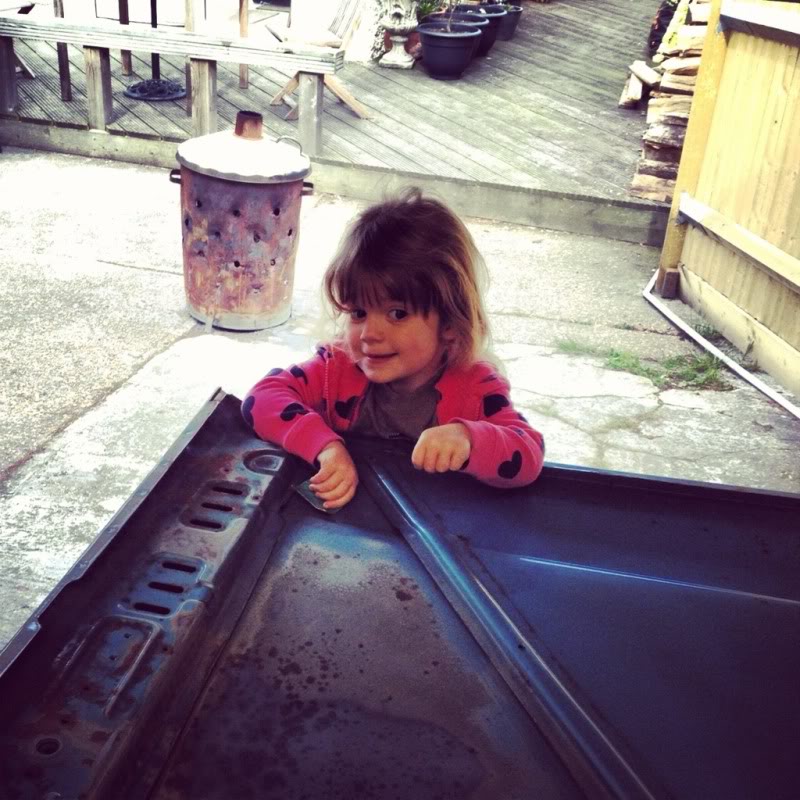
my little girls now at the age where she must help with everything so gave her abit of sand paper hopfully one day she'll be bringing me my spanners and sockets lol
and done bar the odd patch which is where i had to rub it down again
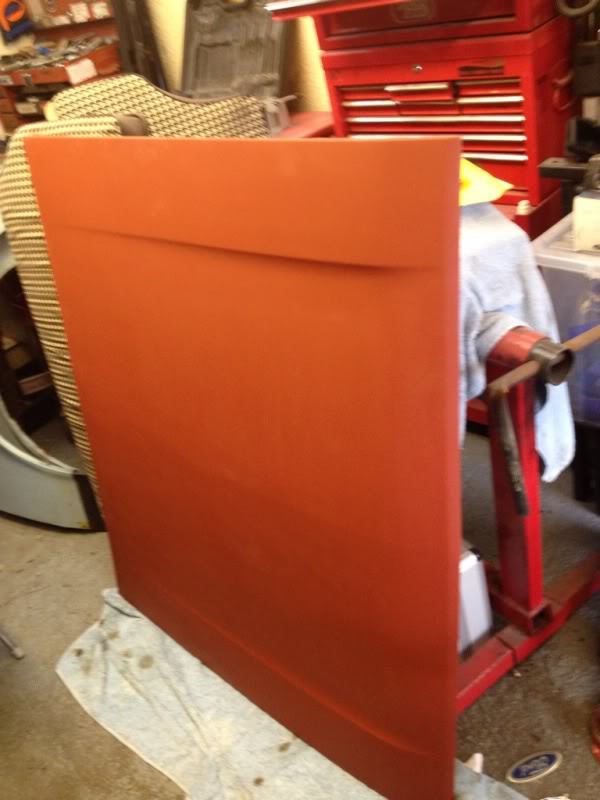
and now fitted with janky old bonnet pins until i get some lockable aero catchs
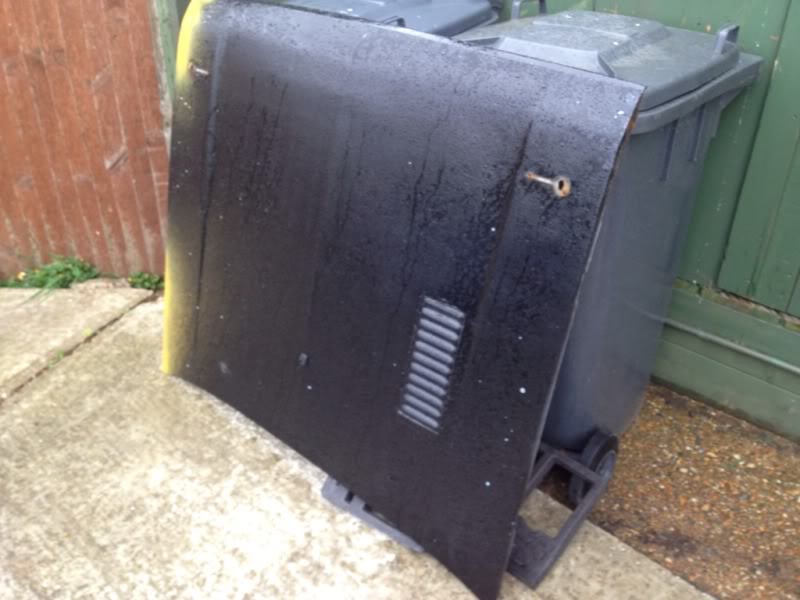
and the old one, what a mess that was!! ideal for a grass track escort if anyone knows anyone
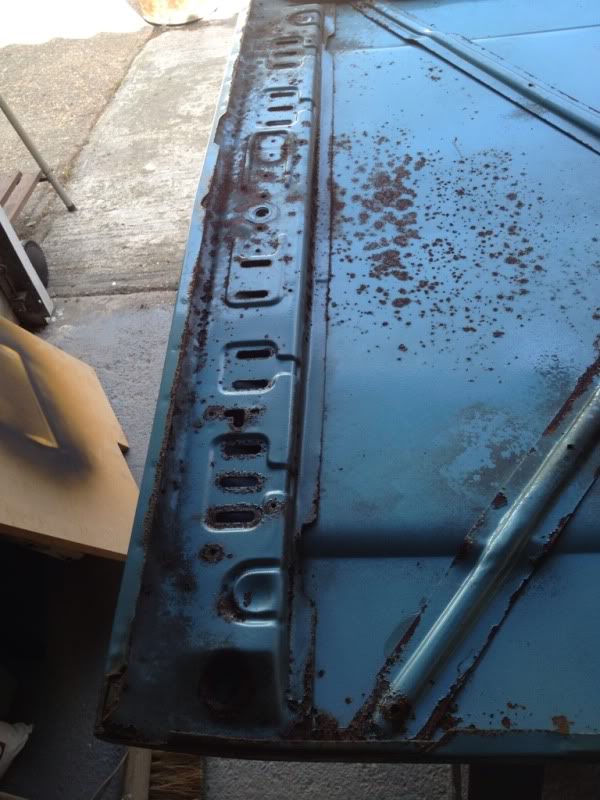
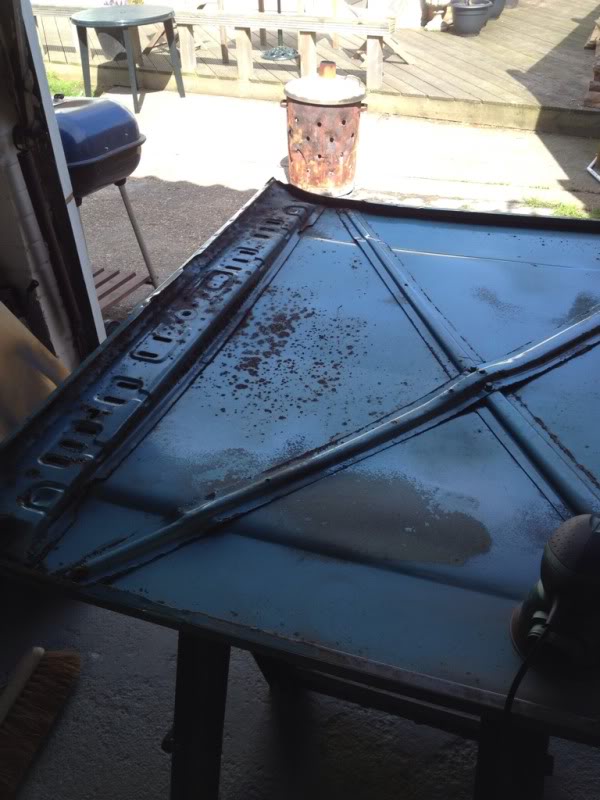
with the bonnet done i then set about doing the tailgate, this is also pretty clean, just needed the holes for the badges and rear wiper welder up and good rub down...
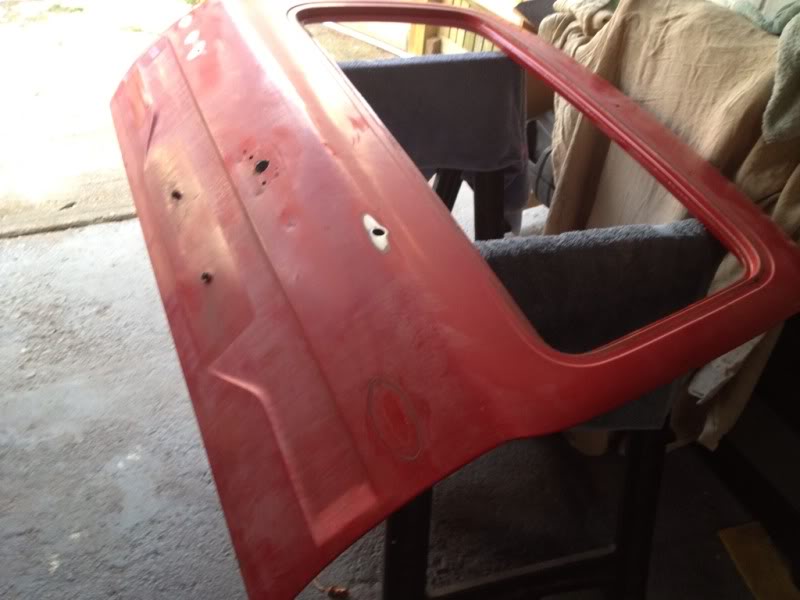
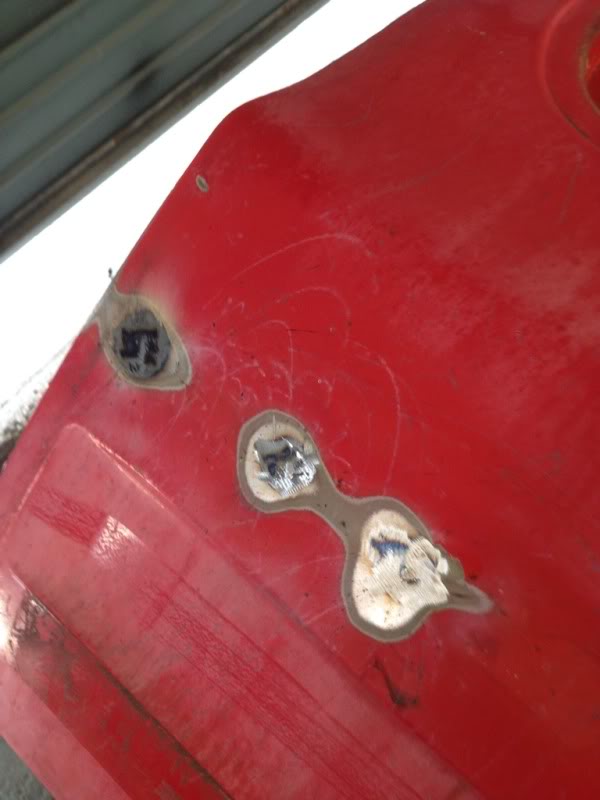
while rubbing it down i found a little hole where the boot handle/lock is so welded that up aswel...
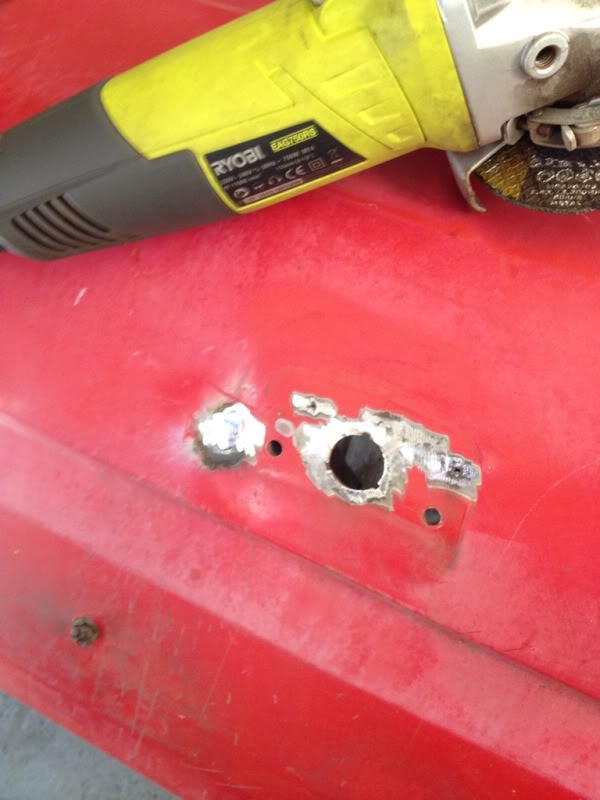
thats as far as i have managed to go with the tailgate for now, need to get some more sanding disc's befour i can go on rubbing down and weld up where the rear window washer jet used to sit
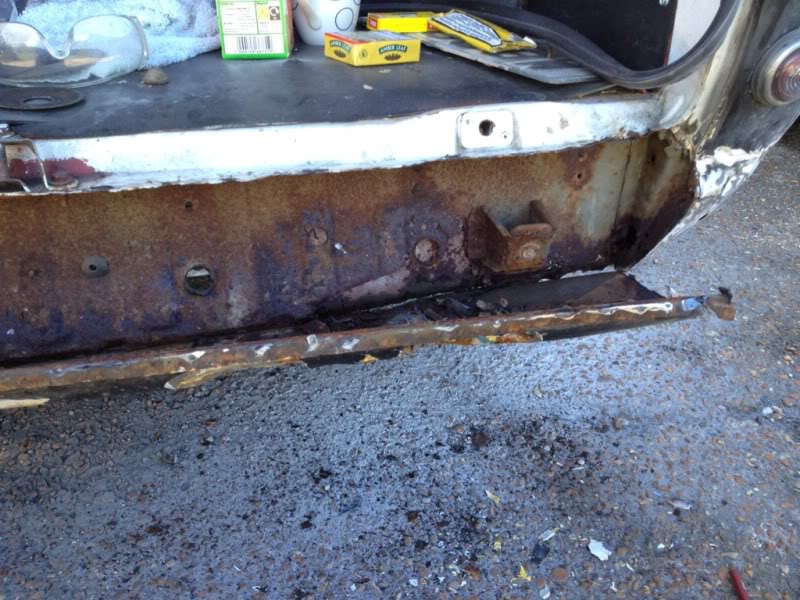
sinse i ran out of sanding discs iv not really had alot i could get on with because the weathers been crap down here and i cant get the car upto my garage :banghead: but i had a quick break it the weather the other night so had another poke about around the car, this time i focused on the rear lower valance because it just looked shot, completly out of shape and you could just tell filler was hiding a few secrets lol
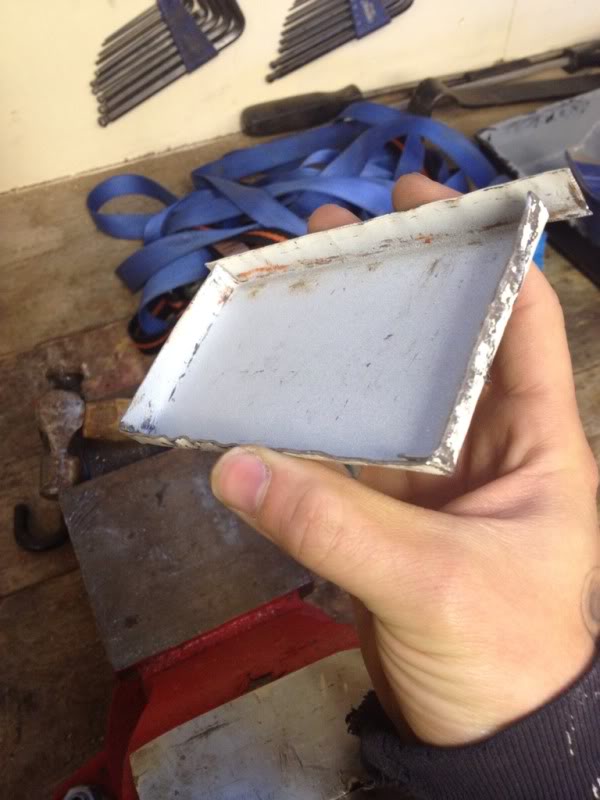
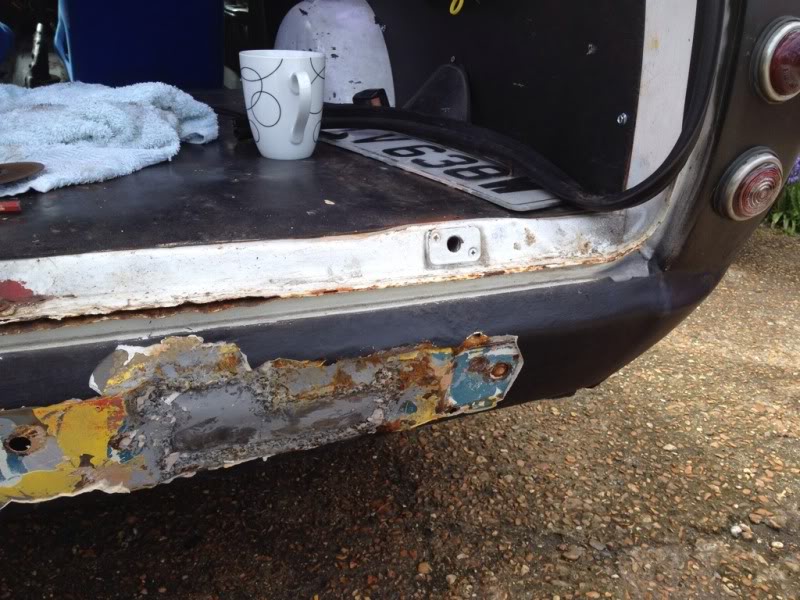
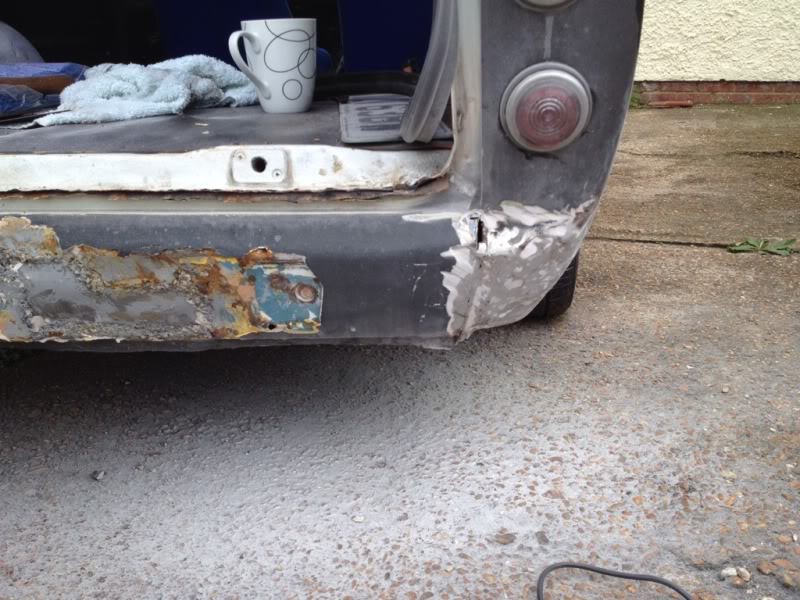
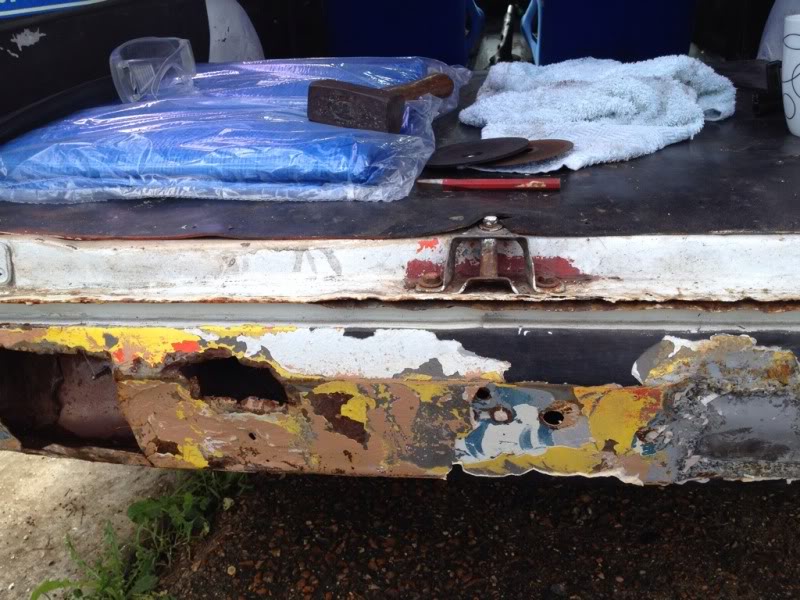
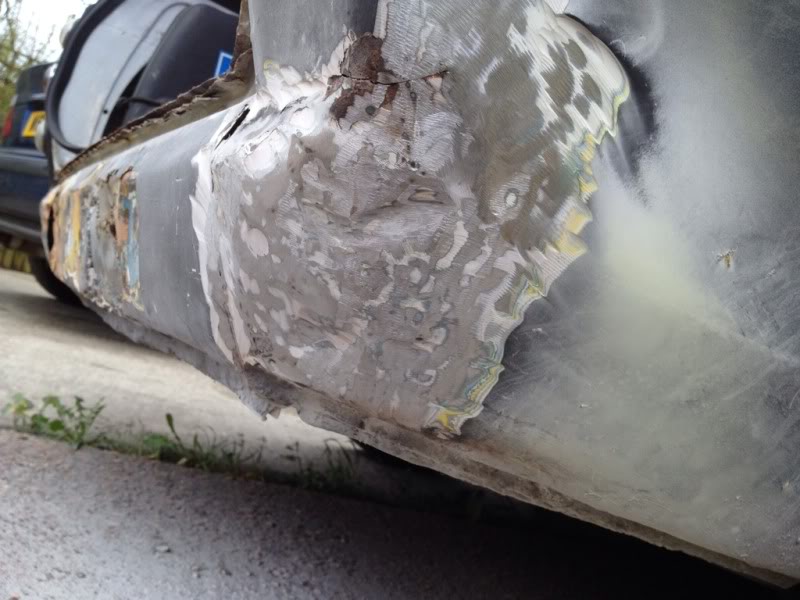
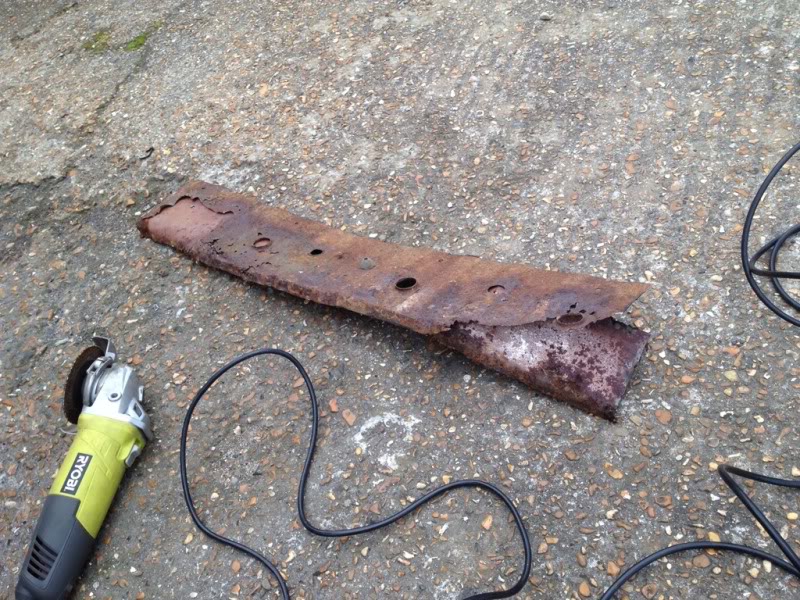
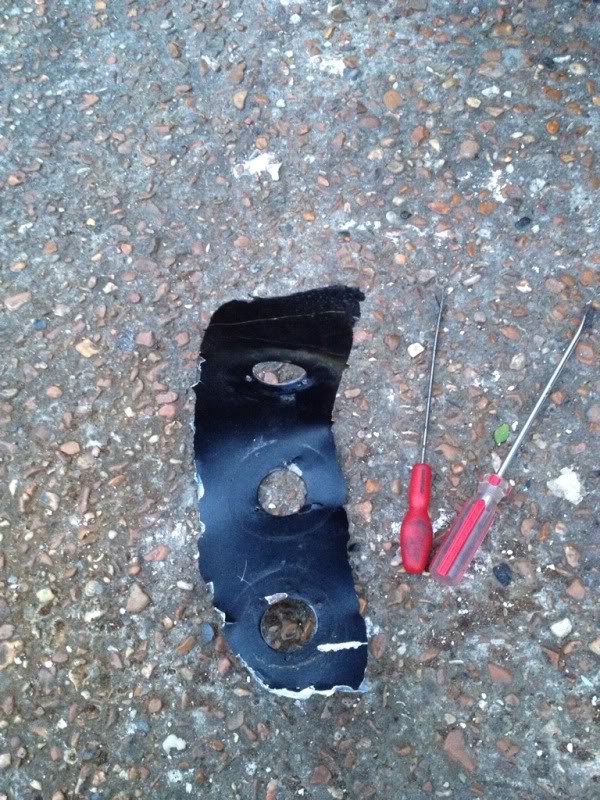
my main focus at first was on the where the rear bumper should mount because it had been filled, so with my hammer and chisel at the ready i started chipping away and then suddely a big old chunk came off and fell to the floor revealing this :no:
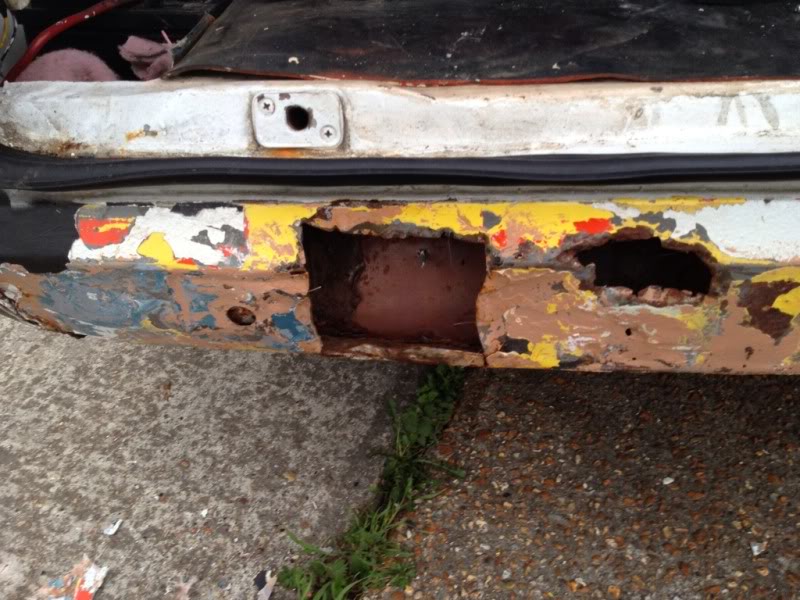
couldnt beleive how much fibre glass and filler was there so had to take a picture...
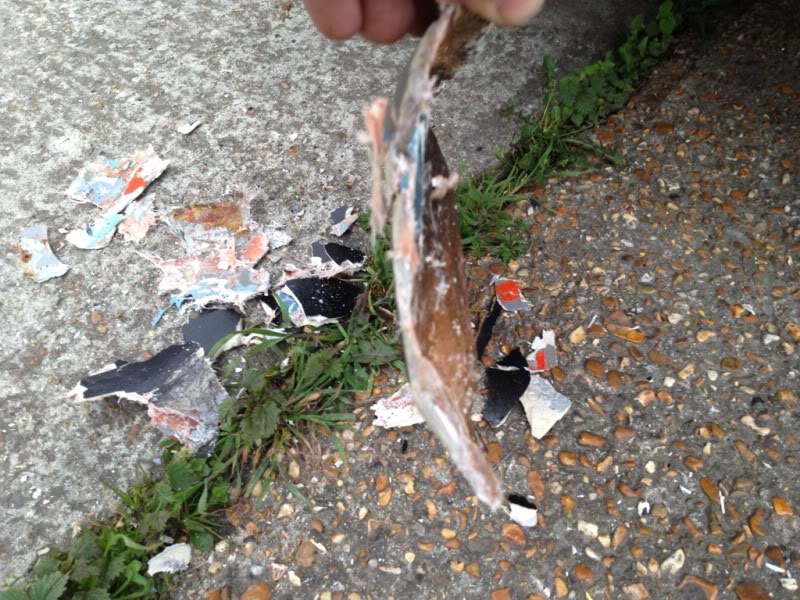
and another bit sized up against a stanley to show how much was there
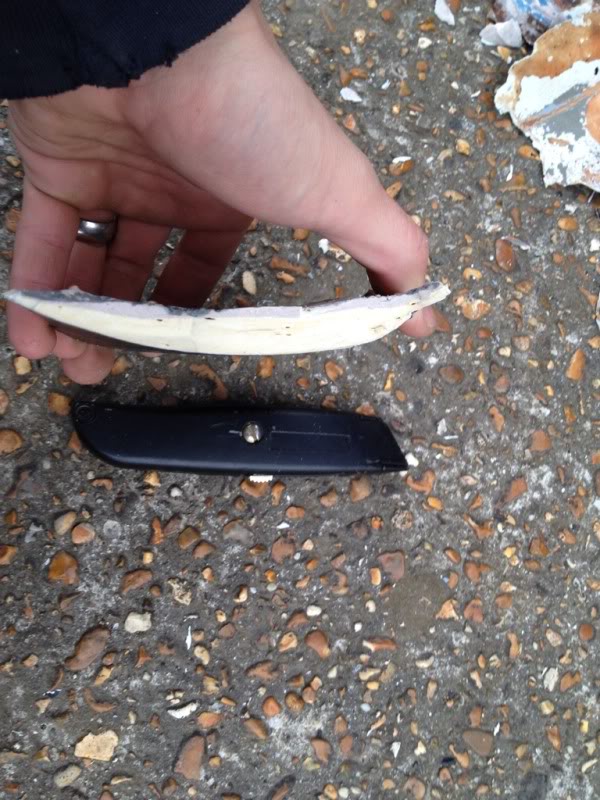
this car will proberly actually be a little bit lighter once iv removed all the filler and repalced with proper metal
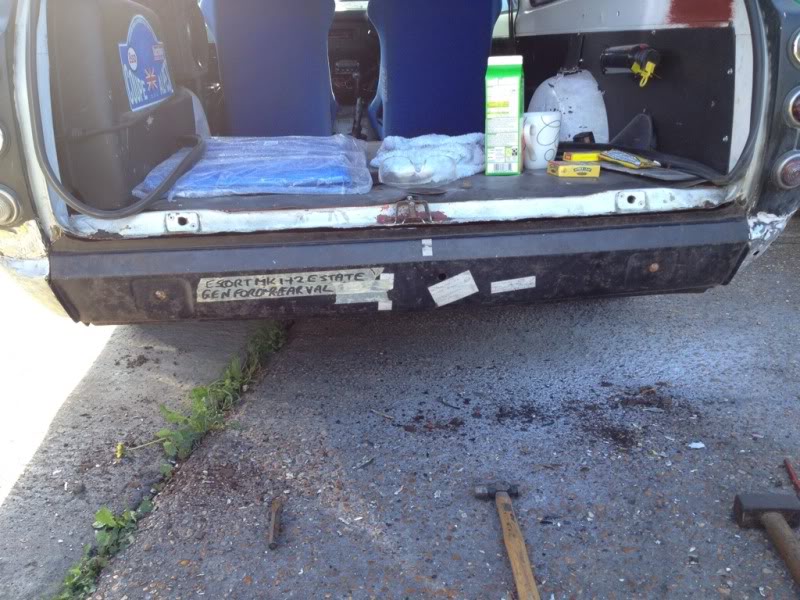
i was expecting that panel to be rot from when i first looked over the car and managed to source a new genuine ford replacement panel befour actaully doing the deal to swop so quite lucky i did find it really...
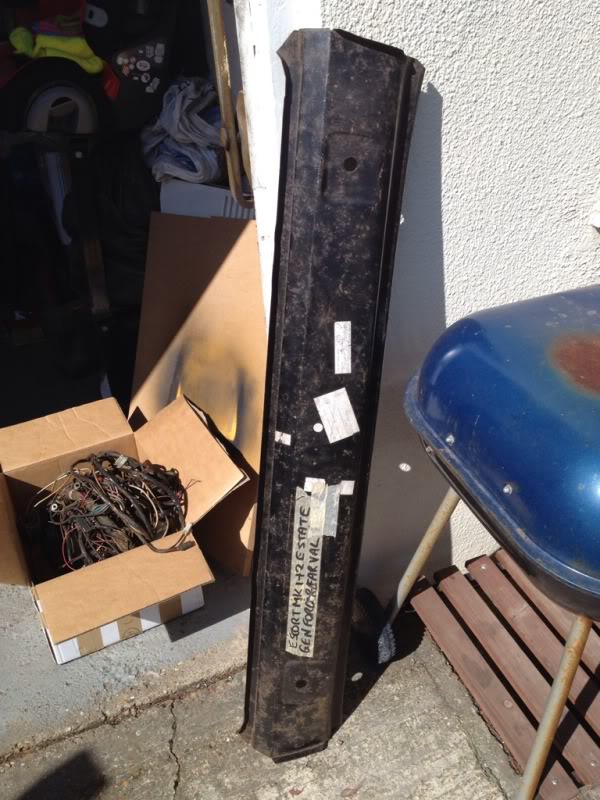
when weather permits im going to chop the old one out and replace all the rot metal thats behind it on the rear underside part if that makes sense? and then fit the new valence but il update as and when i get to that
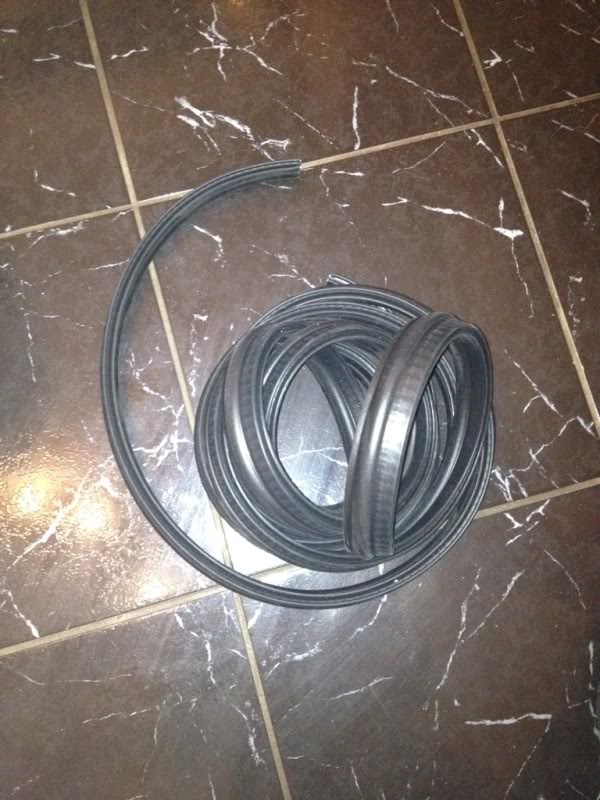
sinse we've had all this bad weather iv noticed i have a couple of leaks on the car, first is coming in through the window wiper area in the middle of the dash and dripping down on to the gearbox tunnel, 2nd is coming in near the drivers side bottom corner of the windscreen and it looks like it's just coming in where the wing meets the front door piller bit (A piller?) so that will have to wait until im ready to fit the wings and the 3rd was coming in around the tailgate, so i had a look and when sitting in the back with the tailgate shut you could see daylight through where the seal should be sealing, so i had a look at the seal and it just looked completly wrong, it didnt sit up to where it should be sitting, looked more like the door seals so seeing as there was nothing i could do with it i ordered a new seal, and sure enough, when it arrived it was completly different, unfortunetly i forgot to take pics of the 2 but i will next time im out there!
here's the new seal anyway...
and finally to finish this update, iv admitted defeat with the wireing in this car and got another off g.s.escort which only needs a couple of repairs which is alot beter than my current loom which needs ALOT of work!
just need to find myself a mk2 estate haynes manual so i can go through it all and tidy it up abit, anyone have a haynes manual? or mk2 estate wireing diamgrams you could e-mail me atall?

more to come soon hopfully :thumbsup:
made a start on the new bonnet the other day, it was relatively clean but had abit of surface rust on the underside so i set about rubbing it all down to prevent the rust getting any worse and gave it a coat of primer.
my little girls now at the age where she must help with everything so gave her abit of sand paper
and done bar the odd patch which is where i had to rub it down again
and now fitted with janky old bonnet pins until i get some lockable aero catchs
and the old one, what a mess that was!! ideal for a grass track escort if anyone knows anyone
with the bonnet done i then set about doing the tailgate, this is also pretty clean, just needed the holes for the badges and rear wiper welder up and good rub down...
while rubbing it down i found a little hole where the boot handle/lock is so welded that up aswel...
thats as far as i have managed to go with the tailgate for now, need to get some more sanding disc's befour i can go on rubbing down and weld up where the rear window washer jet used to sit
sinse i ran out of sanding discs iv not really had alot i could get on with because the weathers been crap down here and i cant get the car upto my garage :banghead: but i had a quick break it the weather the other night so had another poke about around the car, this time i focused on the rear lower valance because it just looked shot, completly out of shape and you could just tell filler was hiding a few secrets lol
my main focus at first was on the where the rear bumper should mount because it had been filled, so with my hammer and chisel at the ready i started chipping away and then suddely a big old chunk came off and fell to the floor revealing this :no:
couldnt beleive how much fibre glass and filler was there so had to take a picture...
and another bit sized up against a stanley to show how much was there
this car will proberly actually be a little bit lighter once iv removed all the filler and repalced with proper metal
i was expecting that panel to be rot from when i first looked over the car and managed to source a new genuine ford replacement panel befour actaully doing the deal to swop so quite lucky i did find it really...
when weather permits im going to chop the old one out and replace all the rot metal thats behind it on the rear underside part if that makes sense? and then fit the new valence but il update as and when i get to that
sinse we've had all this bad weather iv noticed i have a couple of leaks on the car, first is coming in through the window wiper area in the middle of the dash and dripping down on to the gearbox tunnel, 2nd is coming in near the drivers side bottom corner of the windscreen and it looks like it's just coming in where the wing meets the front door piller bit (A piller?) so that will have to wait until im ready to fit the wings and the 3rd was coming in around the tailgate, so i had a look and when sitting in the back with the tailgate shut you could see daylight through where the seal should be sealing, so i had a look at the seal and it just looked completly wrong, it didnt sit up to where it should be sitting, looked more like the door seals so seeing as there was nothing i could do with it i ordered a new seal, and sure enough, when it arrived it was completly different, unfortunetly i forgot to take pics of the 2 but i will next time im out there!
here's the new seal anyway...
and finally to finish this update, iv admitted defeat with the wireing in this car and got another off g.s.escort which only needs a couple of repairs which is alot beter than my current loom which needs ALOT of work!
just need to find myself a mk2 estate haynes manual so i can go through it all and tidy it up abit, anyone have a haynes manual? or mk2 estate wireing diamgrams you could e-mail me atall?
more to come soon hopfully :thumbsup:

 28-04-2012, 09:20 PM
#53
I've found that life I needed.. It's HERE!!
Thread Starter
iTrader: (8)
Join Date: Dec 2006
Location: eastbourne
Posts: 1,350
Likes: 0
Received 0 Likes
on
0 Posts
lol, yeh would certainly catch a few people off gaurd! it's not that slow as is anyway, it has a 2ltr pinto with uprated cam and 5spd box so i can still catch some people out 
i wouldnt know where to start with fitting a jap engine though, iv got a 205 bottom end atm so could i not change the pistons and head for cossie items?
i wouldnt know where to start with fitting a jap engine though, iv got a 205 bottom end atm so could i not change the pistons and head for cossie items?
29-04-2012, 09:05 AM
#54
Hi mate, your doing well now, I just used trial and error on my wiring, there isn't to much anyway, if you start at the fuse box you will see where all the wires go, I cut all the tape off my loom to track wires, I can't get into the garage at the moment but when I can I will take so pics so you can see where some go, or have a look on my thread you mite see on there
30-04-2012, 09:57 AM
#55
I've found that life I needed.. It's HERE!!
Thread Starter
iTrader: (8)
Join Date: Dec 2006
Location: eastbourne
Posts: 1,350
Likes: 0
Received 0 Likes
on
0 Posts
Cheers dude, iv managed to work out where most of it goes but I'm just stuck on the odd wire that isn't taped into the main part of the loom, there 3-4 wires that are part of the loom but not attached if that makes sense? Il get there in the end though, I have a Haynes manual coming now so hopfully that'll shed some light on the odd wires?
01-05-2012, 08:02 PM
#56
I've found that life I needed.. It's HERE!!
Thread Starter
iTrader: (8)
Join Date: Dec 2006
Location: eastbourne
Posts: 1,350
Likes: 0
Received 0 Likes
on
0 Posts
it's that time again...
i managed to get an afternoon on the car the other day while it was sunny, so i thought id crack on and have a go at removing the rear panel. it went alot better that i thought it would if im honest, i was expecting to come across alot more rot than i did which is nice!
anyway il get on with pics
i started in the boot opening area seperating the seams.
then i used my angle grinder to strip the paint off to find the seam between the lower velance and the rear quarter panels, while doing the drivers side i almost choked to death because it was thick with filler so i assumed the worse thinking thats all id find but i did eventually find the rear quarter lol and it looks like its had a little dink at some point, nothing major thankfully so im hoping i can just pop them out, i did try and picture it but it might not show to well?
and then cutting the panel out..
almost there,

done,

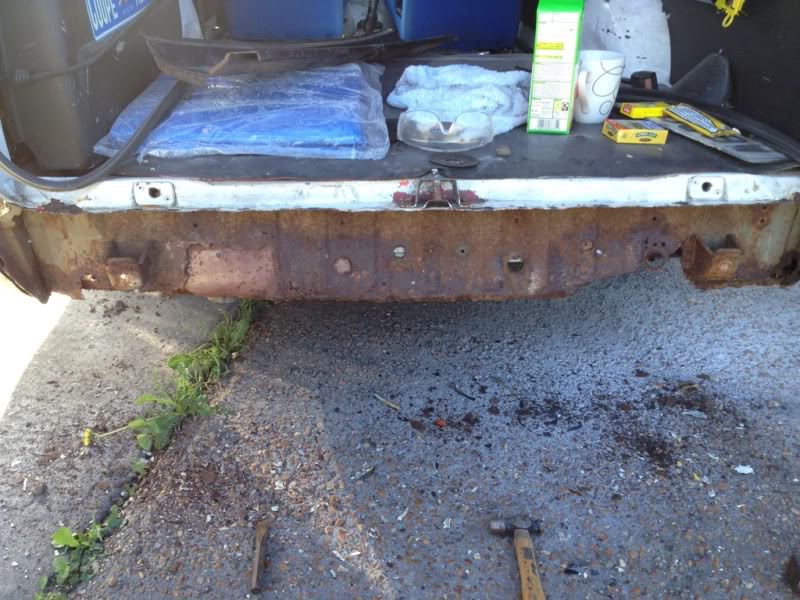
now you can see the panel i mentioned befour that sits behind the lower velance which is also abit rot, but it didnt turn out to be as bad as i thought it was, its mainly just along the bottom that gone so iv just chopped that out and im just replacing what i need to...
but at some point, again rather than having that part sorted properly someone had decided to do this pmsl...

and then removed.
with all that out the way i tried the new panel for size while i was having a tea break...
and then with my tea break over i started having ago at putting new metal back in, so with my trusty bit of old boiler casing lol i cut a new section out and welded it into place.
unfortunetly thats as far as i managed to go with tht befour the heavens opened up again but that didnt dampen my spirits, it gave me chance to have a bash at sorting the new wiring loom out, once i had it all laid out it all started to make abit more sense, but there was a couple of wires that came with the loom but wasnt actually attached so when my haynes manual comes through il hopfully be able to find out what theyre for
slowly going through removing the old tape, repairing any damaged wires/connections and wrapping it back up with new tape, still need to take decent pictures of what iv done though.
and to end this update, my new doors have finally arrived
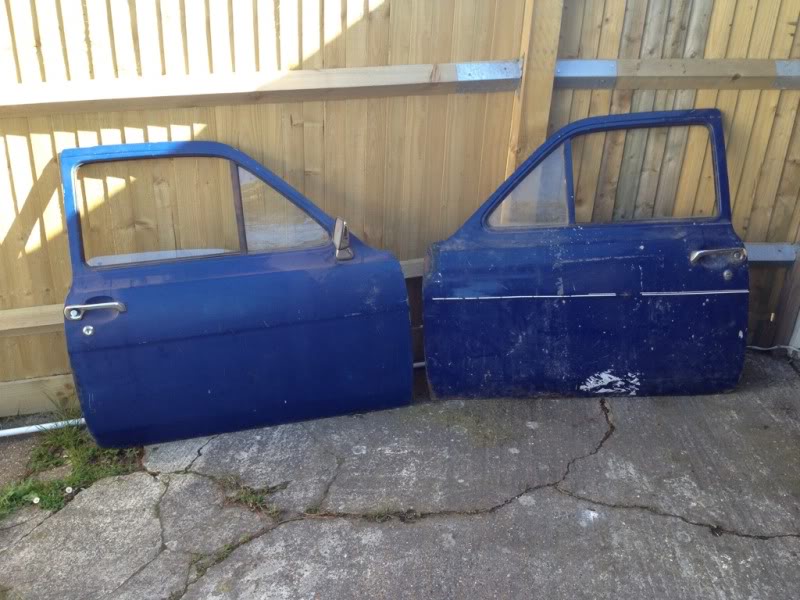
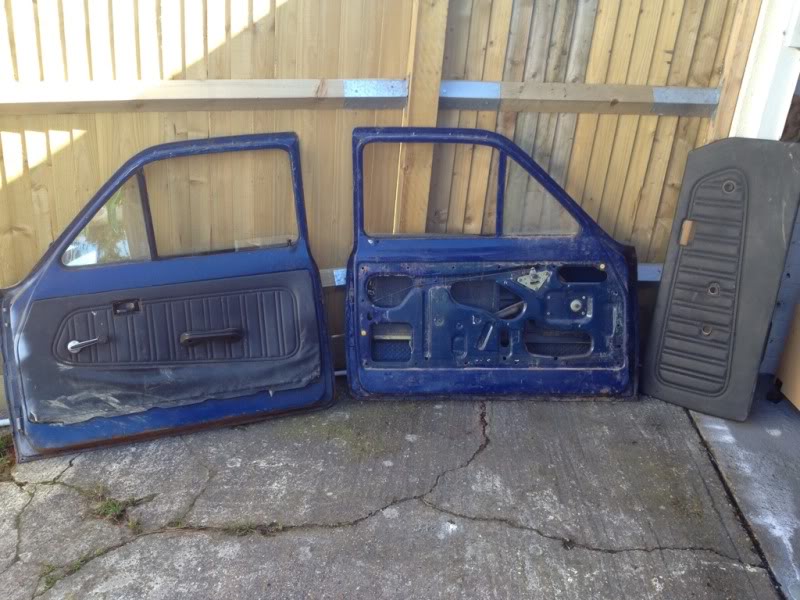
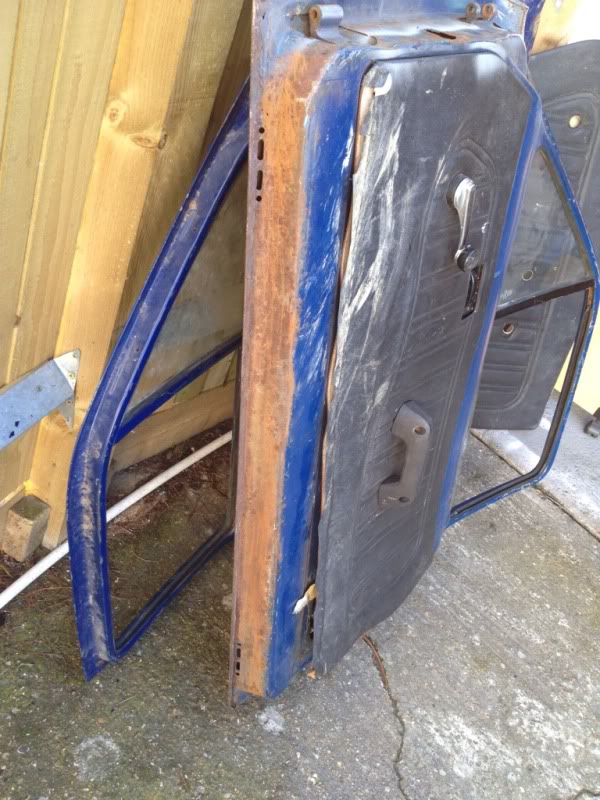
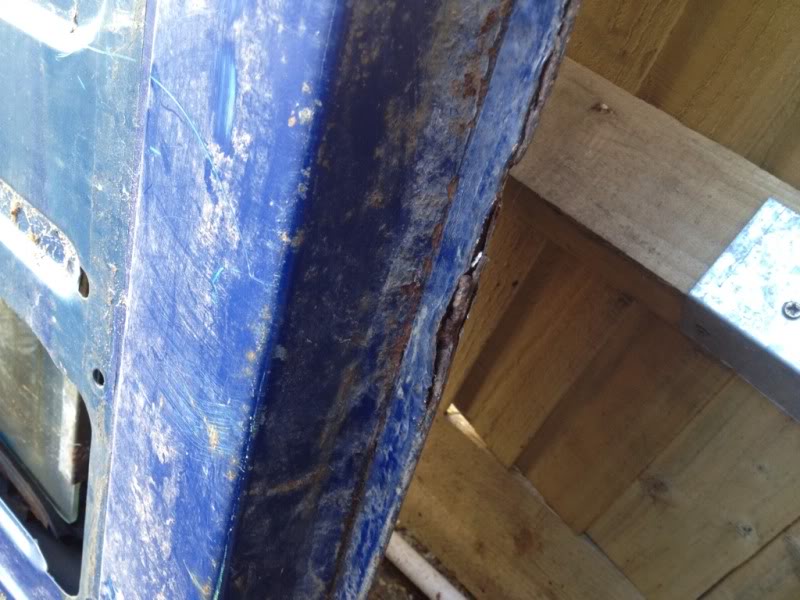
they do need a couple of repairs but theyre soo much better than what i currently have so im pretty happy, hopfully strip them down and take these doors, tailgate and front wings to be blasted so i can see whats what and if need be have them repaired by a pro.
thats all for now but im sure il have more soon
i managed to get an afternoon on the car the other day while it was sunny, so i thought id crack on and have a go at removing the rear panel. it went alot better that i thought it would if im honest, i was expecting to come across alot more rot than i did which is nice!
anyway il get on with pics
i started in the boot opening area seperating the seams.
then i used my angle grinder to strip the paint off to find the seam between the lower velance and the rear quarter panels, while doing the drivers side i almost choked to death because it was thick with filler so i assumed the worse thinking thats all id find but i did eventually find the rear quarter lol and it looks like its had a little dink at some point, nothing major thankfully so im hoping i can just pop them out, i did try and picture it but it might not show to well?
and then cutting the panel out..
almost there,
done,
now you can see the panel i mentioned befour that sits behind the lower velance which is also abit rot, but it didnt turn out to be as bad as i thought it was, its mainly just along the bottom that gone so iv just chopped that out and im just replacing what i need to...
but at some point, again rather than having that part sorted properly someone had decided to do this pmsl...
and then removed.
with all that out the way i tried the new panel for size while i was having a tea break...
and then with my tea break over i started having ago at putting new metal back in, so with my trusty bit of old boiler casing lol i cut a new section out and welded it into place.
unfortunetly thats as far as i managed to go with tht befour the heavens opened up again
slowly going through removing the old tape, repairing any damaged wires/connections and wrapping it back up with new tape, still need to take decent pictures of what iv done though.
and to end this update, my new doors have finally arrived
they do need a couple of repairs but theyre soo much better than what i currently have so im pretty happy, hopfully strip them down and take these doors, tailgate and front wings to be blasted so i can see whats what and if need be have them repaired by a pro.
thats all for now but im sure il have more soon
02-05-2012, 04:16 PM
#58
I've found that life I needed.. It's HERE!!
Thread Starter
iTrader: (8)
Join Date: Dec 2006
Location: eastbourne
Posts: 1,350
Likes: 0
Received 0 Likes
on
0 Posts
Cheers mate, hopfully get the rear panel finished off this week and make a start on removing the rear lights and try and get some standard ones back in
07-05-2012, 07:17 PM
#59
I've found that life I needed.. It's HERE!!
Thread Starter
iTrader: (8)
Join Date: Dec 2006
Location: eastbourne
Posts: 1,350
Likes: 0
Received 0 Likes
on
0 Posts
mini update, havnt been able to get on with anything thanks to the weather once again it always seems to be nice when im at work or out doing something with the family :banghead: lol
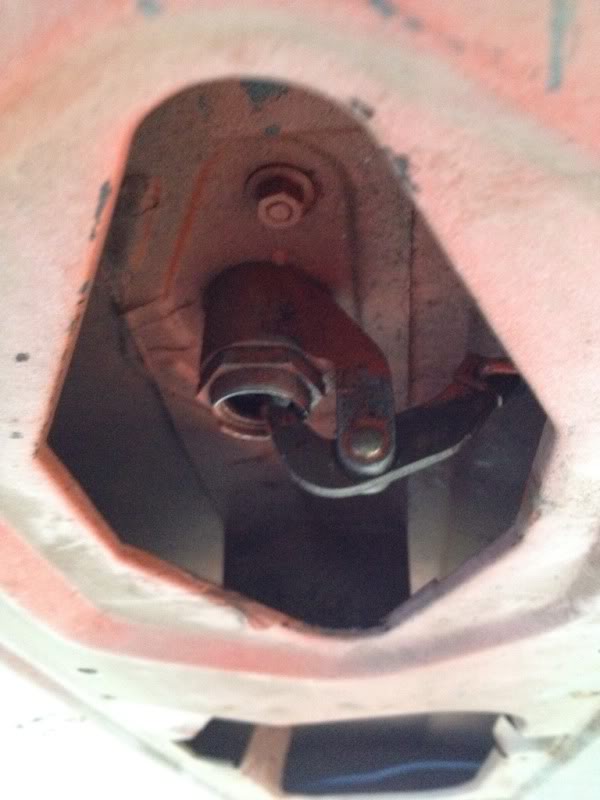
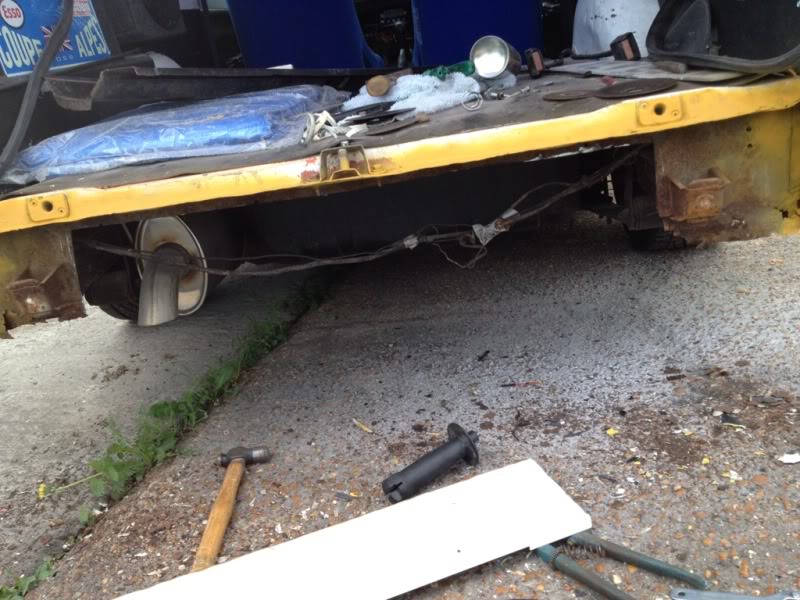
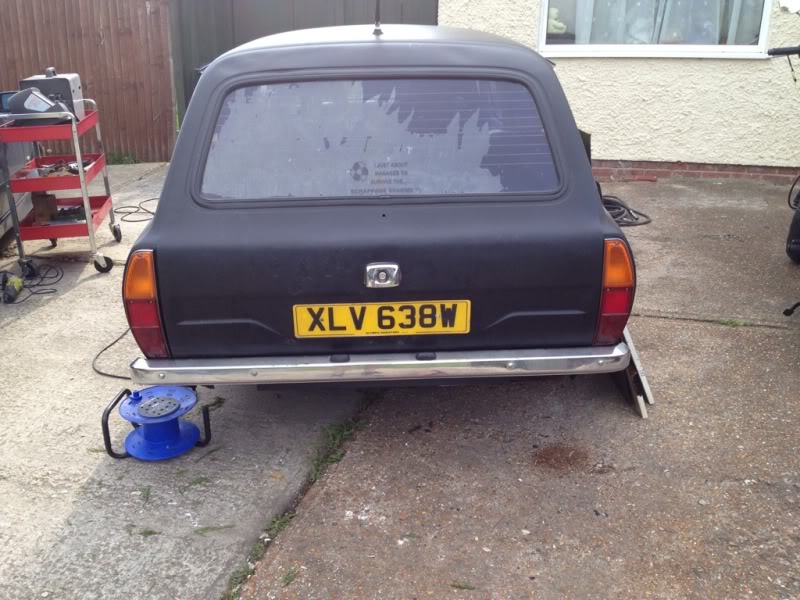
but i did manage to get the rear bumper on the other day, when i removed all the fibre glass and filler on the rear valence panel it looked like someone had just cut the old bolts off in the mounting point for the bumper, so i went out with my drill and tap/die set thinking i would have to drill out the bolt and retap a new thread, but when i went to drill it the drill just flew through it and sure enough, it was just more filler! which for once i was happy to see lol, so i just drilled the filler out and cleaned the thread through with my tap and die and mounted the bumper...
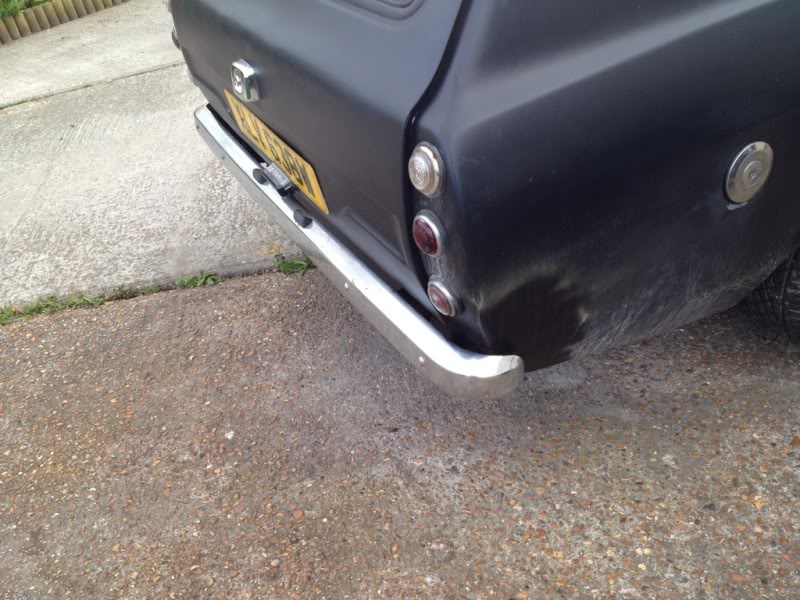
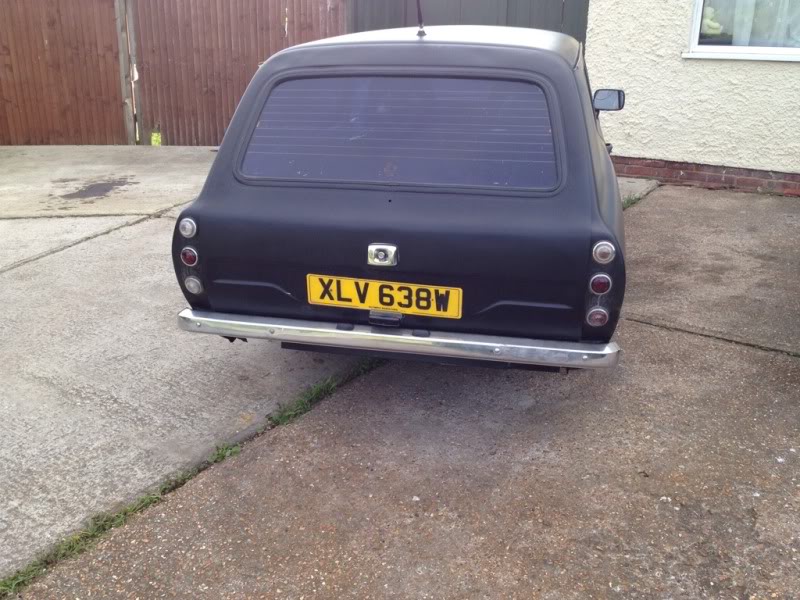
looks soo much better in my opinion :mrgreen:
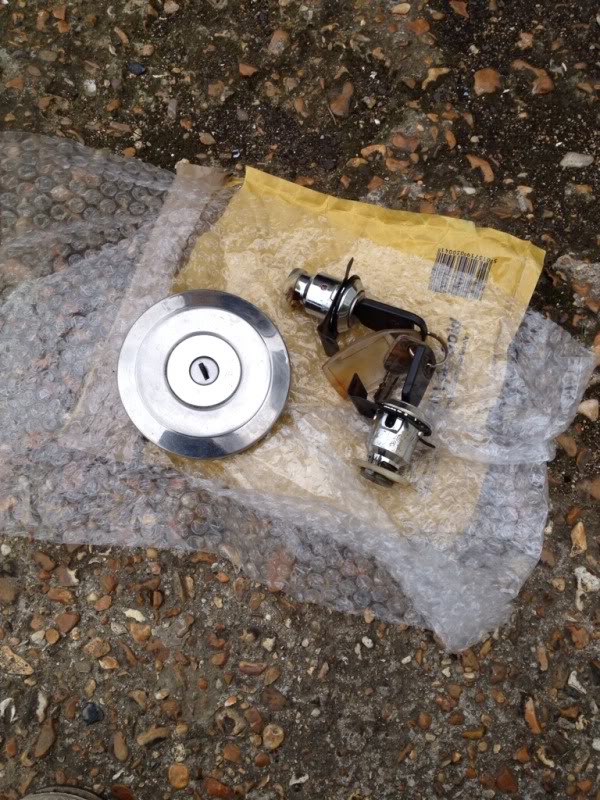
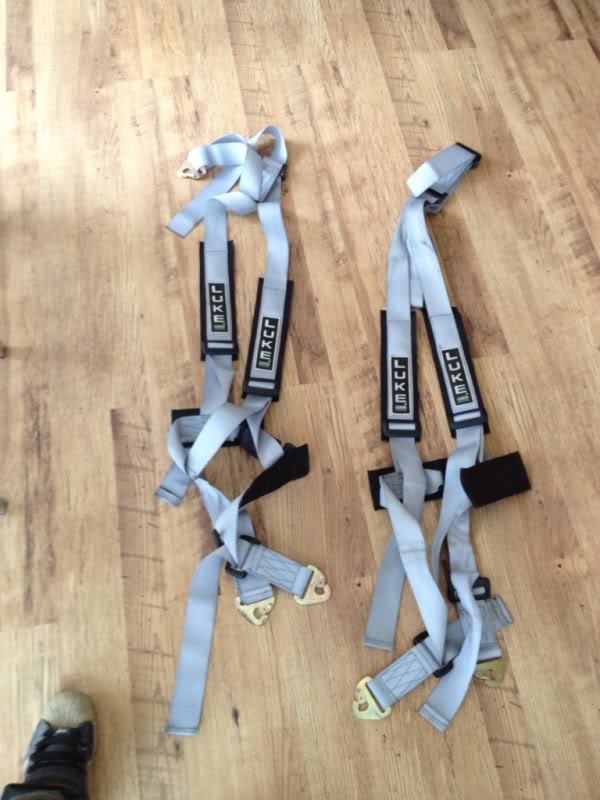
also while i havent been able to do much with the body work i received my new door locks, petrol cap and bought some 3 point harnesses so i can actually drive the car... if i dare to
no pics of them fitted yet though.
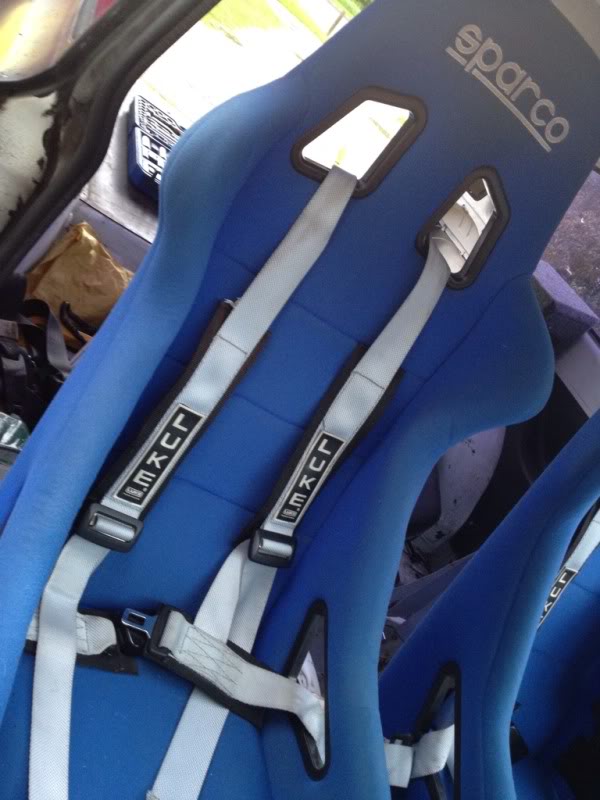
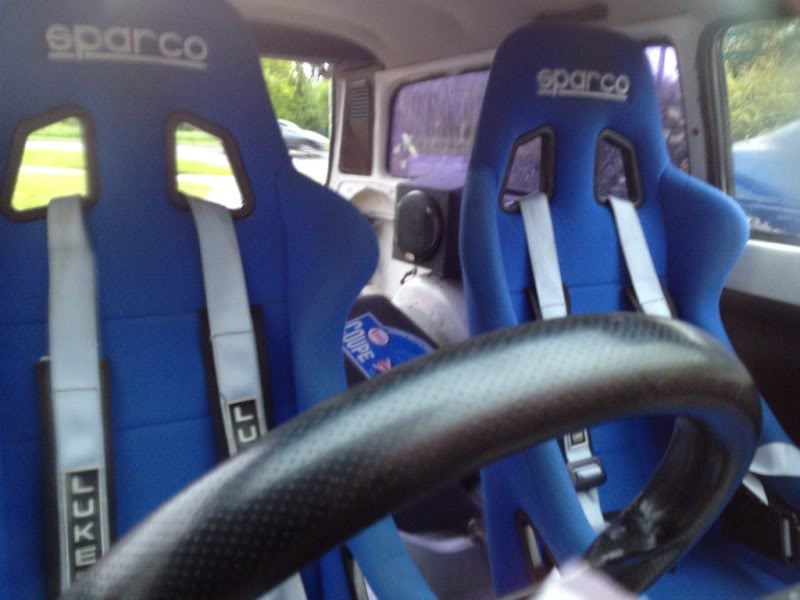
the 3 point harnesses and horrible sparco seats will eventually be replaced with something else, something abit more suited to the car? so if anyone has any front seats and seat belts they'de like to swop for my seats/belts get intouch :thumbsup:
hopfully more to come soon
but i did manage to get the rear bumper on the other day, when i removed all the fibre glass and filler on the rear valence panel it looked like someone had just cut the old bolts off in the mounting point for the bumper, so i went out with my drill and tap/die set thinking i would have to drill out the bolt and retap a new thread, but when i went to drill it the drill just flew through it and sure enough, it was just more filler! which for once i was happy to see lol, so i just drilled the filler out and cleaned the thread through with my tap and die and mounted the bumper...
looks soo much better in my opinion :mrgreen:
also while i havent been able to do much with the body work i received my new door locks, petrol cap and bought some 3 point harnesses so i can actually drive the car... if i dare to
no pics of them fitted yet though.
the 3 point harnesses and horrible sparco seats will eventually be replaced with something else, something abit more suited to the car? so if anyone has any front seats and seat belts they'de like to swop for my seats/belts get intouch :thumbsup:
hopfully more to come soon
 07-05-2012, 07:44 PM
#63
I've found that life I needed.. It's HERE!!
Thread Starter
iTrader: (8)
Join Date: Dec 2006
Location: eastbourne
Posts: 1,350
Likes: 0
Received 0 Likes
on
0 Posts
yeh hopfully mate, well if i can find some standard ones that is, its proving quite difficult to find estate parts if im honest
i am hoping to find some soon so i can get straight onto that after finishing the lower valence because thats the back end done then bar swoping the tailgates over...
i am hoping to find some soon so i can get straight onto that after finishing the lower valence because thats the back end done then bar swoping the tailgates over...
07-05-2012, 08:14 PM
#66
I've found that life I needed.. It's HERE!!
Thread Starter
iTrader: (8)
Join Date: Dec 2006
Location: eastbourne
Posts: 1,350
Likes: 0
Received 0 Likes
on
0 Posts
how easy is it to get to the heater bubble? i havnt got that far yet to have a proper look
07-05-2012, 08:19 PM
#67
I've found that life I needed.. It's HERE!!
Thread Starter
iTrader: (8)
Join Date: Dec 2006
Location: eastbourne
Posts: 1,350
Likes: 0
Received 0 Likes
on
0 Posts
lol, i know mate, why they wer fitted in the first place beats me, they havnt even been fitted properly, 4 wire's hadnt even been connected and they dont seal against the body properly 
but i literally just bought a set of standard lights
http://www.ebay.co.uk/itm/1808774013...84.m1497.l2649
turns out the guy i bought the doors off had some
but i literally just bought a set of standard lights
http://www.ebay.co.uk/itm/1808774013...84.m1497.l2649
turns out the guy i bought the doors off had some
07-05-2012, 08:29 PM
#68
i think i proberly will go back to bare metal, mainly for my peace of mind so i know theres nothing iv missed, thinking of having the doors, tailgate and bonnet sand blasted but im kinda scared about doing that lol
how easy is it to get to the heater bubble? i havnt got that far yet to have a proper look
how easy is it to get to the heater bubble? i havnt got that far yet to have a proper look
 07-05-2012, 09:03 PM
#69
I've found that life I needed.. It's HERE!!
Thread Starter
iTrader: (8)
Join Date: Dec 2006
Location: eastbourne
Posts: 1,350
Likes: 0
Received 0 Likes
on
0 Posts
oh right, ok, il stay away from sand blasting then lol but yeh, just stripping the bonnet took an absolute age lol so im looking foward to doing the rest
11-05-2012, 09:29 PM
#70
I've found that life I needed.. It's HERE!!
Thread Starter
iTrader: (8)
Join Date: Dec 2006
Location: eastbourne
Posts: 1,350
Likes: 0
Received 0 Likes
on
0 Posts
update time, still havnt managed to get anything done to the body work though ;(
il start with my goodies that have turnt up soo far
new inlet and exhaust gaskets
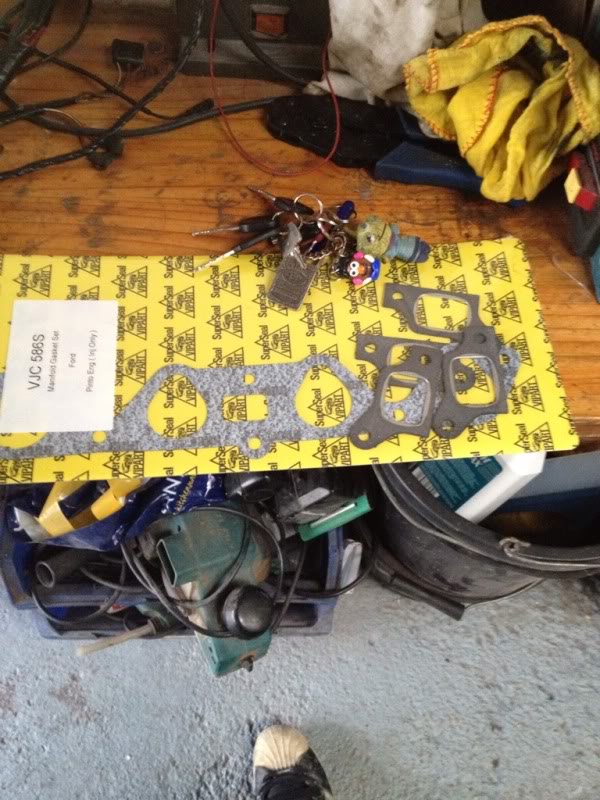
me being the dumb ass that i am didnt noticed these wer for an efi pinto, but luckily it didnt matter because i only needed the exhaust gaskets... storey to follow...
sanding discs, dont really know why i took a pic of these to be honest lol
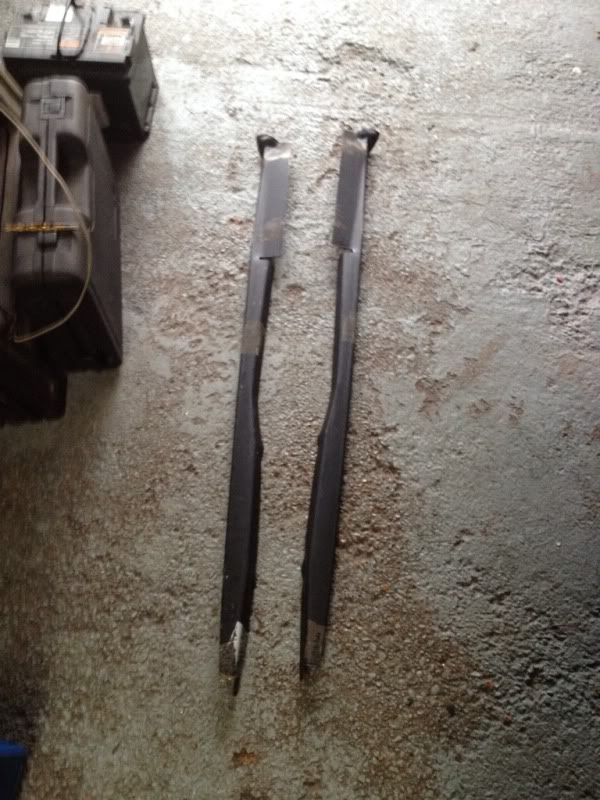
new front wing mounting rails
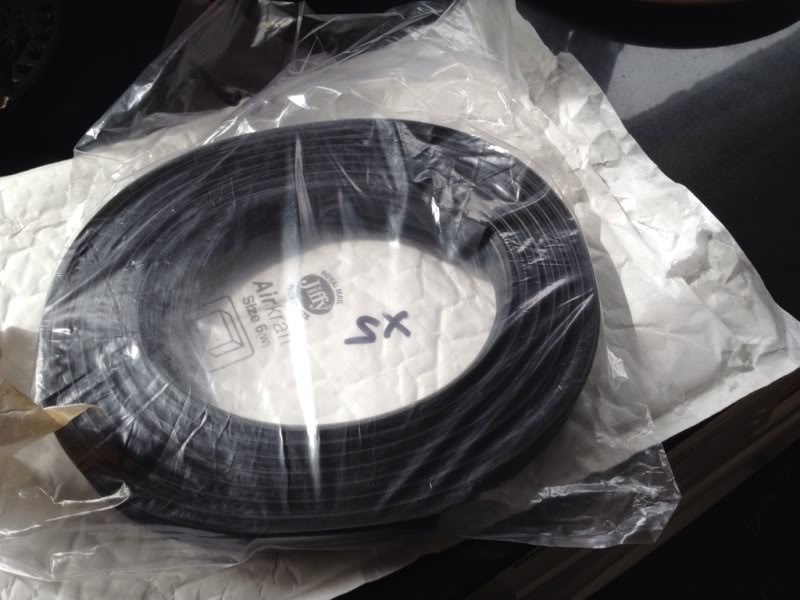
new window channel rubbers for when the doors are painted and ready to be fitted
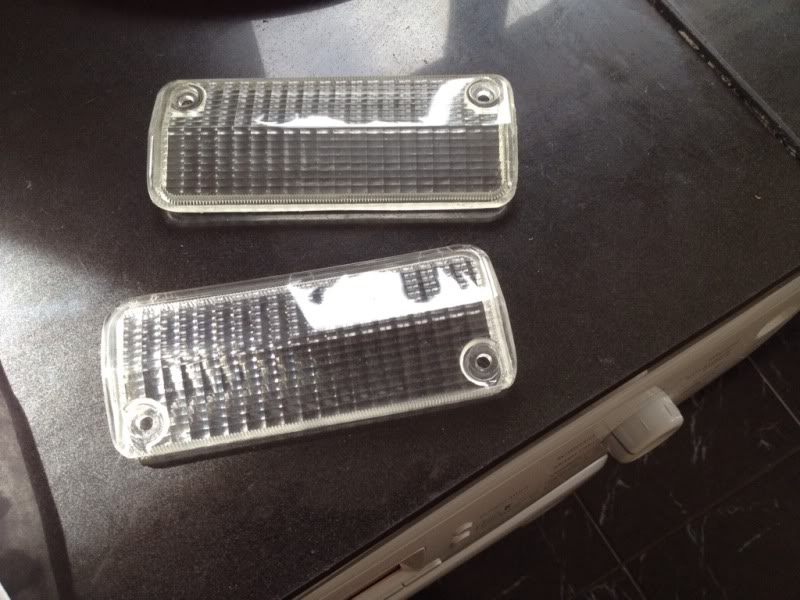
new clear front indicator lense's
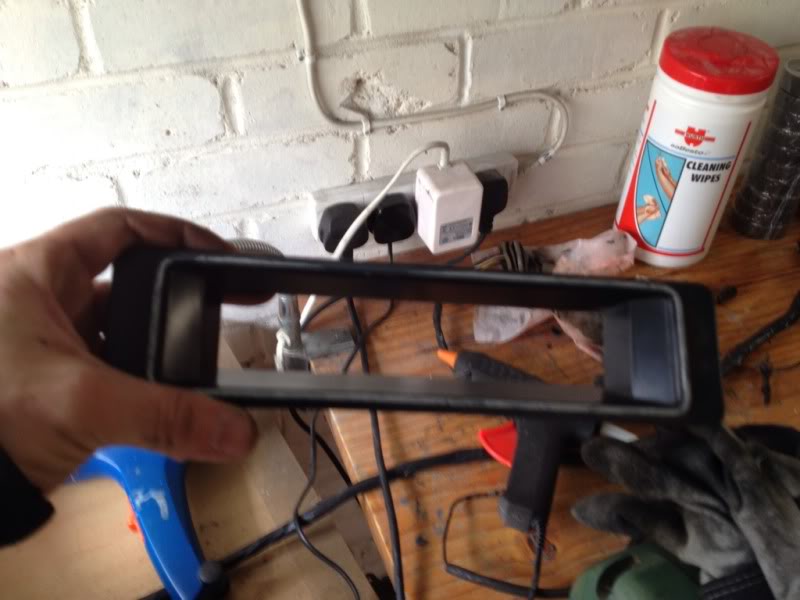
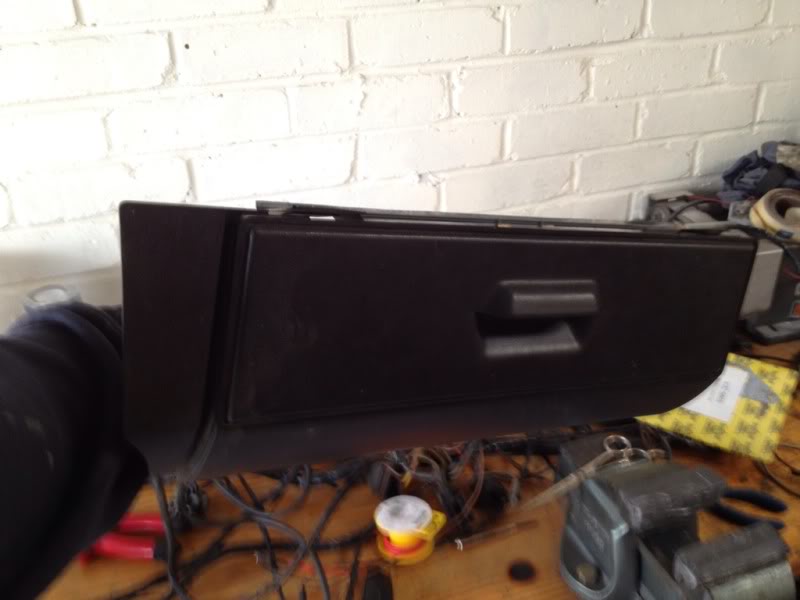
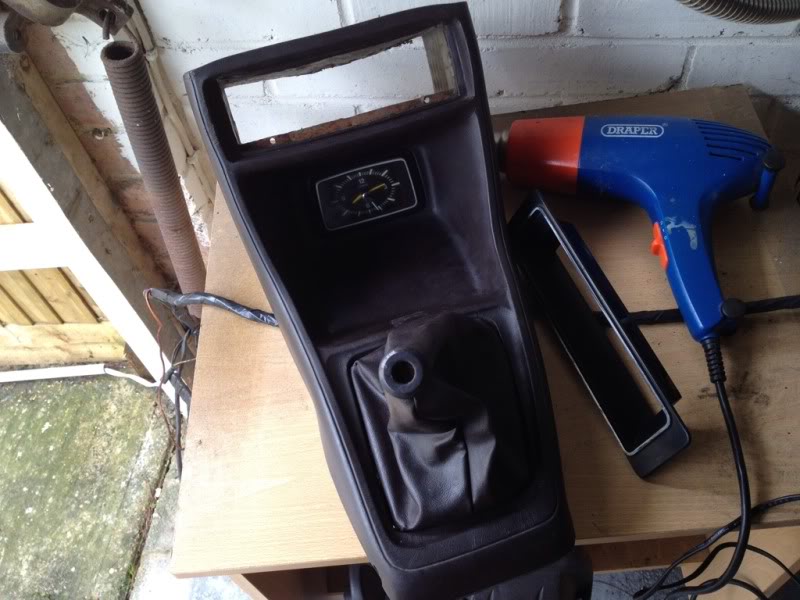
and new glove box, heater control trim and centre console (cheers vista!!)
still have a couple more bits that havnt arrived yet so thats it for goodies for now.
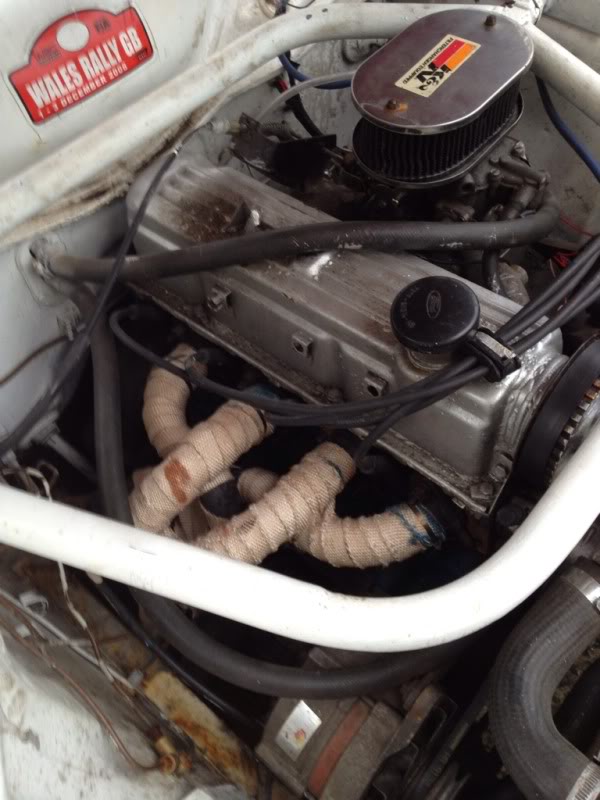
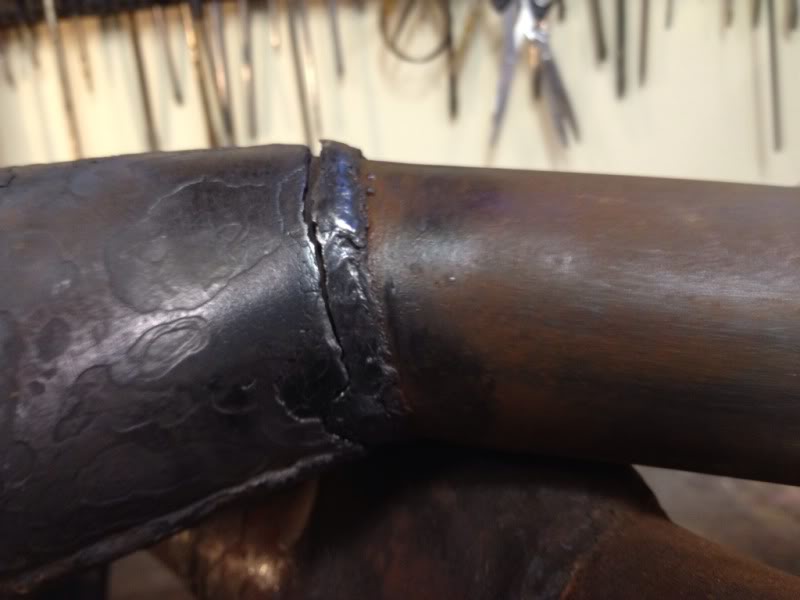
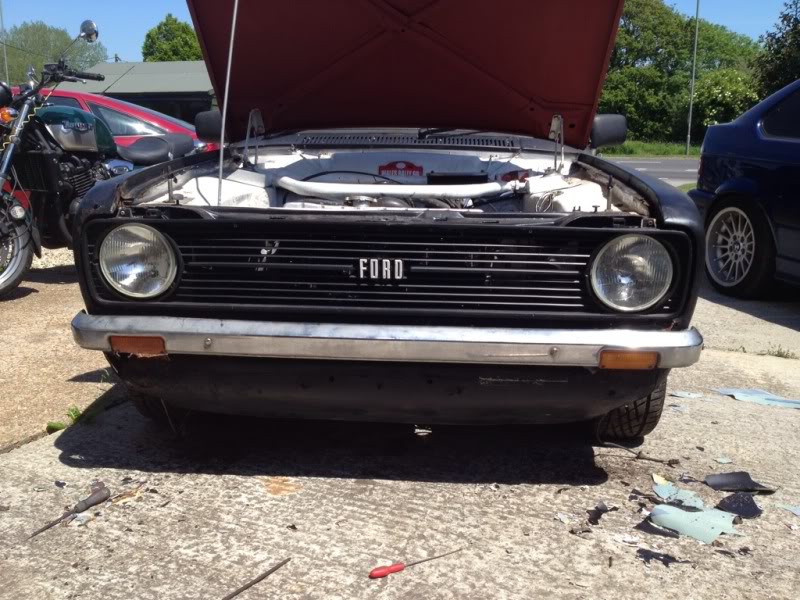
i was hoping to get abit done on the body work this week but run into abit of a problem with the exhaust... when i first got the car it sounded like the exhaust manifold was blowing where it meets the cylinder head so i bought the gaskets above but iv been putting off fitting them because it wasnt thaaat bad, but the other day when i was going to see my mate down he's farm i hit a bump in the road quite hard and all of a sudden the car sounded like a spitfire driving down the road lol so when i got home i thought id get my arse into gear and see what was wrong, so i lifted the bonnet up and had a good old route around and couldnt find anything! i even had my father-in-law take a look and he couldnt see anything either so i just assumed it was the gasket completly giving up, so with that i decided to just fit the new gaskets, unbolted the manifold, went to pull it off and disaster! the manifold had broke...
befour removal
oh dear
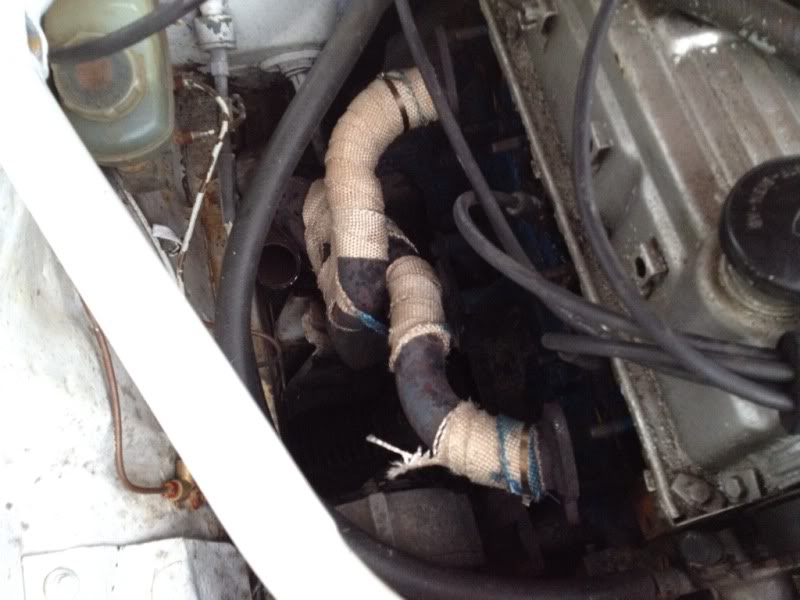
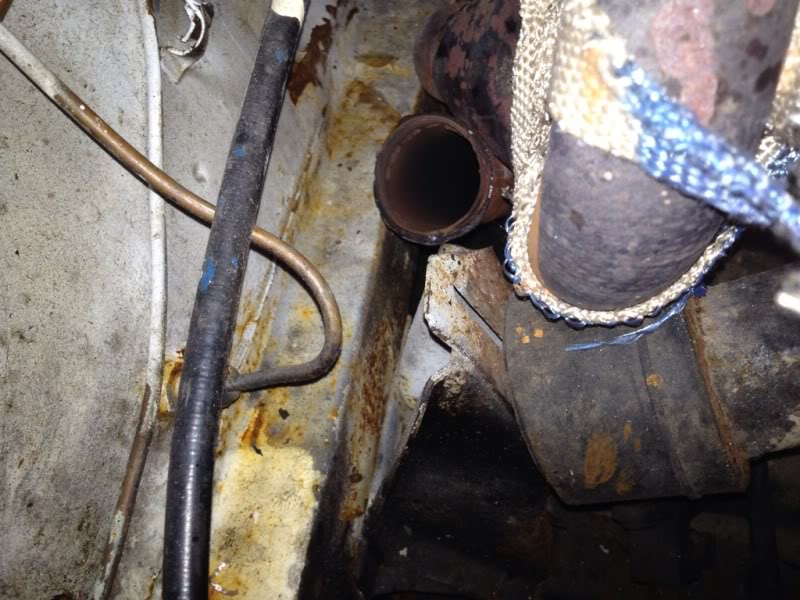
bad times...
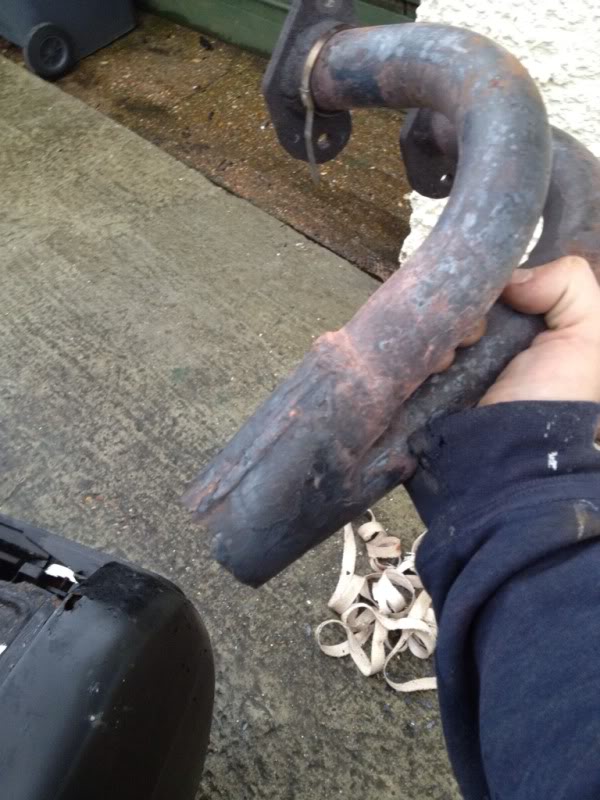
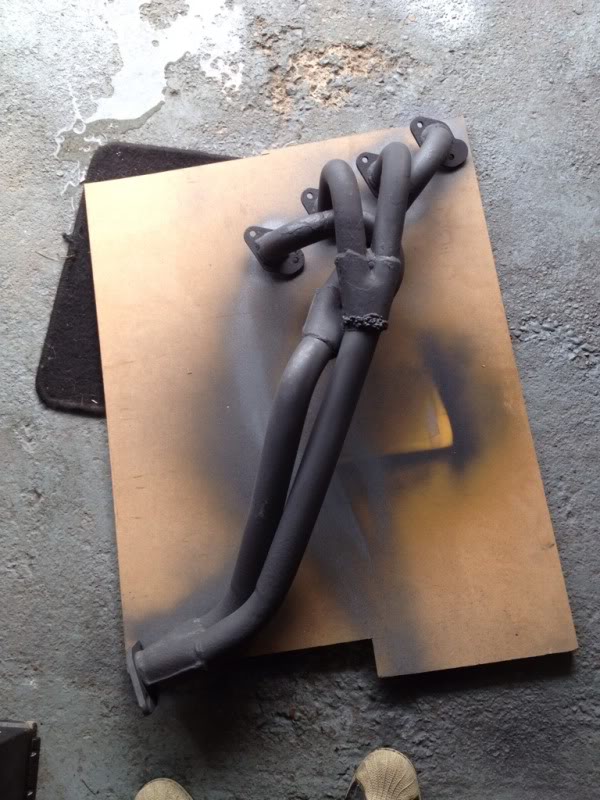
where it had broke off was literally just under where the heat wrap was lol but i was going to let it dampen my spirits so i removed the rest of the manifold and took it into my garage to see if i could weld it up, luckily it was a nice clean break and the 2 peices mated back up perfectly..
so i cleaned it up and had ago at welding it back together..
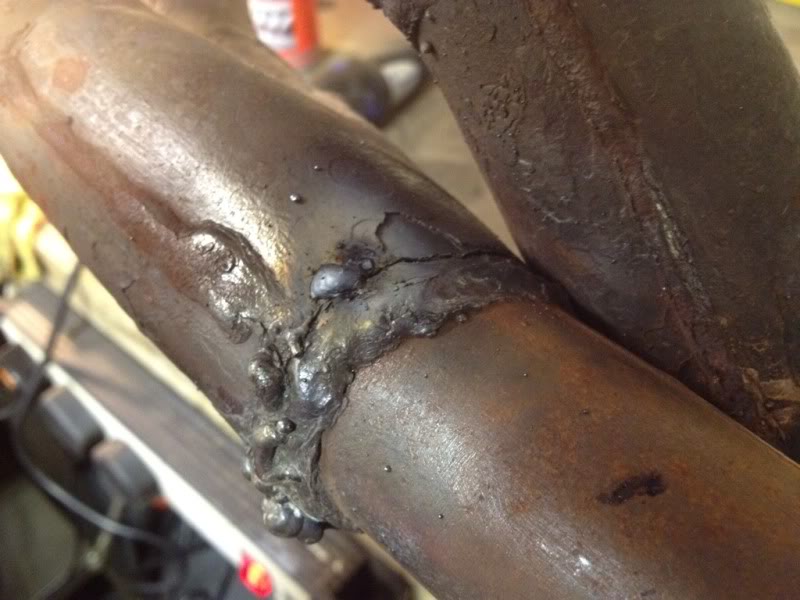
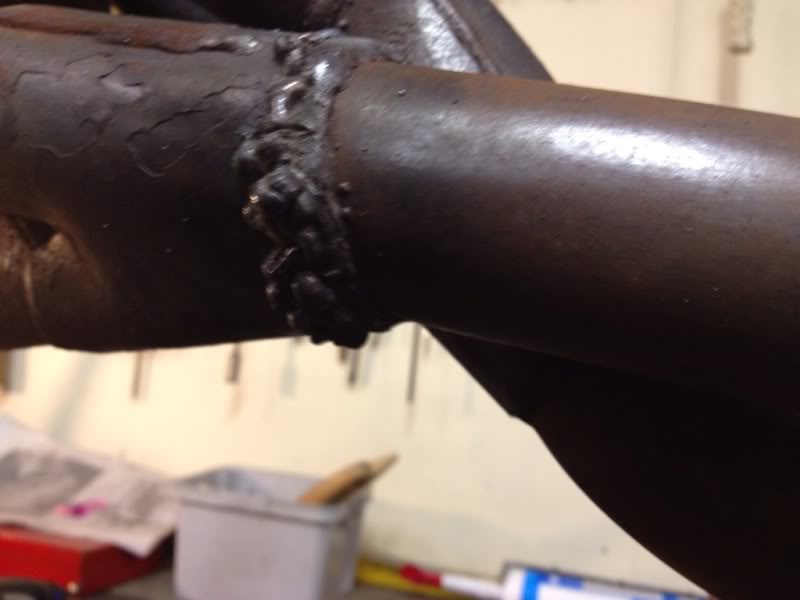
you'l have to excuse my welding, i had no intension of making it look pretty, i just laid loads down so hopfully it wont break again
and finished after spraying it with high temp metallic black manifold paint
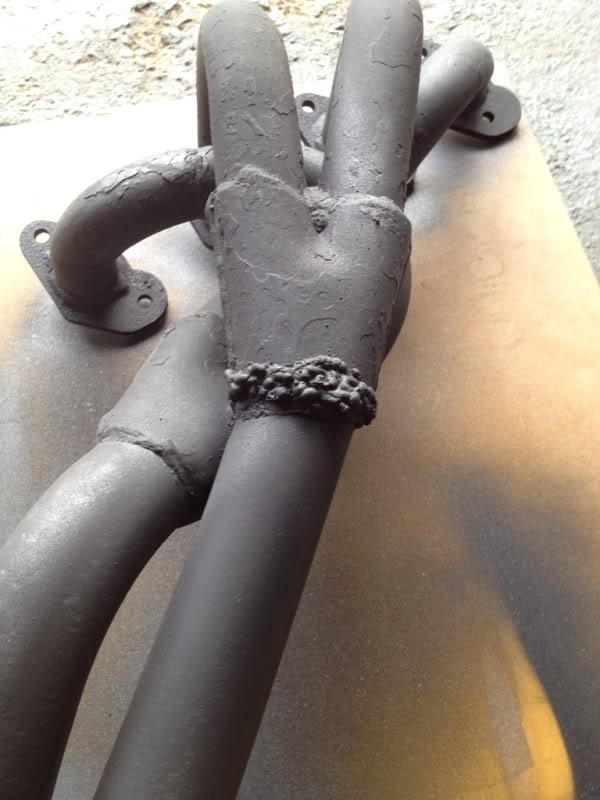
and then back on the car
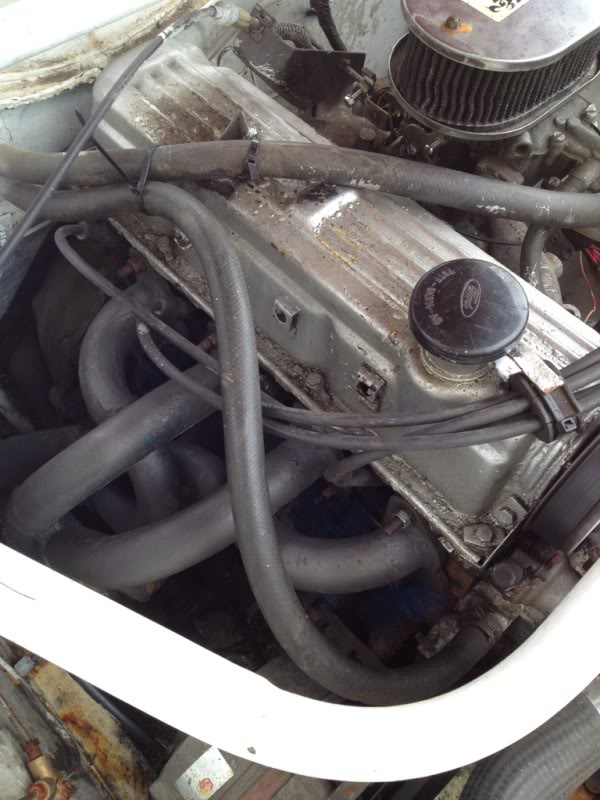
thankfully my welding has held up soo far, i really dont want to take that manifold back off again!! lol
so with that little drama sorted i though id take a couple of pics of the other not so good bits under the bonnet while i had it up...
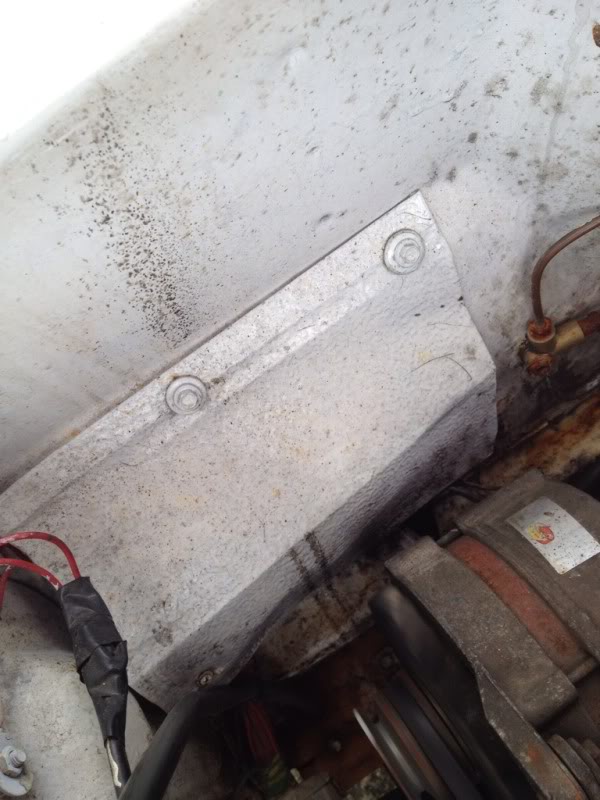
another plate screwed on the o/s inner wing just above where the arb bolts on, god knows what delights are waiting for me behind there...
annnnd, another plate screwed on below the rad...
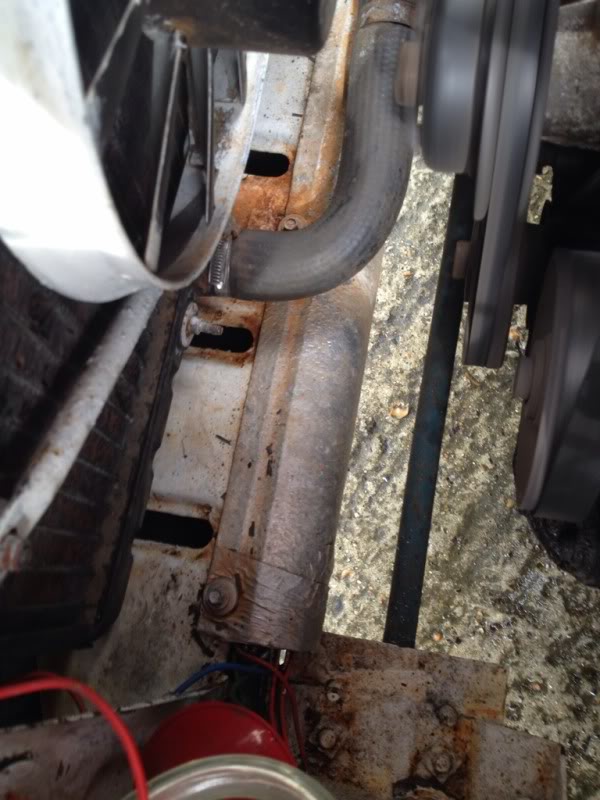
rad sitting p1ssed, dont even think its the right rad to be honest?
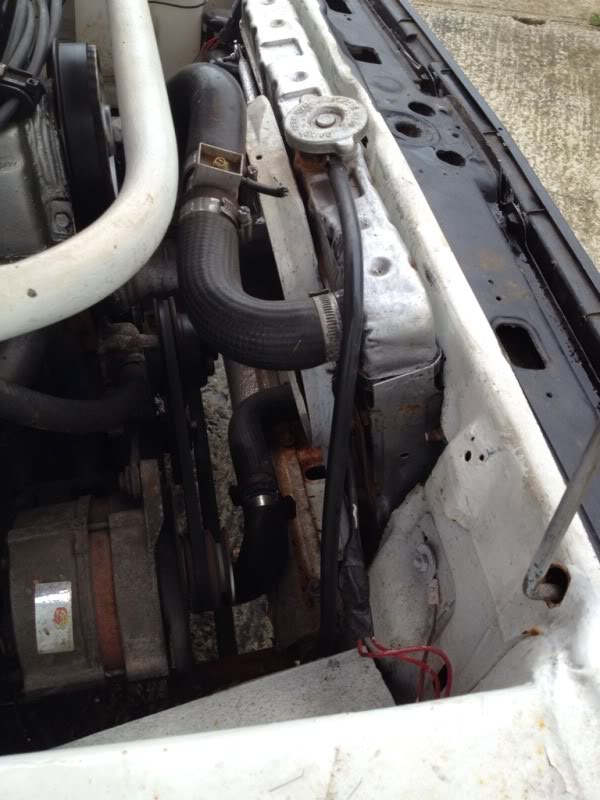
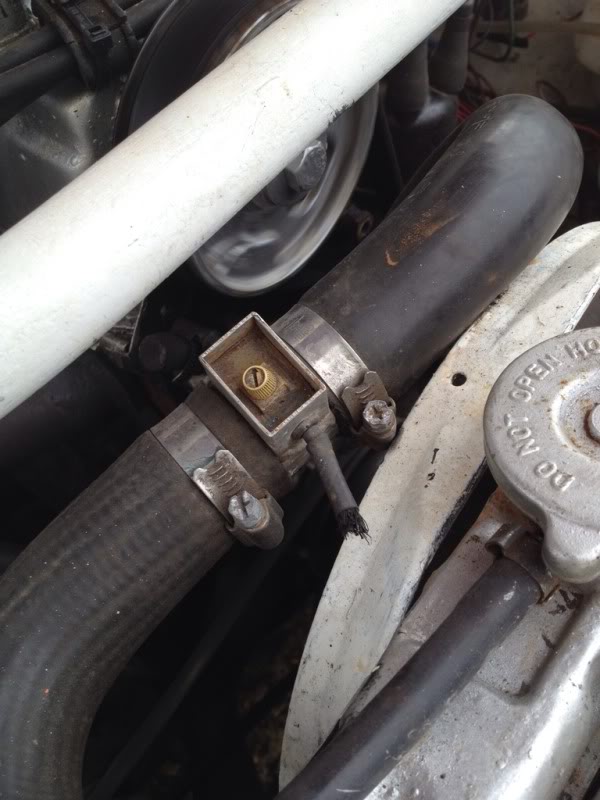
air filters seen better days

and i need a new fan switch but the fans shot aswel so might aswel just get a new electric fan kit...
need to sort this out aswel...
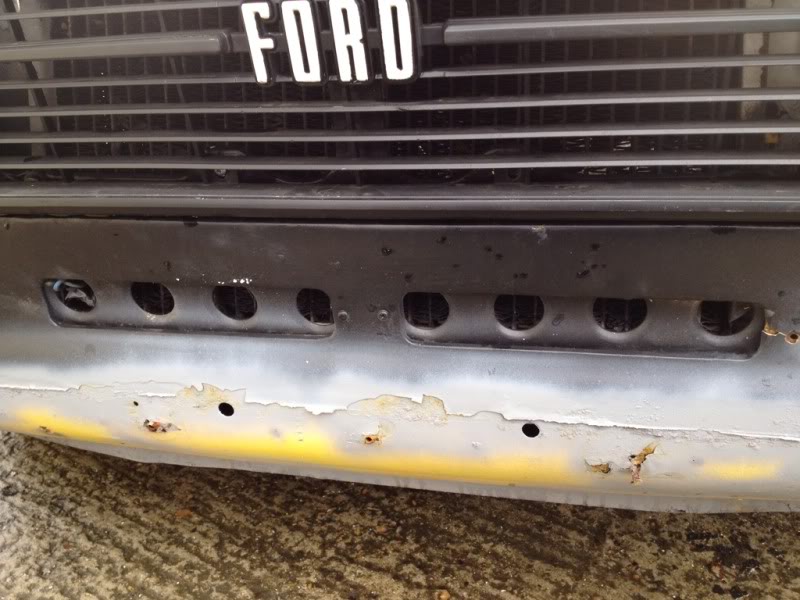
its a bit of metal with pressed holes just screwed behind the front panel, pretty pointless to be honest, but if its decent when i take it off i might keep it and put it on my new front panel properly..?
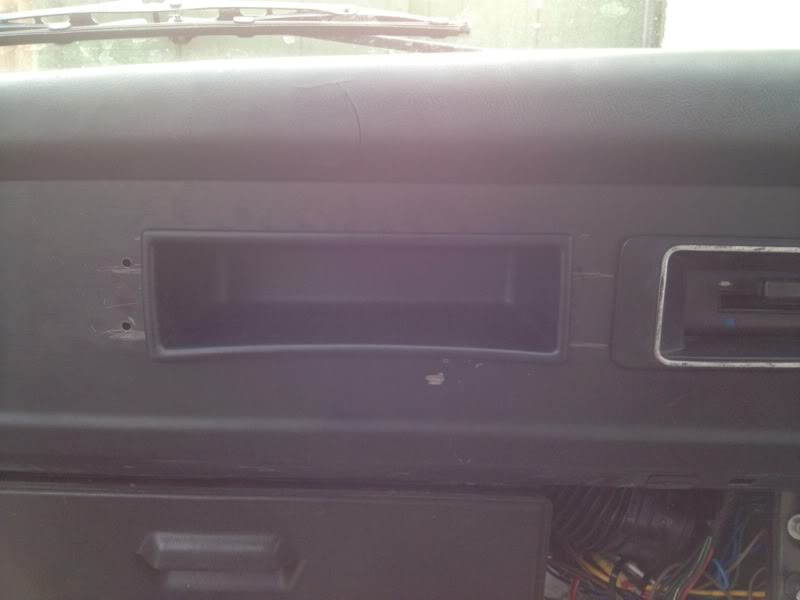
and finally to end this update, a couple of pics of some new bits fitted...
glove box
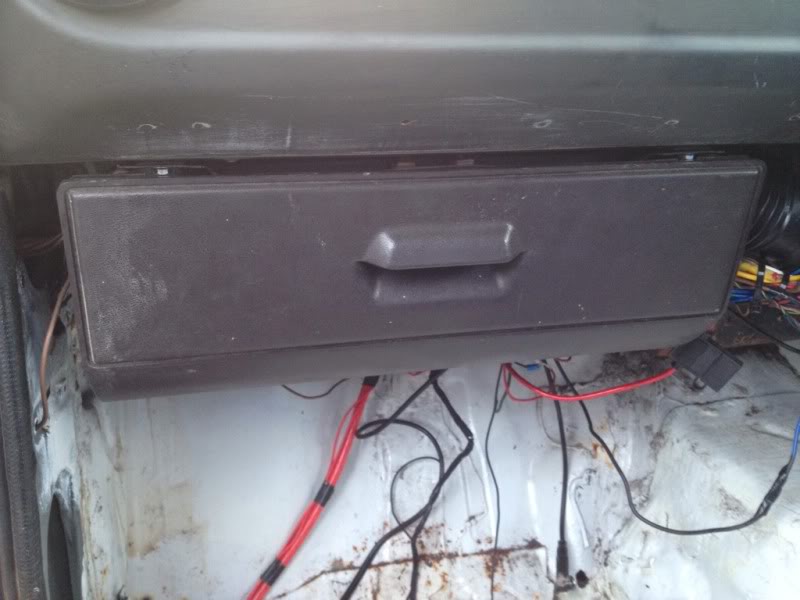
when i got the glove box this was fitted to the left side of it...
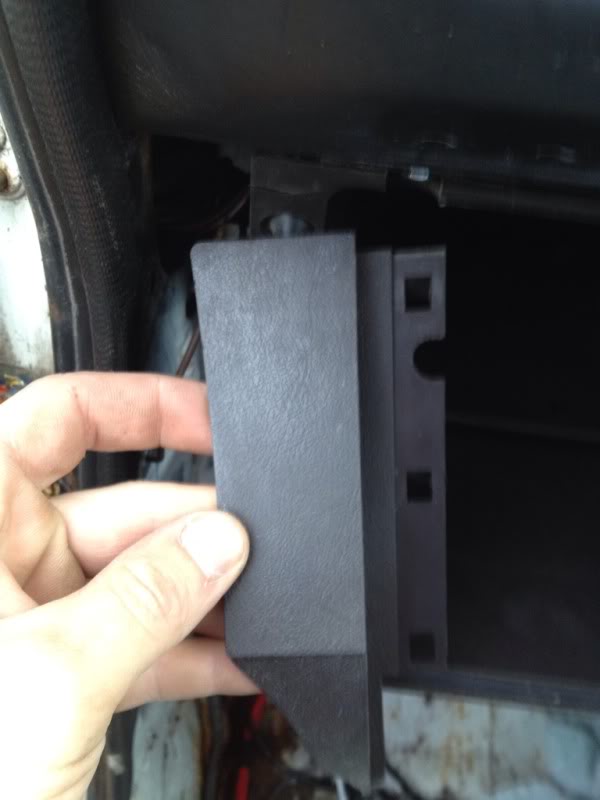
but with it fitted i couldnt get the glove box to fit where it needed to, anyone know of any reasons why this wouldnt go? it's a mk2 glove box...
heater control trim
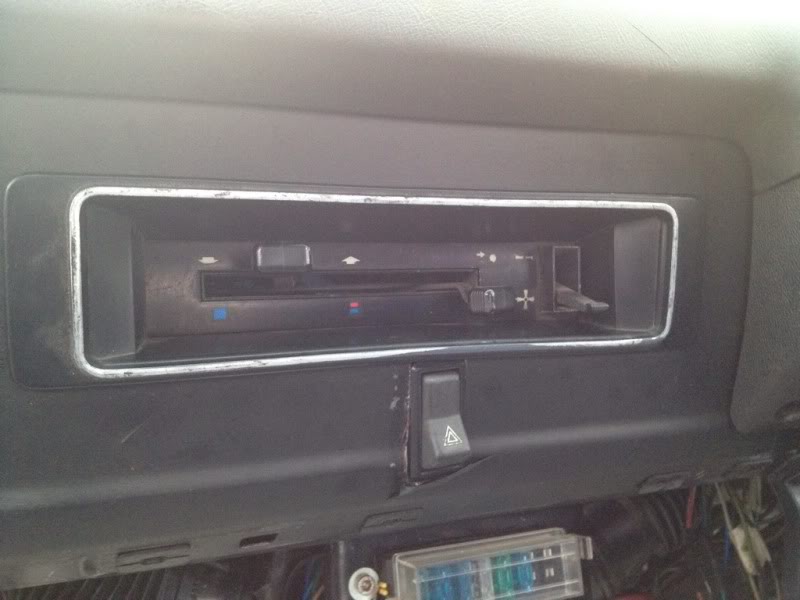
the last one was held on by insolation tape lol
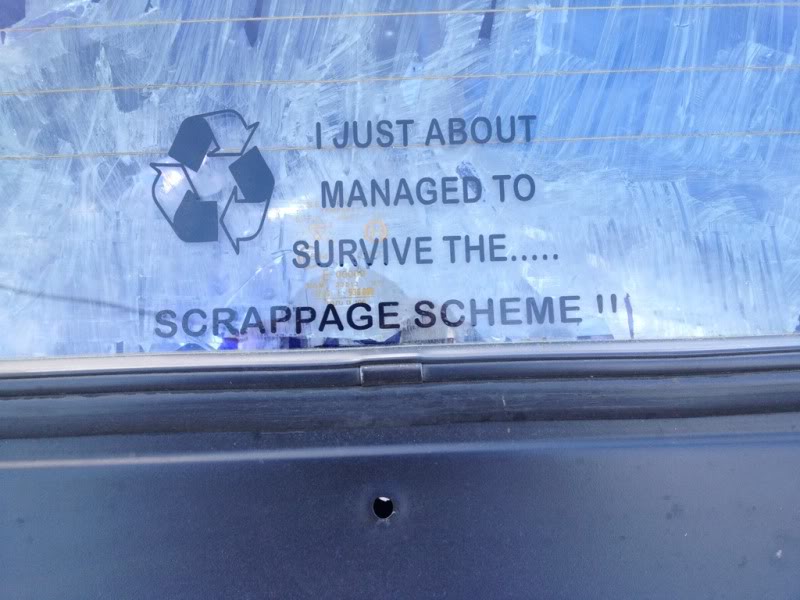
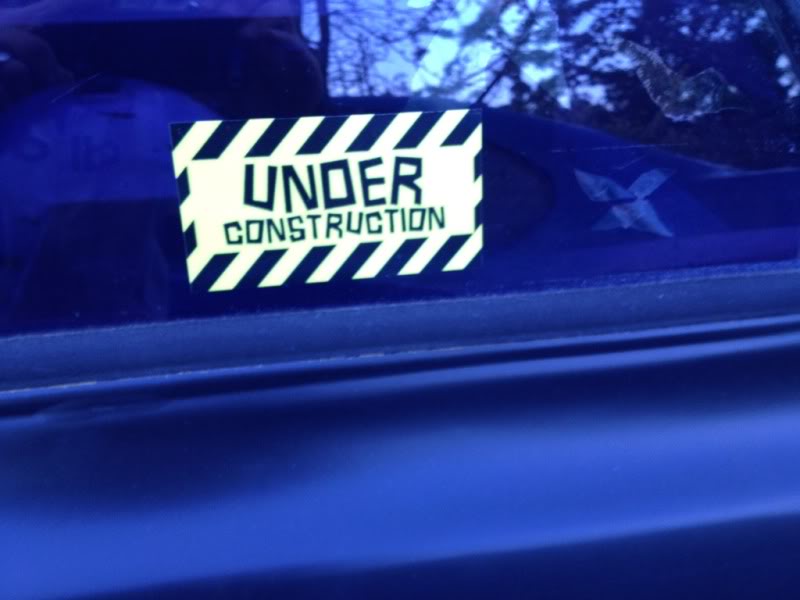
new sticker lol
and harnesses fitted
random edited one...

hopfully get some more done this weekend...?!?
thanks for looking
il start with my goodies that have turnt up soo far
new inlet and exhaust gaskets
me being the dumb ass that i am didnt noticed these wer for an efi pinto, but luckily it didnt matter because i only needed the exhaust gaskets... storey to follow...
sanding discs, dont really know why i took a pic of these to be honest lol
new front wing mounting rails
new window channel rubbers for when the doors are painted and ready to be fitted
new clear front indicator lense's
and new glove box, heater control trim and centre console (cheers vista!!)
still have a couple more bits that havnt arrived yet
i was hoping to get abit done on the body work this week but run into abit of a problem with the exhaust... when i first got the car it sounded like the exhaust manifold was blowing where it meets the cylinder head so i bought the gaskets above but iv been putting off fitting them because it wasnt thaaat bad, but the other day when i was going to see my mate down he's farm i hit a bump in the road quite hard and all of a sudden the car sounded like a spitfire driving down the road lol so when i got home i thought id get my arse into gear and see what was wrong, so i lifted the bonnet up and had a good old route around and couldnt find anything! i even had my father-in-law take a look and he couldnt see anything either so i just assumed it was the gasket completly giving up, so with that i decided to just fit the new gaskets, unbolted the manifold, went to pull it off and disaster! the manifold had broke...
befour removal
oh dear
bad times...
where it had broke off was literally just under where the heat wrap was lol but i was going to let it dampen my spirits so i removed the rest of the manifold and took it into my garage to see if i could weld it up, luckily it was a nice clean break and the 2 peices mated back up perfectly..
so i cleaned it up and had ago at welding it back together..
you'l have to excuse my welding, i had no intension of making it look pretty, i just laid loads down so hopfully it wont break again
and finished after spraying it with high temp metallic black manifold paint
and then back on the car
thankfully my welding has held up soo far, i really dont want to take that manifold back off again!! lol
so with that little drama sorted i though id take a couple of pics of the other not so good bits under the bonnet while i had it up...
another plate screwed on the o/s inner wing just above where the arb bolts on, god knows what delights are waiting for me behind there...
annnnd, another plate screwed on below the rad...
rad sitting p1ssed, dont even think its the right rad to be honest?
air filters seen better days
and i need a new fan switch but the fans shot aswel so might aswel just get a new electric fan kit...
need to sort this out aswel...
its a bit of metal with pressed holes just screwed behind the front panel, pretty pointless to be honest, but if its decent when i take it off i might keep it and put it on my new front panel properly..?
and finally to end this update, a couple of pics of some new bits fitted...
glove box
when i got the glove box this was fitted to the left side of it...
but with it fitted i couldnt get the glove box to fit where it needed to, anyone know of any reasons why this wouldnt go? it's a mk2 glove box...
heater control trim
the last one was held on by insolation tape lol
new sticker lol
and harnesses fitted
random edited one...
hopfully get some more done this weekend...?!?
thanks for looking
29-05-2012, 09:51 PM
#72
I've found that life I needed.. It's HERE!!
Thread Starter
iTrader: (8)
Join Date: Dec 2006
Location: eastbourne
Posts: 1,350
Likes: 0
Received 0 Likes
on
0 Posts
little update again, still havnt managed to get much done but it isnt through lack of trying lol
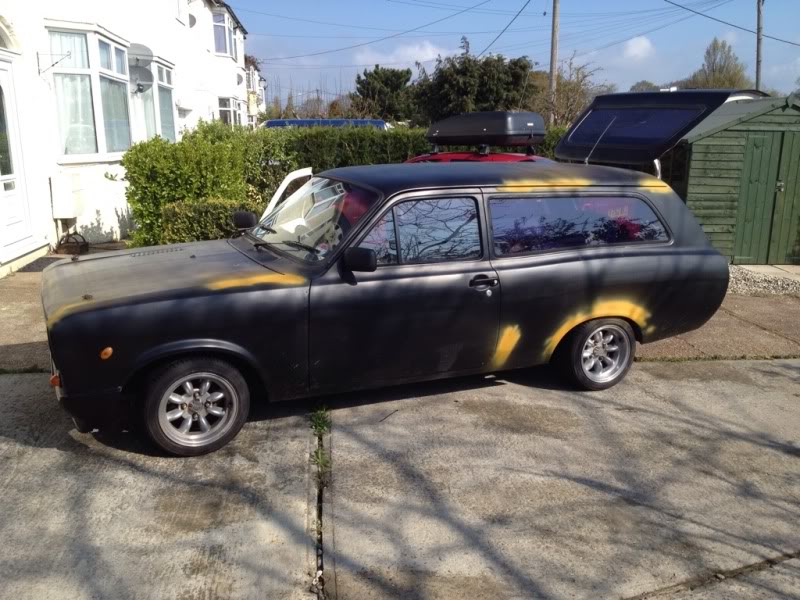
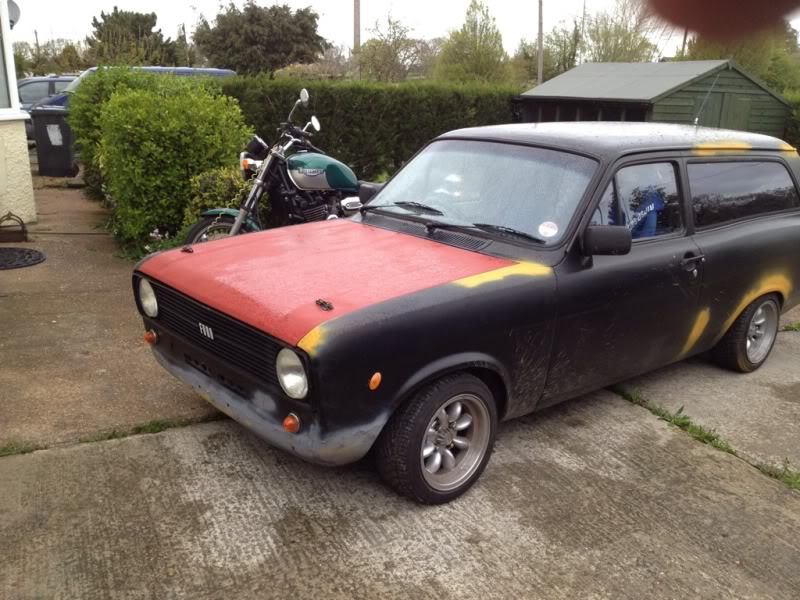
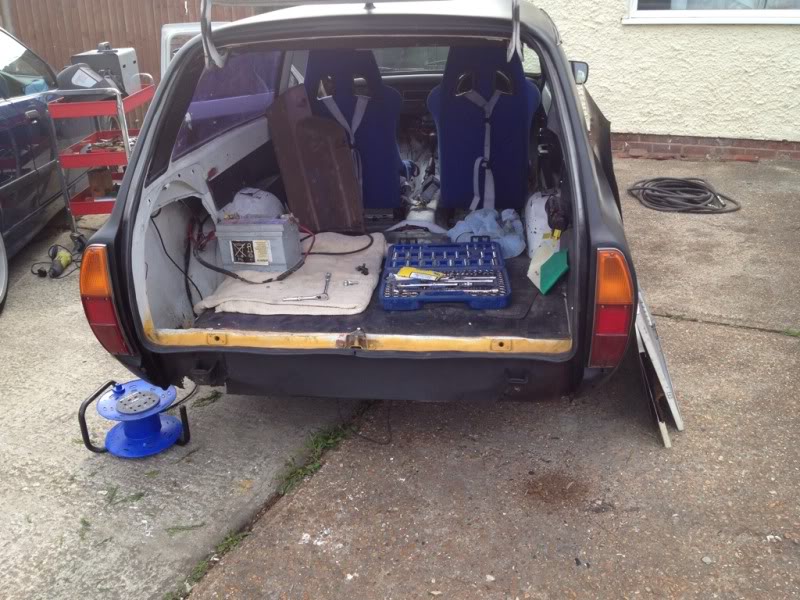
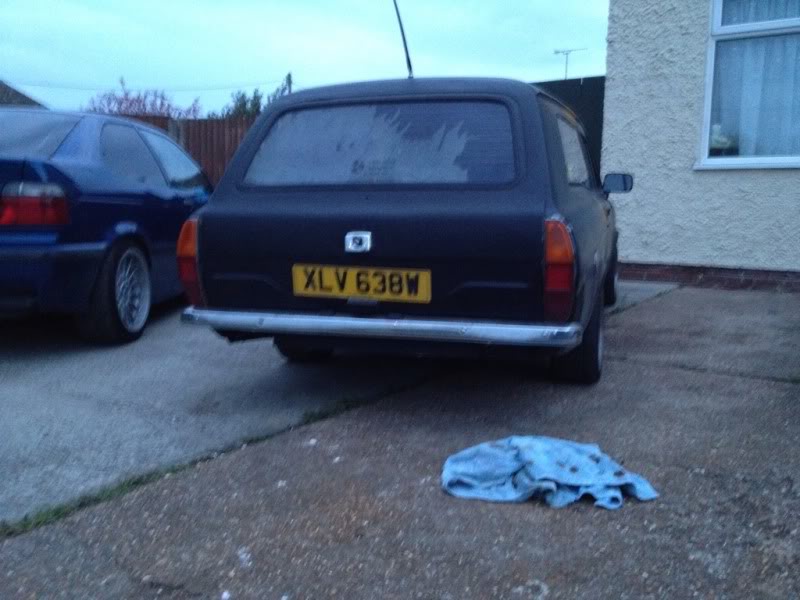
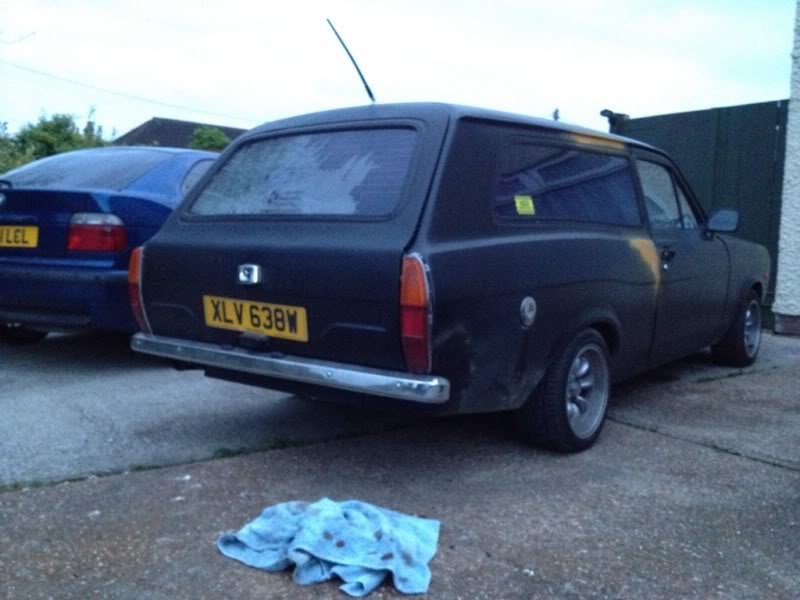
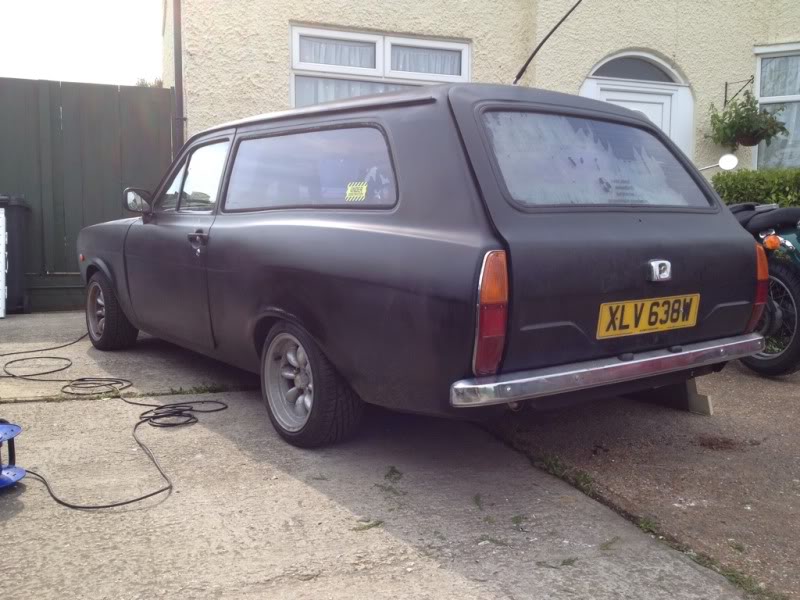
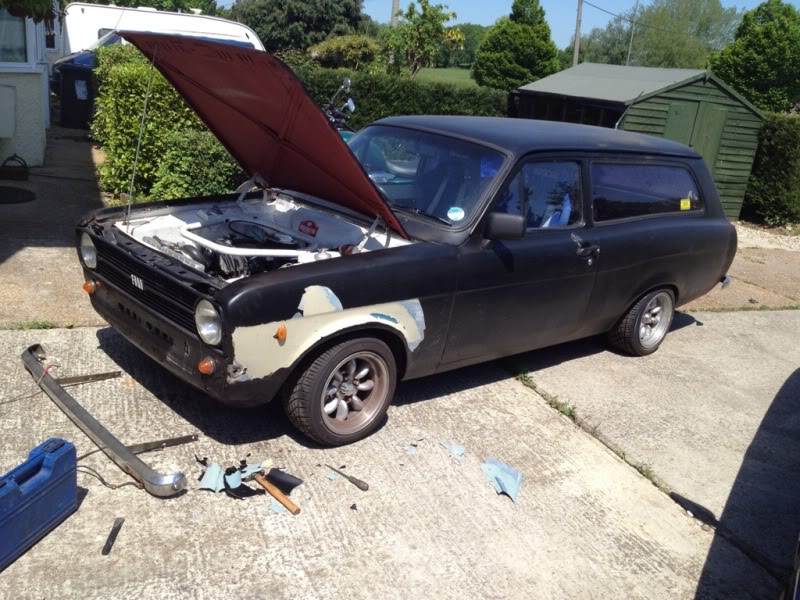
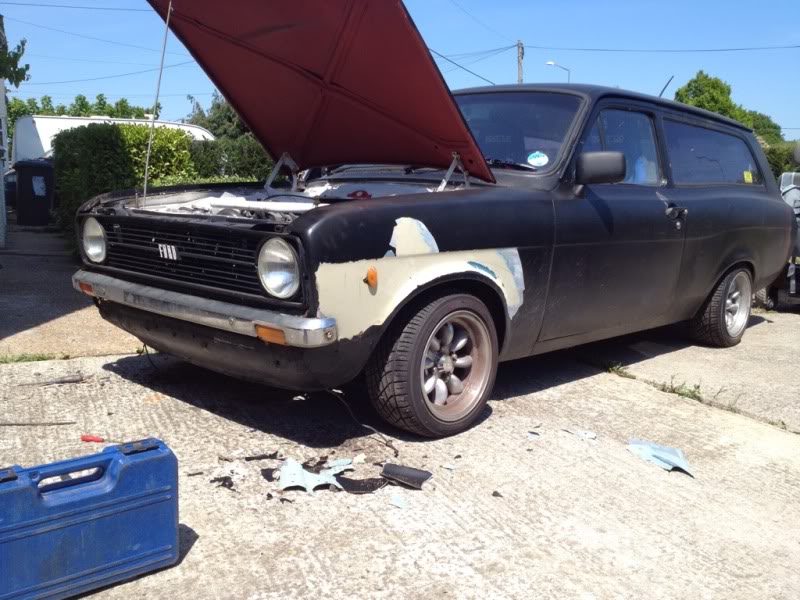
anyway, il start with a picture of her in all her glory lol
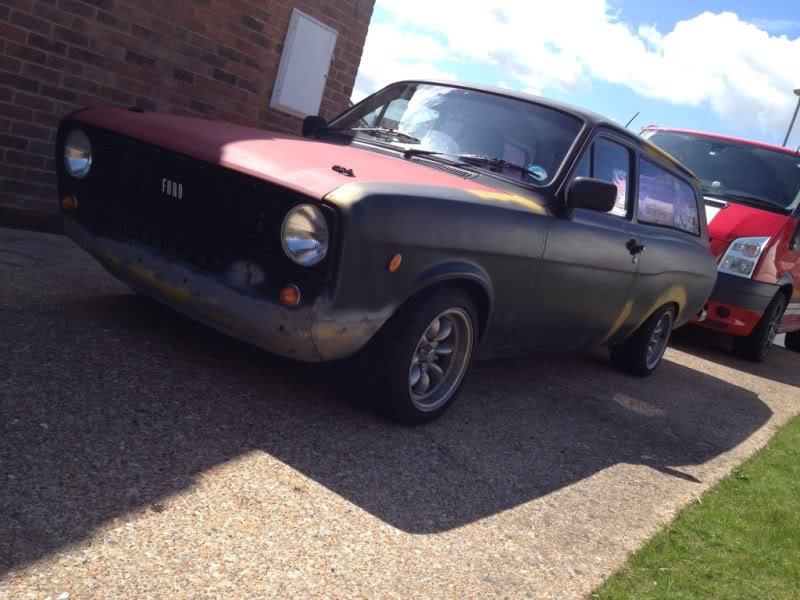
bless it, one day it'l look good again :shock:
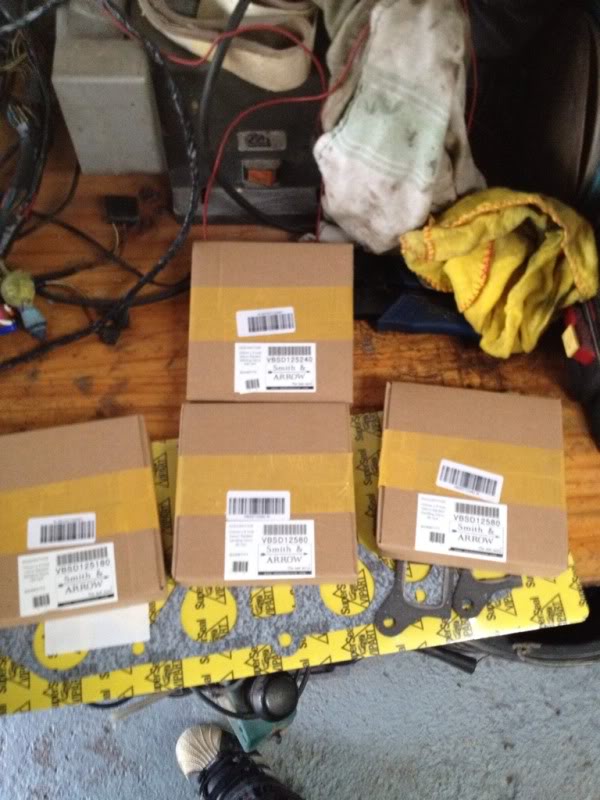
and some more bits iv acquired...
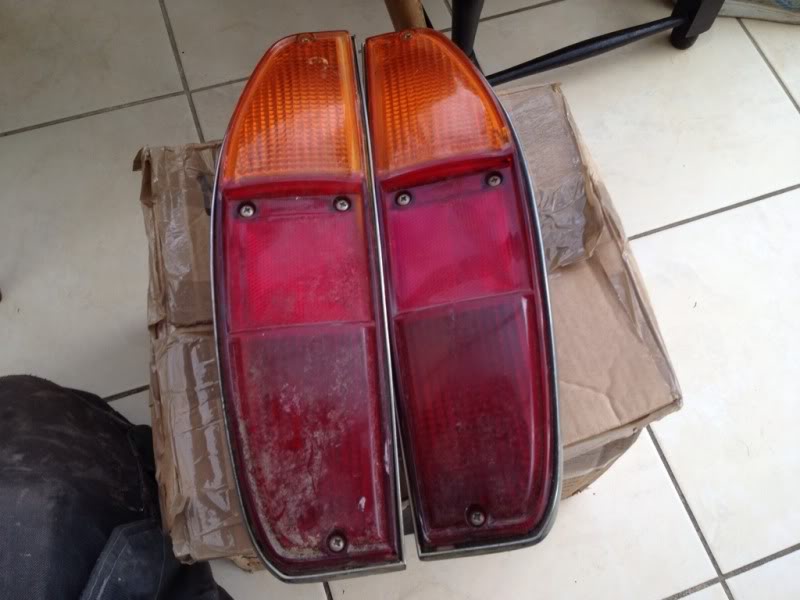
standard rear lights
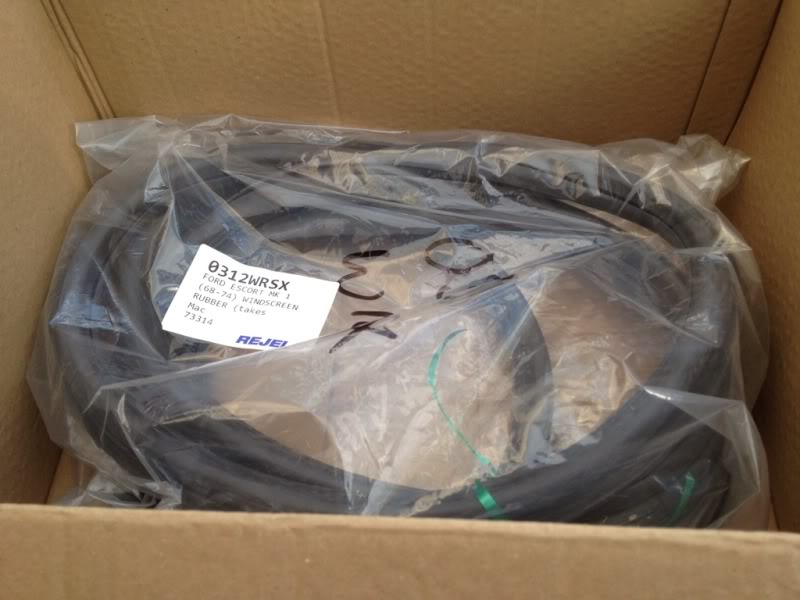
new windscreen rubber
small box of bits mk1mexico sorted me out with, cheers dude!
seam sealer, basically tiger seal.
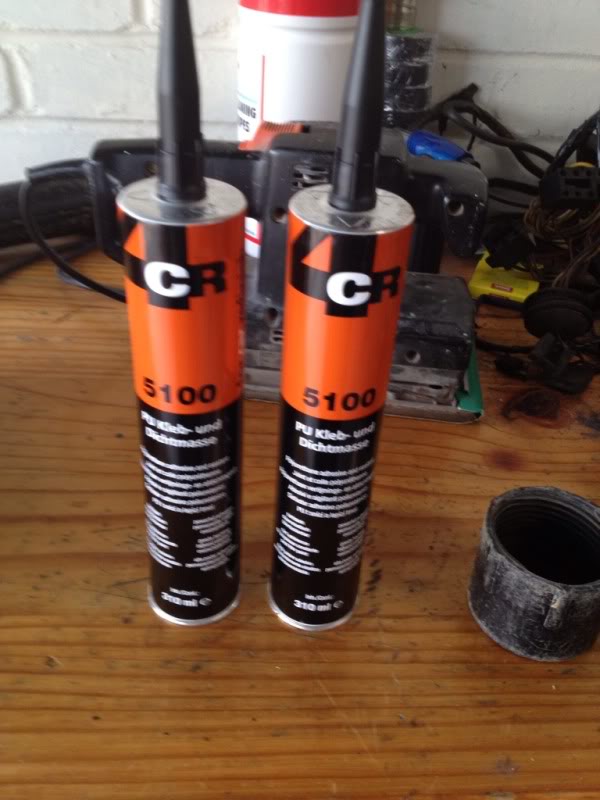
new sticker lol
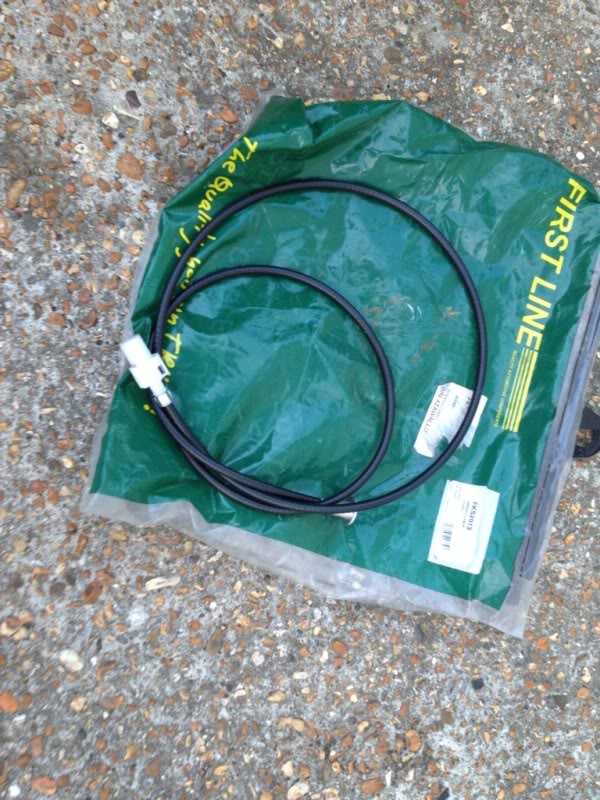
new speedo cable, this actually came with the car but i only got around to fitting it last week and my speedo still doesnt work :banghead: so good knows whats wrong with that, any ideas as to why it isnt working??
mk1 fiesta xr2 utility tray
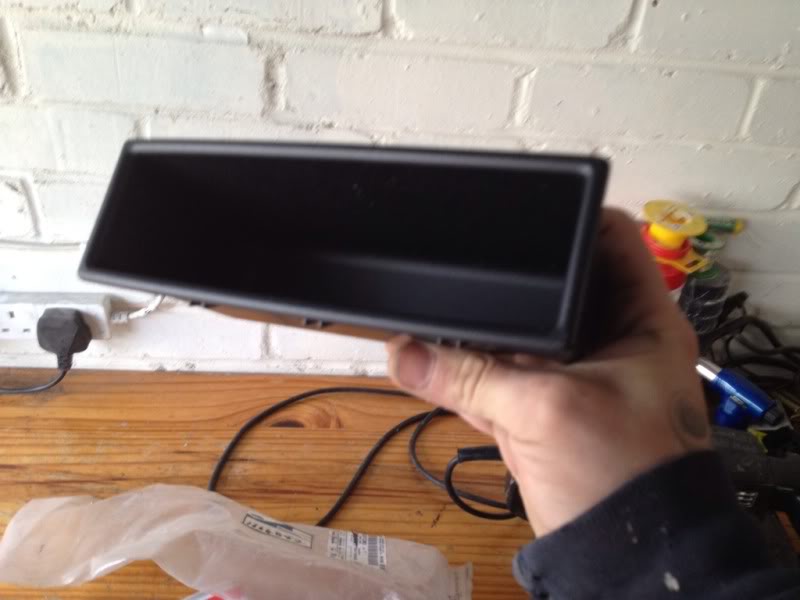
and the plan for the utility tray..
new 2" rear lowering blocks because what i have fitted atm is also a bodge up lol

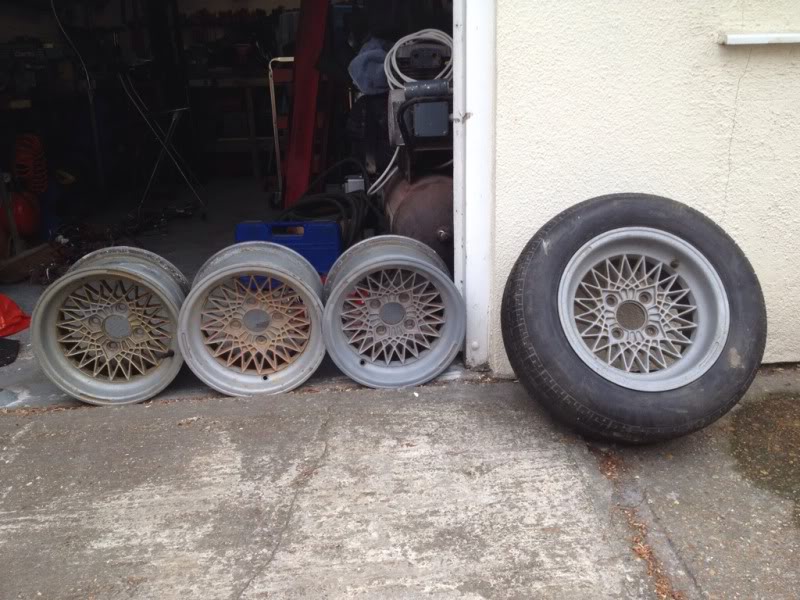
and finally the new choice of rim that collected earlier today...
compomotive cx's 13x7j cheers madmex :thumbsup:
the 'to buy' list is slowly getting smaller lol
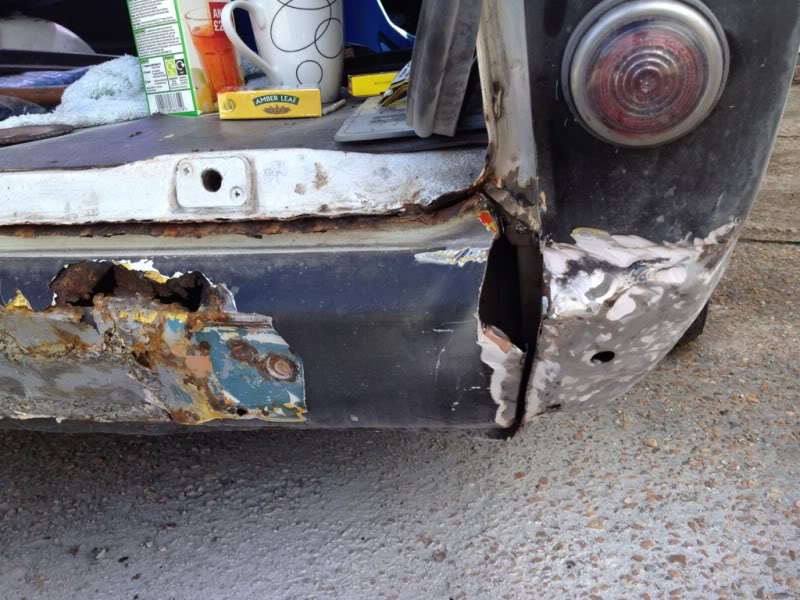
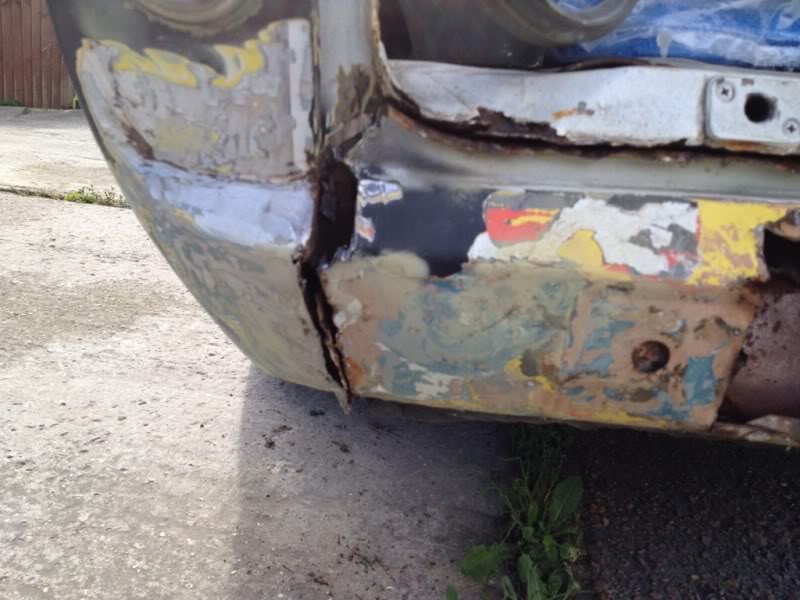
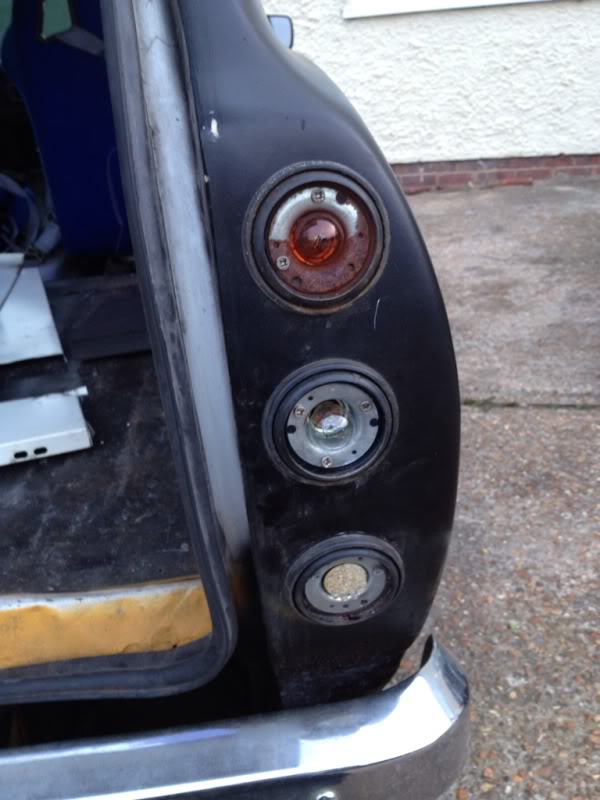
and now for the car itself, i still havnt really done much with it due to lack of time and enthusiasm to work out in the intense heat but i did managed to do a couple of bits, first up is the rear lights, i just couldnt resist trying to fit them when i received them and it was getting on abit so i only planned on removing the old lights ready for the morning so i could finish it off and get the new standard lights back but because it went so well i managed to get the old ones out and the new ones in in just an hour lol...
old light removal
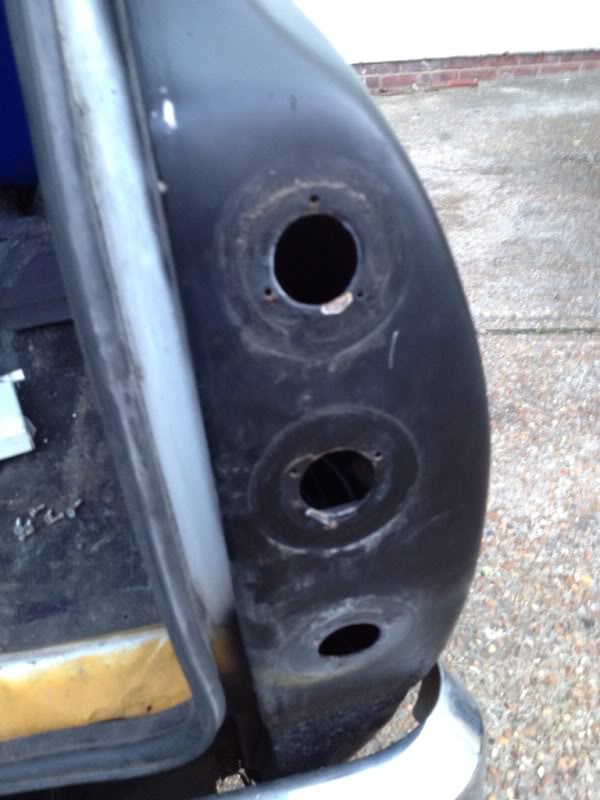
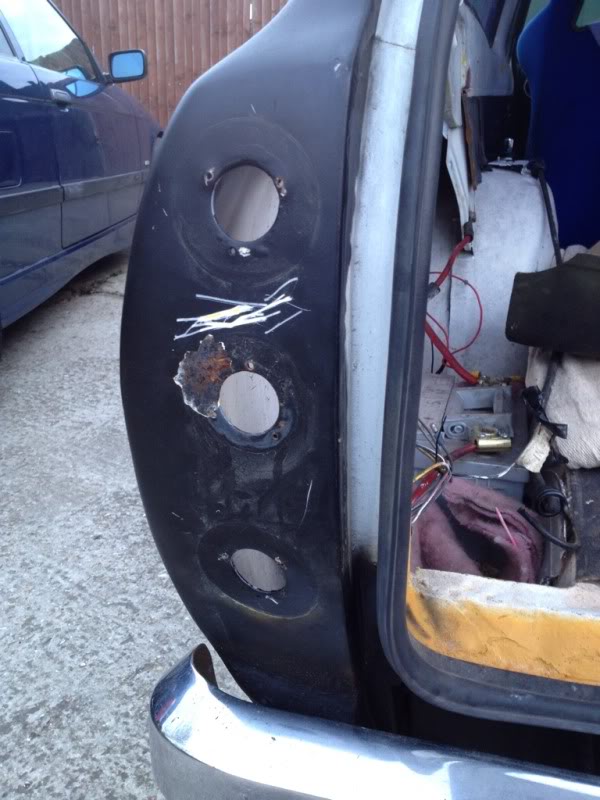
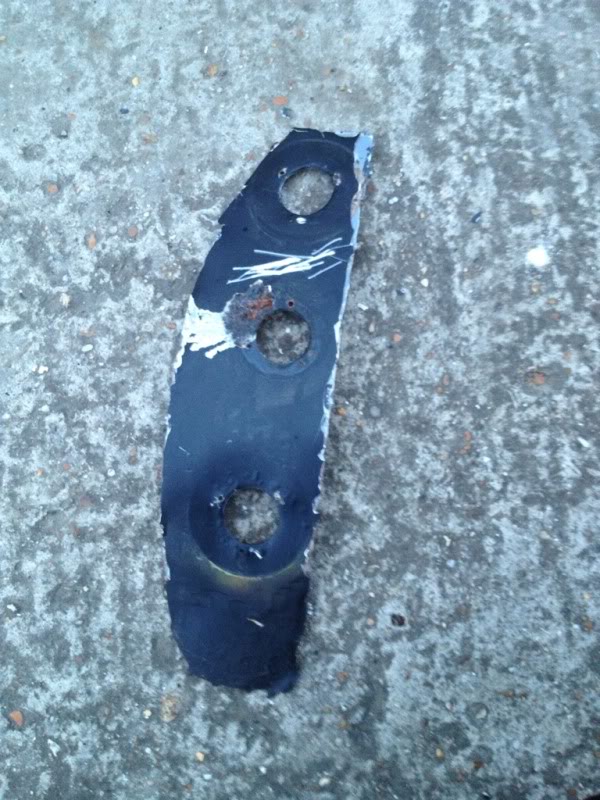

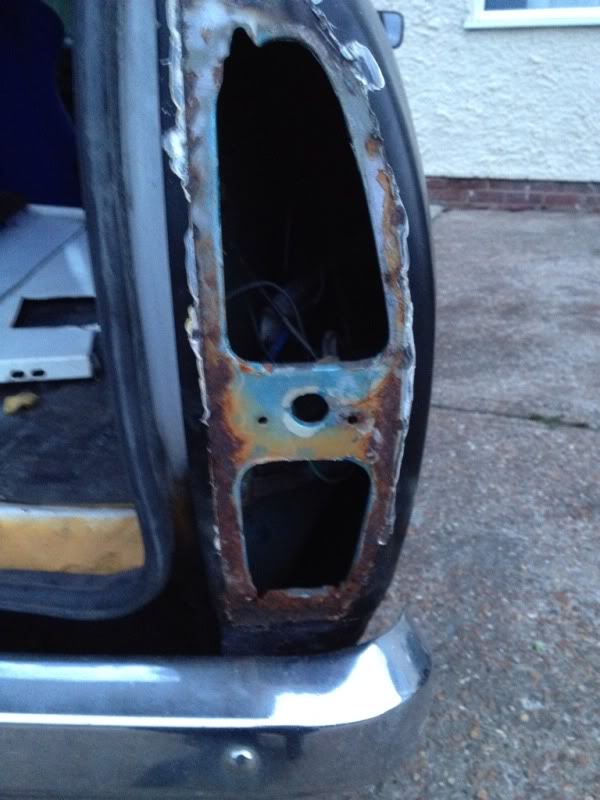
and new ones going back in...
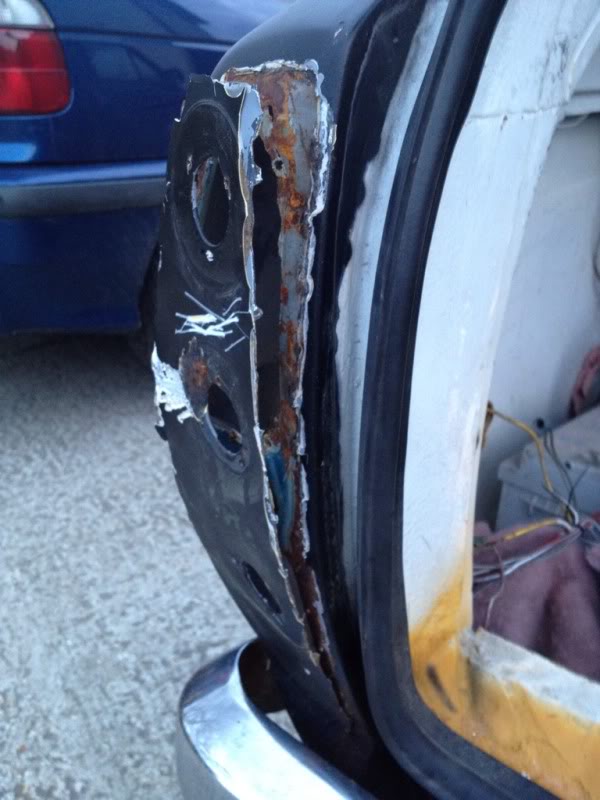
unfortunetly the filla that was used the blend in the plates that the old lights sat into was also hiding this...
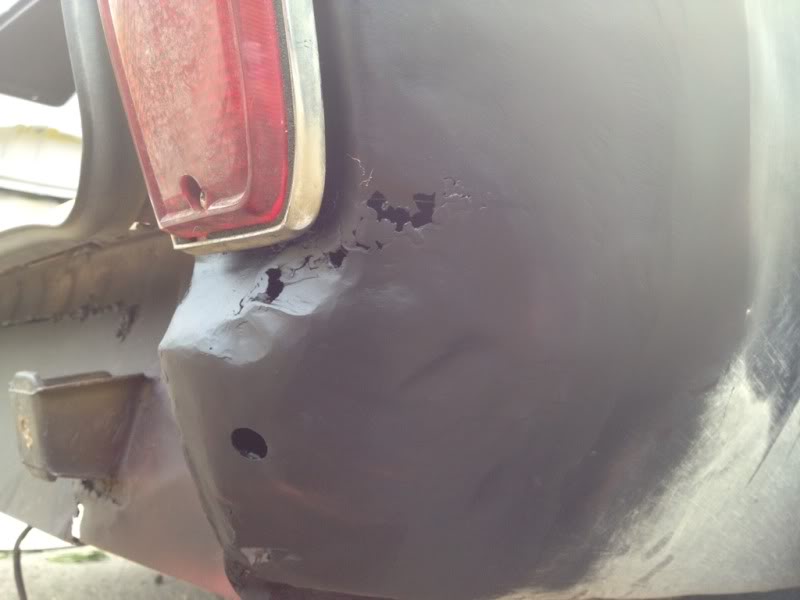
so iv now decided to pay for the rear end to be done as thats a little out of my depth really so does anyone know anyone down the south east area that would be willing to take it on? the holes above and the lower inner and outer valence panels?
next up was ripping out the old abused rear loom and replace it all with a better loom..
no pics of the new rear loom going in though im affraid
with that done i decided to fit the front bumper because it just looked silly with out it but that didnt turn out to be as easy as the rear lights
first up, i had to cut out the n/s hole that the bumper mounting bracket goes through because it had been welded up for whatever reason?
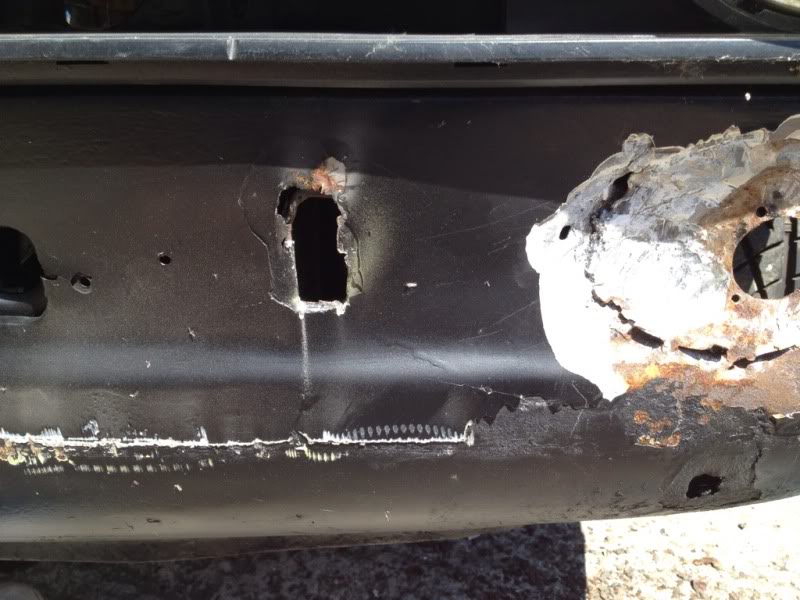
i didnt have any intension of doing it neatly because the whole front panel will be replaced at some point...
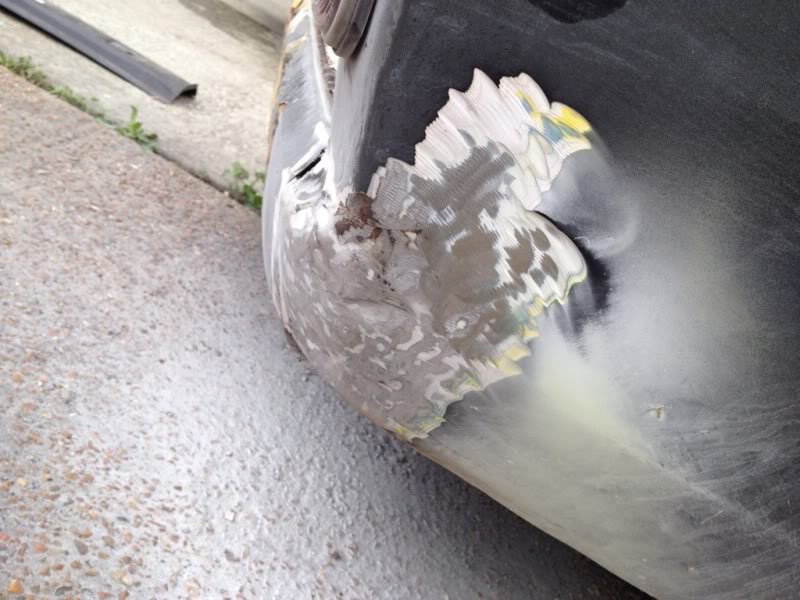
then i had to chip away all the filla that covered up the holes on the front wings that the bumper also mounts to... and it ended up like this lol
it was so hot when i was doing this that the paint literally just pealed off, it only started with a bit the size of a 20p coin coming away with a chunk of filler but i had to see how far it would go after that
then i had to get my hammer out and make an indicator resess as that had also been chopped out and a flat plate welded in its place
random pic
and the front bumper mounted
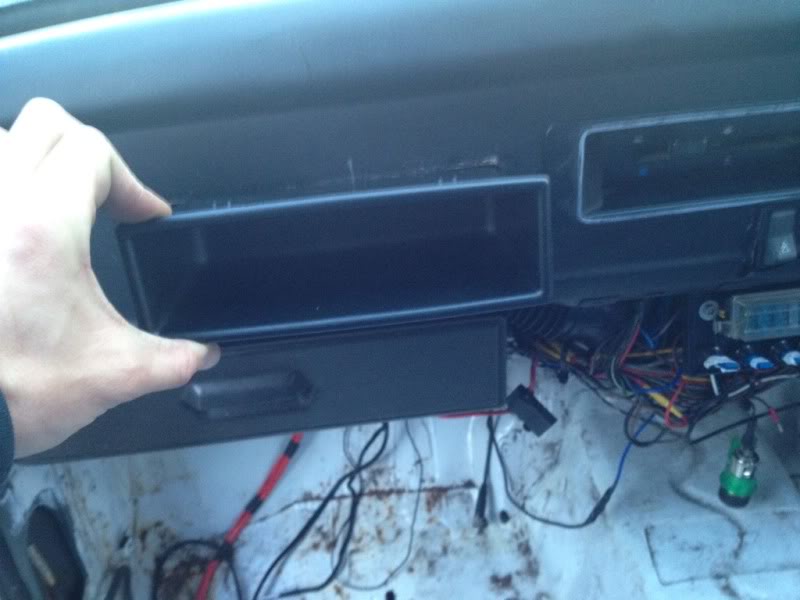
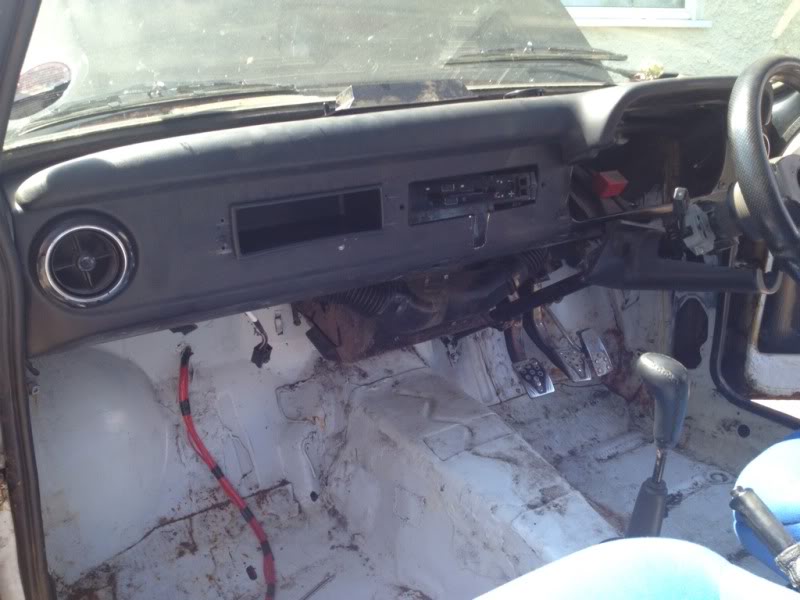
it was still nice outside when i had finished the front bumper so while the air compressor was outside i decided to chop the dash for the utility tray...
i still need to chop a tiny bit more out to make it a proper fit but im still waiting for the cutting discs to arrive.
and finally, today i started on swopping the wireing looms over because i had no work and i have the use of my bosses van for 16 days while he's on holiday so nows the best time to get on with it
all gone except the power cable.
all the engine bay and front light loom gone although the pic is pretty point less because it dont really show anything
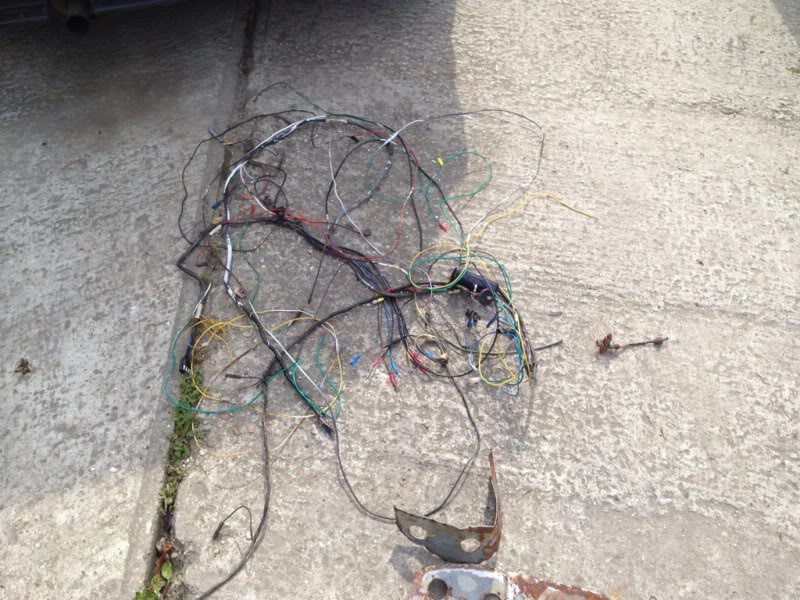
and the loom out
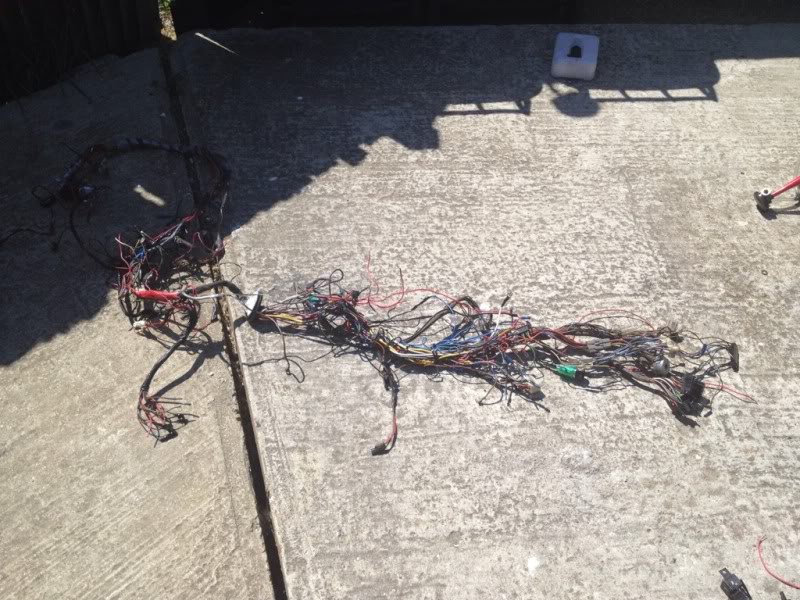
such a bloody mess!
also removed these while i was at it
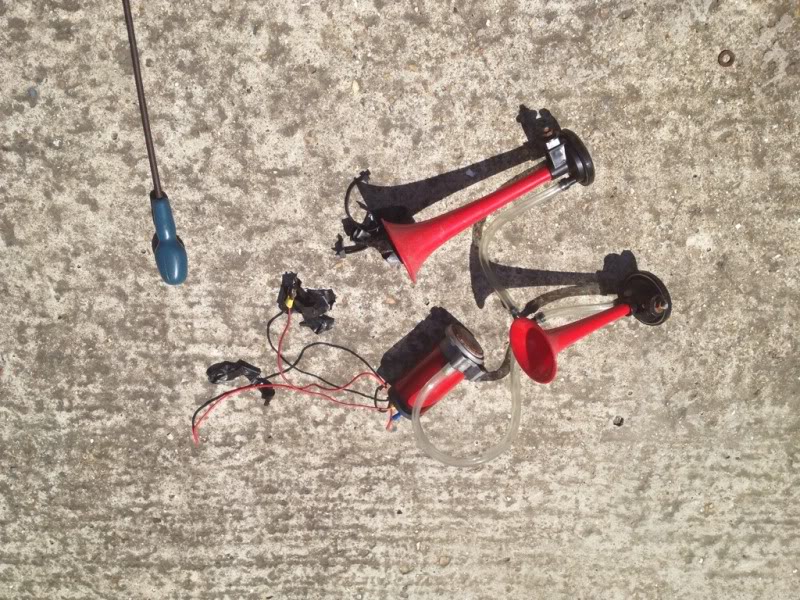
stupid bloody things, whats wrong with a standard horn ffs lol
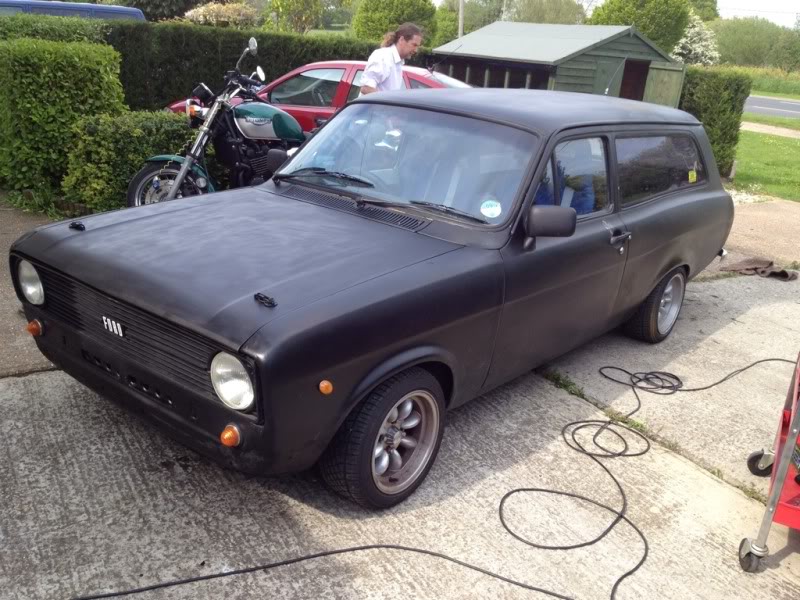
and a random pic of the car when i put some black paint back over the primer
hopfully get the new loom in thursday or friday weather permitting and have a go at the n/s/r arch
thanks for looking :thumbsup:
anyway, il start with a picture of her in all her glory lol
bless it, one day it'l look good again :shock:
and some more bits iv acquired...
standard rear lights
new windscreen rubber
small box of bits mk1mexico sorted me out with, cheers dude!
seam sealer, basically tiger seal.
new sticker lol
new speedo cable, this actually came with the car but i only got around to fitting it last week and my speedo still doesnt work :banghead: so good knows whats wrong with that, any ideas as to why it isnt working??
mk1 fiesta xr2 utility tray
and the plan for the utility tray..
new 2" rear lowering blocks because what i have fitted atm is also a bodge up lol
and finally the new choice of rim that collected earlier today...
compomotive cx's 13x7j cheers madmex :thumbsup:
the 'to buy' list is slowly getting smaller lol
and now for the car itself, i still havnt really done much with it due to lack of time and enthusiasm to work out in the intense heat but i did managed to do a couple of bits, first up is the rear lights, i just couldnt resist trying to fit them when i received them and it was getting on abit so i only planned on removing the old lights ready for the morning so i could finish it off and get the new standard lights back but because it went so well i managed to get the old ones out and the new ones in in just an hour lol...
old light removal
and new ones going back in...
unfortunetly the filla that was used the blend in the plates that the old lights sat into was also hiding this...
so iv now decided to pay for the rear end to be done as thats a little out of my depth really so does anyone know anyone down the south east area that would be willing to take it on? the holes above and the lower inner and outer valence panels?
next up was ripping out the old abused rear loom and replace it all with a better loom..
no pics of the new rear loom going in though im affraid
with that done i decided to fit the front bumper because it just looked silly with out it but that didnt turn out to be as easy as the rear lights
first up, i had to cut out the n/s hole that the bumper mounting bracket goes through because it had been welded up for whatever reason?
i didnt have any intension of doing it neatly because the whole front panel will be replaced at some point...
then i had to chip away all the filla that covered up the holes on the front wings that the bumper also mounts to... and it ended up like this lol
it was so hot when i was doing this that the paint literally just pealed off, it only started with a bit the size of a 20p coin coming away with a chunk of filler but i had to see how far it would go after that
then i had to get my hammer out and make an indicator resess as that had also been chopped out and a flat plate welded in its place
random pic
and the front bumper mounted
it was still nice outside when i had finished the front bumper so while the air compressor was outside i decided to chop the dash for the utility tray...
i still need to chop a tiny bit more out to make it a proper fit but im still waiting for the cutting discs to arrive.
and finally, today i started on swopping the wireing looms over because i had no work and i have the use of my bosses van for 16 days while he's on holiday so nows the best time to get on with it
all gone except the power cable.
all the engine bay and front light loom gone although the pic is pretty point less because it dont really show anything
and the loom out
such a bloody mess!
also removed these while i was at it
stupid bloody things, whats wrong with a standard horn ffs lol
and a random pic of the car when i put some black paint back over the primer
hopfully get the new loom in thursday or friday weather permitting and have a go at the n/s/r arch
thanks for looking :thumbsup:
29-05-2012, 10:06 PM
#73
Lucifer II - 666
Bloody hell pal, you've taken on some work here! good look with it and hope you manage to turn it around well.
looks nice ratty but would be great of made mint.
looks nice ratty but would be great of made mint.
30-05-2012, 05:13 PM
#76
I've found that life I needed.. It's HERE!!
Thread Starter
iTrader: (8)
Join Date: Dec 2006
Location: eastbourne
Posts: 1,350
Likes: 0
Received 0 Likes
on
0 Posts
Cheers dude, I don't supose you have any spare rear light nuts atall do you? Think I need about 4 in total so the lights are properly bolted in... Just can't seem to get any normal nut on them
30-05-2012, 06:08 PM
#77
PassionFord Post Whore!!
Tez,
Keeping you busy then, liking this car a lot.
You done some great work so far, keep it up.
What bodywork do you need a workshop to do as I know plenty near me who could, just depends on budget.
Makes me want to hurry up and get my MK1 Escort back to play aroung with.
You must get it on the road and bring it to a meet soon
30-05-2012, 06:37 PM
#78
Lucifer II - 666