'86 Sierra 3dr iS 2.0 Turbo Pinto (planning for bigger spec))
 23-03-2012, 10:03 PM
#121
Part of the Furniture
Join Date: Feb 2010
Location: basvagus
Posts: 166
Likes: 0
Received 0 Likes
on
0 Posts
Very nice work but I have a question I am doing exatley the same as you I have cossy pistons and Rods but what you going to do about the under piston oil spray as pinto rods have a oil spray in the rod as where cosworth rods do not ( its part of the oil pick up pipe) to have the under piston oil spray bar?
 24-03-2012, 05:43 PM
#122
PassionFord Regular
Thread Starter
They are not actually 100% necessary so it's still possible I won't fit oil sprays. But there are few options I'm thinking about. One is to do "BMW style" grooves like in the picture:

so the oil gets sprayed from there.
Or get a machine shop to do holes to the main oil line and fit nozzles like in the picture above:

They're decent thing for cooling down the piston and cylinder walls, but many turbo Pintos also run without any oil sprays so it shouldn't be a problem.
so the oil gets sprayed from there.
Or get a machine shop to do holes to the main oil line and fit nozzles like in the picture above:
They're decent thing for cooling down the piston and cylinder walls, but many turbo Pintos also run without any oil sprays so it shouldn't be a problem.
09-04-2012, 07:15 PM
#123
Part of the Furniture
Join Date: Feb 2010
Location: basvagus
Posts: 166
Likes: 0
Received 0 Likes
on
0 Posts
Ah nice info I have got Myself a cosworth oil pick up whitch has the spray bar to spray oil cheap and does a good job I hope how is you engine.comming along
11-04-2012, 09:19 PM
#124
PassionFord Regular
Thread Starter
I'm currently waiting for some of the snow to melt from top (and around) of the car so I can get it to the garage and strip out what's left of the old engine. I also have to buy an engine lifter and engine stand. Maybe few weeks and I'll strip it and then I'll probably send all the usable engine parts to an engine shop so they'll measure everything and really tell me if they actually are usable.
So currently not doing anything but it will probably pick up in few weeks.
So currently not doing anything but it will probably pick up in few weeks.
12-04-2012, 12:07 AM
#125
15000

Join Date: Feb 2006
Posts: 26
Likes: 0
Received 0 Likes
on
0 Posts
Hey
Was just looking at your projekt, and if you dont have fund a way to spray oil under the piston, you can also drill a hole i the conrod to spray under the piston as the stock OHC rod do.
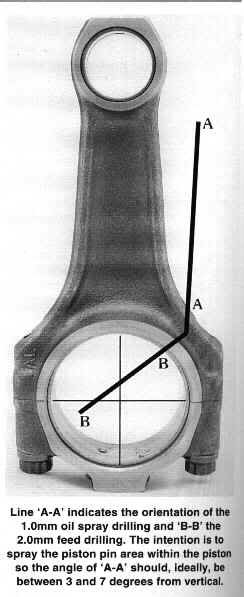
Was just looking at your projekt, and if you dont have fund a way to spray oil under the piston, you can also drill a hole i the conrod to spray under the piston as the stock OHC rod do.
12-04-2012, 01:49 PM
#126
PassionFord Regular
Thread Starter
Yeah, I have read the "how to power tune Ford SOHC & DOHC" and it mentions this. But I actually think it might be easier to use the "BMW style" like I mentioned before.
12-04-2012, 10:02 PM
#127
15000
Join Date: Feb 2006
Posts: 26
Likes: 0
Received 0 Likes
on
0 Posts
Have you also read "How to Modify Ford S.O.H.C Engines by DAVID VIZARD" It is a really good book, I think it is the best book writen over the SOHC engien. The "BMW style" is used on many N/A SOHC engines there is runnig cosworth rods, but there is also many turbo and N/A with out any under piston cooling.
30-04-2012, 11:10 PM
#129
Part of the Furniture
Join Date: Feb 2010
Location: basvagus
Posts: 166
Likes: 0
Received 0 Likes
on
0 Posts
hey mate quick question how did u get the fuel to the extra injector , the standard fuel pressure regulater do you know what thread size they are or how did u connect the new pipes in?
01-05-2012, 04:40 PM
#132
PassionFord Regular
Thread Starter
Came with the car.
Tho I don't remember that there would have been anything very special about it's piping. Only needs the in and out lines and the intake pressure like the original one too. Oh and the fuel lines were simply connected by a fittingly sized fuel hose and some clamps.
Tho I don't remember that there would have been anything very special about it's piping. Only needs the in and out lines and the intake pressure like the original one too. Oh and the fuel lines were simply connected by a fittingly sized fuel hose and some clamps.
Last edited by BigPeBe; 01-05-2012 at 04:43 PM.
12-05-2012, 03:20 PM
#133
PassionFord Regular
Thread Starter
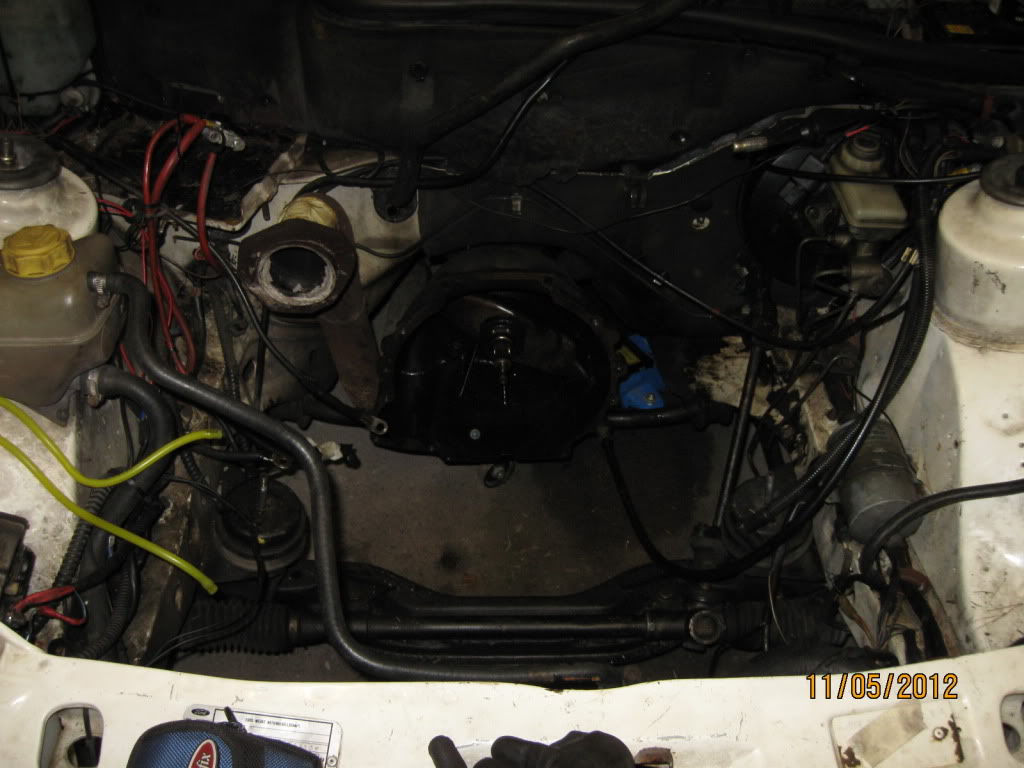
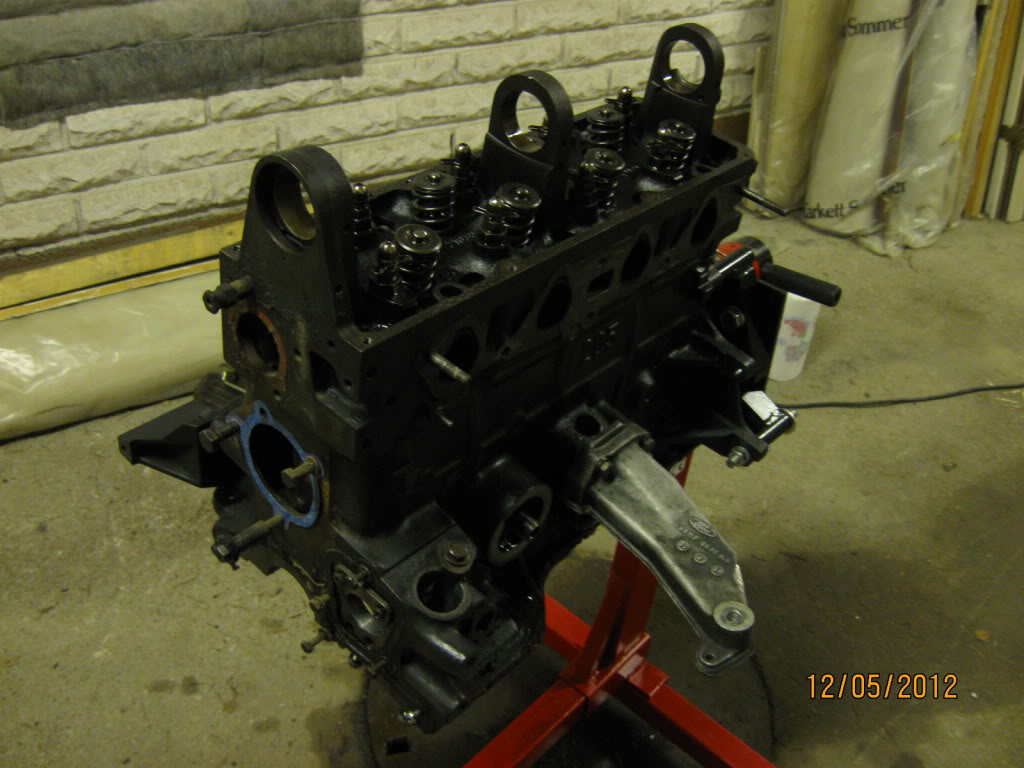
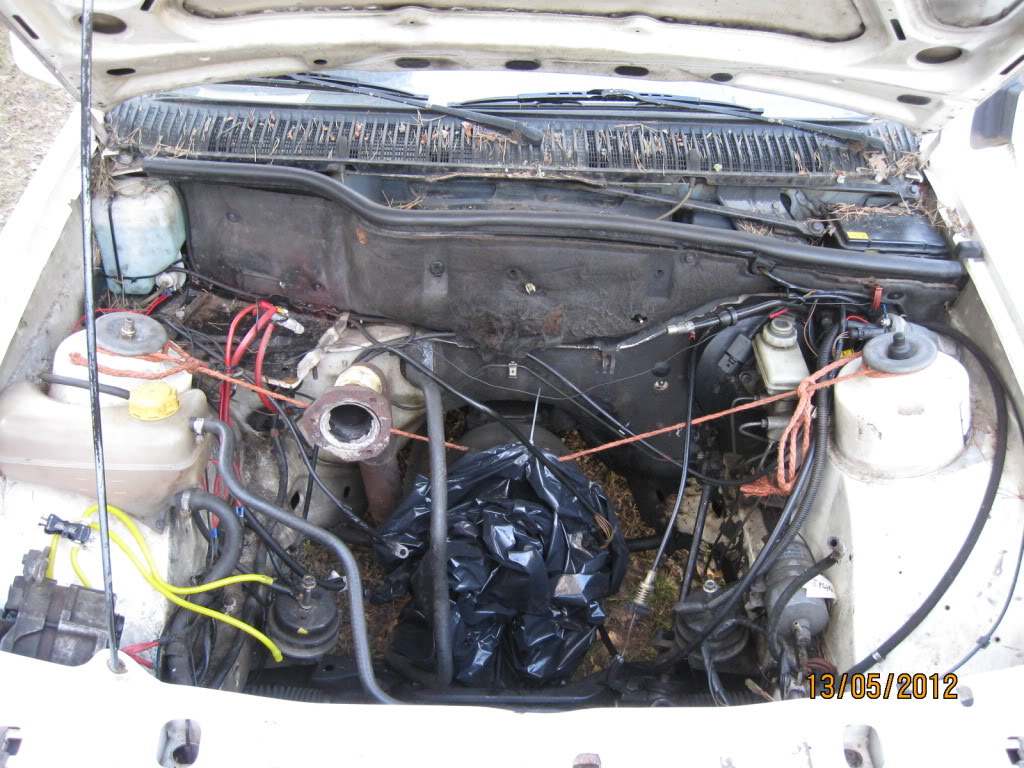
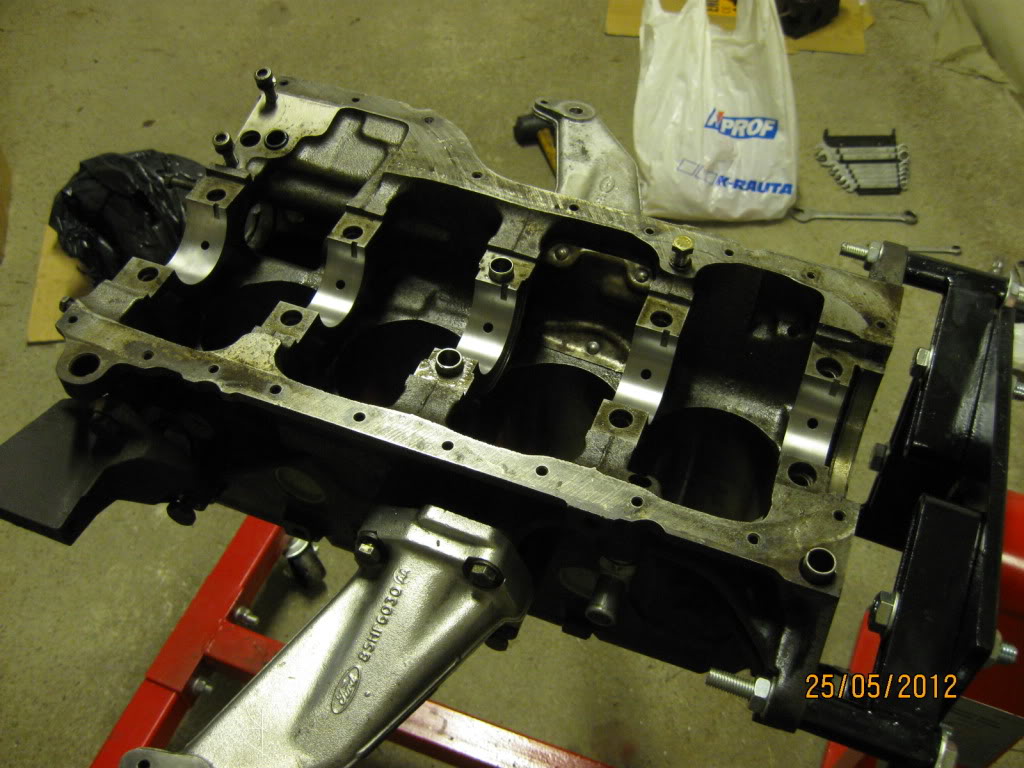
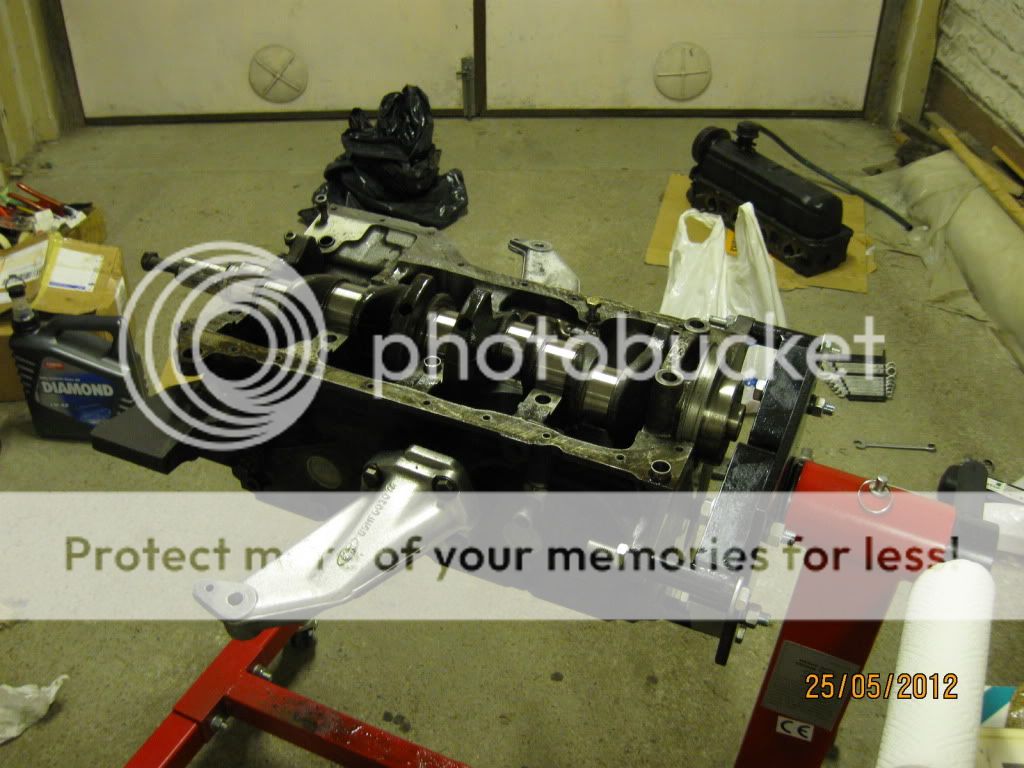
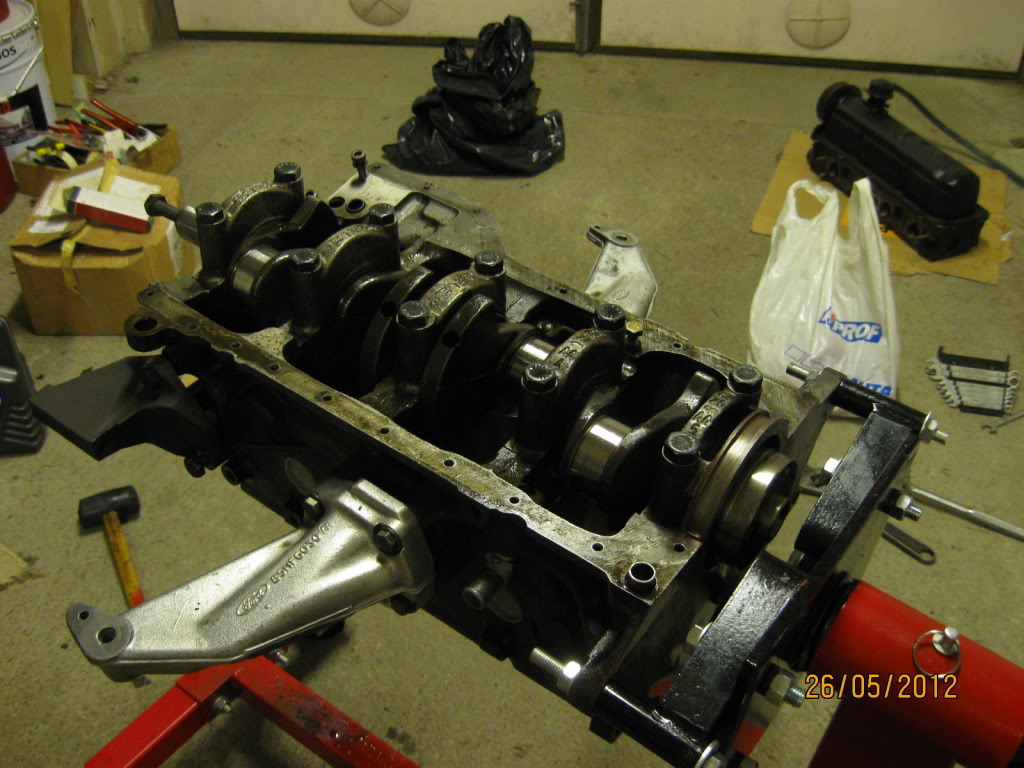
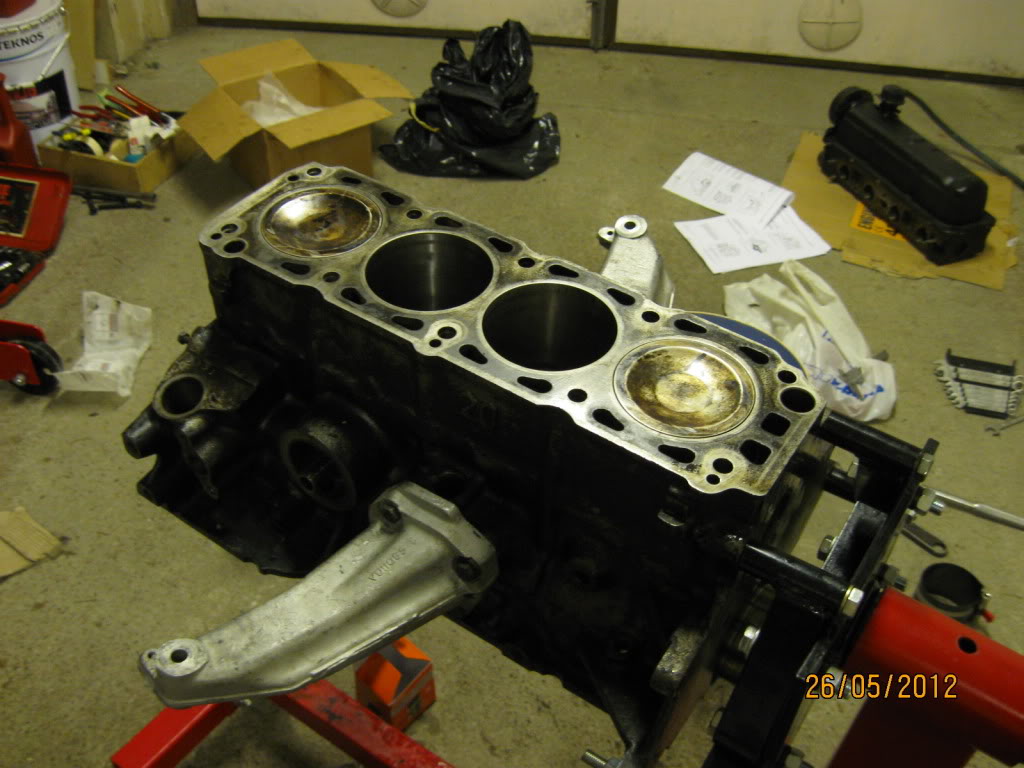
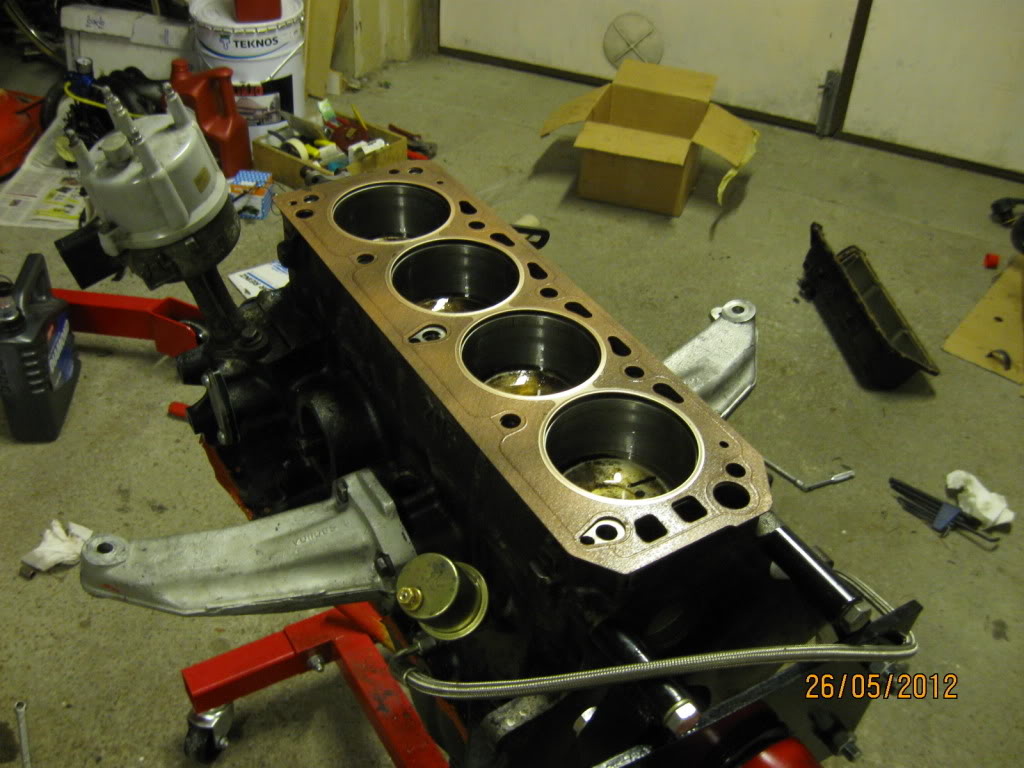
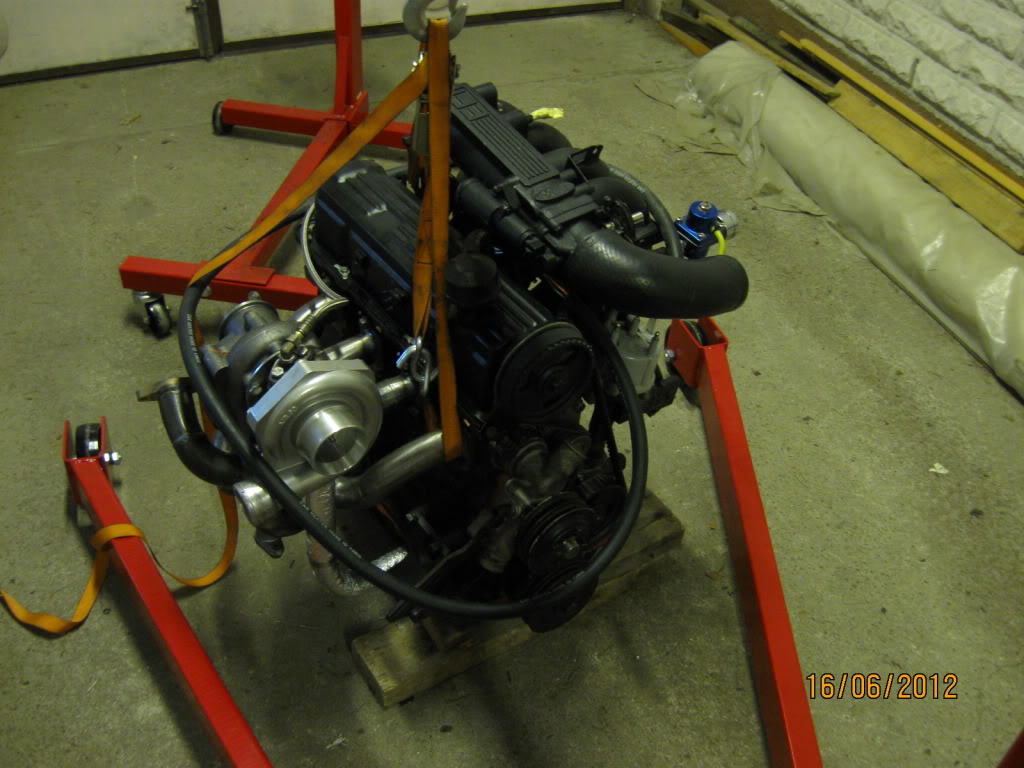
Finally some "progress". We took the old engine out and disassembled it.
Pictures:


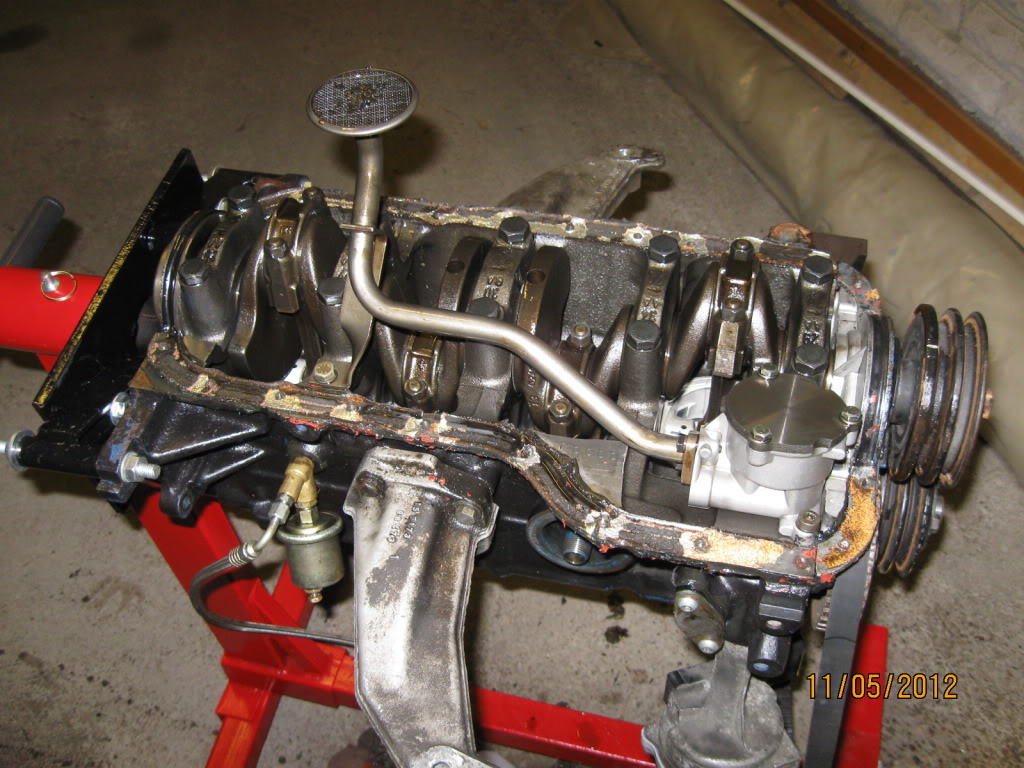
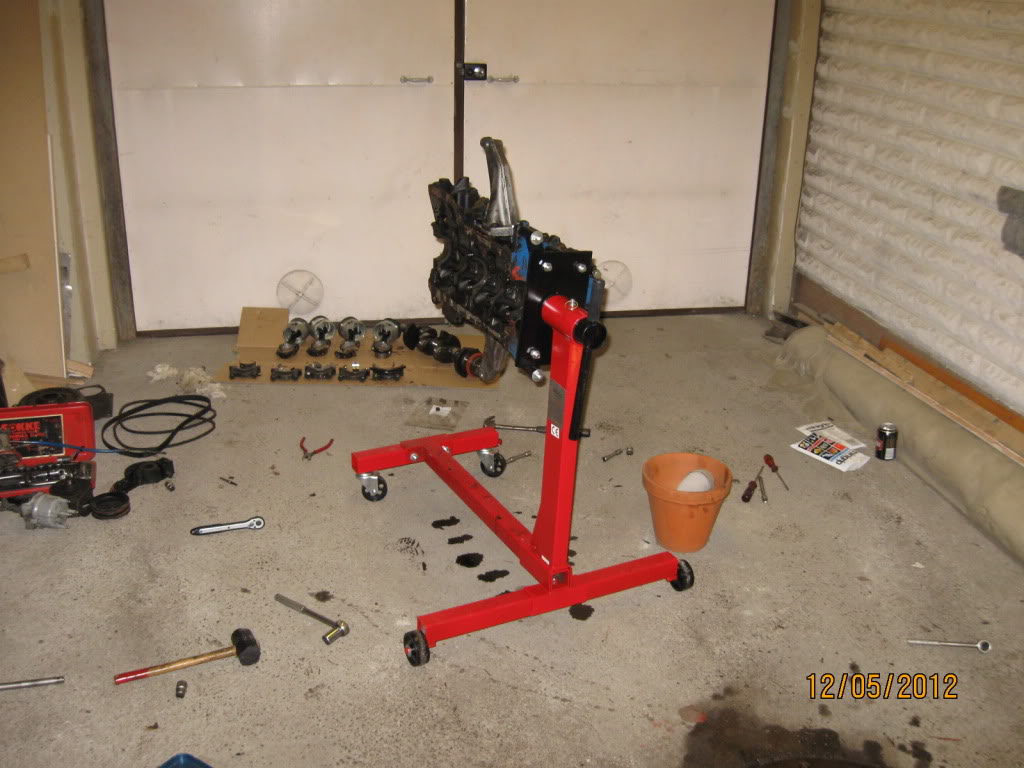
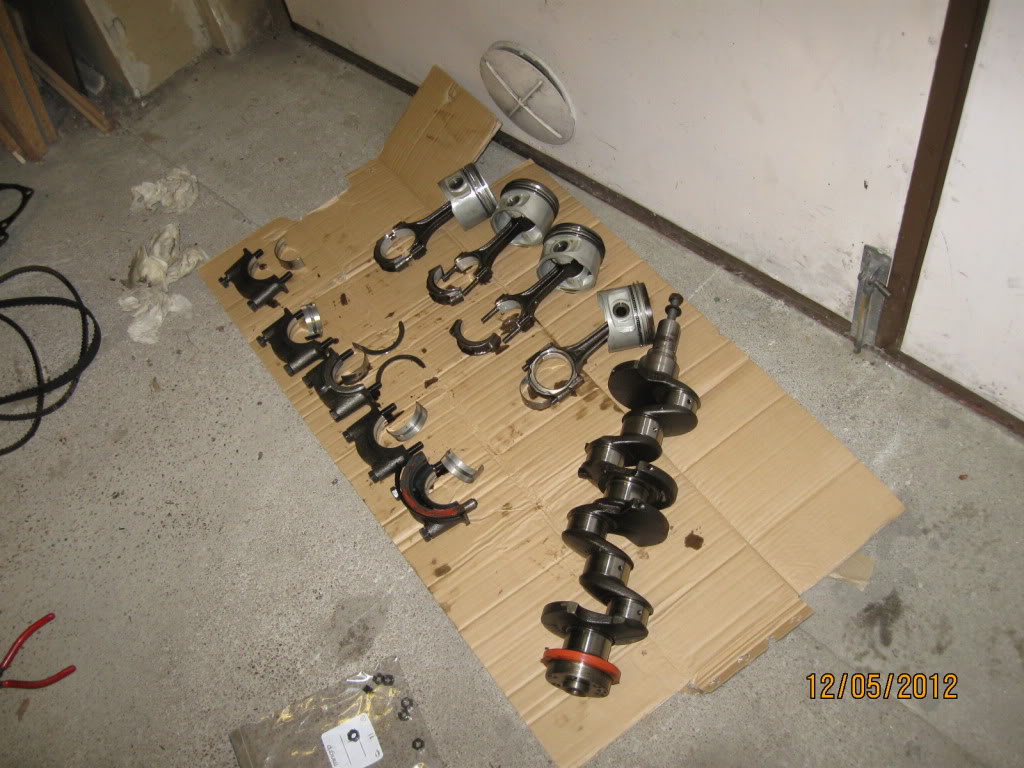
Interesting markings on the crank. Probably from the rod bolts:

Block seems to be overbored. I'll store it for some possible future usage.
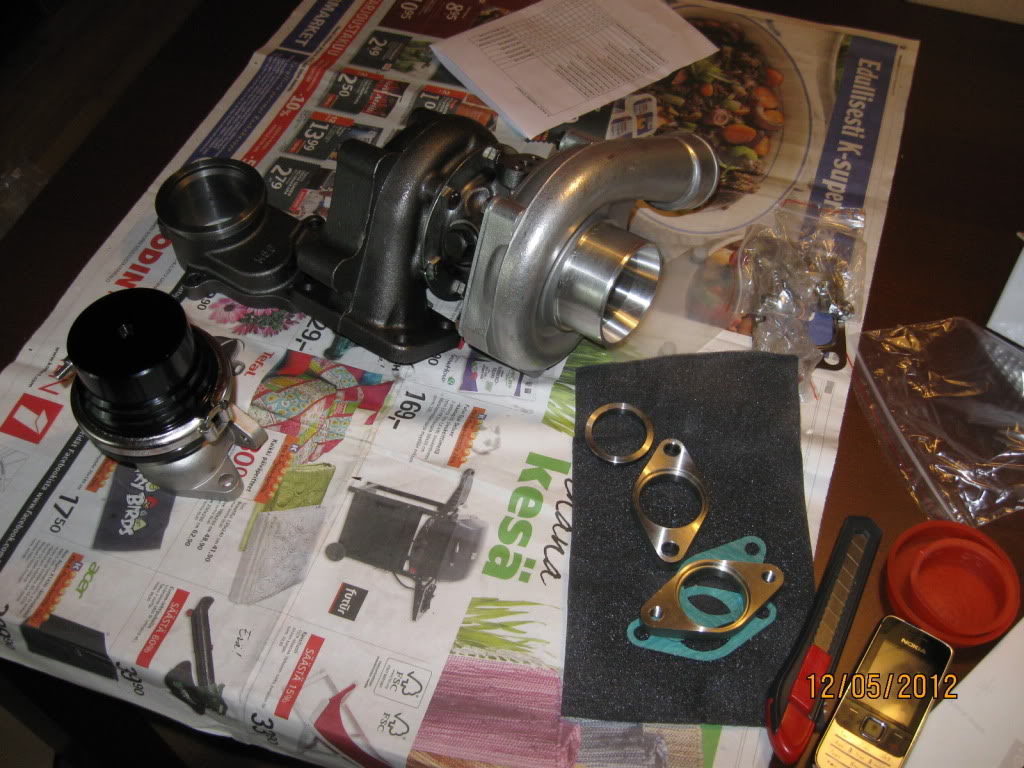
Turbo and wastegate arrived:
Pictures:
Interesting markings on the crank. Probably from the rod bolts:
Block seems to be overbored. I'll store it for some possible future usage.
Turbo and wastegate arrived:
13-05-2012, 03:52 PM
#134
PassionFord Regular
Thread Starter
Yesterday we took the Pipercams 134 out from the old head I used in my daily driver. Will probably be using this cam on the next turbo engine.
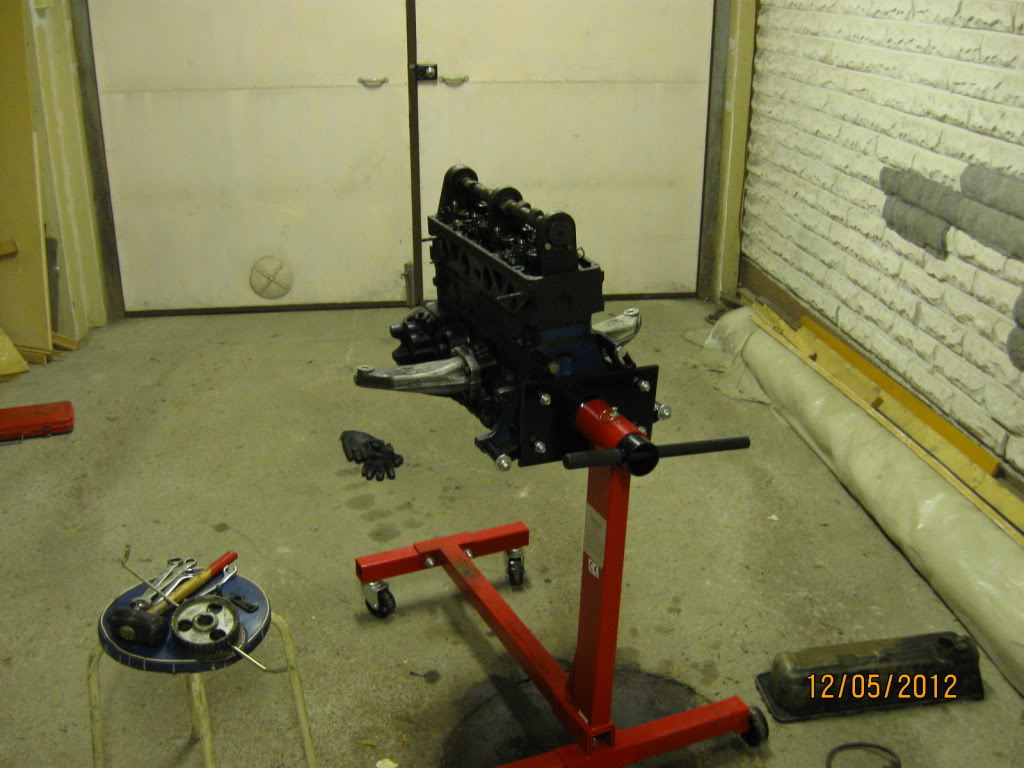
Today we changed the psi boost gauge to one with bar units and also put some hose ready for the MAP sensor of the ECU. Scrubbed the moldy interior so it looks (and smells) much better now. Removed the block heater and interior heater wiring. Checked the original wiring a bit, but didn't remove it just yet, not 100% sure yet how much of it should be left to the car.
Couple boring pictures:
17-05-2012, 10:12 PM
#135
PassionFord Regular
Thread Starter
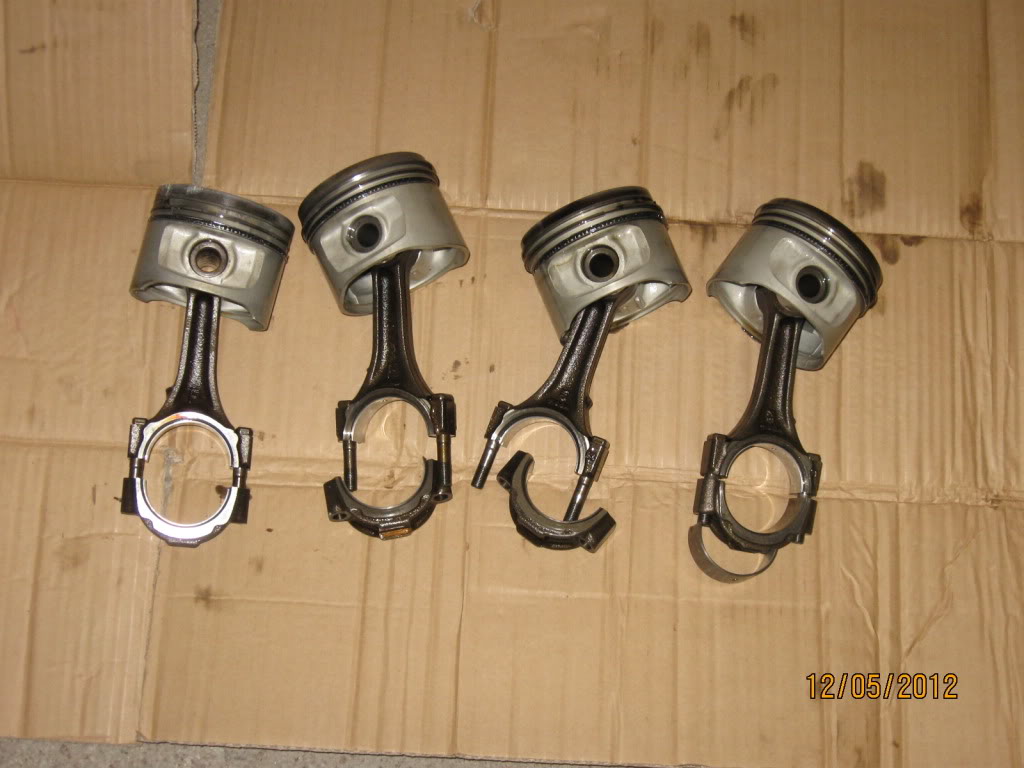
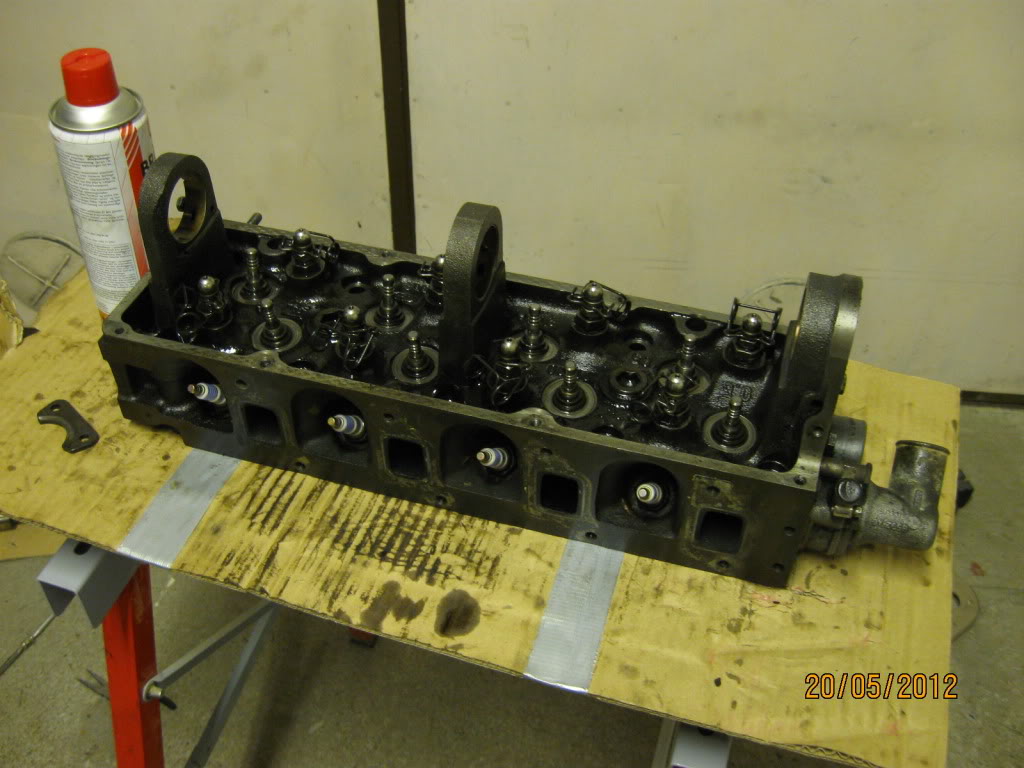
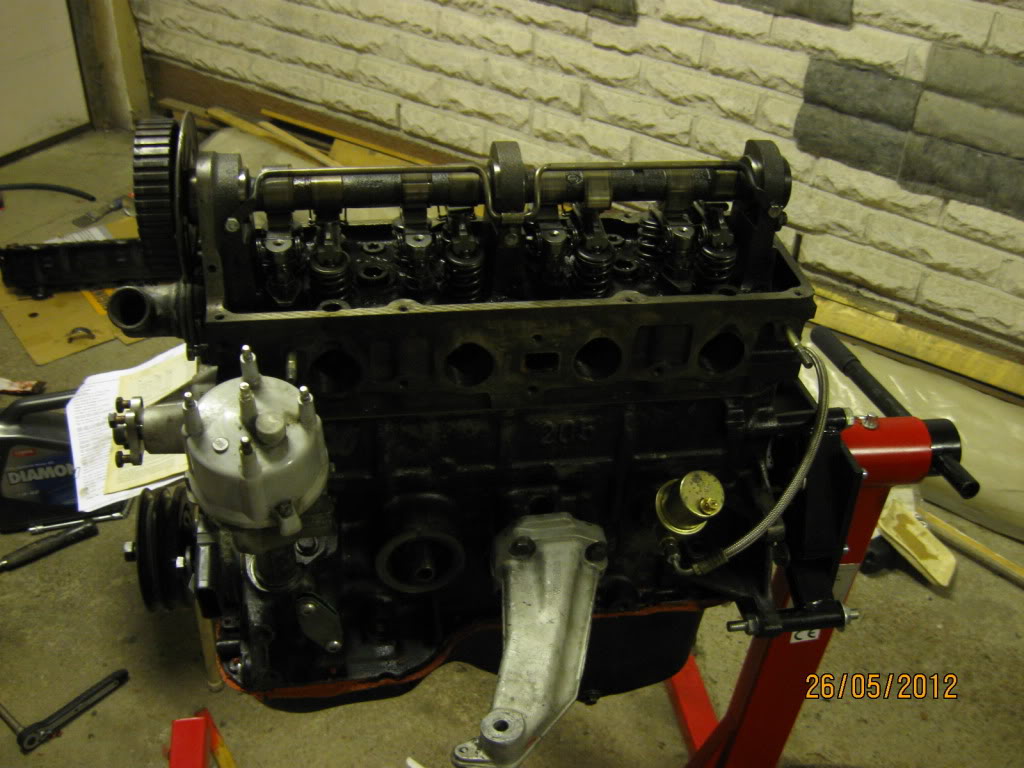
Today we measured the size of bores, main bearing bores, rod big end bearing bores and piston ring gaps. Everything seems ok.
Couldn't yet measure the crankshaft because we didn't have correctly sized micrometer for it. But calibre told us at least it isn't undersized. Probably gonna measure it accurately in monday.
Couldn't yet measure the crankshaft because we didn't have correctly sized micrometer for it. But calibre told us at least it isn't undersized. Probably gonna measure it accurately in monday.
20-05-2012, 05:00 PM
#136
PassionFord Regular
Thread Starter
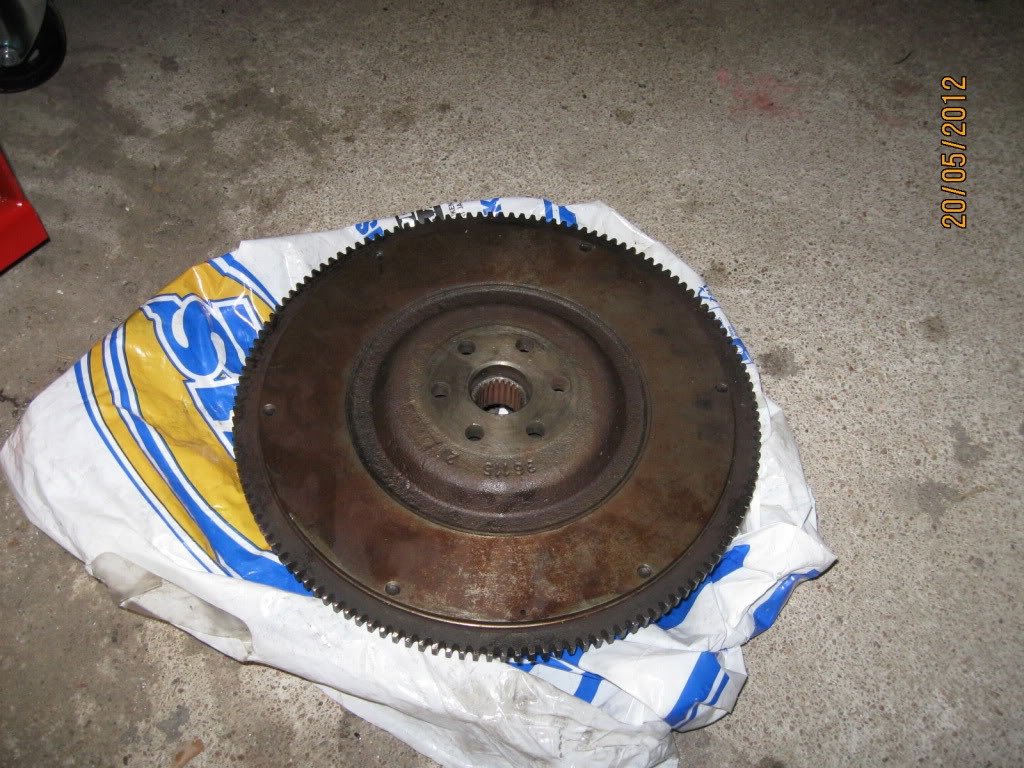
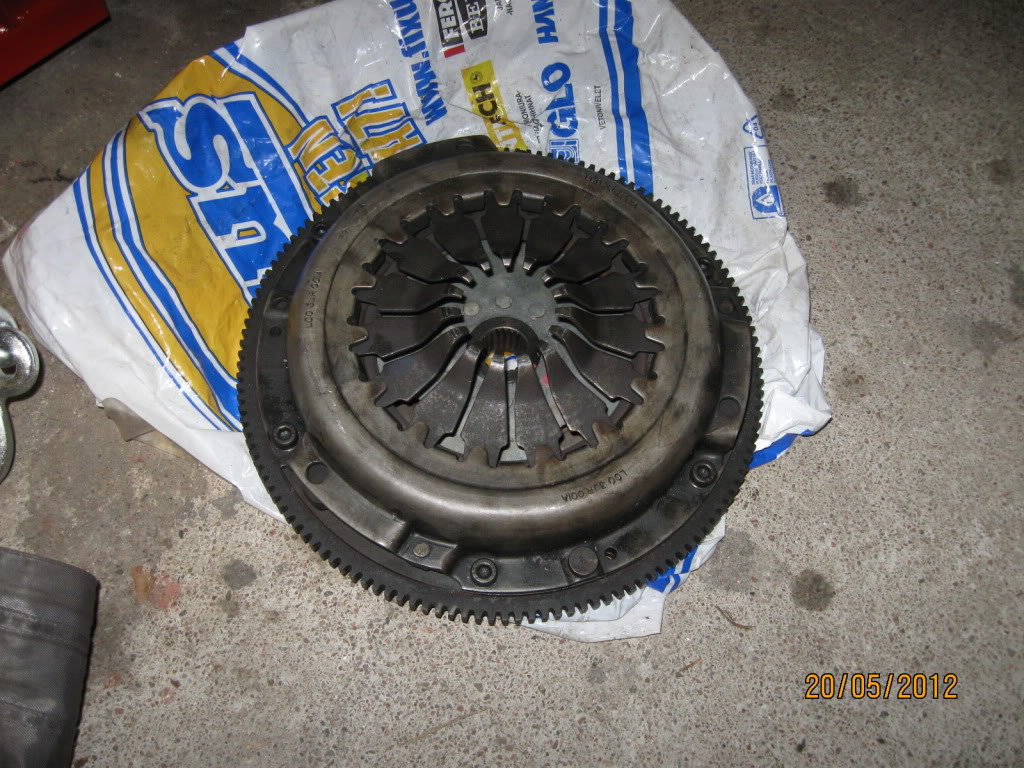
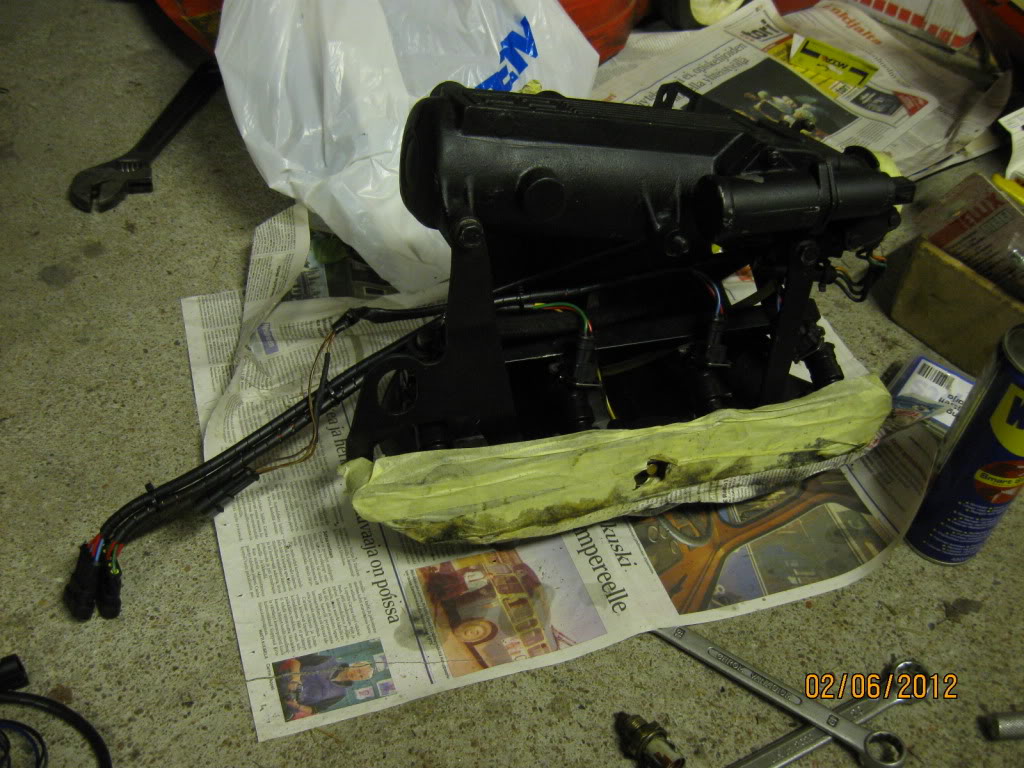
Modified and installed the new wiring harness for the Megasquirt ECU. At least we did something right because now it properly communicated with laptop and was also able to see the ex-owners fuel and spark tables. 
Lightened flywheel and better clutch arrived:
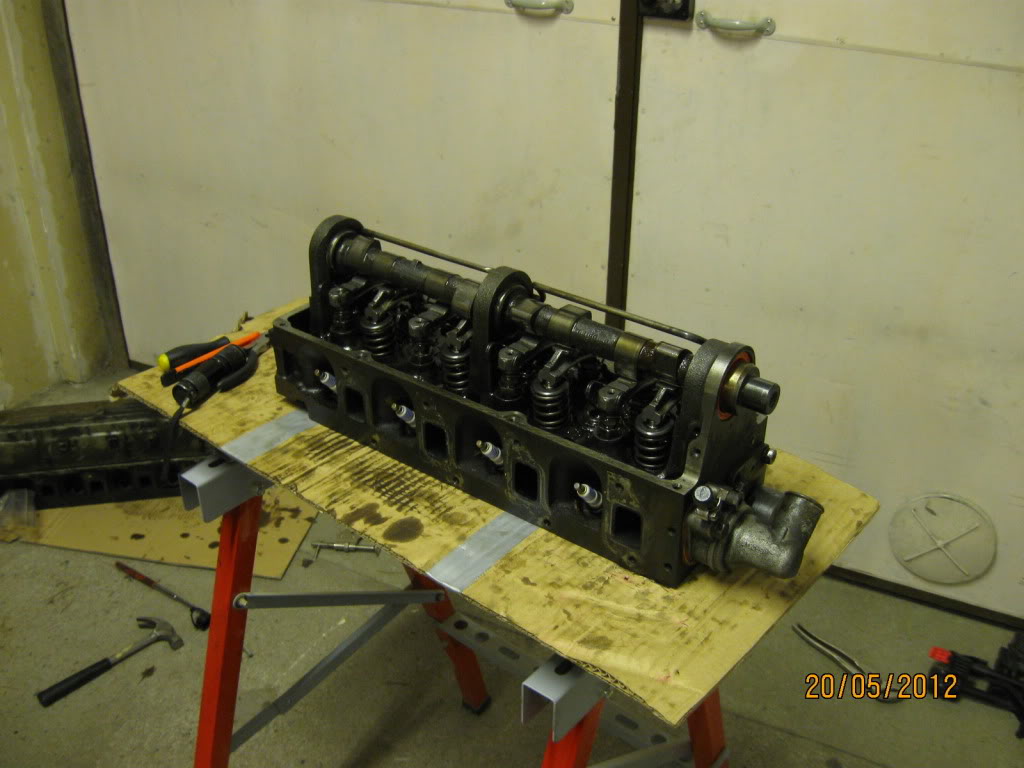
Prepared the head for installation. Installed a slightly better cam, Pipercams 134 and Crane valve springs (from the old head of my daily runner) + new rocker arms. Put new valve stem seals and cam seal in place too.
Also removed the puke paint from the cam gear and painted it matte black.

Lightened flywheel and better clutch arrived:
Prepared the head for installation. Installed a slightly better cam, Pipercams 134 and Crane valve springs (from the old head of my daily runner) + new rocker arms. Put new valve stem seals and cam seal in place too.
Also removed the puke paint from the cam gear and painted it matte black.
21-05-2012, 04:26 PM
#137
PassionFord Regular
Thread Starter
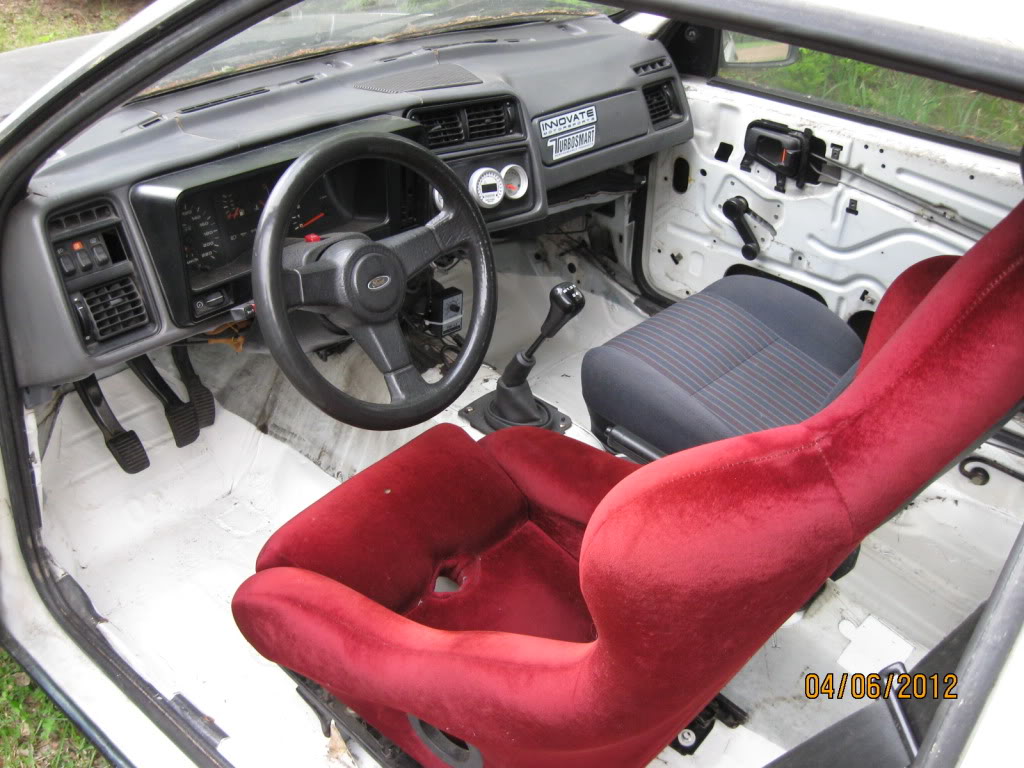
Crankshaft and pistons have now been measured. Crank is in a good std size. Pistons are "shrinked" a little bit, but that was to be expected, not too serious I think. Calculated some average values for piston sizes and bores, seems like I'm going to do a "reverse" installation for them. Piston what has been earlier in cylinder number 4 goes now to first and so on.
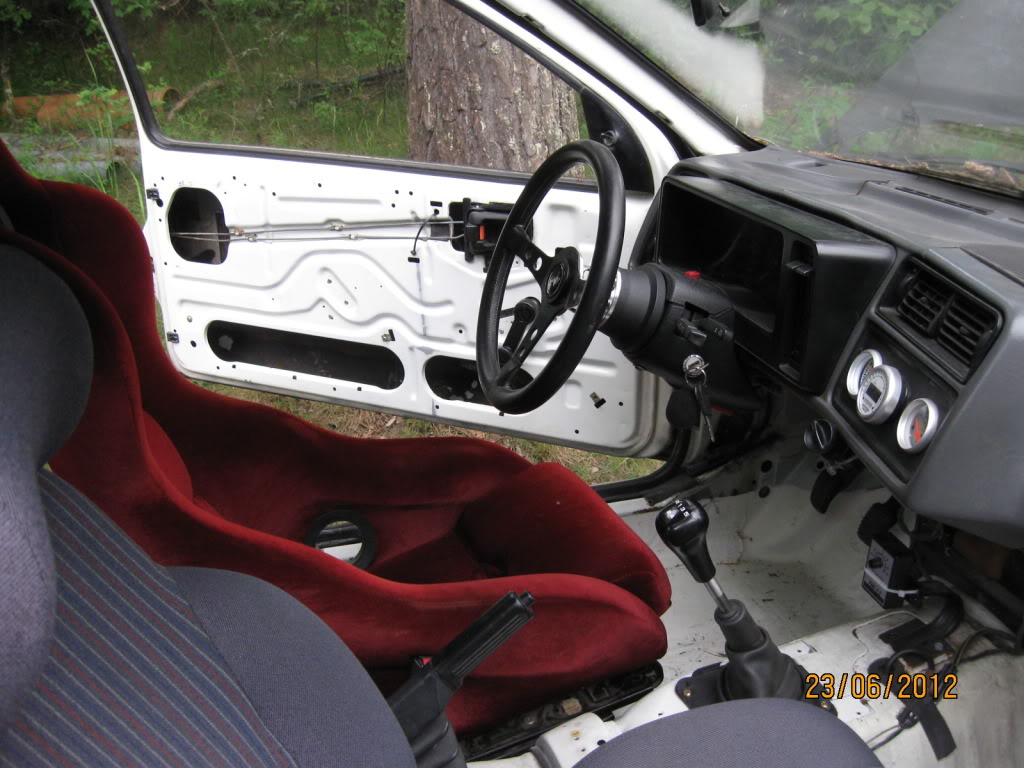
Floor carpet and lots of sound deadening removed. When I carried the garbage bag full of sound deadening material I kinda realised what a huge weight removal it was.
So pretty right?
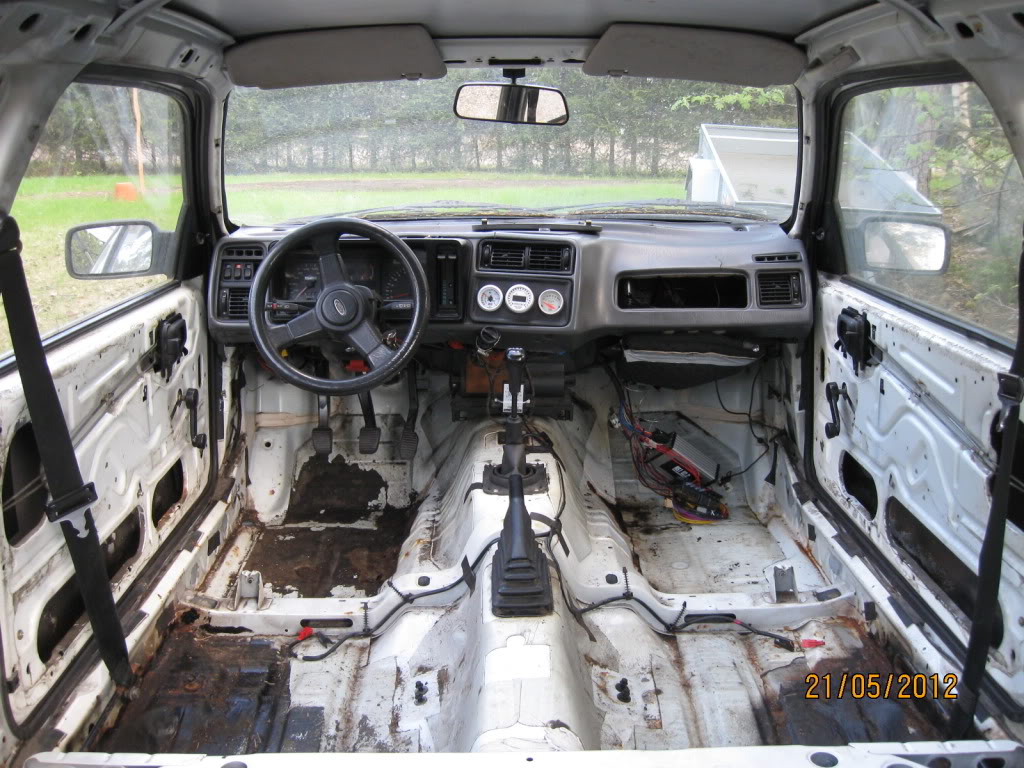
Couple of little welds needs to be done also.
Floor carpet and lots of sound deadening removed. When I carried the garbage bag full of sound deadening material I kinda realised what a huge weight removal it was.
So pretty right?
Couple of little welds needs to be done also.
26-05-2012, 09:44 PM
#139
PassionFord Regular
Thread Starter
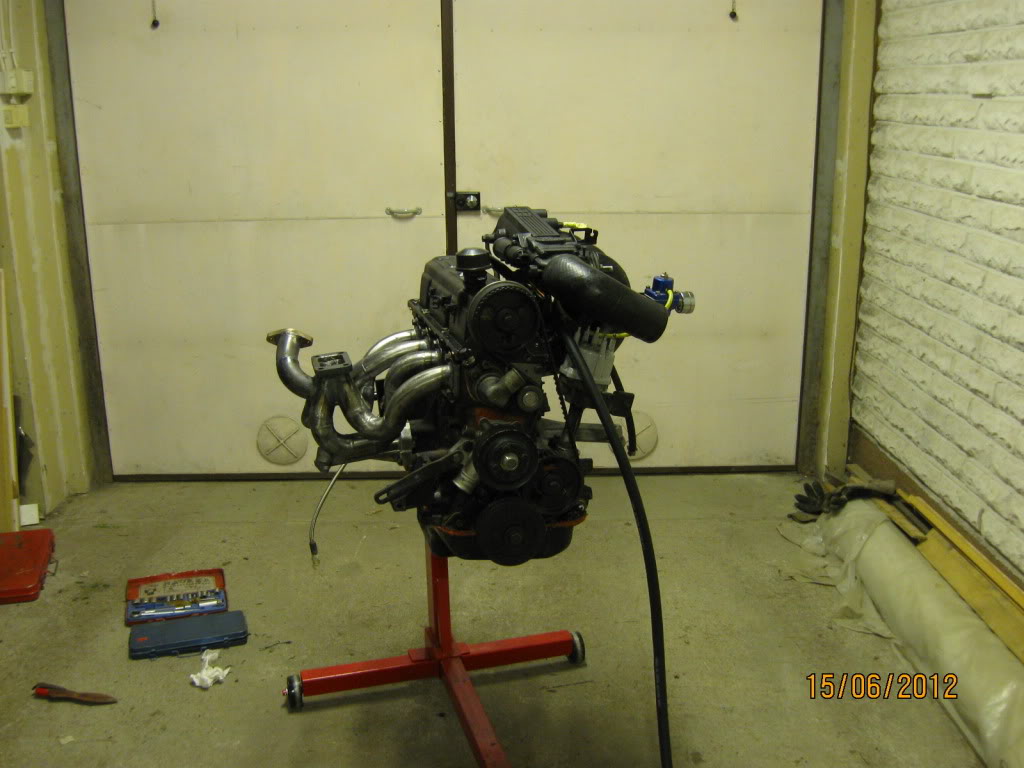
Measured the bearing gaps with plastigage and they were ok so assembled pretty much everything.

Applied some Copper Gasket spray to the A-group gasket:
Applied some Copper Gasket spray to the A-group gasket:
03-06-2012, 03:17 PM
#140
PassionFord Regular
Thread Starter
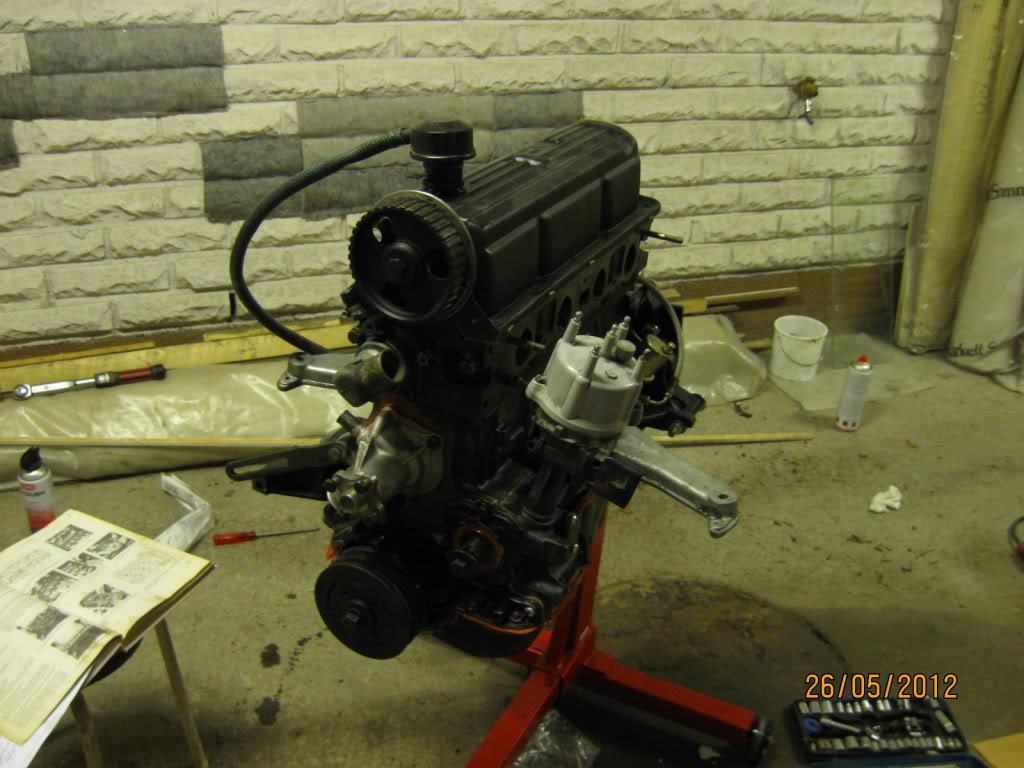
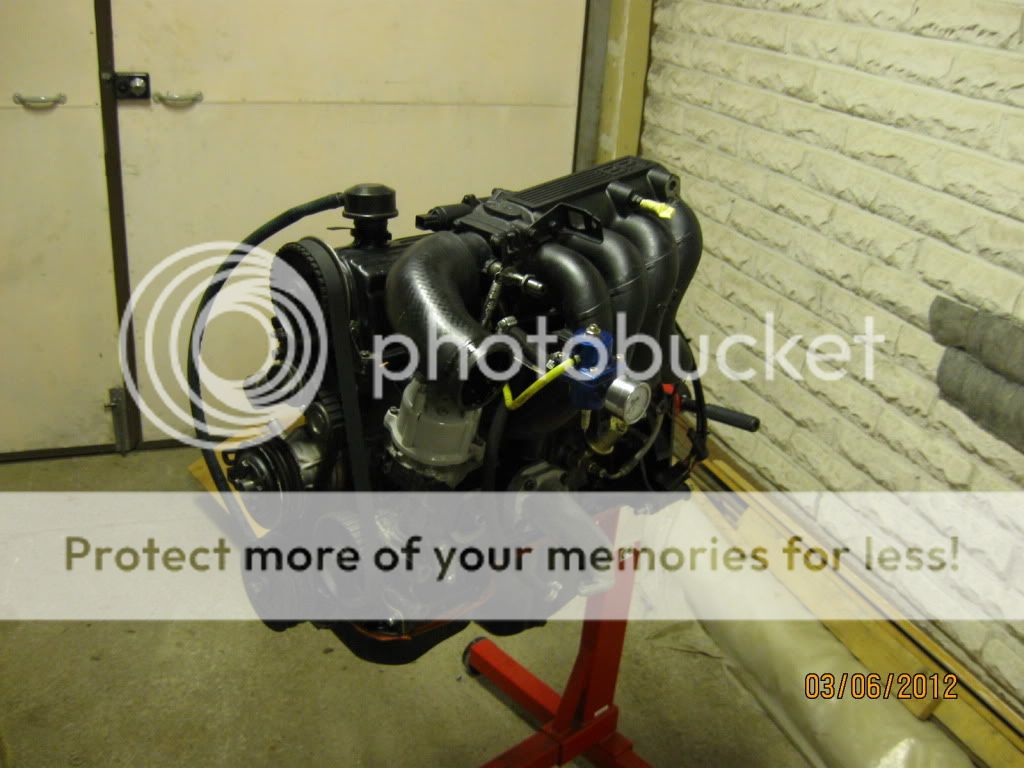
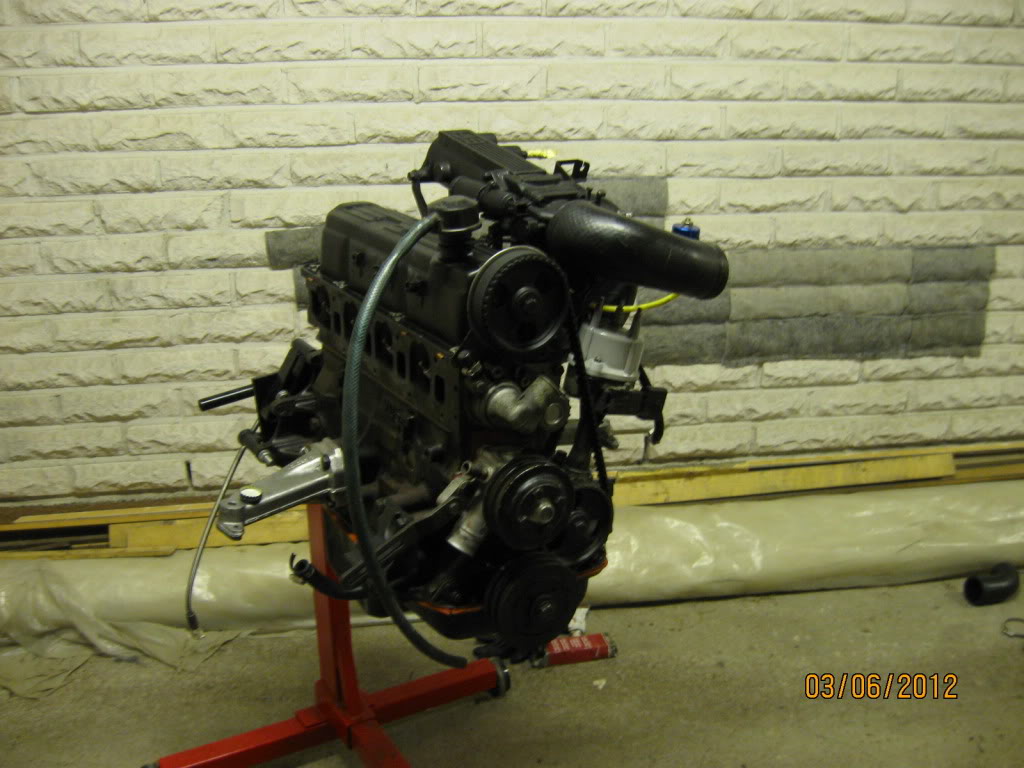
Assembled the timing gear, adjusted the valve clearances and also checked the valve geometry (or how it should be called) and it seems fine to me:
Finally installed the valve cover:
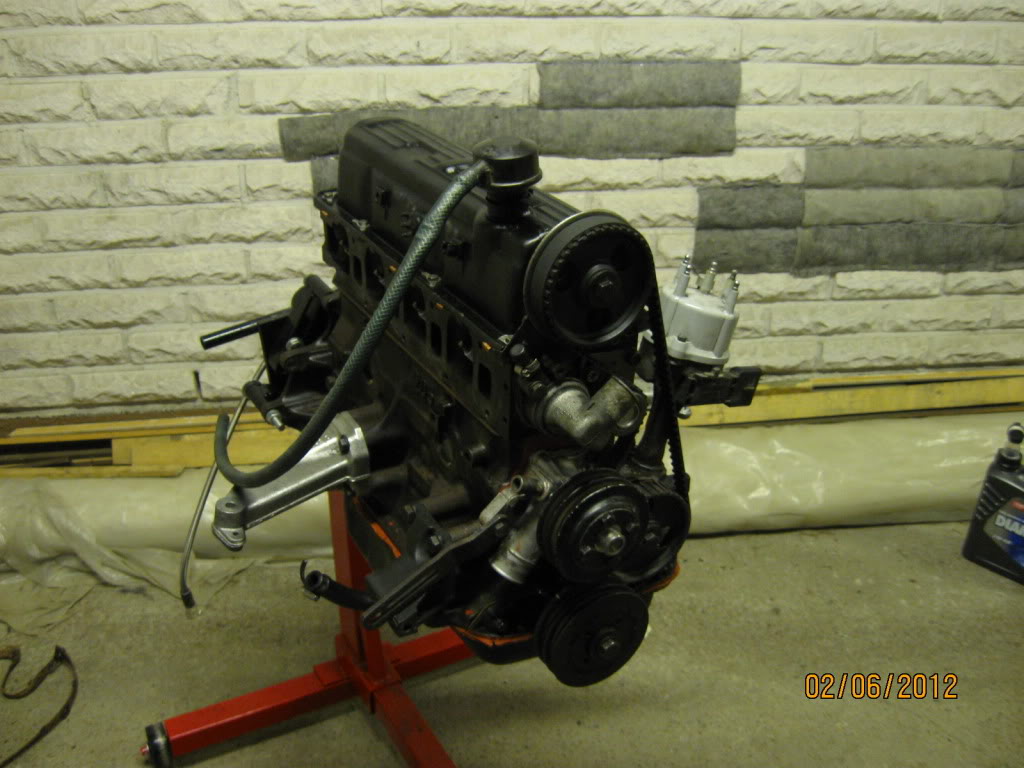
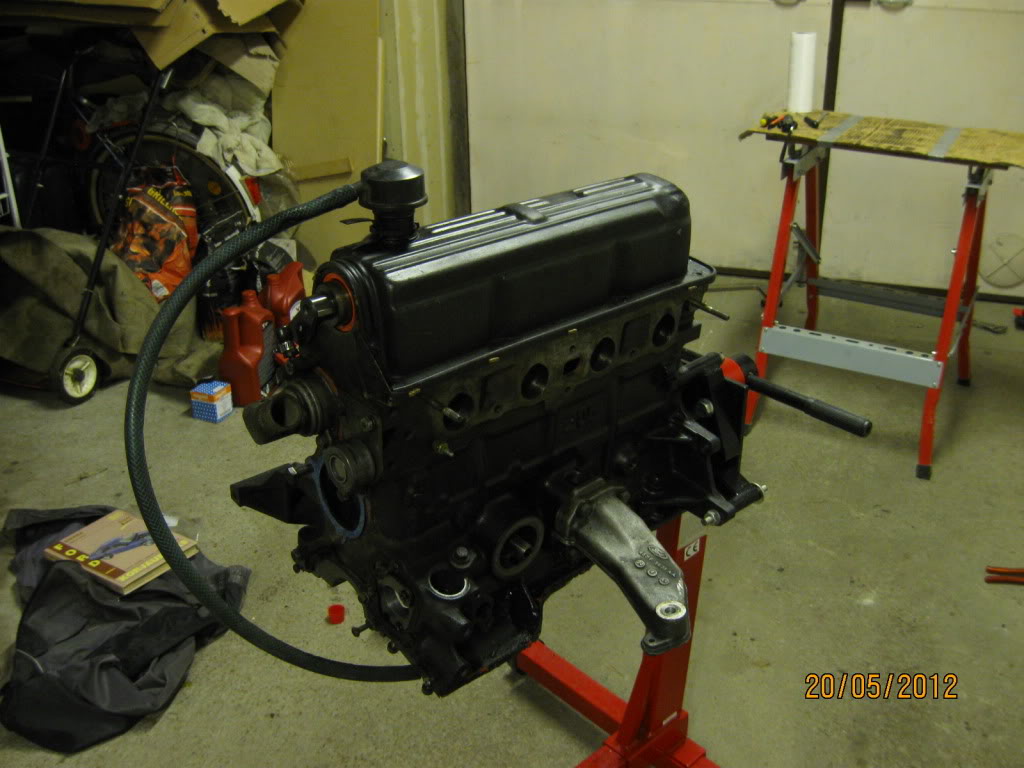
Did some work to the wiring, installed some water proof connectors in a similar manner than in the original harness too, makes installing and removing the manifold or engine much easier:
And installed the intake manifold. Currently waiting for the exhaust manifold to arrive, should be here somewhere next week I guess.
Finally installed the valve cover:
Did some work to the wiring, installed some water proof connectors in a similar manner than in the original harness too, makes installing and removing the manifold or engine much easier:
And installed the intake manifold. Currently waiting for the exhaust manifold to arrive, should be here somewhere next week I guess.
04-06-2012, 05:36 PM
#141
PassionFord Regular
Thread Starter
Last summer I had a problem with the seat, wasn't able to adjust it for a good driving position. It was sitting too high and crooked rails so was even pain in the ass to move at all. So decided to fix it finally. Got rid of the old seat rails and now it's sitting on rails from the old stock drivers seat, installed it so it's fully adjustable (up - down & front - back) so now I can get a decent driving position.
09-06-2012, 07:09 PM
#142
PassionFord Regular
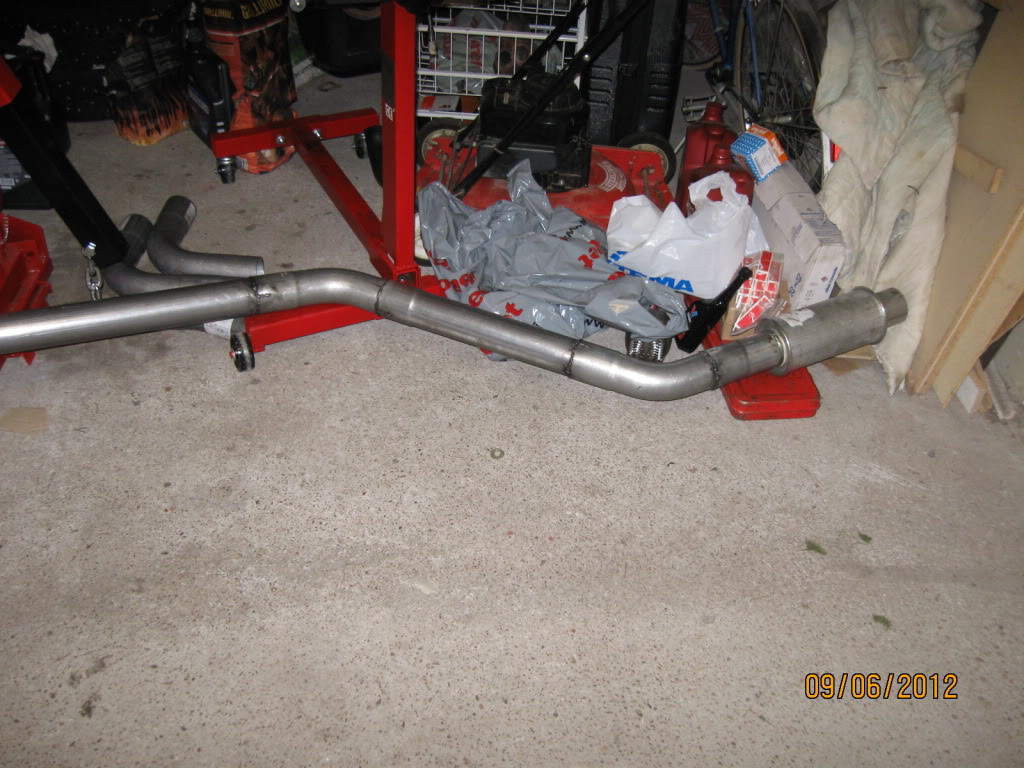
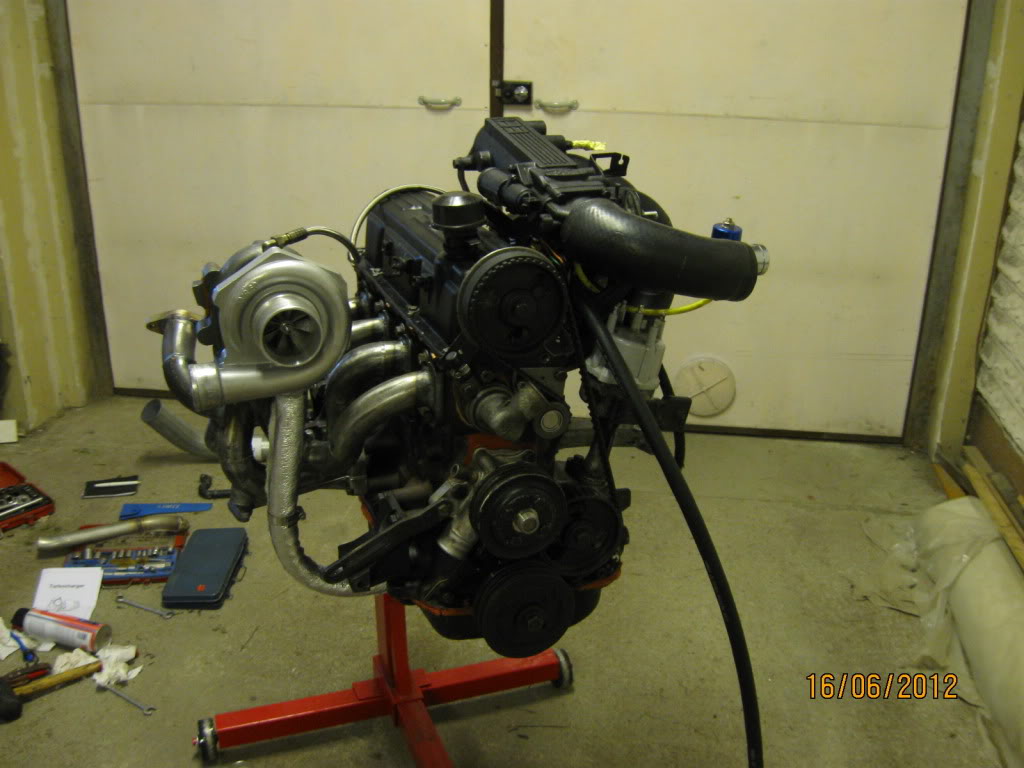
Thread Starter
Fabricated most of the exhaust, downpipe and the front end part of the exhaust needs to be done later when the engine is in also.
Installed working throttle linkage and did some of the breather piping and installed the dipstick.
Installed working throttle linkage and did some of the breather piping and installed the dipstick.
Last edited by BigPeBe; 09-06-2012 at 07:11 PM.
 17-06-2012, 06:52 PM
#144
PassionFord Regular
Thread Starter
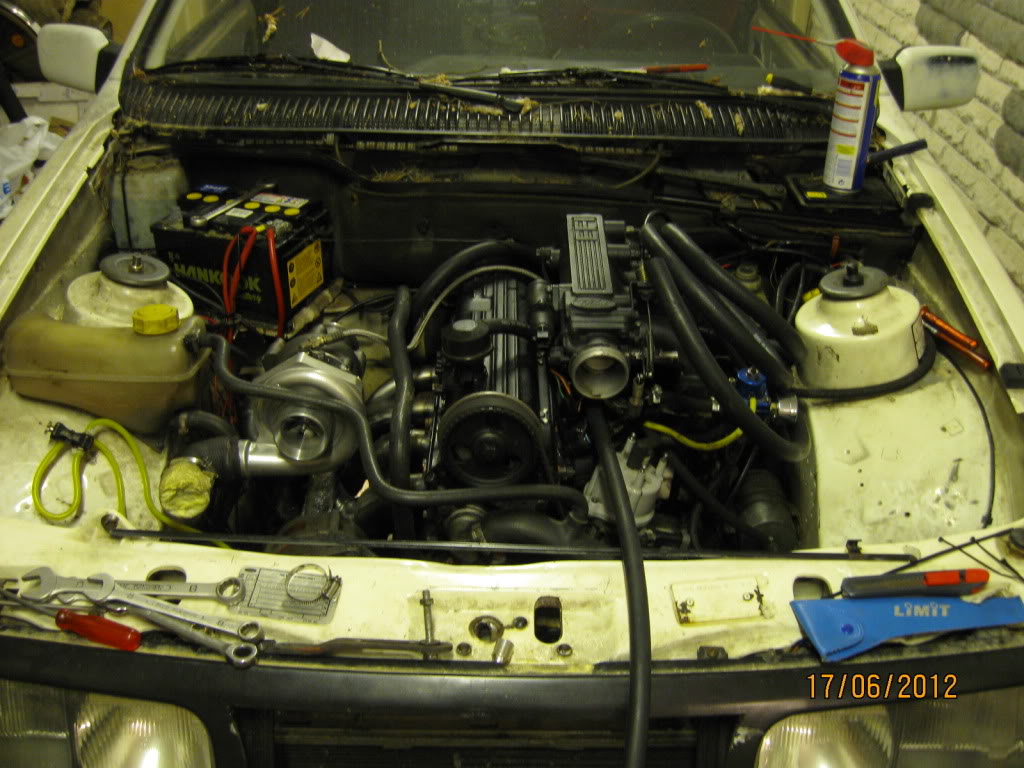
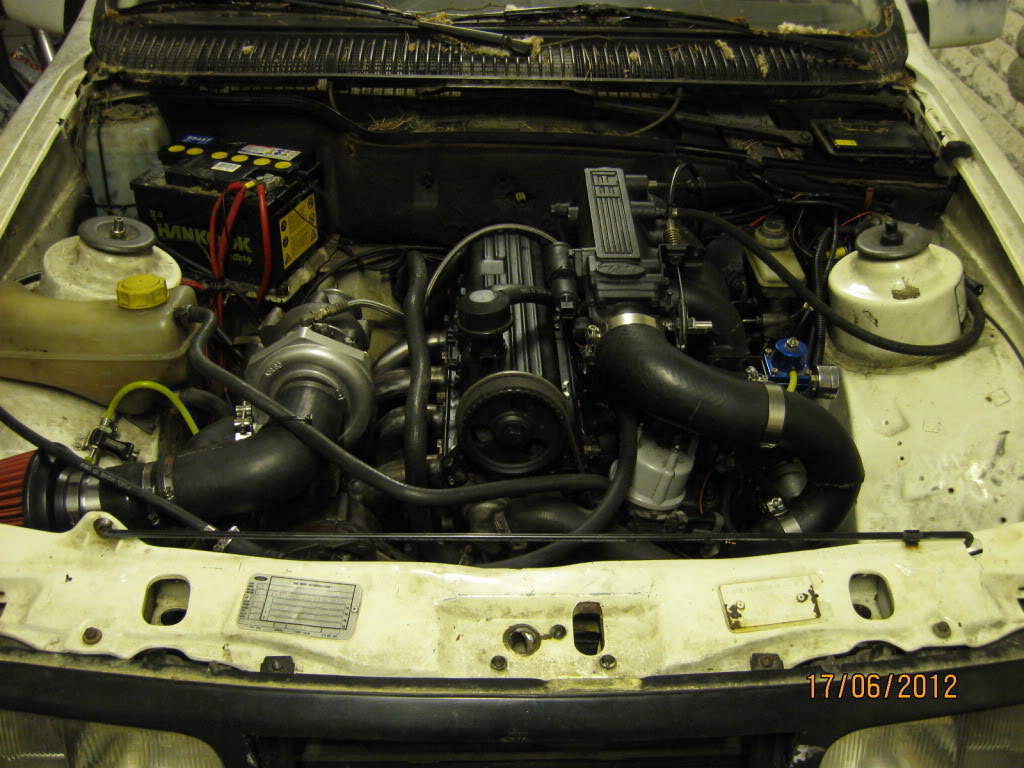
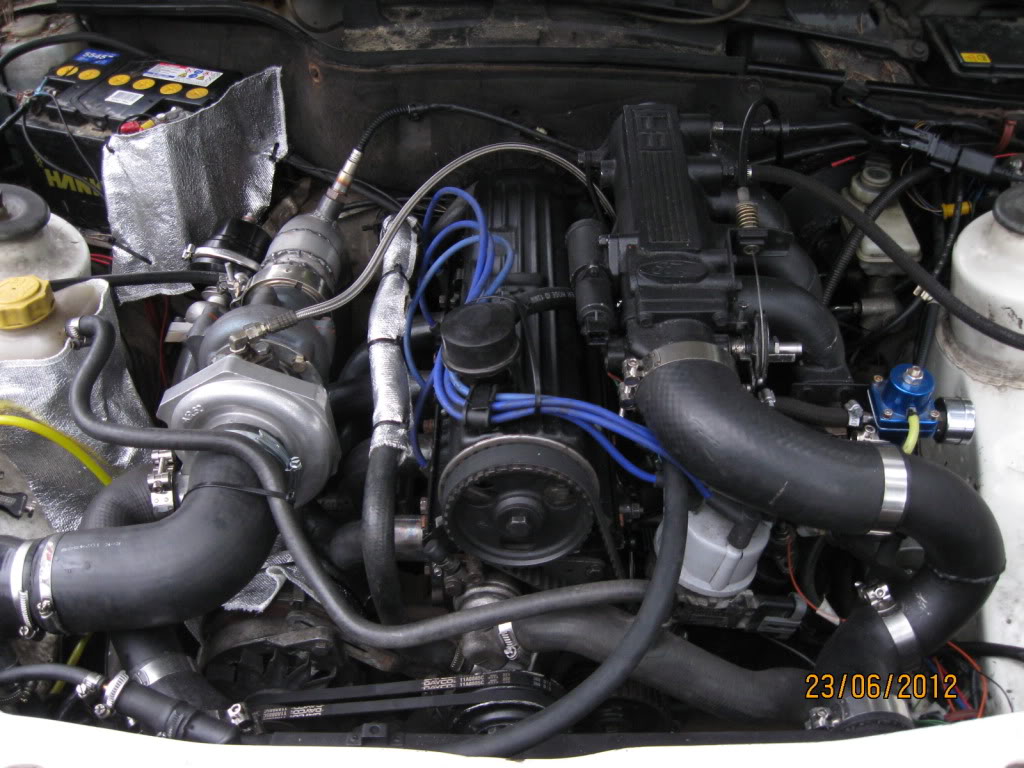
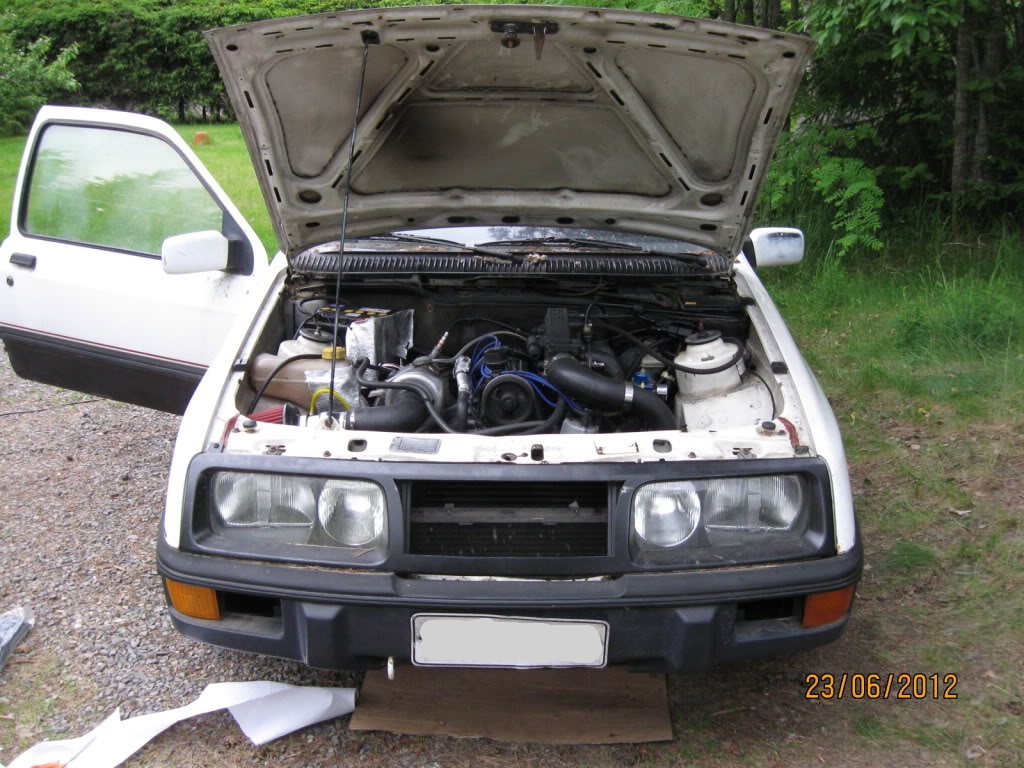
Goal was to start the engine this weekend, but just couldn't do it because it seemed like every little thing needed some little adjusting and so on, took all the time. But engine is finally in, all hoses and electrics etc. done also. Downpipe almost done too, needs just the final welding. + First part of the exhaust needs to be done too.
Original tps seemed to work fine with Megasquirt so I'm using it.
Original tps seemed to work fine with Megasquirt so I'm using it.
19-06-2012, 04:13 PM
#145
PassionFord Regular

Where do i find V8 Mk1 hatchbacks ? I want to build one with either a Rover or old 289ci mustang engine or modern alloy 302ci mustang engine. Which one to choose. Maybe there is a thread already somewhere here ?
Well done for the project m8
Well done for the project m8
20-06-2012, 04:37 PM
#149
PassionFord Regular
Thread Starter
TY.
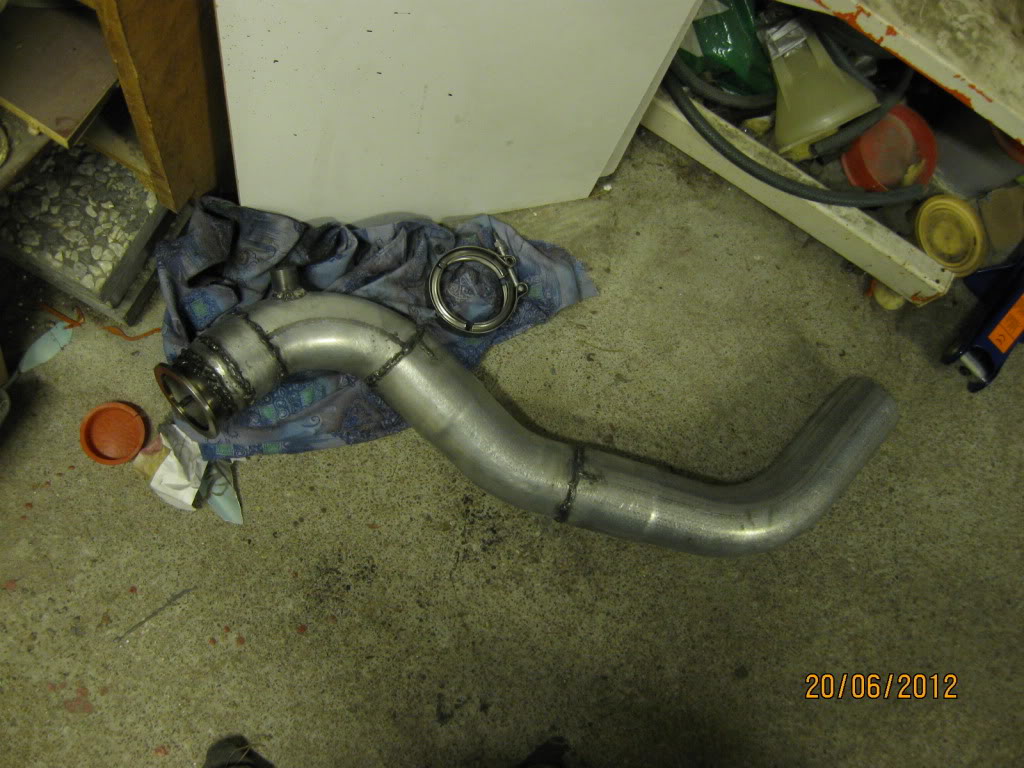
Turbo is T34 with .48 ex housing. Chinese made copy but I bought it from a domestic store with a warranty so hopefully doesn't end up being one of the bad examples.
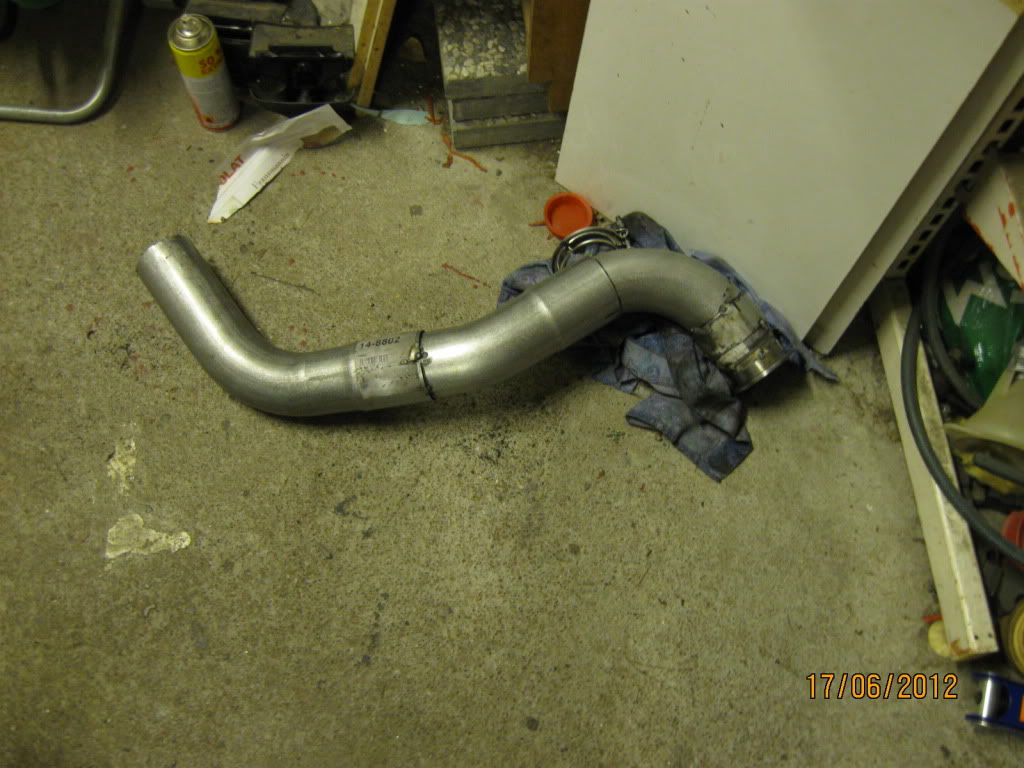
Today I finished the downpipe. Not very pretty, especially the first welds close to the Vband because they were done with a poor quality mig wire, kinda lucky that I ran out in middle of the job and had to buy better one.
Turbo is T34 with .48 ex housing. Chinese made copy but I bought it from a domestic store with a warranty so hopefully doesn't end up being one of the bad examples.
Today I finished the downpipe. Not very pretty, especially the first welds close to the Vband because they were done with a poor quality mig wire, kinda lucky that I ran out in middle of the job and had to buy better one.
Last edited by BigPeBe; 20-06-2012 at 04:39 PM.
24-06-2012, 04:29 PM
#151
PassionFord Regular
Thread Starter
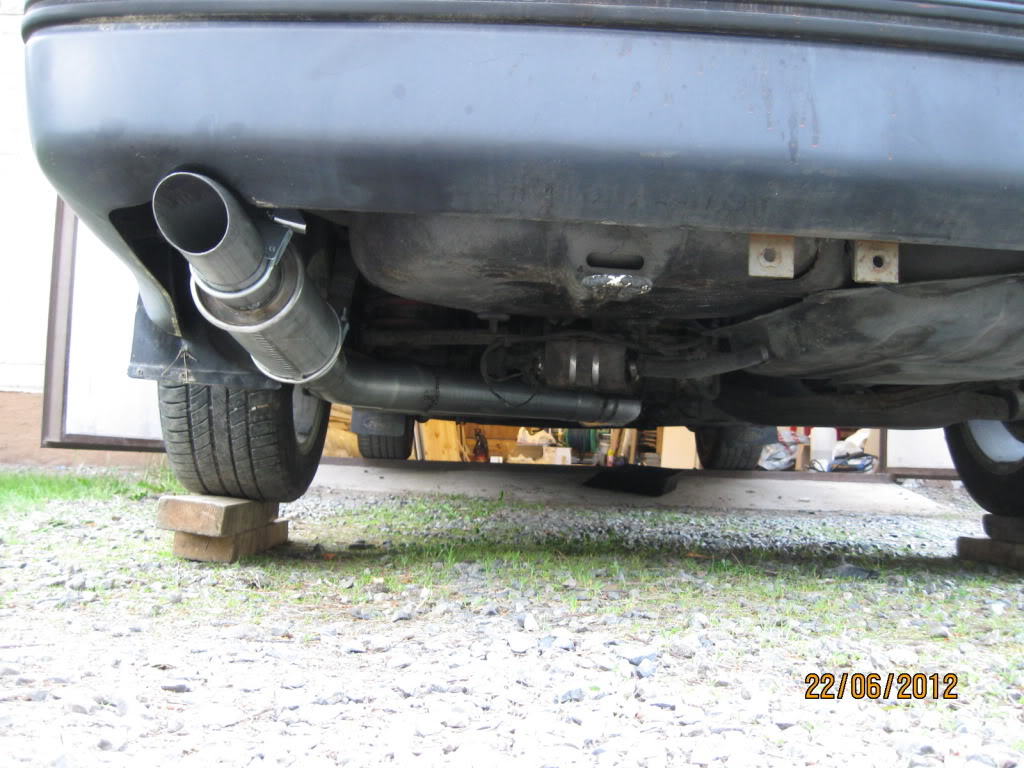
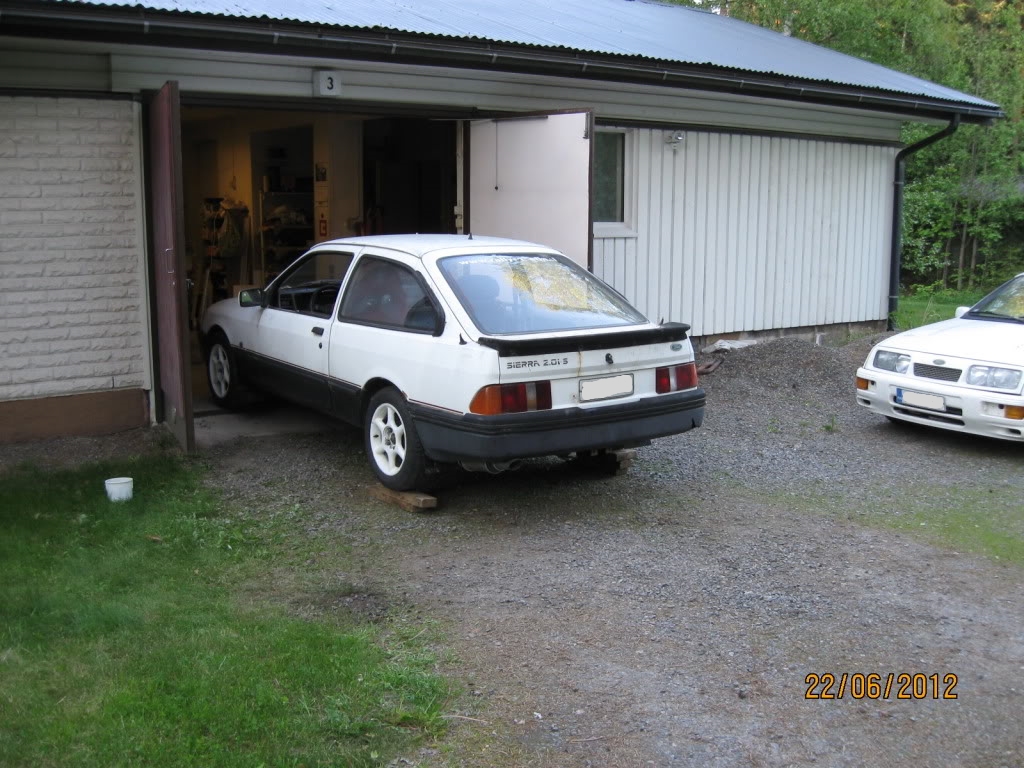
First testdrives done. Works very nicely already with mild 0.5 bar of boost.
Video + pictures:
Video + pictures:
Last edited by BigPeBe; 24-06-2012 at 04:38 PM.
30-06-2012, 04:12 PM
#153
PassionFord Regular
Thread Starter
Thanks. Maybe I can't dare to diss Cossie so much, after all pretty much the most important parts in my engine are Cossie parts. Tho I don't think I'll be swapping for an YB head ever.
Last edited by BigPeBe; 30-06-2012 at 04:15 PM.
01-07-2012, 01:50 PM
#154
Wahay!! I've lost my Virginity!!
Yeah, not dissing Cosworth parts really, (the YB = whY Bother was just a tu'peny ha'penny throw away comment)
Just impressed with what a bit of ingenuity (enginuity) can create. I guess your engine has the potential to rival a stage one YB? But I would have also considered the oil spray bar or similar if you're planning to take it to it's limits, maybe you're not and just after a good driveable and economical setup, for me that's just as important.
Are you also running a steel crank? I looked back and couldn't find any mention. How are you doing your air metering now, is it still mas air or map sensor now.
By the way, jealous of the seemingly inexhaustable supply of three doors all over Europe (even though you're not in Europe as such), we've used all of ours up now pretty much, and it was always quite a rare car here.
Last edited by draftdodgers; 01-07-2012 at 01:52 PM.
01-07-2012, 04:30 PM
#155
PassionFord Regular
Thread Starter
Crank is stock pinto crank. 300bhp should be pretty easy with this setup, probably just gonna need bigger injectors before I can get to that. For now I would be happy with "just" 250bhp.
Megasquirt uses map sensor.
Oh and little update, the head needs to come off yet once, it was a mistake after all to use the old Pipercam. Valvetrain noise is not too healthy...
Gonna order a new Burton BF134 cam + followers and it should sort it out. Hopefully it will arrive pretty soon so we can get to the mapping session.
BTW Finland is an European country. Just not side by side with France or anything.
03-07-2012, 08:57 PM
#156
Wahay!! I've lost my Virginity!!
Thanks for the reply, interesting.
Is the BF134 cam a good one to for? I don't know much about the Pinto, just no you need lift and duration but without much valve overlap for forced induction.
Good luck with the next phase(s) anyway.
..... and..Oh yes, I see that you are in Europe now, sorry. You're lucky not being next to France anyway .
.
Is the BF134 cam a good one to for? I don't know much about the Pinto, just no you need lift and duration but without much valve overlap for forced induction.
Good luck with the next phase(s) anyway.
..... and..Oh yes, I see that you are in Europe now, sorry. You're lucky not being next to France anyway
04-07-2012, 05:25 PM
#157
PassionFord Regular
Thread Starter
BF134 is similar to the worn out Pipercams 134i I have now. Much lift but not much duration. They have been proven good cams on Pinto turbos.
BTW there seems to be a lot of discussion and differing opinions about the cams in forced induction engines. I think the BF134 is good for my current spec and goals, but if I ever want to make the engine more mental (more power and more revs) I would probably still go for a cam with more duration. They're not so good turbo lag wise (at least if you like so called "streetable engines") but many people run more aggressive cams with turbo Pintos succesfully.
BTW there seems to be a lot of discussion and differing opinions about the cams in forced induction engines. I think the BF134 is good for my current spec and goals, but if I ever want to make the engine more mental (more power and more revs) I would probably still go for a cam with more duration. They're not so good turbo lag wise (at least if you like so called "streetable engines") but many people run more aggressive cams with turbo Pintos succesfully.
04-07-2012, 06:43 PM
#158
Wahay!! I've lost my Virginity!!
Hmm......Always good to be learning something...
My RS 500 rep ended up with a Scorpio 24v in it, a cracking engine and great sound, but now I think I should have gone the same route as you, a Pinto turbo is much more in the spirit of it, and an interesting thing to mess around with and setup too.
At the risk of a hijack.......(none intended)
They say the camera doesn't lie, here's proof it does!:
04-07-2012, 07:03 PM
#159
PassionFord Regular
Thread Starter
That's a very sweet looking replica, much more than my current daily driver.
You also could have boosted the V6 (or some other V6 like the old Cologne) for some serious cheapo power. Tho I know what you mean with the spirit of it, 4-pot engines suit the Cossie styling much better.
You also could have boosted the V6 (or some other V6 like the old Cologne) for some serious cheapo power. Tho I know what you mean with the spirit of it, 4-pot engines suit the Cossie styling much better.
04-07-2012, 07:25 PM
#160
Wahay!! I've lost my Virginity!!
Thx, just a lucky picture really, it didn't look that good in reality. Weighed around 1050kg so good all round though.
Look forward to more updates on your project, keep the info coming,
Rgds Paul.
Look forward to more updates on your project, keep the info coming,
Rgds Paul.