545 bhp Radiant Red Sapphire Cosworth
 07-04-2014, 02:18 PM
#481
But I agree with you though, it's one of those things thats 'there for a reason' and you should really run one, I personally know of a couple of people that have had bad experiances with running no cover, but it's still very uncommon or unlucky to have anything happen. better safe than sorry though, it's the first thing you'll wish you did if you have a problem!
Last edited by rog; 07-04-2014 at 02:19 PM.
 11-04-2014, 06:06 AM
#482
Doesn't bother me only having half a cambelt cover. If it wasn't for the small turbo cam cover i wouldn't bother at all.
I would rather be able to see the belt and and oil leaks etc. easily. At least with it like this it is only 3 bolts to remove.
On the front fixing post, mine was missing too. I got 6x m6 nuts, wound them onto a piece of threaded bar, and welded down the sides of the nuts. Then, while it was hot, i unwound the threaded bar part way to make a male and female end.
Quick fettle with a file and grinder and it looks fine. quick coat of paint and jobs a good'un.
sounds pikey but it looks fine and you can't see it when the cover is on anyway.
 13-04-2014, 08:29 PM
#485
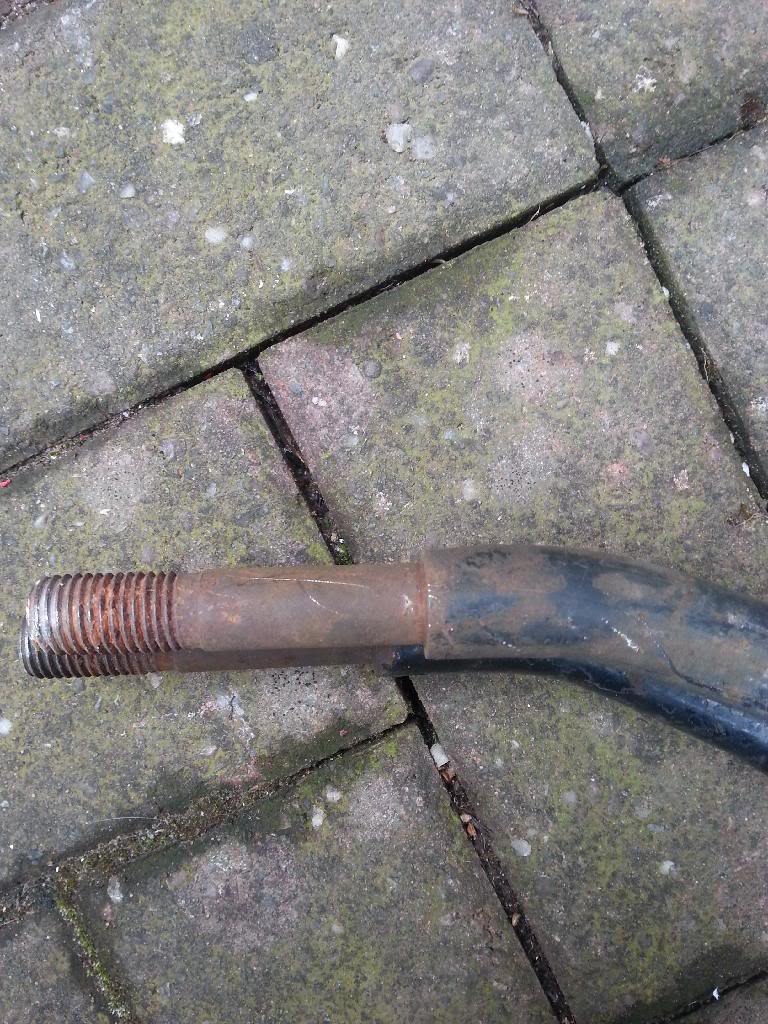
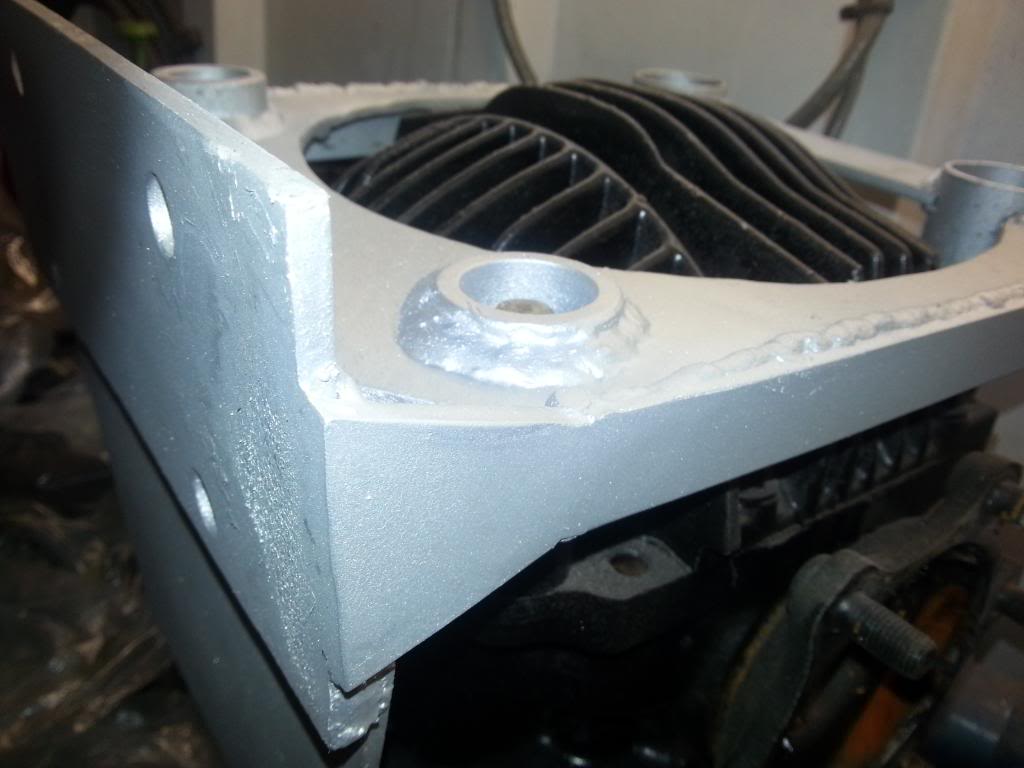
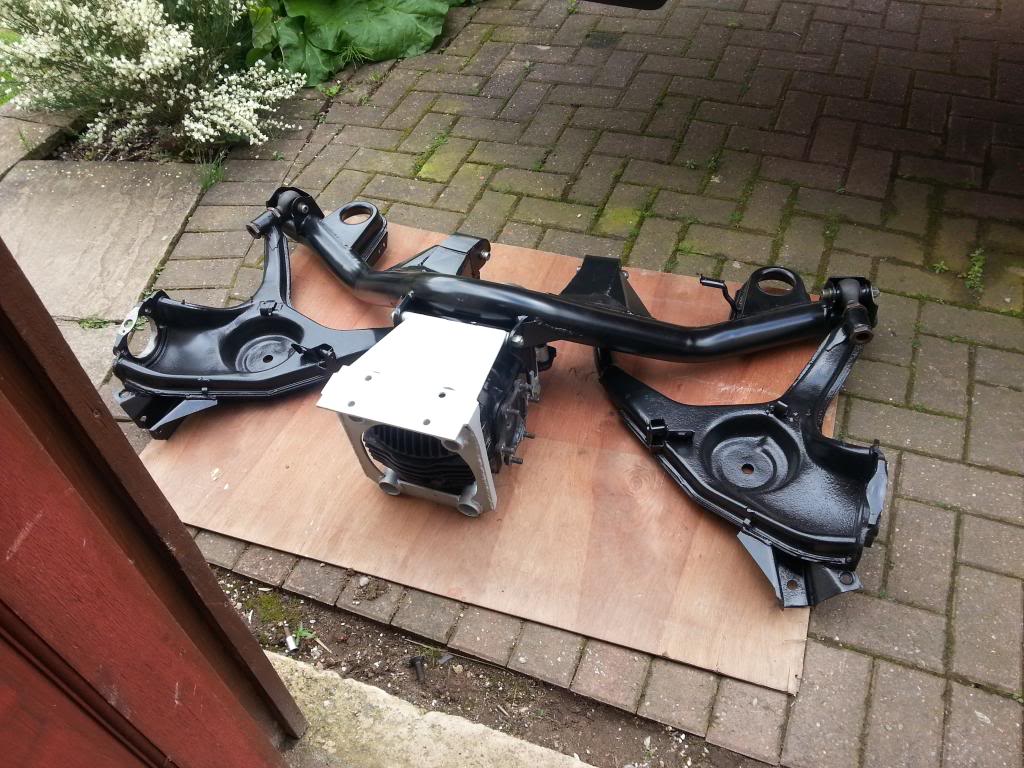
Well this weekend didn't quite go to plan, i picked up the beam yesterday, and was hoping to get it fitted today, but then i noticed a crack in the diff cover 
should of taken a better pic, but i the stud has bent slightly and cracked the cover in 2 places.
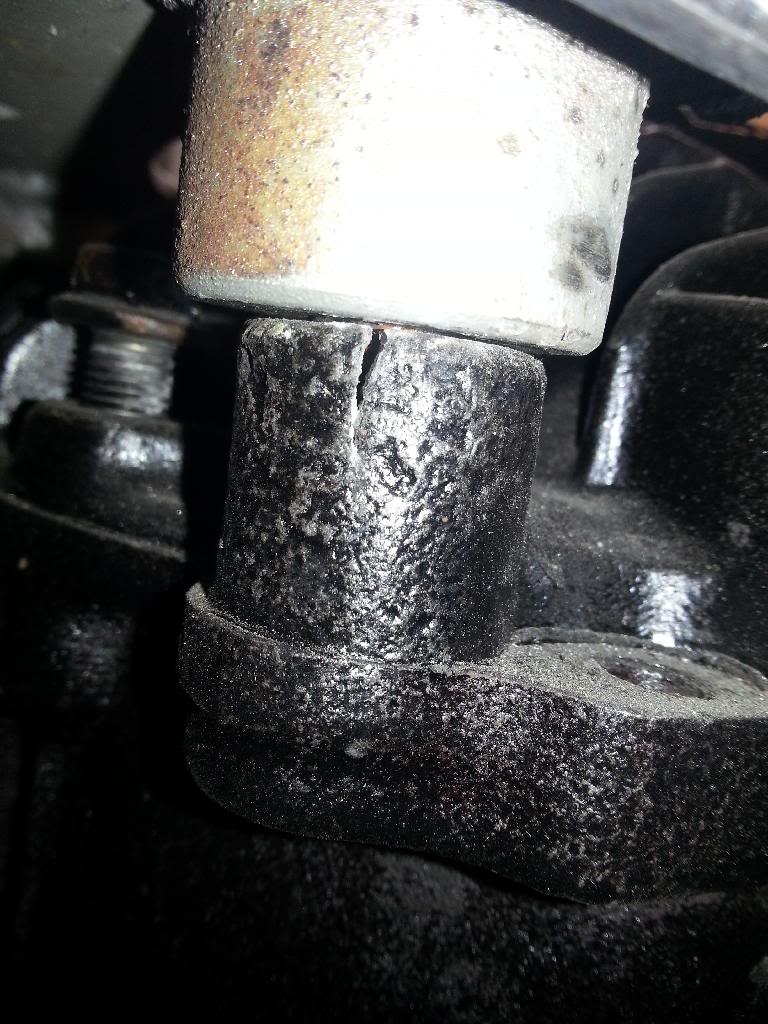
its not too bad, it should be fine with a new stud, but im not sure when or how exactly it has happened. It could of been ages ago when the original diff mount failed, or it could of happened in the crash (which i doubt) or it could of just gone on the road. I remember a thread on here a while ago when someone ripped these 2 top mounts clean off!
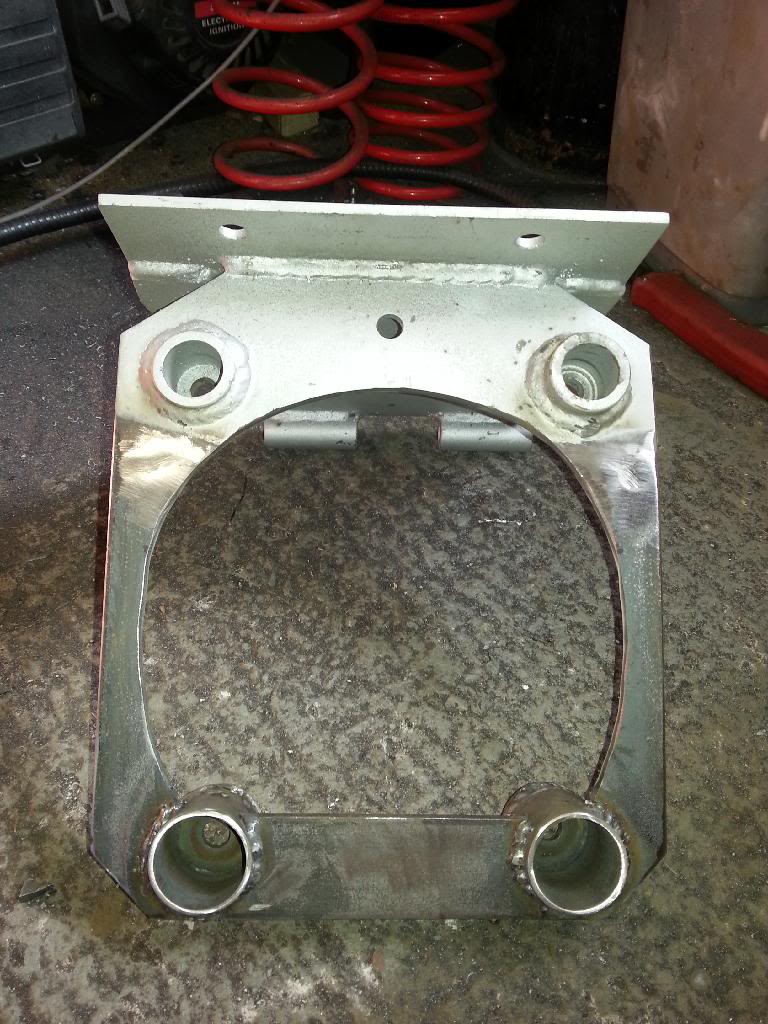
Anyway, i decided to strengthen it up a bit to take some of the strain of the two bolts.
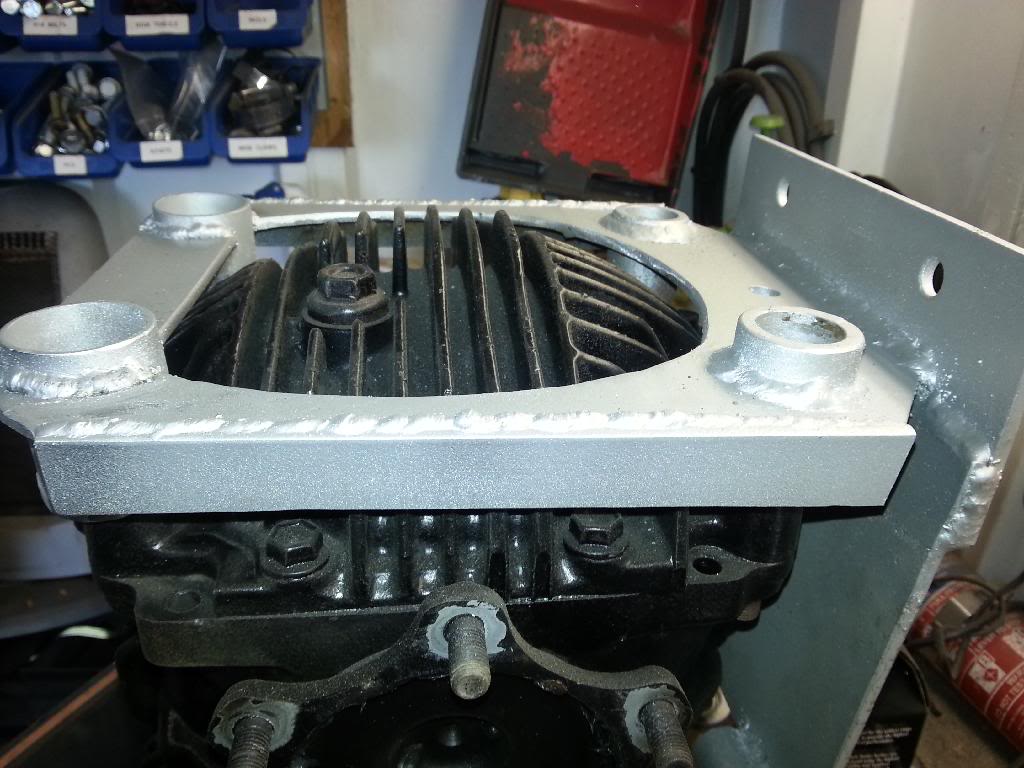
Beam is going for powder coating in the morning.
should of taken a better pic, but i the stud has bent slightly and cracked the cover in 2 places.

its not too bad, it should be fine with a new stud, but im not sure when or how exactly it has happened. It could of been ages ago when the original diff mount failed, or it could of happened in the crash (which i doubt) or it could of just gone on the road. I remember a thread on here a while ago when someone ripped these 2 top mounts clean off!
Anyway, i decided to strengthen it up a bit to take some of the strain of the two bolts.


Beam is going for powder coating in the morning.
 14-04-2014, 10:33 PM
#489
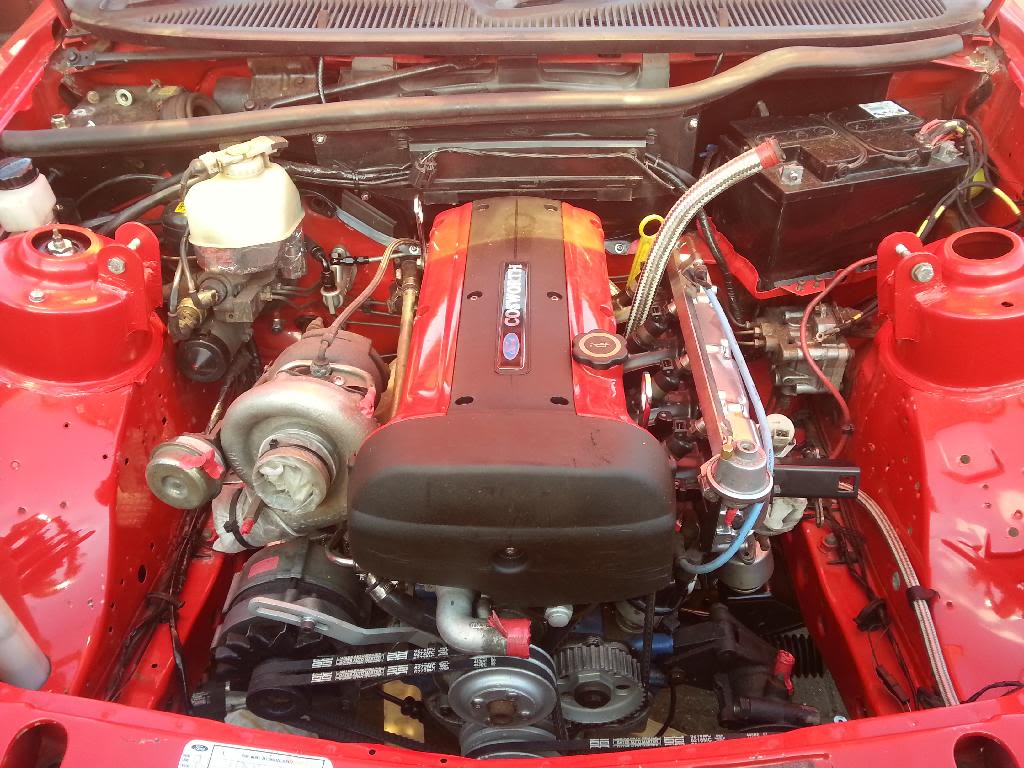
got the turrets painted tonight
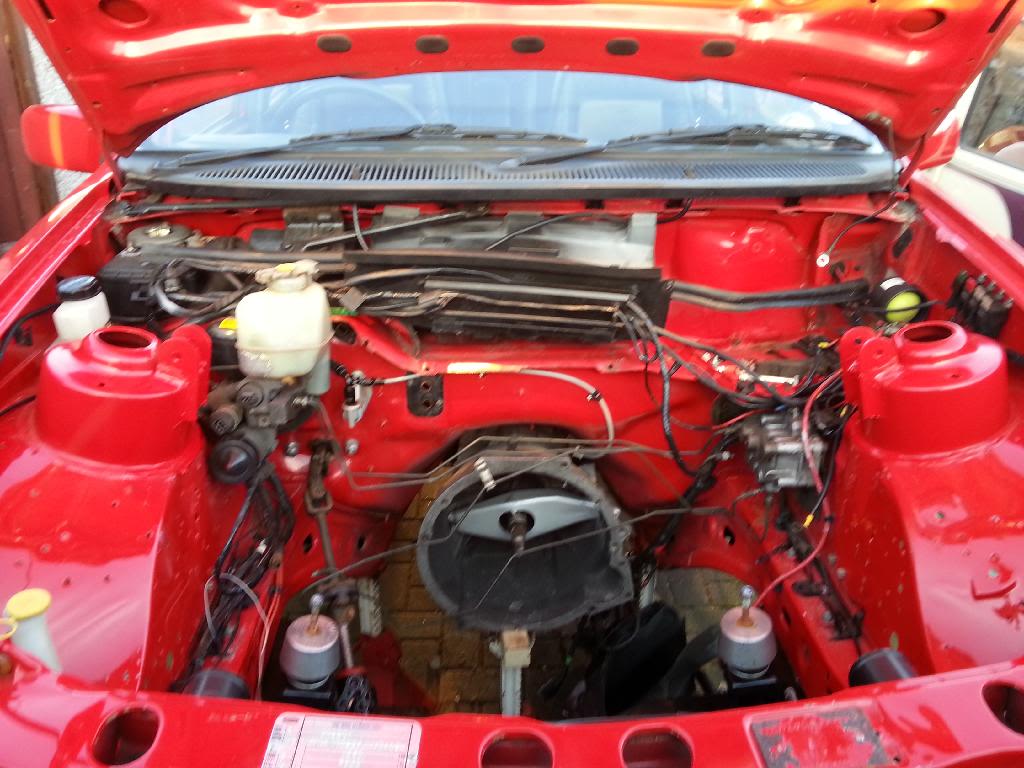
hopefully my new bulkhead panel will be here tomorrow, so i can tidy up the wiring in the engine bay as it looks a right mess at the moment.
I've fitted all the brake lines since the picture.
Also got the rear calipers rebuilt with all new pistons and seals including the handbrake mechanism etc. and gave them a coat of paint. no pictures yet though as my battery died.
15-04-2014, 07:50 PM
#490
Wahay!! I've lost my Virginity!!

Join Date: Nov 2011
Location: cheshire
Posts: 56
Likes: 0
Received 0 Likes
on
0 Posts
Hey up,with you now using the 4 mounting points on your diff mount,you will need to make the stenghting plate which you have welded on the side of the mount longer,and weld them to the top plate of the mount,they will still flex unless you weld them to the top plate,better of doing it now before you fit it all to the car,than taking it all apart again once the top weld begins to crack,up to you but i thought i would let you know.
16-04-2014, 11:08 AM
#492
finally managed to find a good condition bulkhead panel. It was a little rough in places so i gave it a rub down and coat of satin black.
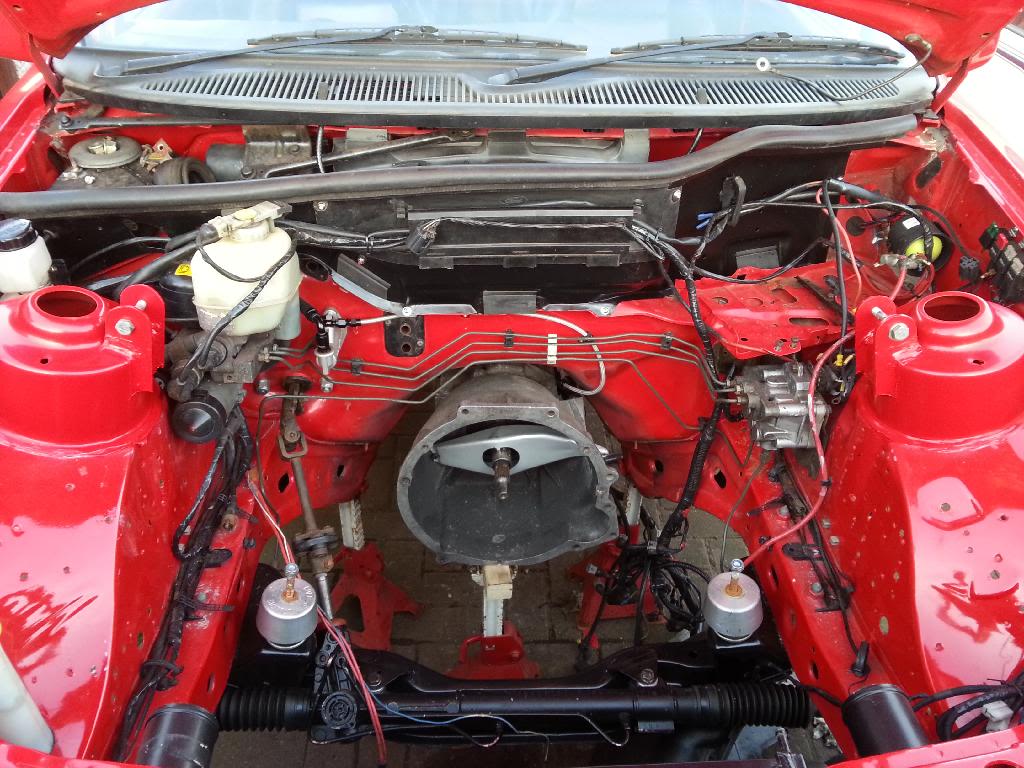
also got one of the front calipers cleaned and painted last night.
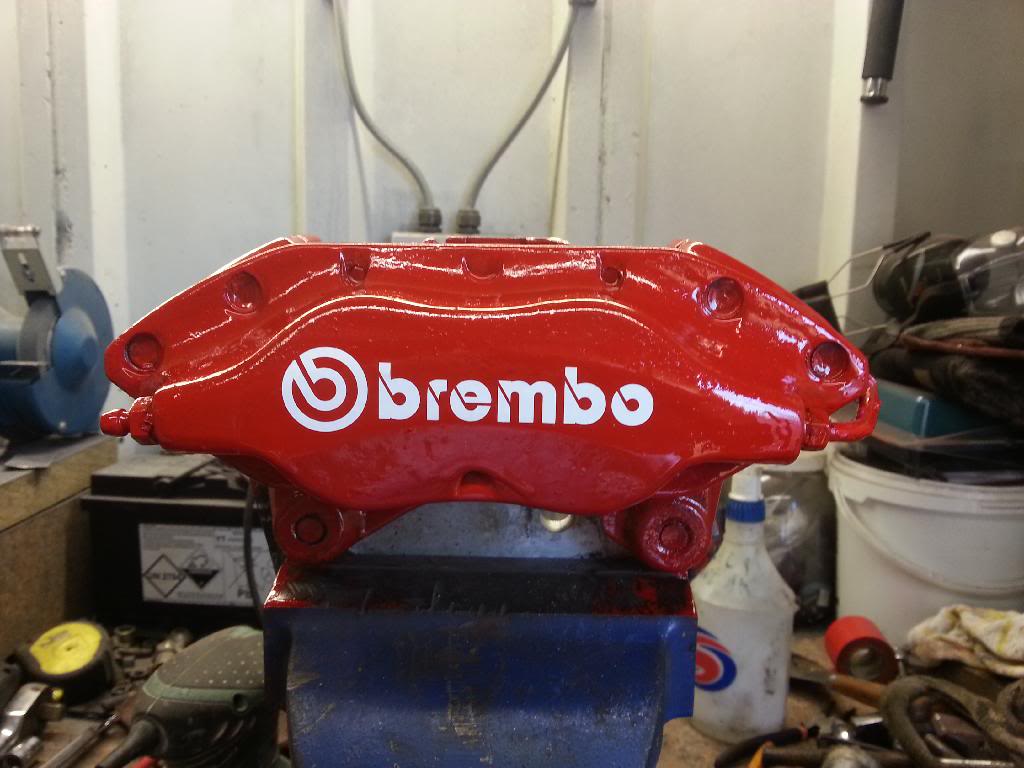
they are in pretty good condition, i'm not replacing the seals etc. on the front because i want to upgrade to AP's at some point.
tonights job is to try to tidy up the battery connections.

also got one of the front calipers cleaned and painted last night.
they are in pretty good condition, i'm not replacing the seals etc. on the front because i want to upgrade to AP's at some point.

tonights job is to try to tidy up the battery connections.
19-04-2014, 09:13 PM
#495
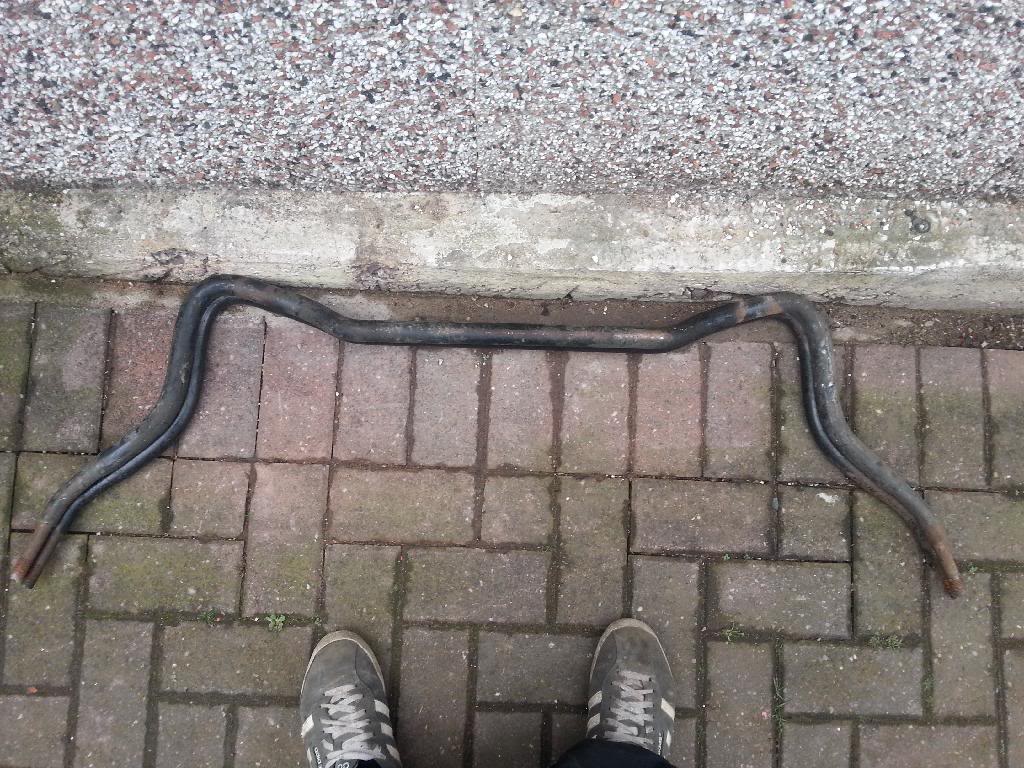
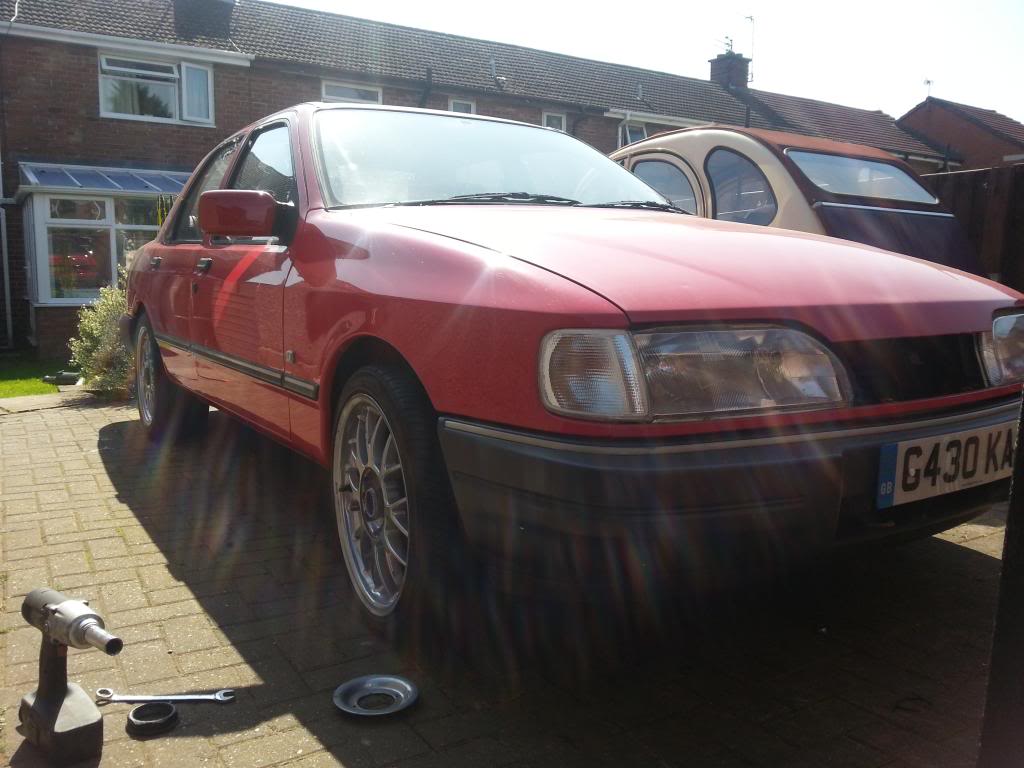
Got quite a bit done the last few days, started by fitting up the front suspension, only to discover i have a 4wd anti roll bar
new one ordered from gary at rs classics, so should be sorted this week

Then make a heat sheild for the steering column. Not the prettiest but it should help.
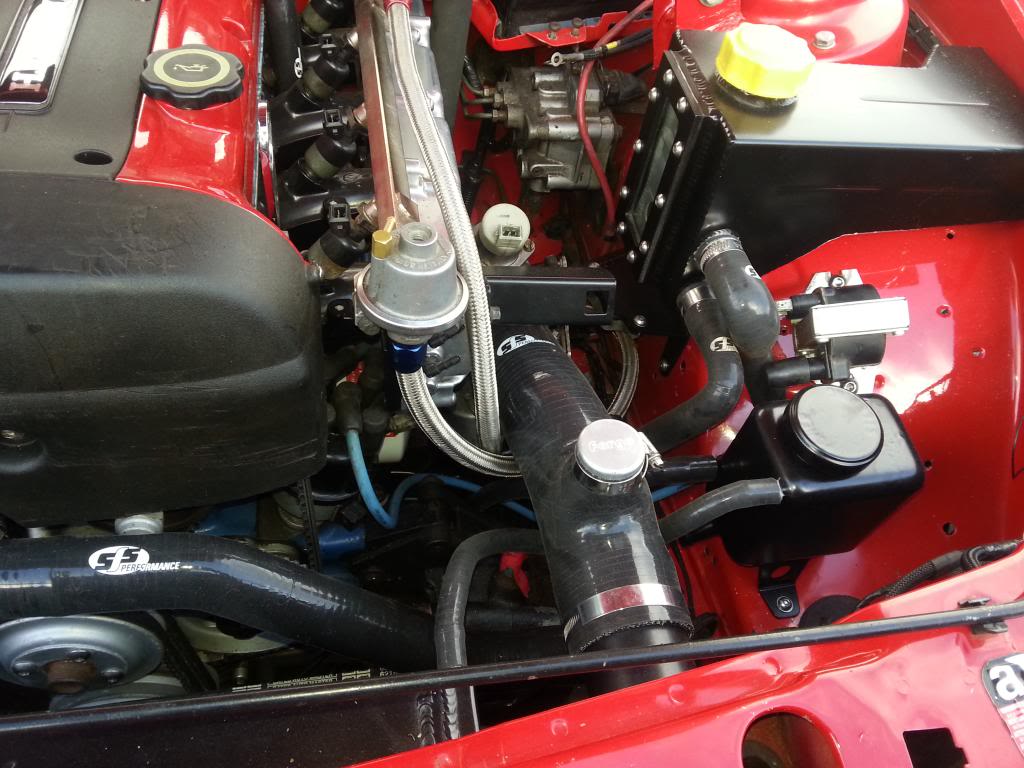
then today i dropped the engine in
and the cooling package in the front
still a lot of jobs to do, but it feels like a big milestone
just waiting on a delivery of the rest of my hoses from matt lewis and i think i have everything to put the engine bay back together.
Still waiting on the beam from the powedercoaters so when that comes back and i get the front suspension on it can go down on it wheels
new one ordered from gary at rs classics, so should be sorted this week


Then make a heat sheild for the steering column. Not the prettiest but it should help.

then today i dropped the engine in


and the cooling package in the front

still a lot of jobs to do, but it feels like a big milestone
just waiting on a delivery of the rest of my hoses from matt lewis and i think i have everything to put the engine bay back together.
Still waiting on the beam from the powedercoaters so when that comes back and i get the front suspension on it can go down on it wheels
Last edited by fraser9764; 19-04-2014 at 09:18 PM.
20-04-2014, 12:52 PM
#496
PassionFord Post Whore!!
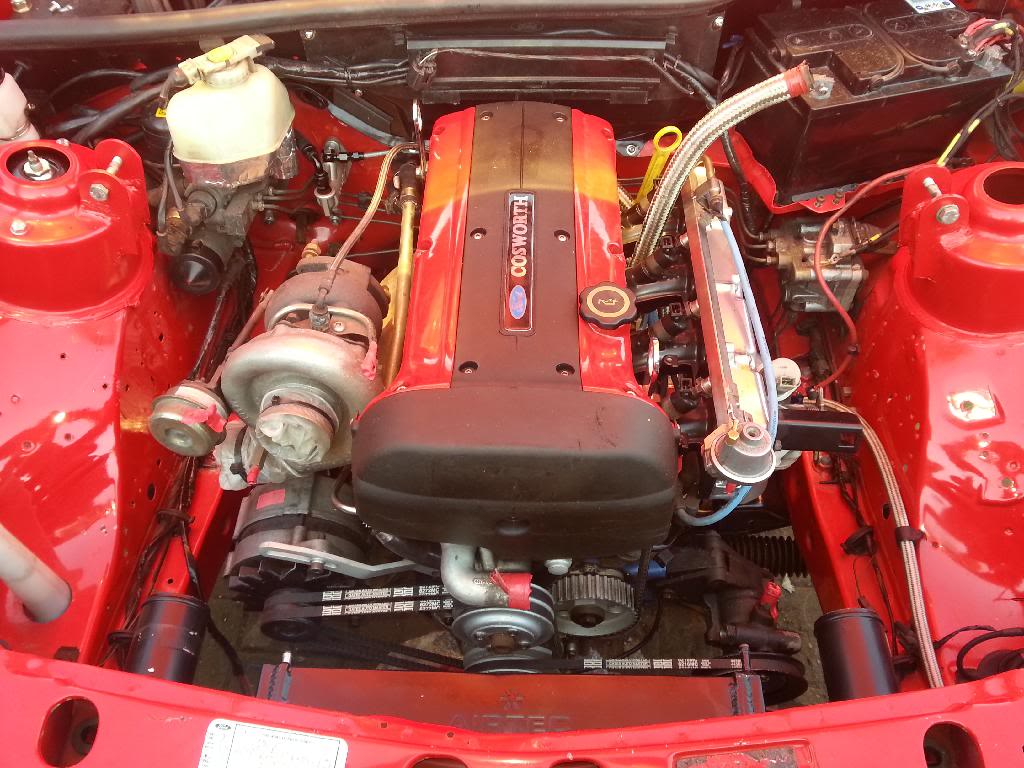
Looks lovely in the bay...


 25-04-2014, 08:13 AM
#500
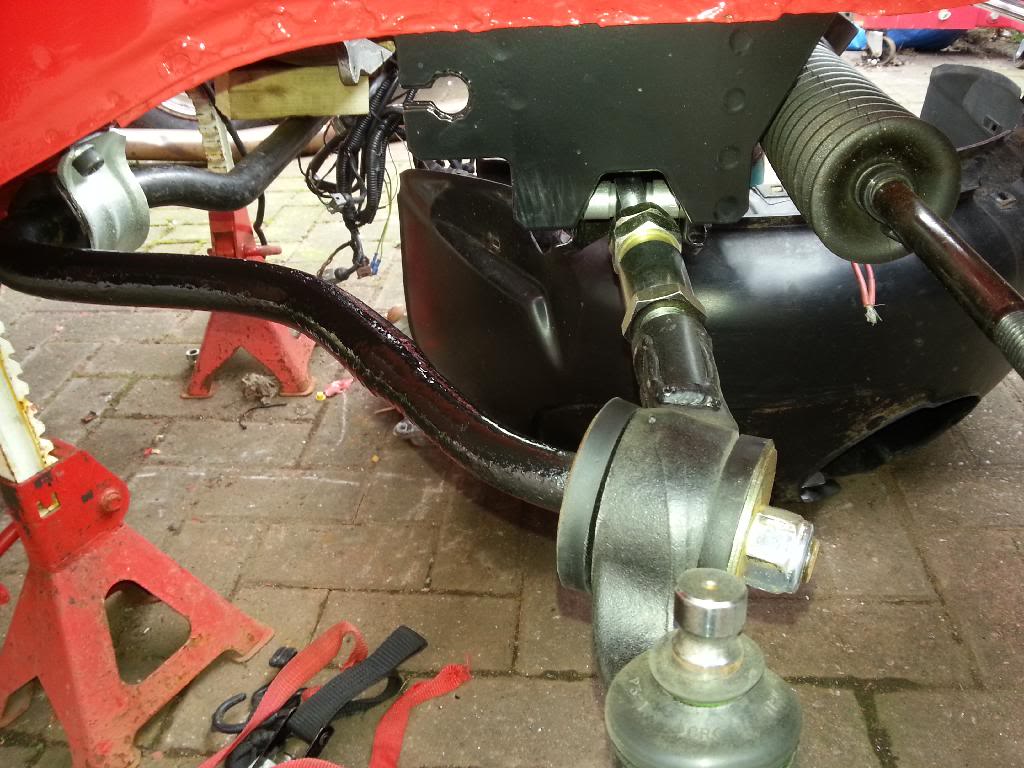
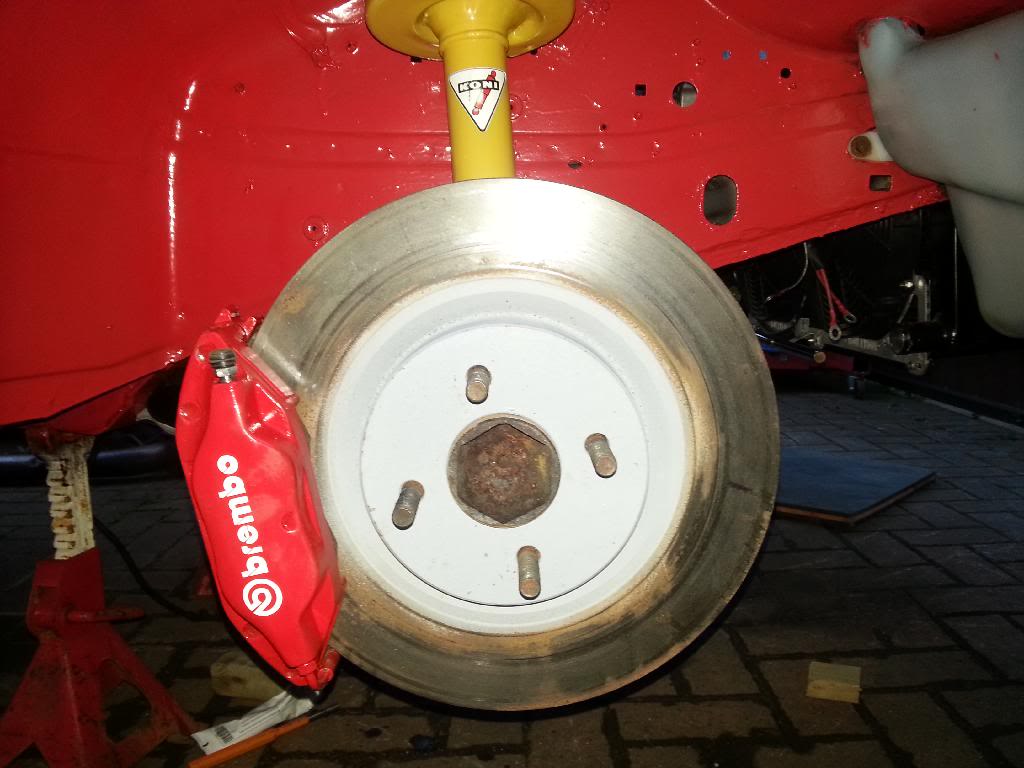
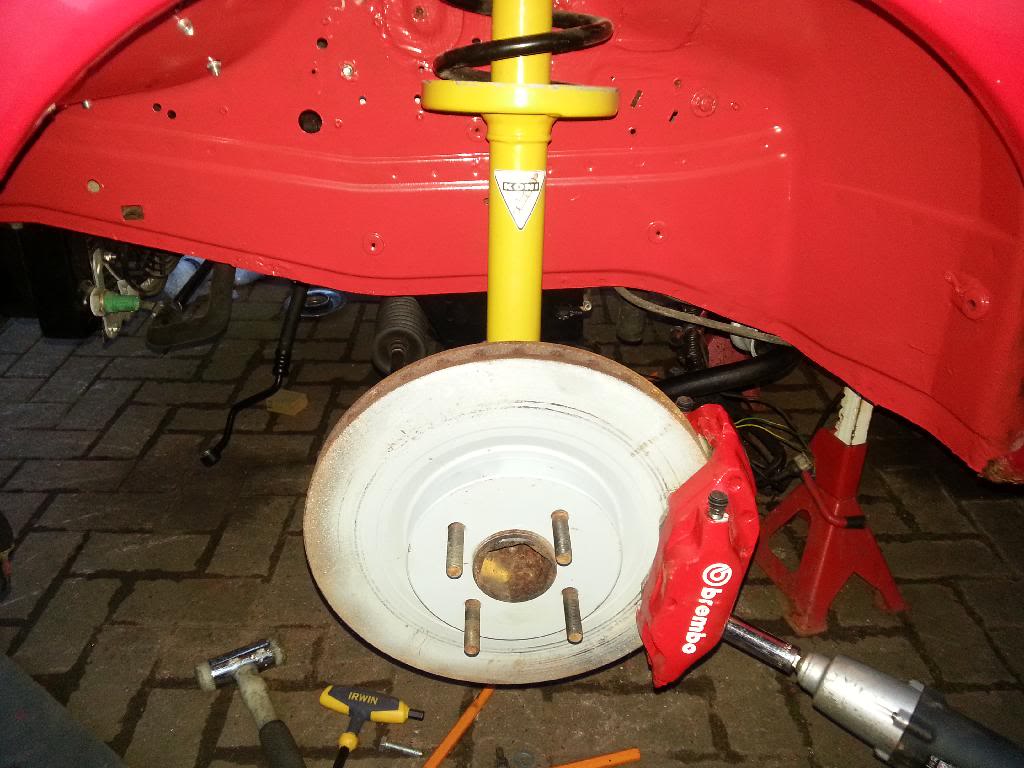
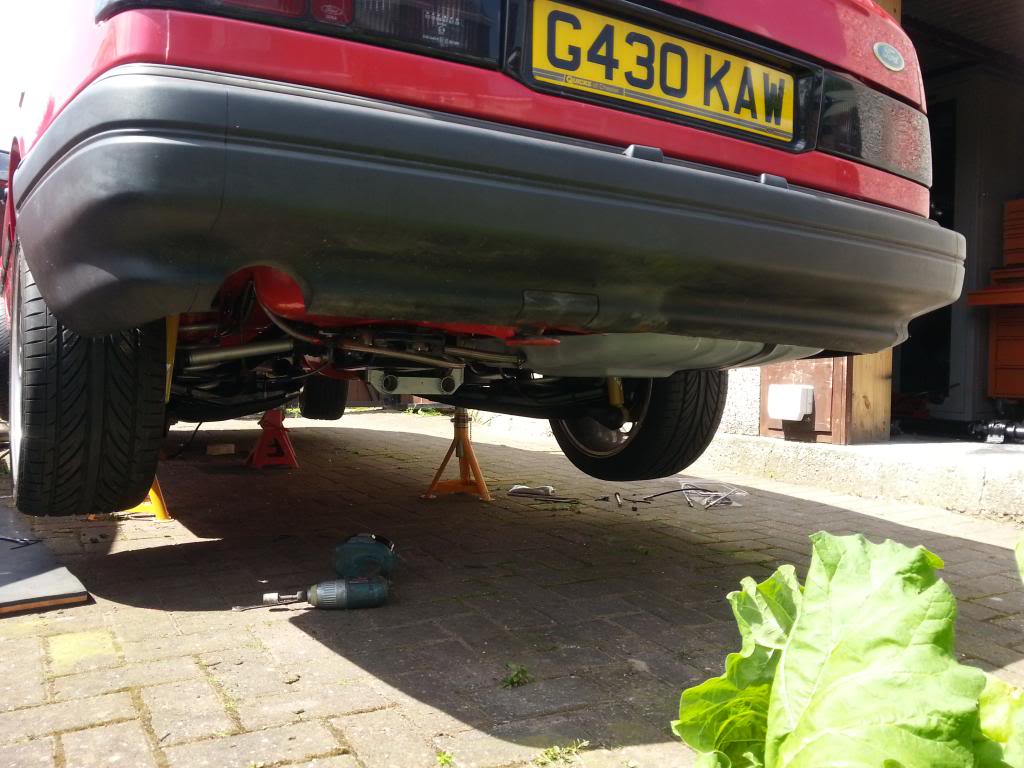
Received my new 2wd saph front ARB the other day, got it fitted to check if it had solved the problem.
Popped the hub, strut. a brake disc and a wheel on to see how it looked in the arch
Problem solved i think
I will measure the castor when the car is back on the ground to check.
So i removed it all again to give the new arb a coat of paint, and fit the boots on the tca rose joints.
and fitted the front brakes. ive connected the lines up since this pic. Just got to fit the abs sensor and the wheels can go on.


Popped the hub, strut. a brake disc and a wheel on to see how it looked in the arch


Problem solved i think
I will measure the castor when the car is back on the ground to check.
So i removed it all again to give the new arb a coat of paint, and fit the boots on the tca rose joints.

and fitted the front brakes. ive connected the lines up since this pic. Just got to fit the abs sensor and the wheels can go on.

 29-04-2014, 02:53 AM
#501
PassionFord Post Whore!!
Looks lovely and clean under there now... 
Should be ok to start painting the rest of the bits in the new place within a week or two?
Don't forget that shopping list I give you to pick up from RH Services...
Should be ok to start painting the rest of the bits in the new place within a week or two?
Don't forget that shopping list I give you to pick up from RH Services...
 09-05-2014, 10:10 PM
#504
PassionFord Post Whore!!
Don't forget the shopping list...
Making space over weekend so I can crack on with painting...
Making space over weekend so I can crack on with painting...
10-05-2014, 06:06 AM
#505
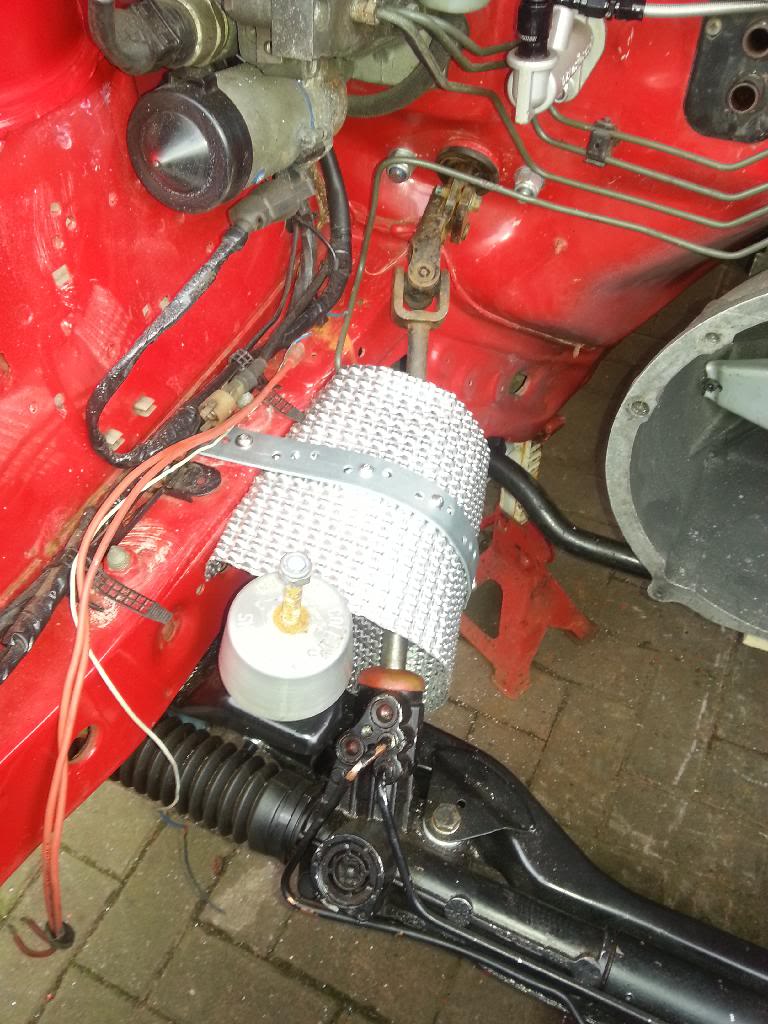
Off out to pick up the beam from the powdercoaters in a bit, I'll call and get some painting bits on the way and drop them off chris
Phil i've realised i have the wrong washer bottle so it has to come out anyway the filler kneck comes straight up instead of cranked around the air filter 
Phil i've realised i have the wrong washer bottle so it has to come out anyway
the filler kneck comes straight up instead of cranked around the air filter
10-05-2014, 05:46 PM
#507
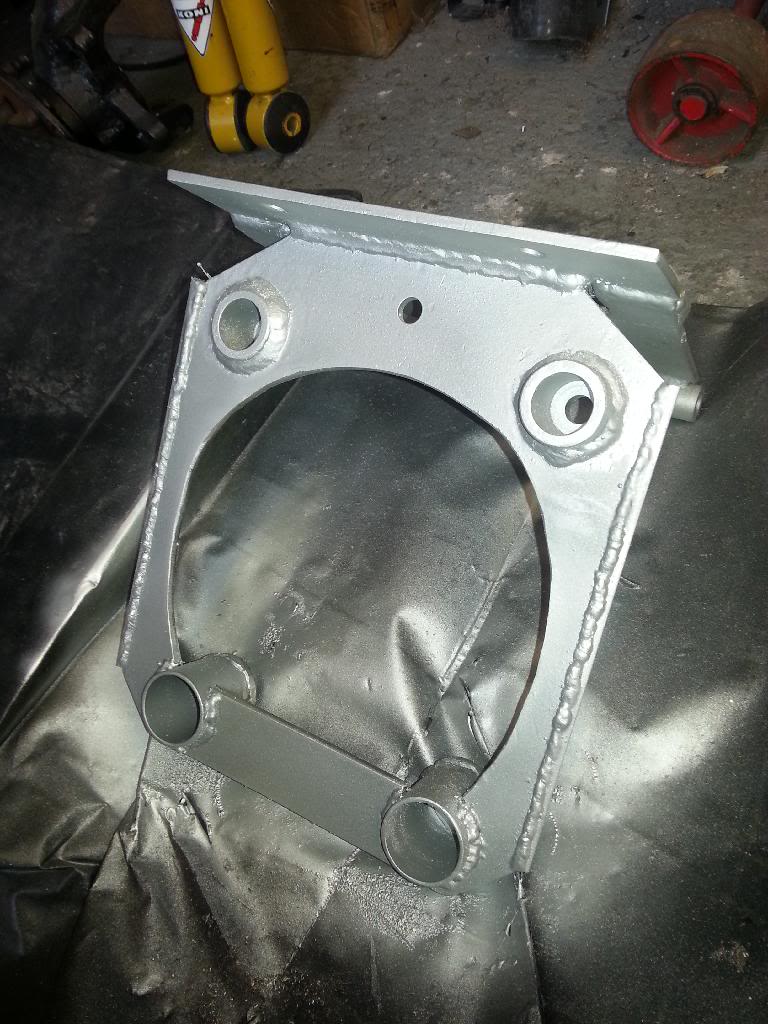
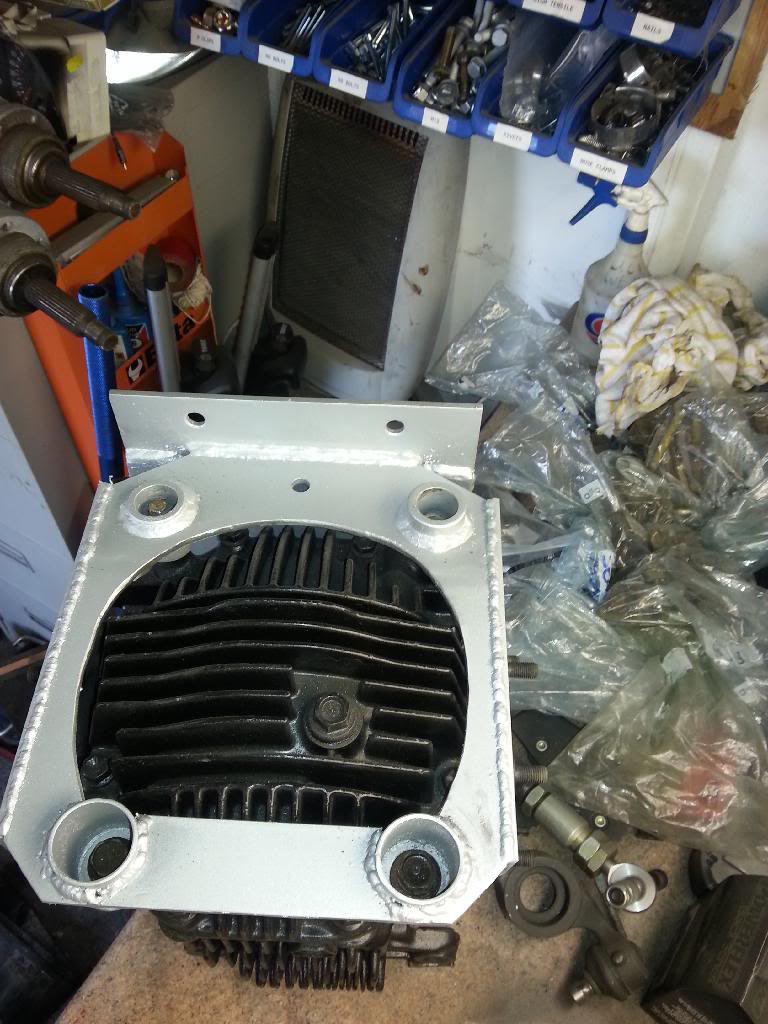
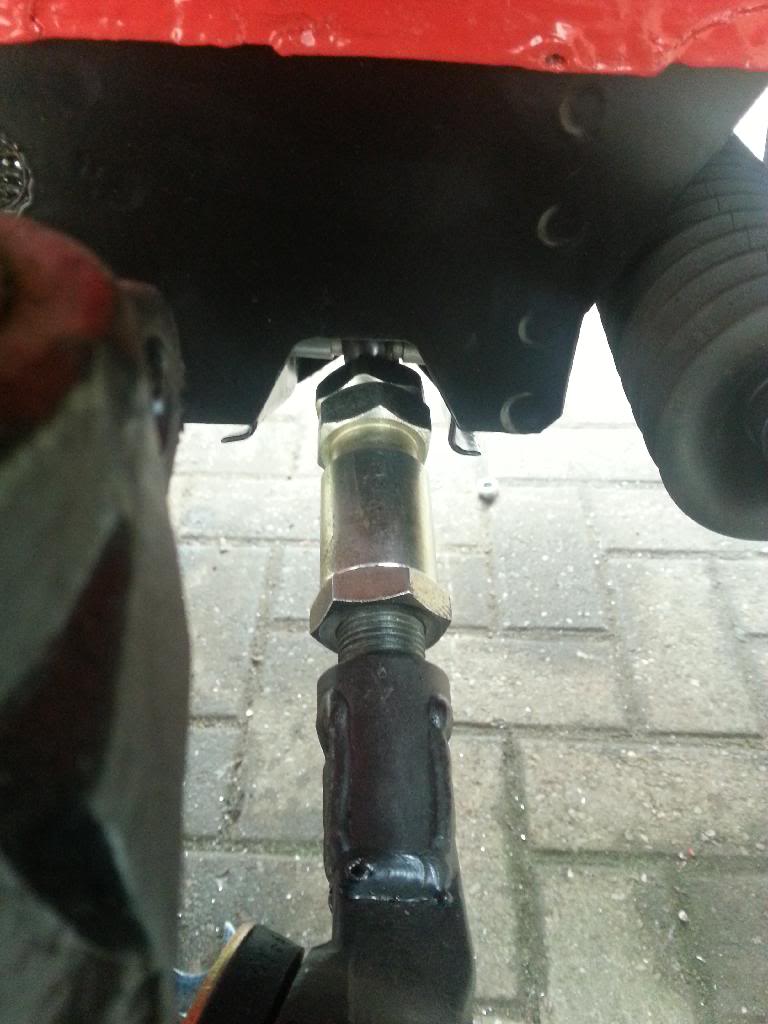
Got the diff mount finished the other day
also got 99% of the new hoses. Just got to get a different turbo to intercooler hose and power steering tank to pump hose.
decided to change the breather hoses to the correct flourine lined silicone.
and today I finally picked up the beam from the powder coaters.

few bits to sort and it should be down on its wheels this week

also got 99% of the new hoses. Just got to get a different turbo to intercooler hose and power steering tank to pump hose.

decided to change the breather hoses to the correct flourine lined silicone.

and today I finally picked up the beam from the powder coaters.


few bits to sort and it should be down on its wheels this week
10-05-2014, 07:13 PM
#508
PassionFord Post Whore!!
Nice
Put the bent Hocks on when you drop it down...
Will get your new Hocks painted before they get tires on them...
Put the bent Hocks on when you drop it down...
Will get your new Hocks painted before they get tires on them...
Last edited by slammedorion; 10-05-2014 at 07:24 PM.
13-05-2014, 03:04 PM
#509
Well the plastic bits in the engine bay have always annoyed me, the cam covers for these small turbo heads seem to be few and far between and i can't bring myself to pay for carbon fibre. The turbo heat sheild was always grey, if you put any tyre black etc. on it would look great for 2 mins then it would soak it up and back to grey
So after discussing it with Chris i decided to try some crackle black on them.
It turned up today so it was straight out in the garage for a play
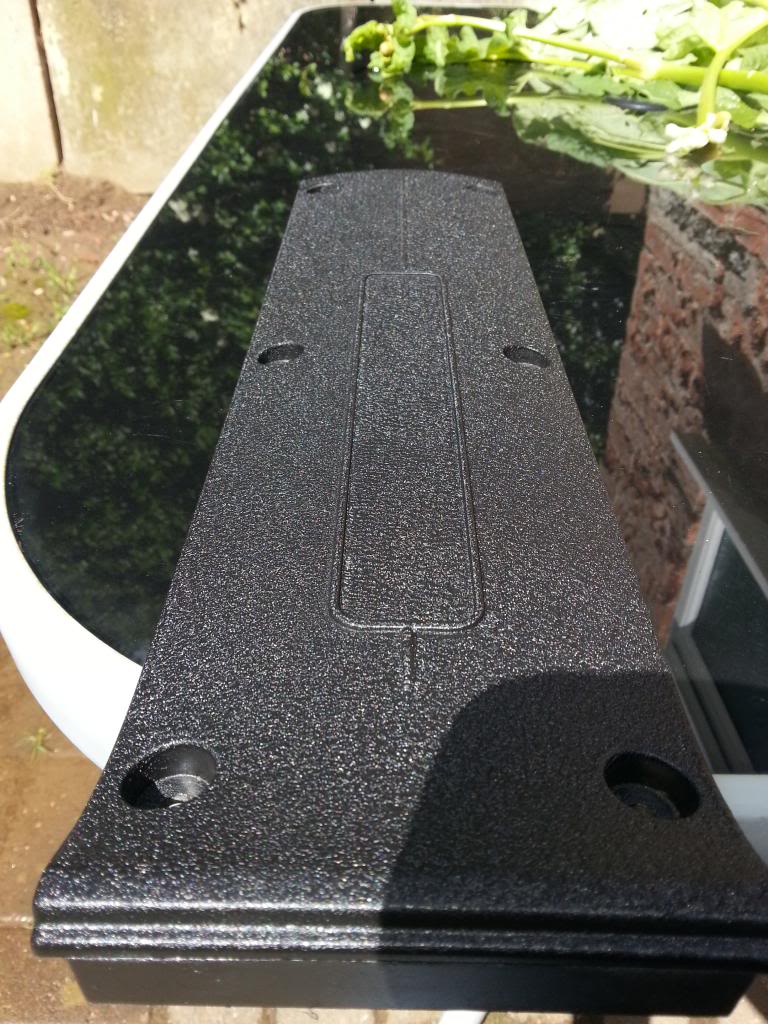
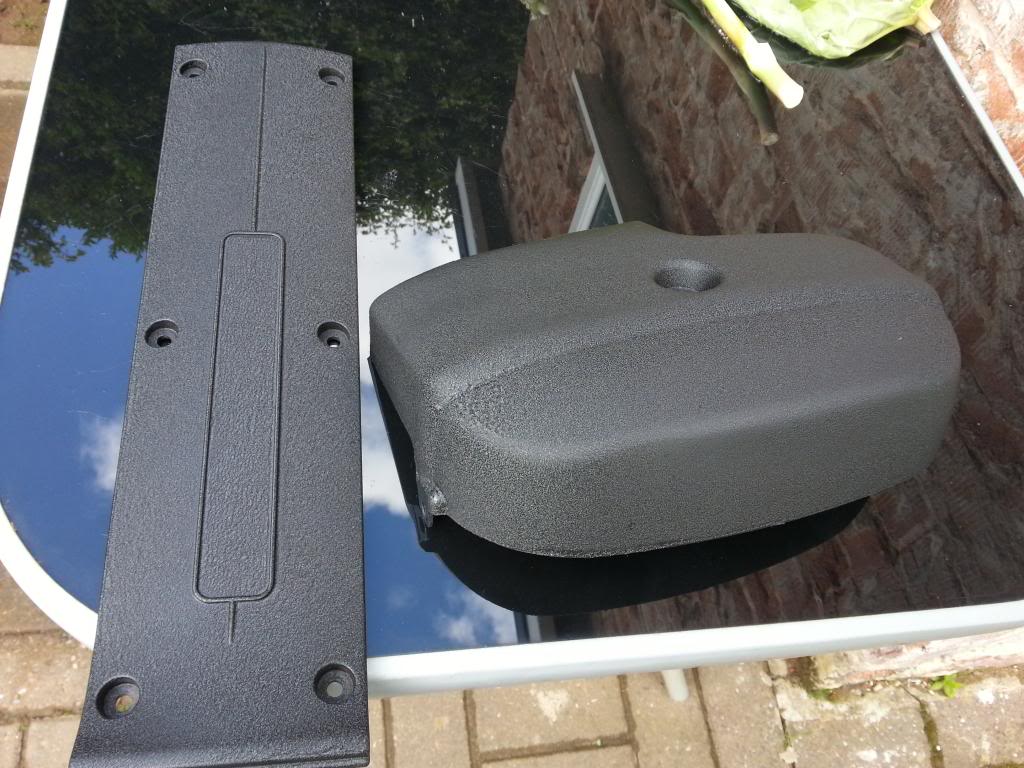
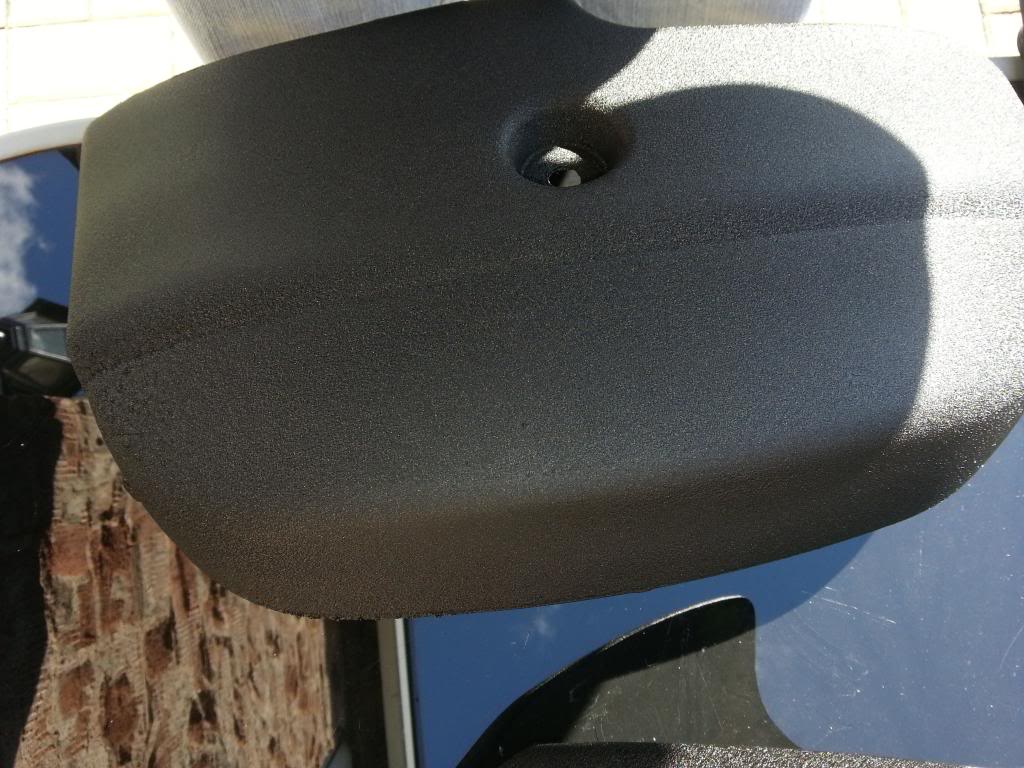

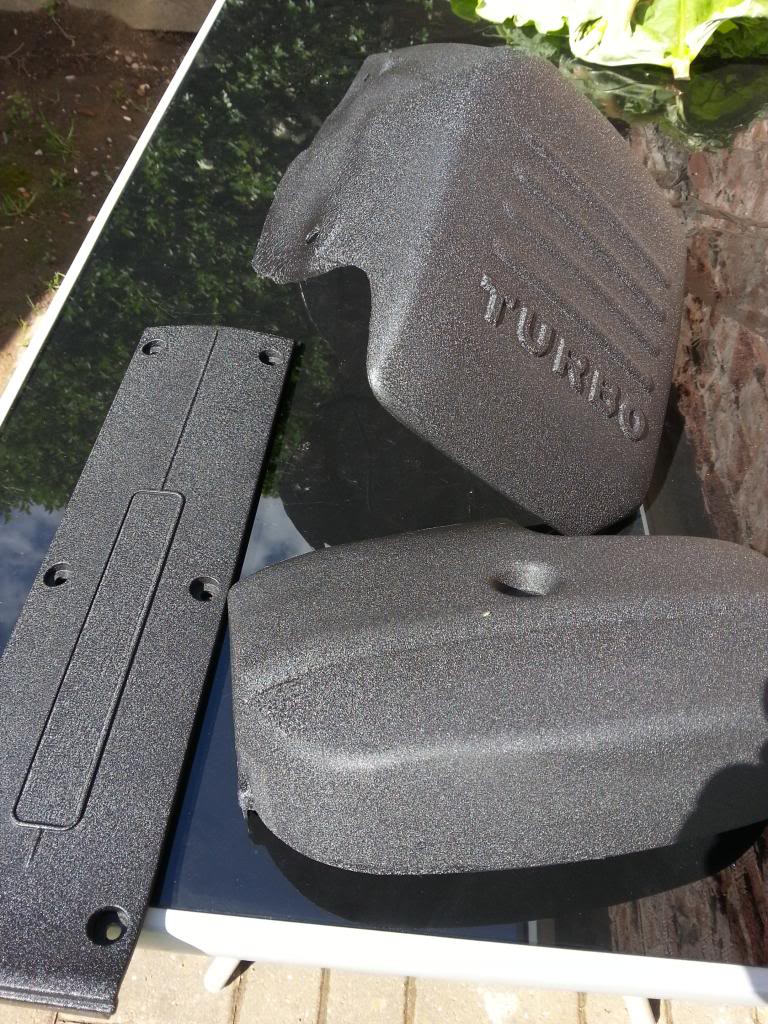
Quite pleased with the outcome, just got to see how well it sticks to the plastic....
So after discussing it with Chris i decided to try some crackle black on them.
It turned up today so it was straight out in the garage for a play


Quite pleased with the outcome, just got to see how well it sticks to the plastic....
 13-05-2014, 09:45 PM
#512
PassionFord Post Whore!!
Looks great now its all coming together, deffo worth ago... hopefully the crackle paint lasts...
18-05-2014, 10:14 PM
#514
Cheers glenn
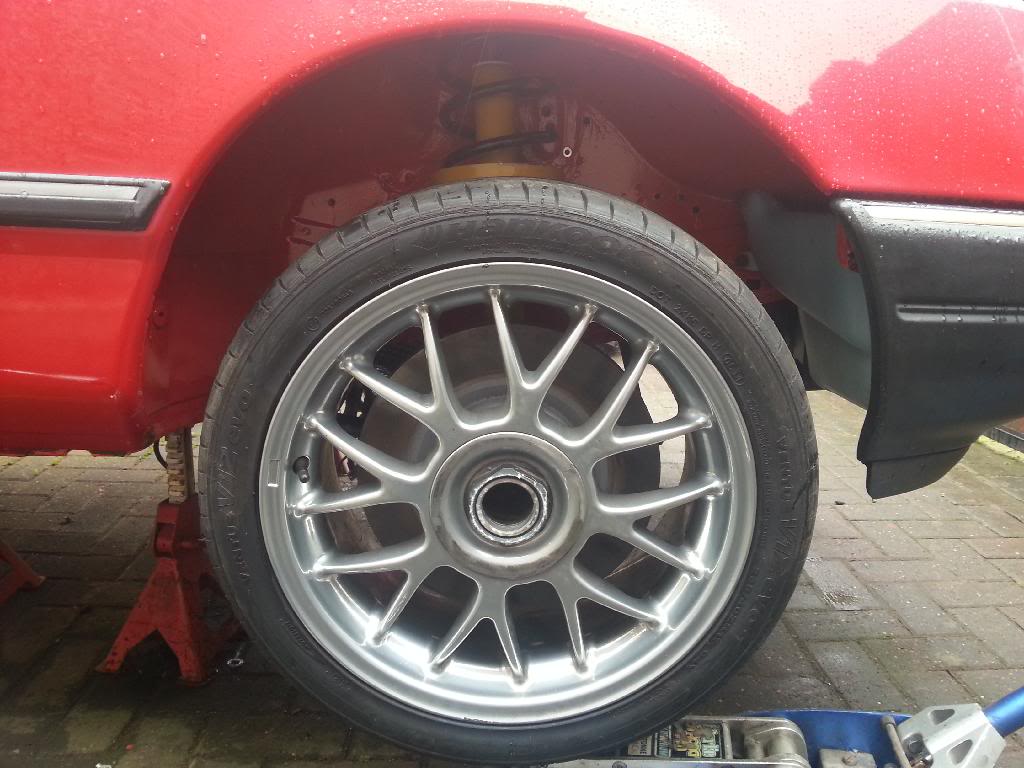
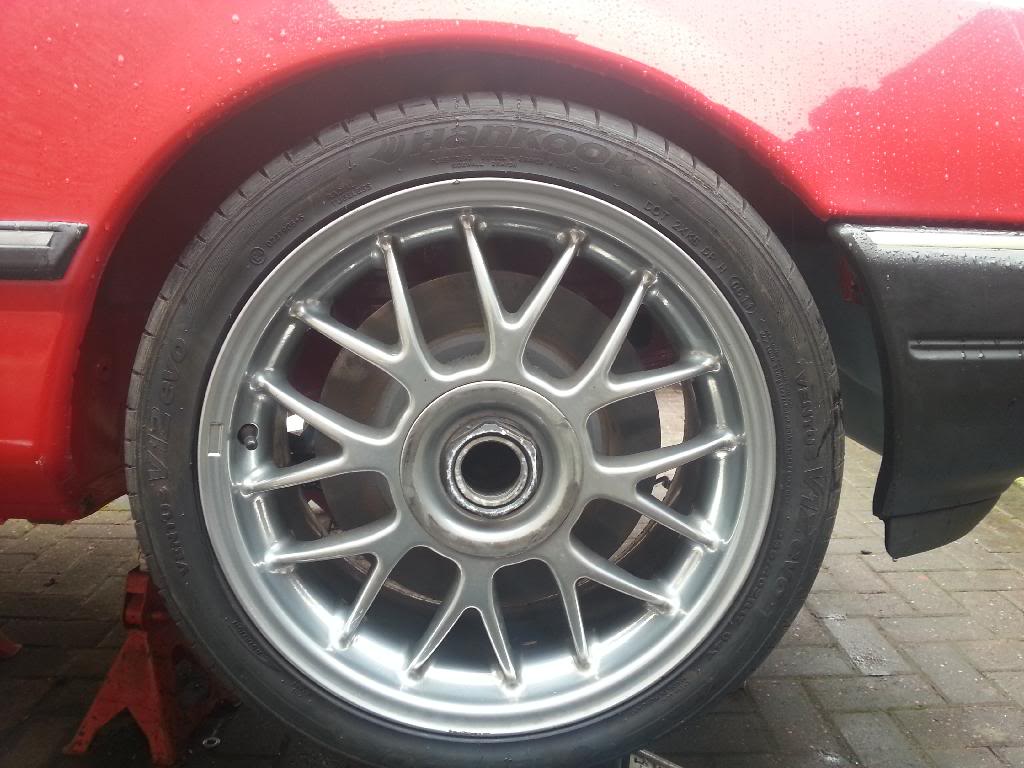
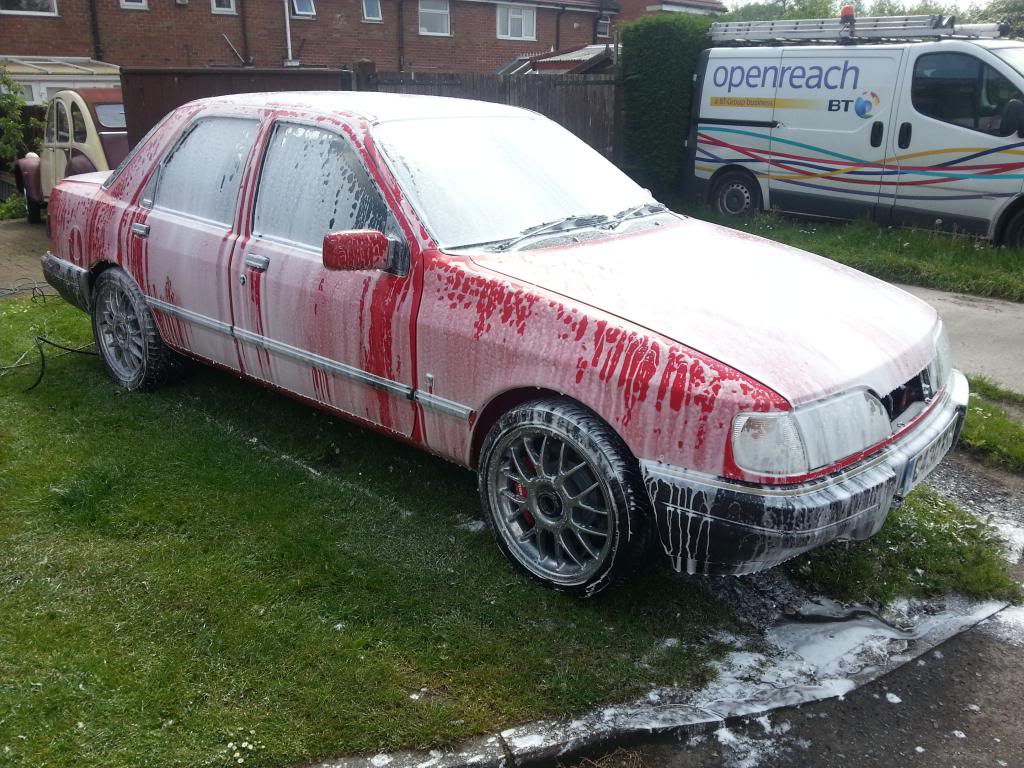
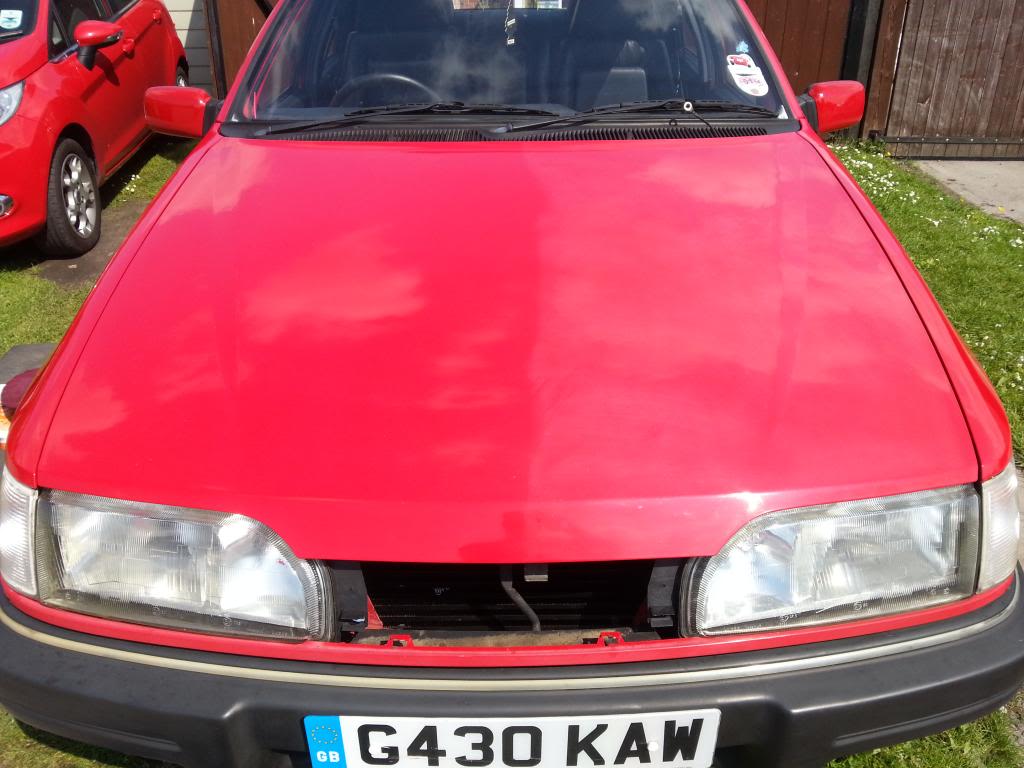
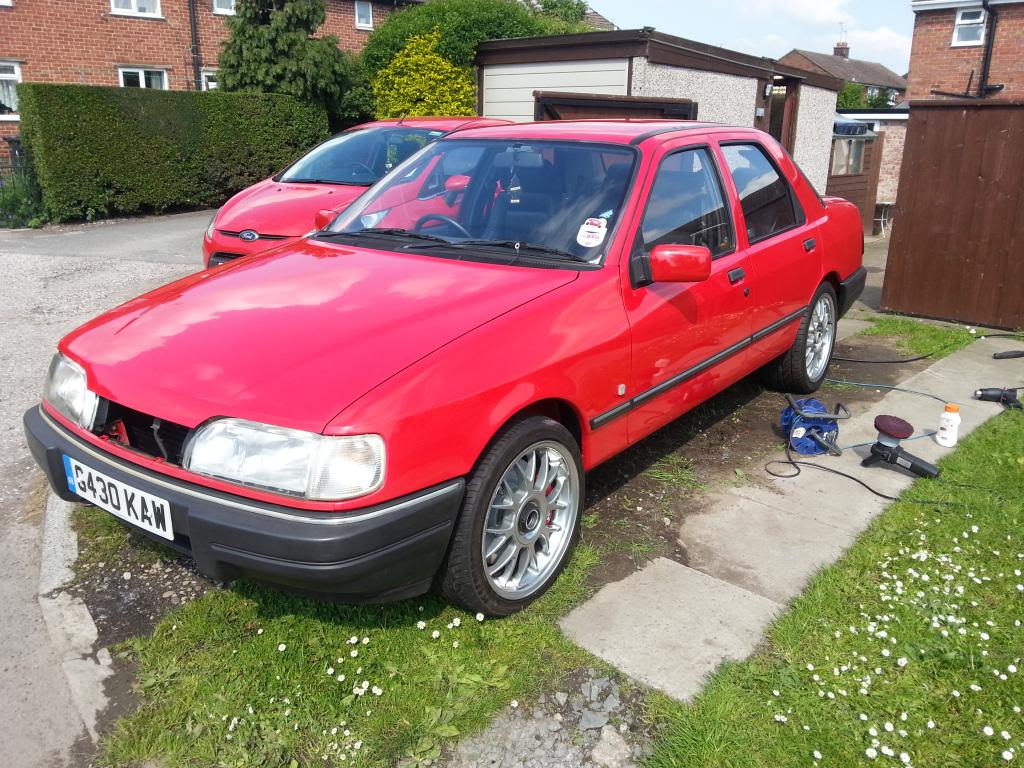
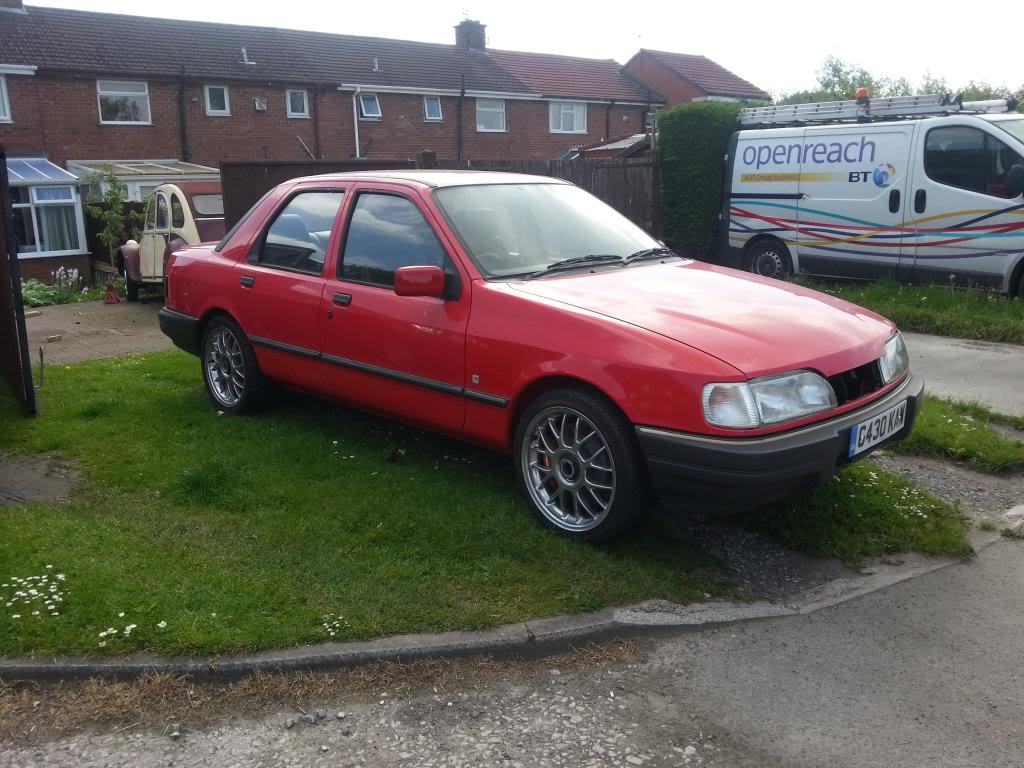
Well I finished putting the rear suspension together yesterday, and then after several hours wrestling with the exhaust I have up and dropped it down on its wheels and pushed it out for a clean up
its been snowfoamed, washed, clayed, polished and waxed. It was awfull before, pink and covered in all sorts. Its come up well really.
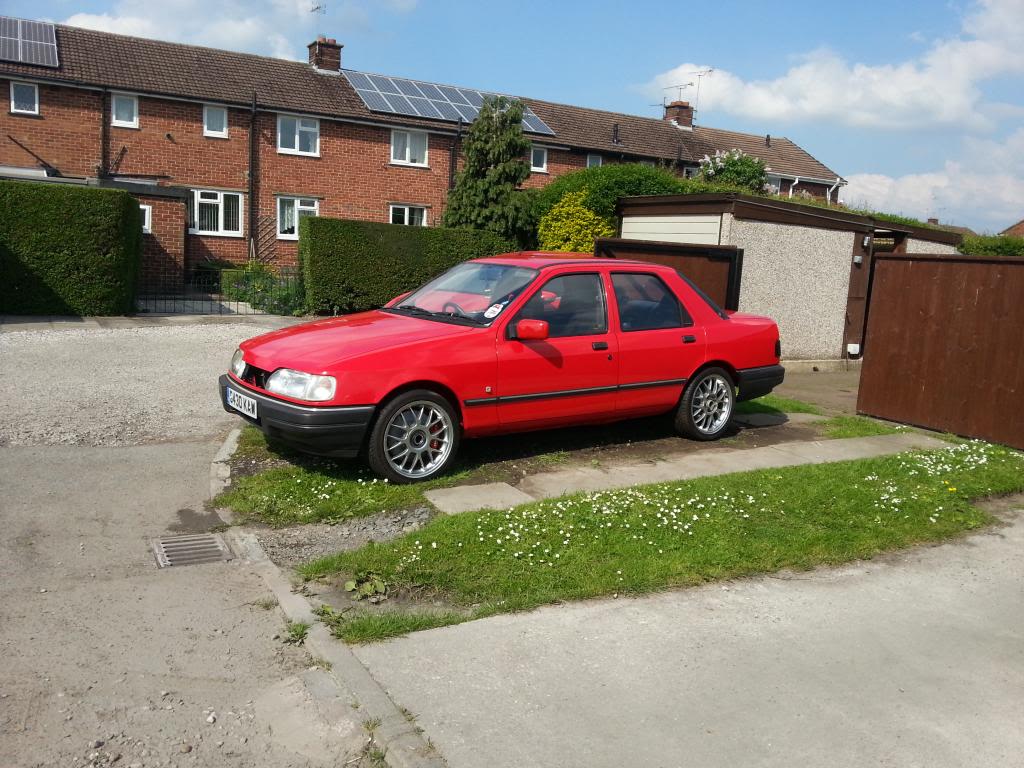


