Escort RST S2 RWD Cosworth, update 8/12/16


 12-06-2011, 10:32 AM
#42
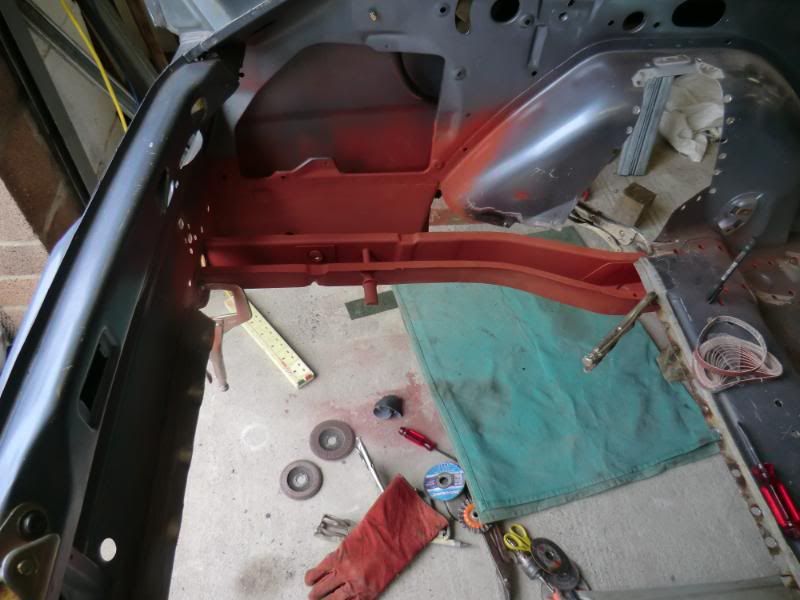
With the position of the axle figured out i started onto some of the repair work needed before i can turn the car over on the spit.
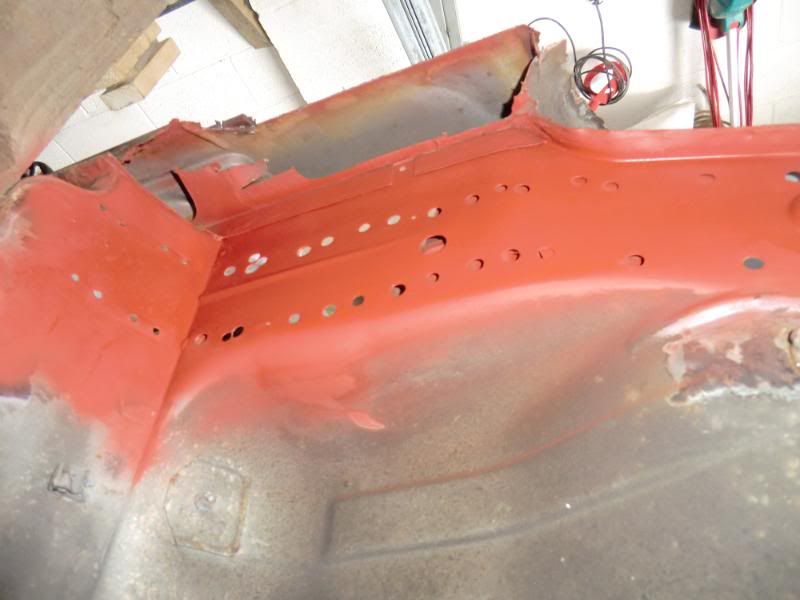
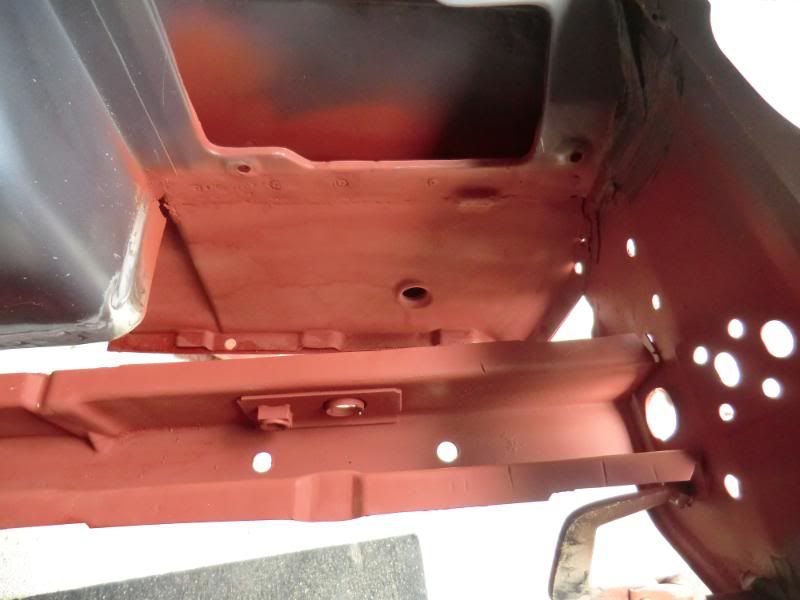
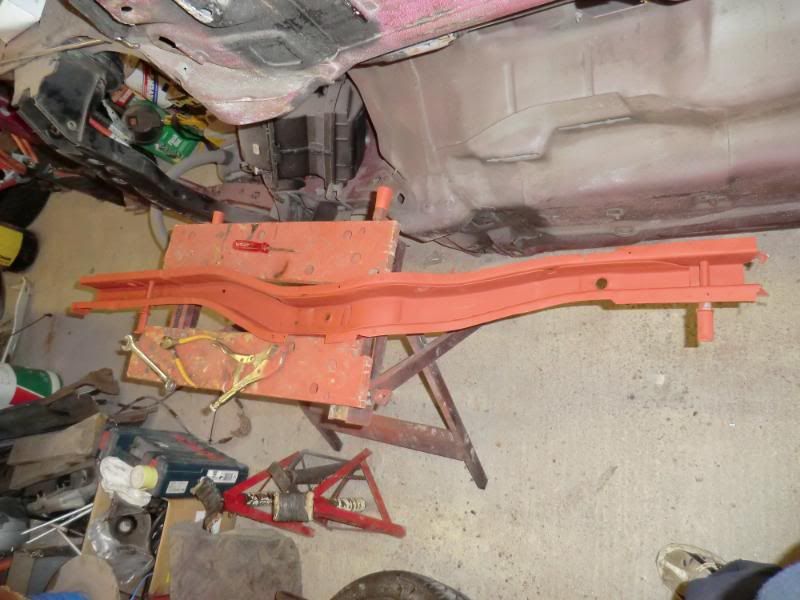
I needed to replace both chassis rails, and both rear lower corners, the drivers side was the worst, but i manged to get the parts of a good convertable shell that i cut up about 3 years ago, I new i needed them so just kept both rear sides of the car after cutting it up, Removing the rails took about 4 hours and to say they were MINT is an understatement, after sand blasting i could easy have passed them of as NOS.
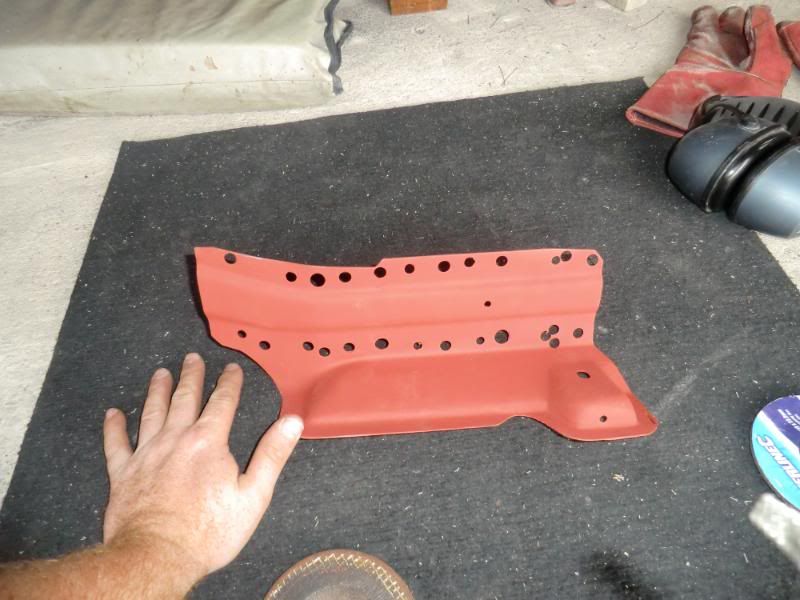
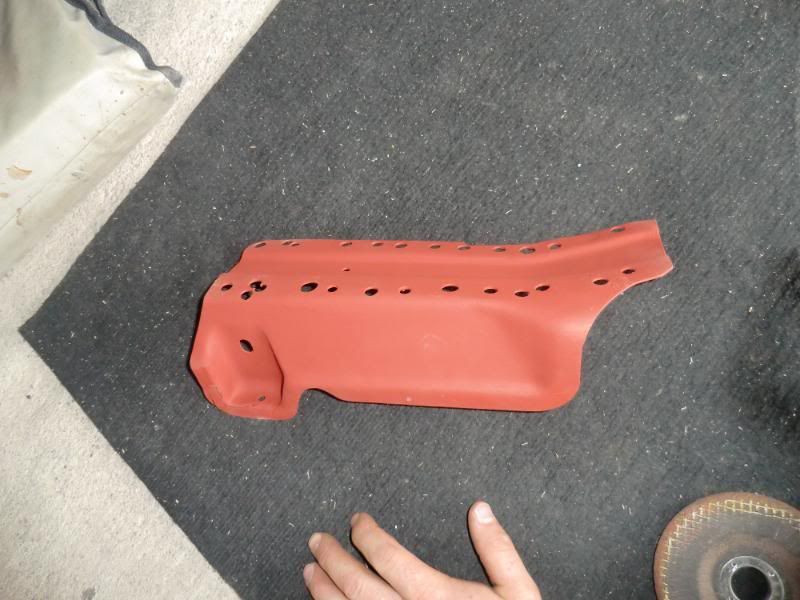
The lower rear corners were also salvaged, the drivers side was the better of the 2 but both usable. All parts that blasted have been red oxided.
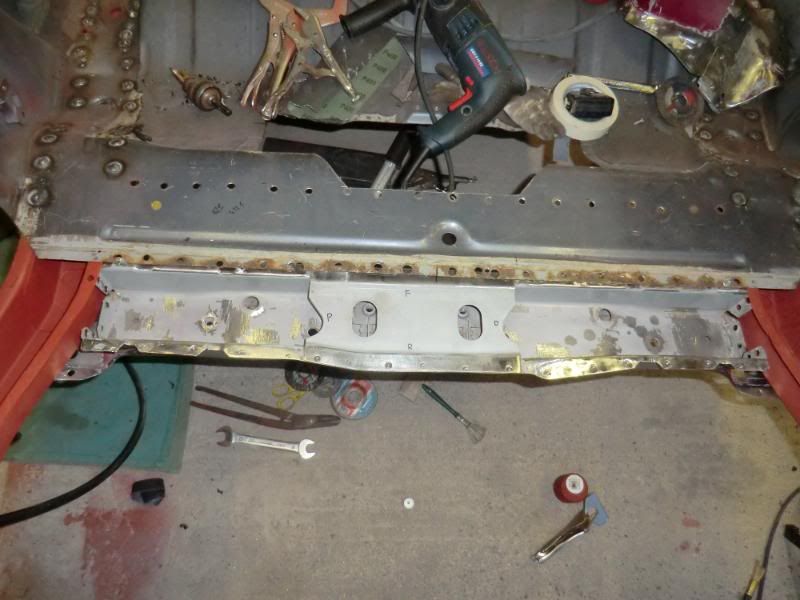
Well it's starting to go back together
refitted

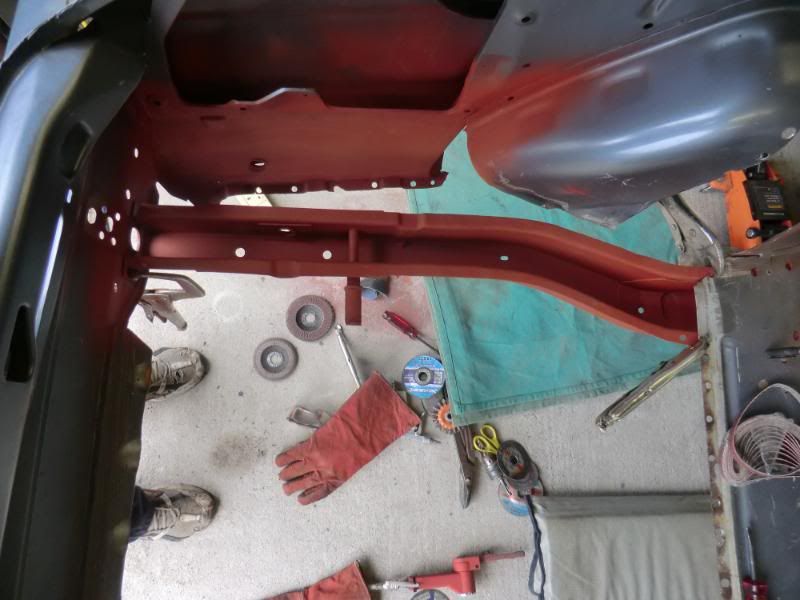
Drivers chassis rail
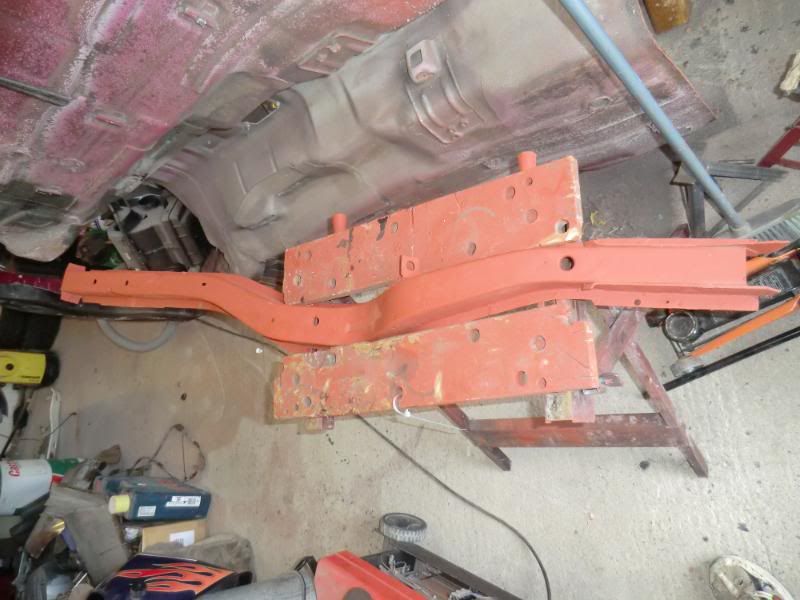
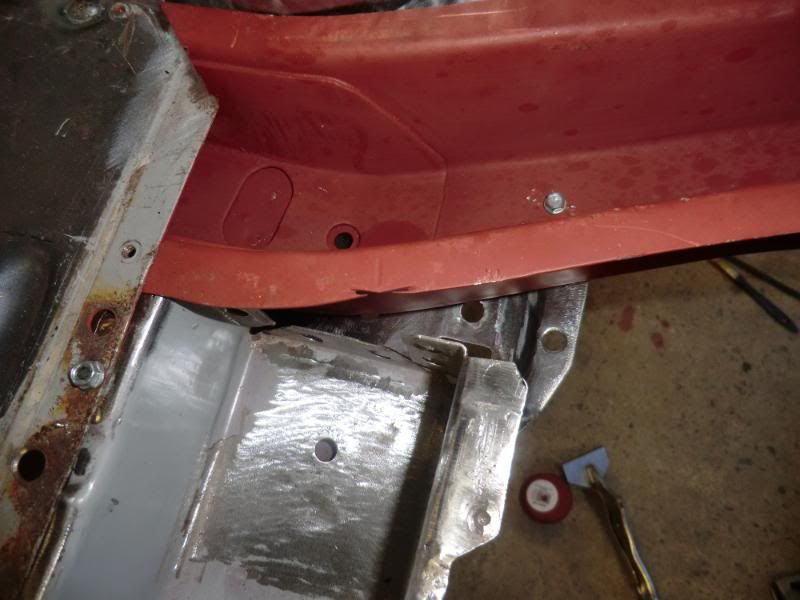
salvaged driver lower rear corner

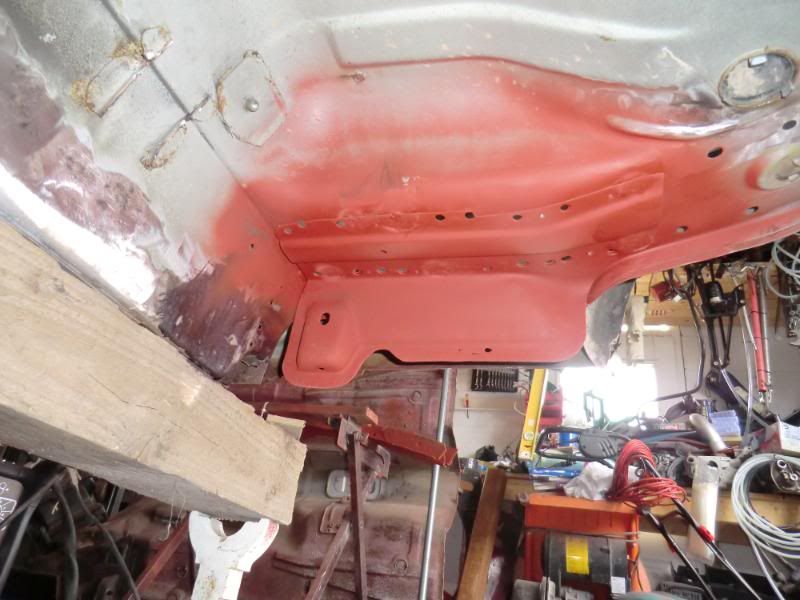
to replace this (it was trimmed down and welded in along the floor line so as to hide the join )
)
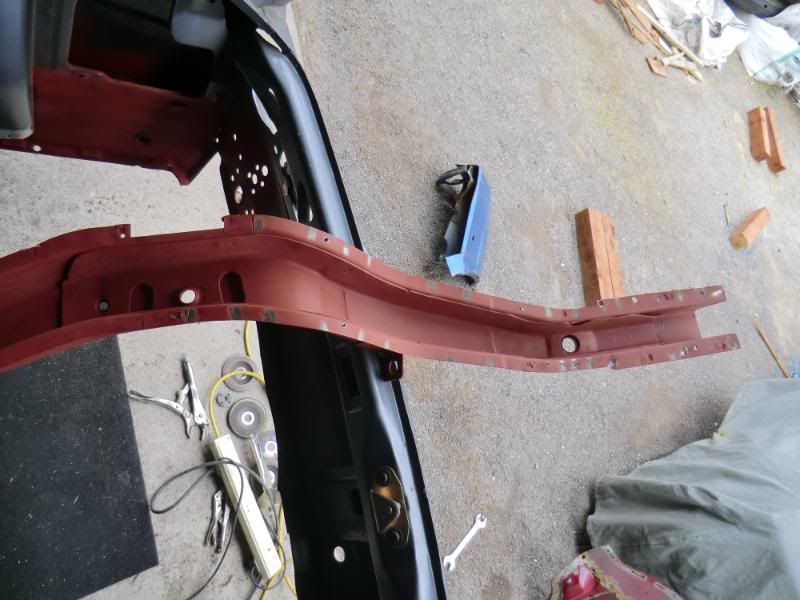
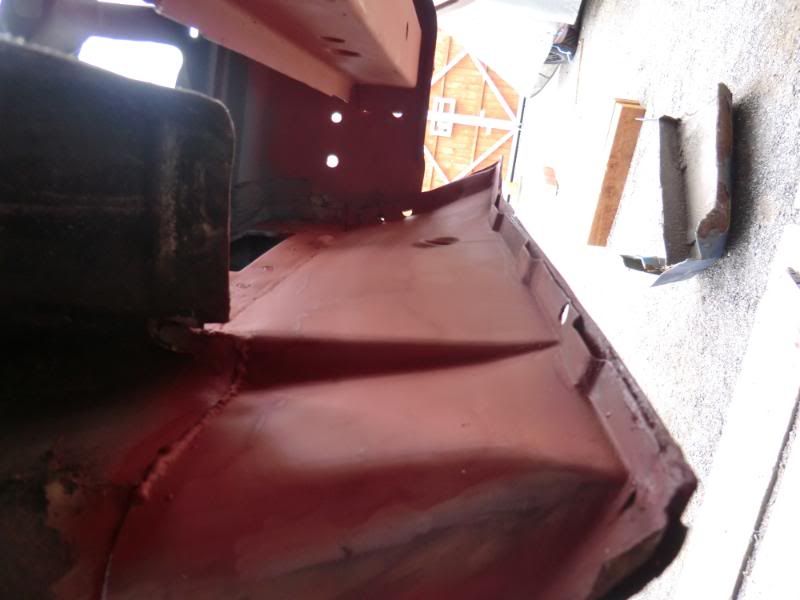
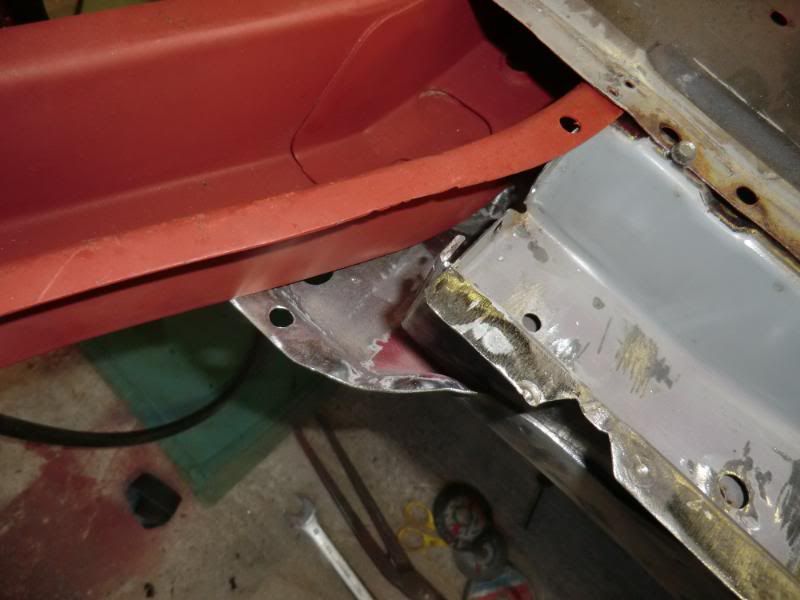
chassis rail and lower corner welded in (lost pics of the out side corner section, will get some more taken)
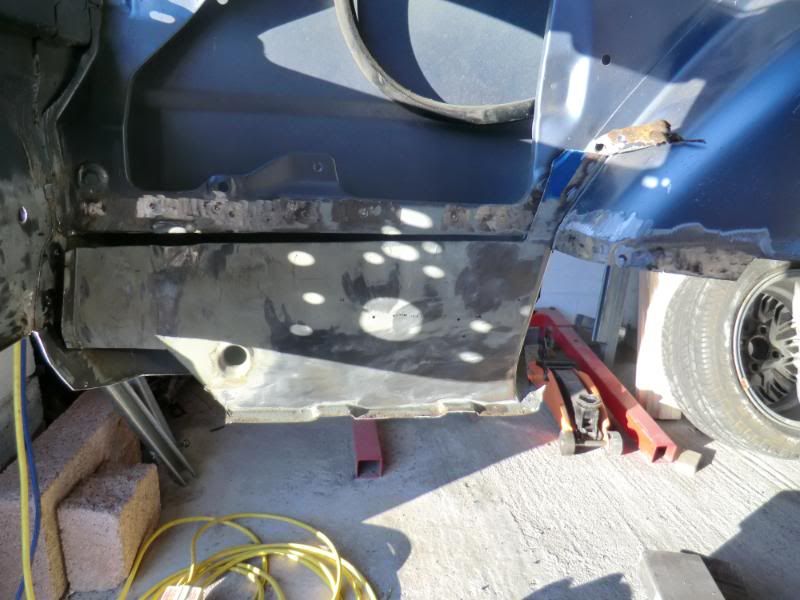
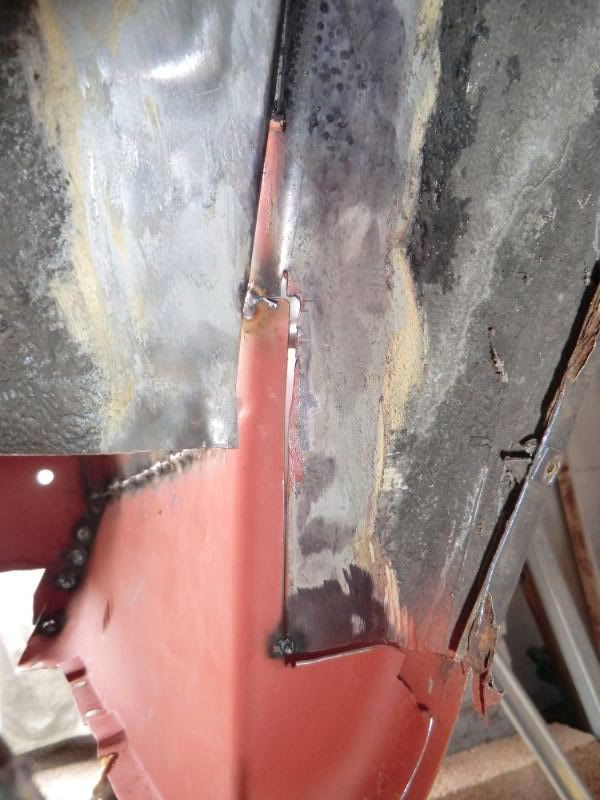
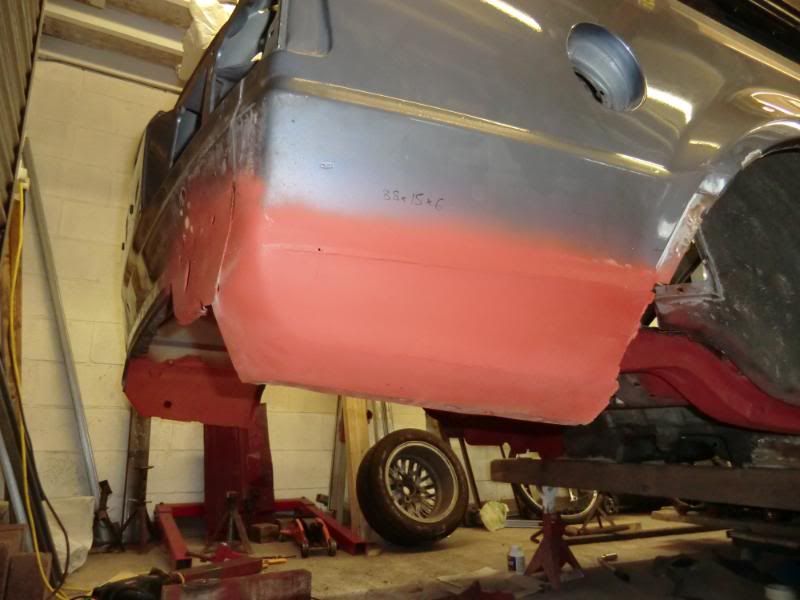
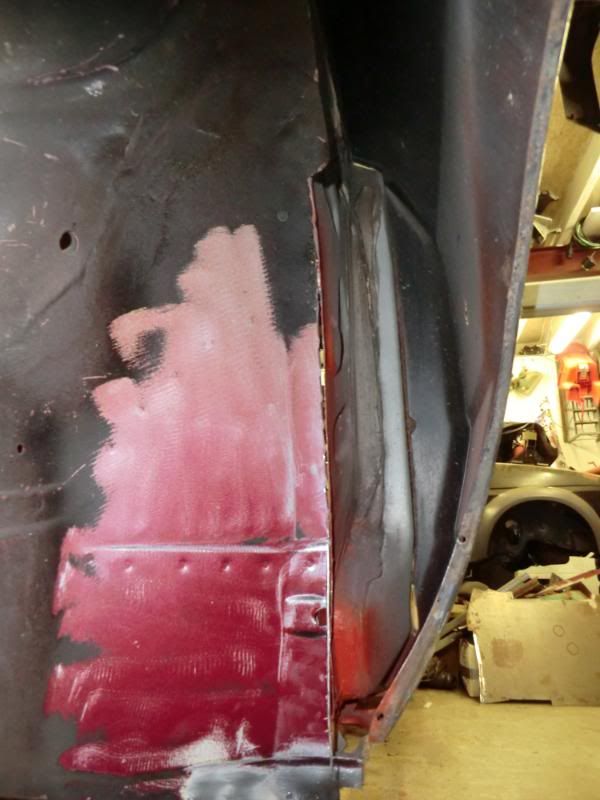
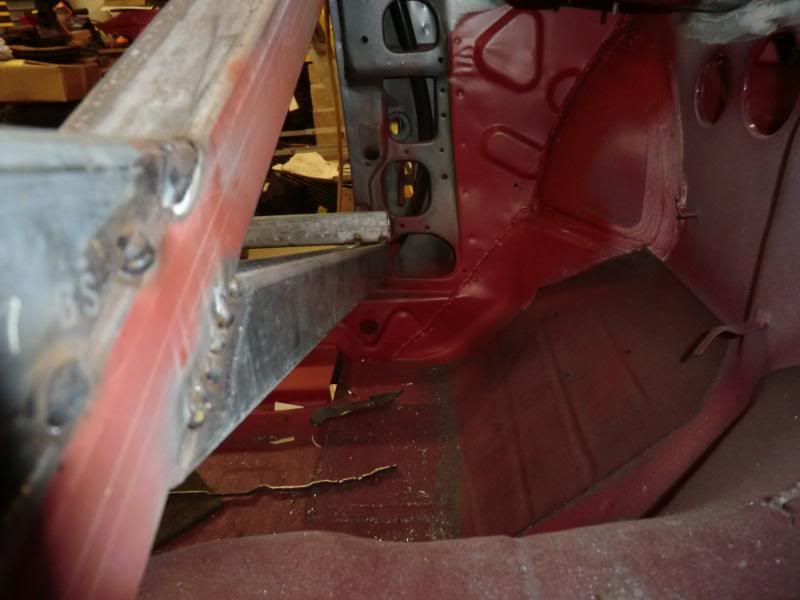
Then started on the passenger side corner.
From this
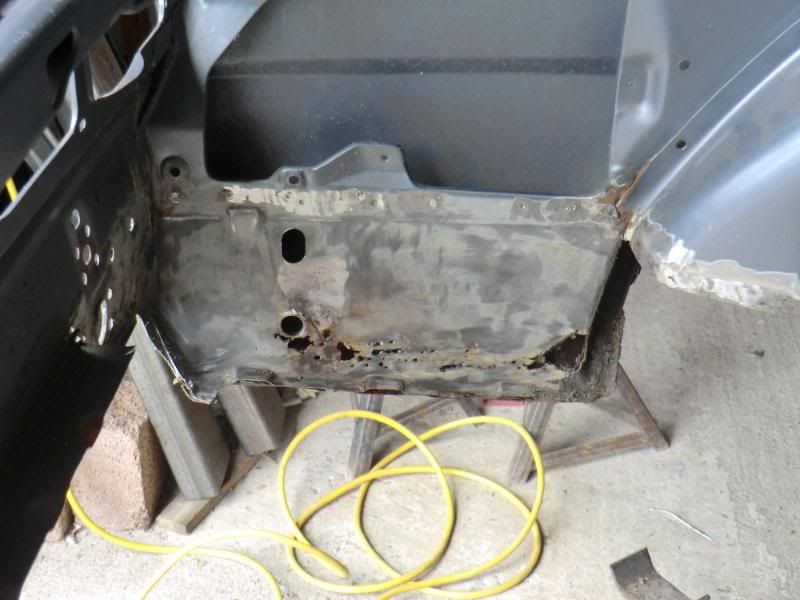
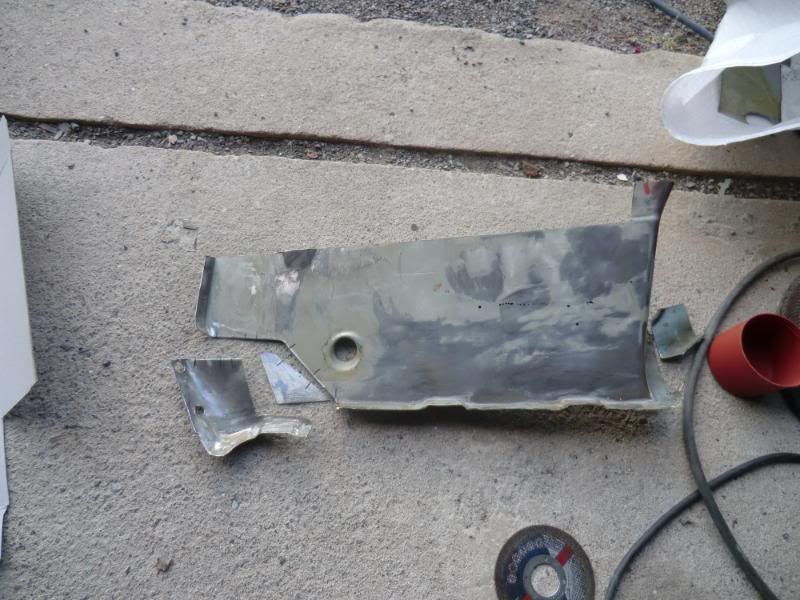
This was a bit harder as i had to use a small section of the original panel.
Using this
And repairing this at the same time
trimmed down (before the small section was added on)
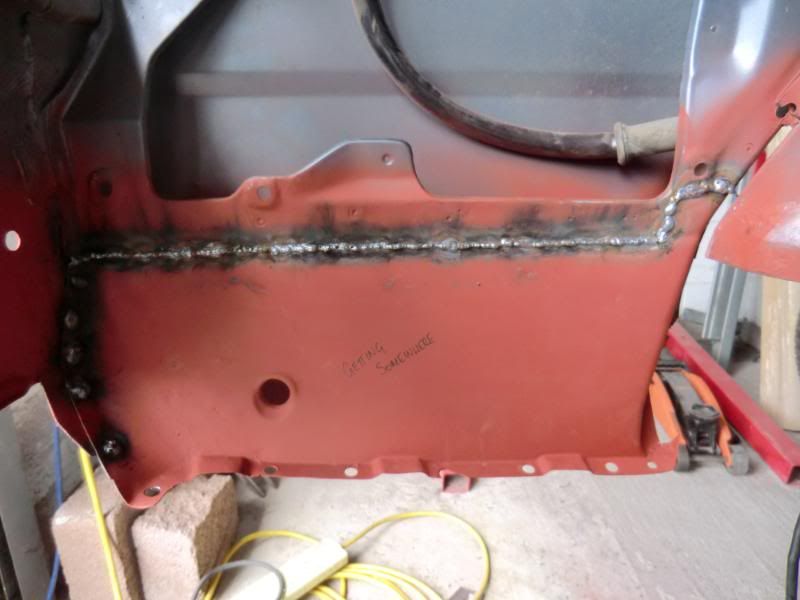
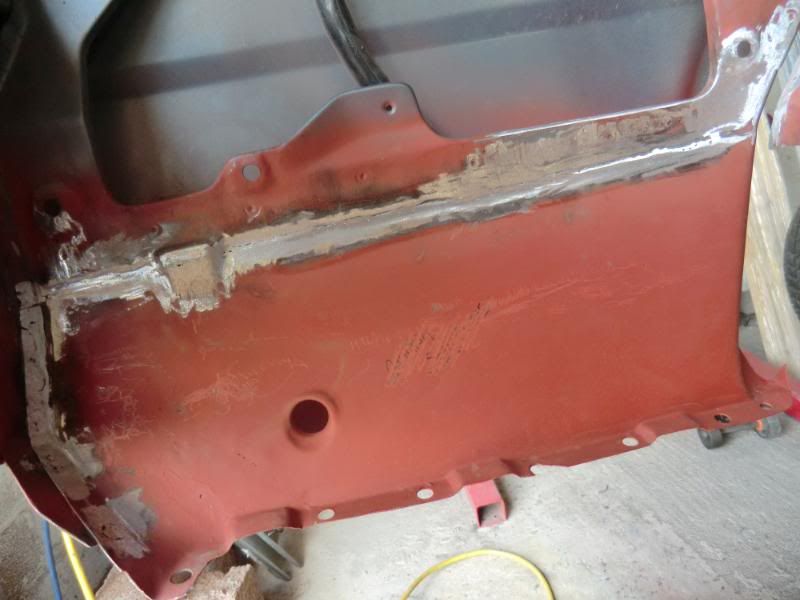
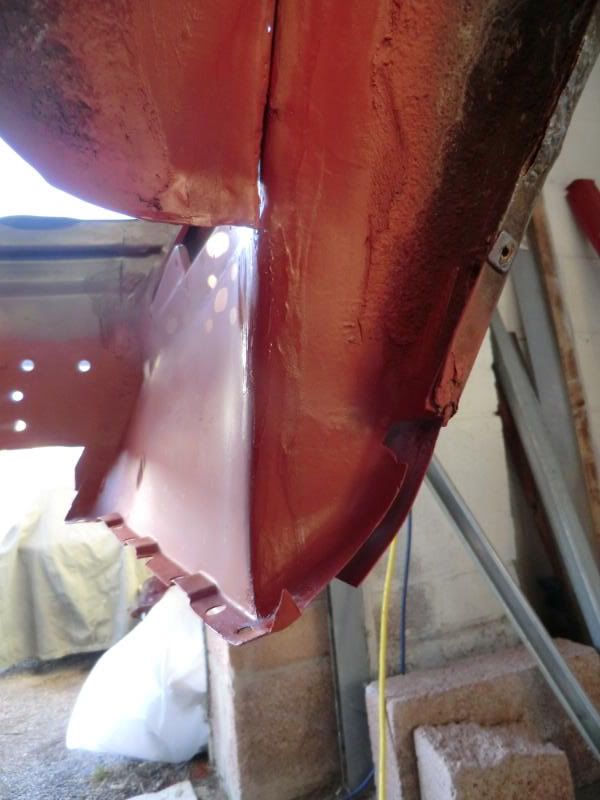
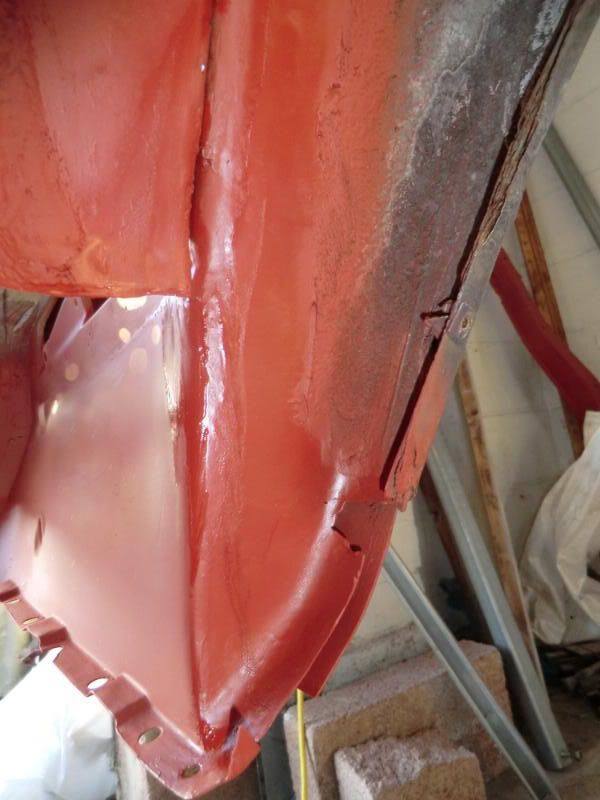
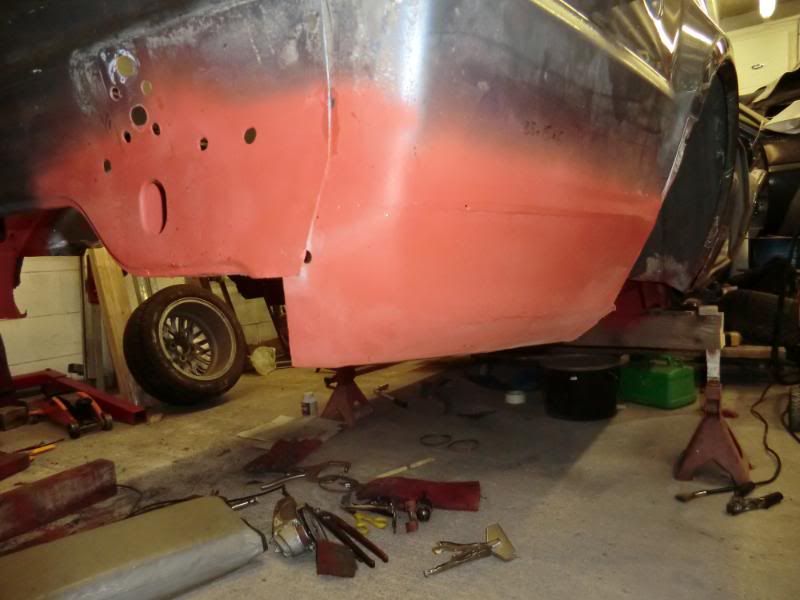
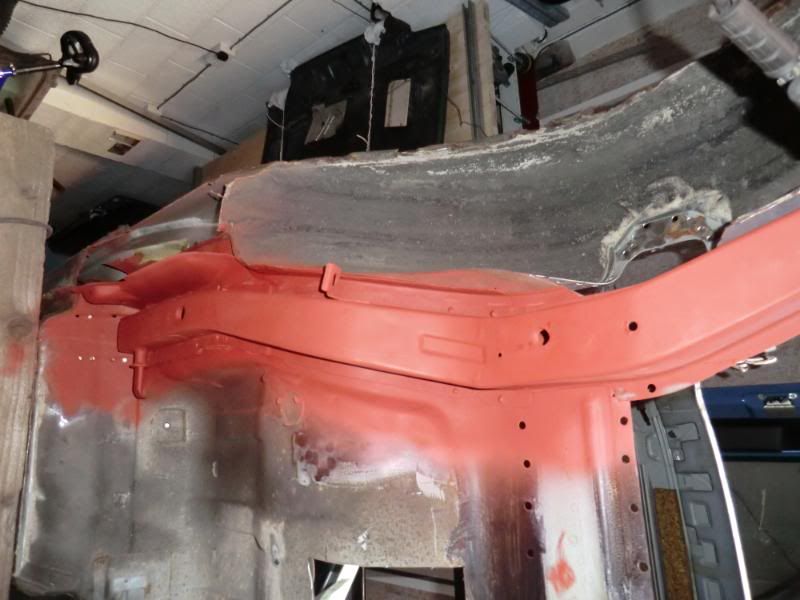
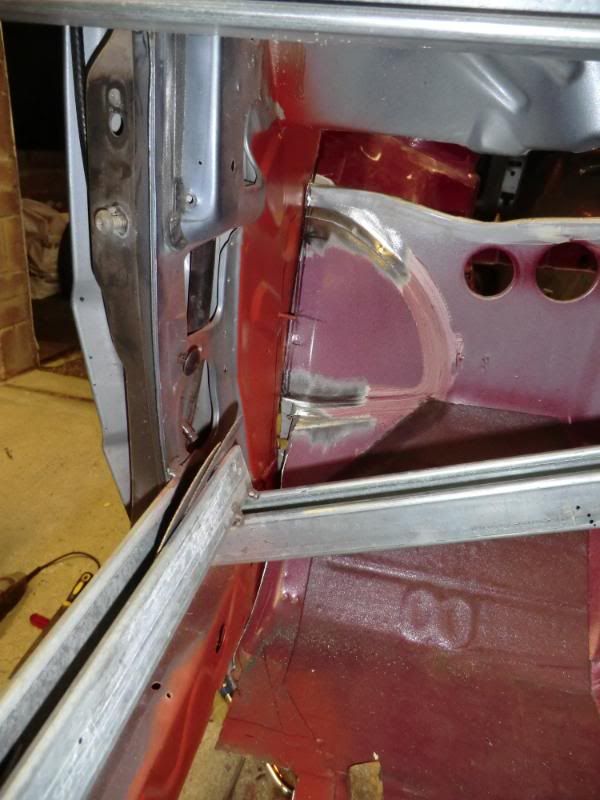
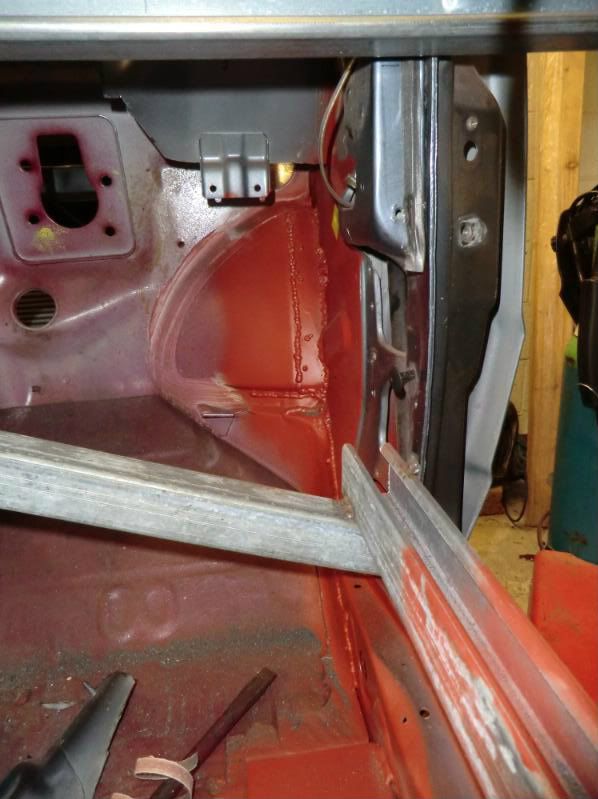
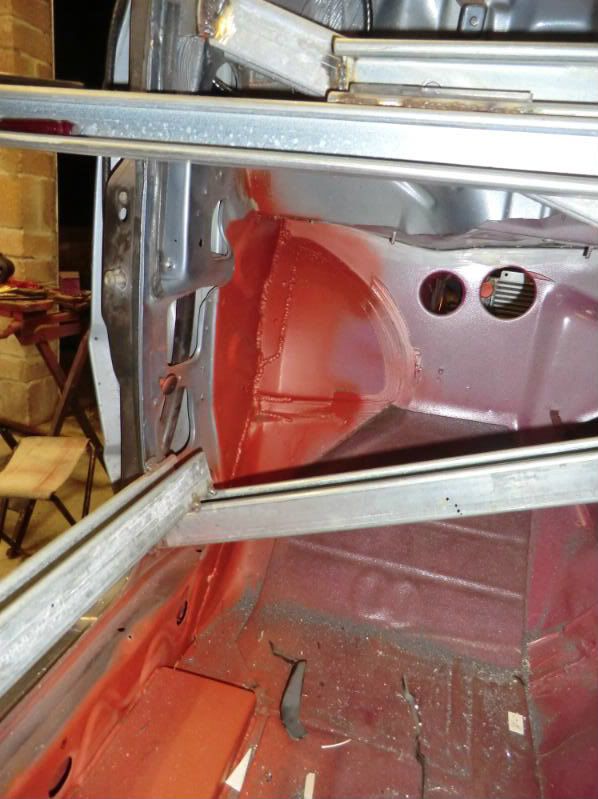
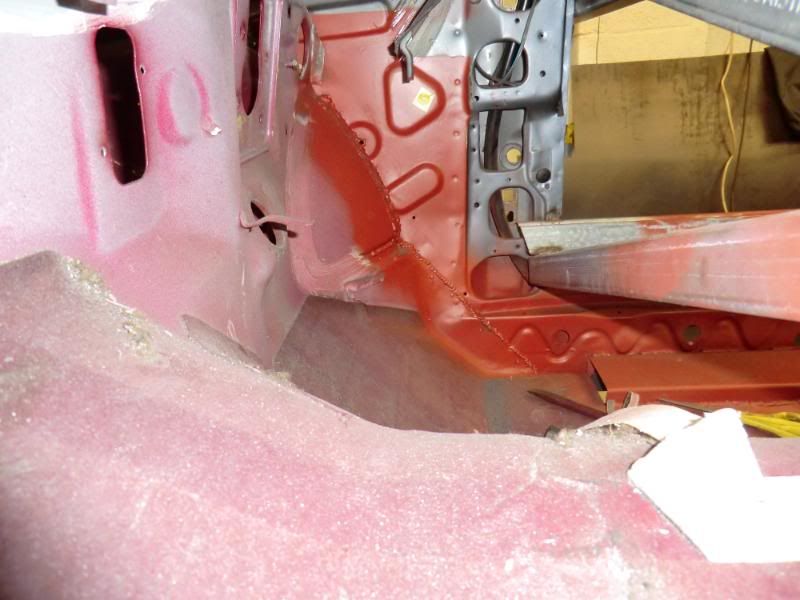
And pics of the finshed repairs.
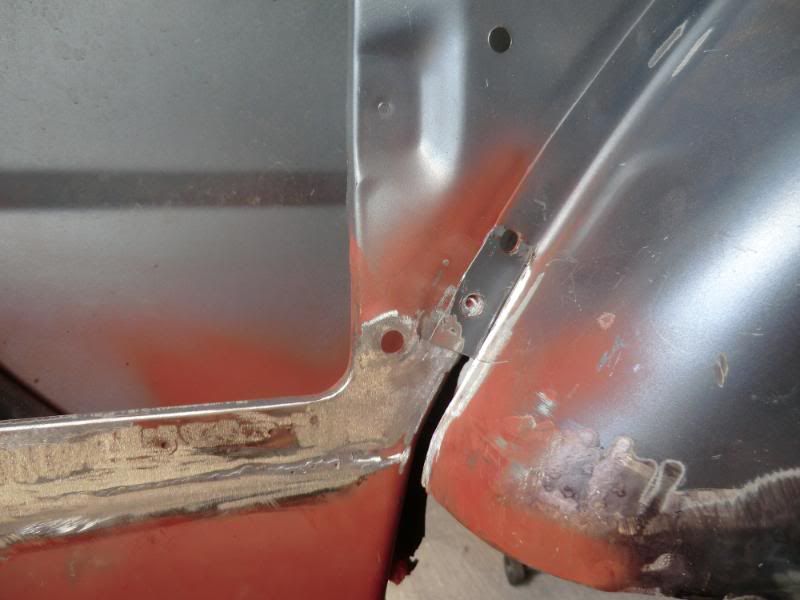
had to make a small piece for here

welded in an filed back
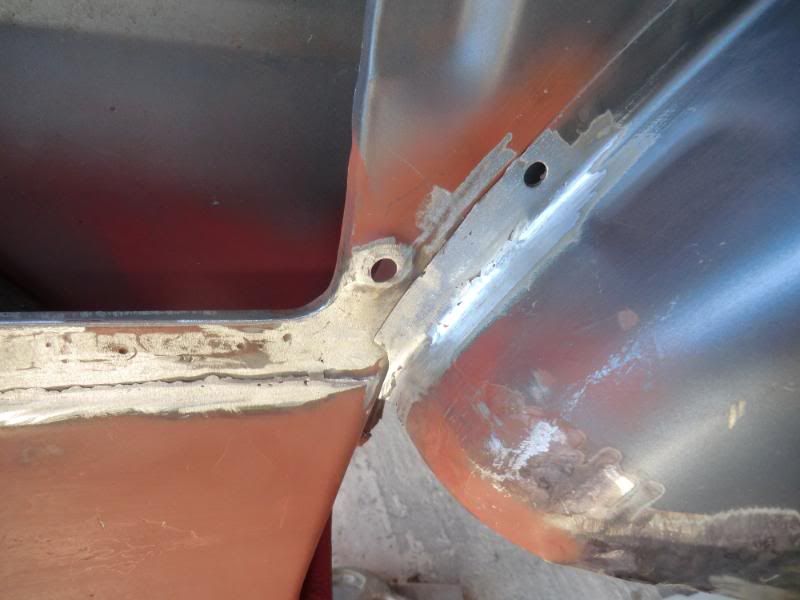
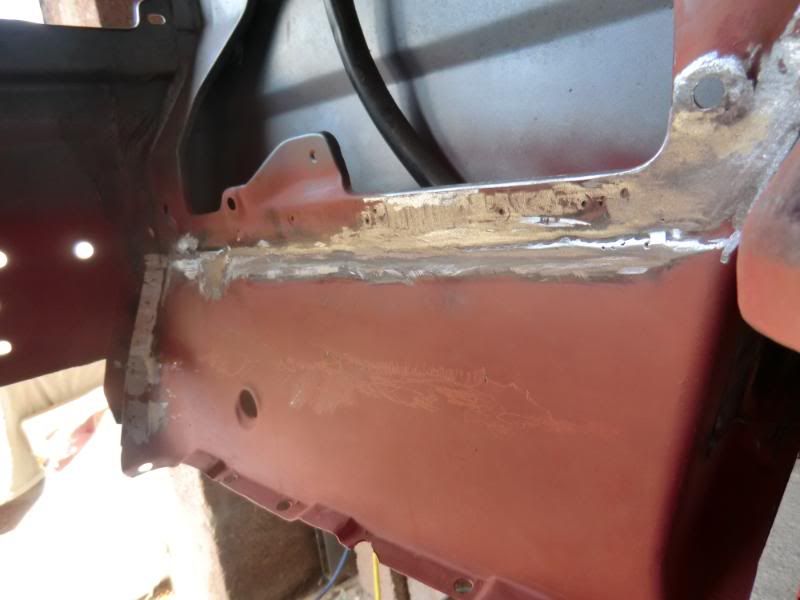
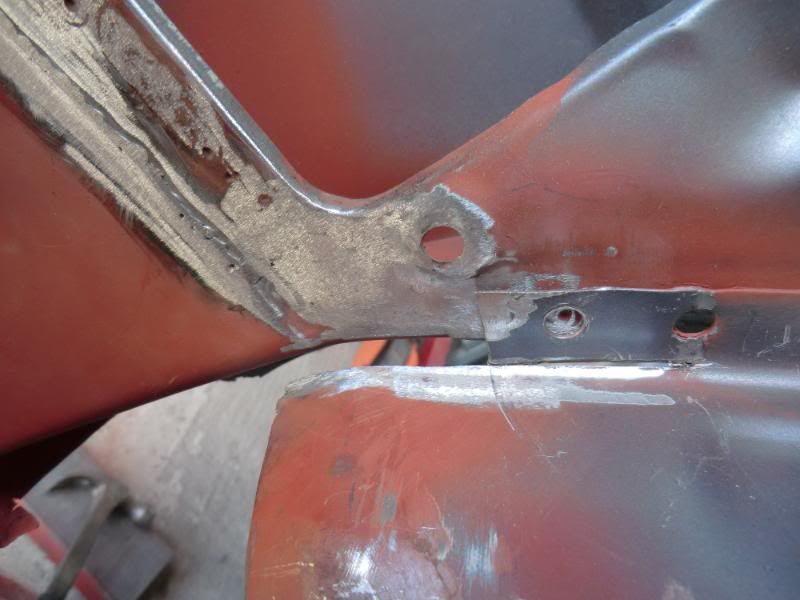
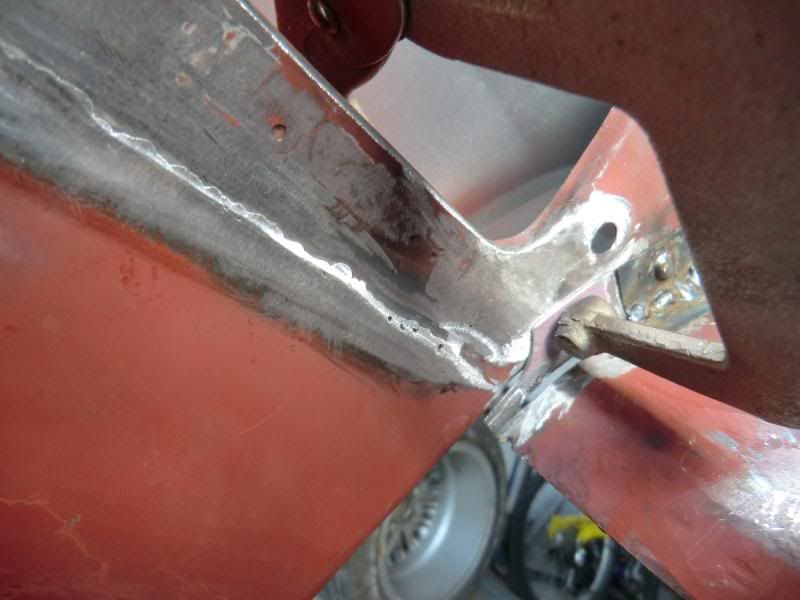
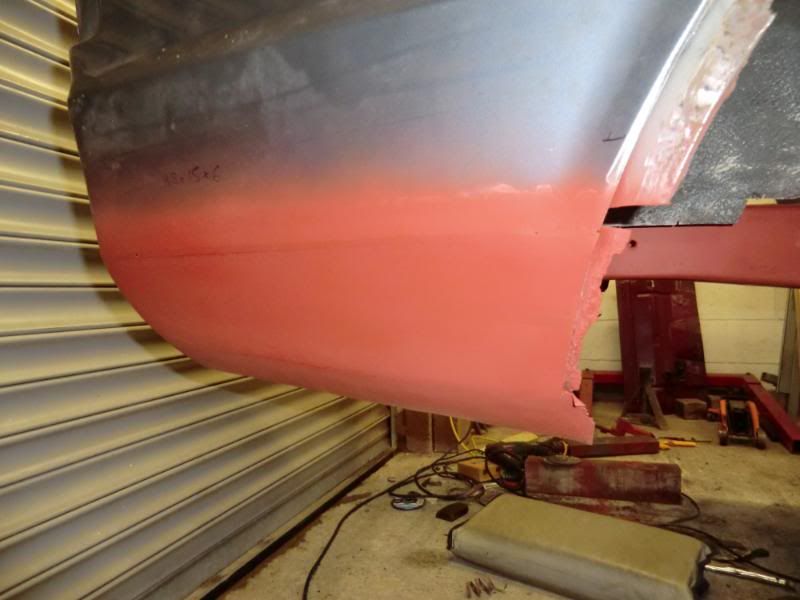
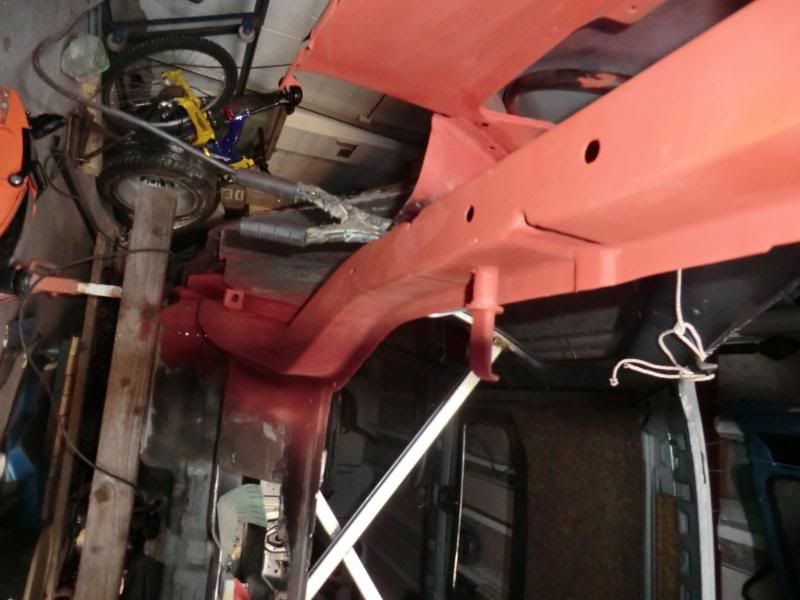
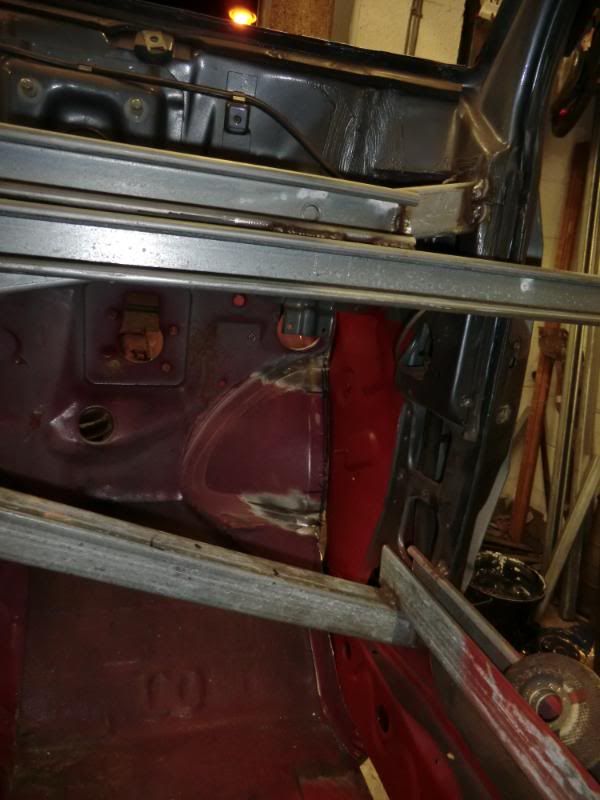
And the finished repair, Again the join is at floor level so as to hide the join

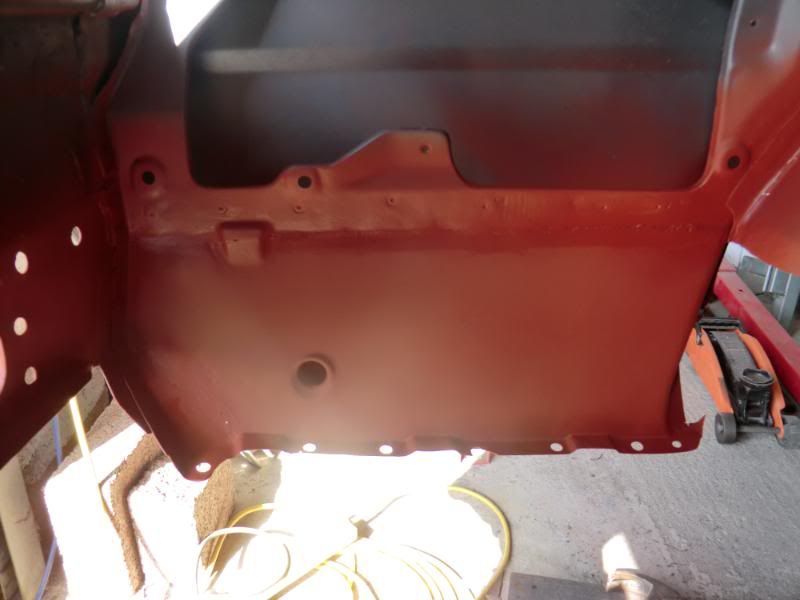
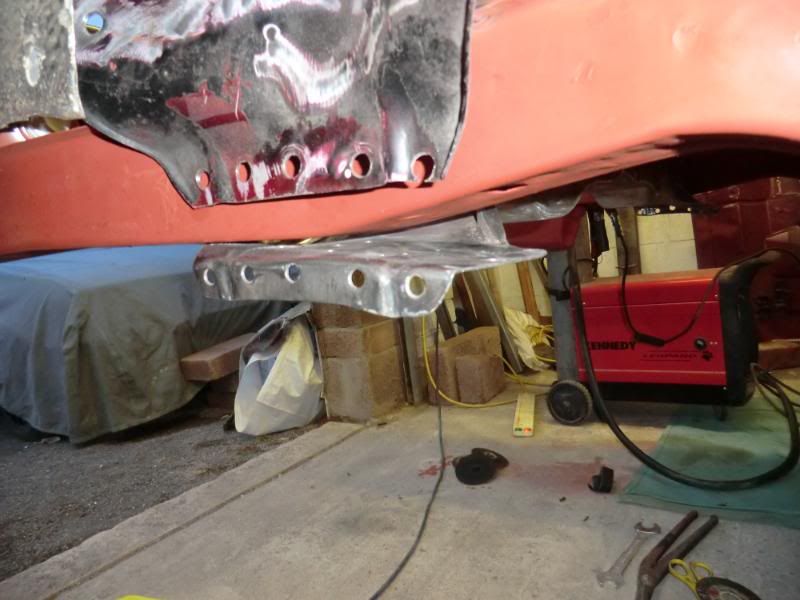
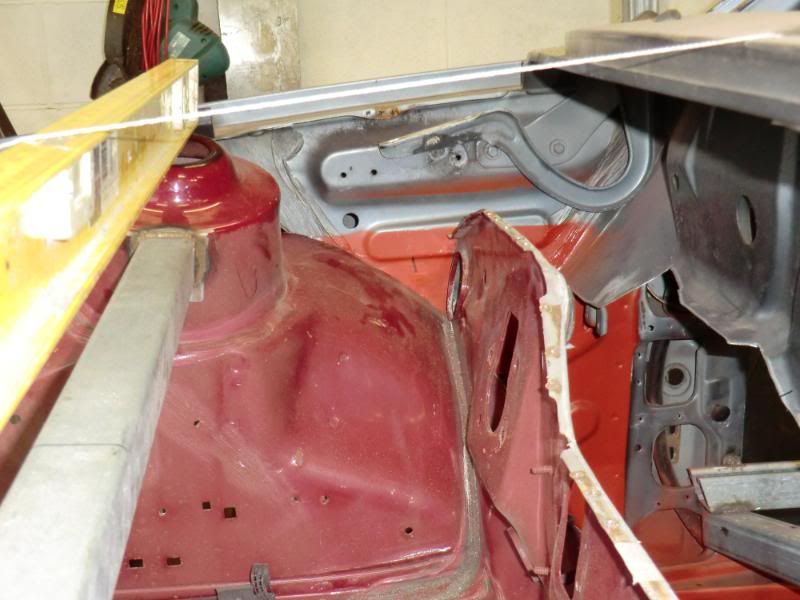
And the inner arch part.
It's coming along nice, and i'm pleased with my repair work so far, I'm gonna try to get some work done today, plus i need to make a small repair section for the passenger rear outter corner, i can get a repair panel but for the size of the section it seems silly to waste �30.
Thanks for looking
Ginger
I needed to replace both chassis rails, and both rear lower corners, the drivers side was the worst, but i manged to get the parts of a good convertable shell that i cut up about 3 years ago, I new i needed them so just kept both rear sides of the car after cutting it up, Removing the rails took about 4 hours and to say they were MINT is an understatement, after sand blasting i could easy have passed them of as NOS.
The lower rear corners were also salvaged, the drivers side was the better of the 2 but both usable. All parts that blasted have been red oxided.
Well it's starting to go back together
refitted
Drivers chassis rail
salvaged driver lower rear corner
to replace this (it was trimmed down and welded in along the floor line so as to hide the join
chassis rail and lower corner welded in (lost pics of the out side corner section, will get some more taken)
Then started on the passenger side corner.
From this
This was a bit harder as i had to use a small section of the original panel.
Using this
And repairing this at the same time
trimmed down (before the small section was added on)
And pics of the finshed repairs.
had to make a small piece for here
welded in an filed back
And the finished repair, Again the join is at floor level so as to hide the join
And the inner arch part.
It's coming along nice, and i'm pleased with my repair work so far, I'm gonna try to get some work done today, plus i need to make a small repair section for the passenger rear outter corner, i can get a repair panel but for the size of the section it seems silly to waste �30.
Thanks for looking
Ginger
12-06-2011, 04:53 PM
#43
PassionFord Post Whore!!

Join Date: May 2003
Location: aldershot
Posts: 3,577
Likes: 0
Received 0 Likes
on
0 Posts
Massive job you got on there mate, much respect. quick question what did you do with loom out of that sierra, i need one real bad mate, the whole lot would be great if you still have it, could help your costs
 12-06-2011, 08:30 PM
#45
looking good fella ,
know a mate whos building one and had the same issuse regards the hoop fouling the mk 4 floor section when set at the correct ride height ect,
i boxxed his aswell iirc ,
my old mk 4 one ( see the very beginning of my resto ) had the beam notched for clearance , basically involved cutting the top half of the hoop out and flipping it and re welding it bk in ,
still good progress bud
beef
13-06-2011, 11:01 AM
#46
know a mate whos building one and had the same issuse regards the hoop fouling the mk 4 floor section when set at the correct ride height ect,
i boxxed his aswell iirc ,
my old mk 4 one ( see the very beginning of my resto ) had the beam notched for clearance , basically involved cutting the top half of the hoop out and flipping it and re welding it bk in ,
beef
i boxxed his aswell iirc ,
my old mk 4 one ( see the very beginning of my resto ) had the beam notched for clearance , basically involved cutting the top half of the hoop out and flipping it and re welding it bk in ,
beef
Cheers Beef, i did have a look and saved the pics from yours a while back, gonna see if i can leave the hoop alone for now and modify the floor and seat base around it.
Cheers all
Ginger
14-06-2011, 09:40 PM
#47
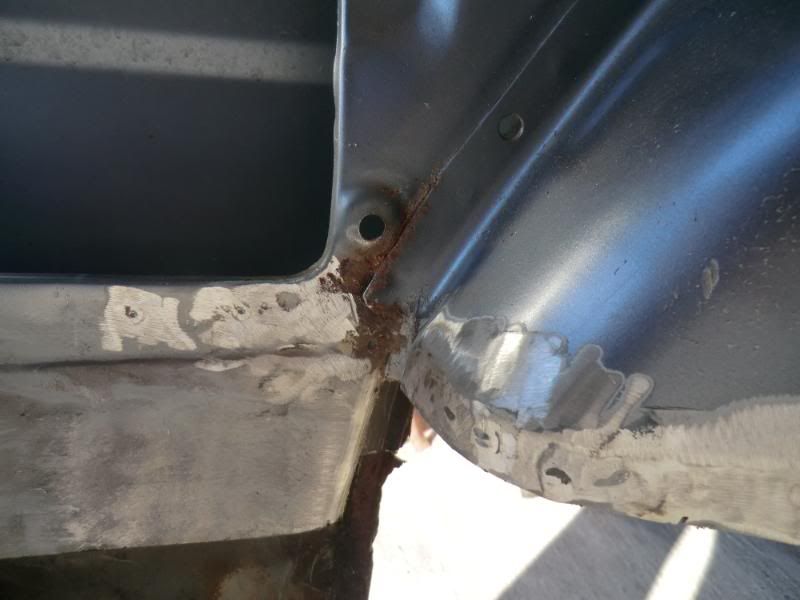
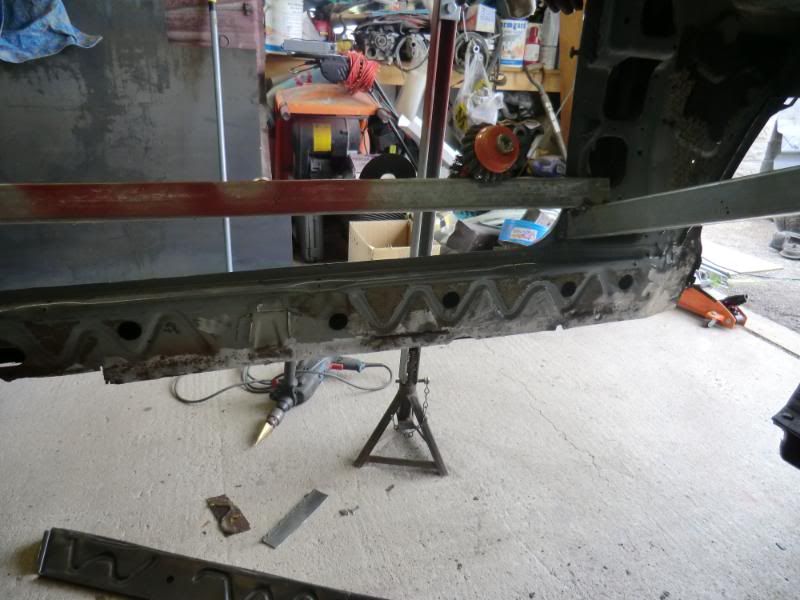
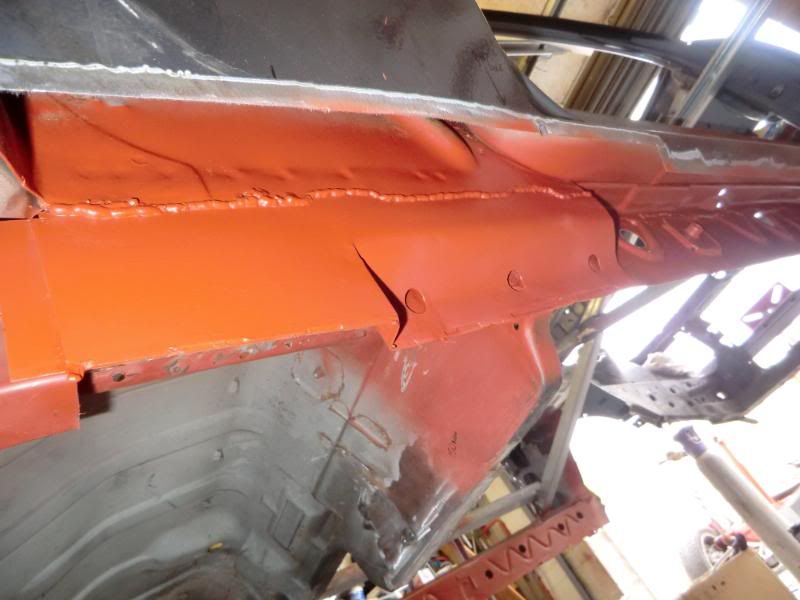
Managed to get a bit done on Sunday afternoon seen as it was PISSING down, also manged a couple of hours after work today.
Pics of the out side rear lower right corner i forgot on the last update.
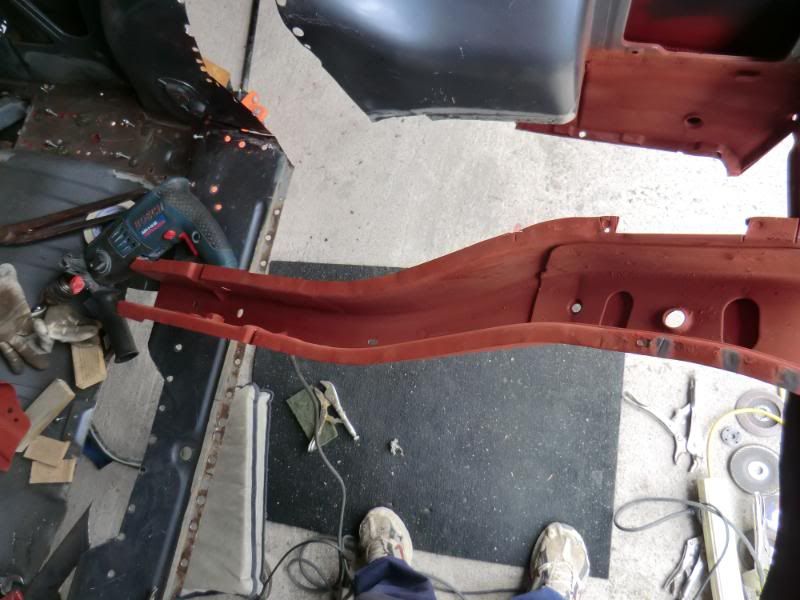
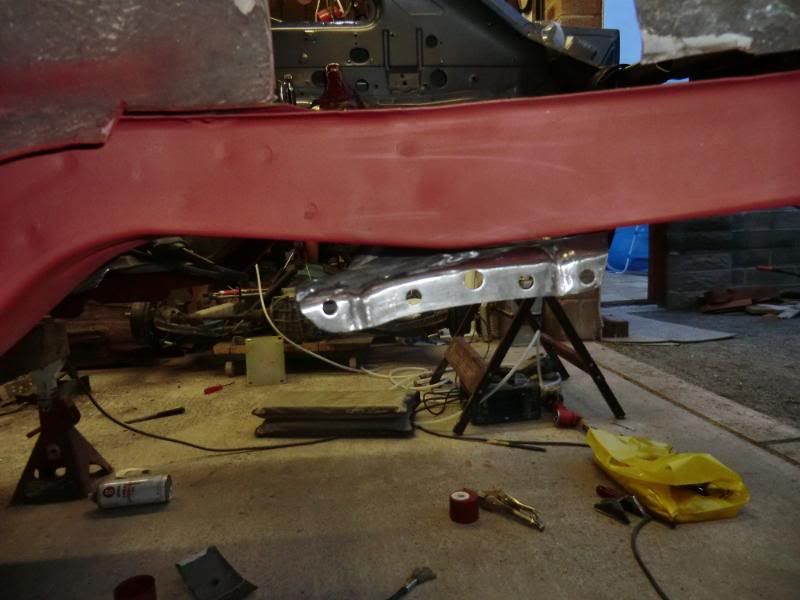
Left side chassis rail ready and clamped in position
And fitted
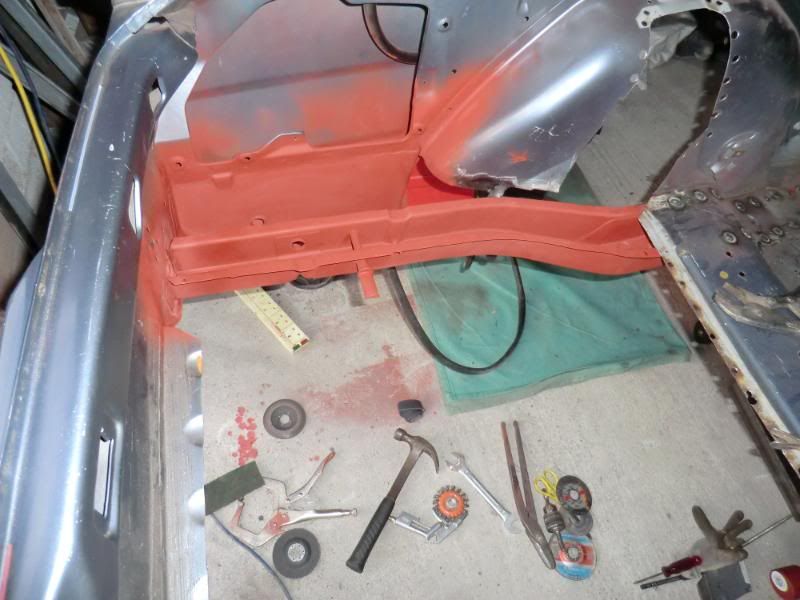
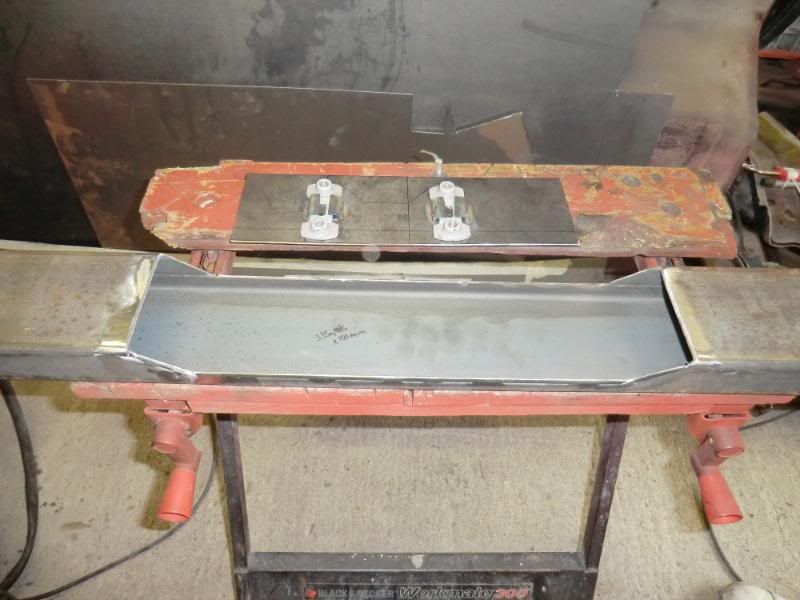
cross member before and after excess removed

Tek screwed in to see how and were i need to extend and add mounting boxing ( I love TEK screw)
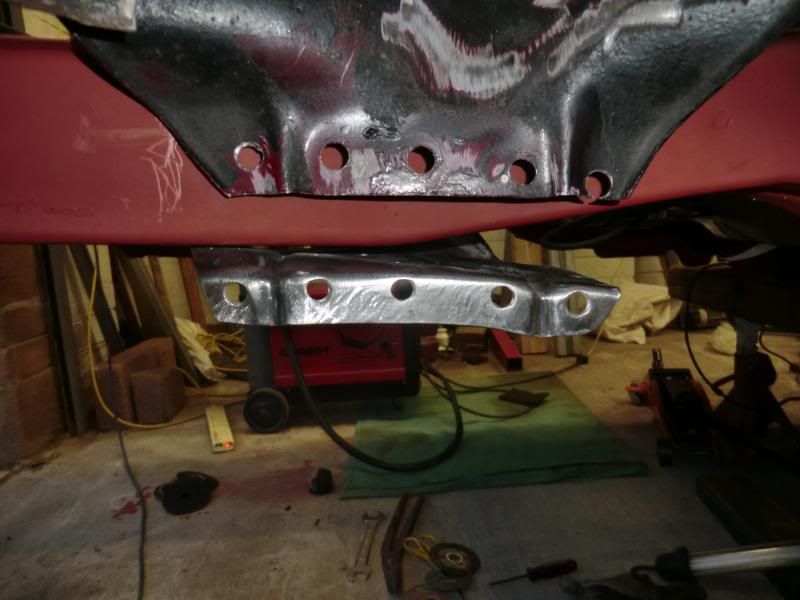
The under side were the chassis rails need exrta boxing to meet the cross section.
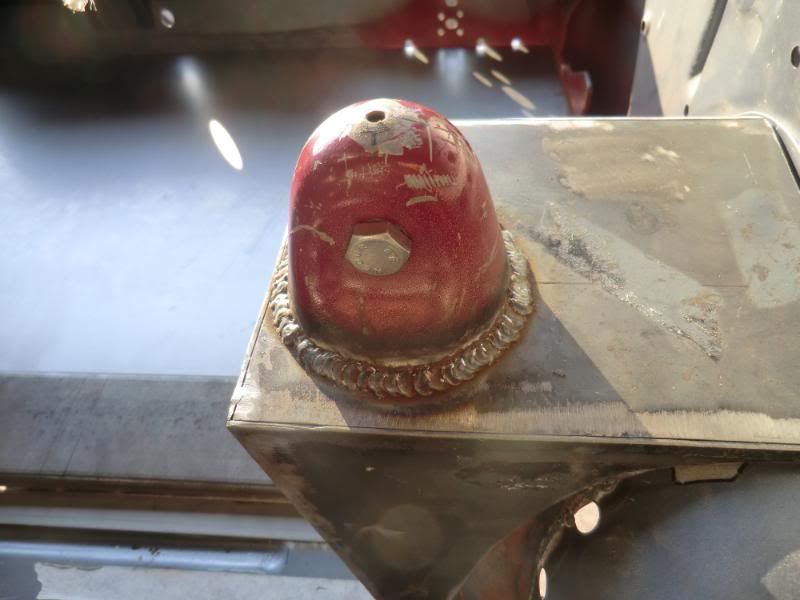
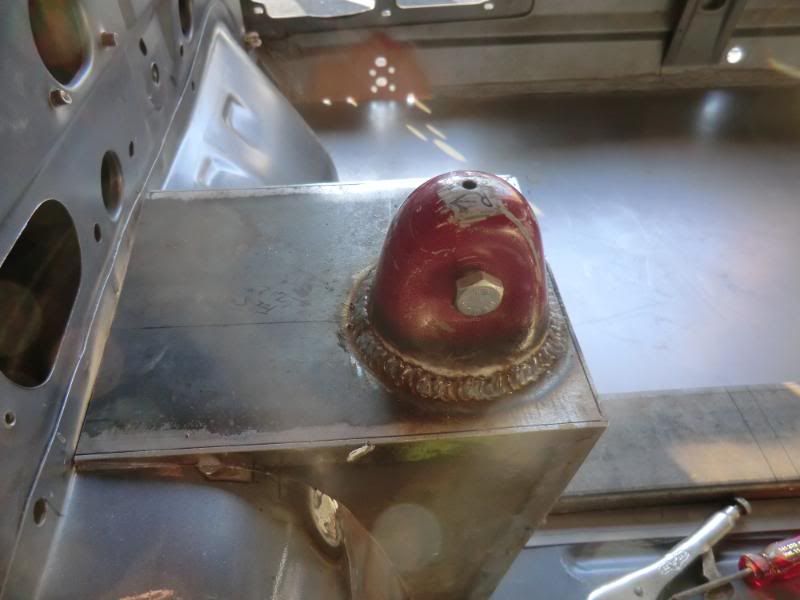
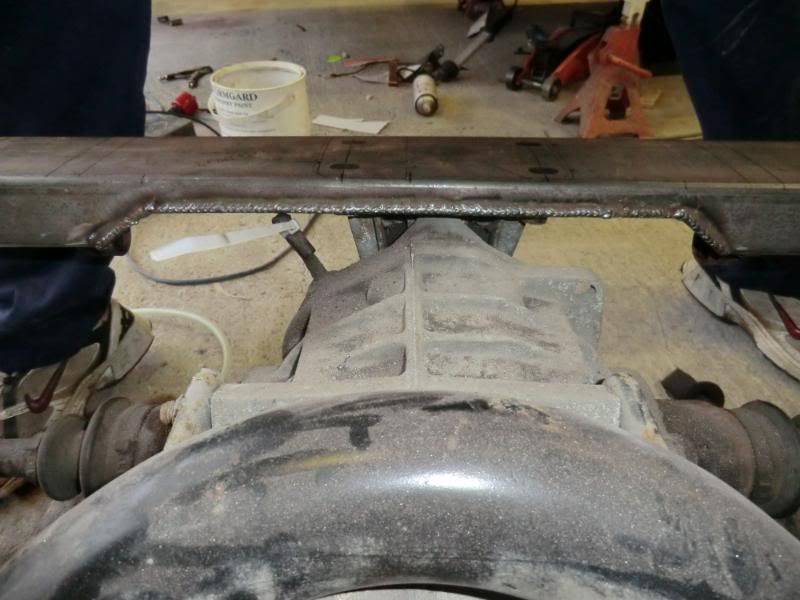
The bottom 50mm of the turret will be cut off and extended so that the spotweld holes line back up, this is about 40-50mm, this will do 2 jobs, 1st it'll put the mount in exactly the right place and correct angle and will raise the top mount to the hight i need it. Reason for the extra height is because the diff will be mounted 45mm ish higher with a coustom mount, so I have to do this to get the correct shock travel.
Tomorrow i'm gonna get the complete axle back under the car just to check the cross section is in the right place before i start extending it and fabricating some boxing.
Thanks for looking
Ginger
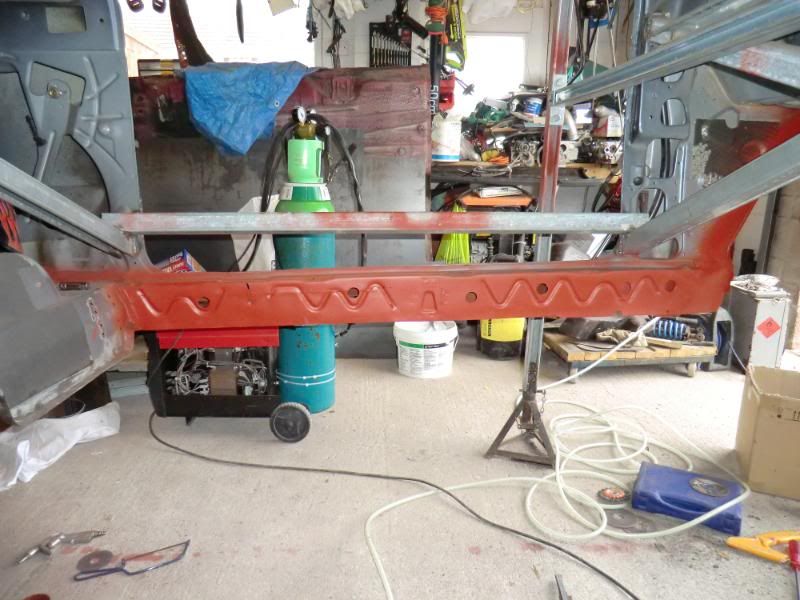
Pics of the out side rear lower right corner i forgot on the last update.
Left side chassis rail ready and clamped in position
And fitted
cross member before and after excess removed
Tek screwed in to see how and were i need to extend and add mounting boxing ( I love TEK screw)
The under side were the chassis rails need exrta boxing to meet the cross section.
The bottom 50mm of the turret will be cut off and extended so that the spotweld holes line back up, this is about 40-50mm, this will do 2 jobs, 1st it'll put the mount in exactly the right place and correct angle and will raise the top mount to the hight i need it. Reason for the extra height is because the diff will be mounted 45mm ish higher with a coustom mount, so I have to do this to get the correct shock travel.
Tomorrow i'm gonna get the complete axle back under the car just to check the cross section is in the right place before i start extending it and fabricating some boxing.
Thanks for looking
Ginger
21-06-2011, 09:08 PM
#48
.
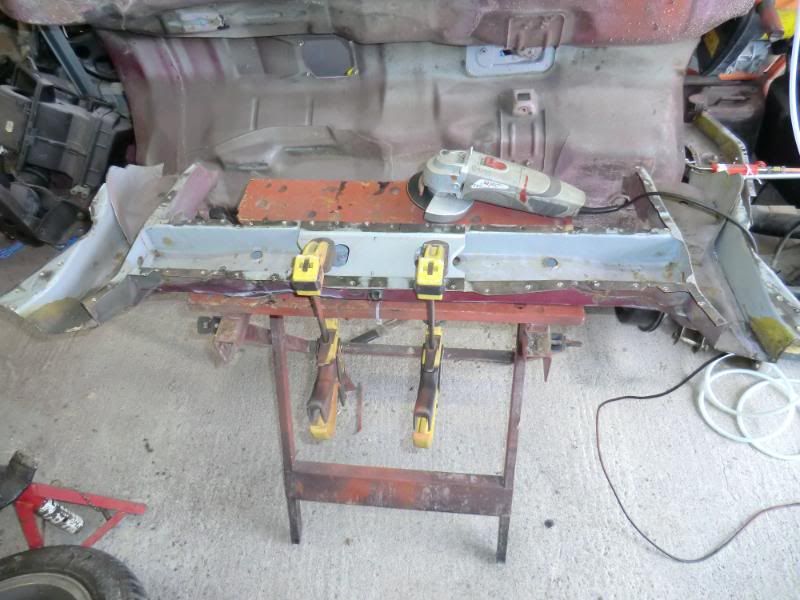
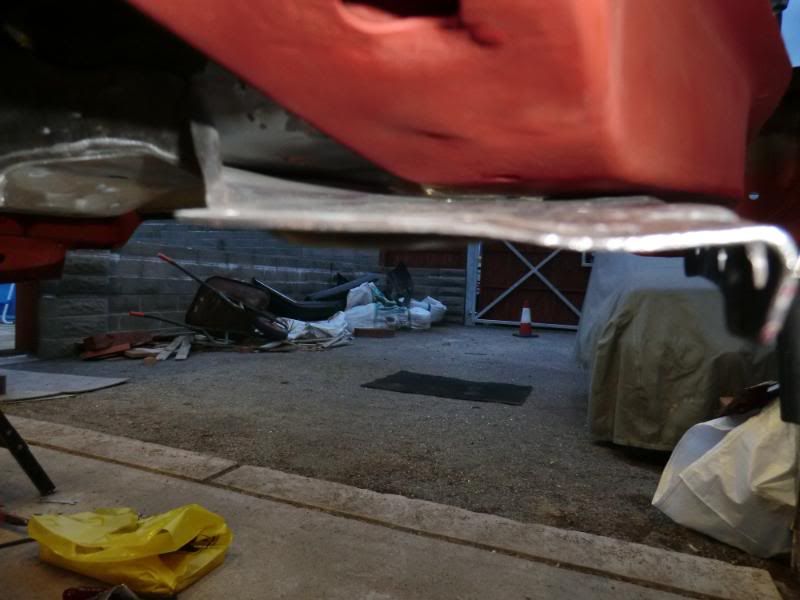
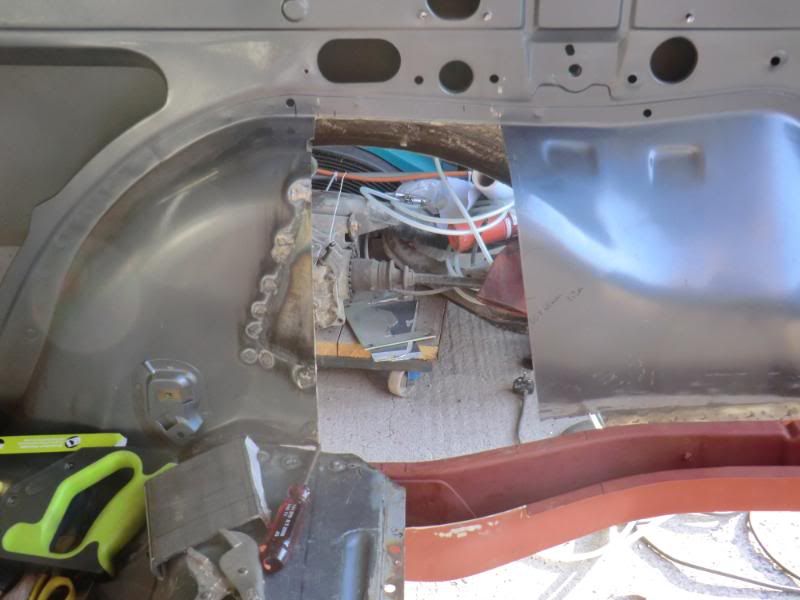
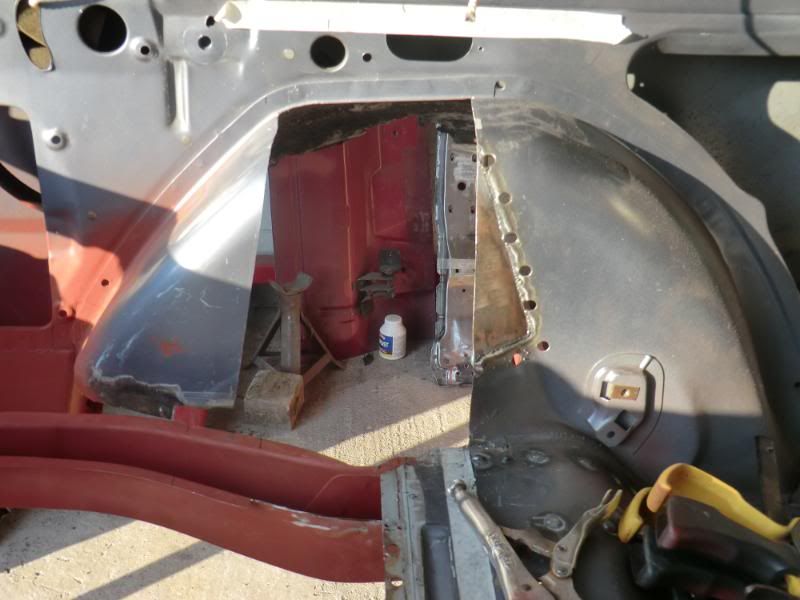
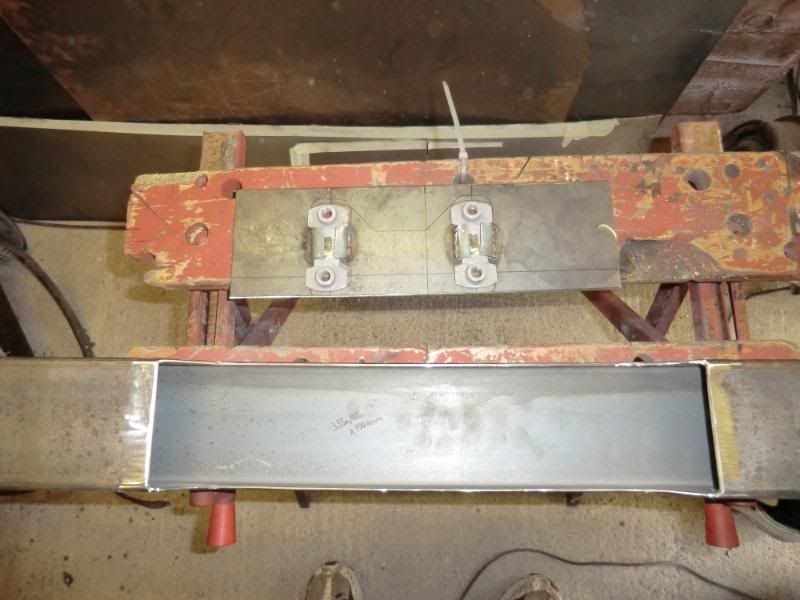
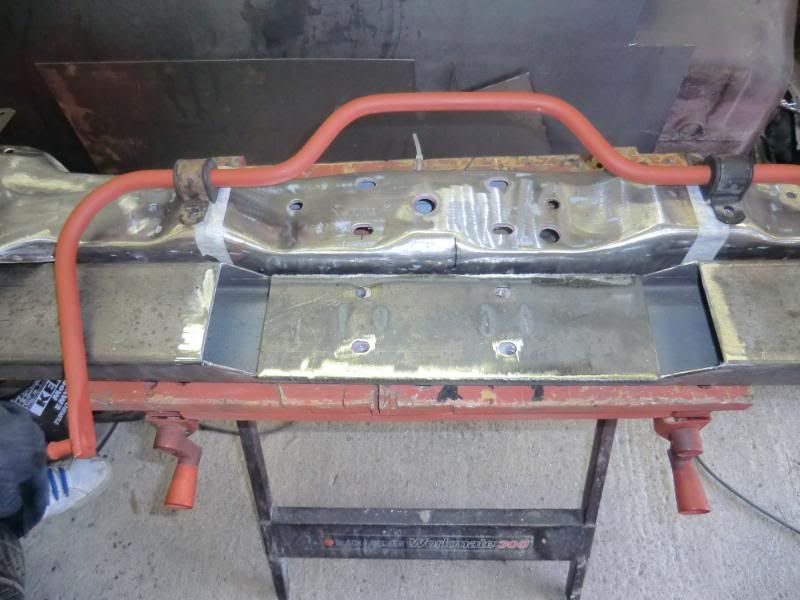
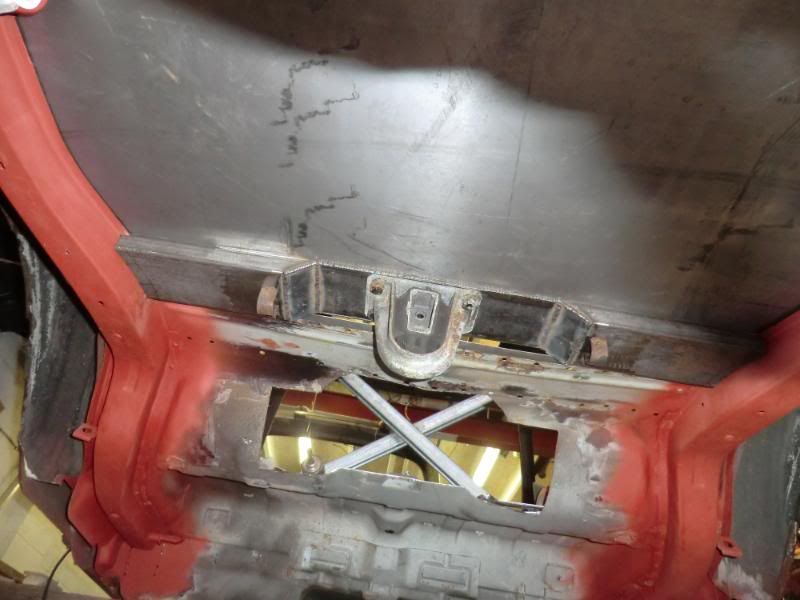
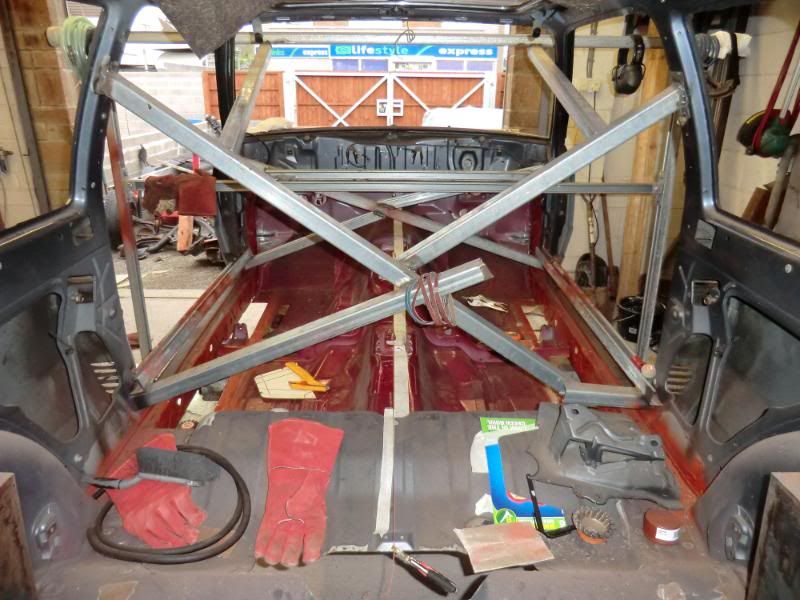
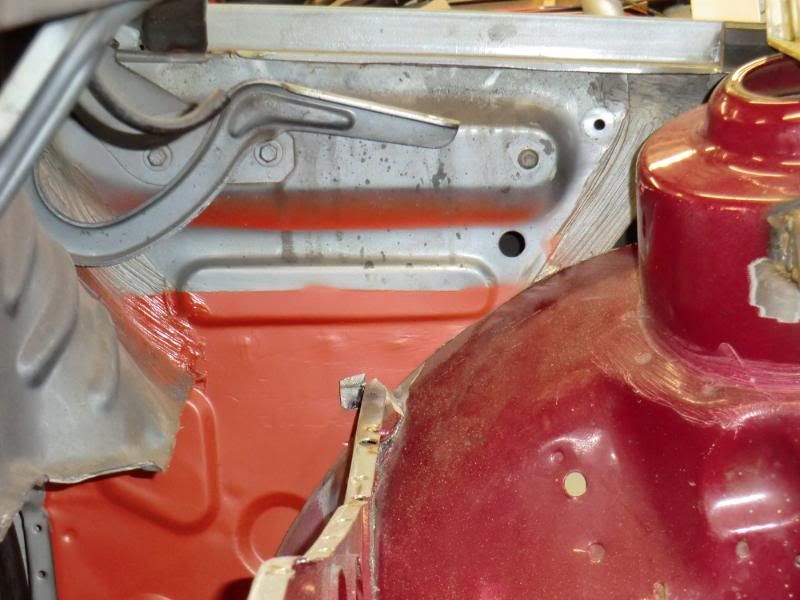
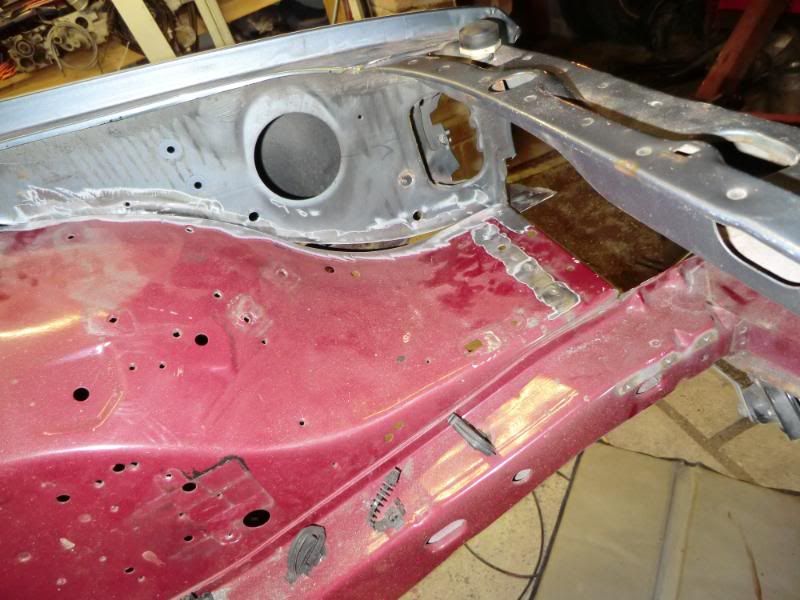
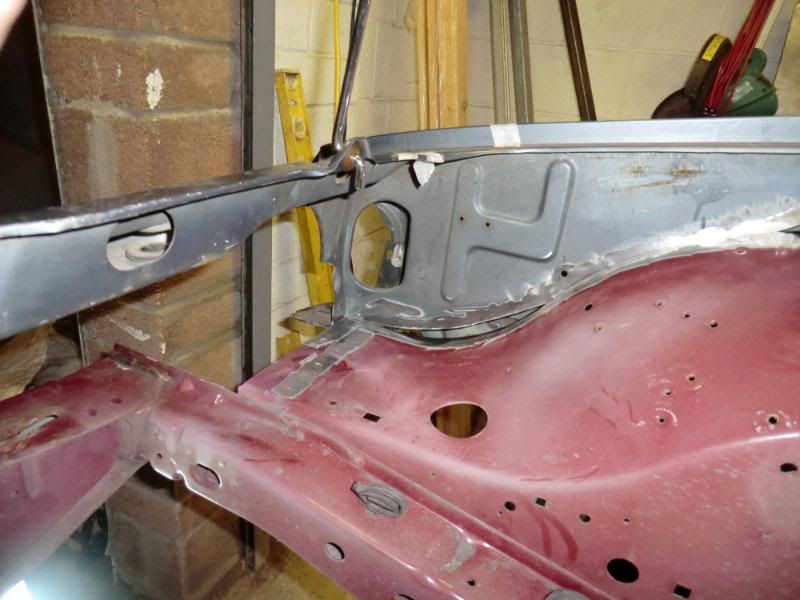
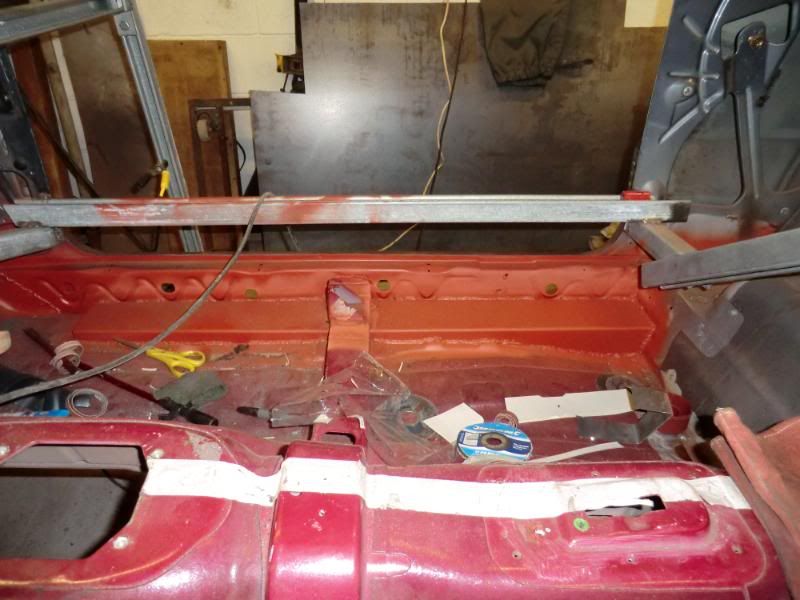
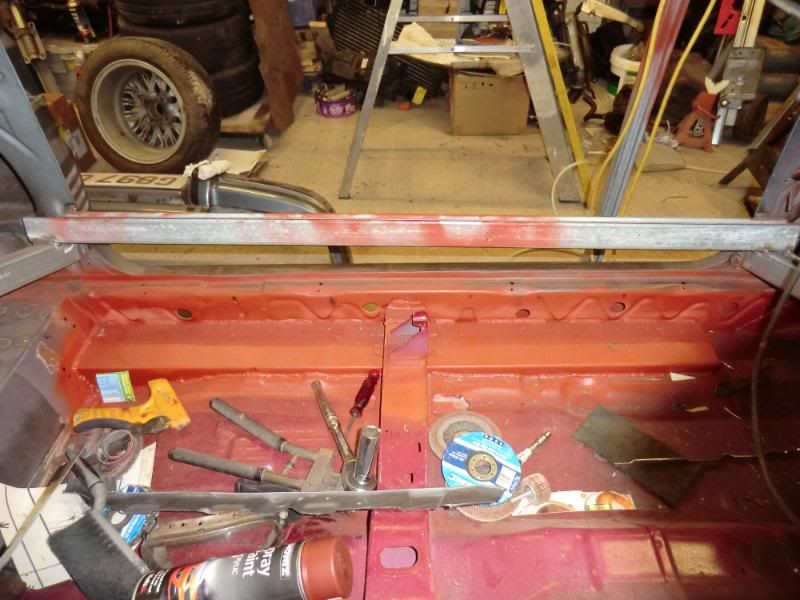
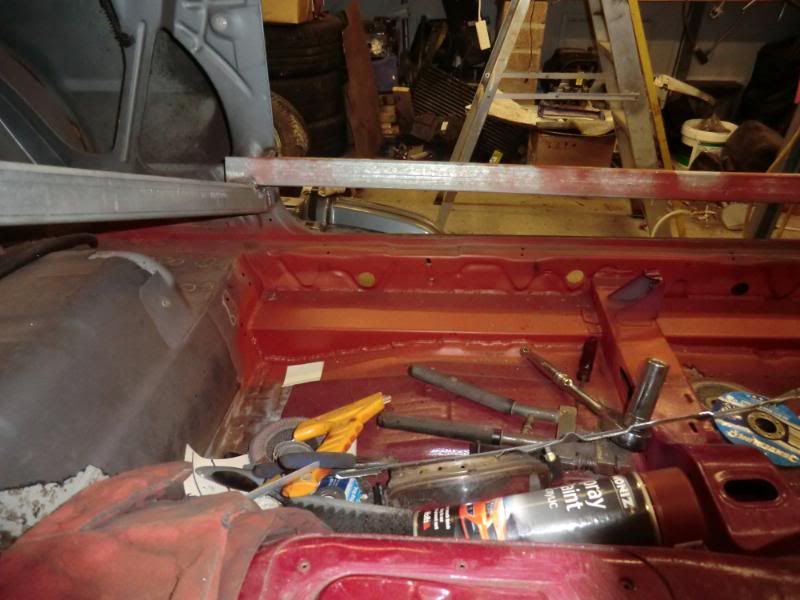
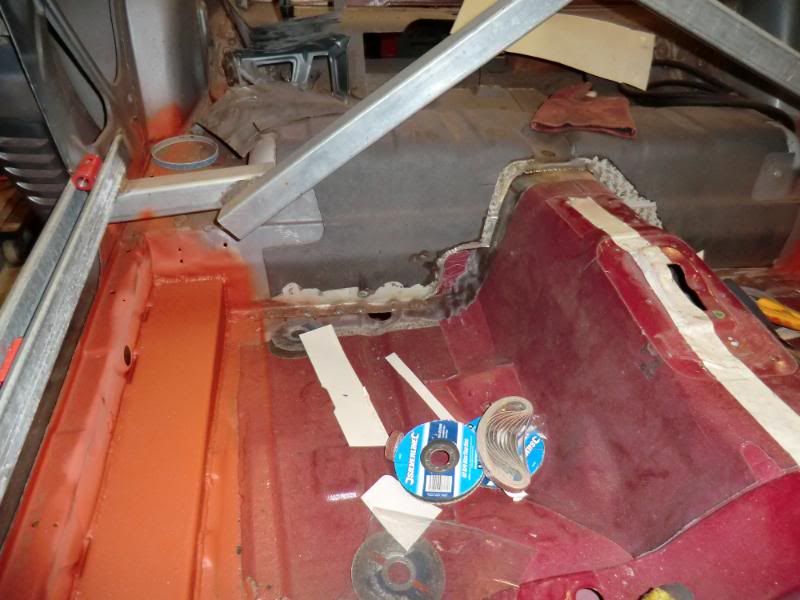
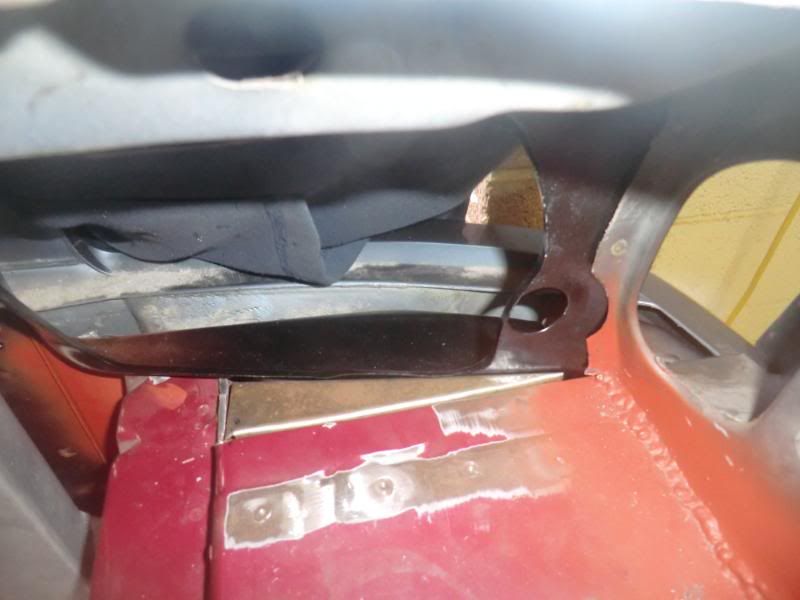
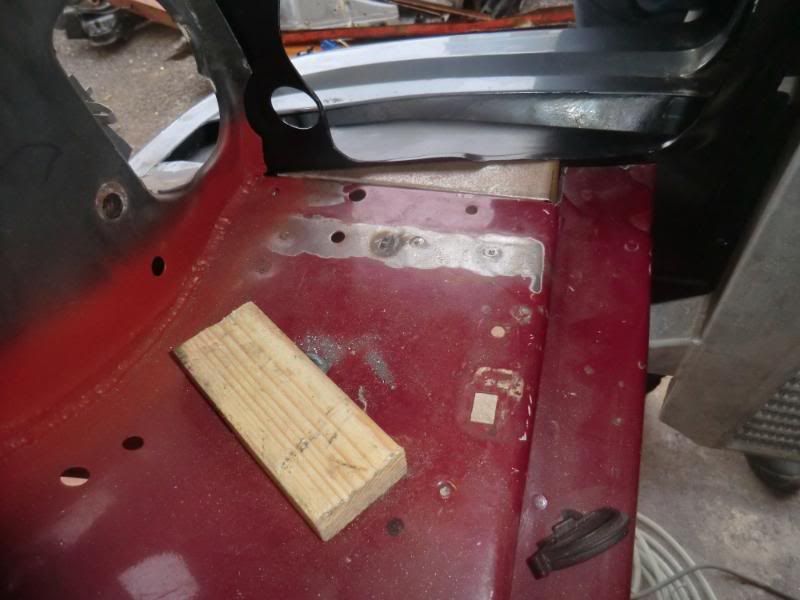
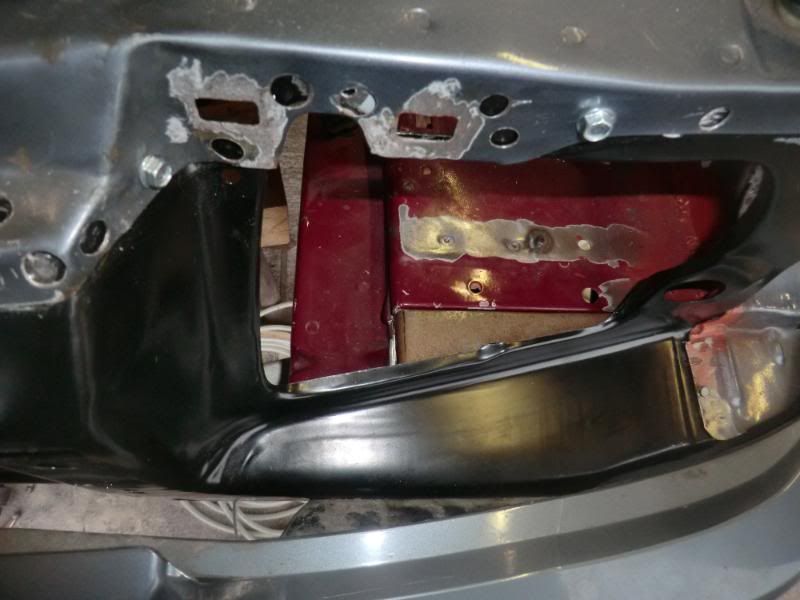
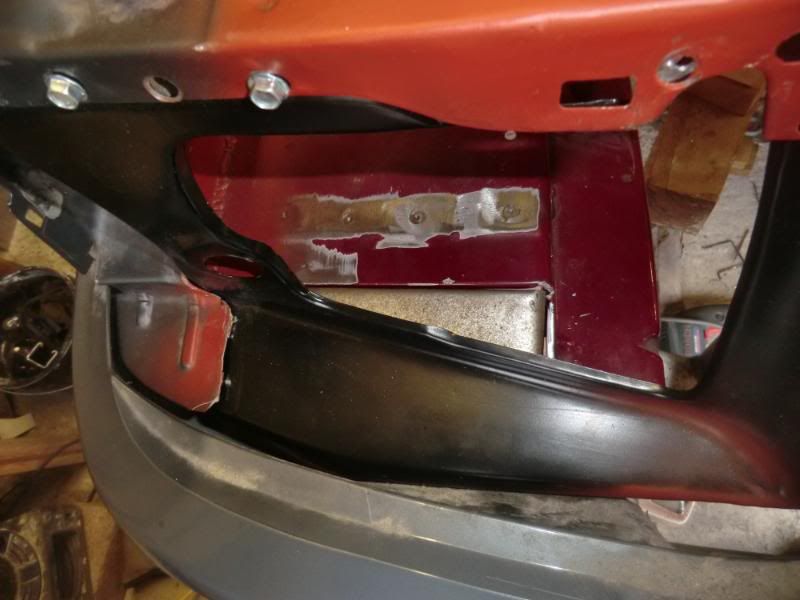
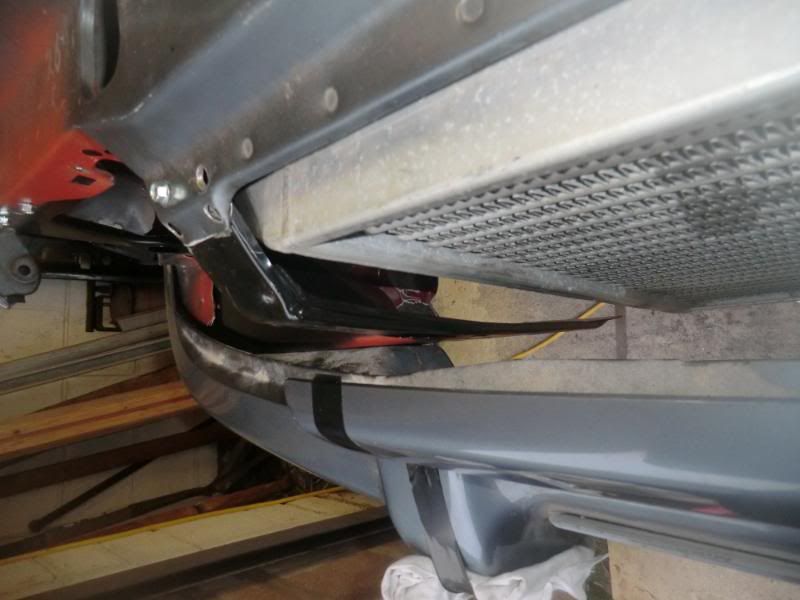
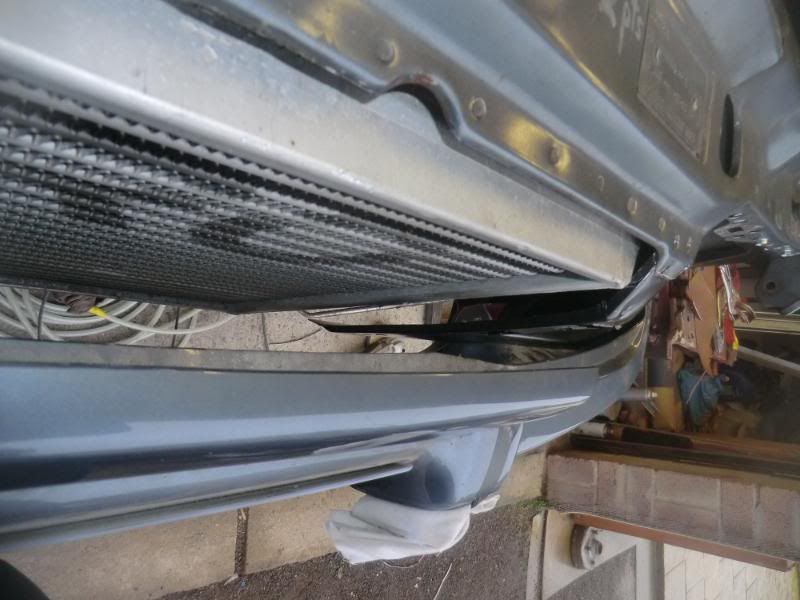
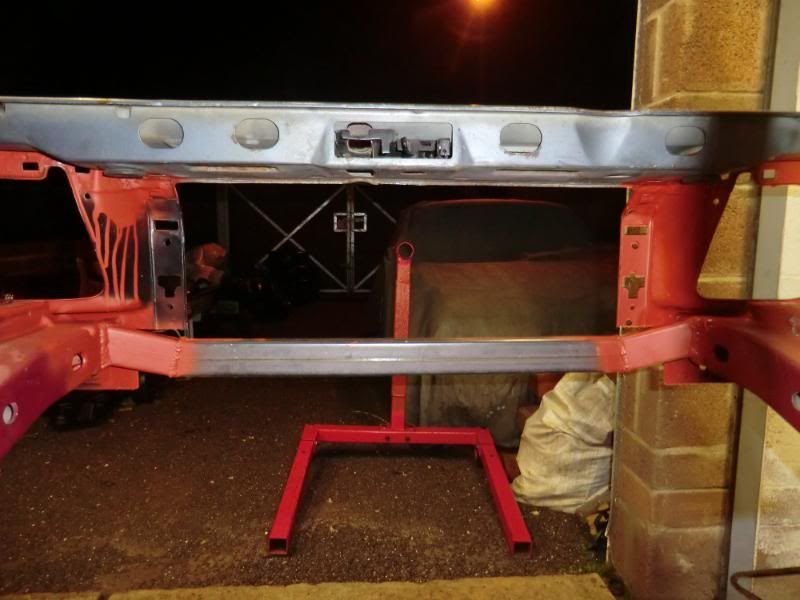
Well after a few wasted hours trying to use/modify the Sierra rear turrets i decided it's a no go, i had them in place (sort of)
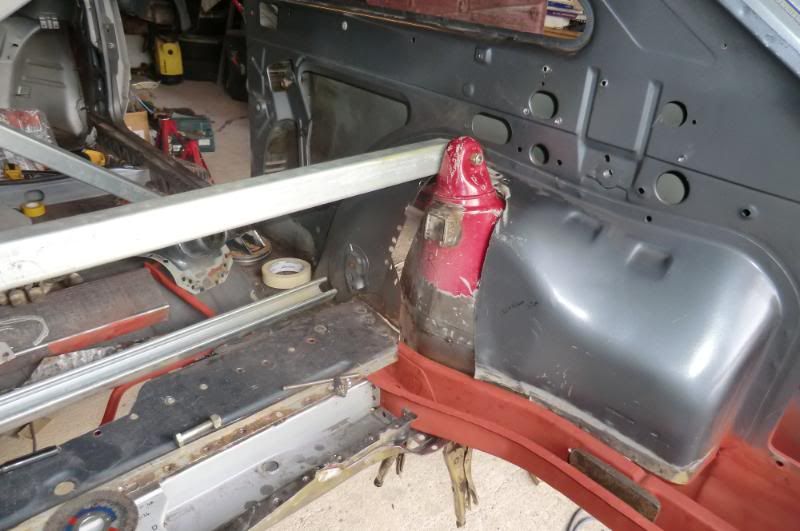
The bar is the brace i made before cutting the car up, and you can see how fair they needed moving.
Anyway, due to working 5-6 days a week i find it hard to get to places to pick up or get stuff fabricated, So today i happened to be working around the corner from a local steel suppliers, as it was so close the tracker on my van would not be an issue
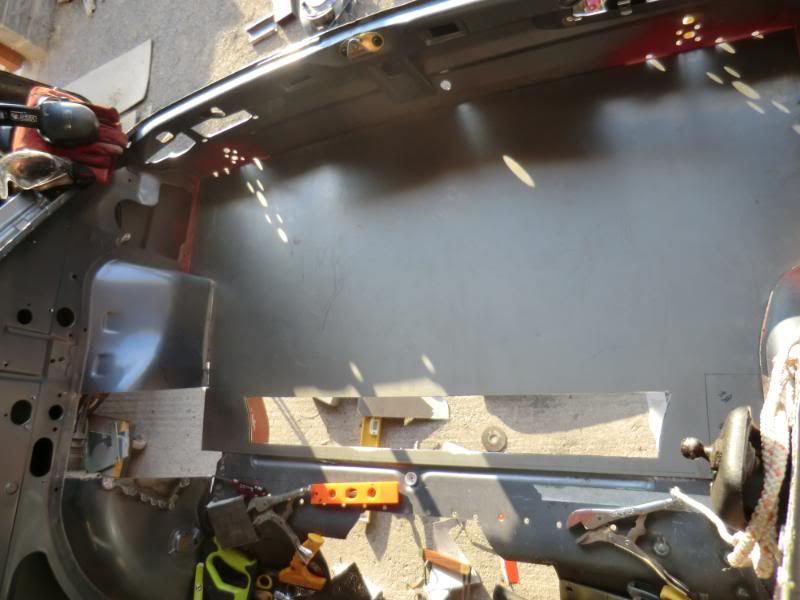
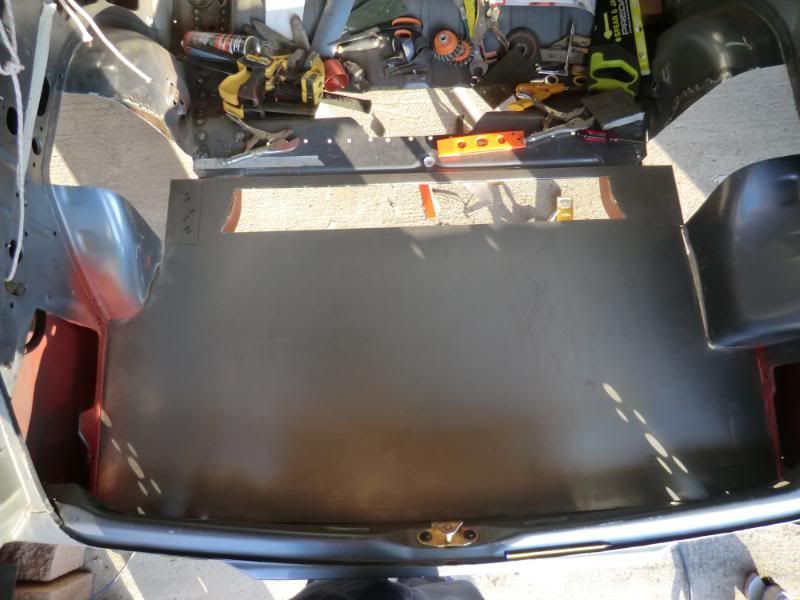
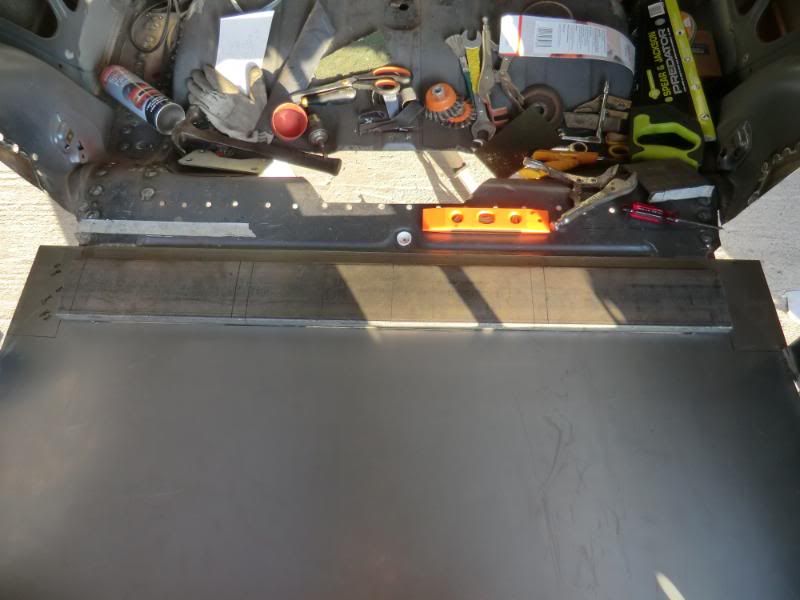
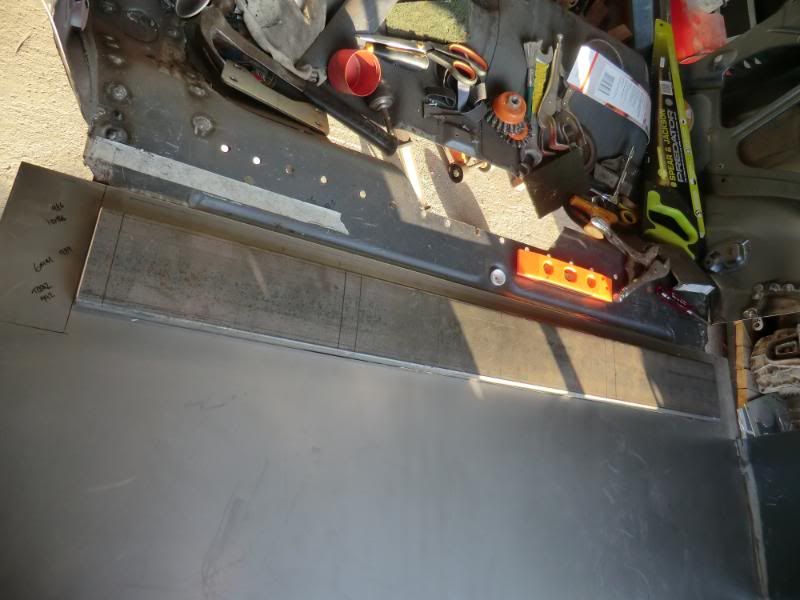
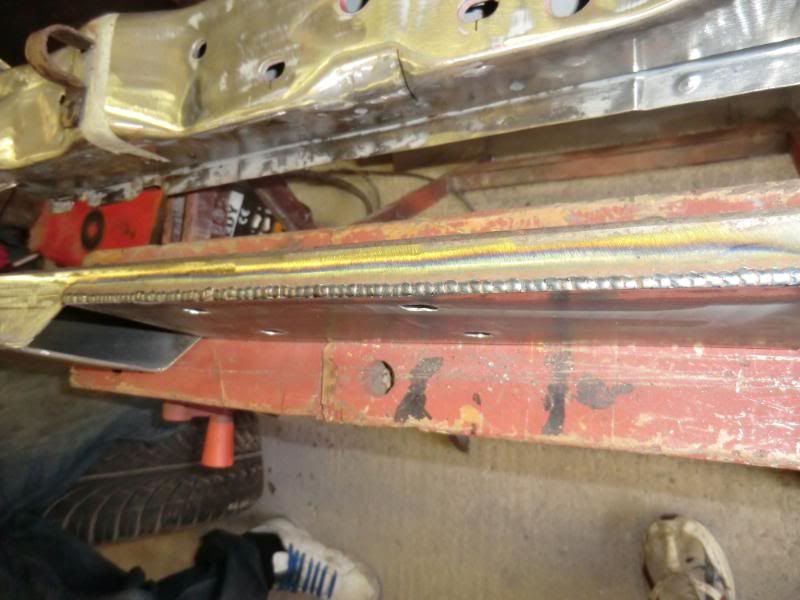
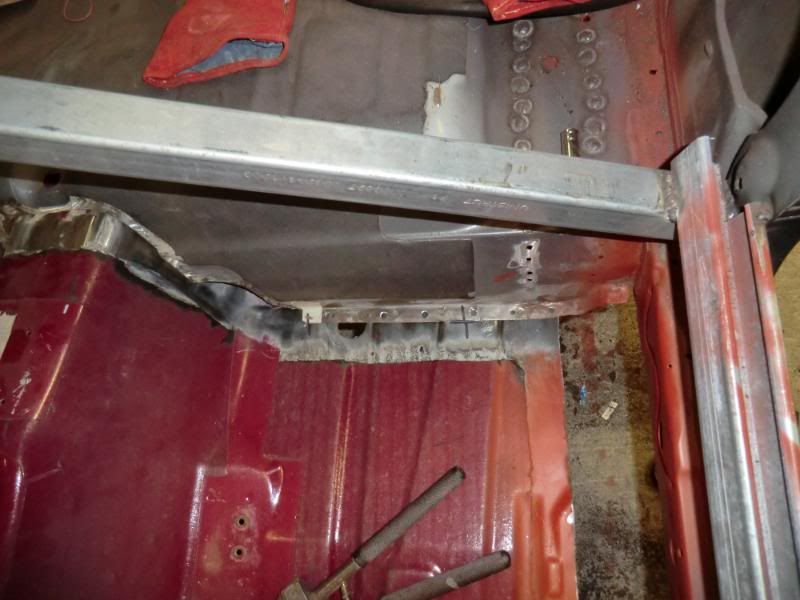
So i managed to get a 1200x1800x2mm sheet of mild steel, after making a cardboard template i started marking up a 1 piece sheet to have folded, but after a visit from a mate it was apparent it was not possible on his folder, so i cut 4 bits and welded them up, only got the left side done, it is over size and does need a lot of trimming down, but you get the idea
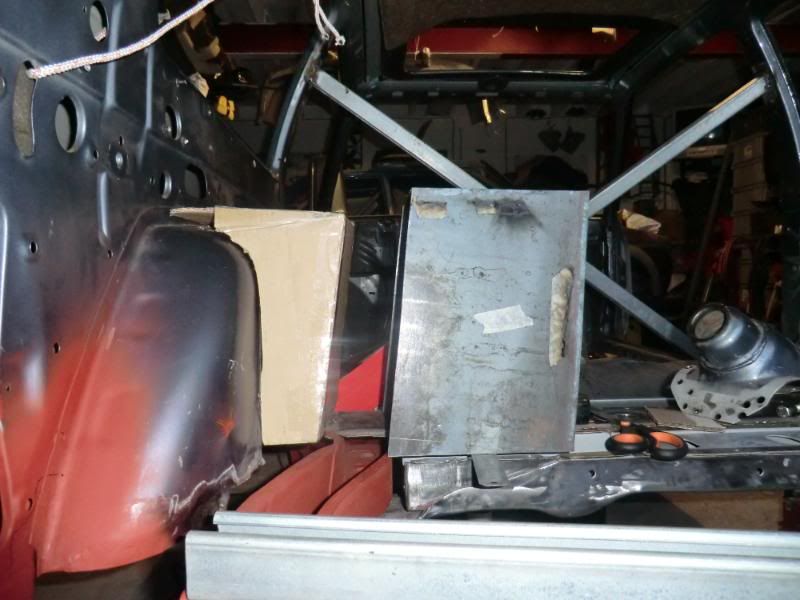

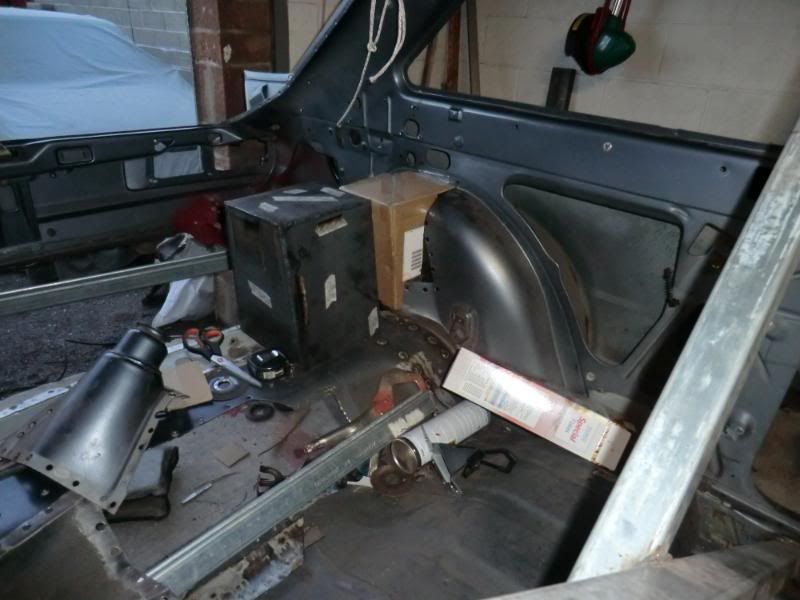
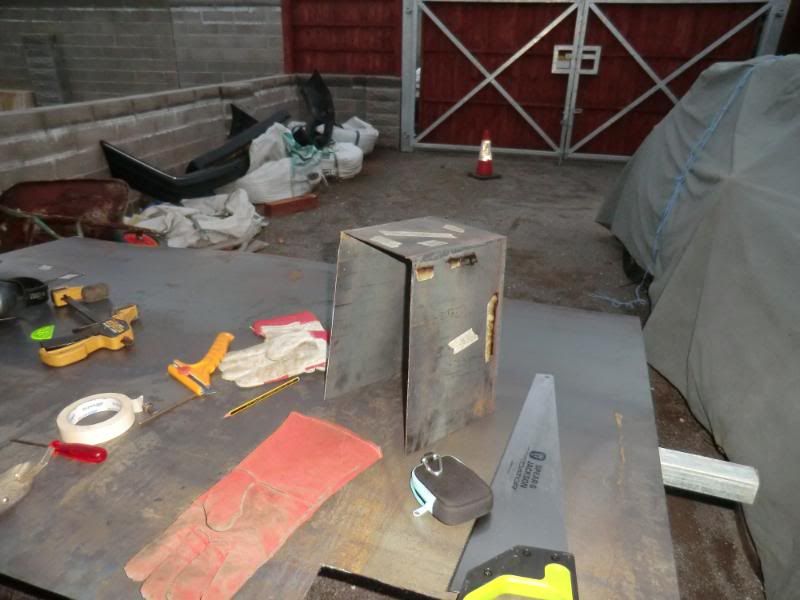
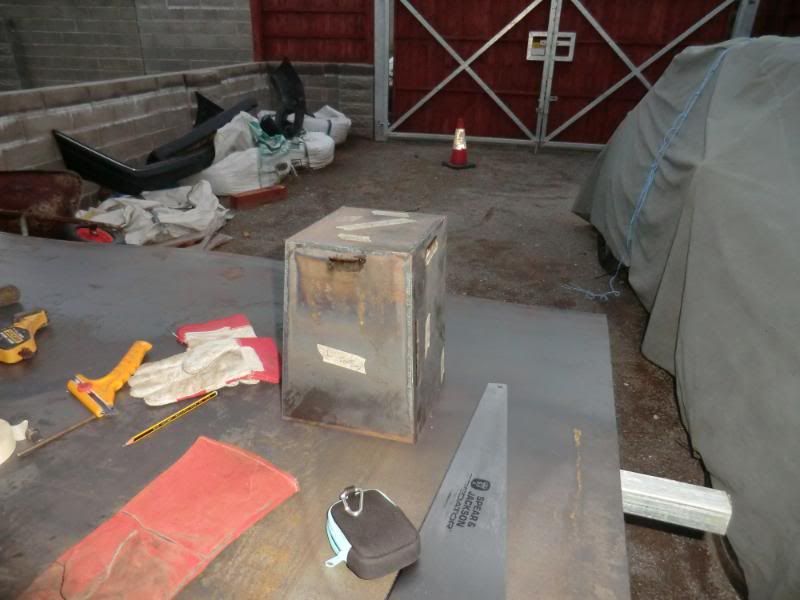
I'm gonna try and get this one fitted before welding the other one together
Chers, Ginger
.
Well after a few wasted hours trying to use/modify the Sierra rear turrets i decided it's a no go, i had them in place (sort of)
The bar is the brace i made before cutting the car up, and you can see how fair they needed moving.
Anyway, due to working 5-6 days a week i find it hard to get to places to pick up or get stuff fabricated, So today i happened to be working around the corner from a local steel suppliers, as it was so close the tracker on my van would not be an issue
So i managed to get a 1200x1800x2mm sheet of mild steel, after making a cardboard template i started marking up a 1 piece sheet to have folded, but after a visit from a mate it was apparent it was not possible on his folder, so i cut 4 bits and welded them up, only got the left side done, it is over size and does need a lot of trimming down, but you get the idea
I'm gonna try and get this one fitted before welding the other one together
Chers, Ginger
.


 22-06-2011, 10:19 AM
#51
.
Yer, i like the look of tube turrets, but to run a standard diff hanger i need to mount the cross member section on top of the Escort chassis rails. I'm going down this route with the turrets so i can tie the croos member section into the turret easier as they'll both be square edged, I'll make more sence when it 's finished.
Yes mate, the only thing i wont be doing is putting the paint on it. All the parts have come from cars i bought a broke so all in the car shouldn't owe me much when finished
Ginger
.
Yes mate, the only thing i wont be doing is putting the paint on it. All the parts have come from cars i bought a broke so all in the car shouldn't owe me much when finished
Ginger
.
14-07-2011, 08:50 PM
#53
.
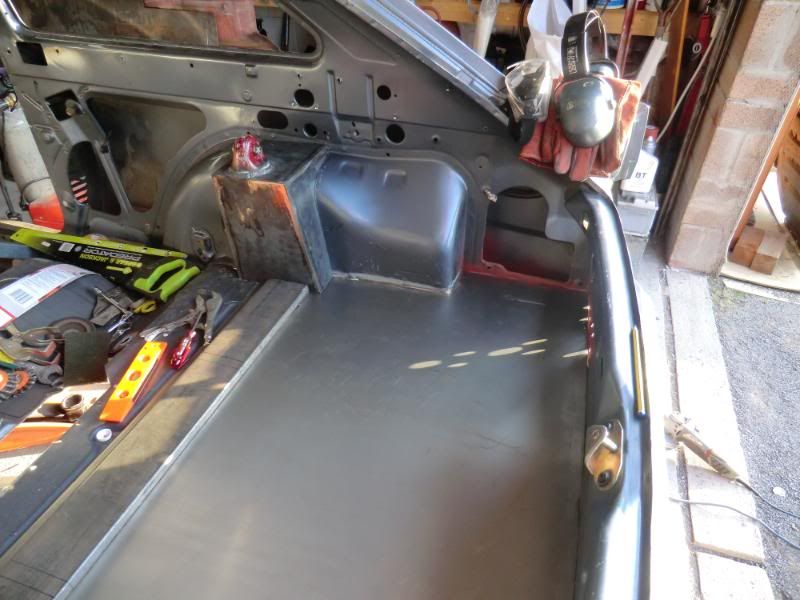
Well it's taking some time but we have an update,
I've been pressing on with the rear floor, turrets and cross member.
One of my main concerns was strenght, a Mk4 Escort was never design to have any/little force going through the rear turrets so there just spot welded to the inner arch. A Sirrea on the other hand has the turret, cross member, chassis rails and floor all tied together.
I've tried to replicate this and this is the outcome, It's not welded in as yet, but all shaped and trimmed like a puzzle ready to go.
1st, the tubs needed a filler panel on the forward sides
Right
Left (got to plug weld the spot weld holes up on this side)
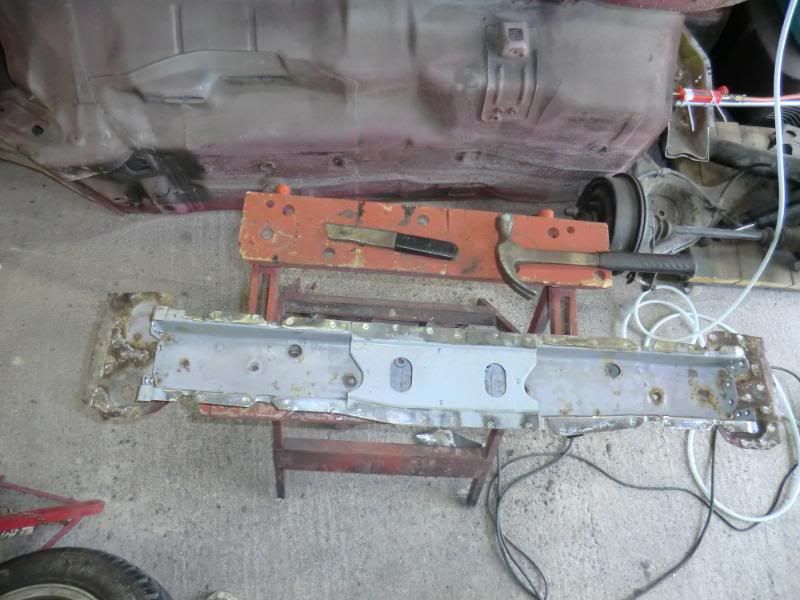
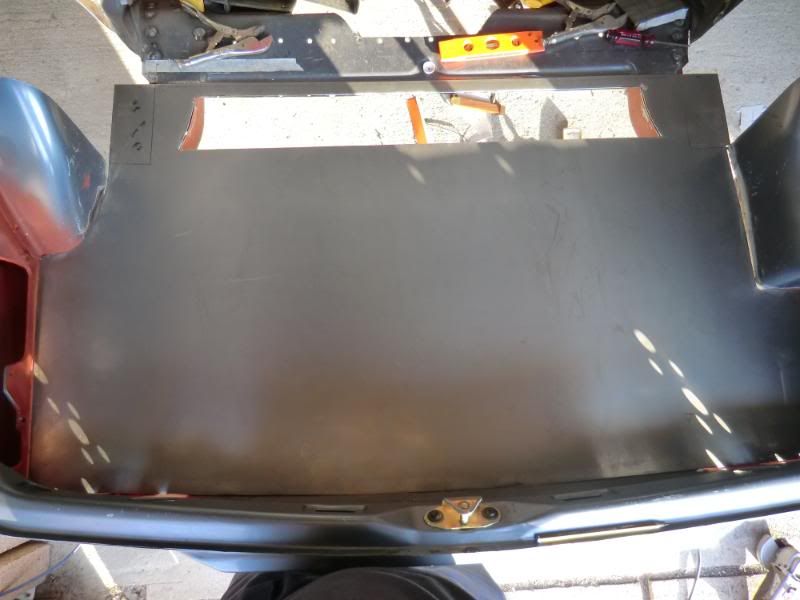
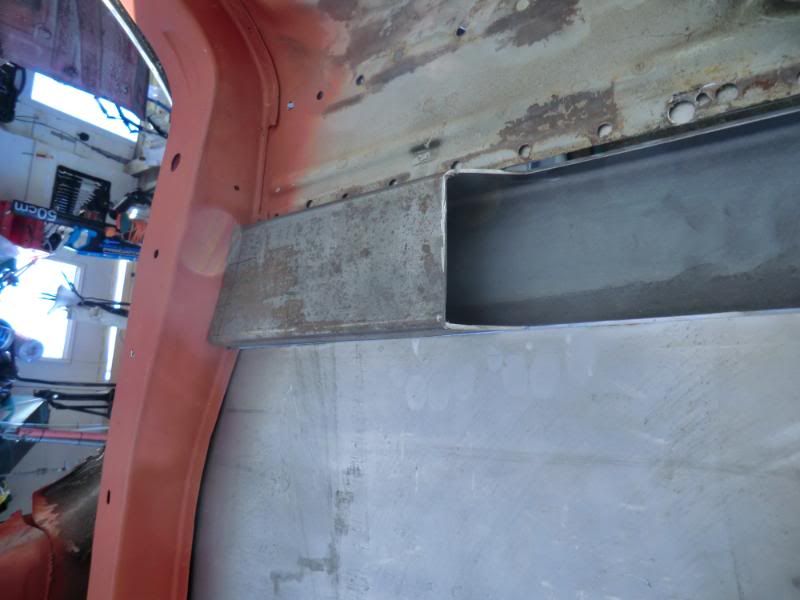
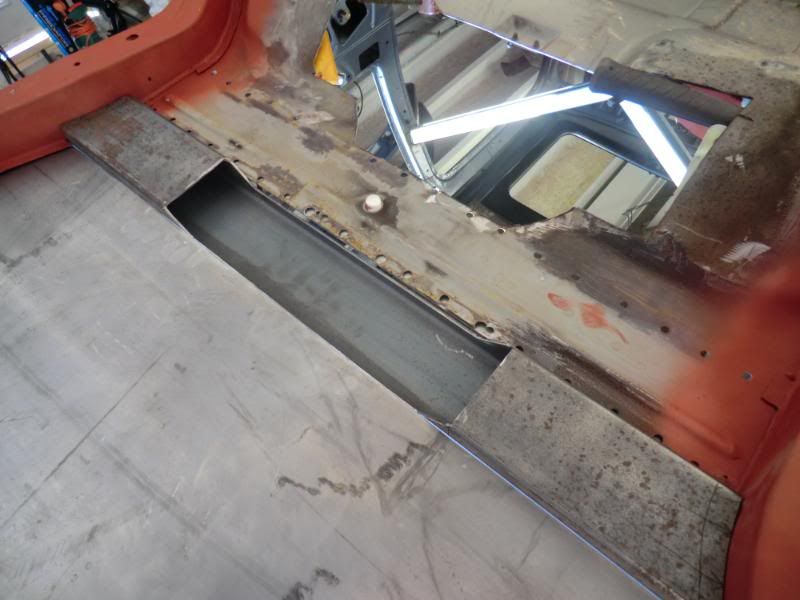
The new floor panel, with a slot cut out for the cross member to drop through.
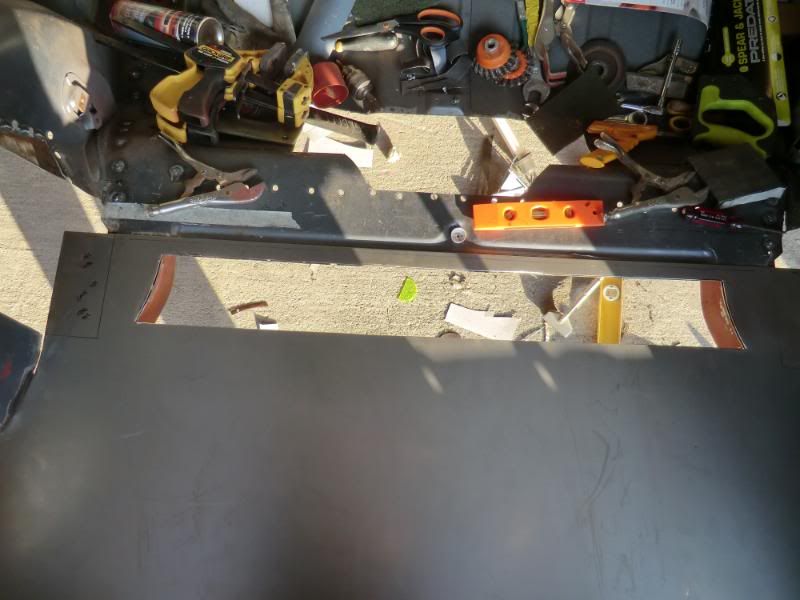
Cross member fits through the slot in the floor panel, but sit on top of the chassis rails, and is shaped around the side of the rail were it will be fully seam welded.
under side, the centre will be boxed in and have mounting holes for the diff hanger
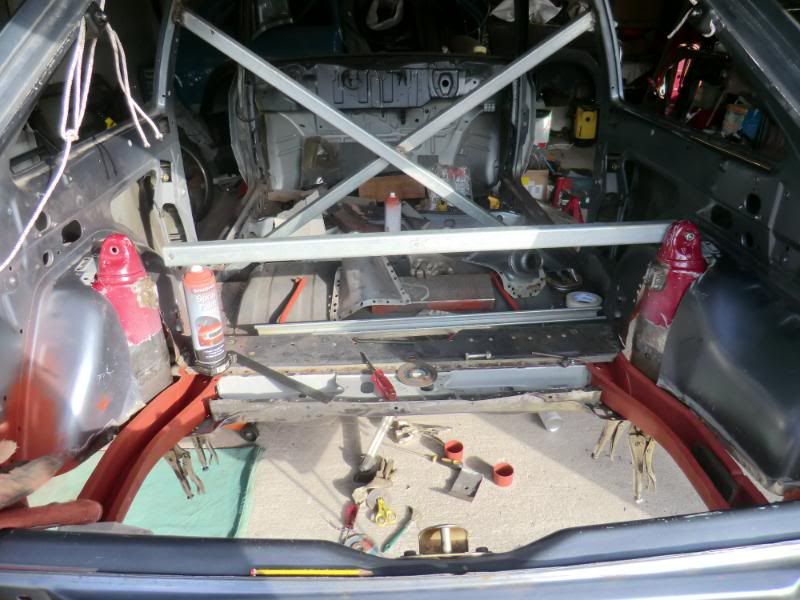
And the turret towers in place,
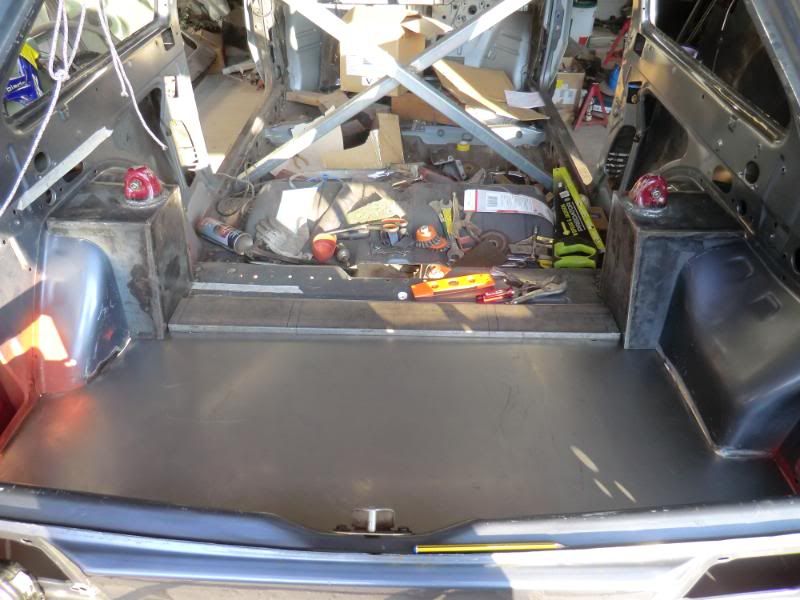
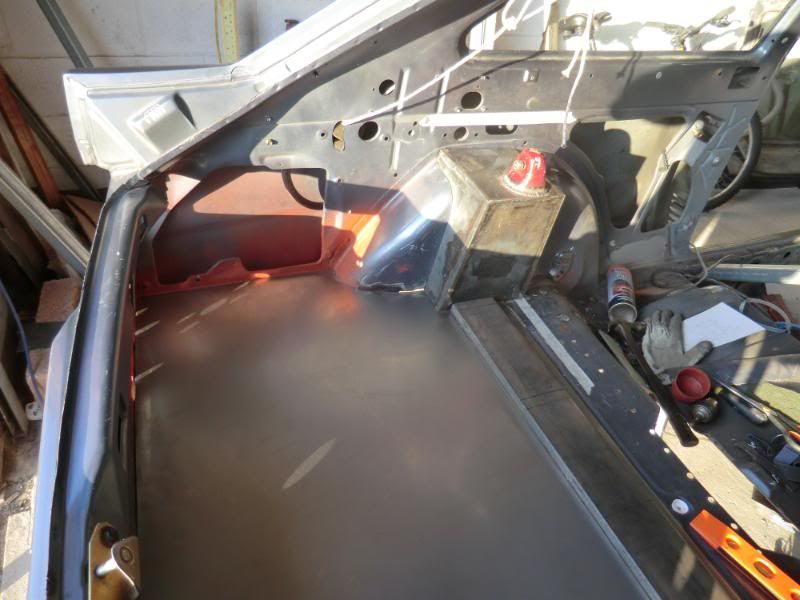
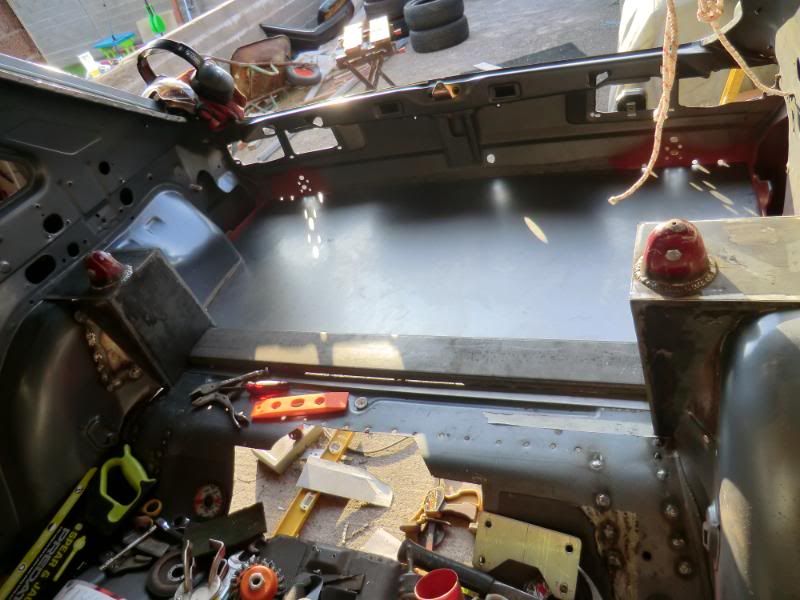
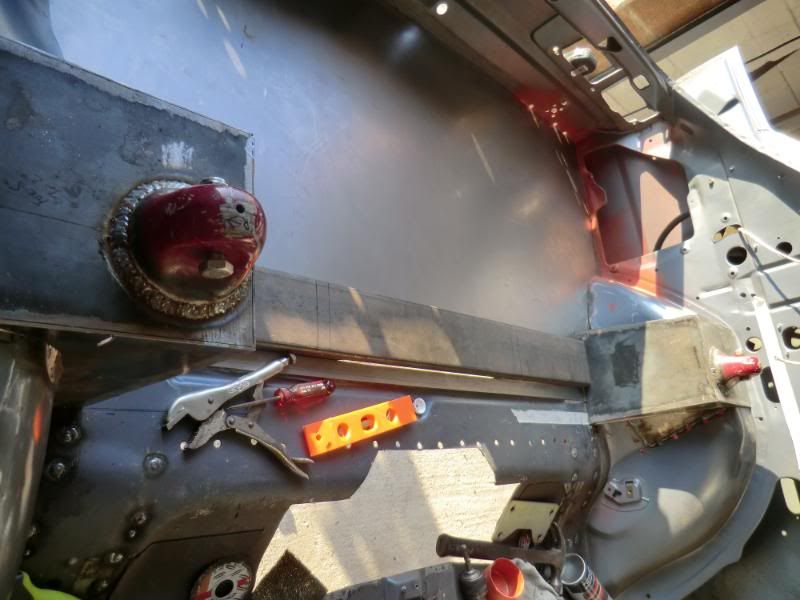
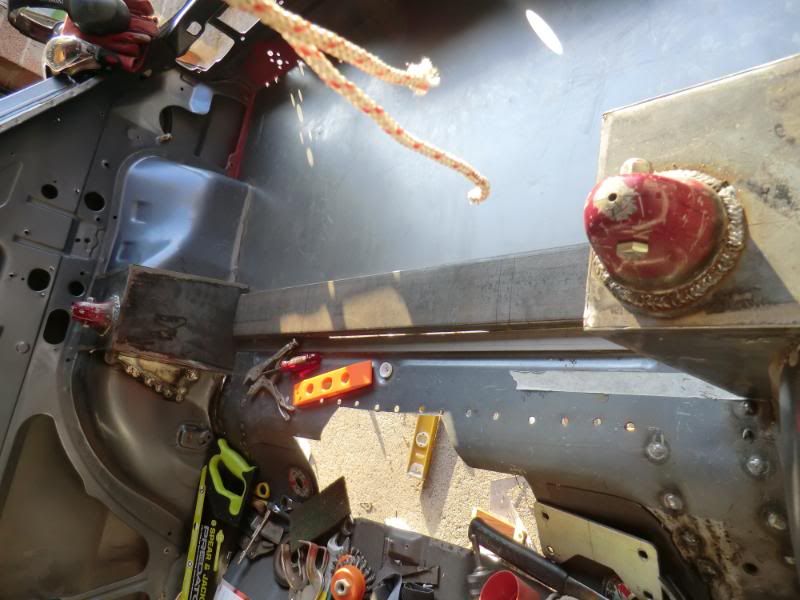
and the Sierra cups are fitted up through a hole that is a few mm's smaller in diameter, this was so that the cups have no chance of pushing through, not that the welds are likey to fail
As you can see they'll all be nicely tied into each other and all seem welded up, I've got a few prep bit's to sort out 1st, but they should be all weled in by next weekend, if i get time :-(
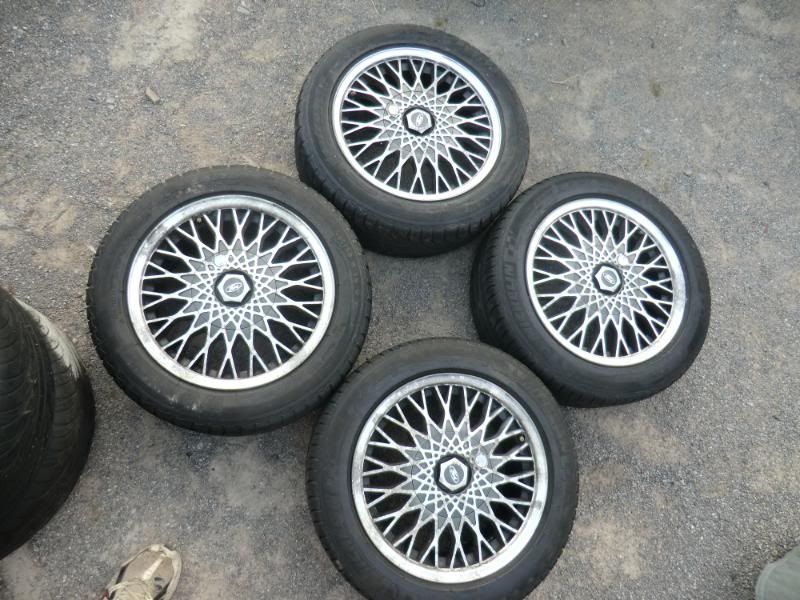
And last off, i picked up a set of wheels, �135 with Pilots, centres and a full set of locks with a new key
should have finished pics at the end of next week
Ginger
.
Well it's taking some time but we have an update,
I've been pressing on with the rear floor, turrets and cross member.
One of my main concerns was strenght, a Mk4 Escort was never design to have any/little force going through the rear turrets so there just spot welded to the inner arch. A Sirrea on the other hand has the turret, cross member, chassis rails and floor all tied together.
I've tried to replicate this and this is the outcome, It's not welded in as yet, but all shaped and trimmed like a puzzle ready to go.
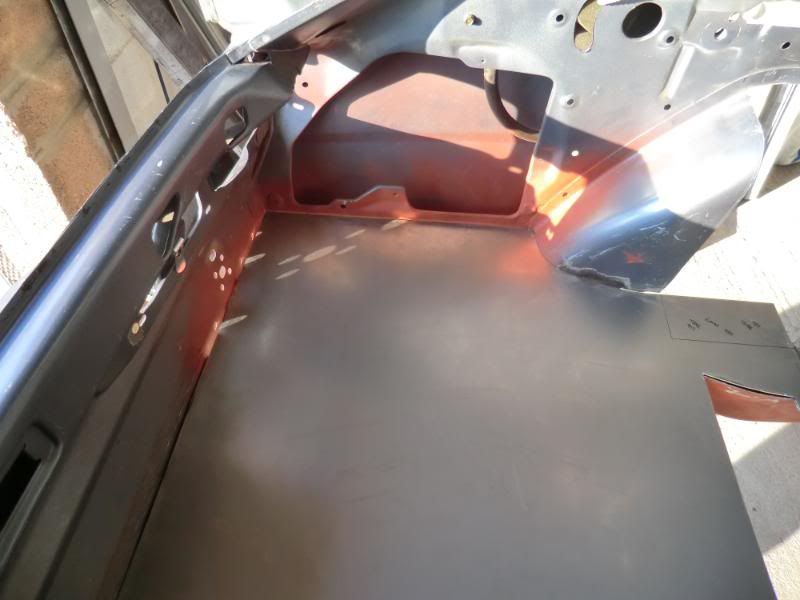
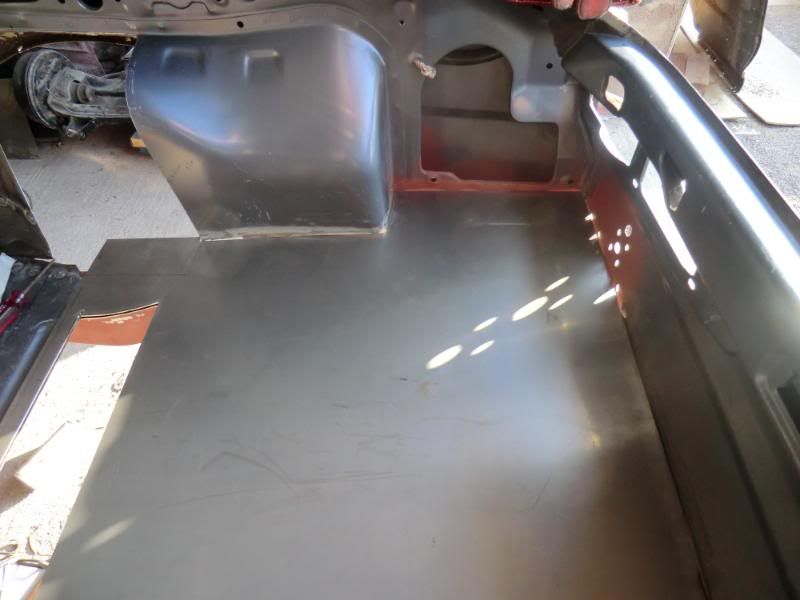
1st, the tubs needed a filler panel on the forward sides
Right
Left (got to plug weld the spot weld holes up on this side)
The new floor panel, with a slot cut out for the cross member to drop through.
Cross member fits through the slot in the floor panel, but sit on top of the chassis rails, and is shaped around the side of the rail were it will be fully seam welded.
under side, the centre will be boxed in and have mounting holes for the diff hanger
And the turret towers in place,
and the Sierra cups are fitted up through a hole that is a few mm's smaller in diameter, this was so that the cups have no chance of pushing through, not that the welds are likey to fail
As you can see they'll all be nicely tied into each other and all seem welded up, I've got a few prep bit's to sort out 1st, but they should be all weled in by next weekend, if i get time :-(
And last off, i picked up a set of wheels, �135 with Pilots, centres and a full set of locks with a new key
should have finished pics at the end of next week
Ginger
.
Last edited by GINGExR2 T; 14-07-2011 at 11:04 PM.
 17-07-2011, 08:33 PM
#59
.
Well i've managed to sqeezze a few hours in as i've only done a 51 hour 6 day week this week :-(
Less of my sob story,
I've been working on boxing in the under side of the cross member, and putting all the fixings in place for the anti roll bar and the diff hanger.
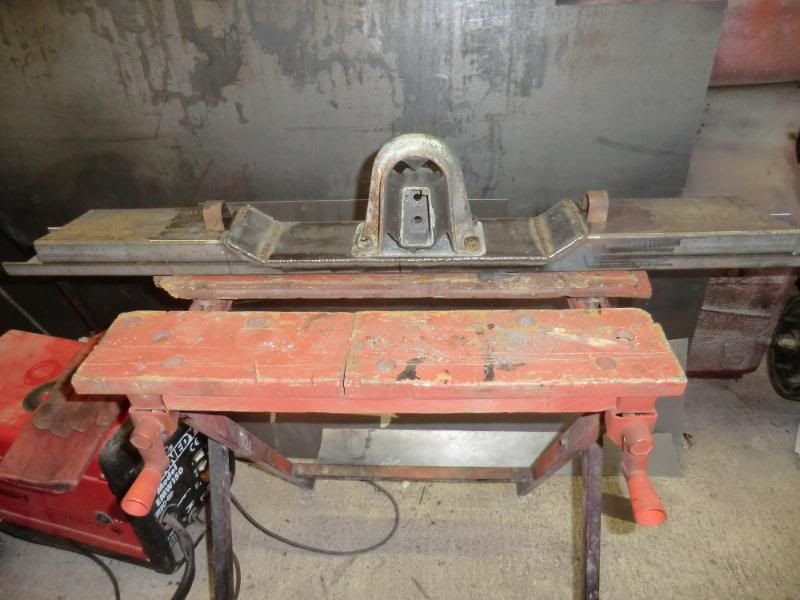
I started off with the hanger bolts, for this i used the adjustable slide bolts off the original cross member and welded in some holders simular to the original, By doing this i keep the left,right, front and backward adjustment
The edges were ground to opposite angles to create a 'V' so that the welds fill the gap and give a sronger weld
then the 2 small angle pieces were welded in after the antiroll bar fixings were sorted, this was a fucking nightmare to do as i hate welding nuts on
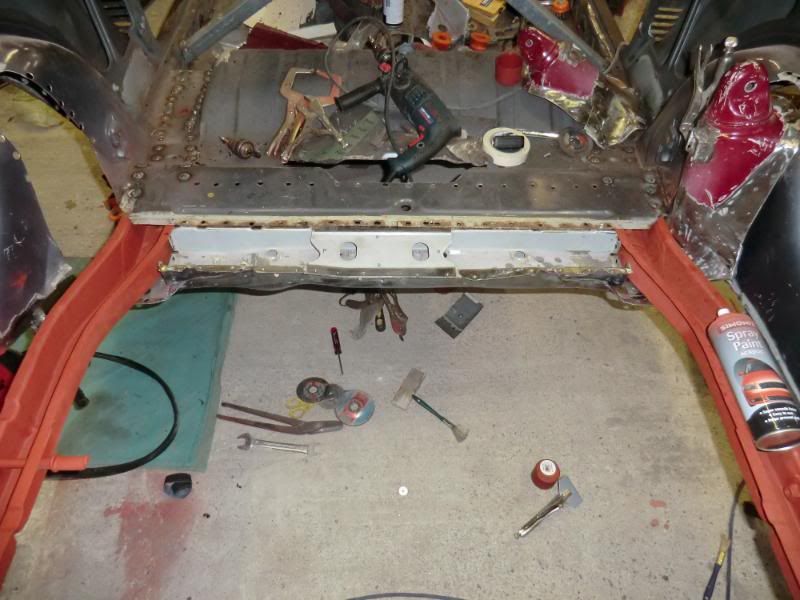
When done a test fit was done

Then put in the car to have a look, the slot in the floor needs to be made a tad wider to clear the welds
Bolted to the diff to check clearance

Thats all, got a busy week this coming week, but hoping to get a couple of hours on it
Ginger
P.S. I'm loving my welding at the moment
.
Well i've managed to sqeezze a few hours in as i've only done a 51 hour 6 day week this week :-(
Less of my sob story,
I've been working on boxing in the under side of the cross member, and putting all the fixings in place for the anti roll bar and the diff hanger.
I started off with the hanger bolts, for this i used the adjustable slide bolts off the original cross member and welded in some holders simular to the original, By doing this i keep the left,right, front and backward adjustment
The edges were ground to opposite angles to create a 'V' so that the welds fill the gap and give a sronger weld
then the 2 small angle pieces were welded in after the antiroll bar fixings were sorted, this was a fucking nightmare to do as i hate welding nuts on
When done a test fit was done
Then put in the car to have a look, the slot in the floor needs to be made a tad wider to clear the welds
Bolted to the diff to check clearance
Thats all, got a busy week this coming week, but hoping to get a couple of hours on it
Ginger
P.S. I'm loving my welding at the moment
.
Last edited by GINGExR2 T; 17-07-2011 at 09:05 PM.
18-07-2011, 01:16 PM
#61
Cheers Beef, there a bit more industrial looking than i originally wanted, but being square edged they should be a lot easier to trim/carpet when it comes to fitting the interior.
Hopeing to make a start on the front end soon as these are welded in, gonna leave the front mounting points until i get the front floor in so as to be able to measure the wheel base etc better, should make it a lot easier to get the axle perfectly square/true.
Ginger
.
24-10-2011, 09:07 PM
#62
.
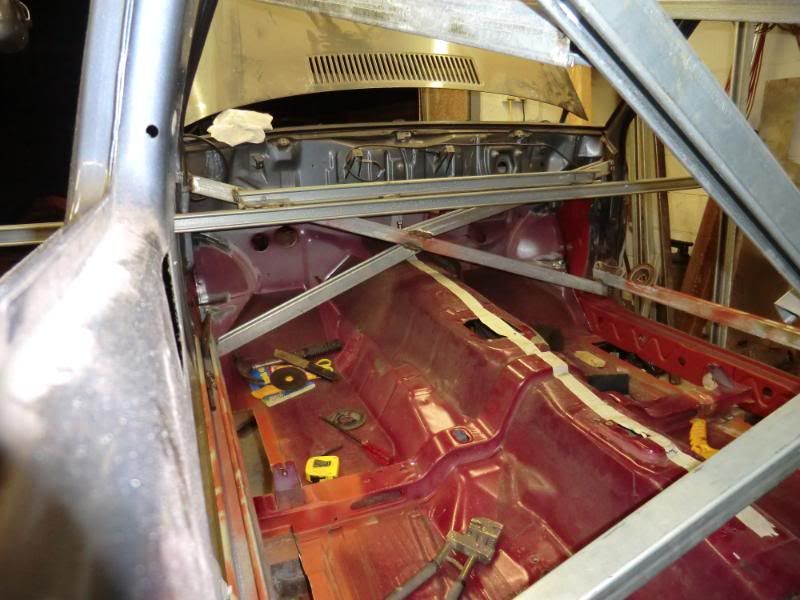
Time for a bit of an update, been really busy with work so time on the car is limited, but i do manage to get a couple of hours a week on it, been slow progress though.
1st off was some frame work to keep the car square when the floor etc came out, I made the frame extend out of the car for extra work room under the car.


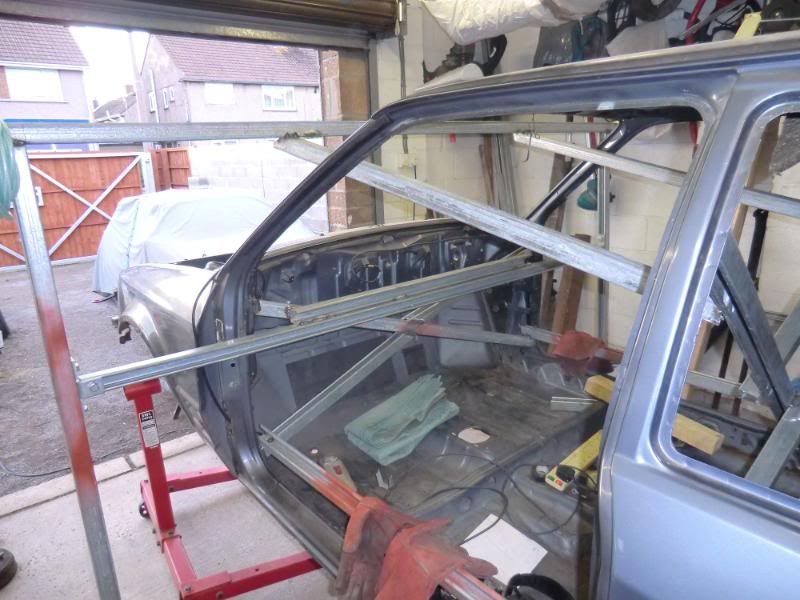
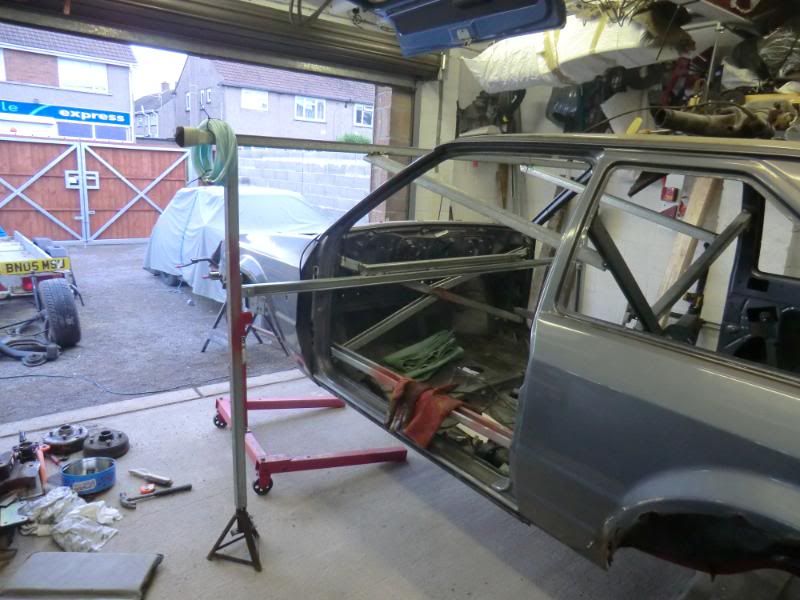
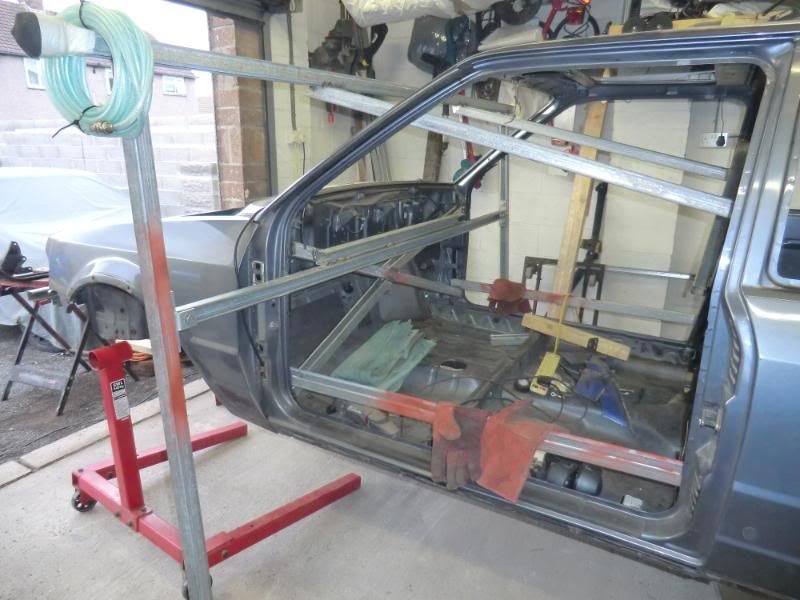
Full out
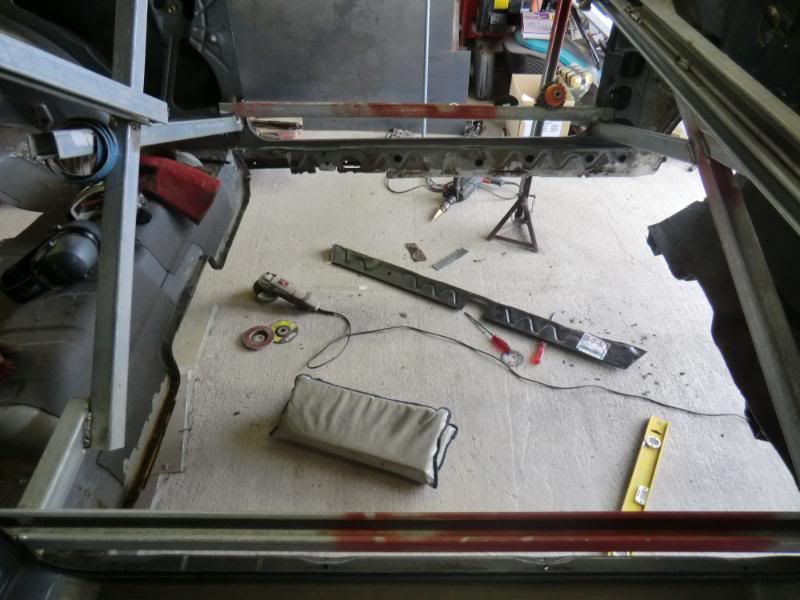
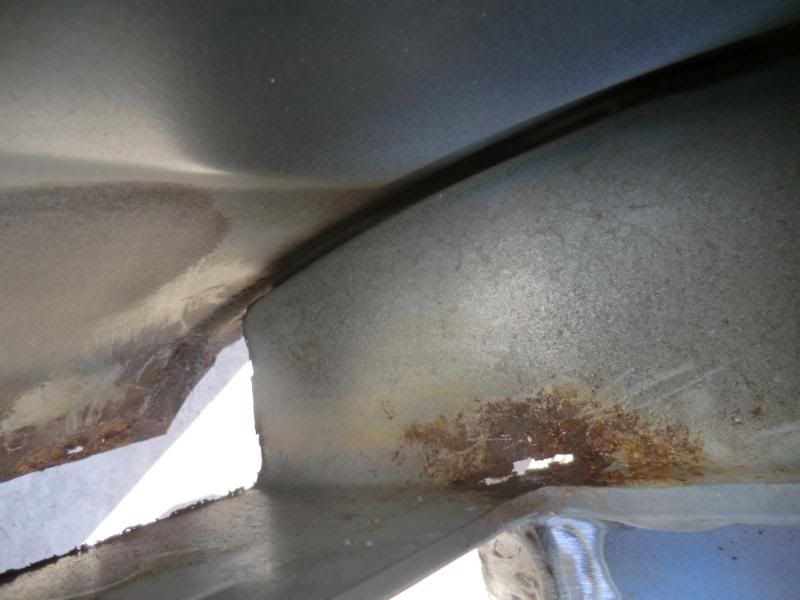
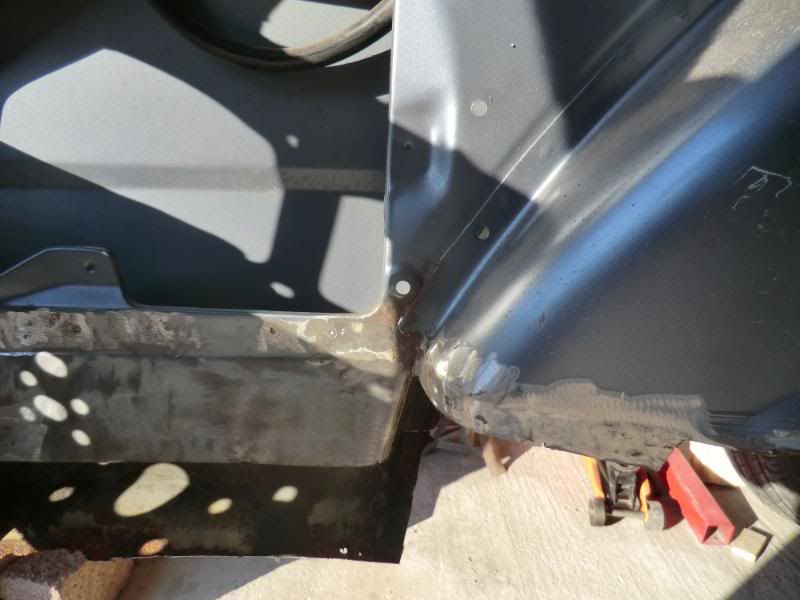
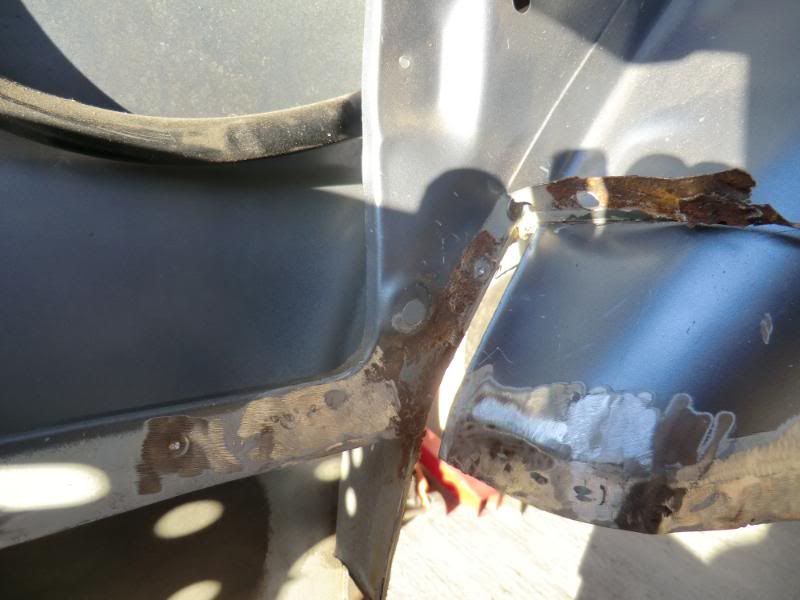
And sill rot :-(
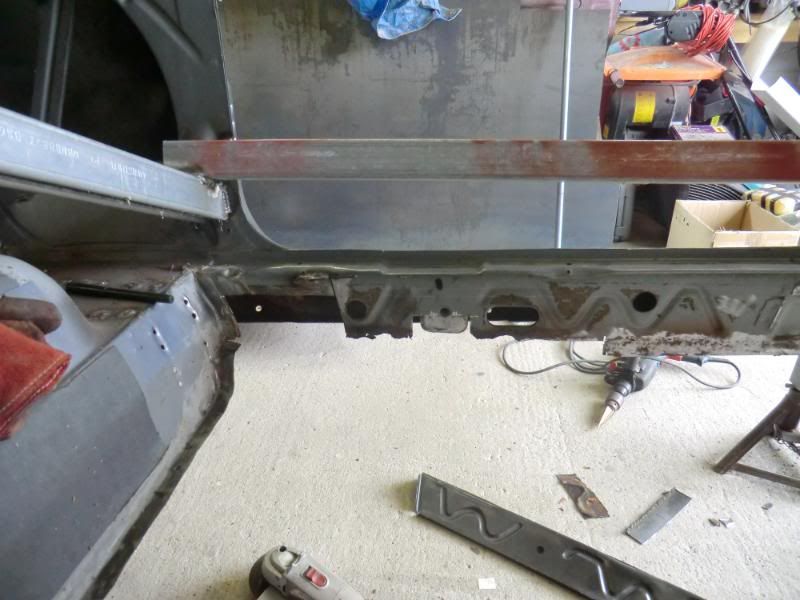
After looking at removing and replacing the whole inner sill i noticed the relacement sills are over sills and the metal is thinner, so i removed and replaced only the rot and left the good metal alone
Passenger side

Drivers side
Floor offered up into place to check the fit


And wheels fitted to check position in the arches before welding could begin
Wheels are in perfect position, Had a bit of a woory about the bonnet to turret clearance, so bonnet was fitted back on and theres plenty of room, All 20mm of it
Inner arches have been tacked in, as has the rear of the floor, started on some filler pannels for around the rear of the tunnel.
Hope to have the floor welded in by the weekend, as i need to get 2 panels made by a local sheet steel company to go along the sil to floor area as it was easier to it this way as i t made moving the floor to as perfect positon easier.
Thanks for looking, hopfully the next update wont be 3 months :-(
Ginger
P.S. I may have to go down the S1 arches route to get extra clerance :-(
.
Time for a bit of an update, been really busy with work so time on the car is limited, but i do manage to get a couple of hours a week on it, been slow progress though.
1st off was some frame work to keep the car square when the floor etc came out, I made the frame extend out of the car for extra work room under the car.
Full out
And sill rot :-(
After looking at removing and replacing the whole inner sill i noticed the relacement sills are over sills and the metal is thinner, so i removed and replaced only the rot and left the good metal alone
Passenger side
Drivers side
Floor offered up into place to check the fit
And wheels fitted to check position in the arches before welding could begin
Wheels are in perfect position, Had a bit of a woory about the bonnet to turret clearance, so bonnet was fitted back on and theres plenty of room, All 20mm of it
Inner arches have been tacked in, as has the rear of the floor, started on some filler pannels for around the rear of the tunnel.
Hope to have the floor welded in by the weekend, as i need to get 2 panels made by a local sheet steel company to go along the sil to floor area as it was easier to it this way as i t made moving the floor to as perfect positon easier.
Thanks for looking, hopfully the next update wont be 3 months :-(
Ginger
P.S. I may have to go down the S1 arches route to get extra clerance :-(
.
Last edited by GINGExR2 T; 24-10-2011 at 09:15 PM.
 25-10-2011, 10:04 AM
#65
Regular Contributor

Nice work fella, shells all most to good to chop up.Was very tempted to rwd mine when i got it.spooky you put your thread on now. I looked for your thread for ages yesterday been looking for original sealer pictures in engine bays to get mine looking factory. Remembered how mint yours was and same colour.Been following your thread for a while .All ways nice to see good fabrication and skill.keep updates coming mate. paul

 28-11-2011, 10:09 PM
#71
.
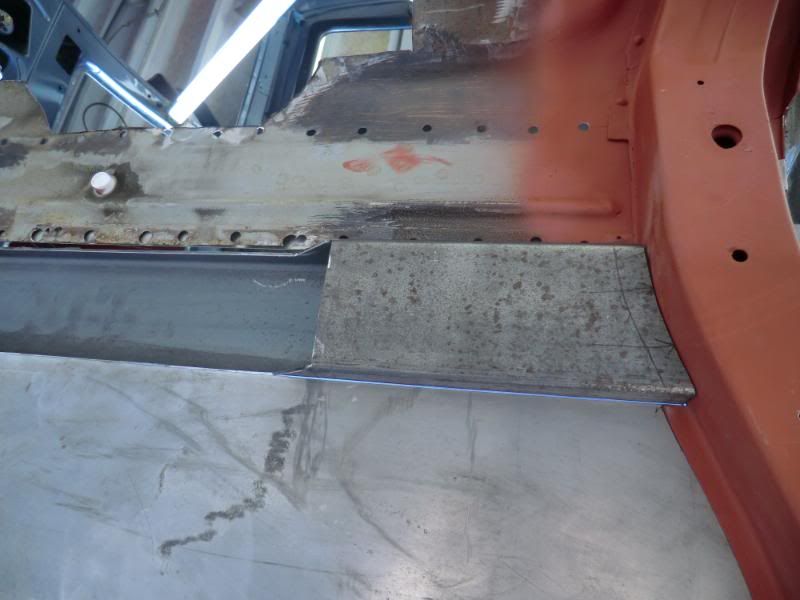
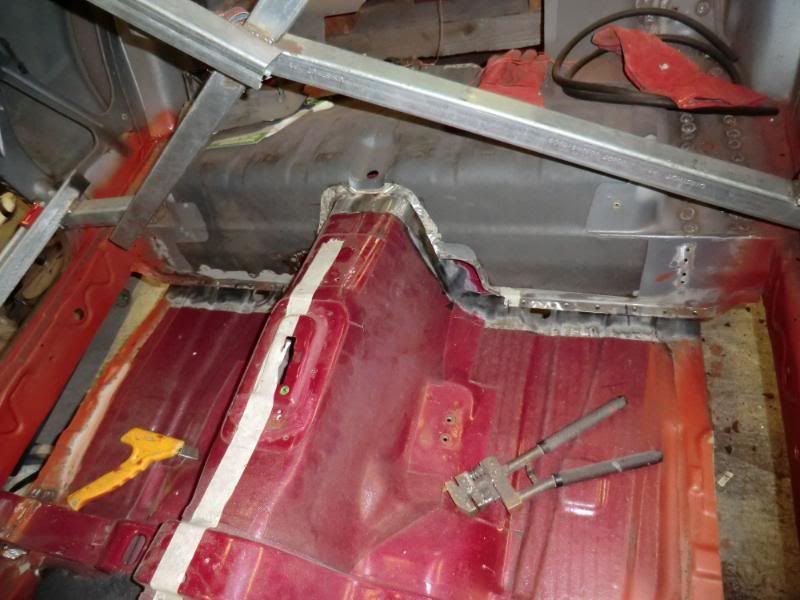
Time for a bit of an update, Had 2 steel channels made up for the floor to sill section, Had them made out of 1.5mm plate, reason for this was to add some strenght to the floor, plus it ment i could get some deep welds into it without it distorting
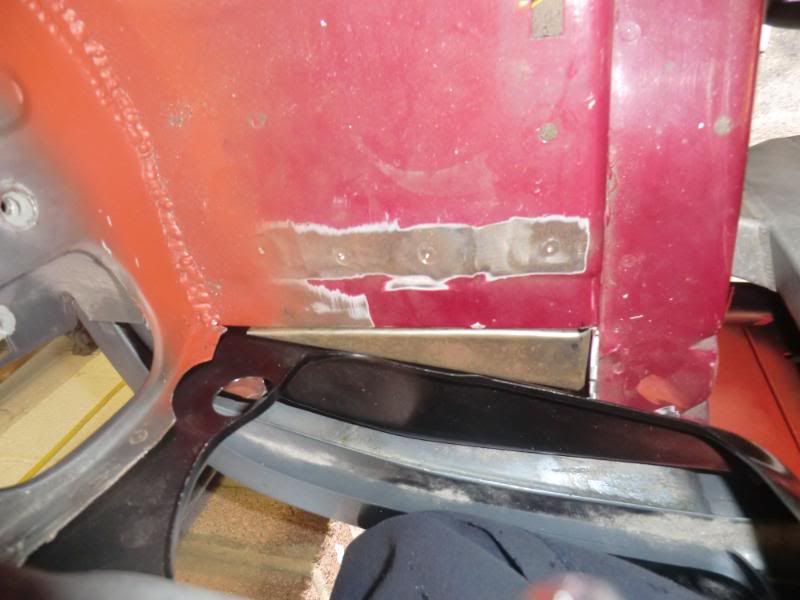
Front arch section
Inner arches
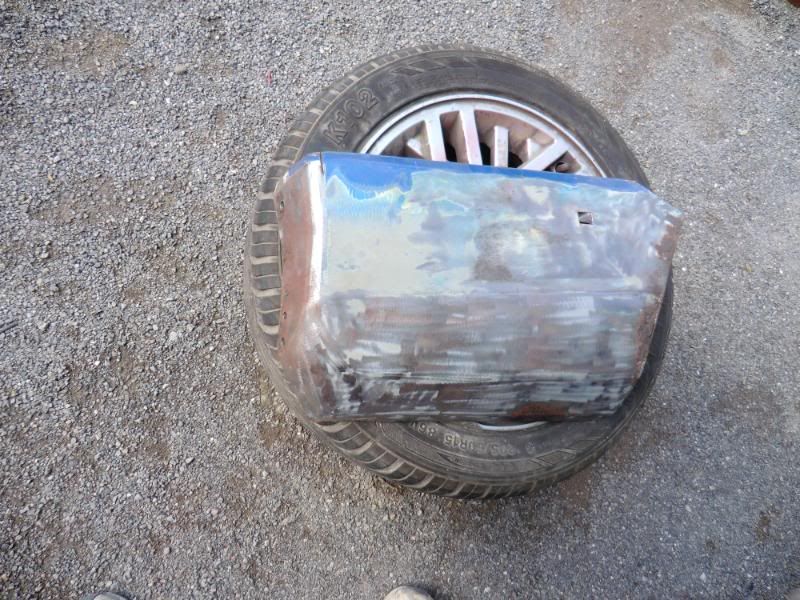
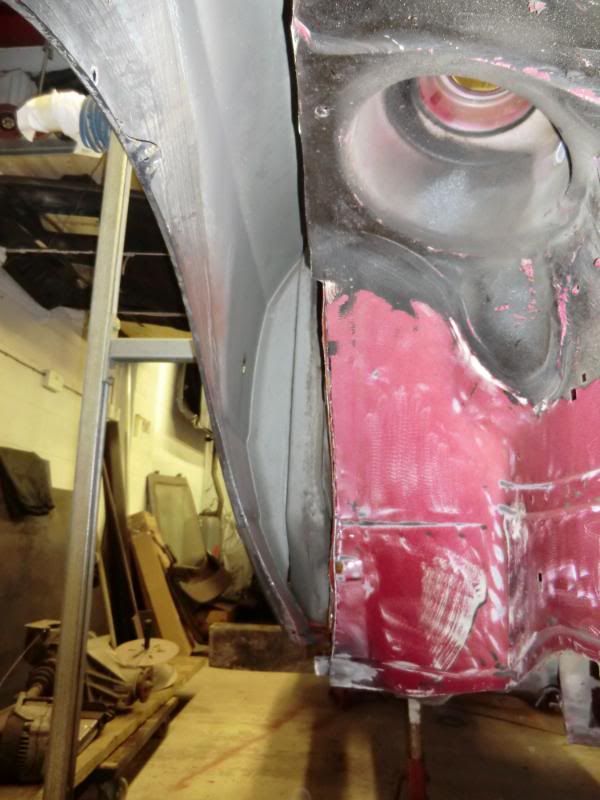
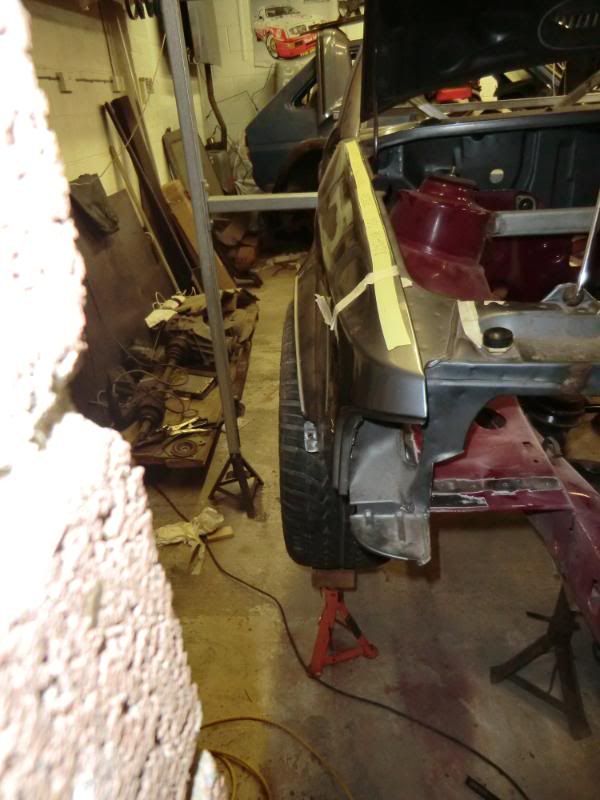
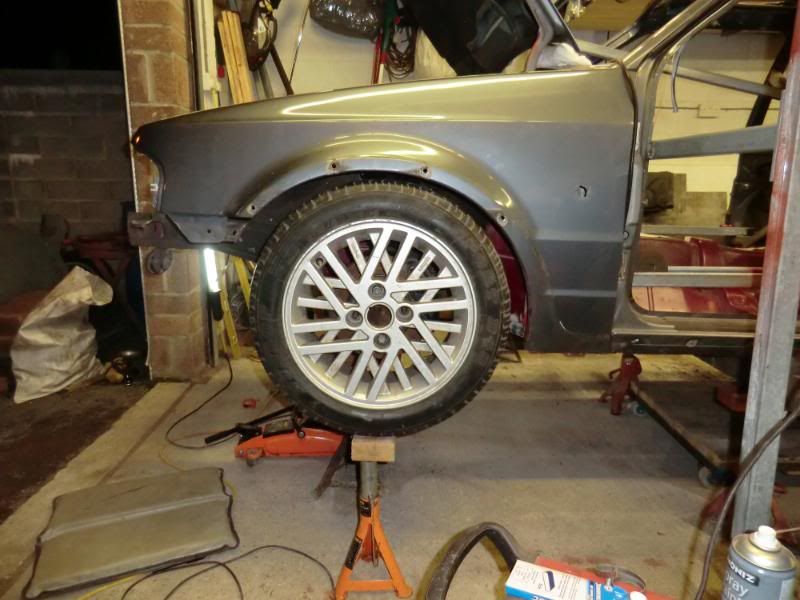
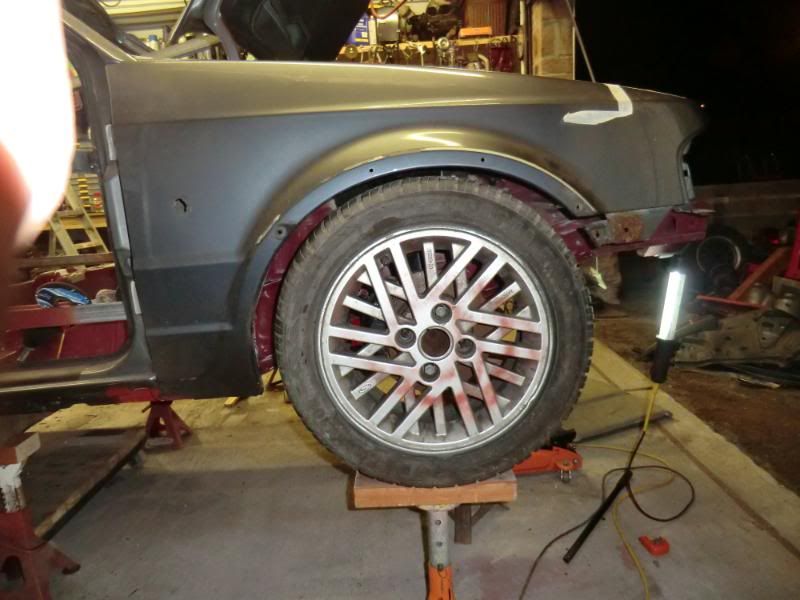
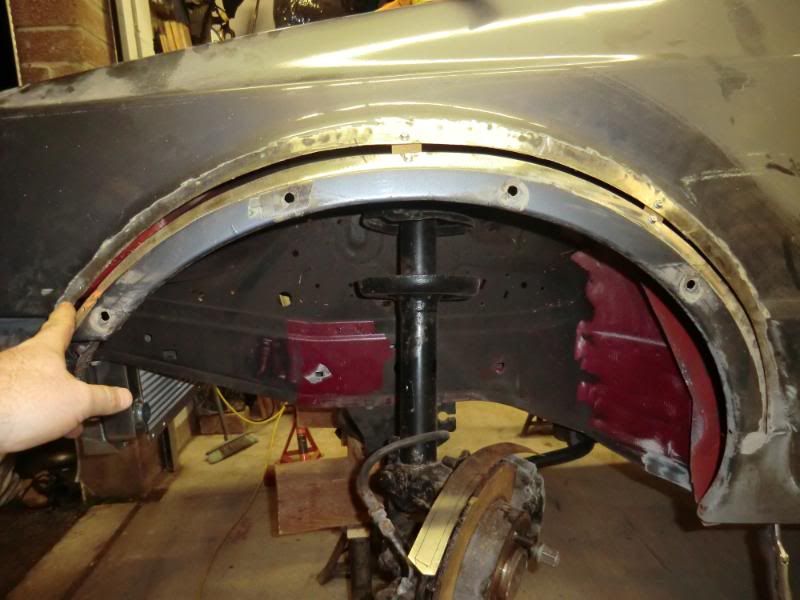
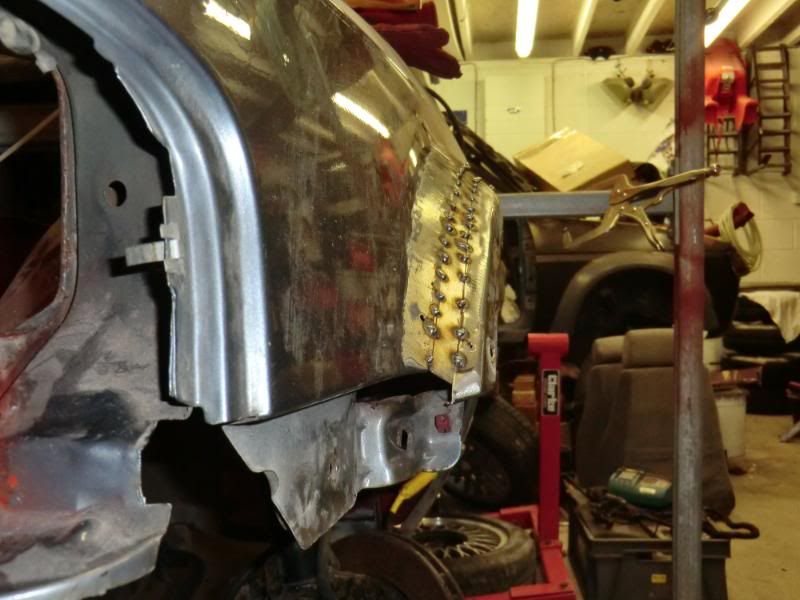
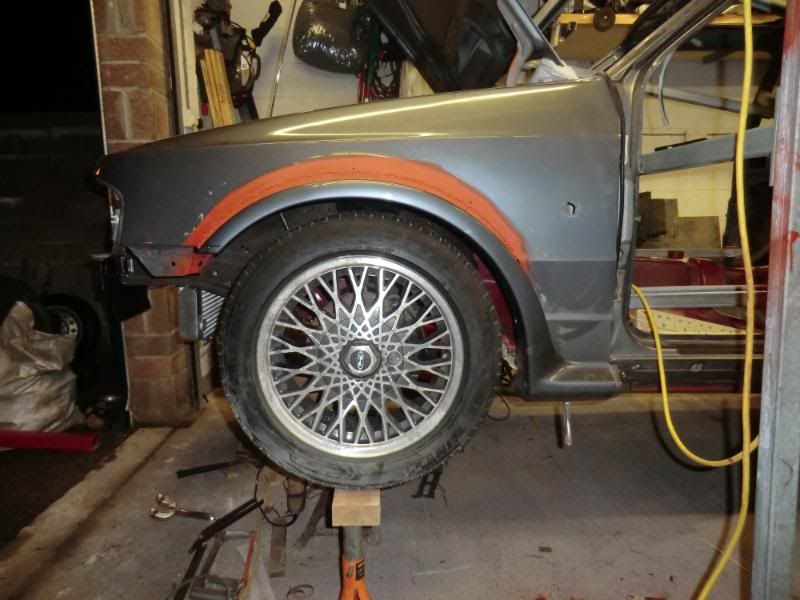
I want to run the standard 3dr wheels i bought a while back and run the standard size 205/50/15 tires, so had a bit of an idea on flareing the arches a bit.
This did 2 things, widened the arch 10mm but also lowered it 10mm at the same time, this is useful as the car will look lower and with a floor to arch measurement of 600mm (standard 2wd Saff hight) the wheel sit in the arch perfectly
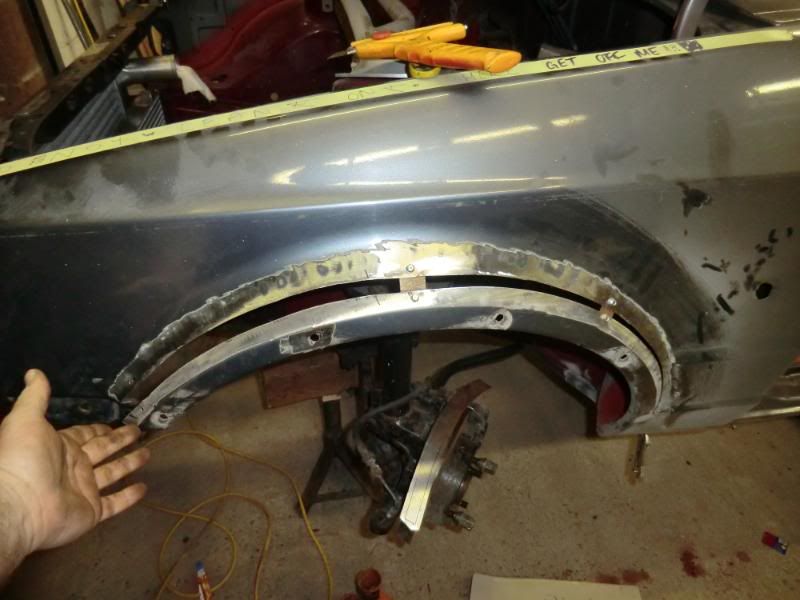
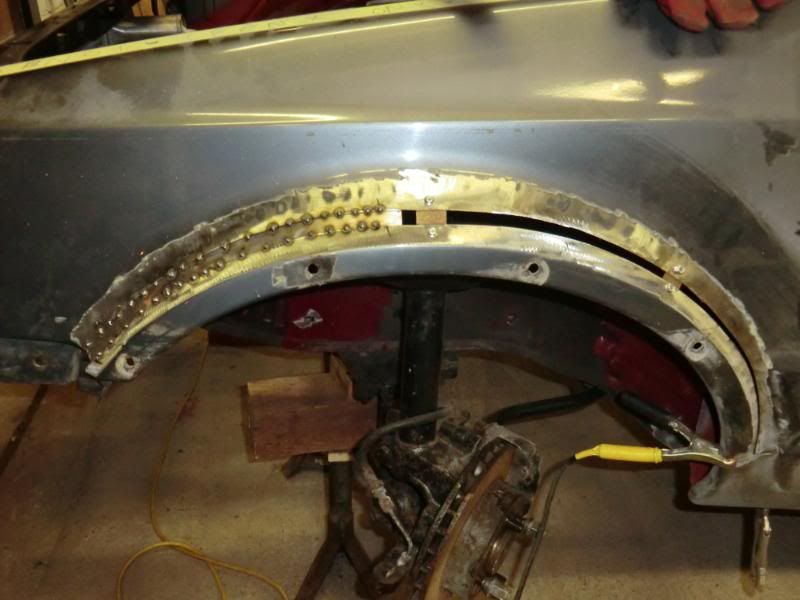
Before (not good)
After (much better)
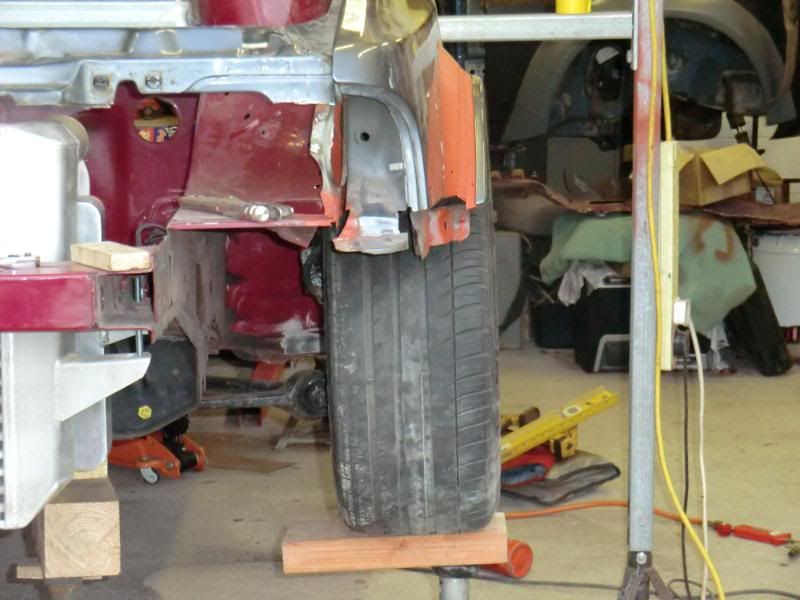

What it looks like from the side @585mm & 600mm
585mm from floor
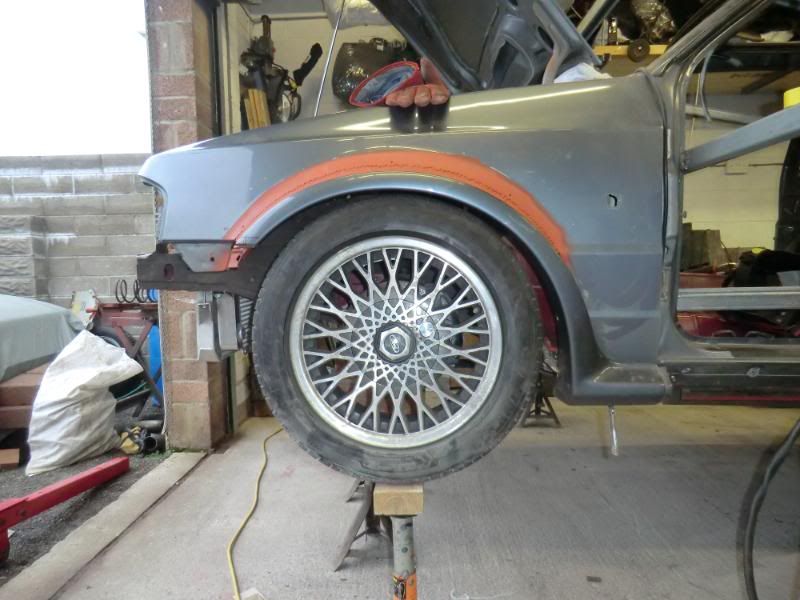
600mm from floor
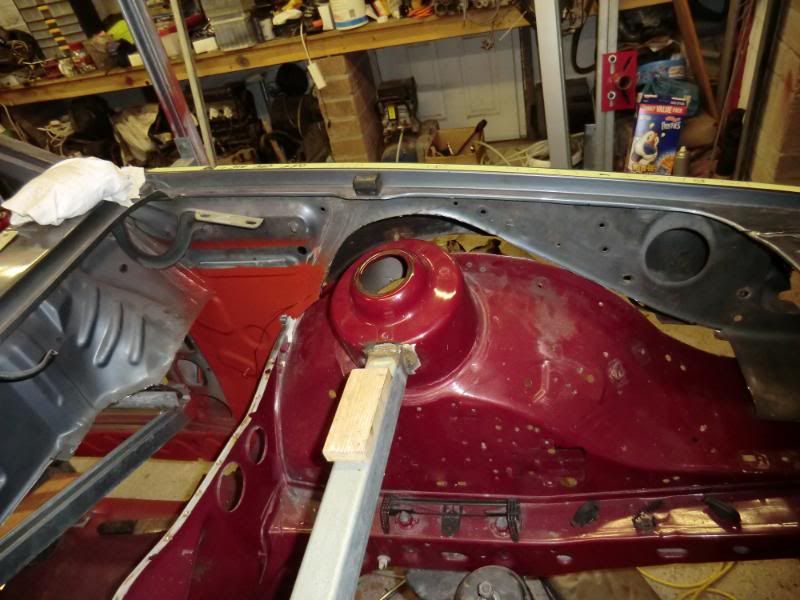
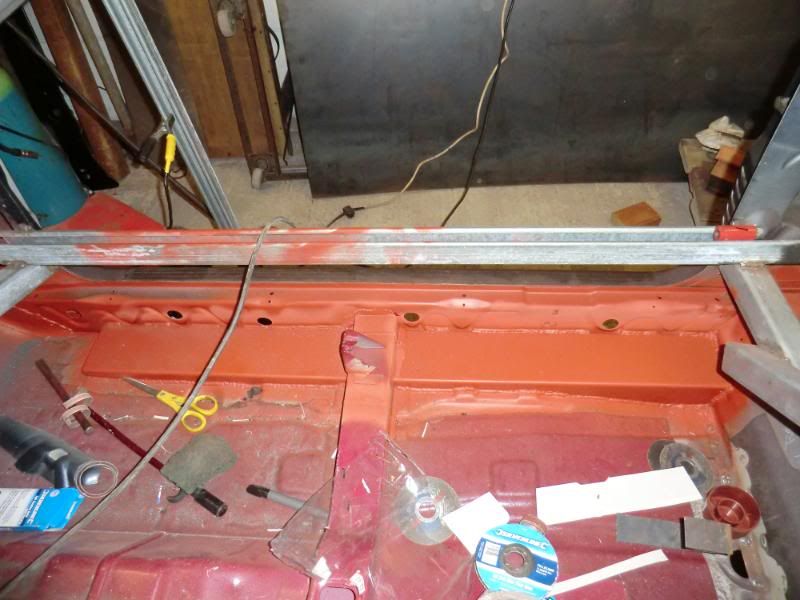
Also started on the top of the bulkhead.
Fuse box section removed (will sort this out when the box section is removed from the car)
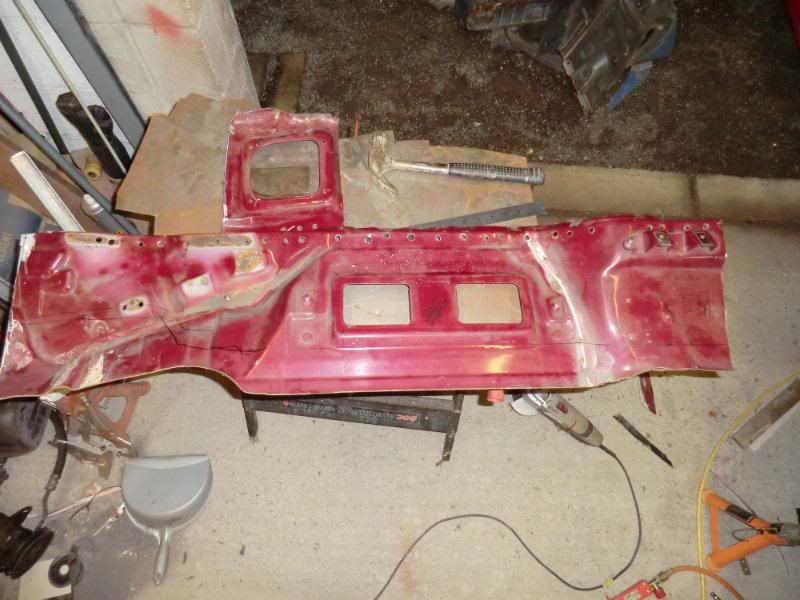
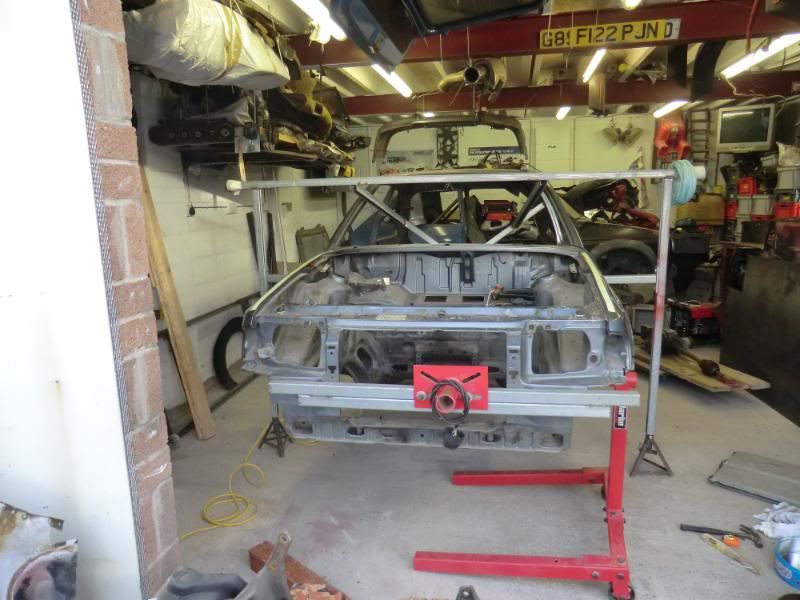
Tried for ages to get a genuine front panel with no joy, so i ordered a copy panel of Ebay as i couldn't get one locally, it arrived today and it 's FUCKING SHIT.
Luckily i hadn't cut the top section at all, So i removed the last of the head light sections of the car, and dismantled the new one so as not to replace the whole thing.
Also managed to make my spit stands higher, so won't be long til i can get it back on a spit to get it upside down so i can finish the rear end of the floor off from underneath, and i can get the front rear beam mounts sorted
Cheers for looking, Ginger
.
Time for a bit of an update, Had 2 steel channels made up for the floor to sill section, Had them made out of 1.5mm plate, reason for this was to add some strenght to the floor, plus it ment i could get some deep welds into it without it distorting
Front arch section
Inner arches
I want to run the standard 3dr wheels i bought a while back and run the standard size 205/50/15 tires, so had a bit of an idea on flareing the arches a bit.
This did 2 things, widened the arch 10mm but also lowered it 10mm at the same time, this is useful as the car will look lower and with a floor to arch measurement of 600mm (standard 2wd Saff hight) the wheel sit in the arch perfectly
Before (not good)
After (much better)
What it looks like from the side @585mm & 600mm
585mm from floor
600mm from floor
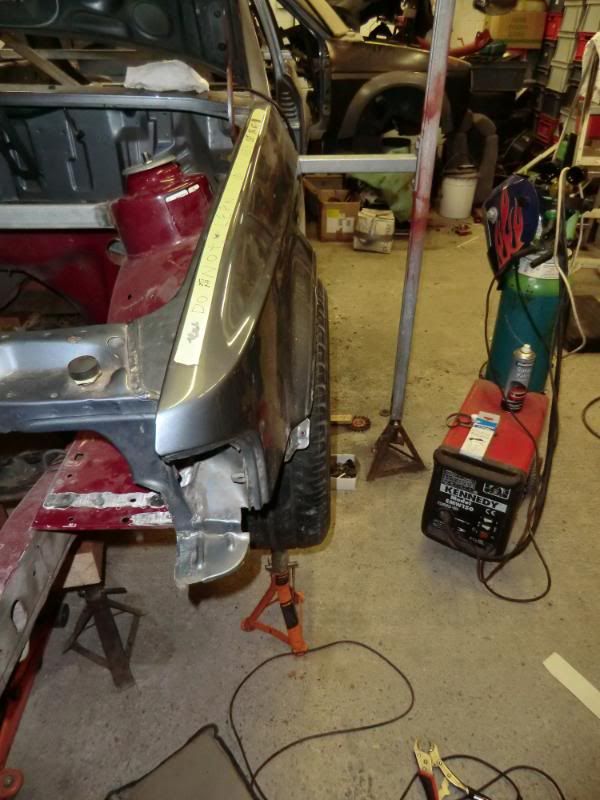
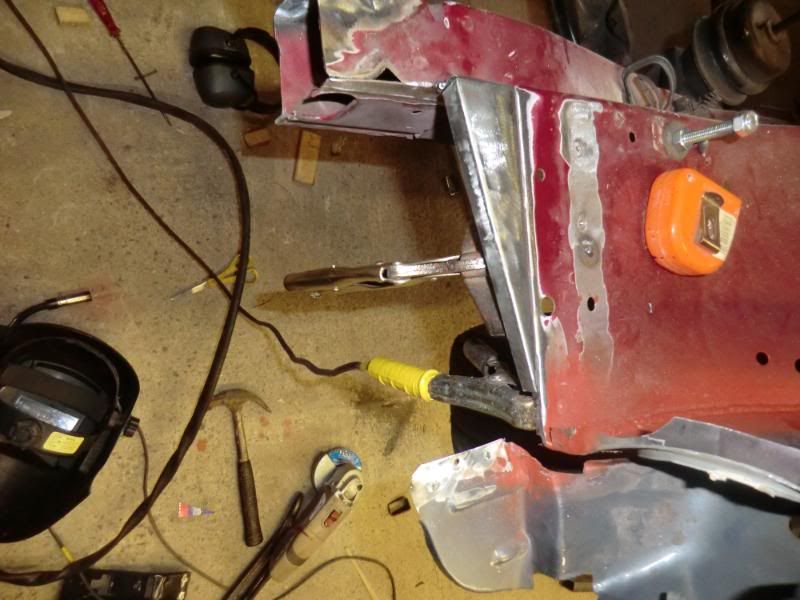
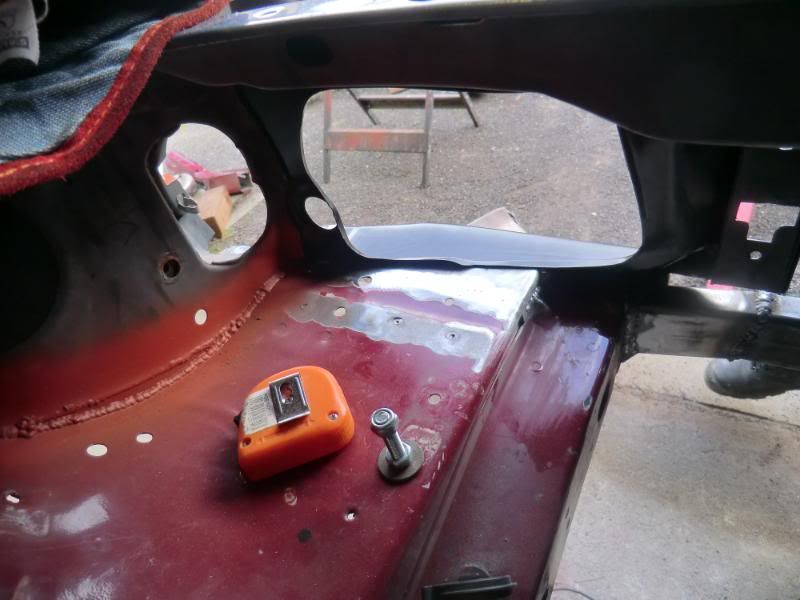
Also started on the top of the bulkhead.
Fuse box section removed (will sort this out when the box section is removed from the car)
Tried for ages to get a genuine front panel with no joy, so i ordered a copy panel of Ebay as i couldn't get one locally, it arrived today and it 's FUCKING SHIT.
Luckily i hadn't cut the top section at all, So i removed the last of the head light sections of the car, and dismantled the new one so as not to replace the whole thing.
Also managed to make my spit stands higher, so won't be long til i can get it back on a spit to get it upside down so i can finish the rear end of the floor off from underneath, and i can get the front rear beam mounts sorted
Cheers for looking, Ginger
.

 01-01-2012, 04:47 PM
#79
.
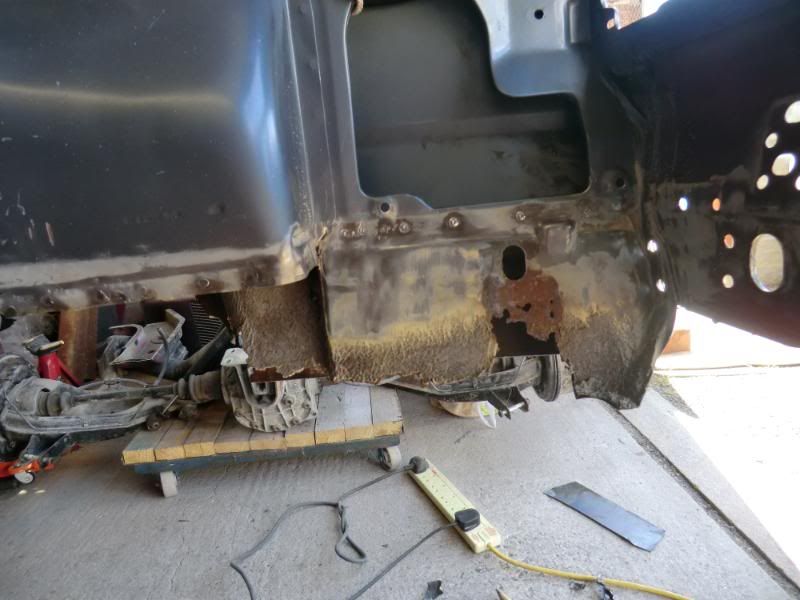
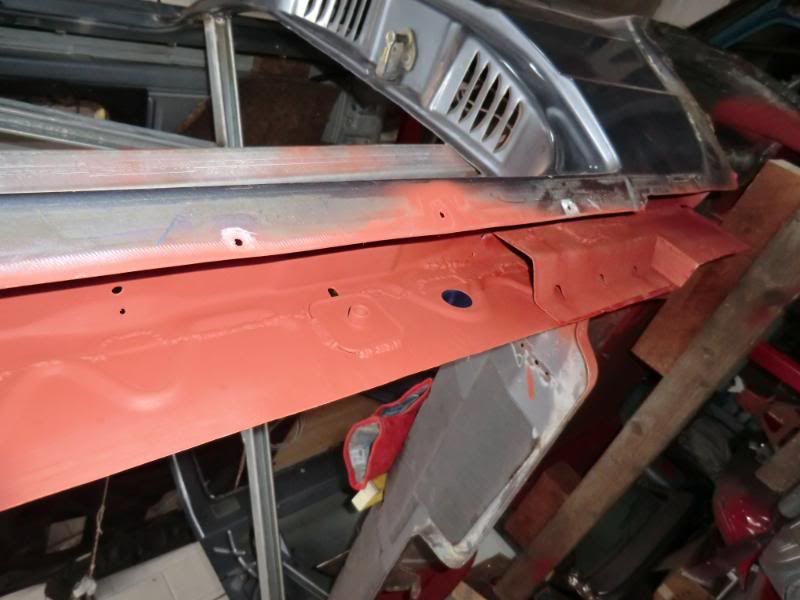
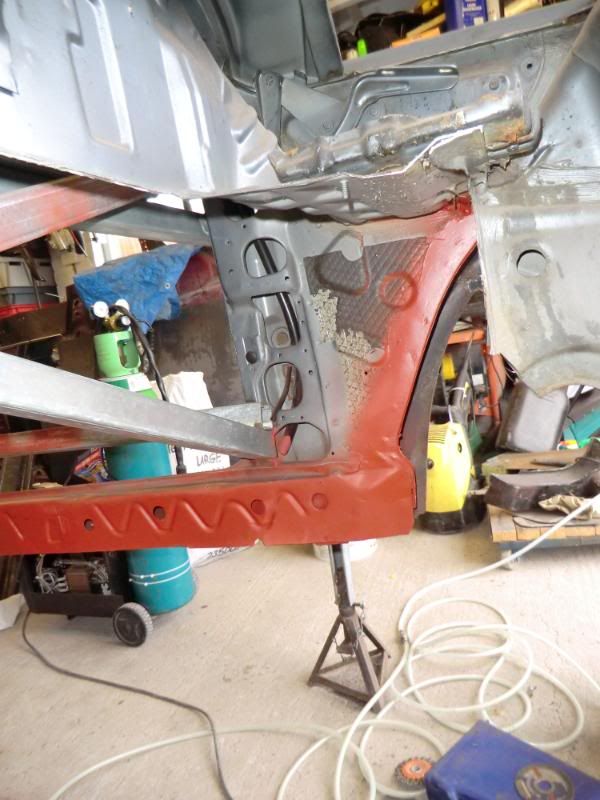
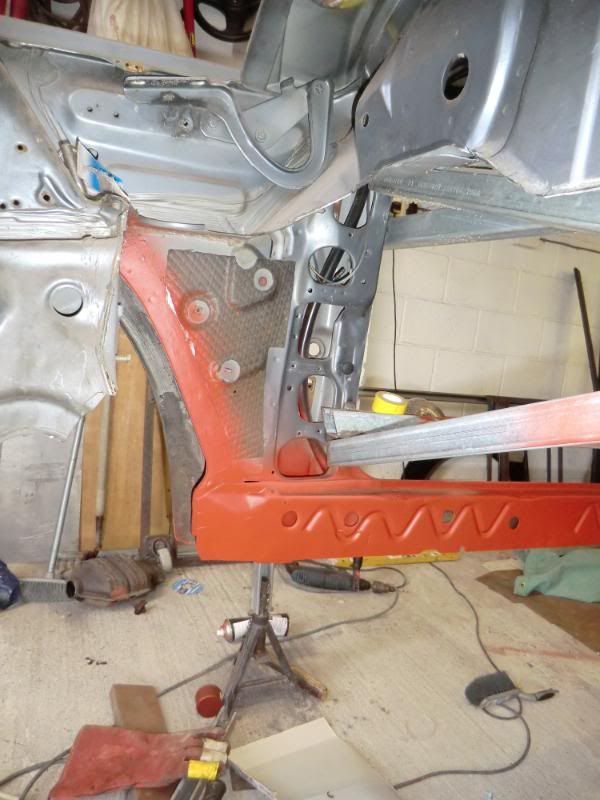
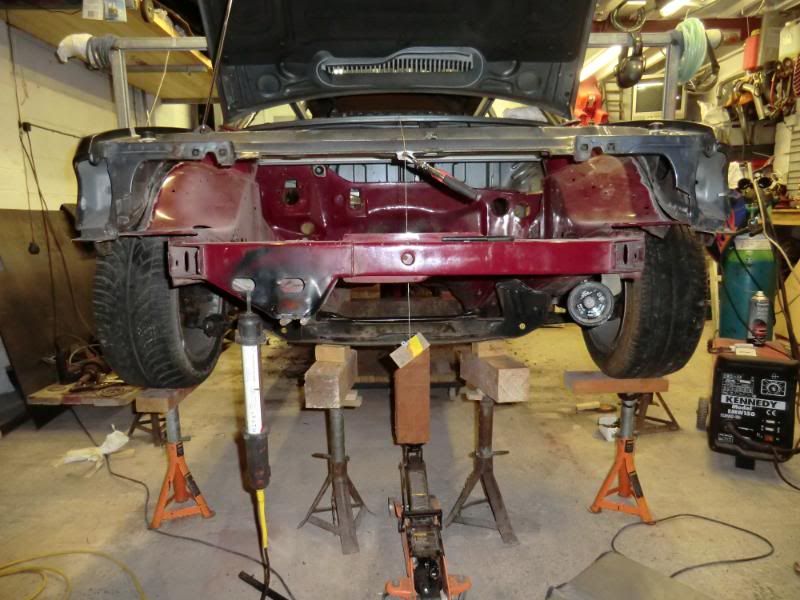
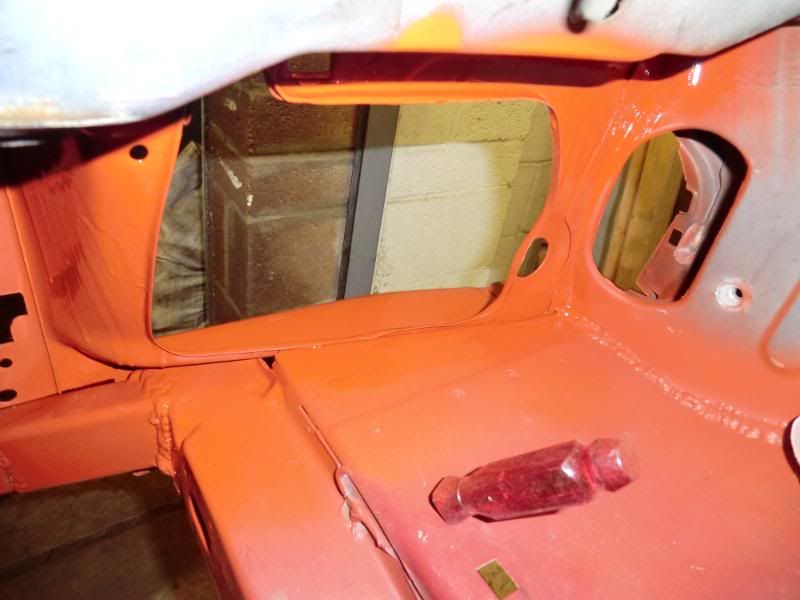
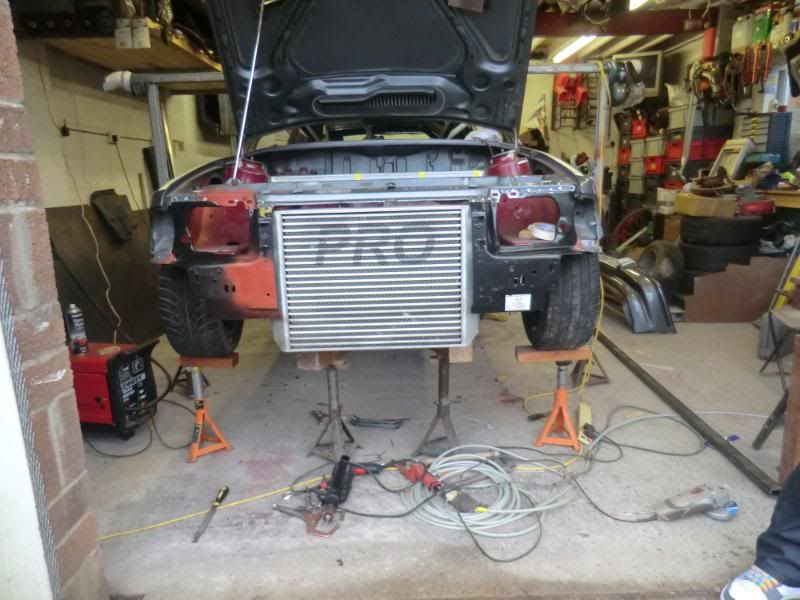
Time for a bit of an update, Been stupid busy in work so it's going a bit slow, but every bit done is a step forward
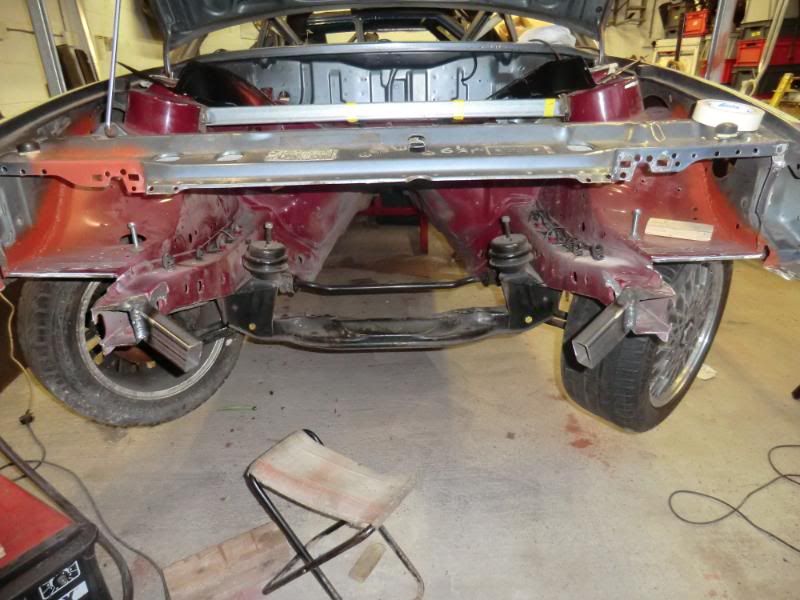
All ready to be rebuilt
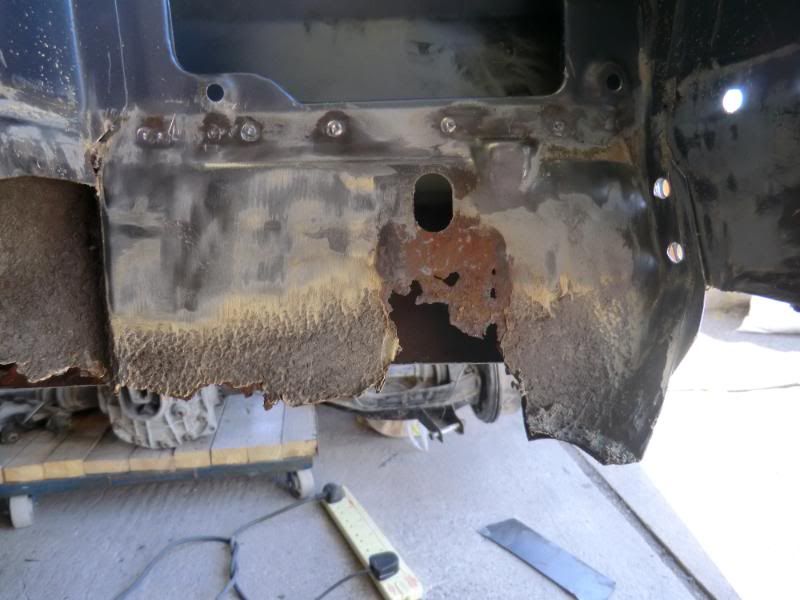
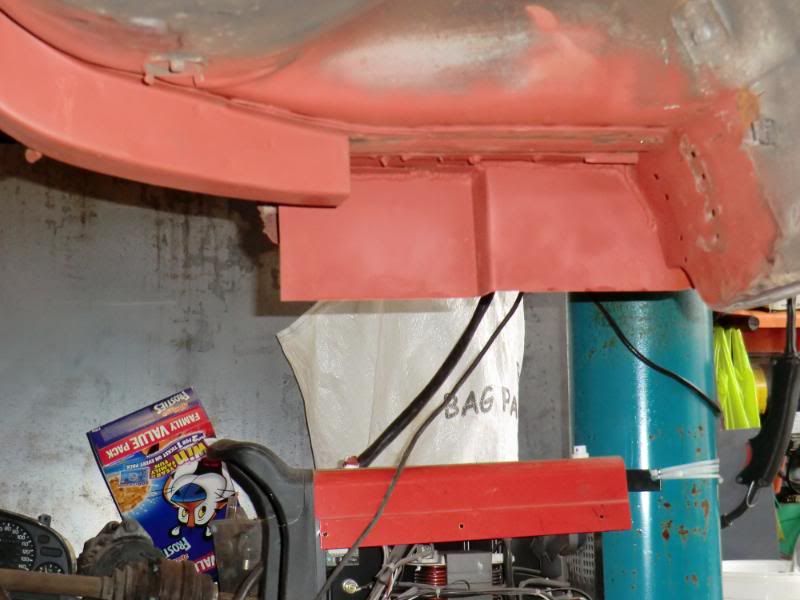
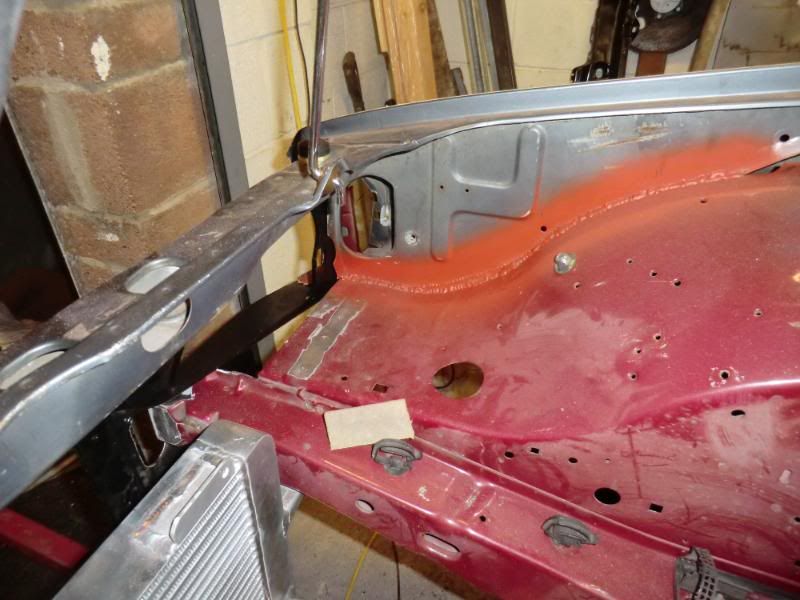
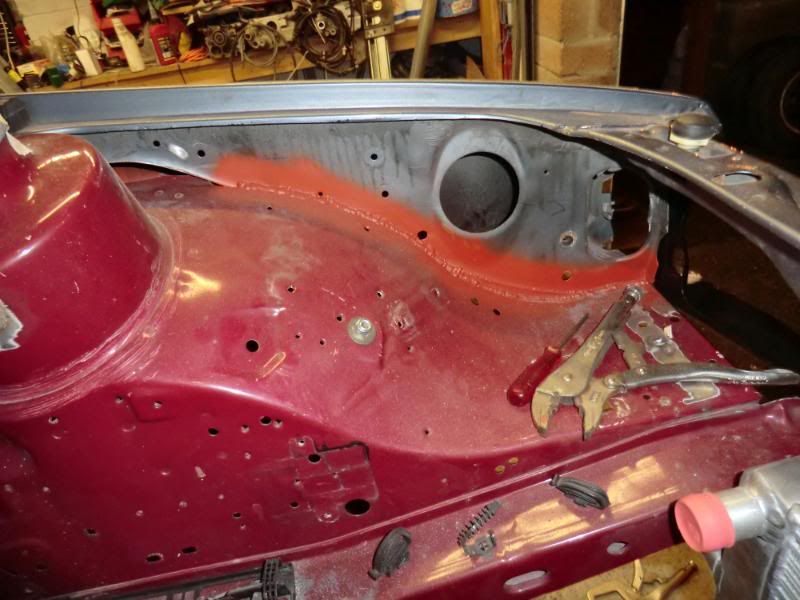
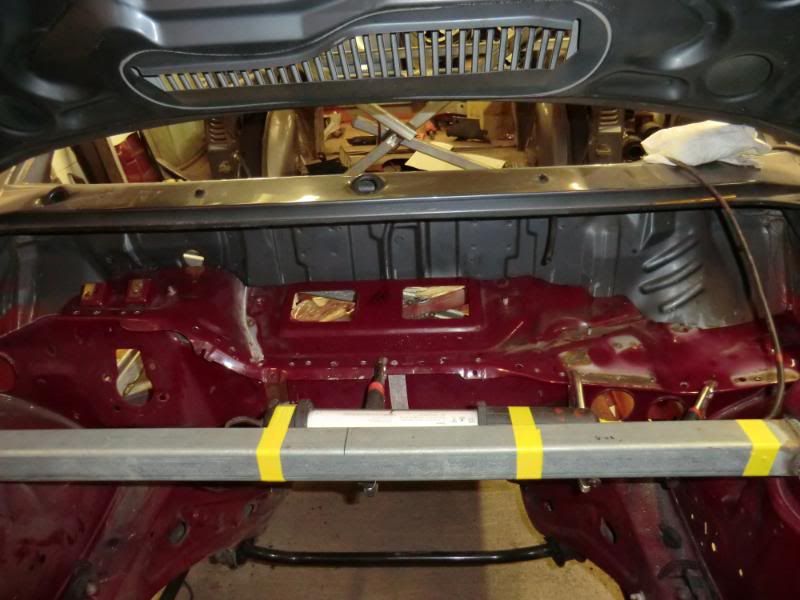
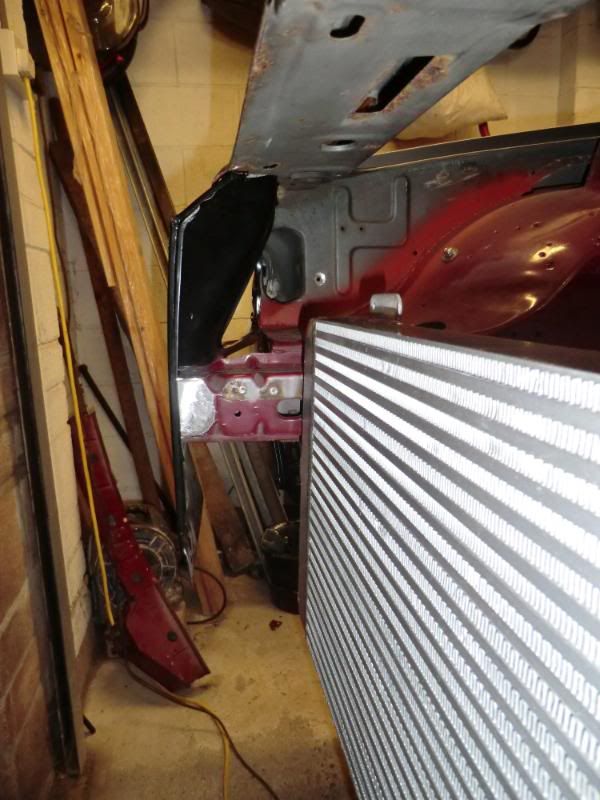
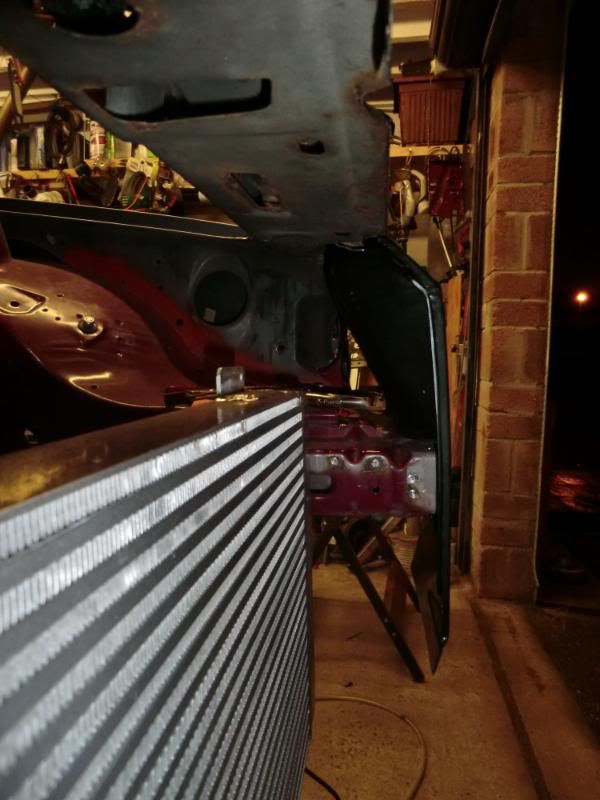
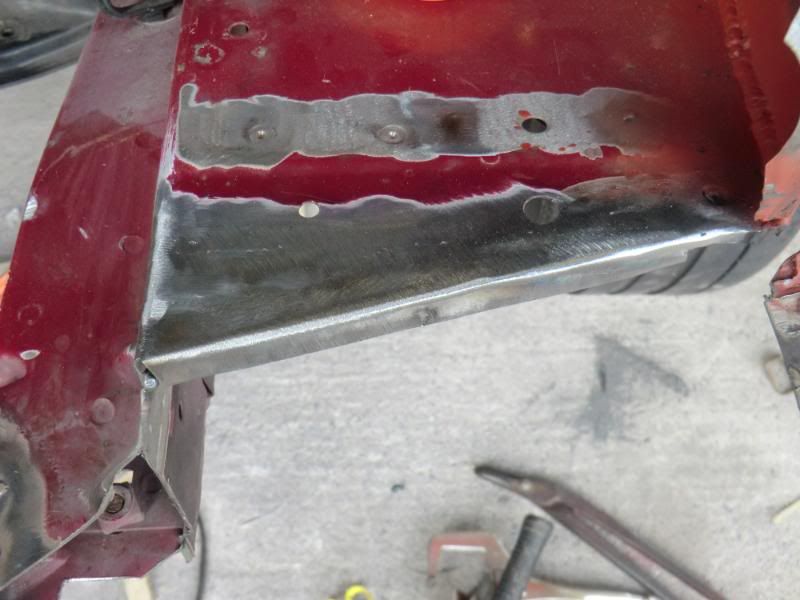
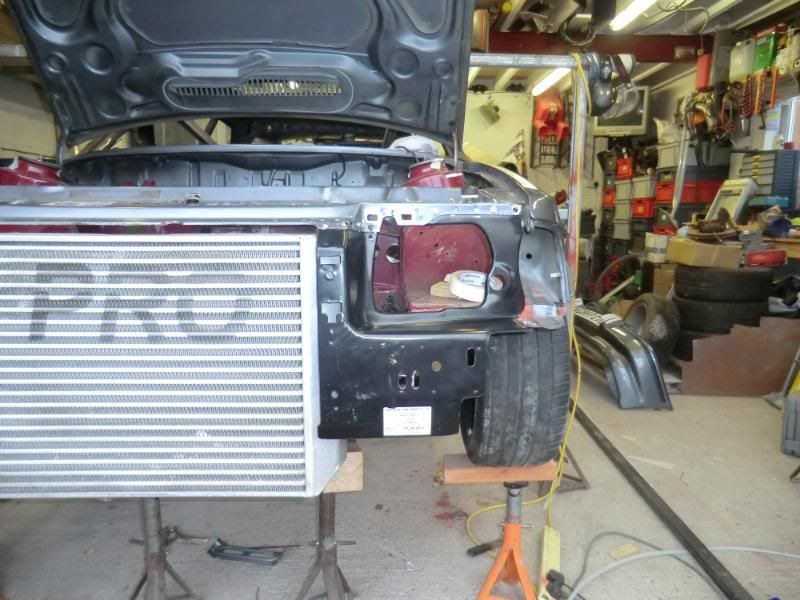
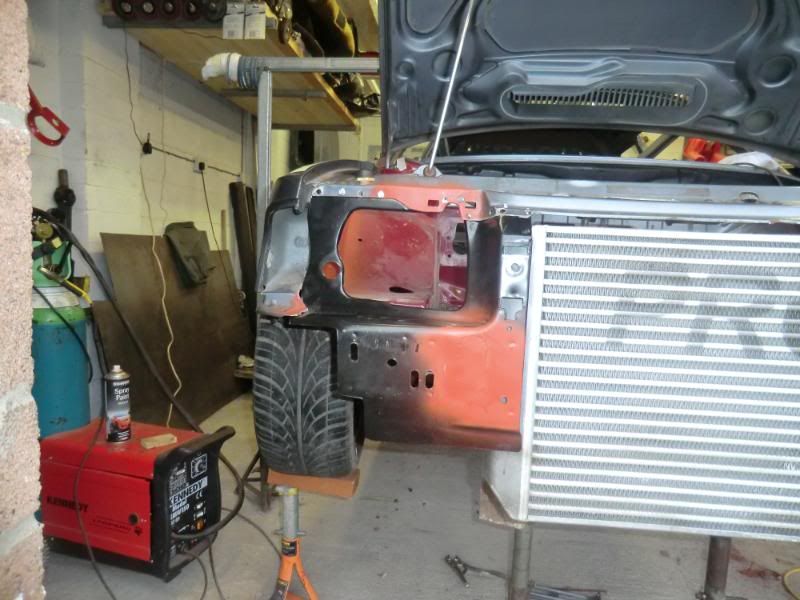
As people will know the inner wing section on the Sierra is shorter than the Escort, so you end up with gaps, made 2 filler pieces up.

And welded in
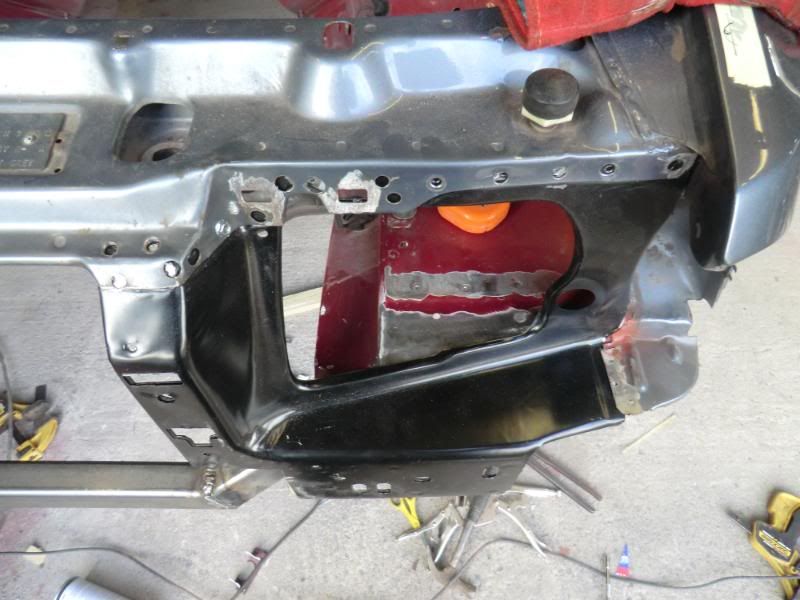
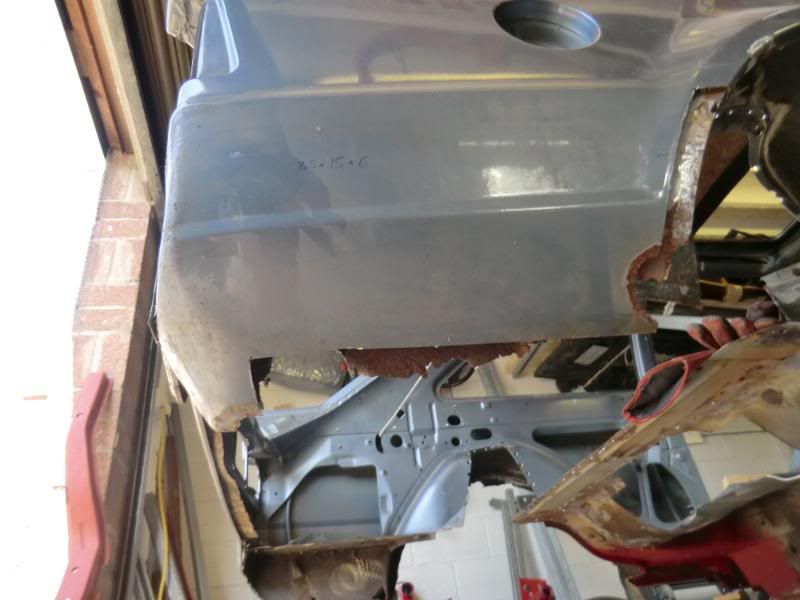
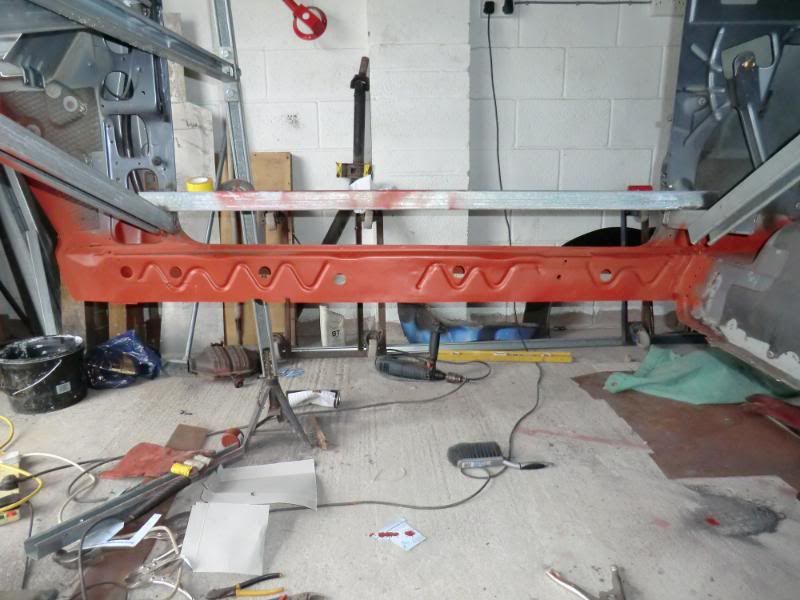
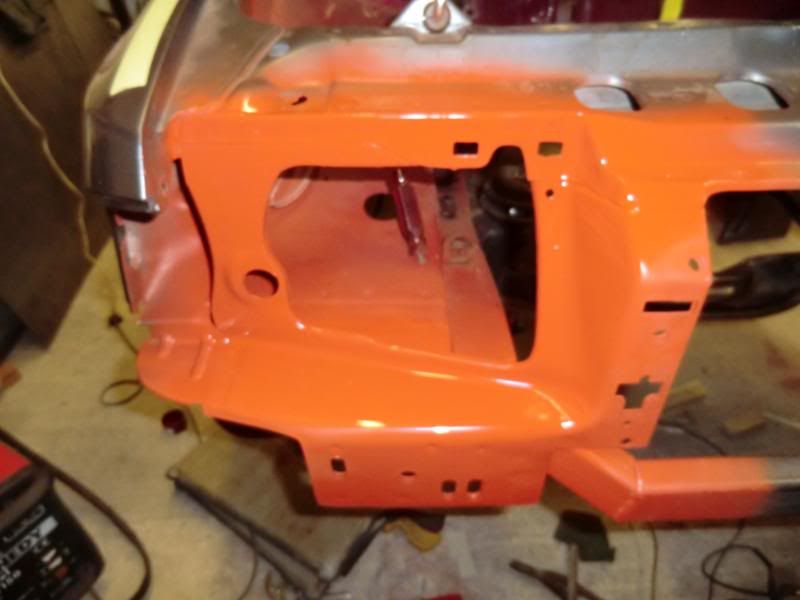
Space checked ready for new cross member
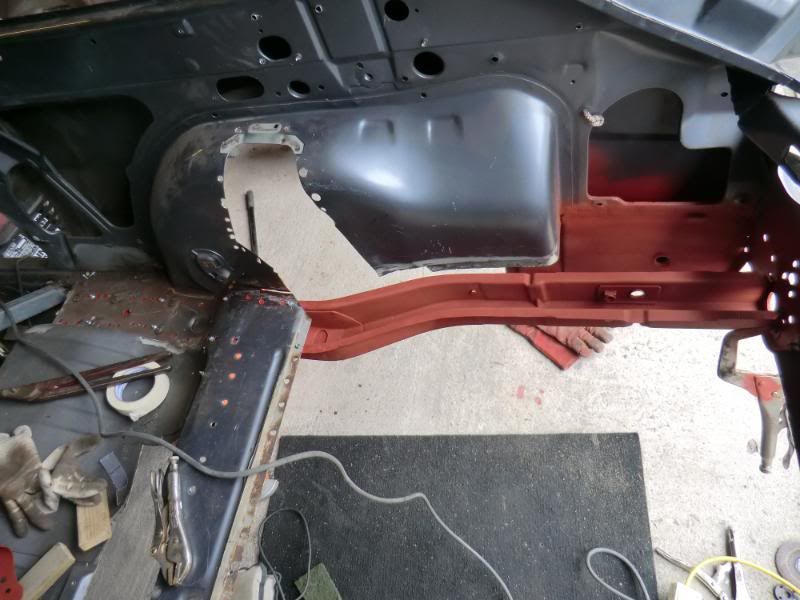
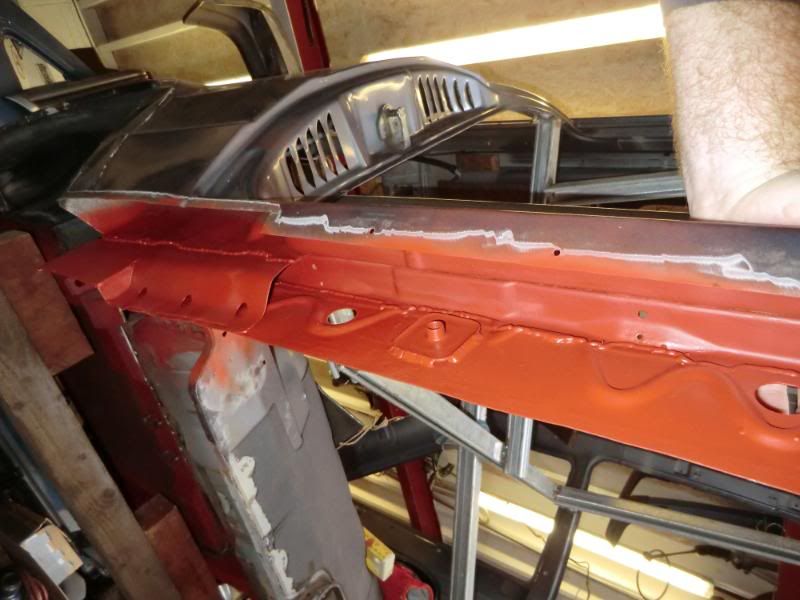
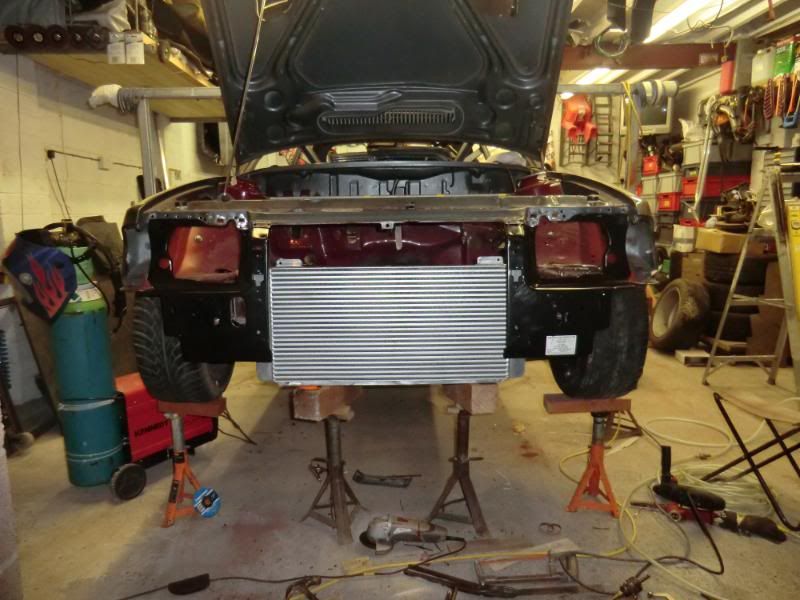
And all rebuilt, the lower sections of the head light panel attach to the cross member on an Escort, but seen as it's no longer there i cut them back. Managed to borrow a spot welder aswell, which made the job a lot easier

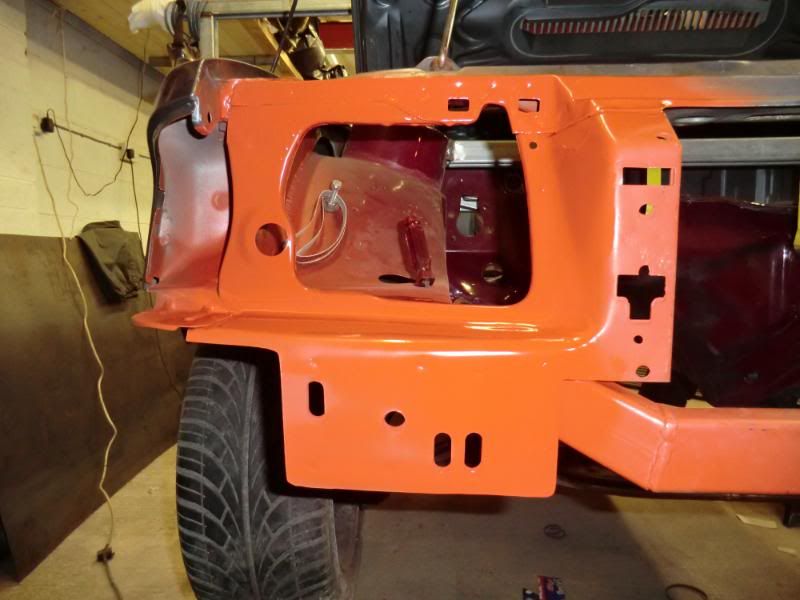

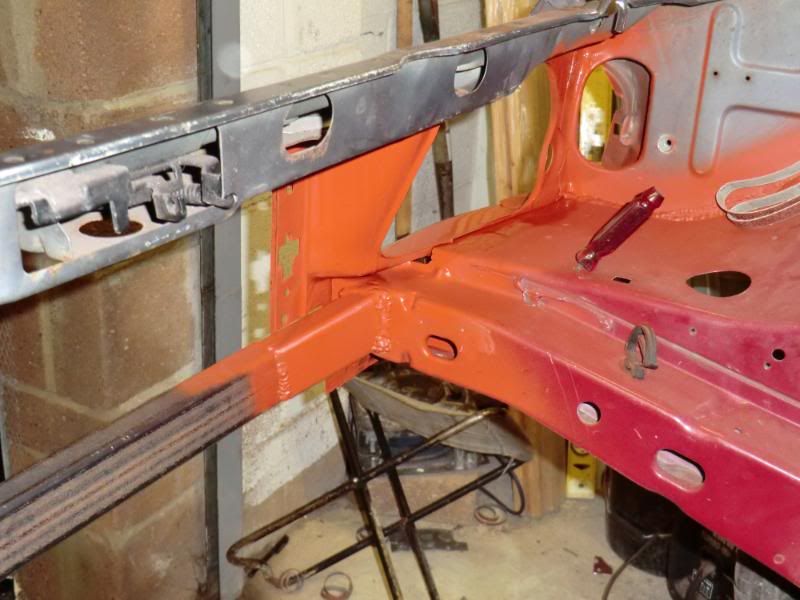
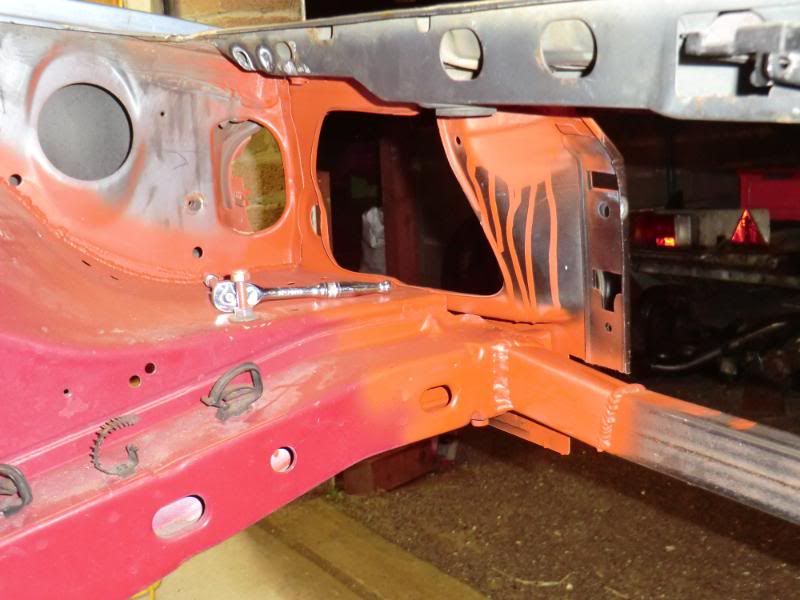
And just some random pics
Now the cross member is sorted i can get it on the spit so as to finish off the 2 forward rear axle mounts
Got a 2 days off now, so hoping to do a bit.
Ginger
.
Time for a bit of an update, Been stupid busy in work so it's going a bit slow, but every bit done is a step forward
All ready to be rebuilt
As people will know the inner wing section on the Sierra is shorter than the Escort, so you end up with gaps, made 2 filler pieces up.
And welded in
Space checked ready for new cross member
And all rebuilt, the lower sections of the head light panel attach to the cross member on an Escort, but seen as it's no longer there i cut them back. Managed to borrow a spot welder aswell, which made the job a lot easier
And just some random pics
Now the cross member is sorted i can get it on the spit so as to finish off the 2 forward rear axle mounts
Got a 2 days off now, so hoping to do a bit.
Ginger
.
