Escort RST S2 RWD Cosworth, update 8/12/16
 11-09-2012, 11:50 AM
#121
PassionFord Regular

Hi your project is very inspiring  ... i have a sierra sapphire with some very bad front damage was repaired but still not straight Would anyone recommend i cut the front and weld in a good one ? Similar to what has been done with this Escort but instead will be a Sierra cut into a Sierra

 13-09-2012, 09:22 PM
#129
.
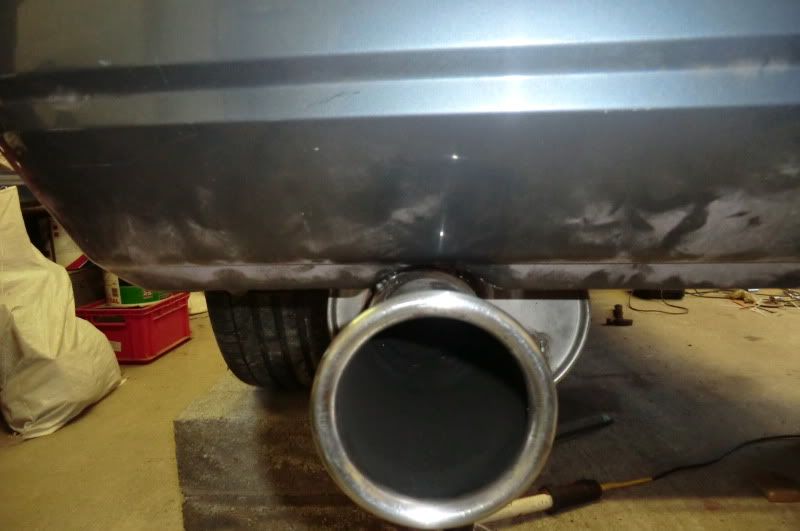
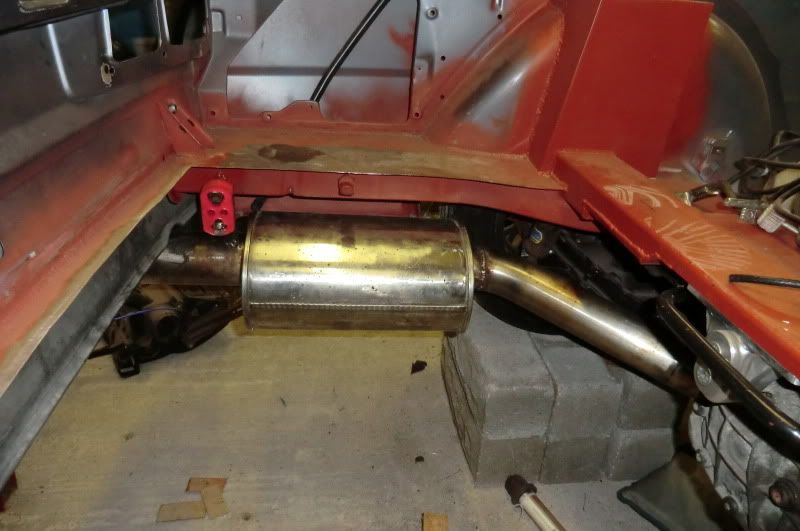
Been cracking on with things, the exhaust i have had a really bad flat spot where it runs past/under the diff, I will in the future have a new system from the down pipe back so the part that was damaged i've replaced, so i bought 1m of tubing and made a new section, it will be fine for now
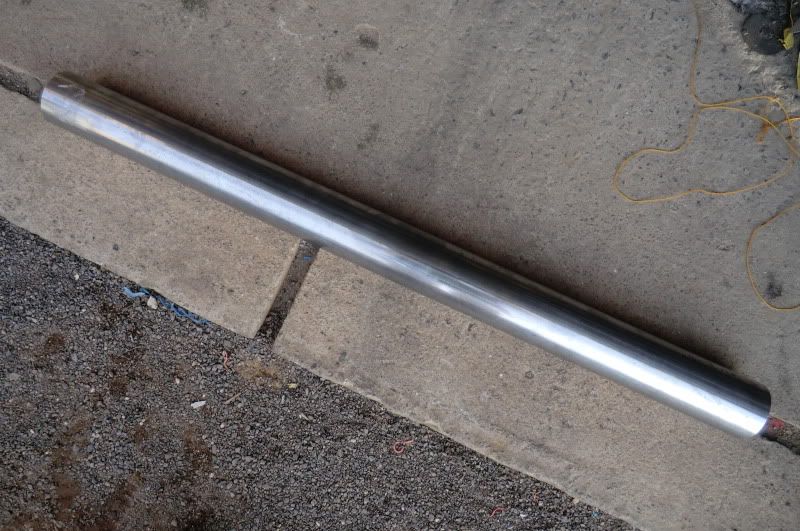
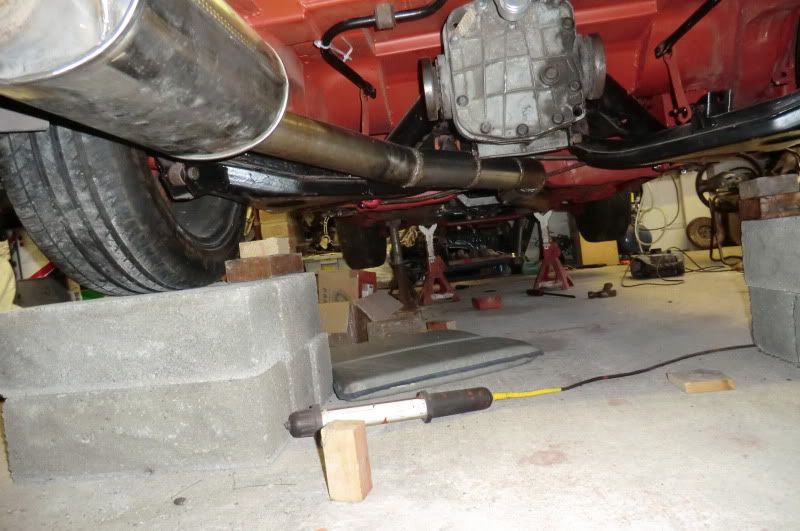
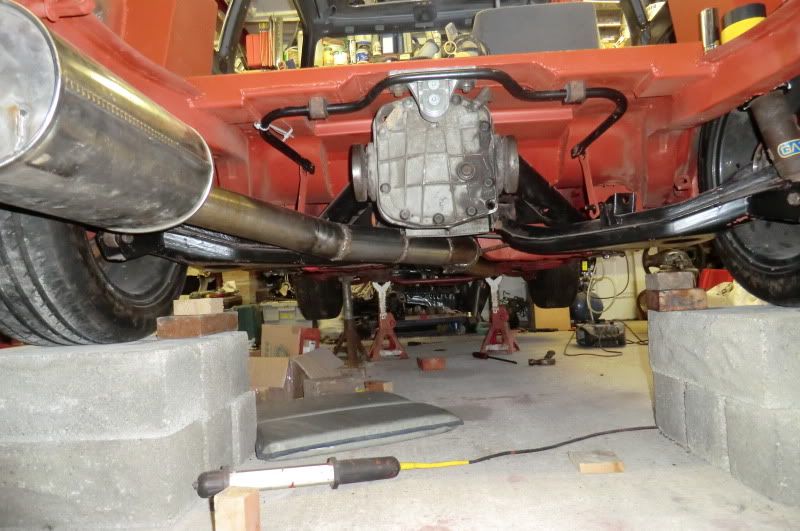
I had to turn the silencer 90' as it wouldn't fit under the chassis rail

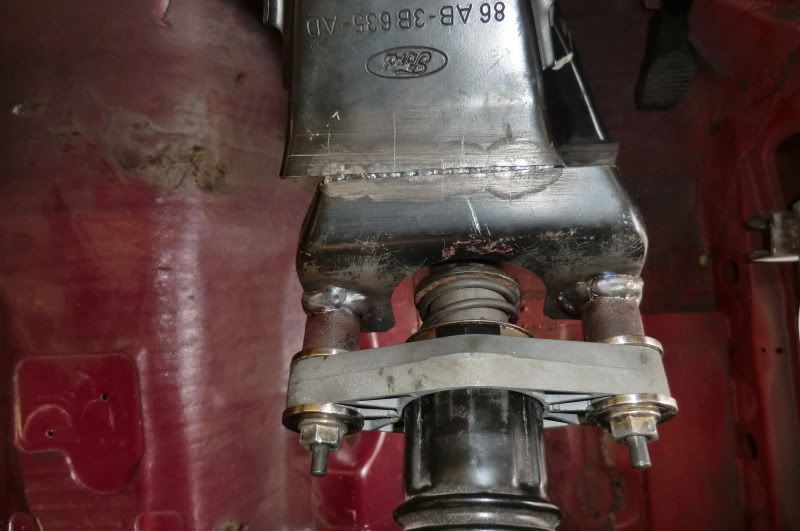
I've mentioned before that i'll be using the complete Sierra loom, Part of the reason is the fact that i really don't like the Escort indicator/wiper stalks, So by using the Sierra loom i can get rid of them and use the Cossie ones. Now i know most people just cut and shut the Escort and Sierra rack but i'll be using the complete Sierra rack.
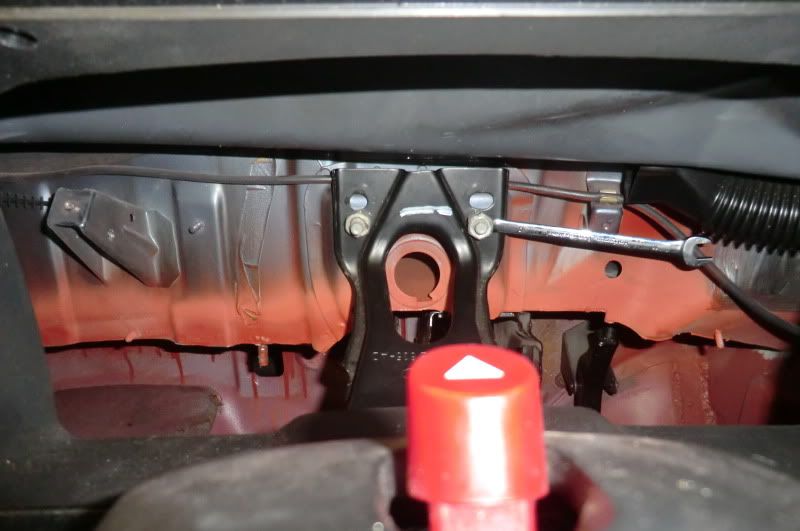
So after a few mock up's etc i removed this washer thing
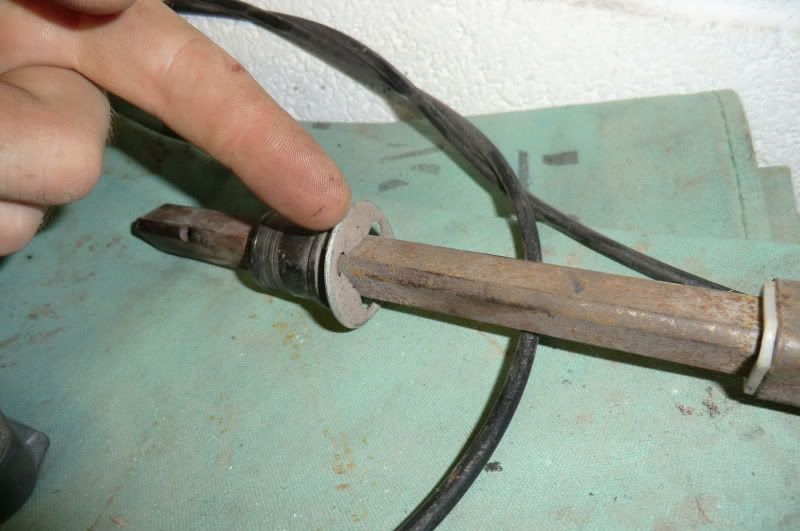
Which ment that the alloy mounting bracket would now bolt to the Escort bulk head fixing, This also pushed the end that goes throught the bulk head further into the engine bay
This can be cut down later
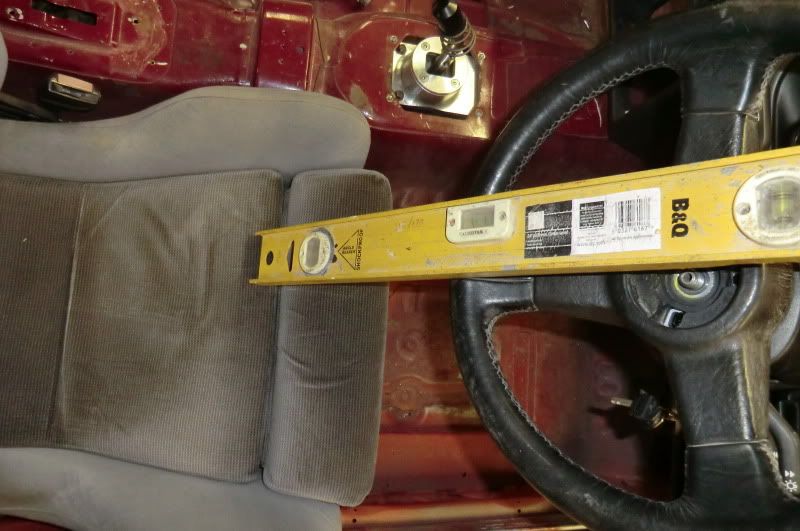
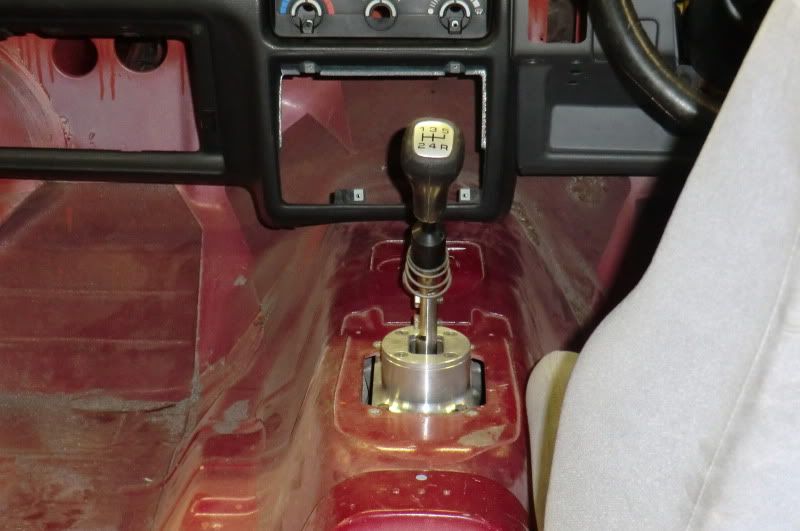
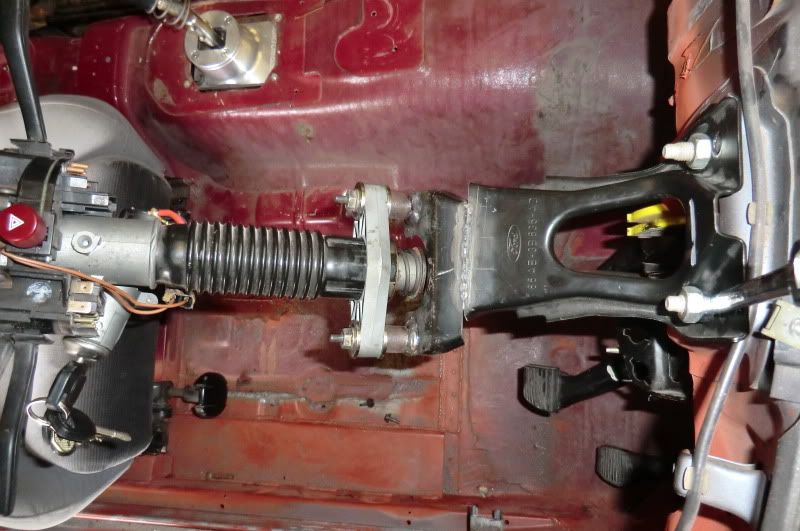
The steering wheel now sits the same distance from the bulkhead as in a standard Escort
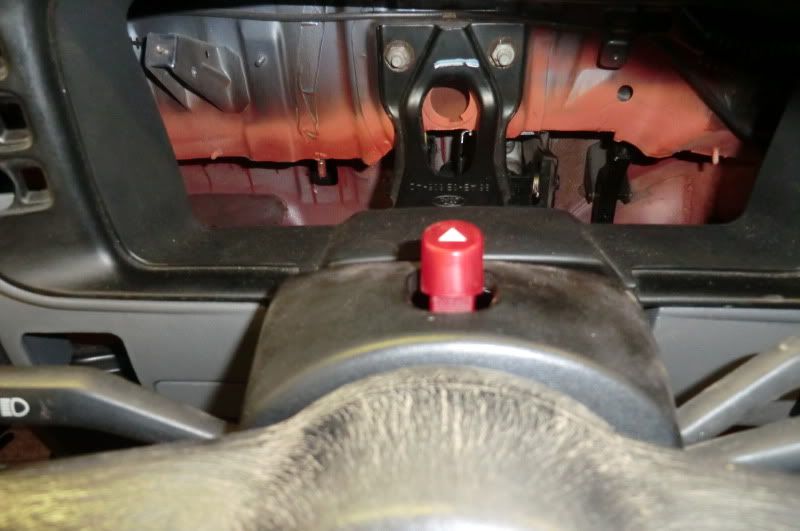
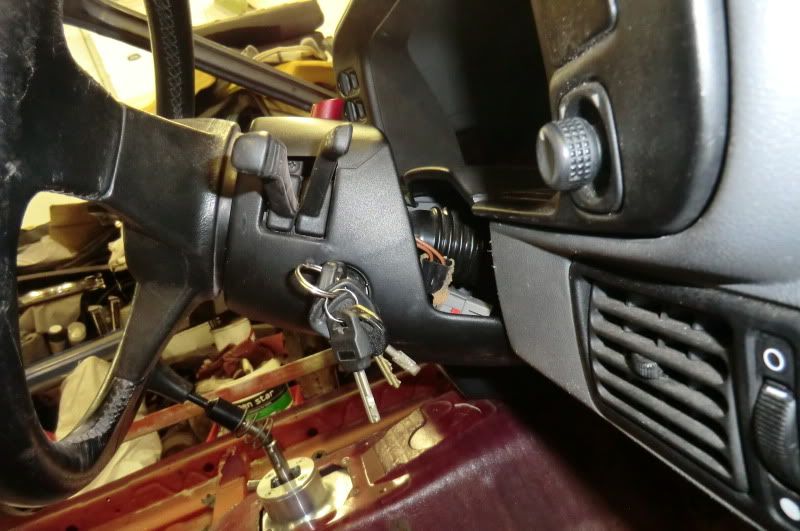
But, because the Sierra is wider than an Escort the seats a further apart, plus the seats are mounted further off the floor than in an Escort so the wheel is a bit to low and to far to the centre of the car.
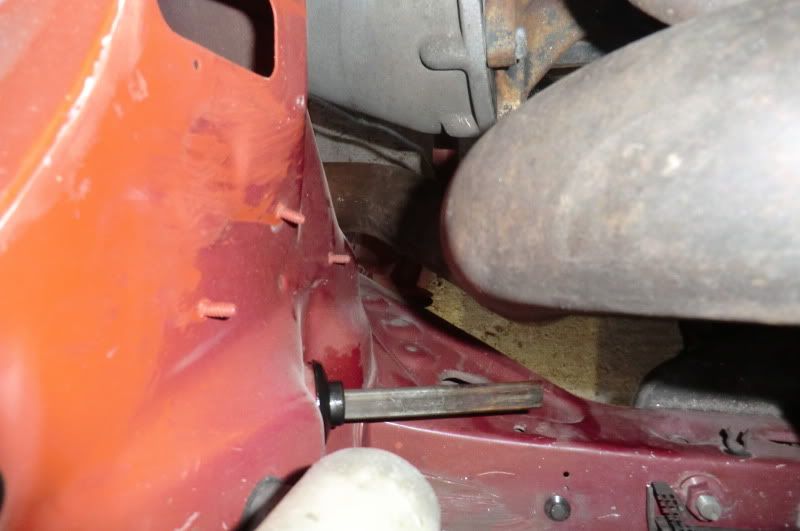
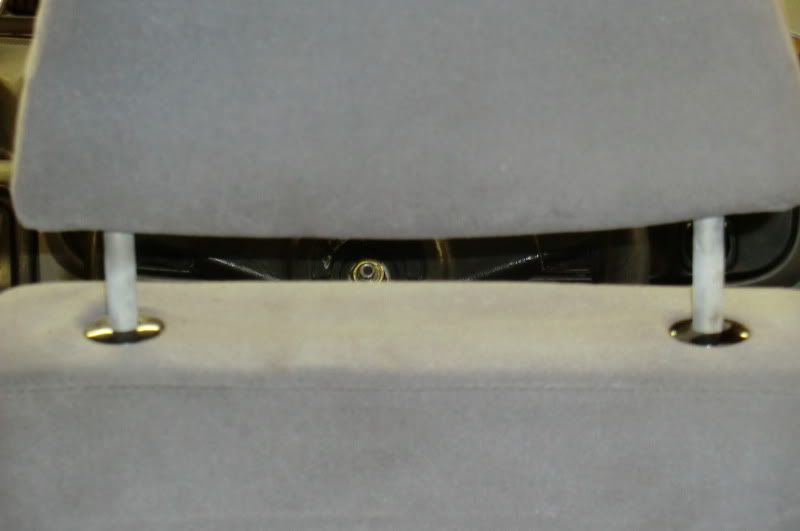
You can see the steering wheel bolt in this pic in through the gap in the seat and how far to the left it is

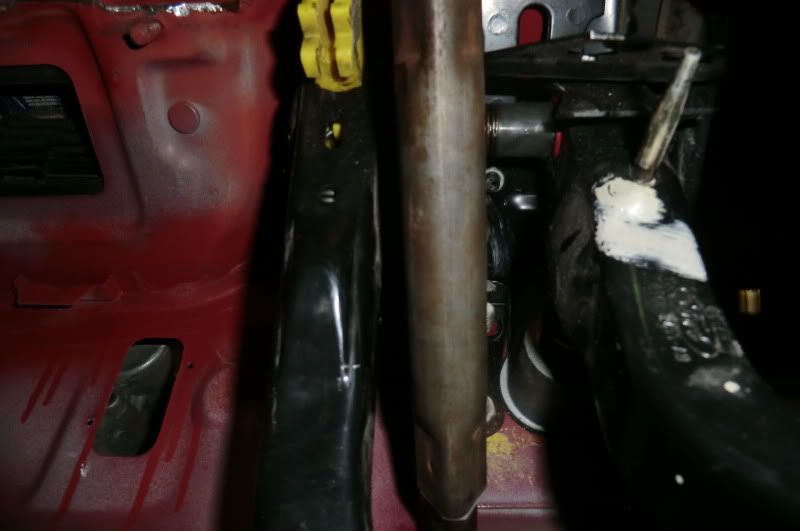
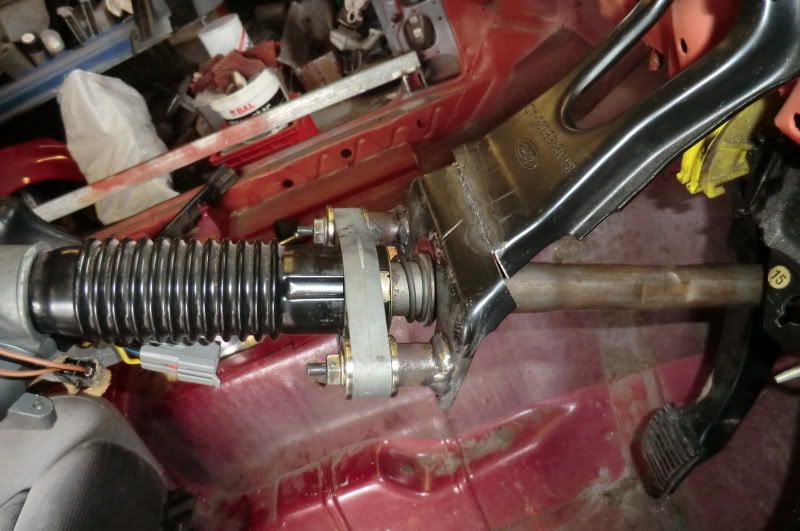
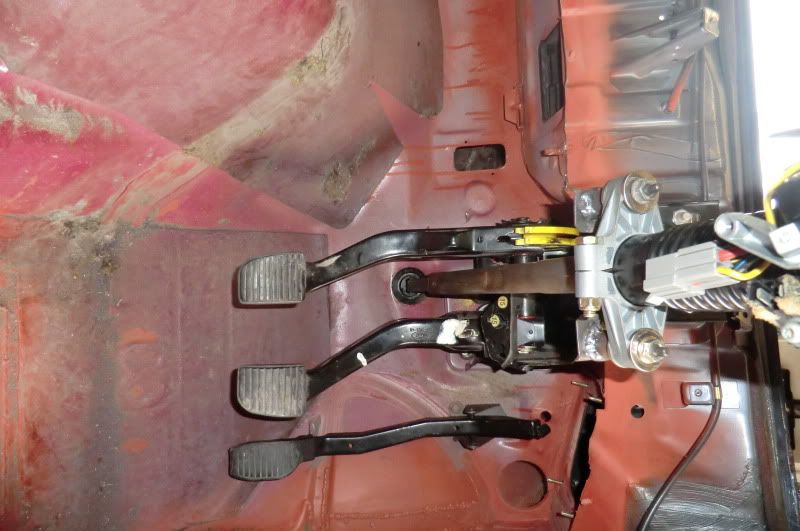
So after a bit of a think i removed the Escort bulk head mount and redrilled the holes 10mm low so that it'll bolt up higher in the car,( The spanner is acting like a spacer )
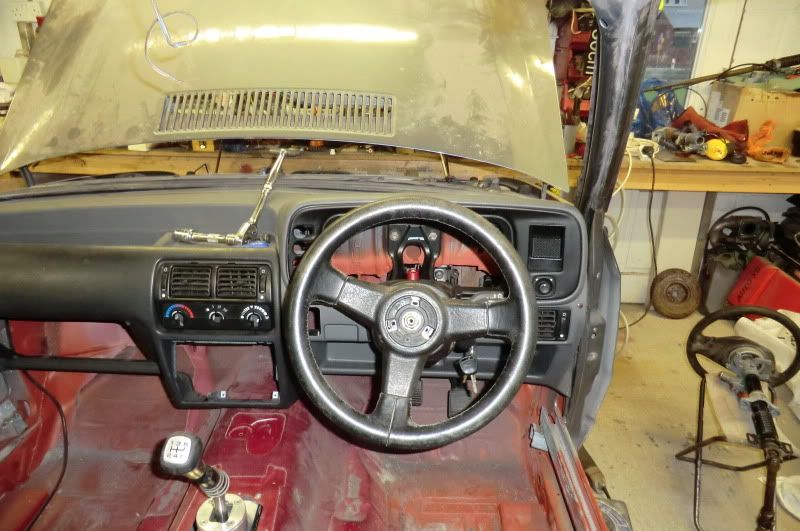
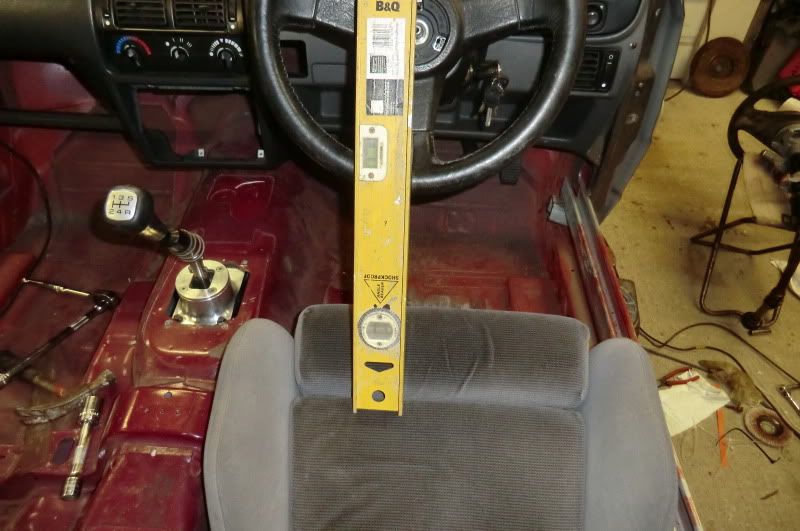
This moved the wheel up to a nice hight (simular angle pics)
Before
After
Plenty of room between the pedals to move it across about 20mm
You can see how far off the centre of the seat the wheel is here
No big drama, i'll modify the other end of the mount tomorrow
Tried the Sierra clocks for a look (these are coil pack clocks, which i will be running when i sort the coilpack conversion)
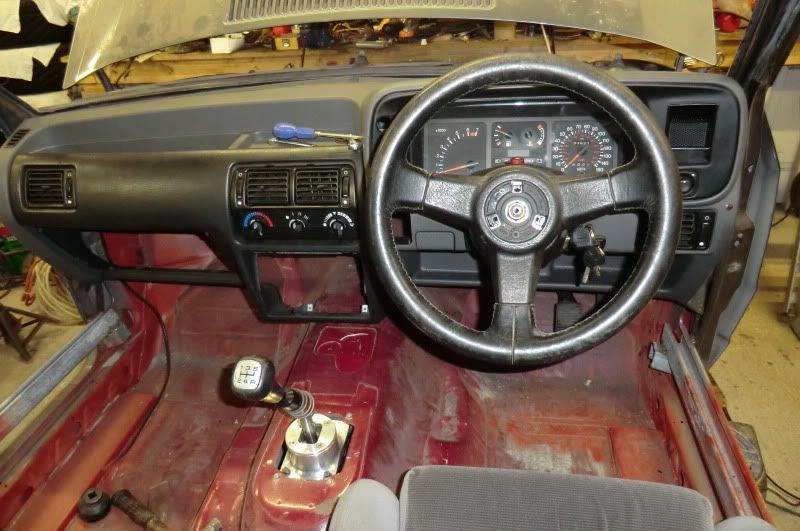
The Sierra cowling will need extending, but that's no big issue.
This is the standard Escort centre consol
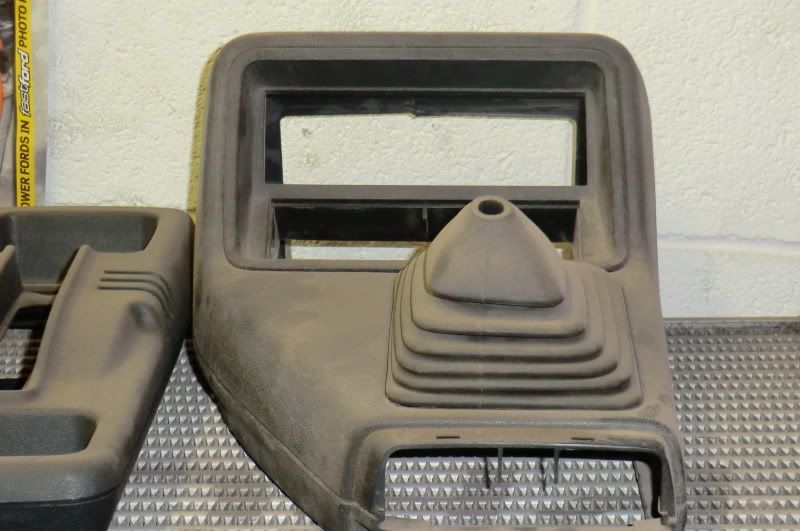
Because it flares out to the passenger side the bottom of the dash doesn't sit central over the tunnel
Nothing i can do about that, so i'll have to live with it :-/
Fitted the fuse box in just for a look, I love how neat it all fits
Gonna crack on with the rack mounting tomorrow.
Thanks for looking
Ginger
.
Been cracking on with things, the exhaust i have had a really bad flat spot where it runs past/under the diff, I will in the future have a new system from the down pipe back so the part that was damaged i've replaced, so i bought 1m of tubing and made a new section, it will be fine for now
I had to turn the silencer 90' as it wouldn't fit under the chassis rail
I've mentioned before that i'll be using the complete Sierra loom, Part of the reason is the fact that i really don't like the Escort indicator/wiper stalks, So by using the Sierra loom i can get rid of them and use the Cossie ones. Now i know most people just cut and shut the Escort and Sierra rack but i'll be using the complete Sierra rack.
So after a few mock up's etc i removed this washer thing
Which ment that the alloy mounting bracket would now bolt to the Escort bulk head fixing, This also pushed the end that goes throught the bulk head further into the engine bay
This can be cut down later
The steering wheel now sits the same distance from the bulkhead as in a standard Escort
But, because the Sierra is wider than an Escort the seats a further apart, plus the seats are mounted further off the floor than in an Escort so the wheel is a bit to low and to far to the centre of the car.
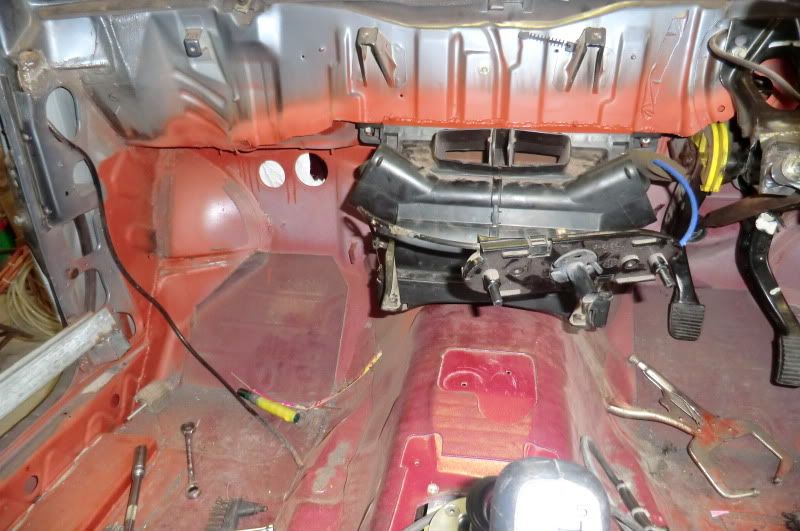
You can see the steering wheel bolt in this pic in through the gap in the seat and how far to the left it is
So after a bit of a think i removed the Escort bulk head mount and redrilled the holes 10mm low so that it'll bolt up higher in the car,( The spanner is acting like a spacer
This moved the wheel up to a nice hight (simular angle pics)
Before
After
Plenty of room between the pedals to move it across about 20mm
You can see how far off the centre of the seat the wheel is here
No big drama, i'll modify the other end of the mount tomorrow
Tried the Sierra clocks for a look (these are coil pack clocks, which i will be running when i sort the coilpack conversion)
The Sierra cowling will need extending, but that's no big issue.
This is the standard Escort centre consol
Because it flares out to the passenger side the bottom of the dash doesn't sit central over the tunnel
Nothing i can do about that, so i'll have to live with it :-/
Fitted the fuse box in just for a look, I love how neat it all fits
Gonna crack on with the rack mounting tomorrow.
Thanks for looking
Ginger
.
16-09-2012, 09:07 PM
#130
.
Been busy at it today and got a few things ticked off the "To Do" list
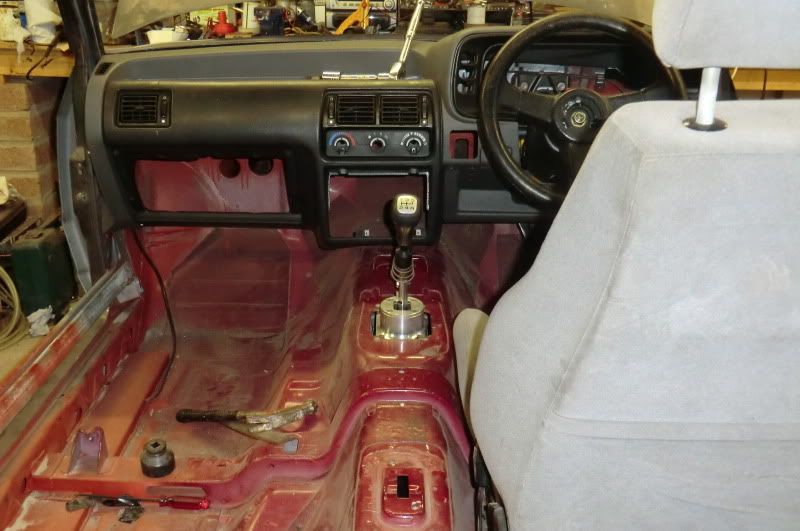
1st off was the steering wheel position that i was not happy with, I had it in the same position as per standard Escort, but it sat to low and to far to the centre of the car.
So i've moved it 38mm closer to the driver, which has raised it up a few mm, also moved it across towards the drive door 15mm and it now sits perfect
and it sits perfect between the clutch and brake pedals
Then needed to add a brace under the bracket to make it more rigid,
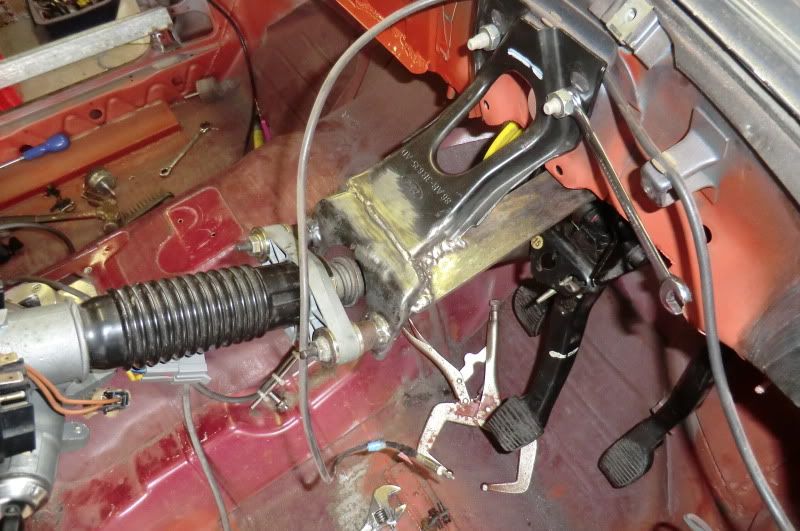
which bolts to the buk head and pedal box
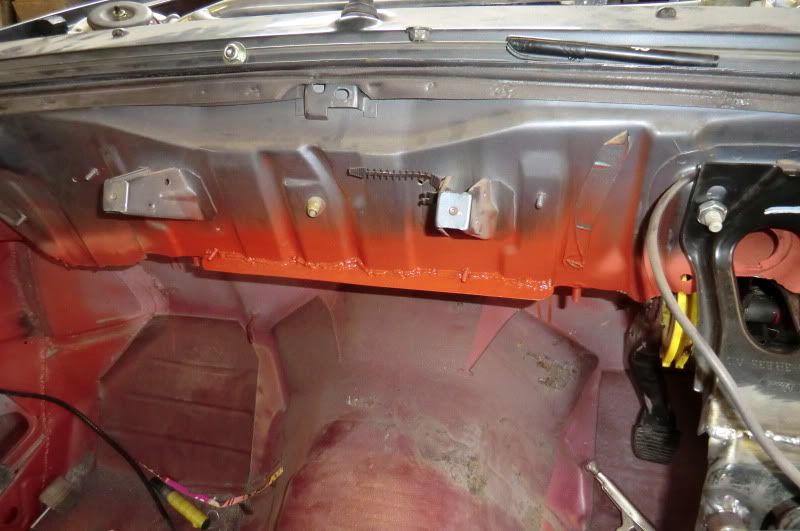
The heater box was next, 1st up was extending the bulk head back to cover the rear most edge so that it'll seal up
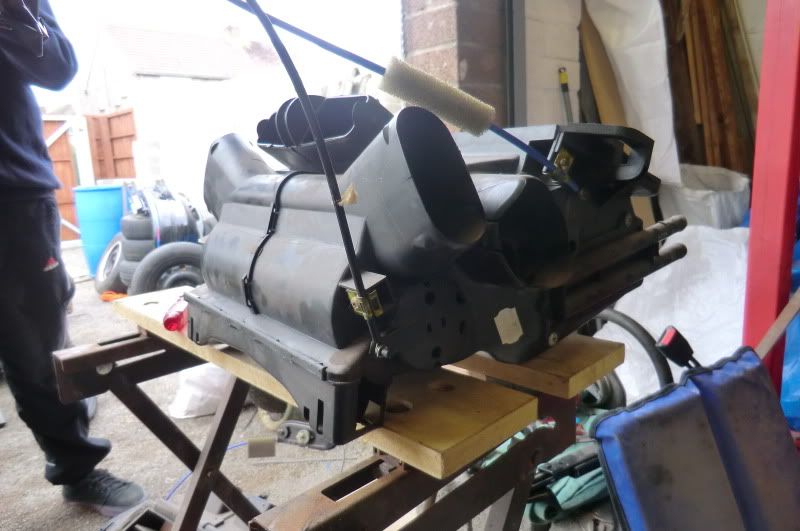
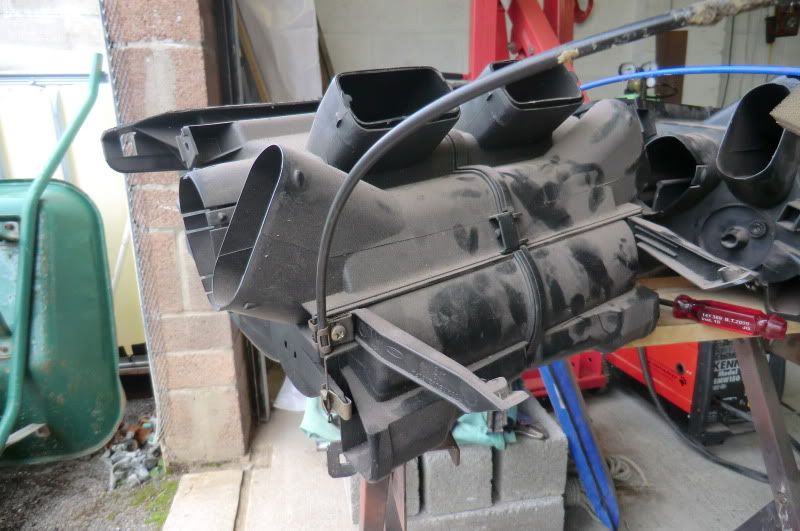
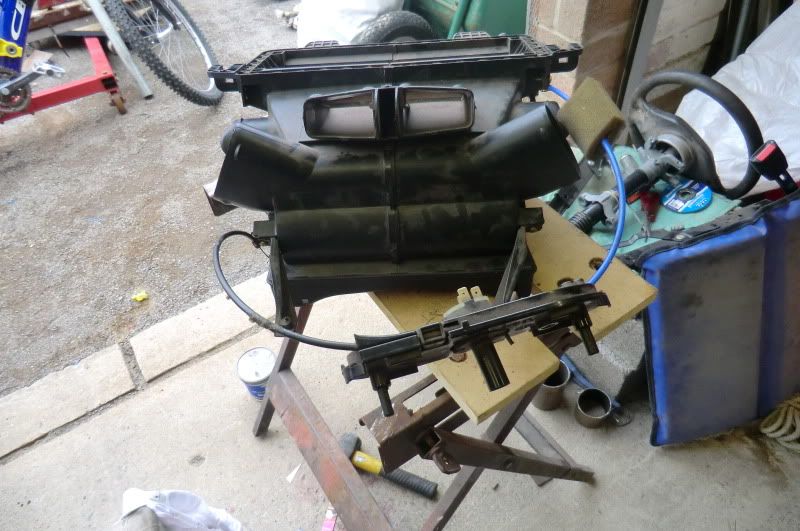
Then next up was making a Sierra/Escort heater box, on the Sierra the hot/cold and the up/down director dials are both on the right hand side, on the Escort the up/down director is on the left.
So the Sierra box was dismantled and the air director and end controls were removed and swapped to the other end (which was a piece of piss)
Sierra box before
Escort box
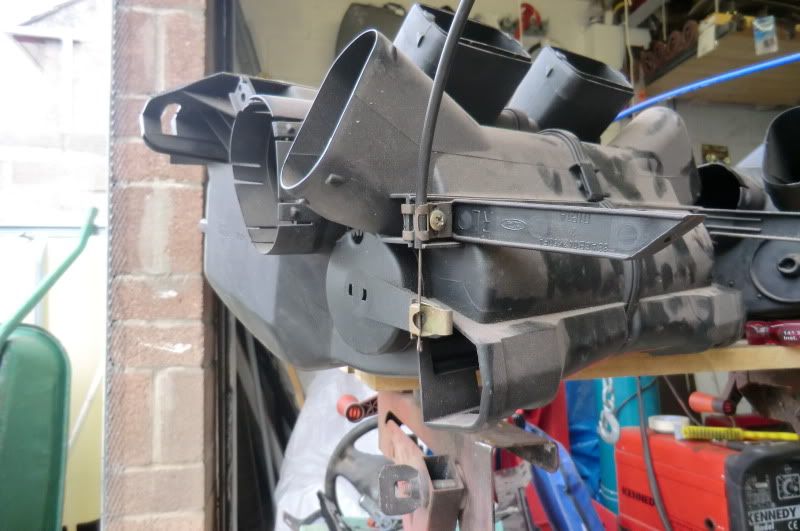
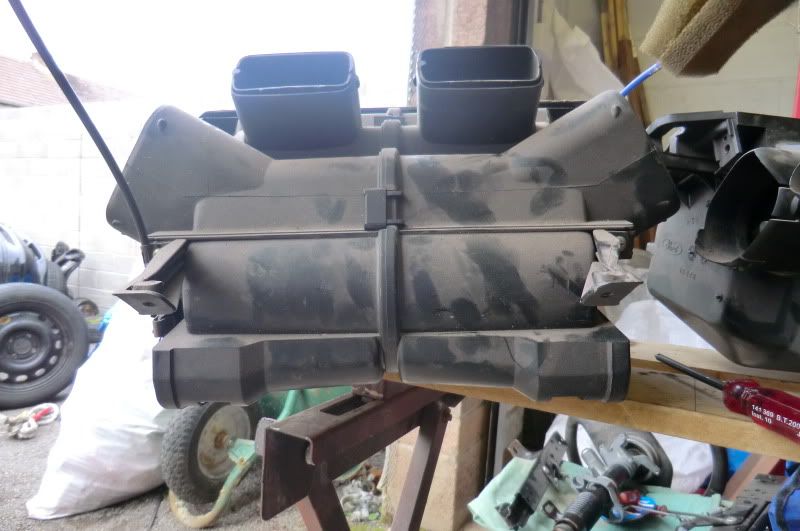
So this
used to be this end

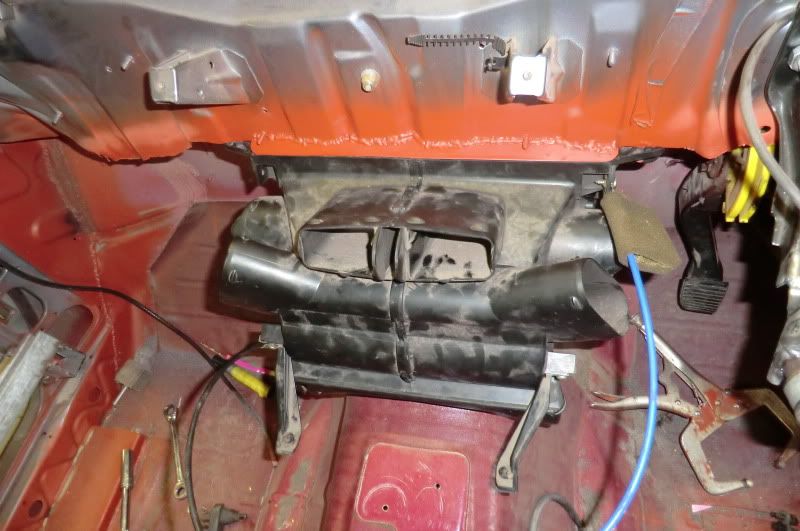
Sierra box after

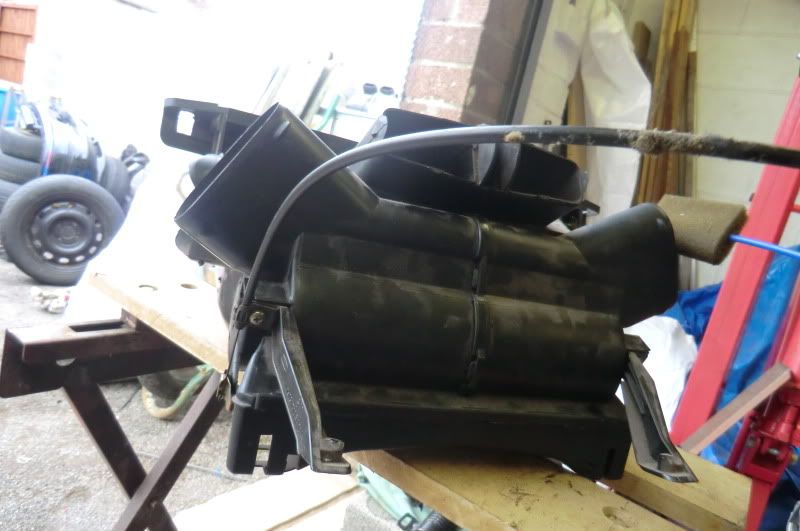
And fitted with the new bulk head seal fitting mint
Then started having a fit up of the donor Sierra loom as the cossie one is a bit of a mess (fucking cuts and joins every where in it :-( )
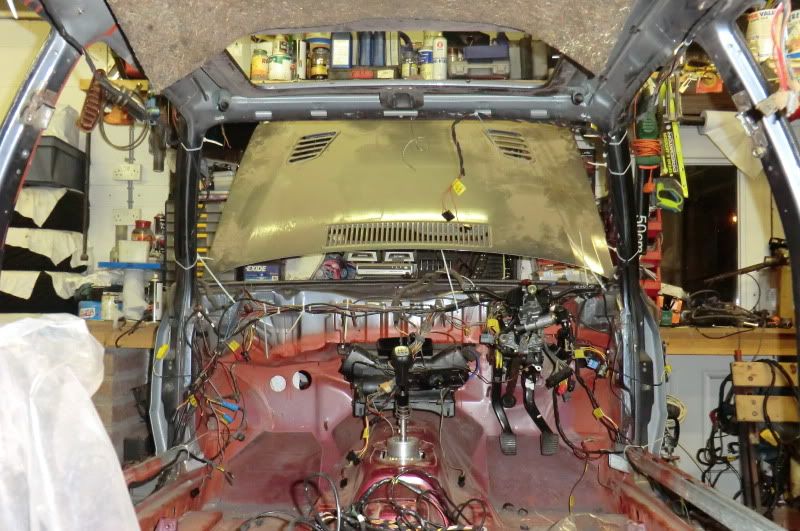
I've got the Cossie loom laid out on the floor next to the car and there are lot of differences even in the basic wiring. I need to use the doner loom as this has all the rear hatch wiring for the wiper, heated window etc.

Looks like it's gonna take a lot of time to splice them together.
More soon
Ginger
.
Been busy at it today and got a few things ticked off the "To Do" list
1st off was the steering wheel position that i was not happy with, I had it in the same position as per standard Escort, but it sat to low and to far to the centre of the car.
So i've moved it 38mm closer to the driver, which has raised it up a few mm, also moved it across towards the drive door 15mm and it now sits perfect
and it sits perfect between the clutch and brake pedals
Then needed to add a brace under the bracket to make it more rigid,
which bolts to the buk head and pedal box
The heater box was next, 1st up was extending the bulk head back to cover the rear most edge so that it'll seal up
Then next up was making a Sierra/Escort heater box, on the Sierra the hot/cold and the up/down director dials are both on the right hand side, on the Escort the up/down director is on the left.
So the Sierra box was dismantled and the air director and end controls were removed and swapped to the other end (which was a piece of piss)
Sierra box before
Escort box
So this
used to be this end
Sierra box after
And fitted with the new bulk head seal fitting mint
Then started having a fit up of the donor Sierra loom as the cossie one is a bit of a mess (fucking cuts and joins every where in it :-( )
I've got the Cossie loom laid out on the floor next to the car and there are lot of differences even in the basic wiring. I need to use the doner loom as this has all the rear hatch wiring for the wiper, heated window etc.
Looks like it's gonna take a lot of time to splice them together.
More soon
Ginger
.
Last edited by GINGExR2 T; 17-09-2012 at 08:47 PM.
 17-09-2012, 09:01 PM
#132
.
Been compairing the loom tonight, If i just fit the whole cossie loom it'll be easy, the only adjustment to the loom will be the elecrtic mirror wiring as the adjuster is on the door of the Sierra and the on the dash in the Escort.
The Cossie loom i have is a bit ropey, so i'll see if i can repair it, Then i'll just have to add the rear wiper wiring from the hatch back donor car.
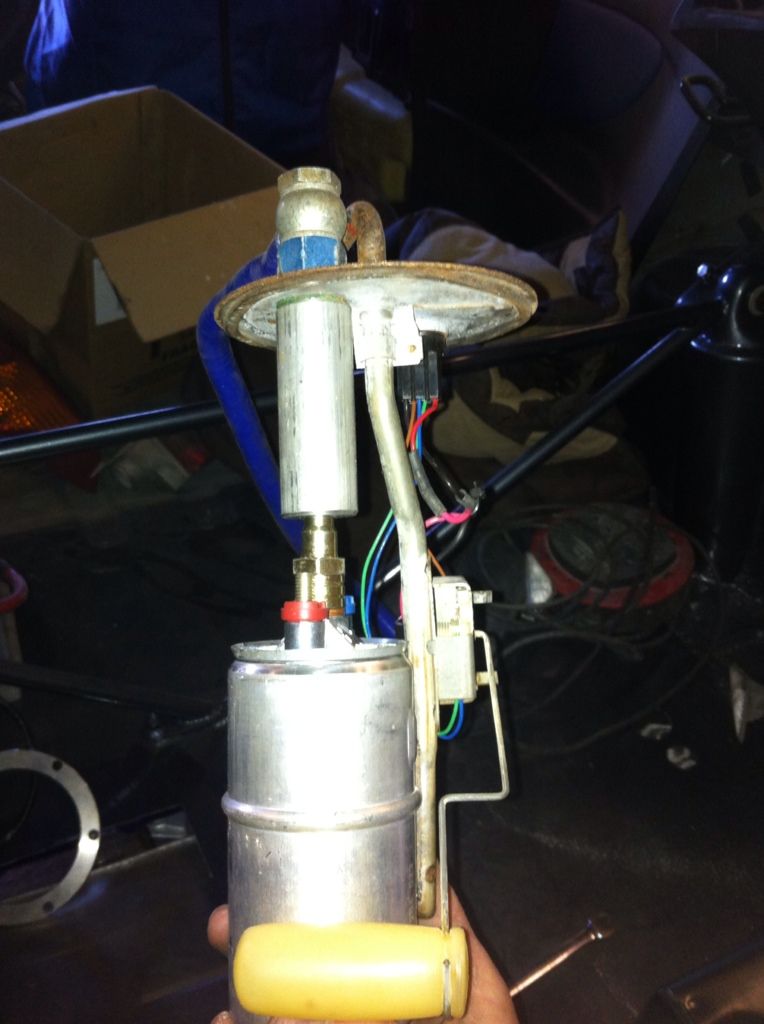
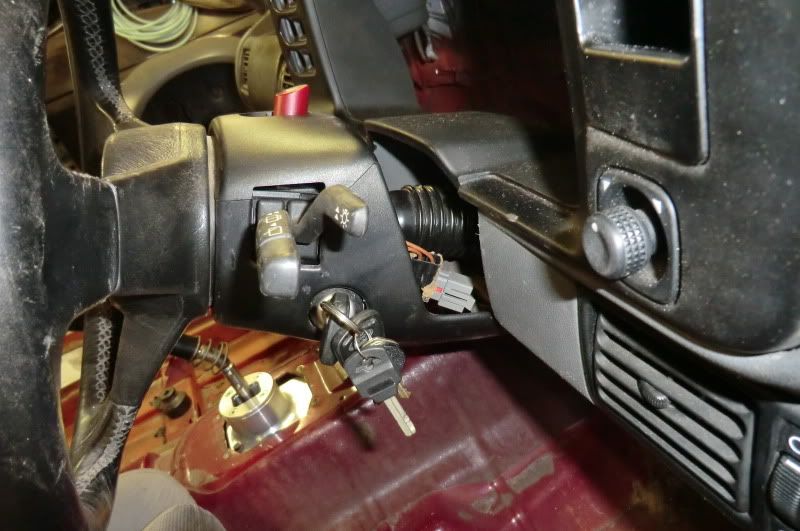
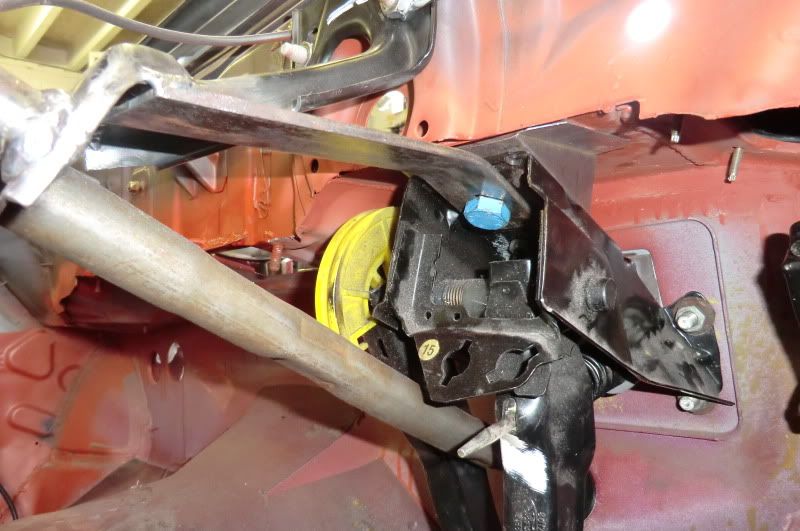
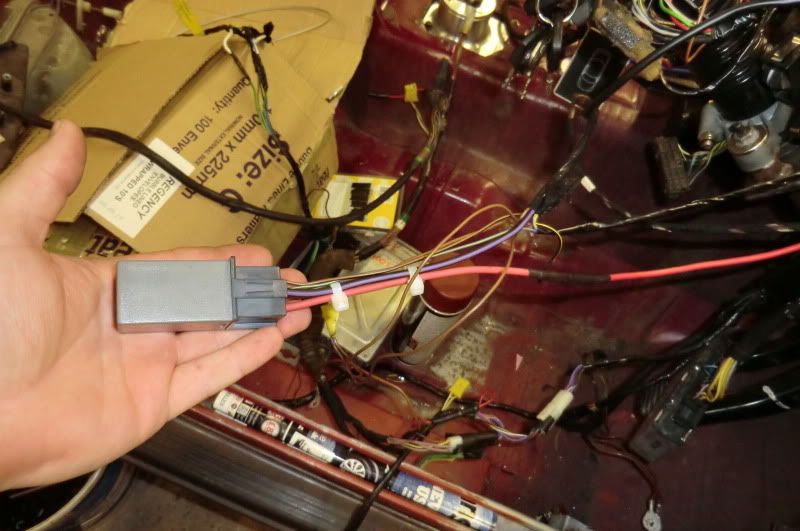
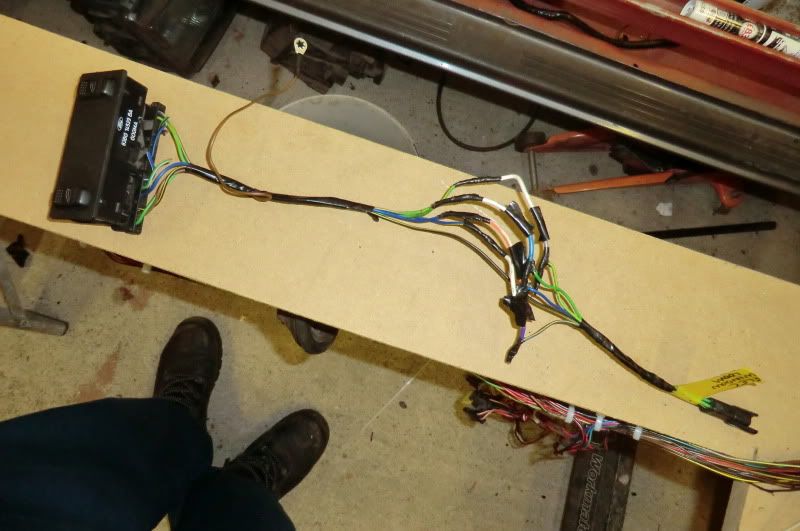
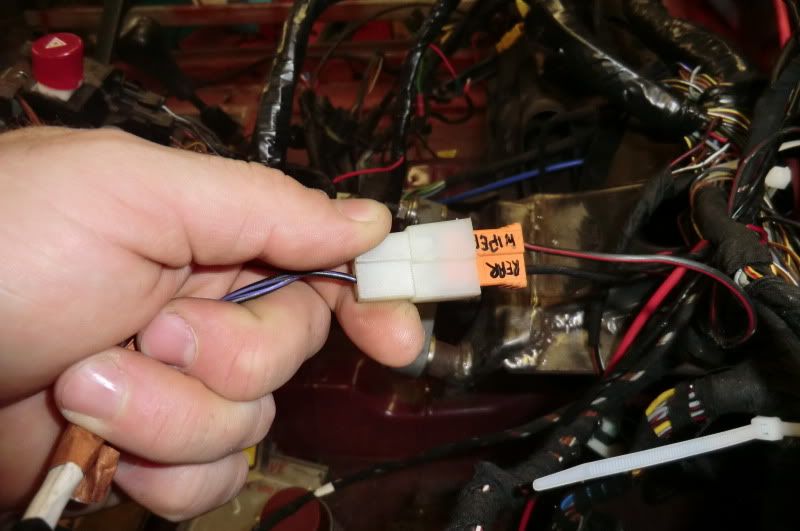
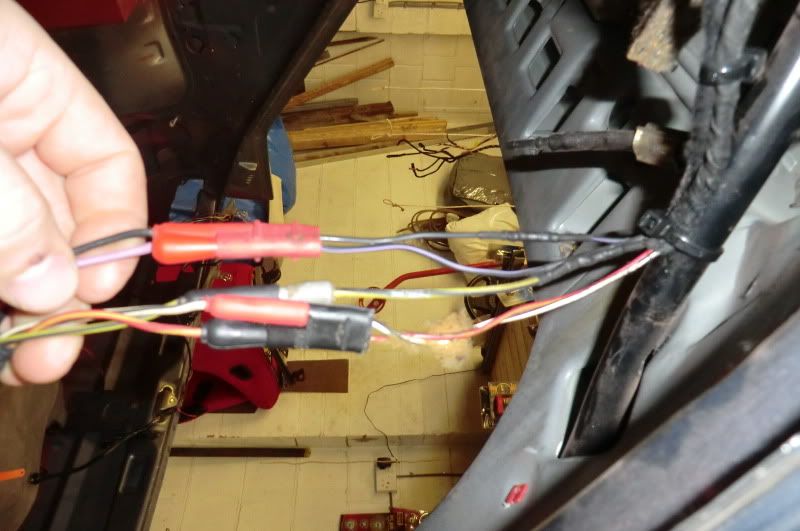
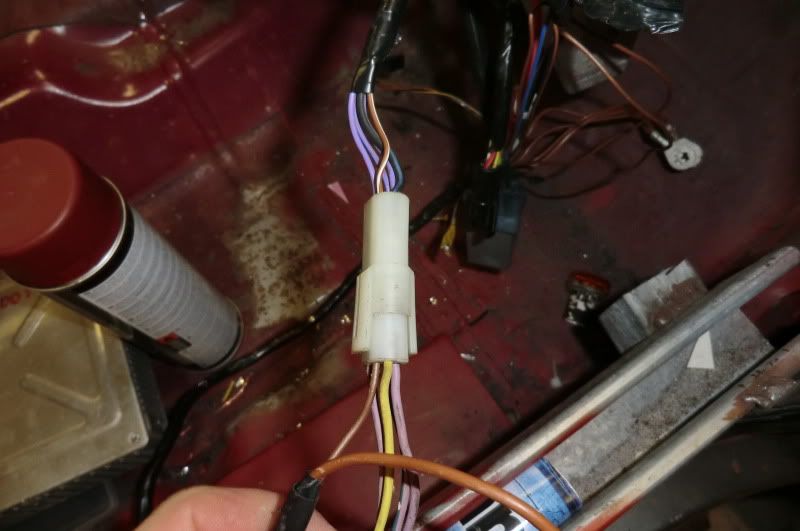
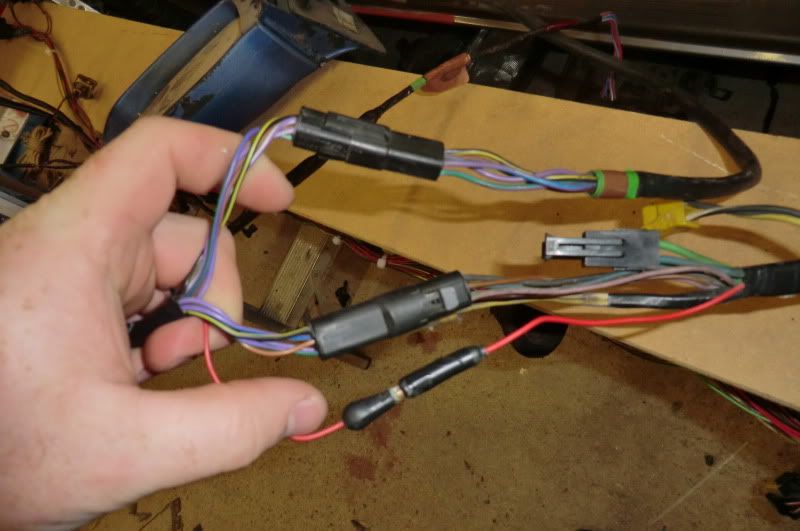
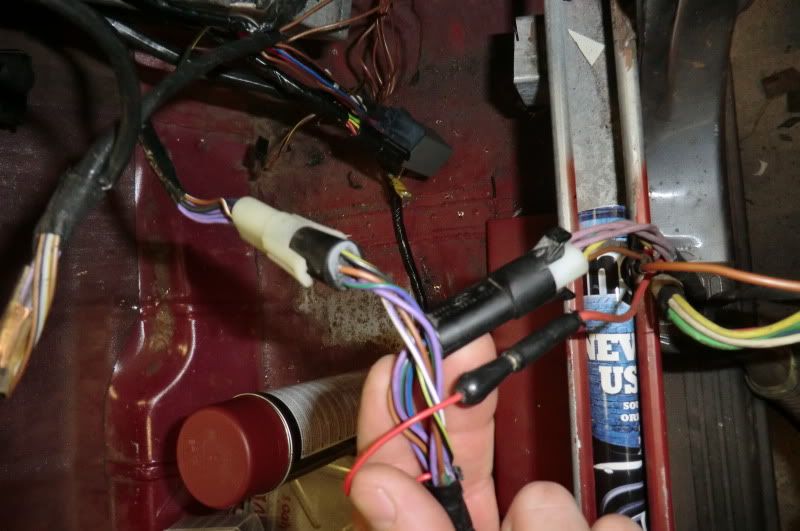
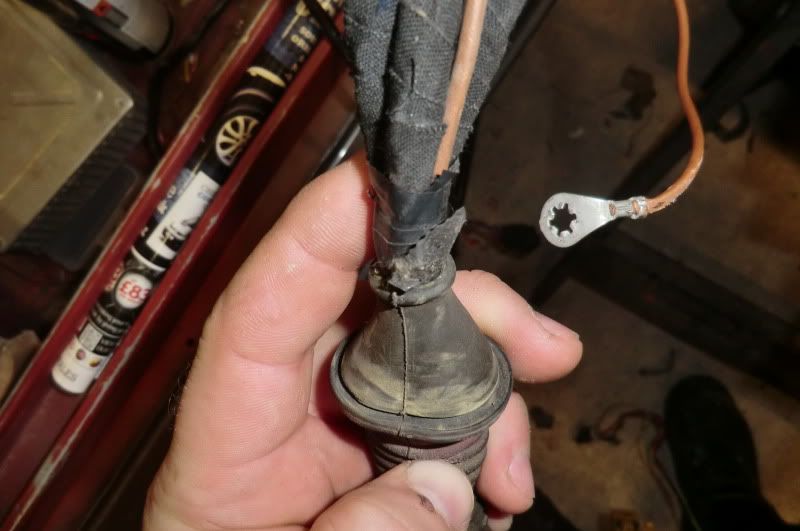
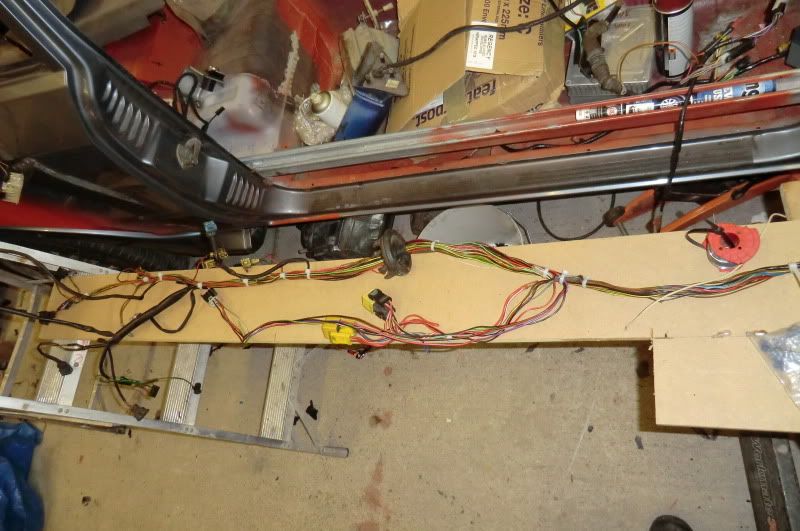
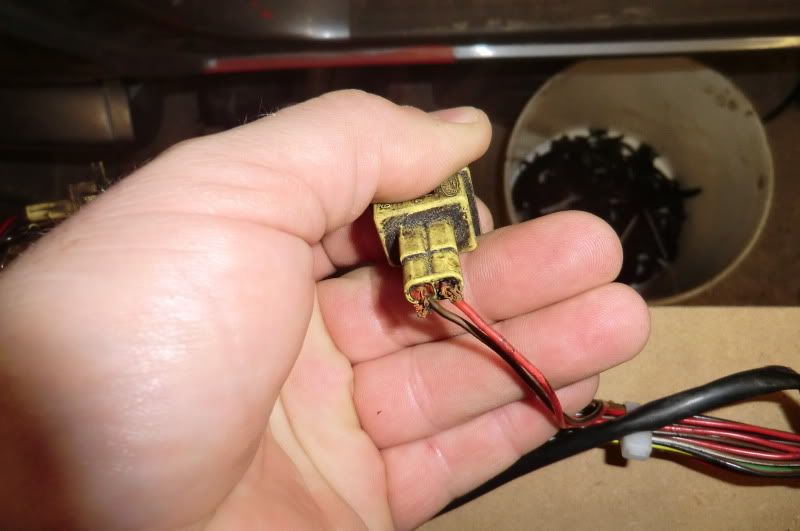
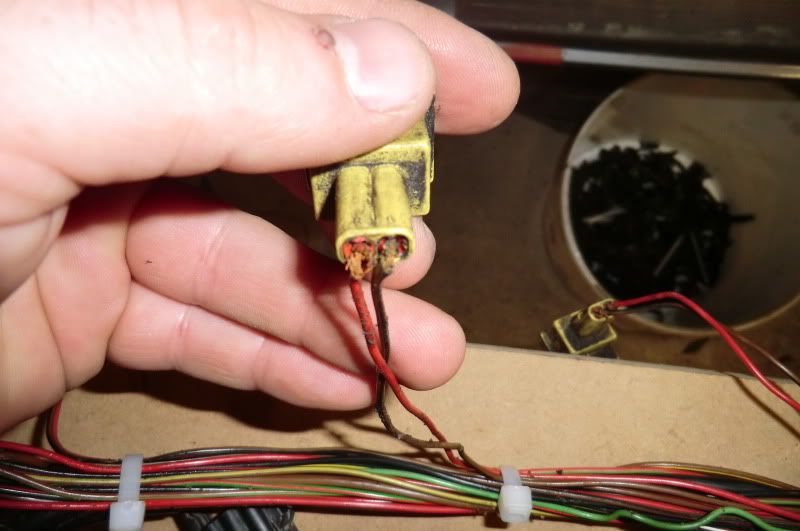
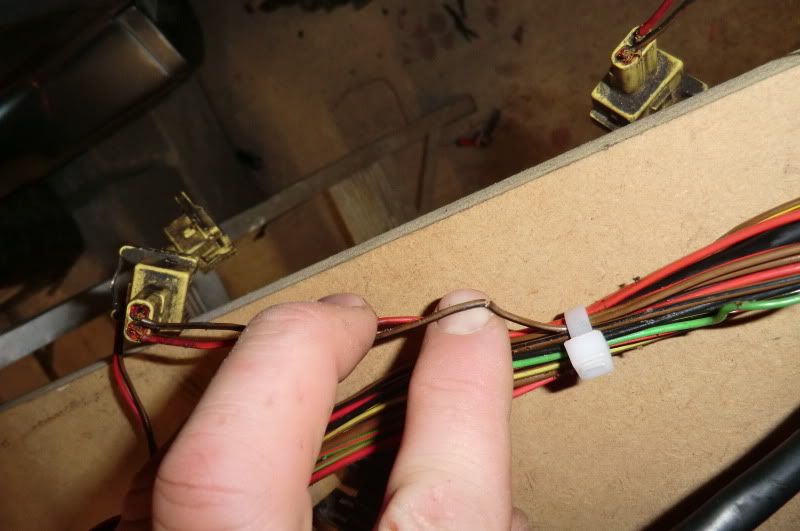
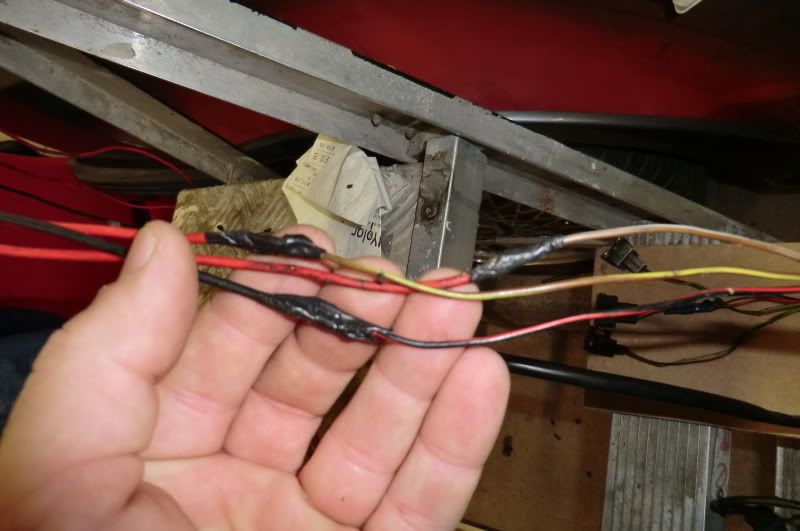
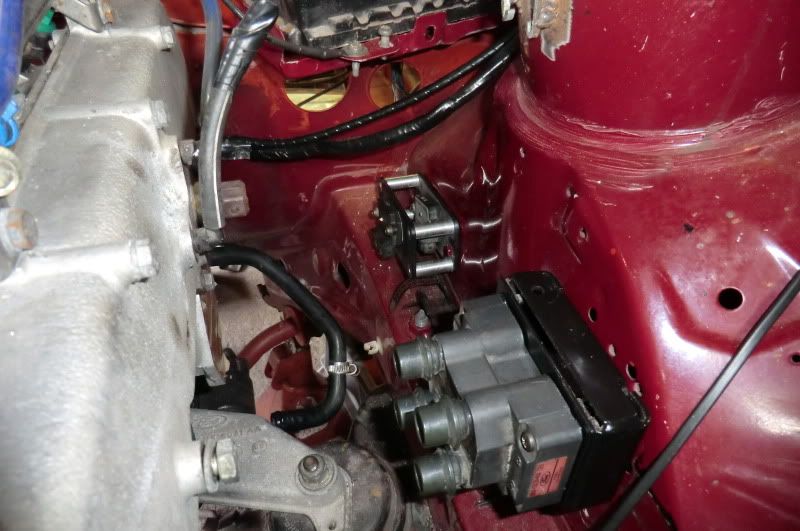
Having trouble identifying a few plugs and things, so if anyone can shed some light on what these are i be grateful
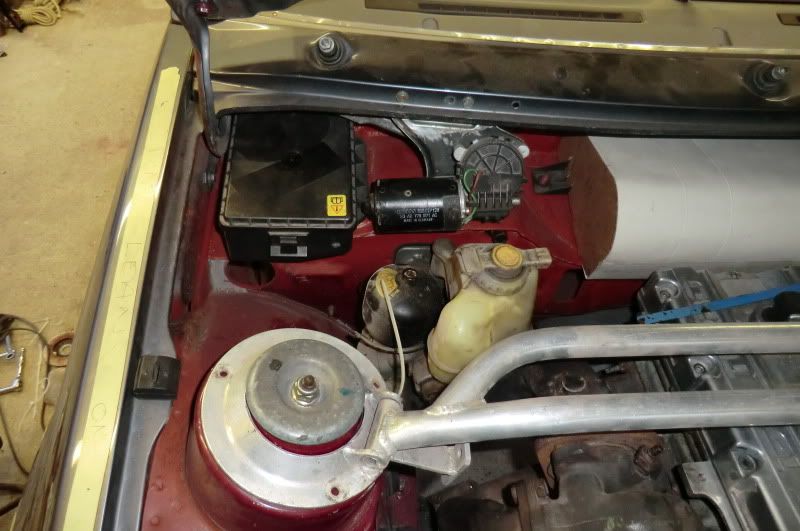
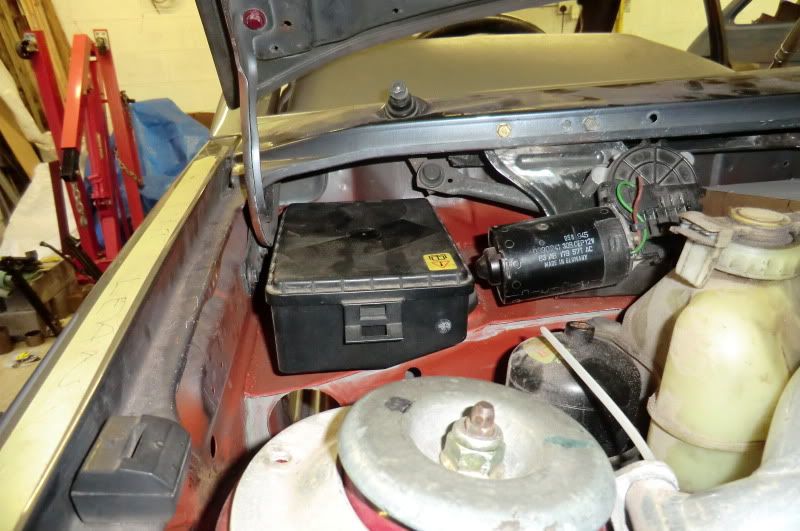
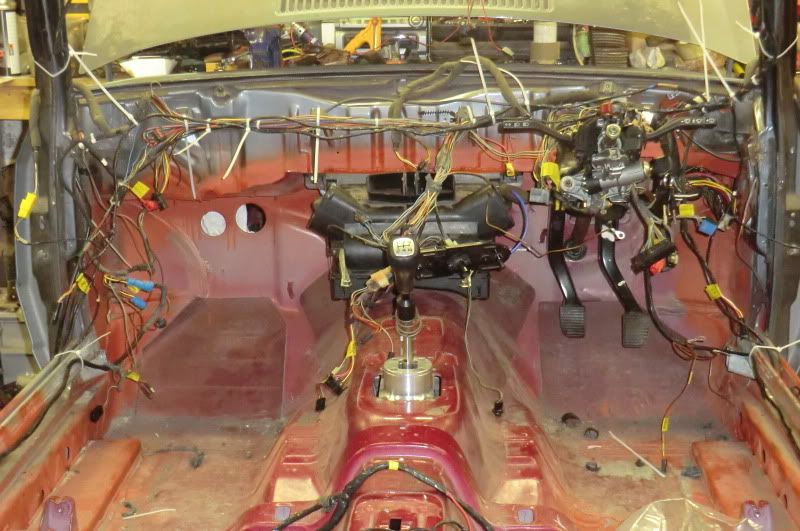
This is from the engine bay near the front drivers side headlight
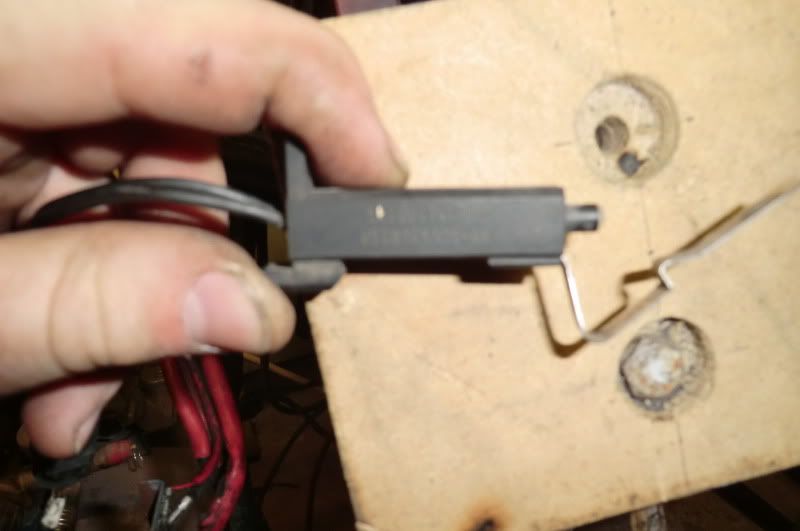
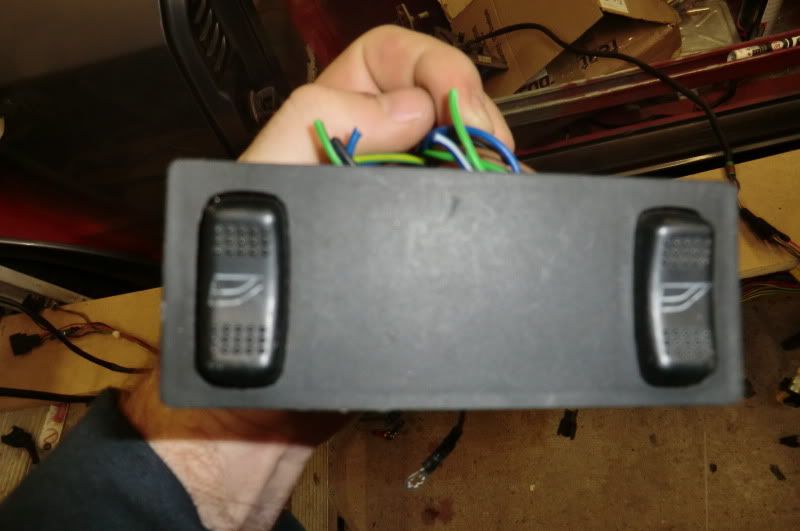
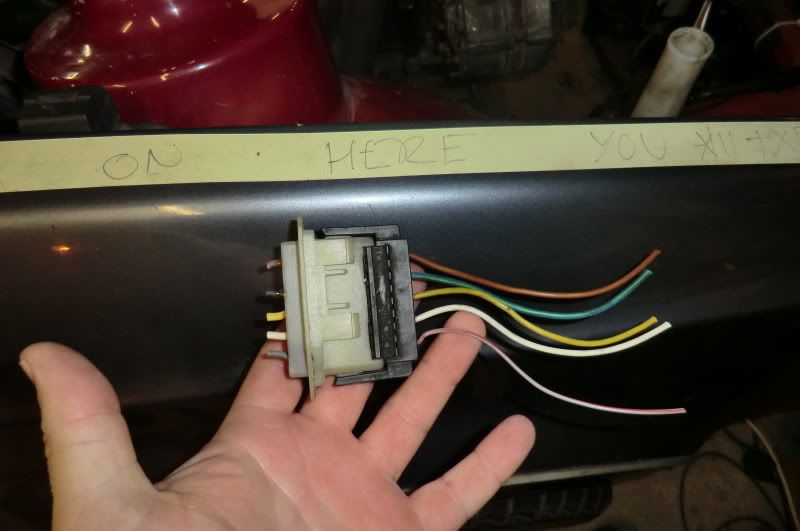
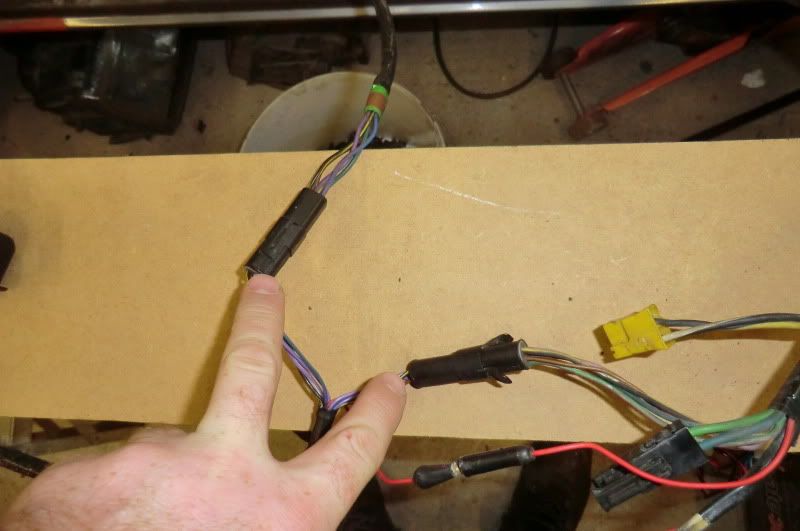
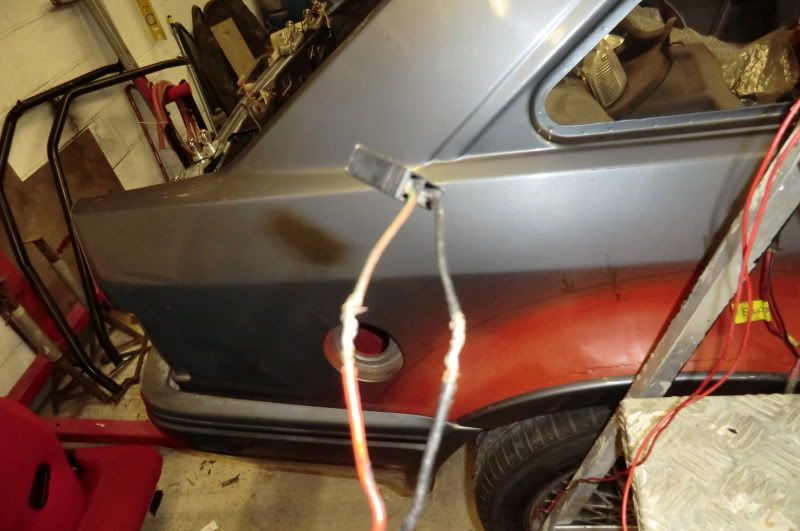
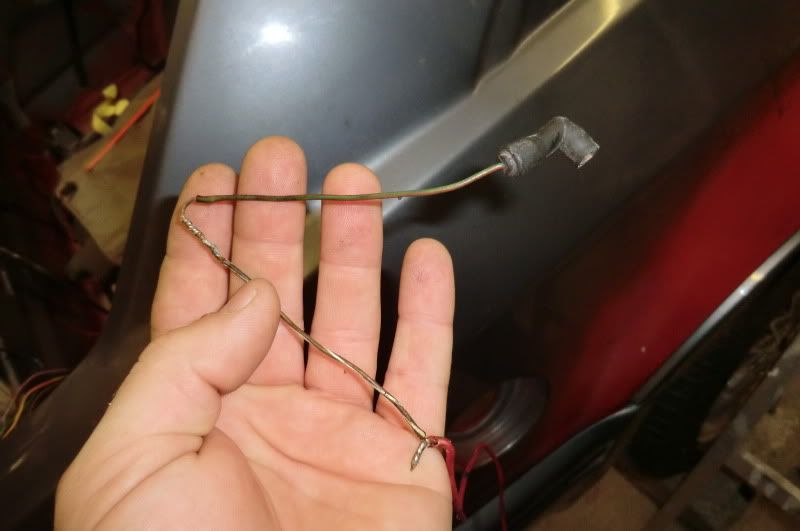
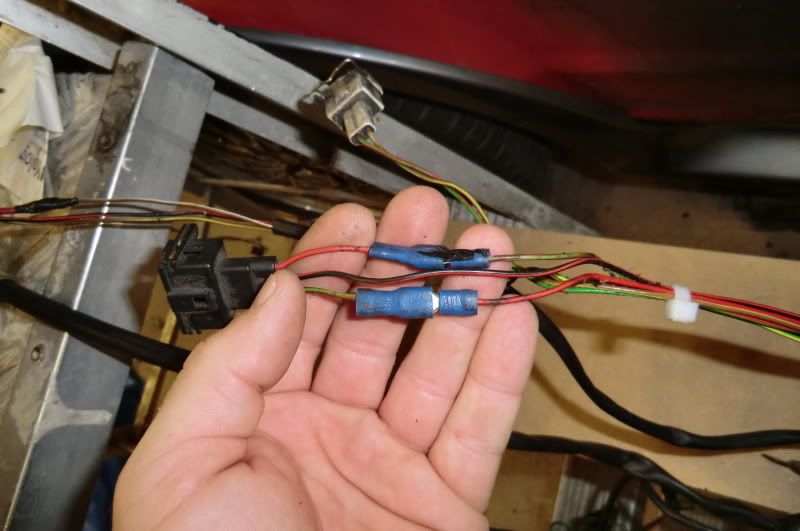
Am i right in thinking this
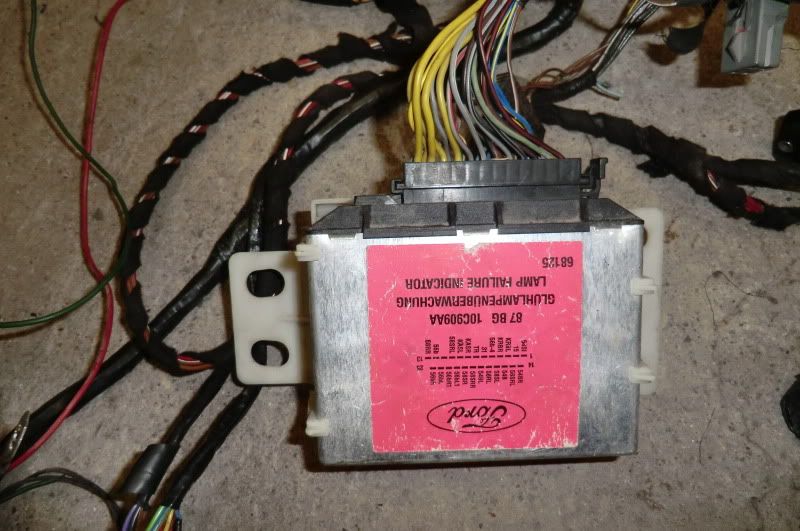
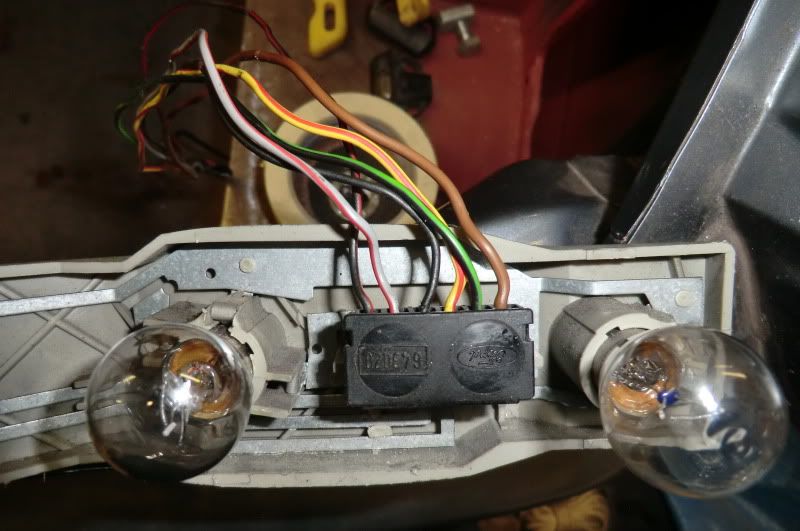
and this

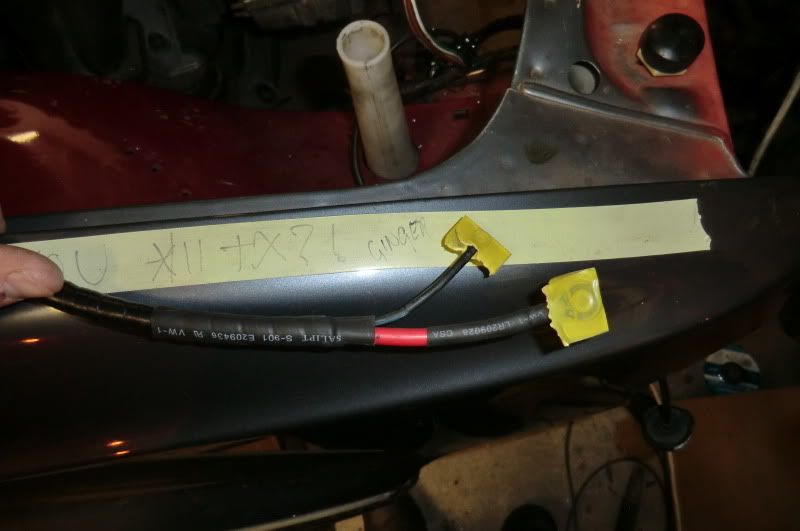
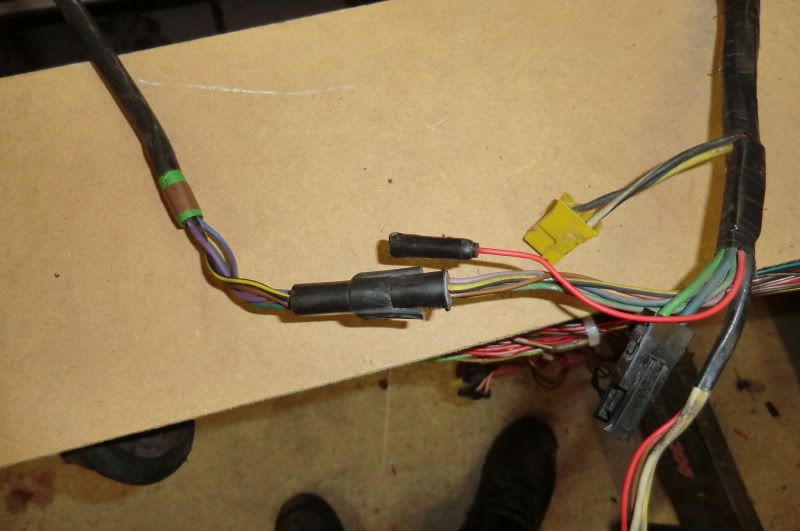
are to do with controlling this
Cheers
Ginger
.
Been compairing the loom tonight, If i just fit the whole cossie loom it'll be easy, the only adjustment to the loom will be the elecrtic mirror wiring as the adjuster is on the door of the Sierra and the on the dash in the Escort.
The Cossie loom i have is a bit ropey, so i'll see if i can repair it, Then i'll just have to add the rear wiper wiring from the hatch back donor car.
Having trouble identifying a few plugs and things, so if anyone can shed some light on what these are i be grateful
This is from the engine bay near the front drivers side headlight
Am i right in thinking this
and this
are to do with controlling this
Cheers
Ginger
.
18-09-2012, 10:47 AM
#137
.
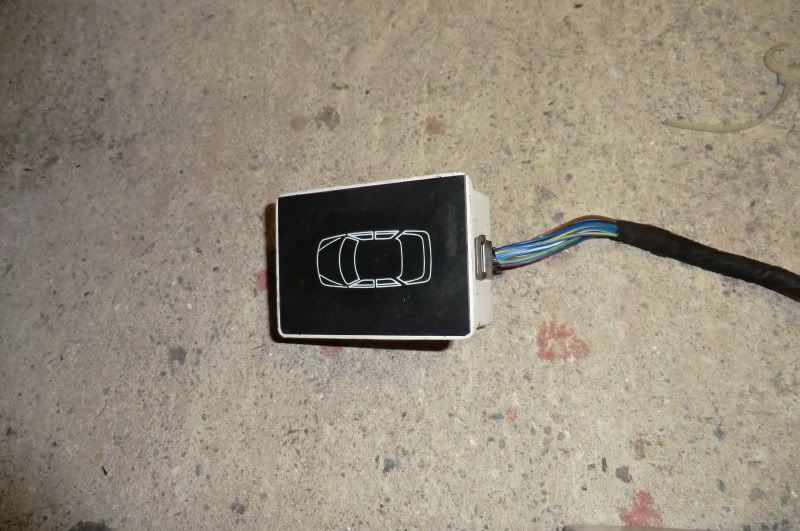
Cheers Tev, I was looking at removing the door/light indicator display, maybe i'll keep it and fit it in the clock cluster surround where the 90 spec fuel computer goes Wonder if i could get and overlay sticker in the shape of an escort made somewhere
Ginger
.
Cheers Tev, I was looking at removing the door/light indicator display, maybe i'll keep it and fit it in the clock cluster surround where the 90 spec fuel computer goes
Ginger
.
12-10-2012, 08:39 PM
#138
.
.
Well i've beem making progress on the wiring, and been buying myself some goodies
Wiring wise, there were a few thing i need to tidy up and a few things to add to the loom for the rear wiper, front heated screen, relocated the mirror adjuster into the car as the sierra is in the door and few other bits
So
Heated front screen wiring from the Escort is being used as it earth to the body at the top and the Sierra earths via 2 earth wires and the bottom,
All done and the per live wire extended to the battery, just waiting on a fuse holder
Rear window feeds removed to leave this
Just need to tidy and repair the wiring were it had total closure on the alarm
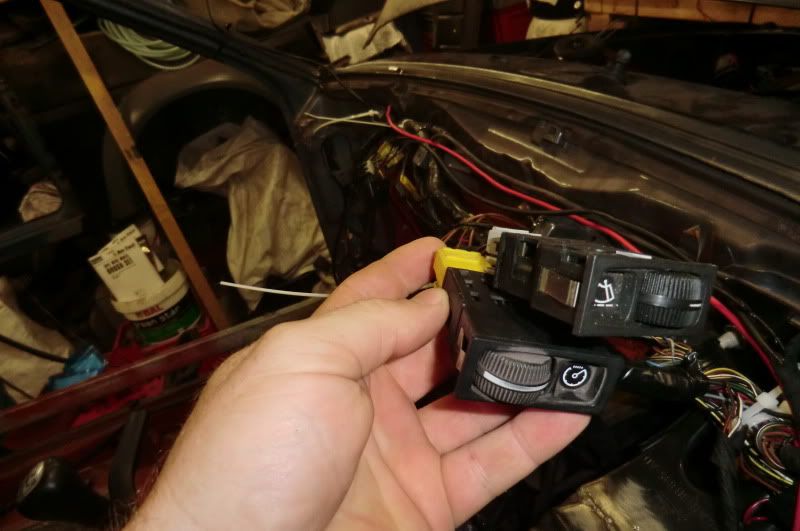
and a 2 switch cluster, as it's only a 2 door and a 4 switch would look stupid
Rear light plugs on the Sierra loom are the same, just had to swap some of the wires around
Rear wiper wiring added as per the same as the hatch back loom which uses the same feed and fuse as the front
and the rear end
The head light bulb plugs of the sierra were like new as there inside the actual lamp, so this was removed
And this was added, soldered, heat shrinked etc

Alternator ends remade off as they were shit
The mirror adjustor was nice and easy, this is the in car plug that feeds it
this is the part in the door, note the red wire, this is the perm live, and theres a female plug on the other end of the loom inside the car
disconnect the 2 plugs in the door for the in and out to the adjuster
and join straight to the mirror
now plug the adjuter wiring in side at the white plug (and the red wire )
and job done, all works, just have to swap the up and down wires around as there backwards on the escort mirrors
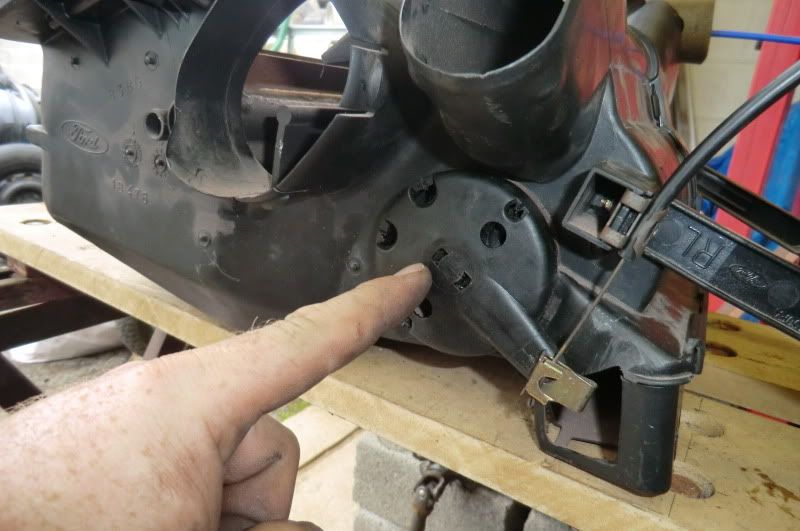
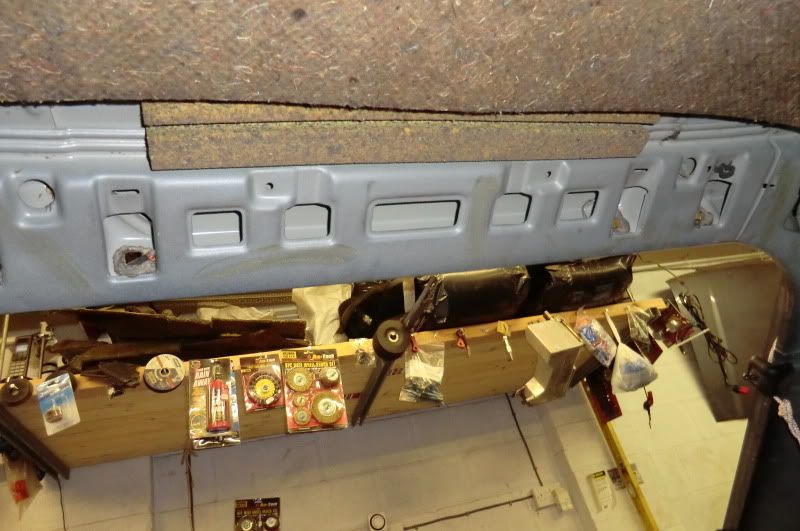
Sierras have a rear interior light, so thought it would be a nice touch
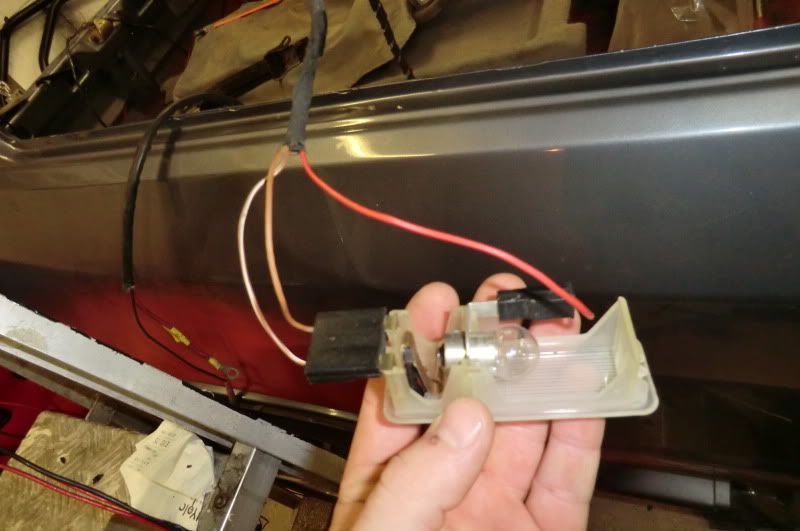
and guess what, Ford were even nice enough to put a cut out there ready for it (middle hole)
Front wiper speed controller and dash cluster dimmer all work
Rear fog, front and rear heated screen plugs all fit the Sierra plugs (nice) just had to swap 2 wires on the front screen plug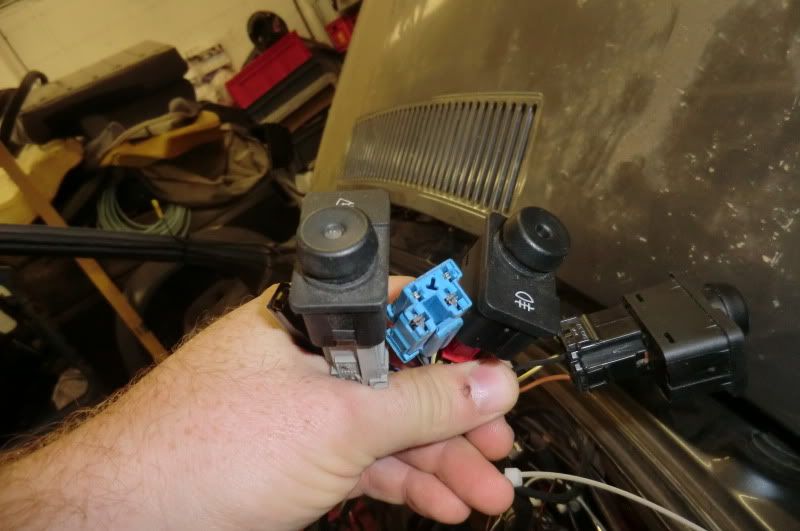
The Esocrt door wire boot is small and round, this is the Sierra one
big and oval, so this happened to the A piller hole
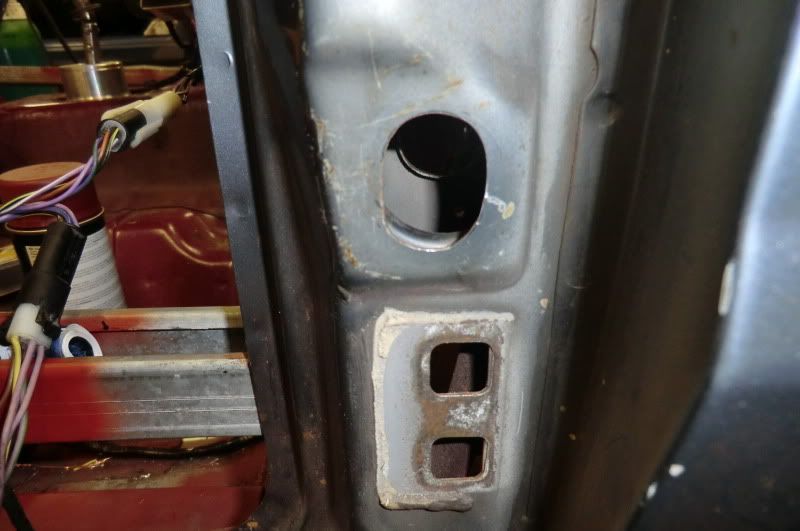
perfect fit
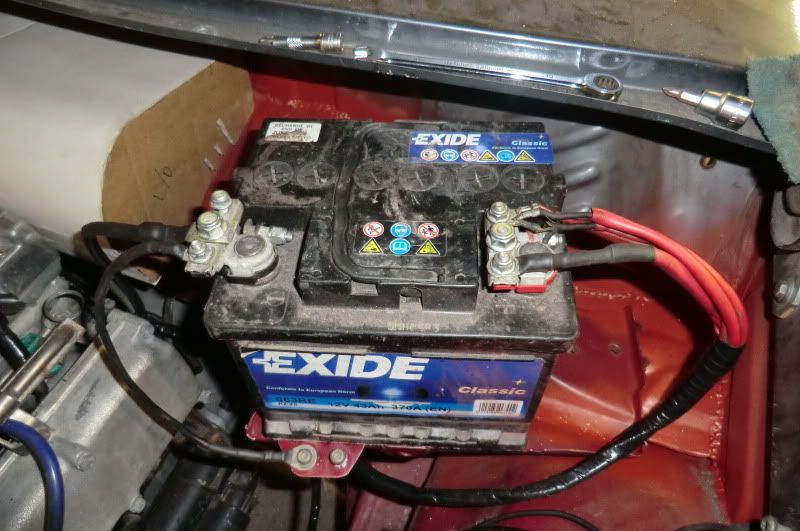
Battery ends changed to round reminals
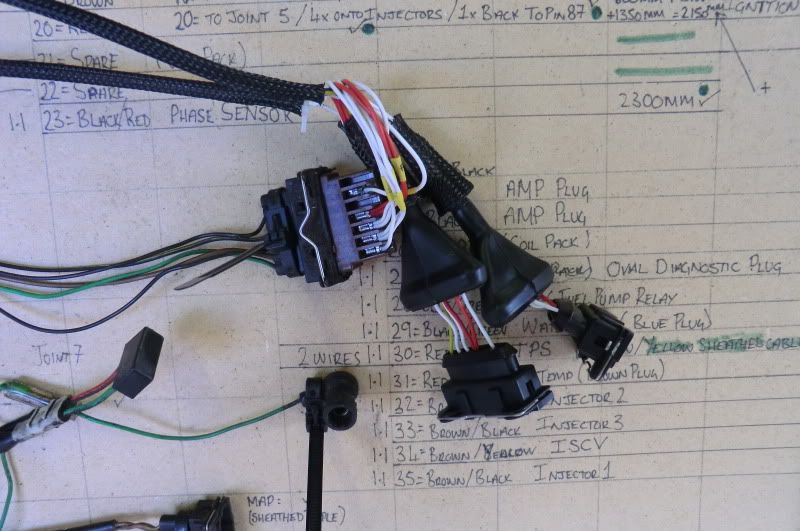
So after all that, i striped the engine loom for a look,
couple of injector plug 3 & 4
need replacing :-(
Crack on injector plug 3 :-(
Was total pickled as there were 2 blue plugs, turns out someone had replaced the brown air temp plug

shitty amal valve and dash temp gauge wiring extension/fucking bodge
and the TPS that was swapped when the PF09 was fitted
Not 100 sure what i'm gonna do about the engine loom as yet, i may just replace the 4 pairs of wires feeding the injectors and the amal valve as the rest all look ok, may just reterminated all the ends with new AMP pin's
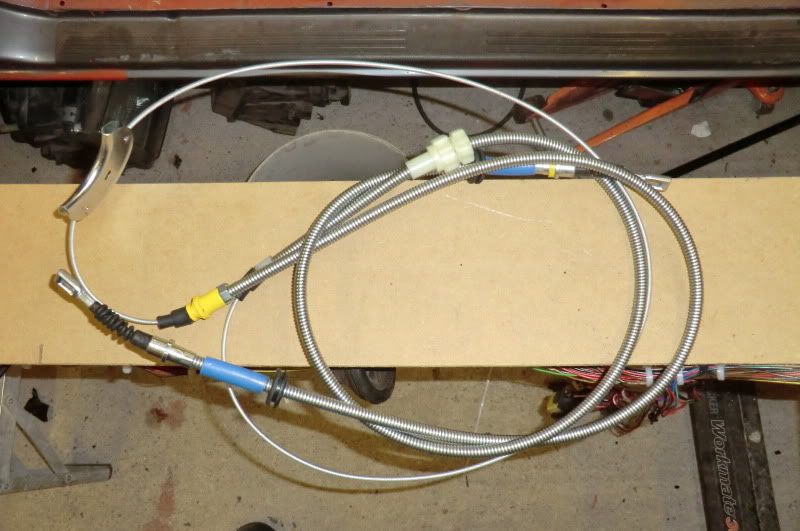
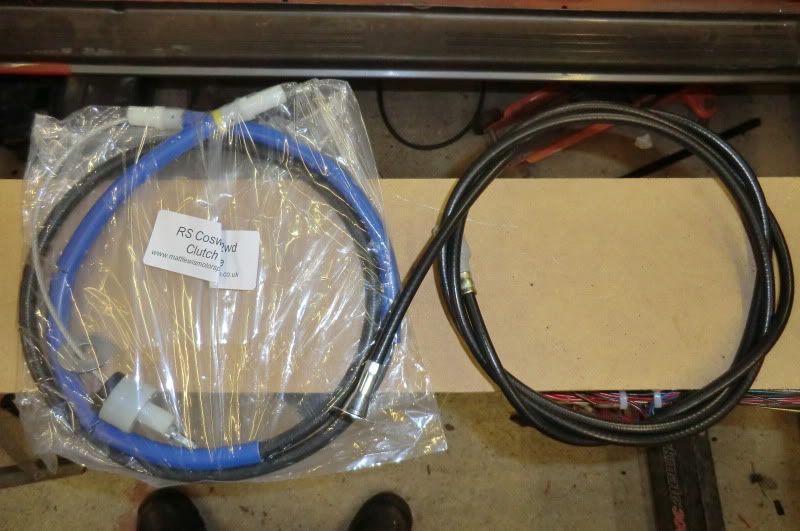
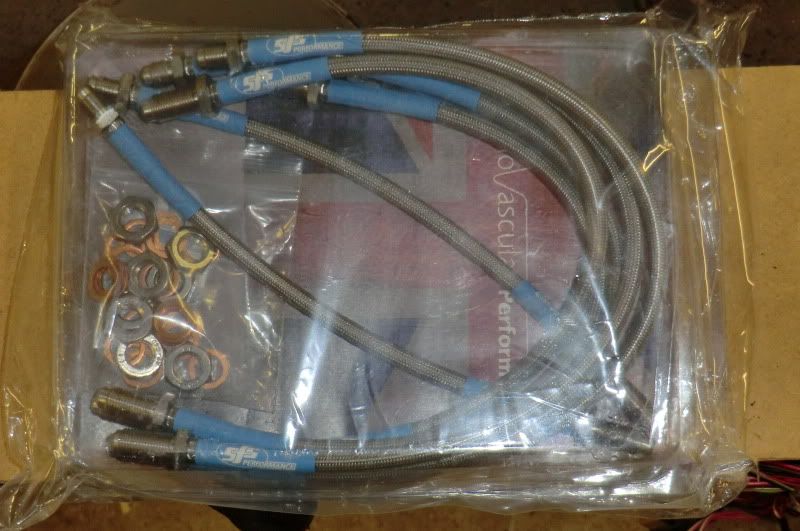
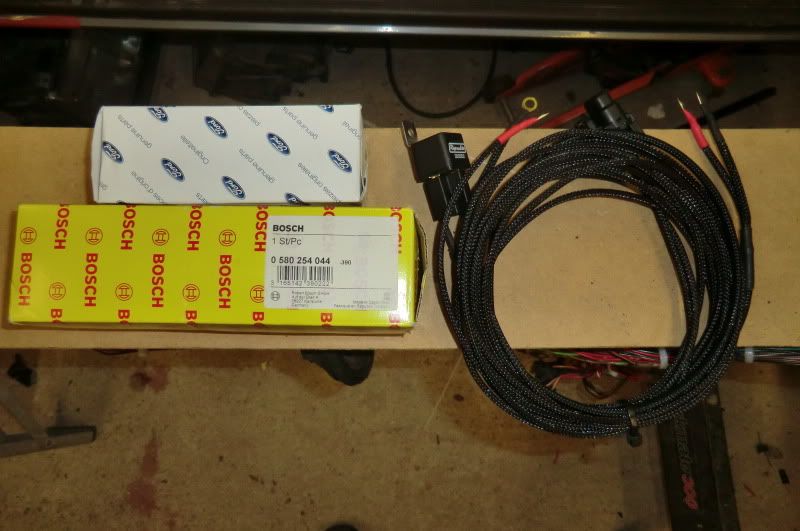
And the new parts i've had delivered from Matt Lewis
Hand brake, clutch and speedo cables
SFS brake hoses
044 pump, filter and adaptor plus uprated pump wiring
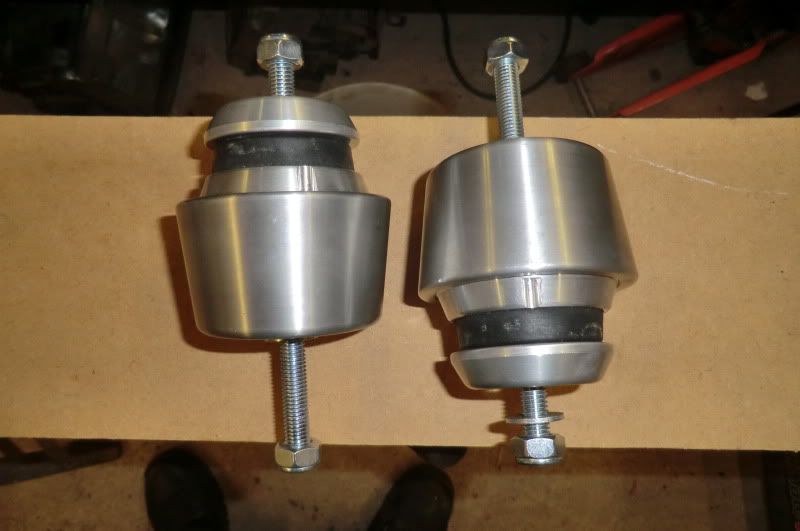
and Collins mounts
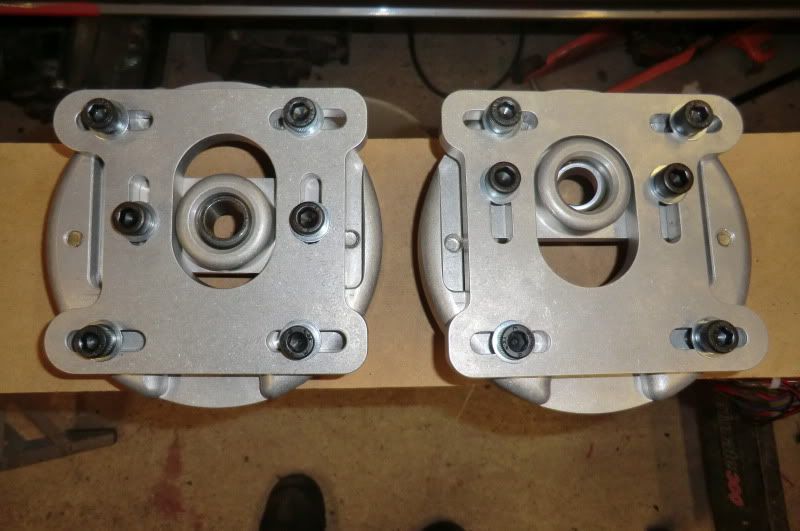
Also been thinking for a while about front camber, castor and track width, when i measured the wheel off the sierra inner arch there abou 3mm difference, so when i did the rear mounts i squared them of multiple fllor pan points.
So that i can get every thing nice and square i bought these off MK MOTORSPORT
So, still got lots to be cracking on with so more updates soon
Cheers for looking
Ginger
.
.
Well i've beem making progress on the wiring, and been buying myself some goodies
Wiring wise, there were a few thing i need to tidy up and a few things to add to the loom for the rear wiper, front heated screen, relocated the mirror adjuster into the car as the sierra is in the door and few other bits
So
Heated front screen wiring from the Escort is being used as it earth to the body at the top and the Sierra earths via 2 earth wires and the bottom,
All done and the per live wire extended to the battery, just waiting on a fuse holder
Rear window feeds removed to leave this
Just need to tidy and repair the wiring were it had total closure on the alarm
and a 2 switch cluster, as it's only a 2 door and a 4 switch would look stupid
Rear light plugs on the Sierra loom are the same, just had to swap some of the wires around
Rear wiper wiring added as per the same as the hatch back loom which uses the same feed and fuse as the front
and the rear end
The head light bulb plugs of the sierra were like new as there inside the actual lamp, so this was removed
And this was added, soldered, heat shrinked etc
Alternator ends remade off as they were shit
The mirror adjustor was nice and easy, this is the in car plug that feeds it
this is the part in the door, note the red wire, this is the perm live, and theres a female plug on the other end of the loom inside the car
disconnect the 2 plugs in the door for the in and out to the adjuster
and join straight to the mirror
now plug the adjuter wiring in side at the white plug (and the red wire
and job done, all works, just have to swap the up and down wires around as there backwards on the escort mirrors
Sierras have a rear interior light, so thought it would be a nice touch
and guess what, Ford were even nice enough to put a cut out there ready for it
Front wiper speed controller and dash cluster dimmer all work
Rear fog, front and rear heated screen plugs all fit the Sierra plugs (nice) just had to swap 2 wires on the front screen plug
The Esocrt door wire boot is small and round, this is the Sierra one
big and oval, so this happened to the A piller hole
perfect fit
Battery ends changed to round reminals
So after all that, i striped the engine loom for a look,
couple of injector plug 3 & 4
need replacing :-(
Crack on injector plug 3 :-(
Was total pickled as there were 2 blue plugs, turns out someone had replaced the brown air temp plug
shitty amal valve and dash temp gauge wiring extension/fucking bodge
and the TPS that was swapped when the PF09 was fitted
Not 100 sure what i'm gonna do about the engine loom as yet, i may just replace the 4 pairs of wires feeding the injectors and the amal valve as the rest all look ok, may just reterminated all the ends with new AMP pin's
And the new parts i've had delivered from Matt Lewis
Hand brake, clutch and speedo cables
SFS brake hoses
044 pump, filter and adaptor plus uprated pump wiring
and Collins mounts
Also been thinking for a while about front camber, castor and track width, when i measured the wheel off the sierra inner arch there abou 3mm difference, so when i did the rear mounts i squared them of multiple fllor pan points.
So that i can get every thing nice and square i bought these off MK MOTORSPORT
So, still got lots to be cracking on with so more updates soon
Cheers for looking
Ginger
.
Last edited by GINGExR2 T; 14-10-2012 at 08:12 AM.


 18-10-2012, 06:42 PM
#147
Regular Contributor

Join Date: Aug 2010
Location: great yarmouth/norfolk
Posts: 337
Likes: 0
Received 2 Likes
on
2 Posts
Glad i looked at this as i havnt been able to use the heater control on mine but i removed my dash & swapped the control lever to otherside & it works a treat now!!
The mk4 dash fouls the bracket on the bottom right of heaterbox so i removed mine & trimmed the bit flush off the heater box & fits perfect now, but im sure urll come across this when u the refit the dash
The mk4 dash fouls the bracket on the bottom right of heaterbox so i removed mine & trimmed the bit flush off the heater box & fits perfect now, but im sure urll come across this when u the refit the dash
20-10-2012, 01:40 PM
#149
.
Small update,
I was toying with the idea of just repairing the parts of the engine loom that were faulty, but after a good look i've decided to have a go at making a new one and incorporating the wasted spark coil pack loom.
I already have a wasted spark loom from my old cossie managed XR2 turbo, so after removing the male amp 7 pin plug i figured out how to wire it straight to the ECU plug, This is the diagram, very simple really
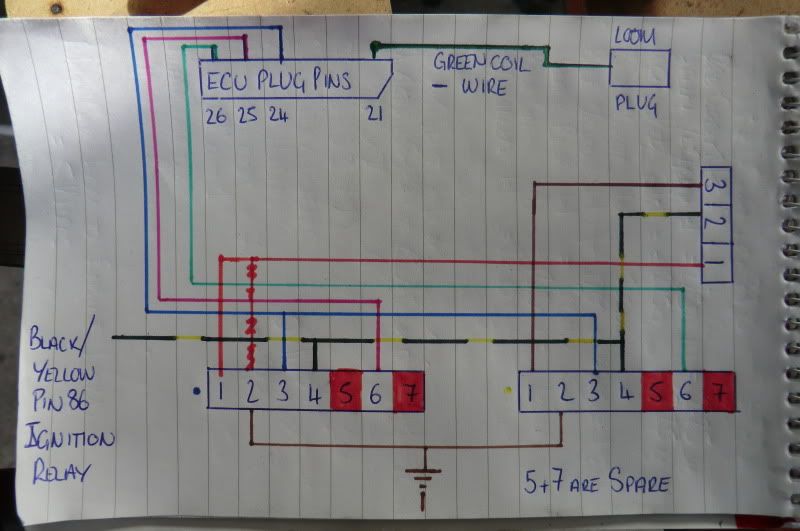
Which will tidy up this
Now the coil pack loom was running on an SECS S8 ECU so the 2 wires that were labeled Pin's 9 and 26 were actually in Pins 21 and 26, but can't remember the reason for it :-( Anyway, i still have the S8 so i'll reuse it as it's easy to swap between different sensor's, injector etc Just need to find a stage 3 map to load onto it.
Anyway, i read somewhere about a pin board for making looms so came up with this

I've got all the measurements for the wire, but i'm having a problem find a diagram that shows the wire thinkness's. So i've striped some of the sheathing back and used a set of digital calliper to measure the conductors.
Now the injector wires are 1.1mm, and having looked on http://www.vehicle-wiring-products.e...e/homepage.php they do 1mm standard and thin wall.
0.5mm thin wall is amp rated higher than the 1mm standard but they only do solid colours.
Could anyone tell me if i'm going to have an issue using 1mm thin wall as they do tracer coloured cables aswell as solid colours?????
The 1mm thin wall is almost twice the amp rating so want to check it's not going to cause issue with sensor readings!!!!
Found a home for the twin ignition amps and coilpack, need to get a MAP sensor braket as used it on another car.
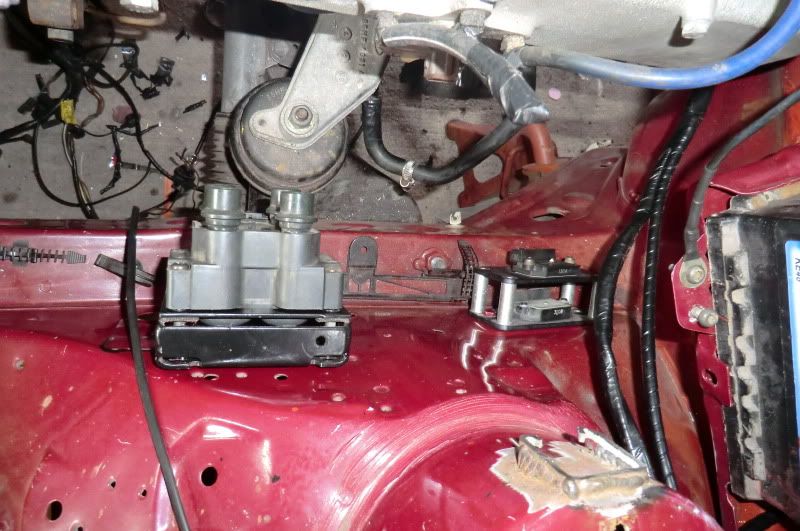
Also found the lambda sensor so fitted it in the down pipe ready for wiring into the engine loom

Got a few parts on order off Matt Lewis, more updates soon
Ginger
.
Small update,
I was toying with the idea of just repairing the parts of the engine loom that were faulty, but after a good look i've decided to have a go at making a new one and incorporating the wasted spark coil pack loom.
I already have a wasted spark loom from my old cossie managed XR2 turbo, so after removing the male amp 7 pin plug i figured out how to wire it straight to the ECU plug, This is the diagram, very simple really
Which will tidy up this
Now the coil pack loom was running on an SECS S8 ECU so the 2 wires that were labeled Pin's 9 and 26 were actually in Pins 21 and 26, but can't remember the reason for it :-( Anyway, i still have the S8 so i'll reuse it as it's easy to swap between different sensor's, injector etc
Anyway, i read somewhere about a pin board for making looms so came up with this
I've got all the measurements for the wire, but i'm having a problem find a diagram that shows the wire thinkness's. So i've striped some of the sheathing back and used a set of digital calliper to measure the conductors.
Now the injector wires are 1.1mm, and having looked on http://www.vehicle-wiring-products.e...e/homepage.php they do 1mm standard and thin wall.
0.5mm thin wall is amp rated higher than the 1mm standard but they only do solid colours.
Could anyone tell me if i'm going to have an issue using 1mm thin wall as they do tracer coloured cables aswell as solid colours?????
The 1mm thin wall is almost twice the amp rating so want to check it's not going to cause issue with sensor readings!!!!
Found a home for the twin ignition amps and coilpack, need to get a MAP sensor braket as used it on another car.
Also found the lambda sensor so fitted it in the down pipe ready for wiring into the engine loom
Got a few parts on order off Matt Lewis, more updates soon
Ginger
.
Last edited by GINGExR2 T; 19-11-2012 at 08:19 PM.
19-11-2012, 09:04 PM
#151
.
Been a bit slow over the last few weeks, but i've got all the wiring loom sorted and removed from the car.
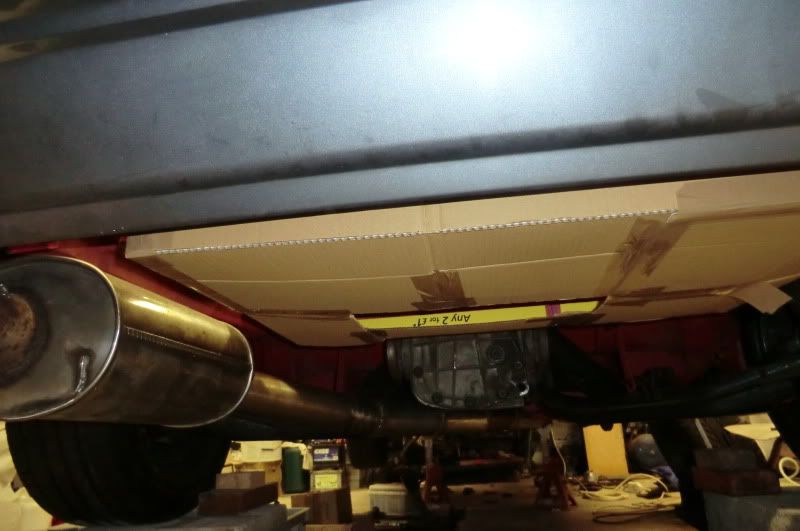
So started on the fuel tank mock up from cardboard to see how and where it will go and came up with this, Works out at 52 litres. Gonna have a sump towards the drivers side so should be 53-54 litres (wood is just to support it).
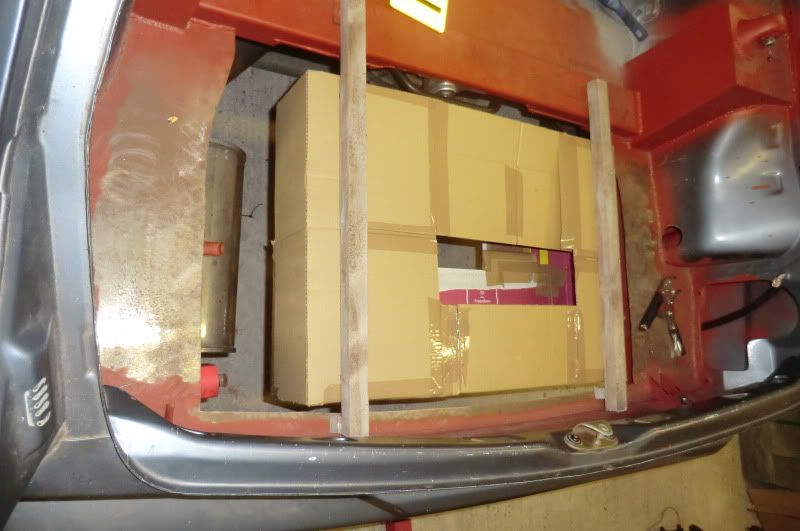
And sits just a bit higher than the lowest point of the bumper
Because of the position of the tank i cant use the standard filler that goes under the chassis rail or i'll never be able to fill the think up properly, so i've cut the filler neck down to this
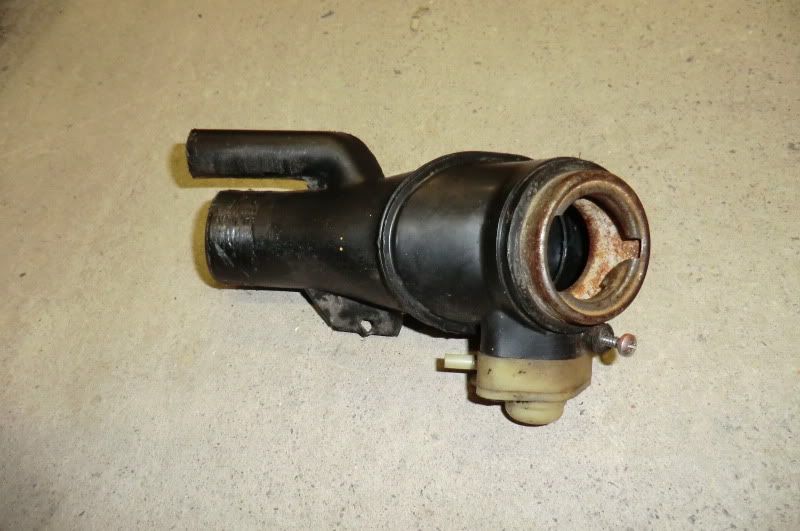
And have ordered 2 x 60degree fuel lined Samco hose's, 1 x 45mm and 1 x 27mm, should be here in a week or so
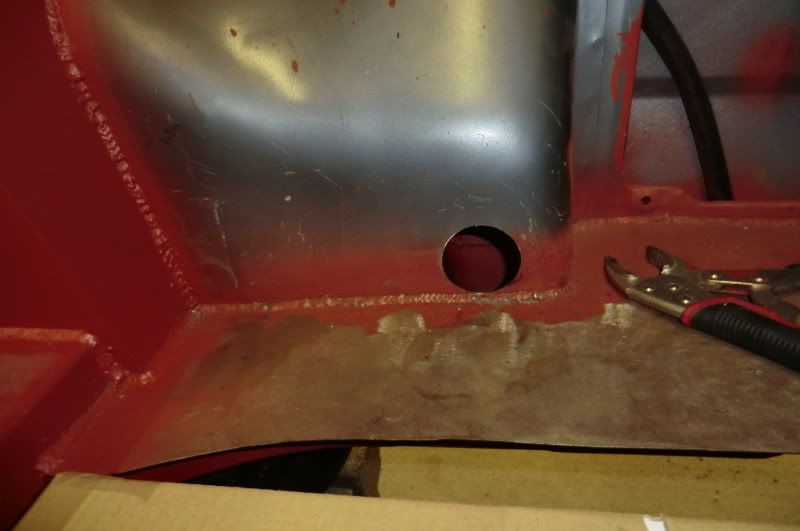
Which will come through here which is near the top of the tank
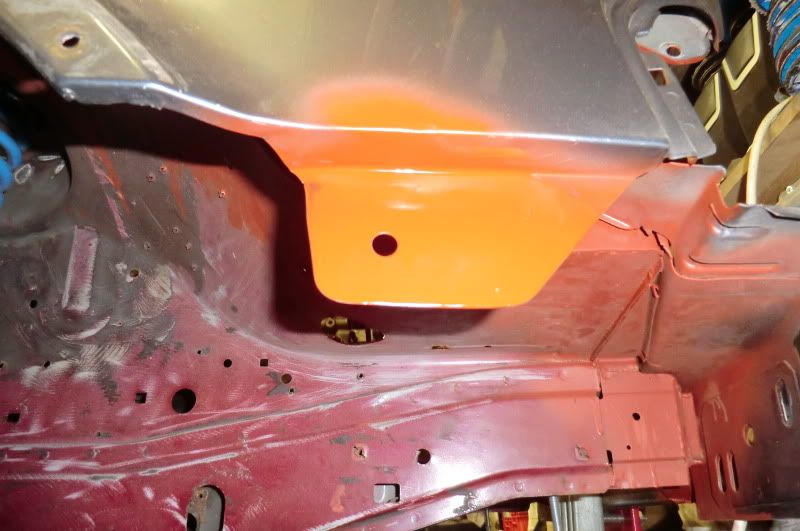
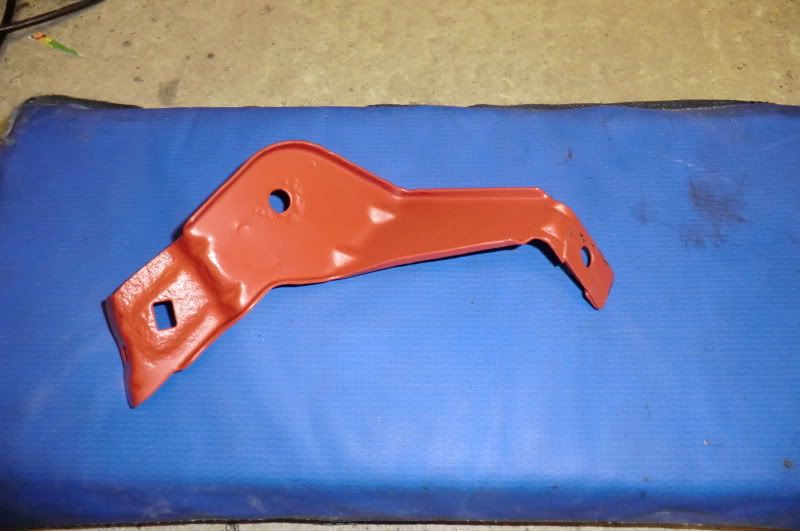
Only a few fabrication jobs left, one was the drivers side bumper mount on the wing,
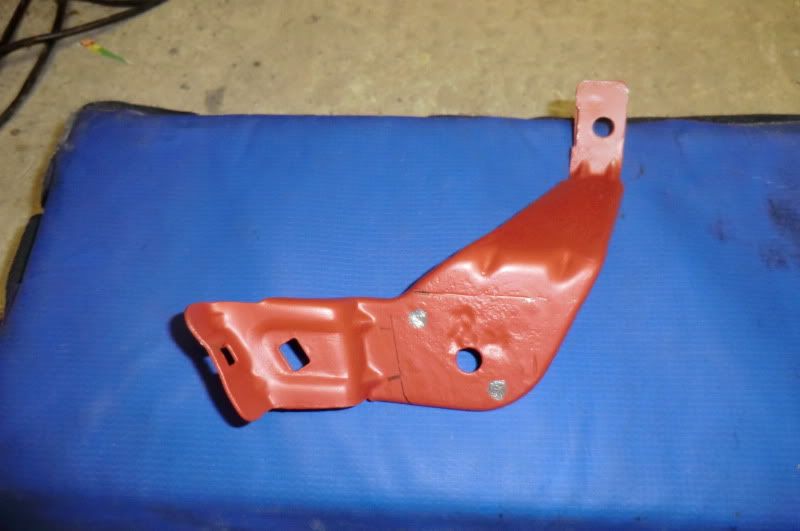
Removed and cleaned up the inner support bracket which i've sand blasted, Qrusted and when dried the surface was fully wire brushed as paint doesn't take to the Qrust very well.
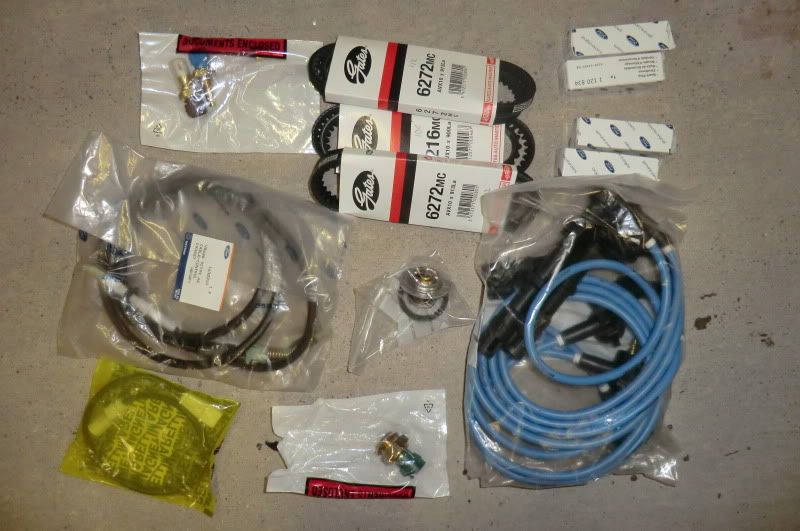
Had some parts through,
Crank sensor,
Plug,
Alternator and and pwoer steering belts,
Throttle cable,
Coil pack leads,
Oil and Water sensors,
Low temp stat,
And uprated fan switch and loom
Genuine Ford modified adjustable TCA

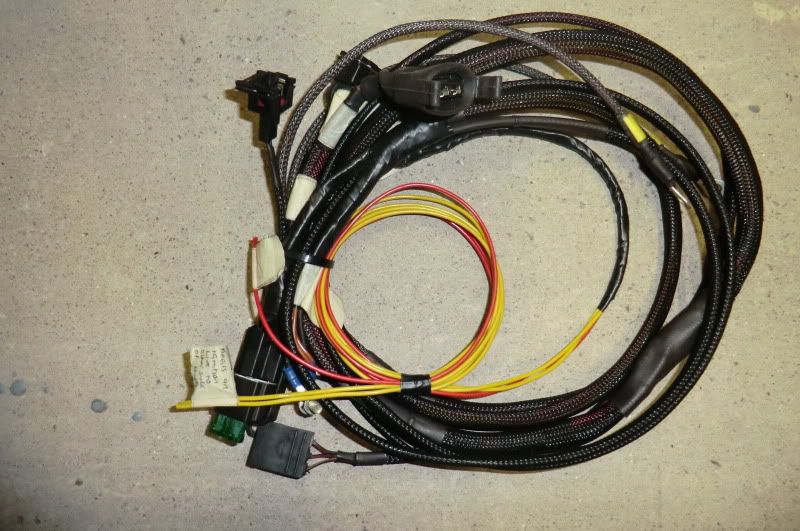
And a big big thanks to Dave (aka whizzisat114) for making me an ABS bypass loom so that i can run the servo pump
will keep plodding along, soon as the Samco's come i'll get the tank finalised so that can be fabricated, need to get myself a standard Cossie 2wd fuel sender as i have lost it :-( or if i can get a complete tank cheap then i'll get one.
More soon
Ginger
.
Been a bit slow over the last few weeks, but i've got all the wiring loom sorted and removed from the car.
So started on the fuel tank mock up from cardboard to see how and where it will go and came up with this, Works out at 52 litres. Gonna have a sump towards the drivers side so should be 53-54 litres (wood is just to support it).
And sits just a bit higher than the lowest point of the bumper
Because of the position of the tank i cant use the standard filler that goes under the chassis rail or i'll never be able to fill the think up properly, so i've cut the filler neck down to this
And have ordered 2 x 60degree fuel lined Samco hose's, 1 x 45mm and 1 x 27mm, should be here in a week or so
Which will come through here which is near the top of the tank
Only a few fabrication jobs left, one was the drivers side bumper mount on the wing,
Removed and cleaned up the inner support bracket which i've sand blasted, Qrusted and when dried the surface was fully wire brushed as paint doesn't take to the Qrust very well.
Had some parts through,
Crank sensor,
Plug,
Alternator and and pwoer steering belts,
Throttle cable,
Coil pack leads,
Oil and Water sensors,
Low temp stat,
And uprated fan switch and loom
Genuine Ford modified adjustable TCA
And a big big thanks to Dave (aka whizzisat114) for making me an ABS bypass loom so that i can run the servo pump
will keep plodding along, soon as the Samco's come i'll get the tank finalised so that can be fabricated, need to get myself a standard Cossie 2wd fuel sender as i have lost it :-( or if i can get a complete tank cheap then i'll get one.
More soon
Ginger
.
 20-11-2012, 02:01 PM
#153
Virgin

Join Date: Dec 2011
Location: kent
Posts: 8
Likes: 0
Received 0 Likes
on
0 Posts
theirs only one problem with reading these threads and that is it make me wanna go build one but due to funds and work space i cant! 
car it self looks amazing keep up the top work.......
i will own one thats been converted soon i promise myself
car it self looks amazing keep up the top work.......
i will own one thats been converted soon i promise myself
 20-11-2012, 07:48 PM
#156
.
Got them from Compbrake in the end mate, there Genuine Ford arms aswell so worth paying the extra �50 odd over the non genuine ones.
Thanks for the positive comments fellas, nice to see other people appreciate what i'm doing
Ginger
.
Got them from Compbrake in the end mate, there Genuine Ford arms aswell so worth paying the extra �50 odd over the non genuine ones.
Thanks for the positive comments fellas, nice to see other people appreciate what i'm doing
Ginger
.
Last edited by GINGExR2 T; 20-11-2012 at 08:06 PM.
22-11-2012, 01:22 PM
#157
.
After some info if possible, I have a set of OZ Super T's and a set of Mondeo 5 spokes both of which are 7J, now i know the correct width is 205 but could i use 215 on them. Reason being is i'm tring to get the maximum tread width on the rears. So was looking to use 215 on the rear and 205 on the front.
Would this cause a problem?????
Ginger
.


 22-11-2012, 07:35 PM
#159
Regular Contributor
Join Date: Aug 2010
Location: great yarmouth/norfolk
Posts: 337
Likes: 0
Received 2 Likes
on
2 Posts
.
After some info if possible, I have a set of OZ Super T's and a set of Mondeo 5 spokes both of which are 7J, now i know the correct width is 205 but could i use 215 on them. Reason being is i'm tring to get the maximum tread width on the rears. So was looking to use 215 on the rear and 205 on the front.
Would this cause a problem?????
Ginger
.
also the mondeo front wheel drive offset may cause an issue so spacers maybe needed??? (mine uses spacers on front to clear callipers on std rs rims)
Last edited by lockie; 22-11-2012 at 07:36 PM.
23-11-2012, 09:53 AM
#160
I was thinking the same on the profile, but after putting the sizes into the link below a 40 profile has a lower diametre by 12mm :-/ were as a 45 is only 9mm bigger.
http://www.miata.net/garage/tirecalc.html
Ginger
.

