'90 Sapphire Cosworth Mini Restoration: Updated 21/03/10
 21-02-2010, 08:21 PM
#1
Wahay!! I've lost my Virginity!!
Thread Starter

Join Date: Jun 2009
Location: Crewe
Posts: 84
Likes: 0
Received 0 Likes
on
0 Posts
Ladies and Gents,
After taking lots from the forum I thought I'd give a little back by sharing my current front suspension restoration with you all. There is a larger scope to the project, but this part has made the most ground.
I'm looking after my Dad's Sapphire Cosworth as he works abroad and thought I'd keep myself busy at weekends by giving her some TLC. The basic brief of the project was to do a good job, but not break the bank. It's not meant to be a show car at the end of it, just a nice driver in good nick.
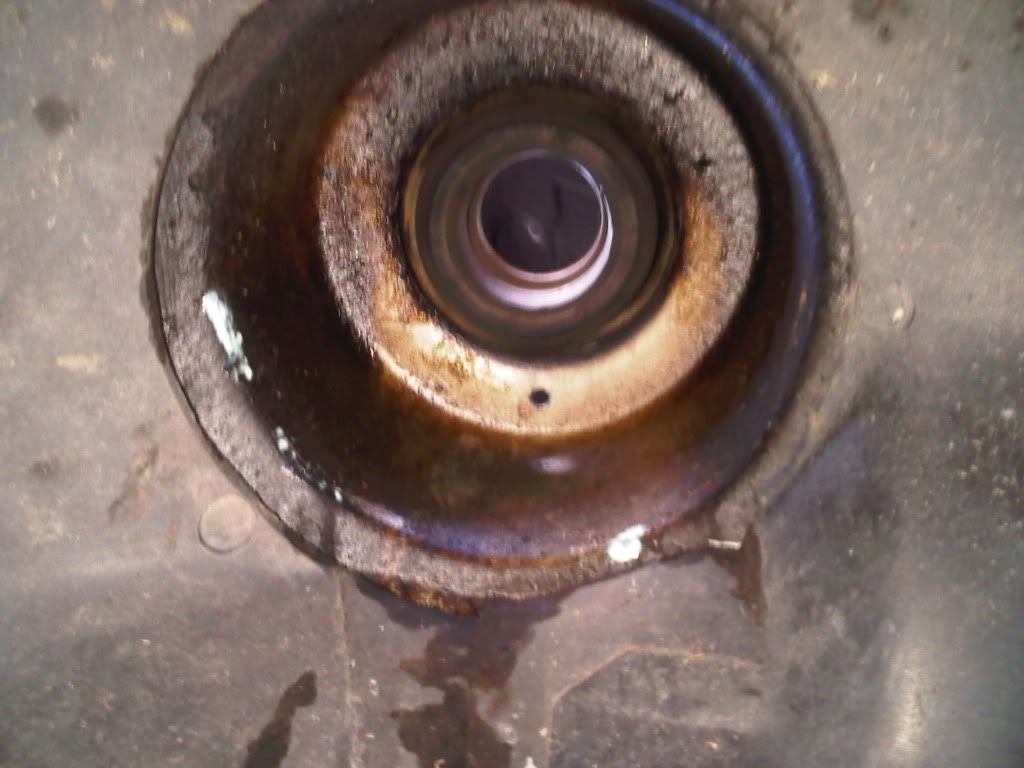
First off, some pictures of what we were dealing with:
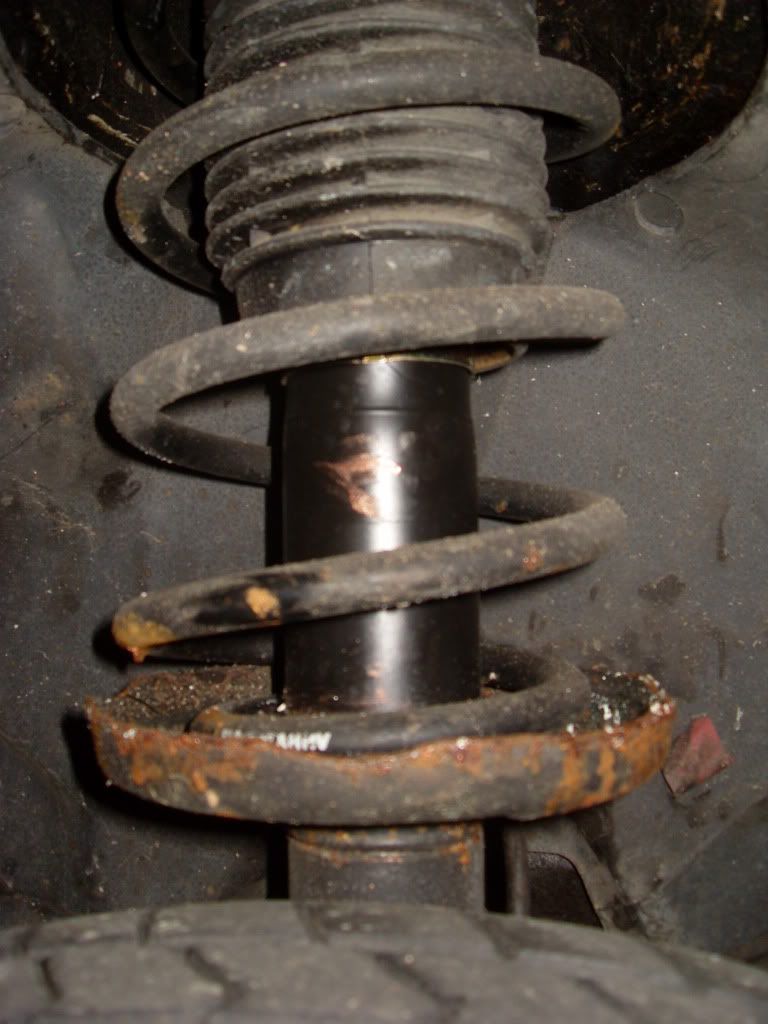
I had only replaced this damper and spring 2000 miles (1 year) ago to get the car through it's MOT. Both are Ford items (the damper actually being a Monroe, but stickered up). Can't believe how quickly it had started to rust. Probably my own fault as I should have sprayed on some Waxoyl after fitting. I should have changed both sides at the same time, but money was short and I needed some wheels.
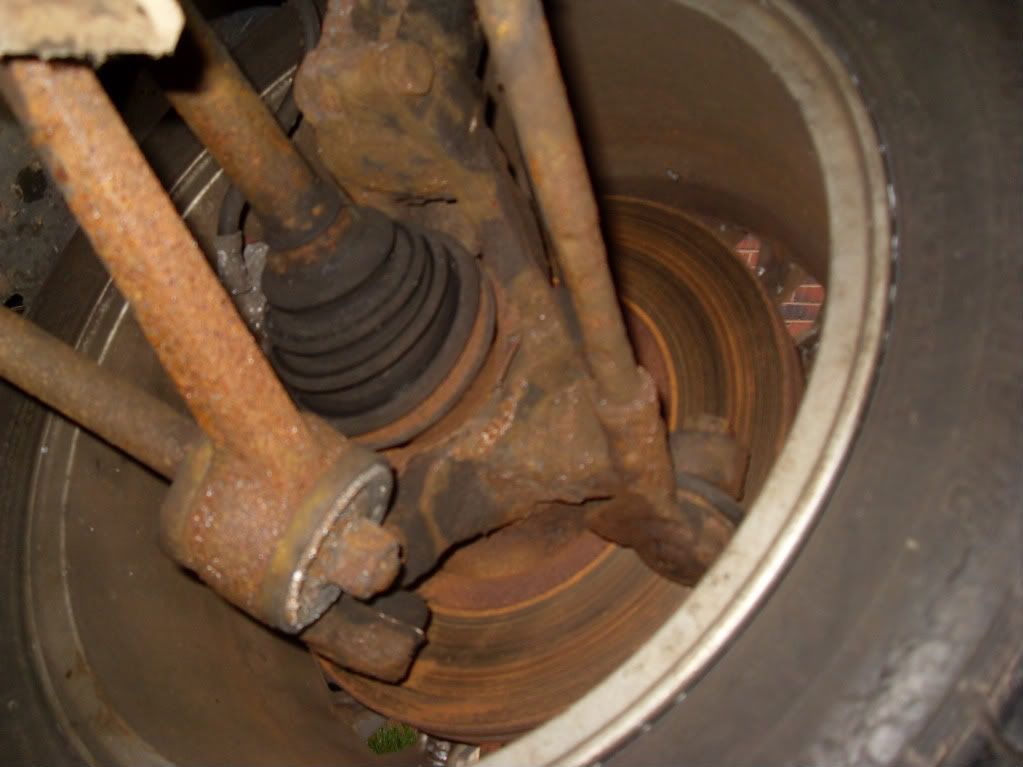
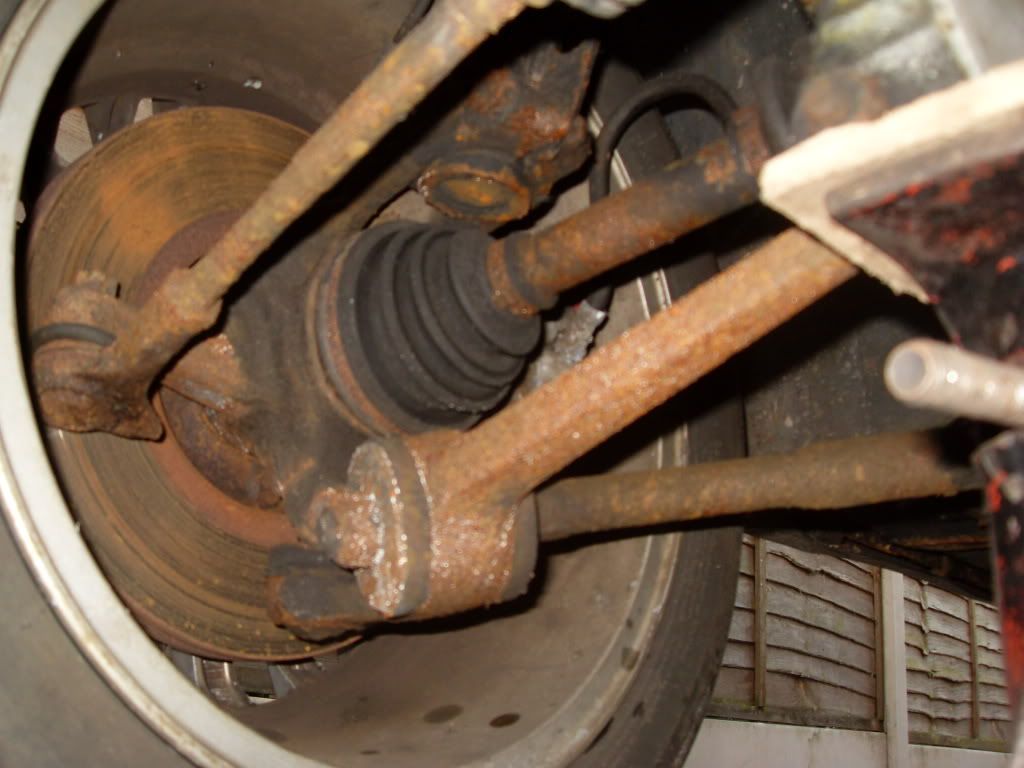
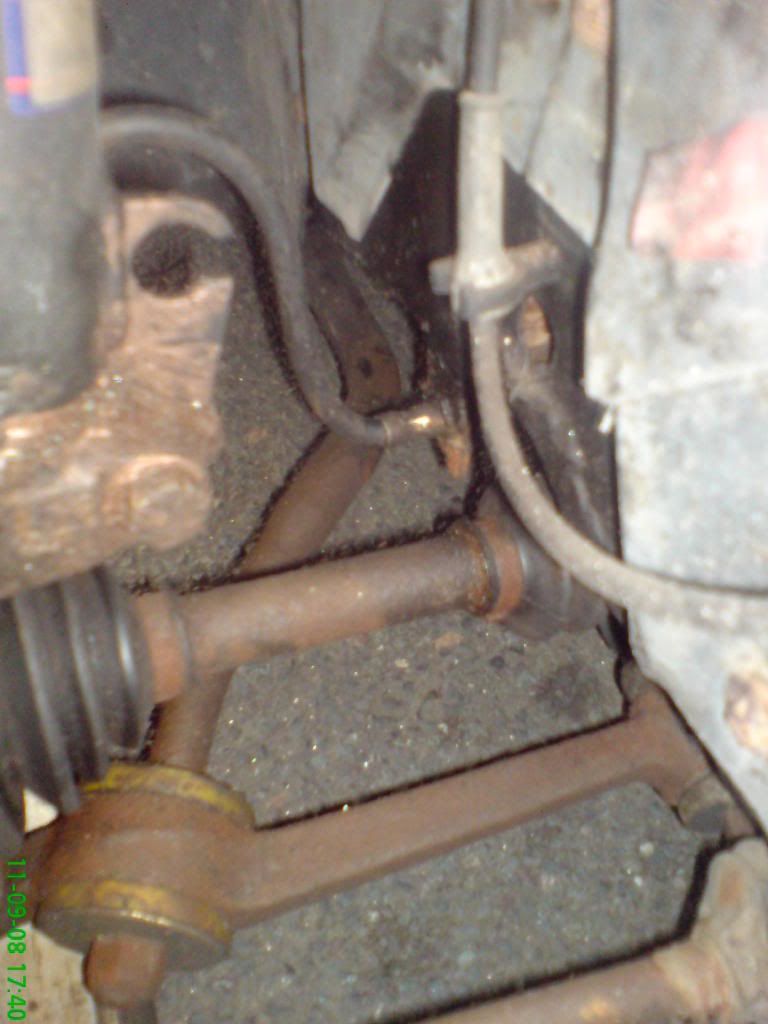
You get the general idea. The car was purchased from a chap up near Aberdeen and suffice to say the harsh winters and road salt have not done the car any favours. Mechanically it all works, but is just visually tired.
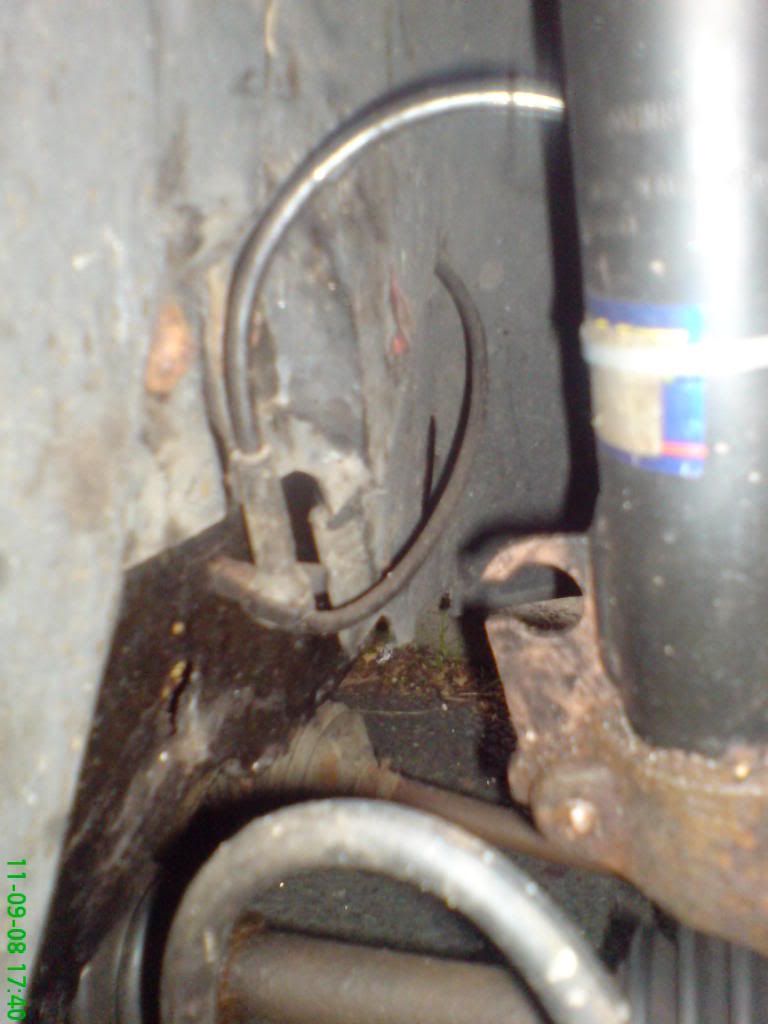
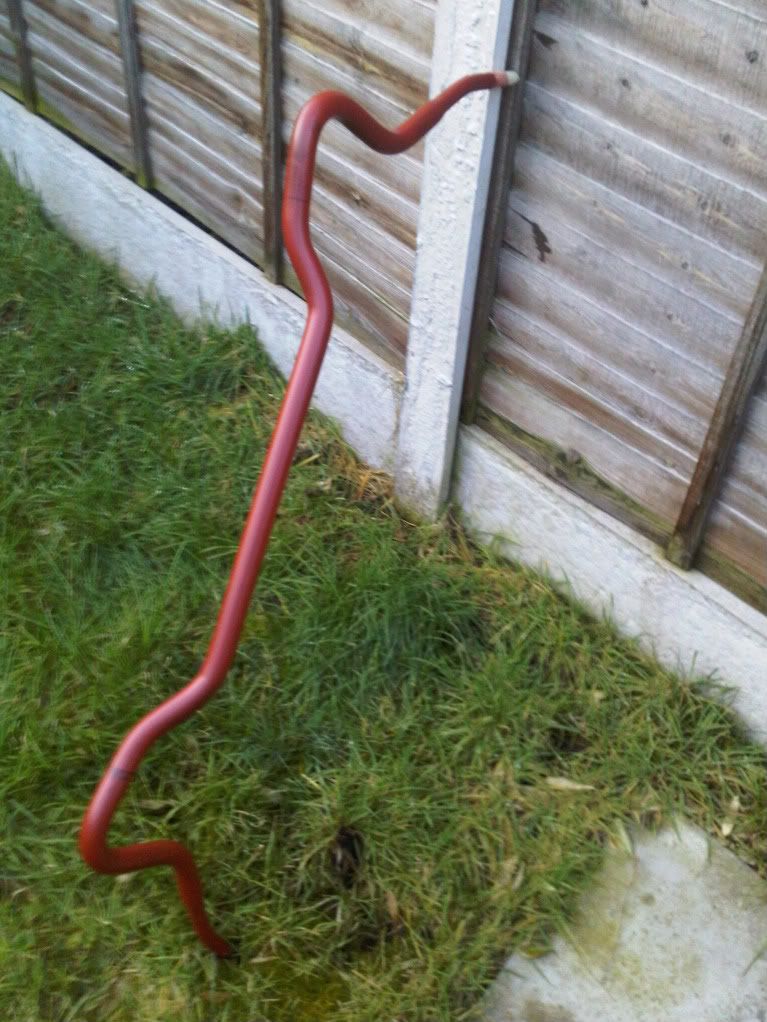
I also had a massive fight with an anti-roll bar bolt whilst dropping the front end:
https://passionford.com/forum/techni...ml#post4739683
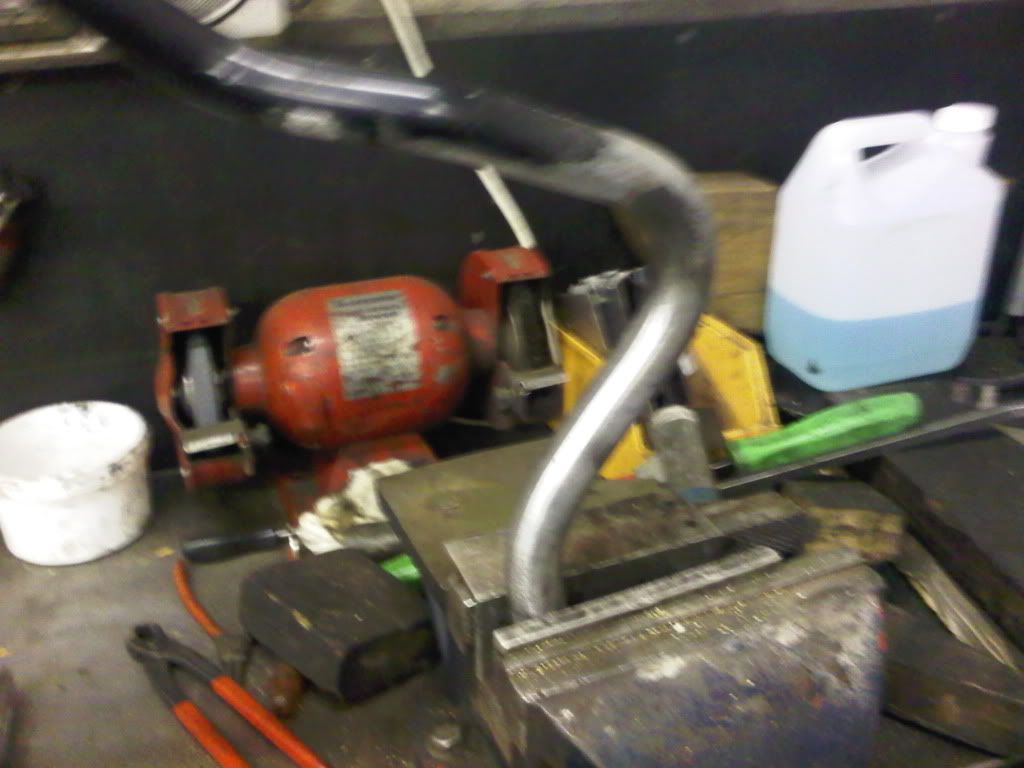
Over Christmas I was lucky enough to have three weeks off due to a Christmas shut-down at work. So, I went back to my old workplace to help out and they kindly let me use all the kit including the sand blaster:
Throughout I have been sourcing parts here and there, no doubt you have received one of my emails. Special thanks goes to "andyuk" and Pete, "RS Specialist" for their help.
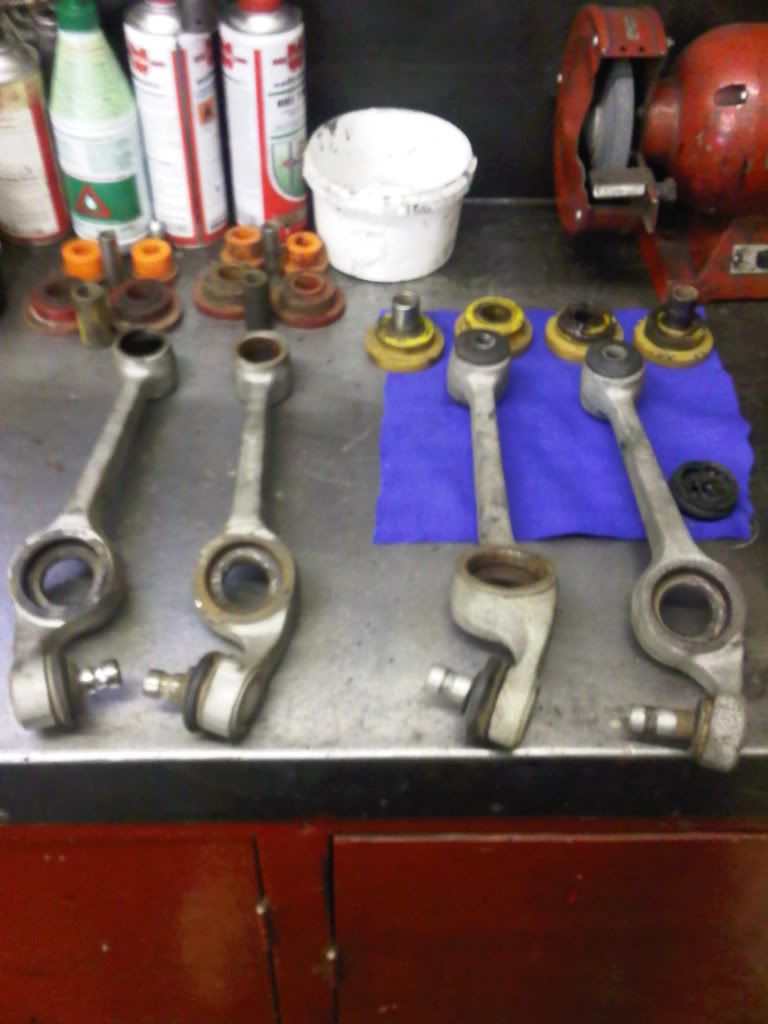
I sourced another set of front lower track control arms from "andyuk" in order to make the best set I could from the four shown above. I now know that these are still available new, just not from Ford. Doh. I've also sourced some inner polybushes to match the outers as shown above as you can see. This is how they looked after initial sand blasting to see which were the best. More blasting followed on the best set. Obviously they were masked up at the time. Turns out that "andyuk"'s ones were better.
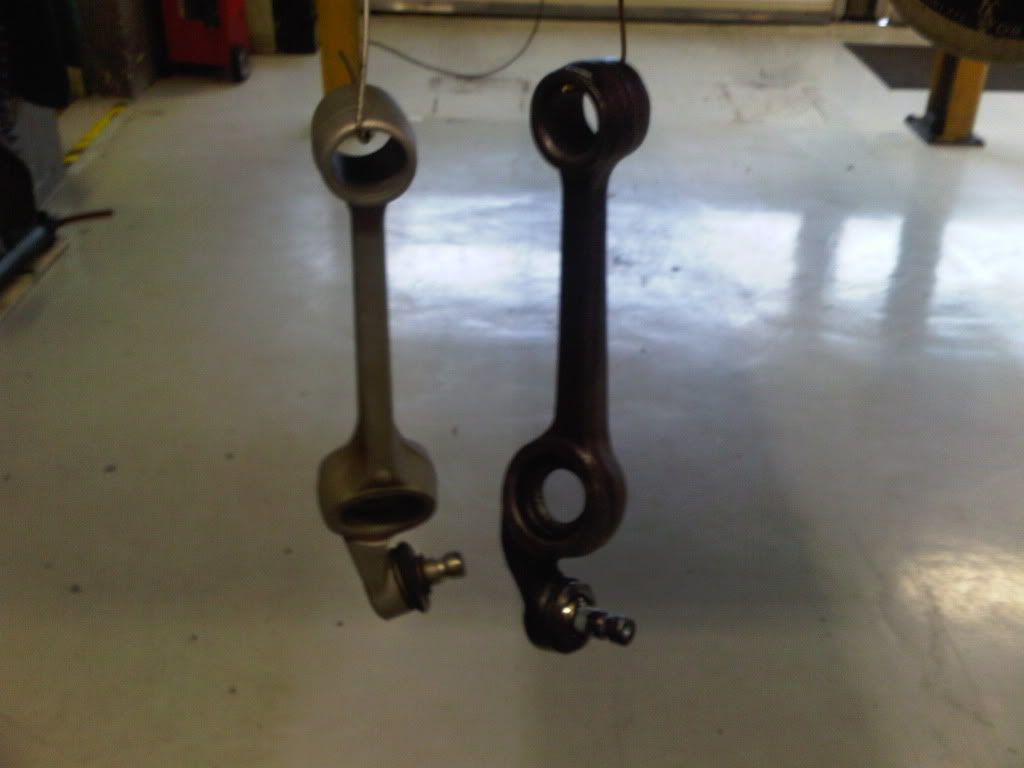
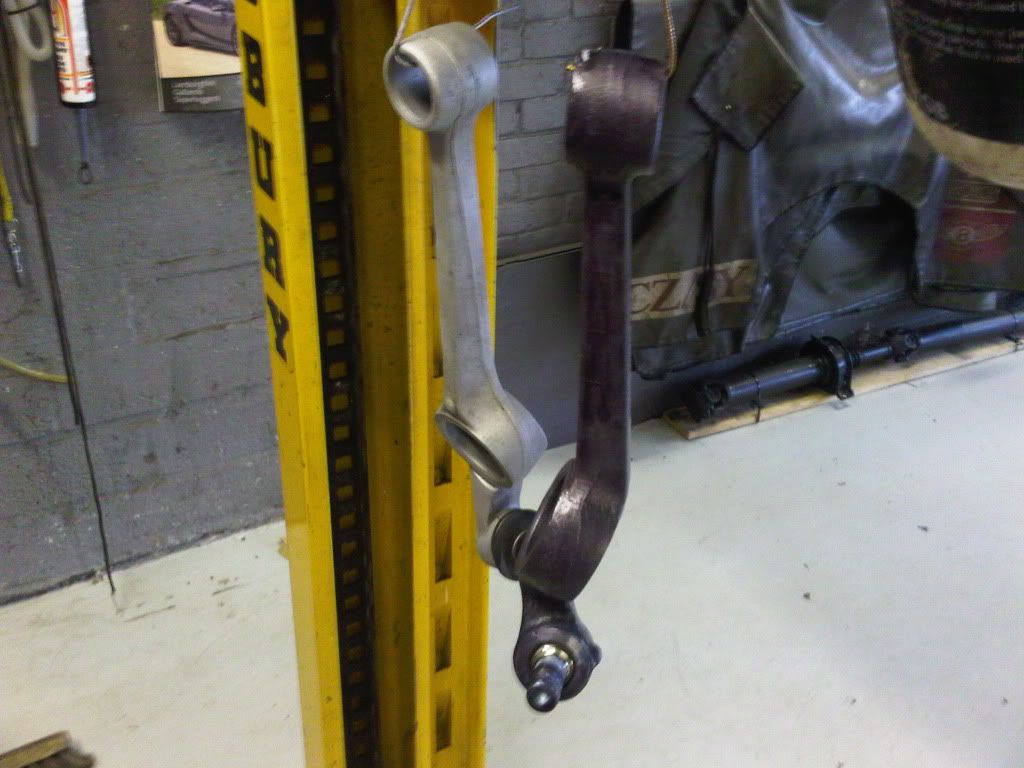
In these photographs you can see the comparison between before and after the application of "Vactan". This stuff from these guys:
http://cgi.ebay.co.uk/VACTAN-RUST-CO...item1c0ff49b17
I noticed that it struggles to cover the surface when it is very heavily pitted, like you will see later on with the hubs. What I mean by this is that a couple of months later (I didn't do anything other than Vactan for some time) rust pin holes appeared. I think the fluid itself has a very high surface tension as it can some times "glob" together and hence not penetrate into a pitted surface. parts that aren't pitted came up a treat first time. I applied three coats in total on all parts just to be sure. Probably a bit much, but I felt better. I thought the parts looked real ace by the time they were all Vactan'd up!
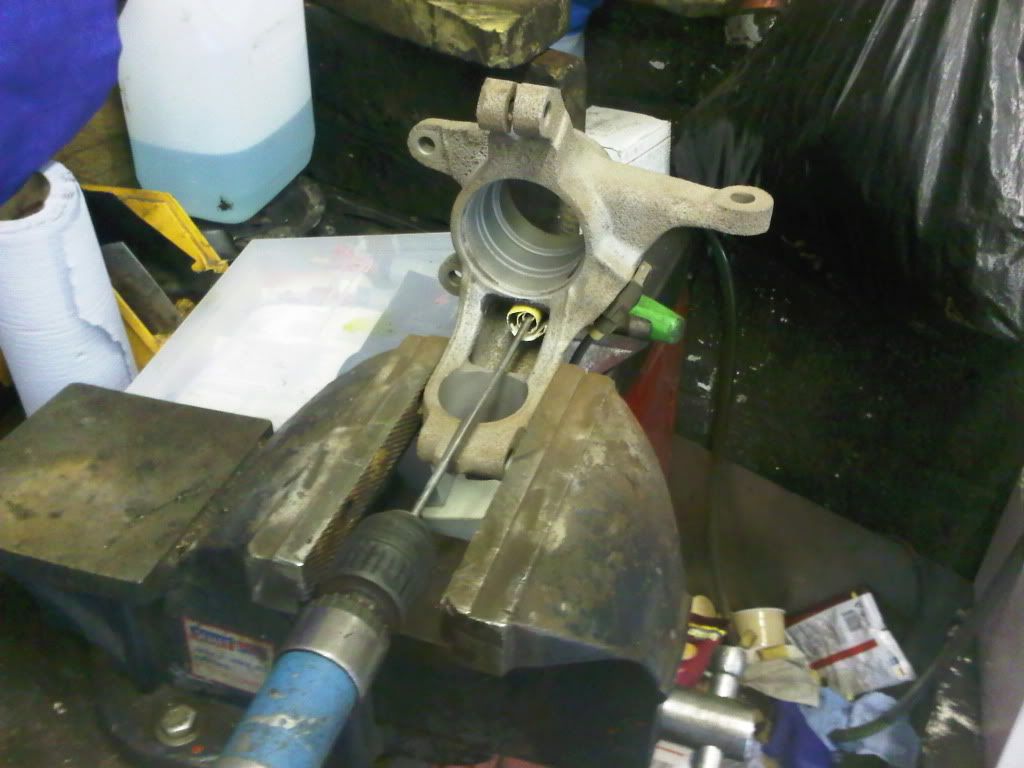
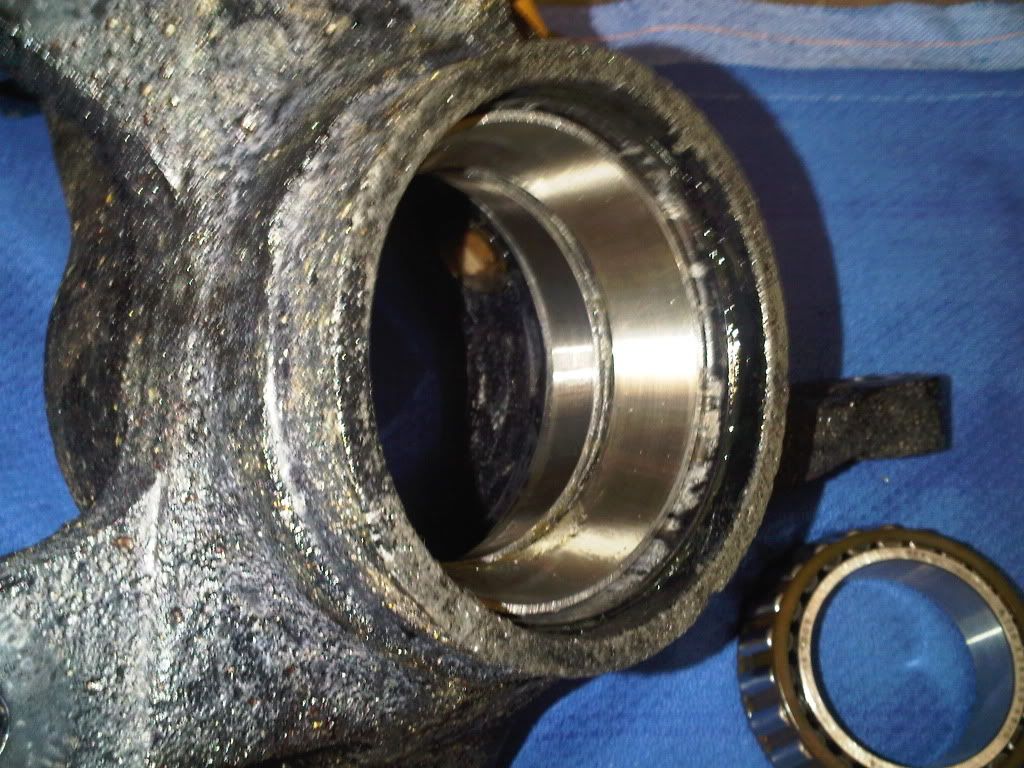
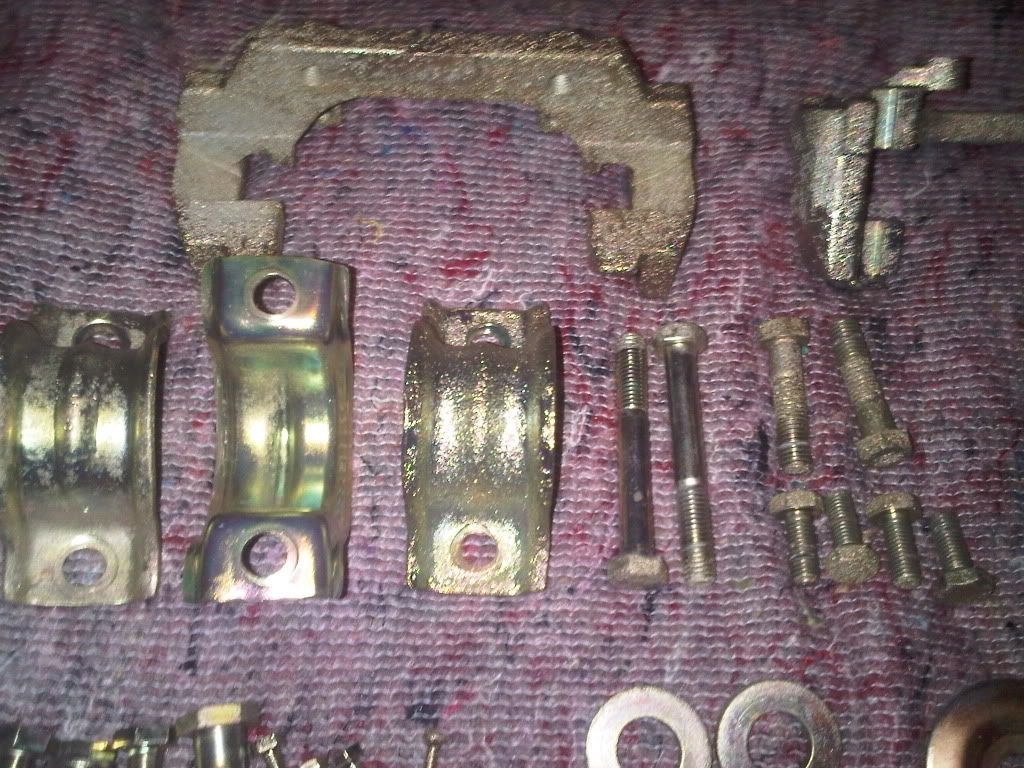
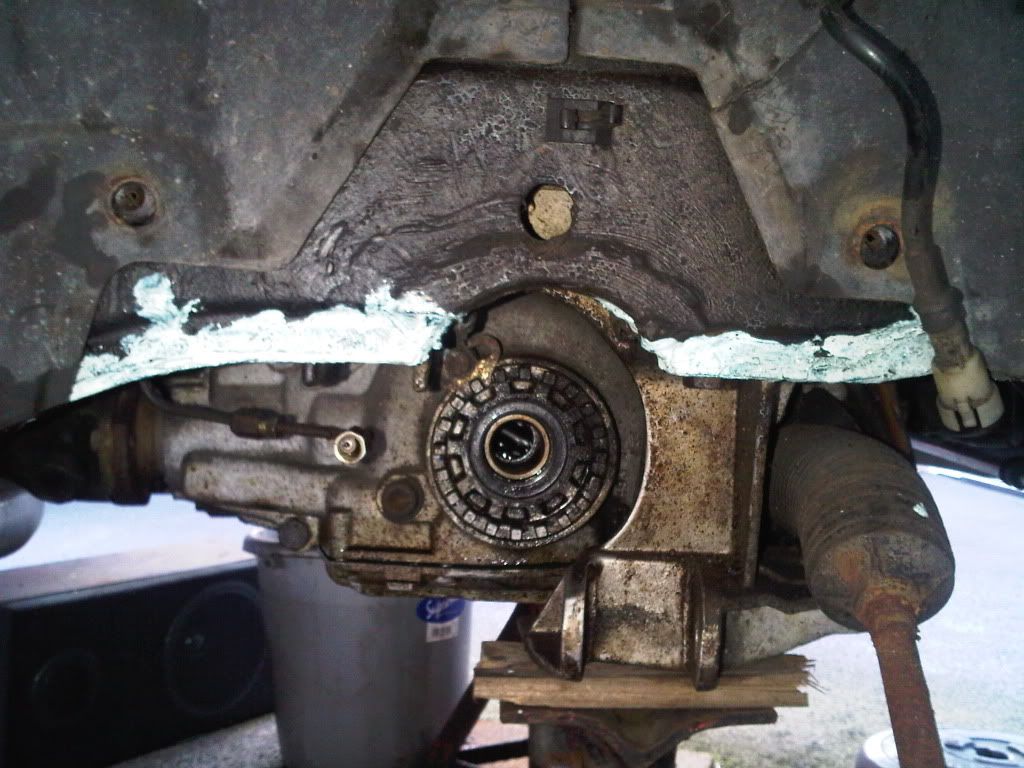
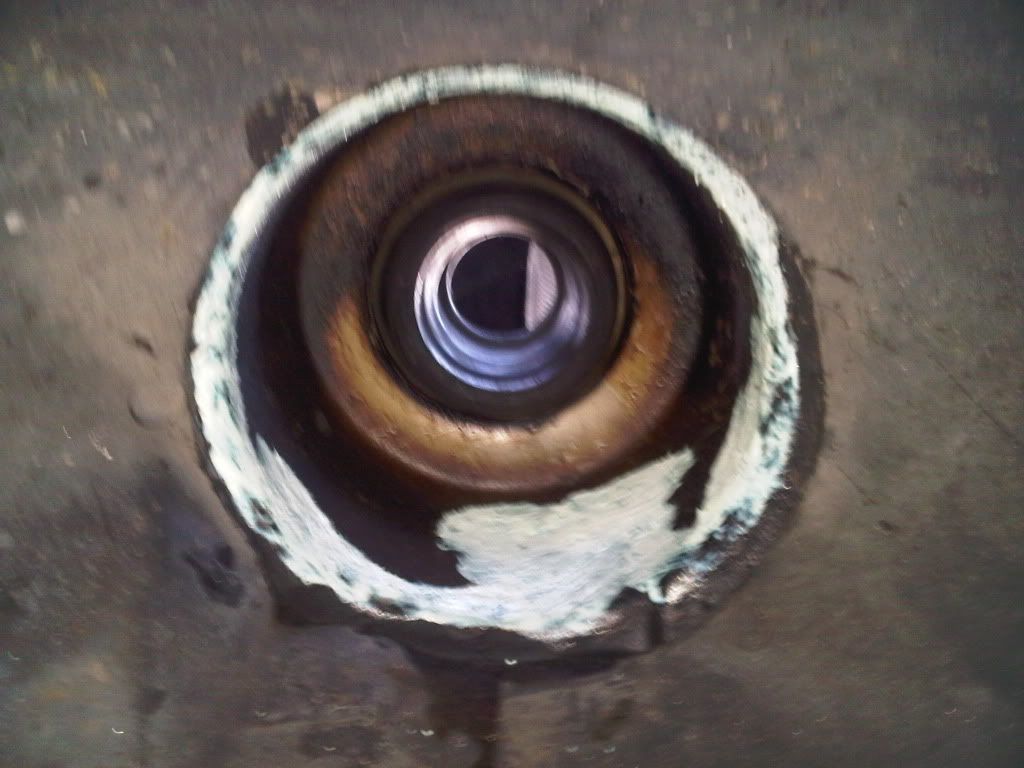
I had real trouble cleaning the rust from these recesses in the hubs. You'll probably know the feeling if you've ever done this job too! I had to resort to the method show. It took a great deal of time and lots of P40 grit paper!
They came up ok in the end. The second picture shows just how pitted they were. You'll notice that I left the Hall/ABS sensors in place. Two reasons; I'm pretty sure they worked when I took them off the car, a resistance check comes up ok at 1075ohms if my memory serves me correct, and they are �168 each new from Ford or �88 new (as good as OEM) from eurocarparts.
I also pressed out the bearings prior to blasting to be replaced by a new SKF set later in the restoration.
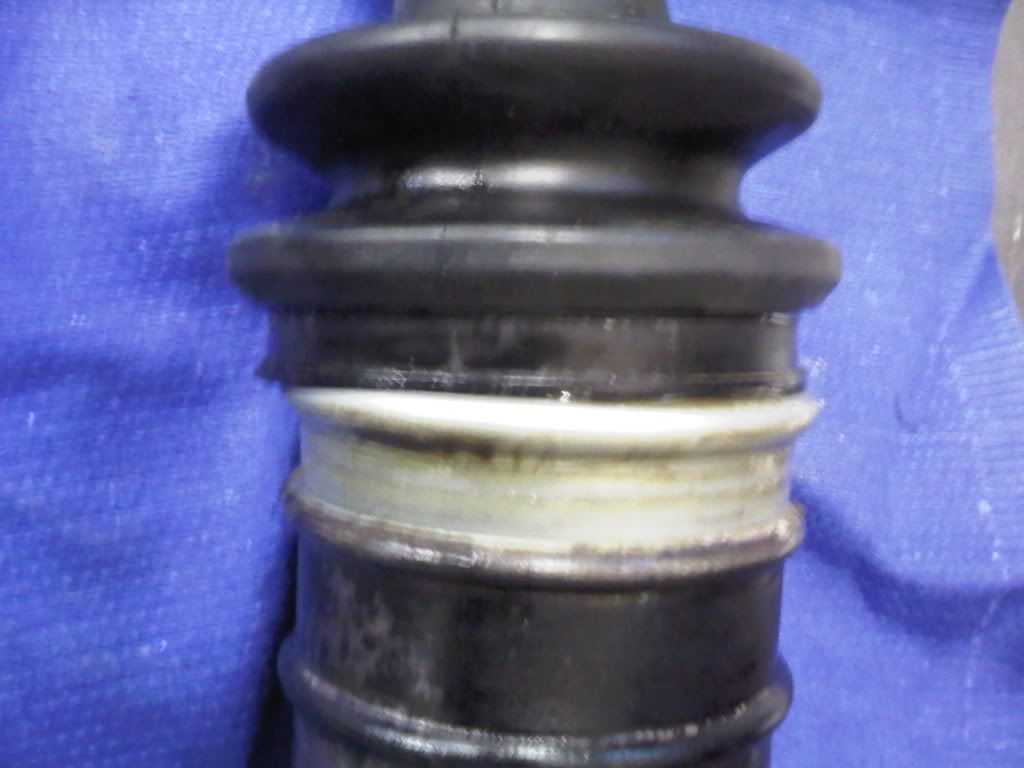
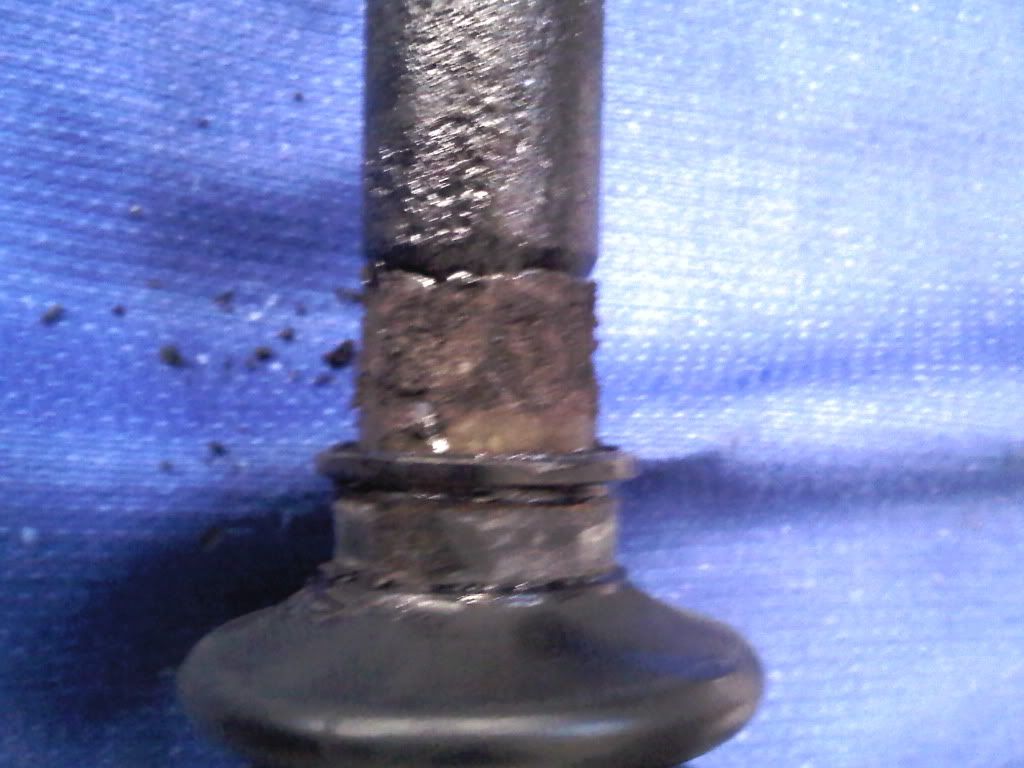
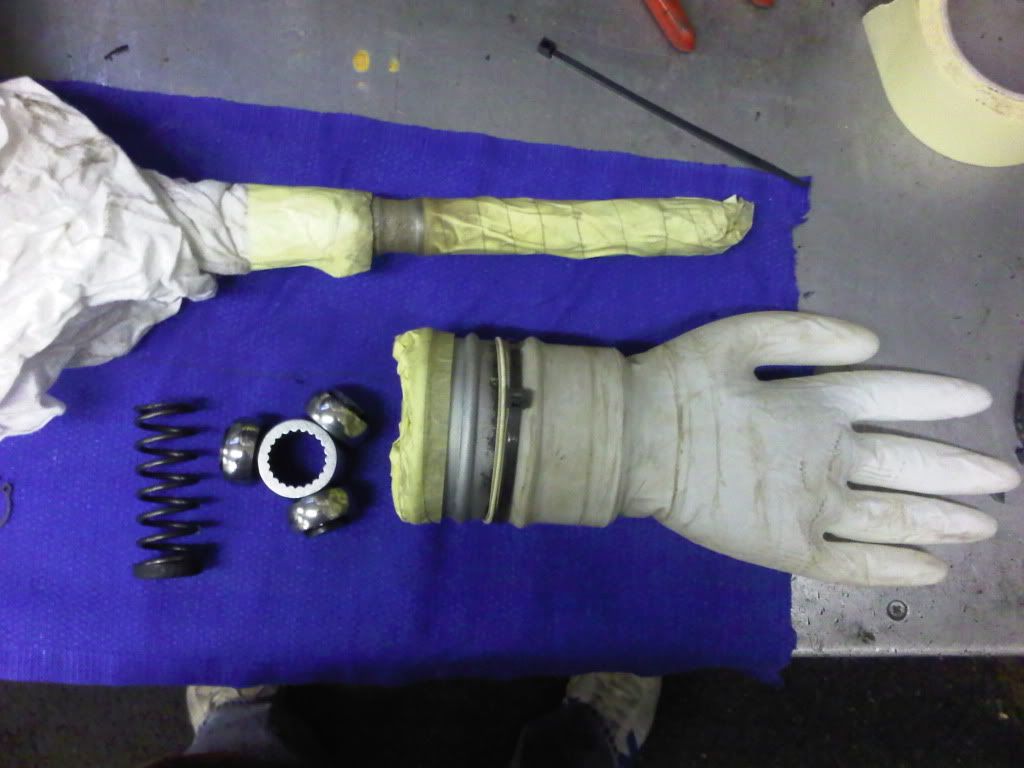


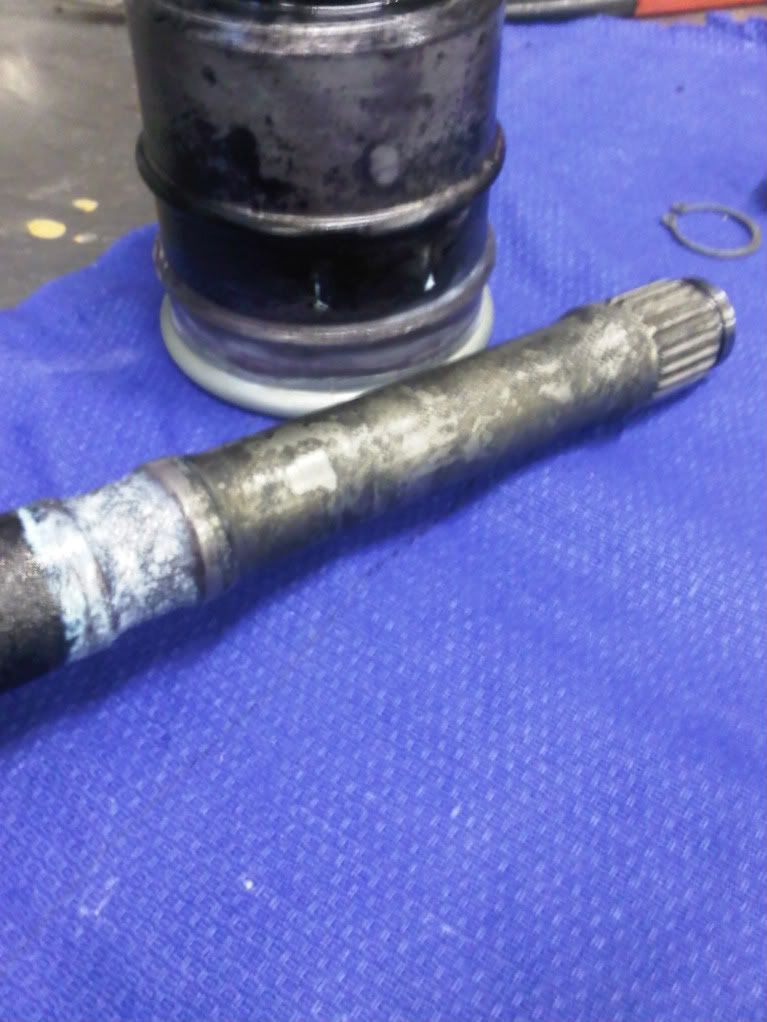
I didn't want to break open all the driveshafts and risk damaging the boots, and getting new clips etc. However I did have to replace one of the boots because it had a small split. I think I did this in the paraffin cleaning pit. You can see how the rust has even penetrated into the areas where the boots clamp down onto the shaft itself. In hindsight, I would have liked to strip all the shafts down now, but my budget is not endless. It's not a bad job, 90% of what I would ideally like. Mechanically they will be fine, aesthetically a good deal better, and any rust still present should have been stopped in it's tracks.
Nice before and after shots of the anti-roll bar ends. I had to do these in the vice using the drill and P40 strips in the same manner that I did the recesses in the hubs. This was because I couldn't fit them into the sand blasting cabinet. Well, I could have with the door open...
Again, more anti-roll bar pics above.
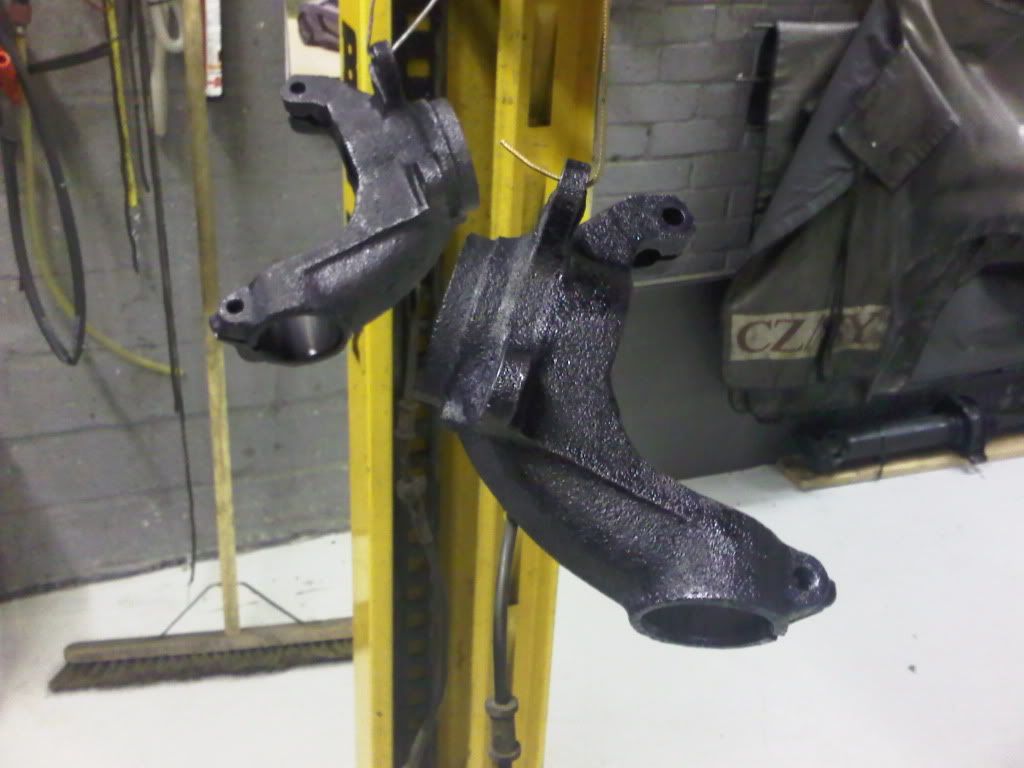
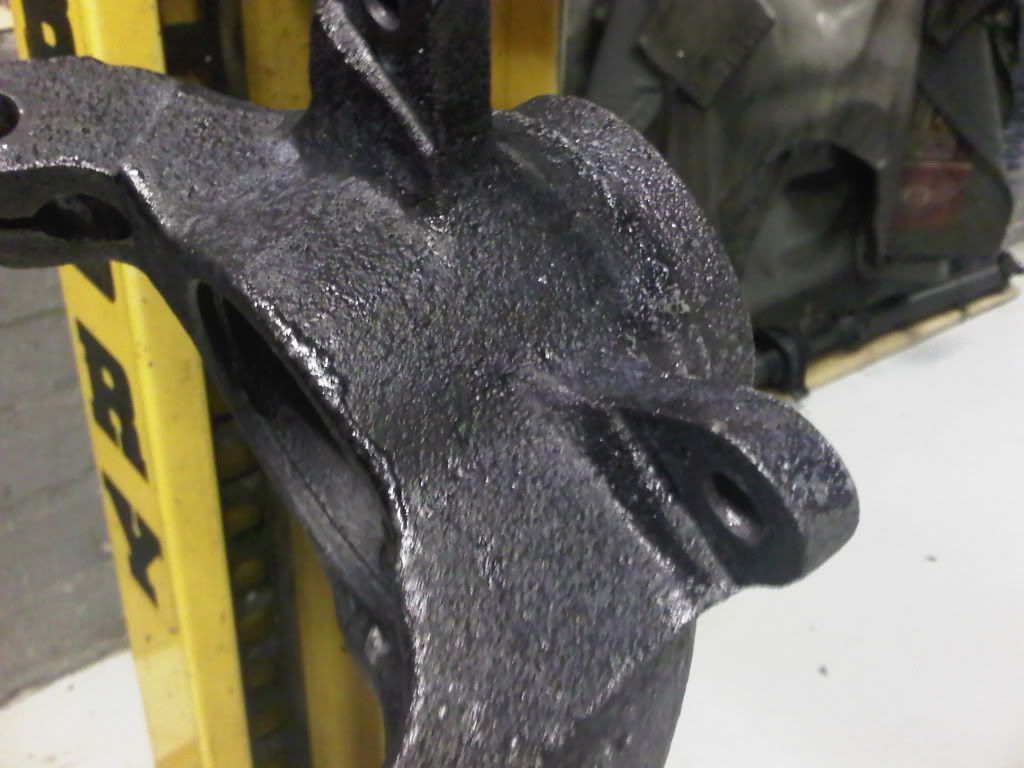
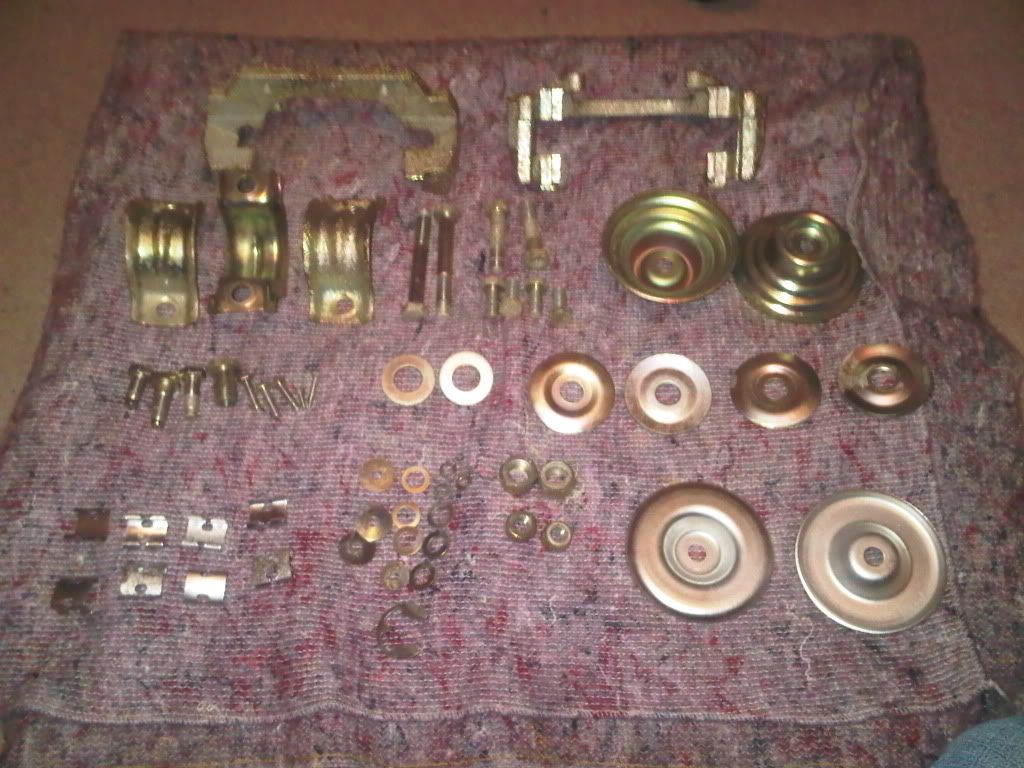
New bearings fitted. Had to be sure they were properly seated. Bit naughty fitting them prior to finishing the restoration of the hub itself (only Vactan at this point), but I only had the free usage of a press for a few more hours before having to return up North to Crewe for work the following week. This photograph above really shows what I mean about the Vactan struggling to get into the pitted areas (the whole hub then!)
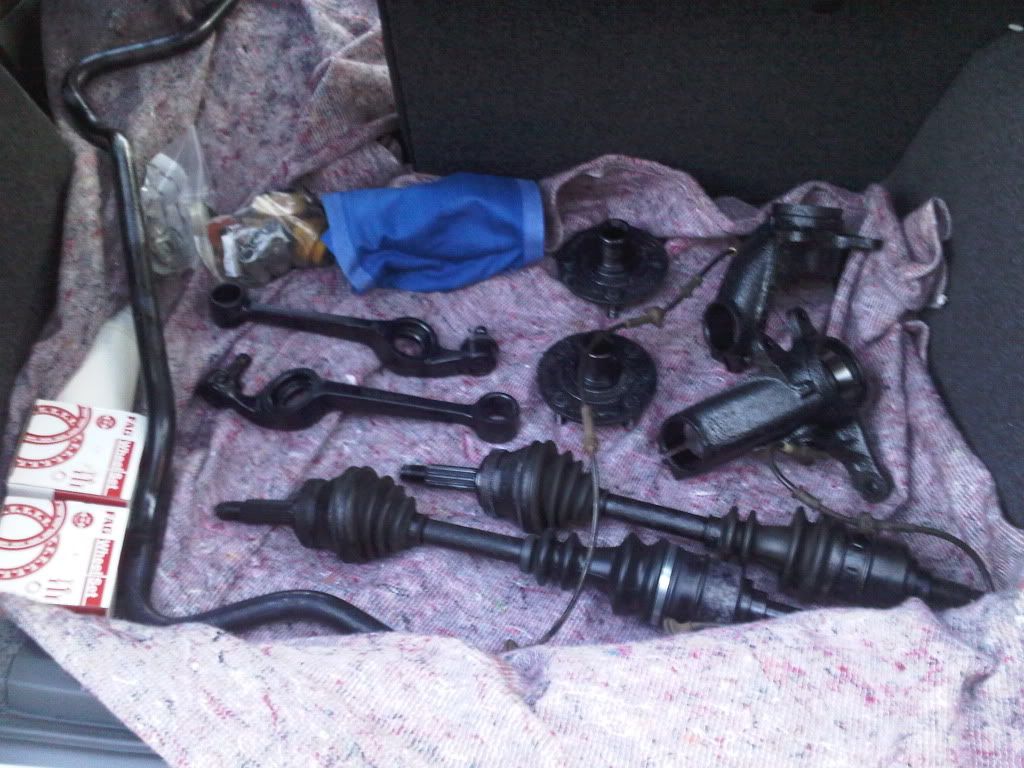
All the sand blasted and Vactan'd parts in the boot of my daily driver. It was a good feeling taking this photo. You can see that I did the little hub carrier thingies (nice phrase) as well.
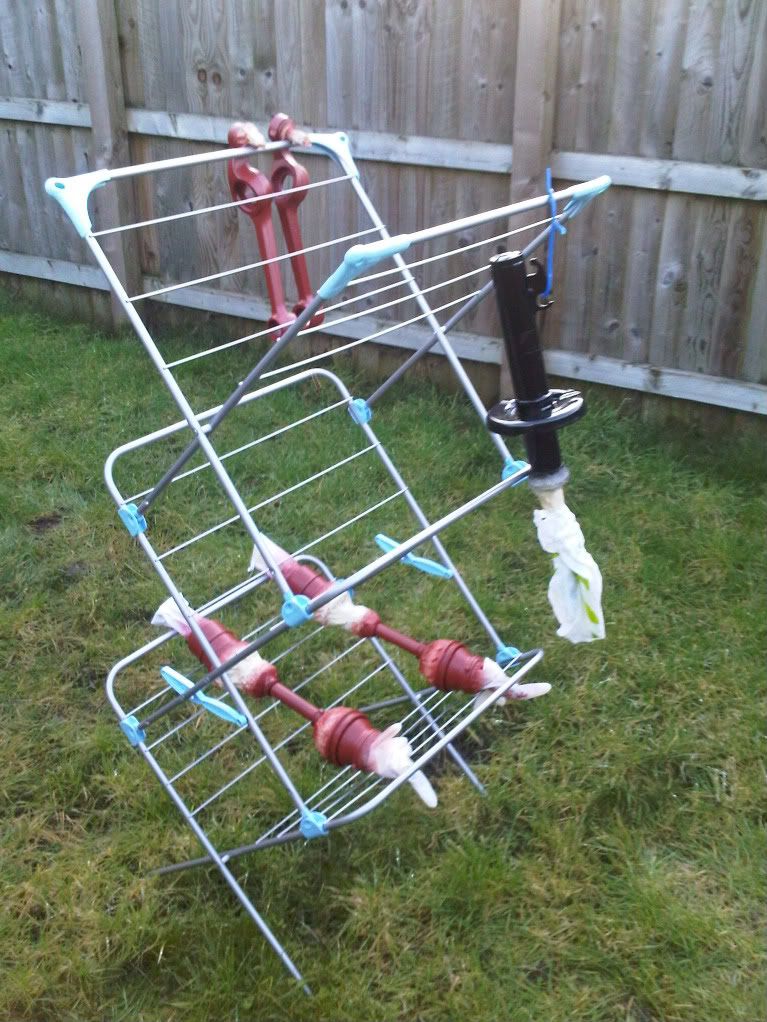
Quite possibly the best use for a clothes drying rack! After debating the final coatings to use I've gone for two coats of red oxide and two of gloss/satin/VHT where appropriate. Reasons are here:
https://passionford.com/forum/techni...to-vactan.html
After painting the whole thing in one go I realised I couldn't rest it anywhere. I had to swing it by the very top and dig it into the ground! Bet the neighbours found this funny. There is only one coat of primer on these bits.
I also sourced another damper for the LHS, but Ford were out of stock so I managed to get another from Monroe direct. However, it was grey? Quick coat of Gloss sorted that out as you can see from one of the above pictures.
Well after a hundred hours or so and a few hundred quid that's about as far as I've got...
Regards,
Alex
After taking lots from the forum I thought I'd give a little back by sharing my current front suspension restoration with you all. There is a larger scope to the project, but this part has made the most ground.
I'm looking after my Dad's Sapphire Cosworth as he works abroad and thought I'd keep myself busy at weekends by giving her some TLC. The basic brief of the project was to do a good job, but not break the bank. It's not meant to be a show car at the end of it, just a nice driver in good nick.
First off, some pictures of what we were dealing with:
I had only replaced this damper and spring 2000 miles (1 year) ago to get the car through it's MOT. Both are Ford items (the damper actually being a Monroe, but stickered up). Can't believe how quickly it had started to rust. Probably my own fault as I should have sprayed on some Waxoyl after fitting. I should have changed both sides at the same time, but money was short and I needed some wheels.
You get the general idea. The car was purchased from a chap up near Aberdeen and suffice to say the harsh winters and road salt have not done the car any favours. Mechanically it all works, but is just visually tired.
I also had a massive fight with an anti-roll bar bolt whilst dropping the front end:
https://passionford.com/forum/techni...ml#post4739683
Over Christmas I was lucky enough to have three weeks off due to a Christmas shut-down at work. So, I went back to my old workplace to help out and they kindly let me use all the kit including the sand blaster:
Throughout I have been sourcing parts here and there, no doubt you have received one of my emails. Special thanks goes to "andyuk" and Pete, "RS Specialist" for their help.
I sourced another set of front lower track control arms from "andyuk" in order to make the best set I could from the four shown above. I now know that these are still available new, just not from Ford. Doh. I've also sourced some inner polybushes to match the outers as shown above as you can see. This is how they looked after initial sand blasting to see which were the best. More blasting followed on the best set. Obviously they were masked up at the time. Turns out that "andyuk"'s ones were better.
In these photographs you can see the comparison between before and after the application of "Vactan". This stuff from these guys:
http://cgi.ebay.co.uk/VACTAN-RUST-CO...item1c0ff49b17
I noticed that it struggles to cover the surface when it is very heavily pitted, like you will see later on with the hubs. What I mean by this is that a couple of months later (I didn't do anything other than Vactan for some time) rust pin holes appeared. I think the fluid itself has a very high surface tension as it can some times "glob" together and hence not penetrate into a pitted surface. parts that aren't pitted came up a treat first time. I applied three coats in total on all parts just to be sure. Probably a bit much, but I felt better. I thought the parts looked real ace by the time they were all Vactan'd up!
I had real trouble cleaning the rust from these recesses in the hubs. You'll probably know the feeling if you've ever done this job too! I had to resort to the method show. It took a great deal of time and lots of P40 grit paper!
They came up ok in the end. The second picture shows just how pitted they were. You'll notice that I left the Hall/ABS sensors in place. Two reasons; I'm pretty sure they worked when I took them off the car, a resistance check comes up ok at 1075ohms if my memory serves me correct, and they are �168 each new from Ford or �88 new (as good as OEM) from eurocarparts.
I also pressed out the bearings prior to blasting to be replaced by a new SKF set later in the restoration.
I didn't want to break open all the driveshafts and risk damaging the boots, and getting new clips etc. However I did have to replace one of the boots because it had a small split. I think I did this in the paraffin cleaning pit. You can see how the rust has even penetrated into the areas where the boots clamp down onto the shaft itself. In hindsight, I would have liked to strip all the shafts down now, but my budget is not endless. It's not a bad job, 90% of what I would ideally like. Mechanically they will be fine, aesthetically a good deal better, and any rust still present should have been stopped in it's tracks.
Nice before and after shots of the anti-roll bar ends. I had to do these in the vice using the drill and P40 strips in the same manner that I did the recesses in the hubs. This was because I couldn't fit them into the sand blasting cabinet. Well, I could have with the door open...
Again, more anti-roll bar pics above.
New bearings fitted. Had to be sure they were properly seated. Bit naughty fitting them prior to finishing the restoration of the hub itself (only Vactan at this point), but I only had the free usage of a press for a few more hours before having to return up North to Crewe for work the following week. This photograph above really shows what I mean about the Vactan struggling to get into the pitted areas (the whole hub then!)
All the sand blasted and Vactan'd parts in the boot of my daily driver. It was a good feeling taking this photo. You can see that I did the little hub carrier thingies (nice phrase) as well.
Quite possibly the best use for a clothes drying rack! After debating the final coatings to use I've gone for two coats of red oxide and two of gloss/satin/VHT where appropriate. Reasons are here:
https://passionford.com/forum/techni...to-vactan.html
After painting the whole thing in one go I realised I couldn't rest it anywhere. I had to swing it by the very top and dig it into the ground! Bet the neighbours found this funny. There is only one coat of primer on these bits.
I also sourced another damper for the LHS, but Ford were out of stock so I managed to get another from Monroe direct. However, it was grey? Quick coat of Gloss sorted that out as you can see from one of the above pictures.
Well after a hundred hours or so and a few hundred quid that's about as far as I've got...
Regards,
Alex
Last edited by redzuki1; 21-03-2010 at 11:22 PM.


 22-02-2010, 10:14 PM
#7
Wahay!! I've lost my Virginity!!
Thread Starter
Join Date: Jun 2009
Location: Crewe
Posts: 84
Likes: 0
Received 0 Likes
on
0 Posts
Thanks for the well wishing chaps. I've just realised that I have no photographs of the rest of the car! It's in good nick, bar the front suspension. It had the rear end all re-built a couple of years ago now.
I'll put some up in good time. No pictures of it all back together - what you see is the current status. Seeing the mrs this weekend so no progress for a week or two now.
Thanks,
Alex
I'll put some up in good time. No pictures of it all back together - what you see is the current status. Seeing the mrs this weekend so no progress for a week or two now.
Thanks,
Alex
Trending Topics
 16-03-2010, 09:42 PM
#12
Wahay!! I've lost my Virginity!!
Thread Starter
Join Date: Jun 2009
Location: Crewe
Posts: 84
Likes: 0
Received 0 Likes
on
0 Posts
Small update:
Picked up some parts today from "Niphos Metal Finishing" in Crewe. Nice lads, good service being happy to redo any bits I thought weren't up to scratch at no extra cost. Most of the parts have been bright zinc plated, a couple in a silver finish (strut tops and headlight clips, etc).
Again, you can see how pitted many of the parts were. Got Thursday, Friday and Monday booked off work so hope to make good progress.
Apologies for the quality of the images:
Does anybody have any ideas regarding my last post? Standard front hubs colour on a Sapphire Cossie?
Alex
Last edited by redzuki1; 16-03-2010 at 09:51 PM.
19-03-2010, 07:41 PM
#16
Wahay!! I've lost my Virginity!!
Thread Starter
Join Date: Jun 2009
Location: Crewe
Posts: 84
Likes: 0
Received 0 Likes
on
0 Posts
Thanks James_RScos. I went for gloss black in the end. I've been busy painting, cleaning and sub-assembling these last couple of days and will have some pictures to share soon.
One question:
Front wheel bearing dust caps/grease seals - does the metal circular retention spring face out of or into the hub itself? I'm guessing you push the seal's first lip over the outer edge of the bearing and then butt the second seal lip against the outer face of the bearing itself? Sound's like a good story to me?
Thanks in advance guys.
Alex
19-03-2010, 07:47 PM
#17
Glennvestite
iTrader: (1)
Join Date: Jul 2006
Location: Darlington county durham
Posts: 62,755
Received 1,042 Likes
on
996 Posts
Top work mate.I used black paint on my suspension bits and about 6 months later they looked rusty again.The big nuts on the roll bar,are the both normal thread or is one side different to the other.
19-03-2010, 07:52 PM
#18
Wahay!! I've lost my Virginity!!
Thread Starter
Join Date: Jun 2009
Location: Crewe
Posts: 84
Likes: 0
Received 0 Likes
on
0 Posts
99% sure they are normal threaded nuts and not handed items as you suspect.
I've also rust proofed, sprayed two coats of primer as well as two coats of black and once all assembled I will waxoyl. Should be much better than before whatever happens! Powder coat would be best...
Bearing seal query anyone...?
Thanks,
Alex
I've also rust proofed, sprayed two coats of primer as well as two coats of black and once all assembled I will waxoyl. Should be much better than before whatever happens! Powder coat would be best...
Bearing seal query anyone...?
Thanks,
Alex
21-03-2010, 11:47 AM
#21
Wahay!! I've lost my Virginity!!
Thread Starter
Join Date: Jun 2009
Location: Crewe
Posts: 84
Likes: 0
Received 0 Likes
on
0 Posts
Chaps,
My theory regarding the bearing seal appears correct upon checking with a former colleague.
However, I tapped one edge of one of the seals in to far, tried to rectify and have subsequently damaged the seal. Grrrrr.
Has anybody got 1x brand new (great condition second hand?) front wheel bearing seal for a '90 Sapphire Cosworth 4x4?
Postage or pick up if near to Crewe?
Thanks,
Alex
21-03-2010, 08:48 PM
#22
Wahay!! I've lost my Virginity!!
Thread Starter
Join Date: Jun 2009
Location: Crewe
Posts: 84
Likes: 0
Received 0 Likes
on
0 Posts
Update:
Right, I've been working on the car since Thursday morning, but unfortunately have been struck by a couple of issues, hurdles and hinderances that have hampered my progress (mostly the car's fault, but a little bit my fault).
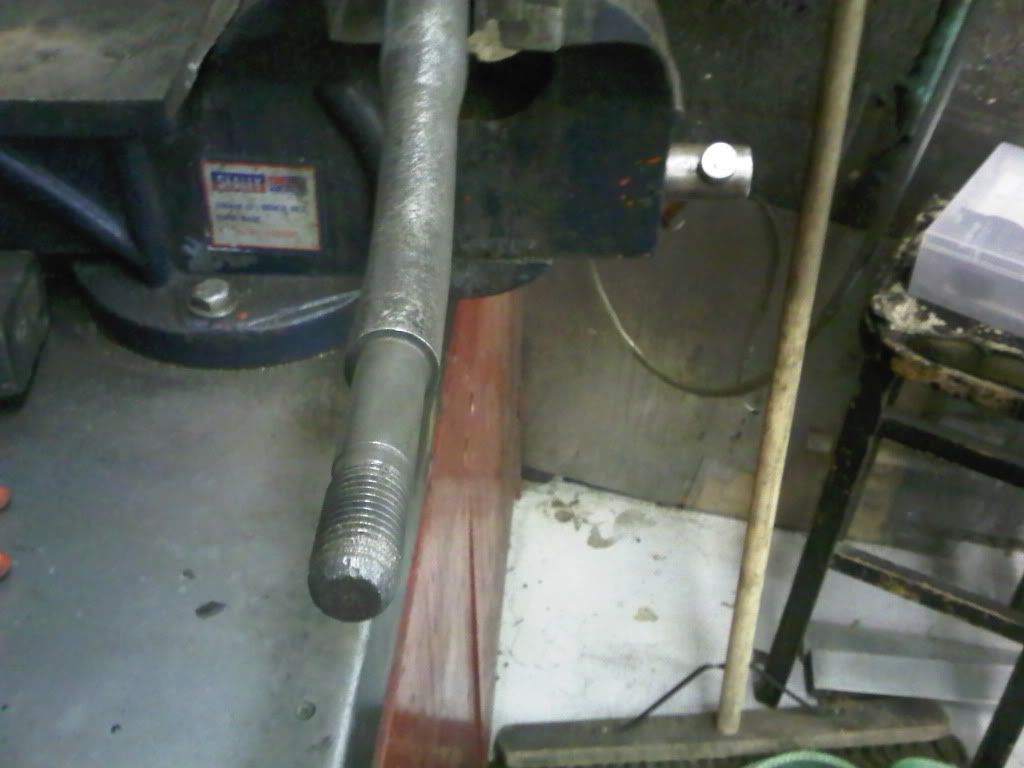
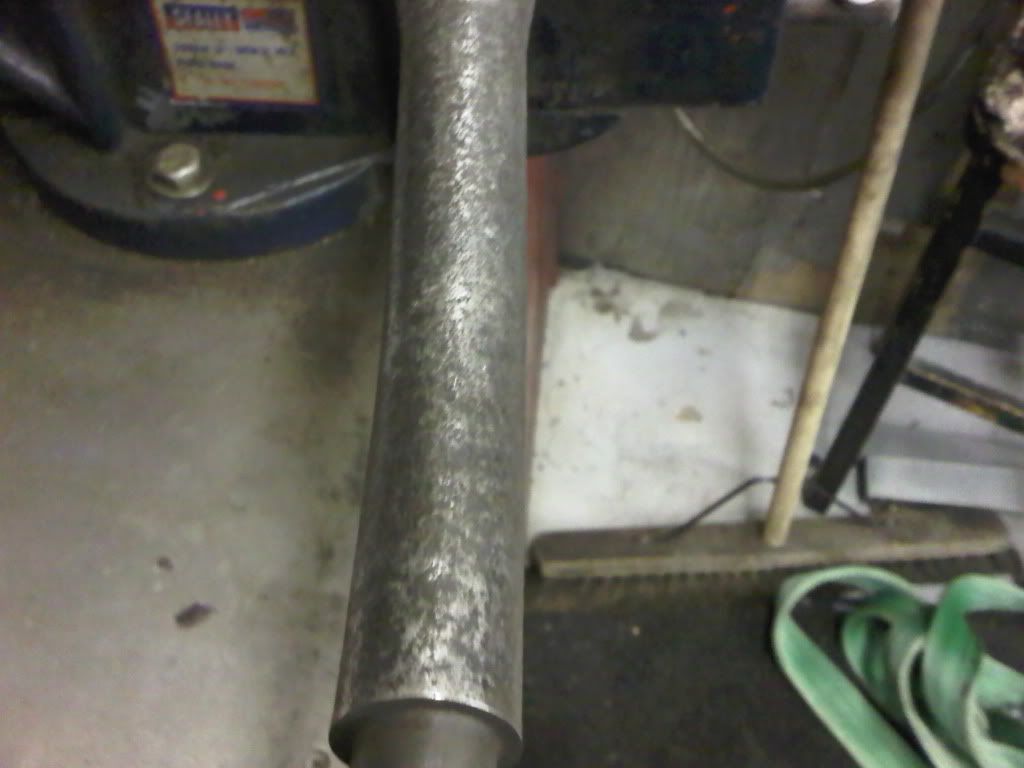
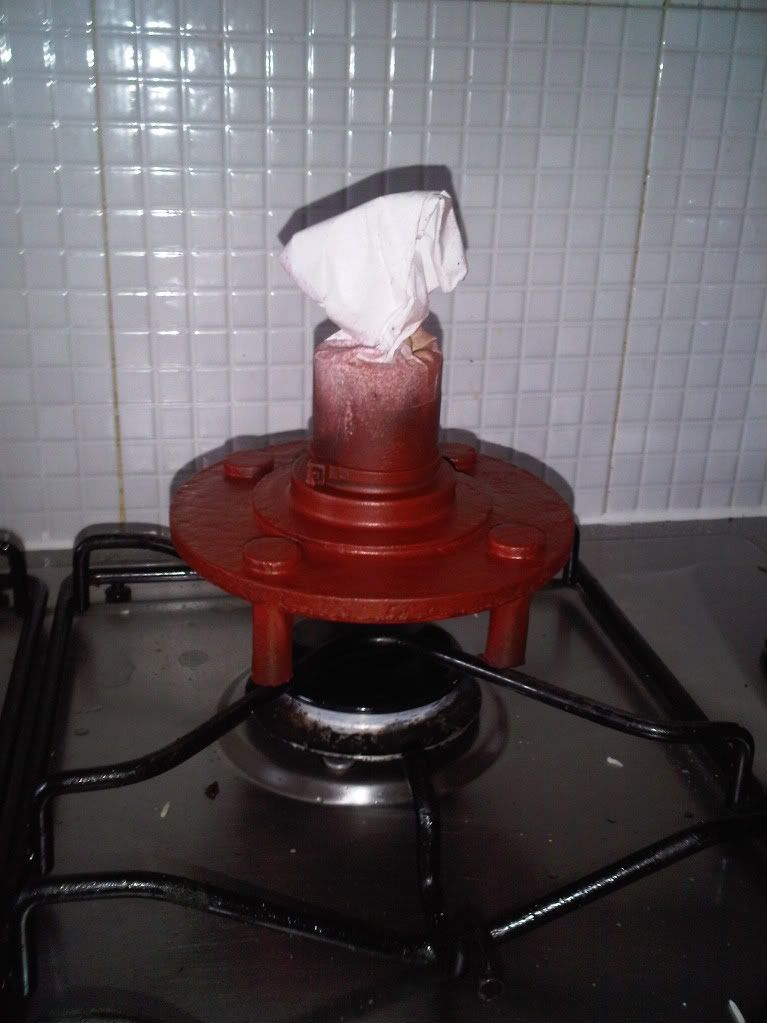
Thursday saw my applying all of the primer coats and all of the gloss black top coats. I went for VHT black on the hub carrier thingy's as I estimated they would get very hot what with having to carry the brake disc. It's on the hob in the picture below in order to heat it up prior to spraying (the first time I did it it all cracked because it was too cold two weeks back). I also used the VHT paint on the inboard end of the drive shaft for similar reasons although maybe it will never get hot enough? Similar idea over the hob prior to spraying.
I had to touch up lots of the new Ford parts that I had purchased. The new LHS front spring had an unpainted line where it had clearly been hung from whilst being powder coated. The new strut spring tops were scratched and dented so I sprayed these also. Ah well...
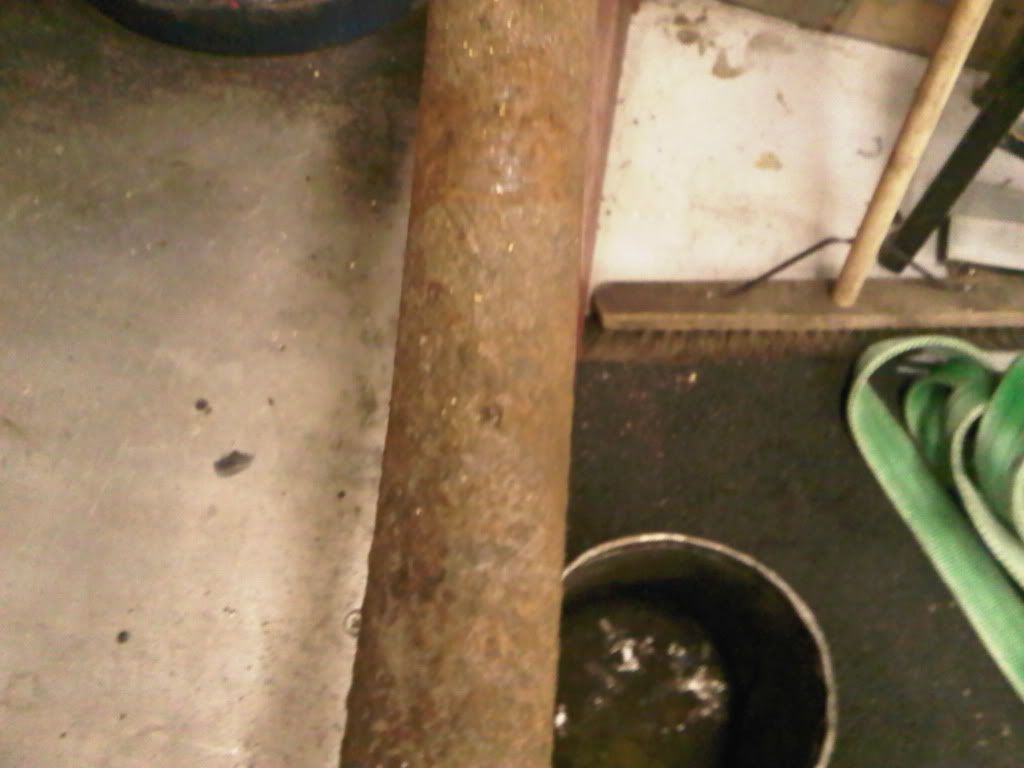
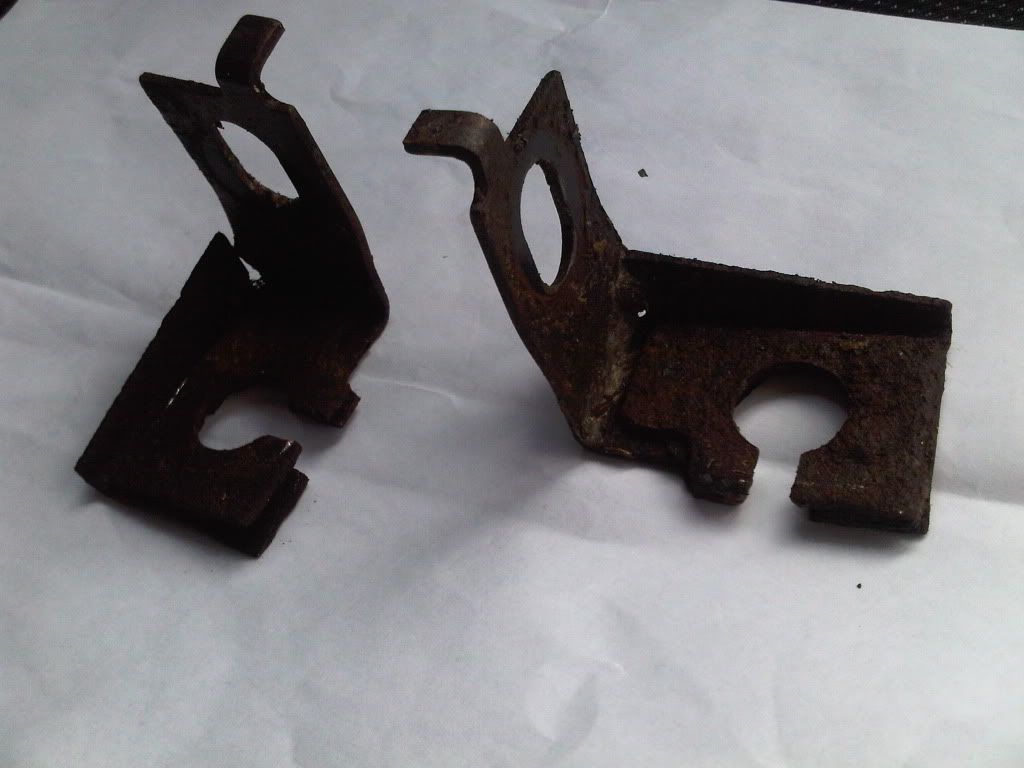
I also removed the front brake lines to flexible hose bracket for a clean up. Tried to source new from Ford, but they are no longer available. So they have gone to my local plating firm to be restored. The rust has got inbetween the two plates and started forcing them apart, so I've ask them to remove the rust in the acid and then braze the parts back together prior to re-plating. See picture below. We'll wait and see how they come out...
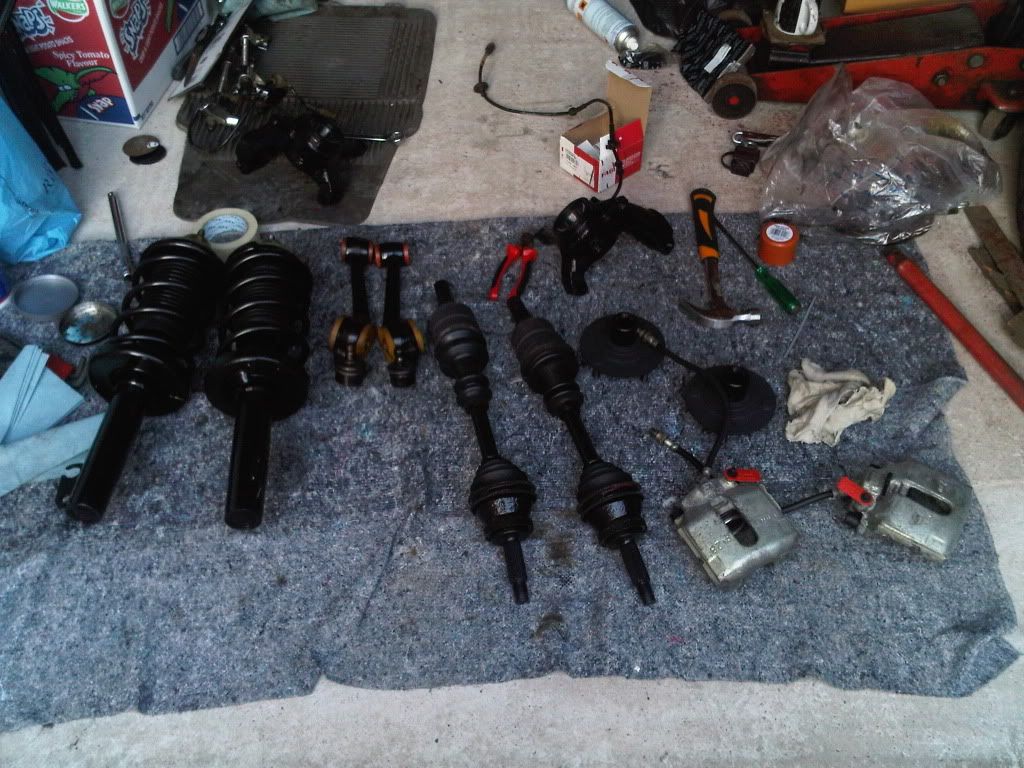
Friday saw the sub-assembly of both front struts, a nice milestone. These have subsequently been fitted to the car - hand tight.
I tried to fit the poly-bushed front lower track control arms, but found that one side inner bush housing was three mm wider than the other. Therefore, with the polybushes, it does not fit in the car. I thought about hacksawing some material from the bushes, but if I do this I'm affecting the overall behaviour of the bush when compared side to side. I think I'm going to take it to a local firm to mill off 1.5mm of the material from either side. This lower track control arm must be a non-OEM item as the castings are slightly different to the other three items that I have around me.
I've also fully sub-assembled one hub with the new bearings, bar calliper. However, it is very, very tight when turning the hub carrier thingy in the hub itself? Getting over the initial stiction is remarkably difficult, getting easier once moving, but still noticeably tight. This doesn't sound right to me. The bearings rotated freely prior to inserting the hub carrier thingy? Any thoughts?
I already mentioned about the screw up on the front bearing grease seal...grrr...
I also forced myself to re-paint a load of the parts as I managed to spray red oxide primer around my entire garage by accident. Surely caused by my being tired late on Firday night. Very frustrating, but I've cleaned all the parts now.
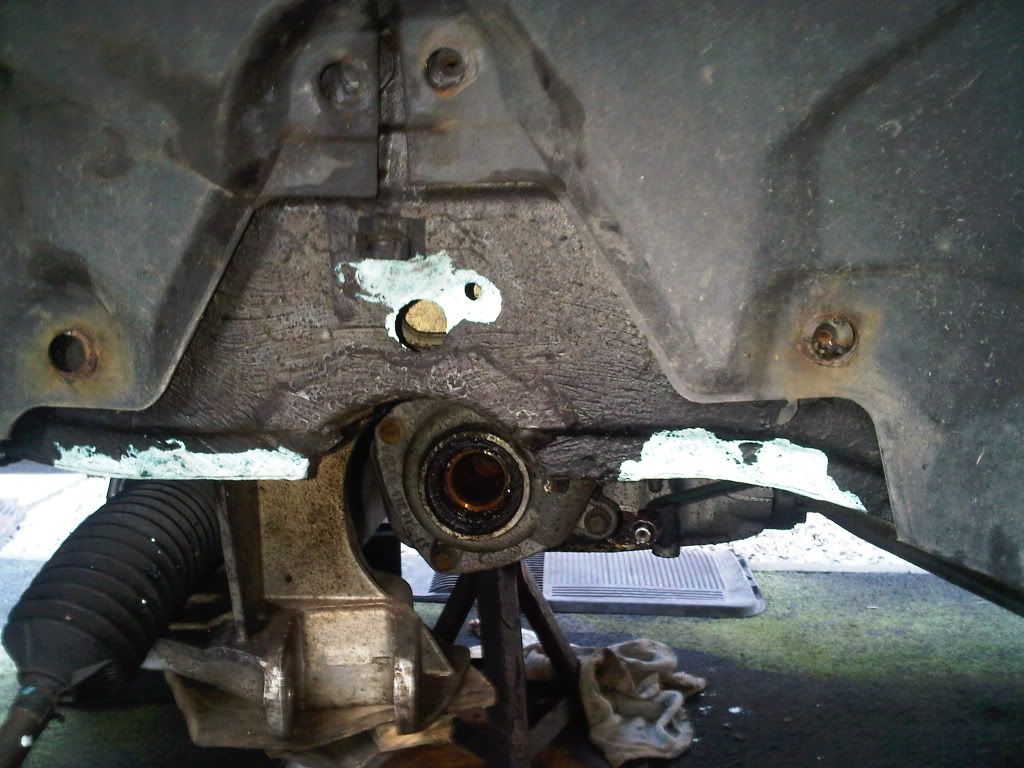
I also did a bit of rust proofing on the inner arches and strut towers. The car was not too bad actually.
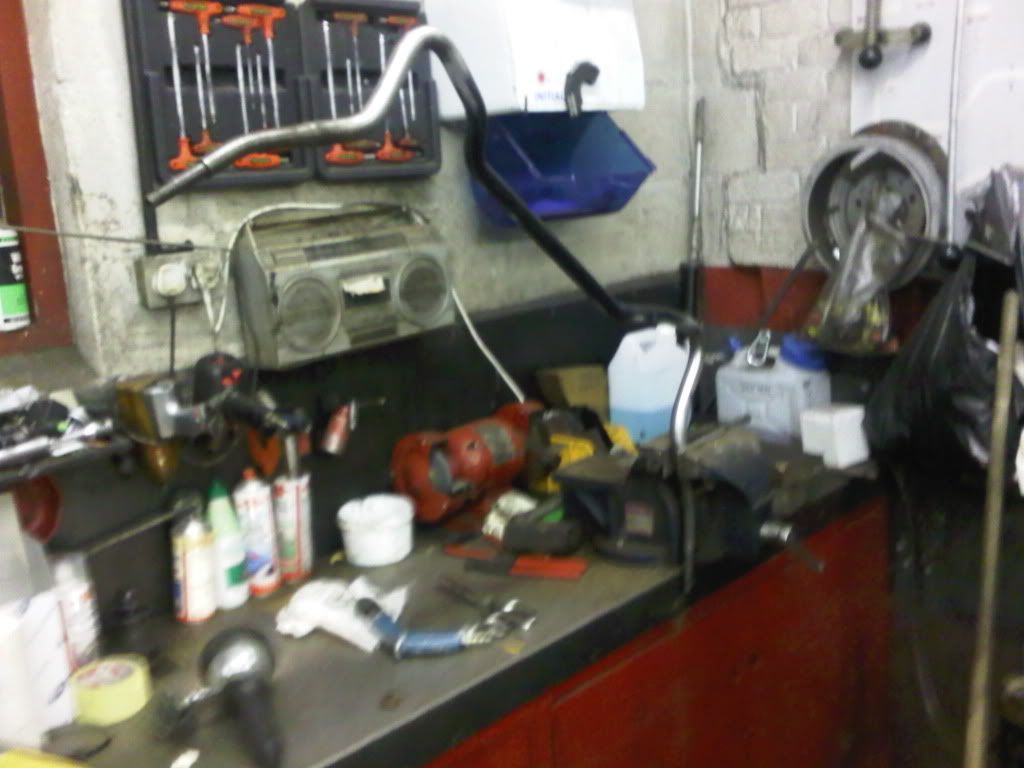
Here are the pics, third showing where the "magic" and general lack of skill takes place:
Your thoughts on those points raised would be much appreciated.
Regards,
Alex
Right, I've been working on the car since Thursday morning, but unfortunately have been struck by a couple of issues, hurdles and hinderances that have hampered my progress (mostly the car's fault, but a little bit my fault).
Thursday saw my applying all of the primer coats and all of the gloss black top coats. I went for VHT black on the hub carrier thingy's as I estimated they would get very hot what with having to carry the brake disc. It's on the hob in the picture below in order to heat it up prior to spraying (the first time I did it it all cracked because it was too cold two weeks back). I also used the VHT paint on the inboard end of the drive shaft for similar reasons although maybe it will never get hot enough? Similar idea over the hob prior to spraying.
I had to touch up lots of the new Ford parts that I had purchased. The new LHS front spring had an unpainted line where it had clearly been hung from whilst being powder coated. The new strut spring tops were scratched and dented so I sprayed these also. Ah well...
I also removed the front brake lines to flexible hose bracket for a clean up. Tried to source new from Ford, but they are no longer available. So they have gone to my local plating firm to be restored. The rust has got inbetween the two plates and started forcing them apart, so I've ask them to remove the rust in the acid and then braze the parts back together prior to re-plating. See picture below. We'll wait and see how they come out...
Friday saw the sub-assembly of both front struts, a nice milestone. These have subsequently been fitted to the car - hand tight.
I tried to fit the poly-bushed front lower track control arms, but found that one side inner bush housing was three mm wider than the other. Therefore, with the polybushes, it does not fit in the car. I thought about hacksawing some material from the bushes, but if I do this I'm affecting the overall behaviour of the bush when compared side to side. I think I'm going to take it to a local firm to mill off 1.5mm of the material from either side. This lower track control arm must be a non-OEM item as the castings are slightly different to the other three items that I have around me.
I've also fully sub-assembled one hub with the new bearings, bar calliper. However, it is very, very tight when turning the hub carrier thingy in the hub itself? Getting over the initial stiction is remarkably difficult, getting easier once moving, but still noticeably tight. This doesn't sound right to me. The bearings rotated freely prior to inserting the hub carrier thingy? Any thoughts?
I already mentioned about the screw up on the front bearing grease seal...grrr...
I also forced myself to re-paint a load of the parts as I managed to spray red oxide primer around my entire garage by accident. Surely caused by my being tired late on Firday night. Very frustrating, but I've cleaned all the parts now.
I also did a bit of rust proofing on the inner arches and strut towers. The car was not too bad actually.
Here are the pics, third showing where the "magic" and general lack of skill takes place:
Your thoughts on those points raised would be much appreciated.
Regards,
Alex
Last edited by redzuki1; 21-03-2010 at 11:19 PM.
05-05-2010, 09:19 PM
#23
Wahay!! I've lost my Virginity!!
Thread Starter
Join Date: Jun 2009
Location: Crewe
Posts: 84
Likes: 0
Received 0 Likes
on
0 Posts
Made some more progress, but require the following prior to getting the front suspension on the car:
I need 1x mint front track control arm outer ball joint rubber seal, with spring clips?
Potentially lots of work for little gain I appreciate, but I'm in dire need.
Price and postage to Crewe area?
Thanks,
Alex
I need 1x mint front track control arm outer ball joint rubber seal, with spring clips?
Potentially lots of work for little gain I appreciate, but I'm in dire need.
Price and postage to Crewe area?
Thanks,
Alex
16-05-2010, 03:18 PM
#24
Wahay!! I've lost my Virginity!!
Thread Starter
Join Date: Jun 2009
Location: Crewe
Posts: 84
Likes: 0
Received 0 Likes
on
0 Posts
Sorted the ball joint gaiter issues - more on that later as well as pictures of my current status.
Anybody able to help on the following:
The Haynes manual for non-Cosworth models describes the following:
Lower arm-to-hub carrier balljoint nut: 65 to 85NM/48 to 63lbft.
Lower arm inner pivot bolt: Stage 1 ("clamping" torque) 45Nm/33lbft, Loosen fully, Stage 2 ("snug" torque) 15Nm/11lbft, Stage 3 Tighten through a further 90deg.
Can anybody confirm as to whether this correlates to Cosworth models?
Thanks,
Alex
16-05-2010, 03:33 PM
#25
Wahay!! I've lost my Virginity!!
Thread Starter
Join Date: Jun 2009
Location: Crewe
Posts: 84
Likes: 0
Received 0 Likes
on
0 Posts

Thread
Thread Starter
Forum
Replies
Last Post
3dr cossie
Non Ford parts & other stuff for sale
11
21-12-2015 03:38 PM
3dr cossie
Ford RS Cosworth Parts for Sale
21
20-11-2015 05:00 PM