Mk6 JWRC fiesta cosworth
 18-03-2012, 02:36 AM
#2241
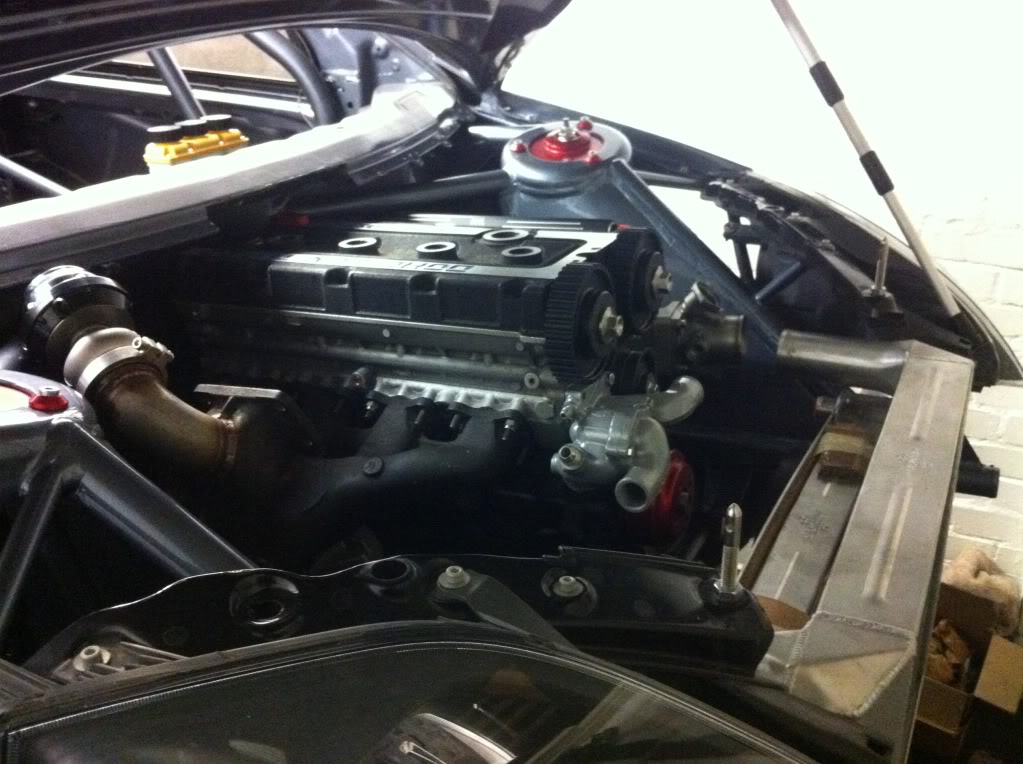
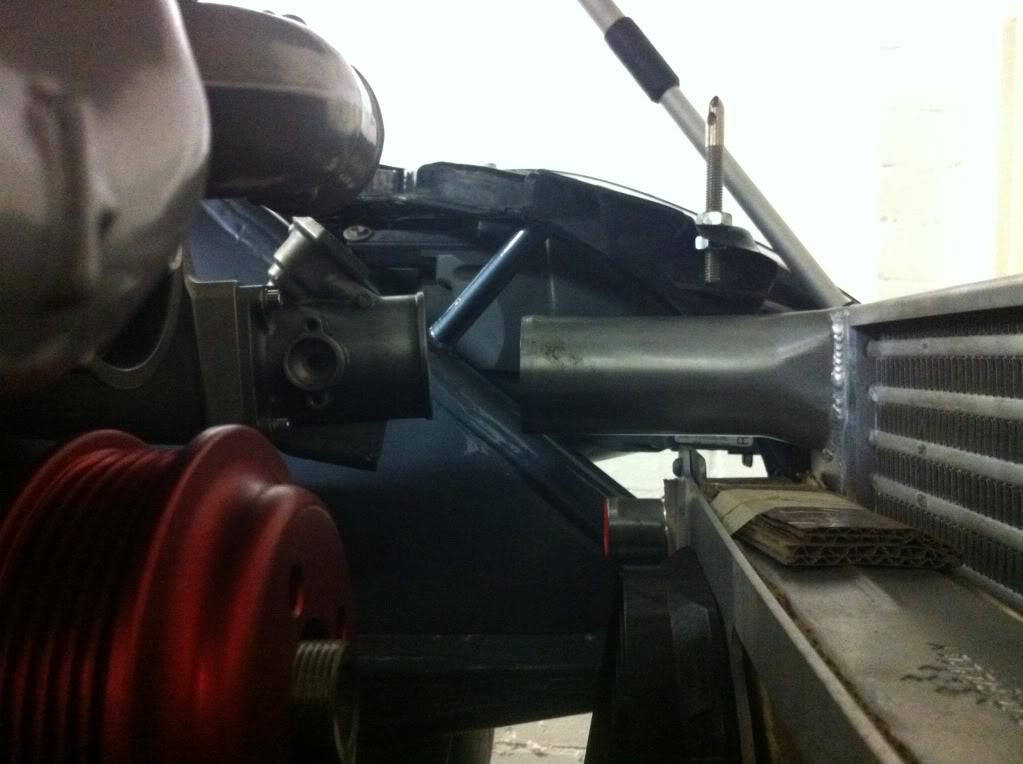
Quickly bolted the tb back on to see how it lines up with the cooler now the cooler has been lowered a little, i think it may kink so will have to fit a piece of hose and see, easy enough to sort if it does, and if i end up dropping the engine 5mm it will be fine
Also after last weeks dramas ruining a new -10 fitting due to the thread on 1 of the fuel tank outlets being damaged i bought a -10 split die to repair it.
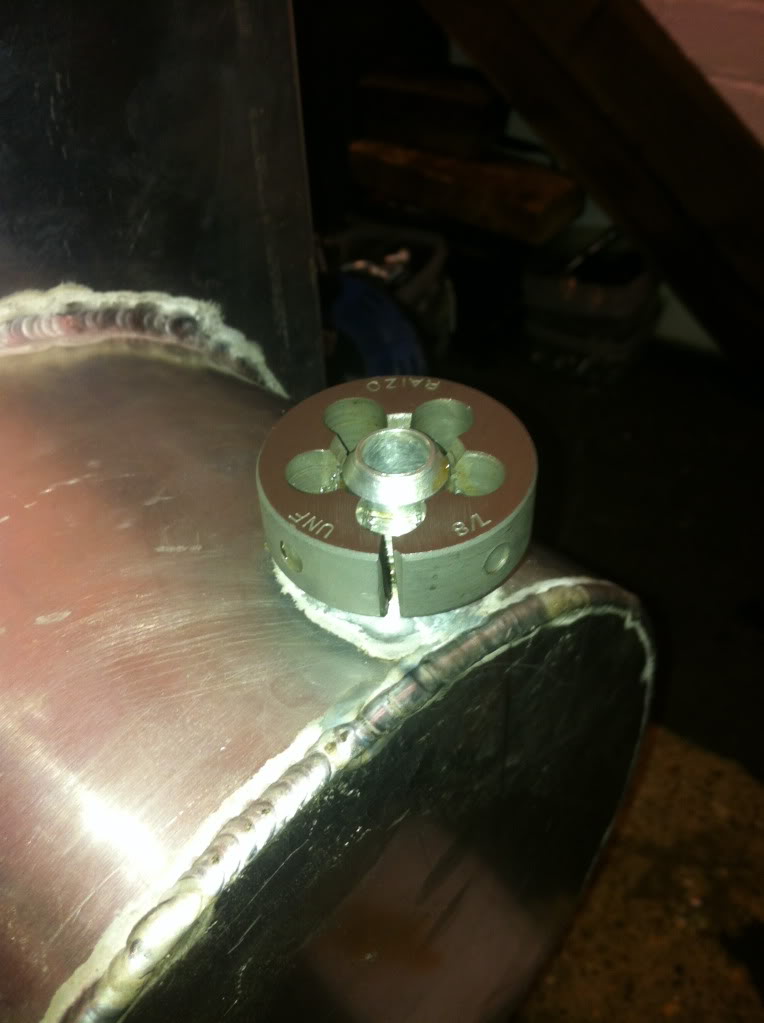
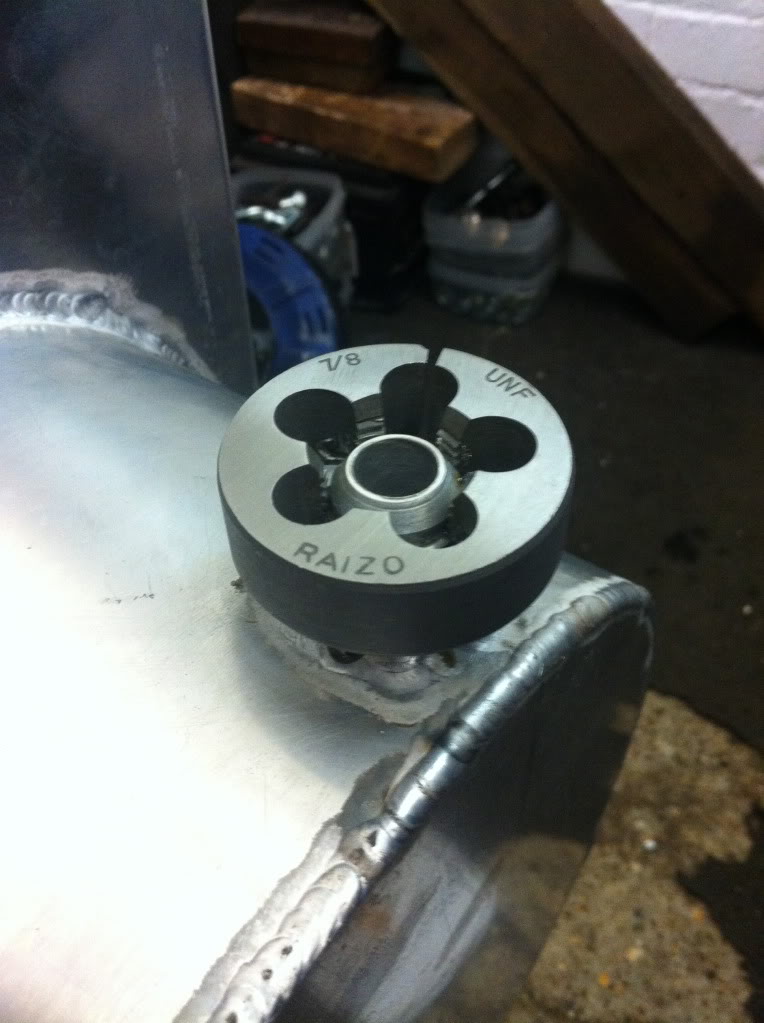
Lucky enough it done the trick and the new replacement fitting screwed straight on

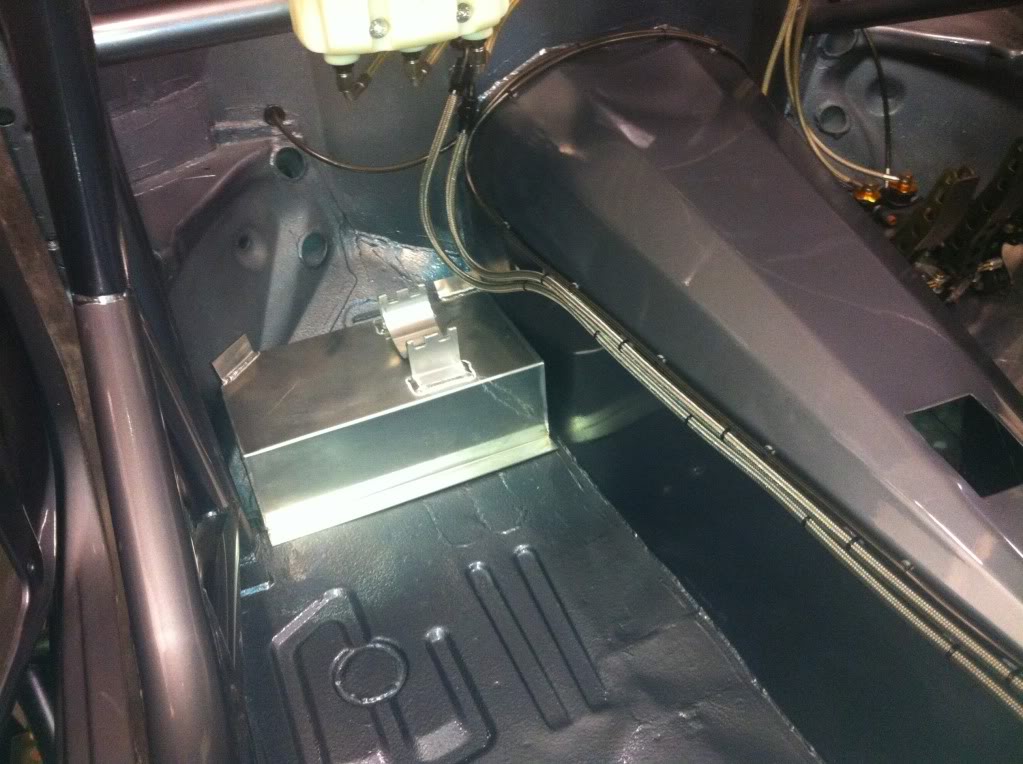
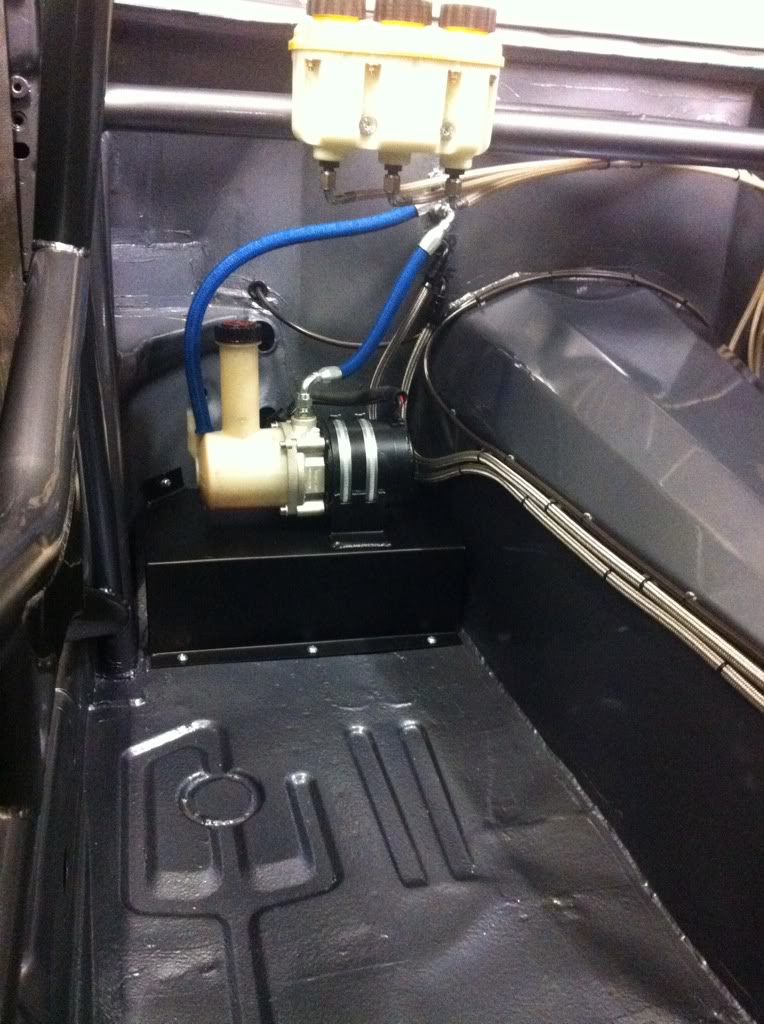
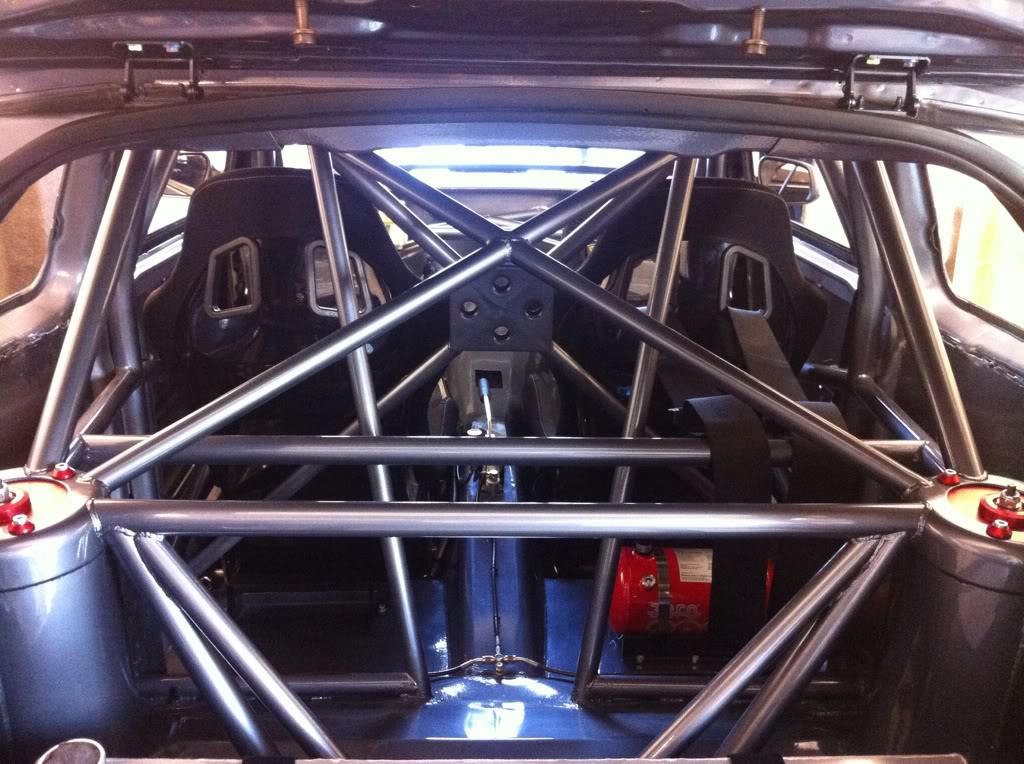
So with that sorted and a load of fittings and hose to hand i started to make up the fuel lines on the rear end and the inside of the car
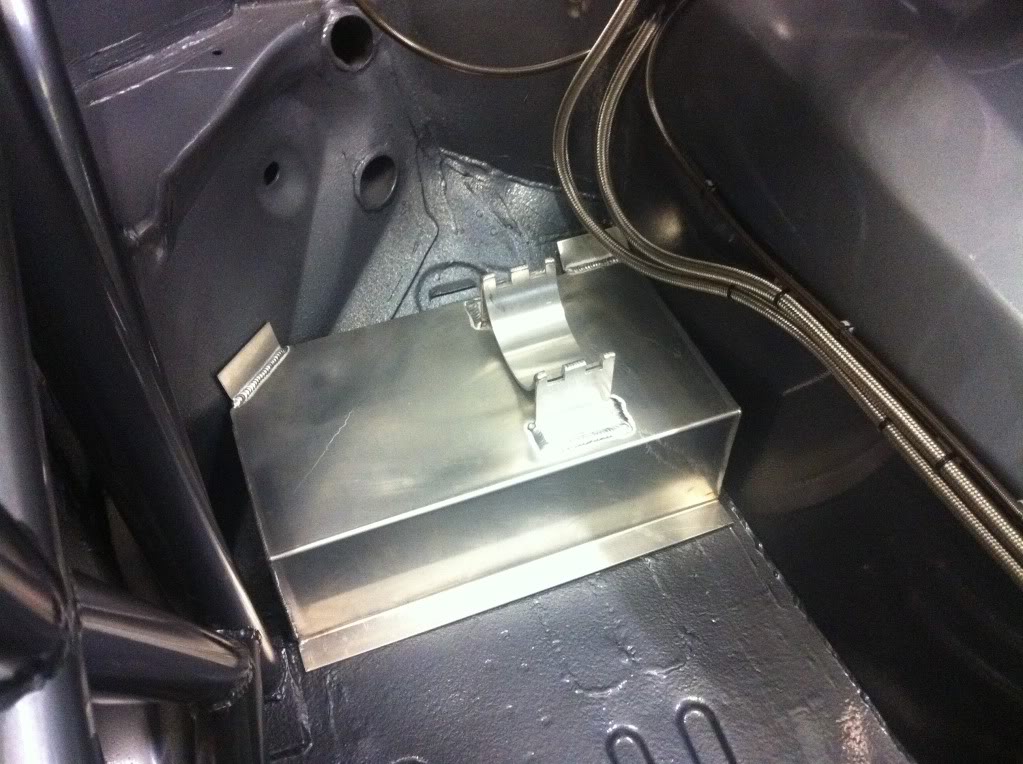
-10 tank to pump lines
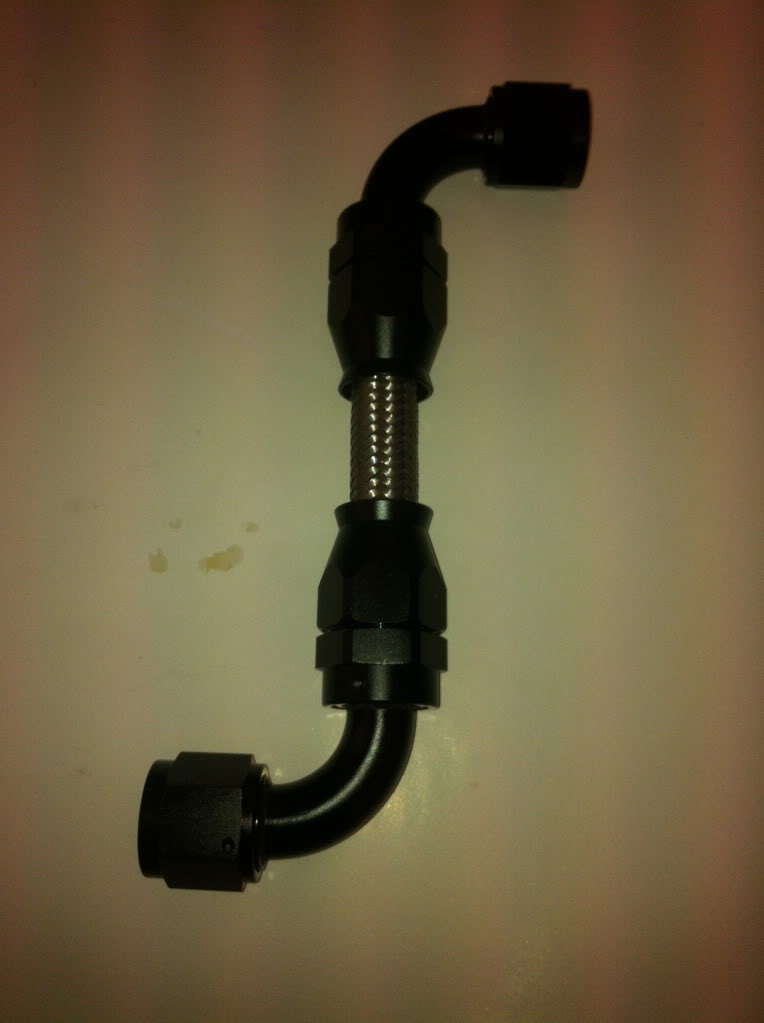
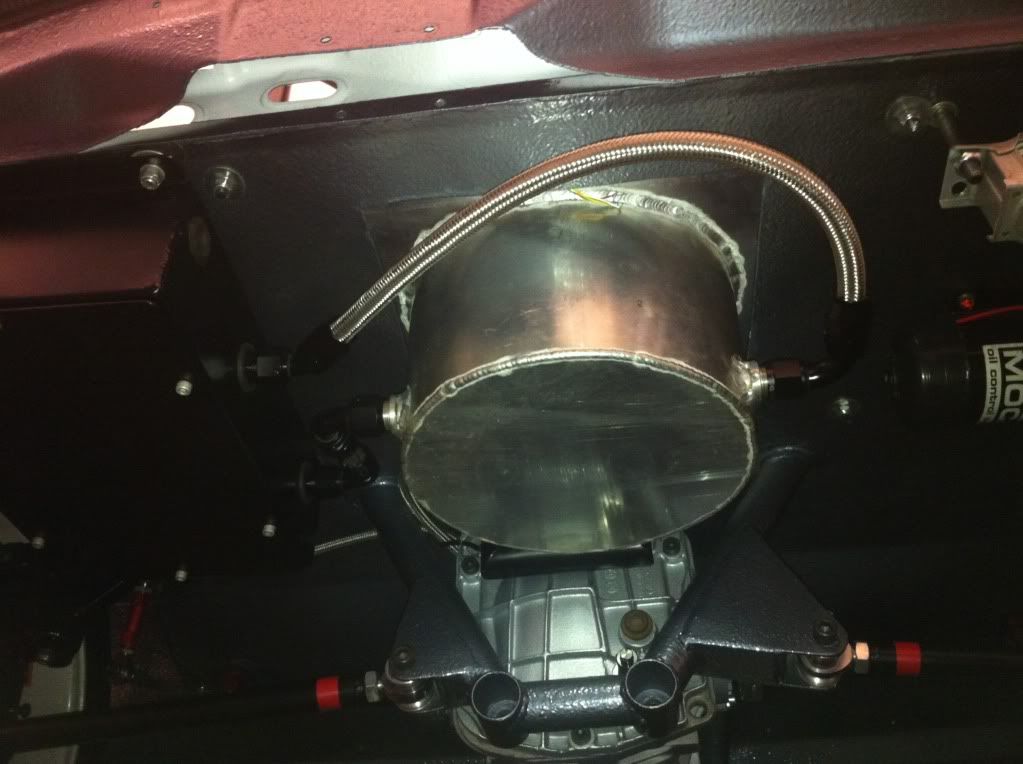
_6 pump/filter box to inner car lines all made and cable tied in place
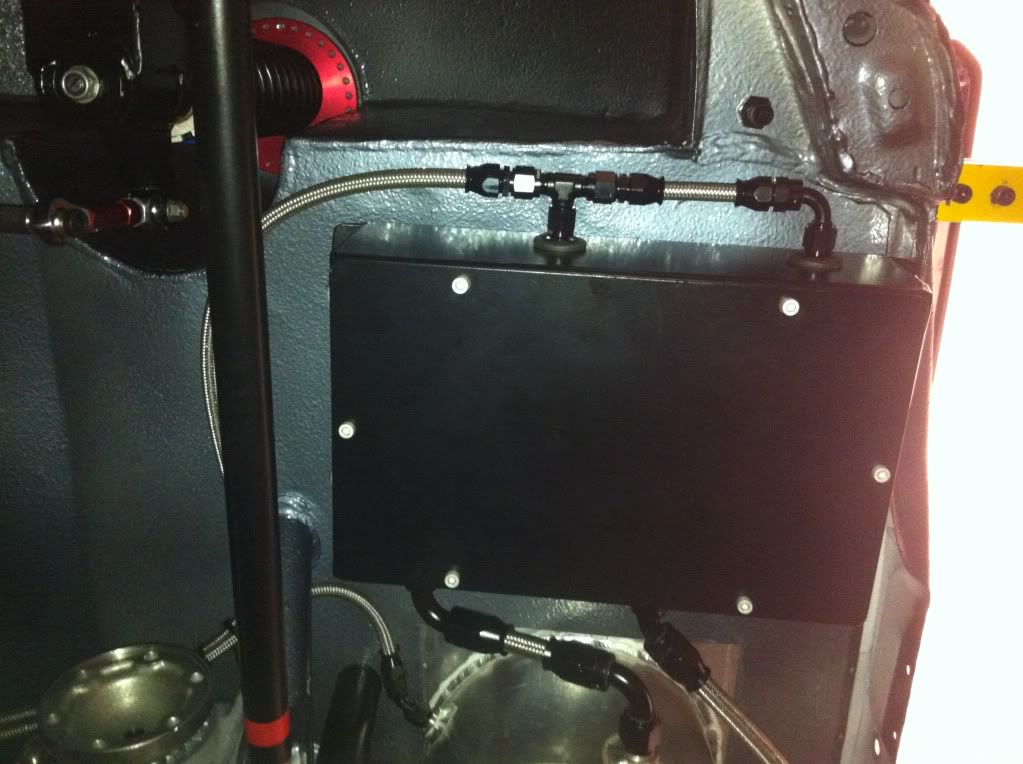
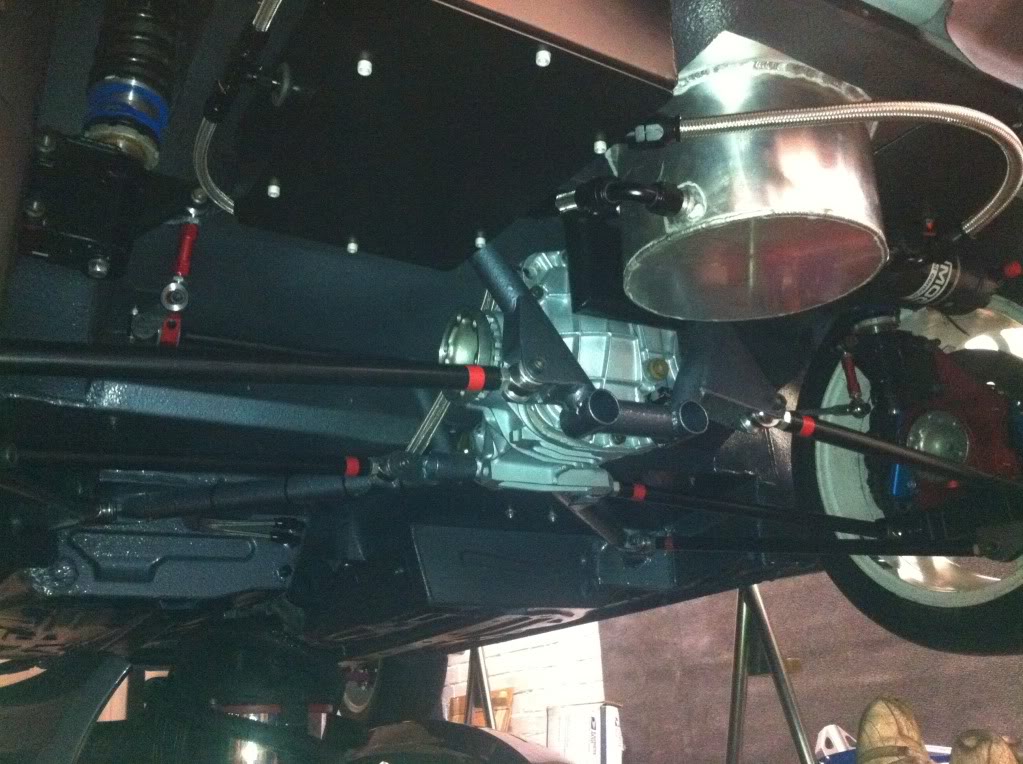
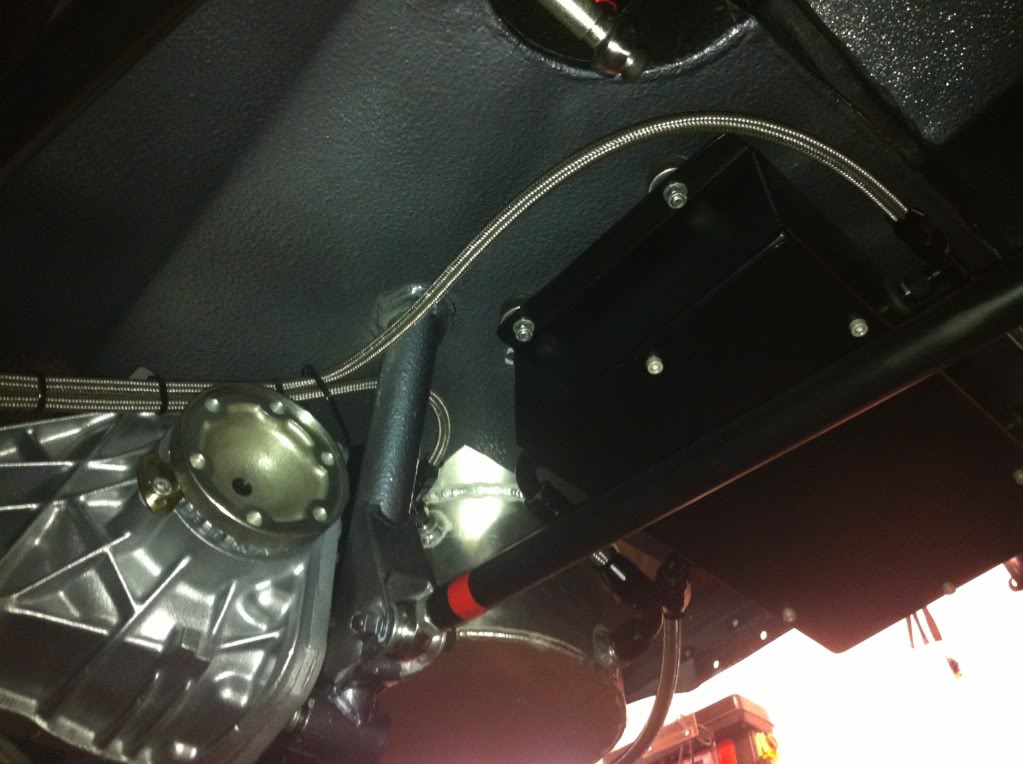
Then it was feed and return that run inside the car, these were secured the same as the brake lines, with cable tie saddles riveted to the body every 150mm. so if needed they can be removed as often as i like without the hassles of a nut a bolt p-clip need 2 people to undo or a self tapping screw coming loose because it's been undone too many times
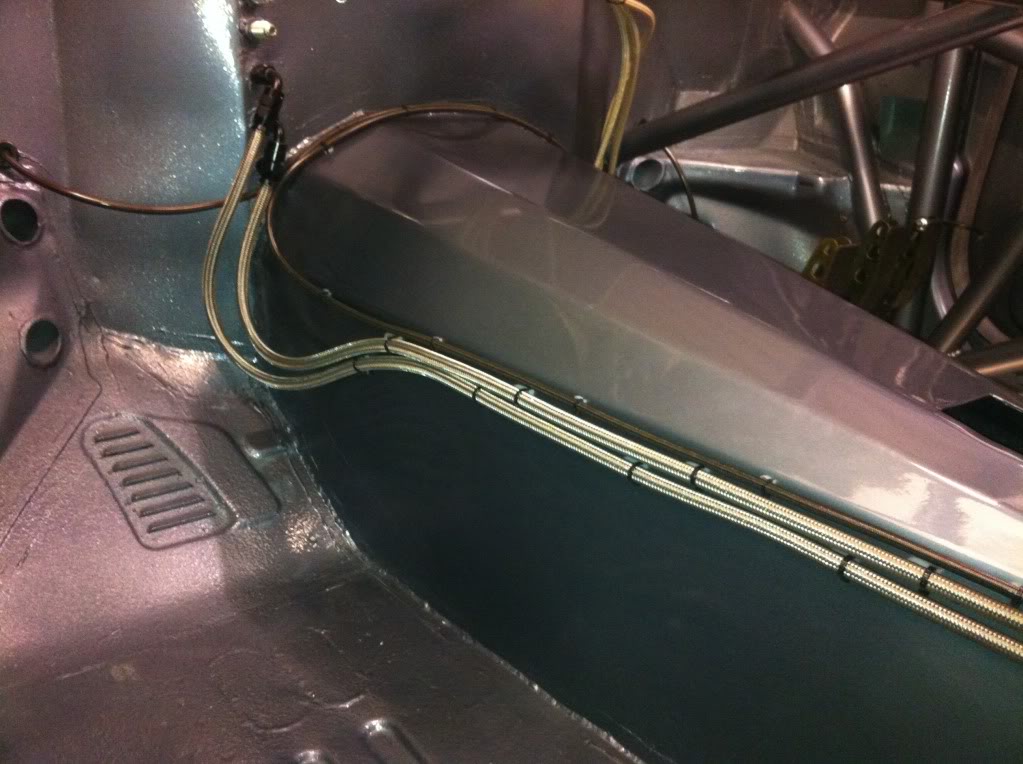
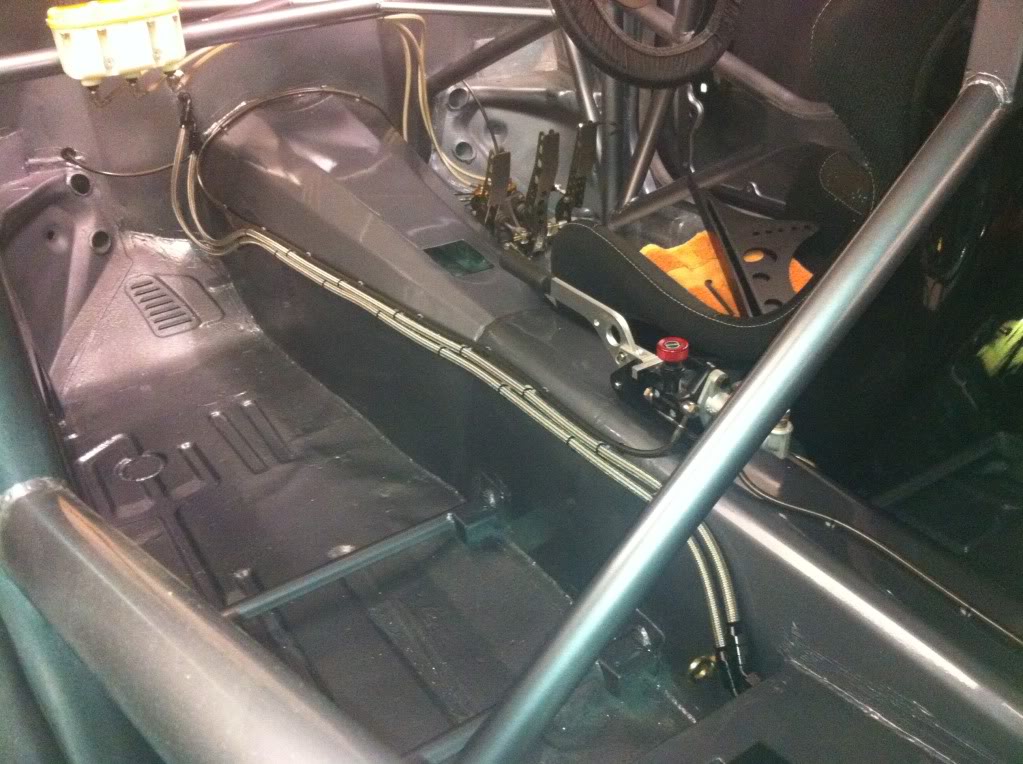
All looks nice and tidy i think
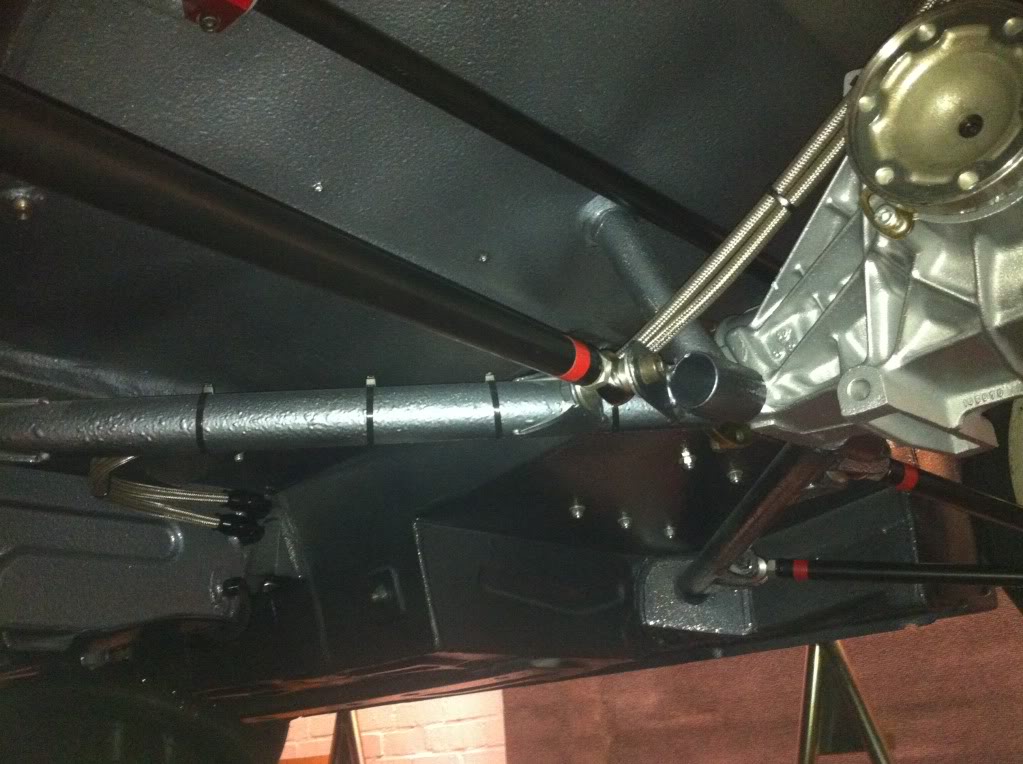
And lastly for today i gave the rear prop a quick lick of paint
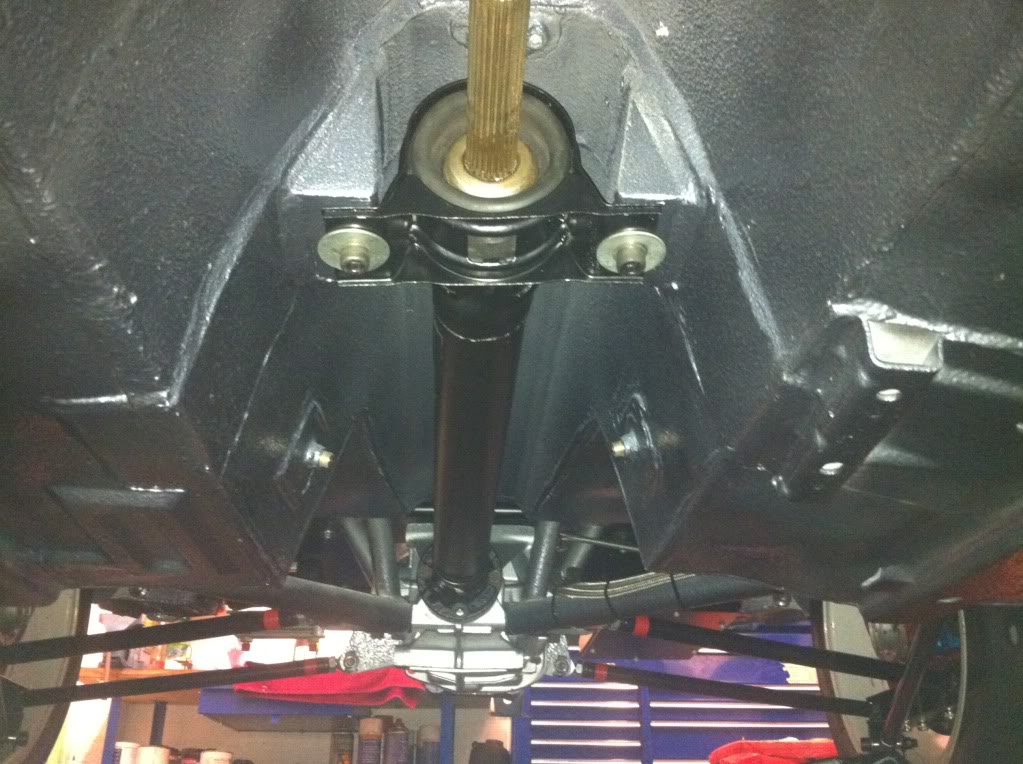
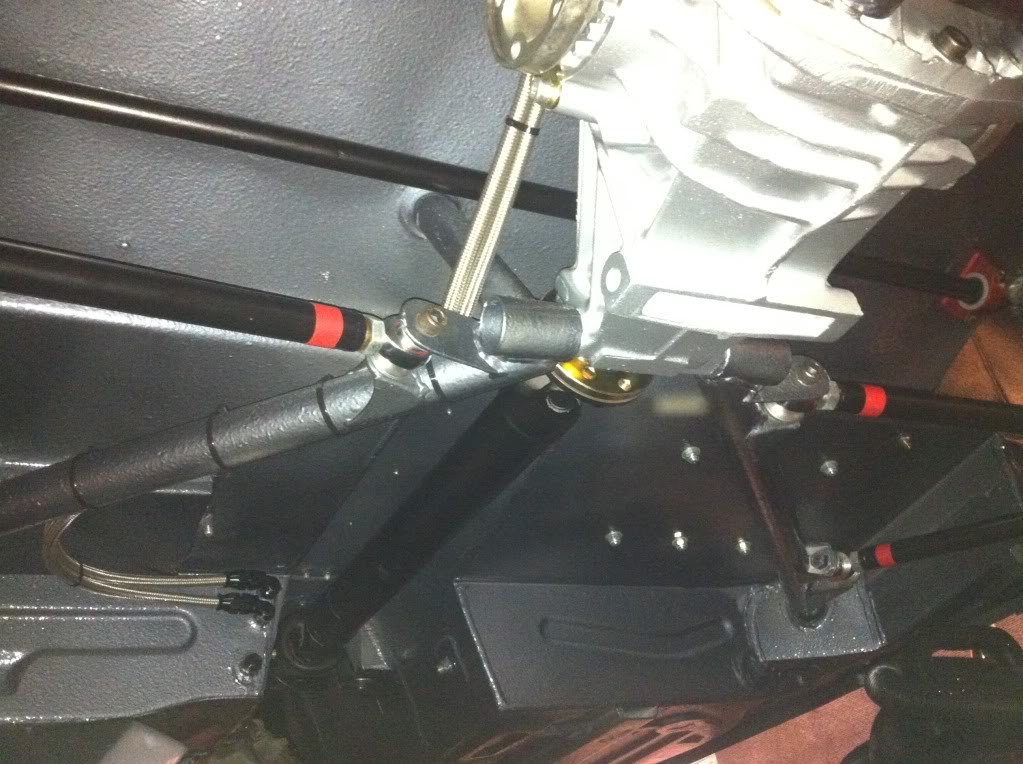
I was going to send it off for a rebuild, but it all seems good and i need to save money where possible to aid in finishing the build,
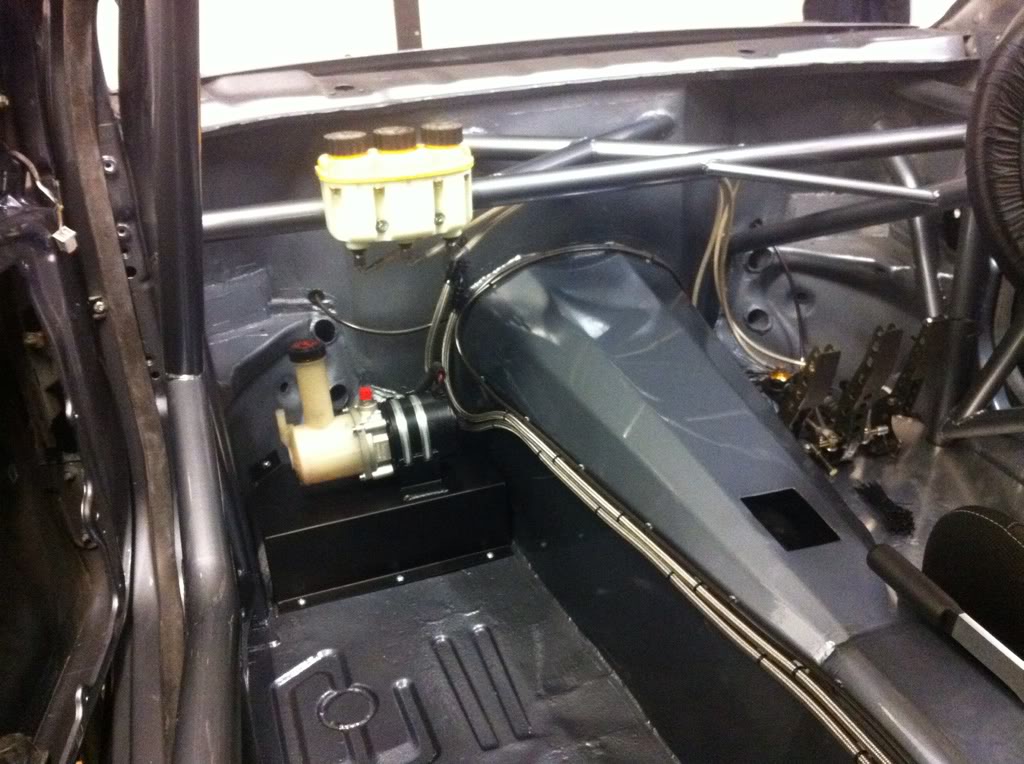
Tomorrow i am going to mount the power steering pump on it's custom alloy tray and make up the lines from inside bulkhead to pump, so more pics of that tomorrow
Also after last weeks dramas ruining a new -10 fitting due to the thread on 1 of the fuel tank outlets being damaged i bought a -10 split die to repair it.
Lucky enough it done the trick and the new replacement fitting screwed straight on
So with that sorted and a load of fittings and hose to hand i started to make up the fuel lines on the rear end and the inside of the car
-10 tank to pump lines
_6 pump/filter box to inner car lines all made and cable tied in place
Then it was feed and return that run inside the car, these were secured the same as the brake lines, with cable tie saddles riveted to the body every 150mm. so if needed they can be removed as often as i like without the hassles of a nut a bolt p-clip need 2 people to undo or a self tapping screw coming loose because it's been undone too many times
All looks nice and tidy i think
And lastly for today i gave the rear prop a quick lick of paint
I was going to send it off for a rebuild, but it all seems good and i need to save money where possible to aid in finishing the build,
Tomorrow i am going to mount the power steering pump on it's custom alloy tray and make up the lines from inside bulkhead to pump, so more pics of that tomorrow
 18-03-2012, 08:02 AM
#2242
Spanner monkey
Awesome, Glad you've kept all the cable ties saddles a uniform distance apart, if there's one thing that does my head in is mounts, cable ties or p clips just anywhere!!
Mark, If it's still a problem, you can mount the cam trigger disc on the front of the pully and make the bracket for the sensor come over the top of the belt!
Mark, If it's still a problem, you can mount the cam trigger disc on the front of the pully and make the bracket for the sensor come over the top of the belt!
18-03-2012, 10:08 AM
#2243
PassionFord Post Whore!!
Brilliant job as usual mark.
Has nobody offered you a job yet? Lol.
You got a link or info to the cam trigger that goes where the dizzy is? Sounds interesting.
Has nobody offered you a job yet? Lol.
You got a link or info to the cam trigger that goes where the dizzy is? Sounds interesting.
18-03-2012, 11:28 AM
#2244
looks good marc, one to thing to take into consideration witht he cam pulleys being close to the bonnet, is the that the belt will flap about a fair bit between the pulleys and could rub on the bonnet.
i think martin had a problem with that on his escort. i might be wrong tho.
if you can drop the engine 5mm it might make a massive difference.
good work tho chap, its looking more like a complete car every time you do stuff to it
i think martin had a problem with that on his escort. i might be wrong tho.
if you can drop the engine 5mm it might make a massive difference.
good work tho chap, its looking more like a complete car every time you do stuff to it

 18-03-2012, 06:49 PM
#2248
Awesome, Glad you've kept all the cable ties saddles a uniform distance apart, if there's one thing that does my head in is mounts, cable ties or p clips just anywhere!!
Mark, If it's still a problem, you can mount the cam trigger disc on the front of the pully and make the bracket for the sensor come over the top of the belt!
Mark, If it's still a problem, you can mount the cam trigger disc on the front of the pully and make the bracket for the sensor come over the top of the belt!

I had a look at a galaxy sensor today and think it will fit so i am going to order 1 and go from there, i really don't want 1 around the cam pulleys as there is no room and think it will be a bit unsightly
The cam sensor for dizzy area is still in development so will keep you informed, no pics as yet
looks good marc, one to thing to take into consideration witht he cam pulleys being close to the bonnet, is the that the belt will flap about a fair bit between the pulleys and could rub on the bonnet.
i think martin had a problem with that on his escort. i might be wrong tho.
if you can drop the engine 5mm it might make a massive difference.
good work tho chap, its looking more like a complete car every time you do stuff to it
i think martin had a problem with that on his escort. i might be wrong tho.
if you can drop the engine 5mm it might make a massive difference.
good work tho chap, its looking more like a complete car every time you do stuff to it
Thanks mate
18-03-2012, 07:01 PM
#2249
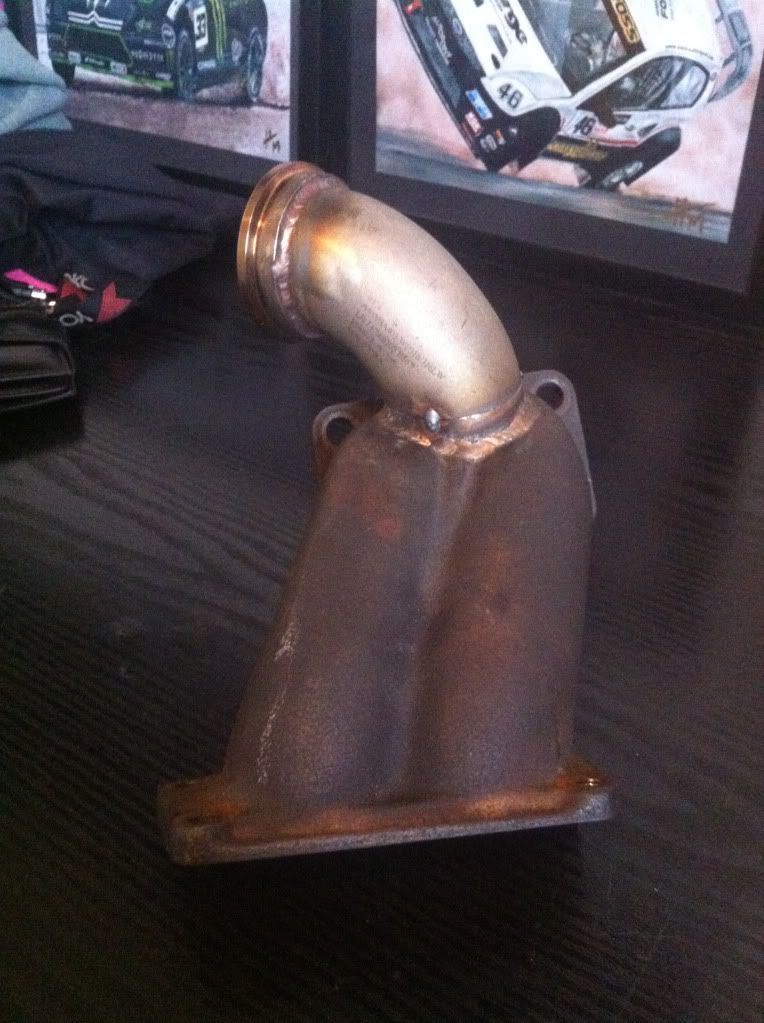
As the external wastegate hits the roll cage cross bar in the bay i had to cut and re angle the pipe so it clears everything, so out with the grinder again
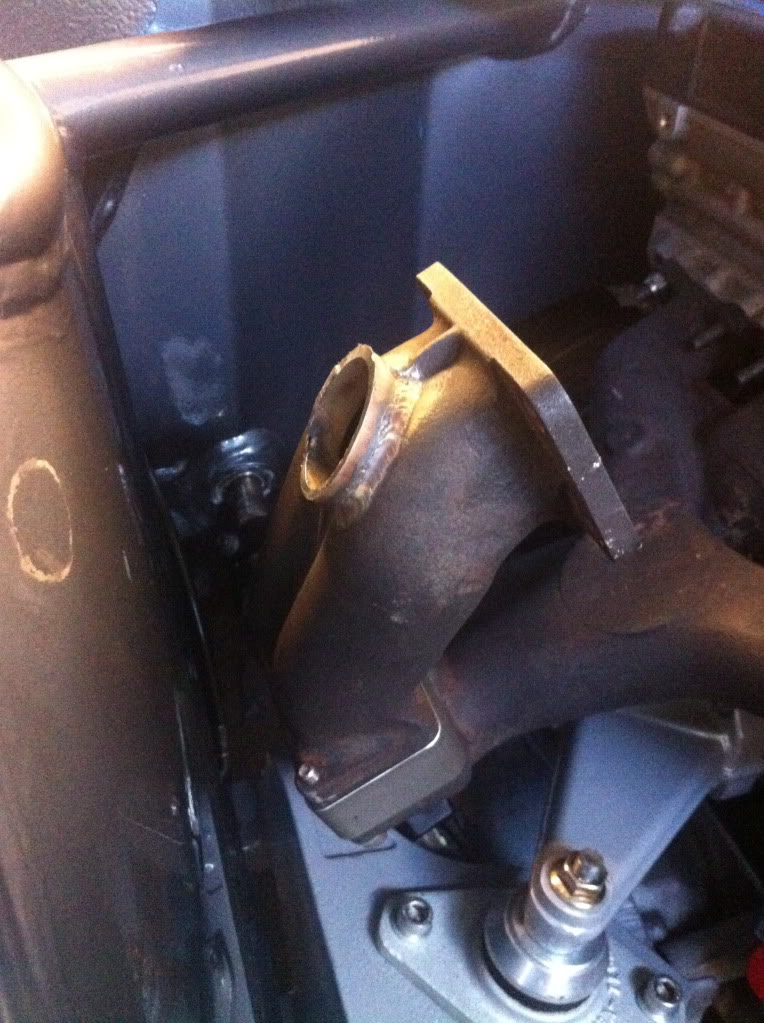
Worked out how far it needed to be rotated to clear and got the welder out and tacked it together
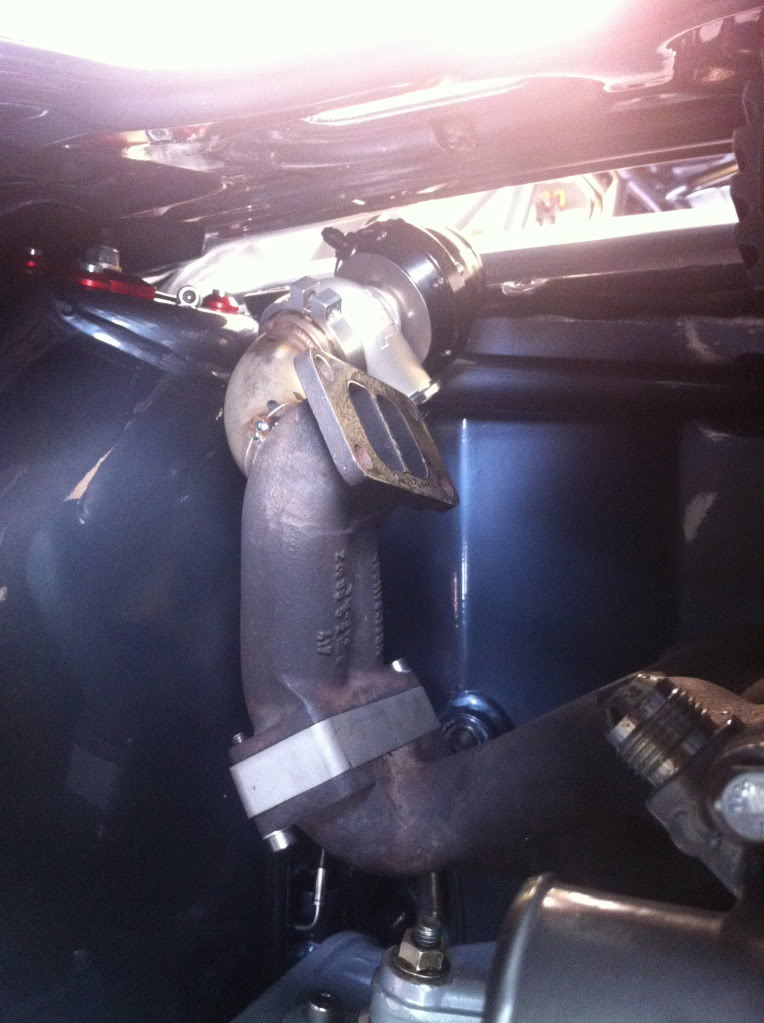
Now i can give it to my mate who can tig it properly and grind off my crappy tack lol
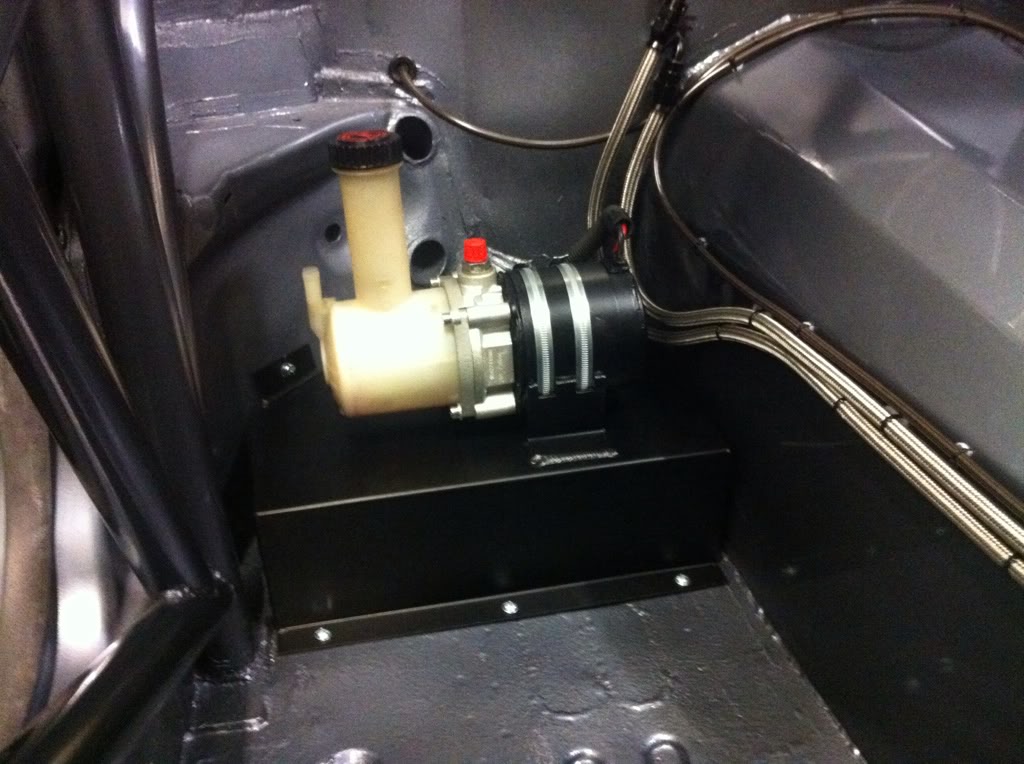
Only other thing i got done today was to drill the holes and fit the riv-nuts for the new alloy power steering pump holder
Pump will be secured on with 2 heavy duty jubilee clips, it will also get a lick of black paint for now and most likely black powder coat at a later date when a few other things are ready to be coated
Riv-nuts in place as i had needing 2 people to undo nut and bolts when it requires 1 person under the car and 1 inside, this way is easier and neater

That's all i got done today but every little helps as they say lol
Worked out how far it needed to be rotated to clear and got the welder out and tacked it together
Now i can give it to my mate who can tig it properly and grind off my crappy tack lol
Only other thing i got done today was to drill the holes and fit the riv-nuts for the new alloy power steering pump holder
Pump will be secured on with 2 heavy duty jubilee clips, it will also get a lick of black paint for now and most likely black powder coat at a later date when a few other things are ready to be coated
Riv-nuts in place as i had needing 2 people to undo nut and bolts when it requires 1 person under the car and 1 inside, this way is easier and neater
That's all i got done today but every little helps as they say lol

 every bit done is another step in the right direction .
 20-03-2012, 11:08 AM
#2258
Borg Warner EFR Equipped!

Join Date: Apr 2005
Location: In the unit, building a 450bhp Time Attack Focus!
Posts: 5,810
Likes: 0
Received 2 Likes
on
2 Posts
I think i've got a spare high pressure 45 degree -6 power steering hose fitting if you want me to post it down for you to try Marc?
20-03-2012, 05:54 PM
#2261
I like this mate one thing i wont to ask you is how are you going to get return oil pipe on ???
could you not just move the pipes from the top fittings to the bottom ones if there all AN-6 ??
could you not just move the pipes from the top fittings to the bottom ones if there all AN-6 ??
Last edited by COLEYST200; 20-03-2012 at 05:59 PM.
 20-03-2012, 06:37 PM
#2263
Just like normal rivets really, except it only goes into one sheet.
drill hole, put rivnut in the tool, insert in hole, tighten to correct setting, job done.
Some tools work just like a normal rivet gun and you just squeeze. Some are rotating in action so you can more precisely set the tightness of the rivnut in the sheet. Extra care is needed with rivnuts as too loose and it will rotate in the hole.
I bought one of these:
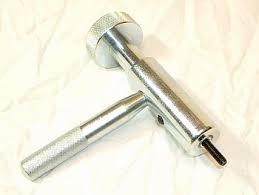
works very well and you can in theory use a torque wrench to ensure they all go on exactly the same if youre using loads of them.
drill hole, put rivnut in the tool, insert in hole, tighten to correct setting, job done.
Some tools work just like a normal rivet gun and you just squeeze. Some are rotating in action so you can more precisely set the tightness of the rivnut in the sheet. Extra care is needed with rivnuts as too loose and it will rotate in the hole.
I bought one of these:
works very well and you can in theory use a torque wrench to ensure they all go on exactly the same if youre using loads of them.
20-03-2012, 06:37 PM
#2264
10K+ Poster!!

Not sure what Marks uses but mine was quite expensive but it does do upto M12 which is useful.
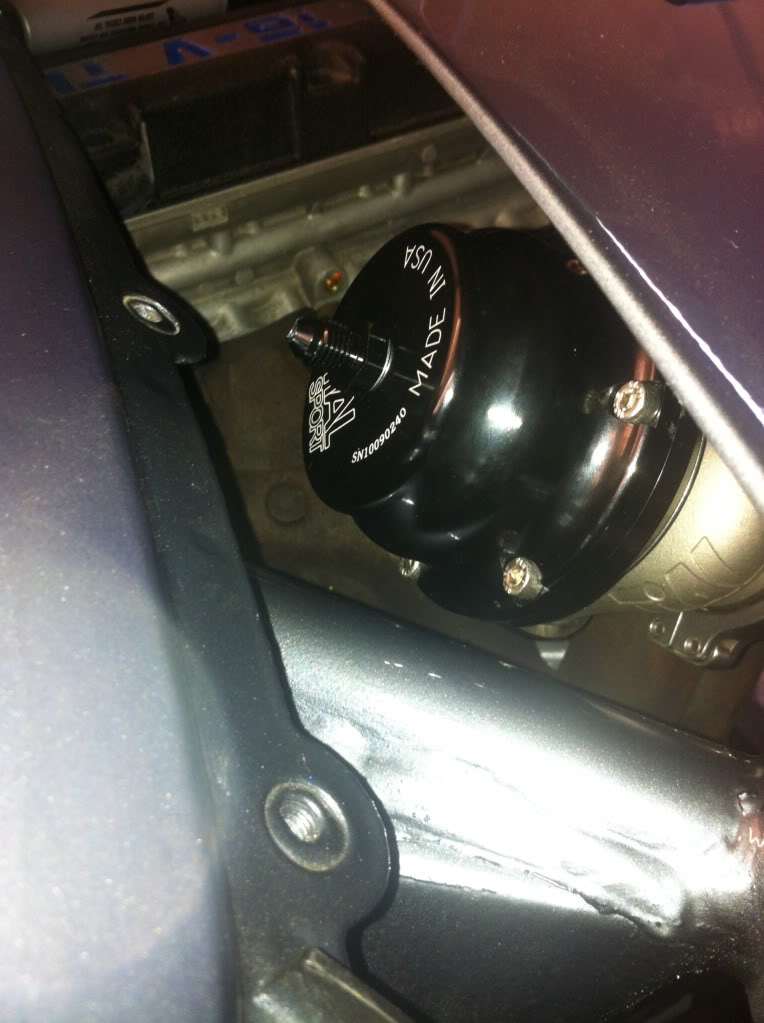
Looking really good now Marc, have you run that pump up yet ? I did one years ago and it was louder than a 044
 20-03-2012, 09:48 PM
#2268
Just like normal rivets really, except it only goes into one sheet.
drill hole, put rivnut in the tool, insert in hole, tighten to correct setting, job done.
Some tools work just like a normal rivet gun and you just squeeze. Some are rotating in action so you can more precisely set the tightness of the rivnut in the sheet. Extra care is needed with rivnuts as too loose and it will rotate in the hole.
I bought one of these:
works very well and you can in theory use a torque wrench to ensure they all go on exactly the same if youre using loads of them.
You need a tool that compresses the nut into the panel as well.
Not sure what Marks uses but mine was quite expensive but it does do upto M12 which is useful.
Looking really good now Marc, have you run that pump up yet ? I did one years ago and it was louder than a 044
Not sure what Marks uses but mine was quite expensive but it does do upto M12 which is useful.
Looking really good now Marc, have you run that pump up yet ? I did one years ago and it was louder than a 044
Yes mate i ran the pump up a while back to check my home made Aeroquip fittings etc all worked ok and yes the pump makes noise but the car will be noisier so no drama there, Martin used the same in his escort and did not find it an issue so should be fine
Just in case, that's what peltor intercoms are for

Cheers mate
20-03-2012, 09:50 PM
#2269
(second 1 down)
http://www.thinkauto.com/acatalog/On...tric__157.html
Congrats on your recent outing mate, very well done
 20-03-2012, 09:53 PM
#2270
Get it from think automotive Luca, part number is FBM2608
(second 1 down)
http://www.thinkauto.com/acatalog/On...tric__157.html
Congrats on your recent outing mate, very well done
(second 1 down)
http://www.thinkauto.com/acatalog/On...tric__157.html
Congrats on your recent outing mate, very well done
Thankyou too on the congrats, one thing I shall ask what pedal box you using in this. ?
 25-03-2012, 03:55 PM
#2274
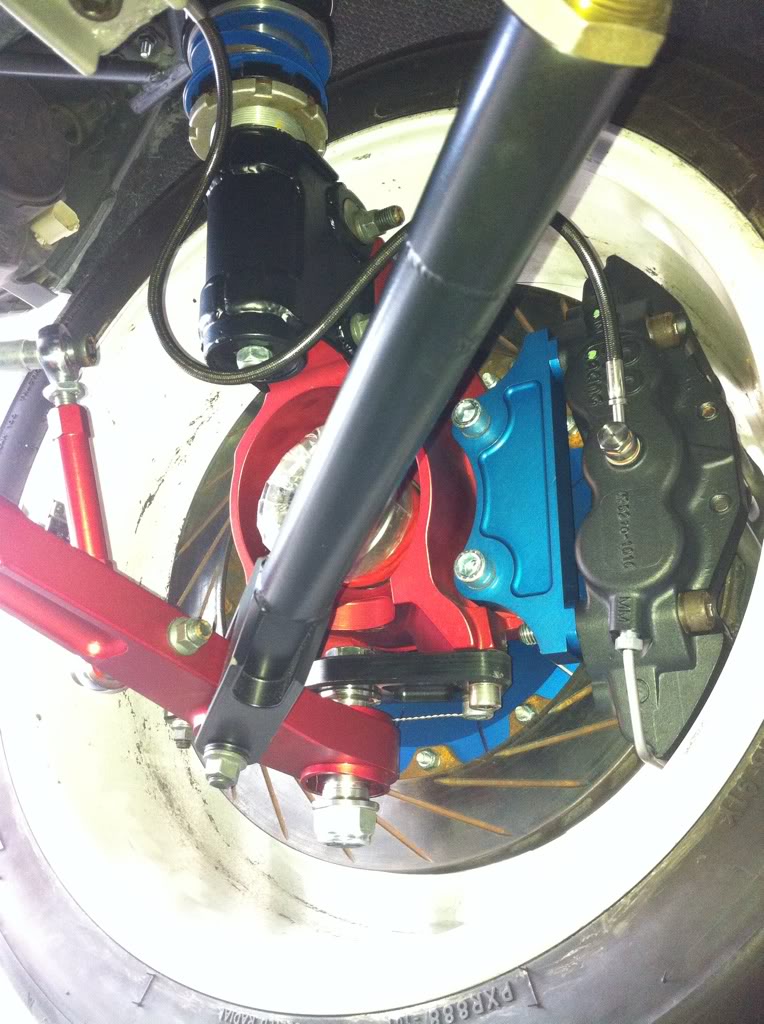
Not done much this last week/weekend but I got my brake line though from Andrew
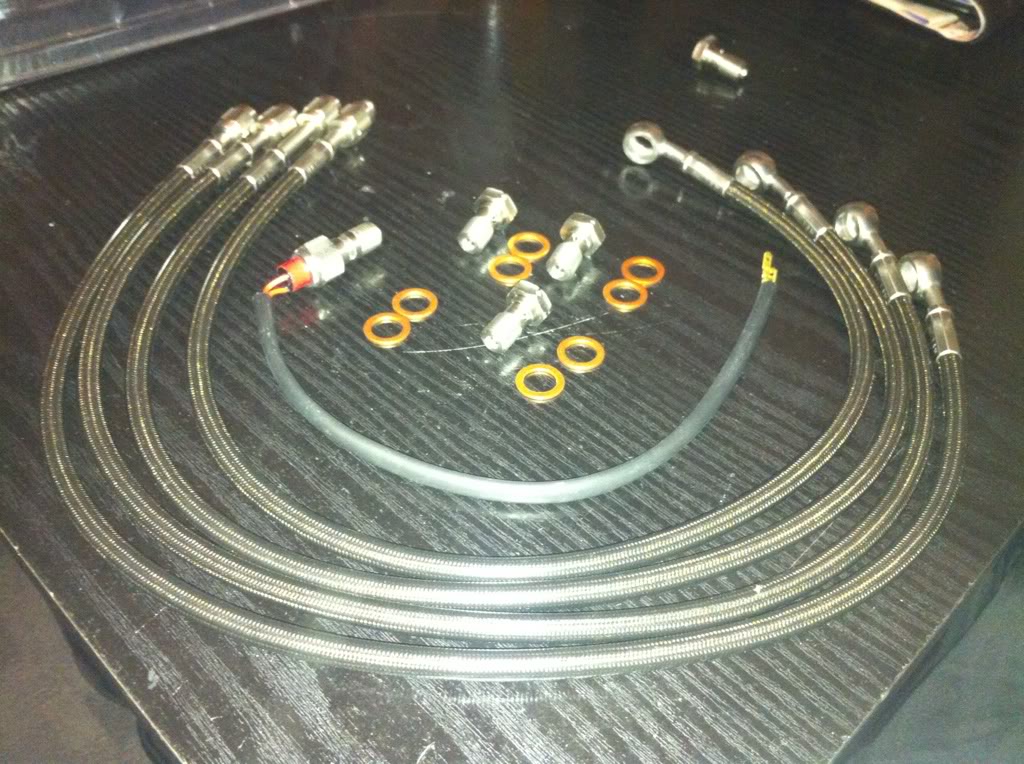
Got them fitted
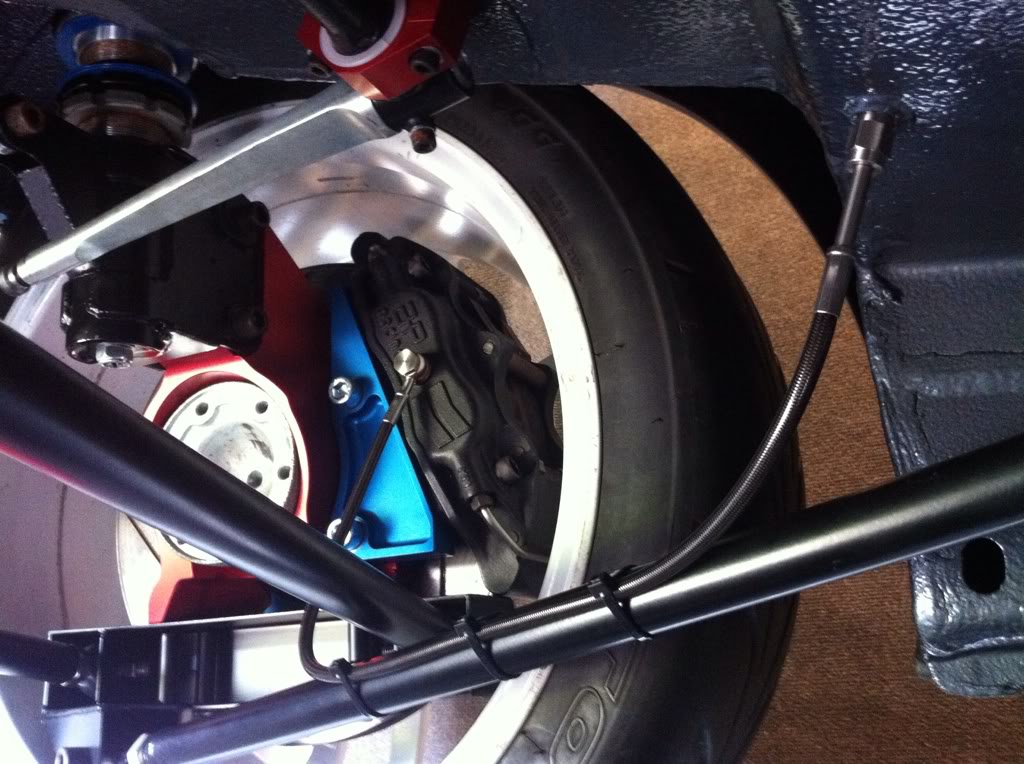
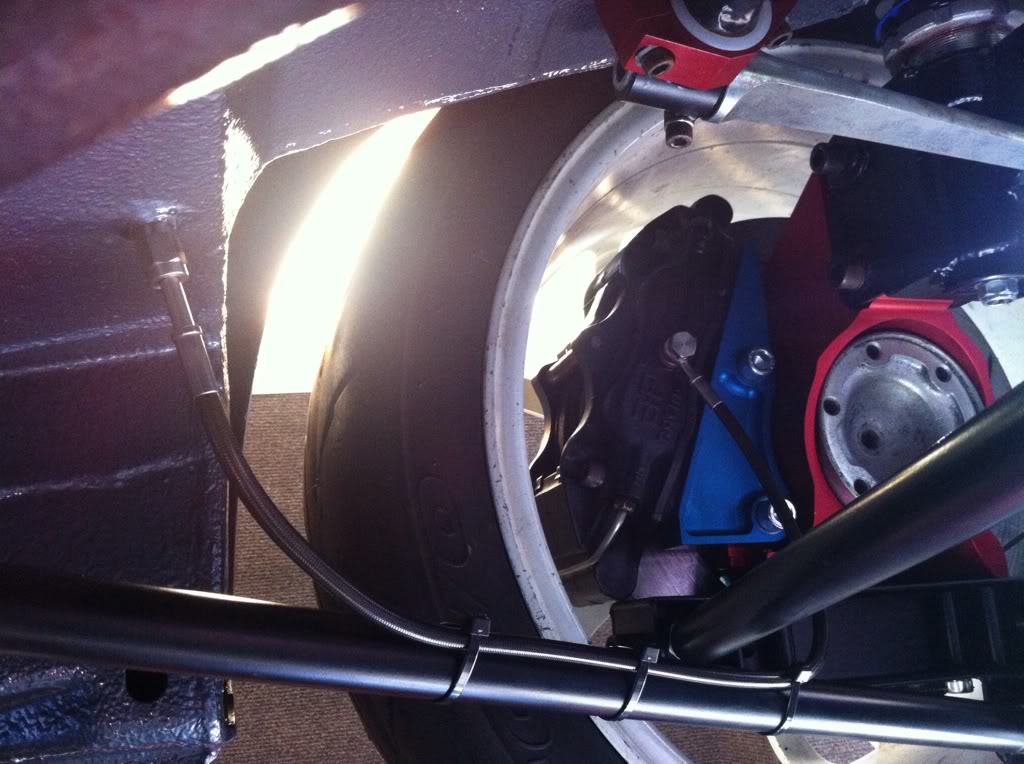
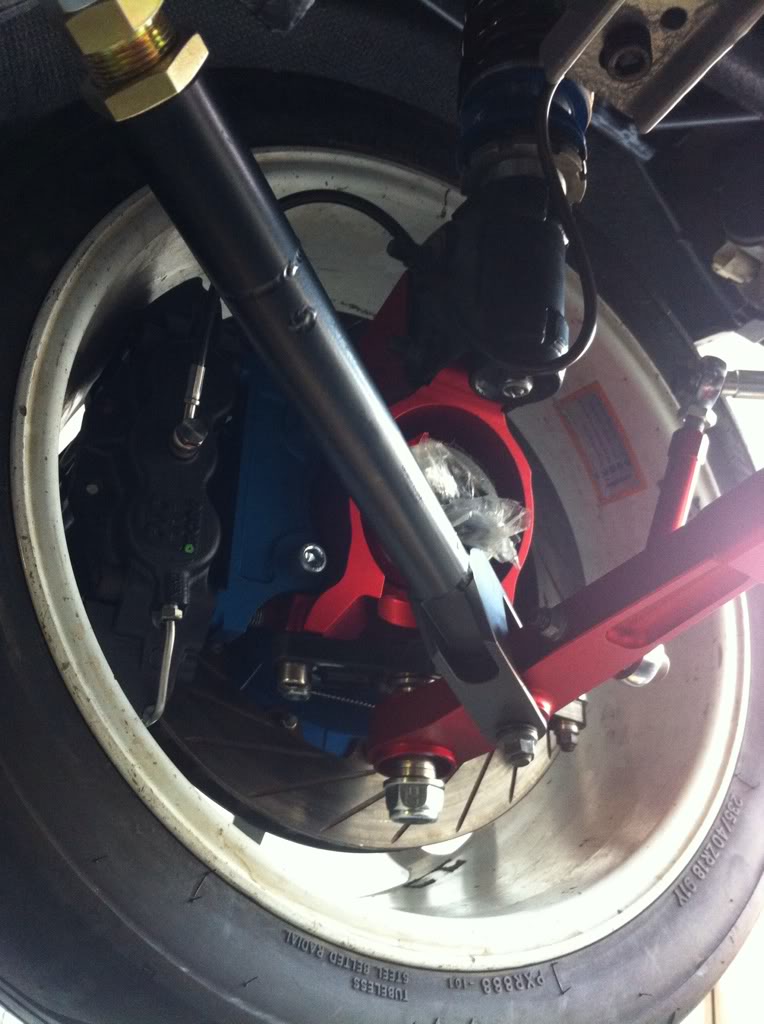
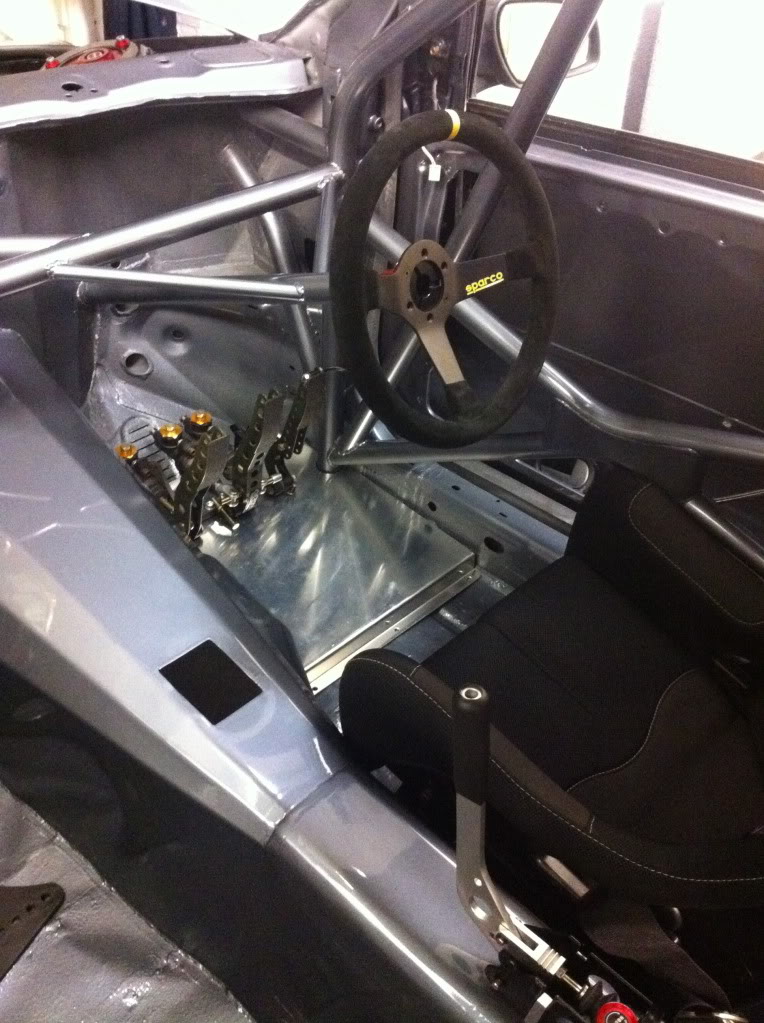
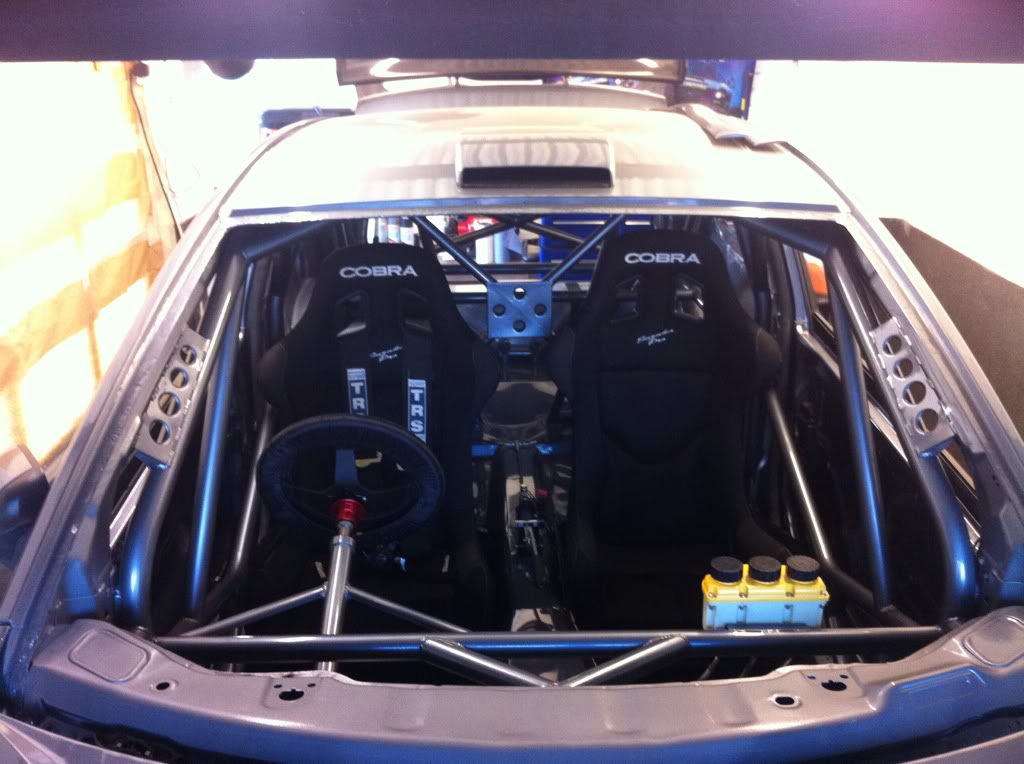
Only other thing I managed to do was bolt in the passenger seat to check it cleared the newly run fuel and brake lines, all is ok so that's a relief
Not a great deal as spent out on new injectors for my daily runner mondeo tdci so that's eaten some funds this month
Got them fitted
Only other thing I managed to do was bolt in the passenger seat to check it cleared the newly run fuel and brake lines, all is ok so that's a relief
Not a great deal as spent out on new injectors for my daily runner mondeo tdci so that's eaten some funds this month