Puma Cosworth restoration/bodge job fix!
 22-04-2009, 11:49 PM
#1
Well i decided to do a thread now ive started to mess around with the car. Theres a few things need doing, mostly from bits rushed at the end of the build and i want to tidy things up and tweak a bit.
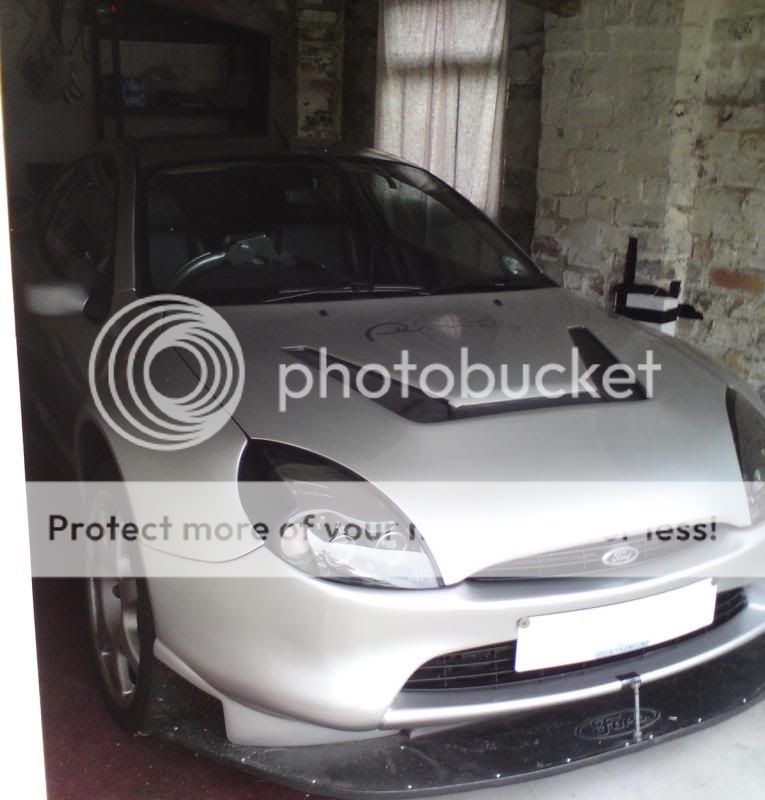
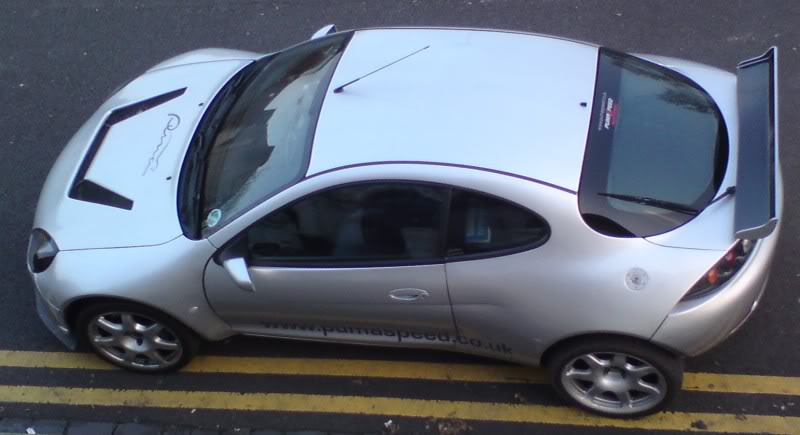
Here she is resting in her nice dry garage!
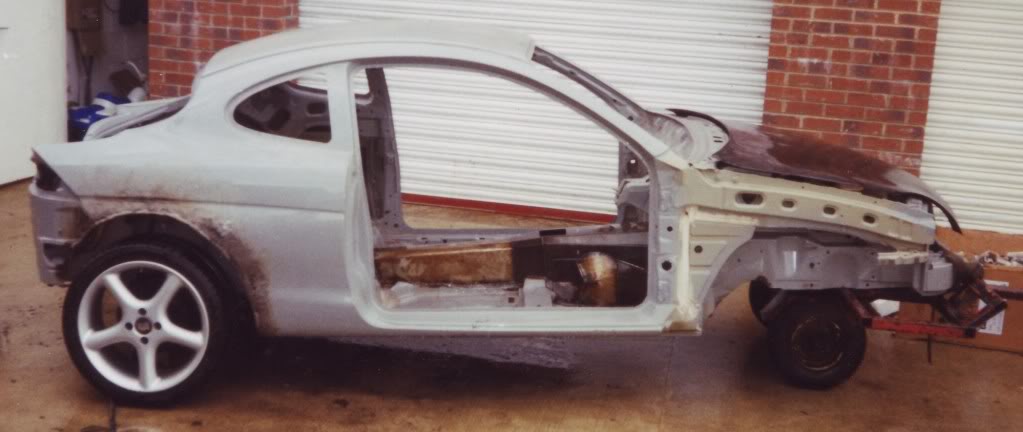
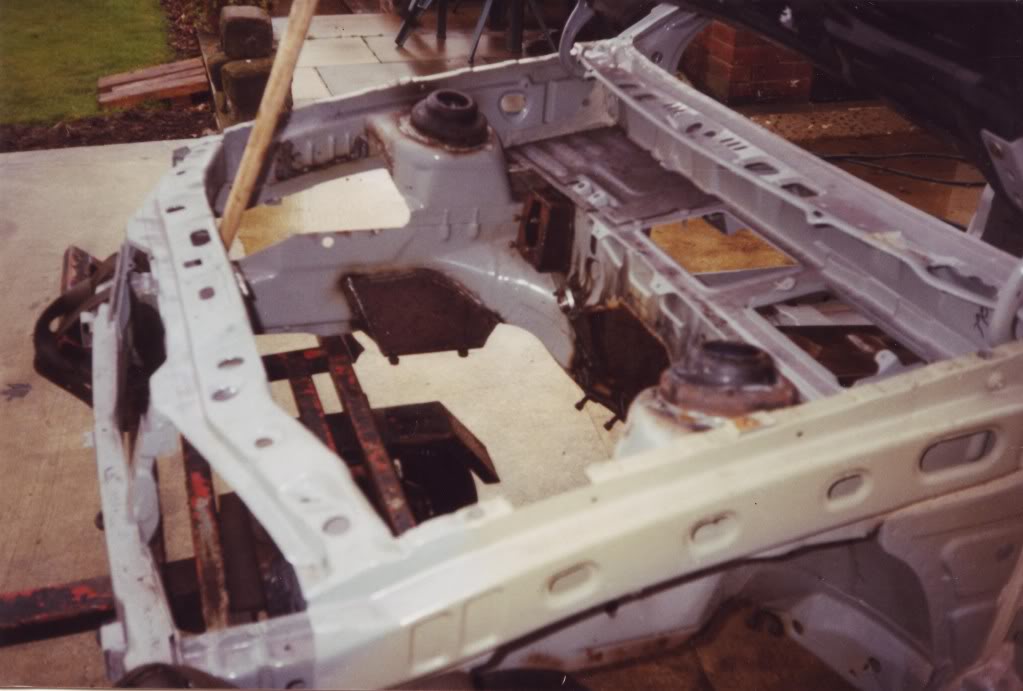
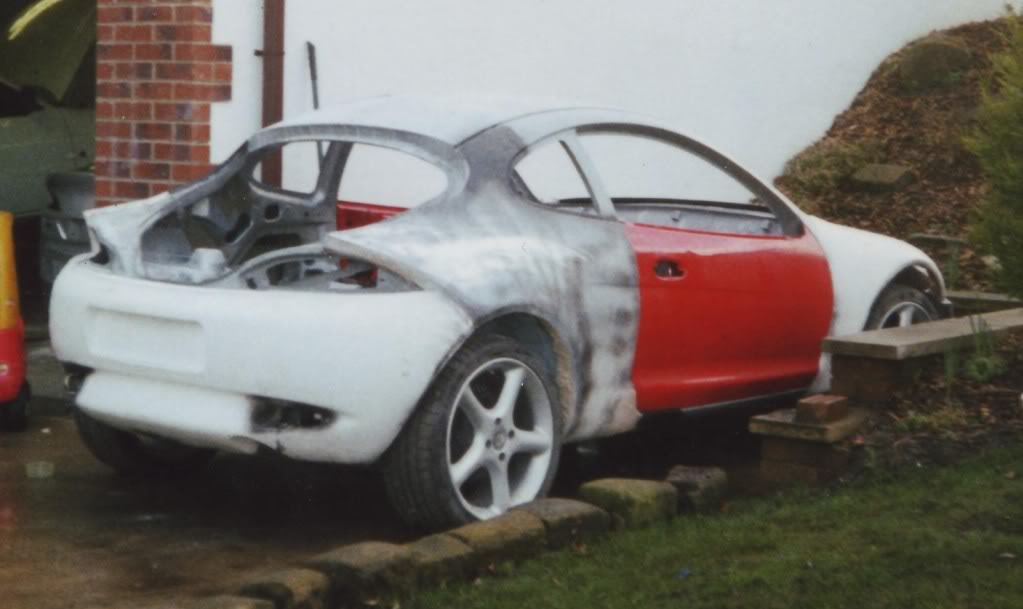
Some shots from the original build:
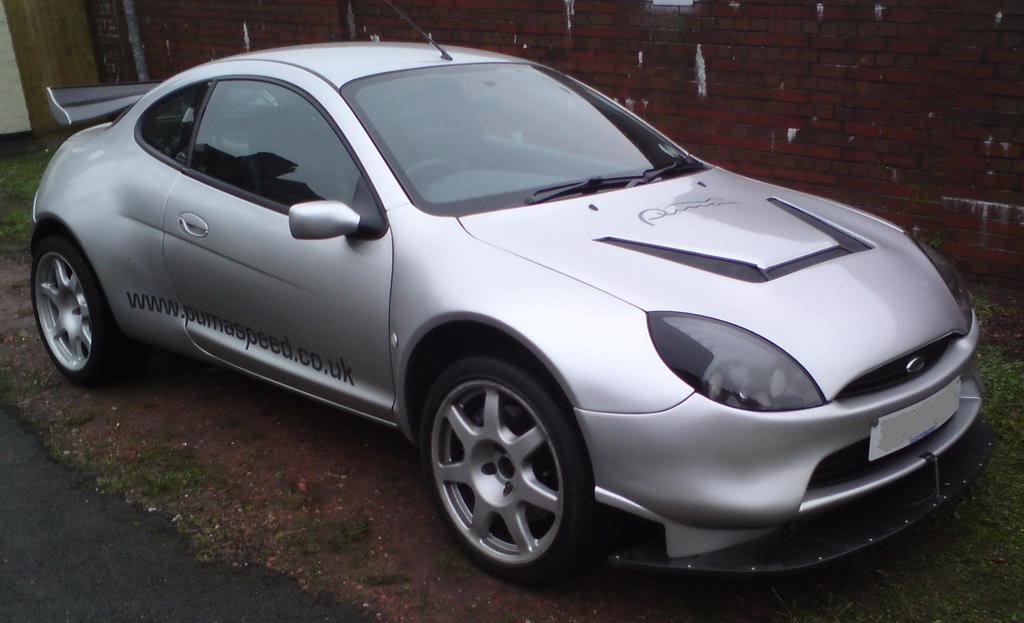
Few shots of the car in general:


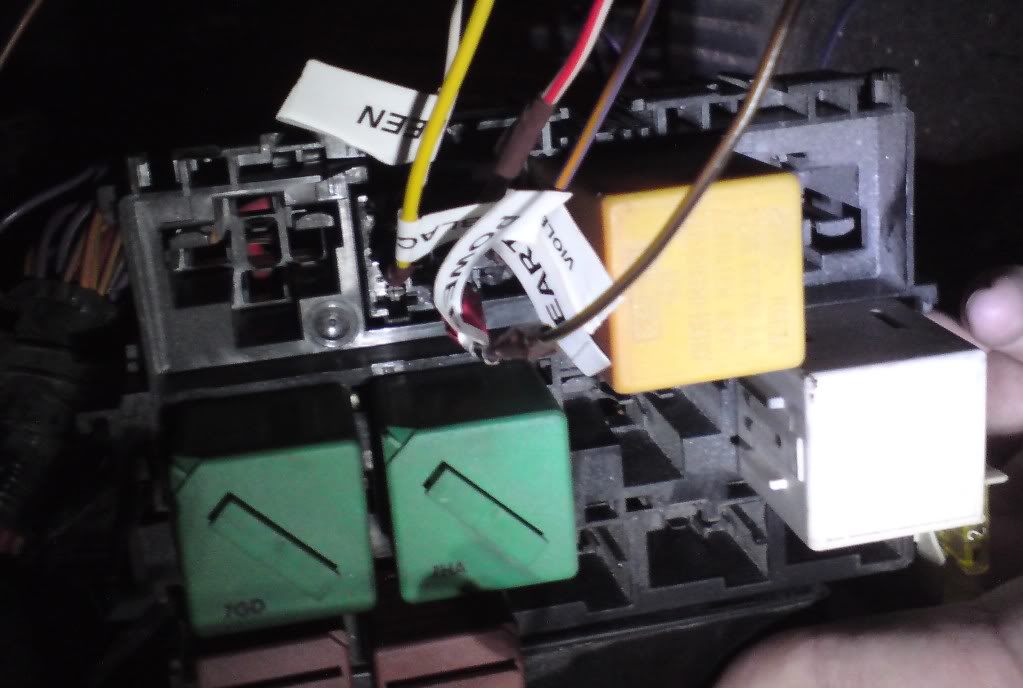
Unfortunately Tony didnt make any record of how he wired the two looms together which is annoying!!! Everything works at the moment except the heated windscreen which i think is the relay.
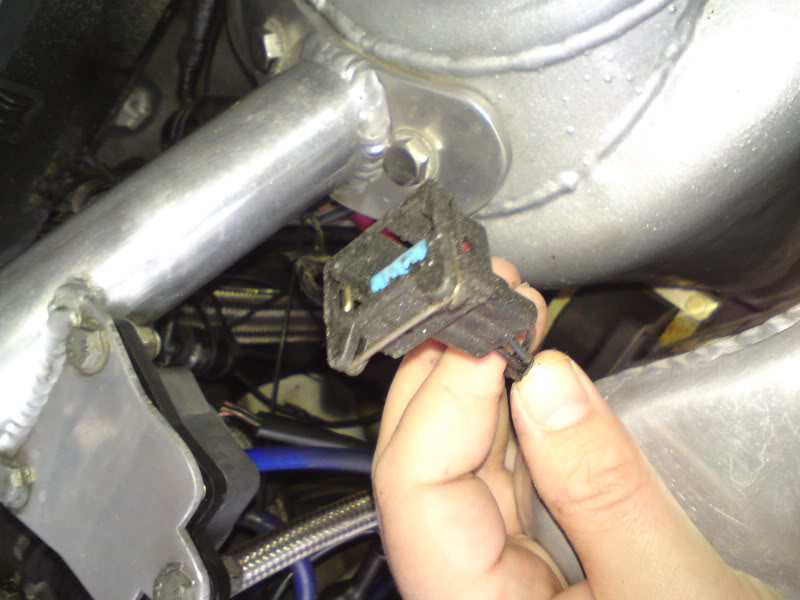
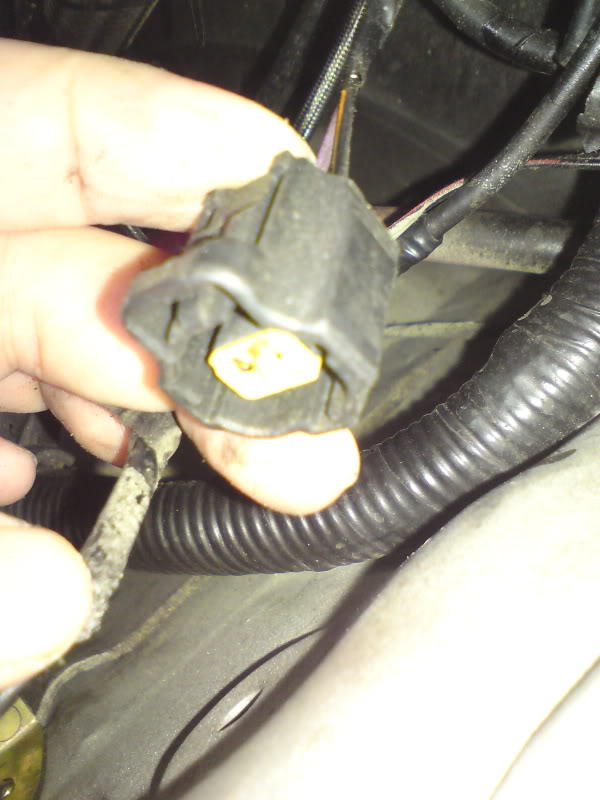
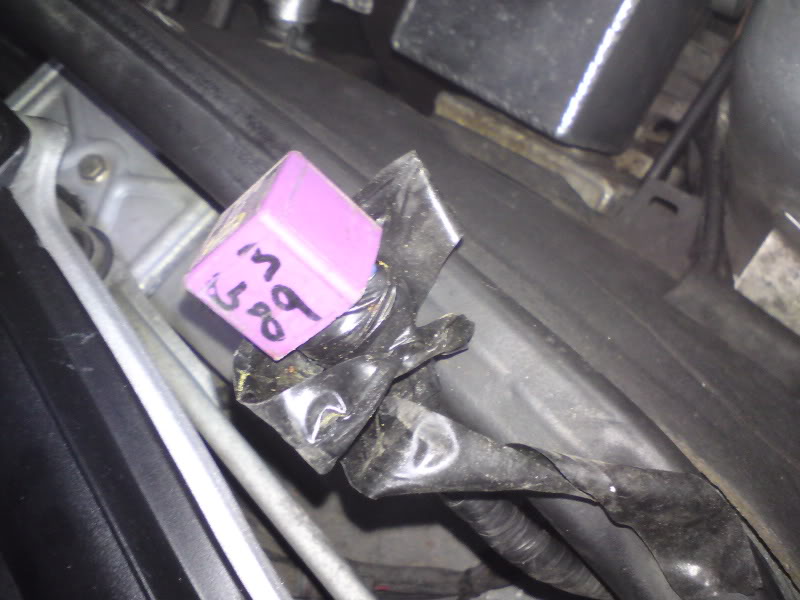
Have got a few issues with exposed relays and spare plugs.
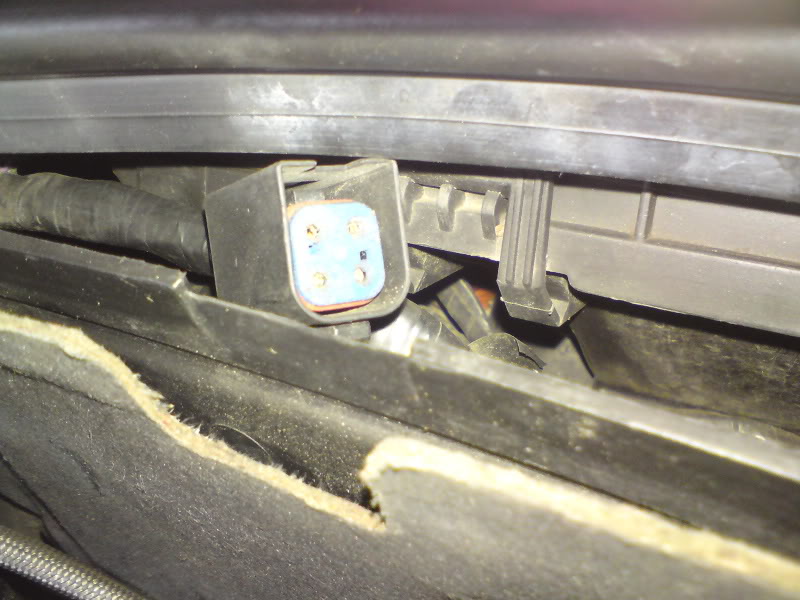
These two are the relays used to run the cosworth engine loom. Personally i would have integrated the wiring with the fuse box, but thats just me, plus id run the circuits off the original ignition relay.

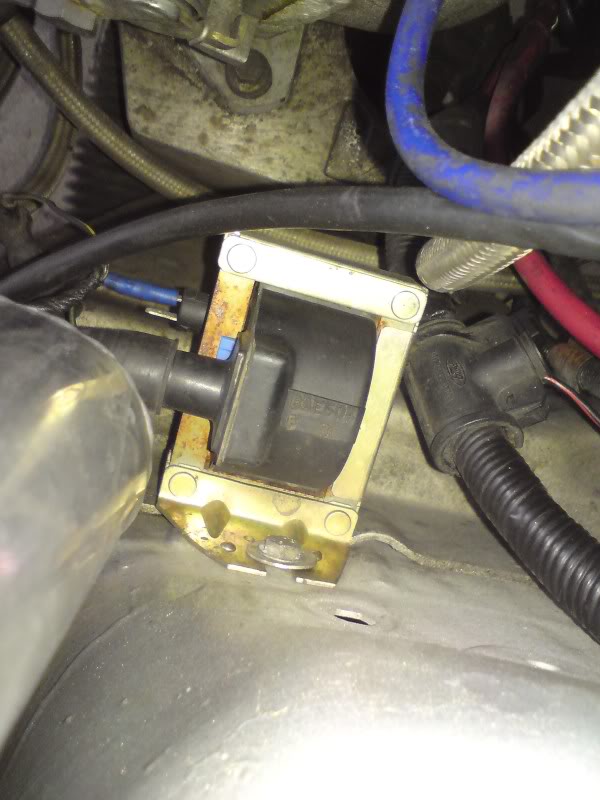
This is just an untidy mess to be sorted and horrible clips on the coil!!!

And some shocking bodges on fuel system!!! No wonder i was only getting 6V at fuel pump!!
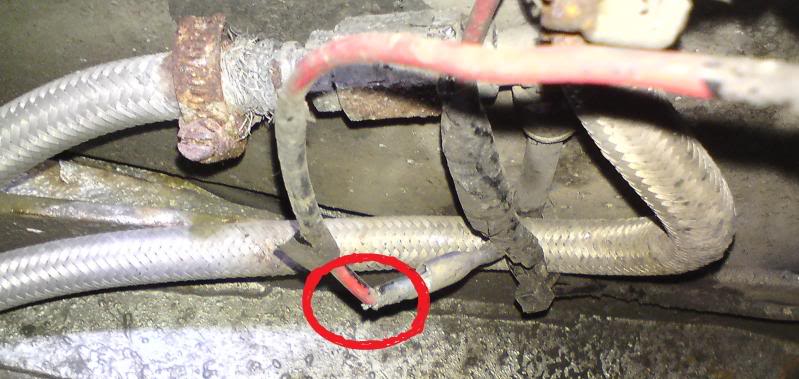
yes this is cable ties holding pump!!!
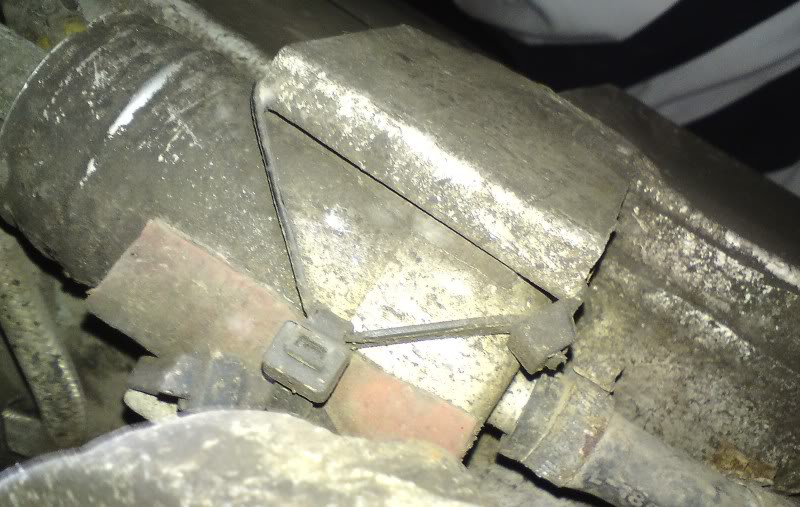
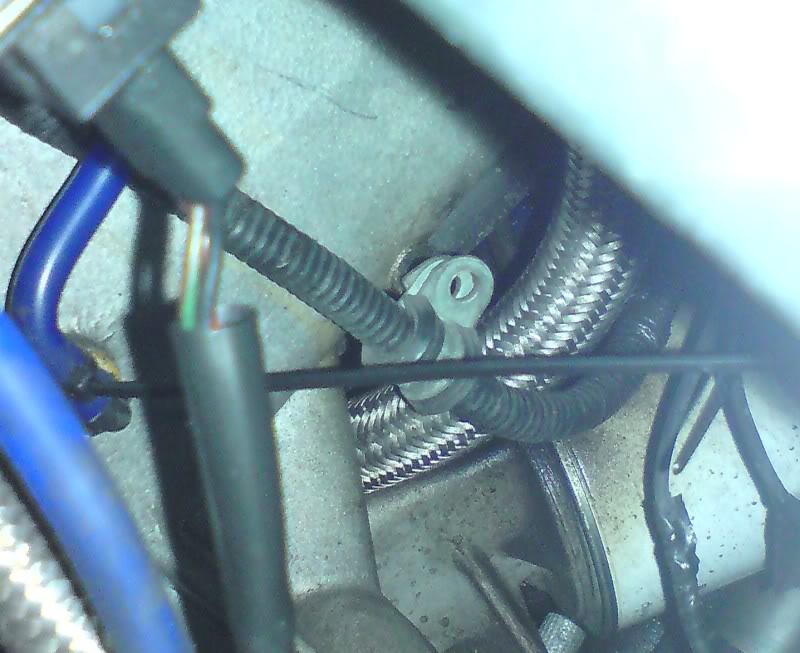
Also the boost control is erm... dodgy as fuck!!!!
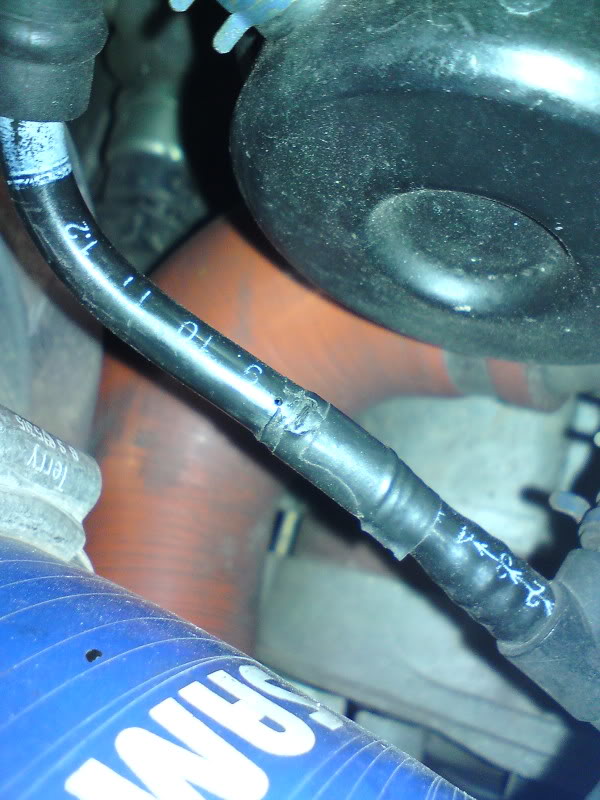
Saw this screw under the air filter 90 degree hose:
on closer inspection saw that its blocking the hole in compressor to actuator pipe where a boost control valve once was
and the pin hole to let air bleed off
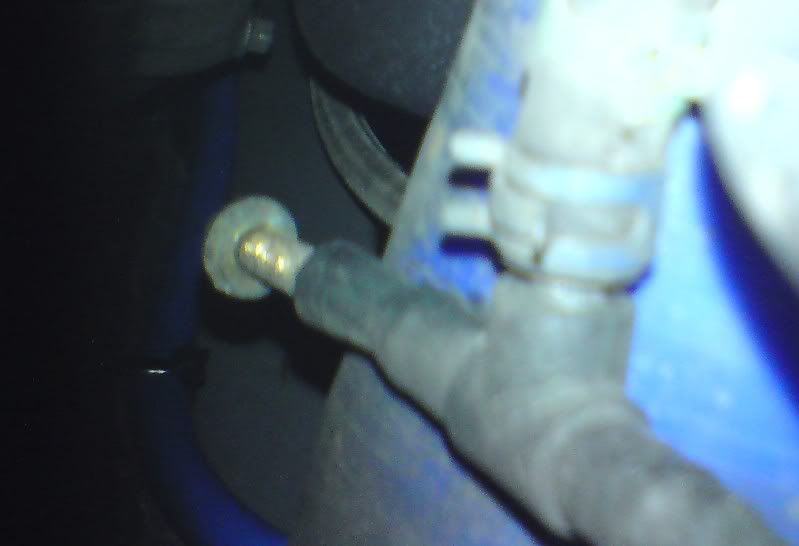
and some banjo thing on end of actuator rod:
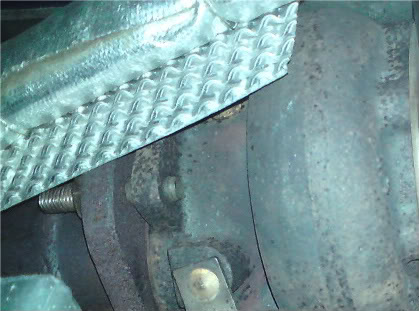
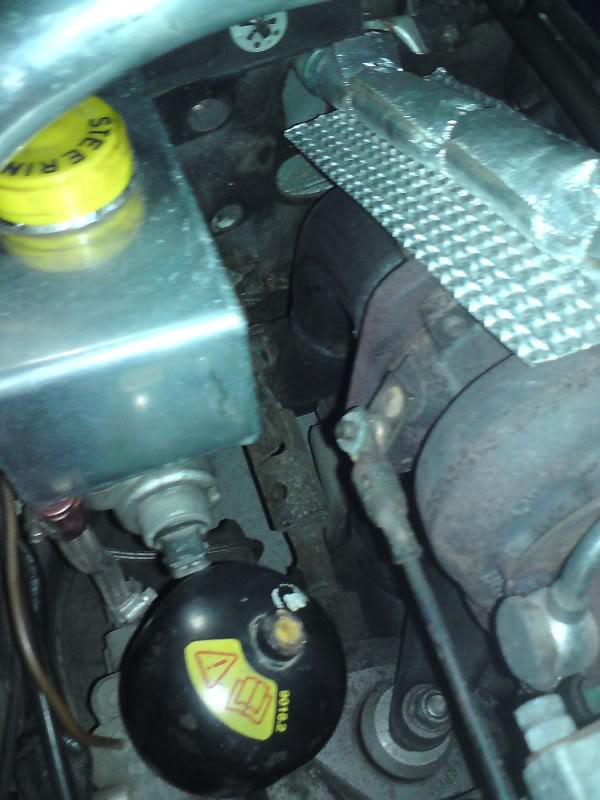
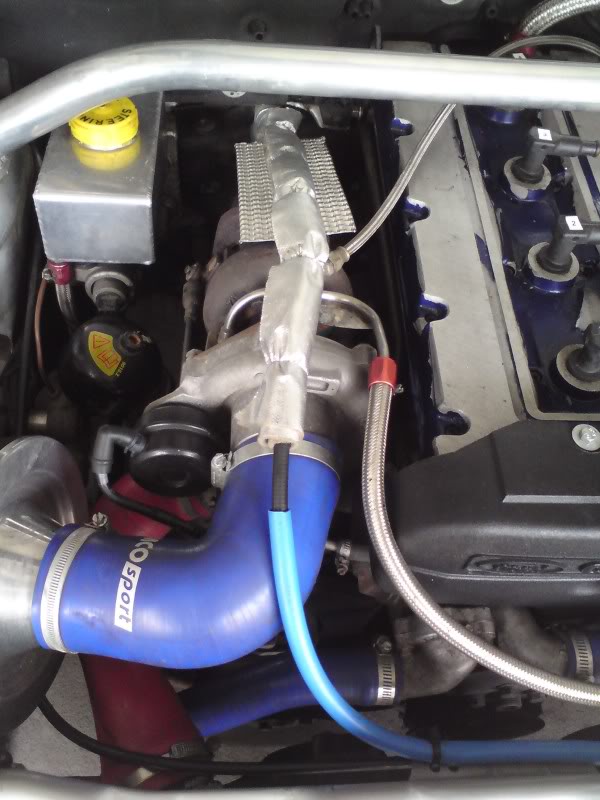
Also needs some heat sheilding:
and this canister actually connecting rather than doing nothing:
needs a new gasket by looks of things on inlet manifold:
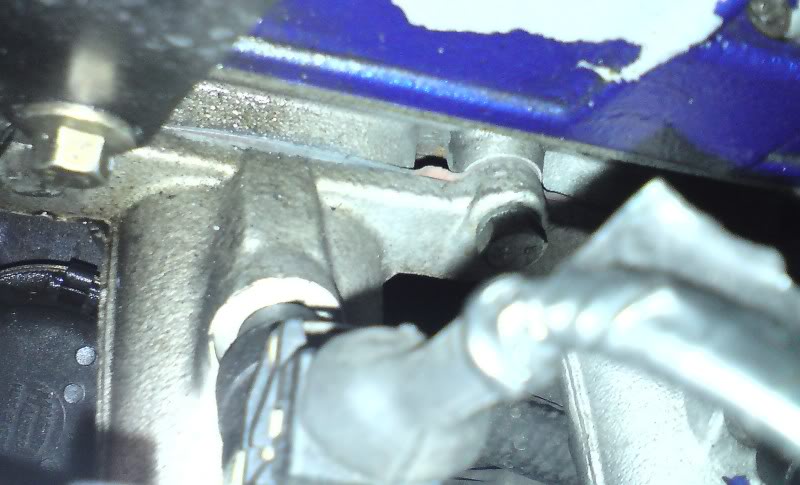
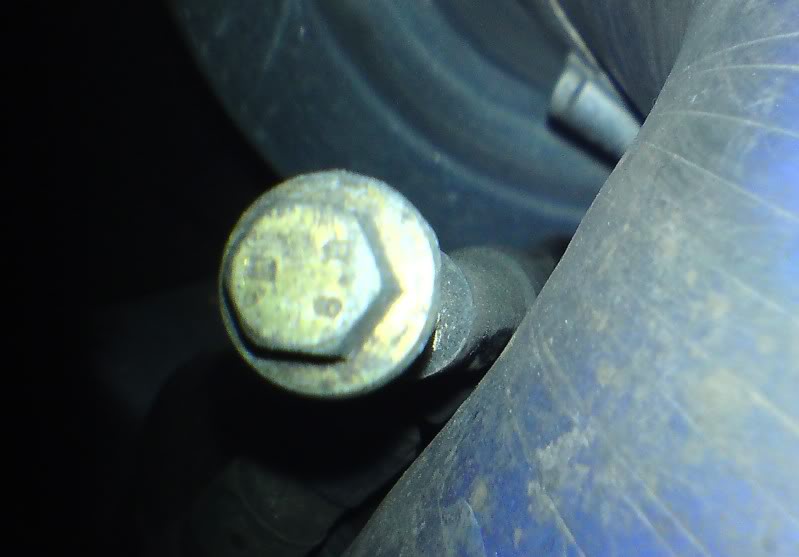
And also a manifold bolt which is randomly missing for some reason
Im quite pissed off with a lot of these bodges as quite frankly they were totally unessecary. Hes spent a lot of money getting shell done, custom alloy tank aeroquip etc etc etc then hasnt spent the extra few hours putting it together properly!!
Still i cant argue too much because i got it cheap and certainly a hell of a lot cheaper than building one from scratch which was my alternative plan.
The first thing i have had modified is the clutch cable arrangement:
The old clutch was VERY heavy due to kinks in the cable routing and also not quite enough travel making it hard to engage/disengage gears unless road and engine speed matched. That was because the modiefied clutch pedal has slightly less travel than a standard escos pedal and the cables were stretching due to heavy pedal and the auto adjusting ratchet was at limit of travel. Ive now got a stronger cable and also removed the rubber gromit at gearbox end of cable which reduces all the wieght on the pedal as the rubber used to be compressed tightly to get enough travel to use clutch. But alls fine now!! Curtesy of reyland!!! Eventually i will go hydraulic but its finance dependant!!!
Also fitted a cambelt cover as seen above as the cambelt used to be exposed with a turbo pipe running very close to it. Technically it was fine but it only takes a cable clip to come loose or when tweeking things to put finger in wrong place!!!!
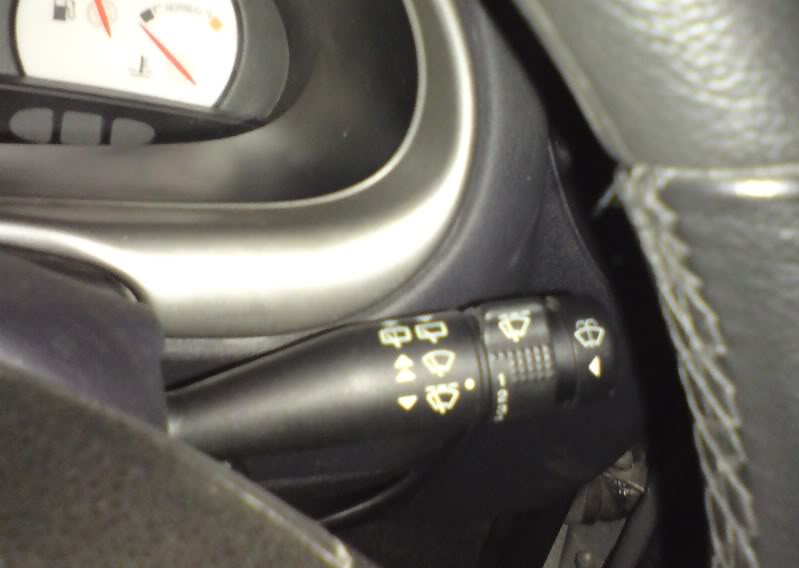
I then started my project to fit a variable intermittant wiper stalk from hispec mk6/7 escorts.
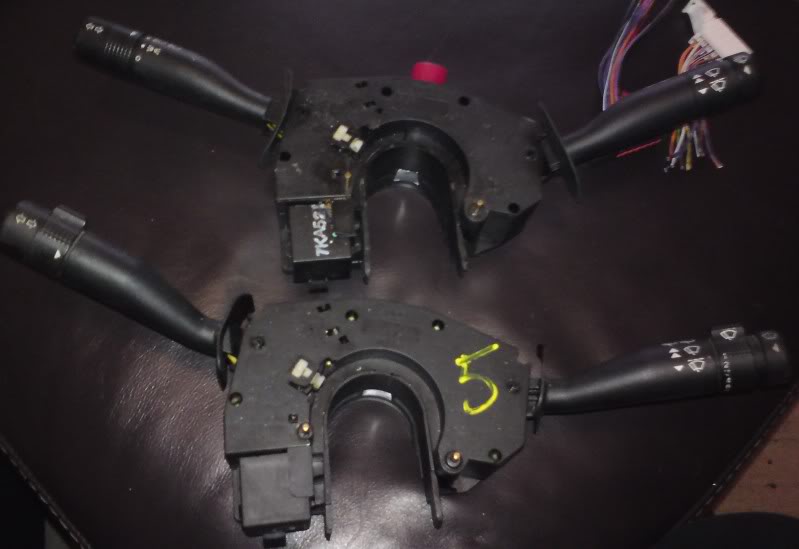
compare the two indicator stalks!!! ones escort, ones puma!!
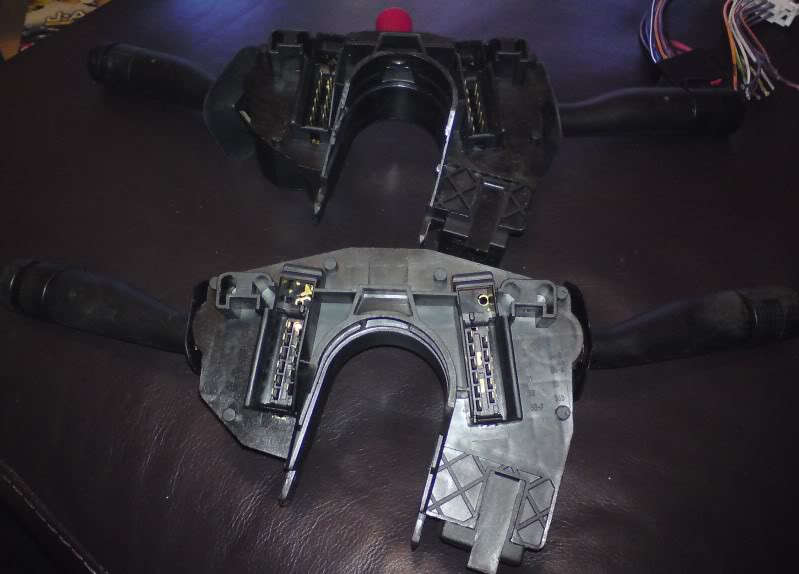
They are made from the same moudings and appear identical (except variable wipe resister). Taken apart an escort and puma stalks to look at internal electrical differences.
They are basically the same circuit board inside with only minor differences, being the lack of variable resistor wired into the puma stalk and one less pin on the puma stalk (the variable resistor timing pin on escort stalk!).

The differences are circled in red. Also means i can easily swap around stalks if bits are broken by soldering on the new stalk.
It also means when later on i remove the factory steering wheel i can fit a fiesta mk3 left side stalk with horn button on the end.
Here is the scribbled wiring diagram i did:
and the neater version drawn into my wiring diagrams:
I got my variable intermittant wipe fully working by making a sub loom to fit into the fuse box on one of the spare relay holder positions to the side of the box.
the wire in the back of the stalks is just inserting the extra pin into the back of the stalk where there is an empty hole so dead easy to do.
So far ive made it as a removable subloom incase i do some more fusebox wiring:
Ive used connectors to plug directly into the original relay holder so no changes to car fuse box. Tidied it since that phot which was test fitting!! Have a nice relay holder clipped on side of fuse box and the wires are all threaded neatly!!
Eventually im thinking once im happy i will dismantle the relay holder and swap all the pins over and hard wire in the extra timing wire to the stalk. that way it will be both permenant and totally factory look.
Stalk fitted looks factory:
Interior all fitted up again and the intermittant wipe looks factory!!
Got plenty of other bits and bobs to do like sort out stupid actuator hose and make permenant changes to fuel system like proper mounts and rewireing the pump. Im getting a full 12v at pump now following repairs, but the wiring outside the car from the gromit to the fuel pump is potentially a liability and Im not prepared to trust that it will be ok so its getting replaced to be on safe side.
Here she is resting in her nice dry garage!
Some shots from the original build:
Few shots of the car in general:
Unfortunately Tony didnt make any record of how he wired the two looms together which is annoying!!! Everything works at the moment except the heated windscreen which i think is the relay.
Have got a few issues with exposed relays and spare plugs.
These two are the relays used to run the cosworth engine loom. Personally i would have integrated the wiring with the fuse box, but thats just me, plus id run the circuits off the original ignition relay.
This is just an untidy mess to be sorted and horrible clips on the coil!!!
And some shocking bodges on fuel system!!! No wonder i was only getting 6V at fuel pump!!
yes this is cable ties holding pump!!!
Also the boost control is erm... dodgy as fuck!!!!
Saw this screw under the air filter 90 degree hose:
on closer inspection saw that its blocking the hole in compressor to actuator pipe where a boost control valve once was
and the pin hole to let air bleed off
and some banjo thing on end of actuator rod:
Also needs some heat sheilding:
and this canister actually connecting rather than doing nothing:
needs a new gasket by looks of things on inlet manifold:
And also a manifold bolt which is randomly missing for some reason
Im quite pissed off with a lot of these bodges as quite frankly they were totally unessecary. Hes spent a lot of money getting shell done, custom alloy tank aeroquip etc etc etc then hasnt spent the extra few hours putting it together properly!!
Still i cant argue too much because i got it cheap and certainly a hell of a lot cheaper than building one from scratch which was my alternative plan.
The first thing i have had modified is the clutch cable arrangement:
The old clutch was VERY heavy due to kinks in the cable routing and also not quite enough travel making it hard to engage/disengage gears unless road and engine speed matched. That was because the modiefied clutch pedal has slightly less travel than a standard escos pedal and the cables were stretching due to heavy pedal and the auto adjusting ratchet was at limit of travel. Ive now got a stronger cable and also removed the rubber gromit at gearbox end of cable which reduces all the wieght on the pedal as the rubber used to be compressed tightly to get enough travel to use clutch. But alls fine now!! Curtesy of reyland!!! Eventually i will go hydraulic but its finance dependant!!!
Also fitted a cambelt cover as seen above as the cambelt used to be exposed with a turbo pipe running very close to it. Technically it was fine but it only takes a cable clip to come loose or when tweeking things to put finger in wrong place!!!!
I then started my project to fit a variable intermittant wiper stalk from hispec mk6/7 escorts.
compare the two indicator stalks!!! ones escort, ones puma!!
They are made from the same moudings and appear identical (except variable wipe resister). Taken apart an escort and puma stalks to look at internal electrical differences.
They are basically the same circuit board inside with only minor differences, being the lack of variable resistor wired into the puma stalk and one less pin on the puma stalk (the variable resistor timing pin on escort stalk!).
The differences are circled in red. Also means i can easily swap around stalks if bits are broken by soldering on the new stalk.
It also means when later on i remove the factory steering wheel i can fit a fiesta mk3 left side stalk with horn button on the end.
Here is the scribbled wiring diagram i did:
and the neater version drawn into my wiring diagrams:
I got my variable intermittant wipe fully working by making a sub loom to fit into the fuse box on one of the spare relay holder positions to the side of the box.
the wire in the back of the stalks is just inserting the extra pin into the back of the stalk where there is an empty hole so dead easy to do.
So far ive made it as a removable subloom incase i do some more fusebox wiring:
Ive used connectors to plug directly into the original relay holder so no changes to car fuse box. Tidied it since that phot which was test fitting!! Have a nice relay holder clipped on side of fuse box and the wires are all threaded neatly!!
Eventually im thinking once im happy i will dismantle the relay holder and swap all the pins over and hard wire in the extra timing wire to the stalk. that way it will be both permenant and totally factory look.
Stalk fitted looks factory:
Interior all fitted up again and the intermittant wipe looks factory!!
Got plenty of other bits and bobs to do like sort out stupid actuator hose and make permenant changes to fuel system like proper mounts and rewireing the pump. Im getting a full 12v at pump now following repairs, but the wiring outside the car from the gromit to the fuel pump is potentially a liability and Im not prepared to trust that it will be ok so its getting replaced to be on safe side.
Last edited by Psycho Warren; 22-04-2009 at 11:53 PM.


Trending Topics
 23-04-2009, 08:47 AM
#10
Black Country RSOC
Join Date: Oct 2005
Location: Stourbridge
Posts: 2,282
Likes: 0
Received 0 Likes
on
0 Posts
At least going through the car with a fine toothcomb means all these silly jobs can be done out the way and you can enjoy it properly.
Cool Puma as well!
Cool Puma as well!
 23-04-2009, 11:12 AM
#16
PassionFord Regular
Join Date: Sep 2008
Location: Runcorn
Posts: 375
Likes: 0
Received 0 Likes
on
0 Posts
Looks like it was a bit of utter bodge to me . You've got abit of work to be doing there Warren. Keep the pics coming and good look mate 
P.S Have fun figuring the wiring
. You've got abit of work to be doing there Warren. Keep the pics coming and good look mate P.S Have fun figuring the wiring
Last edited by jeans43; 23-04-2009 at 11:16 AM.
 23-04-2009, 11:44 AM
#18
Advanced PassionFord User

Join Date: Feb 2005
Location: Solihull
Posts: 2,090
Likes: 0
Received 0 Likes
on
0 Posts
Sounds like a typical pumaspeed job to me - never mind eh! It's a nice looking car and bet it goes like stink  Will be following your updates - good luck fella

 23-04-2009, 08:12 PM
#24
It does go like stink, just not at the moment im taking it easy especially with those bodges on the boost control
Thats not too bad to be honest. I know where the cossy loom connects to puma so thats easy ish. Just need to trace all those connectors back to the puma loom so i can hide them behind dash and then work out which one of those connectors is for boost control from the P8 so it can be sorted out eventually.
Well now ive got 12v at the pump I'm content that the wiring repair is satisfactory!! It will do for a couple of weeks until i can make a complete new loom to go from the in car connector (which i shall rebuild to be safe) under rear seat all the way to the pump.
I might buy a new pump at the same time as the current pump is a standard escort cosworth one which is ok for my spec but its a few years old so cant hurt to replace it with a sightly uprated one, and as i understand it, aftermarket pumps have posts for ring terminals so id be better off replacing pump with loom so i can put rings on the new loom.
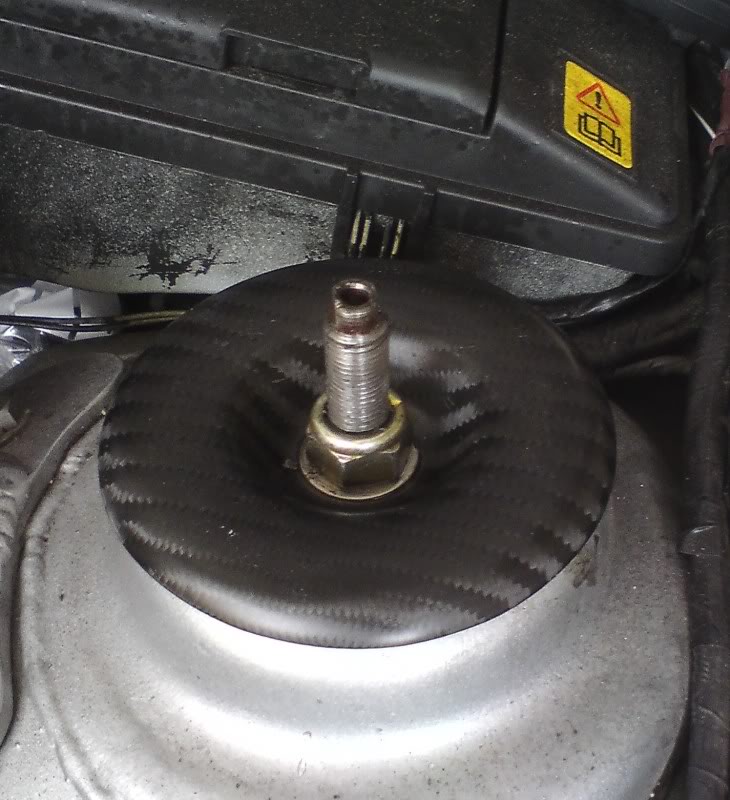
While i was dirty i decided i might as well fit the carbontec strut top mounts i bought ages ago, just hadnt got round to sorting.
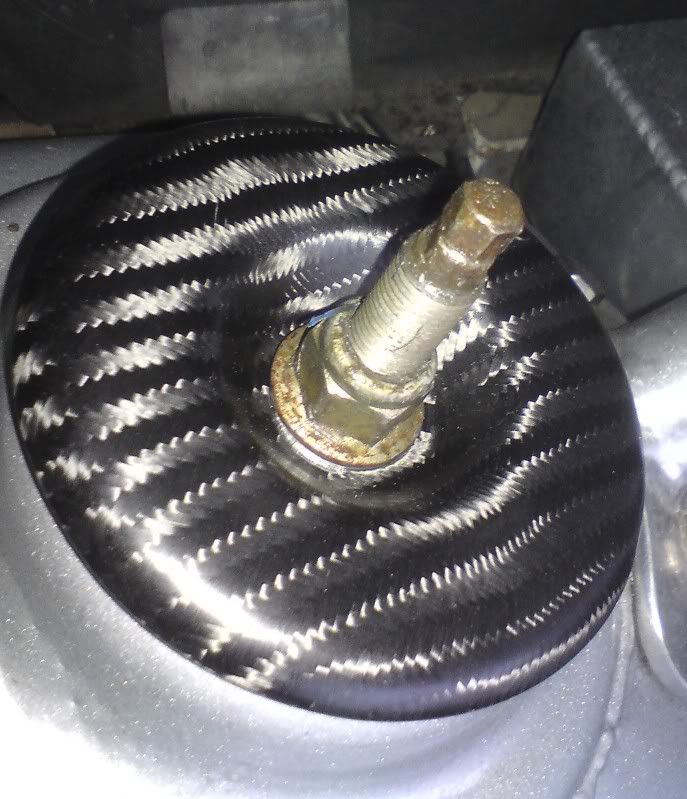
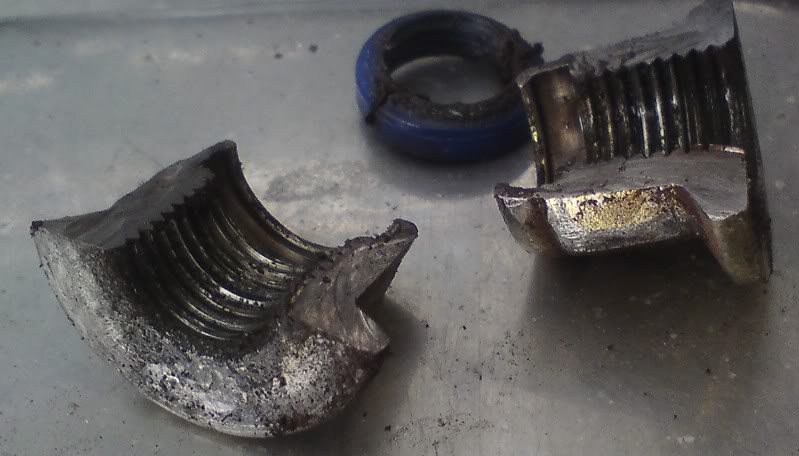
Things didnt go quite to plan on the passenger side!! for a start i noticed the AVO hex bolt for adjusting dampers is missing...... and secondly the strut top bolt decided to jam at top of the thread!!!
 This is despite me cleaning thread and WD40 ing the lot. heat wouldnt loosen it and i didnt want to clamp the thread as it will be damaged so i gave it one more warning and gave the bolt strict words. I did warn it that if it didnt loosen i would cut it off!!!
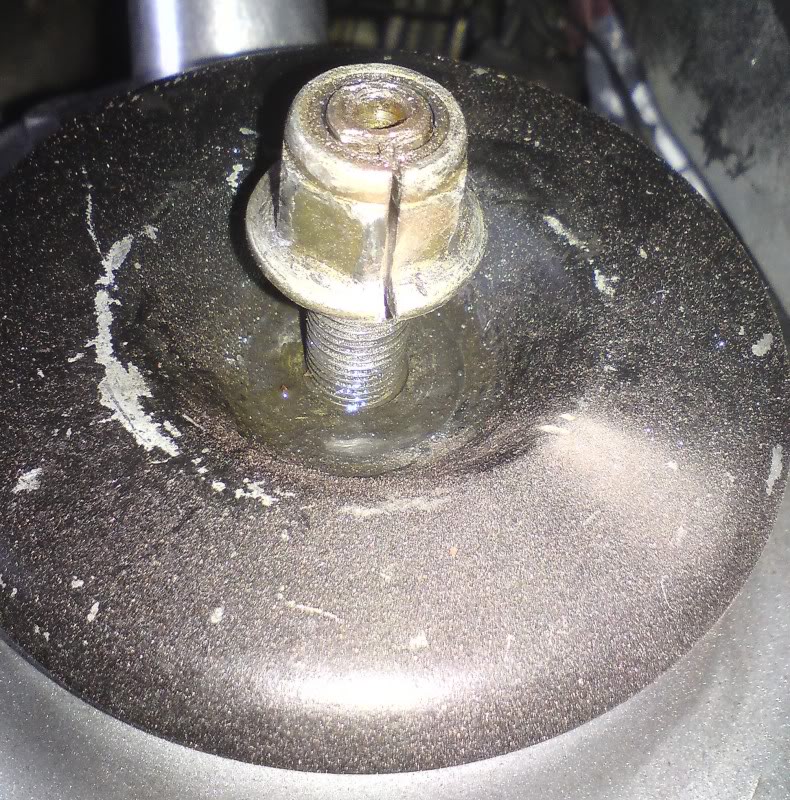
hahahahaha that'll teach the bolt!!! doing the last bit by hand with hacksaw blade so i dont cut down to thread then i shall lever it apart once ive done the same on other side!! Good job i have new bolt to go on!!!
im taking it easy especially with those bodges on the boost control Thats not too bad to be honest. I know where the cossy loom connects to puma so thats easy ish. Just need to trace all those connectors back to the puma loom so i can hide them behind dash and then work out which one of those connectors is for boost control from the P8 so it can be sorted out eventually.
Well now ive got 12v at the pump I'm content that the wiring repair is satisfactory!! It will do for a couple of weeks until i can make a complete new loom to go from the in car connector (which i shall rebuild to be safe) under rear seat all the way to the pump.
I might buy a new pump at the same time as the current pump is a standard escort cosworth one which is ok for my spec but its a few years old so cant hurt to replace it with a sightly uprated one, and as i understand it, aftermarket pumps have posts for ring terminals so id be better off replacing pump with loom so i can put rings on the new loom.
While i was dirty i decided i might as well fit the carbontec strut top mounts i bought ages ago, just hadnt got round to sorting.
Things didnt go quite to plan on the passenger side!! for a start i noticed the AVO hex bolt for adjusting dampers is missing......
and secondly the strut top bolt decided to jam at top of the thread!!! This is despite me cleaning thread and WD40 ing the lot. heat wouldnt loosen it and i didnt want to clamp the thread as it will be damaged so i gave it one more warning and gave the bolt strict words. I did warn it that if it didnt loosen i would cut it off!!!hahahahaha that'll teach the bolt!!! doing the last bit by hand with hacksaw blade so i dont cut down to thread then i shall lever it apart once ive done the same on other side!! Good job i have new bolt to go on!!!


 24-04-2009, 07:01 PM
#30

I had a look round this today when you were outside Bristol Street (i work there),
Does look very nice mate, couldnt believe how wide it is tbh!!
What size are your rear tyres if you dont mind me asking?
Good luck with sorting the niggles, will be awsome when its done!!
Does look very nice mate, couldnt believe how wide it is tbh!!
What size are your rear tyres if you dont mind me asking?
Good luck with sorting the niggles, will be awsome when its done!!
 24-04-2009, 10:24 PM
#34
Lol, i'd gone back in by that point, had a job to finish!!
Makes a change to have something interesting on the car park, hence the crowd of mechanics!!
Hoping to have mine back on the road in the next few weeks so hopefull i'll see you about mate!!
Makes a change to have something interesting on the car park, hence the crowd of mechanics!!
Hoping to have mine back on the road in the next few weeks so hopefull i'll see you about mate!!
24-04-2009, 10:42 PM
#35

I also saw this drive past today as i walked out of work (Toyota dealership next to bristol street) Recognised the car as soon as it came round the corner as being the Cosworth powered one!
Looks a nice motor - sounded nice too! Be even better when all the dodgy parts are sorted.
Its a small world.
Mart
Looks a nice motor - sounded nice too! Be even better when all the dodgy parts are sorted.
Its a small world.
Mart
 26-04-2009, 06:40 PM
#38
I got a fair few pictures of your car at yesterdays meet mate : hope you don't mind if I post them for all to see your amazing beast.
Mine and yours:
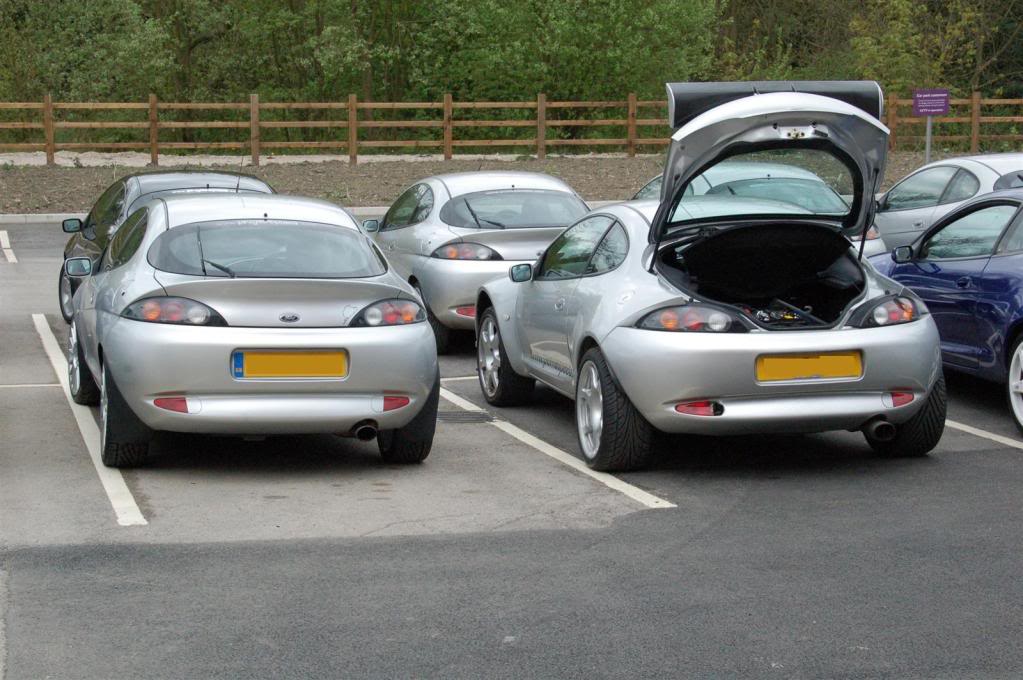
Next to Jacko'd FRP:
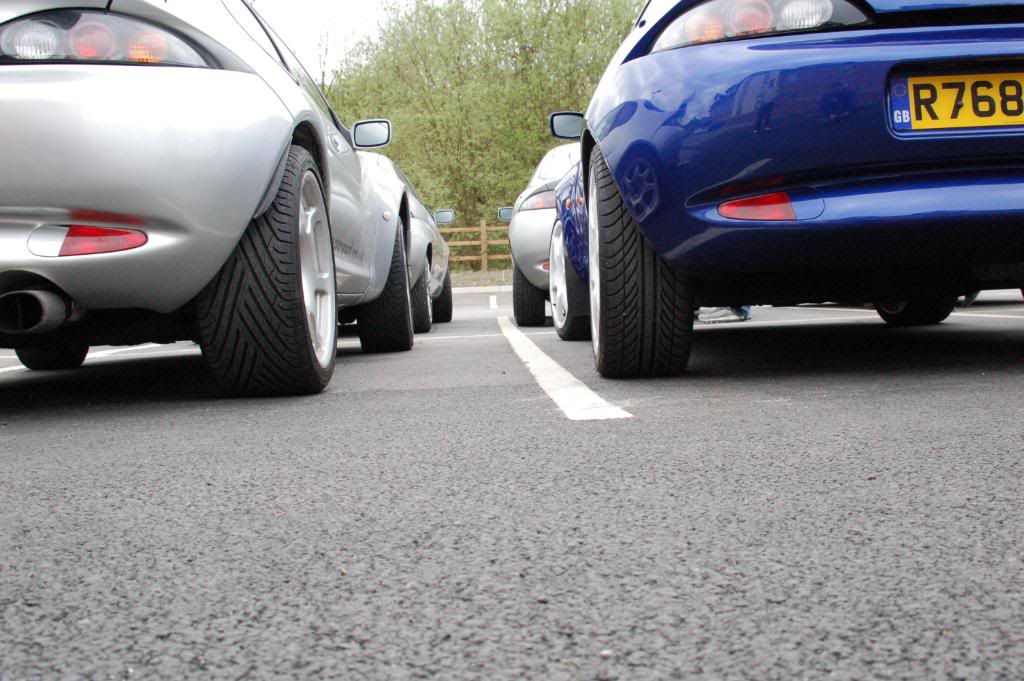
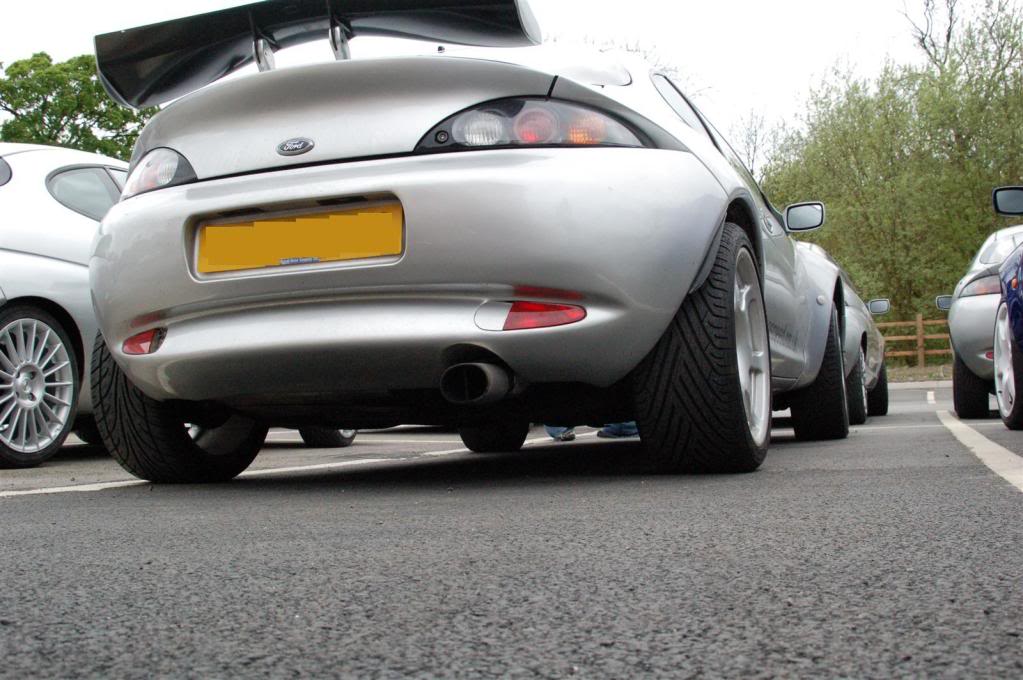
Awesome shot:
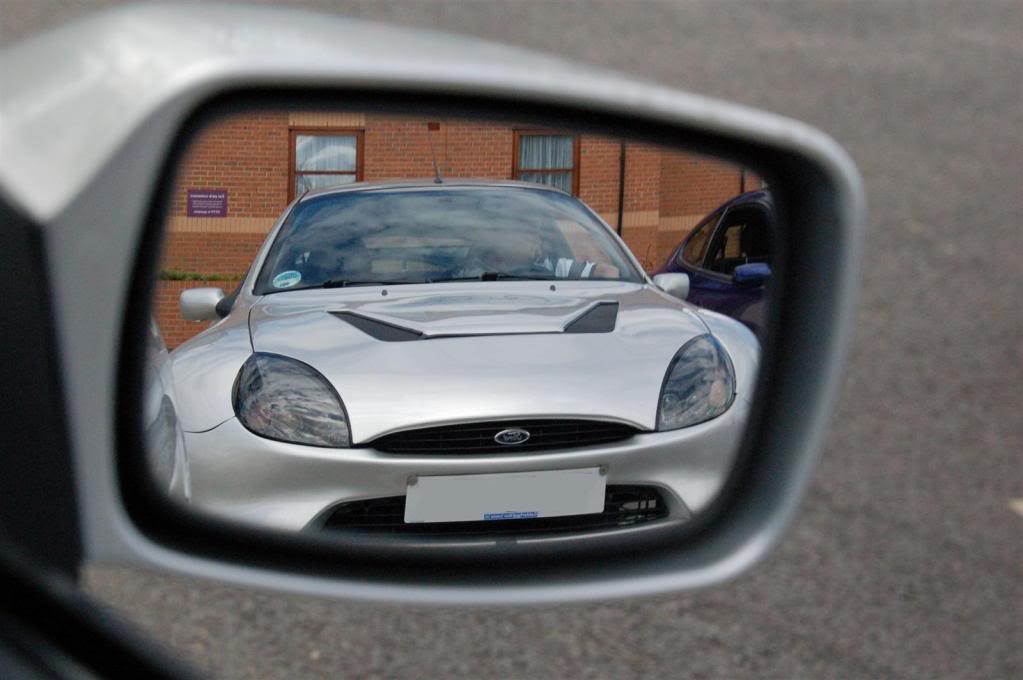
My mirror full of Warren!
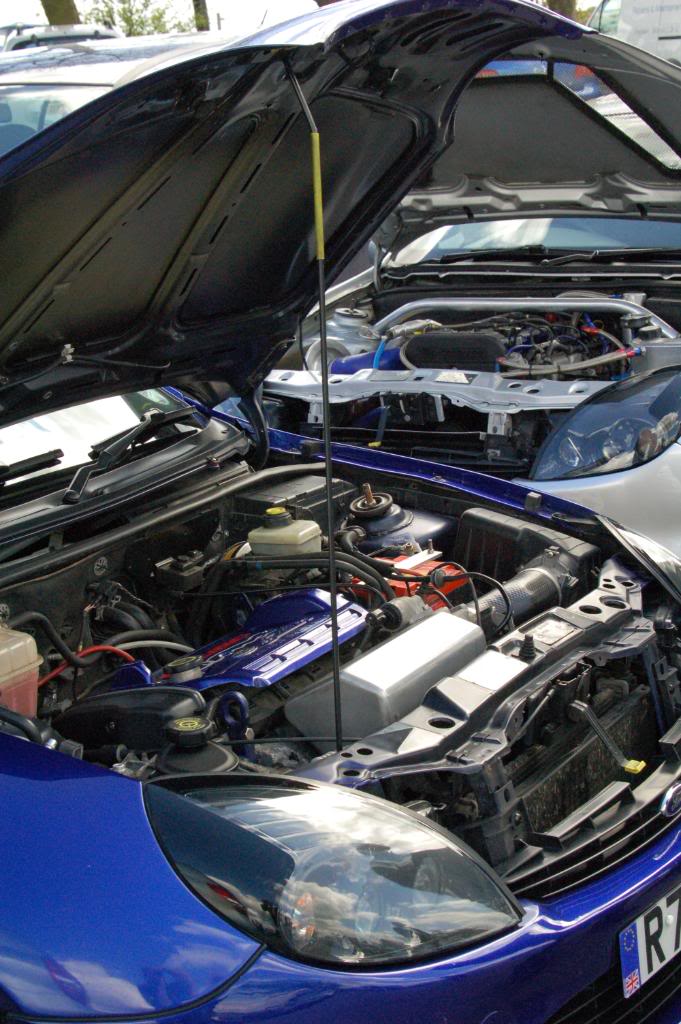
FRP engine fore ground / Cosworth background:
Epic car mate!!
Mine and yours:
Next to Jacko'd FRP:
Awesome shot:
My mirror full of Warren!
FRP engine fore ground / Cosworth background:
Epic car mate!!
Last edited by Dal_; 26-04-2009 at 09:19 PM.
