My 2.0L Laser Capri, conversion to 5.0L V8
 17-04-2009, 10:34 PM
#1
Virgin
Thread Starter

Join Date: Apr 2009
Location: yorkshire
Posts: 7
Likes: 0
Received 0 Likes
on
0 Posts
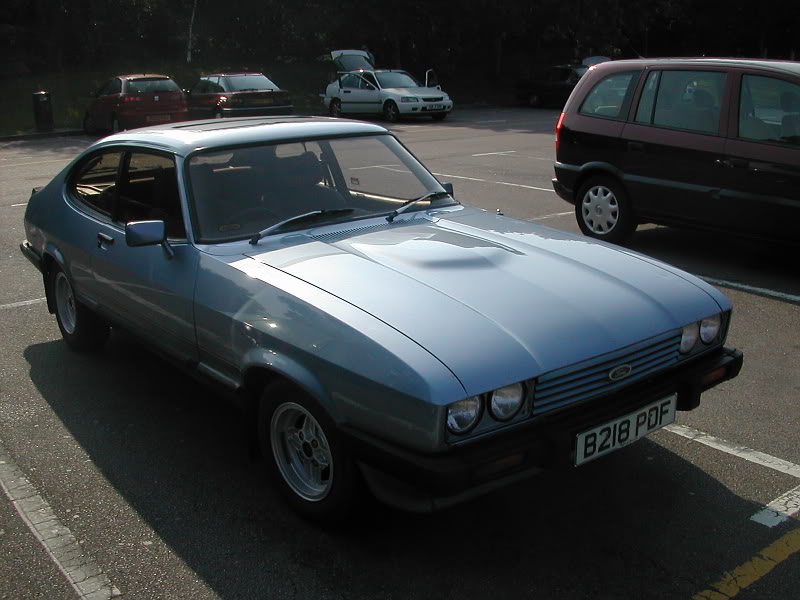
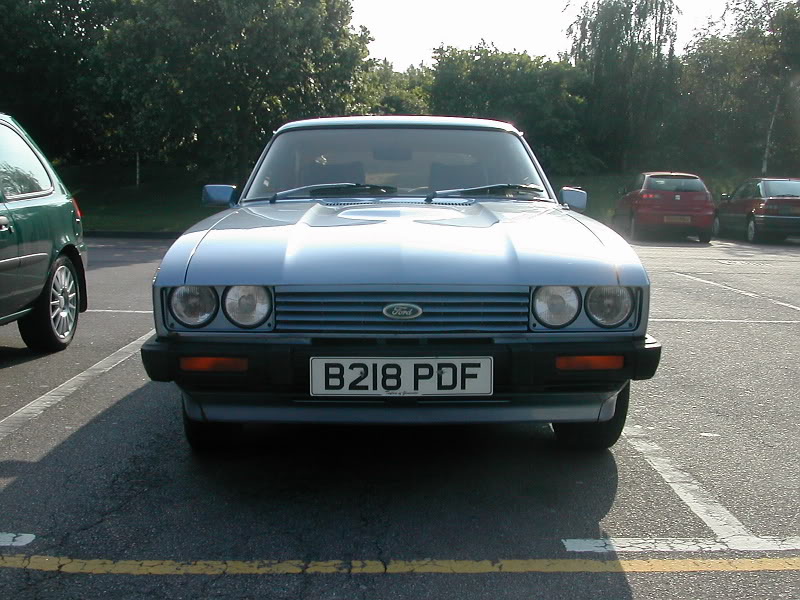
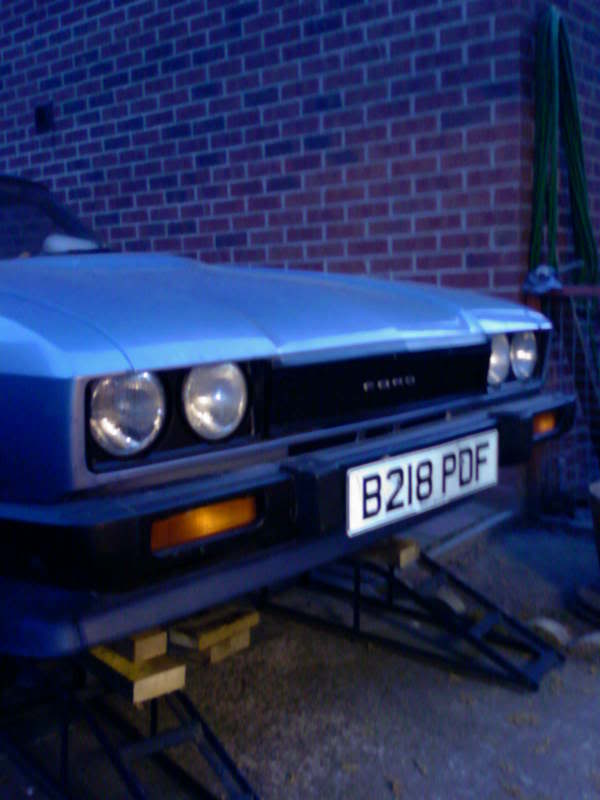
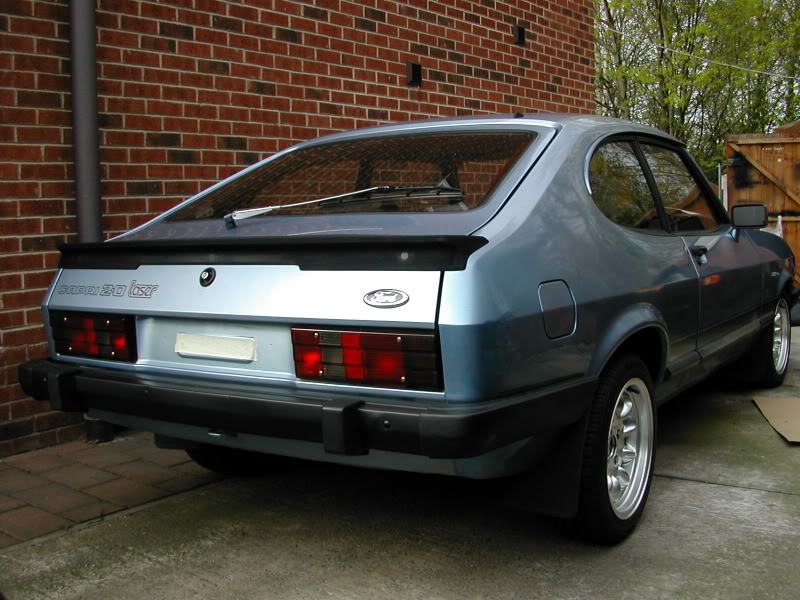
Hi there all, , thought i'd put a post up about my MK3 Capri that i'm gradually converting from 2L to a Ford 5L V8 ( well it's actually a Lincoln V8, but same difference really ).
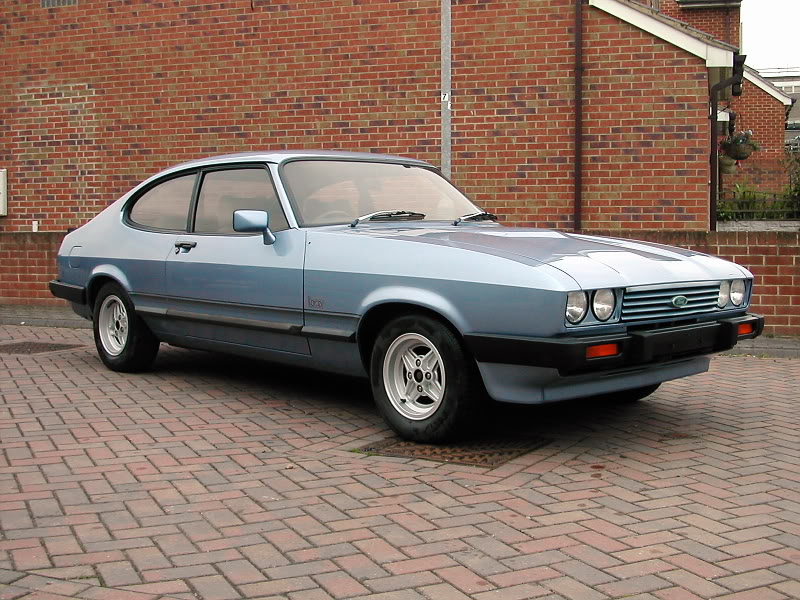
So here's abit of history on the car itself, it's a 1985 2L Laser in Paris blue, has/had genuine 74,000 miles on clock, all original panels ( although it has had some very minor repair plates before i got it ), service history and 4 previous owners.
I bought the capri from a small village in Devon, which was quite a trek for me as i live in Barnsley, South yorkshire! but it was worth it as i paid �630 for it with around 6 months test and 2 months tax, not bad really.
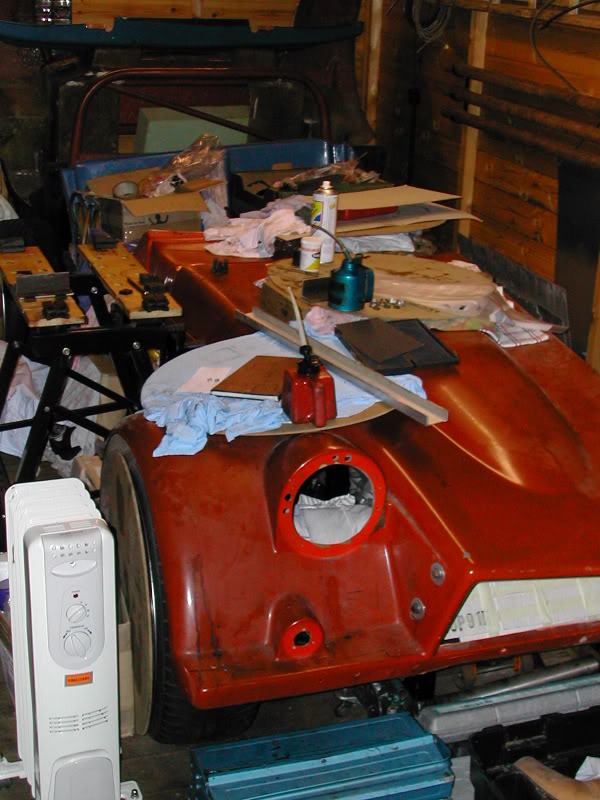
Anyway heres some pics of what it looked like when i bought it:
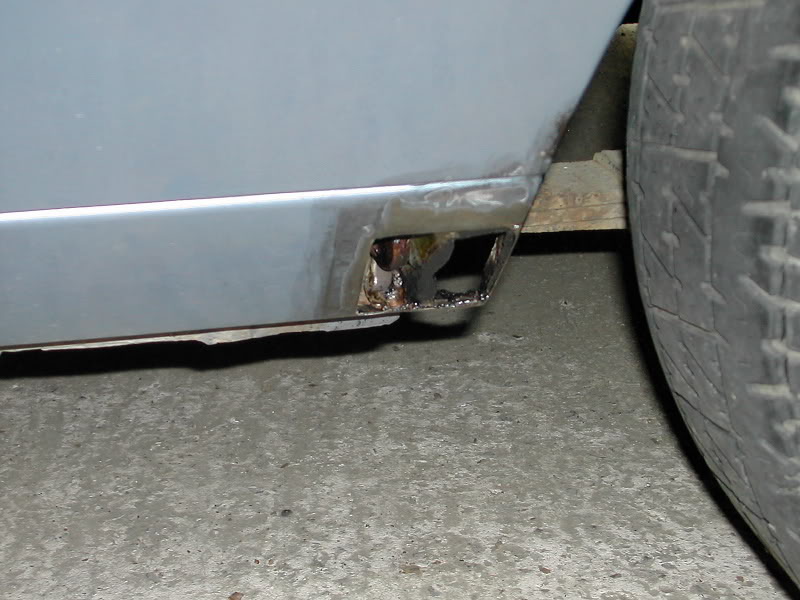
A couple of area's that needed work:
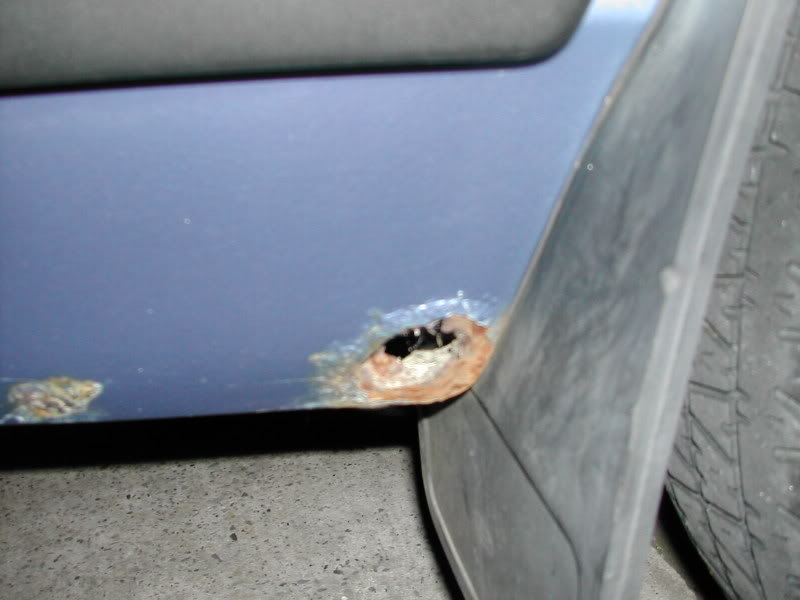
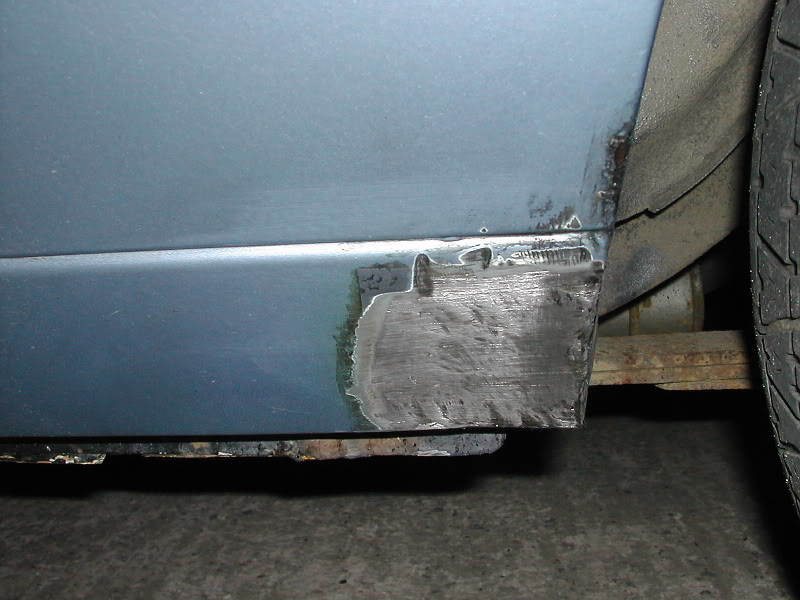
Area's of rot removed and repair work started:
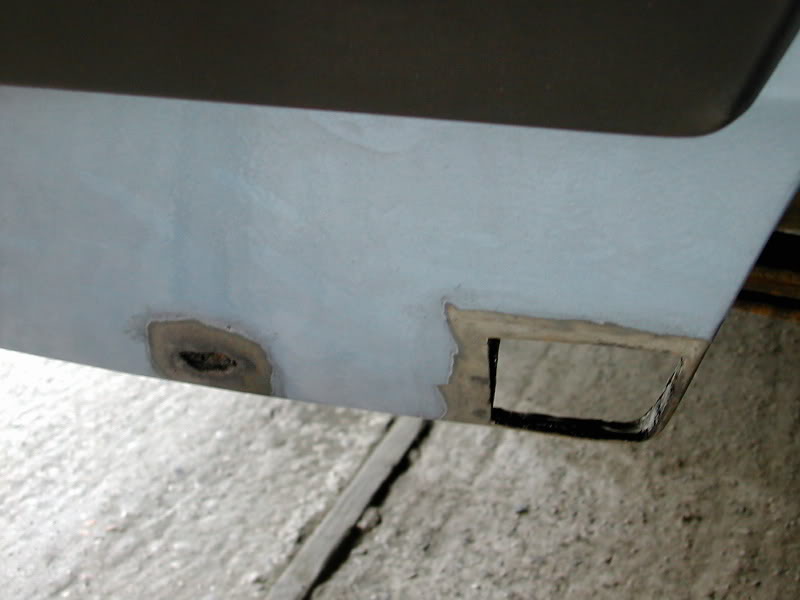

Primed and painted, just a rough job to get it through the winter ( this is my first attempt at bodywork/spraying so it's not a work of art, LOL:

After a good clean:
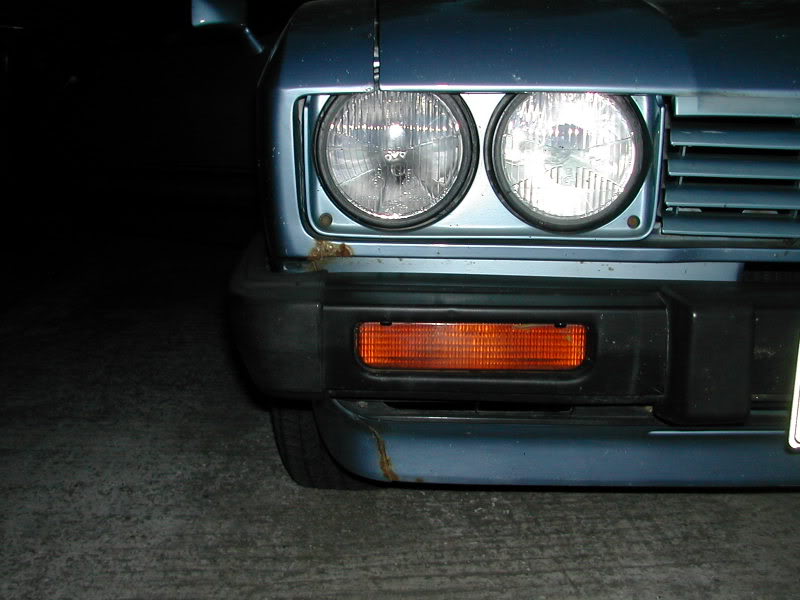
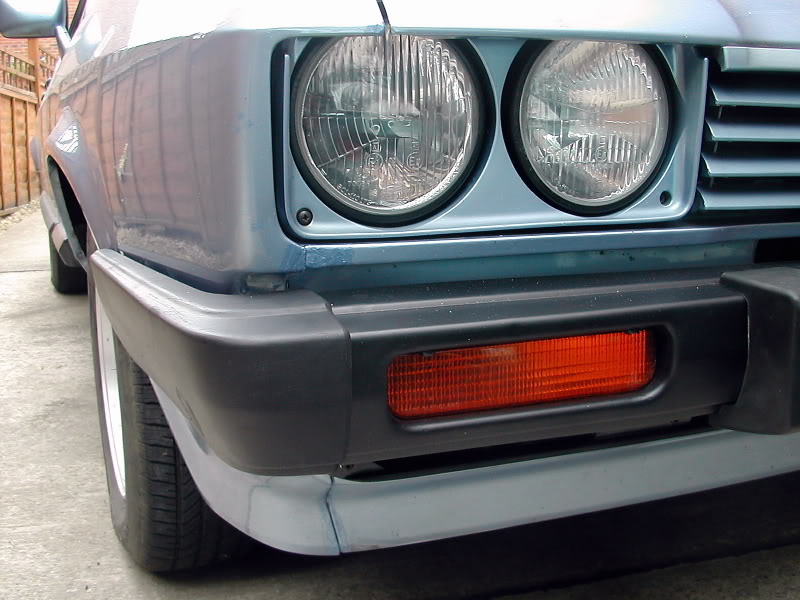
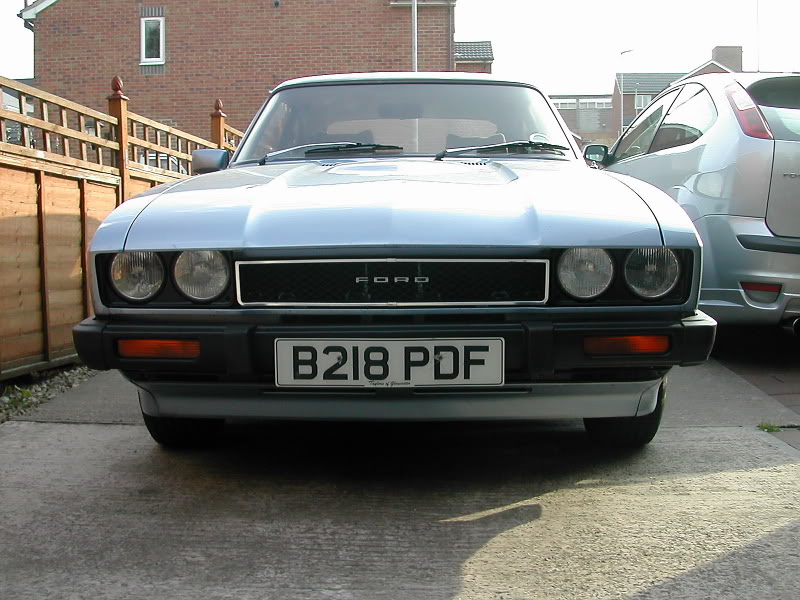
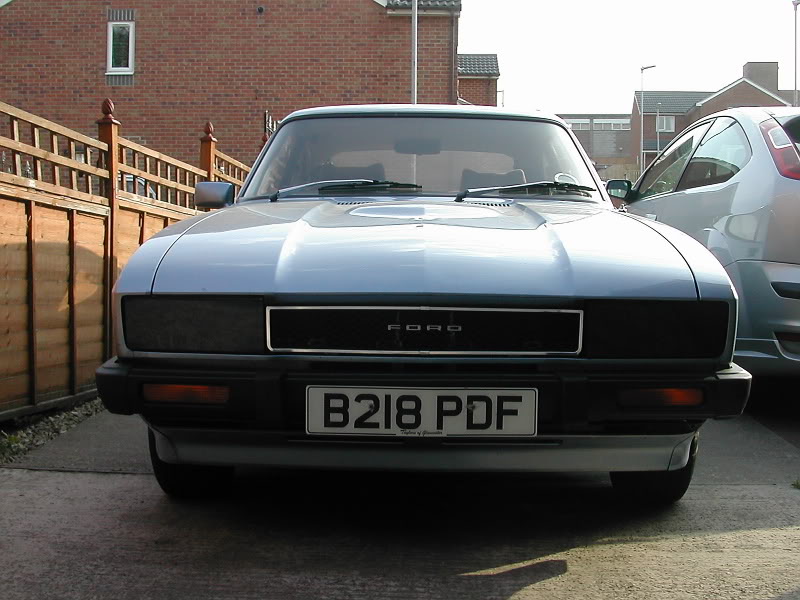
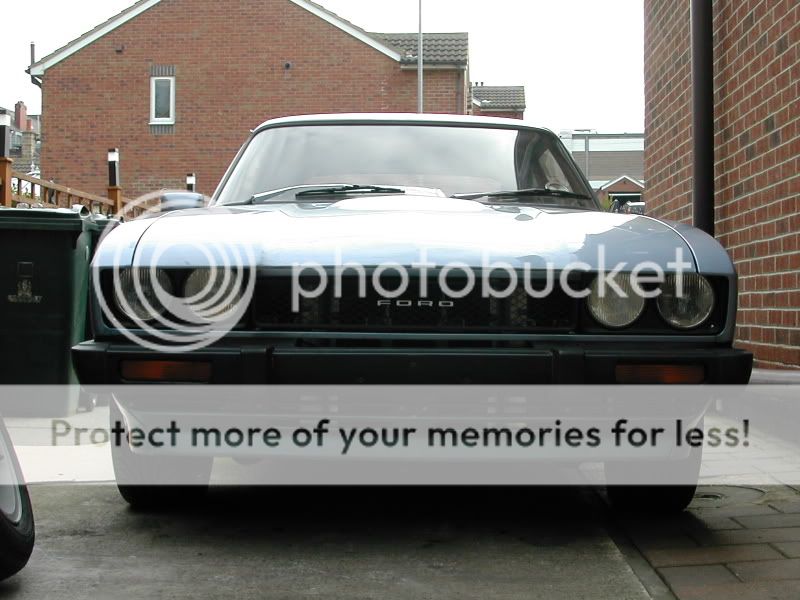
I wanted to go with the look of earlier MK3 'S' versions for the front end, so changed the headlight surrounds and changed the grille to a MK2 version:
Removal of the Pinto engine:
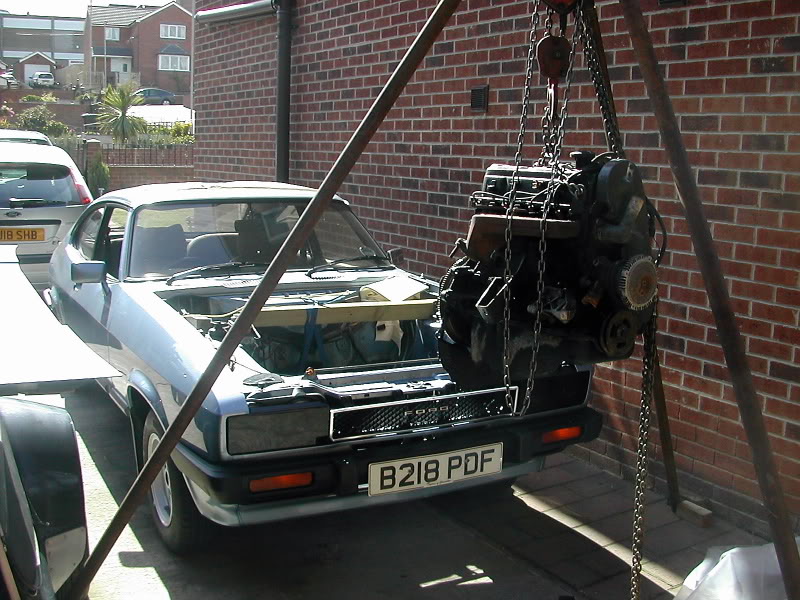
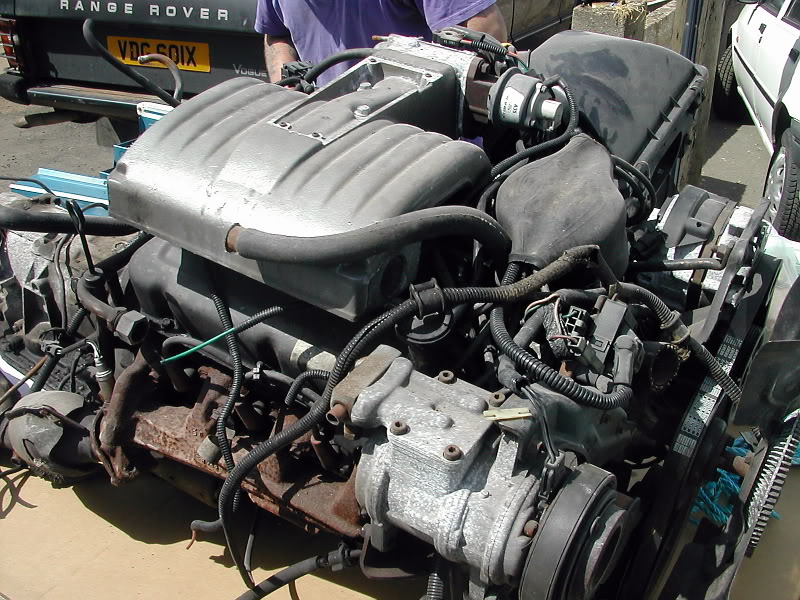
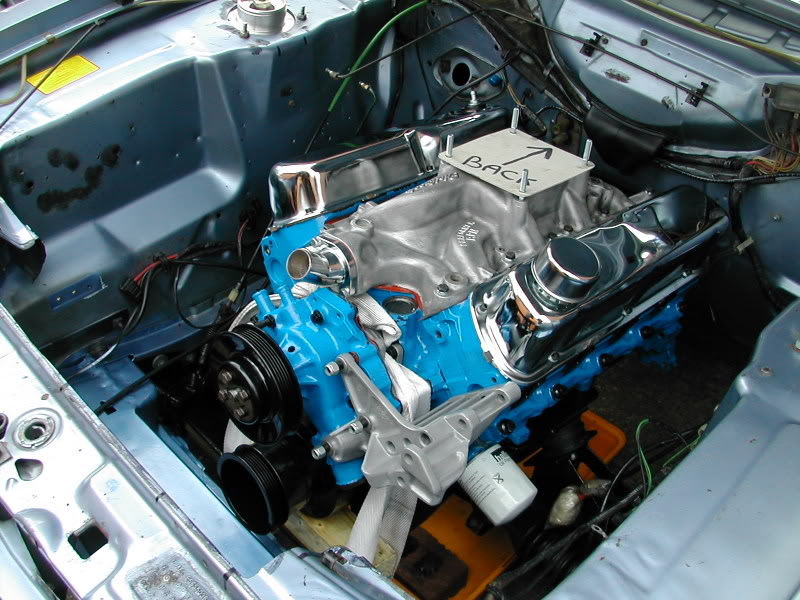
Right, here's the Lincoln V8, as bought off of Ebay:
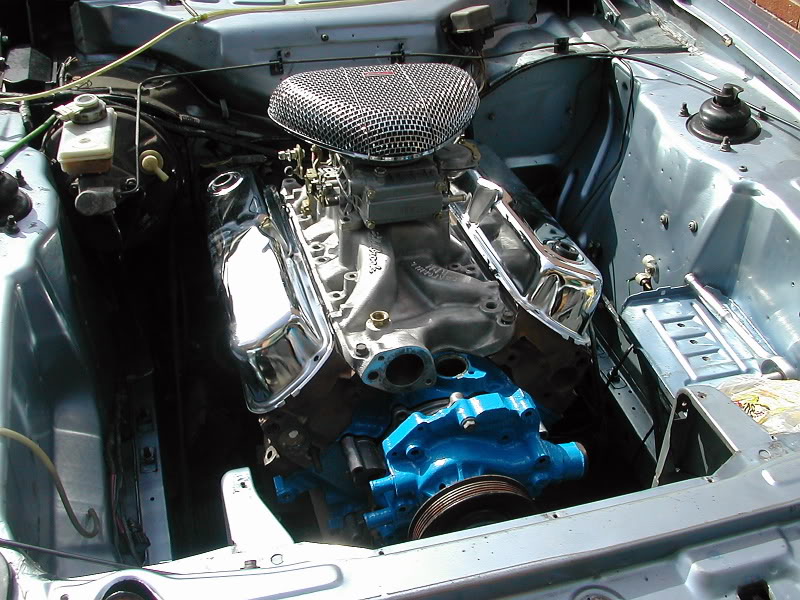
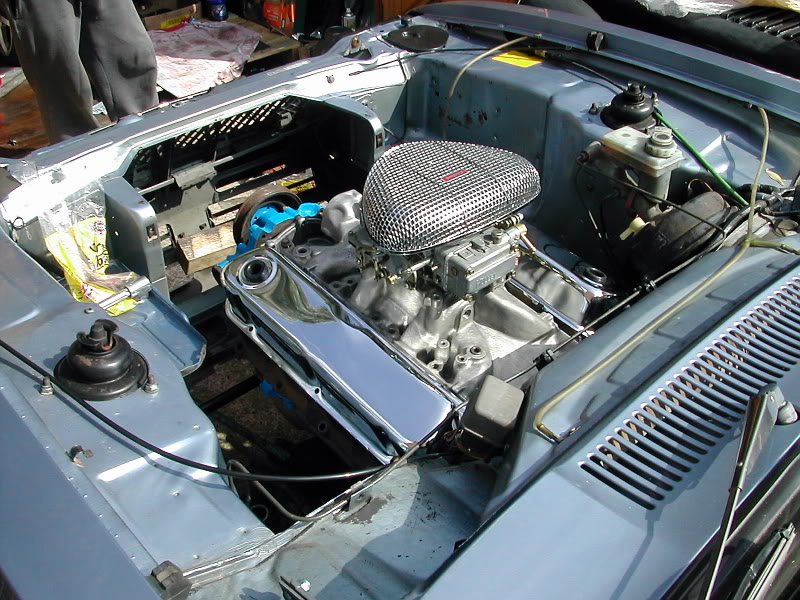
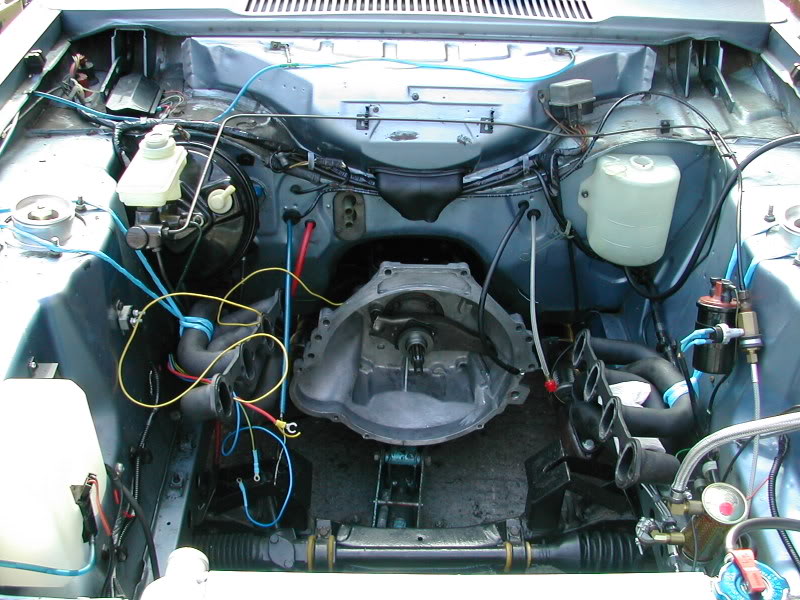
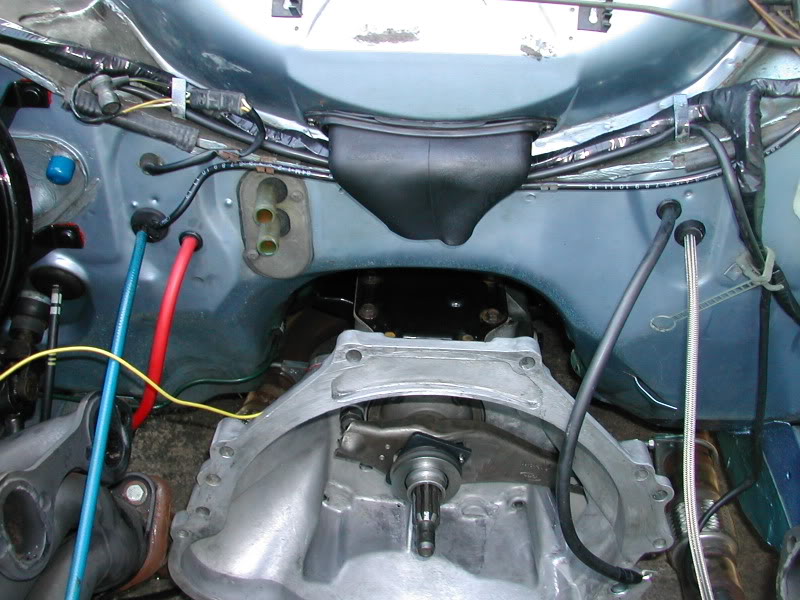
And here's it Mocked into place in the engine bay:
Once i have found the other pic's i have of parts of the capri, i will update shortly with alot more info on whats gone into it.
but heres 1 last pic:
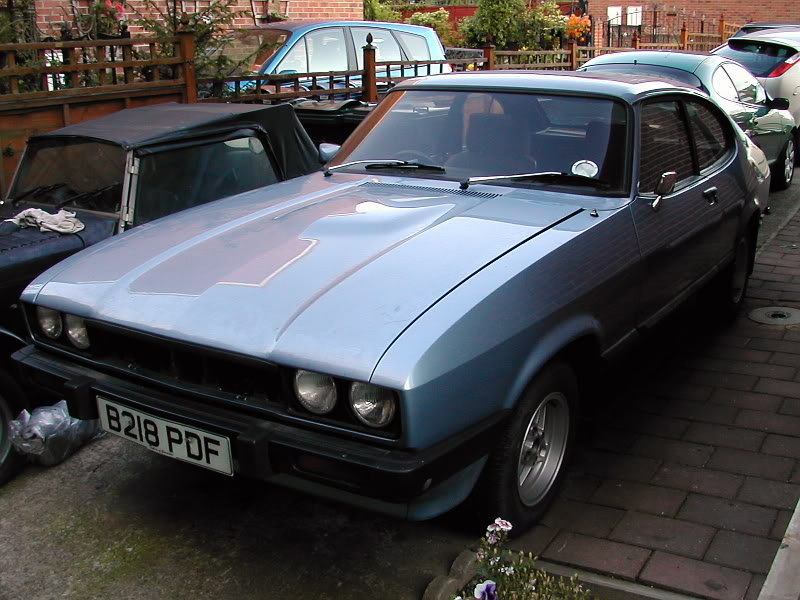
As it is now.
heres some info on what has been done on the car:
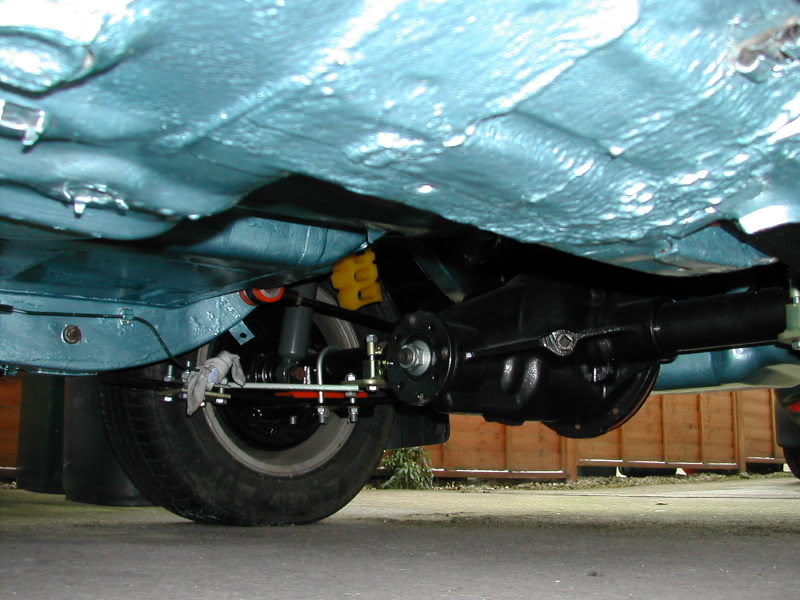
All rear running gear has been uprated to 2.8i special, so now has single leaf springs with capri-sport axle location kit fitted, Monroe Gas shockers and fully poly-bushed front and rear.
Also it is fitted with a refurbished ex-works rally GRP4 LSD unit, which i bought off a friend for �250!
The front struts have been converted to coil-overs using a kit from Burton power, these filled with 15w fork oil and fitted with 250lbs springs.
All seals and bearings have been replaced and the units are fitted with roller-bearing top mounts:
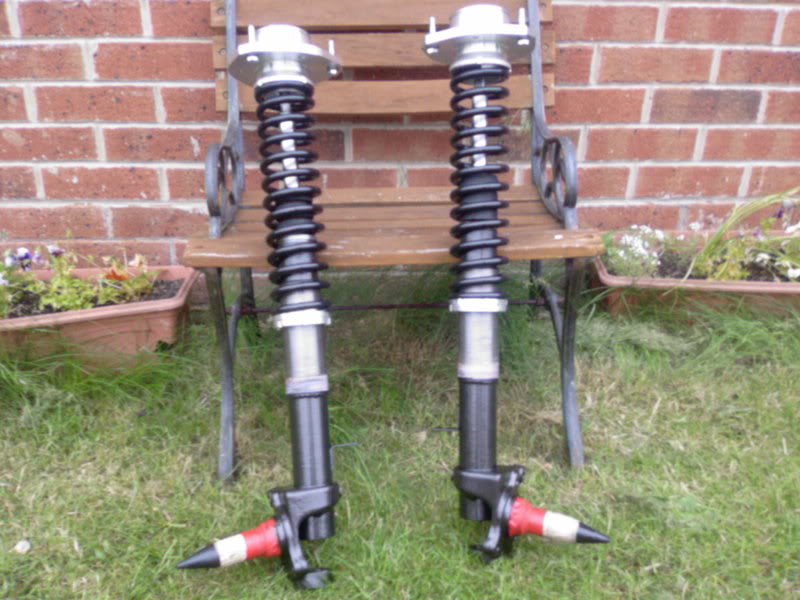
The front also has a home-made anti-dive kit fitted and the TCA's and trackrod ends have been renewed.
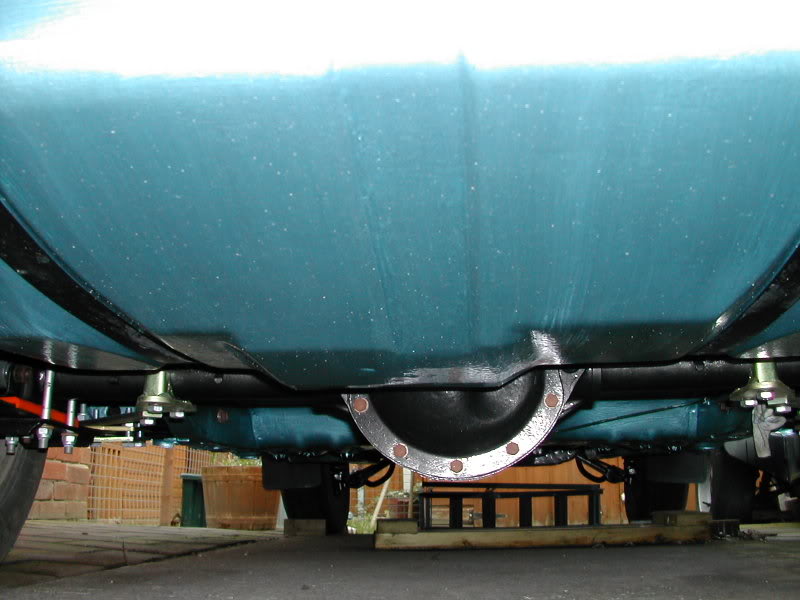
All of the underside has been cleaned, chip-guarded and painted with light blue hammerite to make it look neat and tidy ( pics to follow )
plus all under the wheelarches have been undersealed and chassis members/cavities waxoiled.
Front discs have been upgraded to drilled/grooved items and calipers are to be fully rebuilt along with servo.
The gearbox i am fitting is from a 1979 mustang and is a 4-speed overdrive version ( cannot afford a T5 just yet, but will upgrade in time ):
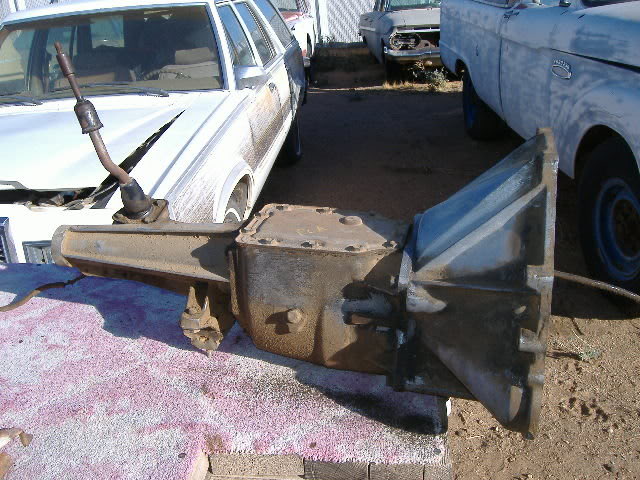

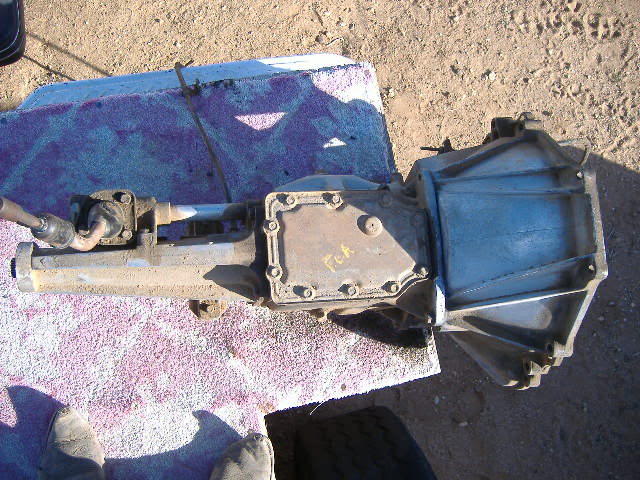
As bought from USA.
This will be fitted with a ZOOM performance clutch kit and a Mcleod Steel flywheel with ARP Bolts.
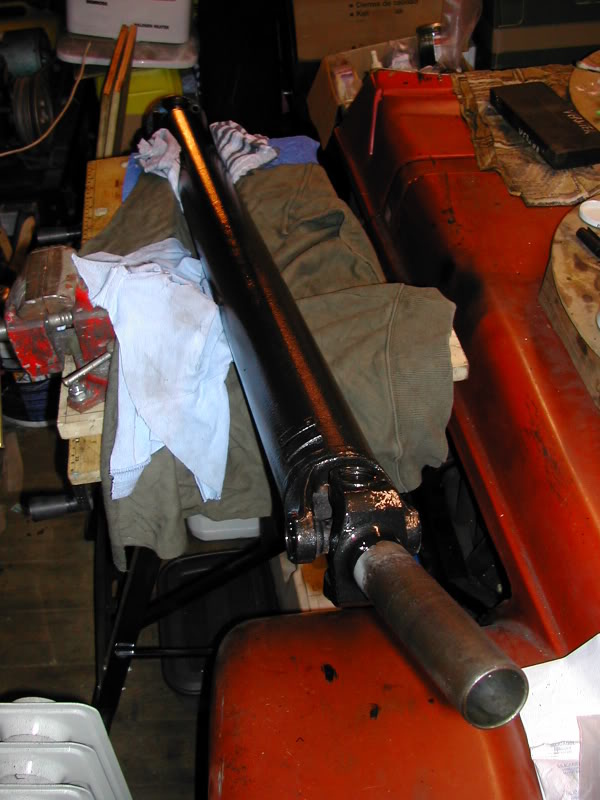
The Propshaft ( not finished conversion yet ) is a Mustang front yoke coupled to a sierra Cosworth rear flange.
Right!!, Engine Specs people,
Engine is a 1988 lincoln/Ford 5.0L EFI V8, upto now these are the following mods i have made:
Thrown the EFI system, dizzy and air control system in the bin and replaced with.
* Edelbrock performer RPM Inlet Manifold with a Holley 600 carb
* Accel Dual-point dizzy
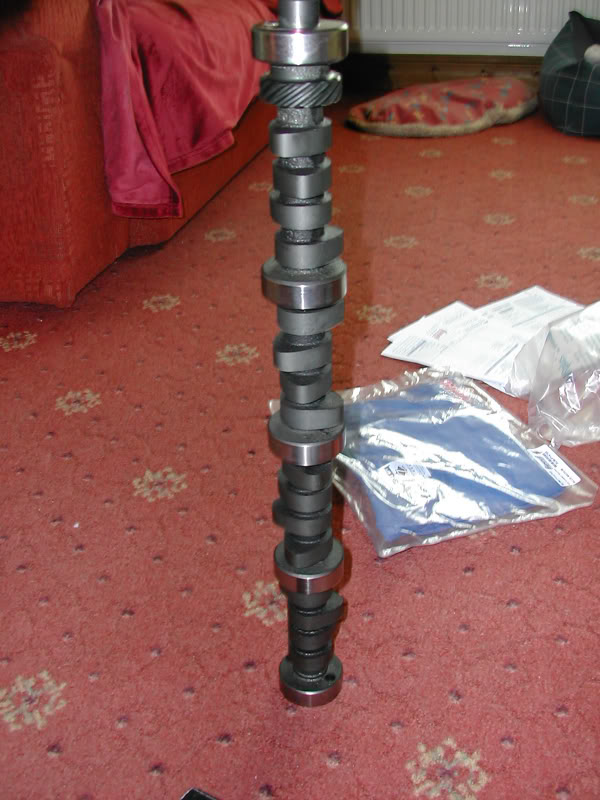
* Edelbrock performer RPM Camshaft kit
* Summit adjustable true-roller timing set
* Summit performance pulley set
* Plasma performance Piston ring set
* Summit 8mm performane HT leads
* Edelbrock torker valve spring kit
* Mr-gasket full race engine gasket set
* Pro-comp roller rocker arm set
* ARP full engine bolt set
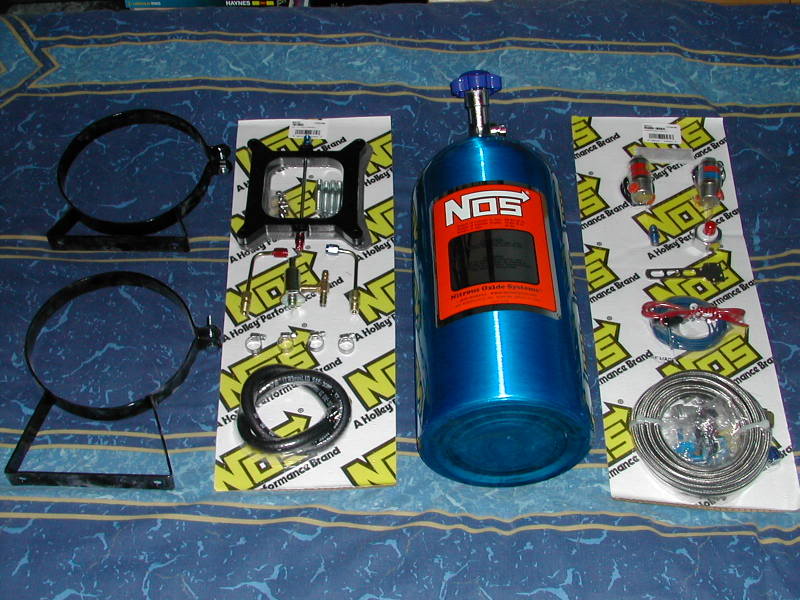
* NOS super powershot system:
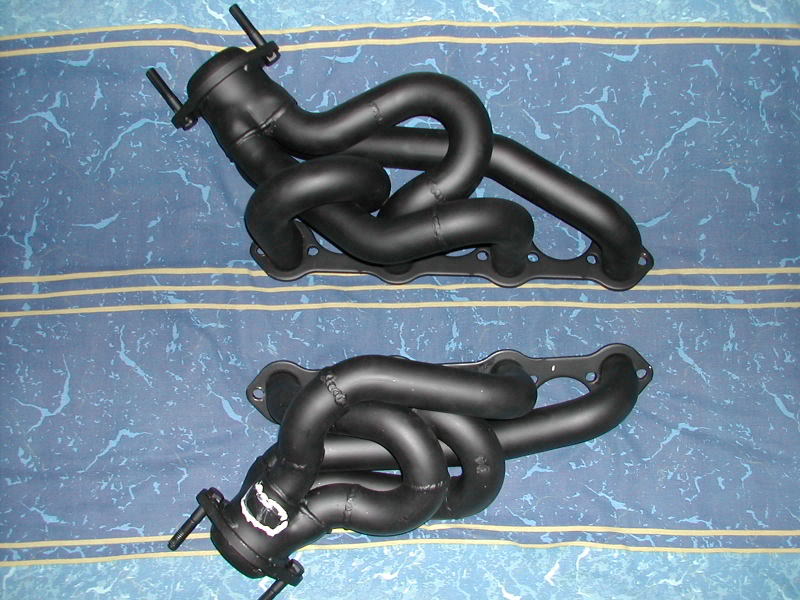
* Flow-tech equal length performance exhaust manifolds:
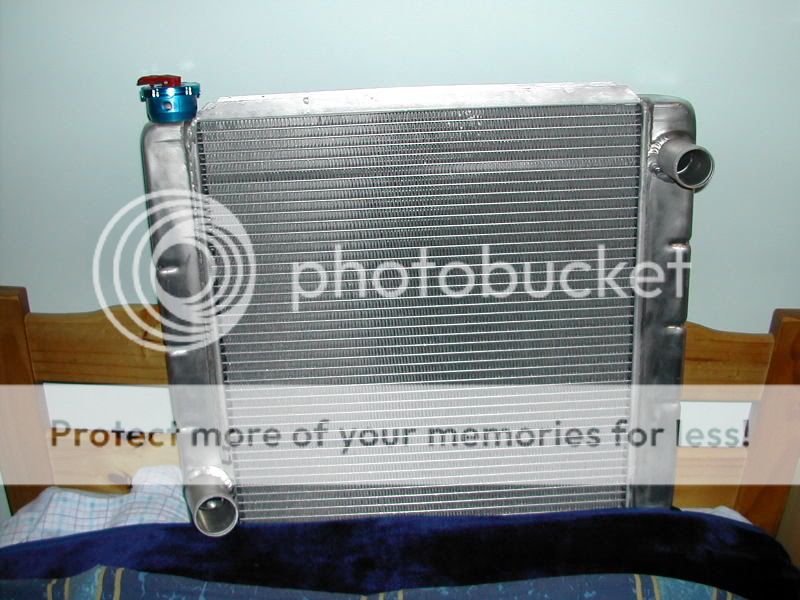
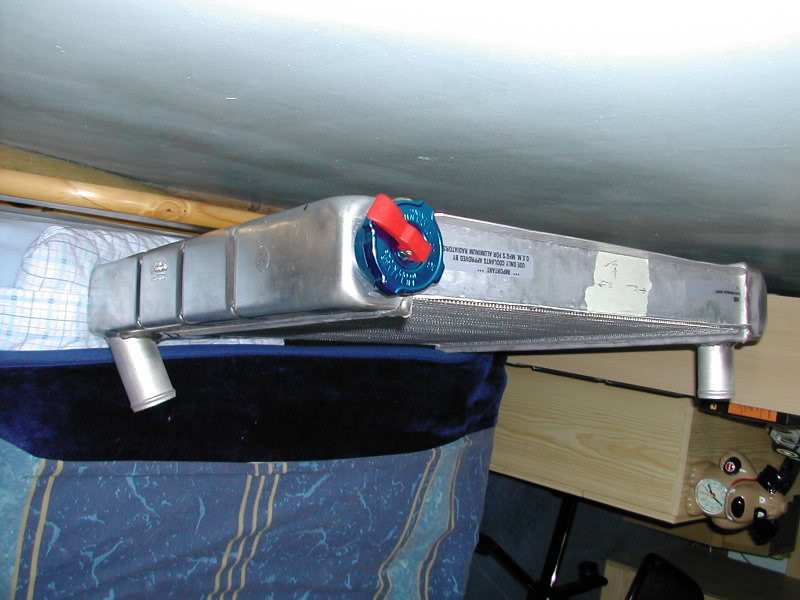
* Summit race spec all ally twin-core radiator:
* Edelbrock RPM air filter
here's a few 'odds and sods' pics of it.
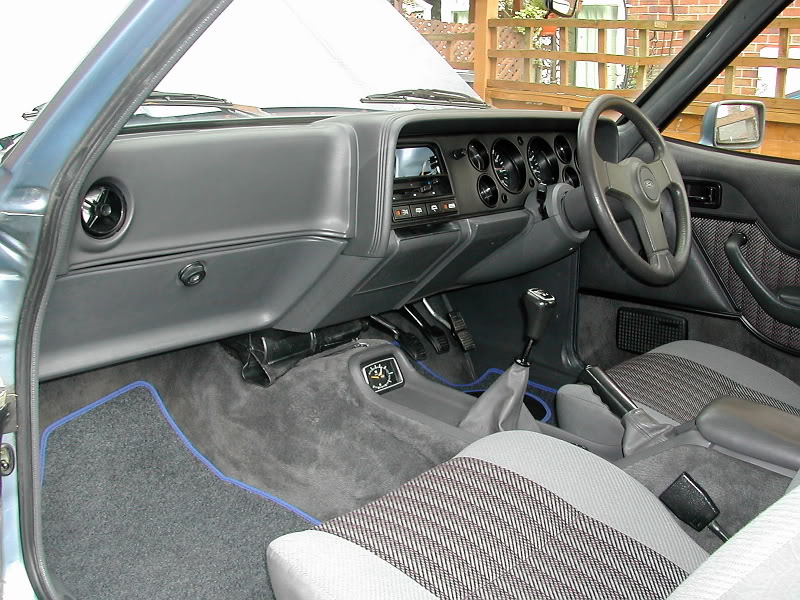
The interior after a good clean out, gunna keep it as stock as possible:
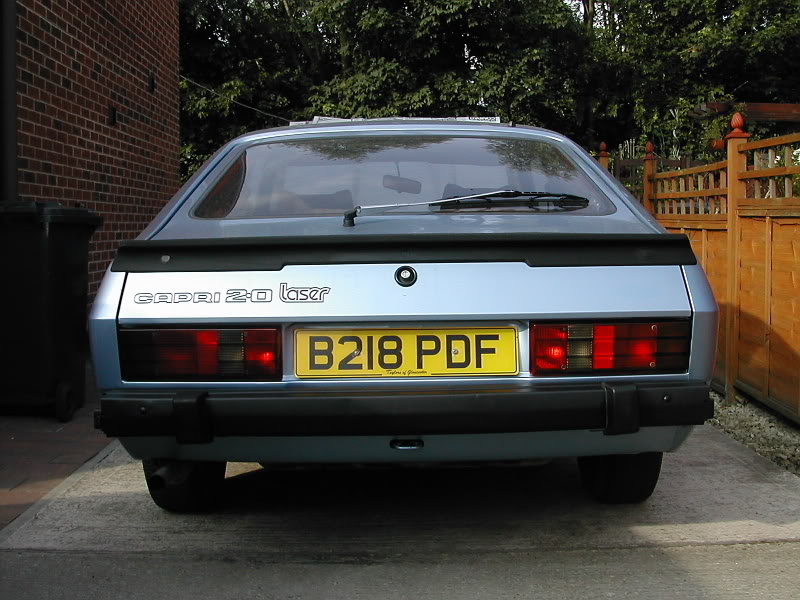
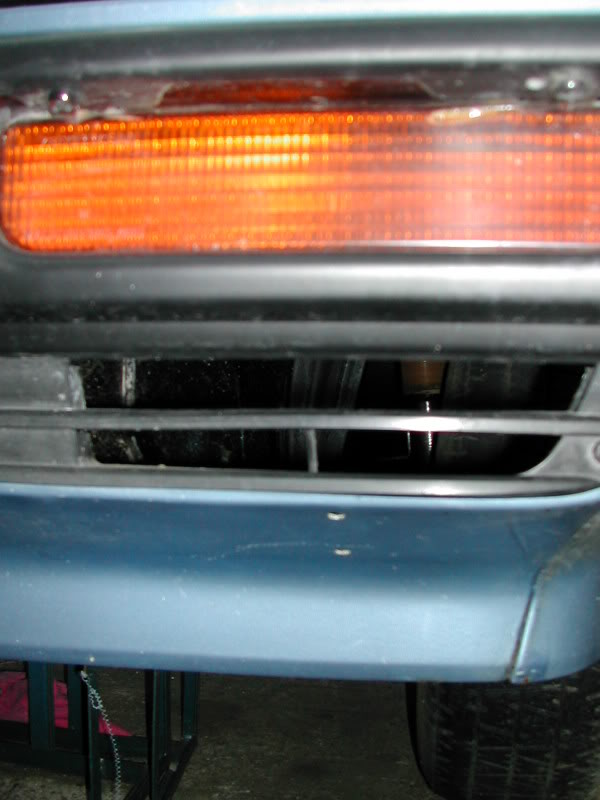
Before and after pics of the smoked rear lights:
Before:
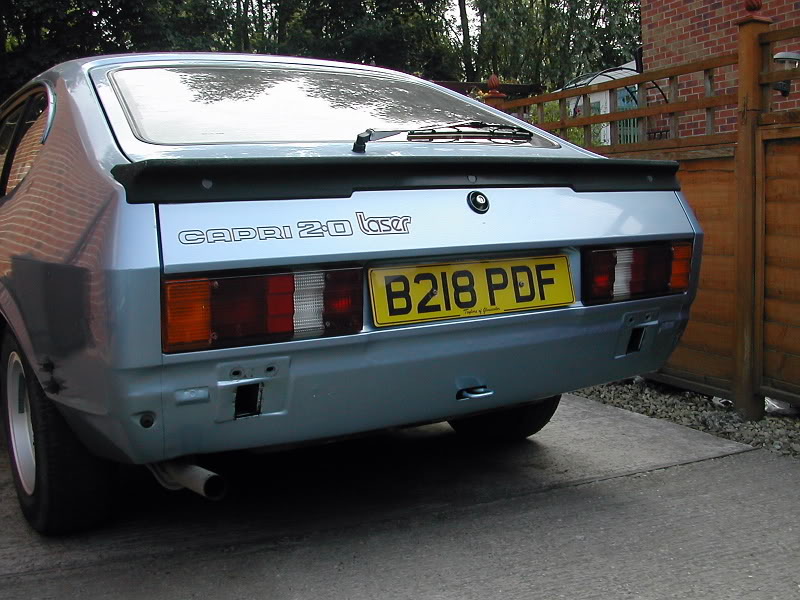
After:
Trying a 15 x 8 Revolution alloy in rear:
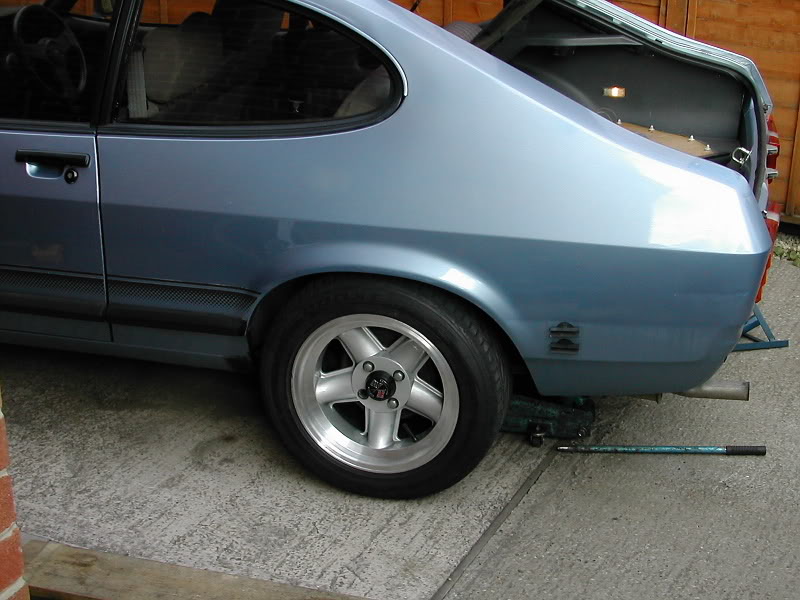
It's abit of a tight fit
De-chromed MK2 grille in place:
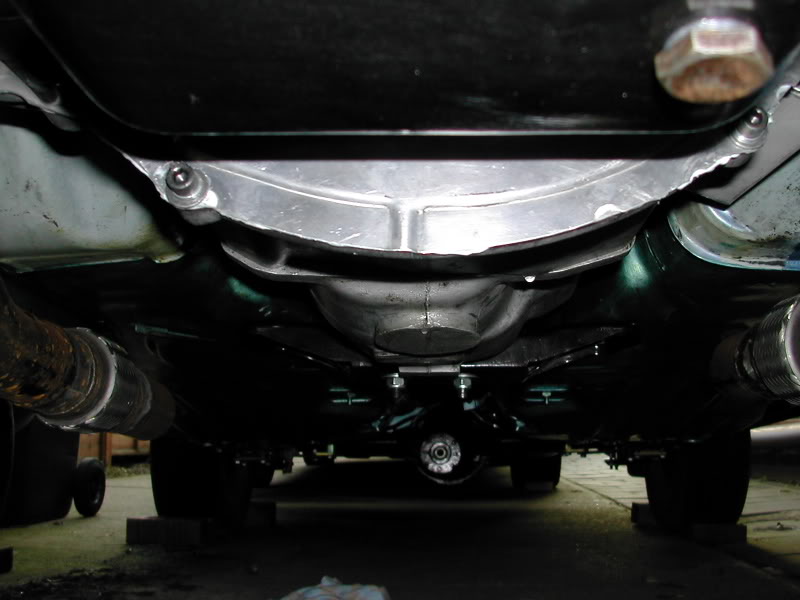
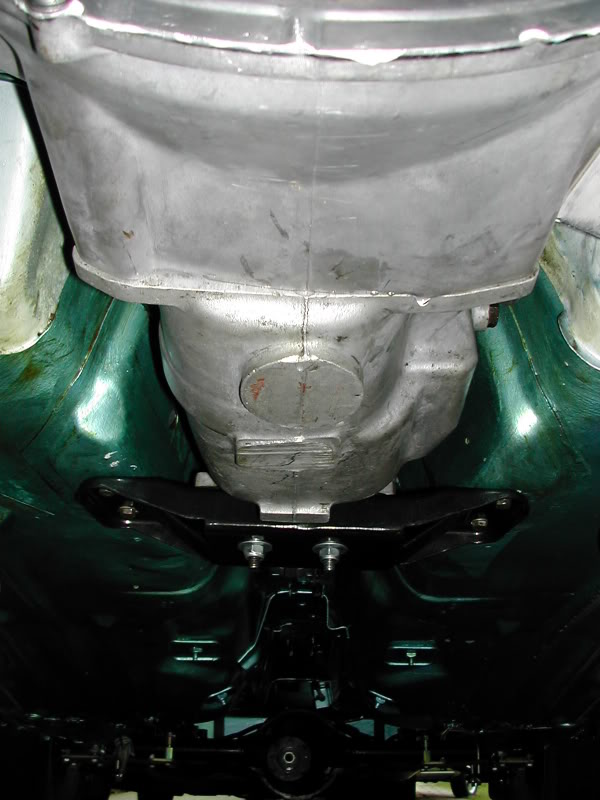
couple of pics showing the painted underbody, petrol tank and rebuilt axle:
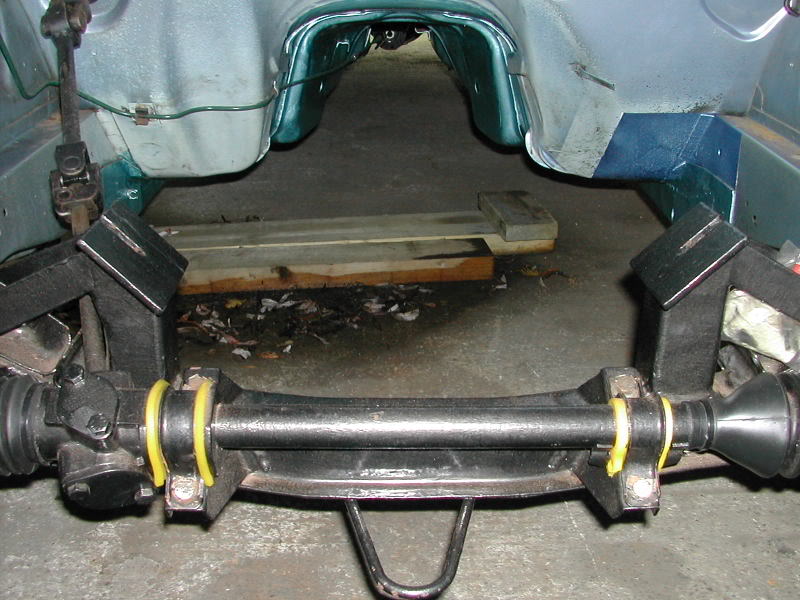
Also Modified X-member, as you can see, the original engine mountings have been removed and replaced with 40mm box section with 6mm plates at the top, there are also 4 3mm bracing strips welded in to add strength to the X-member:
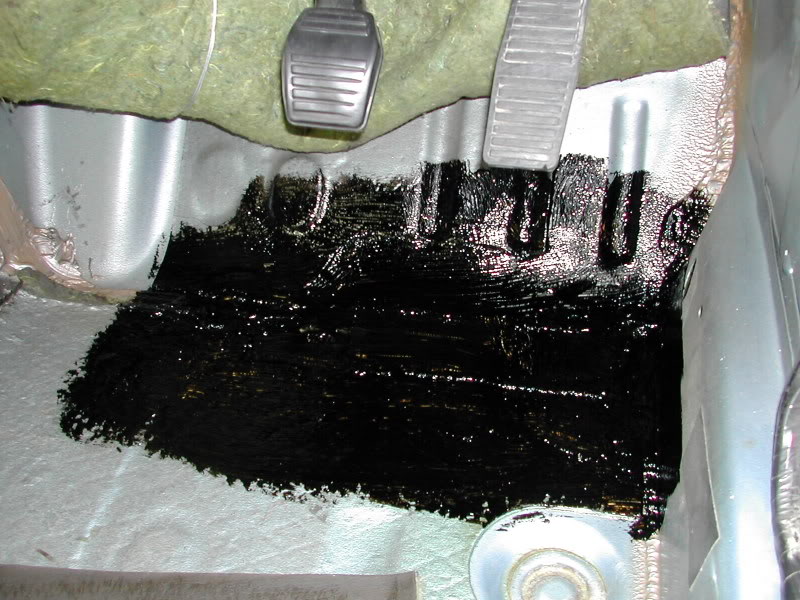
There are repair plates required on both driver and passenger ( below ) footwells:
Think i'm going to plate it on both inside and outside to keep it strong.
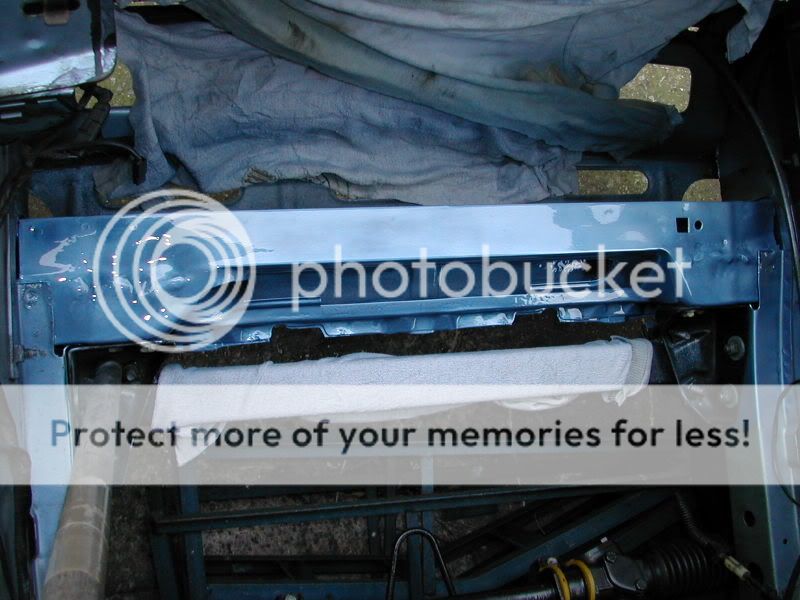
Front/Radiator Slam panel that has had a Tube welded in place for the radiator bottom hose to go through, just needs a small amount of work to finish and then can be sprayed:

timing cover and water pump bolted in place,
Now completed Brake servo ( master cylinder needs a touch up in places )
The servo and master cylinder have been fully rebuilt with new rubbers, seals and fibre washers.
Although this is a job that your " AVERAGE JOE " ( ie: ME ) could do, i would'nt recommend doing so, as in barnsley it's known as a " REYT PAIN IN'T ARSE!! "
I did the rebuild as i wanted to be sure the servo was in good nick before asking it to help stop the 5.0L.
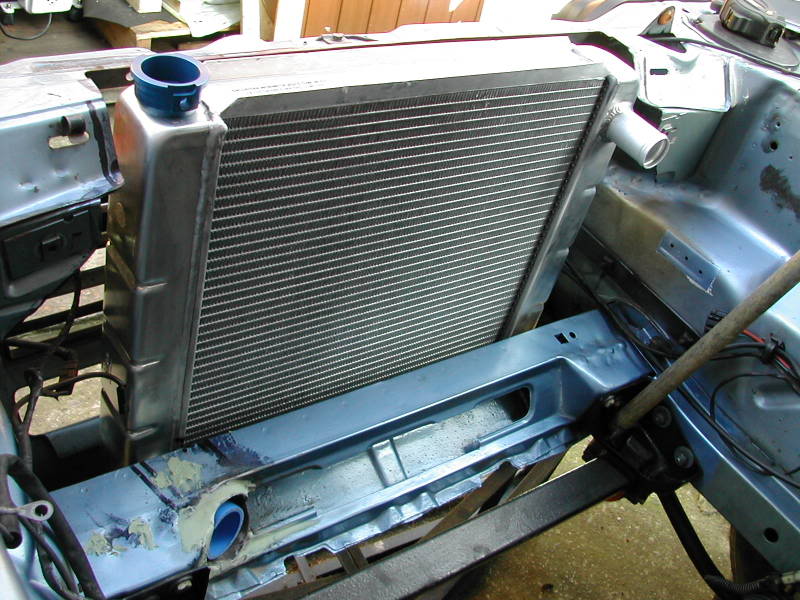
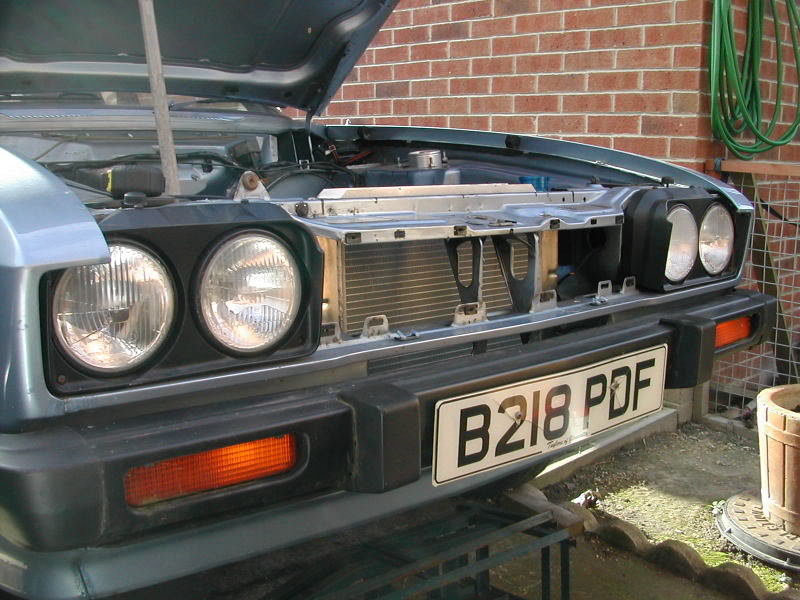
Also managed to get some measurements for the Radiator/Fan mounting brackets too, so here's a couple of pics of the rad in place:
Outside view:
****** THINK SHE COULD DO WITH A WASH ******
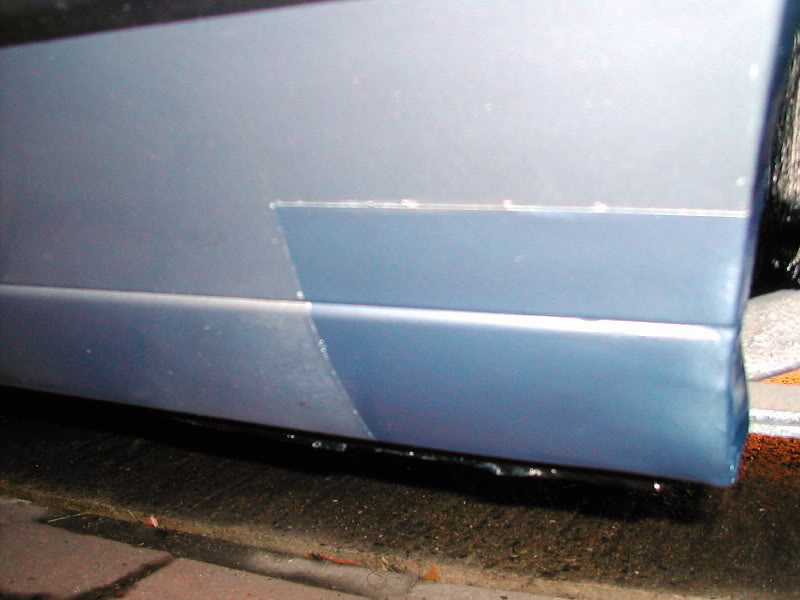
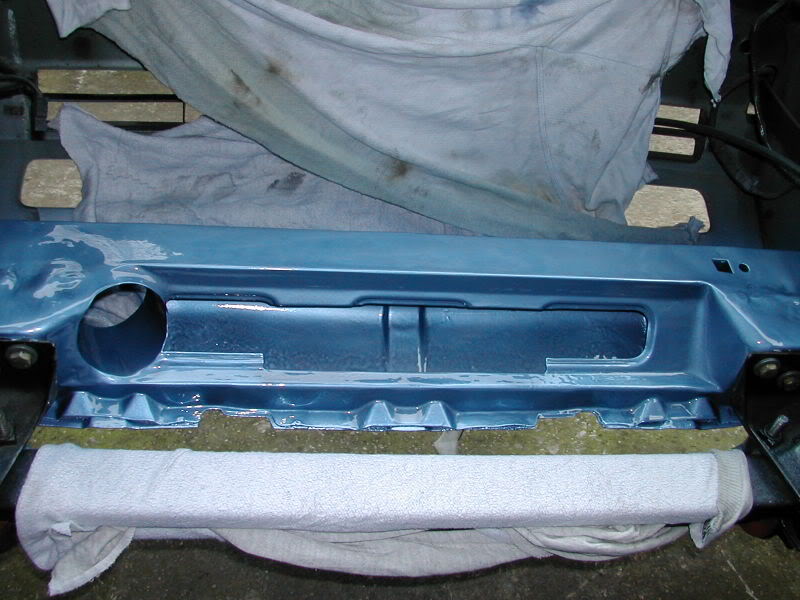
Managed to finish off rubbing down the poor paint job on the top and back edge of the valance, cleaned it, then primered, top coat and clear coated it over the space of 7 hours.
Here's the result:
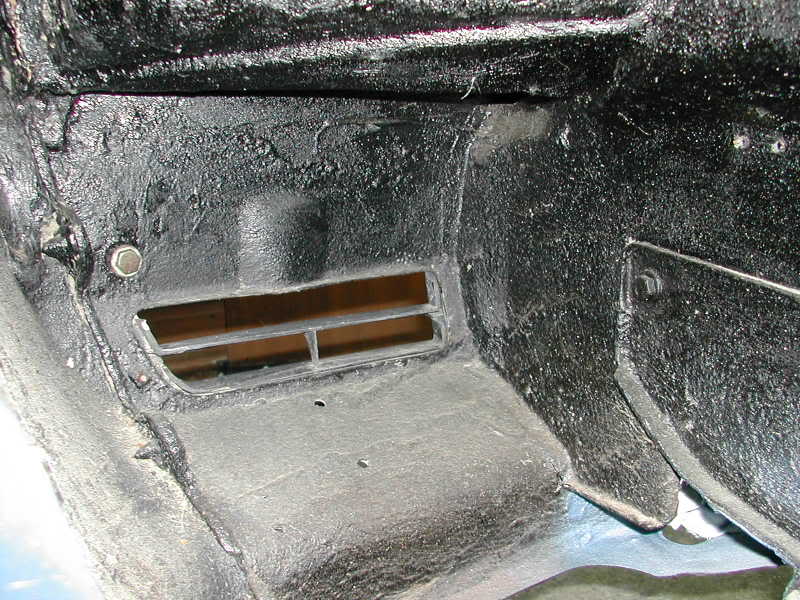
Also got some piccies of the area in the passenger wheel-arch i'm wanting to fit an oil cooler ( if not too much hassle )
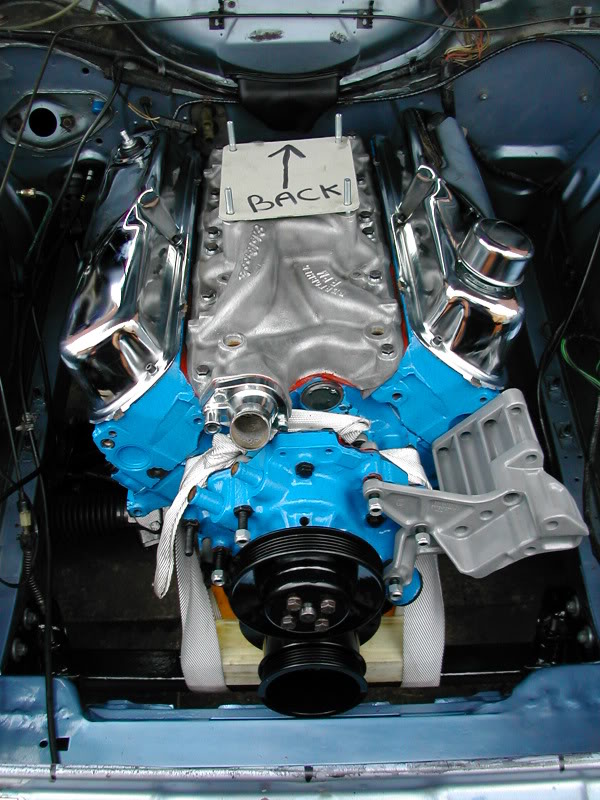
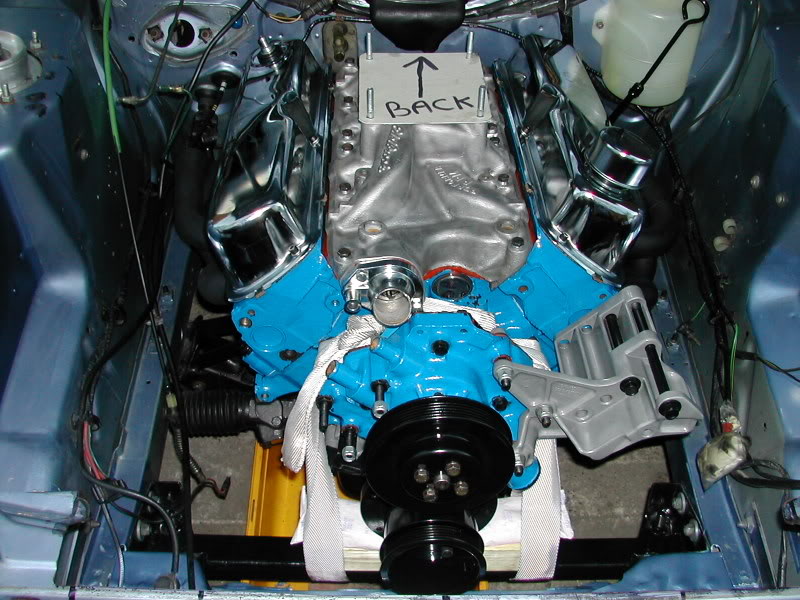
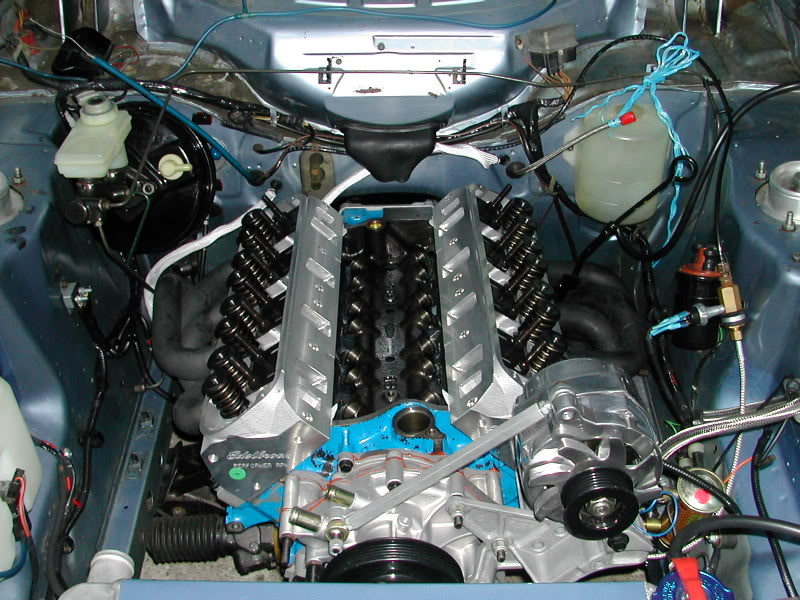
engine block and heads in for good.
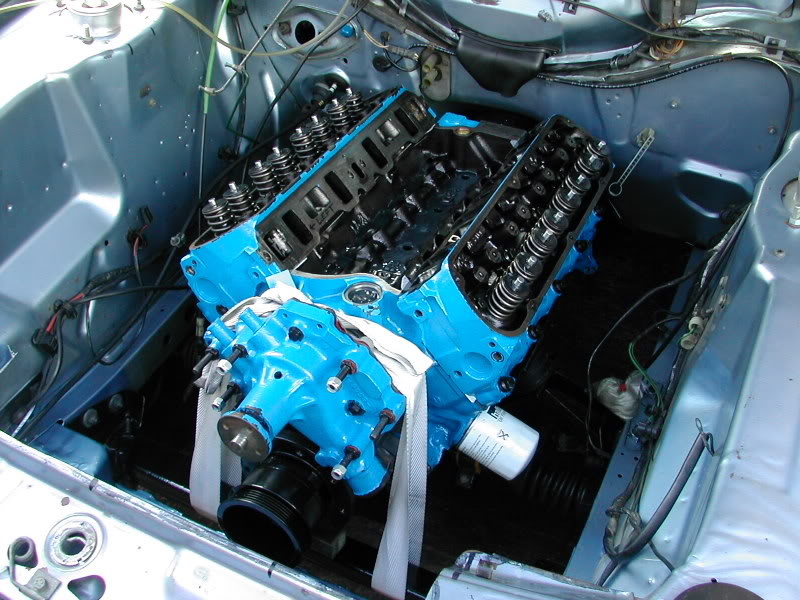
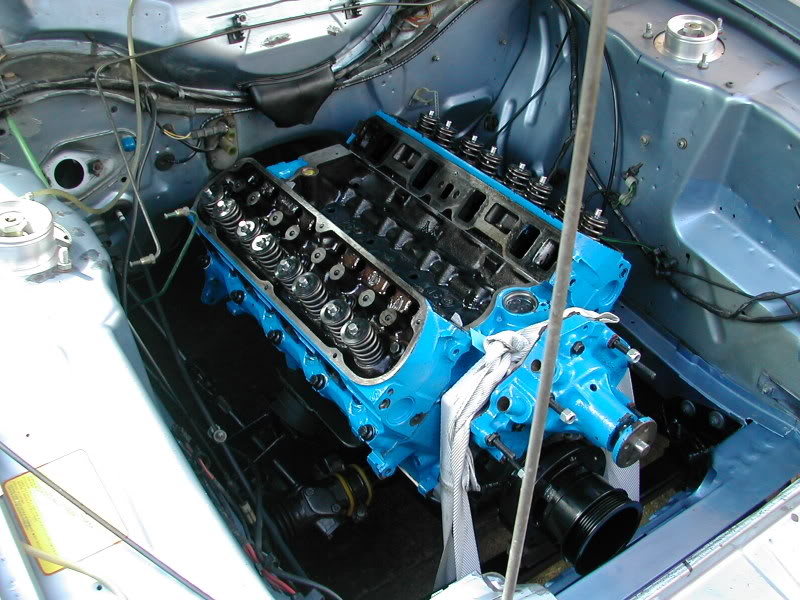
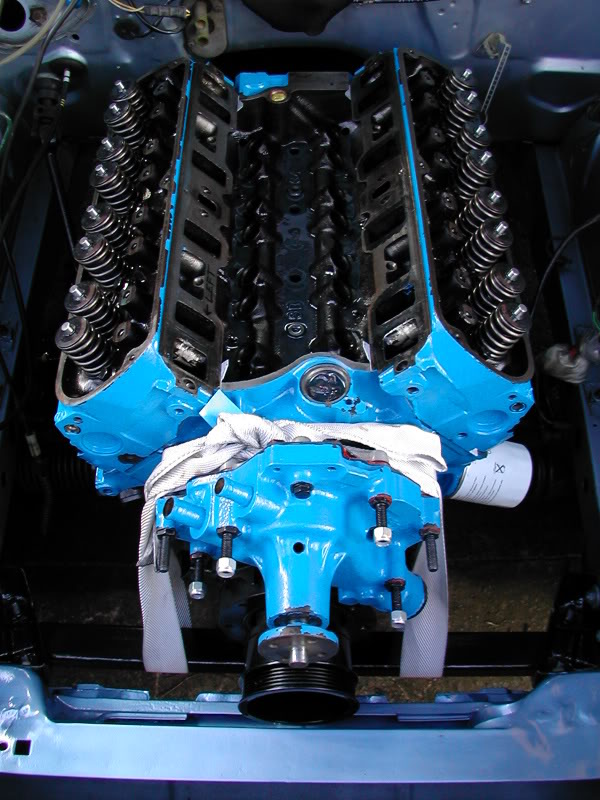
The white strap round the water-pulley is there to balance the engine as we have'nt put the gearbox in place yet, still need to make a mounting for it.
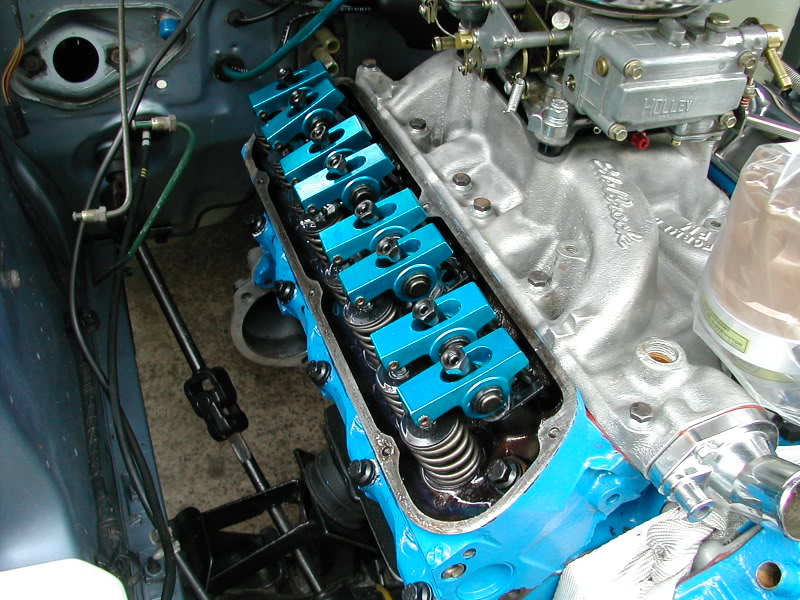
we managed to fit the Valve rocker studs and pushrod guide plates, with these in place we were able to measure up for the new pushrods required as we've changed the cam.
Also managed to bolt the waterpump pulley in place.
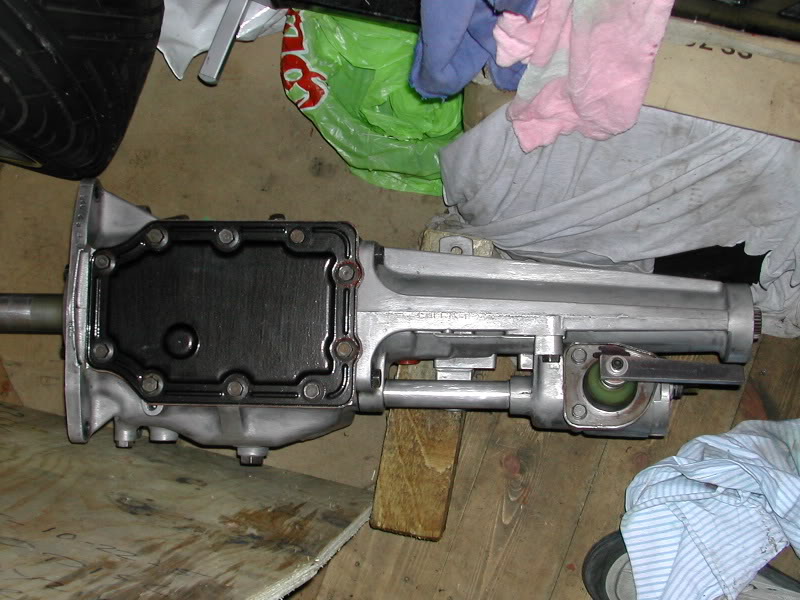
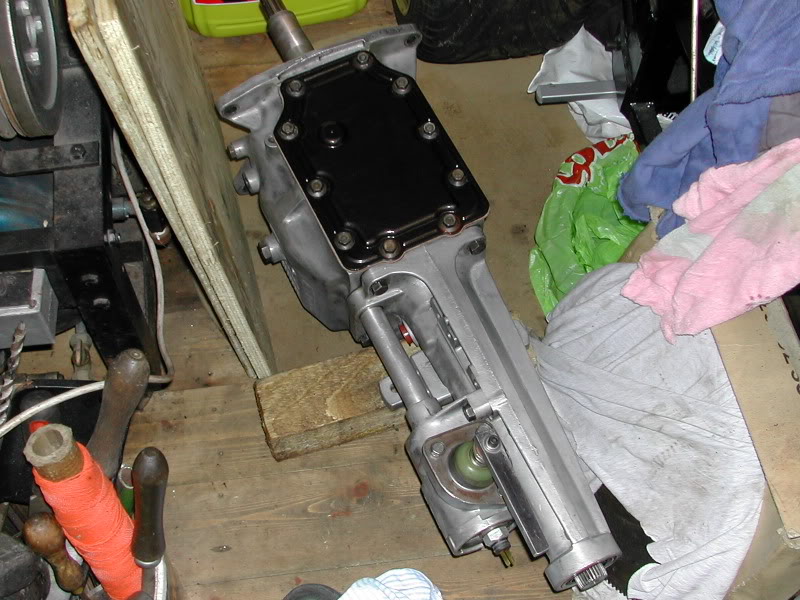
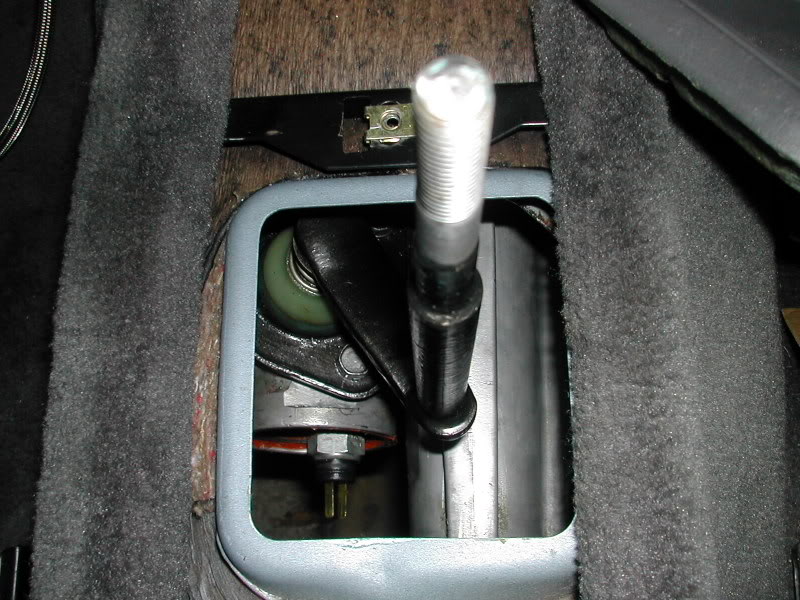
With the V8 now out of our shed, we had room to work on the gearbox, it needed a clean, the top cover bolting back into place and we needed to take measurements for the new gear-stick that has to be made for it:
Also while having abit of a tidy out in the shed/garage I found this buried under bags of rags and tools in there:
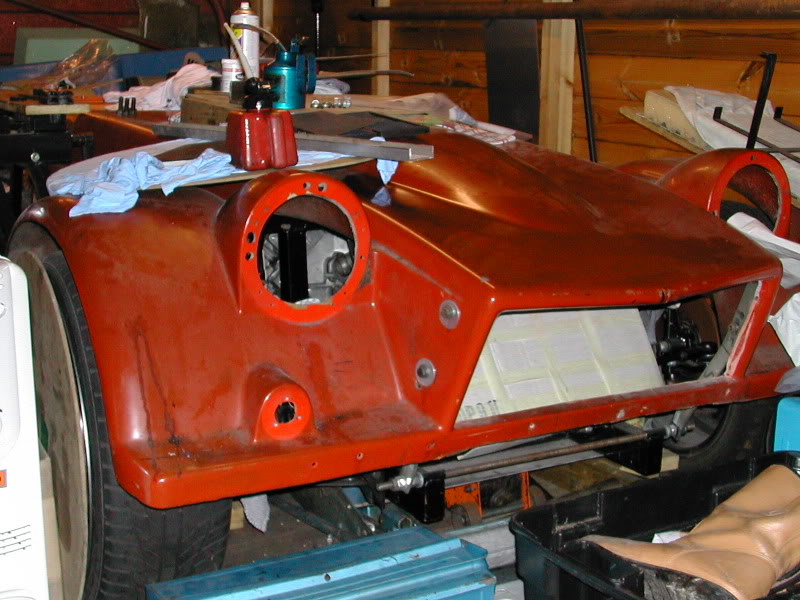
Amazing what you forget you have when you cant see it.
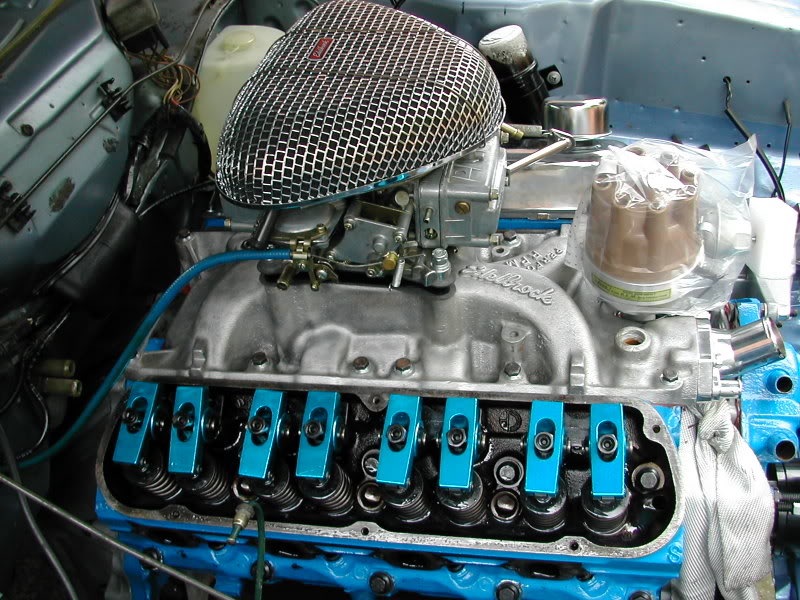
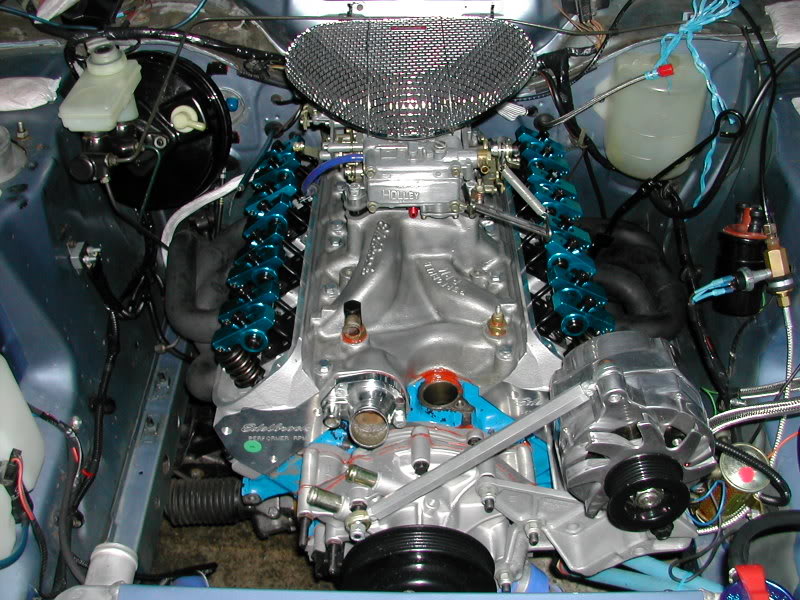
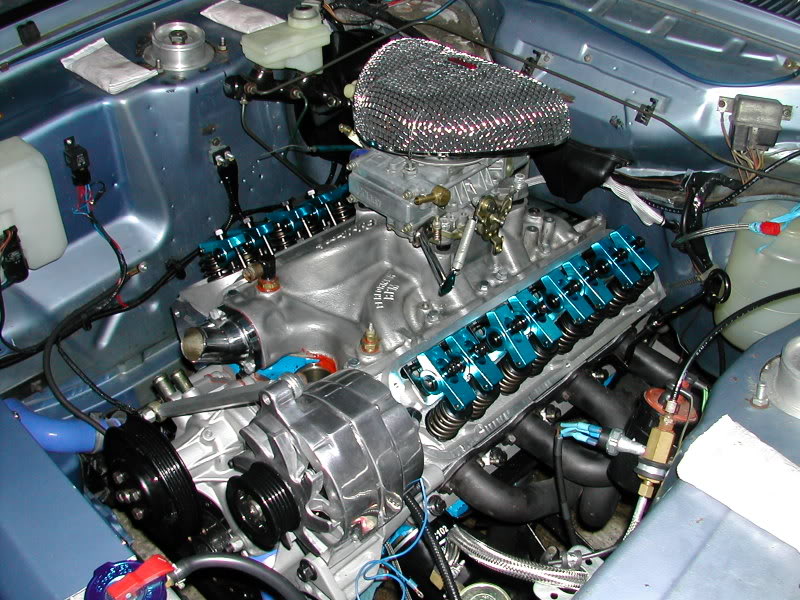
inlet manifold in place
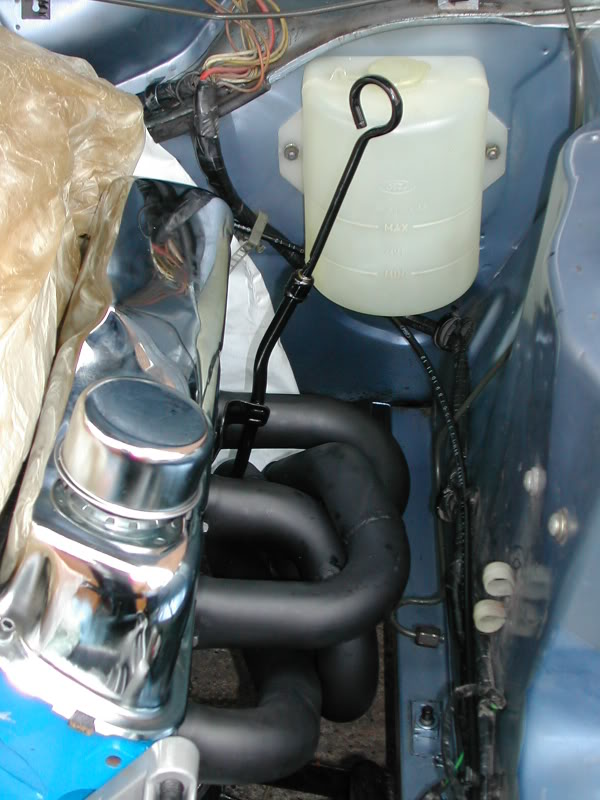
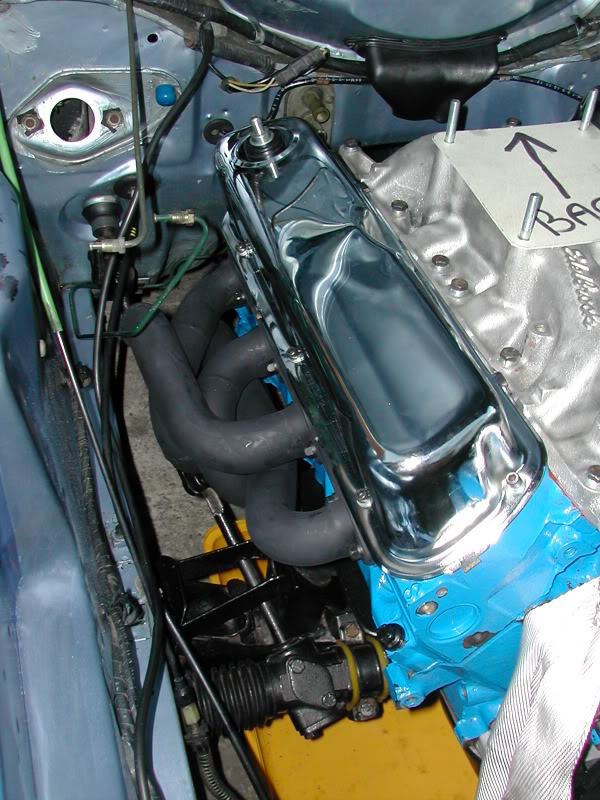
Passenger side manifold in place, we also fitted the dip-stick and tube, plus the radiator overflow tank too.
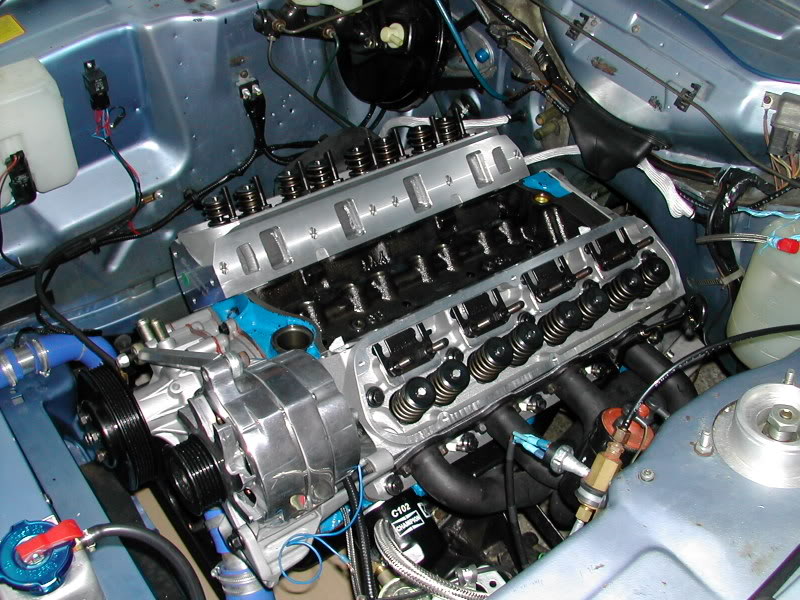
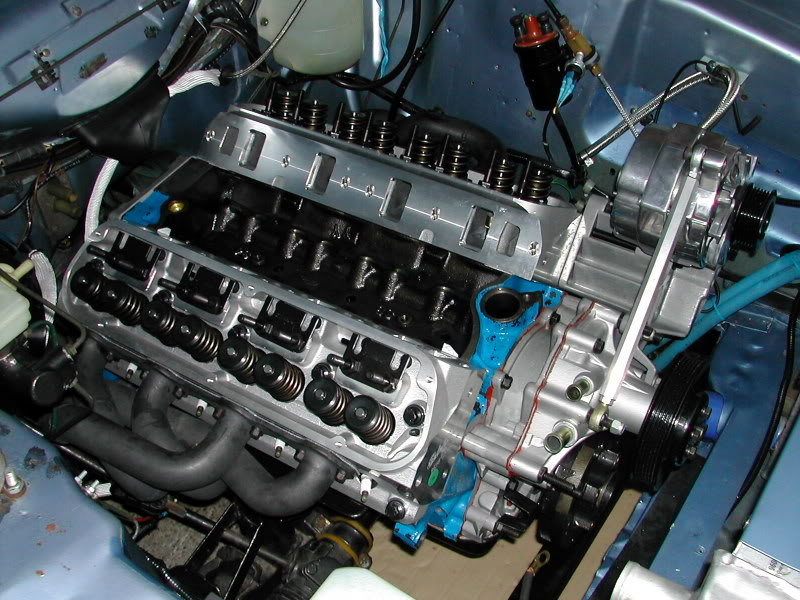
Drivers side manifold in place
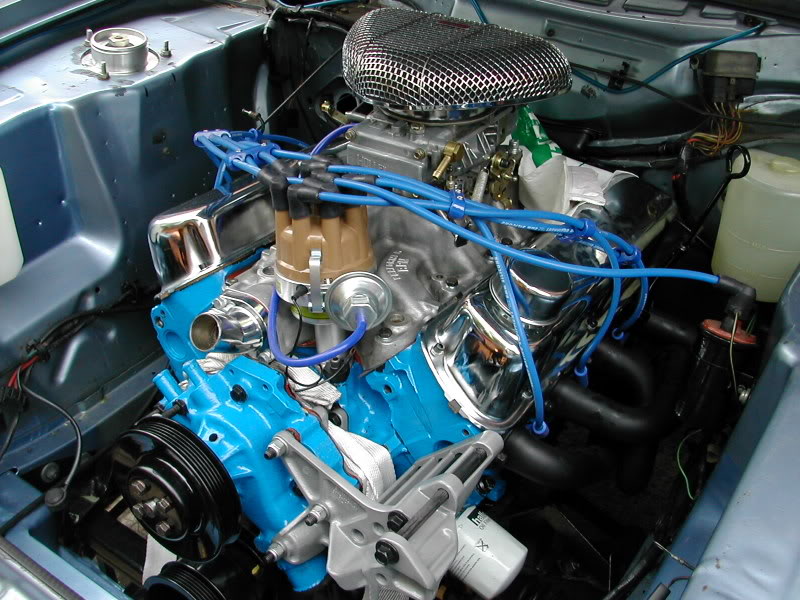
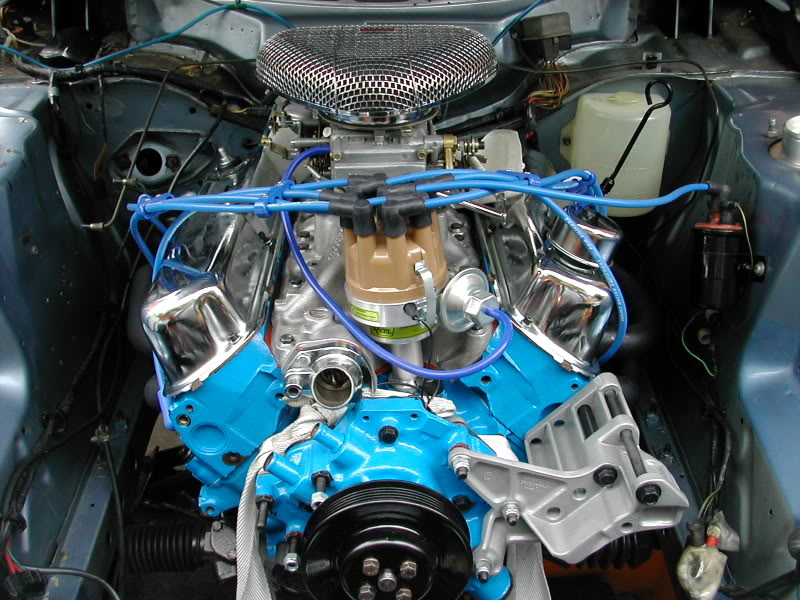
How the engine looks now
The Brake Servo will be going back on shortly and with other small items like the screen wash bottle etc.
Next major item to fit is the radiator and fan, plus the carb and Nitrous plate.
Well after a couple of weeks wait, the new pushrods ( and other bits such as a racing Fuel pump, regulator and relay switch ) have arrived from the States.
So Today we fitted the Valve lashcaps, new pushrods and Roller tip rockers, heres a piccie of the drivers side:
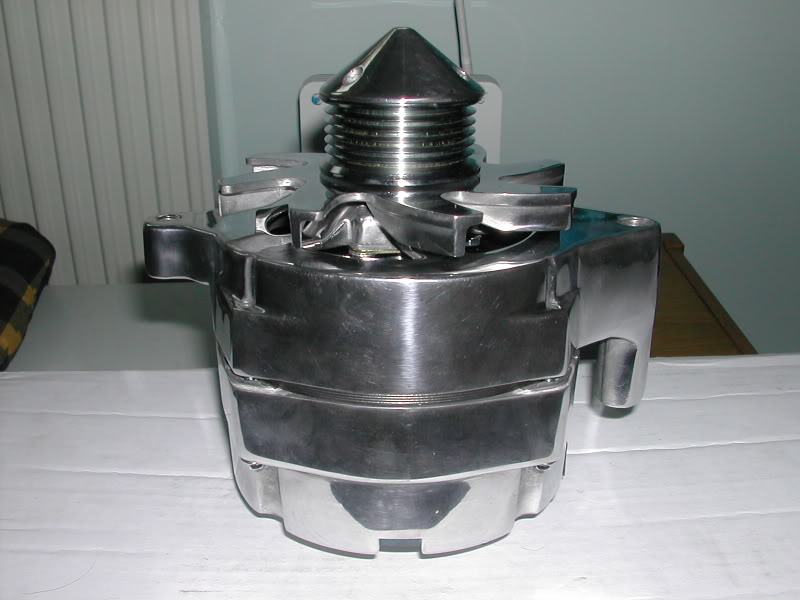
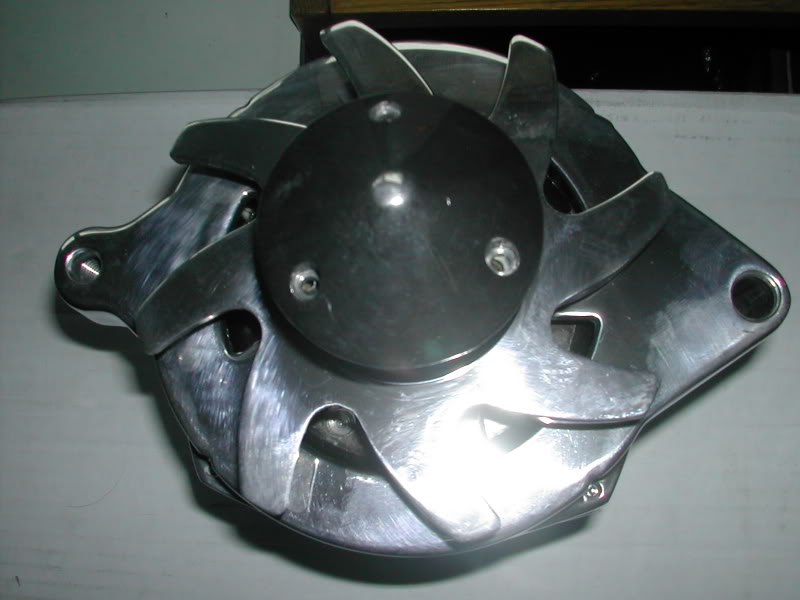
And here's my new Billet, High output Alternator that i've got for the capri too:
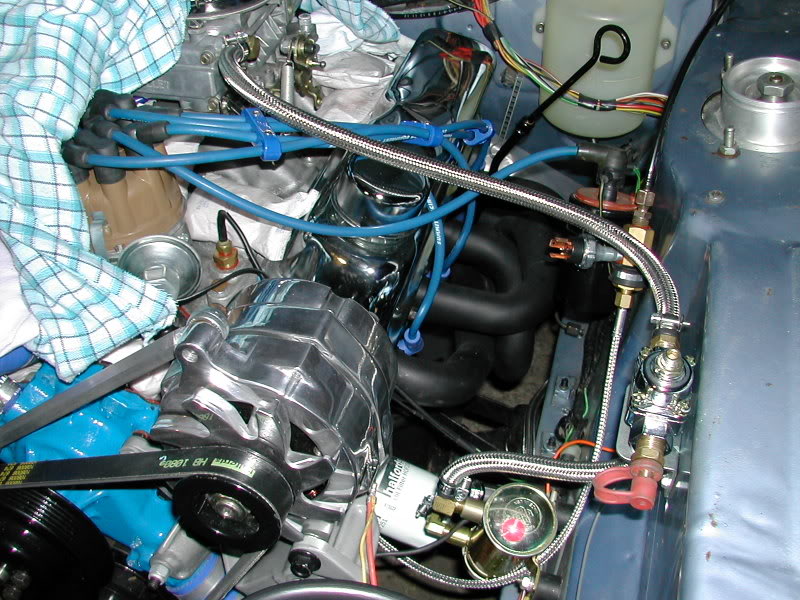
Just finished making up all the new 8mm silicone HT leads, connected the vacuum on the dizzy and connected some of the coil wiring up:
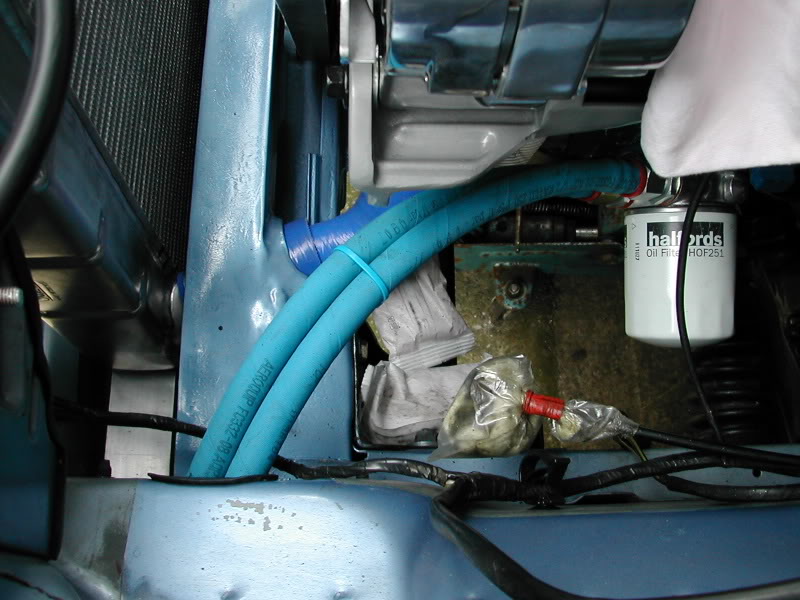
Also re-newed all engine bay washer jet tubing with blue silicone too 8)
the rad and fan are now fixed in place and so is the homemade rad cover too:
fitted the Electric Fan Controller and partially wired it up, also fitted the new alternator too:

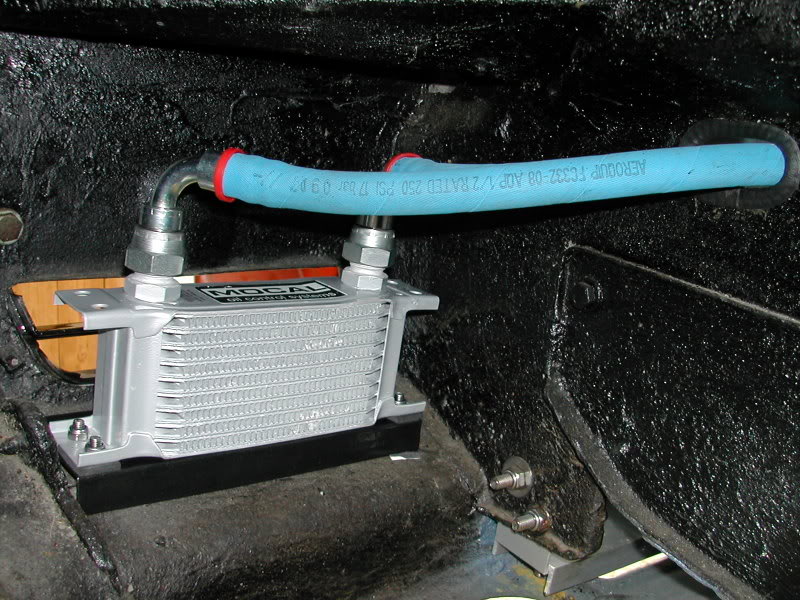
fitted the oil cooler,filled the engine with oil,done abit of work with the exhaust manifolds and started making plans for the new fuel pump.
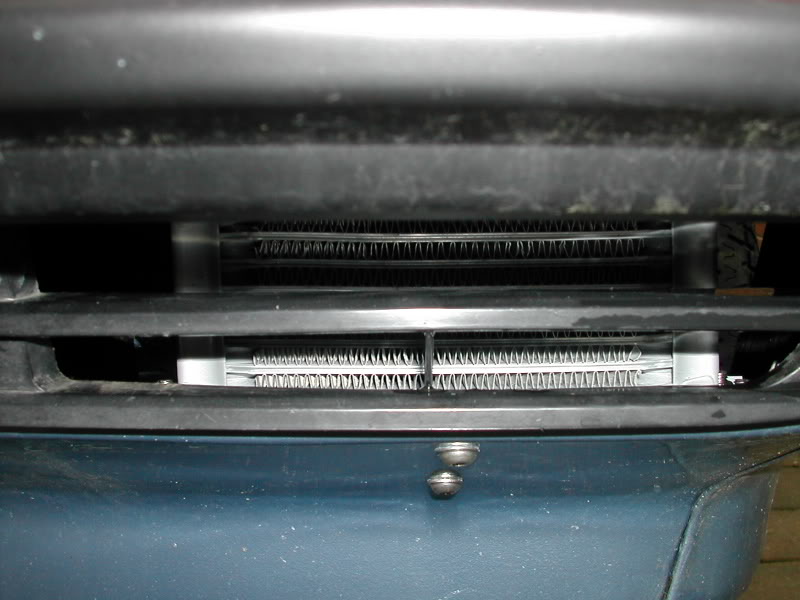
heres some pics of the oil cooler on place underneath the passenger side headlight:
Brake servo in place:

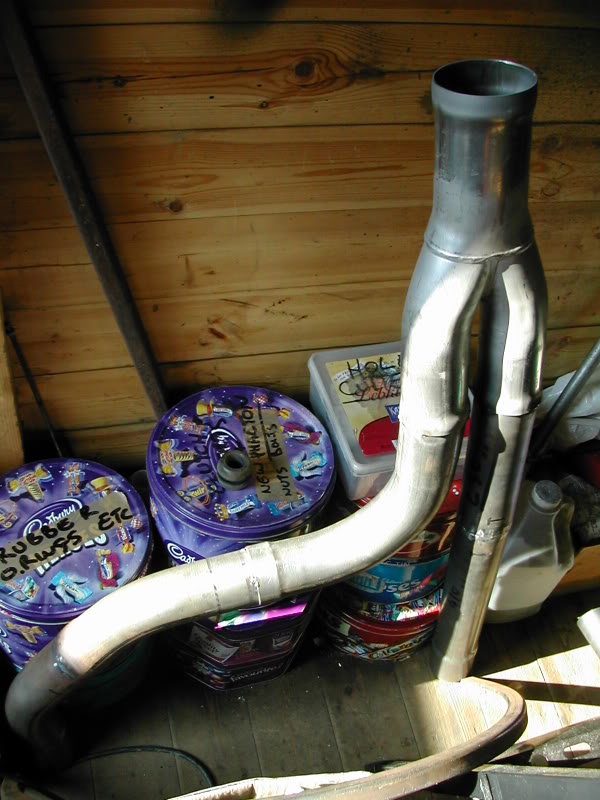
Middle section of exhaust:
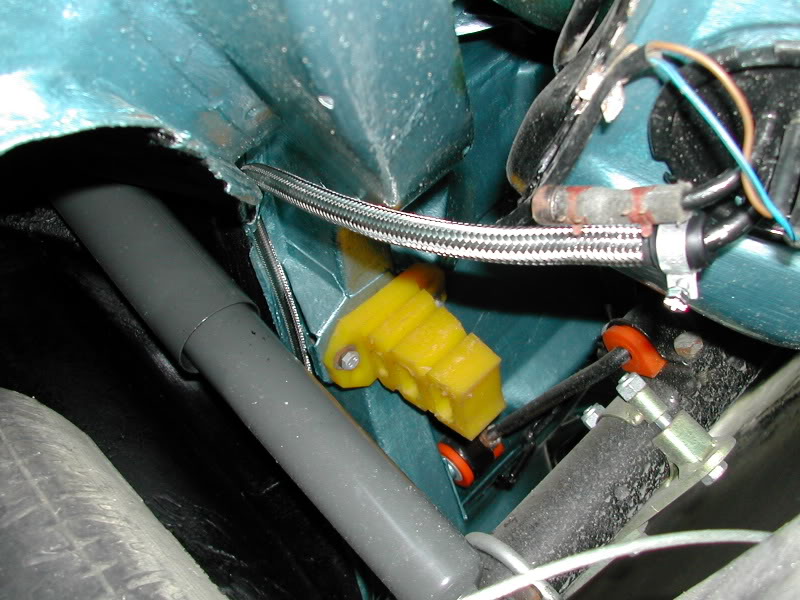
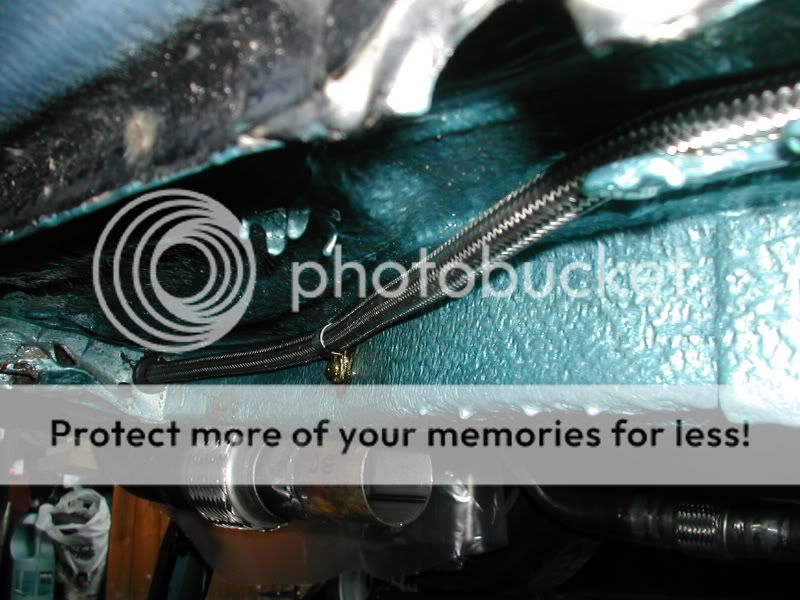
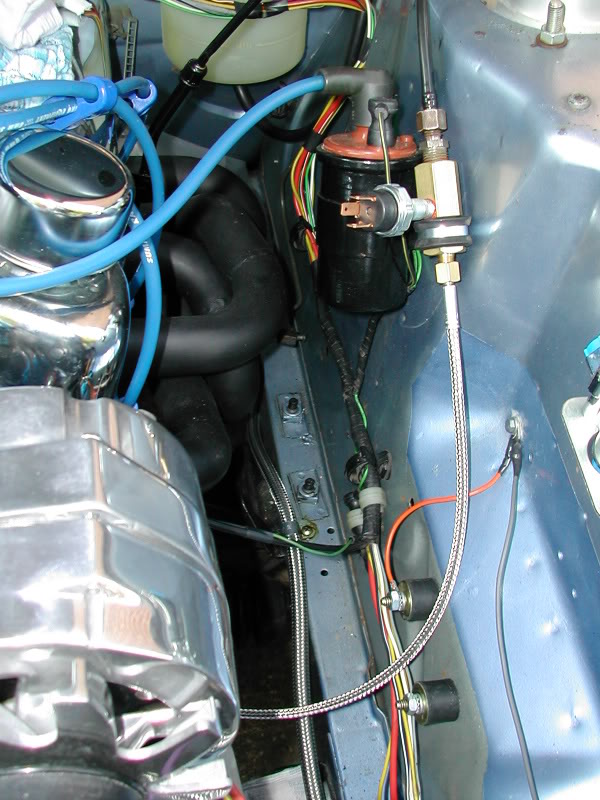
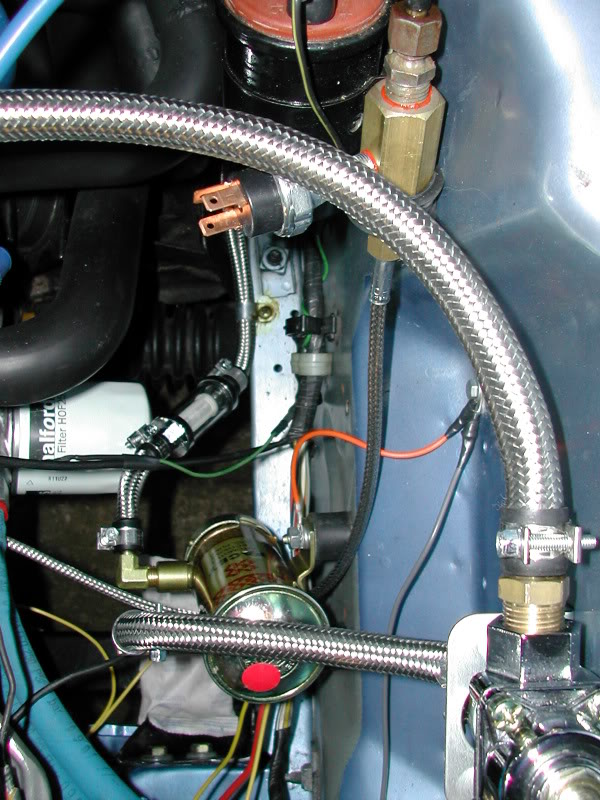
And spent the last hour of todays daylight fitting the fuel pump, filter and every fuel line other than the Nitrous one.
Also fitted a fuel cut-off switch that runs off the oil pressure.
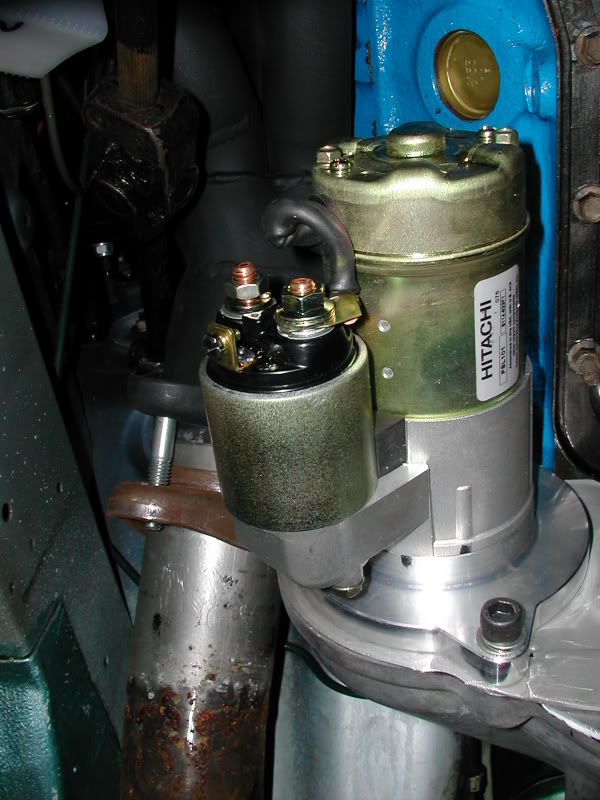
Clutch,Gearbox and Starter now in place, along with a homemade clutch-arm cover too:
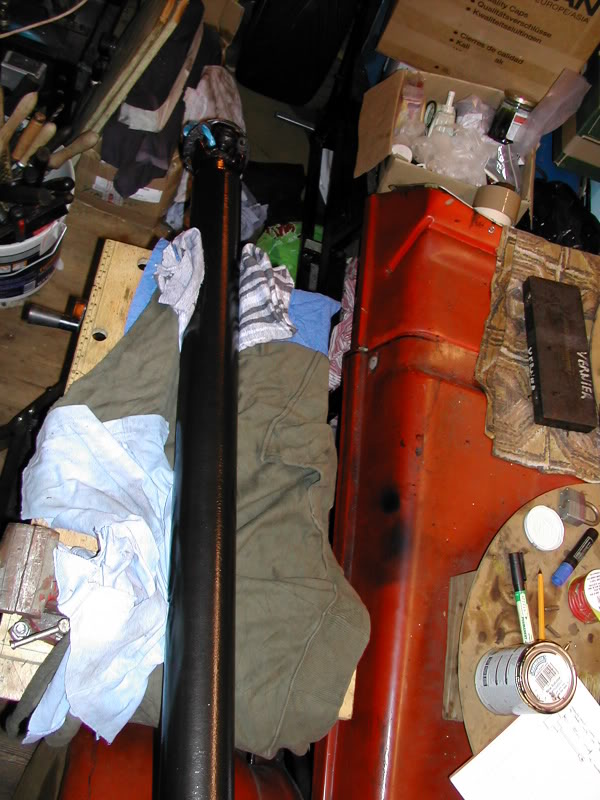
Just a couple of piccies showing the finished Prop-Shaft:
After running the engine for the 1st time, the Cam gave up the ghost, so we stripped the V8 down and started a rebuild
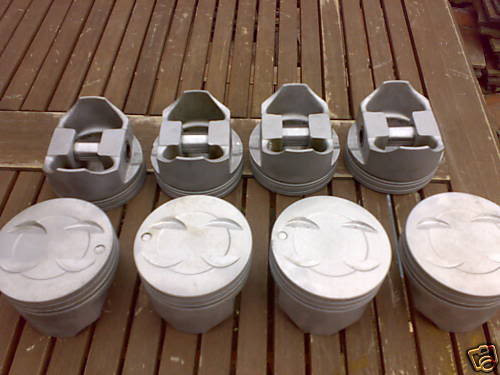
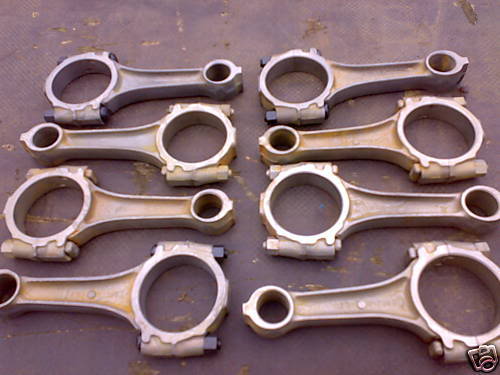
my new TRW Forged pistons and polished conrods came today, so here's a couple of piccies:
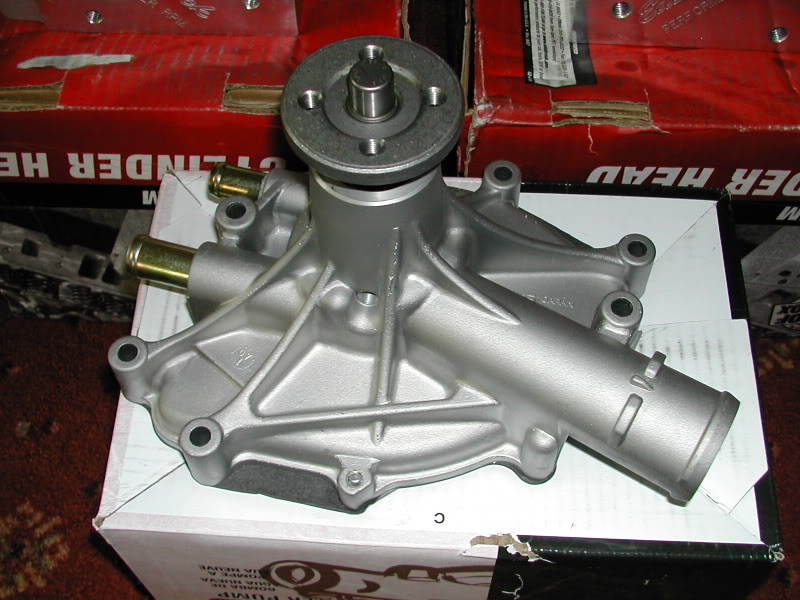
All other parts are here now, inc new performance gasket set, NASCAR sparkplugs, heads, cam kit and waterpump:
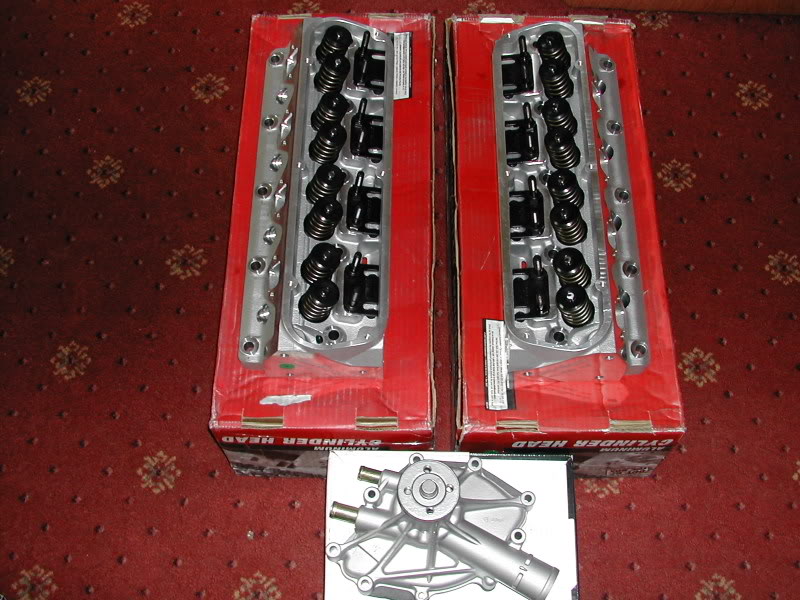
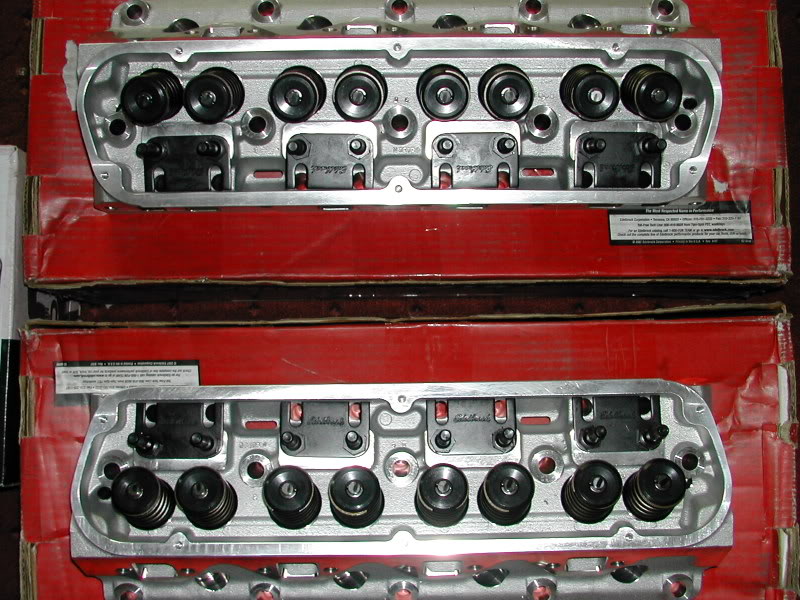
The original heads weighed 25Kg EACH, these weigh 28Kg the pair!!
Got afew jobs done over this weekend, The rods are now basically connected back onto the pistons, just need alittle finishing off at my dads work to make sure they're spot on
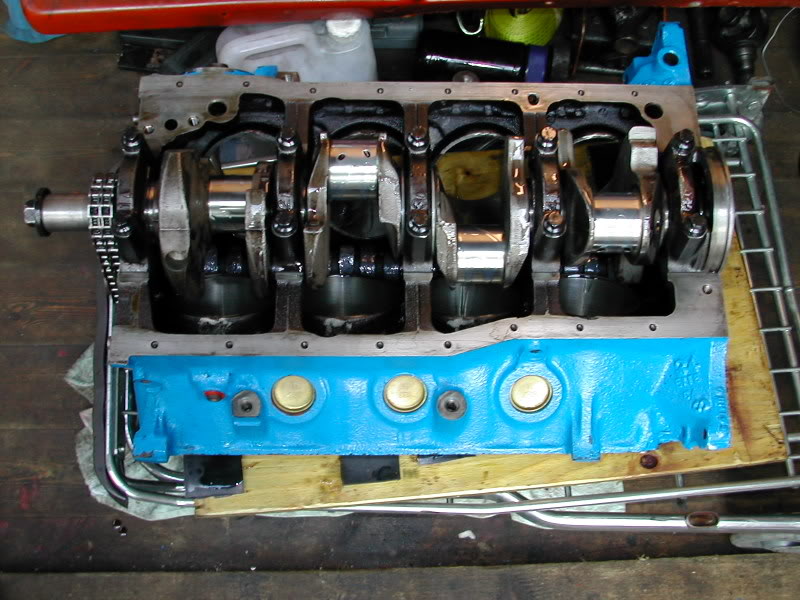
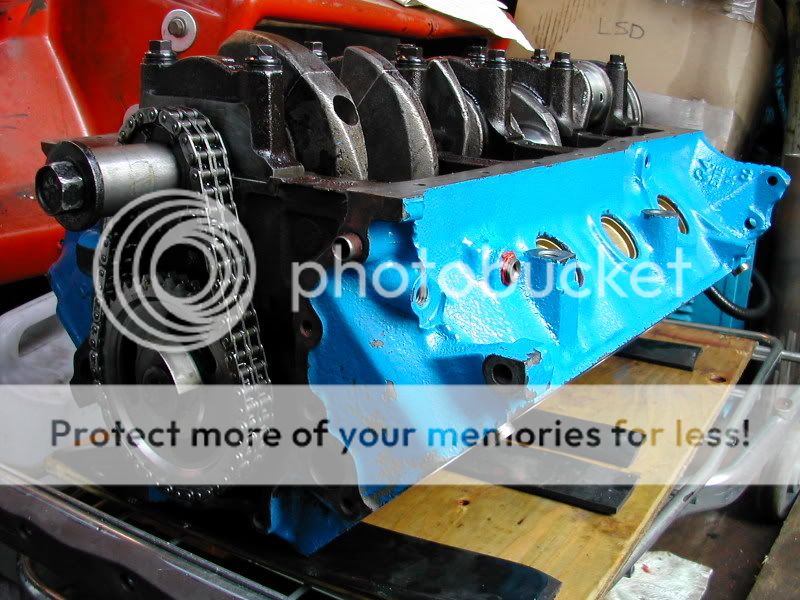
Today we've refitted the Crank with the new NASCAR bearings, fitted the new Cam and refitted the Timing gear:
All but the Starter motor wiring is finished and wrapped in either conduit or electrical wrap, both the main battery cable and earth cable are in place and so is the Nitrous line too:
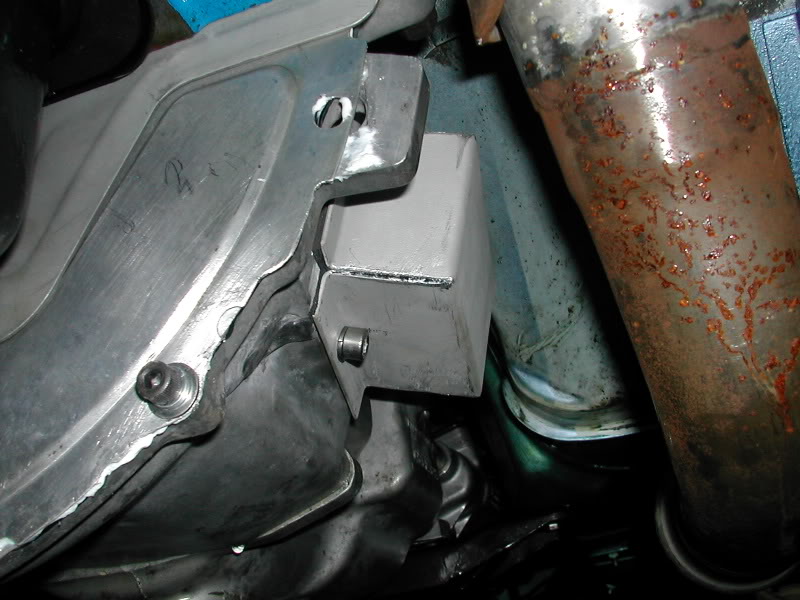
Also did a small job on the bellhousing so that it does'nt get water build up anymore.
Well guys, we've had a busy day today, the Block is in, the heads, starter, water pump, Exhaust manifolds and Alternator are back on the block
Also finished off the starters wiring and put some heat resistant wrap over the battery cables.
so heres some piccies:
Have just refitted the lifters, pushrods, roller rockers, Inlet manifold and carb, plus done a couple of other small jobs too
Quick video of the old girl running:

Well got some more jobs done over the last 2 days,
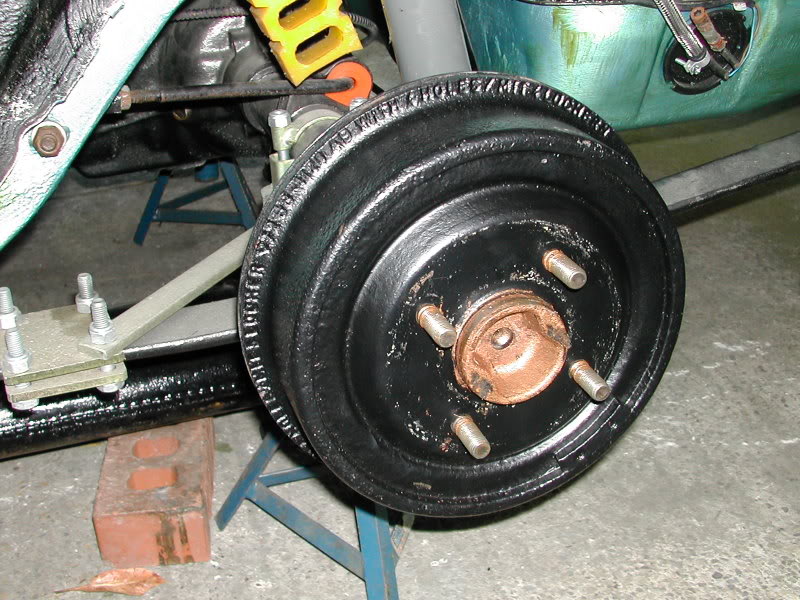
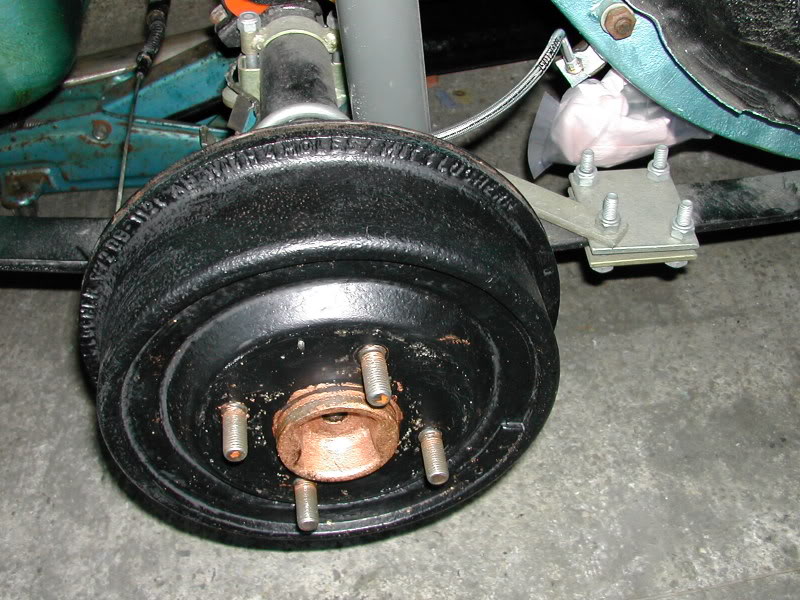
All the rear brakes are back on and lines in place:
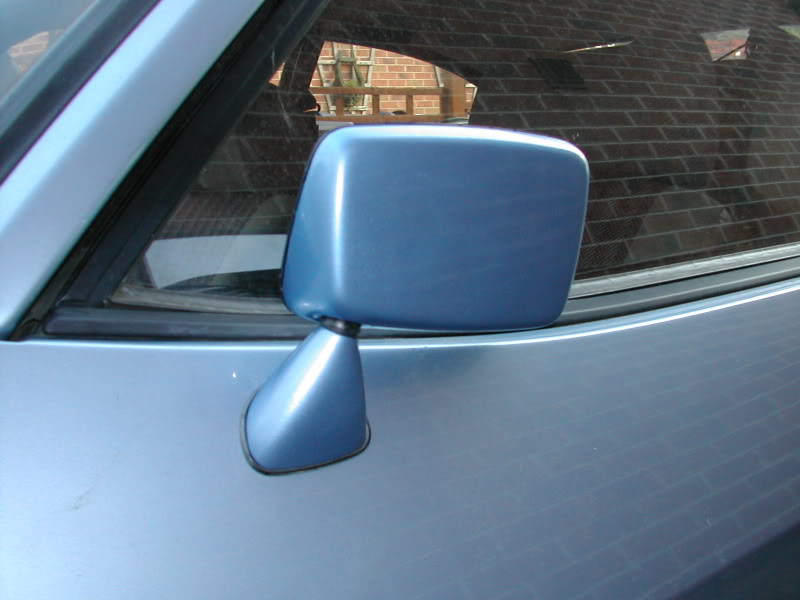
Also got round to fitting my blue passenger side mirror that been in my room for last 18 months
Put some extra sound deadening in the doors and uprated the capri's security too 8)
A little bit more of an update for you,
Today we've managed to do the passenger side footwell repair that we've been meaning to do for months , Unfortunately I dont have a before picture, but all the rot has been cut out and a nice fresh piece of steel ( kindly donated by my bezzy mate matt )
So heres a after piccie:
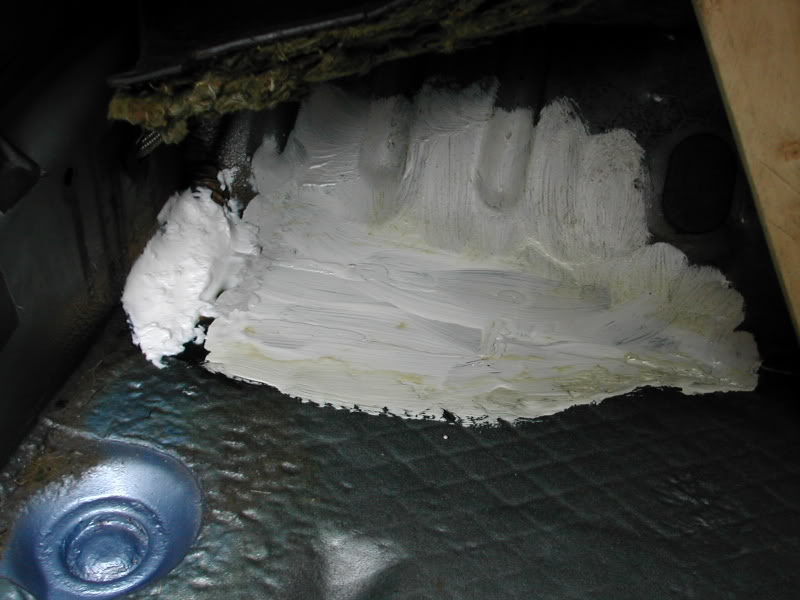
Since this picture, it's been under sealed and is awaiting a piece of sound deadening.
And heres the only pic i can get at the moment of the capri with its superlites fitted:
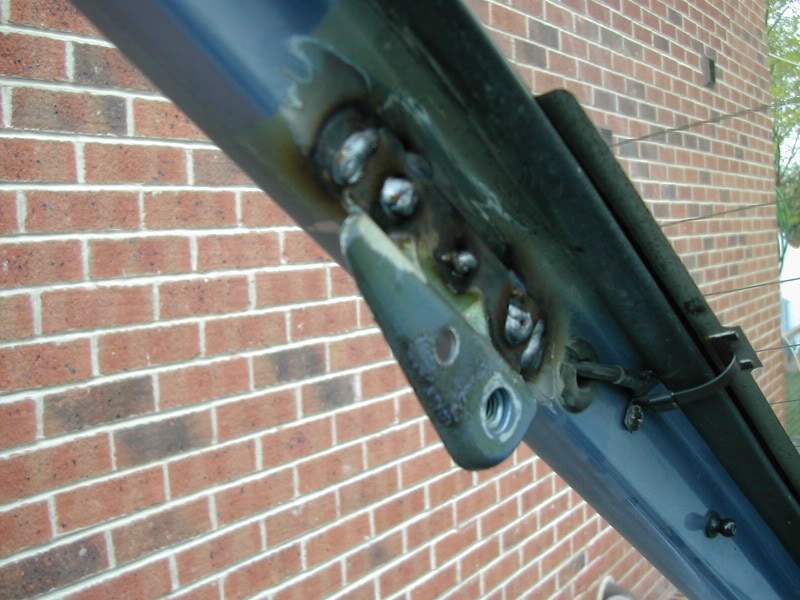
Right guys, the drivers side footwell repair:
Nasty, Nasty Rot holes:
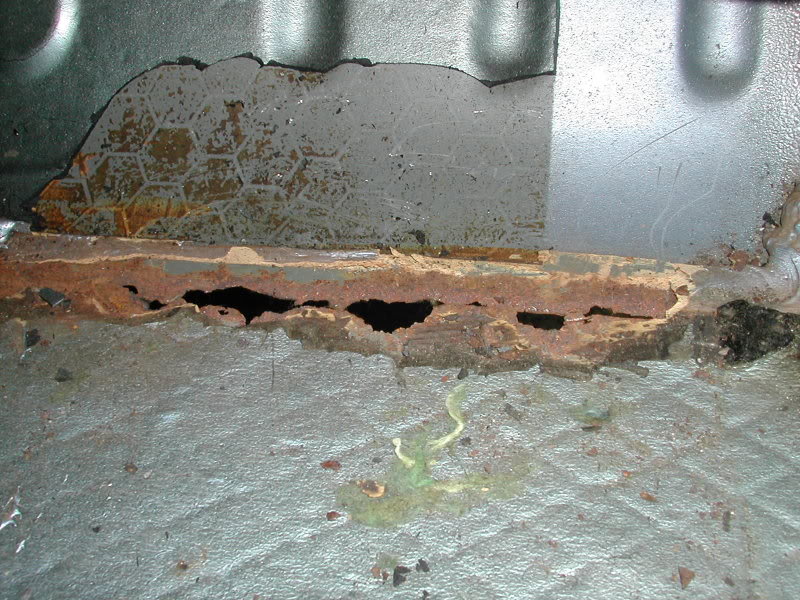
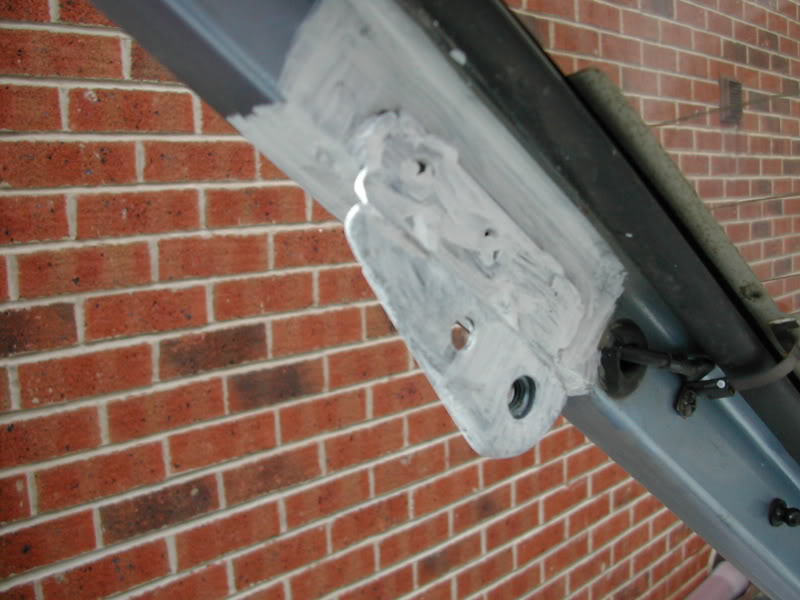
Cut back to good metal:
MK1 Fiesta door skin used for the footwell plates ( yes it is a new one ):
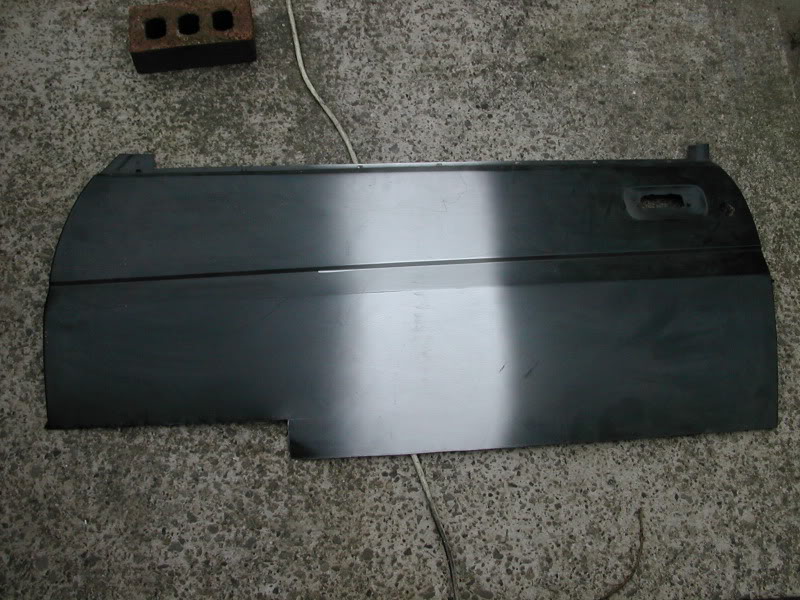
Plate tacked in place:
Chip guarded and sealed:
And finally given a coat of chassis paint:
Then we Refitted the original boot gas ram mounting:
And primered:
And a couple of random piccies:
steve
So here's abit of history on the car itself, it's a 1985 2L Laser in Paris blue, has/had genuine 74,000 miles on clock, all original panels ( although it has had some very minor repair plates before i got it ), service history and 4 previous owners.
I bought the capri from a small village in Devon, which was quite a trek for me as i live in Barnsley, South yorkshire! but it was worth it as i paid �630 for it with around 6 months test and 2 months tax, not bad really.
Anyway heres some pics of what it looked like when i bought it:
A couple of area's that needed work:
Area's of rot removed and repair work started:
Primed and painted, just a rough job to get it through the winter ( this is my first attempt at bodywork/spraying so it's not a work of art, LOL:
After a good clean:
I wanted to go with the look of earlier MK3 'S' versions for the front end, so changed the headlight surrounds and changed the grille to a MK2 version:
Removal of the Pinto engine:
Right, here's the Lincoln V8, as bought off of Ebay:
And here's it Mocked into place in the engine bay:
Once i have found the other pic's i have of parts of the capri, i will update shortly with alot more info on whats gone into it.
but heres 1 last pic:
As it is now.
heres some info on what has been done on the car:
All rear running gear has been uprated to 2.8i special, so now has single leaf springs with capri-sport axle location kit fitted, Monroe Gas shockers and fully poly-bushed front and rear.
Also it is fitted with a refurbished ex-works rally GRP4 LSD unit, which i bought off a friend for �250!
The front struts have been converted to coil-overs using a kit from Burton power, these filled with 15w fork oil and fitted with 250lbs springs.
All seals and bearings have been replaced and the units are fitted with roller-bearing top mounts:
The front also has a home-made anti-dive kit fitted and the TCA's and trackrod ends have been renewed.
All of the underside has been cleaned, chip-guarded and painted with light blue hammerite to make it look neat and tidy ( pics to follow )
plus all under the wheelarches have been undersealed and chassis members/cavities waxoiled.
Front discs have been upgraded to drilled/grooved items and calipers are to be fully rebuilt along with servo.
The gearbox i am fitting is from a 1979 mustang and is a 4-speed overdrive version ( cannot afford a T5 just yet, but will upgrade in time ):
As bought from USA.
This will be fitted with a ZOOM performance clutch kit and a Mcleod Steel flywheel with ARP Bolts.
The Propshaft ( not finished conversion yet ) is a Mustang front yoke coupled to a sierra Cosworth rear flange.
Right!!, Engine Specs people,
Engine is a 1988 lincoln/Ford 5.0L EFI V8, upto now these are the following mods i have made:
Thrown the EFI system, dizzy and air control system in the bin and replaced with.
* Edelbrock performer RPM Inlet Manifold with a Holley 600 carb
* Accel Dual-point dizzy
* Edelbrock performer RPM Camshaft kit
* Summit adjustable true-roller timing set
* Summit performance pulley set
* Plasma performance Piston ring set
* Summit 8mm performane HT leads
* Edelbrock torker valve spring kit
* Mr-gasket full race engine gasket set
* Pro-comp roller rocker arm set
* ARP full engine bolt set
* NOS super powershot system:
* Flow-tech equal length performance exhaust manifolds:
* Summit race spec all ally twin-core radiator:
* Edelbrock RPM air filter
here's a few 'odds and sods' pics of it.
The interior after a good clean out, gunna keep it as stock as possible:
Before and after pics of the smoked rear lights:
Before:
After:
Trying a 15 x 8 Revolution alloy in rear:
It's abit of a tight fit
De-chromed MK2 grille in place:
couple of pics showing the painted underbody, petrol tank and rebuilt axle:
Also Modified X-member, as you can see, the original engine mountings have been removed and replaced with 40mm box section with 6mm plates at the top, there are also 4 3mm bracing strips welded in to add strength to the X-member:
There are repair plates required on both driver and passenger ( below ) footwells:
Think i'm going to plate it on both inside and outside to keep it strong.
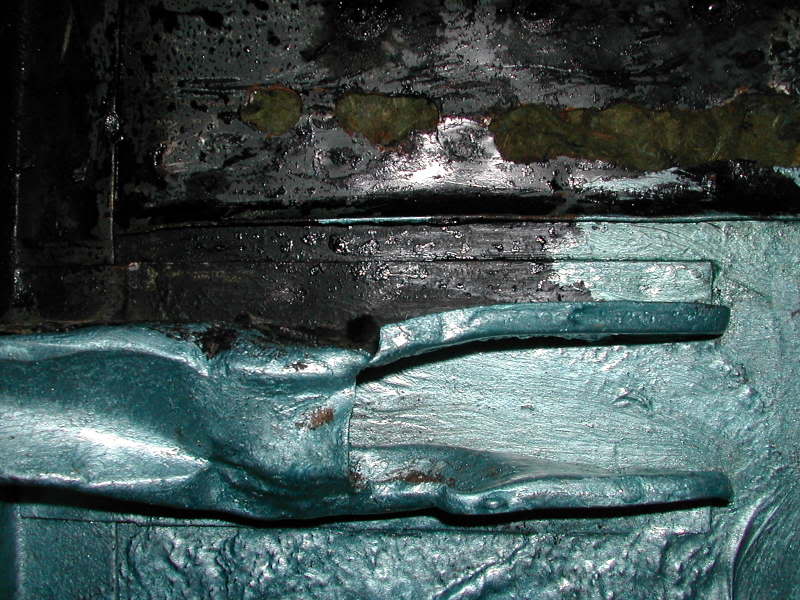
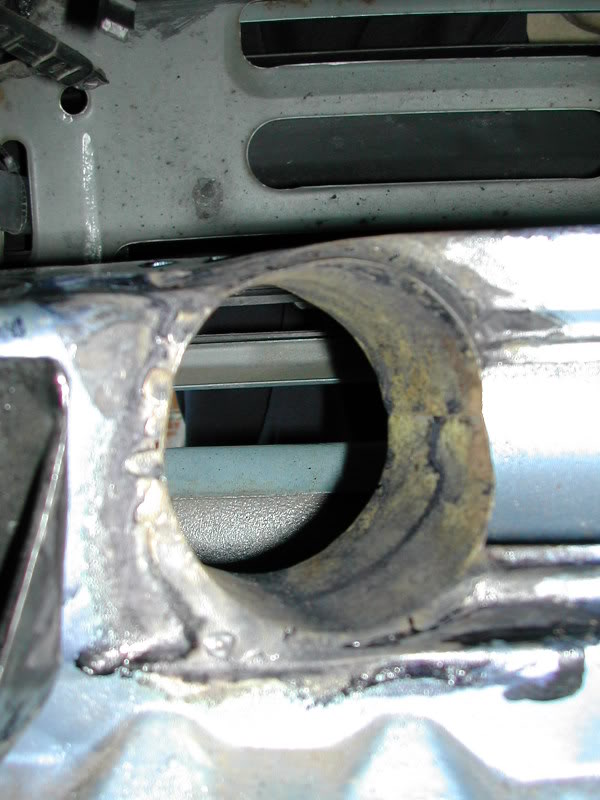
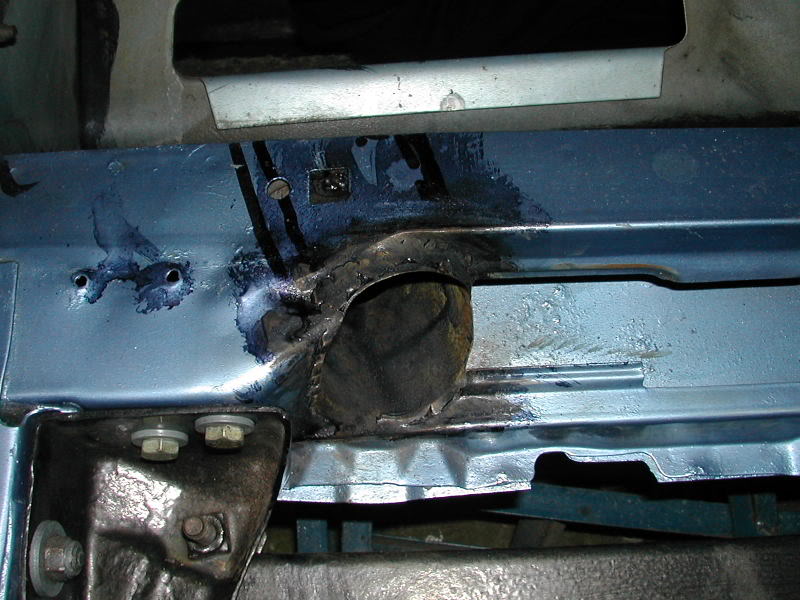
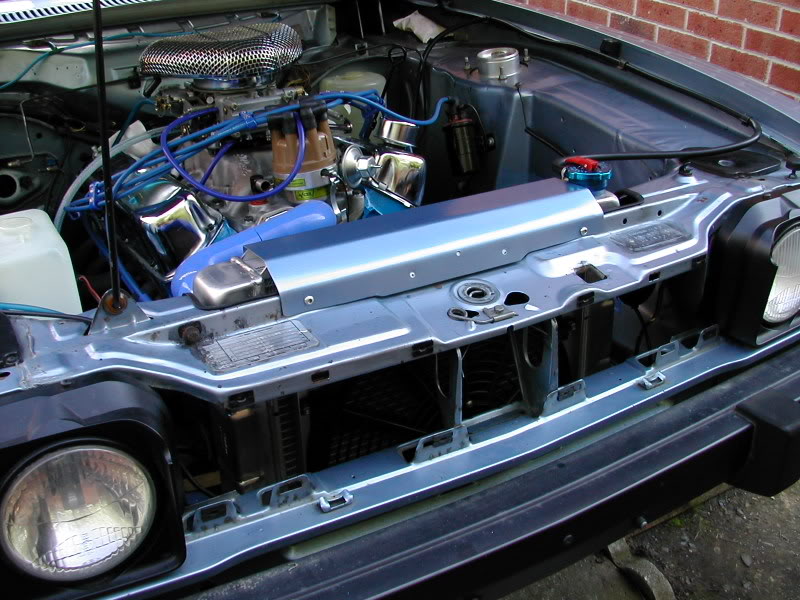
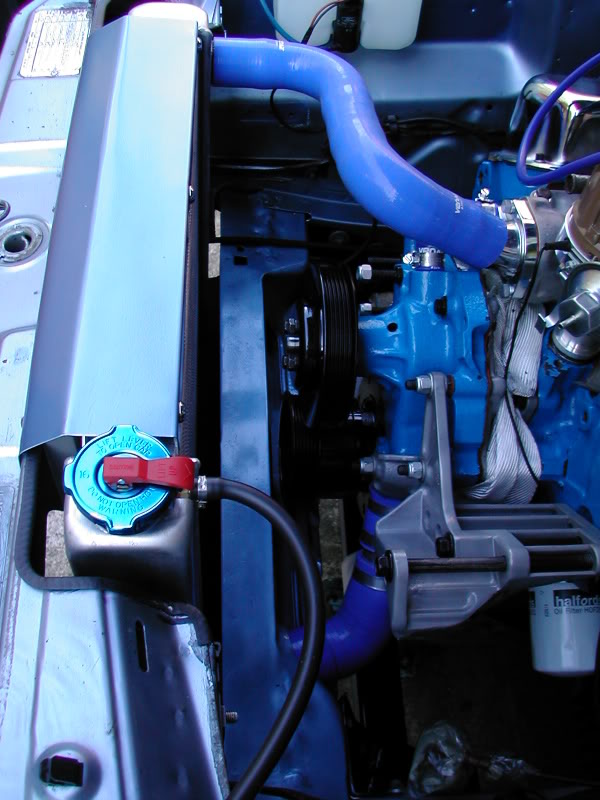
Front/Radiator Slam panel that has had a Tube welded in place for the radiator bottom hose to go through, just needs a small amount of work to finish and then can be sprayed:
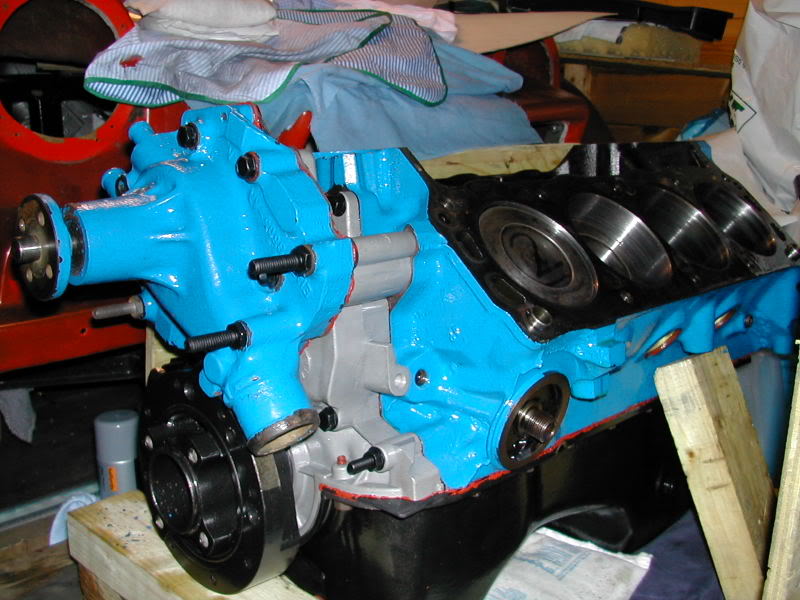
timing cover and water pump bolted in place,
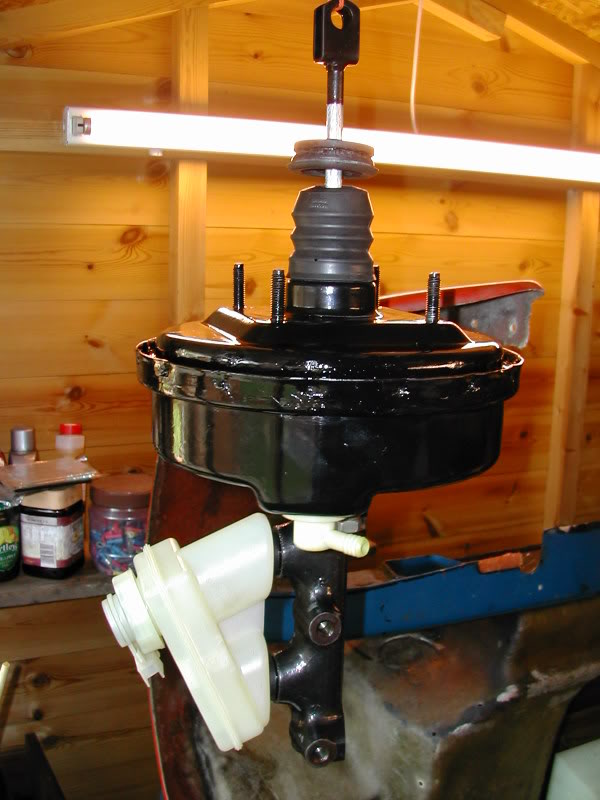
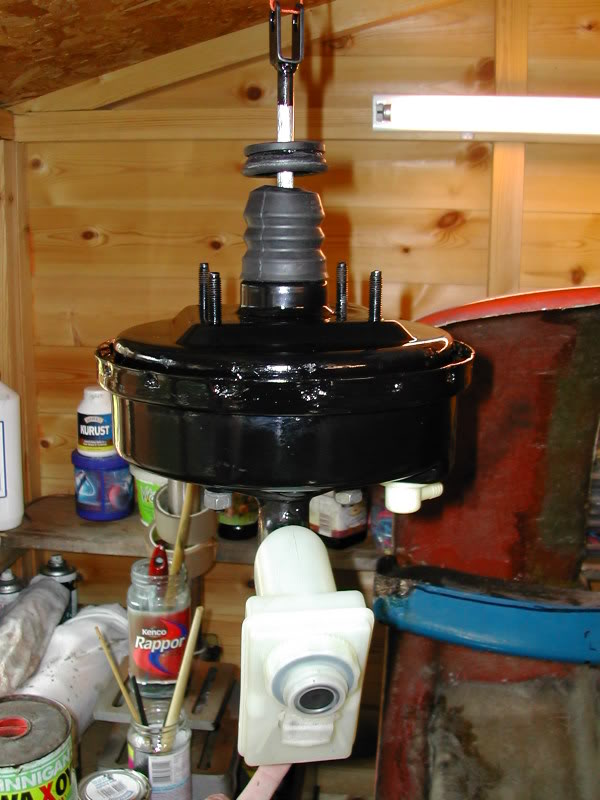
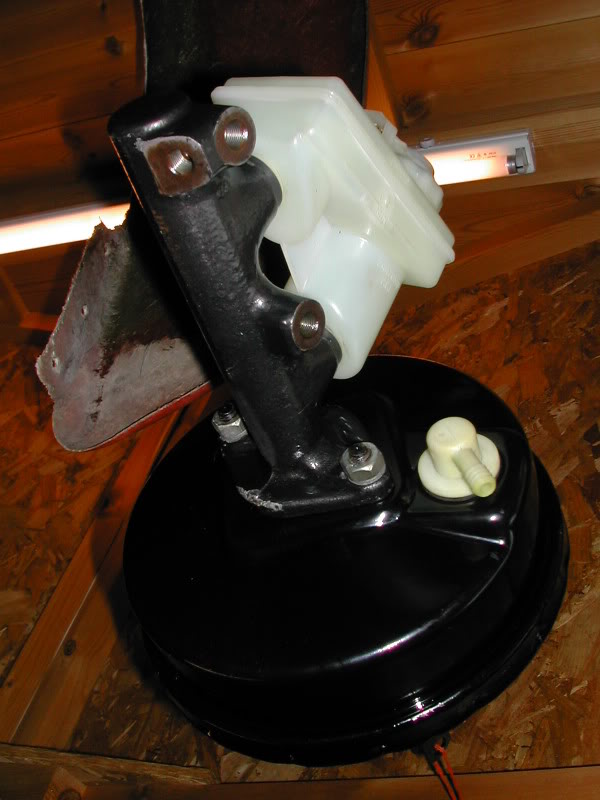
Now completed Brake servo ( master cylinder needs a touch up in places )
The servo and master cylinder have been fully rebuilt with new rubbers, seals and fibre washers.
Although this is a job that your " AVERAGE JOE " ( ie: ME ) could do, i would'nt recommend doing so, as in barnsley it's known as a " REYT PAIN IN'T ARSE!! "
I did the rebuild as i wanted to be sure the servo was in good nick before asking it to help stop the 5.0L.
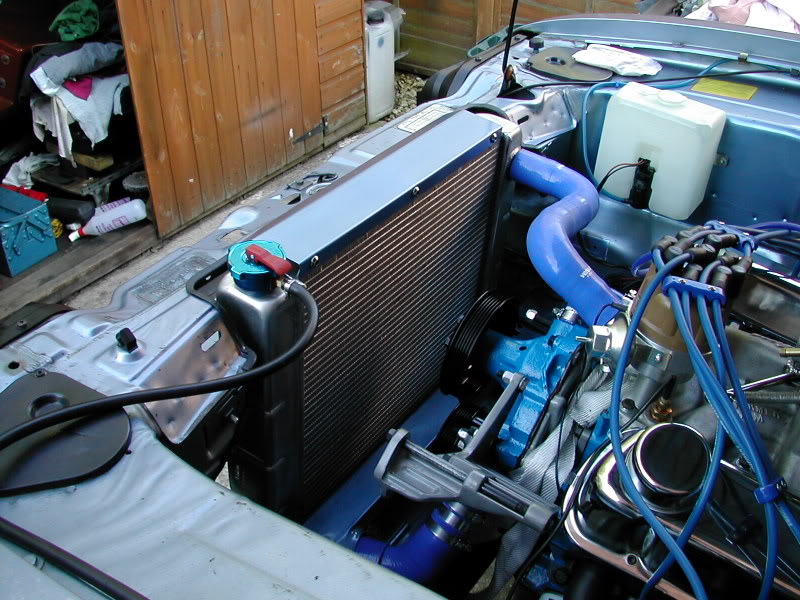
Also managed to get some measurements for the Radiator/Fan mounting brackets too, so here's a couple of pics of the rad in place:
Outside view:
****** THINK SHE COULD DO WITH A WASH
Managed to finish off rubbing down the poor paint job on the top and back edge of the valance, cleaned it, then primered, top coat and clear coated it over the space of 7 hours.
Here's the result:
Also got some piccies of the area in the passenger wheel-arch i'm wanting to fit an oil cooler ( if not too much hassle )
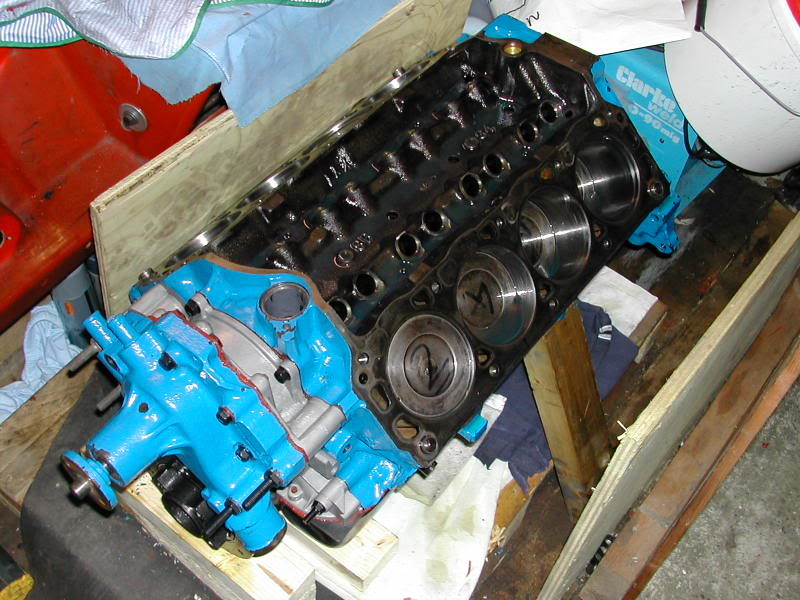
engine block and heads in for good.
The white strap round the water-pulley is there to balance the engine as we have'nt put the gearbox in place yet, still need to make a mounting for it.
we managed to fit the Valve rocker studs and pushrod guide plates, with these in place we were able to measure up for the new pushrods required as we've changed the cam.
Also managed to bolt the waterpump pulley in place.
With the V8 now out of our shed, we had room to work on the gearbox, it needed a clean, the top cover bolting back into place and we needed to take measurements for the new gear-stick that has to be made for it:
Also while having abit of a tidy out in the shed/garage I found this buried under bags of rags and tools in there:
inlet manifold in place
Passenger side manifold in place, we also fitted the dip-stick and tube, plus the radiator overflow tank too.
Drivers side manifold in place
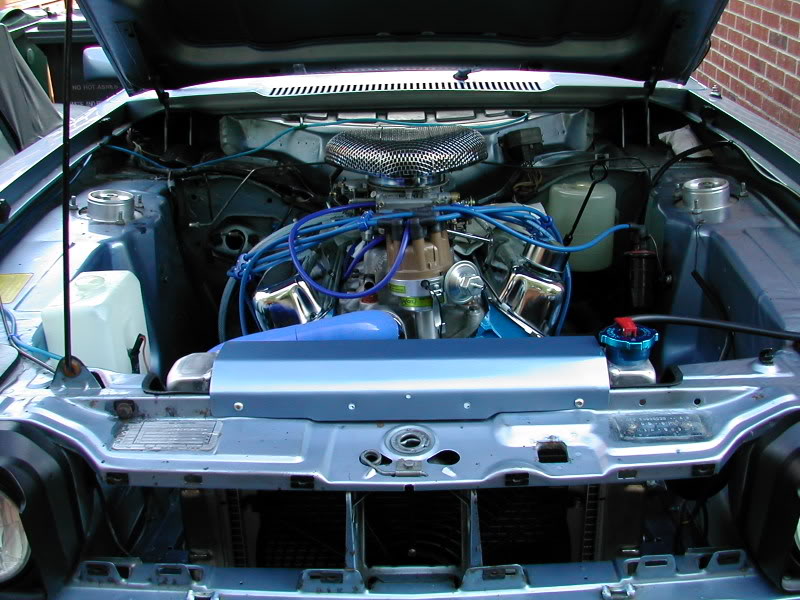
How the engine looks now
The Brake Servo will be going back on shortly and with other small items like the screen wash bottle etc.
Next major item to fit is the radiator and fan, plus the carb and Nitrous plate.
Well after a couple of weeks wait, the new pushrods ( and other bits such as a racing Fuel pump, regulator and relay switch ) have arrived from the States.
So Today we fitted the Valve lashcaps, new pushrods and Roller tip rockers, heres a piccie of the drivers side:
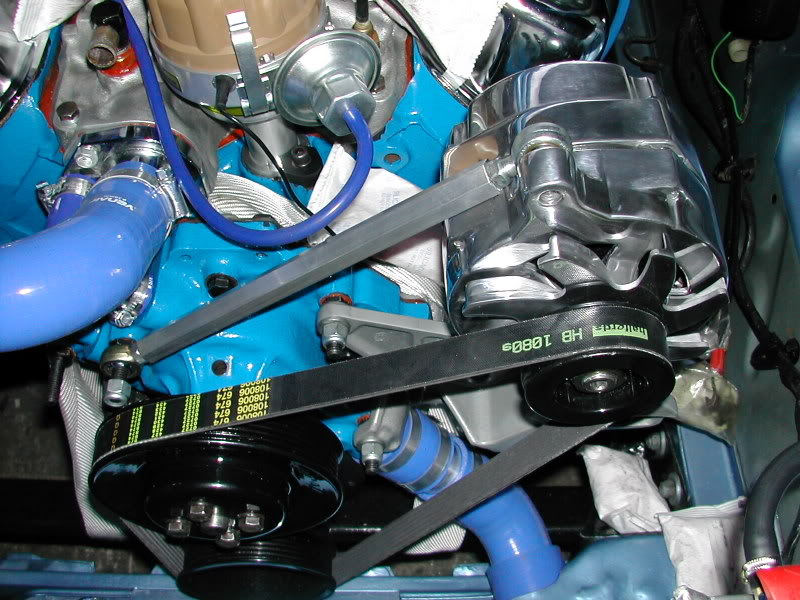
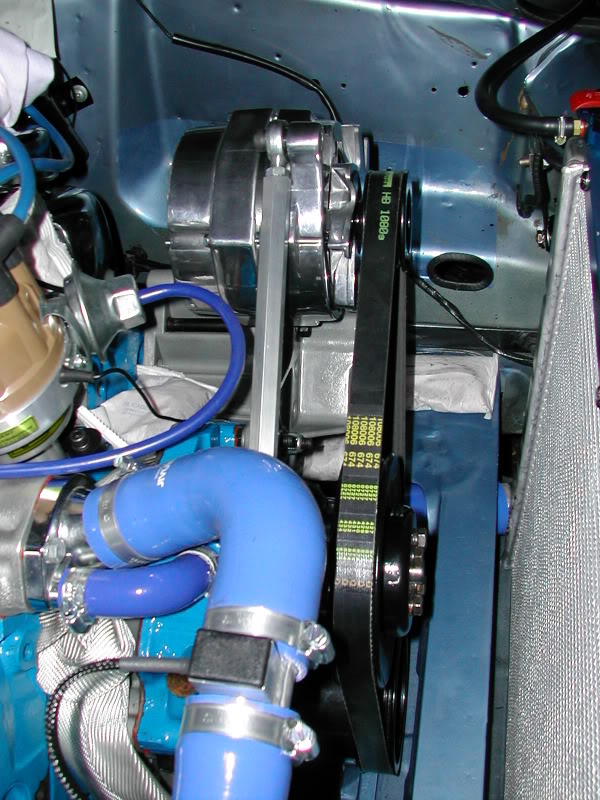
And here's my new Billet, High output Alternator that i've got for the capri too:
Just finished making up all the new 8mm silicone HT leads, connected the vacuum on the dizzy and connected some of the coil wiring up:
Also re-newed all engine bay washer jet tubing with blue silicone too 8)
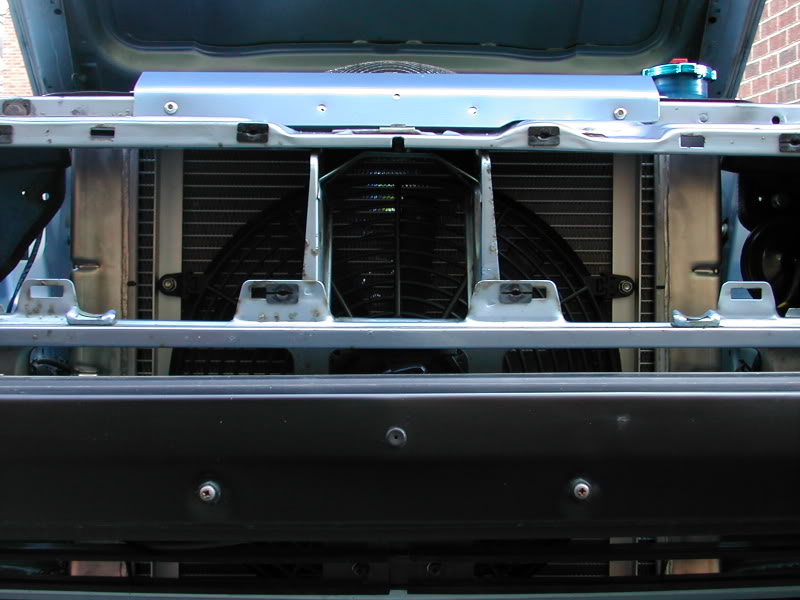
the rad and fan are now fixed in place and so is the homemade rad cover too:
fitted the Electric Fan Controller and partially wired it up, also fitted the new alternator too:
fitted the oil cooler,filled the engine with oil,done abit of work with the exhaust manifolds and started making plans for the new fuel pump.
heres some pics of the oil cooler on place underneath the passenger side headlight:
Brake servo in place:
Middle section of exhaust:
And spent the last hour of todays daylight fitting the fuel pump, filter and every fuel line other than the Nitrous one.
Also fitted a fuel cut-off switch that runs off the oil pressure.
Clutch,Gearbox and Starter now in place, along with a homemade clutch-arm cover too:
Just a couple of piccies showing the finished Prop-Shaft:
After running the engine for the 1st time, the Cam gave up the ghost, so we stripped the V8 down and started a rebuild
my new TRW Forged pistons and polished conrods came today, so here's a couple of piccies:
All other parts are here now, inc new performance gasket set, NASCAR sparkplugs, heads, cam kit and waterpump:
The original heads weighed 25Kg EACH, these weigh 28Kg the pair!!
Got afew jobs done over this weekend, The rods are now basically connected back onto the pistons, just need alittle finishing off at my dads work to make sure they're spot on
Today we've refitted the Crank with the new NASCAR bearings, fitted the new Cam and refitted the Timing gear:
All but the Starter motor wiring is finished and wrapped in either conduit or electrical wrap, both the main battery cable and earth cable are in place and so is the Nitrous line too:
Also did a small job on the bellhousing so that it does'nt get water build up anymore.
Well guys, we've had a busy day today, the Block is in, the heads, starter, water pump, Exhaust manifolds and Alternator are back on the block
Also finished off the starters wiring and put some heat resistant wrap over the battery cables.
so heres some piccies:
Have just refitted the lifters, pushrods, roller rockers, Inlet manifold and carb, plus done a couple of other small jobs too
Quick video of the old girl running:
Well got some more jobs done over the last 2 days,
All the rear brakes are back on and lines in place:
Also got round to fitting my blue passenger side mirror that been in my room for last 18 months
Put some extra sound deadening in the doors and uprated the capri's security too 8)
A little bit more of an update for you,
Today we've managed to do the passenger side footwell repair that we've been meaning to do for months
)So heres a after piccie:
Since this picture, it's been under sealed and is awaiting a piece of sound deadening.
And heres the only pic i can get at the moment of the capri with its superlites fitted:
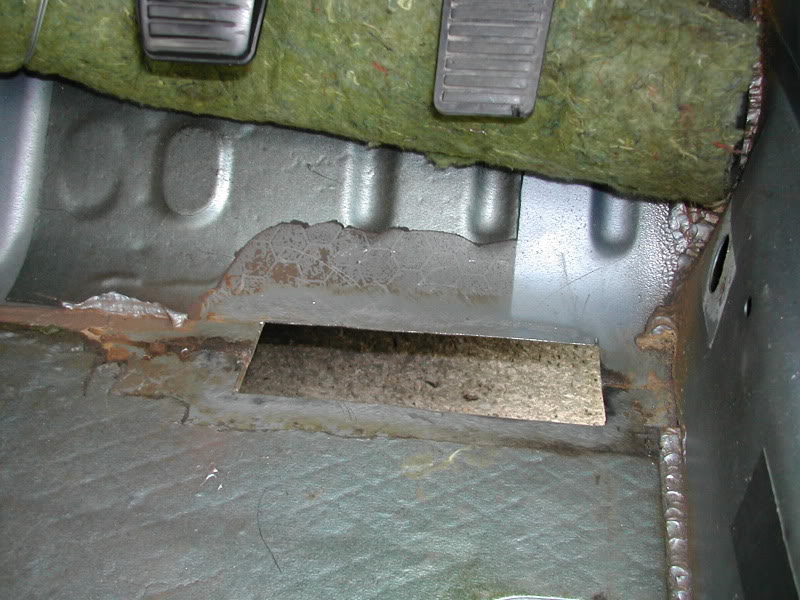
Right guys, the drivers side footwell repair:
Nasty, Nasty Rot holes:
Cut back to good metal:
MK1 Fiesta door skin used for the footwell plates ( yes it is a new one ):
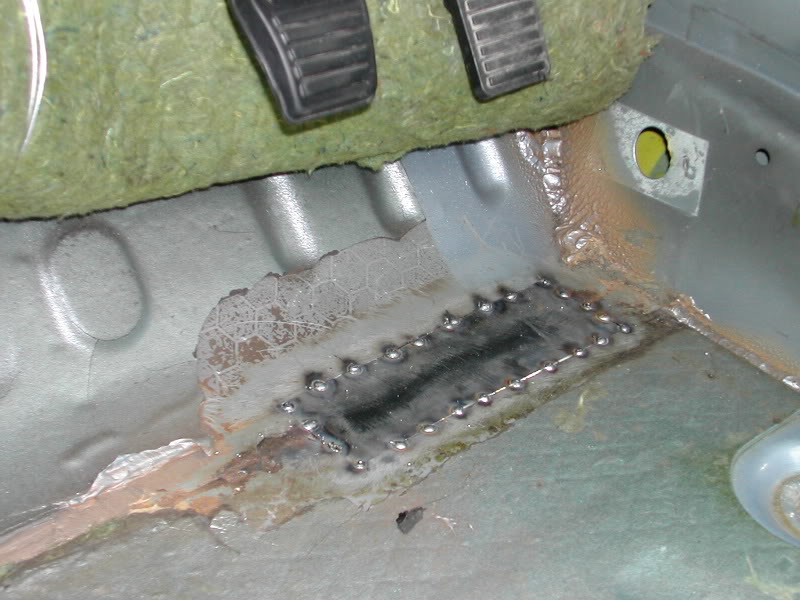
Plate tacked in place:
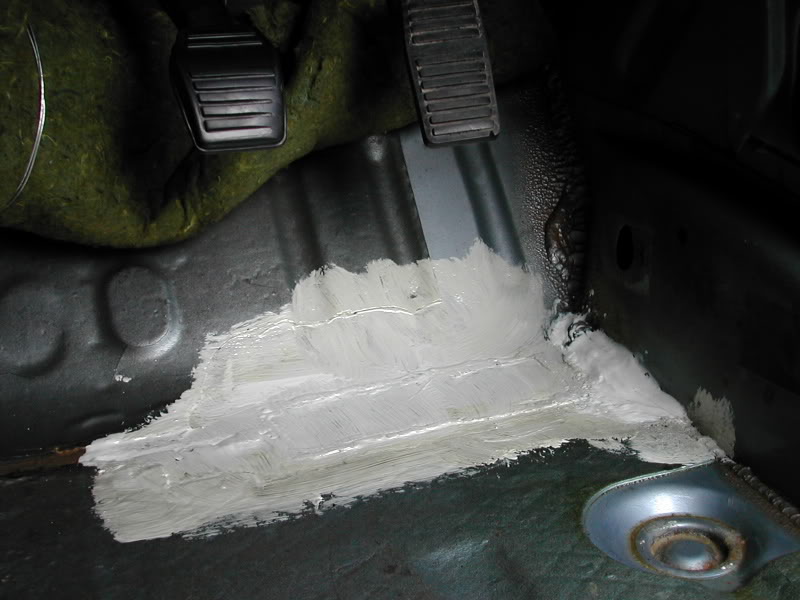
Chip guarded and sealed:
And finally given a coat of chassis paint:
Then we Refitted the original boot gas ram mounting:
And primered:
And a couple of random piccies:
steve


 17-04-2009, 10:57 PM
#5
Advanced PassionFord User
iTrader: (2)
Join Date: Apr 2009
Location: BC, Canada
Posts: 2,229
Likes: 0
Received 0 Likes
on
0 Posts
Nice Project mate .. 100% props.
Nice motor ... Same as in old Mustang ... Can get 32v heads for them.
I like the shorty Header's ...
Nice motor ... Same as in old Mustang ... Can get 32v heads for them.
I like the shorty Header's ...
Last edited by .Ross.; 17-04-2009 at 10:59 PM.
17-04-2009, 11:02 PM
#6
Virgin
Thread Starter
Join Date: Apr 2009
Location: yorkshire
Posts: 7
Likes: 0
Received 0 Likes
on
0 Posts

Trending Topics

 18-04-2009, 08:06 AM
#14
Virgin
Thread Starter
Join Date: Apr 2009
Location: yorkshire
Posts: 7
Likes: 0
Received 0 Likes
on
0 Posts
cheers for the kind words guys, when the engine let go, i was close to selling the project, but its a car ive wanted to build for a long time, so i could'nt let it go that easily.
 18-04-2009, 08:45 AM
#16
YES I KNOW I CANT SPELL
Join Date: Mar 2008
Location: chingford e4
Posts: 5,271
Likes: 0
Received 0 Likes
on
0 Posts
thats very nice mate ive gota ask tho your fuel cut of switch, do you have to keep cranking your engine over till you get oil presure and then you will get fuel presure?
18-04-2009, 11:36 AM
#19
Virgin
Thread Starter
Join Date: Apr 2009
Location: yorkshire
Posts: 7
Likes: 0
Received 0 Likes
on
0 Posts


 02-05-2009, 06:13 PM
#31
Virgin
Thread Starter
Join Date: Apr 2009
Location: yorkshire
Posts: 7
Likes: 0
Received 0 Likes
on
0 Posts
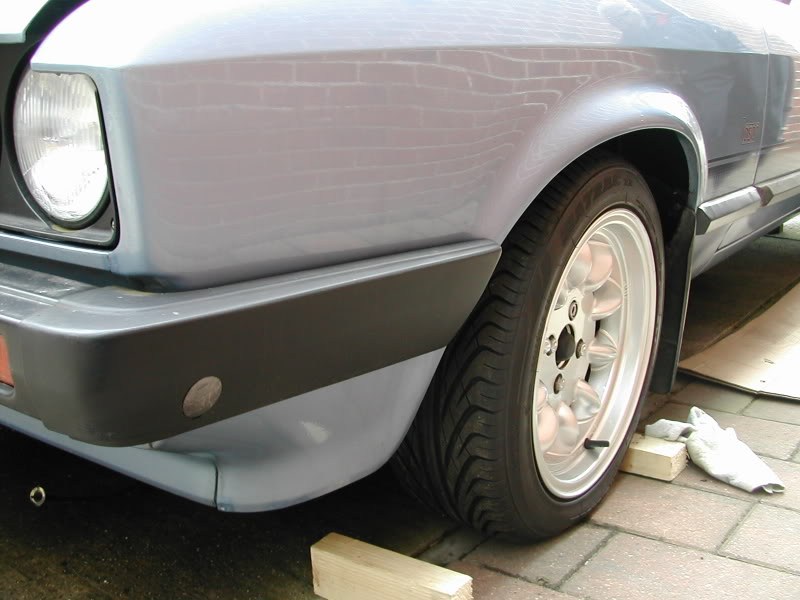
Right Guys, thought I'd do abit of an update, i've just swopped my PC to a Laptop so have had to prat around with all my piccies etc.
So lately i've fitted 10mm wheel spacers all to give extra clearance and a meaner look , ordered a oneoff clutch cable and some performance vented discs to suit my new MK2 Granada Calipers.
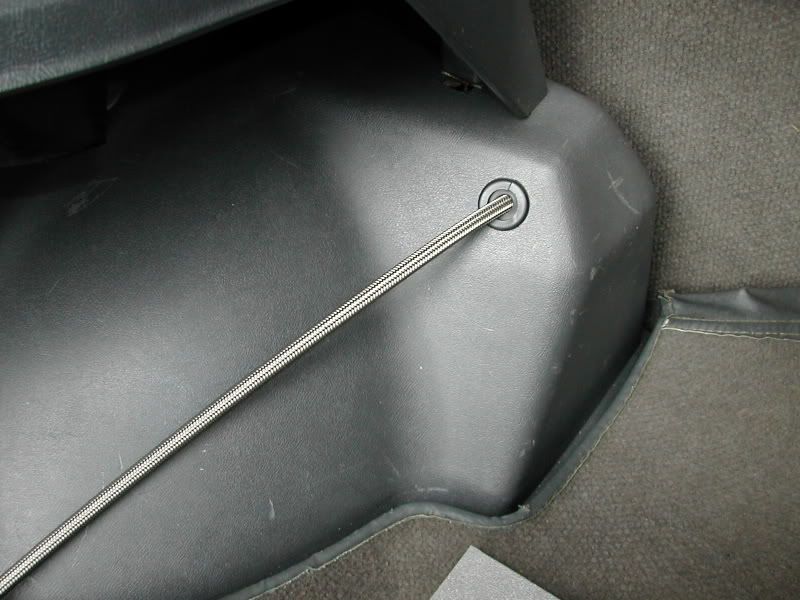
Also got the battery cables into the boot:
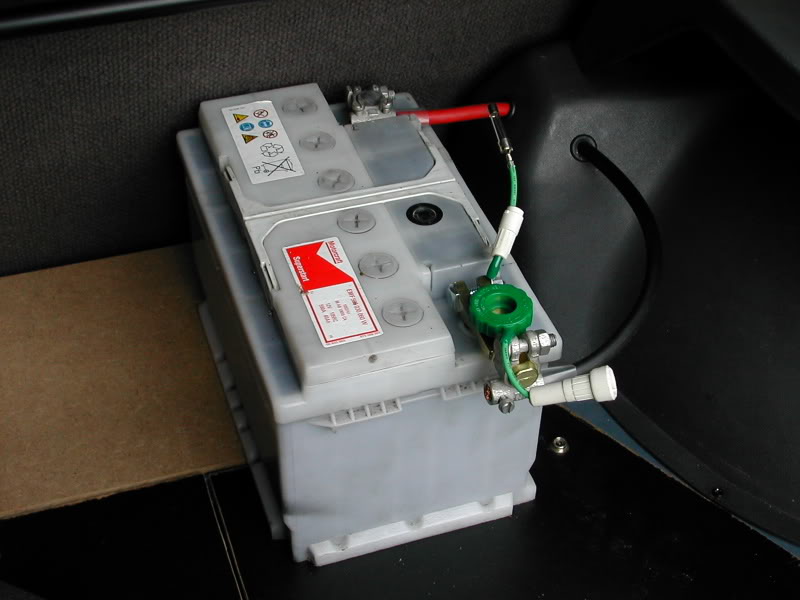
Along with the Nitrous line:
Any made up my new centre caps for the alloys as I dont like the original CONE type ones, got hold of some 3 series BMW items, stripped them, sprayed them black and fitted these nifty badges on 8) :
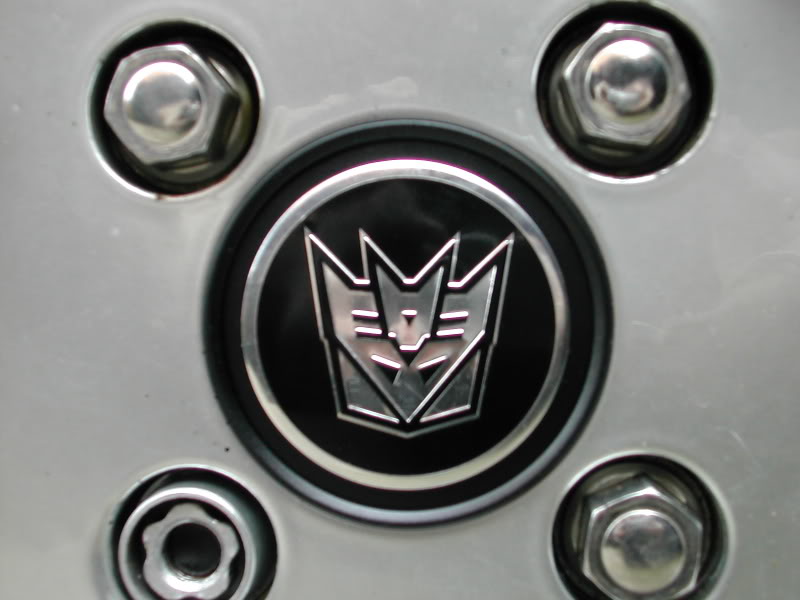
Deceptacon anyone??
Steve
So lately i've fitted 10mm wheel spacers all to give extra clearance and a meaner look
Also got the battery cables into the boot:
Along with the Nitrous line:
Any made up my new centre caps for the alloys as I dont like the original CONE type ones, got hold of some 3 series BMW items, stripped them, sprayed them black and fitted these nifty badges on 8) :
Deceptacon anyone??
Steve

 21-06-2011, 10:07 PM
#40
PassionFord Regular

great job  i will have a similar set up in my sapphire ons day ....just don`t know which g`box to use with a 5.0 efi V8. I would tune the engine slightly though. And i want to keep the gear leaver tunnel hole stock don`t want to cut it up.
Keep it up
i will have a similar set up in my sapphire ons day Keep it up