Smart ForTwo Hayabusa Project - Update 04/05/2015
 25-02-2009, 10:53 AM
#1
Regular Contributor
Thread Starter

Hey Everyone,
Update - 04/05/2015 - See Page 3!
Re-fitting Clutch.
-42Haya
Update - 04/05/2015 - See Page 3!
Re-fitting Clutch.
-42Haya
Last edited by 42Haya; 04-05-2015 at 09:34 AM. Reason: Change Updated Date
 25-02-2009, 11:37 AM
#3
PassionFord Post Whore!!

Join Date: Jul 2007
Location: Uk
Posts: 4,270
Likes: 0
Received 0 Likes
on
0 Posts
28-02-2009, 08:02 PM
#5
Regular Contributor
Thread Starter
Update - 28/02/2009
Hey Guys, an update for you all.
I've taken apart both driveshafts and cleaned everything up. I've even taken the Lobro fittings apart and soaked them I've got new boots and grease on the way!
I have also got the rear hubs apart, i need to press the bearings out now (tips anyone?), new bearings will be ordered tommorow.
Once the bearings are out then i'm getting everything sand blasted and powder coated, the custom rear uprights will be ordered early week too.
Tommorow i'm taking one of the front hubs off, measurements are then going to be taken so my custom front hubs can be made (Ford PCD instead of Smart PCD). These shouldn't take too long to make so hopefully i'll have some pictures soon.
Two of the driveshaft bolts were a nightmare to get out (the last two as well!), i've ordered 50 Socket Cap version so i'll have a few spare for when the diff is ordered.
Anyway, i've got a few pictures also.


I'll grab some more photo's tommorow!
Hey Guys, an update for you all.
I've taken apart both driveshafts and cleaned everything up. I've even taken the Lobro fittings apart and soaked them
I have also got the rear hubs apart, i need to press the bearings out now (tips anyone?), new bearings will be ordered tommorow.
Once the bearings are out then i'm getting everything sand blasted and powder coated, the custom rear uprights will be ordered early week too.
Tommorow i'm taking one of the front hubs off, measurements are then going to be taken so my custom front hubs can be made (Ford PCD instead of Smart PCD). These shouldn't take too long to make so hopefully i'll have some pictures soon.
Two of the driveshaft bolts were a nightmare to get out (the last two as well!), i've ordered 50 Socket Cap version so i'll have a few spare for when the diff is ordered.
Anyway, i've got a few pictures also.
I'll grab some more photo's tommorow!
 01-03-2009, 03:02 PM
#7
Regular Contributor
Thread Starter
Update - 28/02/2009
Afternoon all, not much hands on work today but alot of design work is about to start.
I've taken off the original ForTwo front hubs, as i've mentioned before these are going to be remade but with Ford wheel fitment (4x10⁸).
The reason for this obviously that i won't be able to get any decent and matched front and rear wheels.
This will mean though i'll be using Ford Sierra or similar front calipers and discs, i'll have to get these to fit using custom bits when it comes to it but for the moment i didn't want to spend too much time at the front when the rear needs all the thought and work initially!
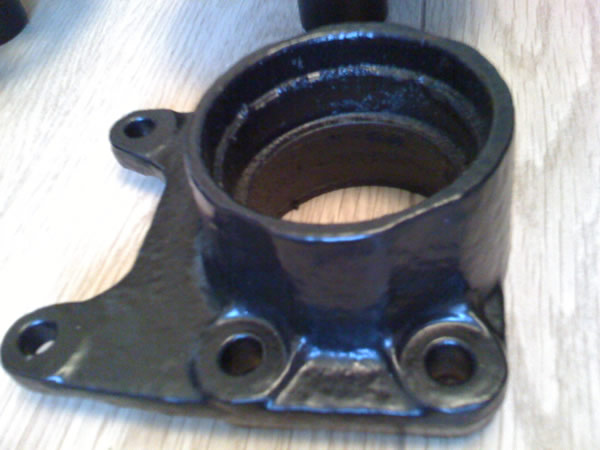
Here's a few pictures to explain what i've been talking about.
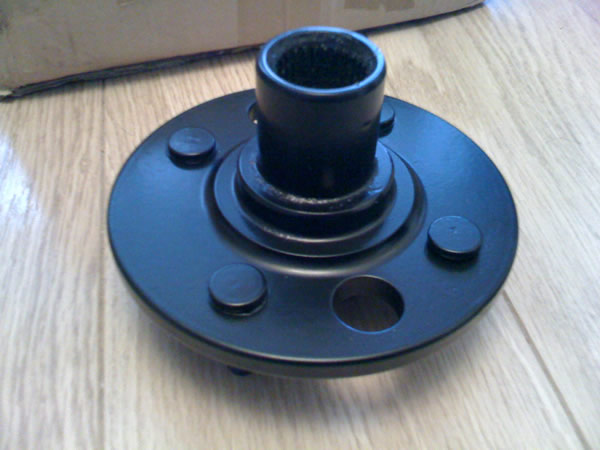
Original Smart Fortwo front Hub


Note the ABS ring attached on the opposite side

Left: Fortwo front hub, Right: Ford Sierra Cosworth 4x4 Rear Hub

The difference between the hubs is only a few millimeters so it won't cause too much of a problem, the main concerns is obviously getting the ABS ring in the right place on the new hub, and making sure the hub center is correct so that Ford Wheels will fit on perfectly.
Should have some drawings of the new hubs later
Afternoon all, not much hands on work today but alot of design work is about to start.
I've taken off the original ForTwo front hubs, as i've mentioned before these are going to be remade but with Ford wheel fitment (4x10⁸).
The reason for this obviously that i won't be able to get any decent and matched front and rear wheels.
This will mean though i'll be using Ford Sierra or similar front calipers and discs, i'll have to get these to fit using custom bits when it comes to it but for the moment i didn't want to spend too much time at the front when the rear needs all the thought and work initially!
Here's a few pictures to explain what i've been talking about.
Original Smart Fortwo front Hub
Note the ABS ring attached on the opposite side
Left: Fortwo front hub, Right: Ford Sierra Cosworth 4x4 Rear Hub
The difference between the hubs is only a few millimeters so it won't cause too much of a problem, the main concerns is obviously getting the ABS ring in the right place on the new hub, and making sure the hub center is correct so that Ford Wheels will fit on perfectly.
Should have some drawings of the new hubs later
Trending Topics
17-03-2009, 09:14 AM
#8
Regular Contributor
Thread Starter
Update - 17/03/2009
I picked this up yesterday..
This should certainly do the job!
I've also been working on my welding skills and can say its definitely something everyone should try! Very easy once the welding kit is setup for the type and thickness of the metal .
.
More updates soon.
David
I picked this up yesterday..
This should certainly do the job!
I've also been working on my welding skills and can say its definitely something everyone should try! Very easy once the welding kit is setup for the type and thickness of the metal
More updates soon.
David
20-03-2009, 12:41 PM
#9
Regular Contributor
Thread Starter
Update - 20/03/2009
Everythings at the powdercoaters! Here's a before picture..

I'll take an 'after' picture once i get these back early next week.
I've also purchased some bearings to sit on either side of the diff, i'll be bending up the tubing previously purchased and welding together a rough design for the rear subframe.
To be continued..
Everythings at the powdercoaters! Here's a before picture..
I'll take an 'after' picture once i get these back early next week.
I've also purchased some bearings to sit on either side of the diff, i'll be bending up the tubing previously purchased and welding together a rough design for the rear subframe.
To be continued..
 20-03-2009, 01:01 PM
#11
Regular Contributor
Thread Starter
1/4 mile: 9.62 seconds @ 149.7 mph
0–60 mph: 2.60 seconds
0–180 mph: 15.9 seconds
With the addional weight (Hayabusa is around 230KG, SmartBusa will be about 600KG) but with the lowered gearing to our advantage. I would hope the 0.60 to be about 3.4 seconds.
The standard hayabusa does 90mph in 1st and 117mph in 2nd, so you can see how lowering the gearing will be to my advantage (i'd still like 60mph in 1st gear).
Obviously i won't know exactly how quick until the car is completed and i can run some real tests.
 20-03-2009, 04:47 PM
#13
AMG C32
Join Date: Jun 2008
Location: Blackpool
Posts: 1,219
Likes: 0
Received 0 Likes
on
0 Posts
A standard Suzuki Hayabusa has the following statistics:
1/4 mile: 9.62 seconds @ 149.7 mph
0�60 mph: 2.60 seconds
0�180 mph: 15.9 seconds
With the addional weight (Hayabusa is around 230KG, SmartBusa will be about 600KG) but with the lowered gearing to our advantage. I would hope the 0.60 to be about 3.4 seconds.
The standard hayabusa does 90mph in 1st and 117mph in 2nd, so you can see how lowering the gearing will be to my advantage (i'd still like 60mph in 1st gear).
Obviously i won't know exactly how quick until the car is completed and i can run some real tests.
30-03-2009, 01:38 PM
#15
Regular Contributor
Thread Starter
Update - 30/03/2009
Rear Calipers arrived today, HUGE! Should definitely stop the rear end no problem Will measure to see if they take Solid or Vented discs, either way they'll be more than enough to stop the rear end of a 600KG car.
Had word from the powder coaters mentioning they weren't too happy with how some of the parts came out, so getting them back tommorow.
David
Rear Calipers arrived today, HUGE! Should definitely stop the rear end no problem
Had word from the powder coaters mentioning they weren't too happy with how some of the parts came out, so getting them back tommorow.
David
02-04-2009, 07:59 AM
#16
Regular Contributor
Thread Starter
Update - 02/04/2009
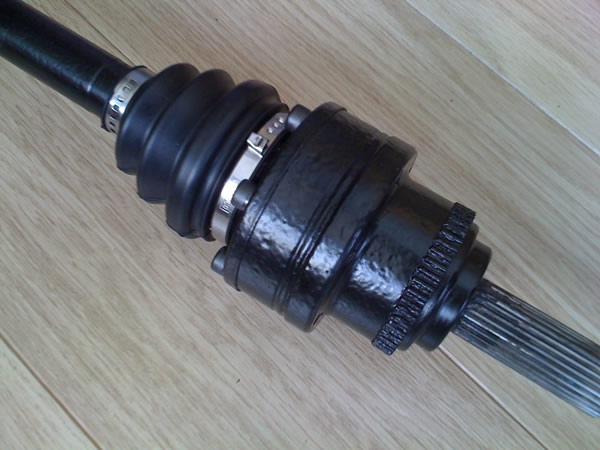
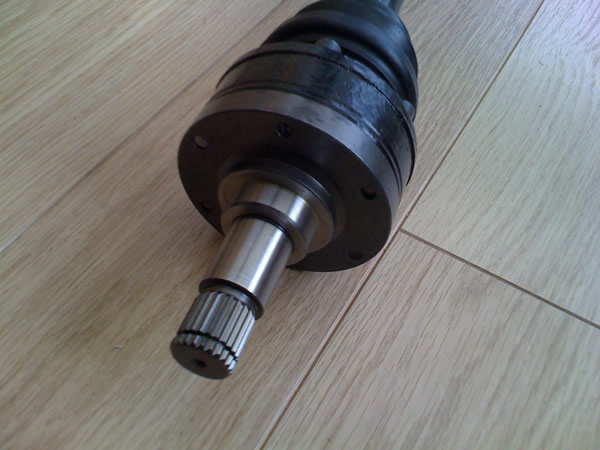
The parts are back from the powder coaters! I've just got to clean up a few threads and spines.
Before
After
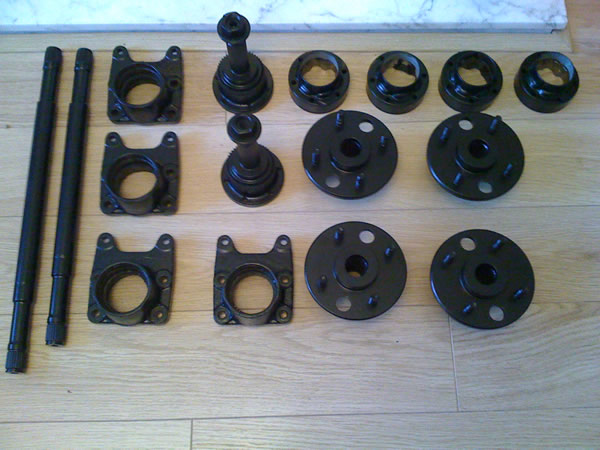
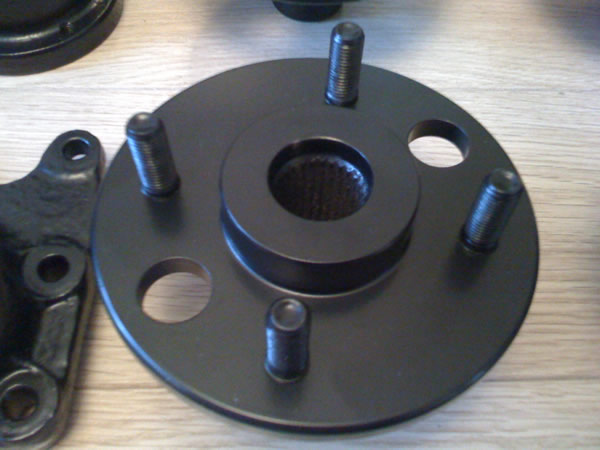
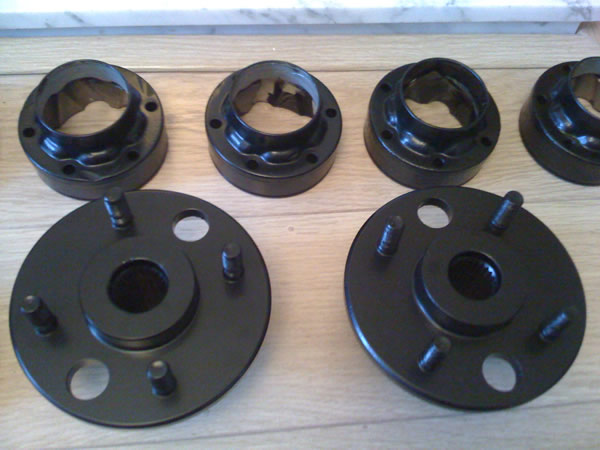
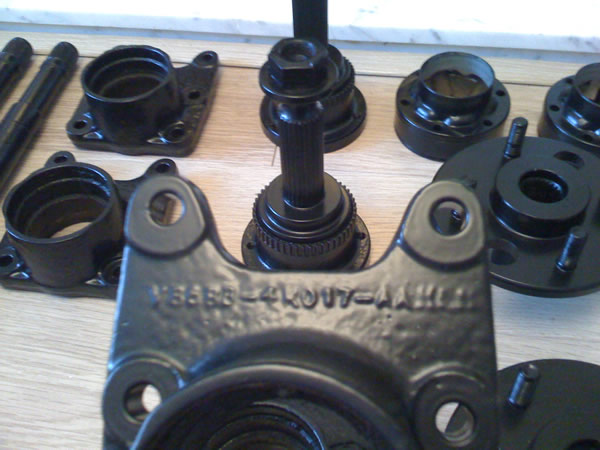
The rear calipers have also arrived and i've ordered two rebuild kits, i've gone for the solid disk versions.
More updates soon..
The parts are back from the powder coaters! I've just got to clean up a few threads and spines.
Before
After
The rear calipers have also arrived and i've ordered two rebuild kits, i've gone for the solid disk versions.
More updates soon..
02-04-2009, 08:21 AM
#18
Regular Contributor
Thread Starter
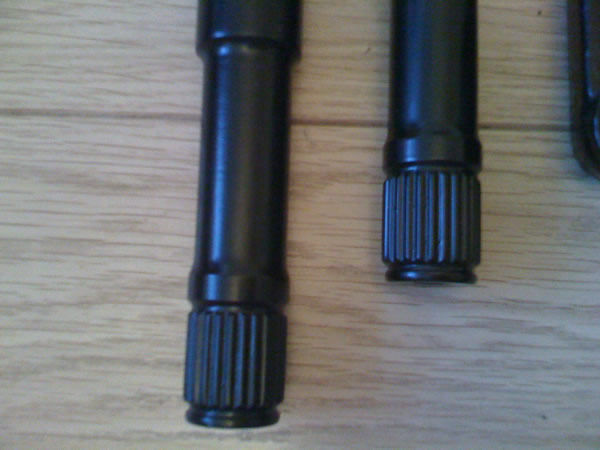
I had the lobro joints masked but to be honest i wasn't sure on how thick the powder coat would be on the splines. Its not too much effort to whisk a dremal or similar accross the spines so i wasn't too fussed.. I'm pleased with the results though!
 04-04-2009, 03:53 AM
#20
Regular Contributor

Ill promise you. You gonna have a nightmare cleaning those parts. And the powdercoat will crack and it will very soon rust and look like shit. But best of luck anyway. Cool project.
05-04-2009, 12:21 AM
#21
Whilst it would have been easier to mask, it is what it is and your steps forward make sense. I know what is like to take a step forward then find that an earlier step would have made life easier.
I do my own powder coating, in case you get more done here is how I mask of bits...
I use aluminium foil for most bits, cheap and easy to use. I often remove the bigger aluminium bits prior to curing. For more intricate bits I have heat proof tape that will not effect the curing. In your case I would get your guy to do his sand blasting the return for masking.
On the cracking, I bet you have thought of this already, you might find that using a fine dremel grinder or similar tip to make a sharp clean edge first up and taking time move out from the edge before you get a bigger tip would be ok. I would say the most important bit is to avoid fracturing the coating. Given that it tends to bond I think it will work just takes time.
On the rusting the shafts are bright steel so I think it wont be too bad, I put CRC or similar stuff on the metal and use that to avoid rust. On the castings I think most of your clean up is inside and will be covered with grease.
Put up some pics when you get em cleaned off. They will look awesome im sure.
If you do find its taking to long, consider getting another set and mask them up, cleaning off the parts with sand blasting to recoat is common but might be risky due to risk of damaging the surface. I bet your powder coater used sand blasting prior to coating to get a clean surface. Check with him as you might find that you can mask of what you want to keep coated and sand blast the rest off.
Also have you checked on effect of curing in relation to effecting the heat curing of the axles... exposure at that high temp might effect their strength. I have not elected to powder coat my axles for fear of effecting strength, if you found some info on that I would be interested.
Last edited by oohogwash1; 05-04-2009 at 12:34 AM.
05-04-2009, 10:38 AM
#22
Regular Contributor
Thread Starter
I managed to get all the powder coating off the splines yesterday, they look amazing. Will have the driveshafts completely built up by the end of today.
Thanks for the support guys..
David
Thanks for the support guys..
David
05-04-2009, 10:53 AM
#23
Professional Waffler
This whole project is making me grin. It has oodles of that "What the Fuck!!!" factor and the potential for upsetting far posher cars in something that looks like a rollerskate is fantastic.
Hats off to you sir, I'm loving it
Hats off to you sir, I'm loving it
05-04-2009, 03:21 PM
#24
Regular Contributor
Thread Starter
05-04-2009, 11:15 PM
#25
Regular Contributor
Thread Starter
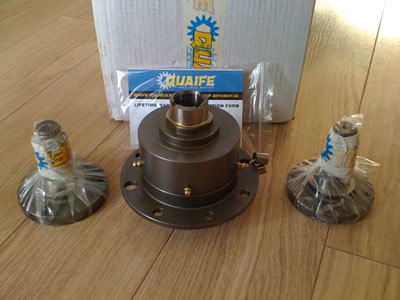
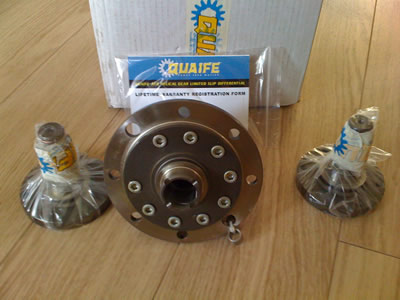
Update 06-04-2009
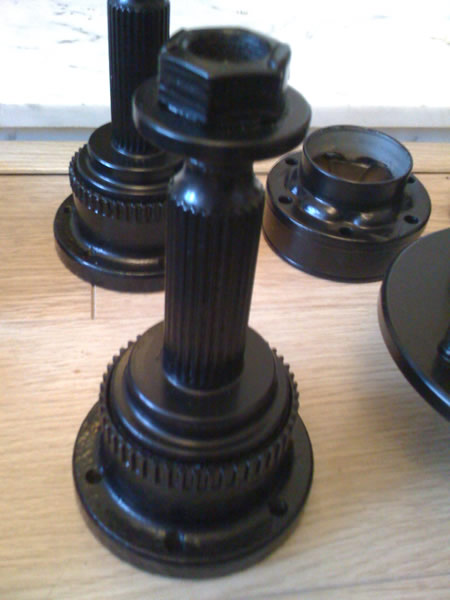
..and here's one I made earlier
Complete Shaft
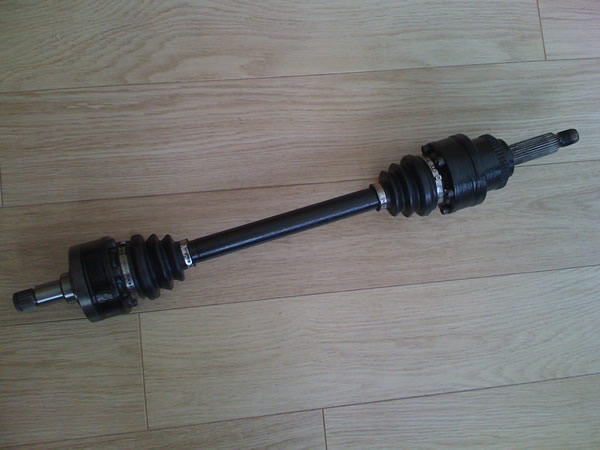
New CV Boots
Quaife Lobro Joints
Cap Head Bolts
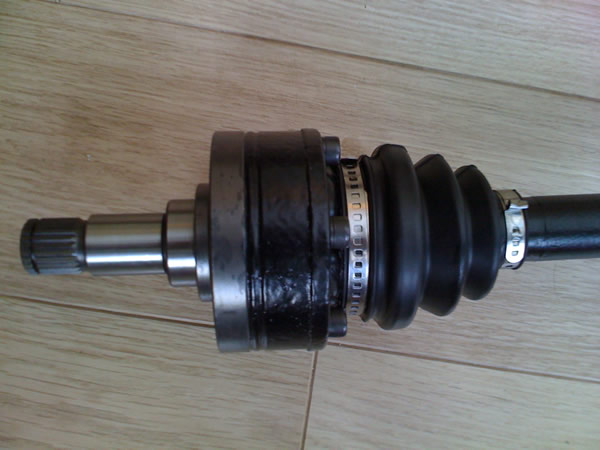
I'm missing a circlip from the inside of the other drive shaft, so as soon as i source another i can get the other one together
The caliper seal/o-ring kit should be here tomorrow. I'll get these cleaned up, painted and sealed this week.
More news soon..
..and here's one I made earlier
Complete Shaft
New CV Boots
Quaife Lobro Joints
Cap Head Bolts
I'm missing a circlip from the inside of the other drive shaft, so as soon as i source another i can get the other one together
The caliper seal/o-ring kit should be here tomorrow. I'll get these cleaned up, painted and sealed this week.
More news soon..
06-04-2009, 07:54 AM
#28
Regular Contributor
Thread Starter
It'll soon take off once we get bending and welding
 21-04-2009, 02:28 PM
#30
Regular Contributor
Thread Starter
Update - 21/04/2009
Not much to report but a minor update. Wheel bearings have arrived and have been pressed into the hubs. This morning i sent off the cheque for the kit-car rear uprights.
Soon as these arrive the rear subframe is getting built
Bit of slow progress but i can see alot getting done over the next month!
Not much to report but a minor update. Wheel bearings have arrived and have been pressed into the hubs. This morning i sent off the cheque for the kit-car rear uprights.
Soon as these arrive the rear subframe is getting built
Bit of slow progress but i can see alot getting done over the next month!
25-04-2009, 08:13 PM
#31
Regular Contributor
Thread Starter
Update - 25/04/2009
Lots of progress today!
Making some final decisions on wishbone design, calipers are half way being refurbed. The colour of the calipers look simply amazing! I'll post up some pics of them once they've had a few more coats
Getting some inserts made for fixing the new subframe to the original mounting points. As soon as these are made its go go go!
25-04-2009, 09:43 PM
#32
Too many posts.. I need a life!!
wow you are a brave man, would love to have a go in this once you've got it finnished.
part of my job is buying/selling (used) smart for two's and when you hustle them along at a half decent pace (ie half what you'd be doing in a ka 1.3!) they are one of the worst handling cars I've ever driven, it will be interesting to see what you can do to get it to handle, stop and steer.
In many ways they are great, as in a great city car, but making one quick and handle is a big challenge good luck and keep us updated...
02-05-2009, 04:00 PM
#34
Regular Contributor
Thread Starter
Update - 02/05/2009
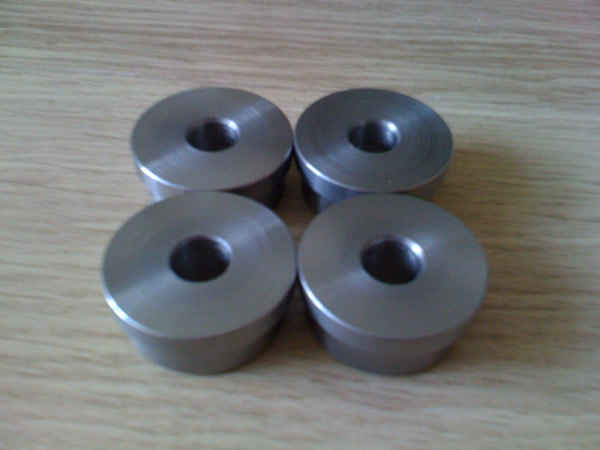
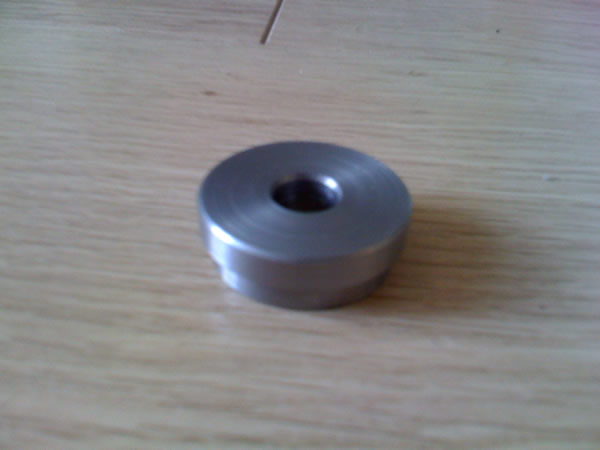
First of my custom parts have been made! Some nice beefy subframe inserts to keep all the power bolted to the car.
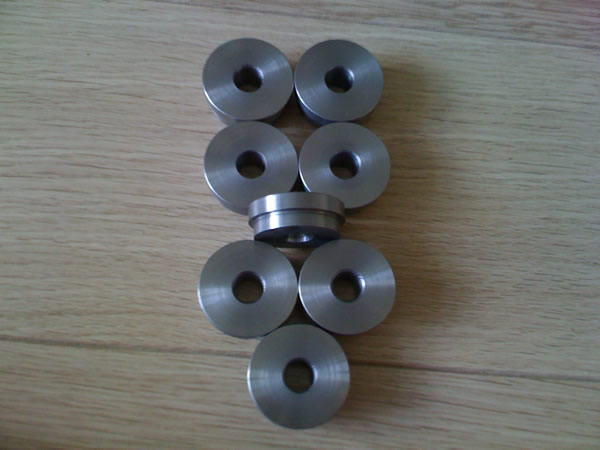
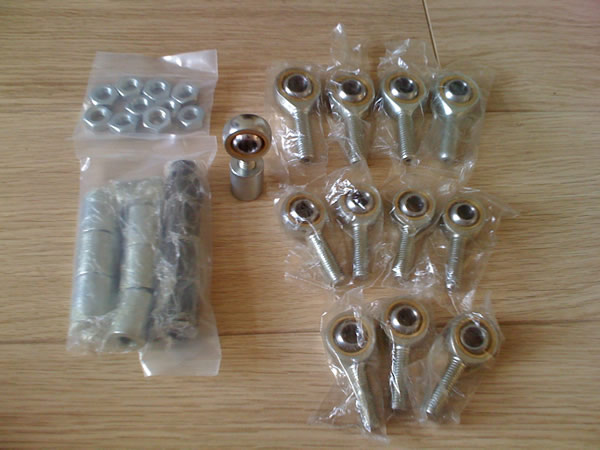
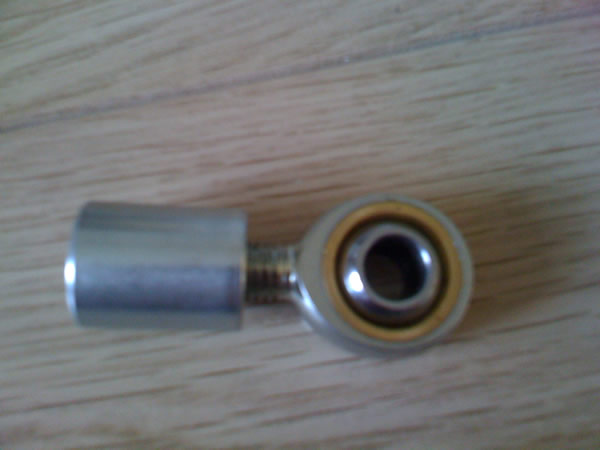
Also these arrived, PTFE lined .. silky smooth
This should keep the back end in check! I'll be doing some subframe and arm work over this weekend. Should have something rolling very soon
First of my custom parts have been made! Some nice beefy subframe inserts to keep all the power bolted to the car.
Also these arrived, PTFE lined .. silky smooth
This should keep the back end in check! I'll be doing some subframe and arm work over this weekend. Should have something rolling very soon

 18-05-2009, 09:57 AM
#38
Regular Contributor
Thread Starter
Update - 18/05/2009
Prototype Subframe 1 Failed - We've started making a proper jig to hold it all in place so when welded it'll be alot more rigid! We had issues with the frame being stressed when bolted on to the car.
Atleast with a new jig we will have alot more room to play with compared to the previous method!
Prototype Subframe 1 Failed
Atleast with a new jig we will have alot more room to play with compared to the previous method!
12-06-2009, 03:59 PM
#40
Virgin

Join Date: Feb 2005
Location: BLACKPOOL
Posts: 3
Likes: 0
Received 0 Likes
on
0 Posts
This sounds like a fantastic project and i am building one myself, brand new to building anything like this but have plenty of projects under my belt. would be very intrested in any info you have on the build IE. parts needed and were to find them, i have been on smartuki website and they sell everything you can ever need to build one including the rear subframe at the cost of �2500 but its only lists the gsx1000 k1,k2 etc engines not the 1300 fitment into the subframe, i guess you may have already seen there website with doing this type of project.. i will be very greatful for any help, info or anything you may think you can help me with in the building of the most fun i have ever seen on you tube Many thanks Cliff