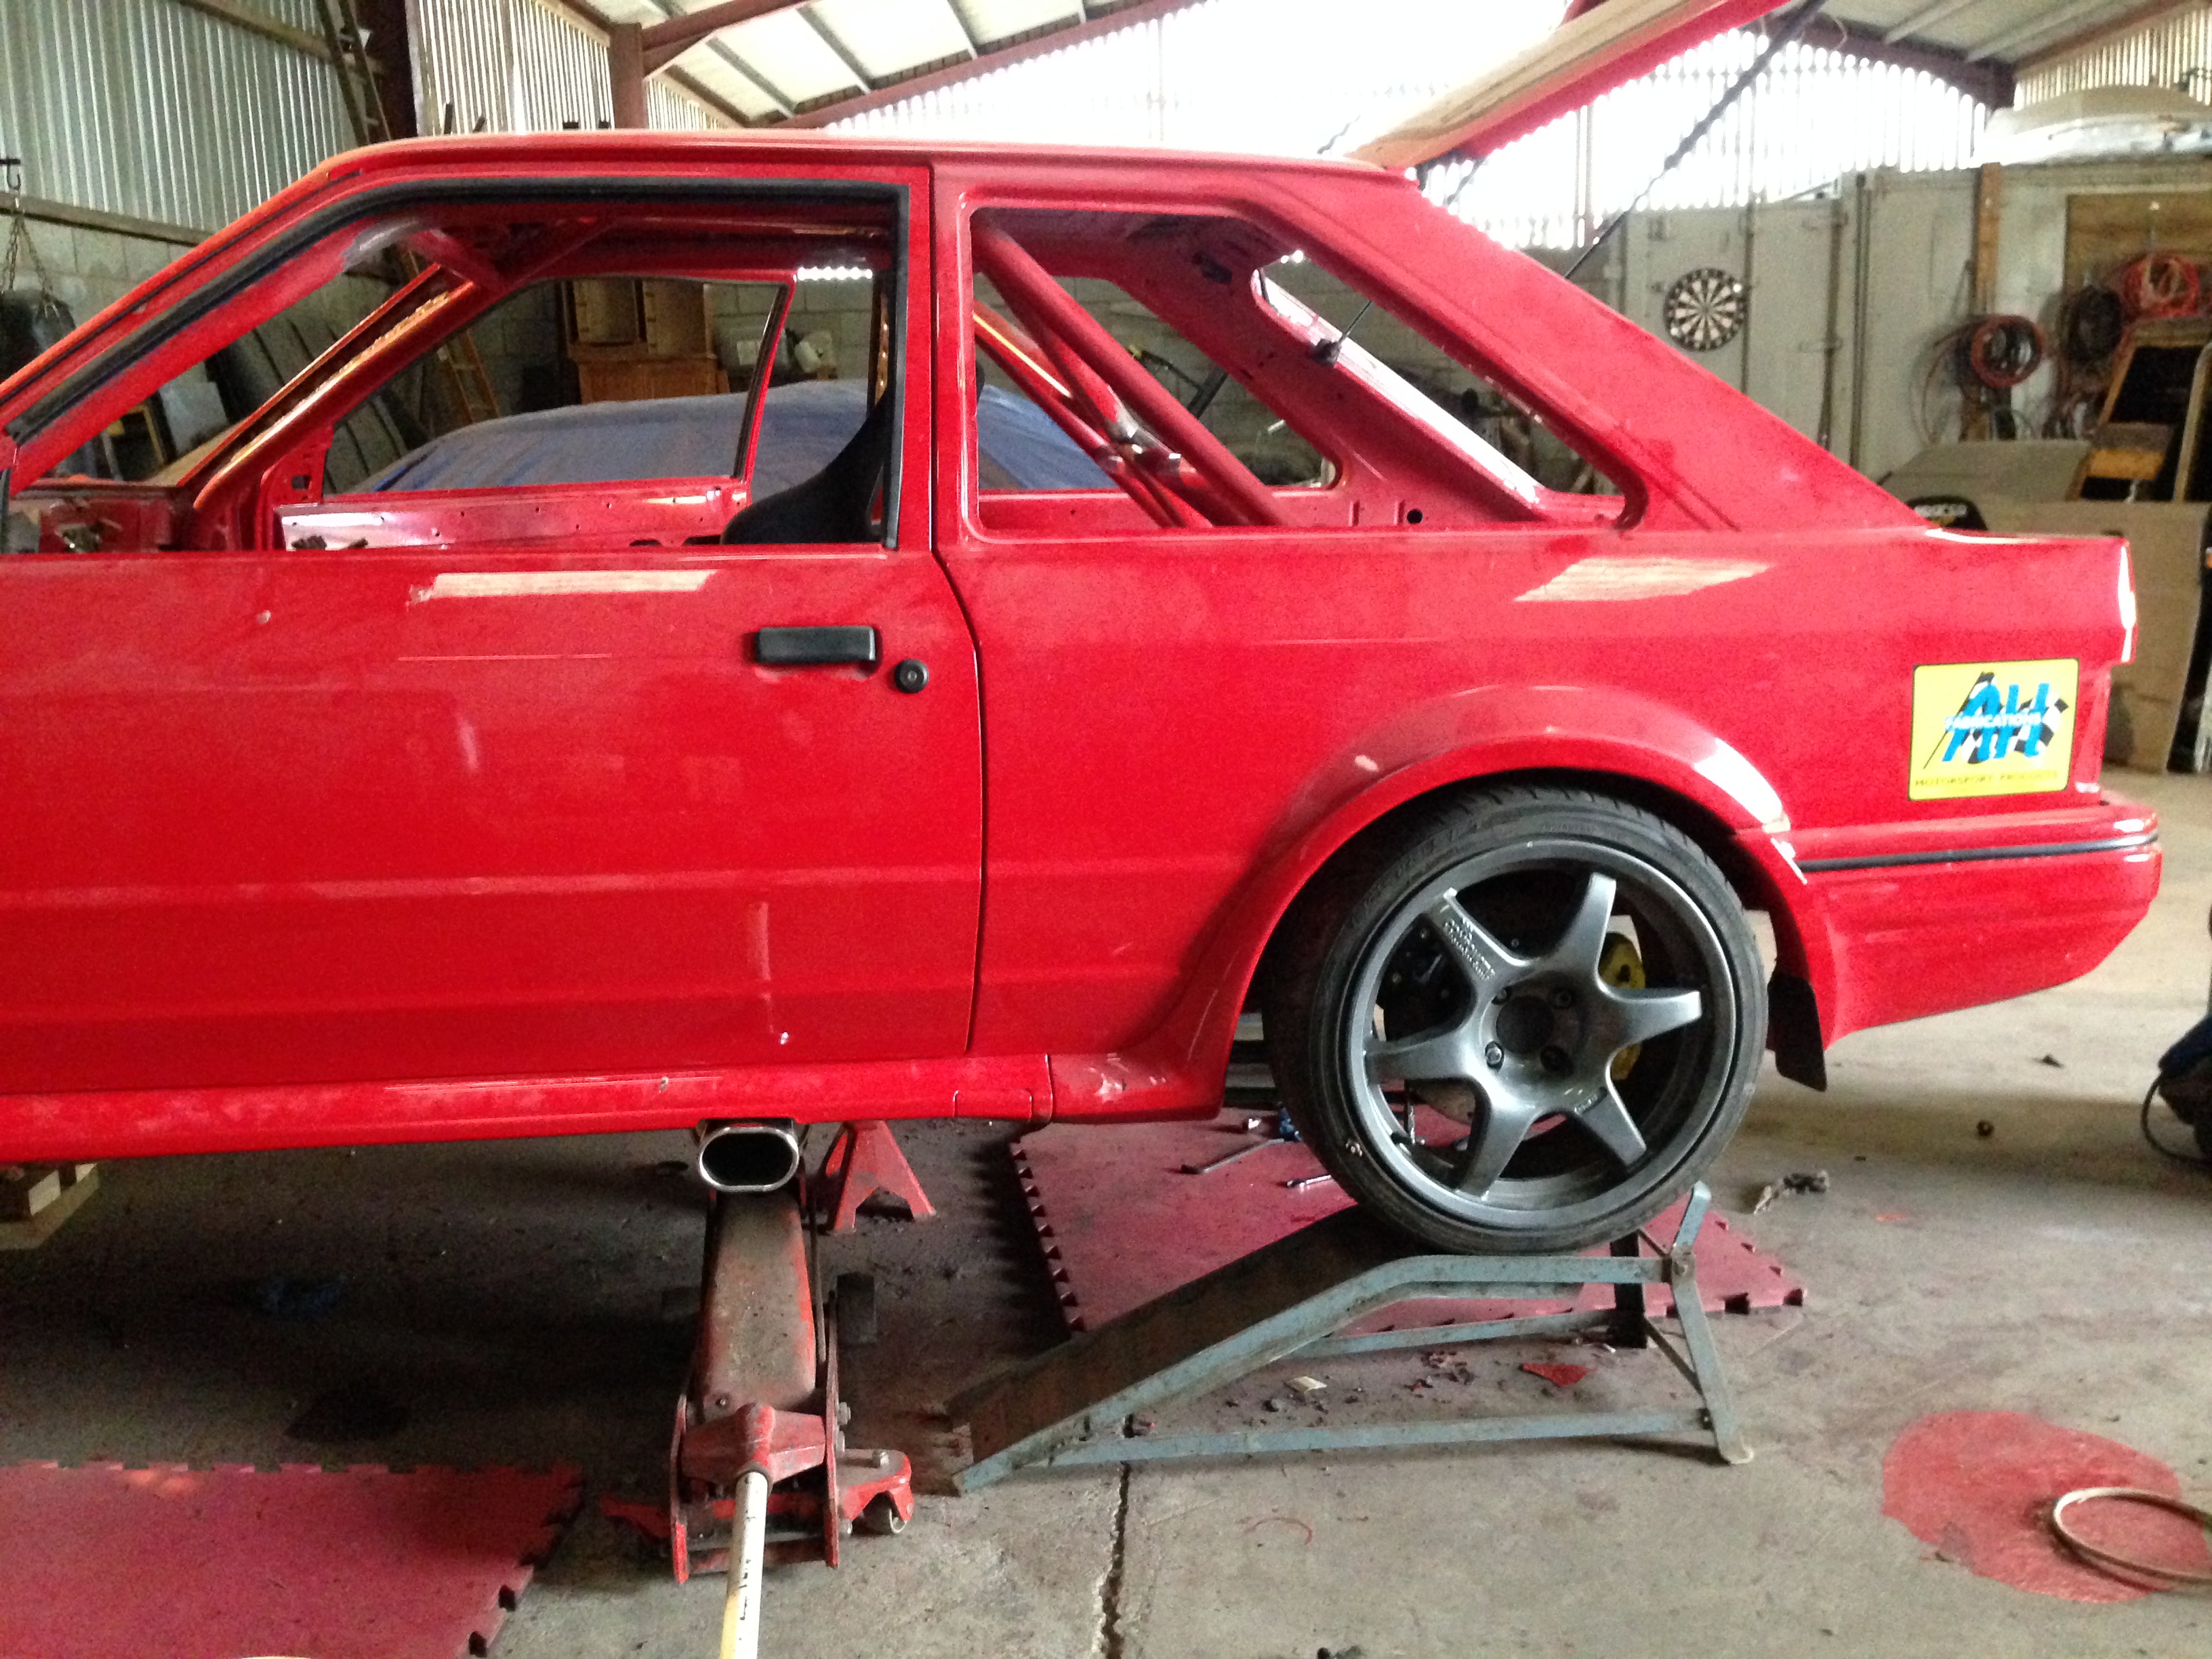
Muz's Escort RS Turbo Track Car. Bumper painted and fitted.


 08-08-2014, 04:28 PM
#971
PassionFord Regular
God this car is so hard to put a value on ! the work is ace Muz must say the ideas of the rear like where the bench seat used to be i think is one of the top bits of Fabrication and boot floor/rails.
When it came to the relays for the headlights (hope you dont mind me asking) how did you get it to work on the 2 relays 1 high and 1 low as the switch has a million wires and i carnt seem to see how you would do it trigger wire wise to the relay. Hope you get time/chance to answer thanks
When it came to the relays for the headlights (hope you dont mind me asking) how did you get it to work on the 2 relays 1 high and 1 low as the switch has a million wires and i carnt seem to see how you would do it trigger wire wise to the relay. Hope you get time/chance to answer thanks
 09-08-2014, 07:40 AM
#973
Wye Valley Hardcore
Thread Starter
God this car is so hard to put a value on ! the work is ace Muz must say the ideas of the rear like where the bench seat used to be i think is one of the top bits of Fabrication and boot floor/rails.
When it came to the relays for the headlights (hope you dont mind me asking) how did you get it to work on the 2 relays 1 high and 1 low as the switch has a million wires and i carnt seem to see how you would do it trigger wire wise to the relay. Hope you get time/chance to answer thanks
When it came to the relays for the headlights (hope you dont mind me asking) how did you get it to work on the 2 relays 1 high and 1 low as the switch has a million wires and i carnt seem to see how you would do it trigger wire wise to the relay. Hope you get time/chance to answer thanks
Remember that the headlights on Fords use a negative trigger, not a positive. Off the top of my head the trigger wires are;
Brown /White tracer - Low Beam
Brown/Yellow tracer. - High Beam
These need to be connected to the relays as trigger wires, instead of a 12v. You still need a 12v source, however.
The lights then ground through the switch via a central ground.
The side lights I didn't relay.
The wiring diagram is at work, 200 miles away, but I can get back to you in the week. I'll drop you a PM.
09-08-2014, 09:05 AM
#975
PassionFord Regular
Mate that wiring diagram would save me so much head ache and if you could do that would be awesome of Muz thanks alot, if your ever up North i owe you a few drinks
 06-09-2014, 07:46 AM
#980
Wye Valley Hardcore
Thread Starter
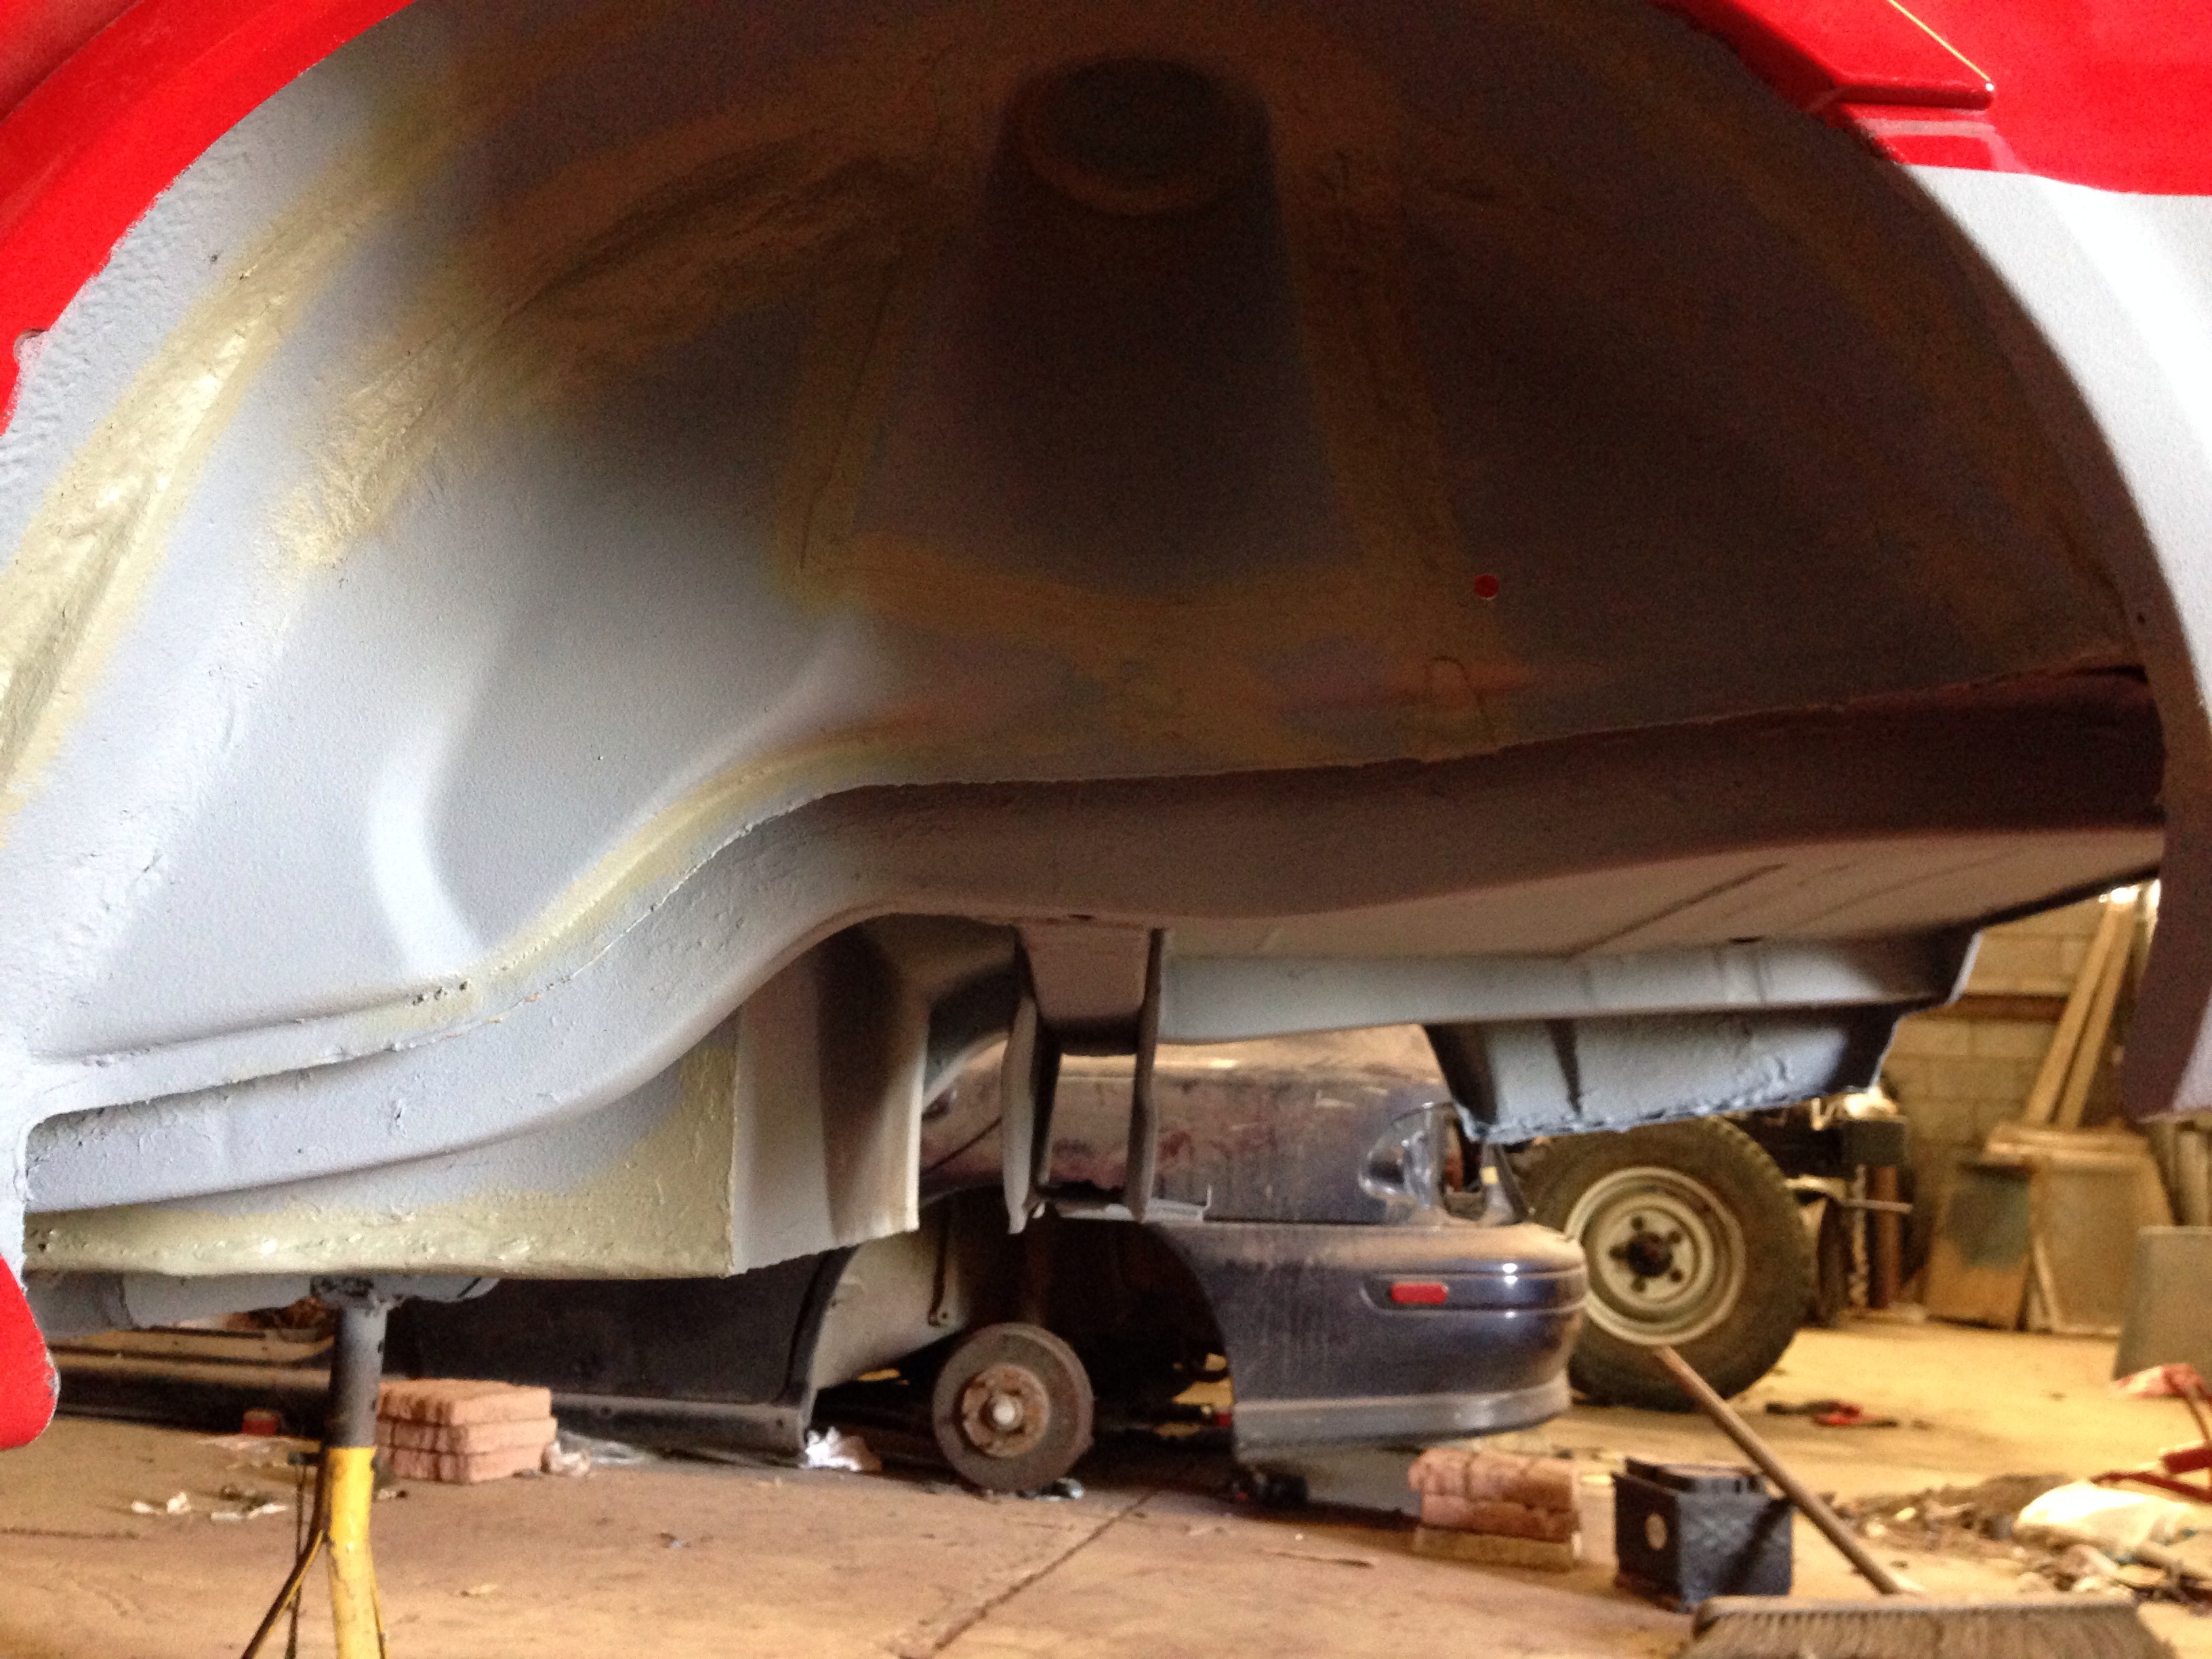
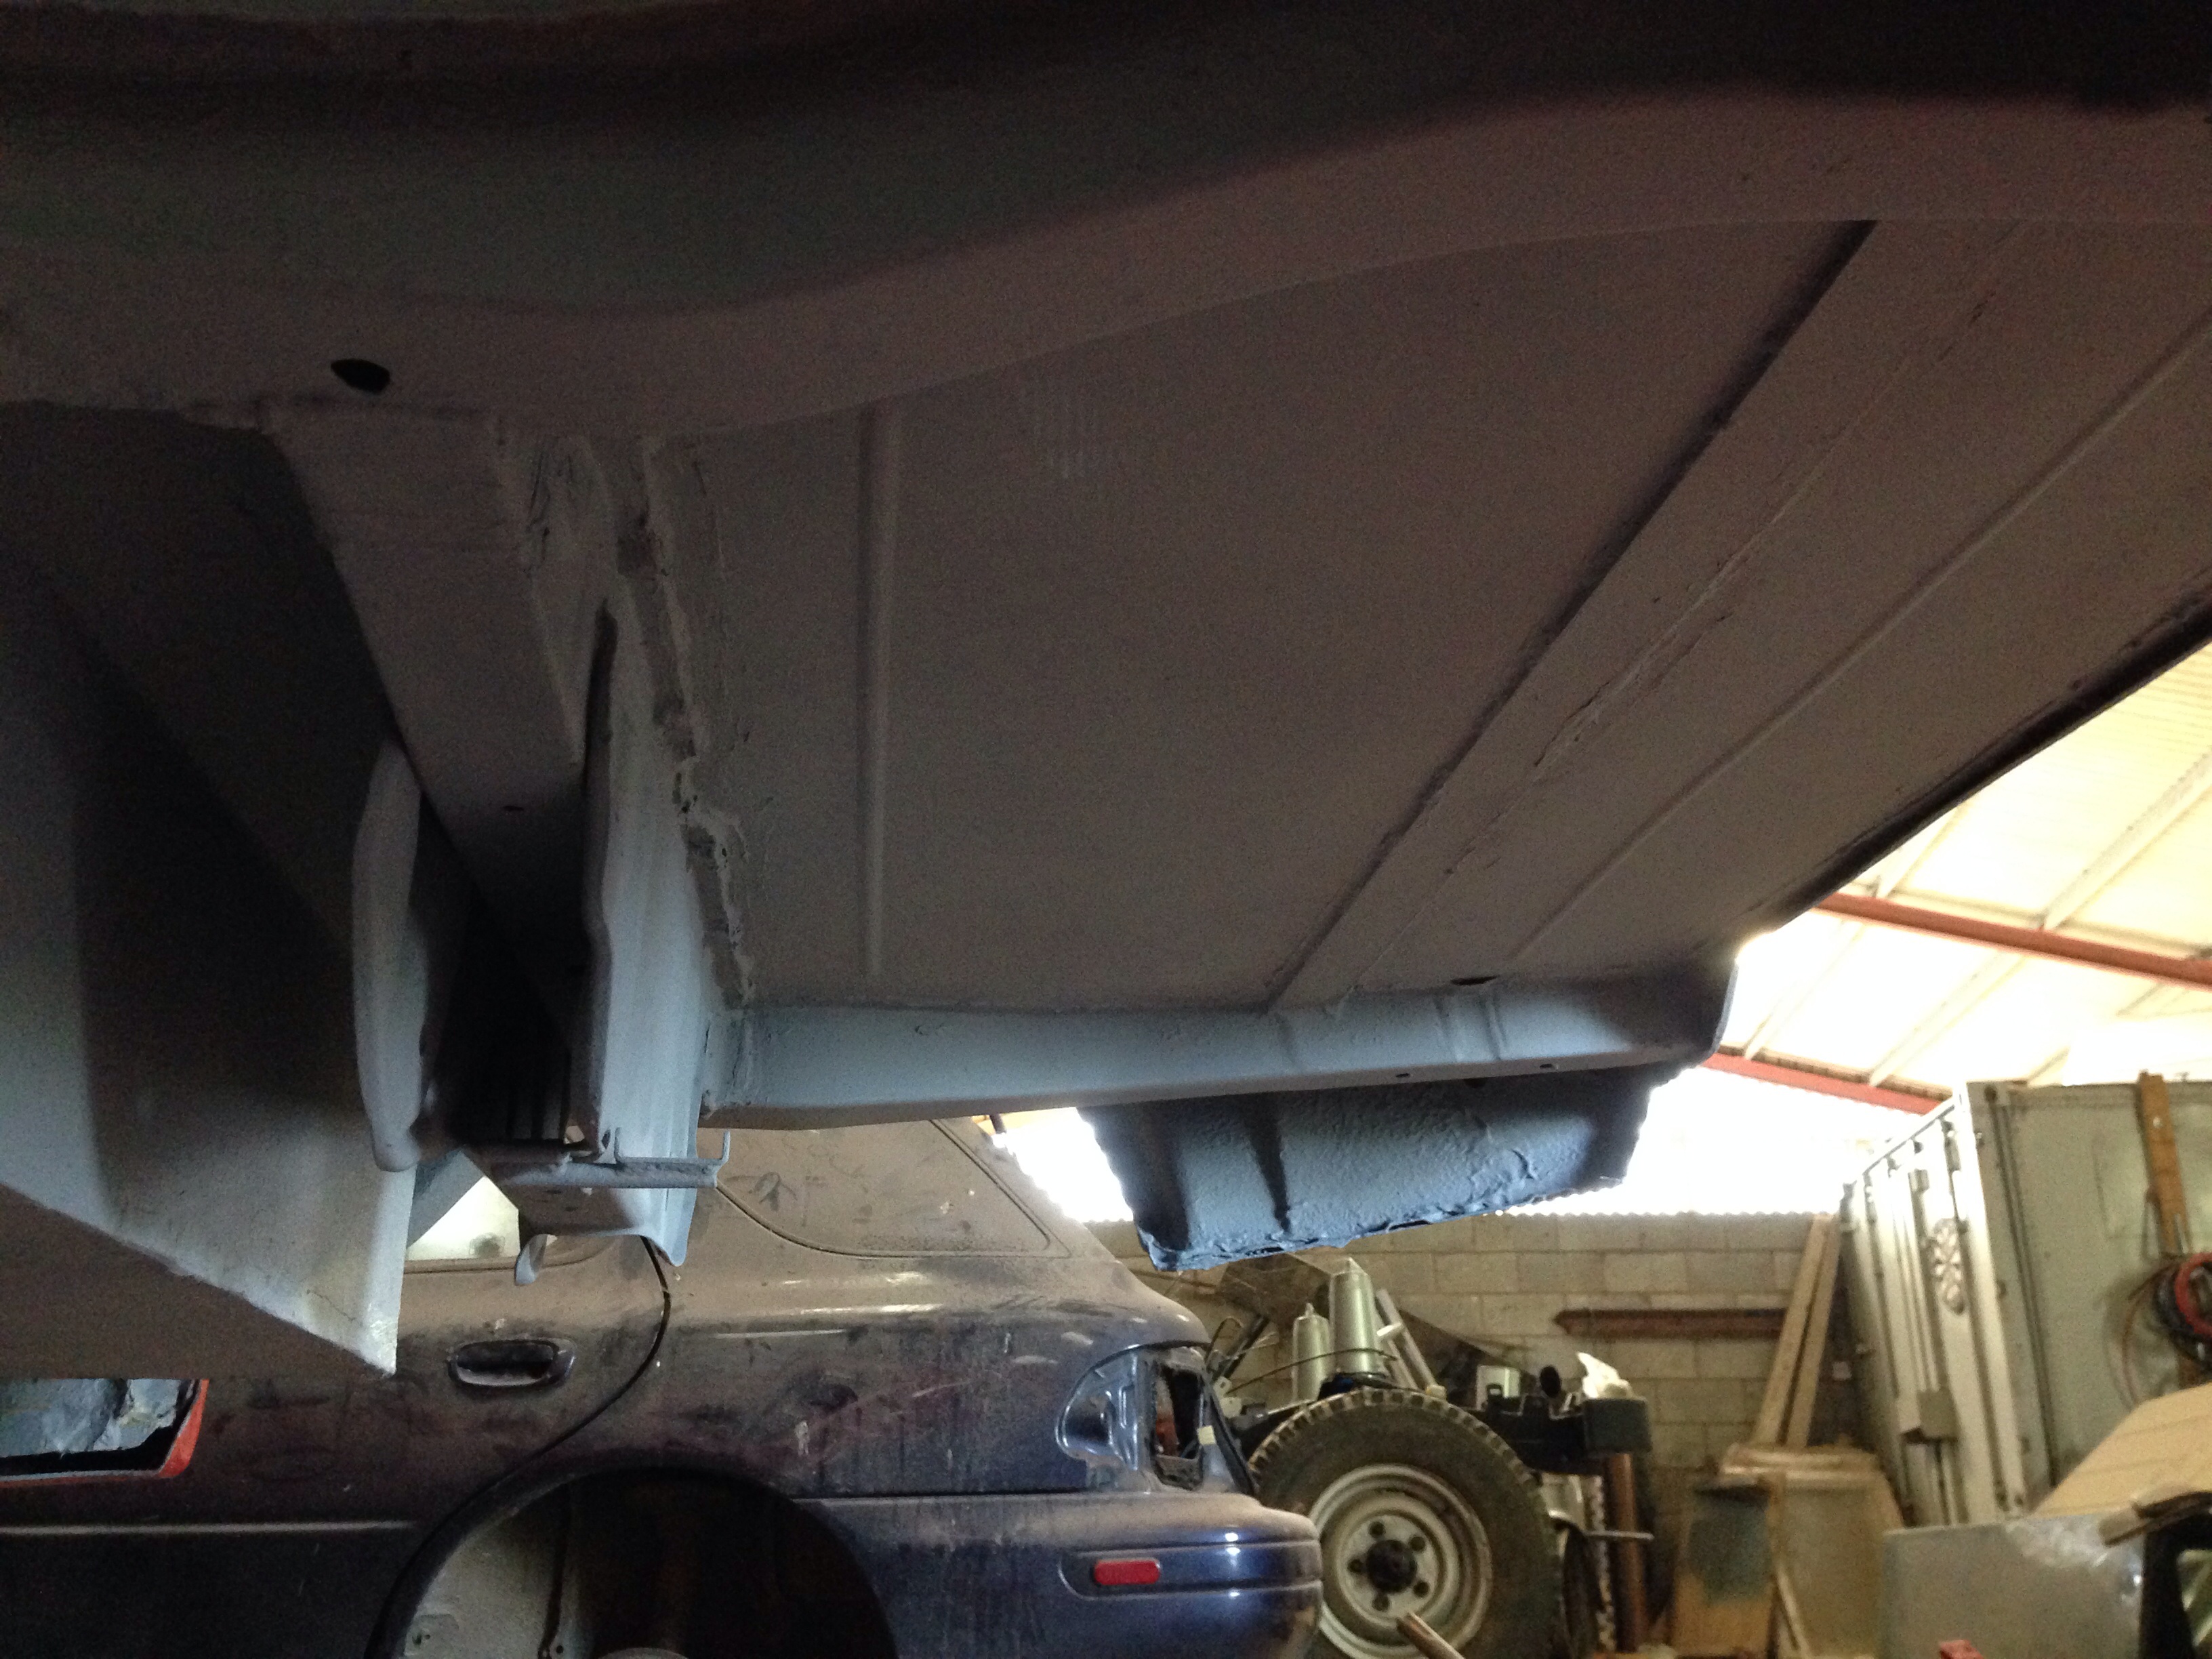
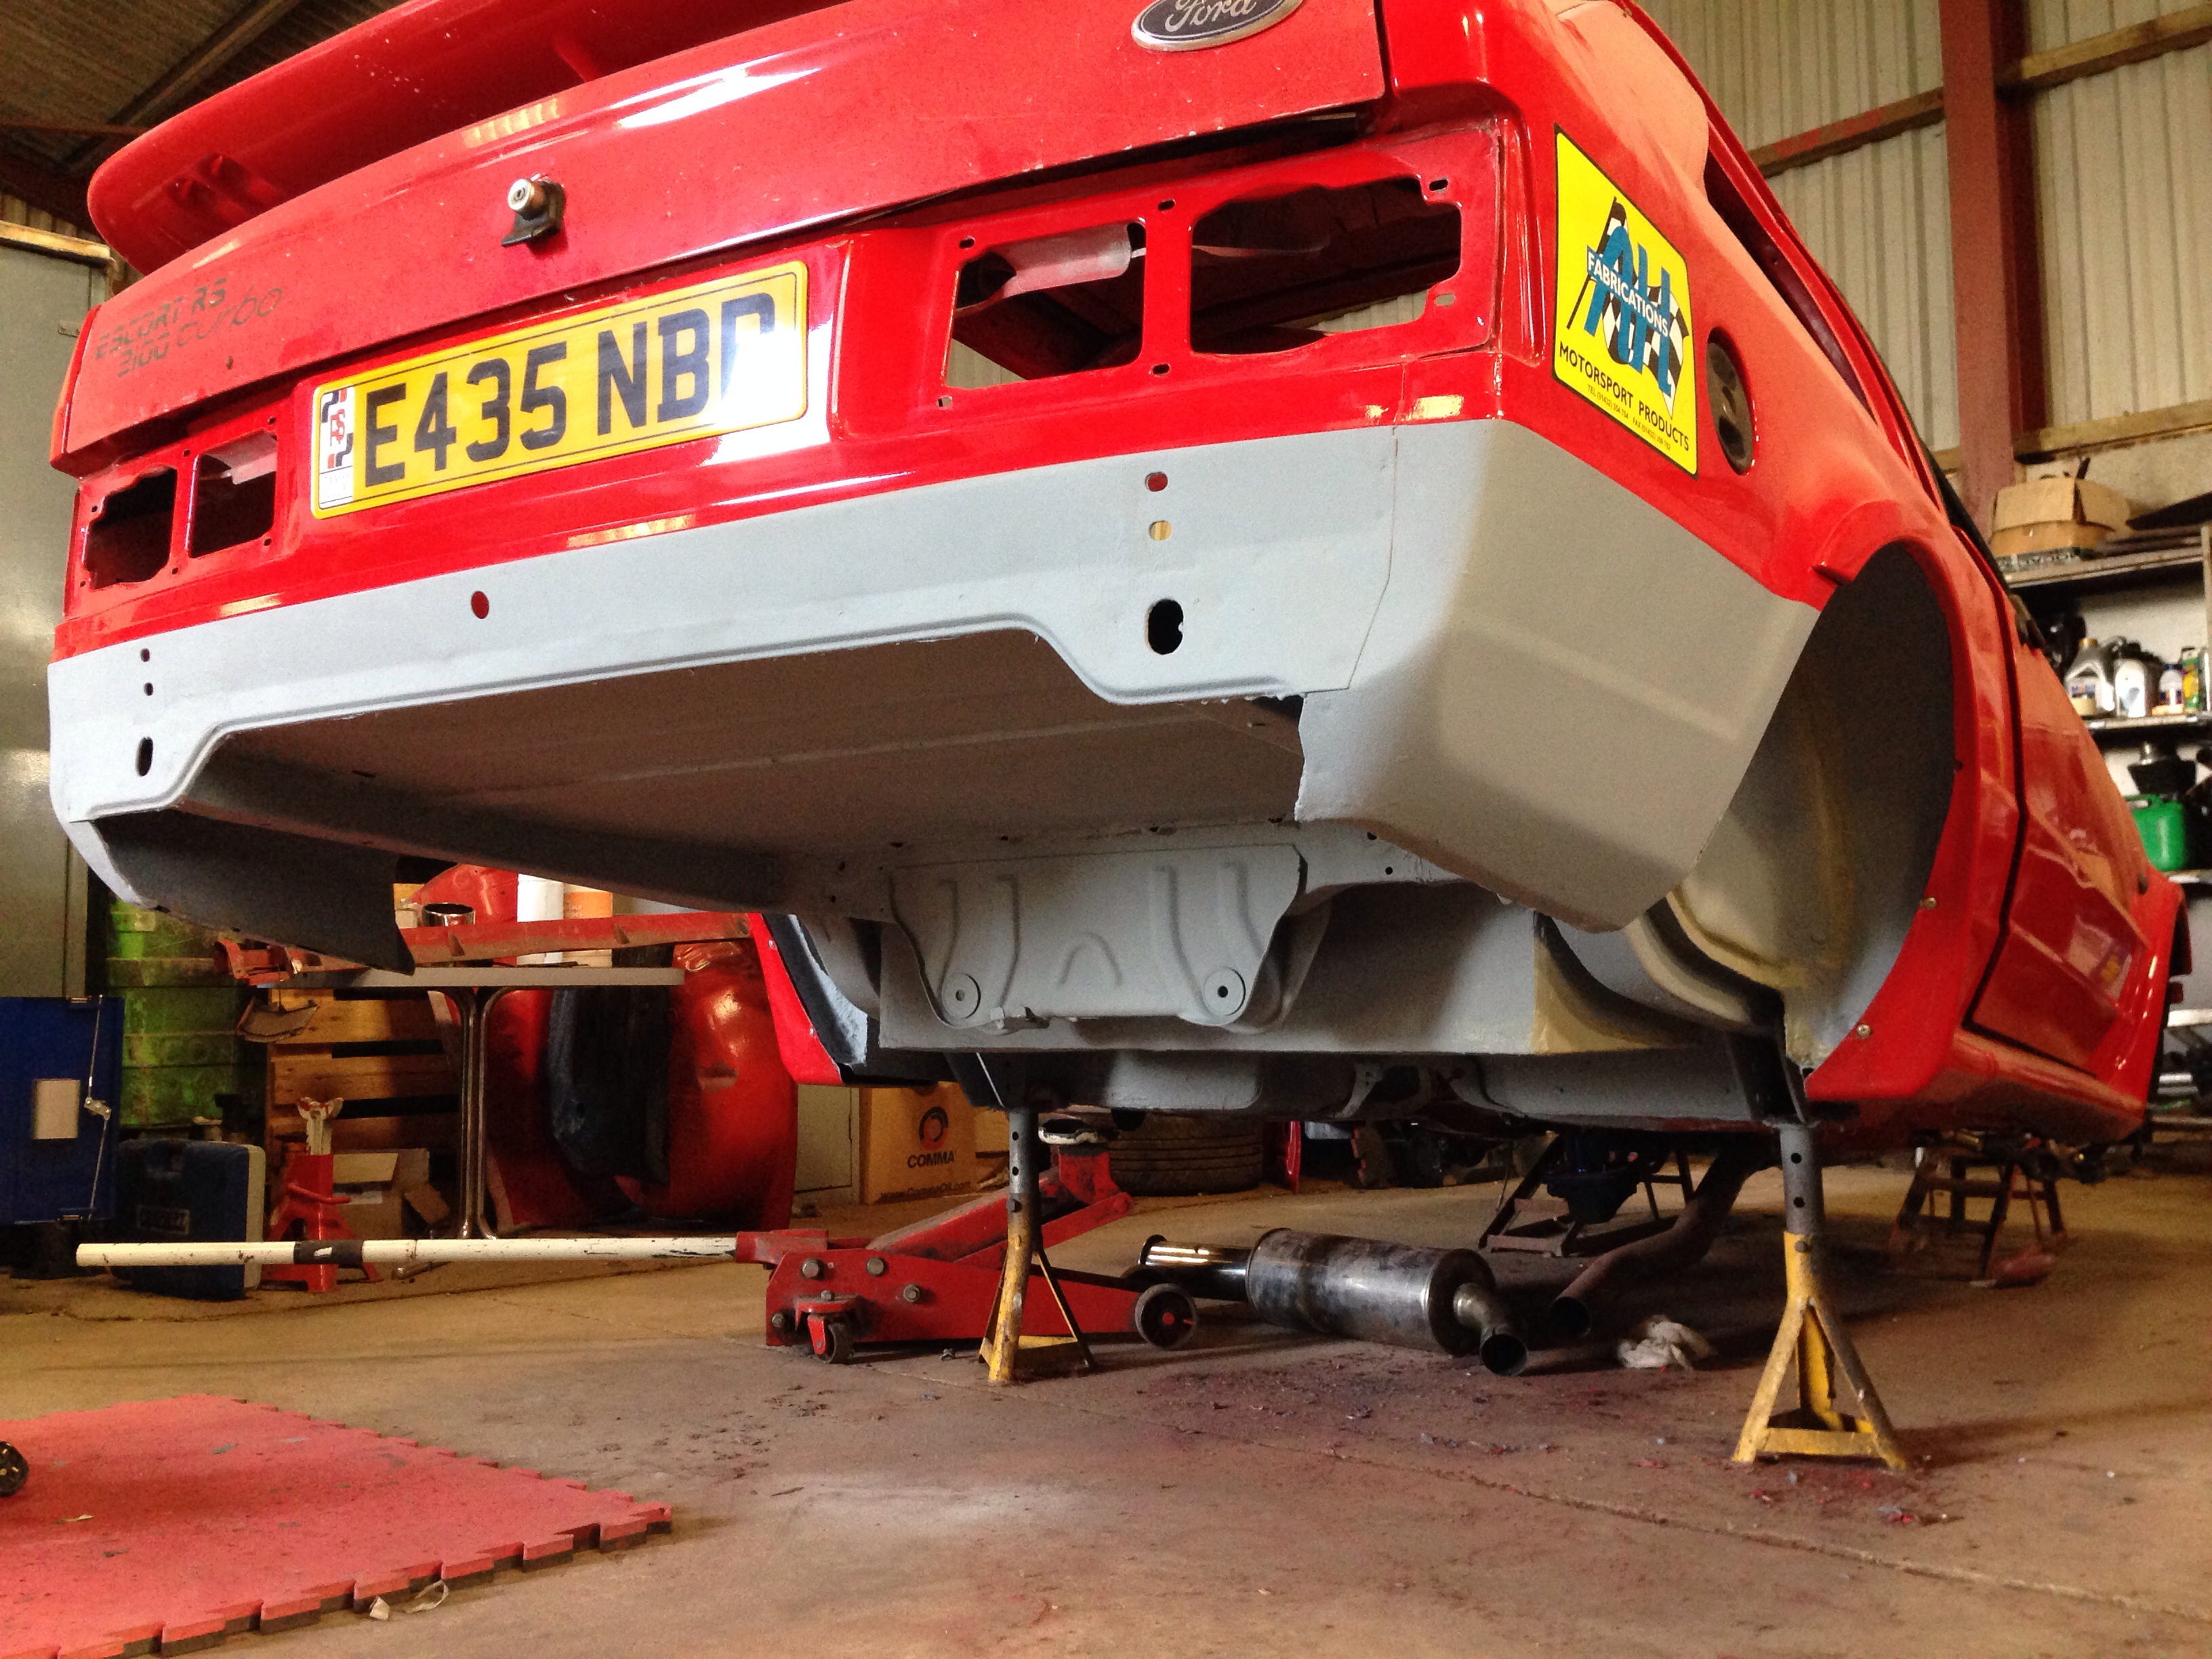
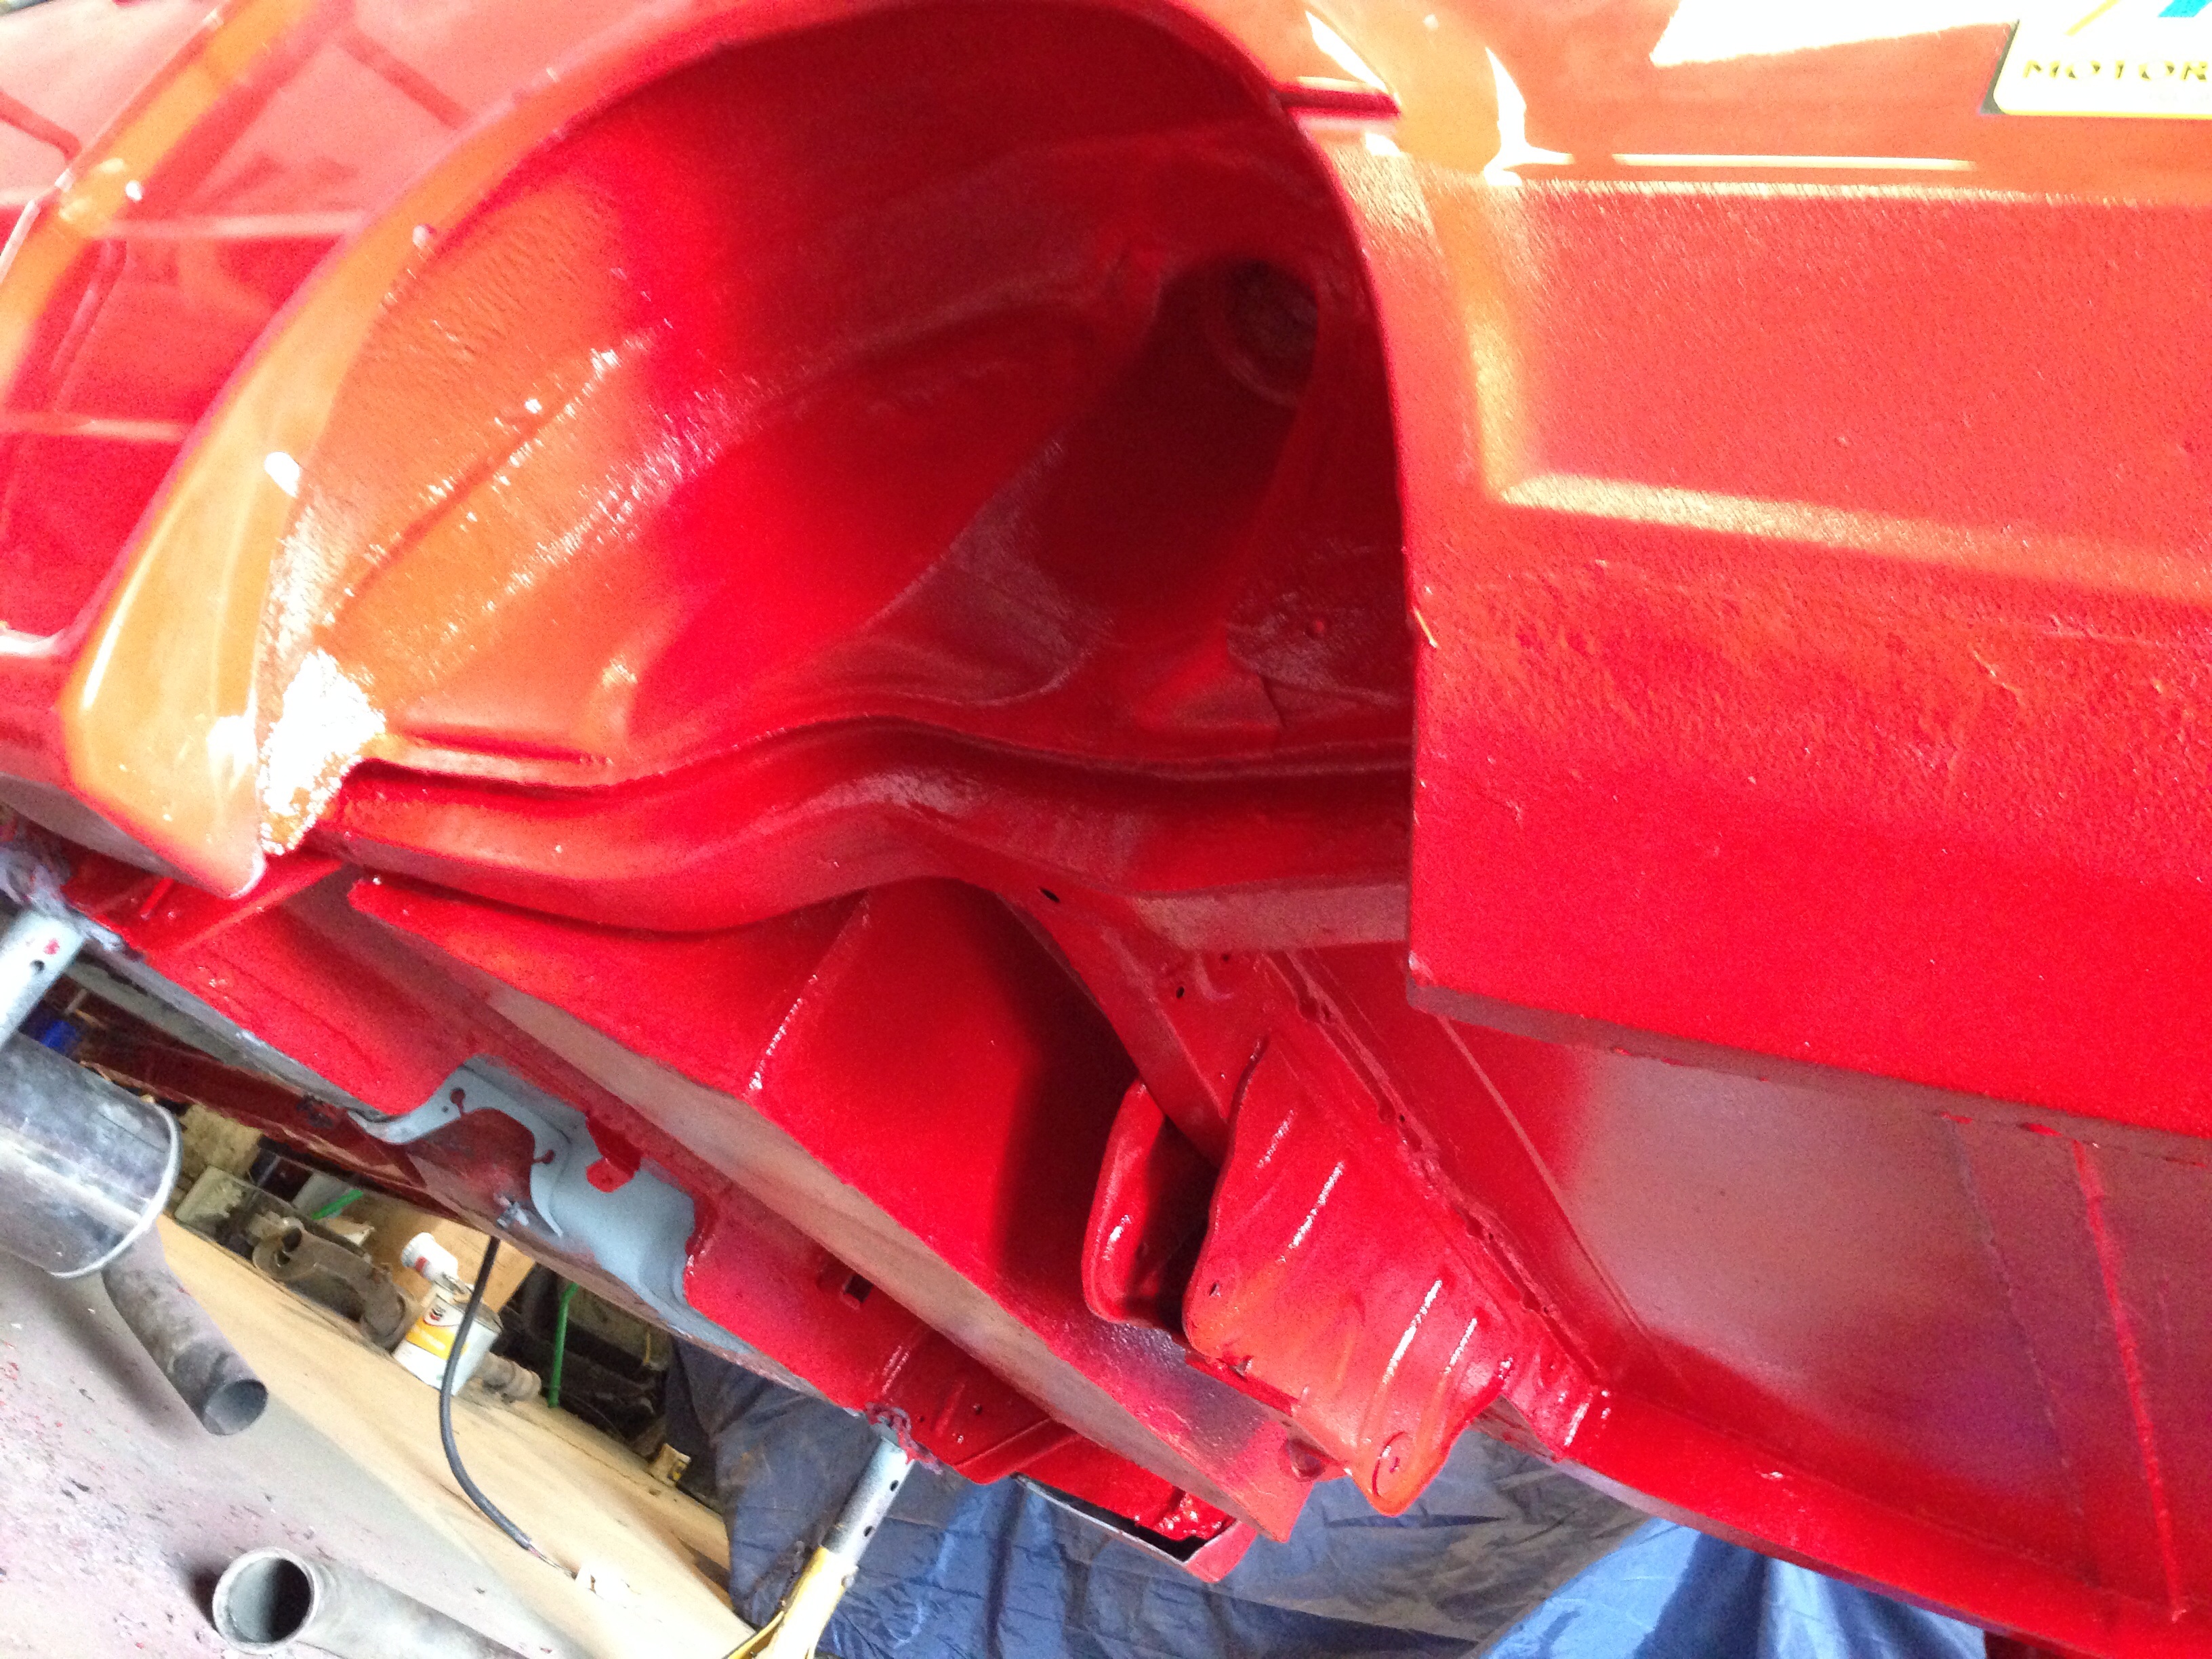
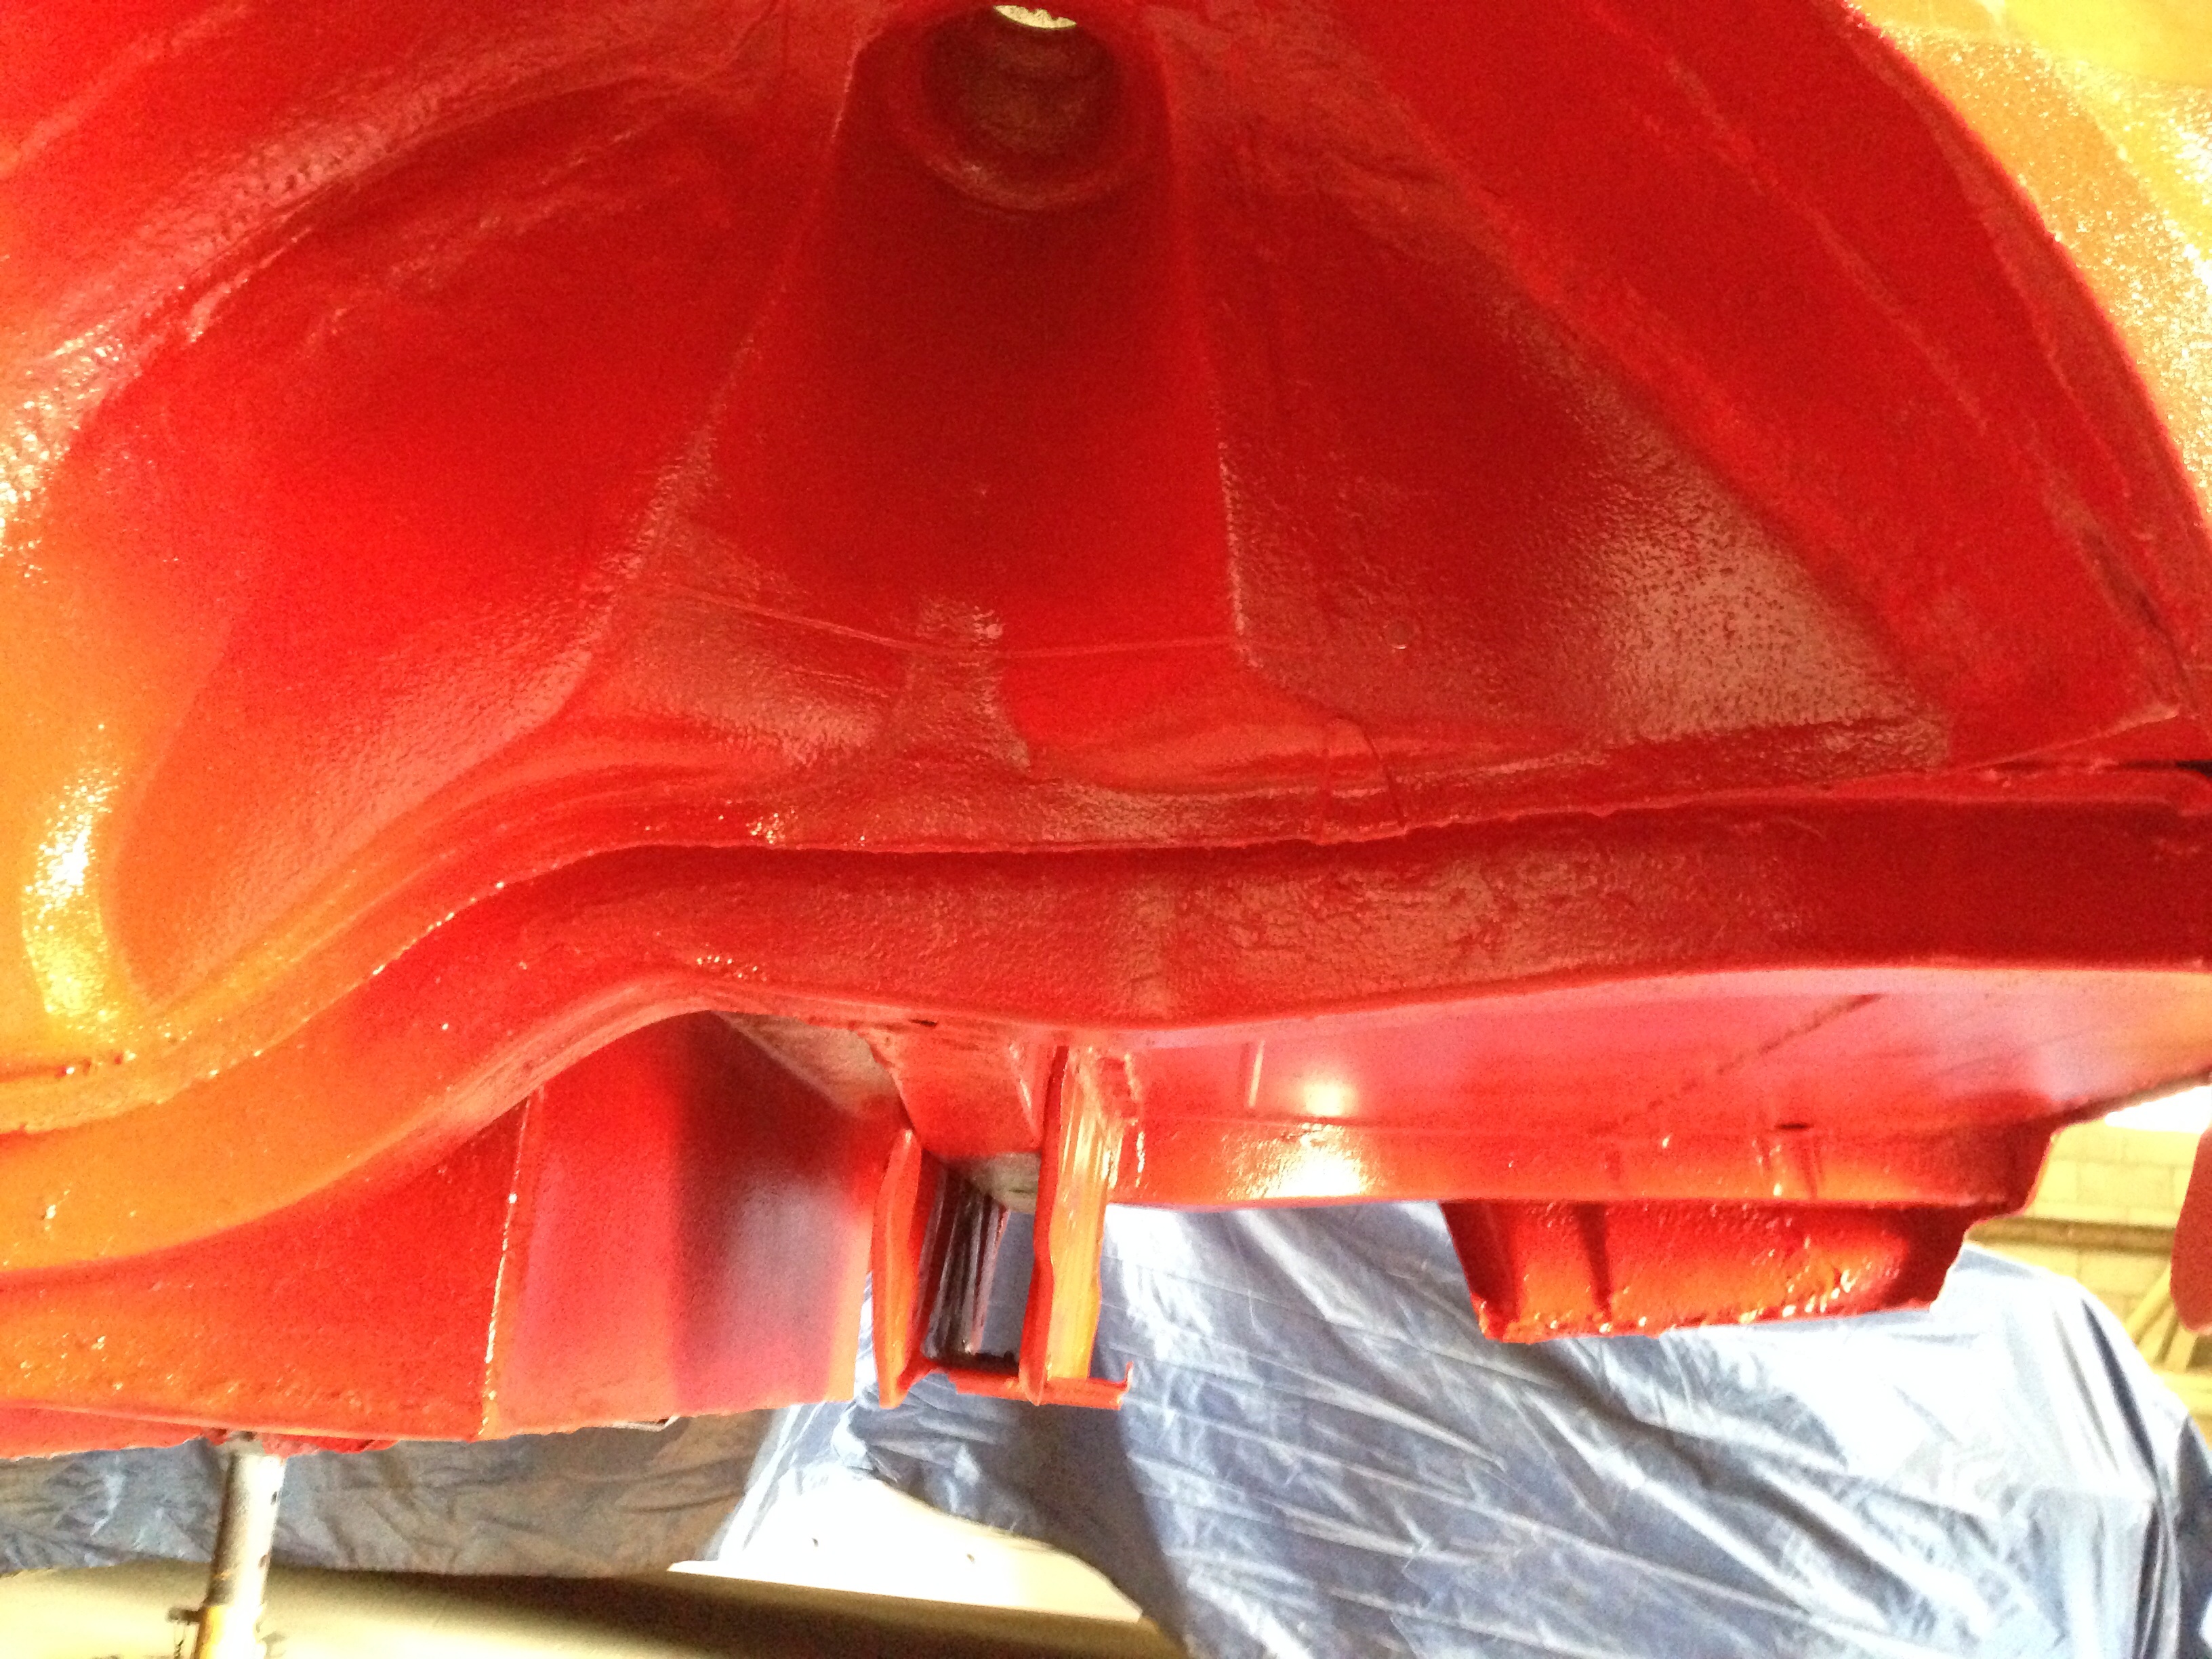
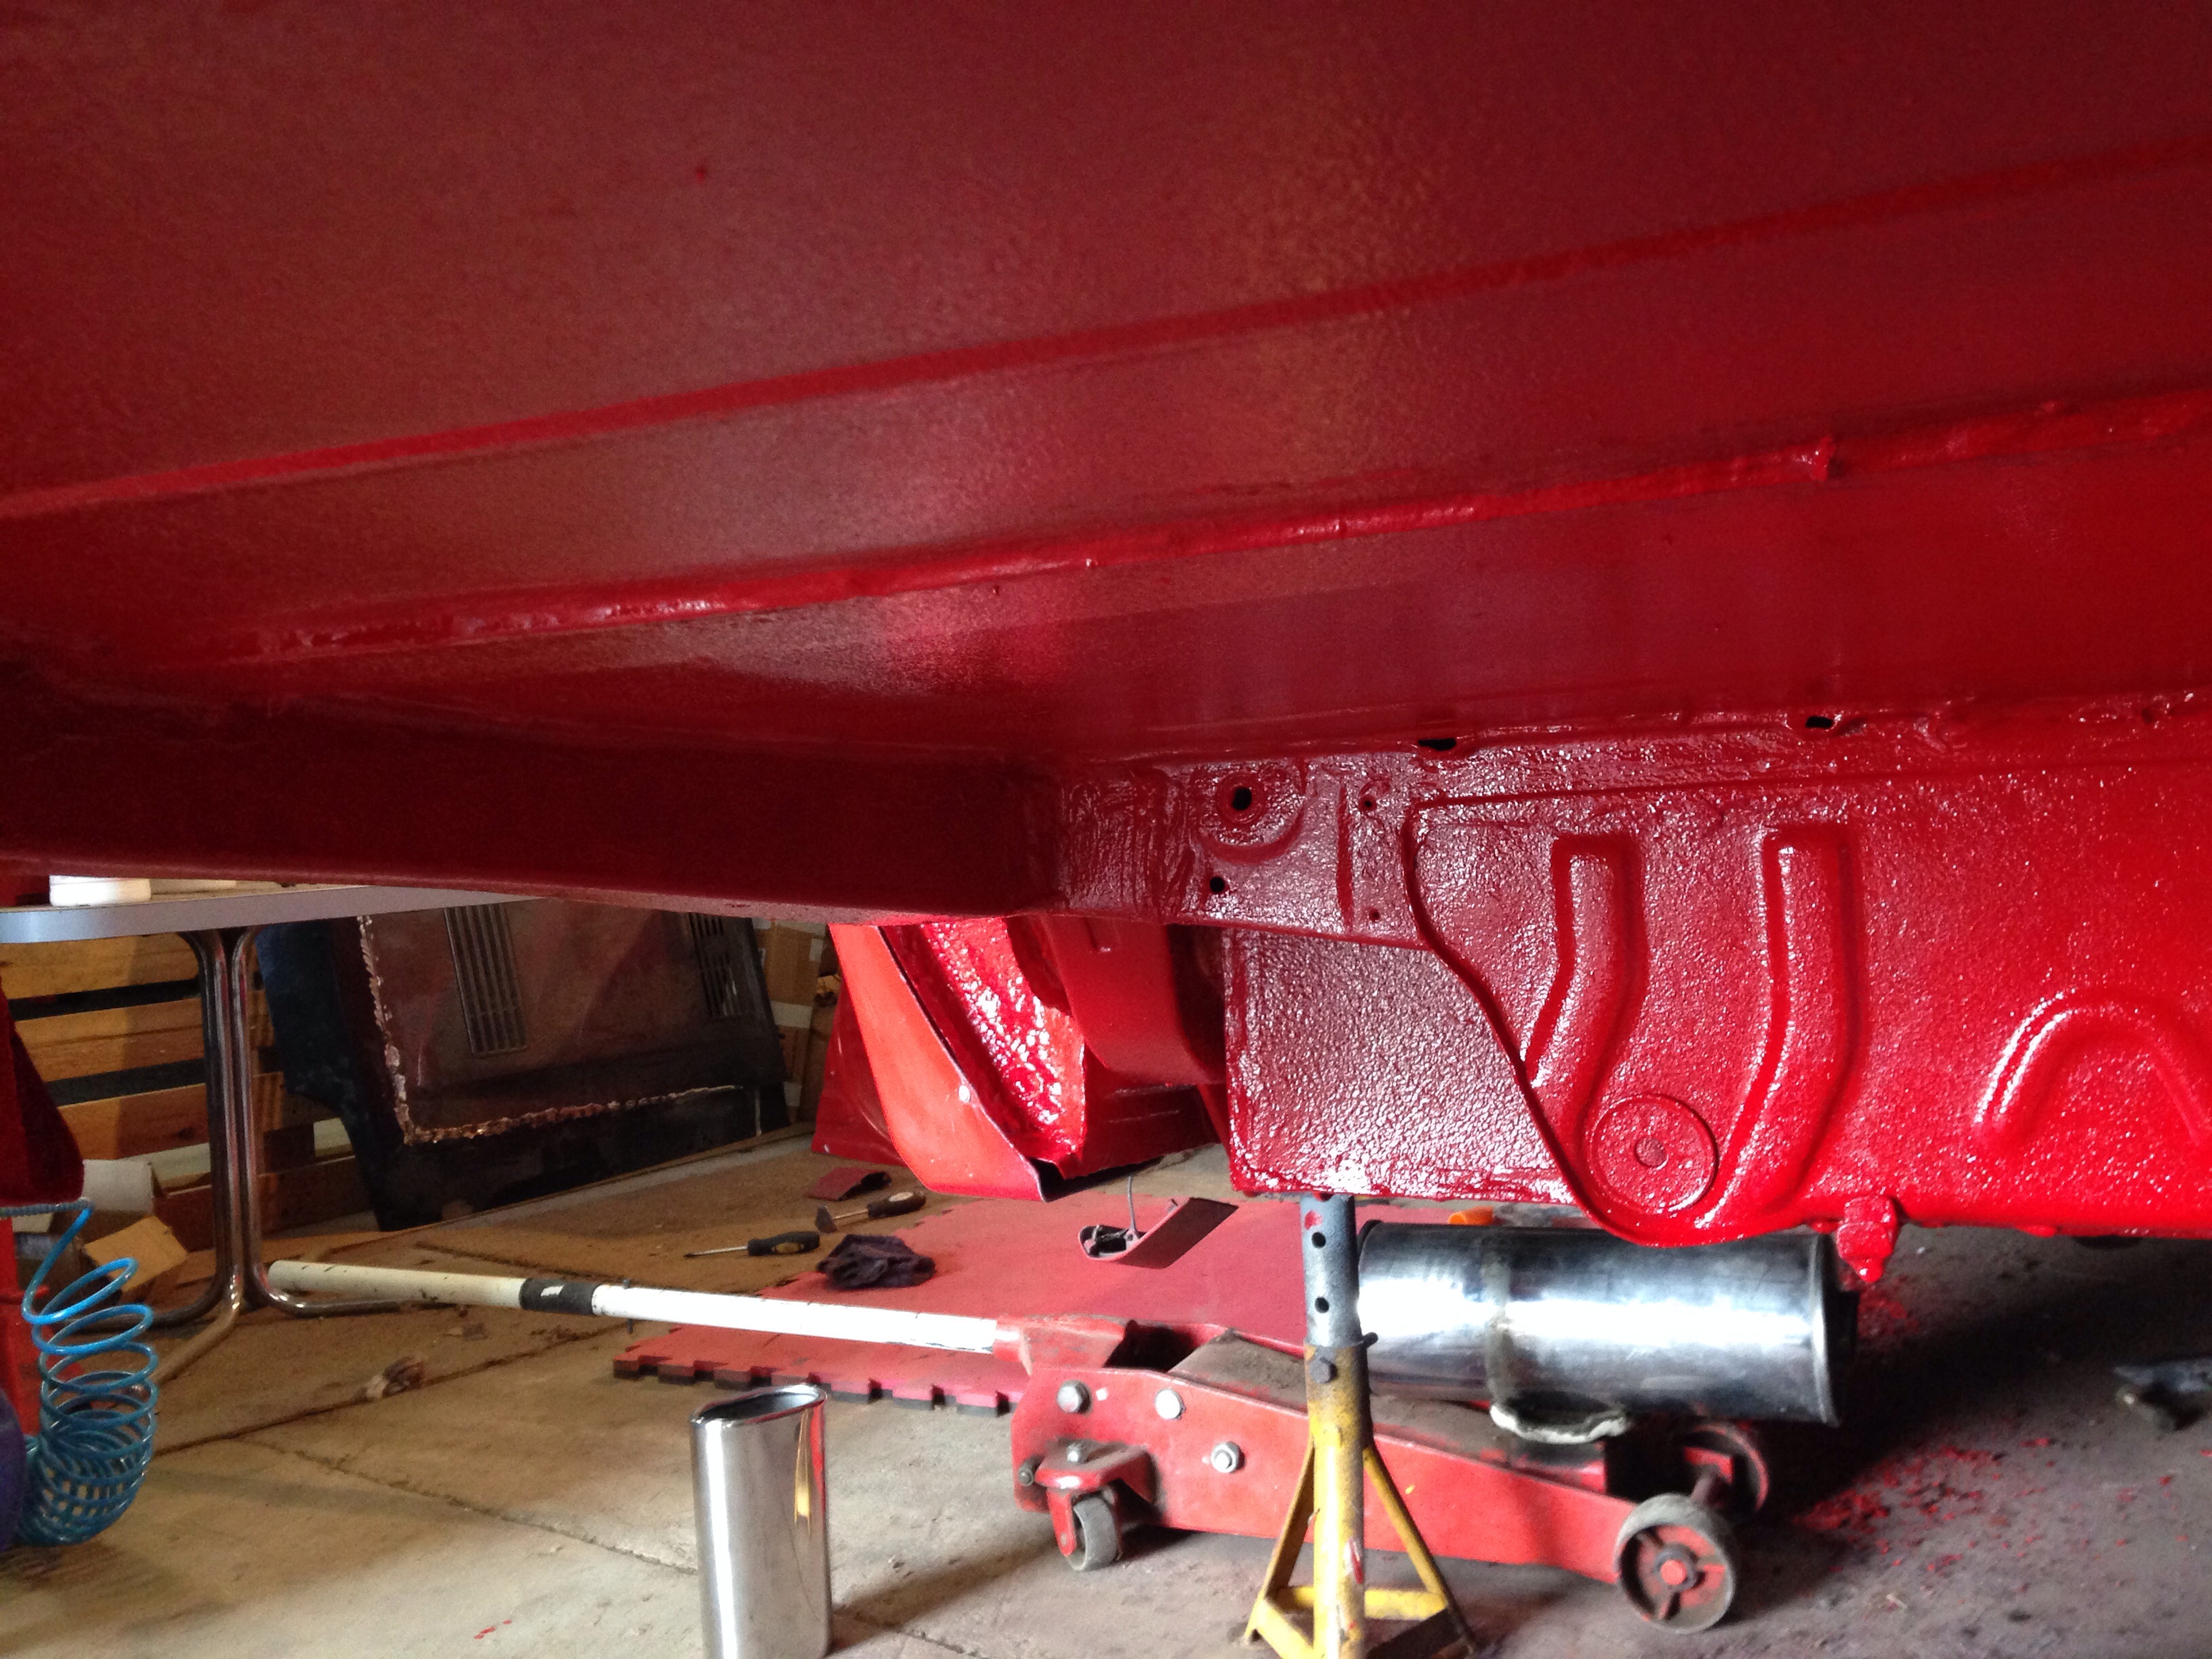
Havent updated this lately, so I'll pop a few pics up. Got the rear end in stone chip, finally! I had to strip practically everything back to bare metal, zinc prime, primer, Gravitex and the 2k top coat. Turned out nice, though. Can tell the difference between the Gravitex and 2k rather than the Tetrosol and Hammerite. The finish it so much nicer, so the whole floor is will be re down when I finish the welding, hopefully today.
Seam sealed an Gravitex. The seams were sealed before the Gravitex then I re-sealed some of the high impact areas afterwards, as well.
There was also a small bit of rot in the rear, lower number corner, so this was replaced, as was the inner panel which I had to hand fabricate.

Unfortunately, I couldn't borrow the correct air fed mask to spray the 2K in time, as I wanted it finished before I go back to work, so decided to roller the 2K on. I wasn't going to change to with just a carb-can mask.
Came out really nice, though, just took a little longer.

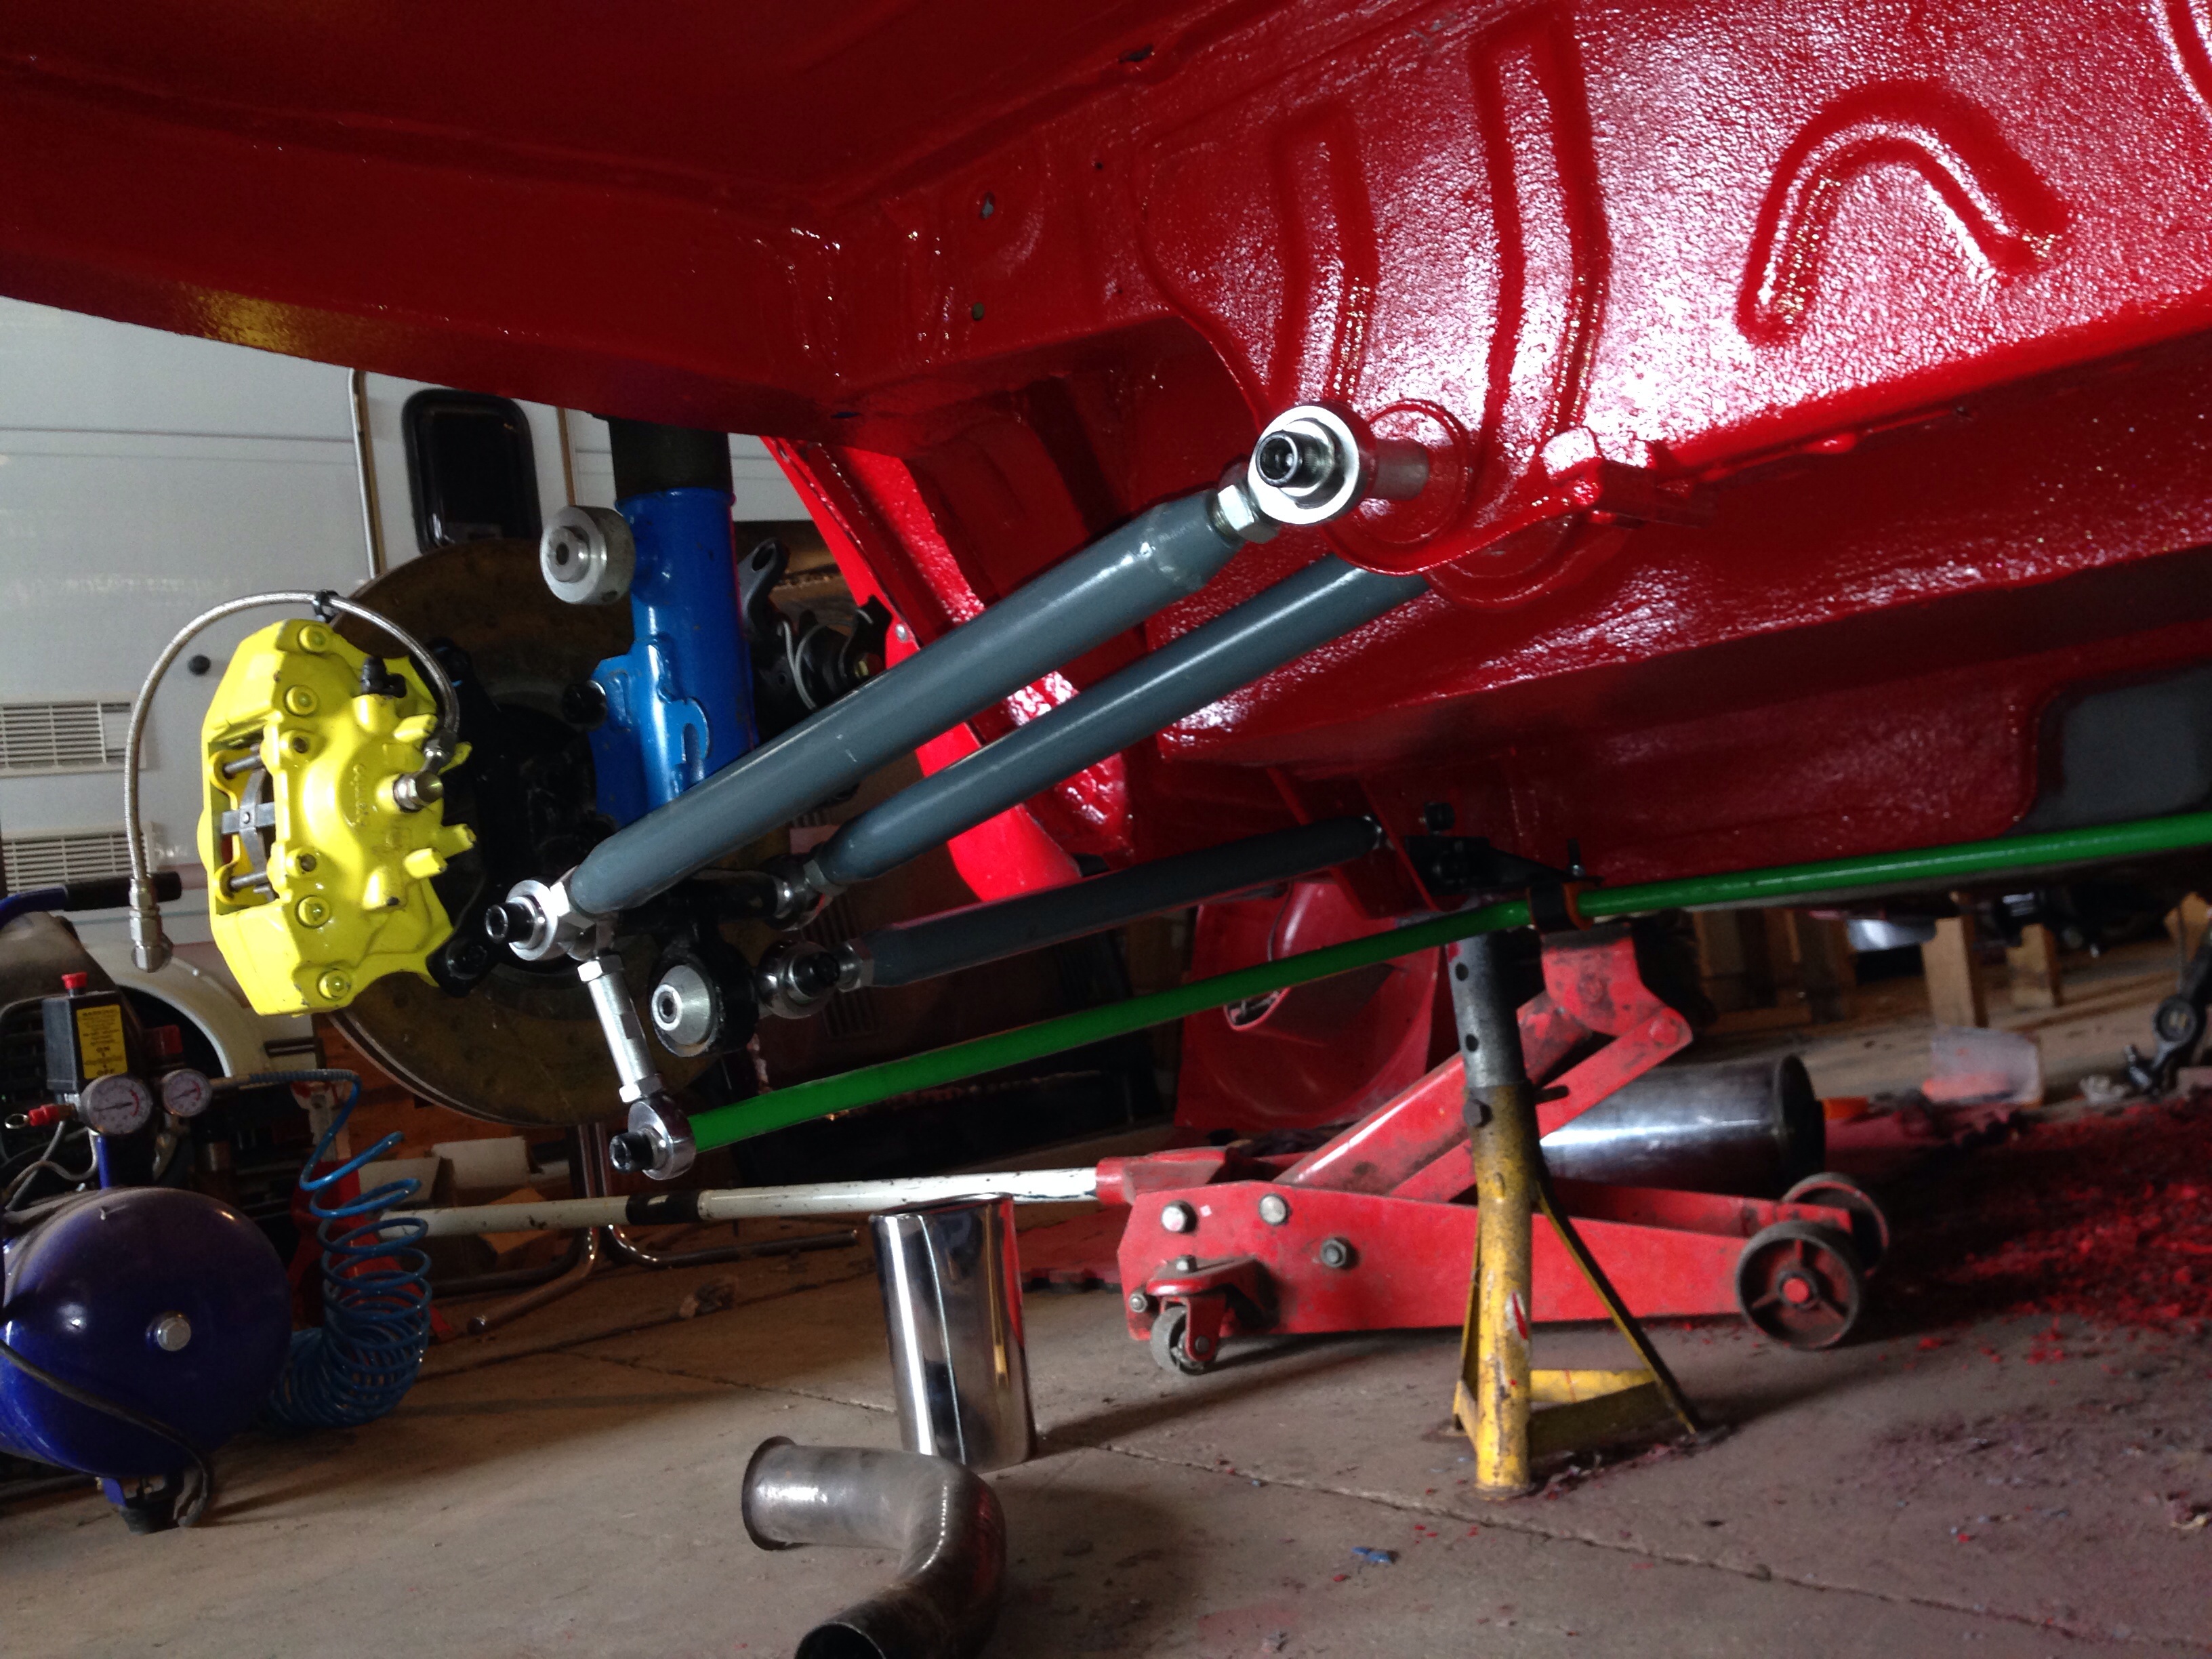
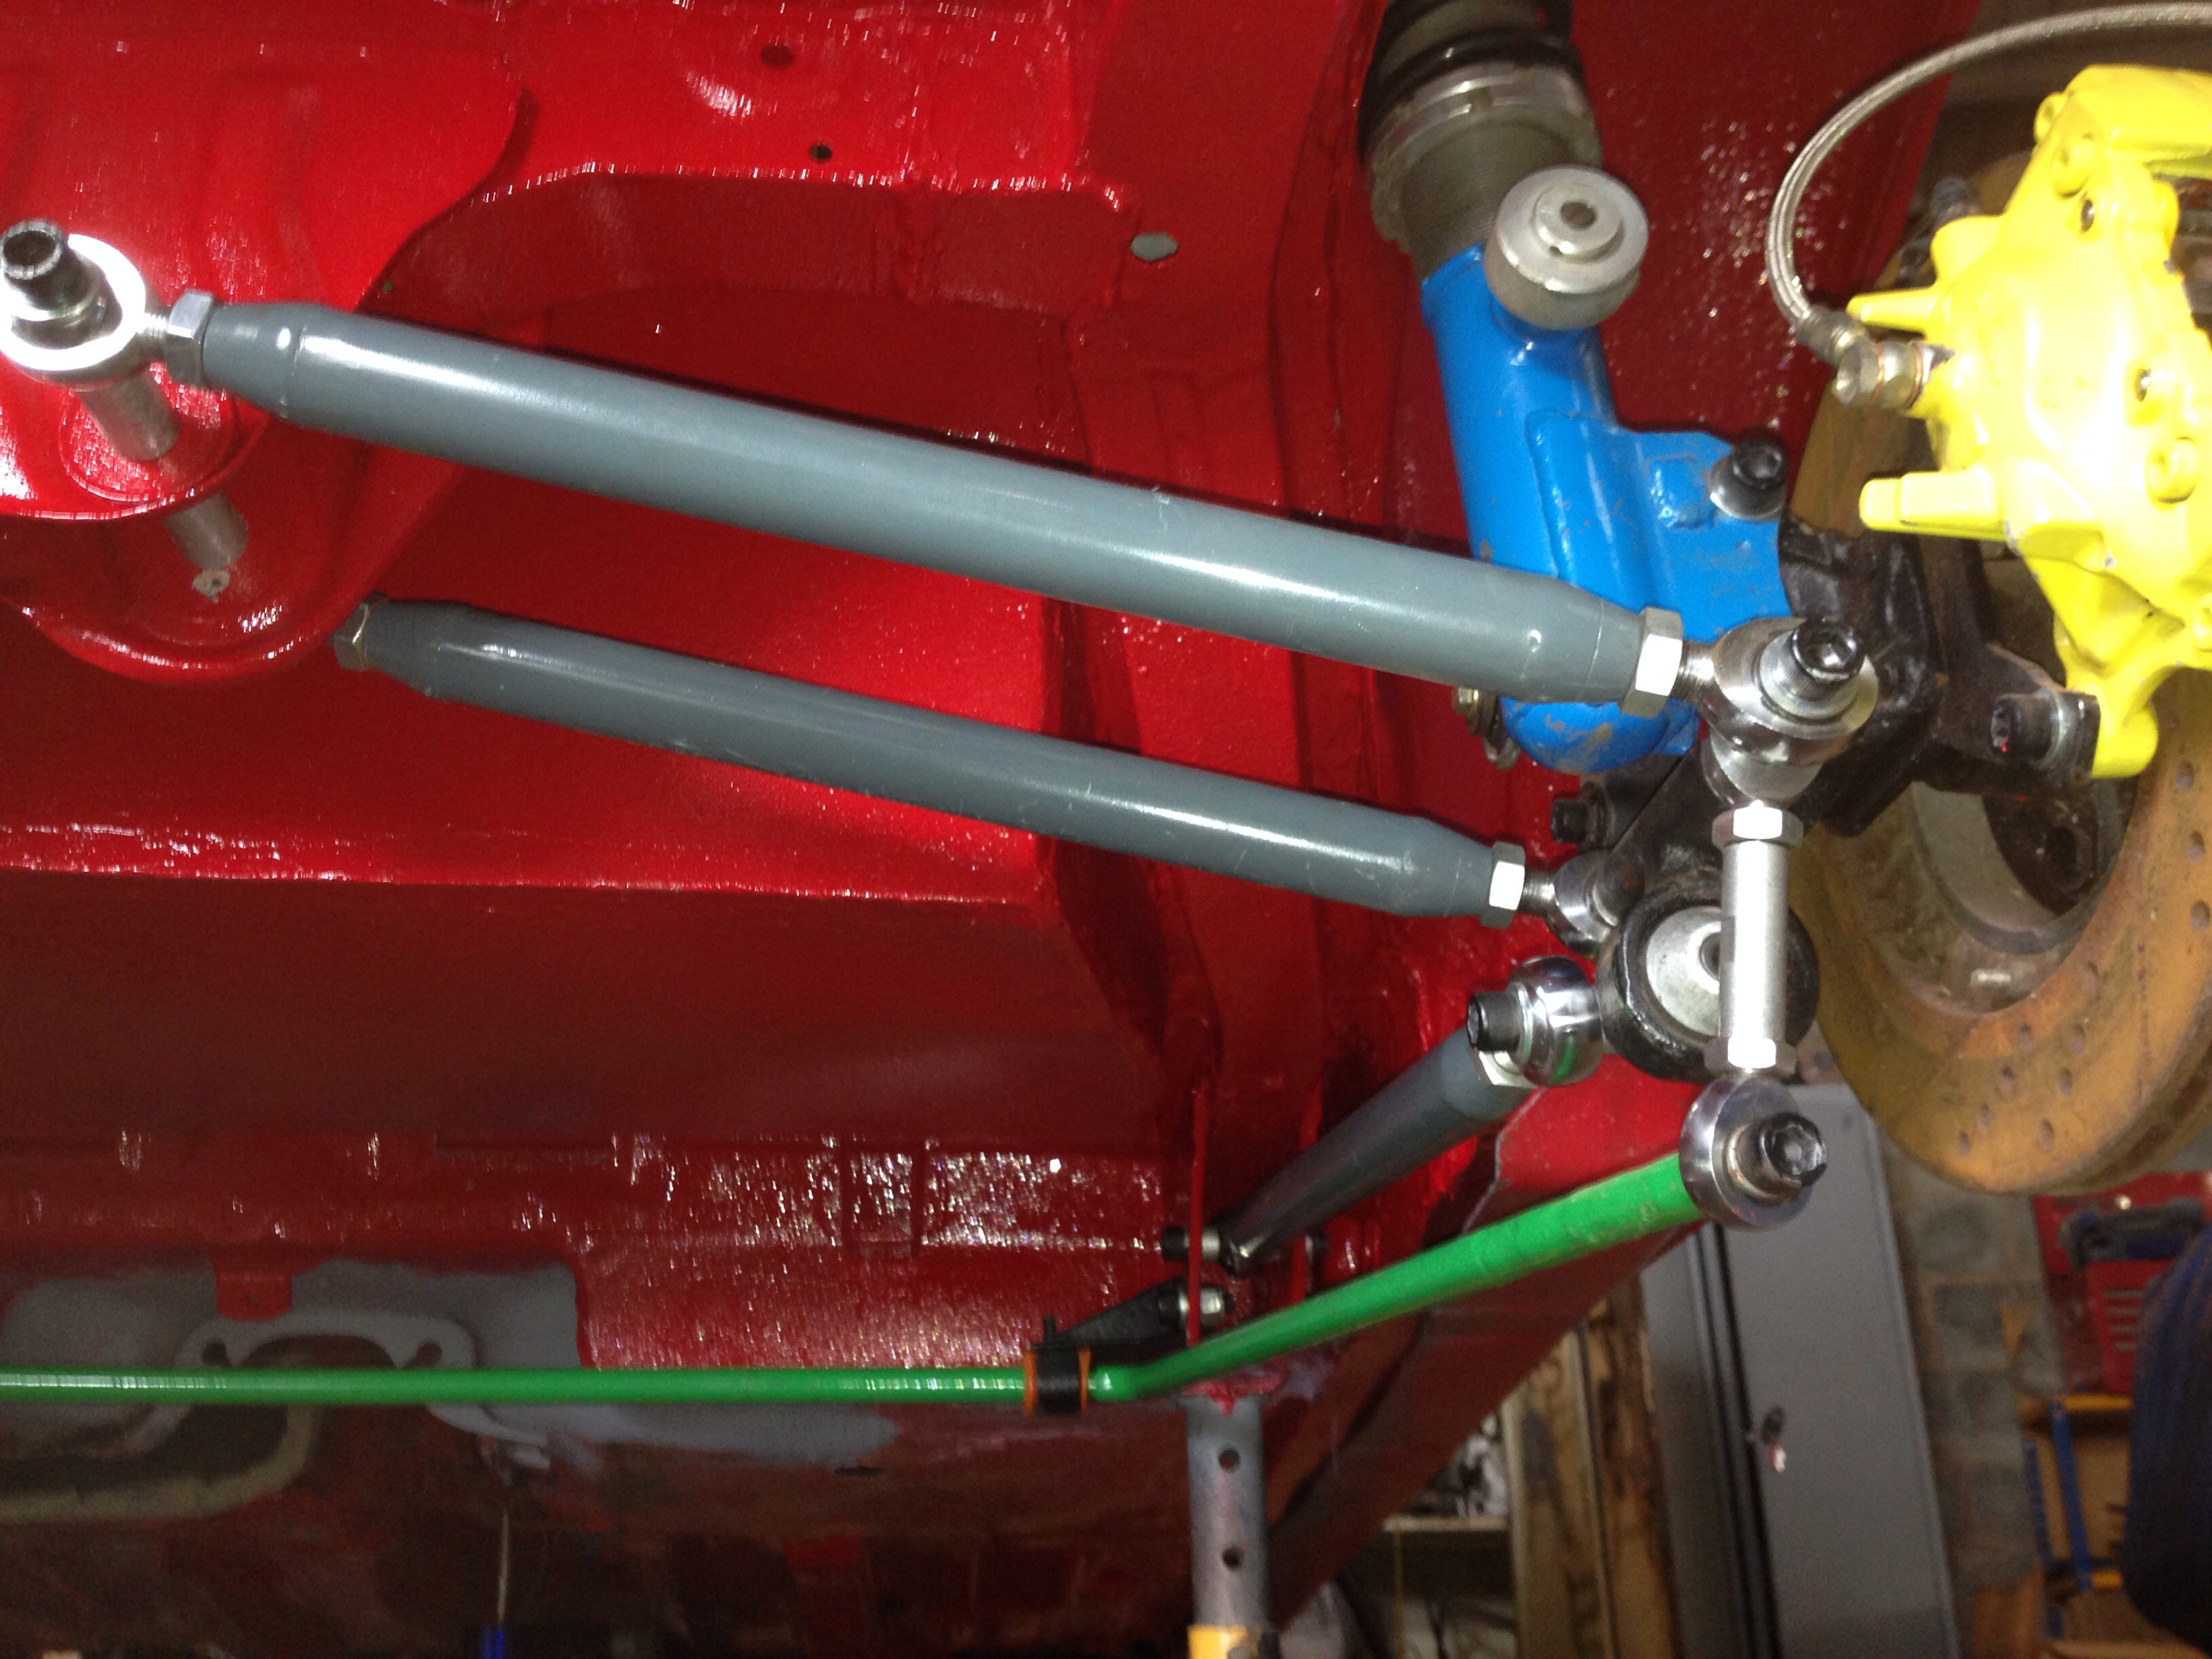
Then got the rear suspension all back on.
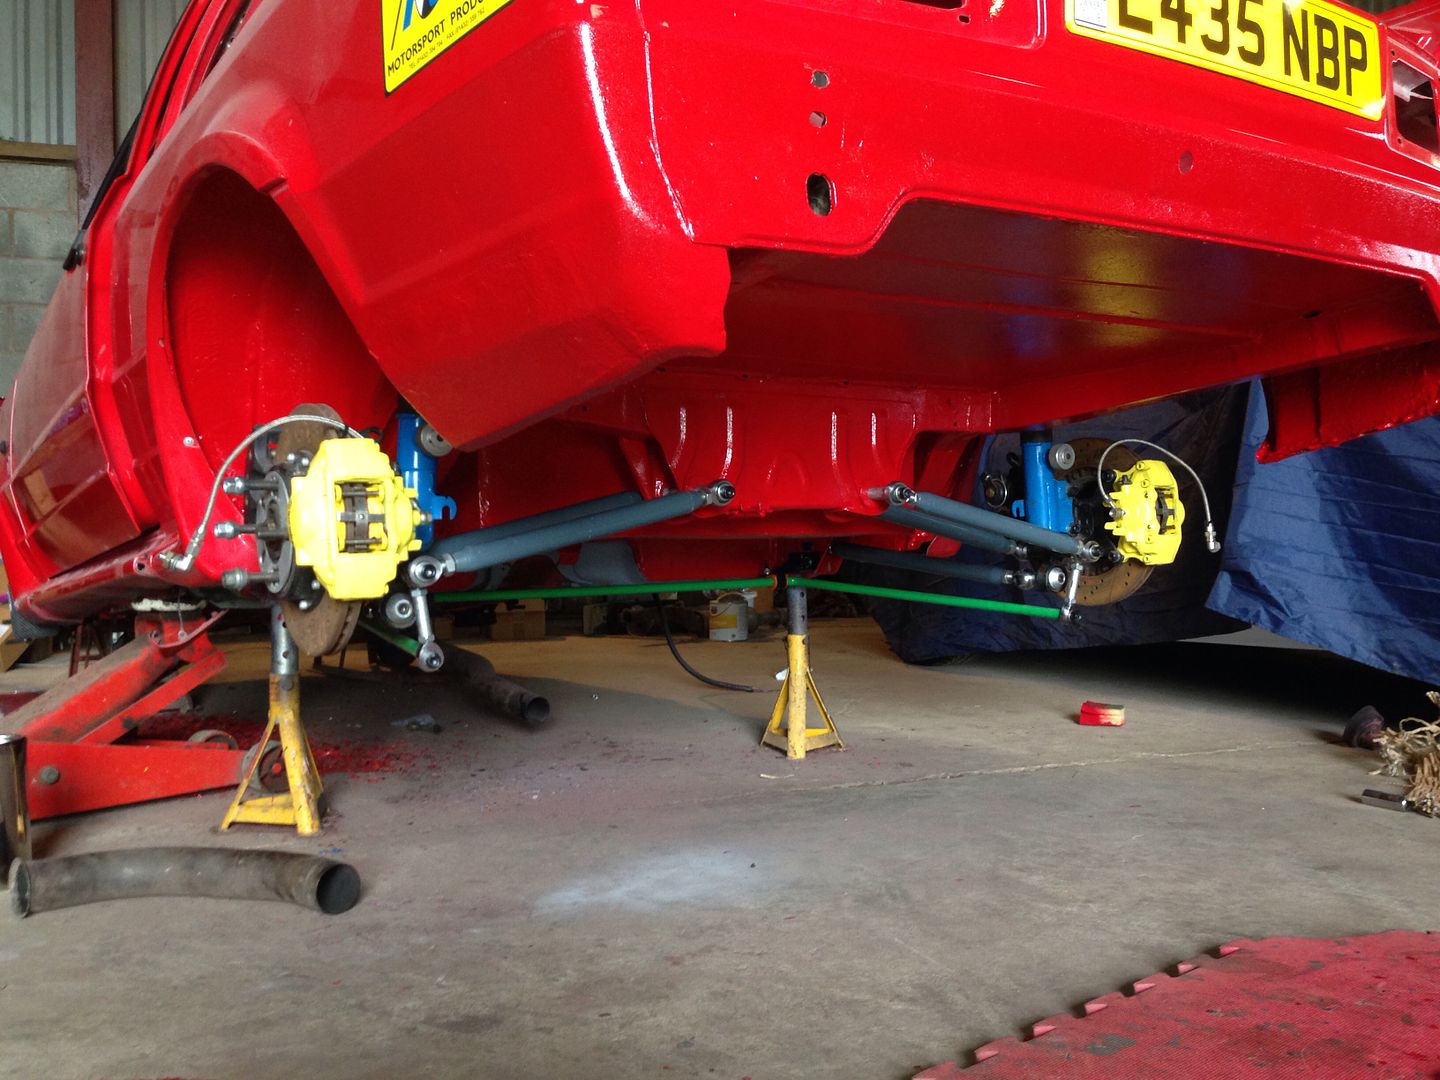
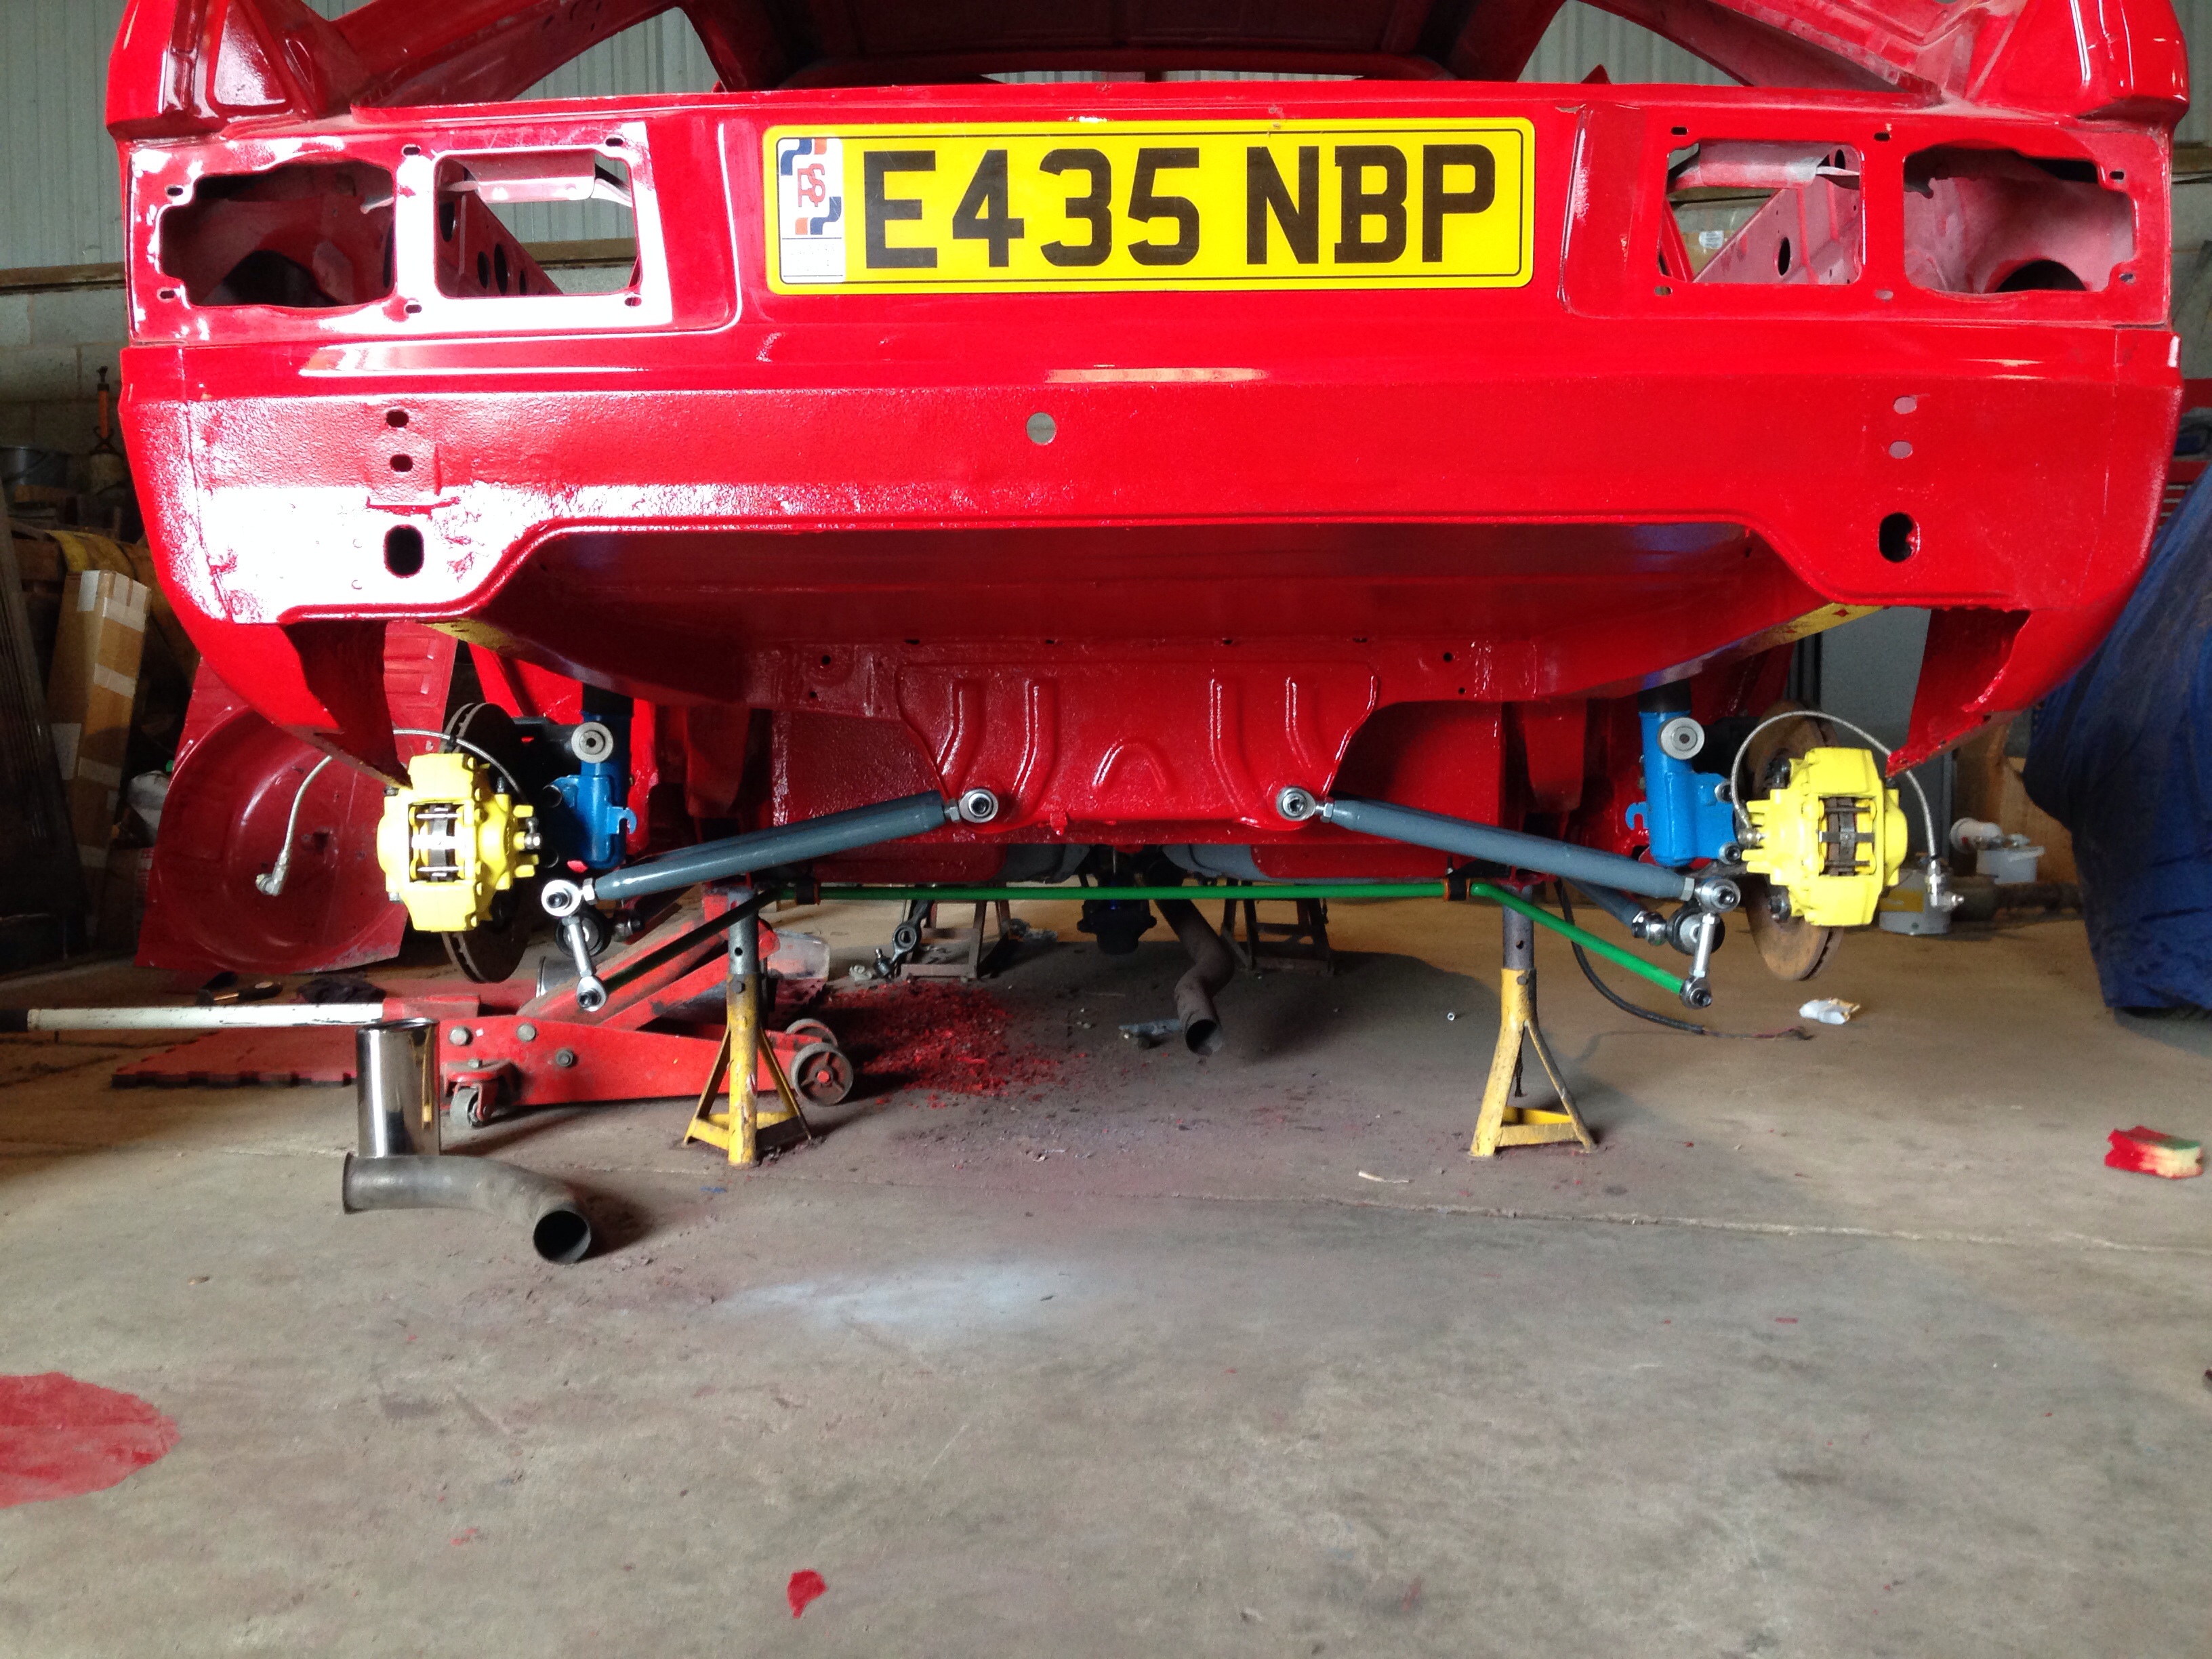
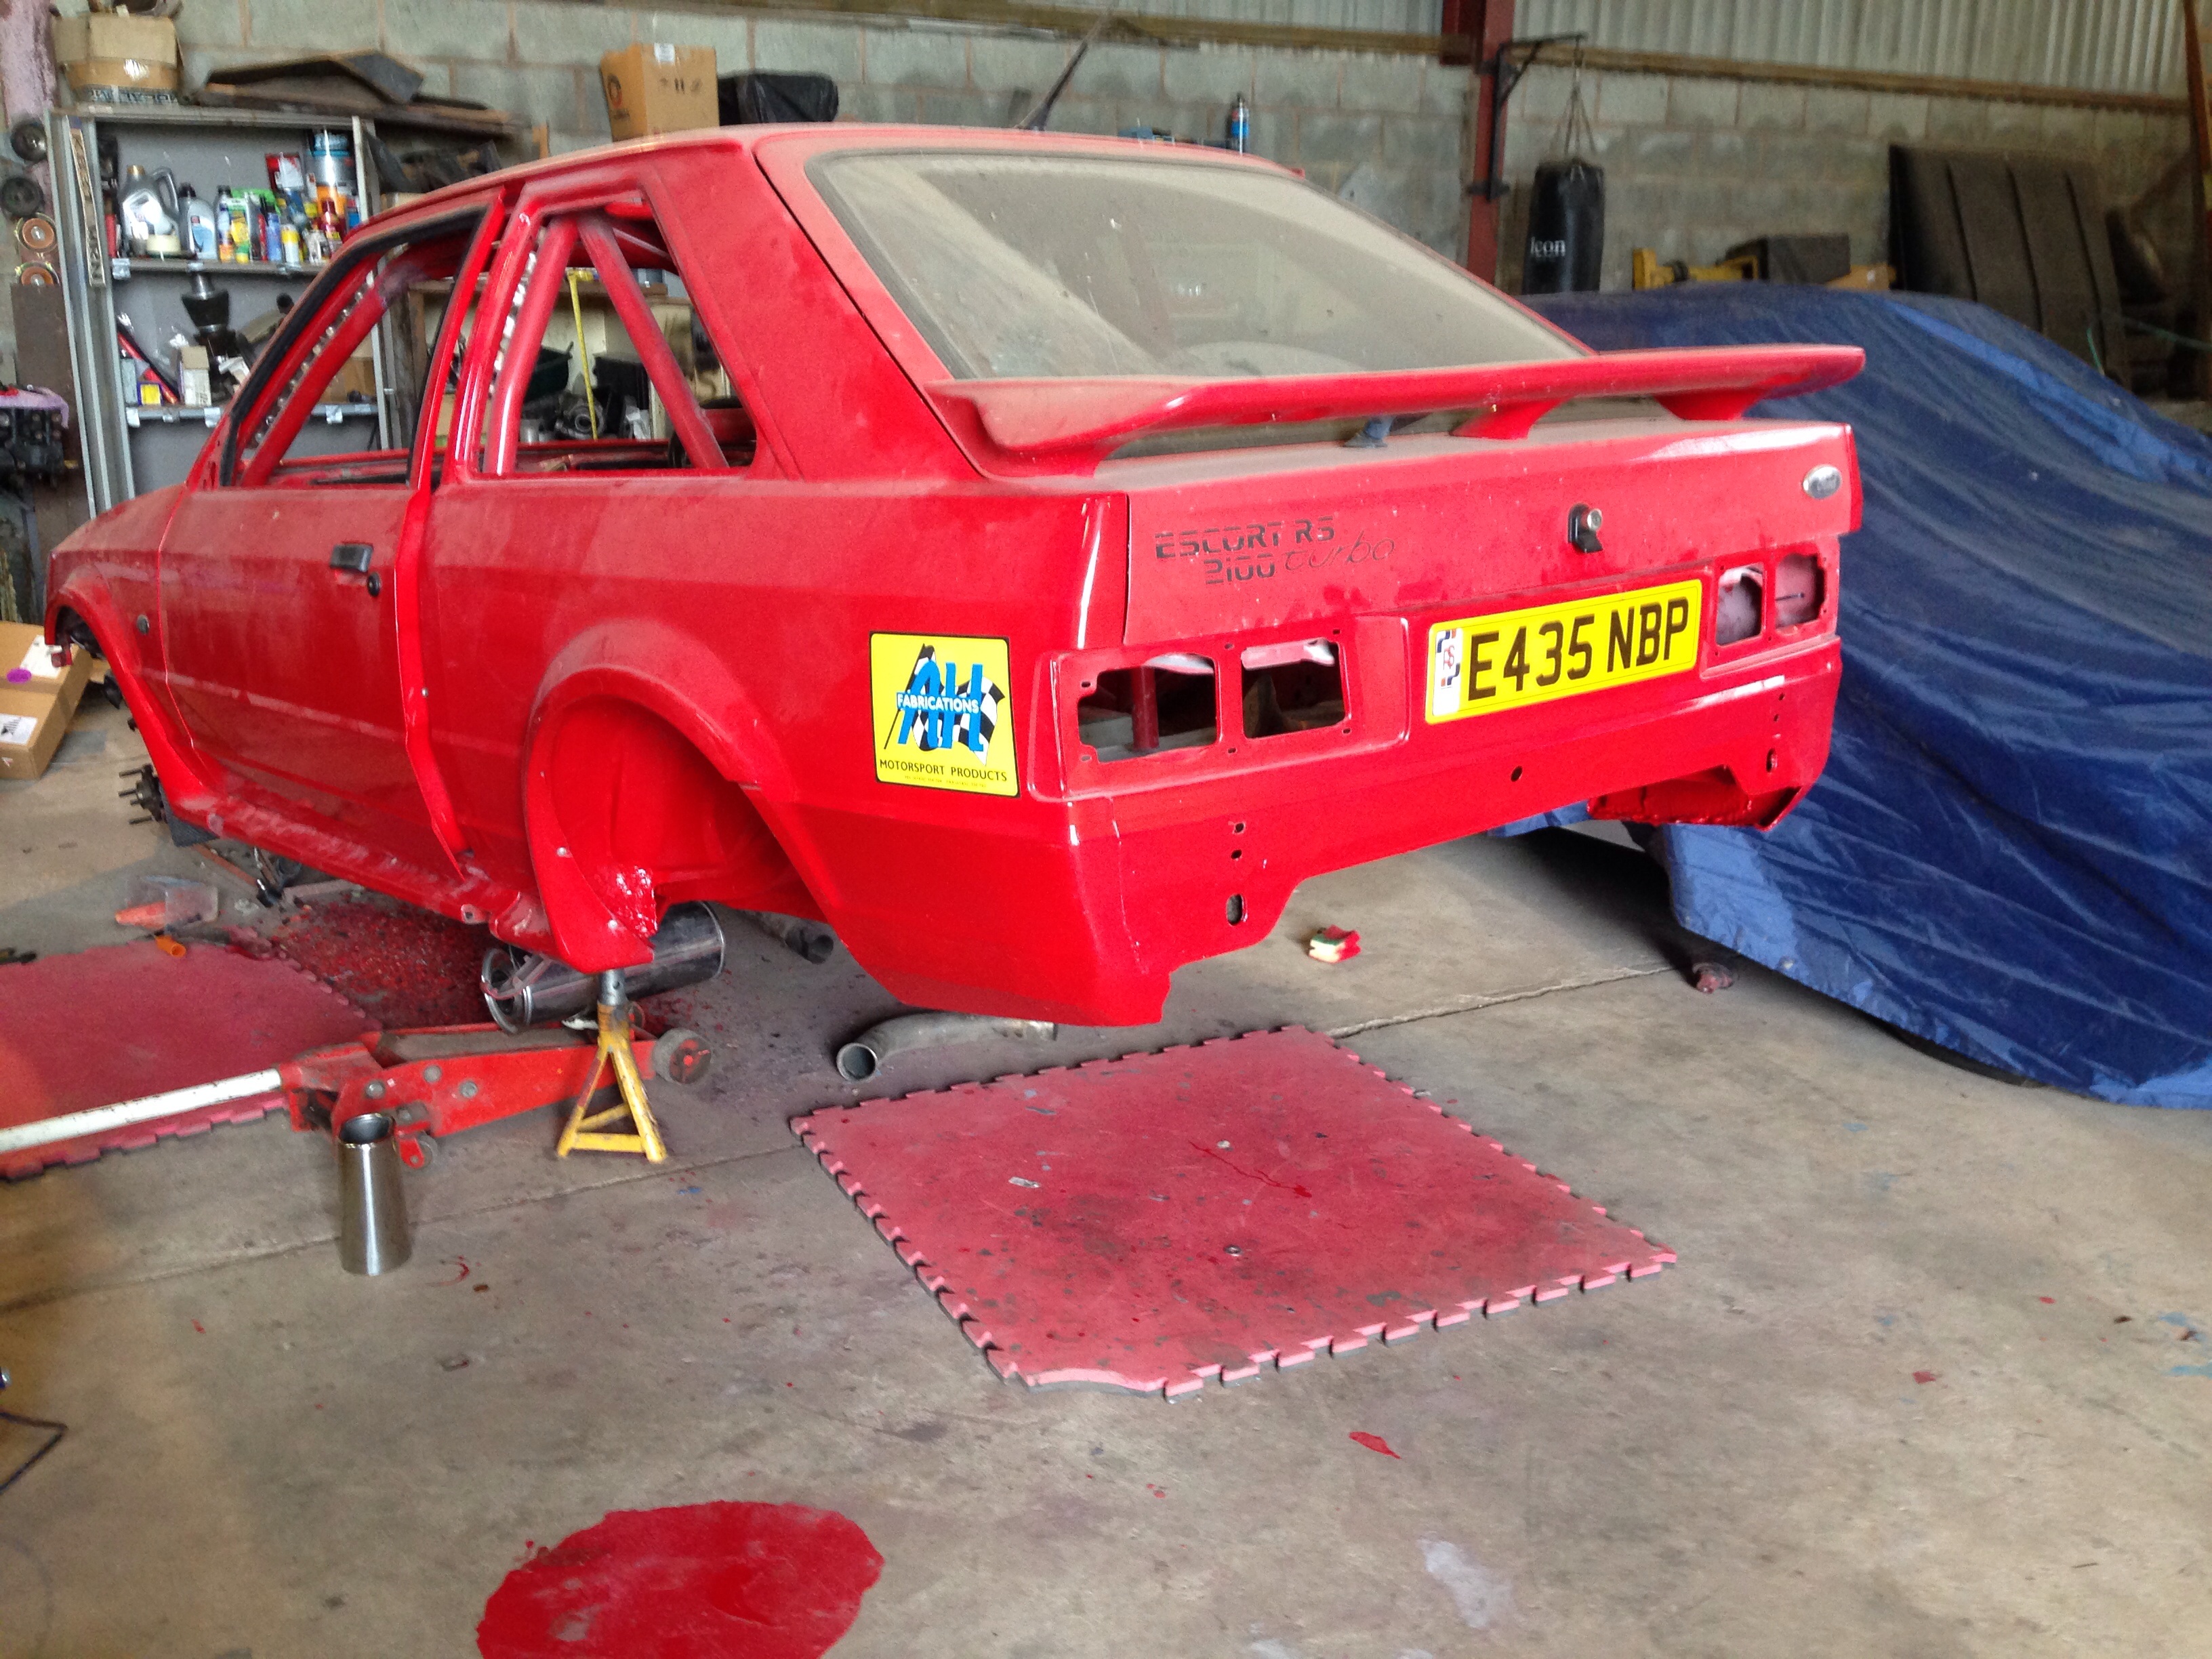
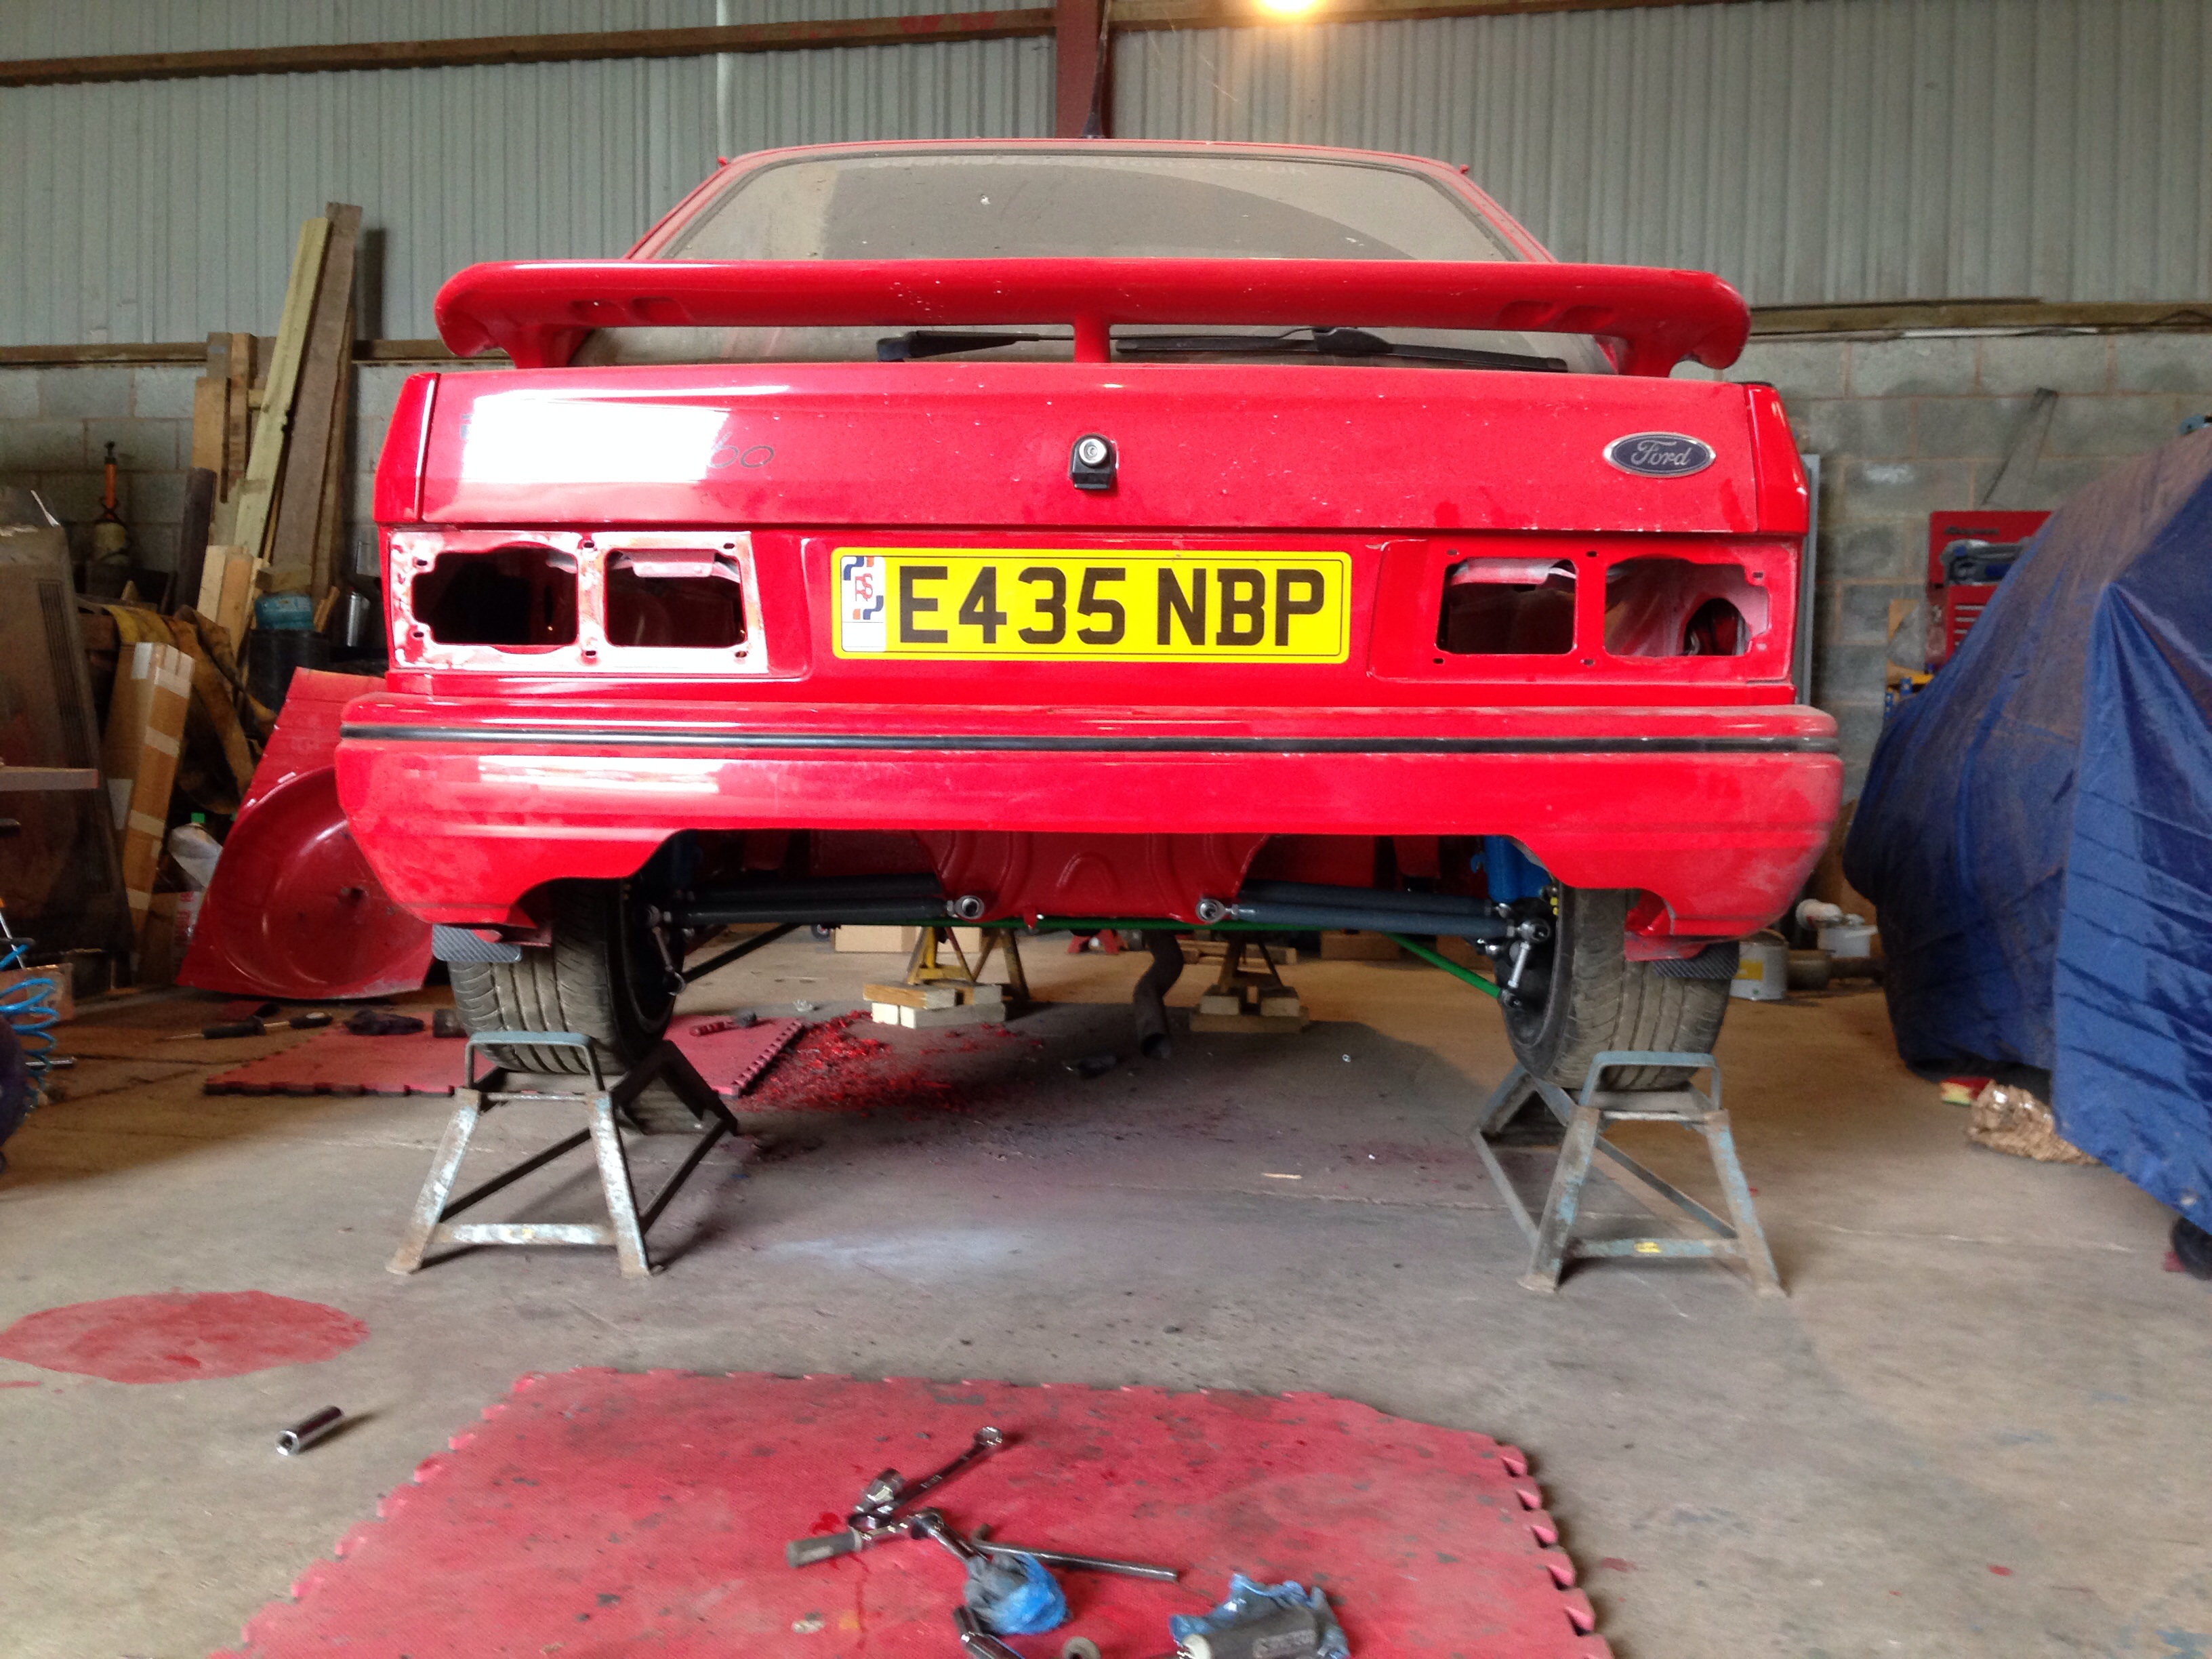
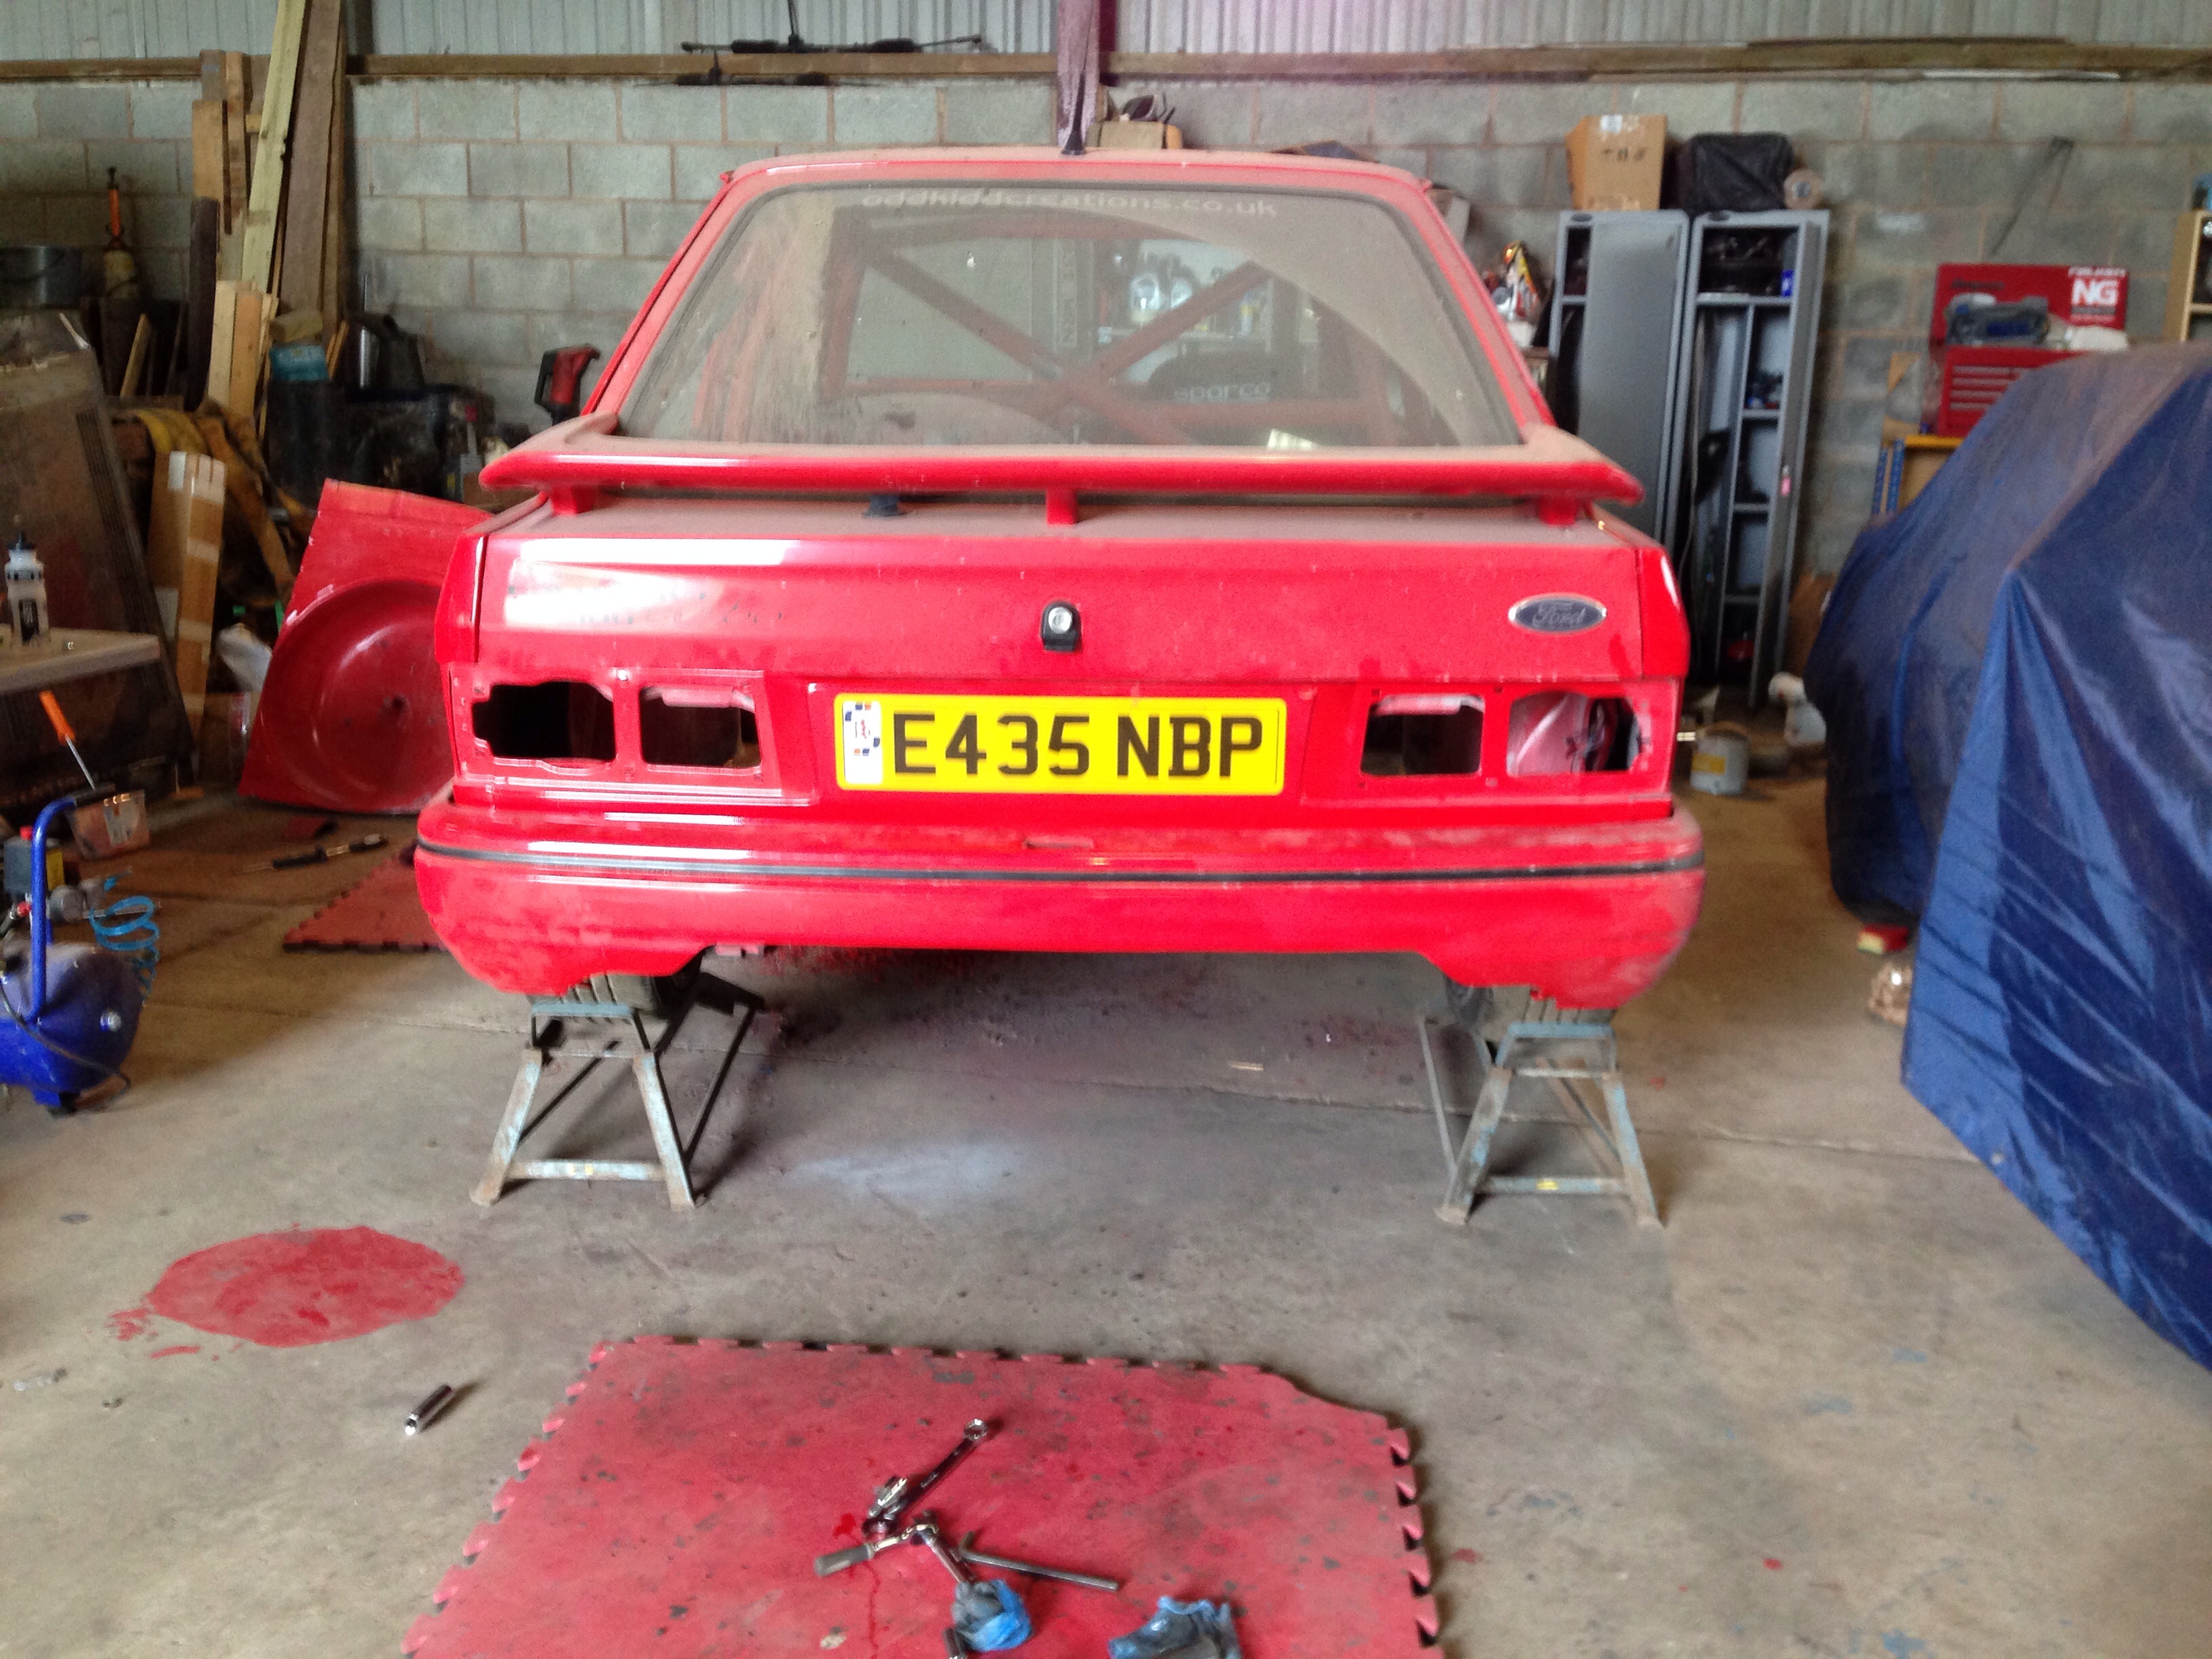
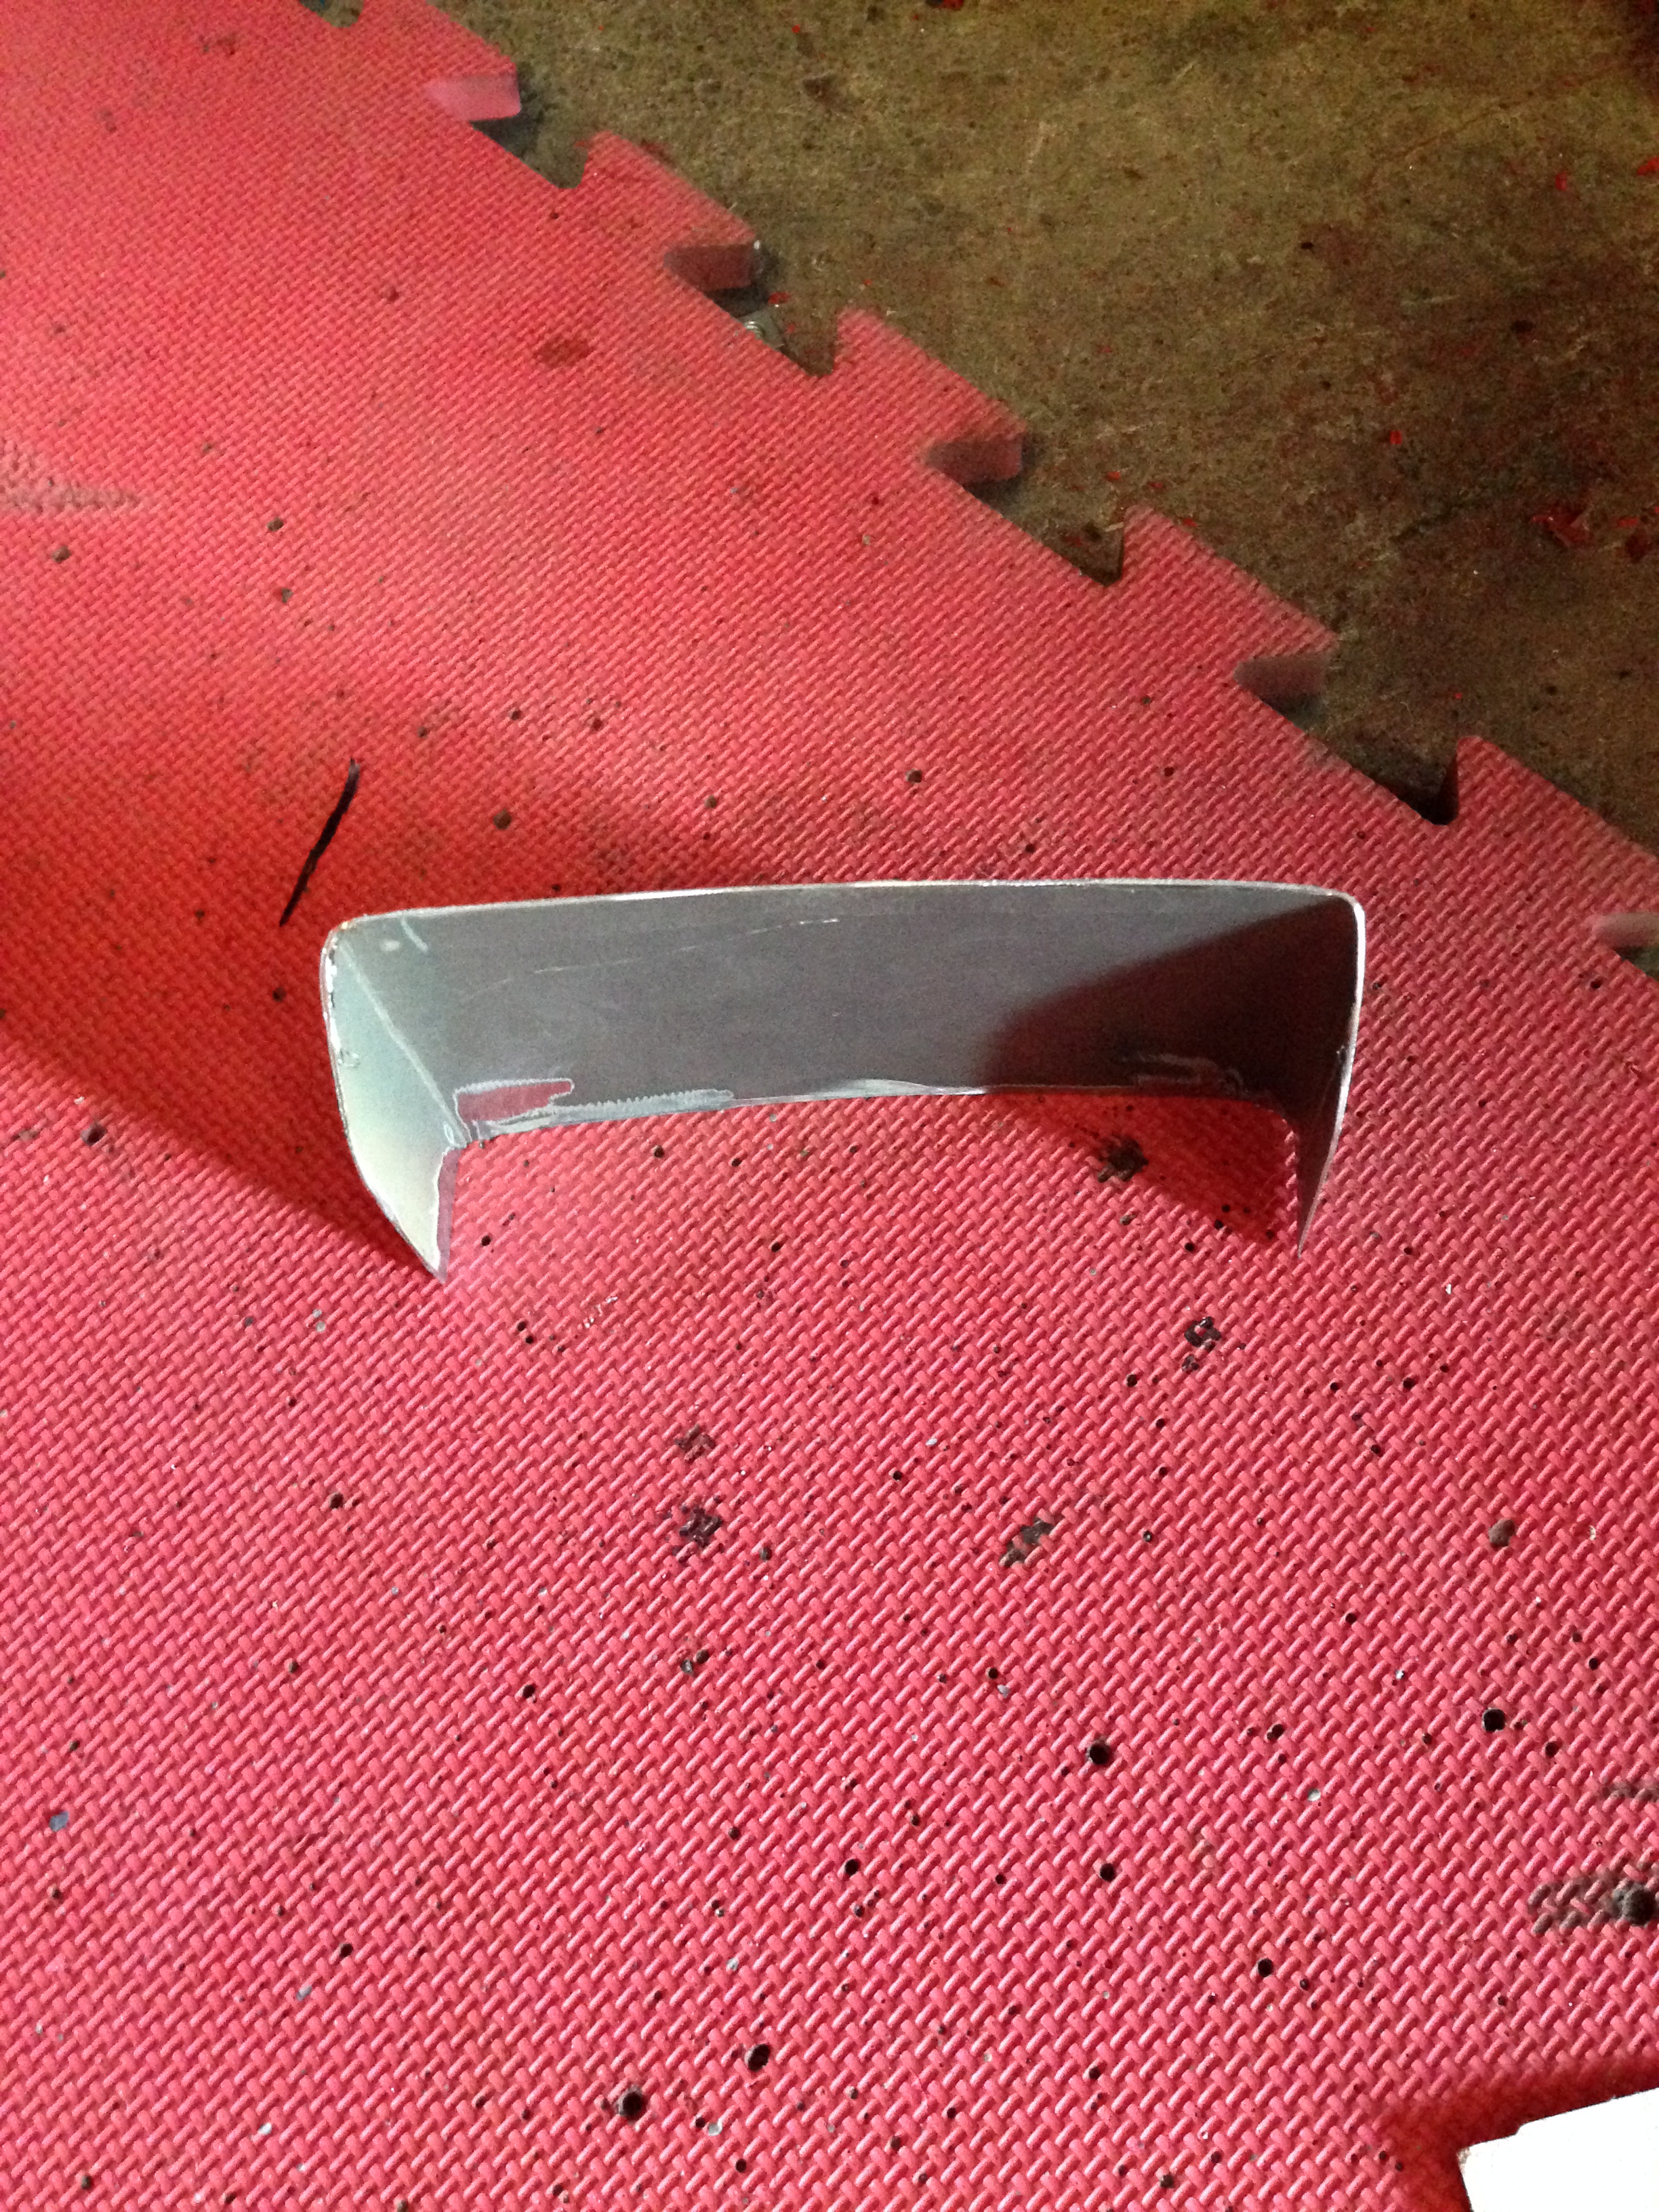
Then popped the rear bumper on, but It didn't look right. I didn't like how it hid all the suspension so got the grinder out.
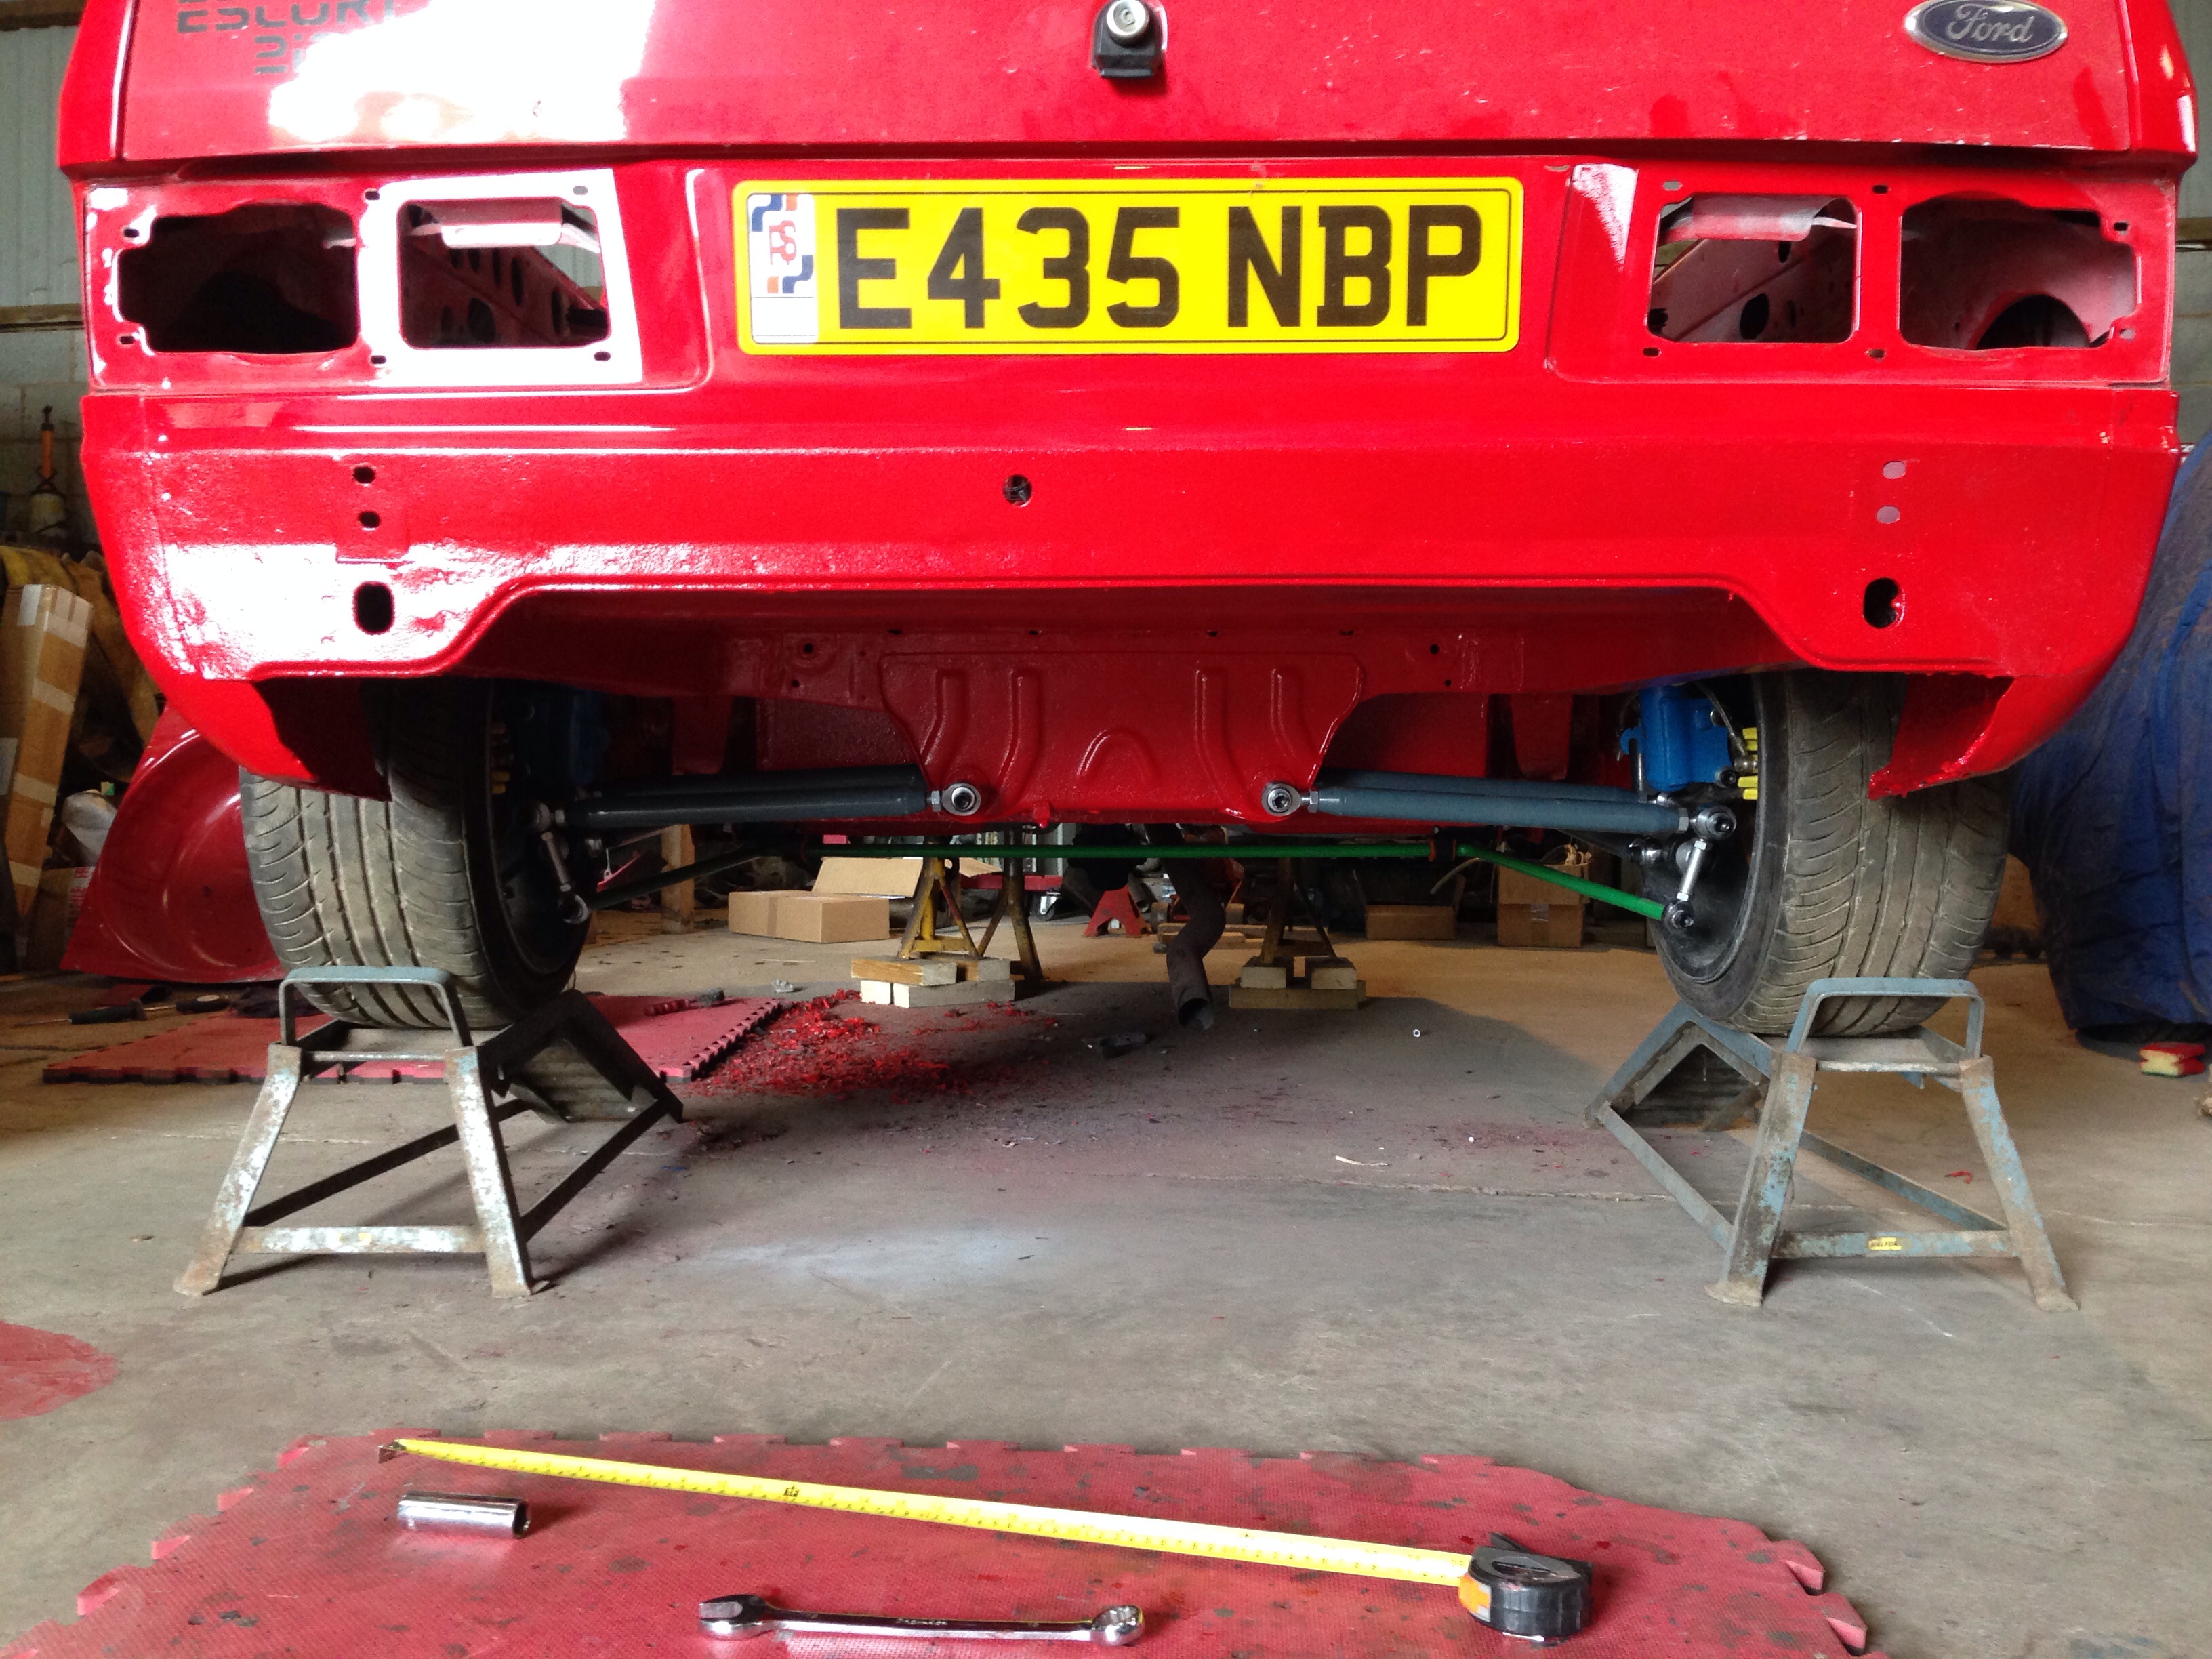
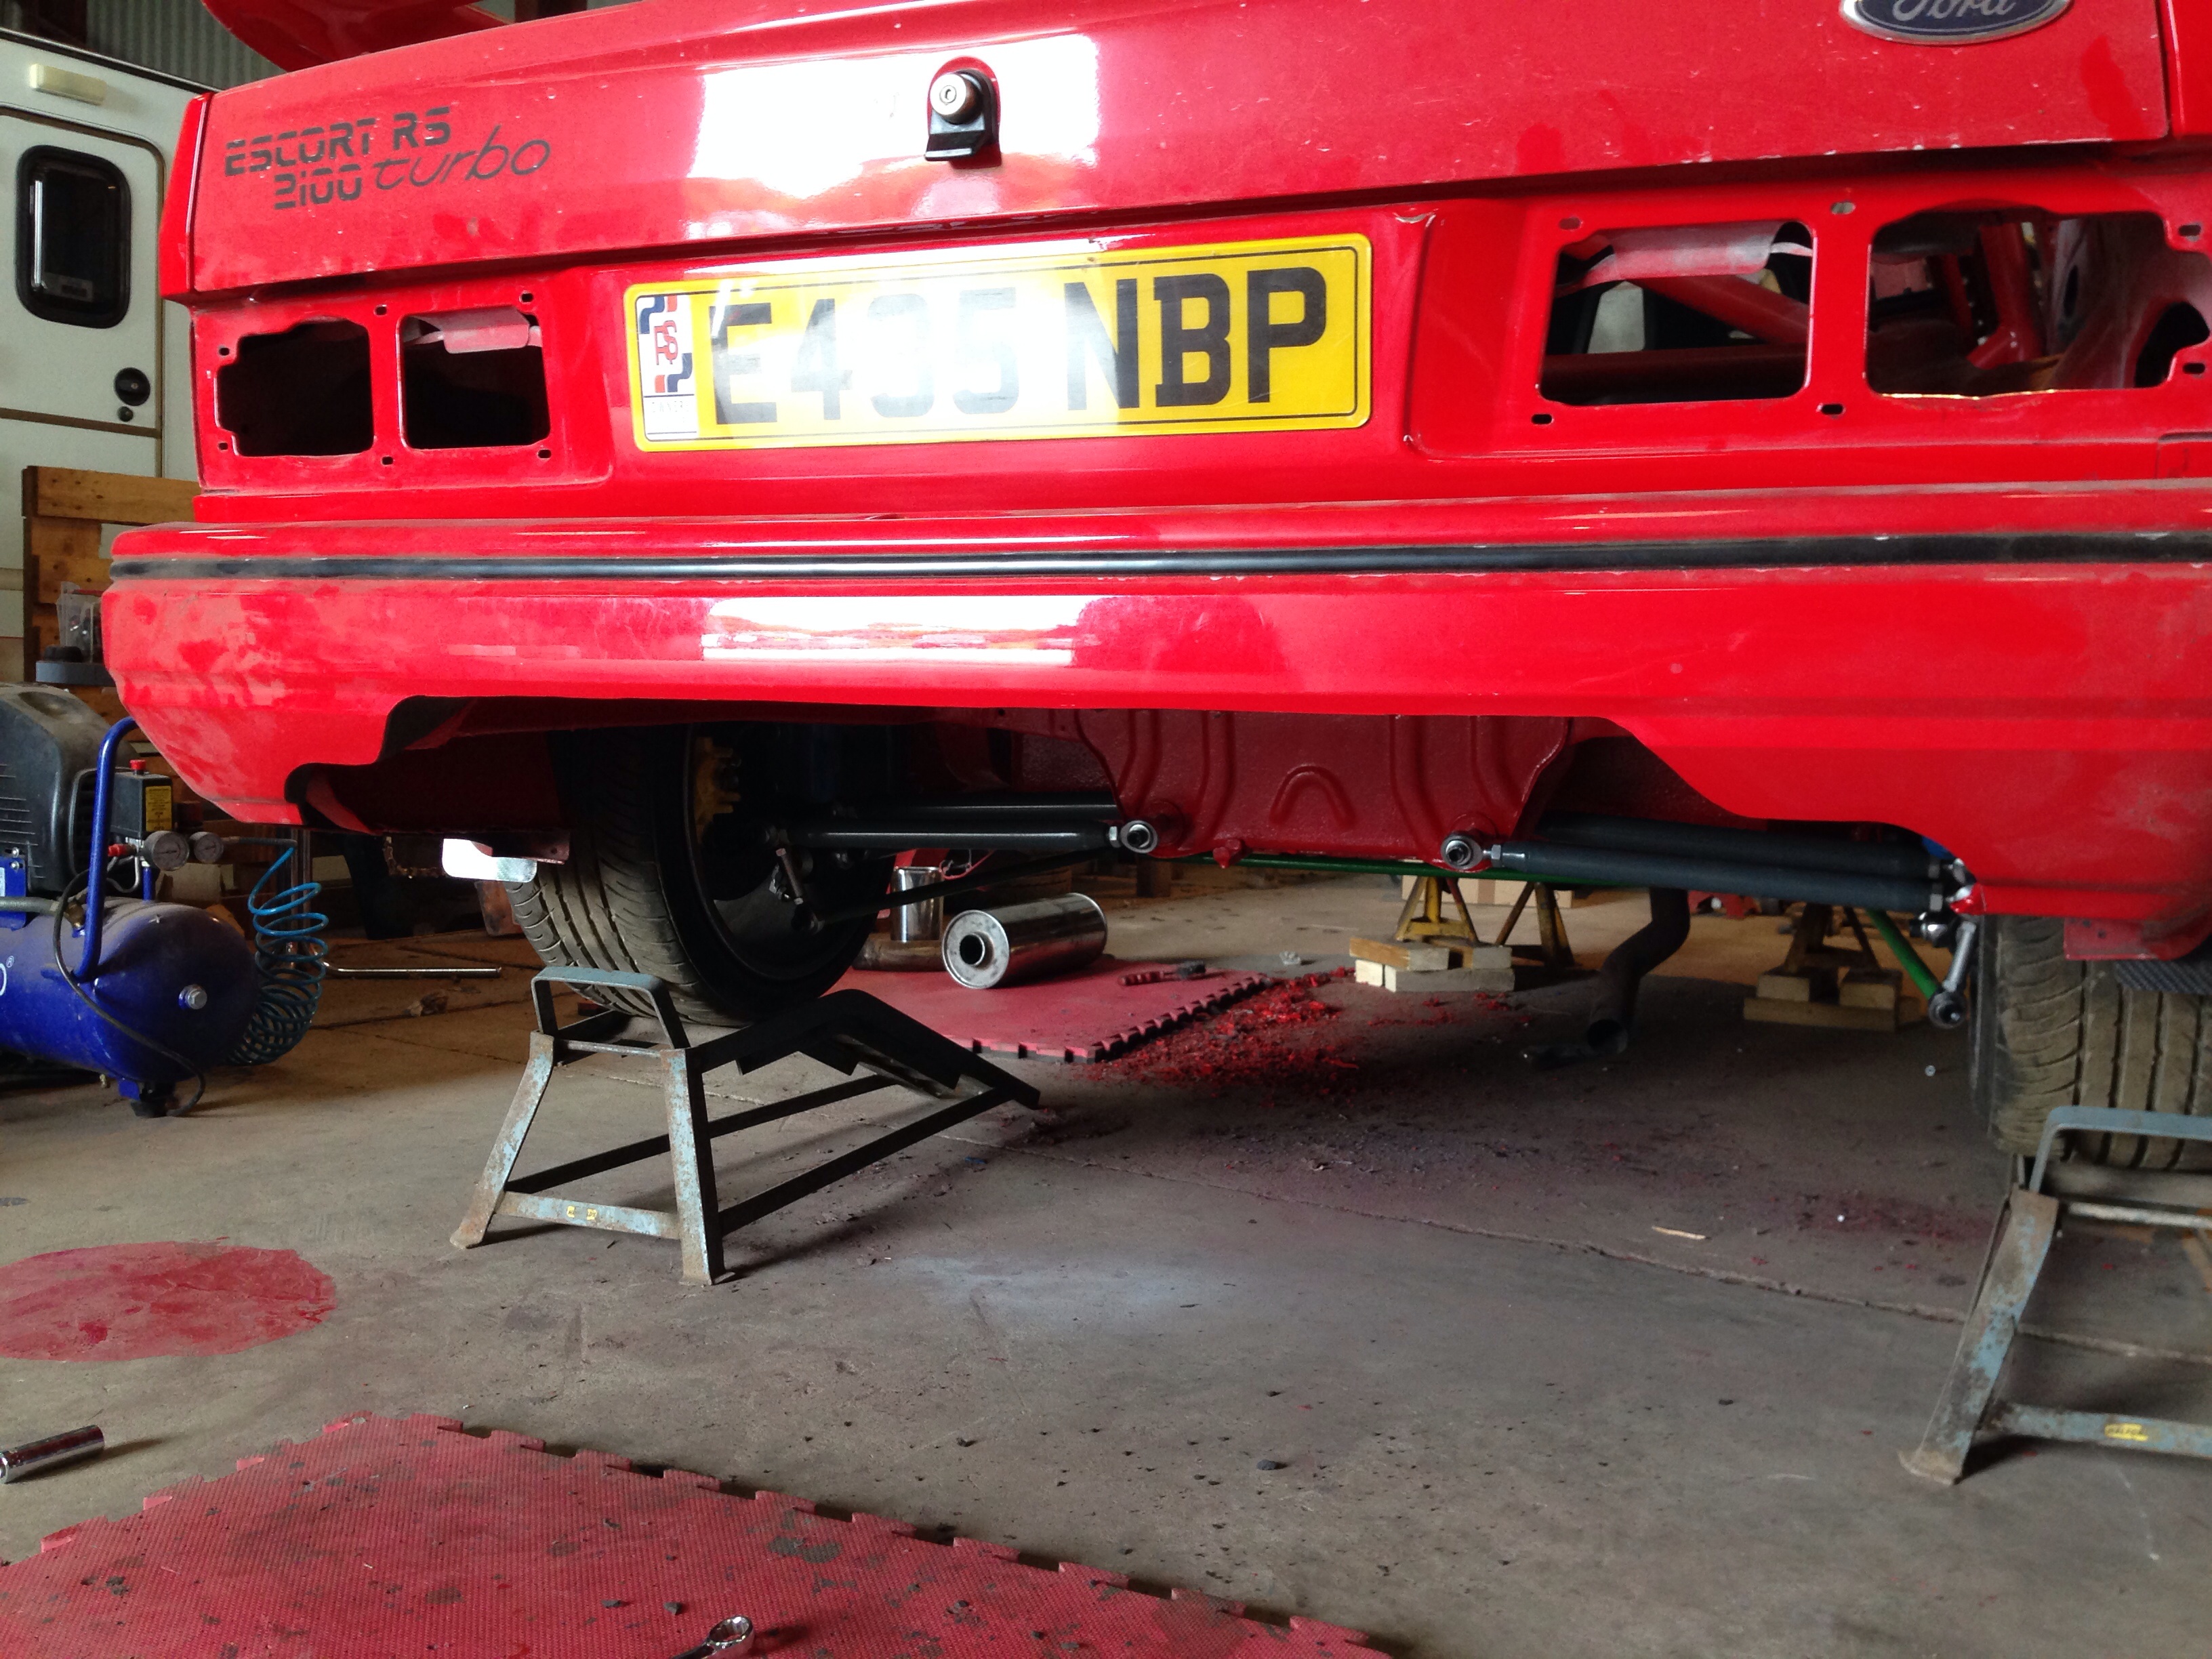
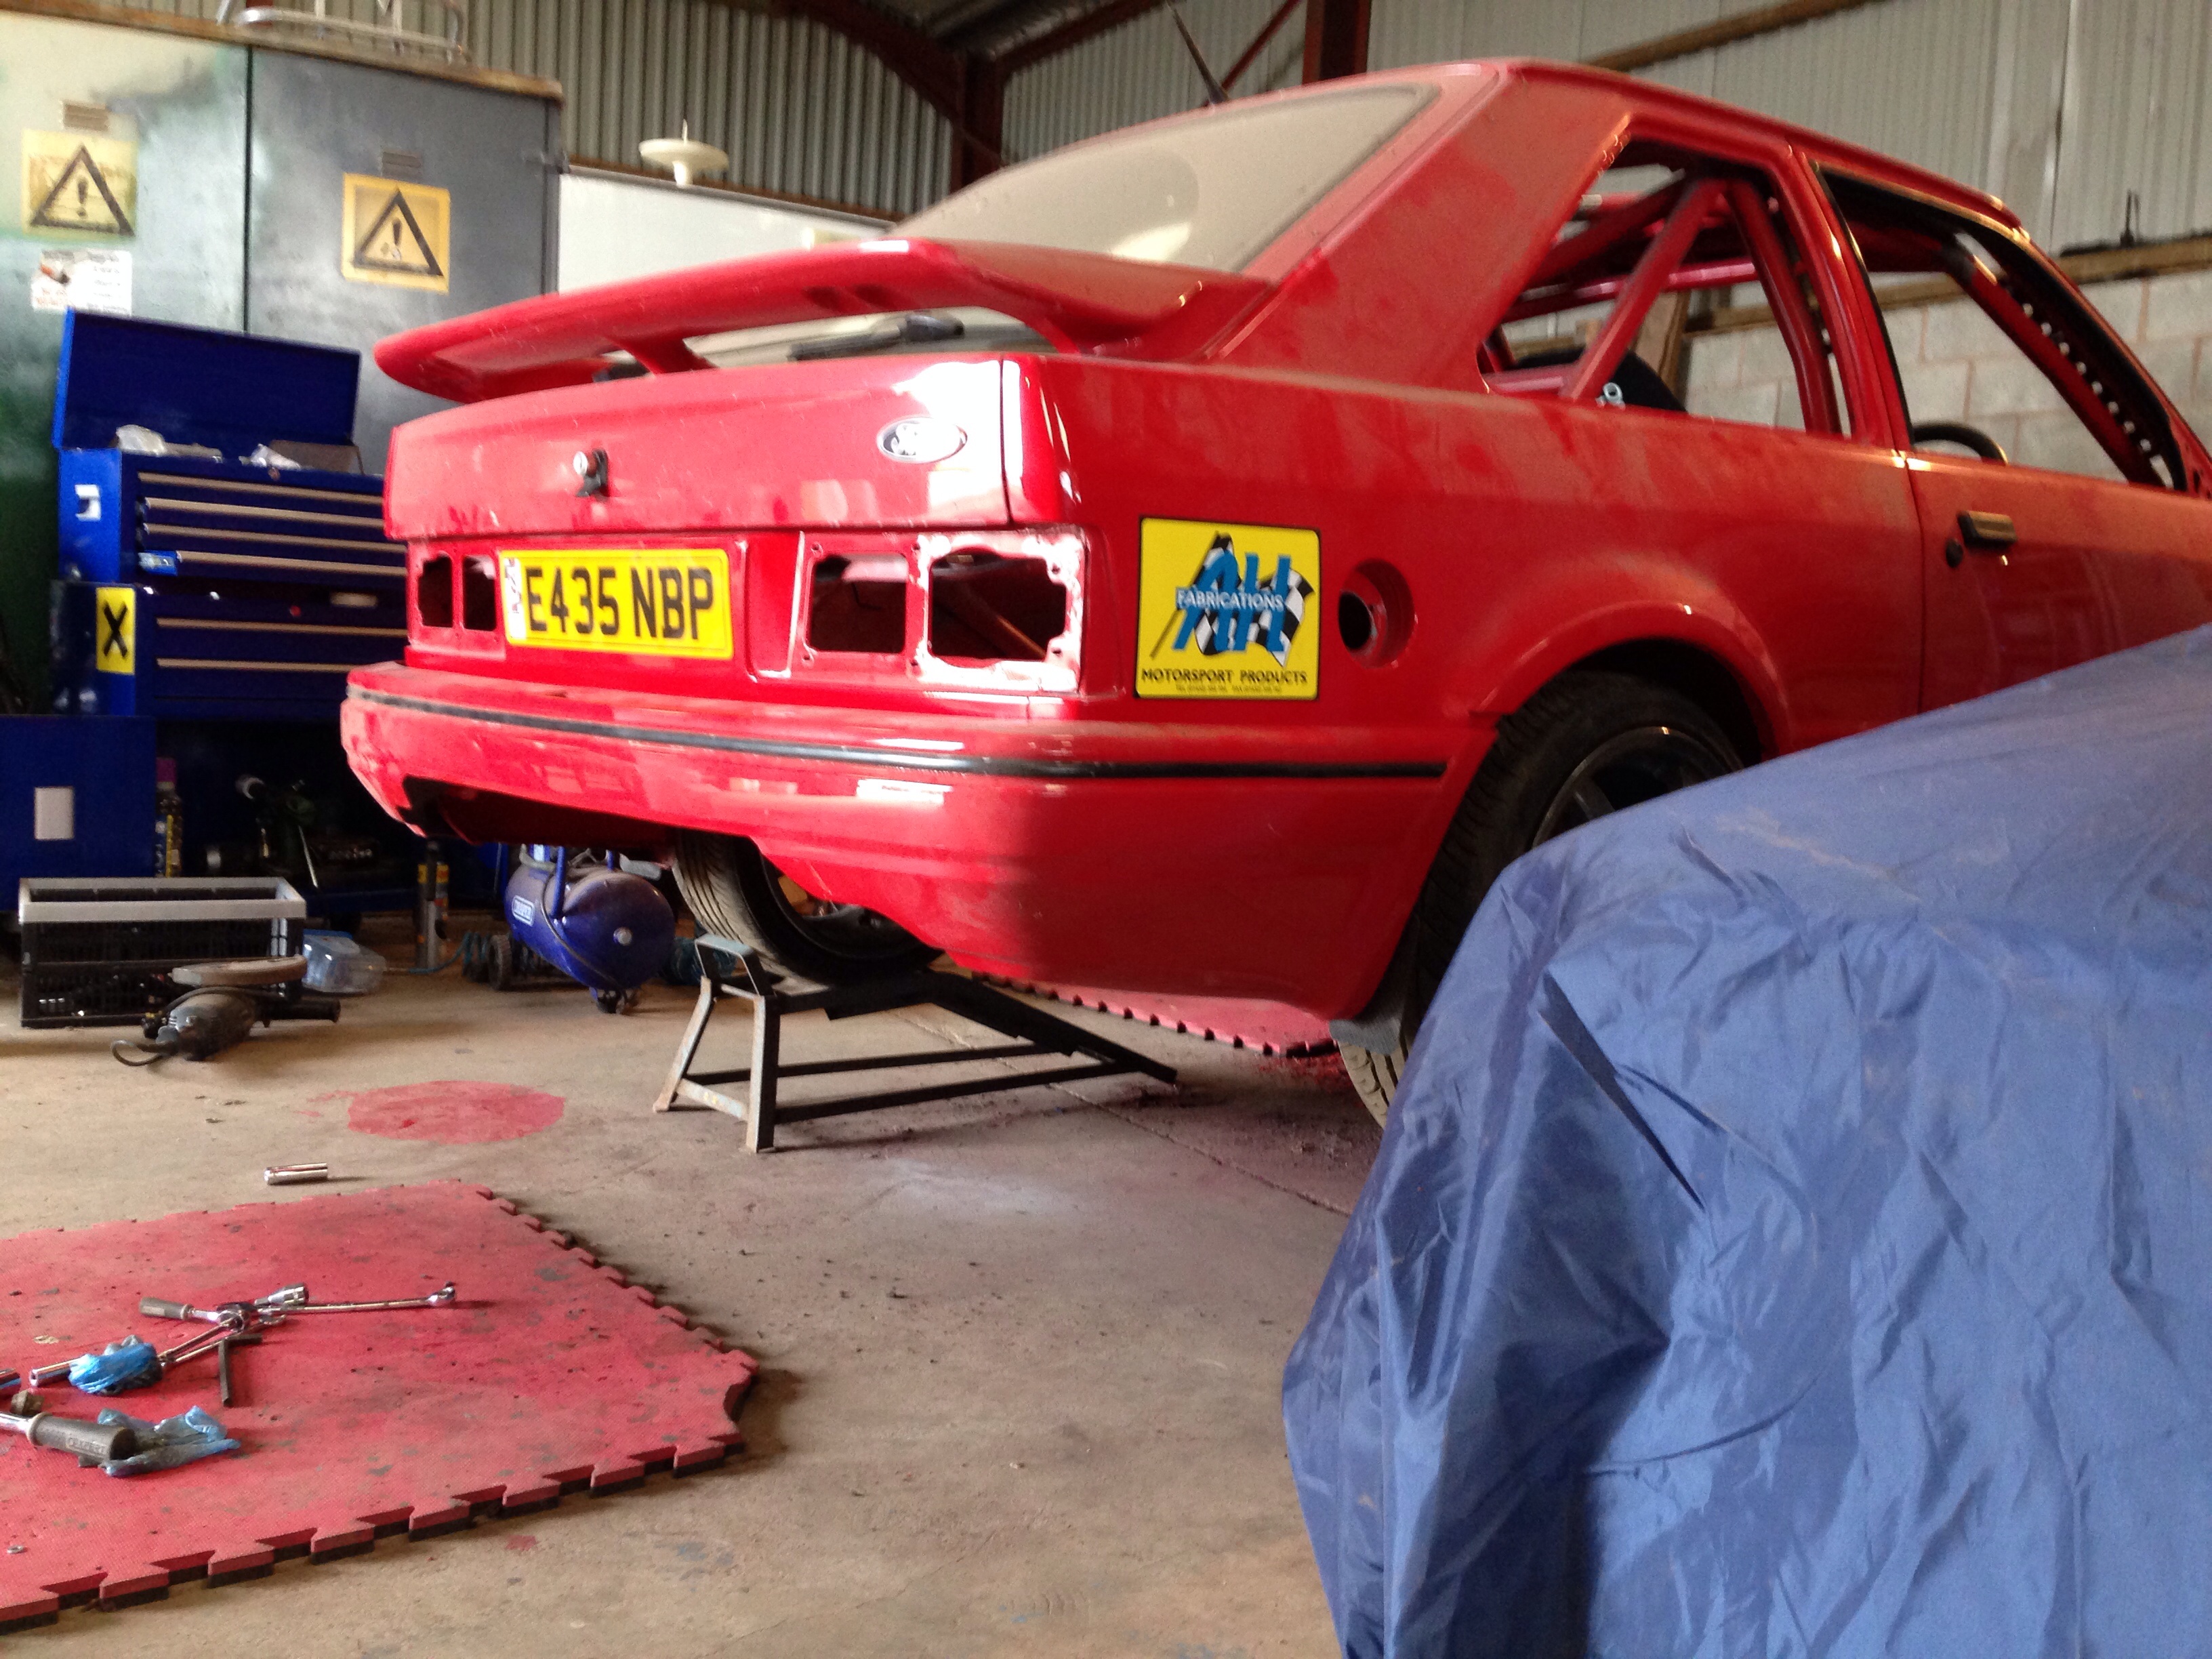
I'm so much happier with it this time round. This will be the last time I fit-up the rear end!
Todays jobs are to finish the side exit exhaust so I can put it in place and finish boxing up the sill, then finish the cradle for the floor mount pedal box and get that welded inlace. I also need to get the seat rails in, but depends if I have enough time.
Seam sealed an Gravitex. The seams were sealed before the Gravitex then I re-sealed some of the high impact areas afterwards, as well.
There was also a small bit of rot in the rear, lower number corner, so this was replaced, as was the inner panel which I had to hand fabricate.


Unfortunately, I couldn't borrow the correct air fed mask to spray the 2K in time, as I wanted it finished before I go back to work, so decided to roller the 2K on. I wasn't going to change to with just a carb-can mask.
Came out really nice, though, just took a little longer.


Then got the rear suspension all back on.


Then popped the rear bumper on, but It didn't look right. I didn't like how it hid all the suspension so got the grinder out.


I'm so much happier with it this time round. This will be the last time I fit-up the rear end!
Todays jobs are to finish the side exit exhaust so I can put it in place and finish boxing up the sill, then finish the cradle for the floor mount pedal box and get that welded inlace. I also need to get the seat rails in, but depends if I have enough time.
06-09-2014, 03:24 PM
#982
Wye Valley Hardcore
Thread Starter
Cheers, mate.
First I had to make a small piece to finish the sill notch.
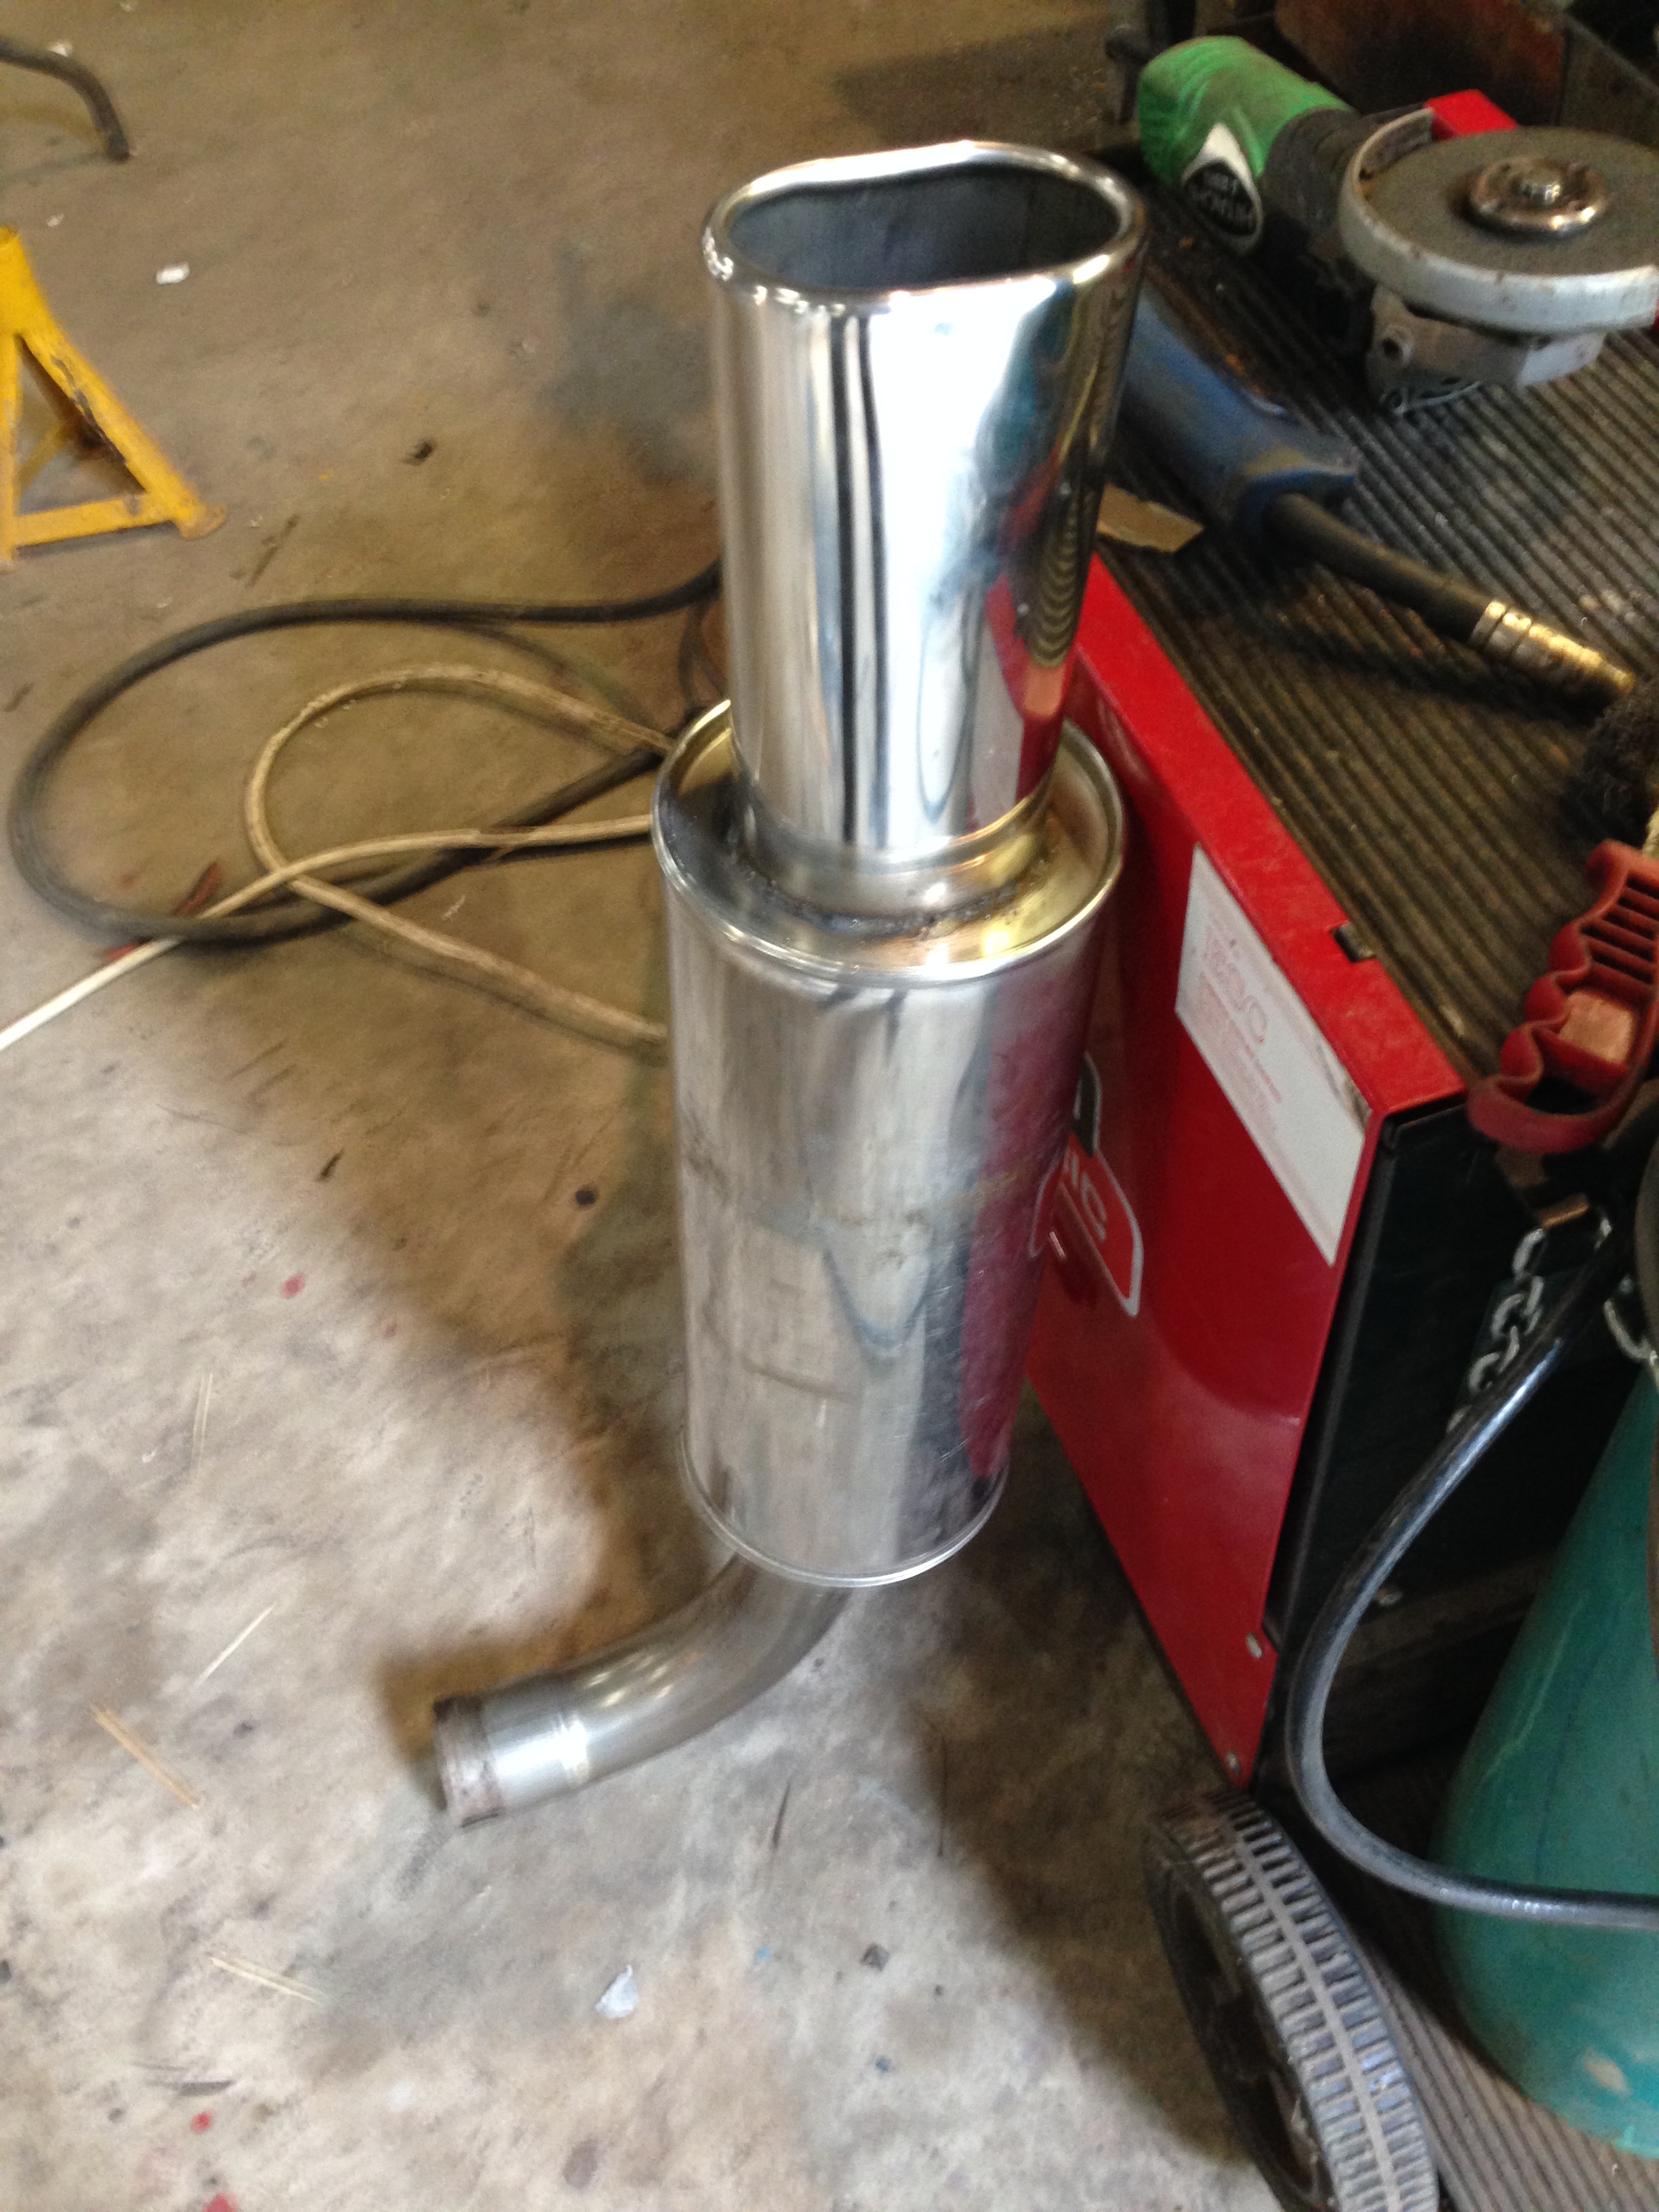
Then cracked on with the exhaust.
Ended up using my Mongoose back box, as it fits perfectly, well made and sounded nice in it original layout.
Welded a 90 degree on the end and a square oval tailpipe.
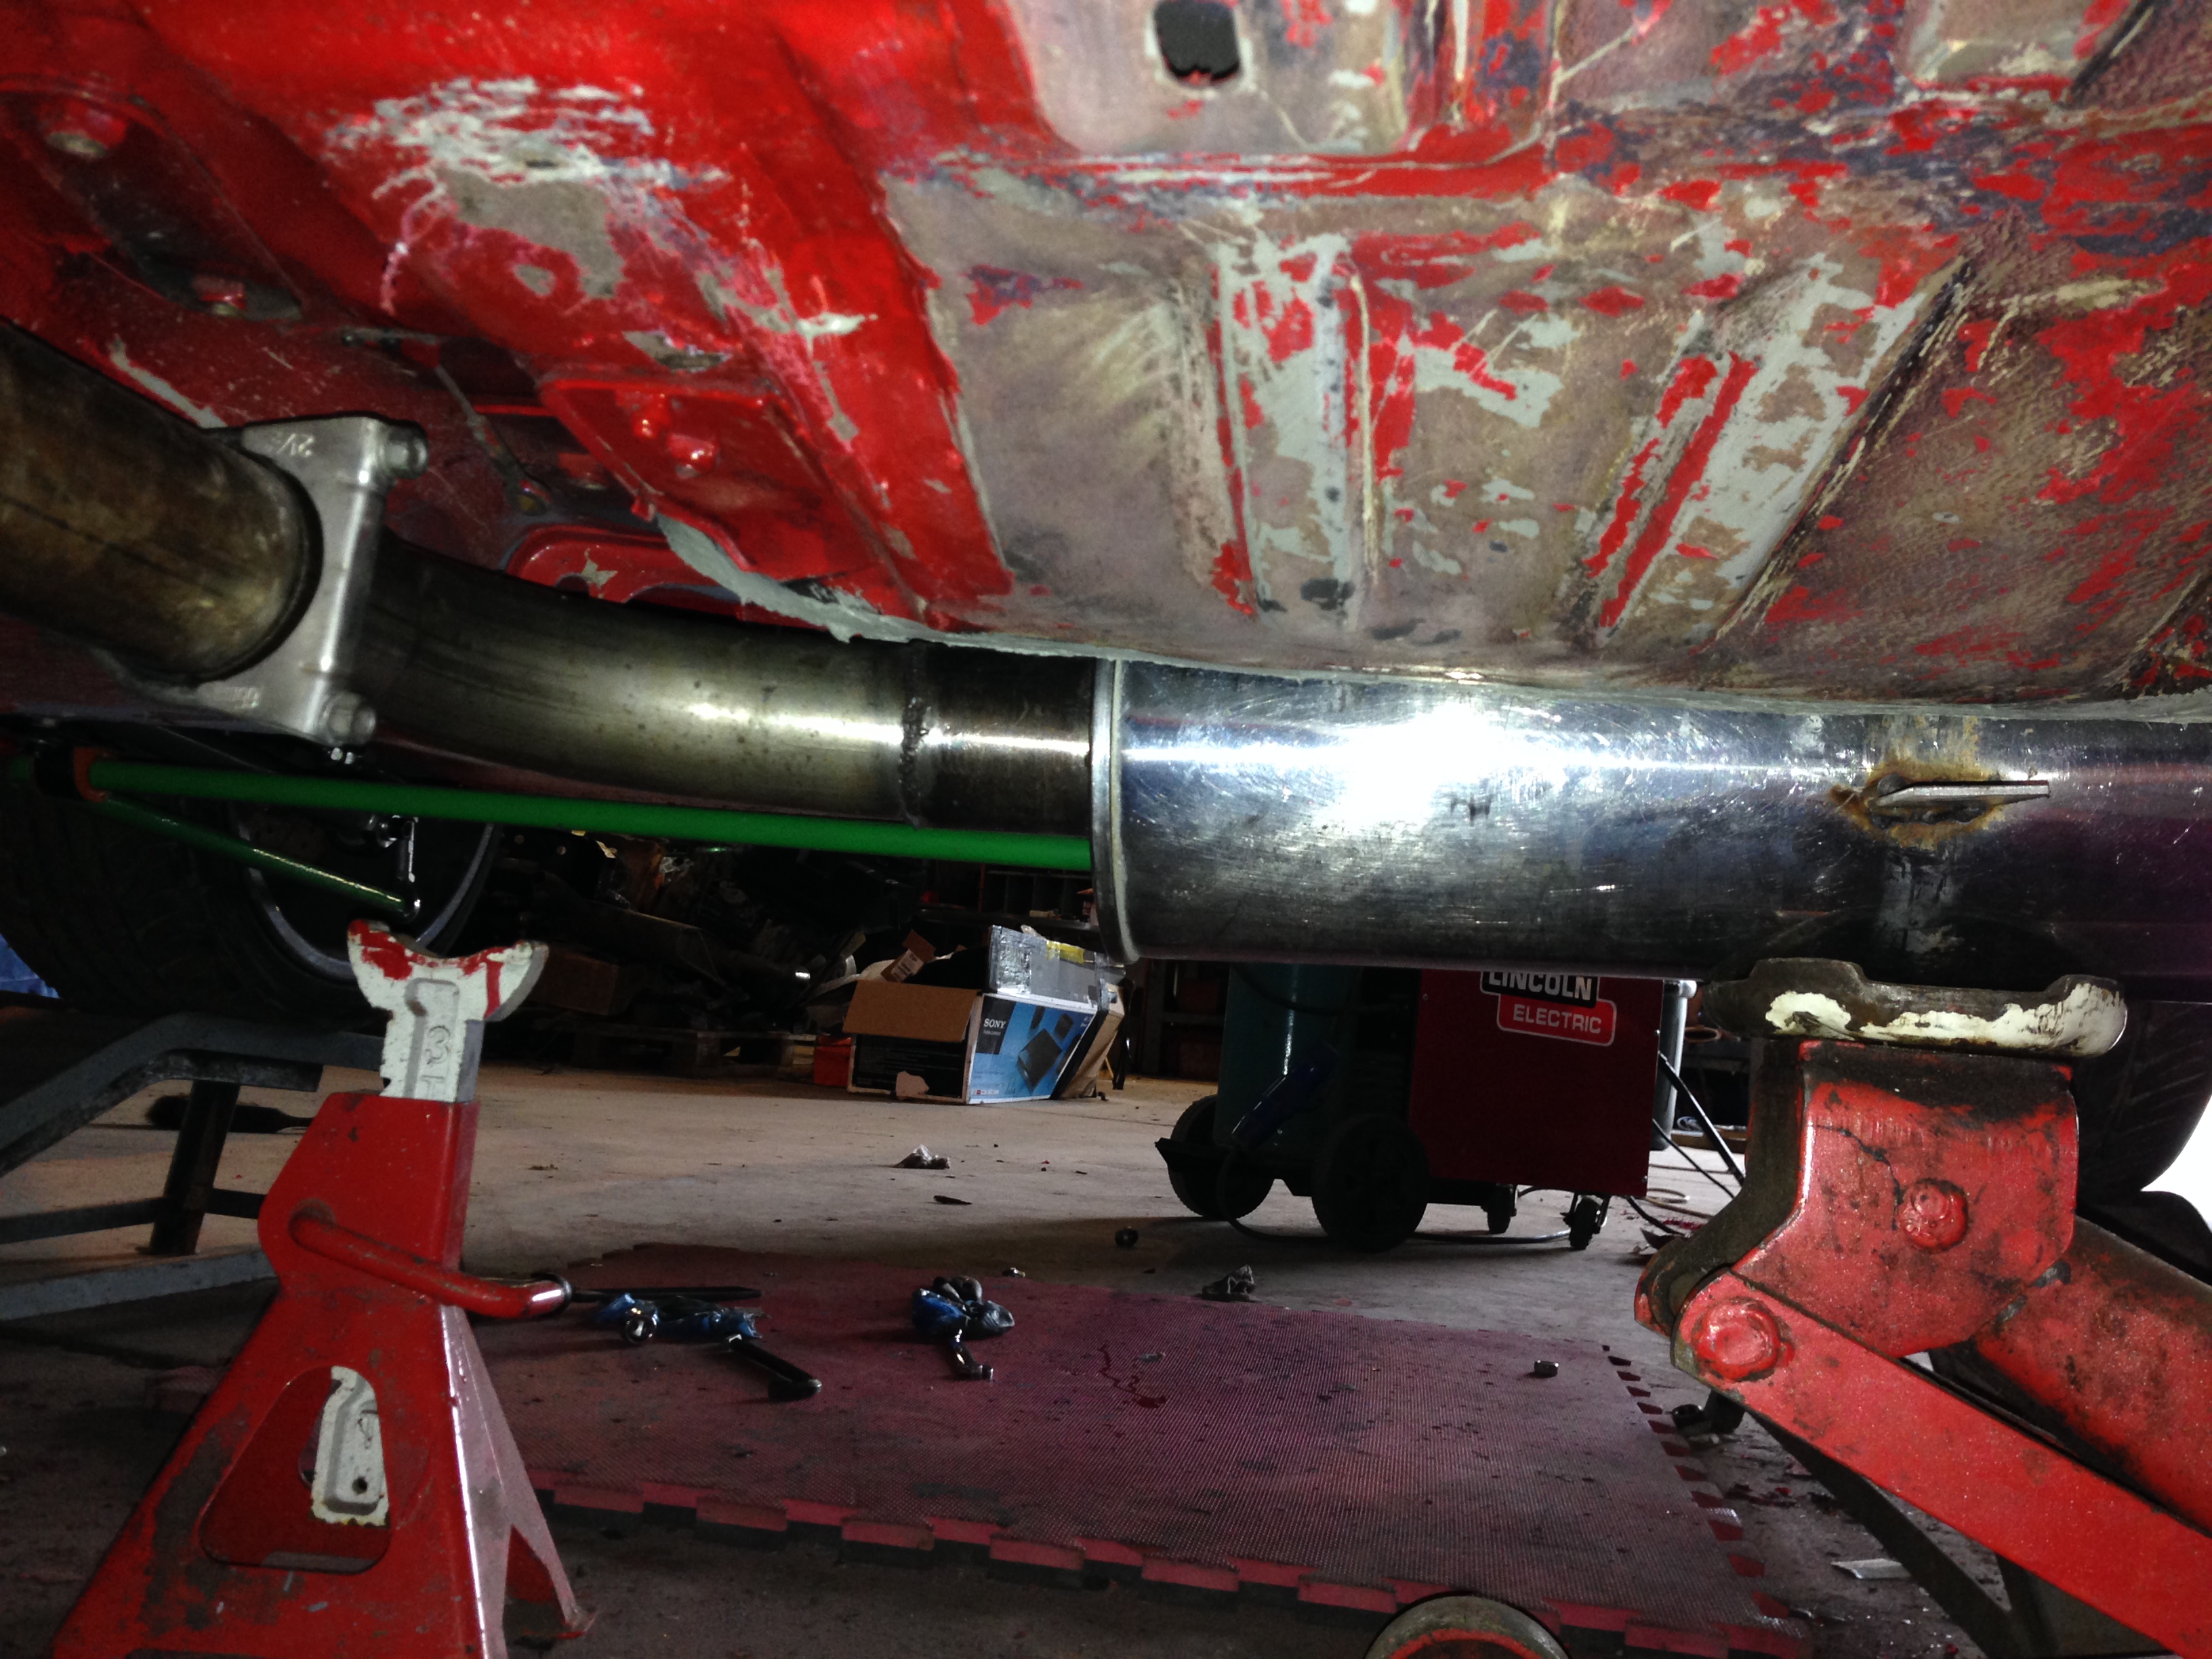
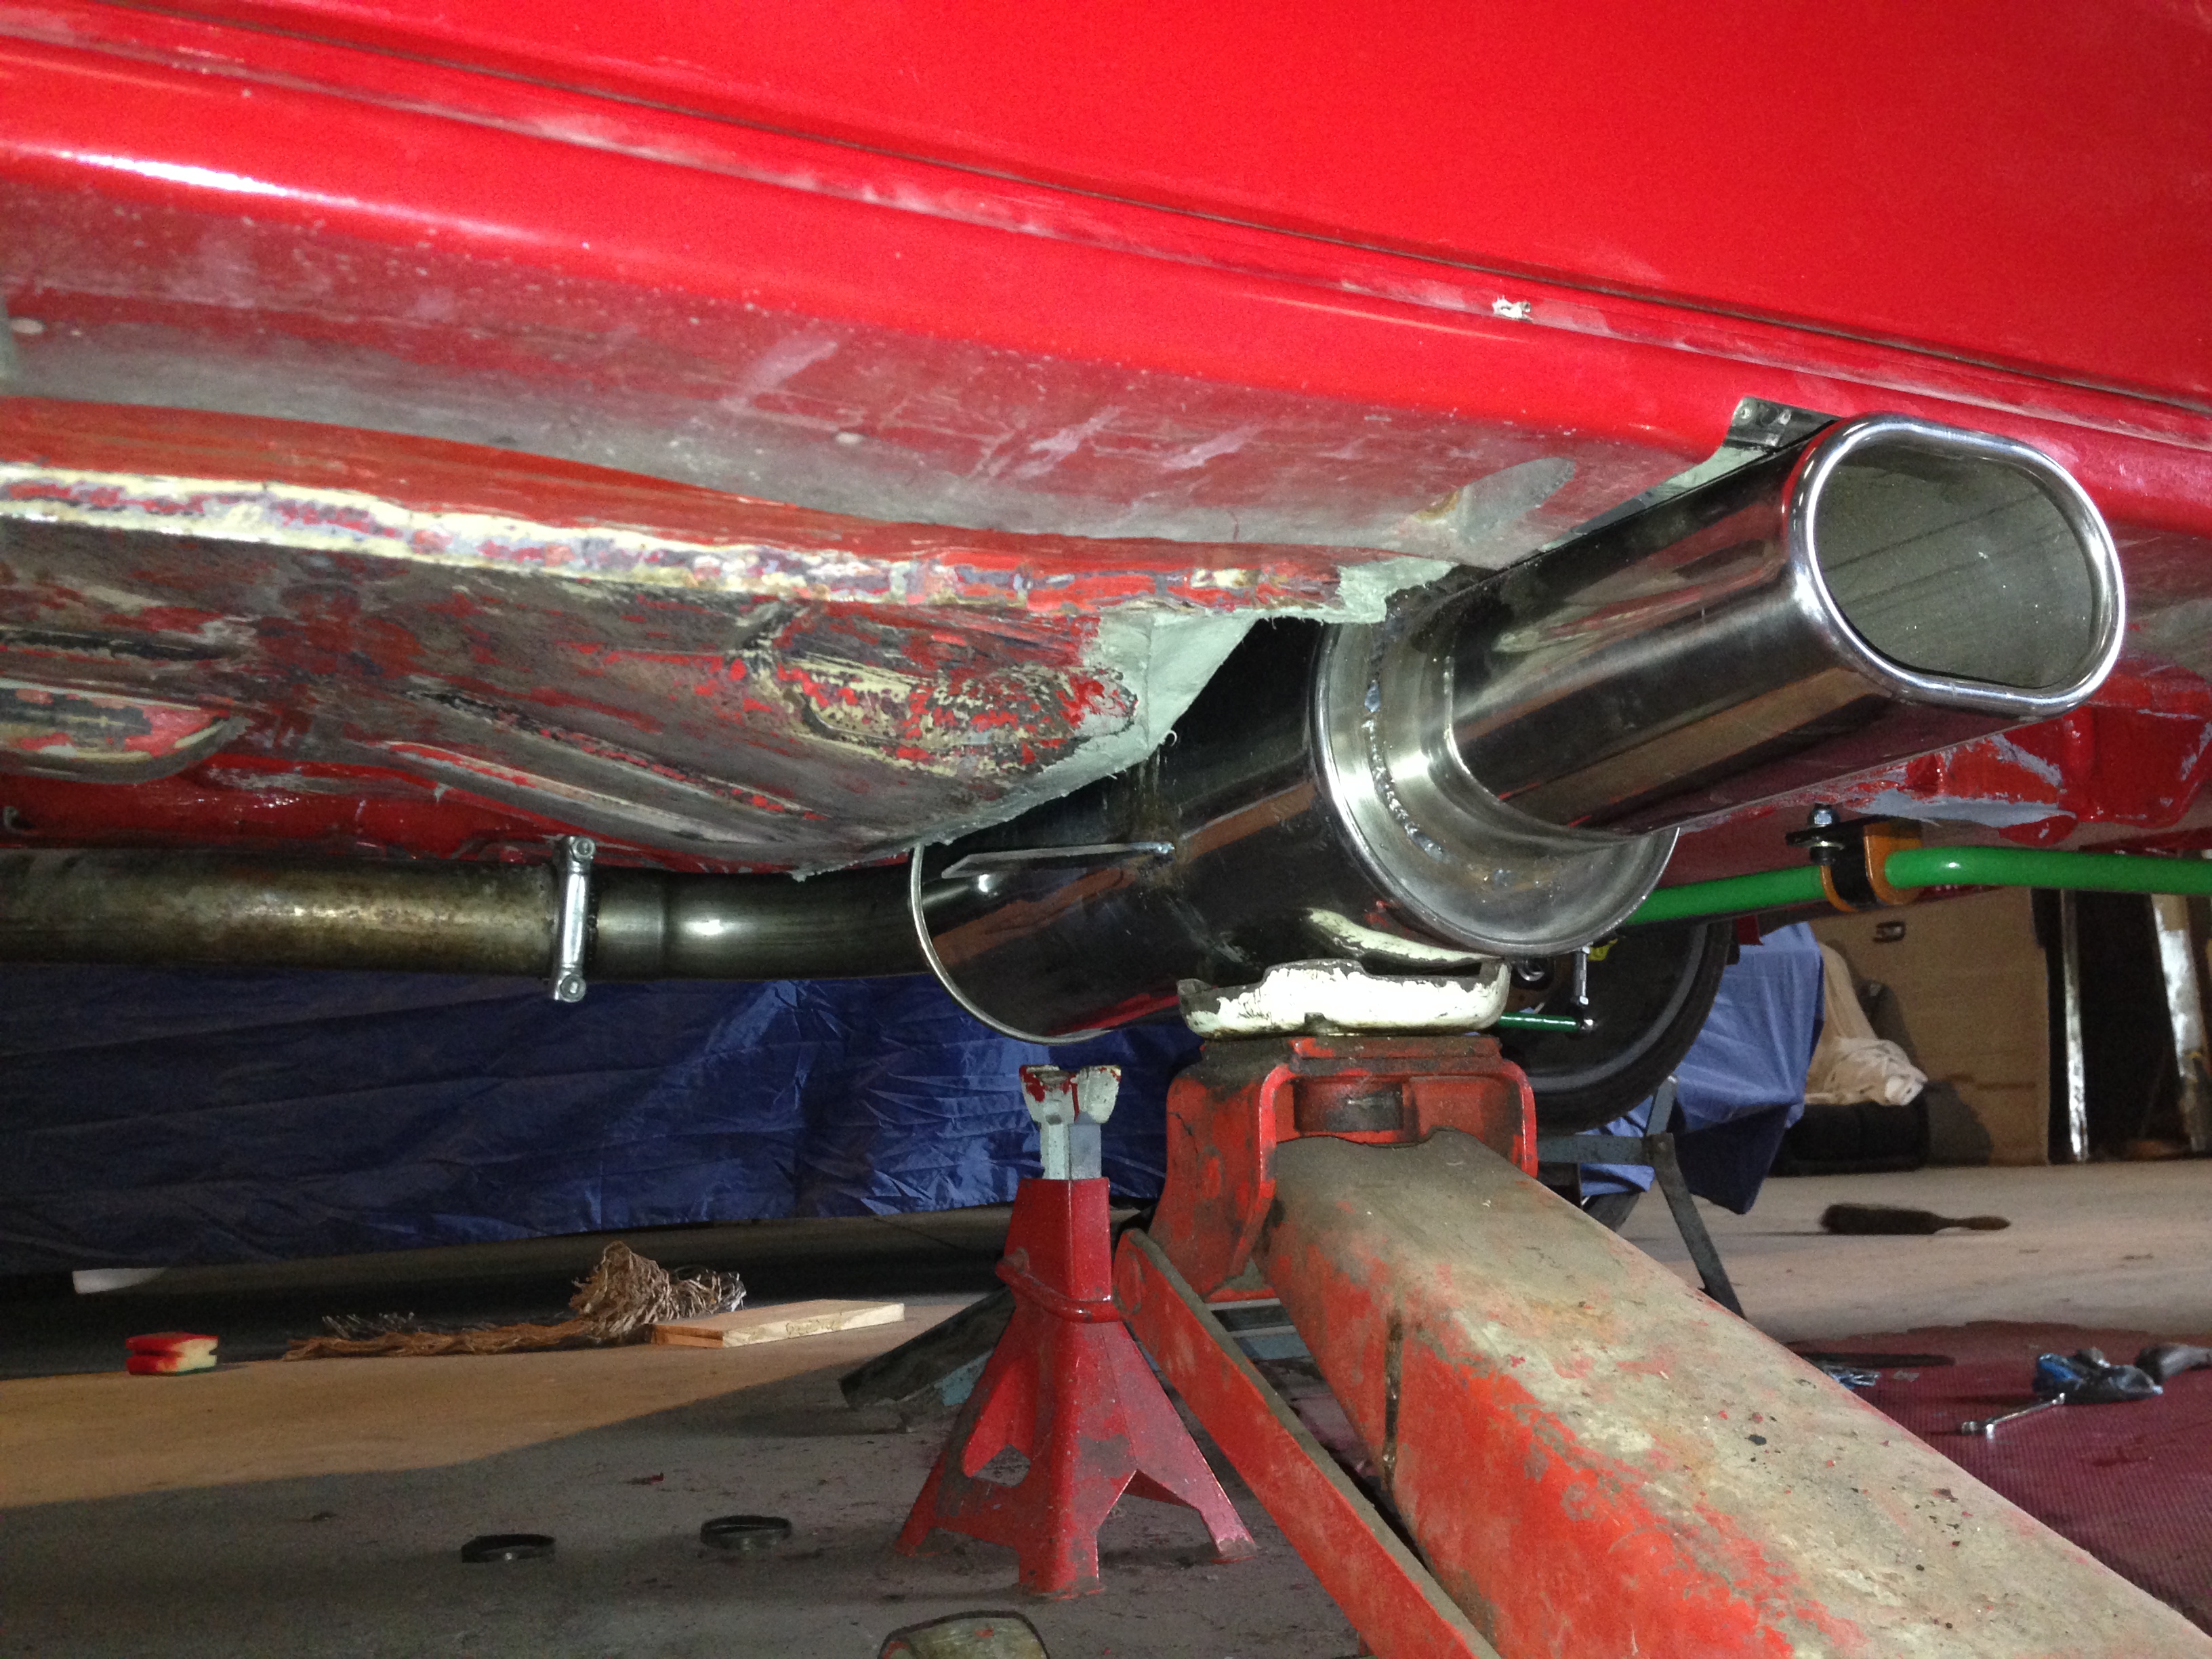

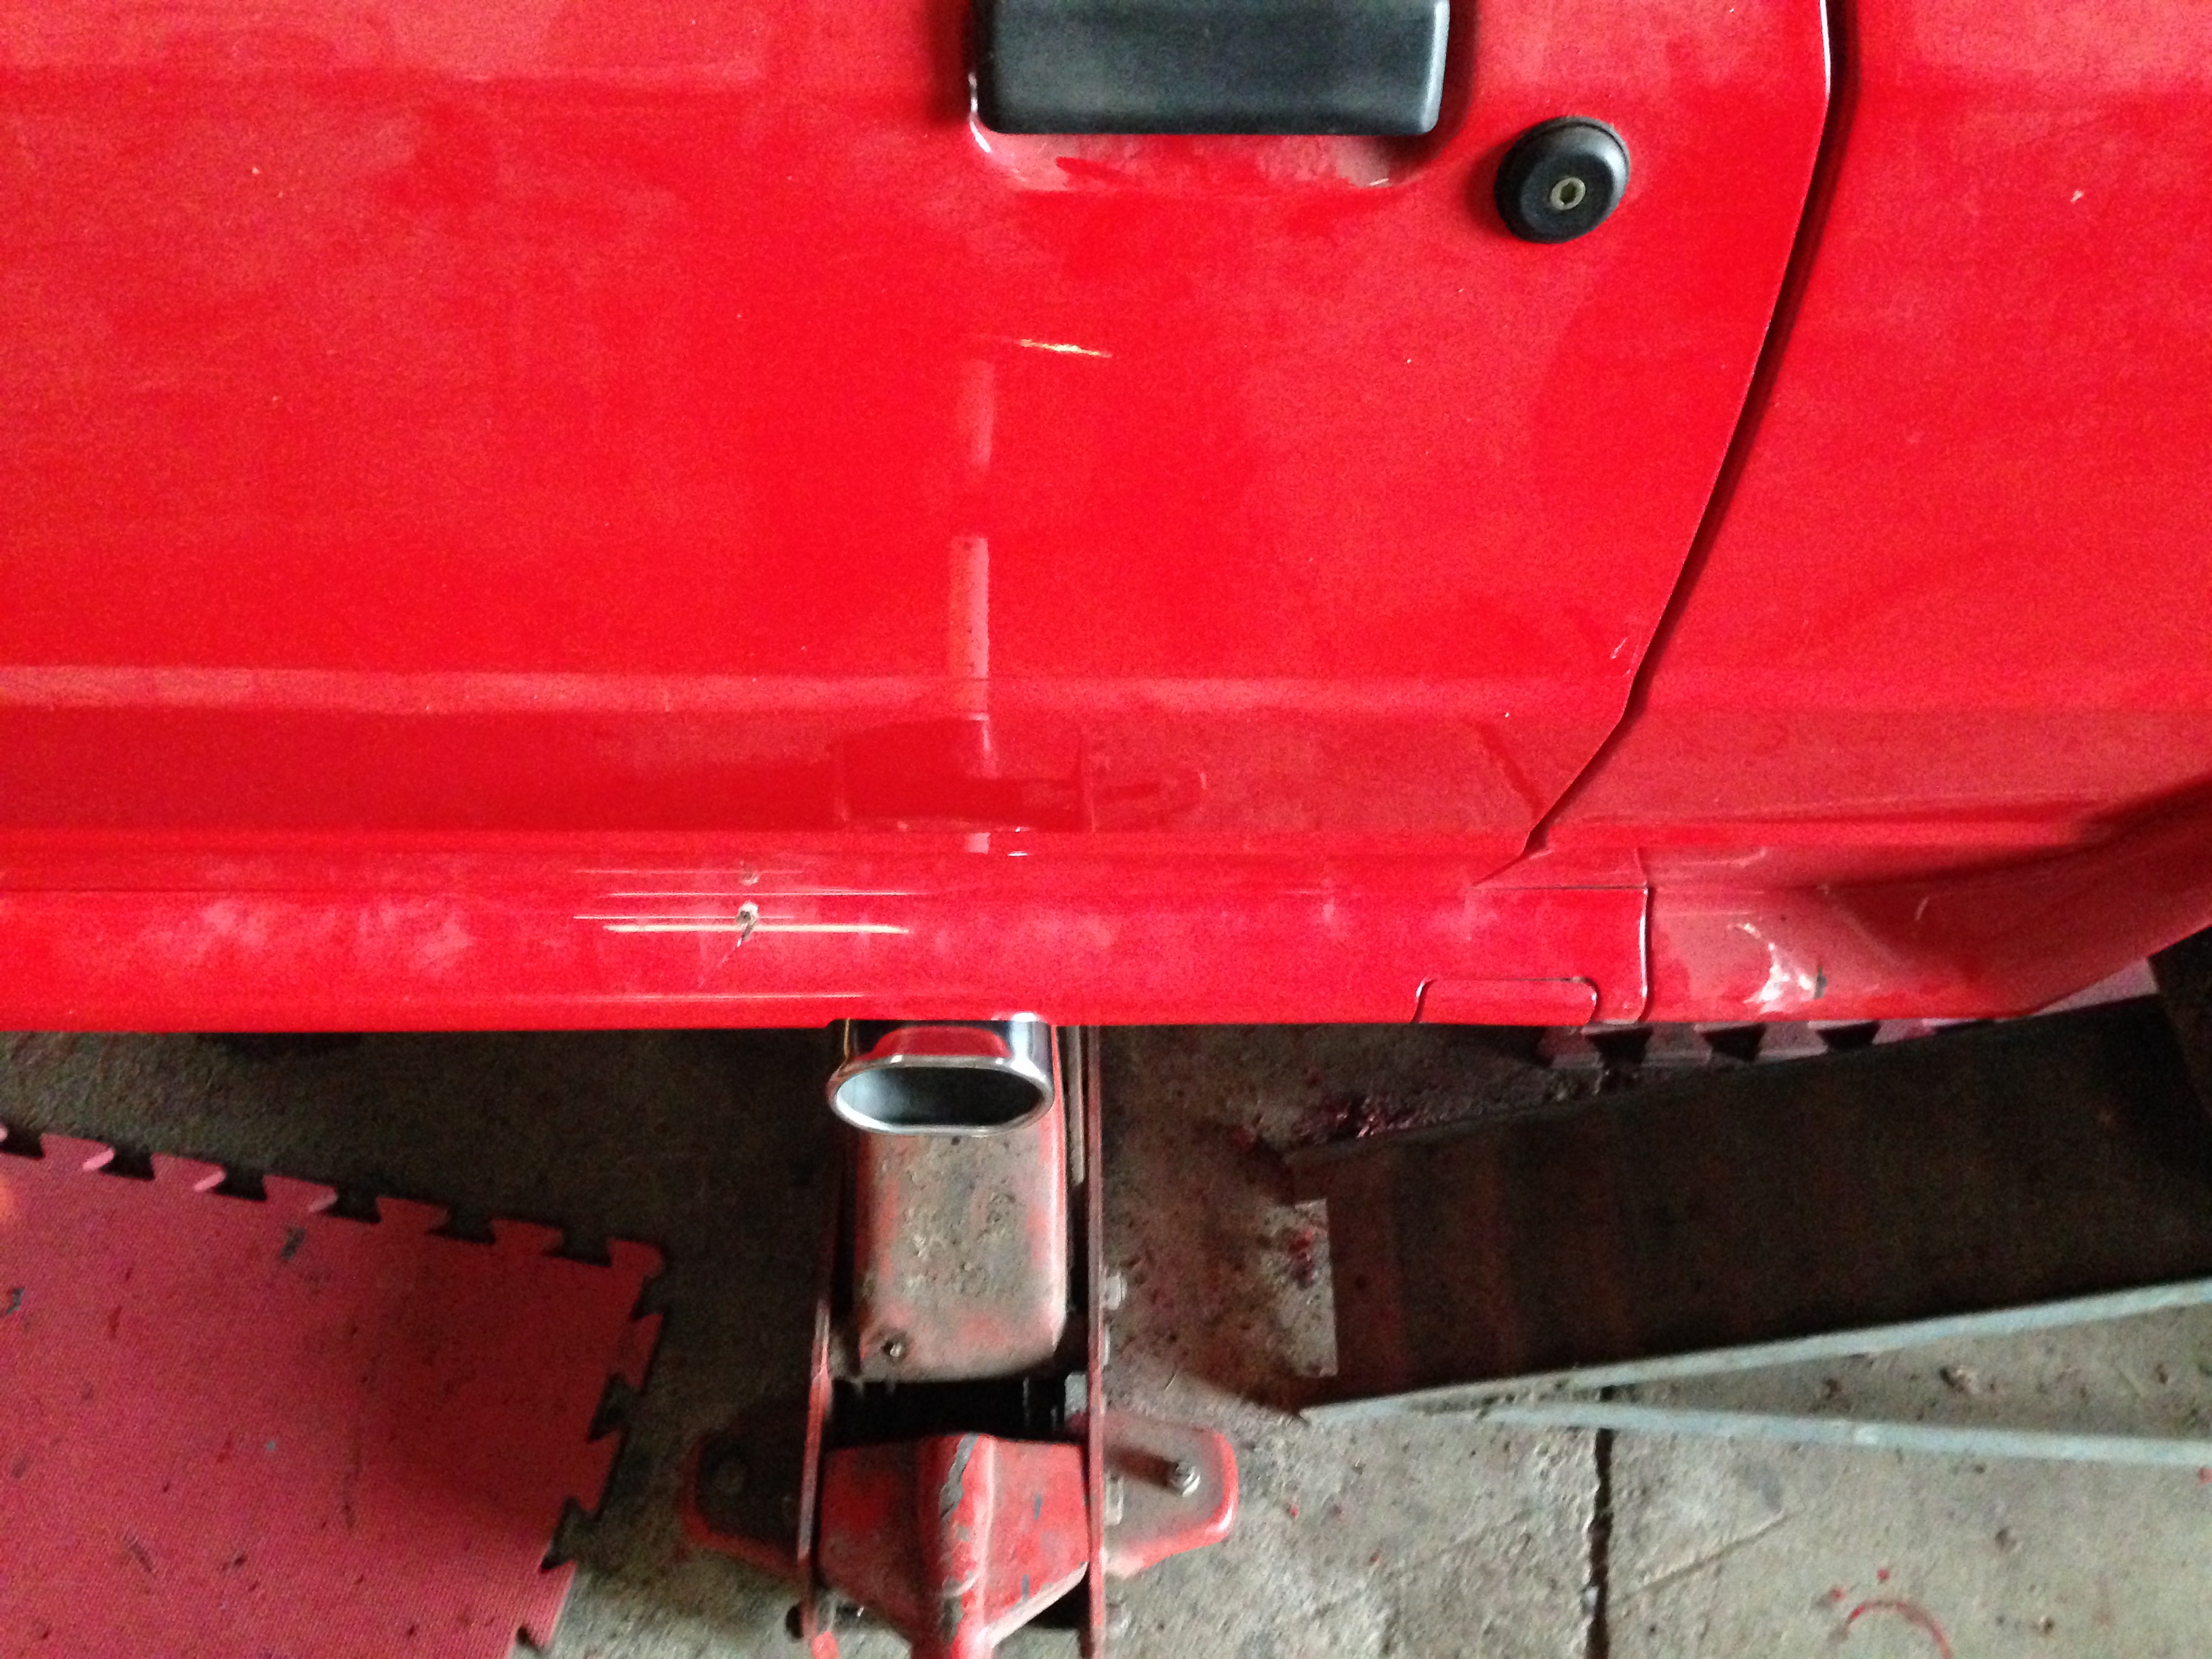
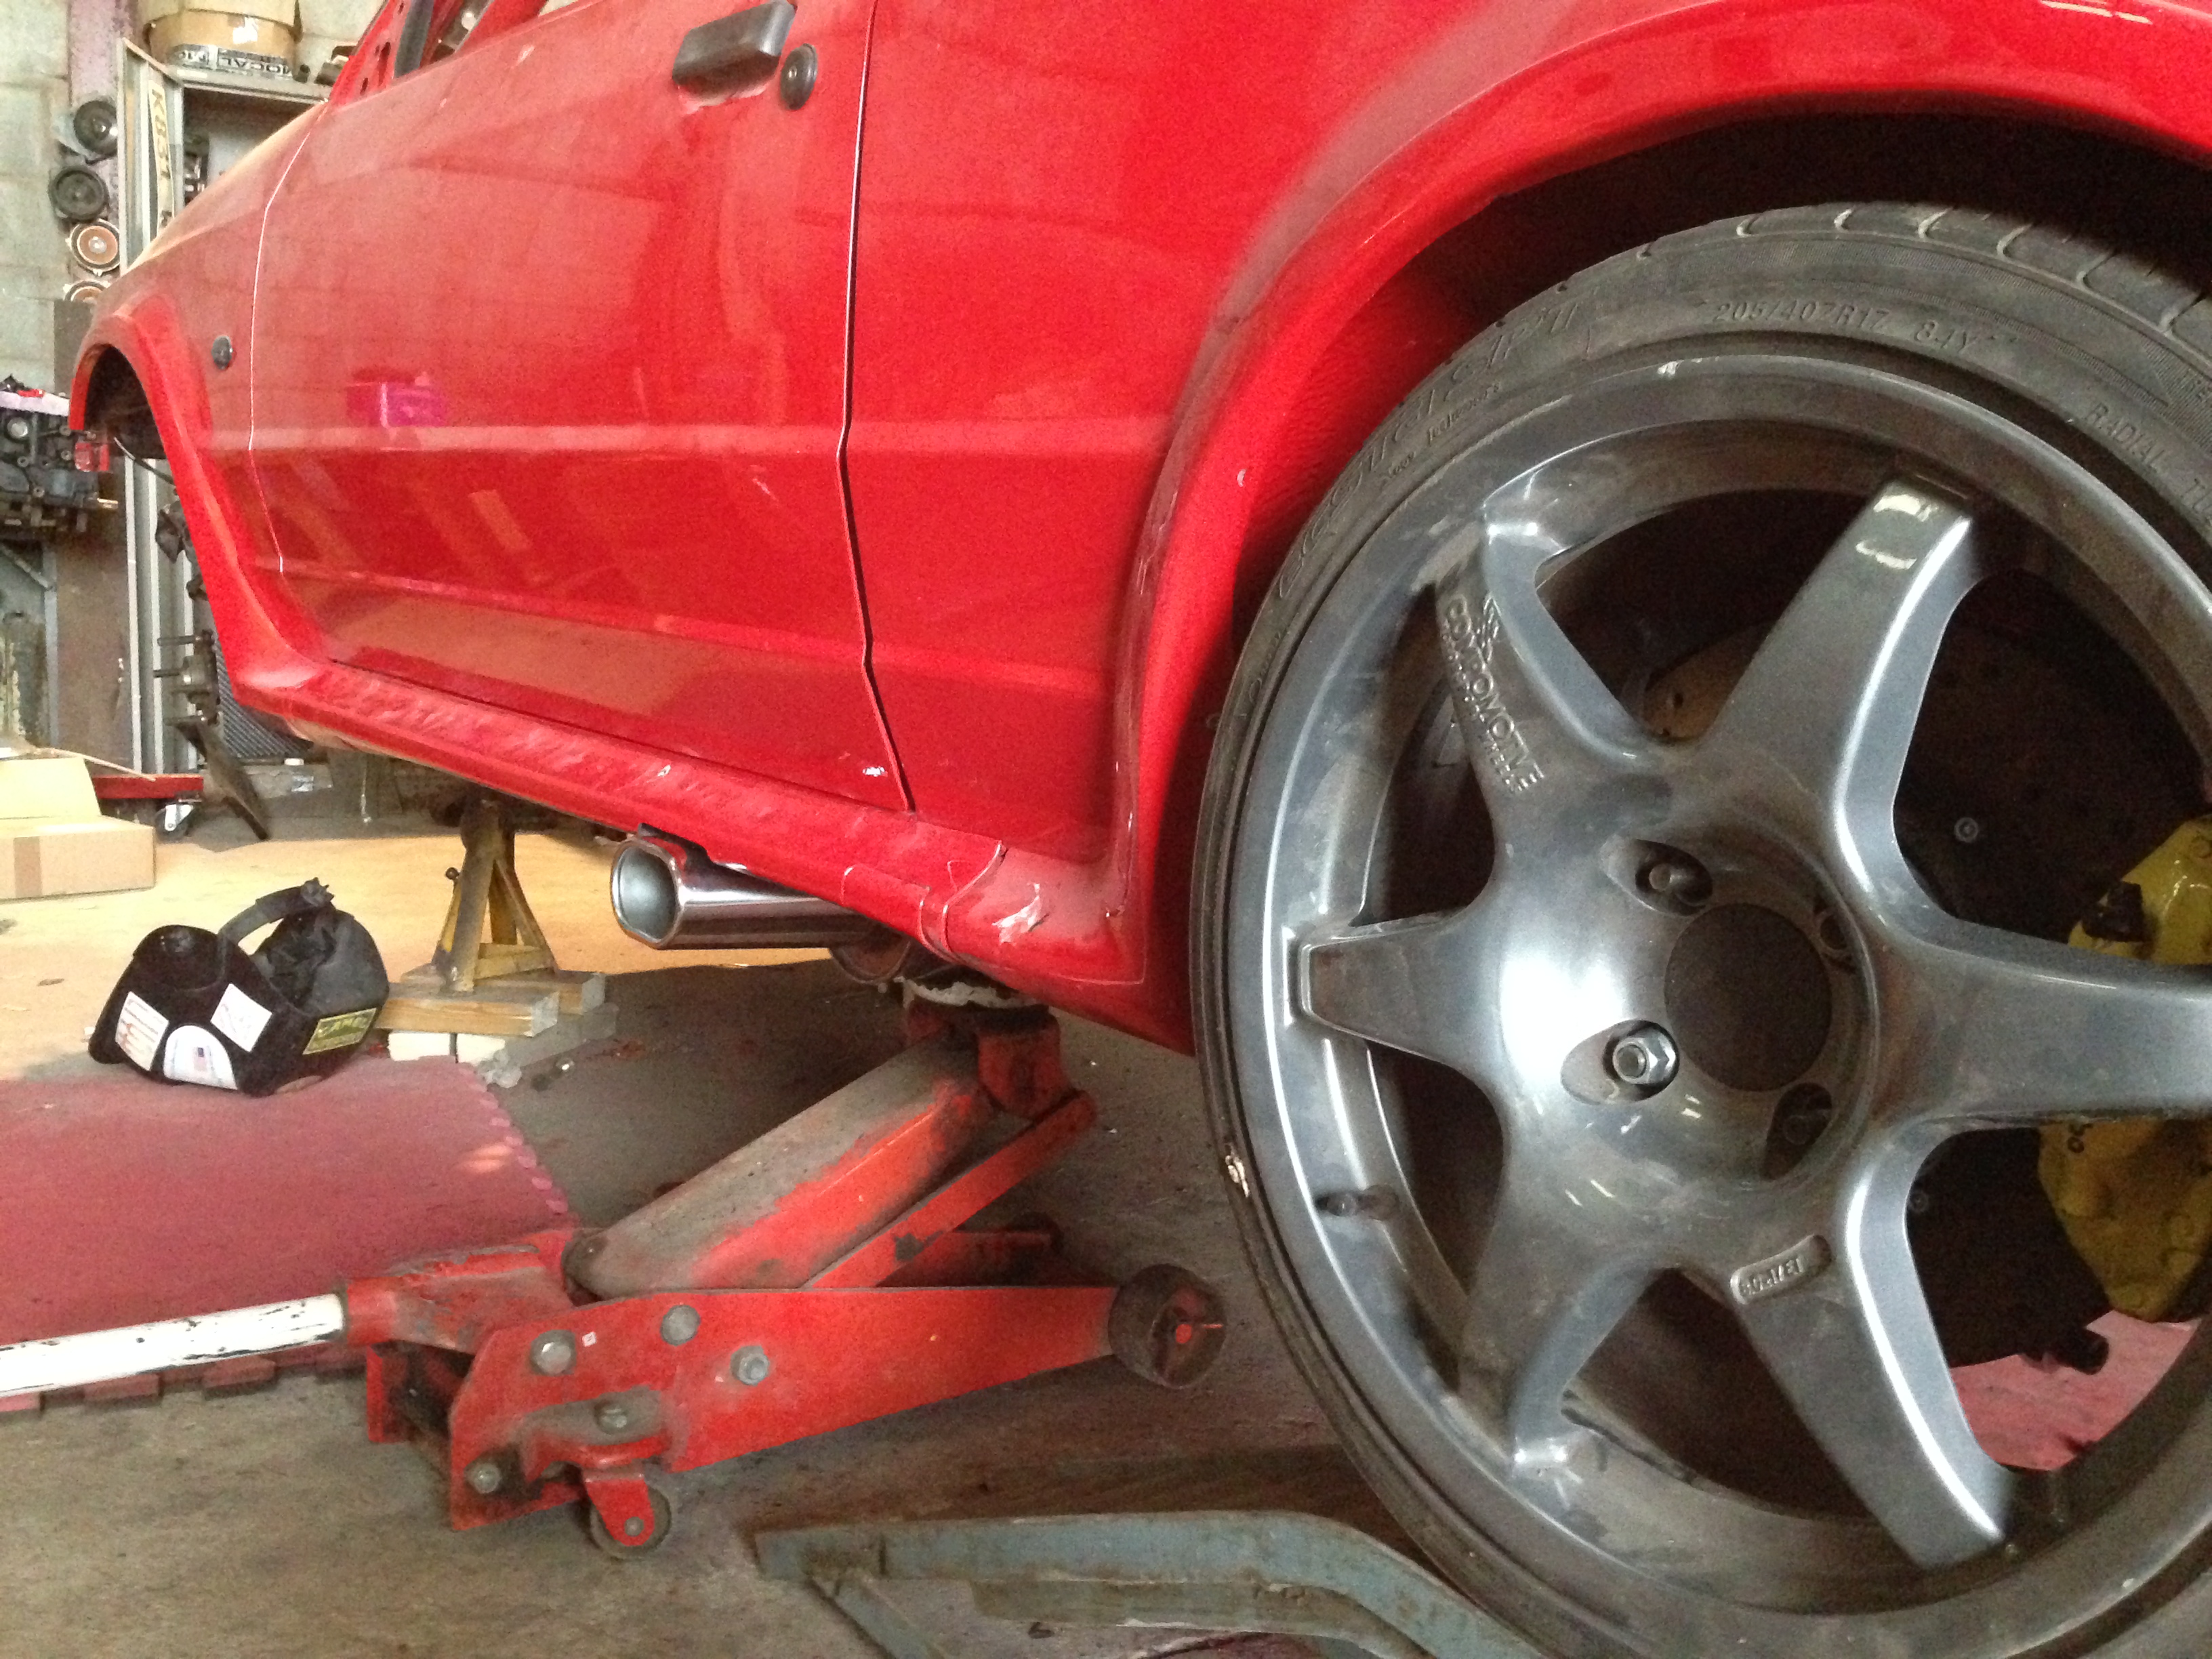
Not entirely happy with the side skirt cut out, if I'm honest, but it is what it is.
I've started on the pedal box frame, but its not finished yet.
First I had to make a small piece to finish the sill notch.

Then cracked on with the exhaust.
Ended up using my Mongoose back box, as it fits perfectly, well made and sounded nice in it original layout.
Welded a 90 degree on the end and a square oval tailpipe.


Not entirely happy with the side skirt cut out, if I'm honest, but it is what it is.
I've started on the pedal box frame, but its not finished yet.
08-09-2014, 08:49 PM
#983
Wye Valley Hardcore
Thread Starter
Got bored at work so have the pedal box a strip down and freshen up.
Was looking a bit tired.
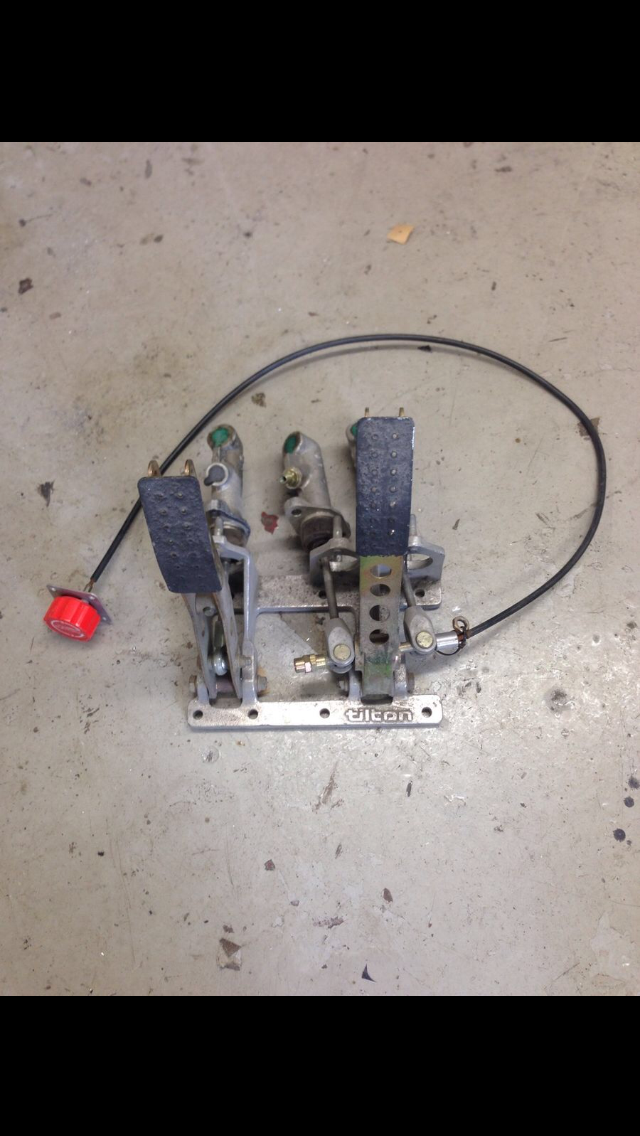
Have the pedals a coat of Matt black, the frame Matt grey and replace the fastenings with cap heads.
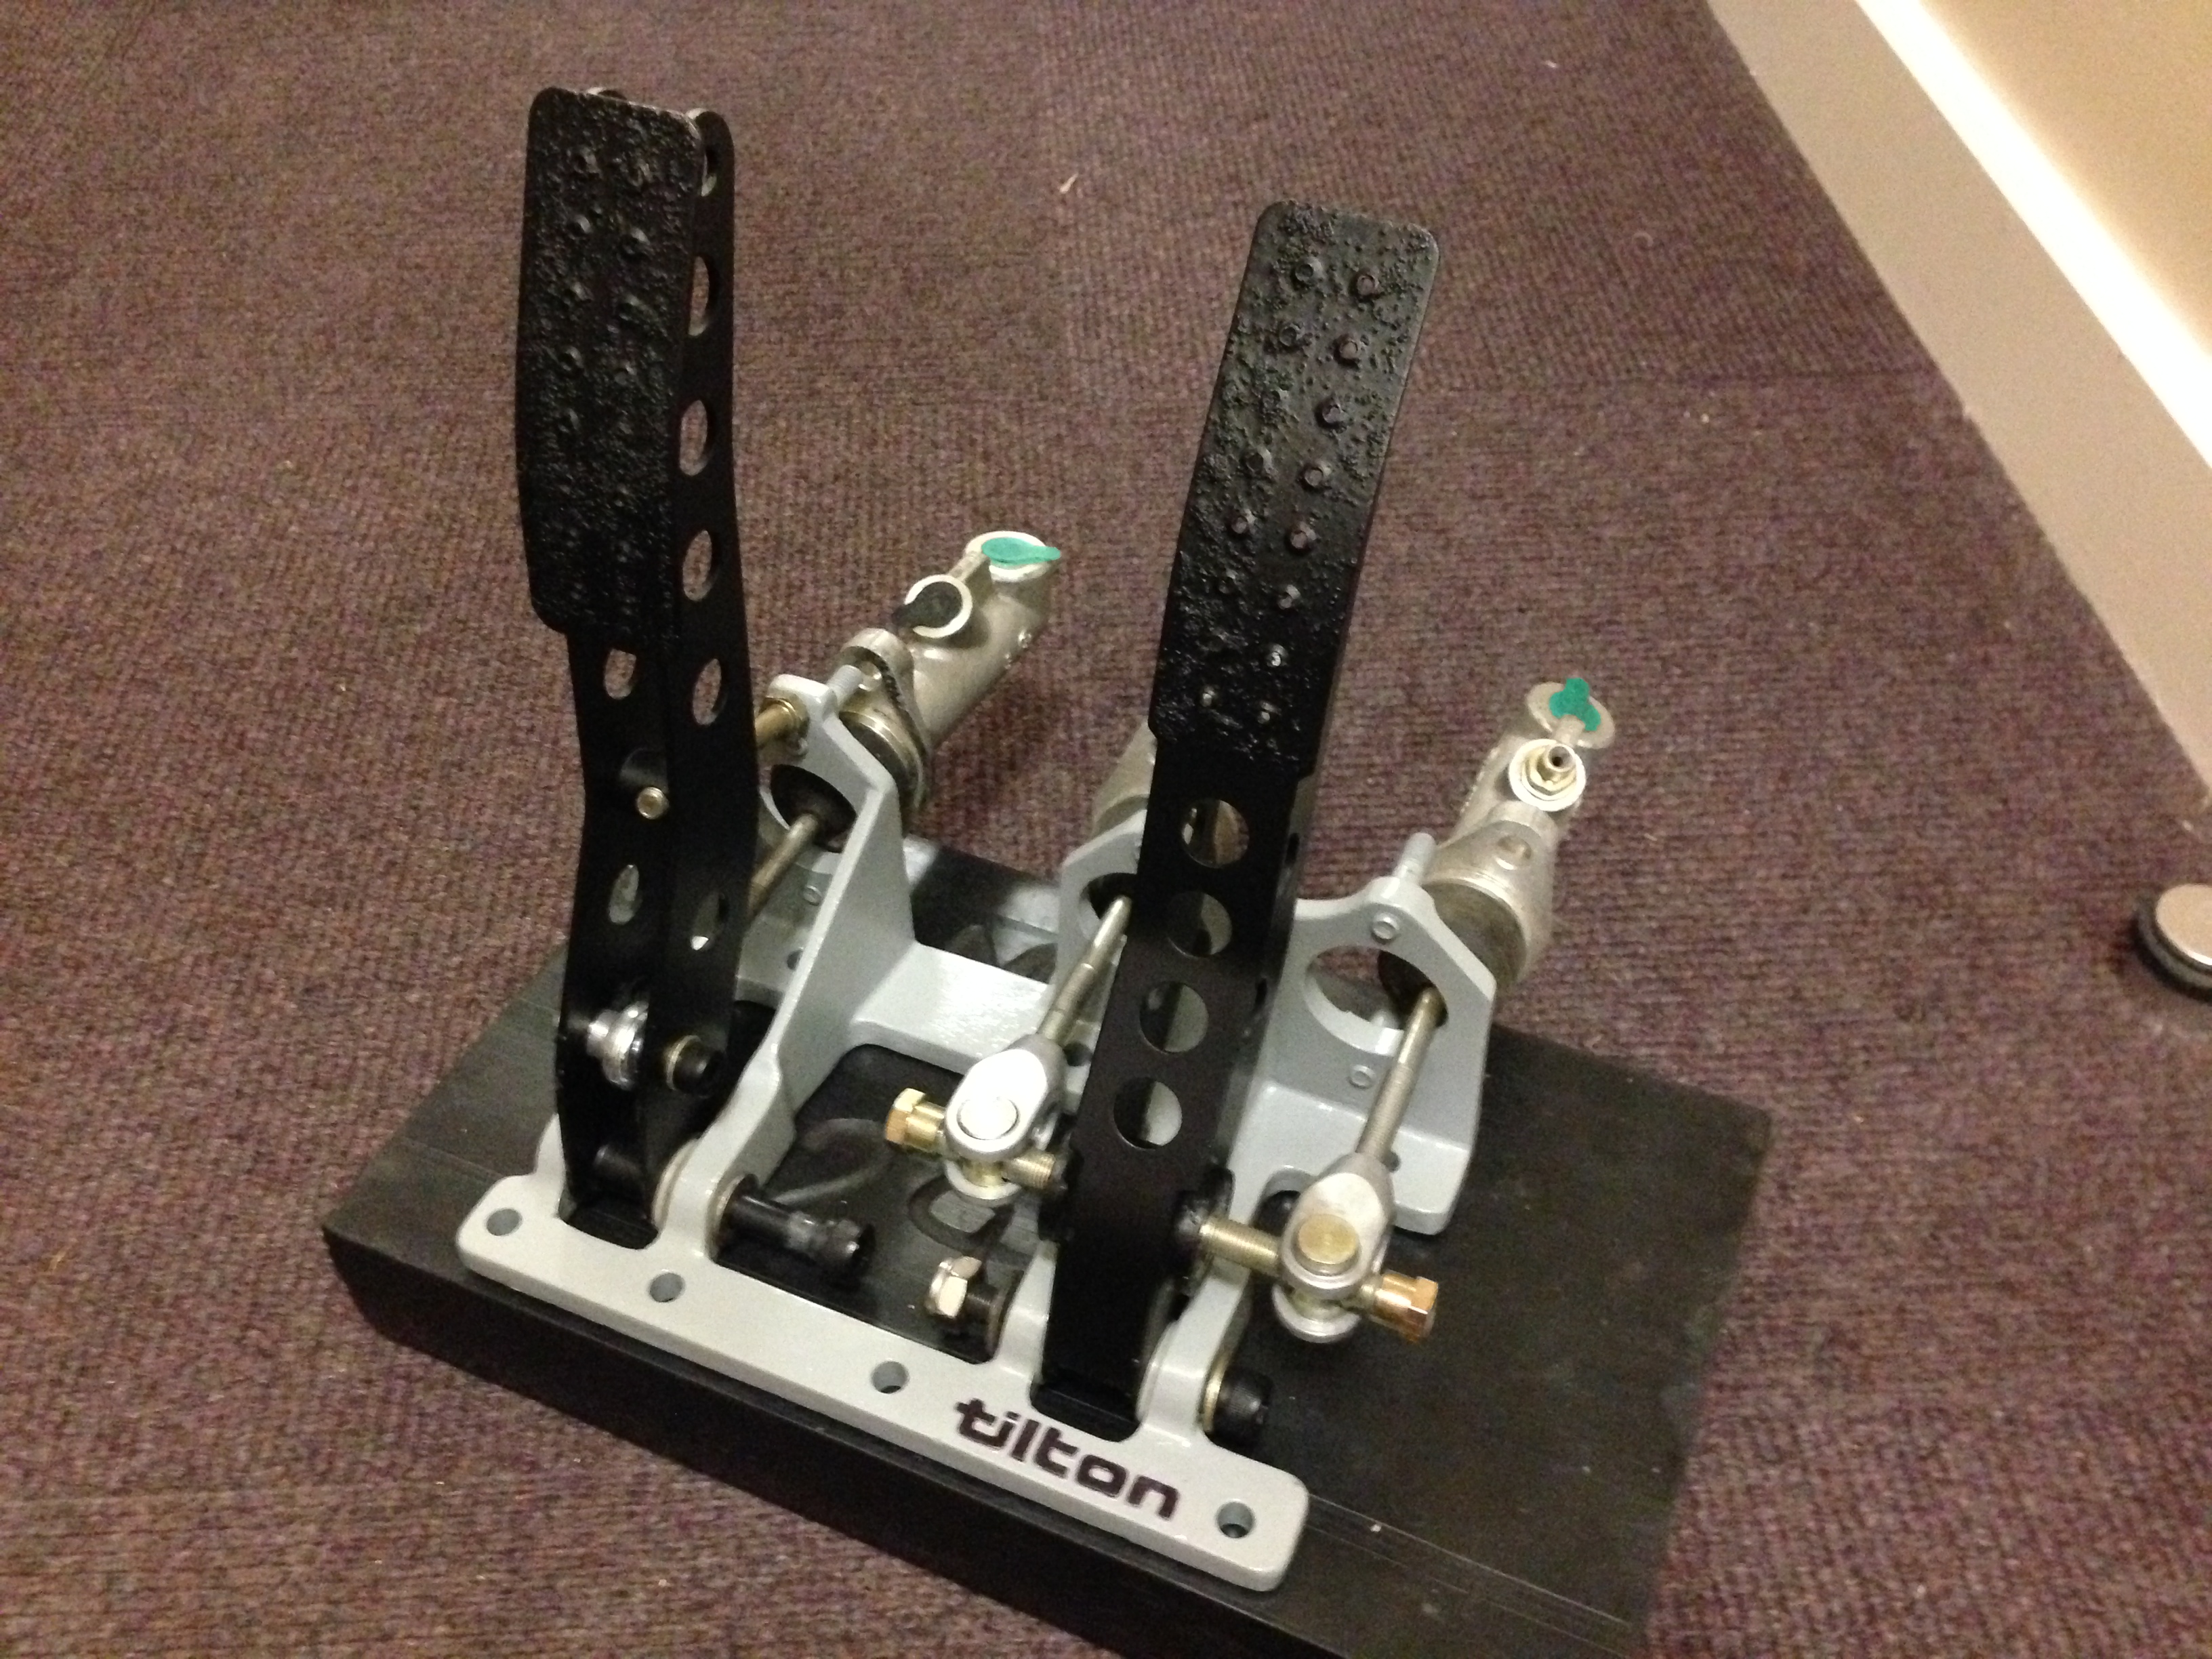
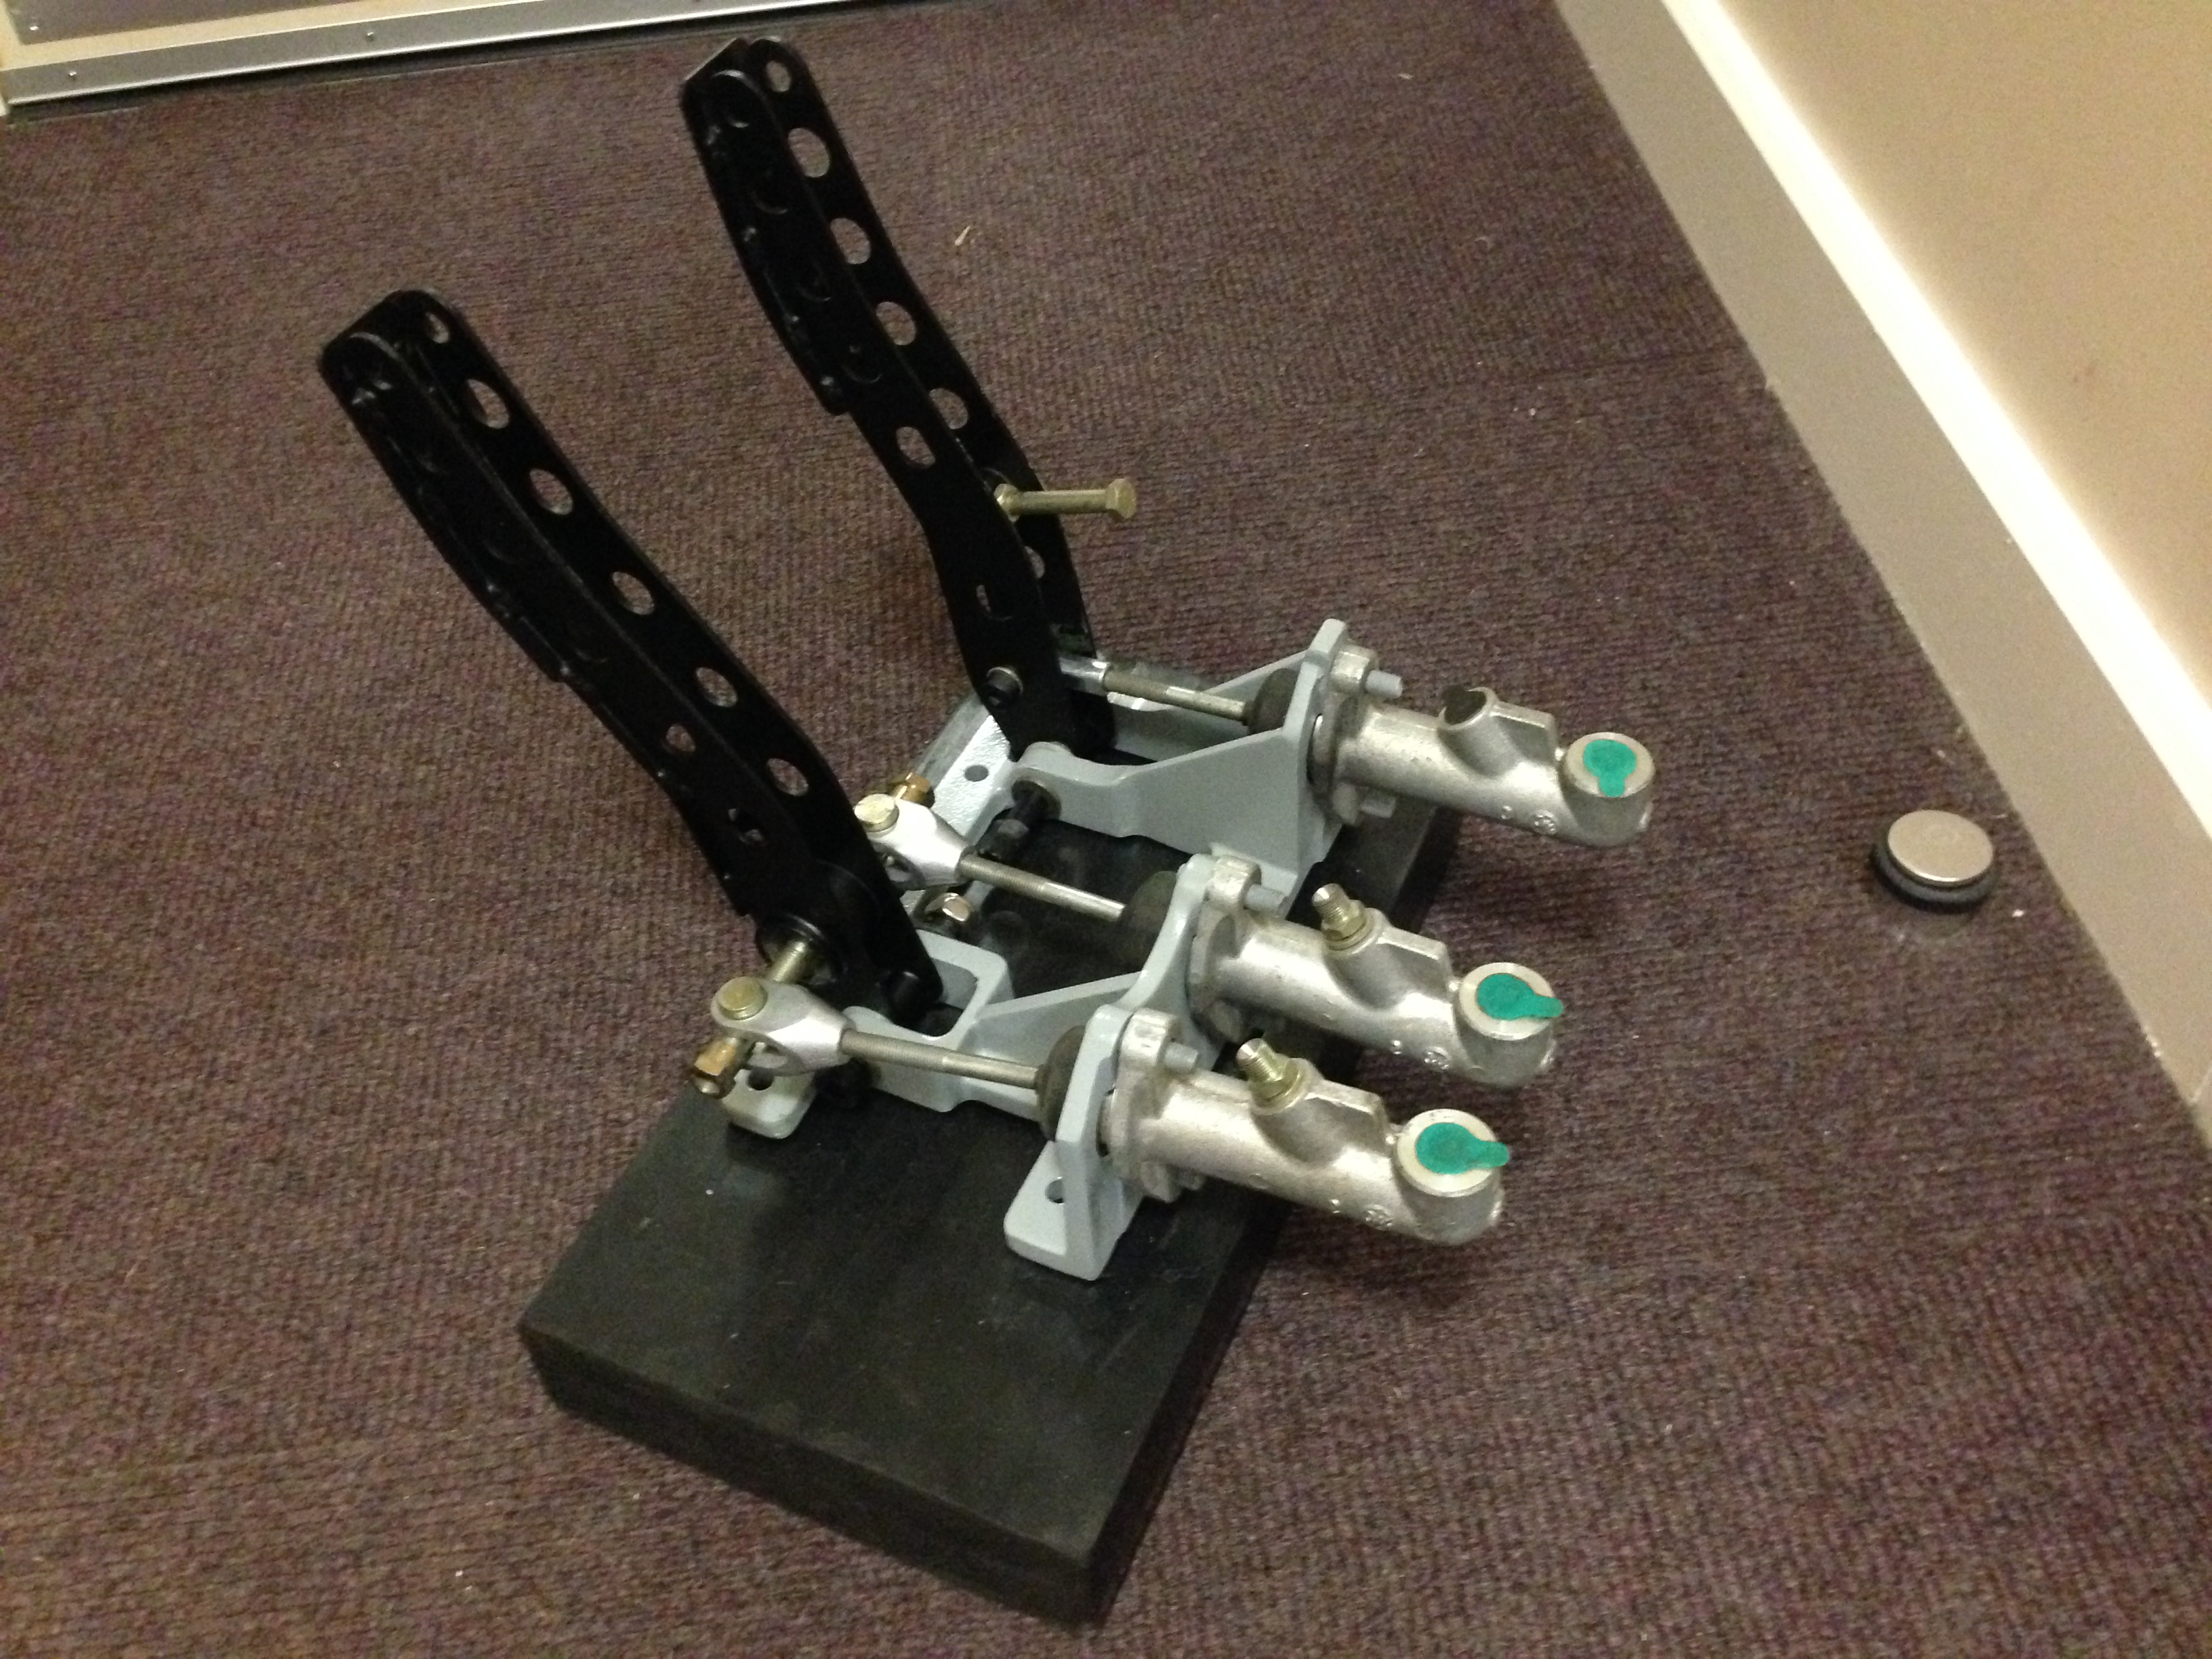

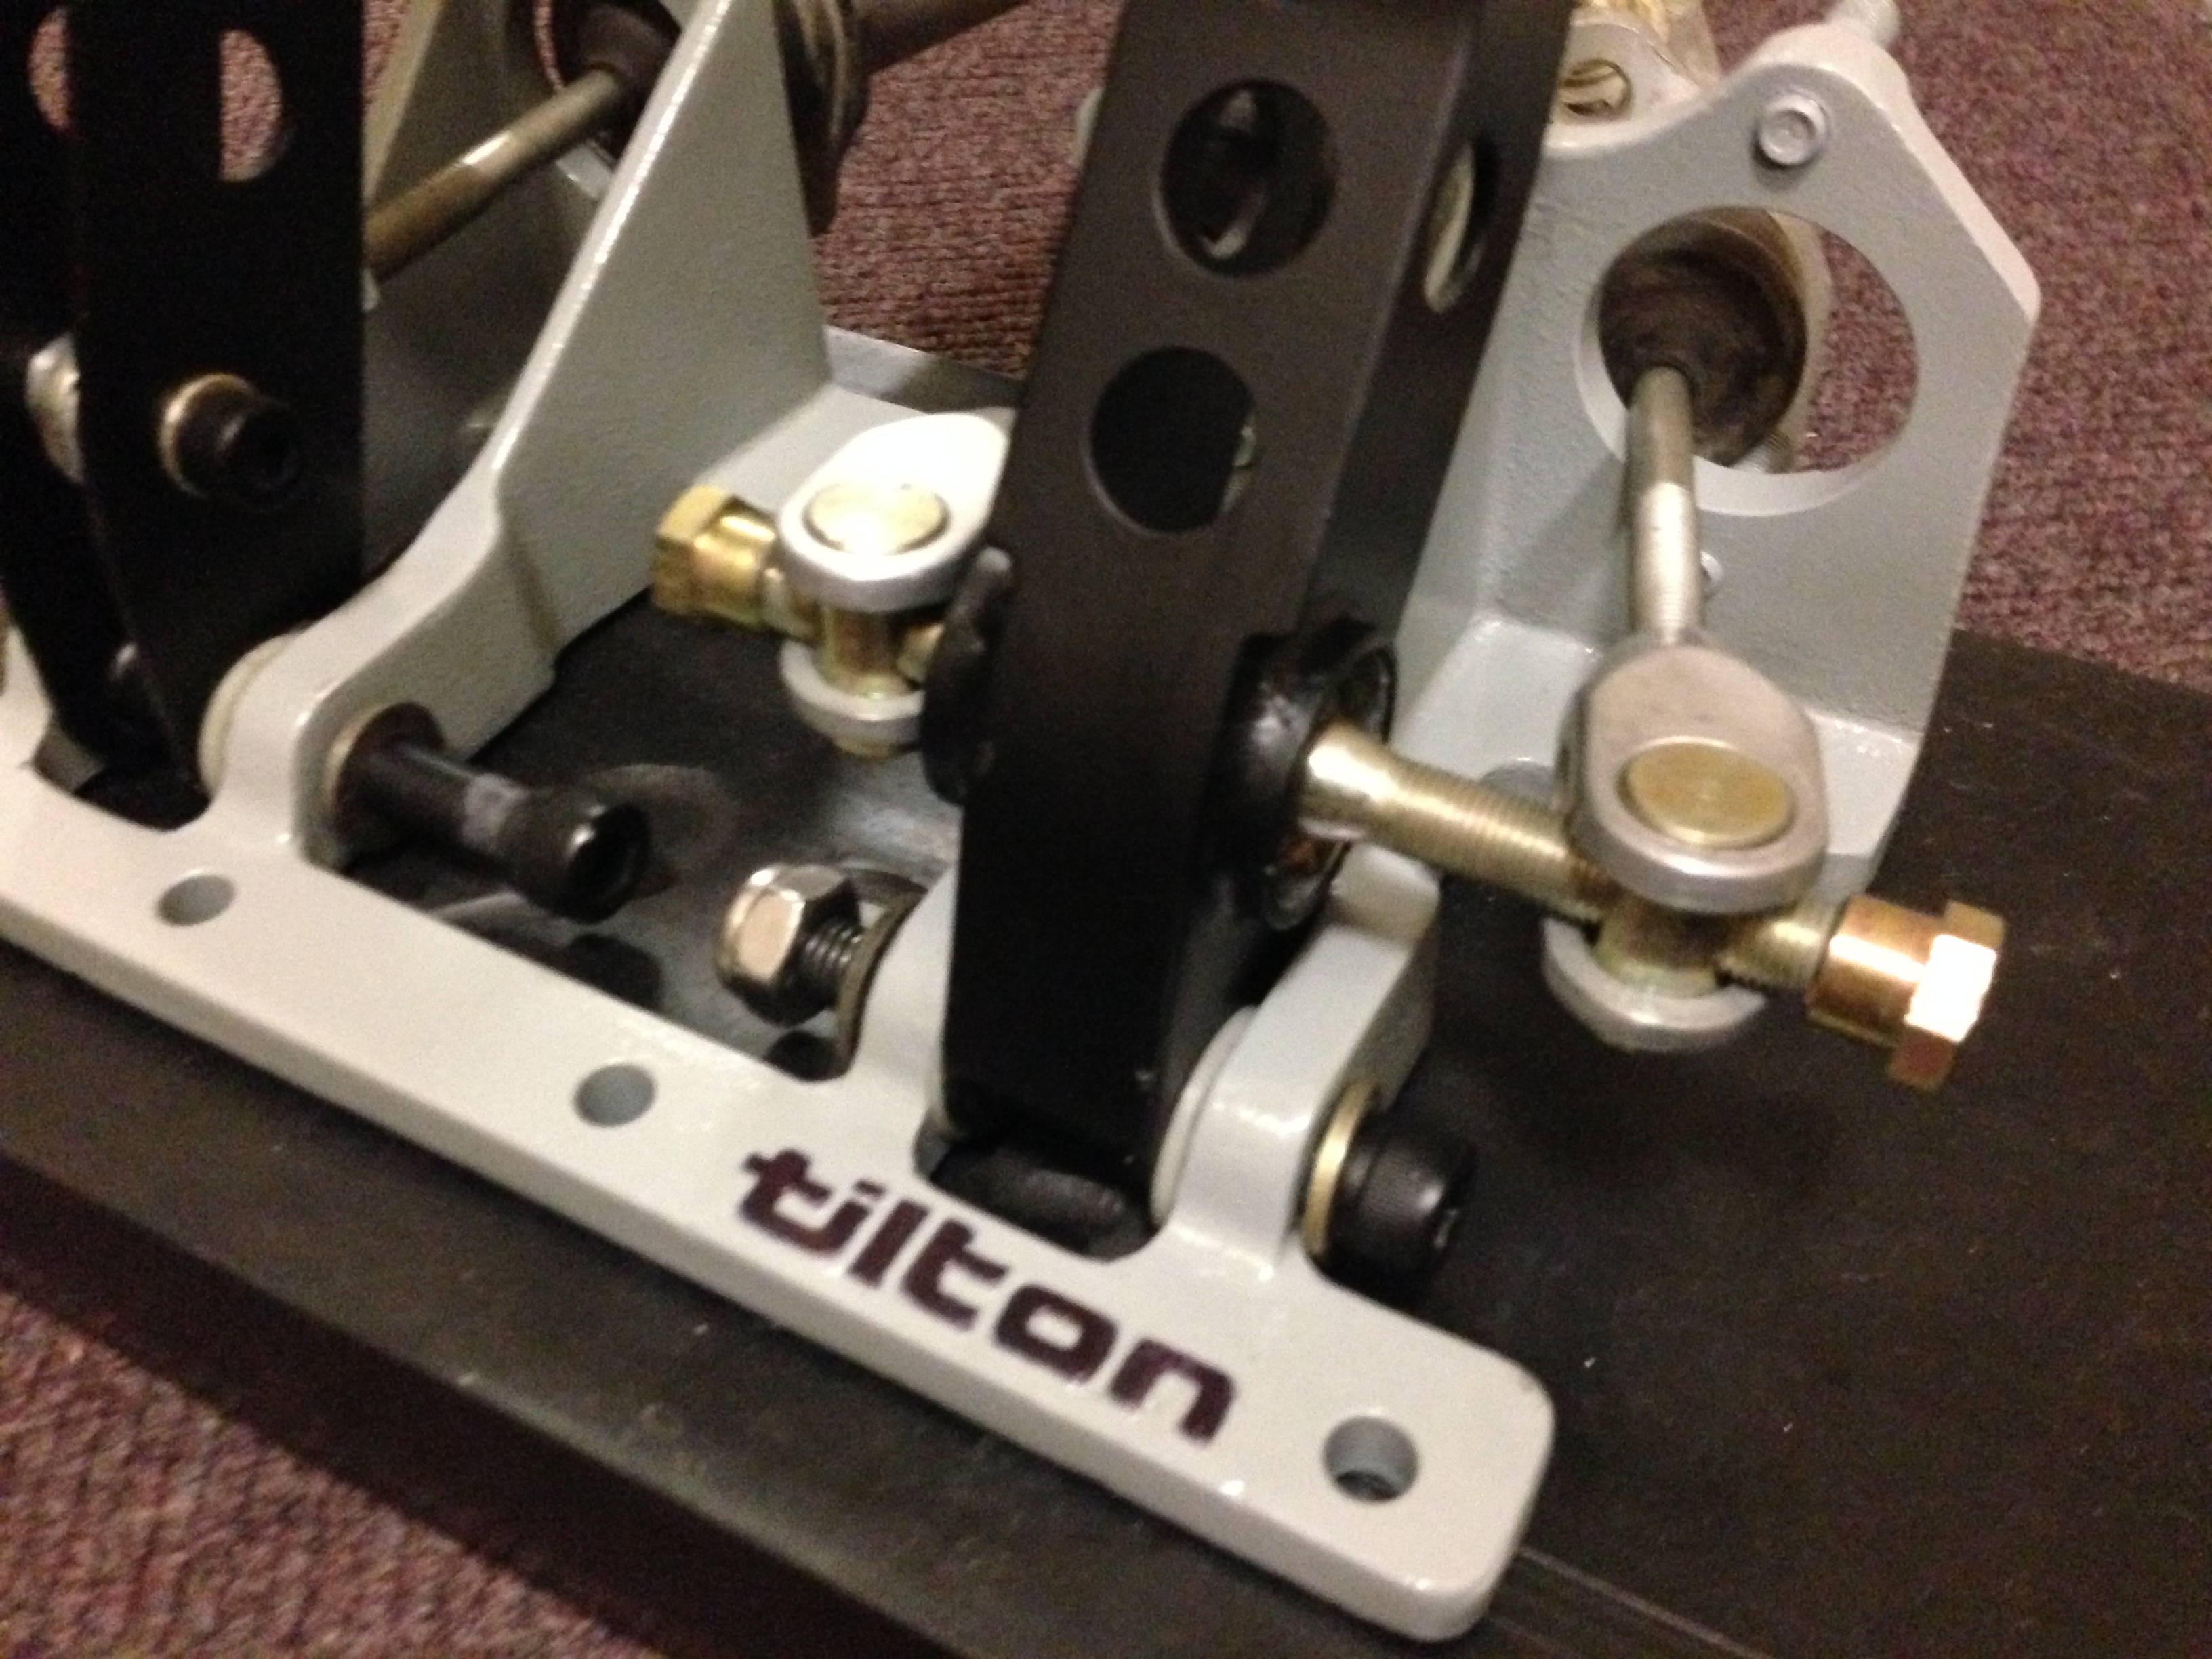
Not sure what to do cylinder wise. It came with 3 Girling's but they are all .75 sized.
Was looking a bit tired.


Have the pedals a coat of Matt black, the frame Matt grey and replace the fastenings with cap heads.


Not sure what to do cylinder wise. It came with 3 Girling's but they are all .75 sized.
21-09-2014, 10:25 PM
#985
Lucifer II - 666
I've gone
front .700
rear .625
clutch .750
clutch may change to .700 when I try it out.
front .700
rear .625
clutch .750
clutch may change to .700 when I try it out.
22-09-2014, 12:24 PM
#986
Wye Valley Hardcore
Thread Starter
22-09-2014, 12:28 PM
#987
Wye Valley Hardcore
Thread Starter
I was going to go .625 and .70 on the front and rears respectively, it was the clutch I was wondering about, more.
17-12-2014, 08:05 PM
#988
Wye Valley Hardcore
Thread Starter
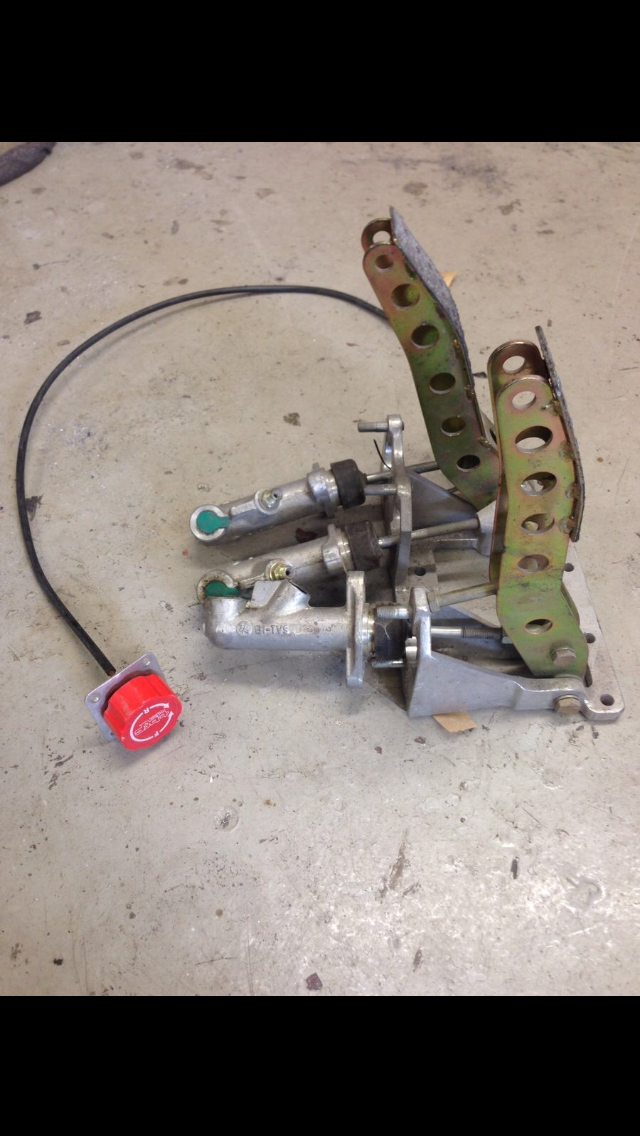
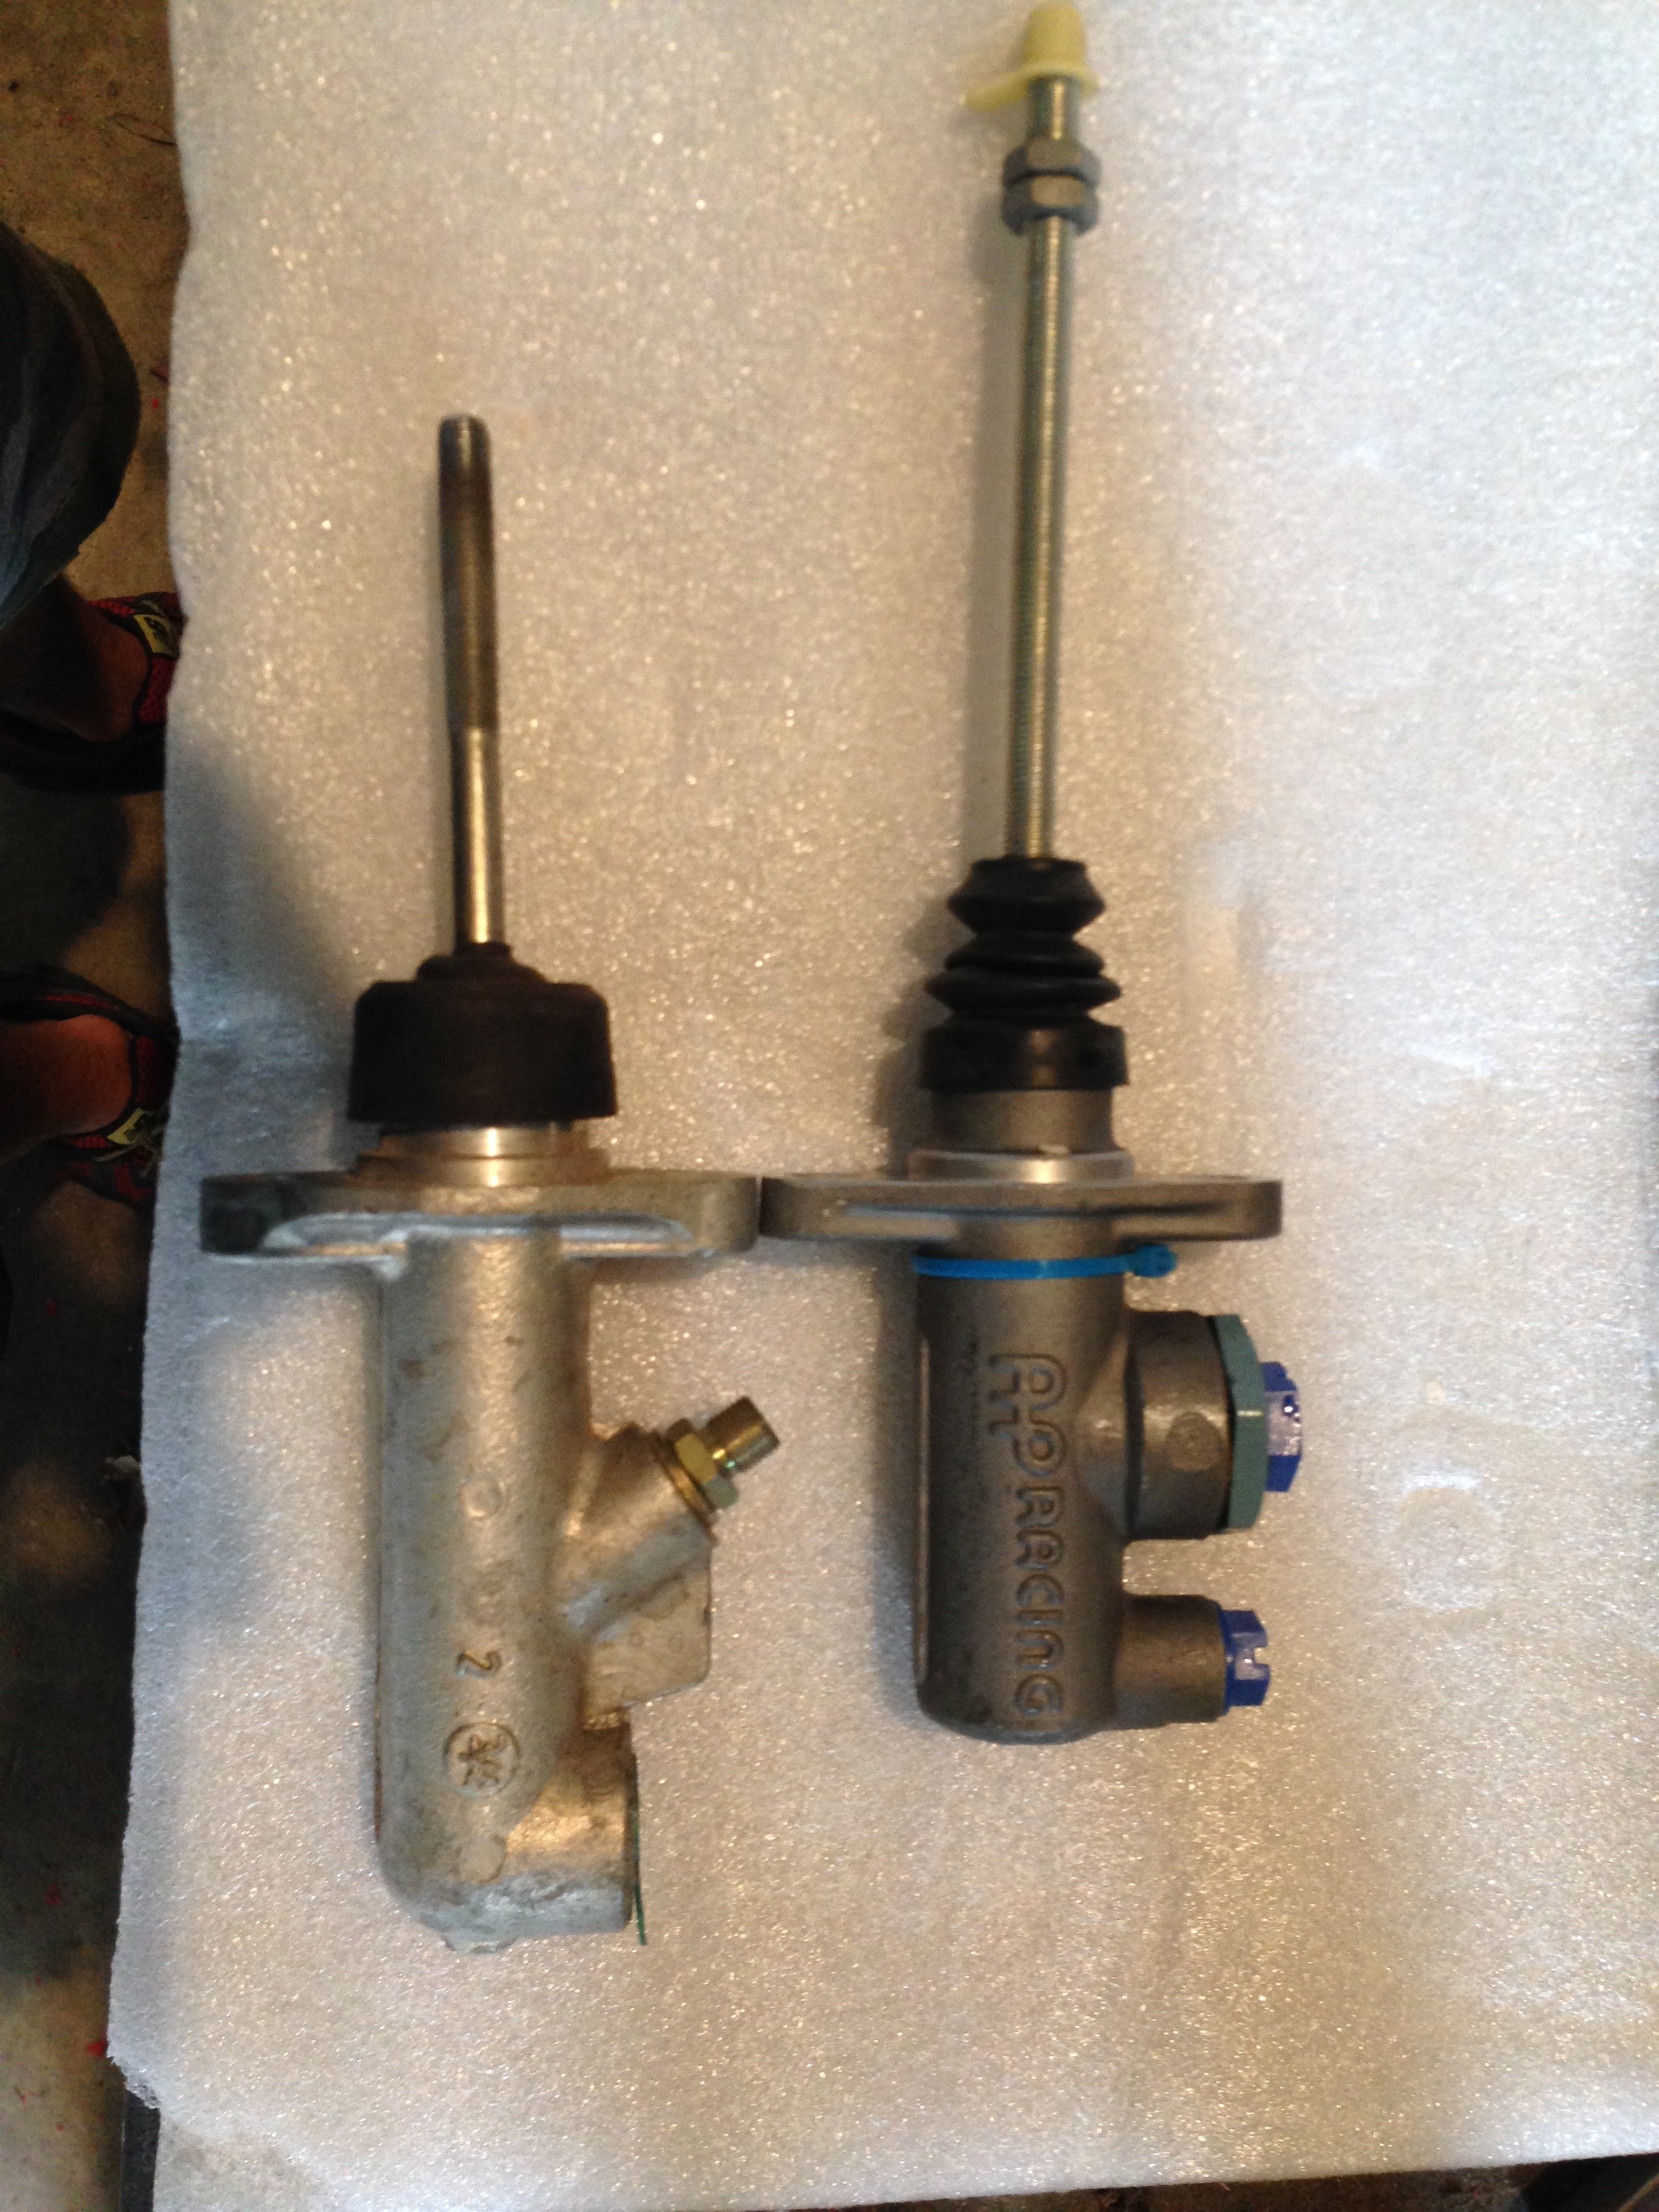
Few bits done the last two days. Got hold of some brand new AP short cylinders for a steal. They only had .75, .70 and .625 which I'm using for rear, front and clutch, respectively.
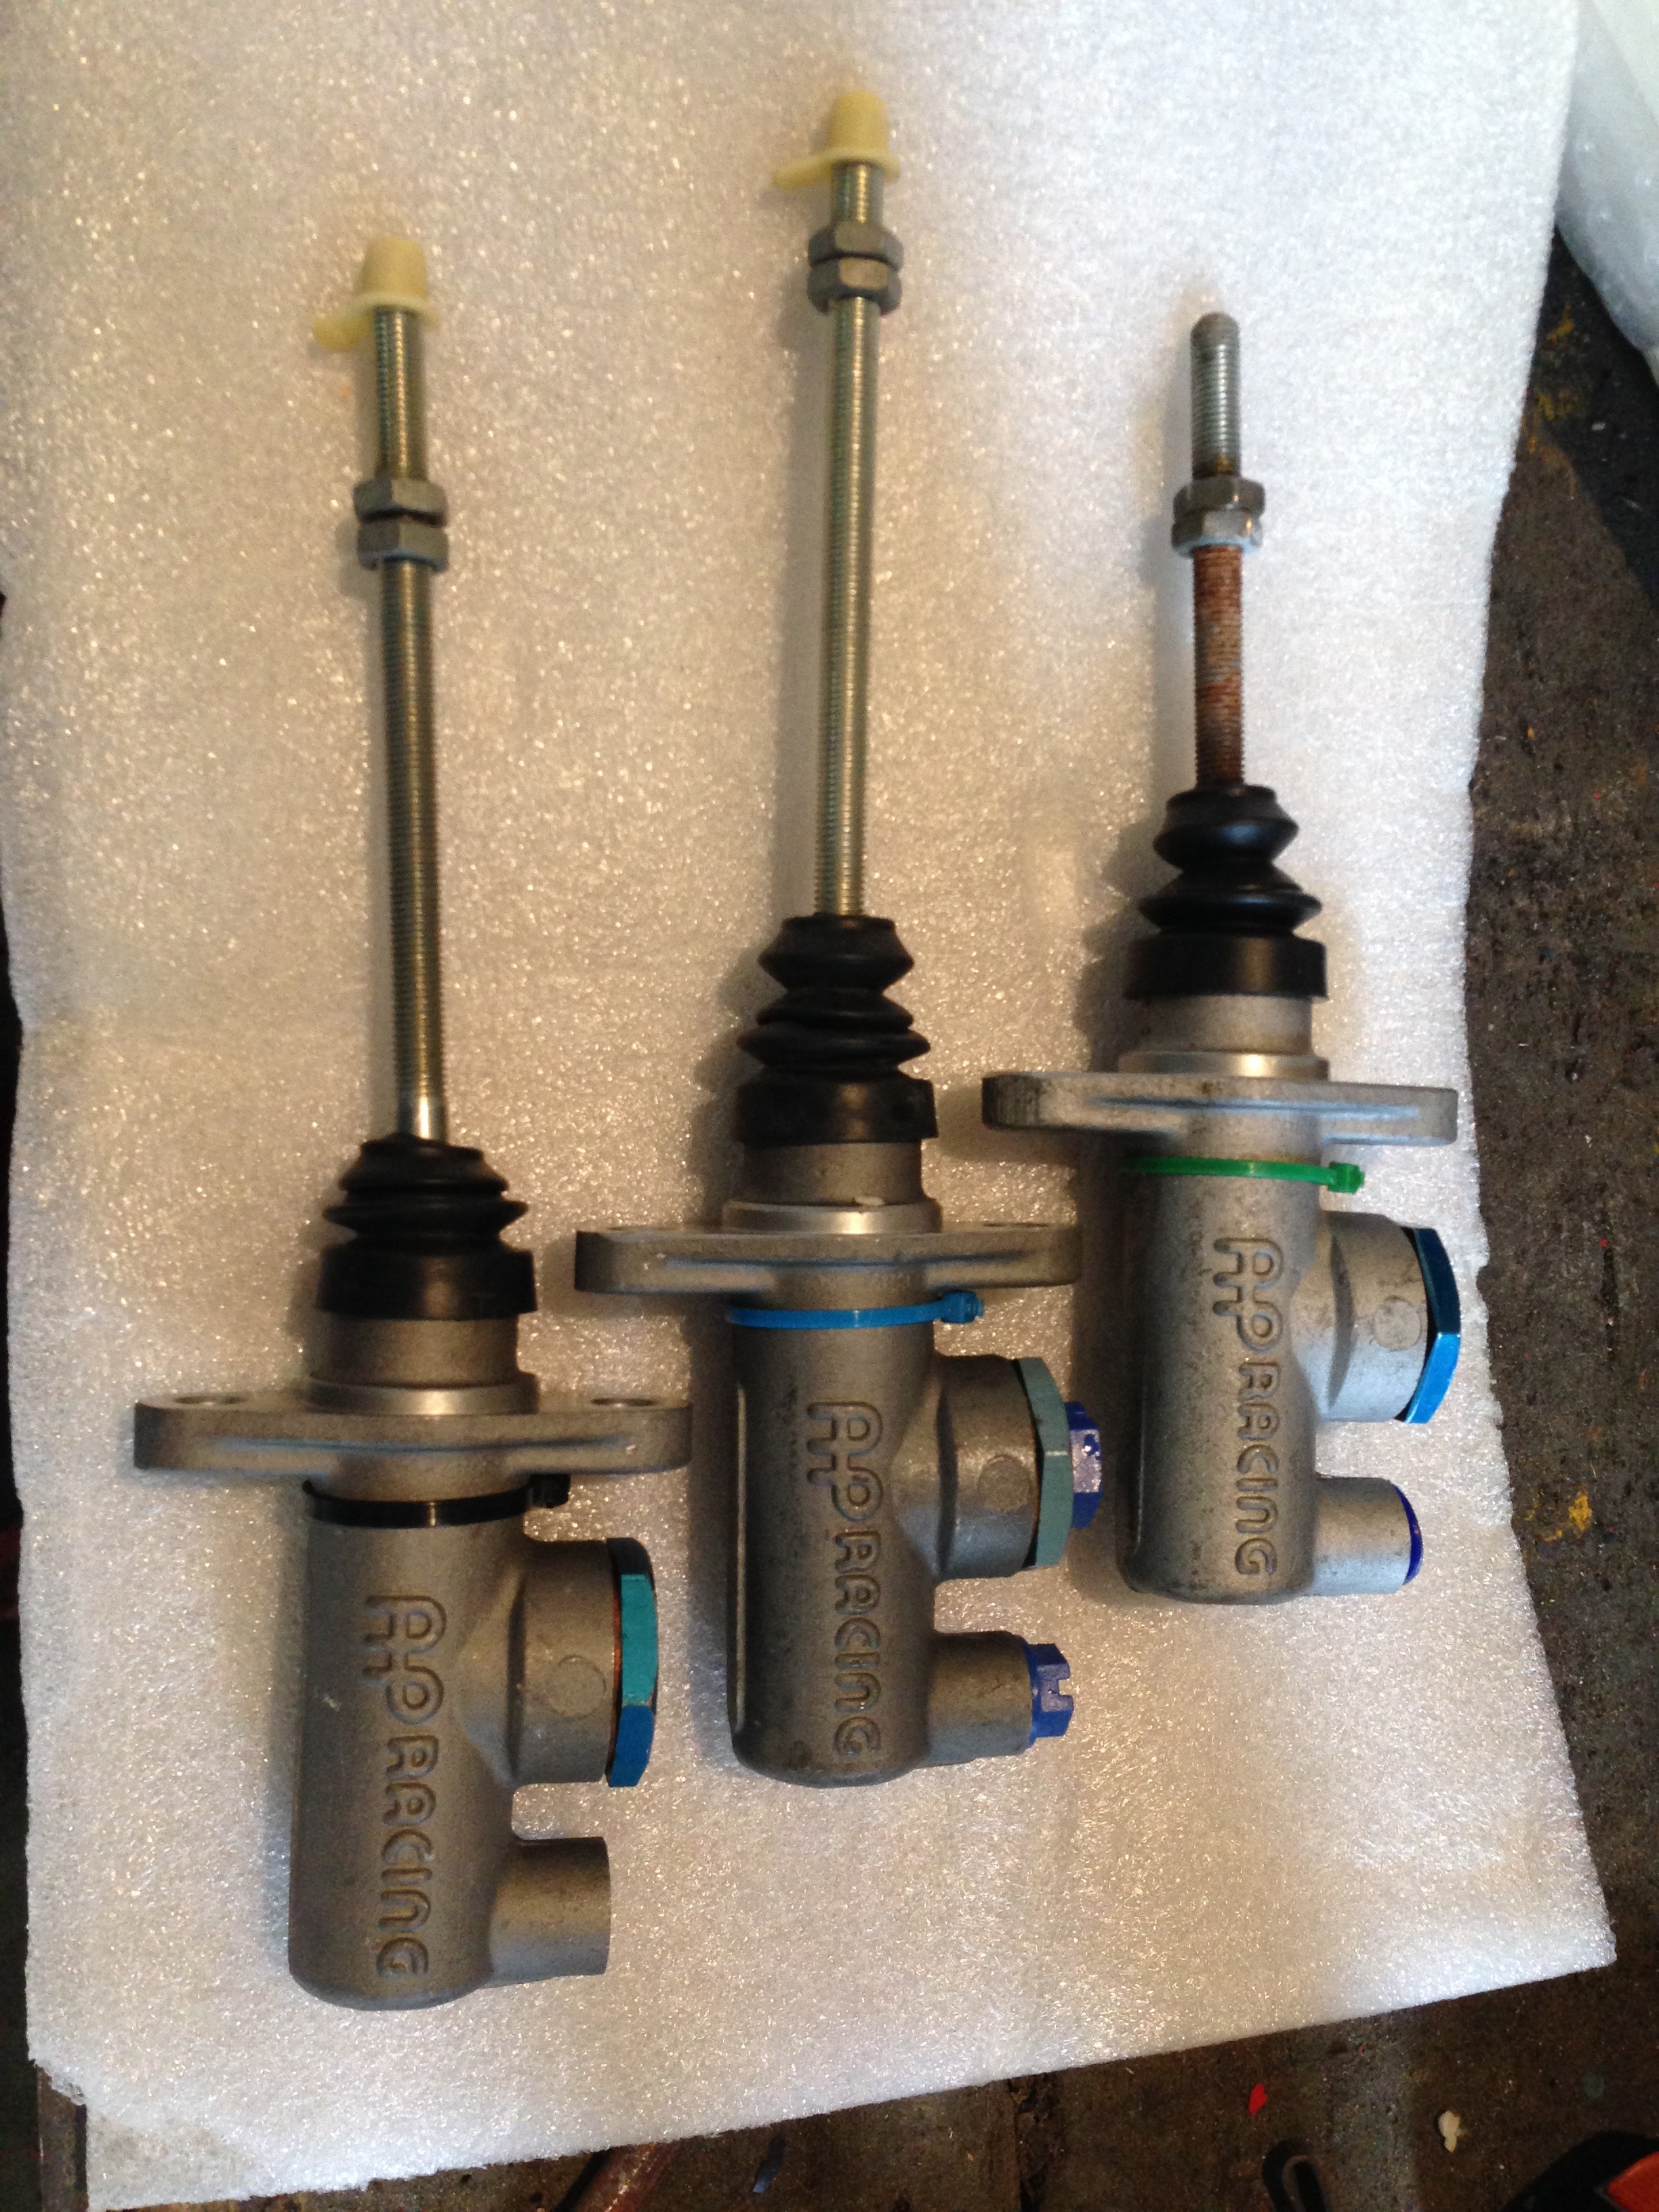
They are quite a bit shorter than standard!
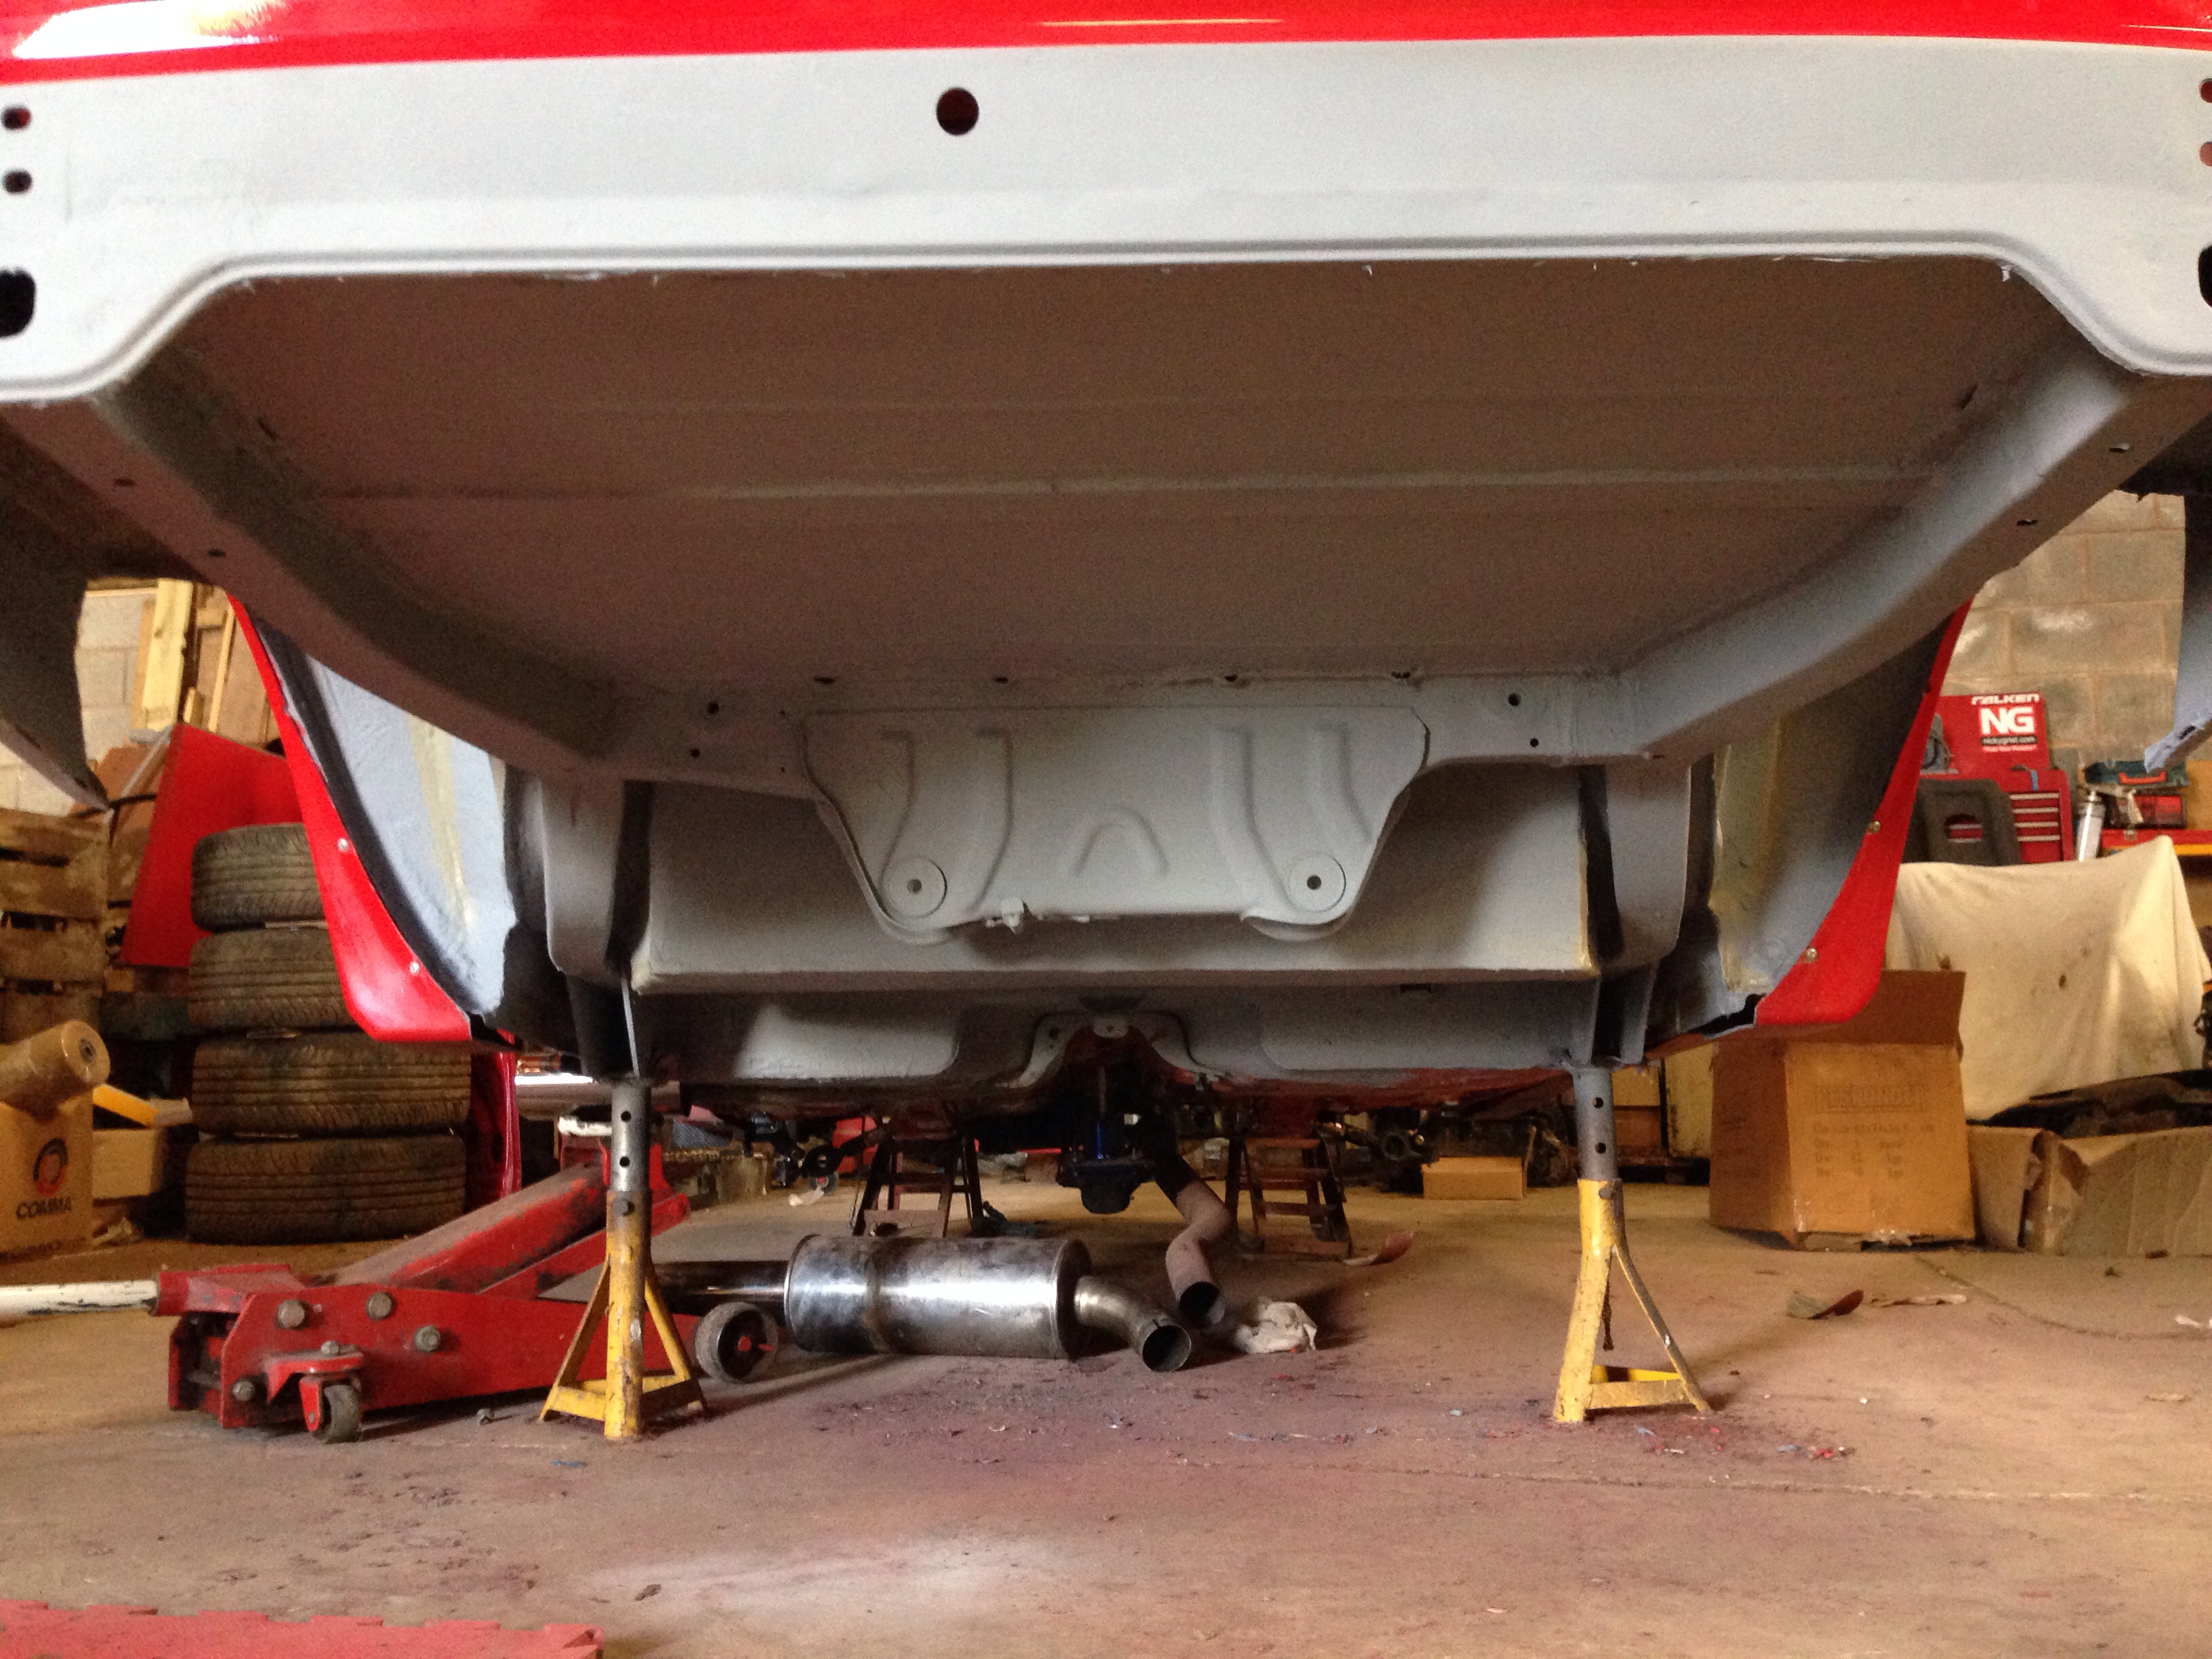
Time to start the mock up for the seat rails and pedal box mount.
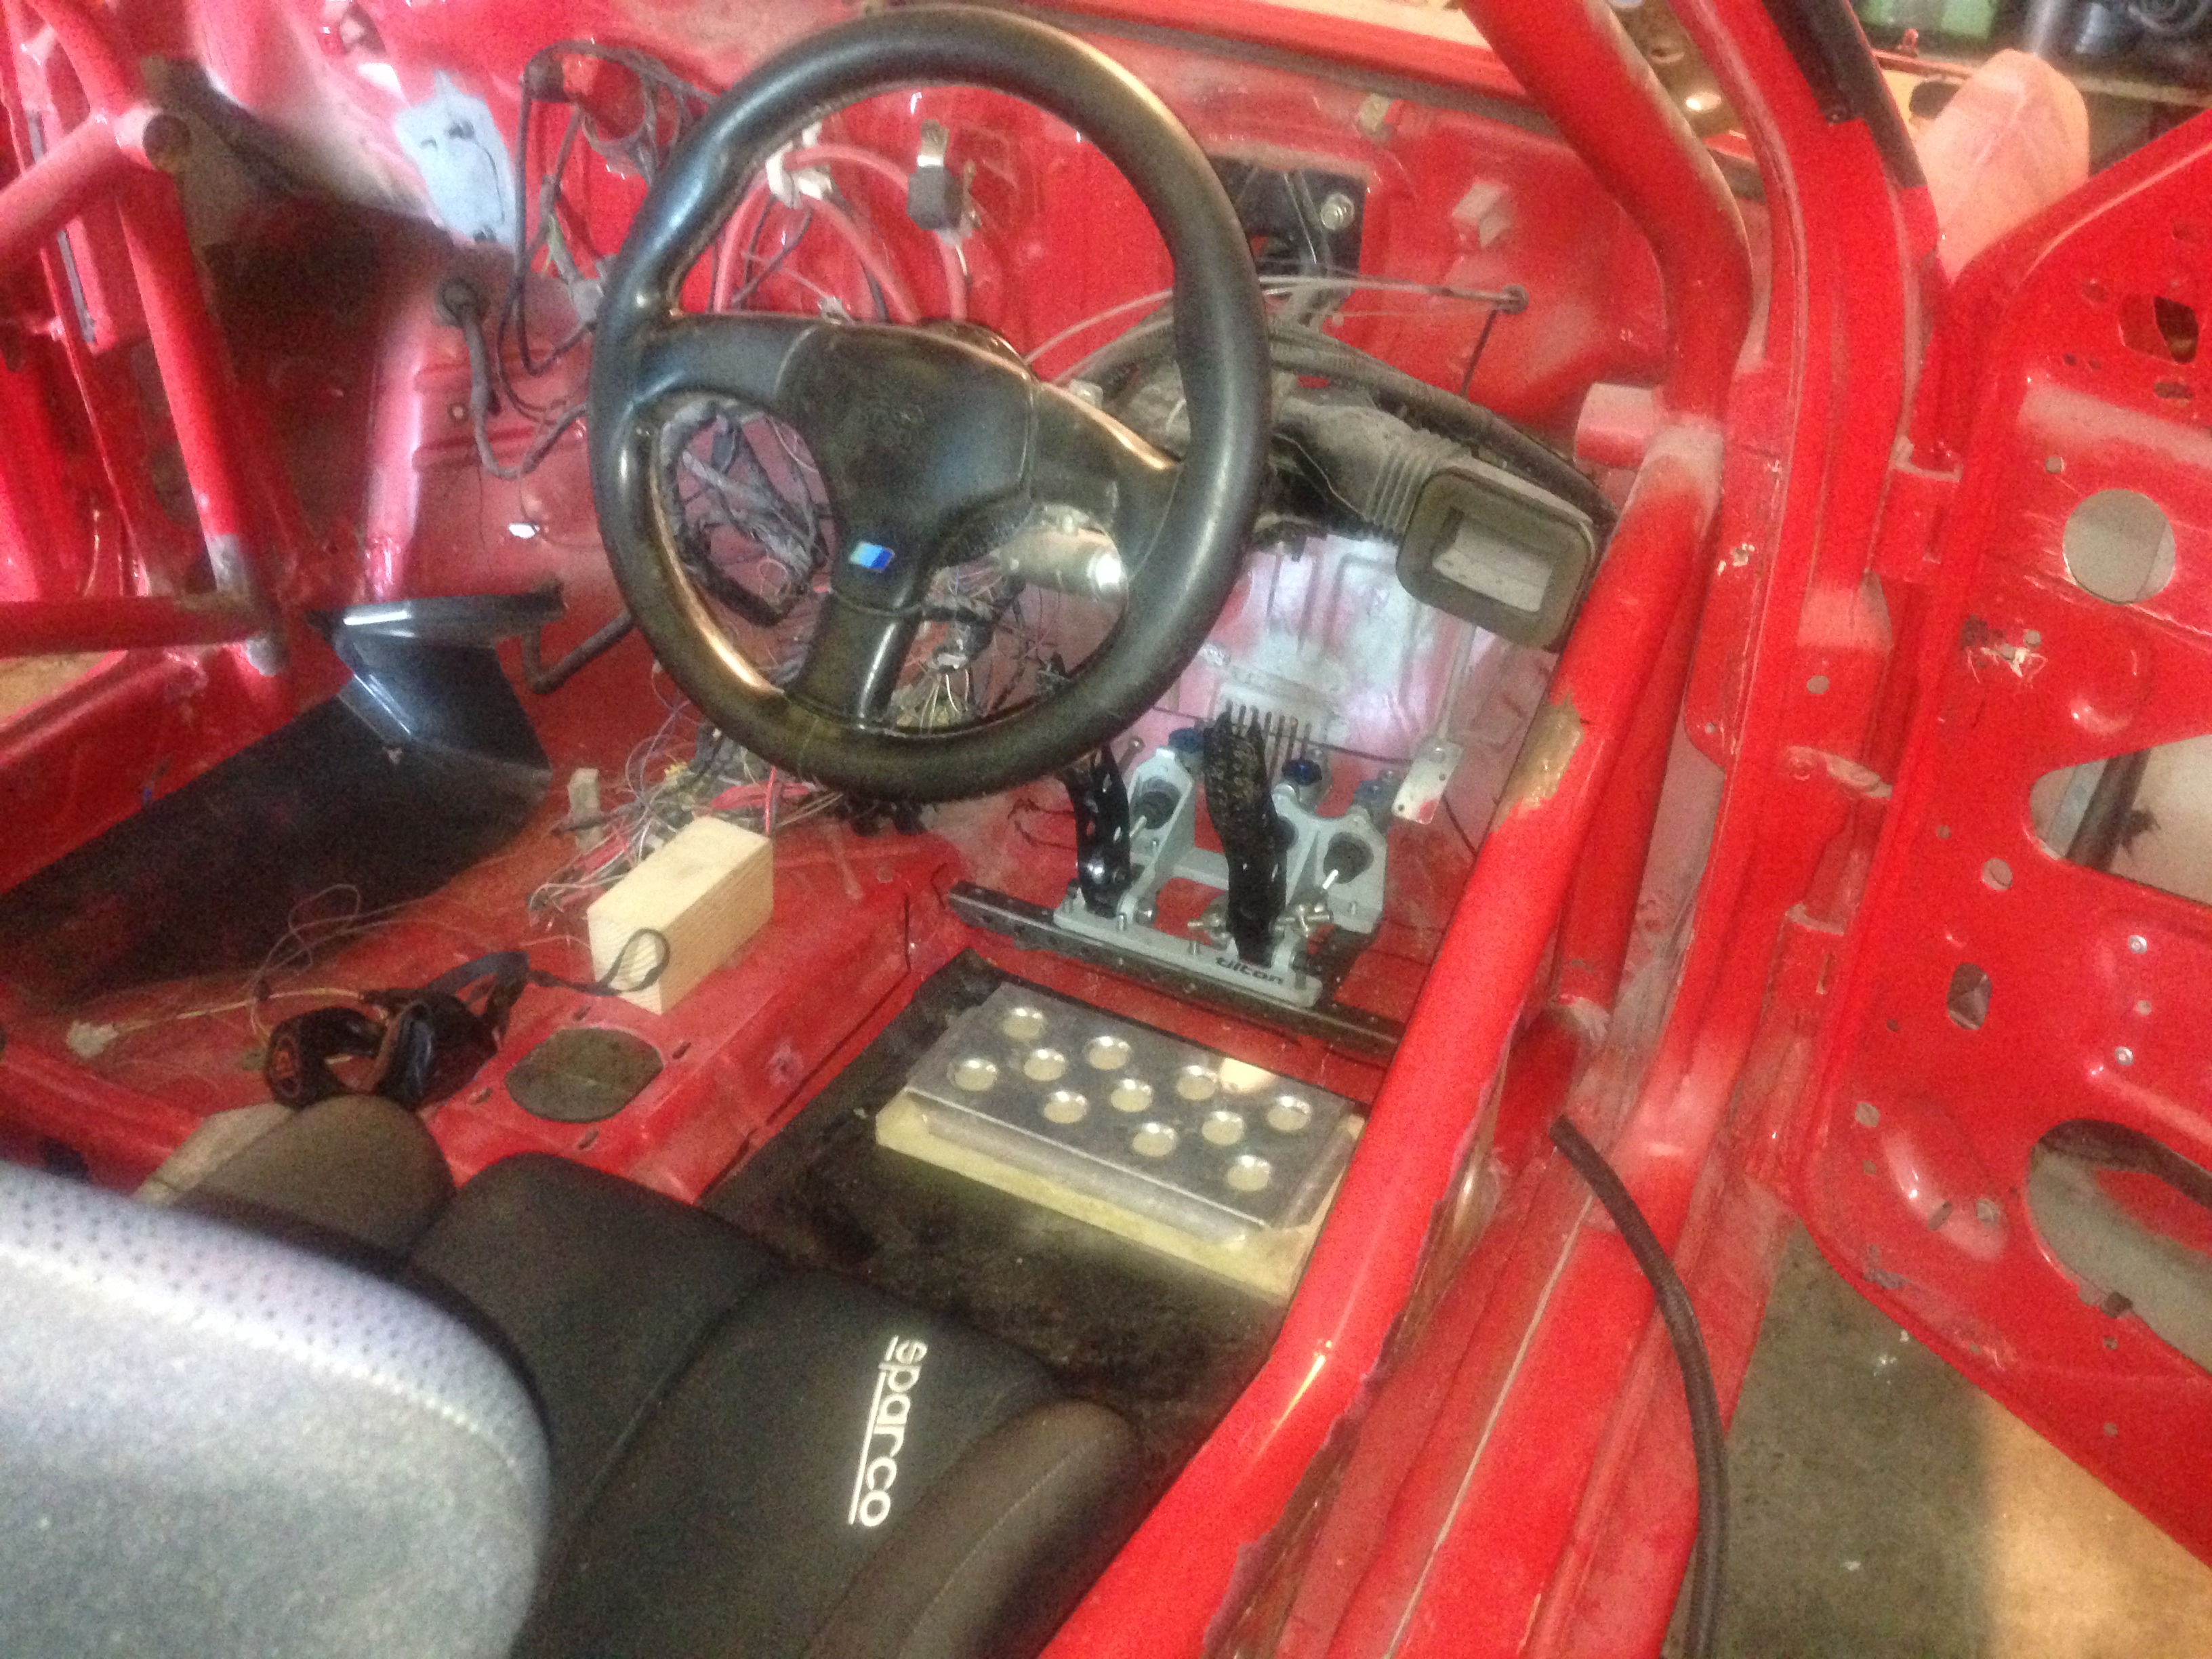
Happy with the seating position etc it was time to weld it all in.
Seat rails and harness anchors in.
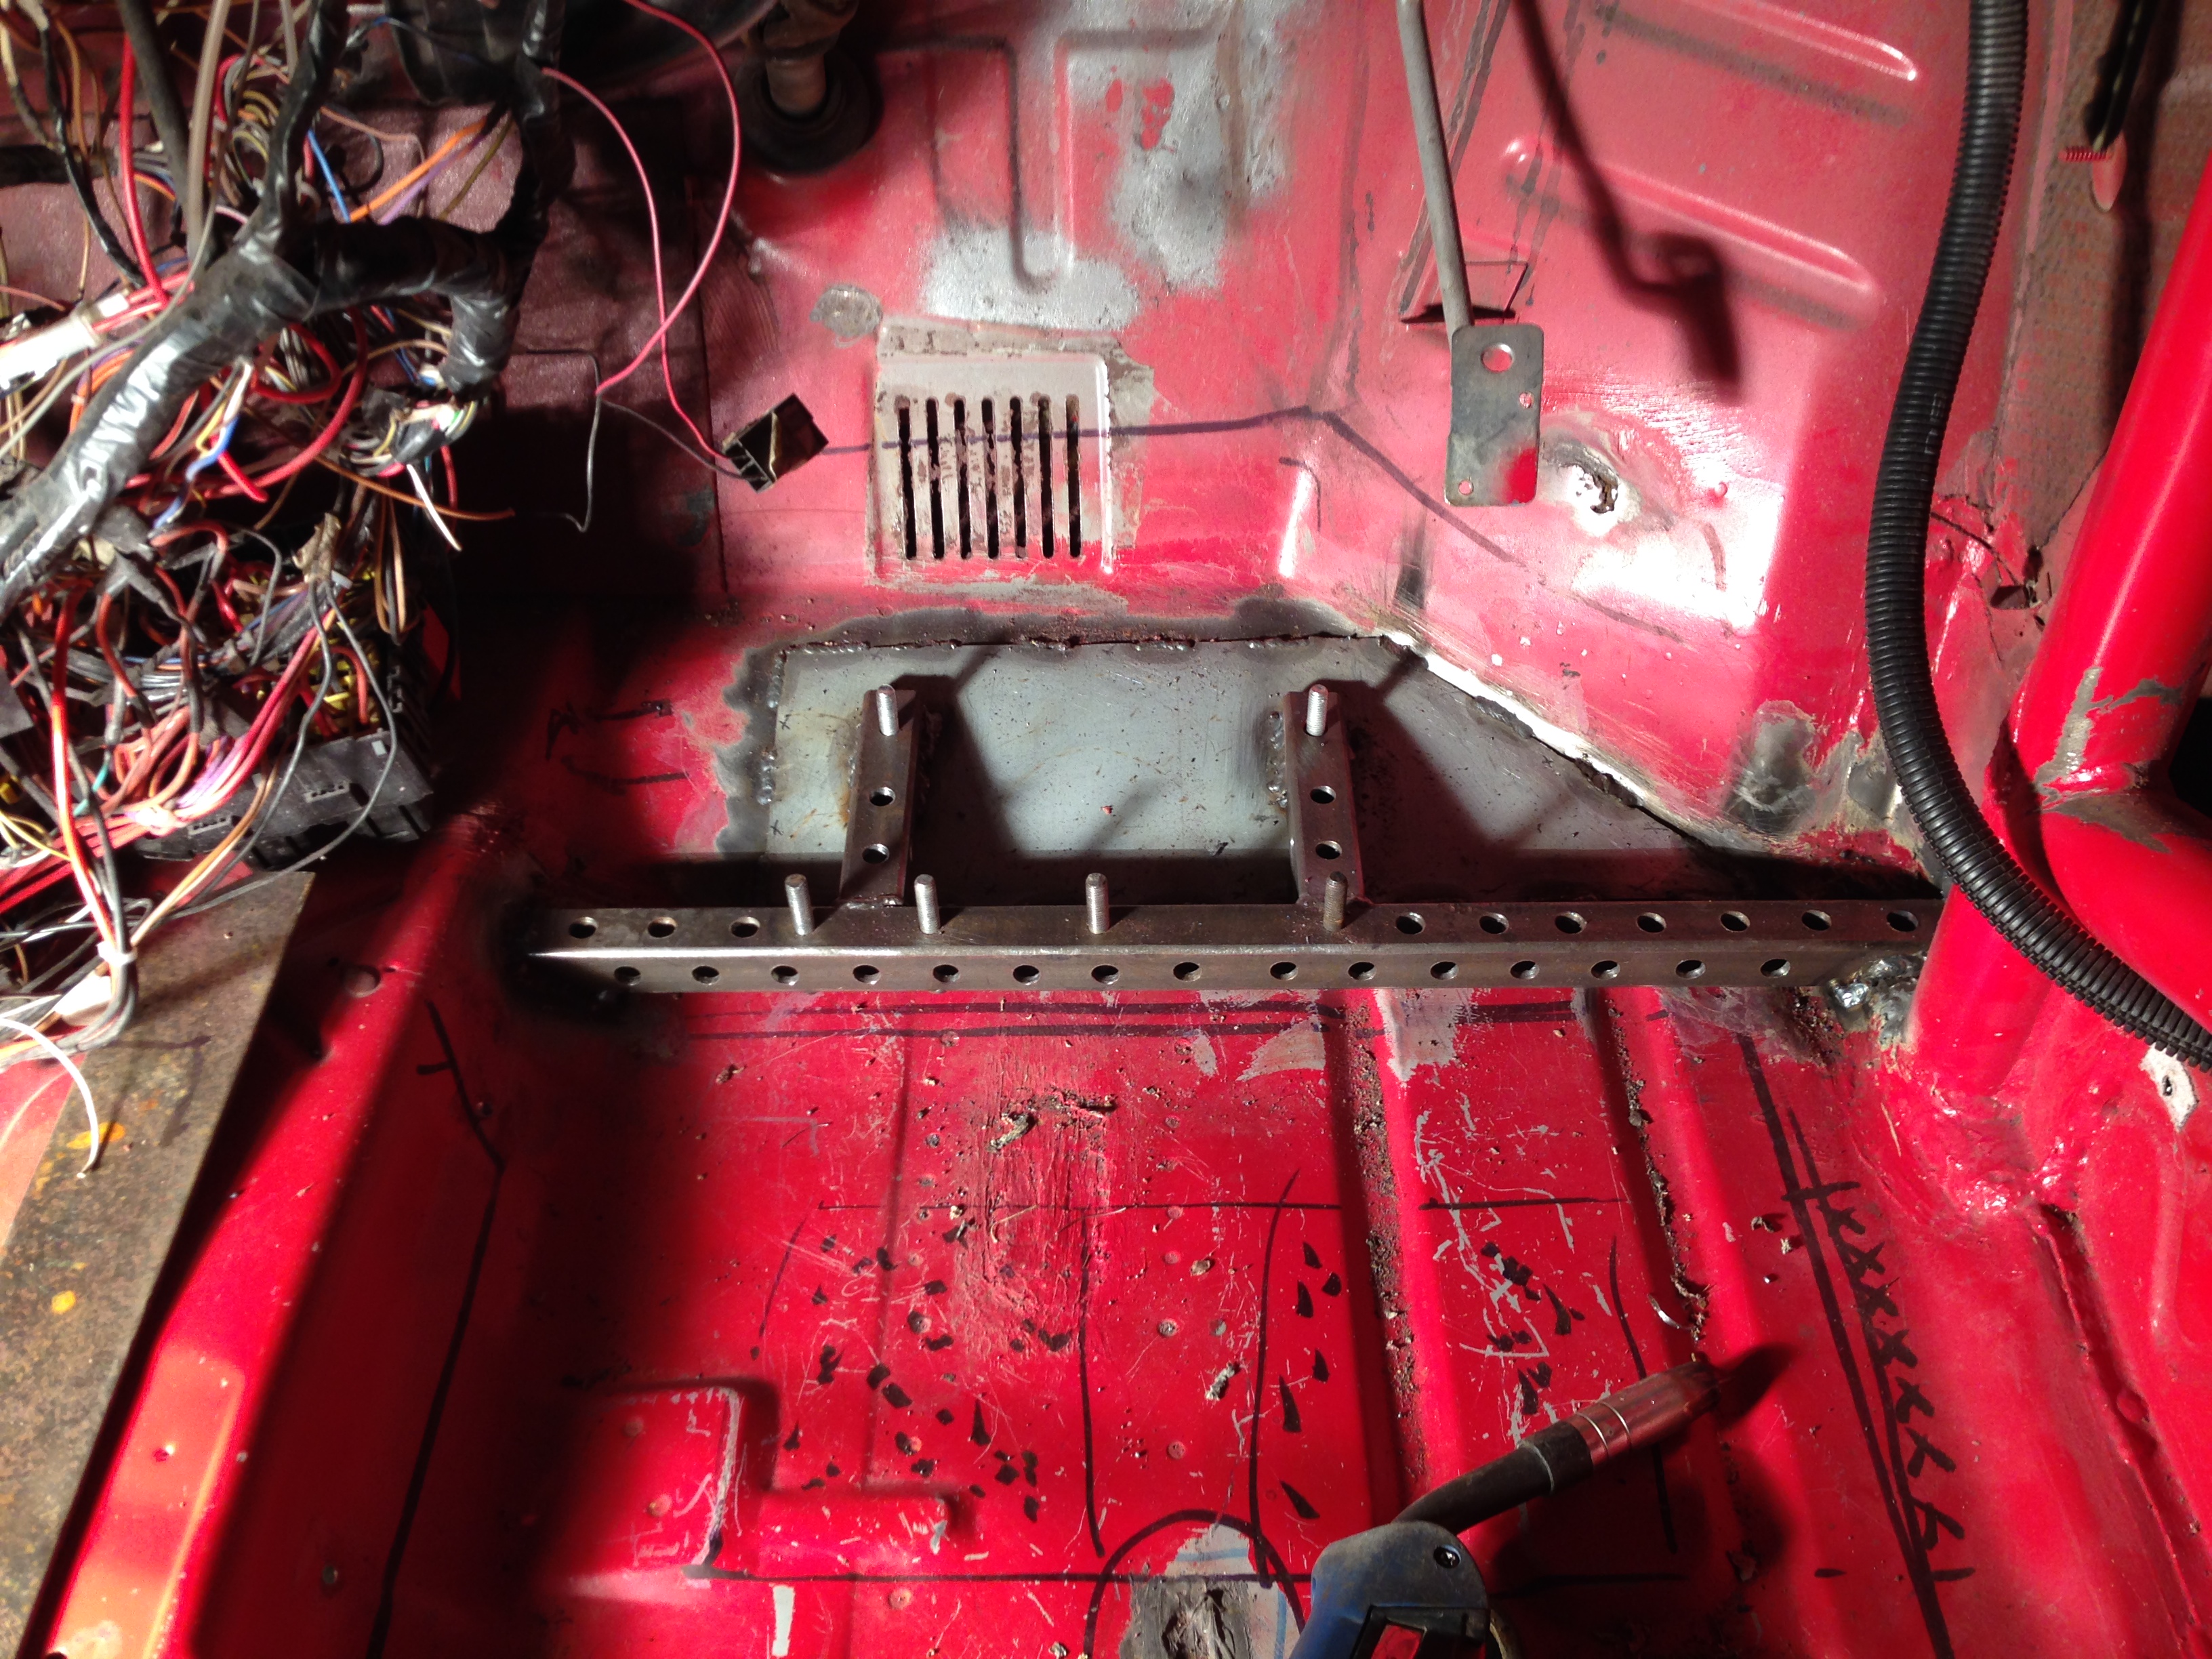
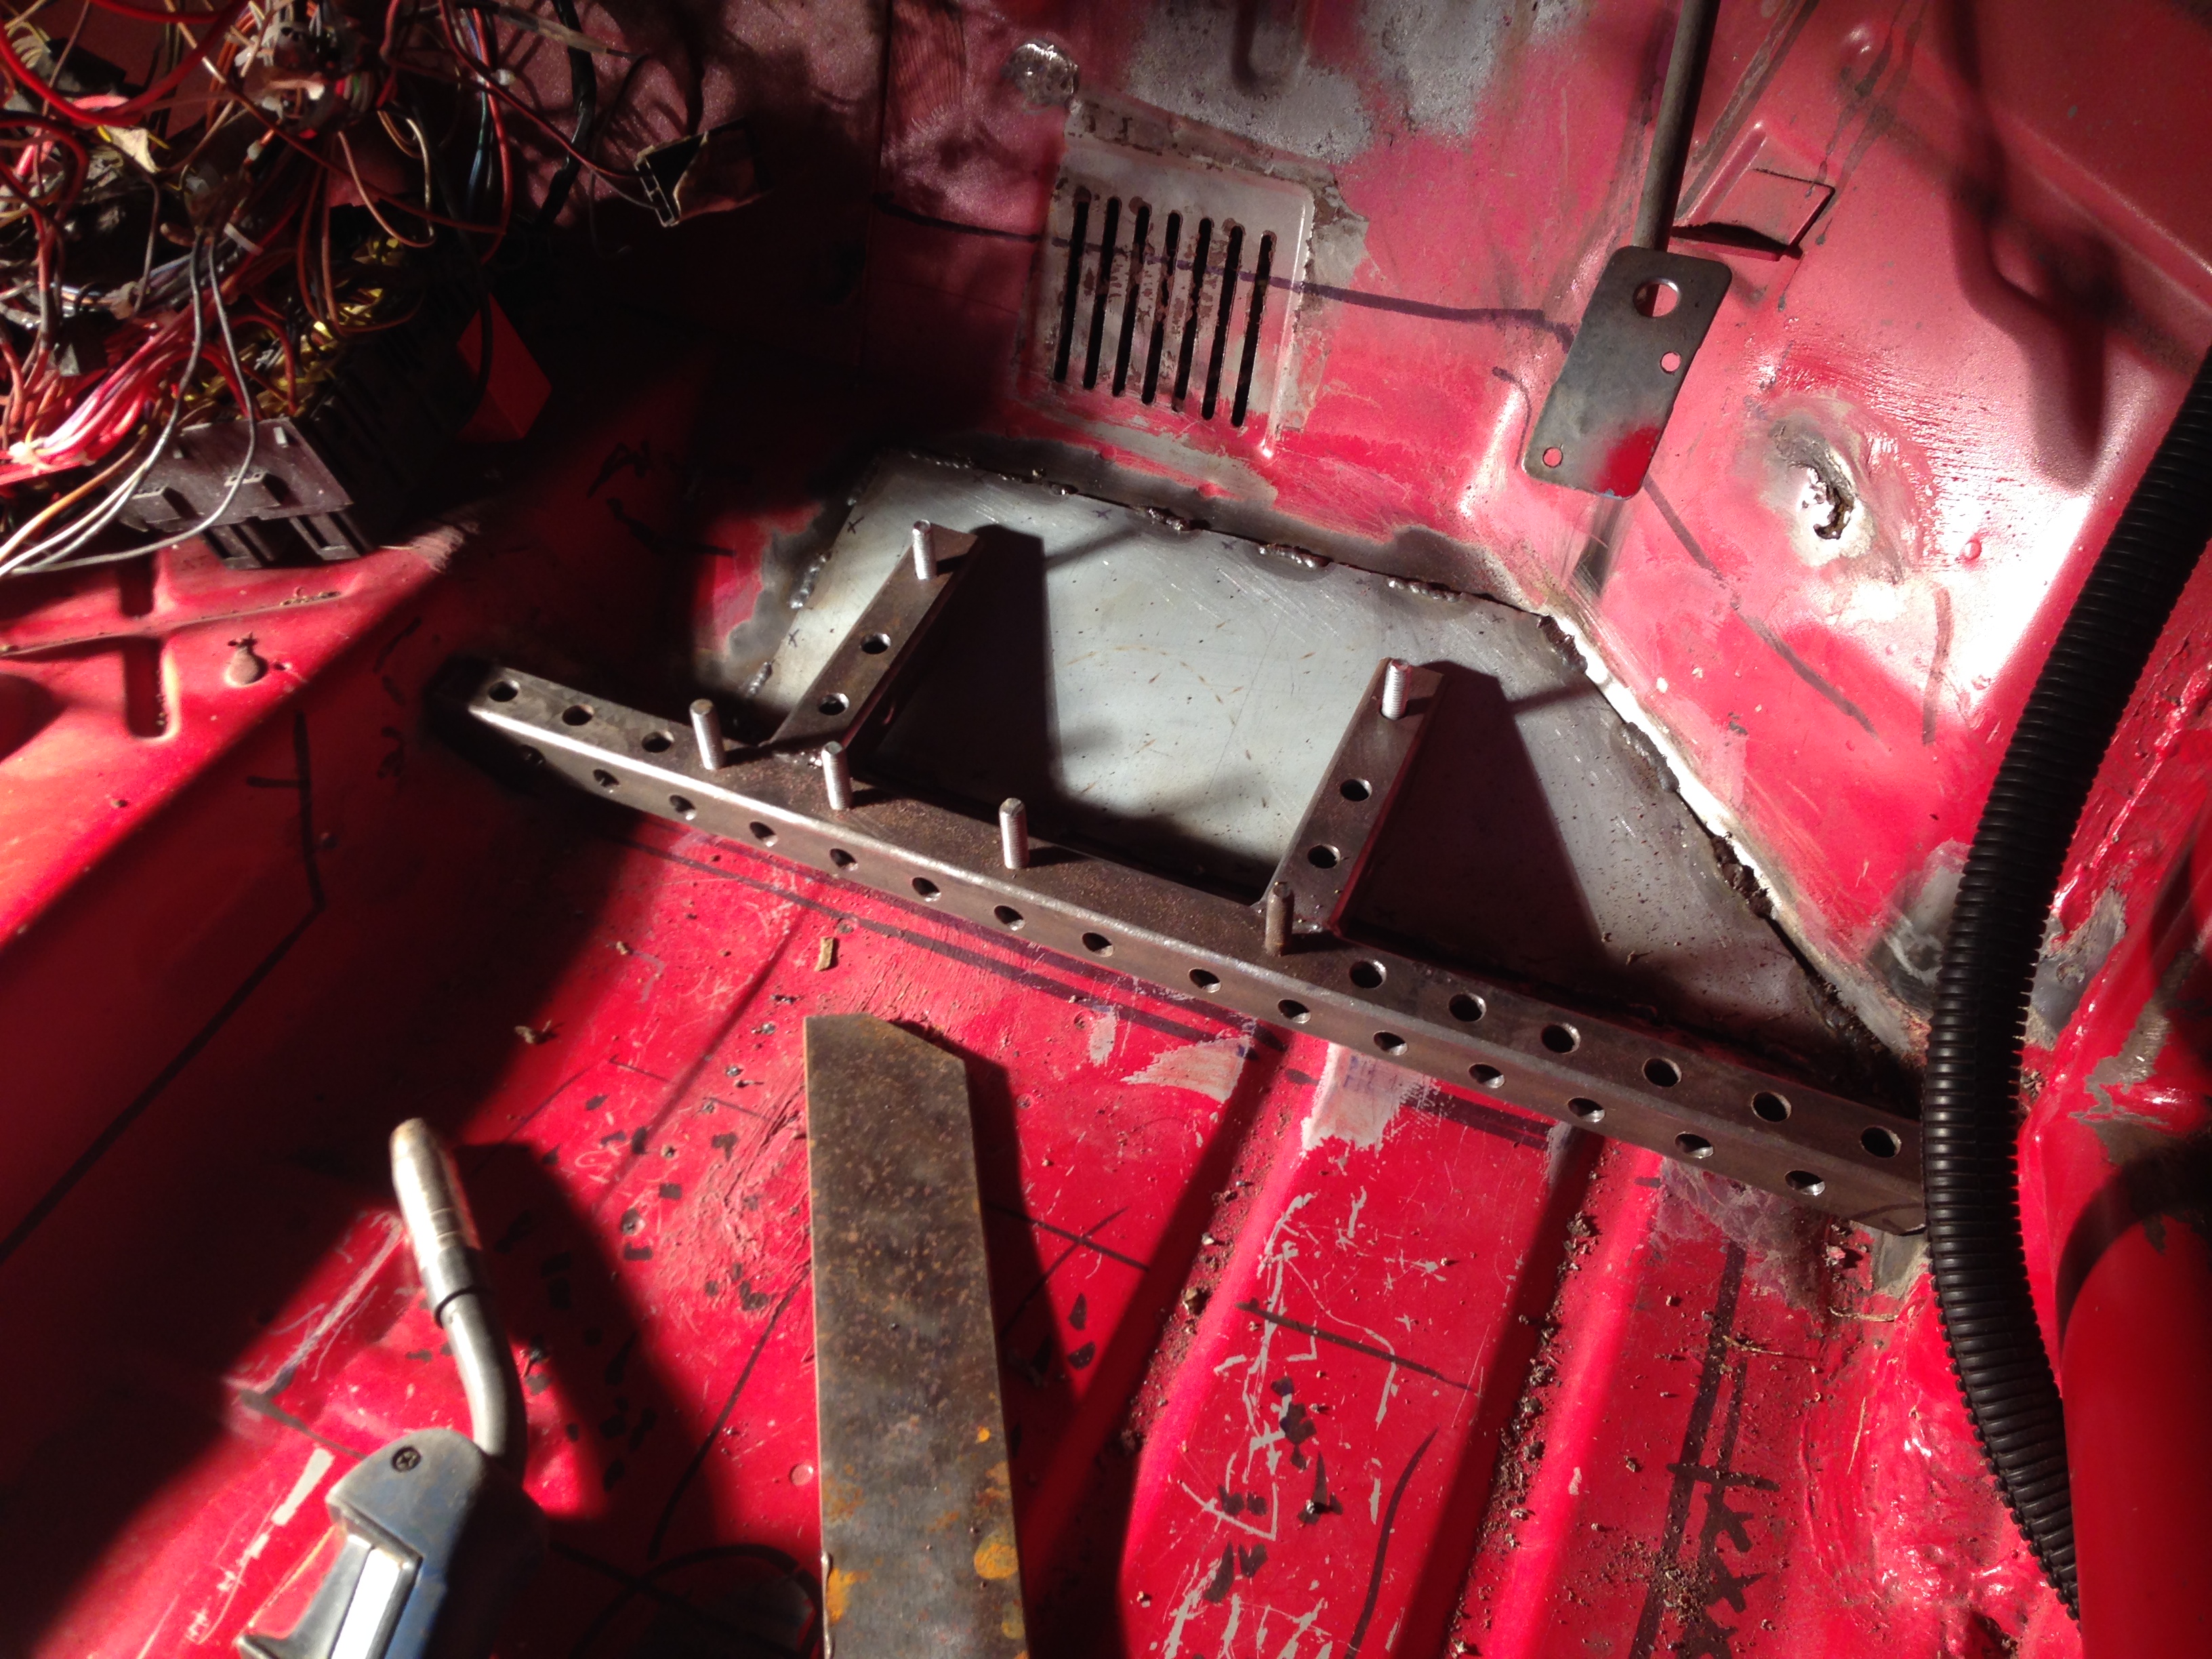
Pedal box frame made and in. I reinforced the floor with 1.5mm plate.

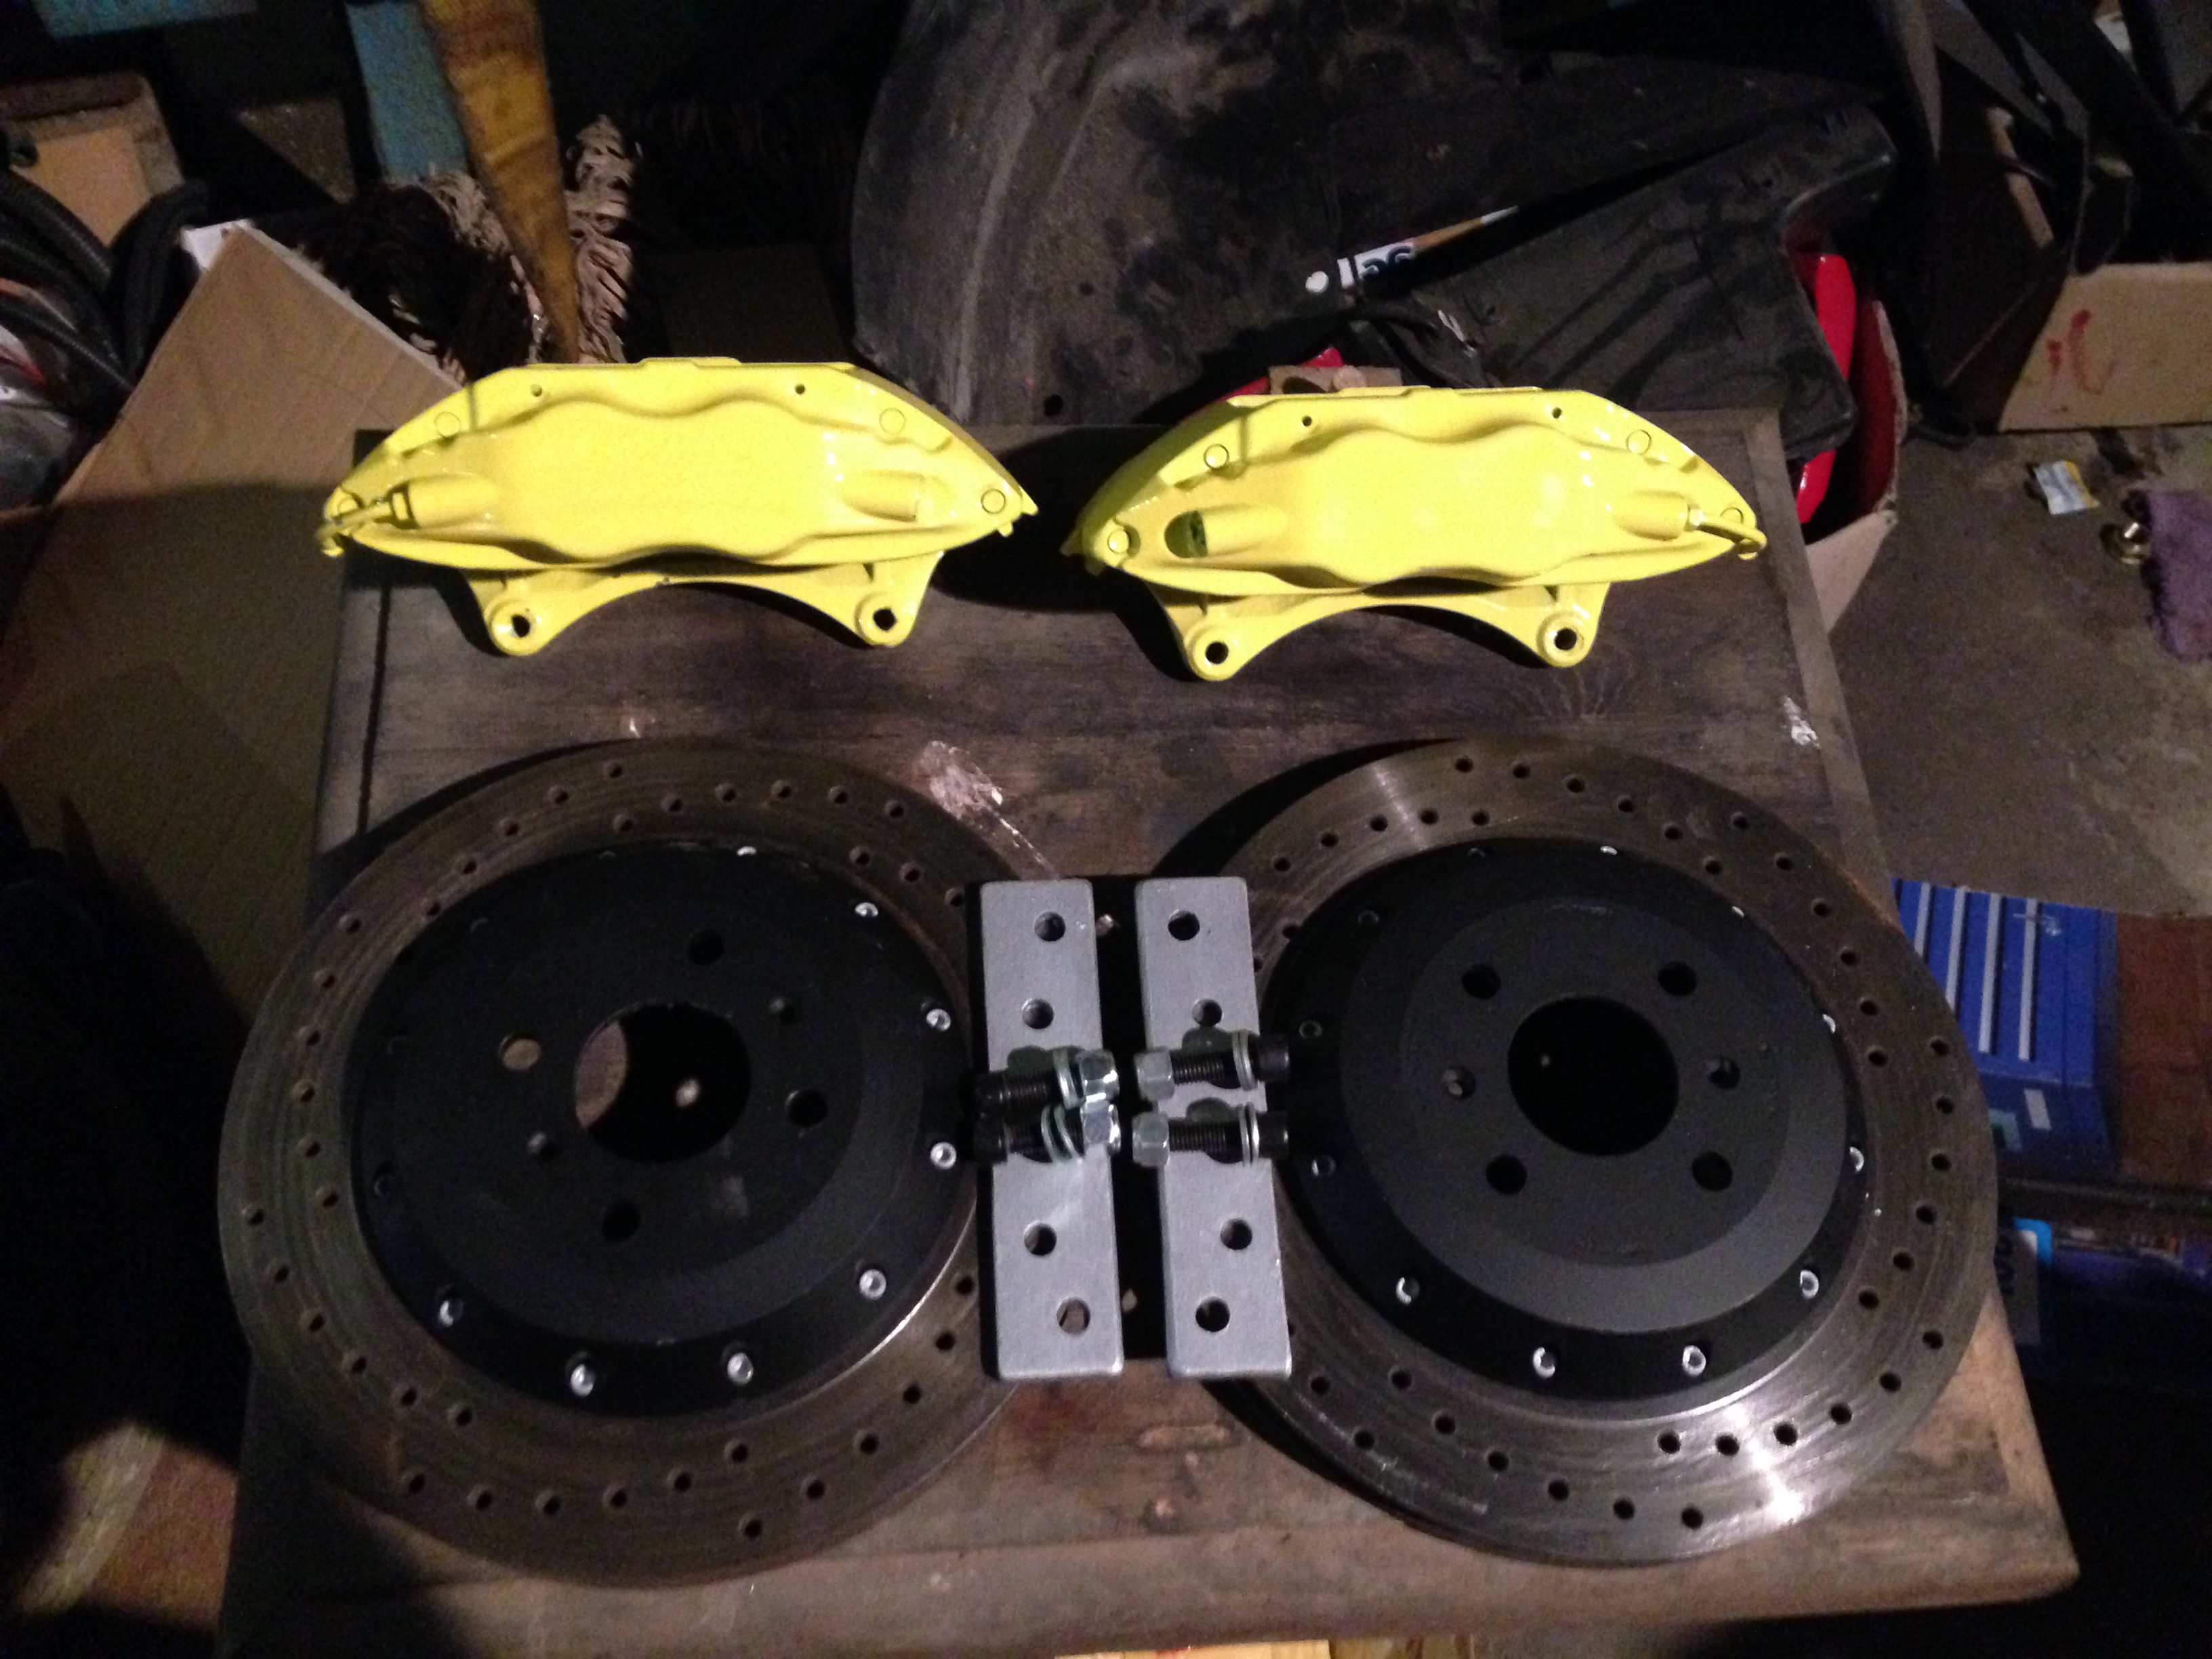
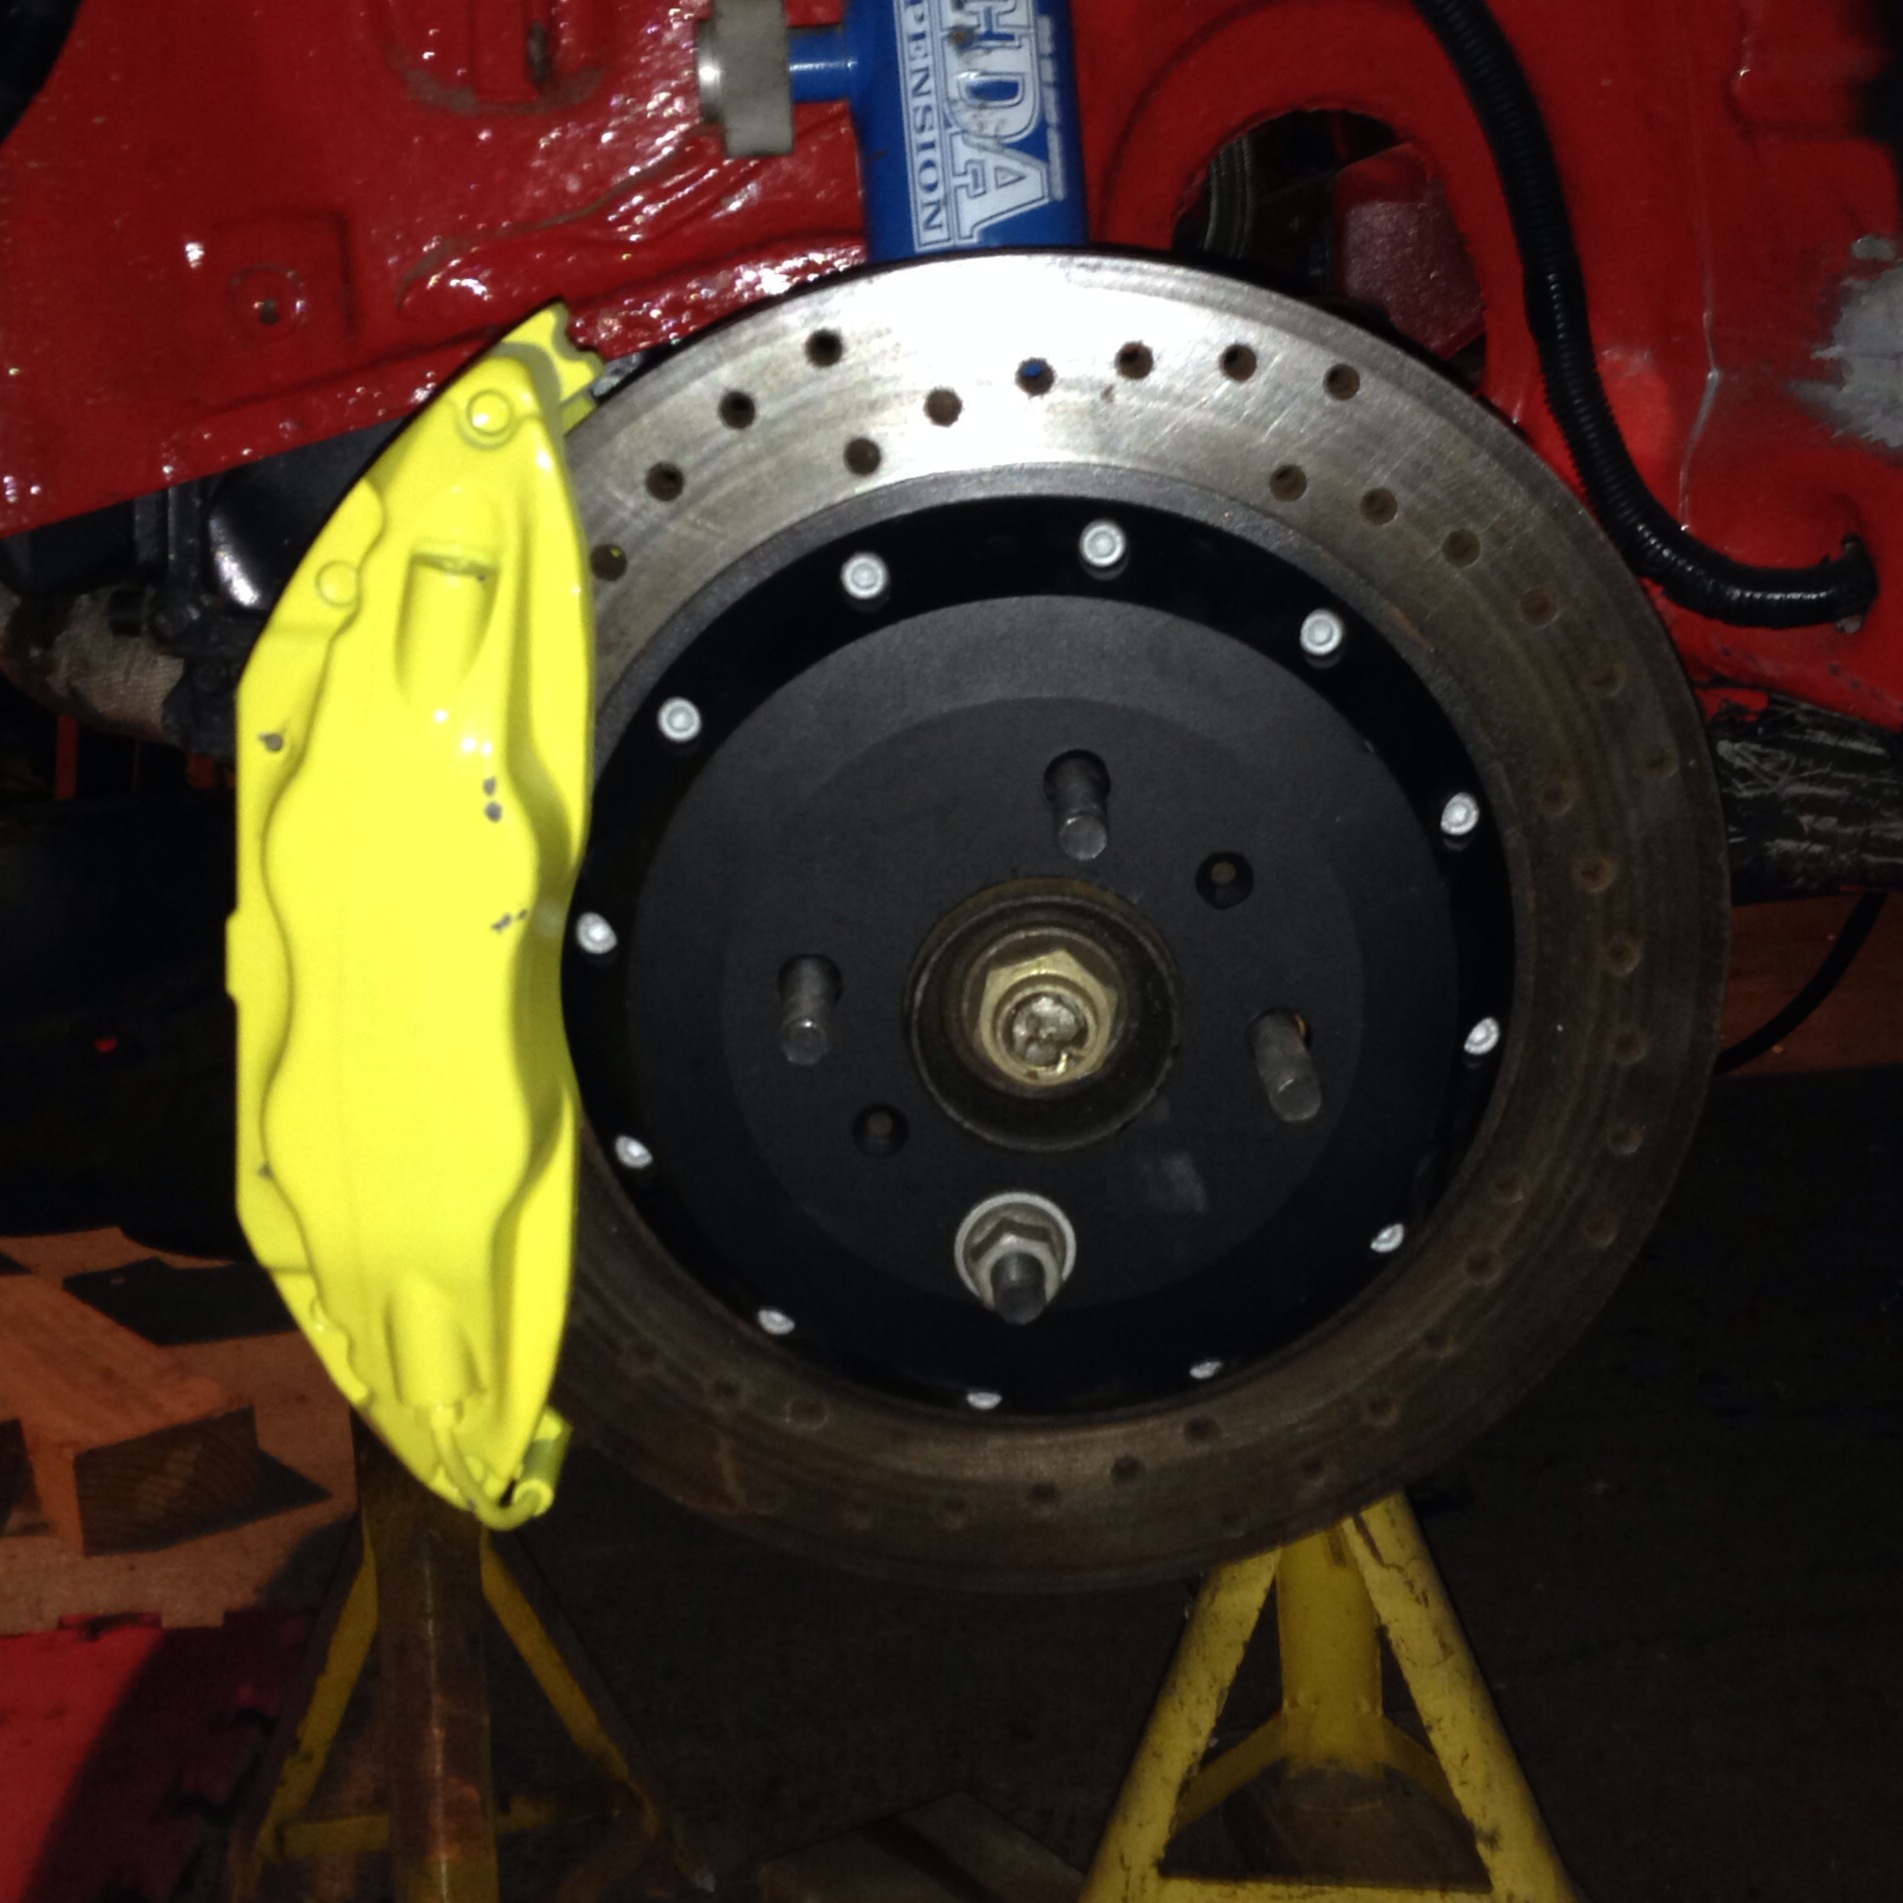
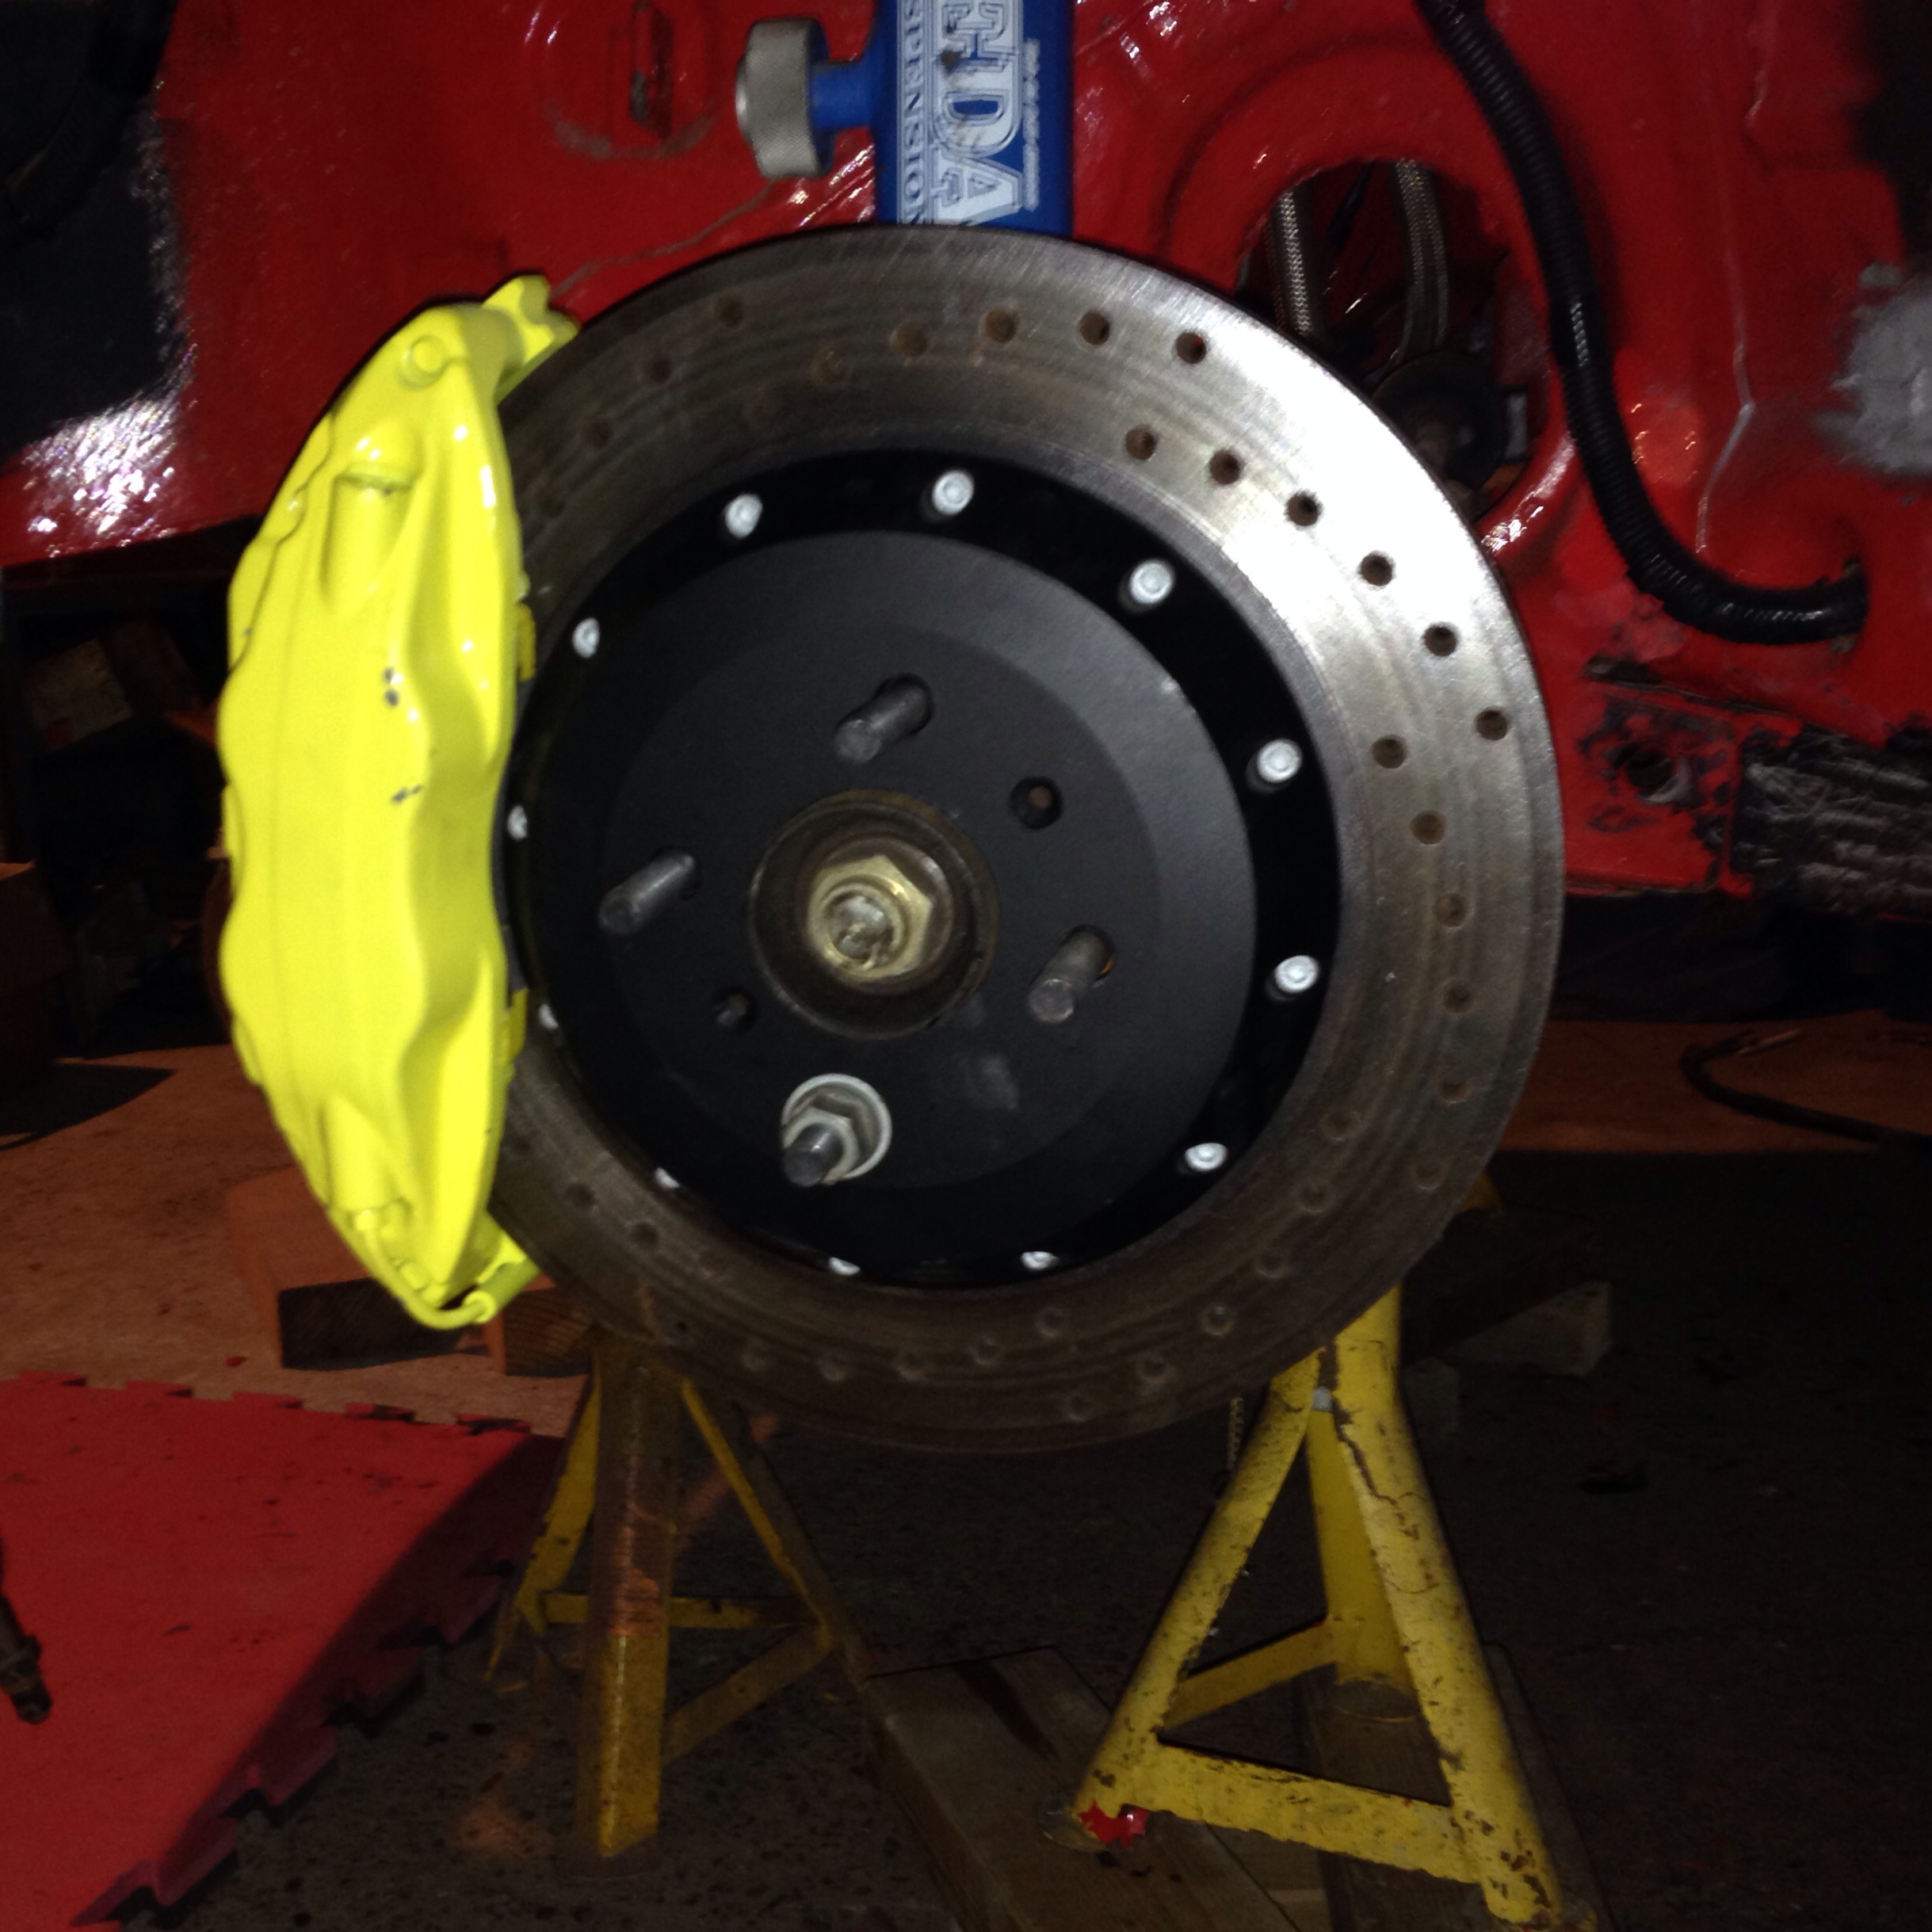
Also finished by brakes during the night while I've been at work and knocked up some brackets from 8mm steel.
I'm just wondering if the calliper is slightly too close to the bell? How much will heat expansion affect it?

They are quite a bit shorter than standard!

Time to start the mock up for the seat rails and pedal box mount.

Happy with the seating position etc it was time to weld it all in.
Seat rails and harness anchors in.

Pedal box frame made and in. I reinforced the floor with 1.5mm plate.


Also finished by brakes during the night while I've been at work and knocked up some brackets from 8mm steel.
I'm just wondering if the calliper is slightly too close to the bell? How much will heat expansion affect it?


Last edited by muz; 17-12-2014 at 08:12 PM.
 23-12-2014, 02:20 PM
#990
Wye Valley Hardcore
Thread Starter
To be honest, Jon, even though they are expensive, they seem to be worth the money.
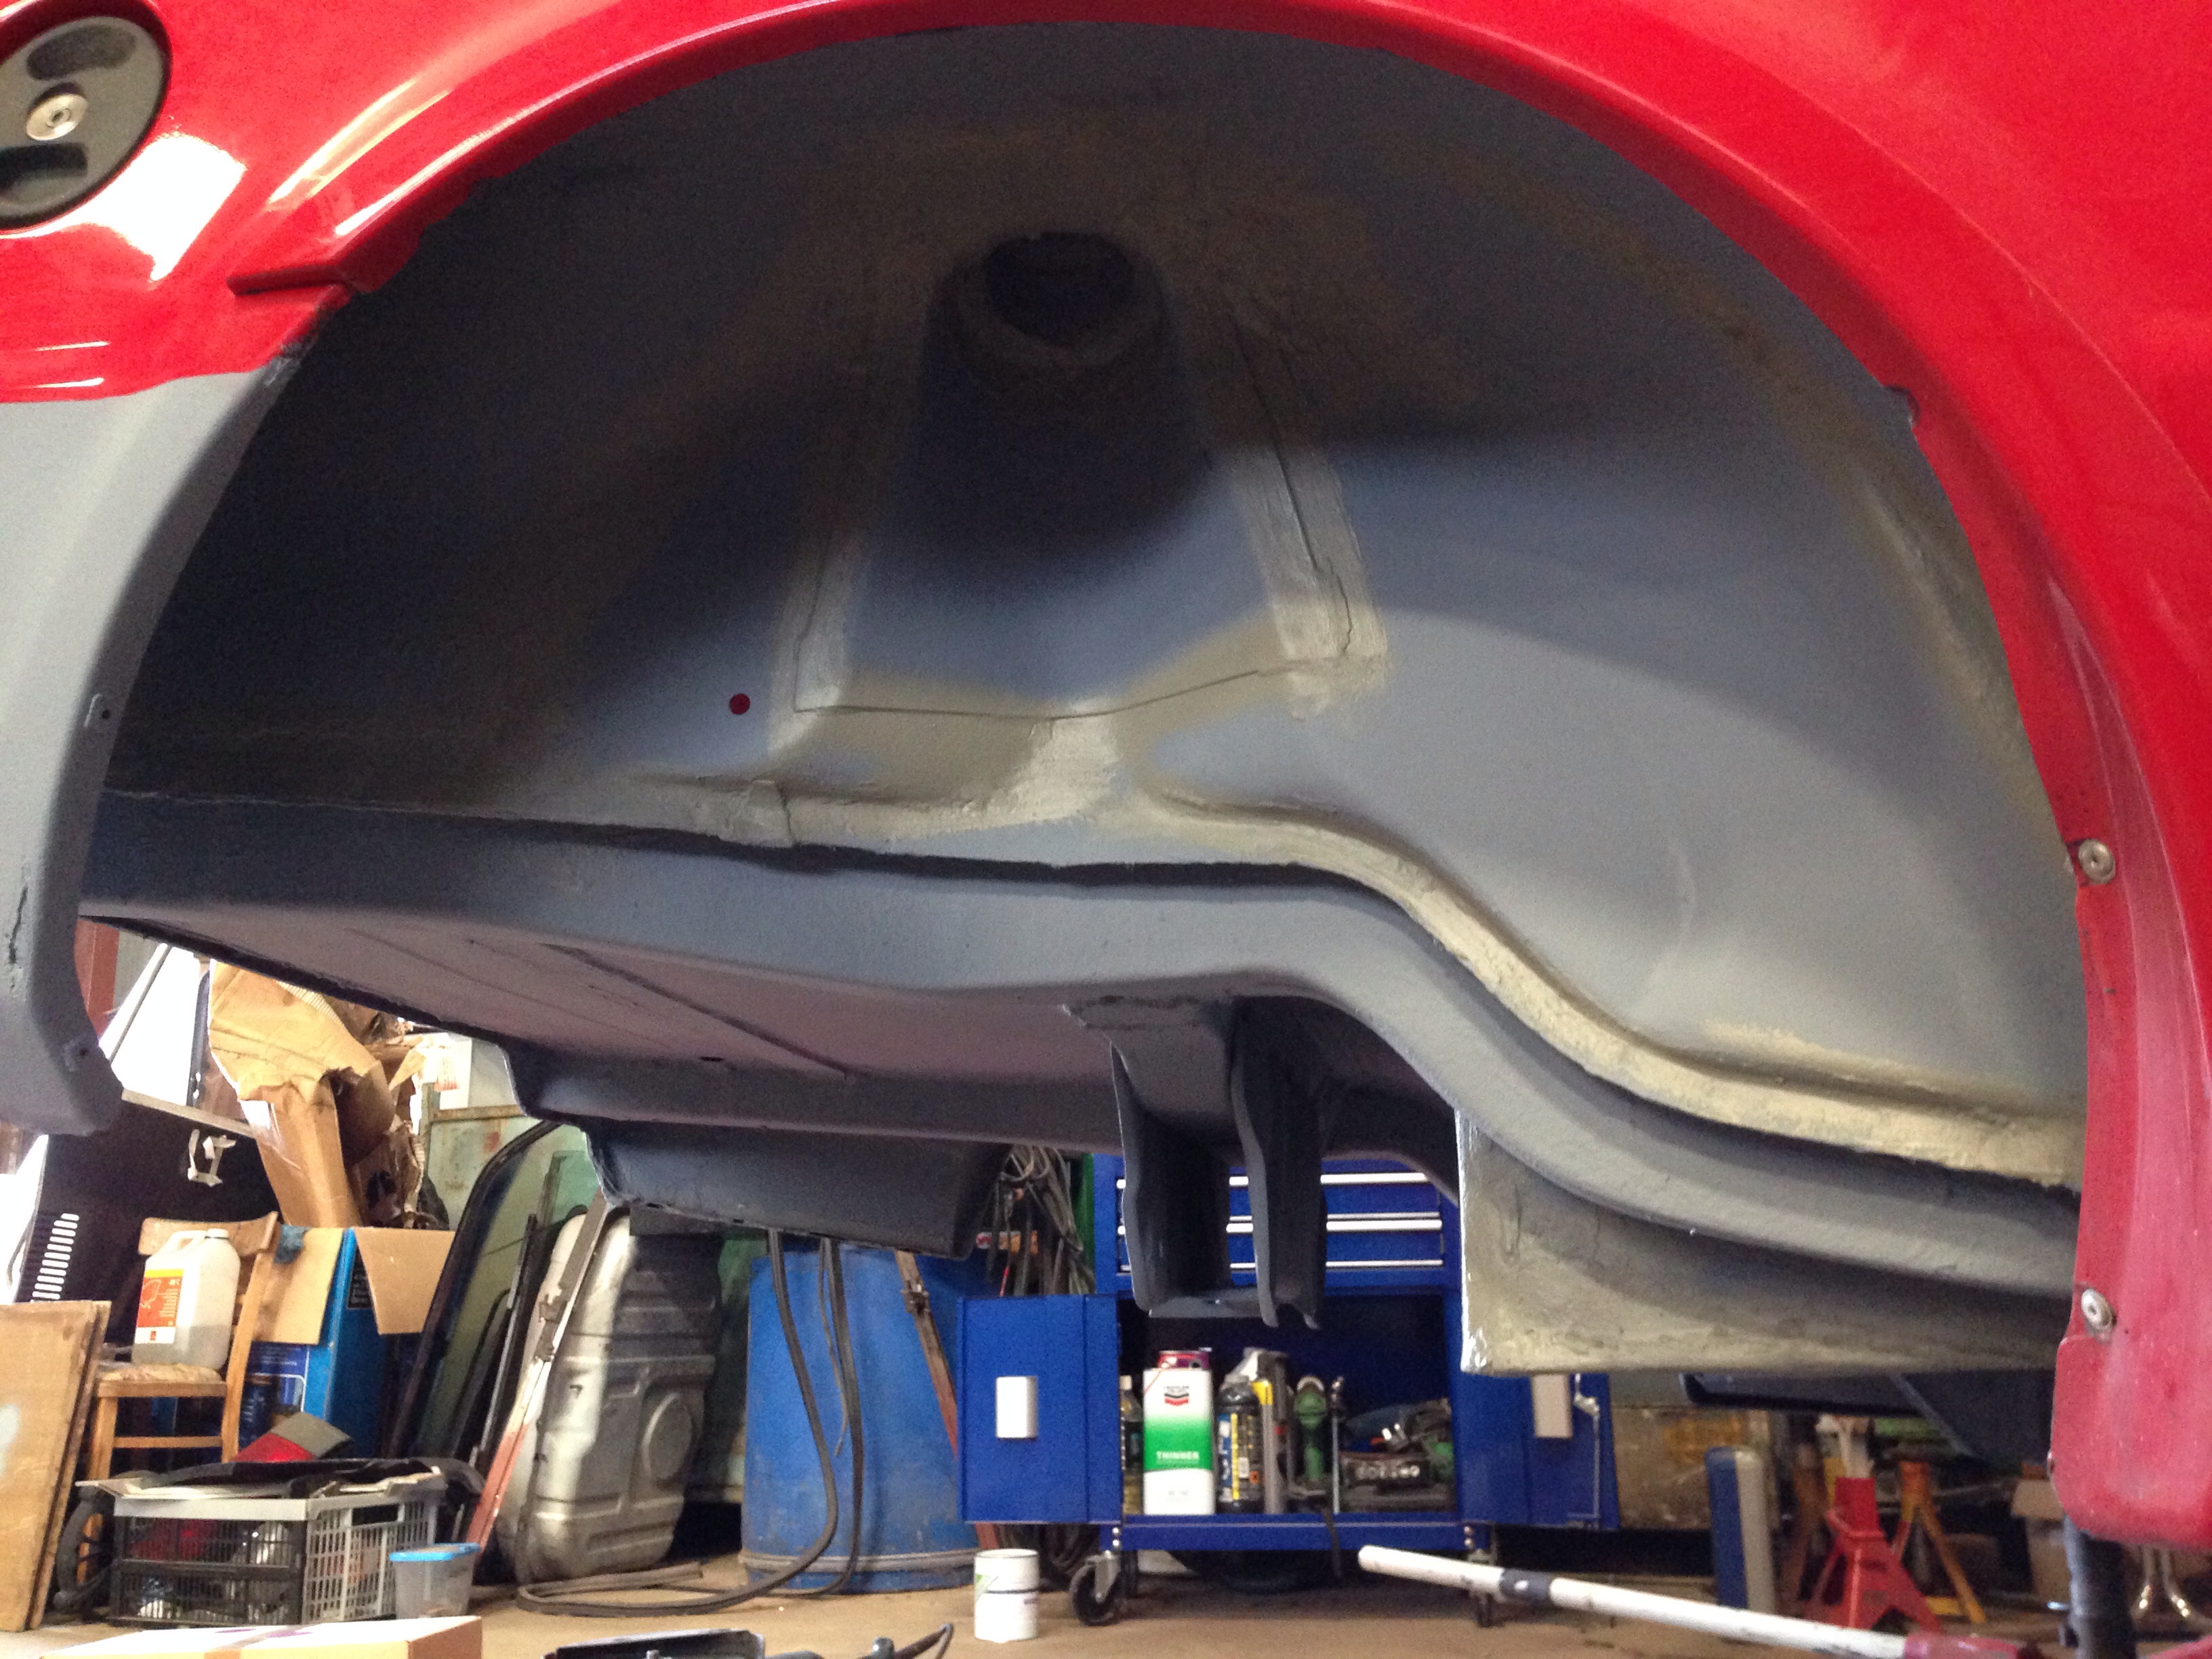
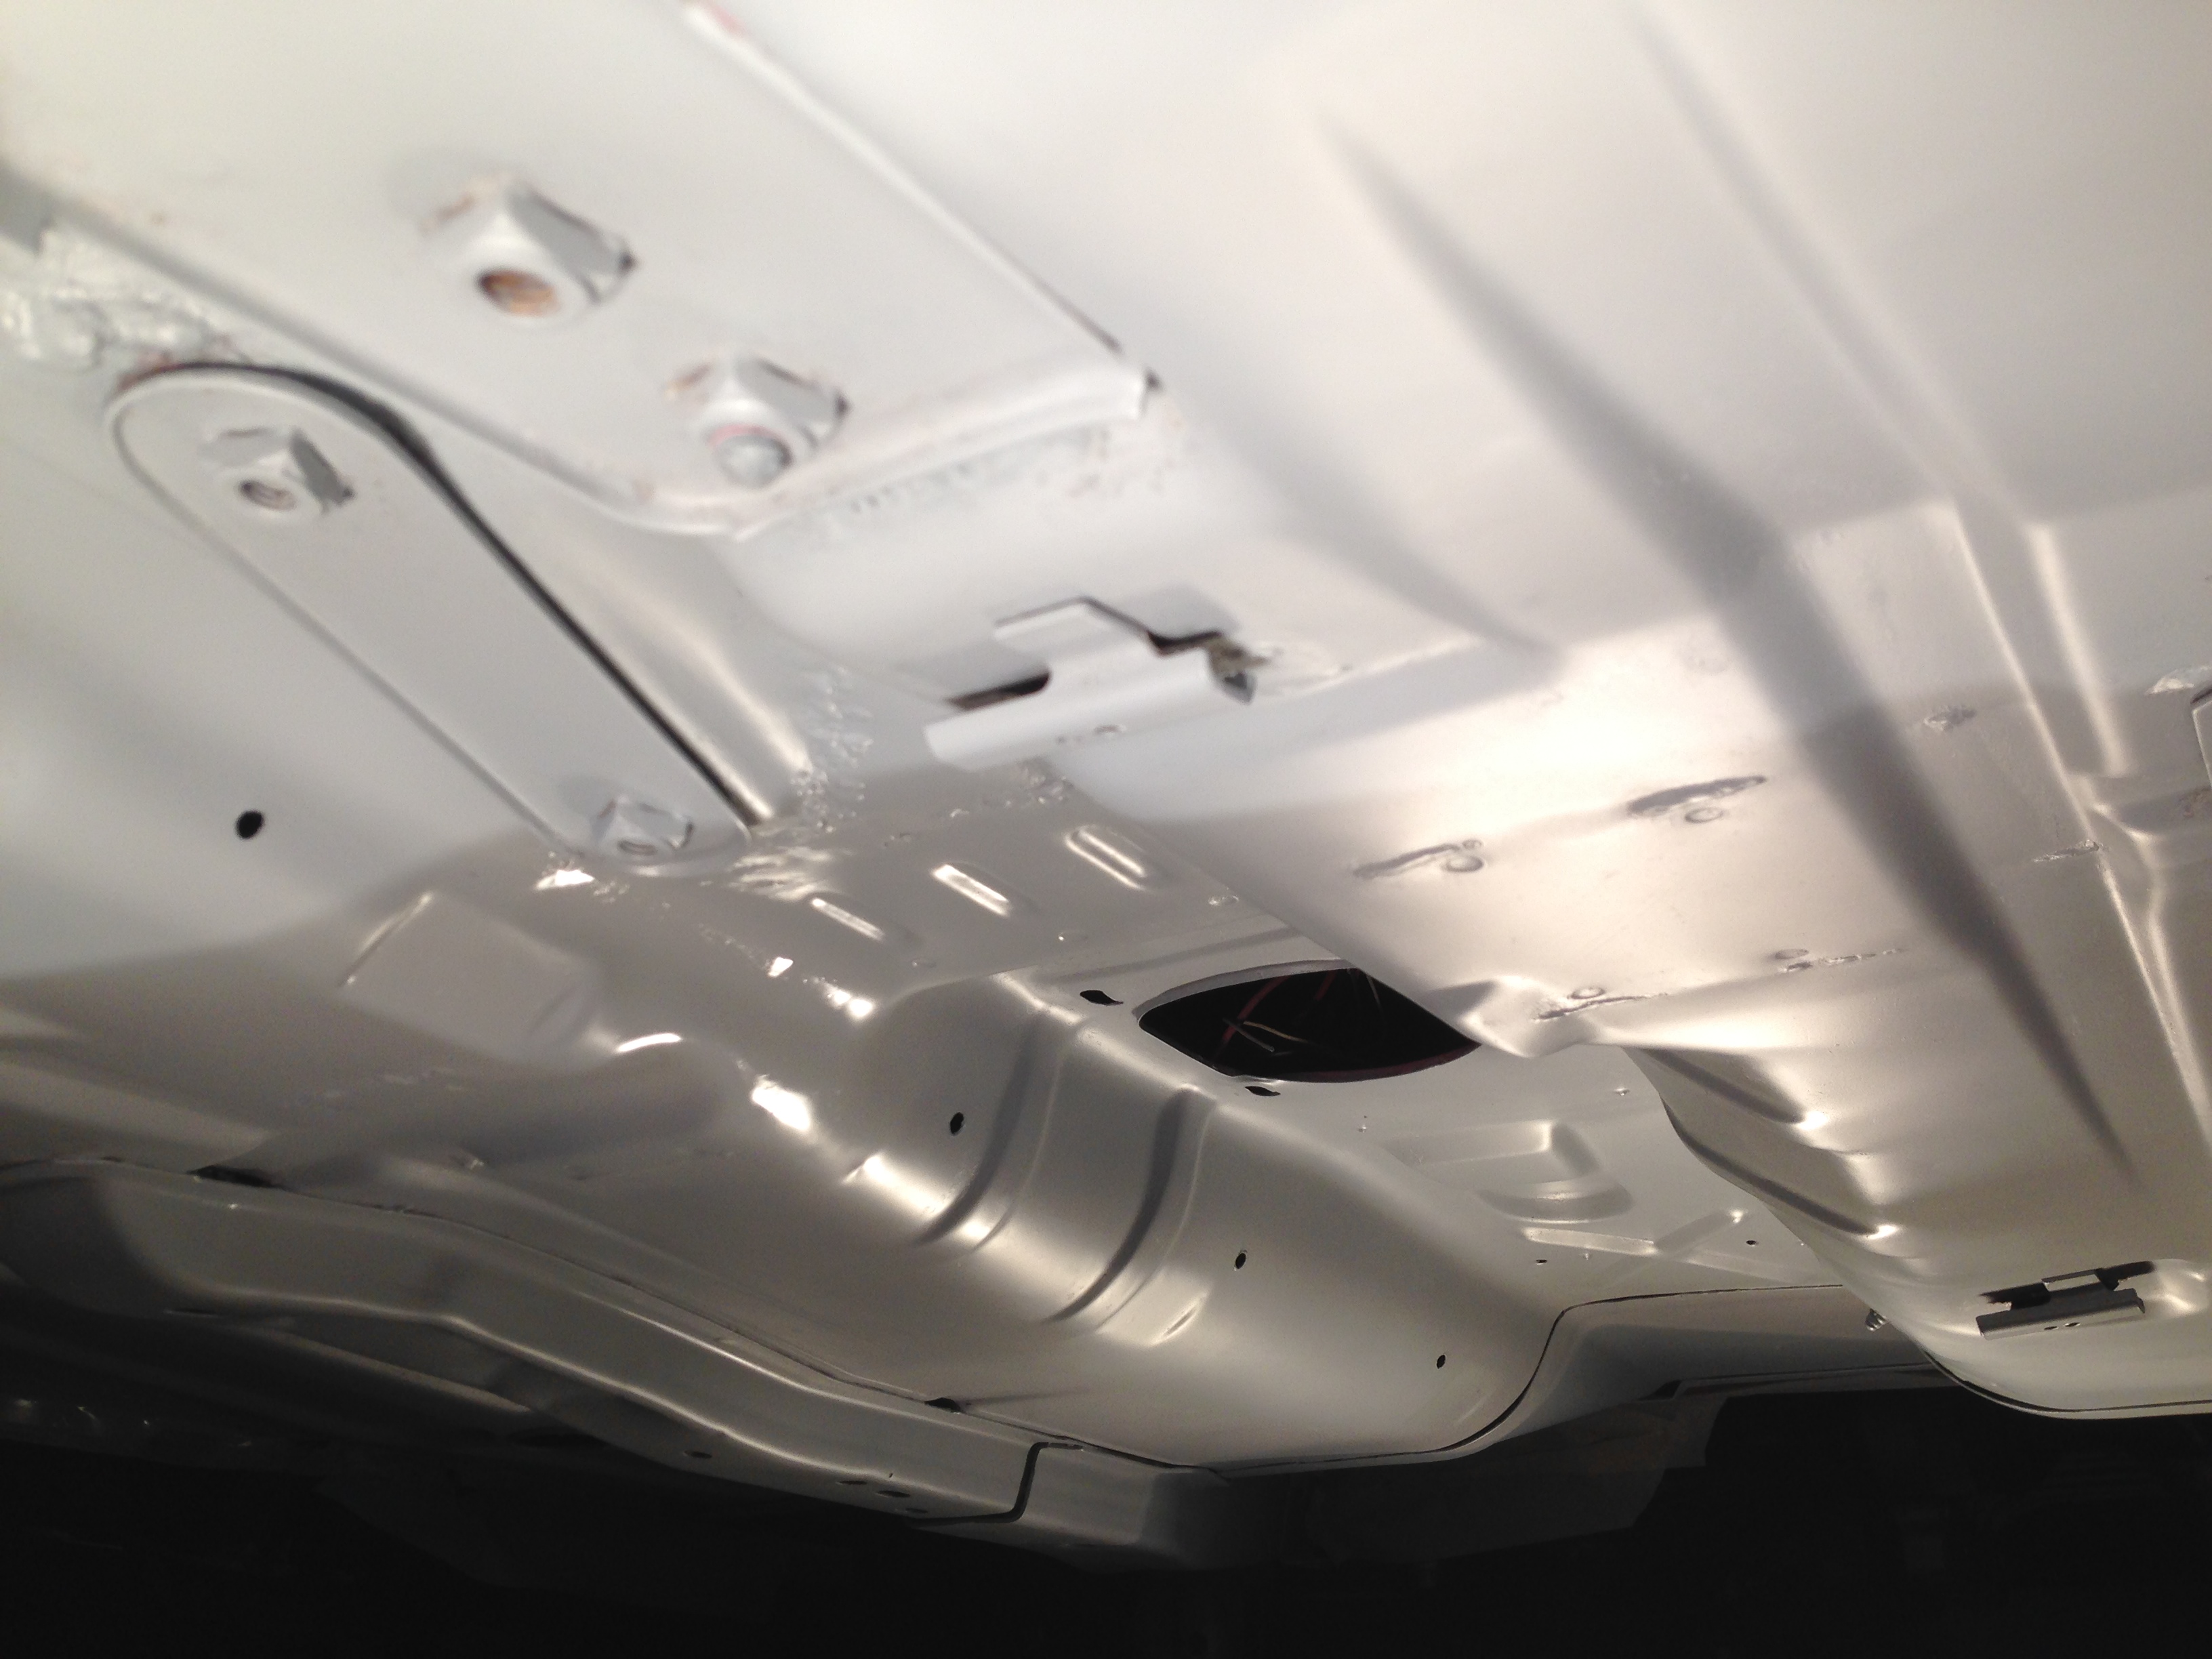
I've been working on it everyday and don't have much to show for it. Reason being when I started the car I didn't really know what I was doing (some would say I still don't ) and I did a shit job of the underside. Now the back ends been done properly the front end looks shit so I decided to do it properly and took the floor back to bare metal.
It's a track car and never going to be concourse, but I still want it to look nice.
Would have been so much easier with a spit!
Shit pics, but got it in Etch primer this morning.
Then my dad mixed up too much high build so I rollered what was left over the top just to seal it over x mas, hence why it's a bit patchy.
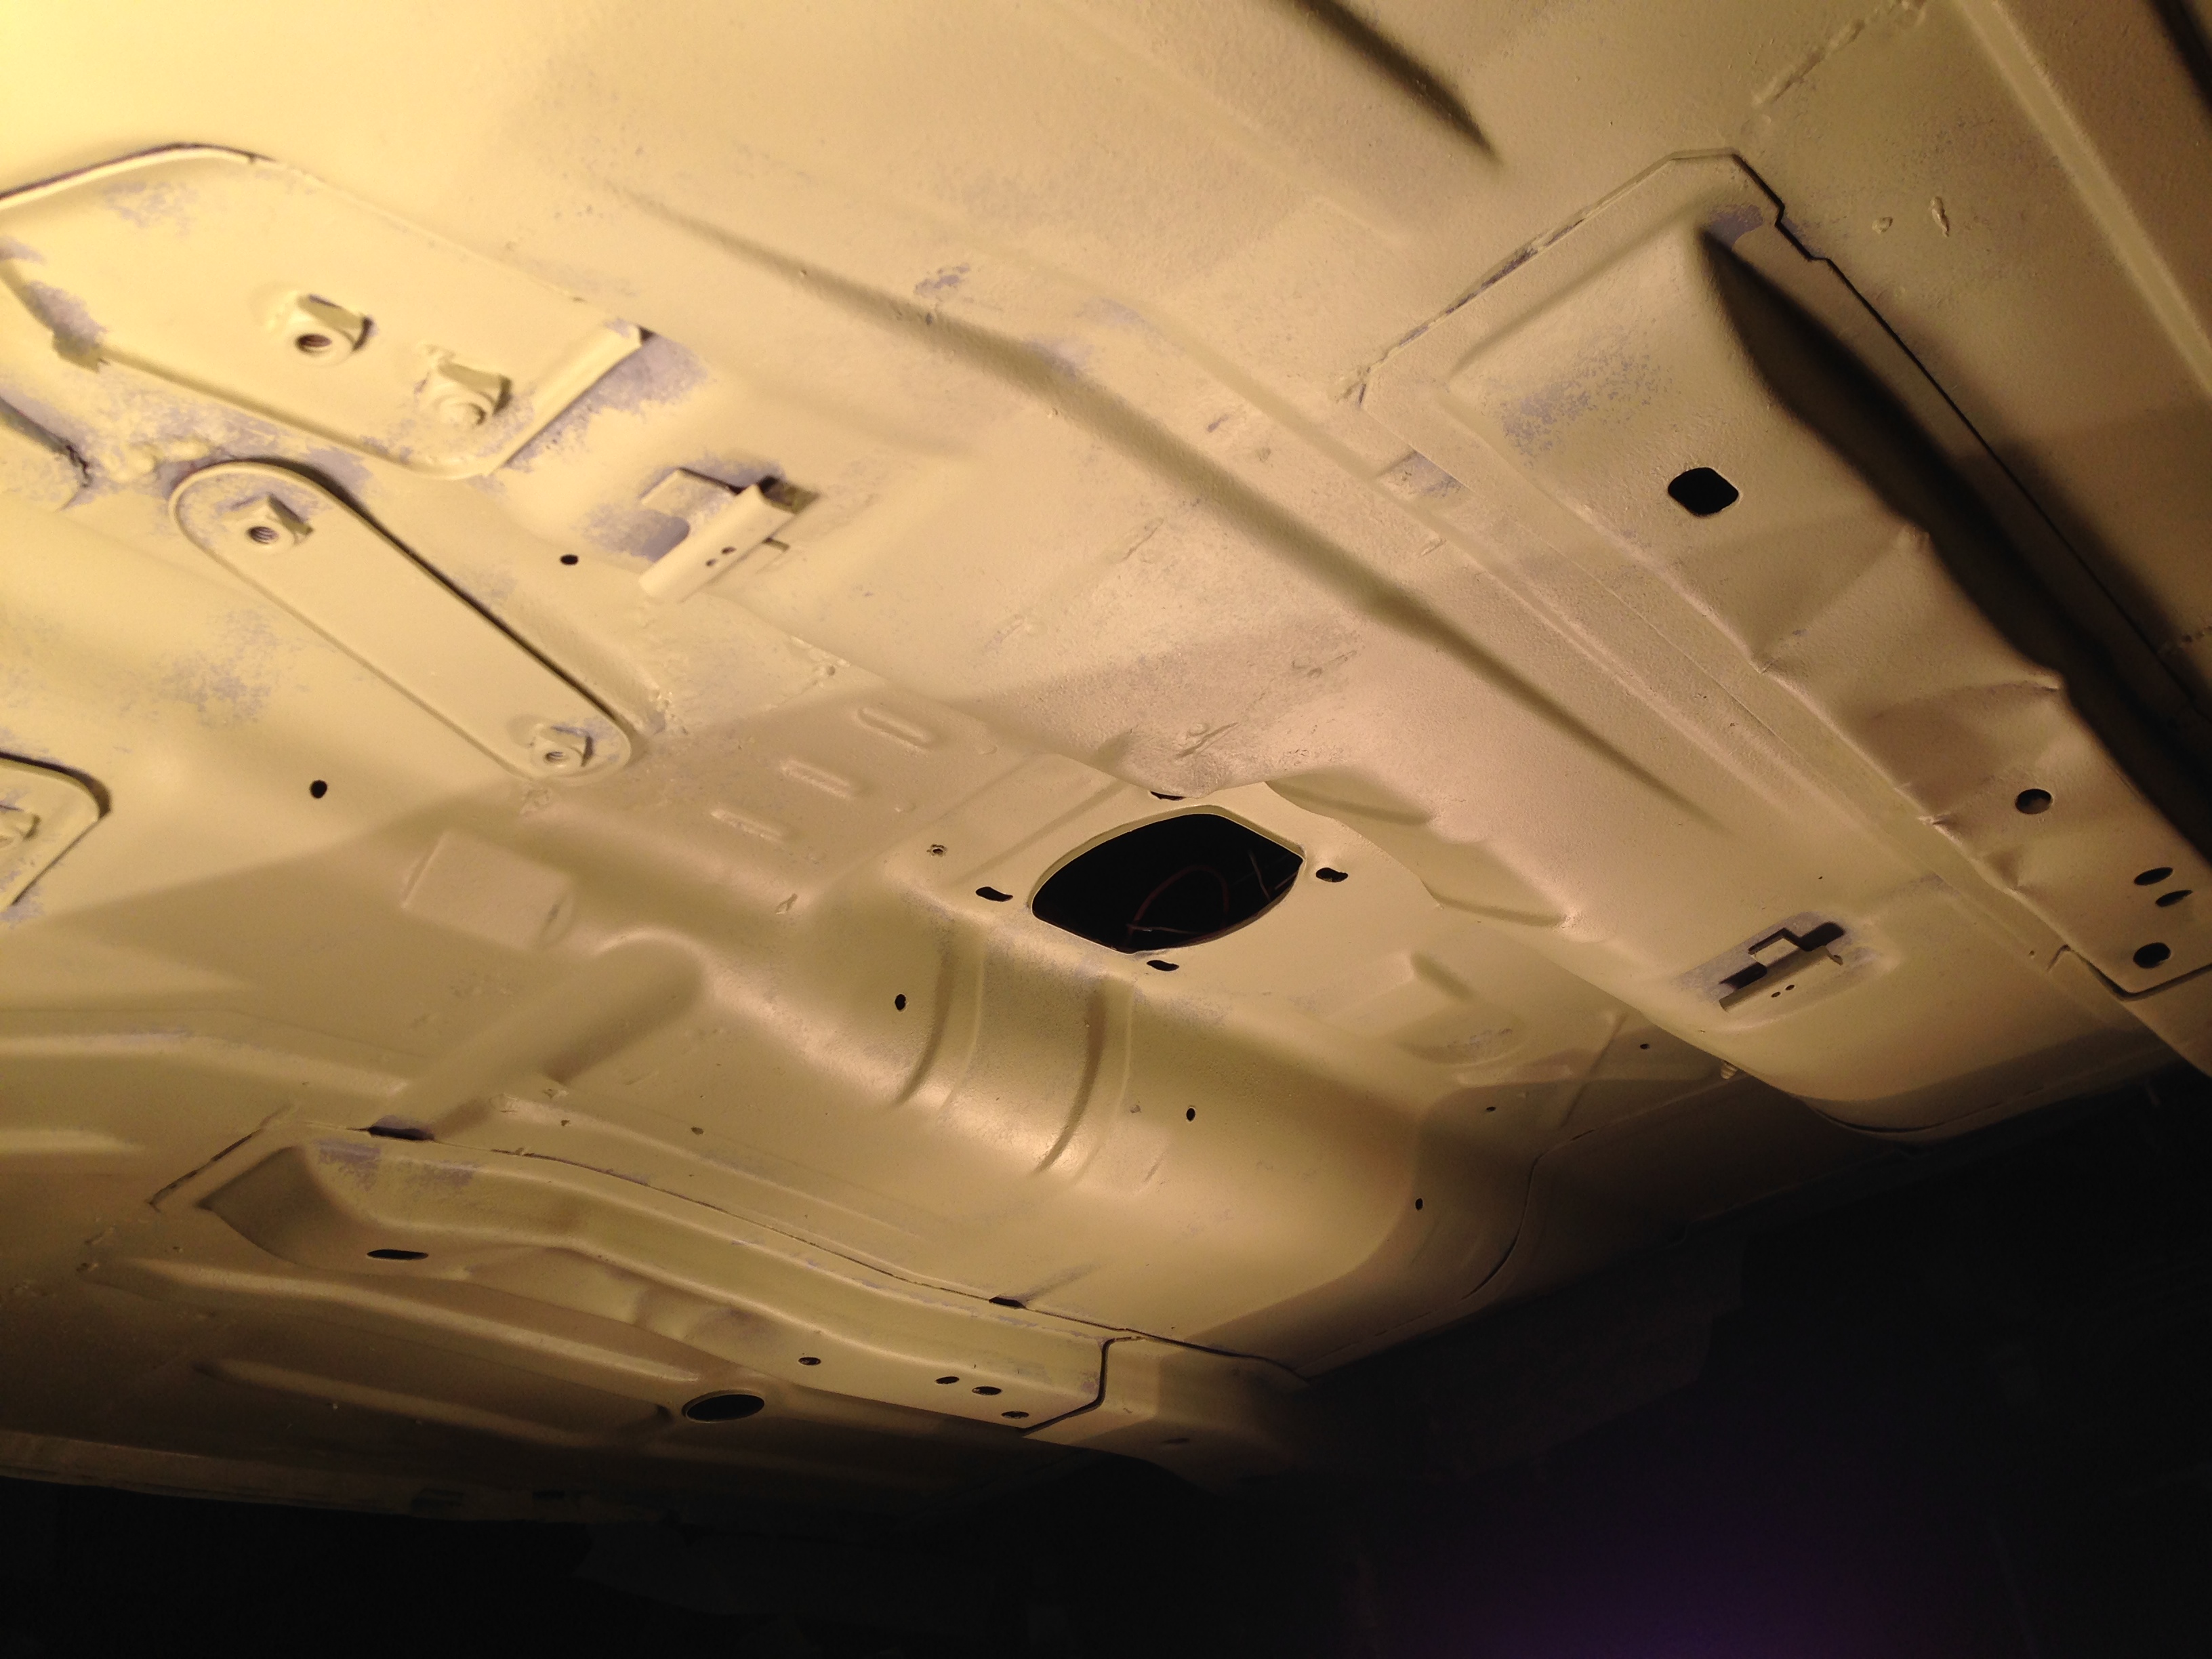
Will leave the car now until Monday and stonechip it.
I've been working on it everyday and don't have much to show for it. Reason being when I started the car I didn't really know what I was doing (some would say I still don't
) and I did a shit job of the underside. Now the back ends been done properly the front end looks shit so I decided to do it properly and took the floor back to bare metal. It's a track car and never going to be concourse, but I still want it to look nice.
Would have been so much easier with a spit!
Shit pics, but got it in Etch primer this morning.

Then my dad mixed up too much high build so I rollered what was left over the top just to seal it over x mas, hence why it's a bit patchy.

Will leave the car now until Monday and stonechip it.
Last edited by muz; 23-12-2014 at 02:33 PM.
29-12-2014, 04:51 PM
#992
Wye Valley Hardcore
Thread Starter
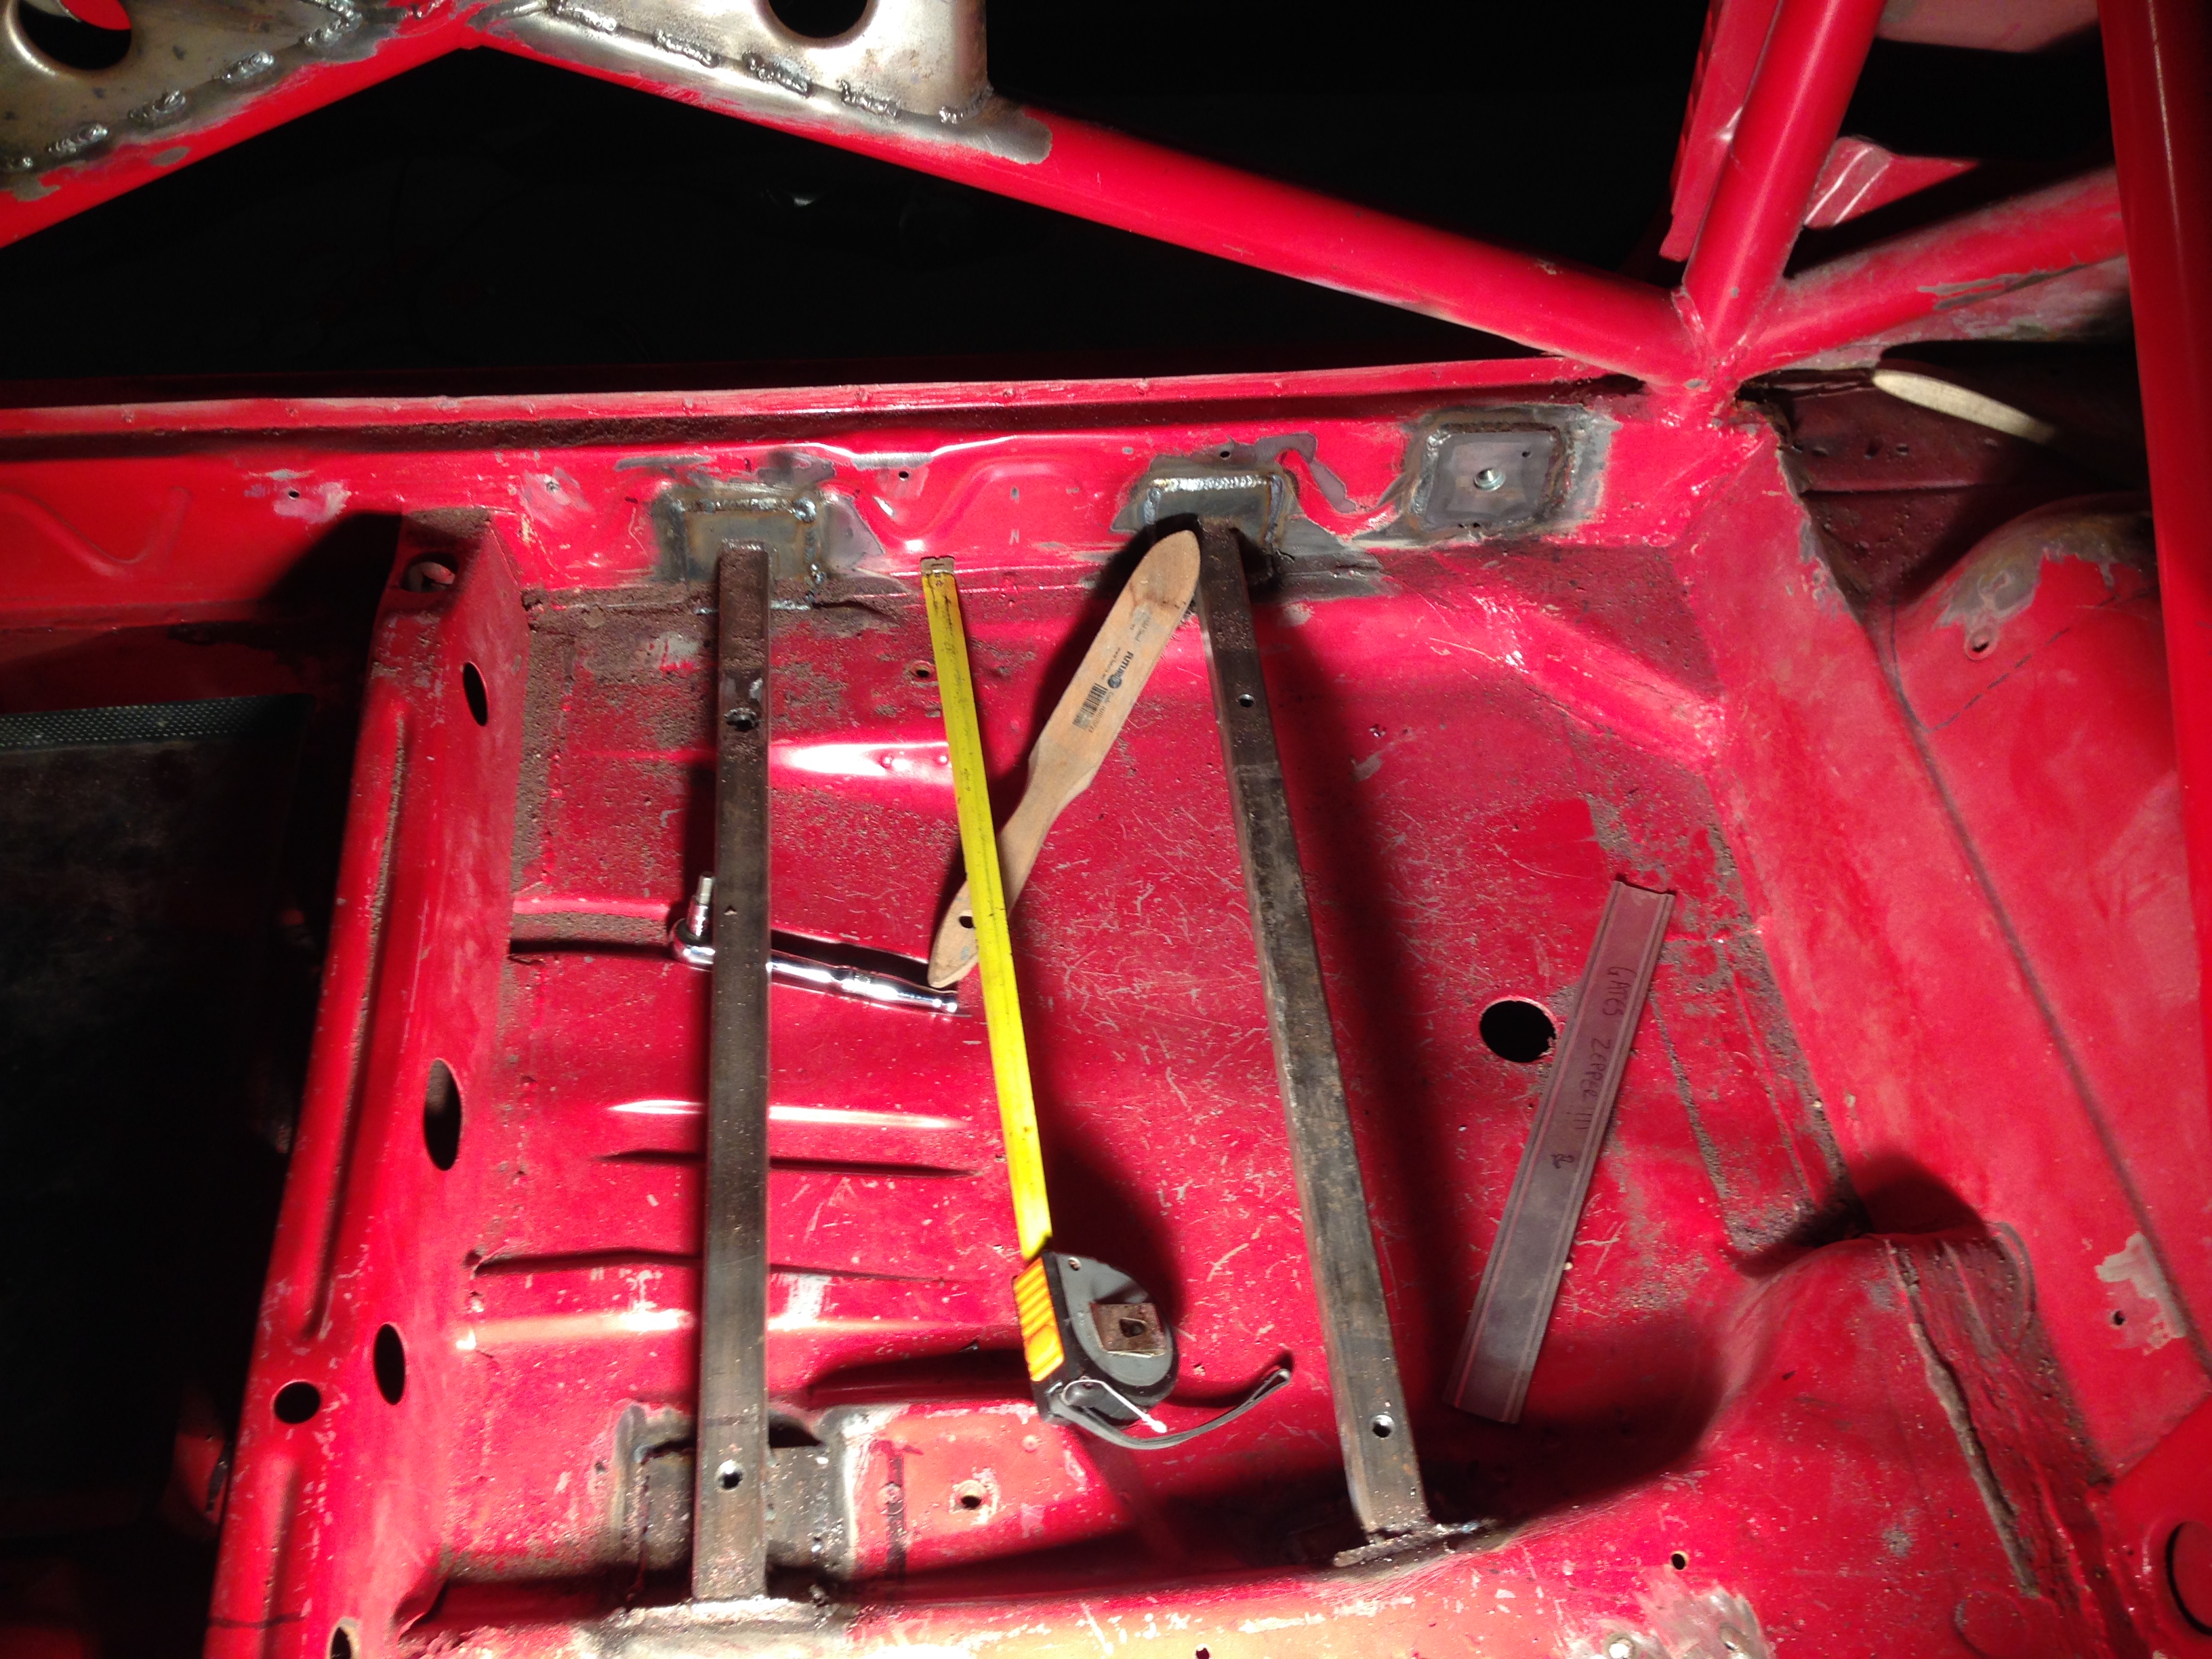
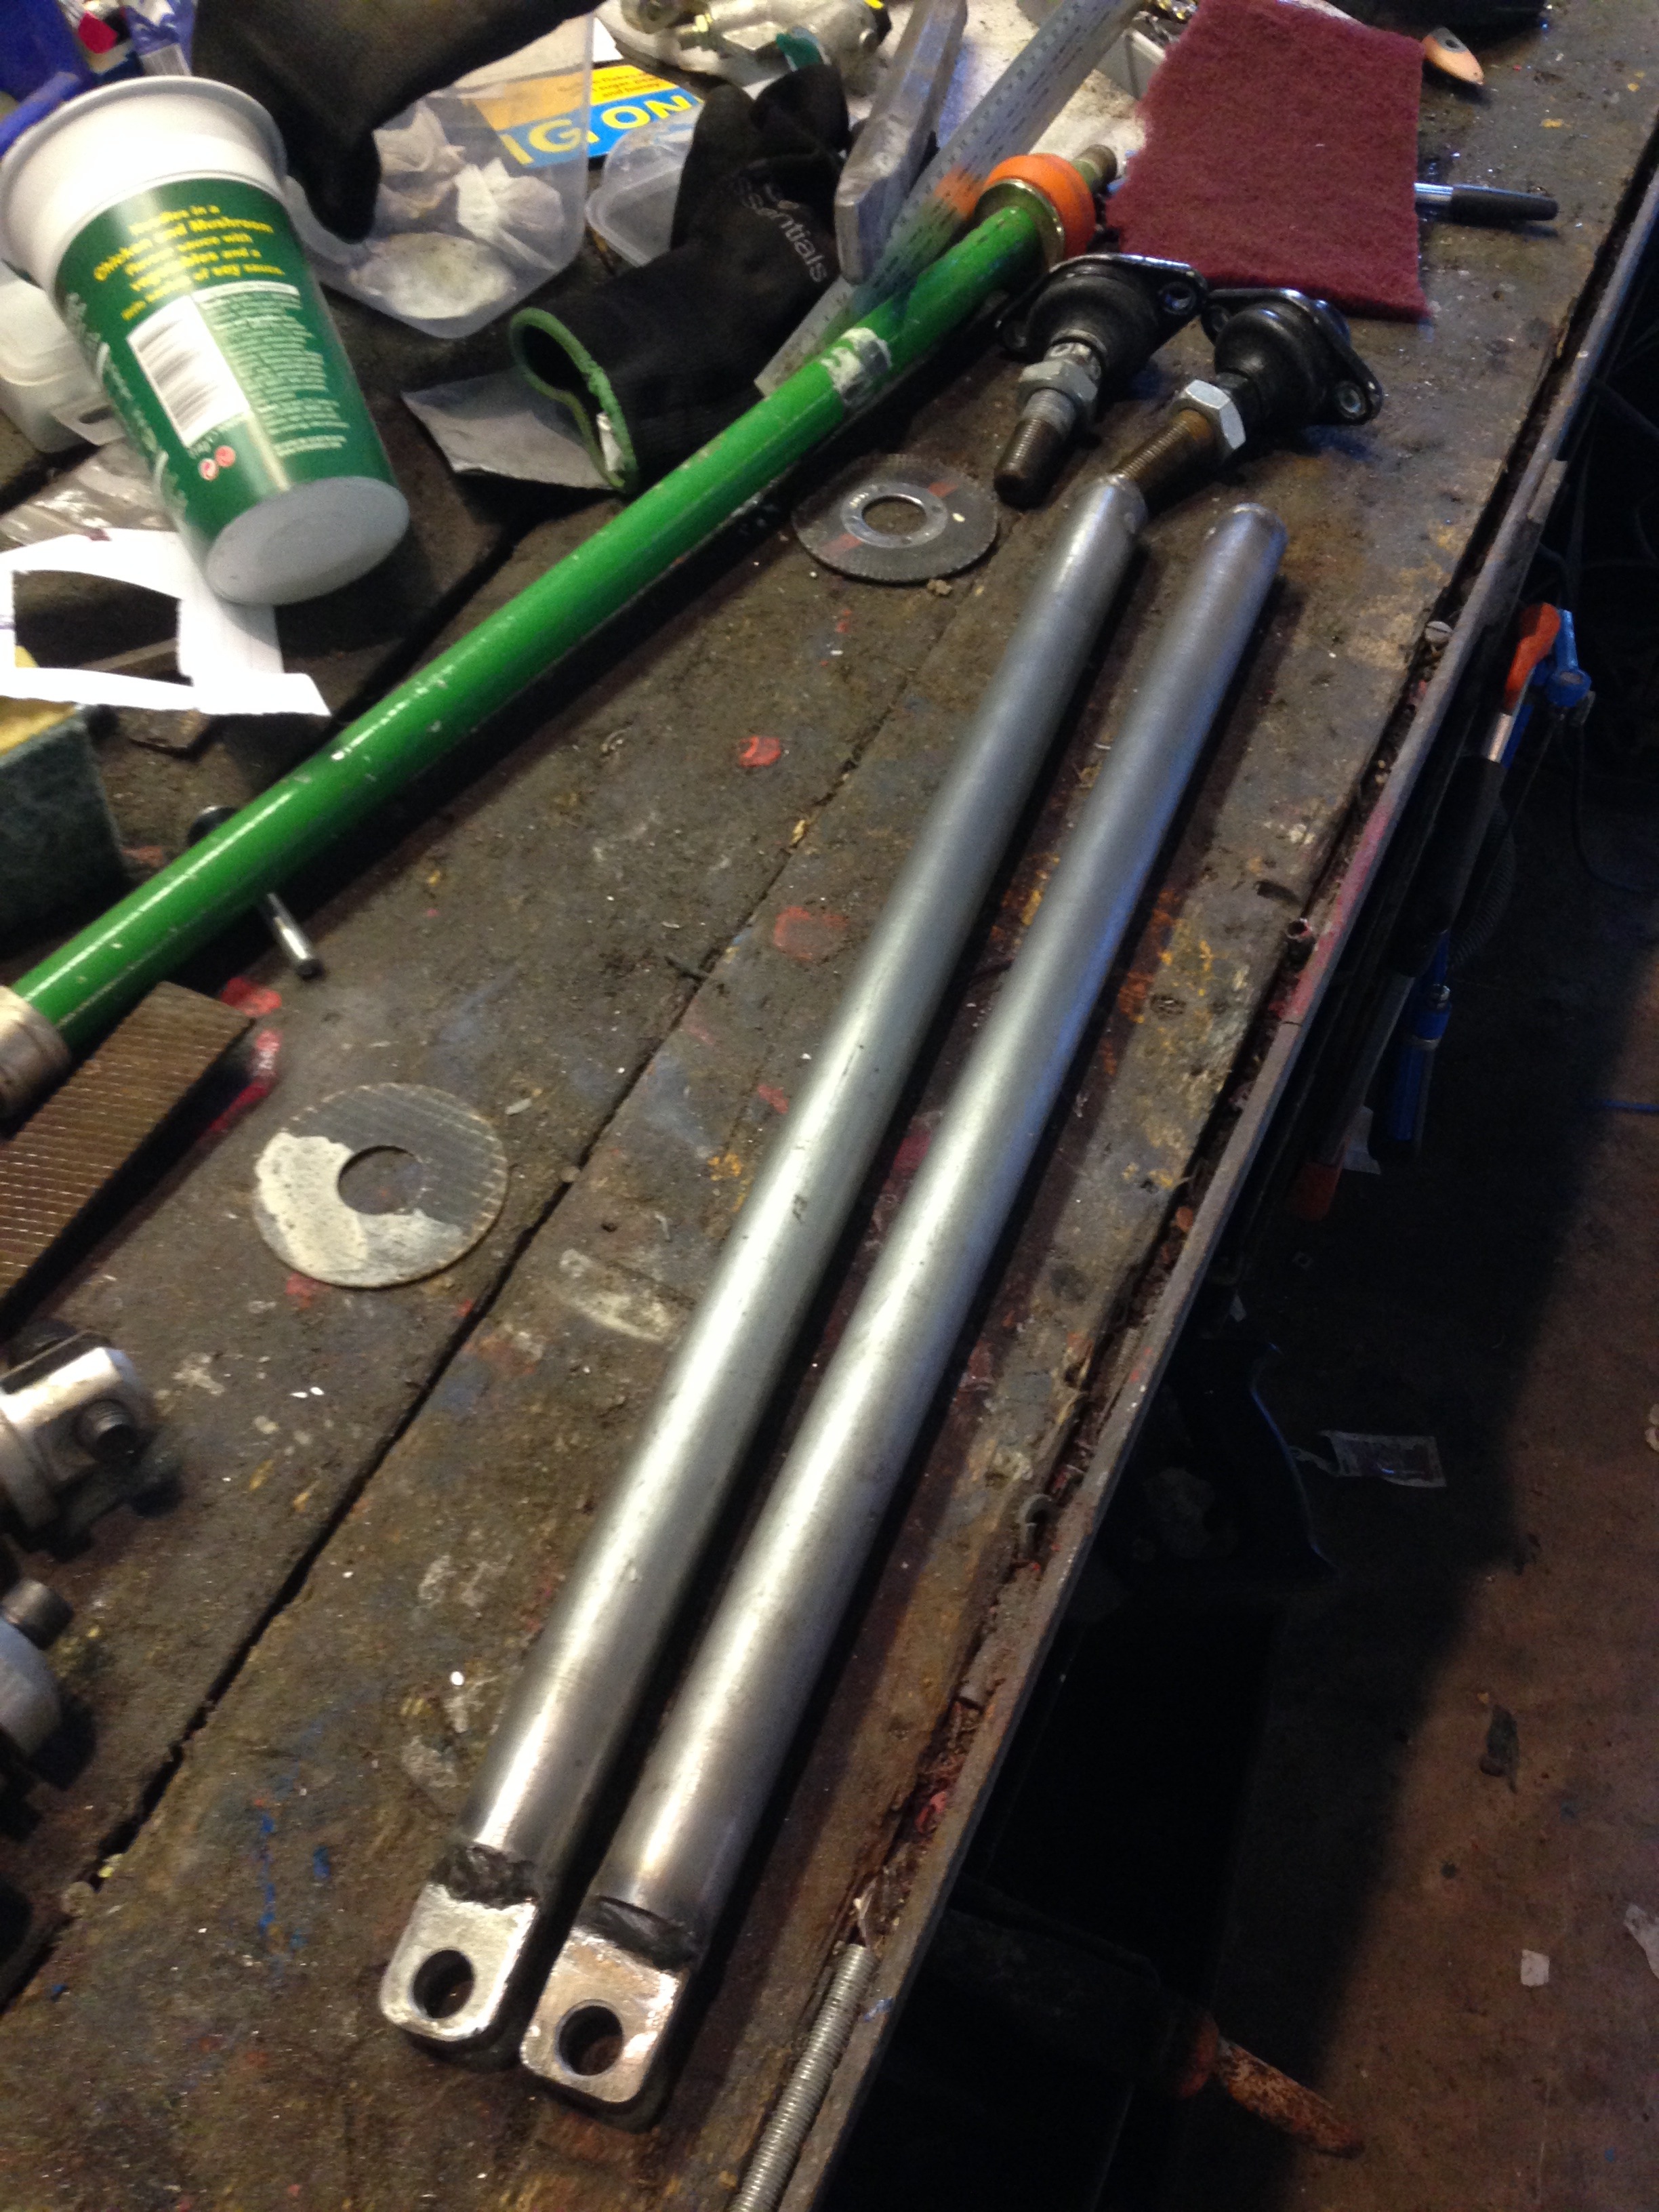
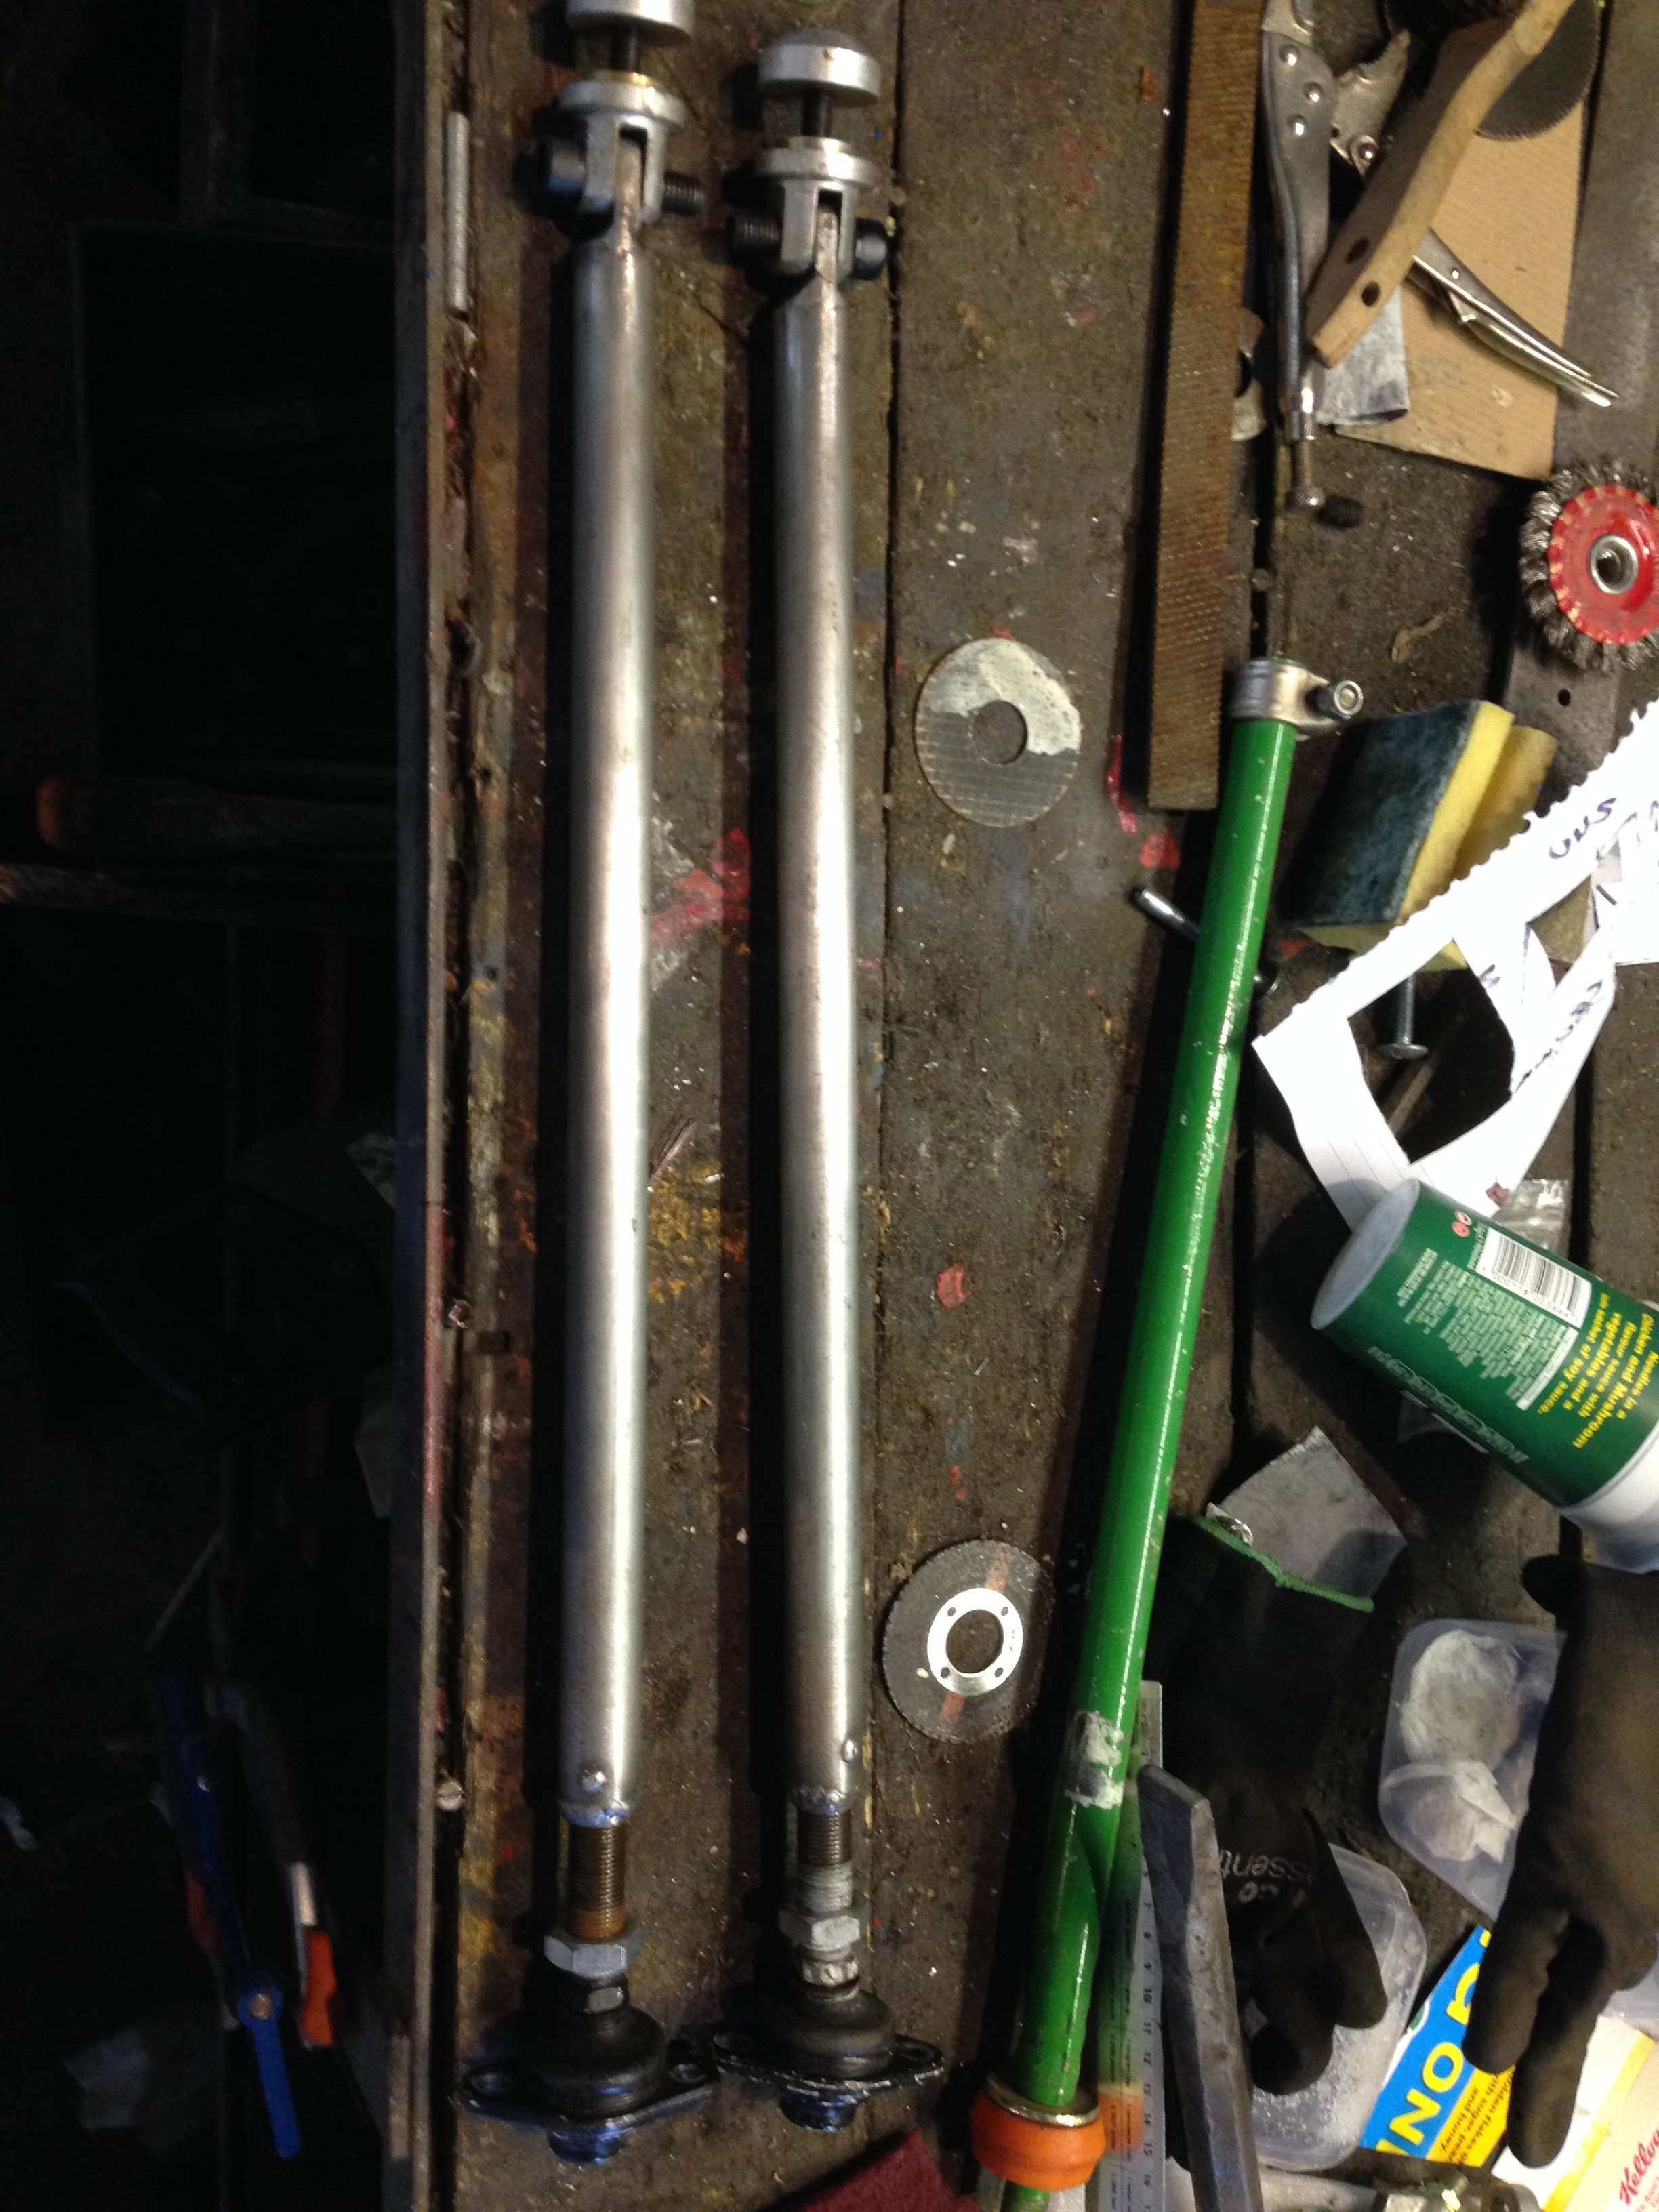
Well, stonechipping and painting were out of the question today as it was -2 in the workshop, so made up my front tie bars. Also drilled out the TCA cone links to accept an M12 fastener.


 14-02-2015, 11:45 AM
#998
PassionFord Post Troll
Still looking good buddy one day we will be on that track looking back!!!
Mines been stale for nearly two years but now were at it full power
What ofset are your 8j comps ? Got a set of et35 flat faced ones im going to try and fit. What they like on the Leda's ?
Mines been stale for nearly two years but now were at it full power
What ofset are your 8j comps ? Got a set of et35 flat faced ones im going to try and fit. What they like on the Leda's ?
14-02-2015, 04:06 PM
#999
Wye Valley Hardcore
Thread Starter
I've done bits and bobs but haven't had much time to work on it recently due to work. The whole underside, arches, sills are in Gravitex waiting for top coat and then I can bolt everything back together. Also, got a pile of stuff which needs painting before it can be bolted on TCA's, front tie bars, gear shifter etc and I want to re paint the Ledas as there's too much colour going on and they are a bit tatty up close. I could make a huge dent in it if I get a week off work, which I should be able to take in the next few weeks.
The comps are 17x8 ET35. I have 3mm spacers on the front and 1/2mm on the rear. They are very thin on the back! Then again, I've got custom bells and rotors all round so the clearances will be different to yours. They don't need much to clear the shocks, though.
The comps are 17x8 ET35. I have 3mm spacers on the front and 1/2mm on the rear. They are very thin on the back! Then again, I've got custom bells and rotors all round so the clearances will be different to yours. They don't need much to clear the shocks, though.
15-02-2015, 08:50 AM
#1000
PassionFord Post Troll
I've done bits and bobs but haven't had much time to work on it recently due to work. The whole underside, arches, sills are in Gravitex waiting for top coat and then I can bolt everything back together. Also, got a pile of stuff which needs painting before it can be bolted on TCA's, front tie bars, gear shifter etc and I want to re paint the Ledas as there's too much colour going on and they are a bit tatty up close. I could make a huge dent in it if I get a week off work, which I should be able to take in the next few weeks.
The comps are 17x8 ET35. I have 3mm spacers on the front and 1/2mm on the rear. They are very thin on the back! Then again, I've got custom bells and rotors all round so the clearances will be different to yours. They don't need much to clear the shocks, though.
The comps are 17x8 ET35. I have 3mm spacers on the front and 1/2mm on the rear. They are very thin on the back! Then again, I've got custom bells and rotors all round so the clearances will be different to yours. They don't need much to clear the shocks, though.