Mk5 Escort RS2000 UPDATED 15/2/06 Big Update (56k no no).
 10-08-2006, 01:11 AM
#1
Regular Contributor
Thread Starter

Join Date: Jul 2006
Location: Oldham
Posts: 208
Likes: 0
Received 0 Likes
on
0 Posts
Decided since the oil pumps gone I'm gunna rebuild/mod the engine. Thought I'd post it in here for future reference to anyone who may need it or like to read it.
Feel free to let me know what you think and most important of all shout at me when I'm messing things up. Here goes......
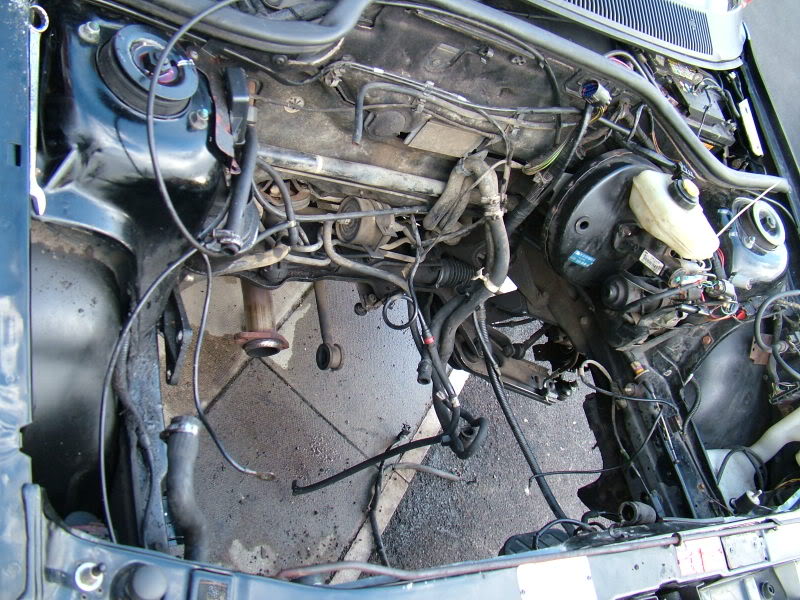
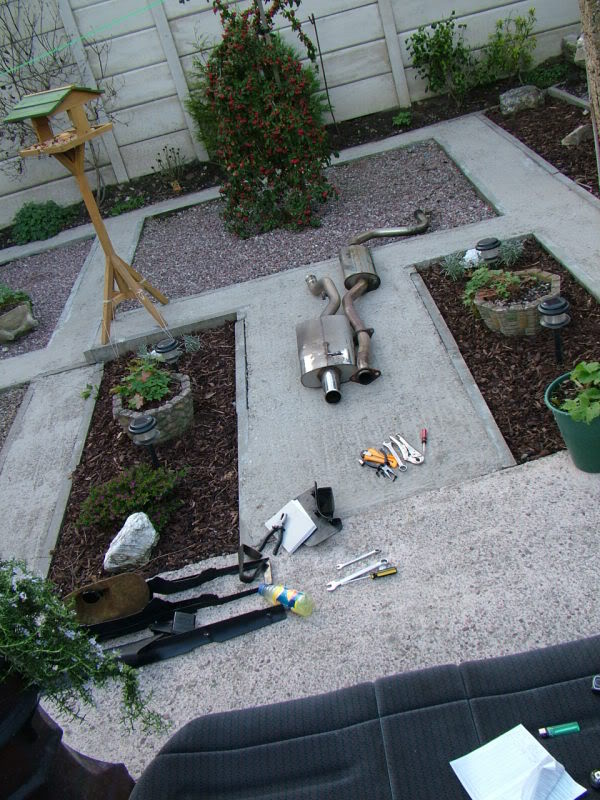
Started taking the engine out the other night and will be out by tomorrow night, cleaned up and put in the spare bedroom.
Calipers are off and ive already degreased them and brushed them down with a wire brush will paint next. I Want to get the car back into a rolling state so I can move it from my drive to somewhere else with a little more room to work on it. Thats why I've decided to get under the front arches all cleaned up re paint everything re builed everything and stick the wheels back on.
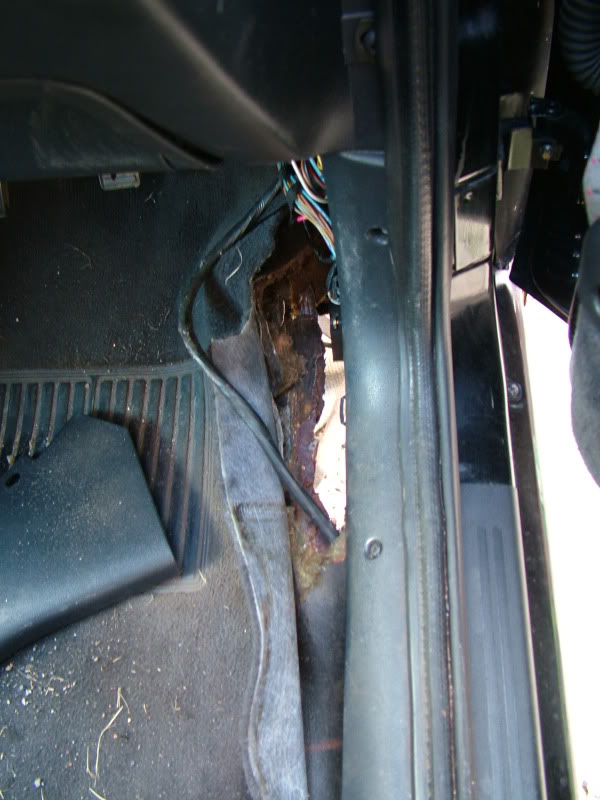
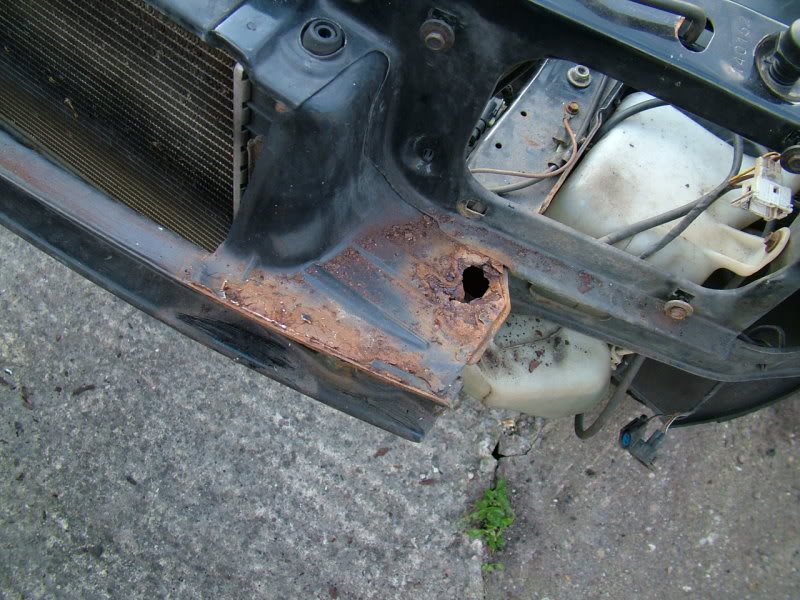
In doing this Ive already found a nice hole of rust in the drivers footwell just below where the hinges are for the doors.
Just thought I'd get the thread started because theres gunna be quite alot of photos added tomorrow.
Peace Out
Feel free to let me know what you think and most important of all shout at me when I'm messing things up. Here goes......
Started taking the engine out the other night and will be out by tomorrow night, cleaned up and put in the spare bedroom.
Calipers are off and ive already degreased them and brushed them down with a wire brush will paint next. I Want to get the car back into a rolling state so I can move it from my drive to somewhere else with a little more room to work on it. Thats why I've decided to get under the front arches all cleaned up re paint everything re builed everything and stick the wheels back on.
In doing this Ive already found a nice hole of rust in the drivers footwell just below where the hinges are for the doors.
Just thought I'd get the thread started because theres gunna be quite alot of photos added tomorrow.
Peace Out
 10-08-2006, 06:42 PM
#2
Regular Contributor
Thread Starter
Join Date: Jul 2006
Location: Oldham
Posts: 208
Likes: 0
Received 0 Likes
on
0 Posts
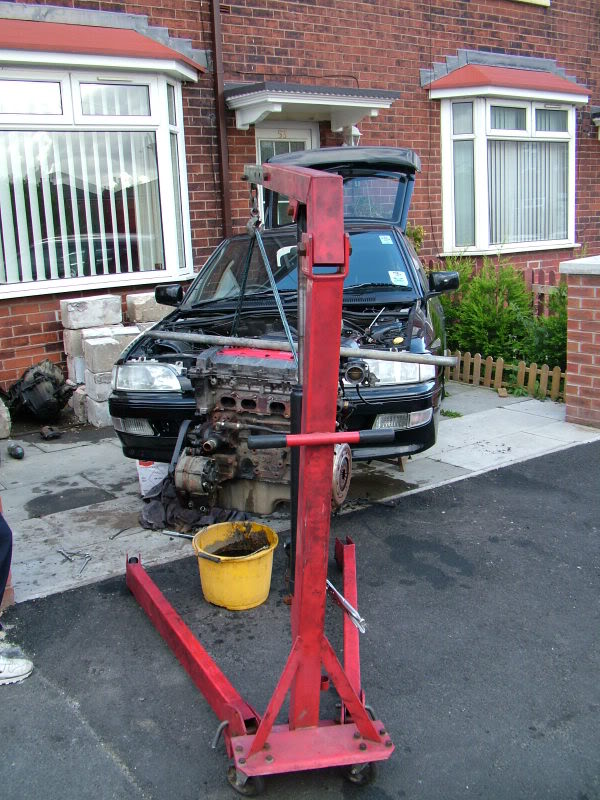
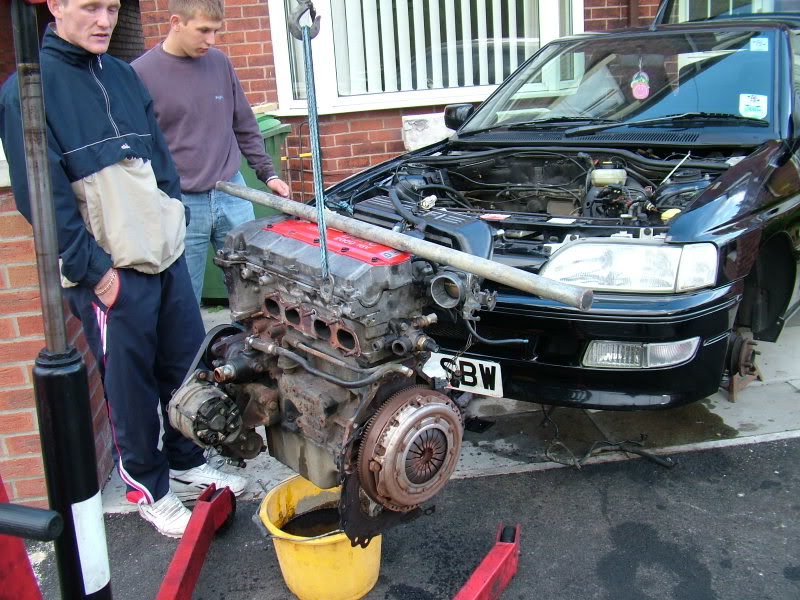
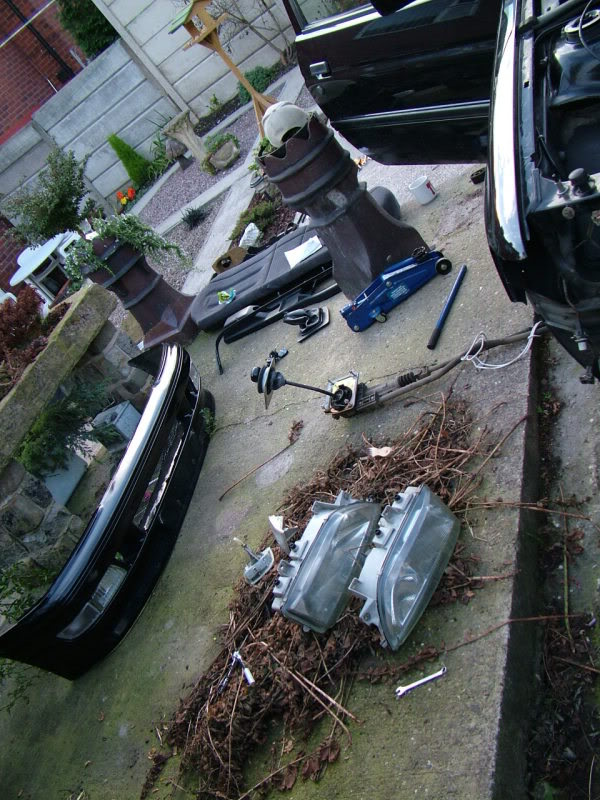
Engines out and in the spare bedroom now. Was easy enough getting it out with that engine lift, just a shame that the engine lift couldnt be pushed upstairs.

Need to clean the drive next or else the mrs is going to go crazy.
Need to clean the drive next or else the mrs is going to go crazy.
10-08-2006, 06:48 PM
#3
Advanced PassionFord User
iTrader: (1)

Join Date: Jun 2003
Location: new milton, hampshire
Posts: 2,121
Likes: 0
Received 0 Likes
on
0 Posts
good work mate i hope you have more interest in your project than i do 
my rs2k is in shit loads of bits and i have proper lost interest in cars just lately and cant see it ever getting done now
WOMEN ARE BAD
my rs2k is in shit loads of bits and i have proper lost interest in cars just lately and cant see it ever getting done now
WOMEN ARE BAD
 29-08-2006, 01:11 AM
#6
Regular Contributor
Thread Starter
Join Date: Jul 2006
Location: Oldham
Posts: 208
Likes: 0
Received 0 Likes
on
0 Posts
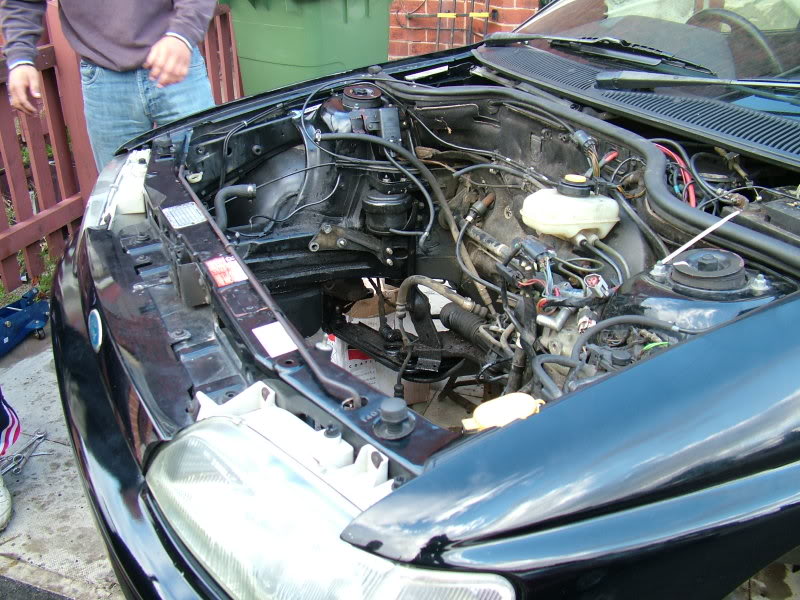
Started taking the engine apart last night, heads been up my ass recently so I've only just started it again. I think the picture ive added on my desktop of my car when it was working has reminded me I do actually need to finish it.
Here goes...
Stripped it down some more today, is it me or are engines quite clean inside. I don't know if its me not knowing what an engines like inside or most of this is new.


Anyways I got the crank pully off and took the tentioner off went to undo the oil pump sprocket, head of the bolt came straight off without much pressure at all. Put it this way i could undo the thread remaining in the hole with my fingernail. That tells me that was loose to start with.
With a little bit more detective work, I stripped the oil pump down to find the following. (May be a sore sight to the trained eye)


From what I can see the cylinder thats sat insdide the oil pump has collected some metal from somehwere and scored the inside enough for the metal to build up and jam it together. Now I've put this down to be tightened up too much, now im not 100% on this because I'm unaware if anyone has ever even touched the oil pump.
So what I thinks happened is that its siezed up, the sprocket wasnt tight leaving some play for chain to rip the head off enough to spin without actually turning the oil pump. If that makes sense. It was all still intact when I opened it up, so the chains pulled the sprocket but rathern than spin the siezed oil pump its bent the head enough to spin freely without pulling the sprocket away from the oil pump completely.
I'm no better off now because I still need an oil pump but at least I think I know why it happened. Also I've learnt quite alot so far, and amazed a few friends that think I'm crazy for stripping the engine down. Just keep telling them its easy when you have instructions. :P
Good job they dont see this thread.
Cheers guys.
Hope you enjoy.
Here goes...
Stripped it down some more today, is it me or are engines quite clean inside. I don't know if its me not knowing what an engines like inside or most of this is new.
Anyways I got the crank pully off and took the tentioner off went to undo the oil pump sprocket, head of the bolt came straight off without much pressure at all. Put it this way i could undo the thread remaining in the hole with my fingernail. That tells me that was loose to start with.
With a little bit more detective work, I stripped the oil pump down to find the following. (May be a sore sight to the trained eye)
From what I can see the cylinder thats sat insdide the oil pump has collected some metal from somehwere and scored the inside enough for the metal to build up and jam it together. Now I've put this down to be tightened up too much, now im not 100% on this because I'm unaware if anyone has ever even touched the oil pump.
So what I thinks happened is that its siezed up, the sprocket wasnt tight leaving some play for chain to rip the head off enough to spin without actually turning the oil pump. If that makes sense. It was all still intact when I opened it up, so the chains pulled the sprocket but rathern than spin the siezed oil pump its bent the head enough to spin freely without pulling the sprocket away from the oil pump completely.
I'm no better off now because I still need an oil pump but at least I think I know why it happened. Also I've learnt quite alot so far, and amazed a few friends that think I'm crazy for stripping the engine down. Just keep telling them its easy when you have instructions. :P
Good job they dont see this thread.
Cheers guys.
Hope you enjoy.
20-09-2006, 12:07 AM
#7
Regular Contributor
Thread Starter
Join Date: Jul 2006
Location: Oldham
Posts: 208
Likes: 0
Received 0 Likes
on
0 Posts
Heads off now.
Still saving at the minute to get the head ported and polished, and bottom end lightened and balanced. But I just couldnt help myself getting a set of morettes. �137 all in :P.
Anyone on here that can recommend somewhere as close as possible to the north west that I can get the work done???
Been quoted �480 for port n polish and �160ish for bottom end.
Also whats the best thing to clean all my bits up with?
Cheers
Trending Topics
 22-09-2006, 10:55 AM
#13
PassionFord Post Whore!!

Join Date: Mar 2006
Location: Nottingham
Posts: 5,581
Likes: 0
Received 0 Likes
on
0 Posts
small world mate my number plates k606 gew here is my restro just put sum wheels on it awaitin for cash so i can get a starter motor.
your doing sum good work there matey keep it up
https://passionford.com/forum/viewto...113&highlight=
your doing sum good work there matey keep it up
https://passionford.com/forum/viewto...113&highlight=
22-09-2006, 11:00 AM
#14
Regular Contributor
Thread Starter
Join Date: Jul 2006
Location: Oldham
Posts: 208
Likes: 0
Received 0 Likes
on
0 Posts
Hello dan,
Thats the car that the Morettes are coming out of, I'm in the same boat as you waiting for money to get the engine work done. Its a bummer.
Thats the car that the Morettes are coming out of, I'm in the same boat as you waiting for money to get the engine work done. Its a bummer.
22-09-2006, 11:13 AM
#15
PassionFord Post Whore!!
Join Date: Mar 2006
Location: Nottingham
Posts: 5,581
Likes: 0
Received 0 Likes
on
0 Posts
alright nath  lol its even more of a bummer for me i got my licence back on sept 9th after being banned for 6 months n i still carnt drive it cus the starter motor has packed in all i get is a click click
  now ran out of cash till next week
i wouldnt mind a set but there daft money might c if i can get some from the ford show at donny
now ran out of cash till next week i wouldnt mind a set but there daft money might c if i can get some from the ford show at donny
22-09-2006, 11:20 AM
#17
PassionFord Post Whore!!
Join Date: Mar 2006
Location: Nottingham
Posts: 5,581
Likes: 0
Received 0 Likes
on
0 Posts
bargin matey i will try n find some for round the �150.00 mark or less if i can ive only seen them for about �200ish
keep up the good work then mate i will keep my thead up to date as soon as the cash starts coming in again
i will try n find some for round the �150.00 mark or less if i can ive only seen them for about �200ish keep up the good work then mate i will keep my thead up to date as soon as the cash starts coming in again
27-09-2006, 02:24 AM
#18
Regular Contributor
Thread Starter
Join Date: Jul 2006
Location: Oldham
Posts: 208
Likes: 0
Received 0 Likes
on
0 Posts
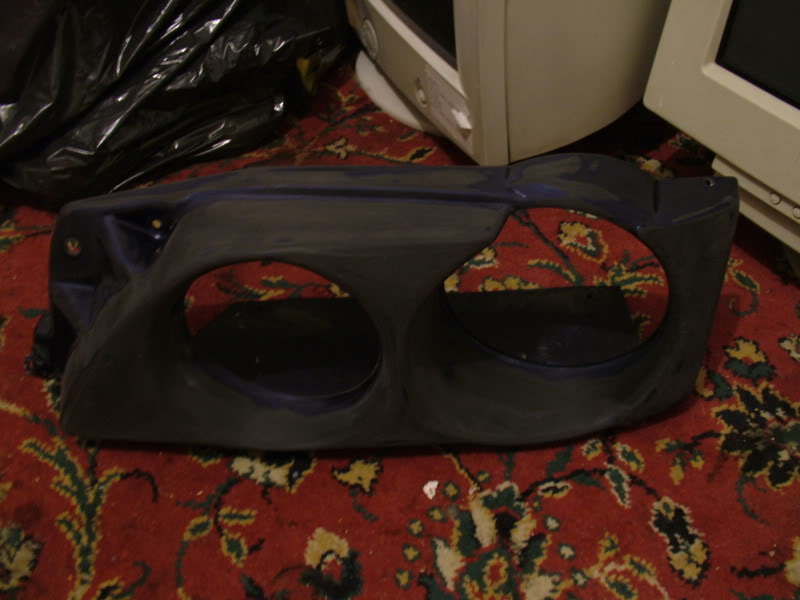
Lights came a little later than he said but I got them at least.
Started off by getting things cleared up in a seperate thread.
Took them apart and rubbed em down.
Primed them up.
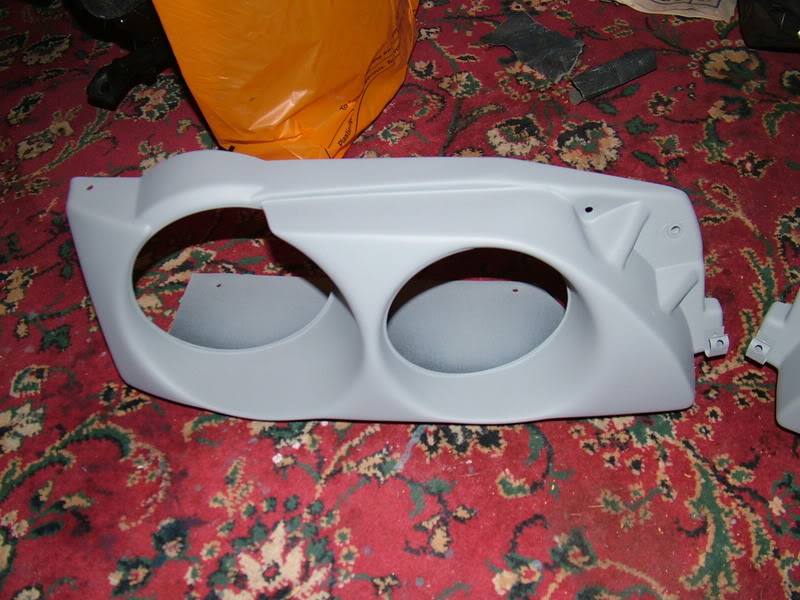
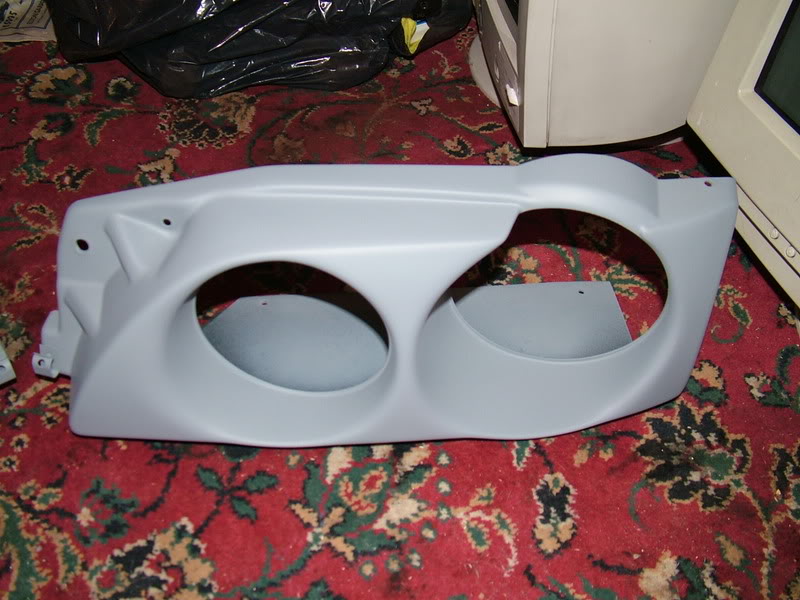
Finding it hard to wait till tomorrow but I know I have to. I dont ever want to have to rub them down ever again.
Ill update it tomorrow when Ive painted them.
Started off by getting things cleared up in a seperate thread.
Took them apart and rubbed em down.
Primed them up.
Finding it hard to wait till tomorrow but I know I have to. I dont ever want to have to rub them down ever again.
Ill update it tomorrow when Ive painted them.
02-10-2006, 02:47 AM
#19
Regular Contributor
Thread Starter
Join Date: Jul 2006
Location: Oldham
Posts: 208
Likes: 0
Received 0 Likes
on
0 Posts
Finished the Morette Lights off.
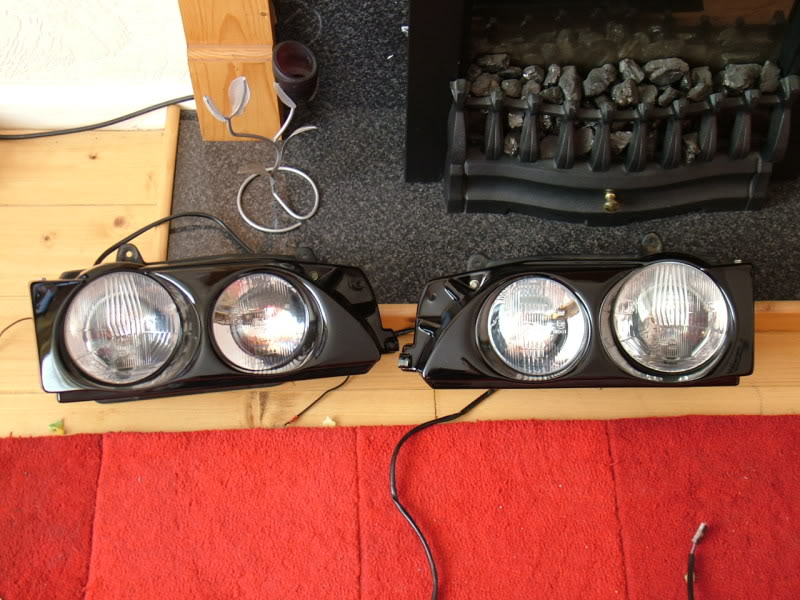
Stripped the trim outta it too.
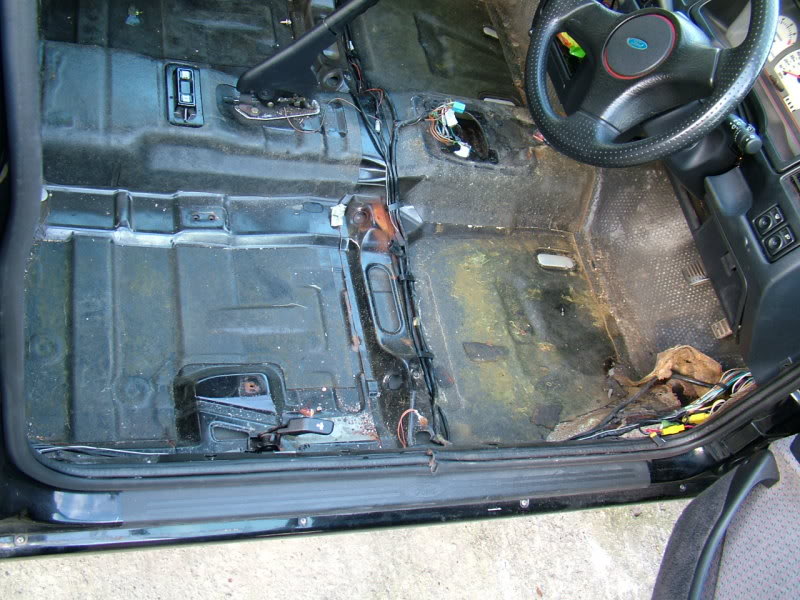
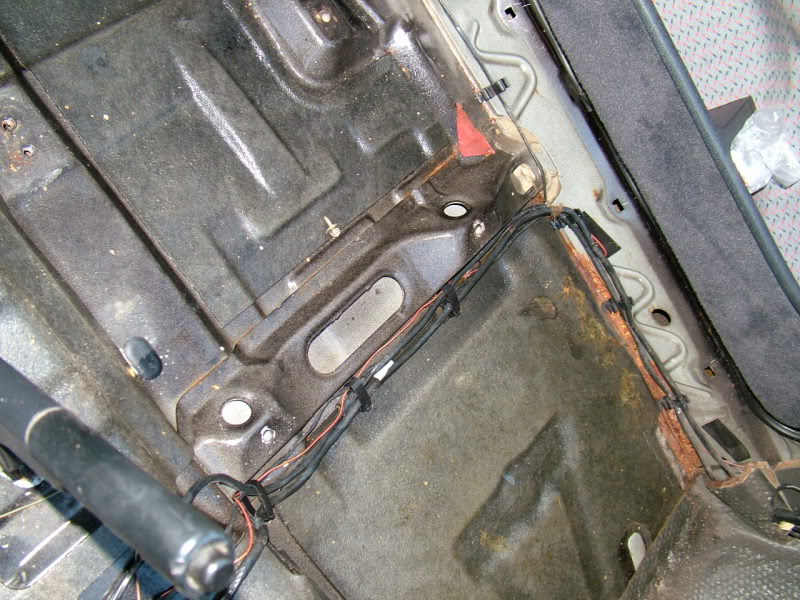
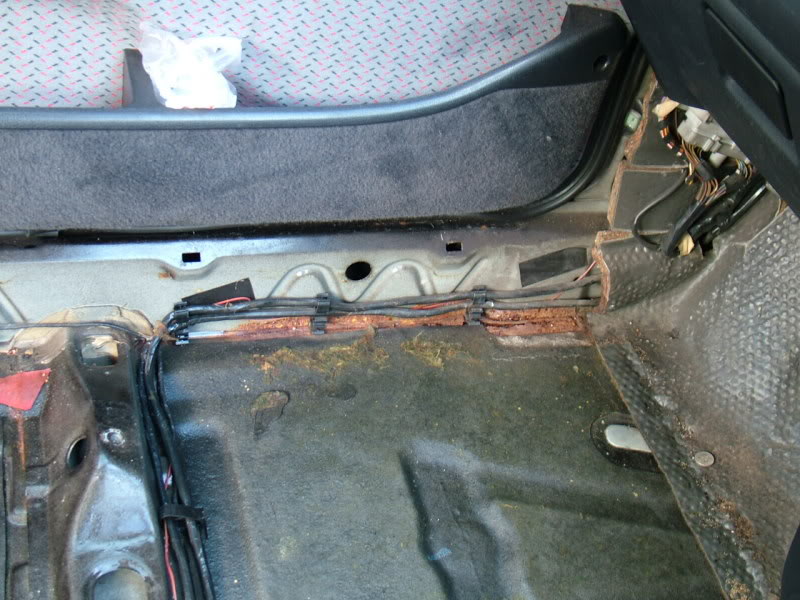
When I got to removing the passenger side this is what I found.
One wet carpet/sound proofing Passenger side only.
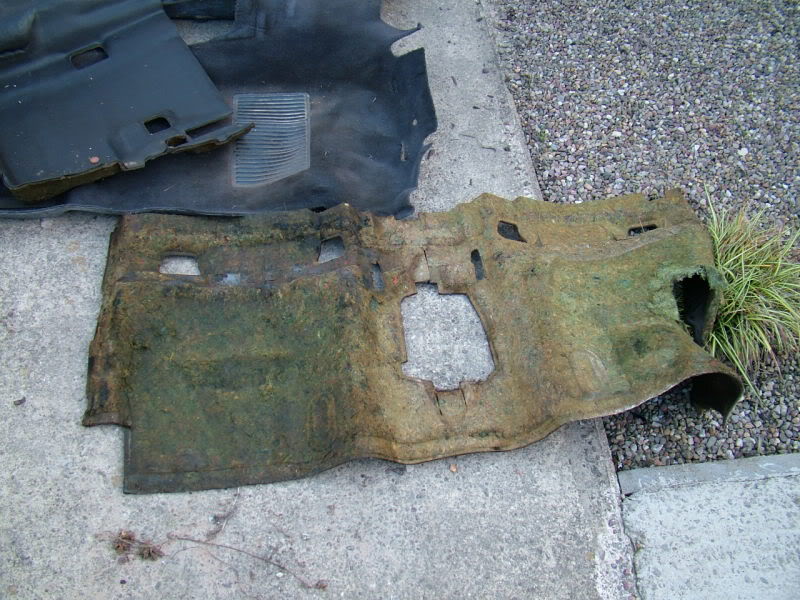
Nice puddle.
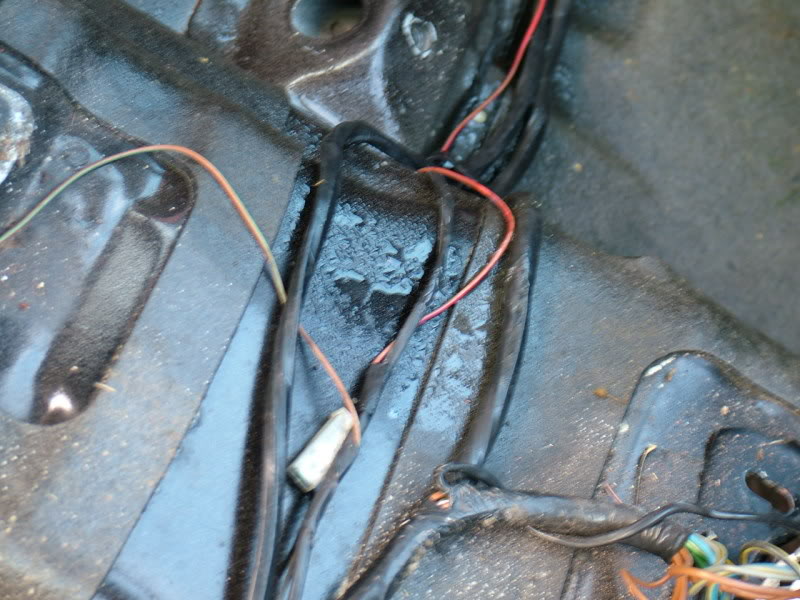
RUST.
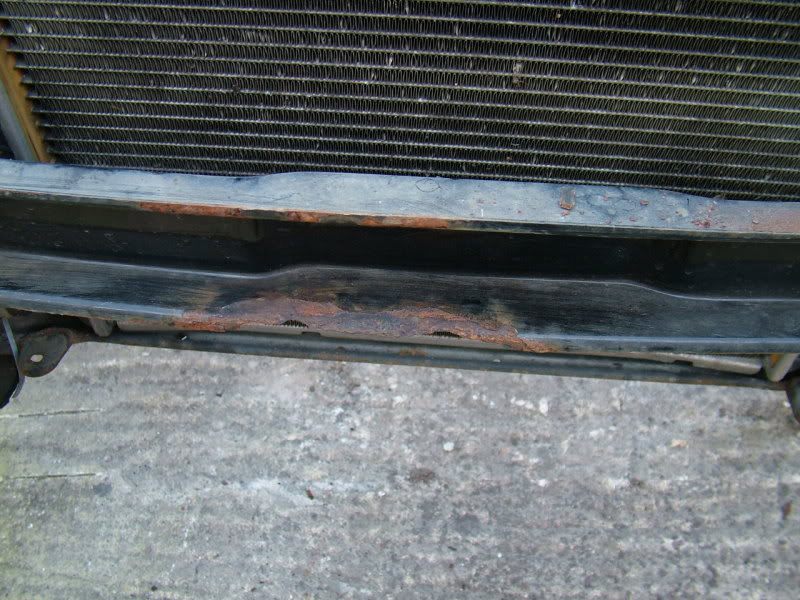
Front end off.
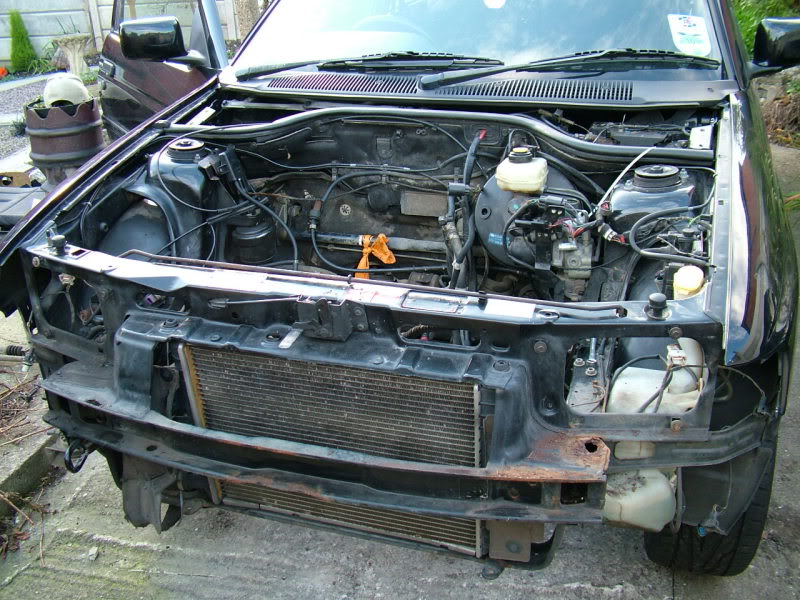
More RUST.
Mother in laws back garden
Decided I'd best get the body work done ASAP. Gunna buy another engine and stick that in once the body is done, ill rebuild the other when I've got time/money.
Stripped the trim outta it too.
When I got to removing the passenger side this is what I found.
One wet carpet/sound proofing Passenger side only.
Nice puddle.
RUST.
Front end off.
More RUST.
Mother in laws back garden
Decided I'd best get the body work done ASAP. Gunna buy another engine and stick that in once the body is done, ill rebuild the other when I've got time/money.
24-10-2006, 12:55 PM
#22
Regular Contributor
Thread Starter
Join Date: Jul 2006
Location: Oldham
Posts: 208
Likes: 0
Received 0 Likes
on
0 Posts
Found an engine now RS2000 out of a 4X4 but I think I'm right in thinking it will just pop straight into my 2wd.
Engine has covered 62,000 miles
FSH
Fast road cams fitted
�1000 worth of reciepts for work carried out and repairs
Spoke to the bloke who has the engine now because he bought it as a full written off car and has broke it. He was laughing saying its un believable the work that has been carried out on it regardless of the cost.
�450
Hopefully picking up this week.
26-10-2006, 12:07 AM
#23
Regular Contributor
Thread Starter
Join Date: Jul 2006
Location: Oldham
Posts: 208
Likes: 0
Received 0 Likes
on
0 Posts
Picked engine up tonight and yeah whoever owned it before I did, did spend alot of cash on thow ehole car nevermind the engine.
Havnt added it all up yet but I'm gunna have to just to see the bottomline.
Cheers
Havnt added it all up yet but I'm gunna have to just to see the bottomline.
Cheers
15-02-2007, 01:36 AM
#27
Regular Contributor
Thread Starter
Join Date: Jul 2006
Location: Oldham
Posts: 208
Likes: 0
Received 0 Likes
on
0 Posts
Massive update really taken from another forum over the last few weeks, all comments welcome. Especially advice seem as though this is the first time ive worked on cars. Enjoy.
Made a start on the bumper today.
One bumper


Rubbed down a little


After I rubbed it all down I washed it to find the parts id missed
(I done recommend this if your Mrs is due home)

Nice and clean, some missed parts also.


Damage

Filled all the damaged areas, dont think I really needed to do all of them because the high build primer will probably sort them out.


Rubbed em down again.


And thats that.
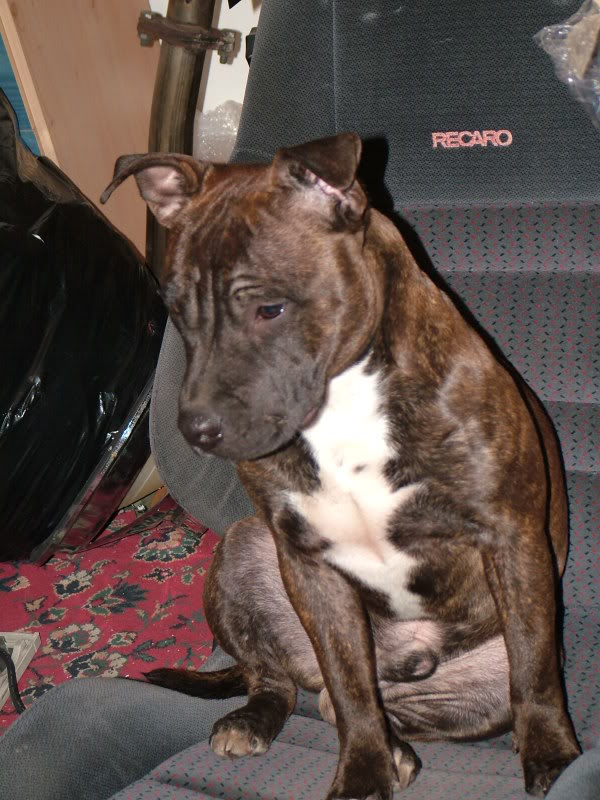
Oh I nearly forgot, I must admit I didnt do all the hard work myself I had a little helper.

Primed up front bumper and grill tonight, first time using the compressor and spray gun so I didnt really know what to expect. However all went well and they just need painting now.
Practice bonnet off a saffy.

1St coat

2Nd coat

Finished


Grill


My M8 who owns the 3dr. Trav

Moved the car to my m8s house ready for all the work to start. Stripped it down a little more to see just exactly what needs doing. Heres a few pics more to follow.


This didnt look too bad with only a few bubbles around the filler, did the ole screwdriver test and here we have it.

Took the boot spoiler off to see how bad it was under there.


Not that bad really.
And a really upset Saphire Cosworth, now the 3dr has moved in.


Did a little bit tonight started poking about like you do and a bit more strippin.
Underneath started flapping it down to see what was under all this sealent crap. Im gunna leave it as it is becasause it is stopping it from rusting where it has been applied. Ill just patch up all the bits that havnt been done.

Battery Tray, solid just has very minor surface rust.

Better shots of the air scoop located in my floor pan.


Got cracked on with the fuel filler repair.
Beginning


Now although the welding wasnt the best by no means we used a flap type disk to remove it down until it was level. However it did get a little thin

Hammered it in filler to stop it getting rusty again until the next time Ive got time to finish it off.

I also found this same on both sides.

Made a start on the bumper today.
One bumper
Rubbed down a little
After I rubbed it all down I washed it to find the parts id missed
(I done recommend this if your Mrs is due home)
Nice and clean, some missed parts also.
Damage
Filled all the damaged areas, dont think I really needed to do all of them because the high build primer will probably sort them out.
Rubbed em down again.
And thats that.
Oh I nearly forgot, I must admit I didnt do all the hard work myself I had a little helper.
Primed up front bumper and grill tonight, first time using the compressor and spray gun so I didnt really know what to expect. However all went well and they just need painting now.
Practice bonnet off a saffy.
1St coat
2Nd coat
Finished
Grill
My M8 who owns the 3dr. Trav
Moved the car to my m8s house ready for all the work to start. Stripped it down a little more to see just exactly what needs doing. Heres a few pics more to follow.
This didnt look too bad with only a few bubbles around the filler, did the ole screwdriver test and here we have it.
Took the boot spoiler off to see how bad it was under there.
Not that bad really.
And a really upset Saphire Cosworth, now the 3dr has moved in.
Did a little bit tonight started poking about like you do and a bit more strippin.
Underneath started flapping it down to see what was under all this sealent crap. Im gunna leave it as it is becasause it is stopping it from rusting where it has been applied. Ill just patch up all the bits that havnt been done.
Battery Tray, solid just has very minor surface rust.
Better shots of the air scoop located in my floor pan.
Got cracked on with the fuel filler repair.
Beginning
Now although the welding wasnt the best by no means we used a flap type disk to remove it down until it was level. However it did get a little thin
Hammered it in filler to stop it getting rusty again until the next time Ive got time to finish it off.
I also found this same on both sides.
 15-02-2007, 10:44 AM
#29
Advanced PassionFord User
Join Date: Oct 2005
Location: SUTTON IN ASHFIELD
Posts: 2,062
Likes: 0
Received 0 Likes
on
0 Posts
Nice one mate i've got most of this work to do yet
Take a look at my thread in my sig, Good luck with it nice to see i'm not alone now you and dan are doing mk5 rs's cheeRS, Grant
Take a look at my thread in my sig, Good luck with it nice to see i'm not alone now you and dan are doing mk5 rs's cheeRS, Grant

Thread
Thread Starter
Forum
Replies
Last Post