Wes-Spec 4x4 Sapphire Cosworth
 20-02-2007, 08:59 PM
#41
I've found that life I needed.. It's HERE!!
Thread Starter

Originally Posted by martin-reyland
About time you did something with it  Btw go GT30
Btw go GT30


 21-03-2007, 06:10 PM
#46
I've found that life I needed.. It's HERE!!
Thread Starter
Hi Brom, yes mate going OK, abit slow, how are you now?
yes the mounting rings are underneath the turret tops, i want to mount the topmounts from underneath, i just don't like the idea of them being mounted ontop (and i don't want to cut my turret tops off )
yes the mounting rings are underneath the turret tops, i want to mount the topmounts from underneath, i just don't like the idea of them being mounted ontop (and i don't want to cut my turret tops off
)
22-03-2007, 09:37 PM
#47
thats ok mate
i rather have them ontop as make car so easy to set and and i can change springs with out takein wheel and strut off
6 m10 allen key bolts per side aint going nowwhere
i rather have them ontop as make car so easy to set and and i can change springs with out takein wheel and strut off
6 m10 allen key bolts per side aint going nowwhere
25-03-2007, 12:37 AM
#48
I've found that life I needed.. It's HERE!!
Thread Starter
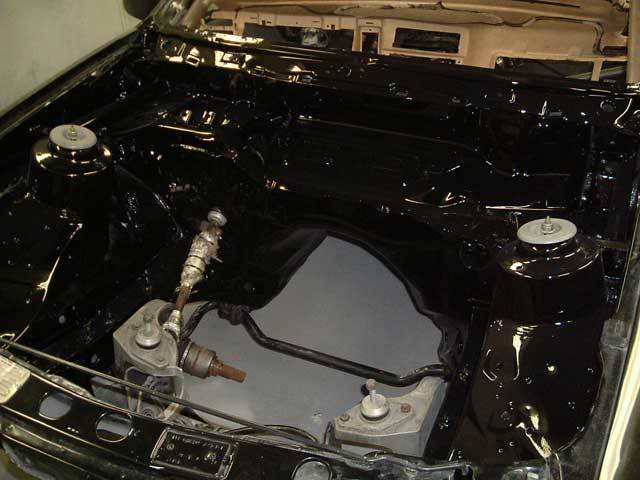
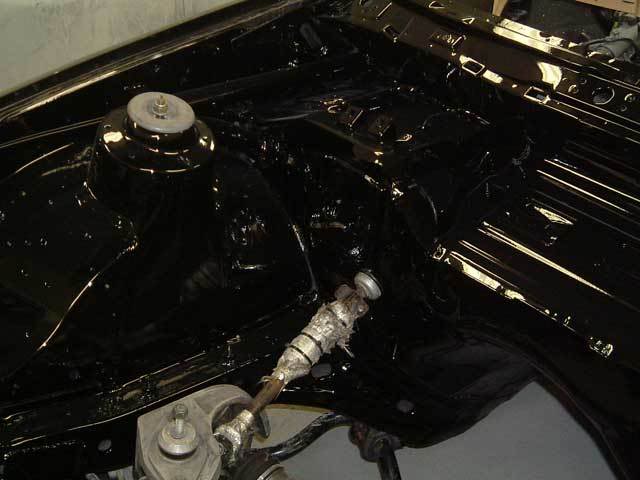
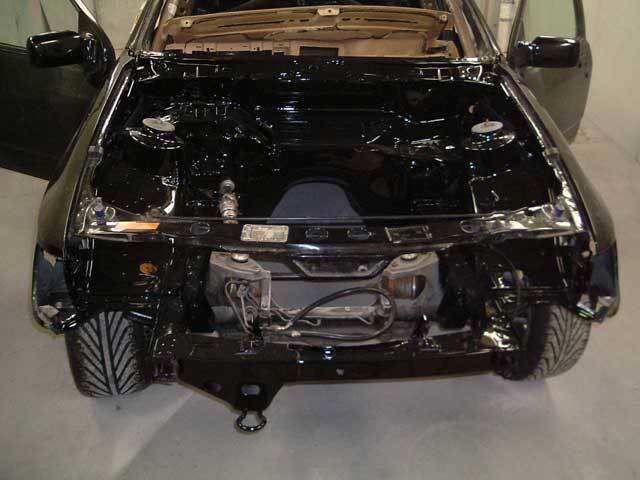
At last abit of progress on the paintwork, engine bay has been painted, not much to see in the pics but at least it�s a start:

Also replacement dashboard has been trimmed to fit around the cage, this can now be sent off to be flocked: (batterys ran out after 1st pic )
)
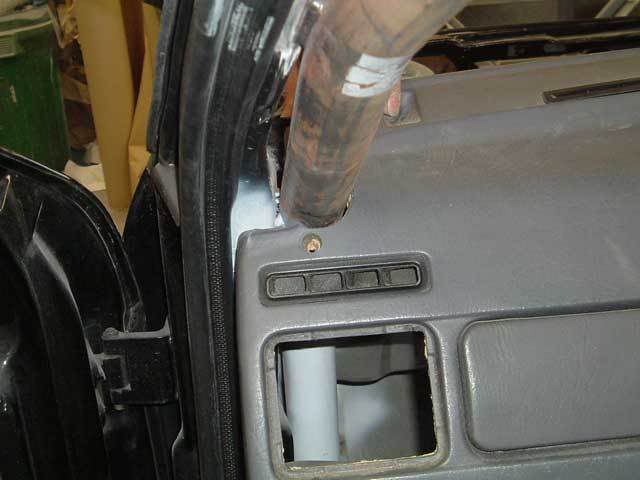
I messed up the original dash by cutting too much away and also it looked shit The old dash had other faults anyway so no biggie to get another one.
I think the inside is going to be painted next, we have decided to paint everything black inside now, too much hassle to mask off everything to paint the bars silver. Then the front wings will be getting some treatment so I can run 235/40 17�s on the front, so should be another couple of months before the next update
Also replacement dashboard has been trimmed to fit around the cage, this can now be sent off to be flocked: (batterys ran out after 1st pic
)I messed up the original dash by cutting too much away and also it looked shit
The old dash had other faults anyway so no biggie to get another one.I think the inside is going to be painted next, we have decided to paint everything black inside now, too much hassle to mask off everything to paint the bars silver. Then the front wings will be getting some treatment so I can run 235/40 17�s on the front, so should be another couple of months before the next update
23-05-2007, 01:05 PM
#49
I've found that life I needed.. It's HERE!!
Thread Starter
Well when i said another couple of months for an update, i didn't think that would actually be the case
The car itself hasn't changed since the last pics, I expressed my displeasure with their progress on Saturday
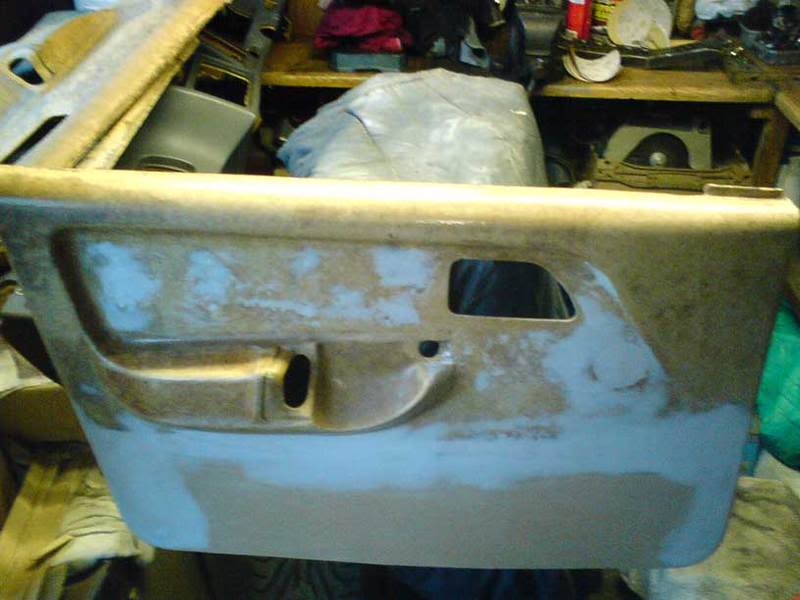
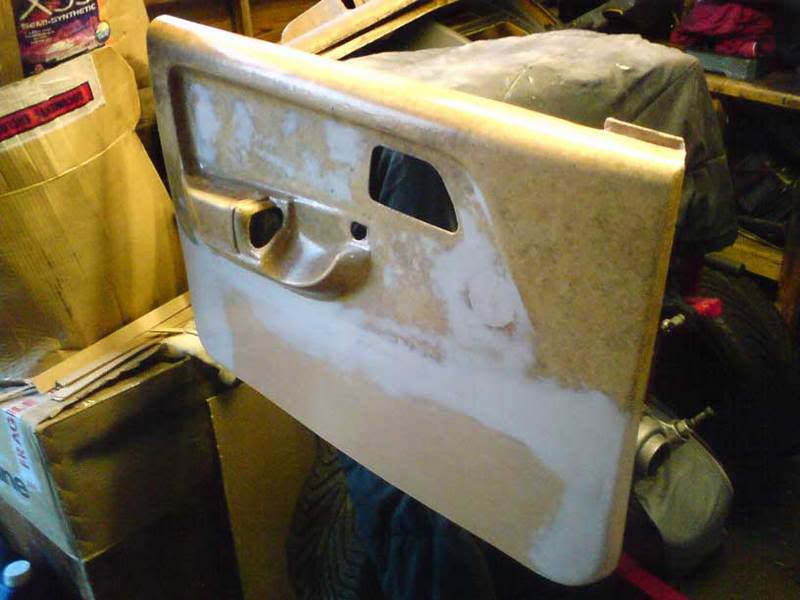
Anyway, i have managed to do some work with the front door cards, as they fouled the roll cage in the door pocket / speaker area, and the vinyl on the door cards had started to shrink due to exposure to the sun.
I have modified them with an angle grinder and some wes-spec woodwork / filler. I have also filled in the hole cut out by the previous owner for some tweeters, and filled in the 8 holes left by the trim panel that goes on the door card, and then sealed the whole lot up ready for flocking:
The car itself hasn't changed since the last pics, I expressed my displeasure with their progress on Saturday
Anyway, i have managed to do some work with the front door cards, as they fouled the roll cage in the door pocket / speaker area, and the vinyl on the door cards had started to shrink due to exposure to the sun.
I have modified them with an angle grinder and some wes-spec woodwork / filler. I have also filled in the hole cut out by the previous owner for some tweeters, and filled in the 8 holes left by the trim panel that goes on the door card, and then sealed the whole lot up ready for flocking:

 23-05-2007, 07:01 PM
#53
I've found that life I needed.. It's HERE!!
Thread Starter
Originally Posted by Ryan
jesus christ wes, your build is moving as slowly as mine.
glas its moving though
glas its moving though
Have you decided to keep yours now, i think i read the other day you were asking about the price of 3dr shells? DON'T DO IT!
Originally Posted by ricky_3dr
Hopefully see it in '08 
Originally Posted by Twins
23-05-2007, 07:09 PM
#54
Advanced PassionFord User

Keep going Wes, car will be stunning when its done pal......
Even paying a fortune it took my painter 6 fooking weeks to do a few panels.....
Is the inside and cage going to be the same colour as the exterior?
Even paying a fortune it took my painter 6 fooking weeks to do a few panels.....
Is the inside and cage going to be the same colour as the exterior?
23-05-2007, 07:23 PM
#55
I've found that life I needed.. It's HERE!!
Thread Starter
Originally Posted by ian sibbert
Keep going Wes, car will be stunning when its done pal......
Even paying a fortune it took my painter 6 fooking weeks to do a few panels.....
Is the inside and cage going to be the same colour as the exterior?
Even paying a fortune it took my painter 6 fooking weeks to do a few panels.....
Is the inside and cage going to be the same colour as the exterior?
The inside will all be done body colour, except for the bars in my field of vision, which are going to be a 2 pack matt black. Originally i was going to have all the bars done silver, but the painter was saying it will be a mission, so i said do it all black , just to speed things up, that tactic didn't work


 20-01-2009, 12:01 PM
#58
I've found that life I needed.. It's HERE!!
Thread Starter
29-03-2009, 09:28 PM
#60
I've found that life I needed.. It's HERE!!
Thread Starter
At last a bit of progress to report, went to Turbosystems on sat to pic up some bits, got a new T4 (with secret squirell mods to exhaust housing), Autonic SM4 and a new WRC breather. I shall be bolting my engine together over the next couple of weeks and then it's in the car, wire up the new ECU and see if it all works Many thanks to Tony @ Turbosystems for getting the WRC breather made, very nice bit of kit and i'm told alot of work to make it, in particular the internal baffling system to seperate oil properly. Also liked the bracket to mount it to the engine mount rather than having to drill and tap the block:

Many thanks to Tony @ Turbosystems for getting the WRC breather made, very nice bit of kit and i'm told alot of work to make it, in particular the internal baffling system to seperate oil properly. Also liked the bracket to mount it to the engine mount rather than having to drill and tap the block:
Last edited by wes; 29-03-2009 at 09:38 PM.


 01-05-2009, 02:39 PM
#67
I've found that life I needed.. It's HERE!!
Thread Starter
Ok been doing abit on it recently, now have my ECU (Autronic SM4) so got started on making the engine loom, I must of spent 9 hours on it so far, I forgot how much i hate doing wiring

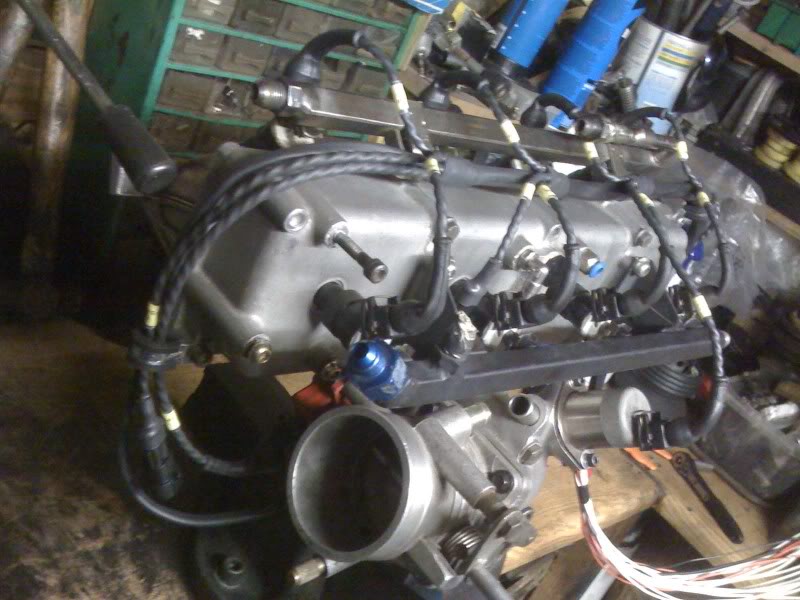
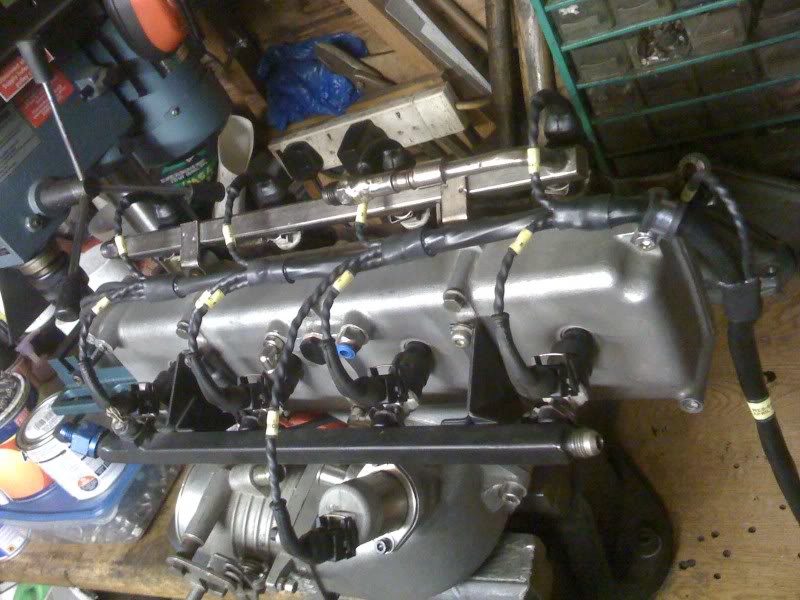
I've only done the engine bay side so far as i need engine in the car to finalise the wire lengths to the ECU (which has moved to a none standard location).
I've started on the engine build too, will post some pics of that when it is finished, hopefuly it will be in and running by the end of the month
02-05-2009, 12:14 PM
#70
Too many posts.. I need a life!!
Join Date: May 2005
Location: J�lich / Germany
Posts: 544
Likes: 0
Received 0 Likes
on
0 Posts

keep working
looks very very good.
nice loom you are doing. Maybe Ryan would ve been a good help... but anyway, looks very proper what you are building!!!
 07-05-2009, 01:48 PM
#72
Too many posts.. I need a life!!
Join Date: May 2005
Location: J�lich / Germany
Posts: 544
Likes: 0
Received 0 Likes
on
0 Posts
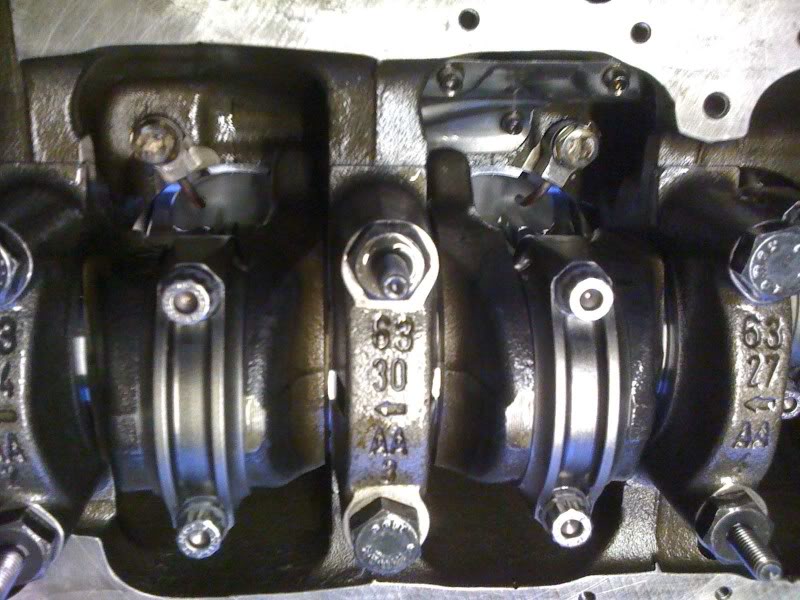
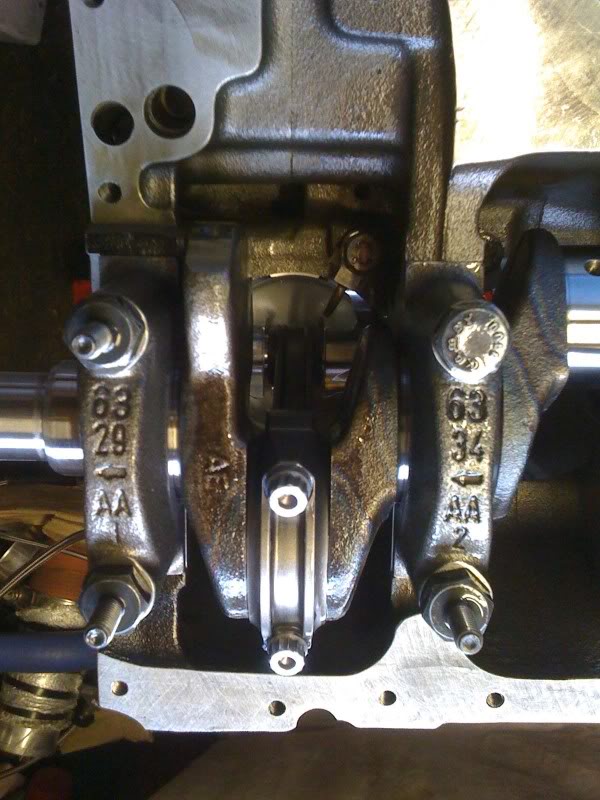
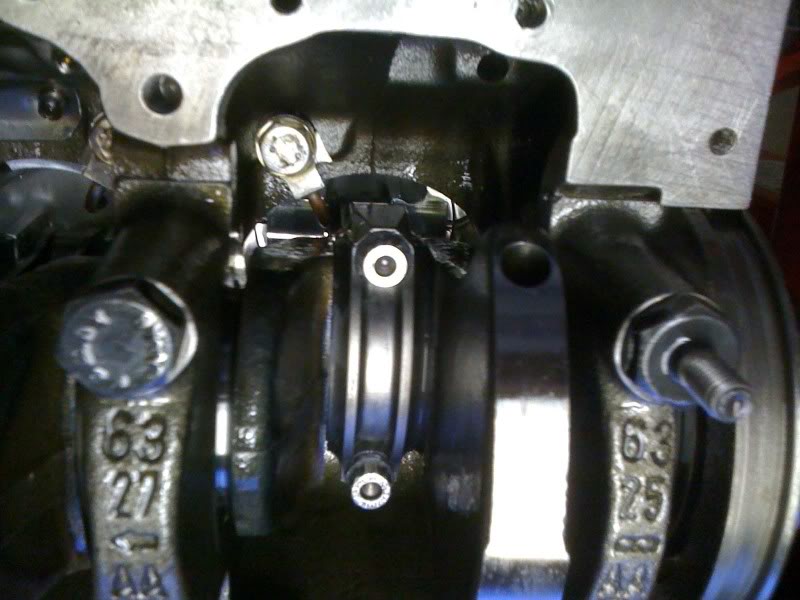
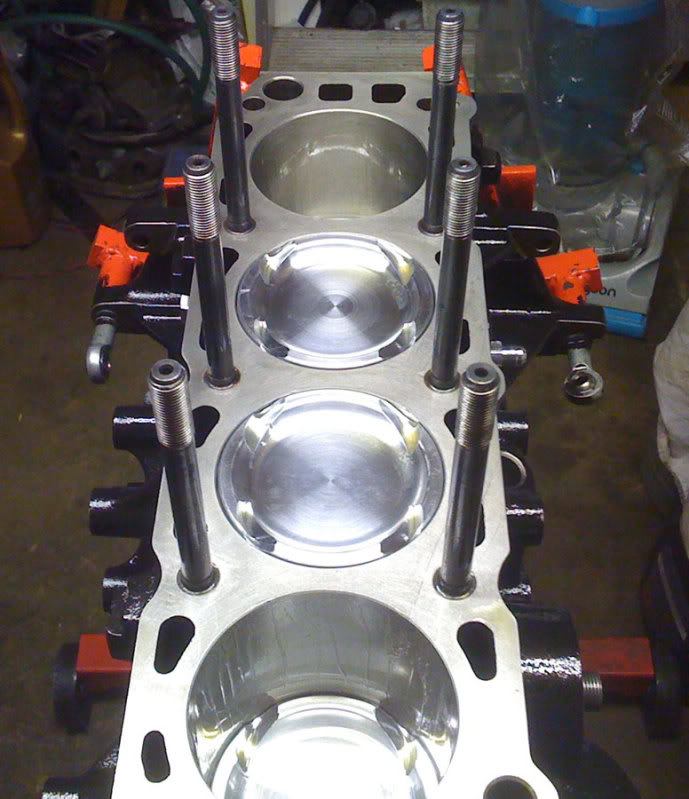
nice !!! spray jets work is looking good
what piston clearance in the block do you have?
standard mahle pistons need 5 to 6 / 100 mm
for power above 400 bhp there shall be up to 10 / 100 mm or even 12 / 100 mm
as far as I heard.
what piston clearance in the block do you have?
standard mahle pistons need 5 to 6 / 100 mm
for power above 400 bhp there shall be up to 10 / 100 mm or even 12 / 100 mm
as far as I heard.
07-05-2009, 05:09 PM
#75
I've found that life I needed.. It's HERE!!
Thread Starter
I'm not at liberty to discuss that information, sorry.I'll take some more pics over the weekend when i put the rest of it together.
07-05-2009, 09:59 PM
#77
I've found that life I needed.. It's HERE!!
Thread Starter
Mountune modded the block for the spray jets, made sense to use them as i got their GRP A / WRC oil squirters. However the bolts for these have been the biggest pain in the behind i have had with this build, and the torque setting they say to use is wrong, i don't care what they say! It's a long story, but if i was to start again i would find an EEC-IV block and use the std ford squirters used in that, or i would use the std spray bar, these mountune items have been that much greif :-( But since i had my block machined for them i can't really go back now, so i will see what happens.
07-05-2009, 10:14 PM
#78
Mountune modded the block for the spray jets, made sense to use them as i got their GRP A / WRC oil squirters. However the bolts for these have been the biggest pain in the behind i have had with this build, and the torque setting they say to use is wrong, i don't care what they say! It's a long story, but if i was to start again i would find an EEC-IV block and use the std ford squirters used in that, or i would use the std spray bar, these mountune items have been that much greif :-( But since i had my block machined for them i can't really go back now, so i will see what happens.
Cheers for the honest reply mate
Good luck with rest of build
 10-05-2009, 10:51 PM
#80
I've found that life I needed.. It's HERE!!
Thread Starter
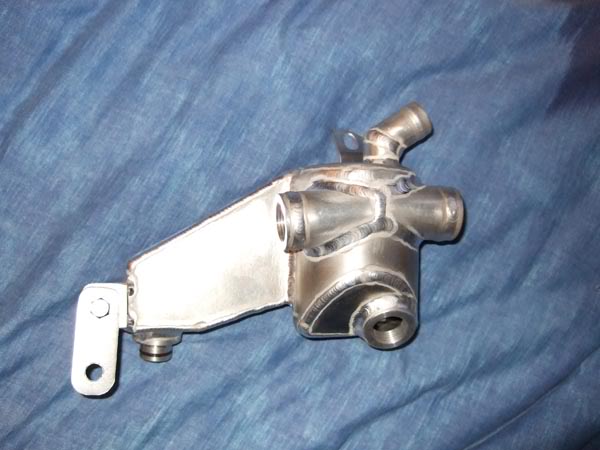
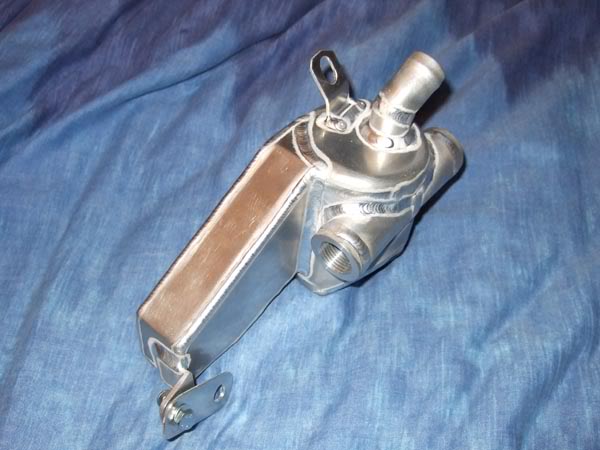
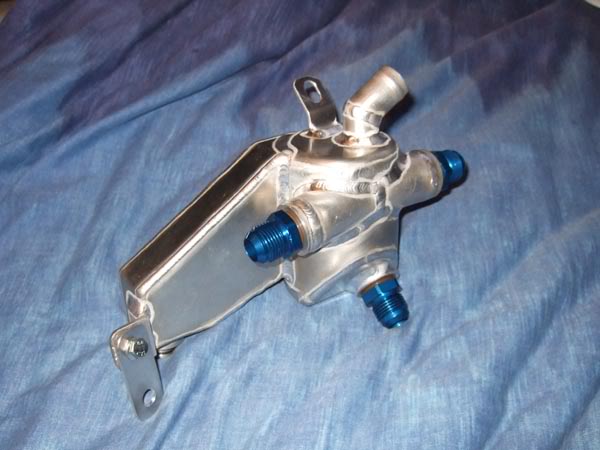
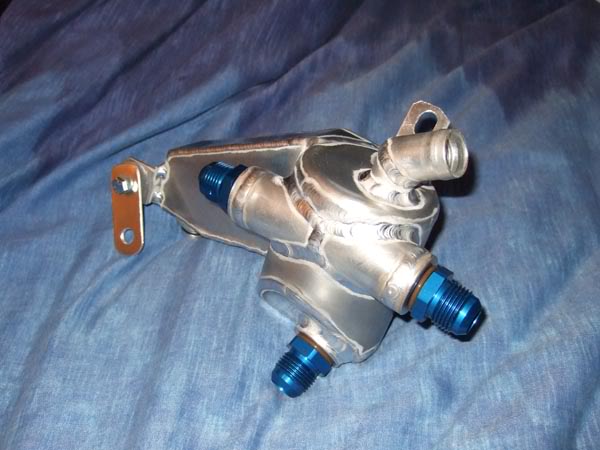
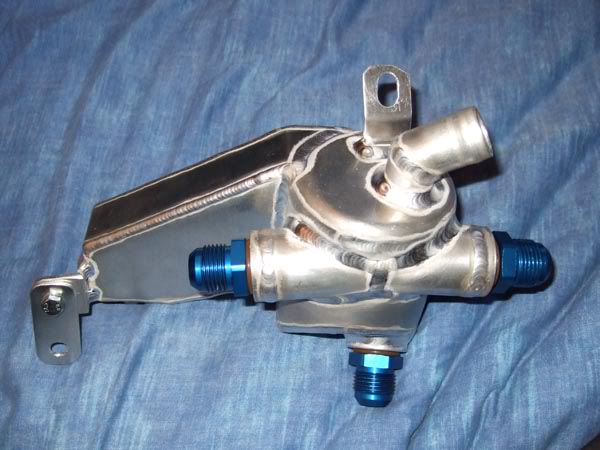
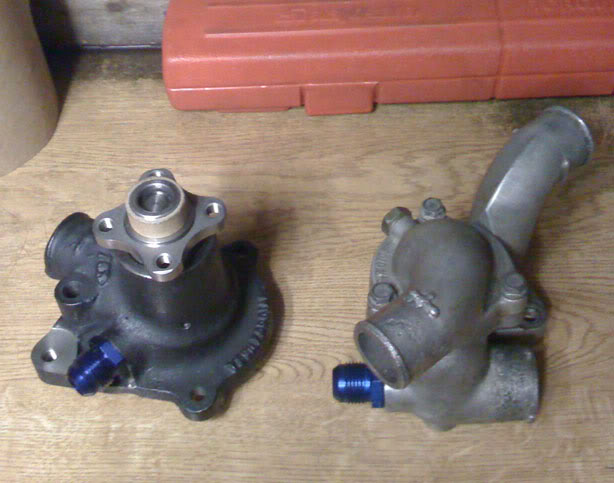
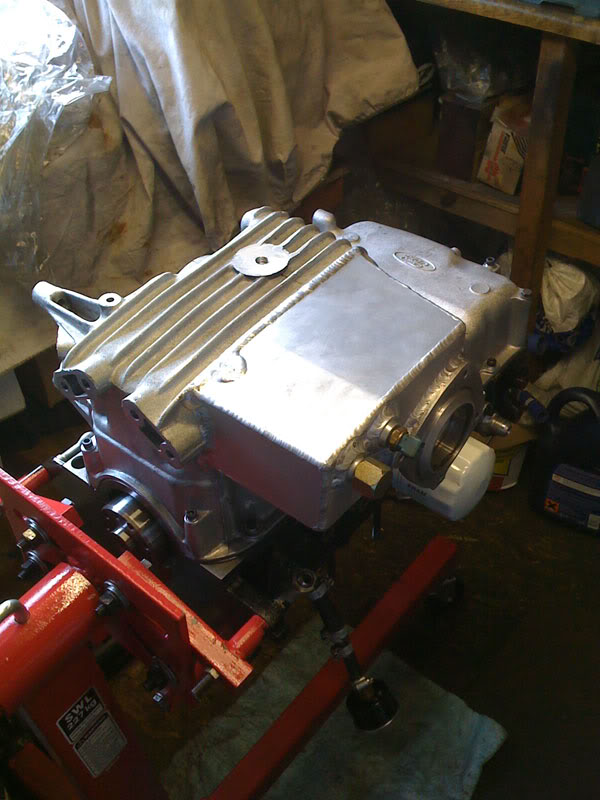
Well been a busy boy on it this weekend, Saturday afternoon I modified the new 4x4 water pump and thermostat housing to take some -10 JIC fittings, I have done this as I want to have as many of the ancillary hoses as possible in stainless braided hose:
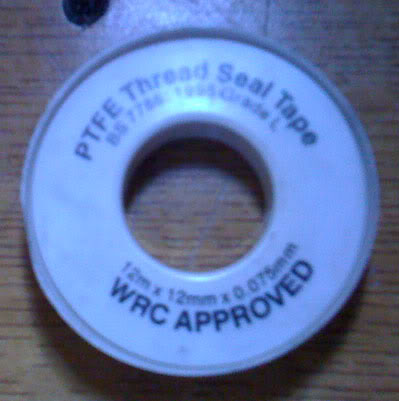
I used some of this quality PTFE tape so I don’t get any leaks, rally proven
I then spent Saturday evening rigging up a way of testing the oil jets by placing the oil pickup pipe in a tray of fresh oil and spinning the oil pump with a drill and attachment in the dizzy hole, I didn’t take any pics as it was quite messy and I needed all of my limbs to spin the drill and see what was going on from underneath The oil jets were firing oil so I was pleased about that I then cleaned up all the mess and set about putting the sump on. So I put the sump seals in place with abit of sealer on the ends, then laid the sealer on the sump flange and went to put it on, to my surprise the sump would not sit flush with the block, no matter what I tried  I took it back off to see that there were some silver marks on the windage tray. I worked out from were the marks were that the casting in the sump were the turbo oil return is (it’s like a baffle cast into the sump for the turbo oil return) was fouling the windage tray And part of my Mountune baffle in the sump was also fouling the windage tray Fecking thing! I had dry built the engine to check the oil pickup pipe to sump clearance, but hadn’t put the windage tray or Mountune baffle in as they got in the way of this procedure, that’ll learn me for assuming that the windage tray from an EEC IV Escort Cosworth wouldn’t interfere with the sump from a 4x4 Sapphire Cosworth!!!
I spent the few hours cleaning the sealant off of the sump as I knew it would be no good by the time I had fixed the problem (nice job) and then modifying the sump and Mountune baffle so they didn’t foul each other. Again no pics of this as I was quite annoyed with myself at this point and it was 2am in the morning
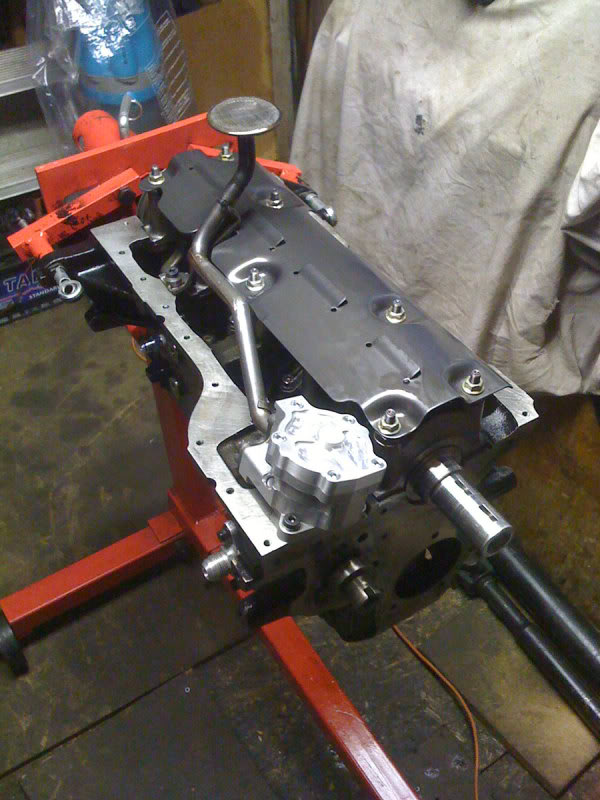
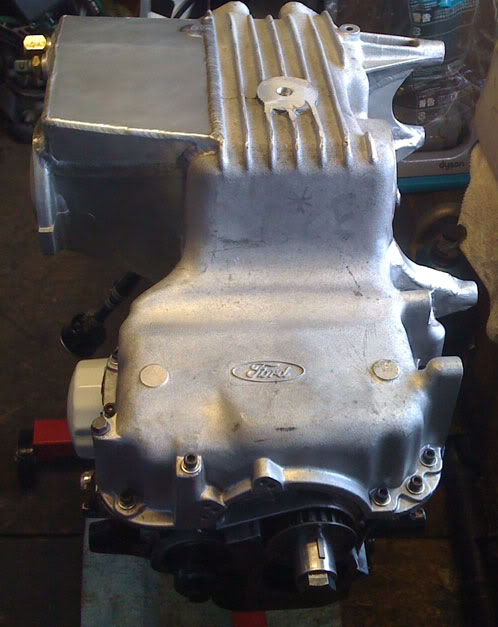
Sunday after a long sleep I set about cleaning the sump and Mountune baffle with the pressure washer, I then double checked they all fitted together and this time it was all perfect So I put on some more sealer and bolted them all together:
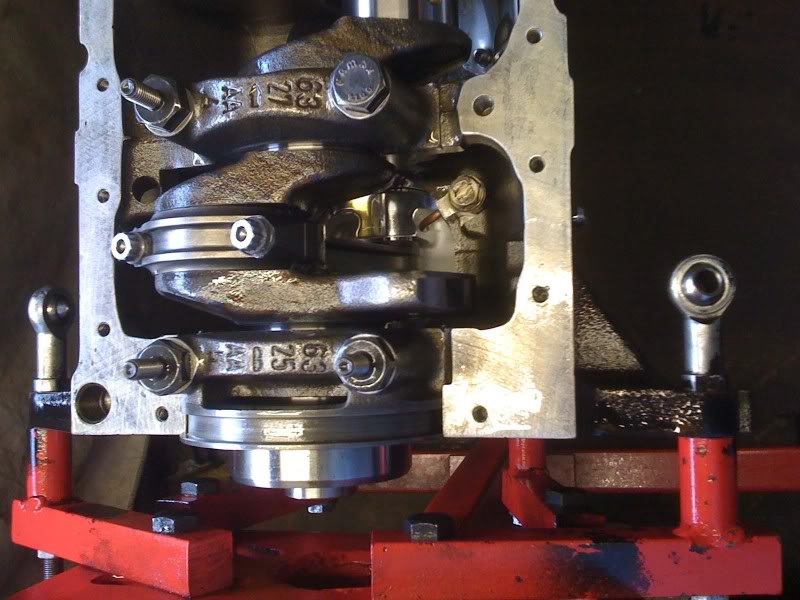
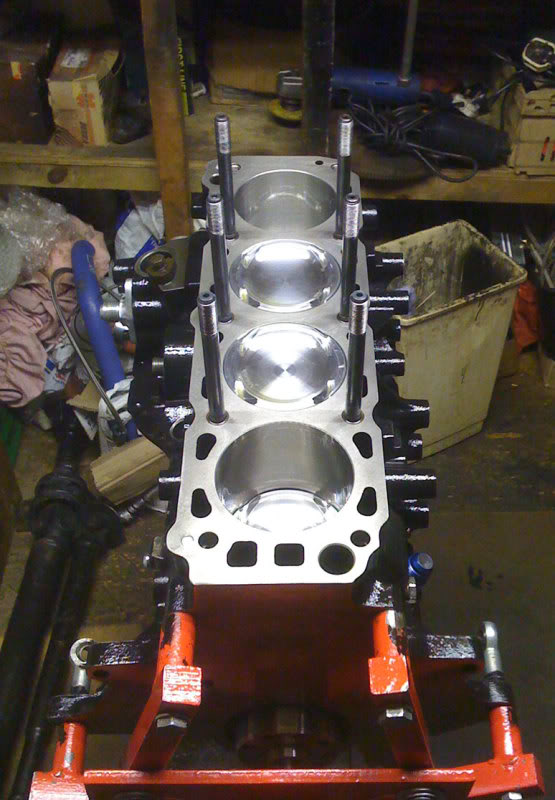
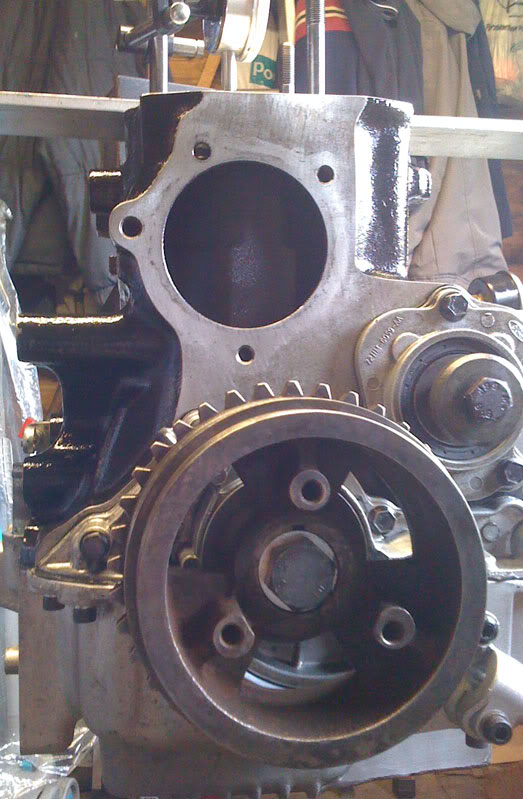
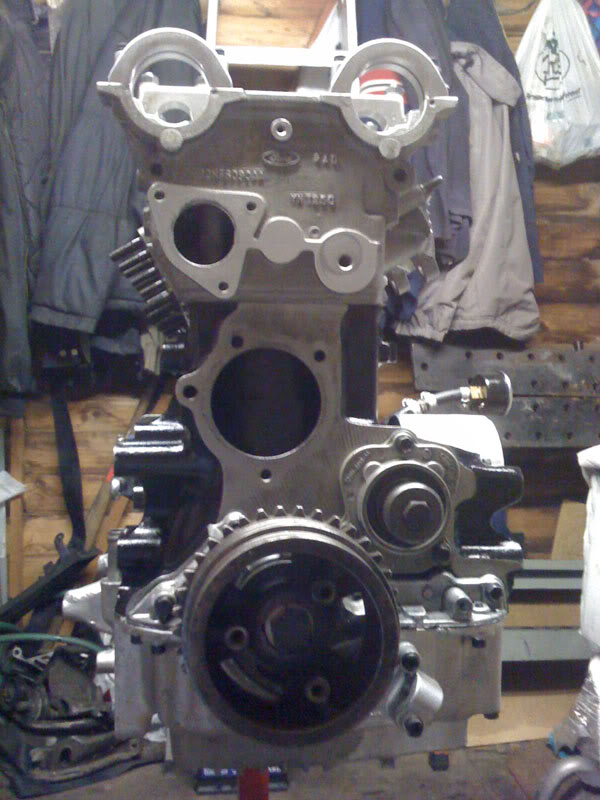
I then flipped the engine back over and decided to check the TDC mark on the crank pulley, in this pic you can see I placed a alloy bar across the top of the piston and put a DTI gauge on it then rotated the engine to TDC, the standard mark was bang on!
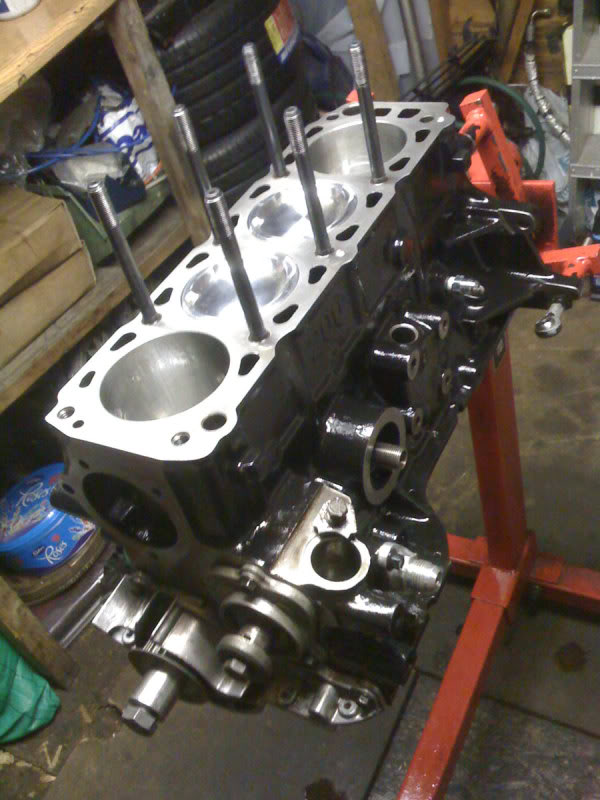
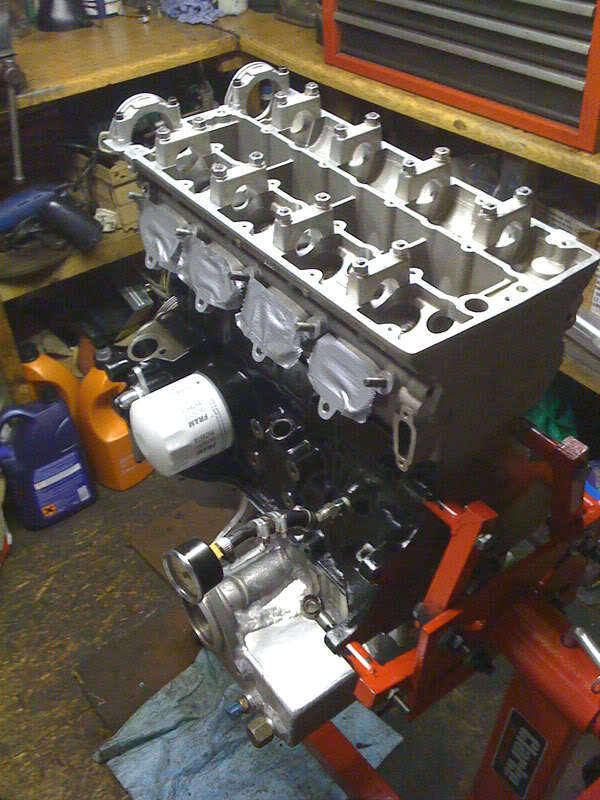
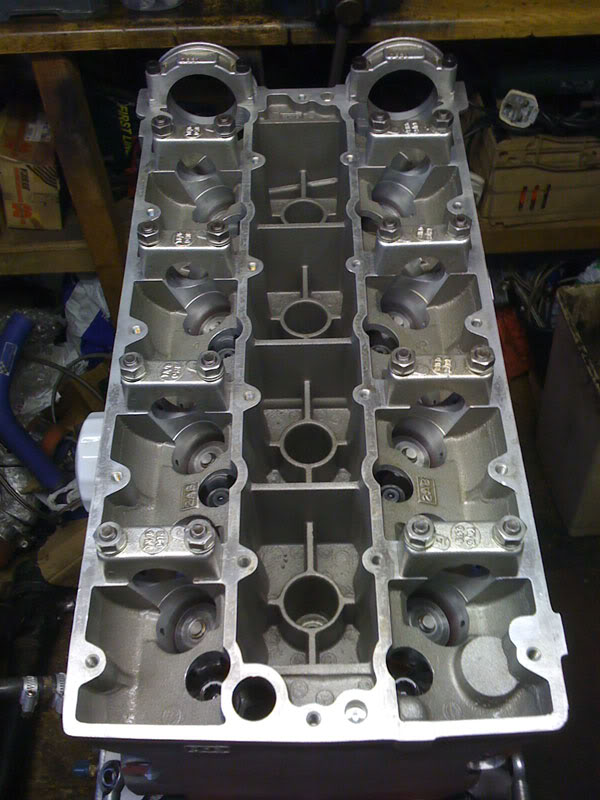
After some dinner and nice cuppa I then decided to put the head on, so that’s what I did:
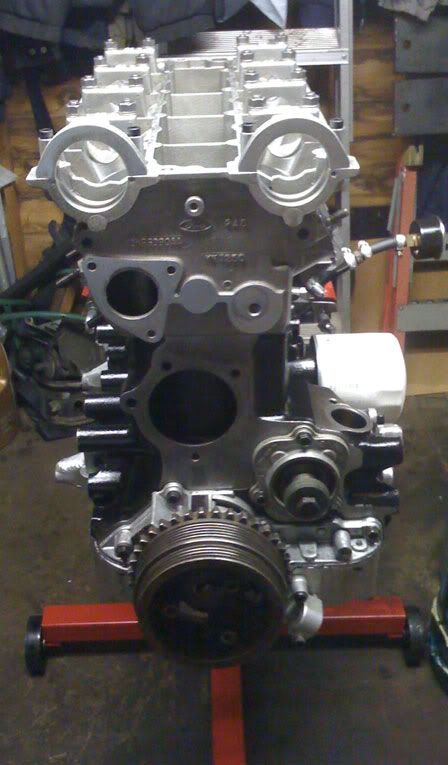
Will be building the rest of it up and timing the cams in during the week
I used some of this quality PTFE tape so I don’t get any leaks, rally proven
I then spent Saturday evening rigging up a way of testing the oil jets by placing the oil pickup pipe in a tray of fresh oil and spinning the oil pump with a drill and attachment in the dizzy hole, I didn’t take any pics as it was quite messy and I needed all of my limbs to spin the drill and see what was going on from underneath
The oil jets were firing oil so I was pleased about that and set about putting the sump on. So I put the sump seals in place with abit of sealer on the ends, then laid the sealer on the sump flange and went to put it on, to my surprise the sump would not sit flush with the block, no matter what I tried I took it back off to see that there were some silver marks on the windage tray. I worked out from were the marks were that the casting in the sump were the turbo oil return is (it’s like a baffle cast into the sump for the turbo oil return) was fouling the windage tray And part of my Mountune baffle in the sump was also fouling the windage tray Fecking thing! I had dry built the engine to check the oil pickup pipe to sump clearance, but hadn’t put the windage tray or Mountune baffle in as they got in the way of this procedure, that’ll learn me for assuming that the windage tray from an EEC IV Escort Cosworth wouldn’t interfere with the sump from a 4x4 Sapphire Cosworth!!!I spent the few hours cleaning the sealant off of the sump as I knew it would be no good by the time I had fixed the problem (nice job) and then modifying the sump and Mountune baffle so they didn’t foul each other. Again no pics of this as I was quite annoyed with myself at this point and it was 2am in the morning
Sunday after a long sleep I set about cleaning the sump and Mountune baffle with the pressure washer, I then double checked they all fitted together and this time it was all perfect
I then flipped the engine back over and decided to check the TDC mark on the crank pulley, in this pic you can see I placed a alloy bar across the top of the piston and put a DTI gauge on it then rotated the engine to TDC, the standard mark was bang on!
After some dinner and nice cuppa I then decided to put the head on, so that’s what I did:
Will be building the rest of it up and timing the cams in during the week
Last edited by wes; 12-05-2009 at 11:12 AM. Reason: Technical wordings corrected