My Series 1 Underbody / Engine Bay resto*NOW FINISHED !!!!!*
 09-07-2006, 06:57 PM
#1
Too many posts.. I need a life!!

Thread Starter

Join Date: Sep 2004
Location: Aberdeen
Posts: 594
Likes: 0
Received 0 Likes
on
0 Posts
Found myself a nice Series 1 Custom back last October, and after taking it back North of the Border i decided that although having only 55k miles on it from new, with FSH....it was in need of a good clean up and freshen.
I didnt want to do TOO much to the car to detract from original, but a minimum was to freshen up the underside. I started pottering away with it over the winter in the garage, and after not getting very far cleaning the engine bay by hand....i decided that the best option was to give the engine bay a respray and clean up or powder coat everything as best possible that i couldnt replace for brand new. So far its cost me a fortune in finding parts for it.....but hopefully its all going to be worth it.
The outside has a few tiny small blemishes on it, but nothing major....one thing i didnt want to do however was to respray the outside, and am still undecided on that. See what you all think......comments welcome.

Original Underside wasnt too bad. Just dirt and muck over 20 years.

Started by rubbing down the floorpan once everything had been removed, and was pleasantly surprised to find only a few areas of light surface rust. No rot whatsoever.
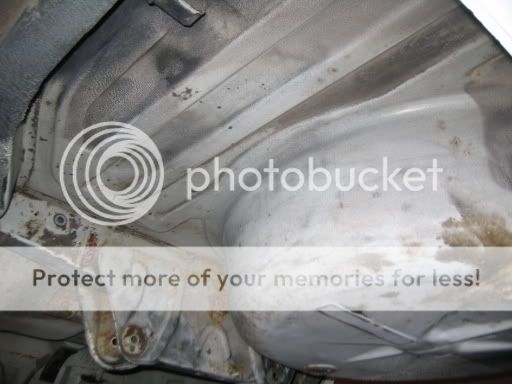
Petrol tank area was as new and also a nice surprise
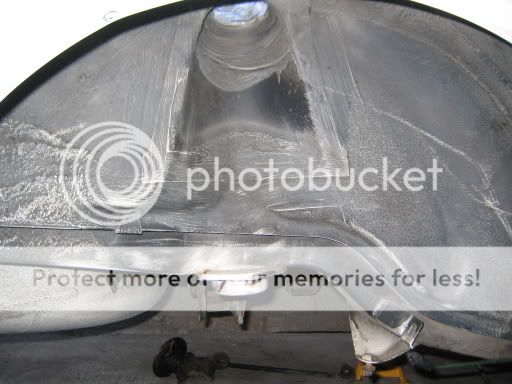
Front arches were rubbed and degreased and cleaned out ready for paint.
I didnt want to do TOO much to the car to detract from original, but a minimum was to freshen up the underside. I started pottering away with it over the winter in the garage, and after not getting very far cleaning the engine bay by hand....i decided that the best option was to give the engine bay a respray and clean up or powder coat everything as best possible that i couldnt replace for brand new. So far its cost me a fortune in finding parts for it.....but hopefully its all going to be worth it.
The outside has a few tiny small blemishes on it, but nothing major....one thing i didnt want to do however was to respray the outside, and am still undecided on that. See what you all think......comments welcome.
Original Underside wasnt too bad. Just dirt and muck over 20 years.
Started by rubbing down the floorpan once everything had been removed, and was pleasantly surprised to find only a few areas of light surface rust. No rot whatsoever.
Petrol tank area was as new and also a nice surprise
Front arches were rubbed and degreased and cleaned out ready for paint.
 09-07-2006, 06:57 PM
#2
Too many posts.. I need a life!!
Thread Starter
Join Date: Sep 2004
Location: Aberdeen
Posts: 594
Likes: 0
Received 0 Likes
on
0 Posts
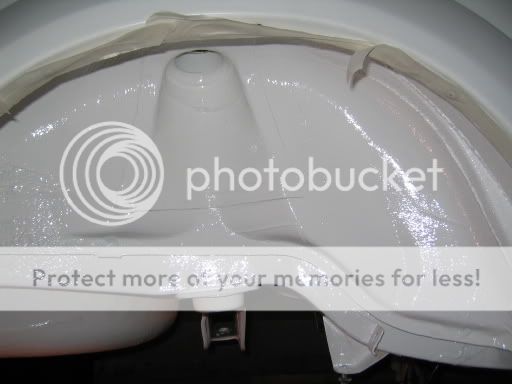
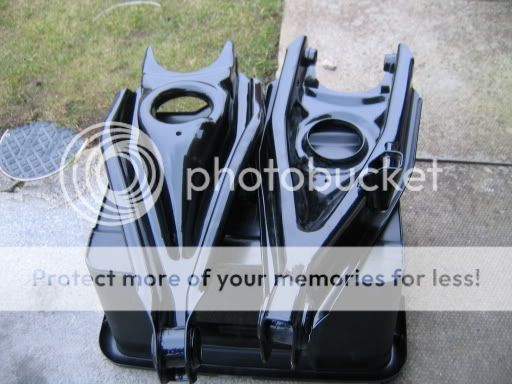
After that, the arches all round and the underside were painted white, a good few coats to say the least.  The old fuel tank had seen better days, so was binned and a new one ordered.


Then it was time once that was all done, to start putting some of the rear end back together.
Rear wishbones etc were powdercoated.
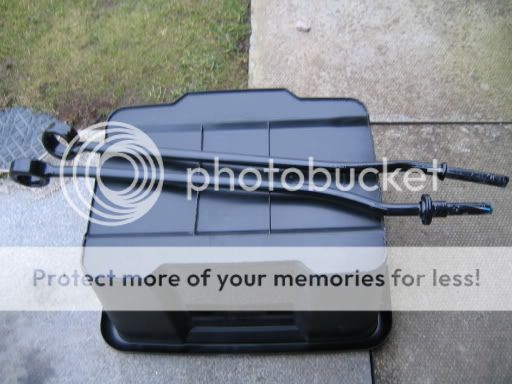
The old fuel tank had seen better days, so was binned and a new one ordered. Then it was time once that was all done, to start putting some of the rear end back together.
Rear wishbones etc were powdercoated.
09-07-2006, 06:58 PM
#3
Too many posts.. I need a life!!
Thread Starter
Join Date: Sep 2004
Location: Aberdeen
Posts: 594
Likes: 0
Received 0 Likes
on
0 Posts
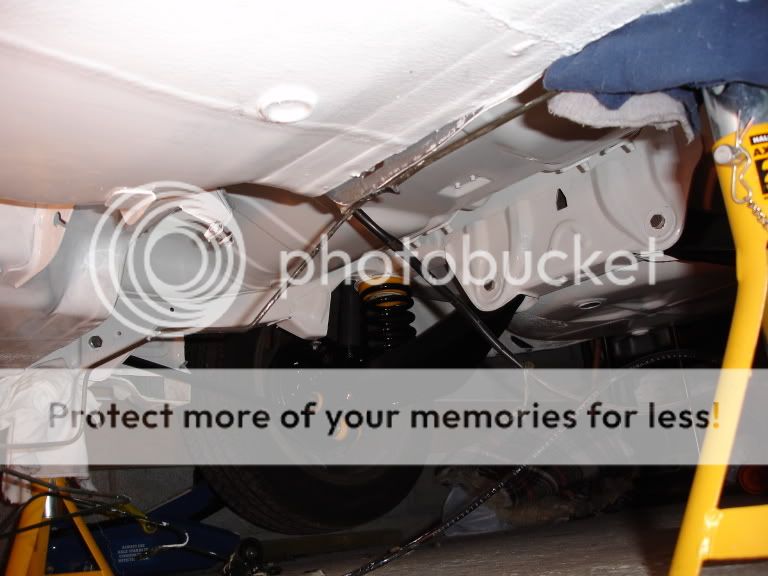
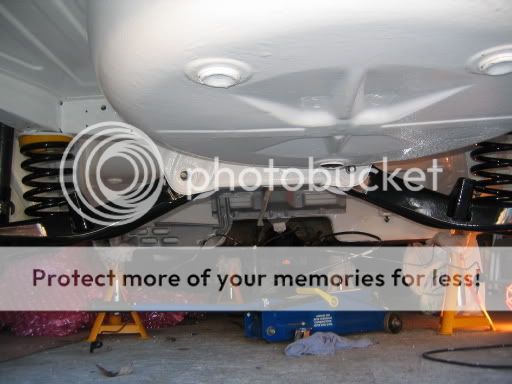
Rear end suspension was put back together.
After that the car was put back rolling, and the engine was taken out, with help from my mate who owns a bodyshop. The whole lot handling kit etc was dropped out the bottom of the car and stripped in less than 2 1/2 hours.
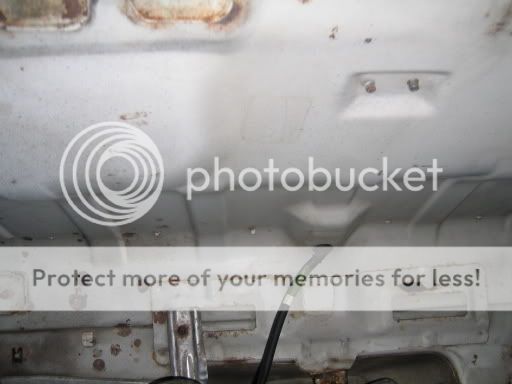
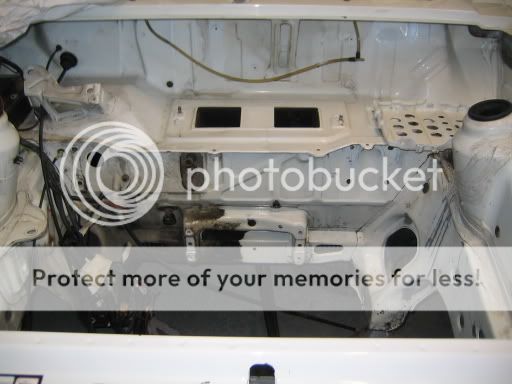
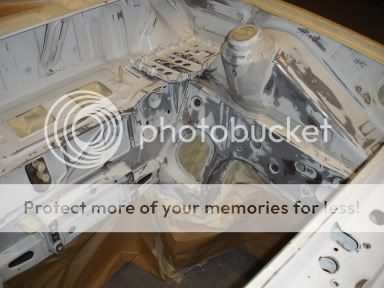
Once the engine was out, again a nice fresh bodywork awaited underneath with no rot, and only some minor surface rust in the seams etc.
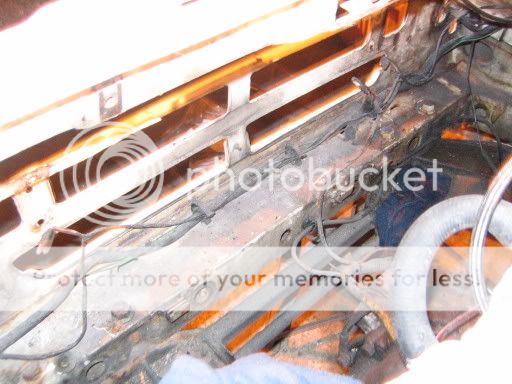
Both inner wings were mint, with just grub and grime all over them.

After that the car was put back rolling, and the engine was taken out, with help from my mate who owns a bodyshop. The whole lot handling kit etc was dropped out the bottom of the car and stripped in less than 2 1/2 hours.
Once the engine was out, again a nice fresh bodywork awaited underneath with no rot, and only some minor surface rust in the seams etc.
Both inner wings were mint, with just grub and grime all over them.
09-07-2006, 06:59 PM
#4
Too many posts.. I need a life!!
Thread Starter
Join Date: Sep 2004
Location: Aberdeen
Posts: 594
Likes: 0
Received 0 Likes
on
0 Posts
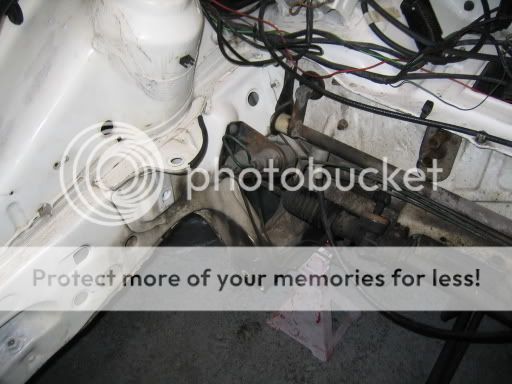
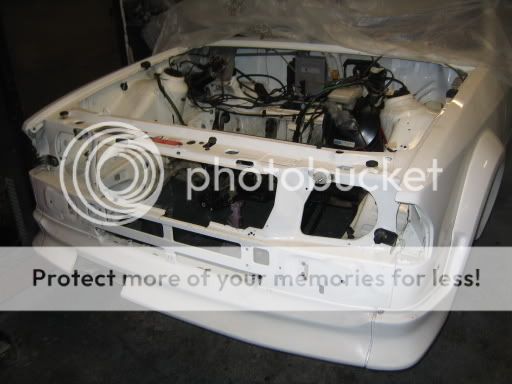
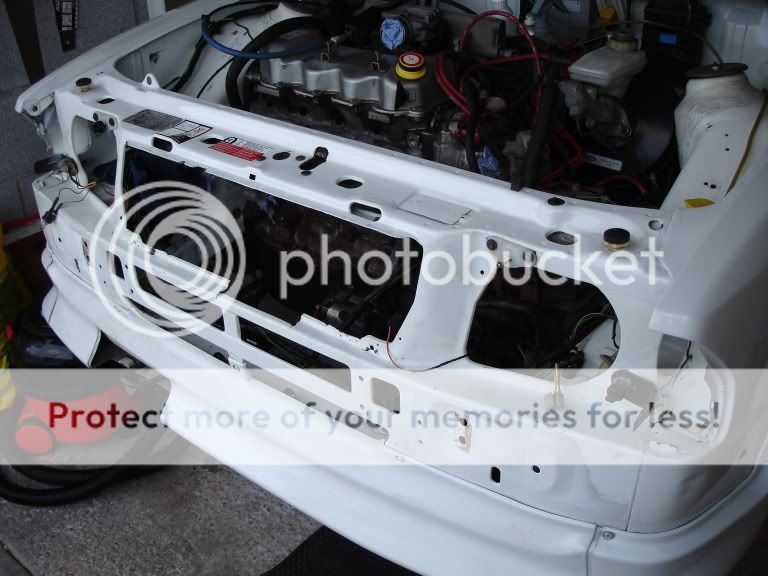
With the engine out, i started to degrease all the engine bay, inner wings etc, and get it ready, rubbed down and prepped for painting.
Half of the engine bay degreased and cleaned.
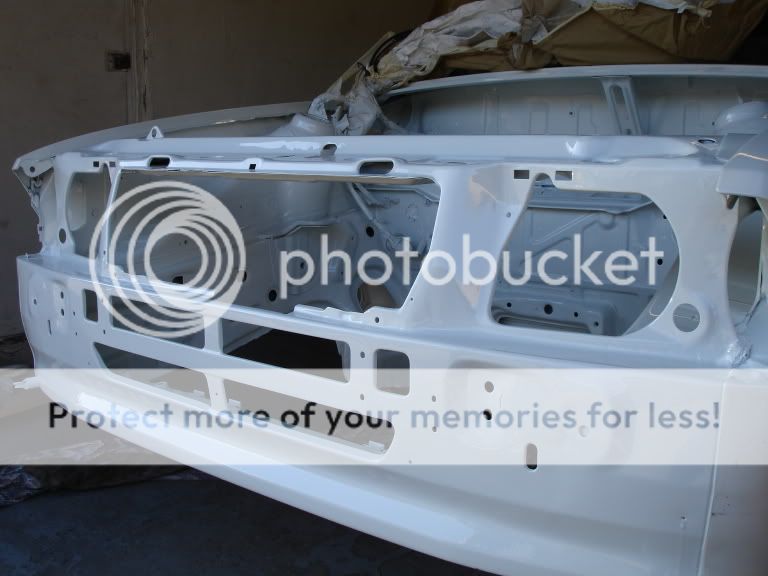
The front panel was going to be sprayed too, so that was given a clean, and amazingly no rot again !! Even where the headlights sit came up like new with a degrease solution and polish
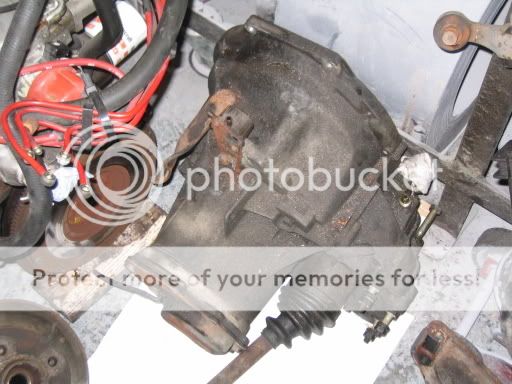
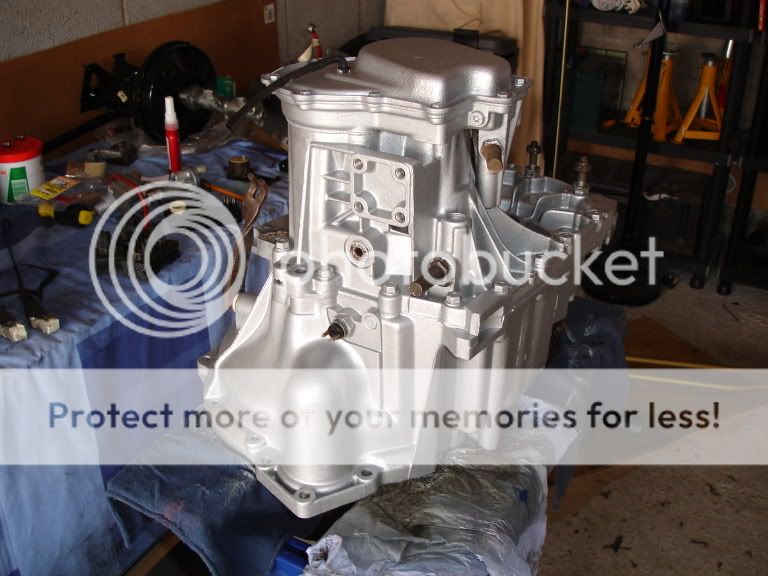
With the engine and gearbox out, the gearbox had all the oil seals replaced, was rubber down to the ally and painted again like new.
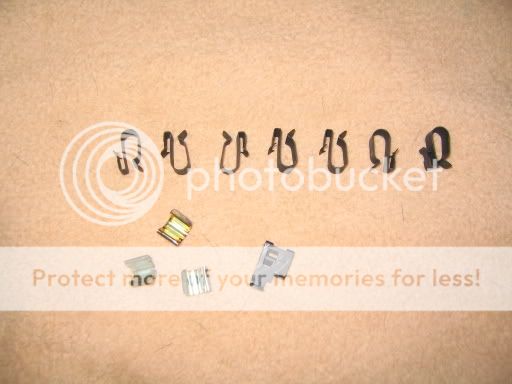
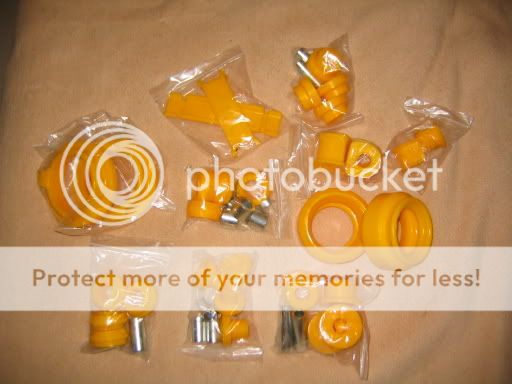
New parts were purchased for every area of the car with just some of them below. Every single nut and bolt where possible was replaced with stainless steel 8.8 grade or Standard Ford Items.
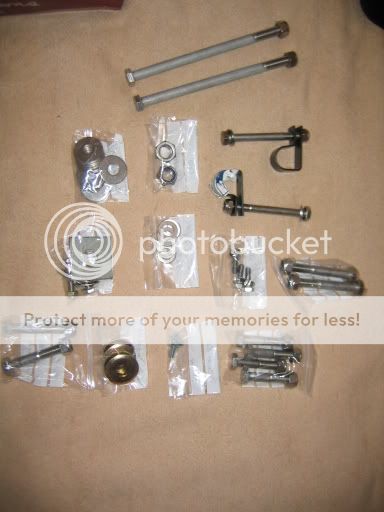
Full Poly Bush Kit
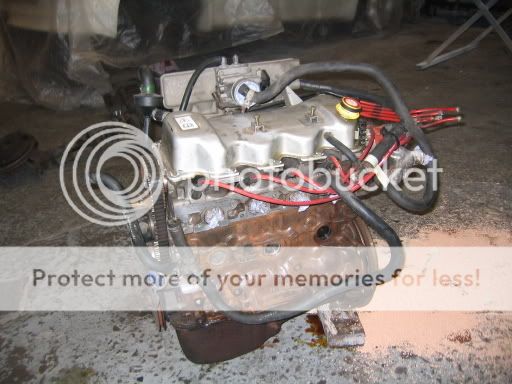
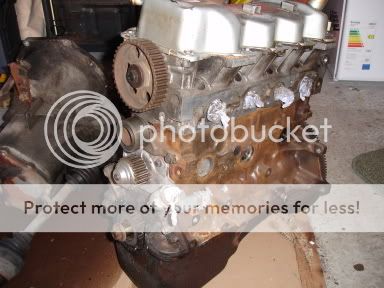
Luckily i have a very helpful and interested neighbour who knows EVERYTHING there is to know about old fords from 1970-odd onwards, and instead of just cleaning the engine and parts....he persuaded me it would be more beneficial to strip the engine and decoke it / replace worn parts. Cheers Steve New tappets were fitted, head cleaned and decoked, and the engine block cleaned, painted, and all the other parts such as manifold and inlet cleaned back like new, polished up, and the exhaust manifold sand blasted (thanks to my other mate who has access to a sand blaster)
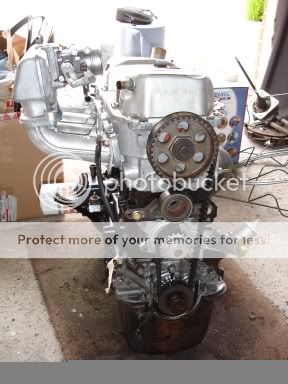
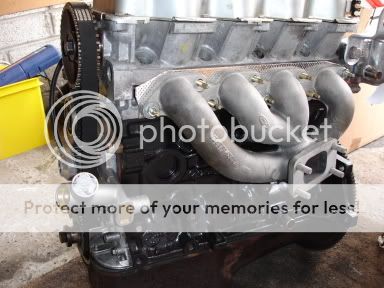
The engine had new water pump, tappets, valves lapped in, timing belt, etc etc etc.
Before
After (old sump still on until we get it back into car to prevent it getting scraped)
Half of the engine bay degreased and cleaned.
The front panel was going to be sprayed too, so that was given a clean, and amazingly no rot again !! Even where the headlights sit came up like new with a degrease solution and polish
With the engine and gearbox out, the gearbox had all the oil seals replaced, was rubber down to the ally and painted again like new.
New parts were purchased for every area of the car with just some of them below. Every single nut and bolt where possible was replaced with stainless steel 8.8 grade or Standard Ford Items.
Full Poly Bush Kit
Luckily i have a very helpful and interested neighbour who knows EVERYTHING there is to know about old fords from 1970-odd onwards, and instead of just cleaning the engine and parts....he persuaded me it would be more beneficial to strip the engine and decoke it / replace worn parts. Cheers Steve
The engine had new water pump, tappets, valves lapped in, timing belt, etc etc etc.
Before
After (old sump still on until we get it back into car to prevent it getting scraped)
09-07-2006, 06:59 PM
#5
Too many posts.. I need a life!!
Thread Starter
Join Date: Sep 2004
Location: Aberdeen
Posts: 594
Likes: 0
Received 0 Likes
on
0 Posts
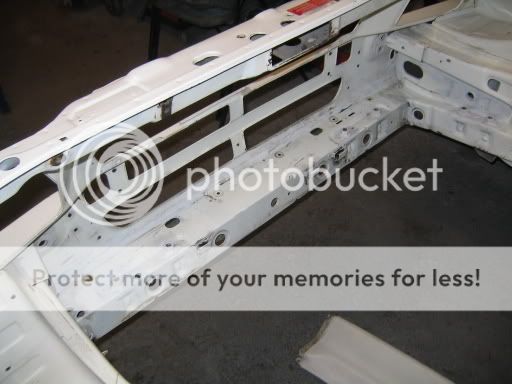
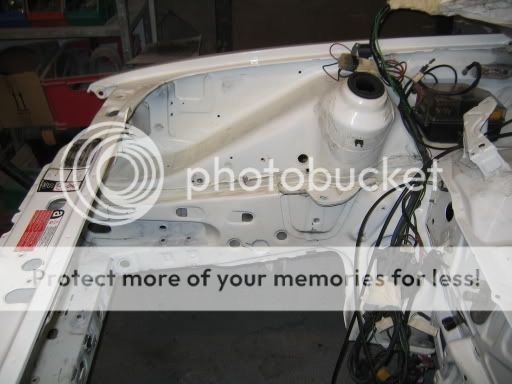
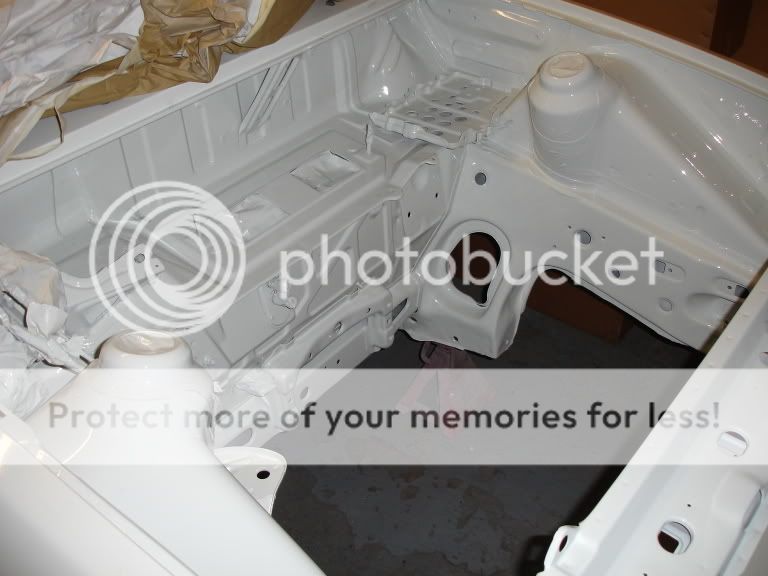
The engine bay was SLOWLY and painfully over a few nights after work, rubbed down to prep it for the primer, and again as you can see.....no tin worm and just lovely metal ready to be repainted.
Car ready for putting into the spray booth
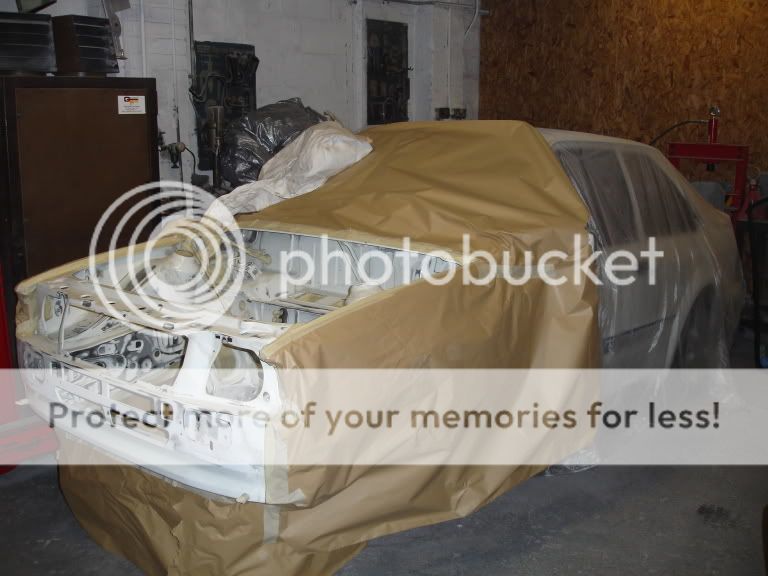
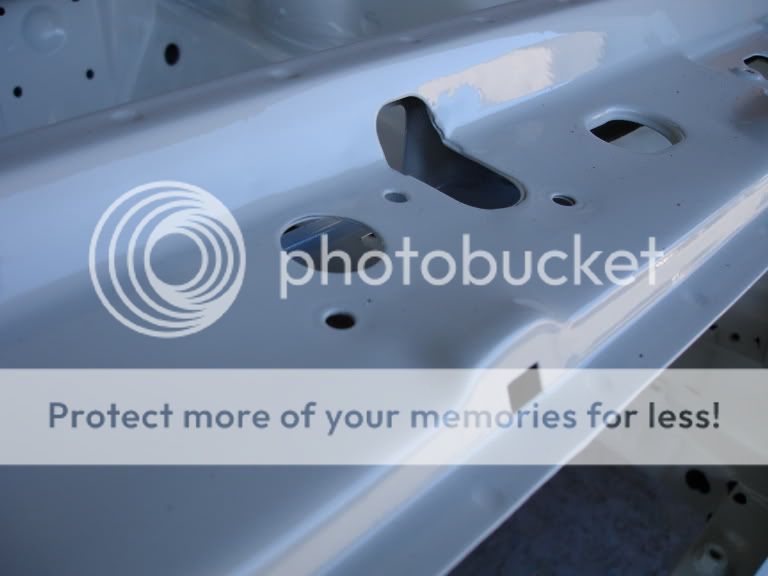
Engine bay and front panel sprayed and looking superb......thanks to Warren


After that it was time to clean up parts and repaint, then refit, retape and start running the loom again.....
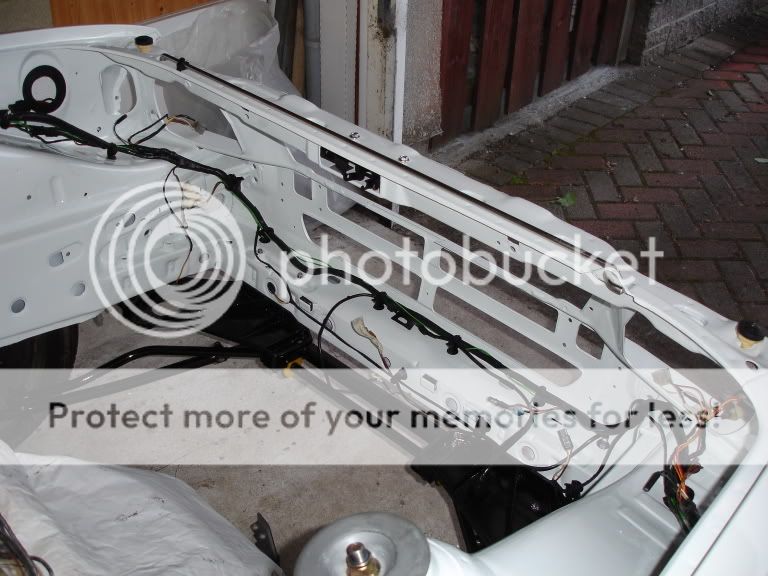
Thats about as far as i have got so far folks, just started putting bits back in the engine bay, painted the steering rack and brake servo bar etc. its taken ages, but going to be worth it.....the engine is rebuilt and going back in this week, and the new fuel tank is away being painted etc....fuel pump mounted, and its slowly coming together. Will post more pics as and when i get them.....
Car ready for putting into the spray booth
Engine bay and front panel sprayed and looking superb......thanks to Warren
After that it was time to clean up parts and repaint, then refit, retape and start running the loom again.....
Thats about as far as i have got so far folks, just started putting bits back in the engine bay, painted the steering rack and brake servo bar etc. its taken ages, but going to be worth it.....the engine is rebuilt and going back in this week, and the new fuel tank is away being painted etc....fuel pump mounted, and its slowly coming together. Will post more pics as and when i get them.....

Trending Topics


 10-07-2006, 10:31 PM
#19
PassionFord Post Whore!!
iTrader: (3)

Join Date: Jun 2003
Location: Maldon, Essex!
Posts: 4,186
Likes: 0
Received 0 Likes
on
0 Posts
absolutely spot on. weird question but how do u go about painting the underneath of a car wen it comes to undersealing? coz mine just has that black underseal wen it was striped and redone by bodyshop. but i wana get mine done body colour. keep the updates coming 
11-07-2006, 07:14 AM
#20
Too many posts.. I need a life!!
Thread Starter
Join Date: Sep 2004
Location: Aberdeen
Posts: 594
Likes: 0
Received 0 Likes
on
0 Posts
Cheers for the comments guys,
As regards to the underseal on the car, theres two ways, you can either rub it down completely to the bare metal with a wire wheel etc, but it takes AGES then paint it....or you can use thinners etc, and rub it down to clean the underseal surface, and paint on top of that.
Doing it the second way still leaves the car looking as though it left the factory with the paint forming over the shape and contour of the underseal etc
I have seen it done both ways.

 11-07-2006, 10:24 PM
#26
Too many posts.. I need a life!!
Thread Starter
Join Date: Sep 2004
Location: Aberdeen
Posts: 594
Likes: 0
Received 0 Likes
on
0 Posts
Originally Posted by RSTG65TOM
Wish i could afford to do the same with my series2 - i love your tho mate. nice job
Even just a clean and freshen up and put everything back together would have you chuffed to bits mate.....give it a go.
11-07-2006, 11:18 PM
#27
Originally Posted by MichaelG
Cheers for the comments guys,
As regards to the underseal on the car, theres two ways, you can either rub it down completely to the bare metal with a wire wheel etc, but it takes AGES then paint it....or you can use thinners etc, and rub it down to clean the underseal surface, and paint on top of that.
Doing it the second way still leaves the car looking as though it left the factory with the paint forming over the shape and contour of the underseal etc
I have seen it done both ways.
As regards to the underseal on the car, theres two ways, you can either rub it down completely to the bare metal with a wire wheel etc, but it takes AGES then paint it....or you can use thinners etc, and rub it down to clean the underseal surface, and paint on top of that.
Doing it the second way still leaves the car looking as though it left the factory with the paint forming over the shape and contour of the underseal etc
I have seen it done both ways.
looks good by the way
 12-07-2006, 11:26 PM
#29
Too many posts.. I need a life!!
Thread Starter
Join Date: Sep 2004
Location: Aberdeen
Posts: 594
Likes: 0
Received 0 Likes
on
0 Posts
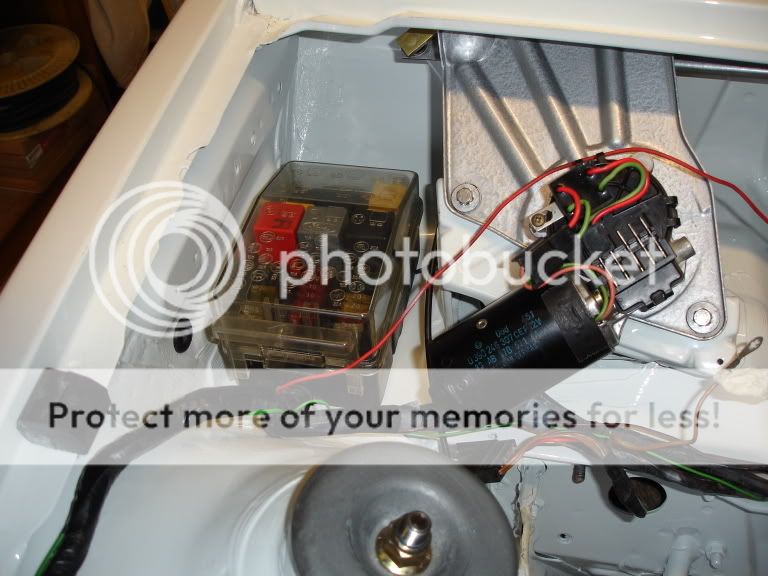
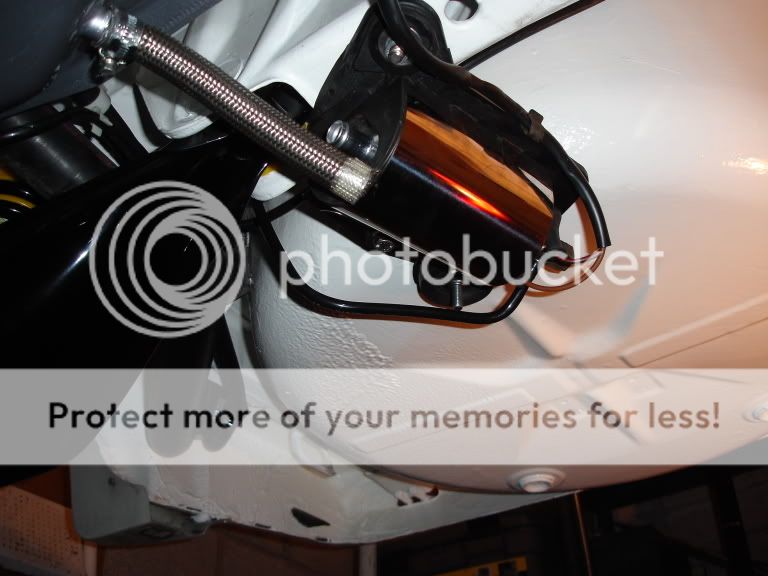
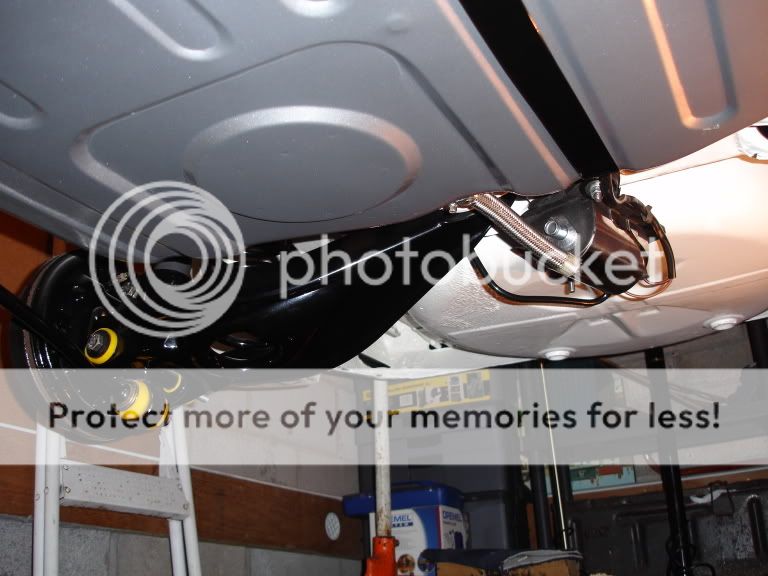
Been busy the past two nights guys.....i got my mate with the bodyshop to make the new fuel tank all shiny and nice and he painted it silver for me....got that fitted tothe car along with the new fuel lines, new braided fuel extensions, new Bosch Fuel Pump, carrier, accumulator etc etc.....used stainless nuts and bolts all round and genuine ford clips. Nice powder coated tank strap too. (Yes i know one end of the fuel pipe is off as i ran out of Jubilees lol
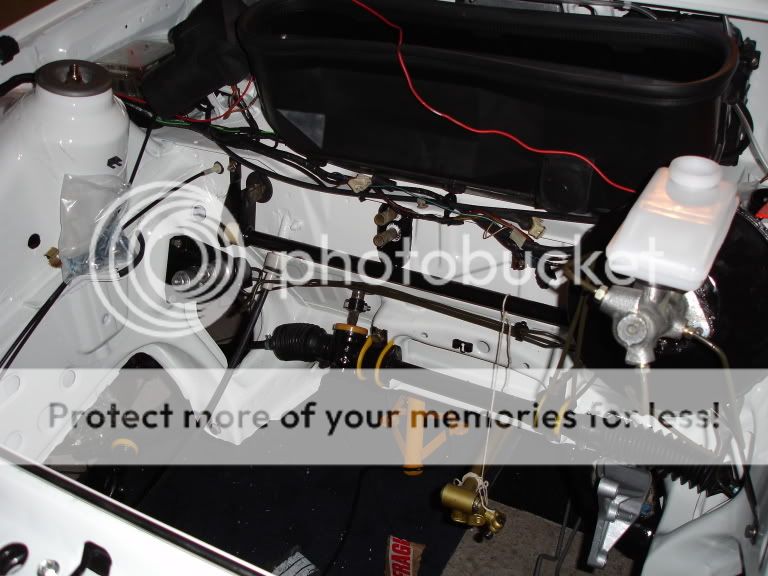
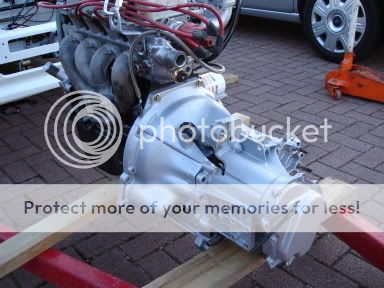
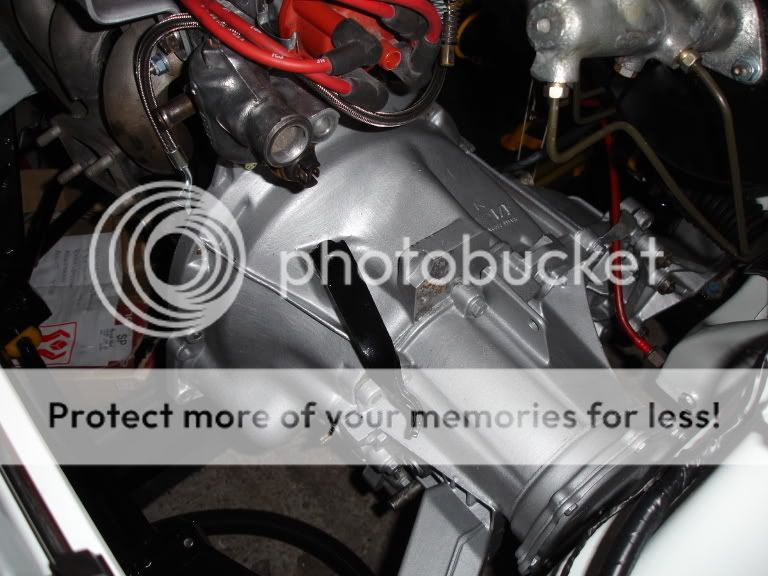
After that, tonight, it was time to refit the gearbox to the engine, and then VERY carefully remount the engine and box into the engine bay. Steve the neighbour more than happy to help as usual and is seen below pretending to look like he knows what hes doing
Engine and box all nice and spanky clean

Steve looking busy.... he must of dropped a cigarette down the side

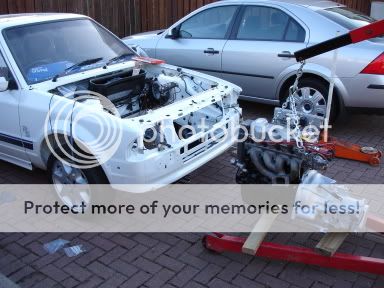
Engine back in the car....theres a new rocker cover and sump still to be added as i didnt want to fit these just yet incase they got scuffed.....
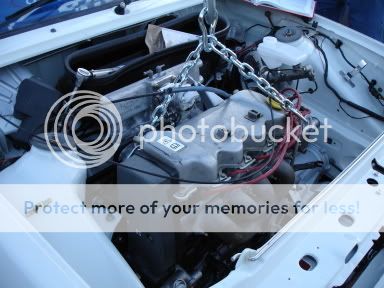
Thats it for now..... more soon.....its coming together now !!
and he painted it silver for me....got that fitted tothe car along with the new fuel lines, new braided fuel extensions, new Bosch Fuel Pump, carrier, accumulator etc etc.....used stainless nuts and bolts all round and genuine ford clips. Nice powder coated tank strap too. (Yes i know one end of the fuel pipe is off as i ran out of Jubilees lol After that, tonight, it was time to refit the gearbox to the engine, and then VERY carefully remount the engine and box into the engine bay. Steve the neighbour more than happy to help as usual and is seen below pretending to look like he knows what hes doing
Engine and box all nice and spanky clean
Steve looking busy.... he must of dropped a cigarette down the side
Engine back in the car....theres a new rocker cover and sump still to be added as i didnt want to fit these just yet incase they got scuffed.....
Thats it for now..... more soon.....its coming together now !!
12-07-2006, 11:59 PM
#31
PassionFord Post Whore!!
Join Date: Jul 2004
Location: isle of wight (K.O.P 2006 mother fucker!)
Posts: 4,276
Likes: 0
Received 0 Likes
on
0 Posts
fuck me i had a guy live next door to me that looked like that!! and his name was steve too 
nice to see it coming on mate.
how long has it taken you so far?
nice to see it coming on mate.
how long has it taken you so far?
13-07-2006, 06:36 AM
#33
Too many posts.. I need a life!!
Thread Starter
Join Date: Sep 2004
Location: Aberdeen
Posts: 594
Likes: 0
Received 0 Likes
on
0 Posts
Originally Posted by jayRS
fuck me i had a guy live next door to me that looked like that!! and his name was Steve too
nice to see it coming on mate.
how long has it taken you so far?
nice to see it coming on mate.
how long has it taken you so far?


 13-07-2006, 06:04 PM
#37
PassionFord Post Whore!!
Join Date: Jul 2004
Location: isle of wight (K.O.P 2006 mother fucker!)
Posts: 4,276
Likes: 0
Received 0 Likes
on
0 Posts
cool, mines in the 7th month but ive had a tad more to do and plus its outside so it was a slow start and its governed but the weather all the time 
