Fiesta Build - 24/09/06 - Suspension, Braces, Wheels, etc
 14-05-2006, 06:47 PM
#1
PassionFord Regular
Thread Starter

Join Date: Mar 2006
Location: Barnsley
Posts: 396
Likes: 0
Received 0 Likes
on
0 Posts
Well you will have seen me knocking around on the forum asking questions, mainly about Mk3 Fiestas. I am 16 and I am an Apprentice Plumbing and Heating Engineer. I was supposed to be buying a Red Mk3 1.1 Azura on a P Plate, low miles, immaculate shell and no sunroof. An ideal base for what I want to do, but was gazumped by the bloke I had agreed to buy it off. So I am currently looking for a similar example, but since I have a few months before I will need the car, I am going to take my time and stockpile the parts I need.
Please feel free to leave any comments or suggestions, and any help on enquiries would be great. Also, if anyone wants any specific photos, feel free to ask and I will do my best to get them.
Thanks
Saturday 6th May 2006
I went to Ford Salvage in Barnsley today to enquire about a Zetec S Rear Beam, some V6 Mondeo Front Disks and Focus 2.0 Rear Brakes with the Stub Axles.
They had a Street KA in, which has the same rear beam as a Zetec S, so I paid for that.
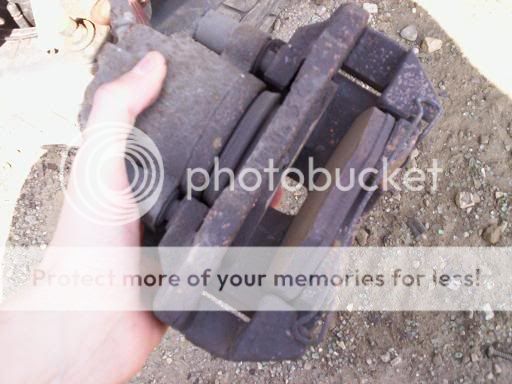
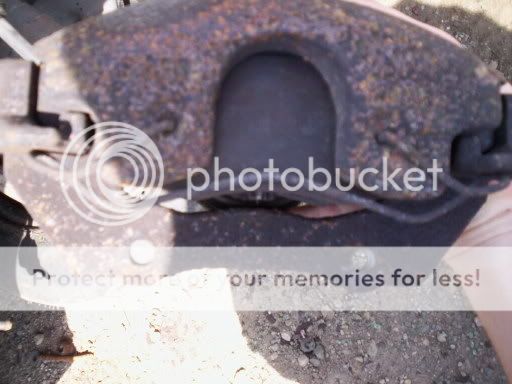
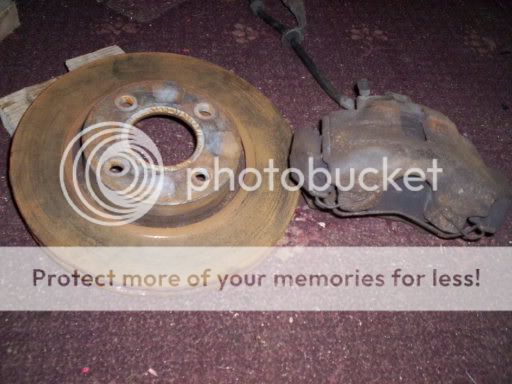
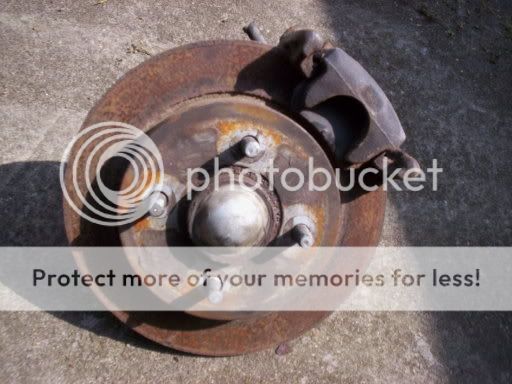
They also had a V6 Cougar in, which shares its Front brakes with the Mondeo, bargain! I paid for them too.
Unfortunately they did not have a 2.0 Focus in for the rear brakes.
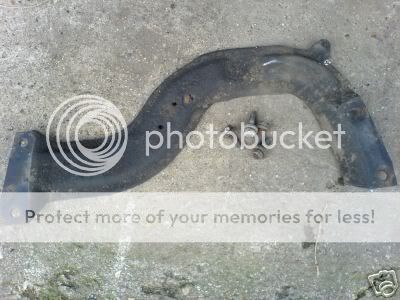
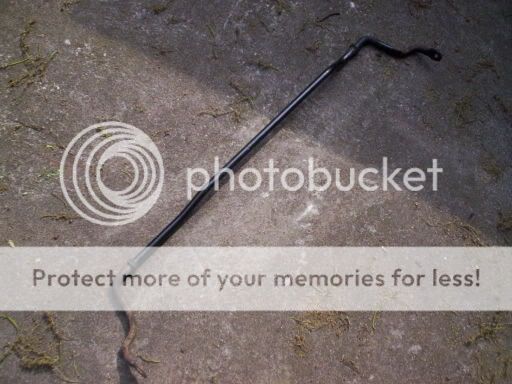
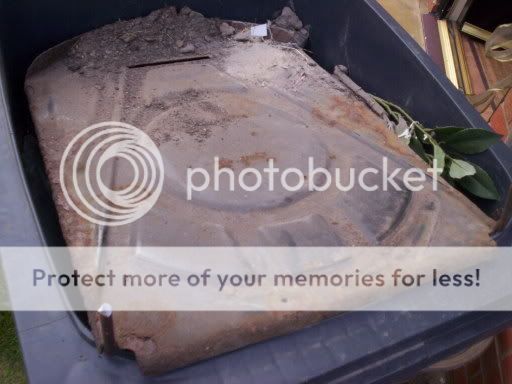
I then went to my Uncle�s Scrap yard as he had an XR2i 16v in. I got there and immediately removed the front lower strut brace from the car. A lot easier said then done. The silly captive bolts are a twat to get off, and I only managed to get one off before the heavens opened. They have a square base and are held by two prongs of metal. They needed prising off, but the left side was very tricky to get to. It looked very similar to this one when I got it (forgot to take a picture of mine)
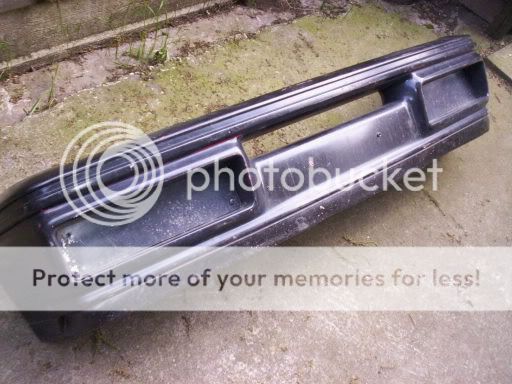
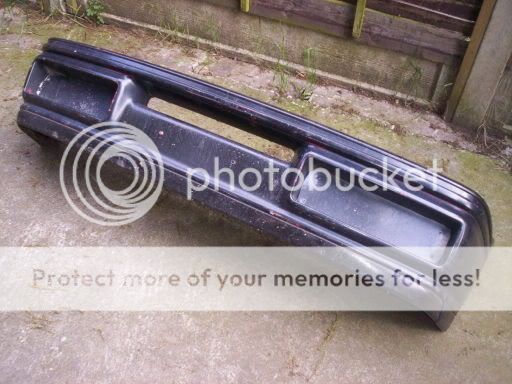
The XR2i had been in a front end smash, so the front bumper was damaged. Someone had already taken the Rear Bumper. I went looking around the yard, and came across a crappy Fiesta with a RS Turbo bumper. It was a real mess, and very badly painted, but is ideal for experimentation so I got that too. There is a Focus 2.0 there too, but I didn�t get time to take the stub axles and discs off. For some reason one of the rear callipers is missing (the Drivers Side) so I will have to source one of those too. Probably means I need a new set of pads too, as I will have to be really lucky to find one with evenly worn pads. I will be taking the rear brakes off the car in the next couple of weeks.
Sunday 7th May 2006
I cleaned the Lower Strut Brace today. After accumulating over 14 years of dirt, grime and grease, it wasn�t a simple wipe clean. I started out by using a sponge and some soapy water so clean the thick layer of mud from the surface. I then scraped off the grease. With a rag and some petrol, I rubbed down the rest of the brace and it came up quite nicely.
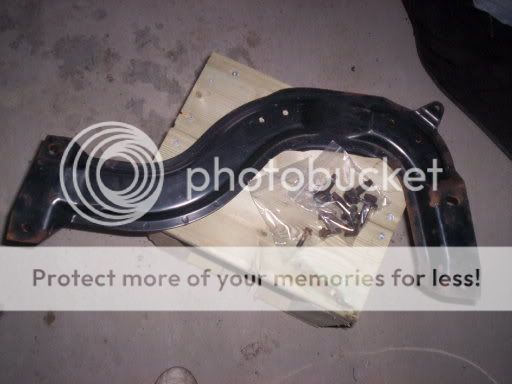
When scraping off the grease, I scratched the surface of the brace, so be careful if you are doing the same thing. I will be painting it, so no problem for me. It had two exhaust brackets bolted to it, so I took those off and cleaned them.
I have noticed though, that most peoples only have holes for one bracket, why is this??
I got all the bolts cleaned up too; my old electric toothbrush worked a treat. They are all reusable, so that�s saved me some messing about.
Wednesday 10th May 2006
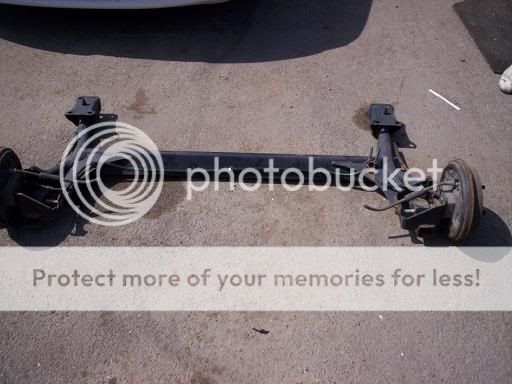
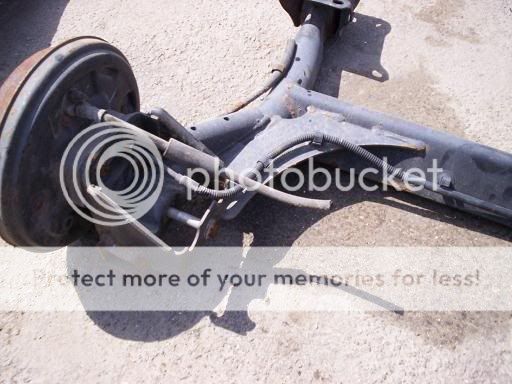
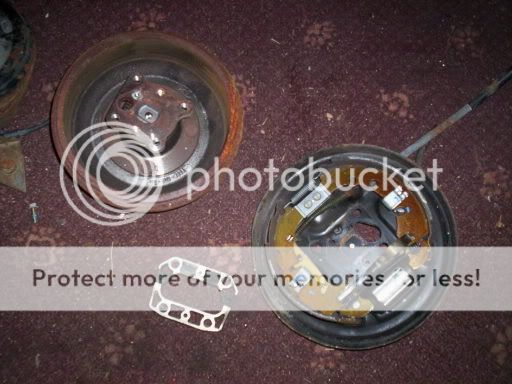
Collected the Zetec S/KA Rear Beam and got cracking with the rear drums. These will be replaced with Focus 2.0 rear stub axles, callipers and discs shortly. This makes the beam around 20mm wider each side than a standard Fiesta Beam. To remove the drums, I removed the four big (19mm IIRC) bolts from the reverse of the drum. It then moved, but was stuck by something. I then removed the ABS sensor with an 8 or 9mm socket. The drivers� side was a little more problematic, as one of the shoes was stuck on, stopping the outer part of the drum being removed. A few good whacks and some prising it popped off nicely. The rest of the drum is then held on by 2 rivets either side, so I drilled the heads off them, and knocked them out with a hammer and a long nail. Once this was done, the whole drum assembly was removed, and the beam is ready for the Focus brakes. I also gave the beam a quick clean, but it was taken from a very new car, so it is more or less immaculate.

The Rear Drums made by AP Racing! � For Sale if anyone wants them, open to offers.
Thursday 11th May 2006
Not a very big update. I have collected the passenger Cougar brake from Ford Salvage, as they weren�t off the car when I went last time and they still hadn�t taken the passenger one off, as I said I would be there on Saturday. They are in very good condition and there is plenty of meat left on the pads, so I am very pleased.
Saturday 13th May 2006
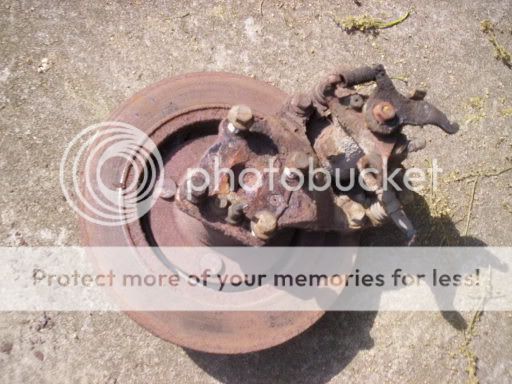
My dad picked up the passenger side brake from Ford Salvage. I had asked Lee to keep the brake lines and everything with it, so that I could trial fit before I bought new discs, pads and hoses. It must not have been him who took it off, as the lines have been cut and one of the pads is missing. No harm done really.
Sunday 14th May 2006
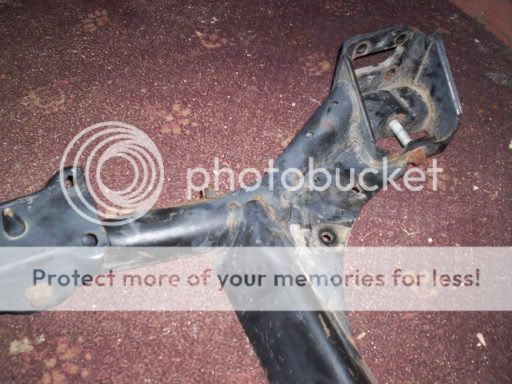
I went through to Sheffield today to pick up an Escort S2 RST Gearbox (Thanks IANS2RST on passionford.com). Ian told me it was whining in 3rd and 4th, but that doesn�t really bother me.
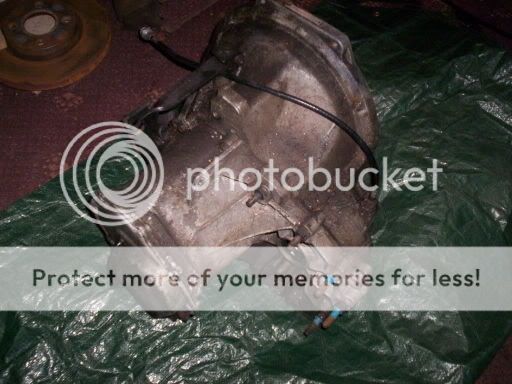
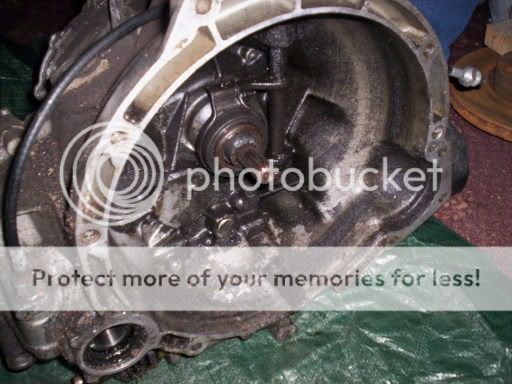
This is what I wanted though; you can just see it, the LSD.
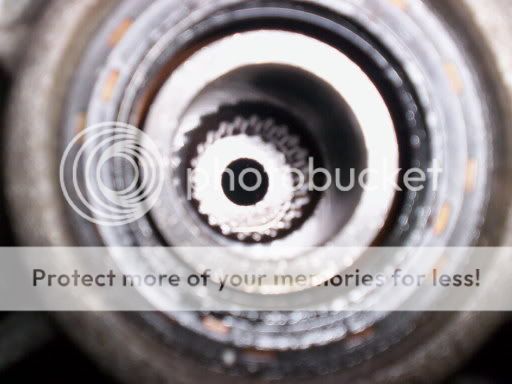
I am going to strip it down to remove the Diff and then the box will be sold on, either without a diff, or with the diff from the Diesel box when I exchange them. I am also getting some degreaser, so the box will be made spotless. This will be up for sale, so any offers are welcome!
Anyone know what Grade of oil I should put in the Box?
Please feel free to leave any comments or suggestions, and any help on enquiries would be great. Also, if anyone wants any specific photos, feel free to ask and I will do my best to get them.
Thanks
Saturday 6th May 2006
I went to Ford Salvage in Barnsley today to enquire about a Zetec S Rear Beam, some V6 Mondeo Front Disks and Focus 2.0 Rear Brakes with the Stub Axles.
They had a Street KA in, which has the same rear beam as a Zetec S, so I paid for that.
They also had a V6 Cougar in, which shares its Front brakes with the Mondeo, bargain! I paid for them too.
Unfortunately they did not have a 2.0 Focus in for the rear brakes.
I then went to my Uncle�s Scrap yard as he had an XR2i 16v in. I got there and immediately removed the front lower strut brace from the car. A lot easier said then done. The silly captive bolts are a twat to get off, and I only managed to get one off before the heavens opened. They have a square base and are held by two prongs of metal. They needed prising off, but the left side was very tricky to get to. It looked very similar to this one when I got it (forgot to take a picture of mine)
The XR2i had been in a front end smash, so the front bumper was damaged. Someone had already taken the Rear Bumper. I went looking around the yard, and came across a crappy Fiesta with a RS Turbo bumper. It was a real mess, and very badly painted, but is ideal for experimentation so I got that too. There is a Focus 2.0 there too, but I didn�t get time to take the stub axles and discs off. For some reason one of the rear callipers is missing (the Drivers Side) so I will have to source one of those too. Probably means I need a new set of pads too, as I will have to be really lucky to find one with evenly worn pads. I will be taking the rear brakes off the car in the next couple of weeks.
Sunday 7th May 2006
I cleaned the Lower Strut Brace today. After accumulating over 14 years of dirt, grime and grease, it wasn�t a simple wipe clean. I started out by using a sponge and some soapy water so clean the thick layer of mud from the surface. I then scraped off the grease. With a rag and some petrol, I rubbed down the rest of the brace and it came up quite nicely.
When scraping off the grease, I scratched the surface of the brace, so be careful if you are doing the same thing. I will be painting it, so no problem for me. It had two exhaust brackets bolted to it, so I took those off and cleaned them.
I have noticed though, that most peoples only have holes for one bracket, why is this??
I got all the bolts cleaned up too; my old electric toothbrush worked a treat. They are all reusable, so that�s saved me some messing about.
Wednesday 10th May 2006
Collected the Zetec S/KA Rear Beam and got cracking with the rear drums. These will be replaced with Focus 2.0 rear stub axles, callipers and discs shortly. This makes the beam around 20mm wider each side than a standard Fiesta Beam. To remove the drums, I removed the four big (19mm IIRC) bolts from the reverse of the drum. It then moved, but was stuck by something. I then removed the ABS sensor with an 8 or 9mm socket. The drivers� side was a little more problematic, as one of the shoes was stuck on, stopping the outer part of the drum being removed. A few good whacks and some prising it popped off nicely. The rest of the drum is then held on by 2 rivets either side, so I drilled the heads off them, and knocked them out with a hammer and a long nail. Once this was done, the whole drum assembly was removed, and the beam is ready for the Focus brakes. I also gave the beam a quick clean, but it was taken from a very new car, so it is more or less immaculate.
The Rear Drums made by AP Racing! � For Sale if anyone wants them, open to offers.
Thursday 11th May 2006
Not a very big update. I have collected the passenger Cougar brake from Ford Salvage, as they weren�t off the car when I went last time and they still hadn�t taken the passenger one off, as I said I would be there on Saturday. They are in very good condition and there is plenty of meat left on the pads, so I am very pleased.
Saturday 13th May 2006
My dad picked up the passenger side brake from Ford Salvage. I had asked Lee to keep the brake lines and everything with it, so that I could trial fit before I bought new discs, pads and hoses. It must not have been him who took it off, as the lines have been cut and one of the pads is missing. No harm done really.
Sunday 14th May 2006
I went through to Sheffield today to pick up an Escort S2 RST Gearbox (Thanks IANS2RST on passionford.com). Ian told me it was whining in 3rd and 4th, but that doesn�t really bother me.
This is what I wanted though; you can just see it, the LSD.
I am going to strip it down to remove the Diff and then the box will be sold on, either without a diff, or with the diff from the Diesel box when I exchange them. I am also getting some degreaser, so the box will be made spotless. This will be up for sale, so any offers are welcome!
Anyone know what Grade of oil I should put in the Box?

 14-05-2006, 10:34 PM
#3
PassionFord Post Troll

Looks like you are doing a bloody good job.  I am looking at building something simiilar. I'm too tight to run anything but a diesel for a daily runnner, but i can't see why i can't still be a fun car.
The drums you have will be made by AP which do alot of OE and OE replacement parts. They are no longer the same company as AP racing which split from them a few years ago. AP racing tend to make the special parts.
Keep up the good work and the updates.
I am looking at building something simiilar. I'm too tight to run anything but a diesel for a daily runnner, but i can't see why i can't still be a fun car.The drums you have will be made by AP which do alot of OE and OE replacement parts. They are no longer the same company as AP racing which split from them a few years ago. AP racing tend to make the special parts.
Keep up the good work and the updates.
 15-05-2006, 06:13 AM
#5
PassionFord Regular
Thread Starter
Join Date: Mar 2006
Location: Barnsley
Posts: 396
Likes: 0
Received 0 Likes
on
0 Posts
mackers - Thanks Mate! will keep the updates coming!
Garage19 - Cheers. My bro had a White H Reg with a TD a few years back, it was quite nippy, and really good on juice. First Car so with the milage i will be doing, i need something that is economical.
Well i thought it was odd when i saw the Ap logo, cheers for the info!
luke89 - Its going to be a 1.8TD engine. Not 100% sure which model to use yet, but i have got a Mk5 Escort lined up, which is going to cost less than i was quoted for a full engine. Plus i know it runs and can get every little part i need (Including the Brake Servo ect) and then sell or scrap the car depending on interest in it. its a quite low milage example for its age too, something like 50,000. i'll see how it goes.
Thanks for the replies guys!
31-05-2006, 02:11 PM
#6
PassionFord Regular
Thread Starter
Join Date: Mar 2006
Location: Barnsley
Posts: 396
Likes: 0
Received 0 Likes
on
0 Posts
Thursday 25th May
Bought a car yesterday, going to pick it up at the weekend (hopefully)
http://cgi.ebay.co.uk/ws/eBayISAPI.d...MEWA%3AIT&rd=1
I asked the buyer to end the item soon for a very reasonable price! More pics when I collect it.
Sunday 28th May
Got the car today, lovely bloke - he put it back on his insurance for the day so we were legal on the way home.
The car runs perfect so I�ve got a 1.1 engine freshly serviced with a new exhaust and plugs for sale if anyone�s interested? Offers of course
and also a set of five 13"'s with 175/70 firestones (no oddballs) if anyone wants?
I'll post some pics tomorrow.
Wednesday 31st May
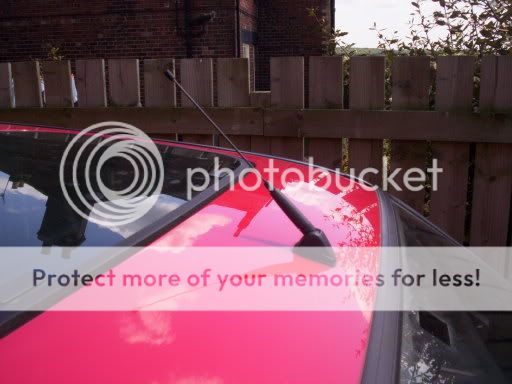
Sorry for the delay in posting, I have been working, but I have managed to get some little bits done. I cut the Ariel down as I thought it looked odd, I cut about half a foot off:
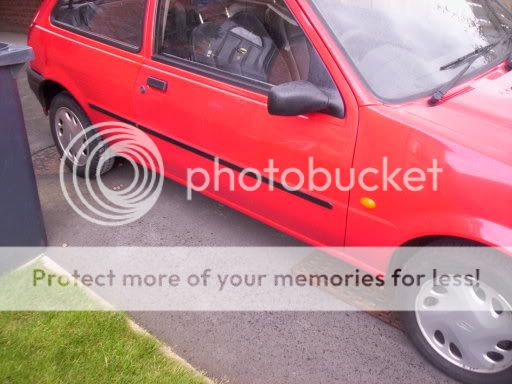
My next task was to get rid of the horrible black side strips. I used a credit card (or store card, make sure it has expired!) and a hair dryer. It just takes a lot of heat and patients to get it done. I then used white spirit to get the rest of the glue off.
Before:
After:
I then moved on to the tailgate. The Ford and Fiesta Classic badges were removed using the same method. It all still needs a good polish.
Before:
After:
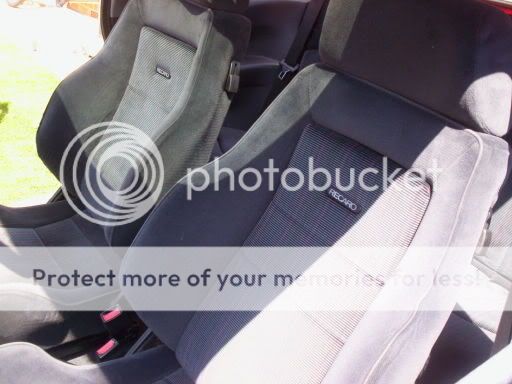
I bought some Recaro seats as well. mrorange2 delivered them (thanks mate!) this morning at about 10. Finished putting them in about half 12 so I don�t think we did too bad. As it�s a mk3.5 the sub frames needed changing round, and after a little head scratching it was all sorted, I am going to write up a guide for this and will post the link when it is done. I have been told they don�t fit, but this �theory� has been proved wrong!

I have also ordered a brand new RS2000 Handbrake cable to fit my rear discs, and a new front fiesta one as it was too cheap to miss!
That�s about it for now, oh and I have received my brand new set of Facom Axle stands, should be ideal while I am changing the whole suspension setup.
Thanks!
Bought a car yesterday, going to pick it up at the weekend (hopefully)
http://cgi.ebay.co.uk/ws/eBayISAPI.d...MEWA%3AIT&rd=1
I asked the buyer to end the item soon for a very reasonable price! More pics when I collect it.
Sunday 28th May
Got the car today, lovely bloke - he put it back on his insurance for the day so we were legal on the way home.
The car runs perfect so I�ve got a 1.1 engine freshly serviced with a new exhaust and plugs for sale if anyone�s interested? Offers of course
and also a set of five 13"'s with 175/70 firestones (no oddballs) if anyone wants?
I'll post some pics tomorrow.
Wednesday 31st May
Sorry for the delay in posting, I have been working, but I have managed to get some little bits done. I cut the Ariel down as I thought it looked odd, I cut about half a foot off:
My next task was to get rid of the horrible black side strips. I used a credit card (or store card, make sure it has expired!) and a hair dryer. It just takes a lot of heat and patients to get it done. I then used white spirit to get the rest of the glue off.
Before:
After:
I then moved on to the tailgate. The Ford and Fiesta Classic badges were removed using the same method. It all still needs a good polish.
Before:
After:
I bought some Recaro seats as well. mrorange2 delivered them (thanks mate!) this morning at about 10. Finished putting them in about half 12 so I don�t think we did too bad. As it�s a mk3.5 the sub frames needed changing round, and after a little head scratching it was all sorted, I am going to write up a guide for this and will post the link when it is done. I have been told they don�t fit, but this �theory� has been proved wrong!
I have also ordered a brand new RS2000 Handbrake cable to fit my rear discs, and a new front fiesta one as it was too cheap to miss!
That�s about it for now, oh and I have received my brand new set of Facom Axle stands, should be ideal while I am changing the whole suspension setup.
Thanks!
Trending Topics
31-05-2006, 05:50 PM
#8
Fucking superstar........
Join Date: May 2004
Location: Argyll.... It's lonely...
Posts: 13,240
Likes: 0
Received 0 Likes
on
0 Posts
It's really nice to have someone putting this much effort in! And you know how to type which is really nice! It doesn't strain my brain reading it
 31-05-2006, 08:22 PM
#10
Good work mate, here's a link for inspiration of a car that started with a similar conversion then progressing into a zetec turbo, (19 pages)
http://www.fiestaturbo.com/forums/viewtopic.php?t=93689
http://www.fiestaturbo.com/forums/viewtopic.php?t=93689


 05-06-2006, 04:36 PM
#16
PassionFord Regular
Thread Starter
Join Date: Mar 2006
Location: Barnsley
Posts: 396
Likes: 0
Received 0 Likes
on
0 Posts
Another Update. I went to my Uncle�s Scrap yard again on Saturday, to hunt for some more parts. First on the list was the XR2i Anti Roll Bar I had left the previous time. It was quite fiddly to get off, as the drop link bolts had seized and the bushing mounts are hard to get to, but it came off eventually. As a note to anyone removing one, it is easier to remove it from the side furthest from the gearbox, as there is less for it to snag on. Also, the drop links will have to be removed completely. I left the drop links there, as I am buying some brand new ones before I fit it.
I had taken off a RST front bumper, which was on a very badly painted late model Mk3, the last time I went to the yard, but didn�t have anywhere to put it in the car, but I picked it up this time. The Fog lights have been blanked off with 2 plates and the paint is so shabby that you can peel it off with your finger nail, but it want painting anyway. I may even use this one for some experimentation, since I got it for free.
I (finally!) got the rear brakes and stub axles off the Focus 2.0 at the yard. The drivers� side calliper is missing, but locating a replacement shouldn�t be a problem. They were absolutely horrible to take off, as they were still on the full car. In the end we melted off one of the suspension bolts (even the snap on impact wrench would not budge it) and took more or less the full beam off. This allowed us to pivot the stub axle around, giving a good angle to get at the four bolts on either side. After that they were off in no time.
They are in quite good condition, but a new set of disks and pads will be used once the car is on the road, these will be used just to get the car rolling.
I also got some other little bits, such as a seatbelt surround (where it goes through the doorcard) as mine was missing, and a stereo surround, as the one I had was messed up and scratched.
My brother brought me a present from work the other day:
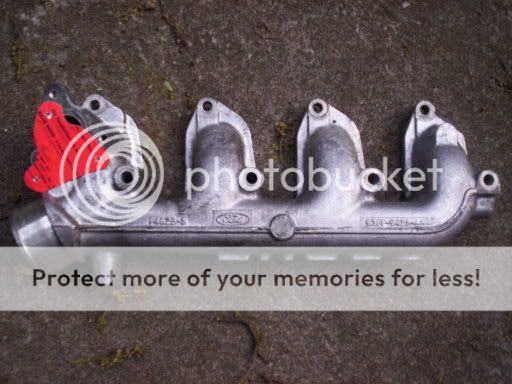
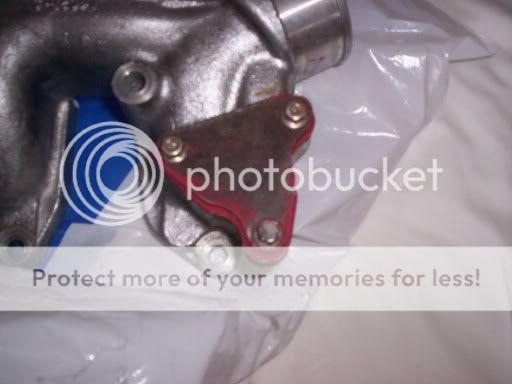
It�s a Mondeo TD Inlet Manifold. I need to change the direction to boost pipe will enter it, so that I can use a front mount intercooler (eventually). One problem this does cause though is the exhaust gas recirculation (EGR) port. This is used to regulate the inlet temperature by circulating exhaust gas into the inlet. While this works okay, major gains can be had by removing the system, namely reduced charge temperatures, meaning more power (with increased fuelling). So I did this:
Its only a cardboard template at the moment, but I will make one from some plate steel and bolt it up, using some gasket sealer to make sure it�s a proper seal.
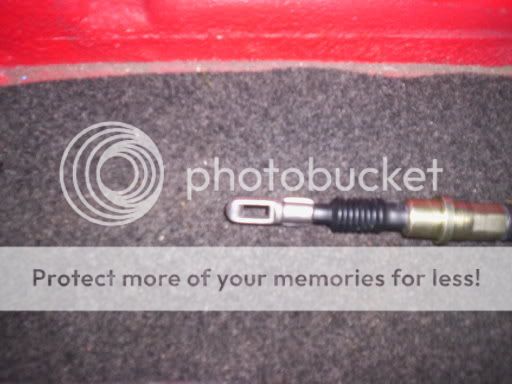
My handbrake cable also arrived, I think it is the right one, but I will have to find out when it comes to fitting it to the rear beam once I have my rear suspension. The first picture is where it attaches to the front part of the cable, and the second picture is where it hooks onto the calliper.
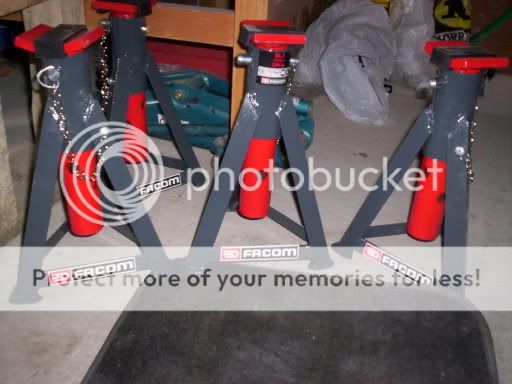
I got round to unwrapping my axle stands. They are just what I needed, and are really high. The jack will need choking up to get them to their full height.
That�s about it for now, should get some more done soon, but I am busy with my exams at the moment.
Thanks!
I had taken off a RST front bumper, which was on a very badly painted late model Mk3, the last time I went to the yard, but didn�t have anywhere to put it in the car, but I picked it up this time. The Fog lights have been blanked off with 2 plates and the paint is so shabby that you can peel it off with your finger nail, but it want painting anyway. I may even use this one for some experimentation, since I got it for free.
I (finally!) got the rear brakes and stub axles off the Focus 2.0 at the yard. The drivers� side calliper is missing, but locating a replacement shouldn�t be a problem. They were absolutely horrible to take off, as they were still on the full car. In the end we melted off one of the suspension bolts (even the snap on impact wrench would not budge it) and took more or less the full beam off. This allowed us to pivot the stub axle around, giving a good angle to get at the four bolts on either side. After that they were off in no time.
They are in quite good condition, but a new set of disks and pads will be used once the car is on the road, these will be used just to get the car rolling.
I also got some other little bits, such as a seatbelt surround (where it goes through the doorcard) as mine was missing, and a stereo surround, as the one I had was messed up and scratched.
My brother brought me a present from work the other day:
It�s a Mondeo TD Inlet Manifold. I need to change the direction to boost pipe will enter it, so that I can use a front mount intercooler (eventually). One problem this does cause though is the exhaust gas recirculation (EGR) port. This is used to regulate the inlet temperature by circulating exhaust gas into the inlet. While this works okay, major gains can be had by removing the system, namely reduced charge temperatures, meaning more power (with increased fuelling). So I did this:
Its only a cardboard template at the moment, but I will make one from some plate steel and bolt it up, using some gasket sealer to make sure it�s a proper seal.
My handbrake cable also arrived, I think it is the right one, but I will have to find out when it comes to fitting it to the rear beam once I have my rear suspension. The first picture is where it attaches to the front part of the cable, and the second picture is where it hooks onto the calliper.
I got round to unwrapping my axle stands. They are just what I needed, and are really high. The jack will need choking up to get them to their full height.
That�s about it for now, should get some more done soon, but I am busy with my exams at the moment.
Thanks!
05-06-2006, 08:27 PM
#19
PassionFord Regular
Thread Starter
Join Date: Mar 2006
Location: Barnsley
Posts: 396
Likes: 0
Received 0 Likes
on
0 Posts
Thanks for the nice comments guys!
Another small update. Had a little time spare in between revising, so I thought I�d let off a little steam and have a mess about with the Fiesta.
As I will be changing the wheels and brakes, the spare wheel will be useless, so I decided to get rid of it, and the hanger for it. The bolt for the hanger cannot be taken out, so I just cut it down with a hacksaw. The hanger is now in its proper place, which also has wheels:
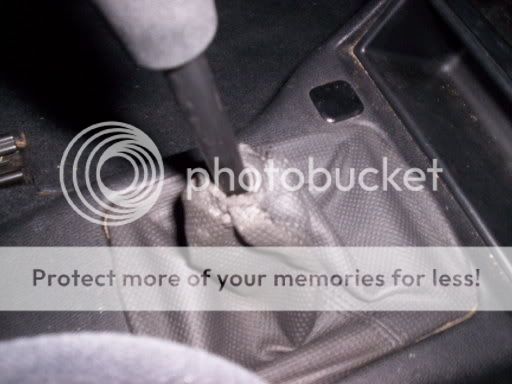
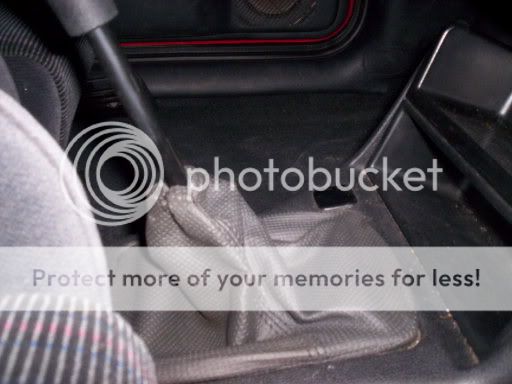
After fitting my Recaro interior, I thought the horrible rubber gear gaiter needed to be rid. As I have not found a FRST (or Escort) leather one yet, I had a wonderful idea. The MK4 Golf GTi gear knob and gaiter were collecting dust in the garage, so I separated them (they are permanently fixed together) and used the gaiter. I think it looks quite good, but I am only using this until I get my RST one, or something a little more special (all will be revealed)
And I think that�s all, will be another update soon.
Thanks!
Another small update. Had a little time spare in between revising, so I thought I�d let off a little steam and have a mess about with the Fiesta.
As I will be changing the wheels and brakes, the spare wheel will be useless, so I decided to get rid of it, and the hanger for it. The bolt for the hanger cannot be taken out, so I just cut it down with a hacksaw. The hanger is now in its proper place, which also has wheels:
After fitting my Recaro interior, I thought the horrible rubber gear gaiter needed to be rid. As I have not found a FRST (or Escort) leather one yet, I had a wonderful idea. The MK4 Golf GTi gear knob and gaiter were collecting dust in the garage, so I separated them (they are permanently fixed together) and used the gaiter. I think it looks quite good, but I am only using this until I get my RST one, or something a little more special (all will be revealed)
And I think that�s all, will be another update soon.
Thanks!
 07-06-2006, 08:59 PM
#21
PassionFord Regular
Thread Starter
Join Date: Mar 2006
Location: Barnsley
Posts: 396
Likes: 0
Received 0 Likes
on
0 Posts
I have got some more stuff done on the car over the past few days in between some exams. I bought some black faux (artificial) suede off eBay, and some upholstery spray adhesive, which came to about �15 in all.
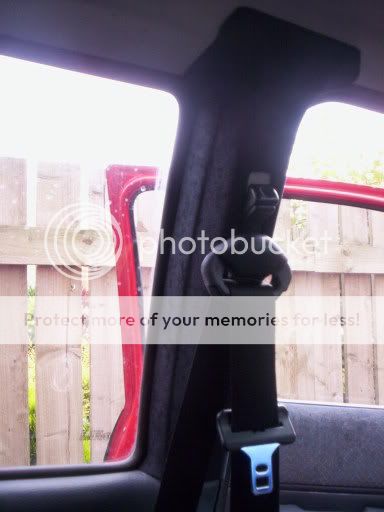
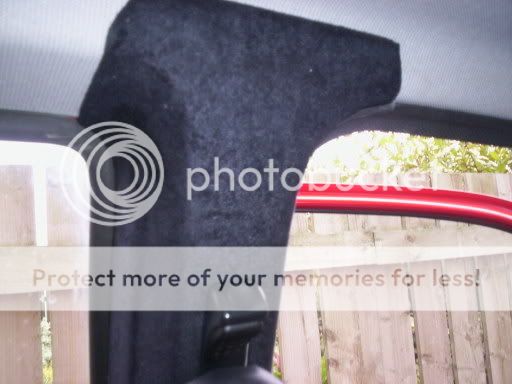
I have recovered the horrible cream B pillar covers, where the seatbelt mounts onto. It was quite difficult to get around the contours and curves, but it come out alright. The material does have quite a lot of leeway in terms of stretching. One of the clips did crack and break off, but I sorted it out with a small screw and some plastic cement.
I think they look quite good, and go well with the dark Recaros. When I bought the interior, it didn�t come with any doorcards. Here are the ones I had in:

They were horrible, and didn�t match the seats at all. I have now retrimmed them in the same suede as the B Pillar covers. It has turned out nicely, they are not 100% prefect, as the original leather creased a little when sticking it back down, but it looks good. If anyone has any questions on how I did them, just ask!


That�s all folks. I have just been cleaning up my rear brakes and stub axles, as there was a little surface rust.
Thanks!
I have recovered the horrible cream B pillar covers, where the seatbelt mounts onto. It was quite difficult to get around the contours and curves, but it come out alright. The material does have quite a lot of leeway in terms of stretching. One of the clips did crack and break off, but I sorted it out with a small screw and some plastic cement.
I think they look quite good, and go well with the dark Recaros. When I bought the interior, it didn�t come with any doorcards. Here are the ones I had in:
They were horrible, and didn�t match the seats at all. I have now retrimmed them in the same suede as the B Pillar covers. It has turned out nicely, they are not 100% prefect, as the original leather creased a little when sticking it back down, but it looks good. If anyone has any questions on how I did them, just ask!
That�s all folks. I have just been cleaning up my rear brakes and stub axles, as there was a little surface rust.
Thanks!
08-06-2006, 11:30 AM
#26
Advanced PassionFord User

Join Date: Jan 2006
Location: gt yarmouth Drives: Escort RS replica
Posts: 1,929
Likes: 0
Received 0 Likes
on
0 Posts
nice project you've got mate, can you tell me where you got the leather stuff from and what did you stick it all down with 
08-06-2006, 01:56 PM
#27
DEYTUKURJERBS

maaaaaaaate 
thats a fucking shithot project you doing there
fair play for all the hard work and sourcing bits off other motors
this kinda stuff is what i really like, DIY, low budget, but proper thought being put in to it
thats a fucking shithot project you doing there
fair play for all the hard work and sourcing bits off other motors
this kinda stuff is what i really like, DIY, low budget, but proper thought being put in to it
08-06-2006, 03:46 PM
#29
PassionFord Regular
Thread Starter
Join Date: Mar 2006
Location: Barnsley
Posts: 396
Likes: 0
Received 0 Likes
on
0 Posts
Garage19, I dont have the money to be paying other people to do stuff for me, I find it more rewarding to do stuff by myself anywayz.
Its not leather its faux suade. http://cgi.ebay.co.uk/ws/eBayISAPI.d...tem=8287597618
This is the adhesive, good stuff and stays tacky for a while while you smooth creases out http://cgi.ebay.co.uk/ws/eBayISAPI.d...tem=6058576879
I wrote a kind of how to on FT, here it is:
To do the Doorcards, I did this. I took the Doorcards off, by removing all the related trim (door pockets, handles, window winders and pull handles) and then lifted the door card up and out (after pulling out the plastic clips, which are like push fit holes, around the sides and bottom, which pull out with a bit of force, and then a row of metal ones at the top, this is why you have to lift them up and out).
I took out all the staples from the back (around 6 or 7 each side) and peeled the top cloth back. The padding behind is stuck to the cloth, so this needs to be separated and left on the door card. Where the cloth meets the leather is also glued, but this comes off with a bit of force. Make sure you do not pull the leather too far down. The cloth goes just past the two indented lines (you will know what I mean when you see it), so this is only how much it needs peeling back).
Once the cloth was all removed, I got the suede (any material will work really) and cut around the original piece, try and leave a little more at the top of the door card, as it makes it easier to stick it all down.
Once this is done, the piece can be stuck down. Using some spray adhesive (eBay, around 7 quid for some good stuff) coat between the two indented lines you peeled the leather up from. Stick the suede down once tacky and leave to dry for a few moments. Then, after covering up both the suede and leather at both sides (I used two pieces of card) spray over the suede (again between the indented lines, ensuring the adhesive does not get anywhere else). Stick the leather over the top of the suede, and smooth out any creases before it dries. You may also need some on the reverse of the door card where the staples were (I do not recommend using staples, as these are special �short� staples, as the door card is only very thin).
Turn the door card over, and apply some more adhesive at the top edge. Immediately start sticking the material down, making sure that it is still wet enough to move around, so that all creases can be smoothed out. Keep doing this all the way along until the material is completely stuck down. Some cutting on the edges may be necessary to stop creasing and folding.
Wait until dry, and turn the door card back over. Cut out the door handle hole by creating a x from every corner, and folding the excess to the opposite side of the door card, sticking it down tightly with adhesive, ensuring that the edges are followed perfectly.
Pop the door cards back on, and put all the trim again. Be careful not to pull up the material when dropping it over the top clips.
That's about it really, not too difficult. I recommend two people doing it, as it gets quite fiddly with the sticking and holding the Doorcards. Leave about 1 and a half to 2 hours to get both sides done, more if you are unsure how to get the trim off.
the headlining is next on my hit list
Cheers for the positive comments guys, keeps projects like this on the go.
10-06-2006, 11:46 AM
#31
PassionFord Regular
Thread Starter
Join Date: Mar 2006
Location: Barnsley
Posts: 396
Likes: 0
Received 0 Likes
on
0 Posts
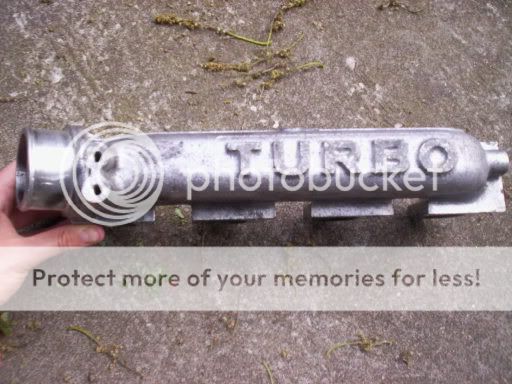
Another little update for you guys. I took the inlet manifold I got to school yesterday and cleaned it up a little and gave it a quick polish on the machine they have. It looks loads better, but isn�t too �in your face�

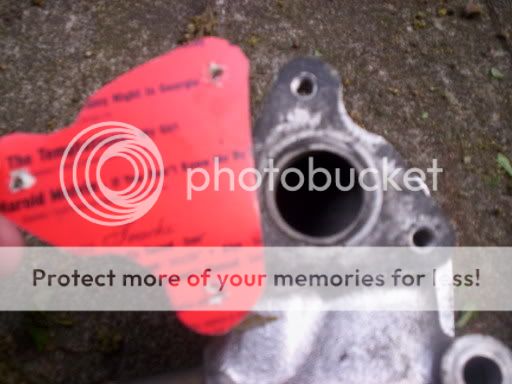
I also got round to doing the EGR port. I used the paper template I made to cut the piece from some plate steel I had lying around. It took a little work with the file but works a treat. I also found 3 8mm bolts to bolt it on. I made a gasket from some thin card, and the red stuff you can see is gasket sealer. It should be okay, and one of the DT teachers used to be a mechanic, and he agrees.
That�s about it for now. Thanks for looking!
10-06-2006, 12:21 PM
#32
Redumbdancy
Excellent - how cool is that, wish i was able to do that stuff in school a your age, although one of my old teachers did build his own Imprezza.
Looking forward to the next update, especailly the roof lining, mine needs something done to it.
Looking forward to the next update, especailly the roof lining, mine needs something done to it.
16-06-2006, 02:36 PM
#33
PassionFord Regular
Thread Starter
Join Date: Mar 2006
Location: Barnsley
Posts: 396
Likes: 0
Received 0 Likes
on
0 Posts
I�ve got another update for ya. I have been looking for a black parcel shelf for the fiesta, and then decided to just re-trim my blue one. It came out alright:

I don�t think it looks too bad, and it hardly cost me anything to do.
I have also made a spacer for the RS2000 handbrake cable. I have been told that the drivers side outer is too short, and the inner cable is slightly too long, so I made a little spacer to solve this problem:
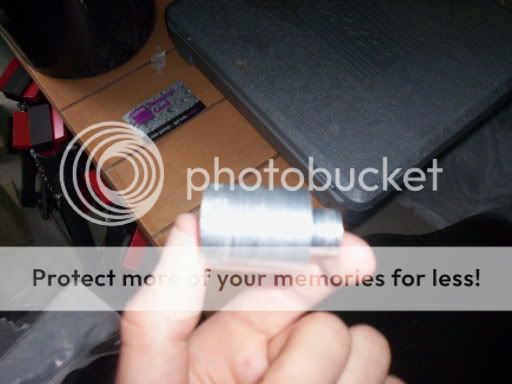
All it does is mimic the normal end of the cable, spacing the inner cable out by around 28mm. It should do the trick.
Also, I have trimmed the back of the rear seats on the metal backing. While the seat material was mint, the rear of it was scratched where it had been stored/things being put in the boot. It wasn�t too bad but I wanted it to look right.
The material part of the seats comes off with the removal of a few plastic nuts, leaving just the metal backing plate. It wasn�t really a hard job and they came out fine:


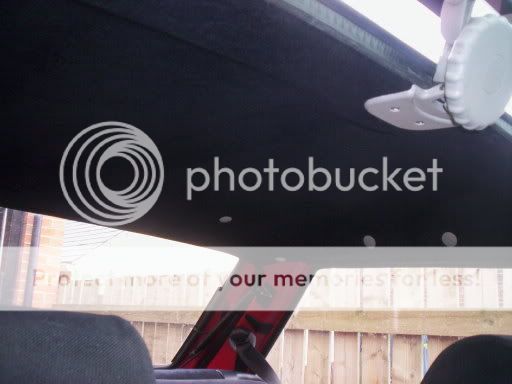
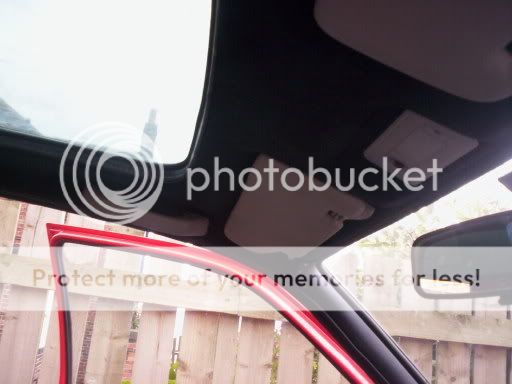
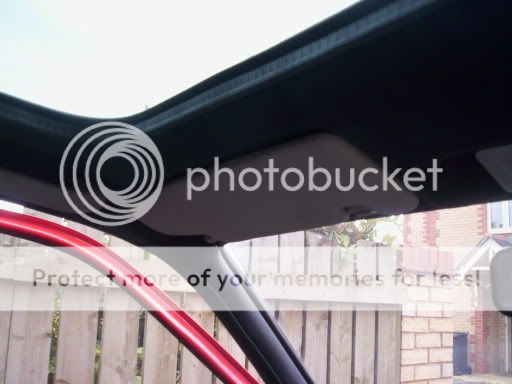
My other length of suede arrived in the post, so I got cracking with the headlining. I had to remove most of the interior plastics, such as the grab handles and sun visors. Once these were all taken off, the lining needed to be pulled away from the sealing rubbers, on the doors, sunroof, tailgate and windscreen. The hardest part was probably messing around with the sunroof rubber.
After the associated trims are removed, it was a case of peeling back the glue that sticks the lining to the roof, and taking it out through the boot.
The trimming part was easy. We just took it a small length at a time, smoothing it down and pulling it tight, making sure there were no creases. After about 15 minutes it was all done and we left it to dry for a couple of minutes.
Putting it back in was merely a reverse of the removal, ensuring the lining went underneath the windscreen rubber first, and working backwards from there. All of the clips and handles went back in ok, but I think I will spray the blanking covers black, as they stand out a bit too much. I am also going to get a drivers side grab handle.
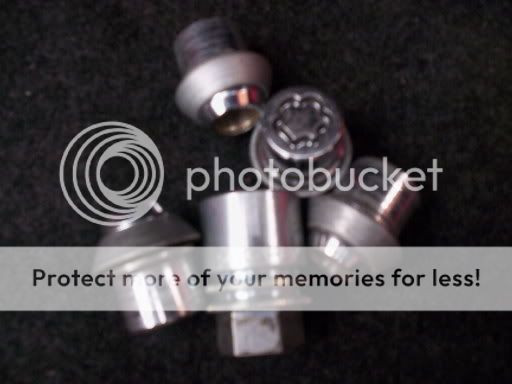
I also got some Ford/McGuard Locking Wheel nuts, and I may get another set, for added security!
So for the headlining, does anyone know what model/year fiesta the black grab handles and sun visors came in?? as I need to get some really.
And that�s it!
Thanks!
I don�t think it looks too bad, and it hardly cost me anything to do.
I have also made a spacer for the RS2000 handbrake cable. I have been told that the drivers side outer is too short, and the inner cable is slightly too long, so I made a little spacer to solve this problem:
All it does is mimic the normal end of the cable, spacing the inner cable out by around 28mm. It should do the trick.
Also, I have trimmed the back of the rear seats on the metal backing. While the seat material was mint, the rear of it was scratched where it had been stored/things being put in the boot. It wasn�t too bad but I wanted it to look right.
The material part of the seats comes off with the removal of a few plastic nuts, leaving just the metal backing plate. It wasn�t really a hard job and they came out fine:
My other length of suede arrived in the post, so I got cracking with the headlining. I had to remove most of the interior plastics, such as the grab handles and sun visors. Once these were all taken off, the lining needed to be pulled away from the sealing rubbers, on the doors, sunroof, tailgate and windscreen. The hardest part was probably messing around with the sunroof rubber.
After the associated trims are removed, it was a case of peeling back the glue that sticks the lining to the roof, and taking it out through the boot.
The trimming part was easy. We just took it a small length at a time, smoothing it down and pulling it tight, making sure there were no creases. After about 15 minutes it was all done and we left it to dry for a couple of minutes.
Putting it back in was merely a reverse of the removal, ensuring the lining went underneath the windscreen rubber first, and working backwards from there. All of the clips and handles went back in ok, but I think I will spray the blanking covers black, as they stand out a bit too much. I am also going to get a drivers side grab handle.
I also got some Ford/McGuard Locking Wheel nuts, and I may get another set, for added security!
So for the headlining, does anyone know what model/year fiesta the black grab handles and sun visors came in?? as I need to get some really.
And that�s it!
Thanks!
 19-06-2006, 11:31 AM
#38
Too many posts.. I need a life!!

Join Date: Dec 2004
Location: NEWCASTLE
Posts: 593
Likes: 0
Received 0 Likes
on
0 Posts
Good work mate well done to you for this project, I'm hoping to get the same kind of fiesta real soon and starting my own! Keep up the good work mate 