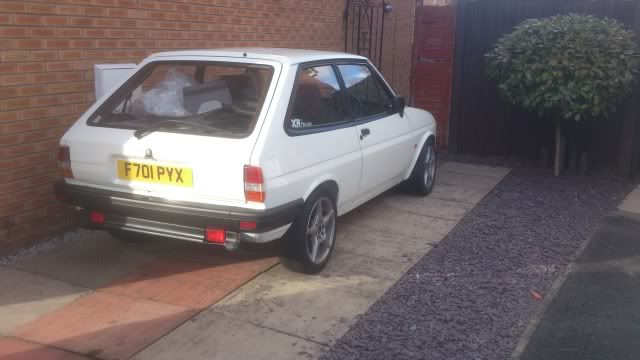
Fiesta MK2 resto.1.8 EFI now Running
 05-09-2011, 01:55 AM
#161
PassionFord Post Whore!!
Get that engine built up 

 21-08-2012, 10:33 PM
#163
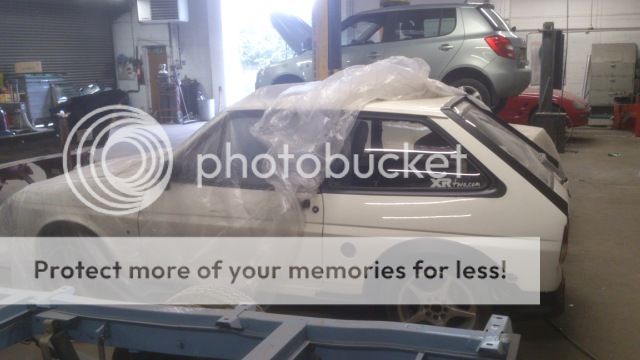
Ok a little update on this again as its been so long :shock:
I'm currently looking at fitting a 1.8 N/A zetec into her until the ZT is ready. Funds dont come by very often so when I had the chance of getting a MK6 Escort 1.8 for �130 I took it.... Long story short I bought the car, Drained the fuel (25ltrs), stripped the running gear (engine, box, ecu loom,starter alternator etc...) and added some extra weight from works scrap :blub: and weighed it in at the local scrap yard for �200
Anyway back to the car which is still tucked up at the bodyshop so I can only work on it during my dinner 40mins. Ive been painting the kit with U-pol plastic restorer as my bodyshop friend recommended it to me. My mate at the bodyshop reshaped on side of the window surround and I repainted it to make it the right shape. Fitted a few bits and bobs but thats it really
Looking into getting it home now because as nice as it is in the dry warm bodyshop I cant do alot to it. As soon as the kit and window surround on the other side are sorted I'll bring it back and see about fitting the engine and brakes
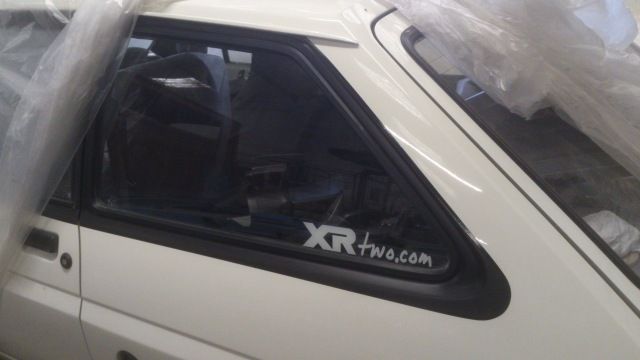
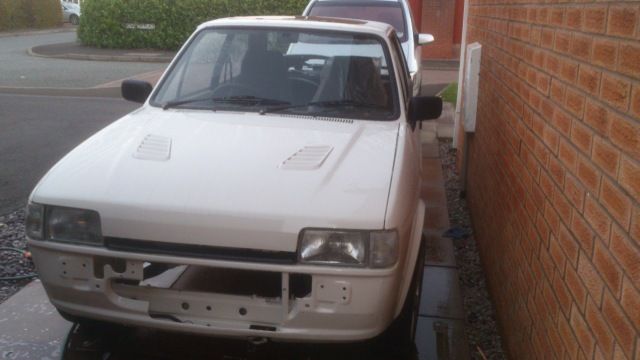
A few pics of it at the mo, all dusty....

mart
I'm currently looking at fitting a 1.8 N/A zetec into her until the ZT is ready. Funds dont come by very often so when I had the chance of getting a MK6 Escort 1.8 for �130 I took it.... Long story short I bought the car, Drained the fuel (25ltrs), stripped the running gear (engine, box, ecu loom,starter alternator etc...) and added some extra weight from works scrap :blub: and weighed it in at the local scrap yard for �200
Anyway back to the car which is still tucked up at the bodyshop so I can only work on it during my dinner 40mins. Ive been painting the kit with U-pol plastic restorer as my bodyshop friend recommended it to me. My mate at the bodyshop reshaped on side of the window surround and I repainted it to make it the right shape. Fitted a few bits and bobs but thats it really
Looking into getting it home now because as nice as it is in the dry warm bodyshop I cant do alot to it. As soon as the kit and window surround on the other side are sorted I'll bring it back and see about fitting the engine and brakes
A few pics of it at the mo, all dusty....
mart
26-08-2012, 06:01 PM
#165
Cheers mate. Hopefully get some more done in the next couple of weeks
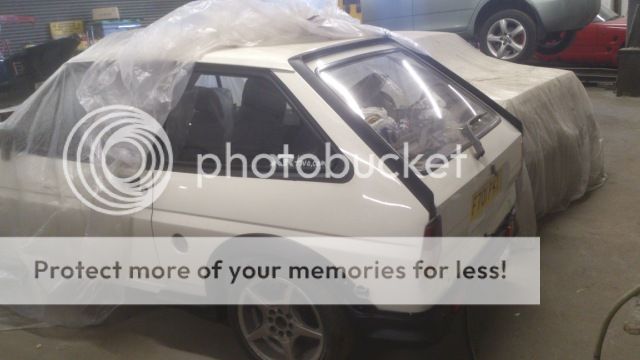
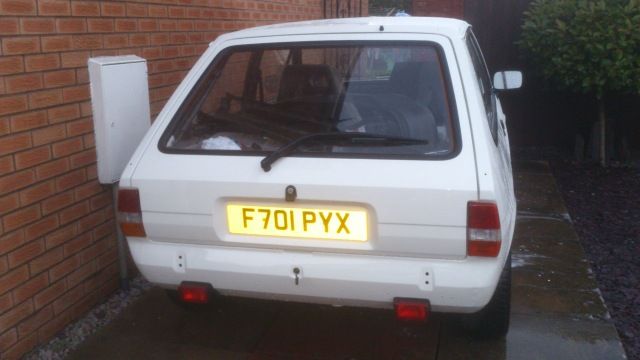
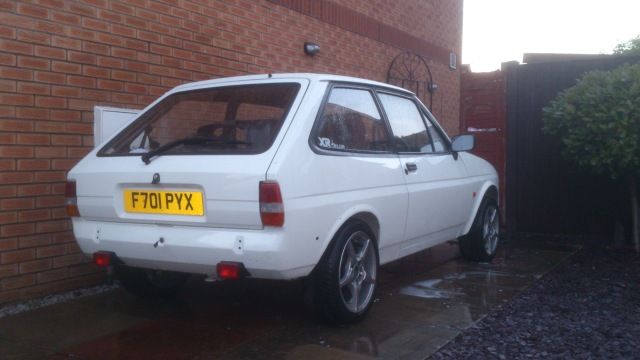
Just 2 more pics of the front end in need of a de-dust/clean lol
Finished reshaping the other window surround so it's basically ready to go. Just needs the pin stripe around the rear windows. Hopefully can talk my mate into it so I can bring it back
Just 2 more pics of the front end in need of a de-dust/clean lol
Finished reshaping the other window surround so it's basically ready to go. Just needs the pin stripe around the rear windows. Hopefully can talk my mate into it so I can bring it back
26-08-2012, 08:20 PM
#166
PassionFord Post Whore!!
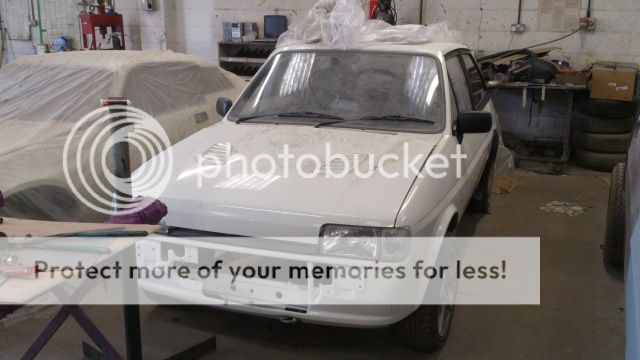
Poor thing deffo needs a bath!!! look at the dust on it.
look at the dust on it.
07-09-2012, 10:29 PM
#168
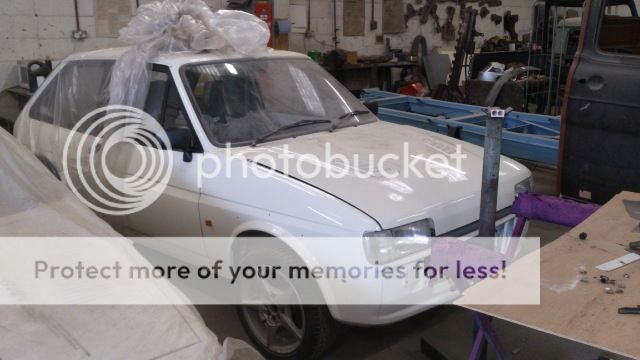
Last week finally finished window surrounds, reshaped around the rear window because it wasn't the right shape and my mate from the bodyshop put the strip around it for me 
Then managed to bring it back home tonight.
Gave it a quick wash just before it went dark.Had a disaster with some TFR. It apparently doesn't like U-Pol plastic paint. It ate straight through some of the black window surround so I've had to repaint it tonight don't think you'll be able to tell to be honest will see better tomorrow.
Anyway she's tucked back up ready for some more work to be done...
Mart
Then managed to bring it back home tonight.
Gave it a quick wash just before it went dark.Had a disaster with some TFR. It apparently doesn't like U-Pol plastic paint. It ate straight through some of the black window surround so I've had to repaint it tonight
don't think you'll be able to tell to be honest will see better tomorrow.Anyway she's tucked back up ready for some more work to be done...
Mart
10-09-2012, 09:41 AM
#169
PassionFord Post Whore!!
What night we mopping it?
Wants doing before bumpers and kit go back on.
Wants doing before bumpers and kit go back on.
13-09-2012, 10:32 PM
#171
PassionFord Post Whore!!
Any progress???
Is it running yet???
Is it running yet???
17-09-2012, 06:39 PM
#172
Nothing to shout home about mate no. Been playing with the wiring thats about it. Need to clean up the engine and paint the subframe before it can go in. I might need you help me lift it in when the time comes so I dont scratch the new paint work
Last edited by xrt-mart; 19-10-2012 at 09:34 PM.
19-12-2012, 08:42 PM
#173
PassionFord Post Whore!!
And wheres your updates on this? 
20-01-2013, 08:21 PM
#174
Just for you mate
First thing I wanted to tackle was the engine/bay wiring. Bearing in mind this shell was originally a 1.1 auto the main differences I found where:
1 It has a starter inhibitor relay for the starter motor. This is actuated by the ignition switch and gear selector lever. I was going to make it the same as a "normal" Fiesta loom but decided better to leave it in as it protects the ignition switch anyway. Its easily bypassed by permanently earthing the relay.
2 The reverse light has one extra wire going into the above loom this is nothing to do with reverse but another safety mechanism. The wire can be completely removed and reverse lights rewired in a per normal.
3 Because it was a push-rod type engine the coolant temperature sensor and fan switch wiring is on the opposite side. I extended the temperature sensor wire to the other side of the bay but I'm Using a RS1800 radiator which has the fan switch on this side so no need to move which is good
4 The alternator wiring is built into the loom unlike the CVH. However I'm Using the IB5 rear starter and alternator and wiring from the donor Escort which comes with its own starter/alternator wiring loom. What I have done is to remove the alternator wiring completely, cut the wire that feeds the whole car loom, starter feed and the alternator dash light wire, un-taped them out of the loom and refitted the opposite side of the bay by the battery.
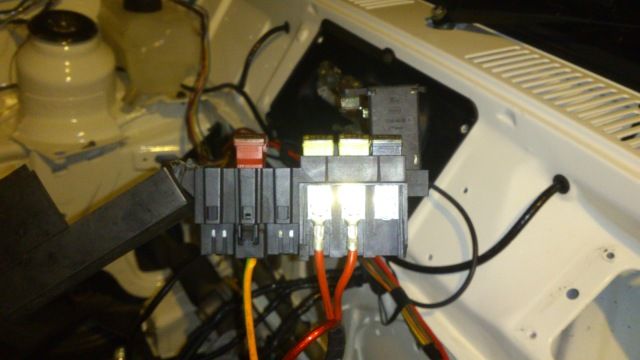
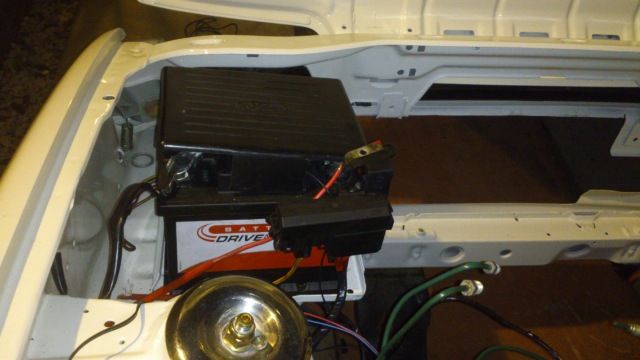
This left me with the 3 wires. On the Escort loom there is a multi-plug next to the battery cables which house the starter feed and alternator dash light. I've put my wires onto this multi-plug. This left me with the main wiring harness feed which I have used the Escort battery fuse box and mounted it on the battery with the Escort cables so it is wired in as it would be on the Escort. This has left me with 2 extra main battery feed outlets which is handy to use for the engine management system
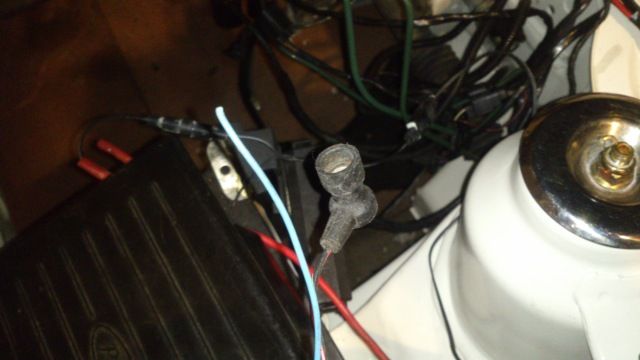
Alternator wiring removed ( dash light wire cut for maximum length re-routing )
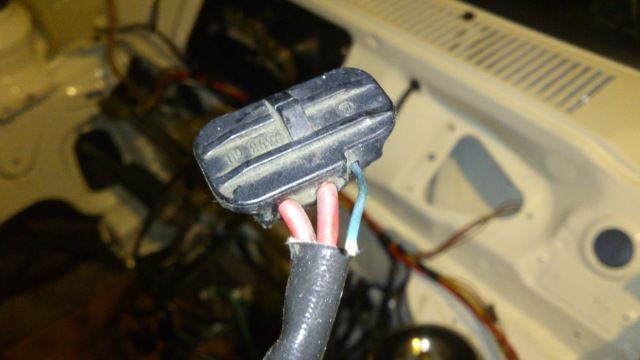
Main harness feed with fuse link, I've removed the fuse link and I'm using the Escort fuse The Orange one on the left of the fuse box is the one its connected to....

It leaves me with these 2 wires which I'll connect to the muti-plug as mentioned above when the engine is in...
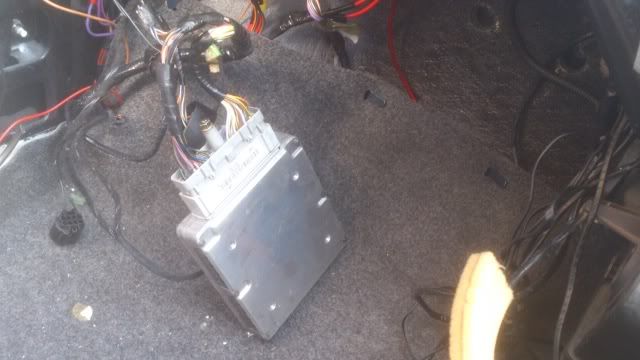
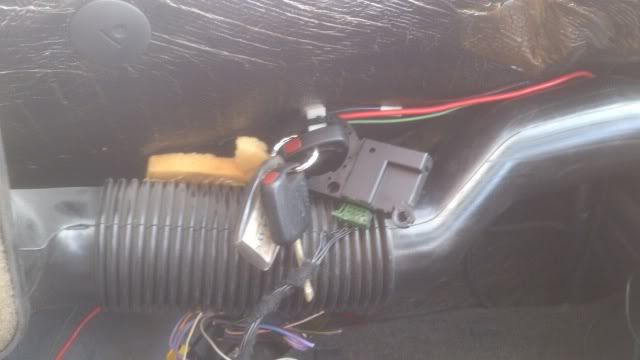
Bay as complete as it could be I moved on to the engine ECU wiring. I'm using a 1.8 zetec as it came out of my donor complete with a SLUG ecu and PATS.
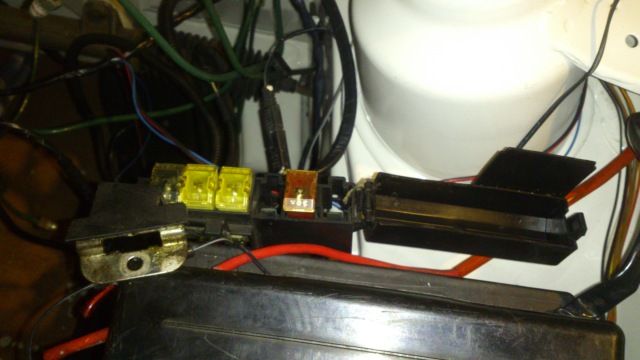
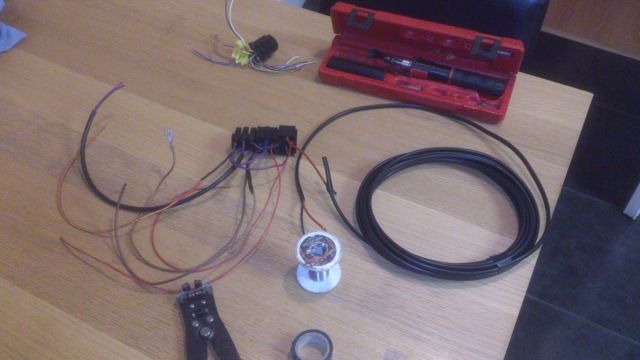
Started off by making a 2 relay loom ( the big coil of wire is for the fuel pump ) Copied the original wiring and fuses as much as possible with all fuses etc...
Did loads of research on the SLUG/PATS wiring and labeled up the engine mult-plug. Connected up the 2 bits together. This left me with 2 connections needed to connect to the existing car loom. One for the rev counter. Originally this car didn't have one but had a clock instead, the power for the clock is input into the the dash cluster via the same pin as the rev counter so I took the wire out of the fuse bos and rerouted it to the multiplug. Then took a ignition feed direct from the ignition switch. The feeds for the relays come direct from the battery via the Escort fuse box so no extra load goes onto the fiesta loom.


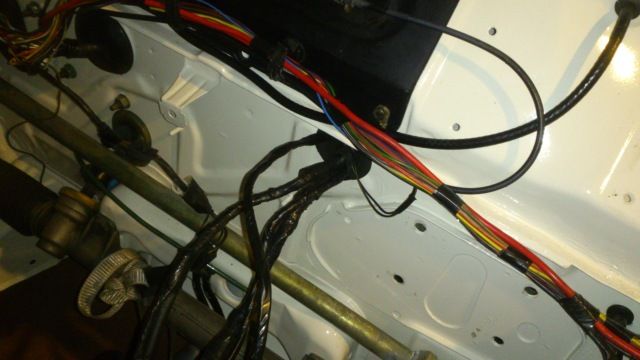
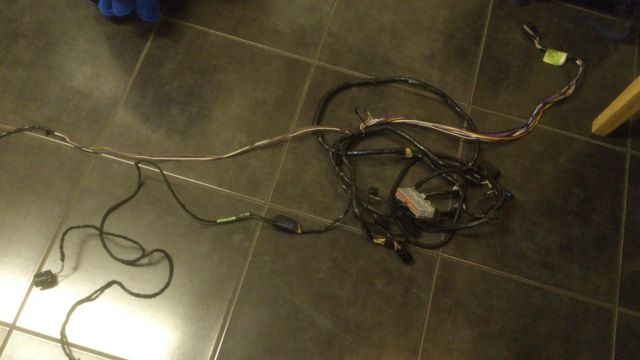
Next I got the whole engine loom and took a look at where I could fit it. I noticed that a lot of the loom could be left inside the car to keep things neater if it weren't for the lamda wiring. It turned out that if I extended the power feed for it I could leave around 2 foot extra inside the loom so I did Now Ive put the wiring through the bulkhead with a 40mm hole. Connected it up inside the car and turned the ignition and the fuel pump relay primes That was it for the wiring.
Moving onto the engine.....
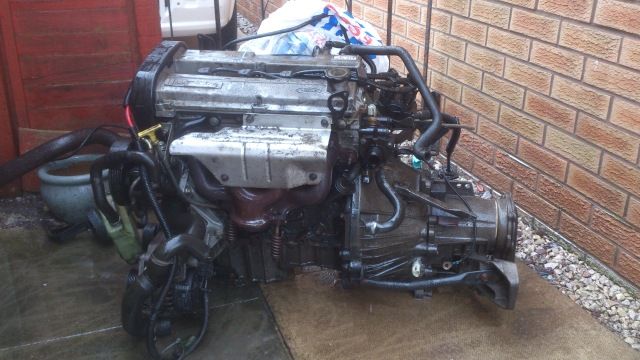
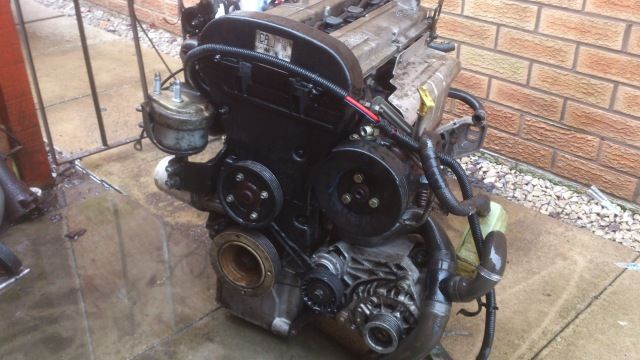
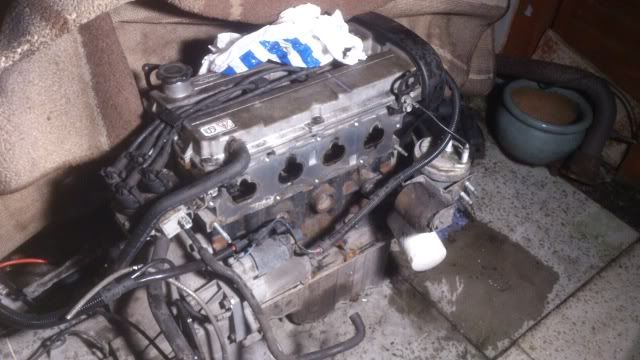
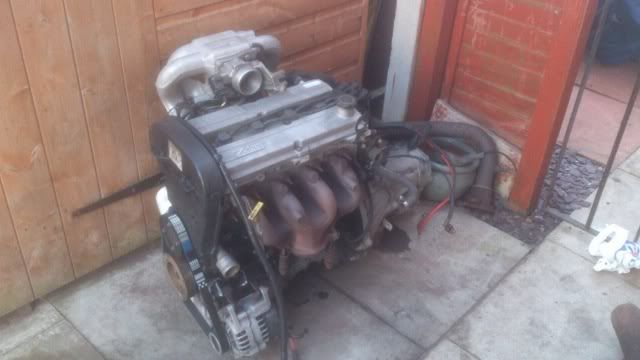
Got the engine out from under the cover and started to give it a clean with the jet wash.
Before...
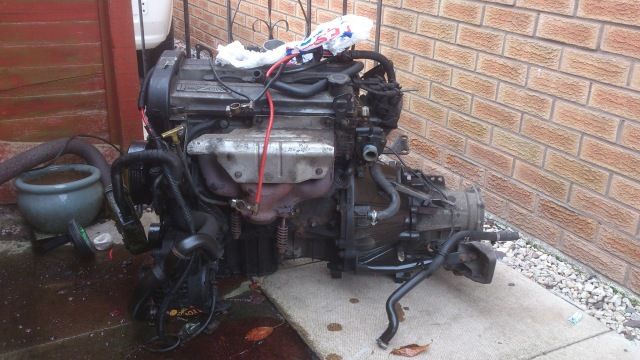
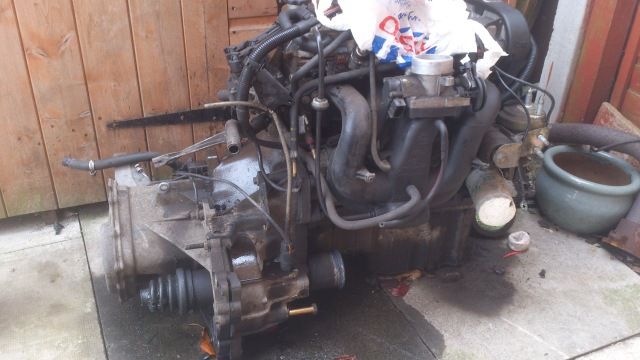
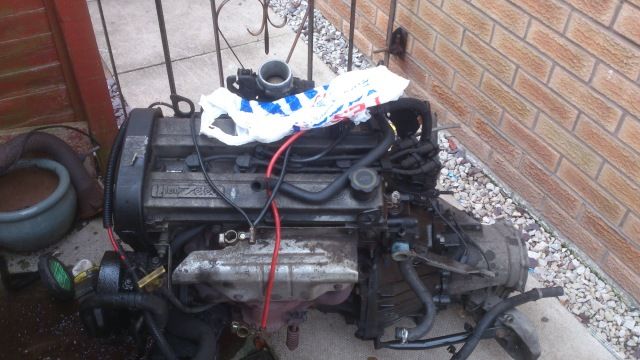
After...
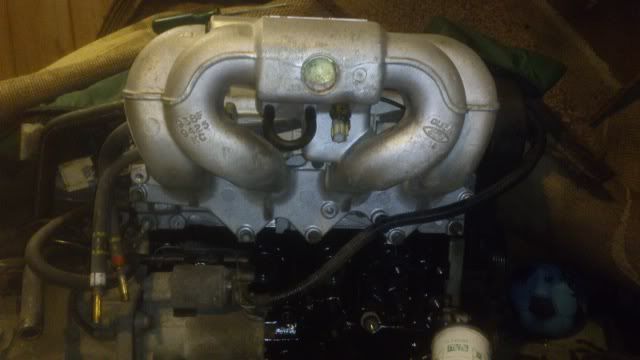
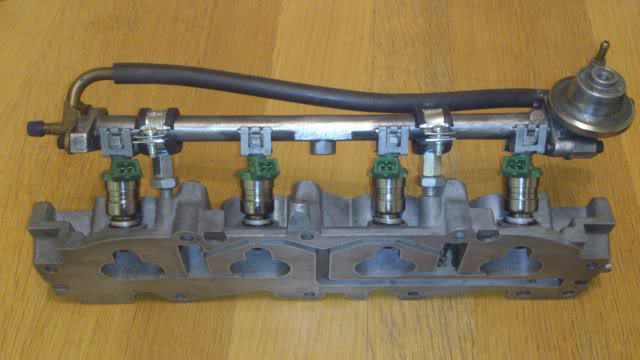
Then took the plastic inlet off which doesn't fit inside the XR2 bay and started getting the other manifold ready.
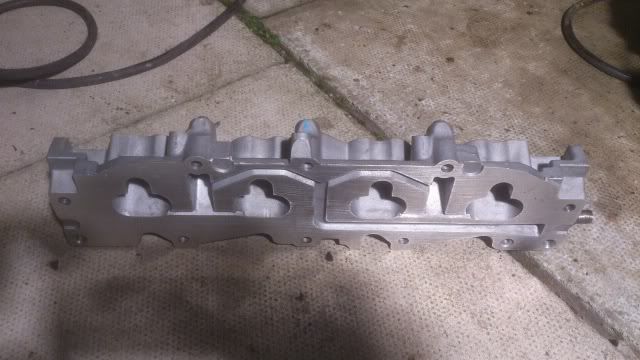
First took the new sandwich plate
swapped over the injector rail off the old manifold.
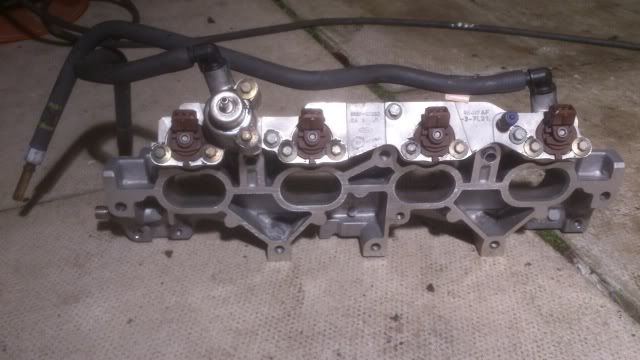
Then over to the actual manifold (kindly donated by my friend Chris)
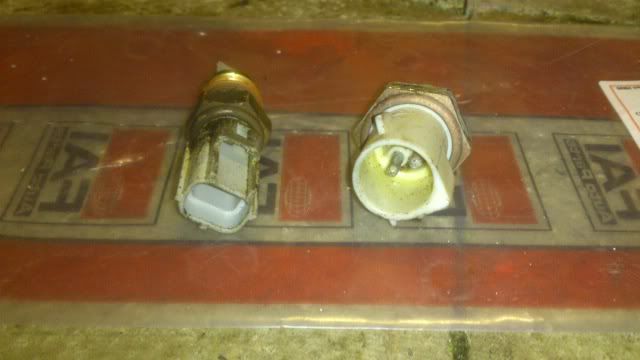
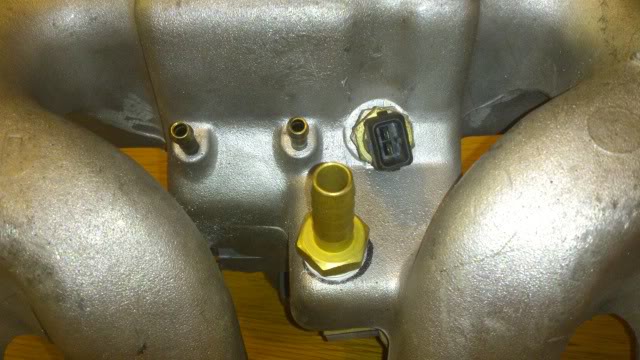
Only part needing changing was the air temp sensor, which I'm running the new management system off a 98 car. New on the left side.
Next up inlet side stripped off engine
Painted up
new plastic gasket fitted
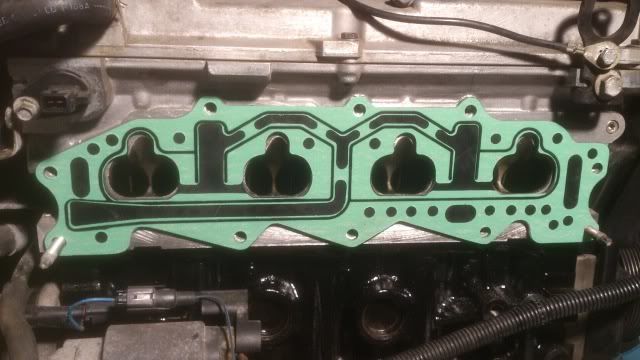
Sandwich plate fitted
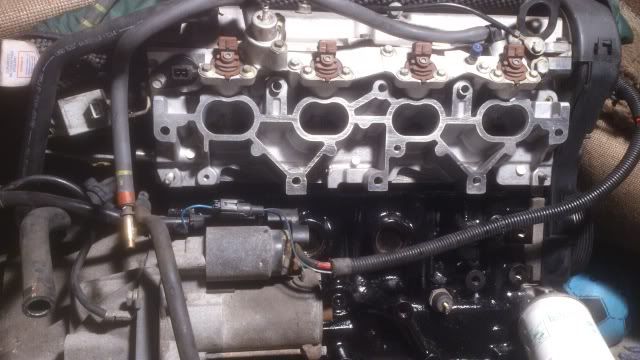
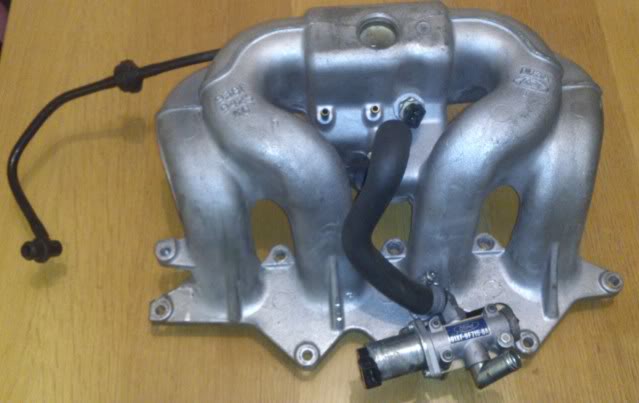
Inlet fitted.
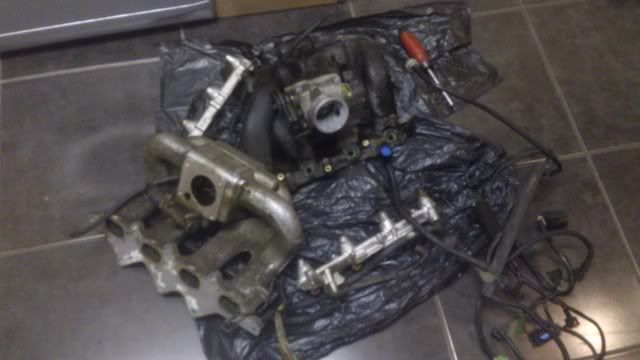
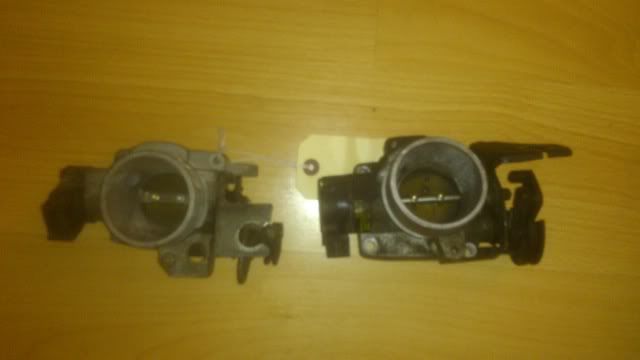
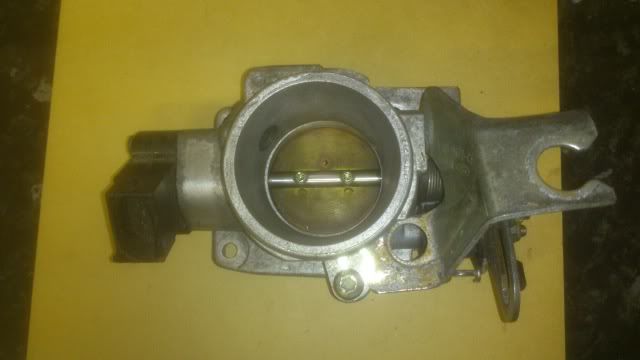
Then I had the throttle body trouble. The plastic type and alloy type aren't compatible as the throttle cable mechanism and position sensors are different so ordered up a cheap throttle body off ebay which was a smaller diameter intake but had good other parts, swapped them all over
Alloy one the left plastic on the right. look how tiny the left one is :shock:
all swapped over
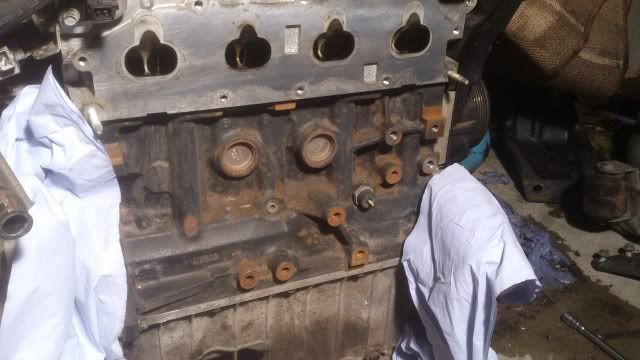
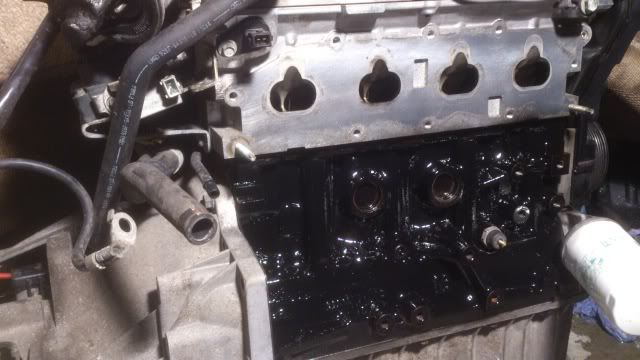
Then stripped off the front side and got rid of this stuff
Painted up the same as the back.....
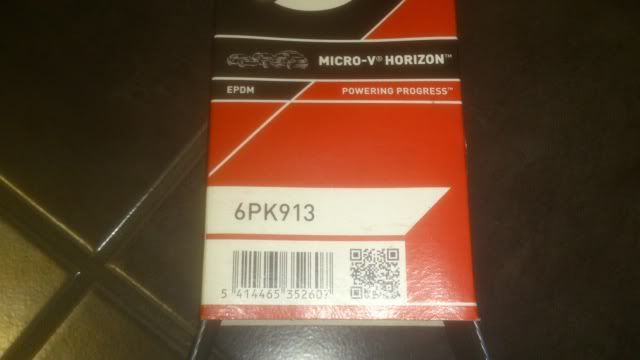
Ordered up a alternator belt. Got a 900mm one at first and that was to short so went for a 913mm which is OK. Fitted that up to the engine with the zetec alternator and Fiesta CVH bracket, then put the exhaust manifold back on and its looking a lot better
Got most of the wiring finished
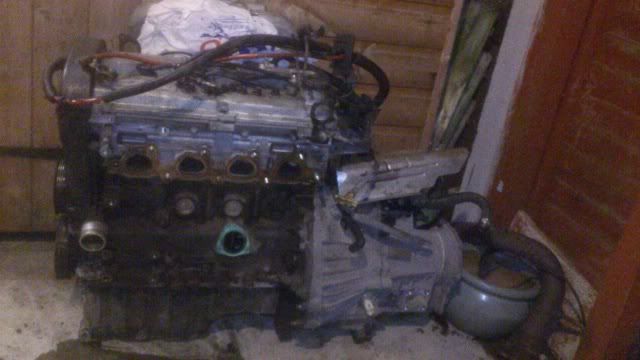
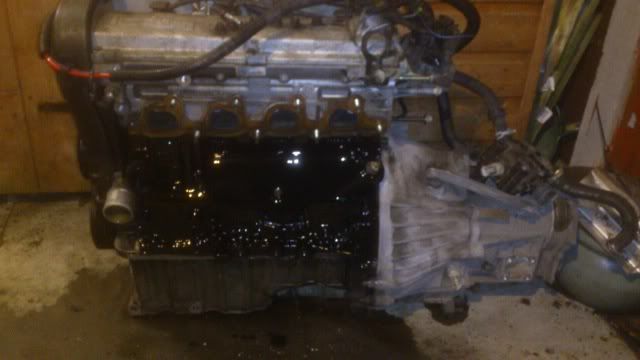
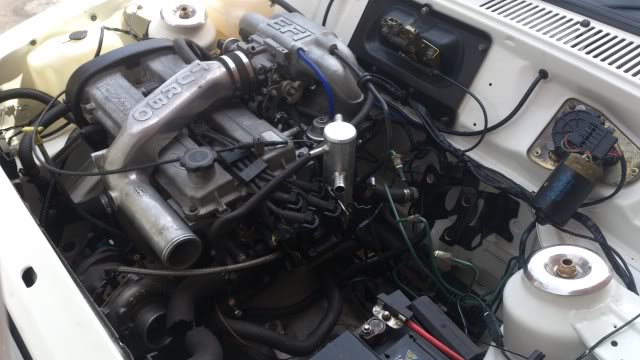
Finally managed to lift the engine in .....
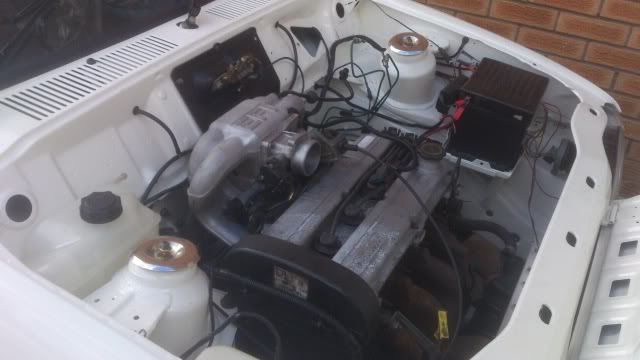
Which has made it sit a bit better too....
Couple of vids of it running FINALLY .....
Needs a good cleaning but its getting there.
Mart
First thing I wanted to tackle was the engine/bay wiring. Bearing in mind this shell was originally a 1.1 auto the main differences I found where:
1 It has a starter inhibitor relay for the starter motor. This is actuated by the ignition switch and gear selector lever. I was going to make it the same as a "normal" Fiesta loom but decided better to leave it in as it protects the ignition switch anyway. Its easily bypassed by permanently earthing the relay.
2 The reverse light has one extra wire going into the above loom this is nothing to do with reverse but another safety mechanism. The wire can be completely removed and reverse lights rewired in a per normal.
3 Because it was a push-rod type engine the coolant temperature sensor and fan switch wiring is on the opposite side. I extended the temperature sensor wire to the other side of the bay but I'm Using a RS1800 radiator which has the fan switch on this side so no need to move which is good
4 The alternator wiring is built into the loom unlike the CVH. However I'm Using the IB5 rear starter and alternator and wiring from the donor Escort which comes with its own starter/alternator wiring loom. What I have done is to remove the alternator wiring completely, cut the wire that feeds the whole car loom, starter feed and the alternator dash light wire, un-taped them out of the loom and refitted the opposite side of the bay by the battery.
This left me with the 3 wires. On the Escort loom there is a multi-plug next to the battery cables which house the starter feed and alternator dash light. I've put my wires onto this multi-plug. This left me with the main wiring harness feed which I have used the Escort battery fuse box and mounted it on the battery with the Escort cables so it is wired in as it would be on the Escort. This has left me with 2 extra main battery feed outlets which is handy to use for the engine management system
Alternator wiring removed ( dash light wire cut for maximum length re-routing
Main harness feed with fuse link, I've removed the fuse link and I'm using the Escort fuse
It leaves me with these 2 wires which I'll connect to the muti-plug as mentioned above when the engine is in...
Bay as complete as it could be I moved on to the engine ECU wiring. I'm using a 1.8 zetec as it came out of my donor complete with a SLUG ecu and PATS.
Started off by making a 2 relay loom ( the big coil of wire is for the fuel pump
Did loads of research on the SLUG/PATS wiring and labeled up the engine mult-plug. Connected up the 2 bits together. This left me with 2 connections needed to connect to the existing car loom. One for the rev counter. Originally this car didn't have one but had a clock instead, the power for the clock is input into the the dash cluster via the same pin as the rev counter so I took the wire out of the fuse bos and rerouted it to the multiplug. Then took a ignition feed direct from the ignition switch. The feeds for the relays come direct from the battery via the Escort fuse box so no extra load goes onto the fiesta loom.
Next I got the whole engine loom and took a look at where I could fit it. I noticed that a lot of the loom could be left inside the car to keep things neater if it weren't for the lamda wiring. It turned out that if I extended the power feed for it I could leave around 2 foot extra inside the loom so I did
Moving onto the engine.....
Got the engine out from under the cover and started to give it a clean with the jet wash.
Before...
After...
Then took the plastic inlet off which doesn't fit inside the XR2 bay and started getting the other manifold ready.
First took the new sandwich plate
swapped over the injector rail off the old manifold.
Then over to the actual manifold (kindly donated by my friend Chris)
Only part needing changing was the air temp sensor, which I'm running the new management system off a 98 car. New on the left side.
Next up inlet side stripped off engine
Painted up
new plastic gasket fitted
Sandwich plate fitted
Inlet fitted.
Then I had the throttle body trouble. The plastic type and alloy type aren't compatible as the throttle cable mechanism and position sensors are different so ordered up a cheap throttle body off ebay which was a smaller diameter intake but had good other parts, swapped them all over
Alloy one the left plastic on the right. look how tiny the left one is :shock:
all swapped over
Then stripped off the front side and got rid of this stuff
Painted up the same as the back.....
Ordered up a alternator belt. Got a 900mm one at first and that was to short so went for a 913mm which is OK. Fitted that up to the engine with the zetec alternator and Fiesta CVH bracket, then put the exhaust manifold back on and its looking a lot better
Got most of the wiring finished
Finally managed to lift the engine in
Which has made it sit a bit better too....
Couple of vids of it running FINALLY
Needs a good cleaning but its getting there.
Mart
Last edited by xrt-mart; 20-01-2013 at 08:26 PM.
03-02-2013, 08:57 PM
#177
PassionFord Post Whore!!
 Sounds well enough.
 It'll do until you get round to dropping the zetec turbo lump in...
13-06-2013, 11:41 PM
#179
PassionFord Post Whore!!
Back from honeymoon now mate, you still need that boost pipe?
Sorry...
Sorry...
02-07-2013, 10:35 PM
#183
Ok so time for a update on this.
I decided to bolt on my turbo bits, just because I can :blub:
Anyway decided to put a decompression plate on the 1.8. It owes me nothing so doesn't matter if it blows up but will do for now until ive built the 2.0 blacktop up.
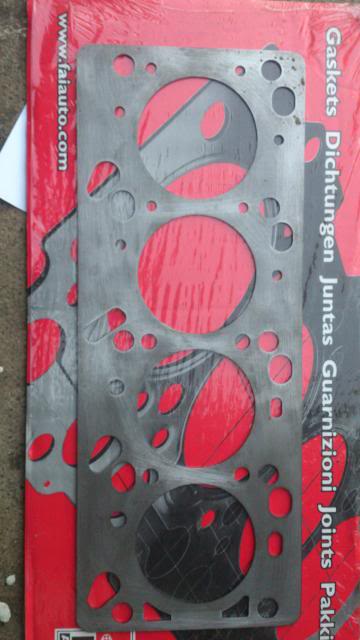
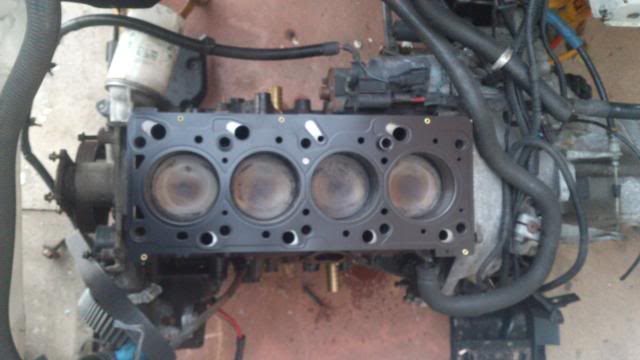
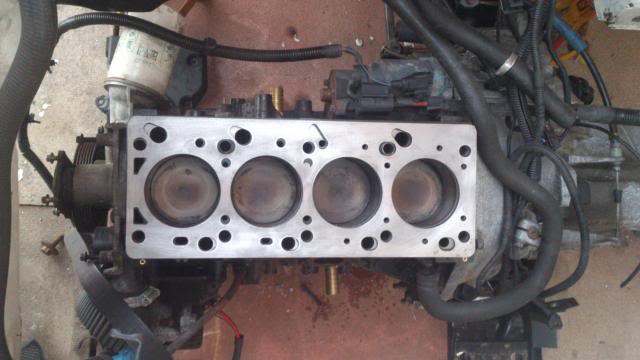
Removed the cylinder head....
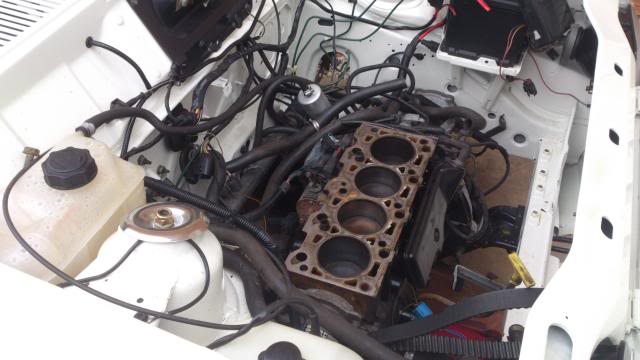
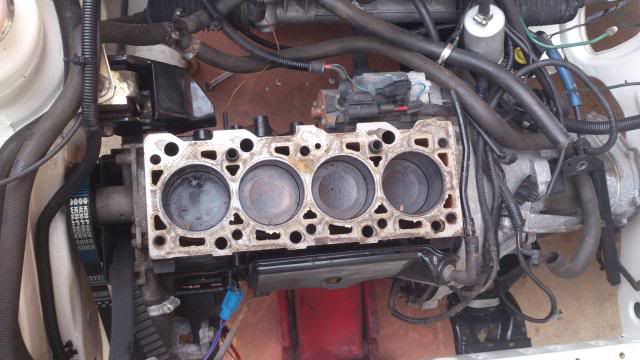
Drilled the block front and rear for turbo return and breather.
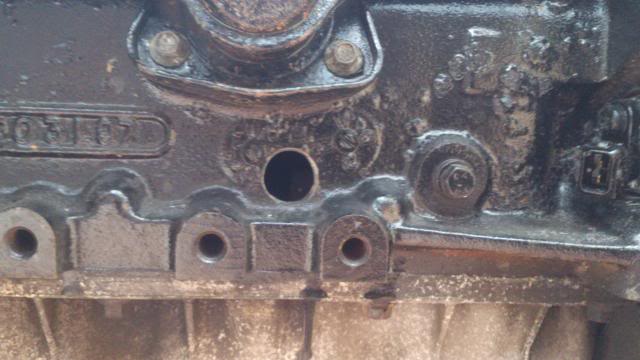
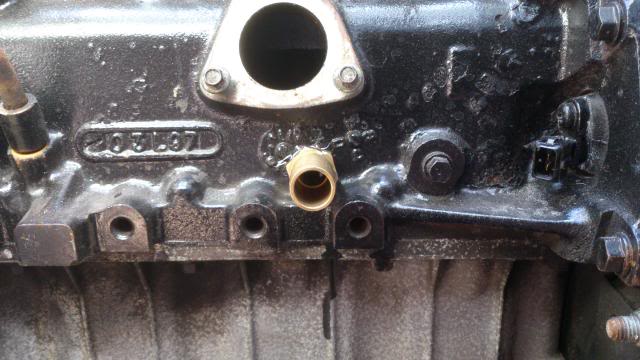
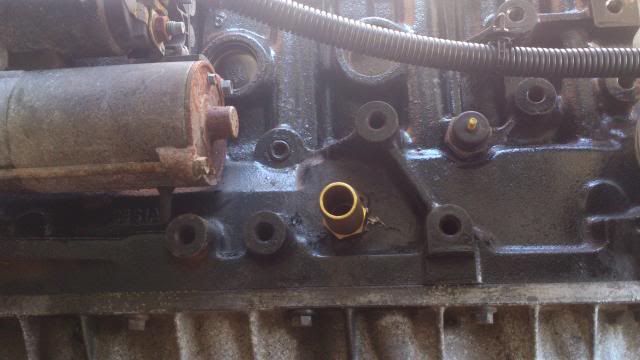
Cleaned it all up and added the decom plate
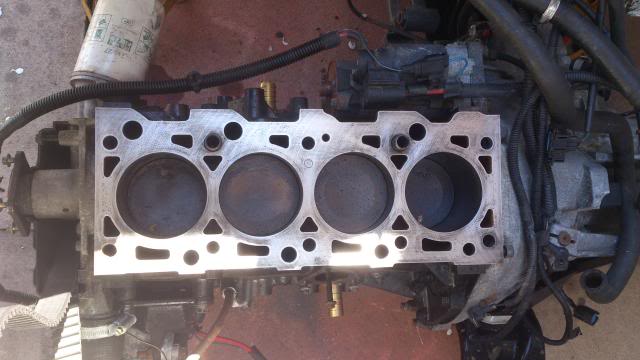
Rebuilt the SO manifold with my modified sandwich plate and the IW031 injectors, some new steel rubber lined munson rings and remote idle speed control valve

Drilled the head for a ERST manifold but forgot pics Anyway refitted the head and bolted on the cossie turbo. Made a down pipe with help from a friend who can weld
Ive wired in the OFAB to the car but thats it for now.
Just need some brakes and a outer cv joint lol
mart
I decided to bolt on my turbo bits, just because I can :blub:
Anyway decided to put a decompression plate on the 1.8. It owes me nothing so doesn't matter if it blows up but will do for now until ive built the 2.0 blacktop up.
Removed the cylinder head....


Drilled the block front and rear for turbo return and breather.


Cleaned it all up and added the decom plate


Rebuilt the SO manifold with my modified sandwich plate and the IW031 injectors, some new steel rubber lined munson rings and remote idle speed control valve


Drilled the head for a ERST manifold but forgot pics

Ive wired in the OFAB to the car but thats it for now.
Just need some brakes and a outer cv joint lol
mart
03-07-2013, 12:00 PM
#184
PassionFord Post Whore!!
About time... 
Looks lovely in the flesh, properly built...
Looks lovely in the flesh, properly built...
03-07-2013, 08:45 PM
#185
Advanced PassionFord User
 30-08-2014, 02:34 PM
#188
OK tiny update of whats been happening with fiesta.
I hadnt really touched the car in a year after splitting with the wife and having to live with my dad a while we sorted finances etc..
I decided a couple of weeks ago to have a look at it and it need a damn good cleaning up as you can imagine. :blub:
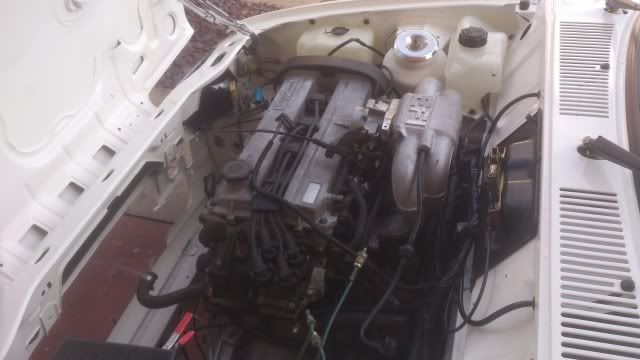
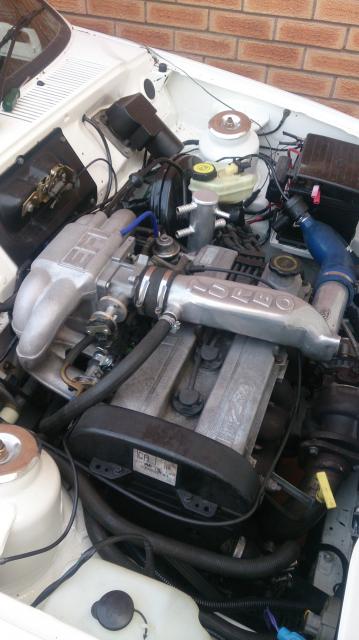
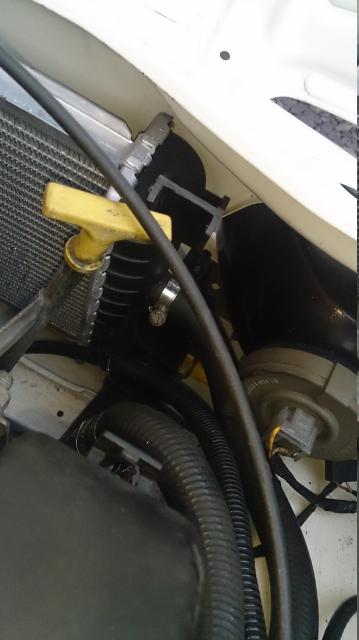
Ive fitted the radiator and finished the plumbing to that. Ive also fitted the single 10inch Kenlow blower fan to the front. Finished off the plumbing to the charge air system. I decided to blank off the dump valve instead of using it...
Put some fresh super unleaded in it and got it running. It was running but not very well so I managed to borrow a snap-on fault reader off a friend which came up with a fault for MAP sensor so Ive bought a new cossie 2.5bar MAP and tried it again. Now it idles OK and revs if done slowly. If floor the throttle it missfires like mad but I suppose it could just need setting up.
So Ive decided to get the thing done quicker I would just use standard rear brake setup. So I've got myself some new cylinders and shoes. Fitted new bearings to the original drums.
So on the shopping list is a new back plate and brake compensator's (somehow lost them :blub: ) Then on to front brakes which is RS2000 discs and pads
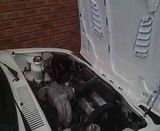
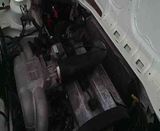
Heres a pic and vid of the engine bay. Excuse the mucky hand haha

mart
I hadnt really touched the car in a year after splitting with the wife and having to live with my dad a while we sorted finances etc..
I decided a couple of weeks ago to have a look at it and it need a damn good cleaning up as you can imagine. :blub:
Ive fitted the radiator and finished the plumbing to that. Ive also fitted the single 10inch Kenlow blower fan to the front. Finished off the plumbing to the charge air system. I decided to blank off the dump valve instead of using it...
Put some fresh super unleaded in it and got it running. It was running but not very well so I managed to borrow a snap-on fault reader off a friend which came up with a fault for MAP sensor so Ive bought a new cossie 2.5bar MAP and tried it again. Now it idles OK and revs if done slowly. If floor the throttle it missfires like mad but I suppose it could just need setting up.
So Ive decided to get the thing done quicker I would just use standard rear brake setup. So I've got myself some new cylinders and shoes. Fitted new bearings to the original drums.
So on the shopping list is a new back plate and brake compensator's (somehow lost them :blub: ) Then on to front brakes which is RS2000 discs and pads
Heres a pic and vid of the engine bay. Excuse the mucky hand haha
mart
Last edited by xrt-mart; 30-08-2014 at 02:56 PM.
30-08-2014, 03:01 PM
#189
Dave not Claire.

Mart, Are the injectors and chip for a 2.0? could be overfuelling. you will love it when its done, i did mine (with Ians help) on a strict budget almost 15 years ago now. yours will be quicker, i ran the frst T2 with a decomped 1800 on ofac and it was still a blast. hope you get it finished soon and enjoy it.
30-08-2014, 03:28 PM
#190
The chip,injectors and MAP sensor are for a 1.8 ZVH but I spoke to Ian Howell where the kit originally came from and he said it would be fine but may need the fuel pressure raising.
There's quite a few settings that can be done with the FRST but I dont know how much effect it has to be honest. The annoying thing is I cant get hold of the equipment again now as the chap swapped it for a different unit and doesnt have the leads needed any more.
Hoping that its a good bit of fun. Its been so long I cant remember what driving one of these fords is like
Mart
15-10-2014, 08:49 PM
#191
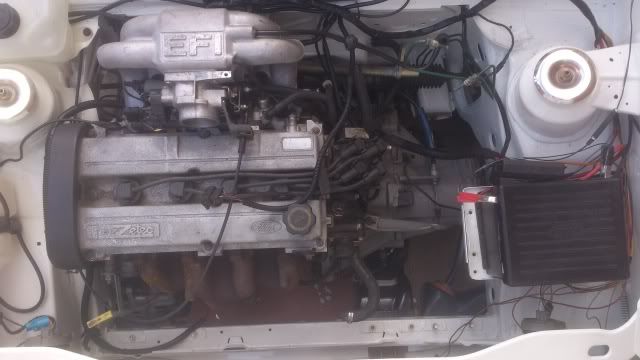
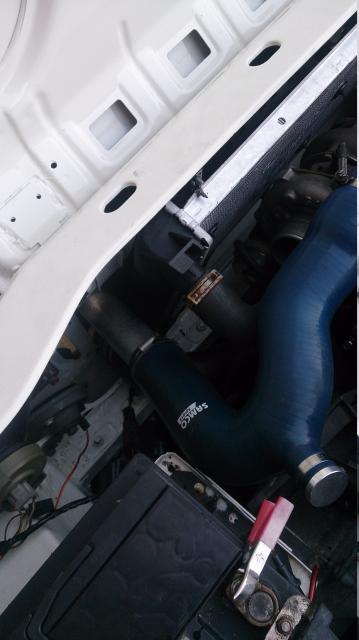
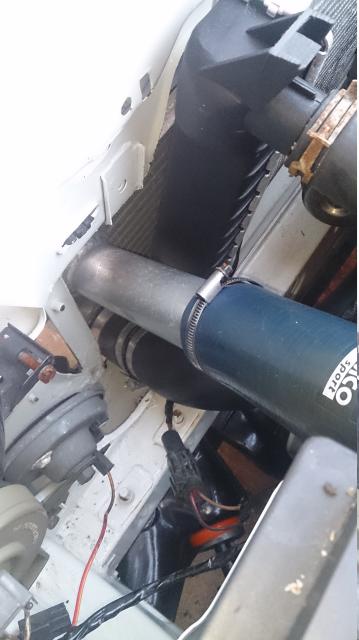
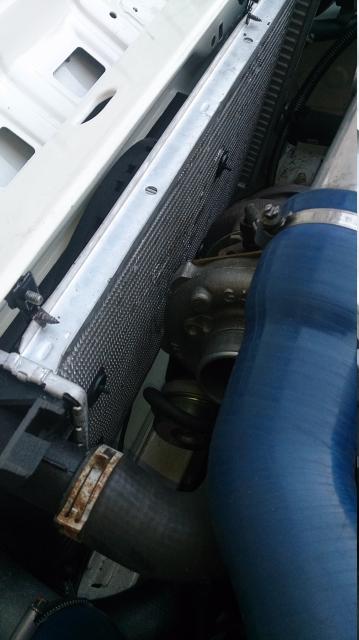
Couple of pics of the engine bay. Seems to always be people asking about fitting in rads and fans. so this is mine with a mk3 16v radiator, 10inch Kenlow fan and a twin pass GRS intercooler.
Nothing much more to report sorry :blub:

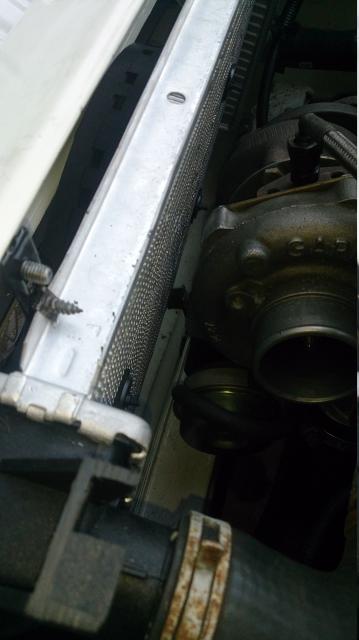
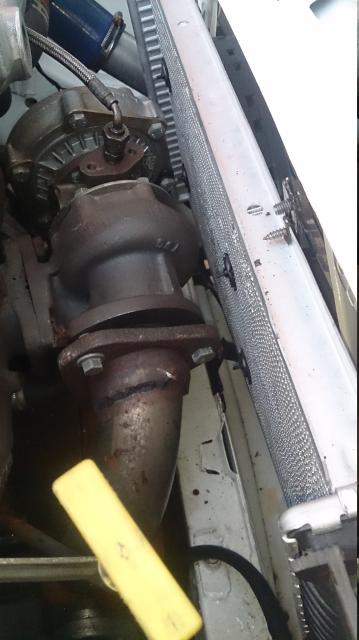

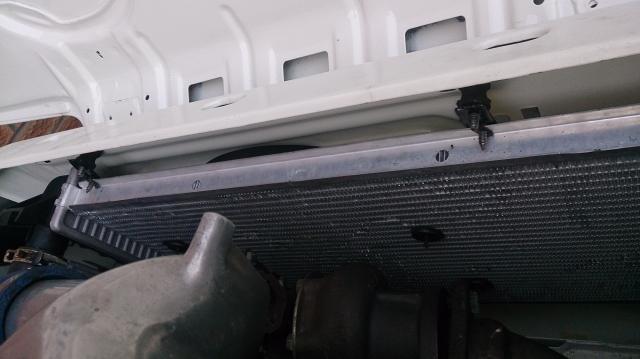
mart
Nothing much more to report sorry :blub:
mart
15-10-2014, 09:52 PM
#192
PassionFord Post Whore!!
There's loads of room there... 
Not forgot about mopping this...
Just trying to sort a few jobs on the house... Still not got any heating!!!
Not forgot about mopping this...
Just trying to sort a few jobs on the house... Still not got any heating!!!
16-10-2014, 10:41 PM
#194
PassionFord Post Whore!!
Keep the updates coming...
Will have to drag it here soon...
Will have to drag it here soon...

 06-02-2016, 12:23 PM
#197
PassionFord Post Whore!!
Any updates on this?

Thread
Thread Starter
Forum
Replies
Last Post
Ben26
Pictures, video & Photoshop Forum
10
27-08-2015 08:56 PM