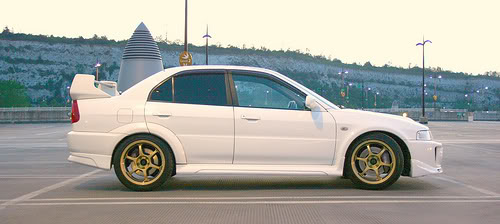
My Evo 5 - before - then and now - LOTS & LOTS OF PICS !!!
 21-07-2010, 07:23 PM
#1
15000
Thread Starter

Join Date: Jul 2010
Location: shropshire
Posts: 39
Likes: 0
Received 0 Likes
on
0 Posts
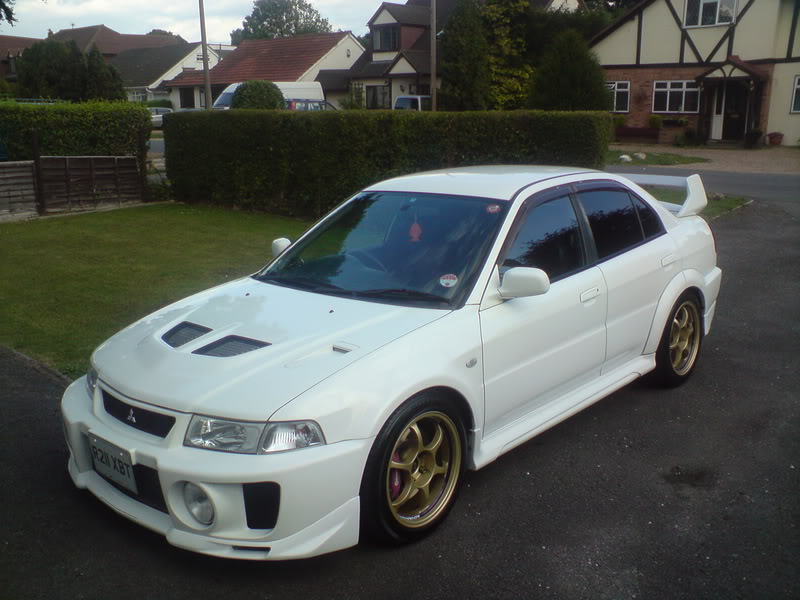
I've been working hard getting my Evo to a spec to be proud of, its still a work in progress and i'm slowly getting there, i thought i'd share it with you guys and girls....
I HAVE COPIED THIS FROM ANOTHER THREAD I STARTED ON THE MLR SO FORGIVE THE REFERENCES TO "TODAY AND "NEXT WEEK" ETC....
HERE'S WHAT IT WAS LIKE WHEN I GOT IT :
THE SPEC WHEN I GOT IT (OBVIOUSLY ITS GOT BETTER NOW !!).
Running 370bhp 350ftlb's
Engine
Fujitsubo Giken SS backbox
Janspeed De-cat Pipe
Apexi downpipe
Ralliart coil leads
HKS Airfilter
Apexi Ecu + Hand Commander
Exceedy Organic clutch
Ignition earthing system
Running 1.6 bar boost
SS Manifold Heat Sheild
Walbro Fuel Pump
Cooler Grade Denso plugs
Suspension/wheels
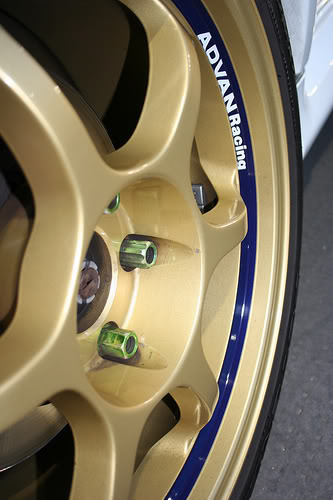
17 inch Advan Alloys
Annodised Wheel Nuts
Bridgestone Forenza Tyres
Front Wing Inner Braces
Tein Super Street Coilovers
Front and Rear Strut Braces
Grooved front discs


So after spending all my money modding a Skyline, it was now time to spend all my money on modding my Evo 5.
SEPTEMBER 2008...
My 1st mod was a carbon bonnet.....
The Brembo's had gone pink so I treated them to a coat of T-cut which made them red again before I did the proper refurb which required removing all the old laquer, repaint, put some new stickers on and then re-laquer.
BEFORE :

AFTER :

( I painted the disc lip too in black, thats why there's black paint on the disc )
The door pillar trim started to go a bit grey, so i bought some carbon fibre sheet and made some pillar covers.
thanks to Stewart at Stewartsf1.com
http://www.stewartsf1.com/


OCTOBER 2008...
I fitted an HKS 60mm boost gauge and A pillar pod.
I also refurbed brake calipers..... properly

FROM THIS....

TO THIS.......


very pleased with the brake calipers, it took me 3 days to do them all but it was well worth it.
NOVEMBER 2008....
I was bit busy taking the car apart ready for bit to be painted etc, and a bit more besides...
firstly I sold my 17" Advans and got myself some 18" Rota Torques......


Then I started on the front bumper , I took it off so it can be resprayed to make it perfect again. Whilst it's off I cleaned and tarted up the intercooler - removed the std coupling hoses ready to replace with silicone hoses.


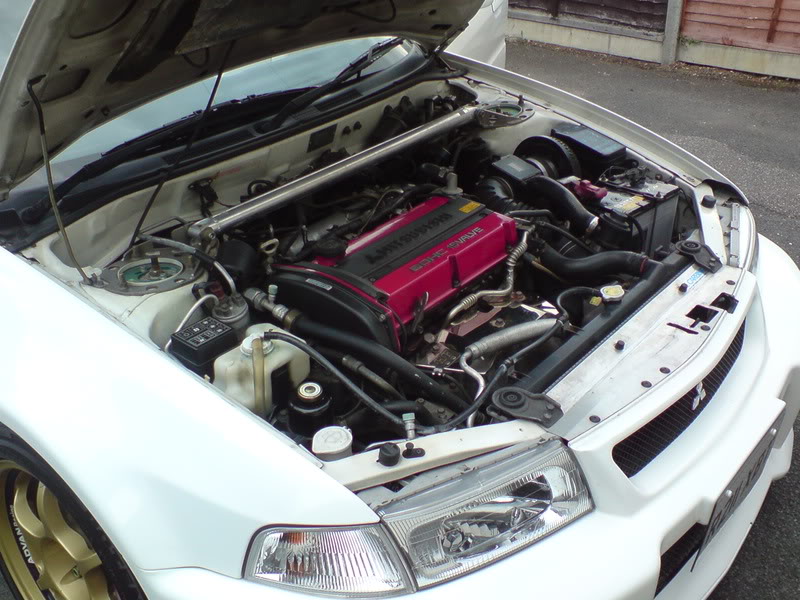
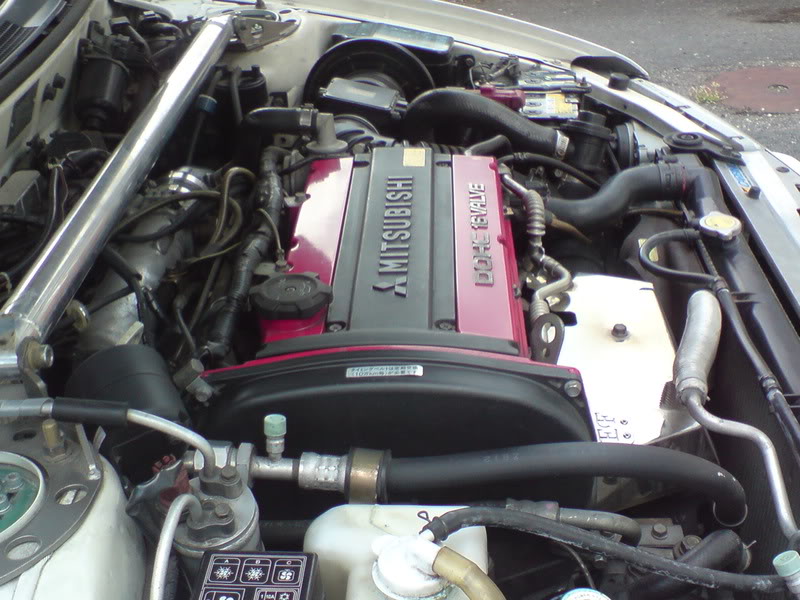
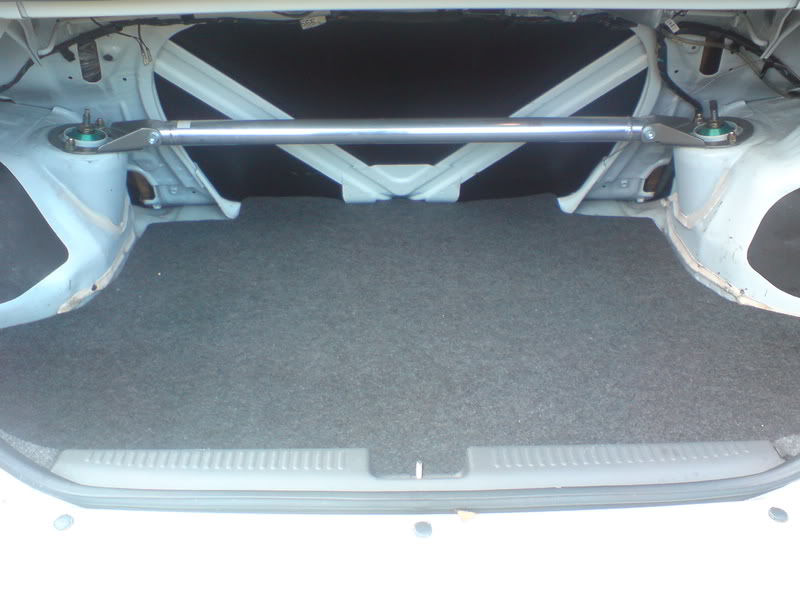
Next is the engine bay, i've relocated the battery to the boot to give me some room for my new alloy intake pipes and to make it look less cluttered....

i've removed the rocker cover and cambelt cover to be repainted, also taken the power steering off to be painted.

There's lots of silicone hoses on order to replace ALL the black rubber ones.
The rear lights and rear garnishes are off to be tinted a slightly darker shinier red to remove the orange indicator colour from the rear lights, the clear bits will be kept clear.

they will look like this - much better without the orange indicator bit on the top....

DECEMBER 2008....
I had a few things back from the bodyshop( www.innovationbodyworx.co.uk ) - thanks to Darren, and i got around to fitting them.
I relocated battery to the boot so i can fit my hard pipes and to de-clutter the engine bay.


I've got to do a few more jobs to the engine bay yet :
Replace all bolts with Stainless items
Stainless fuse box covers
Fit Coolant hose kit ( RED )
fit silicone vac hoses ( RED )
Fit catch tank
Braided hoses in a few places
Fit carbon bonnet struts
Ralliart oil and rad caps
AND A FEW OTHER LITTLE BITS....
I fitted the Ralliart mudflaps but I didn't like them so I got rid.


Also tinted the rear lenses to get rid of the orange indicators...


Lastly but not least I fitted the 3 gauge pod on the dash with oil pressure, oil temp and water temp gauges...


ITS STARTING TO ALL COME TOGETHER NOW.
Also fitted my catch tank and all the rest of the hoses i'd bought. I used braided hose for the catch tank and anodised hose finishers.


Fitted the lower intercooler pipe from the turbo that I had made at powerflow exhausts, this removed the restriction in the standard pipe (crap pictures )....


Front and rear lower splitters were away for painting to make them pretty again.
I decided to have a go at tinting my rear lights on my Evo 5 to get rid of the orange indicator.
I loved the results as it looks so much neater....
(lights just need a polish with rubbing compound to give them a shine.... ).


(Rear spoiler and rear bumper splitter are away for painting...)
BUT, i wasn't happy with the colour of the light from the indicator, it was more RED than ORANGE, i removed some of the tint but it was still no good, I put an ORANGE bulb in the bulb holder but the light was still more red. I just know the coppers round here and they are just looking for an excuse to pull you over so i decided to remove all the tint and put them back to standard - WHICH I WAS GUTTED ABOUT CAUSE I LIKED THE TINTED LOOK.
So I had a think about how I could overcome this and I came up with an idea - so I retinted the rear lights with the red tint and set to work on my idea.
I decided to reconfigure the rear lamp unit so that the reverse lights were now the indicators, the original indicators now became the brake lights and the stop/tail light now became the tail/fog light.
This left the reversing light to sort out, I decided to use the boot garnishes and put a bulb in the clear part to become the reversing lights. I had to dremmel out the rear of the lens so i could put in a bulb holder.
I did a proper job by taking out the pins in the plug from the wiring loom on the tail lamp unit and repositioning them in the block to activate the different lights, the retro fit fog lamp wire that was fitted when it was imported was soldered into the loom plug to activate the fogs, and the reverse light wire was re-routed along the cable on the boot lid (for the 3rd brake light) into the garnishes, so you cannot tell its all been rewired.
All I need to do is put some chrome indicator bulbs to get rid of the orange in the lens.
Here's the results......

So now I have the red tinted lights i wanted, with indicators that glow orange, AND 2 fog lights instead of the 1 that was originally there, I put red bulbs in the new brake light position and this gives the new brake lights a really bright red look thus helping with safety .....:
JANUARY 2009....
In the new year the car was finally ready for the road again, it was all back together and ready to be MOT'd and taxed, I had the front and rear bumper splitters painted as they were a bit scuffed.
The front splitter i had the centre section painted black to compliment the carbon bonnet.
Also fitted the fog light covers - i love the look of them....
I also fitted my white LED sidelight bulbs and my HID 4300k Hi/Lo kit.


Also had the rear spoiler blade painted satin black....


FEBUARY 2009....
Fitted my BLACK mudflaps, happy with the look of them, I used to have red ones but i didn't think they suited the wheels.


also fitted my Black sunstrip...

Another couple of jobs crossed off the long list.
I got round to fitting a little bit of Carbon too
I got myself a set of rear arch covers and an exhaust heat shield.


MARCH 2009.....
Plans changed again !!!!
Swapped the Carbon bonnet for a white standard bonnet.....
Also fitted my Ganador mirrors, I had them sprayed black for no other reason than I like them in Black - they are electrically operated too.


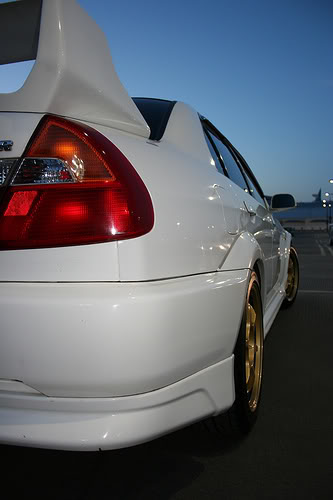
Got some new wheels fitted and i'm dead chuffed with them, pics don't do them justice, they fill the arch out perfect, the tyres have the stretched look and look perfect.
They are Rota G Force 18x9's with 235/40/18's fitted.


well chuffed...
Also fitted the 1 piece lights which i'm ultra happy about, also fitted the HID's and fit a couple of relays so the low beam stays on with the high beam.


PS : here's another view of the wheels to give you an idea how well they fill the arches and give the car a wider track.


NOT A LOT HAPPENNED FOR A WHILE, I JUST DROVE THE CAR......
JUNE 2009....
After yearning for the pops, flames and bangs back I needed to re-fit my SAS which i removed in order to tidy up the engine bay and fit my polished intercooler and turbo hardpipes.
I didn't want to put the standard pipework back on, which was a good job since I gave it away....
I borrowed some standard pipework, just to check i could still get some pops and bangs and good news is that i could with the SAS re-fitted.
So I put a 22mm outlet onto my polished hardpipe.
So its been re-fitted with a piece of silicon hose and it looks a top job with the pops and bangs returned....
here's a couple of pics of the SAS re-fitted....


SEPTEMBER 2009....
SORN'D the car so that I can start on the refurb of the underside and the front end.
Once that was done then I started on the removal of the dash etc for flocking.
Here's a few pics of what its like underneath now, i've got a fair bit to do.
I'm cleaning, removing surface rust, sealing and then painting Scotia White, i'm powdercoating whatever can be powdercoated and painting everything else.
The ARB's are being powercoated along with the front crossmember / engine mount, not sure what colour yet.
The whole of the underside of the floor will be cleaned, sealed and painted white so i've got a fair bit of stripping down to do yet.
There's a couple of oil leaks that need sorting out, the rear diff has a leak so i'll sort that out when i change the diff oil. There's a leak from the aftermarket oil pressure sender so that'll be sorted when I change the engine oil and there's a leak from the power steering pot lower pipe which will be done when i replace the pot with a spec-R one.


Stripped some more off the front end and engine in readiness for painting etc.
This is the plan for the next couple of months on the front end and engine.
(everything will be cleaned, stripped and treated before painting, then painted with Epoxy Mastic 121 before painting with the relevent colour).
Repaint front end back to white as well as the engine bay.
Paint gearbox top to bottom Gloss Black & do gearbox oil change.
Refurb & Paint lower crossmember
Refurb & paint lower H Brace.
Remove ARB's and repaint
Fit Alloy Radiator
Move washer / intercooler spray resevoir into the boot to clean up that area of the engine bay.
Remove carbon canister.
Replace FMIC with aftermarket bigger one, not sure which one yet.
Completely re-route and tidy up the looms in the engine bay as they look very messy, i'm going to try to hide them as much as possible.
Spec-R power steering pot
Spec-R header tank
Remove Air conditioning and fit RS pulley belt
and much more...
here's the pics of the progress today, more stripped off...


Its coming along nicely....
Stripped a lot out of the engine bay ready for cleaning, sanding and the rust prep and painting.
I've managed to re-route a lot of the engine loom to hide it as it gets on my nerves !!!
Here's the current state ready for paint preperation......


I'm getting the angle grinder out and chopping off the old battery tray mounts as the battery is in the boot, it'll tidy up the bay a little, also removing the bracket that held on the carbon canister as i've ditched the canister (a small part of the bracket will be left because the ABS attaches to it). - I've put black marker pen on the bits i'm removing.


Took off the scuttle panel and its going to get a good clean underneath before painting as its got 11 years of grime under it....

Made a start on painting the engine bay, my fingers were worn down to the bone with all that sanding !!!!
Put 3 coats of primer on, and rubbed it all down....


Took off the brackets that held the batter tray on, what a job that was !!!
BEFORE...
AFTER...

Then tested a bit of the Scotia White to see how it goes on, looks like it goes on ok.

Painted the bonnet hinges as they were manky...
BEFORE...

AFTER...

Lastly painted the bit that goes on the front infront of the radiator, its a pipe that carries power steering fluid.... its gloss black but doesn't show up very good in pics.
This is the part i mean....

PAINTED...


Decided to get off my fat arse and get the dash out, i've been putting it off for ages so seeing as the weather was good i'd thought i'd sort it out.
Its not a bad job, it took me 3 hours from start to finish including taking the door cards off and re-routing some of the loom and generally tidying things up as the bodger who put in the rear fog light and turbo timer needs to go on a course to learn how to wire things in safely, no fuses were used and the wires were just twisted together and covered in black tape !! - so its all sorted now, nice and safe and tidy....
I've also moved the alarm control box and all the wiring so that once the dash is on it will be very difficult to access it without removing lots of bits of dash, so this prevents a thief getting to it to disable the alarm....
I was going to do a "how to" but to be honest its easy to do, its just a matter of removing panels and the screws / bolts are pretty self explanatery, I did identify each plug though so I know where it goes when i put it back together....
I'm getting it all flocked as soon as i get the cash together and it'll look brilliant !!!
here's some pics....


I'm really looking forward to getting the flocking done as its looks the dogs !!
I'm removing the rear fog light switch that the importer put on to pass SVA and i'm wiring the rear fogs into the original front fog light which as i don't have front fogs anymore, it'll look a lot neater plus it'll get rid of the naff switch thats there now.
I'm removing the turbo timer too as i never use it, i just drive sensibly the last few miles home to cool down the turbo.
I got rid of the Kenwood Double Din as its jap spec and I want a decent stereo in its place, I might get a double din DVD player ?
Then i'm changing the bushes in the gear change linkage, by the gear lever, for skateboard bearings, i've already done it to the linkages in the engine bay, it'll make the gearchange crisper along with some brass bushed to mount the linkage box to the chassis, get rid of the rubber mounts.
OCTOBER 2009....
I've collected some bits from Autoflock that have been flocked and i'm VERY happy with the finish and feel of the parts.
I'm collecting the main body of the dash soon once its been flocked and modified slightly to incorporate my Apexi hand commander.
Here's some pics of the parts that have neen done....
AIRCON FACIA...


GLOVEBOX....

RADIO / ASHTRAY SURROUND....


and the AIRBAG COVER that Raj at Autoflock has modified too, I LIKE IT !!!!
(and before anyone comments on the airbag not working now correctly, I am aware of this - airbag has been removed ).


Can't wait to get the rest back now, main dash and centre console and A pillars.
I sorted out my apexi hand controller so that the screen is now detached and seperate from the keypad.
The reason behind this is because the hand controller is being custom built into the dash before it gets flocked, there wasn't anywhere for the hand controller to go before except on a mobile phone holder attached to the dash.
As soon as its fitted to the dash i'll put up some pics, here's the screen seperated from the keypad.....
FROM THIS....

TO THIS.....


HERE'S ONE SOMEONE ELSE DID, SO YOU CAN SEE WHATS GOING ON....


Mine isn't going by the radio though, its going in a custom jobbie...
Started to paint the engine bay....
I sanded all the primer with 1200 wet and dry, cleaned with panel wipe and painted the 1st coat of Scotia White.
Leaving it overnight to dry properly and then another quick sand down ready for another coat of the white tomorrow night.
Then its a couple of coats of laquer to make it nice and shiny and hardwearing.
Next job is to take off engine mountings, and H brace and get them powedercoated, whilst the engine mountings are off I think i'll put some polybush engine mountings in to replace the standard bushes.
Here's some pics after the 1st coat of white.....looking much better.


I look forward to getting the shiny bits bolted back on, oh and i've got to spray the underside of the bonnet Scotia white too as its a bit grey at the moment due to never getting polished...
I HAVE COPIED THIS FROM ANOTHER THREAD I STARTED ON THE MLR SO FORGIVE THE REFERENCES TO "TODAY AND "NEXT WEEK" ETC....
HERE'S WHAT IT WAS LIKE WHEN I GOT IT :
THE SPEC WHEN I GOT IT (OBVIOUSLY ITS GOT BETTER NOW !!).
Running 370bhp 350ftlb's
Engine
Fujitsubo Giken SS backbox
Janspeed De-cat Pipe
Apexi downpipe
Ralliart coil leads
HKS Airfilter
Apexi Ecu + Hand Commander
Exceedy Organic clutch
Ignition earthing system
Running 1.6 bar boost
SS Manifold Heat Sheild
Walbro Fuel Pump
Cooler Grade Denso plugs
Suspension/wheels
17 inch Advan Alloys
Annodised Wheel Nuts
Bridgestone Forenza Tyres
Front Wing Inner Braces
Tein Super Street Coilovers
Front and Rear Strut Braces
Grooved front discs
So after spending all my money modding a Skyline, it was now time to spend all my money on modding my Evo 5.
SEPTEMBER 2008...
My 1st mod was a carbon bonnet.....
The Brembo's had gone pink so I treated them to a coat of T-cut which made them red again before I did the proper refurb which required removing all the old laquer, repaint, put some new stickers on and then re-laquer.
BEFORE :
AFTER :
( I painted the disc lip too in black, thats why there's black paint on the disc )
The door pillar trim started to go a bit grey, so i bought some carbon fibre sheet and made some pillar covers.
thanks to Stewart at Stewartsf1.com
http://www.stewartsf1.com/
OCTOBER 2008...
I fitted an HKS 60mm boost gauge and A pillar pod.
I also refurbed brake calipers..... properly
FROM THIS....
TO THIS.......
very pleased with the brake calipers, it took me 3 days to do them all but it was well worth it.
NOVEMBER 2008....
I was bit busy taking the car apart ready for bit to be painted etc, and a bit more besides...
firstly I sold my 17" Advans and got myself some 18" Rota Torques......
Then I started on the front bumper , I took it off so it can be resprayed to make it perfect again. Whilst it's off I cleaned and tarted up the intercooler - removed the std coupling hoses ready to replace with silicone hoses.
Next is the engine bay, i've relocated the battery to the boot to give me some room for my new alloy intake pipes and to make it look less cluttered....
i've removed the rocker cover and cambelt cover to be repainted, also taken the power steering off to be painted.
There's lots of silicone hoses on order to replace ALL the black rubber ones.
The rear lights and rear garnishes are off to be tinted a slightly darker shinier red to remove the orange indicator colour from the rear lights, the clear bits will be kept clear.
they will look like this - much better without the orange indicator bit on the top....
DECEMBER 2008....
I had a few things back from the bodyshop( www.innovationbodyworx.co.uk ) - thanks to Darren, and i got around to fitting them.
I relocated battery to the boot so i can fit my hard pipes and to de-clutter the engine bay.
I've got to do a few more jobs to the engine bay yet :
Replace all bolts with Stainless items
Stainless fuse box covers
Fit Coolant hose kit ( RED )
fit silicone vac hoses ( RED )
Fit catch tank
Braided hoses in a few places
Fit carbon bonnet struts
Ralliart oil and rad caps
AND A FEW OTHER LITTLE BITS....
I fitted the Ralliart mudflaps but I didn't like them so I got rid.
Also tinted the rear lenses to get rid of the orange indicators...
Lastly but not least I fitted the 3 gauge pod on the dash with oil pressure, oil temp and water temp gauges...
ITS STARTING TO ALL COME TOGETHER NOW.
Also fitted my catch tank and all the rest of the hoses i'd bought. I used braided hose for the catch tank and anodised hose finishers.
Fitted the lower intercooler pipe from the turbo that I had made at powerflow exhausts, this removed the restriction in the standard pipe (crap pictures )....
Front and rear lower splitters were away for painting to make them pretty again.
I decided to have a go at tinting my rear lights on my Evo 5 to get rid of the orange indicator.
I loved the results as it looks so much neater....
(lights just need a polish with rubbing compound to give them a shine.... ).
(Rear spoiler and rear bumper splitter are away for painting...)
BUT, i wasn't happy with the colour of the light from the indicator, it was more RED than ORANGE, i removed some of the tint but it was still no good, I put an ORANGE bulb in the bulb holder but the light was still more red. I just know the coppers round here and they are just looking for an excuse to pull you over so i decided to remove all the tint and put them back to standard - WHICH I WAS GUTTED ABOUT CAUSE I LIKED THE TINTED LOOK.
So I had a think about how I could overcome this and I came up with an idea - so I retinted the rear lights with the red tint and set to work on my idea.
I decided to reconfigure the rear lamp unit so that the reverse lights were now the indicators, the original indicators now became the brake lights and the stop/tail light now became the tail/fog light.
This left the reversing light to sort out, I decided to use the boot garnishes and put a bulb in the clear part to become the reversing lights. I had to dremmel out the rear of the lens so i could put in a bulb holder.
I did a proper job by taking out the pins in the plug from the wiring loom on the tail lamp unit and repositioning them in the block to activate the different lights, the retro fit fog lamp wire that was fitted when it was imported was soldered into the loom plug to activate the fogs, and the reverse light wire was re-routed along the cable on the boot lid (for the 3rd brake light) into the garnishes, so you cannot tell its all been rewired.
All I need to do is put some chrome indicator bulbs to get rid of the orange in the lens.
Here's the results......
So now I have the red tinted lights i wanted, with indicators that glow orange, AND 2 fog lights instead of the 1 that was originally there, I put red bulbs in the new brake light position and this gives the new brake lights a really bright red look thus helping with safety .....:
JANUARY 2009....
In the new year the car was finally ready for the road again, it was all back together and ready to be MOT'd and taxed, I had the front and rear bumper splitters painted as they were a bit scuffed.
The front splitter i had the centre section painted black to compliment the carbon bonnet.
Also fitted the fog light covers - i love the look of them....
I also fitted my white LED sidelight bulbs and my HID 4300k Hi/Lo kit.
Also had the rear spoiler blade painted satin black....
FEBUARY 2009....
Fitted my BLACK mudflaps, happy with the look of them, I used to have red ones but i didn't think they suited the wheels.
also fitted my Black sunstrip...
Another couple of jobs crossed off the long list.
I got round to fitting a little bit of Carbon too
I got myself a set of rear arch covers and an exhaust heat shield.
MARCH 2009.....
Plans changed again !!!!
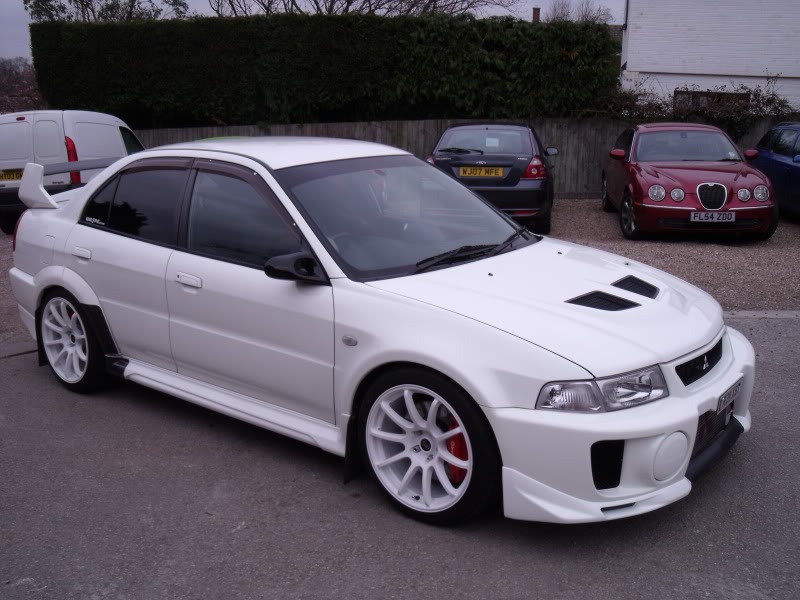
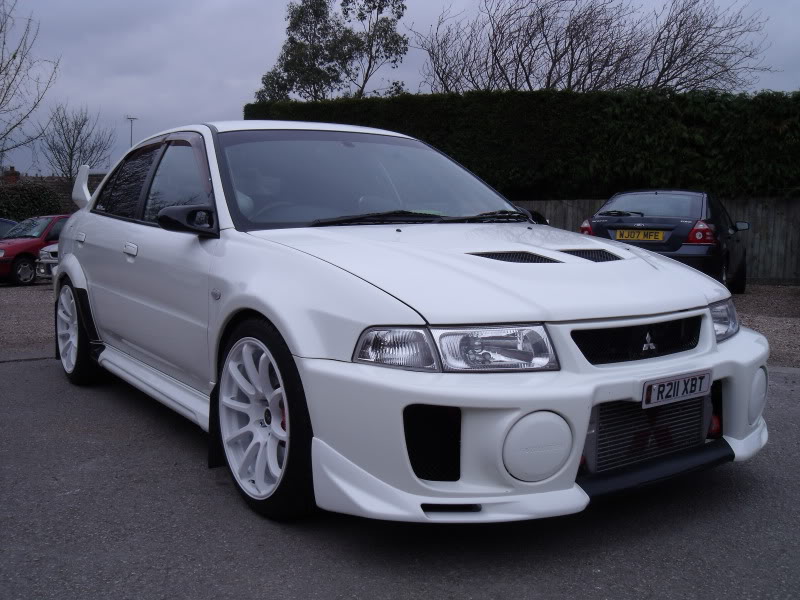
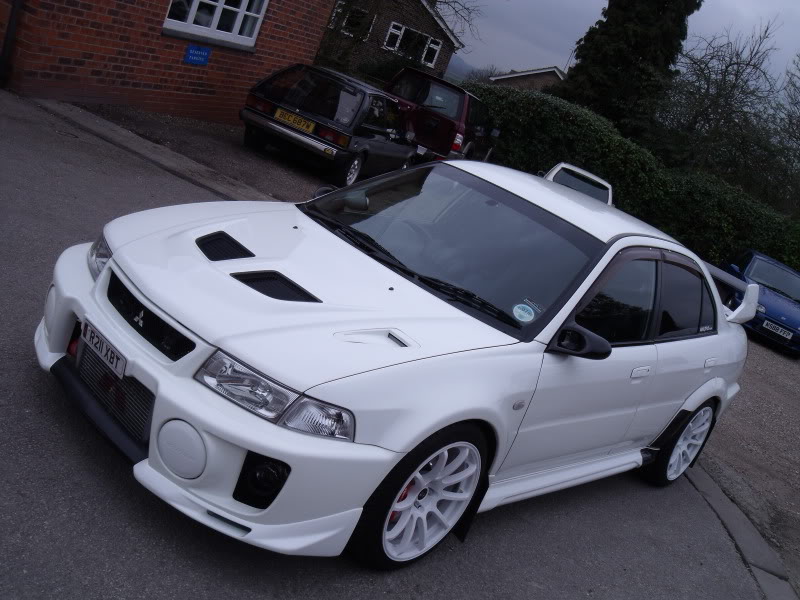
Swapped the Carbon bonnet for a white standard bonnet.....
Also fitted my Ganador mirrors, I had them sprayed black for no other reason than I like them in Black - they are electrically operated too.
Got some new wheels fitted and i'm dead chuffed with them, pics don't do them justice, they fill the arch out perfect, the tyres have the stretched look and look perfect.
They are Rota G Force 18x9's with 235/40/18's fitted.
well chuffed...
Also fitted the 1 piece lights which i'm ultra happy about, also fitted the HID's and fit a couple of relays so the low beam stays on with the high beam.
PS : here's another view of the wheels to give you an idea how well they fill the arches and give the car a wider track.
NOT A LOT HAPPENNED FOR A WHILE, I JUST DROVE THE CAR......
JUNE 2009....
After yearning for the pops, flames and bangs back I needed to re-fit my SAS which i removed in order to tidy up the engine bay and fit my polished intercooler and turbo hardpipes.
I didn't want to put the standard pipework back on, which was a good job since I gave it away....
I borrowed some standard pipework, just to check i could still get some pops and bangs and good news is that i could with the SAS re-fitted.
So I put a 22mm outlet onto my polished hardpipe.
So its been re-fitted with a piece of silicon hose and it looks a top job with the pops and bangs returned....
here's a couple of pics of the SAS re-fitted....
SEPTEMBER 2009....
SORN'D the car so that I can start on the refurb of the underside and the front end.
Once that was done then I started on the removal of the dash etc for flocking.
Here's a few pics of what its like underneath now, i've got a fair bit to do.
I'm cleaning, removing surface rust, sealing and then painting Scotia White, i'm powdercoating whatever can be powdercoated and painting everything else.
The ARB's are being powercoated along with the front crossmember / engine mount, not sure what colour yet.
The whole of the underside of the floor will be cleaned, sealed and painted white so i've got a fair bit of stripping down to do yet.
There's a couple of oil leaks that need sorting out, the rear diff has a leak so i'll sort that out when i change the diff oil. There's a leak from the aftermarket oil pressure sender so that'll be sorted when I change the engine oil and there's a leak from the power steering pot lower pipe which will be done when i replace the pot with a spec-R one.
Stripped some more off the front end and engine in readiness for painting etc.
This is the plan for the next couple of months on the front end and engine.
(everything will be cleaned, stripped and treated before painting, then painted with Epoxy Mastic 121 before painting with the relevent colour).
Repaint front end back to white as well as the engine bay.
Paint gearbox top to bottom Gloss Black & do gearbox oil change.
Refurb & Paint lower crossmember
Refurb & paint lower H Brace.
Remove ARB's and repaint
Fit Alloy Radiator
Move washer / intercooler spray resevoir into the boot to clean up that area of the engine bay.
Remove carbon canister.
Replace FMIC with aftermarket bigger one, not sure which one yet.
Completely re-route and tidy up the looms in the engine bay as they look very messy, i'm going to try to hide them as much as possible.
Spec-R power steering pot
Spec-R header tank
Remove Air conditioning and fit RS pulley belt
and much more...
here's the pics of the progress today, more stripped off...
Its coming along nicely....
Stripped a lot out of the engine bay ready for cleaning, sanding and the rust prep and painting.
I've managed to re-route a lot of the engine loom to hide it as it gets on my nerves !!!
Here's the current state ready for paint preperation......
I'm getting the angle grinder out and chopping off the old battery tray mounts as the battery is in the boot, it'll tidy up the bay a little, also removing the bracket that held on the carbon canister as i've ditched the canister (a small part of the bracket will be left because the ABS attaches to it). - I've put black marker pen on the bits i'm removing.
Took off the scuttle panel and its going to get a good clean underneath before painting as its got 11 years of grime under it....
Made a start on painting the engine bay, my fingers were worn down to the bone with all that sanding !!!!
Put 3 coats of primer on, and rubbed it all down....
Took off the brackets that held the batter tray on, what a job that was !!!
BEFORE...
AFTER...
Then tested a bit of the Scotia White to see how it goes on, looks like it goes on ok.
Painted the bonnet hinges as they were manky...
BEFORE...
AFTER...
Lastly painted the bit that goes on the front infront of the radiator, its a pipe that carries power steering fluid.... its gloss black but doesn't show up very good in pics.
This is the part i mean....
PAINTED...
Decided to get off my fat arse and get the dash out, i've been putting it off for ages so seeing as the weather was good i'd thought i'd sort it out.
Its not a bad job, it took me 3 hours from start to finish including taking the door cards off and re-routing some of the loom and generally tidying things up as the bodger who put in the rear fog light and turbo timer needs to go on a course to learn how to wire things in safely, no fuses were used and the wires were just twisted together and covered in black tape !! - so its all sorted now, nice and safe and tidy....
I've also moved the alarm control box and all the wiring so that once the dash is on it will be very difficult to access it without removing lots of bits of dash, so this prevents a thief getting to it to disable the alarm....
I was going to do a "how to" but to be honest its easy to do, its just a matter of removing panels and the screws / bolts are pretty self explanatery, I did identify each plug though so I know where it goes when i put it back together....
I'm getting it all flocked as soon as i get the cash together and it'll look brilliant !!!
here's some pics....
I'm really looking forward to getting the flocking done as its looks the dogs !!
I'm removing the rear fog light switch that the importer put on to pass SVA and i'm wiring the rear fogs into the original front fog light which as i don't have front fogs anymore, it'll look a lot neater plus it'll get rid of the naff switch thats there now.
I'm removing the turbo timer too as i never use it, i just drive sensibly the last few miles home to cool down the turbo.
I got rid of the Kenwood Double Din as its jap spec and I want a decent stereo in its place, I might get a double din DVD player ?
Then i'm changing the bushes in the gear change linkage, by the gear lever, for skateboard bearings, i've already done it to the linkages in the engine bay, it'll make the gearchange crisper along with some brass bushed to mount the linkage box to the chassis, get rid of the rubber mounts.
OCTOBER 2009....
I've collected some bits from Autoflock that have been flocked and i'm VERY happy with the finish and feel of the parts.
I'm collecting the main body of the dash soon once its been flocked and modified slightly to incorporate my Apexi hand commander.
Here's some pics of the parts that have neen done....
AIRCON FACIA...
GLOVEBOX....
RADIO / ASHTRAY SURROUND....
and the AIRBAG COVER that Raj at Autoflock has modified too, I LIKE IT !!!!
(and before anyone comments on the airbag not working now correctly, I am aware of this - airbag has been removed ).
Can't wait to get the rest back now, main dash and centre console and A pillars.
I sorted out my apexi hand controller so that the screen is now detached and seperate from the keypad.
The reason behind this is because the hand controller is being custom built into the dash before it gets flocked, there wasn't anywhere for the hand controller to go before except on a mobile phone holder attached to the dash.
As soon as its fitted to the dash i'll put up some pics, here's the screen seperated from the keypad.....
FROM THIS....
TO THIS.....
HERE'S ONE SOMEONE ELSE DID, SO YOU CAN SEE WHATS GOING ON....
Mine isn't going by the radio though, its going in a custom jobbie...
Started to paint the engine bay....
I sanded all the primer with 1200 wet and dry, cleaned with panel wipe and painted the 1st coat of Scotia White.
Leaving it overnight to dry properly and then another quick sand down ready for another coat of the white tomorrow night.
Then its a couple of coats of laquer to make it nice and shiny and hardwearing.
Next job is to take off engine mountings, and H brace and get them powedercoated, whilst the engine mountings are off I think i'll put some polybush engine mountings in to replace the standard bushes.
Here's some pics after the 1st coat of white.....looking much better.
I look forward to getting the shiny bits bolted back on, oh and i've got to spray the underside of the bonnet Scotia white too as its a bit grey at the moment due to never getting polished...
Last edited by wh0s_the_daddy; 21-07-2010 at 07:55 PM.
 21-07-2010, 07:24 PM
#2
15000
Thread Starter
Join Date: Jul 2010
Location: shropshire
Posts: 39
Likes: 0
Received 0 Likes
on
0 Posts
Engine bay was laquered and looks very good, can't wait to start getting it all back together, there's still more things to paint such as all the various brackets that hold things on (gonna do them gloss black).


Next job is to take off the engine mountings, including the one under the engine, to get them stripped and power coated GLOSS BLACK - i'm going to replace the bushes whilst they are off.
I'm removing the inlet plenum and throttle body to get them polished aswell, lots more to do in the engine bay yet then its on to tackle the chassis.
21-07-2010, 07:27 PM
#3
15000
Thread Starter
Join Date: Jul 2010
Location: shropshire
Posts: 39
Likes: 0
Received 0 Likes
on
0 Posts
I spent a few hours sorting out the mish mash of wiring in the engine bay, I hate car looms they are so untidy, so i re-routed the loom and hid a lot of it away.
The drivers side is so much neater now without the air con etc, the only thing going there now is a nice Spec-R power steering pump... also test fitted the engine damper - DIDN'T fit right, had to re-drill the holes for the bracket that goes on the suspension turret.....
Just got to paint the damper red now....


I painted the gearbox black and sorted out the wiring around it....Re-positioned my oil catch tank, put it in place of the carbon canister....


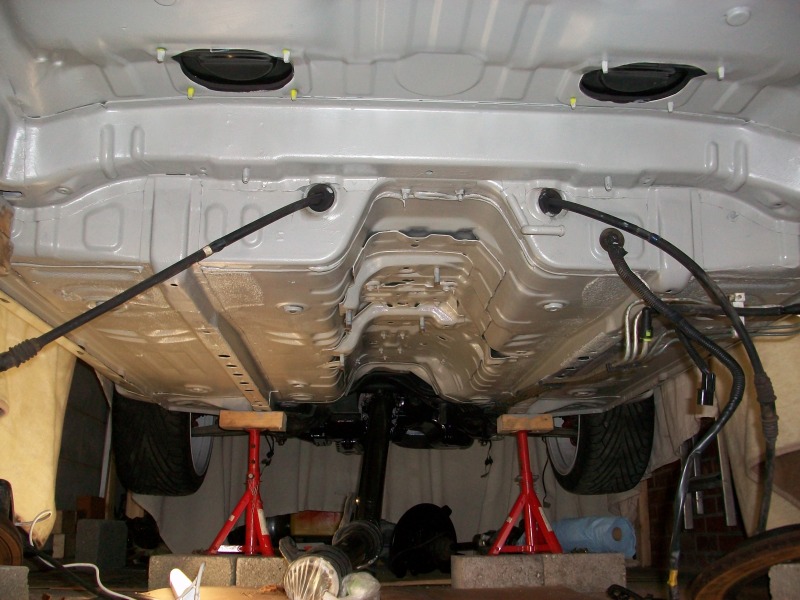
Put the car up on axle stands now for then next couple of months and made a start on painting the underside, 1st coat is on, as soon as its dry then the next coat goes on.
The chassis is going to be Scotia white and the rest of the suspension, gearbox, diffs etc will be gloss black....
(NOTE : i'd better remove that bristle in the paint ).


Now i've taken the whole rear suspension off and the fuel tank to reveal the rear floor so i can clean, treat and paint it.
Its in very good condition really, the only areas that need addressing are the rear suspension mounts.
So i'll be sorting this out, all the suspension components are being power coated or painted along with any brackets that hold things to the car.
The diff will be painted along with the propshafts and rear hubs, i'm pianting the fuel tank too to give it some protection.
The paint i'm using is Epoxy Mastic 121 as an undercoat and then whatever colour I need as a top coat.


Next job is to remove AYC pump and brake calipers, then paint the pump and pipes, i'll refurb the calipers while they are off and replace the rubber hoses with braided brake lines.
Fuel filler pipe is in excellent condition, this is a worry for Evo 5/6 owners as the tend to rust through, but i'll treat and paint it to make sure it never goes that way.
The drivers side is so much neater now without the air con etc, the only thing going there now is a nice Spec-R power steering pump... also test fitted the engine damper - DIDN'T fit right, had to re-drill the holes for the bracket that goes on the suspension turret.....
Just got to paint the damper red now....
I painted the gearbox black and sorted out the wiring around it....Re-positioned my oil catch tank, put it in place of the carbon canister....
Put the car up on axle stands now for then next couple of months and made a start on painting the underside, 1st coat is on, as soon as its dry then the next coat goes on.
The chassis is going to be Scotia white and the rest of the suspension, gearbox, diffs etc will be gloss black....
(NOTE : i'd better remove that bristle in the paint ).
Now i've taken the whole rear suspension off and the fuel tank to reveal the rear floor so i can clean, treat and paint it.
Its in very good condition really, the only areas that need addressing are the rear suspension mounts.
So i'll be sorting this out, all the suspension components are being power coated or painted along with any brackets that hold things to the car.
The diff will be painted along with the propshafts and rear hubs, i'm pianting the fuel tank too to give it some protection.
The paint i'm using is Epoxy Mastic 121 as an undercoat and then whatever colour I need as a top coat.
Next job is to remove AYC pump and brake calipers, then paint the pump and pipes, i'll refurb the calipers while they are off and replace the rubber hoses with braided brake lines.
Fuel filler pipe is in excellent condition, this is a worry for Evo 5/6 owners as the tend to rust through, but i'll treat and paint it to make sure it never goes that way.
21-07-2010, 07:28 PM
#4
15000
Thread Starter
Join Date: Jul 2010
Location: shropshire
Posts: 39
Likes: 0
Received 0 Likes
on
0 Posts
fitted the carbon bonnet lifters and alloy rad (the rad is from an Evo 7 but if fitted ok ), the standard fan doesn't fit the rad so I got a slimline fan to fit instead. Had to get some new coolant hoses to fit the rad.


Also got the dash back from Autoflock and I am very pleased with it, i've just got to assemble the dash back together and its ready to fit back into the car.
Raj at Autoflock did a great job of mounting my Power FC hand controller into the dash, I split the screen from the buttons and had the screen mounted seperate from the buttons...
So now the screen is in the centre vent of the dash and the buttons are in the drivers side dash vent....
(THE FLASH MAKES THE DASH LOOK VERY LIGHT, BUT ITS A LOVELY FINISH LIKE IN THE 2nd PIC ).


Fitted my catch tank to where the carbon canister used to be.....


And painted my bonnet catch.....

As soon as I re-assemble the dadh i'll take some more pics.
Also got the dash back from Autoflock and I am very pleased with it, i've just got to assemble the dash back together and its ready to fit back into the car.
Raj at Autoflock did a great job of mounting my Power FC hand controller into the dash, I split the screen from the buttons and had the screen mounted seperate from the buttons...
So now the screen is in the centre vent of the dash and the buttons are in the drivers side dash vent....
(THE FLASH MAKES THE DASH LOOK VERY LIGHT, BUT ITS A LOVELY FINISH LIKE IN THE 2nd PIC ).
Fitted my catch tank to where the carbon canister used to be.....
And painted my bonnet catch.....
As soon as I re-assemble the dadh i'll take some more pics.
21-07-2010, 07:29 PM
#5
15000
Thread Starter
Join Date: Jul 2010
Location: shropshire
Posts: 39
Likes: 0
Received 0 Likes
on
0 Posts
I took a load of things to the powder coaters yesterday then got cracking on with the chassis again.
Last week I removed all surface rust with a wire brush drill attachment ( there wasn't much thank goodness) and then gave it a treatment of dinitrol just to be safe.
Then the last couple of days i've been painting with EPOXY MASTIC 121.


and under the rear arches.....


Removed the sideskirts ready for painting under them , the paint underneath is surprisingly clean, but it will get a treatment of Mastic 121 anyhow.

ONCE THE 2nd COAT IS APPLIED AND DRY THEN I'LL SPRAY THE UNDERSIDE WHITE.
Once the rear is back together them i'll move onto the middle section of the floor and then on to the front.
The AYC pump is a bit manky.......

so i'm going to clean it up and spray it with gloss black, the AYC pump brackets are away at the powder coaters and HEL performance are making me up some braided lines from the pump to the diff to replace the tired looking standard ones, it'll look very nice once re-fitted.
Last week I removed all surface rust with a wire brush drill attachment ( there wasn't much thank goodness) and then gave it a treatment of dinitrol just to be safe.
Then the last couple of days i've been painting with EPOXY MASTIC 121.
and under the rear arches.....
Removed the sideskirts ready for painting under them , the paint underneath is surprisingly clean, but it will get a treatment of Mastic 121 anyhow.
ONCE THE 2nd COAT IS APPLIED AND DRY THEN I'LL SPRAY THE UNDERSIDE WHITE.
Once the rear is back together them i'll move onto the middle section of the floor and then on to the front.
The AYC pump is a bit manky.......
so i'm going to clean it up and spray it with gloss black, the AYC pump brackets are away at the powder coaters and HEL performance are making me up some braided lines from the pump to the diff to replace the tired looking standard ones, it'll look very nice once re-fitted.
21-07-2010, 07:33 PM
#6
15000
Thread Starter
Join Date: Jul 2010
Location: shropshire
Posts: 39
Likes: 0
Received 0 Likes
on
0 Posts
put another coat of 121 under the arches and the rear part of the floor, also managed to paint the rest of the chassis floor.
One more coat on the chassis floor and its ready for the white paint to go on.....
Going to rub the brake & fuel lines, that run the length of the car, down and put a coat of 121 on them too, then paint them BLACK.


Another job off the list....
The powder coater has nearly finished the stuff I took to him, I took a load more stuff today, so as soon as I get them back then i'll start to re-assemble, probably won't start to re-assemble until after christmas.
I took the heat shields off the fuel tank aswell as i'm getting the fuel tank and the heat shields powder coated, the heat shields were spot welded to the lip of the tank, so I drilled them out. I will re-attach with stainless bolts.
I'm replacing all the hoses to and from the fuel tank while i'm at it.
Once all the rear end and the chassis floor is all back together then i'll make a start on stripping the front suspension off and giving the front end the same treatment.
managed to get some bits back from the powdercoater, still a lot more to send to him...
FUEL TANK

FUEL TANK HEAT SHIELD


REAR SUSPENSION BEAM


REAR BRAKE CALIPERS
( just got to fit new seals and brembo decals, then a coat of laquer & braided lines ).


FRONT H BRACE

and loads more...
Also removed the inlet manifold so it can be polished or powdercoated (not made my mind up yet), the exhaust manifold and turbo are also off - the nuts came off very easily ( I soaked them with WD40 for a few days ) which was nice. I'm going to uprate the exhaust manifold to a tubular manifold.


I'm whipping the engine out as soon as the car's back on its wheels and the block and everything else will be painted.
I'm taking all the suspension arms to the powdercoater next week and once they've been done i'll be fitting polybushes and new ball joints, drop links and ARB.
The arms are being done silver just like the fuel tank heat shield, the hubs are red, the brake disc shield silver.
The front engine mount beam and engine mount bush carriers are going to be silver too.
The power steering pot is being chromed (cheaper option than a Spec-R one )
There's lots to take to him....


As soon as i get all the parts back from the powdercoater and all the nuts and bolts back from the platers then i'll start to re-assemble the rear end once i've painted the floor white....
I got some bits back from the chromers ( I know chrome isn't everyones cup of tea ), seeing as i'm making the underside like new I thought i'd make every nut and bolt like new too, chrome is dead easy to keep clean, just give it a wipe over - plus its very hard wearing.
So here's the parts i got back, he's got a load more nuts and bolts to do for me and a few more bits which i'll post up when i get back.
I got the fuel filler pipe done so it will last forever now...


Fuel filler pipe protective shield...


Diff brackets...


Diff hanger washers ( rubber still attached to other side )...

Thermostat housing....and cam position sensor cover.

Rad brackets....

Exhaust rubber mounting bracket ( bolts to rear suspension beam )..

ARB bush mounts and front intercooler pipe mounting bracket....

Engine damper brackets...

All the bolts that hold the rear suspension and beams on, inc camber bolts / washers and nuts...


selection of brackets that hold the brake pipes to car aswell as handbrake cable brackets and AYC line brackets....

Speaking of AYC lines, I got the braided AYC lines from HEL Performance and will test fit them to the pump tomorrow, also the high pressure line for the power steering pump... great quality !!
The power steering line had to utilise the existing fittings as they are specific to mitsi - they look brill.
AYC lines...


Power steering line...


One more coat on the chassis floor and its ready for the white paint to go on.....
Going to rub the brake & fuel lines, that run the length of the car, down and put a coat of 121 on them too, then paint them BLACK.
Another job off the list....
The powder coater has nearly finished the stuff I took to him, I took a load more stuff today, so as soon as I get them back then i'll start to re-assemble, probably won't start to re-assemble until after christmas.
I took the heat shields off the fuel tank aswell as i'm getting the fuel tank and the heat shields powder coated, the heat shields were spot welded to the lip of the tank, so I drilled them out. I will re-attach with stainless bolts.
I'm replacing all the hoses to and from the fuel tank while i'm at it.
Once all the rear end and the chassis floor is all back together then i'll make a start on stripping the front suspension off and giving the front end the same treatment.
managed to get some bits back from the powdercoater, still a lot more to send to him...
FUEL TANK
FUEL TANK HEAT SHIELD
REAR SUSPENSION BEAM
REAR BRAKE CALIPERS
( just got to fit new seals and brembo decals, then a coat of laquer & braided lines ).
FRONT H BRACE
and loads more...
Also removed the inlet manifold so it can be polished or powdercoated (not made my mind up yet), the exhaust manifold and turbo are also off - the nuts came off very easily ( I soaked them with WD40 for a few days ) which was nice. I'm going to uprate the exhaust manifold to a tubular manifold.
I'm whipping the engine out as soon as the car's back on its wheels and the block and everything else will be painted.
I'm taking all the suspension arms to the powdercoater next week and once they've been done i'll be fitting polybushes and new ball joints, drop links and ARB.
The arms are being done silver just like the fuel tank heat shield, the hubs are red, the brake disc shield silver.
The front engine mount beam and engine mount bush carriers are going to be silver too.
The power steering pot is being chromed (cheaper option than a Spec-R one )
There's lots to take to him....
As soon as i get all the parts back from the powdercoater and all the nuts and bolts back from the platers then i'll start to re-assemble the rear end once i've painted the floor white....
I got some bits back from the chromers ( I know chrome isn't everyones cup of tea ), seeing as i'm making the underside like new I thought i'd make every nut and bolt like new too, chrome is dead easy to keep clean, just give it a wipe over - plus its very hard wearing.
So here's the parts i got back, he's got a load more nuts and bolts to do for me and a few more bits which i'll post up when i get back.
I got the fuel filler pipe done so it will last forever now...
Fuel filler pipe protective shield...
Diff brackets...
Diff hanger washers ( rubber still attached to other side )...
Thermostat housing....and cam position sensor cover.
Rad brackets....
Exhaust rubber mounting bracket ( bolts to rear suspension beam )..
ARB bush mounts and front intercooler pipe mounting bracket....
Engine damper brackets...
All the bolts that hold the rear suspension and beams on, inc camber bolts / washers and nuts...
selection of brackets that hold the brake pipes to car aswell as handbrake cable brackets and AYC line brackets....
Speaking of AYC lines, I got the braided AYC lines from HEL Performance and will test fit them to the pump tomorrow, also the high pressure line for the power steering pump... great quality !!
The power steering line had to utilise the existing fittings as they are specific to mitsi - they look brill.
AYC lines...
Power steering line...
21-07-2010, 07:37 PM
#7
15000
Thread Starter
Join Date: Jul 2010
Location: shropshire
Posts: 39
Likes: 0
Received 0 Likes
on
0 Posts
I finally got to work on putting some white paint on the chassis, the mastic 121 protects and the white paint covering it makes it look pretty.
Only done the drivers side rear arch as yet because i wanted to know how much paint it will use for the whole floor and arches.
So far i've used 2 tins of 500ml white gloss for the rear arch and the floor where the AYC pump sits.
Its a good job i've got 24 x 500ml tins to play with...
I want to put a few coats on to give it a nice thick protective layer, then I think i'll put a few coats of clear laquer on as extra protection.
Here's what it looks like so far, it needs another coat yet but you get the idea...


I should have it all painted up by the weekend.
Then i'm going to sand down the diff / AYC casings, etch primer them and give it a couple of coats of either gloss silver or black - not decided yet.
sooo much to do...
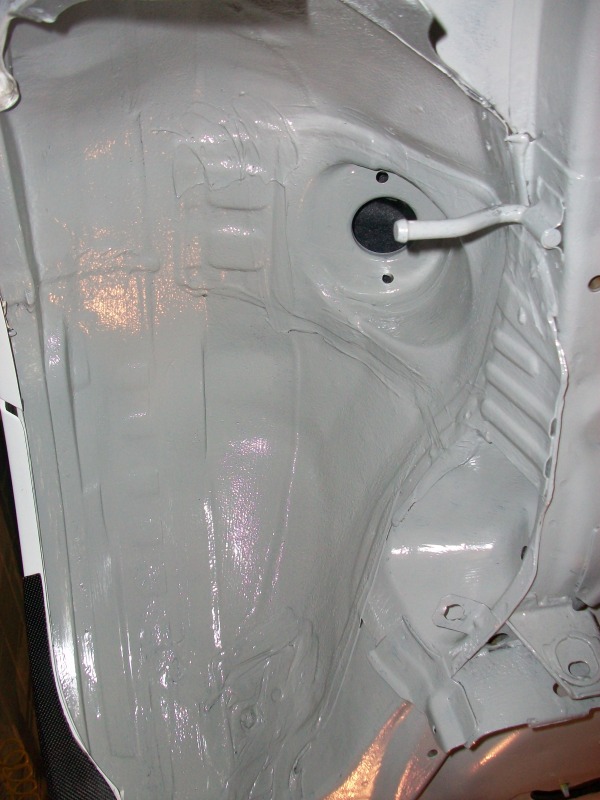
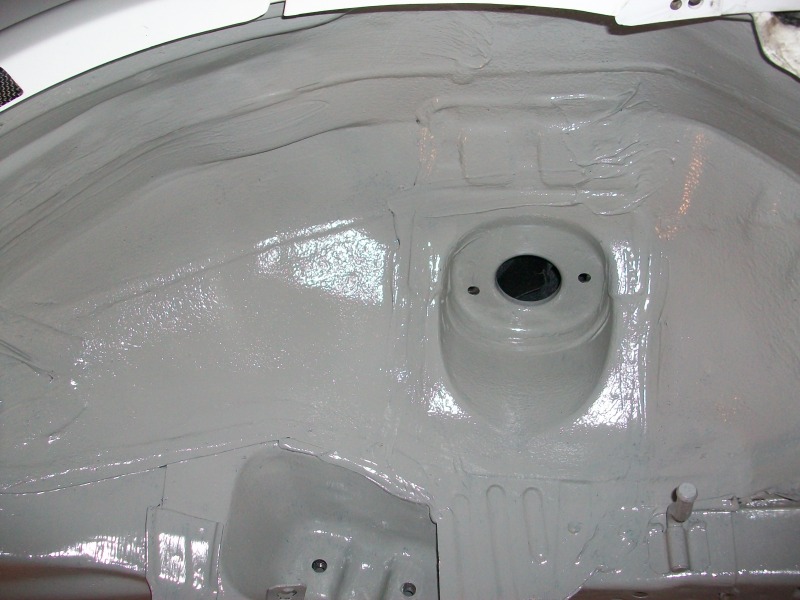
At last i've managed to finish off the painting of the rear end, rear arches and the whole of the floor pan (well i've put 2 good coats on, just one more coat and a couple of coats of laquer to go ).
I'm very pleased with the results, I can start to put things back together in a couple of weeks....
FLOORPAN...


REAR - fuel tank area


SPARE WHEEL WELL....

SUSPENSION MOUNTS.....


AYC PUMP LOCATION.....


AND OTHER SIDE...


HERE'S A REMINDER TO WHAT IT WAS LIKE BEFORE I STARTED...


A vast improvement I think, still a way to go yet though, i'll keep chipping away at it....
I've been a bit busy lately so i haven't got as far as i liked, but here's what i've been doing....
I decided to refit the fuel tank and to see what the rear suspension beam looked like now its been powdercoated.
The tank looks great, I had it powdercoated gloss black and the heat shields on the tank done gloss silver.
I replaced the rubber hoses and fitted new pipe clips between the pum and sender unit, just got to replace the filler rubber hose and clips now.


Also i fitted the newly chromed fuel filler pipe, just got to fit the rear suspension mounts so i can fit the fuel filler pipe guard which has also been chromed...


I had the heat shield near the front of the car powder coated aswell...

Rear suspension beam powder coated and fitted.... i had all the bolts chromed too...


I also had EVERY bracket that holds the handbrake cables, brake and fuel lines chromed, as i wanted to pay attention to the details...

Diff hanger washers....


Camber bolts and washers.....


All suspension arm bolts were done aswell...

So you can see the theme i'm working to.
I sprayed my AYC diff , spent 2 hours rubbing it down with wire wool to get rid of 12 years of crud, 2 coats of primer then a couple of coats of gloss black.
I removed all the diff bolts (and fitted temporary ones) so they can be chromed, they will look good against the gloss black casings. The little square inspection cover is being chromed aswell...
I also drained all the oils ready to put in new stuff.


also sprayed my SAS valve...


Whilst I was in the garage i removed the fuel tank again and sanded down all the brake lines and fuel lines ( I forgot to do them, i got carried away with fitting shiny bits :spank , I treated them to a coat of Mastic 121 so they will now last forever. As soon as the Mastic is dry i'll spray them gloss black and re-fit the fuel tank....
I sprayed the brake / fuel lines gloss black now the Mastic 121 was dry, they are very much protected now...


Again attention to detail meant I had the brake pipe clips chromed, stainless bolts aswell...

I had a stainless plate made to cover up the brake / fuel lines from from to back of the car .
I modified it to fit, this is a guard to protect the lines as they are exposed under the car, here's a couple of pics as i test fitted it, just a few more tweaks but you get the idea.... I'm going to get it polished to a mirror finish.

IGNORE the temporary screws used to test fit it.

I had to pull all the carpet back inside the car to make sure that i could drill the chassis for the bols to fit it to the car, took my ages, had to get the front seats out...:grinno:
Obviously i'll use nice stainless bolts to bolt it to the chassis, also i'll use sealer to seal it up against the chassis, maybe i'll fill it with waxoil aswell ?
Fitted upper arm brackets.....new stainless bolts aswell.

Fitted rear beam exhaust hanger...had it chromed.

Fitted fuel filler pipe stone guard ( although it needs taking off again so i can move fuel filler pipe in order to get rear upper arm bolt in ).


Fitted rear ARB mounts just to make sure they look ok - chromed & polished


Fitted rear diff mounting brackets to diff - had them chromed and the bolts chromed.


Fitted AYC braided lines to diff to check fitment....

Then fitted AYC pump, i cleaned the pump up and sprayed it gloss black, the pump mounting brackets were powder coated silver then same colour as the fuel tank heat shields.
Replaced all bolts with stainless.

This is what it was like...
Pipe bracket chromed, following the attention to detail, notice the domed nuts....
GOT TO REPLACE HOSE CLIPS WITH NICE SHINY NEW ONES....


Fitted braided AYC lines to AYC pump...


Just got to work out now where to route the new lines and where to secure them to the chassis, i'll do this once i've re-fitted the diff...

Replace fuel tank mounting nuts with nice dome nuts.....

Had a helper with me too, my 18 year old tabby - Sid...:grinno:

I've had my flocked dash in bits stored in big plastic bags in the garage for months now and today I decided to re-assemble it, the cooling ducts needed re-fitting and the power FC screen and hand controller mounting, the dash is in 3 pieces so they needed all putting back together.
As you can see the power FC screen is now where the centre vent was and the control buttons are where the drivers side vent used to be.


Airbag cover also has a neat touch...(need to clean dash of dust ).

Only done the drivers side rear arch as yet because i wanted to know how much paint it will use for the whole floor and arches.
So far i've used 2 tins of 500ml white gloss for the rear arch and the floor where the AYC pump sits.
Its a good job i've got 24 x 500ml tins to play with...
I want to put a few coats on to give it a nice thick protective layer, then I think i'll put a few coats of clear laquer on as extra protection.
Here's what it looks like so far, it needs another coat yet but you get the idea...
I should have it all painted up by the weekend.
Then i'm going to sand down the diff / AYC casings, etch primer them and give it a couple of coats of either gloss silver or black - not decided yet.
sooo much to do...
At last i've managed to finish off the painting of the rear end, rear arches and the whole of the floor pan (well i've put 2 good coats on, just one more coat and a couple of coats of laquer to go ).
I'm very pleased with the results, I can start to put things back together in a couple of weeks....
FLOORPAN...
REAR - fuel tank area
SPARE WHEEL WELL....
SUSPENSION MOUNTS.....
AYC PUMP LOCATION.....
AND OTHER SIDE...
HERE'S A REMINDER TO WHAT IT WAS LIKE BEFORE I STARTED...
A vast improvement I think, still a way to go yet though, i'll keep chipping away at it....
I've been a bit busy lately so i haven't got as far as i liked, but here's what i've been doing....
I decided to refit the fuel tank and to see what the rear suspension beam looked like now its been powdercoated.
The tank looks great, I had it powdercoated gloss black and the heat shields on the tank done gloss silver.
I replaced the rubber hoses and fitted new pipe clips between the pum and sender unit, just got to replace the filler rubber hose and clips now.
Also i fitted the newly chromed fuel filler pipe, just got to fit the rear suspension mounts so i can fit the fuel filler pipe guard which has also been chromed...
I had the heat shield near the front of the car powder coated aswell...
Rear suspension beam powder coated and fitted.... i had all the bolts chromed too...
I also had EVERY bracket that holds the handbrake cables, brake and fuel lines chromed, as i wanted to pay attention to the details...
Diff hanger washers....
Camber bolts and washers.....
All suspension arm bolts were done aswell...
So you can see the theme i'm working to.
I sprayed my AYC diff , spent 2 hours rubbing it down with wire wool to get rid of 12 years of crud, 2 coats of primer then a couple of coats of gloss black.
I removed all the diff bolts (and fitted temporary ones) so they can be chromed, they will look good against the gloss black casings. The little square inspection cover is being chromed aswell...
I also drained all the oils ready to put in new stuff.
also sprayed my SAS valve...
Whilst I was in the garage i removed the fuel tank again and sanded down all the brake lines and fuel lines ( I forgot to do them, i got carried away with fitting shiny bits :spank
I sprayed the brake / fuel lines gloss black now the Mastic 121 was dry, they are very much protected now...
Again attention to detail meant I had the brake pipe clips chromed, stainless bolts aswell...
I had a stainless plate made to cover up the brake / fuel lines from from to back of the car .
I modified it to fit, this is a guard to protect the lines as they are exposed under the car, here's a couple of pics as i test fitted it, just a few more tweaks but you get the idea.... I'm going to get it polished to a mirror finish.
IGNORE the temporary screws used to test fit it.
I had to pull all the carpet back inside the car to make sure that i could drill the chassis for the bols to fit it to the car, took my ages, had to get the front seats out...:grinno:
Obviously i'll use nice stainless bolts to bolt it to the chassis, also i'll use sealer to seal it up against the chassis, maybe i'll fill it with waxoil aswell ?
Fitted upper arm brackets.....new stainless bolts aswell.
Fitted rear beam exhaust hanger...had it chromed.
Fitted fuel filler pipe stone guard ( although it needs taking off again so i can move fuel filler pipe in order to get rear upper arm bolt in ).
Fitted rear ARB mounts just to make sure they look ok - chromed & polished
Fitted rear diff mounting brackets to diff - had them chromed and the bolts chromed.
Fitted AYC braided lines to diff to check fitment....
Then fitted AYC pump, i cleaned the pump up and sprayed it gloss black, the pump mounting brackets were powder coated silver then same colour as the fuel tank heat shields.
Replaced all bolts with stainless.
This is what it was like...
Pipe bracket chromed, following the attention to detail, notice the domed nuts....
GOT TO REPLACE HOSE CLIPS WITH NICE SHINY NEW ONES....
Fitted braided AYC lines to AYC pump...
Just got to work out now where to route the new lines and where to secure them to the chassis, i'll do this once i've re-fitted the diff...
Replace fuel tank mounting nuts with nice dome nuts.....
Had a helper with me too, my 18 year old tabby - Sid...:grinno:
I've had my flocked dash in bits stored in big plastic bags in the garage for months now and today I decided to re-assemble it, the cooling ducts needed re-fitting and the power FC screen and hand controller mounting, the dash is in 3 pieces so they needed all putting back together.
As you can see the power FC screen is now where the centre vent was and the control buttons are where the drivers side vent used to be.
Airbag cover also has a neat touch...(need to clean dash of dust ).
Trending Topics
 21-07-2010, 07:41 PM
#9
15000
Thread Starter
Join Date: Jul 2010
Location: shropshire
Posts: 39
Likes: 0
Received 0 Likes
on
0 Posts
Then I cleaned off the dash and put it back into storage ready to be fitted to the car soon...
Also i had some more parts shot blasted ready for me to paint them, however once i got them back I decided that it would be better to powder coat them instead as I wouldn't of been happy with just paint.
I had the rear brake disc shields done silver to match the fuel tank shields, also the rear diff front and rear hangers were done silver too.
Brake disc shields aren't the best as they are a little dented, I will see what they look like once fitted, if I don't like them then i'll get some more and get them coated.
The rear ARB red same as the rear beam and the rear hubs red.
All the holes in the hub were masked as to not get any paint in them, i'm pleased with the results....


I shall fit them in a couple of weeks as soon as I get the suspension arms back from the polisher and the polybushes delivered.
pics will follow once they are all fitted, nearly finished the rear end now, it should all be done in a few weeks.
I assembled the rear diff carriers and put in the polybushes, the diff looks great now (just waiting for the original diff casing bolts to come back from the chromers ), I will be fitting it back on the car soon.


I also put the ABS sensor back onto the rear hubs, as with everything so far on this project I payed attention to the details, the ABS sensor bracket was shot blasted (very carefully) to clean it up and then a light coat of paint added, also used a stainless bolt to bolt it to the hub.


The rear brake disc shield was fitted along with the handbrake shoe spring retainer.

Then I rubbed down and cleaned the rear wheel bearing assembly and sprayed it gloss black...


Those who are observant will notice that the bolts that hold the wheel bearing to the hub are missing, as is the handbrake shoe spring retainer nut - you guessed it - waiting for them to come back from the chromers....
(I need to take the masking tape off the wheel nut studs too ).
I picked up the rest of the rear arms from the chromer / poilsher yesterday and he's done a brilliant job on them.
Had some engine bits done too.
As soon as my polybushes arrive then the rear end will finally be put back together and the car put back on its wheels.
Here's some bits ready to be fitted....
Fuel rail.....

fuel filter bracket and fuel line....

SAS pipework...

Starter motor cover plate....

Standard power steering pot...

ABS distribution block brackets...

All the rear arms....


Its going to look great when its all back together, next job is to get the car back on its wheels and roll it out of the garage so i can fit my flocked dash which has been patiently waiting to go in for 6 months now !!!
I will, of course, put up some pics when the rear arms etc are assembled on the car in the hubs etc....
I'm at the final stages now ready to bolt all of the rear back together, all of the suspension arms are now polybushed and ready to go on.
I spent 6 hours sealing up all the seams on the chassis (with Tigerseal ) and then protecting the internals of the chassis (with Dinitrol Cavity Wax).
The idea of sealing the seams is to prevent any water getting in between any parts of the chassis and body therefore keeping out the rust.
The materials used :

The cavity wax has been sprayed internally on the rear chassis legs, the main chassis rails from back to front of the car, all around the fuel tank mounts and the spare wheel well front to back support bar. Also along the whole length of the sills (and anywhere else i could squirt it ).
Seams Tigersealed :
( I will give the seams now another quick spray of the white paint just to cover the Tigerseal ).


I ALSO SEALED ALONG THE WHOLE LENGTH OF EACH SILL.
Rear Chassis Legs sprayed inside with Cavity Wax :
Holes taped up to minimise leakage.

THE CAVITY WAX IS BROWN - ITS NOT RUST IN THIS PICTURE - :biggrin:


Getting good penetration as you can see, the Dinitrol is finding its way out of any small gap - good sign that its reaching where it should do. DON'T PANIC - I DID WIPE IT ALL CLEAN....!!

Main Chassis rails :
Again taped up to prevent leakage.

there are plenty of access holes to the chassis rails to squirt in the Dinitrol, so I just moved down the chassis leg and squirted the wax into every hole.
Then I did both sills..
There are access holes under each of the sill protectors (covered by a plastic cover, which i removed and will replace once wax is dry)

So thats my chassis protected now, here's a quick summary of what's been done to it :
1) Everything removed from rear end and floor, including whole of the rear suspension, AYC, diffs, propshaft, exhaust, brakes - EVERYTHING.
2) Whole of the now exposed floor was cleaned with degreaser and petrol soaked cloths.
3) Whole of the floor and chassis was cleaned up with various wire drill attachments, hand brushes and hand held grinder to remove any trace of the surface rust :
MY FLOOR AND CHASSIS ONLY HAD LIGHT SURFACE RUST.
4) Cleaned again using petrol soaked cloths.
5) Whole floor treated with Dinitrol Rust Convertor just to be sure that all traces of rust was dealt with.
6) Painted with 2 coats ( 3 in the exposed areas ) of Epoxy Mastic 121.
7) Sprayed with 3 coats of Gloss White Paint.
8) Seam sealed with Tigerseal
9) Protected with Dinitrol Cavity Wax.
So i'm happy now that the car is protected now and for many years to come, its been worth the long days and nights and believe me i have wondered many times "why did i ever start this" !!!!
Products used :
http://www.rust.co.uk/popup.cfm?p_i=496547&p_n=496547 - DEGREASER / SURFACE PREP
http://www.rust.co.uk/popup.cfm?p_i=405092&p_n=405092 - DINITROL RUST CONVERTOR
http://www.rust.co.uk/epoxy-mastic.cfm - EPOXY MASTIC 121
http://cgi.ebay.co.uk/12-X-500-ML-SI...#ht_2304wt_911 - WHITE SPRAY PAINT
http://cgi.ebay.co.uk/TIGER-SEAL-WHI...#ht_500wt_1154 - TIGERSEAL (WHITE)
http://www.frost.co.uk/item_Detail.a...20Wax%20(500ml) - CAVITY WAX
Diff is on.....
Rear beam looks pink in the pictures.... - BUT it's red....


Also i had some more parts shot blasted ready for me to paint them, however once i got them back I decided that it would be better to powder coat them instead as I wouldn't of been happy with just paint.
I had the rear brake disc shields done silver to match the fuel tank shields, also the rear diff front and rear hangers were done silver too.
Brake disc shields aren't the best as they are a little dented, I will see what they look like once fitted, if I don't like them then i'll get some more and get them coated.
The rear ARB red same as the rear beam and the rear hubs red.
All the holes in the hub were masked as to not get any paint in them, i'm pleased with the results....
I shall fit them in a couple of weeks as soon as I get the suspension arms back from the polisher and the polybushes delivered.
pics will follow once they are all fitted, nearly finished the rear end now, it should all be done in a few weeks.
I assembled the rear diff carriers and put in the polybushes, the diff looks great now (just waiting for the original diff casing bolts to come back from the chromers ), I will be fitting it back on the car soon.
I also put the ABS sensor back onto the rear hubs, as with everything so far on this project I payed attention to the details, the ABS sensor bracket was shot blasted (very carefully) to clean it up and then a light coat of paint added, also used a stainless bolt to bolt it to the hub.
The rear brake disc shield was fitted along with the handbrake shoe spring retainer.
Then I rubbed down and cleaned the rear wheel bearing assembly and sprayed it gloss black...
Those who are observant will notice that the bolts that hold the wheel bearing to the hub are missing, as is the handbrake shoe spring retainer nut - you guessed it - waiting for them to come back from the chromers....
(I need to take the masking tape off the wheel nut studs too ).
I picked up the rest of the rear arms from the chromer / poilsher yesterday and he's done a brilliant job on them.
Had some engine bits done too.
As soon as my polybushes arrive then the rear end will finally be put back together and the car put back on its wheels.
Here's some bits ready to be fitted....
Fuel rail.....
fuel filter bracket and fuel line....
SAS pipework...
Starter motor cover plate....
Standard power steering pot...
ABS distribution block brackets...
All the rear arms....
Its going to look great when its all back together, next job is to get the car back on its wheels and roll it out of the garage so i can fit my flocked dash which has been patiently waiting to go in for 6 months now !!!
I will, of course, put up some pics when the rear arms etc are assembled on the car in the hubs etc....
I'm at the final stages now ready to bolt all of the rear back together, all of the suspension arms are now polybushed and ready to go on.
I spent 6 hours sealing up all the seams on the chassis (with Tigerseal ) and then protecting the internals of the chassis (with Dinitrol Cavity Wax).
The idea of sealing the seams is to prevent any water getting in between any parts of the chassis and body therefore keeping out the rust.
The materials used :
The cavity wax has been sprayed internally on the rear chassis legs, the main chassis rails from back to front of the car, all around the fuel tank mounts and the spare wheel well front to back support bar. Also along the whole length of the sills (and anywhere else i could squirt it ).
Seams Tigersealed :
( I will give the seams now another quick spray of the white paint just to cover the Tigerseal ).
I ALSO SEALED ALONG THE WHOLE LENGTH OF EACH SILL.
Rear Chassis Legs sprayed inside with Cavity Wax :
Holes taped up to minimise leakage.
THE CAVITY WAX IS BROWN - ITS NOT RUST IN THIS PICTURE - :biggrin:
Getting good penetration as you can see, the Dinitrol is finding its way out of any small gap - good sign that its reaching where it should do. DON'T PANIC - I DID WIPE IT ALL CLEAN....!!
Main Chassis rails :
Again taped up to prevent leakage.
there are plenty of access holes to the chassis rails to squirt in the Dinitrol, so I just moved down the chassis leg and squirted the wax into every hole.
Then I did both sills..
There are access holes under each of the sill protectors (covered by a plastic cover, which i removed and will replace once wax is dry)
So thats my chassis protected now, here's a quick summary of what's been done to it :
1) Everything removed from rear end and floor, including whole of the rear suspension, AYC, diffs, propshaft, exhaust, brakes - EVERYTHING.
2) Whole of the now exposed floor was cleaned with degreaser and petrol soaked cloths.
3) Whole of the floor and chassis was cleaned up with various wire drill attachments, hand brushes and hand held grinder to remove any trace of the surface rust :
MY FLOOR AND CHASSIS ONLY HAD LIGHT SURFACE RUST.
4) Cleaned again using petrol soaked cloths.
5) Whole floor treated with Dinitrol Rust Convertor just to be sure that all traces of rust was dealt with.
6) Painted with 2 coats ( 3 in the exposed areas ) of Epoxy Mastic 121.
7) Sprayed with 3 coats of Gloss White Paint.
8) Seam sealed with Tigerseal
9) Protected with Dinitrol Cavity Wax.
So i'm happy now that the car is protected now and for many years to come, its been worth the long days and nights and believe me i have wondered many times "why did i ever start this" !!!!
Products used :
http://www.rust.co.uk/popup.cfm?p_i=496547&p_n=496547 - DEGREASER / SURFACE PREP
http://www.rust.co.uk/popup.cfm?p_i=405092&p_n=405092 - DINITROL RUST CONVERTOR
http://www.rust.co.uk/epoxy-mastic.cfm - EPOXY MASTIC 121
http://cgi.ebay.co.uk/12-X-500-ML-SI...#ht_2304wt_911 - WHITE SPRAY PAINT
http://cgi.ebay.co.uk/TIGER-SEAL-WHI...#ht_500wt_1154 - TIGERSEAL (WHITE)
http://www.frost.co.uk/item_Detail.a...20Wax%20(500ml) - CAVITY WAX
Diff is on.....
Rear beam looks pink in the pictures.... - BUT it's red....
21-07-2010, 07:44 PM
#11
15000
Thread Starter
Join Date: Jul 2010
Location: shropshire
Posts: 39
Likes: 0
Received 0 Likes
on
0 Posts
Did a bit more assembly work today on the rear drivers side.
Put shock on to check everything, but it will be taken off again and repainted / refurbished.
Put rear hub and suspension arms back on and driveshaft (driveshaft will be rubbed down and painted soon).


You can now get the idea how its going to look now, i've got a lot of cleaning to do to it all because of my grubby hand prints on everything....
BUT HAD A SETBACK TODAY AS WHEN I TIGHTENED UP THE DRIVESHAFT NUT AND TORQUED IT UP I FOUND A LOT OF PLAY IN THE WHEEL BEARING.....
When i took the hub off last year the driveshaft was stuck solid in the wheel bearing shaft and NOTHING would shift it, so it had to be pressed out with a hydraulic press, it took 10 tons ( yes 10 tons ) of pressure to pop it out, so this has knackered the bearing...
I never noticed any play in it until it was tightened up so i had to take everything off again to get the bearing off - boy oh boy did i curse !!!!
So i need to get hold of a drivers side rear wheel bearing now.
Another 9 hours in the garage !!!!
Took the offending wheel bearing off and replaced it wil another, thanks a million Kev.... :happy:
Then fitted the driveshafts again and rubbed them down and painted them gloss black.


Fitted the rear ARB and polybushes, just got to fit the droplinks - not sure whether to fit some from uprated ones or to get the standard ones chromed...")
Fitted all the handbrake assembly, took me ages to put it all together because i forgot how it was supposed to go together.... :sprint:
Then fitted the discs after i got my grinder out and cleaned them up and then painted them.... (masking wasn't the best but once i've applied the brakes a few times the paint on the disc will come off....)


Goodridge brake lines are on along with the rear calipers and pads, just need some Brembo decals now.
Put new banjo bolts in from Hel Performance, new nipples will go on as soon as they arrive.


Propshaft is back on and painted gloss black....

So this is the rear end nearly finished and its looking good so far....


Put the rear wheels back on....


Removed the axle stands and put the car on the deck for the 1st time in over 8 months, so i'm dead chuffed because now i can put the dash in next week.....

Engine out soon and front end to get the wh0s_the_daddy treatment....
Put shock on to check everything, but it will be taken off again and repainted / refurbished.
Put rear hub and suspension arms back on and driveshaft (driveshaft will be rubbed down and painted soon).
You can now get the idea how its going to look now, i've got a lot of cleaning to do to it all because of my grubby hand prints on everything....
BUT HAD A SETBACK TODAY AS WHEN I TIGHTENED UP THE DRIVESHAFT NUT AND TORQUED IT UP I FOUND A LOT OF PLAY IN THE WHEEL BEARING.....
When i took the hub off last year the driveshaft was stuck solid in the wheel bearing shaft and NOTHING would shift it, so it had to be pressed out with a hydraulic press, it took 10 tons ( yes 10 tons ) of pressure to pop it out, so this has knackered the bearing...
I never noticed any play in it until it was tightened up so i had to take everything off again to get the bearing off - boy oh boy did i curse !!!!
So i need to get hold of a drivers side rear wheel bearing now.
Another 9 hours in the garage !!!!
Took the offending wheel bearing off and replaced it wil another, thanks a million Kev.... :happy:
Then fitted the driveshafts again and rubbed them down and painted them gloss black.
Fitted the rear ARB and polybushes, just got to fit the droplinks - not sure whether to fit some from uprated ones or to get the standard ones chromed...
Fitted all the handbrake assembly, took me ages to put it all together because i forgot how it was supposed to go together.... :sprint:
Then fitted the discs after i got my grinder out and cleaned them up and then painted them.... (masking wasn't the best but once i've applied the brakes a few times the paint on the disc will come off....
Goodridge brake lines are on along with the rear calipers and pads, just need some Brembo decals now.
Put new banjo bolts in from Hel Performance, new nipples will go on as soon as they arrive.
Propshaft is back on and painted gloss black....
So this is the rear end nearly finished and its looking good so far....
Put the rear wheels back on....
Removed the axle stands and put the car on the deck for the 1st time in over 8 months, so i'm dead chuffed because now i can put the dash in next week.....
Engine out soon and front end to get the wh0s_the_daddy treatment....
21-07-2010, 07:48 PM
#12
15000
Thread Starter
Join Date: Jul 2010
Location: shropshire
Posts: 39
Likes: 0
Received 0 Likes
on
0 Posts
I managed to get the dash put in today, the weather was kind and didn't rain until just after i'd finished, so that was lucky..... :shock:
I've got to fit the steering wheel when it arrives, its being flocked... :mrgreen:
i've also got to fit an AFR gauge in the speedo gauge cowl, the boost gauge is there now just waiting for an AFR gauge.
I like the look of it, a point and shoot camera just doesn't take good pics of flocked dashes for some reason, the pics look ok but it looks loads better in the flesh.
I had the A pillar trims done along with the centre console etc.
The Apexi Power FC hand controller I modified to split up the screen and the buttons ( detailed earlier in this project thread ), i think its come out quite good.
I've got a DVD touch screen to go in at a later date (single DIN ) and under that I am going to fit some Stack gauges.
Here's the pics, the whole interior needs a bloody good clean because its been used as a parts store for the last few months. I also need to re-cover the door cars as the material has started to come away whilst they have been stored....:wallbang: - So i'll revover them in black alcantara later... :happy:


I'm soooo pleased the dash is back in, its not a job for the faint hearted and its a long winded affair, but its out of the way now and i'm very pleased with it....
Another modification i did today was to change the front fog lamp switch so that it now operates the rear fogs ( I don't have front fogs, just RS covers ), I also utilised the standard rear fog lamp warning light that is in the instrument cluster - there isn't a bulb or wiring for it on the imports, but there is now on mine, i put in a bulb and used a pin from another loom ( thanks Kev ) to wire up the original cluster plug, i just pushed the pin into the spare slot in the loom plug and wired it up into the fog lamp circuit. So now when the rear fogs are turned on (using the old front fog switch ) there is a "factory" warning light that lights up on the dash....
A few days ago when I fitted the rear beam i decided to fit the AYC braided lines that HEL Performance made up for me and found that they didn't fit because the lines were fouling on the rear beam.....


So I sent them back to Ben @ Hel and he put a 90deg bend on the end and they now fit just fine - big thanks to Ben for doing this....


much better and no chance of any rubbing anywhere.....
I decided to make a start on finishing off the interior before I go full steam ahead on the front end.
Now the flocked dash and A pillars are in it makes the grey headlining look very dirty and a bit oddly matched, the B and C pillars looked odd too.


I decided i'd get the B and C pillars flocked to match the A pillars and also i'll change the colour of the headlining to black using fabric spray paint.
The grab handles will be flocked and the interior light plastics will be sprayed black to match.
So today i removed the B and C pillars and the headlining so i can get them flocked and sprayed...


I will put up some pics of it all back together once its all done in a week or so...
I also (whilst i had a spanners in my hand) took off the front wings to store them in readiness for the engine to come out and the front end refurb to start, notice the flitch bars under the wings which I will get powder coated once the front end is treated and painted.


So the rear end looks nice and the front end looks naff, BUT the front end will soon look as good as the rear.
I painted my headlining today, the fabric paint isn't very good and the tins are tiny, so i used normal Gloss black spray paint and it worked a treat...
BEFORE :

AFTER


I also rubbed down and painted the interior light frames, the little push in clips that hold the rear of the headlining in and also the blanks for the grab handle that isn't required for the drivers side...
(looks slightly grey in the pic because i used the flash)


Did the sunvisors too with vinyl paint I got from the motor factors, i've got a tin coming from ebay too.. - didn't realise they sold it at my local shop...!!!
(looks slightly grey in the pic because i used the flash)

Looks loads better now, once the B and C pillars are back in and flocked it will look perfect.
I did a bit with the wiring in the dash to check everything worked seeing as the dash was out for months....
Everything worked just fine which was a relief, I also wired in the rear fog light properly because whoever put the fog light in originally needs to keep well clear of anything electrical in the future !!!
I originally had a fog light switch bodged into the dash but thats been ditched when the dash was flocked.
Because I don't have front fogs ( RS covers instead ) I decided to use the front fog light switch to activate the rear fogs instead, but you need a warning light on the dash ( or a switch that illuminates ) for the rear fogs otherwise it will fail an MOT.
So I thought i'd make it "factory" look and do a proper job.
The speedo cluster has a rear fog warning light built into it ( on my Evo 5 anyhow ) but it isn't used because the car is an import - there wasn't a bulb or any wiring for it.
So my mate Kev gave me a bit of the loom from behind the speedo cluster from his 5 before he finished breaking it up, i needed a pin, with some cable attached, from one of the plugs that plug into the speedo cluster.
Then I got hold of another bulb and holder and then put this into the vacant hole where the rear fog warning light is. I also traced where the fog bulb connects to the loom plug - sure enough there wasn't any wiring to it, so the pin Kev gave me was inserted into the loom plug and the wire was then routed to the front fog light switch.
I used a meter to find the wire which gives 12v to the front fogs and connected the rear fog and the rear fog warning wire to it, so now the warning light on the dash lights up when the fog light switch is pressed..... and the rear fogs light up too which is nice...


lots better than a switch bodged into the dash.....
I fitted the rest of the interior trim today, I was going to get the B and C pillars flocked, but I decided to paint them instead using vinyl primer and paint, they have came out great.
I rubbed each item down with wire wool to give the paint a good key, cleaned with panel wipe and put on a coat of primer then a few light coats of vinyl black, then I put them in the oven (door open) for a while on 50c to bake the paint a little...
The vinyl paint is satin black and looks just fine, although my pictures a rubbish !!!
B pillar....

C pillar....

then now match the black headlining, it makes the car look a lot neater inside.
I also fitted the steering wheel that Lee@FCM flocked for me, the wheel is a "Nardi Personal" wheel so its not too bad.
The wheel was in a terrible state and I was going to bin it and get another, but I saw a thread in which Lee flocked a steering wheel and i thought "i'll have some of that" to match my dash.
Here's the wheel in its terrible state.....


I asked Lee if he'd take a look at it to see if it can be reapired and flocked, so i sent it to him and he worked some magic on it and returned it to me better than a new wheel, i can't believe how good it is, picture never get the best look of flock, but it is brilliant...
here it is fitted....

many thanks Lee, top job...
another couple of jobs off the list...
I've got to fit the steering wheel when it arrives, its being flocked... :mrgreen:
i've also got to fit an AFR gauge in the speedo gauge cowl, the boost gauge is there now just waiting for an AFR gauge.
I like the look of it, a point and shoot camera just doesn't take good pics of flocked dashes for some reason, the pics look ok but it looks loads better in the flesh.
I had the A pillar trims done along with the centre console etc.
The Apexi Power FC hand controller I modified to split up the screen and the buttons ( detailed earlier in this project thread ), i think its come out quite good.
I've got a DVD touch screen to go in at a later date (single DIN ) and under that I am going to fit some Stack gauges.
Here's the pics, the whole interior needs a bloody good clean because its been used as a parts store for the last few months. I also need to re-cover the door cars as the material has started to come away whilst they have been stored....:wallbang: - So i'll revover them in black alcantara later... :happy:
I'm soooo pleased the dash is back in, its not a job for the faint hearted and its a long winded affair, but its out of the way now and i'm very pleased with it....
Another modification i did today was to change the front fog lamp switch so that it now operates the rear fogs ( I don't have front fogs, just RS covers ), I also utilised the standard rear fog lamp warning light that is in the instrument cluster - there isn't a bulb or wiring for it on the imports, but there is now on mine, i put in a bulb and used a pin from another loom ( thanks Kev ) to wire up the original cluster plug, i just pushed the pin into the spare slot in the loom plug and wired it up into the fog lamp circuit. So now when the rear fogs are turned on (using the old front fog switch ) there is a "factory" warning light that lights up on the dash....
A few days ago when I fitted the rear beam i decided to fit the AYC braided lines that HEL Performance made up for me and found that they didn't fit because the lines were fouling on the rear beam.....
So I sent them back to Ben @ Hel and he put a 90deg bend on the end and they now fit just fine - big thanks to Ben for doing this....
much better and no chance of any rubbing anywhere.....
I decided to make a start on finishing off the interior before I go full steam ahead on the front end.
Now the flocked dash and A pillars are in it makes the grey headlining look very dirty and a bit oddly matched, the B and C pillars looked odd too.
I decided i'd get the B and C pillars flocked to match the A pillars and also i'll change the colour of the headlining to black using fabric spray paint.
The grab handles will be flocked and the interior light plastics will be sprayed black to match.
So today i removed the B and C pillars and the headlining so i can get them flocked and sprayed...
I will put up some pics of it all back together once its all done in a week or so...
I also (whilst i had a spanners in my hand) took off the front wings to store them in readiness for the engine to come out and the front end refurb to start, notice the flitch bars under the wings which I will get powder coated once the front end is treated and painted.
So the rear end looks nice and the front end looks naff, BUT the front end will soon look as good as the rear.
I painted my headlining today, the fabric paint isn't very good and the tins are tiny, so i used normal Gloss black spray paint and it worked a treat...
BEFORE :
AFTER
I also rubbed down and painted the interior light frames, the little push in clips that hold the rear of the headlining in and also the blanks for the grab handle that isn't required for the drivers side...
(looks slightly grey in the pic because i used the flash)
Did the sunvisors too with vinyl paint I got from the motor factors, i've got a tin coming from ebay too.. - didn't realise they sold it at my local shop...!!!
(looks slightly grey in the pic because i used the flash)
Looks loads better now, once the B and C pillars are back in and flocked it will look perfect.
I did a bit with the wiring in the dash to check everything worked seeing as the dash was out for months....
Everything worked just fine which was a relief, I also wired in the rear fog light properly because whoever put the fog light in originally needs to keep well clear of anything electrical in the future !!!
I originally had a fog light switch bodged into the dash but thats been ditched when the dash was flocked.
Because I don't have front fogs ( RS covers instead ) I decided to use the front fog light switch to activate the rear fogs instead, but you need a warning light on the dash ( or a switch that illuminates ) for the rear fogs otherwise it will fail an MOT.
So I thought i'd make it "factory" look and do a proper job.
The speedo cluster has a rear fog warning light built into it ( on my Evo 5 anyhow ) but it isn't used because the car is an import - there wasn't a bulb or any wiring for it.
So my mate Kev gave me a bit of the loom from behind the speedo cluster from his 5 before he finished breaking it up, i needed a pin, with some cable attached, from one of the plugs that plug into the speedo cluster.
Then I got hold of another bulb and holder and then put this into the vacant hole where the rear fog warning light is. I also traced where the fog bulb connects to the loom plug - sure enough there wasn't any wiring to it, so the pin Kev gave me was inserted into the loom plug and the wire was then routed to the front fog light switch.
I used a meter to find the wire which gives 12v to the front fogs and connected the rear fog and the rear fog warning wire to it, so now the warning light on the dash lights up when the fog light switch is pressed..... and the rear fogs light up too which is nice...
lots better than a switch bodged into the dash.....
I fitted the rest of the interior trim today, I was going to get the B and C pillars flocked, but I decided to paint them instead using vinyl primer and paint, they have came out great.
I rubbed each item down with wire wool to give the paint a good key, cleaned with panel wipe and put on a coat of primer then a few light coats of vinyl black, then I put them in the oven (door open) for a while on 50c to bake the paint a little...
The vinyl paint is satin black and looks just fine, although my pictures a rubbish !!!
B pillar....
C pillar....
then now match the black headlining, it makes the car look a lot neater inside.
I also fitted the steering wheel that Lee@FCM flocked for me, the wheel is a "Nardi Personal" wheel so its not too bad.
The wheel was in a terrible state and I was going to bin it and get another, but I saw a thread in which Lee flocked a steering wheel and i thought "i'll have some of that" to match my dash.
Here's the wheel in its terrible state.....
I asked Lee if he'd take a look at it to see if it can be reapired and flocked, so i sent it to him and he worked some magic on it and returned it to me better than a new wheel, i can't believe how good it is, picture never get the best look of flock, but it is brilliant...
here it is fitted....
many thanks Lee, top job...
another couple of jobs off the list...
21-07-2010, 07:50 PM
#13
15000
Thread Starter
Join Date: Jul 2010
Location: shropshire
Posts: 39
Likes: 0
Received 0 Likes
on
0 Posts
Engine came out today, with the help of my mate Kev (Coskev3) - many thanks mate.....
Not too bad of a job really, dropped it out from underneath with the gearbox still attached.
Engine is now stored until I refurb the whole front end, still not decided what to do with the engine yet, so i've stored it until i make up my ever changing mind....


Engine ready to come out....

Front end up on axle stands....

Engine slung ready to drop down.....

Engine out......

A nice big hole now for me to refurb, plenty to do, i'm off work all this week so i'll crack on with the strip down....

I will take some detailed pics tomorrow to show what's got to be done and then, of course, the during pics and the after pics.
I'm well chuffed its out now, on the home straight now with this project...
I got cracking with stripping the front end down now the engine is out.
I'm stripping the whole engine bay out so that it can be painted properly in every nook and cranny....
I took out the ABS unit and wiper motor...

all the sound deadening has gone, i'm going to repaint the bulkhead to make it really shiny and leave the sound deadening off- all the brake lines taken off the bulkhead aswell - these will be chromed.

Brake servo and clutch cylinder removed....


Then I moved onto the front suspension, took it all off to leave the front chassis and arches ready to be prepped for paint... Tiny amounts of surface rust, so it will be an easy refurb, just a matter of rubbing down - then protecting with Epoxy mastic 121, then painting Scotia white.
BEFORE PICS...


Then removed the steering rack and the front subframe....


Found a split in the gaitor so i'll replace them before i re-fit it...

Got a box of bits for the chromer now...

and a few bits to keep the powder coater going.....

onwards and upwards as they say.
Not too bad of a job really, dropped it out from underneath with the gearbox still attached.
Engine is now stored until I refurb the whole front end, still not decided what to do with the engine yet, so i've stored it until i make up my ever changing mind....
Engine ready to come out....
Front end up on axle stands....
Engine slung ready to drop down.....
Engine out......
A nice big hole now for me to refurb, plenty to do, i'm off work all this week so i'll crack on with the strip down....
I will take some detailed pics tomorrow to show what's got to be done and then, of course, the during pics and the after pics.
I'm well chuffed its out now, on the home straight now with this project...
I got cracking with stripping the front end down now the engine is out.
I'm stripping the whole engine bay out so that it can be painted properly in every nook and cranny....
I took out the ABS unit and wiper motor...
all the sound deadening has gone, i'm going to repaint the bulkhead to make it really shiny and leave the sound deadening off- all the brake lines taken off the bulkhead aswell - these will be chromed.
Brake servo and clutch cylinder removed....
Then I moved onto the front suspension, took it all off to leave the front chassis and arches ready to be prepped for paint... Tiny amounts of surface rust, so it will be an easy refurb, just a matter of rubbing down - then protecting with Epoxy mastic 121, then painting Scotia white.
BEFORE PICS...
Then removed the steering rack and the front subframe....
Found a split in the gaitor so i'll replace them before i re-fit it...
Got a box of bits for the chromer now...
and a few bits to keep the powder coater going.....
onwards and upwards as they say.
21-07-2010, 07:52 PM
#14
15000
Thread Starter
Join Date: Jul 2010
Location: shropshire
Posts: 39
Likes: 0
Received 0 Likes
on
0 Posts
Thats where i am up to now, i'll be prepping the front end next week (26/07/10) ready for the same treatment as the rear end has had, updates will follow.
cheers
Andy
cheers
Andy
Last edited by wh0s_the_daddy; 21-07-2010 at 08:11 PM.
 ,keep up the hard work
22-07-2010, 04:46 AM
,keep up the hard work
22-07-2010, 04:46 AM
#16
Advanced PassionFord User
Too be honest mate i started looking at the pics and really liked the car. Then you stuck the carbon bonnet on the second set of wheels and the sunstripe and i thought it was all going a bit chav 
Then you stuck the original bonnet back on and changed the wheels again
I personally liked the first wheels lol but the white ones also look well and the interiour is spot on and the underneath restoration is something else
It must have been a real labour of love but well done i look forward to the updates
23-07-2010, 11:10 AM
#18
Virgin

Join Date: Jul 2010
Location: us
Posts: 2
Likes: 0
Received 0 Likes
on
0 Posts
Looks great awesome fab skills. But i have to tell you. You just took the wind out of my buddies sails he has been talking about doing this for the last year just started collecting parts a couple months ago now hes bummed he cant be the first.
31-07-2010, 01:07 PM
#19
15000
Thread Starter
Join Date: Jul 2010
Location: shropshire
Posts: 39
Likes: 0
Received 0 Likes
on
0 Posts
I've spent a few days sorting out the front end, not finished it yet but i should have it finished next week....
Firstly I stripped off all the old paint to take it down to bare metal and remove any sign of surface rust... I used the tools below...

This is what i ended up like (halfway through) so you get the idea what the surface is prepared to..


I did this on both front wing / arch areas and where ever there was signs of any surface rust - everywhere else was sanded down and then treated with rust convertor just to be sure.
Then i painted the Epoxy Mastic 121 everywhere, here's a pic of the 1st of 3 coats....


Notice that the colour of the mastic 121 paint is beige and not grey as the rear end was, this was an ordering error on my part..., it makes no difference though as its being painted over white anyhow....
So, after 3 coats of mastic 121 the arches and front wing areas were painted gloss white.... here's the 1st coat of 3 coats of white.


I also painted under where the front subframe attaches to, this was given the same prep and paint treatment as the wings / arches... ( so that's the whole floorpan finished now....).

Once the paint was dry i sealed EVERY seam i could find with tigerseal, you can see the kind of thing i that needed sealing in the pics below ( gaps in the sections )....


So here are some areas sealed with Tigerseal....


You get the idea now, I sprayed Dinotrol cavity wax in the large gaps before sealing with Tigerseal.
I've still got LOADS are areas to seal with the Tigerseal but i ran out today so i've got to order some more , ideally i'll seal EVERY gap all along the floorpan and everywhere else i see one, so any water won't get between any of the panels ( not that the car will be driven in the rain !!).
So thats it for now, i'll prep and paint the engine bay next week and update once that's done.
Here's a quick reminder of what the front end was like before i started....


cheers
Andy
Firstly I stripped off all the old paint to take it down to bare metal and remove any sign of surface rust... I used the tools below...
This is what i ended up like (halfway through) so you get the idea what the surface is prepared to..
I did this on both front wing / arch areas and where ever there was signs of any surface rust - everywhere else was sanded down and then treated with rust convertor just to be sure.
Then i painted the Epoxy Mastic 121 everywhere, here's a pic of the 1st of 3 coats....
Notice that the colour of the mastic 121 paint is beige and not grey as the rear end was, this was an ordering error on my part..., it makes no difference though as its being painted over white anyhow....
So, after 3 coats of mastic 121 the arches and front wing areas were painted gloss white.... here's the 1st coat of 3 coats of white.
I also painted under where the front subframe attaches to, this was given the same prep and paint treatment as the wings / arches... ( so that's the whole floorpan finished now....).
Once the paint was dry i sealed EVERY seam i could find with tigerseal, you can see the kind of thing i that needed sealing in the pics below ( gaps in the sections )....
So here are some areas sealed with Tigerseal....
You get the idea now, I sprayed Dinotrol cavity wax in the large gaps before sealing with Tigerseal.
I've still got LOADS are areas to seal with the Tigerseal but i ran out today so i've got to order some more , ideally i'll seal EVERY gap all along the floorpan and everywhere else i see one, so any water won't get between any of the panels ( not that the car will be driven in the rain !!).
So thats it for now, i'll prep and paint the engine bay next week and update once that's done.
Here's a quick reminder of what the front end was like before i started....
cheers
Andy
 31-07-2010, 06:16 PM
#21
15000
Thread Starter
Join Date: Jul 2010
Location: shropshire
Posts: 39
Likes: 0
Received 0 Likes
on
0 Posts
Lightmoor, in Telford mate.
I've had it off the road for a year now while i do all the work on it, i bought it in September 2008 and took it off the road in October 2008 to sort out the engine spruce up, put it back on the road in May 2009 and took it back off the road in July 2009 for the complete going over.
I should have it back on the road in April 2011.
31-07-2010, 06:50 PM
#23
15000
Thread Starter
Join Date: Jul 2010
Location: shropshire
Posts: 39
Likes: 0
Received 0 Likes
on
0 Posts
Thats what i'm debating with myself now....
should i get it back on the road for the Spring 2011, use it for a few months then sort out the engine and diff, forge the engine and give it plenty of useable reliable power, it would be a fast minter then....
should i get it back on the road for the Spring 2011, use it for a few months then sort out the engine and diff, forge the engine and give it plenty of useable reliable power, it would be a fast minter then....
31-07-2010, 08:43 PM
#25
PassionFord Post Troll
what an epic thread but what effort u have put in mate , a big well done there.
as for the carbon bonnet IMO it would be a no no from me so was glad when u went white again.
I cant imagine havin a car off the road for so long or having the under side so clean, i would be affraid of gettin it dirty
Ben
as for the carbon bonnet IMO it would be a no no from me so was glad when u went white again.
I cant imagine havin a car off the road for so long or having the under side so clean, i would be affraid of gettin it dirty
Ben
 01-08-2010, 05:09 PM
#27
Impreza Type R

Join Date: Aug 2010
Location: Shropshire
Posts: 3
Likes: 0
Received 0 Likes
on
0 Posts
I thought there was somet special about this car when it past me on the road a while back. I only live about 10 doors down the road from you, small world eh? We're you also the guy that had a white Skyline that used to live in Aqueduct?
01-08-2010, 06:53 PM
#30
15000
Thread Starter
Join Date: Jul 2010
Location: shropshire
Posts: 39
Likes: 0
Received 0 Likes
on
0 Posts
I had the white skyline yes ( although didn't live in Aqueduct ).
Here was my Skyline.... it had 375hp @ the hubs...


and this is how it ended up after the new owner had an accident....


 01-08-2010, 07:39 PM
#31
Impreza Type R
Join Date: Aug 2010
Location: Shropshire
Posts: 3
Likes: 0
Received 0 Likes
on
0 Posts
Yeah I live just down the road from you. Is that your relation who drives the blue Astra estate? I live opposite him, he always says hello. I saw your EVO in the garage all covered up when we went passed a while ago & I wondered what you were doing to it. Then my mate pointed me to this thread & all was revealed.
I just thought I'd say hello anyway & congratulate you on such a superb example of an EVO
 01-08-2010, 08:23 PM
#32
15000
Thread Starter
Join Date: Jul 2010
Location: shropshire
Posts: 39
Likes: 0
Received 0 Likes
on
0 Posts
Ouch! The new owner did a proper job on that Skyline! I'd be gutted even if I didn't own the car any more.
Yeah I live just down the road from you. Is that your relation who drives the blue Astra estate? I live opposite him, he always says hello. I saw your EVO in the garage all covered up when we went passed a while ago & I wondered what you were doing to it. Then my mate pointed me to this thread & all was revealed.
I just thought I'd say hello anyway & congratulate you on such a superb example of an EVO
Pop in and say hello next time you're passing if the garage door is open.
I'm in there most days fiddling about with things on the car.
i'll be spraying the engine bay next week and getting the front end ready to accept the newly powdercoated bits i'm picking up on Friday.
01-08-2010, 08:29 PM
#33
PF's random poster!

Join Date: Jun 2010
Location: .....
Posts: 109
Likes: 0
Received 0 Likes
on
0 Posts
WOW! IMO the carbon bonnet looked best...and the third set of wheels you had on last... very neat car! Nice one! That Skyline is totalled... I was gutted looking at it...what a waste
IMO the carbon bonnet looked best...and the third set of wheels you had on last... very neat car! Nice one! That Skyline is totalled... I was gutted looking at it...what a waste
02-08-2010, 12:11 AM
#34
Impreza Type R
Join Date: Aug 2010
Location: Shropshire
Posts: 3
Likes: 0
Received 0 Likes
on
0 Posts
He's not a relation , just a mate. His name's Dave, nice fella.
Pop in and say hello next time you're passing if the garage door is open.
I'm in there most days fiddling about with things on the car.
i'll be spraying the engine bay next week and getting the front end ready to accept the newly powdercoated bits i'm picking up on Friday.
Pop in and say hello next time you're passing if the garage door is open.
I'm in there most days fiddling about with things on the car.
i'll be spraying the engine bay next week and getting the front end ready to accept the newly powdercoated bits i'm picking up on Friday.
23-08-2010, 01:52 PM
#35
15000
Thread Starter
Join Date: Jul 2010
Location: shropshire
Posts: 39
Likes: 0
Received 0 Likes
on
0 Posts
I finally got some paint and laquer on the engine bay today, its taken me a while to get it to this stage, lots of rubbing down etc, I also removed the charcoal canister bracket and the bracket that used to hold the fuse box in place ( the fuse box is in the glovebox now )....
I'm going to start putting things back in the engine bay over the next 2 weeks, so keep looking for updates....


I took a leaf out of Coskev's book and took off all the sealer around the front strut tops and the bulkhead, then used a small run of tigerseal instead of the huge thick seal that mitsi used, looks 100% better....


I'm 90% happy with the results, i always wanted to get rid of all the unwanted bolt holes but it was far too big of a job for me to tackle in the time i have, but 90% is good.
My next job once the laquer is dry is to treat all the chassis leg cavities etc with Dinitrol and the seal up with Tigerseal.
Getting there slowly..
cheers
Andy
I'm going to start putting things back in the engine bay over the next 2 weeks, so keep looking for updates....
I took a leaf out of Coskev's book and took off all the sealer around the front strut tops and the bulkhead, then used a small run of tigerseal instead of the huge thick seal that mitsi used, looks 100% better....
I'm 90% happy with the results, i always wanted to get rid of all the unwanted bolt holes but it was far too big of a job for me to tackle in the time i have, but 90% is good.
My next job once the laquer is dry is to treat all the chassis leg cavities etc with Dinitrol and the seal up with Tigerseal.
Getting there slowly..
cheers
Andy
25-08-2010, 10:54 AM
#37
15000
Thread Starter
Join Date: Jul 2010
Location: shropshire
Posts: 39
Likes: 0
Received 0 Likes
on
0 Posts
Sorry about the crap pic but i've fitted the little cubby glovebox where the airbag was (the normal glovebox is now where the engine bay fuse box is located).
(i'll sort out some better pics soon).


Thanks to Raj at Autoflock for the top work as usual.
cheers
andy
(i'll sort out some better pics soon).
Thanks to Raj at Autoflock for the top work as usual.
cheers
andy
 25-08-2010, 01:33 PM
#39
15000
Thread Starter
Join Date: Jul 2010
Location: shropshire
Posts: 39
Likes: 0
Received 0 Likes
on
0 Posts
It may well be for sale this time next year if i decide to get another project, i'm always looking out for something else to keep me busy over the winter months....
26-08-2010, 02:37 PM
#40
15000
Thread Starter
Join Date: Jul 2010
Location: shropshire
Posts: 39
Likes: 0
Received 0 Likes
on
0 Posts
I finished off putting the Dinitrol cavity wax in the front chassis legs and the inside of the front wing frame, also did the front bar that wraps around the radiator and the chassis where the subframe bolts to.
So 90% of the chassis is protected now, all that is left is to drill some holes under the back seat where the rear chassis beam goes across the car - spray in some Dinitrol and then re-seal.


Dinitrol give very good penetration, you can see below where all the Dinitrol finds every seam and runs through so i know the penetration is very good, a bit of cleaning up to do now though.....


I'm going to put Tigerseal on all the seams in a few days once the Dinitrol has thickened up a bit, i'm going to try to seal up EVERY gap along the whole chassis and floor to prevent any water ingress, it also makes the chassis look a whole lot neater as there won't be any gaps visible.
Its a real messy job but i think it's worth it in the long run.
cheers
Andy
So 90% of the chassis is protected now, all that is left is to drill some holes under the back seat where the rear chassis beam goes across the car - spray in some Dinitrol and then re-seal.
Dinitrol give very good penetration, you can see below where all the Dinitrol finds every seam and runs through so i know the penetration is very good, a bit of cleaning up to do now though.....
I'm going to put Tigerseal on all the seams in a few days once the Dinitrol has thickened up a bit, i'm going to try to seal up EVERY gap along the whole chassis and floor to prevent any water ingress, it also makes the chassis look a whole lot neater as there won't be any gaps visible.
Its a real messy job but i think it's worth it in the long run.
cheers
Andy