YB engine rebuild diary w/Pics
 07-06-2011, 09:42 PM
#1
PassionFord Regular
Thread Starter
Join Date: Aug 2010
Location: cambridgeshire
Posts: 441
Likes: 0
Received 0 Likes
on
0 Posts
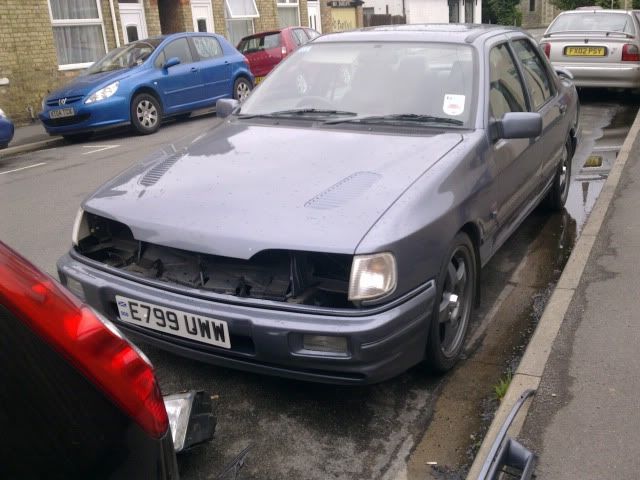
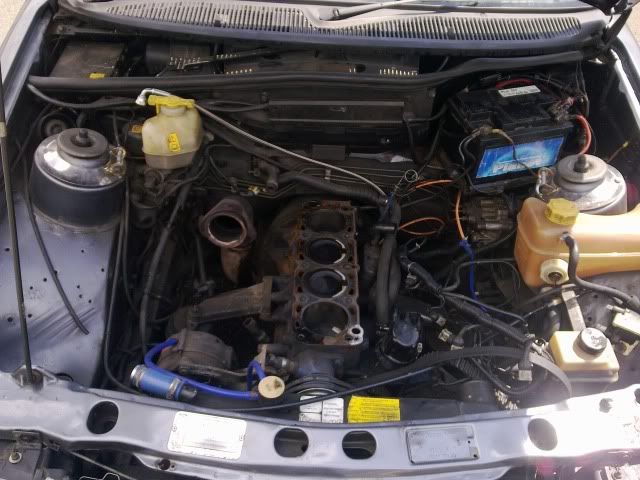
After classic ford the sierra was put to bed for a month or so while i rebuild the engine, i thought id keep a diary of my progress on here (mainly to ask for help when i get stuck)
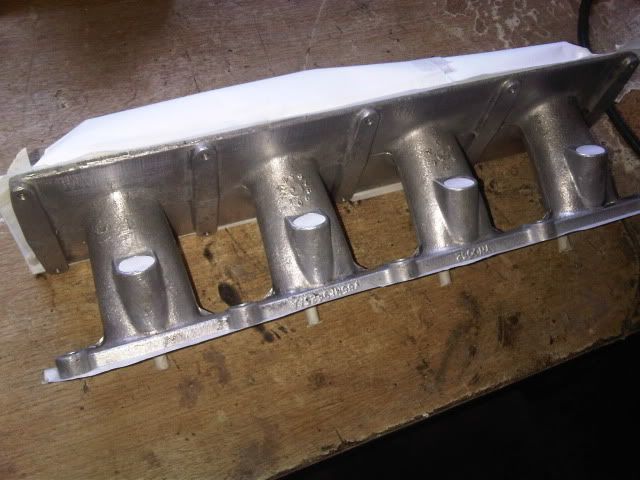
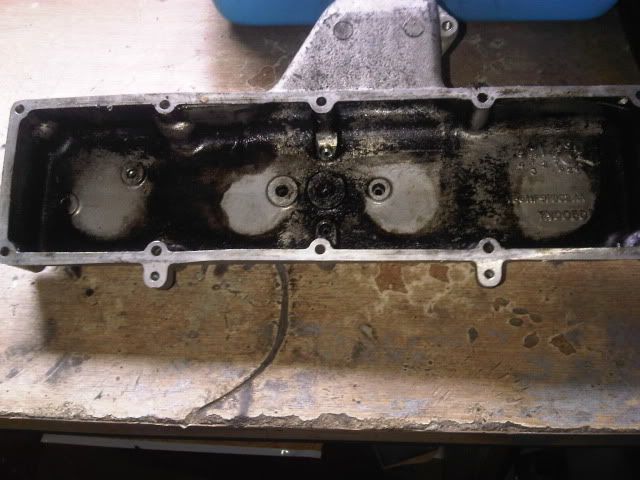
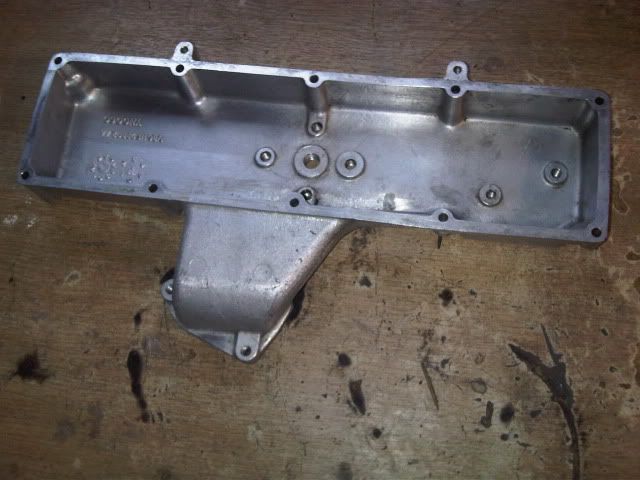
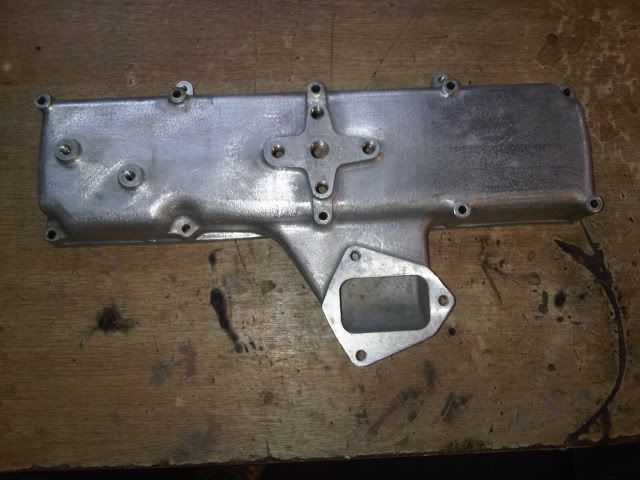
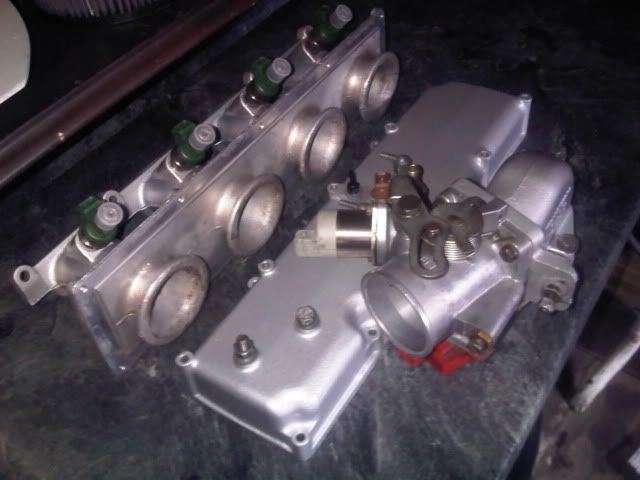
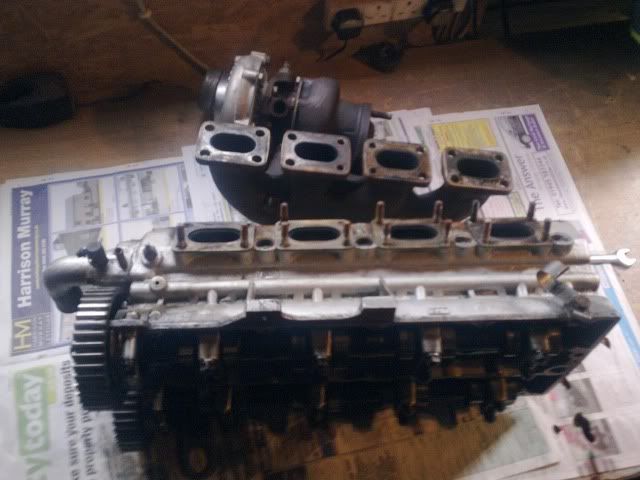
Got a few hours spare yesterday so pulled out the inlet side ready to be stripped down, cleaned up and put back together...
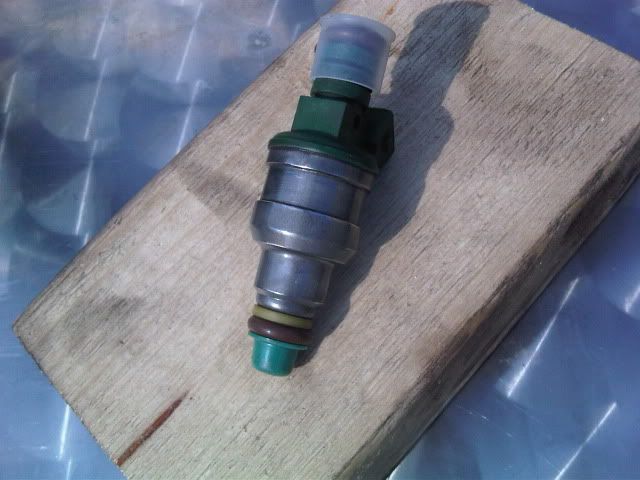
no modifications here other than upgrading to Bosch 803's / Dark Greens
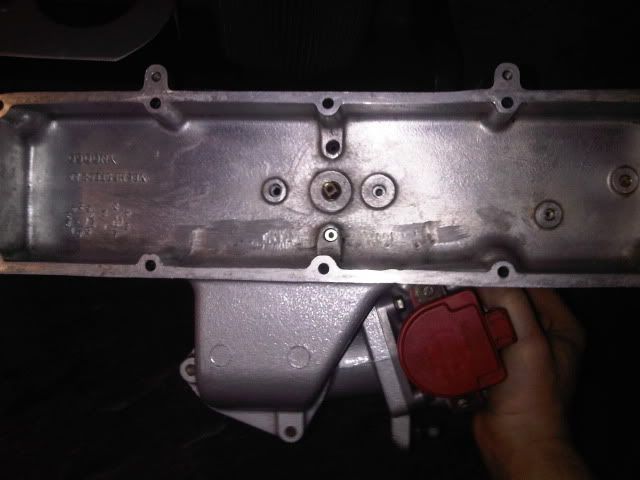
Inlet was covered in very thick black oil which was hard to remove
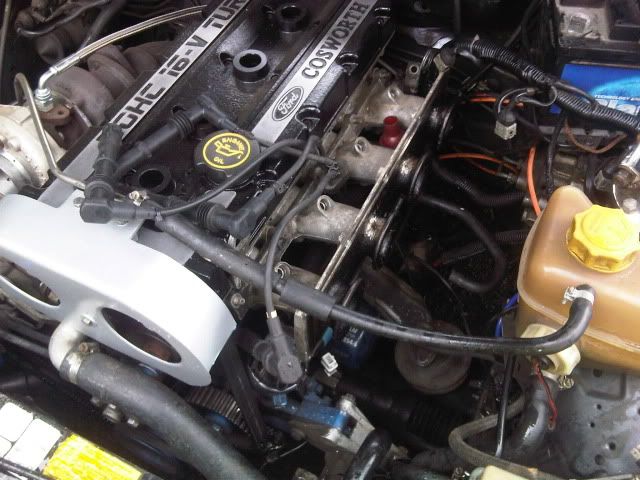
interestingly discovered a raised 'T3' stamp, not sure if its common
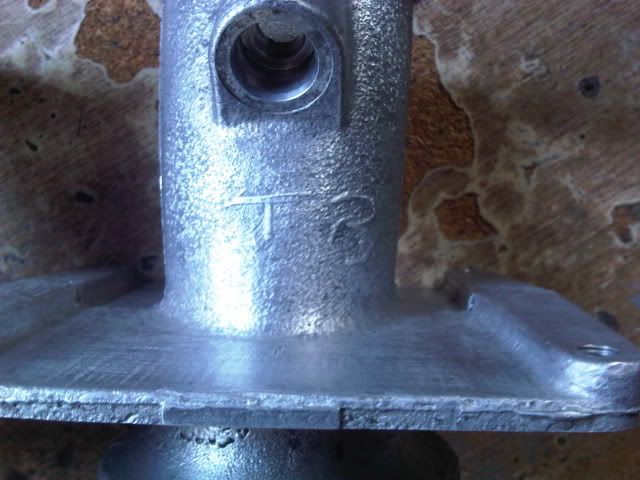
So i got it all cleaned and masked up ready for spraying tomorrow in hammerite silver
Got a few hours spare yesterday so pulled out the inlet side ready to be stripped down, cleaned up and put back together...
no modifications here other than upgrading to Bosch 803's / Dark Greens
Inlet was covered in very thick black oil which was hard to remove
interestingly discovered a raised 'T3' stamp, not sure if its common
So i got it all cleaned and masked up ready for spraying tomorrow in hammerite silver
 08-06-2011, 05:42 AM
#3
PassionFord Regular
Thread Starter
Join Date: Aug 2010
Location: cambridgeshire
Posts: 441
Likes: 0
Received 0 Likes
on
0 Posts
cheers mate,
i was looking for a similar thread as a guideline but couldnt find one so decided to create my own, will hopefully be completed by the middle of July
i was looking for a similar thread as a guideline but couldnt find one so decided to create my own, will hopefully be completed by the middle of July
 08-06-2011, 06:24 PM
#6
PassionFord Regular
Thread Starter
Join Date: Aug 2010
Location: cambridgeshire
Posts: 441
Likes: 0
Received 0 Likes
on
0 Posts
i know that im gonna be sticking to a colour scheme of black silver and blue but not sure which parts are gonna be what colour yet if that makes sense, its very easy to get carried away and end up with an ugly un co-ordinated engine bay.
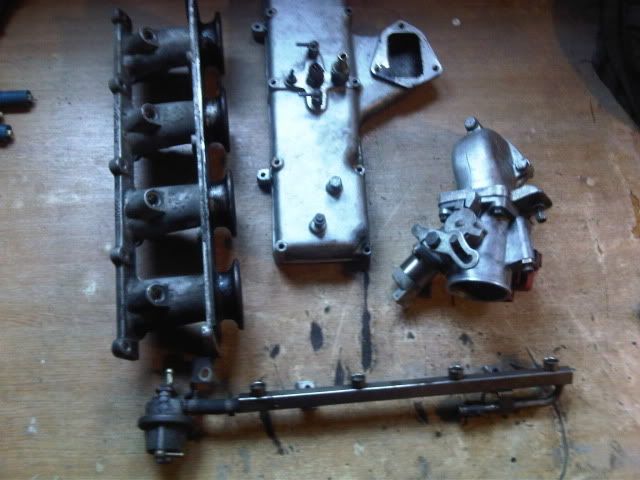
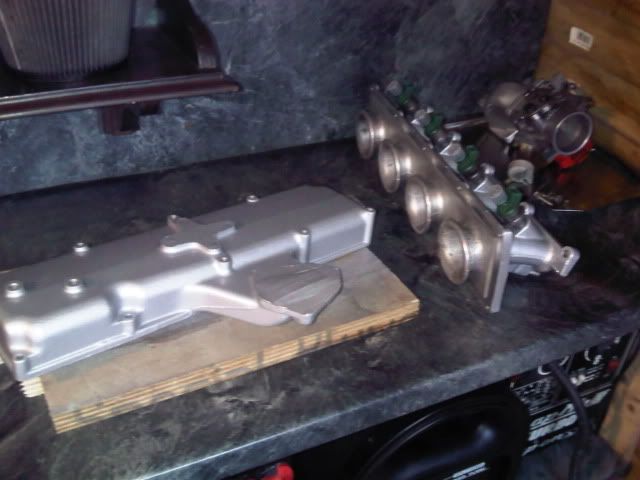
For now im spraying the inlet manifold silver ... mainly because i have some up the shed
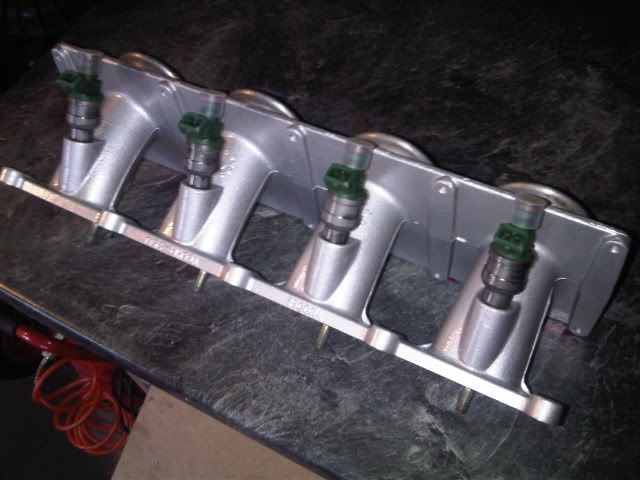
Ok, was on an early shift today so got myself up the shed and sprayed half of the inlet manifold in hammerite silver, i polished my 803's too as opposed to the original black body

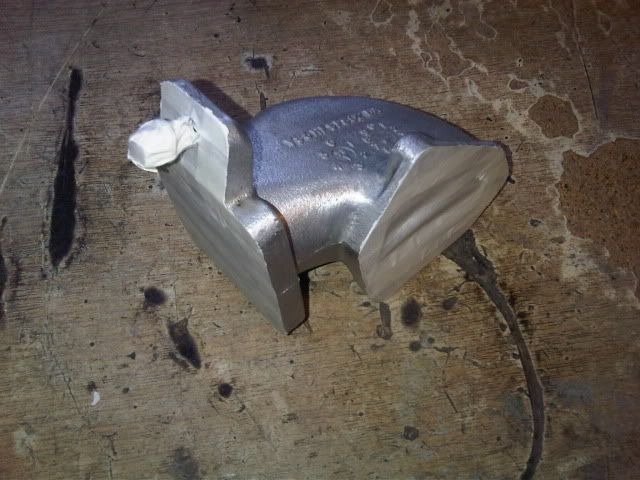
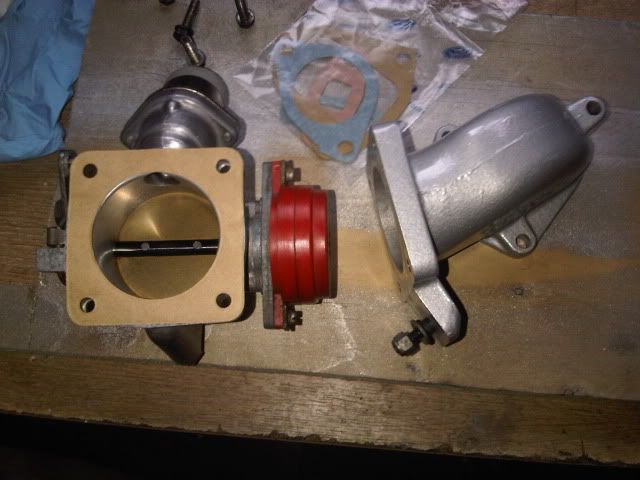
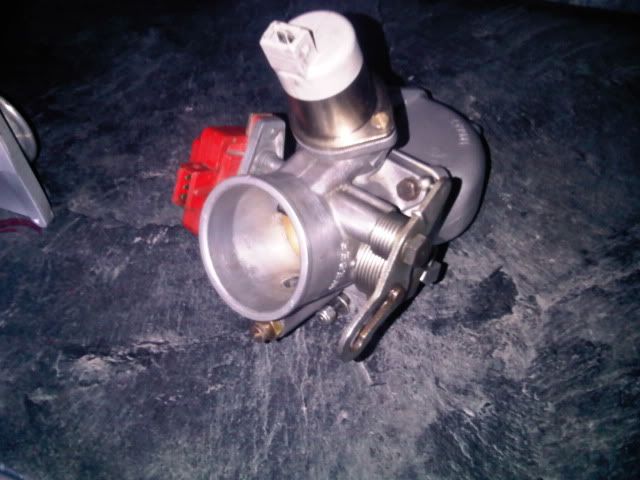
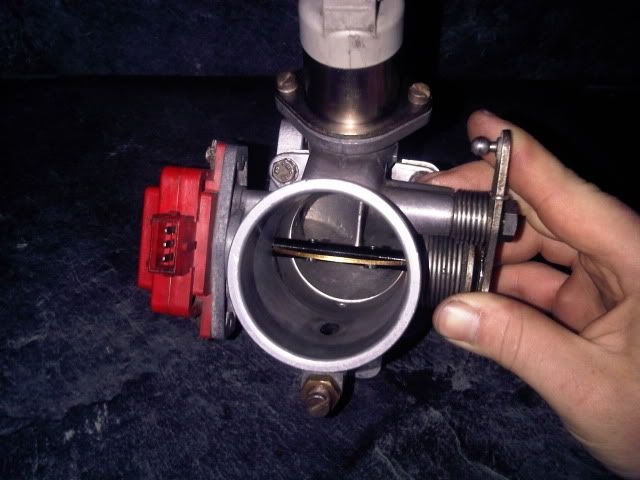
Other than that i pulled the throttle body, manifold elbow and idle speed control valve apart for a good clean and new gaskets... The elbow is drying up the shed ready to be re-assembled tomorrow
elbow prepped:
Other bits all cleaned up and re-assembled:


Might seem a little over the top but i love a nice clean engine bay (and probably suffer with a touch of OCD)
For now im spraying the inlet manifold silver ... mainly because i have some up the shed
Ok, was on an early shift today so got myself up the shed and sprayed half of the inlet manifold in hammerite silver, i polished my 803's too as opposed to the original black body
Other than that i pulled the throttle body, manifold elbow and idle speed control valve apart for a good clean and new gaskets... The elbow is drying up the shed ready to be re-assembled tomorrow
elbow prepped:
Other bits all cleaned up and re-assembled:
Might seem a little over the top but i love a nice clean engine bay (and probably suffer with a touch of OCD)
Trending Topics
08-06-2011, 07:59 PM
#8
PassionFord Regular
Thread Starter
Join Date: Aug 2010
Location: cambridgeshire
Posts: 441
Likes: 0
Received 0 Likes
on
0 Posts
cleaned with a diesel/petrol mix to get the main crap off, sanded back to rough it up a bit and then wiped over with thinners before spraying
09-06-2011, 01:42 PM
#10
PassionFord Regular
Thread Starter
Join Date: Aug 2010
Location: cambridgeshire
Posts: 441
Likes: 0
Received 0 Likes
on
0 Posts
Got a few bits bolted back together this afternoon
and got the other half of my inlet manifold cleaned up and re-sprayed
Just waiting on the paint to dry so got the dremel out, best tool in the world!
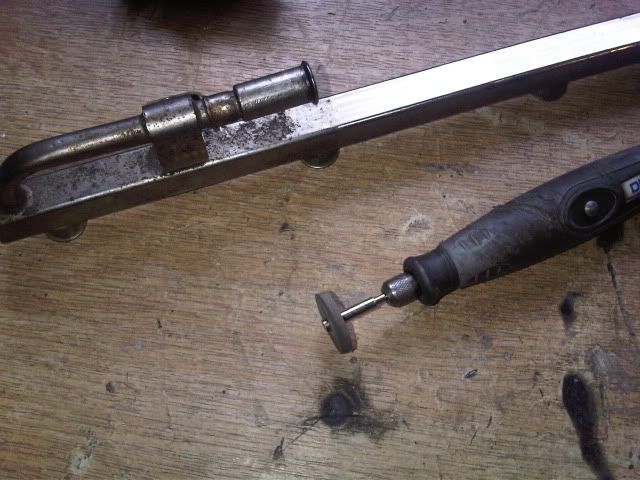
... Waiting for Lisa to get home now so i can explain the silver fingerprints all over her hair dryer lol
and got the other half of my inlet manifold cleaned up and re-sprayed
Just waiting on the paint to dry so got the dremel out, best tool in the world!
... Waiting for Lisa to get home now so i can explain the silver fingerprints all over her hair dryer lol
09-06-2011, 04:38 PM
#11
PassionFord Regular
Thread Starter
Join Date: Aug 2010
Location: cambridgeshire
Posts: 441
Likes: 0
Received 0 Likes
on
0 Posts


all of what ive done here so far probably makes absolutely no difference to the running of the car but i just sleep better kowing its all clean (plus its nicer to look at)
18-06-2011, 05:39 PM
#12
PassionFord Regular
Thread Starter
Join Date: Aug 2010
Location: cambridgeshire
Posts: 441
Likes: 0
Received 0 Likes
on
0 Posts
not really an engine update but got some HID's fitted which are double the brightness of the standard full beams... very happy with them, i can finally drive after dark again
(it gets a bit worrying with candle power)

(it gets a bit worrying with candle power)
18-06-2011, 05:50 PM
#13
PassionFord Regular
Thread Starter
Join Date: Aug 2010
Location: cambridgeshire
Posts: 441
Likes: 0
Received 0 Likes
on
0 Posts
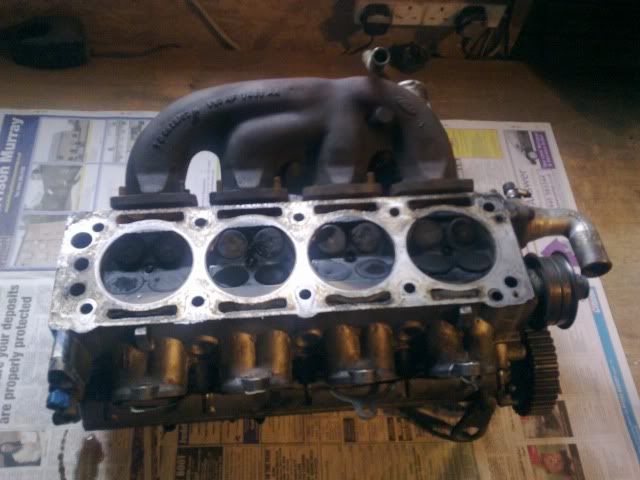
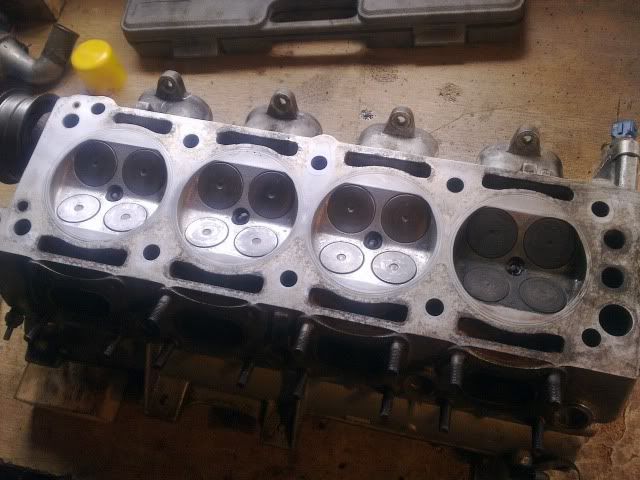
Between the showers today i managed to get the cylinder head off and learned that its far easier to take off the head and exhaust side as one complete unit as oppossed to fiddling about trying to remove the ex side with the head still bolted to the block
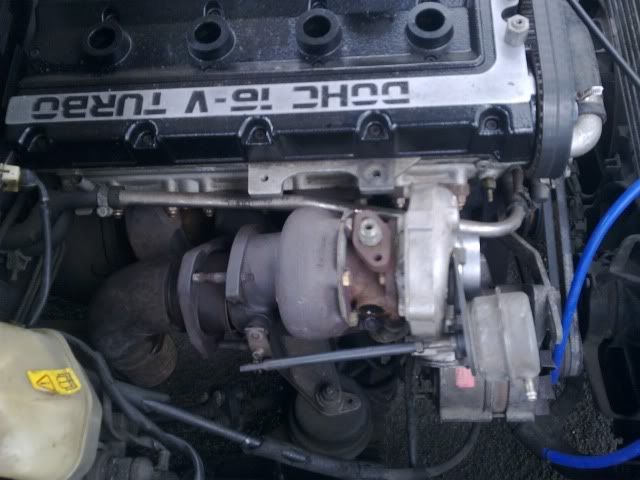
I was expecting loads of carbon deposits on the seat of the wastegate making it 'leak' but both surfaces were spot on!
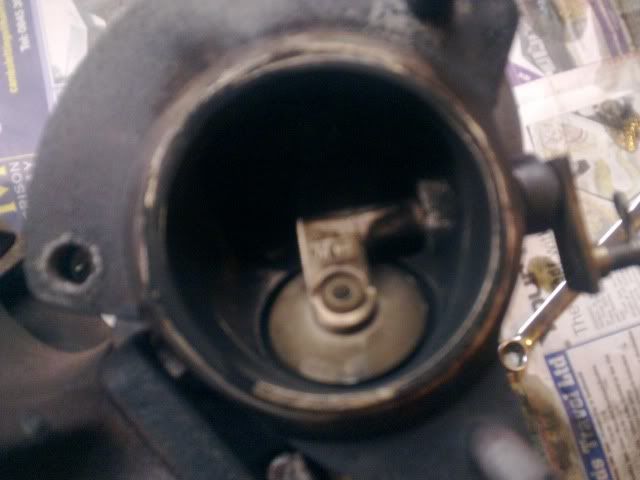
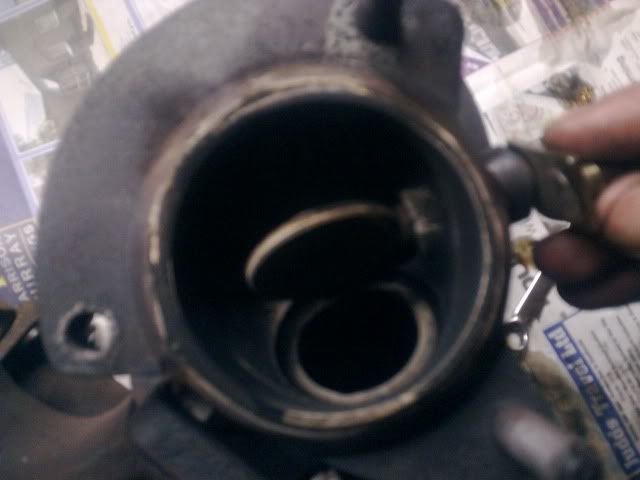
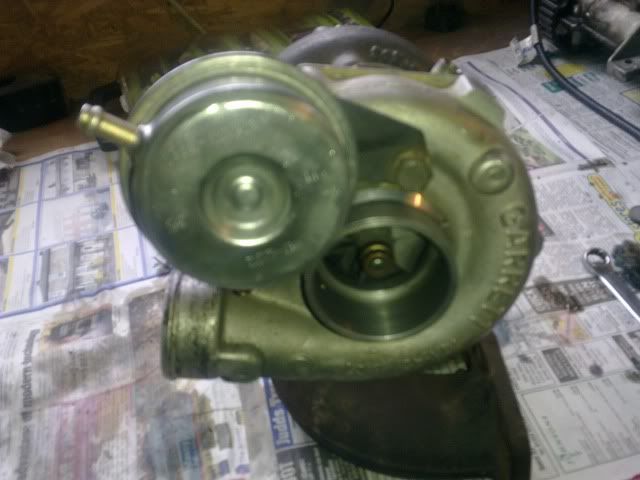
Polished up the actuator but wont be touching the ex side other than that
(i do however want to test my actuator to se if its working corectly, not sure how to do tis yet)
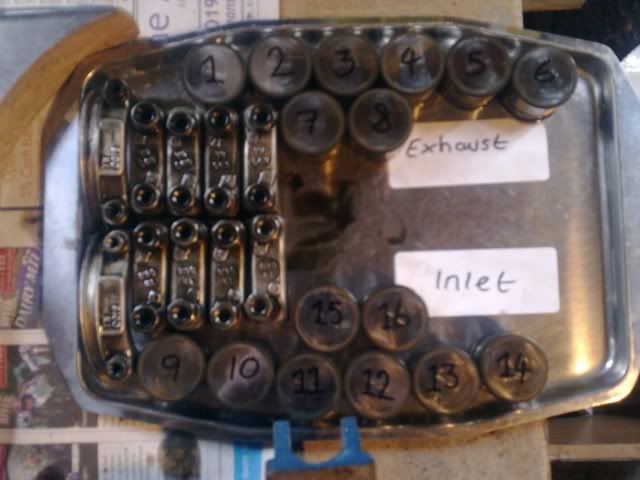
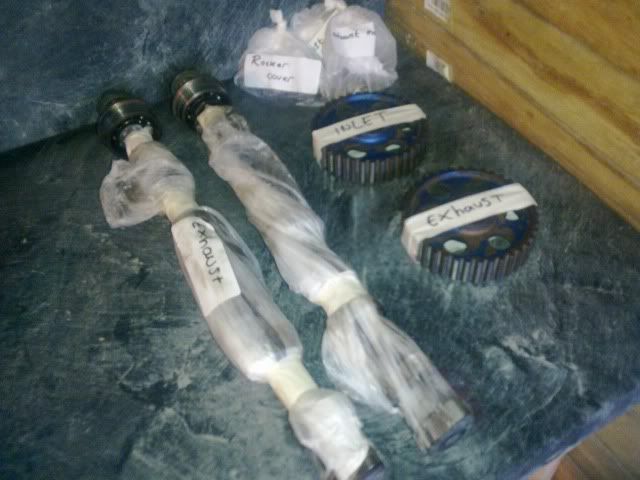
Pulled out the cams and hydraulic lifters and marked everything... IMO one of the most important parts of a rebuild.
EVERYTHING was over tightened but no damage / excessive wear as far as i can see
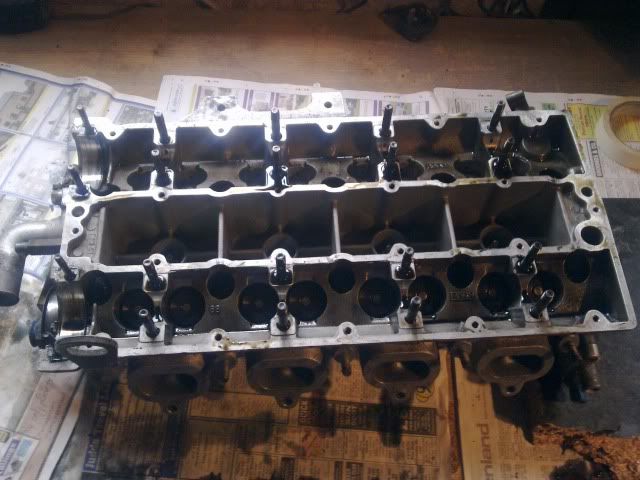
The cylinder bores are MINT with no lip at the top at all, doesnt even need honing as its still roughed up as if it had just been done
Had a few bolts/studs pull the threads off (the 3 which hold on the downpipe) but all in all a very good day
... off to get showered and ready now to celebrate my 26th on monday ... Woohoo
I was expecting loads of carbon deposits on the seat of the wastegate making it 'leak' but both surfaces were spot on!
Polished up the actuator but wont be touching the ex side other than that
(i do however want to test my actuator to se if its working corectly, not sure how to do tis yet)
Pulled out the cams and hydraulic lifters and marked everything... IMO one of the most important parts of a rebuild.
EVERYTHING was over tightened but no damage / excessive wear as far as i can see
The cylinder bores are MINT with no lip at the top at all, doesnt even need honing as its still roughed up as if it had just been done
Had a few bolts/studs pull the threads off (the 3 which hold on the downpipe) but all in all a very good day
... off to get showered and ready now to celebrate my 26th on monday ... Woohoo
18-06-2011, 06:21 PM
#15
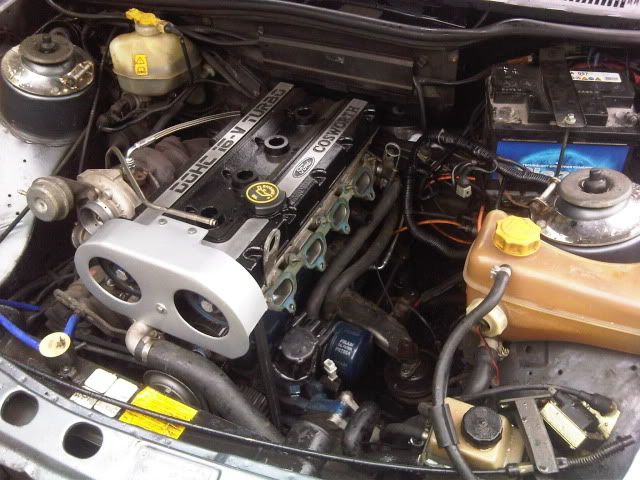
Very nice to see the standard header tank, just make sure this dosen't get broke as you won't be able to replace it
As I am a inquisitive can I ask if the sensor is connected on the front? Seems very strange as Saphs never had the sensor, only the 3DR so I guess it's a 3DR tank, they were blanked off on Saphs, I presume it's not actually connected I can't quite tell from where the wires dissappear?
Martin
As I am a inquisitive can I ask if the sensor is connected on the front? Seems very strange as Saphs never had the sensor, only the 3DR so I guess it's a 3DR tank, they were blanked off on Saphs, I presume it's not actually connected I can't quite tell from where the wires dissappear?
Martin

 18-06-2011, 07:00 PM
#17
Wahay!! I've lost my Virginity!!

Join Date: May 2011
Location: Newcastle
Posts: 79
Likes: 0
Received 0 Likes
on
0 Posts
Very similar to what I have just done myself mate. Mainly mine was to get the pistons skimmed and a new head gasket. I have just got it running again today and very happy with it. Although i am taking a few bits and pieces back off it tomorrow to get painted. I will update with photos soon.
18-06-2011, 07:35 PM
#20
Nice piccies there, don't be too obsessed with keeping the followers in order, it's not needed, in use everytime they are pressed down they rotate slightly, so keeping the wear even across the faces, that's the reason the cam lobe is not central on them when pressed.
I assume you are going to strip and clean out the tappets ?, be best to rather than buying new, easy to do, bit time consuming that's all.
Just use the square section on the back of a vice and bang the tappets down squarely on this, the insides will pop out, use some clean paper towel and carb cleaner etc to wash them out, esp the hole around the centre recessed band on the follower, leave DRY, ie do NOT fill with oil.
They can't release oil, unless they leak, they will rattle for about 30 secs but afterwards will remain silent even when left for weeks on start up if done correctly.
With the head take out the allen blanking plugs each side and end of head to expose the oil gallery each side, then use cleaning brush with copious quantities of paraffin to clean out, the congealed oil usually settles at the back of the head esp on exhaust side, then make sure feed holes from each gallery to each tappet bore are clear with a drill, just use a suitable size bit to push in the hole into the gallery.
When my new engine was left for 3 weeks without starting there was not a single tap from any tappet, even though it's got 10W40 mineral in it.
tabetha
tabetha
19-06-2011, 07:25 AM
#23
15000

Join Date: May 2011
Location: Leicester
Posts: 33
Likes: 0
Received 0 Likes
on
0 Posts
19-06-2011, 08:21 AM
#24

Nothing to do with the ecu, just the laws of physics. Dont know exactly what goes on in terms of flows and pressures but;
-4x4 ex manifold upto 400ish bhp, turbo spools sooner, after 400ish bhp
the manifold becomes restictive. Also no need for a damper.
-2wd ex manifold, slightly more lag, need a damper as at certain levels it
sets a resonating frequency (can cause cracks, bolts to loosen).
At 400+bhp it flows better & is less restrictive.
19-06-2011, 10:02 AM
#26
PassionFord Regular
Thread Starter
Join Date: Aug 2010
Location: cambridgeshire
Posts: 441
Likes: 0
Received 0 Likes
on
0 Posts
cheers fellas, tappits will be cleaned out at some point... was happy to find that every one was solid and not spongy (i think spongy ones mean a damaged spring)
the header tank isnt plugged in, must have been replaced at some point
The ex manifold was replaced by the guy who owned it before my brother, got a folder full of history
the header tank isnt plugged in, must have been replaced at some point
The ex manifold was replaced by the guy who owned it before my brother, got a folder full of history
19-06-2011, 05:44 PM
#27
PassionFord Regular
Thread Starter
Join Date: Aug 2010
Location: cambridgeshire
Posts: 441
Likes: 0
Received 0 Likes
on
0 Posts
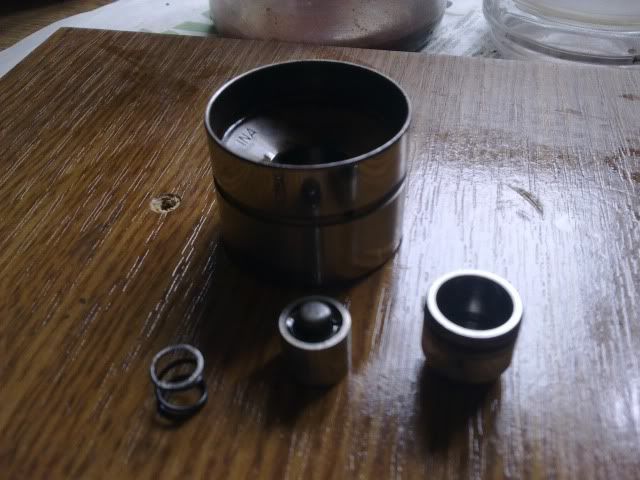
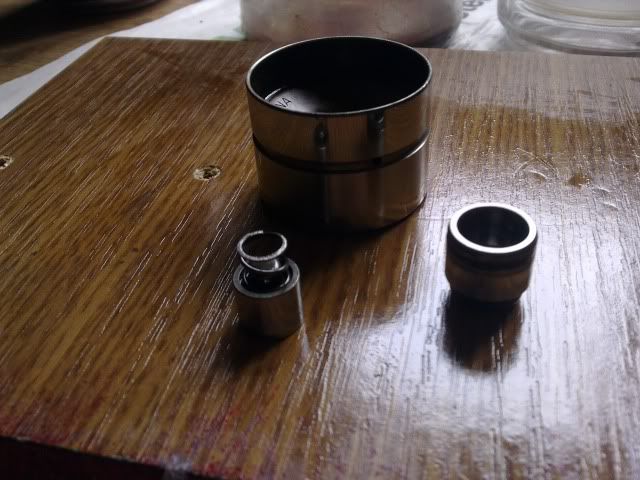
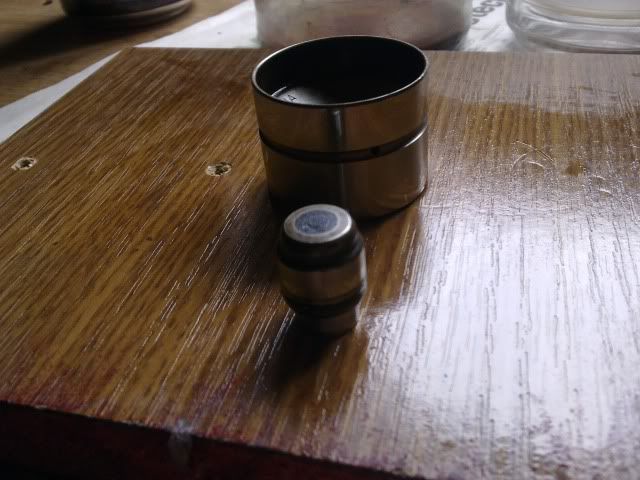
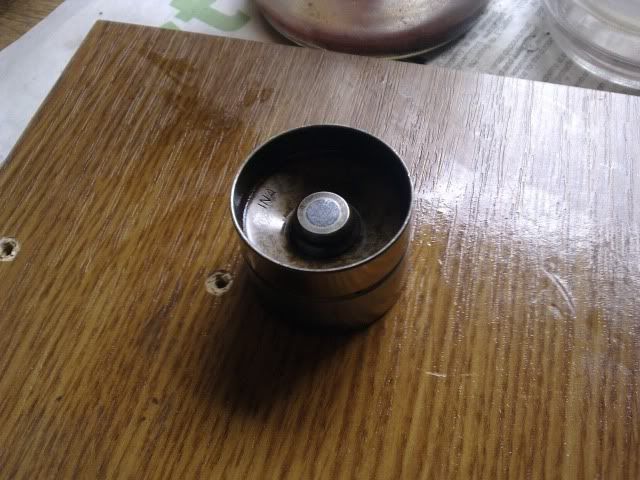
had a few minutes up the shed thisevening so decided on cleaning out the hydraulic lifters / tappits
Taking onboard tabs advice i stripped each one down, cleaned it out with engine degreaser and blowed them dry with the air compressor
i got halfway taking about an hour and decided on leaving the other 8 for tomorrow
number 6 was a total but after a soak in some diesel/petrol mix and some serious yeehaa it soon popped out
Taking onboard tabs advice i stripped each one down, cleaned it out with engine degreaser and blowed them dry with the air compressor
i got halfway taking about an hour and decided on leaving the other 8 for tomorrow
number 6 was a total
but after a soak in some diesel/petrol mix and some serious yeehaa it soon popped out
19-06-2011, 06:06 PM
#28
The 2wd needs a damper due to the design, looking closely it is acting as a lever on the exhaust manifold with the length of the trousers making this worse, any vibe is effectively amplified, cosworth did some 2wd without the damper in trialing the car, the damper was added later by southampton university who did the NVH on the cossie.
tabetha
19-06-2011, 06:11 PM
#29
cheers fellas, tappits will be cleaned out at some point... was happy to find that every one was solid and not spongy (i think spongy ones mean a damaged spring)
the header tank isnt plugged in, must have been replaced at some point
The ex manifold was replaced by the guy who owned it before my brother, got a folder full of history
the header tank isnt plugged in, must have been replaced at some point
The ex manifold was replaced by the guy who owned it before my brother, got a folder full of history
No 6 was a baddy, imagine how pissed you'd have been stripping the engine and not doing these for one to rattle!!.
You can get a specific tool for extracting the innards, but unless doing all the time not worth it imo, these come apart easy enough.
Just be sure to only wet the bits when putting back together do NOT fill with oil, it can't squeeze it out and will hold a valve open, don't forget the oil galleries in the head.
tabetha
19-06-2011, 06:33 PM
#30
PassionFord Regular
Thread Starter
Join Date: Aug 2010
Location: cambridgeshire
Posts: 441
Likes: 0
Received 0 Likes
on
0 Posts
yup, they are all completely empty... was a little concerned incase it caused any damage to the spring in the first minute or so of starting
im expecting it to knock its bollox off for a minute or so but as you said before, after filling up with new oil it should fix the tapping sound.
The oil that come out was black sludge, not very nice
Ill get the oil gallery cleaned out tomorrow and stick some air through it too, that should sort it
im expecting it to knock its bollox off for a minute or so but as you said before, after filling up with new oil it should fix the tapping sound.
The oil that come out was black sludge, not very nice
Ill get the oil gallery cleaned out tomorrow and stick some air through it too, that should sort it
19-06-2011, 07:44 PM
#32
PassionFord Regular
Thread Starter
Join Date: Aug 2010
Location: cambridgeshire
Posts: 441
Likes: 0
Received 0 Likes
on
0 Posts
the problem is that the oil goes in never to be released again so over a period of years the oil turns bad
its a very simple job to do mate, although the tapping is nothing to worry about it does get a little annoying
Sounds like an old tank lol
its a very simple job to do mate, although the tapping is nothing to worry about it does get a little annoying
Sounds like an old tank lol
19-06-2011, 08:10 PM
#33
Whichever tappets are compressed when the engine stops, they won't hold against a constant pressure like this, with no oil feed supplying pressure, so each time it stops for any length of time some lose some of their oil overnight, replaced by fresh oil, so over time it does change.
The worst cars are the easy use cars, as the oil never gets a roasting burning off the contaminants, mine is 100% silent on 10W40 oil, after I cleaned out the 80,000 mile(approx) tappets, was clickety clack on the old engine, sounded like a massey f, had piston slap when fully warm!!
tabetha
The worst cars are the easy use cars, as the oil never gets a roasting burning off the contaminants, mine is 100% silent on 10W40 oil, after I cleaned out the 80,000 mile(approx) tappets, was clickety clack on the old engine, sounded like a massey f, had piston slap when fully warm!!
tabetha
19-06-2011, 08:16 PM
#34
PassionFord Regular
Thread Starter
Join Date: Aug 2010
Location: cambridgeshire
Posts: 441
Likes: 0
Received 0 Likes
on
0 Posts
Tab you mentioned before about getting the flywheel machined/lightened
can you recommend anywhere? its something im seriously considering
can you recommend anywhere? its something im seriously considering
19-06-2011, 09:00 PM
#35
The place I use is B E Randal, of Hepworth near Diss, Norfolk, 01359 251888, ask for brian or barry, brian is the owner of the place, they do anything machining wise for cars.
Having driven mine today for around 300 miles, I can say it makes a massive difference esp to off boost pick up, only "downside" is the lack of inertia pulling away, you need to feed in a few more revs whilst letting the clutch out slightly slower, but I'm also getting used to a alcon 6 paddle, which is a lot more on/off than a std clutch, the hydraulic clutch was receiving my praises today it's just so light if doing a lot of traffic work.
tabetha
Last edited by tabetha; 19-06-2011 at 09:03 PM.
21-06-2011, 04:37 PM
#36
PassionFord Regular
Thread Starter
Join Date: Aug 2010
Location: cambridgeshire
Posts: 441
Likes: 0
Received 0 Likes
on
0 Posts
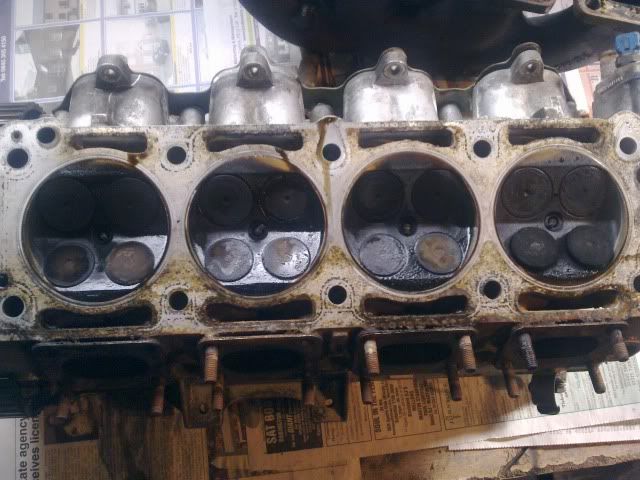
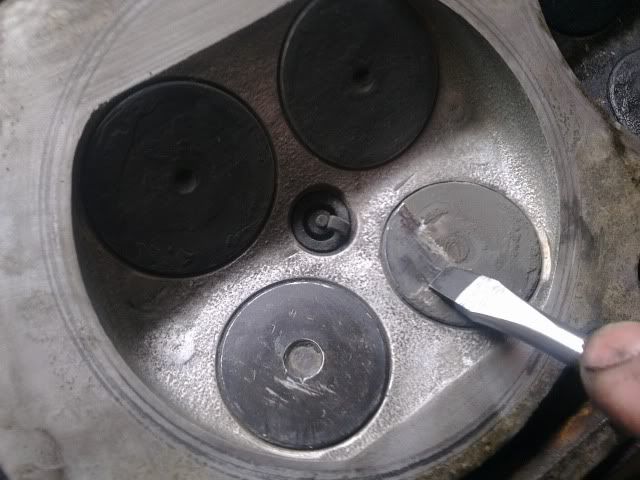
finished off the hydraulic lifters today and started on cleaning up the cylinder head to discover a few gremlins...
To begin with i thought that one of the exhaust studs had come loose and fallen out while driving but upon closer inspection its not missing but snapped off inside the head grrrr!

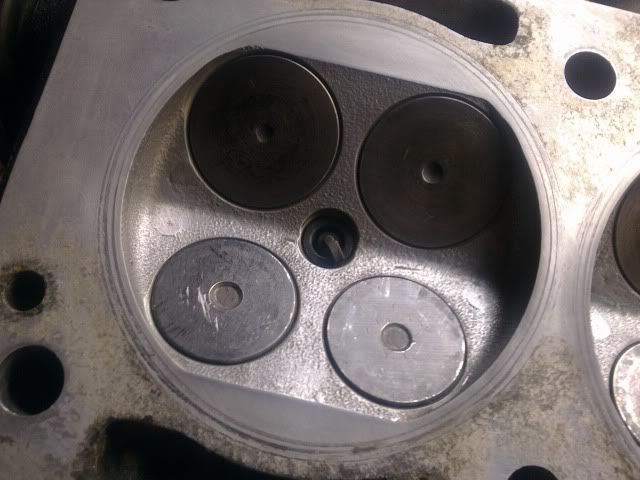
while cleaning up the face of the head underneath the carbon i also discovered some quite bad detonation one one of the cylinders, it wouldnt normally be a problem but it covers the firing ring which definitely wont be good if im running more boost
i have two options, either to get it repaired or to stick in a 2.1 head gasket which may JUST clear the pitting

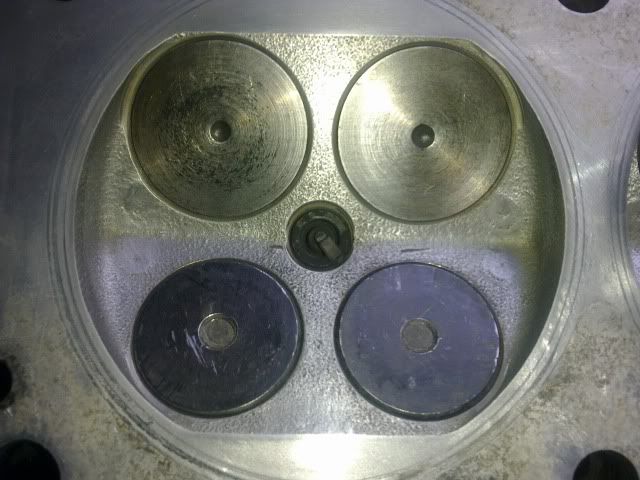
Lifted off the carbon build up using a screwdriver to take off the worst and then scrubbed the chamber and valve heads with brake cleaner and a scouring pad

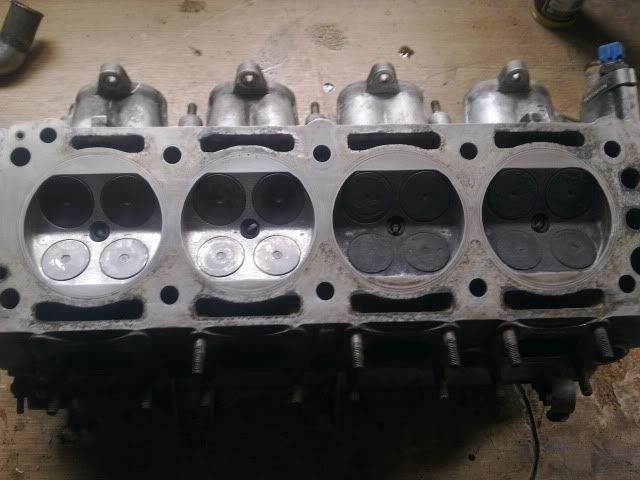
Will get the last chamber cleaned up tomorrow and hopefully get the rest of the head cleaned up too, tried taking some valves out earlier and the spring compressor seems to be having none of it! it just gets extremely tight to turn and the spring doesnt seem to budge at all ?? ill have a closer look tomorrow
To begin with i thought that one of the exhaust studs had come loose and fallen out while driving but upon closer inspection its not missing but snapped off inside the head grrrr!
while cleaning up the face of the head underneath the carbon i also discovered some quite bad detonation one one of the cylinders, it wouldnt normally be a problem but it covers the firing ring which definitely wont be good if im running more boost
i have two options, either to get it repaired or to stick in a 2.1 head gasket which may JUST clear the pitting
Lifted off the carbon build up using a screwdriver to take off the worst and then scrubbed the chamber and valve heads with brake cleaner and a scouring pad
Will get the last chamber cleaned up tomorrow and hopefully get the rest of the head cleaned up too, tried taking some valves out earlier and the spring compressor seems to be having none of it! it just gets extremely tight to turn and the spring doesnt seem to budge at all ?? ill have a closer look tomorrow
21-06-2011, 05:14 PM
#37
Too many posts.. I need a life!!
Join Date: Dec 2009
Location: England
Posts: 810
Likes: 0
Received 0 Likes
on
0 Posts
looks good mate im in the process of rebuilding my small turbo cylinder head for na form, give the springs a tap with hammer on a socket and extension first to try and release them, i had a bit of a cheap valve spring compressor and was really awquard to use so bought a �50-60 one from burtons, its a bit more money but it did the job alot easier
21-06-2011, 07:00 PM
#38
PassionFord Regular
Thread Starter
Join Date: Aug 2010
Location: cambridgeshire
Posts: 441
Likes: 0
Received 0 Likes
on
0 Posts
its one of the REALLY big G shaped clamps and was �60, never had an issue with any of the Vauxhall C20XE's or C20LET's ive had apart.
I think ill try whacking them a few times as you say to shock them a little
I think ill try whacking them a few times as you say to shock them a little
21-06-2011, 07:52 PM
#39
Give the stem of the valve a tap with a punch and hammer it will loosen the collets and allow you to remove them easier, also best way to clean valves is to take them out and put them in a pillar drill, spin them and hold some sand paper etc on them, works a treat.
Also, where did you get your hid kit from ? is it any good ?
Also, where did you get your hid kit from ? is it any good ?
Last edited by coswurv; 22-06-2011 at 07:46 AM.
22-06-2011, 05:57 PM
#40
Just use a drift on the edge of the valve spring seat/holder, tap down one edge, be careful not to mark the wall around it where the tappet goes, tapping down one side will loosen them easily.
tabetha
tabetha