My Saph. An update on loads of little bits. 13/04/15

 08-08-2013, 05:46 PM
#162
Last Time, Get Off PF FFS
Thread Starter
Lol, was gonna pick her up this afternoon but the garage had an issue getting the box out and then to find out that the release bearing was a 2wd one  but the are getting a 4b one in the morning. If only I wasn't going to this birthday party Saturday I would be going somewhere else the following day as my group chairman has a spare stand pass going (taxi gear and all). I would have also have to quickly change a cv joint boot in the afternoon tomorrow
  I am beyond peed off now I am probably not going lol
but the are getting a 4b one in the morning. If only I wasn't going to this birthday party Saturday I would be going somewhere else the following day as my group chairman has a spare stand pass going (taxi gear and all). I would have also have to quickly change a cv joint boot in the afternoon tomorrow I am beyond peed off now I am probably not going lol
09-08-2013, 02:52 PM
#163
Last Time, Get Off PF FFS
Thread Starter
Hi guys, just got the car back. 
Clutch. Thought it had a 6 plate.
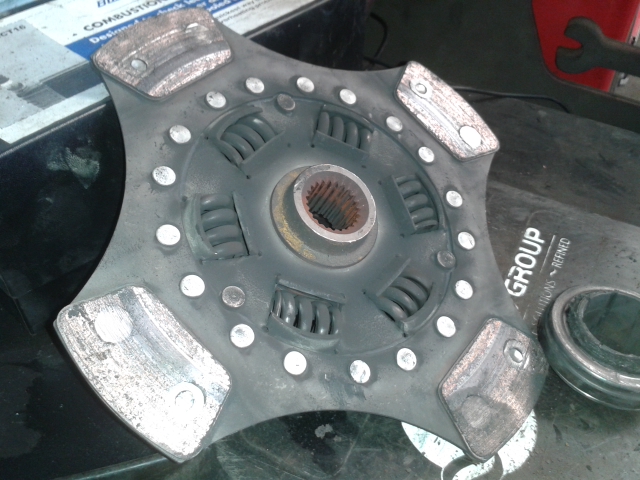
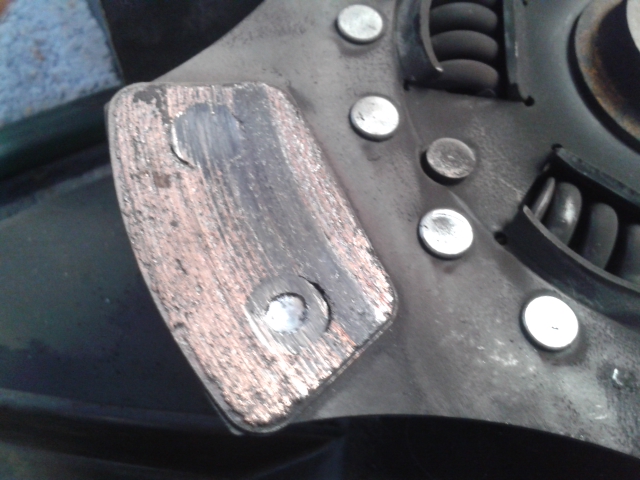
Eating into the rivets
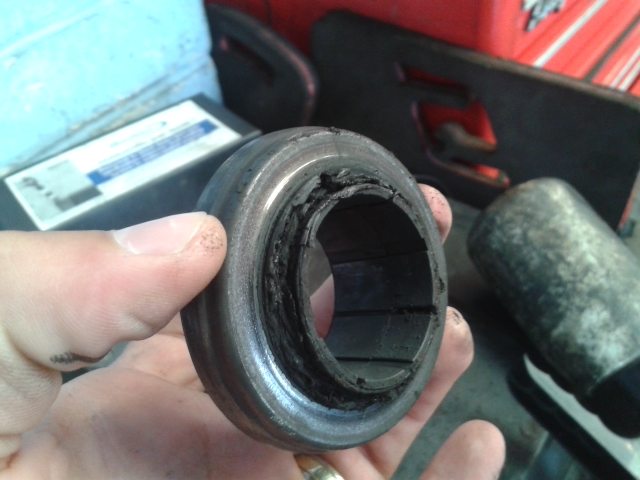
The guy who fitted it said that the bearing was more than likely the culprit as it had fell apart and stuck literally to the input shaft. No wonder the clutch was heavy as fu@k lol.
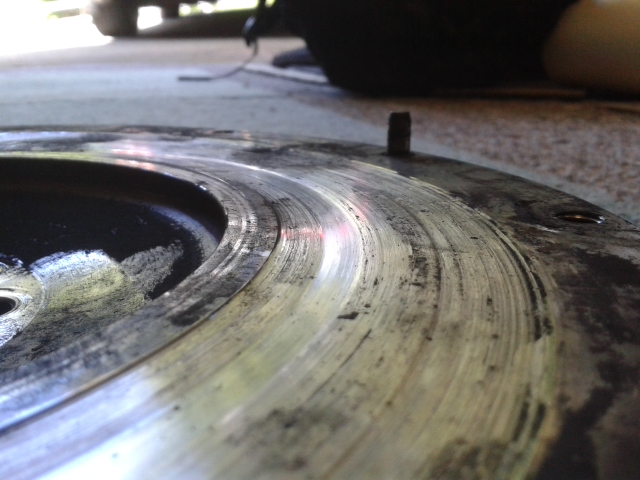
The Pressure plate eaten into.
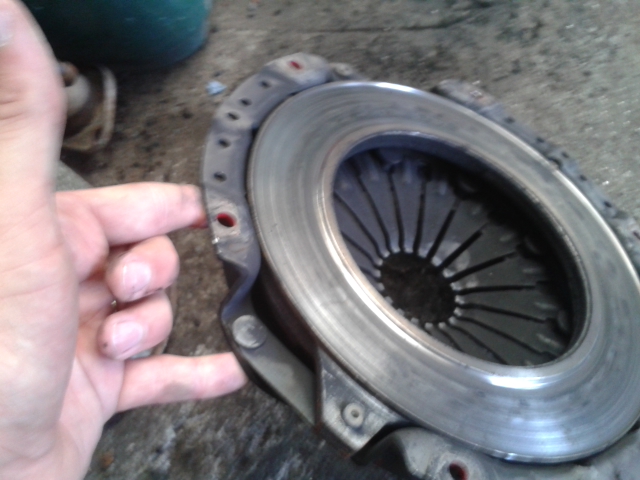
And the flywheel eaten into. Hope it is saveable.
The new clutch is so so light, it's even lighter than my wife BMW clutch lol.
Next on the to do list is to change the n/s outer cv joint. Got one from kevin Coopers for �7 and bought a 30mm socket and large socket wrench so I don't have to do it at my car club anymore and do it on my drive
Clutch. Thought it had a 6 plate.

Eating into the rivets

The guy who fitted it said that the bearing was more than likely the culprit as it had fell apart and stuck literally to the input shaft. No wonder the clutch was heavy as fu@k lol.

The Pressure plate eaten into.

And the flywheel eaten into. Hope it is saveable.

The new clutch is so so light, it's even lighter than my wife BMW clutch lol.
Next on the to do list is to change the n/s outer cv joint. Got one from kevin Coopers for �7 and bought a 30mm socket and large socket wrench so I don't have to do it at my car club anymore and do it on my drive
 03-09-2013, 09:22 PM
#166
Last Time, Get Off PF FFS
Thread Starter
Well un-planned really.
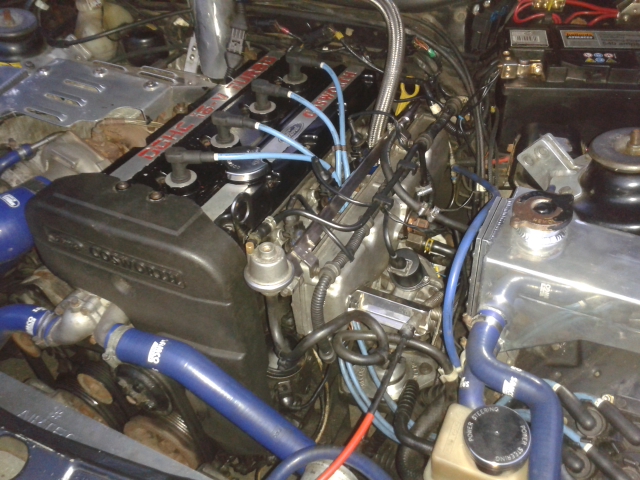
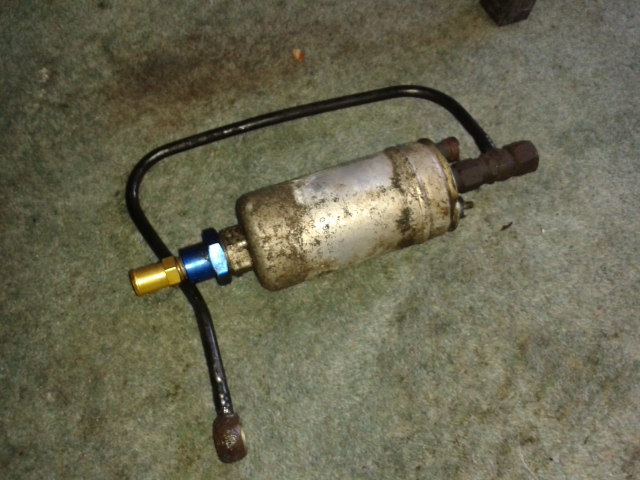
I went to have a look at my fuel pump wiring to clean it up a bit and get the voltage back up Again and this happened.
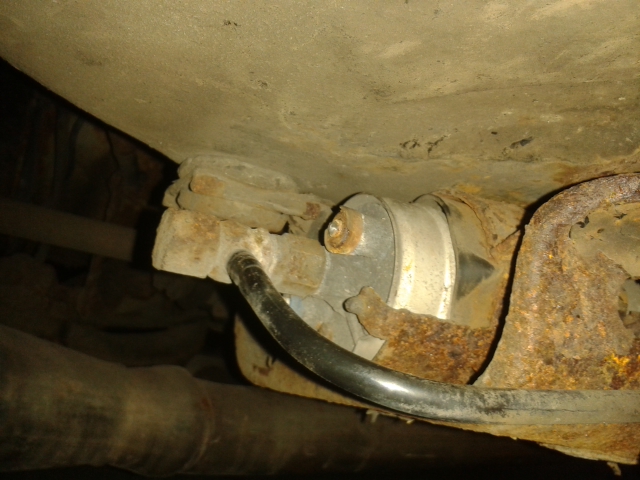
I am going to take the lot out once it have got the fuel out the tank and get a new pump and fit the new filter I have had for ages. Gonna sand blast the cradle too as it is saveable just about .
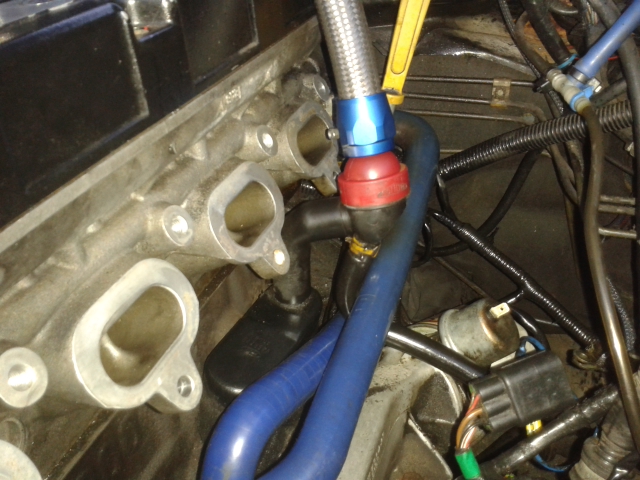
Anyway knowing that this would take a bit of time to sort out I thought I would hunt down the idling problem I have had for the last few month.
I sprayed WD40 on all the hose joins with no revs rises, then I sprayed around the inlet gasket to the head. 1 fine, 2 fine, 3 fine the around no 4 vvvrrrOOOMMM.
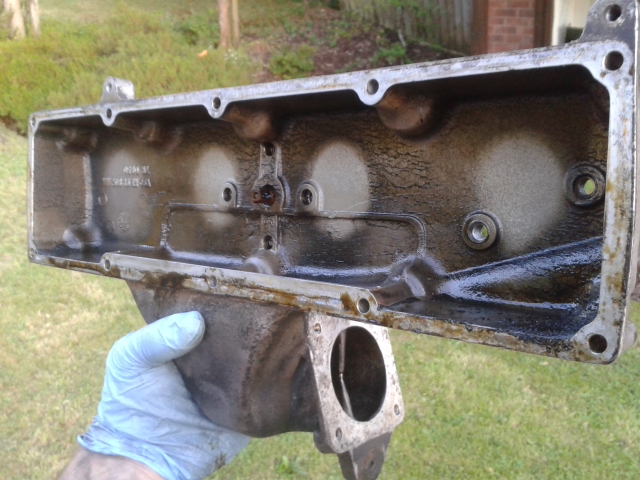
So made a start on taking it all apart.
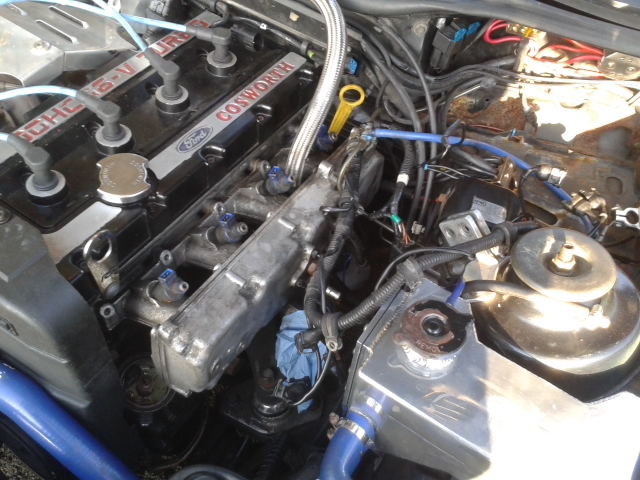
And found the problem.
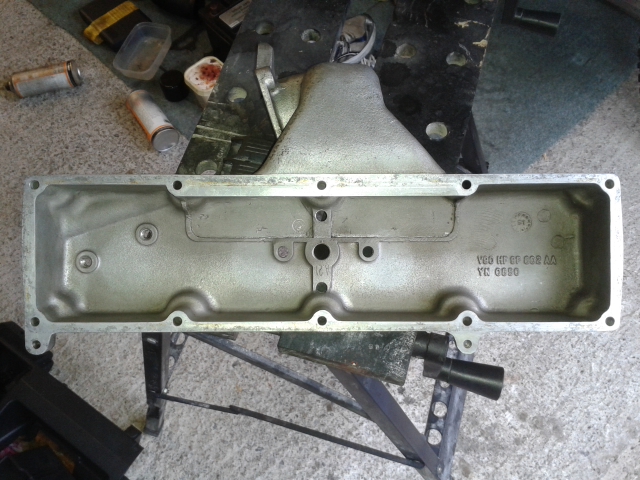
Also found out how my oil breather work. Sort of
Never seen anything like this before.
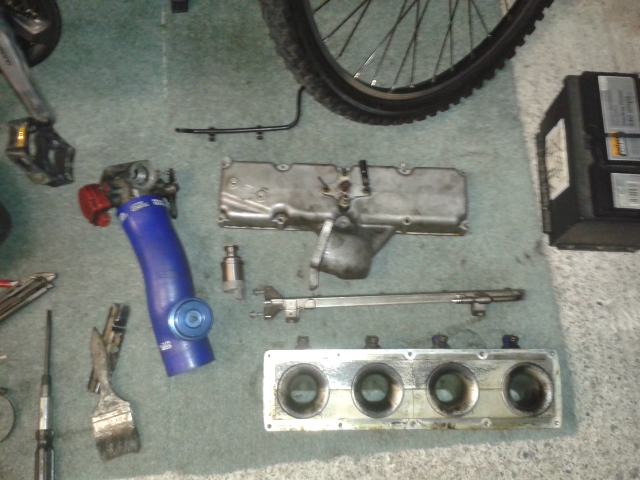
The filter bits were vertical inside the red bit which was a bit strange.
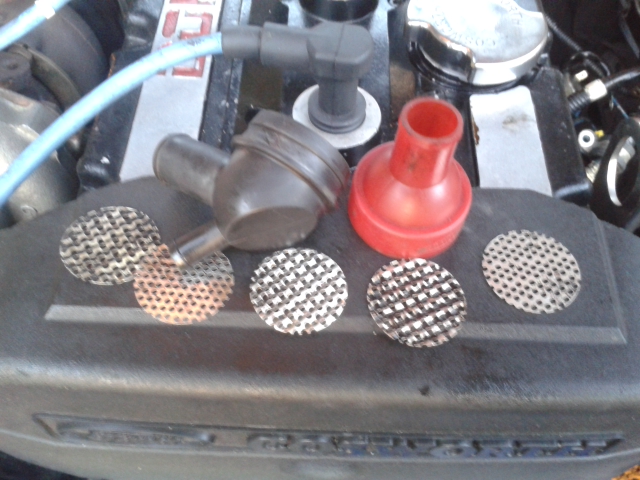
But gave it a good clean and got them in right.

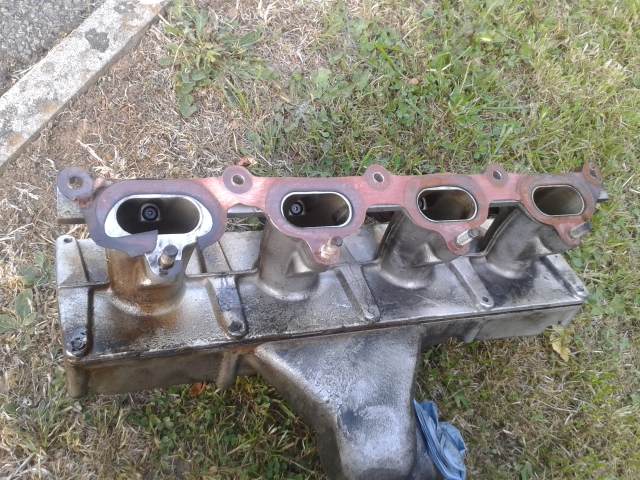
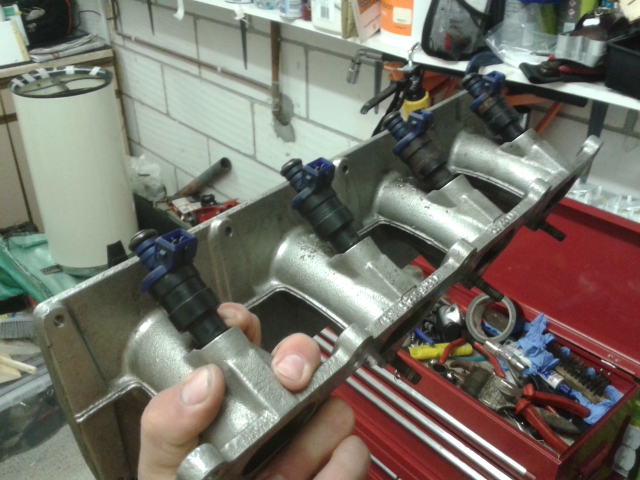
The trumpets were not too bad oil wise.
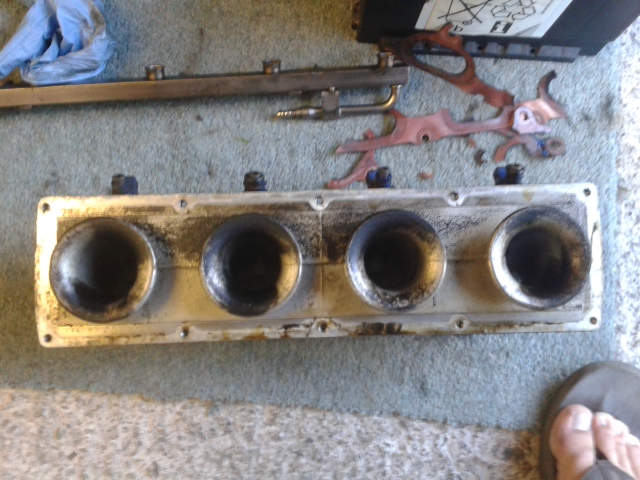
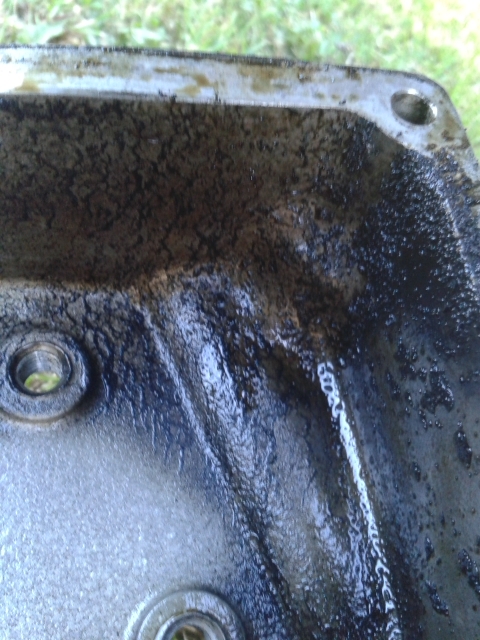
The plenum was filthy and had oily grit in the bottom corners
All shall get a good clean soon.
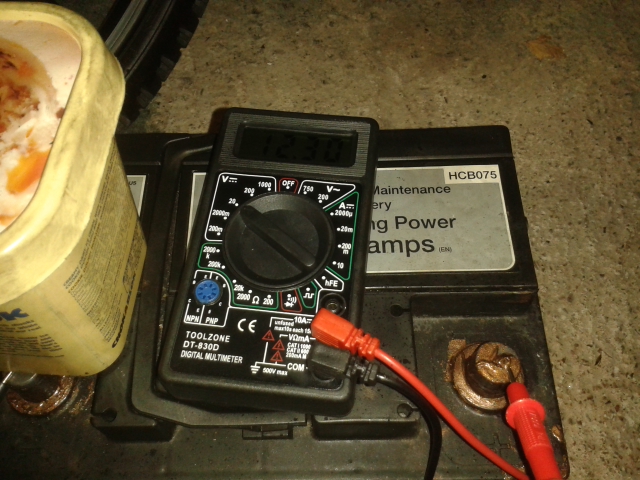
On the bright side my battery is still in good nick
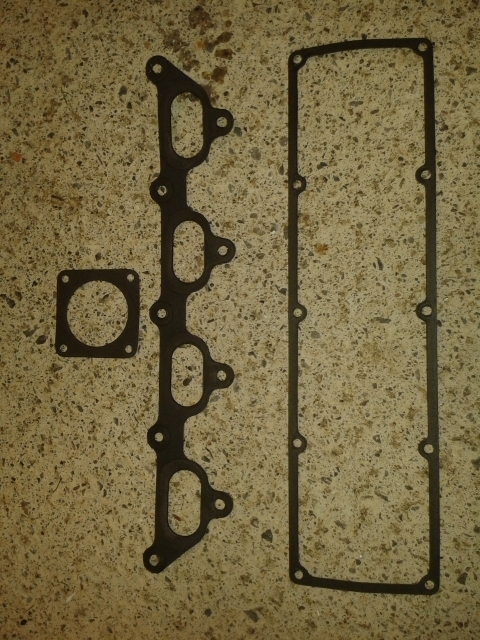
Got a Cometic gasket sorted. Just getting prices for a new 044 pump and order the throttle and plenum gaskets too.
That's me biking in and out of work for the next few weeks00
I went to have a look at my fuel pump wiring to clean it up a bit and get the voltage back up Again and this happened.

I am going to take the lot out once it have got the fuel out the tank and get a new pump and fit the new filter I have had for ages. Gonna sand blast the cradle too as it is saveable just about .
Anyway knowing that this would take a bit of time to sort out I thought I would hunt down the idling problem I have had for the last few month.
I sprayed WD40 on all the hose joins with no revs rises, then I sprayed around the inlet gasket to the head. 1 fine, 2 fine, 3 fine the around no 4 vvvrrrOOOMMM.
So made a start on taking it all apart.

And found the problem.

Also found out how my oil breather work. Sort of

Never seen anything like this before.
The filter bits were vertical inside the red bit which was a bit strange.

But gave it a good clean and got them in right.


The trumpets were not too bad oil wise.

The plenum was filthy and had oily grit in the bottom corners


All shall get a good clean soon.

On the bright side my battery is still in good nick

Got a Cometic gasket sorted. Just getting prices for a new 044 pump and order the throttle and plenum gaskets too.
That's me biking in and out of work for the next few weeks00
06-09-2013, 07:01 PM
#167
Last Time, Get Off PF FFS
Thread Starter
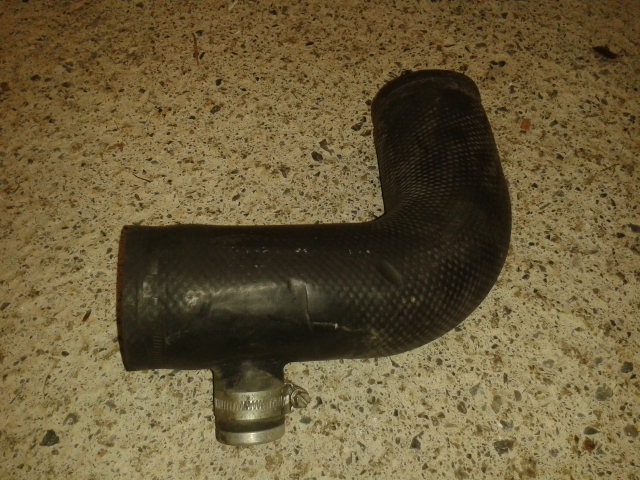
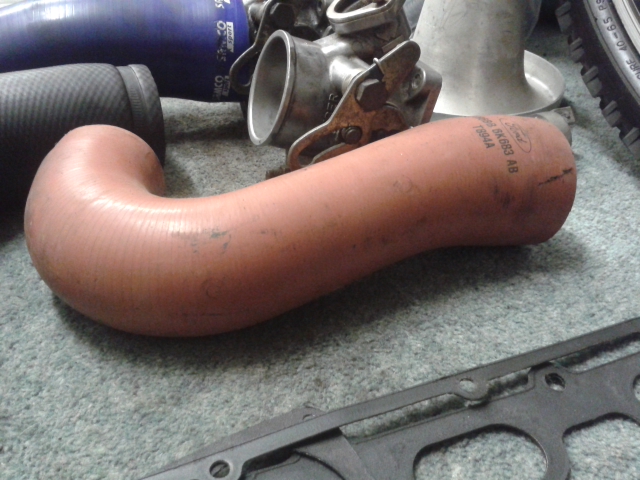
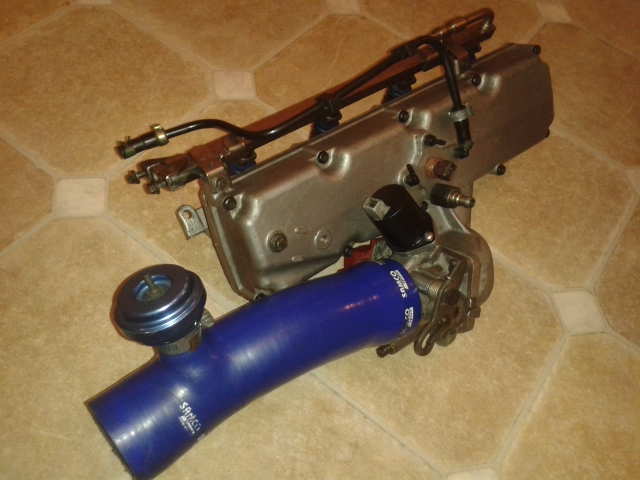
Right pic time. The hoses. A good clean and they shall be good as new.
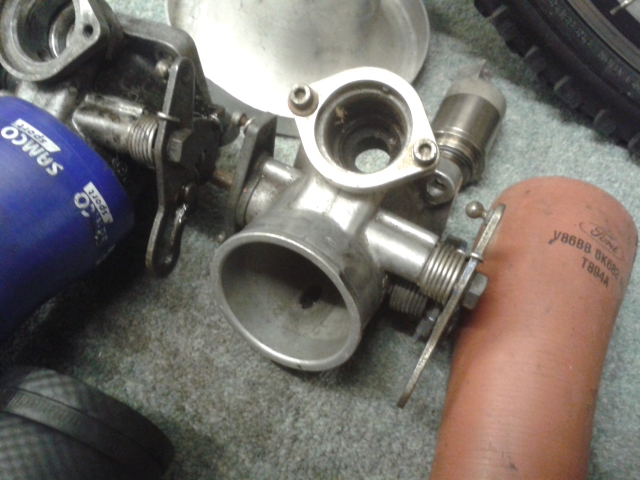
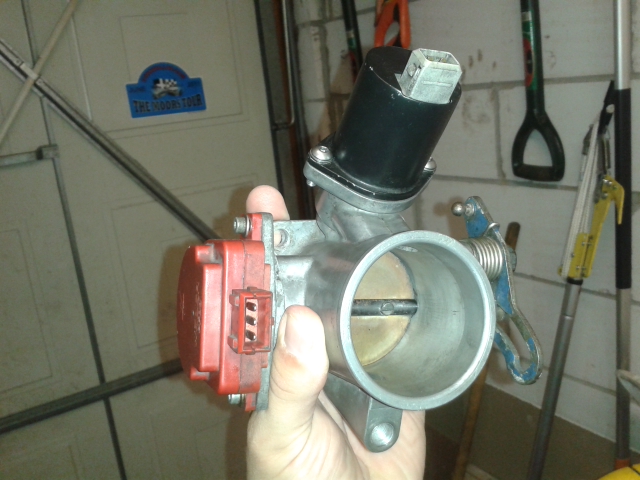
A back up throttle body incase the revs are still hi and I will be able to adjust this one lol. Thanks Richie
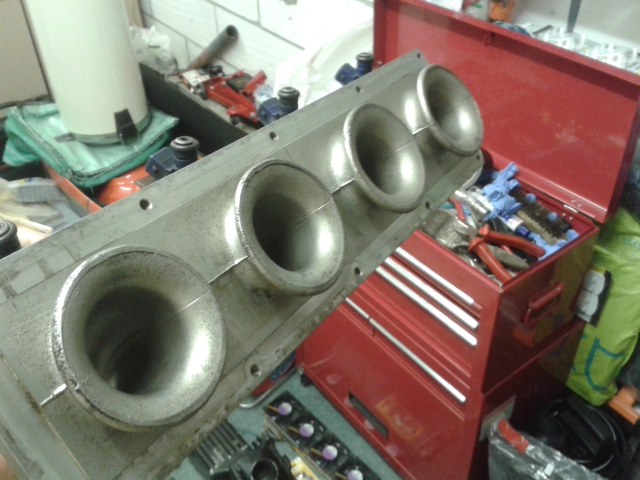
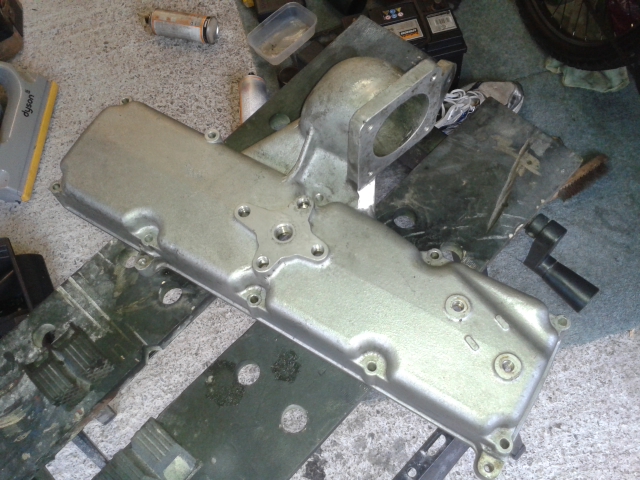
Gave the inner part of the inlet a clean up quickly after work today.
Cometic gaskets Thanks Jason and Richie
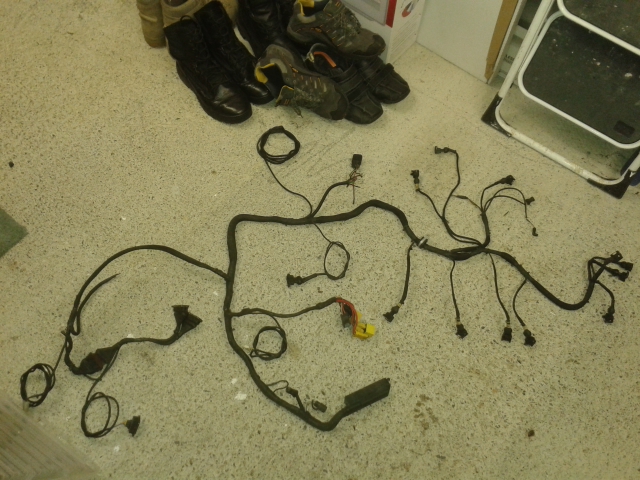
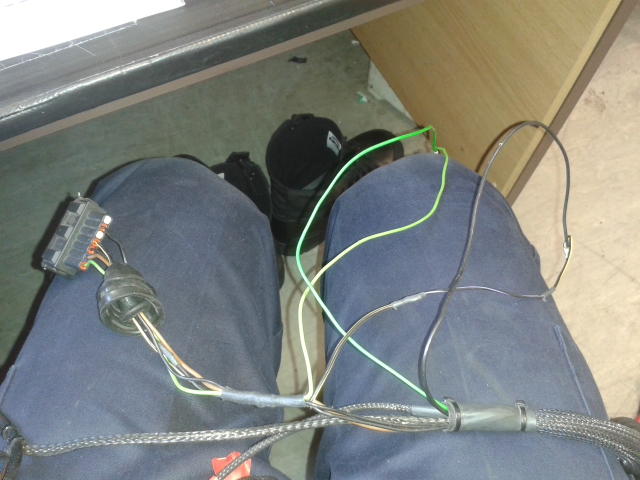
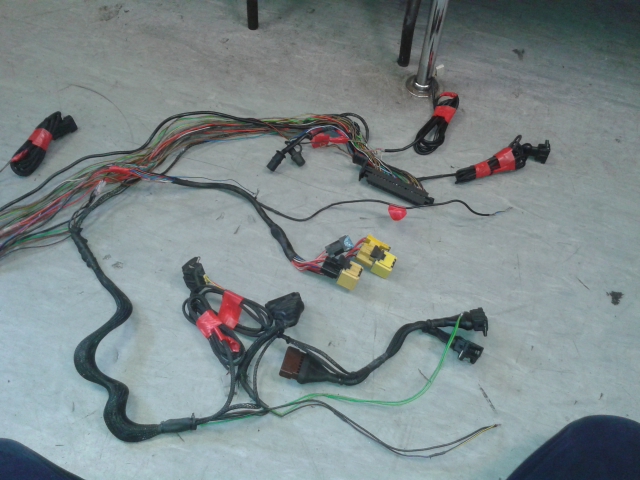
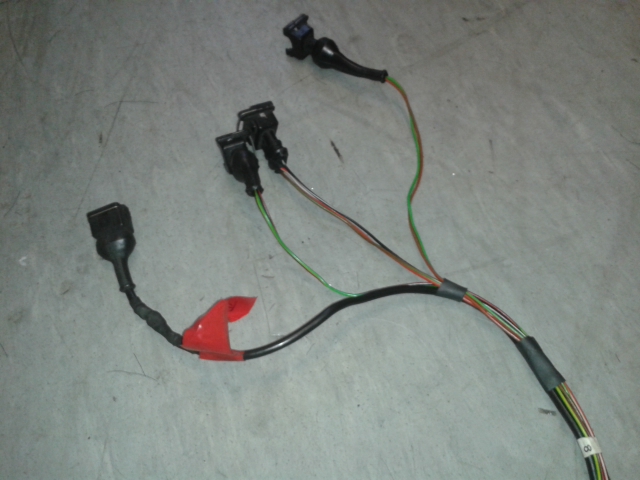
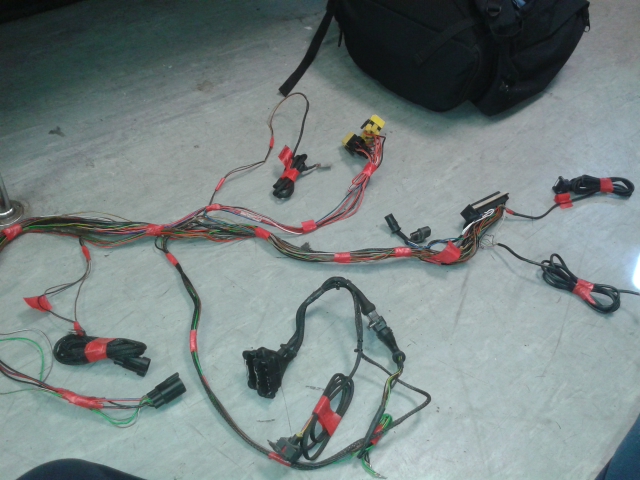
The Loom. Going to strip down the braid and tape tomorrow at work and take measurements for the new braid etc and do some repairs that are needed. From the looks of the photo there is the standard coil wiring so I shall bin that and check that the 2 W/S wires that go into the ecu are the same as mine.
Thanks again Paul for the loom.

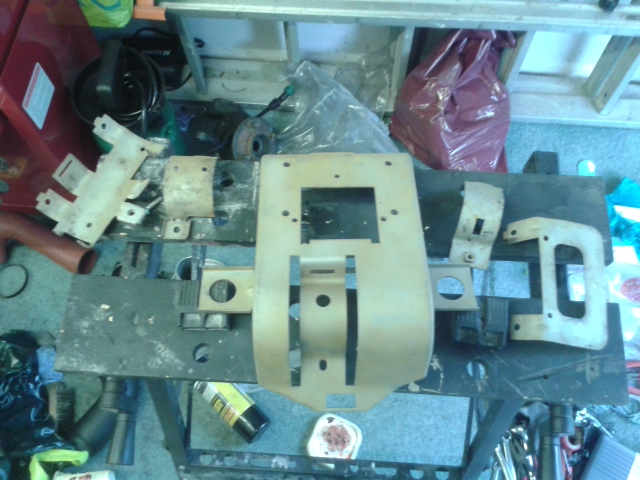
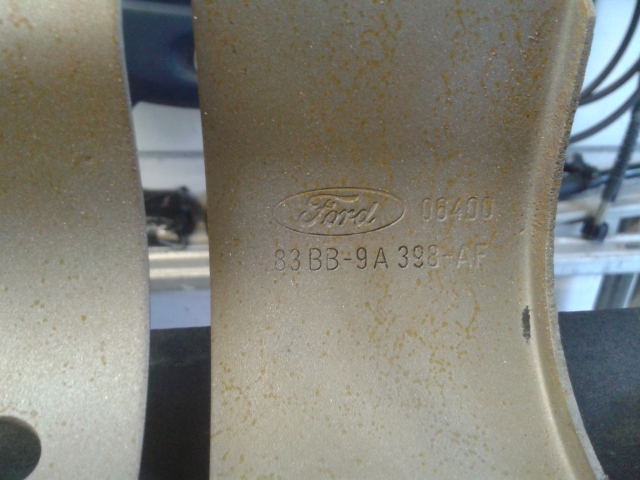
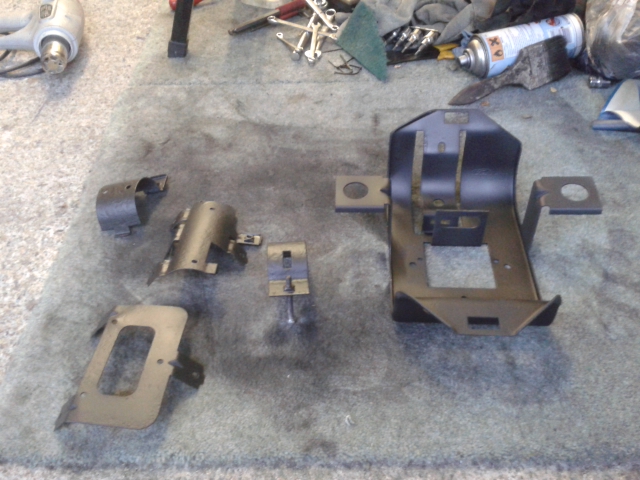
And the cradle. It's main bit is as solid as a rock and the other bits should come out fine too. This is all getting sandblasted for me at work next week.
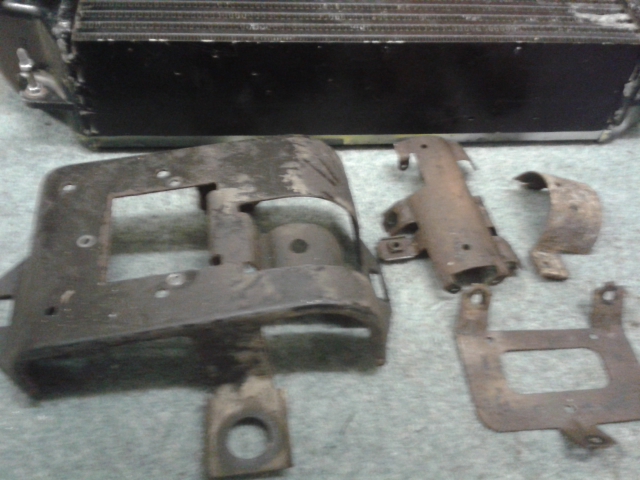
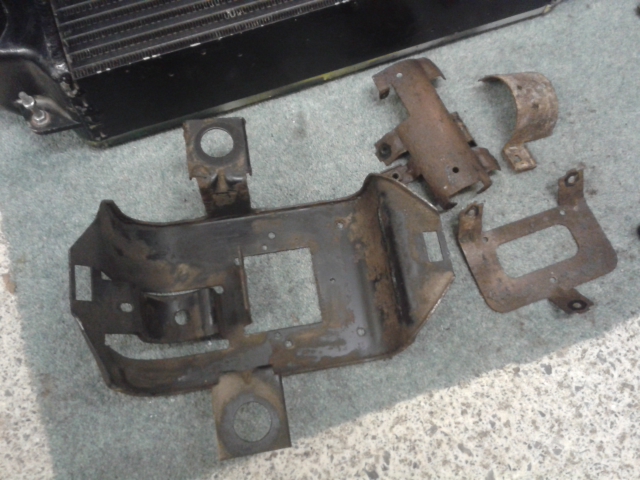
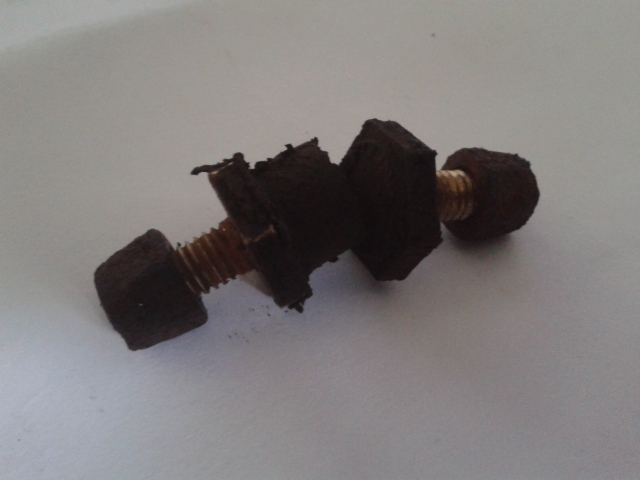
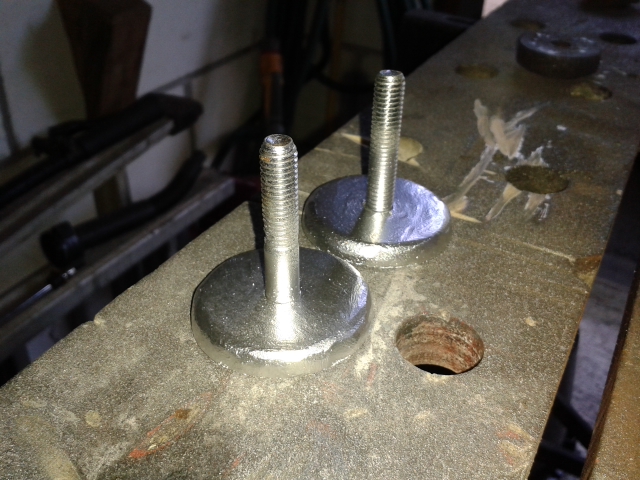
One thing though is that the nuts/bolt that have the rubber shock mount in-between them where shot really and they split even though I had a spanner on both ends to stop them splitting.
What type of bolt are these called so I can order some new ones please guys???????
OOoooopppps
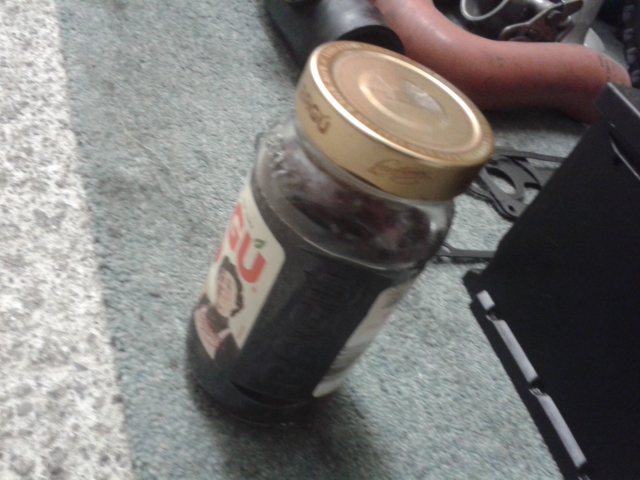
Also just trying the vinegar trick on the filter bracket for a few hours lol.
And the intercooler, Thanks Andy
Already looks like its cutting into the rust.


A back up throttle body incase the revs are still hi and I will be able to adjust this one lol. Thanks Richie

Gave the inner part of the inlet a clean up quickly after work today.


Cometic gaskets Thanks Jason and Richie

The Loom. Going to strip down the braid and tape tomorrow at work and take measurements for the new braid etc and do some repairs that are needed. From the looks of the photo there is the standard coil wiring so I shall bin that and check that the 2 W/S wires that go into the ecu are the same as mine.
Thanks again Paul for the loom.

And the cradle. It's main bit is as solid as a rock and the other bits should come out fine too. This is all getting sandblasted for me at work next week.


One thing though is that the nuts/bolt that have the rubber shock mount in-between them where shot really and they split even though I had a spanner on both ends to stop them splitting.
What type of bolt are these called so I can order some new ones please guys???????
OOoooopppps

Also just trying the vinegar trick on the filter bracket for a few hours lol.
And the intercooler, Thanks Andy
Already looks like its cutting into the rust.

Last edited by kosienutter; 07-09-2013 at 11:04 AM.
07-09-2013, 11:07 AM
#168
Last Time, Get Off PF FFS
Thread Starter
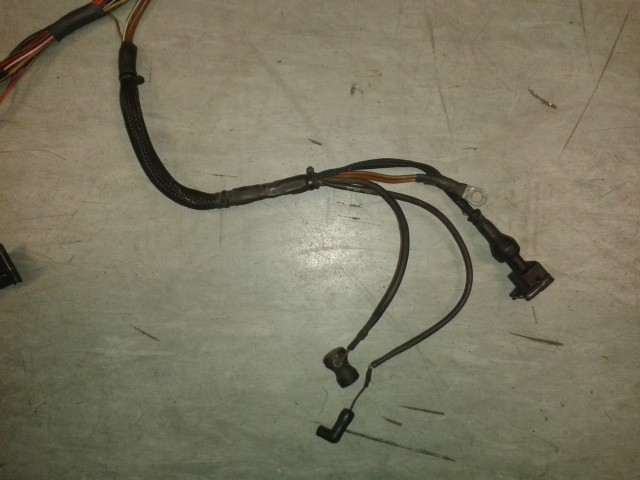
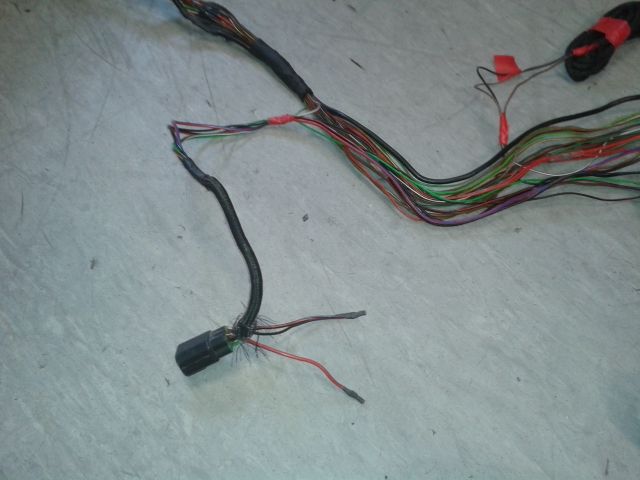
Started stripping the loom this morning. I have got to the point in it where it meets No4 Injector starting from the ecu end.
It has had some repairs done to it that I shall make better. One being (10) Negative to the ECU relay. Found 3 solder joins so far. Gonna run a whole new wire from the ecu pin to the relay for that one. And reheat shrink the connections for the SECS monitor wiring as the solder is just taped over.
Cant wait it have this loom looking mint again, and enjoying it too. Always wanted to tackle an engine loom.
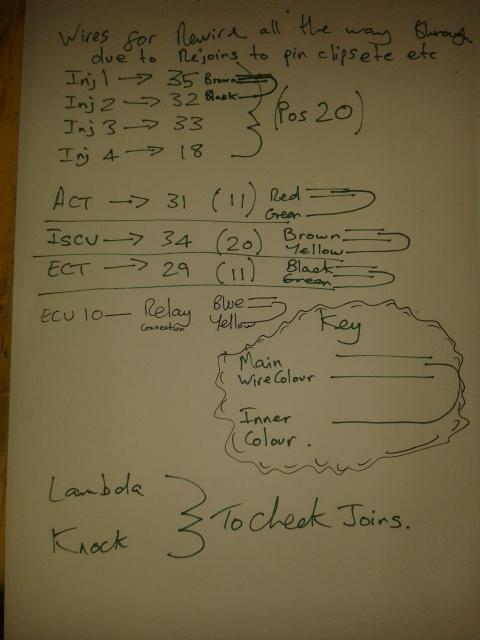
All the loom diagrams I have printed of help
Right on with the stripping this afternoon.
Photos to follow laters
It has had some repairs done to it that I shall make better. One being (10) Negative to the ECU relay. Found 3 solder joins so far. Gonna run a whole new wire from the ecu pin to the relay for that one. And reheat shrink the connections for the SECS monitor wiring as the solder is just taped over.
Cant wait it have this loom looking mint again, and enjoying it too. Always wanted to tackle an engine loom.
All the loom diagrams I have printed of help
Right on with the stripping this afternoon.
Photos to follow laters
Last edited by kosienutter; 07-09-2013 at 11:09 AM.
 07-09-2013, 11:59 AM
#171
Last Time, Get Off PF FFS
Thread Starter
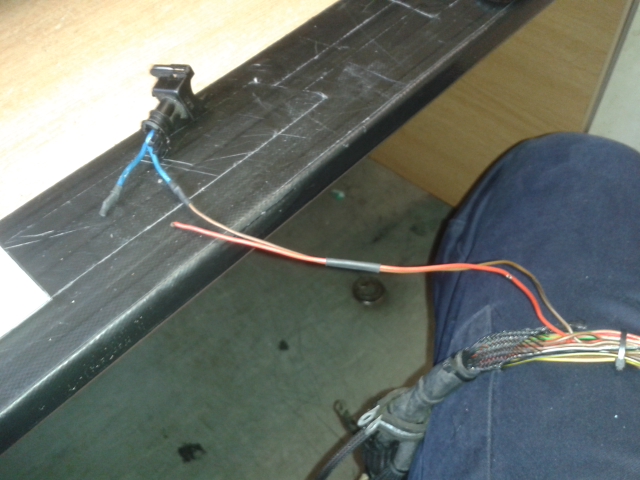
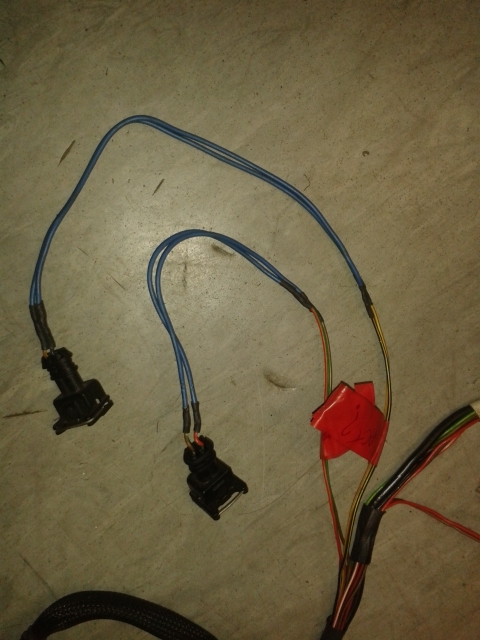
These two wires can be cut back and re connected. One is to the coil and one to the relay/coil according to the diagram.
No 10 pin connection to ecu relay to be redone.
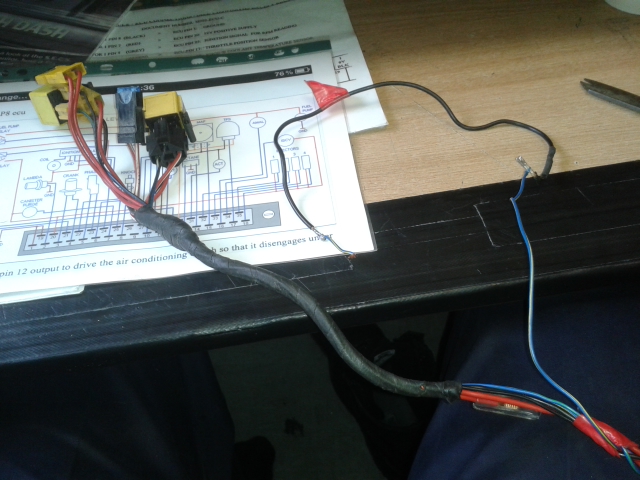
The loom so far.
Just figuring out which this one is. The thing is there is only one of these on this loom but 3 on my cars current one, that are attached the scuttle panel behind the cam cover.

No 10 pin connection to ecu relay to be redone.

The loom so far.

Just figuring out which this one is. The thing is there is only one of these on this loom but 3 on my cars current one, that are attached the scuttle panel behind the cam cover.
 07-09-2013, 03:20 PM
#172
Last Time, Get Off PF FFS
Thread Starter
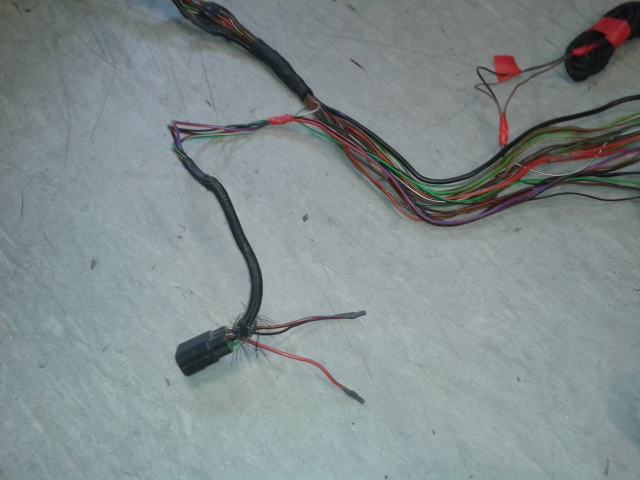
Ok. No4 Injector wiring had a break in it.
The others are fine.
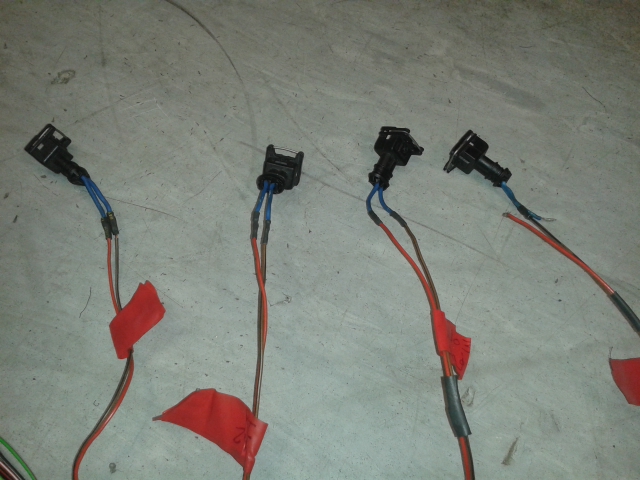
The MAP an ACT are the same as the injectors but I shall replace all the wires from the sensors right up to the ecu so its 1 wire not 2/3 in the same line lol.
The KNOCK, CPS, PHASE and TPS are all tickerty boo and just need rebraiding.
Think this is the part of the loom to the old coil system and an earth point. Have not traced it via the diagram yet.
And where I am with the loom at the moment after 5 hours off stripping.
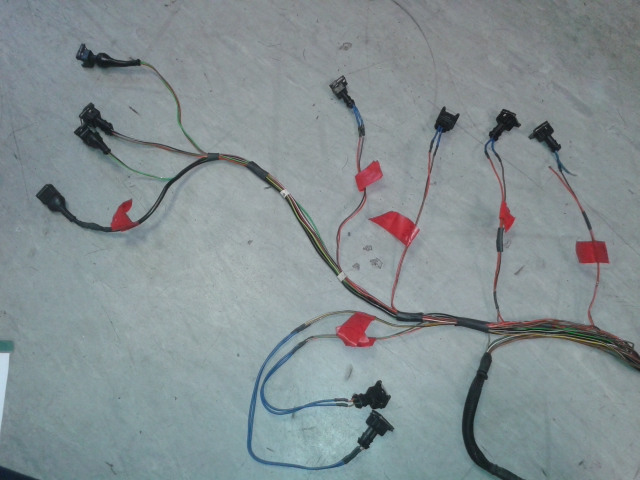
Just got a little bit to do when I am next on watch at midnight then it's onto sorting out and measuring the amount of wiring I need and get the right pin connections ordered up

The others are fine.

The MAP an ACT are the same as the injectors but I shall replace all the wires from the sensors right up to the ecu so its 1 wire not 2/3 in the same line lol.

The KNOCK, CPS, PHASE and TPS are all tickerty boo and just need rebraiding.

Think this is the part of the loom to the old coil system and an earth point. Have not traced it via the diagram yet.

And where I am with the loom at the moment after 5 hours off stripping.


Just got a little bit to do when I am next on watch at midnight then it's onto sorting out and measuring the amount of wiring I need and get the right pin connections ordered up
Last edited by kosienutter; 07-09-2013 at 03:23 PM.
08-09-2013, 08:42 PM
#173
Last Time, Get Off PF FFS
Thread Starter
This is where I ended this morning with the loom.
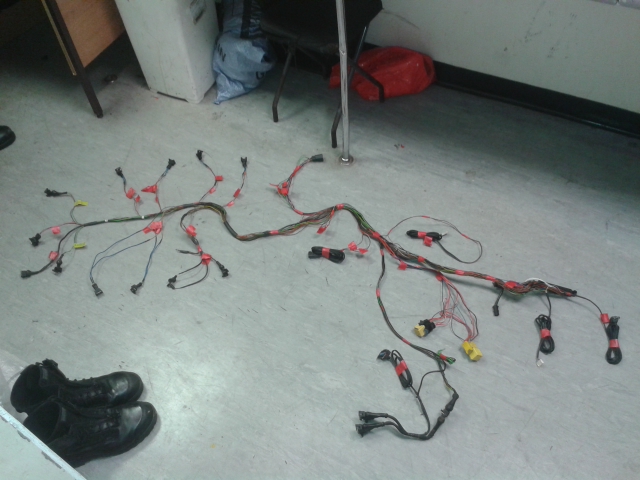
Started a list of the things that need sorting and will shop around for the right wires.
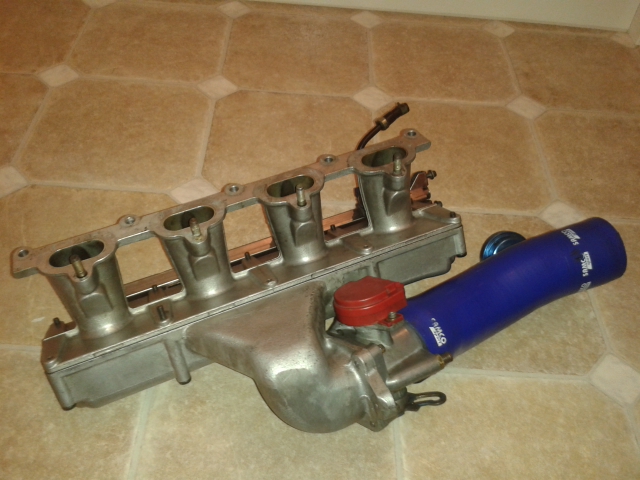
Put the inlet manifold back together this evening after a good clean.
Has come out quite well.
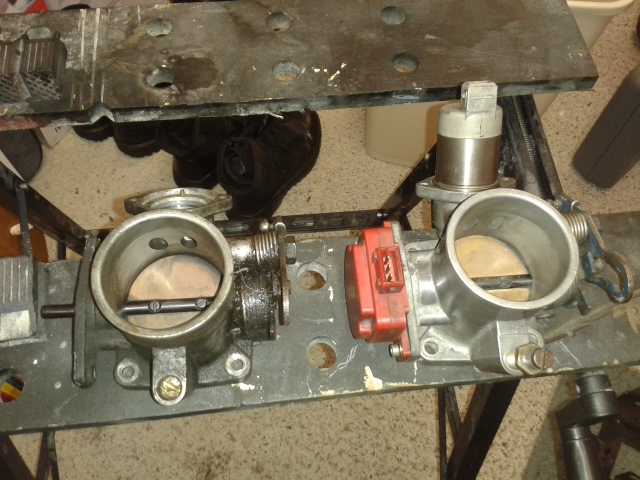
Made up the new throttle body only needing the TPS from mine and the ISCV which I cleaned out before refitting, gave its cover a blow over of Matt Black and greased up the idle screw too for good measure.
Spot the difference
The injectors are a pain to get back in
All clean and ready to fit later this week.

Started a list of the things that need sorting and will shop around for the right wires.

Put the inlet manifold back together this evening after a good clean.
Has come out quite well.


Made up the new throttle body only needing the TPS from mine and the ISCV which I cleaned out before refitting, gave its cover a blow over of Matt Black and greased up the idle screw too for good measure.

Spot the difference

The injectors are a pain to get back in
All clean and ready to fit later this week.


Last edited by kosienutter; 08-09-2013 at 08:47 PM.
10-09-2013, 07:19 PM
#177
OR you could use these
http://www.cbsonline.co.uk/product/C...ia_x_15mm_COT1
Last edited by Cossy Mike; 10-09-2013 at 07:40 PM.
 [/URL]
10-09-2013, 09:22 PM
[/URL]
10-09-2013, 09:22 PM
#182
Last Time, Get Off PF FFS
Thread Starter
Thanks mate. Once I have finished my current car fixing lol, I shall slow time finish this. Going to buy a board to hang it up and have it laid out better.
�18.........Sod that lol. Will get those mounts if the ones I have made up don't work.
cheeRS bud. I had the ECT labelled up but not the others. Thanks bud now they make sense
I am taking the connectors off bud as some of the wiring have to many solder joins in it, so the plan is to get the right wires and run 1 instead of the same line having 2 or 3 in it.
I have found the right connectors and black coverings etc etc
OK thanks bud
Thank mate.
Thought I'd give it a go as I have made my own gauge sender loom and it came out IMO brilliantly with no issues. I am not going to rush this as I want it perfect.
Available from Ford for �18 EACH
OR you could use these
http://www.cbsonline.co.uk/product/C...ia_x_15mm_COT1
OR you could use these
http://www.cbsonline.co.uk/product/C...ia_x_15mm_COT1
cheeRS bud. I had the ECT labelled up but not the others. Thanks bud now they make sense
I have found the right connectors and black coverings etc etc
Thank mate.
Thought I'd give it a go as I have made my own gauge sender loom and it came out IMO brilliantly with no issues. I am not going to rush this as I want it perfect.
Last edited by kosienutter; 10-09-2013 at 09:23 PM.
10-09-2013, 09:25 PM
#183
Last Time, Get Off PF FFS
Thread Starter
Hey guys.
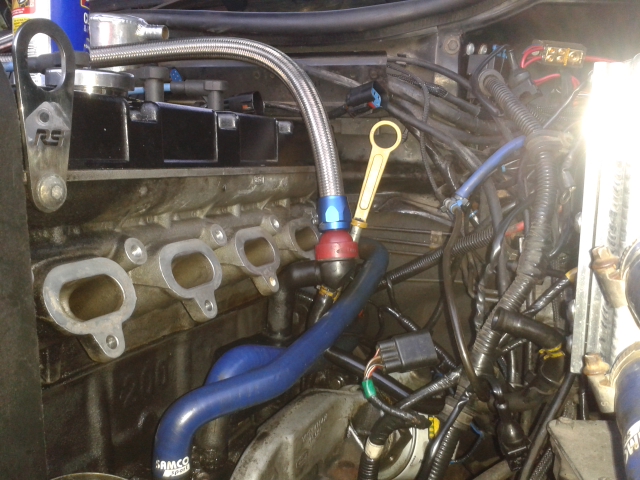
Got the inlet back on earlier this evening. The rear bottom nut was an absolute tw@t to get on. I was effin and blinding whilst practically dislocating my wrists to attempt to get a spanner on it
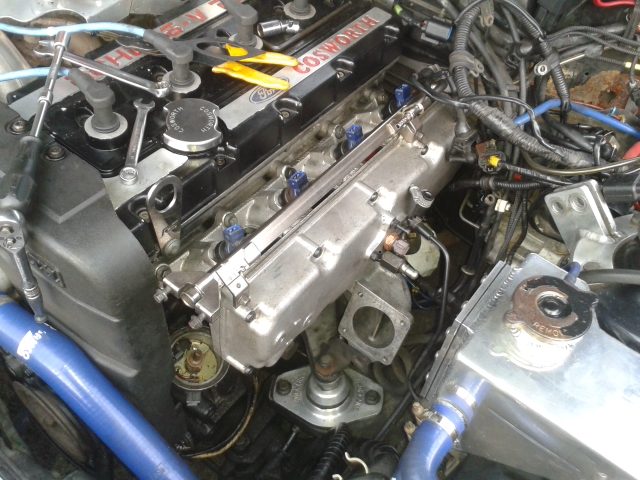
All plumbed in. I have left the cold side boost pipe off for now so I have access to the base idle screw when she is up to temp and I can set in when I finally start her up. Cant wait. Turned her over and she didn't do what she used to do at all which was turn over 6 times and completely die till it kicked back into turning over again. Must have been the air leak making the car struggle to start. Shame the pump is still buggered lol.
Now it is back to the original problem that started this unexpected car of the road time.
Got the fuel pump from Matt Lewis today. Super fast postage as usual
Also the filter I have had in its box in the garage for a couple of years. Got the connections and rubber seals to so once I have plastered the nuts and bolts in grease I know they will come off better than what happened to my old one
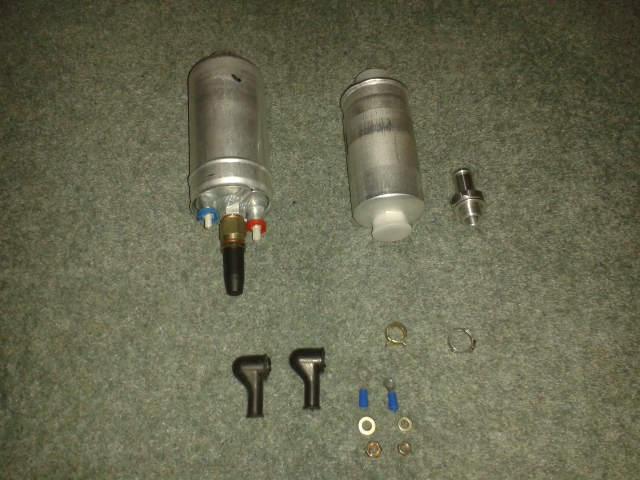
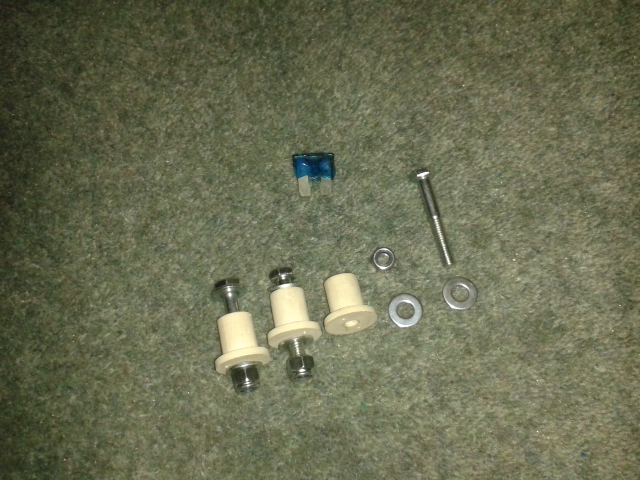
Also got these from work for the fuel pump inner shock mount. M6 bolts. I think these might work but not sure if they will have the same effect as a rubber centre bobbin type???????
Got the cradle and bits all bagged up for blasting. Picking the scuttle up Thursday. Hopefully I should have it back by Friday or next Monday. My plan is to have all this done for Rally Day as I am determined to go in the Taxi.
Got the inlet back on earlier this evening. The rear bottom nut was an absolute tw@t to get on. I was effin and blinding whilst practically dislocating my wrists to attempt to get a spanner on it

All plumbed in. I have left the cold side boost pipe off for now so I have access to the base idle screw when she is up to temp and I can set in when I finally start her up. Cant wait. Turned her over and she didn't do what she used to do at all which was turn over 6 times and completely die till it kicked back into turning over again. Must have been the air leak making the car struggle to start. Shame the pump is still buggered lol.

Now it is back to the original problem that started this unexpected car of the road time.
Got the fuel pump from Matt Lewis today. Super fast postage as usual
Also the filter I have had in its box in the garage for a couple of years. Got the connections and rubber seals to so once I have plastered the nuts and bolts in grease I know they will come off better than what happened to my old one

Also got these from work for the fuel pump inner shock mount. M6 bolts. I think these might work but not sure if they will have the same effect as a rubber centre bobbin type???????

Got the cradle and bits all bagged up for blasting. Picking the scuttle up Thursday. Hopefully I should have it back by Friday or next Monday. My plan is to have all this done for Rally Day as I am determined to go in the Taxi.
Last edited by kosienutter; 10-09-2013 at 09:31 PM.
11-09-2013, 09:03 PM
#184
Last Time, Get Off PF FFS
Thread Starter
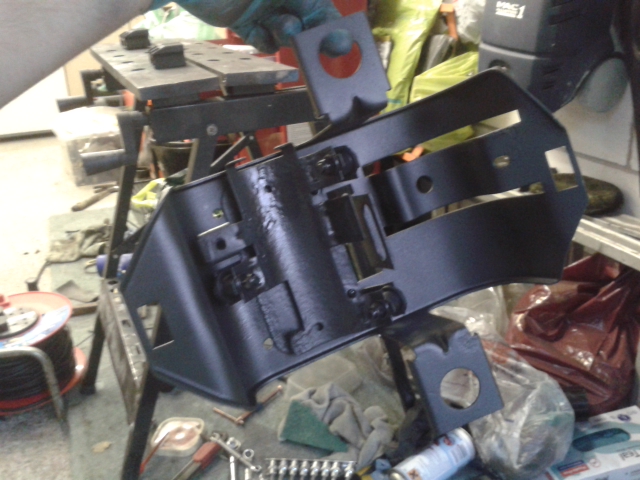
Got the cradle back from the blasters and got it primed sprayed an stop chipped.
Few paint runs but as it'll be lagged in waxoil I don't think it'll matter
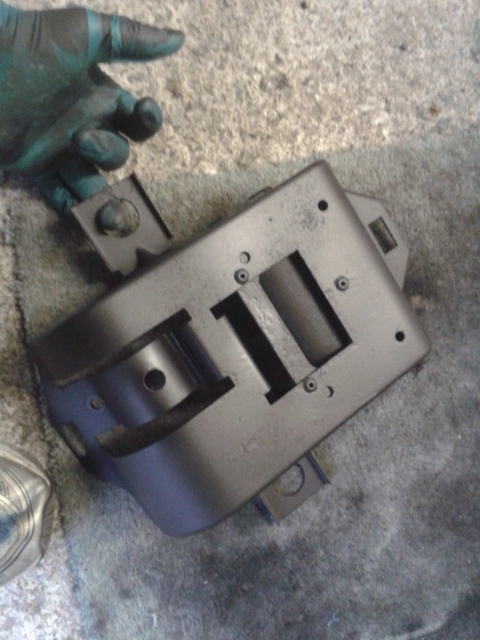
Got the old ones nuts and connections soaking in WD40 for removal
Few paint runs but as it'll be lagged in waxoil I don't think it'll matter


Got the old ones nuts and connections soaking in WD40 for removal
22-09-2013, 04:22 PM
#189
Last Time, Get Off PF FFS
Thread Starter
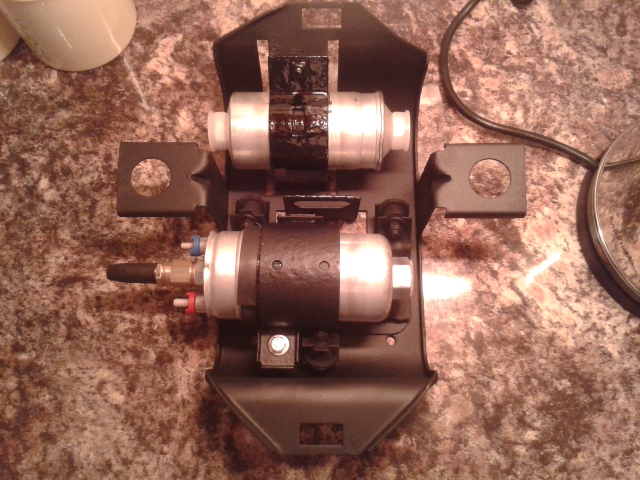
Just a few photos for the final instalment of this thread.
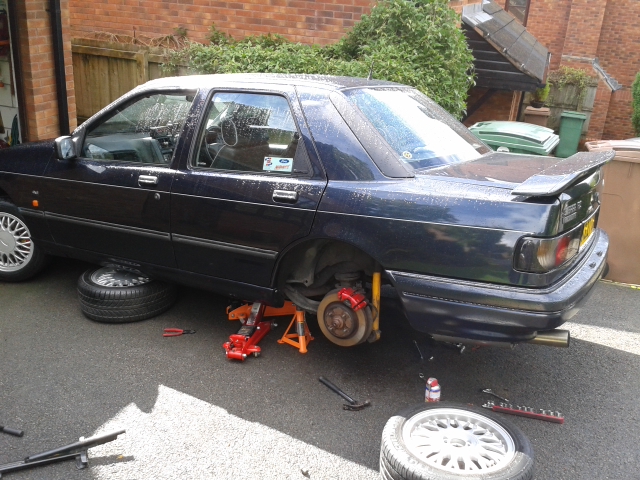
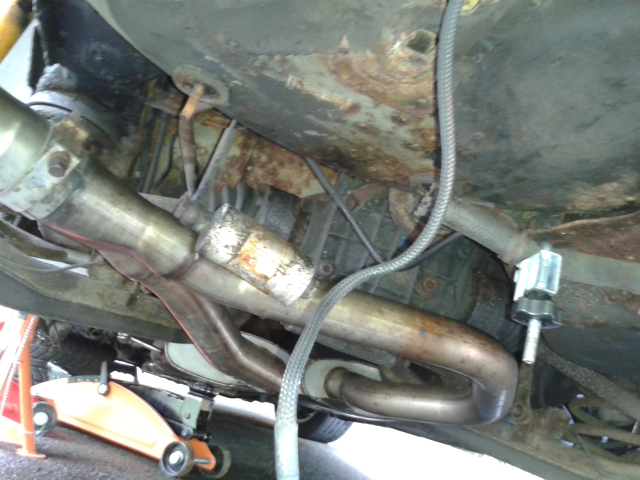
Managed to roll the car onto my drive and lift her up to get the old pump out.
My neighbours must be thinking whats he doing now
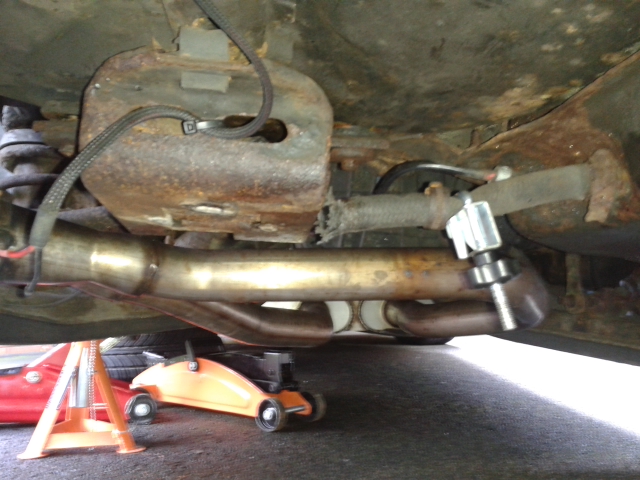
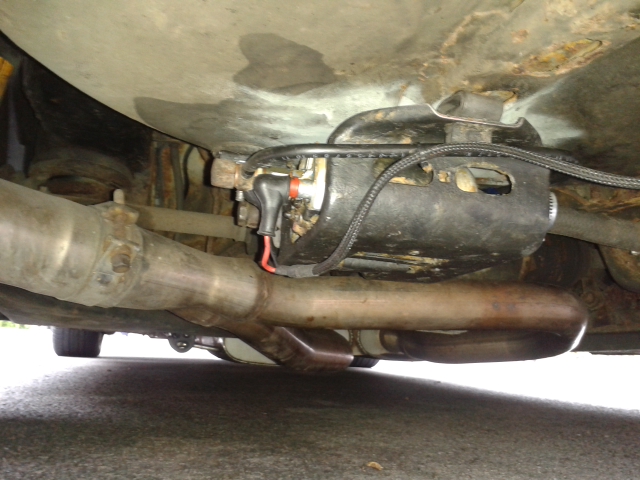
Also took the time to raise the left hand exhaust silencer mount back into position after the left silencer smacking a raised man hole cover as it was hanging very low. Hence the orange jack in the middle of the car.
Got the pump pipe clamped up. Got 4 different sizes in a pack for �10. A bargain and such a good product.
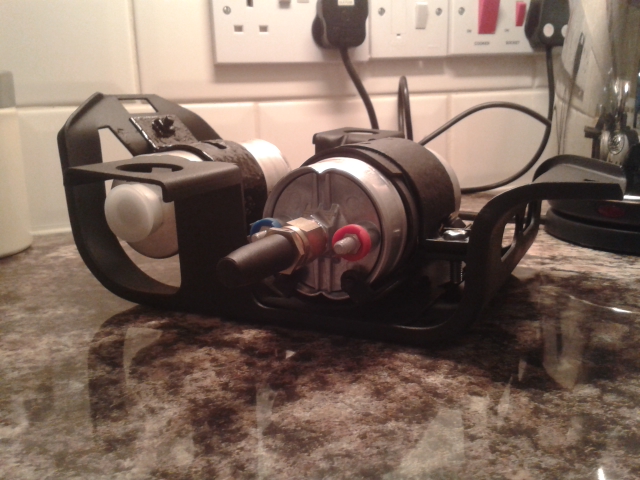
Literally pulled the old pump out as nothing was holding it in other than gravity lol.
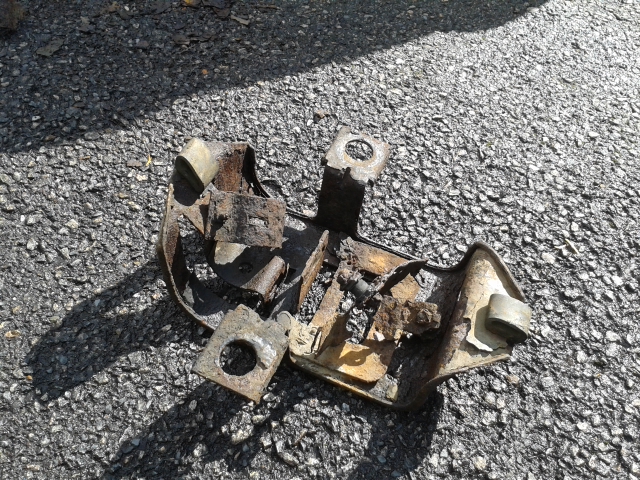
Probably cause this was doing bugger all
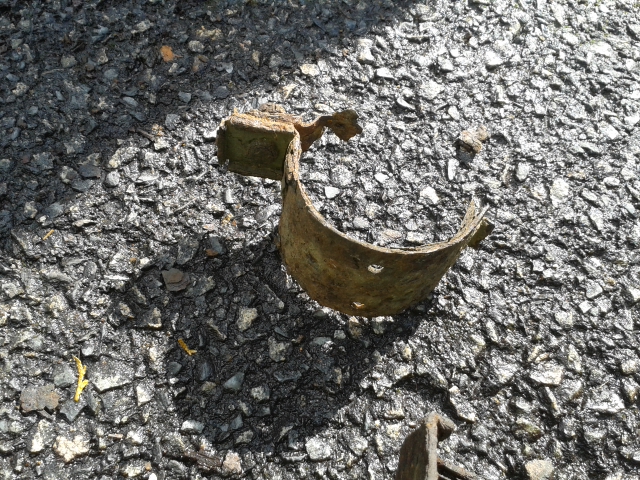
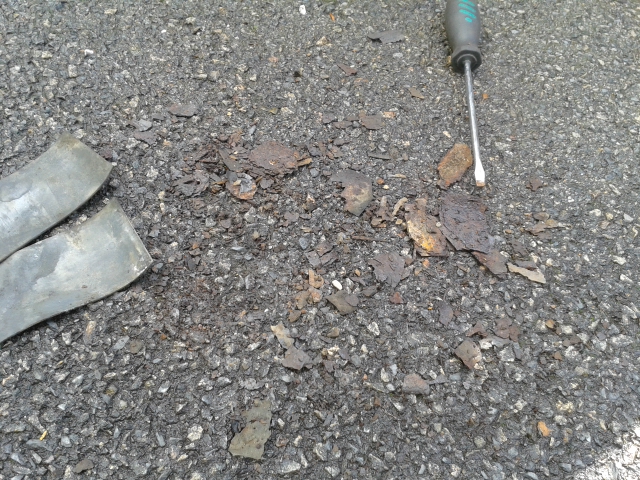
What's left of it all. I think I can save the brackets and the cradle itself but the pump mount and the rubbers and the bit that is riveted have had it.
Better get the broom out
Had to wait for Paul to come round with something big enough to get round the old filter to get its outlet nut off. What a tw@t that was.
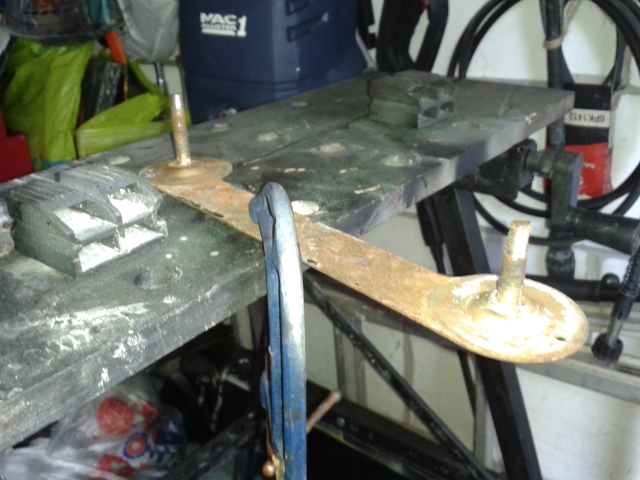
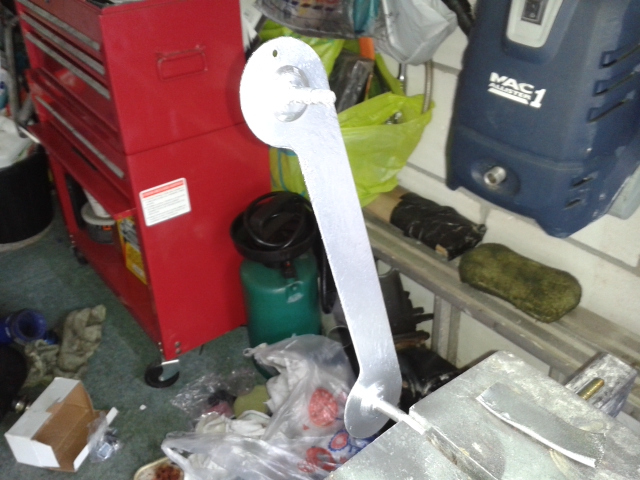
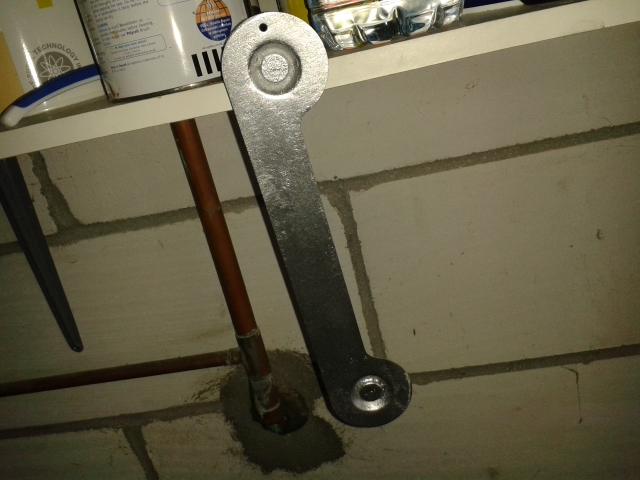
Gave the wheel well mount bracket a quick grinder session and etch primer and paint up inc the bottom mount circle covers too and re-tapped the M8 size bolts ends too for good measure. I know the grinder marks are still there but its better that rust lol.
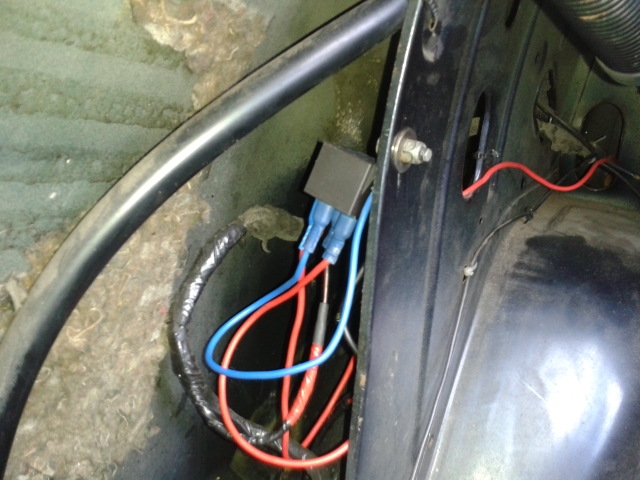
Re-done the wiring to just in case with new terminals and rubber boots and new relay.

And it fitted.
Had a few leaks which eventually got sorted, and when they did we had a relay fault which ended up being the 20 amp fuse one behind the passenger foot well carpet, as we had to bridge the connections of the relay until we found it.
Then when we came to start her the battery lost its Amps to start, so I called it a night and got the car jump started Friday afternoon in time for a quick shakedown and quick clean before the show.
I need to clean underneath and get some black stone chip on as I didn't have time before Rally day.
Managed to roll the car onto my drive and lift her up to get the old pump out.
My neighbours must be thinking whats he doing now
Also took the time to raise the left hand exhaust silencer mount back into position after the left silencer smacking a raised man hole cover as it was hanging very low. Hence the orange jack in the middle of the car.

Got the pump pipe clamped up. Got 4 different sizes in a pack for �10. A bargain and such a good product.

Literally pulled the old pump out as nothing was holding it in other than gravity lol.

Probably cause this was doing bugger all

What's left of it all. I think I can save the brackets and the cradle itself but the pump mount and the rubbers and the bit that is riveted have had it.

Better get the broom out

Had to wait for Paul to come round with something big enough to get round the old filter to get its outlet nut off. What a tw@t that was.

Gave the wheel well mount bracket a quick grinder session and etch primer and paint up inc the bottom mount circle covers too and re-tapped the M8 size bolts ends too for good measure. I know the grinder marks are still there but its better that rust lol.


Re-done the wiring to just in case with new terminals and rubber boots and new relay.


And it fitted.

Had a few leaks which eventually got sorted, and when they did we had a relay fault which ended up being the 20 amp fuse one behind the passenger foot well carpet, as we had to bridge the connections of the relay until we found it.
Then when we came to start her the battery lost its Amps to start, so I called it a night and got the car jump started Friday afternoon in time for a quick shakedown and quick clean before the show.
I need to clean underneath and get some black stone chip on as I didn't have time before Rally day.
Last edited by kosienutter; 22-09-2013 at 04:31 PM.
23-09-2013, 11:13 AM
#193
Last Time, Get Off PF FFS
Thread Starter
Thanks mate. She ran brilliantly there and back. Got 130 miles out of 1/4 of a tank with 3 or 4 full throttle blasts too, so the air leak fix has bought the fuel consumption down brilliantly. Had a 30 min shake down Friday night after cleaning her and had no leaks thank god lol.
 25-03-2014, 07:58 PM
#195
Last Time, Get Off PF FFS
Thread Starter
The old girl has to see nasty MOT man tomorrow. I think shell be alright but they'll find something on her again I am sure
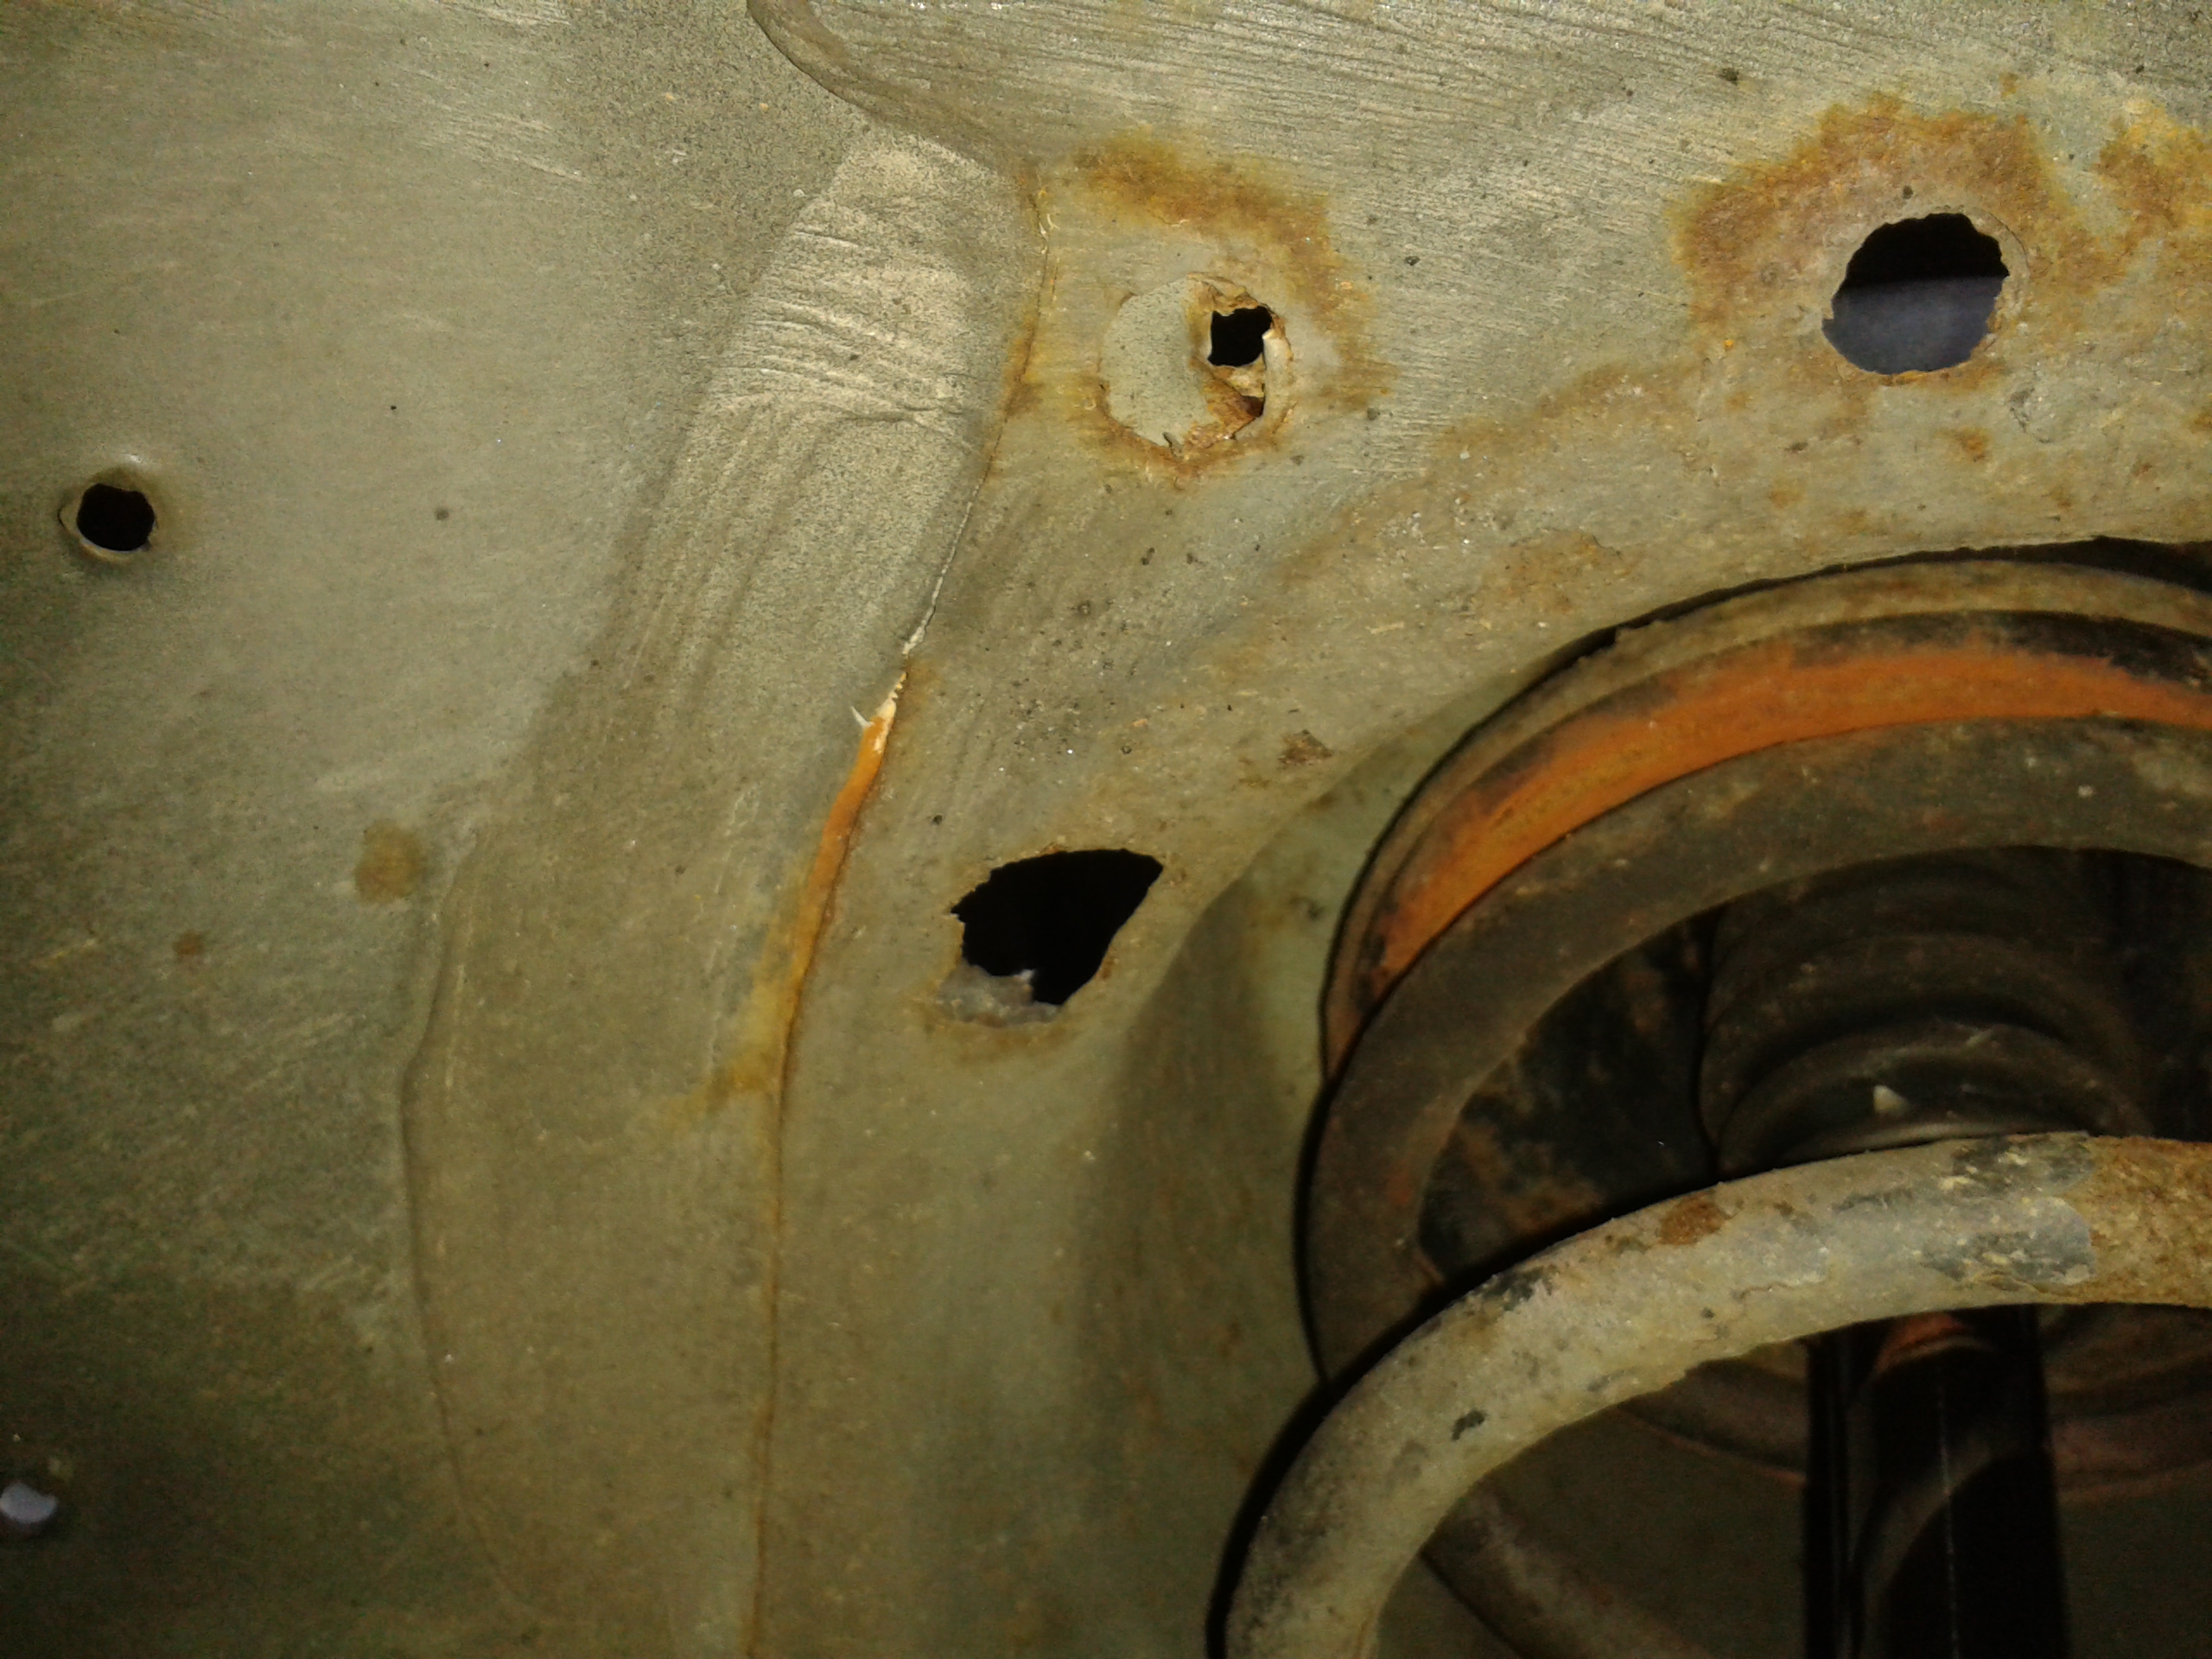
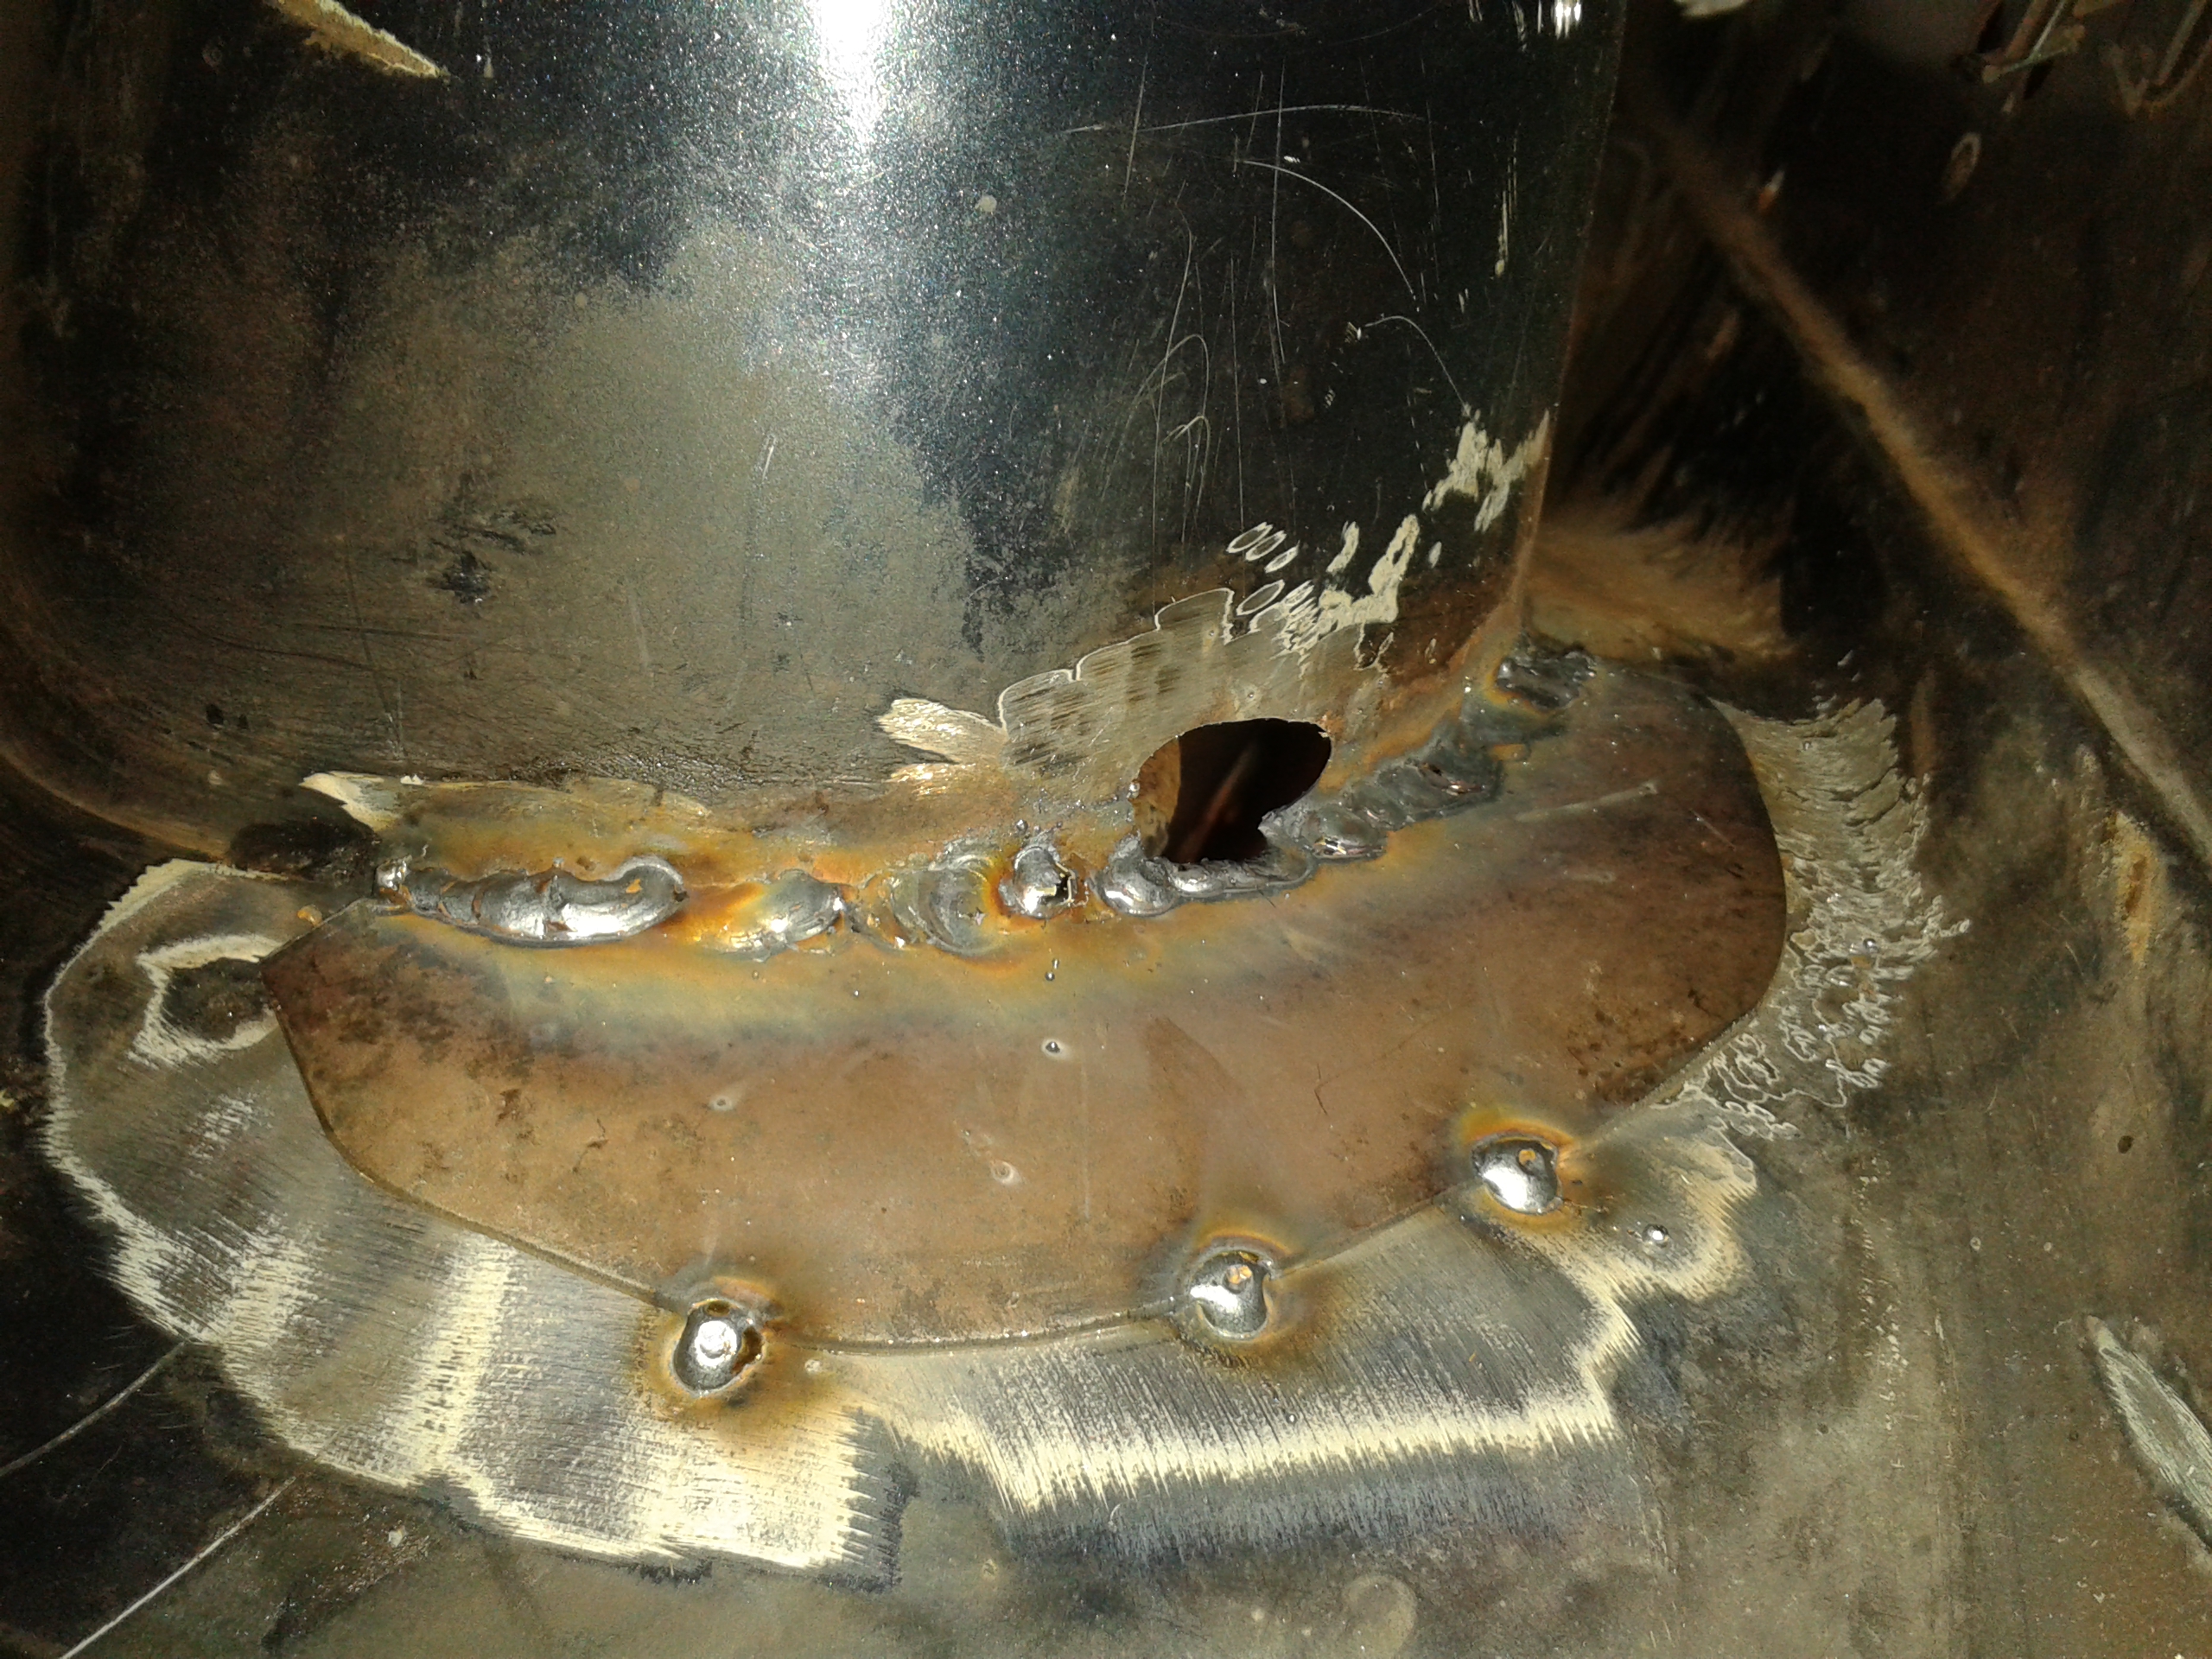
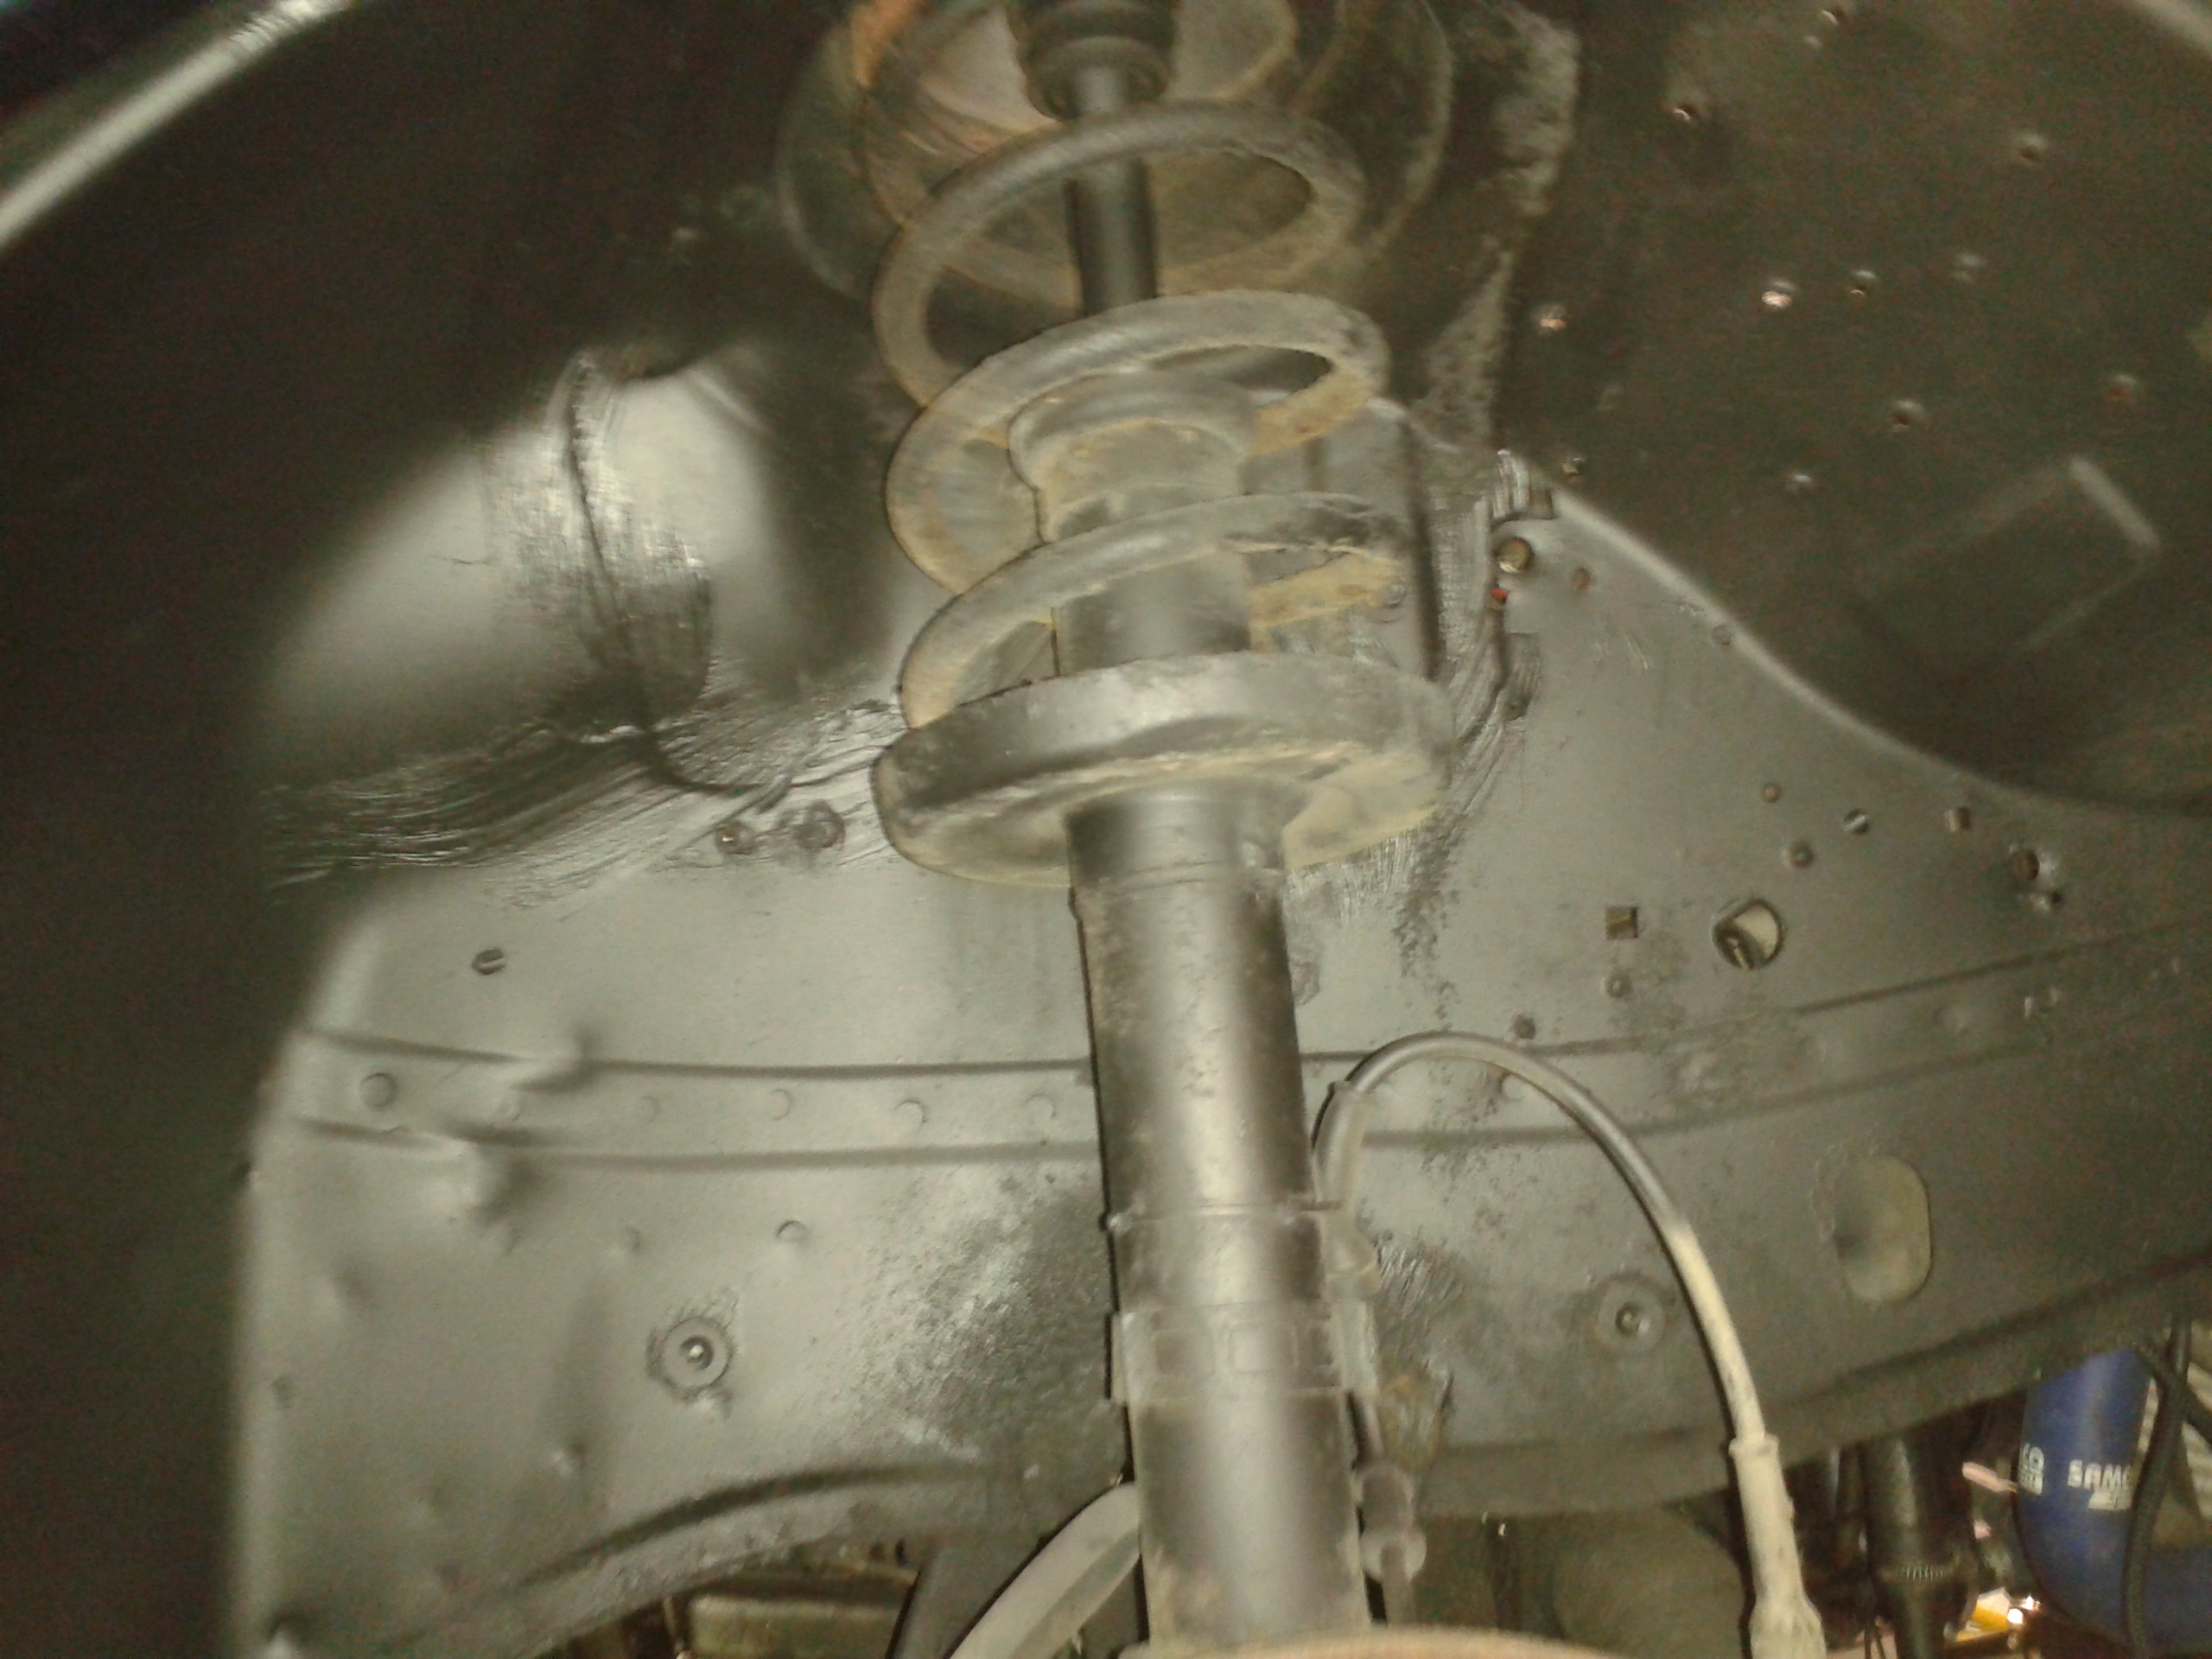
I knew there was some welding to be done on one of the suspension cup things that attach to the arch so checked them out further.
The O/S had a slight bit of surface rust around the sealant so a quick wire wheel down, primed, tiger sealed and repainted it. I managed to find gen Ford Smokestone paint rattle cans and top laquer on eGay.
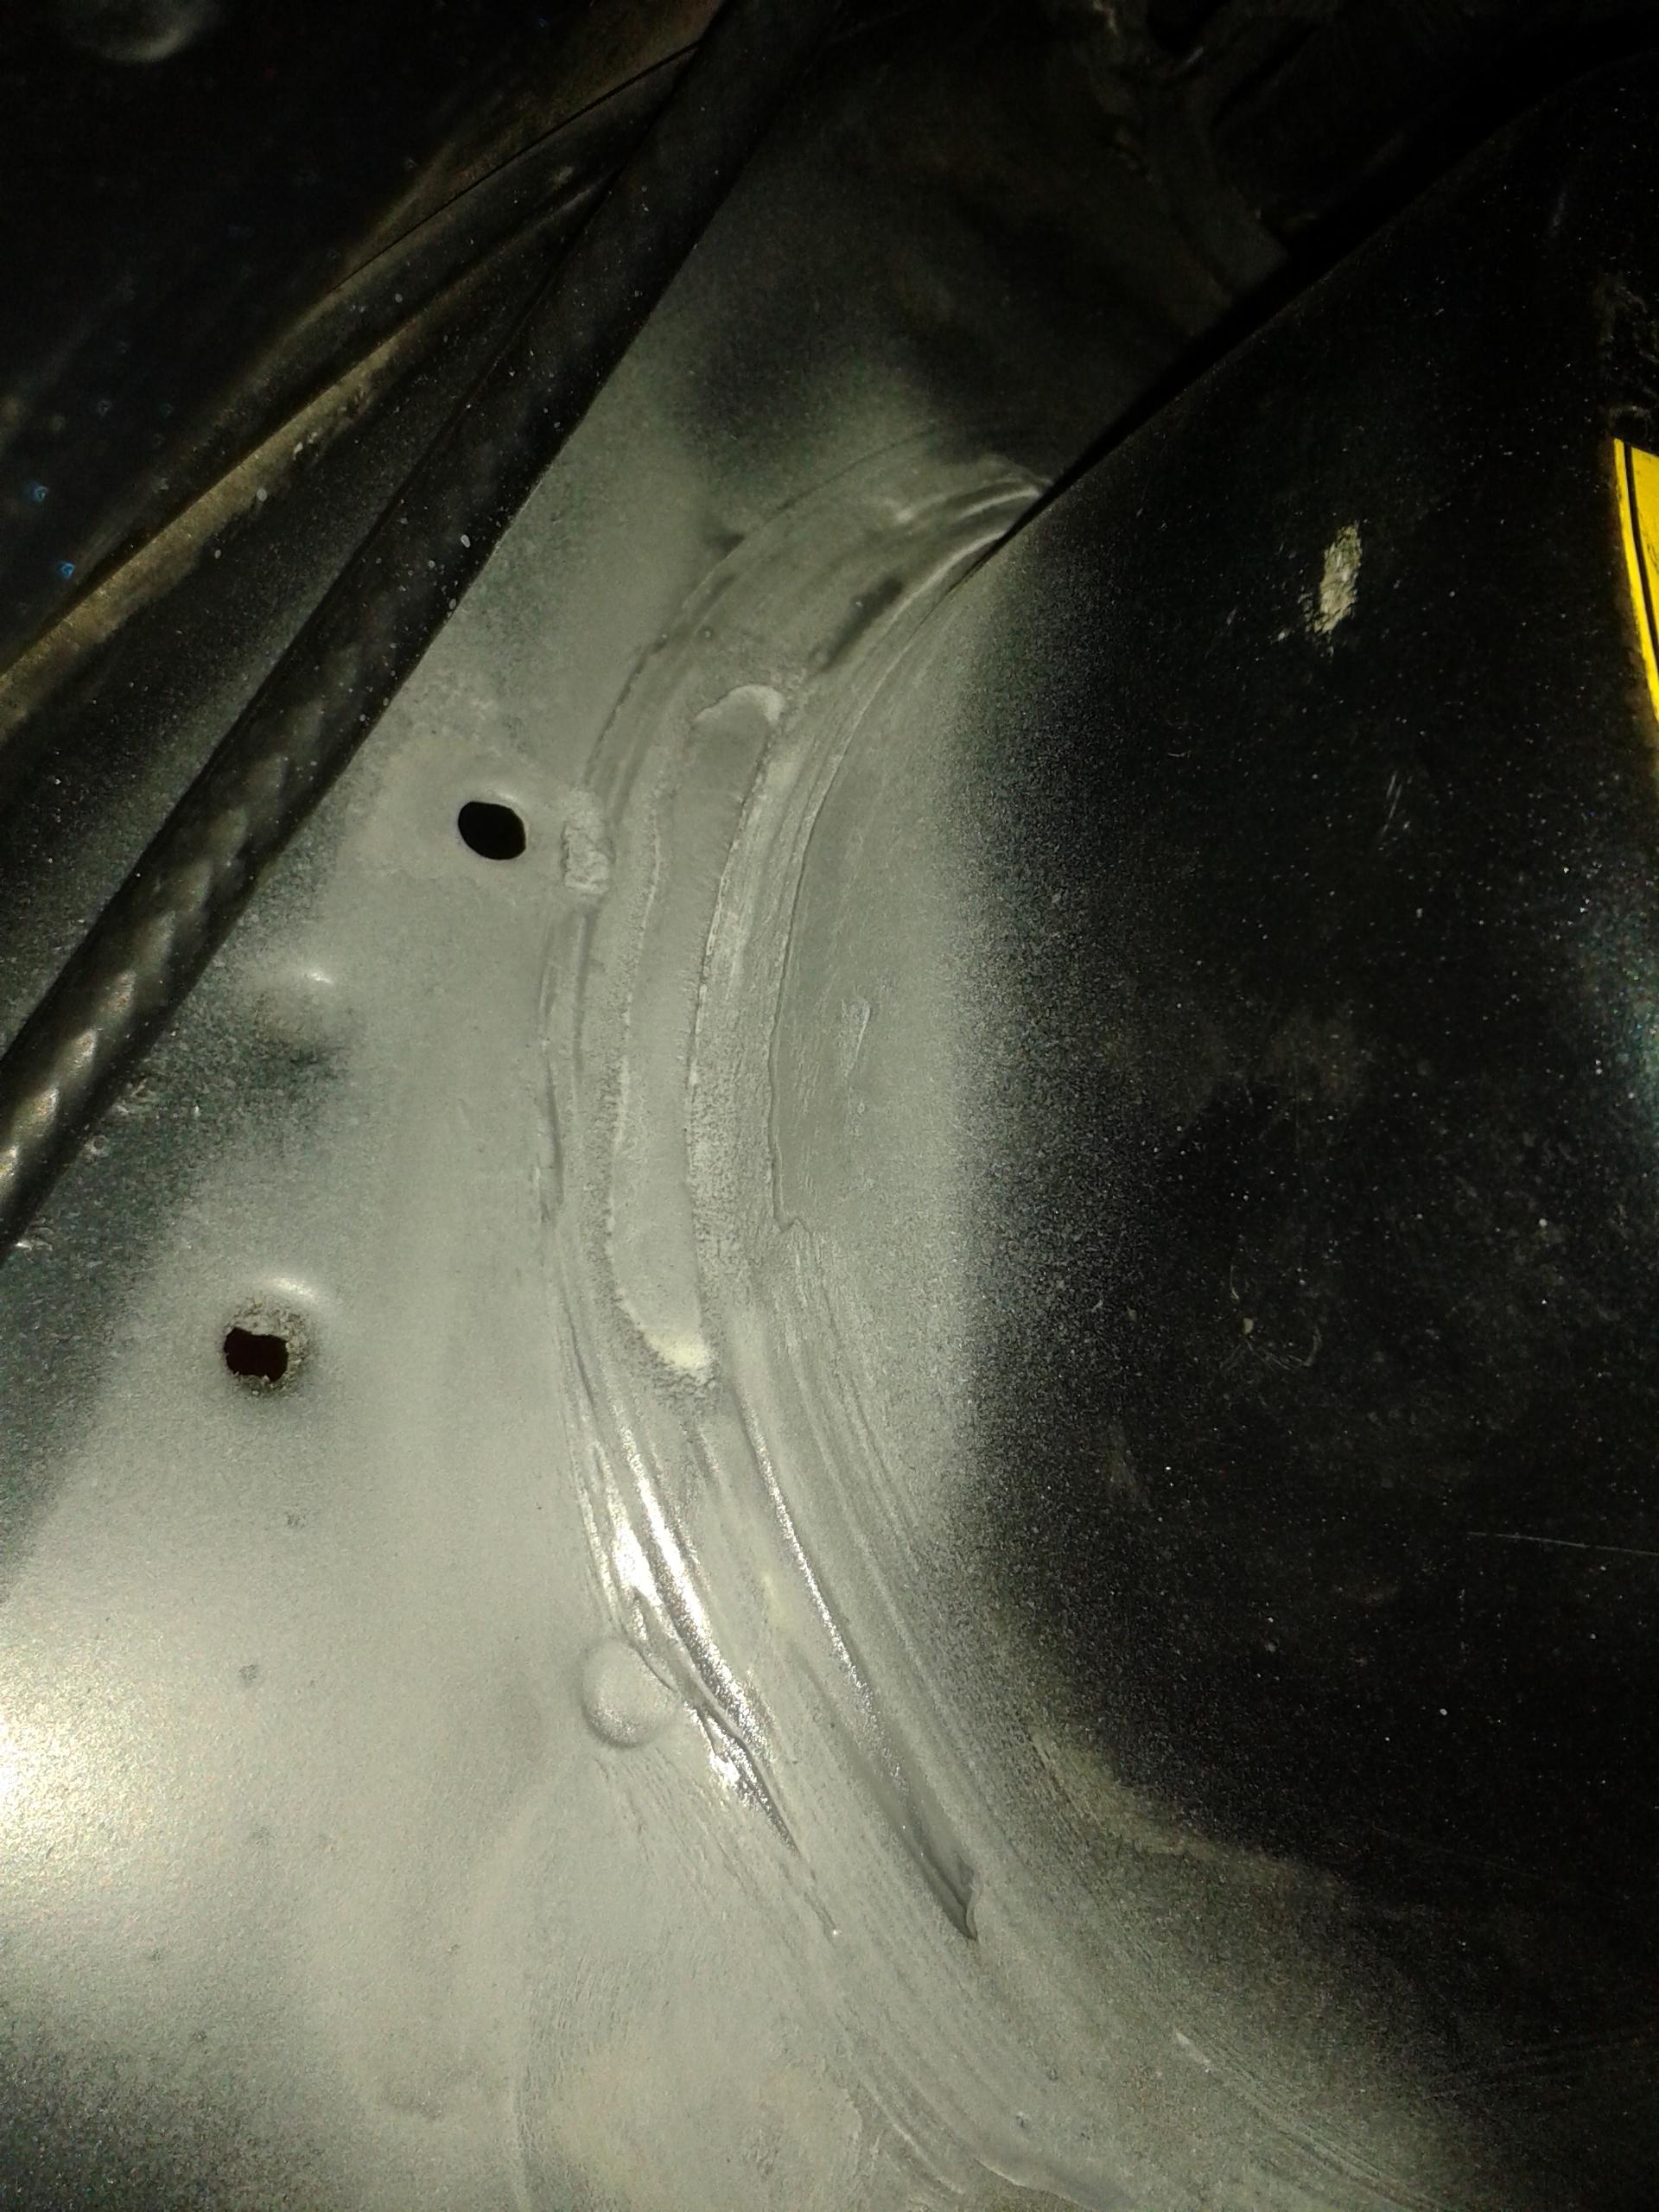
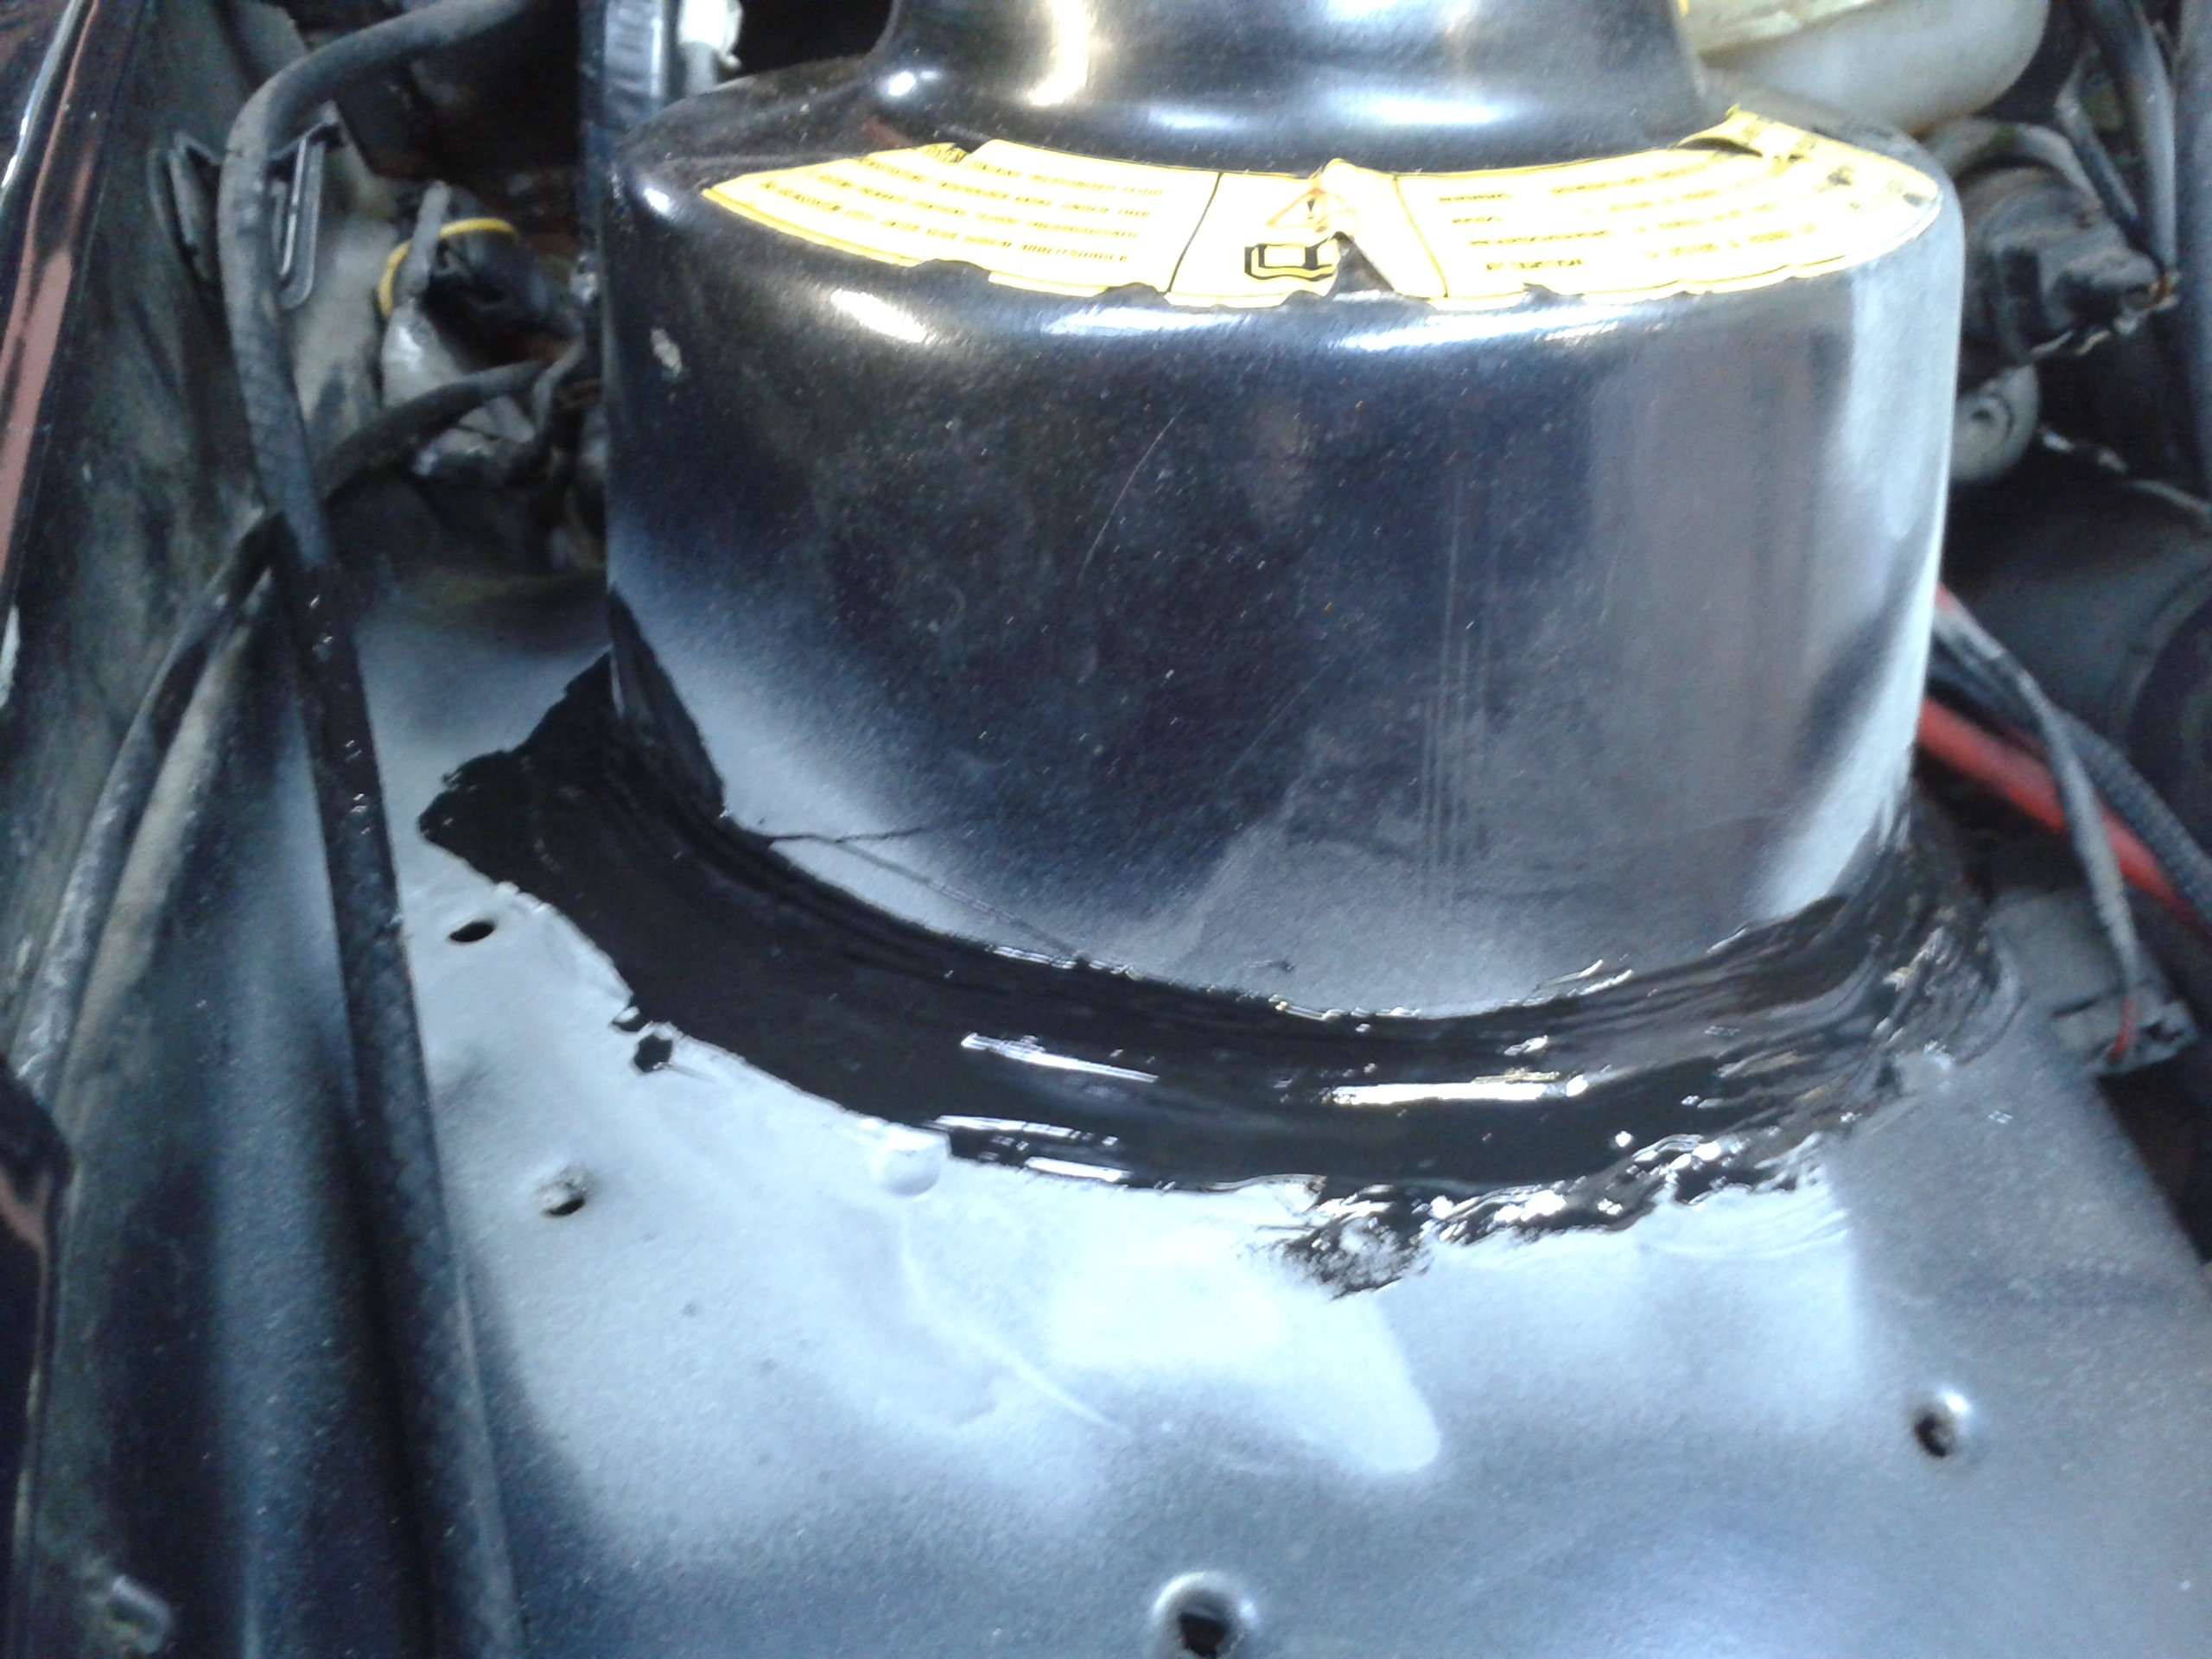
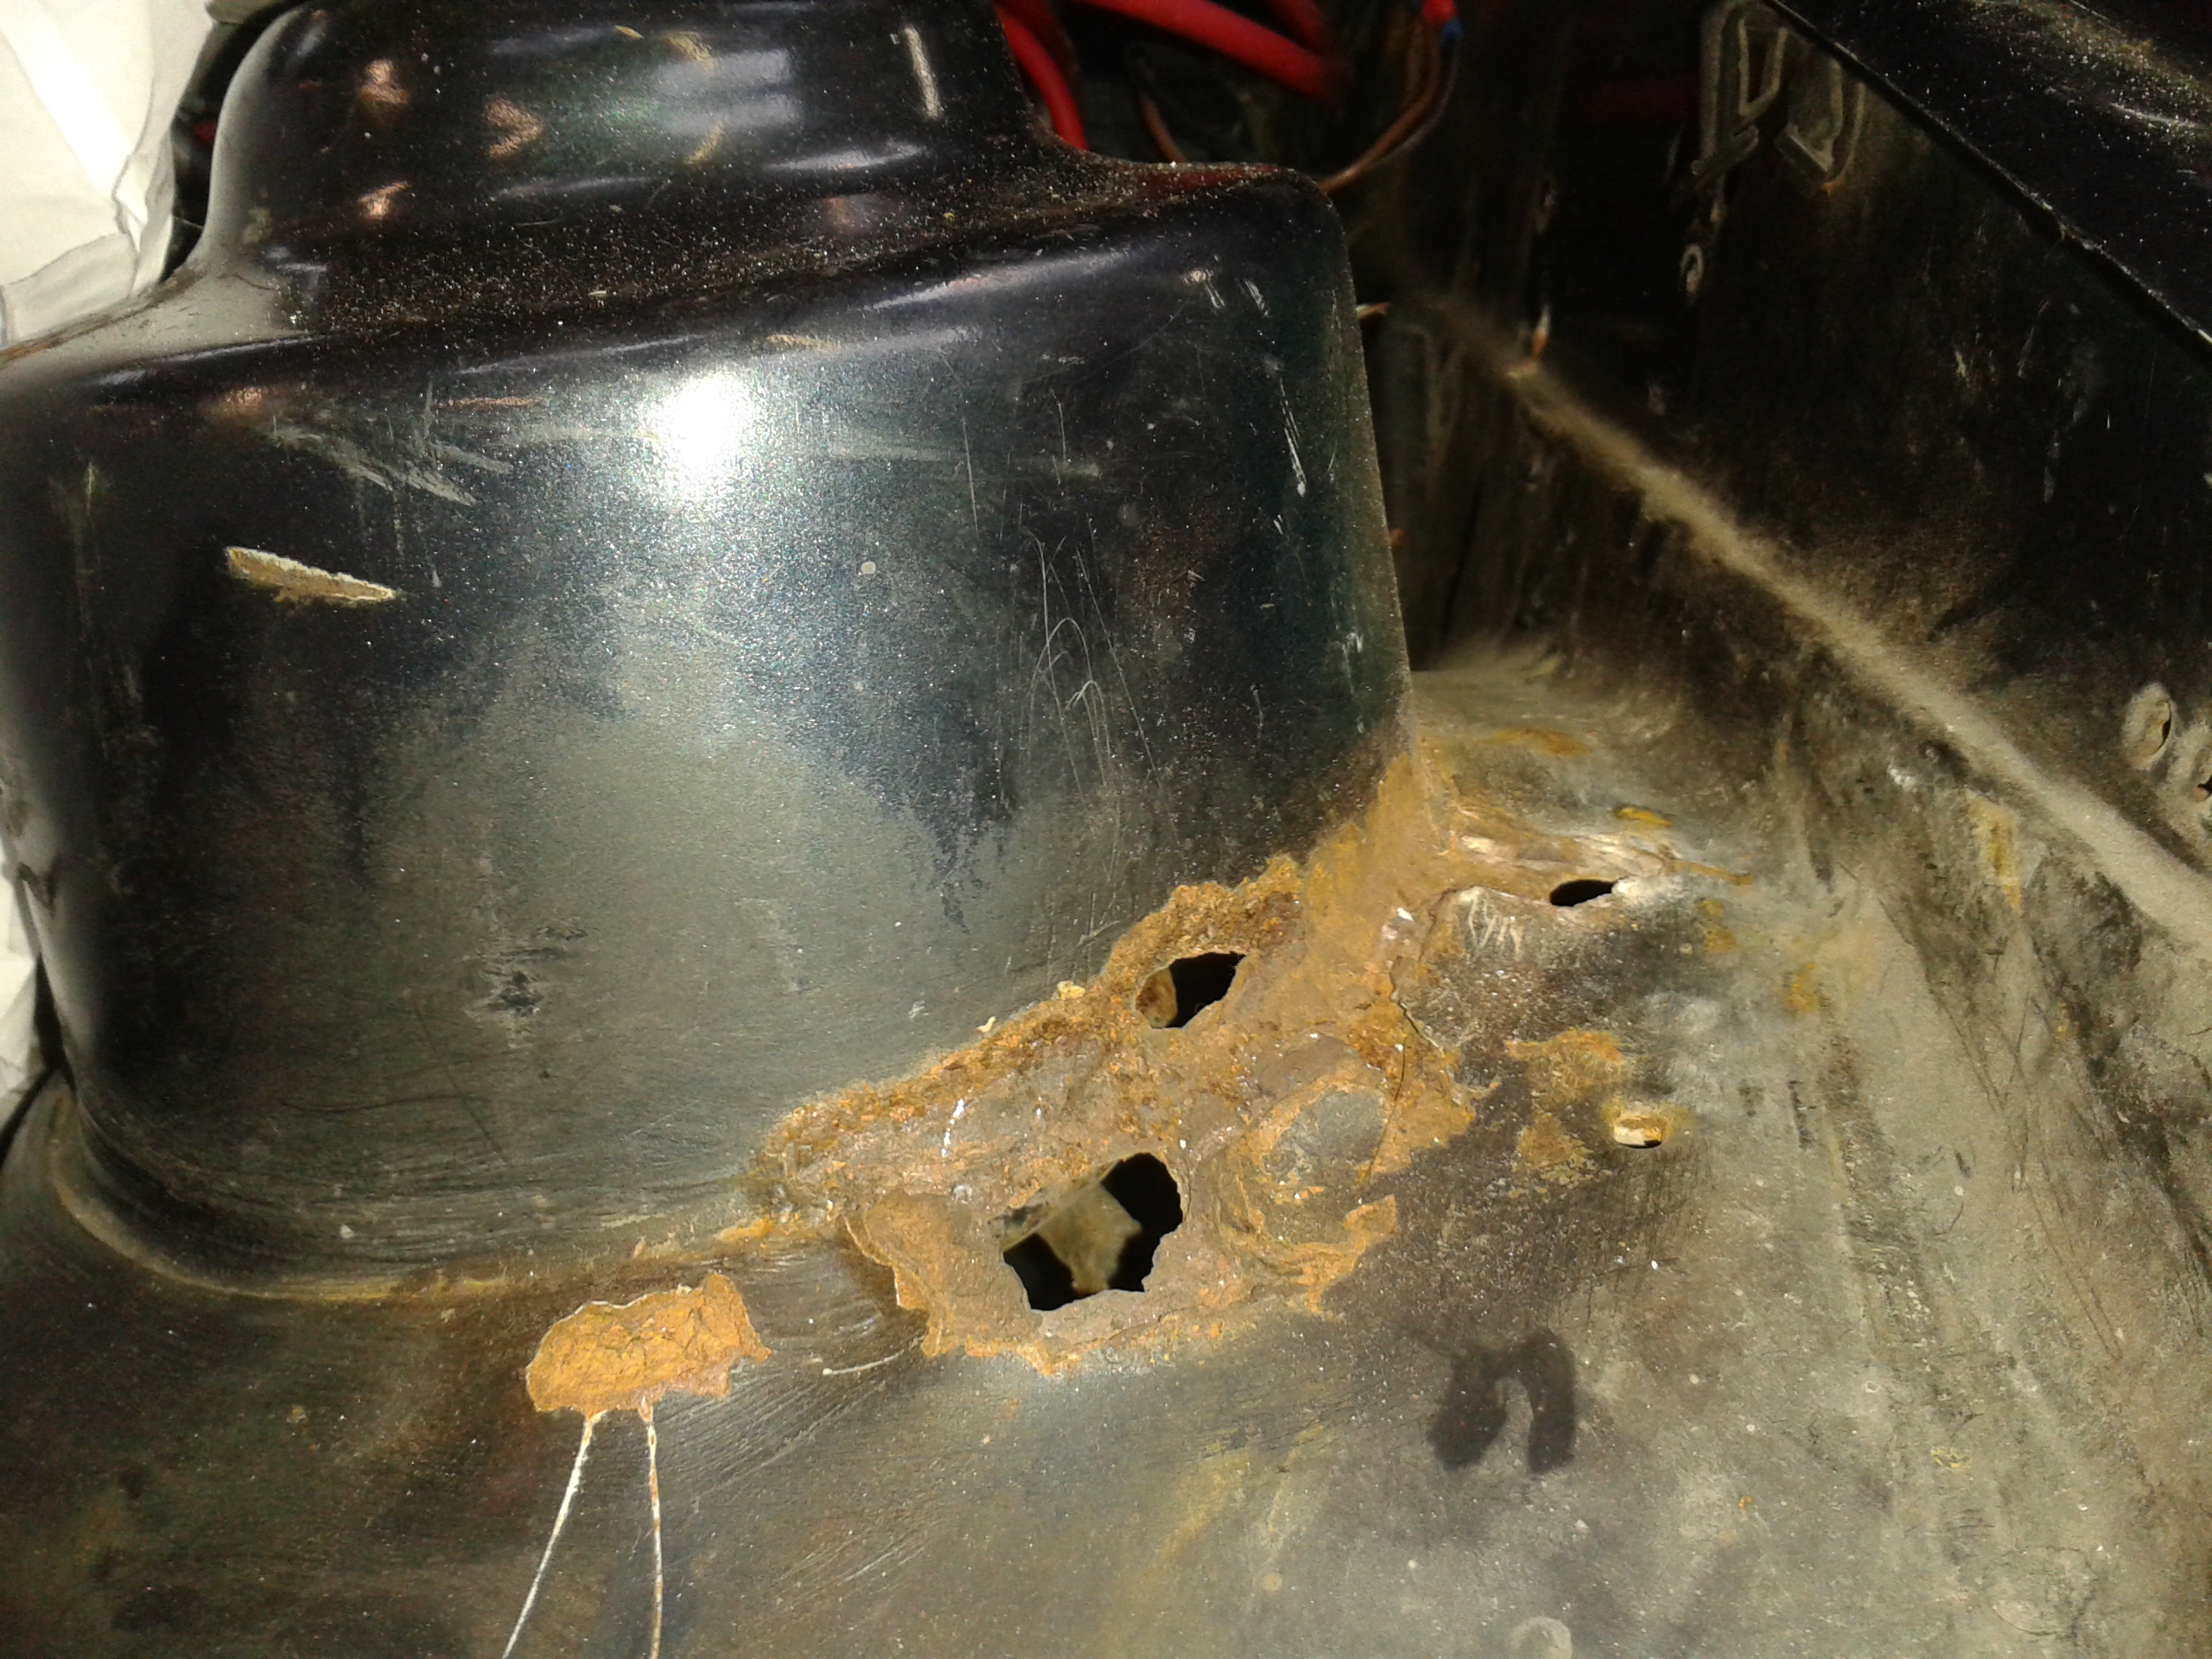
The biggy was the N/S. A few holes under the header tank needed addressing
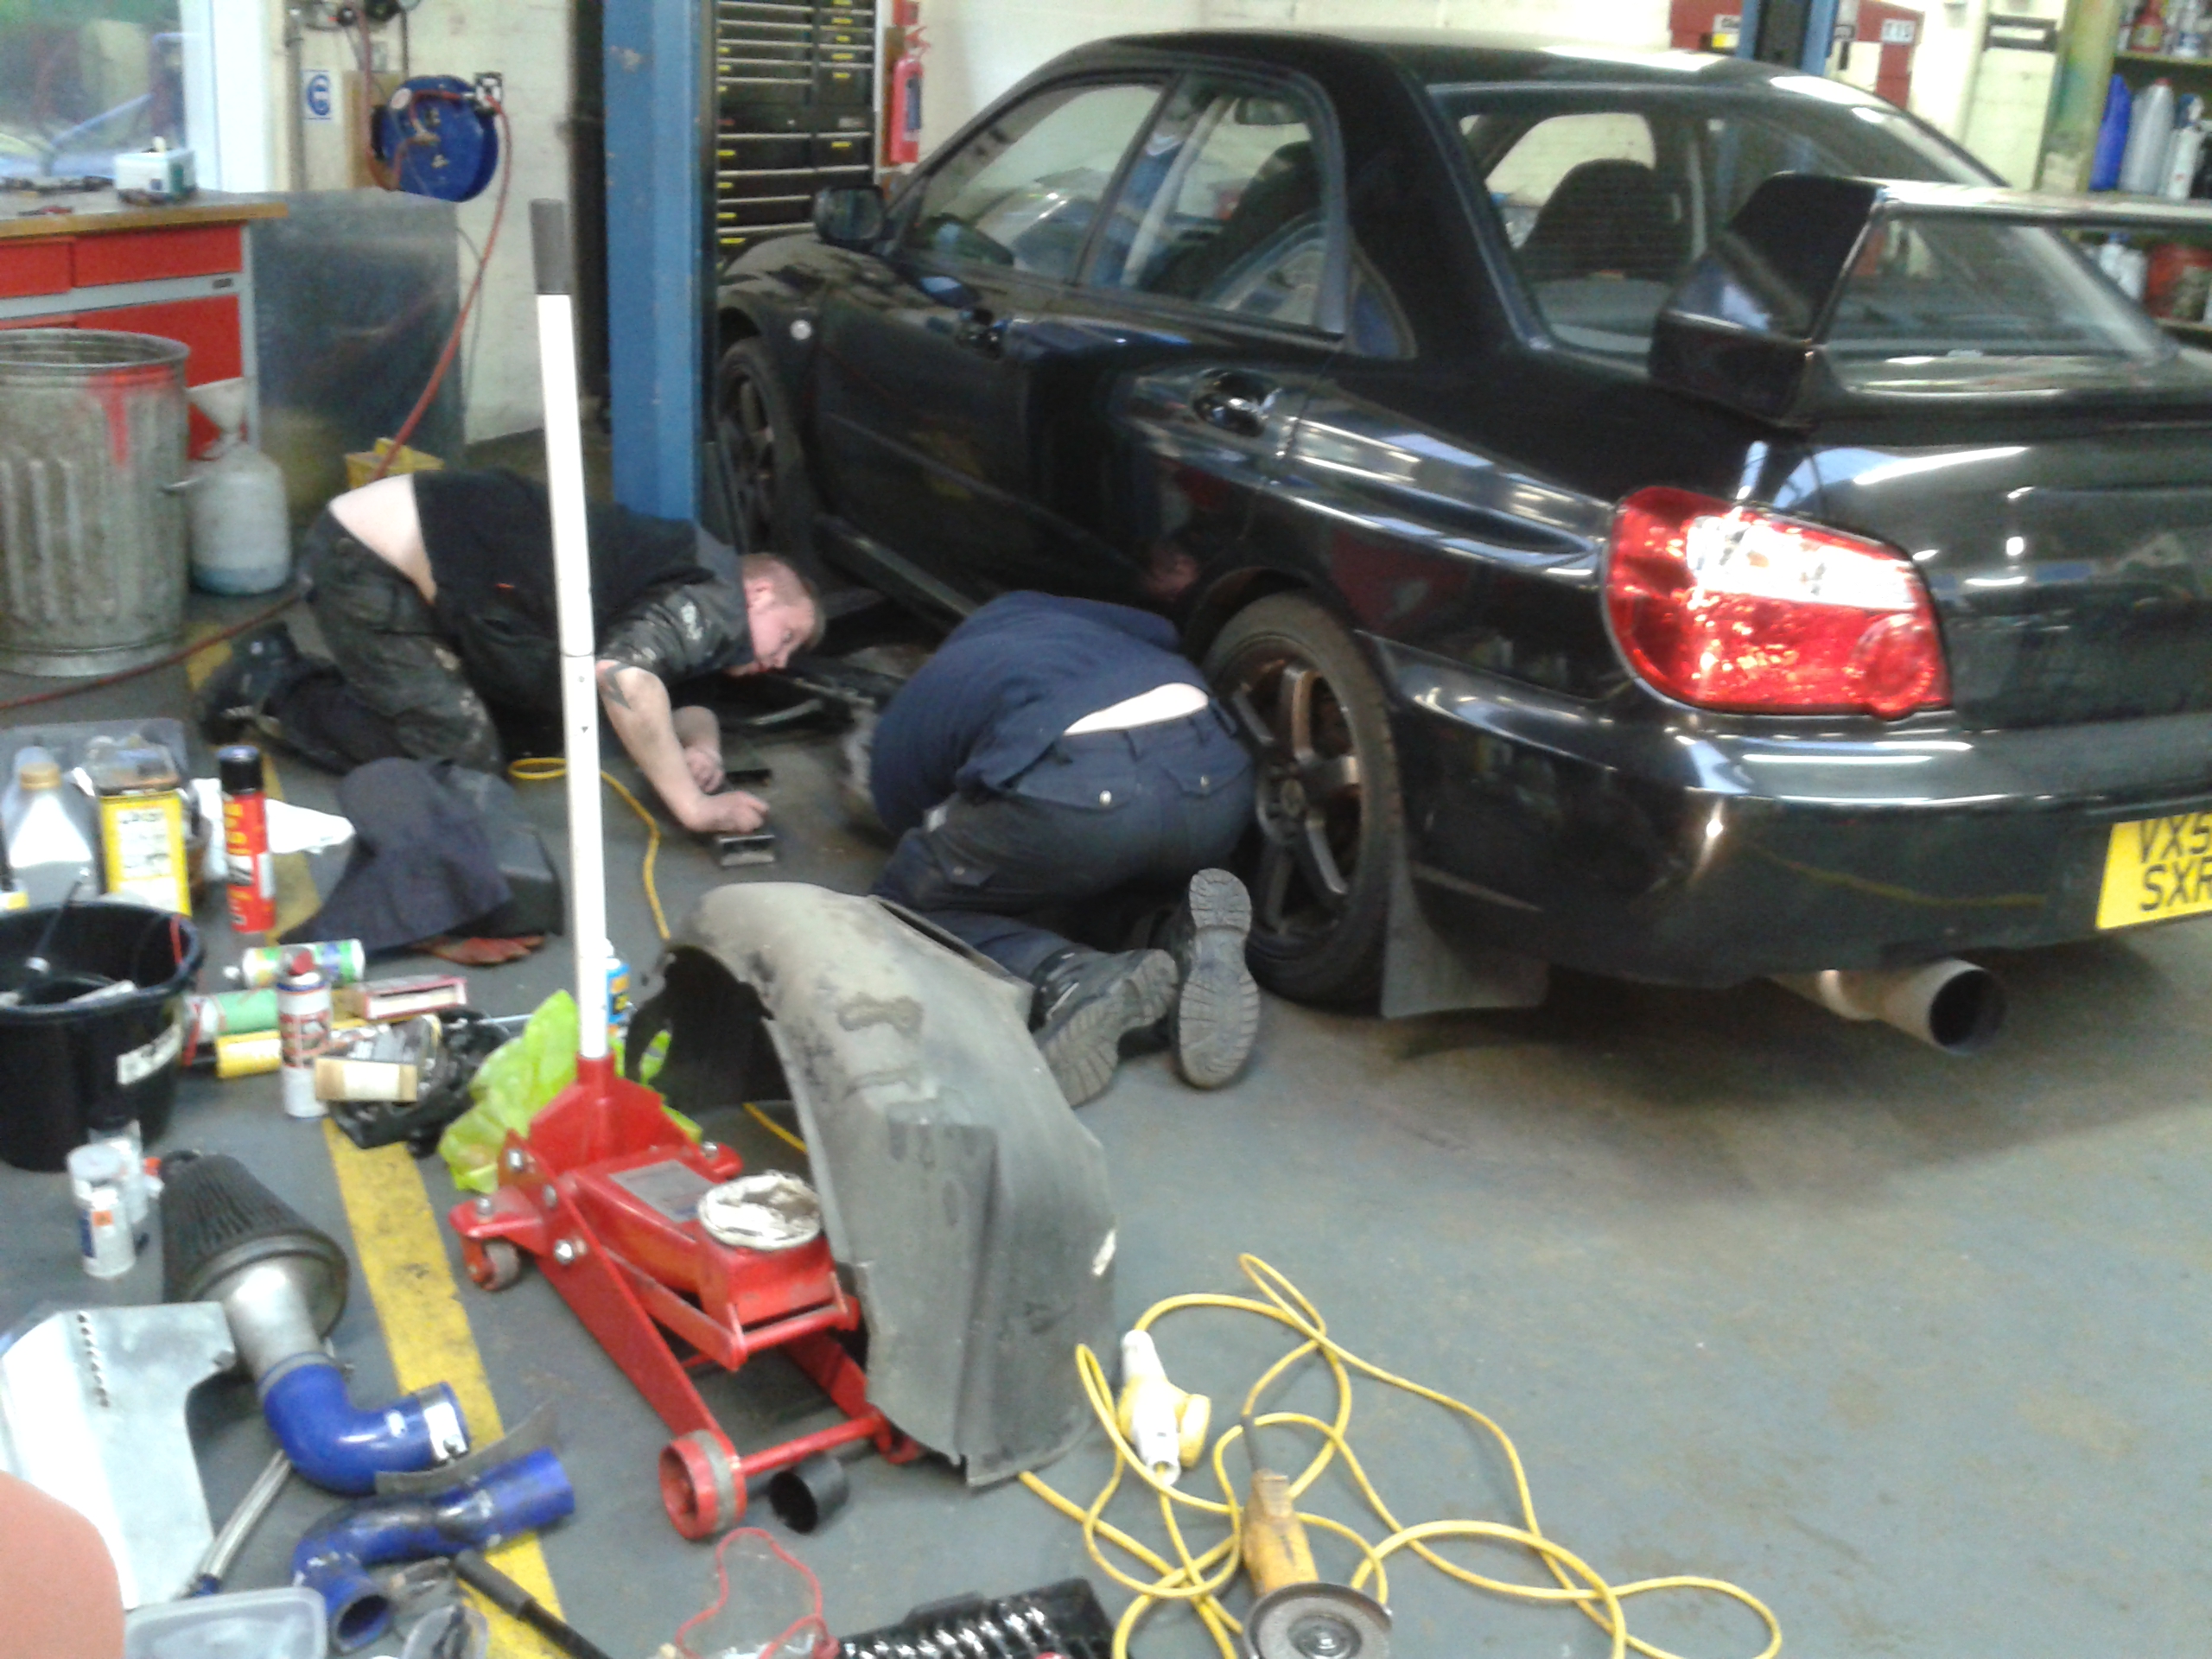
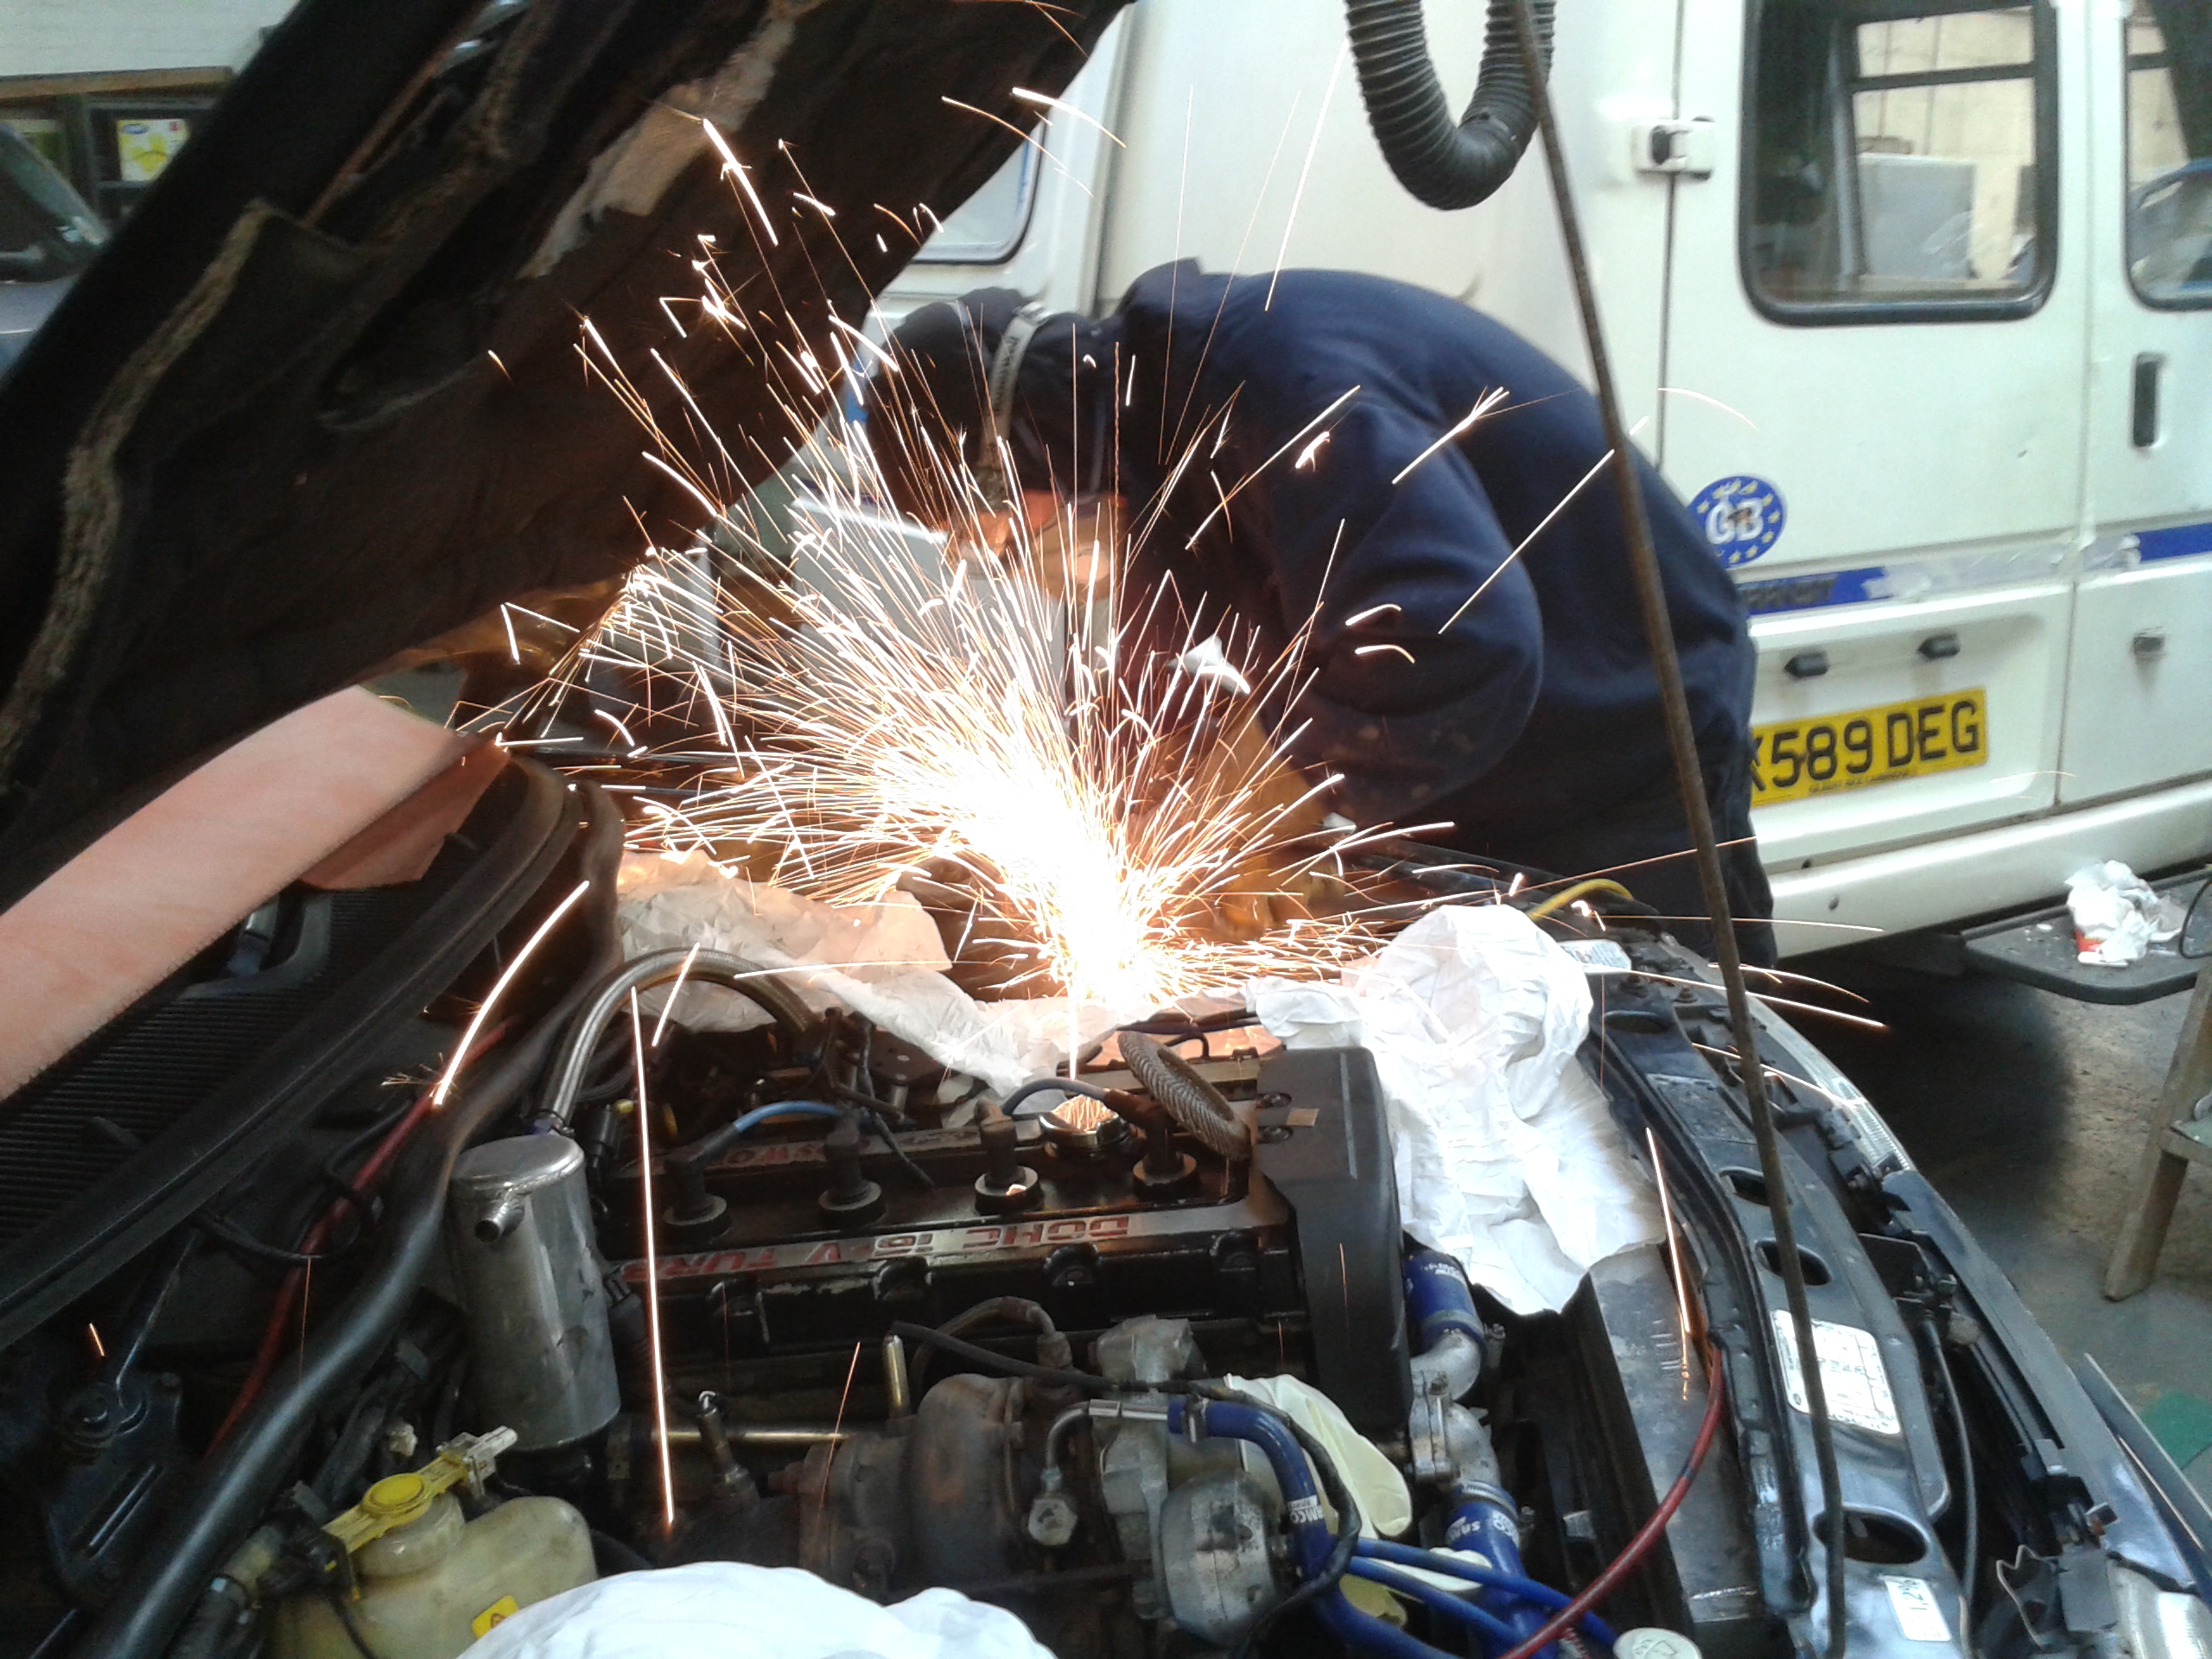
Andy got his favourite toy out to play again and got going
He even helped out the car club guys whilst waiting for me to finish stripping the engine bay and got some grinder action on a Pug

And helped another guy get his Scooby safely on the 4 post car lift.
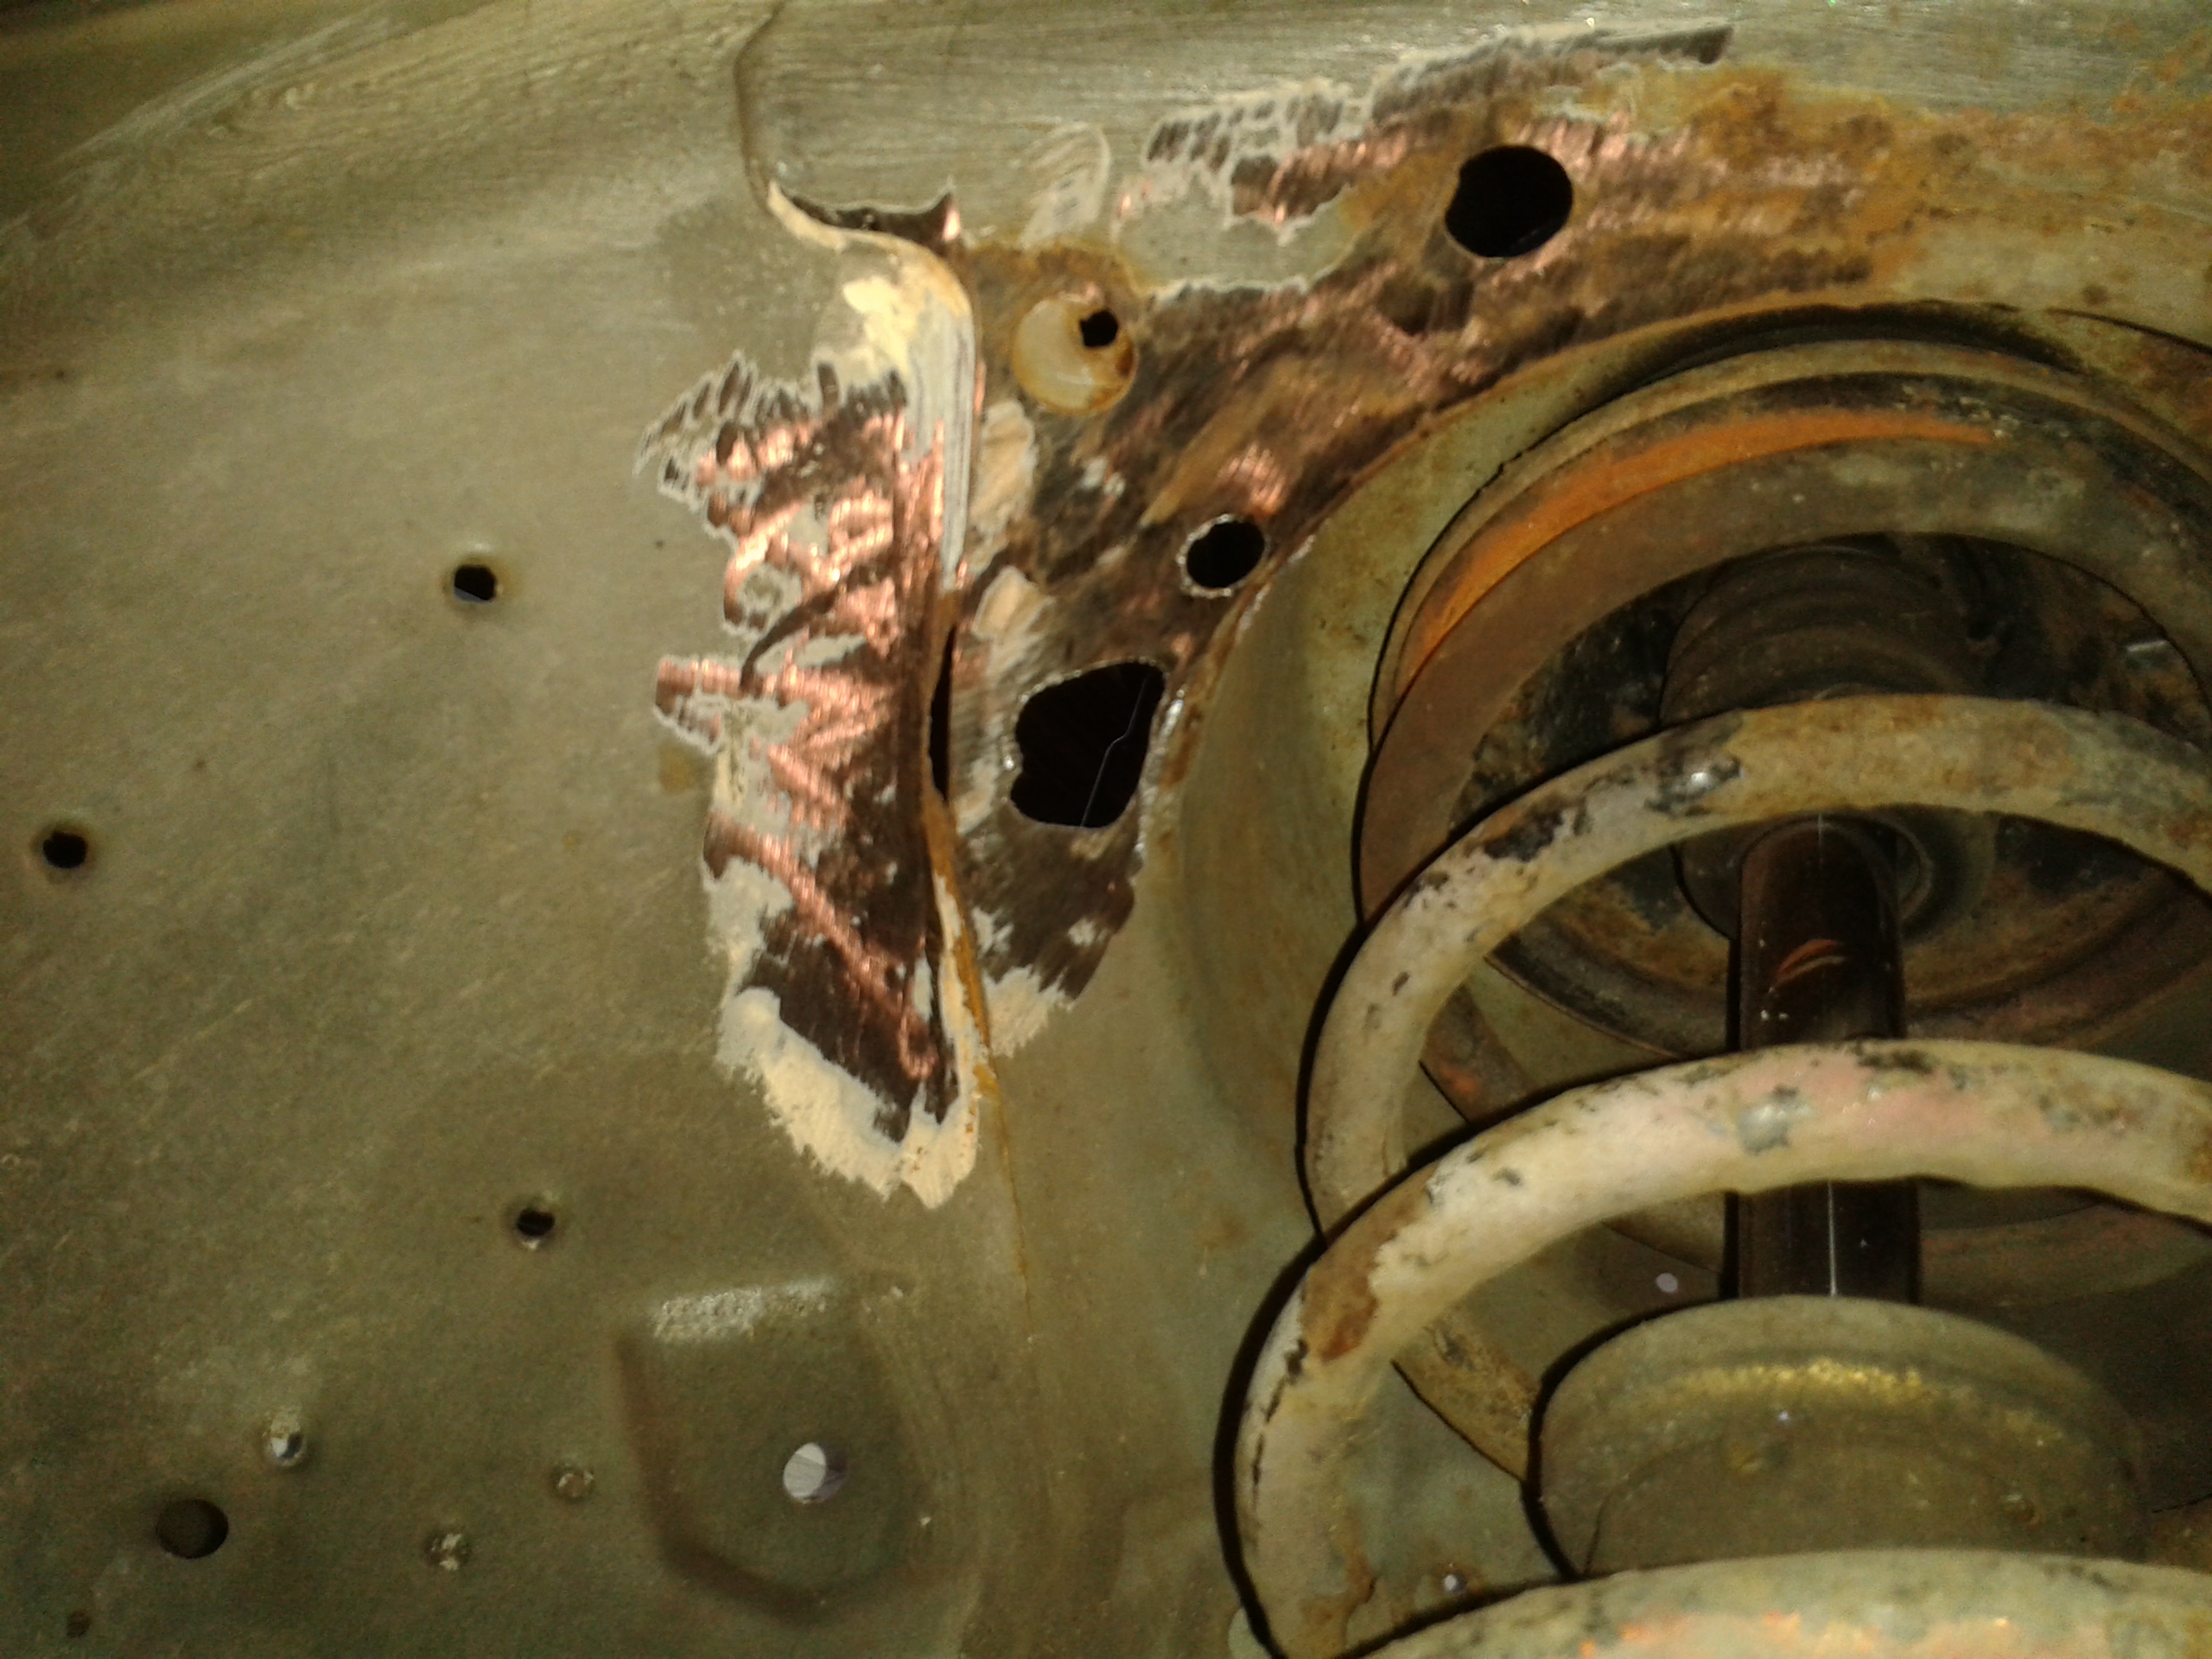
Got it all welded along the join after this photo and done underneath. Did a lovely job.
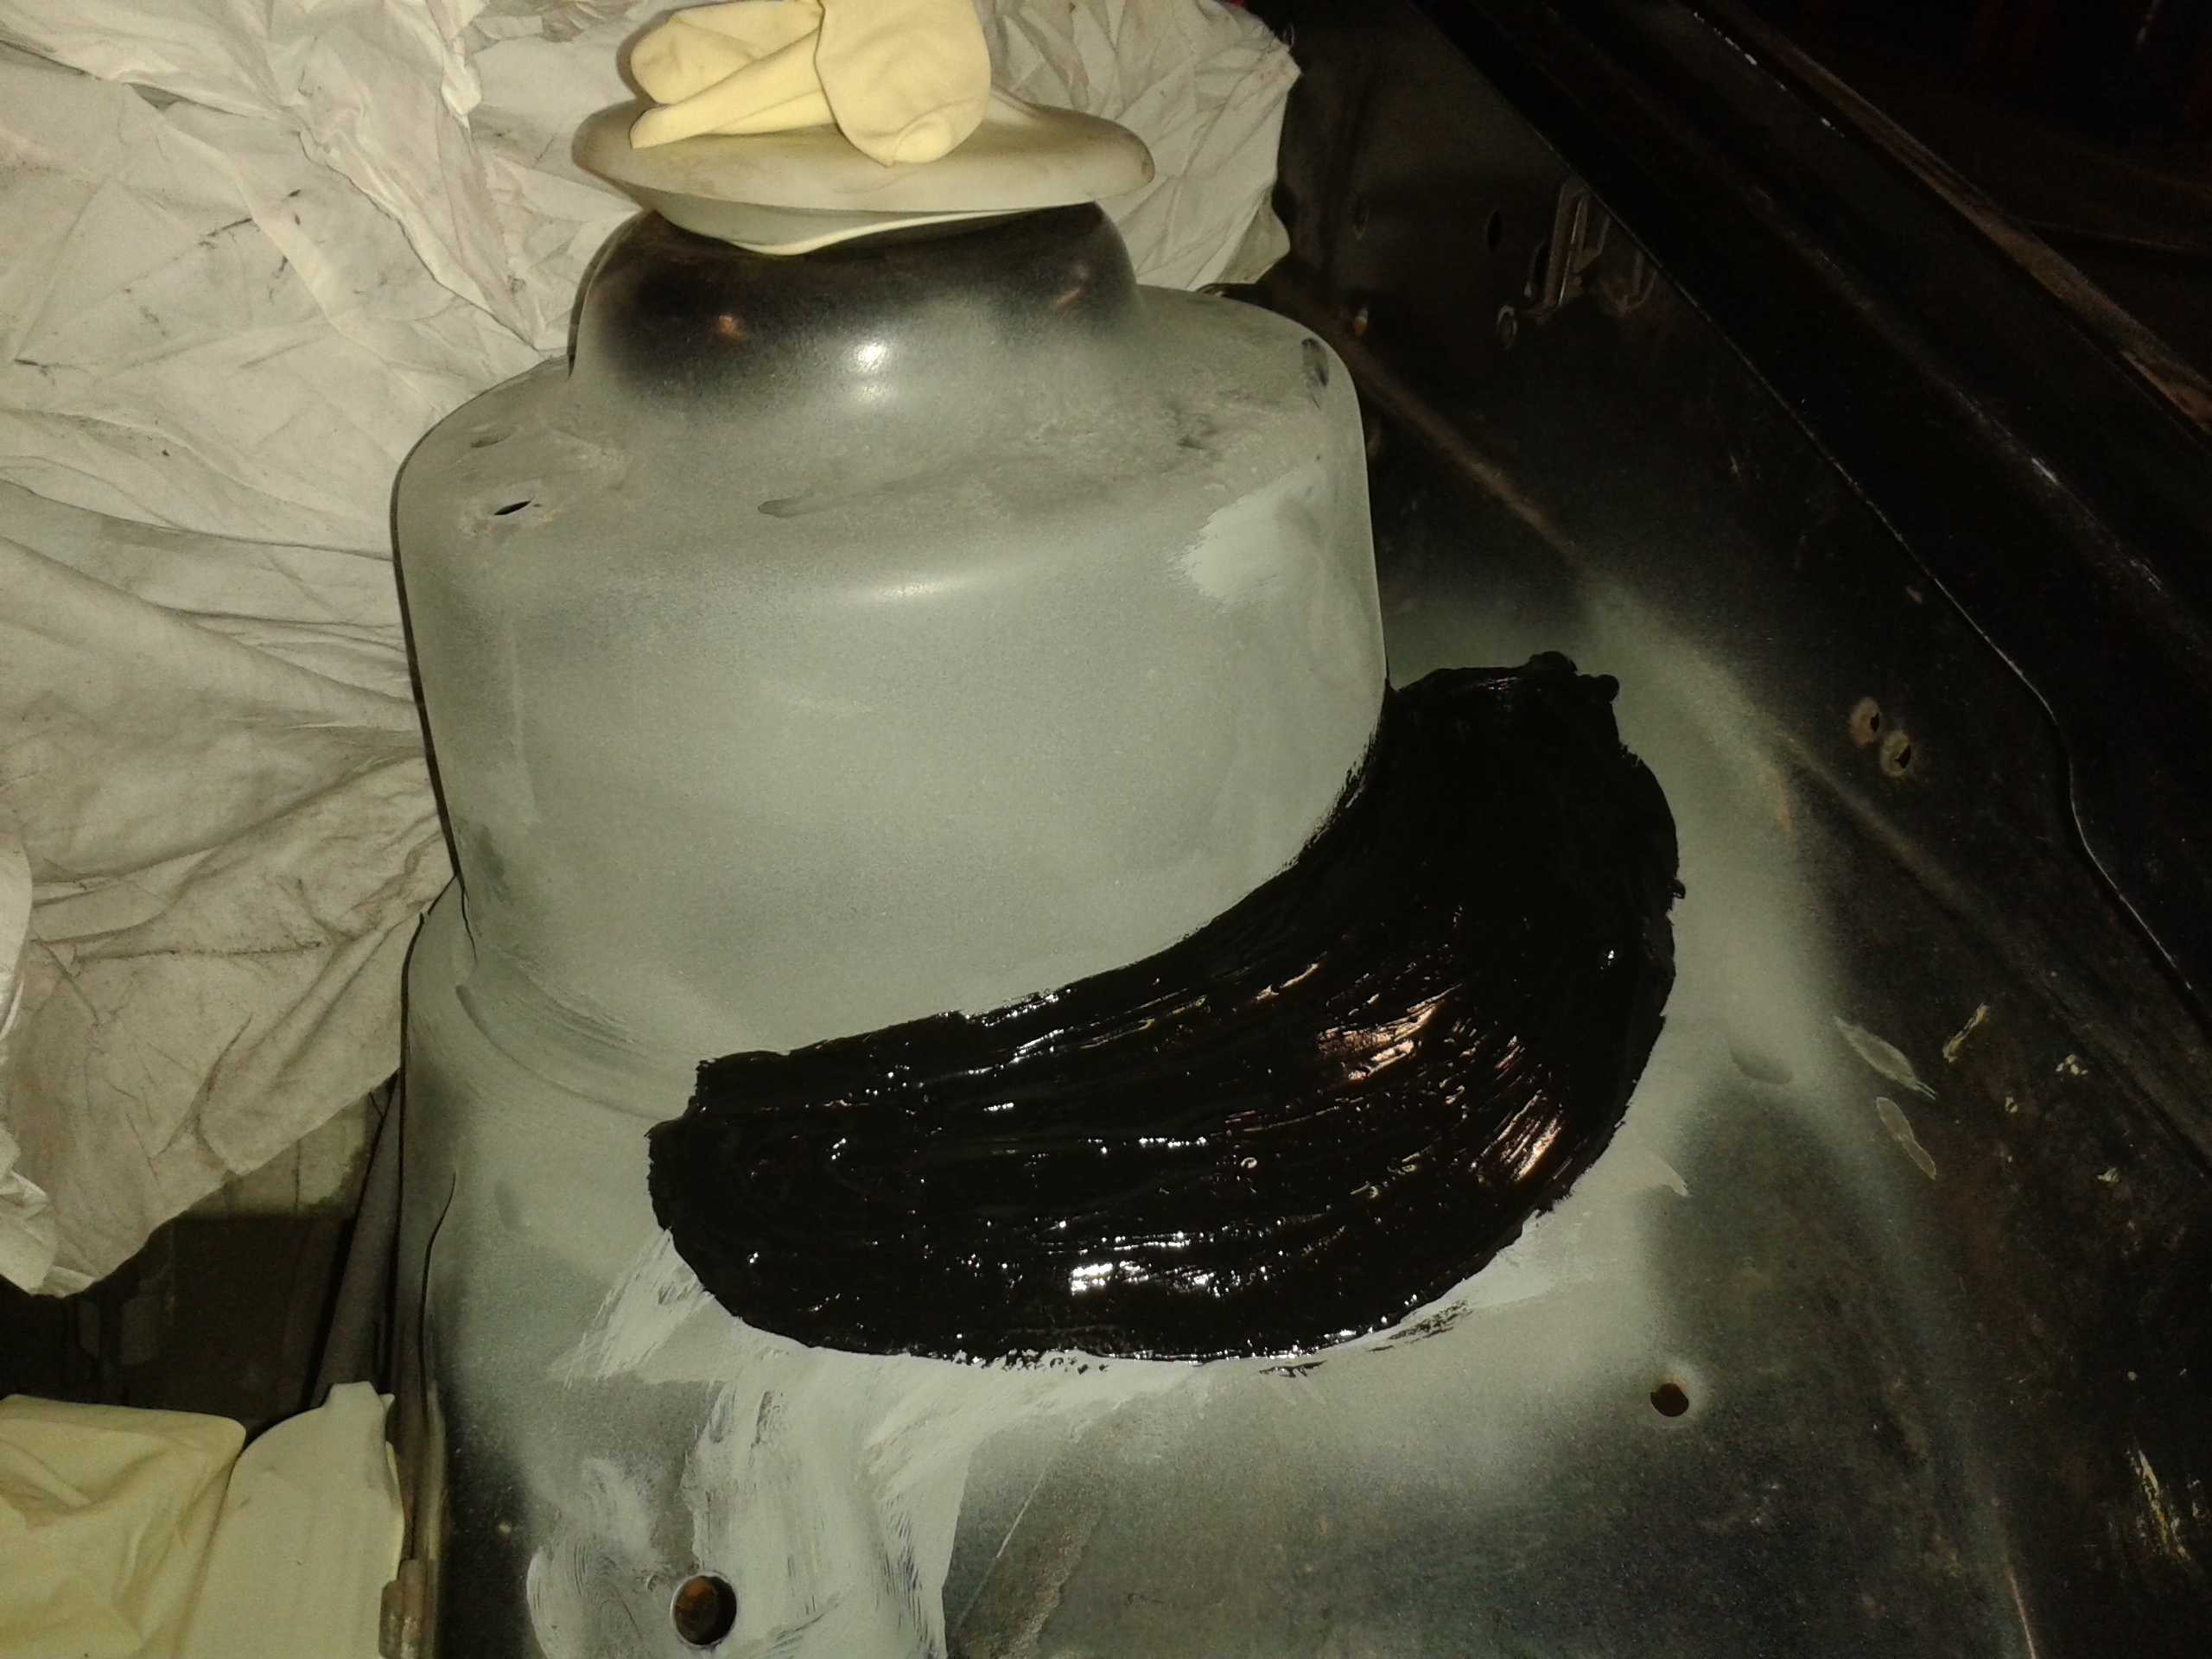
Nice dollop of tiger seal.
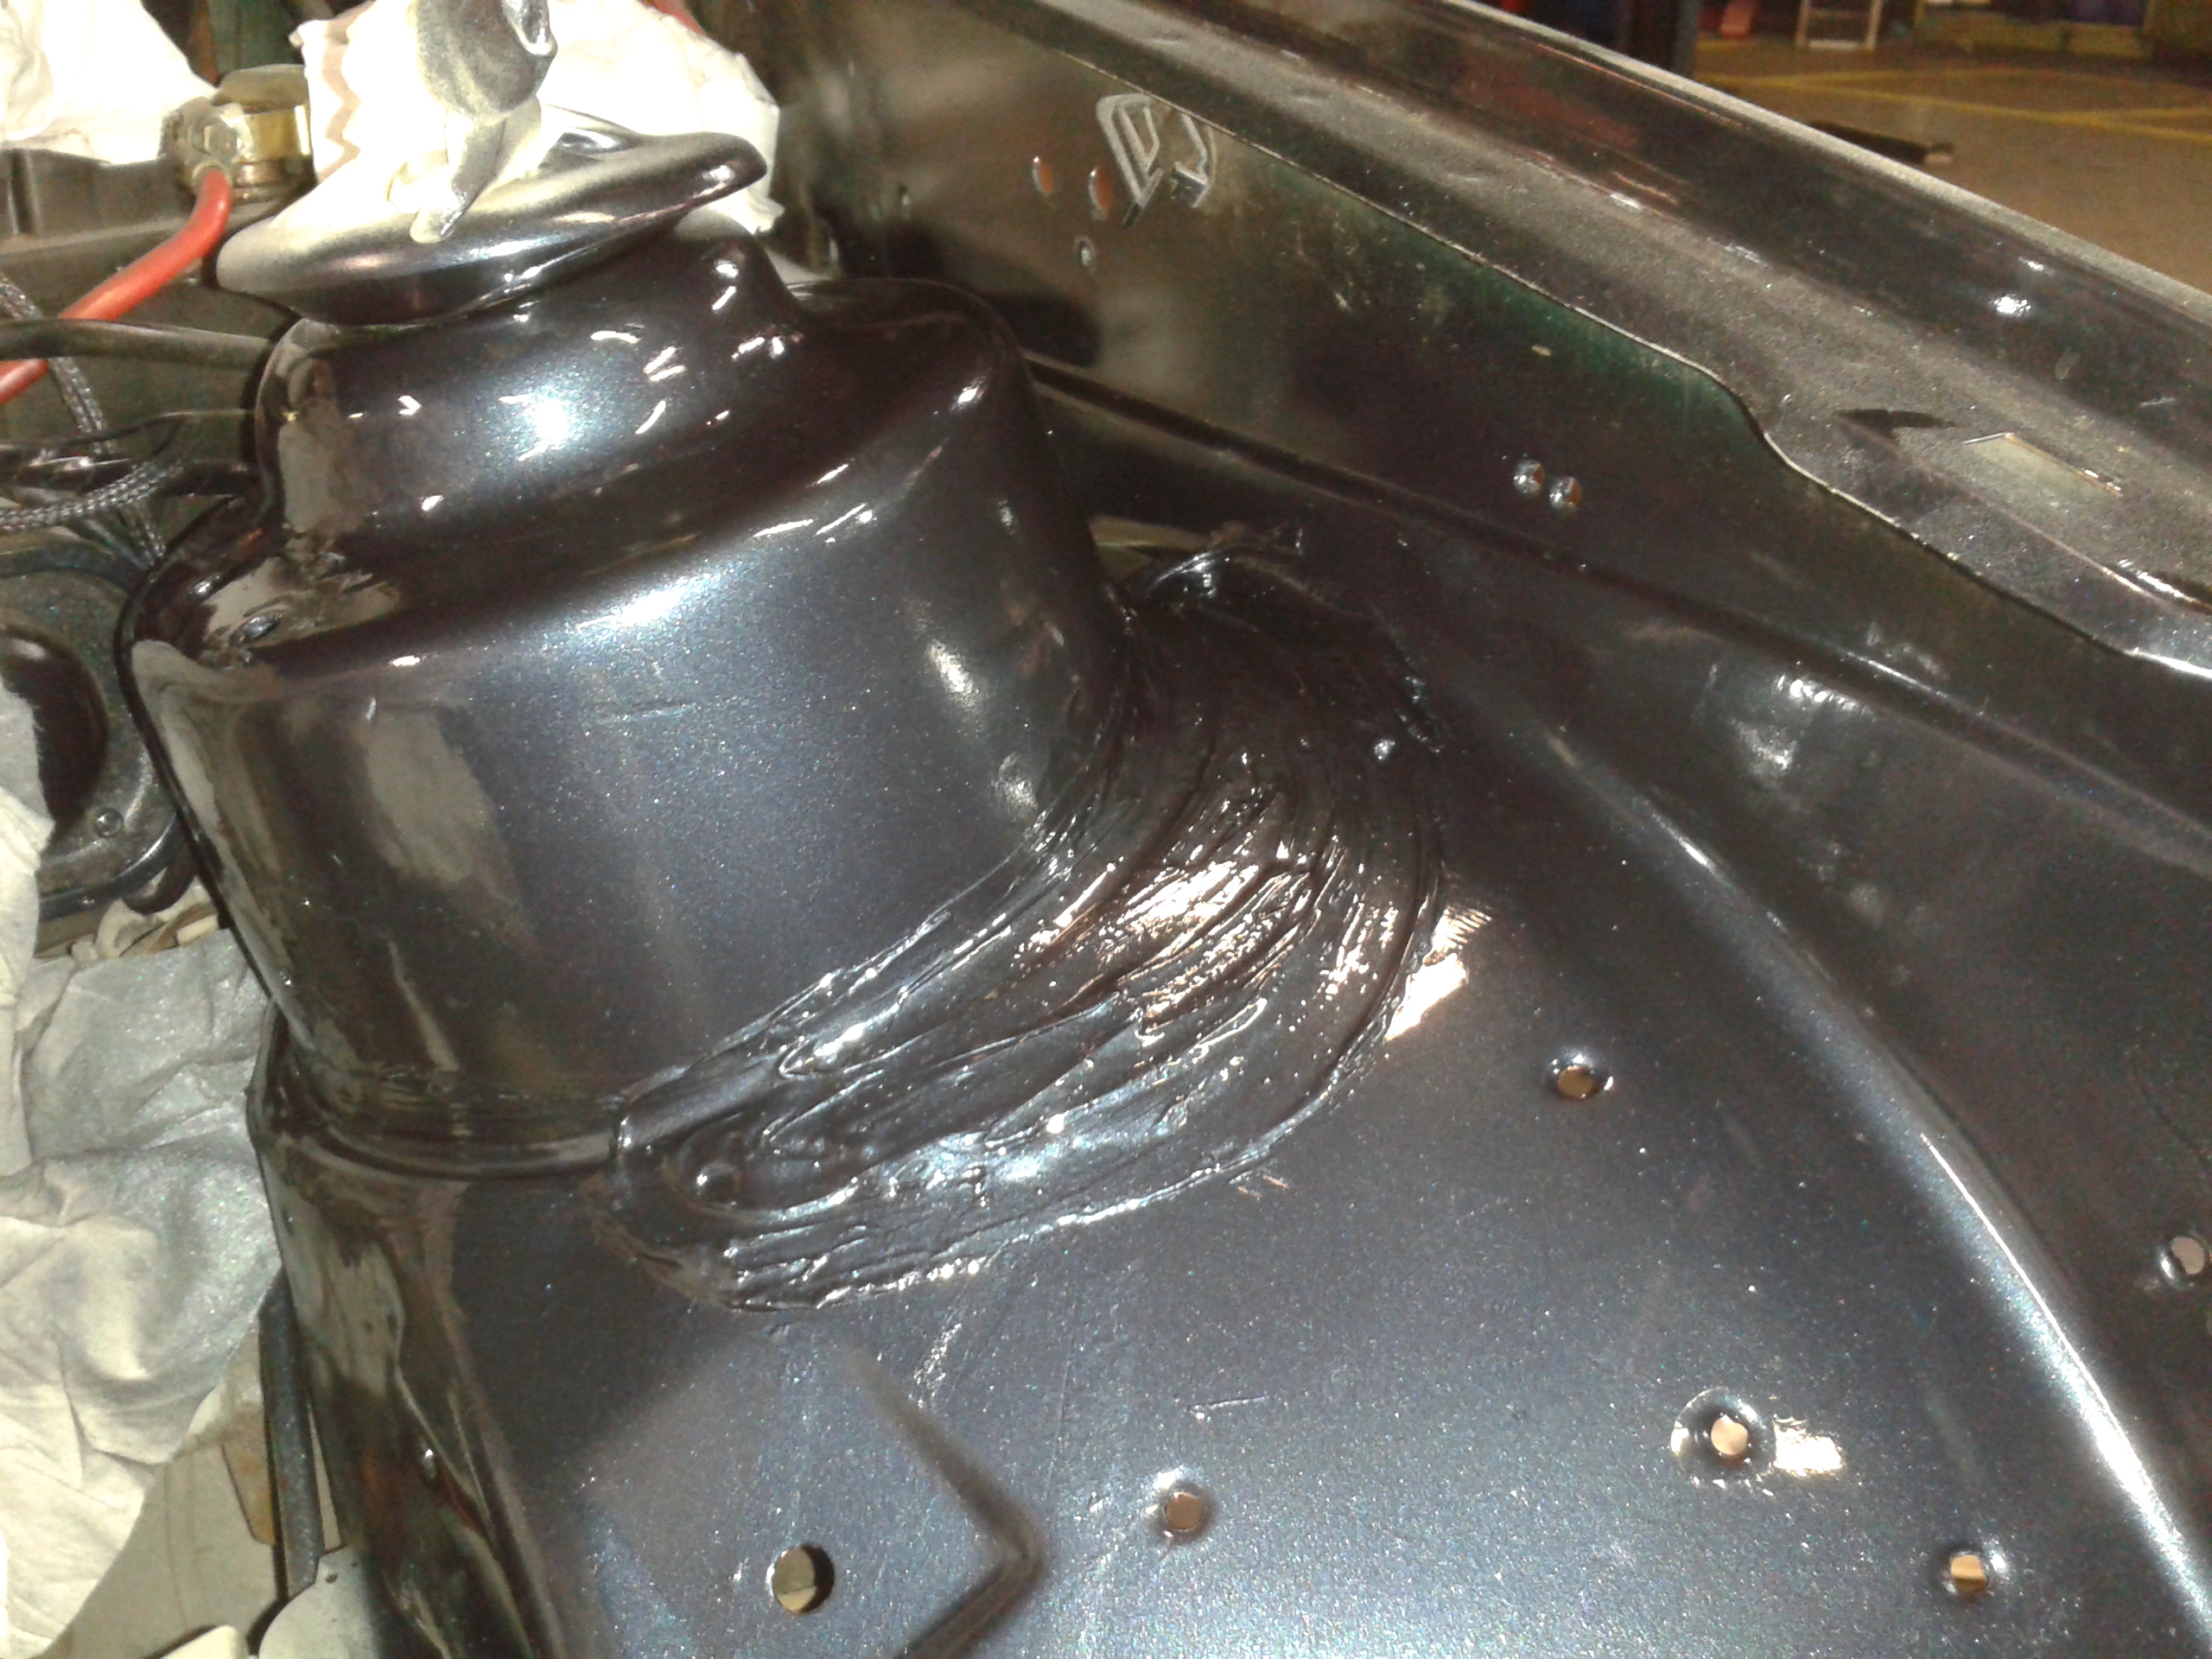
Also gave the inner arches a good clean and painted and stone chiped them up. Came up ok then all covered up with the liners.
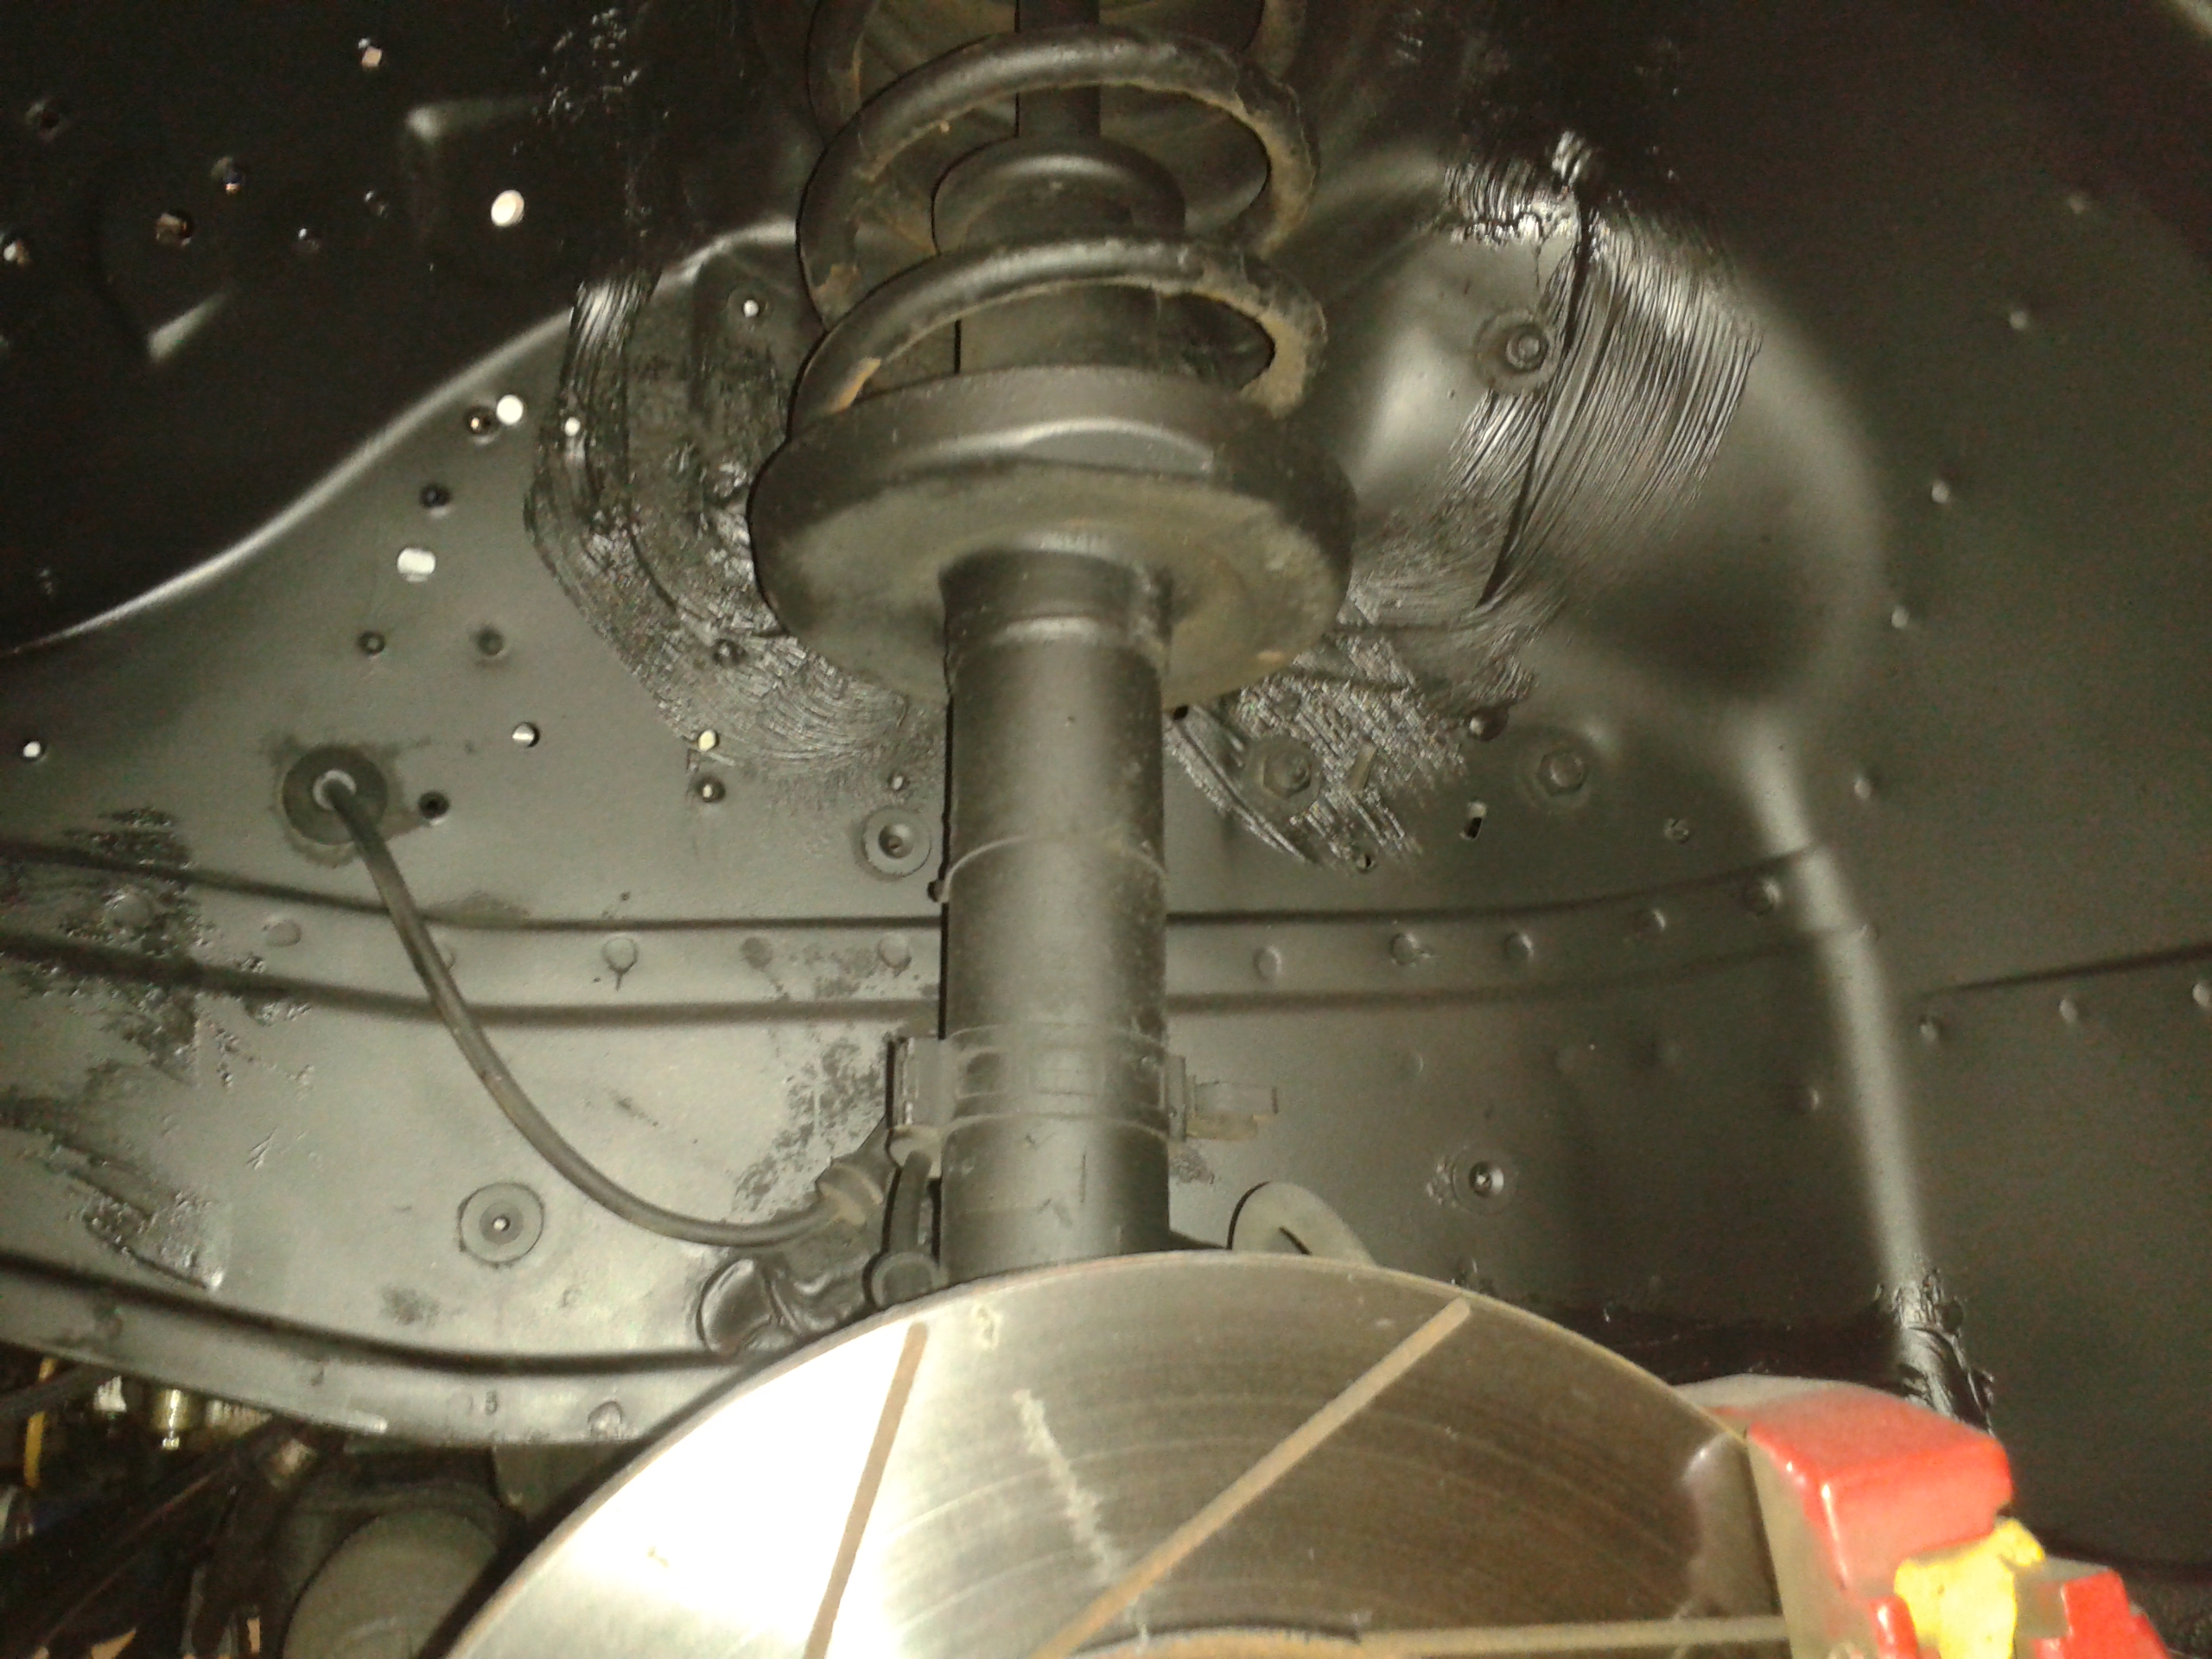
Need to get the springs sorted out. Looking horrid and give the shocks a rub down and blow over.
Massive thanks again Andy
I knew there was some welding to be done on one of the suspension cup things that attach to the arch so checked them out further.
The O/S had a slight bit of surface rust around the sealant so a quick wire wheel down, primed, tiger sealed and repainted it. I managed to find gen Ford Smokestone paint rattle cans and top laquer on eGay.


The biggy was the N/S. A few holes under the header tank needed addressing
Andy got his favourite toy out to play again and got going
He even helped out the car club guys whilst waiting for me to finish stripping the engine bay and got some grinder action on a Pug

And helped another guy get his Scooby safely on the 4 post car lift.


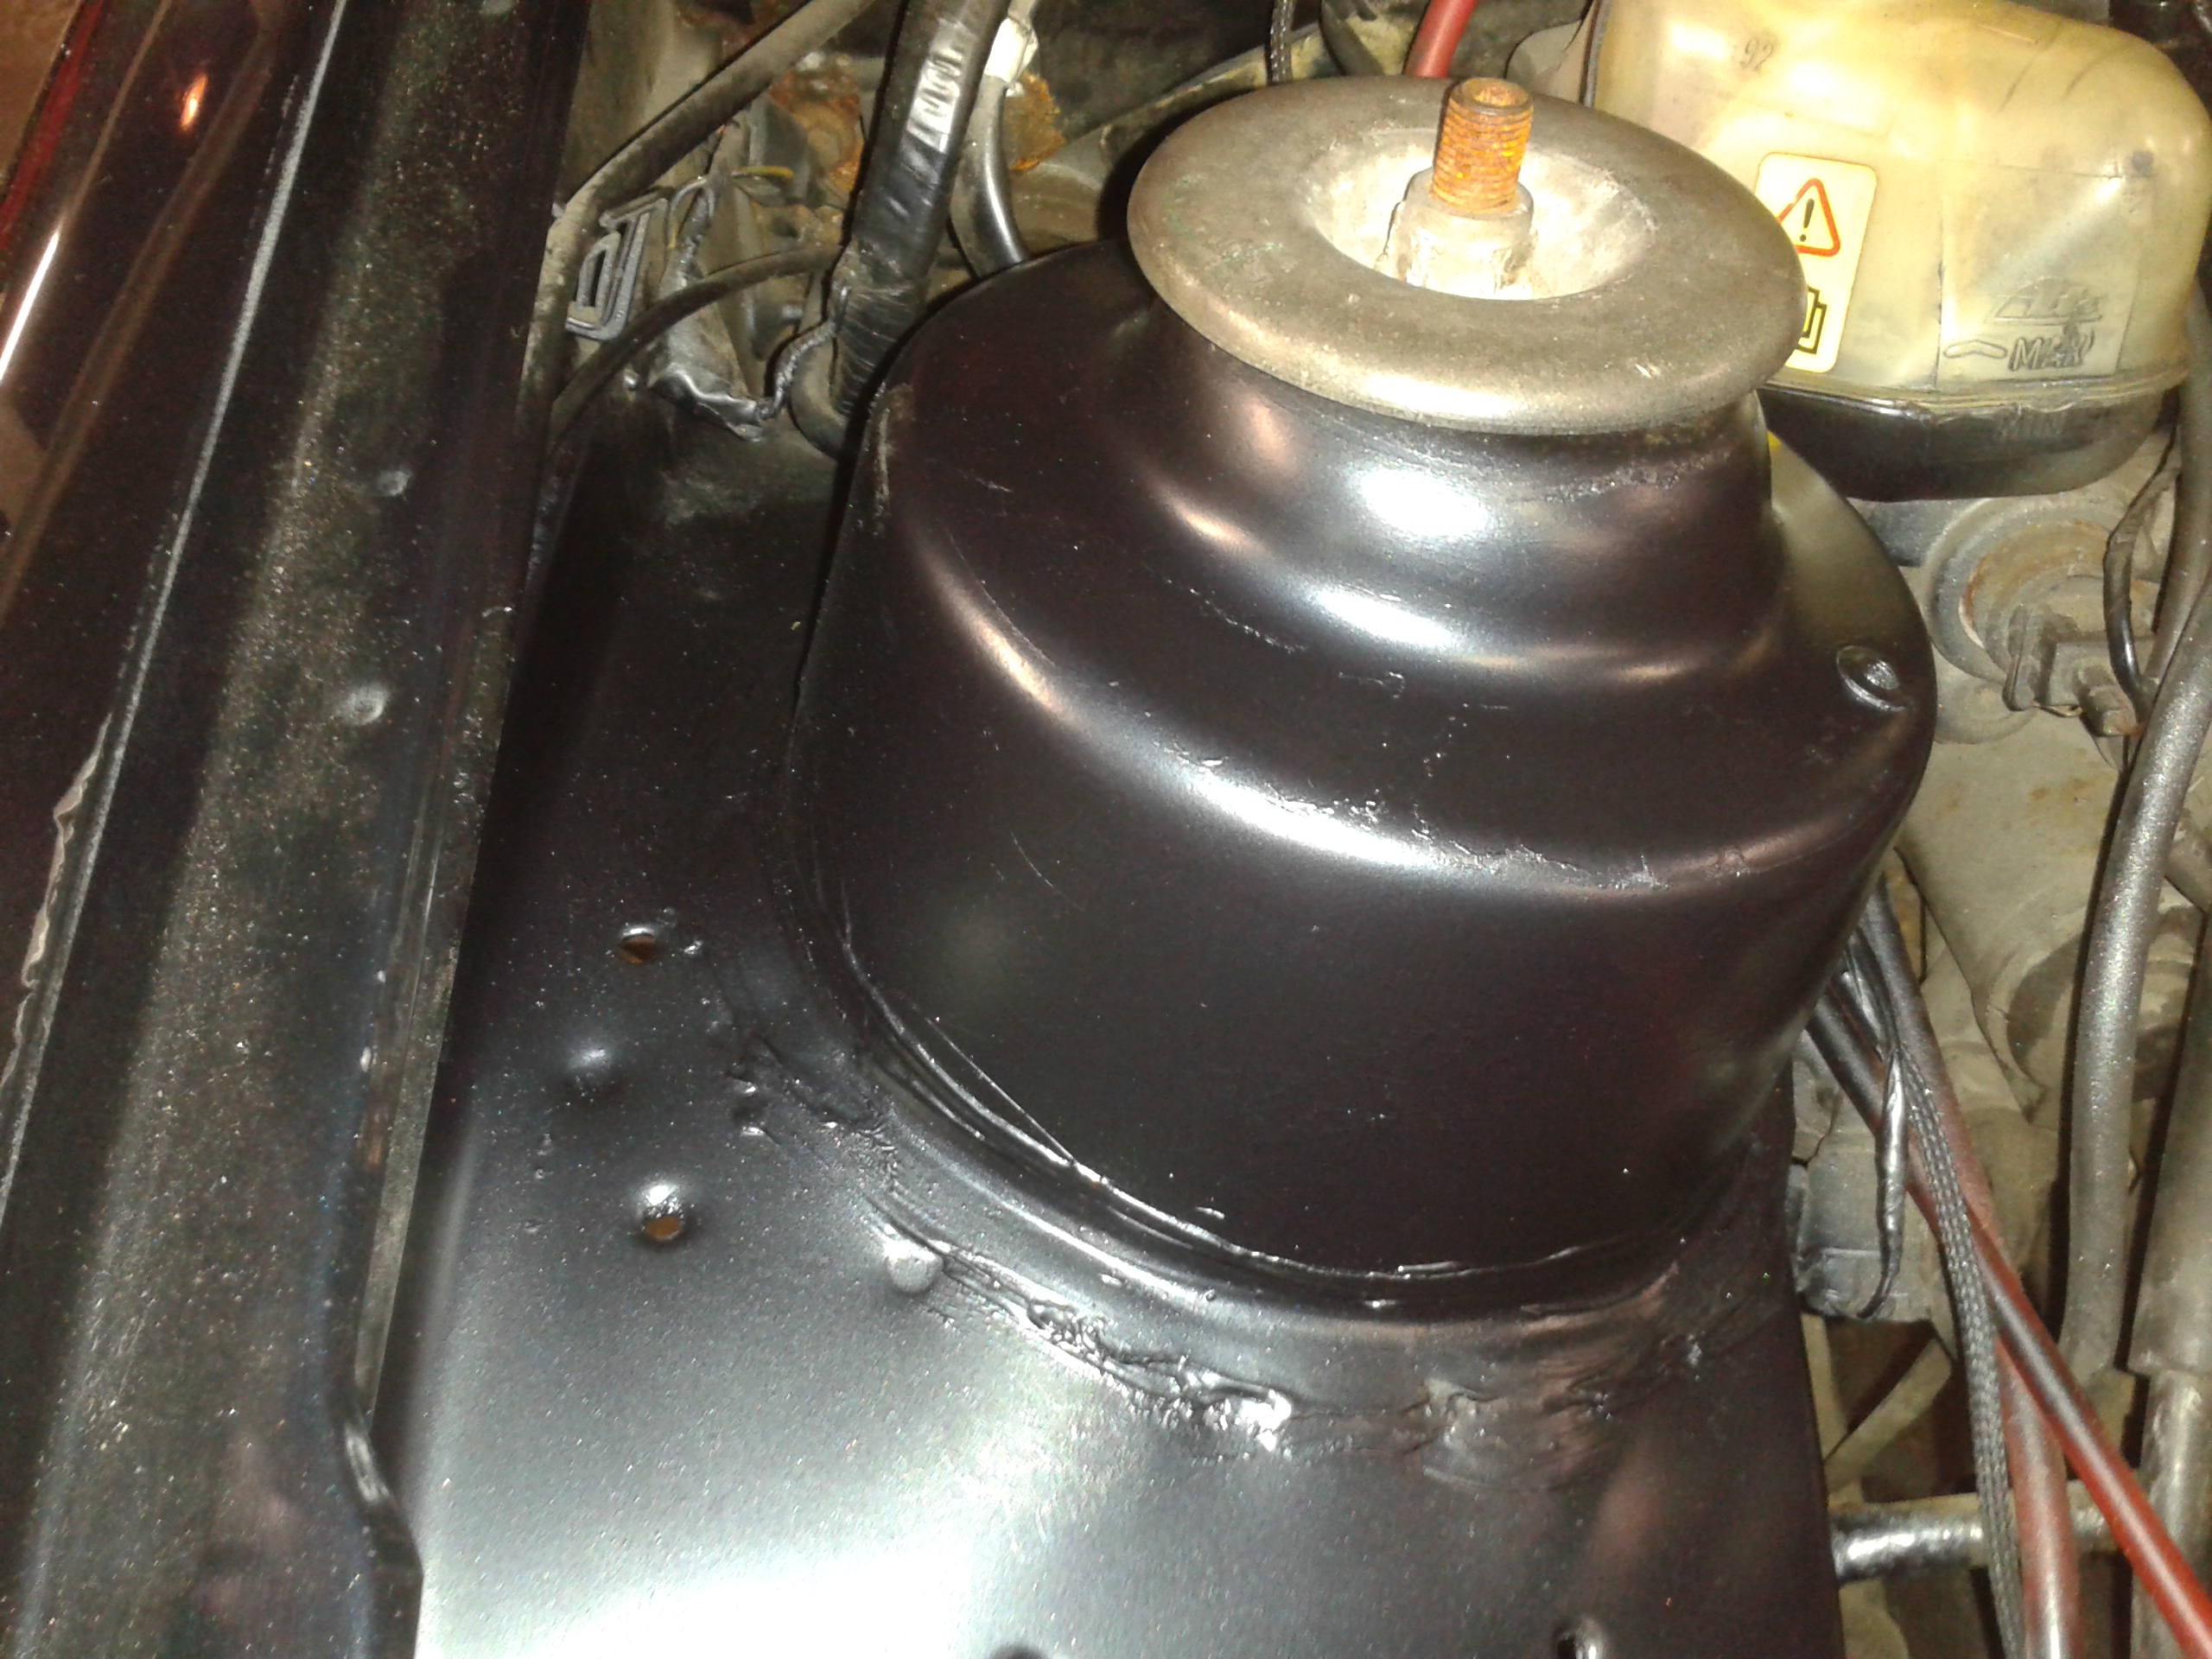
Got it all welded along the join after this photo and done underneath. Did a lovely job.

Nice dollop of tiger seal.


Also gave the inner arches a good clean and painted and stone chiped them up. Came up ok then all covered up with the liners.


Need to get the springs sorted out. Looking horrid and give the shocks a rub down and blow over.
Massive thanks again Andy
Last edited by kosienutter; 25-03-2014 at 08:00 PM.
03-04-2014, 11:02 PM
#197
Last Time, Get Off PF FFS
Thread Starter
Thanks mate.
She is finally getting picked up tomorrow. Had to wait ages for a TCA and get a weld done and source a door latch mechanism from a breakers.
She is finally getting picked up tomorrow. Had to wait ages for a TCA and get a weld done
and source a door latch mechanism from a breakers.